
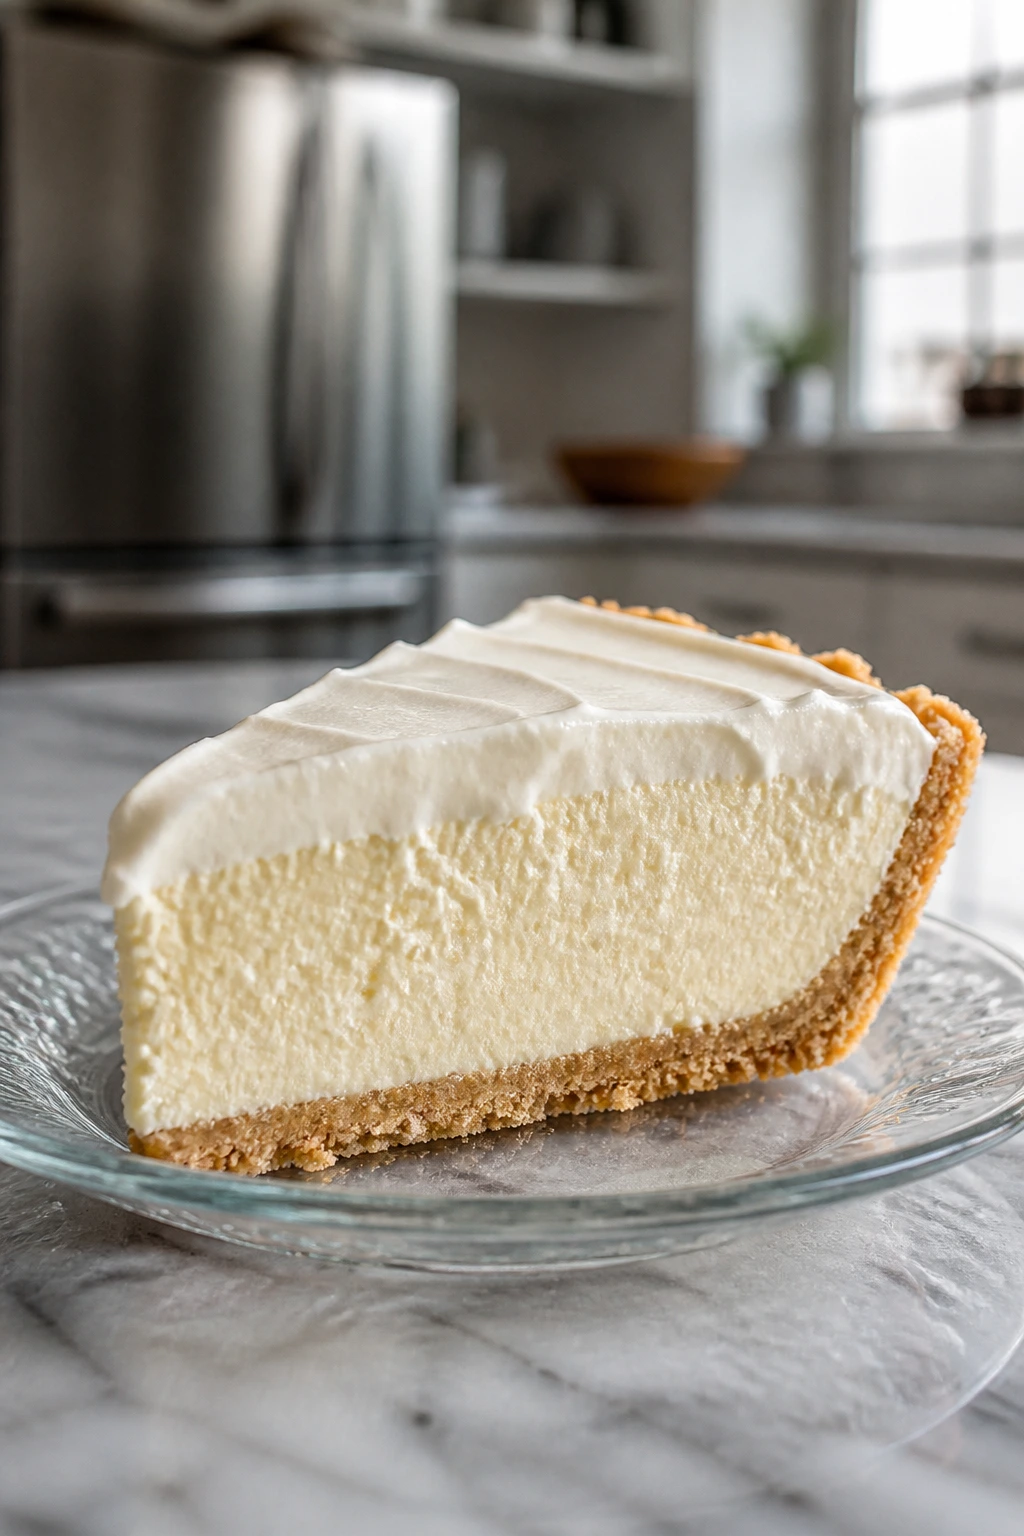
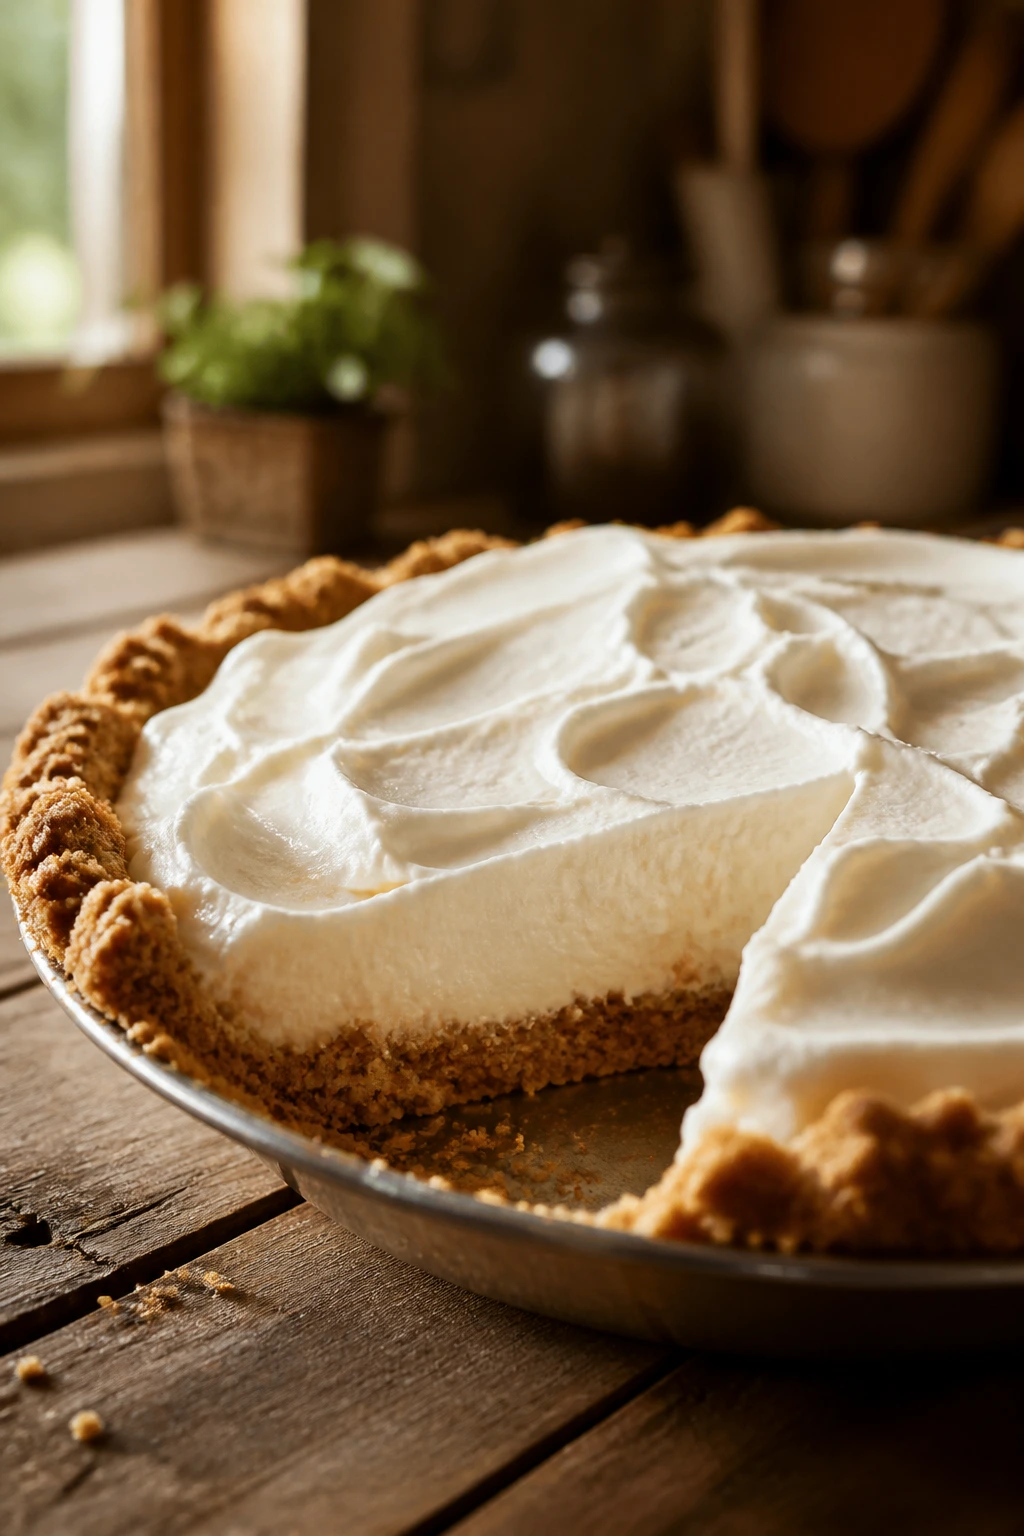
The first forkful should crack, then give way, then leave a cool stripe of cream on the plate.
That’s the charm of a good icebox pie, and it’s why a buttery icebox pie with cream cheese frosting earns its keep so quickly. The crust gets toasted just enough to taste like a cookie that spent a little time in the oven, the filling stays plush and cold, and the frosting lands on top like a soft, sweet finish instead of a heavy cap.
I prefer this style of pie when I want dessert to feel rich without dragging me through a full baking project. There’s no custard to babysit, no meringue to coax into submission, and no mystery once it comes out of the fridge: if the dairy is soft where it should be and the crust is fully cool, the slice behaves.
A lot of icebox pies go wrong because they try to be too many things at once. This one keeps a clear job for every layer. The crust brings the butter. The filling brings the cold, fluffy middle. The frosting brings the tang and sweetness that make the second bite better than the first. Once you see how those pieces fit together, the rest is just careful assembly.
Why This Pie Earns Its Chill Time
-
Shortbread Does More Work Than Graham Cracker Here: A buttery cookie crust bakes into a firmer, more fragrant base than a standard graham crust, so each slice feels richer before you even hit the filling.
-
The Filling Sets by Texture, Not Tricks: Whipped cream folded into sweetened cream cheese gives you a mousse-like center that firms in the fridge without gelatin or cornstarch.
-
The Frosting Keeps the Whole Pie From Tasting Flat: A thin layer of cream cheese frosting adds a sharp edge that cuts through the butter and sugar instead of letting the pie get cloying.
-
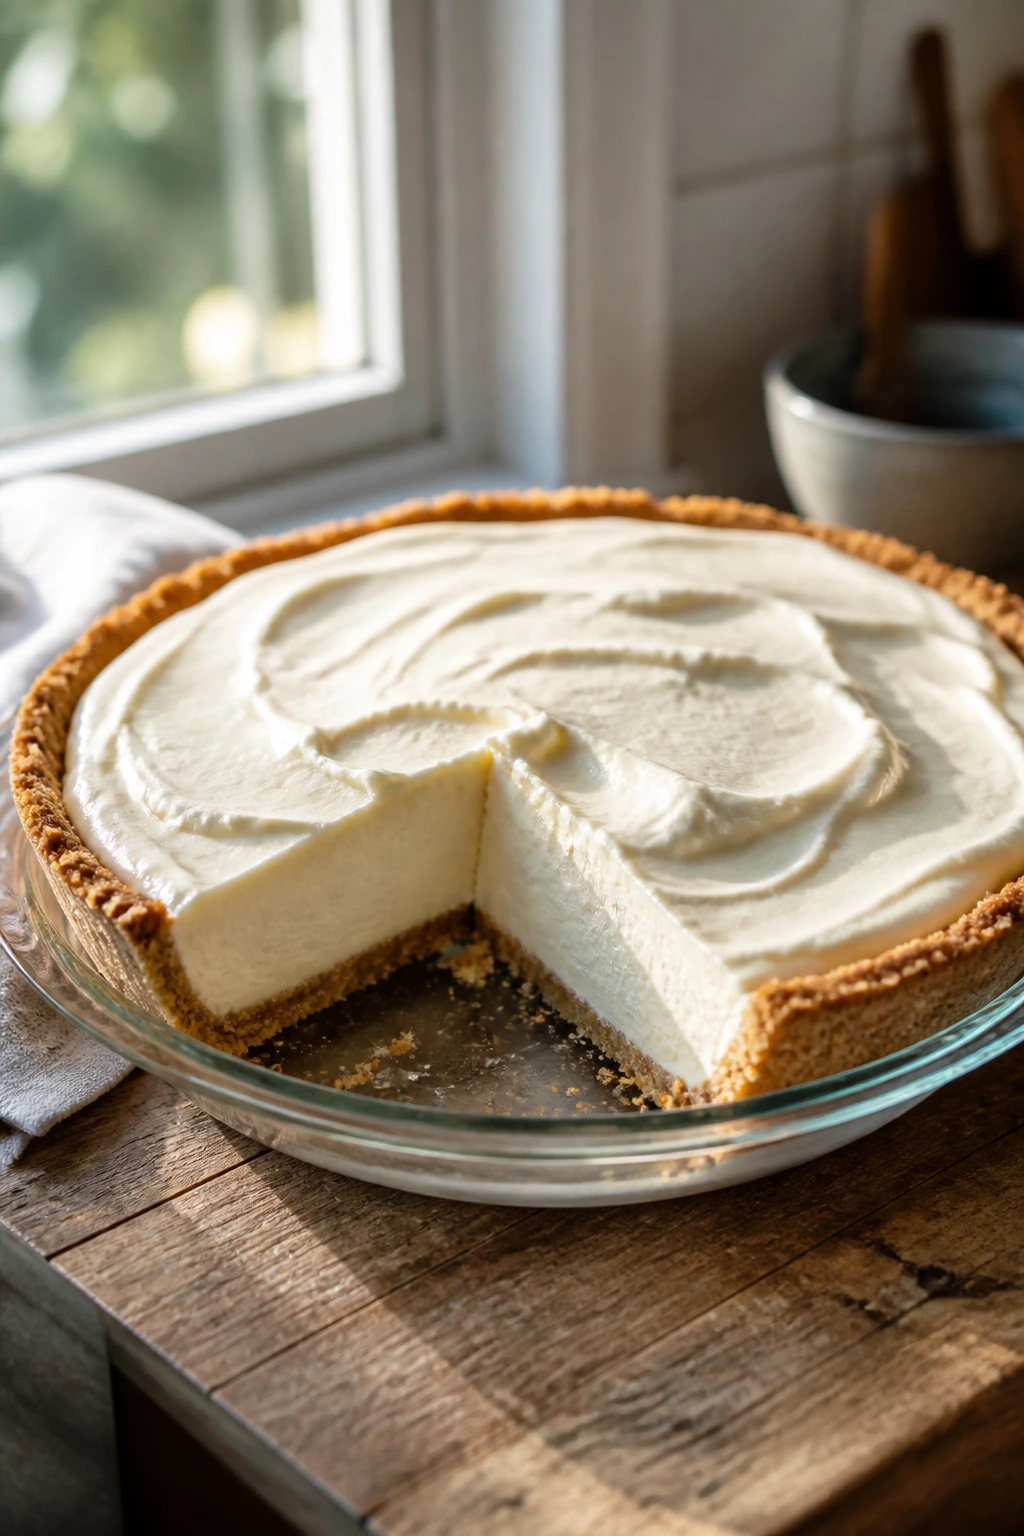
It Slices Better the Next Day: The overnight chill lets the crust hydrate just enough and the filling settle, which means cleaner wedges and fewer crumbs on the plate.
-
It’s Fancy Enough for a Holiday Table, Simple Enough for a Weeknight Bake: The ingredient list looks indulgent, but the method is mostly mixing and chilling, which is exactly where this pie shines.
Yield: Serves 10
Prep Time: 30 minutes
Cook Time: 12 minutes
Total Time: 42 minutes active, plus 6 hours chilling
Difficulty: Intermediate — the steps are simple, but the pie only behaves if the butter, cream cheese, and whipped cream are at the right texture.
Chill/Rest Time: 6 hours, preferably overnight
Best Served: Very cold, with a sharp knife and a few minutes on the plate before eating
Why Icebox Pies Still Have a Place on the Table
Icebox pies were never about showy technique. They were about letting the refrigerator do the work that an oven once had to do by brute force. You bake a crust, chill a filling, and let time turn a loose mixture into something you can cut into wedges without a wrestling match.
That old logic still makes sense. In fact, it makes even more sense now, because a chilled pie gives you a lot of control without much drama. If the filling tastes too sweet before it chills, a pinch more salt can fix it. If the crust looks pale, ten extra minutes in the oven solves the problem. If the finished pie feels a little too soft, it just needs more time in the cold. No rescue mission required.
What makes this version worth making is the combination of textures. The crust is crisp at the edge and slightly tender underneath. The filling lands somewhere between cheesecake and whipped frosting, but colder and cleaner. The top layer of cream cheese frosting brings a soft tang that keeps the whole thing from reading like pure sugar. It’s rich, yes. But it has enough structure to feel deliberate, not sloppy.
There’s also something satisfying about a dessert that improves while you leave it alone. You build it, chill it, and come back to a pie that tastes more together than it did when you first spooned the filling into the crust. That is a pleasant kind of kitchen magic. Not glamorous. Just useful.
The Full Ingredient List
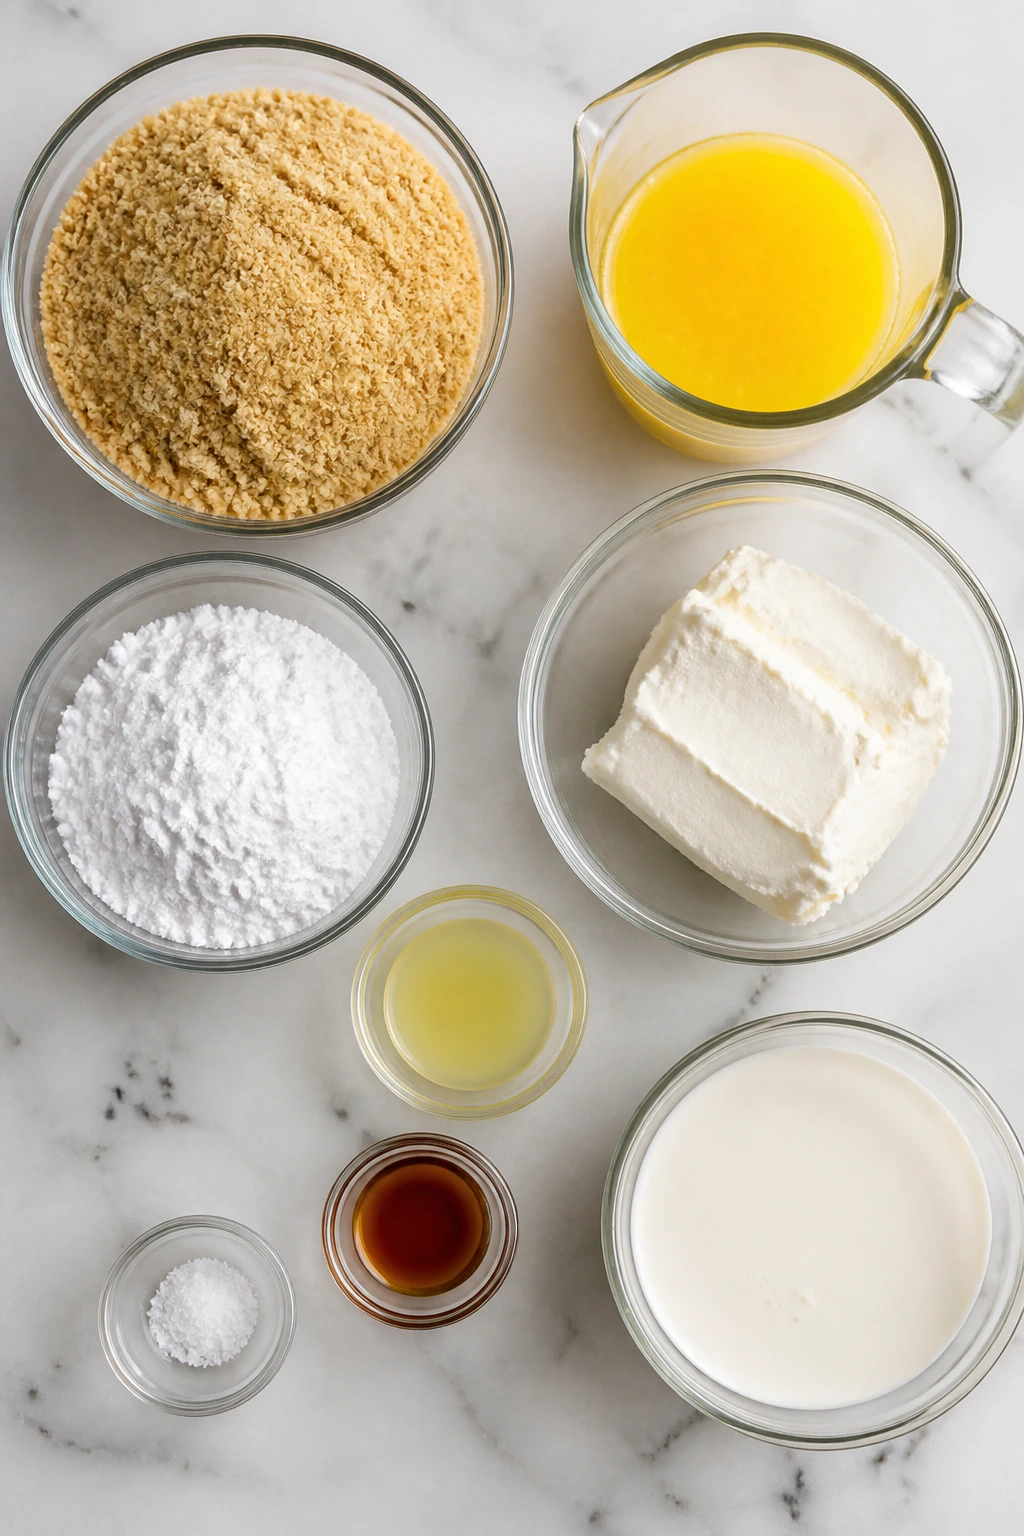
For the Shortbread Crust:
- 2 cups shortbread cookie crumbs, finely ground, from about 8 ounces of cookies
- 2 tablespoons granulated sugar
- 1/4 teaspoon fine sea salt
- 1/2 cup unsalted butter, melted and slightly cooled
For the Buttery Filling:
- 8 oz full-fat cream cheese, softened to room temperature
- 1/2 cup unsalted butter, softened to room temperature
- 1 cup powdered sugar, sifted
- 1 tablespoon fresh lemon juice
- 2 teaspoons pure vanilla extract
- 1/4 teaspoon fine salt
- 1 1/2 cups cold heavy cream
For the Cream Cheese Frosting:
- 4 oz cream cheese, softened
- 2 tablespoons unsalted butter, softened
- 1 1/2 cups powdered sugar, sifted
- 1 teaspoon pure vanilla extract
- 1 to 2 tablespoons heavy cream
- Pinch of fine salt
For Finishing, Optional:
- 1/4 cup chopped toasted pecans
- 1 teaspoon finely grated lemon zest
- Fresh berries, for serving
What Each Ingredient Is Doing in the Bowl
Shortbread Crust
What to use: 2 cups shortbread cookie crumbs, 2 tablespoons granulated sugar, 1/4 teaspoon fine salt, and 1/2 cup melted butter.
Preparation: Crush the cookies into fine crumbs, not chunky bits. You want the texture of damp sand when the butter goes in, because large pieces make the crust fracture when you slice it.
Substitutions: Graham cracker crumbs work if that’s what you have, and vanilla wafer crumbs give a softer, sweeter crust. For a gluten-free version, use certified gluten-free shortbread cookies and keep the butter amount the same.
Tips: Bake the crust until the surface smells toasted and the color deepens by a shade or two. That short bake is doing more than you think; it sets the butter and keeps the bottom from tasting raw or sandy.
Buttery Filling
What to use: 8 oz cream cheese, 1/2 cup butter, 1 cup powdered sugar, 1 tablespoon lemon juice, 2 teaspoons vanilla, 1/4 teaspoon salt, and 1 1/2 cups cold heavy cream.
Preparation: Let the cream cheese and butter soften fully so they beat into a smooth base. Cold cream is the opposite story — it whips better if it stays cold until the moment you use it.
Substitutions: Mascarpone can replace half the cream cheese if you want a softer, less tangy finish. If you want a lighter filling, replace 1/4 cup of the butter with an extra 1/4 cup of whipped cream, but the pie will set a little looser.
Tips: The lemon juice doesn’t make the pie lemon-flavored; it sharpens the dairy so the filling doesn’t taste heavy. That tiny bit of acidity matters more than people expect.
Cream Cheese Frosting
What to use: 4 oz cream cheese, 2 tablespoons butter, 1 1/2 cups powdered sugar, 1 teaspoon vanilla, 1 to 2 tablespoons heavy cream, and a pinch of salt.
Preparation: Beat the cream cheese and butter until they lose all visible lumps before adding sugar. If you dump powdered sugar into a cold, clumpy base, you’ll get a gritty frosting that never really smooths out.
Substitutions: If you like a softer topping, replace half the cream cheese with whipped cream. If you want a sturdier top, use the full amount of cream cheese and only the first tablespoon of cream.
Tips: Spread the frosting in a thin layer. You are not building a bakery-style mountain here. A thick cap can overwhelm the filling and make the pie eat more like frosting with a crust than pie with a finish.
Optional Finishing Ingredients
What to use: Chopped toasted pecans, lemon zest, and fresh berries.
Preparation: Toast the pecans until they smell nutty and a little warm, then cool them before chopping. Zest the lemon fine, because big shreds can taste bitter on a cold pie.
Substitutions: Toasted almonds, shaved white chocolate, or sliced strawberries can stand in for the pecans if you want a different finish.
Tips: Add berries right before serving, not hours earlier. Fruit juices run fast on a chilled surface, and a pretty slice can turn into a slippery one in no time.
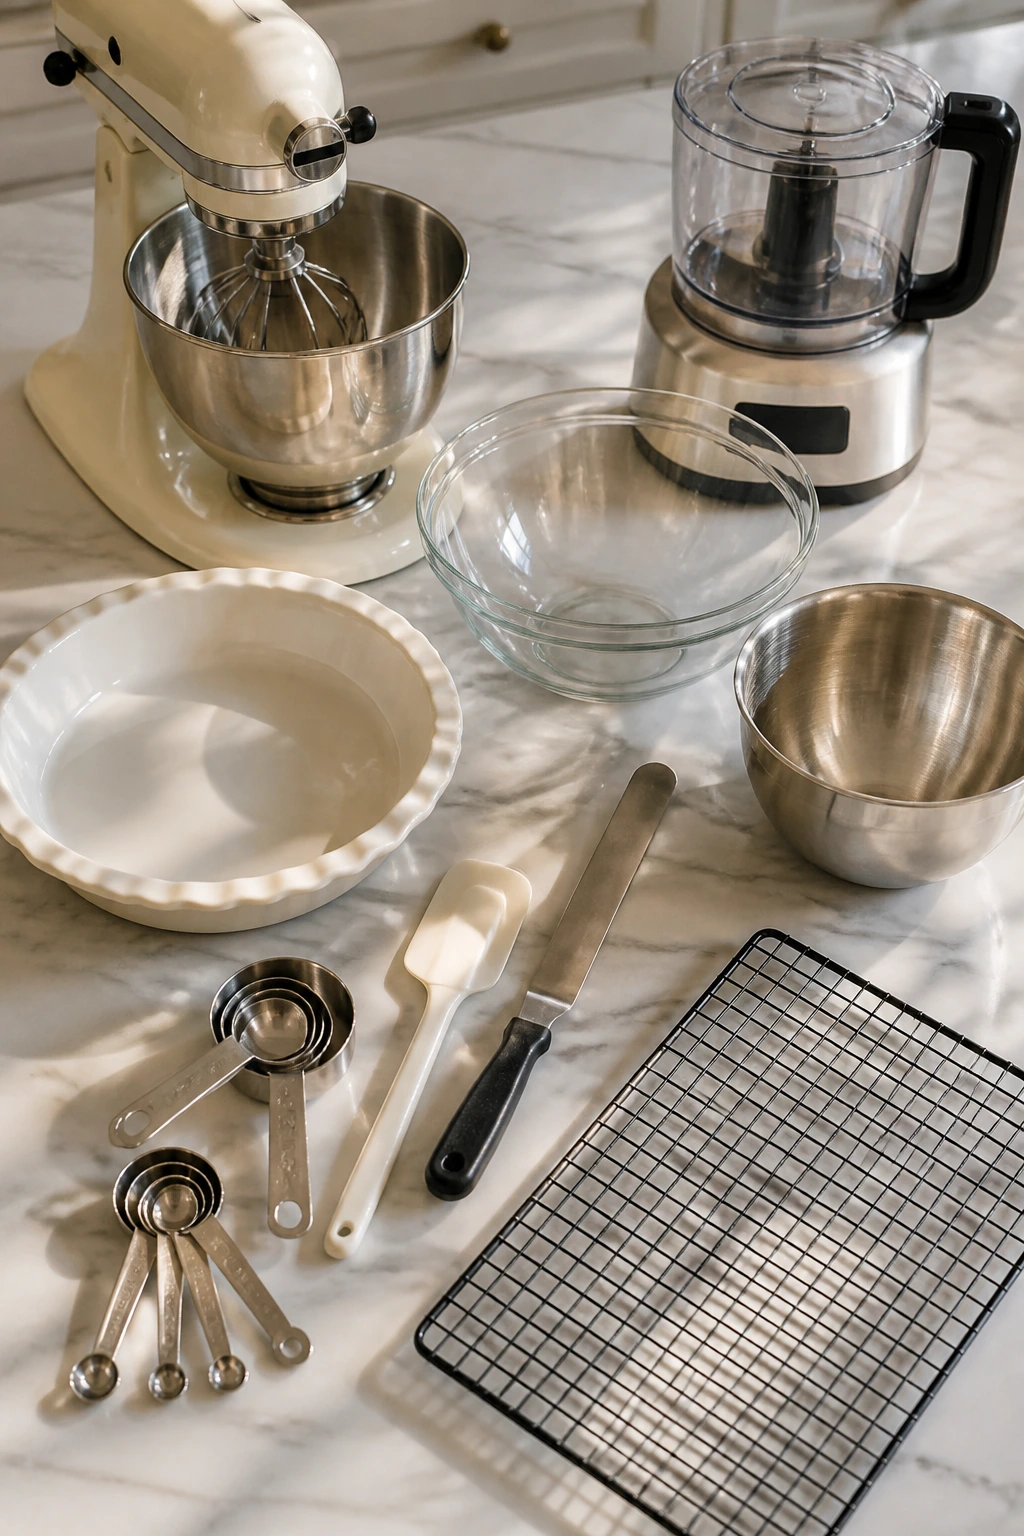
The Kitchen Tools I Reach For
-
9-inch deep-dish pie plate: The filling makes a generous pie, and a deep-dish plate keeps it from riding too high on the rim.
-
Food processor or zip-top bag and rolling pin: You need a fine crumb for the crust, and a food processor makes that easy. A bag and rolling pin work fine if you don’t mind a little noise.
-
Stand mixer or hand mixer: You can make the filling by hand, but a mixer gives you a smoother base and a better whip on the cream.
-
Large mixing bowls: Use at least two. One for the base, one for the cream, and a third if you want to keep the frosting separate until the last minute.
-
Rubber spatula: This is what folds the whipped cream into the filling without knocking all the air out.
-
Offset spatula or the back of a spoon: Useful for smoothing the frosting and making the top look intentional instead of merely spread.
-
Measuring cups and spoons: The butter and sugar ratios matter here, so eyeballing is a bad idea.
-
Cooling rack: The crust needs to cool evenly before the filling goes in.
-
Sharp knife and tall glass of hot water: A hot blade makes cleaner cuts through the chilled filling and frosting.
How to Press and Bake the Shortbread Crust
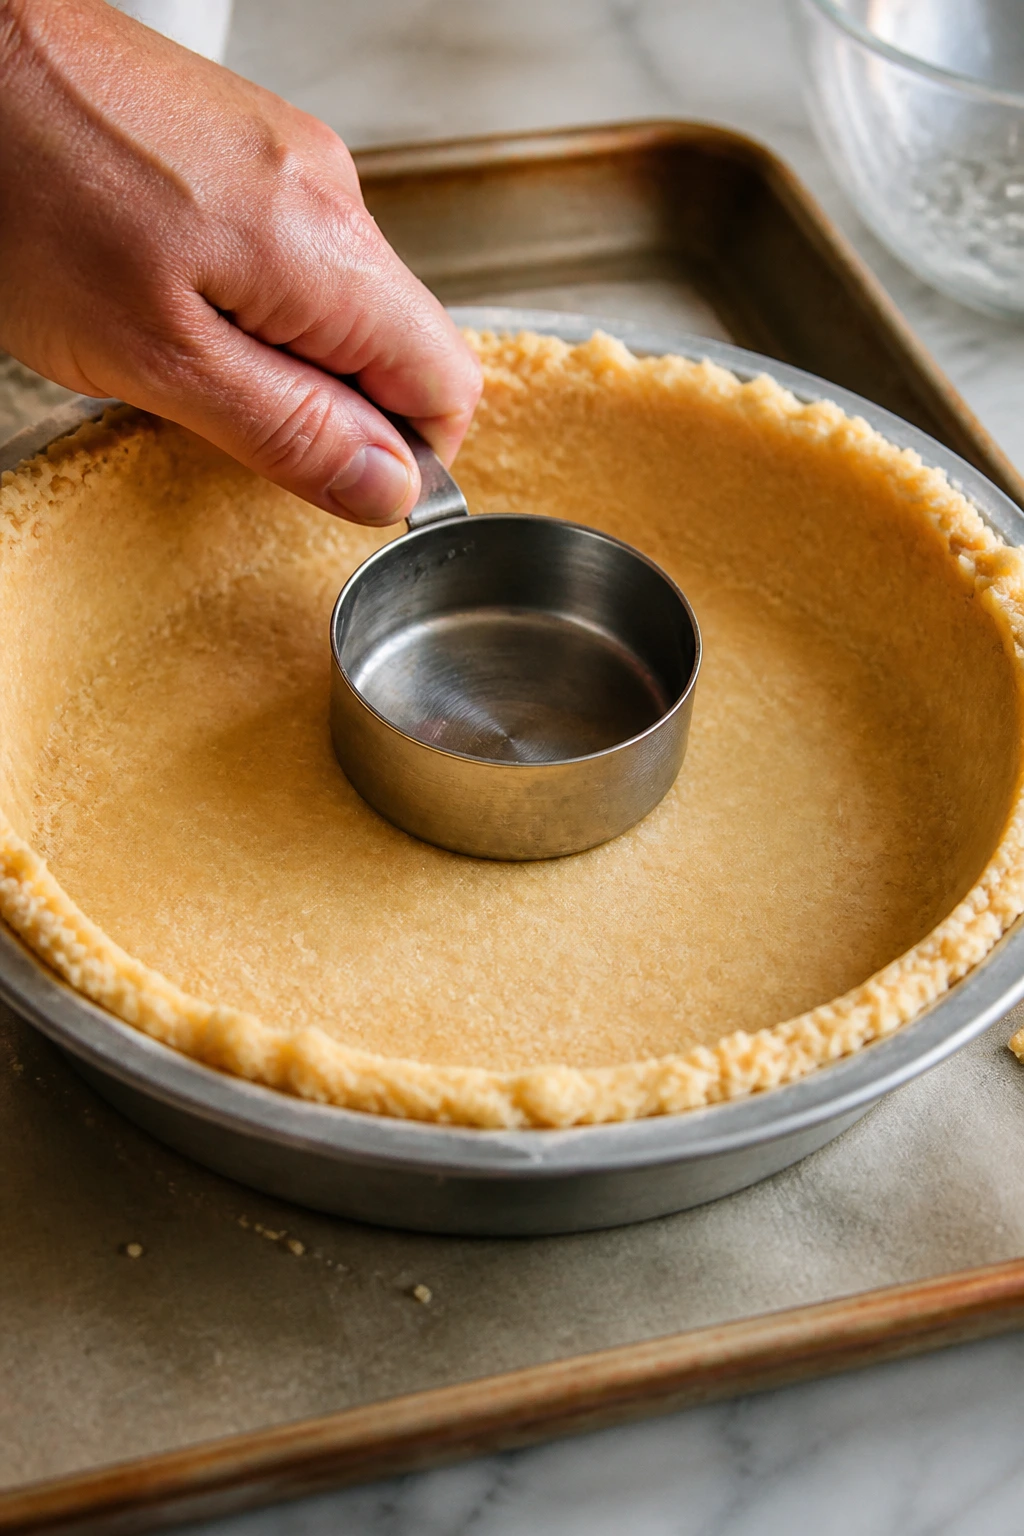
Make the Crust:
-
Preheat the oven to 350°F (175°C) and lightly butter a 9-inch deep-dish pie plate. In a medium bowl, stir together the shortbread crumbs, granulated sugar, and salt until the mixture looks even.
-
Pour in the melted butter and stir with a fork until every crumb is coated and the texture resembles wet sand. If a spoonful holds together when squeezed, you’re in the right zone.
-
Press the mixture firmly into the pie plate with the bottom of a measuring cup, working it across the base first and then up the sides. The crust should feel compact and even, not loose or patchy. Bake for 10 to 12 minutes, until the edges smell toasted and the color deepens slightly.
-
Cool the crust completely on a rack, about 30 minutes. Do not add the filling while the crust is warm. Warm butter softens the filling and turns the bottom layer into a mushy mess.
A good crust for this pie should hold its shape without feeling heavy. That’s the whole balancing act. Shortbread helps because it already carries a lot of butter flavor, so you don’t need to drown it in sugar to make it interesting.
Press the crumbs harder than you think you need to. Most crumb crusts fail because they’re too loosely packed, not because they lack butter. A compact crust cuts better and gives the filling a real base instead of a pile of crumbs pretending to be a shell.
If the sides slump during baking, nudge them back up with a spoon while the crust is still warm. A tiny repair now saves a broken edge later. And yes, it’s worth the extra minute.
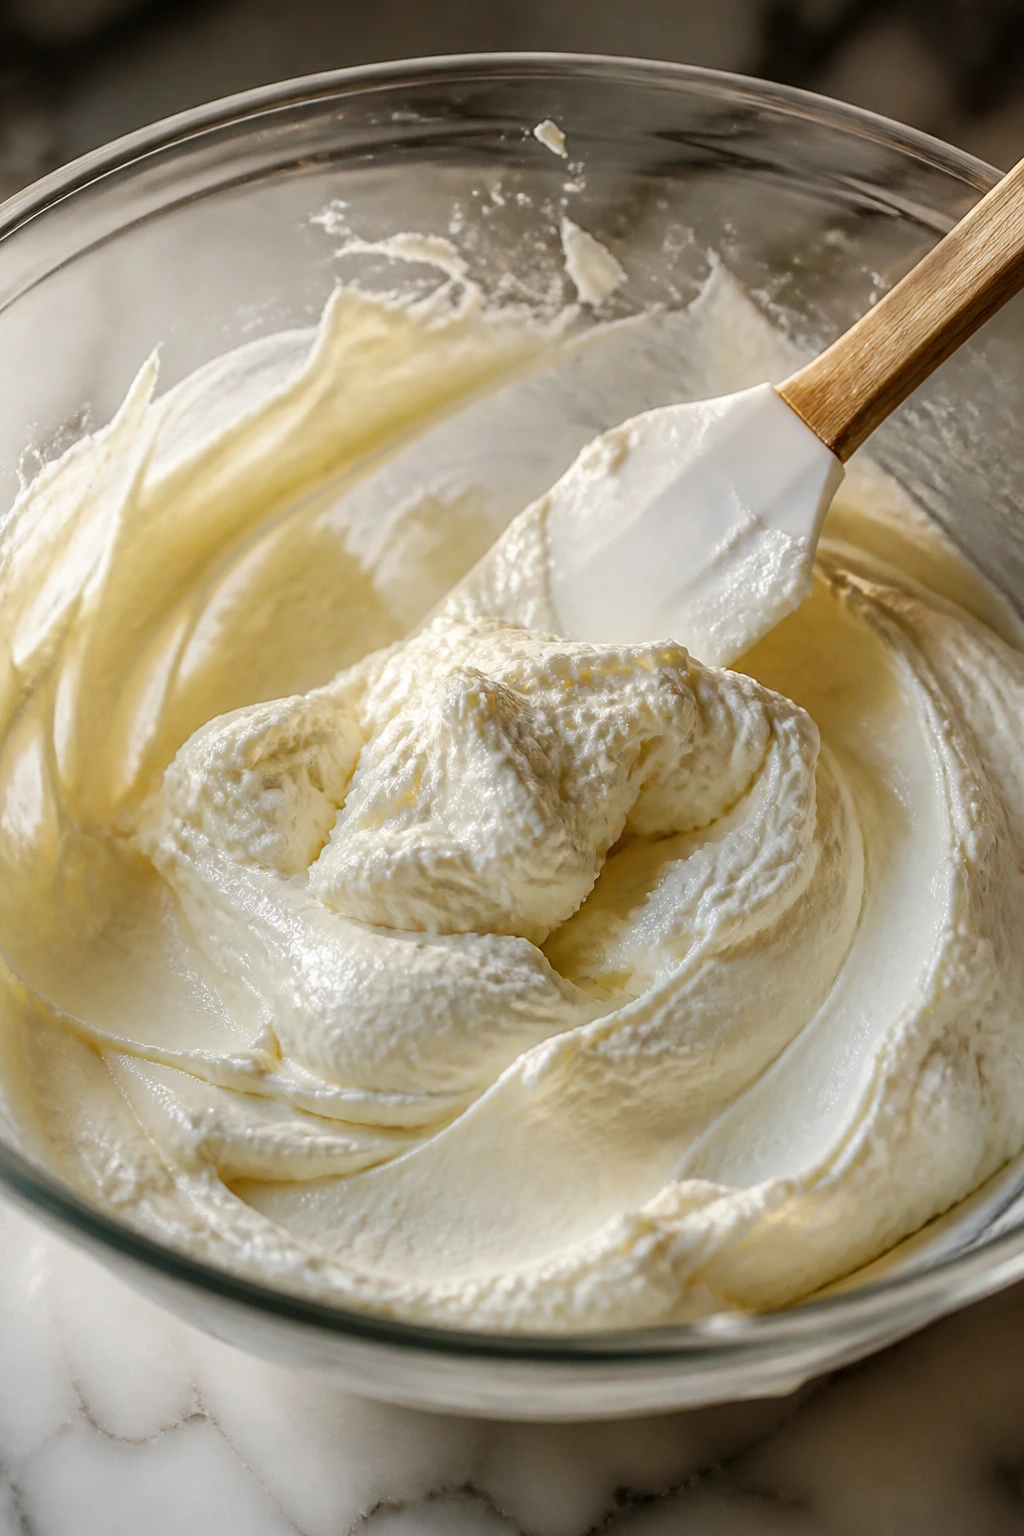
How to Whip the Filling Without Making It Heavy
Make the Filling:
-
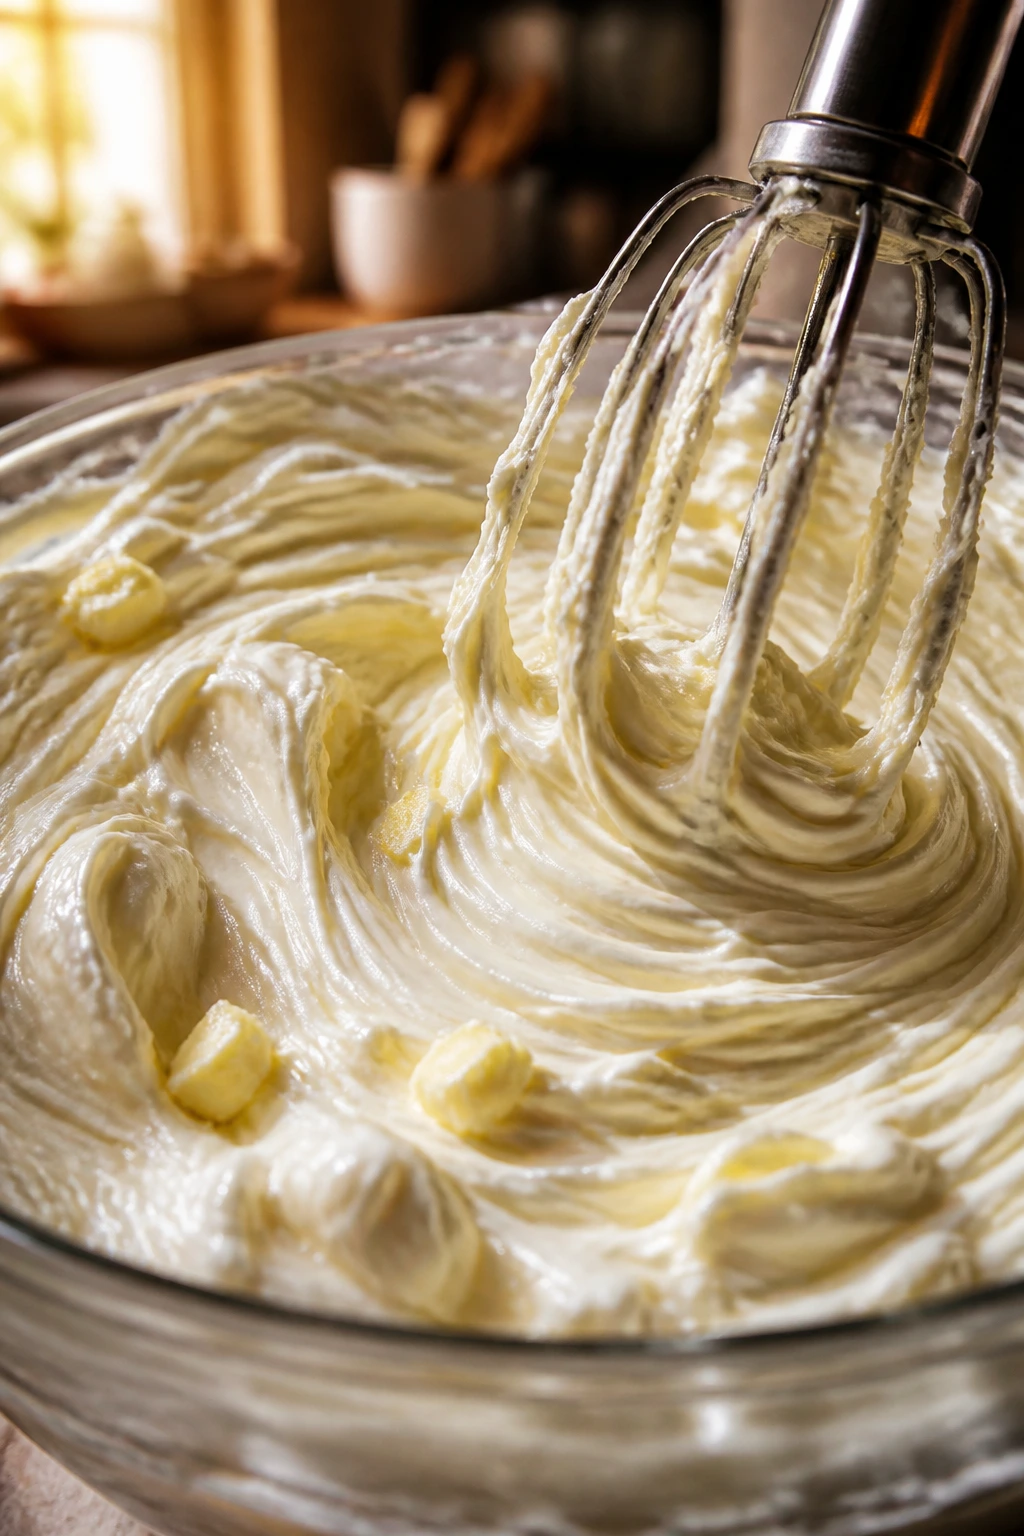
Beat the cream cheese and butter in a large bowl on medium speed for 2 to 3 minutes, until the mixture is smooth, pale, and completely free of lumps. Scrape the bowl well, especially at the bottom where cold bits like to hide.
-
Add the powdered sugar, lemon juice, vanilla, and salt and beat for another minute, until the mixture turns glossy and a little lighter. It should taste rich, yes, but the lemon and salt should keep it from reading as flat sugar paste.
-
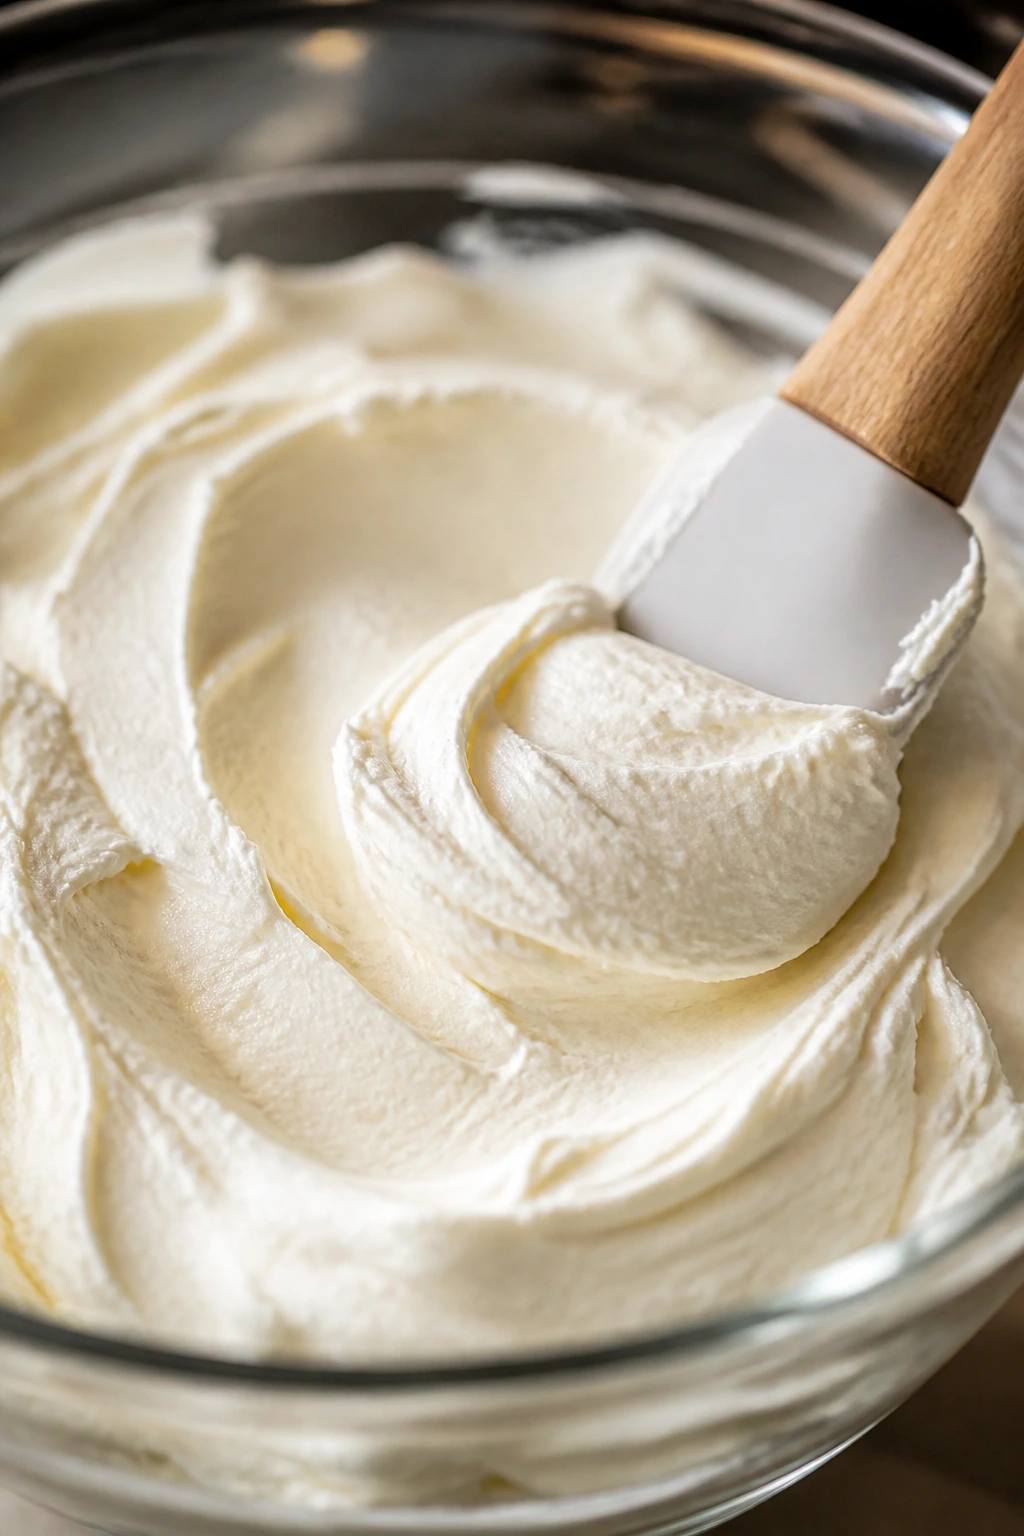
Whip the cold heavy cream in a separate chilled bowl on medium-high speed for 2 to 3 minutes, until medium peaks form. When you lift the beaters, the cream should hold its shape but still tip over at the end. Fold the whipped cream into the cream cheese mixture in two additions with a rubber spatula. Stop as soon as the streaks disappear. Overmixing knocks out the air and leaves you with a dense filling.
This is the part where the pie starts to feel like dessert instead of ingredients. The whipped cream gives the filling lift, while the cream cheese and butter make it set. Both things matter. If one is off, the whole pie feels too soft or too heavy.
There’s a real temptation to keep beating once the filling looks smooth. Don’t. The goal is not maximum fluff; the goal is a filling that holds a slice. A few folds too many can flatten the texture, and no amount of chilling will bring the air back.
Taste the filling before you put it in the crust. If it tastes a little too sweet, add a tiny pinch more salt. If it tastes a little too rich, a few drops more lemon juice brighten it up. That’s one of the pleasures of a cold pie: you can adjust before the filling sets.
How to Make the Cream Cheese Frosting
Make the Frosting:
- Beat the cream cheese and butter for the frosting in a medium bowl until smooth, about 1 minute. Add the powdered sugar, vanilla, salt, and 1 tablespoon heavy cream, then beat for 30 to 45 seconds until thick and spreadable. If it looks stiff or dry, add the second tablespoon of cream a little at a time.
The frosting should feel soft enough to spread without tearing the filling, but firm enough to hold a swoop if you drag the spatula through it. That balance is what keeps it from sliding around on top of the pie.
I like to keep this layer thin. A heavy frosting cap can smother the filling, and then every bite tastes like sweet cream cheese first and pie second. You want the frosting to finish the pie, not erase it.
If your kitchen is warm, chill the filling-filled crust for 15 to 20 minutes before frosting. That small pause gives the top enough firmness to accept the spread without tearing. It also makes your final layer cleaner, which matters more than people admit.
How to Assemble and Chill the Pie
Assemble and Chill:
-
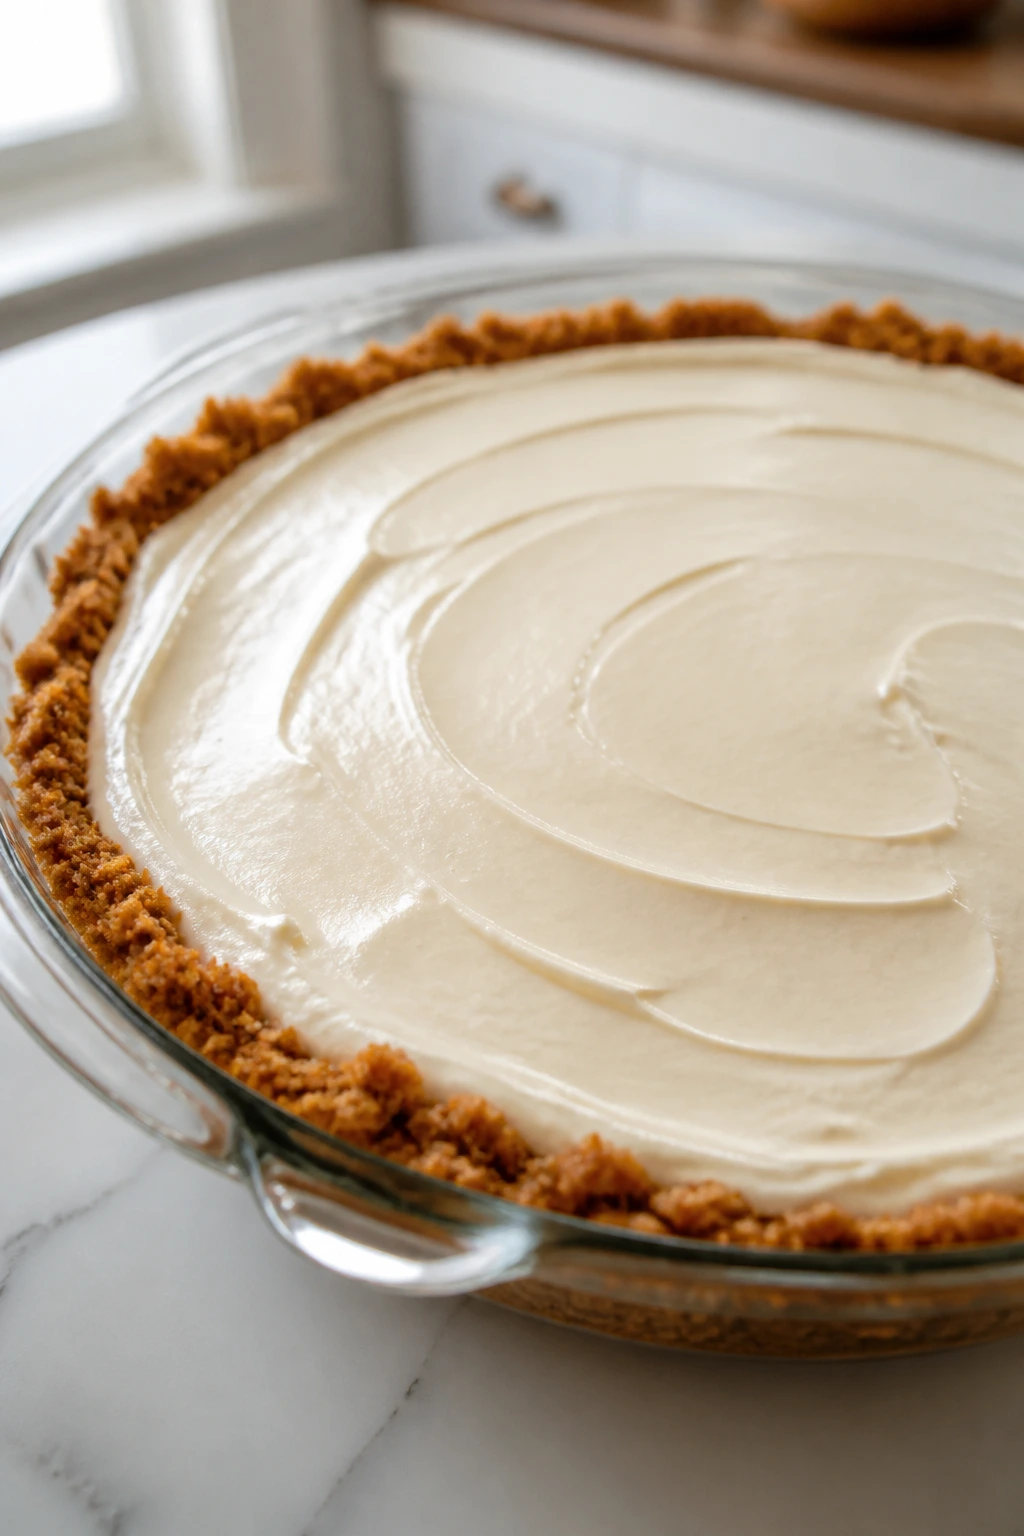
Spoon the filling into the cooled crust and nudge it into the corners with a spatula. Smooth the top into a level layer, then chill the pie for 15 to 20 minutes if it feels soft while you finish the frosting.
-
Spread or pipe the frosting over the filling in an even layer. If you want a more finished look, use the back of a spoon to make shallow swoops, then scatter pecans or lemon zest over the top.
-
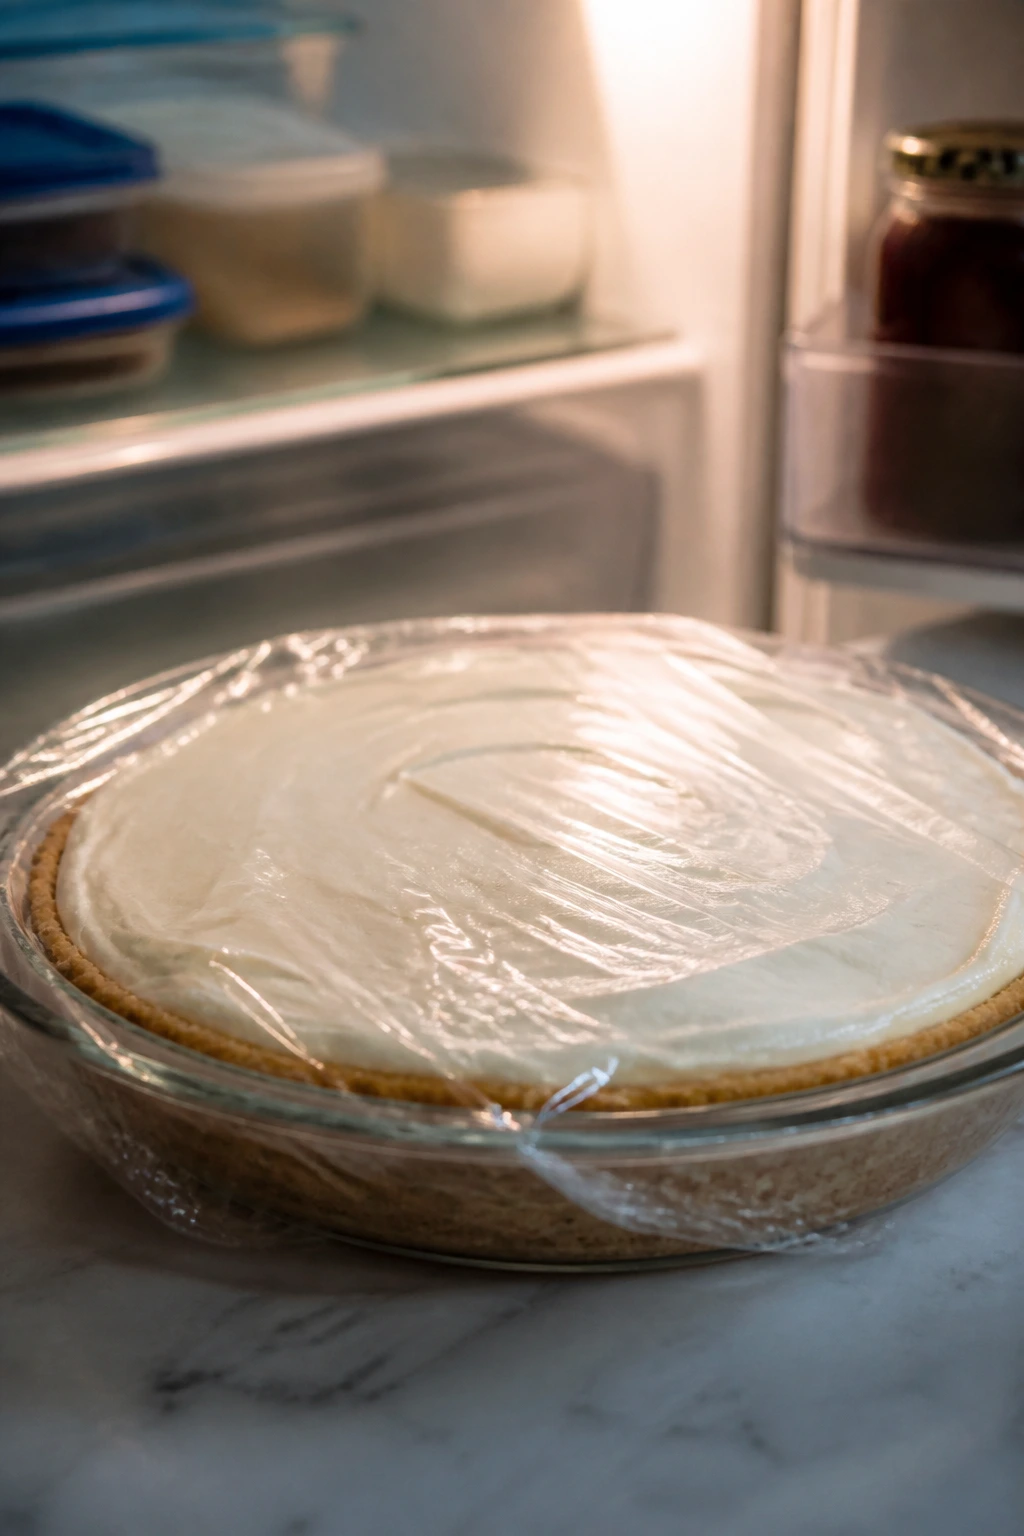
Cover the pie loosely and refrigerate for at least 6 hours, preferably overnight, until the center feels firm when you press it lightly. If the pie still wobbles in the middle, it is not ready to slice. Give it more time. Rushing this step is how you get a lopsided wedge that collapses on the plate.
-
Cut with a hot, dry knife and wipe the blade between slices. A clean knife gives you the neatest edge and keeps frosting from dragging across the cut face. If you’re serving to guests, let each slice sit for 5 minutes on the plate so the chill softens just a touch.
The pie will look more settled after a long chill, and that is exactly what you want. A cold pie should not wobble like pudding. It should hold together with a quiet firmness, the kind that lets a fork go in cleanly but still gives you a creamy bite.
If you’re adding berries, add them just before serving. Not earlier. Fruit juices are the enemy of a neat top, and a pretty garnish can become a red puddle if it sits too long.
Serving a Cold Pie Without Messing Up the Slice
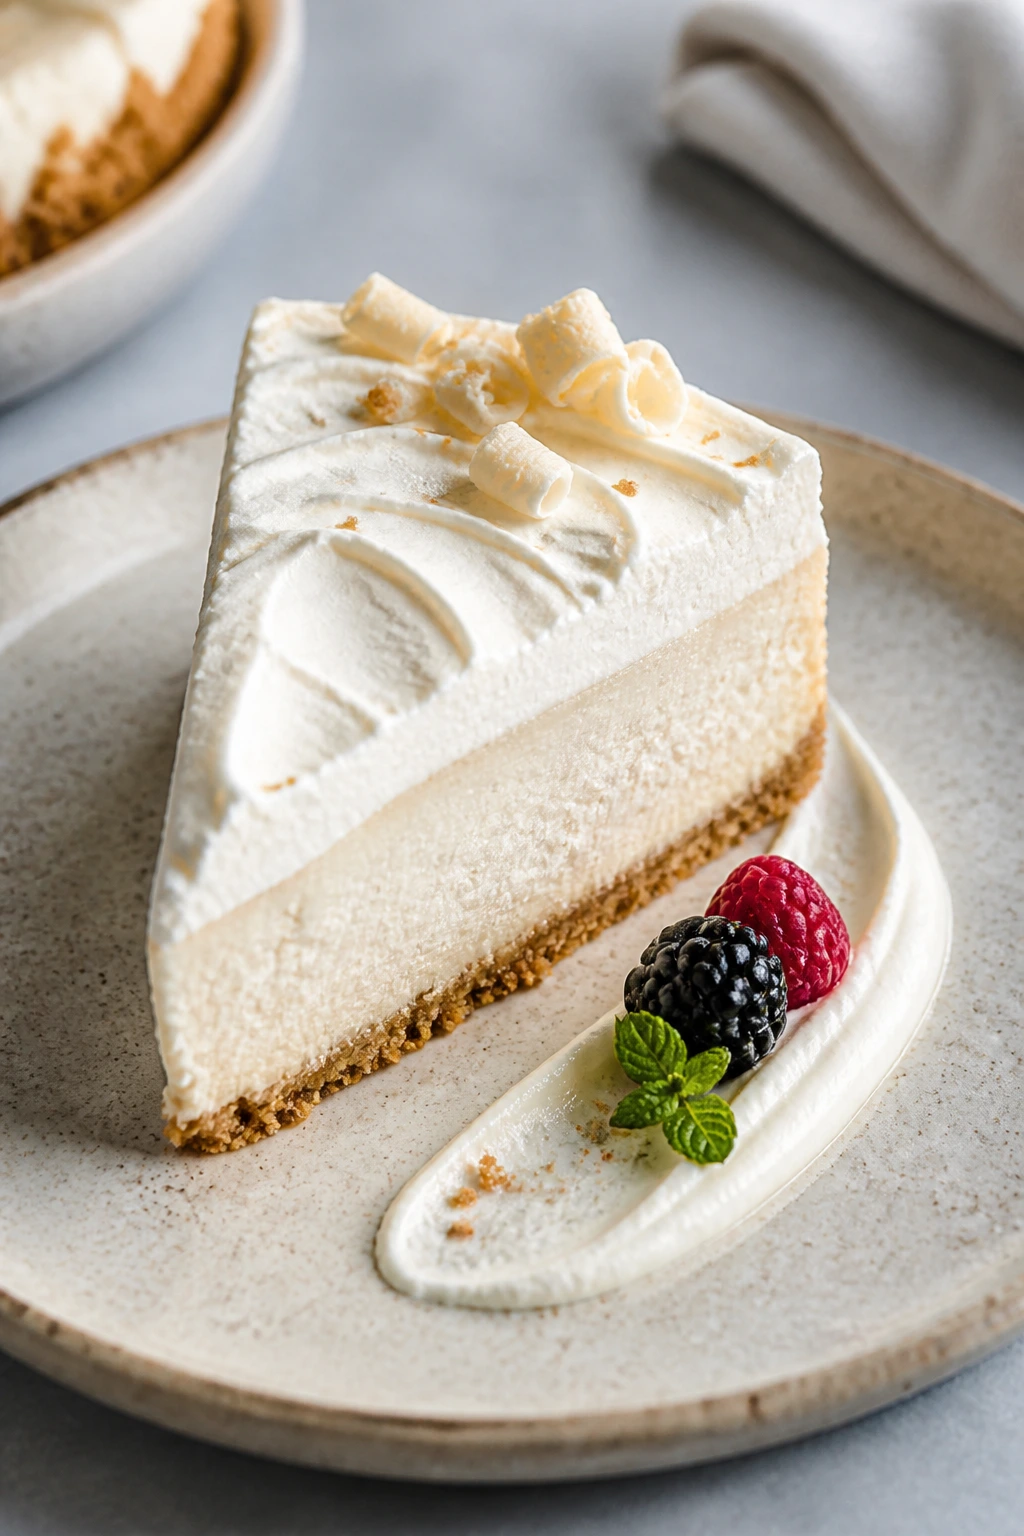
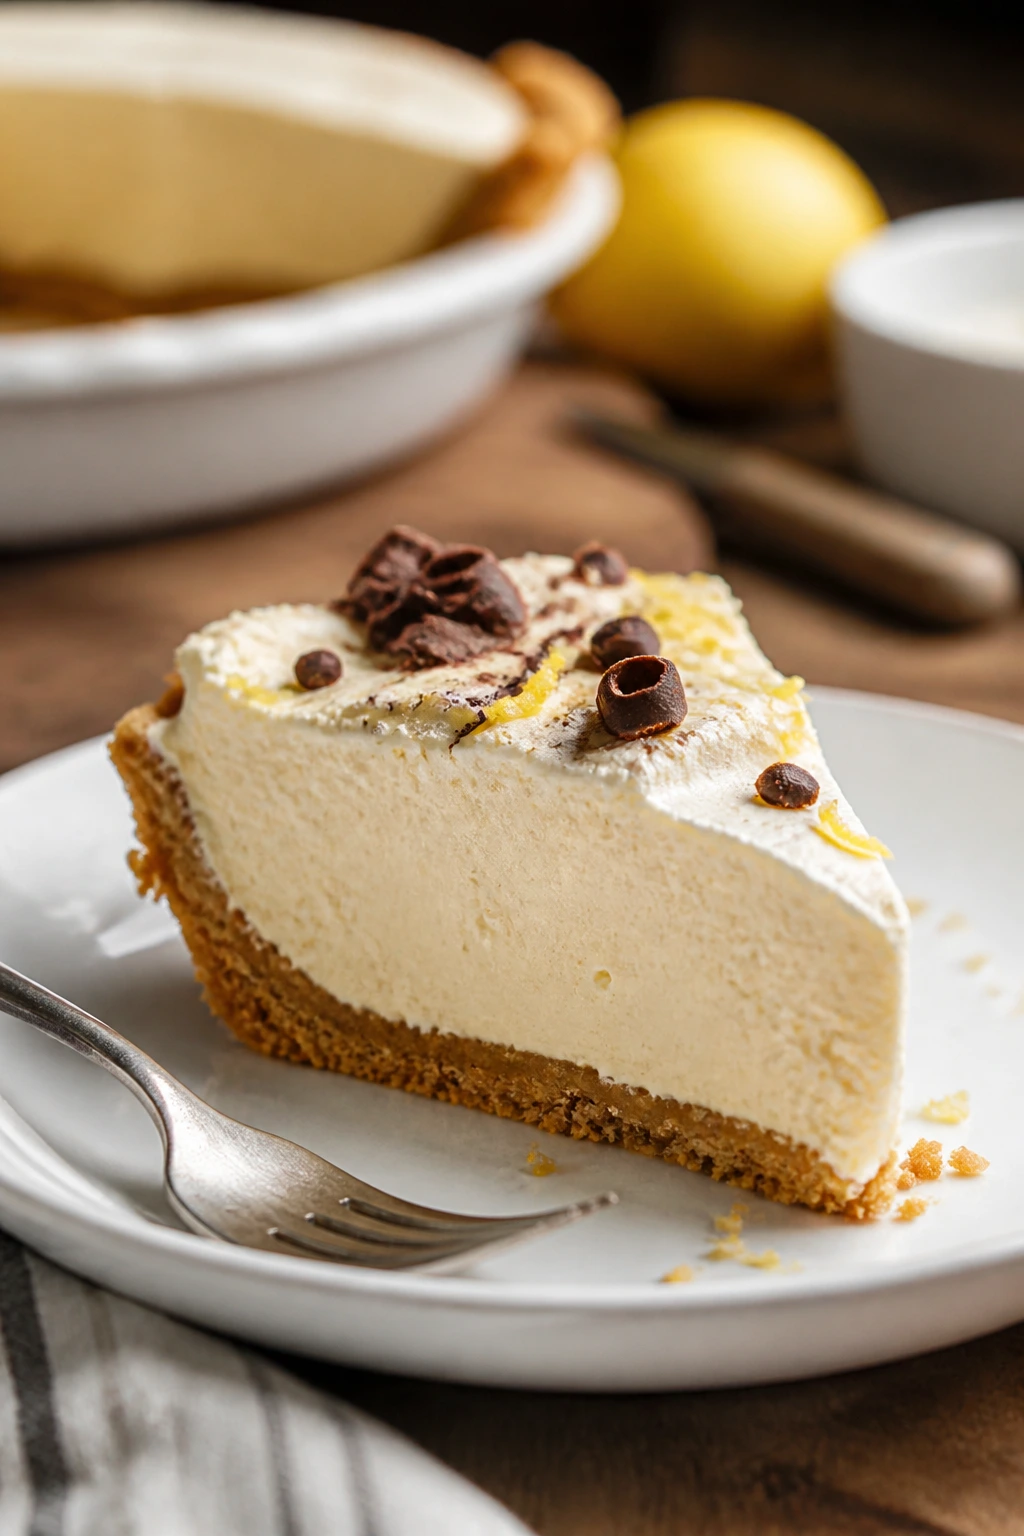
Presentation: Slice the pie with a hot knife and move each wedge onto a chilled dessert plate. A small swoosh of frosting on top, plus a few pecans or a thin dusting of lemon zest, makes the slice look deliberate instead of plain.
Accompaniments: Serve it with fresh berries, a spoonful of lightly macerated strawberries, or a few crisp butter cookies on the side. I’d avoid heavy sauces unless you want the plate to turn syrupy; this pie already carries enough richness on its own.
Portions: Ten slices is the sweet spot for a 9-inch pie, especially if you’re serving it after a meal. If you want smaller portions, cut twelve thin wedges and keep the knife hot between each cut. If you want larger ones, give yourself eight slices and let the pie sit 5 minutes before serving so the chill doesn’t make it feel too firm.
Beverage Pairing: Strong coffee works beautifully here because it cuts through the butter and cream cheese without fighting them. If you want something colder, a glass of cold milk or unsweetened iced tea does the job without adding more sweetness to the plate.
Extra Moves That Make It Taste Even Better
Flavor Enhancement: A little lemon zest in the filling wakes the whole pie up. Not much — just 1 teaspoon is enough to keep the dairy from tasting sleepy. If you like a deeper, bakery-style finish, add a pinch of flaky salt over each slice right before serving.
Time-Saver: Bake the crust a day ahead and keep it uncovered at room temperature once it has cooled fully. That means the only thing left on dessert day is mixing, filling, and chilling. It’s a small change, but it takes pressure off the final stretch when your oven is busy with everything else.
Pro Move: Chill the mixing bowl and beaters for the cream before you whip it. Cold tools help the cream whip faster and hold better, especially if your kitchen runs warm. I’ve seen more soft fillings traced back to lukewarm cream than to any other mistake.
Cost-Saver: Store-brand cream cheese works fine here because the filling is whipped and sweetened. The big thing is texture, not boutique branding. Spend on real butter, though. That’s where the flavor sits.
Make-It-Yours: If you like a nuttier finish, fold half the chopped pecans into the crust and save the rest for the top. If you prefer fruit, skip the nuts and add fresh raspberries after the pie has chilled. For a slightly brighter pie, swap vanilla extract for vanilla bean paste and keep the lemon zest.
Common Mistakes That Turn a Good Pie Heavy or Loose
-
Using cream cheese and butter straight from the fridge: Cold dairy leaves small lumps in both the filling and the frosting. The fix is simple: let the cream cheese and butter sit out until they bend easily under a fingertip, then beat the base until it looks smooth before anything else goes in.
-
Whipping the cream to stiff peaks: Stiff cream can turn grainy once it’s folded into the filling, and the pie may feel dense instead of fluffy. Stop at medium peaks, where the cream holds shape but the tip still curls over. That texture folds cleanly and chills into a better slice.
-
Skipping the crust bake: A no-bake crumb crust seems tempting, but the bottom usually turns soft after a day in the fridge. Ten to twelve minutes in the oven gives the butter a set and toasts the crumbs enough to taste like something you actually want to eat.
-
Frosting the pie while the filling is still loose: If the filling hasn’t had even a short chill, the frosting can slide or sink into the top. Give the filled crust 15 to 20 minutes in the fridge first if the room is warm. That little pause is the difference between a neat top and a messy one.
-
Cutting too soon: A pie that hasn’t chilled long enough will slump when you lift the slice. If the center still jiggles like custard, it needs more time. Overnight is best, and I don’t say that often about desserts that don’t involve pastry cream.
-
Using a dull knife: You can make a perfect pie and still ruin the first slice with a blunt blade. Heat the knife under hot water, wipe it dry, and cut cleanly. Repeat between slices. It takes thirty extra seconds and saves you from ragged edges.
Variations That Still Taste Like the Original
Lemon-Zest Brightener: Add 2 teaspoons of lemon zest to the filling and 1 teaspoon to the frosting. The pie stays rich, but the citrus makes the cream cheese taste sharper and more awake. This is the version I’d serve after a heavy meal.
Chocolate Cookie Base: Swap the shortbread crumbs for chocolate wafer crumbs and keep the rest of the recipe the same. The dark crust gives the pie a deeper, almost cookies-and-cream feel without changing the filling at all. A few chocolate curls on top finish it cleanly.
Brown-Butter Shortbread Pie: Brown 1/4 cup of the butter for the crust before mixing it with the crumbs, then use the remaining melted butter as written. That extra nutty note makes the crust taste more homemade and less straight-from-the-cookie-box.
Pecan-Praline Finish: Fold 1/2 cup finely chopped toasted pecans into the crust and scatter more over the frosting with a light drizzle of caramel just before serving. The crunch gives the chilled filling a little tension, which is a nice contrast.
Gluten-Free Cookie Swap: Use certified gluten-free shortbread cookies or gluten-free vanilla wafers in place of the standard crumbs. Keep the butter ratio the same and press the crust firmly, because gluten-free crumbs can be a touch more fragile once chilled.
Make-Ahead, Storage, and Freezer Notes
A pie like this wants the fridge. That’s not a weakness. It’s the whole point.
If you need to make parts ahead, the crust is the easiest piece to get out of the way. Bake it up to 1 day in advance, cool it completely, and leave it uncovered at room temperature if your kitchen is cool and dry. Once it’s filled, the whole pie can be assembled up to 24 hours ahead and chilled overnight, which is where it tastes best anyway.
At room temperature, keep the pie out for no more than 2 hours. Because of the cream cheese, whipped cream, and butter, it shouldn’t sit on the counter through a long dessert hangout. If you’re serving outdoors or in a warm room, give it shorter stretches and return leftovers to the fridge quickly.
Covered loosely in the refrigerator, the pie keeps for 3 to 4 days. A pie dome is nice, but plastic wrap or foil works too as long as it doesn’t press hard into the frosting. If the top is piped or decorative, place a few toothpicks in the surface before tenting it so the wrap doesn’t smear the finish.
Freezing works, but treat it as a backup, not the preferred plan. Freeze the whole pie or individual slices on a tray until firm, then wrap tightly in plastic and a second layer of foil. For the best texture, freeze for up to 1 month. Thaw slices in the refrigerator overnight. Do not microwave them; the filling will break and the crust will go soft in a strange, damp way.
If you know you’ll be freezing a few slices, skip the fresh berries on top until serving day. Fruit gets sad in the freezer. The pie itself handles freezing far better than the garnish does.
Questions People Ask Before Making It

Can I make this pie a day ahead?
Yes, and I prefer it that way. The crust sets more firmly, the filling firms up, and the frosting holds its shape better after an overnight chill. If anything, the slices are cleaner on day two.
Can I use graham crackers instead of shortbread cookies?
You can, and the pie will still work. Graham crackers make a more familiar icebox-pie base, but shortbread gives a rounder buttery flavor and a finer crumb. If you want the pie to taste richer, stay with shortbread.
Do I have to bake the crust?
Technically no, but I wouldn’t skip it. A baked crust has a toasted smell and a firmer edge, and it resists turning soggy once the filling has been in the fridge for a day. If you’re in a rush, you can chill the crust instead, but the texture will be softer.
Why did my filling turn runny?
Usually the cream wasn’t whipped enough, or the whipped cream got folded in too roughly and lost too much air. Another common problem is a crust that was still warm when the filling went in. Chill the crust fully, whip the cream to medium peaks, and fold gently.
Can I make it without a mixer?
Yes, but it takes patience. A sturdy whisk can handle the filling base if the cream cheese and butter are very soft, though you’ll work harder to get it smooth. The cream still whips best with a hand mixer or stand mixer, so I’d use one if you have it.
What if my frosting is too thick to spread?
Add heavy cream 1 teaspoon at a time and beat briefly after each addition. If you dump in too much liquid at once, the frosting can go from spreadable to slack in a hurry. Softening the cream cheese properly also helps more than people expect.
Can I freeze the whole pie?
Yes, but wrap it well and thaw it in the refrigerator, not on the counter. The filling holds up better than the frosting does, so if you’re freezing a decorative top, expect it to look a little less neat after thawing. Flavor stays good; the look softens.
A Pie Worth the Wait
This is the kind of dessert that rewards patience without making you work for it. The crust gets toasted, the filling settles into a cool, creamy slab, and the frosting gives each slice that last little tangy note that keeps a rich pie from feeling one-note.
I like desserts that know what they are. This one knows. It’s chilled, buttery, and a little plush around the edges, and it tastes better once the fridge has had its say. If your dessert table likes a little drama and a lot of butter, this pie will keep earning a spot there.
Buttery Icebox Pie with Cream Cheese Frosting — Recipe Card
Recipe Name: Buttery Icebox Pie with Cream Cheese Frosting
Description: A chilled shortbread-crust pie with a fluffy buttery cream cheese filling and a smooth cream cheese frosting on top. It slices cleanly after an overnight chill and lands somewhere between cheesecake and buttercream.
Prep Time: 30 minutes
Cook Time: 12 minutes
Total Time: 42 minutes active, plus 6 hours chilling
Course: Dessert
Cuisine: American
Servings: 10 servings
Calories: About 620 kcal per serving
Ingredients
For the Shortbread Crust:
- 2 cups shortbread cookie crumbs, finely ground
- 2 tablespoons granulated sugar
- 1/4 teaspoon fine sea salt
- 1/2 cup unsalted butter, melted and slightly cooled
For the Buttery Filling:
- 8 oz full-fat cream cheese, softened to room temperature
- 1/2 cup unsalted butter, softened to room temperature
- 1 cup powdered sugar, sifted
- 1 tablespoon fresh lemon juice
- 2 teaspoons pure vanilla extract
- 1/4 teaspoon fine salt
- 1 1/2 cups cold heavy cream
For the Cream Cheese Frosting:
- 4 oz cream cheese, softened
- 2 tablespoons unsalted butter, softened
- 1 1/2 cups powdered sugar, sifted
- 1 teaspoon pure vanilla extract
- 1 to 2 tablespoons heavy cream
- Pinch of fine salt
For Finishing, Optional:
- 1/4 cup chopped toasted pecans
- 1 teaspoon finely grated lemon zest
- Fresh berries, for serving
Instructions
-
Preheat the oven to 350°F (175°C) and lightly butter a 9-inch deep-dish pie plate.
-
In a bowl, stir together the shortbread crumbs, sugar, and salt. Add the melted butter and mix until the crumbs look evenly damp.
-
Press the crumb mixture firmly into the pie plate, making an even layer on the bottom and up the sides. Bake for 10 to 12 minutes, until lightly toasted and set. Cool completely.
-
Beat the cream cheese and butter for the filling on medium speed until smooth and lump-free.
-
Add the powdered sugar, lemon juice, vanilla, and salt. Beat until glossy and light.
-
In a separate bowl, whip the cold heavy cream to medium peaks, then fold it into the cream cheese mixture in two additions.
-
Spoon the filling into the cooled crust and smooth the top. Chill briefly if needed while you make the frosting.
-
Beat the cream cheese and butter for the frosting until smooth. Add the powdered sugar, vanilla, salt, and 1 tablespoon heavy cream, then beat until spreadable. Add more cream only if needed.
-
Spread or pipe the frosting over the filling. Sprinkle with pecans or lemon zest if using.
-
Cover loosely and refrigerate for at least 6 hours, preferably overnight, until firm.
-
Cut with a hot, dry knife, wiping the blade between slices. Serve cold.
Notes: For the cleanest slices, chill overnight and warm the knife between cuts. If you want a brighter finish, add lemon zest just before serving.