
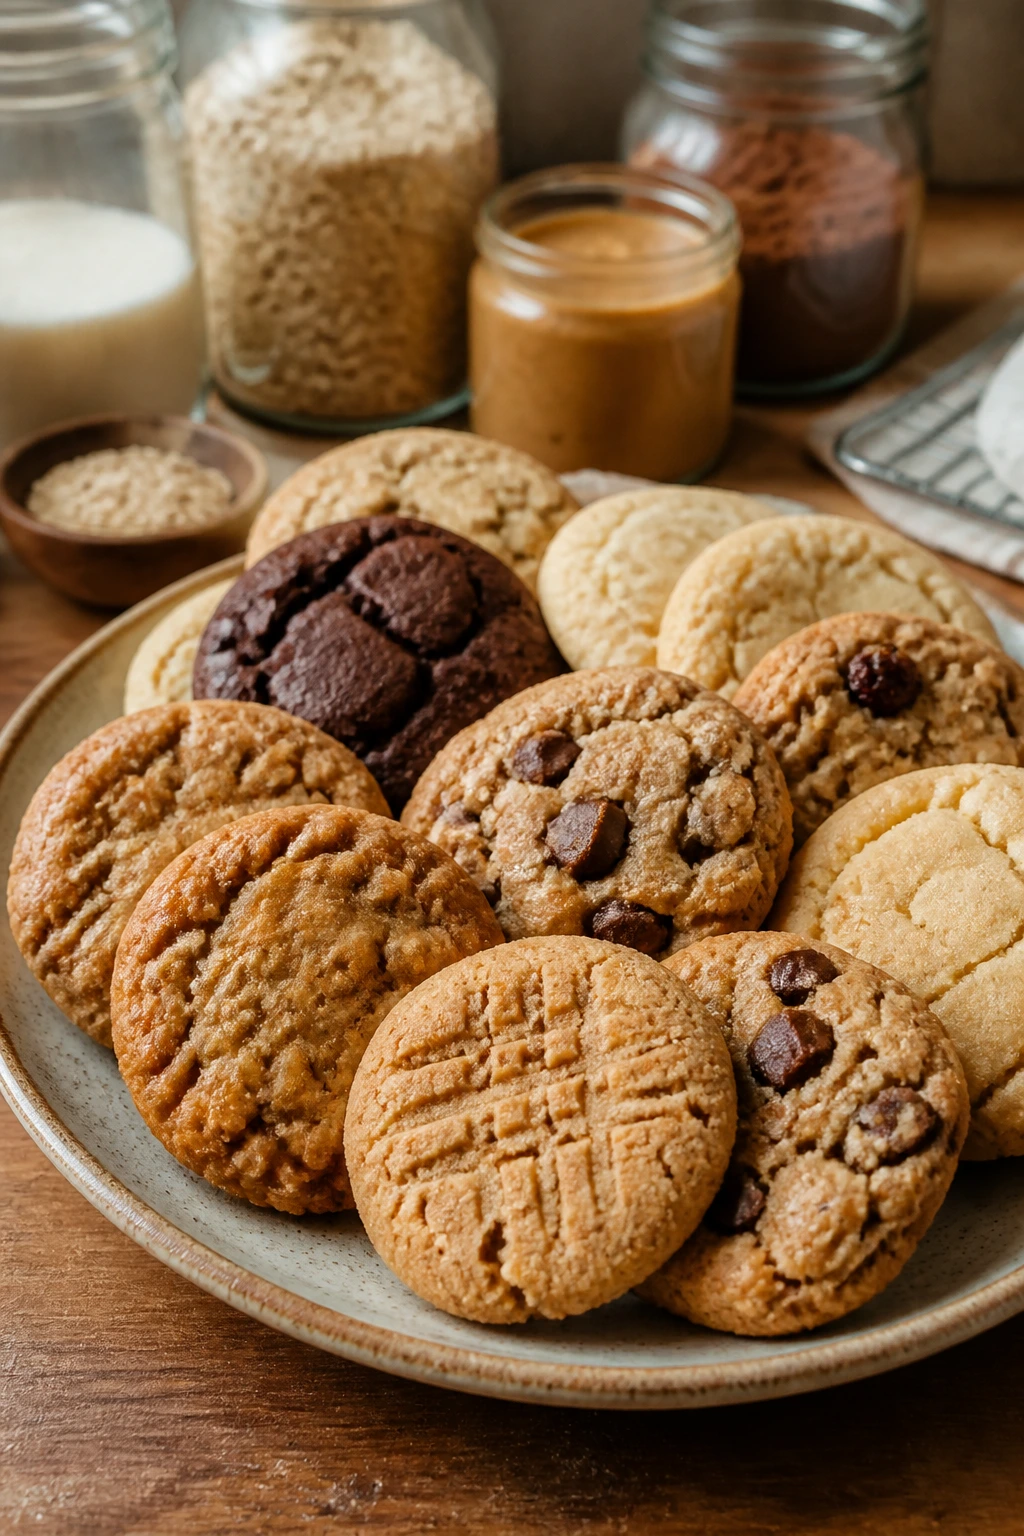
A good pantry cookie has a kind of kitchen magic that feels almost rude. You open a cupboard, find a half bag of oats, a jar of peanut butter, maybe a little cocoa, and within an hour there’s a plate of cookies kids are already asking for before the tray cools. That’s the whole trick here: cookies kids will actually eat, made from the things most home kitchens already keep around.
I’m fond of recipes that don’t make you chase one odd ingredient to three different stores. These are the cookies I reach for when the butter is soft, the chocolate chips are low, the bananas are spotted, or the jam jar has that last stubborn spoonful at the bottom. Some bake chewy, some bake crisp, some set on the counter, and one or two barely need the oven at all. They all lean on pantry staples, though, and that’s the part that keeps them useful.
There’s also a practical upside that gets overlooked: pantry cookies are easier to repeat. Once you know the dough feels right, or the crinkle cookie needs a generous sugar coat, or the thumbprint jam has to be thick, you can make them without a recipe panic. The first batch starts with a classic for a reason.
Why This Collection Works
- Pantry-first baking: Every cookie here starts with ingredients that live well on the shelf or in the freezer, so you can bake without building a grocery list from scratch.
- Kid-friendly textures: There’s a real spread here—soft, chewy, crisp, fudgy, no-bake, and dunkable—because children rarely agree on one cookie texture for long.
- Low-drama substitutions: Several of these cookies welcome swaps like raisins for chocolate chips, sunflower butter for peanut butter, or a different jam when the jar runs low.
- Good use of leftovers: Half a banana, a few spoonfuls of cocoa, the last of the pretzels, stale cereal, a lonely handful of oats—these recipes put all of it to work.
- Make-ahead friendly: Doughs that chill well, batters that freeze well, and cookies that keep their shape mean you can bake once and snack for days.
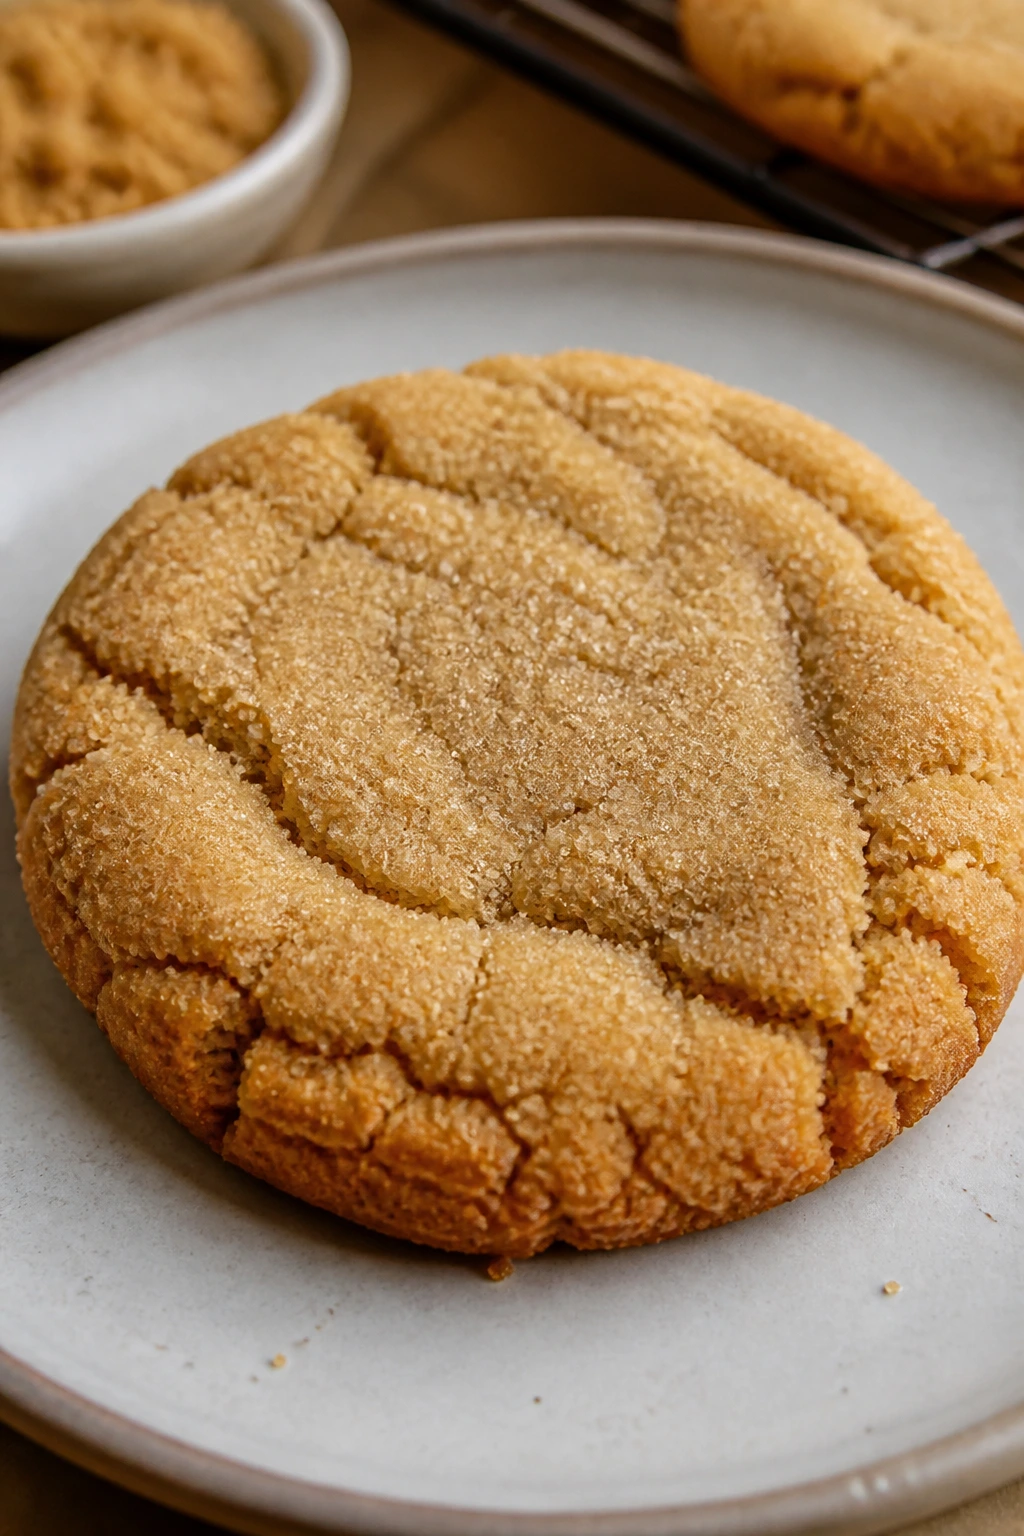
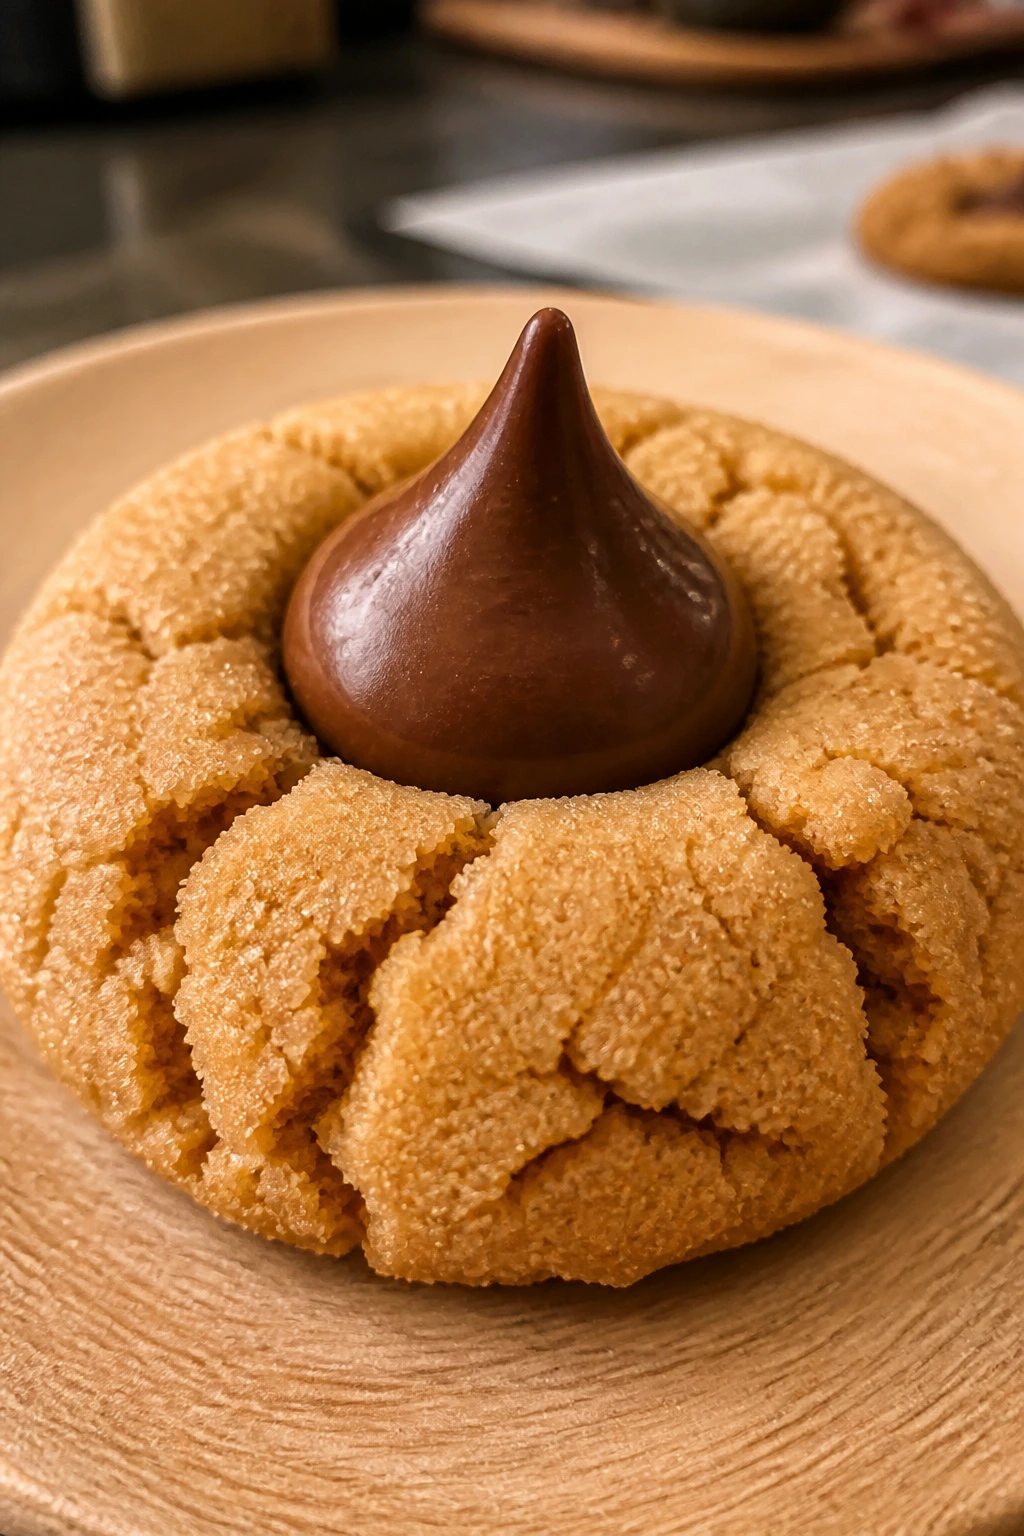
1. Peanut Butter Blossoms
The first bite is all soft peanut butter crumb and sweet chocolate on top. These are the cookies that vanish fastest at a kid table because they look festive, taste familiar, and don’t ask much from the pantry beyond peanut butter and a handful of chocolate kisses.
Why It Works:
The dough stays tender because peanut butter brings fat and a little salt, while the sugar coating gives the outside a light sparkle and a faint crunch. The chocolate kiss goes on while the cookies are still warm, so it settles into the center instead of cracking the top in a messy way.
Key Ingredients:
- 1/2 cup unsalted butter, softened
- 1/2 cup creamy peanut butter
- 1/2 cup granulated sugar, plus 1/4 cup for rolling
- 1/2 cup packed light brown sugar
- 1 large egg
- 1 teaspoon vanilla extract
- 1 1/2 cups all-purpose flour
- 1 teaspoon baking soda
- 1/2 teaspoon fine salt
- 24 milk chocolate kisses, unwrapped
Quick Steps:
- Preheat the oven to 350°F and line two baking sheets with parchment.
- Cream the butter, peanut butter, granulated sugar, and brown sugar for 2 to 3 minutes until pale and fluffy.
- Beat in the egg and vanilla, then mix in the flour, baking soda, and salt just until no dry streaks remain.
- Scoop into 1-inch balls, roll in the extra sugar, and bake for 9 to 10 minutes until puffed and set at the edges.
- Press one chocolate kiss into the center of each cookie right after baking, then cool on the sheet for 10 minutes.
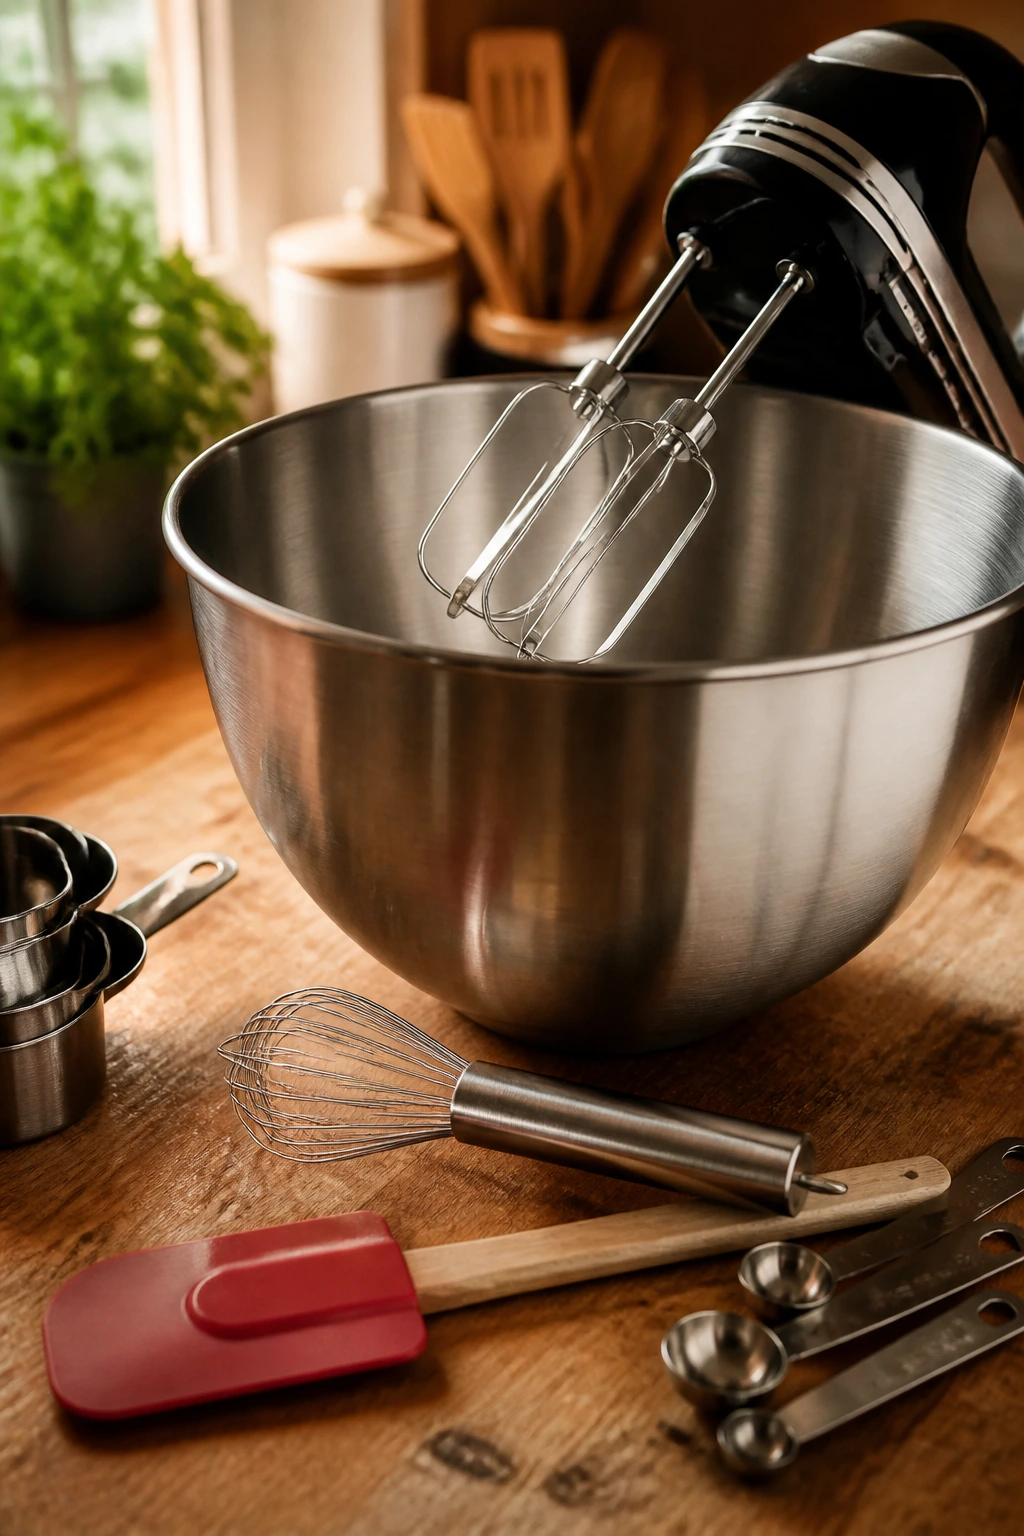
Equipment for This Recipe:
- Mixing bowl and hand mixer
- Rimmed baking sheets
- Parchment paper
- Small cookie scoop or spoon
How to Serve This Dish:
Pile them on a plate while the chocolate is still glossy in the center. They sit nicely beside cold milk, but they also do well tucked into a lunchbox once fully cool. Two cookies is usually enough for a child-sized snack; adults tend to act otherwise.
Pro Tips for This Recipe:
- Set the kisses on the counter before you start; unwrapping them after the cookies come out feels frantic.
- If the cookies spread too much, chill the dough for 15 minutes before scooping.
- Use creamy peanut butter here. Natural peanut butter can make the dough oily and loose.
Variations on This Dish:
- Pretzel Crown: Swap the chocolate kiss for a mini pretzel pressed into the center for a sweet-salty crunch.
- Dark-Chocolate Center: Use dark chocolate kisses or chunks for a deeper finish that tastes less sugary.
Common Mistakes to Avoid with This Dish:
- Don’t wait too long to press the chocolate in. The tops set fast, and the kiss will crack the cookie if the tray has cooled.
- Don’t overbake. The cookies should look slightly underdone in the middle when they come out; they finish on the sheet.
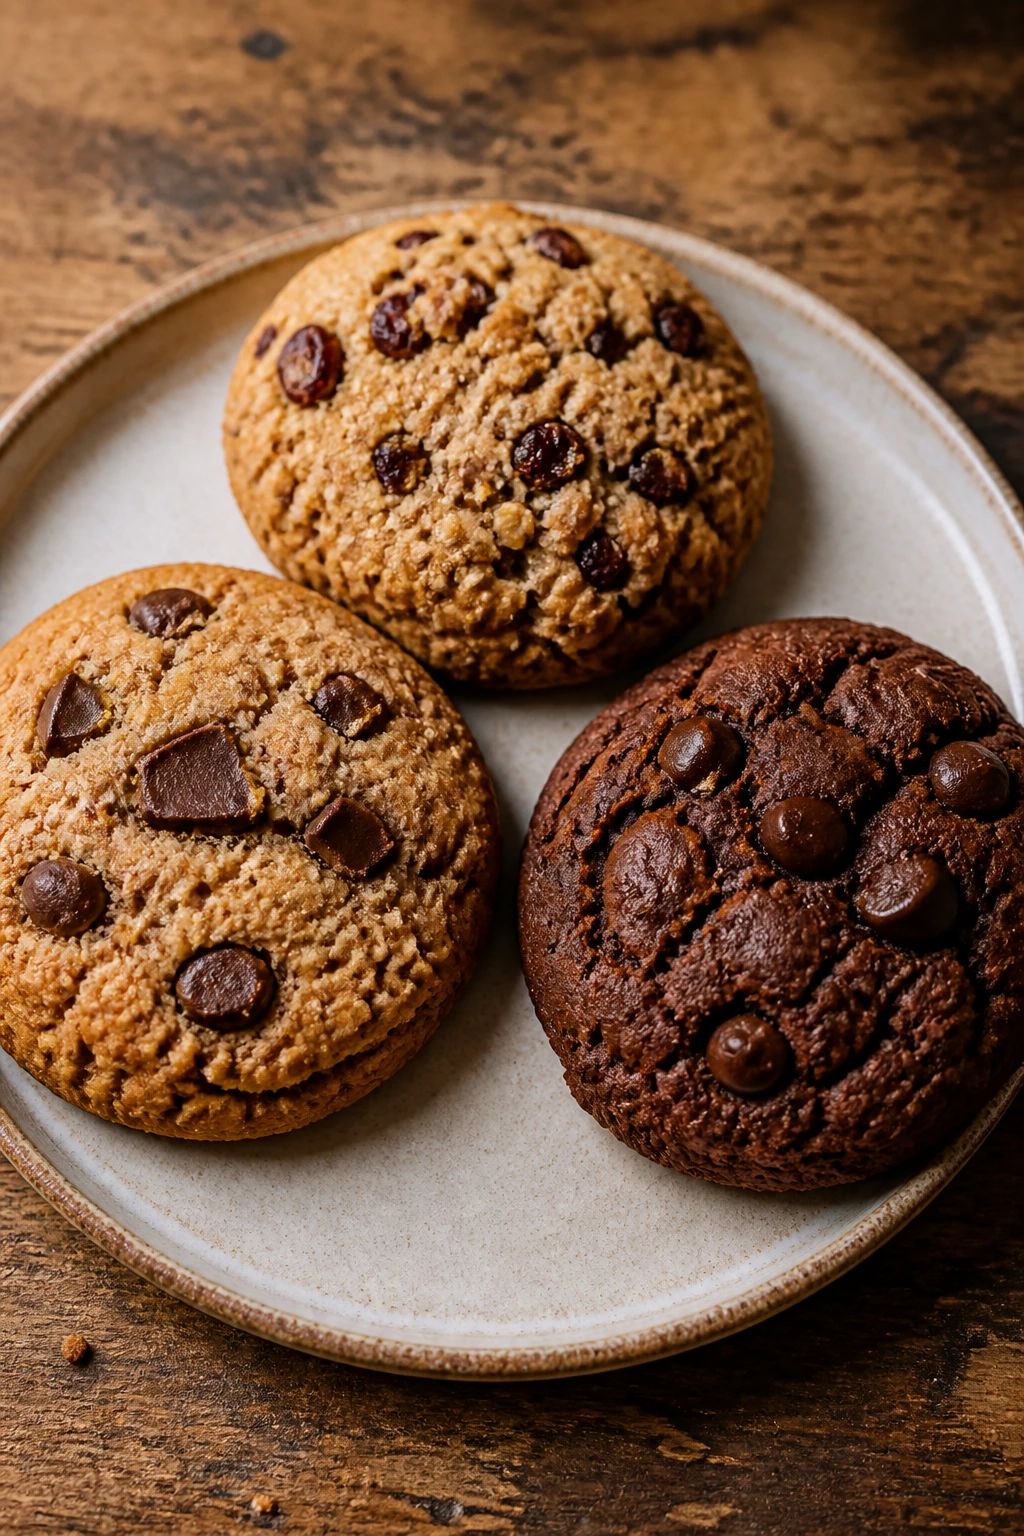
2. Classic Chocolate Chip Cookies
A warm chocolate chip cookie is still the easiest way to empty a plate in under five minutes. These bake with crisp edges, soft middles, and enough vanilla to make the chocolate taste round instead of flat.
Why It Works:
A mix of brown sugar and white sugar gives both chew and spread, while a little cornstarch helps the centers stay tender. If you want thicker cookies, a short chill in the fridge keeps the butter from rushing across the pan.
Key Ingredients:
- 1 cup unsalted butter, softened
- 3/4 cup packed light brown sugar
- 1/2 cup granulated sugar
- 1 large egg
- 2 teaspoons vanilla extract
- 2 1/4 cups all-purpose flour
- 1 teaspoon cornstarch
- 1 teaspoon baking soda
- 1/2 teaspoon fine salt
- 1 1/2 cups semisweet chocolate chips
Quick Steps:
- Heat the oven to 350°F and line baking sheets with parchment.
- Cream the butter and both sugars for 2 to 3 minutes, then beat in the egg and vanilla.
- Whisk the flour, cornstarch, baking soda, and salt together, then mix into the wet ingredients just until combined.
- Fold in the chocolate chips and scoop into 2-tablespoon mounds.
- Bake for 9 to 11 minutes until the edges are golden and the centers still look a little soft.
Equipment for This Recipe:
- Large mixing bowl
- Hand mixer
- Cookie scoop
- Baking sheets and parchment
How to Serve This Dish:
Serve them warm with a cold glass of milk or alongside sliced strawberries, which cut through the sweetness nicely. For a classroom treat, let them cool fully and stack them between parchment sheets in a container. They’re sturdy enough to travel.
Pro Tips for This Recipe:
- Chop a handful of the chips by hand. The mix of melty bits and whole chips gives the cookies a better texture.
- If your kitchen is warm, chill the dough for 20 minutes before baking.
- Pull them when the centers still look slightly glossy; that’s where the chew lives.
Variations on This Dish:
- Brown-Butter Version: Brown the butter first for a toasty flavor that makes the cookies taste deeper and less sweet.
- Extra-Chippy Batch: Add another 1/2 cup of chips and press a few on top before baking for a bakery-style look.
Common Mistakes to Avoid with This Dish:
- Don’t scoop flour straight from the bag with the measuring cup. Packed flour makes dry, cakey cookies.
- Don’t bake until the whole cookie looks done. The centers should still look soft when you pull the tray.
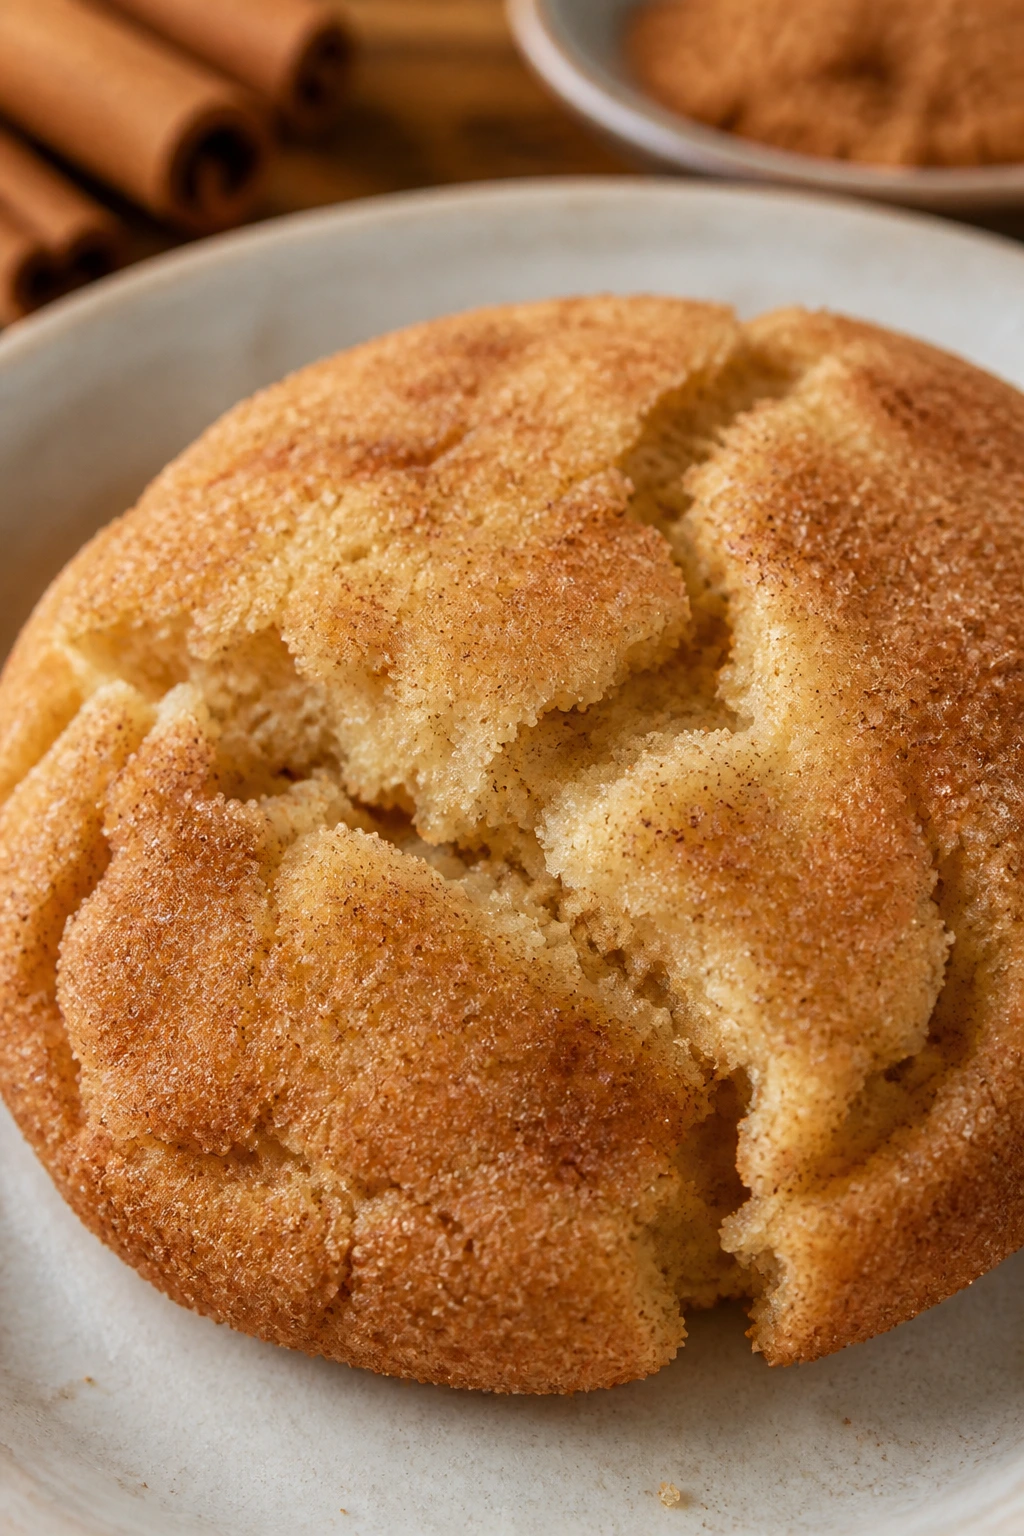
3. Soft Snickerdoodles
There’s something almost stubborn about a good snickerdoodle. The cinnamon-sugar shell cracks when you bite in, and the middle stays soft and pale, with that little tang that keeps the cookie from tasting one-note.
Why It Works:
Cream of tartar gives snickerdoodles their gentle tang and their tender, chewy texture. The cinnamon-sugar coating melts into a thin crust in the oven, so you get a sandy edge without a hard shell.
Key Ingredients:
- 1 cup unsalted butter, softened
- 1 1/3 cups granulated sugar
- 2 large eggs
- 2 3/4 cups all-purpose flour
- 2 teaspoons cream of tartar
- 1 teaspoon baking soda
- 1/2 teaspoon fine salt
- 2 tablespoons granulated sugar, for rolling
- 1 tablespoon ground cinnamon, for rolling
Quick Steps:
- Preheat the oven to 375°F and line baking sheets with parchment.
- Cream the butter and sugar until light, then beat in the eggs one at a time.
- Mix in the flour, cream of tartar, baking soda, and salt just until the dough comes together.
- Stir the cinnamon and rolling sugar together, then roll the dough into 1-inch balls and coat them well.
- Bake for 8 to 10 minutes until the tops are set and the cookies still look a little puffy.
Equipment for This Recipe:
- Mixing bowl and hand mixer
- Baking sheets
- Parchment paper
- Small bowl for cinnamon sugar
How to Serve This Dish:
These are good plain, but they’re even better with a mug of hot cocoa when the butter still smells warm. A few on a plate with sliced apple turns snack time into something that feels more deliberate. Kids usually grab the fattest ones first.
Pro Tips for This Recipe:
- Roll the dough generously in cinnamon sugar. A thin coat bakes into a weak whisper.
- Do not overbake these. Snickerdoodles should leave the oven looking pale, not bronzed.
- Chill the dough for 15 minutes if you want slightly thicker cookies.
Variations on This Dish:
- Maple Snickerdoodle: Replace 1/4 cup of the sugar with maple sugar if you keep it in the pantry.
- Pumpkin Spice Roll: Swap half the cinnamon in the coating for pumpkin pie spice.
Common Mistakes to Avoid with This Dish:
- Don’t skip the cream of tartar unless you’re intentionally making a different cookie. It changes both the taste and the texture.
- Don’t press the dough flat before baking. The cookies spread on their own.
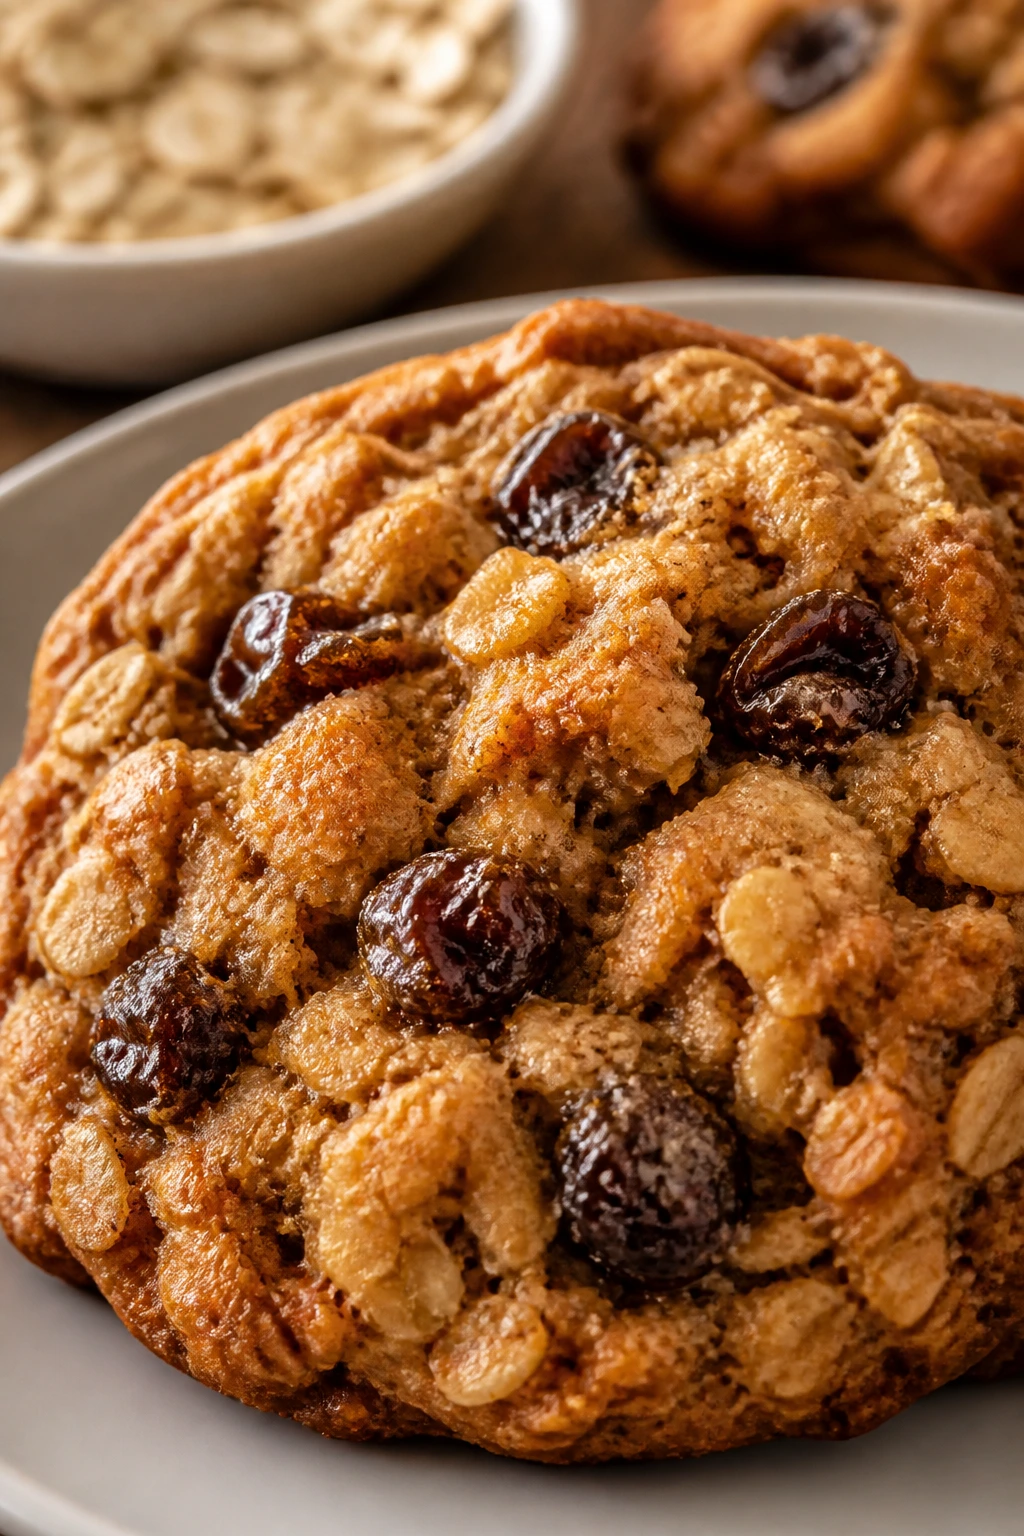
4. Oatmeal Raisin Cookies
Oatmeal raisin cookies get unfairly dragged by people who have never had a proper one. A good batch is chewy in the middle, a little crisp at the edge, and full of the soft, jammy sweetness that raisins bring after baking.
Why It Works:
Old-fashioned oats hold their shape and give the cookie a hearty chew, while cinnamon and brown sugar make the whole tray smell like a warmed pantry. Soaking the raisins for a few minutes before mixing is a small step that pays off in plumper, less leathery fruit.
Key Ingredients:
- 1 cup unsalted butter, softened
- 1 cup packed light brown sugar
- 1/2 cup granulated sugar
- 2 large eggs
- 2 teaspoons vanilla extract
- 1 1/2 cups all-purpose flour
- 1 teaspoon baking soda
- 1 1/2 teaspoons ground cinnamon
- 1/2 teaspoon fine salt
- 3 cups old-fashioned rolled oats
- 1 1/2 cups raisins
Quick Steps:
- Preheat the oven to 350°F and line two baking sheets.
- Cream the butter and sugars, then beat in the eggs and vanilla.
- Stir in the flour, baking soda, cinnamon, and salt until just combined.
- Fold in the oats and raisins; the dough will be thick and a little shaggy.
- Scoop onto the sheet and bake for 10 to 12 minutes until the edges are golden and the centers look set but soft.
Equipment for This Recipe:
- Large bowl and mixer
- Measuring cups
- Sheet pans
- Cooling rack
How to Serve This Dish:
These cookies are made for a paper napkin and a glass of milk. They also tuck neatly into lunchboxes because they don’t crumble much once cool. If you’re serving a mixed plate, put them beside something chocolate-heavy; they balance each other.
Pro Tips for This Recipe:
- Soak the raisins in hot water for 5 minutes if yours are dry and chewy.
- Use old-fashioned oats, not instant oats, or the cookies lose their texture.
- Let the cookies sit on the pan for 5 minutes before moving them; they’re fragile when hot.
Variations on This Dish:
- Chocolate Chip Raisin Swap: Replace half the raisins with chocolate chips for a softer, sweeter version.
- Cranberry Oat Cookie: Use dried cranberries and add orange zest if you happen to have it.
Common Mistakes to Avoid with This Dish:
- Don’t use too much flour. Dry oatmeal cookies go crumbly fast.
- Don’t bake until the centers are hard. They should finish setting on the tray.
5. Brown Sugar Shortbread
Shortbread sounds plain until you bite into a good one. Brown sugar makes these taste rounder and deeper than the usual pale version, and the crumb breaks cleanly without turning sandy or dry.
Why It Works:
Shortbread depends on a small ingredient list, so each one matters more. Brown sugar adds a little molasses flavor, and a touch of cornstarch keeps the cookies tender enough to melt instead of snap like a biscuit.
Key Ingredients:
- 1 cup unsalted butter, softened
- 3/4 cup packed light brown sugar
- 2 cups all-purpose flour
- 1 tablespoon cornstarch
- 1/2 teaspoon fine salt
- 1 teaspoon vanilla extract
- 2 tablespoons coarse sugar, for sprinkling
Quick Steps:
- Heat the oven to 325°F and line a baking sheet or 8-inch square pan with parchment.
- Cream the butter and brown sugar for 2 minutes, then mix in the vanilla.
- Add the flour, cornstarch, and salt and stir just until the dough comes together.
- Press or roll the dough into 1/2-inch rounds or an even layer in the pan, then sprinkle with coarse sugar.
- Bake for 12 to 15 minutes until the edges are just barely golden.
Equipment for This Recipe:
- Mixing bowl
- Hand mixer or sturdy spatula
- Baking sheet or square pan
- Parchment paper
How to Serve This Dish:
Serve these with tea, milk, or hot chocolate; they’re the cookie equivalent of a clean notebook page. They also make a good base for dipping in melted chocolate if you want to dress them up a little for a party tray.
Pro Tips for This Recipe:
- Don’t beat the dough hard after the flour goes in. Overworking shortbread makes it tough.
- If cutting rounds, chill the dough log for 30 minutes first so the slices stay neat.
- Pull them before they look deeply browned. Shortbread should color at the edges, not all the way through.
Variations on This Dish:
- Chocolate Dip: Dip one end of each cooled cookie in melted chocolate and let it set on parchment.
- Cinnamon Edge: Sprinkle the tops with cinnamon sugar instead of coarse sugar for a warmer flavor.
Common Mistakes to Avoid with This Dish:
- Don’t add too much flour when rolling. That dries out the crumb fast.
- Don’t slice warm shortbread. It smears and loses that clean edge.
6. Double Chocolate Crinkle Cookies
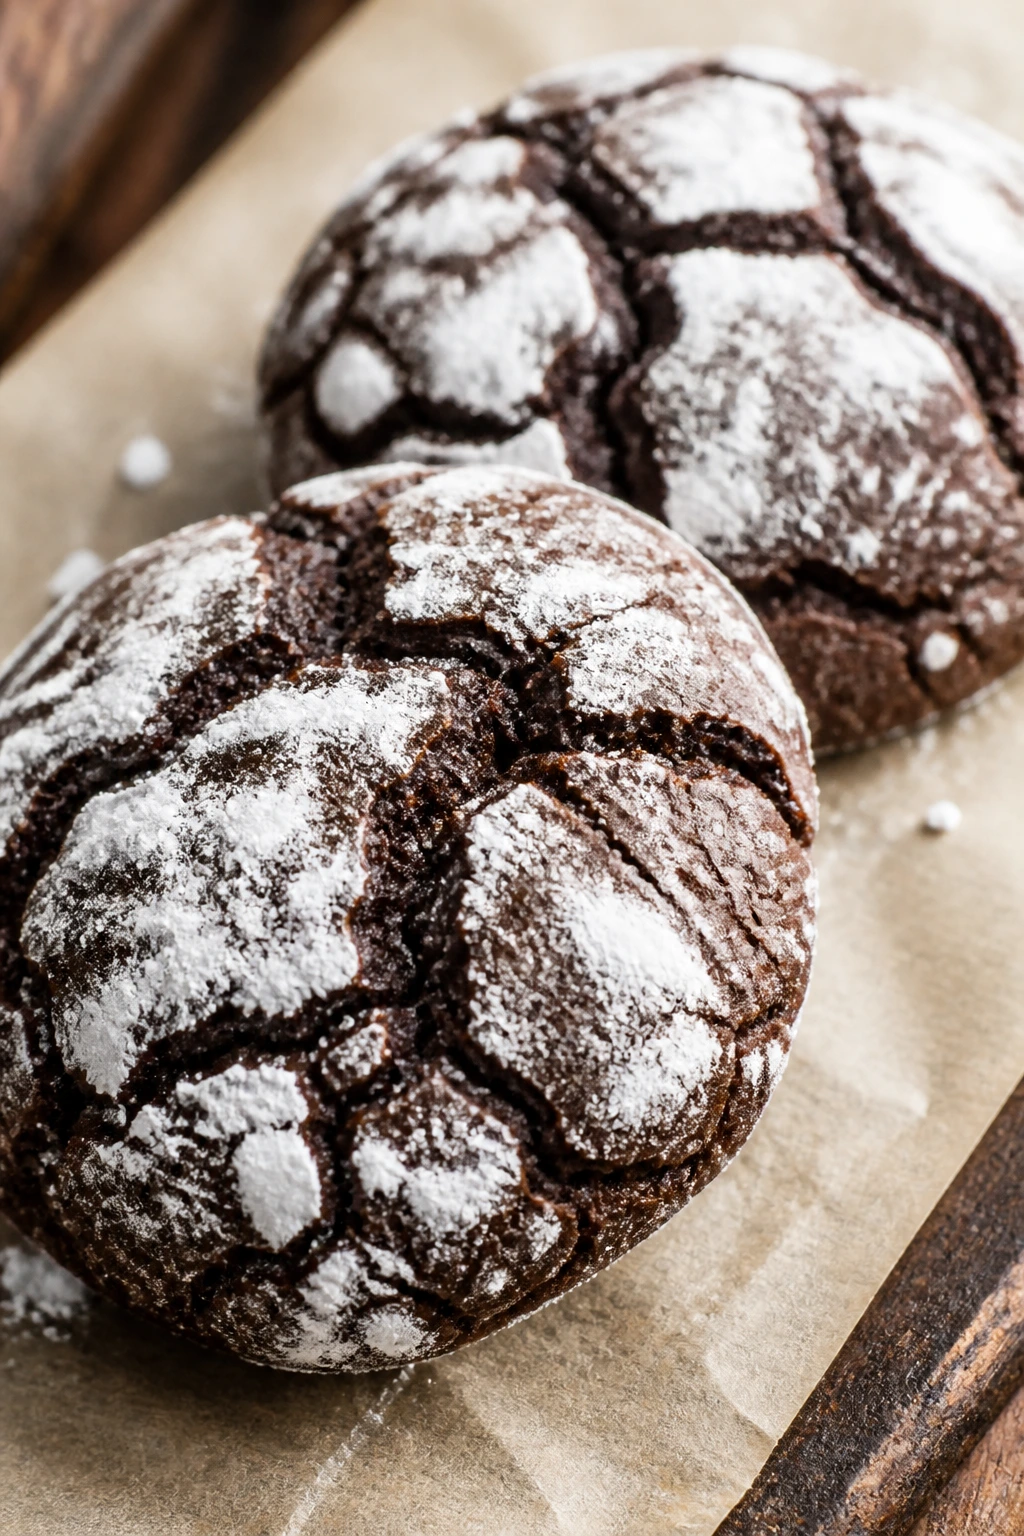
These are the cookies with the snowy tops and the deep brownie center, the ones that look like they took more effort than they did. Kids like them because they’re messy in the best way: powdery sugar on fingers, dark chocolate inside, and a soft middle that bends before it breaks.
Why It Works:
Cocoa powder gives the dough a strong chocolate base, while powdered sugar on the outside cracks as the cookies spread in the oven. A chill in the fridge makes the dough easier to scoop and helps the crinkles show instead of disappearing.
Key Ingredients:
- 1/2 cup unsweetened cocoa powder
- 1 cup granulated sugar
- 1/2 cup vegetable oil
- 2 large eggs
- 1 teaspoon vanilla extract
- 1 1/2 cups all-purpose flour
- 1 1/2 teaspoons baking powder
- 1/4 teaspoon fine salt
- 1/2 cup powdered sugar, for coating
Quick Steps:
- Whisk the cocoa, granulated sugar, oil, eggs, and vanilla until smooth.
- Stir in the flour, baking powder, and salt until you have a thick, sticky dough.
- Cover and chill for at least 1 hour, or until the dough is firm enough to scoop.
- Roll the dough into balls and coat each one generously in powdered sugar.
- Bake at 350°F for 10 to 11 minutes until the tops are cracked and the centers still feel soft.
Equipment for This Recipe:
- Mixing bowl
- Whisk and spatula
- Baking sheets
- Small bowl for powdered sugar
How to Serve This Dish:
Serve these on a white plate if you want the sugar contrast to show. They’re especially good with cold milk or a small bowl of berries. One cookie can feel rich; two is usually the limit unless someone has a deep chocolate mood.
Pro Tips for This Recipe:
- Coat the balls heavily in powdered sugar. A thin dusting disappears in the oven.
- The dough should feel sticky. If it feels dry, the cookies usually bake up stiff.
- Use a timer. These go from soft to overdone quickly.
Variations on This Dish:
- Espresso Crinkle: Stir 1 teaspoon instant espresso powder into the cocoa for a darker, less sweet cookie.
- Peppermint Crinkle: Add 1/4 teaspoon peppermint extract and a few crushed candy canes on top.
Common Mistakes to Avoid with This Dish:
- Don’t skip chilling. Warm dough spreads too fast and loses the crackle pattern.
- Don’t overbake just because the centers look soft. That softness is the point.
7. Jam Thumbprint Cookies
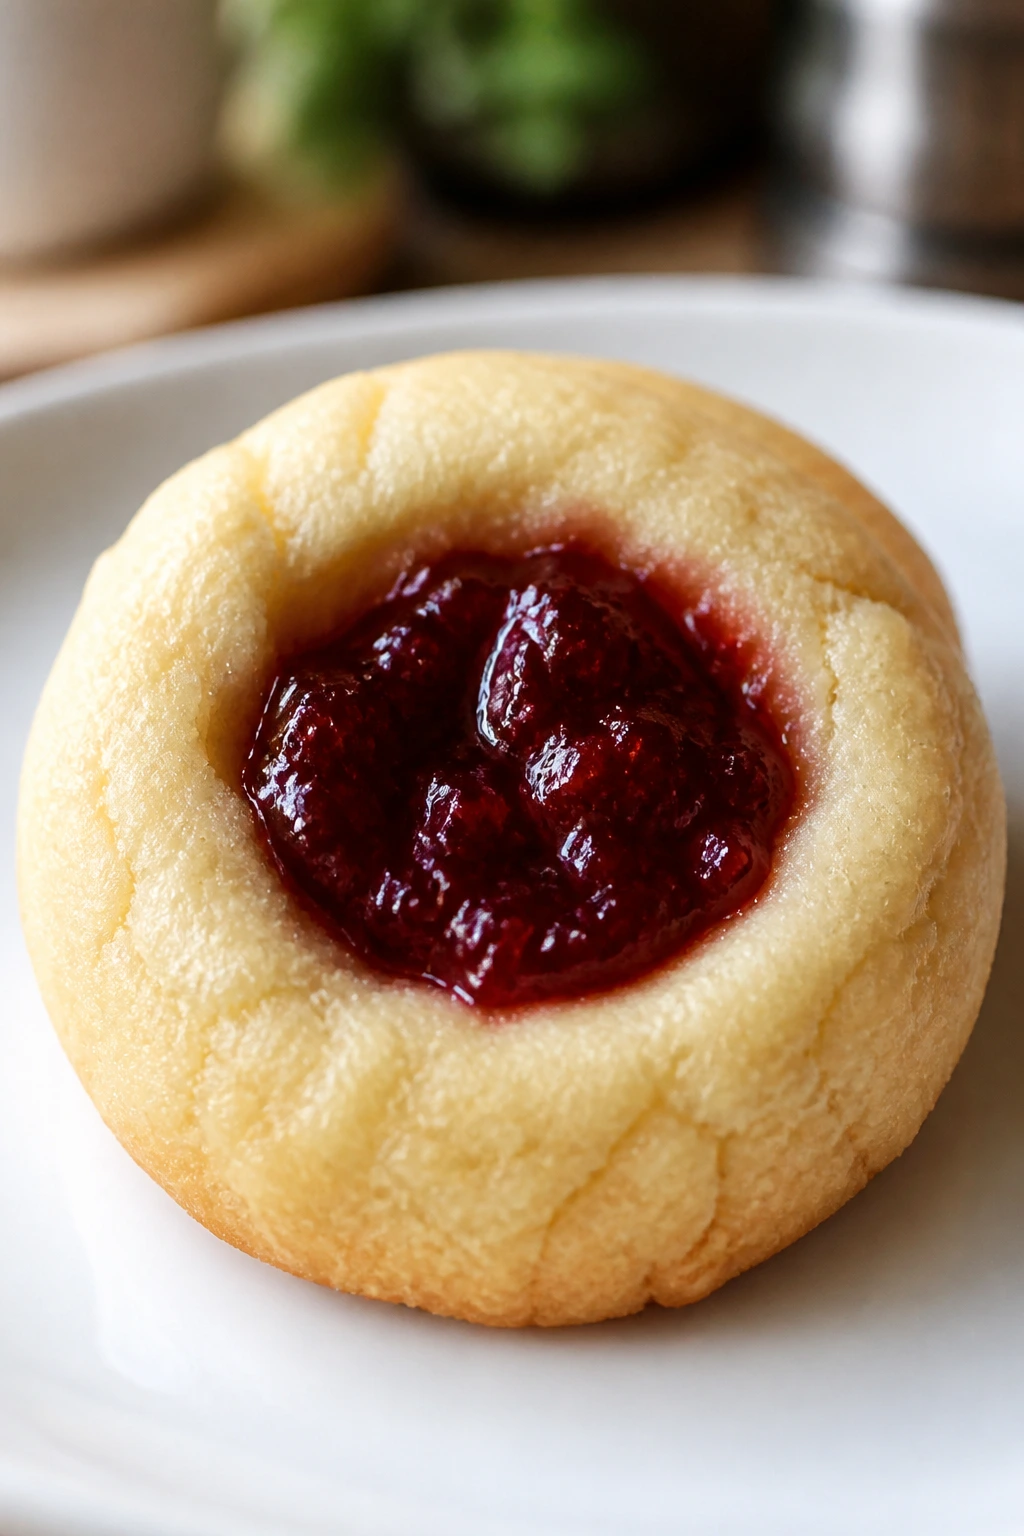
Thumbprints are tiny, bright, and easy to customize with whatever jam is hanging out in the fridge door. They look cheerful on a tray, with the little pool of fruit in the middle like a built-in garnish.
Why It Works:
A buttery dough gives the cookie structure, and the jam bakes into a glossy center that stays soft when the edges firm up. Thick jam behaves better than runny preserves, which can spill over and stain the pan.
Key Ingredients:
- 1 cup unsalted butter, softened
- 2/3 cup granulated sugar
- 1 large egg yolk
- 1 teaspoon vanilla extract
- 2 cups all-purpose flour
- 1/2 teaspoon fine salt
- 3/4 cup thick jam or preserves
Quick Steps:
- Preheat the oven to 350°F and line a baking sheet.
- Cream the butter and sugar, then mix in the egg yolk and vanilla.
- Add the flour and salt and stir until the dough holds together.
- Roll into 1-inch balls, place them on the sheet, and press a thumb or spoon into the center of each one.
- Fill each indent with about 1/2 teaspoon jam and bake for 12 to 14 minutes.
Equipment for This Recipe:
- Mixing bowl
- Baking sheet
- Measuring spoon or your thumb
- Parchment paper
How to Serve This Dish:
These cookies look nicest on a simple platter where the jam colors can show. They’re good beside plain tea biscuits, fruit, or a cheese board if you’re serving a mixed snack spread for older kids and adults. The flavor reads sweeter than the ingredient list suggests.
Pro Tips for This Recipe:
- Use a thick jam, not a thin jelly. You want a mound, not a spill.
- If the centers puff up during baking, press them again with the back of a spoon while warm.
- Chill the dough for 20 minutes if your kitchen is warm.
Variations on This Dish:
- Peanut Butter Thumbprints: Swap in 1/2 cup peanut butter for part of the butter and fill with strawberry jam.
- Citrus Marmalade Version: Use orange marmalade for a sharper, less sugary center.
Common Mistakes to Avoid with This Dish:
- Don’t overload the wells with jam. It bubbles over and glues the cookies to the pan.
- Don’t bake until the dough is deeply browned. The cookies should stay pale with lightly golden edges.
8. Lemon Sugar Cookies
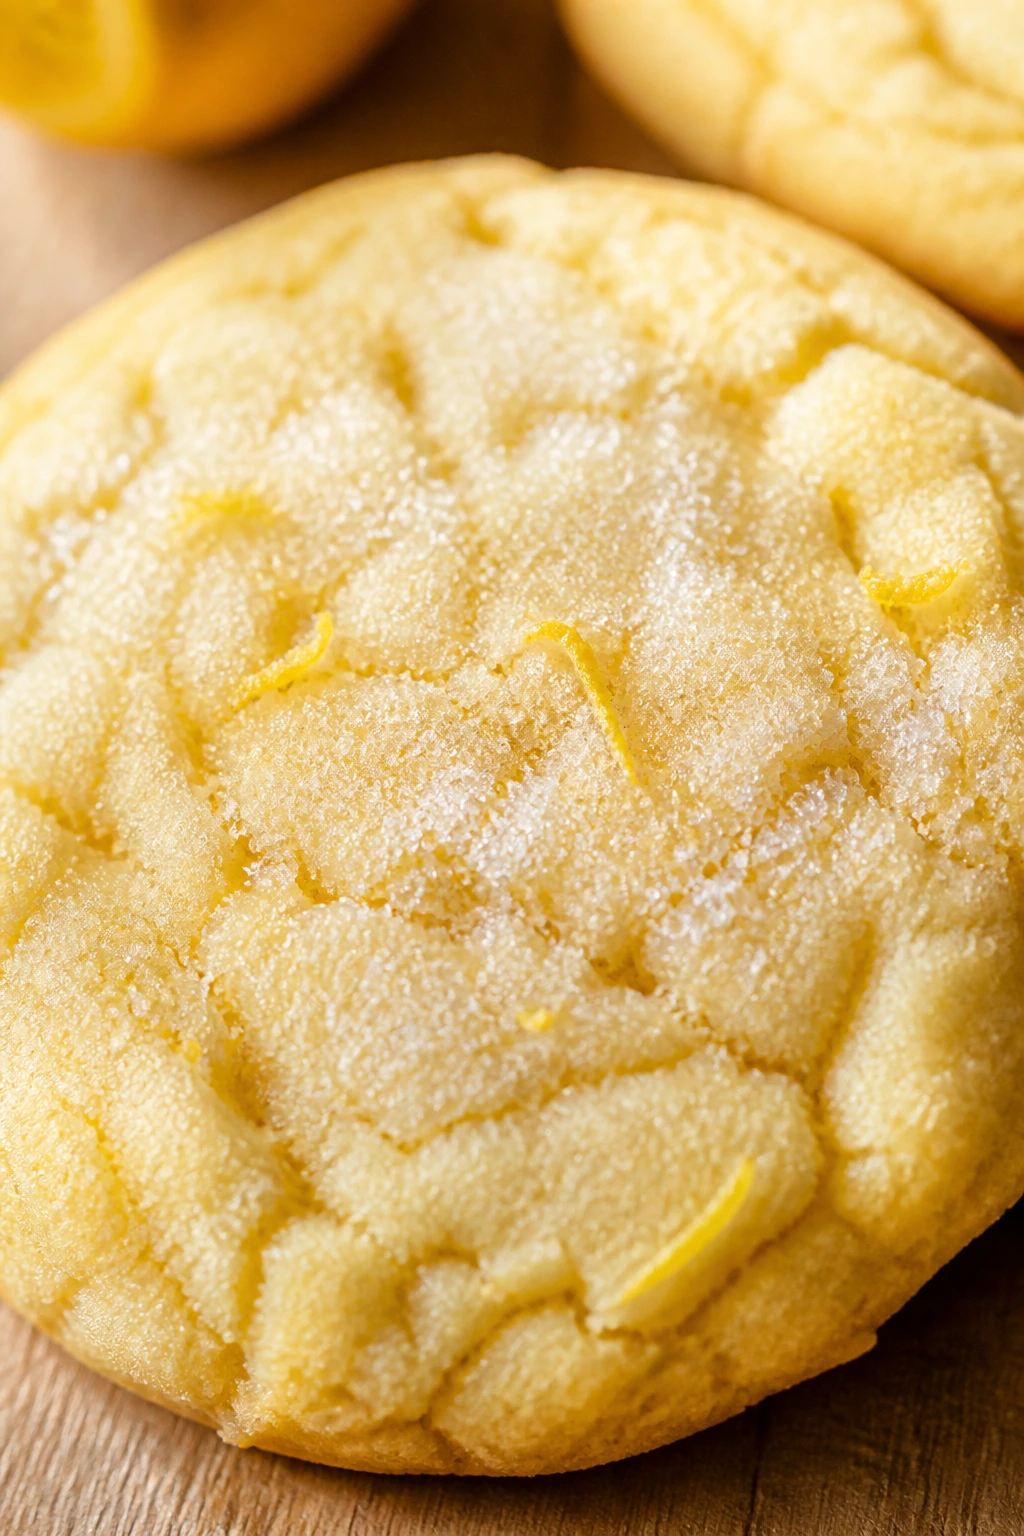
Lemon sugar cookies taste bright without turning fussy. The zest wakes up the dough, the sugar softens the tart edge, and the result is the kind of cookie a child will grab if you set it beside all the chocolate options.
Why It Works:
Lemon zest carries more flavor than lemon juice alone, so the cookie tastes clean and sunny without making the dough too wet. A light dusting of sugar on top gives the edges a tiny crunch that keeps the middle from feeling flat.
Key Ingredients:
- 1 cup unsalted butter, softened
- 1 1/4 cups granulated sugar
- 1 large egg
- 1 tablespoon lemon zest
- 1 tablespoon fresh lemon juice
- 2 1/2 cups all-purpose flour
- 1 teaspoon baking powder
- 1/2 teaspoon fine salt
- 2 tablespoons granulated sugar, for topping
Quick Steps:
- Preheat the oven to 350°F and line baking sheets with parchment.
- Cream the butter and sugar, then beat in the egg, lemon zest, and lemon juice.
- Mix in the flour, baking powder, and salt until the dough just comes together.
- Scoop into balls, roll lightly in the extra sugar, and flatten slightly with your palm.
- Bake for 9 to 11 minutes until the edges are set and the centers still look soft.
Equipment for This Recipe:
- Bowl and mixer
- Citrus zester
- Baking sheets
- Cooling rack
How to Serve This Dish:
Serve these with berries or plain yogurt if you want a snack plate that feels a little fresher. They also make a bright counterpoint to a tray of chocolate cookies. Two small cookies and a glass of milk is a tidy after-school portion.
Pro Tips for This Recipe:
- Rub the zest into the sugar with your fingers before mixing. It releases more oil and gives a stronger lemon flavor.
- Don’t add extra juice unless the dough feels dry. Too much liquid makes the cookies spread.
- Bake one test cookie first if your oven runs hot; lemon sugar cookies can brown faster than you expect.
Variations on This Dish:
- Orange Sugar Cookies: Swap orange zest for lemon for a softer citrus note.
- Lemon Glaze Finish: Drizzle cooled cookies with powdered sugar mixed with a teaspoon of lemon juice.
Common Mistakes to Avoid with This Dish:
- Don’t rely on juice alone. Without zest, the lemon flavor fades into the sugar.
- Don’t overbake. Pale cookies taste cleaner and stay softer.
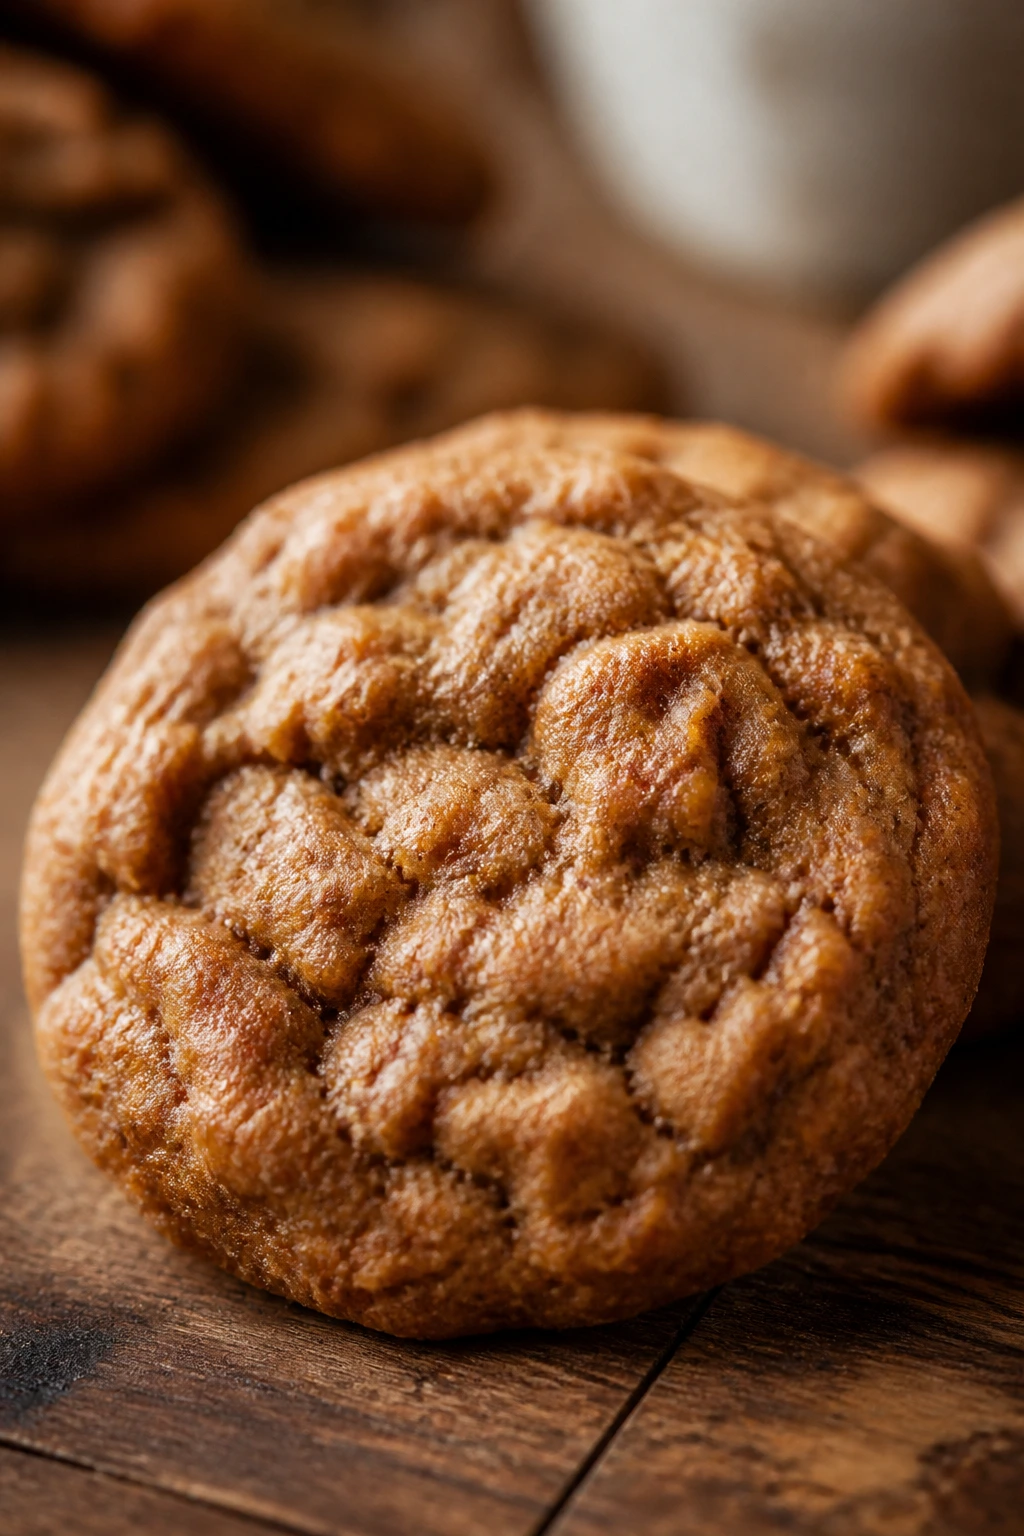
9. Molasses Spice Cookies
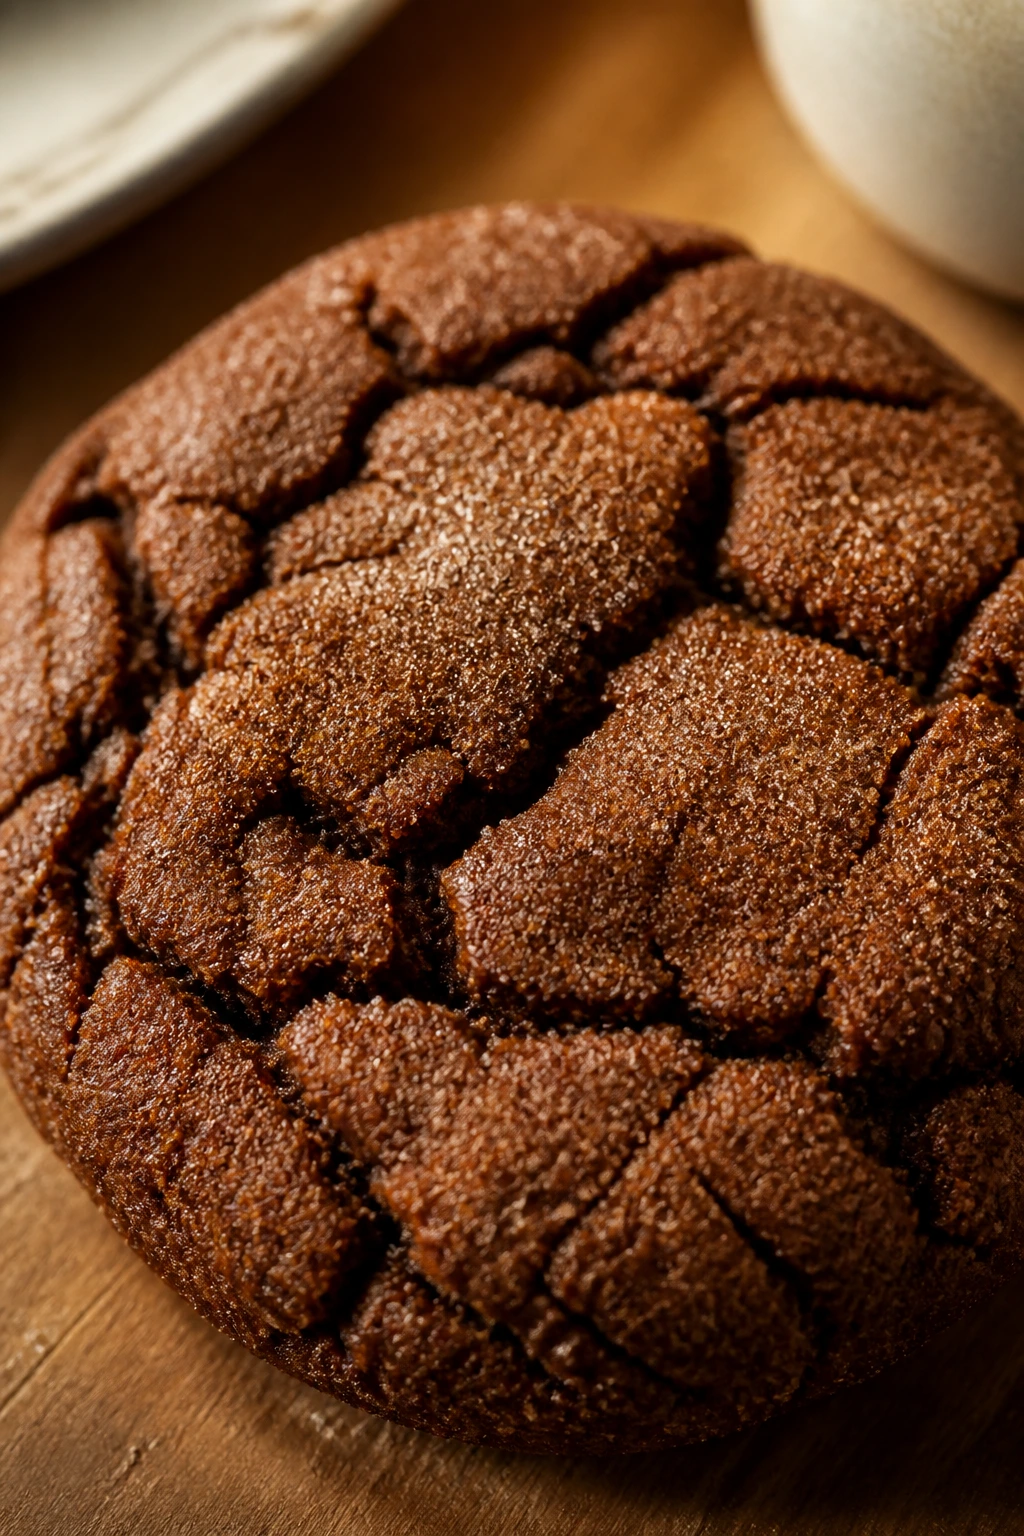
Molasses spice cookies smell like the kind of kitchen where someone is always making tea. They’re dark, chewy, and warm with ginger and cinnamon, and the cracked tops make them look far more old-fashioned than they are difficult.
Why It Works:
Molasses keeps the crumb soft and slightly sticky, while ginger and cinnamon bring a warm bite that stands up well to the sugar. A short chill helps the dough hold its shape and gives you those classic crinkles on top.
Key Ingredients:
- 3/4 cup unsalted butter or shortening, softened
- 1 cup packed light brown sugar
- 1/4 cup unsulphured molasses
- 1 large egg
- 2 1/4 cups all-purpose flour
- 2 teaspoons baking soda
- 2 teaspoons ground ginger
- 1 teaspoon ground cinnamon
- 1/4 teaspoon ground cloves
- 1/2 teaspoon fine salt
- 1/4 cup granulated sugar, for rolling
Quick Steps:
- Preheat the oven to 350°F and line a baking sheet.
- Cream the butter and brown sugar, then mix in the molasses and egg.
- Stir in the flour, baking soda, ginger, cinnamon, cloves, and salt until the dough forms.
- Chill the dough for 30 minutes, then roll into balls and coat them in granulated sugar.
- Bake for 9 to 11 minutes until the tops are cracked but the centers still feel soft.
Equipment for This Recipe:
- Mixing bowl
- Hand mixer
- Baking sheets
- Small bowl for rolling sugar
How to Serve This Dish:
These are very good with cold milk, but I like them best with something plain on the side—a banana, a square of cheddar, or nothing at all. They’re the cookie I set out when I want a deeper flavor in the mix, not another sweet one. Kids who like gingerbread usually go for them fast.
Pro Tips for This Recipe:
- Use unsulphured molasses. Blackstrap tastes bitter and throws off the balance.
- Chill the dough. It’s the difference between tidy cracks and a puddle.
- Pull them early; they firm as they cool and can turn dry if you wait for a hard center.
Variations on This Dish:
- Extra-Ginger Batch: Add another teaspoon of ginger for a sharper spice edge.
- Dairy-Free Version: Use shortening instead of butter and keep the rest the same.
Common Mistakes to Avoid with This Dish:
- Don’t overmeasure the molasses. Too much makes the cookies heavy and sticky.
- Don’t expect them to look fully set in the oven. The centers should stay soft.
10. Banana Oat Cookies
This is the clean-out-the-fruit-bowl cookie, and that’s a compliment. A ripe banana brings sweetness and softness, oats give structure, and the whole batch tastes like something between breakfast and dessert, which kids rarely object to.
Why It Works:
Mashed banana replaces some of the fat and sugar you’d normally need, so the cookies come together without much fuss. Peanut butter adds body, and oats keep the texture from collapsing into a muffin top.
Key Ingredients:
- 2 very ripe bananas, mashed
- 1/2 cup creamy peanut butter
- 2 cups old-fashioned rolled oats
- 1/2 teaspoon ground cinnamon
- 1 teaspoon vanilla extract
- 1/4 teaspoon fine salt
- 1/2 teaspoon baking powder
- 1/2 cup mini chocolate chips or raisins
Quick Steps:
- Heat the oven to 350°F and line a baking sheet with parchment.
- Mash the bananas in a bowl, then stir in the peanut butter, vanilla, cinnamon, salt, and baking powder.
- Mix in the oats until evenly coated, then fold in the chips or raisins.
- Scoop the dough into mounds and flatten them slightly with a spoon.
- Bake for 12 to 14 minutes until the edges look dry and the centers are set.
Equipment for This Recipe:
- Bowl and fork or potato masher
- Baking sheet
- Parchment paper
- Cookie scoop or spoon
How to Serve This Dish:
These are best the day they’re baked, when the banana aroma still shows up first. Stack them with apple slices for an after-school snack, or serve them warm with a spoonful of yogurt on the side. They’re soft enough for younger kids if you keep the chips small.
Pro Tips for This Recipe:
- Use very ripe bananas with lots of brown speckles; pale bananas don’t flavor the batch enough.
- If the mixture looks wet, add 2 to 3 tablespoons more oats.
- Let them cool on the pan for 5 minutes before moving them, or they may tear.
Variations on This Dish:
- Sunflower Butter Version: Swap the peanut butter for sunflower seed butter for a nut-free batch.
- Chocolate Banana: Add an extra 2 tablespoons cocoa powder and reduce the oats by 1/4 cup.
Common Mistakes to Avoid with This Dish:
- Don’t expect a crisp cookie. These bake soft and cakey by nature.
- Don’t use underripe bananas. The flavor turns bland and starchy.
11. Coconut Macaroons
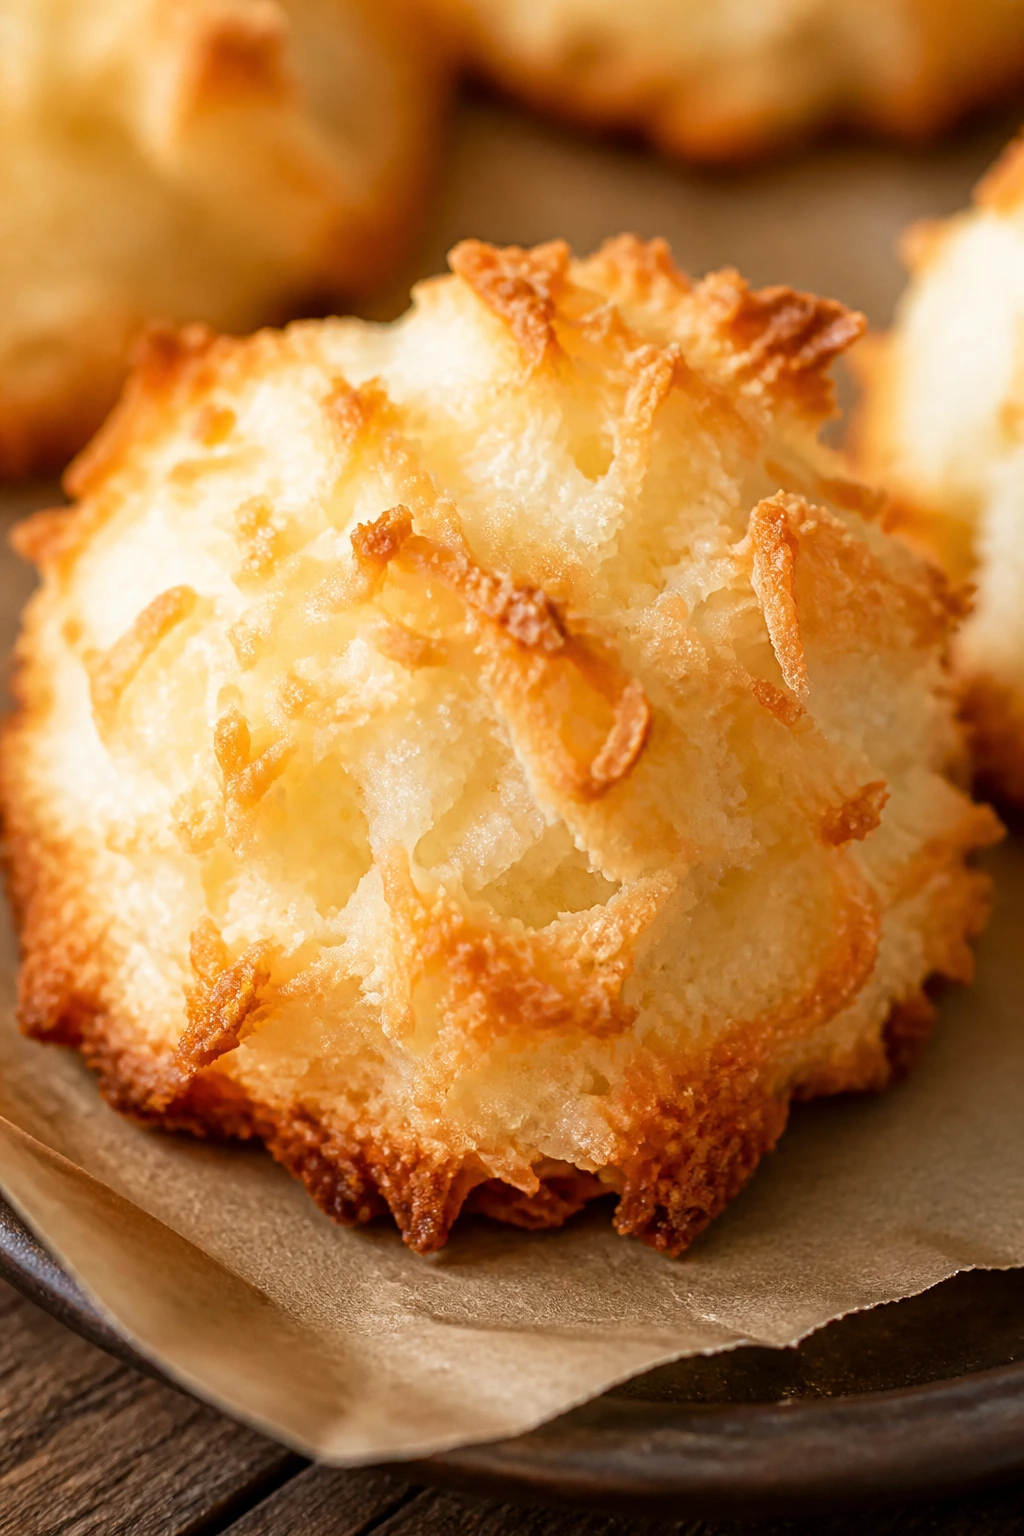
Coconut macaroons are the cookies for people who like a chewy center and a toasted, golden edge. They’re naturally simple, and the coconut shreds do most of the work, which is useful when the pantry is running thin.
Why It Works:
Egg whites bind the coconut together, while sugar helps the tops brown and the centers stay moist. A little flour or cornstarch gives the mounds enough structure so they don’t spread into lace.
Key Ingredients:
- 3 cups sweetened shredded coconut
- 2 large egg whites
- 1/2 cup granulated sugar
- 1 tablespoon all-purpose flour or cornstarch
- 1 teaspoon vanilla extract
- 1/4 teaspoon fine salt
- 2 ounces melted chocolate, for drizzling optional
Quick Steps:
- Preheat the oven to 325°F and line a baking sheet with parchment.
- Whisk the egg whites, sugar, vanilla, and salt until foamy.
- Fold in the coconut and flour or cornstarch until everything is evenly coated.
- Scoop into mounds and pack them lightly so they hold their shape.
- Bake for 15 to 18 minutes until the tops are golden and the edges are deeply toasted.
Equipment for This Recipe:
- Mixing bowl
- Whisk
- Baking sheet
- Parchment paper
How to Serve This Dish:
Serve these on a small plate where the golden tops can show off. They’re rich enough that one or two make a good snack, especially with tea or milk. If you drizzle chocolate on top, let it set before stacking.
Pro Tips for This Recipe:
- Pack the coconut lightly in the measuring cup. Heavy packing can make the macaroons dense.
- Don’t overmix after the egg whites go in; you want the shreds coated, not crushed.
- Let them cool fully before moving them, because they firm up a lot as they rest.
Variations on This Dish:
- Chocolate-Dipped Macaroons: Dip the bottoms in melted chocolate after baking.
- Lime Coconut: Add lime zest for a sharper, brighter flavor.
Common Mistakes to Avoid with This Dish:
- Don’t underbake them. Pale macaroons can taste wet in the middle.
- Don’t use unsweetened coconut unless you adjust the sugar; the batch will taste dry and flat.
12. No-Bake Cocoa Oat Cookies
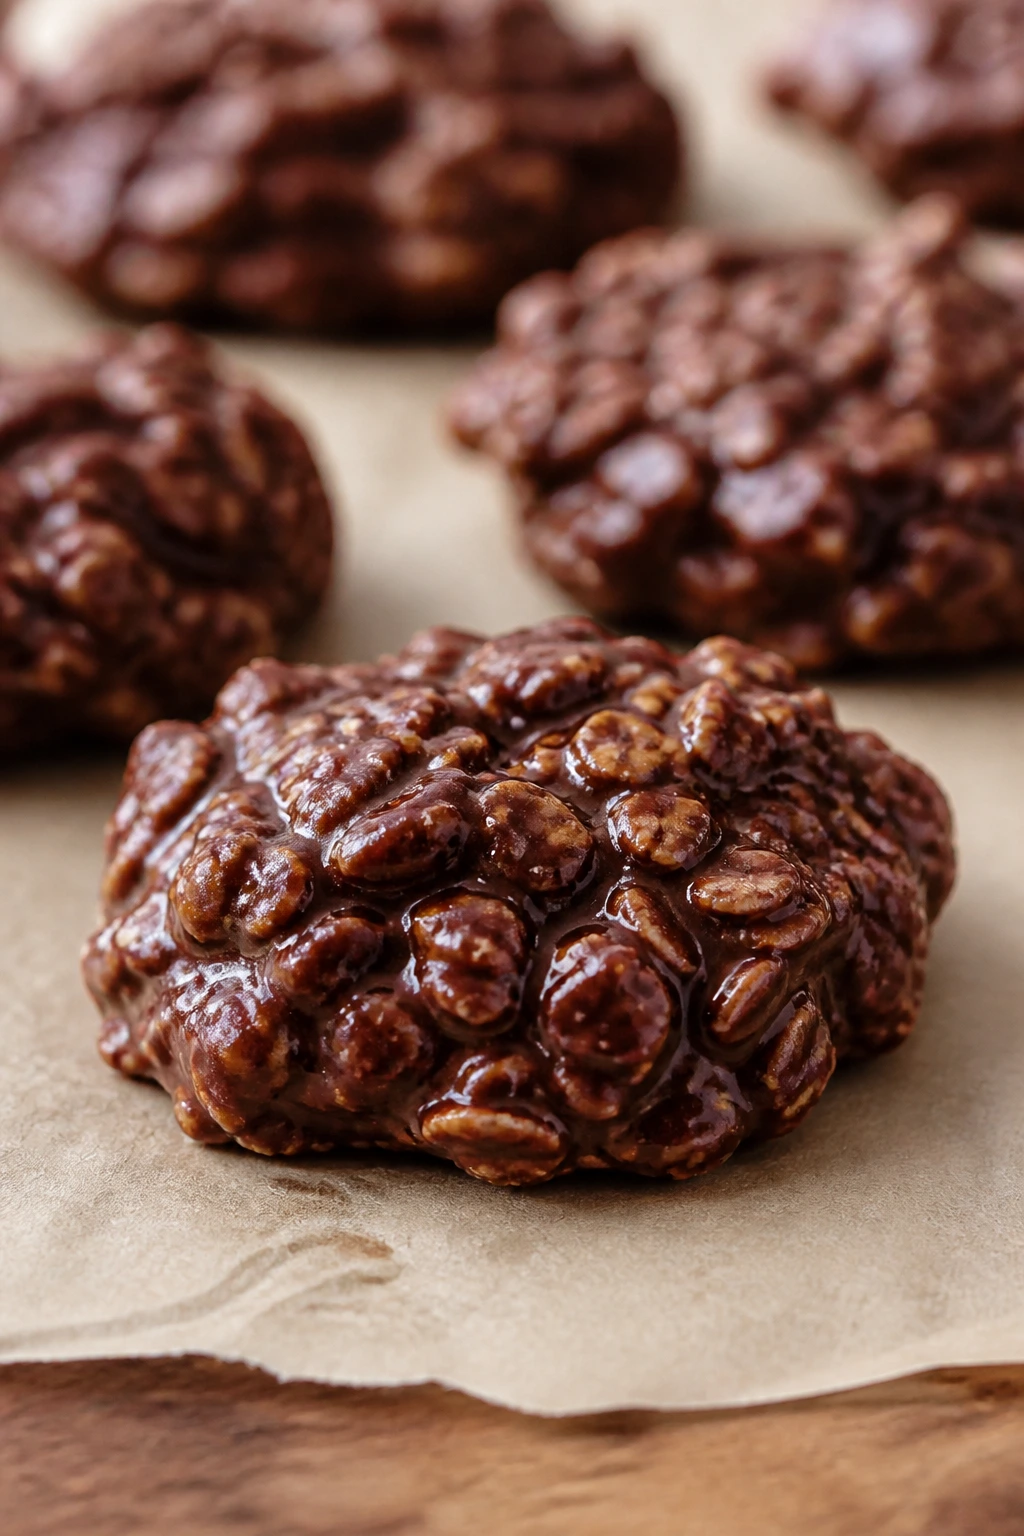
These are the cookies you make when the oven is already full or you’d rather not turn it on at all. They set on the counter, taste like fudge and peanut butter, and have a chewy oat texture that kids usually accept without complaint.
Why It Works:
The sugar syrup binds everything once it boils long enough, and cocoa gives the cookies their dark chocolate flavor. Peanut butter helps them firm up as they cool, so the set depends more on timing than on baking.
Key Ingredients:
- 1/2 cup unsalted butter
- 2 cups granulated sugar
- 1/2 cup milk
- 1/4 cup unsweetened cocoa powder
- 1/2 cup creamy peanut butter
- 1 teaspoon vanilla extract
- 1/4 teaspoon fine salt
- 3 cups quick oats
Quick Steps:
- Line your counter or a tray with parchment before you start.
- In a saucepan, bring the butter, sugar, milk, and cocoa to a full rolling boil and cook for 1 minute.
- Remove from the heat and stir in the peanut butter, vanilla, and salt until smooth.
- Fold in the oats quickly, then drop spoonfuls onto the parchment.
- Let the cookies set at room temperature for 20 to 30 minutes until firm.
Equipment for This Recipe:
- Medium saucepan
- Wooden spoon
- Parchment or wax paper
- Cookie scoop or tablespoons
How to Serve This Dish:
Serve these once they’re fully set; if you rush them, they stay sticky. They’re good beside cold milk, and they travel well if you separate the layers with wax paper. I keep them small because they’re rich.
Pro Tips for This Recipe:
- Start timing the boil only when the syrup is bubbling across the whole surface.
- Work fast once the oats go in. The mixture thickens as it cools.
- If the cookies stay soft, the syrup probably did not boil long enough.
Variations on This Dish:
- Coconut Cocoa Version: Add 1/2 cup shredded coconut with the oats.
- Crunchy Peanut Butter Batch: Use crunchy peanut butter for a little extra texture.
Common Mistakes to Avoid with This Dish:
- Don’t underboil the syrup. The cookies won’t set and will stay gooey.
- Don’t make them on a humid day if you can help it; they take longer to firm up.
13. Cowboy Cookies
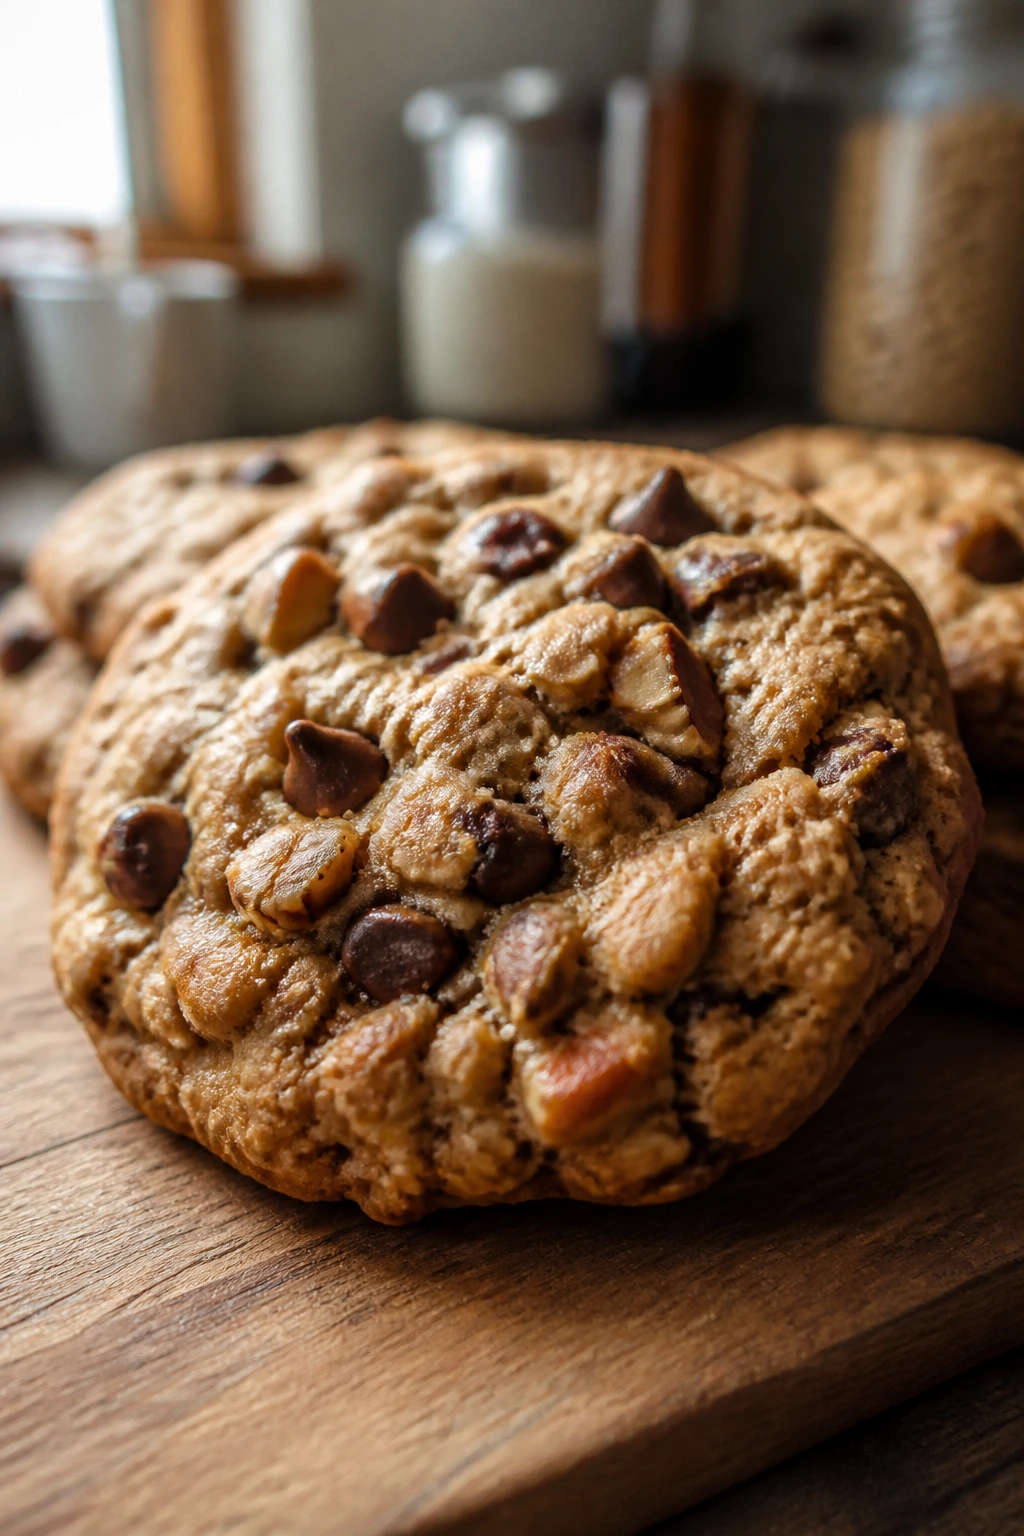
Cowboy cookies are the kitchen sink cookie in its happiest form. Oats, chocolate chips, and nuts all show up together, so every bite has a little different mix of chew, melt, and crunch.
Why It Works:
The oat base keeps the cookies sturdy enough to hold the mix-ins, while brown sugar and butter give them the chewy center kids seem to prefer. Because there’s so much going on in the dough, these cookies are especially good when you want one batch that feels generous.
Key Ingredients:
- 1 cup unsalted butter, softened
- 1 cup packed light brown sugar
- 1/2 cup granulated sugar
- 2 large eggs
- 2 teaspoons vanilla extract
- 2 cups all-purpose flour
- 1 teaspoon baking soda
- 1 teaspoon fine salt
- 2 cups old-fashioned rolled oats
- 1 1/2 cups chocolate chips
- 1 cup chopped walnuts or pecans
Quick Steps:
- Preheat the oven to 350°F and line baking sheets.
- Cream the butter and sugars, then beat in the eggs and vanilla.
- Mix in the flour, baking soda, and salt, then stir in the oats.
- Fold in the chocolate chips and nuts.
- Scoop onto the tray and bake for 10 to 12 minutes until the edges are golden and the tops are set.
Equipment for This Recipe:
- Large mixing bowl
- Hand mixer
- Baking sheets
- Cooling rack
How to Serve This Dish:
These are the cookie you put on a big plate because they look happiest in a pile. They’re sturdy enough for lunchboxes and after-school snacks, and they pair well with fruit or plain milk. Two makes a strong snack; one giant cookie can feel like a whole event.
Pro Tips for This Recipe:
- Toast the nuts in a dry skillet first if you have a few extra minutes. It sharpens the flavor.
- Keep the mix-ins to the stated amount. More is not better here; it just makes the dough fall apart.
- Slightly flatten the scoops before baking for more even browning.
Variations on This Dish:
- Nut-Free Cowboy Cookies: Skip the nuts and add an extra 1/2 cup oats.
- Coconut Cowboy: Fold in 3/4 cup shredded coconut for a sweeter, chewier cookie.
Common Mistakes to Avoid with This Dish:
- Don’t crowd the dough with too many add-ins. The cookie needs enough batter to hold together.
- Don’t pull them too late. Oatmeal-based cookies can dry out quickly.
14. Chewy M&M Cookies
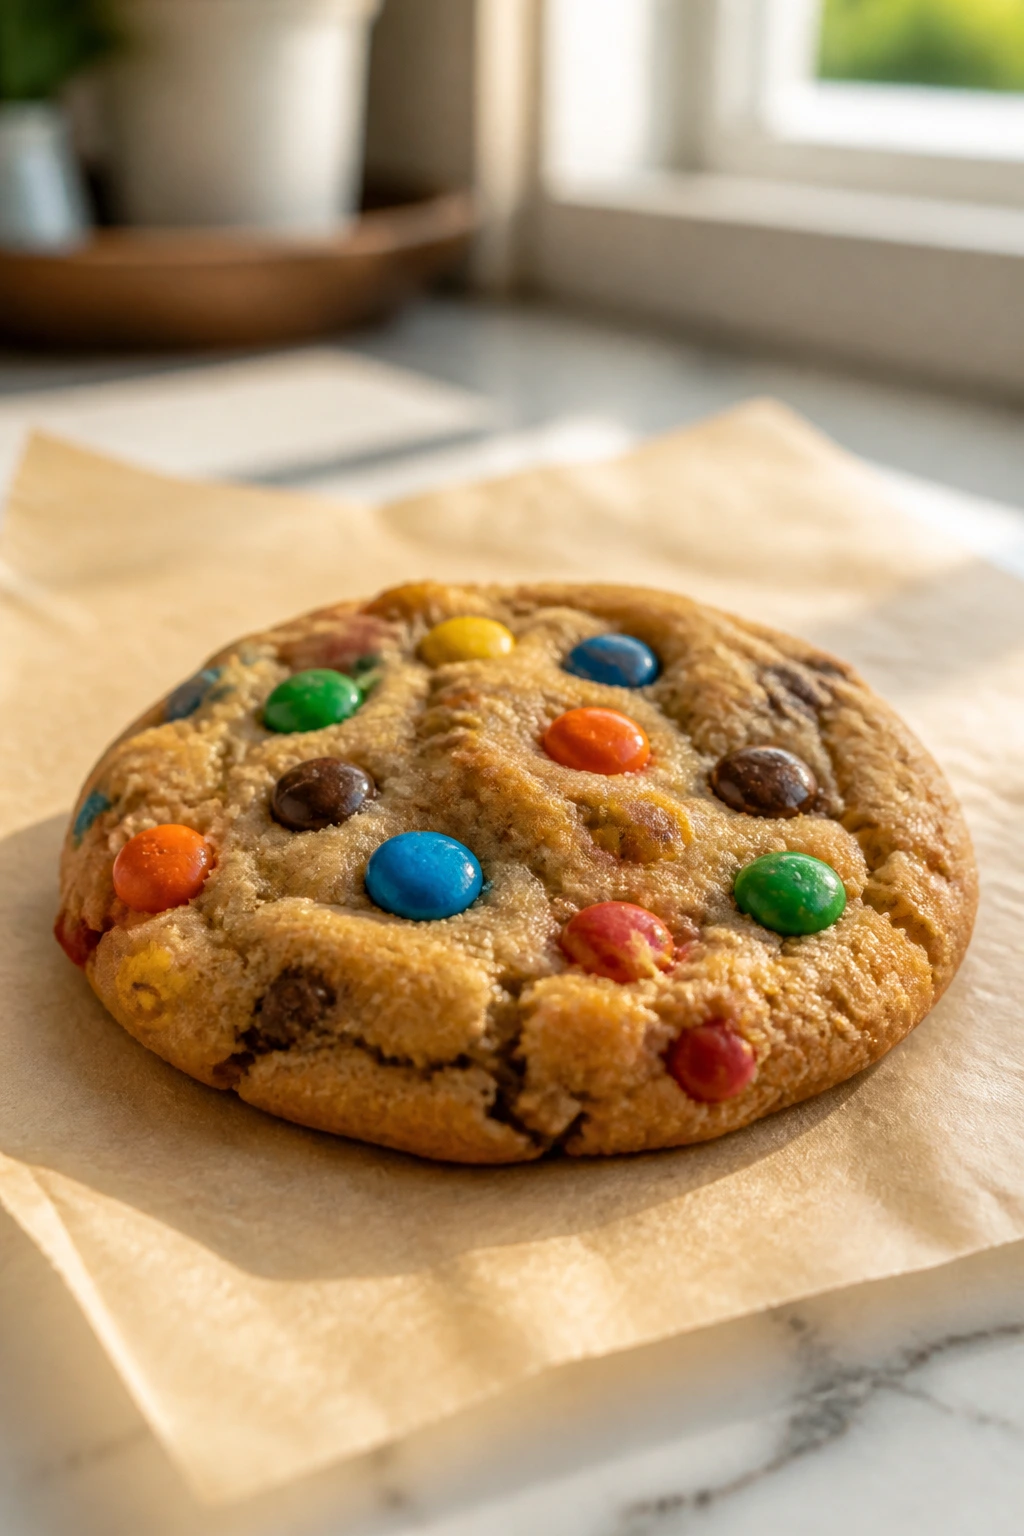
These are the bright, candy-studded cookies that look like a birthday party in a mixing bowl. Kids spot the colors first, then the chewy center, and the tray empties with almost no help from adults.
Why It Works:
Brown sugar keeps the base soft, cornstarch adds a little tenderness, and the candy shells give you color without melting into the dough completely. Pressing a few extra M&Ms on top after baking makes the cookies look fuller and keeps the candy visible.
Key Ingredients:
- 3/4 cup unsalted butter, softened
- 3/4 cup packed light brown sugar
- 1/4 cup granulated sugar
- 1 large egg
- 2 teaspoons vanilla extract
- 2 cups all-purpose flour
- 1 teaspoon cornstarch
- 1 teaspoon baking soda
- 1/2 teaspoon fine salt
- 1 1/2 cups M&M candies
Quick Steps:
- Preheat the oven to 350°F and line baking sheets with parchment.
- Cream the butter and sugars, then beat in the egg and vanilla.
- Mix in the flour, cornstarch, baking soda, and salt until just combined.
- Fold in most of the M&Ms, saving a handful for the tops.
- Scoop onto the sheet, press a few candies into each mound, and bake for 9 to 11 minutes.
Equipment for This Recipe:
- Mixing bowl
- Hand mixer
- Baking sheet
- Cookie scoop
How to Serve This Dish:
These belong on a bright plate or in a clear jar where the candy colors show up. They work well for school lunches because they’re easy to grab and don’t crumble badly once cool. Pair them with plain milk so the candy sweetness doesn’t take over.
Pro Tips for This Recipe:
- Fold the candies in gently so they stay whole.
- Reserve some M&Ms for the top; the cookies look more finished that way.
- Chill the dough for 20 minutes if your kitchen is warm and the cookies spread too much.
Variations on This Dish:
- Peanut M&M Version: Use peanut M&Ms and reduce the mix-in amount slightly so the cookies don’t split.
- Half-Chocolate Batch: Replace half the M&Ms with chocolate chips for a less candy-heavy cookie.
Common Mistakes to Avoid with This Dish:
- Don’t overbake until the candy shells harden too much. The centers should still feel soft.
- Don’t use too many mix-ins or the dough will barely hold together.
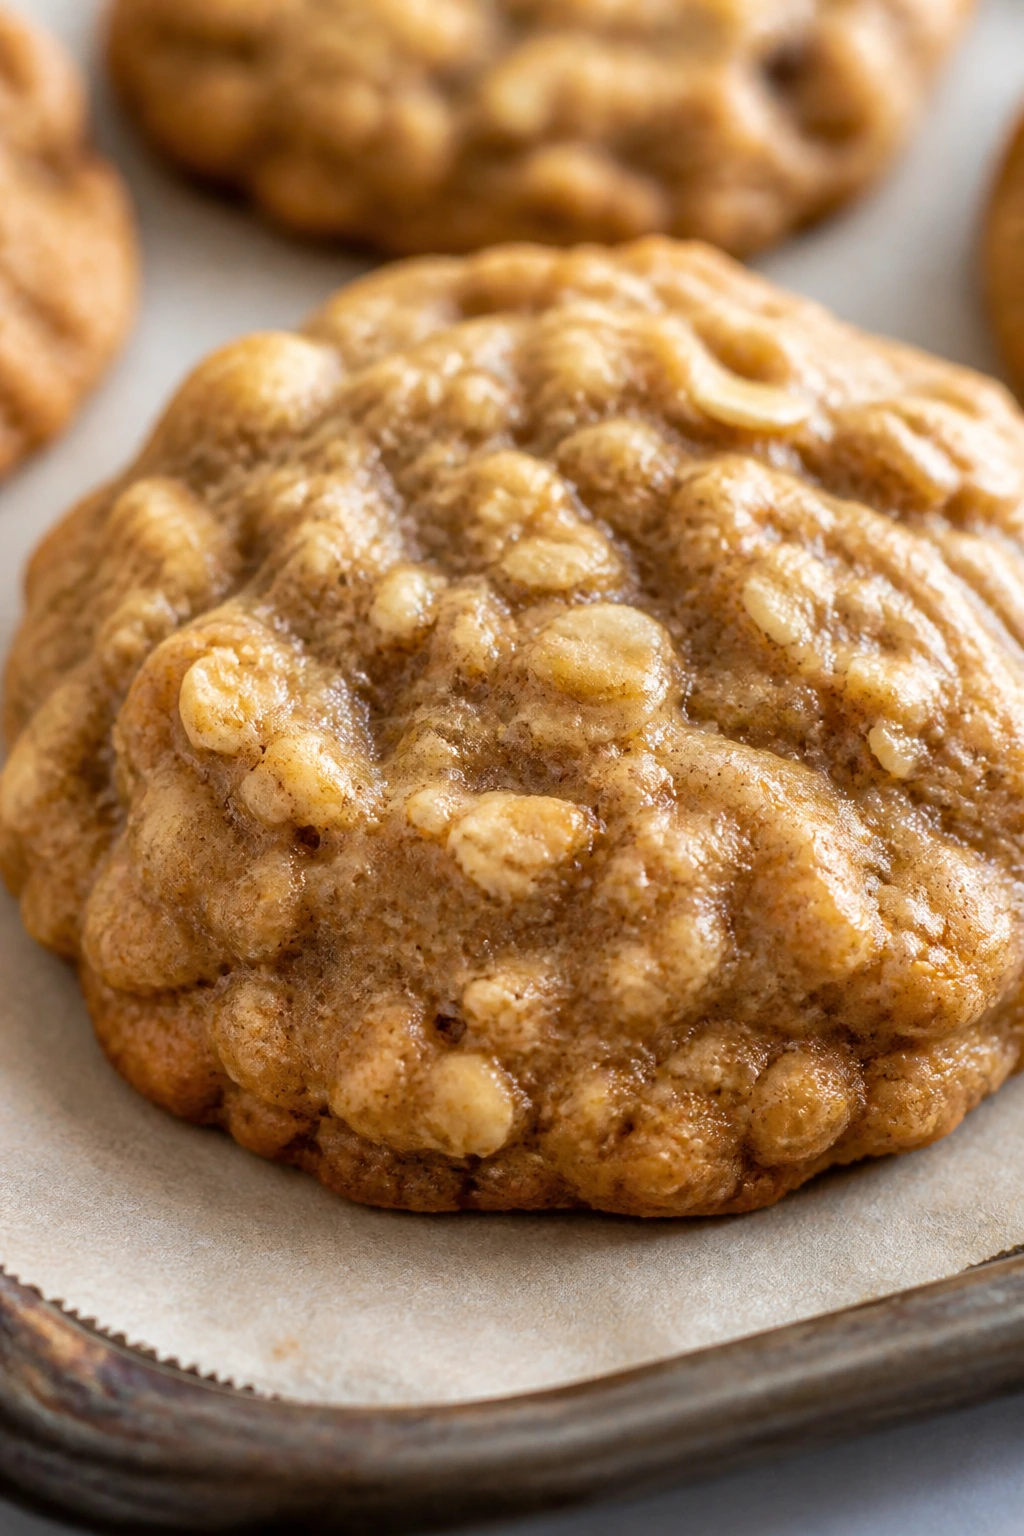
15. Rice Krispie Peanut Butter Cookies
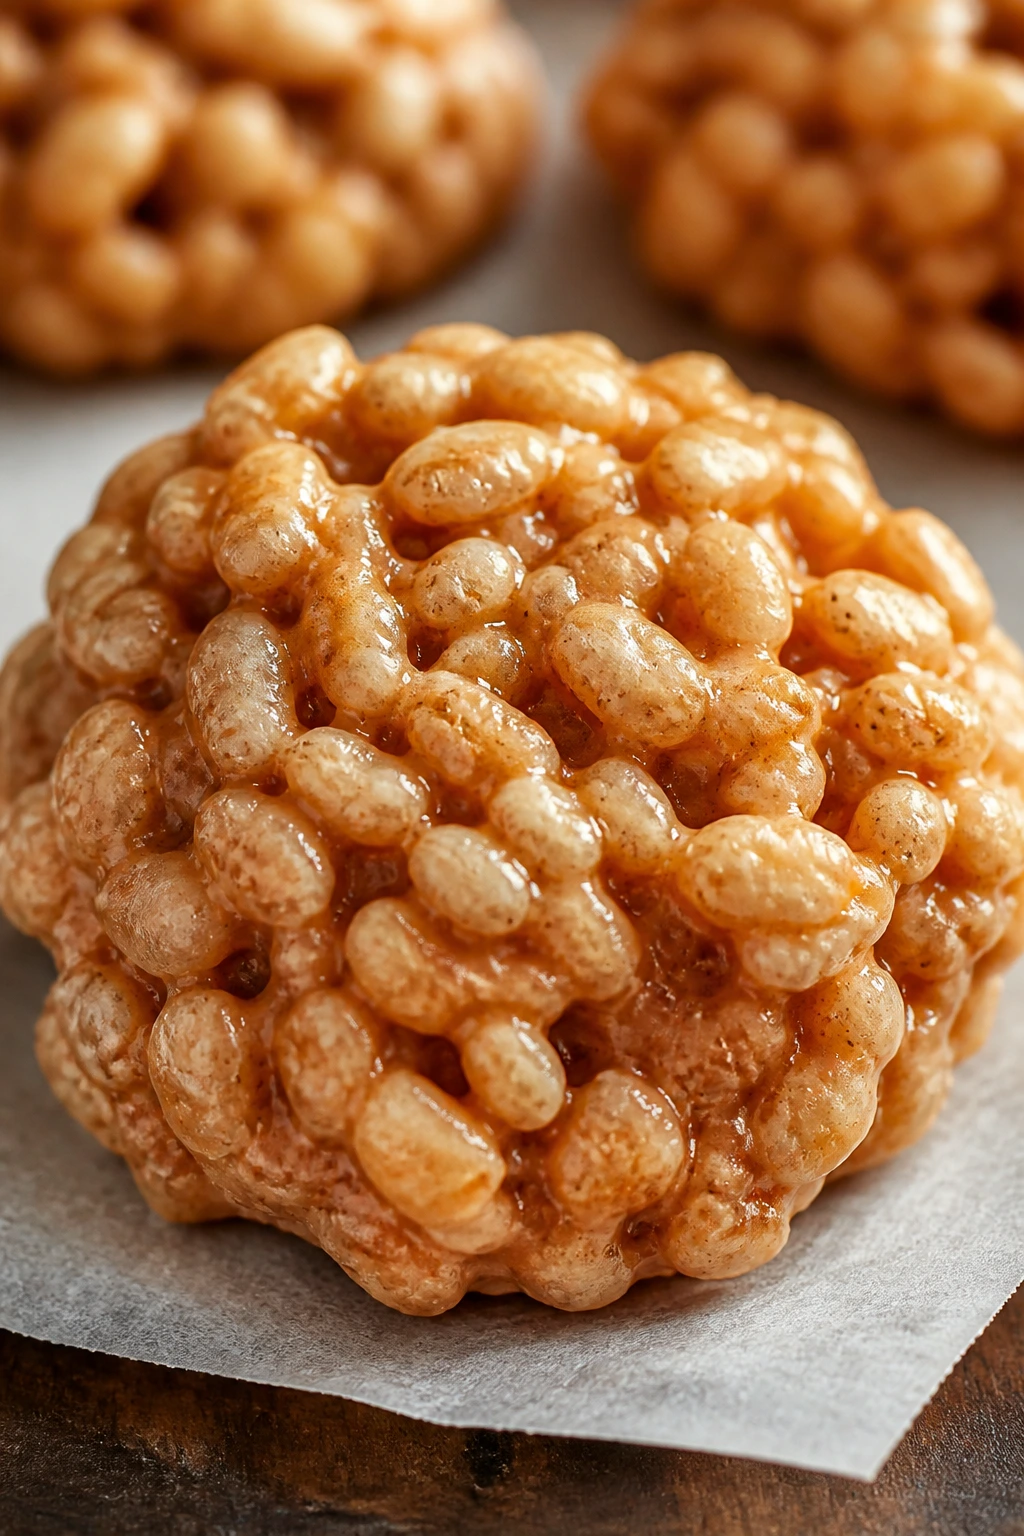
If you want crunch without nuts, this is a good place to land. The cereal gives these cookies a light crackle, while peanut butter keeps the flavor familiar and the texture chewy underneath.
Why It Works:
Rice cereal stays crisp if you fold it in last and handle it gently. Peanut butter carries the dough, so the cookies hold shape even when the cereal adds a little air and roughness to the surface.
Key Ingredients:
- 1/2 cup unsalted butter, softened
- 1 cup creamy peanut butter
- 3/4 cup packed light brown sugar
- 1/4 cup granulated sugar
- 1 large egg
- 1 teaspoon vanilla extract
- 1 1/2 cups all-purpose flour
- 1 teaspoon baking soda
- 1/2 teaspoon fine salt
- 2 cups Rice Krispies cereal
Quick Steps:
- Preheat the oven to 350°F and line a baking sheet.
- Cream the butter, peanut butter, and sugars, then beat in the egg and vanilla.
- Mix in the flour, baking soda, and salt until the dough forms.
- Fold in the Rice Krispies very gently so the cereal stays intact.
- Scoop the dough, flatten slightly, and bake for 10 to 12 minutes until the edges are set.
Equipment for This Recipe:
- Mixing bowl
- Spatula
- Baking sheet
- Parchment paper
How to Serve This Dish:
These cookies do well in snack boxes because they keep a little crunch even after sitting. They’re also good with sliced bananas or an apple, since the peanut butter flavor likes fruit. Serve them once cool so the cereal stays crisp.
Pro Tips for This Recipe:
- Fold the cereal with a spatula, not the mixer, or it breaks down too much.
- Don’t pack the cereal into the cup; a light measure keeps the dough from becoming dry.
- Cool the cookies fully before stacking them, or the cereal will soften from trapped steam.
Variations on This Dish:
- Chocolate Krispie Cookie: Add 2 tablespoons cocoa powder and 1/4 cup extra flour.
- Nut-Free Swap: Use sunflower seed butter and omit the peanut butter entirely.
Common Mistakes to Avoid with This Dish:
- Don’t crush the cereal during mixing. You want some of that airy crunch left.
- Don’t bake until deeply brown; the texture gets brittle fast.
16. Fudgy Brownie Cookies
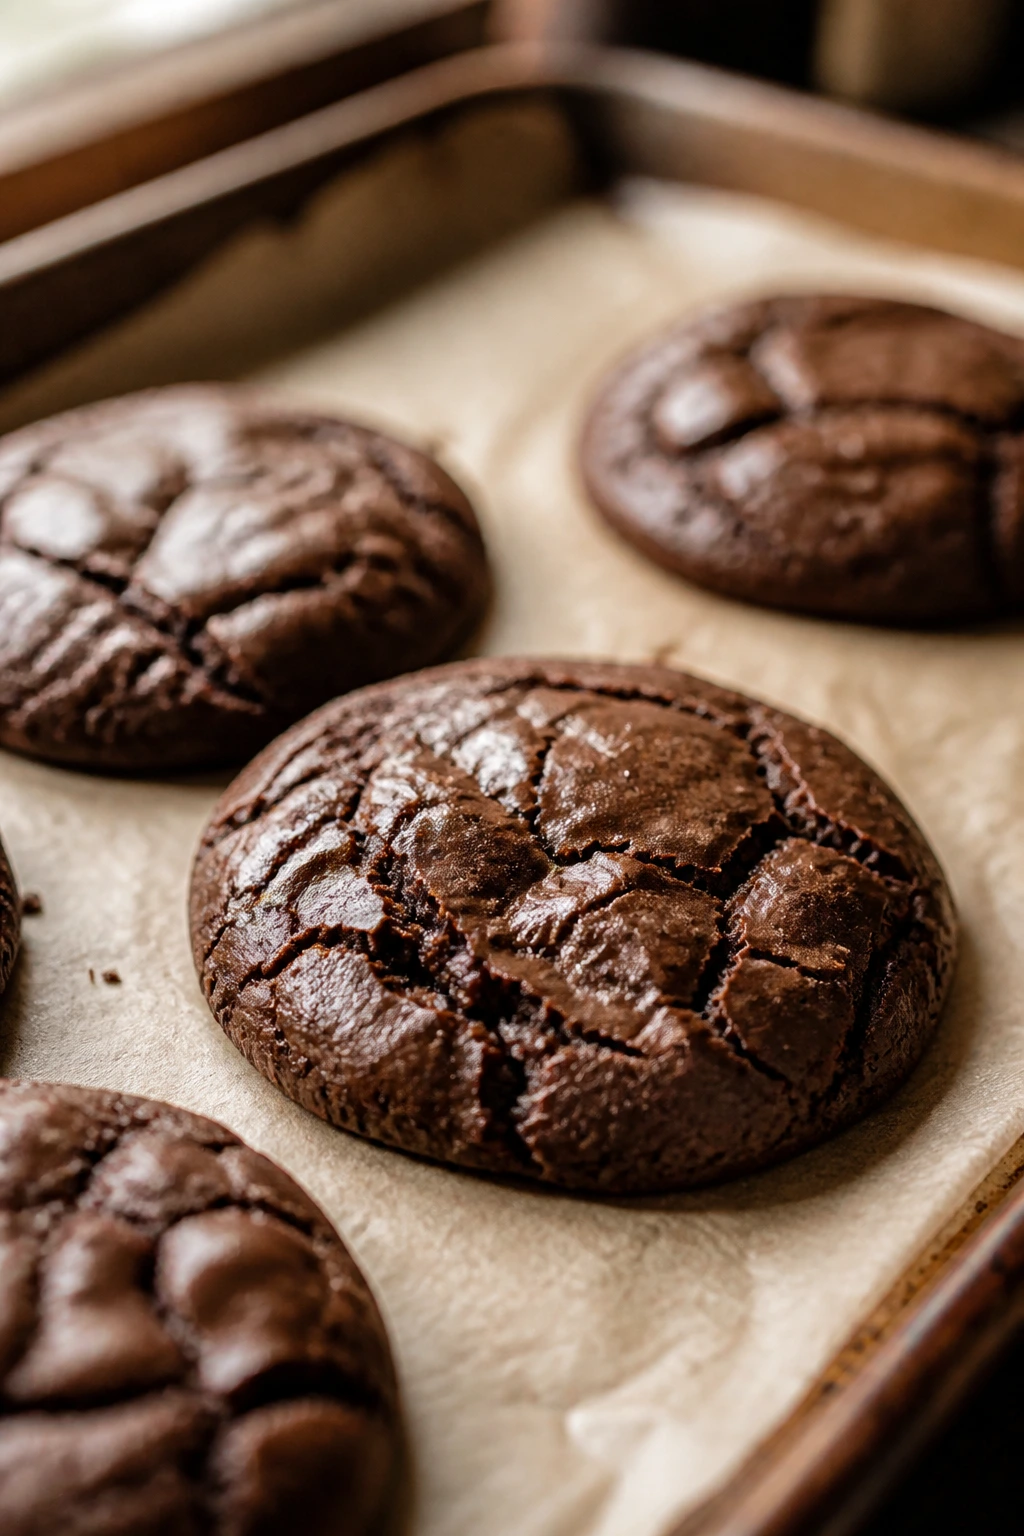
These are for the child who always steals the edge pieces from the brownie pan. They bake with shiny tops, chewy middles, and a flavor that leans closer to brownie than cake, which is exactly why they work.
Why It Works:
Melted butter and cocoa create a dense chocolate base, while eggs give the tops that slightly crackled finish. A short bake keeps the centers soft enough to feel almost truffle-like when they cool.
Key Ingredients:
- 1/2 cup unsalted butter
- 1 cup granulated sugar
- 2 large eggs
- 1 teaspoon vanilla extract
- 1/2 cup unsweetened cocoa powder
- 3/4 cup all-purpose flour
- 1/2 teaspoon baking powder
- 1/4 teaspoon fine salt
- 1/2 cup semisweet chocolate chips, optional
Quick Steps:
- Preheat the oven to 350°F and line a baking sheet with parchment.
- Melt the butter, then whisk in the sugar, eggs, and vanilla until glossy.
- Stir in the cocoa, flour, baking powder, and salt until the batter turns thick.
- Fold in the chocolate chips if using, then scoop onto the sheet.
- Bake for 10 to 12 minutes until the tops are crackly and the centers still look soft.
Equipment for This Recipe:
- Heatproof bowl
- Whisk
- Baking sheet
- Parchment paper
How to Serve This Dish:
Serve these when they have cooled enough to hold together but are still a little soft inside. They’re rich, so a smaller portion works fine, and a scoop of vanilla ice cream turns them into something far more formal than the recipe asks for. Cold milk helps, as usual.
Pro Tips for This Recipe:
- Don’t overmix after the flour goes in. You want a thick batter, not a whipped one.
- Use a cookie scoop and space them well; the batter spreads more than it looks like it will.
- Pull them when the centers still seem underdone. Brownie cookies finish as they cool.
Variations on This Dish:
- Peppermint Brownie Cookie: Add a small splash of peppermint extract and a few crushed peppermint candies on top.
- Espresso Brownie: Stir in 1 teaspoon instant espresso powder for a deeper chocolate flavor.
Common Mistakes to Avoid with This Dish:
- Don’t bake until firm all the way through. That turns them cakey and dull.
- Don’t use too much flour. Brownie cookies need a loose, sticky batter.
17. Cornflake Crunch Cookies
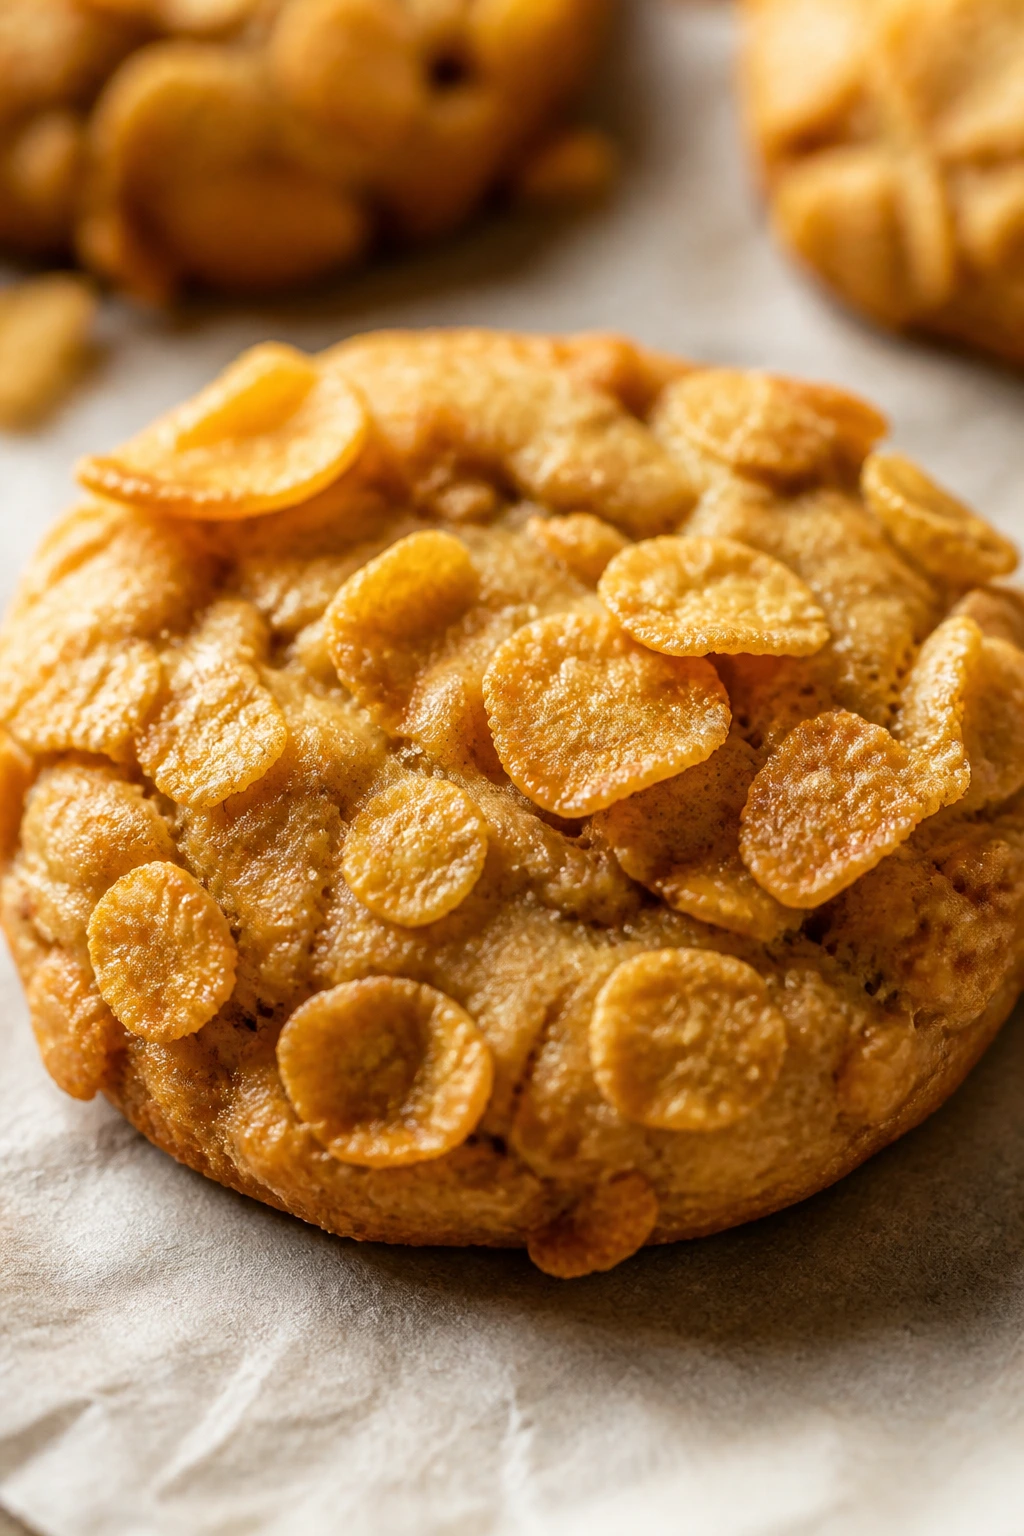
Cornflake cookies are oddly satisfying because they sound plain and taste like a little surprise. The flakes bring a gentle toastiness and a crisp bite that feels different from an oat cookie without asking for unusual ingredients.
Why It Works:
Cornflakes stay light if you fold them in at the end, and brown sugar keeps the cookie from tasting dry. The contrast between the soft dough and the crisp cereal makes these especially good for kids who like texture as much as sweetness.
Key Ingredients:
- 1/2 cup unsalted butter, softened
- 3/4 cup packed light brown sugar
- 1/4 cup granulated sugar
- 1 large egg
- 1 teaspoon vanilla extract
- 1 1/2 cups all-purpose flour
- 1 teaspoon baking powder
- 1/2 teaspoon fine salt
- 2 cups cornflake cereal
- 1/2 teaspoon ground cinnamon, optional
Quick Steps:
- Heat the oven to 350°F and line a sheet with parchment.
- Cream the butter and sugars, then beat in the egg and vanilla.
- Mix in the flour, baking powder, salt, and cinnamon if using.
- Fold in the cornflakes gently.
- Scoop into mounds and bake for 10 to 12 minutes until the edges are lightly golden.
Equipment for This Recipe:
- Mixing bowl
- Spatula
- Baking sheet
- Parchment paper
How to Serve This Dish:
These are best served with a little space between them on the plate so the cereal stays crisp. They make a nice change on a mixed cookie tray because the texture is lighter than the richer chocolate cookies. A cup of milk or warm tea works equally well.
Pro Tips for This Recipe:
- Fold the cornflakes in with a light hand. Crushed flakes disappear into the dough.
- Use fresh cereal. Stale flakes don’t crisp up the same way in the oven.
- Let the cookies cool on the tray for 5 minutes before moving them.
Variations on This Dish:
- Peanut Butter Crunch: Add 1/2 cup peanut butter and reduce the butter by 1/4 cup.
- Chocolate Drizzle Finish: Drizzle cooled cookies with melted chocolate for a sweeter version.
Common Mistakes to Avoid with This Dish:
- Don’t overmix after the cereal goes in. The flakes break and the cookie loses its crunch.
- Don’t bake too long. The cookies should stay pale with only a little color at the edges.
18. Applesauce Spice Cookies
These smell like a soft-handed version of fall baking, though they work any time a jar of applesauce needs a purpose. The crumb is tender, the spice is gentle, and the cookies stay moist longer than most drop cookies.
Why It Works:
Applesauce adds moisture and a little fruit sweetness, which means you can pull back on the butter a bit without making the cookies dry. Cinnamon and nutmeg give the dough enough warmth to keep the apple flavor from tasting too plain.
Key Ingredients:
- 1/2 cup unsalted butter, softened
- 3/4 cup packed light brown sugar
- 1 large egg
- 1/2 cup unsweetened applesauce
- 2 cups all-purpose flour
- 1 teaspoon baking soda
- 1 1/2 teaspoons ground cinnamon
- 1/4 teaspoon ground nutmeg
- 1/2 teaspoon fine salt
- 1/2 cup raisins, optional
Quick Steps:
- Preheat the oven to 350°F and line baking sheets.
- Cream the butter and brown sugar, then beat in the egg and applesauce.
- Stir in the flour, baking soda, cinnamon, nutmeg, and salt.
- Fold in the raisins if using.
- Scoop onto the sheet and bake for 11 to 13 minutes until the tops are set and the edges are lightly browned.
Equipment for This Recipe:
- Bowl and mixer
- Measuring cups
- Baking sheet
- Cooling rack
How to Serve This Dish:
These work nicely as a mid-afternoon snack because they’re softer than a crisp cookie and don’t crumble everywhere. They also pair well with sliced pears or a cup of cinnamon tea. If you glaze them, serve them after the glaze has set, not while it is still tacky.
Pro Tips for This Recipe:
- Use unsweetened applesauce if you can. Sweetened applesauce can make the cookies taste flat.
- If your applesauce is watery, blot a little moisture off before measuring.
- Bake until the tops look set, not dry; these stay soft for days.
Variations on This Dish:
- Applesauce Oat Cookies: Add 1 cup oats and increase the applesauce by 2 tablespoons.
- Maple Spice Glaze: Stir a little maple syrup into powdered sugar for a quick finish.
Common Mistakes to Avoid with This Dish:
- Don’t add too much applesauce or the dough turns cakey and loose.
- Don’t store them uncovered. The soft texture dries out fast.
19. Icebox Vanilla Sugar Cookies
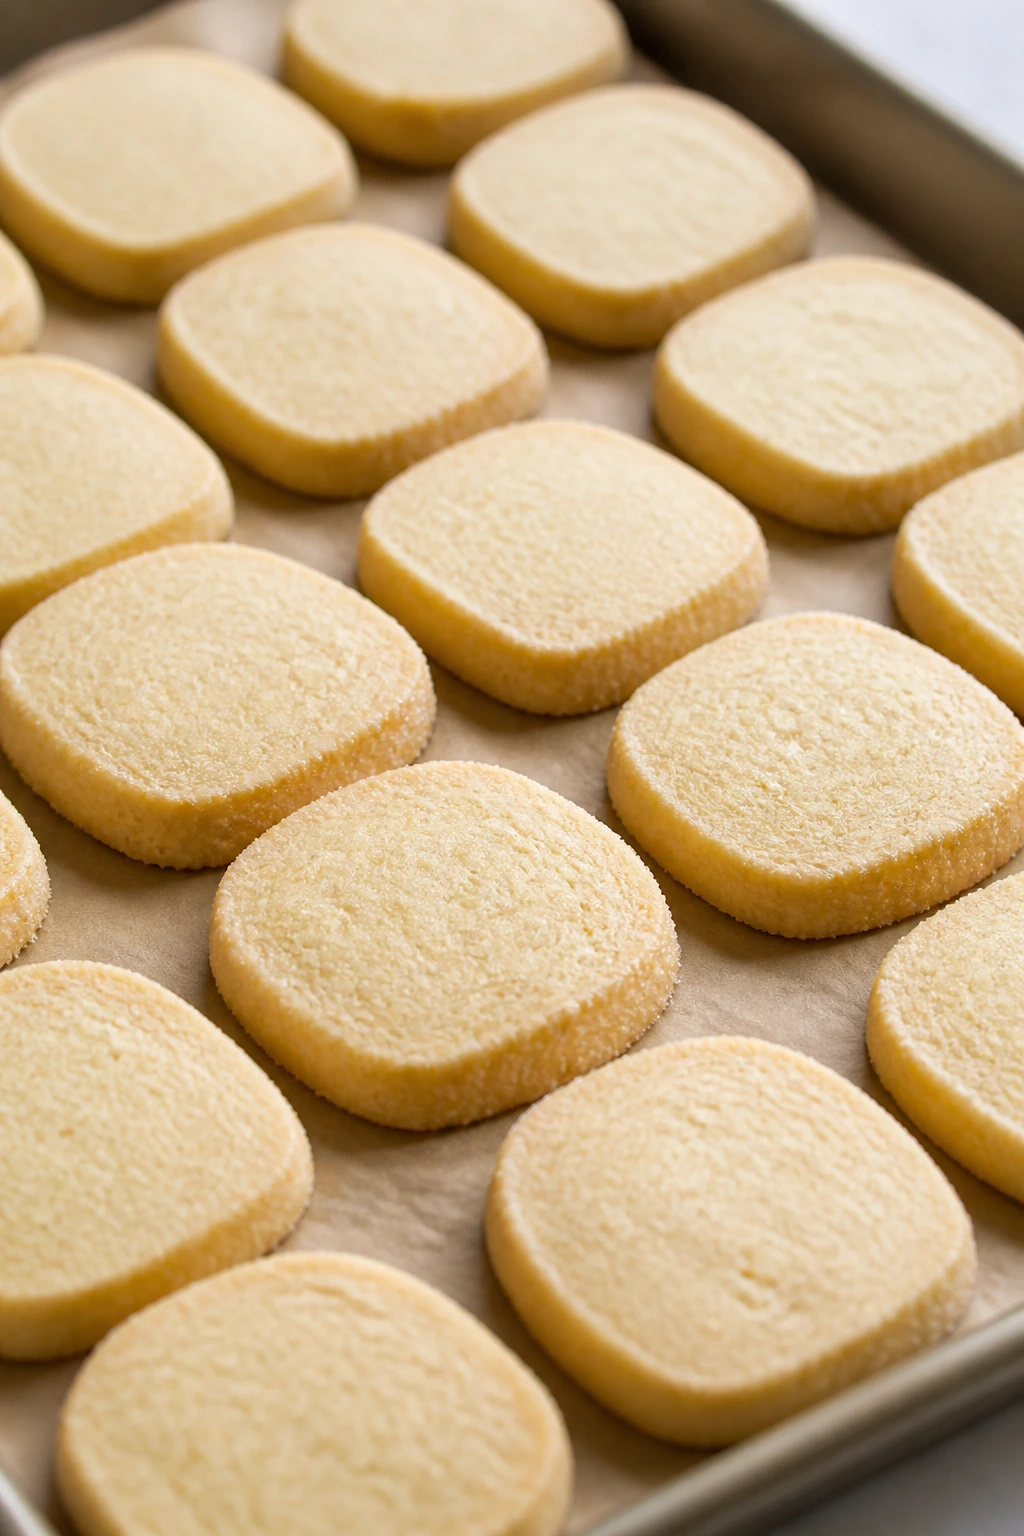
Icebox cookies are the quiet workhorses of the cookie tin. You mix the dough once, chill it into a log, and slice off neat rounds whenever the oven is ready, which feels almost unfairly useful.
Why It Works:
A firm dough slices cleanly after chilling, and baking from cold helps the cookies hold their shape. Vanilla does most of the flavoring here, so using a decent one makes a bigger difference than you’d think.
Key Ingredients:
- 1 cup unsalted butter, softened
- 1 cup granulated sugar
- 1 large egg
- 2 teaspoons vanilla extract
- 2 1/2 cups all-purpose flour
- 1 teaspoon baking powder
- 1/2 teaspoon fine salt
- 2 tablespoons sanding sugar or sprinkles, optional
Quick Steps:
- Cream the butter and sugar, then beat in the egg and vanilla.
- Mix in the flour, baking powder, and salt until a soft dough forms.
- Shape the dough into logs about 2 inches thick, wrap tightly, and chill for at least 1 hour.
- Slice into 1/4-inch rounds, sprinkle with sanding sugar if you like, and place on a lined sheet.
- Bake at 350°F for 9 to 11 minutes until the edges are just beginning to color.
Equipment for This Recipe:
- Mixing bowl
- Plastic wrap or parchment
- Sharp knife
- Baking sheet
How to Serve This Dish:
These cookies are easy to dress up with sprinkles for parties or to leave plain for lunchbox duty. They pair well with fruit and milk, but they also make a good base for a sandwich cookie if you spread jam between two rounds. Keep the slices even, and the tray looks neat enough to matter.
Pro Tips for This Recipe:
- Chill the log until firm all the way through; soft centers make slicing messy.
- Rotate the log while rolling so the cookies stay round instead of lopsided.
- Bake the first tray as a test if your oven has hot spots.
Variations on This Dish:
- Almond Vanilla: Swap half the vanilla for almond extract.
- Cinnamon Sugar Icebox: Roll the dough log in cinnamon sugar before chilling.
Common Mistakes to Avoid with This Dish:
- Don’t slice the dough before it’s cold. The rounds collapse and smear.
- Don’t overbake. These should stay pale and tender.
20. Chocolate Chip Biscotti
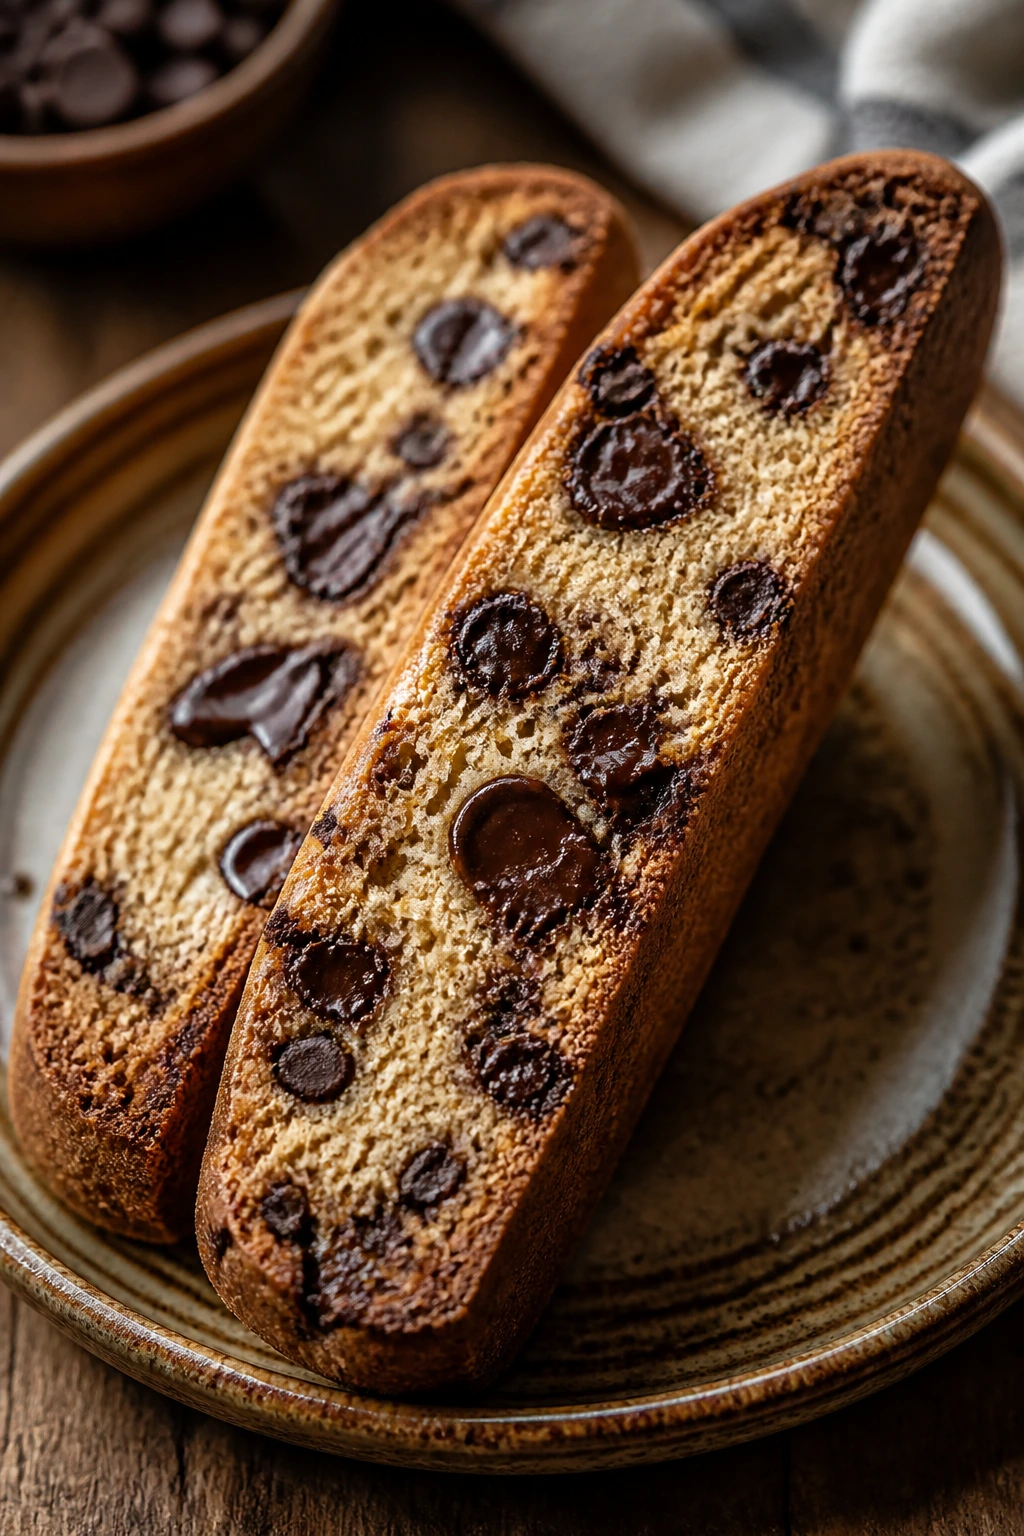
Biscotti are the cookie you make when you want something crisp enough to dunk. They’re not soft like the others in this list, but kids who like crunch and a milk-dip usually get into them fast.
Why It Works:
The first bake sets the loaf, and the second bake dries the slices into that classic crisp bite. Chocolate chips melt into little pockets, so even a dry cookie gets enough reward to keep it interesting.
Key Ingredients:
- 2 cups all-purpose flour
- 3/4 cup granulated sugar
- 1 teaspoon baking powder
- 1/4 teaspoon fine salt
- 2 large eggs
- 1/4 cup unsalted butter, melted
- 1 teaspoon vanilla extract
- 3/4 cup semisweet chocolate chips
Quick Steps:
- Preheat the oven to 350°F and line a baking sheet.
- Whisk the flour, sugar, baking powder, and salt in a bowl.
- Stir in the eggs, melted butter, and vanilla until a stiff dough forms, then fold in the chocolate chips.
- Shape into two flat logs and bake for 22 to 25 minutes until lightly golden.
- Cool for 10 minutes, slice diagonally, then bake the slices again for 8 to 10 minutes per side until crisp.
Equipment for This Recipe:
- Mixing bowl
- Baking sheet
- Serrated knife
- Cooling rack
How to Serve This Dish:
Serve biscotti with milk, coffee, or hot cocoa, and put something softer next to them if you’re serving younger children. They’re good for dunking and for making a cookie plate feel less one-note. One or two pieces is enough because they’re crisp and filling.
Pro Tips for This Recipe:
- Slice while the loaf is still warm. If it cools fully, the cuts get crumbly.
- Use a serrated knife and a gentle sawing motion.
- Don’t make the logs too thick or the center stays soft after the second bake.
Variations on This Dish:
- Orange Chocolate Biscotti: Add orange zest to the dough.
- Almond Chip Biscotti: Swap half the chips for chopped almonds if you keep them on hand.
Common Mistakes to Avoid with This Dish:
- Don’t wait too long to slice. Hard loaves crack and crumble.
- Don’t cut the second bake short or the biscotti stay chewy instead of crisp.
21. Salted Pretzel Chocolate Chip Cookies
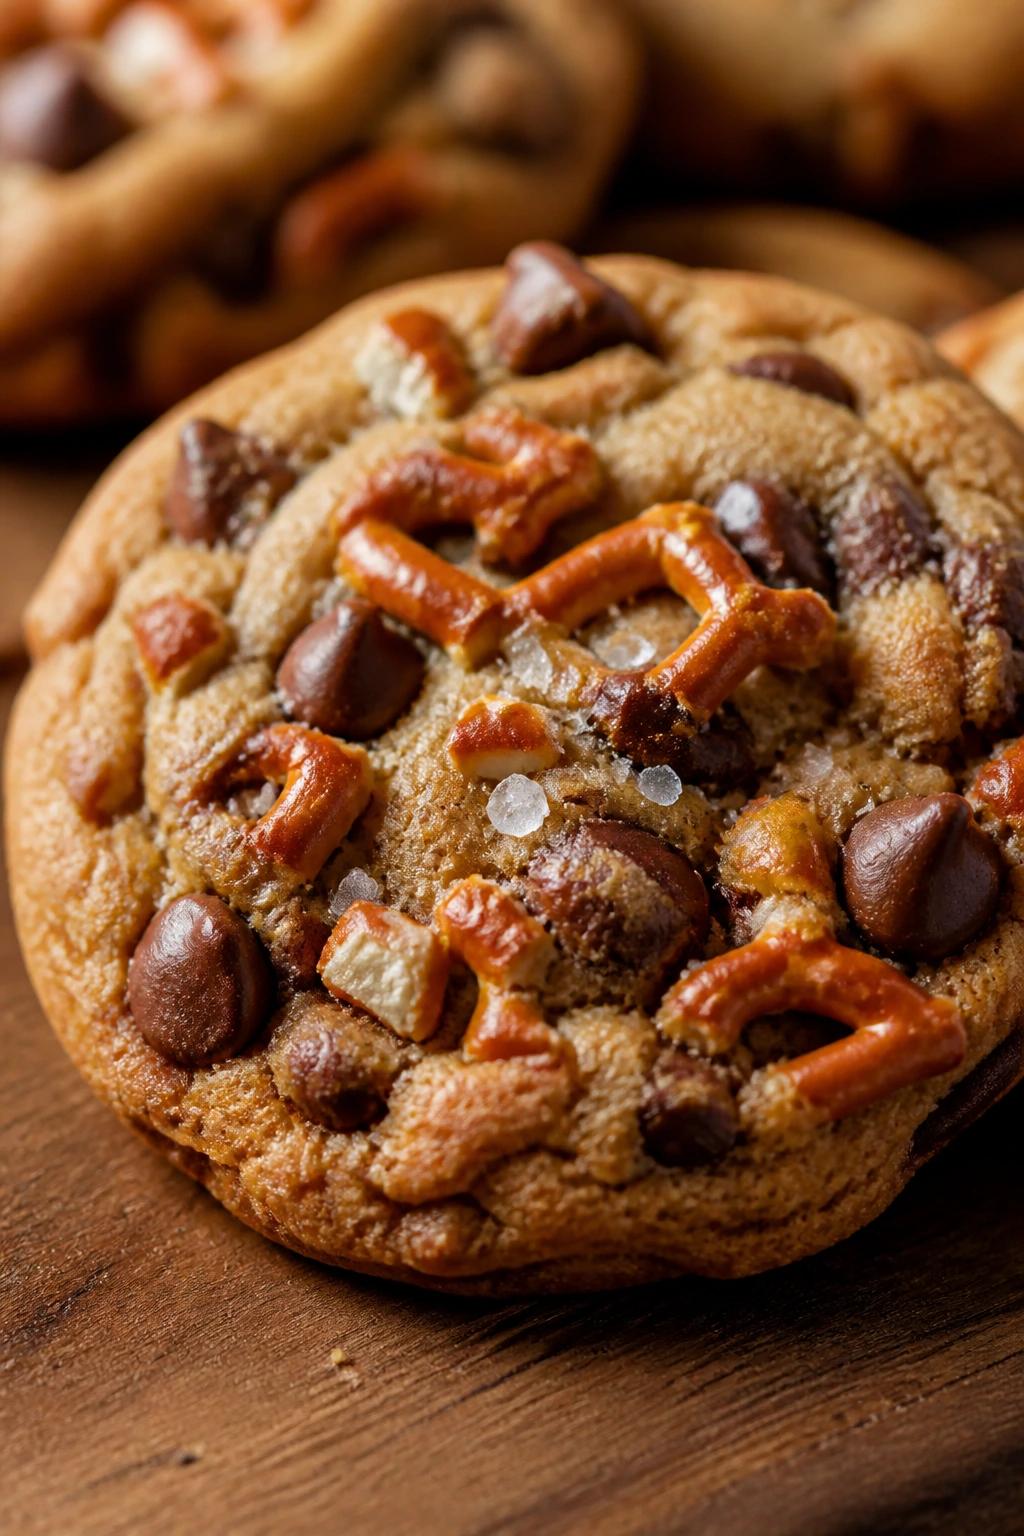
This is the sweet-salty cookie that wins over kids who like a little crunch. Pretzels bring the salty snap, chocolate chips melt into the dough, and the edges bake with a slightly toasty bite.
Why It Works:
Crushed pretzels give the cookies texture and salt without needing extra fancy ingredients. The chocolate keeps the flavor friendly, while a pinch of flaky salt on top sharpens the contrast and makes the sweet part taste sweeter.
Key Ingredients:
- 1 cup unsalted butter, softened
- 3/4 cup packed light brown sugar
- 1/4 cup granulated sugar
- 1 large egg
- 2 teaspoons vanilla extract
- 2 cups all-purpose flour
- 1 teaspoon baking soda
- 1/2 teaspoon fine salt
- 1 cup crushed pretzels
- 1 cup chocolate chips
- Flaky salt, for topping optional
Quick Steps:
- Preheat the oven to 350°F and line a baking sheet.
- Cream the butter and sugars, then beat in the egg and vanilla.
- Mix in the flour, baking soda, and fine salt until the dough comes together.
- Fold in the pretzels and chocolate chips gently.
- Scoop onto the sheet, add a few pretzel pieces on top, and bake for 9 to 11 minutes.
Equipment for This Recipe:
- Mixing bowl
- Spatula
- Baking sheet
- Parchment paper
How to Serve This Dish:
These are the cookies I’d put on a game-day plate or a mixed snack tray because they offer a break from the usual sweet flavors. They’re sturdy enough to pack, and they taste especially good once the chocolate firms back up. A glass of cold milk reins them in nicely.
Pro Tips for This Recipe:
- Crush the pretzels into small pieces, not dust. You want little sharp bites, not salty sand.
- Add the pretzels at the end so they stay crisp.
- Use a light hand with the flaky salt; the pretzels already bring enough salt.
Variations on This Dish:
- Toffee Pretzel Cookie: Add 1/2 cup toffee bits if you want more caramel flavor.
- Peanut Butter Pretzel: Replace 1/4 cup of the butter with peanut butter.
Common Mistakes to Avoid with This Dish:
- Don’t use huge pretzel chunks. They cut through the cookie and make it hard to bite.
- Don’t overbake or the pretzels get too hard.
22. Peanut Butter Oatmeal Cookies
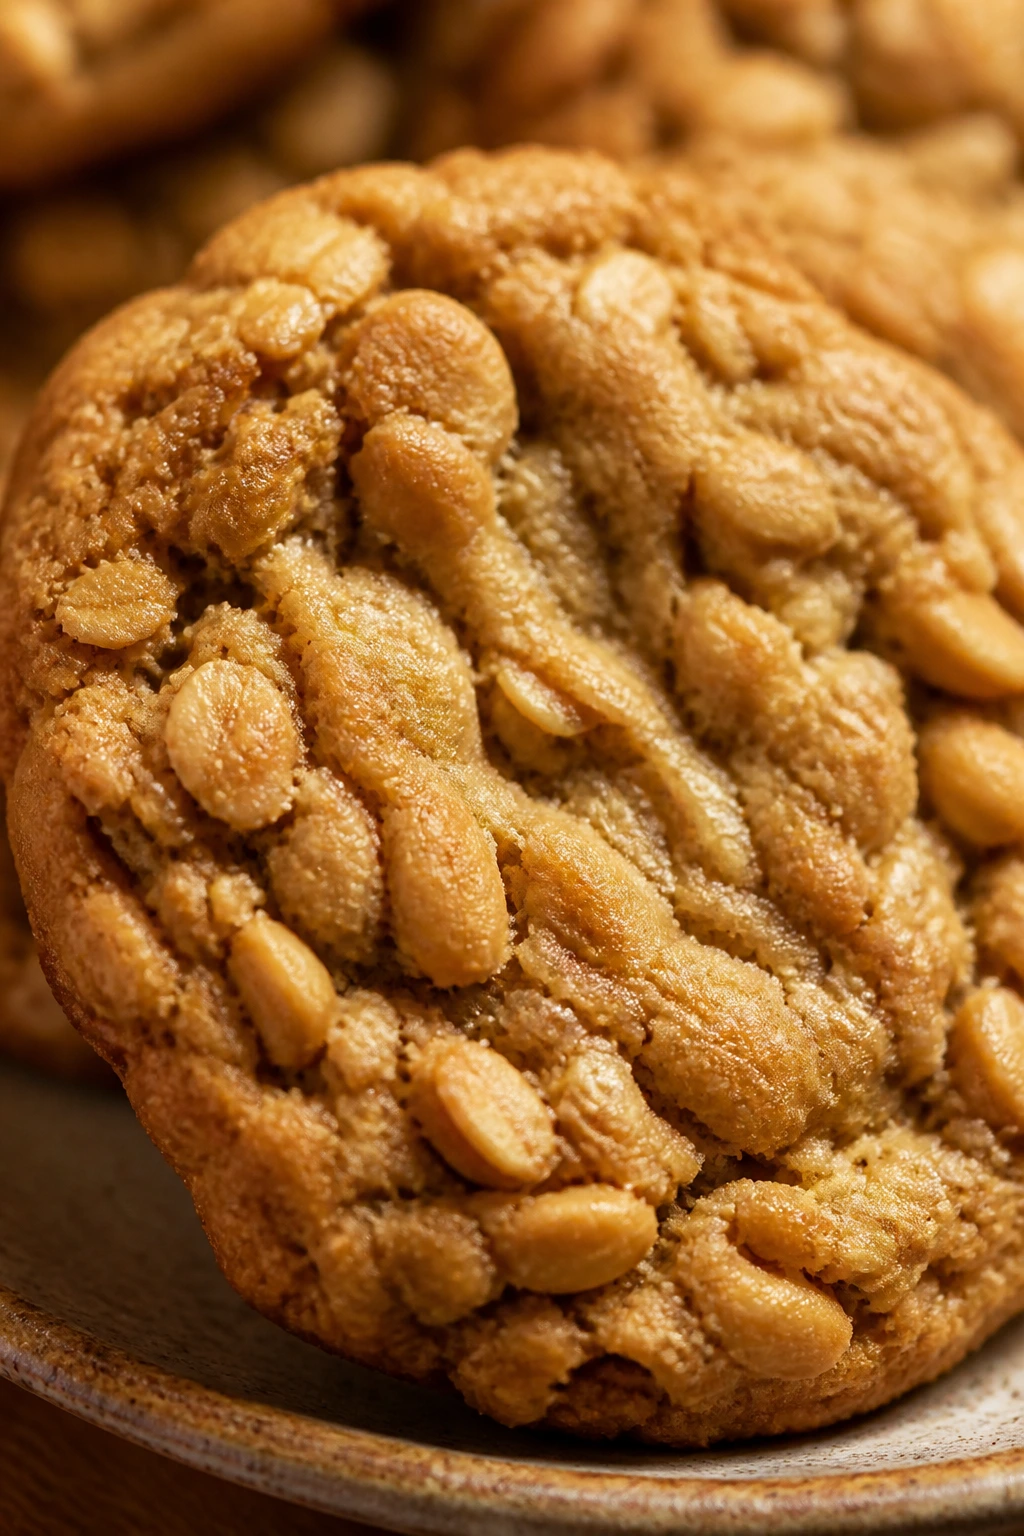
This one feels like the practical cousin of the whole collection. Peanut butter, oats, brown sugar, and a bit of vanilla turn into a chewy cookie that tastes familiar in the first bite and stays useful for days.
Why It Works:
The oats bring chew and body, while peanut butter keeps the cookie rich enough that it doesn’t need much else. A little brown sugar adds moisture, and the dough stays sturdy enough to scoop without much trouble.
Key Ingredients:
- 1/2 cup unsalted butter, softened
- 1/2 cup creamy peanut butter
- 3/4 cup packed light brown sugar
- 1 large egg
- 1 teaspoon vanilla extract
- 1 cup all-purpose flour
- 1 teaspoon baking soda
- 1/2 teaspoon fine salt
- 1 1/2 cups old-fashioned rolled oats
- 1/2 cup mini chocolate chips, optional
Quick Steps:
- Heat the oven to 350°F and line baking sheets with parchment.
- Cream the butter, peanut butter, and brown sugar, then beat in the egg and vanilla.
- Mix in the flour, baking soda, and salt until just combined.
- Stir in the oats and chocolate chips if using.
- Scoop onto the sheet, flatten each mound lightly, and bake for 10 to 12 minutes until the edges are set and the centers are soft.
Equipment for This Recipe:
- Large bowl
- Hand mixer
- Baking sheets
- Cookie scoop
How to Serve This Dish:
These are sturdy lunchbox cookies and easy after-school snacks because they don’t fall apart in your hand. Serve them with apple slices or celery if you want the peanut butter to feel almost like a snack spread in cookie form. They’re good warm, but they hold well once cool.
Pro Tips for This Recipe:
- Use old-fashioned oats, not instant, for a better chew.
- If the dough feels dry, let it sit for 5 minutes; the oats absorb moisture.
- A tiny press with the back of a spoon helps them bake evenly.
Variations on This Dish:
- Cinnamon Chip Version: Add 1 teaspoon cinnamon and skip the chocolate chips.
- Nut-Free Swap: Use sunflower seed butter and skip the peanut butter entirely.
Common Mistakes to Avoid with This Dish:
- Don’t use natural peanut butter unless you know how it behaves; the oil can make the dough spread.
- Don’t overbake these. The center should still feel soft when they come out.
Why Pantry Cookies Work So Well on Real Baking Days
Pantry cookies earn their keep because they reduce the friction that usually stops a baking session before it starts. You do not need five specialty flours or a shopping trip for obscure extracts. You need a few reliable ingredients, a bowl, and enough attention to keep the butter from getting too warm or the flour from sneaking past the measuring line. That’s enough to make the whole thing work.
There’s also a nice rhythm to this kind of baking. Some cookies want a chill, some want a quick mix, and some want no oven at all. That means you can match the cookie to your mood and to the time you actually have, which matters more in real kitchens than recipe writers like to admit. A cookie that asks for 15 minutes of effort tends to get made; a cookie that feels like a project often waits too long.
I like the range here too. You can choose a chewy bar-style cookie for a snack box, a crisp biscotti for dunking, a soft banana cookie for ripe fruit, or a crinkle cookie when you want something that looks a little more finished. The pantry is doing the heavy lifting. Your job is mostly to keep the dough honest.
Essential Equipment for These Cookies
- Mixing bowls: One large bowl handles most doughs; a second smaller bowl helps with coatings like cinnamon sugar or powdered sugar.
- Hand mixer or stand mixer: Useful for creaming butter and sugar smoothly, though many of the simpler cookies can be mixed by hand.
- Rimmed baking sheets: The rim keeps soft doughs and meltier cookies from sliding off.
- Parchment paper: It prevents sticking, especially for jam, chocolate, and no-bake cookies.
- Cookie scoop: A medium scoop keeps batches even so the cookies bake at the same rate.
- Wire cooling rack: Helps crisp cookies set and keeps softer cookies from steaming on the tray.
- Whisk and rubber spatula: A whisk handles dry ingredients and a spatula folds in oats, chips, or cereal without crushing them.
- Measuring cups and spoons: Cookie dough needs real measurements; free-pouring flour is how dry cookies happen.
- Small saucepan: Necessary for no-bake cocoa oat cookies and handy for melting butter.
- Airtight containers or tins: Keep layers of cookies separated with parchment so the softer ones do not absorb the crunchier ones.
Smart Shopping and Ingredient Tips
The biggest upgrade to pantry cookie baking is not a fancy ingredient. It’s paying attention to the ordinary ones. Butter should smell fresh and clean, not waxy or stale, because butter carries flavor in almost every recipe here. If you only keep salted butter, that works too—just trim the added salt by a small pinch and taste the dough if it allows a taste, as with shortbread or sugar cookie dough.
Peanut butter deserves a little more judgment than people give it. Creamy shelf-stable peanut butter makes the most reliable cookie dough because it mixes smoothly and holds shape. Natural peanut butter can work in some recipes, but the oil separation changes how the dough spreads, and that matters most in blossoms, oatmeal cookies, and the peanut butter oatmeal batch. Stir it thoroughly if that is what you have.
For oats, reach for old-fashioned rolled oats whenever a chewy texture matters. Instant oats break down too quickly and turn the dough soft in the wrong way. The same logic applies to cereal cookies: fresh cornflakes and Rice Krispies stay crisp better than stale boxes that have been open too long. A stale cereal cookie tastes flat before it even bakes.
Chocolate chips, cocoa powder, jam, molasses, and spices each do a different job. Cocoa should be unsweetened and fresh enough to smell deeply chocolatey when you open the tin. Molasses should be unsulphured and mild unless you want the stronger, darker flavor of blackstrap. Jam works best when it’s thick and spoonable rather than runny. Cinnamon and ginger lose force when they’ve been sitting forever in a warm cabinet, so if a spice smells dusty, it will taste dusty too.
How to Serve These Cookies
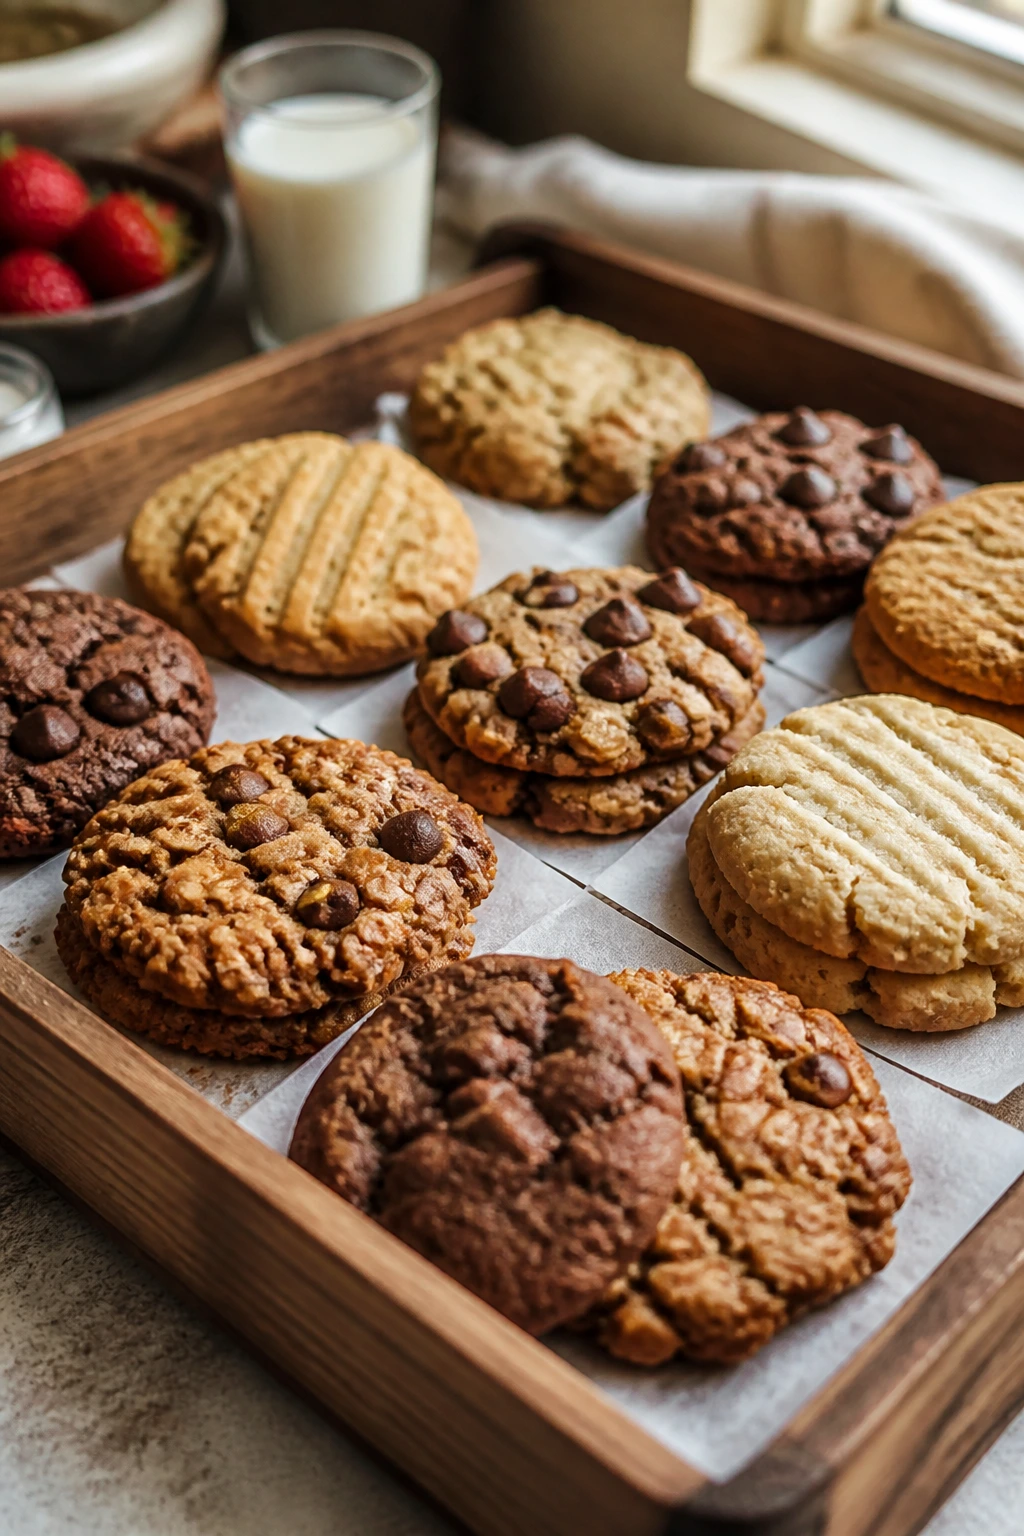
Presentation:
A mixed cookie tray looks best when you give the different textures a little room. Put the powdered sugar cookies beside the darker cocoa ones, stack the crisp biscotti on their sides, and leave the jam thumbprints where the fruit color can show. Small parchment squares under soft cookies keep the tray from looking greasy.
Accompaniments:
Milk is the obvious answer, and it earns its place here, but fruit works too—apple slices with peanut butter cookies, strawberries with chocolate chip, oranges with lemon sugar. For a fuller snack plate, add cheese cubes, pretzels, or a bowl of yogurt so the cookies don’t have to do all the work.
Portions:
For younger kids, 1 to 2 cookies is usually enough if the cookie is rich or full of chocolate. Chewier oatmeal or banana cookies can be served in pairs because they’re a little lighter. For a party tray, plan on 2 to 3 cookies per person if there are other snacks around, and more if the cookies are the whole show.
Beverage Pairing:
Cold milk covers most of the field, but hot cocoa belongs with shortbread and snickerdoodles, and tea works especially well with lemon, thumbprints, or biscotti. If you’re serving adults too, strong coffee or black tea makes the sweeter cookies taste less heavy.
Additional Tips and Flavor Boosters

Flavor Enhancement:
A pinch of flaky salt on chocolate chip, brownie, or pretzel cookies sharpens the flavor more than an extra spoonful of sugar ever will. Toasting oats or coconut in a dry skillet for 3 to 4 minutes before mixing adds a nutty note that feels much bigger than the effort involved.
Customization:
Swap raisins for dried cranberries, mini chips for chopped chocolate, or cinnamon for pumpkin pie spice when you want to change the mood without changing the whole recipe. If you need a nut-free version, sunflower seed butter works well in peanut butter cookies and banana-oat cookies, though the color can turn the dough a little greenish over time.
Serving Suggestions:
Sandwich jam between two shortbread cookies, drizzle melted chocolate over macaroons, or press extra chocolate chips onto warm cookies right after they come out of the oven. Those small finishes make a tray look intentional even when the pantry looked random five minutes earlier.
Make-It-Yours:
For dairy-free baking, use a good plant butter in the soft drop cookies and stick with recipes that lean on oil or fruit, like no-bake cocoa oats and banana oat cookies. For gluten-free baking, the oat-heavy cookies and the crinkle cookies adapt well with a 1:1 gluten-free flour blend, though you should always use certified gluten-free oats if cross-contact matters.
Make-Ahead, Storage, and Reheating Guidance
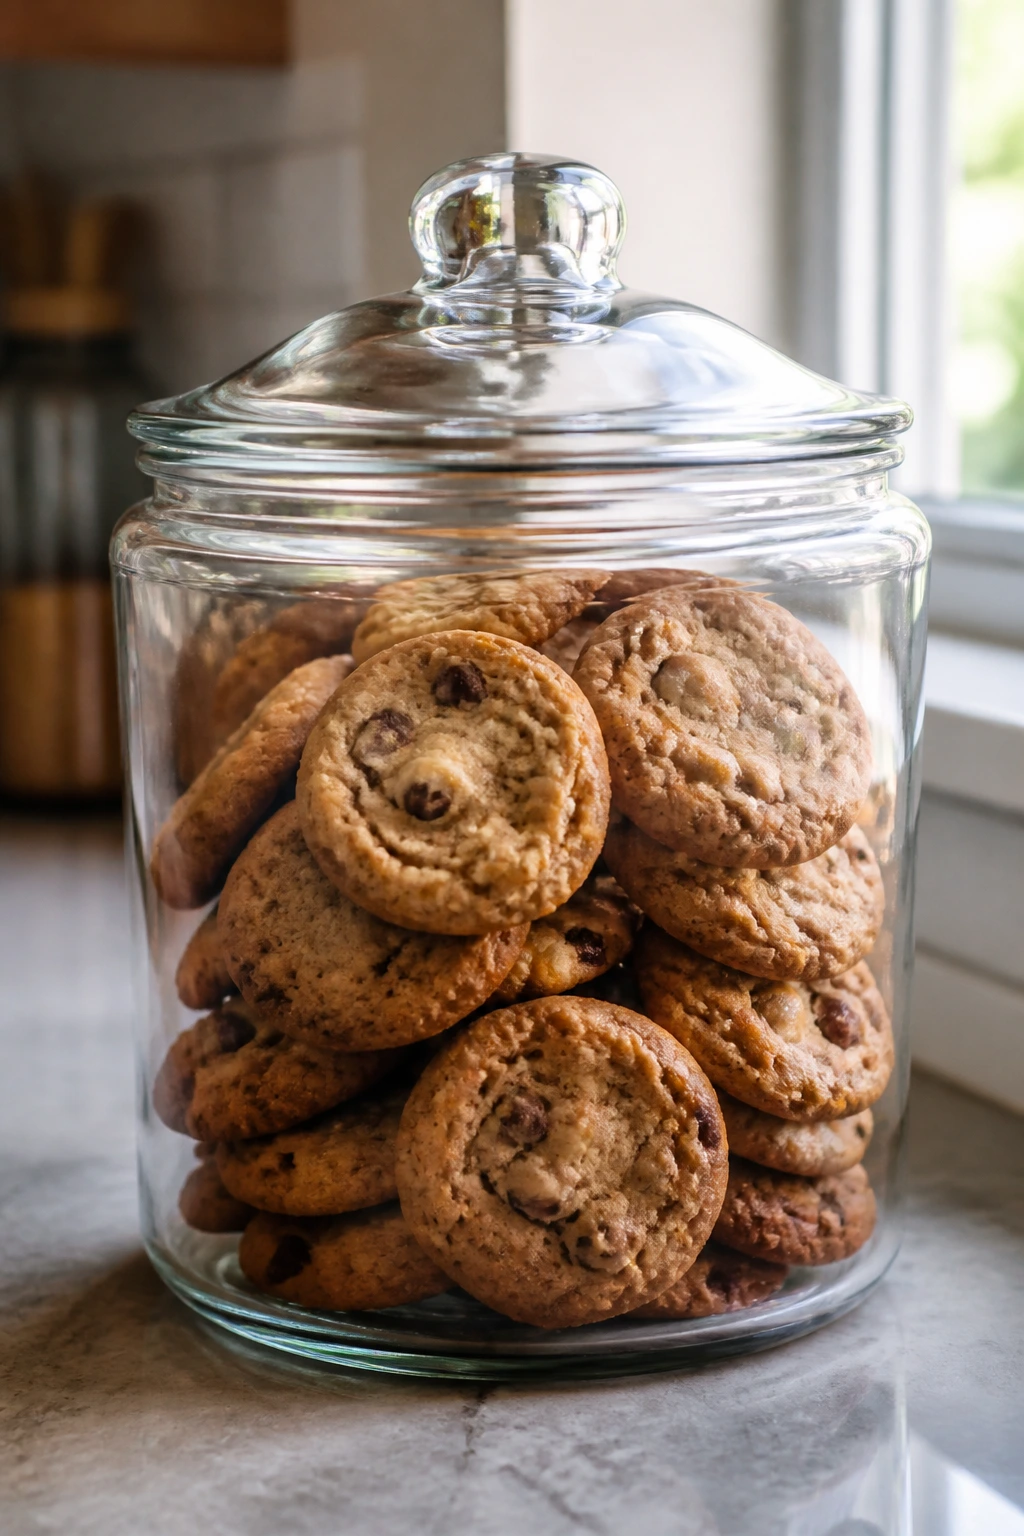
Most baked cookies in this collection keep well in an airtight container at room temperature for 3 to 4 days. Soft cookies like banana oat, applesauce spice, and peanut butter oatmeal stay moist if you slip a small piece of parchment or wax paper between layers. Crisp cookies like biscotti and shortbread hold their texture a little longer, usually up to 5 days if the container stays dry.
The freezer is where these cookies become useful in a different way. Baked cookies freeze well for up to 2 months if you wrap them tightly and separate layers with parchment. Dough balls freeze just as well for many of the drop cookies—chocolate chip, blossoms, M&M, cowboy, oatmeal raisin, and snickerdoodles all work nicely this way. Freeze the scooped dough on a tray first, then move it to a bag once hard; that keeps the pieces from sticking together.
Reheating depends on the cookie. A soft cookie can go in a 300°F oven for 3 to 5 minutes or in the microwave for 8 to 10 seconds if you want it warm and bendy. Shortbread and biscotti are better refreshed in a low oven for a few minutes rather than microwaved, which can make them weirdly limp at the edges. No-bake cookies need no reheating at all, but they do need a solid set at room temperature before stacking.
For make-ahead baking, icebox dough and thumbprint dough are the easiest wins because they can chill overnight. Crinkle dough also benefits from a long chill. The richer cookies—blossoms, brownie cookies, cowboy cookies—taste fine the next day and sometimes better because the flavors settle a little. Banana and applesauce cookies, on the other hand, are best baked the same day you mix them.
Variations and Adaptations to Try
Gluten-Free Pantry Tin:
Use a dependable 1:1 gluten-free flour blend for the drop cookies that depend on wheat flour, and keep certified gluten-free oats on hand for the oat-based recipes. The texture changes a little, but the peanut butter, chocolate, and spice cookies still bake into familiar shapes. Biscotti and shortbread usually need the most testing, so start there only if you’re comfortable adjusting the dough.
Dairy-Free School Snack Batch:
Plant butter works well in most of the soft cookies, and the oil-based recipes like crinkle cookies and no-bake cocoa oats already skip the dairy issue almost entirely. Choose dairy-free chocolate chips, and the list suddenly gets a lot more flexible. Macaroons and banana-oat cookies also fit this lane without much fuss.
Egg-Free Emergency Fix:
Banana oat cookies, applesauce spice cookies, and some peanut butter cookies can tolerate flax eggs or extra fruit purée if you need a quick swap. The structure is softer, so they tend to bake more like snack cookies than perfect bakery rounds. I would skip the macaroons and biscotti if eggs are off the table; those recipes need them more than the others.
Lower-Sugar Snack Version:
The banana, applesauce, and oatmeal cookies can handle a modest sugar reduction because the fruit and oats still carry flavor. In richer cookies, cut the sugar by about 1/4 cup rather than more, or the texture starts to suffer. A smaller cookie also helps here; kids often care more about shape than volume.
Nut-Free Classroom Mix:
Sunflower seed butter can stand in for peanut butter in several recipes, and cereal-based cookies like cornflake crunch or chocolate chip biscotti are easy to keep nut-free if you skip the optional nuts. Read the labels on chocolate chips, pretzels, and cereal, because those are the sneaky places cross-contact tends to show up.
Common Mistakes to Avoid
- Scooping flour straight from the bag: The flour packs down and makes the dough dry, which is how cookies end up cakey or bland. Spoon it into the cup and level it off instead, especially for shortbread, chocolate chip, and sugar cookies.
- Baking every cookie until it looks fully done: A lot of these cookies finish on the hot tray. If you wait for hard centers, the chewy ones turn dry and the soft ones lose their best texture.
- Using stale leavening or old spices: Baking soda and baking powder don’t forgive age well, and tired cinnamon or ginger makes the whole cookie taste flat. If a cookie should puff or crack and doesn’t, stale leavening is one of the first things to check.
- Adding mix-ins too aggressively: Pretzels, cornflakes, Rice Krispies, and even chocolate chips can break down if you beat them in. Fold them gently at the end so the cookie still has contrast.
- Skipping the chill on sticky doughs: Crinkle cookies, snickerdoodles, thumbprints, and some chocolate chip doughs spread better when cold. If the cookies look thin or greasy, the dough probably needed a rest.
- Overloading the tray: Crowding cookies makes them steam instead of bake, and the edges don’t set properly. Give them room, even if that means baking one extra sheet.
Frequently Asked Questions
Which cookies in this collection are best for a lunchbox?
The sturdiest choices are chocolate chip, oatmeal raisin, peanut butter oatmeal, snickerdoodles, and M&M cookies. They hold their shape, travel well, and don’t need refrigeration once baked and cooled.
Can I freeze the dough instead of baking everything right away?
Yes. Dough balls for chocolate chip, peanut butter blossoms, snickerdoodles, cowboy cookies, and oatmeal cookies freeze especially well for about 2 months. Bake from frozen with an extra 1 to 3 minutes in the oven, depending on size.
What if I only have salted butter?
Use it. Just cut back the added salt by a small amount in the recipe, especially in shortbread, sugar cookies, and chocolate chip cookies. The flavor usually turns out fine, and in some cookies the extra salt actually helps.
How do I keep cookies from spreading too much?
Start with butter that’s soft, not greasy, and chill the dough if the kitchen is warm. Too much flour, too little flour, or a hot baking sheet can also throw off the shape, so let the sheet cool between batches.
Can I make these without a mixer?
Many of them, yes. No-bake cookies, shortbread, oatmeal cookies, banana oat cookies, and thumbprints can all be mixed by hand. The dough just takes a little more time and a firmer spoon.
Which cookies are the easiest for kids to help make?
Banana oat cookies, no-bake cocoa oats, chocolate chip cookies, and sugar cookie icebox slices are the most forgiving. Kids can mash, stir, roll, or sprinkle without needing perfect technique, and the results still look good.
What if my peanut butter is natural and oily?
Stir it thoroughly before measuring, and expect the dough to be looser. It works best in cookies with oats or banana, where the texture has enough support already. For blossoms and sugarier peanut butter cookies, shelf-stable creamy peanut butter gives a more reliable result.
How do I revive cookies that went stale?
Warm soft cookies for 5 to 8 seconds in the microwave or a few minutes in a low oven to wake them up. Crisp cookies like shortbread and biscotti can be refreshed in a 300°F oven for 3 to 5 minutes, then cooled again before serving.
A Tin Full of Easy Cookies
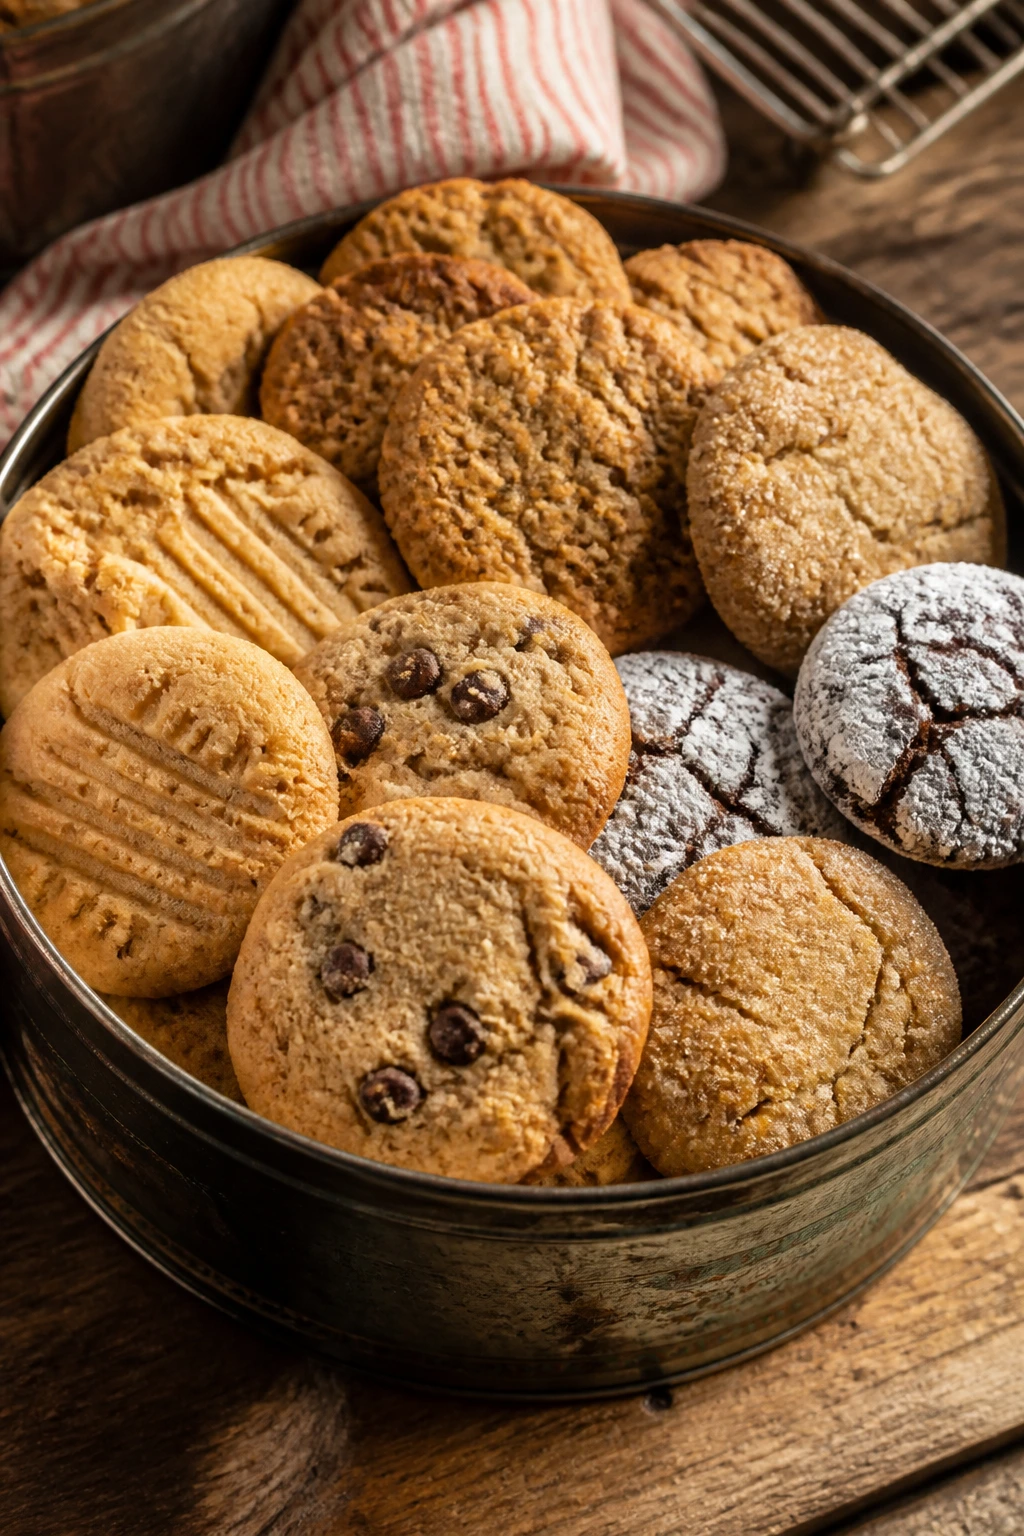
The nicest thing about a cookie collection like this is that it keeps ordinary ingredients from feeling ordinary. A jar of jam, a half bag of oats, a box of cereal near the back of the shelf—those things stop being leftovers and start becoming dessert. That’s a useful shift, and it happens without much ceremony.
I’d keep a few of these in regular rotation rather than trying to memorize all twenty-two at once. Pick one chewy cookie, one crisp cookie, one no-bake cookie, and one that uses fruit. That’s enough to cover most baking moods and most kid requests, which is usually the real test anyway.