
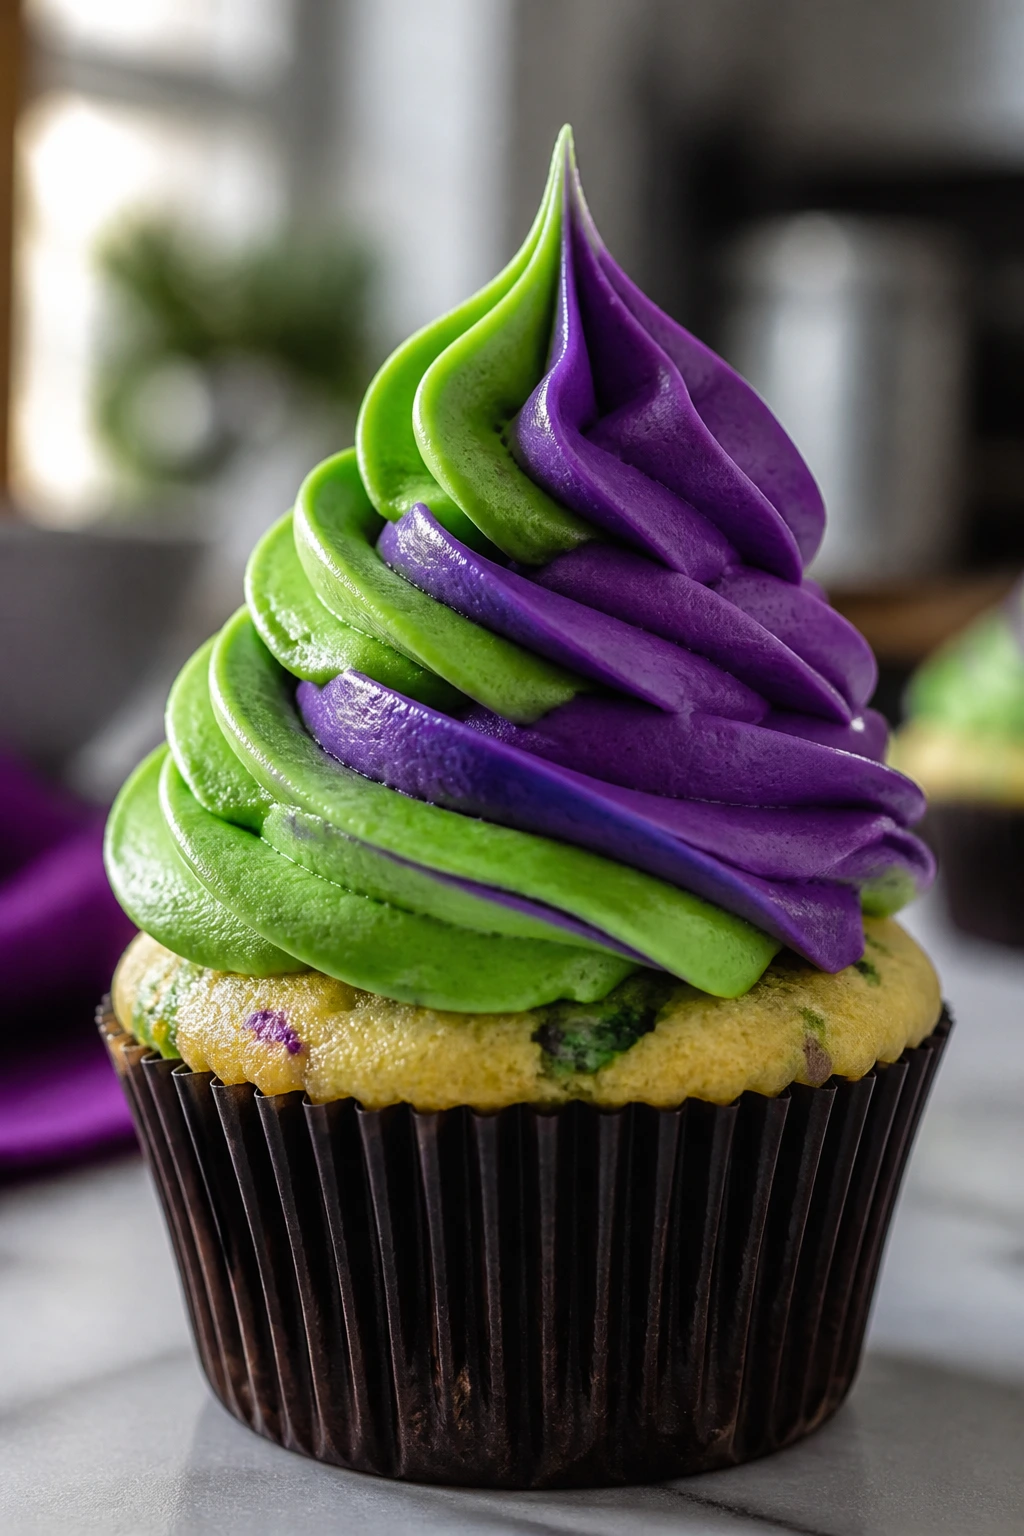
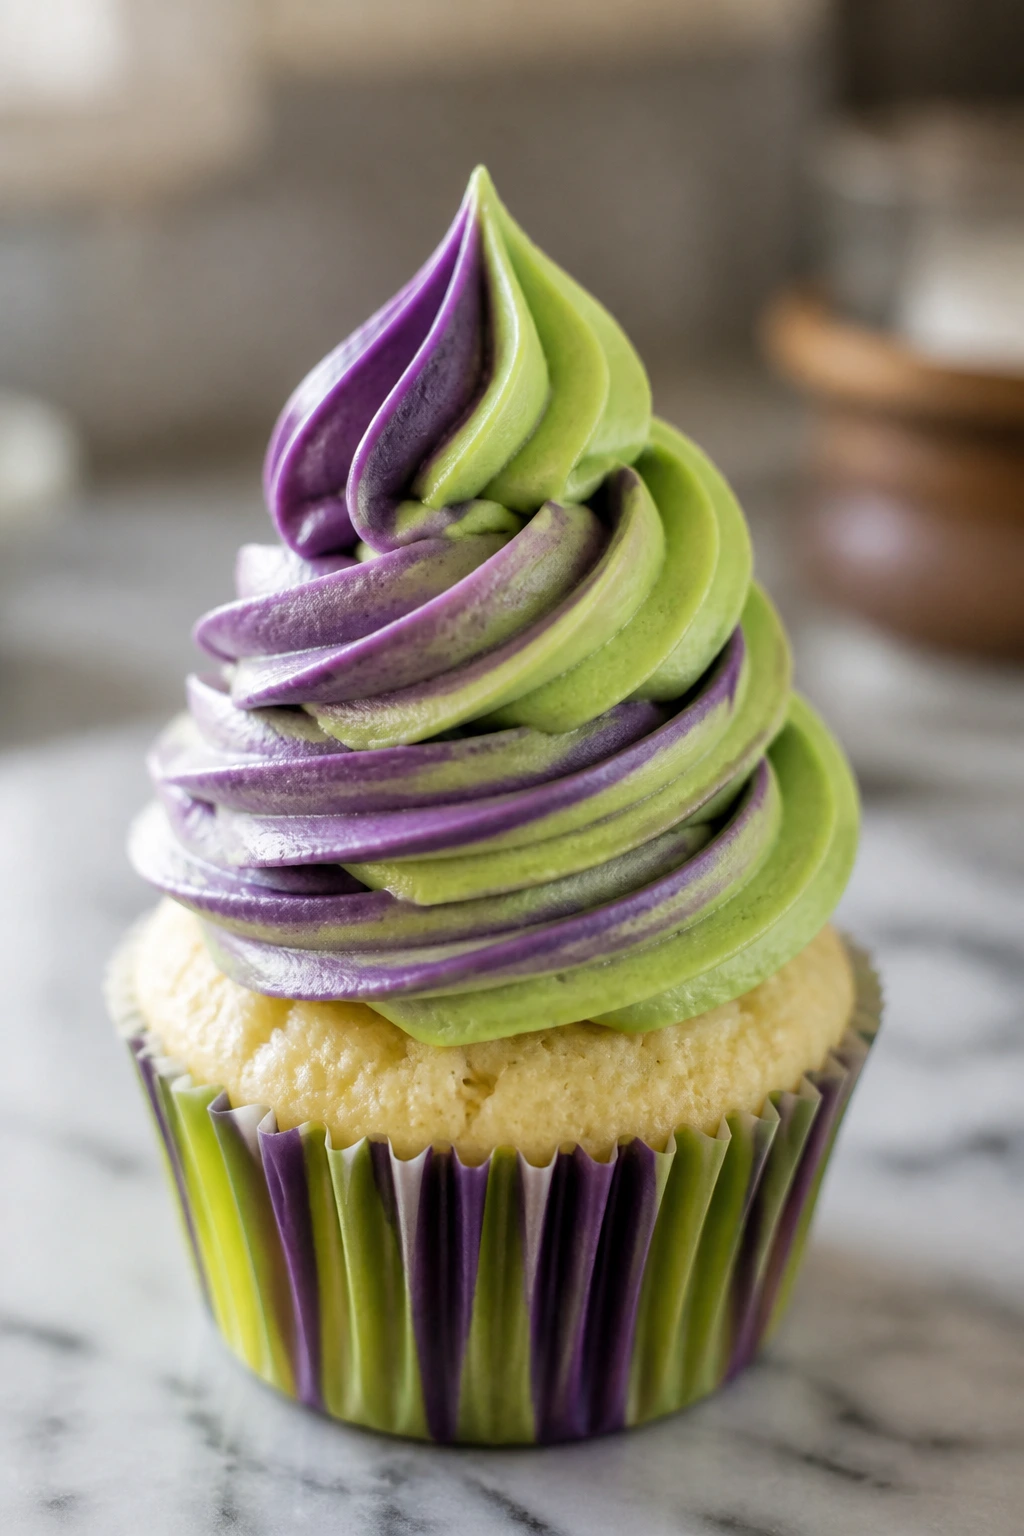
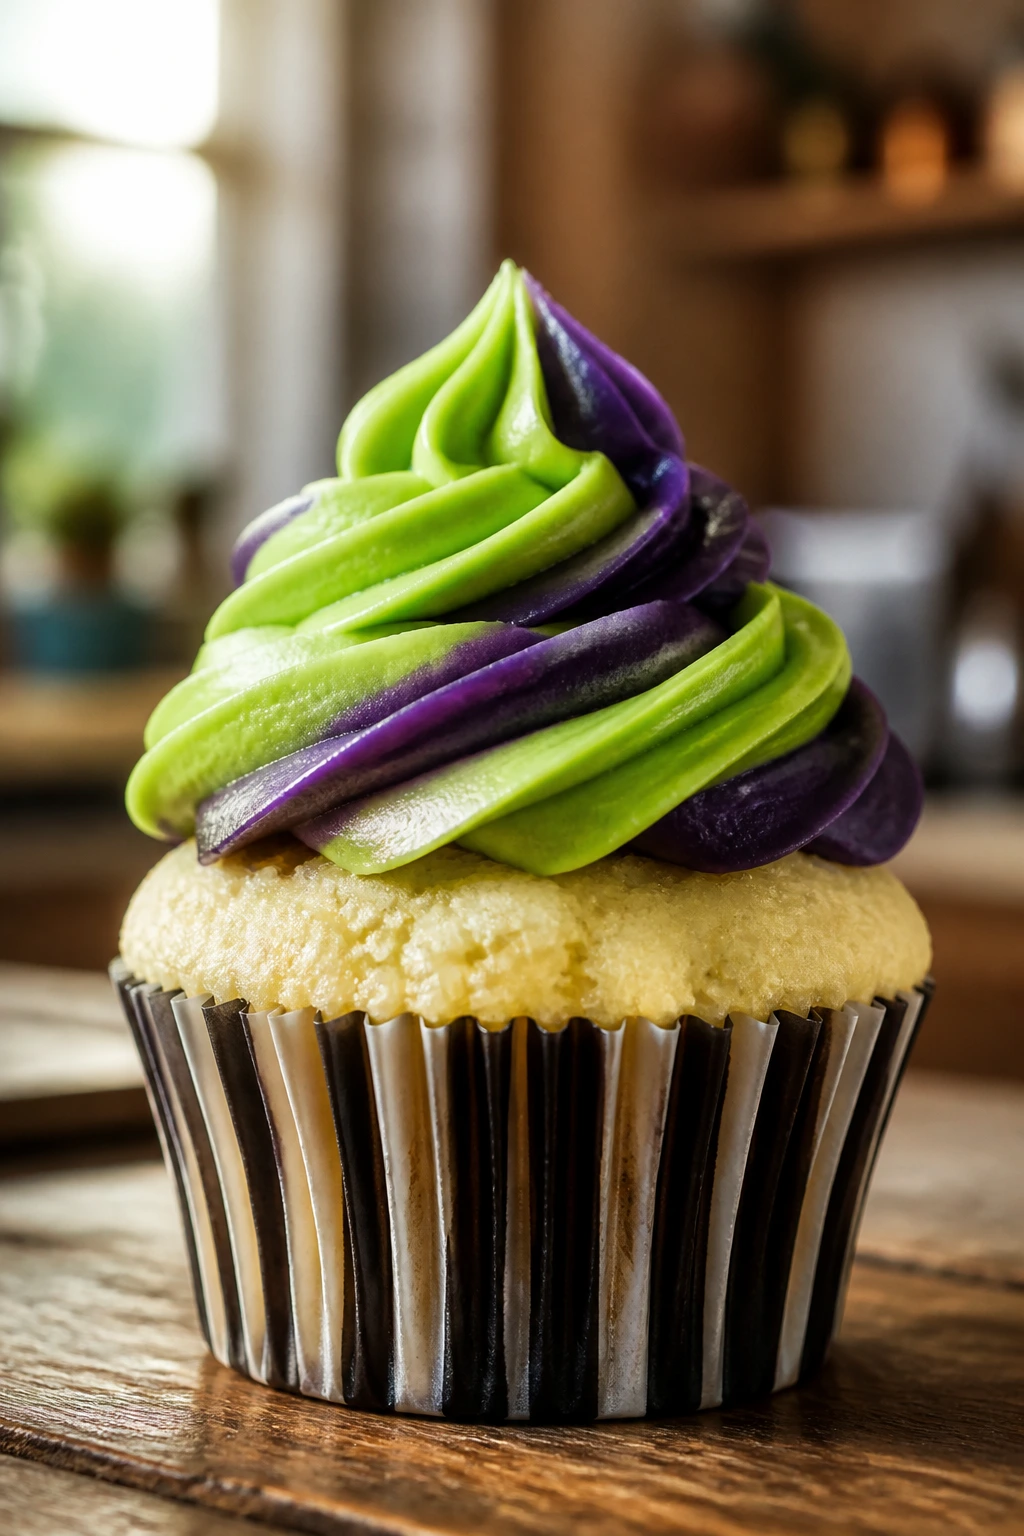
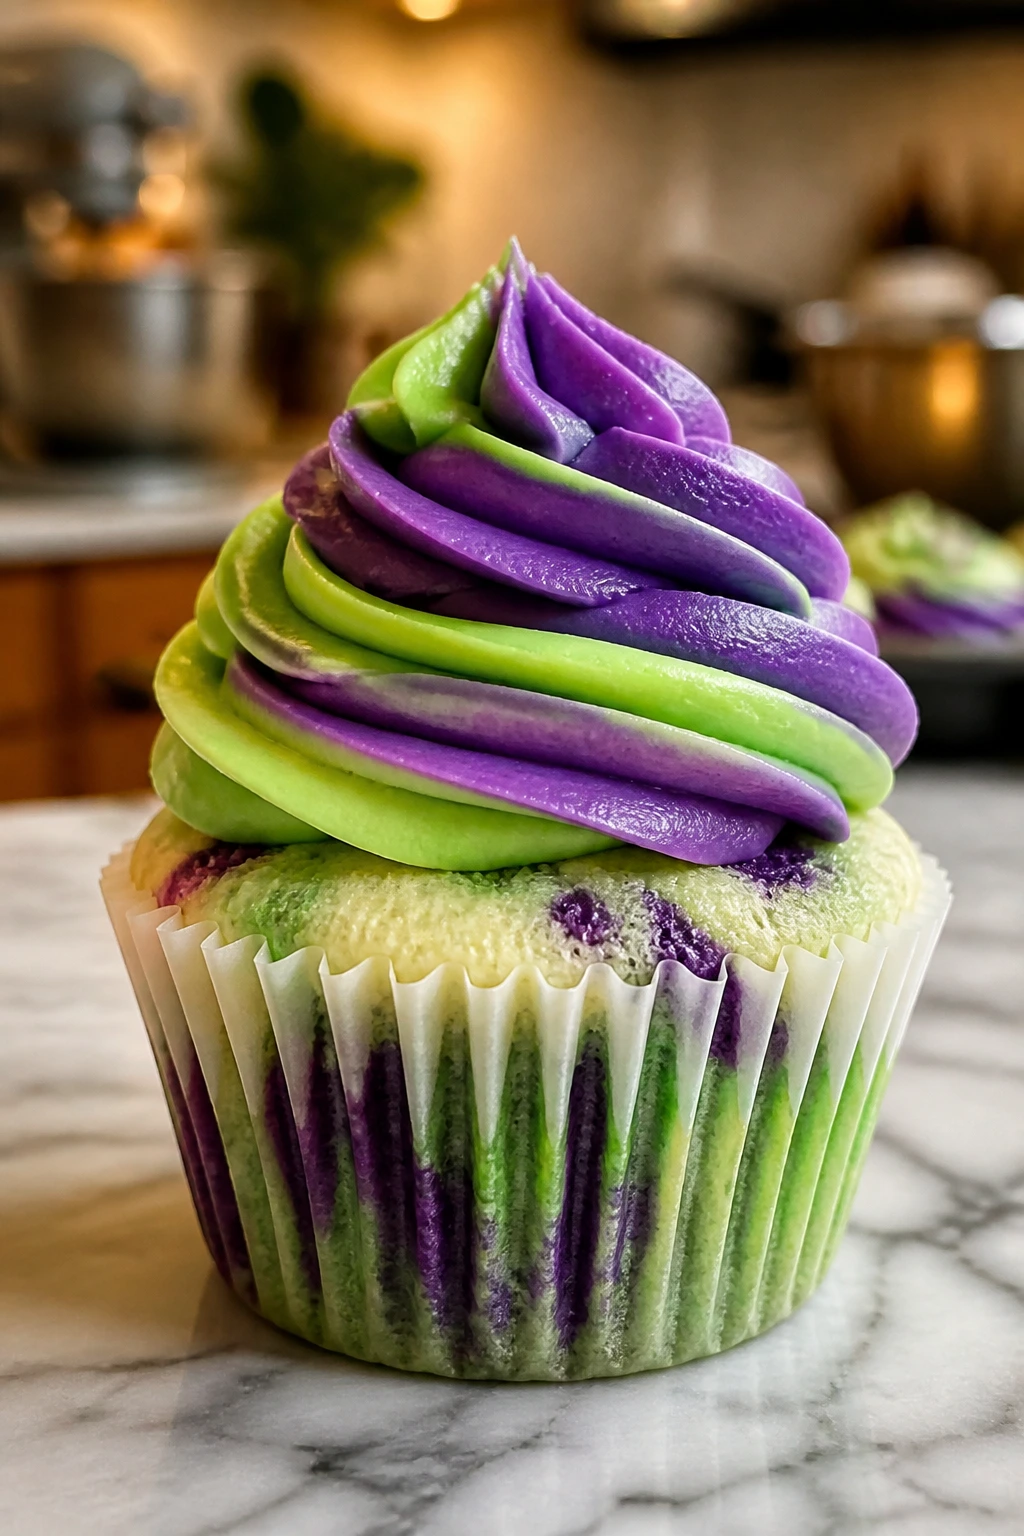
The best Beetlejuice cupcakes do not look polite. They should have a soft dome, a pale vanilla crumb, and a frosting swirl that looks like it got dressed in green and purple on purpose. Fluffy Beetlejuice cupcakes with cream cheese frosting work because the cake stays tender enough to cut with a fork, while the tang of the frosting keeps the sugar from turning cloying.
A lot of themed cupcakes get one thing right and the rest wrong. They either look theatrical and taste bland, or they taste rich and collapse under the frosting. The trick here is old-fashioned cupcake structure: butter and sugar creamed until pale, a little sour cream for moisture, buttermilk for lift, and a careful bake that stops the moment the tops spring back.
The Beetlejuice part should feel playful, not fussy. Green and purple gel color, a few black crumbs or sprinkles, and a piping swirl tall enough to stand up on the tray are enough. No one needs a sugar sculpture here. What you want is a cupcake that disappears fast and still looks a little mischievous while it does it.
Why These Fluffy Beetlejuice Cupcakes Earn Their Spot on the Tray
-
Soft crumb, not dense cake: The sour cream and buttermilk keep the inside plush and fine, so the cupcakes stay tender even after chilling.
-
Tangy frosting balances the sugar: Cream cheese frosting has enough bite to handle the sweet batter and the bright Beetlejuice colors without tasting flat.
-
The decoration is dramatic without being tricky: Gel coloring gives you strong green and purple shades without thinning the frosting into soup.
-
They bake in a standard muffin tin: No special pans, no weird equipment, and no carving or stacking.
-
The texture holds up overnight: The crumb stays moist, and the frosting settles into itself in a way that makes the cupcakes taste even better the next day.
-
They fit a party table without needing a second dessert: One cupcake looks finished on its own, which matters when you’re juggling a dozen other snacks.
What You’re Baking and How Long It Takes
Yield: 12 standard cupcakes
Prep Time: 25 minutes
Cook Time: 18 to 20 minutes
Total Time: 45 minutes active, about 1 hour 15 minutes including cooling
Chill/Rest Time: 30 to 45 minutes for complete cooling before frosting; 10 to 15 minutes of chilling for the frosting if you want sharper piping
Difficulty: Beginner — the method is straightforward, but the frosting color work rewards a steady hand and a little patience.
Best Served: Slightly cool or at cool room temperature, when the frosting keeps its shape and the crumb still feels soft.
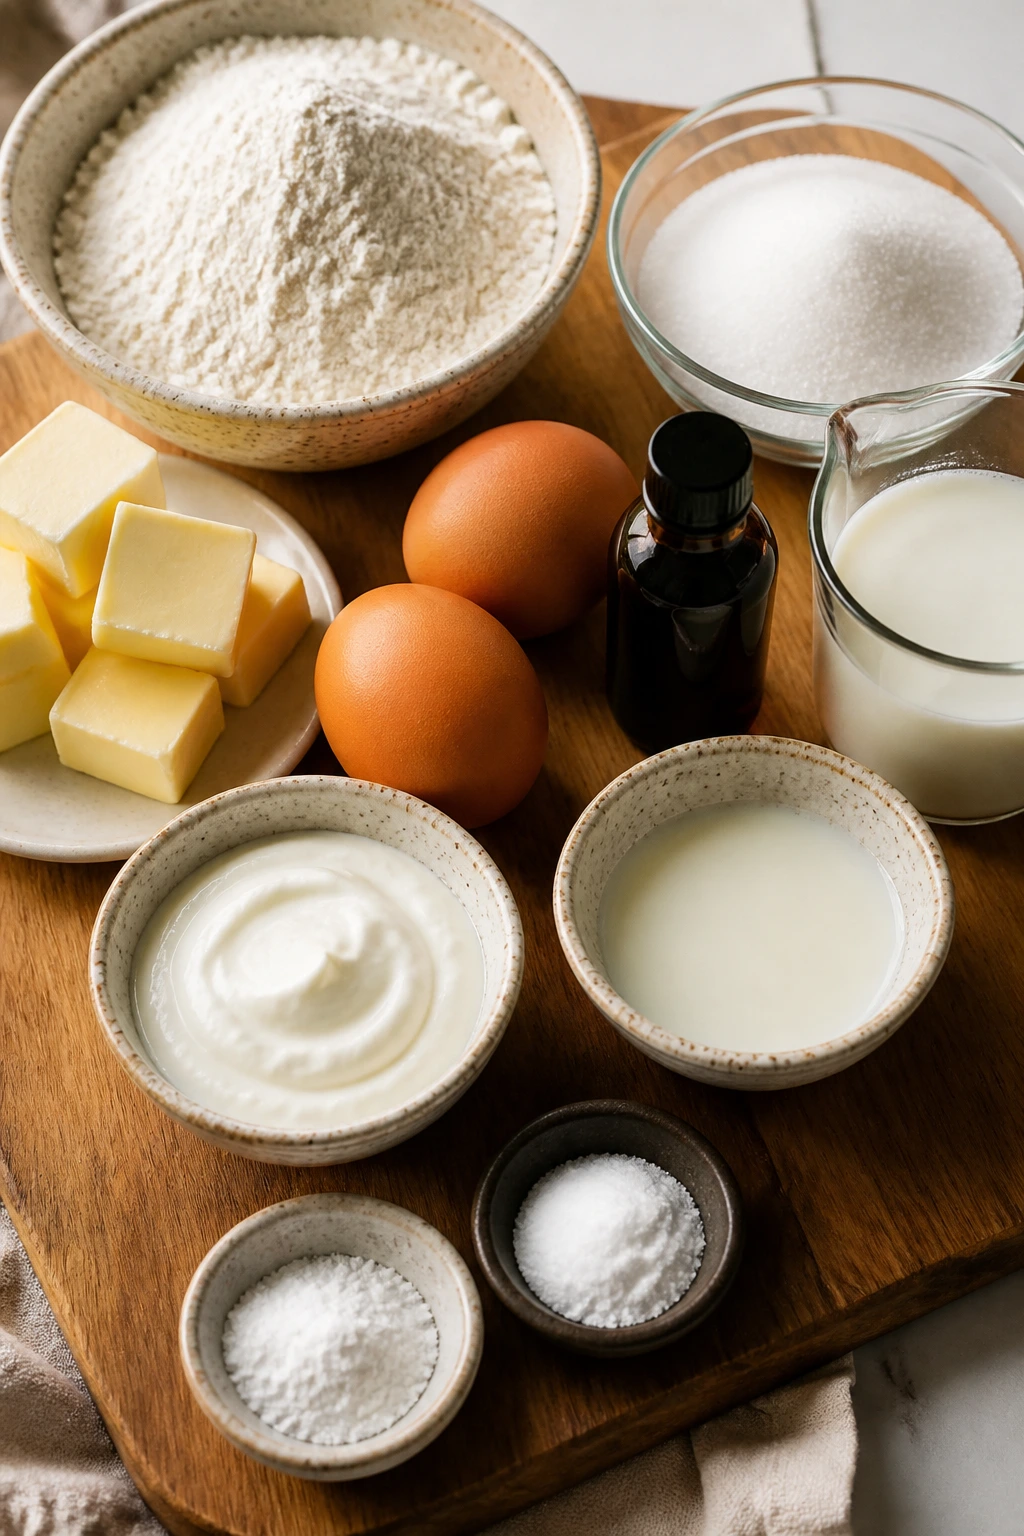
The Ingredients That Keep the Crumb Soft
For the Cupcakes:
- 1 1/2 cups (180 g) all-purpose flour
- 1 1/2 teaspoons baking powder
- 1/4 teaspoon baking soda
- 1/2 teaspoon fine salt
- 1/2 cup (113 g) unsalted butter, softened to room temperature
- 3/4 cup (150 g) granulated sugar
- 2 large eggs, room temperature
- 1 teaspoon vanilla extract
- 1/2 cup (120 g) sour cream, room temperature
- 1/2 cup (120 ml) buttermilk, room temperature
For the Cream Cheese Frosting:
- 8 oz (226 g) brick-style cream cheese, softened but still cool
- 1/2 cup (113 g) unsalted butter, softened
- 3 1/2 to 4 cups (420 to 480 g) powdered sugar, sifted
- 1 teaspoon vanilla extract
- Pinch of fine salt
- 1 tablespoon heavy cream, plus 1 to 2 teaspoons more if needed
For the Beetlejuice Finish:
- 1 to 2 teaspoons green gel food coloring
- 1 to 2 teaspoons purple gel food coloring
- 1/4 cup black sanding sugar or crushed chocolate sandwich cookies, for topping
That’s the whole list. Short on paper. Not short on purpose.
Why the Cupcake Batter Stays Plush
The Cupcake Base
The cupcake batter relies on a familiar formula, but the proportions matter more than the buzzwords do. What to use: 1 1/2 cups flour, baking powder, baking soda, salt, butter, sugar, eggs, vanilla, sour cream, and buttermilk. That mix gives you enough structure to rise and enough fat and acid to keep the crumb soft instead of bready.
Preparation: Let the butter, eggs, sour cream, and buttermilk sit out until they lose the fridge chill. Cold dairy makes the batter look broken for longer and makes it harder to mix evenly. Room-temperature ingredients turn into a smoother emulsion, which means a finer crumb in the oven.
Substitutions: If you do not have buttermilk, use 1/2 cup whole milk mixed with 1 1/2 teaspoons lemon juice or white vinegar; let it sit for 5 minutes before using. Greek yogurt can stand in for sour cream at the same amount, though the cupcakes will taste a little tangier.
Tips: Butter does not need to be oily-soft. It should give slightly when pressed, not slump. If it gets too warm, the batter can turn greasy and the baked tops may spread instead of doming.
Why the Acid and Fat Both Matter
The sour cream and buttermilk do two different jobs, and I would not cut either one unless you have to. The sour cream adds body and a little richness, while the buttermilk loosens the batter enough to keep the crumb tender. Together, they make the cupcake feel soft even after a night in the fridge.
The baking soda and baking powder also work as a pair. Baking soda wakes up the acid from the buttermilk and sour cream, while baking powder gives the batter its extra lift in the oven. That’s the small thing people miss when they try to strip a cupcake down to “just flour, sugar, and eggs.” It needs the whole little machine.
The Vanilla That Keeps It from Tasting Flat
What to use: 1 teaspoon vanilla extract, or a little more if yours is strong and dark. You want the cupcake to taste like a real bakery vanilla base, not like frosting delivery vehicles.
Preparation: Stir the vanilla into the wet ingredients so it disperses before the flour goes in. That helps the batter smell even and warm instead of patchy.
Substitutions: Vanilla bean paste works beautifully if you want flecks in the crumb. Almond extract is too loud here unless you keep it to a few drops.
Tips: If the batter smells sweet but vague before baking, it usually needs a touch more vanilla, not more sugar. Sugar makes cupcakes heavier; vanilla makes them read as finished.
Why the Frosting Holds a Tall Swirl
The Cream Cheese Frosting
The frosting is where this dessert gets its shape. What to use: 8 oz brick-style cream cheese, 1/2 cup butter, 3 1/2 to 4 cups powdered sugar, vanilla, salt, and just enough heavy cream to make the piping smooth. Brick cream cheese matters. The tub stuff is softer and often waterier, and it behaves like a different ingredient when you beat it.
Preparation: Soften the butter until it bends cleanly under your finger, but keep the cream cheese only slightly cool. That small temperature gap helps the frosting whip up thick without turning greasy. If both ingredients are too warm, the frosting will slump the second you tint it.
Substitutions: Mascarpone can replace part of the cream cheese if you want a softer tang, though it tastes richer and less sharp. For a dairy-free version, use a firm vegan cream cheese and a plant-based butter that comes in sticks, not a tub.
Tips: Add the powdered sugar in stages. Dumping all of it at once sends a powder cloud across the kitchen and makes the frosting harder to smooth. Also, taste before adding more sugar. Sometimes a pinch of salt does more than another half-cup of sweetness.
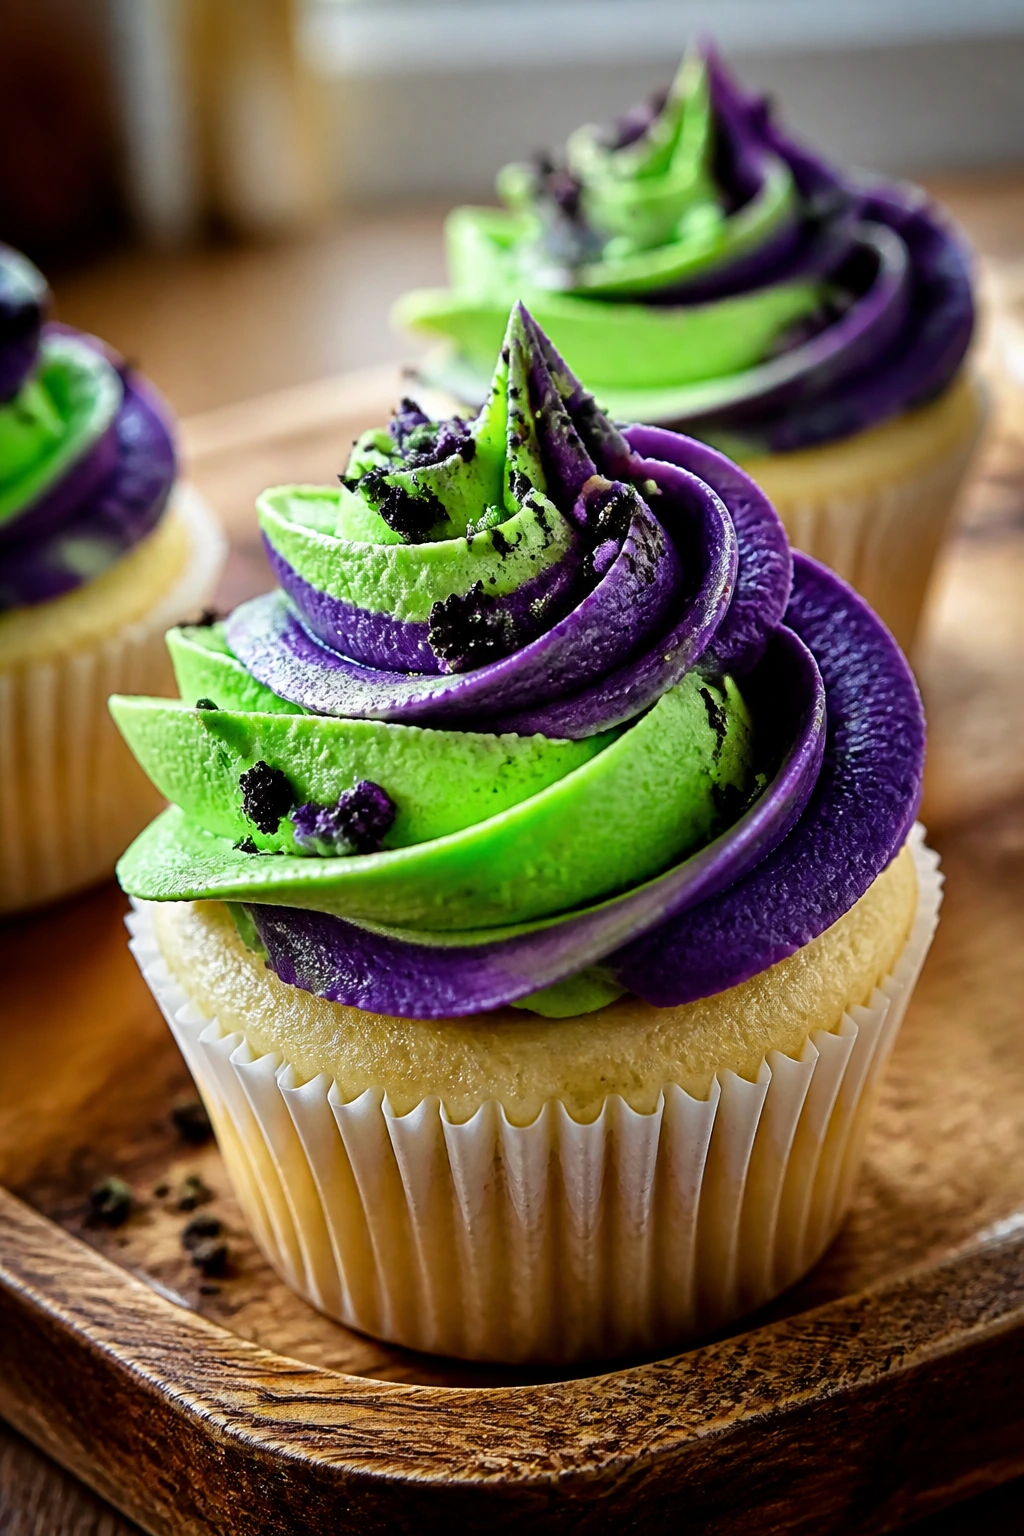
The Green-and-Purple Finish
The Beetlejuice look depends on color that stays bright. Gel food coloring is the move here because it gives strong color without thinning the frosting. Liquid coloring can work in a pinch, but it tends to push cream cheese frosting into a soft, muddy state.
What to use: green gel, purple gel, and either black sanding sugar or cookie crumbs for the finish. The coloring should be bold enough to show against the white base without needing a lot of product.
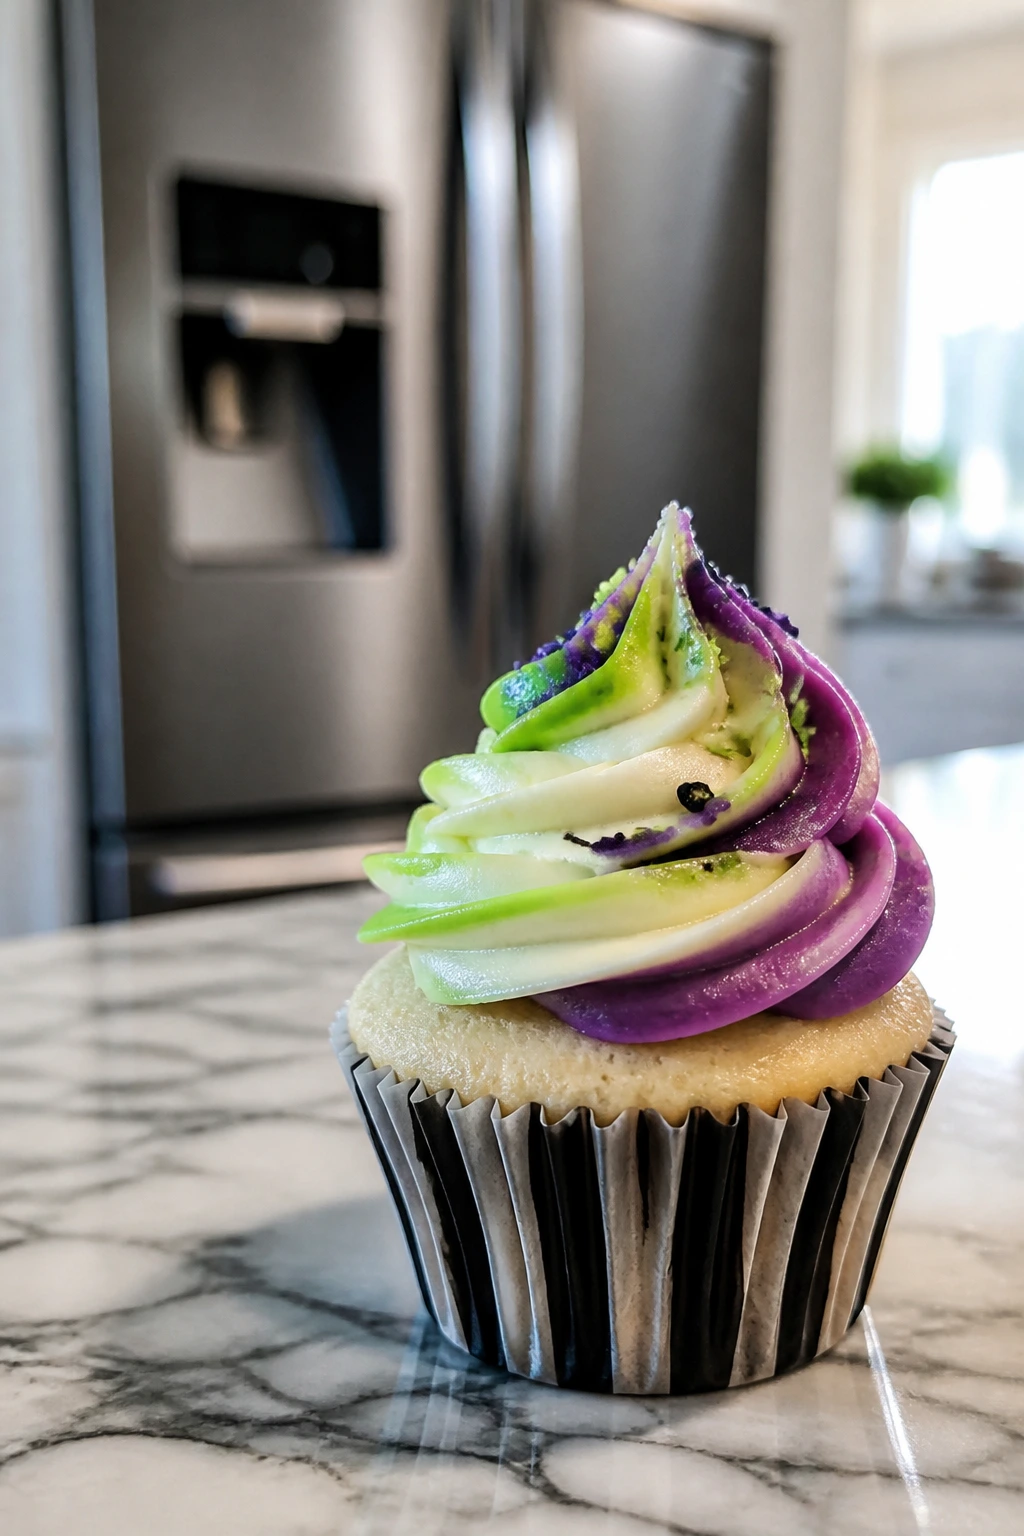
Preparation: Divide the frosting into two or three bowls before coloring. That keeps the colors clean. If you stir green into purple into white all in one bowl, you get swampy beige. And nobody wants swampy beige in a Beetlejuice dessert.
Substitutions: Crushed chocolate sandwich cookies give you a darker, more textured top. Black sanding sugar looks cleaner and sharper, especially if you want a glossy, theatrical finish.
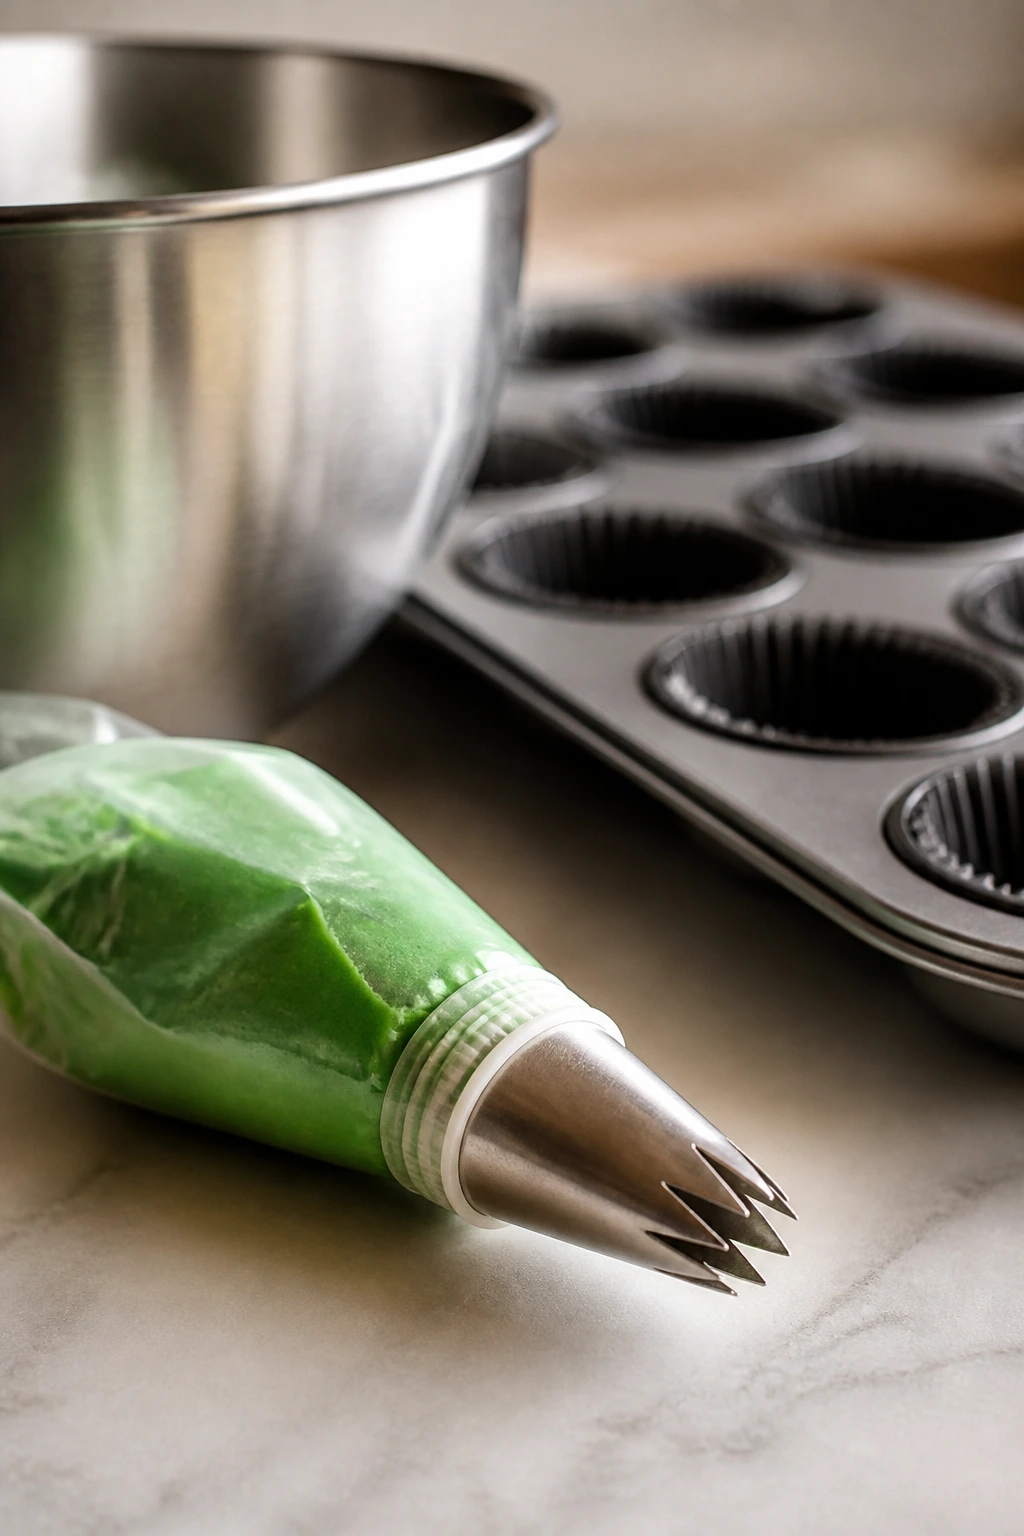
Tips: If you plan to pipe stripes of different colors into one bag, chill the tinted frostings for 10 minutes first. Slightly firm frosting pipes into separate bands instead of bleeding together at the tip.
The Mixing Bowl, Muffin Tin, and Piping Tools
-
12-cup standard muffin tin: A metal pan bakes these evenly and gives the cupcakes a neat rise. Dark pans brown a little faster, so check a minute early.
-
Paper cupcake liners: Beetlejuice colors look sharper in black or striped liners, but plain white works if that’s what you have.
-
Two mixing bowls: One for dry ingredients and one large bowl for the batter keeps the process tidy and prevents flour streaks from hiding in corners.
-
Hand mixer or stand mixer: The butter-and-sugar step needs enough power to trap air. A whisk can do it, but your arm will complain.
-
Rubber spatula: Scrape the bowl all the way down. Butter likes to cling to the sides and sit there smugly.
-
Ice cream scoop or 1/4-cup measure: This makes the batter portion even so the cupcakes bake at the same rate.
-
Wire rack: The bottoms need airflow after baking, or steam collects and softens the liners.
-
Piping bag and large star tip: A large open star or French tip gives the frosting the tall swirls that fit the theme.
-
Small bowls for tinting: Keep each color separate until you’re ready to pipe.
Mixing the Batter Without Beating It Flat
The batter is where people get impatient. That’s usually the mistake.
Prep the Pan and Oven:
-
Preheat the oven to 350°F (175°C) and position a rack in the center. Line a 12-cup muffin tin with paper liners.
-
Set out the butter, eggs, sour cream, and buttermilk if you haven’t already. Room-temperature ingredients blend faster and keep the batter from looking broken.
Build the Dry Mix: 3. In a medium bowl, whisk together the flour, baking powder, baking soda, and salt for about 20 seconds. The point is not ceremony; it’s even distribution.
- Keep whisking until you no longer see streaks of baking powder along the sides of the bowl. Little white pockets there can leave bitter spots in the baked cupcakes.
Cream the Butter and Sugar: 5. In a large bowl, beat the butter and granulated sugar on medium speed for 2 to 3 minutes. The mixture should turn lighter in color and look fluffy around the edges. Do not stop while it still looks grainy and heavy.
- Beat in the eggs one at a time, mixing for about 20 seconds after each addition. Scrape down the bowl once or twice. Add the vanilla and mix for another few seconds.
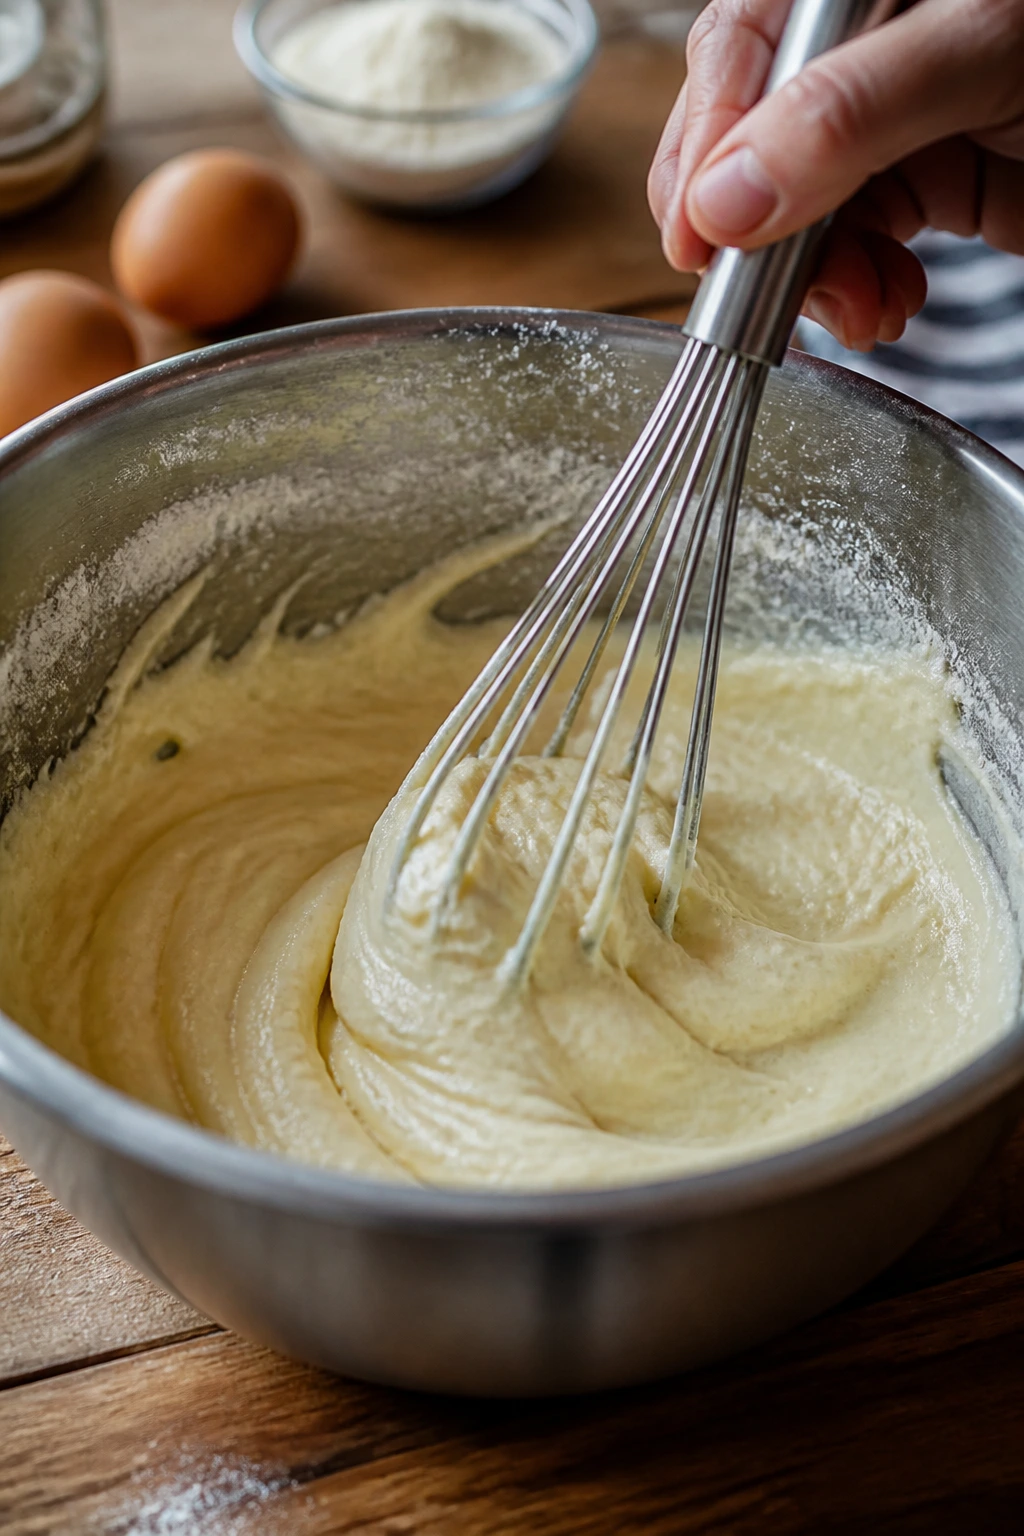
Finish the Batter: 7. Add the sour cream and beat on low speed until the batter looks smooth and thick. A few tiny streaks are fine.
-
Add the dry ingredients in two additions, alternating with the buttermilk in two additions, beginning and ending with the flour mixture. Mix on low speed only until the flour disappears. Stop the mixer the second the streaks are gone — overmixing tightens the crumb and makes the cupcakes tough.
-
Give the bowl one last scrape with a spatula and fold the batter by hand a few times. That catches the flour hiding at the bottom without knocking out the air you just worked in.
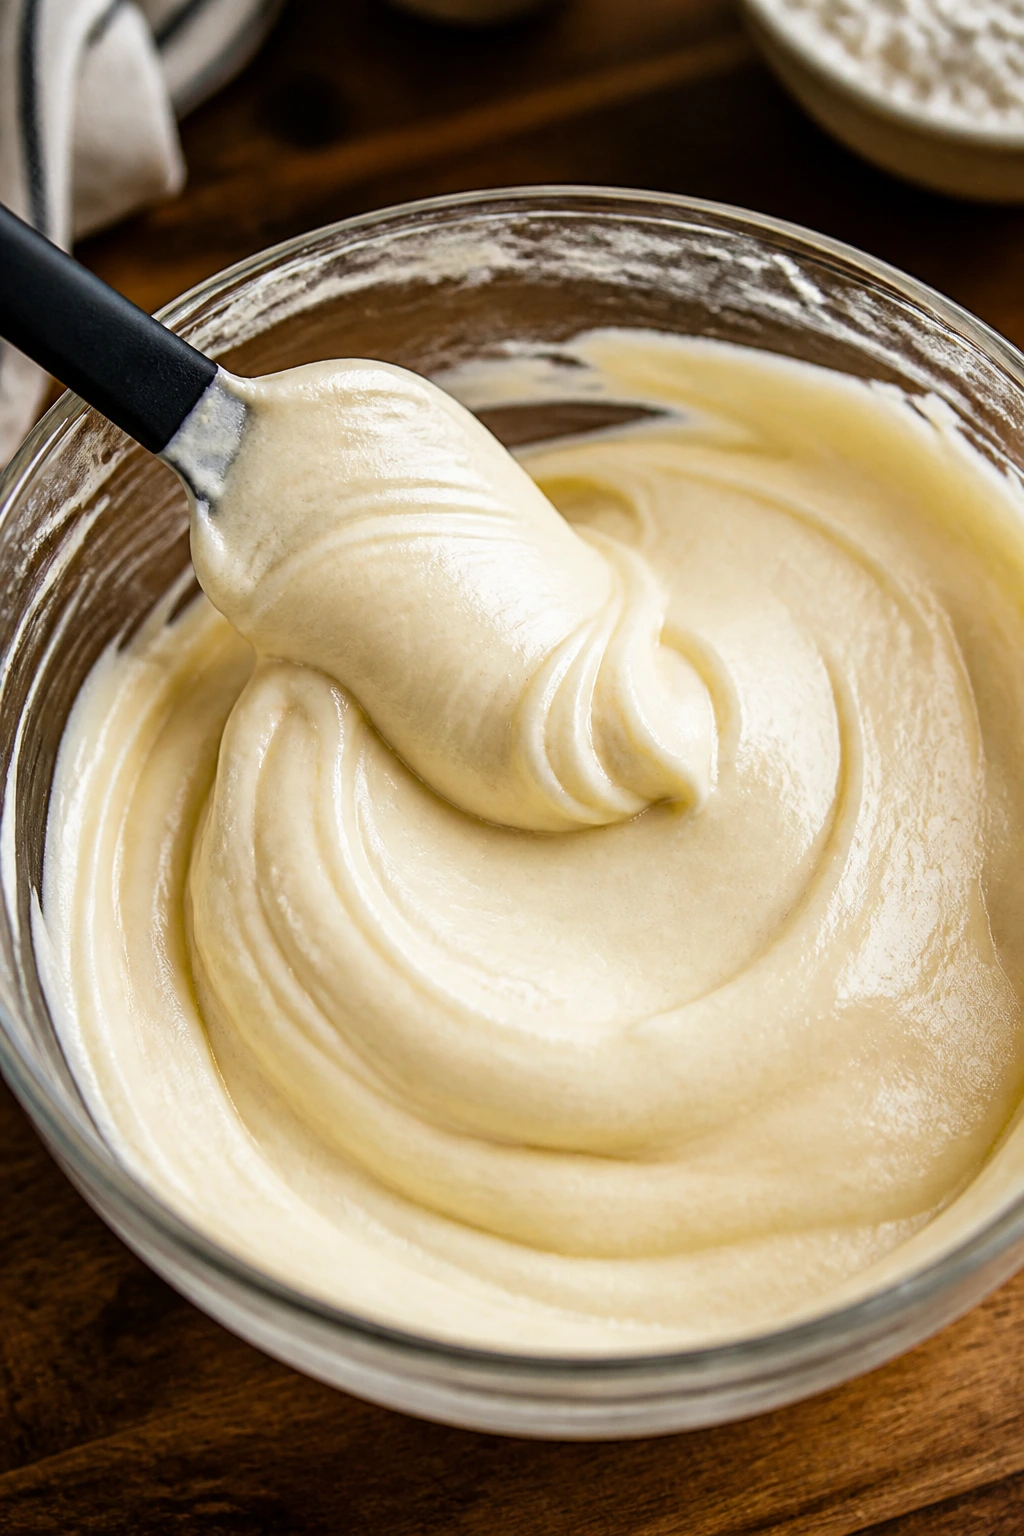
A good cupcake batter should look satiny and scoopable, not runny. If it pours like cake batter for a loaf pan, you’ve added too much liquid or overmixed it into slackness. It should hold its shape for a second when dropped from the scoop.
Baking Until the Tops Spring Back
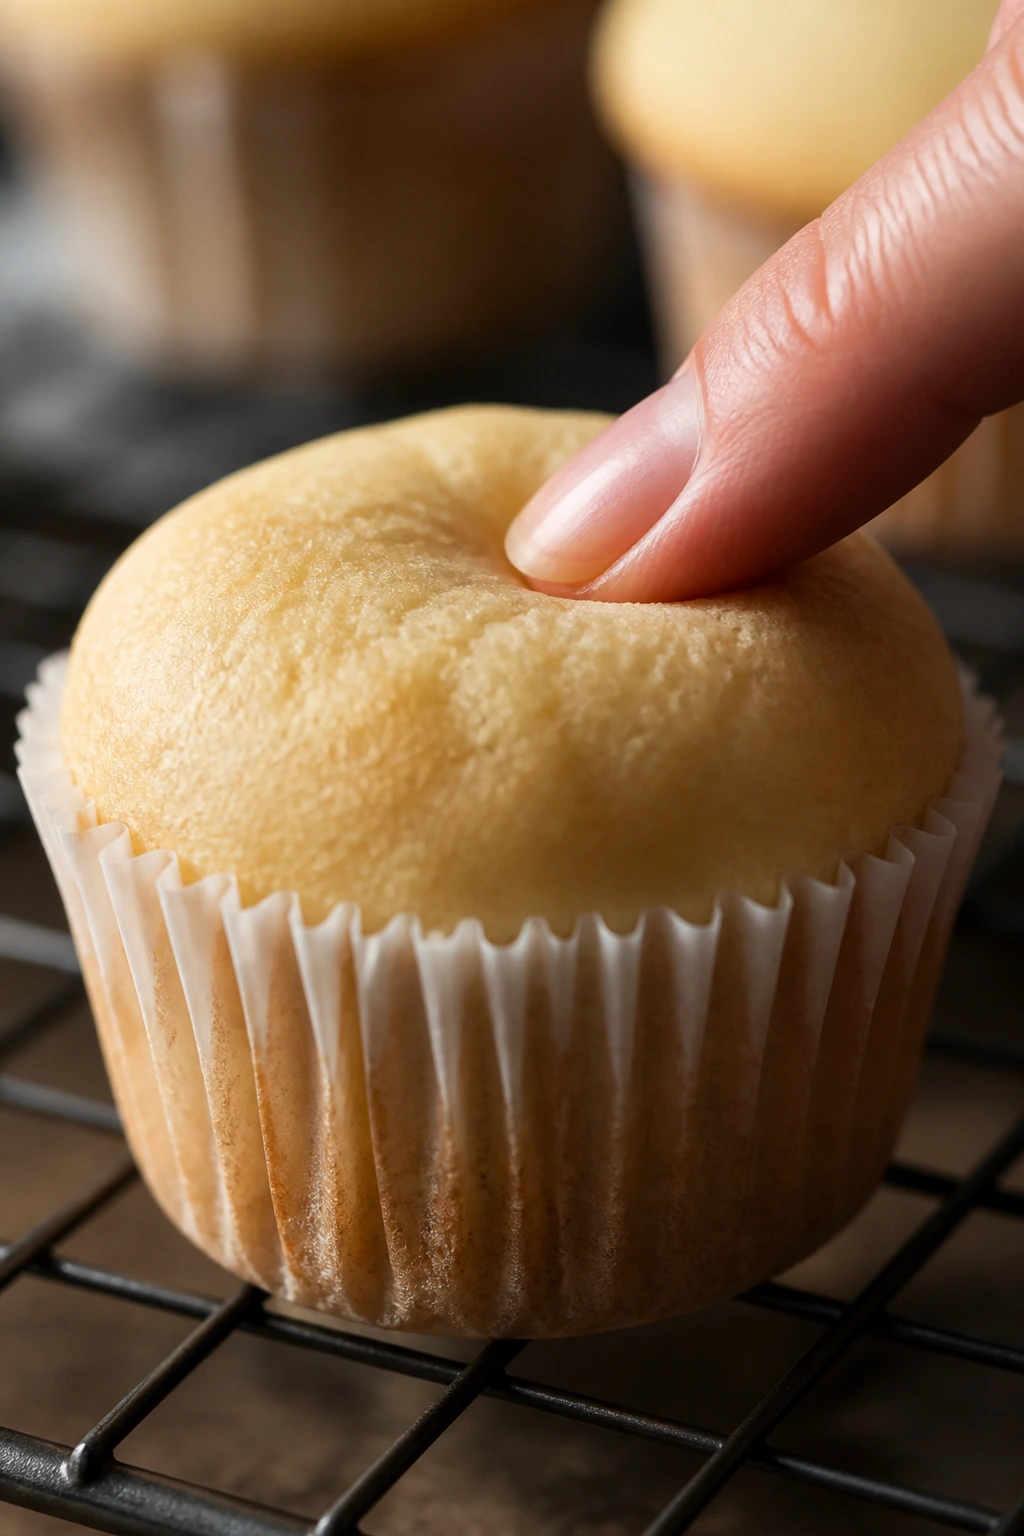
There’s a narrow window where these cupcakes are done and still soft. Miss it, and you get dry edges. Pull them too soon, and the centers sink.
Fill and Bake: 10. Divide the batter evenly among the lined cups, filling each about two-thirds full. A scoop makes this easy and keeps the tops even. If one cup gets a little more batter than the others, it will dome more aggressively and steal the show.
-
Bake for 18 to 20 minutes, rotating the pan once at the 10-minute mark if your oven has a hot back corner. The cupcakes are done when the tops spring back after a light press and a toothpick inserted in the center comes out with a few moist crumbs, not wet batter. Do not wait for the tops to look dry all the way across — that usually means they’ve already gone past tender.
-
Let the cupcakes rest in the pan for 5 minutes, then move them to a wire rack. Cool completely, about 30 to 45 minutes, before frosting. If the cupcakes are even slightly warm, the frosting will slide and the colors will smear.
If your oven runs cool, the cupcakes may need another minute or two. If it runs hot, the tops can brown before the centers finish setting, and that’s when you see the dreaded sticky middle under a good-looking top. Trust the spring-back test more than the color.
Whipping the Frosting Into Tall, Tangy Swirls
Cream cheese frosting sounds simple until it turns loose and glossy and refuses to pipe. The fix is a cooler base and a little restraint.
Make the Base Frosting: 13. In a large bowl, beat the cream cheese and butter on medium speed for about 2 minutes, until smooth and no lumps remain. The mixture should look silky, not shiny and loose.
- Add the powdered sugar in 1-cup additions, mixing on low speed after each addition so the sugar doesn’t fly out of the bowl. Beat in the vanilla, salt, and 1 tablespoon of heavy cream. If the frosting feels stiff and crumbly, add 1 to 2 teaspoons more cream. If it feels loose now, it will not pipe well later.
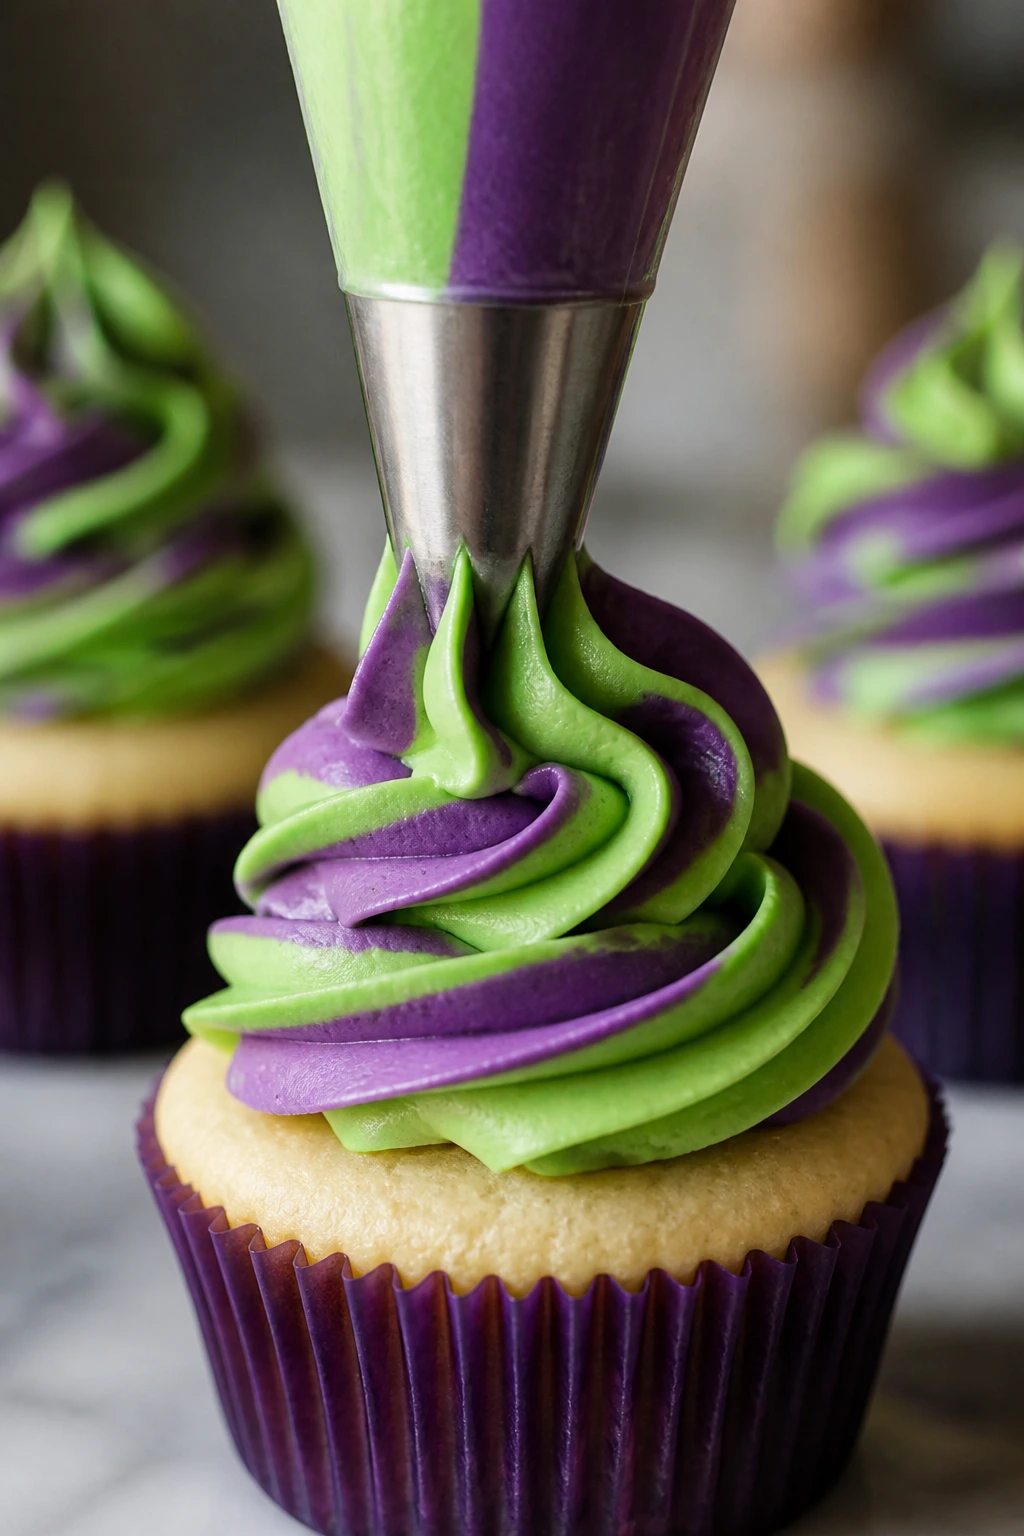
Tint and Shape the Beetlejuice Look: 15. Divide the frosting into two bowls. Tint one bowl green and the other purple with gel food coloring, stirring slowly so you do not add too much air. If you want a white stripe in the swirl, reserve a small third portion uncolored.
-
Spoon the colors into a piping bag side by side for a marbled look, or load each color into a separate corner of the bag if you want more defined stripes. A little black sanding sugar or cookie crumb topping can go on top after piping, while the frosting is still soft enough to catch it.
-
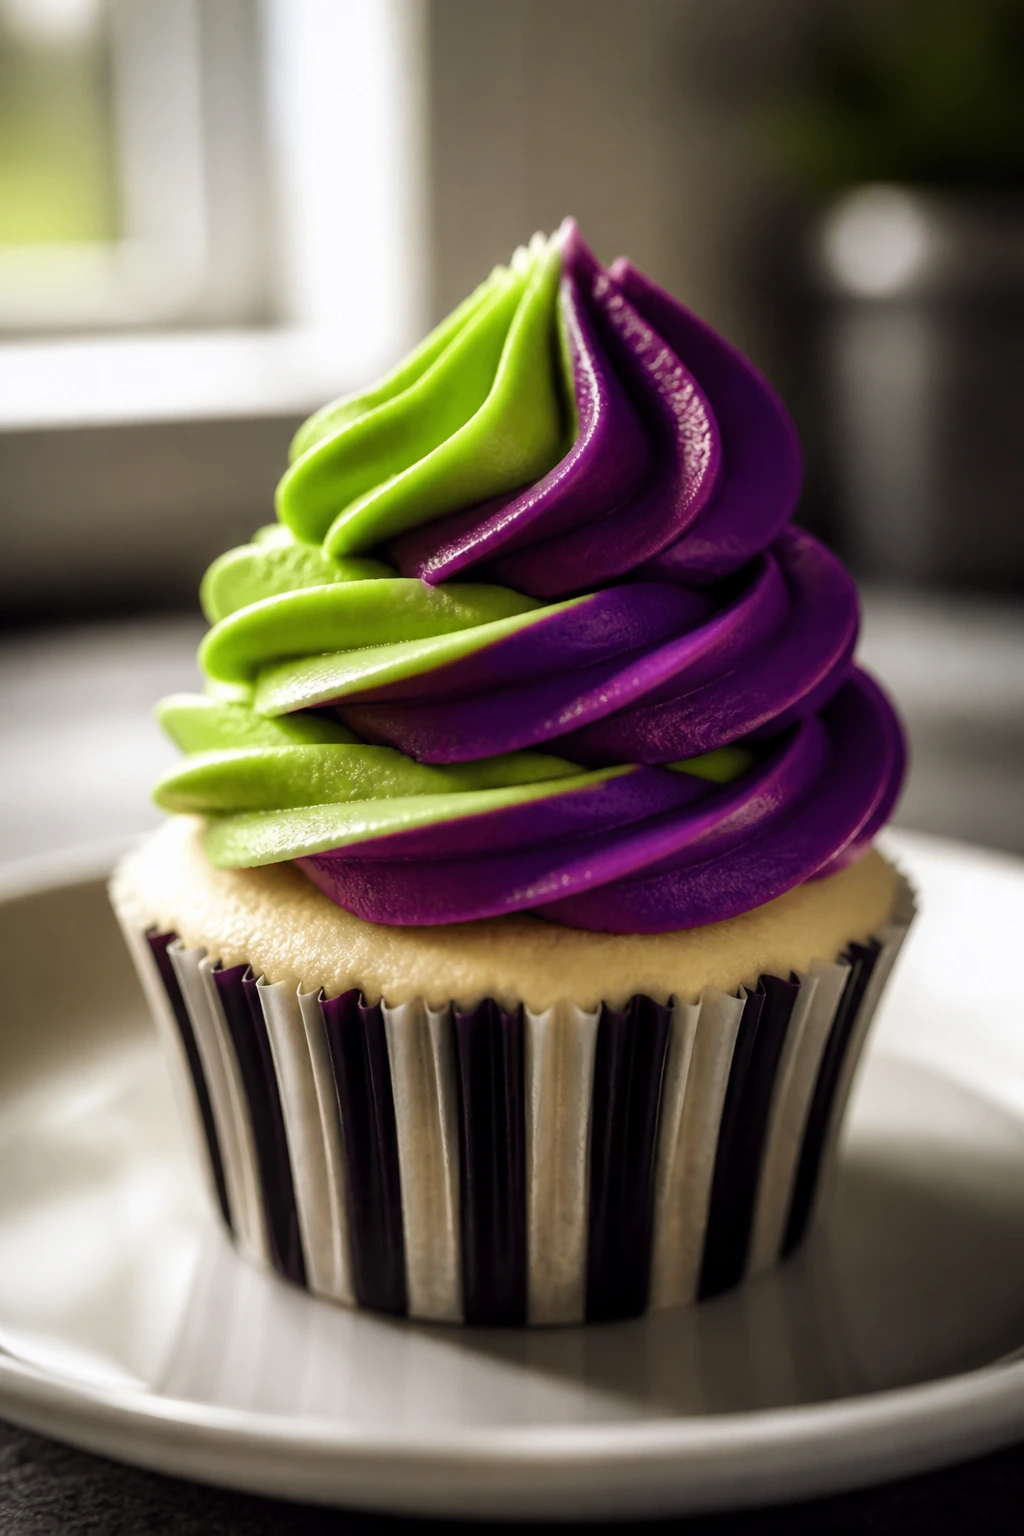
Pipe tall swirls onto the cooled cupcakes, starting at the outside edge and circling inward. Finish with a pinch of black sanding sugar or a small scatter of cookie crumbs. If the frosting begins to soften while you work, chill the bag for 5 to 10 minutes and keep going.
I like a swirl that looks a little imperfect. Smooth frosting is fine, but this dessert looks more alive when the piping has a bit of movement.
Serving Them on a Dark Dessert Table
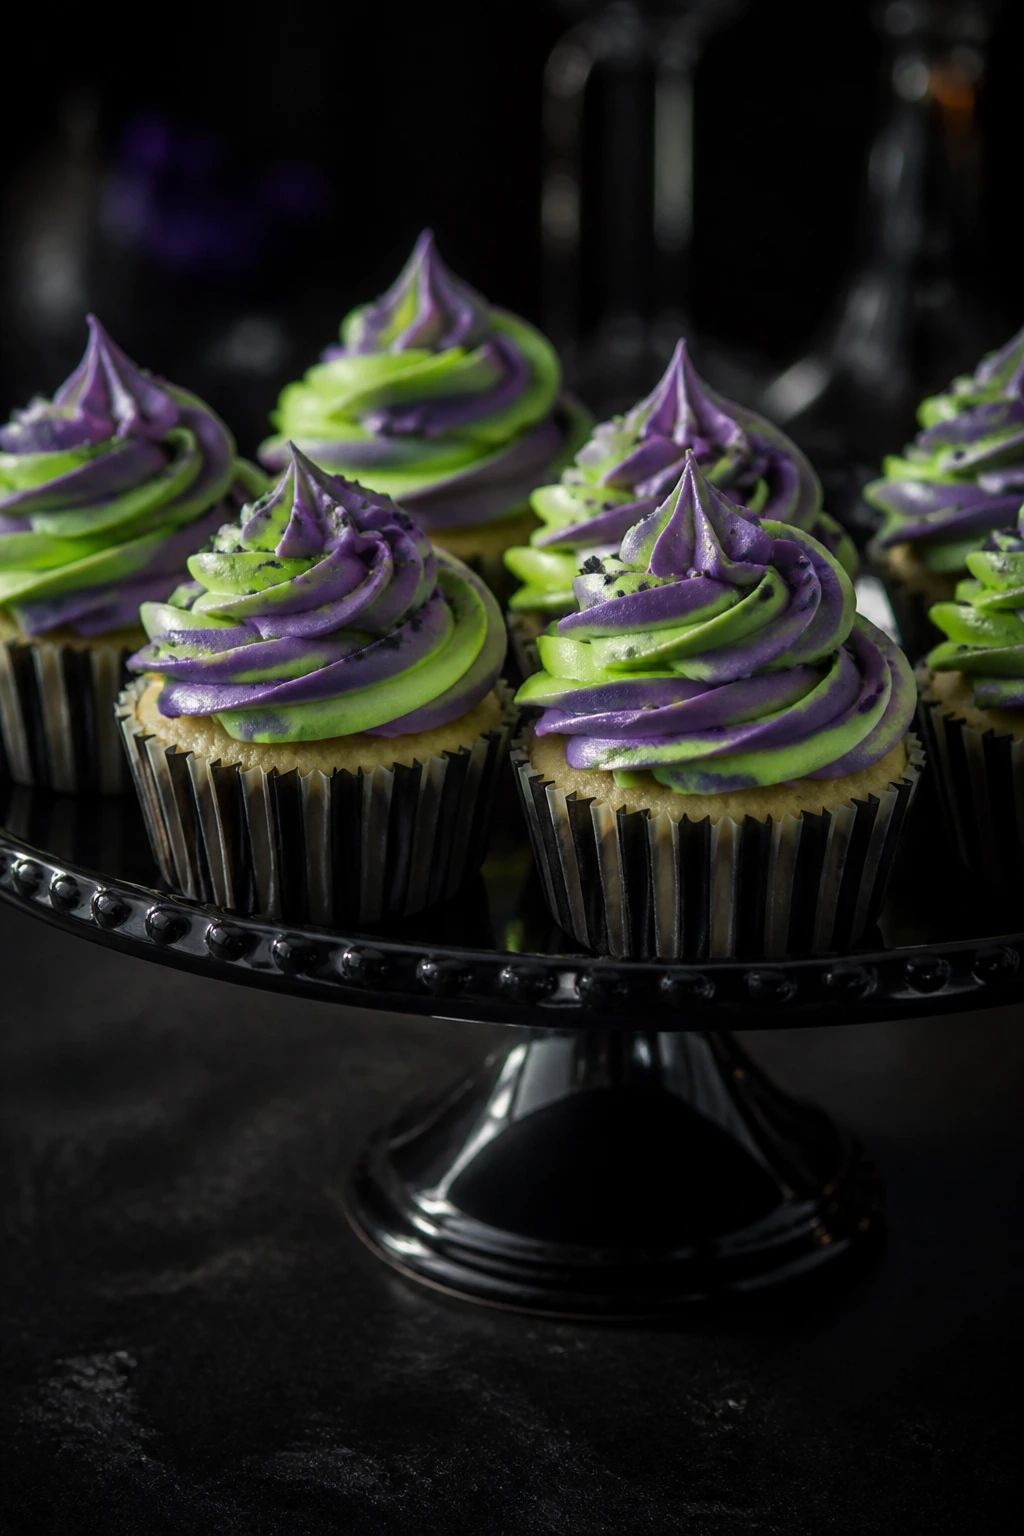
Presentation: A black cake stand or a plain white platter both work, but the contrast matters. The green and purple frosting shows best when the tray underneath doesn’t compete with it, so skip the loud patterned plate unless you want the whole thing to feel busier than a costume closet. If you have black liners, they reinforce the theme without needing extra decoration.
Accompaniments: These cupcakes sit nicely beside fresh berries, a bowl of vanilla ice cream, or a plate of salty snacks like pretzels if you’re building a dessert spread. The frosting is rich enough that I usually pair the cupcakes with something plain and cold — a simple fruit bowl is enough. If you’re serving them after dinner, a few thin slices of orange or tart cherries give the plate a cleaner finish.
Portions: One standard cupcake per person is the honest serving. They’re rich because of the cream cheese frosting, and the swirl on top adds more volume than people expect. If you’re making them for kids, you can split each cupcake in half and still feel like you’ve served a full treat. To scale up, double the batter and bake in two tins rather than crowding one pan.
Beverage Pairing: Cold milk is the obvious answer, and it works. Coffee is better if you want the tang of the frosting to stand out; a medium roast with a little bitterness cuts through the sugar. For a party table, sparkling water with lime keeps the palate clean between bites.
Small Tweaks That Make the Cupcakes Taller and Smoother
-
Flavor Enhancement: Add 1 teaspoon of lemon zest to the frosting. It sharpens the cream cheese and makes the sweetness taste cleaner, especially after the cupcakes chill.
-
Texture Trick: Pull the cupcakes from the oven the second the tops spring back. An extra two minutes can take them from soft to dry at the edges, and cupcakes show that damage fast.
-
Color Control: Use gel color, not liquid. Liquid coloring loosens the frosting and dulls the shades, while gel gives you a bright green and purple with only a small amount.
-
Piping Shortcut: If you do not want to stripe the bag, spread the frosting with a small offset spatula and drag a toothpick through it in a few loose arcs. It looks messy in a good way and still reads as Beetlejuice.
-
Serving Upgrade: Chill the finished cupcakes for 15 minutes before serving if the room is warm. The frosting firms enough to hold its swirl, and the colors look sharper.
Common Mistakes That Flatten the Crumb or Loosen the Frosting
-
Overmixing after the flour goes in: The cupcakes come out dense and slightly rubbery, especially near the bottom. Stop mixing the second the flour disappears, then finish with a few spatula folds.
-
Using tub cream cheese instead of brick cream cheese: The frosting turns soft and loose, and no amount of powdered sugar fully fixes it. Buy brick-style cream cheese and keep it cool but spreadable.
-
Filling the liners too high: The batter spills over, the tops mushroom, and the frosting slides off the side. Keep the cups at about two-thirds full. That gives the cupcakes room to dome without breaking the liner line.
-
Baking until the tops look dry and brown: By that point, the interior usually needs no help getting dry. Pull the cupcakes when the tops spring back and the centers still have a little spring.
-
Using liquid food coloring: The frosting gets thin and the color fades into a muddy pastel. Gel coloring gives stronger color with less liquid, which matters a lot in cream cheese frosting.
-
Frosting cupcakes that are still warm: The frosting melts at the base and the swirls go limp. Wait until the cupcakes are fully cool, then pipe.
Variations Worth Trying
-
Swamp Lime Swirls: Add 1 teaspoon lime zest to the cupcake batter and another teaspoon to the frosting. The citrus edge cuts through the cream cheese and gives the green frosting a sharper, brighter taste.
-
Midnight Cocoa Version: Replace 1/4 cup of the flour with 1/4 cup black cocoa powder and add 1 tablespoon extra buttermilk. The cupcakes turn darker and lean into a deeper chocolate-vanilla vibe without losing the soft crumb.
-
Mini Party Bites: Bake the batter in a mini muffin tin lined with paper cups for 10 to 12 minutes. The smaller size works well for a dessert board, and the frosting can be piped in tiny spirals or spread with a spoon.
-
Dairy-Free Trickster Cupcakes: Use plant-based butter, a firm dairy-free cream cheese, dairy-free sour cream, and unsweetened non-dairy milk mixed with lemon juice in place of buttermilk. The texture changes a little, but the cupcakes still bake up soft and hold the Beetlejuice colors.
Storing, Freezing, and Making Them a Day Ahead
Unfrosted Cupcakes
Unfrosted cupcakes keep well at room temperature for 1 day if you store them in an airtight container once they are fully cool. If you need them longer than that, refrigerate them for up to 3 days, though the crumb is nicest if you frost them the same day or the next morning. To freshen them, let them sit at room temperature for 20 to 30 minutes before frosting.
Frosted Cupcakes
Because the frosting contains cream cheese, frosted cupcakes should not sit out for long. Give them up to 2 hours at room temperature if the room is cool, then move them into the refrigerator. Stored in a covered container, they keep for 4 days. The frosting firms in the fridge, so set the cupcakes out 20 to 30 minutes before serving if you want the cream cheese flavor to soften and the crumb to feel less cold.
Freezer Plan
Freeze unfrosted cupcakes for up to 2 months. Wrap each one tightly in plastic wrap, then slide them into a freezer bag or lidded container. Thaw overnight in the refrigerator or on the counter for 1 to 2 hours before frosting. The frosting can also be frozen on its own for about 1 month, but it should be thawed in the fridge and beaten briefly to restore its texture.
Make-Ahead Schedule
Bake the cupcakes a day ahead if that helps. Make the frosting the same day or the day before, then re-beat it for 20 to 30 seconds before piping if it has firmed up too much in the fridge. If you want the decorations to stay crisp, add the sanding sugar or cookie crumbs right before serving; otherwise, they soften a little overnight and lose their snap.
Questions About Flavor, Frosting, and Food Coloring
Can I make these cupcakes without sour cream?
Yes. Plain full-fat Greek yogurt works in the same amount and gives a similar tang and moisture level. The crumb will be slightly denser, but not in a bad way.
Can I use liquid food coloring instead of gel?
You can, but you’ll need more of it, and the frosting may loosen before it reaches a bold color. Gel is the safer choice here because cream cheese frosting is already softer than buttercream.
Why did my cupcakes sink in the middle?
Usually the oven was too cool, the batter was overmixed, or the cupcakes came out before the centers finished setting. The tops should spring back, and the toothpick should come out with a few crumbs, not wet batter.
Can I pipe the frosting the day before?
Yes, though the swirl will look sharpest if you pipe it the same day. If you frost ahead, chill the cupcakes in a single layer and bring them back to cool room temperature before serving so the frosting tastes creamy instead of hard.
What if my frosting turns too soft after adding color?
Chill it for 10 to 15 minutes, then stir or beat it briefly. If it still feels loose, add 2 to 4 tablespoons more powdered sugar, a spoonful at a time, until it can hold a clean swirl.
Can I make these into a cake instead of cupcakes?
Yes. The batter fits one 8-inch or 9-inch round cake pan if you bake it longer, roughly 25 to 30 minutes. Start checking early, because cake pan depth changes the bake more than people expect.
Do these need to stay refrigerated?
Once frosted, yes, because of the cream cheese. You can let them sit out for a short party window, but they should go back into the fridge afterward in a covered container.
Strange, Soft, and Gone Fast
Beetlejuice-themed desserts can get cheesy in a hurry. Too much decoration, too much color, too much trying to imitate the movie instead of baking an actual cupcake. These stay on the right side of that line because the base is solid: soft vanilla crumb, tangy frosting, and color that makes sense once the tray hits the table.
What matters most is the balance. The cake should feel tender, the frosting should taste bright, and the whole thing should look a little mischievous without falling apart when someone picks it up. That’s the part people remember. Not the amount of food coloring. The bite.
Bake them once and you’ll probably start tinkering with the swirls the next time. That’s fine. The whole charm of fluffy Beetlejuice cupcakes with cream cheese frosting is that they can look a little unruly and still be exactly what they’re supposed to be — soft, tangy, and gone before the coffee gets cold.
Fluffy Beetlejuice Cupcakes with Cream Cheese Frosting — Recipe Card
Recipe Name: Fluffy Beetlejuice Cupcakes with Cream Cheese Frosting
Description: Soft vanilla cupcakes topped with tangy cream cheese frosting tinted in Beetlejuice-inspired green and purple swirls. The crumb stays tender, and the frosting holds a tall piping swirl once chilled briefly.
Prep Time: 25 minutes
Cook Time: 18 to 20 minutes
Total Time: 45 minutes active, about 1 hour 15 minutes including cooling
Course: Dessert
Cuisine: American
Servings: 12 cupcakes
Calories: About 430 kcal per cupcake
Ingredients
For the Cupcakes:
- 1 1/2 cups (180 g) all-purpose flour
- 1 1/2 teaspoons baking powder
- 1/4 teaspoon baking soda
- 1/2 teaspoon fine salt
- 1/2 cup (113 g) unsalted butter, softened to room temperature
- 3/4 cup (150 g) granulated sugar
- 2 large eggs, room temperature
- 1 teaspoon vanilla extract
- 1/2 cup (120 g) sour cream, room temperature
- 1/2 cup (120 ml) buttermilk, room temperature
For the Cream Cheese Frosting:
- 8 oz (226 g) brick-style cream cheese, softened but still cool
- 1/2 cup (113 g) unsalted butter, softened
- 3 1/2 to 4 cups (420 to 480 g) powdered sugar, sifted
- 1 teaspoon vanilla extract
- Pinch fine salt
- 1 tablespoon heavy cream, plus 1 to 2 teaspoons more if needed
For the Beetlejuice Finish:
- 1 to 2 teaspoons green gel food coloring
- 1 to 2 teaspoons purple gel food coloring
- 1/4 cup black sanding sugar or crushed chocolate sandwich cookies, for topping
Instructions
- Preheat the oven to 350°F (175°C) and line a 12-cup muffin tin with paper liners.
- Whisk together the flour, baking powder, baking soda, and salt.
- Beat the butter and sugar until pale and fluffy, then beat in the eggs one at a time and add the vanilla.
- Mix in the sour cream, then add the dry ingredients in two additions, alternating with the buttermilk, mixing only until combined.
- Divide the batter among the liners, filling each about two-thirds full.
- Bake for 18 to 20 minutes, until the tops spring back and a toothpick comes out with a few moist crumbs.
- Cool in the pan for 5 minutes, then transfer to a wire rack and cool completely.
- Beat the cream cheese and butter until smooth, then add the powdered sugar, vanilla, salt, and heavy cream.
- Divide the frosting, tint with green and purple gel food coloring, pipe onto the cooled cupcakes, and finish with black sanding sugar or cookie crumbs.
Notes: Use brick-style cream cheese, not whipped tub cream cheese. Chill the frosting for 10 minutes if it feels loose. Add the decorations right before serving if you want the topping to stay crisp.