
Holiday dessert does not have to mean a sink full of bowls, three separate chilling windows, and a timer that keeps hijacking the evening. The best holiday desserts for a weeknight are the ones that give you the smell of butter, spice, chocolate, and citrus without asking for a full afternoon in the kitchen. A good tray of bark cracks in your hand. A pan of bars cools fast on the counter. A cookie dough that starts with softened butter and a single bowl can rescue an ordinary Tuesday and make it feel like someone planned ahead.
I’m drawn to desserts that hold up on a tray, travel well, and taste better after they sit for a few hours. That usually means shortbread, fudge, quick bars, no-bake truffles, crisp cookies, and fruit desserts with a restrained amount of sugar. It also means knowing when not to fuss. A little flaky salt on chocolate. Fresh orange zest in a shortbread dough. Toasted pecans folded into a bar batter instead of buried under frosting. Those details do more for a holiday dessert table than a pile of decorative sprinkles ever will.
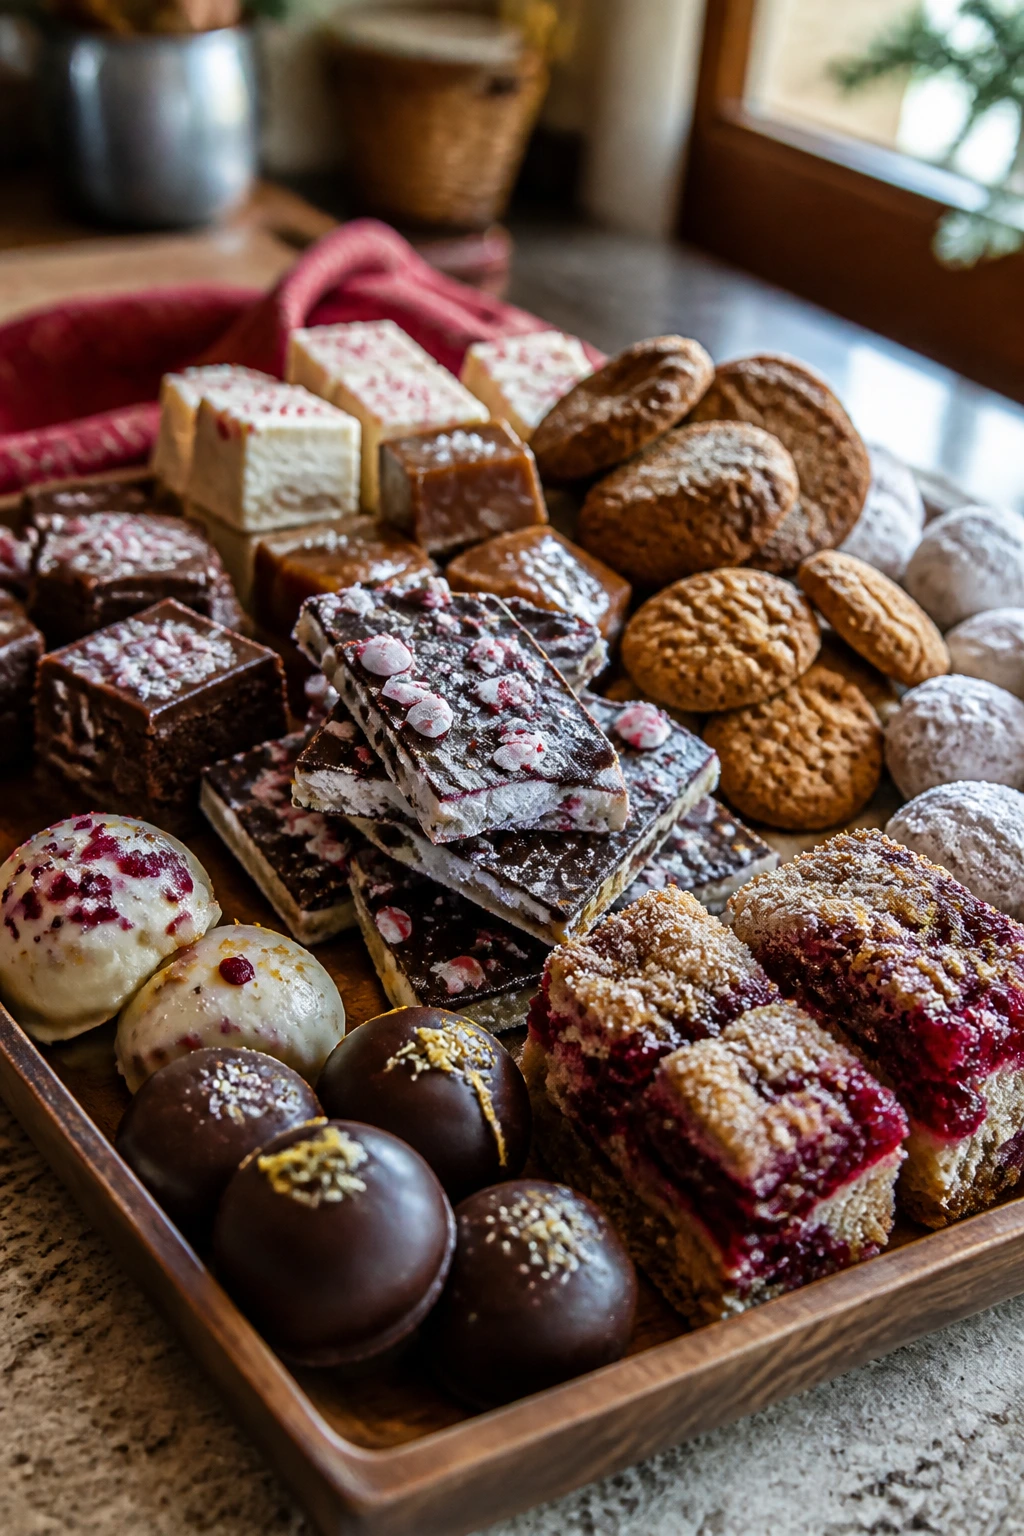
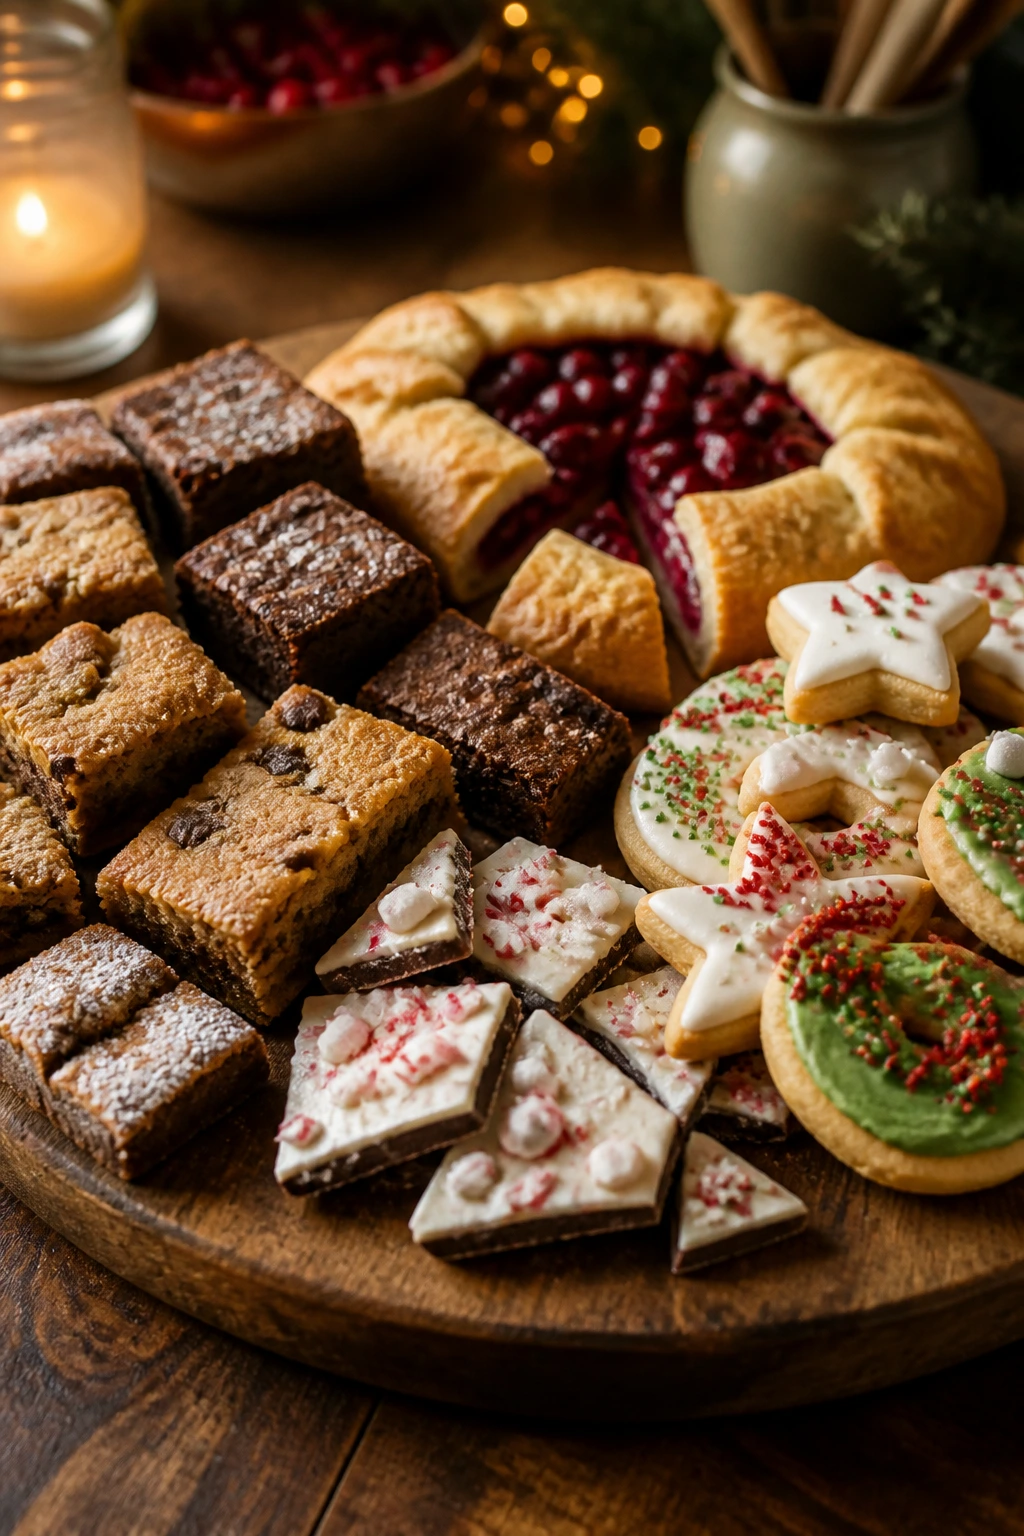
So here’s the practical version of festive baking: 35 desserts that look at home beside twinkle lights but still fit into a weeknight rhythm. Some are one-bowl jobs. Some use pantry staples. All of them are built to be made, cooled, cut, and eaten without turning the evening into a project.
Why This Collection Earns a Spot on the Counter
- Fast paths: Most of these holiday desserts lean on one pan, one bowl, or a short chill time, which means you can start after dinner and still have something finished before bedtime.
- Mix-and-match flavors: Peppermint, ginger, orange, cranberry, caramel, chocolate, and maple show up in combinations that feel festive without requiring rare ingredients.
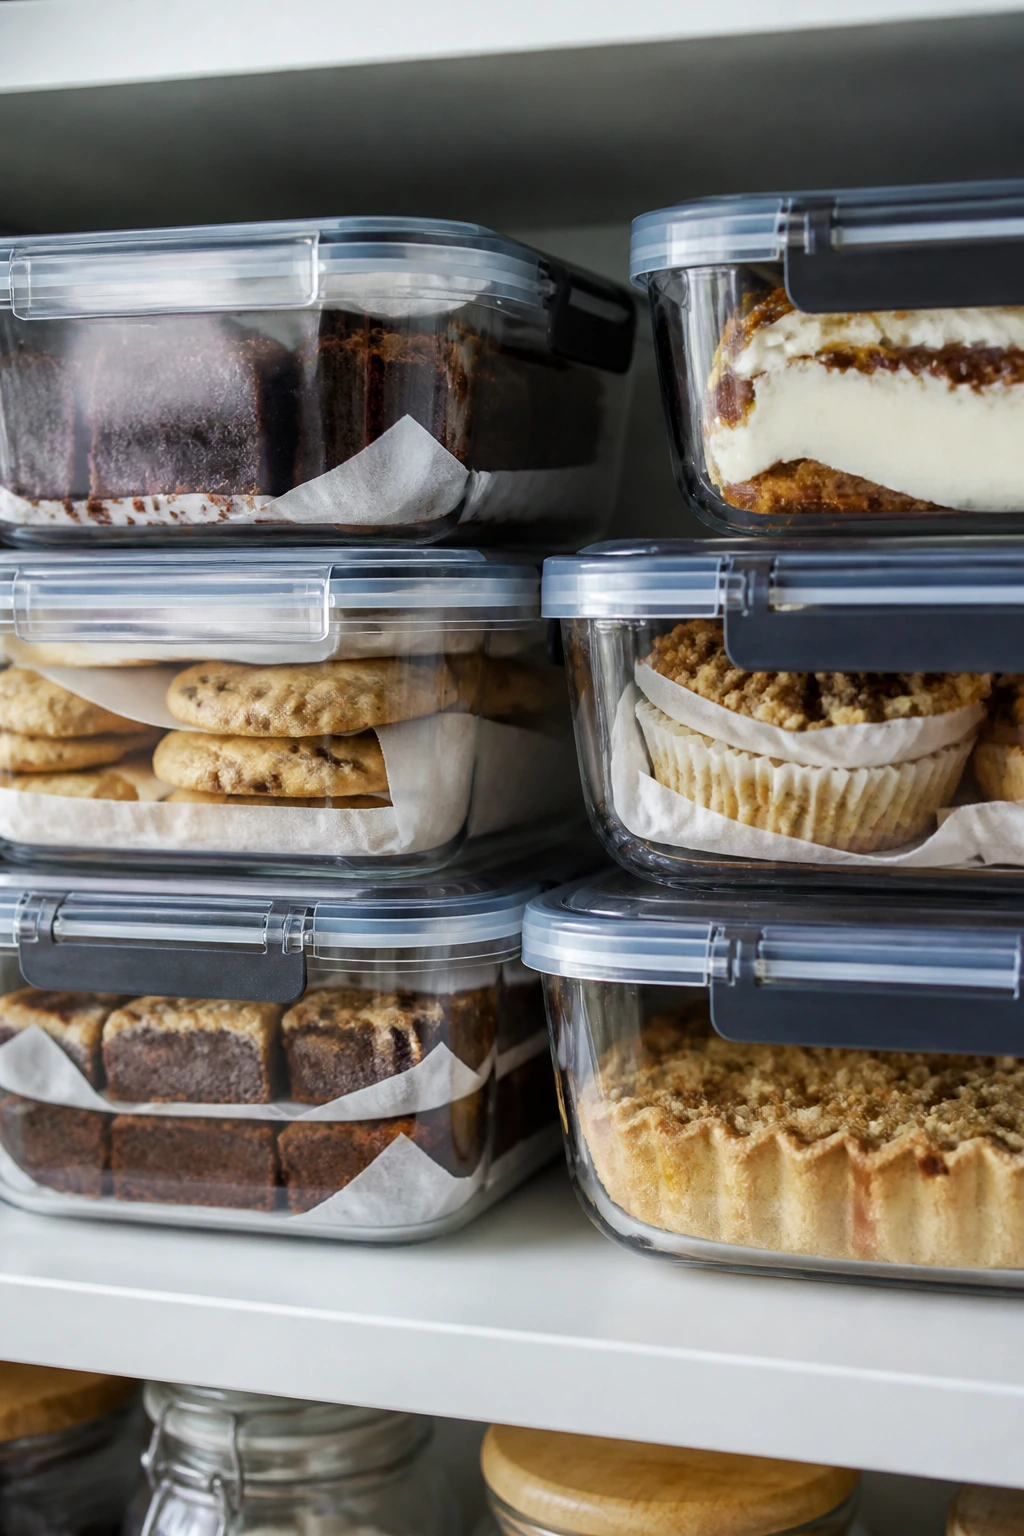
- Tray-friendly finishes: Bars, bark, cookies, and truffles stack neatly on platters, so the spread looks full even if you made only two recipes.
- Weeknight logic: A lot of these desserts slice cleanly after a short cool-down, which is the difference between serving dessert and serving warm rubble.
- Budget-aware ingredients: Butter, oats, flour, brown sugar, canned pumpkin, chocolate chips, and nuts do most of the heavy lifting here.
- Make-ahead friendly: Several of these actually settle in overnight, which is handy when the evening itself is already noisy enough.
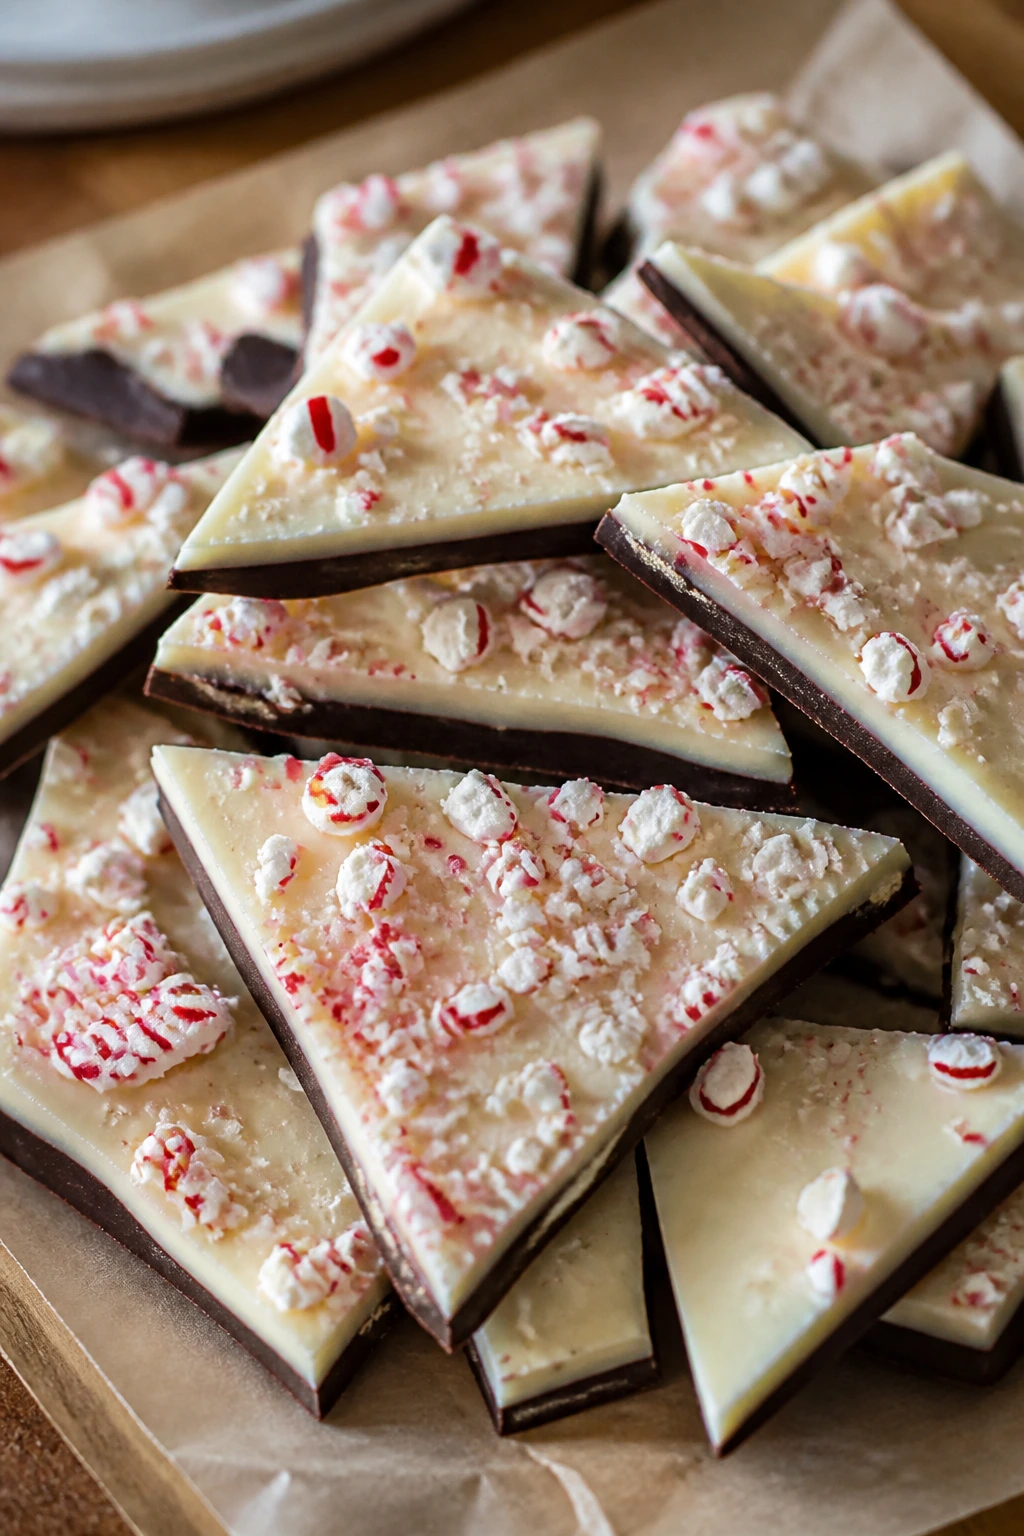
1. Peppermint Bark
Peppermint bark is the dessert I make when I want something festive with almost no drama. Melted chocolate, a thin white-chocolate layer, and crushed candy canes set into a crackly slab that breaks into shiny shards.
Why It Works:
The layering does the work for you. Dark chocolate gives the bark a firm snap, while the white chocolate softens the bitterness and lets the peppermint read clearly.
Key Ingredients:
- 12 oz semisweet chocolate, chopped or chips
- 12 oz white chocolate, chopped or chips
- 1 teaspoon peppermint extract
- 1/2 cup crushed candy canes
- Pinch of flaky salt
- Parchment paper for lining
Quick Steps:
- Line a rimmed baking sheet with parchment.
- Melt the semisweet chocolate in 20-second bursts, stirring until smooth.
- Spread into a thin rectangle, about 1/4 inch thick, and chill 10 minutes until set at the edges.
- Melt the white chocolate, stir in peppermint extract, and spread over the dark layer.
- Scatter crushed candy canes on top and press lightly. Chill until fully hard, then break into pieces.
Equipment for This Recipe:
- Rimmed baking sheet
- Parchment paper
- Microwave-safe bowl or double boiler
How to Serve This Dish:
Pile the shards in a shallow bowl or tuck them into cello bags for gifting. They look best with irregular edges and a few visible candy-cane flecks, not overworked squares.
Pro Tips for This Recipe:
- Crush the candy canes in a zip-top bag with a rolling pin so the pieces stay mixed between dust and chunks.
- Use good white chocolate; waxy chips can seize and turn grainy.
- Let the dark layer set before adding the top layer, or the colors will blend.
Variations on This Dish:
- Triple-Chocolate Bark: Add a drizzle of melted milk chocolate after the white layer sets.
- Orange-Peppermint Bark: Stir 1 teaspoon orange zest into the white chocolate.
Common Mistakes to Avoid with This Dish:
- Don’t overheat the chocolate. If it goes grainy, it was cooked too fast.
- Don’t skip parchment. Bark sticks hard to bare pans.
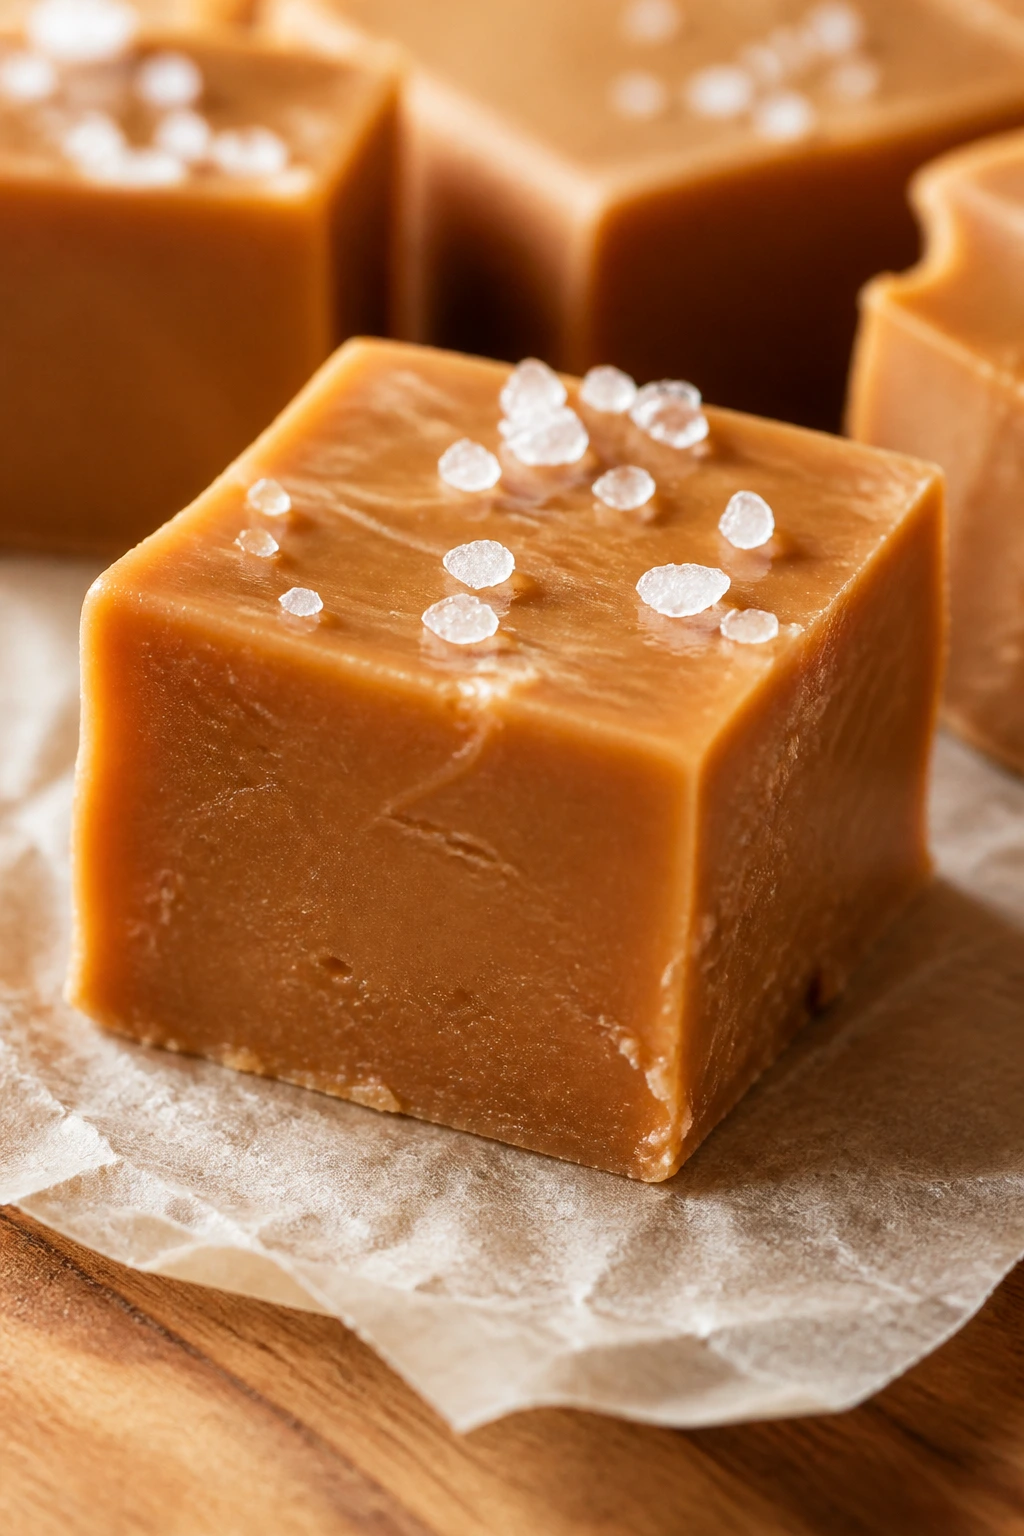
2. Salted Caramel Fudge
This is the kind of fudge that looks like it took patience, even though the stovetop does most of the work. The texture should be dense and creamy, with a caramel note that lands before the chocolate does.
Why It Works:
Sweetened condensed milk and brown sugar make the fudge smooth without a candy thermometer. The finishing salt keeps it from tasting flat.
Key Ingredients:
- 3 cups semisweet chocolate chips
- 1 can sweetened condensed milk, 14 oz
- 1/2 cup packed light brown sugar
- 4 tablespoons unsalted butter
- 1 teaspoon vanilla extract
- 1 teaspoon flaky sea salt, divided
Quick Steps:
- Line an 8-inch square pan with parchment.
- Warm condensed milk, brown sugar, and butter over low heat until the sugar dissolves.
- Stir in chocolate chips until the mixture turns glossy and thick.
- Add vanilla and 1/2 teaspoon salt.
- Spread into the pan, smooth the top, and finish with remaining salt. Chill at least 2 hours before cutting.
Equipment for This Recipe:
- Medium saucepan
- Rubber spatula
- 8-inch square pan
- Parchment paper
How to Serve This Dish:
Cut it into tiny squares; fudge disappears fast when the pieces are too large. A little flaky salt on top gives each bite a sharp, clean finish.
Pro Tips for This Recipe:
- Keep the heat low so the fudge stays silky.
- Use a parchment sling for easy lifting.
- Chill until firm enough to slice with a warm knife.
Variations on This Dish:
- Pecan Caramel Fudge: Fold in 3/4 cup toasted pecans.
- Espresso Fudge: Add 1 teaspoon instant espresso powder with the vanilla.
Common Mistakes to Avoid with This Dish:
- Don’t boil the base hard or the texture turns crumbly.
- Don’t cut before chilling; soft fudge smears instead of slicing cleanly.
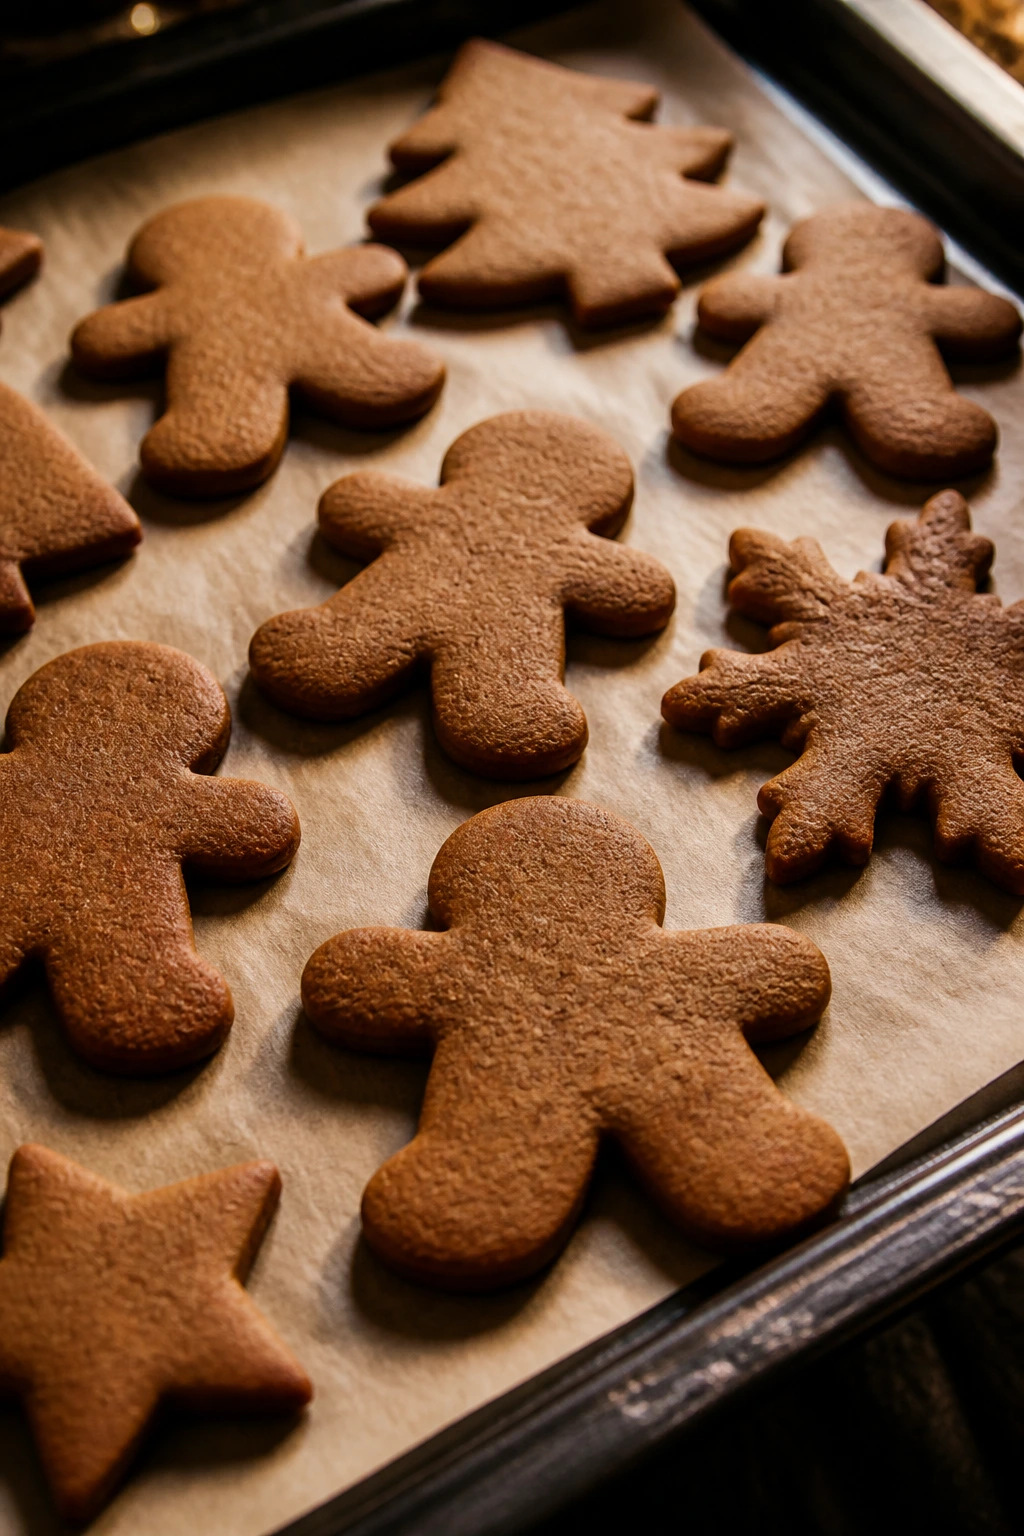
3. Gingerbread Cookie Cutouts
Gingerbread cookies are all about the smell. Molasses, cinnamon, ginger, and cloves hit the oven air before the first tray is even done.
Why It Works:
A chilled dough keeps the shapes sharp and stops the cookies from puffing into blobs. Molasses gives them that dark, rounded sweetness that plain sugar cookies can’t fake.
Key Ingredients:
- 3 cups all-purpose flour
- 1 teaspoon baking soda
- 1 tablespoon ground ginger
- 2 teaspoons ground cinnamon
- 1/2 teaspoon ground cloves
- 1/2 teaspoon fine salt
- 3/4 cup unsalted butter, softened
- 3/4 cup brown sugar
- 1 large egg
- 1/2 cup molasses
Quick Steps:
- Whisk the dry ingredients together.
- Beat butter and brown sugar until fluffy, then add egg and molasses.
- Mix in the dry ingredients just until the dough comes together.
- Chill 1 hour, roll to 1/4 inch, and cut shapes.
- Bake at 350°F for 8 to 10 minutes until the edges look set and the centers still feel soft.
Equipment for This Recipe:
- Mixing bowls
- Rolling pin
- Cookie cutters
- Parchment-lined baking sheets
How to Serve This Dish:
Leave some plain and decorate some with a thin glaze. The contrast between matte brown cookies and a few glossy outlines makes the tray look intentional.
Pro Tips for This Recipe:
- Roll the dough between two sheets of parchment to avoid extra flour.
- Chill cut shapes for 10 minutes before baking if the kitchen is warm.
- Pull them when the centers still seem a little tender; they firm as they cool.
Variations on This Dish:
- Orange-Gingerbread: Add 1 tablespoon orange zest to the dough.
- Chocolate Gingerbread: Replace 1/4 cup flour with cocoa powder.
Common Mistakes to Avoid with This Dish:
- Don’t skip chilling or the edges spread.
- Don’t overbake; dry gingerbread tastes like old spice cabinet dust.
4. Cranberry Orange Shortbread
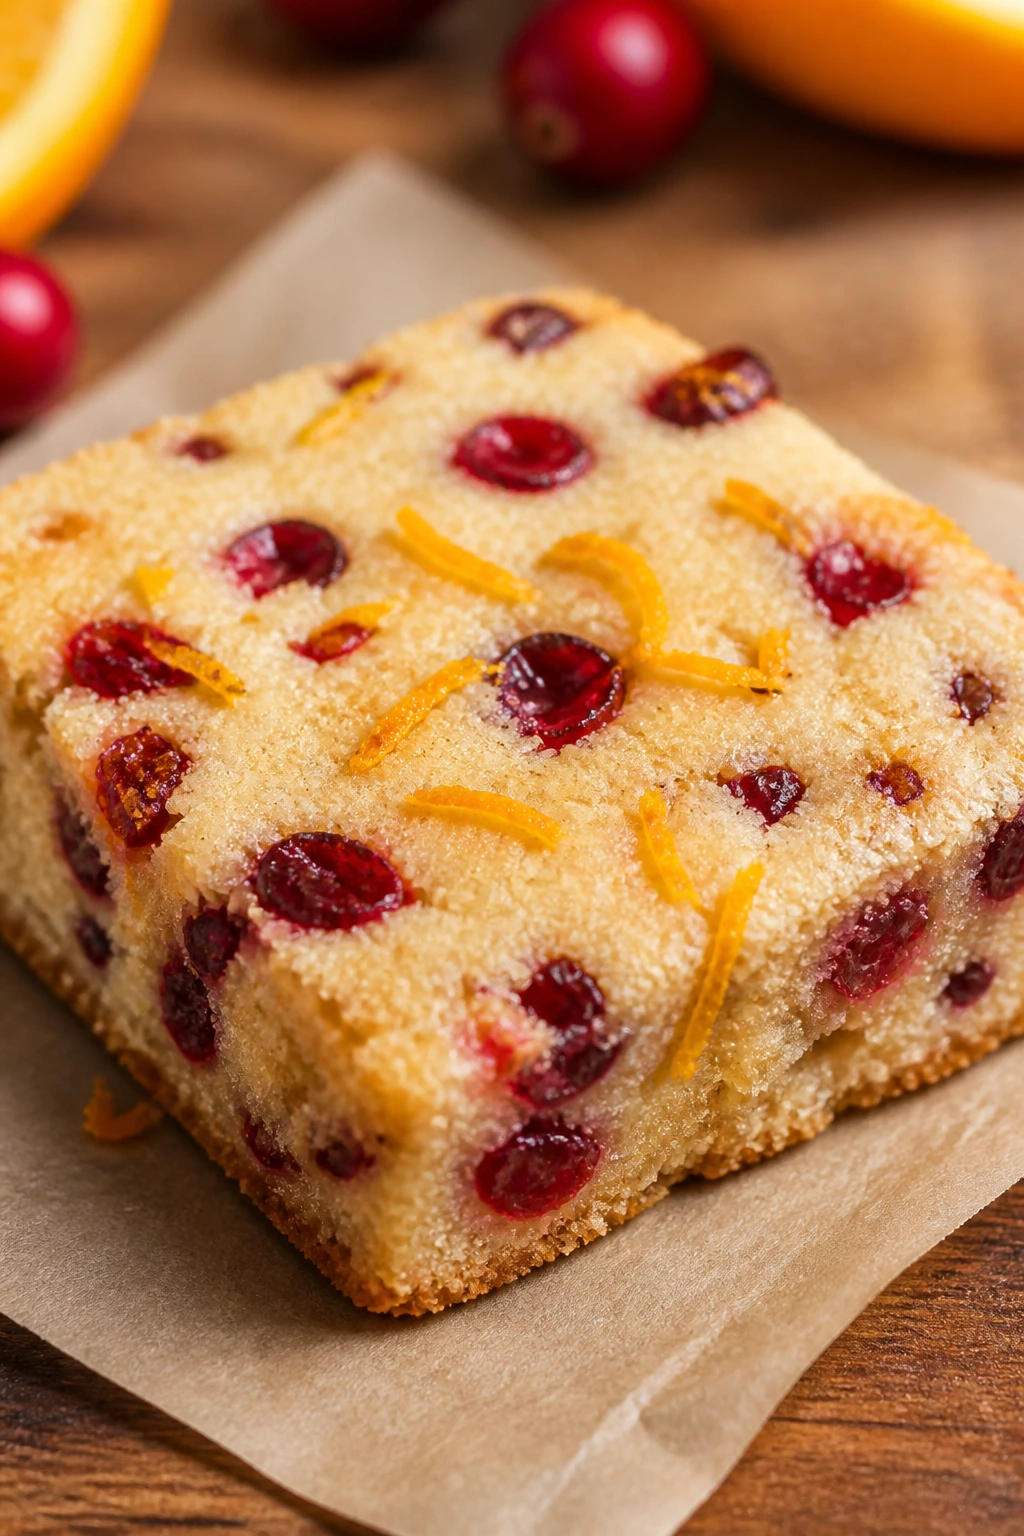
Shortbread can feel plain until you add zest and tart fruit. Then it turns into a buttery little square that tastes sharper, brighter, and more holiday-ready.
Why It Works:
The dough needs only a few ingredients, so the orange and cranberry have room to show up. A firm bake gives the edges a light gold color and a clean snap.
Key Ingredients:
- 2 cups all-purpose flour
- 1/2 cup powdered sugar
- 1/4 teaspoon fine salt
- 1 cup unsalted butter, cold and cubed
- 1 tablespoon orange zest
- 1/2 cup finely chopped dried cranberries
Quick Steps:
- Cut butter into the flour, sugar, and salt until the mix looks sandy.
- Work in orange zest and cranberries.
- Press into a lined 8-inch pan and chill 20 minutes.
- Bake at 325°F for 30 to 35 minutes until pale gold at the edges.
- Cool fully before slicing.
Equipment for This Recipe:
- Food processor or pastry cutter
- 8-inch square pan
- Sharp knife
- Parchment paper
How to Serve This Dish:
Serve the squares at room temperature with tea or coffee. They’re tidy enough for a cookie tray and sturdy enough to stack.
Pro Tips for This Recipe:
- Chop the cranberries finely so the dough slices cleanly.
- Press the dough down hard; loose shortbread crumbles when cut.
- Dust with a little powdered sugar after cooling if you want a frosty look.
Variations on This Dish:
- Lemon-Cranberry Shortbread: Swap orange zest for lemon.
- Pistachio Shortbread: Add 1/3 cup chopped pistachios.
Common Mistakes to Avoid with This Dish:
- Don’t overmix once the butter is in; shortbread wants a tender hand.
- Don’t cut while hot or the bars will fracture.
5. Chocolate Crinkle Cookies
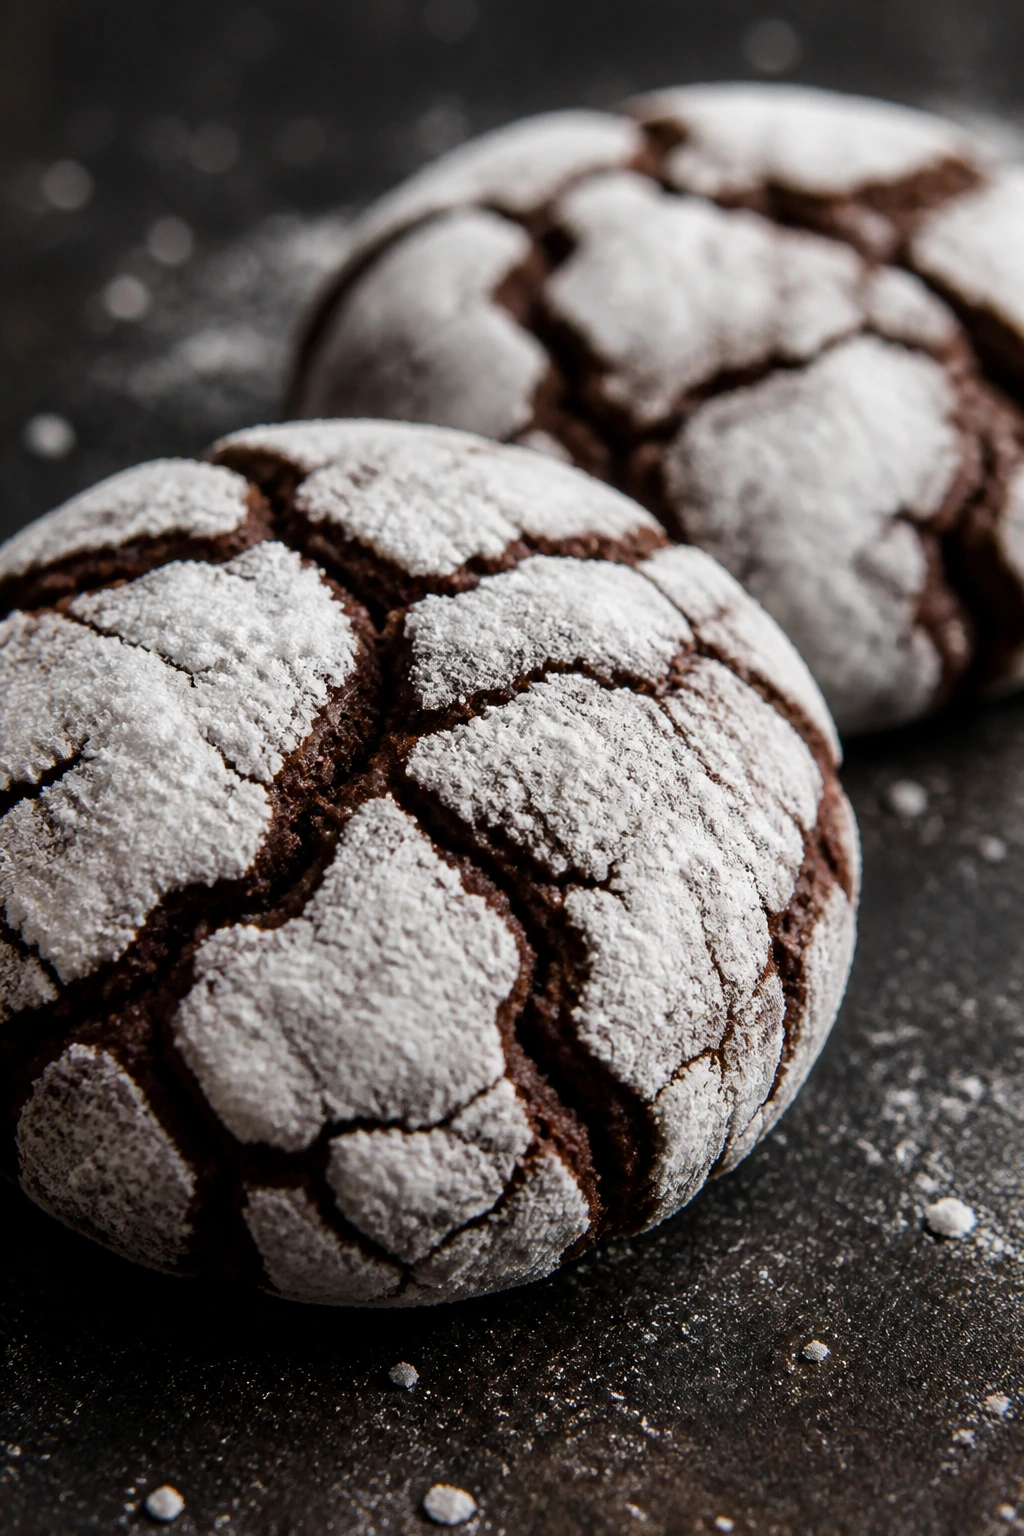
These cookies look dramatic with almost no effort. The crackled tops open like little fault lines, and the centers stay fudgy instead of cakey if you pull them at the right moment.
Why It Works:
The dough is sticky on purpose, and the powdered sugar shell cracks as the cookies rise. That gives you the snowy, high-contrast finish people usually think took more work than it did.
Key Ingredients:
- 1 cup unsweetened cocoa powder
- 2 cups granulated sugar
- 1/2 cup vegetable oil
- 4 large eggs
- 2 teaspoons vanilla extract
- 2 cups all-purpose flour
- 2 teaspoons baking powder
- 1/2 teaspoon salt
- 1 cup powdered sugar for coating
Quick Steps:
- Mix cocoa, sugar, oil, eggs, and vanilla until smooth.
- Stir in flour, baking powder, and salt.
- Chill the dough 2 hours.
- Scoop into balls and roll heavily in powdered sugar.
- Bake at 350°F for 10 to 12 minutes until puffed and cracked.
Equipment for This Recipe:
- Mixing bowl
- Cookie scoop
- Baking sheets
- Wire rack
How to Serve This Dish:
These belong on a tray with other dark-and-light desserts. The white sugar cracks against the black cocoa base, which looks especially nice next to bark or shortbread.
Pro Tips for This Recipe:
- Chill the dough until it’s scoopable, not soupy.
- Coat the balls generously; a thin dusting disappears in the oven.
- Pull them when the center looks just set.
Variations on This Dish:
- Peppermint Crinkle Cookies: Add 1/2 teaspoon peppermint extract.
- Orange Crinkle Cookies: Add orange zest to the batter.
Common Mistakes to Avoid with This Dish:
- Don’t skip chilling, or the dough spreads too much.
- Don’t undercoat with powdered sugar; the crackle loses its contrast.
6. Eggnog Cheesecake Bars
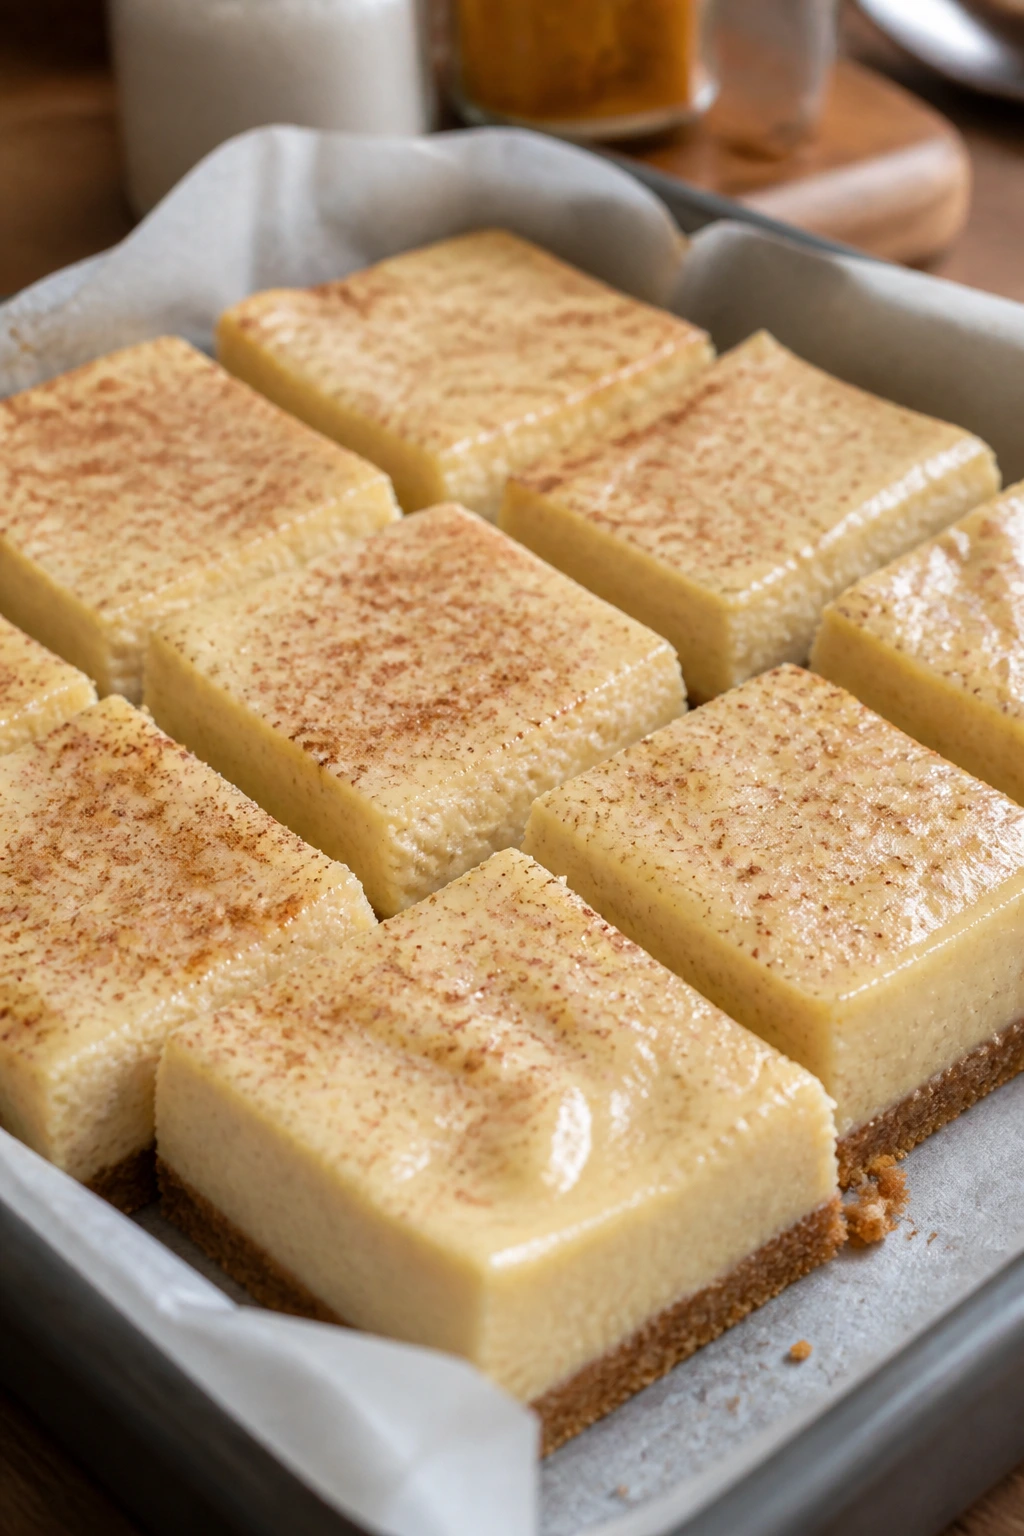
Eggnog in dessert form can be cloying, but cheesecake bars handle it better. The tang from cream cheese reins in the spice and gives the filling a smooth, custardy feel.
Why It Works:
A simple graham crust gives the bars structure, while a modest amount of eggnog keeps the filling soft without turning it loose. The bars set best after a full chill, which is worth the wait.
Key Ingredients:
- 1 1/2 cups graham cracker crumbs
- 1/4 cup sugar
- 6 tablespoons melted butter
- 16 oz cream cheese, softened
- 2/3 cup granulated sugar
- 2 large eggs
- 1/2 cup eggnog
- 1 teaspoon vanilla extract
- 1/2 teaspoon nutmeg
Quick Steps:
- Press crumb mixture into a lined 8-inch pan and bake 8 minutes at 350°F.
- Beat cream cheese and sugar until smooth.
- Add eggs, eggnog, vanilla, and nutmeg.
- Pour over crust and bake 25 to 30 minutes until the center jiggles slightly.
- Chill 4 hours before slicing.
Equipment for This Recipe:
- 8-inch baking pan
- Hand mixer
- Mixing bowls
- Parchment paper
How to Serve This Dish:
Finish with a dusting of nutmeg and a clean knife dipped in hot water. Serve cold; the flavor is sharper and the bars cut better.
Pro Tips for This Recipe:
- Use room-temperature cream cheese to avoid lumps.
- Don’t overbake; the center should still wobble a little.
- Chill long enough for a firm slice.
Variations on This Dish:
- Spiced Eggnog Bars: Add a pinch of cinnamon and cloves.
- Gingersnap Crust Bars: Replace graham crumbs with gingersnap crumbs.
Common Mistakes to Avoid with This Dish:
- Don’t pour in cold eggnog straight from the fridge; it can make the batter uneven.
- Don’t slice warm. Cheesecake bars need time to settle.
7. Apple Crisp with Oat Streusel
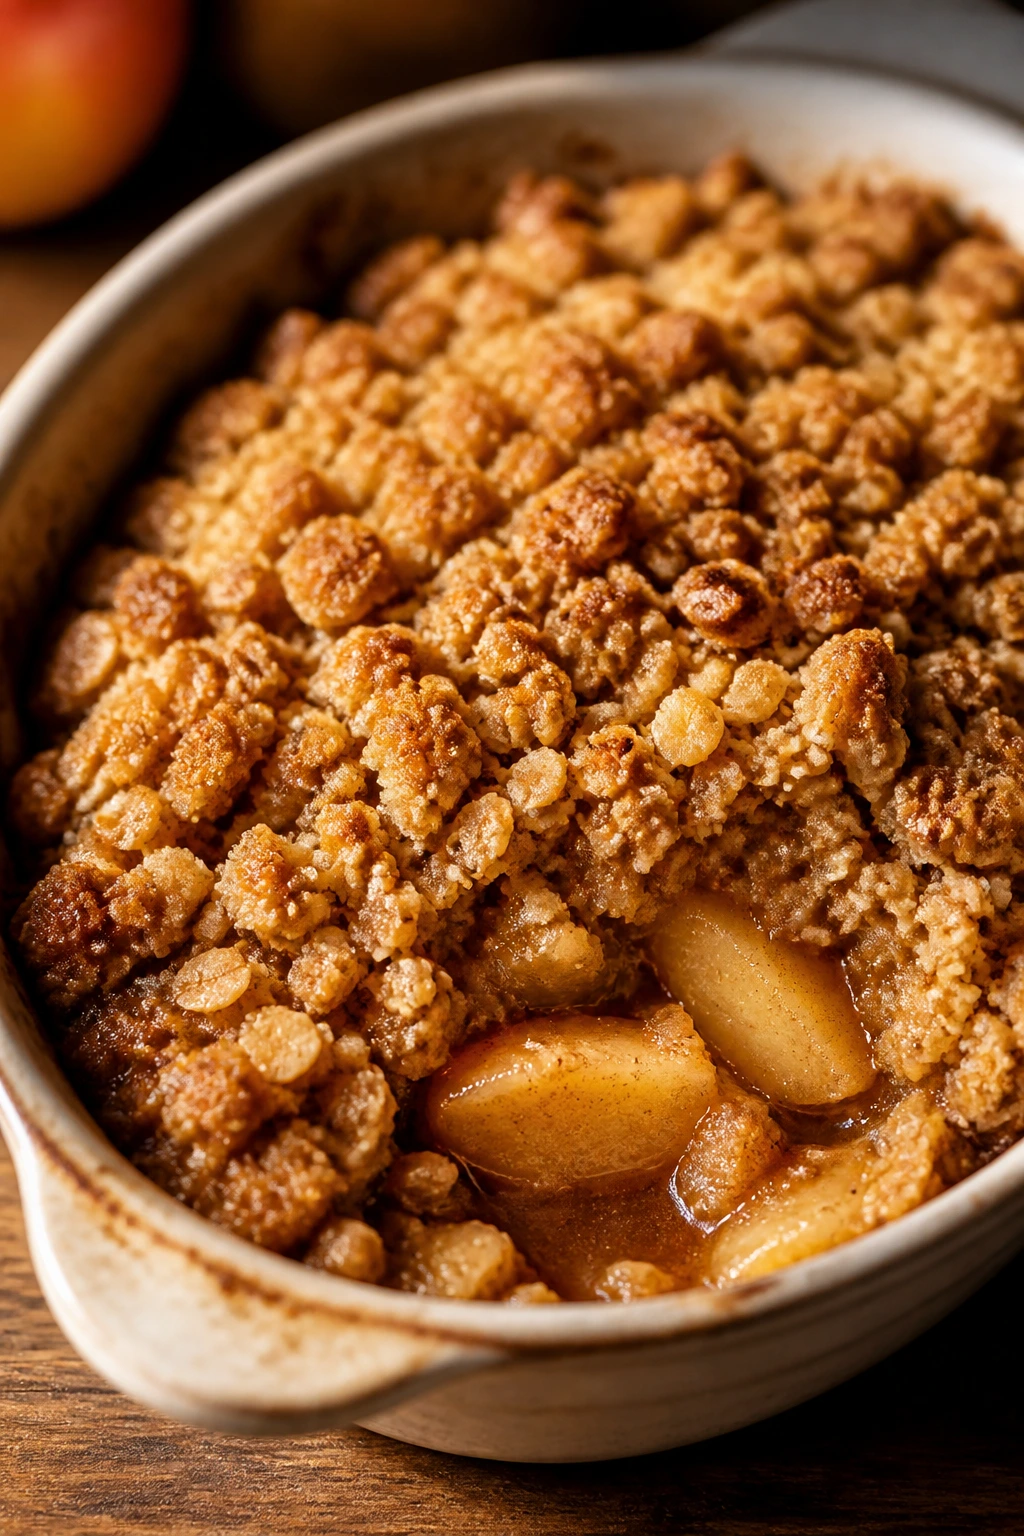
Apple crisp is one of those desserts that smells like the whole kitchen has settled down. Soft fruit underneath, crisp oats on top, and enough cinnamon to make the air feel warmer.
Why It Works:
The fruit softens in the oven while the topping stays rough and crunchy. A mix of tart and sweet apples keeps the filling from tasting like applesauce.
Key Ingredients:
- 6 medium apples, peeled and sliced
- 2 tablespoons lemon juice
- 1/3 cup granulated sugar
- 1 teaspoon cinnamon
- 1 cup old-fashioned oats
- 3/4 cup flour
- 3/4 cup brown sugar
- 1/2 cup cold butter, cubed
- 1/4 teaspoon salt
Quick Steps:
- Toss apples with lemon juice, sugar, and cinnamon.
- Spread into an 8-inch baking dish.
- Mix oats, flour, brown sugar, salt, and butter until crumbly.
- Scatter over apples and bake at 375°F for 35 to 40 minutes.
- Serve when the topping is deep golden and the filling bubbles at the edges.
Equipment for This Recipe:
- 8-inch baking dish
- Mixing bowls
- Peeler and knife
- Pastry cutter or fingers
How to Serve This Dish:
Spoon it warm into bowls and add vanilla ice cream if you have it. The contrast between the hot fruit and cold ice cream is the whole point.
Pro Tips for This Recipe:
- Mix tart and sweet apples for better flavor.
- Keep the butter cold so the topping bakes crisp instead of pasty.
- Bake until the fruit bubbles visibly at the edge.
Variations on This Dish:
- Pecan Apple Crisp: Add 1/2 cup chopped pecans to the topping.
- Pear-Apple Crisp: Replace half the apples with firm pears.
Common Mistakes to Avoid with This Dish:
- Don’t slice the apples too thin or they melt down.
- Don’t pull it early; underbaked fruit tastes flat and watery.
8. Pecan Pie Bars
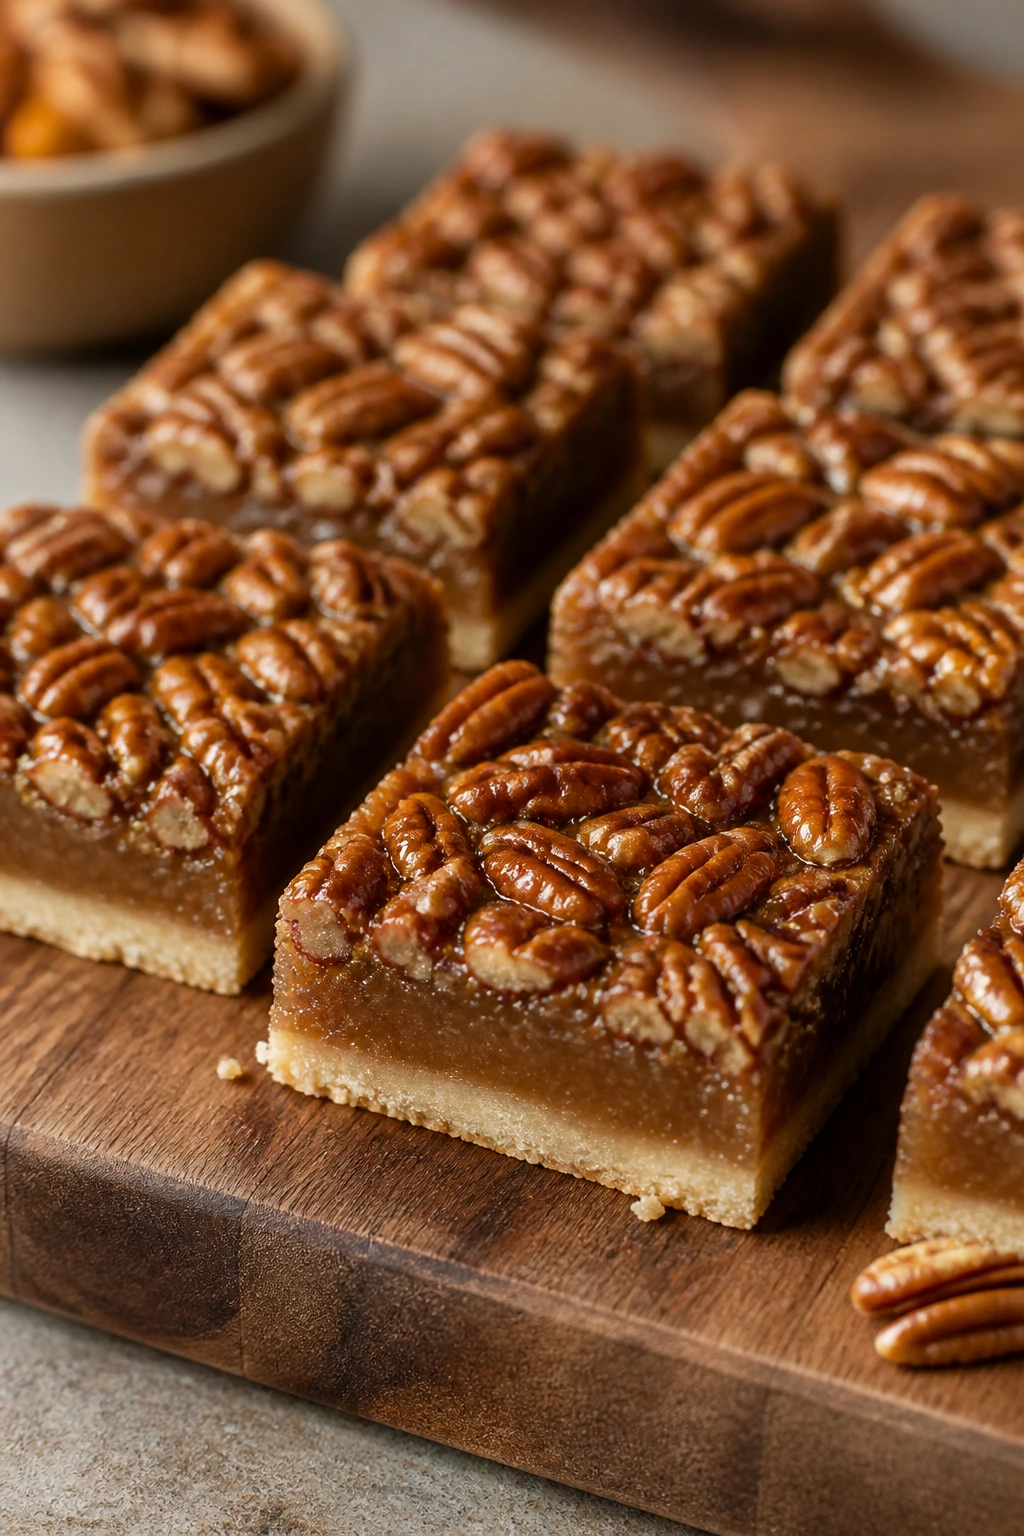
These taste like pecan pie without the battle of a pastry crust. You get the sticky, nutty top and a sturdy base that cuts into clean squares.
Why It Works:
A shortbread bottom supports the gooey topping, and the bars cool faster than a whole pie. That makes them much friendlier for a weeknight dessert run.
Key Ingredients:
- 1 cup flour
- 1/2 cup butter, softened
- 1/4 cup powdered sugar
- 3 large eggs
- 1 cup corn syrup or maple syrup
- 1 cup brown sugar
- 2 tablespoons melted butter
- 2 teaspoons vanilla extract
- 2 cups pecans, chopped
Quick Steps:
- Press the crust ingredients into a lined 9-inch pan and bake 15 minutes at 350°F.
- Whisk eggs, syrup, brown sugar, butter, and vanilla.
- Stir in pecans and pour over the hot crust.
- Bake 25 to 30 minutes until the center is set but still slightly soft.
- Cool completely before lifting and slicing.
Equipment for This Recipe:
- 9-inch square pan
- Mixing bowls
- Whisk
- Parchment paper
How to Serve This Dish:
Cut small. These are rich, and a modest square goes farther than people expect. A little whipped cream helps, but they do not need it.
Pro Tips for This Recipe:
- Toast the pecans first for a deeper nutty taste.
- Let the bars cool fully or the filling will run.
- Use parchment overhang so you can lift the slab out cleanly.
Variations on This Dish:
- Chocolate Pecan Bars: Add 1/2 cup chocolate chips to the filling.
- Maple Pecan Bars: Use maple syrup instead of corn syrup.
Common Mistakes to Avoid with This Dish:
- Don’t overbake the filling; it should still have a slight jiggle.
- Don’t cut warm. Sticky bars need time to set.
9. Pumpkin Spice Blondies
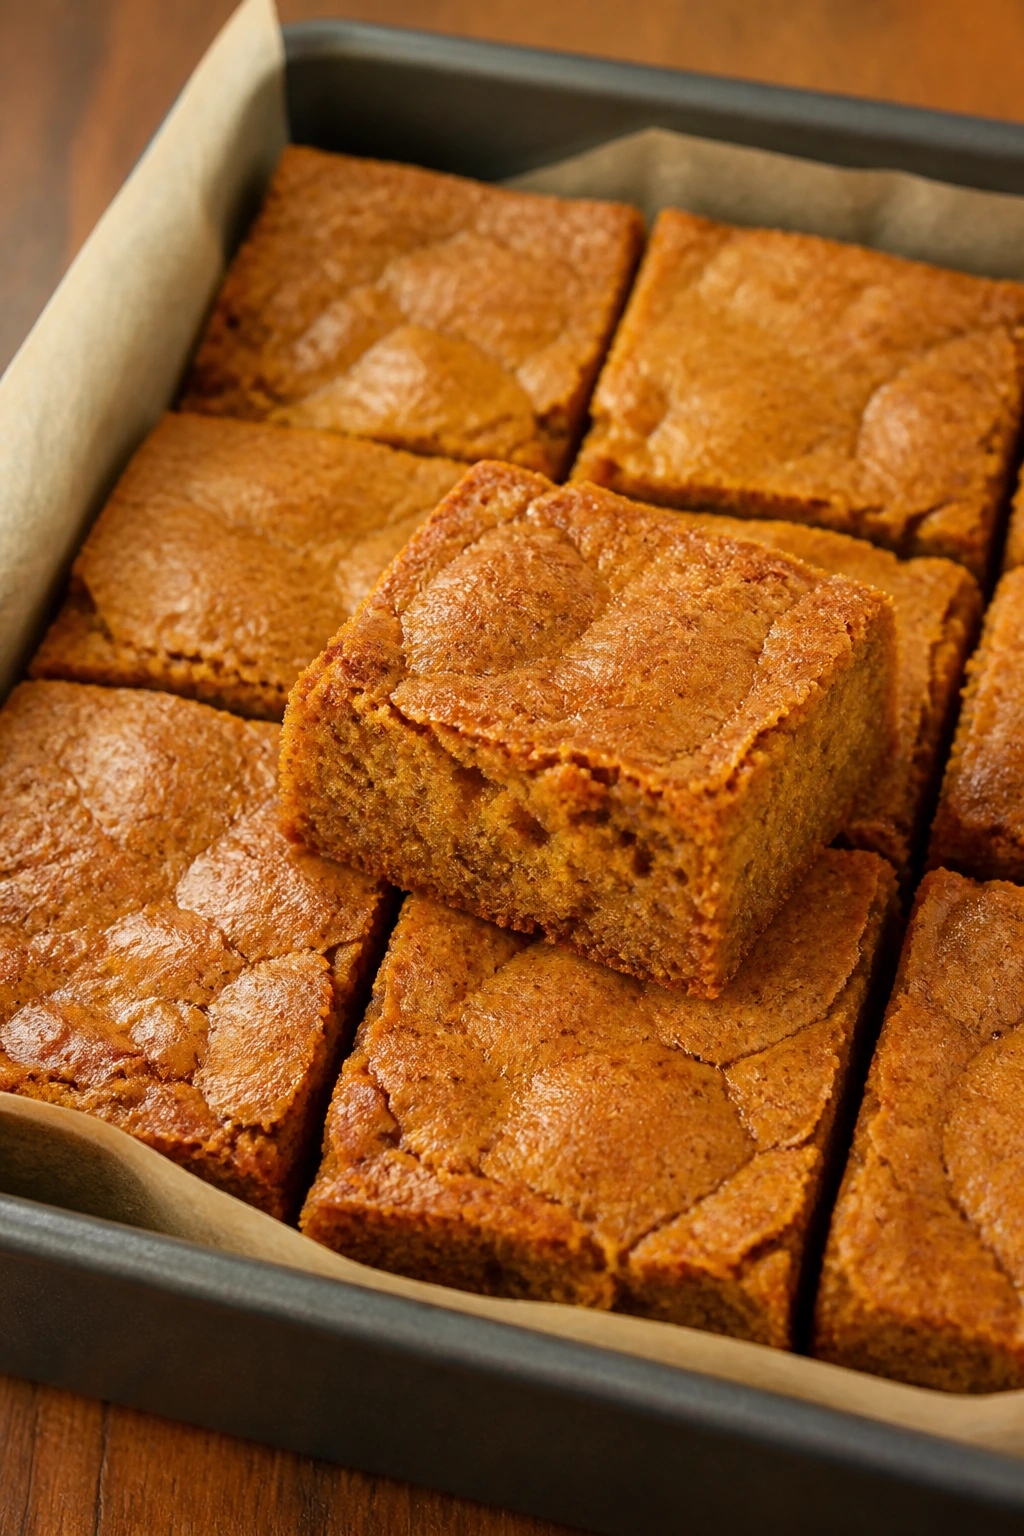
Pumpkin blondies are softer than brownies and more interesting than plain bars. They carry cinnamon, nutmeg, and brown sugar in a dense, chewy square.
Why It Works:
Pumpkin puree adds moisture, but the batter still needs enough flour and butter to bake into a sliceable bar. The sugar top turns a little crackly, which is the best part.
Key Ingredients:
- 1 cup pumpkin puree
- 1/2 cup melted butter
- 1 cup brown sugar
- 1/4 cup granulated sugar
- 1 large egg
- 1 teaspoon vanilla extract
- 2 cups flour
- 1 teaspoon cinnamon
- 1/2 teaspoon nutmeg
- 1/2 teaspoon baking soda
Quick Steps:
- Whisk pumpkin, butter, sugars, egg, and vanilla.
- Stir in flour, spices, baking soda, and a pinch of salt.
- Spread into a lined 8-inch pan.
- Bake at 350°F for 25 to 30 minutes until the center is set.
- Cool before slicing so the crumb tightens.
Equipment for This Recipe:
- 8-inch square pan
- Mixing bowls
- Whisk and spatula
- Parchment paper
How to Serve This Dish:
They’re good plain, but a thin glaze or a dusting of powdered sugar gives them a more polished look. Cut them into small squares; they’re richer than they appear.
Pro Tips for This Recipe:
- Use plain pumpkin puree, not pumpkin pie filling.
- Don’t overmix after the flour goes in.
- Chill for 20 minutes before slicing if the bars feel too soft.
Variations on This Dish:
- Chocolate Chip Blondies: Fold in 3/4 cup mini chips.
- Walnut Spice Blondies: Add 1/2 cup chopped walnuts.
Common Mistakes to Avoid with This Dish:
- Don’t add too much pumpkin or the bars go gummy.
- Don’t cut while hot; the center needs time to set.
10. Hot Cocoa Cookies
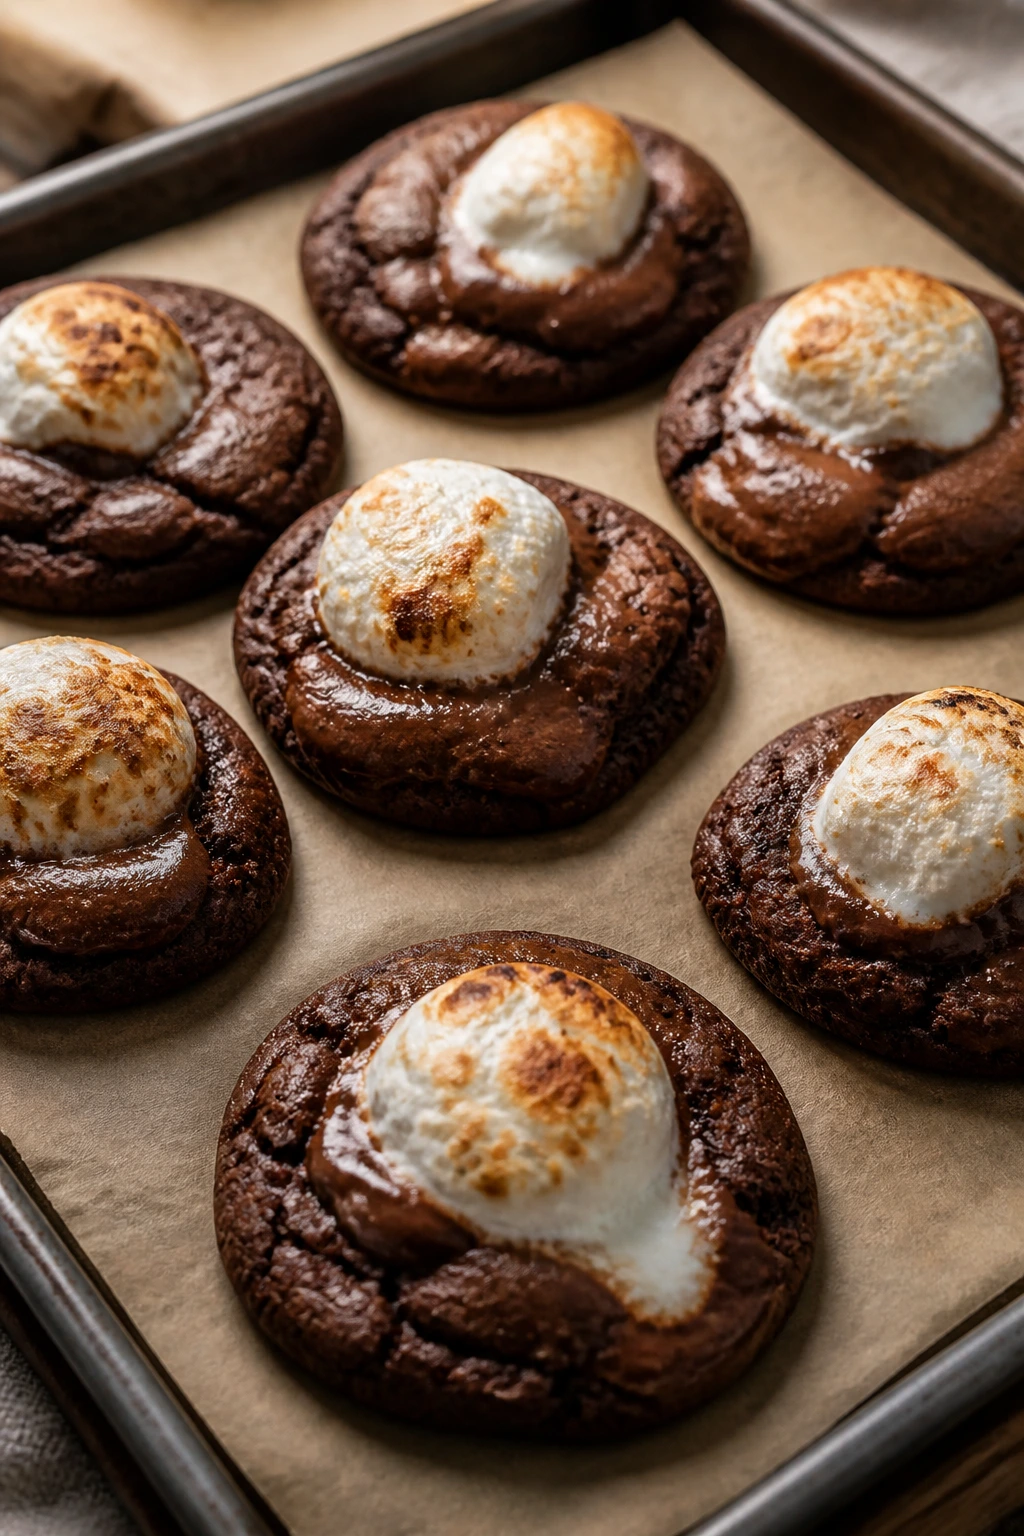
These cookies taste like the rim of a mug of cocoa, which is exactly the appeal. The marshmallows on top melt and bubble just enough to look a little messy in the best way.
Why It Works:
Cocoa in the dough deepens the chocolate flavor, and a marshmallow pressed into the center after baking gives the right hot-cocoa finish. The texture lands between a soft brownie and a cookie.
Key Ingredients:
- 2 cups flour
- 1/2 cup cocoa powder
- 1 teaspoon baking soda
- 1/2 teaspoon salt
- 3/4 cup butter, softened
- 1 cup sugar
- 1 large egg
- 2 teaspoons vanilla
- 1 cup mini marshmallows
Quick Steps:
- Whisk the dry ingredients together.
- Cream butter and sugar, then add egg and vanilla.
- Mix in the dry ingredients and scoop onto lined sheets.
- Bake at 350°F for 9 minutes, add marshmallows, then bake 1 to 2 minutes more.
- Cool until the marshmallows set.
Equipment for This Recipe:
- Mixer or bowl and spoon
- Cookie sheets
- Cookie scoop
- Parchment paper
How to Serve This Dish:
Serve them slightly warm if you want the marshmallows soft, or fully cooled if you want cleaner stacks. They look especially good on a platter with a few crushed peppermint candies scattered nearby.
Pro Tips for This Recipe:
- Add the marshmallows near the end so they do not disappear into the dough.
- Use mini marshmallows; big ones slide off.
- Let the cookies cool before stacking.
Variations on This Dish:
- Peppermint Cocoa Cookies: Add 1/2 teaspoon peppermint extract.
- Salted Caramel Cocoa Cookies: Drizzle with caramel after cooling.
Common Mistakes to Avoid with This Dish:
- Don’t overbake. Dry cocoa cookies lose the whole cocoa-house feel.
- Don’t add marshmallows too soon or they melt into puddles.
11. Raspberry Thumbprint Cookies
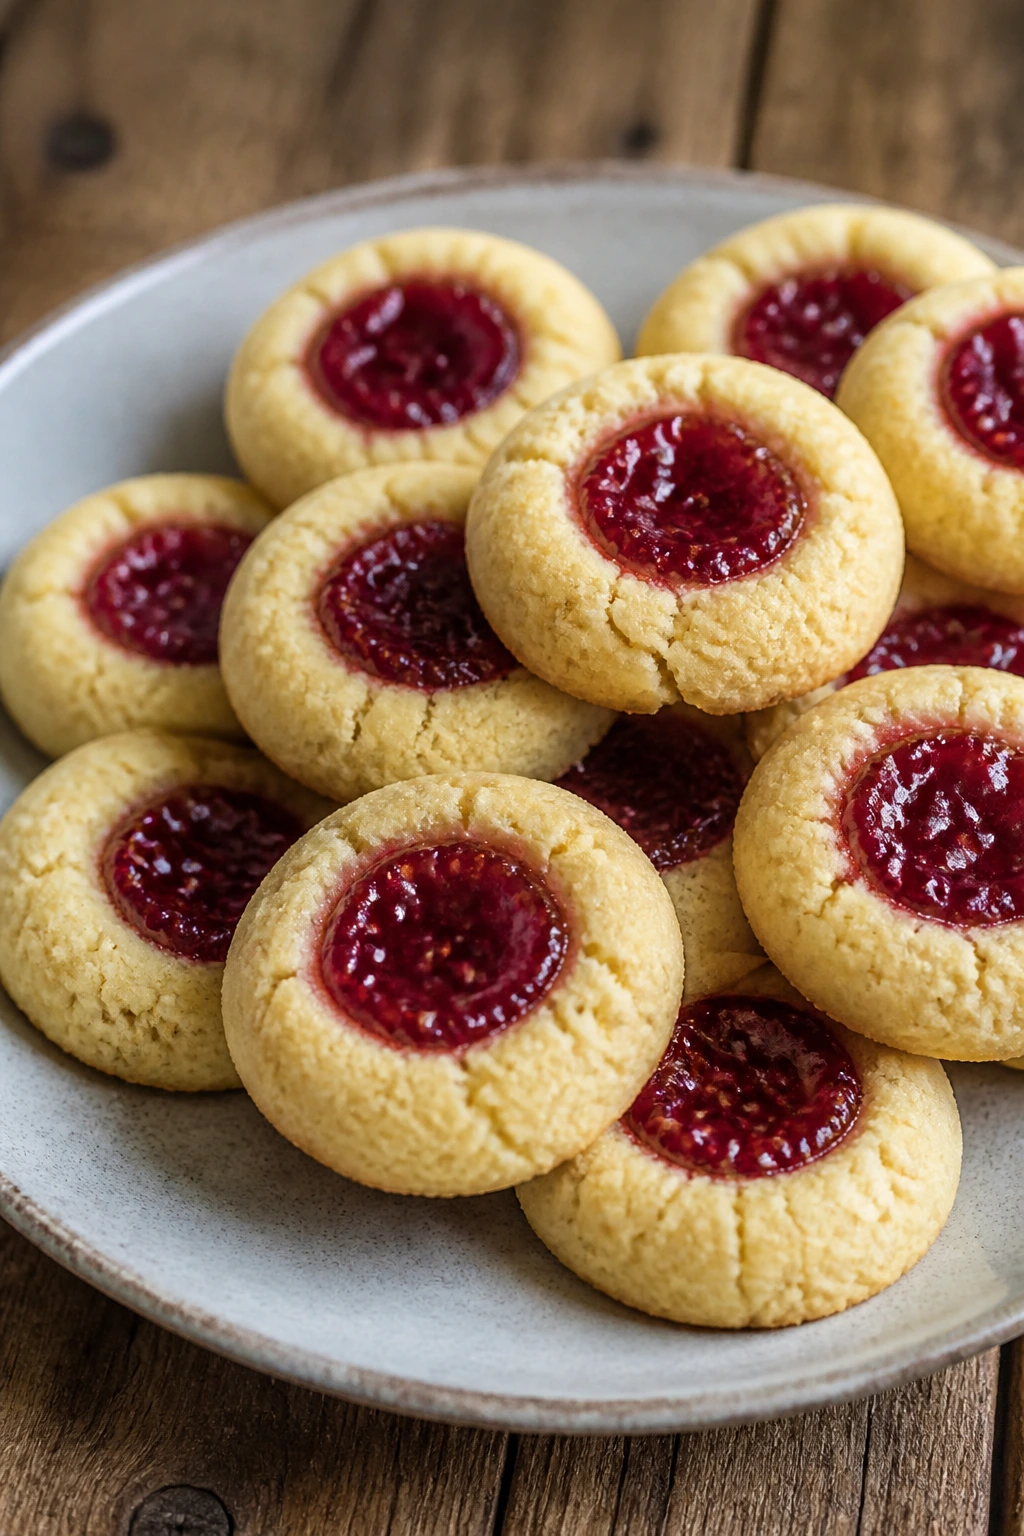
Thumbprints are small, but they always look deliberate. The jam center gives a bright red spark against the buttery cookie base.
Why It Works:
The dough is sturdy enough to hold a deep well, and raspberry jam keeps its color even after baking. A little almond extract makes the cookie taste more refined than the ingredient list suggests.
Key Ingredients:
- 2 cups flour
- 1/2 teaspoon salt
- 1 cup butter, softened
- 2/3 cup sugar
- 1 egg yolk
- 1 teaspoon vanilla extract
- 1/2 teaspoon almond extract
- 3/4 cup raspberry jam
Quick Steps:
- Cream butter and sugar, then mix in yolk and extracts.
- Add flour and salt until a soft dough forms.
- Roll into balls and press a thumb or spoon into the center.
- Fill with jam and bake at 350°F for 12 to 14 minutes.
- Cool on the pan for 5 minutes before moving.
Equipment for This Recipe:
- Mixing bowl
- Baking sheets
- Wooden spoon handle or thumb
- Parchment paper
How to Serve This Dish:
They belong on a cookie tray where color matters. A light dusting of powdered sugar makes the jam look jewel-like.
Pro Tips for This Recipe:
- Chill the shaped dough if the butter feels too soft.
- Use a thicker jam so it stays in the well.
- Repress the thumbprint gently after baking if it puffs up.
Variations on This Dish:
- Apricot Thumbprints: Swap in apricot preserves.
- Citrus Thumbprints: Add lemon zest to the dough.
Common Mistakes to Avoid with This Dish:
- Don’t overfill the centers or the jam spills onto the pan.
- Don’t make the wells too shallow.
12. Brown Butter Rice Krispie Treats
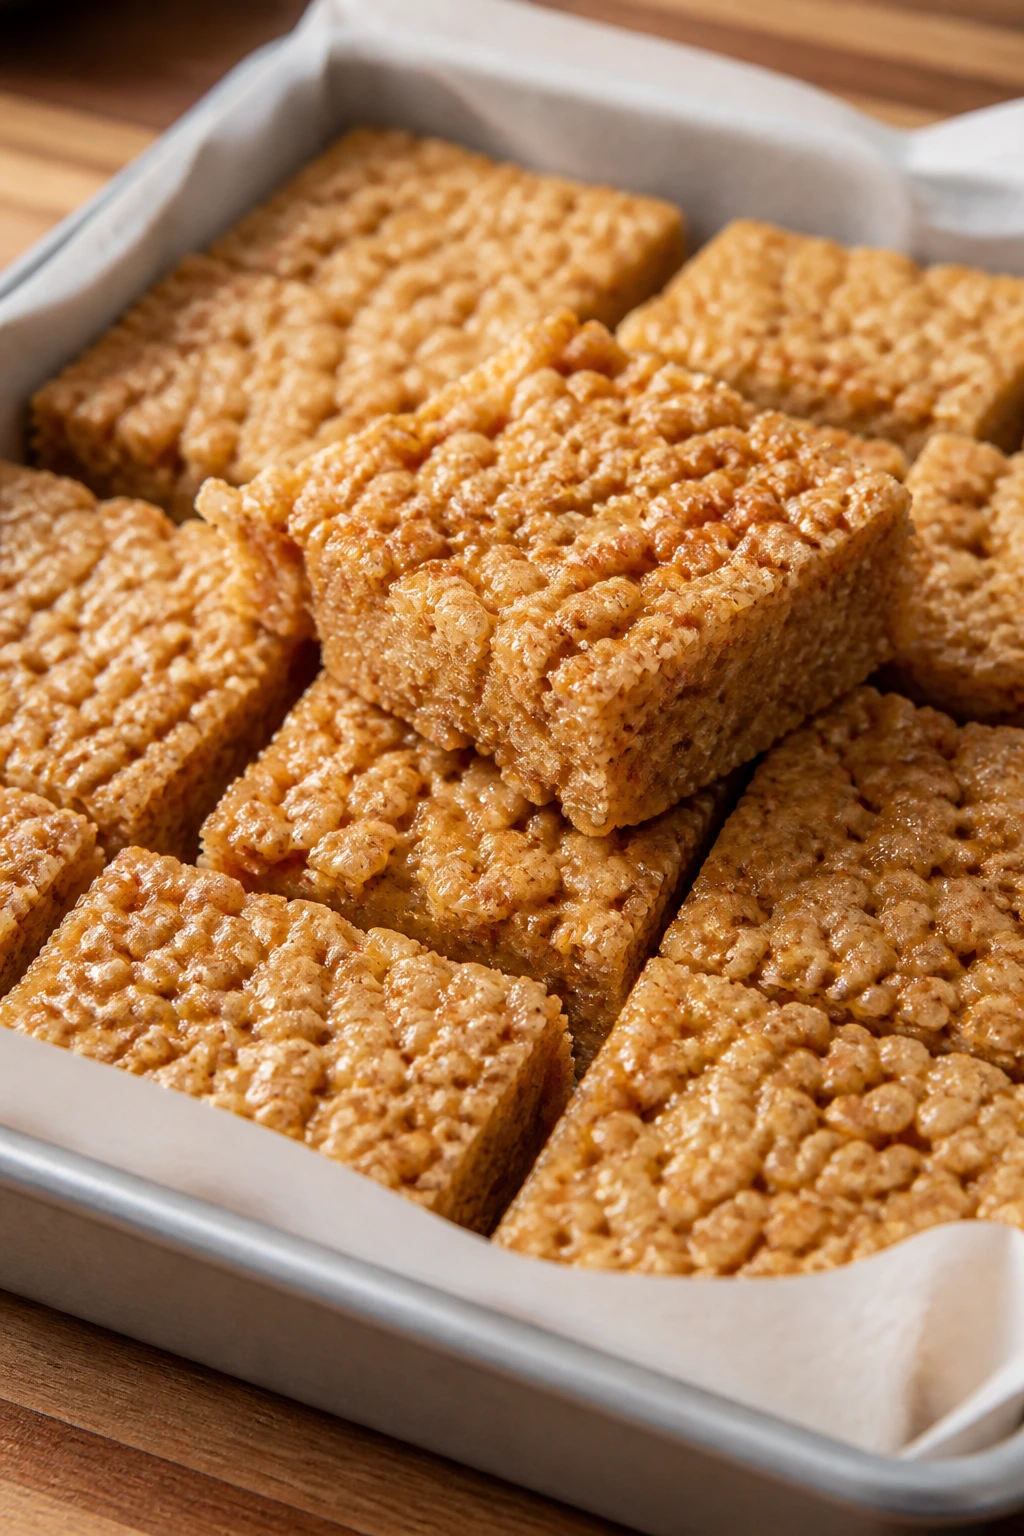
These are the kind of treats that make people stop mid-conversation. Brown butter adds a nutty, toasted smell that plain marshmallow squares never have.
Why It Works:
The brown butter gives the cereal bars a grown-up edge without making them fussy. A generous pinch of salt keeps the sweetness from flattening out.
Key Ingredients:
- 6 tablespoons unsalted butter
- 1 package mini marshmallows, about 10 oz
- 6 cups crisp rice cereal
- 1/2 teaspoon salt
- 1 teaspoon vanilla extract
- 1/2 cup mini chocolate chips, optional
Quick Steps:
- Brown the butter in a large pot until it smells nutty and the milk solids turn amber.
- Add marshmallows and stir until melted.
- Stir in salt and vanilla.
- Fold in cereal and chocolate chips, then press into a parchment-lined pan.
- Cool 30 minutes before slicing.
Equipment for This Recipe:
- Large pot
- Spatula
- 9-inch square pan
- Parchment paper
How to Serve This Dish:
Cut them into small squares and stack them on a plate. They work well with coffee or a glass of cold milk, which is about as honest as dessert gets.
Pro Tips for This Recipe:
- Do not brown the butter so far that it burns.
- Press the mixture gently; packing too hard makes them brick-like.
- Grease your spatula for easier spreading.
Variations on This Dish:
- Peppermint Crisps: Add crushed candy canes on top.
- Chocolate Swirl Treats: Drizzle with melted dark chocolate.
Common Mistakes to Avoid with This Dish:
- Don’t overpack the pan or the bars become hard.
- Don’t let the butter burn; it turns bitter fast.
13. Coconut Macaroons
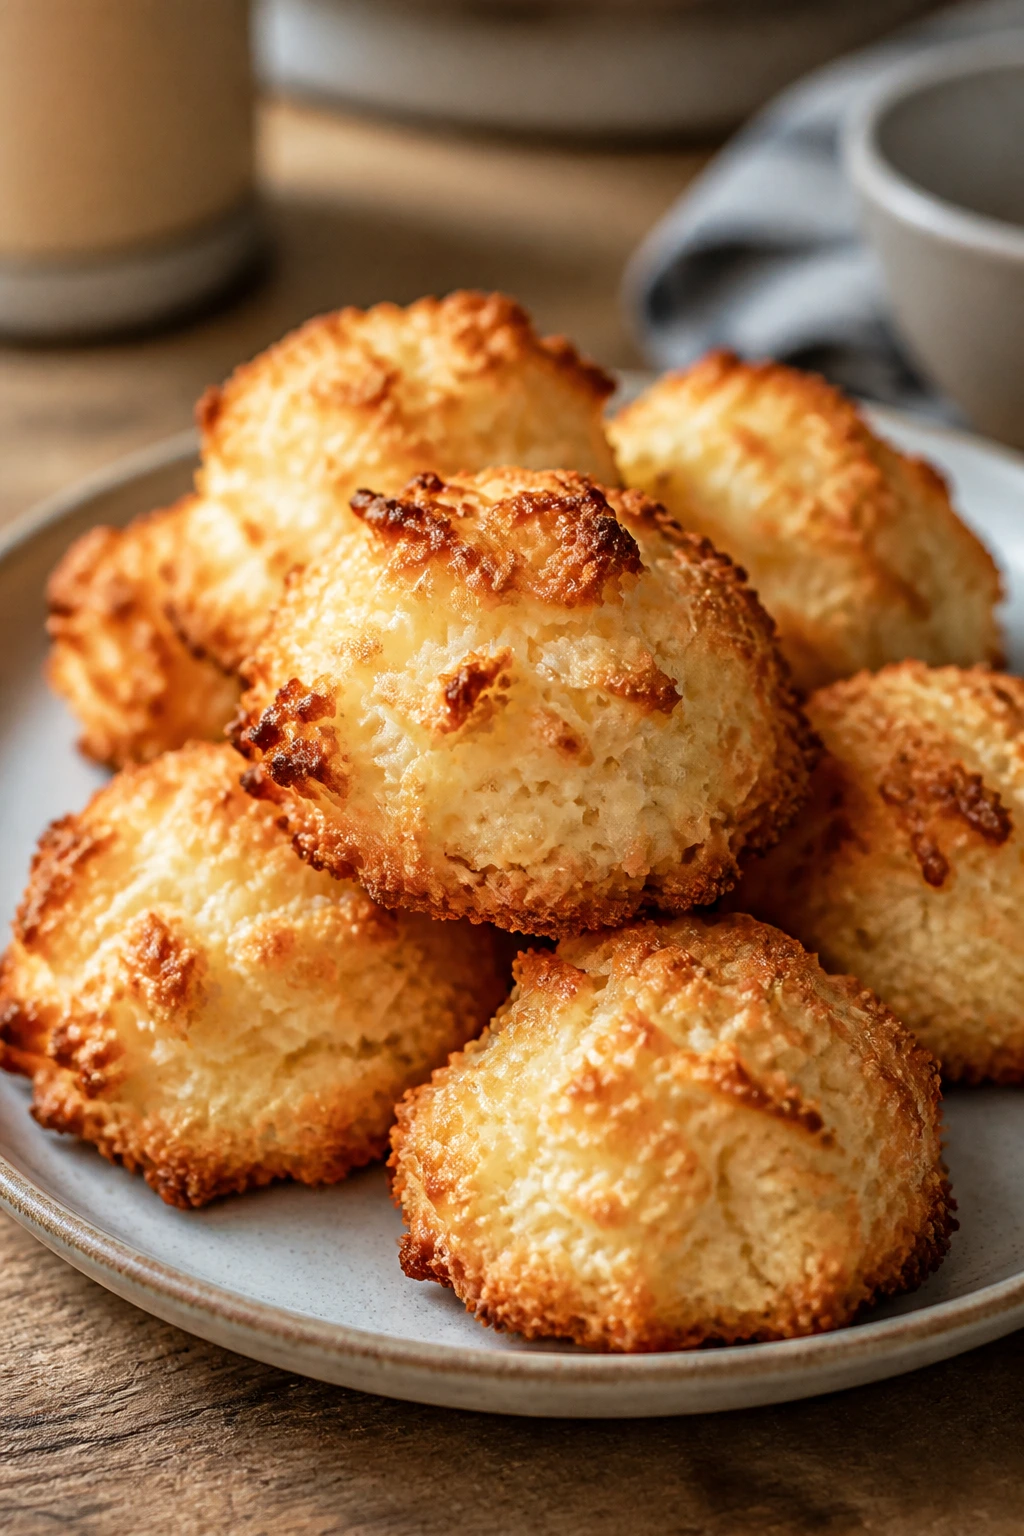
Macaroons are one of those desserts that prove a short ingredient list can still make a real event. Crisp edges, chewy centers, and toasted coconut smell like a holiday bakery case.
Why It Works:
Egg whites bind the coconut without turning the cookies cakey. A hot oven browns the tips and leaves the middles soft.
Key Ingredients:
- 4 cups sweetened shredded coconut
- 2/3 cup sugar
- 4 large egg whites
- 1 teaspoon vanilla extract
- 1/4 teaspoon salt
- 4 oz dark chocolate, optional for dipping
Quick Steps:
- Stir coconut, sugar, salt, egg whites, and vanilla in a bowl.
- Scoop mounds onto a parchment-lined tray.
- Bake at 325°F for 18 to 20 minutes until the edges are golden.
- Cool fully.
- Dip the bottoms in melted chocolate if desired.
Equipment for This Recipe:
- Mixing bowl
- Cookie scoop
- Baking sheet
- Parchment paper
How to Serve This Dish:
They look especially good when half-dipped in dark chocolate. Arrange them in a loose circle so the toasted edges show.
Pro Tips for This Recipe:
- Use sweetened coconut for the right chew.
- Beat the egg whites only enough to combine; you’re not making meringue.
- Let them cool before moving or they can stick.
Variations on This Dish:
- Almond Macaroons: Add 1/2 teaspoon almond extract.
- Lime Coconut Macaroons: Stir in lime zest for a brighter finish.
Common Mistakes to Avoid with This Dish:
- Don’t bake too hot or the coconut dries out.
- Don’t use unsweetened coconut unless you also adjust the sugar.
14. Chocolate-Dipped Biscotti
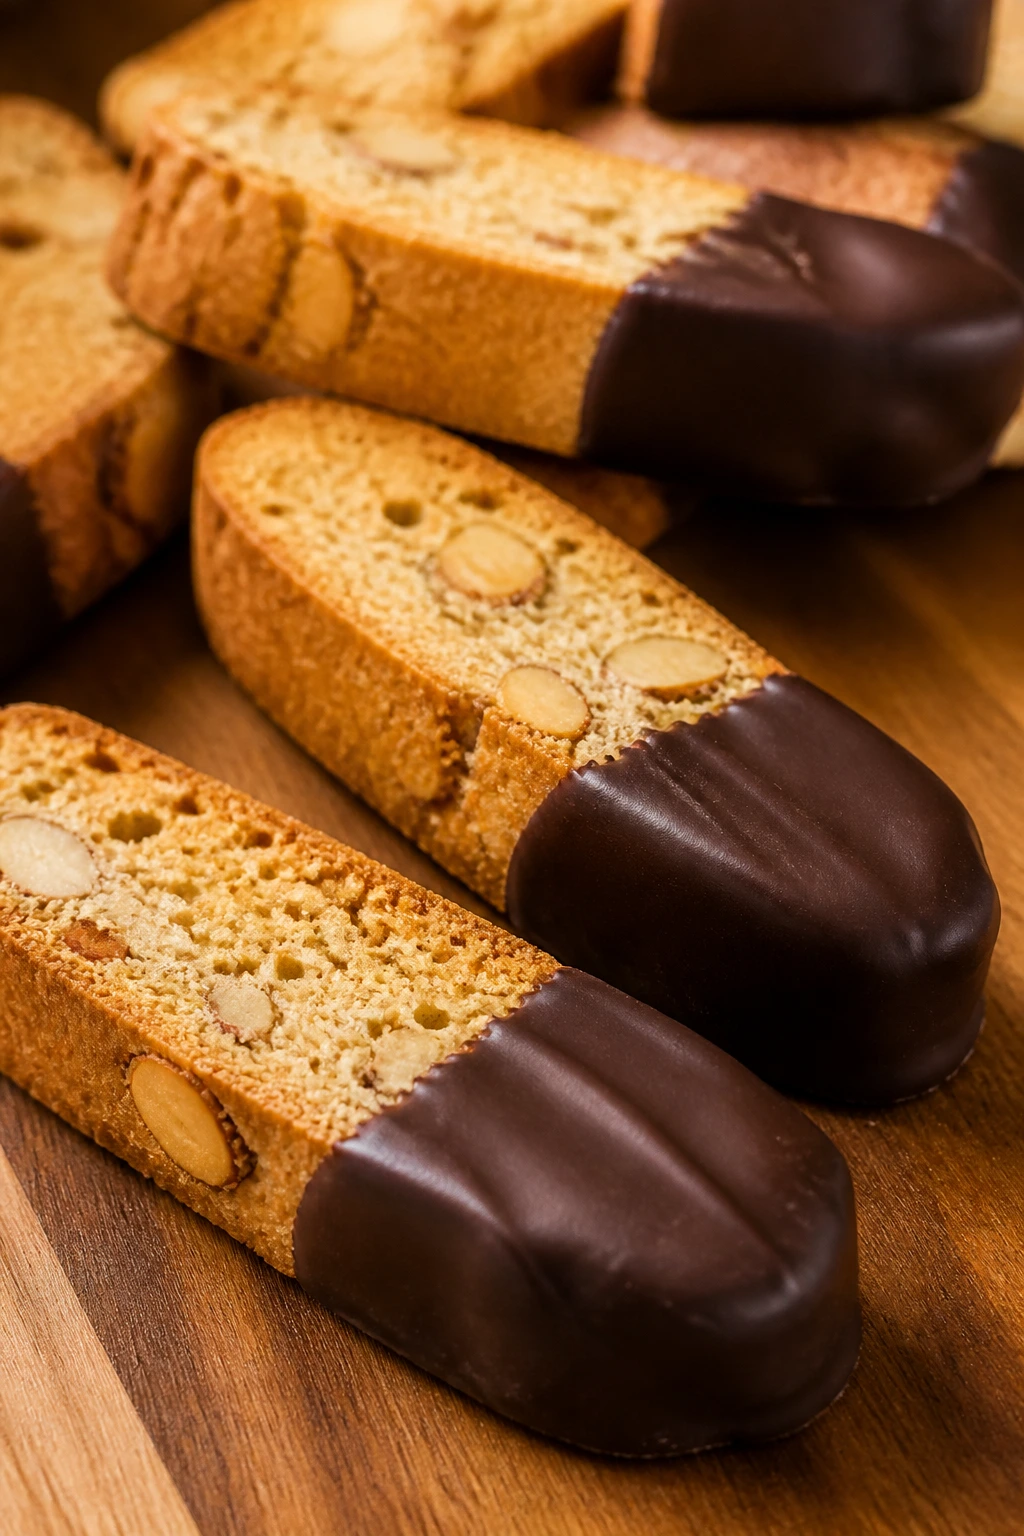
Biscotti are built for dunking, which makes them feel right at home beside strong coffee or hot chocolate. Twice-baked, crisp, and a little rustic.
Why It Works:
The first bake sets the loaf, and the second bake dries the slices into that signature snap. Chocolate on the end gives a softer bite and a cleaner finish.
Key Ingredients:
- 2 cups flour
- 3/4 cup sugar
- 1 teaspoon baking powder
- 1/2 teaspoon salt
- 2 large eggs
- 1 teaspoon vanilla extract
- 3/4 cup chopped almonds
- 4 oz dark chocolate, melted for dipping
Quick Steps:
- Make a soft dough, then shape into a log on a baking sheet.
- Bake at 350°F for 25 minutes until lightly golden.
- Cool 10 minutes, slice on a diagonal, and return slices to the tray.
- Bake 10 minutes per side until crisp.
- Dip one end in chocolate after cooling.
Equipment for This Recipe:
- Baking sheet
- Sharp serrated knife
- Mixing bowl
- Parchment paper
How to Serve This Dish:
Stack them in a mug or tall jar. They’re best with coffee, and the dipped end gives you just enough sweetness to balance the crunch.
Pro Tips for This Recipe:
- Slice while the loaf is still warm or it may crack.
- Bake the second time until the edges feel dry, not soft.
- Use chopped almonds for easier slicing.
Variations on This Dish:
- Cranberry Almond Biscotti: Add 1/2 cup dried cranberries.
- Orange Chocolate Biscotti: Add orange zest to the dough.
Common Mistakes to Avoid with This Dish:
- Don’t wait too long to slice after the first bake.
- Don’t underbake the second time, or the biscotti stay chewy.
15. Mini Pumpkin Pies
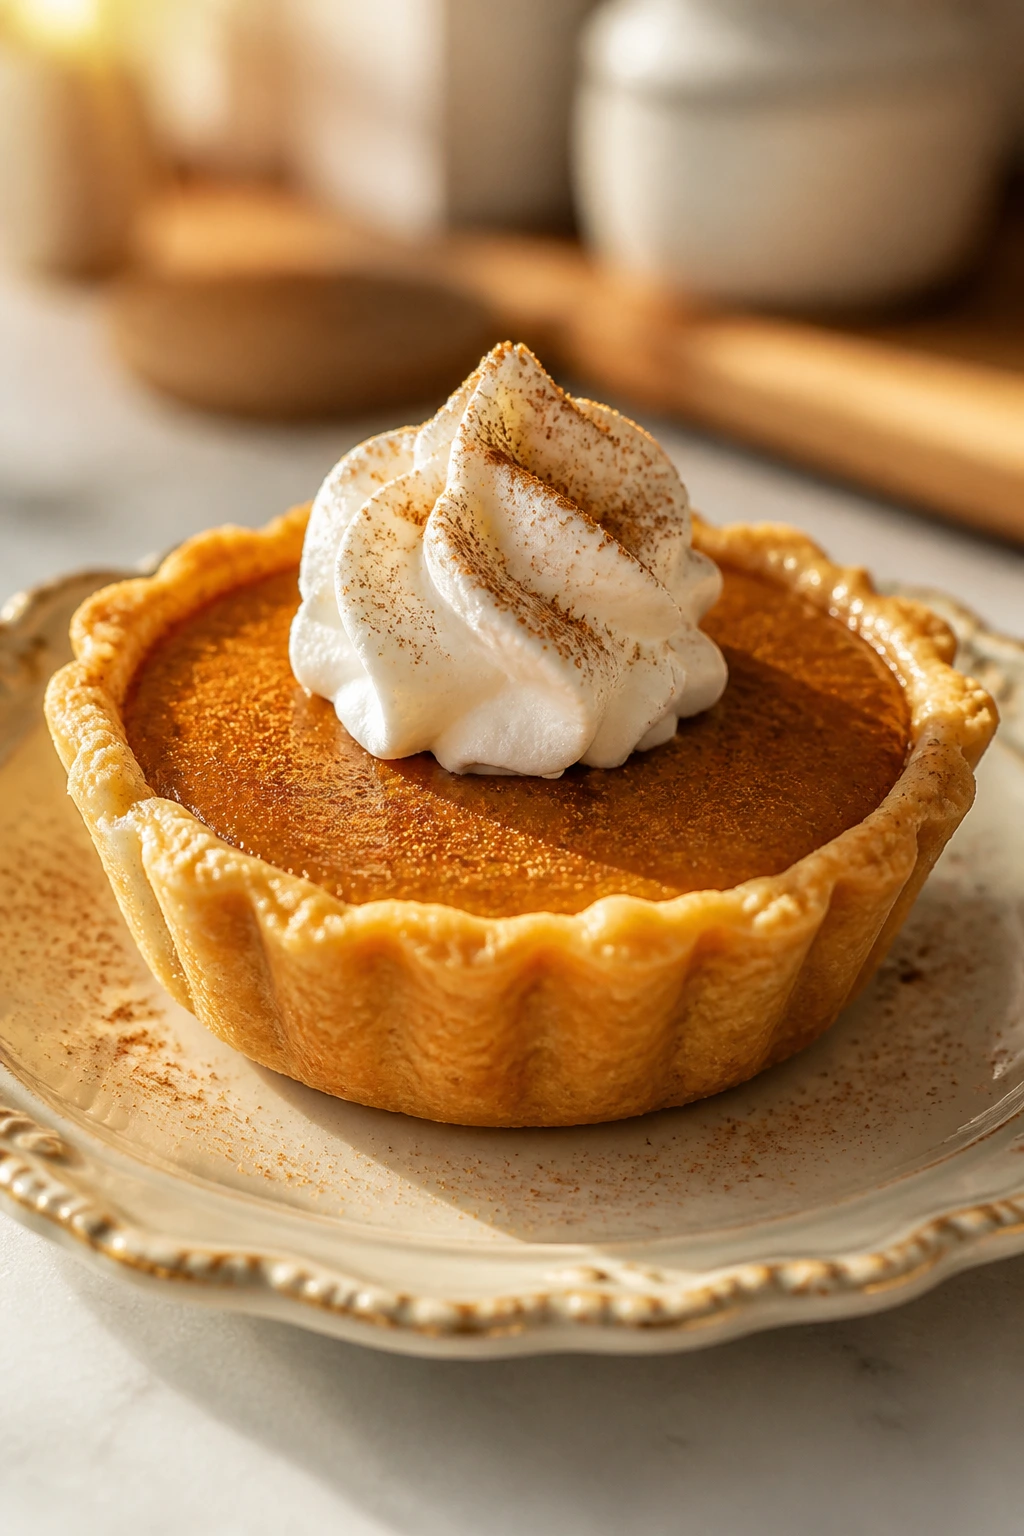
Mini pies fix the biggest problem with pie: waiting around for slices to cool. These bake faster, chill faster, and vanish faster.
Why It Works:
The smaller size means a thinner filling and a crisper crust. Pumpkin puree, eggs, cream, and spice turn into neat little cups that can be eaten in two bites.
Key Ingredients:
- 1 package refrigerated pie crusts, or homemade dough
- 1 cup pumpkin puree
- 1/2 cup evaporated milk
- 1/3 cup brown sugar
- 1 large egg
- 1 teaspoon cinnamon
- 1/4 teaspoon ginger
- 1/4 teaspoon nutmeg
- Pinch of salt
Quick Steps:
- Cut crusts into circles and fit them into muffin cups.
- Whisk filling ingredients until smooth.
- Fill crusts nearly to the top.
- Bake at 375°F for 20 to 24 minutes until the centers are just set.
- Cool completely before lifting out.
Equipment for This Recipe:
- Muffin tin
- Rolling pin
- Mixing bowl
- Round cutter or glass
How to Serve This Dish:
Top with a small curl of whipped cream. Mini pies belong on a tray where you can grab one without needing a plate the size of a dinner board.
Pro Tips for This Recipe:
- Chill the crust before baking to keep it from shrinking.
- Do not overfill or the tops puff and crack.
- Use a spoon to smooth the filling after pouring.
Variations on This Dish:
- Maple Pumpkin Pies: Swap part of the sugar for maple syrup.
- Gingersnap Crust Minis: Use crushed gingersnaps for the crust.
Common Mistakes to Avoid with This Dish:
- Don’t bake until rock hard; the filling should still have a slight wobble.
- Don’t remove them while warm or the crust can break.
16. Cranberry Bliss Bars
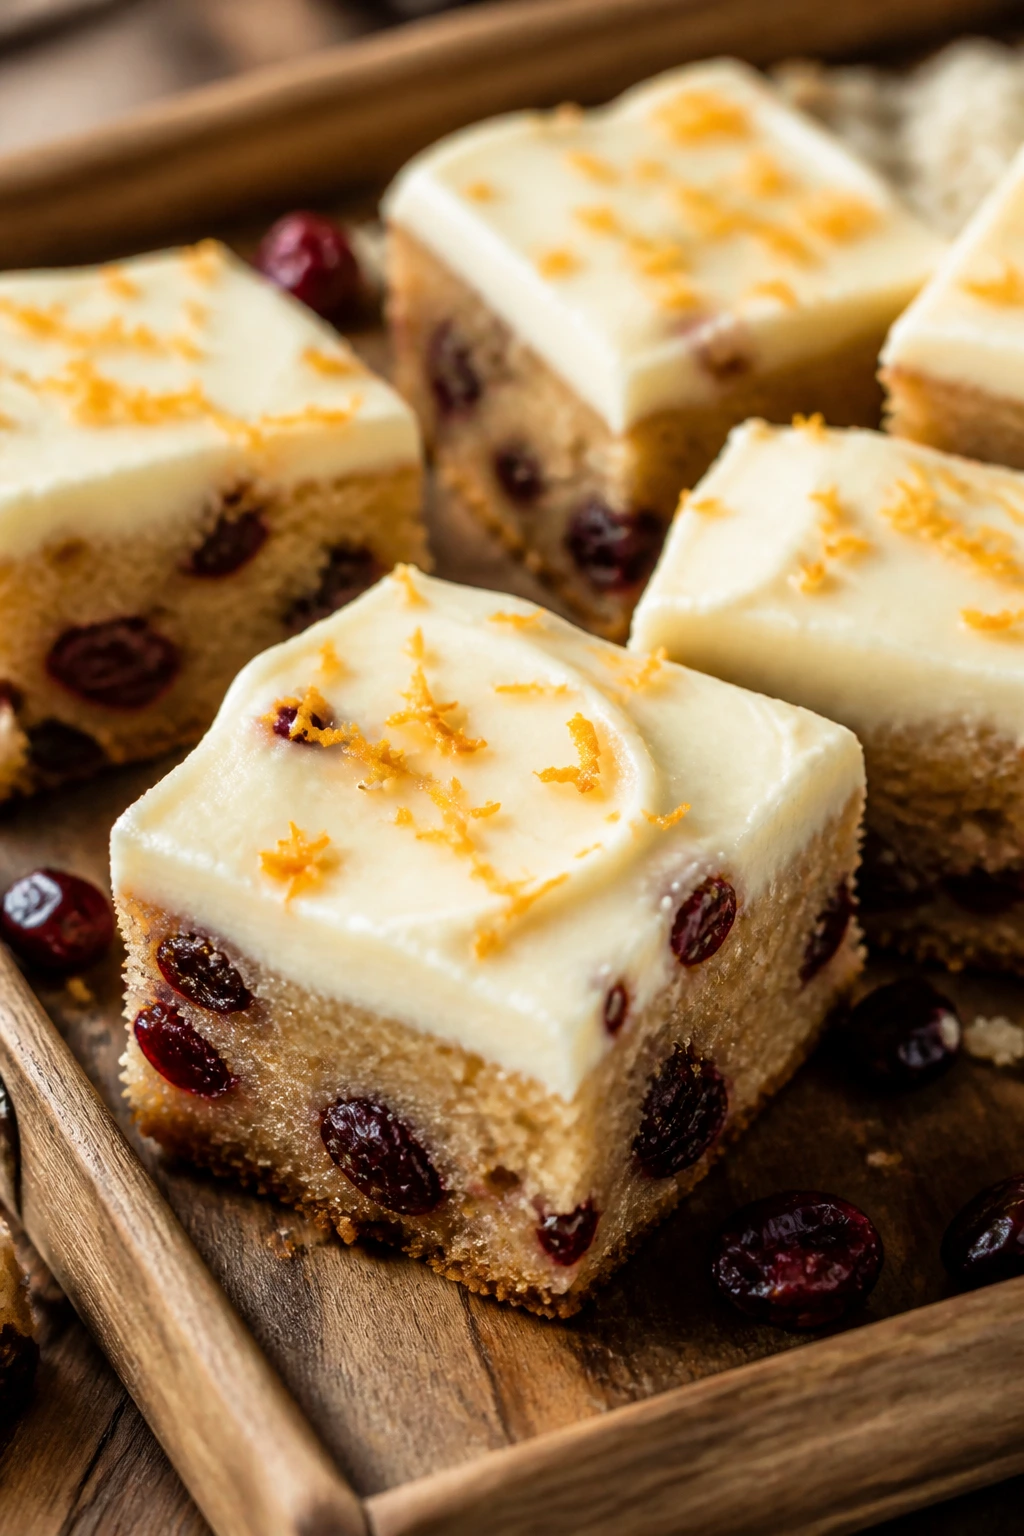
These bars have that bakery-style look people always assume requires a frosting bag and a long afternoon. The tart cranberry and sweet white chocolate keep each bite from feeling too heavy.
Why It Works:
A soft blondie base carries dried cranberries, and the cream cheese frosting gives the bar its signature tang. Orange zest cuts through the sweetness and keeps the whole thing lively.
Key Ingredients:
- 1/2 cup butter, melted
- 1 cup brown sugar
- 1 large egg
- 1 teaspoon vanilla extract
- 1 1/2 cups flour
- 1/2 teaspoon baking powder
- 1/2 teaspoon salt
- 3/4 cup dried cranberries
- 1/2 cup white chocolate chips
- 4 oz cream cheese, softened
- 1 cup powdered sugar
- 1 tablespoon orange zest
Quick Steps:
- Make the blondie batter and spread it in an 8-inch pan.
- Bake at 350°F for 18 to 22 minutes until set.
- Cool fully.
- Beat the frosting ingredients until smooth and spread over the bars.
- Sprinkle with more cranberries and white chocolate.
Equipment for This Recipe:
- 8-inch baking pan
- Hand mixer
- Mixing bowls
- Offset spatula
How to Serve This Dish:
Slice into skinny rectangles, not giant blocks. A little orange zest on top makes the frosting smell as good as it tastes.
Pro Tips for This Recipe:
- Cool the base completely before frosting or the topping melts.
- Chop the cranberries if you want cleaner slices.
- Chill after frosting for the neatest cut.
Variations on This Dish:
- Pistachio Bliss Bars: Add chopped pistachios on top.
- Extra-Citrus Bars: Add orange zest to the batter and frosting.
Common Mistakes to Avoid with This Dish:
- Don’t frost a warm base. It turns the top sloppy.
- Don’t make the bars too thick; they should be square, not brick-like.
17. No-Bake Oreo Truffles
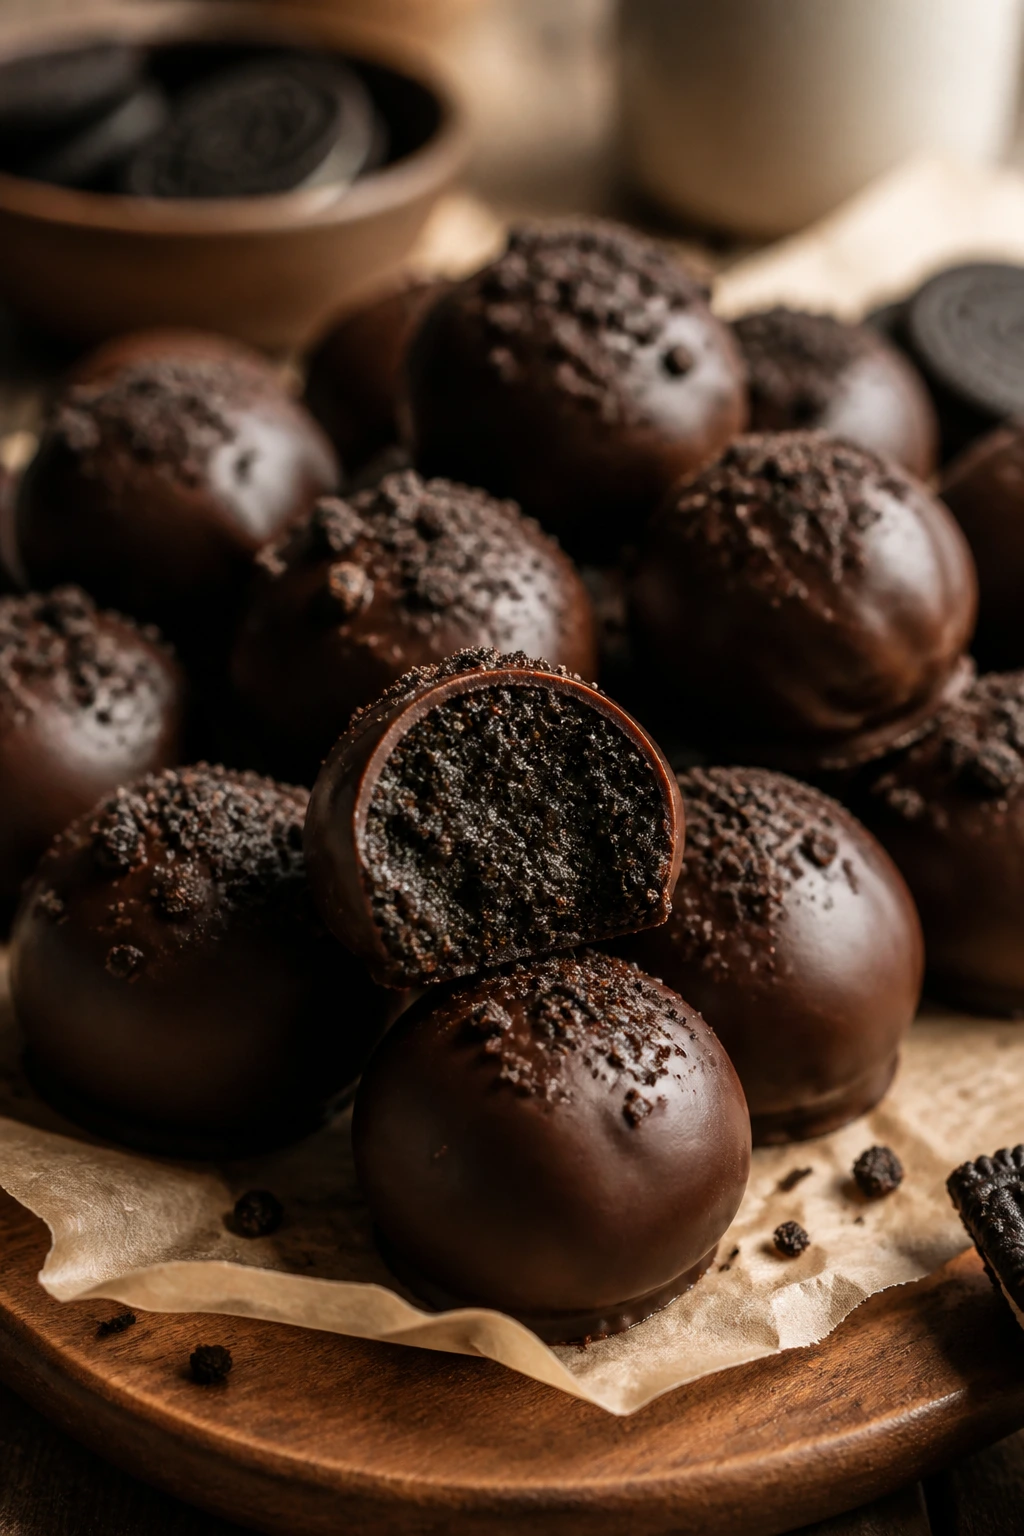
These are the cheat code of dessert trays. Crushed cookies, cream cheese, and chocolate coating—nothing complicated, nothing fussy.
Why It Works:
The filling firms up in the fridge, which makes the balls easy to dip. The dark coating hides any rough edges, so they look polished even if you rolled them quickly.
Key Ingredients:
- 1 package sandwich cookies, about 36 cookies
- 8 oz cream cheese, softened
- 12 oz semisweet chocolate, melted
- 2 tablespoons crushed cookies or sprinkles for topping
Quick Steps:
- Crush cookies into fine crumbs.
- Mix crumbs with cream cheese until a dough forms.
- Roll into 1-inch balls and chill 30 minutes.
- Dip in melted chocolate.
- Top before the coating sets.
Equipment for This Recipe:
- Food processor or rolling pin
- Mixing bowl
- Fork or dipping tool
- Parchment paper
How to Serve This Dish:
Serve them cold or just slightly softened. They look nicest on a chilled platter, because the chocolate shell stays glossy.
Pro Tips for This Recipe:
- Finely crush the cookies so the filling rolls smoothly.
- Chill the balls before dipping or they’ll soften and slump.
- Use a fork to tap off excess chocolate.
Variations on This Dish:
- Peppermint Truffles: Use peppermint sandwich cookies or add extract.
- White Chocolate Truffles: Coat with white chocolate and crushed candy canes.
Common Mistakes to Avoid with This Dish:
- Don’t add too much cream cheese or the balls won’t hold shape.
- Don’t dip while warm; the coating can slide off.
18. Chocolate Spice Truffles
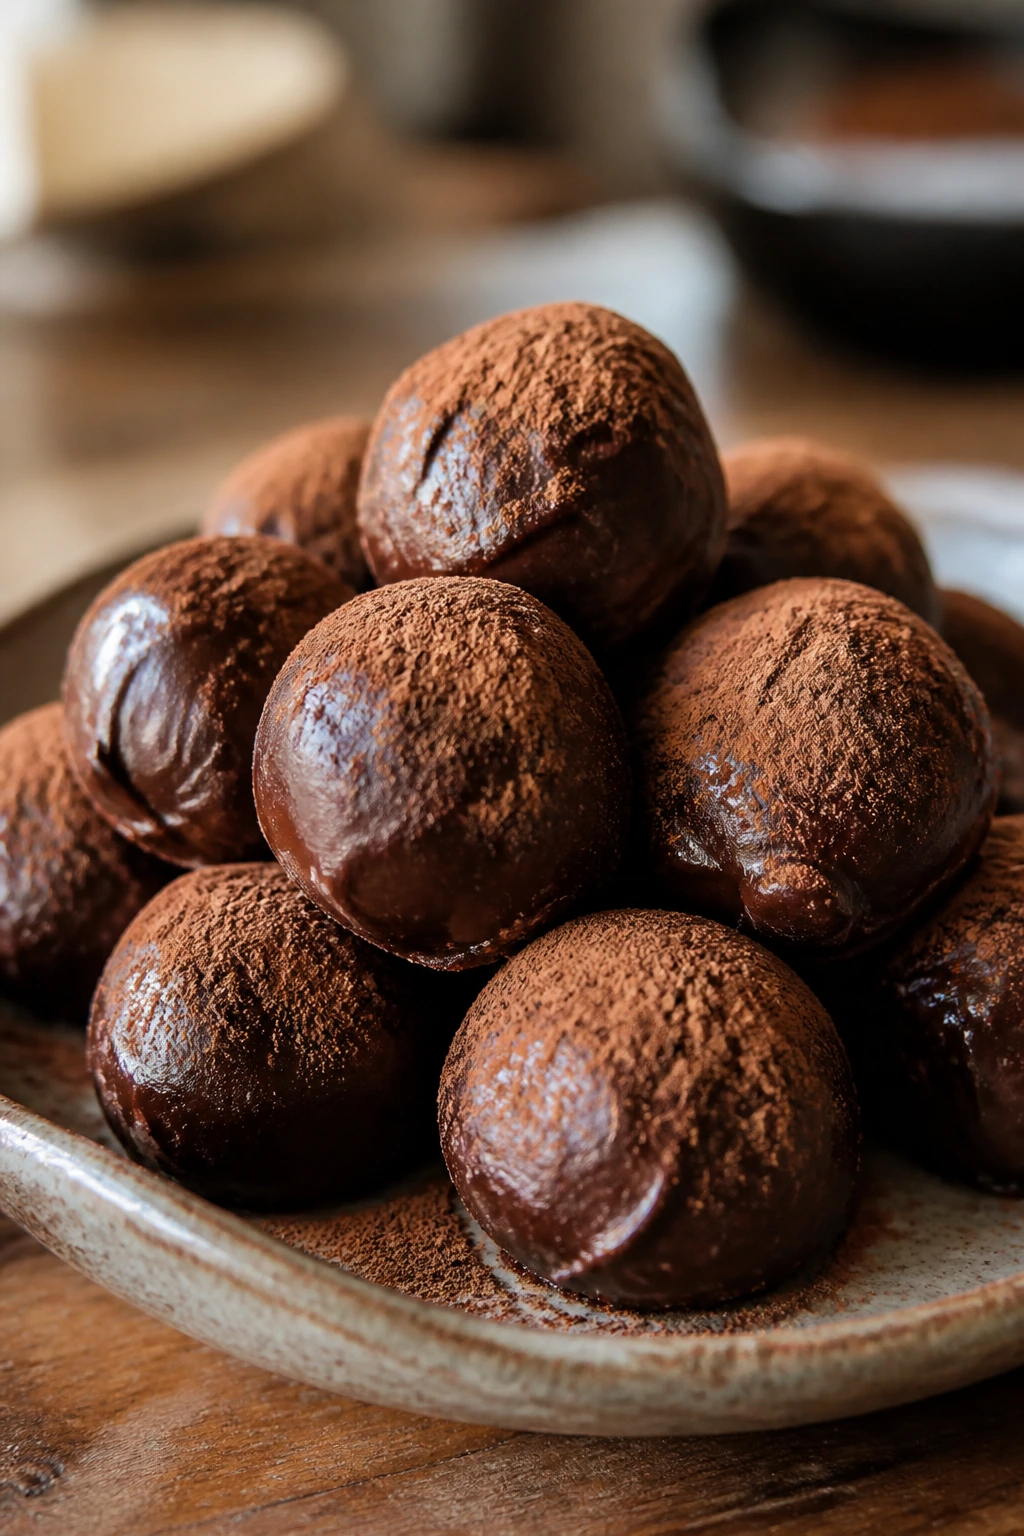
These truffles are a little more adult, a little less sweet, and exactly the sort of thing I like after a heavy dinner. The spice stays in the background and keeps the chocolate from tasting flat.
Why It Works:
Dark chocolate and cream make a ganache that firms up into a rich center. A pinch of cinnamon and cayenne gives the kind of warmth you notice after the second bite.
Key Ingredients:
- 8 oz dark chocolate, chopped
- 1/2 cup heavy cream
- 1 tablespoon butter
- 1/2 teaspoon cinnamon
- Pinch of cayenne
- Cocoa powder, chopped nuts, or shredded coconut for coating
Quick Steps:
- Heat cream and butter until steaming.
- Pour over chocolate, wait 1 minute, then stir smooth.
- Stir in cinnamon and cayenne.
- Chill until scoopable, then roll into balls.
- Coat and chill again before serving.
Equipment for This Recipe:
- Small saucepan
- Mixing bowl
- Spoon or scoop
- Shallow bowl for coating
How to Serve This Dish:
Keep them small and serve with coffee or espresso. A dusting of cocoa looks elegant, but chopped pistachios give better texture.
Pro Tips for This Recipe:
- Use a chocolate you’d actually eat plain.
- Chill ganache until firm but not rock hard.
- Roll with cool hands so the truffles stay smooth.
Variations on This Dish:
- Orange Spice Truffles: Add orange zest to the ganache.
- Peppermint Truffles: Replace half the cinnamon with peppermint extract.
Common Mistakes to Avoid with This Dish:
- Don’t overheat the cream or the chocolate can split.
- Don’t skip the final chill, or the coating gets messy.
19. Sugar Cookie Bars
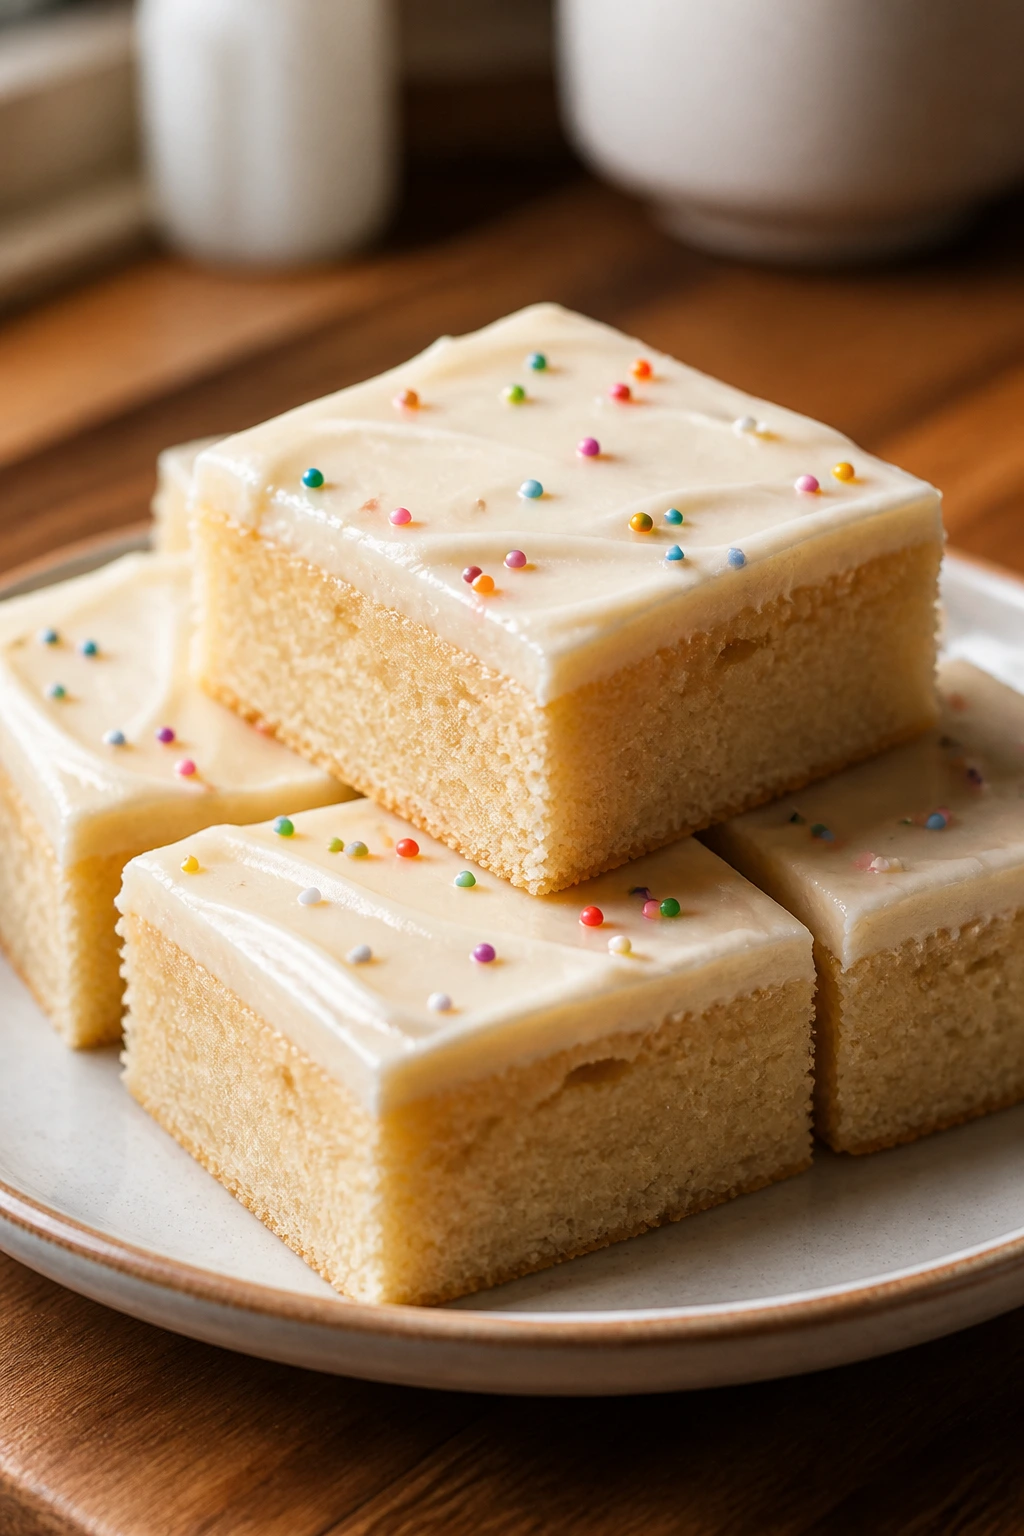
Sugar cookie bars are what I bake when I want cookie flavor without rolling and cutting 40 shapes. They’re soft, thick, and easy to frost or leave plain.
Why It Works:
Bar dough spreads in one pan instead of across several baking sheets. That means you get the buttery sugar-cookie taste with far less handling.
Key Ingredients:
- 2 1/4 cups flour
- 1 teaspoon baking powder
- 1/2 teaspoon salt
- 3/4 cup butter, softened
- 1 cup sugar
- 1 large egg
- 2 teaspoons vanilla extract
- 1/4 cup sour cream
Quick Steps:
- Whisk dry ingredients.
- Cream butter and sugar, then add egg, vanilla, and sour cream.
- Mix in dry ingredients and press into a lined 9-inch pan.
- Bake at 350°F for 18 to 22 minutes until the center is just set.
- Cool and frost or glaze if you want.
Equipment for This Recipe:
- 9-inch square pan
- Mixer
- Spatula
- Parchment paper
How to Serve This Dish:
Cut into neat squares and top with a thin frosting or simple glaze. The bars carry sprinkles well, which makes them the most flexible dessert on this list.
Pro Tips for This Recipe:
- Use sour cream for a softer crumb.
- Do not overbake; the bars should stay pale.
- Chill before cutting if you plan to frost them heavily.
Variations on This Dish:
- Peppermint Sugar Bars: Add peppermint extract to the frosting.
- Citrus Sugar Bars: Add lemon or orange zest to the batter.
Common Mistakes to Avoid with This Dish:
- Don’t overmix once the flour goes in.
- Don’t bake until browned; that dries the bars out.
20. Sticky Toffee Mug Cakes
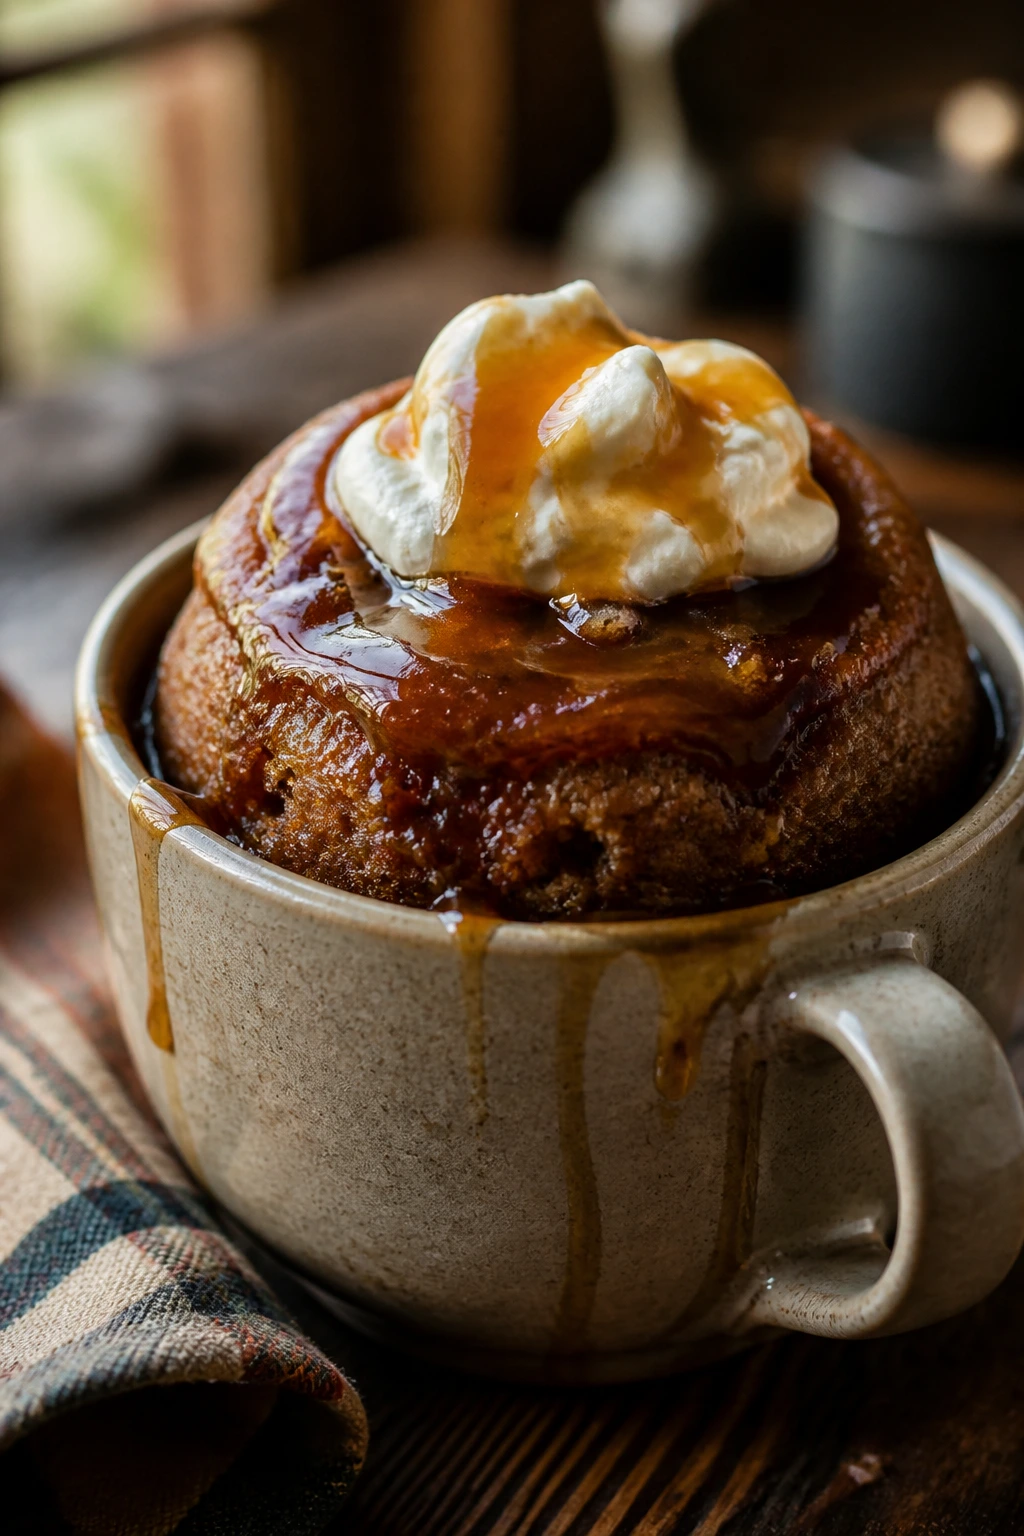
A mug cake sounds small, but this one has enough butter, dates, and spice to feel like a real dessert. It’s the move when you want something warm without starting a whole oven.
Why It Works:
Dates melt into the batter and give it the same dark sweetness sticky toffee pudding is known for. The microwave keeps the crumb tender and fast.
Key Ingredients:
- 3 pitted dates, chopped
- 2 tablespoons boiling water
- 1 tablespoon butter, melted
- 2 tablespoons brown sugar
- 1 egg yolk
- 3 tablespoons flour
- 1/4 teaspoon baking powder
- Pinch of cinnamon
- 2 tablespoons toffee sauce or caramel sauce
Quick Steps:
- Soak the dates in boiling water for 2 minutes.
- Stir in butter, sugar, and egg yolk.
- Mix in flour, baking powder, and cinnamon.
- Microwave in a large mug 60 to 90 seconds until just set.
- Drizzle with warm toffee sauce.
Equipment for This Recipe:
- Microwave-safe mug
- Fork
- Spoon
- Small bowl
How to Serve This Dish:
Eat it straight from the mug while warm. A spoonful of whipped cream on top makes it feel a little more composed.
Pro Tips for This Recipe:
- Use a large mug so the batter does not overflow.
- Stop microwaving while the center still looks a touch damp.
- Chop dates finely so they disappear into the crumb.
Variations on This Dish:
- Apple-Toffee Mug Cake: Add finely diced cooked apple.
- Mocha Mug Cake: Add 1/2 teaspoon instant espresso.
Common Mistakes to Avoid with This Dish:
- Don’t overcook it, or the mug cake turns rubbery.
- Don’t use a tiny mug; the batter rises more than expected.
21. Pear Galette
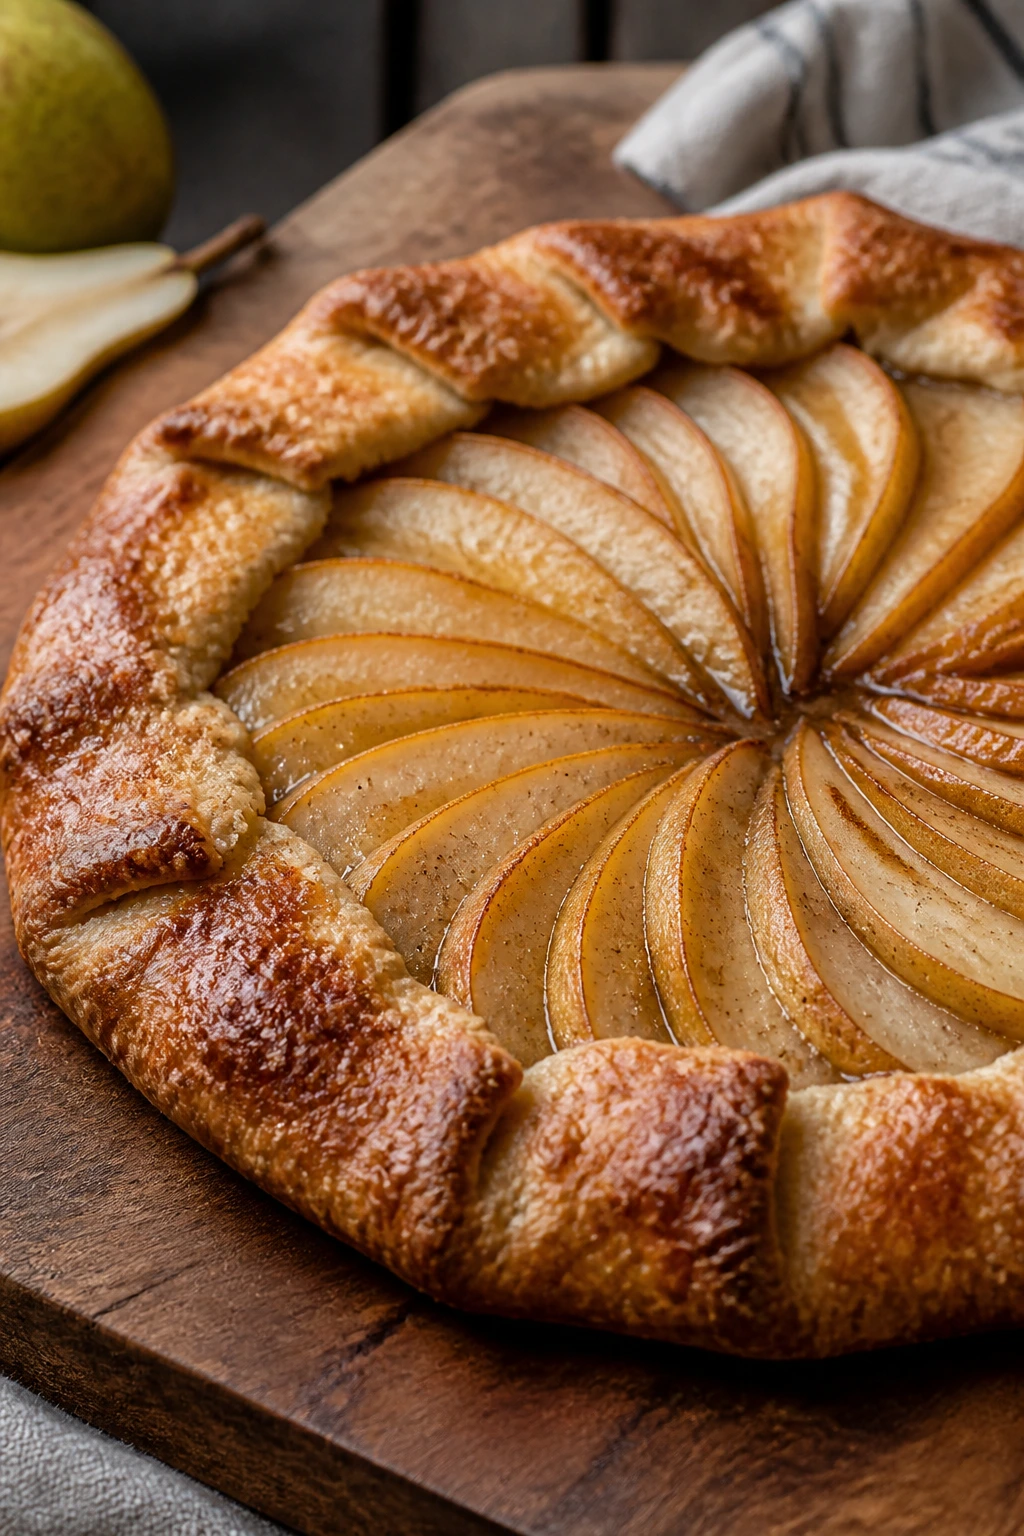
A galette looks more relaxed than pie, and that’s part of the charm. Thin pear slices fan out in a rough circle, and the edges bake up bronzed and craggy.
Why It Works:
The free-form crust means you do not need a pie pan or perfect crimping. Pears soften into a jammy filling while the exposed crust browns fast.
Key Ingredients:
- 1 single pie crust, homemade or store-bought
- 3 ripe but firm pears, sliced
- 2 tablespoons sugar
- 1 tablespoon flour
- 1 teaspoon lemon juice
- 1/2 teaspoon cinnamon
- 1 tablespoon butter, diced
Quick Steps:
- Roll the crust into a rough 12-inch round.
- Toss pears with sugar, flour, lemon, and cinnamon.
- Pile the pears in the center, leaving a 2-inch border.
- Fold the edges over and dot with butter.
- Bake at 400°F for 30 to 35 minutes until the crust is deep golden.
Equipment for This Recipe:
- Baking sheet
- Rolling pin
- Knife and cutting board
- Parchment paper
How to Serve This Dish:
Serve warm with whipped cream or ice cream. The irregular edges make each slice look handmade in the best sense.
Pro Tips for This Recipe:
- Choose pears that give slightly at the neck but are still firm.
- Chill the shaped galette before baking if the dough is soft.
- Brush the crust with egg wash for extra color.
Variations on This Dish:
- Pear-Almond Galette: Sprinkle almond flour under the fruit.
- Pear-Ginger Galette: Add grated fresh ginger to the filling.
Common Mistakes to Avoid with This Dish:
- Don’t use overripe pears; they collapse into soup.
- Don’t skip the flour in the filling, or the juices run everywhere.
22. Caramel Apple Hand Pies
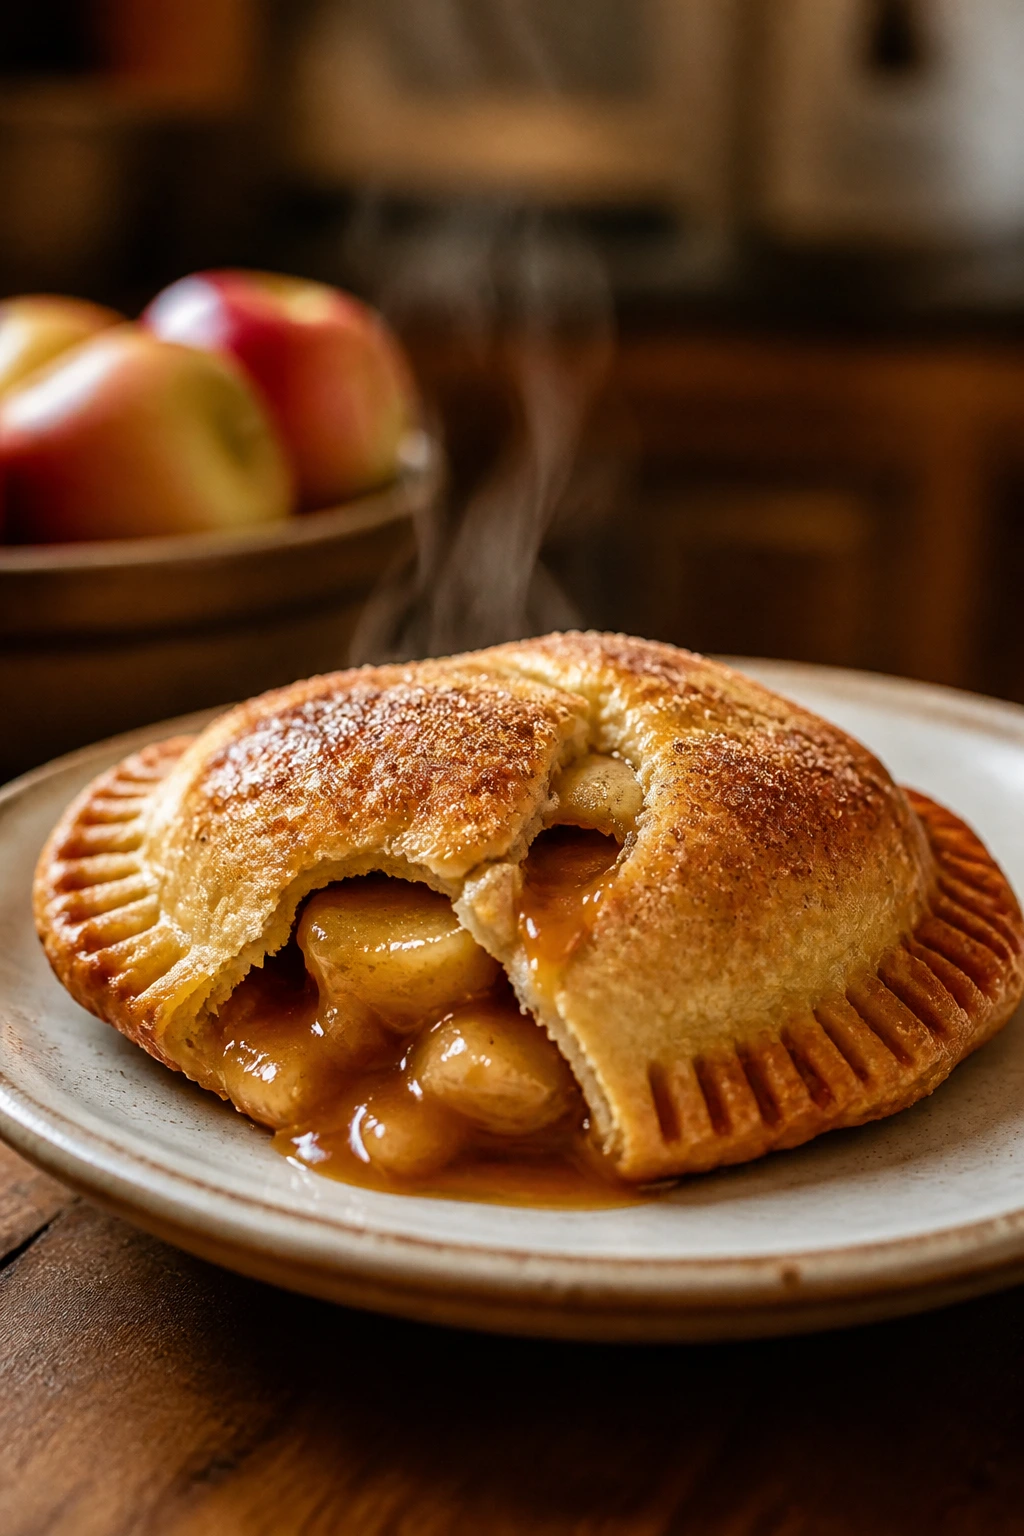
Hand pies are what pie turns into when you want dessert you can hold in one hand. The caramel and apple filling feels cozy, but the pastry shell keeps it tidy.
Why It Works:
Small pies bake faster than one big one, and the filling can be pre-cooked for better control. A sealed edge keeps the caramel from leaking all over the pan.
Key Ingredients:
- 2 pie crusts, rolled
- 2 apples, peeled and diced
- 2 tablespoons brown sugar
- 1 teaspoon cinnamon
- 1 tablespoon flour
- 2 tablespoons caramel sauce
- 1 egg, beaten for wash
Quick Steps:
- Cook apples, sugar, cinnamon, flour, and caramel in a skillet for 5 minutes.
- Cool the filling slightly.
- Cut crust into rounds, fill, fold, and seal with a fork.
- Brush with egg wash and cut a small steam vent.
- Bake at 400°F for 18 to 22 minutes until golden.
Equipment for This Recipe:
- Baking sheet
- Small skillet
- Fork
- Pastry brush
How to Serve This Dish:
Serve them warm, not scalding. A drizzle of caramel right before serving gives the crust a glossy finish.
Pro Tips for This Recipe:
- Cool the filling before assembling so the pastry does not turn soggy.
- Crimp edges tightly.
- Make the vents small but real, so steam escapes.
Variations on This Dish:
- Cranberry Apple Hand Pies: Stir dried cranberries into the filling.
- Maple Apple Hand Pies: Replace some sugar with maple syrup.
Common Mistakes to Avoid with This Dish:
- Don’t overfill the rounds or they burst open.
- Don’t skip the egg wash if you want a deep gold crust.
23. White Chocolate Pretzel Toffee
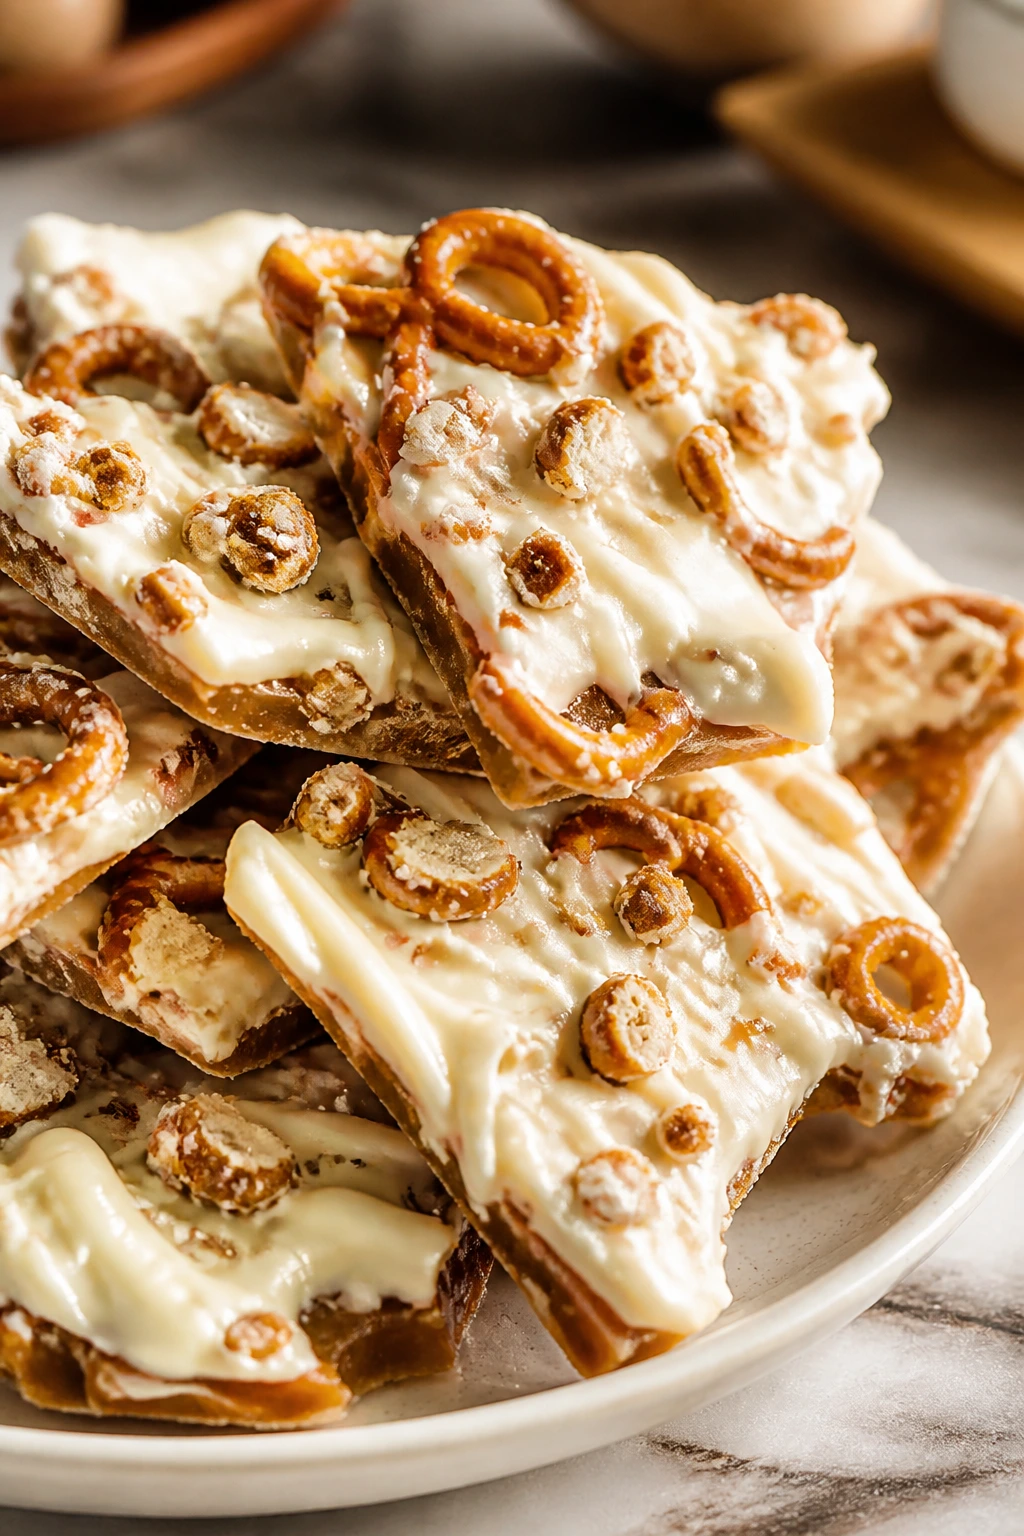
This is the dessert I reach for when I need sweet, salty, crunchy, and fast. It breaks into jagged pieces that disappear off a serving tray with embarrassing speed.
Why It Works:
Pretzels give the toffee a sturdy base, and white chocolate sets the whole thing off with a creamy layer. The salt keeps it from tasting like pure sugar.
Key Ingredients:
- 2 cups mini pretzels
- 1 cup butter
- 1 cup brown sugar
- 1 cup white chocolate chips
- 1/2 cup chopped pecans or almonds
- Flaky salt
Quick Steps:
- Spread pretzels on a lined sheet.
- Boil butter and brown sugar for 3 minutes, then pour over pretzels.
- Bake at 400°F for 5 minutes.
- Scatter white chocolate chips on top and spread once melted.
- Add nuts and salt, then cool and break apart.
Equipment for This Recipe:
- Rimmed baking sheet
- Saucepan
- Offset spatula
- Parchment paper
How to Serve This Dish:
Pile the pieces high in a bowl. The irregular shards look more appetizing than tidy squares here.
Pro Tips for This Recipe:
- Line the pan carefully; toffee hardens like glue.
- Work quickly once the chocolate melts.
- Cool fully before breaking or it smears.
Variations on This Dish:
- Dark Chocolate Toffee Bark: Use dark chocolate instead.
- Peppermint Pretzel Toffee: Add crushed candy canes over the chocolate.
Common Mistakes to Avoid with This Dish:
- Don’t underboil the butter-sugar mix or the toffee stays soft.
- Don’t spread the chocolate before it has melted enough.
24. Mocha Brownies
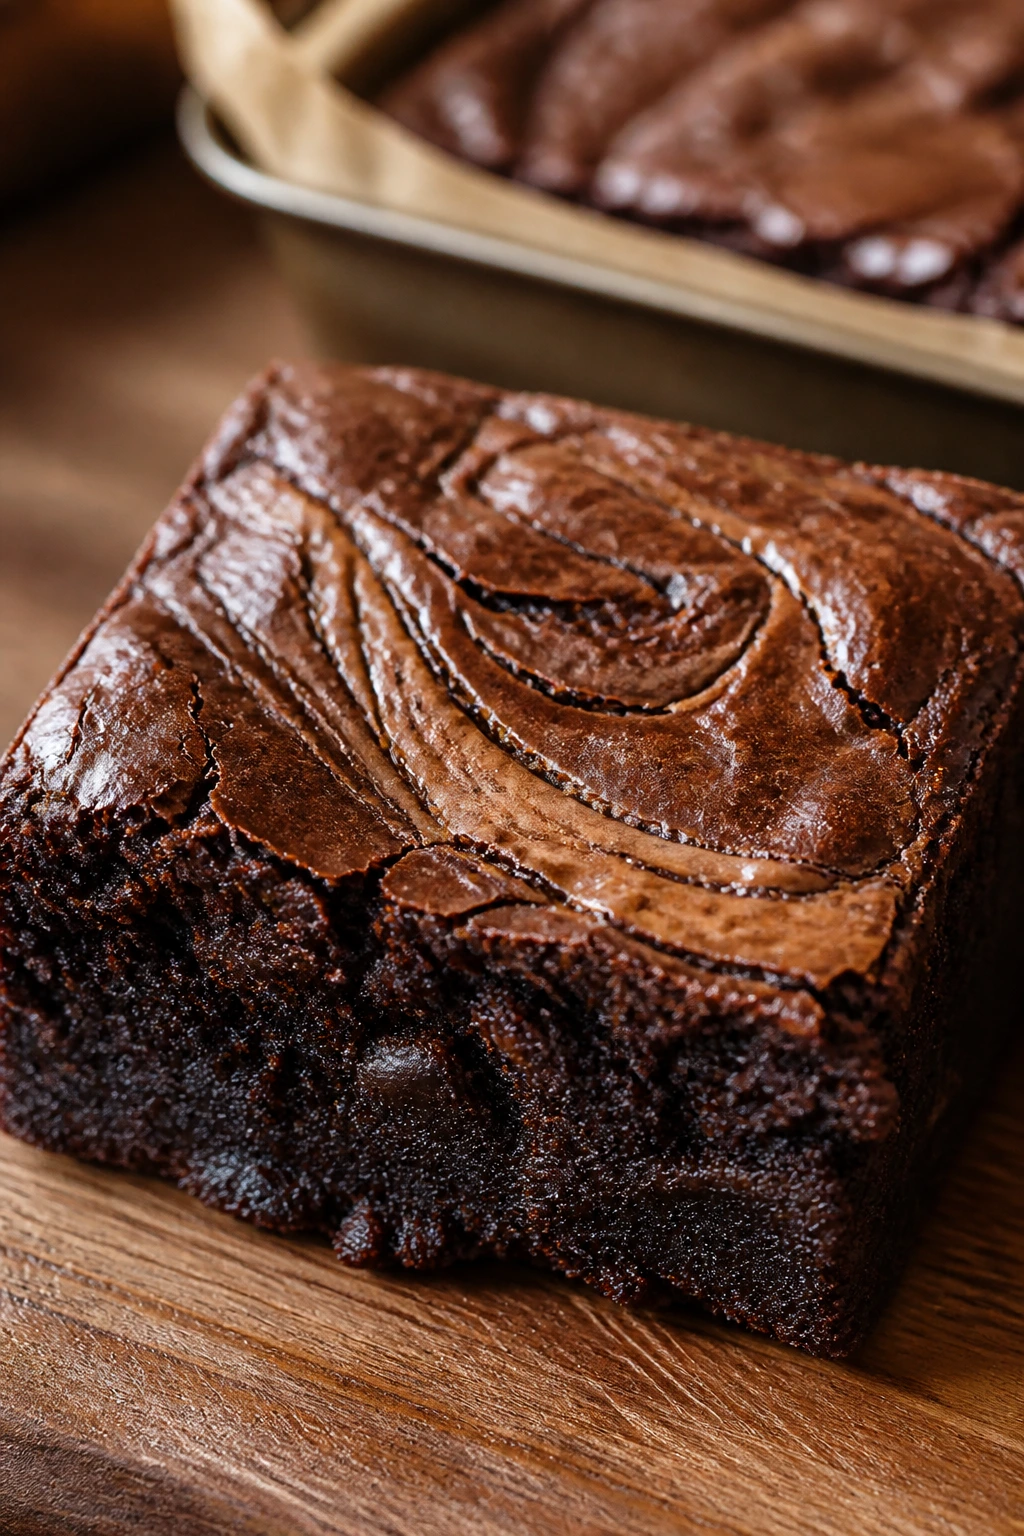
Mocha brownies are for people who want chocolate with a bit of coffee-edge bite. They’re dark, chewy, and more grown-up than plain brownies.
Why It Works:
Espresso powder deepens the cocoa flavor without making the brownies taste like coffee cake. A slightly underbaked center keeps the texture fudgy.
Key Ingredients:
- 1 cup butter, melted
- 2 cups sugar
- 4 large eggs
- 1 tablespoon vanilla extract
- 1 cup flour
- 1 cup cocoa powder
- 2 teaspoons espresso powder
- 1/2 teaspoon salt
- 1 cup chocolate chips
Quick Steps:
- Whisk butter, sugar, eggs, and vanilla.
- Stir in flour, cocoa, espresso powder, and salt.
- Fold in chocolate chips.
- Bake in a lined 9-inch pan at 350°F for 28 to 32 minutes.
- Cool before slicing.
Equipment for This Recipe:
- 9-inch square pan
- Whisk
- Spatula
- Parchment paper
How to Serve This Dish:
A small square with cold milk or coffee works best. If you want to make them look intentional, sprinkle flaky salt on top before baking.
Pro Tips for This Recipe:
- Use espresso powder, not brewed coffee, for stronger flavor without extra liquid.
- Pull the brownies when the center still looks a touch soft.
- Cool completely for clean slices.
Variations on This Dish:
- Walnut Mocha Brownies: Add 3/4 cup toasted walnuts.
- Peppermint Mocha Brownies: Add crushed peppermint to the top.
Common Mistakes to Avoid with This Dish:
- Don’t overbake, or the brownies go cakey.
- Don’t use too much espresso powder; it should support the chocolate, not hijack it.
25. Cheesecake Stuffed Dates
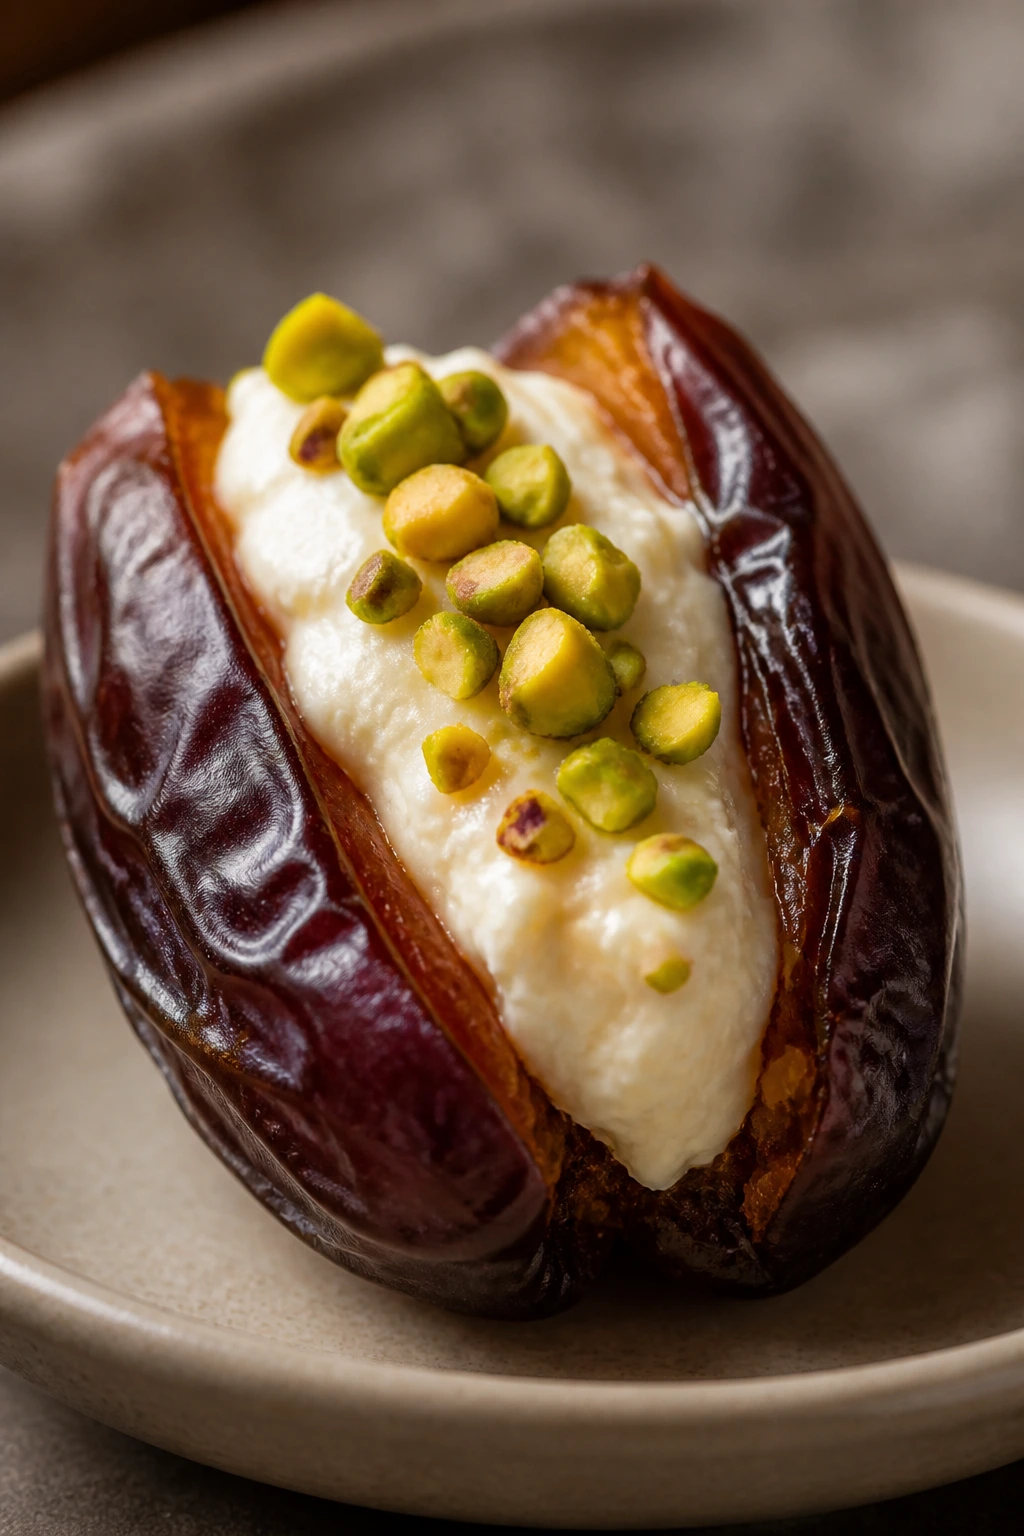
If you want something that looks fancy with minimal work, this is it. Sticky dates, cool cheesecake filling, and a little crunch on top.
Why It Works:
Dates already taste like caramel, so they carry cream cheese beautifully. A toasted nut on top gives the bite some structure and stops it from feeling too soft.
Key Ingredients:
- 20 Medjool dates, pitted
- 8 oz cream cheese, softened
- 1 tablespoon powdered sugar
- 1/2 teaspoon vanilla extract
- 1/4 cup chopped pistachios or walnuts
- Pinch of cinnamon
Quick Steps:
- Split the dates open without cutting all the way through.
- Mix cream cheese, sugar, vanilla, and cinnamon.
- Fill each date with about 1 teaspoon of the mixture.
- Top with nuts.
- Chill 20 minutes before serving.
Equipment for This Recipe:
- Small bowl
- Spoon or piping bag
- Knife
- Serving platter
How to Serve This Dish:
Serve chilled or cool room temperature. They work well as a dessert nibble between heavier sweets because they feel rich without being huge.
Pro Tips for This Recipe:
- Use large Medjool dates for the cleanest split.
- Warm the cream cheese slightly so filling is smooth.
- Chop nuts finely so they cling to the top.
Variations on This Dish:
- Chocolate Date Bites: Drizzle with melted chocolate.
- Orange Pistachio Dates: Add orange zest to the filling.
Common Mistakes to Avoid with This Dish:
- Don’t overfill; the filling should sit inside the date, not bulge out.
- Don’t use dry dates unless you soften them first.
26. Spiced Molasses Cake
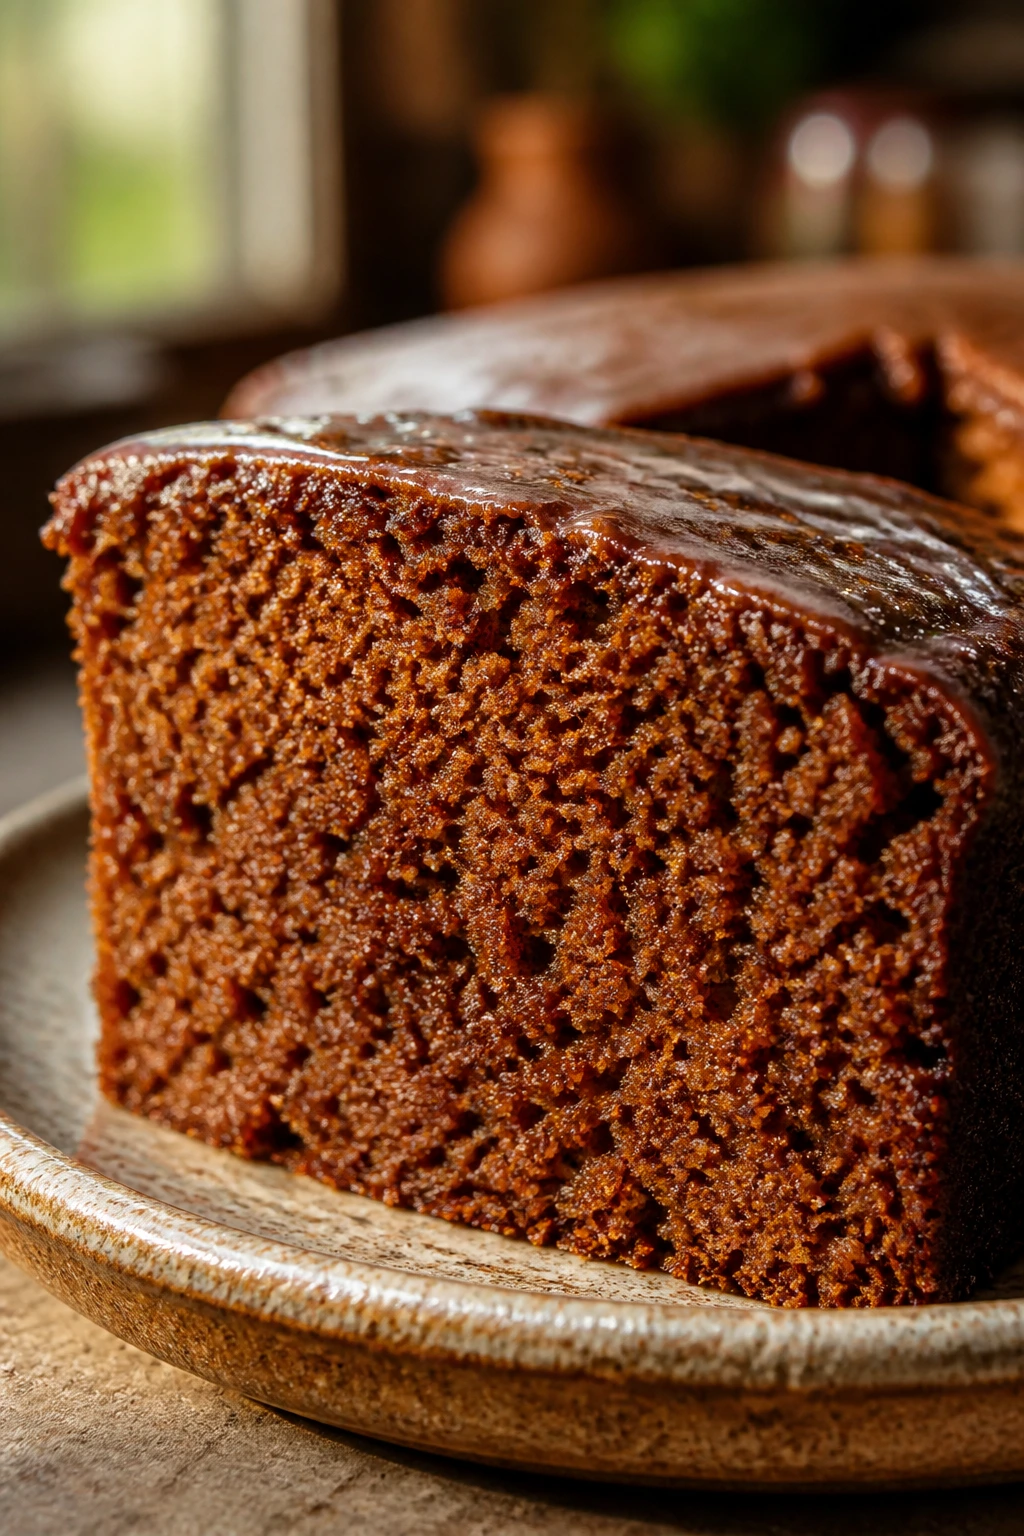
Molasses cake is one of the most underrated holiday desserts. It smells like ginger, brown sugar, and a warm kitchen that has been open too long.
Why It Works:
The molasses gives the cake moisture and a deep color, while the spice keeps each slice from tasting heavy. It’s sturdy enough to make a day ahead and still taste good.
Key Ingredients:
- 2 1/2 cups flour
- 1 teaspoon baking soda
- 1 teaspoon cinnamon
- 1 teaspoon ginger
- 1/2 teaspoon cloves
- 1/2 teaspoon salt
- 1/2 cup butter, softened
- 1 cup brown sugar
- 1 cup molasses
- 1 cup hot water
Quick Steps:
- Whisk dry ingredients together.
- Cream butter and brown sugar.
- Mix in molasses, then alternate dry ingredients and hot water.
- Pour into a greased 9-inch pan.
- Bake at 350°F for 35 to 40 minutes until a tester comes out with a few moist crumbs.
Equipment for This Recipe:
- 9-inch cake pan
- Mixing bowls
- Whisk and spatula
- Cooling rack
How to Serve This Dish:
Serve warm with whipped cream or plain. The crumb is dark and moist, so it does not need much adornment.
Pro Tips for This Recipe:
- Use hot water to loosen the batter and keep the crumb tender.
- Do not overbake; molasses cakes dry out fast.
- Let it sit for 15 minutes before slicing.
Variations on This Dish:
- Ginger-Forward Cake: Add more ginger and a little black pepper.
- Orange Molasses Cake: Add orange zest to the batter.
Common Mistakes to Avoid with This Dish:
- Don’t use too much flour, or the cake turns heavy.
- Don’t slice immediately; the cake needs a brief rest.
27. Cherry Almond Clafoutis
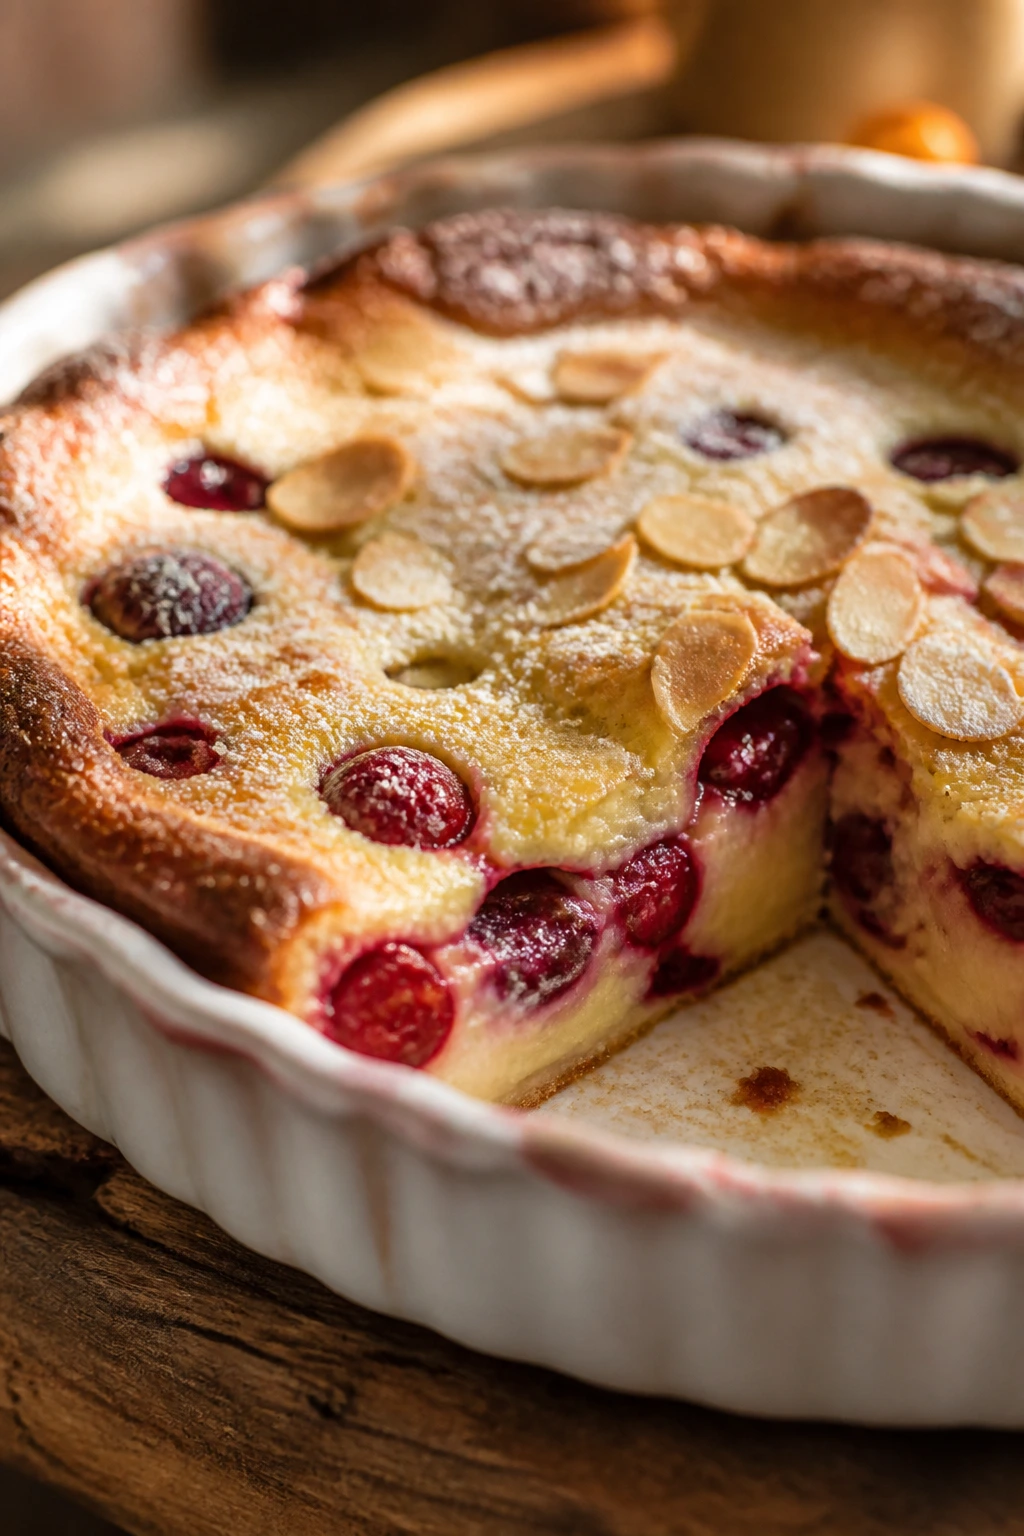
Clafoutis is the elegant-looking dessert that takes less effort than people assume. It’s part custard, part cake, with cherries suspended in the center like little ruby pockets.
Why It Works:
A loose batter bakes around the fruit, so there’s no crust to fuss over. Almond extract and cherries are a pair that never seems to wear out.
Key Ingredients:
- 2 cups pitted cherries
- 3 large eggs
- 1/2 cup sugar
- 1 cup milk
- 1/2 cup flour
- 1 teaspoon vanilla extract
- 1/2 teaspoon almond extract
- Pinch of salt
- Butter for the dish
Quick Steps:
- Butter a baking dish and spread cherries across the bottom.
- Whisk eggs, sugar, milk, flour, extracts, and salt until smooth.
- Pour over the cherries.
- Bake at 350°F for 35 to 40 minutes until puffed and golden.
- Dust with powdered sugar and serve warm.
Equipment for This Recipe:
- Pie dish or shallow baking dish
- Whisk
- Mixing bowl
- Sifter for powdered sugar, optional
How to Serve This Dish:
Serve it warm from the dish with a spoon. It deflates as it cools, which is normal, so do not wait for it to look like a cake.
Pro Tips for This Recipe:
- Use sweet cherries or tart cherries with enough sugar in the batter.
- Blend the batter well so there are no flour lumps.
- Serve the same day for the best texture.
Variations on This Dish:
- Pear Almond Clafoutis: Swap cherries for sliced pears.
- Blackberry Clafoutis: Use blackberries and lemon zest.
Common Mistakes to Avoid with This Dish:
- Don’t expect it to stay tall after baking; the puff settles.
- Don’t use a deep dish or the batter won’t set evenly.
28. Chocolate Peppermint Brownies
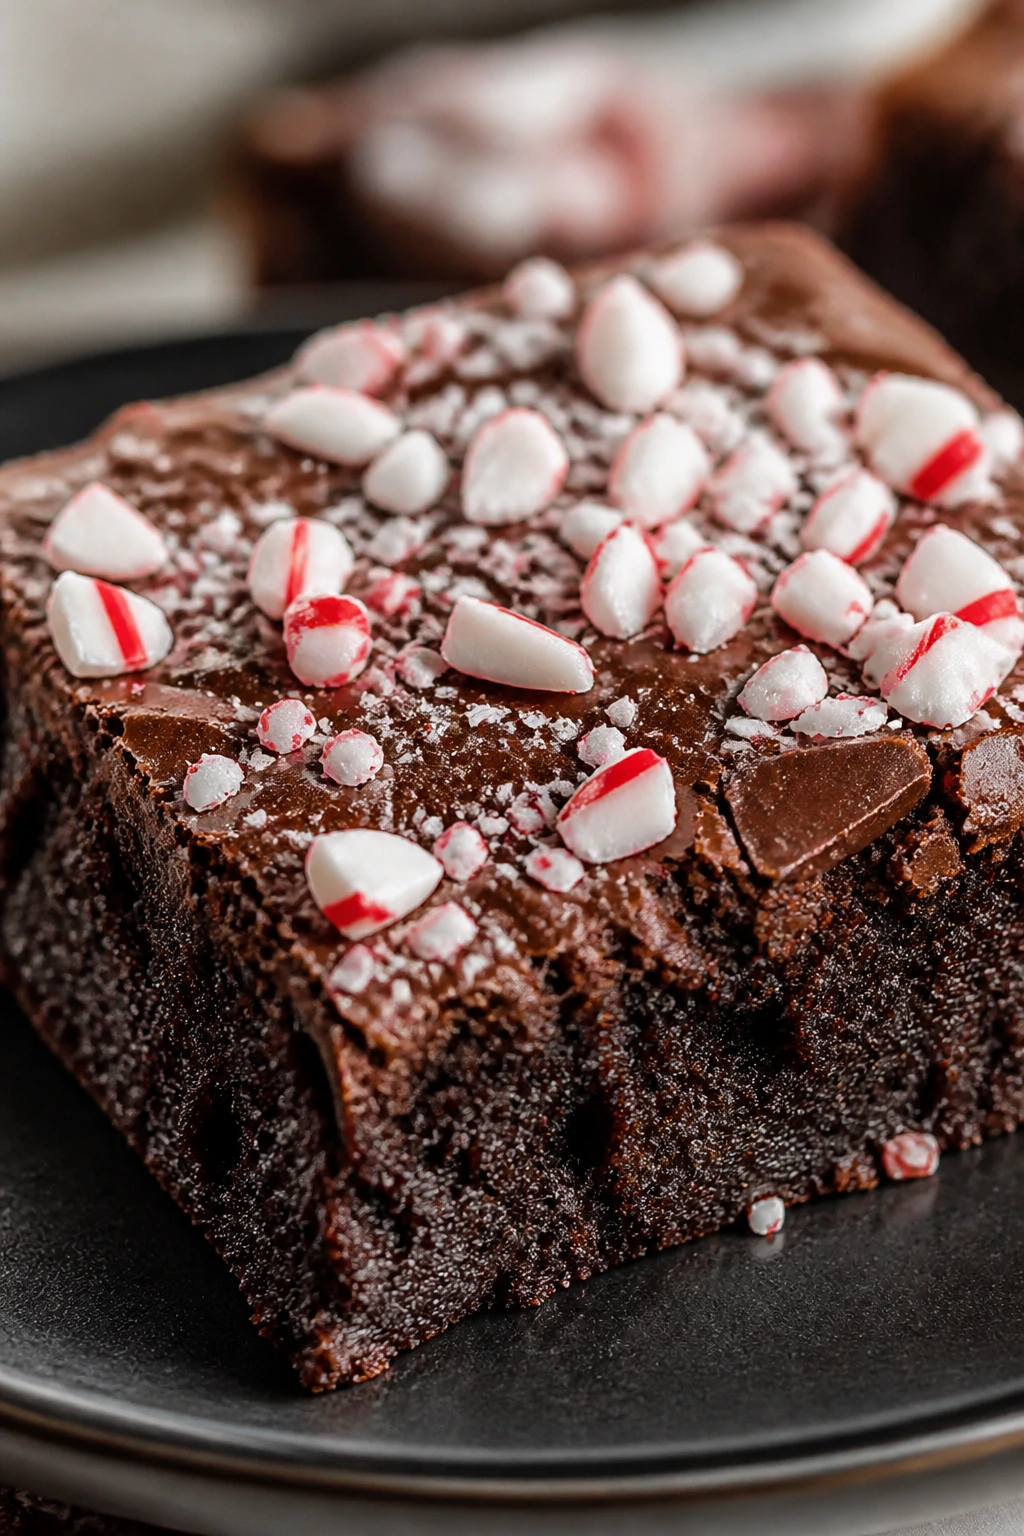
These brownies are what happen when a basic pan of chocolate decides to get dressed up. Peppermint on top gives each square a sharp little snap.
Why It Works:
The chocolate base stays fudgy, and the peppermint comes in at the end where it can stay bright. A glaze or candy crumble adds texture without making the brownie dry.
Key Ingredients:
- 1 cup butter
- 2 cups sugar
- 4 eggs
- 1 cup flour
- 1 cup cocoa powder
- 1/2 teaspoon salt
- 1 teaspoon vanilla
- 1/2 teaspoon peppermint extract
- 1/2 cup crushed peppermint candies or candy canes
Quick Steps:
- Mix melted butter and sugar, then whisk in eggs and extracts.
- Fold in flour, cocoa, and salt.
- Bake in a lined 9-inch pan at 350°F for 28 to 32 minutes.
- Cool slightly, then add crushed peppermint on top.
- Chill before cutting for the cleanest edges.
Equipment for This Recipe:
- 9-inch baking pan
- Whisk
- Spatula
- Parchment paper
How to Serve This Dish:
Cut into small squares; the peppermint topping makes them feel richer than they are. Serve with coffee or cold milk.
Pro Tips for This Recipe:
- Add peppermint lightly. Too much can taste like toothpaste.
- Sprinkle candy on top while the brownies are still a little warm so it sticks.
- Chill before slicing.
Variations on This Dish:
- Dark Chocolate Brownies: Skip the peppermint and add sea salt.
- Peppermint Swirl Brownies: Swirl in a little white chocolate.
Common Mistakes to Avoid with This Dish:
- Don’t overbake, or the peppermint topping won’t save the texture.
- Don’t pour candy on after fully cooling; it falls off.
29. Cranberry Pistachio Biscotti
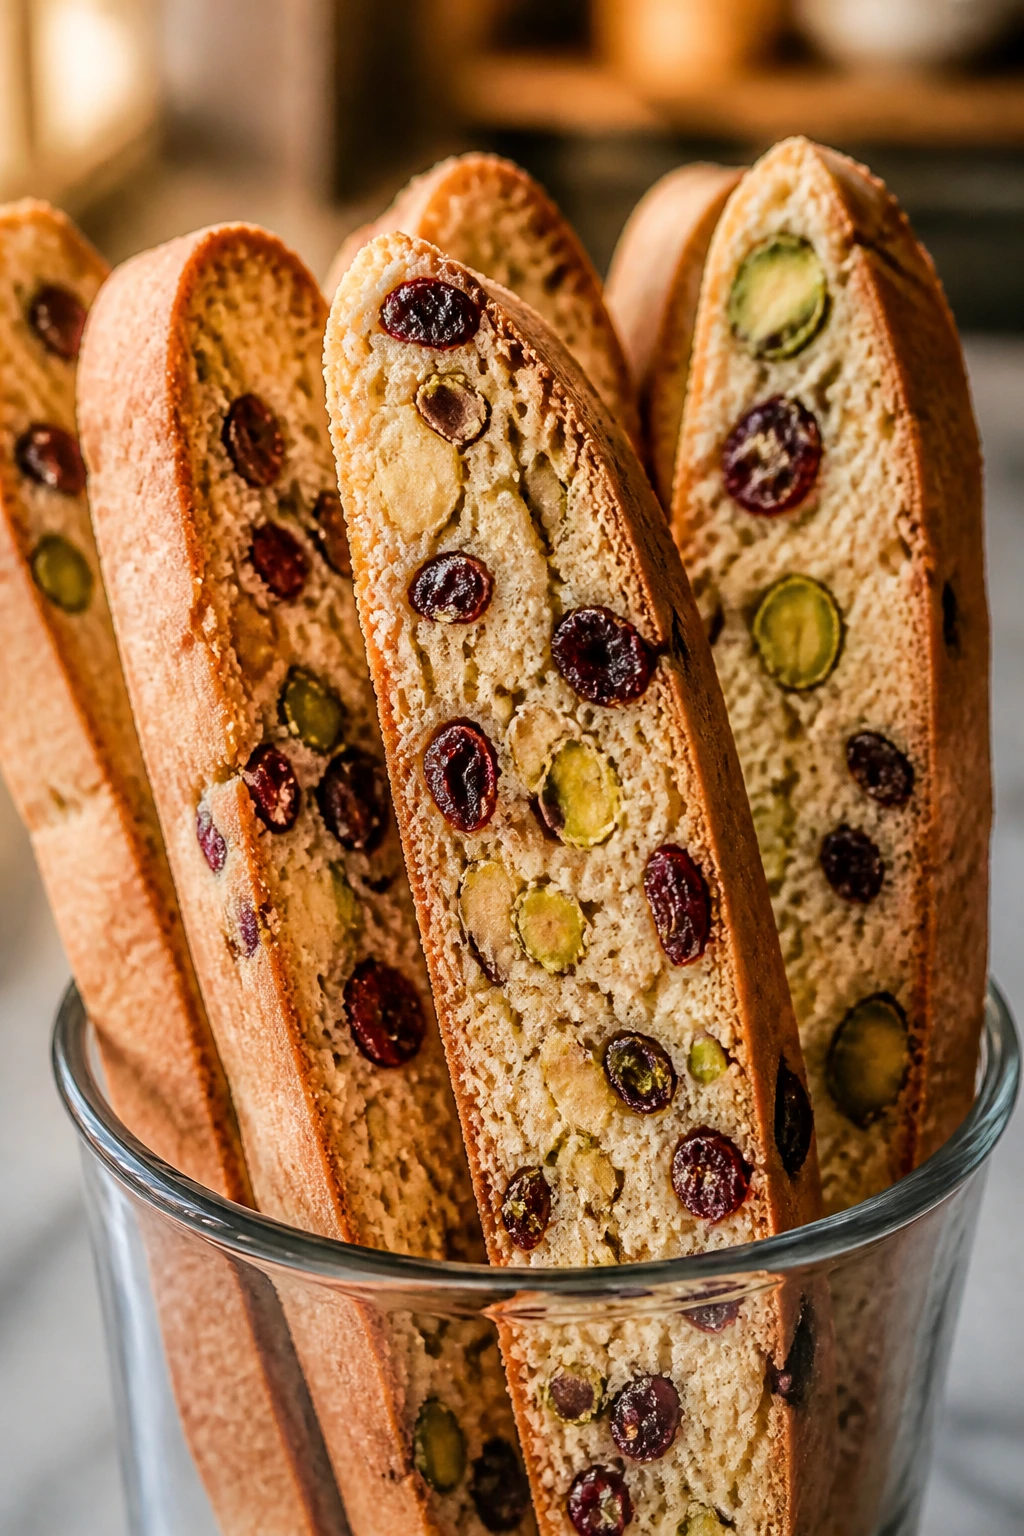
The cranberry-pistachio combination does a lot of visual heavy lifting, and it tastes even better than it looks. Bright fruit, green nuts, and a crisp bite.
Why It Works:
The dough is sturdy enough to handle add-ins without collapsing. Biscotti’s double bake gives you crunch that pairs naturally with tea, coffee, or hot chocolate.
Key Ingredients:
- 2 cups flour
- 1 cup sugar
- 1 teaspoon baking powder
- 1/2 teaspoon salt
- 2 eggs
- 1 teaspoon vanilla extract
- 3/4 cup dried cranberries
- 3/4 cup pistachios, chopped
- Optional white chocolate for dipping
Quick Steps:
- Make a firm dough and shape into a log.
- Bake at 350°F for 25 minutes.
- Cool briefly, slice diagonally, and lay slices flat.
- Bake 10 minutes per side until crisp.
- Dip one end in white chocolate if desired.
Equipment for This Recipe:
- Baking sheet
- Serrated knife
- Mixing bowl
- Parchment paper
How to Serve This Dish:
Stand them in a narrow glass or fan them across a platter. The colors read clearly against a white plate.
Pro Tips for This Recipe:
- Chop the cranberries if they’re very large.
- Slice while warm for less crumbling.
- Let the second bake dry them fully.
Variations on This Dish:
- Orange Cranberry Biscotti: Add orange zest.
- Chocolate-Dipped Biscotti: Dip after cooling.
Common Mistakes to Avoid with This Dish:
- Don’t slice when fully cold or the log cracks.
- Don’t leave them soft after the second bake.
30. Mini Pavlovas with Citrus Cream

Pavlovas sound delicate because they are, but the work is mostly in letting the oven do its slow thing. Crisp shells, marshmallow centers, and bright citrus cream make them feel festive and fresh.
Why It Works:
Egg whites turn into a glossy meringue that bakes into something crisp outside and soft inside. Citrus cuts the sweetness so the dessert doesn’t collapse into sugar overload.
Key Ingredients:
- 4 egg whites
- 1 cup sugar
- 1 teaspoon cornstarch
- 1 teaspoon vinegar or lemon juice
- 1 teaspoon vanilla extract
- 1 cup whipped cream
- 1 tablespoon orange or lemon zest
- Sliced berries or citrus segments
Quick Steps:
- Whip egg whites to soft peaks, then add sugar slowly until glossy.
- Fold in cornstarch, vinegar, and vanilla.
- Pipe or spoon small nests onto a lined sheet.
- Bake at 250°F for 60 to 70 minutes, then cool in the oven.
- Top with citrus cream and fruit just before serving.
Equipment for This Recipe:
- Mixer
- Baking sheet
- Parchment paper
- Piping bag, optional
How to Serve This Dish:
Assemble at the last minute so the shells stay crisp. A spoonful of cream, a few berries, and a curl of zest are enough.
Pro Tips for This Recipe:
- Make sure the bowl is grease-free before whipping.
- Add sugar gradually so the meringue stays stable.
- Do not top early or the shells soften.
Variations on This Dish:
- Cranberry Pavlovas: Top with cranberry sauce and whipped cream.
- Chocolate Pavlovas: Add cocoa powder to the meringue lightly.
Common Mistakes to Avoid with This Dish:
- Don’t open the oven too soon or the shells crack.
- Don’t top them long before serving.
31. Peppermint S’mores Dip
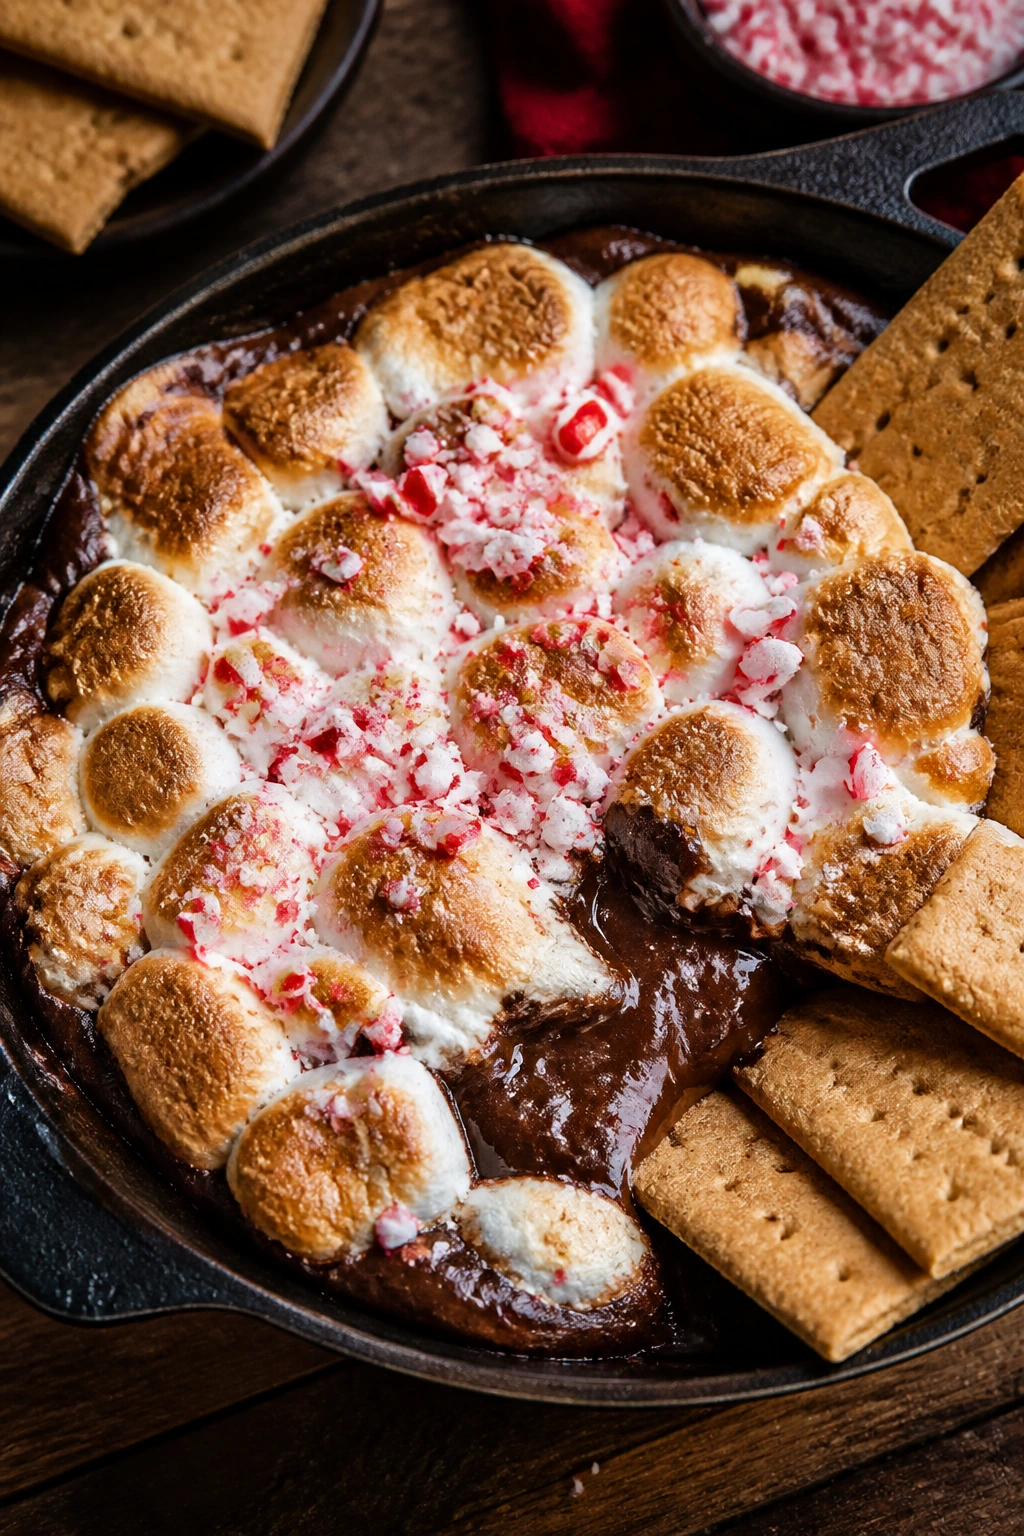
A skillet of melted chocolate and marshmallows can get a little rowdy on the table, which is part of the fun. Peppermint turns the usual campfire dessert into a winter dessert without much extra work.
Why It Works:
Chocolate and marshmallows melt together in a hot skillet, so there’s no shaping or chilling. Crushed peppermint on top gives the whole thing a cool finish after the warm, gooey center.
Key Ingredients:
- 2 cups chocolate chips
- 2 tablespoons heavy cream
- 2 cups mini marshmallows
- 1/4 teaspoon peppermint extract
- 2 tablespoons crushed candy canes
- Graham crackers, pretzels, or cookies for dipping
Quick Steps:
- Melt chocolate chips with cream in an oven-safe skillet.
- Stir in peppermint extract.
- Top with marshmallows.
- Broil 1 to 2 minutes until the tops are toasted.
- Scatter candy cane bits and serve right away.
Equipment for This Recipe:
- Oven-safe skillet
- Broiler
- Spatula
- Dippers for serving
How to Serve This Dish:
Put the skillet in the center of the table and let everyone scoop. The dip is best eaten immediately while the marshmallows are still soft and torched.
Pro Tips for This Recipe:
- Watch the broiler closely; marshmallows go from toasted to burnt in seconds.
- Use a skillet that can handle oven heat.
- Add candy cane bits after broiling so they stay crisp.
Variations on This Dish:
- Dark Chocolate S’mores Dip: Use dark chocolate chips.
- Orange Peppermint Dip: Add a little orange zest to the chocolate.
Common Mistakes to Avoid with This Dish:
- Don’t leave it under the broiler too long.
- Don’t use a cold skillet, or the chocolate may not melt evenly.
32. Cranberry Walnut Banana Bread
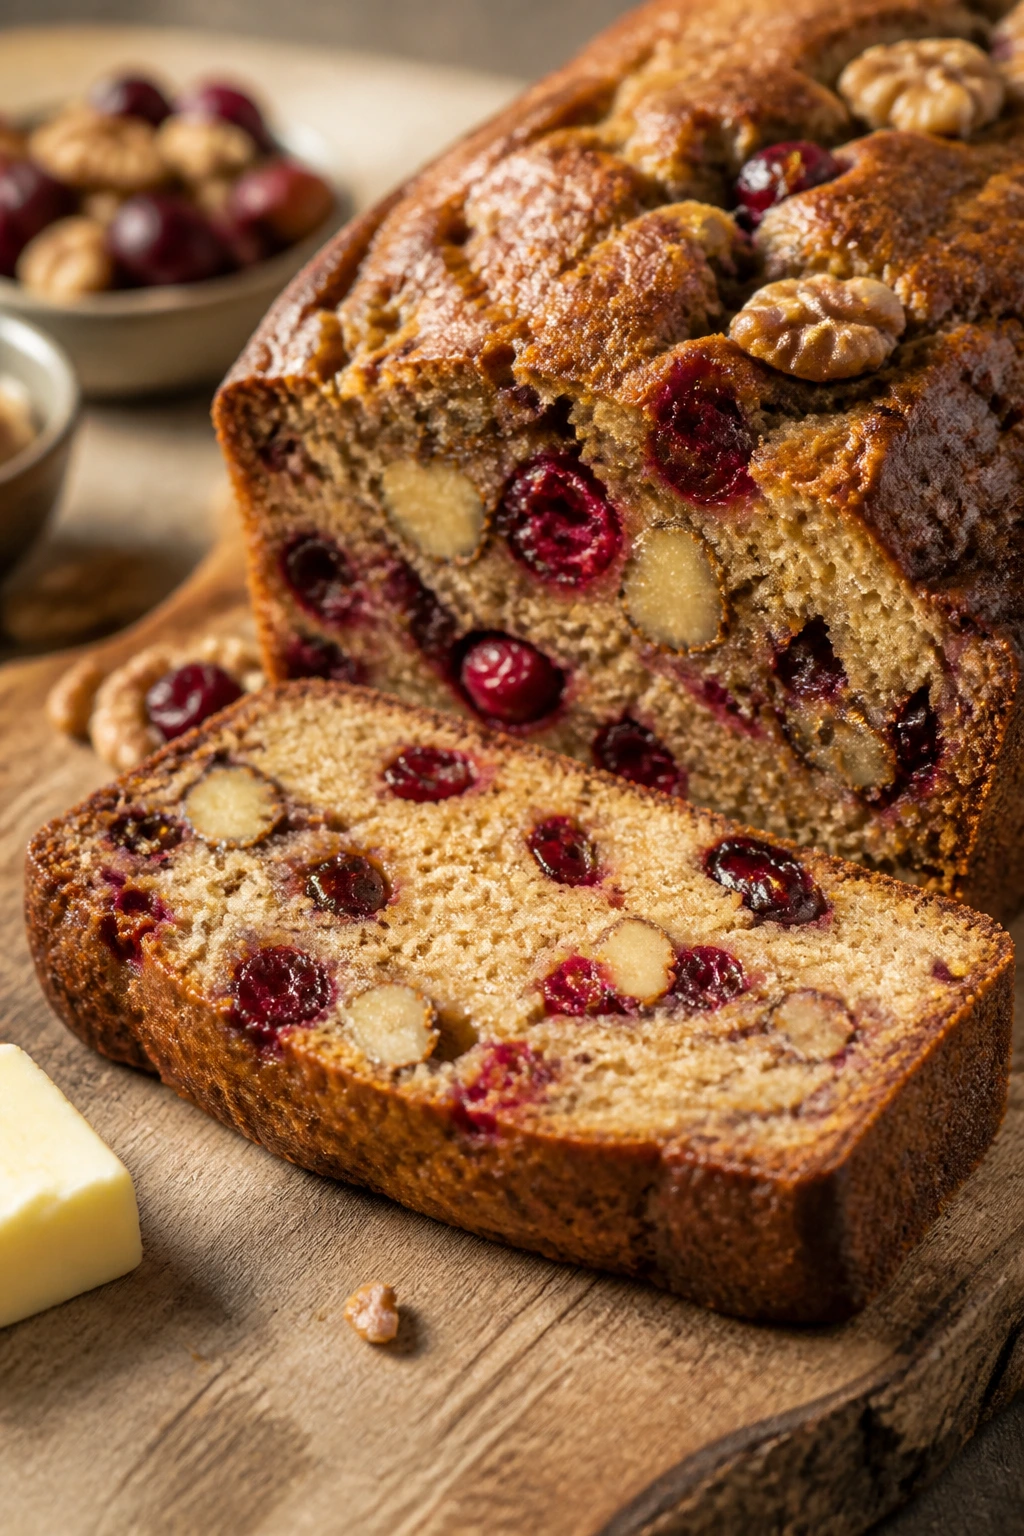
Banana bread on a holiday tray sounds plain until you cut into a loaf full of tart cranberries and toasty walnuts. Then it reads more like a breakfast cake with a useful disguise.
Why It Works:
Very ripe bananas keep the loaf moist, and cranberries keep it from tasting too sweet. Walnuts add crunch so each slice feels more layered.
Key Ingredients:
- 3 ripe bananas, mashed
- 1/2 cup melted butter
- 3/4 cup brown sugar
- 2 large eggs
- 1 teaspoon vanilla extract
- 2 cups flour
- 1 teaspoon baking soda
- 1/2 teaspoon salt
- 3/4 cup dried cranberries
- 3/4 cup chopped walnuts
Quick Steps:
- Whisk bananas, butter, sugar, eggs, and vanilla.
- Stir in flour, baking soda, and salt.
- Fold in cranberries and walnuts.
- Bake in a loaf pan at 350°F for 55 to 65 minutes.
- Cool before slicing.
Equipment for This Recipe:
- Loaf pan
- Mixing bowl
- Spatula
- Cooling rack
How to Serve This Dish:
Serve thick slices with butter or cream cheese. It sits nicely on a brunch table, but it also works as a low-key dessert with coffee.
Pro Tips for This Recipe:
- Use bananas with lots of brown spots.
- Do not overmix after adding flour.
- Tent with foil if the top browns too fast.
Variations on This Dish:
- Chocolate Chip Cranberry Bread: Add 1/2 cup chips.
- Orange Walnut Bread: Add orange zest to the batter.
Common Mistakes to Avoid with This Dish:
- Don’t use under-ripe bananas; the loaf loses flavor.
- Don’t cut while hot or the crumb gets gummy.
33. Dark Chocolate Tartlets with Sea Salt
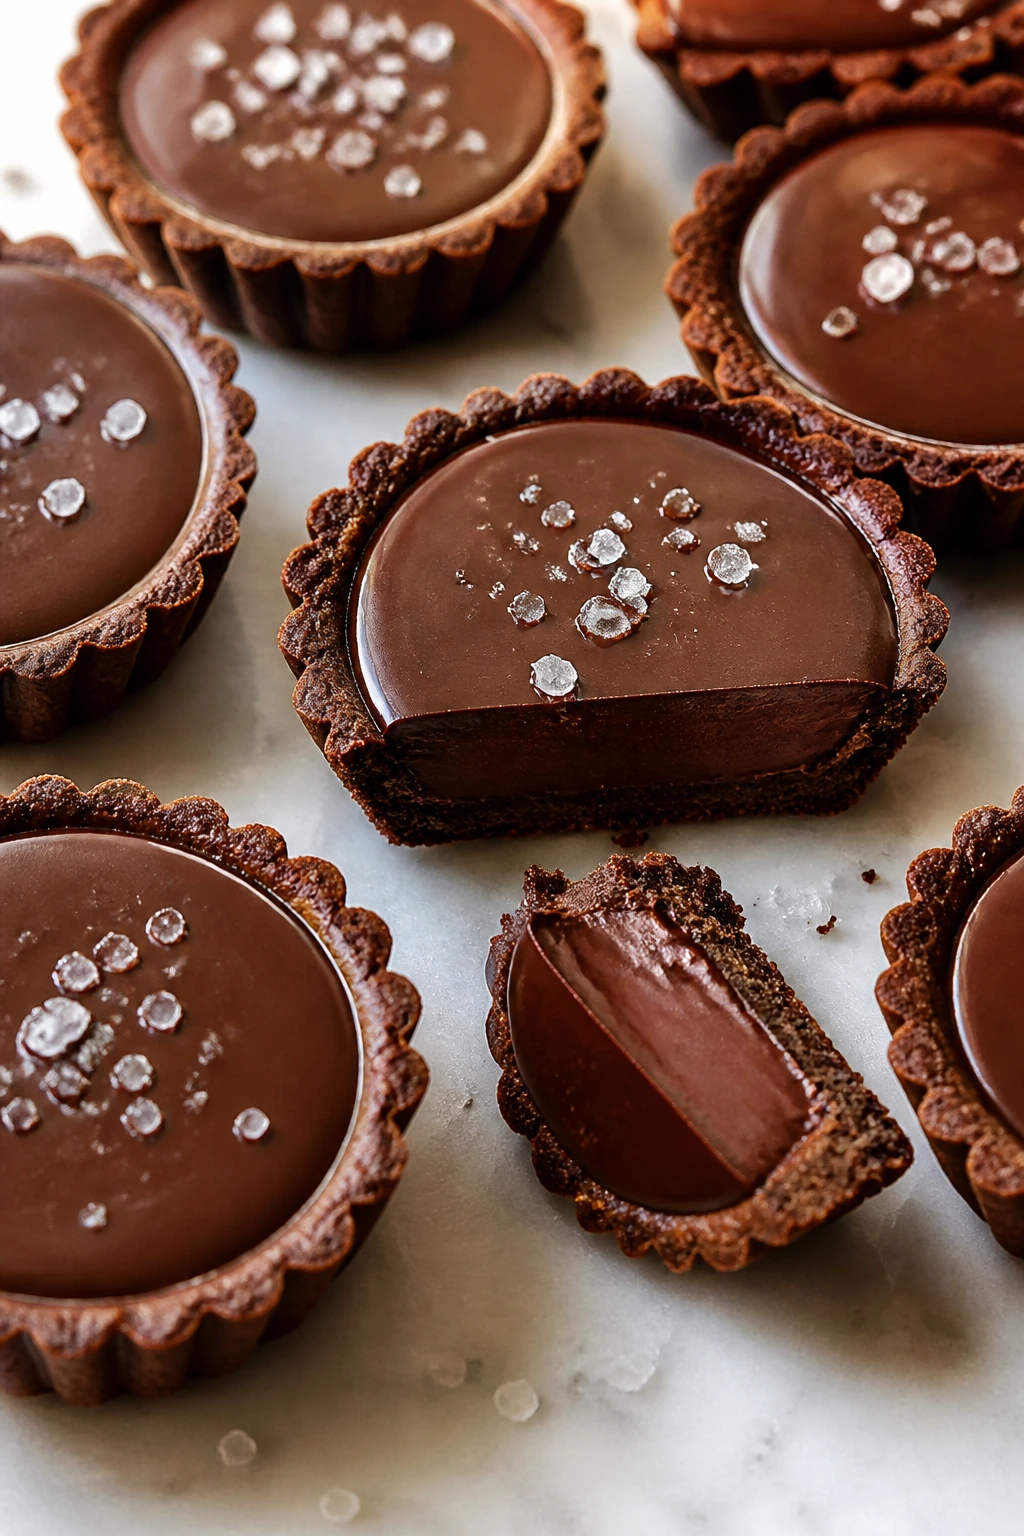
These tartlets look like something from a bakery case, but the filling is basically ganache in a shell. Small size keeps them from being too much after dinner.
Why It Works:
The crust is crisp, the filling is smooth, and the salt sharpens the chocolate. Because they’re miniature, they chill faster than a full tart.
Key Ingredients:
- 1 package mini tart shells or pie dough
- 8 oz dark chocolate, chopped
- 1/2 cup heavy cream
- 1 tablespoon butter
- Flaky sea salt
- Optional raspberries for topping
Quick Steps:
- Bake tart shells if needed and cool.
- Heat cream and butter until steaming.
- Pour over chocolate and stir until glossy.
- Fill shells and chill until set.
- Finish with salt and a berry if you like.
Equipment for This Recipe:
- Tart pan or mini tart shells
- Small saucepan
- Spoon
- Fridge space for chilling
How to Serve This Dish:
Serve them cold or cool room temperature. A single berry or a few flakes of salt is enough decoration.
Pro Tips for This Recipe:
- Use a chocolate bar with decent cocoa percentage.
- Chill until the center is firm, not sloshy.
- Warm a knife for clean cuts if using a full tart.
Variations on This Dish:
- Hazelnut Tartlets: Add a thin layer of hazelnut spread underneath.
- Orange Tartlets: Add orange zest to the ganache.
Common Mistakes to Avoid with This Dish:
- Don’t overfill the shells or the ganache spills.
- Don’t use weak chocolate; the filling turns bland.
34. Maple Pecan Bars
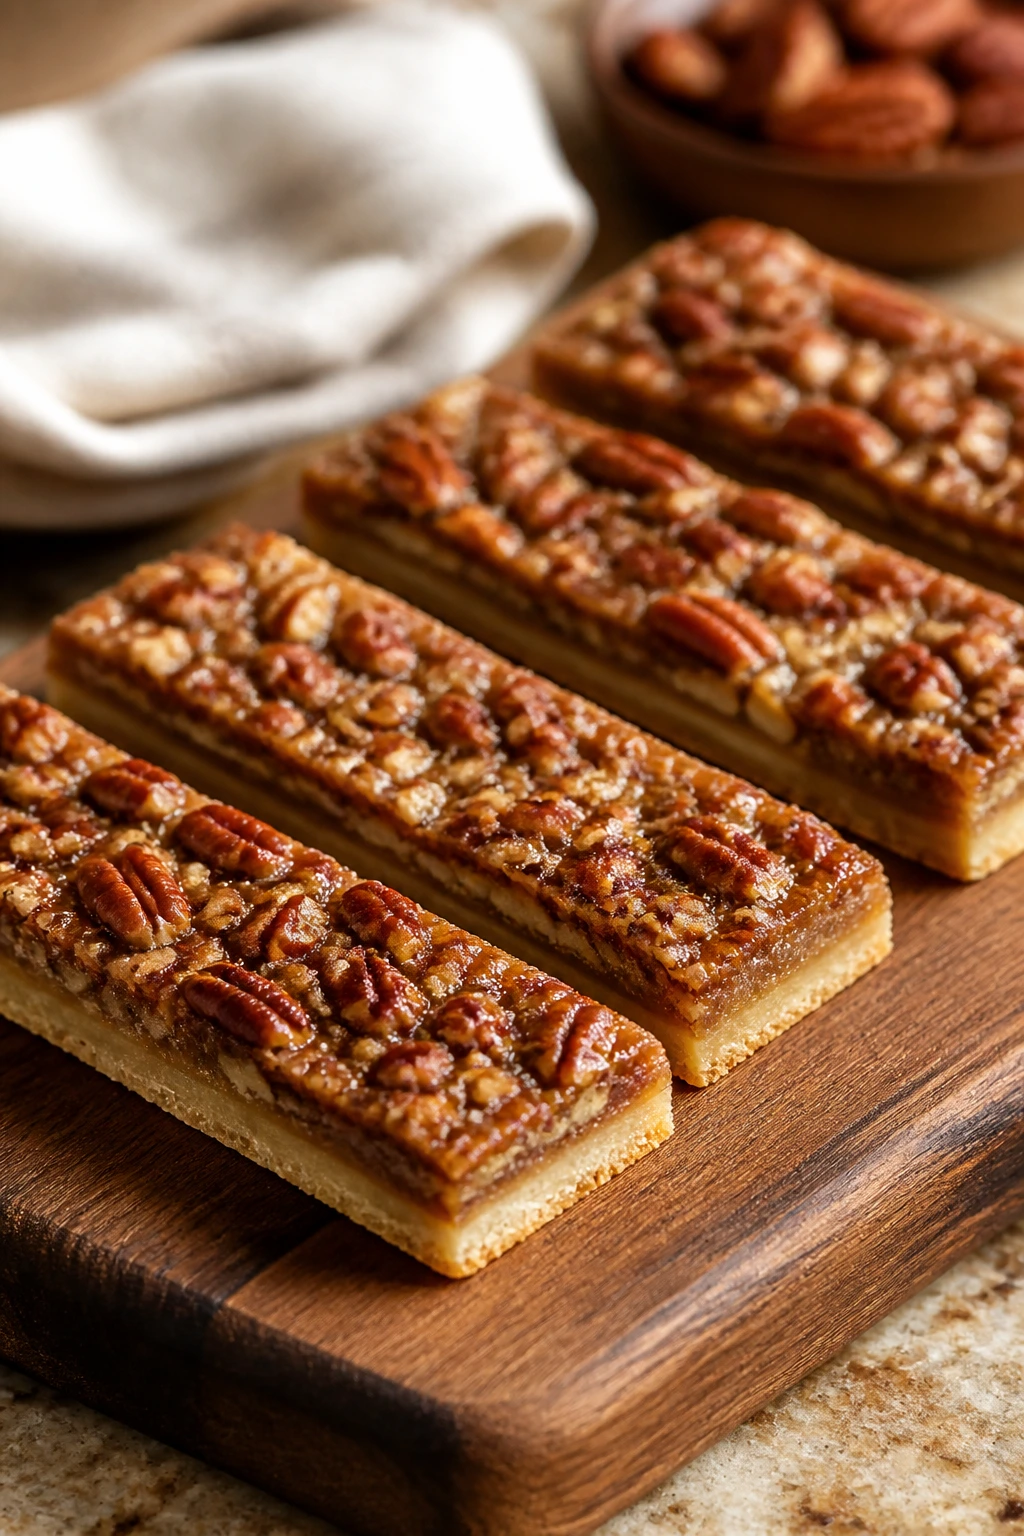
These bars sit somewhere between pie and blondie, which is precisely why they work. Maple gives them a round sweetness that feels right on a cold plate.
Why It Works:
A buttery crust supports a maple-pecan filling that sets into clean squares. The flavor is rich but not sticky-heavy if you keep the bars thin.
Key Ingredients:
- 1 cup flour
- 1/2 cup butter, softened
- 1/4 cup powdered sugar
- 2 eggs
- 1/2 cup maple syrup
- 1/2 cup brown sugar
- 1 teaspoon vanilla
- 2 cups pecans, chopped
- Pinch of salt
Quick Steps:
- Bake the shortbread crust 15 minutes at 350°F.
- Whisk eggs, maple syrup, brown sugar, vanilla, and salt.
- Stir in pecans and pour over the crust.
- Bake 20 to 25 minutes until set at the edges.
- Cool completely before cutting.
Equipment for This Recipe:
- 8- or 9-inch square pan
- Whisk
- Parchment paper
- Mixing bowls
How to Serve This Dish:
Cut into slim bars and serve with coffee or strong tea. They’re rich enough that small pieces make sense.
Pro Tips for This Recipe:
- Use real maple syrup, not imitation syrup.
- Toast the pecans for a better finish.
- Cool before slicing or the filling runs.
Variations on This Dish:
- Chocolate Maple Bars: Add chocolate chips to the filling.
- Cinnamon Maple Bars: Add 1/2 teaspoon cinnamon.
Common Mistakes to Avoid with This Dish:
- Don’t overload the filling with nuts so the bars fall apart.
- Don’t cut warm.
35. Baked Cinnamon Sugar Donut Holes
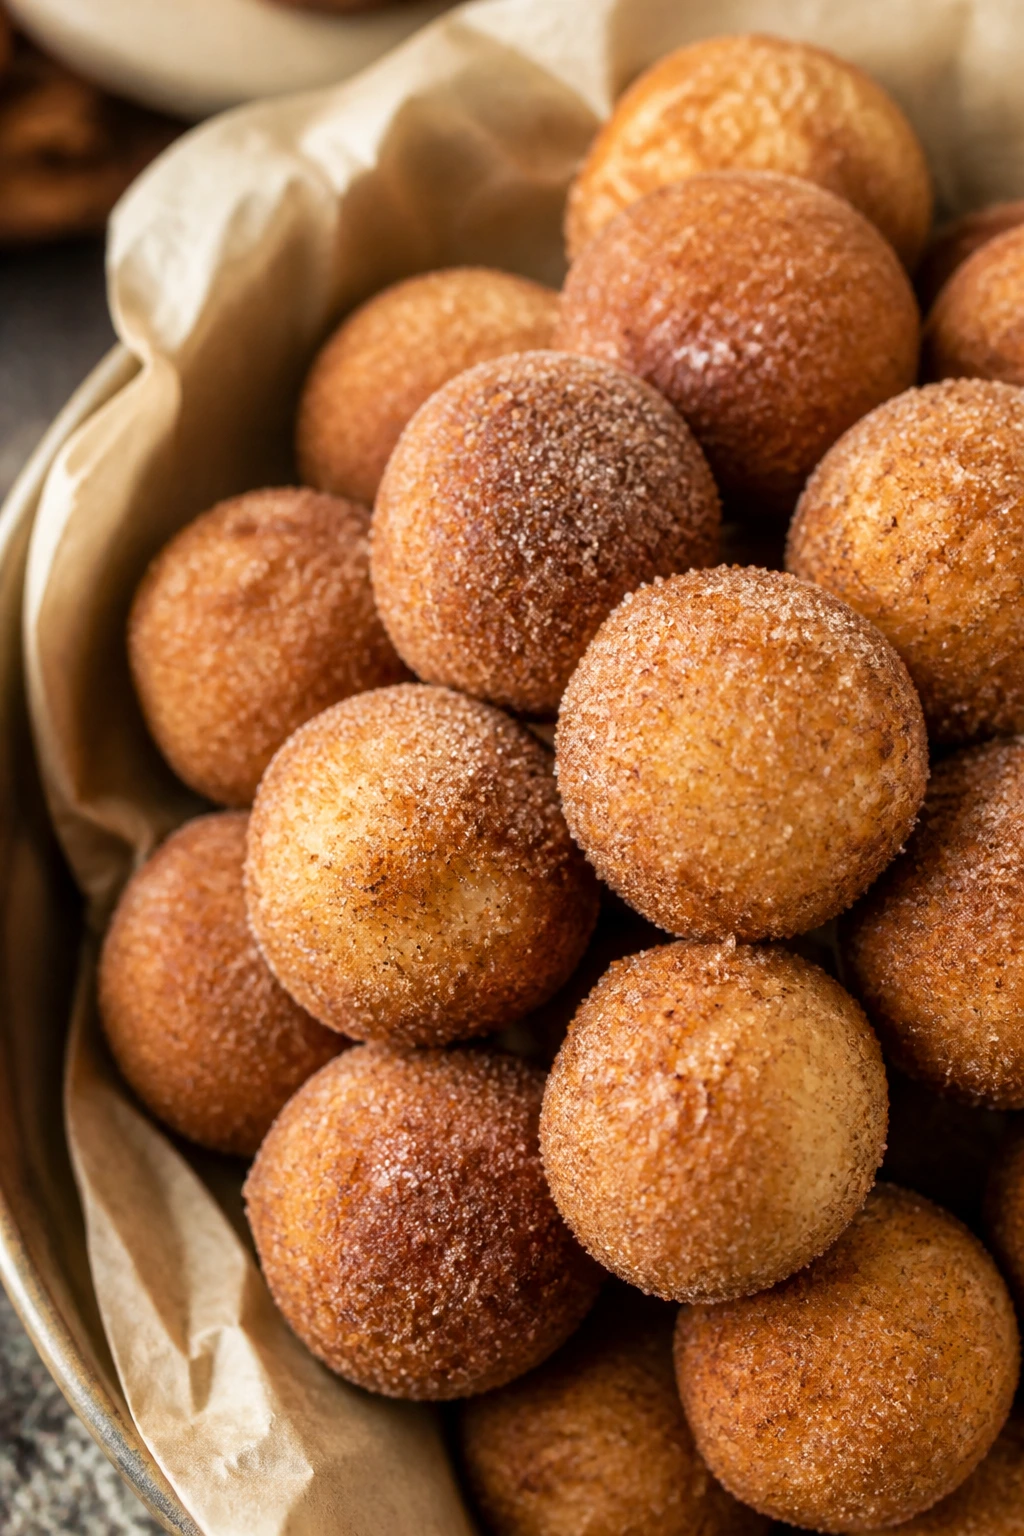
These are a little playful, a little nostalgic, and they disappear fast. A soft baked crumb rolled in cinnamon sugar gives you the donut shop feeling without the fryer.
Why It Works:
Baking keeps the texture tender and low-mess, while the sugar coating adds the crackly finish people expect from a donut hole. They’re best eaten the day they’re made, warm from the oven.
Key Ingredients:
- 2 cups flour
- 1/2 cup sugar
- 2 teaspoons baking powder
- 1/2 teaspoon salt
- 1 cup milk
- 1 egg
- 4 tablespoons melted butter
- 1 teaspoon vanilla extract
- 1/2 cup melted butter for coating
- 1/2 cup cinnamon sugar
Quick Steps:
- Mix dry ingredients in one bowl and wet ingredients in another.
- Stir together just until combined.
- Scoop into mini muffin pans or roll into balls if using a donut-hole pan.
- Bake at 350°F for 10 to 12 minutes until lightly golden.
- Brush with melted butter and roll in cinnamon sugar.
Equipment for This Recipe:
- Mini muffin pan or donut-hole pan
- Mixing bowls
- Small scoop
- Shallow bowl for cinnamon sugar
How to Serve This Dish:
Serve them warm in a basket or bowl. They’re best when the sugar still clings a little to the butter and the centers are soft.
Pro Tips for This Recipe:
- Do not overmix the batter or the crumb tightens.
- Coat while still warm so the sugar sticks.
- Eat them the same day for the best texture.
Variations on This Dish:
- Pumpkin Donut Holes: Replace some milk with pumpkin puree.
- Orange Sugar Donut Holes: Add orange zest to the coating.
Common Mistakes to Avoid with This Dish:
- Don’t bake too long or they dry out.
- Don’t coat after they cool completely, or the sugar slides off.
Why These Weeknight Desserts Work So Well

The trick with holiday desserts is not extravagance. It’s structure. Bars chill faster than layer cakes, bark sets on a sheet pan, and cookies give you multiple chances to get the timing right because a tray usually bakes in 10 to 12 minutes rather than 45.
That matters on a weeknight. So does cleanup. A dessert that asks for one bowl, one pan, and parchment paper will get made far more often than the kind that needs seven ramekins and a torch. I love a dramatic dessert as much as anyone, but a Tuesday evening usually asks for something smarter.
There’s also the matter of flavor drift. Holiday sweets are often heavy on sugar and light on contrast. The winners here have a tart edge, a salty finish, or a toastier note from brown butter, nuts, or spice. That’s the difference between a dessert people nibble once and a dessert they keep circling back to.
Essential Equipment for These Recipes
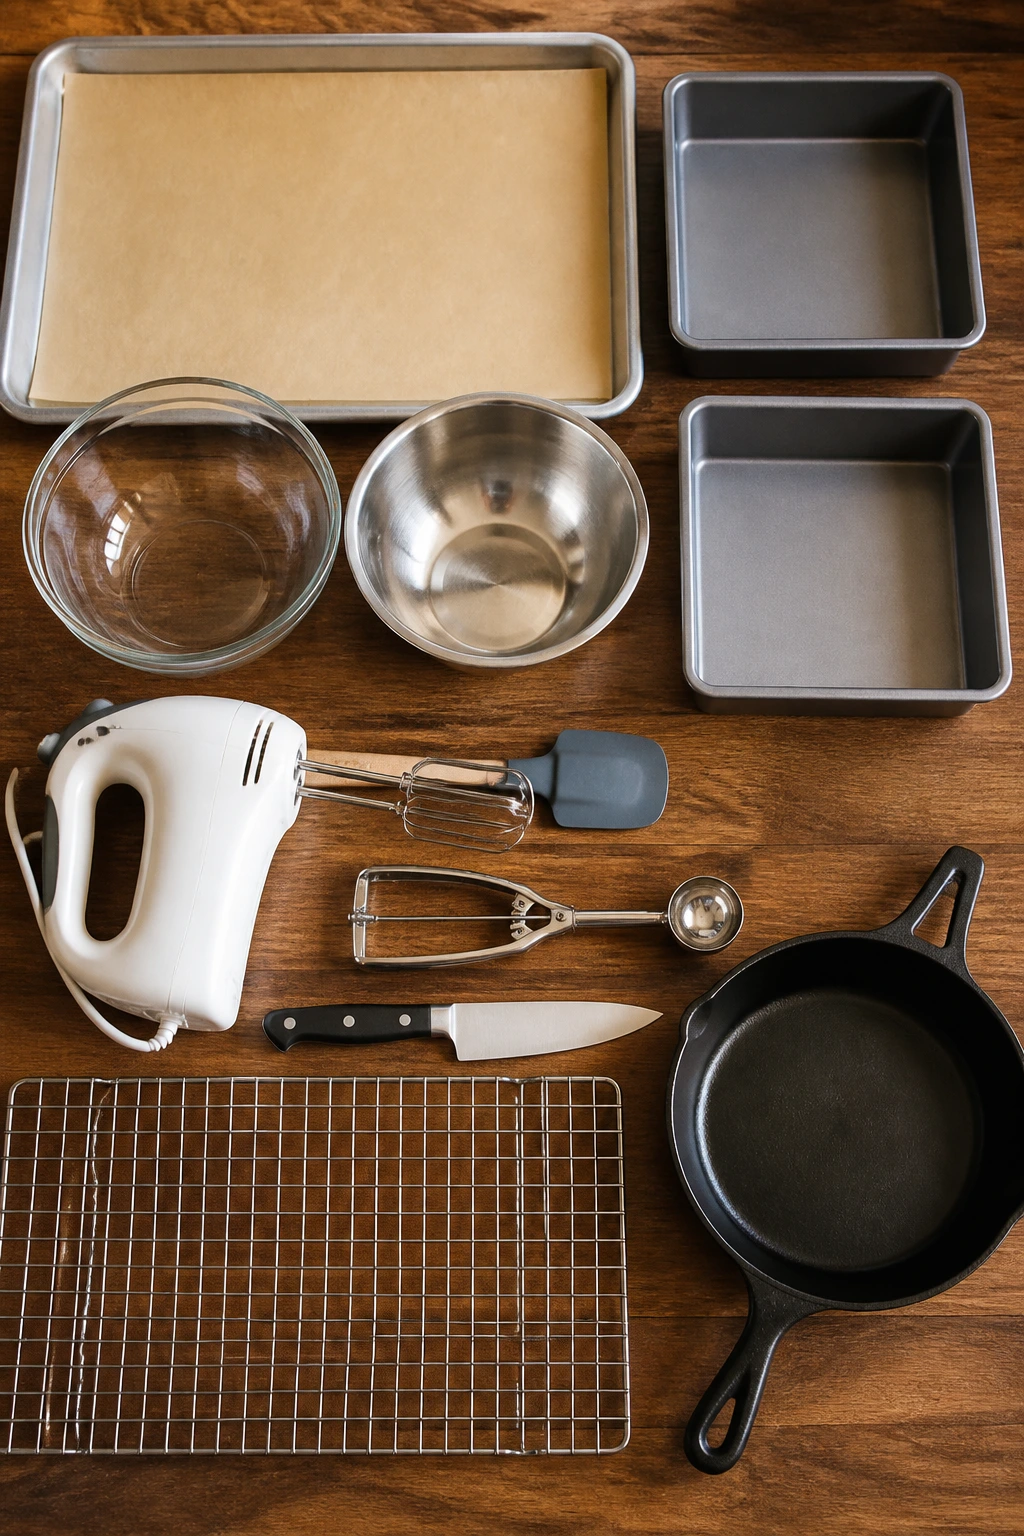
- Rimmed baking sheets: Bark, toffee, cookies, and biscotti all behave better on a sheet with a lip.
- Parchment paper: It keeps fudge, bars, and candy from welding themselves to the pan.
- 8-inch and 9-inch square pans: Most bar recipes land neatly in one of these sizes.
- Mixing bowls in two sizes: One for dry ingredients, one for wet, so you are not scrambling mid-recipe.
- Hand mixer or stand mixer: Helpful for cheesecake bars, cookies, and meringue-based desserts.
- Rubber spatula: Better than a spoon for scraping sticky dough and fudge.
- Cookie scoop: Makes truffles, cookies, and dough balls uniform.
- Sharp knife: A warm, sharp knife gives cleaner cuts on bars and fudge.
- Cooling rack: Helps bars and cakes stop steaming in the pan.
- Oven-safe skillet: Useful for s’mores dip and any quick dessert that starts on the stove and finishes under the broiler.
Smart Shopping and Ingredient Tips
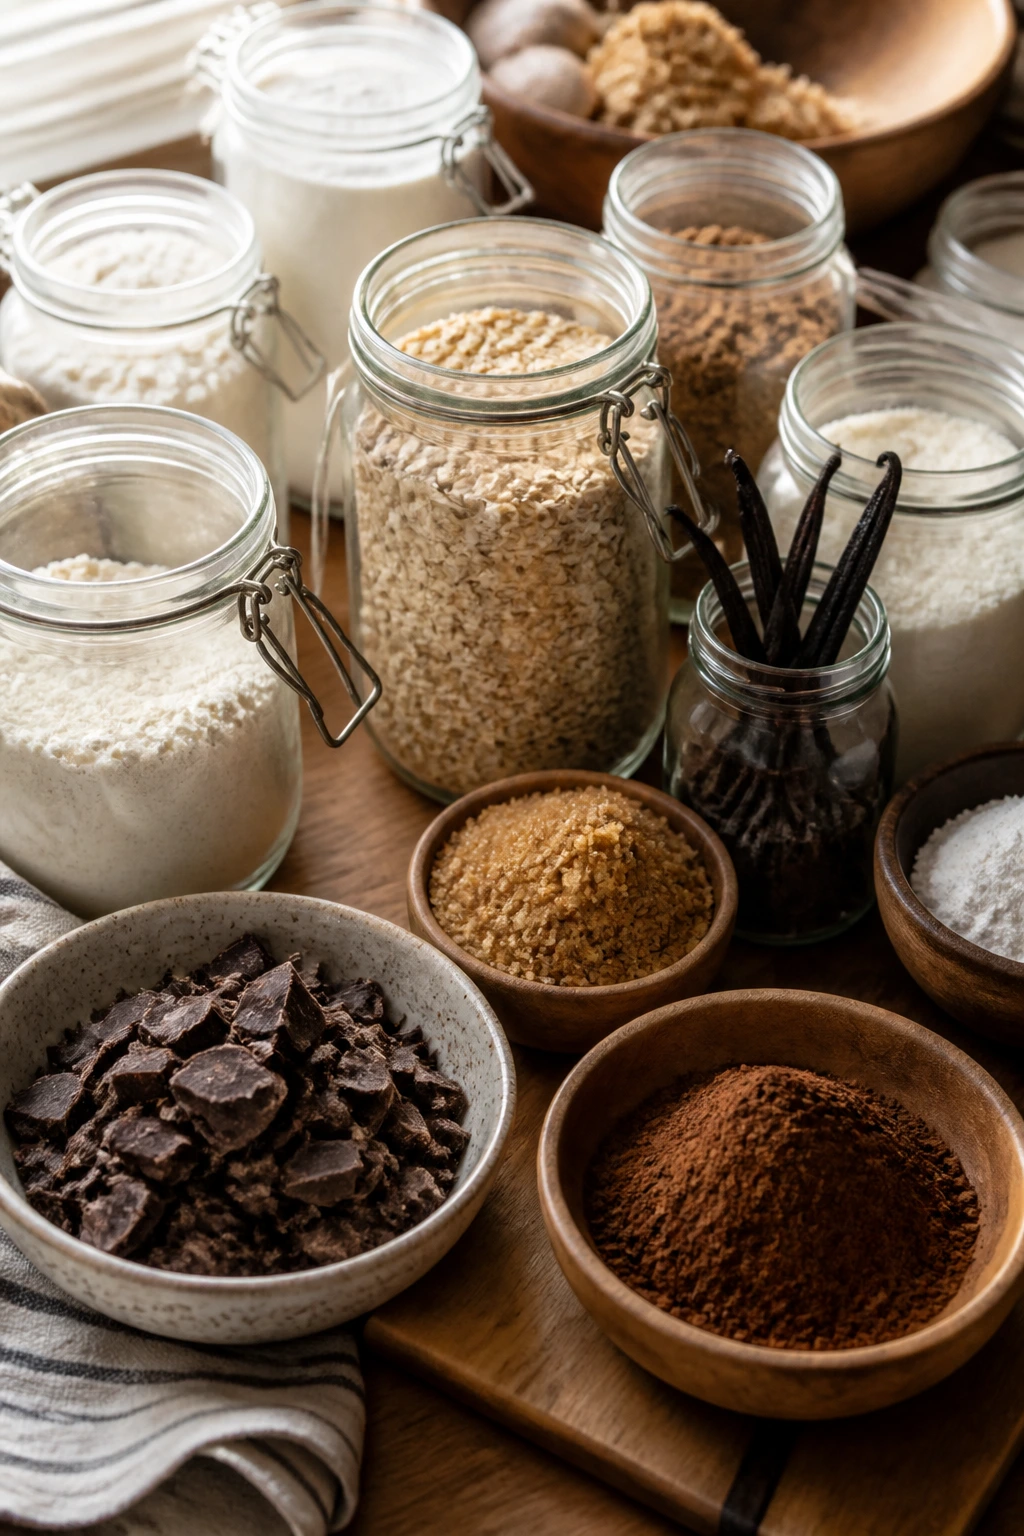
The first place to save time is the pantry. Keep cocoa powder, flour, brown sugar, baking soda, baking powder, vanilla, oats, powdered sugar, and a few good chocolates on hand. That gives you a surprising amount of range: bars, cookies, fudge, bark, brownies, and truffles all start to look easier once the basics are stocked.
Buy butter with the flavor you actually like. It sounds obvious, but holiday baking is butter-forward, and a bland stick of butter gives you a bland dessert. If a recipe depends on butter for richness—shortbread, fudge, blondies, sugar cookie bars—use the good stuff you can find and keep it cold when the recipe asks for it. That little temperature detail changes texture more than people think.
Chocolate matters too. For bark, truffles, brownies, and tartlets, choose chips or chopped bars that melt smoothly and taste good on their own. If the chocolate tastes waxy out of the bag, it’ll taste waxy in the dessert. White chocolate is especially touchy, so buy one that says real cocoa butter if possible.
For fruit desserts, pick apples and pears that still hold shape. Soft fruit is fine for sauce, not for galettes and hand pies. Tart fruit like cranberries and cherries brings balance, which is why those ingredients keep showing up in this collection. And if you’re buying nuts, toast them briefly in a dry skillet or low oven before using them. It takes five minutes and makes pecans, walnuts, pistachios, and almonds taste far less flat.
How to Serve These Recipes
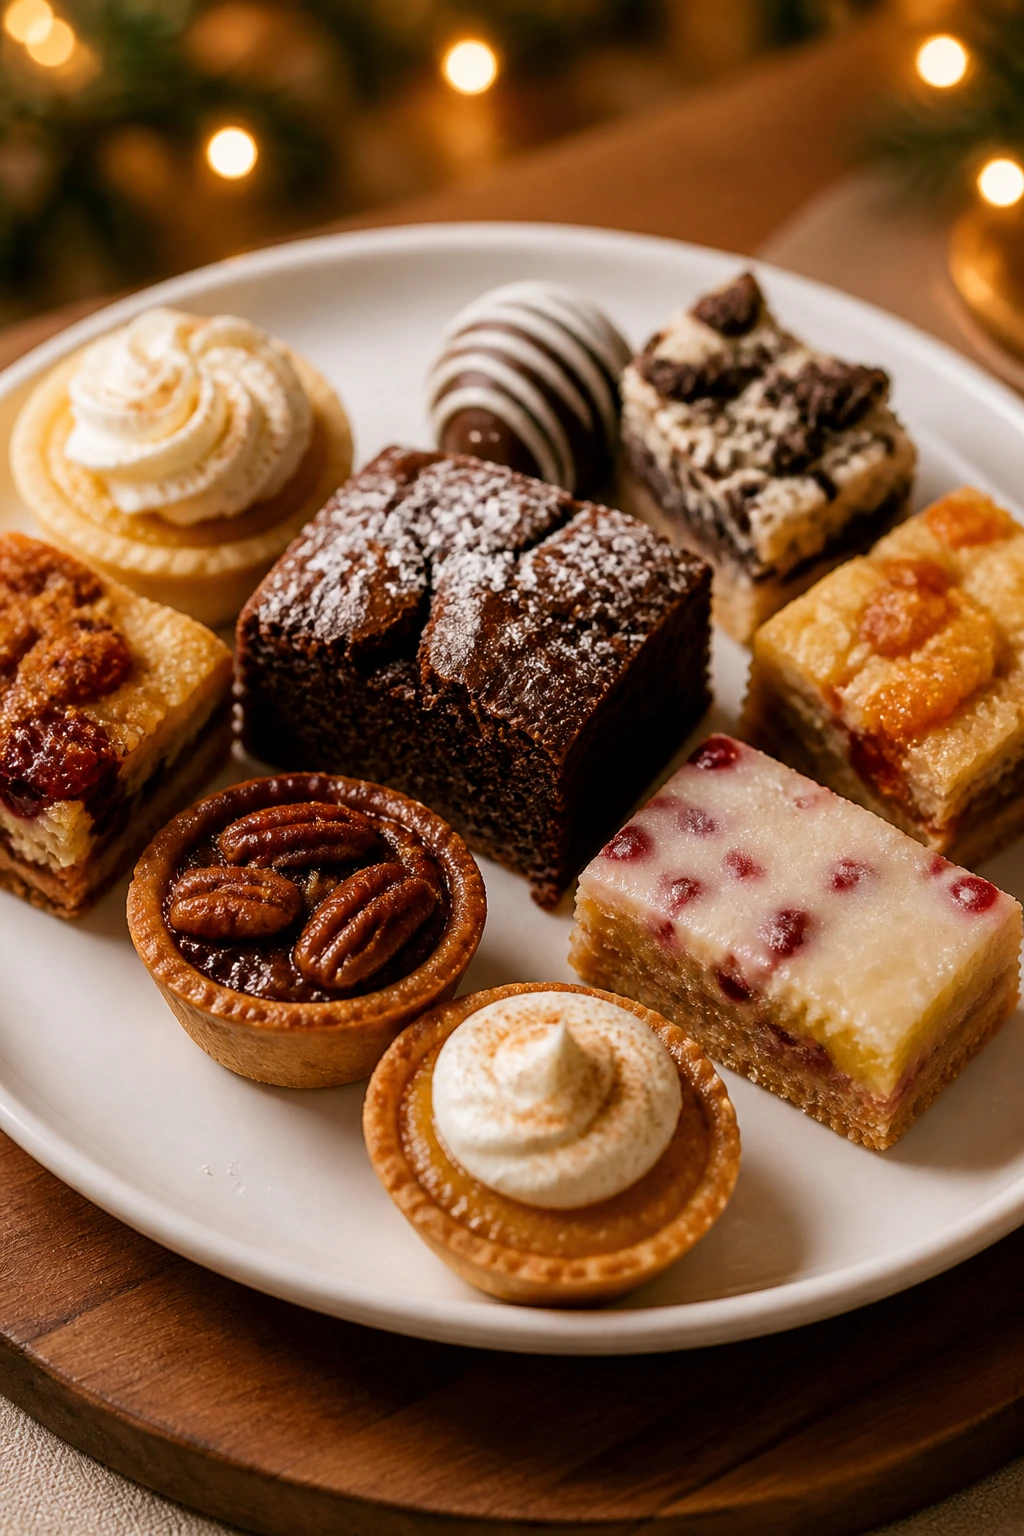
Presentation:
Use height and contrast. Stack bark shards in a bowl, line bars on a rectangular plate, and keep cookies in loose piles rather than neat military rows. A dusting of powdered sugar or a pinch of flaky salt makes dark desserts pop, especially chocolate-heavy ones.
Accompaniments:
Coffee goes with biscotti, brownies, truffles, and molasses cake. Milk belongs with cookies, mug cakes, and donut holes. Vanilla ice cream is the obvious partner for crisps, galettes, and hand pies, and whipped cream covers a lot of ground when you want one quick topping for several desserts.
Portions:
Rich desserts need smaller cuts than people expect. Fudge, tartlets, truffles, and bars often work best in 1- to 2-bite pieces. Fruit desserts can be served in larger scoops, but even there, a modest portion keeps the dessert table from feeling heavy.
Beverage Pairing:
Black coffee sharpens chocolate and nut desserts. Chai or spiced tea works well with gingerbread, molasses cake, and pumpkin bars. If you want one drink that fits nearly all of these, go with hot cocoa for the kids and a strong decaf coffee for everyone else who still wants dessert after dinner.
Additional Tips and Flavor Boosters
Flavor Enhancement: A small pinch of flaky salt on chocolate desserts, caramel, or toffee makes the flavor taste more defined. It is one of the cheapest upgrades in baking, and I use it constantly.
Customization: Citrus zest is the easiest way to make a dessert feel fresher. Orange works with cranberry, chocolate, and molasses. Lemon wakes up shortbread and berry bars. You do not need a lot—usually 1 teaspoon to 1 tablespoon is enough.
Serving Suggestions: Toasted nuts, shaved chocolate, crushed candy canes, or a thin glaze can change the look of a dessert without changing the structure. That is a useful trick when the table needs more color but you do not want to start a second recipe.
Make-It-Yours: For dairy-free versions, swap in coconut cream, dairy-free butter, or good dark chocolate where the recipe allows. For gluten-free baking, bars and cookies usually behave well with a 1:1 flour blend, though shortbread and biscotti may need a little more chill time. If you want a less sweet finish, reduce the frosting or candy topping and lean on salt, spice, or fruit instead.
Make-Ahead, Storage, and Reheating Guidance
Most of these desserts hold well, but they do not all age the same way. Bark, fudge, truffles, biscotti, and shortbread are the easy keepers. Store them airtight at cool room temperature for 4 to 7 days, or refrigerate if your kitchen runs warm. They also freeze well for up to 2 months if layered with parchment so the pieces do not glue themselves together.
Bars, brownies, and cookie dough-based desserts usually keep for 3 to 4 days in the fridge. Wrap tightly or store in a sealed container so they do not dry out at the edges. If you want to freeze bars, cut them first and freeze flat before packing them in a container. That makes thawing faster and keeps the edges clean.
Fruit desserts behave differently. Apple crisp, galettes, hand pies, and mini pies are at their best within a day or two. The crust stays crispier on day one, though many of them can be reheated in a 300°F oven for 10 to 15 minutes. If you microwave them, the crust softens. Sometimes that’s fine. Sometimes it isn’t. I’d rather use the oven and wait a little.
For cheesecake bars and pavlovas, keep the creamy or crisp components separate until serving if possible. Cheesecake bars need a cold fridge, and pavlovas hate humidity. Assemble pavlovas at the last minute, then eat them right away before the shells soften. No clever storage trick fixes that part.
Variations and Adaptations to Try
Gluten-Free Holiday Tray:
Swap in a good 1:1 gluten-free flour blend for cookie bars, brownies, blondies, and many bars. Shortbread and biscotti may need a touch more chilling, but the texture can still land nicely if the dough is handled gently.
Dairy-Free Dessert Counter:
Use dairy-free butter, coconut cream, and dairy-free chocolate where the recipe allows. Peppermint bark, fruit crisps, hand pies, and many truffles are easier to adapt than people expect because the flavor comes from fruit, spice, or chocolate, not just dairy.
Lower-Sugar Plate:
Lean on tart fruit, dark chocolate, and nuts, then cut back the frosting, glaze, or candy topping. Cranberry desserts, galettes, and chocolate spice truffles adapt well because they already have built-in contrast.
Kid-Friendly Decorating Station:
Set out sprinkles, crushed cookies, mini marshmallows, and melted chocolate so kids can finish sugar cookie bars, bark, or brownie tops. The baked base stays the same, but the decorating turns dessert into an activity instead of another chore.
Spice-Forward Version:
Increase ginger, cinnamon, nutmeg, or cloves in gingerbread, molasses cake, and pumpkin bars. A little black pepper in molasses cake or cayenne in chocolate truffles sounds odd until you taste the lift.
Nut-Free Swaps:
Leave out chopped nuts and replace them with toasted oats, crushed pretzels, or extra chocolate in recipes that need crunch. That keeps the texture interesting without bringing nuts to the table.
Common Mistakes to Avoid
The first mistake is trying to make every dessert feel like a centerpiece. Some of the best holiday desserts are the plain ones: shortbread, bark, fudge, truffles, and bars. If you pile on frosting, drips, glaze, and three garnishes, you can cover up the one thing the dessert already had going for it.
Another common slip is chasing speed so hard that you skip the chill time. Fudge, truffles, cheesecake bars, cutout cookies, and hand pies all benefit from firming up before cutting or dipping. If you rush that step, you end up with smeared chocolate, leaky filling, and edges that look chewed instead of sliced.
Temperature mistakes show up everywhere in this kind of baking. Butter that is too cold won’t cream. Butter that is too warm makes cookies spread. Chocolate that overheats turns thick and dull. Egg whites refuse to whip in a greasy bowl. None of this is mysterious. It’s just fussy chemistry, and the fix is to pay attention for five more minutes than you think you need.
The last trap is overbaking because you are waiting for the dessert to look “done” in the center. Bars keep setting after they leave the oven. Cookies finish on the tray. Brownies can be fudgy and still safe. Pulling things a few minutes early is often the difference between tender and dry.
Frequently Asked Questions
Which desserts on this list are the fastest to make on a weeknight?
Peppermint bark, Oreo truffles, white chocolate pretzel toffee, cheesecake stuffed dates, and brown butter Rice Krispie treats are the quickest wins. They mostly rely on melting, mixing, and chilling instead of full baking.
What’s the best dessert to make ahead for a holiday dessert table?
Fudge, biscotti, bark, shortbread, and bars hold up especially well. In fact, several taste better after a night in the fridge because the flavors settle and the slices cut more cleanly.
Can I mix and match these desserts on one platter?
Yes, and that’s where this collection shines. Pair one creamy item, one crunchy item, and one fruit-forward item so the tray has contrast: maybe fudge, cranberry shortbread, and apple hand pies.
How do I keep bars from sticking when I cut them?
Line the pan with parchment and leave a little overhang on two sides. Chill the bars before cutting, then use a sharp knife wiped clean between cuts.
What if my chocolate seizes or looks grainy?
If a little moisture got into it, the texture can go from smooth to stiff in a hurry. Sometimes you can save it by stirring in a spoonful of warm cream or butter, but prevention is easier: dry bowl, dry spoon, low heat.
Can I make any of these desserts without a mixer?
Absolutely. Bark, fudge, hand pies, galettes, toffee, and many bars can be done with a bowl and spatula. A mixer helps with cheesecake bars, meringues, and some cookies, but it is not mandatory for the whole list.
Which desserts travel well if I need to bring them somewhere?
Shortbread, biscotti, bark, fudge, cookies, and bars are the least fussy travelers. Fruit crisps and pavlovas are the most fragile, so save those for home unless you can assemble them on site.
How do I keep cookie trays from feeling samey?
Pick different textures on purpose: one soft cookie, one crisp cookie, one chocolate item, and one with fruit or nuts. That small bit of contrast makes the whole platter feel more thoughtful.
The Dessert Tray Stays Interesting
A good holiday dessert spread does not need to be enormous to feel generous. It needs contrast, a little restraint, and at least one thing that disappears before anyone finishes their coffee. That is why bark sits next to bars, why fruit desserts matter beside all the chocolate, and why a tray with one salty item always tastes better than a tray made only of sugar.
I like these desserts because they match real evenings. The oven is already warm from dinner. The counters are not spotless. The clock is moving. And still, you can set out something that smells like butter, spice, cranberry, or melted chocolate and make the room feel more settled than it did ten minutes earlier. That is enough.