
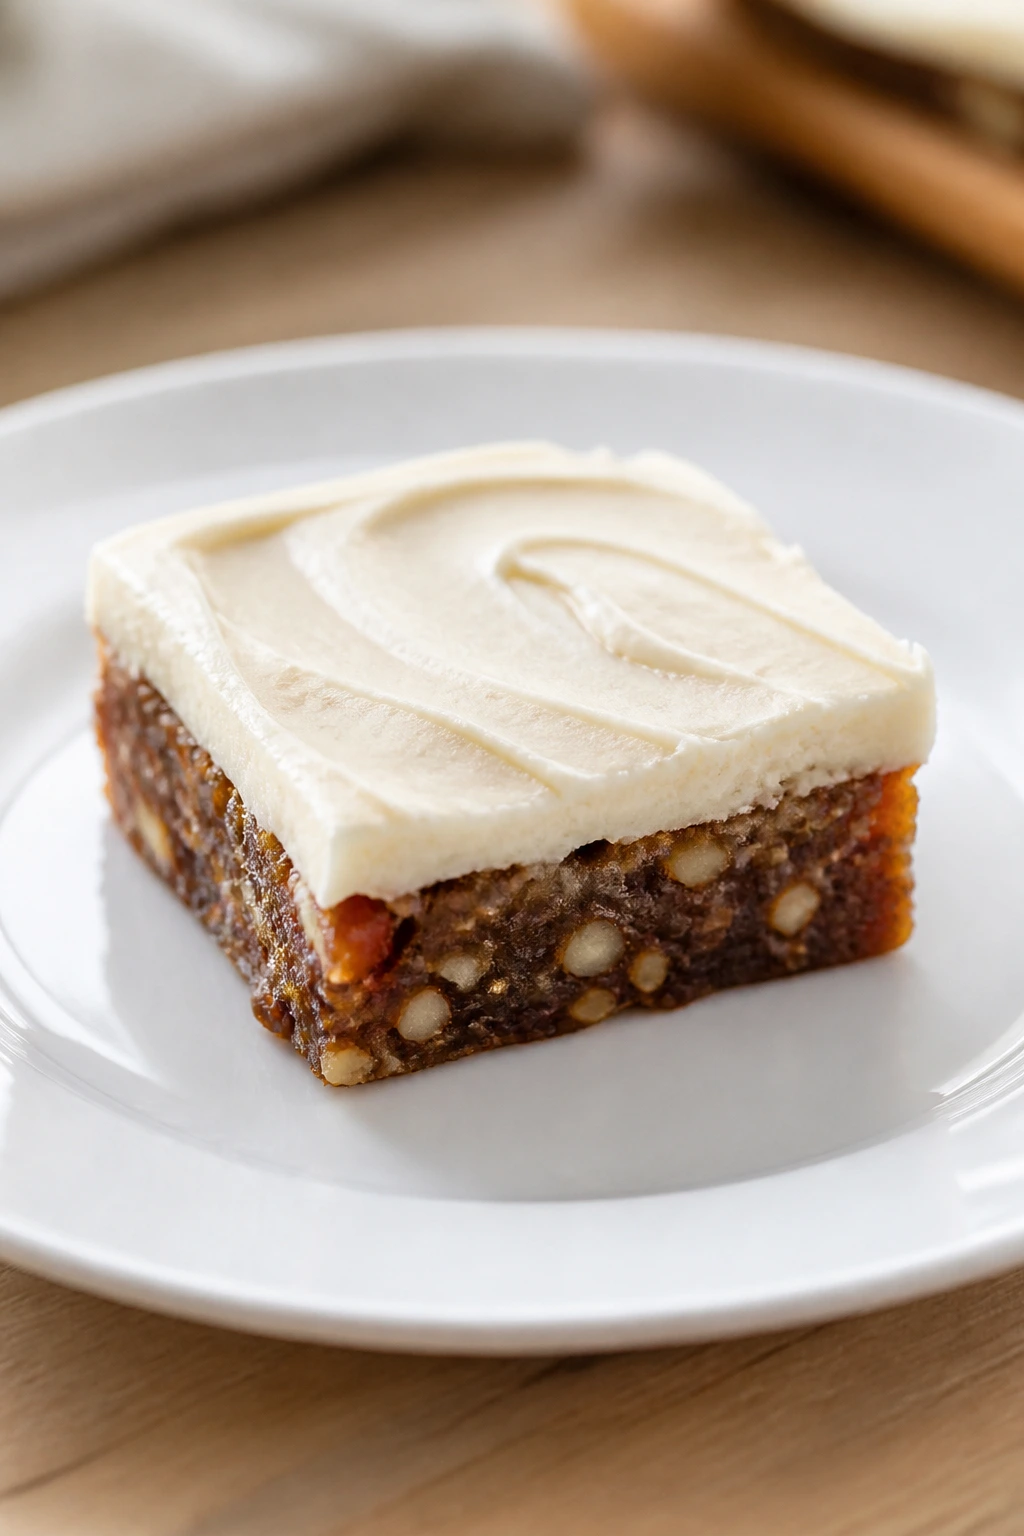
Buttery healthy candy with cream cheese frosting looks like a contradiction until you cut into it and realize the whole thing makes sense. The base is chewy rather than brittle, the sweetness leans on dates and maple syrup instead of a hard hit of refined sugar, and the frosting lands with a cool tang that keeps the square from feeling sticky or cloying. It tastes like a candy bar that grew up, got a pantry upgrade, and learned how to slice cleanly.
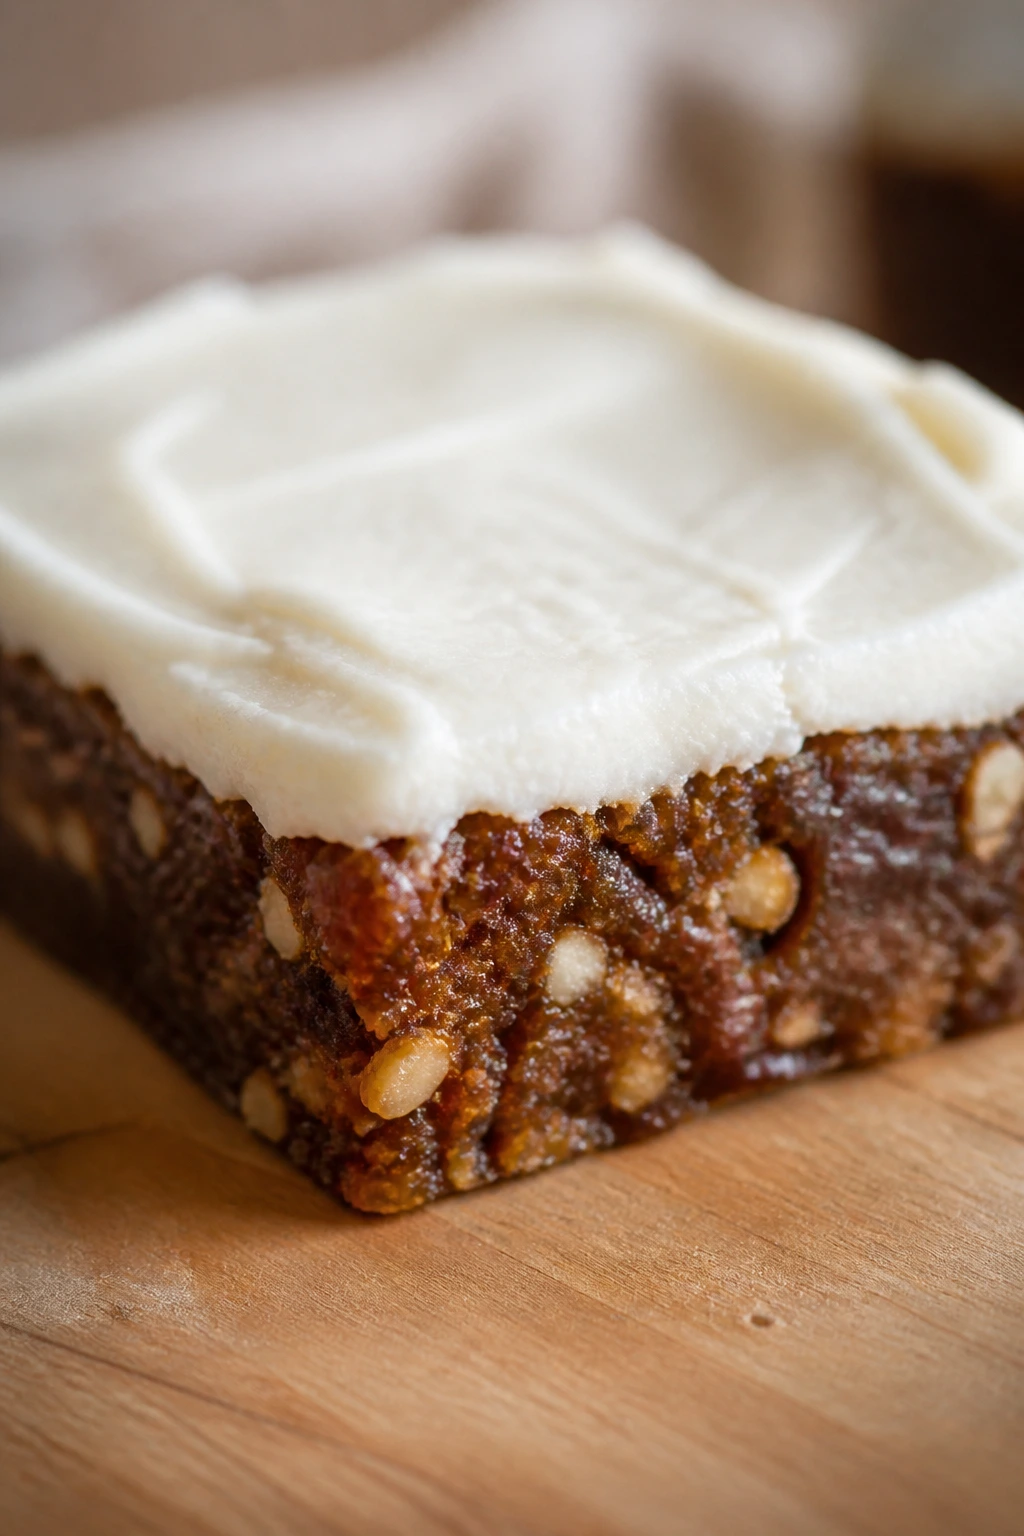
I don’t file this under health food. Not even close. But I do file it under desserts that earn their sweetness instead of shouting for it, and that matters more than people admit. The butter gives the bars that soft, rich edge you expect from a good blondie, while the oats, pecans, and chopped dates keep the crumb lively and a little bit rustic, not gluey.
The best part is the contrast. Warm spice, toasted nuts, caramel notes from the dates, and then that cream cheese frosting sitting on top in a thin, cool layer — not a bakery-style mound, just enough to cut through the richness and make another bite feel like a good idea. If you’ve ever wanted something that tastes indulgent but doesn’t rely on a full sheet of plain sugar rush, this pan is worth making once, then making again.
Why This Healthy Candy Bar Tastes So Rich
Date sweetness: Medjool dates melt into the batter and give the bars a dark caramel taste without needing a long list of sweeteners.
Butter balance: One stick of butter keeps the crumb soft and rich, but the oats and flour stop it from turning greasy or heavy.
Frosting contrast: A thin cream cheese layer adds tang, which is exactly what a sticky candy-style bar needs after the first bite.
Clean cuts: These squares slice best after a short chill, so they look tidy on a plate instead of collapsing into a soft mess.
Pantry logic: Most of the ingredients live in a normal baking cabinet — oats, flour, brown sugar, pecans, vanilla — so this isn’t a specialty-store project.
Dessert, not sugar fog: The bars are sweet, yes, but the nuts, salt, and tangy frosting keep the flavor moving instead of flattening out.
A Pan, a Clock, and the Sweet Spot Between Them
Yield: 16 bars from one 8×8-inch pan
Prep Time: 25 minutes
Cook Time: 28 minutes
Total Time: 53 minutes, plus 1 hour cooling and 20 minutes chilling for the cleanest cuts
Chill/Rest Time: The bars need to cool completely before frosting, then chill briefly after frosting so the top sets
Difficulty: Intermediate — the steps are straightforward, but the date mixture, bake time, and frosting all benefit from a little attention
Best Served: Slightly chilled or at cool room temperature, when the frosting is firm but not hard
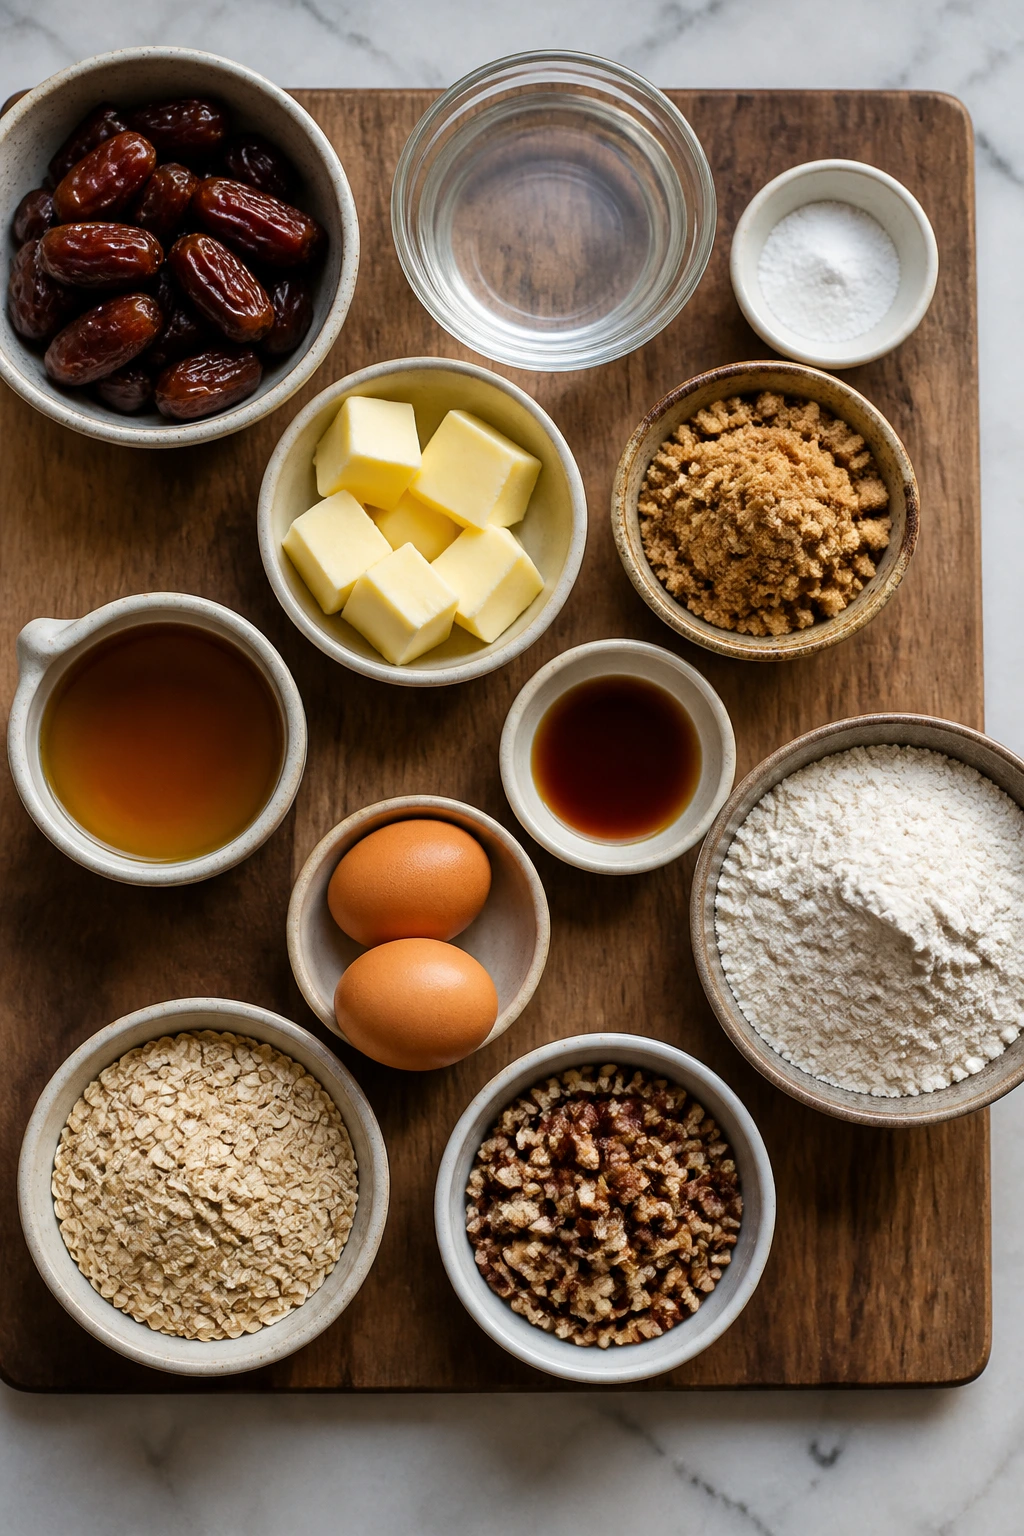
What Goes Into the Pan
For the Bars
- 1 cup pitted Medjool dates, chopped into small pieces — these melt down into the batter and give the candy note.
- 3/4 cup boiling water — used to soften the dates so they blend into the base.
- 1 teaspoon baking soda — helps the dates break down into a soft, caramel-like paste.
- 1/2 cup unsalted butter, melted and cooled for 5 minutes — gives the bars their rich, buttery backbone.
- 1/2 cup packed light brown sugar — adds body and a deeper sweetness than white sugar.
- 1/4 cup pure maple syrup — keeps the bars moist and adds a round, almost toffee-like flavor.
- 2 large eggs, room temperature — bind the batter and give the bars structure.
- 1 teaspoon vanilla extract — warms up the whole pan.
- 1 cup whole wheat pastry flour — keeps the crumb tender but a little more substantial than all-purpose flour alone.
- 3/4 cup old-fashioned rolled oats — add chew and stop the bars from tasting flat.
- 1 teaspoon baking powder — gives the bars a small lift.
- 1/2 teaspoon fine sea salt — keeps the sweetness in check.
- 1 teaspoon ground cinnamon — adds warmth without taking over.
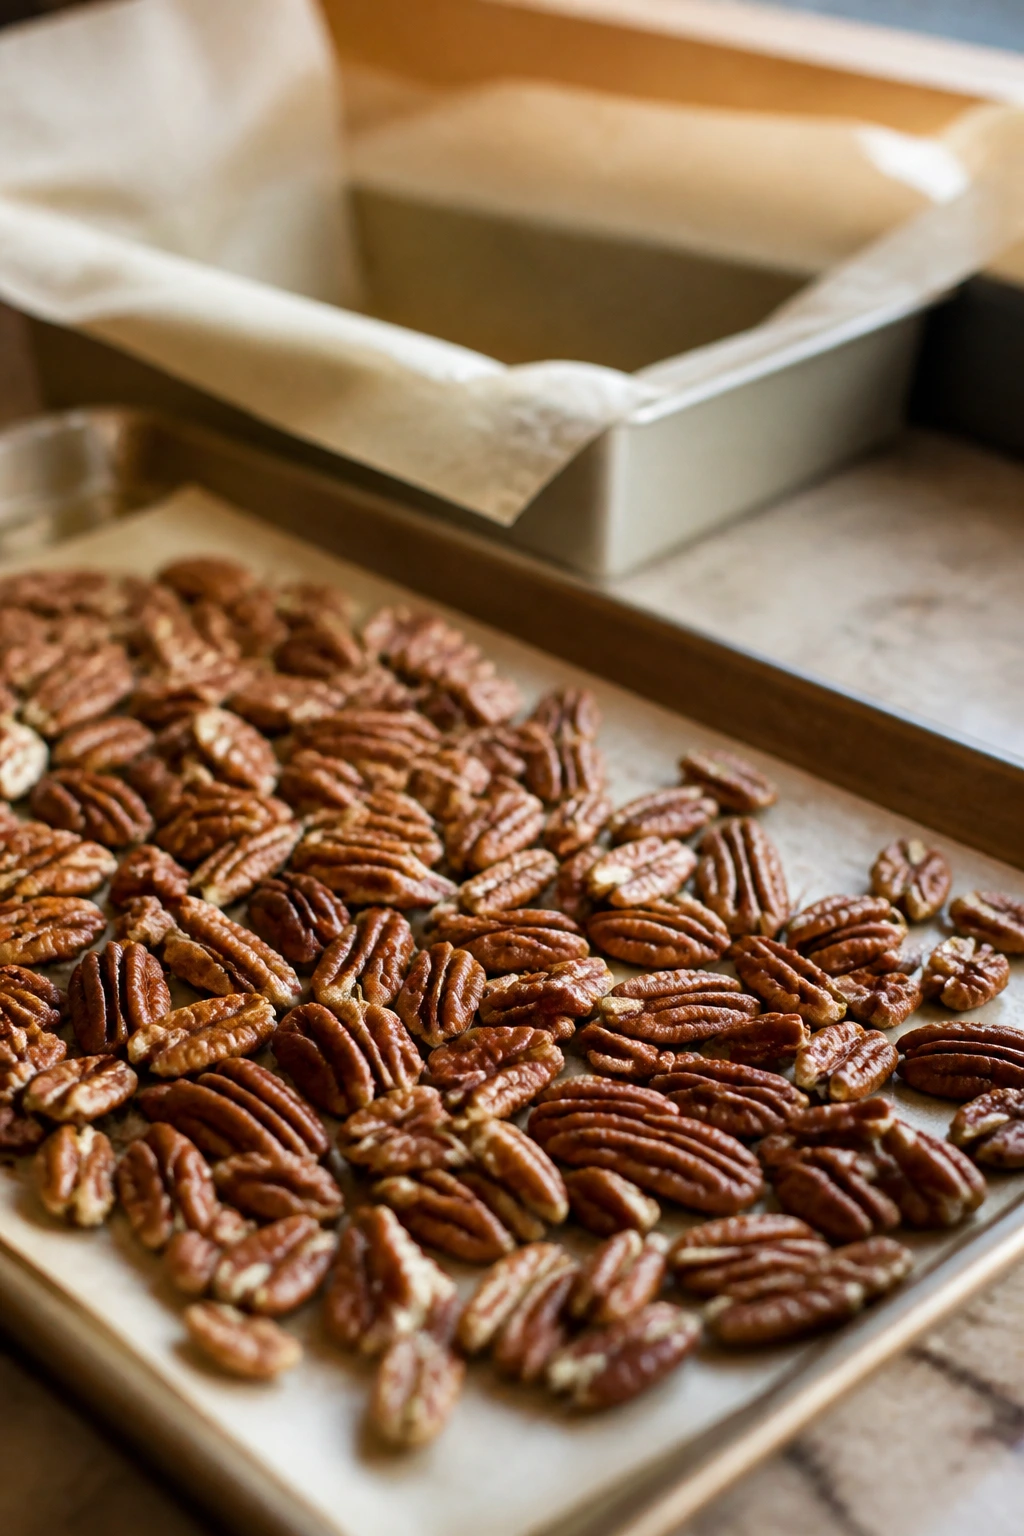
- 1 cup chopped pecans, toasted — gives crunch and a nutty, almost praline-like finish.
For the Cream Cheese Frosting
- 4 ounces cream cheese, softened to room temperature — use full-fat if you want the smoothest, tangiest result.
- 3 tablespoons unsalted butter, softened — helps the frosting spread instead of tearing the bars.
- 1 cup powdered sugar, sifted — sweetens and thickens the frosting.
- 1 teaspoon vanilla extract — keeps the frosting from tasting one-note.
- Pinch of fine salt — sharpens the flavor.
- 1 to 2 tablespoons milk or cream, only if needed — loosens the frosting if it feels too stiff to spread.
For the Finish
- 2 tablespoons chopped toasted pecans — a little extra crunch on top.
- Flaky sea salt, optional — a tiny sprinkle that wakes up the whole square.
Why the Ingredient List Is Built This Way
Dates and the Sticky, Candy-Like Middle
What to use: 1 cup chopped Medjool dates, 3/4 cup boiling water, and 1 teaspoon baking soda. That combination does the heavy lifting here; the dates become soft enough to mash into a paste that behaves almost like homemade caramel.
Preparation: Chop the dates before you measure the boiling water. Small pieces soften faster and leave fewer chewy lumps in the finished bars, which matters because nobody wants a random hard date chunk in the middle of a frosting-topped square.
Substitutions: Deglet Noor dates work in a pinch, but they’re drier and less plush than Medjools, so give them the full soak and add another tablespoon of hot water if needed. If dates are off the table, finely chopped dried figs will work, though the flavor turns earthier and less classic.
Tips: Old dates are the quiet enemy of this recipe. If yours feel leathery or look dusty, soak them a minute or two longer; soft dates make the bars taste rich, while dry ones make the whole pan taste dull.
Butter, Eggs, Maple Syrup, and Vanilla
What to use: 1/2 cup melted butter, 1/2 cup brown sugar, 1/4 cup maple syrup, 2 eggs, and 1 teaspoon vanilla. These ingredients are the bridge between “healthier bar” and “I absolutely want another piece.”
Preparation: Let the butter cool for a few minutes after melting so it doesn’t scramble the eggs when you whisk everything together. Room-temperature eggs mix more smoothly and help the batter emulsify instead of separating into greasy streaks.
Substitutions: Coconut sugar can replace the brown sugar if you want a slightly less molasses-heavy flavor, and honey can stand in for maple syrup, though it brings a softer floral note. If you’re using salted butter, cut the added salt in half.
Tips: Don’t skip the vanilla. In a bar like this, vanilla doesn’t read as “vanilla flavor”; it rounds out the dates, butter, and nuts so the whole thing tastes finished.
Flour, Oats, Cinnamon, and Pecans
What to use: 1 cup whole wheat pastry flour, 3/4 cup rolled oats, 1 teaspoon baking powder, 1/2 teaspoon salt, 1 teaspoon cinnamon, and 1 cup toasted pecans. This is the part that gives the bars structure without making them cakey.
Preparation: Measure the flour lightly and level it off. Pack it down and you’ll make the bars dry; scoop it gently and the crumb stays tender.
Substitutions: All-purpose flour works if that’s what you have, but the bars will lose a little of the nutty depth that whole wheat pastry flour brings. Walnuts can replace pecans, and if you want a more dessert-shop finish, fold in 1/3 cup mini dark chocolate chips along with the nuts.
Tips: Toast the pecans before they go into the batter. Raw pecans are fine, but toasted ones taste almost buttery, and that flavor makes the whole pan feel more expensive than it is.
Cream Cheese Frosting and the Final Finish
What to use: 4 ounces cream cheese, 3 tablespoons butter, 1 cup powdered sugar, 1 teaspoon vanilla, a pinch of salt, and 1 to 2 tablespoons milk or cream if the frosting needs loosening.
Preparation: Let both the cream cheese and butter soften fully before you beat them. Cold cream cheese turns lumpy fast, and once that happens you end up beating longer than you should, which can make the frosting too loose.
Substitutions: Dairy-free cream cheese and plant butter can work, though some brands are softer and need a little more chilling before spreading. If you want the frosting less sweet, reduce the powdered sugar to 3/4 cup and add the tiniest splash of milk only if needed.
Tips: Sift the powdered sugar if it’s been sitting in the cabinet awhile. Lumps in the frosting are annoying, and they show up even more against a brown bar where every little speck stands out.
The Tools That Make the Batch Cleaner
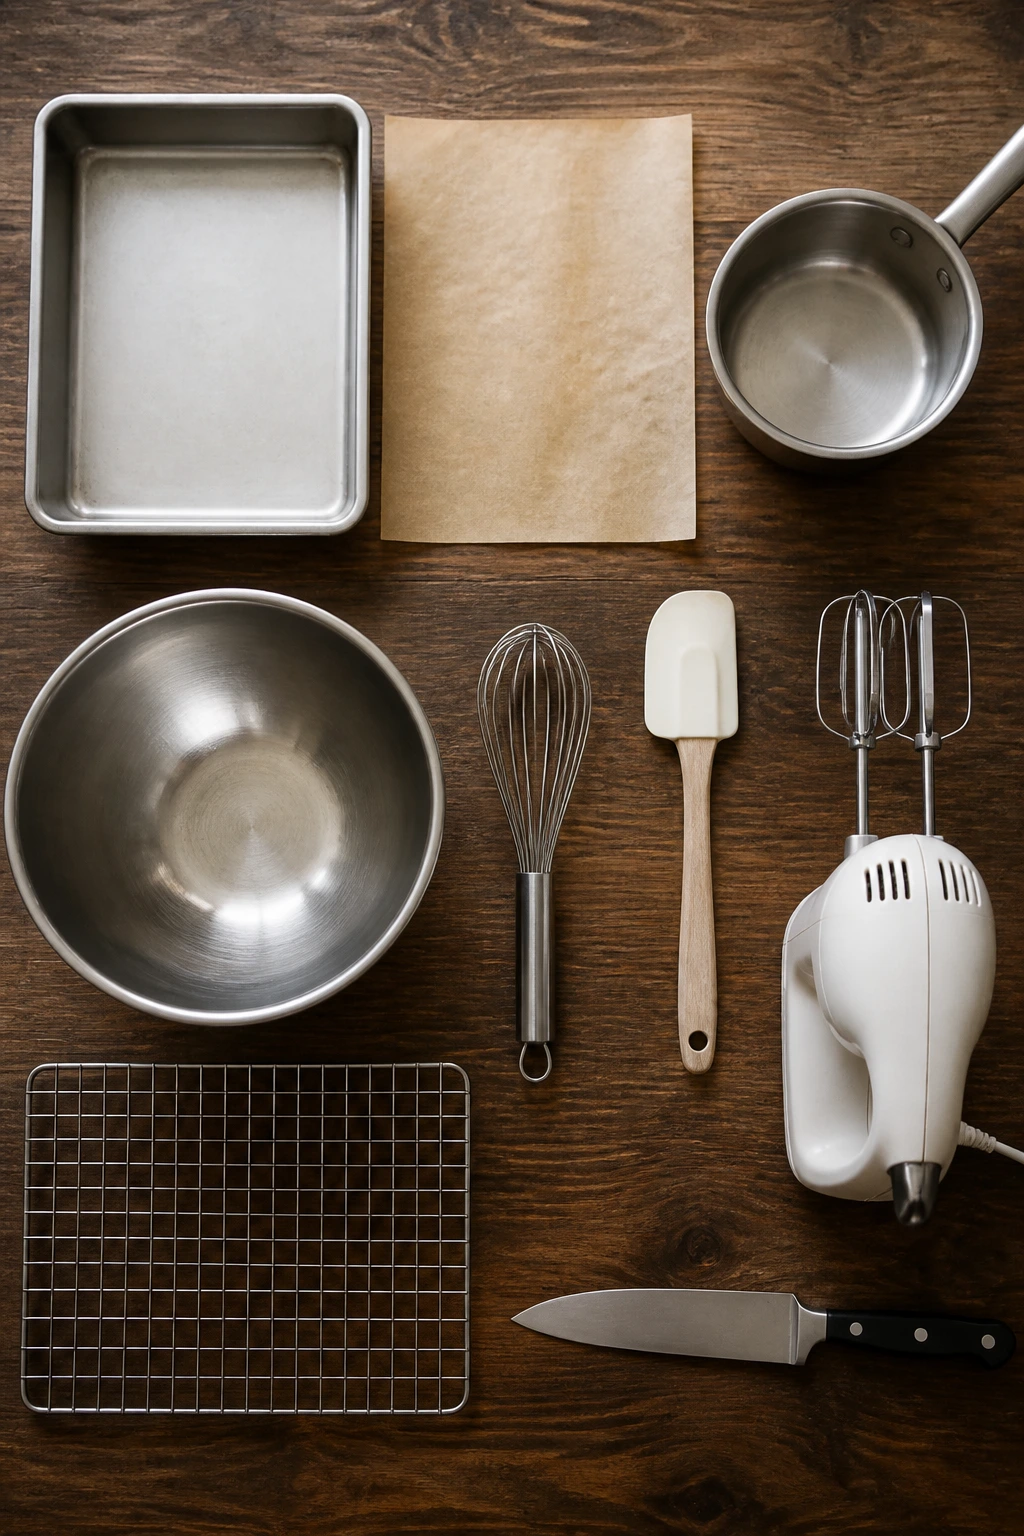
- 8×8-inch metal baking pan — metal browns the edges more evenly than glass here.
- Parchment paper — leave enough overhang to lift the bars out in one piece.
- Medium saucepan or heatproof bowl — useful for softening the dates with boiling water.
- Large mixing bowl — gives you room to fold the batter without throwing oats everywhere.
- Whisk — for the wet ingredients and the frosting base.
- Rubber spatula — the best tool for folding in oats and scraping the bowl clean.
- Hand mixer or stand mixer — not mandatory, but it makes the frosting smoother and faster.
- Wire rack — lets the bars cool without steaming the bottom.
- Offset spatula or butter knife — for spreading the frosting in a thin, even layer.
- Sharp chef’s knife — a dull knife will drag the frosting and tear the edges when you cut.
Toast the Nuts and Prep the Pan
The first few minutes matter more than people think. A well-lined pan and properly toasted pecans set the whole batch up for clean edges, even browning, and that nutty aroma that hits the kitchen before the bars are even done.
You do not need fancy equipment for this part. You do need a little patience. Toasting pecans for six or seven minutes seems like a small move, but it changes the flavor from “there are nuts in here” to “something tastes toasted and round and expensive.”
-
Preheat and line: Preheat the oven to 350°F (175°C) and position a rack in the center. Line an 8×8-inch metal baking pan with parchment paper, leaving a 2-inch overhang on two sides so you can lift the bars out later.
-
Toast the pecans: Spread the chopped pecans on a small baking sheet and toast them for 6 to 8 minutes, stirring once halfway through, until they smell nutty and the edges darken a shade or two. Let them cool while you build the batter. Do not walk away during the last minute — pecans go from toasted to scorched in a blink.
Make the Date-Caramel Base
This is the part that gives the bars their candy-like personality. The dates soften into a sticky paste, and once you stir that into the butter and syrup, the batter takes on a smell that’s halfway between caramel and toasted fruit. It’s a good smell. The kind that makes people linger near the oven.
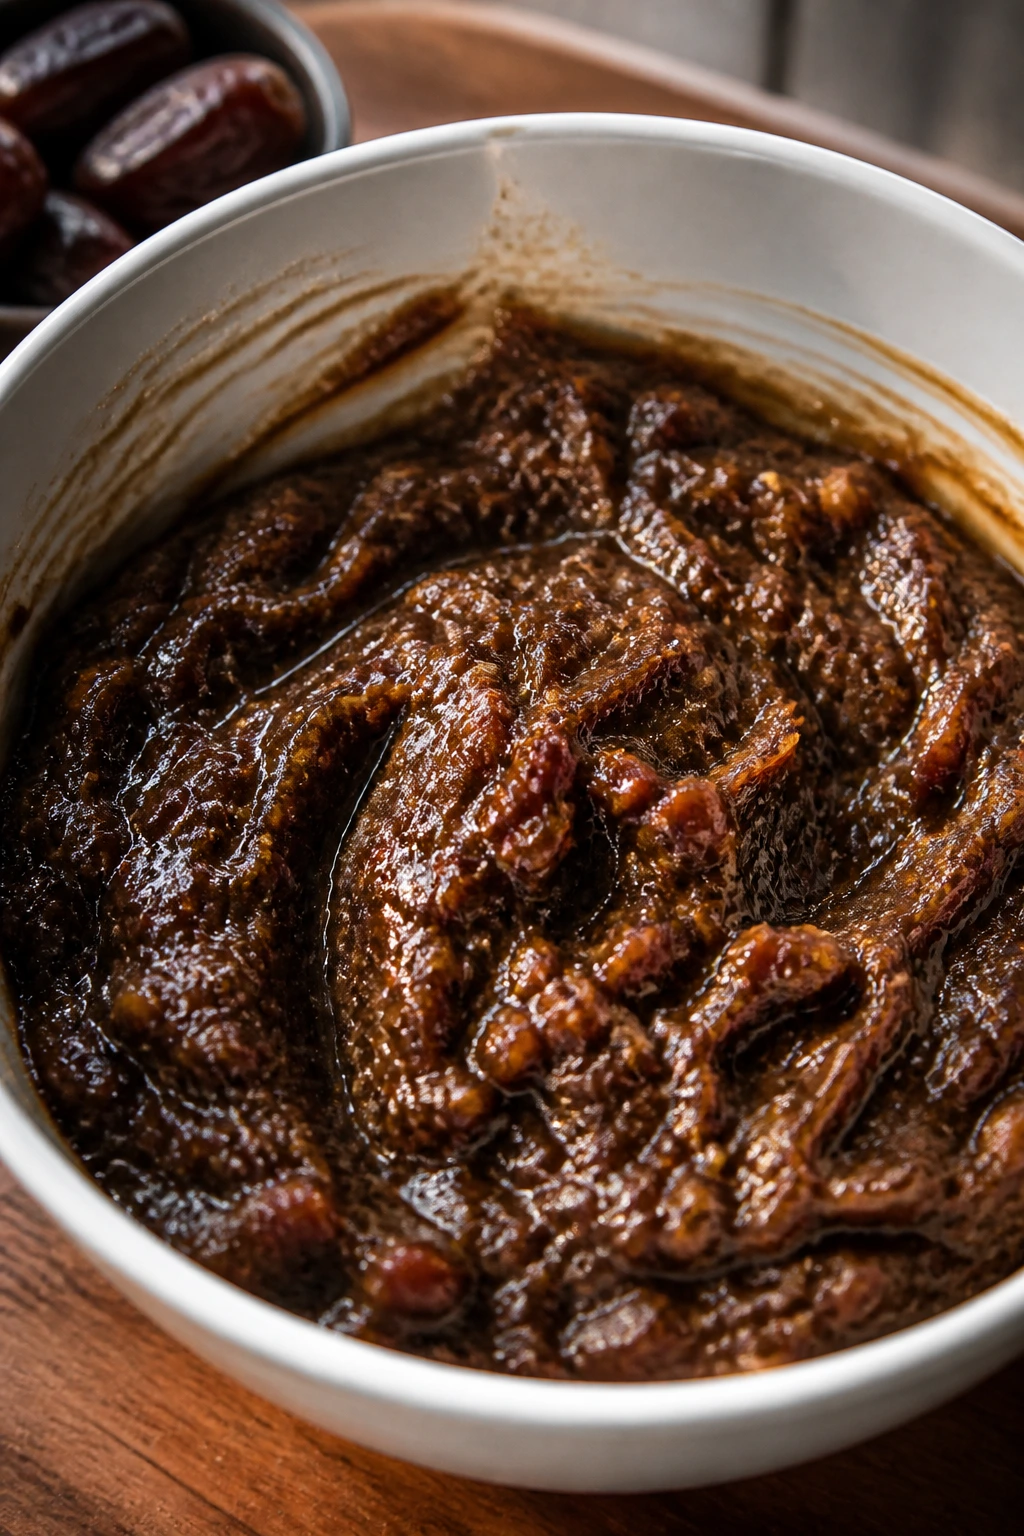
A quick note: the date mixture doesn’t need to become smooth like baby food. A few soft bits are welcome. They disappear into the bars and leave behind little pockets of chew.
-
Soften the dates: Place the chopped dates in a medium heatproof bowl and pour the 3/4 cup boiling water over them. Stir in the baking soda and let the mixture stand for 5 minutes, until the dates are dark, puffed, and very soft. Mash them with a fork into a rough paste.
-
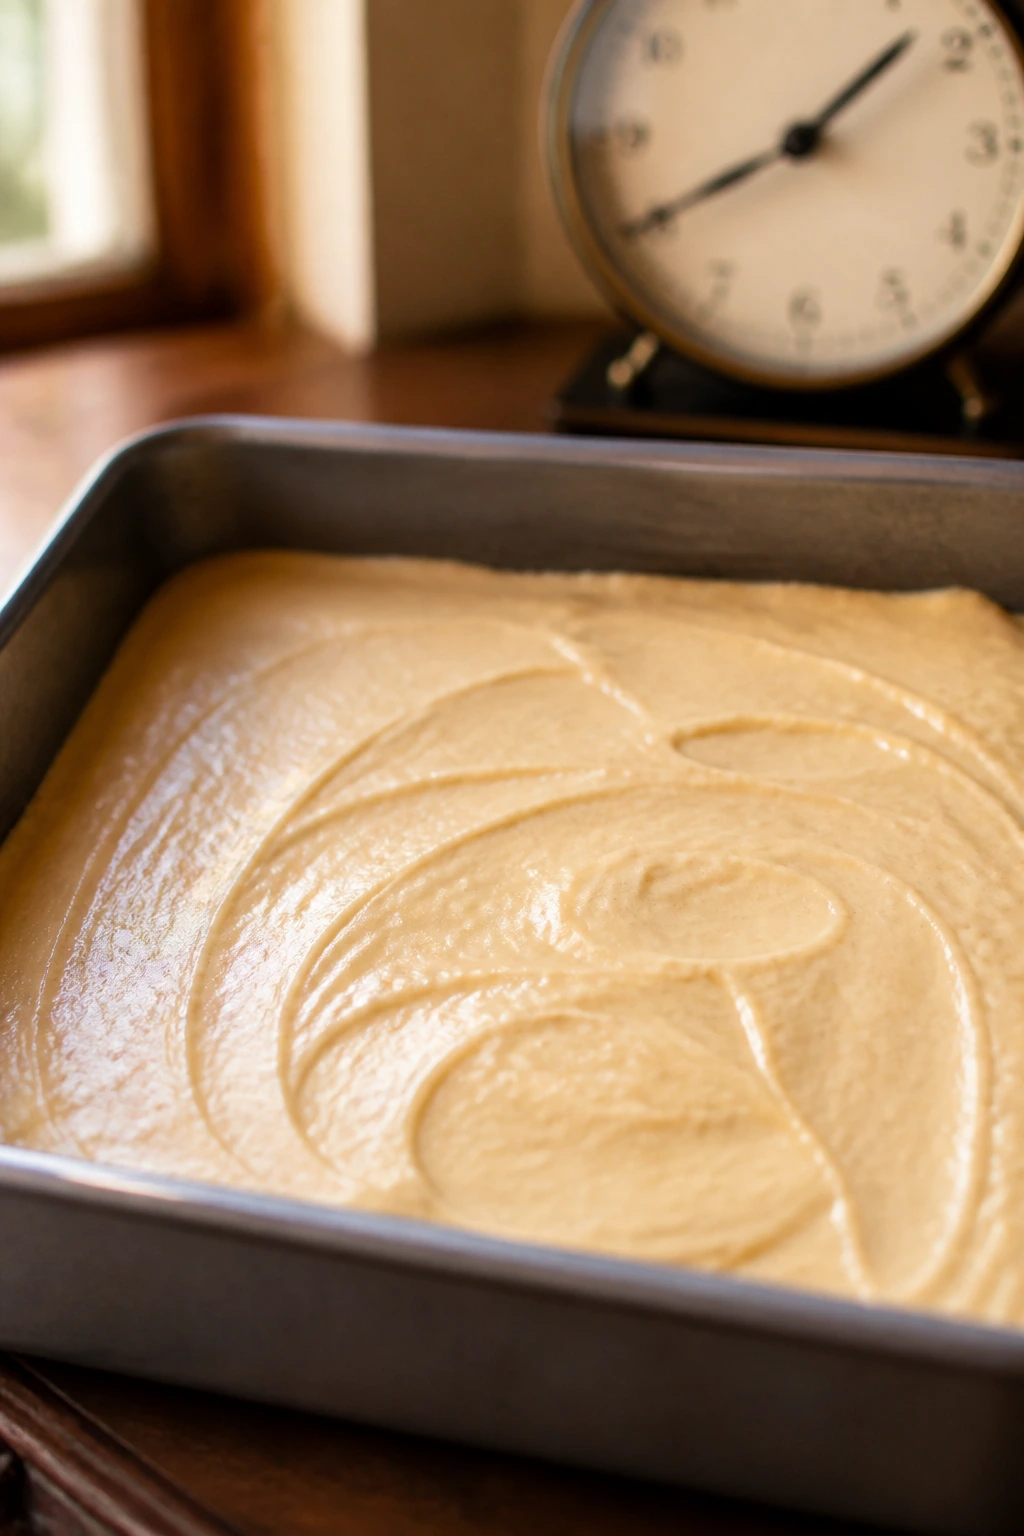
Build the wet base: In a large bowl, whisk together the melted butter, brown sugar, and maple syrup until glossy. Whisk in the eggs one at a time, then add the vanilla. Stir in the date paste. The mixture may look a little uneven at this point, and that is fine.
-
Fold in the dry ingredients: Add the flour, oats, baking powder, salt, and cinnamon to the bowl. Fold with a spatula until only a few streaks of flour remain, then add the toasted pecans and fold just until combined. Stop as soon as the flour disappears; overmixing makes the bars dense and dry instead of chewy. Spread the batter evenly into the prepared pan.
Bake Until the Center Is Just Set
A lot of bar recipes fail here because people bake until the middle looks completely firm. That’s how you get dry edges and a crumb that goes sandy the minute you cut it. What you want instead is a center that springs back lightly when touched and a toothpick that comes out with moist crumbs, not wet batter.
The bars will keep cooking after they leave the oven. That’s not a guess. It’s the whole point of letting them cool in the pan before you even think about frosting.
-
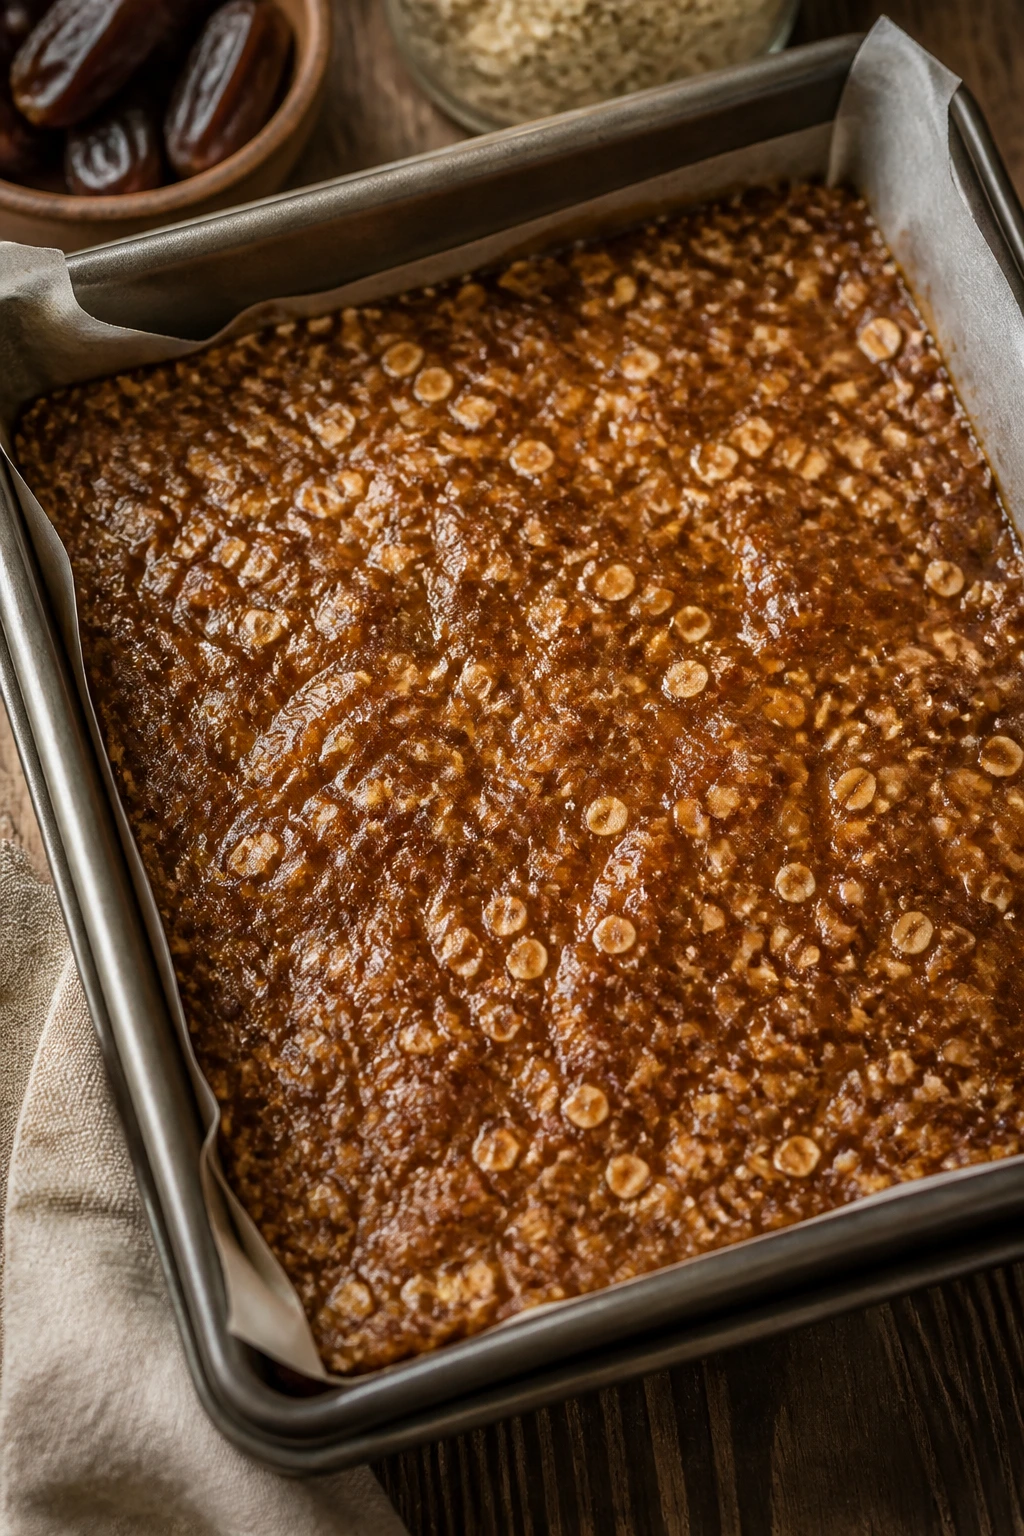
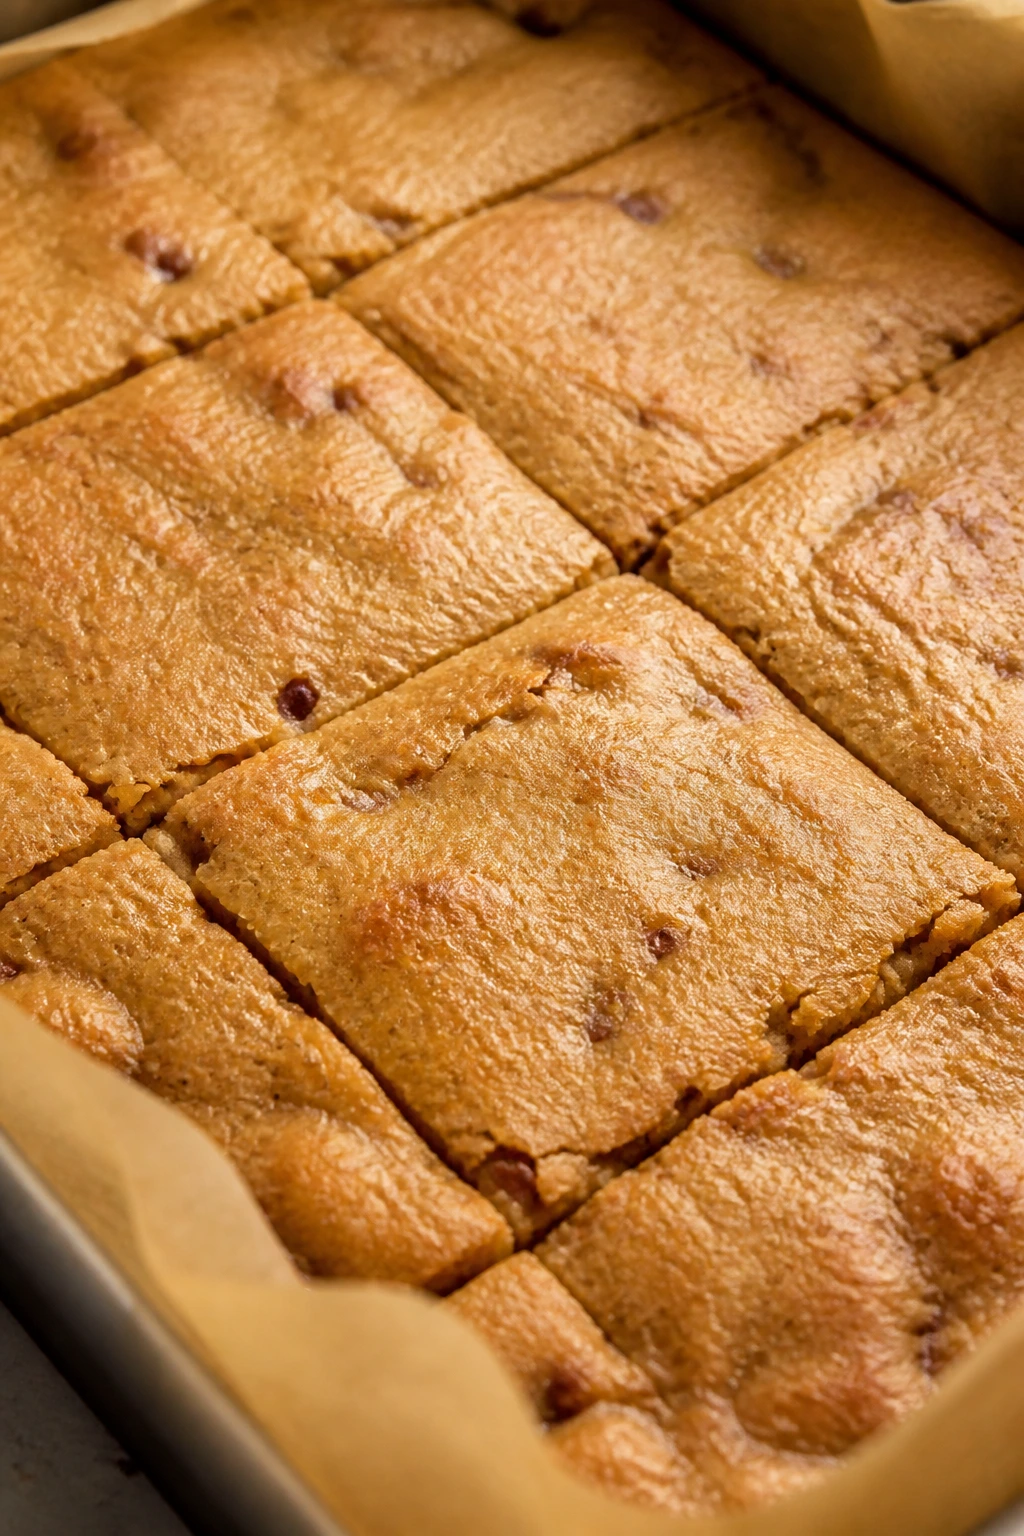
Bake the bars: Bake for 24 to 28 minutes, rotating the pan once halfway through if your oven has hot spots. The top should look set and lightly golden, and the center should give a little when pressed gently with a fingertip.
-
Cool completely: Set the pan on a wire rack and let the bars cool in the pan for 1 hour, or until the bottom of the pan feels barely warm. Lift the slab out using the parchment overhang and let it cool all the way to room temperature before frosting. If the bars are even slightly warm, the frosting will slide and turn glossy instead of staying plush.
Whip the Cream Cheese Frosting
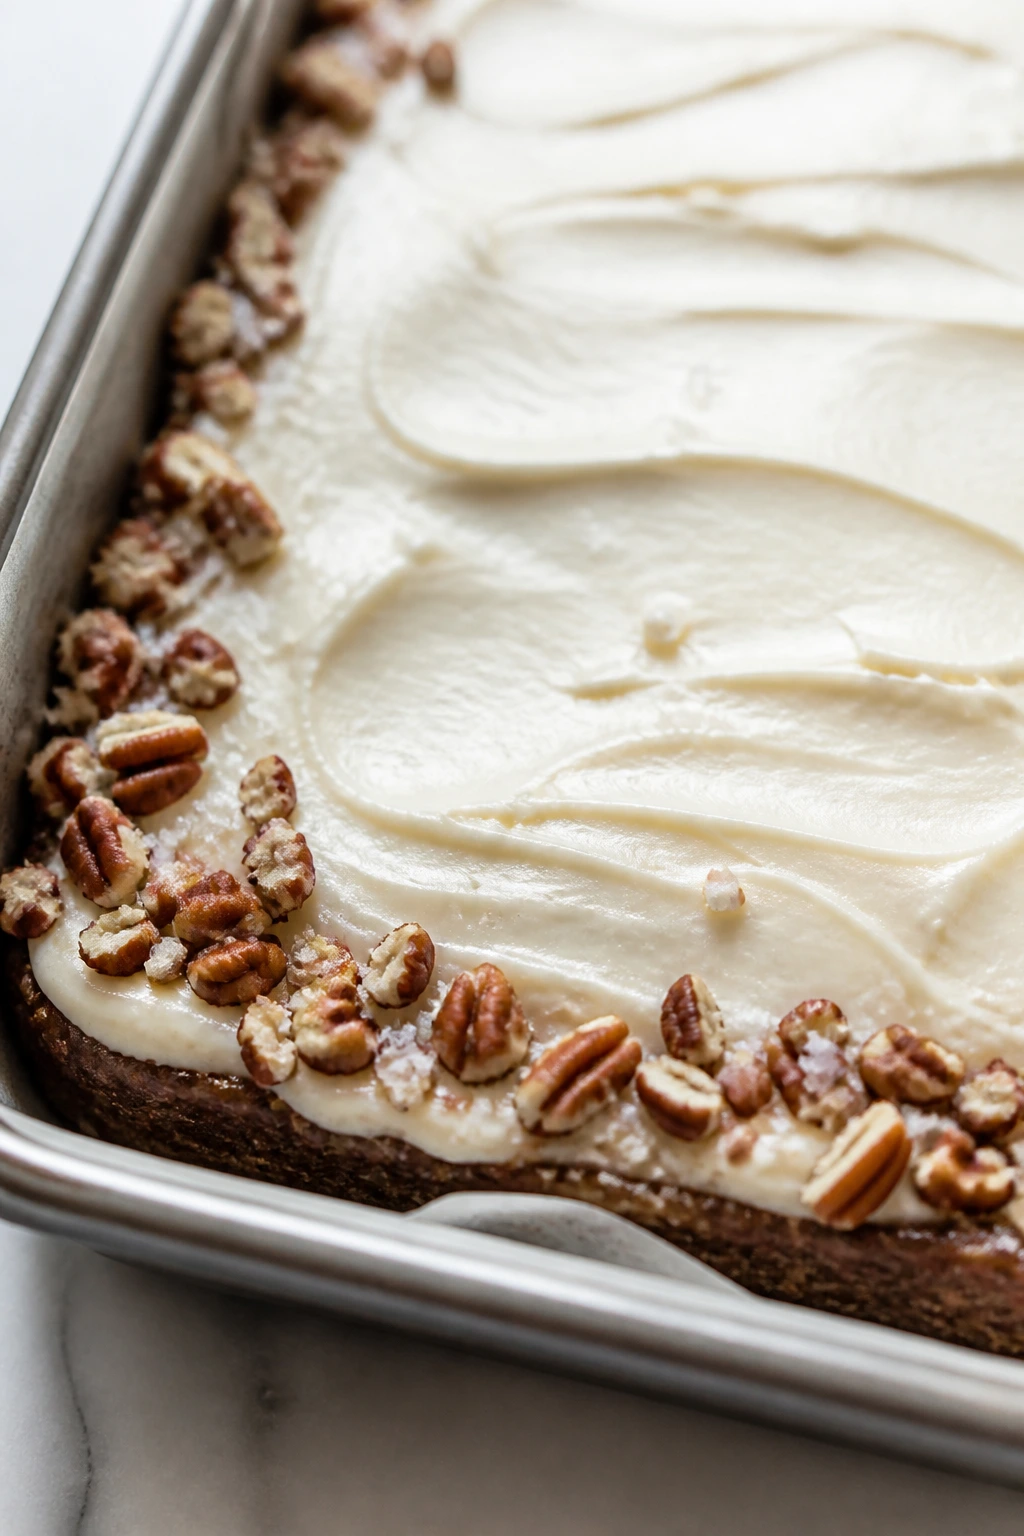
The frosting is not a thick blanket here. I like it thinner than most bakery bars, just enough to give each square a cool, tangy top without burying the flavor underneath. If you spread it too thick, it starts to feel like a separate dessert sitting on top of the dessert, and that’s not what this pan wants.
Beat the frosting until it’s smooth, not airy. You’re after spreadable and silky, not whipped into a cloud.
-
Beat the frosting: In a medium bowl, beat the cream cheese and butter together with a hand mixer for 1 to 2 minutes, until smooth and completely lump-free. Add the powdered sugar, vanilla, and salt, then beat again until creamy. If it feels too stiff to spread, add milk or cream 1 teaspoon at a time.
-
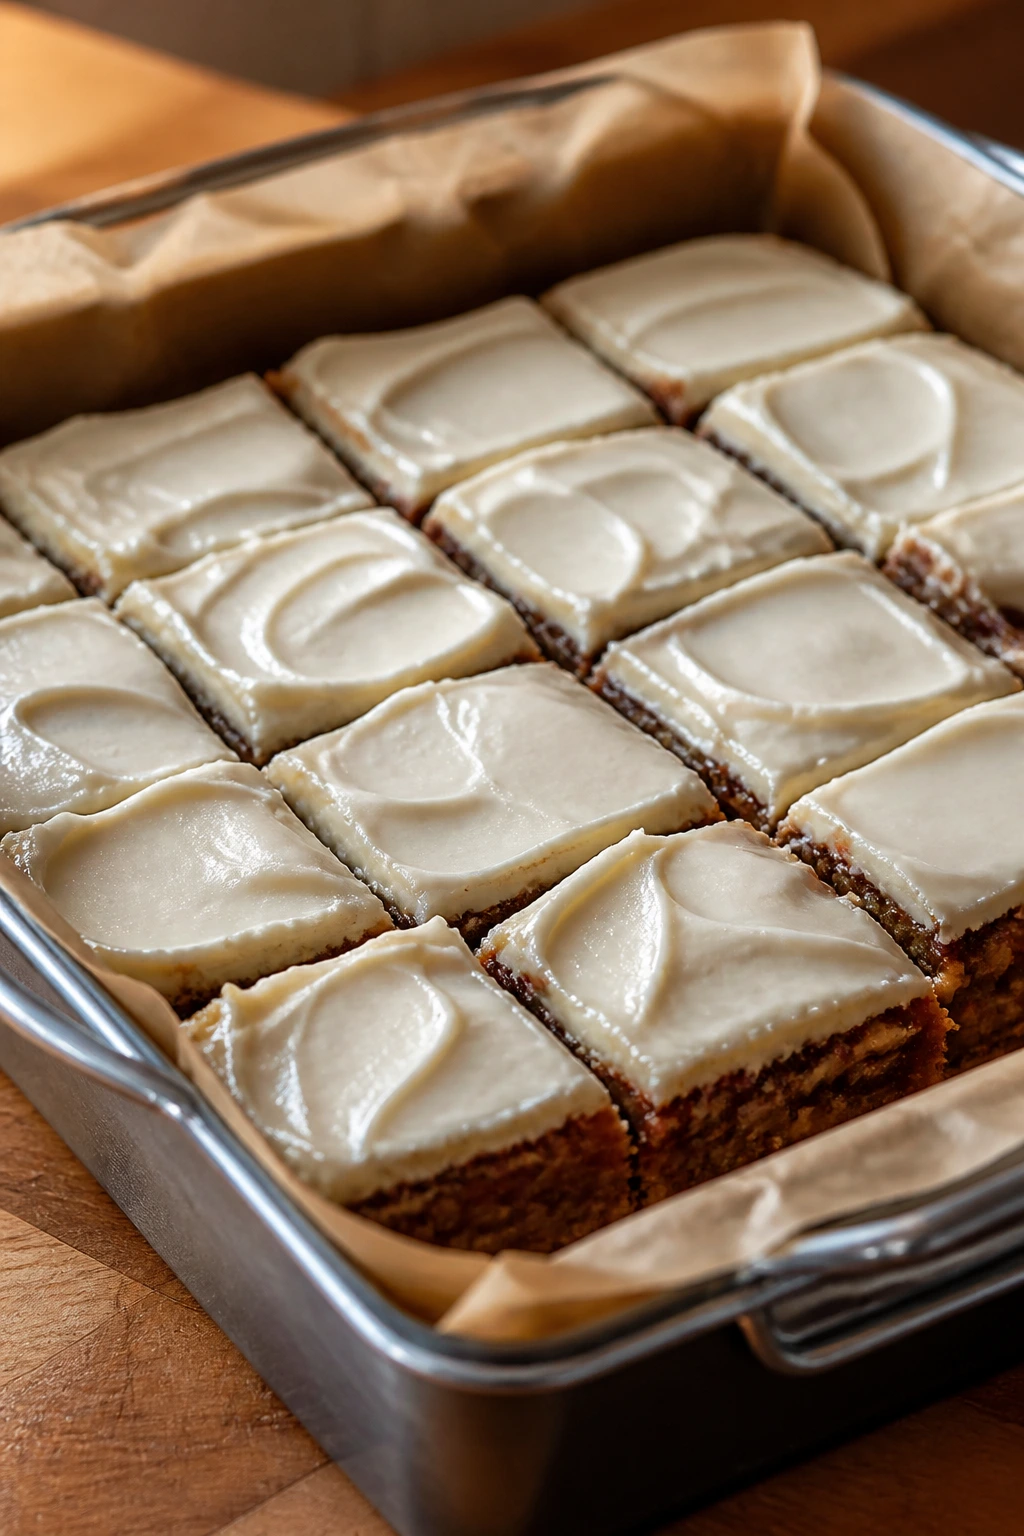
Frost and finish: Spread the frosting in a thin, even layer over the cooled bars. Scatter the extra chopped pecans and a pinch of flaky sea salt over the top if you want a little crunch and contrast. Chill the pan for 20 minutes, then cut into 16 squares with a sharp knife wiped clean between cuts. For the tidiest slices, warm the knife under hot water and dry it before each pass.
Slice, Serve, and Make the Plate Look Finished
These bars want a little restraint on the plate. One square is enough for most people after dinner, especially if you frost them the way I do — thin and tangy rather than overloaded. If you’re bringing them to a table with a lot of snacks, cut them into 24 smaller pieces and watch them disappear in a more civilized way.
I like them best on a plain white plate with something cold and sharp on the side: raspberries, sliced strawberries, or even a few orange segments if you’re serving them after a heavier meal. The color does some of the work for you, and the tart fruit keeps the frosting from feeling too rich.
Presentation: Serve the bars cold from the fridge or let them sit 15 to 20 minutes after chilling so the frosting softens slightly. A few pecan crumbs and a pinch of salt on top make them look finished without much effort.
Accompaniments: Strong coffee, black tea, cold milk, or a bowl of tart berries all work. If you’re serving them for a brunch table, pair them with sliced oranges or strawberries so the plate doesn’t lean entirely sweet.
Portions: Cut the pan into 16 squares for dessert-sized servings, or 24 smaller rectangles if these are part of a bigger spread. Two small pieces are enough for someone who wants “just a little something”; one square is plenty after a full meal.
Beverage Pairing: Dark roast coffee and unsweetened iced tea are my first picks. If you want something softer, a glass of cold milk plays well with the tangy frosting and the date-rich base.
Small Upgrades and Personal Touches
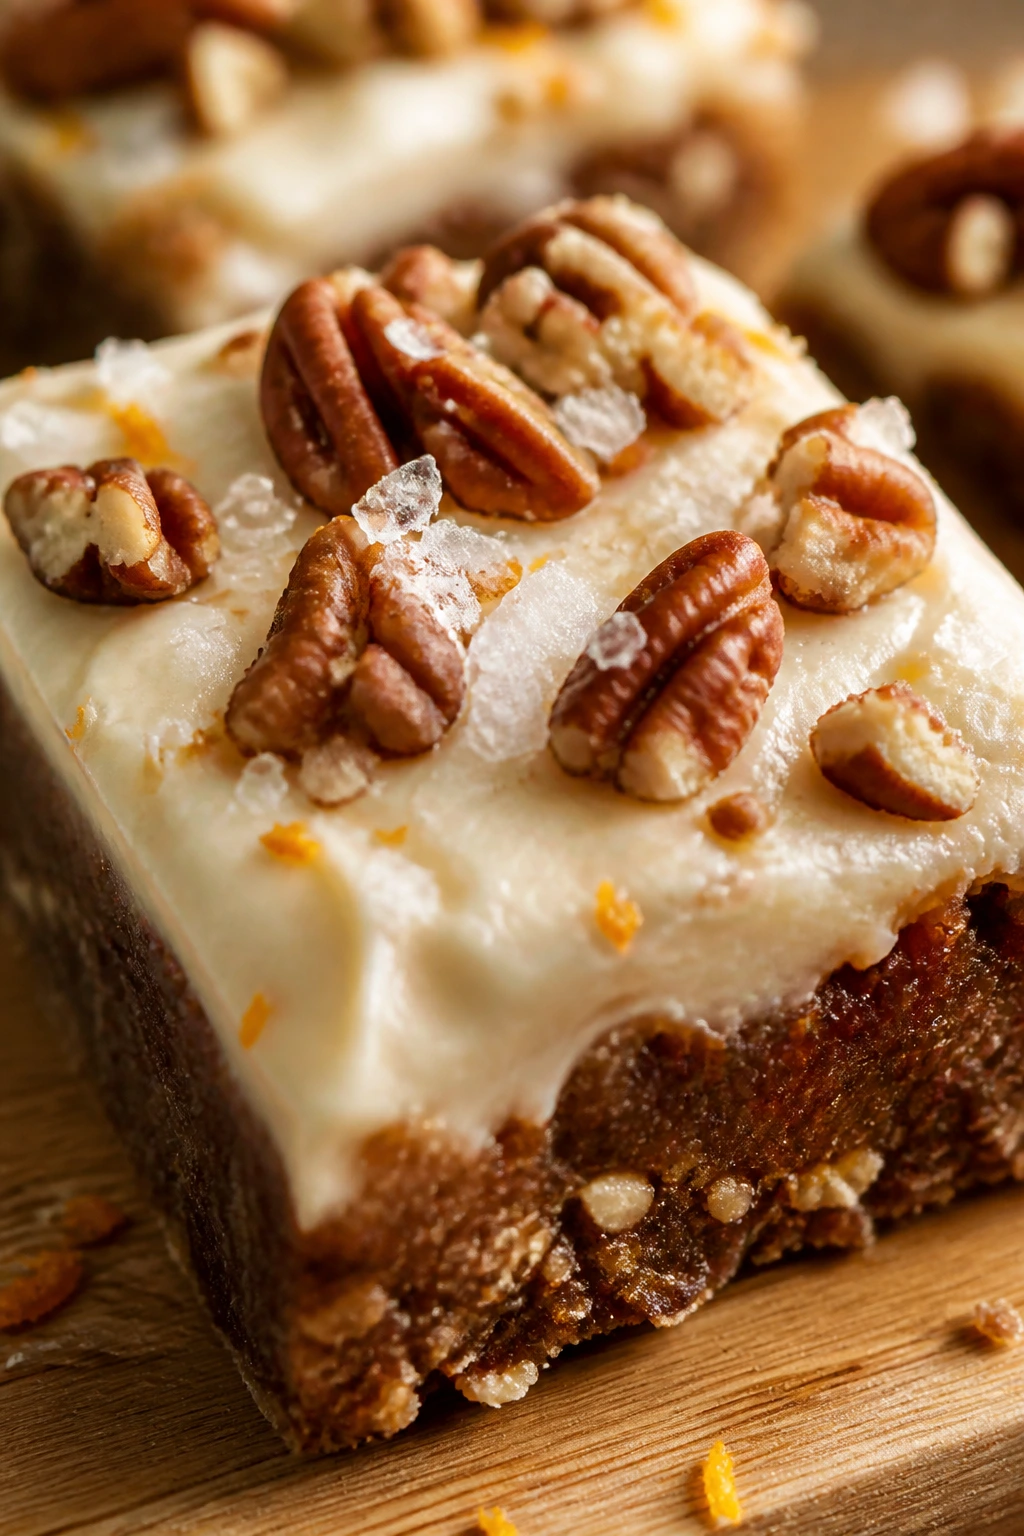
Flavor Enhancement: Toast the pecans with a tiny pinch of salt before they go into the batter, then finish the frosted bars with another pinch of flaky salt. That double hit of salt makes the caramel notes taste deeper, not saltier.
Customization: A teaspoon of orange zest in the frosting gives the bars a bright edge that works especially well if you’re serving them with berries. If you want a more candy-shop finish, fold 1/3 cup mini dark chocolate chips into the batter after the pecans go in.
Serving Suggestions: Cut the bars after they’ve chilled, then let the squares sit on the counter for 10 minutes before serving if you want the frosting softer. A warm knife makes cleaner cuts than brute force ever will — and yes, it matters.
Make-It-Yours: For a gluten-free version, use certified gluten-free oats and a 1:1 gluten-free baking flour blend in place of the whole wheat pastry flour. For a dairy-free version, swap in plant butter and dairy-free cream cheese, then chill the frosting a little longer before spreading because it tends to stay softer.
Common Mistakes That Make the Bars Heavy or Grainy
-
Using dry, old dates without soaking them long enough: The symptom is little tough flecks that never melt into the batter. Fix it by soaking the dates until they squish easily with a fork; if they still feel stiff, give them another 2 to 3 minutes in the hot water.
-
Overmixing the batter after the flour goes in: The bars turn cakey or dense instead of chewy. Stop folding as soon as you no longer see dry flour, even if the batter still looks a little rough.
-
Baking until the center is fully firm: That gives you dry edges and a crumb that feels sandy after cooling. Pull the pan when the center still has a faint spring and the toothpick has moist crumbs attached.
-
Frosting warm bars: The frosting melts, turns shiny, and slides toward the edges. Wait until the pan is completely cool; if the base still feels warm through the parchment, keep waiting.
-
Skipping the chill before slicing: The cuts look ragged and the frosting smears across the knife. Chill the frosted bars for at least 20 minutes, then use a hot knife wiped dry between slices.
Variations Worth Trying
Maple-Pecan Weekend Version
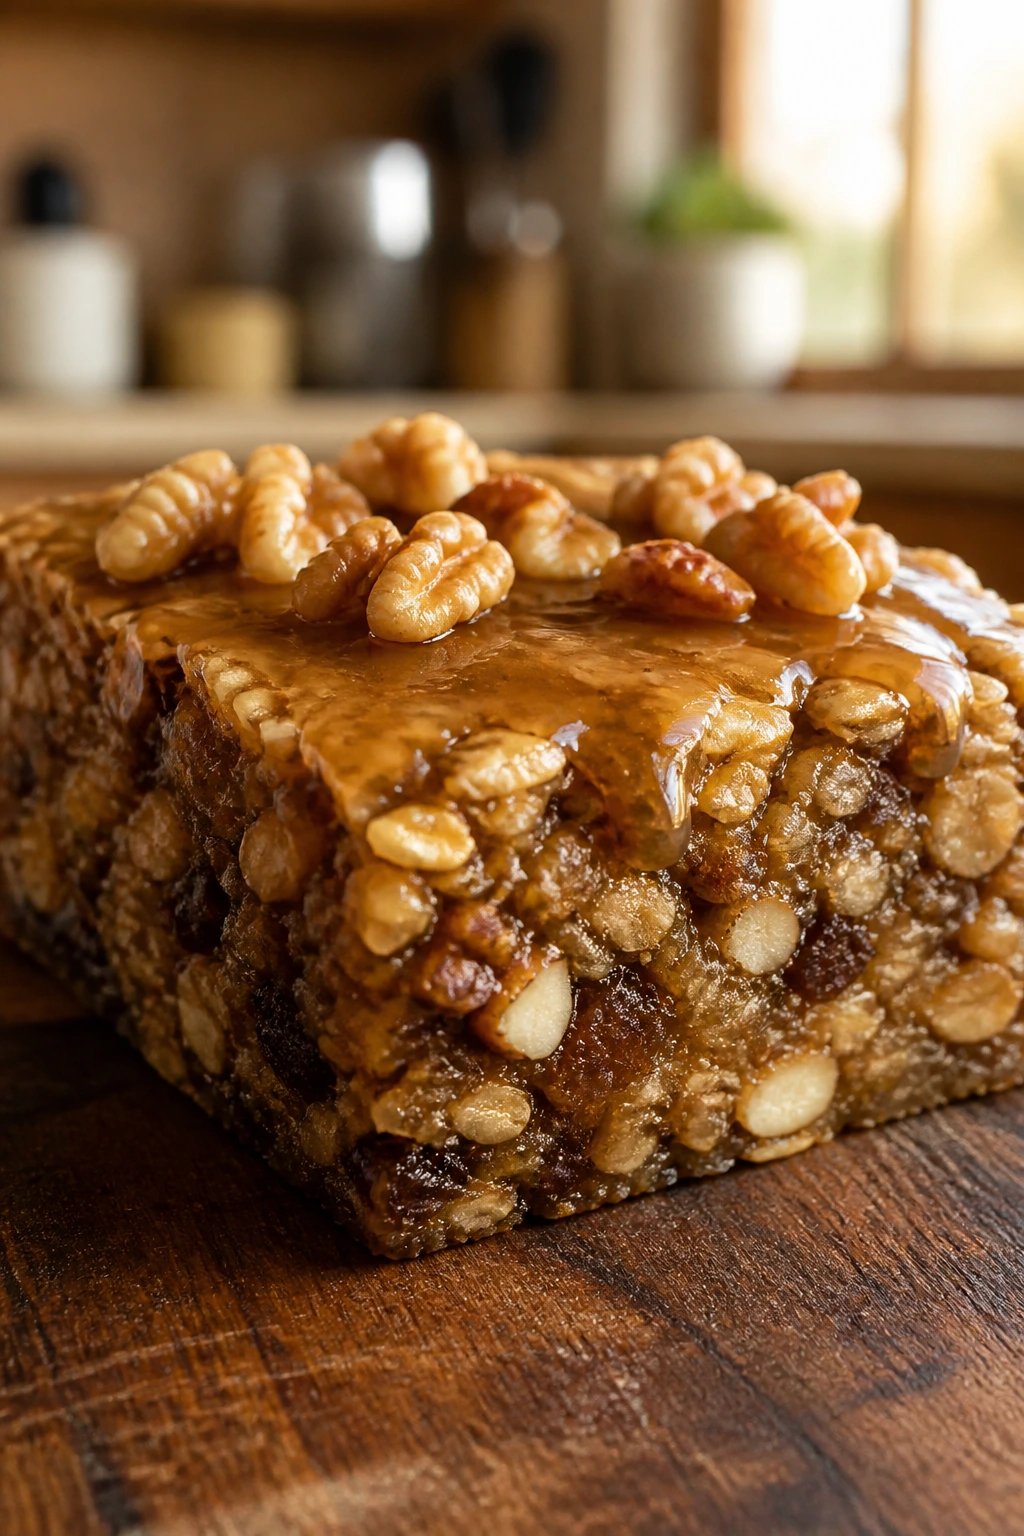
Increase the maple syrup to 1/3 cup and use walnuts for half of the pecans. The flavor gets a little deeper and reads more like a sticky toffee bar with a maple edge, which is a nice change when you want the bars to feel extra cozy.
Orange Cream Cheese Finish
Add 1 teaspoon finely grated orange zest to the frosting and skip the flaky salt on top. The citrus cuts through the butter and dates, and the whole pan tastes brighter without losing the candy-bar feel.
Chocolate Ripple Bars
Fold 1/3 cup mini dark chocolate chips into the batter after the nuts go in, then drizzle the frosted bars with 2 tablespoons melted chocolate once the frosting has chilled. The dark chocolate keeps the sweetness in line and gives the bars a little snap.
Gluten-Free Oat Swap
Use certified gluten-free oats and a 1:1 gluten-free flour blend in place of the whole wheat pastry flour. The texture stays chewy, though you should let the bars cool fully before slicing because the crumb is softer when warm.
Dairy-Free Frosted Squares
Swap the butter for plant butter and the cream cheese for a dairy-free cream cheese spread. Taste the frosting before adding all the powdered sugar, since some dairy-free brands are already saltier and tangier than regular cream cheese.
Make-Ahead, Storage, and Freezer Notes
These bars are one of those desserts that behave better after they’ve had time to settle. The base firms up, the frosting sets, and the pecans stop bouncing around in the crumb. If you want tidy squares for a party or lunchbox dessert, making them ahead is the smart move.
At room temperature, frosted bars should sit out for no more than 2 hours because of the cream cheese topping. If your kitchen runs warm, shorten that window and put the pan back in the fridge sooner rather than later.
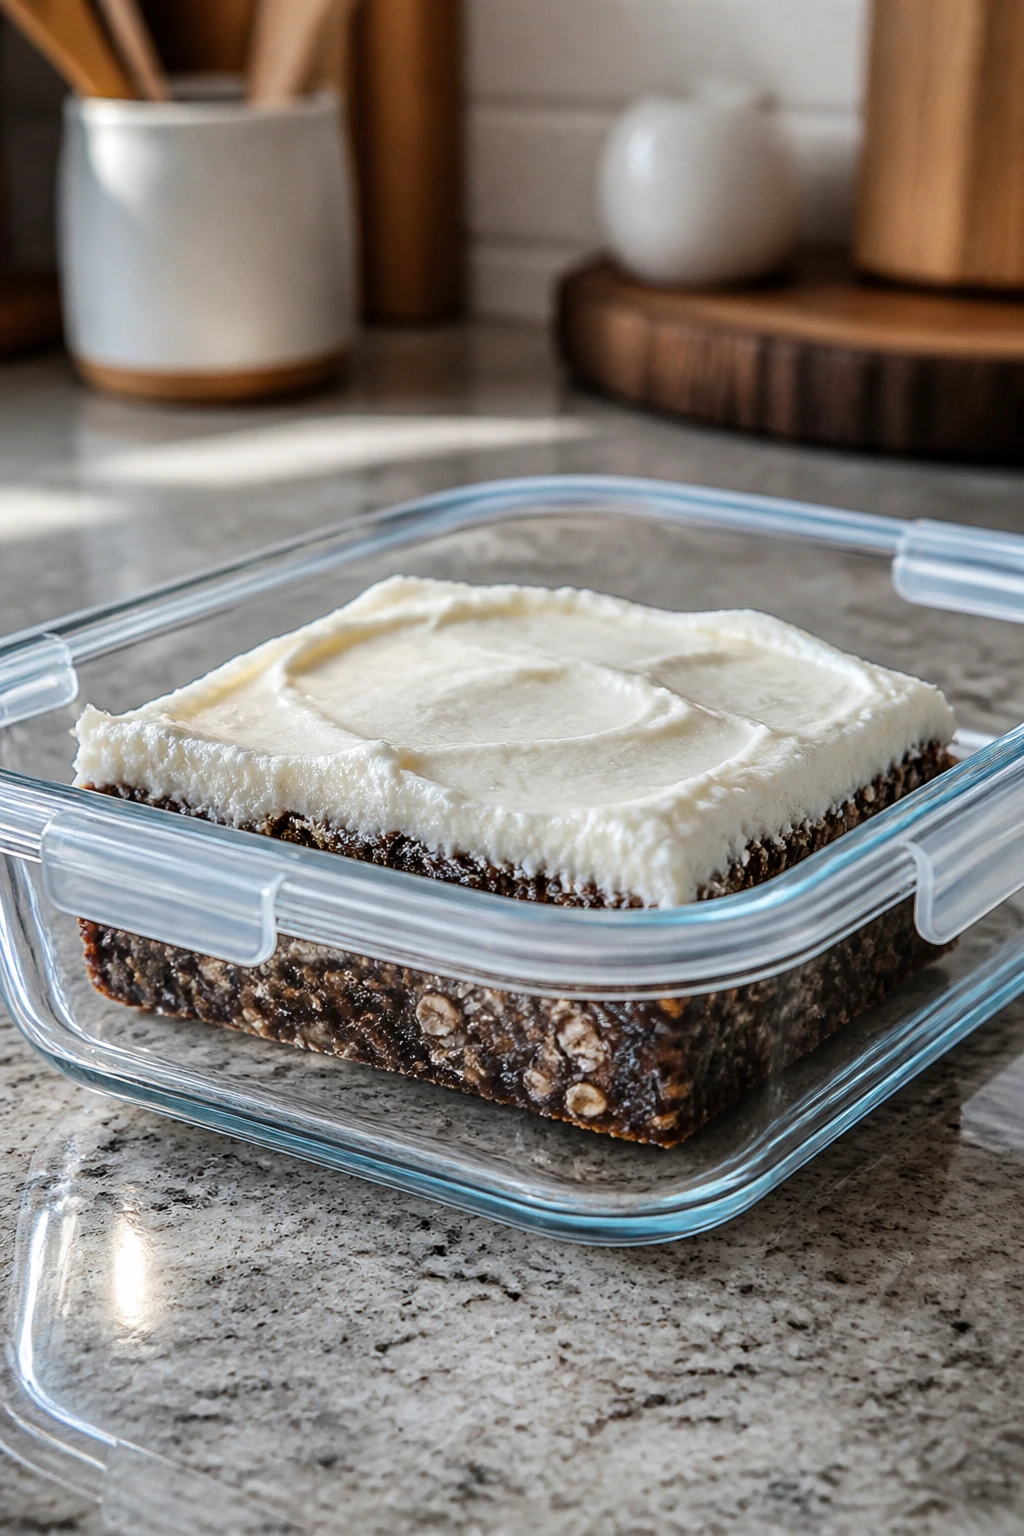
In the refrigerator, the bars keep well in an airtight container for 4 days. I like to place parchment between layers if I stack them, though I usually don’t bother stacking unless I’m short on containers. Let chilled bars sit at room temperature for 15 to 20 minutes before serving if you want the frosting to soften and the butter flavor to come forward.
For freezing, the cleanest method is to freeze the bars in a single layer until firm, then wrap each square and tuck them into a freezer bag or container. They hold for up to 2 months that way. You can also freeze the unfrosted slab, tightly wrapped, and frost it after thawing if you want the freshest texture on the top.
Reheating is only useful for unfrosted bars. Warm a plain square in the microwave for 8 to 10 seconds, just until the butter aroma wakes up again. Do not microwave frosted bars unless you want a puddle.
If you plan ahead, bake the bars one day early, cool them, and leave them unfrosted in the pan wrapped tightly. The frosting can be made up to 2 days ahead and kept in the fridge, then softened for a few minutes before spreading.
Questions People Ask Before They Bake

Can I use all-purpose flour instead of whole wheat pastry flour?
Yes. Use the same amount, 1 cup, and expect a slightly lighter, less nutty bar. The texture will still work, but the flavor loses a little of the “healthy candy” feel that the whole wheat pastry flour gives.
Do I have to use Medjool dates?
No, but they give the smoothest, richest result. If you use a drier date variety, soak them a little longer and add a tablespoon of hot water if the paste still feels stiff after mashing.
Can I make these less sweet?
You can. Reduce the powdered sugar in the frosting to 3/4 cup and finish with flaky salt instead of extra pecans on top. I would not cut the brown sugar much more than that, or the bars lose the candy-like depth that makes them worth baking.
Why did my frosting turn grainy?
Usually it means the cream cheese was too cold or the powdered sugar had lumps. Let the cream cheese soften fully, sift the sugar if needed, and beat the frosting until it turns smooth before you spread it.
Can I bake this in a 9×13-inch pan?
You can, but the bars will be thinner and need less time in the oven. Start checking around 18 to 20 minutes, and don’t expect the same chewy thickness you get from an 8×8 pan.
Can I frost the bars the day before serving?
Yes, and I often do. In fact, the bars cut more neatly after the frosting has had a night to settle in the fridge, though I still like to let them sit out a bit before serving so the texture loosens.
What if the center looks underbaked when I pull it out?
That’s usually fine as long as the top is set and a toothpick comes out with moist crumbs, not raw batter. The center finishes setting as the bars cool, and overbaking is the mistake that turns a chewy square into a dry one.
A Sweet Pan Worth Keeping Around
A dessert like this works because it doesn’t try to do too much. The bars are rich, chewy, and a little sticky in the middle, then the frosting steps in with a cool edge that keeps the whole thing from becoming a sugar brick. That balance is the whole trick, and it’s why the recipe feels more generous than fussy.
I like desserts that let one smart detail carry the batch. Here it’s the date paste, the toasted nuts, and the thin cream cheese frosting — three small choices that make the pan taste more layered than the ingredient list suggests. Bake it once, and the part you’ll remember isn’t the sweetness. It’s how clean the bars cut when they’ve had enough time to rest.
Buttery Healthy Candy with Cream Cheese Frosting — Recipe Card
Recipe Name: Buttery Healthy Candy with Cream Cheese Frosting
Description: Chewy oat-and-date bars baked with toasted pecans and finished with a thin cream cheese frosting. The flavor lands somewhere between sticky toffee candy and a rich blondie, with enough tang on top to keep each square balanced.
Prep Time: 25 minutes
Cook Time: 28 minutes
Total Time: 53 minutes, plus 1 hour cooling and 20 minutes chilling
Course: Dessert
Cuisine: American
Servings: 16 bars
Calories: About 255 kcal per bar
Ingredients
For the Bars
- 1 cup pitted Medjool dates, chopped into small pieces
- 3/4 cup boiling water
- 1 teaspoon baking soda
- 1/2 cup unsalted butter, melted and cooled for 5 minutes
- 1/2 cup packed light brown sugar
- 1/4 cup pure maple syrup
- 2 large eggs, room temperature
- 1 teaspoon vanilla extract
- 1 cup whole wheat pastry flour
- 3/4 cup old-fashioned rolled oats
- 1 teaspoon baking powder
- 1/2 teaspoon fine sea salt
- 1 teaspoon ground cinnamon
- 1 cup chopped pecans, toasted
For the Cream Cheese Frosting
- 4 ounces cream cheese, softened to room temperature
- 3 tablespoons unsalted butter, softened
- 1 cup powdered sugar, sifted
- 1 teaspoon vanilla extract
- Pinch of fine salt
- 1 to 2 tablespoons milk or cream, only if needed
For the Finish
- 2 tablespoons chopped toasted pecans
- Flaky sea salt, optional
Instructions
-
Preheat the oven to 350°F (175°C) and line an 8×8-inch metal baking pan with parchment paper, leaving an overhang for lifting the bars out later. Toast the pecans for 6 to 8 minutes, then cool them.
-
Place the chopped dates in a heatproof bowl, pour the boiling water over them, and stir in the baking soda. Let stand for 5 minutes, then mash into a rough paste.
-
Whisk together the melted butter, brown sugar, and maple syrup. Whisk in the eggs one at a time, then add the vanilla and the date paste.
-
Fold in the flour, oats, baking powder, salt, and cinnamon until almost combined. Fold in the toasted pecans, then spread the batter in the prepared pan.
-
Bake for 24 to 28 minutes, until the top is set, the edges are golden, and the center springs back lightly. Cool in the pan for 1 hour, then lift out and cool completely.
-
Beat the cream cheese and butter until smooth. Add the powdered sugar, vanilla, and salt, then beat until creamy. Add milk or cream, 1 teaspoon at a time, only if needed.
-
Spread the frosting over the cooled bars, sprinkle with the extra pecans and flaky salt if using, chill for 20 minutes, and cut into 16 squares with a hot, clean knife.
Notes: Cool the bars fully before frosting or the top will slide. A short chill after frosting makes cleaner cuts. If you want a brighter finish, add 1 teaspoon orange zest to the frosting.