
The first tray tells you the truth.
If the bottoms are burned, you’ll know your oven runs hot. If the dough spreads into thin puddles, the butter was too soft or the flour was too light. If the centers stay pale and the edges turn golden, you’ve got a cookie worth making again. That’s why cookie recipes for beginner bakers are such a useful place to start: the feedback is fast, the ingredient lists are short, and the mistakes are usually fixable before the batch is ruined.
Cookies also teach the right kind of patience. Not the stiff, fussy kind. The useful kind. You learn to trust the smell of browned sugar, the look of a set edge, the way a scoop of dough changes after ten minutes in a hot oven. A good cookie doesn’t ask for a pastry diploma. It asks for a bowl, a spoon, and the willingness to watch the tray instead of the clock alone.
And that’s exactly what makes this set of 18 recipes worth keeping close. Some are old-school and plain in the best possible way. Some lean on oats, nuts, citrus, jam, or chocolate chips. A few barely need baking at all. All of them are friendly to a first-time baker who wants a clean win without babysitting a temperamental dough.
Why These Cookie Recipes Work for Beginner Bakers
-
Short ingredient lists: Most of these recipes use 8 to 10 ingredients, which keeps the shopping list sane and the mixing bowl from turning into a science project.
-
Familiar techniques: Creaming, stirring, folding, rolling, and scooping show up again and again, so you get repetition without boredom.
-
Forgiving bake windows: Many cookies here go from underdone to overdone in just a couple of minutes, which teaches you to watch color, not panic.
-
No specialty gear required: A bowl, a spoon or mixer, a baking sheet, and parchment paper cover most of the collection.
-
Different textures, same basic logic: Chewy, crisp, soft, crinkled, and no-bake cookies all behave differently, but they share the same quiet lesson: measure well, mix gently, bake with your eyes.
-
A useful mix of methods: You’ll get drop cookies, slice-and-bake cookies, cutout cookies, and no-bake treats, so you can pick the method that fits your mood and your patience.
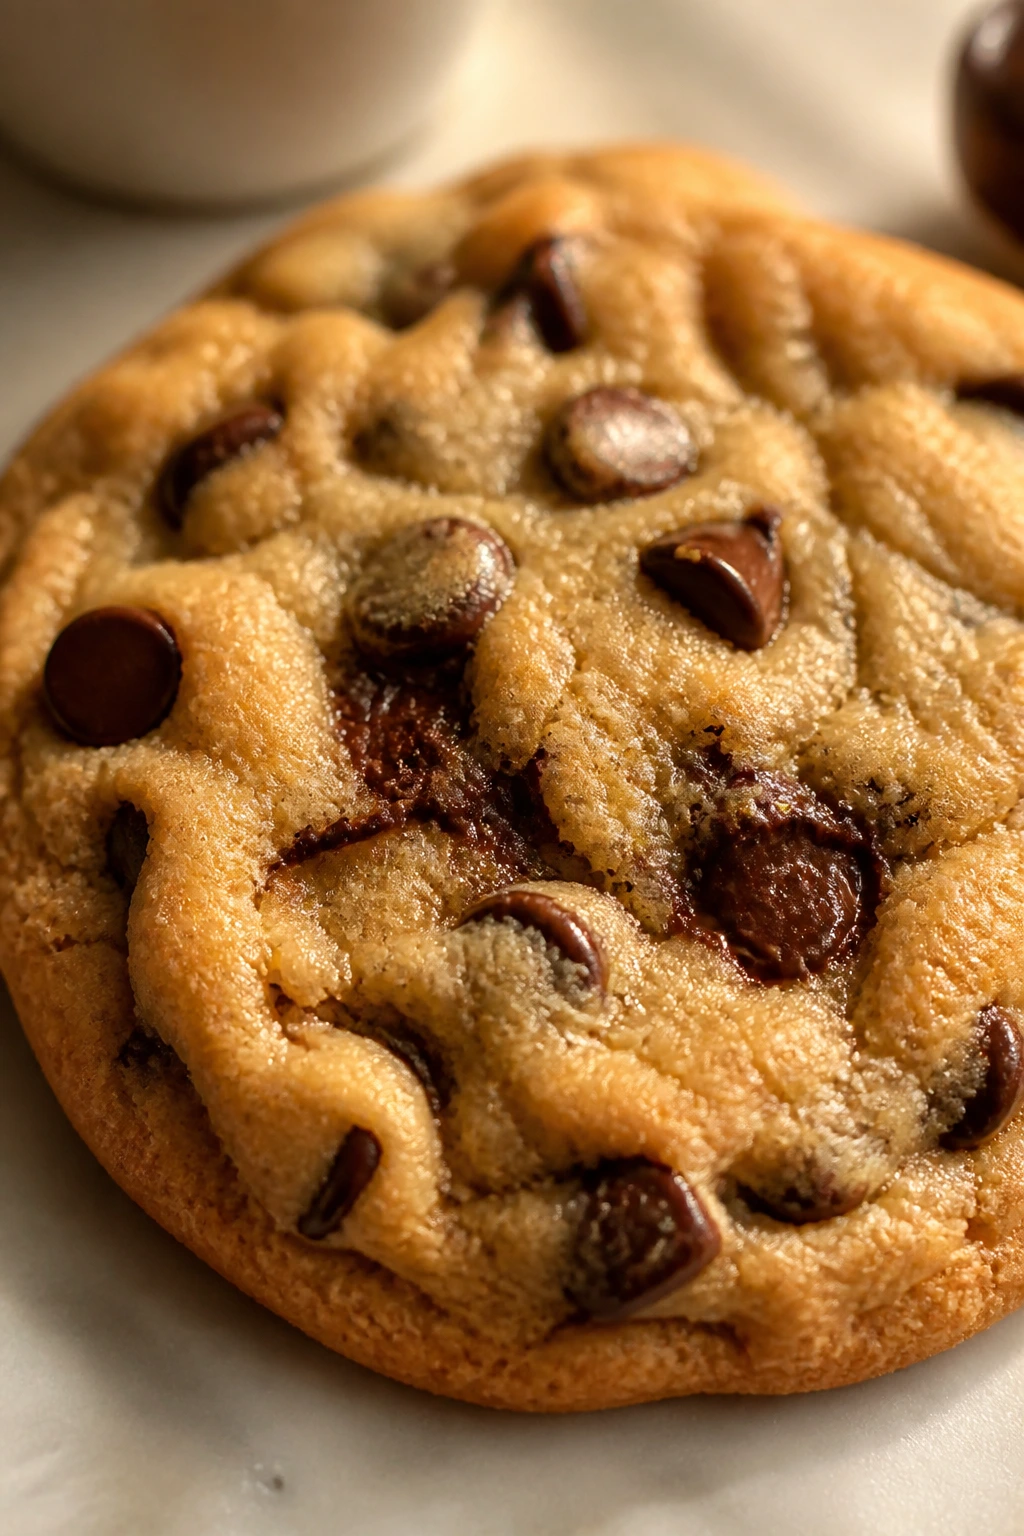
1. Classic Chocolate Chip Cookies
The smell of butter and vanilla usually hits before the timer does. That’s the charm here. These cookies bake with crisp edges, a soft middle, and chocolate pockets that melt into the dough instead of sitting there like decorations.
Why It Works:
Brown sugar gives these cookies chew, while granulated sugar helps the edges turn lightly crisp. A hot oven, set at 375°F, sets the outside fast enough to keep the centers soft. That’s the whole trick: bake until the edges look done and the middles still look a little underbaked.
Key Ingredients:
- 1 cup (2 sticks) unsalted butter, softened to room temperature — soft enough to cream, not melted.
- 3/4 cup packed light brown sugar — brings chew and a light caramel note.
- 3/4 cup granulated sugar — helps the cookie spread and brown.
- 2 large eggs — bind the dough and add structure.
- 2 teaspoons pure vanilla extract — gives the dough that bakery smell.
- 2 1/4 cups all-purpose flour — spooned and leveled for accuracy.
- 1 teaspoon baking soda — gives lift and helps browning.
- 1 teaspoon fine sea salt — keeps the sweetness from flattening out.
- 2 cups semisweet chocolate chips — chips hold shape; chunks melt a little more.
Quick Steps:
- Preheat the oven to 375°F (190°C) and line 2 baking sheets with parchment paper.
- Cream the butter, brown sugar, and granulated sugar in a large bowl for 2 to 3 minutes, until the mixture looks paler and fluffy around the edges.
- Beat in the eggs one at a time, then mix in the vanilla. Stop as soon as the eggs disappear; overbeating adds air you do not need here.
- Whisk the flour, baking soda, and salt in a separate bowl, then add it to the wet mixture and stir just until no dry streaks remain.
- Fold in the chocolate chips with a spatula. If the dough feels warm and sticky, chill it for 20 minutes.
- Scoop 2-tablespoon mounds 2 inches apart and bake for 9 to 11 minutes, until the edges are golden and the centers still look slightly soft. Cool on the tray for 5 minutes before moving them to a rack.
Equipment for This Recipe:
- Large mixing bowl — roomy enough for creaming without splashing.
- Hand mixer or stand mixer — makes the butter and sugar light fast.
- Rimmed baking sheets — keeps the cookies from sliding.
- Parchment paper — prevents sticking and helps with even browning.
How to Serve This Dish:
Stack these on a plate while they’re still a little warm and the chips are glossy. A cold glass of milk is the obvious move, but a scoop of vanilla ice cream between two cookies is the better one if you want a quick dessert sandwich.
Pro Tips for This Recipe:
- Chill the dough if your kitchen runs warm. Even 15 to 20 minutes helps the cookies keep a thicker shape.
- Use semisweet chips if you want balance; milk chocolate can make the batch sweeter than most people expect.
- Pull the tray when the centers still look soft. They finish setting on the hot pan.
Variations on This Dish:
- Sea Salt Finish: Sprinkle flaky salt over the cookies right after baking for a sharper sweet-salty edge.
- Walnut Fold-In: Add 1 cup chopped walnuts with the chips if you like a firmer bite and a little toastiness.
- Brown Butter Batch: Brown the butter first, cool it until opaque but still soft, and the cookies will taste deeper and nuttier.
Common Mistakes to Avoid with This Dish:
- Butter that’s too warm: Melted butter makes flat, greasy cookies. The fix is simple: if it shines like oil, chill it until it softens into a dull, spreadable fat.
- Too much flour from scooping the cup: Dense, dry cookies usually trace back to packed flour. Spoon it into the cup and level the top with a knife, or use a scale.
- Baking until the whole cookie looks done: By the time the center looks firm in the oven, it’s usually overcooked. Look for golden edges and soft middles.
2. Soft Sugar Cookies
Sugar cookies make a better first lesson than people give them credit for. The dough is plain in the best way, the texture should land somewhere between tender and cakey, and the sweet smell tells you exactly when they’re close.
Why It Works:
A little sour cream keeps the crumb soft without making the dough runny. Baking powder and baking soda work together here, so the cookies puff a bit and settle into a gentle dome instead of spreading into thin discs. If you want a sugar cookie that stays soft for a day or two, this is the version.
Key Ingredients:
- 1/2 cup (1 stick) unsalted butter, softened — gives the dough richness.
- 3/4 cup granulated sugar — sweetens and helps with light browning.
- 1 large egg — binds the dough.
- 2 teaspoons pure vanilla extract — rounds out the flavor.
- 1/4 cup sour cream or plain yogurt — keeps the center tender.
- 1 1/2 cups all-purpose flour — enough to hold the shape without making them heavy.
- 1/2 teaspoon baking soda — gives a little spread.
- 1/4 teaspoon baking powder — adds a soft lift.
- 1/4 teaspoon fine sea salt — keeps the sweetness from tasting flat.
- Extra granulated sugar or colored sprinkles — for rolling or topping.
Quick Steps:
- Preheat the oven to 350°F (175°C) and line a baking sheet with parchment paper.
- Cream the butter and sugar for 2 minutes, until the mix looks fluffy and a shade lighter.
- Beat in the egg, vanilla, and sour cream until smooth.
- Stir in the flour, baking soda, baking powder, and salt just until the dough comes together. Do not overmix — the dough should look soft, not whipped.
- Scoop rounded tablespoons of dough, roll lightly in sugar if you want, and place them 2 inches apart.
- Bake for 9 to 11 minutes, until the tops look set and the bottoms are barely golden. Let them cool on the sheet for 5 minutes.
Equipment for This Recipe:
- Medium mixing bowl — enough for a small batch.
- Hand mixer — helps the butter and sugar fluff up.
- Cookie scoop — makes evenly sized rounds.
- Cooling rack — keeps the bottoms from steaming.
How to Serve This Dish:
These look best on a plain white plate or stacked in a shallow tin with a little parchment between layers. They go well with tea, coffee, or a bowl of sliced strawberries if you want something fresh beside the sweetness.
Pro Tips for This Recipe:
- Use room-temperature sour cream, not cold from the fridge. Cold dairy can make the dough stubborn.
- For sparkly tops, roll the dough balls in sugar before baking.
- If the dough feels sticky, chill it for 15 minutes instead of adding more flour.
Variations on This Dish:
- Lemon Sugar Cookies: Add 1 tablespoon lemon zest and swap half the vanilla for lemon extract.
- Birthday Sprinkle Cookies: Fold in 1/3 cup jimmies for a confetti look that holds up in the oven.
- Almond Sugar Cookies: Replace 1 teaspoon of the vanilla with almond extract for a bakery-style finish.
Common Mistakes to Avoid with This Dish:
- Adding too much flour: These cookies should be soft, not crumbly. The dough should be tacky enough to scoop cleanly, not dry enough to crack.
- Baking until brown: Pale sugar cookies are often the right sugar cookies. If the tops are golden, they’ve gone too far.
- Using nonpareils in the dough: Tiny round sprinkles bleed and fade. Use jimmies if you want color to stay put.
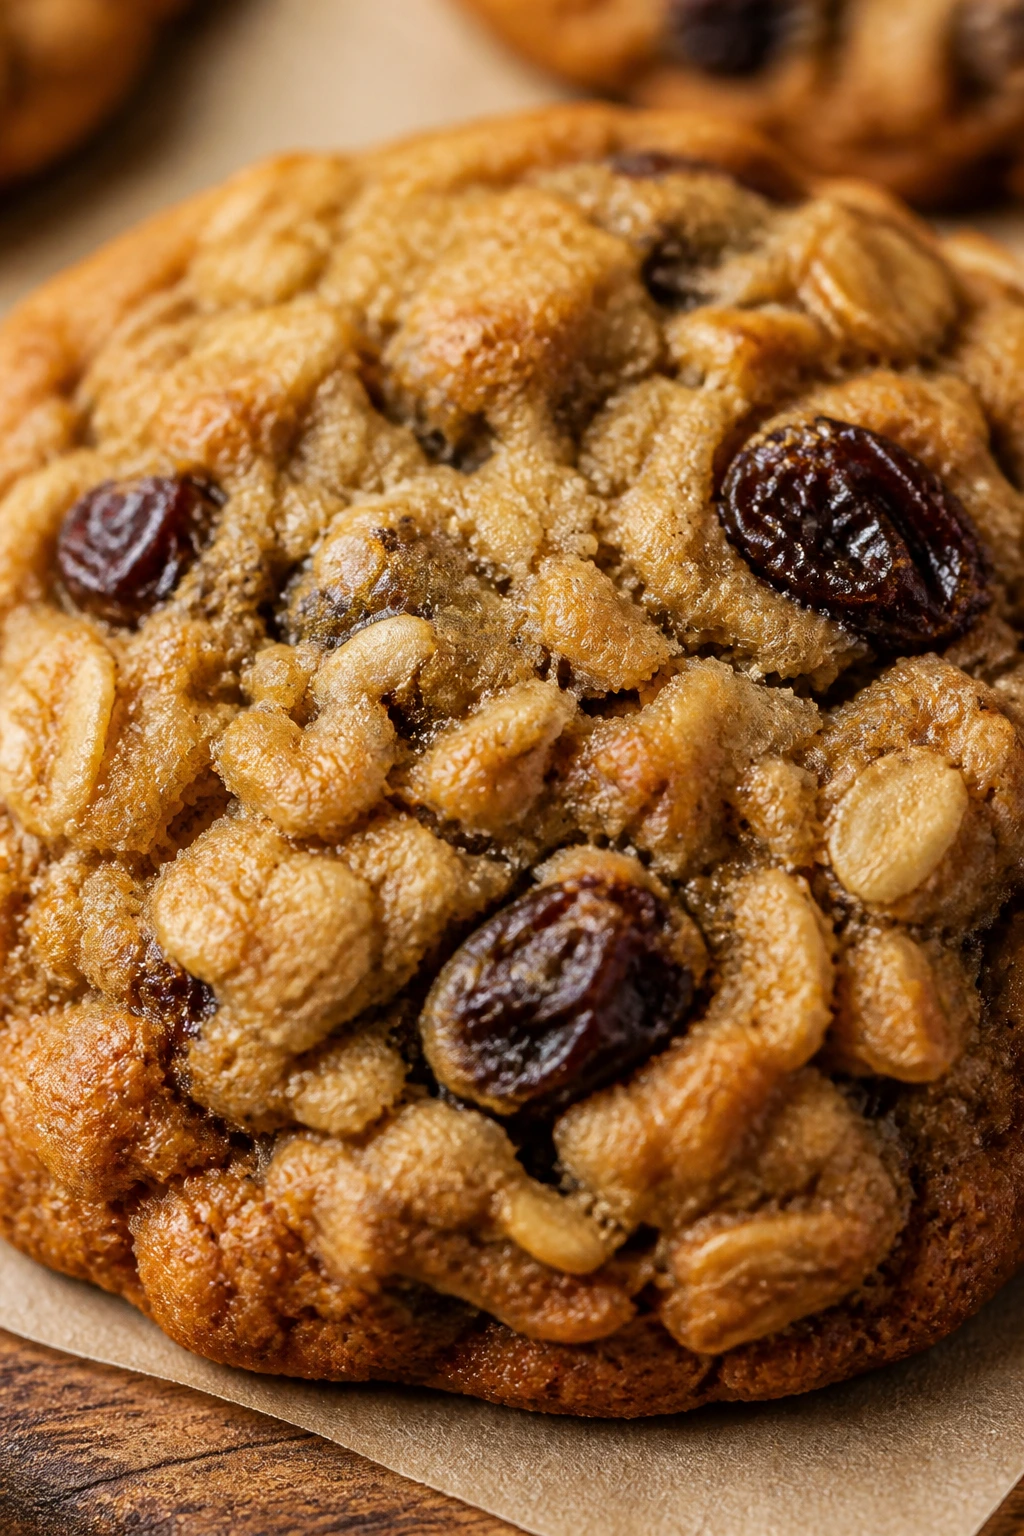
3. Chewy Oatmeal Raisin Cookies
A bowl of oatmeal raisin dough looks humble right up until the cinnamon hits the oven. Then the whole kitchen smells like toasted sugar and warm spice, and the raisins turn soft and jammy instead of chewy in the annoying way.
Why It Works:
Old-fashioned oats give the cookie real texture, while brown sugar keeps the center moist. A short soak for the raisins makes them plumper, which matters more than people think; dry raisins can steal moisture from the dough. Cinnamon does a lot of heavy lifting here, so don’t treat it like background noise.
Key Ingredients:
- 3/4 cup unsalted butter, softened — rich enough for chew without heaviness.
- 1 cup packed light brown sugar — adds moisture and caramel notes.
- 1/2 cup granulated sugar — helps the edges crisp a little.
- 2 large eggs — hold the dough together.
- 1 teaspoon pure vanilla extract — softens the spice.
- 1 1/2 cups all-purpose flour — keeps the cookies structured.
- 1 teaspoon baking soda — gives the cookies their spread.
- 1 teaspoon ground cinnamon — the flavor anchor.
- 1/2 teaspoon fine sea salt — wakes up the oats.
- 3 cups old-fashioned rolled oats — the chewy backbone.
- 1 cup raisins — soak them first if they’re stiff.
- 1/2 cup chopped walnuts, optional — for crunch.
Quick Steps:
- Preheat the oven to 350°F (175°C) and line 2 sheet pans with parchment.
- Soak the raisins in hot water for 5 minutes, then drain and pat them dry.
- Cream the butter and both sugars until fluffy, about 2 to 3 minutes.
- Beat in the eggs and vanilla, then stir in the flour, baking soda, cinnamon, and salt.
- Fold in the oats, raisins, and walnuts, if using. The dough will feel thick and a little rugged — that’s right.
- Scoop 2-tablespoon mounds and bake for 10 to 12 minutes, until the edges are set and the centers still look soft. Let them sit on the pan for 5 minutes before moving.
Equipment for This Recipe:
- Large mixing bowl — the oats need room.
- Small bowl — useful for soaking raisins.
- Baking sheets — two if you want to keep the batches moving.
- Spatula — best for folding in the oats without crushing them.
How to Serve This Dish:
These taste best when they’re still slightly warm and the raisins are soft. Pair them with coffee, chai, or a cold glass of milk, and they make a sturdy lunchbox cookie too.
Pro Tips for This Recipe:
- If your raisins are especially dry, soak them for 10 minutes instead of 5.
- Don’t swap in quick oats unless you want a softer, less textured cookie.
- Let the dough rest for 10 minutes before scooping if the oats seem extra thirsty.
Variations on This Dish:
- Cranberry Oat Cookies: Replace the raisins with dried cranberries for a sharper, brighter chew.
- Chocolate Chip Oatmeal Cookies: Swap half the raisins for chocolate chips and keep the cinnamon.
- Pecan Spice Version: Use chopped pecans and add 1/4 teaspoon nutmeg for a more autumn-leaning cookie.
Common Mistakes to Avoid with This Dish:
- Using instant oats: The texture turns mushy and loose. Old-fashioned rolled oats hold shape and give you the right bite.
- Skipping the raisin soak: Dry raisins can pull moisture out of the dough and leave the cookie dull.
- Overbaking because the center looks pale: Oatmeal cookies firm up after they leave the oven. Pull them while they still look a touch soft in the middle.
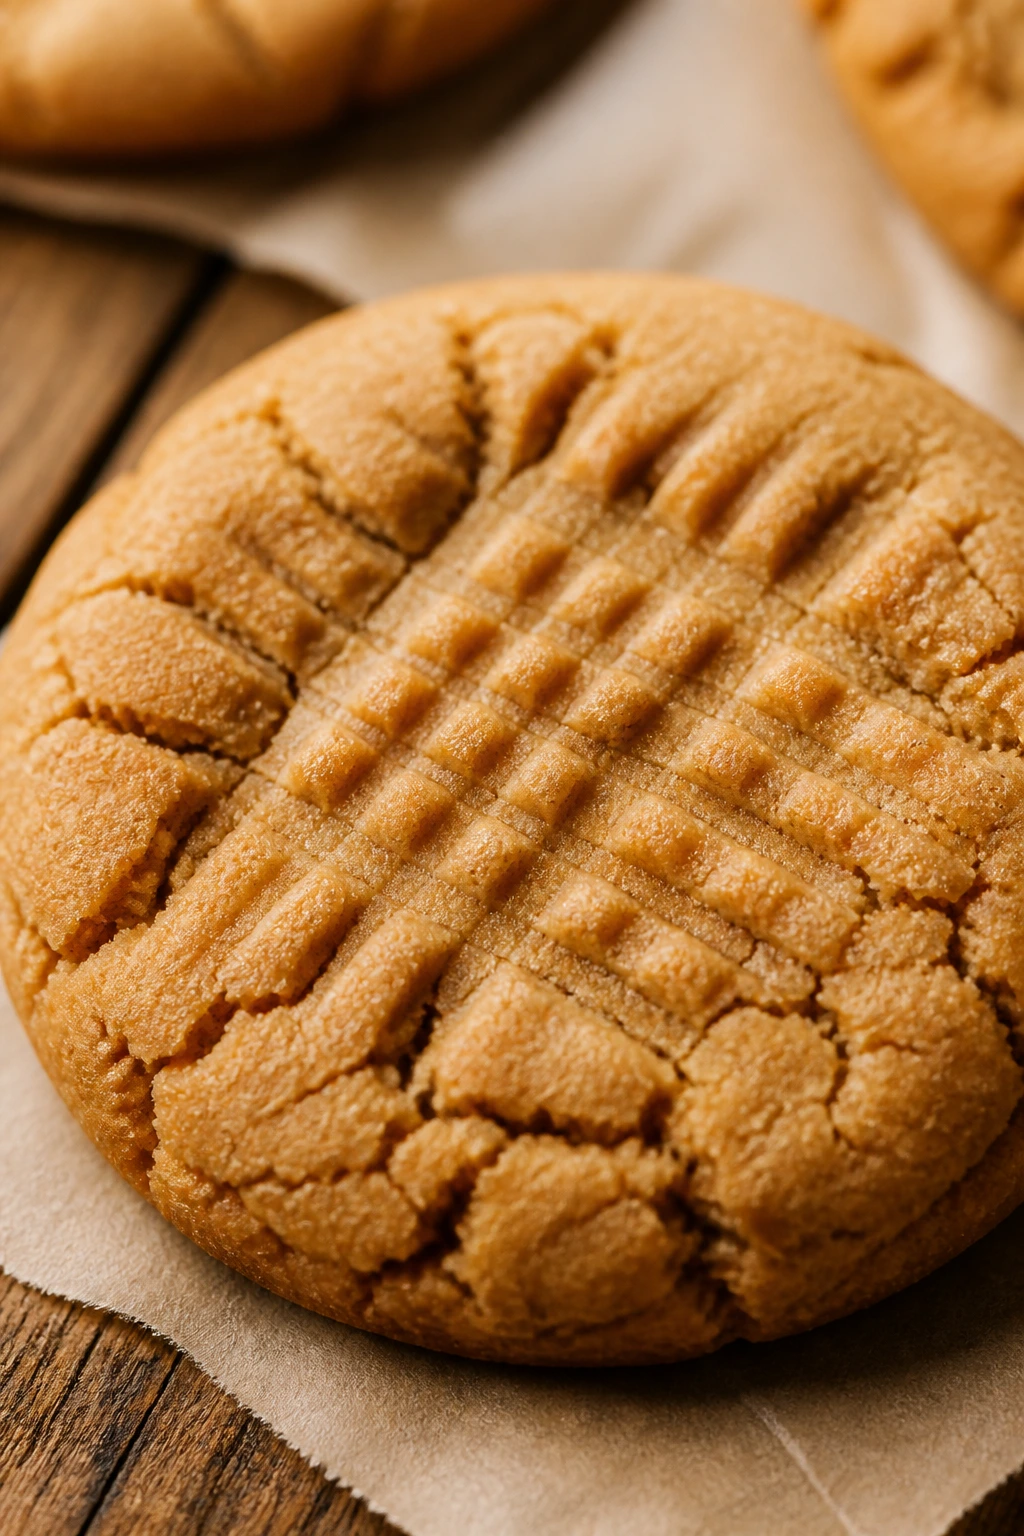
4. Peanut Butter Cookies
Peanut butter cookies are the ones that forgive a slightly clumsy hand. The dough is thick, the scent is unmistakable, and the fork marks look charming even when the rest of the kitchen is a mess.
Why It Works:
Peanut butter brings both fat and flavor, which means the dough does not need much help. The sugar ratio keeps the cookie tender, and the fork pattern helps them bake evenly by flattening the thick dough. These are one of the easiest cookies to mix by hand if you don’t feel like dragging out a mixer.
Key Ingredients:
- 1/2 cup (1 stick) unsalted butter, softened — helps the dough spread just enough.
- 1 cup creamy peanut butter — use a standard no-stir version for the most predictable texture.
- 3/4 cup packed light brown sugar — gives chew and a mellow sweetness.
- 1/2 cup granulated sugar — helps the edges brown.
- 1 large egg — binds the dough.
- 1 teaspoon vanilla extract — softens the peanut flavor.
- 1 1/4 cups all-purpose flour — keeps the cookies from collapsing.
- 1 teaspoon baking soda — gives a little lift.
- 1/2 teaspoon fine sea salt — keeps the peanut butter tasting deep, not dull.
Quick Steps:
- Preheat the oven to 350°F (175°C) and line a baking sheet with parchment.
- Beat the butter, peanut butter, brown sugar, and granulated sugar until the mixture looks smooth and slightly fluffy.
- Mix in the egg and vanilla until the dough looks glossy.
- Stir in the flour, baking soda, and salt until just combined. The dough should be thick and scoopable.
- Roll tablespoons of dough into balls, set them on the sheet, and press each one with a fork in a crisscross pattern. Press gently; you want ridges, not flattened pancakes.
- Bake for 10 to 12 minutes, until the edges set and the tops look dry but still soft. Cool for 5 minutes on the pan.
Equipment for This Recipe:
- Mixing bowl — a medium one is enough.
- Fork — for the crisscross pattern.
- Baking sheet — the dough is dense, so rimmed pans help.
- Cookie scoop or spoon — keeps the size even.
How to Serve This Dish:
These are best beside a cold glass of milk, and I mean cold enough to leave condensation on the glass. They also make a good base for an ice cream sandwich with vanilla or chocolate ice cream.
Pro Tips for This Recipe:
- Use creamy peanut butter, not the oily kind that separates, unless you already know how your dough behaves.
- If the dough is sticky, chill it for 15 minutes instead of adding more flour.
- Sprinkle a few grains of flaky salt on top before baking if you like a sharper finish.
Variations on This Dish:
- Chocolate Peanut Butter Cookies: Fold in 1/2 cup chocolate chips for a richer, dessertier cookie.
- Crunchy Peanut Version: Use crunchy peanut butter if you want little peanut bits in every bite.
- Peanut Butter Cup Center: Press a mini peanut butter cup into the center of each warm cookie right after baking.
Common Mistakes to Avoid with This Dish:
- Using natural peanut butter without adjusting: The oil can make the dough greasy and loose. Standard creamy peanut butter behaves better for beginners.
- Skipping the fork press: Thick peanut butter dough bakes unevenly if you leave it rounded.
- Baking until dark brown: They should look set, not deeply colored. The edges will finish firming as they cool.
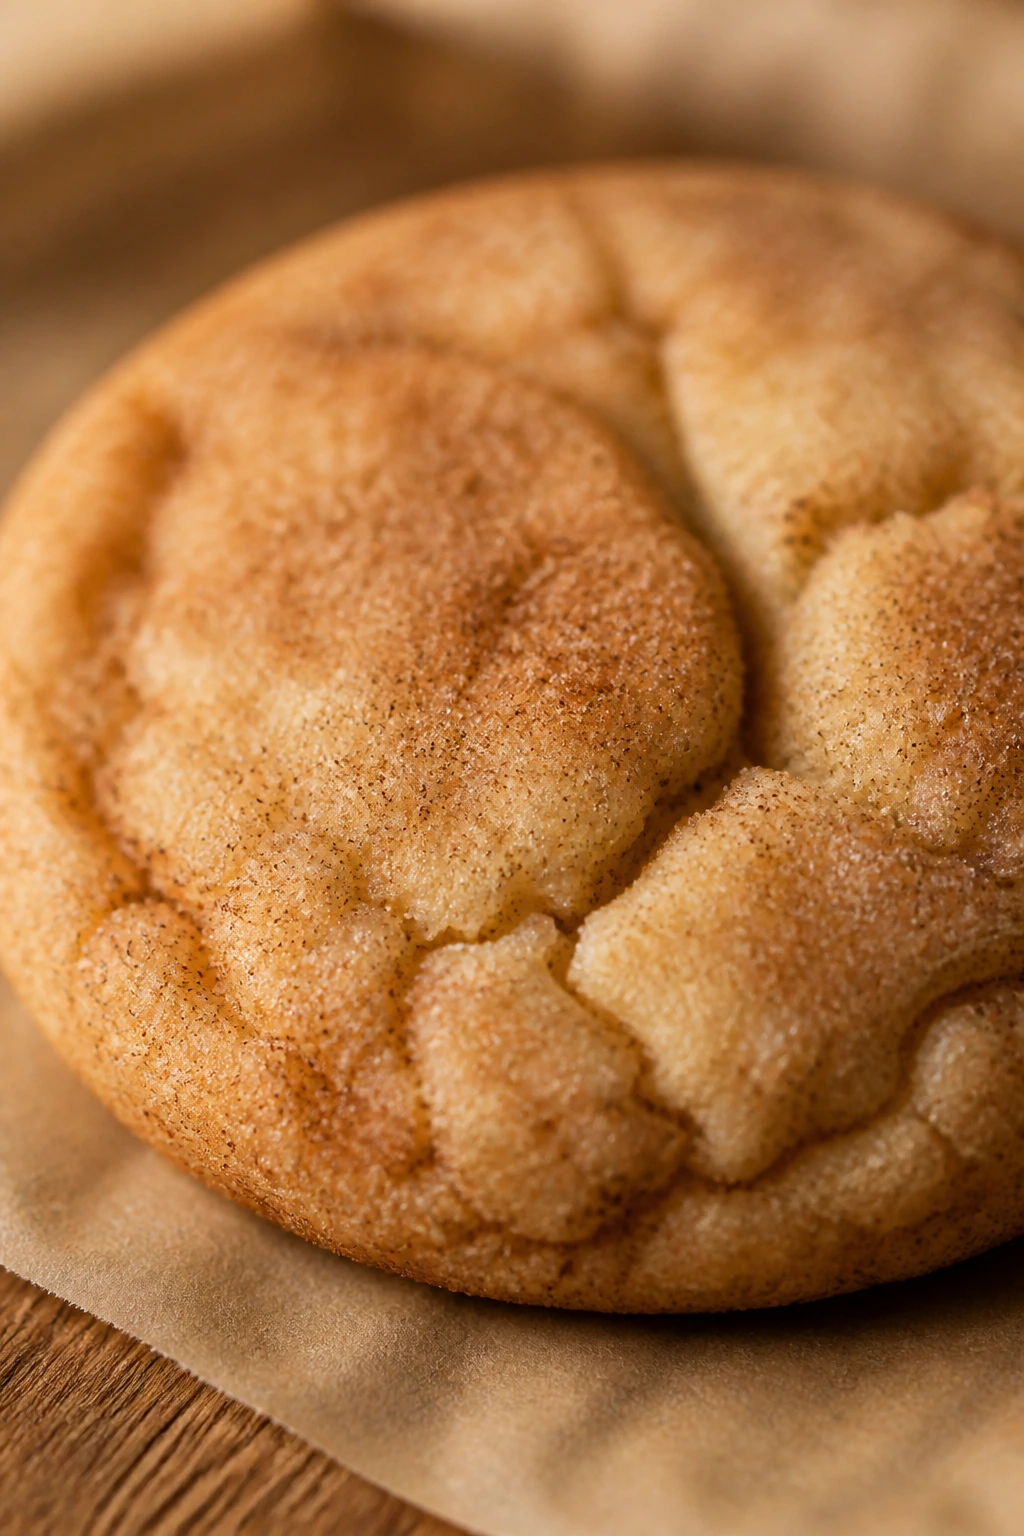
5. Snickerdoodles
Snickerdoodles are basically a sugar cookie with a cinnamon shell and a better personality. They crack on top, stay soft inside, and smell like a bakery with a very good afternoon shift.
Why It Works:
Cream of tartar gives snickerdoodles their faint tang and keeps the texture soft. The cinnamon-sugar coating does more than flavor the outside; it also helps the surface dry out just enough to crack in the oven. They are fast to mix, fast to bake, and hard to mess up once you know not to overwork the dough.
Key Ingredients:
- 1 cup (2 sticks) unsalted butter, softened — the base of the cookie’s richness.
- 1 1/2 cups granulated sugar — sweetens and helps with spread.
- 2 large eggs — provide structure.
- 2 3/4 cups all-purpose flour — enough to keep the cookies tall and soft.
- 2 teaspoons cream of tartar — the signature tang.
- 1 teaspoon baking soda — gives the rise.
- 1/2 teaspoon fine sea salt — keeps the sweetness in line.
- 2 tablespoons ground cinnamon — for the rolling mixture.
- 1/4 cup granulated sugar — mixed with the cinnamon for coating.
- 1 teaspoon vanilla extract, optional — rounds the flavor.
Quick Steps:
- Preheat the oven to 375°F (190°C) and line a baking sheet with parchment paper.
- Cream the butter and sugar for about 2 minutes until the mixture looks fluffy.
- Beat in the eggs and vanilla, if using.
- Whisk the flour, cream of tartar, baking soda, and salt in a separate bowl, then stir it into the butter mixture.
- Mix the cinnamon and sugar in a shallow bowl. Roll the dough into 1 1/2-inch balls and coat them well. Coating matters here; patchy balls bake patchy cookies.
- Place them 2 inches apart and bake for 8 to 10 minutes, until the tops are cracked and the edges look set. Let them cool on the sheet for 5 minutes.
Equipment for This Recipe:
- Large bowl — for easy creaming and rolling.
- Small bowl — for the cinnamon sugar.
- Baking sheet — lined with parchment.
- Cookie scoop — helps keep the balls uniform.
How to Serve This Dish:
These are excellent with coffee, black tea, or a mug of chai that picks up the cinnamon. Serve them on a simple plate dusted with a little extra cinnamon sugar if you want them to look as good as they smell.
Pro Tips for This Recipe:
- If your dough feels sticky, chill it for 20 minutes before rolling.
- Keep the cinnamon-sugar coating thick; thin coverage bakes into a weak crust.
- Pull them early. Snickerdoodles are better slightly underbaked than dry.
Variations on This Dish:
- Pumpkin Spice Snickerdoodles: Swap in 1 teaspoon pumpkin pie spice for 1 teaspoon of the cinnamon.
- Orange Sugar Snickerdoodles: Add 1 tablespoon orange zest to the dough for a brighter scent.
- Extra Tang Version: Increase cream of tartar by 1/2 teaspoon if you like the sharp, old-school flavor.
Common Mistakes to Avoid with This Dish:
- Skipping cream of tartar: The cookies will still bake, but they lose the snickerdoodle taste and texture.
- Undercoating the dough balls: Bare patches mean weaker flavor and less crackle.
- Leaving them in until the tops are dark: The best snickerdoodles are pale gold with visible fissures.
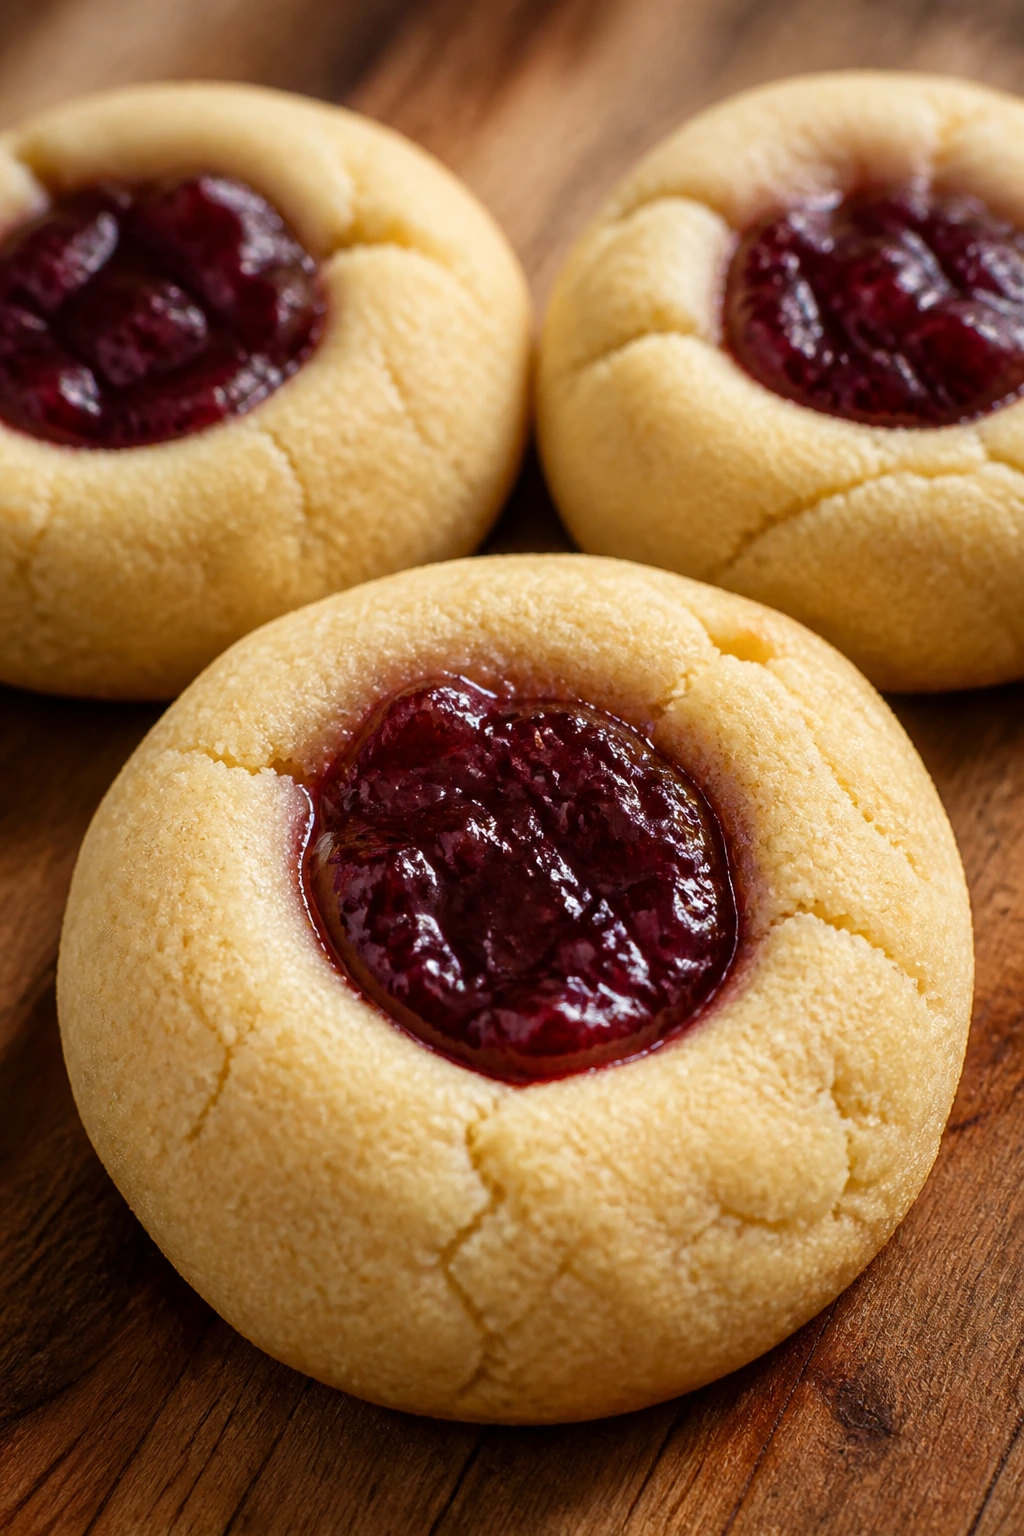
6. Jam Thumbprint Cookies
Thumbprint cookies look fussy from the outside and behave like a beginner recipe once you make the first dent. The dough is buttery, the jam turns glossy in the oven, and the finished cookies look like you spent more time than you did.
Why It Works:
A simple butter dough is sturdy enough to hold a jam well without turning tough. The little well in the center keeps the filling from running all over the pan, and the jam sets as it cools. These are especially nice for a first baker because the shaping is more relaxed than cutout cookies.
Key Ingredients:
- 1 cup (2 sticks) unsalted butter, softened — gives the dough its rich base.
- 2/3 cup granulated sugar — keeps the cookie tender.
- 1 large egg yolk — adds richness without too much moisture.
- 1 teaspoon vanilla extract — rounds out the dough.
- 2 cups all-purpose flour — creates a dough that holds shape.
- 1/4 teaspoon fine sea salt — keeps the butter flavor clean.
- 1/2 cup thick jam or preserves — raspberry, apricot, or strawberry all work.
- 1/2 cup finely chopped nuts, optional — for rolling the cookie edges.
Quick Steps:
- Preheat the oven to 350°F (175°C) and line 2 baking sheets with parchment paper.
- Cream the butter and sugar until light, then beat in the egg yolk and vanilla.
- Stir in the flour and salt until the dough comes together into a soft ball.
- Roll tablespoons of dough into balls. If you want nuts on the edges, roll the balls in the chopped nuts first. Press a deep indentation in the center with your thumb or the back of a 1/2 teaspoon.
- Spoon about 1/2 teaspoon jam into each indentation. Do not overfill — jam that spills over the sides burns before the cookie is done.
- Bake for 12 to 14 minutes, until the edges are lightly golden. Cool on the tray for 5 minutes, then move to a rack.
Equipment for This Recipe:
- Mixing bowl — for the dough.
- Small spoon or teaspoon — for filling the centers.
- Baking sheet — lined with parchment.
- Measuring spoon or your thumb — both work for the indentation.
How to Serve This Dish:
These belong on a tea plate or a holiday tin, especially when you want one cookie that looks a little dressed up. They’re nice with black tea, coffee, or a cheese board if you like mixing sweet and salty bites.
Pro Tips for This Recipe:
- Use thick jam or preserves, not thin jelly, or the filling may run.
- Re-press the centers halfway through baking if the dough puffs back up.
- Chill the shaped balls for 10 minutes if your kitchen is warm.
Variations on This Dish:
- Apricot Almond Thumbprints: Use apricot jam and add 1/4 teaspoon almond extract to the dough.
- Raspberry Lemon Thumbprints: Fill with raspberry preserves and add 1 teaspoon lemon zest to the dough.
- Chocolate Hazelnut Centers: Swap the jam for a teaspoon of chocolate-hazelnut spread.
Common Mistakes to Avoid with This Dish:
- Making the wells too shallow: The jam slides off and the cookie surface bakes unevenly. Press enough to make a clear cup.
- Overfilling the centers: A teaspoon sounds small, but it’s plenty here.
- Using runny jam: Thin fillings leak and make the cookies sticky.
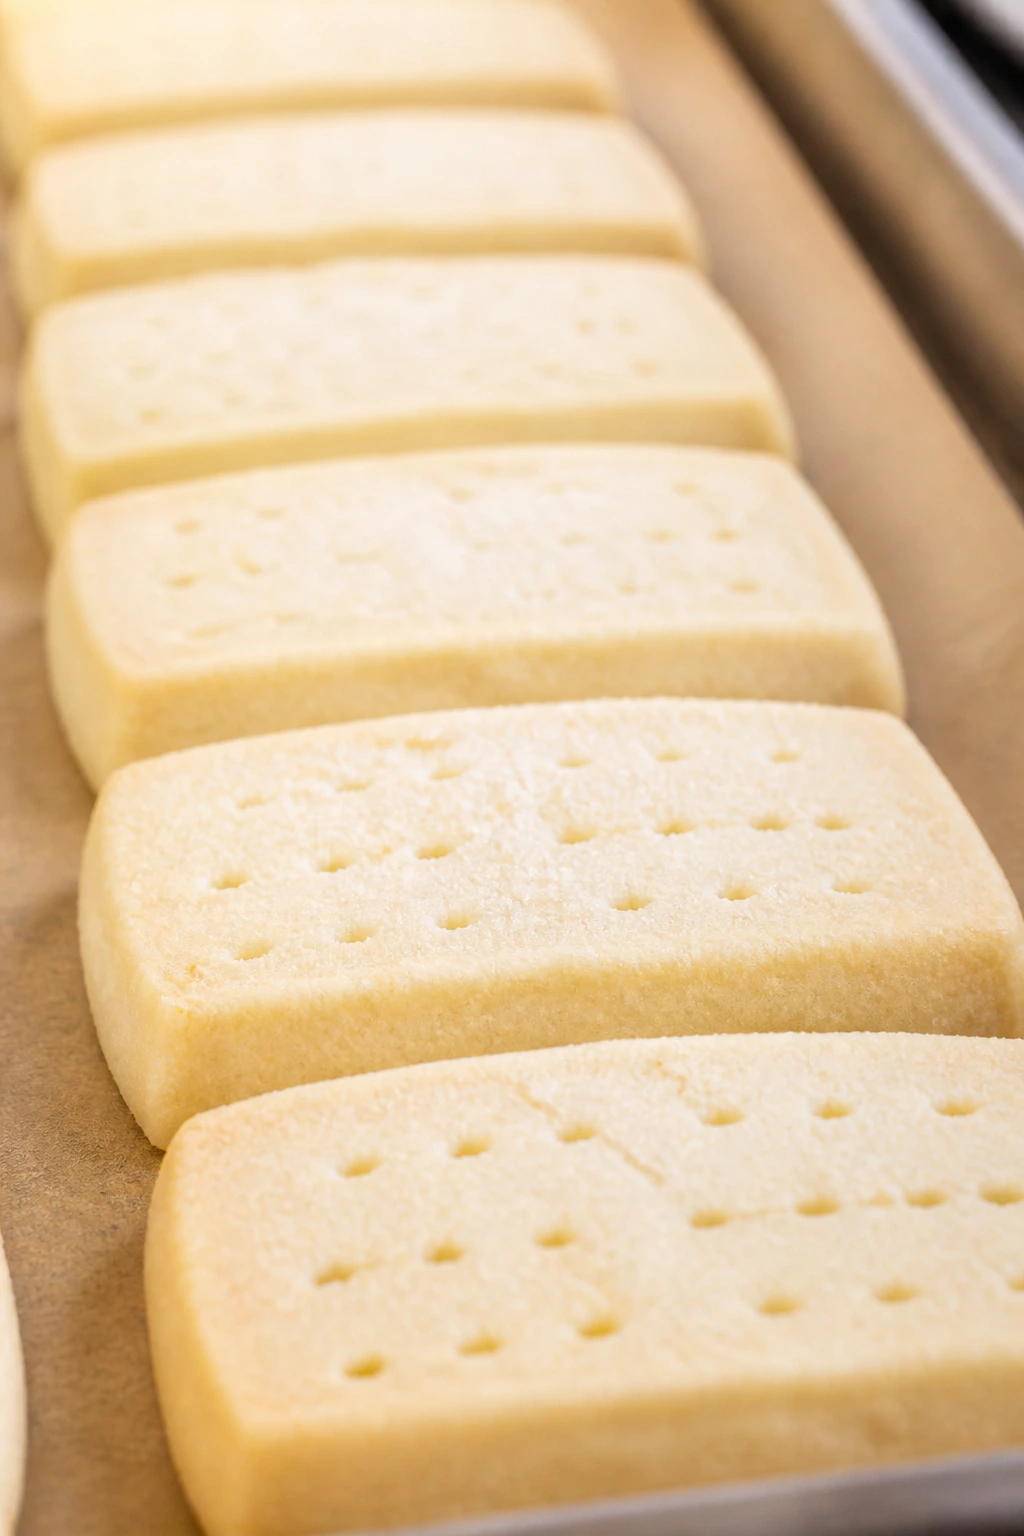
7. Shortbread Cookies
Shortbread is what happens when butter takes center stage. There’s nowhere for the flavor to hide, which is exactly why a shortbread batch teaches restraint better than most cookies ever do.
Why It Works:
Shortbread keeps the ingredient list tiny, so there’s nowhere to mask mistakes. The texture comes from butter, powdered sugar, and just enough flour to hold everything together. Bake it low and slow, and you get a pale, crisp cookie with a clean snap instead of a sugary brick.
Key Ingredients:
- 1 cup (2 sticks) unsalted butter, softened — the whole point of the cookie.
- 1/2 cup powdered sugar — gives a finer, softer crumb than granulated sugar.
- 2 cups all-purpose flour — keeps the dough short and tender.
- 1/4 teaspoon fine sea salt — sharpens the butter flavor.
- 1 teaspoon vanilla extract, optional — adds a rounder finish.
- Extra sugar for sprinkling, optional — if you like a slight crunch on top.
Quick Steps:
- Preheat the oven to 325°F (165°C) and line a baking sheet or 8-inch square pan with parchment.
- Cream the butter and powdered sugar until smooth, then mix in vanilla if you’re using it.
- Stir in the flour and salt just until the dough forms. Stop as soon as the flour disappears; overmixing makes shortbread tough.
- Shape the dough into a 1-inch-thick log and chill it for 20 minutes, then slice into 1/4-inch rounds, or press it into a pan and score the top.
- Bake for 18 to 22 minutes, until the edges are barely golden and the centers still look pale.
- Cool completely before moving them. Shortbread firms up as it cools.
Equipment for This Recipe:
- Mixing bowl — that’s nearly all you need.
- Parchment paper — helps with easy removal.
- Sharp knife — for clean slices if you choose the log shape.
- Baking sheet or square pan — both work.
How to Serve This Dish:
Shortbread likes a plain plate and a hot drink with no fuss. Serve it with tea, coffee, or a spoonful of berry jam on the side if you want a sharper contrast to the butter.
Pro Tips for This Recipe:
- Use powdered sugar, not granulated sugar, if you want that fine, sandy crumb.
- Chill the log before slicing so the rounds keep their shape.
- A light prick with a fork can help the centers bake evenly if you’re pressing the dough into a pan.
Variations on This Dish:
- Chocolate-Dipped Shortbread: Dip half of each cooled cookie in melted dark chocolate.
- Lemon Shortbread: Add 1 tablespoon lemon zest to the dough.
- Pecan Shortbread: Fold in 1/2 cup finely chopped pecans for a nuttier bite.
Common Mistakes to Avoid with This Dish:
- Browning the cookies too much: Shortbread should stay pale with only a hint of color at the edge.
- Using too much flour: That makes a sandy cookie into a dry one. Measure carefully.
- Trying to move them too soon: They’re fragile when hot and firm as they cool.
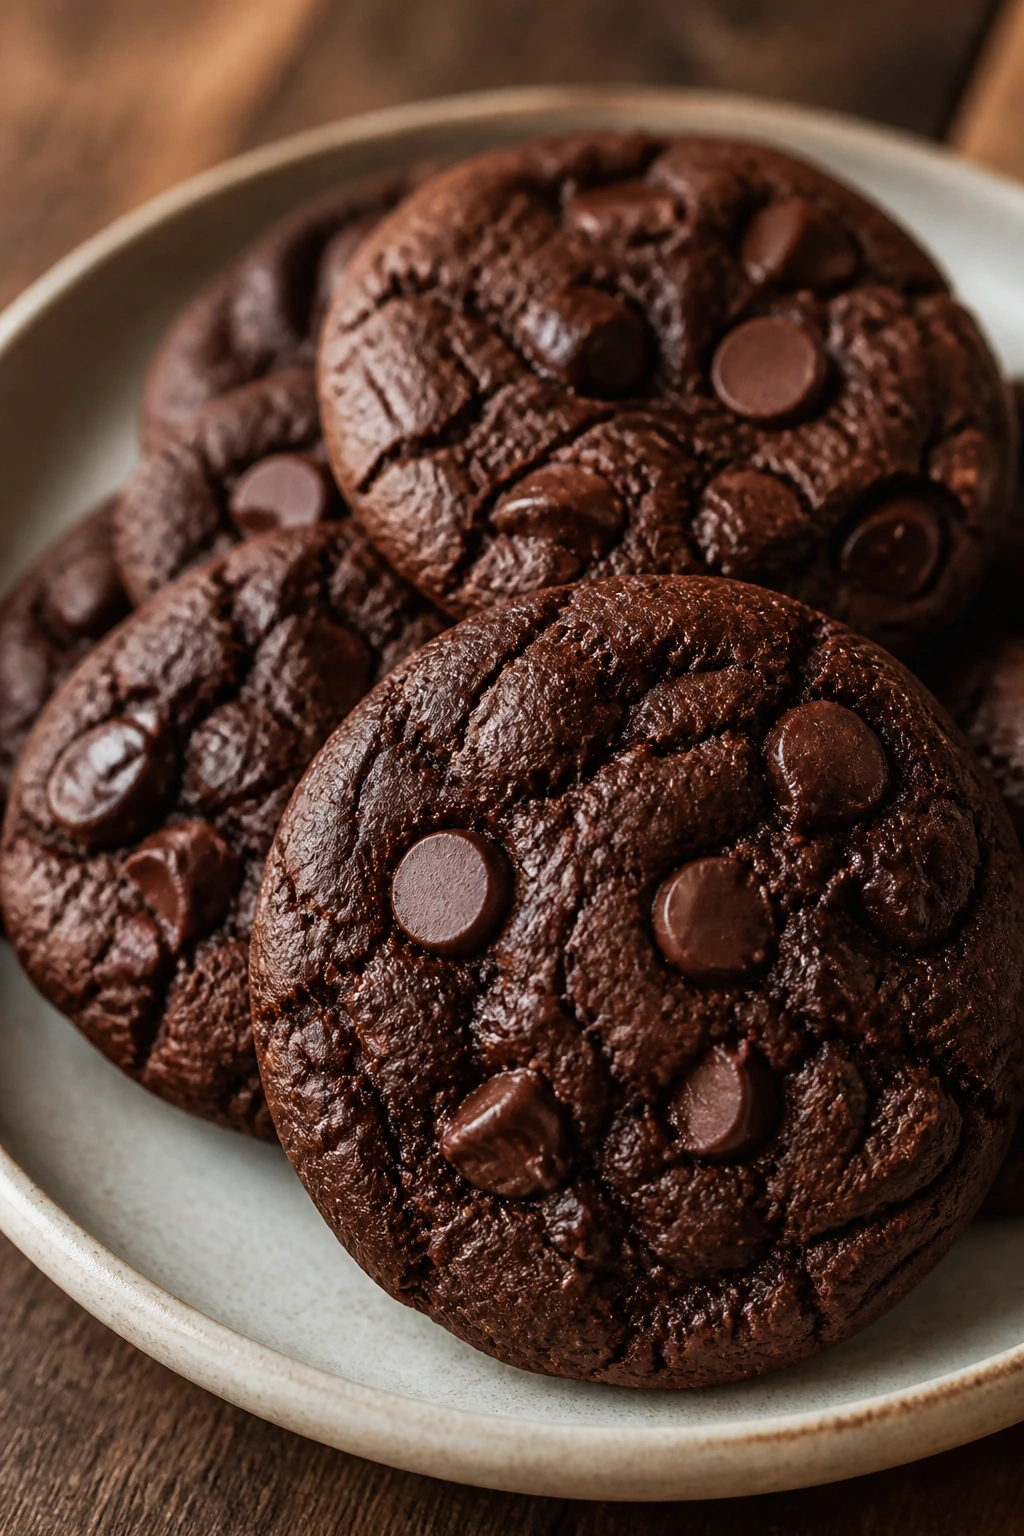
8. Double Chocolate Cookies
Double chocolate cookies exist for the bakers who want the dough to smell like brownie batter. They’re dark, soft, and a little dramatic in the way only cocoa and melted chips can be.
Why It Works:
Cocoa powder gives the dough a dry, deep chocolate flavor, while chocolate chips keep each bite from tasting flat. Brown sugar helps the centers stay chewy, and a moderate oven temperature prevents the cocoa from turning bitter. The result is closer to a brownie edge than a crisp cookie, which is the point.
Key Ingredients:
- 1/2 cup (1 stick) unsalted butter, softened — keeps the dough rich.
- 1 cup granulated sugar — sweetens the cocoa.
- 1/2 cup packed light brown sugar — adds chew.
- 2 large eggs — bind the dough.
- 1 teaspoon vanilla extract — rounds the chocolate.
- 1 3/4 cups all-purpose flour — enough to hold the structure.
- 1/2 cup unsweetened cocoa powder — the main flavor.
- 1 teaspoon baking soda — helps the cookies rise and spread.
- 1/2 teaspoon fine sea salt — keeps the chocolate from tasting one-note.
- 1 1/2 cups semisweet chocolate chips — for pockets of melted chocolate.
Quick Steps:
- Preheat the oven to 350°F (175°C) and line 2 baking sheets with parchment.
- Cream the butter and both sugars until fluffy, about 2 minutes.
- Beat in the eggs and vanilla until smooth.
- Whisk the flour, cocoa powder, baking soda, and salt in a separate bowl, then stir it into the wet ingredients.
- Fold in the chocolate chips. If the dough feels soft, chill it for 15 to 20 minutes.
- Scoop 2-tablespoon mounds and bake for 9 to 11 minutes, until the tops look set but still soft. Cool on the tray for 5 minutes.
Equipment for This Recipe:
- Large bowl — the cocoa gets everywhere if the bowl is too small.
- Hand mixer — helps the butter and sugar combine cleanly.
- Baking sheets — parchment-lined, always.
- Spatula — useful for folding in the chips without smashing them.
How to Serve This Dish:
Serve these with cold milk or a small cup of espresso if you want the chocolate to read darker. They also make a good base for a sandwich cookie with vanilla frosting in the middle.
Pro Tips for This Recipe:
- Use natural cocoa powder here, not Dutch-process, unless the recipe is adjusted for it.
- Sprinkle a tiny pinch of flaky salt on top after baking if you like contrast.
- Do not overbake; cocoa cookies can dry out fast.
Variations on This Dish:
- Espresso Chocolate Cookies: Add 1 teaspoon instant espresso powder to sharpen the cocoa.
- White Chocolate Version: Replace half the semisweet chips with white chocolate for a sweeter cookie.
- Mint Chocolate Cookies: Add 1/2 teaspoon peppermint extract and use dark chocolate chips.
Common Mistakes to Avoid with This Dish:
- Overbaking because the cookies look too soft: They should look a little underdone in the center when they come out.
- Using too much cocoa without enough fat: That turns the dough dry and chalky.
- Skipping the salt: Chocolate needs it more than people think.
9. M&M Cookies
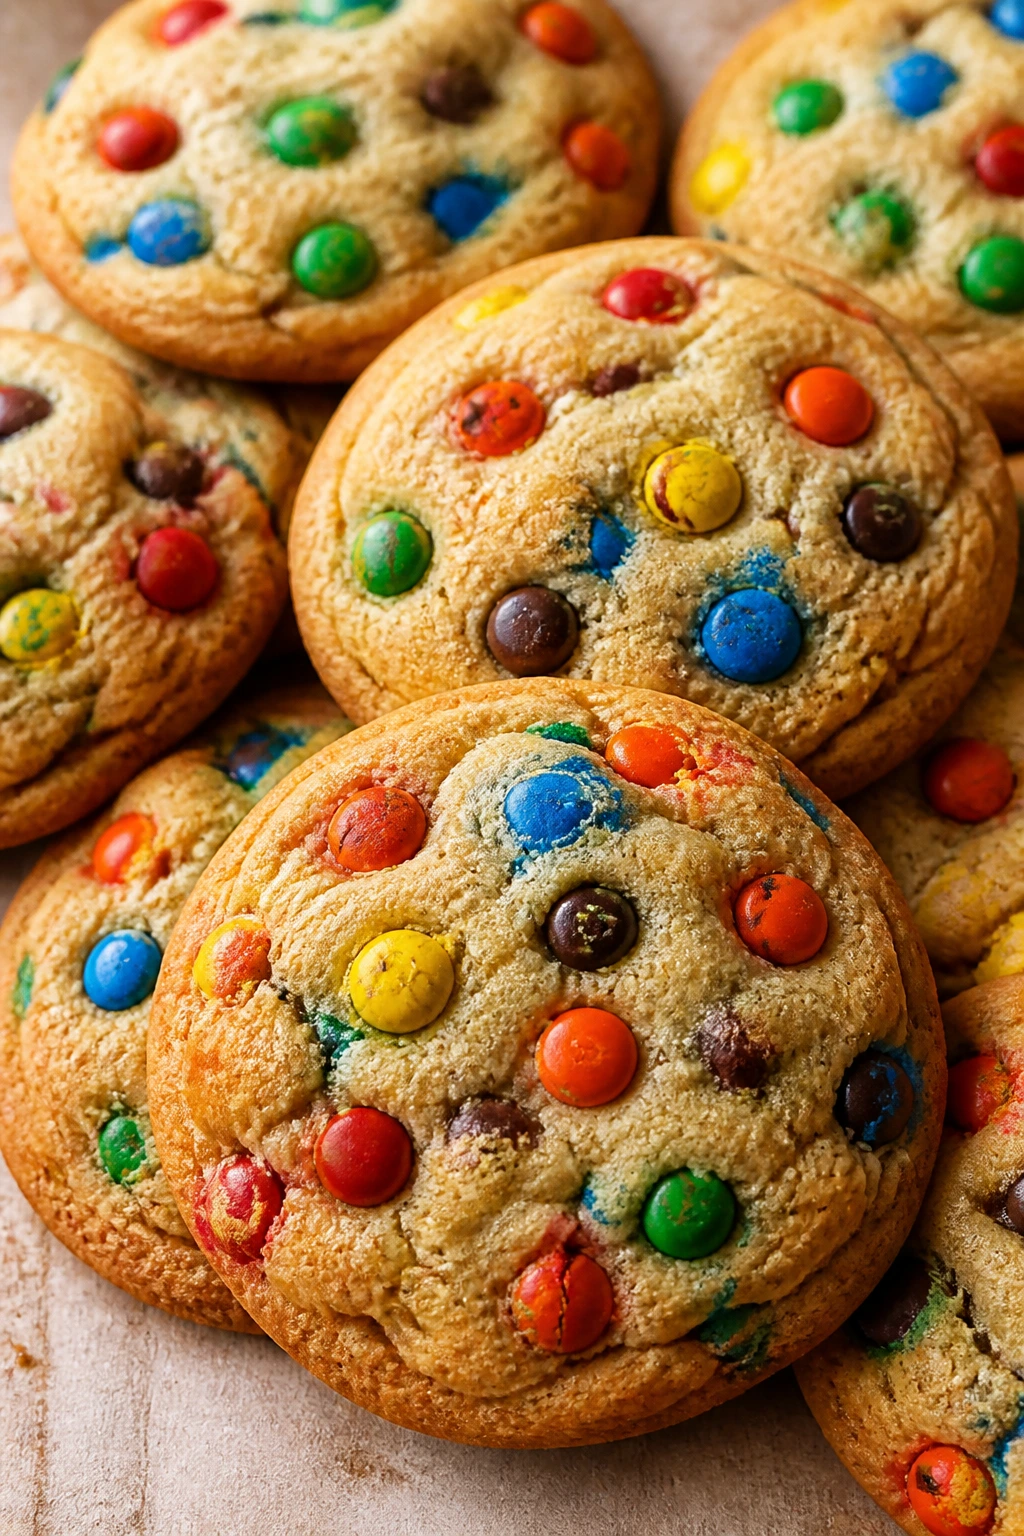
M&M cookies are the easiest way to make a plain dough feel cheerful. The candy shell keeps the colors bright, and the chocolate chips in the dough give the cookie more flavor than a handful of candy alone can manage.
Why It Works:
The dough acts like a standard chocolate chip base, which means it’s familiar and dependable. M&Ms add color and crunch, but the mini chocolate chips keep the cookie from tasting like candy with a flour binder. Pressing a few candies into the tops right after baking gives them that bakery look without any extra skill.
Key Ingredients:
- 3/4 cup unsalted butter, softened — for a soft, rich dough.
- 3/4 cup packed light brown sugar — gives chew.
- 1/2 cup granulated sugar — helps with spread.
- 2 large eggs — bind the dough.
- 2 teaspoons vanilla extract — keeps the flavor warm.
- 2 1/4 cups all-purpose flour — the cookie’s frame.
- 1 teaspoon baking soda — gives lift.
- 1/2 teaspoon fine sea salt — balances the sweetness.
- 1 1/2 cups M&Ms — the color and crunch.
- 1/2 cup mini chocolate chips — help the dough taste like a cookie, not just candy.
Quick Steps:
- Preheat the oven to 350°F (175°C) and line baking sheets with parchment paper.
- Cream the butter and sugars for 2 to 3 minutes until lighter in color.
- Beat in the eggs and vanilla.
- Stir in the flour, baking soda, and salt, then fold in the M&Ms and mini chips.
- Scoop 2-tablespoon mounds and bake for 10 to 12 minutes, until the edges are set and the centers still look soft.
- Press a few extra M&Ms on top while the cookies are warm, then cool on the sheet for 5 minutes.
Equipment for This Recipe:
- Mixing bowl — medium or large.
- Cookie scoop — keeps the rounds even.
- Baking sheets — lined with parchment.
- Spatula — for pressing candies into the tops after baking.
How to Serve This Dish:
These are the ones I’d pile on a tray for a birthday table, school event, or any afternoon where color helps. Serve them with milk, hot chocolate, or tuck them into a lunchbox with an ice pack.
Pro Tips for This Recipe:
- Use mini chips so every bite gets chocolate, not just candy coating.
- Save a small handful of M&Ms to press into the tops after baking.
- If the candies crack in the oven, the dough was probably too hot; chill it for 20 minutes next time.
Variations on This Dish:
- Peanut M&M Cookies: Use peanut M&Ms and skip the mini chips for a nuttier flavor.
- Seasonal Color Cookies: Swap in whatever color mix you want and keep the dough the same.
- Brown Butter Candy Cookies: Brown the butter first for a toastier base.
Common Mistakes to Avoid with This Dish:
- Overloading with candy: Too many M&Ms make the dough brittle and the cookie hard to shape.
- Baking too long: The candy shell can look done before the cookie is. Pull them early.
- Forgetting the extra candies on top: That last little press is what makes them look finished.
10. Lemon Crinkle Cookies
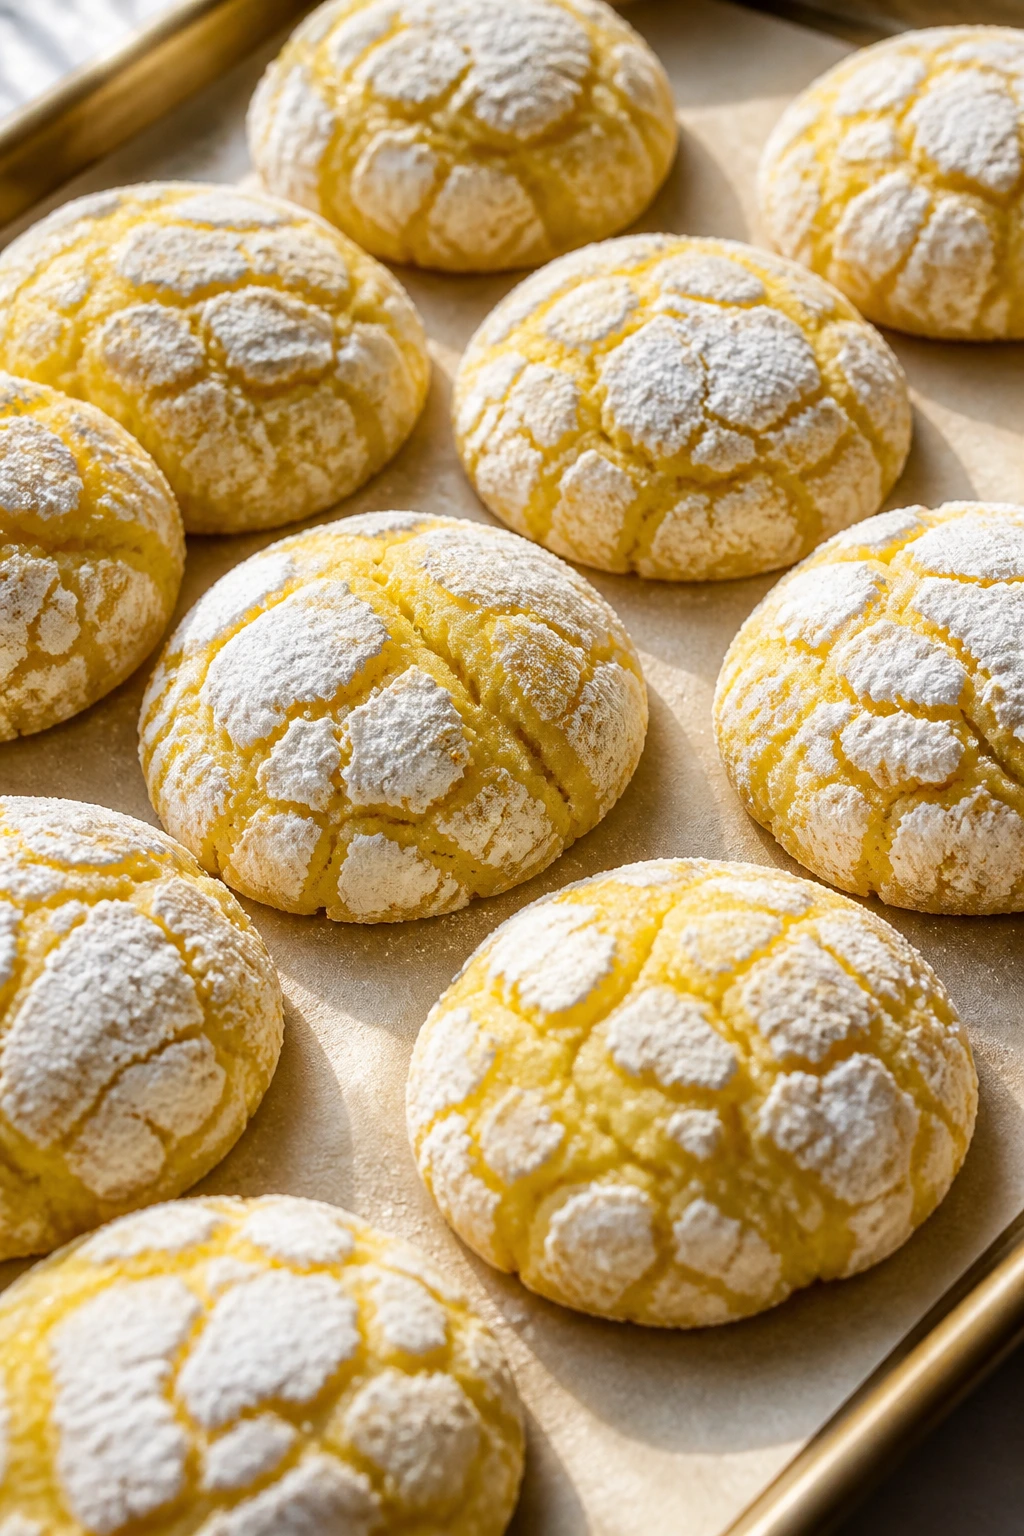
Lemon crinkle cookies give you that powdered-sugar crackle with almost no decorating skill. They smell bright and sunny in the oven, and the crackled surface is one of the easiest “fancy” looks a new baker can make.
Why It Works:
Lemon zest carries the real flavor here, not just the juice, so the dough tastes fresh instead of sour. Chilling the dough helps the cookies hold their shape long enough to wrinkle in the oven. Rolling them in powdered sugar twice creates the white fissures that make crinkle cookies look like they know what they’re doing.
Key Ingredients:
- 1/2 cup (1 stick) unsalted butter, softened — for tenderness.
- 1 cup granulated sugar — sweetens and helps with spread.
- 1 large egg — binds the dough.
- 2 tablespoons lemon zest — the boldest flavor in the bowl.
- 2 tablespoons lemon juice — adds brightness.
- 1 teaspoon vanilla extract — smooths the edges.
- 2 cups all-purpose flour — enough to hold the shape.
- 1 teaspoon baking powder — helps the cookies puff and crack.
- 1/4 teaspoon fine sea salt — keeps the lemon from tasting thin.
- 1/2 cup powdered sugar — for rolling.
Quick Steps:
- Preheat the oven to 350°F (175°C) and line a baking sheet with parchment.
- Cream the butter and sugar until fluffy, then beat in the egg, lemon zest, lemon juice, and vanilla.
- Stir in the flour, baking powder, and salt just until combined.
- Chill the dough for 30 minutes. This is the step that keeps the cookies from spreading too far.
- Scoop small balls of dough, roll them generously in powdered sugar, and place them 2 inches apart. Roll a second time for a thicker coating.
- Bake for 10 to 12 minutes, until the cookies have cracked tops and lightly set edges. Cool on the sheet for 5 minutes.
Equipment for This Recipe:
- Mixing bowl — for the dough.
- Microplane or fine zester — gets the zest very fine.
- Shallow bowl — for the powdered sugar coating.
- Baking sheet — lined and ready.
How to Serve This Dish:
These look cleanest on a pale plate or a small cake stand with a few lemon slices nearby. They’re good with tea, sparkling water, or a bowl of berries if you want to lean into the bright flavor.
Pro Tips for This Recipe:
- Zest the lemon before juicing it; that’s always easier.
- Use fresh lemon juice, not bottled, because the flavor is sharper.
- Don’t skimp on the chill time or the dough gets sticky and flat.
Variations on This Dish:
- Lime Crinkles: Swap the lemon for lime zest and juice.
- Orange Crinkles: Use orange zest and add a little more vanilla.
- Lemon Poppy Seed Cookies: Fold in 1 tablespoon poppy seeds for a faint crunch.
Common Mistakes to Avoid with This Dish:
- Rolling in too little powdered sugar: Thin coating means weak crinkles.
- Skipping the chill: Warm dough spreads before it can crack.
- Using old citrus: Flat lemons make flat cookies.
11. No-Bake Chocolate Oatmeal Cookies
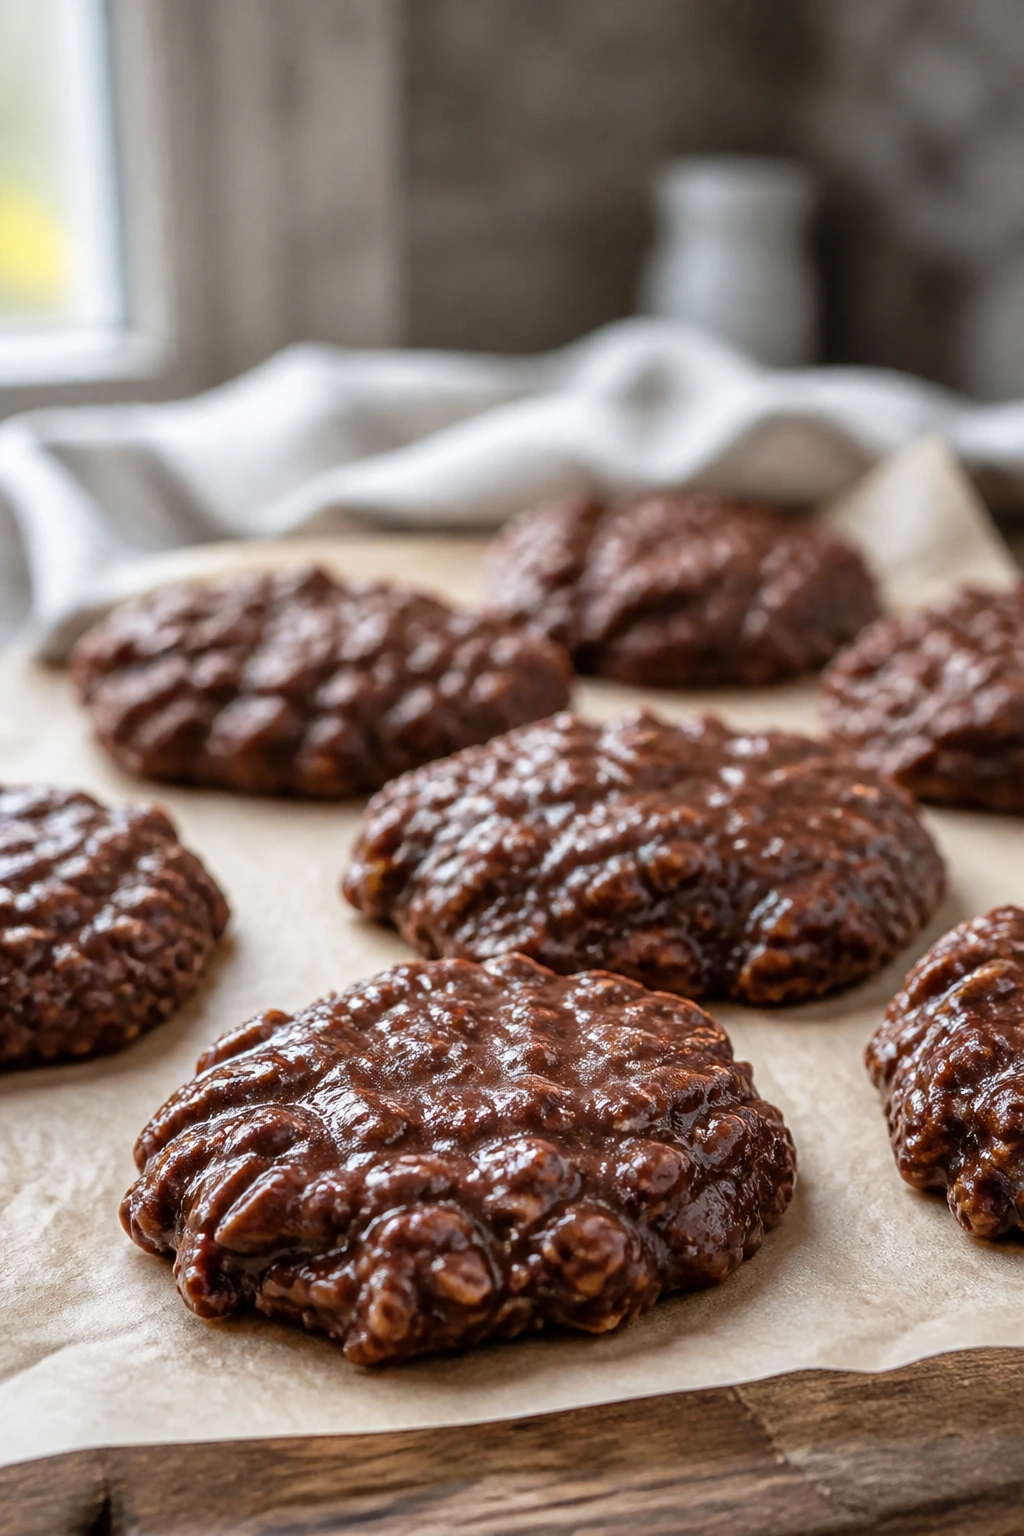
No-bake chocolate oatmeal cookies are fast, but they are not forgiving of wandering off. The sugar syrup needs the full boil, the oats need to be ready, and the spooning needs to happen before the mixture starts to set in the pot.
Why It Works:
The cooked sugar, butter, and milk mixture firms up as it cools, which is what holds the oats together without an oven. Peanut butter helps the texture turn creamy instead of grainy, and the cocoa gives the whole thing that old-school fudge flavor. These are the cookies that teach timing more than technique.
Key Ingredients:
- 2 cups granulated sugar — creates the candy base.
- 1/2 cup unsalted butter — gives richness.
- 1/2 cup whole milk — helps the sugar boil properly.
- 1/4 cup unsweetened cocoa powder — for the chocolate flavor.
- 1/2 cup creamy peanut butter — binds and softens the texture.
- 3 cups quick oats — absorb the syrup fast.
- 1 teaspoon vanilla extract — adds warmth after cooking.
- Pinch of fine sea salt — keeps the sweetness from running away.
Quick Steps:
- Line a baking sheet or countertop with parchment paper or wax paper before you start.
- In a medium saucepan, combine the sugar, butter, milk, cocoa, and salt over medium heat. Stir until the butter melts and the mixture is smooth.
- Bring it to a full rolling boil and cook for exactly 60 seconds. Do not guess here — too little time and the cookies stay sticky; too much and they turn dry and sandy.
- Remove from the heat and stir in the peanut butter and vanilla until smooth, then fold in the oats.
- Drop spoonfuls of the mixture onto the prepared paper right away. Let them set at room temperature for 20 to 30 minutes.
Equipment for This Recipe:
- Medium saucepan — the boiling stage needs even heat.
- Wooden spoon — good for stirring the syrup.
- Parchment or wax paper — for setting the cookies.
- Measuring cups — precision matters here.
How to Serve This Dish:
Serve these chilled or at room temperature on a tray with coffee or cold milk. They’re a solid make-ahead option when you want something sweet without turning on the oven.
Pro Tips for This Recipe:
- Start timing when the boil is rolling across the whole surface, not when you see a few bubbles.
- Work quickly after the oats go in; the mixture sets fast.
- If the cookies turn crumbly, the boil went too long.
Variations on This Dish:
- Nut-Free Version: Use sunflower seed butter instead of peanut butter.
- Coconut Oat Cookies: Add 1/2 cup shredded coconut with the oats.
- Almond Chocolate Cookies: Swap almond butter for peanut butter and add sliced almonds.
Common Mistakes to Avoid with This Dish:
- Underboiling the syrup: The cookies never firm up properly.
- Waiting too long to scoop: The mixture sets in the pot and becomes impossible to portion.
- Using old oats that smell stale: There’s nowhere to hide stale flavor here.
12. Ginger Molasses Cookies
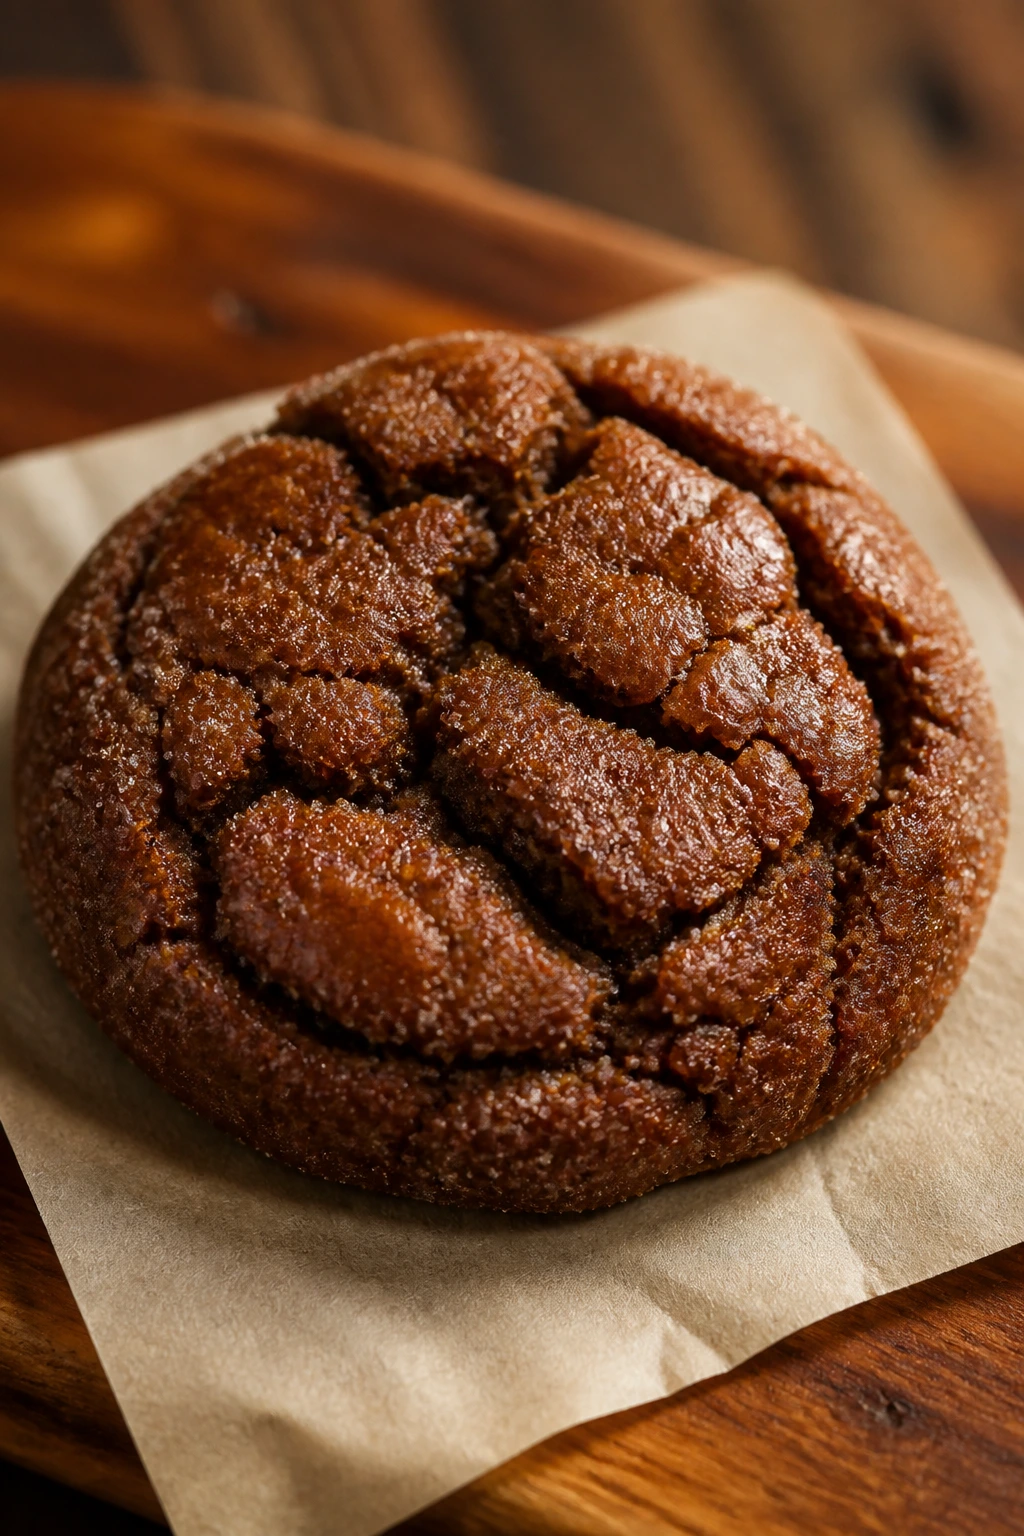
Ginger molasses cookies bake up dark, soft, and a little sticky around the edges. If you like a cookie that smells like spice and brown sugar before it even hits the rack, this is the one.
Why It Works:
Molasses keeps the dough moist and gives it that deep color. Ginger, cinnamon, and cloves make the flavor build in layers instead of landing all at once. Rolling the dough balls in sugar helps the tops crack and adds a tiny shell around the soft center.
Key Ingredients:
- 3/4 cup unsalted butter, softened — the rich base.
- 1 cup packed light brown sugar — adds chew and sweetness.
- 1/4 cup unsulfured molasses — the flavor that defines the cookie.
- 1 large egg — binds the dough.
- 2 1/4 cups all-purpose flour — holds the soft shape.
- 2 teaspoons ground ginger — gives the cookie its kick.
- 1 teaspoon ground cinnamon — softens the spice.
- 1/2 teaspoon ground cloves — keep this modest; cloves are loud.
- 1 teaspoon baking soda — creates the crackled top.
- 1/2 teaspoon fine sea salt — balances the molasses.
- 1/4 cup granulated sugar — for rolling.
Quick Steps:
- Preheat the oven to 350°F (175°C) and line 2 baking sheets with parchment.
- Cream the butter and brown sugar until smooth, then beat in the molasses and egg.
- Stir in the flour, ginger, cinnamon, cloves, baking soda, and salt.
- Chill the dough for 20 minutes if it feels soft, then roll tablespoons of dough into balls and coat them in granulated sugar.
- Set the balls 2 inches apart and bake for 10 to 12 minutes, until the tops crack and the edges look set.
- Cool on the tray for 5 minutes before moving to a rack.
Equipment for This Recipe:
- Mixing bowl — medium or large.
- Cookie scoop — keeps the dough even.
- Shallow bowl — for the rolling sugar.
- Baking sheet — parchment-lined.
How to Serve This Dish:
These are especially good with coffee, black tea, or a warm mug of cider. On a plate, they look nice stacked in a little pile with a dusting of sugar on the surface.
Pro Tips for This Recipe:
- Use unsulfured molasses for the cleanest flavor.
- If the dough sticks to your hands, dampen them lightly before rolling.
- Pull the cookies when they still look soft in the center; they firm up on the tray.
Variations on This Dish:
- Extra-Ginger Batch: Add another 1/2 teaspoon ginger if you want more heat.
- Orange Molasses Cookies: Add 1 tablespoon orange zest for a brighter finish.
- Soft Sandwich Version: Make smaller cookies and sandwich them with cream cheese frosting.
Common Mistakes to Avoid with This Dish:
- Overusing cloves: They take over fast and make the batch taste dusty.
- Skipping the sugar roll: The crackly finish comes partly from that outer coat.
- Baking until firm in the oven: Molasses cookies should still feel tender when you pull them.
13. Coconut Macaroons
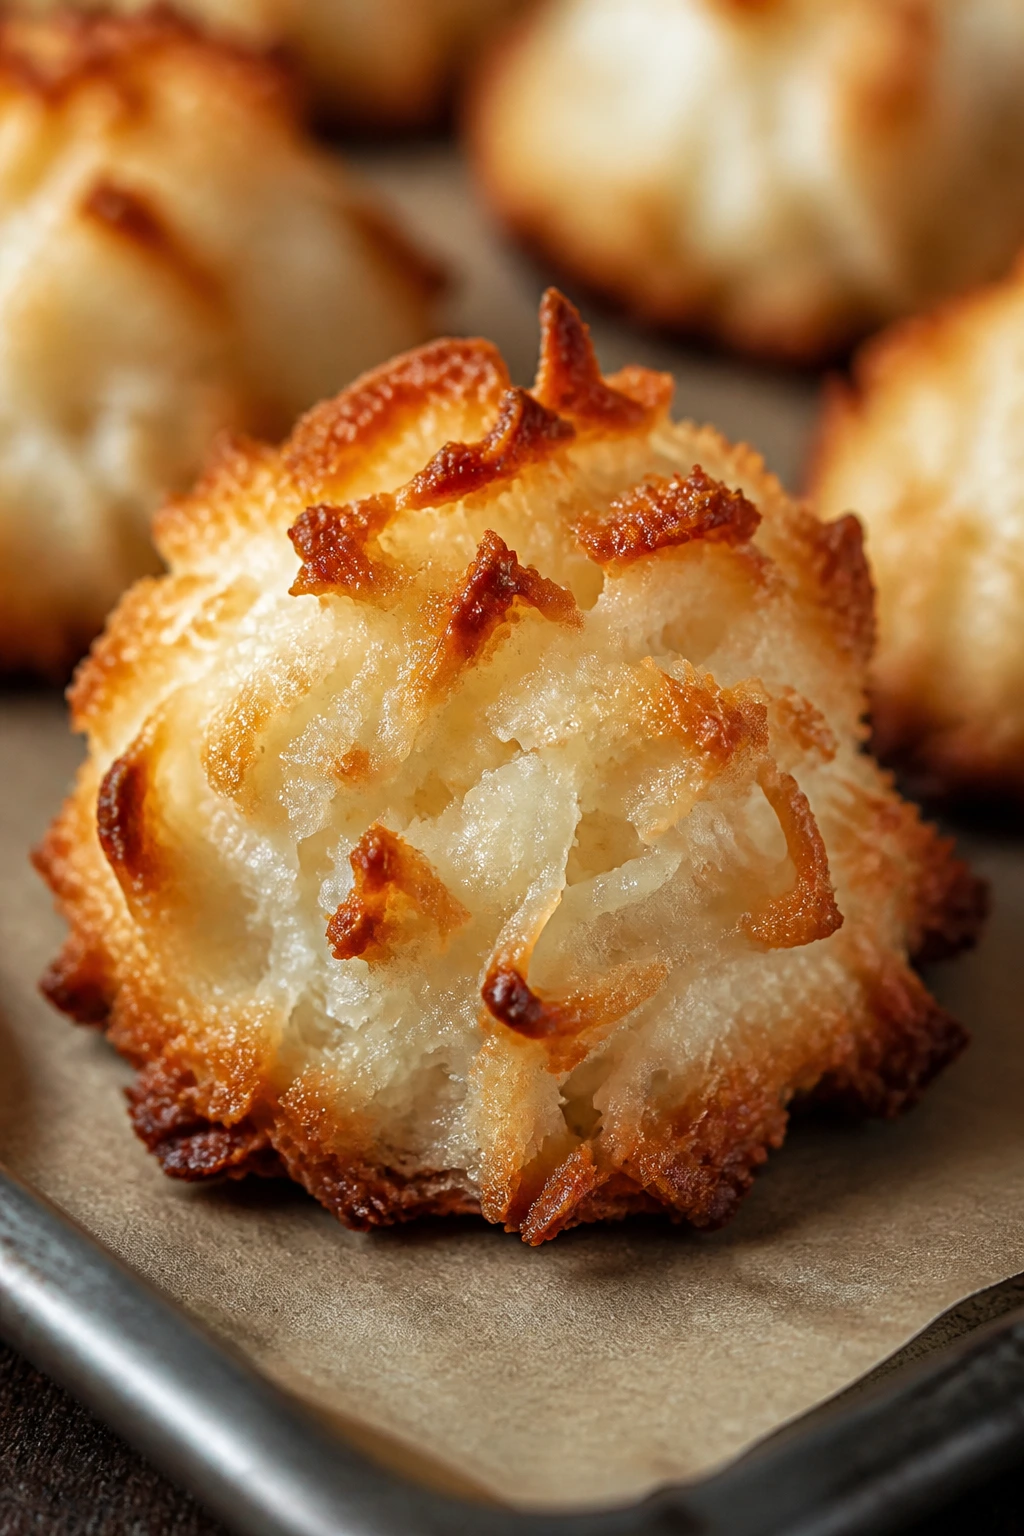
Coconut macaroons are the cookie equivalent of a shortcut that still looks thoughtful. They’re chewy on the inside, toasted on the outside, and simple enough that the ingredient list feels almost suspicious.
Why It Works:
Sweetened condensed milk holds the coconut together without the need for flour. Egg whites add structure and help the mounds set, while the high coconut-to-binder ratio gives the cookies that dense, chewy center. Bake them until the edges turn golden and the coconut shreds on top look toasted, not pale.
Key Ingredients:
- 4 cups sweetened shredded coconut — the main body of the cookie.
- 2/3 cup sweetened condensed milk — binds the coconut.
- 2 large egg whites — help the mounds hold shape.
- 1 teaspoon vanilla extract — softens the sweetness.
- 1/4 teaspoon fine sea salt — keeps the coconut flavor sharp.
- 4 ounces melted dark chocolate, optional — for dipping or drizzling.
Quick Steps:
- Preheat the oven to 325°F (165°C) and line a baking sheet with parchment paper.
- In a bowl, stir together the coconut, condensed milk, vanilla, and salt.
- In a separate bowl, whisk the egg whites until foamy but not stiff, then fold them into the coconut mixture. Do not beat them to stiff peaks; you want lightness, not meringue.
- Scoop heaping tablespoons of the mixture onto the baking sheet, packing each mound lightly so it holds.
- Bake for 18 to 22 minutes, until the tops are golden and the edges are deep gold.
- Cool completely before drizzling or dipping in chocolate.
Equipment for This Recipe:
- Mixing bowl — one large bowl can handle it.
- Whisk — for the egg whites.
- Cookie scoop — helps keep the macaroons even.
- Parchment-lined baking sheet — essential for sticking prevention.
How to Serve This Dish:
Serve these plain, or dip the bottoms in melted chocolate once they’re cool. They make a nice contrast on a tray of darker cookies because the toasted coconut has such a different texture.
Pro Tips for This Recipe:
- Use sweetened shredded coconut, not unsweetened flakes, or the cookies can feel dry.
- Pack the mounds lightly so they don’t spread too much.
- Let them cool all the way before moving them; they firm up as they sit.
Variations on This Dish:
- Chocolate-Dipped Macaroons: Dip the bottoms in dark chocolate for a cleaner finish.
- Lime Coconut Macaroons: Add 1 teaspoon lime zest for a sharper scent.
- Cherry Coconut Macaroons: Fold in 1/3 cup finely chopped dried cherries.
Common Mistakes to Avoid with This Dish:
- Using stiff meringue: That changes the texture and makes the cookies fragile.
- Overbaking until the coconut turns dark brown: You want toast, not burnt sugar.
- Skipping parchment: These stick hard to an unlined sheet.
14. Brown Butter Toffee Cookies
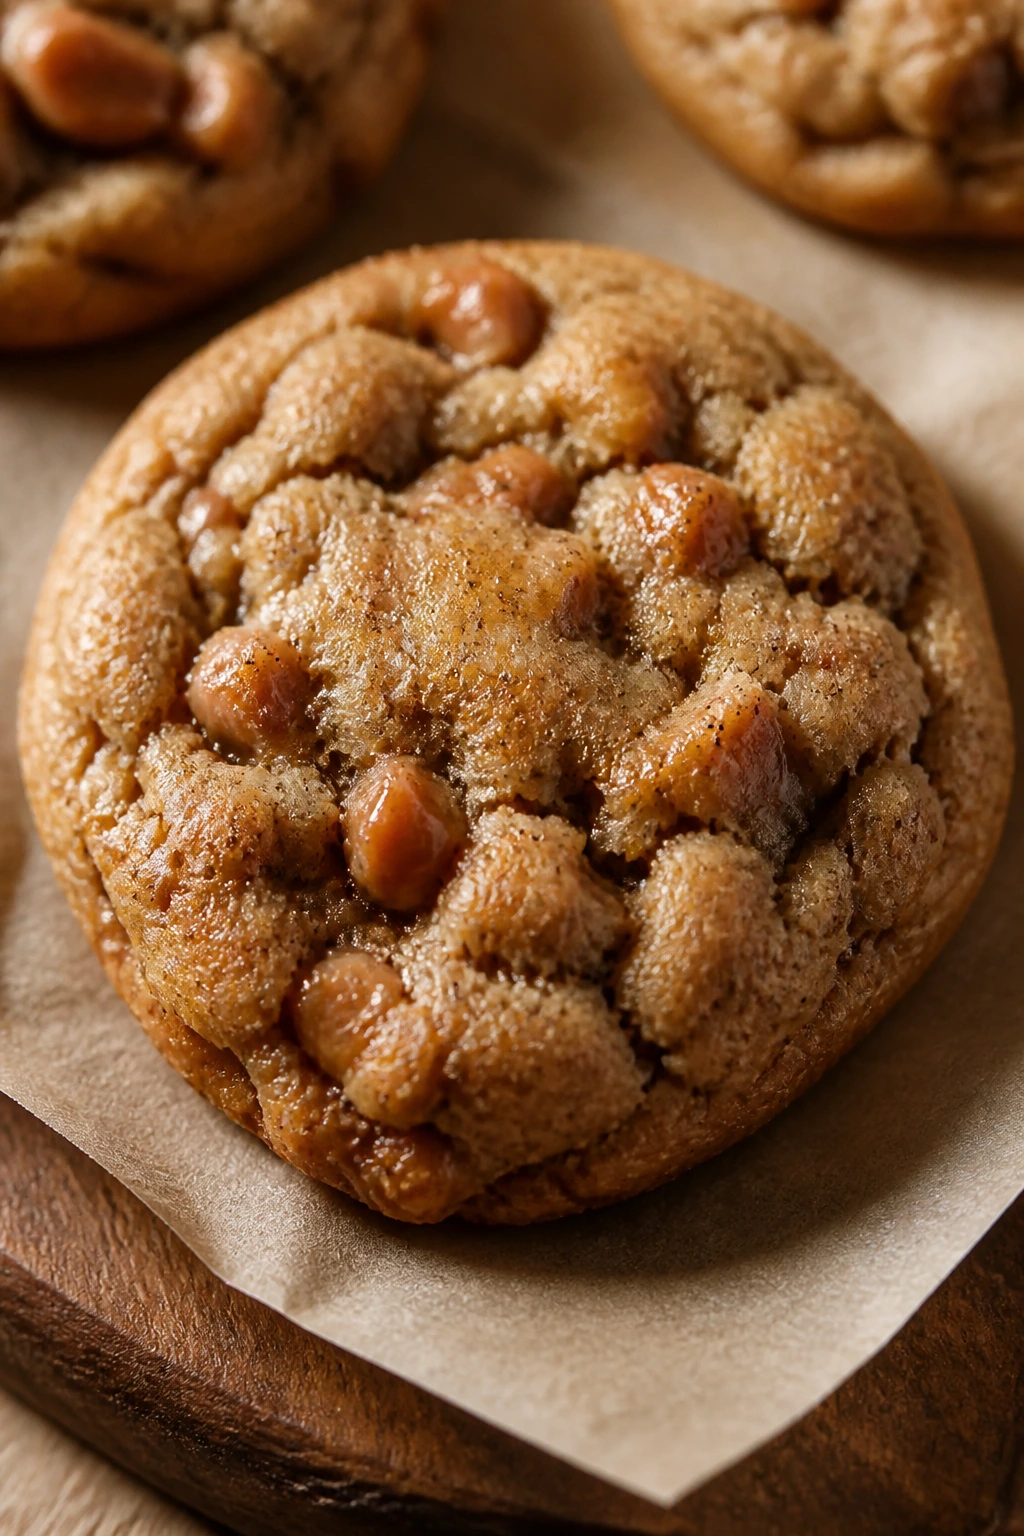
Brown butter toffee cookies smell like toasted nuts before they even leave the bowl. They’ve got a deeper flavor than a standard butter cookie, but the method is still simple enough for a first-timer with a little extra attention.
Why It Works:
Brown butter gives the dough a nutty, almost caramel edge without adding another ingredient. Toffee bits melt slightly in the oven and create little sweet pockets, while brown sugar keeps the centers chewy. The only real skill here is letting the butter cool before you mix it in, because hot browned butter can scramble the eggs.
Key Ingredients:
- 1 cup unsalted butter, browned and cooled slightly — brings the nutty flavor.
- 1 cup packed light brown sugar — keeps the cookies soft.
- 1/2 cup granulated sugar — helps with structure and spread.
- 2 large eggs — bind the dough.
- 2 teaspoons vanilla extract — smooths the toffee flavor.
- 2 1/4 cups all-purpose flour — gives the cookies their shape.
- 1 teaspoon baking soda — for rise.
- 1/2 teaspoon fine sea salt — balances the brown butter.
- 1 cup toffee bits — the crunchy sweet pieces.
- 1/2 cup chopped pecans, optional — for a deeper, toasty finish.
Quick Steps:
- Brown the butter in a light-colored pan over medium heat, swirling often, until the milk solids turn amber and it smells nutty. Cool for 15 minutes.
- Preheat the oven to 350°F (175°C) and line baking sheets with parchment.
- Stir the cooled browned butter with the sugars, then mix in the eggs and vanilla.
- Add the flour, baking soda, and salt, and stir until the dough comes together.
- Fold in the toffee bits and pecans, if using. Chill the dough for 20 minutes if it feels soft.
- Scoop tablespoons of dough and bake for 10 to 12 minutes, until the edges are golden and the centers still look a little soft.
Equipment for This Recipe:
- Light-colored saucepan — helps you see the butter turn brown.
- Mixing bowl — for the dough.
- Baking sheets — lined and ready.
- Spatula — for folding in the toffee.
How to Serve This Dish:
These are strong with coffee and even better with vanilla ice cream if you want a quick dessert plate. A small sprinkle of flaky salt on top makes the toffee taste sharper.
Pro Tips for This Recipe:
- Use a light pan for browning so you can see the color change.
- Cool the butter before adding eggs, or you risk curdling the mixture.
- A 20-minute chill makes the cookies thicker and less greasy.
Variations on This Dish:
- Chocolate Toffee Cookies: Add 1 cup chocolate chips along with the toffee bits.
- Pretzel Toffee Cookies: Fold in 1/2 cup broken pretzels for a salty crunch.
- Pecan Toffee Batch: Increase the pecans to 3/4 cup if you want more nuttiness.
Common Mistakes to Avoid with This Dish:
- Burning the butter solids: Brown is the target; black is a bitter problem.
- Mixing in the eggs while the butter is still hot: That can scramble the batter.
- Overloading with add-ins: Too many mix-ins can stop the cookies from spreading correctly.
15. Oatmeal Chocolate Chip Cookies
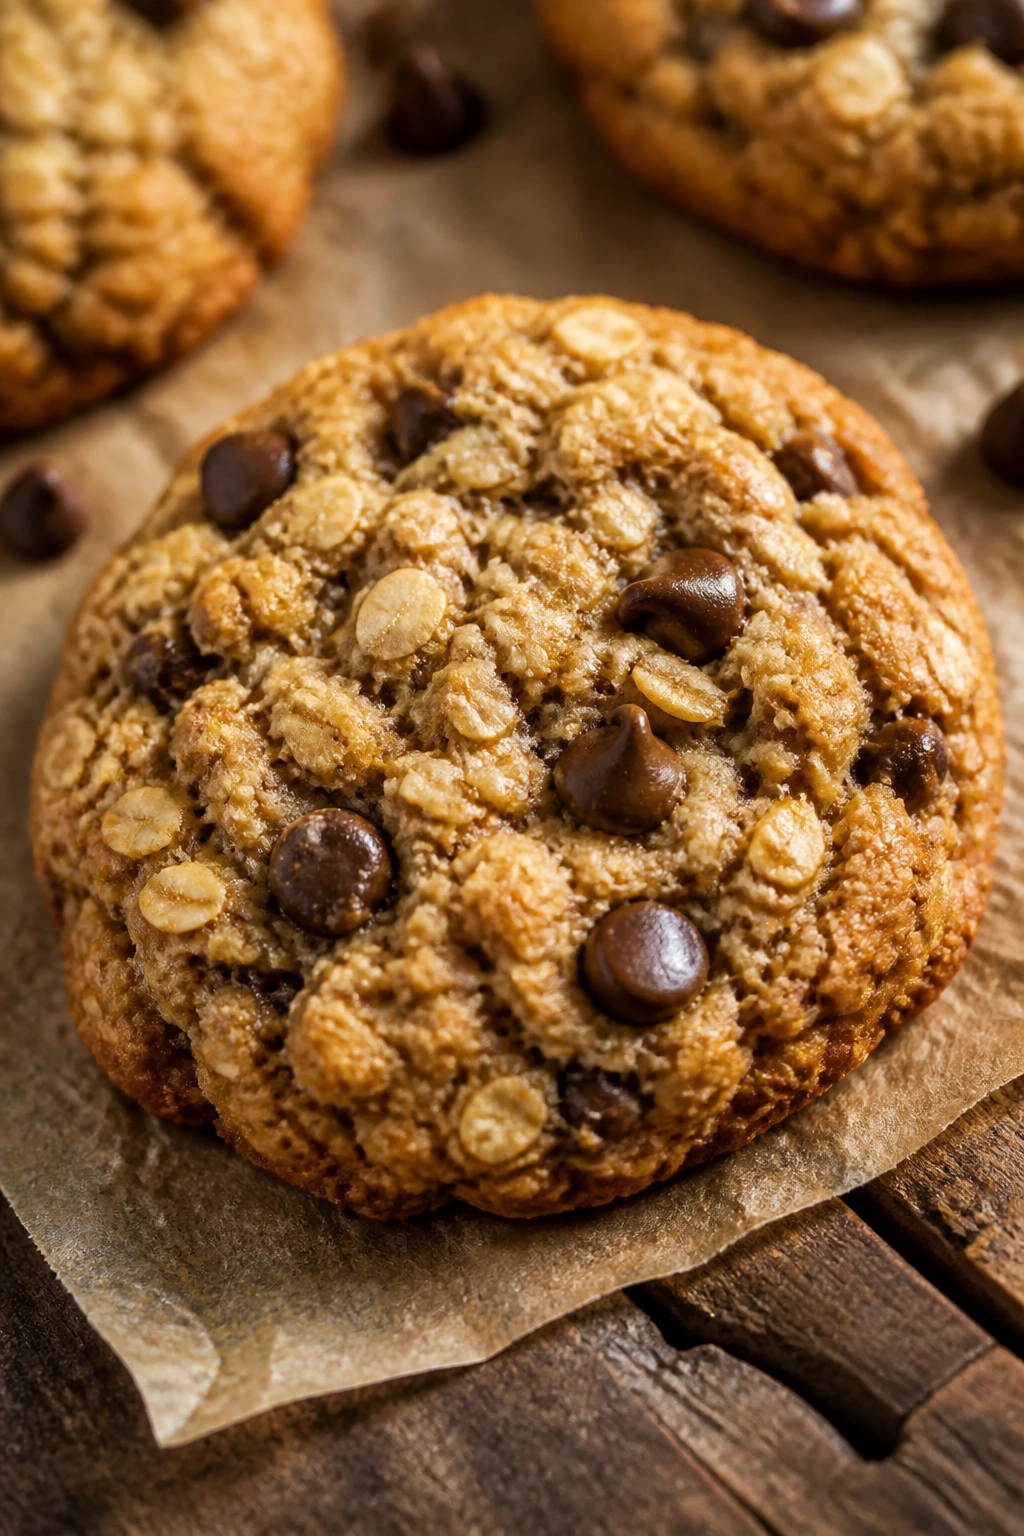
Oatmeal chocolate chip cookies are chewier than classic chocolate chip and less sweet, which is exactly why I like them. They feel a little heartier, a little more grounded, and somehow less likely to disappear from the tray in one sitting.
Why It Works:
The oats bring a substantial chew without making the cookie heavy. Brown sugar and cinnamon soften the flavor so the chocolate chips don’t taste isolated inside the dough. This recipe is also forgiving because oats absorb moisture slowly, which gives you a little more wiggle room with mixing.
Key Ingredients:
- 3/4 cup unsalted butter, softened — richness and spread.
- 1 cup packed light brown sugar — gives chew and moisture.
- 1/2 cup granulated sugar — adds a touch of crispness.
- 2 large eggs — bind the dough.
- 1 teaspoon vanilla extract — rounds the flavor.
- 1 1/4 cups all-purpose flour — keeps the cookies together.
- 1 teaspoon baking soda — helps the cookies rise.
- 1 teaspoon ground cinnamon — a warm background note.
- 1/2 teaspoon fine sea salt — balances the sweetness.
- 2 1/2 cups old-fashioned rolled oats — the chewy core.
- 1 1/2 cups chocolate chips — the sweet pockets.
Quick Steps:
- Preheat the oven to 350°F (175°C) and line baking sheets with parchment.
- Cream the butter and sugars for about 2 minutes until the mixture looks soft and a little fluffy.
- Beat in the eggs and vanilla.
- Stir in the flour, baking soda, cinnamon, and salt, then fold in the oats and chocolate chips.
- Scoop 2-tablespoon mounds 2 inches apart and bake for 10 to 12 minutes, until the edges are set and the centers still look tender.
- Let them cool on the sheet for 5 minutes before moving to a rack.
Equipment for This Recipe:
- Mixing bowl — plenty of room for oats.
- Cookie scoop — helps the dense dough portion evenly.
- Baking sheet — parchment-lined.
- Spatula — for folding in the oats without smashing them.
How to Serve This Dish:
These work well beside coffee, cold milk, or tucked into a bag for later. On a tray, they look nice mixed with plain chocolate chip cookies so the texture difference shows up right away.
Pro Tips for This Recipe:
- Use rolled oats, not instant oats, or the chew disappears.
- If the dough feels stiff, let it sit for 10 minutes so the oats hydrate a bit.
- A few extra chips pressed into the top make the cookies look fuller after baking.
Variations on This Dish:
- Raisin Swap: Replace the chocolate chips with raisins for a more classic oatmeal cookie.
- Coconut Oatmeal Cookies: Add 1/2 cup shredded coconut for a little sweetness and texture.
- Walnut Chocolate Batch: Fold in 1/2 cup chopped walnuts for a deeper crunch.
Common Mistakes to Avoid with This Dish:
- Using quick oats if you want chew: The texture gets softer and less defined.
- Undermeasuring the flour: Too little flour makes the cookies spread too much under the oats.
- Baking until the center looks dry: These cookies finish setting on the tray.
16. Funfetti Sprinkle Cookies
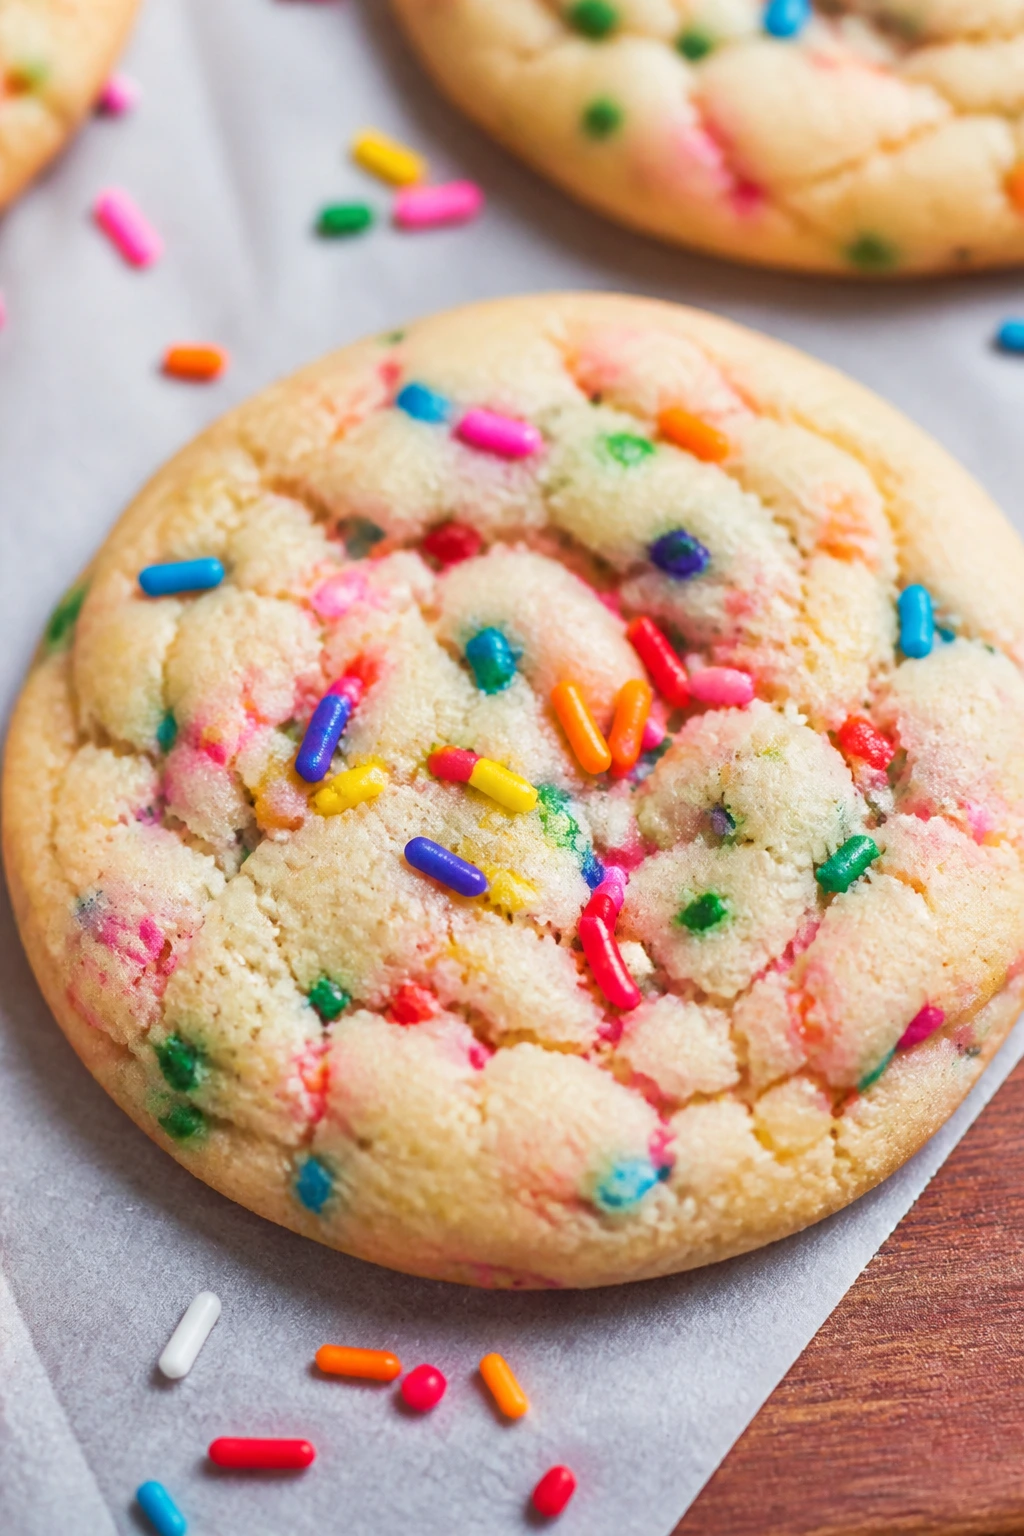
Funfetti cookies are built for sprinkles that stay bright in the oven. They’re soft, cheerful, and simple enough that the main job is choosing the right kind of sprinkle, which is oddly satisfying.
Why It Works:
A basic butter cookie dough carries the sprinkles without turning them into hard pebbles. Jimmies hold their color far better than tiny round nonpareils, so the finished cookie still looks festive after baking. A little almond extract adds a bakery-style note, but vanilla alone works fine if you want the flavor to stay simple.
Key Ingredients:
- 1/2 cup (1 stick) unsalted butter, softened — gives the cookie tenderness.
- 3/4 cup granulated sugar — keeps the sweetness clean.
- 1 large egg — binds the dough.
- 1 teaspoon vanilla extract — the main flavor.
- 1/2 teaspoon almond extract, optional — adds a birthday-cake note.
- 1 1/2 cups all-purpose flour — holds the cookie together.
- 1/2 teaspoon baking powder — gives gentle lift.
- 1/4 teaspoon baking soda — helps with spread.
- 1/4 teaspoon fine sea salt — balances the sugar.
- 1/3 cup rainbow jimmies, plus more for topping — the color.
Quick Steps:
- Preheat the oven to 350°F (175°C) and line a baking sheet with parchment.
- Cream the butter and sugar until fluffy, then beat in the egg, vanilla, and almond extract if you’re using it.
- Stir in the flour, baking powder, baking soda, and salt.
- Fold in the sprinkles gently. Stop as soon as they’re distributed; overmixing can smear the colors.
- Scoop dough into tablespoon-size balls and press a few extra sprinkles on top.
- Bake for 9 to 11 minutes, until the edges are set and the centers still look soft. Cool for 5 minutes on the sheet.
Equipment for This Recipe:
- Mixing bowl — standard size.
- Cookie scoop — keeps the cookies uniform.
- Baking sheet — lined with parchment.
- Spatula — for the last gentle fold.
How to Serve This Dish:
These belong on a bright plate or in a little paper-lined box if you’re handing them out. They’re a natural fit for milk, hot chocolate, or a birthday table where the rest of the dessert needs a burst of color.
Pro Tips for This Recipe:
- Use jimmies, not nonpareils, if you want the colors to stay crisp.
- Add the sprinkles at the end so they don’t streak through the dough.
- A few extra sprinkles pressed into the tops before baking help them look finished.
Variations on This Dish:
- Chocolate Funfetti Cookies: Add 2 tablespoons cocoa powder for a light chocolate base.
- Lemon Funfetti Cookies: Swap almond extract for lemon zest.
- Birthday Cake Version: Use vanilla bean paste and extra jimmies for a stronger cake flavor.
Common Mistakes to Avoid with This Dish:
- Using the wrong sprinkles: Nonpareils can bleed into the dough and turn dull.
- Overmixing after the sprinkles go in: That turns the colors muddy.
- Baking too long: These should stay pale and soft, not browned.
17. Gingerbread Cutout Cookies
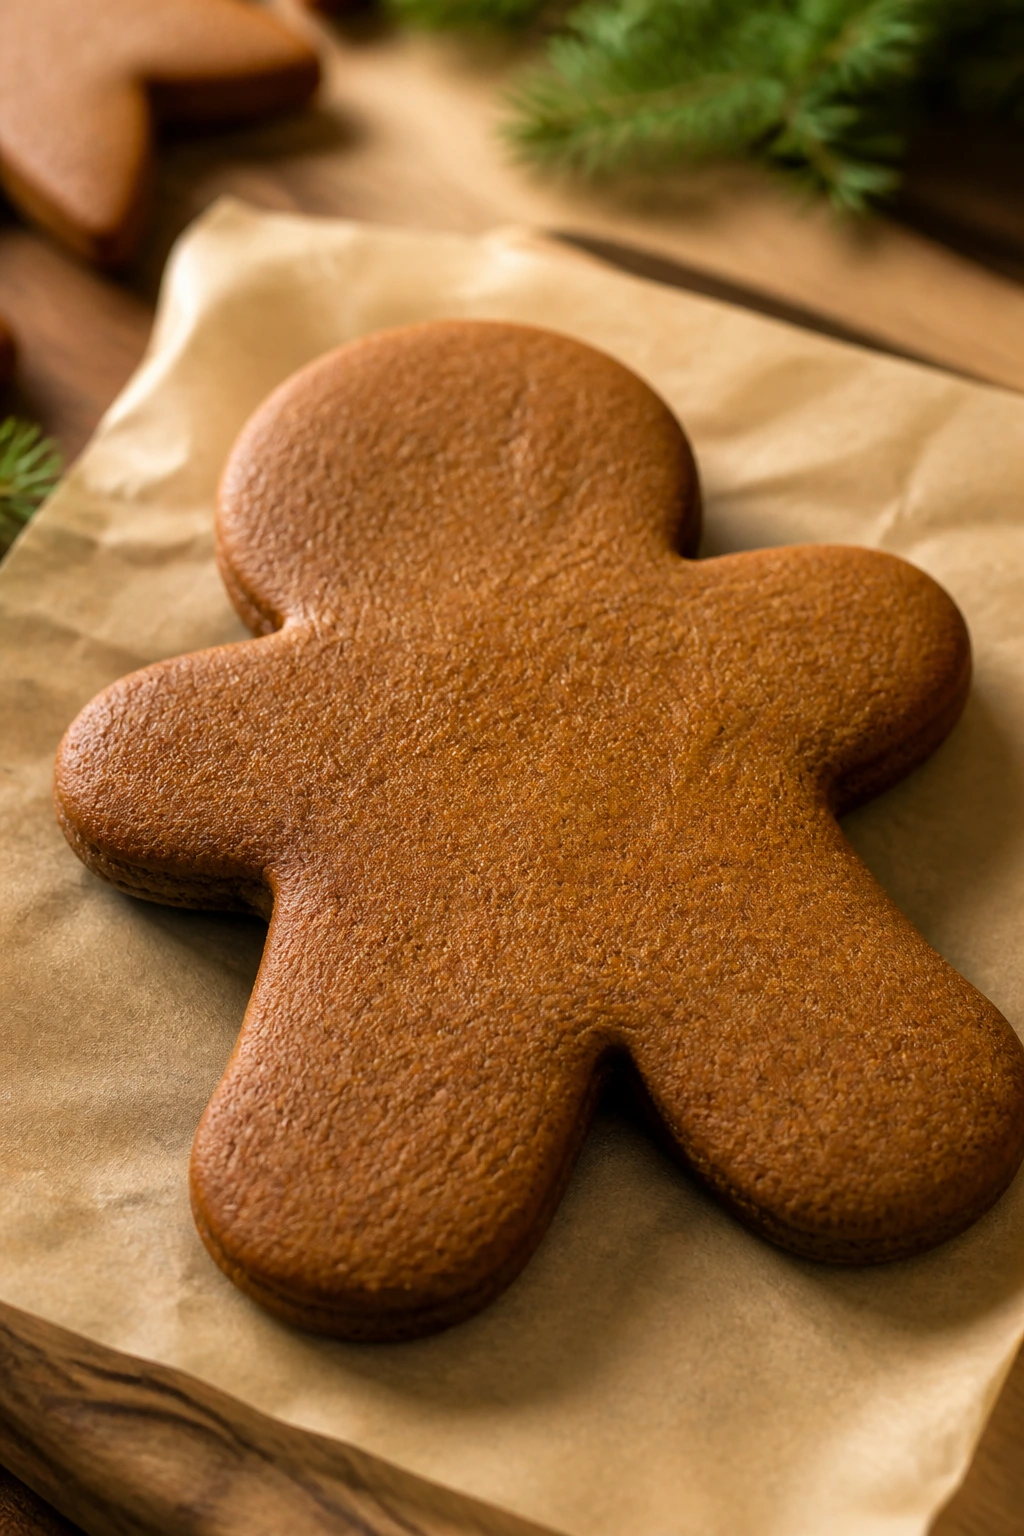
Gingerbread cutouts are the one place where patience earns you a clean edge. The dough smells dark and spicy even before it chills, and the finished cookies have enough structure to decorate without snapping in half.
Why It Works:
Molasses gives gingerbread its color and chew, while the spice mix creates the flavor people expect from the first bite. Chilling the dough matters more here than almost anywhere else in the list; it makes the dough easier to roll and helps the cut shapes stay sharp. If you want a first cutout cookie that behaves, this is the one.
Key Ingredients:
- 3/4 cup unsalted butter, softened — provides richness.
- 3/4 cup packed light brown sugar — for sweetness and chew.
- 1/2 cup unsulfured molasses — the defining flavor.
- 1 large egg — binds the dough.
- 3 cups all-purpose flour — enough to roll and cut.
- 2 teaspoons ground ginger — the main spice.
- 1 teaspoon ground cinnamon — rounds the flavor.
- 1/2 teaspoon ground cloves — use sparingly.
- 1 teaspoon baking soda — helps the cookies rise a little.
- 1/2 teaspoon fine sea salt — keeps the spices bright.
Quick Steps:
- Cream the butter and brown sugar until smooth, then beat in the molasses and egg.
- Stir in the flour, ginger, cinnamon, cloves, baking soda, and salt until the dough forms.
- Divide the dough in half, flatten each piece into a disk, wrap, and chill for at least 1 hour. Do not skip this; warm gingerbread is sticky and impossible to cut cleanly.
- Preheat the oven to 350°F (175°C) and line baking sheets with parchment.
- Roll the dough to 1/4-inch thickness on a lightly floured surface, cut shapes, and place them 1 inch apart.
- Bake for 8 to 10 minutes, until the edges are firm and the centers no longer look wet. Cool completely before icing.
Equipment for This Recipe:
- Rolling pin — essential for even thickness.
- Cookie cutters — any simple shapes work.
- Plastic wrap — for chilling the dough disks.
- Baking sheets — lined with parchment.
How to Serve This Dish:
These are best on a tray with royal icing, simple glaze, or left plain and dunked in hot cocoa. They also pack well in tins if you want to give a batch away.
Pro Tips for This Recipe:
- Roll the dough between two sheets of parchment if your counter gets sticky.
- Chill the cut shapes for 10 minutes before baking if they’ve warmed up.
- Keep the spices modest if you want a softer, more balanced flavor.
Variations on This Dish:
- Orange-Spice Gingerbread: Add 1 tablespoon orange zest for brightness.
- Iced Gingerbread Sandwiches: Sandwich two cookies with cream cheese frosting.
- Simple Glazed Version: Skip royal icing and brush cooled cookies with a thin sugar glaze.
Common Mistakes to Avoid with This Dish:
- Not chilling long enough: The dough spreads and the shapes blur.
- Rolling too thick: The centers stay soft while the edges overbake.
- Using too much flour when rolling: That makes the dough dry and the cookies taste dusty.
18. Slice-and-Bake Cranberry Pistachio Cookies
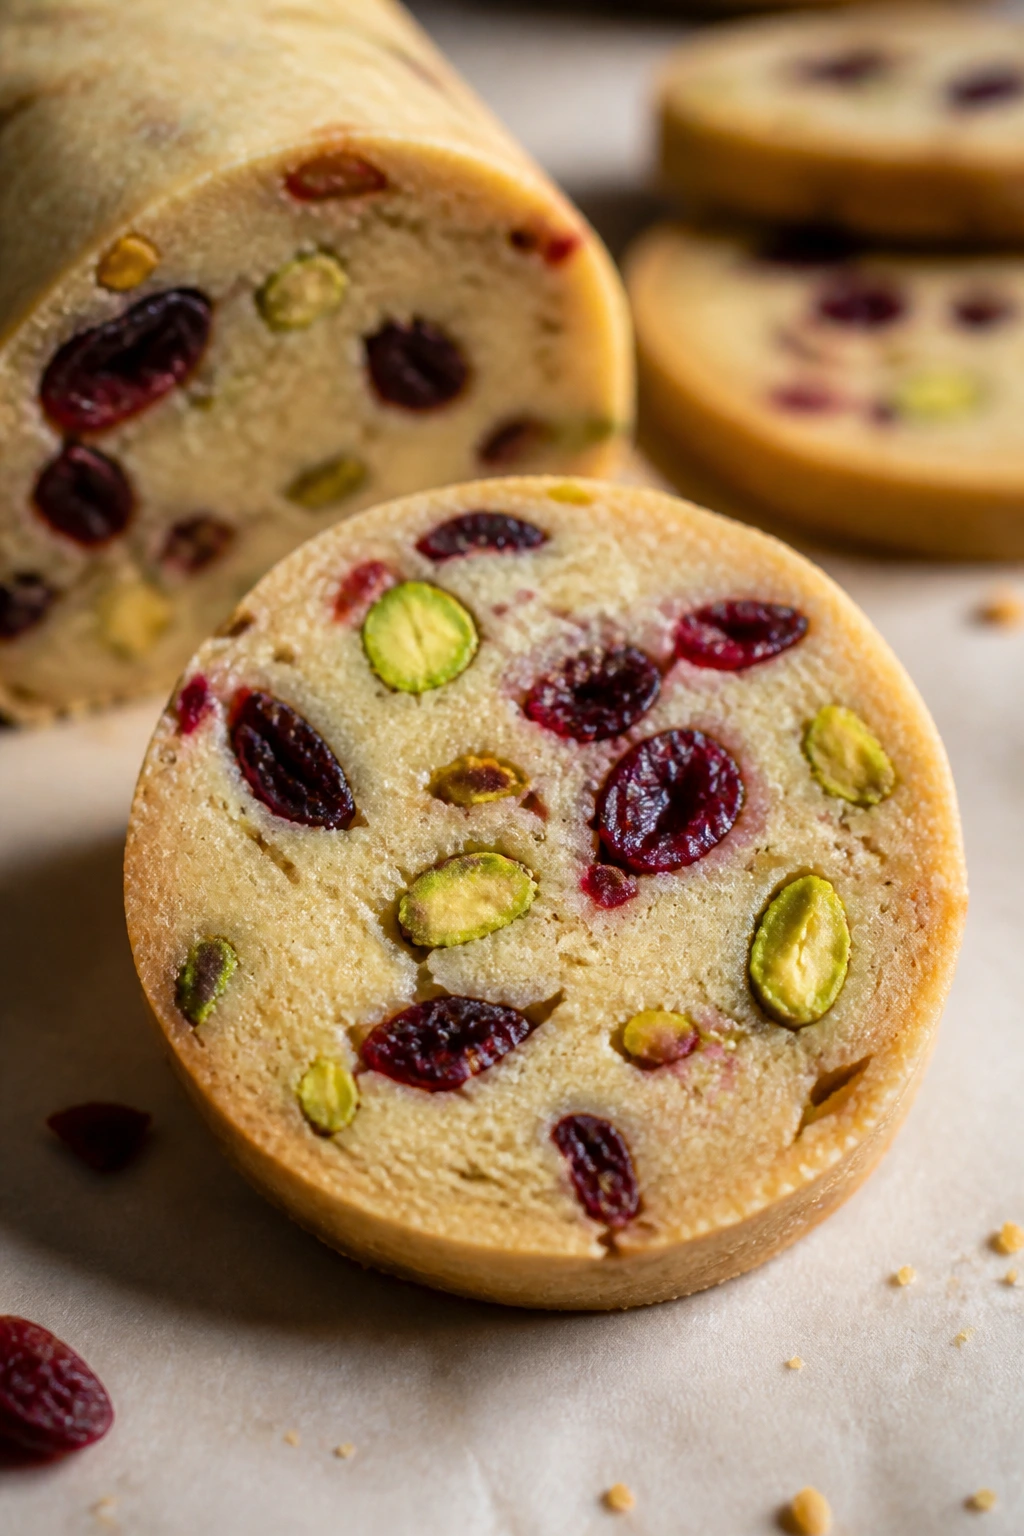
Slice-and-bake cranberry pistachio cookies let the fridge do the shaping for you. The dough bakes into neat rounds with red and green bits running through the center, which makes them look more deliberate than the effort they ask for.
Why It Works:
The dough is firm enough to hold a log shape after chilling, and that makes the slices uniform with almost no fuss. Dried cranberries add chew, pistachios add crunch, and orange zest brightens the whole batch so it doesn’t taste heavy. This is a smart beginner cookie because the hard part is waiting for the dough to chill.
Key Ingredients:
- 1 cup (2 sticks) unsalted butter, softened — the base of the dough.
- 3/4 cup granulated sugar — keeps the cookie light.
- 1 large egg — binds the dough.
- 1 teaspoon vanilla extract — gives warmth.
- 1 teaspoon orange zest — brightens the fruit and nut flavors.
- 2 1/4 cups all-purpose flour — holds the sliceable dough together.
- 1/2 teaspoon baking powder — adds slight lift.
- 1/2 teaspoon fine sea salt — balances the sweetness.
- 3/4 cup dried cranberries — chewy and tart.
- 3/4 cup chopped pistachios — crunchy and green.
Quick Steps:
- Cream the butter and sugar until smooth, then beat in the egg, vanilla, and orange zest.
- Stir in the flour, baking powder, and salt until the dough forms, then fold in the cranberries and pistachios.
- Shape the dough into a 2-inch log, wrap it tightly in parchment or plastic wrap, and chill for at least 2 hours. A firm log slices cleanly; a soft log smears.
- Preheat the oven to 350°F (175°C) and line baking sheets with parchment.
- Slice the log into 1/4-inch rounds and place them 2 inches apart.
- Bake for 10 to 12 minutes, until the edges are lightly golden. Cool on the sheet for 5 minutes.
Equipment for This Recipe:
- Mixing bowl — for the dough.
- Plastic wrap or parchment — for shaping the log.
- Sharp knife — for clean slices.
- Baking sheet — lined and ready.
How to Serve This Dish:
These look especially nice on a holiday plate or beside a fruit bowl because the cranberries and pistachios already bring color. They’re good with tea, coffee, or a mild white hot chocolate if you want a softer pairing.
Pro Tips for This Recipe:
- If the dough crumbles while shaping, press it together firmly with your hands before chilling.
- Rotate the log halfway through chilling if one side flattens in the fridge.
- Use a serrated knife if your pistachios are large and the slices drag.
Variations on This Dish:
- Cherry Almond Slice-and-Bakes: Swap the cranberries for dried cherries and use almond extract.
- Chocolate Pistachio Cookies: Add 1/3 cup mini chocolate chips for a richer version.
- White Chocolate Cranberry Cookies: Fold in white chocolate chips instead of pistachios.
Common Mistakes to Avoid with This Dish:
- Trying to slice a warm log: The rounds smear and lose shape.
- Using oversized fruit chunks: Big pieces tear the dough apart as you slice.
- Baking until browned: Slice-and-bake cookies are better pale gold than deep brown.
Why Cookies Are the Easiest Way Into Baking

Cookies are forgiving in a way cakes and pies usually aren’t. The portions are small, the bakes are short, and most of the clues are sensory: the smell changes, the edges color, the center sets. If you miss the perfect minute by a little, you usually still get something worth eating.
That’s a rare kind of mercy in baking. A novice baker can learn what soft butter feels like, what overmixed dough looks like, and how quickly sugar browns on a hot sheet pan. Those lessons stick. They matter later when you move on to scones, layer cakes, or pie dough, because cookie dough has already taught your hands how to pay attention.
Essential Equipment for a First Cookie Batch
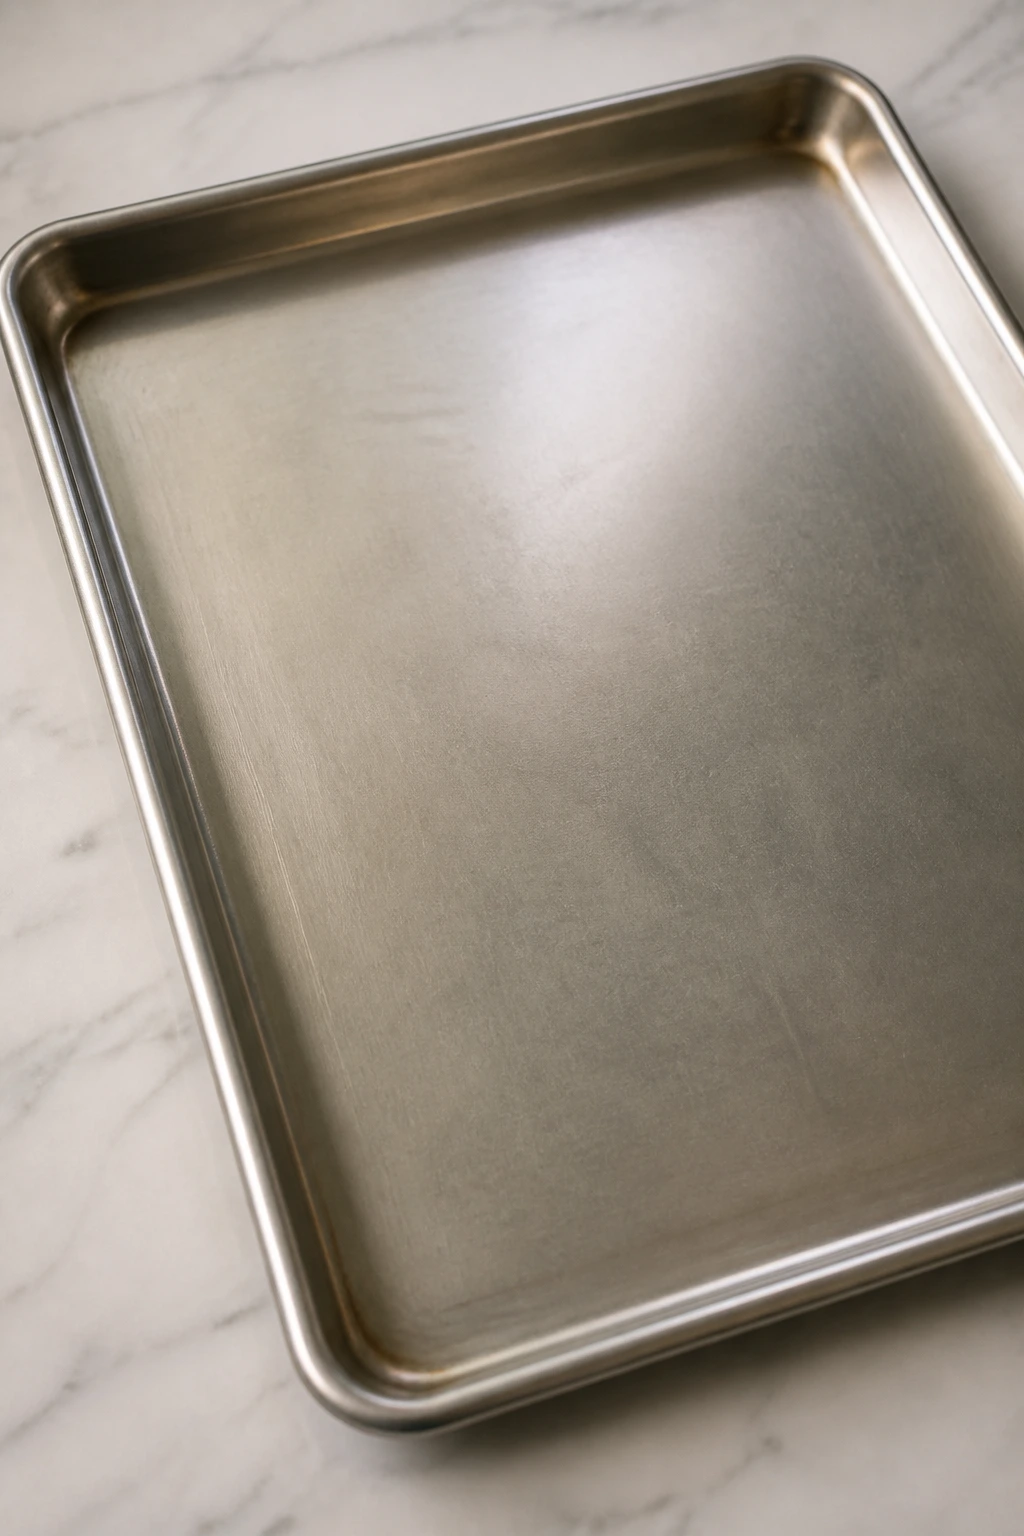
- Rimmed baking sheets: They keep dough from sliding and give you room for parchment.
- Parchment paper: This is the easiest way to avoid sticking and dark bottoms.
- Large mixing bowl: You want space to cream, stir, and fold without flinging flour onto the counter.
- Hand mixer or sturdy wooden spoon: Either works for most of these recipes, though a mixer speeds up creaming.
- Cookie scoop: A 1 1/2- to 2-tablespoon scoop keeps the cookies even, which means more predictable baking.
- Wire cooling rack: Cookies keep cooking on the hot pan; moving them to a rack stops that.
- Measuring cups and spoons: Cookie dough punishes sloppy measuring more than most people expect.
- Digital kitchen scale, optional but useful: If you want repeatable results, weighing flour is a quiet upgrade.
Smart Shopping for Flour, Butter, Chocolate, and Spices
Butter matters more than most people think. Buy unsalted butter if you can, because it lets you control the salt in the dough and keeps the flavor cleaner. If a recipe calls for softened butter, aim for the texture of a pressed thumbprint: cool enough to hold shape, soft enough to leave a dent without resistance.
Flour should be measured gently. Spoon it into the cup and level it off, or use a scale if you have one. Scooping straight from the bag packs the flour down and can turn a soft cookie into a dry one faster than you’d expect.
Chocolate chips are not all the same either. Semisweet chips give you balance in classic chocolate chip and double chocolate cookies, while mini chips spread more evenly through dense doughs like oatmeal or M&M batches. If you want pools of melted chocolate, chop a chocolate bar instead of relying only on chips.
For oats, buy old-fashioned rolled oats when the recipe asks for chew. Quick oats can work in no-bake cookies, but they make baked oatmeal cookies softer and less textured. For molasses cookies, use unsulfured molasses. Blackstrap can taste harsh unless you already know you like it.
Jam, sprinkles, and dried fruit deserve a little attention too. Thick preserves stay put in thumbprints. Jimmies hold color better than nonpareils in funfetti dough. Dried cranberries and raisins should smell clean and fruity, not dusty or stale. That sounds small. It isn’t.
How to Serve a Mixed Cookie Tray
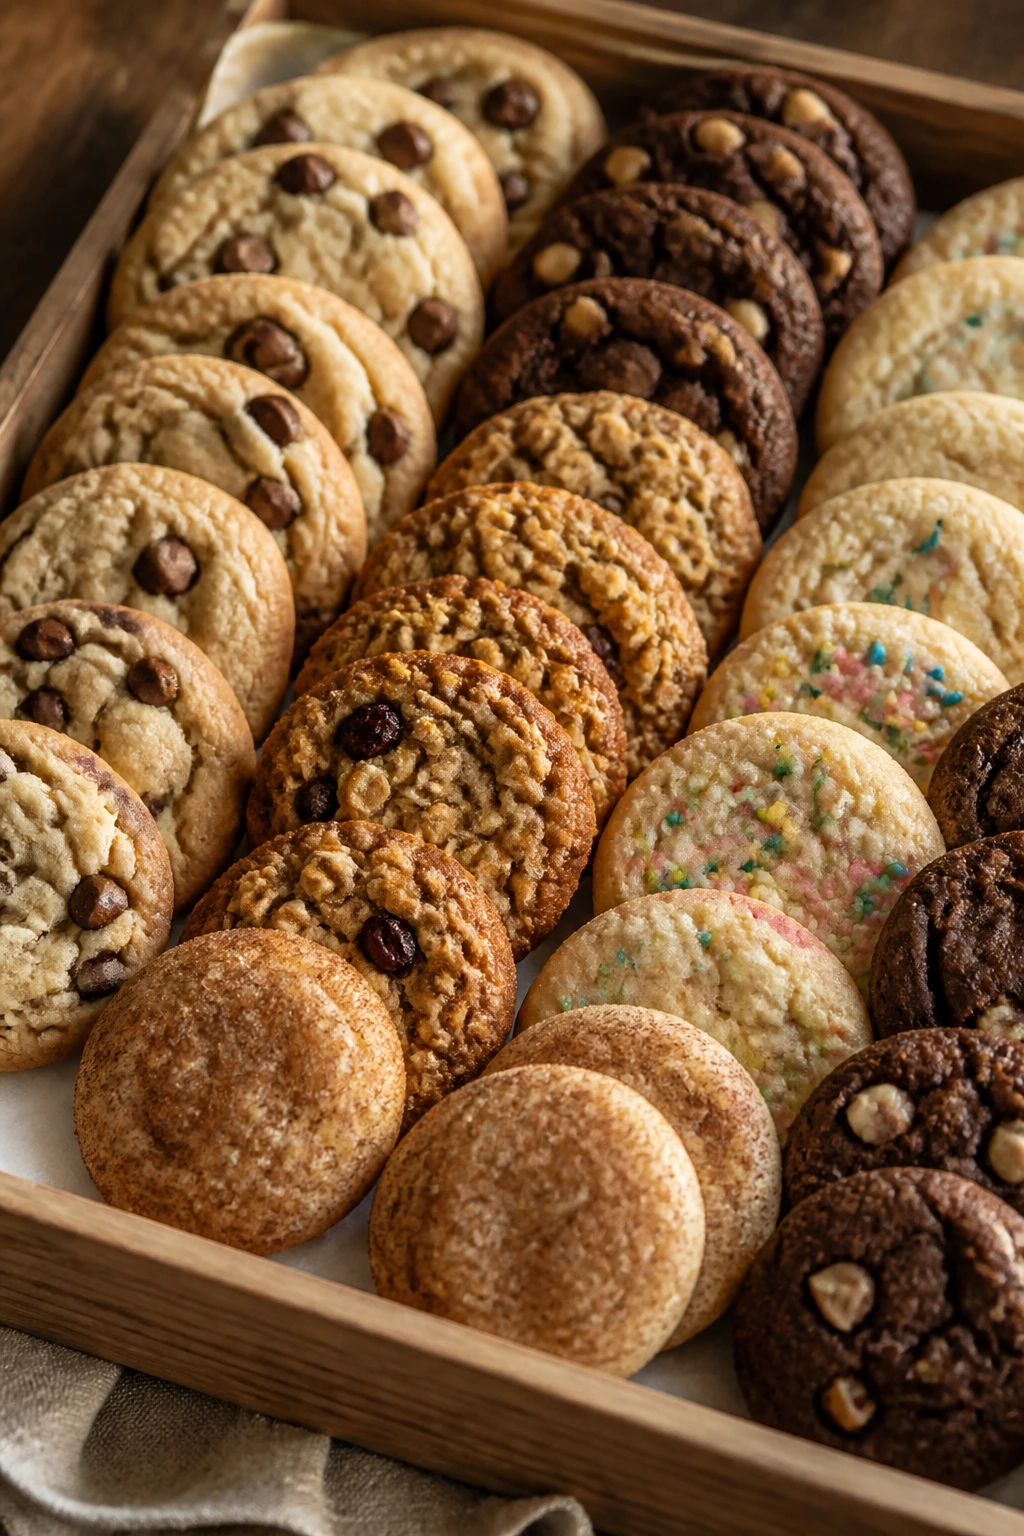
Presentation: Stack the cookies by size instead of by flavor and leave a little negative space on the plate. A simple white platter, a parchment-lined tin, or a wooden board all work better than a crowded pile. Warm cookies should go in the center and sturdier ones around the edge.
Accompaniments: Milk is still the anchor for chocolate chip, peanut butter, and M&M cookies, but coffee, tea, chai, and hot cocoa all have their place. Thumbprints sit well beside fresh berries. Shortbread and gingerbread feel right with a small scoop of whipped cream or a spoonful of jam on the side.
Portions: For a casual dessert tray, count on 2 to 3 cookies per person if there are other sweets around. If cookies are the main event, 4 to 5 smaller cookies is a better estimate. Bigger, richer cookies like brownie-style double chocolate or brown butter toffee may only need 1 or 2.
Beverage Pairing: Cold milk covers the classics. For the spiced cookies, chai or black tea works well. For lemon crinkles and jam thumbprints, a cup of Earl Grey or a simple iced tea keeps the plate from feeling too sweet.
Additional Tips and Flavor Boosters
Flavor Enhancement: A pinch of flaky salt on chocolate chip, toffee, or peanut butter cookies changes the whole bite. It sharpens the sweet parts and makes the flavor feel more complete. For butter-heavy cookies like shortbread, a little lemon zest or vanilla bean paste gives the dough more lift without complicating the method.
Customization: Swap semisweet chips for dark, milk, or white chocolate depending on how sweet you want the batch. Dried cherries can take the place of raisins in oatmeal cookies, and chopped walnuts can step into almost any dough that already leans chewy. If a recipe feels too plain, add citrus zest before you reach for another spice.
Serving Suggestions: Press a few extra chocolate chips, M&Ms, or pistachios into the tops of warm cookies before they cool. It makes the tray look finished without icing or fuss. A dusting of powdered sugar works well on lemon crinkles and shortbread, while a light drizzle of melted chocolate suits macaroons and thumbprints.
Make-It-Yours: For gluten-free baking, use a good 1:1 gluten-free flour blend in drop cookies and shortbread-style doughs. For dairy-free versions, use a plant butter with a similar fat content and skip recipes that rely on condensed milk unless you have a dairy-free substitute you already trust. If you want less sugar, start by trimming 2 to 3 tablespoons from the granulated sugar in most drop cookies rather than making a bigger cut.
Make-Ahead, Storage, and Reheating Guidance
Most baked cookies keep well in an airtight container at room temperature for 2 to 3 days. Chewy cookies like oatmeal raisin, snickerdoodles, ginger molasses, and chocolate chip often stay pleasant for up to 4 days if the kitchen is cool and dry. Crisp cookies such as shortbread and sugar cookies should be kept separately from softer ones so they do not pick up moisture and lose their snap.
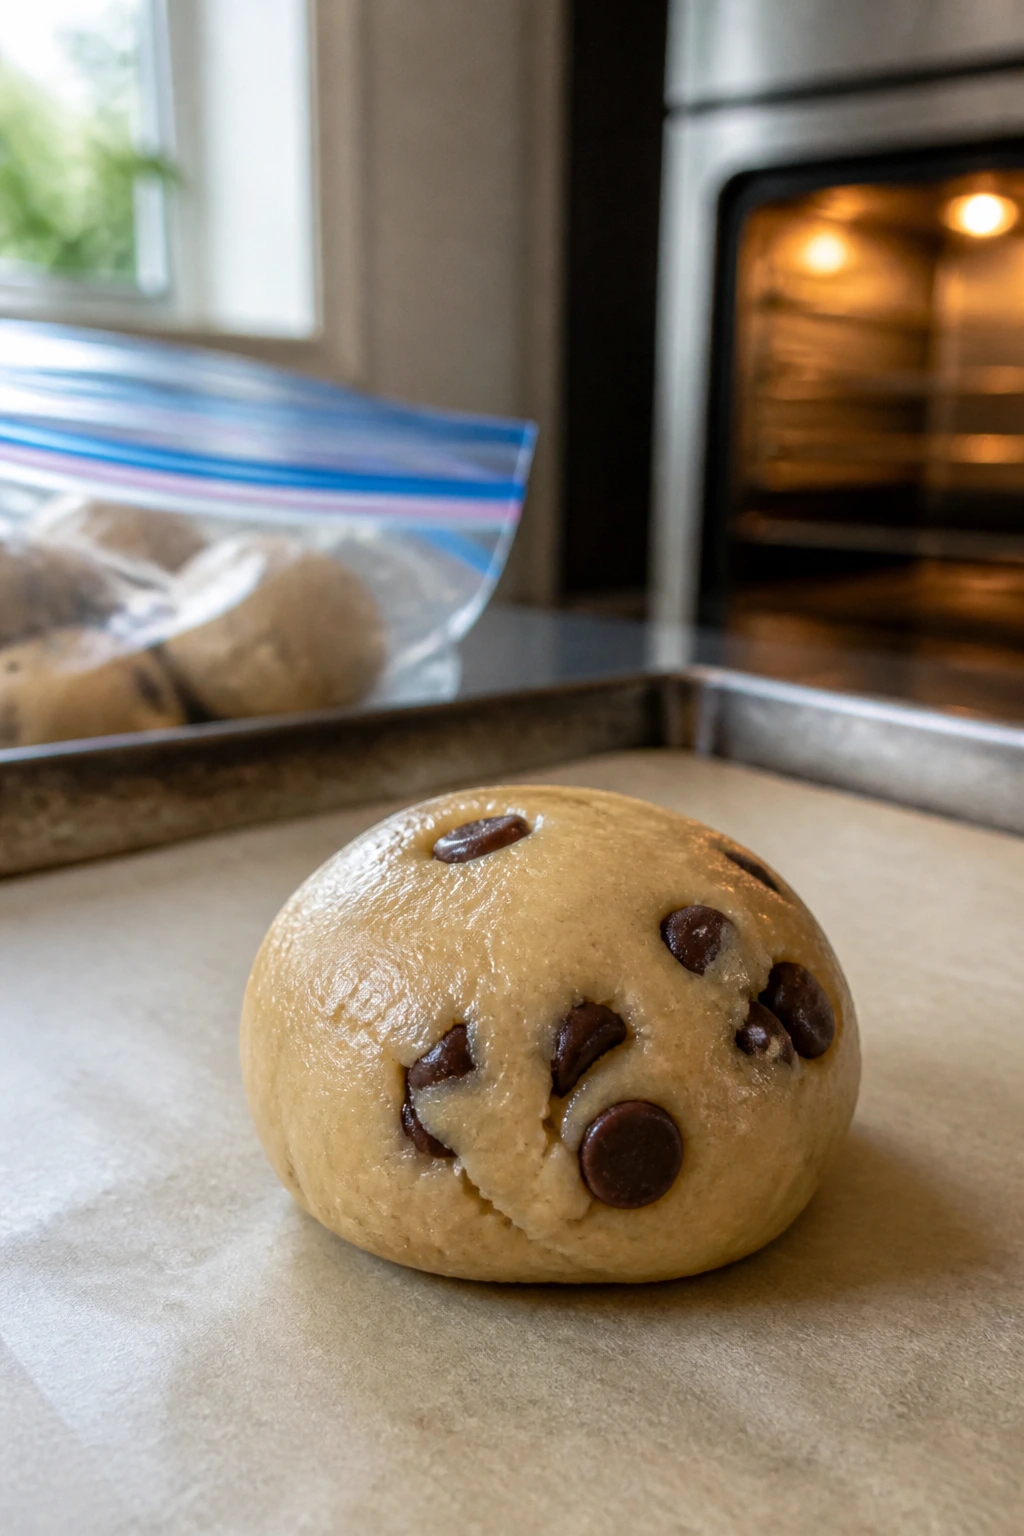
Cookie dough freezes well, and that’s one of the best beginner moves there is. Scoop drop-cookie dough into balls, freeze them on a tray until firm, then move them to a freezer bag for up to 2 months. Bake straight from frozen and add 1 to 3 minutes to the timer. Slice-and-bake logs also freeze well for 2 months; let them sit at room temperature for 10 to 15 minutes before slicing if the knife drags too hard.
No-bake cookies belong in the fridge, where they keep for about 1 week. Jam thumbprints, lemon crinkles, and any cookie with a soft filling or glaze are also better chilled if your kitchen is warm. For reheating, a 300°F (150°C) oven for 3 to 4 minutes wakes up crisp edges without drying the whole cookie. A microwave can soften a cookie in 8 to 10 seconds, but that trick works best when you plan to eat it immediately.
If you want to make ahead for a party, bake the sturdier cookies one day early and keep the delicate ones, like lemon crinkles or thumbprints, in their own container with parchment between layers. Different textures need different treatment. That part is annoying. It also saves the tray.
Variations and Adaptations to Try
Gluten-Free Pantry Swap:
Use a good 1:1 gluten-free flour blend in chocolate chip, peanut butter, snickerdoodle, and shortbread-style cookies. The dough may need a short rest before baking so the flour can hydrate. I would not force it into no-bake cookies, since those already have their own structure.
Dairy-Free Tray:
Plant-based butter can stand in for regular butter in most drop cookies, as long as you choose one with a solid fat content rather than a soft spread. Coconut macaroons are trickier because condensed milk does the binding, so look for a dairy-free version if you want to bake that style. Always chill the dough a little longer if the butter substitute feels softer than dairy butter.
Lower-Sugar Batch:
Trim the sugar in chocolate chip, oatmeal, or peanut butter cookies by a few tablespoons instead of making a large cut. The texture changes faster than people expect when sugar drops too far. For cookies that rely on powdered sugar coatings or jam fillings, keep the structure as written and change the portion size instead.
Kid-Decorator Cookies:
Sugar cookies, funfetti cookies, and thumbprints are the easiest to hand off to a child with a bowl of sprinkles or jam. The shapes are simple, and the decoration happens after the dough is already baked. That matters when you want the process to stay fun instead of frustrating.
Warm-Spice Turn:
If you like gingerbread and molasses cookies, you can pull that flavor into chocolate chip or oatmeal cookies with 1/2 teaspoon cinnamon and a pinch of ginger. It won’t turn the cookie into a spice cookie, but it adds a gentle warmth that reads well in the background. Use this sparingly or the dough gets muddy.
Nut-Forward Batch:
Pecans, walnuts, and pistachios all play different roles. Walnuts are earthy, pecans are sweeter and softer, and pistachios give you a cleaner, almost buttery crunch. If you add nuts to a dough, toast them first and let them cool before mixing them in.
Common Mistakes to Avoid
The most common problem is flour measurement. Packed flour makes dry, bland cookies, and it’s a sneaky mistake because the dough still looks “fine” in the bowl. Spoon and level, or weigh it if you want the cleanest result.
Butter temperature is the next trap. Too cold and it won’t cream properly; too warm and the cookies spread into greasy discs. You want softened butter that bends under pressure but still looks opaque, not glossy.
Baking by color alone can also wreck a good batch. A lot of beginner bakers wait until the whole cookie looks brown, and by then the center has gone past soft into dry. Pull the tray when the edges set and the middles still look slightly pale.
Overcrowding the pan causes pale bottoms and weird spreading. Cookies need space for heat to move around them, so give them at least 2 inches unless the recipe says otherwise. If you only have one baking sheet, let it cool before loading the next batch.
Skipping chill time is another one. It feels harmless, but warm dough spreads more and loses shape, especially in lemon crinkles, gingerbread, thumbprints, and anything with lots of butter. Even 15 minutes in the fridge can change the result.
Wrong mix-ins can throw off texture too. Use jimmies instead of nonpareils in funfetti cookies, rolled oats instead of instant oats in chewy oatmeal cookies, and thick jam instead of runny jelly in thumbprints. Small choices. Big difference.
Frequently Asked Questions
Which cookie recipe should a complete beginner make first?
Peanut butter cookies, classic chocolate chip cookies, and shortbread are the easiest starting points. They use familiar mixing methods and give clear visual cues when they’re done. If you want the least drama, start with peanut butter or shortbread.
Can I freeze cookie dough for later?
Yes, and you should. Scoop drop-cookie dough into balls, freeze them solid on a tray, then store them in a freezer bag for up to 2 months. Slice-and-bake logs also freeze well and can be sliced once they soften slightly.
Why did my cookies spread too much?
The usual culprits are butter that was too warm, too little flour, or a baking sheet that was still hot from the last batch. Chill the dough for 15 to 30 minutes and make sure the sheet cools between batches. If the recipe uses a soft dough, parchment helps too.
Can I use salted butter instead of unsalted butter?
Yes, but cut the added salt back a little. A good rule is to reduce the fine salt by about 1/4 teaspoon per stick of butter. That keeps the cookie from tasting salty at the edges.
How do I know when cookies are done?
Look at the edges first. If they’re set and lightly golden while the centers still look a little soft, the cookies are probably ready. They finish cooking on the hot tray after you pull them out.
Do I need a mixer for these recipes?
Not for all of them. Peanut butter cookies, no-bake cookies, and shortbread can be mixed by hand if the butter is soft enough. A mixer just makes the creaming step faster and a little lighter.
Can I use quick oats instead of old-fashioned oats?
You can in no-bake cookies, where quick oats help everything bind fast. For baked oatmeal cookies, rolled oats give a better chew and a more defined texture. Quick oats make the cookie softer and less textured.
What if my dough is too sticky to scoop?
Chill it first. Ten to twenty minutes in the fridge usually fixes the problem without changing the recipe. Adding more flour can make the cookies dry, so chilling is the safer move.
How do I keep cookies soft after baking?
Store them in an airtight container with a small piece of parchment between layers. For very soft cookies, keep a slice of plain bread in the container and replace it when it goes stale. That little trick works because the cookie steals moisture from the bread, not from the air.
A Tin Worth Refilling
A beginner baker does not need a complicated cookie to learn something useful. A good chocolate chip batch teaches timing. A sugar cookie teaches restraint. A gingerbread cutout teaches patience, which is annoying in the moment and useful for the rest of your life in the kitchen.
What matters most is that the tray tells you what happened. Once you can read that—too much spread, not enough color, a chewy center, a crisp edge—you stop guessing so hard. The recipes in this set give you enough variety to practice without feeling stuck in one lane, and that’s the real win.
Bake one batch, then bake the next one a little differently. That’s how the notebook starts filling up, and it’s how a cookie tin earns its keep.