
Hot afternoons do strange things to lunch. Anything soggy, too rich, or fussy starts feeling like work before you take the first bite, which is why a strong summer lunch lives or dies by texture: crisp lettuce, juicy tomatoes, cool noodles, grilled meat with a little char, and enough salt to wake everything up. A cold drink beside the plate isn’t decoration; it changes the meal. Lemonade sharpens herbs, iced tea reins in sweetness, and sparkling water keeps creamy fillings from sitting like a brick.
That’s the real trick with summer food. The best plates don’t fight the weather; they lean into it. They stay bright, portable, and forgiving if you eat them after the first rush of hunger has passed. A good lunch on a hot day should still taste good after ten minutes on the table, and it should taste even better after a sip from a sweating glass.
These 25 summer lunch ideas are built for exactly that kind of eating. Some are grilled, some are chilled, some are hand-held, and a few are the kind of thing I’d happily eat standing at the counter with one eye on the clock. All of them go down easier beside a cold drink.
Why These Lunches Work Beside a Cold Glass
Crunch matters: Crisp vegetables and toasted bread keep lunch from turning flat, especially when you’re sipping something cold and slightly sweet.
Acid does a lot of heavy lifting: Tomatoes, lemon, lime, vinegar, and pickles cut through mayo, cheese, and grilled meat so the whole plate feels lighter.
Room-temperature food has its place: A lot of these lunches taste better after a short rest, which makes them easier to pack for a picnic or a desk lunch.
Salt keeps cold drinks from tasting one-note: A little feta, bacon, olives, tuna, or halloumi makes lemonade and iced tea feel brighter, not heavier.
Grill marks help, even in small doses: A quick char on chicken, corn, peaches, or bread gives summer lunch that smoky edge you can’t fake with a cold skillet alone.
They travel well: Most of these recipes can be packed in pieces, which means the bread stays dry, the greens stay crisp, and the whole thing still looks like lunch instead of leftovers.
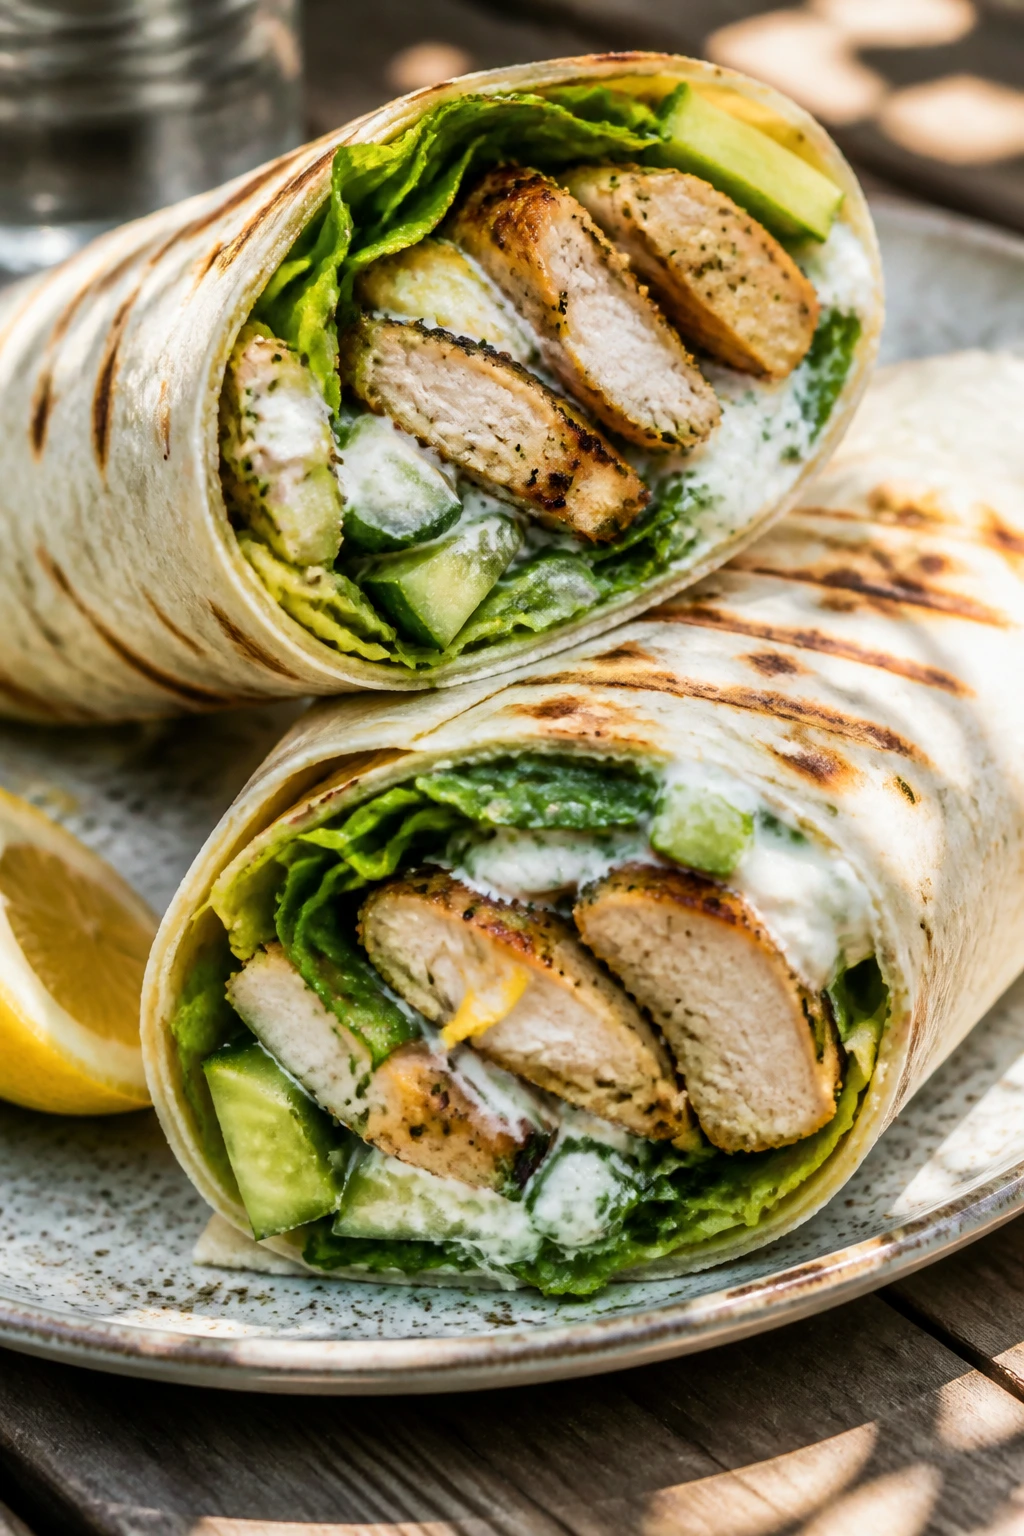
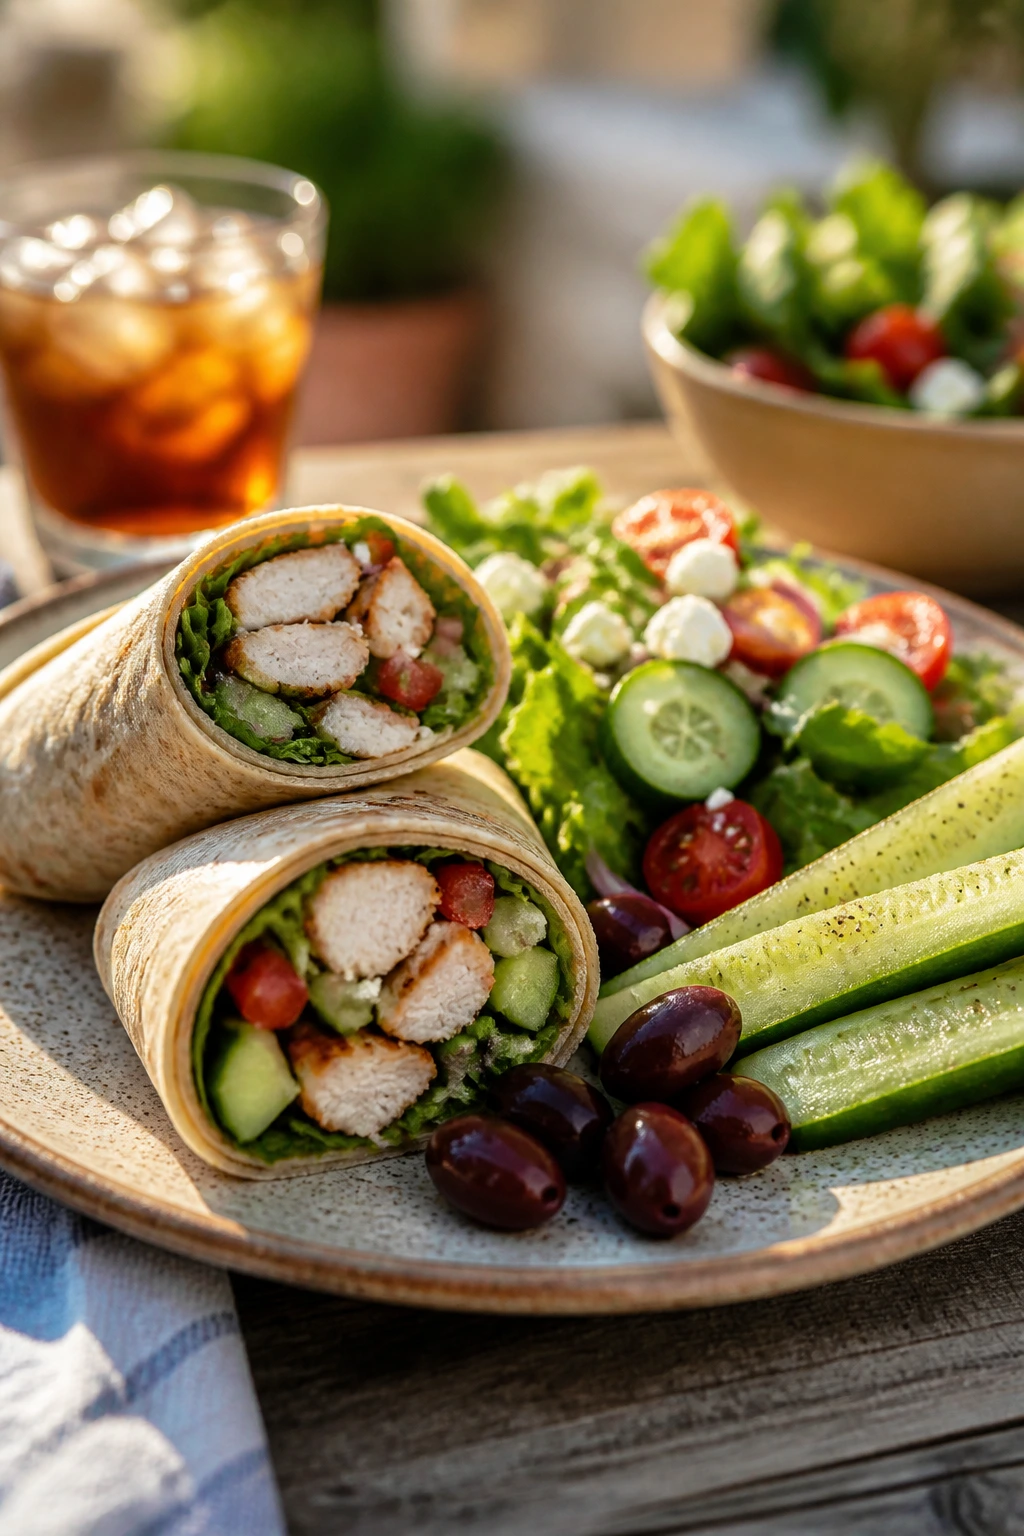
1. Lemon-Herb Grilled Chicken Wraps
Intro: The lemon hits first, then the smoke from the grill, then the cool bite of yogurt and lettuce. These wraps are the kind of lunch that feels tidy in your hands and bright on the plate, which is exactly what a hot day wants.
Why It Works: Thin chicken breasts grill fast, so you get browned edges before the meat dries out. The yogurt sauce brings chill and tang, while romaine and cucumber keep the wrap crisp even after a short wait. I like these with a glass of iced tea because the tea softens the lemon without muting it.
Key Ingredients:
- 1 1/2 pounds boneless, skinless chicken breasts, pounded to even thickness
- 2 tablespoons olive oil
- 1 lemon, zested and juiced
- 2 cloves garlic, grated
- 1 teaspoon dried oregano
- 1/2 teaspoon kosher salt
- 1/2 teaspoon black pepper
- 1/2 cup plain Greek yogurt
- 4 large flour tortillas
- 2 cups chopped romaine
- 1 cup diced cucumber
Quick Steps:
- Toss the chicken with olive oil, lemon, garlic, oregano, salt, and pepper. Marinate 15 to 30 minutes.
- Preheat a grill or grill pan over medium-high heat until hot and lightly smoking.
- Grill the chicken for 5 to 6 minutes per side, until the center reaches 165°F and the juices run clear.
- Rest the chicken for 5 minutes, then slice it thin.
- Stir the yogurt with a spoonful of lemon juice, then spread it on tortillas. Fill with chicken, romaine, and cucumber, then roll tightly.
Equipment for This Recipe:
- Grill or grill pan
- Sharp knife
- Cutting board
- Mixing bowl
How to Serve This Dish: Cut each wrap on a diagonal and stack the halves with a lemon wedge. Serve with kettle chips and a cold glass of mint iced tea.
Pro Tips for This Recipe:
- Pound the chicken to the same thickness so the thinner edges do not turn stringy.
- Warm the tortillas for 10 seconds in a dry skillet; they roll better and crack less.
- Salt the cucumber lightly and blot it dry if it’s especially watery.
Variations on This Dish:
- Greek-Style Swap: Add chopped dill, feta, and sliced red onion.
- Spicy Lunch Wrap: Mix a little harissa or hot sauce into the yogurt.
Common Mistakes to Avoid with This Dish:
- Skipping the rest: Slice too soon and the juices run straight into the cutting board.
- Overstuffing the wrap: It will split at the seam; keep the filling in a tight line down the center.
- Using cold tortillas straight from the bag: They tear. Warm them first.
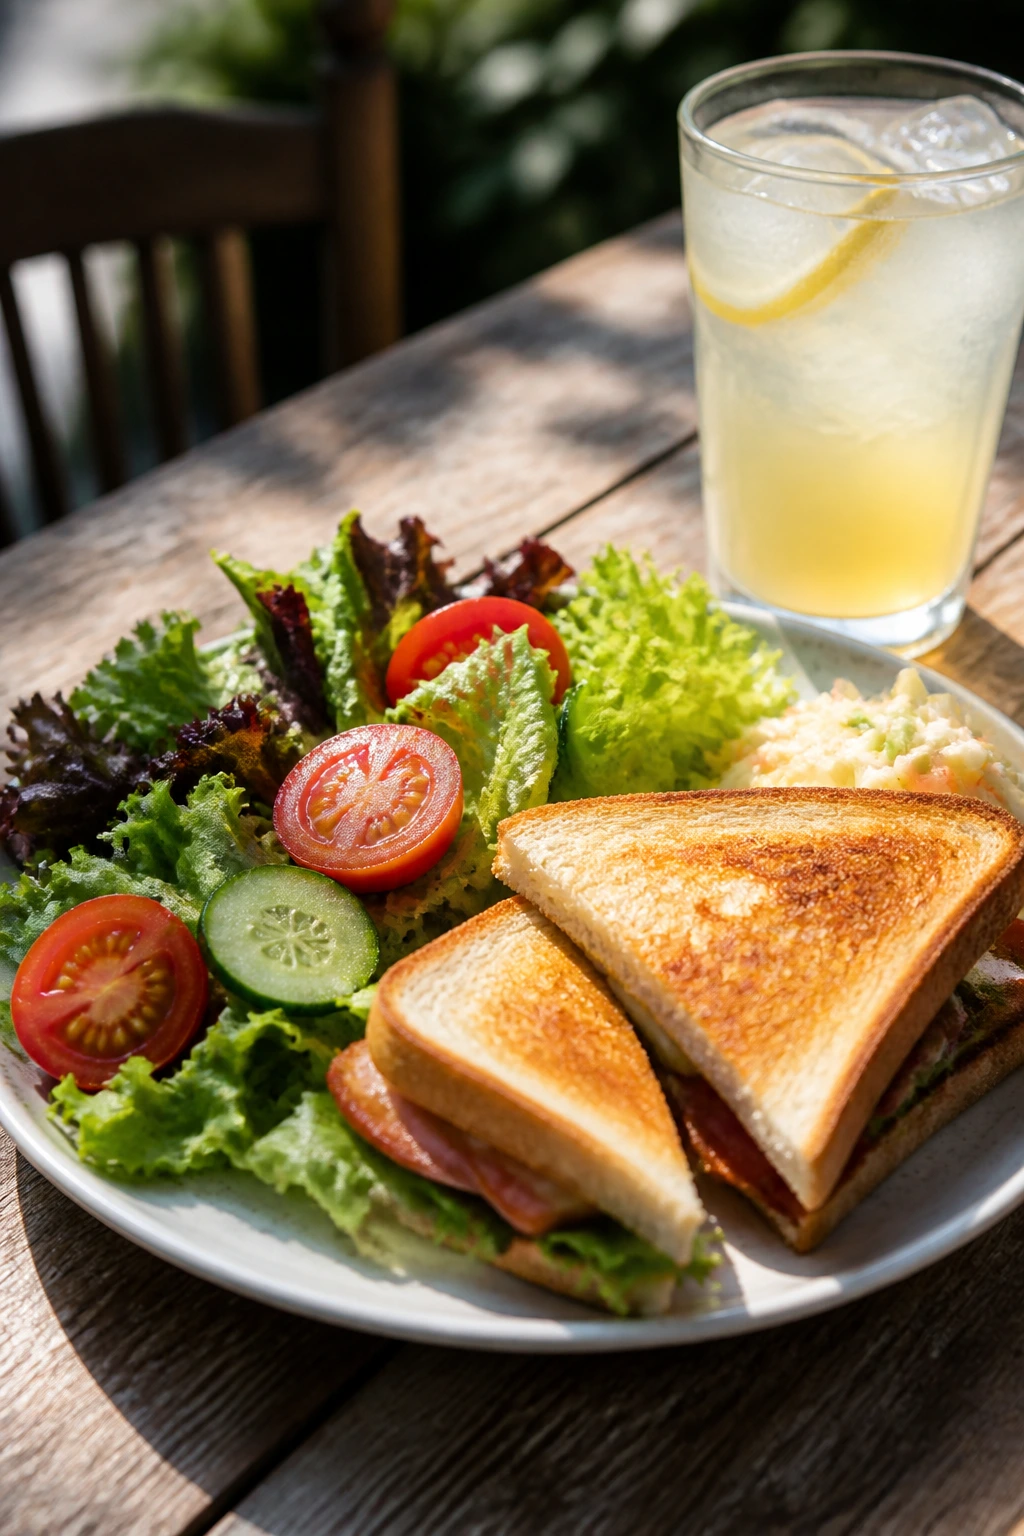
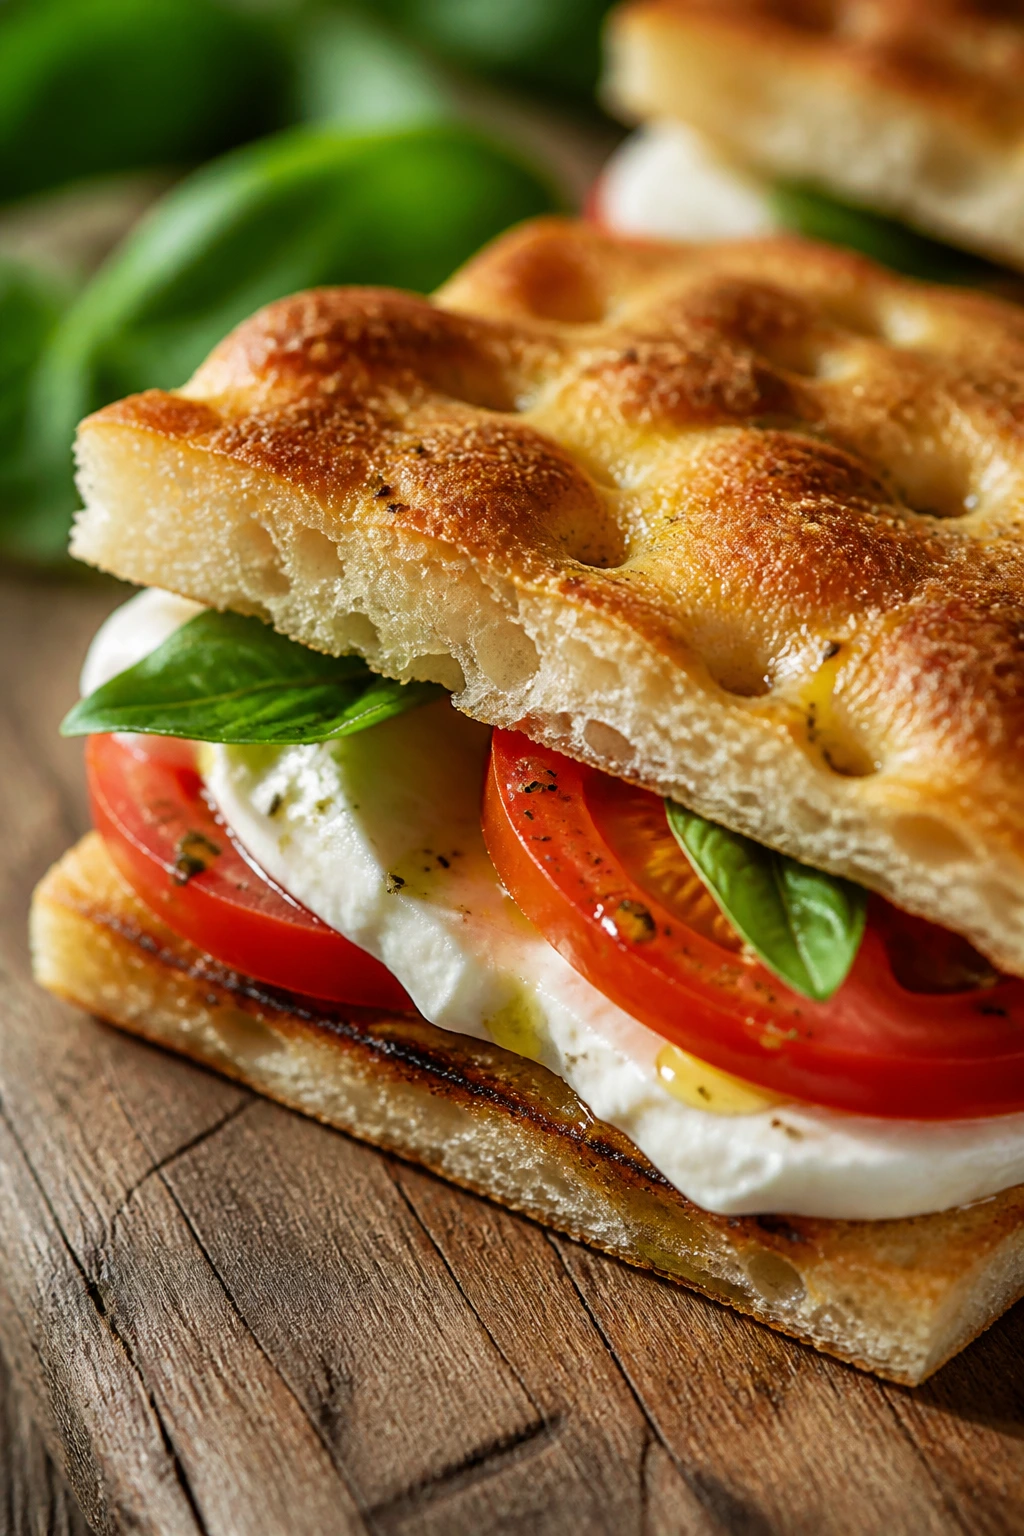
2. Tomato-Basil Mozzarella Sandwiches on Toasted Focaccia
Intro: This is a sandwich that tastes like a market stall in midsummer: ripe tomato, basil that smells sharp when you tear it, and mozzarella that gives up just enough when you bite through it. Toasted focaccia makes the whole thing sturdier and better.
Why It Works: Focaccia holds tomato juices better than soft sandwich bread, and the little pockets in the crumb catch olive oil instead of letting it slide off. Fresh mozzarella brings moisture without heaviness, and basil keeps the sandwich from tasting flat. A cold sparkling water with lemon is the right partner here because it keeps the olive oil from feeling rich.
Key Ingredients:
- 1 loaf focaccia, split horizontally
- 2 large ripe tomatoes, sliced 1/4-inch thick
- 8 ounces fresh mozzarella, sliced and patted dry
- 1 packed cup basil leaves
- 2 tablespoons olive oil
- 1 tablespoon balsamic glaze
- 1/2 teaspoon kosher salt
- 1/4 teaspoon black pepper
Quick Steps:
- Toast the cut sides of the focaccia in a 375°F oven for 6 to 8 minutes, until the edges feel crisp.
- Pat the tomato slices dry with paper towels and season them lightly with salt and pepper.
- Layer mozzarella, tomatoes, and basil over the bottom half of the bread.
- Drizzle with olive oil and balsamic glaze.
- Close the sandwich, press gently, and slice into 4 pieces.
Equipment for This Recipe:
- Baking sheet
- Serrated knife
- Paper towels
- Small bowl
How to Serve This Dish: Wrap the sandwich halves in parchment and serve with sliced melon. A cold lemonade keeps the tomato sweetness from becoming too soft.
Pro Tips for This Recipe:
- Salt the tomatoes right before assembling so they stay juicy, not soggy.
- Pat the mozzarella dry; wet cheese slides around and weakens the bread.
- Tear the basil instead of chopping it if you want the leaves to stay lively.
Variations on This Dish:
- Roasted Tomato Version: Use room-temperature roasted tomatoes for a deeper, sweeter flavor.
- Pesto Layer: Smear a thin layer of pesto on the bread before adding the cheese.
Common Mistakes to Avoid with This Dish:
- Skipping the toast: Untoasted focaccia turns limp fast.
- Using cold tomatoes from the fridge: Their flavor stays muted; let them warm up first.
- Pouring on too much balsamic: The sandwich starts tasting sticky instead of bright.
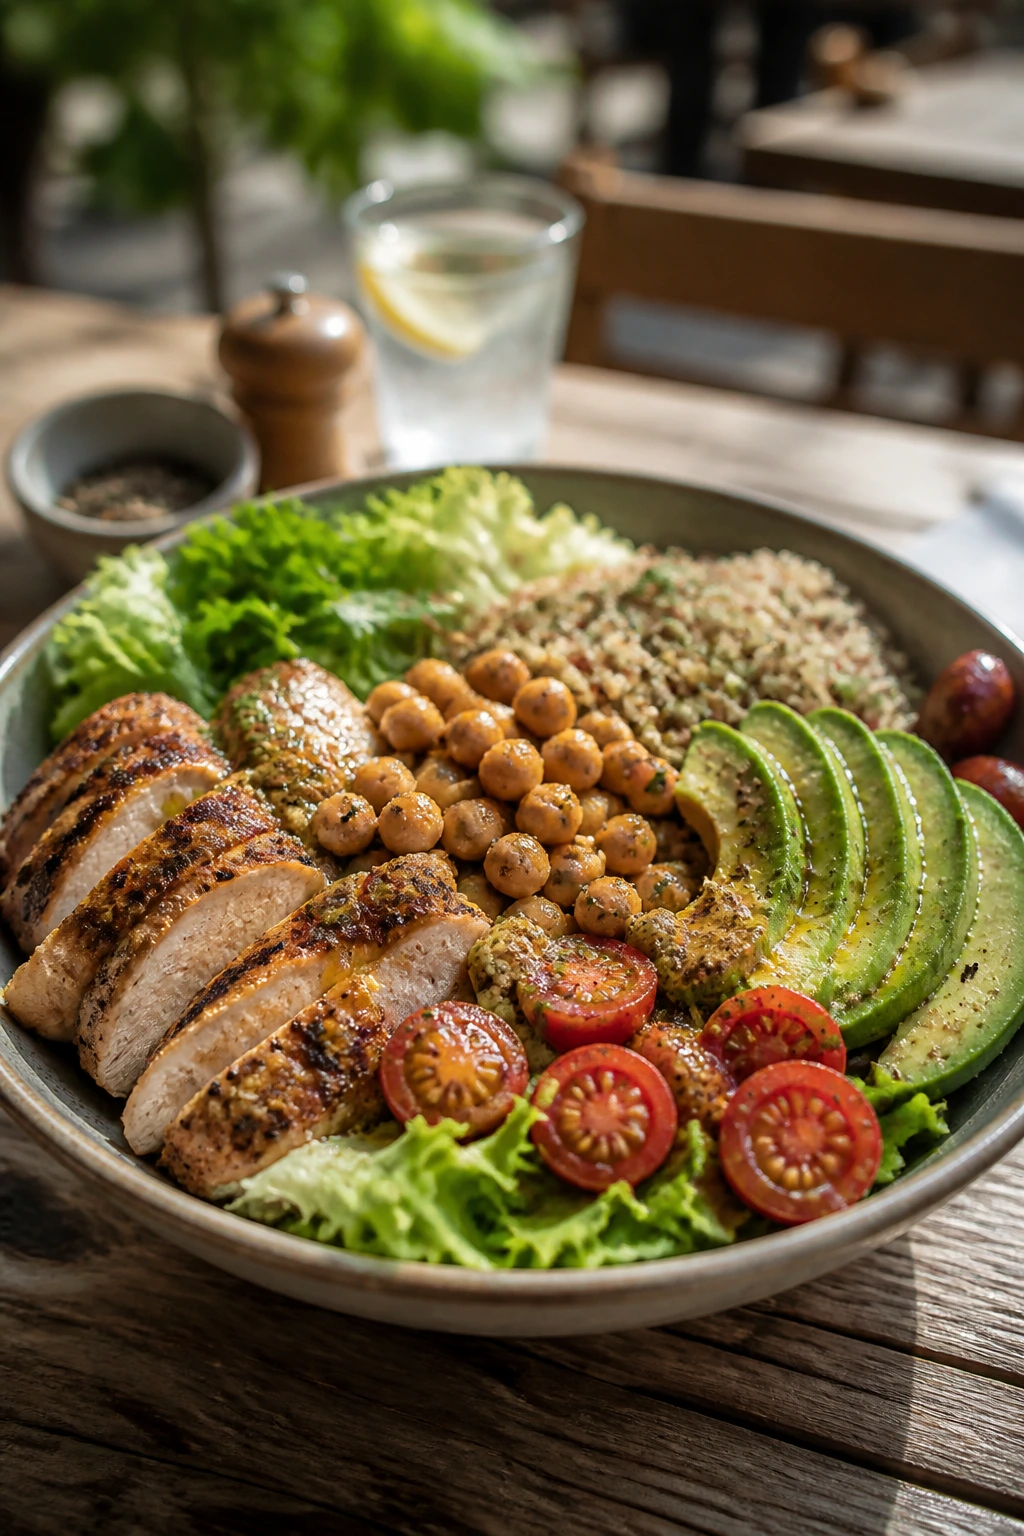
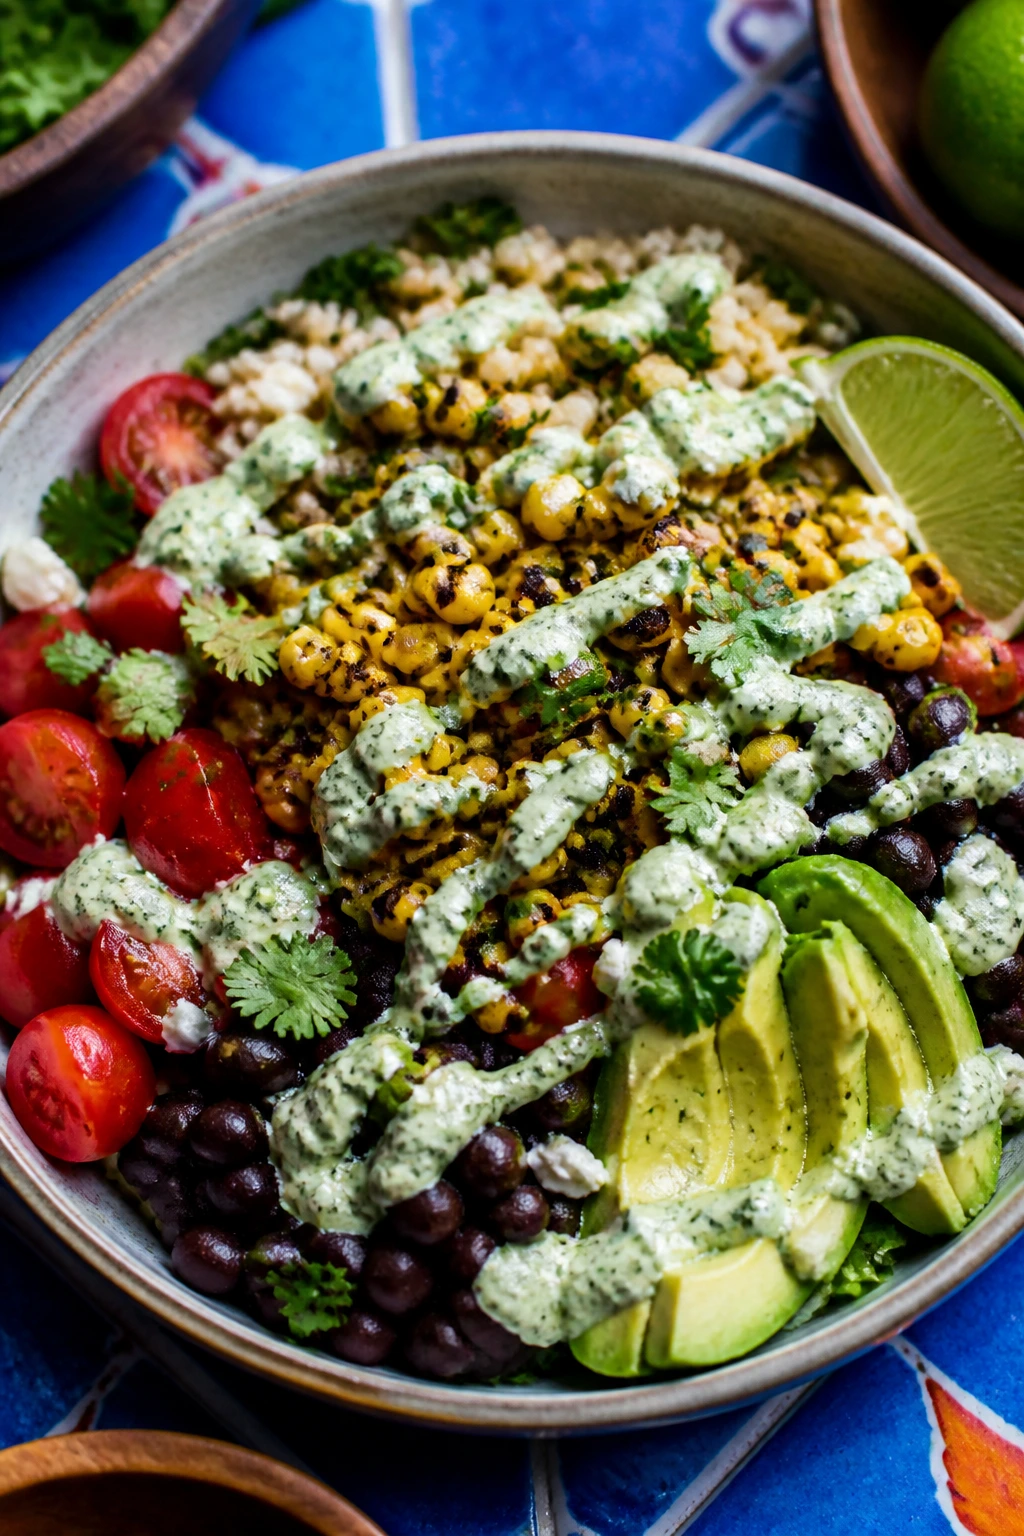
3. Charred Corn and Black Bean Lunch Bowls
Intro: Corn takes on a different personality after a quick char. The kernels taste smoky and sweet at the same time, and that matters when the rest of the bowl is cool, creamy, and lime-bright.
Why It Works: Black beans add body, corn adds sweetness, and avocado gives the bowl enough richness to feel like a meal. A lime crema ties everything together, and the contrast between warm corn and chilled toppings keeps each bite from going dull. This is one of those lunches that works with iced hibiscus tea or plain cold water with lime.
Key Ingredients:
- 3 ears corn, husked
- 1 tablespoon olive oil
- 1 can black beans, drained and rinsed
- 1 cup cooked rice or quinoa
- 1 avocado, diced
- 1/4 cup cilantro, chopped
- 1 lime, juiced
- 1/2 teaspoon chili powder
- 1/3 cup sour cream or plain yogurt
- 1/2 teaspoon salt
Quick Steps:
- Brush the corn with olive oil and grill or sear it over medium-high heat for 6 to 8 minutes, turning until lightly charred.
- Cut the kernels off the cobs once they’re cool enough to handle.
- Stir the sour cream with lime juice, salt, and a pinch of chili powder.
- Divide the rice or quinoa into bowls and top with beans, corn, avocado, and cilantro.
- Spoon the lime crema over the top and serve with extra lime wedges.
Equipment for This Recipe:
- Grill, grill pan, or cast-iron skillet
- Sharp chef’s knife
- Mixing bowl
- Citrus juicer
How to Serve This Dish: Serve in wide bowls so the toppings stay visible. A cold ginger beer works well if you like a sharper drink with a little burn.
Pro Tips for This Recipe:
- Let the corn darken in spots; pale corn tastes flat.
- Warm the beans briefly with a pinch of salt if you want the bowl less cold.
- Add the avocado last so it stays clean and green.
Variations on This Dish:
- Street-Corn Twist: Add cotija, extra lime, and a dusting of smoked paprika.
- Chicken Upgrade: Top with sliced grilled chicken for a bigger lunch.
Common Mistakes to Avoid with This Dish:
- Overdressing the bowl: Too much crema buries the corn flavor.
- Using bland rice: Season the base with salt and a squeeze of lime.
- Skipping the char: Without it, the bowl tastes like bean salad with extras.
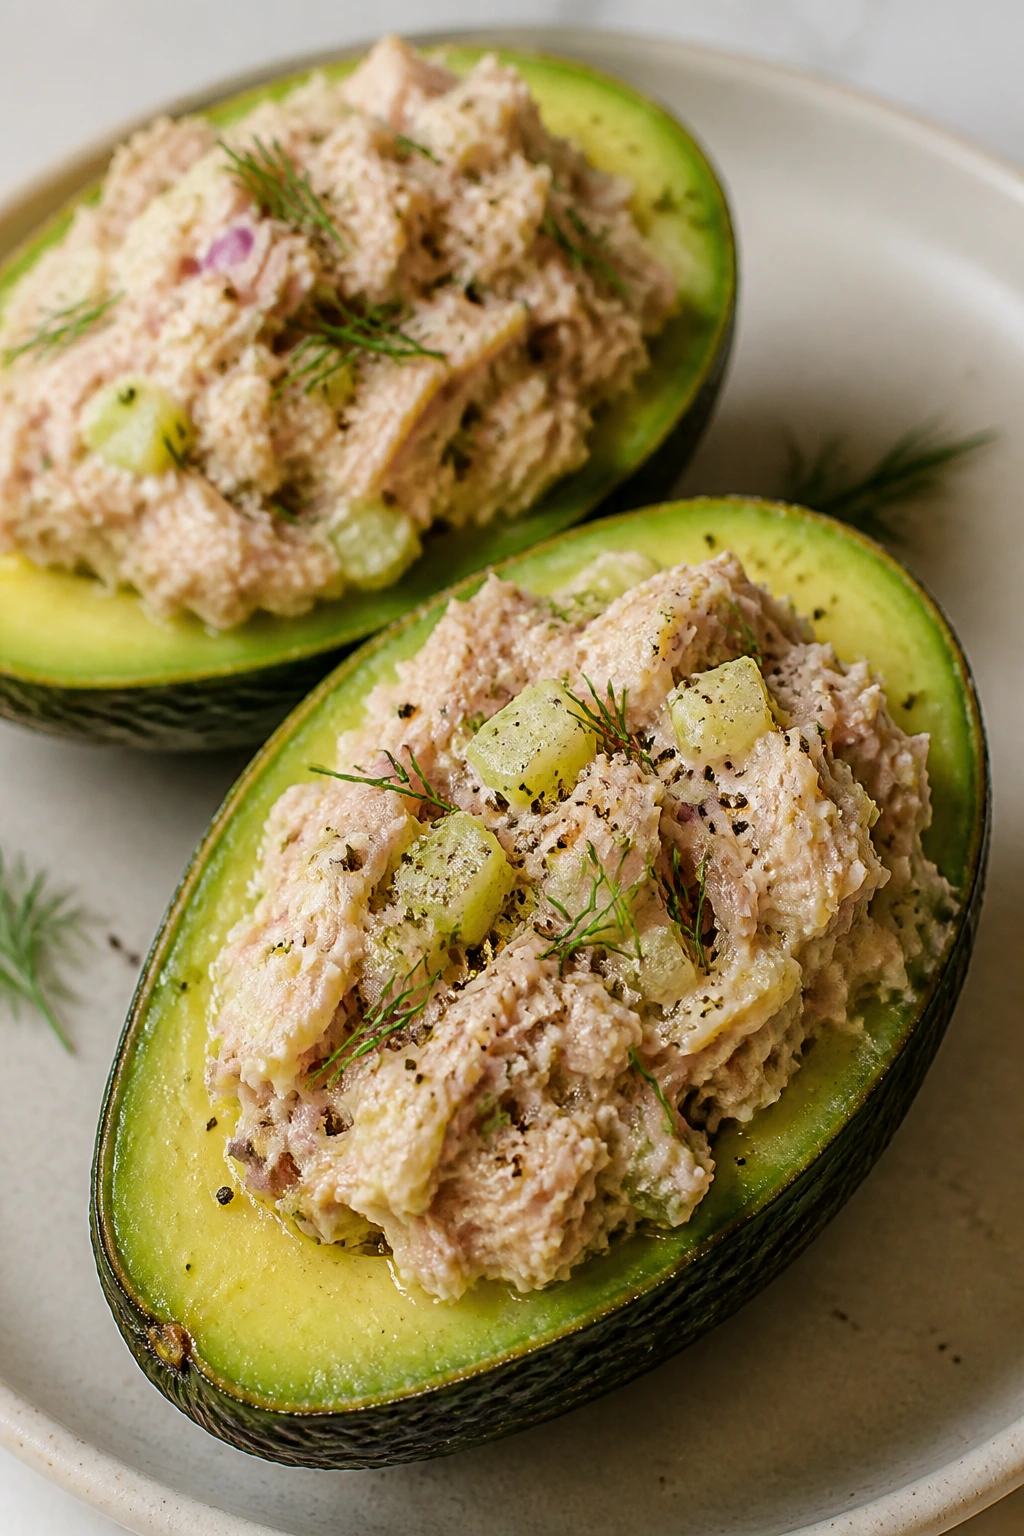
4. Tuna Salad Stuffed Avocados
Intro: This is lunch with no pretense. You spoon the tuna into the avocado, dust it with pepper, and eat the whole thing while the yolk-colored flesh is still cool and firm.
Why It Works: Tuna salad gets a cleaner finish when the mayo is backed up by lemon, celery, and dill pickle. The avocado replaces bread, which keeps the lunch lighter and adds a buttery texture that never gets watery. I’d serve this with a very cold seltzer or cucumber water; both drinks keep the richness in check.
Key Ingredients:
- 2 cans tuna in water, drained well
- 1 ripe avocado, halved and pitted
- 2 tablespoons mayonnaise
- 1 tablespoon finely chopped celery
- 1 tablespoon chopped dill pickle
- 1 teaspoon lemon juice
- 1 teaspoon chopped dill or parsley
- 1/4 teaspoon black pepper
- Pinch of salt
Quick Steps:
- Flake the tuna into a bowl with a fork.
- Stir in mayonnaise, celery, pickle, lemon juice, dill, pepper, and salt.
- Spoon the tuna mixture into the avocado halves.
- Top with a little extra pepper and serve right away.
Equipment for This Recipe:
- Small mixing bowl
- Fork
- Paring knife
- Spoon
How to Serve This Dish: Put the avocado halves on a chilled plate and serve with crackers or sliced cucumbers. A dry iced tea keeps the meal from feeling heavy.
Pro Tips for This Recipe:
- Drain the tuna thoroughly or the filling gets loose.
- Choose an avocado that yields slightly at the stem end, not one that’s soft all over.
- A little mustard gives the tuna more backbone if you like sharper flavor.
Variations on This Dish:
- Herby Version: Add chives, tarragon, and capers.
- Open-Face Style: Pile the tuna onto toast instead of avocado if you want more crunch.
Common Mistakes to Avoid with This Dish:
- Using hard avocados: They taste starchy and won’t cradle the tuna well.
- Overmixing the tuna: It turns pasty; leave some texture.
- Salting too early: The tuna can lose moisture before it reaches the plate.
5. Grilled Halloumi Pitas with Cucumber Yogurt
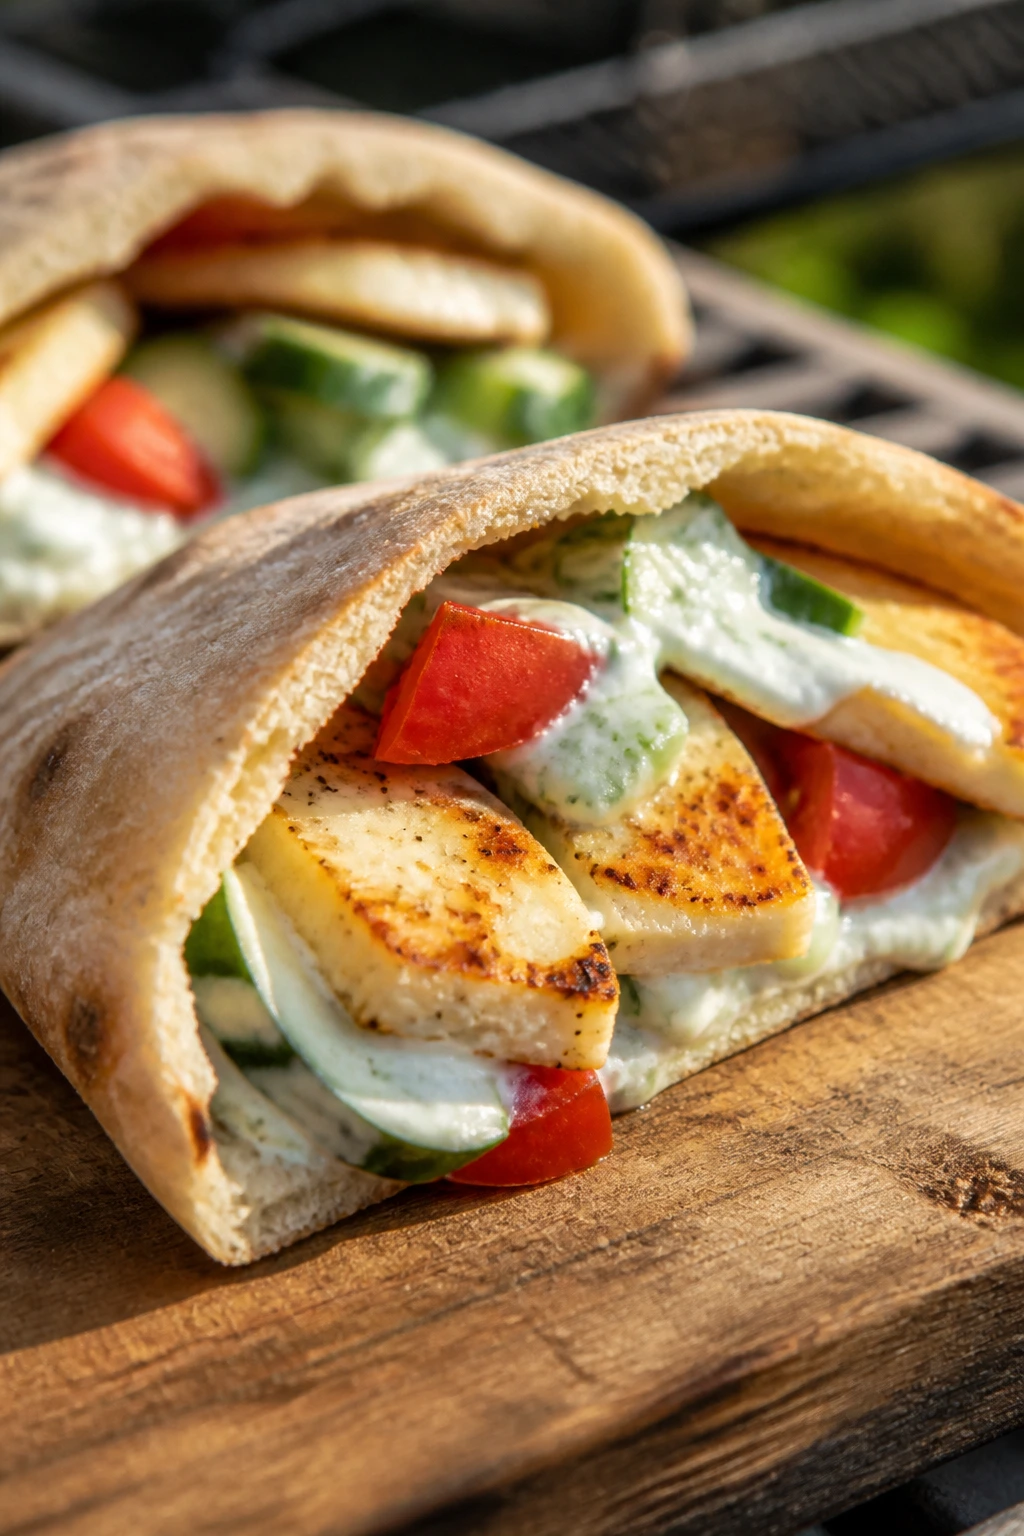
Intro: Halloumi is the cheese for people who like a little resistance in lunch. It squeaks, browns, and keeps its shape on the grill, which makes it a sharp answer to a hot day.
Why It Works: Halloumi gives you the salt and chew you’d normally expect from meat, but it cooks in minutes and takes well to herbs and cucumber. The yogurt sauce cools the salt, and the pita gives the whole thing a soft pocket instead of a heavy bread shell. Cold mint lemonade is the drink I want here; the mint echoes the cheese’s savory edge.
Key Ingredients:
- 8 ounces halloumi, sliced into 1/2-inch slabs
- 4 small pitas
- 1 cup plain Greek yogurt
- 1/2 cucumber, grated and squeezed dry
- 1 tablespoon olive oil
- 1 tablespoon lemon juice
- 1 tablespoon chopped mint
- 1 cup sliced cherry tomatoes
- Black pepper to taste
Quick Steps:
- Stir the yogurt with cucumber, lemon juice, mint, and a pinch of salt.
- Brush the halloumi with olive oil.
- Grill the halloumi over medium-high heat for 1 to 2 minutes per side, until browned with dark lines.
- Warm the pitas for 30 seconds on the grill or in a dry skillet.
- Stuff the pitas with halloumi, tomatoes, and cucumber yogurt.
Equipment for This Recipe:
- Grill or grill pan
- Grater
- Small bowl
- Tongs
How to Serve This Dish: Cut the pitas in half and serve them with a handful of olives. A cold cucumber soda or sparkling water fits the salt and herb note.
Pro Tips for This Recipe:
- Squeeze the cucumber well or the yogurt sauce turns thin.
- Don’t walk away from the halloumi; it browns fast and can go rubbery if you leave it too long.
- Warm the pita so it opens without tearing.
Variations on This Dish:
- Spicy Pepper Version: Add sliced jalapeños or a spoonful of chili crisp.
- Veggie Plate: Serve the halloumi over salad greens instead of inside pita.
Common Mistakes to Avoid with This Dish:
- Cooking halloumi too long: It turns tough fast.
- Skipping the squeeze on cucumber: Excess water dilutes the sauce.
- Using thin store-bought pita straight from the bag: It cracks when stuffed.
6. Turkey BLT with Basil Mayo
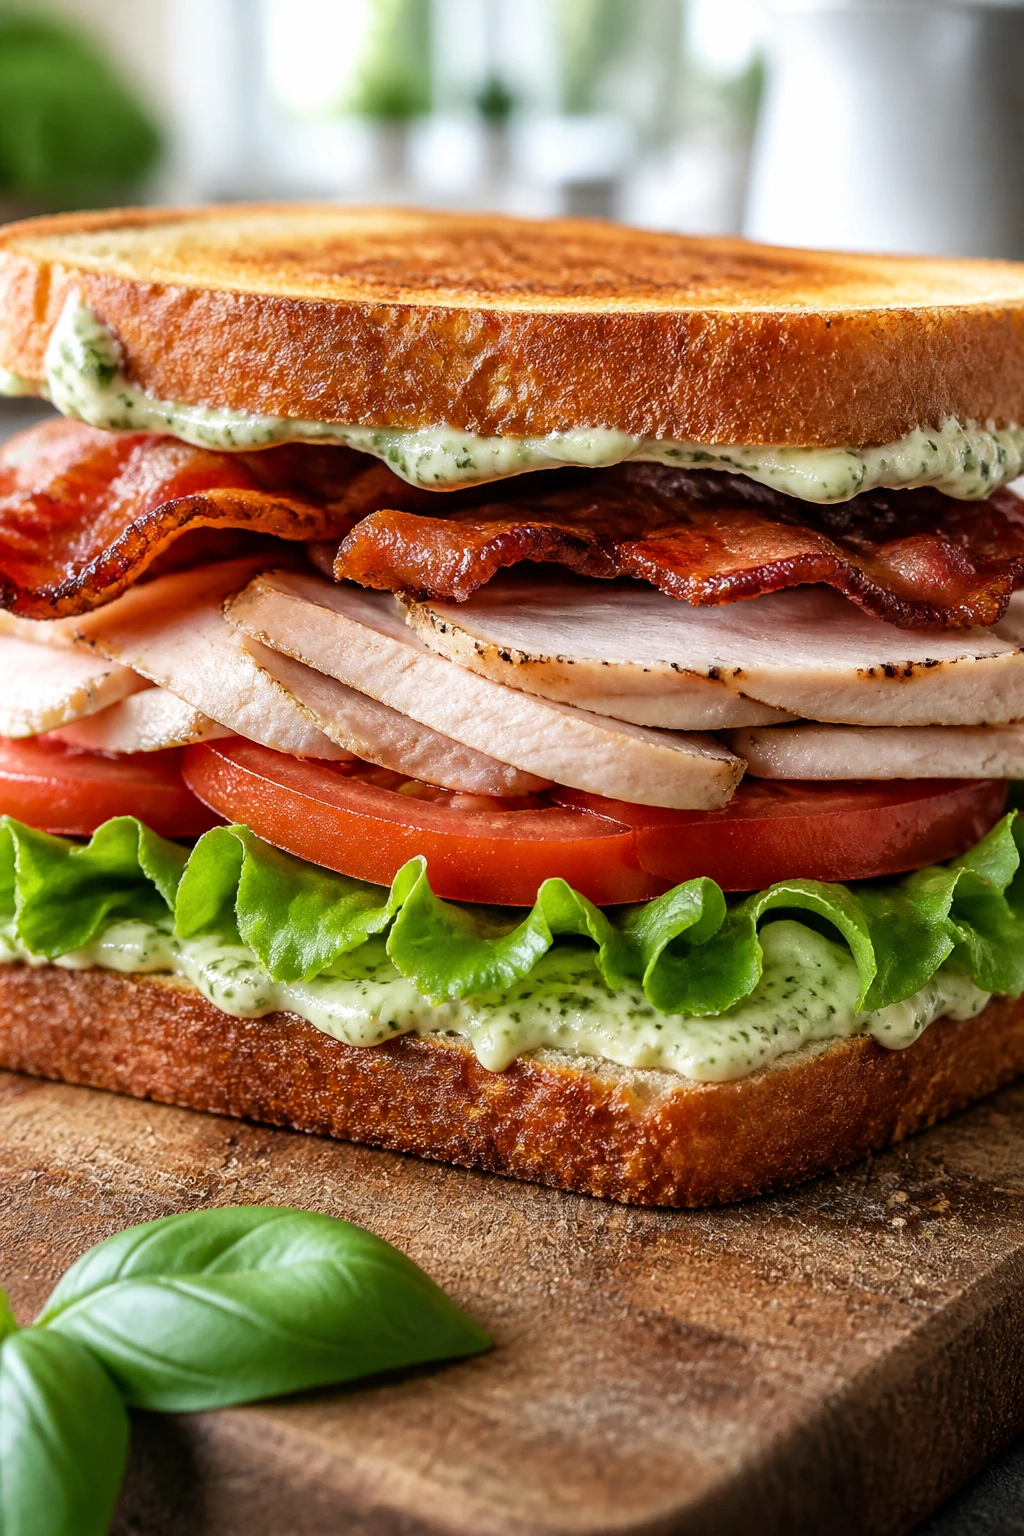
Intro: A BLT already knows how to behave in warm weather. Add turkey for extra staying power and basil mayo for a greener, fresher finish, and it becomes lunch with enough weight to last past the first hour.
Why It Works: Bacon brings smoke, tomatoes bring juice, and turkey gives the sandwich a little more substance than a standard BLT. Basil mayo keeps the flavor from drifting into plain deli territory. I like this with iced black tea because the tea handles the bacon fat without flattening the tomato.
Key Ingredients:
- 8 slices thick-cut bread
- 8 slices bacon
- 8 ounces sliced turkey
- 2 ripe tomatoes, sliced
- 1 cup lettuce
- 1/3 cup mayonnaise
- 1/4 cup basil leaves, finely chopped
- 1 teaspoon lemon juice
- Pinch of salt and pepper
Quick Steps:
- Cook the bacon in a skillet over medium heat until crisp, about 8 to 10 minutes.
- Stir the mayo with basil, lemon juice, salt, and pepper.
- Toast the bread until golden.
- Spread basil mayo on each slice, then layer turkey, bacon, tomato, and lettuce.
- Close, press lightly, and cut the sandwiches in half.
Equipment for This Recipe:
- Skillet
- Cutting board
- Serrated knife
- Mixing spoon
How to Serve This Dish: Serve with dill pickles and a handful of potato chips. A very cold iced tea or lemonade works best because the sandwich has salt, acid, and fat in equal measure.
Pro Tips for This Recipe:
- Salt the tomato slices lightly and blot them after a minute.
- Build the sandwich just before eating so the lettuce stays crisp.
- Thin-sliced turkey stacks better than thick deli slabs.
Variations on This Dish:
- Avocado BLT: Add sliced avocado for a softer, richer bite.
- Open-Face Lunch: Use one slice of bread per sandwich and pile the fillings high.
Common Mistakes to Avoid with This Dish:
- Hot bacon on the tomatoes: It wilts the lettuce fast; cool the bacon for a minute first.
- Over-mayoing the bread: The sandwich slips apart.
- Using mealy tomatoes: They taste dusty, and there’s no fixing that.
7. Shrimp Tacos with Lime Slaw
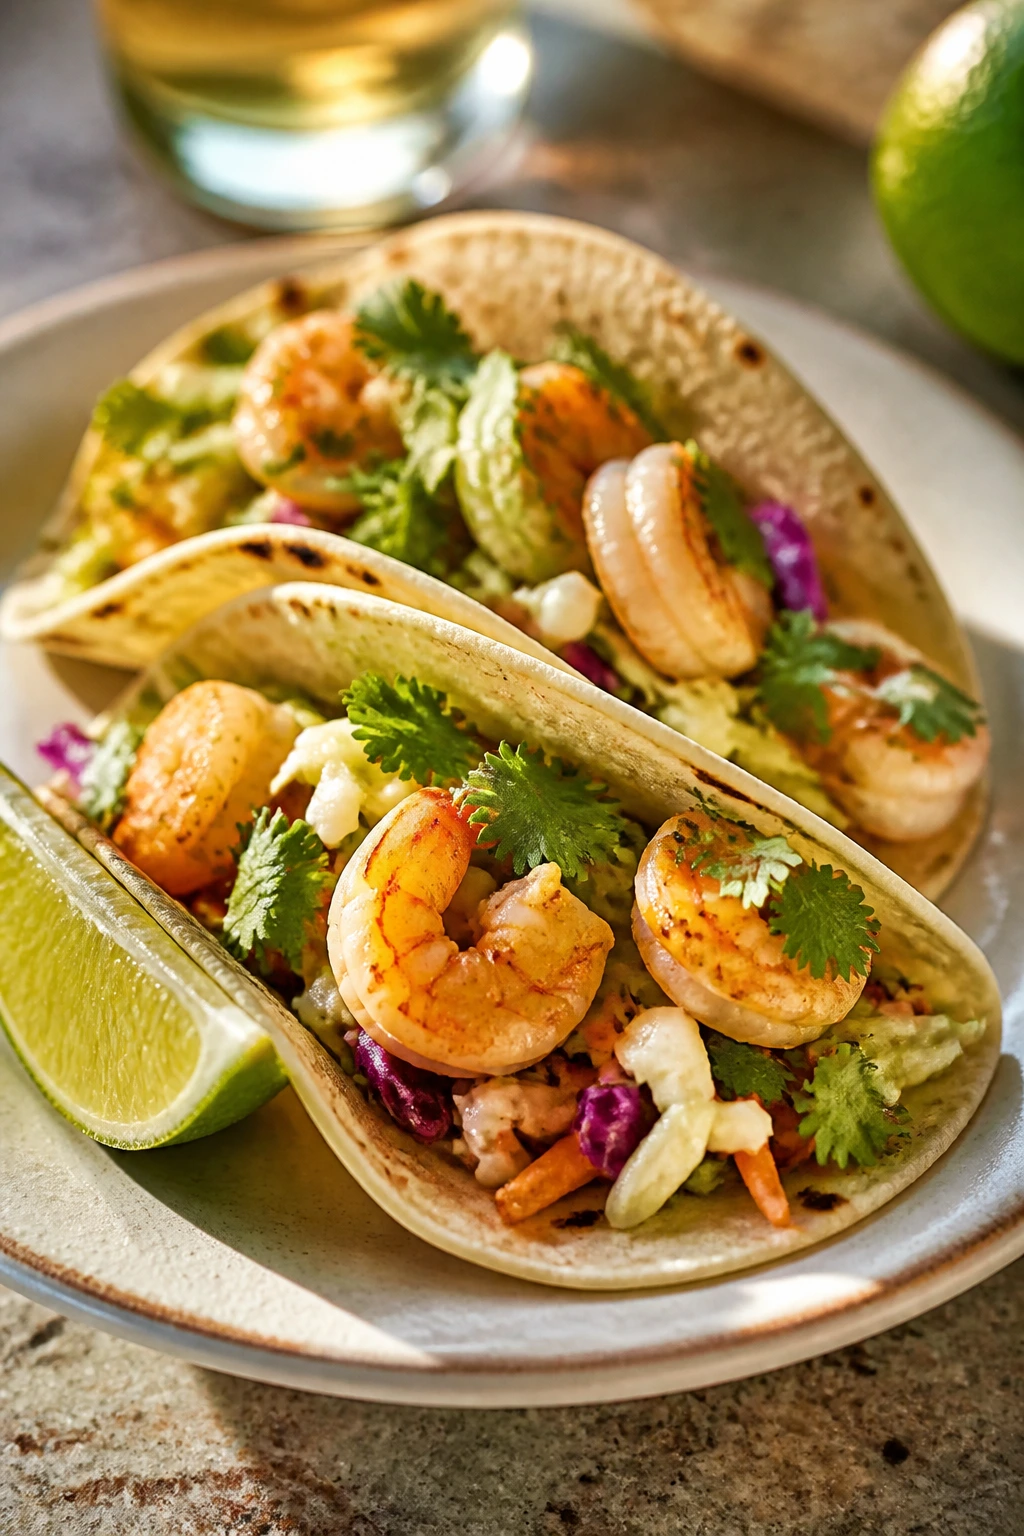
Intro: Shrimp cooks in the time it takes to warm tortillas, which is why it belongs in summer lunch more than almost any other protein. The trick is to keep the seasoning clean and let the slaw bring the crunch.
Why It Works: Shrimp has a sweet, briny edge that wakes up with lime and garlic in minutes. A slaw made with cabbage stays crisp longer than lettuce, so the tacos hold up if you linger over lunch. A cold lager or sparkling lime soda is the right match here because both drinks echo the shrimp’s brightness.
Key Ingredients:
- 1 pound large shrimp, peeled and deveined
- 1 tablespoon olive oil
- 1 teaspoon chili powder
- 1/2 teaspoon cumin
- 1/2 teaspoon salt
- 8 small corn tortillas
- 2 cups shredded cabbage
- 1/4 cup sour cream
- 1 lime, juiced
- 2 tablespoons chopped cilantro
Quick Steps:
- Toss the shrimp with oil, chili powder, cumin, and salt.
- Mix cabbage with sour cream, lime juice, and cilantro.
- Cook the shrimp in a hot skillet for 2 minutes per side until pink and opaque.
- Warm the tortillas in a dry pan for 20 to 30 seconds per side.
- Fill each tortilla with slaw and shrimp, then finish with extra lime.
Equipment for This Recipe:
- Large skillet
- Mixing bowls
- Tongs
- Citrus juicer
How to Serve This Dish: Pile the tacos on a platter with lime wedges and hot sauce on the side. A glass of cold sparkling water with a squeeze of lime keeps the meal sharp.
Pro Tips for This Recipe:
- Dry the shrimp well before seasoning so they sear instead of steam.
- Don’t overcook them; rubbery shrimp happen fast.
- Warm corn tortillas in a dry skillet rather than the microwave if you want better texture.
Variations on This Dish:
- Garlic Butter Shrimp: Swap the chili spice for garlic, parsley, and a little butter.
- Spicy Slaw: Add sliced jalapeño and a spoon of hot sauce to the cabbage.
Common Mistakes to Avoid with This Dish:
- Cooking shrimp until they curl into tight rings: That means they’ve gone too far.
- Wet slaw: If the cabbage is soaked in dressing, the tacos slip apart.
- Cold tortillas: They crack and spill the filling.
8. Caprese Pasta Salad with White Beans
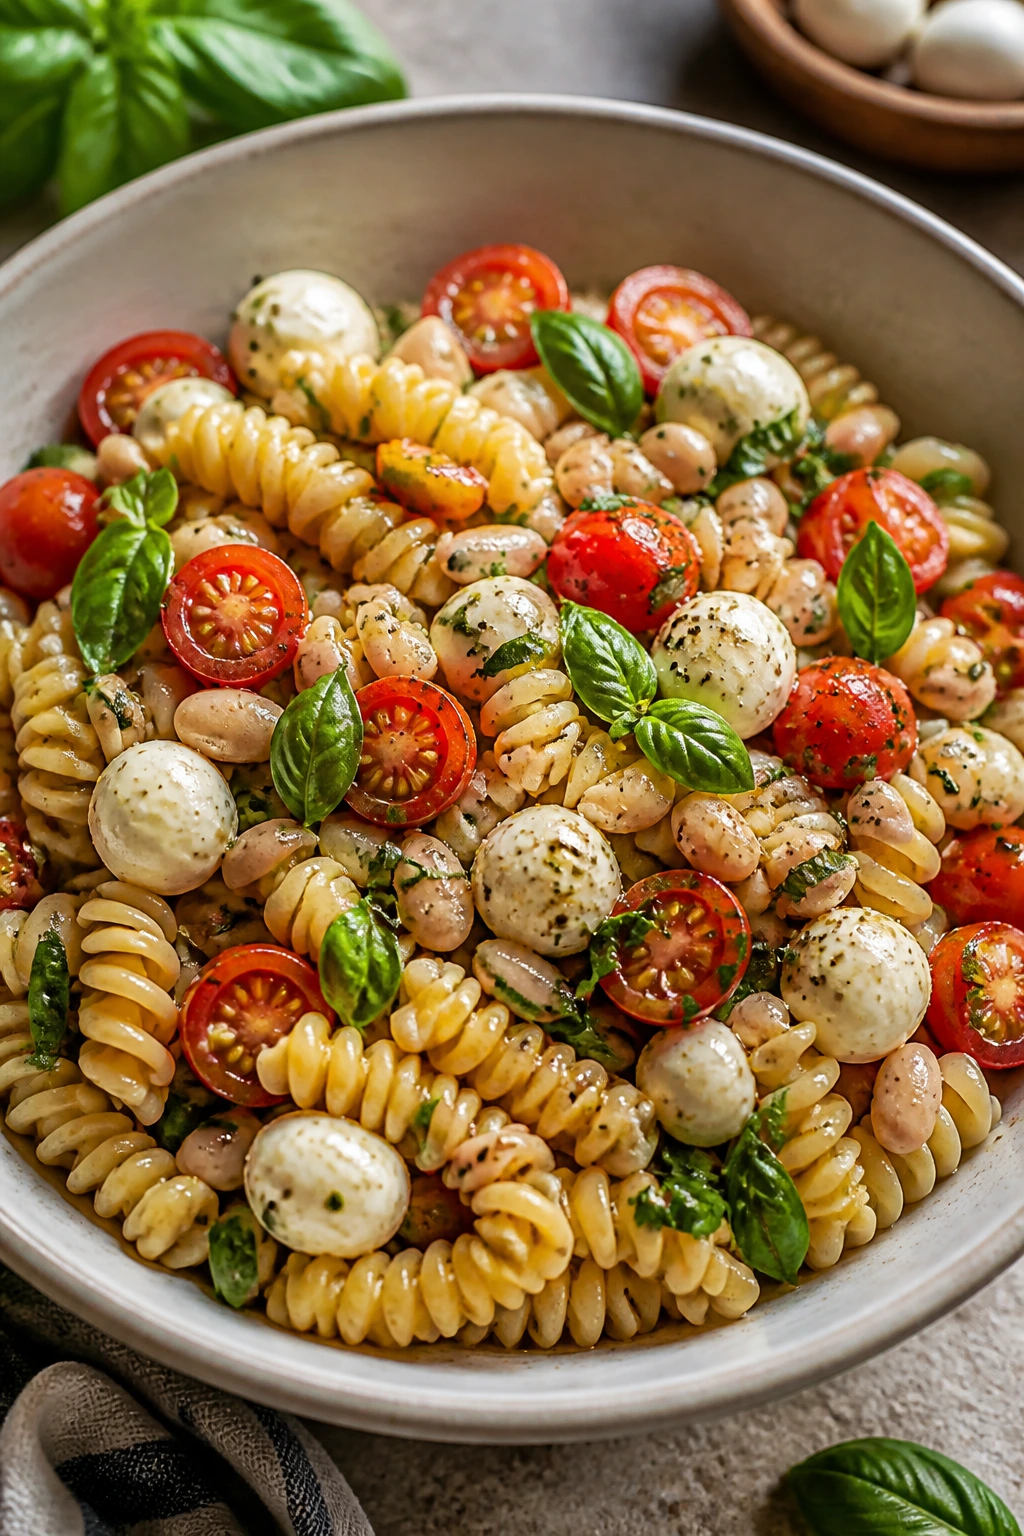
Intro: Pasta salad gets messy when it’s all noodles and no backbone. White beans fix that problem, and the tomatoes, basil, and mozzarella keep the whole bowl tasting like summer instead of cafeteria food.
Why It Works: The beans add protein and keep the salad from disappearing into the bowl an hour later. A simple olive oil and vinegar dressing coats the pasta without drowning it, and the mozzarella gives you soft, cool bites between the sharper tomatoes. I’d pour a chilled herbal tea over ice with this one; it doesn’t fight the basil.
Key Ingredients:
- 12 ounces short pasta
- 1 can cannellini beans, drained and rinsed
- 2 cups cherry tomatoes, halved
- 8 ounces mozzarella pearls
- 1 packed cup basil leaves
- 3 tablespoons olive oil
- 1 1/2 tablespoons red wine vinegar
- 1 teaspoon salt
- 1/2 teaspoon black pepper
Quick Steps:
- Cook the pasta in salted water until al dente, then rinse briefly under cool water.
- Whisk the olive oil, vinegar, salt, and pepper.
- Toss the pasta with beans, tomatoes, mozzarella, basil, and dressing.
- Chill for 20 minutes if you want the flavors tighter.
- Taste again before serving and adjust salt.
Equipment for This Recipe:
- Large pot
- Colander
- Mixing bowl
- Whisk
How to Serve This Dish: Serve it in a wide bowl with extra basil on top. A cold lemonade or white peach iced tea plays well with the tomatoes.
Pro Tips for This Recipe:
- Salt the pasta water well; otherwise the salad tastes flat.
- Add the basil near the end so it stays green.
- If the salad sits, reserve a spoonful of dressing to refresh it before serving.
Variations on This Dish:
- Pesto Pasta Salad: Replace the vinaigrette with a loose pesto dressing.
- Roasted Pepper Version: Add strips of jarred or roasted peppers for extra sweetness.
Common Mistakes to Avoid with This Dish:
- Overcooking the pasta: It turns mushy once dressed.
- Using watery mozzarella: Pat the pearls dry or the bowl gets sloppy.
- Skipping the second taste: Cold pasta needs a little more salt than warm pasta.
9. Smashed Chickpea Salad Sandwiches
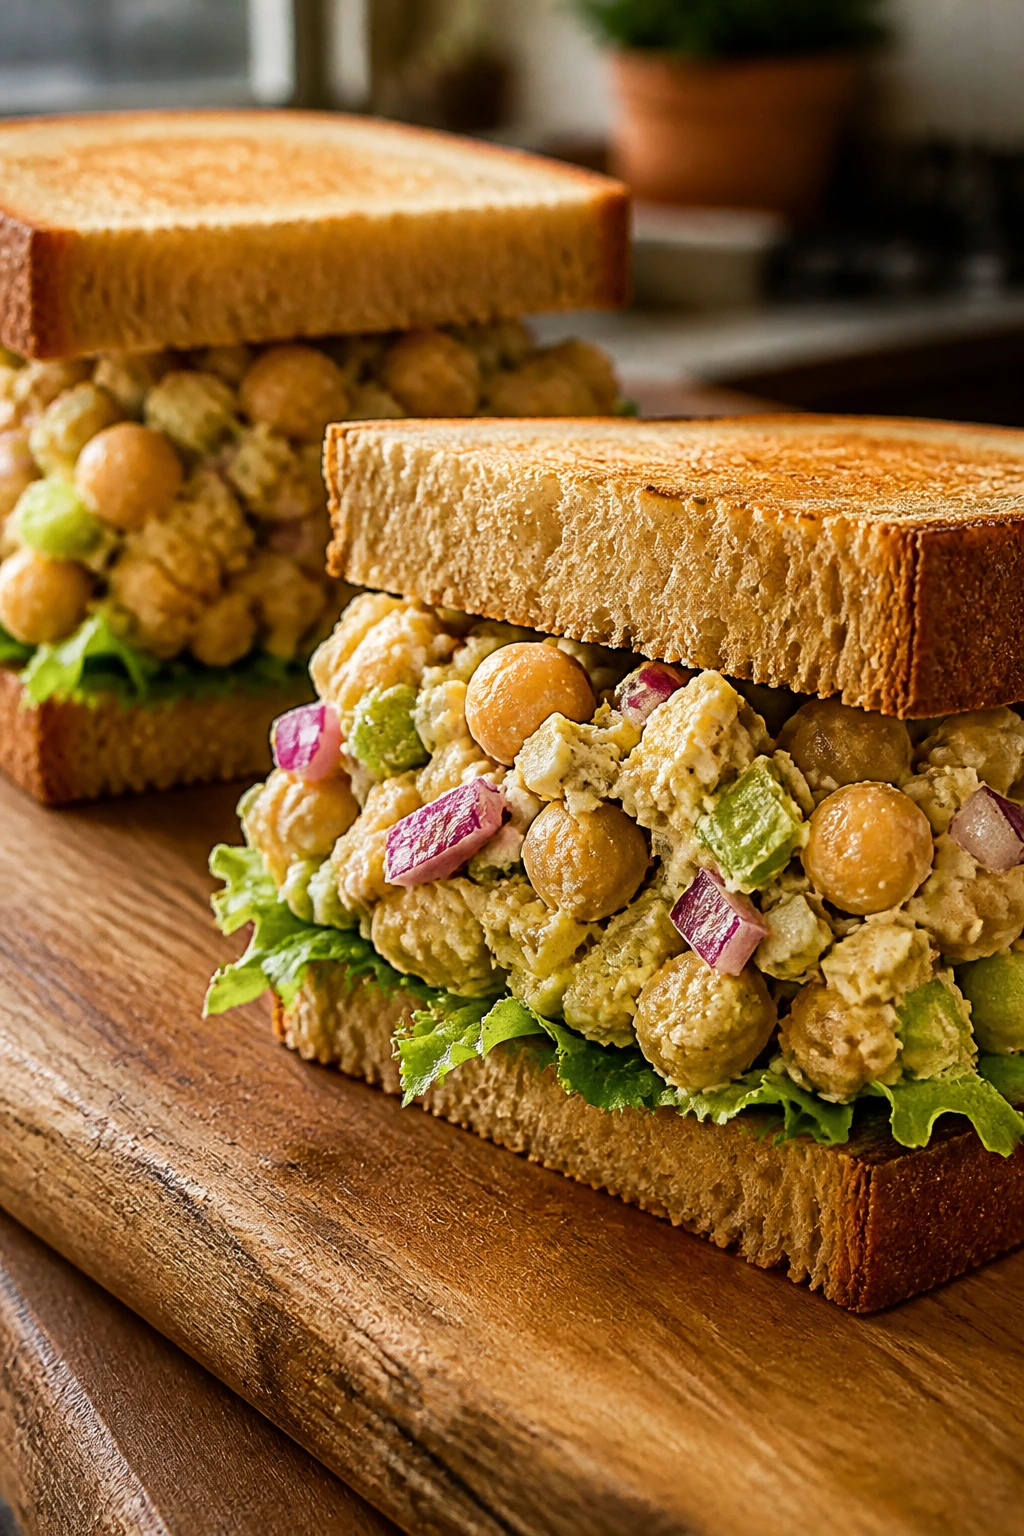
Intro: Chickpeas are at their best when they’re smashed enough to hold together but not so much that they become paste. That texture is what makes this sandwich feel sturdy, cool, and easy to eat with one hand.
Why It Works: Chickpeas bring a nutty base, while celery and red onion add snap. Dijon and lemon keep the filling sharp, so it doesn’t taste like a flat hummus clone. This one likes a cold cucumber water or plain iced tea because the sandwich already has enough flavor on its own.
Key Ingredients:
- 1 can chickpeas, drained and rinsed
- 2 tablespoons mayonnaise or plain yogurt
- 1 teaspoon Dijon mustard
- 1 tablespoon lemon juice
- 2 tablespoons finely diced celery
- 2 tablespoons finely diced red onion
- 1 tablespoon chopped parsley
- 4 slices sturdy bread
- Salt and black pepper
Quick Steps:
- Mash the chickpeas with a fork until about half are broken and half stay whole.
- Stir in mayo, mustard, lemon, celery, onion, parsley, salt, and pepper.
- Toast the bread if you want more structure.
- Spoon the chickpea salad onto the bread and close the sandwich.
Equipment for This Recipe:
- Fork
- Mixing bowl
- Knife and cutting board
- Toaster or skillet
How to Serve This Dish: Add lettuce or sliced tomato if you want more crunch. A cold lemonade sharpens the chickpeas better than a sweet soda.
Pro Tips for This Recipe:
- Leave some chickpeas whole for texture.
- Finely dice the onion so it spreads through the filling instead of hitting in sharp chunks.
- A pinch of celery seed gives the salad a deli-style note.
Variations on This Dish:
- Curried Chickpea Salad: Add curry powder and raisins.
- Avocado Version: Mash half an avocado into the filling for a softer texture.
Common Mistakes to Avoid with This Dish:
- Turning the chickpeas into puree: The sandwich loses its bite.
- Using flimsy bread: It buckles under the filling.
- Overdoing the mayo: The salad should mound, not drip.
10. Grilled Peach and Prosciutto Flatbread
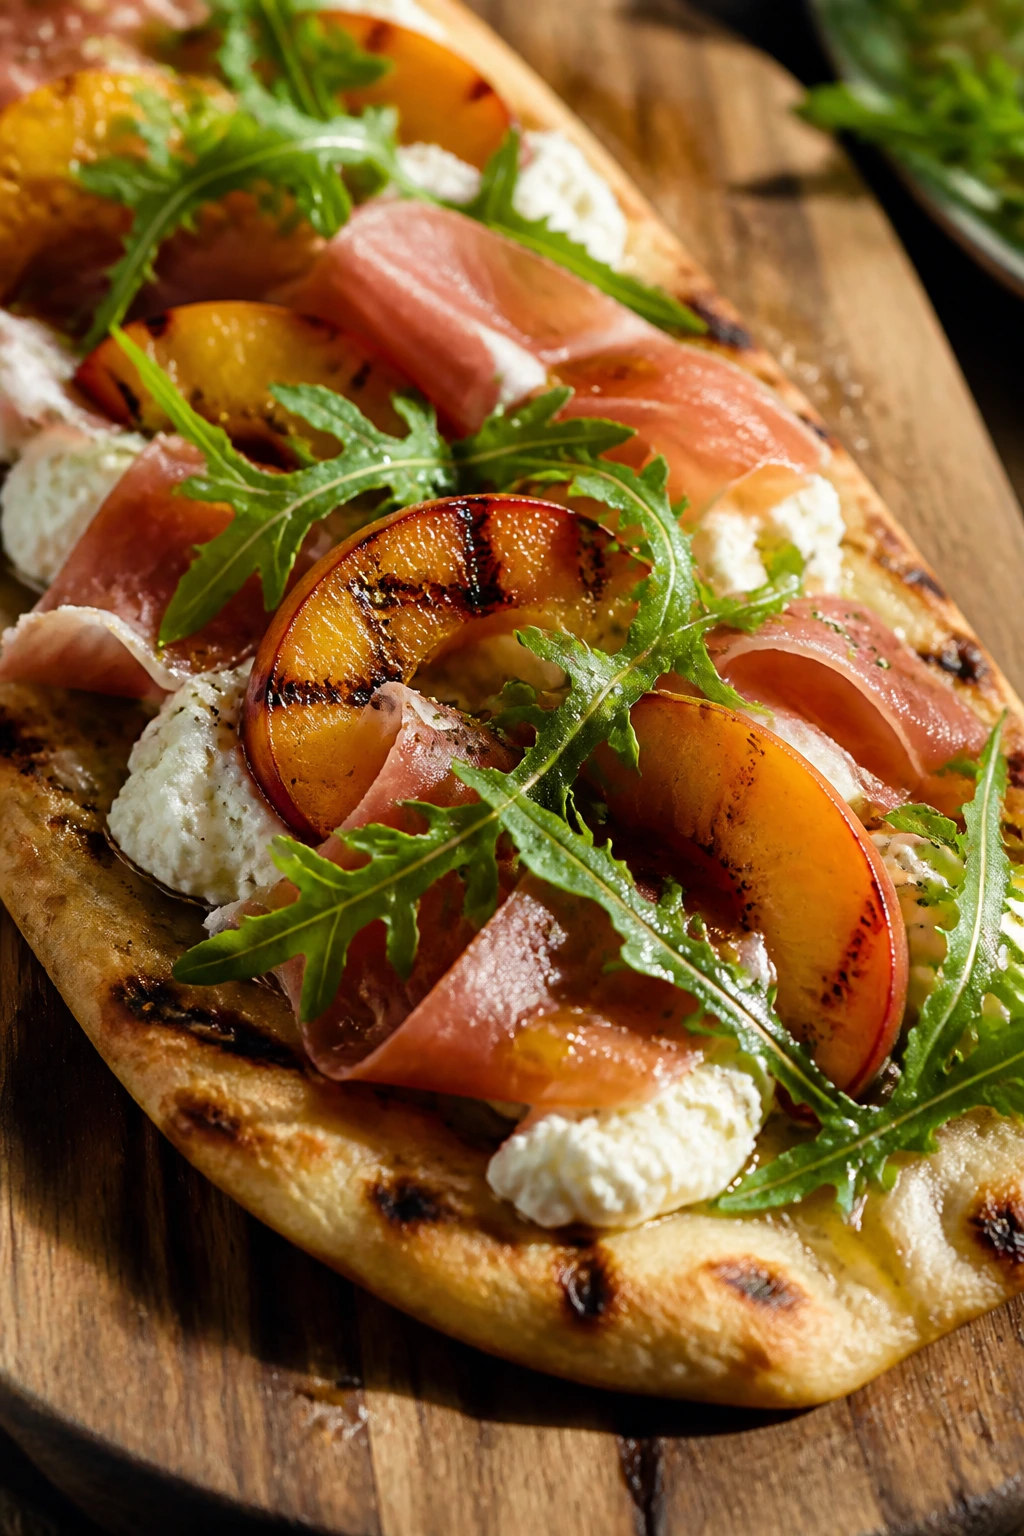
Intro: Sweet fruit and salty cured meat are a pair I never get tired of in warm weather. Grilled peaches bring caramelized edges, prosciutto brings a clean salt hit, and ricotta smooths everything out.
Why It Works: Peaches get deeper and less slippery once they hit the grill, which makes them easier to slice and layer. Ricotta acts like a cool cushion under the peaches, and arugula adds a peppery finish that keeps the flatbread from tasting dessert-like. A cold prosecco or sparkling lemonade is the obvious drink match, depending on your mood.
Key Ingredients:
- 2 flatbreads or naan
- 2 ripe peaches, halved and sliced
- 2 teaspoons olive oil
- 1/2 cup ricotta
- 3 ounces prosciutto, torn
- 1 cup arugula
- 1 tablespoon honey
- 1 tablespoon balsamic glaze
Quick Steps:
- Brush the peach slices with olive oil and grill them for 1 to 2 minutes per side.
- Warm the flatbreads on the grill or in a 400°F oven until they crisp slightly.
- Spread ricotta over the bread.
- Layer on peaches and prosciutto.
- Top with arugula, honey, and balsamic glaze.
Equipment for This Recipe:
- Grill or grill pan
- Baking sheet
- Knife
- Small spoon
How to Serve This Dish: Slice into squares and serve immediately so the arugula stays fresh. A cold citrus spritz or sparkling lemonade works cleanly here.
Pro Tips for This Recipe:
- Choose peaches that smell fragrant but still feel firm.
- Don’t oversauce the flatbread; the honey and balsamic should be a finish, not a glaze bath.
- Grill the peaches briefly so they stay intact.
Variations on This Dish:
- Fig and Prosciutto Version: Swap peaches for sliced figs when they’re available.
- Goat Cheese Swap: Use tangy goat cheese instead of ricotta for more bite.
Common Mistakes to Avoid with This Dish:
- Too-soft peaches: They collapse on the grill.
- Adding arugula too early: It wilts under the heat.
- Using thick balsamic glaze heavily: It overpowers the fruit.
11. Chicken Salad Lettuce Cups
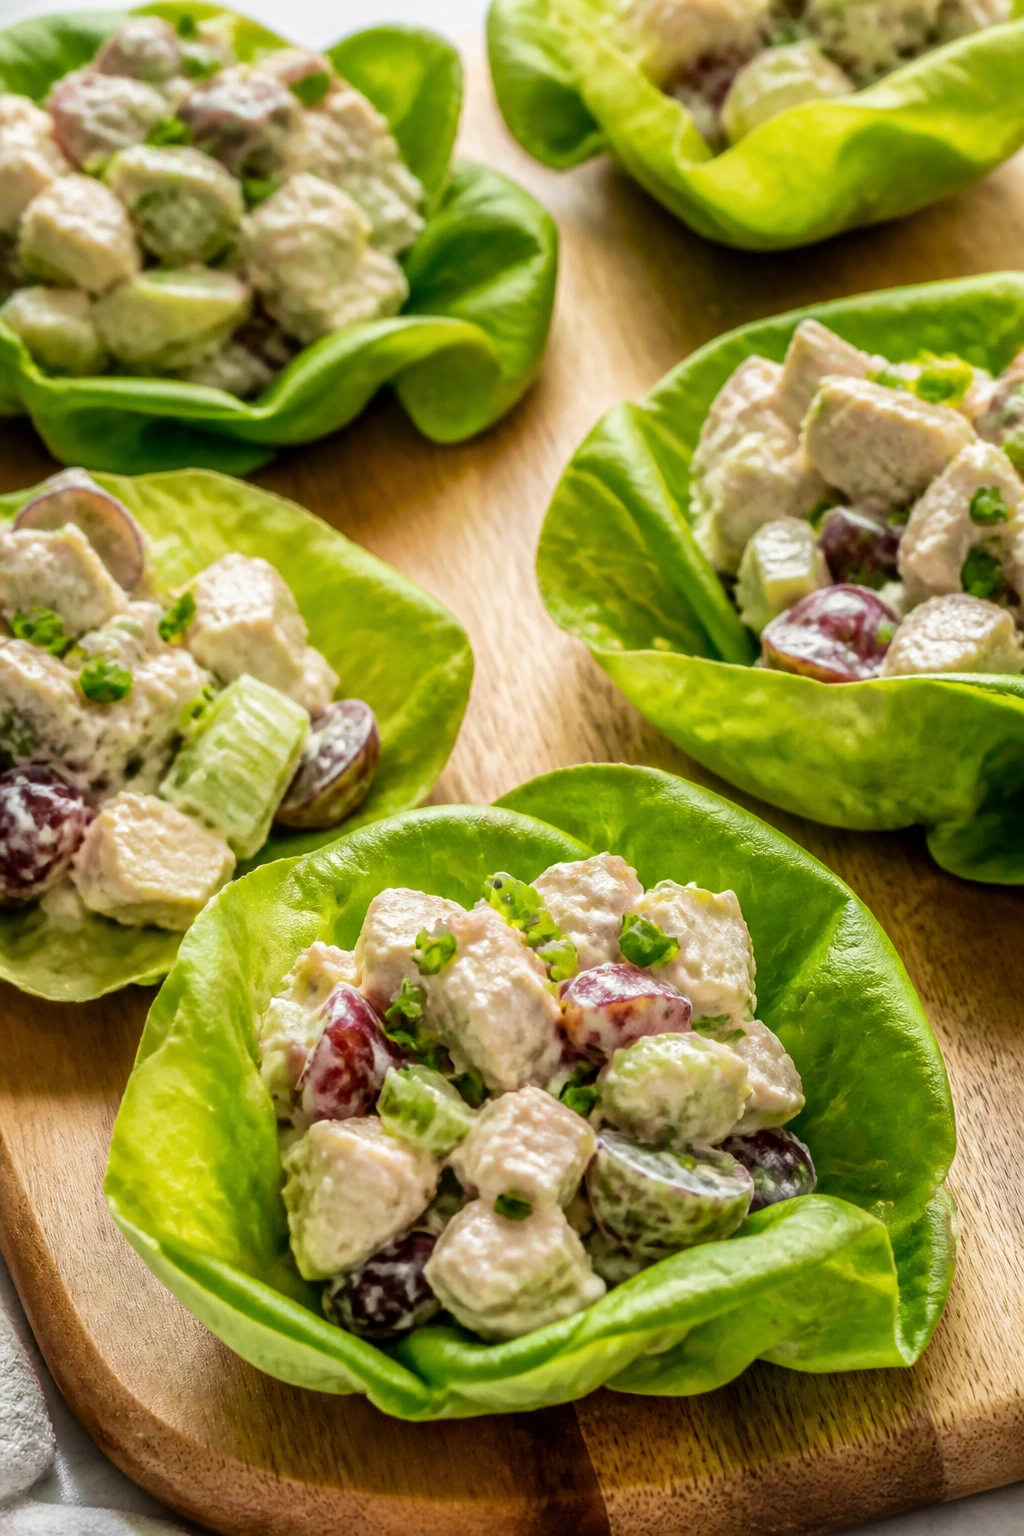
Intro: Chicken salad gets a lot more interesting when you serve it cold in lettuce cups instead of burying it between two slices of bread. The crisp edges of the lettuce keep every bite clean, and the filling stays bright.
Why It Works: Shredded chicken takes well to creamy dressing, but grapes and celery keep the texture moving. Lettuce cups keep the lunch light and make it easier to eat without utensils if you need to. I’d go with sparkling water and lemon here; it resets the palate between bites.
Key Ingredients:
- 2 cups cooked shredded chicken
- 1/3 cup mayonnaise
- 1 stalk celery, diced
- 1/4 cup red grapes, halved
- 1 tablespoon chopped chives
- 1 teaspoon lemon juice
- 8 butter lettuce leaves
- Salt and black pepper
Quick Steps:
- Stir the chicken with mayo, celery, grapes, chives, lemon, salt, and pepper.
- Chill the mixture for 10 to 15 minutes if you want the flavor to settle.
- Spoon into lettuce leaves.
- Serve immediately while the lettuce is crisp.
Equipment for This Recipe:
- Mixing bowl
- Spoon
- Cutting board
- Sharp knife
How to Serve This Dish: Serve with crackers or sliced cucumbers on the side. A cold unsweetened iced tea fits the creamy filling without adding more sweetness.
Pro Tips for This Recipe:
- Dry the lettuce leaves after washing or the filling slides around.
- Use rotisserie chicken if you want a shortcut, but shred it fine so the salad feels cohesive.
- Add chopped toasted almonds if you want more crunch.
Variations on This Dish:
- Curry Chicken Salad: Add curry powder and diced apple.
- Herb Garden Version: Use dill, parsley, and tarragon instead of chives.
Common Mistakes to Avoid with This Dish:
- Overfilling the leaves: They split or fold shut.
- Watery lettuce: It dilutes the dressing.
- Using chicken pieces that are too big: The salad feels clumsy.
12. Cold Sesame Soba Noodle Bowls
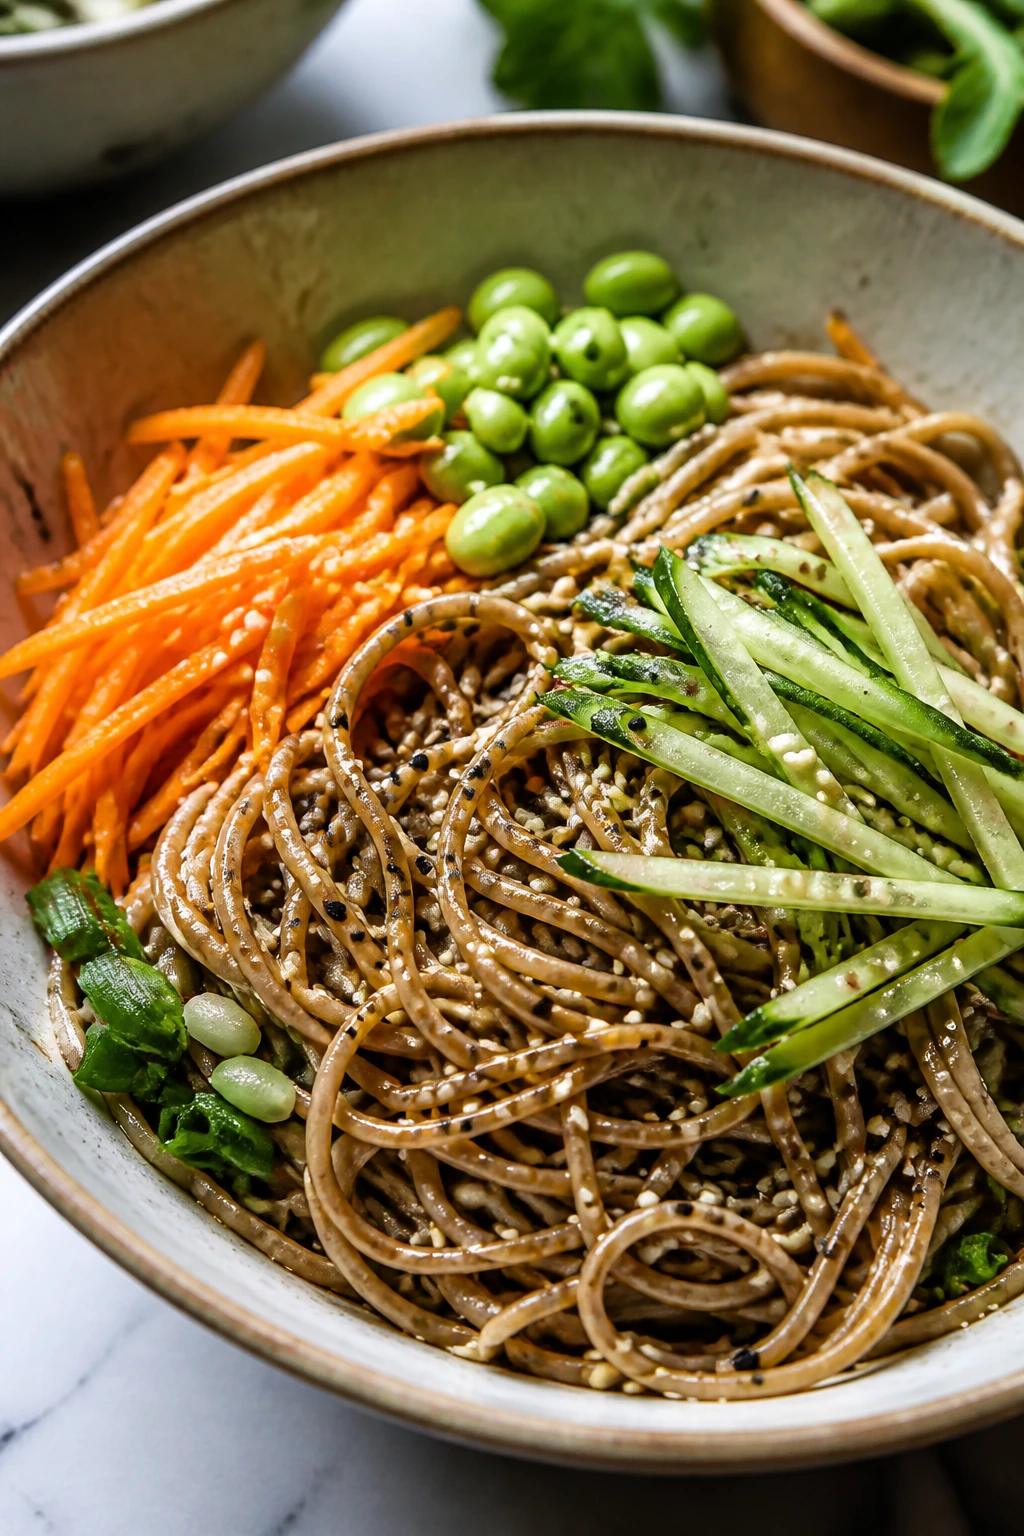
Intro: Soba noodles bring a nutty taste that holds up cold, which is why they work so well for lunch when the air feels heavy. Once they’re rinsed and dressed, they stay springy instead of clumping.
Why It Works: Sesame, soy, and lime create a sauce that clings to the noodles without making them slick. Cucumber and carrots add crunch, and edamame gives the bowl enough substance to count as lunch. This is one of my favorite matches with cold green tea because the tea cuts through the sesame oil cleanly.
Key Ingredients:
- 8 ounces soba noodles
- 2 tablespoons soy sauce
- 1 tablespoon sesame oil
- 1 tablespoon rice vinegar
- 1 tablespoon lime juice
- 1 teaspoon honey
- 1 cup shelled edamame
- 1 cup cucumber matchsticks
- 1 cup shredded carrots
- 2 tablespoons sesame seeds
Quick Steps:
- Cook the soba noodles according to the package, then rinse under cold water until cool.
- Whisk soy sauce, sesame oil, vinegar, lime juice, and honey.
- Toss the noodles with edamame, cucumber, carrots, and dressing.
- Sprinkle with sesame seeds and chill for 10 minutes if desired.
- Serve cold or cool room temperature.
Equipment for This Recipe:
- Pot
- Colander
- Whisk
- Large bowl
How to Serve This Dish: Serve in shallow bowls with chopsticks or a fork, whichever feels easier. A cold ginger-lime drink works especially well here.
Pro Tips for This Recipe:
- Rinse the noodles well or they turn gummy.
- Cut the vegetables thin so they mingle with the noodles instead of sitting on top.
- Taste after chilling; soba often needs a pinch more salt once cold.
Variations on This Dish:
- Peanut Soba Bowl: Add peanut butter to the dressing for a richer sauce.
- Chicken Add-On: Top with sliced grilled chicken for a heartier lunch.
Common Mistakes to Avoid with This Dish:
- Leaving the noodles warm: They soak up dressing too fast and go soft.
- Heavy sauce: Sesame oil should coat, not swamp.
- Thick vegetable cuts: They make the bowl feel disconnected.
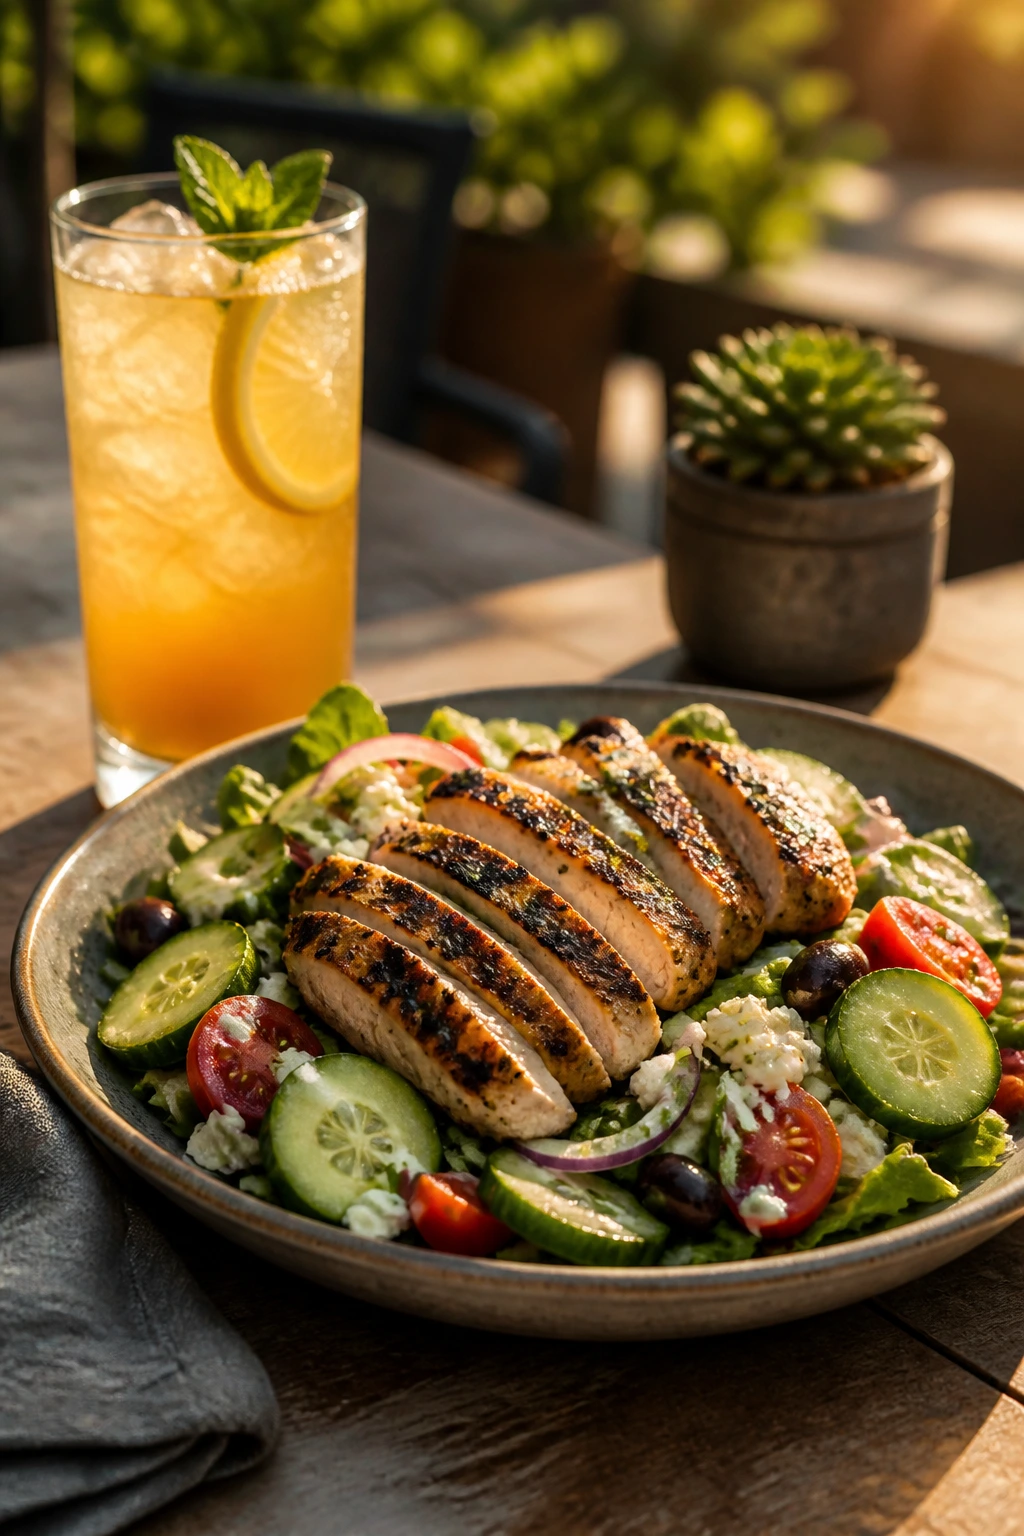
13. Steak Salad with Blue Cheese and Corn
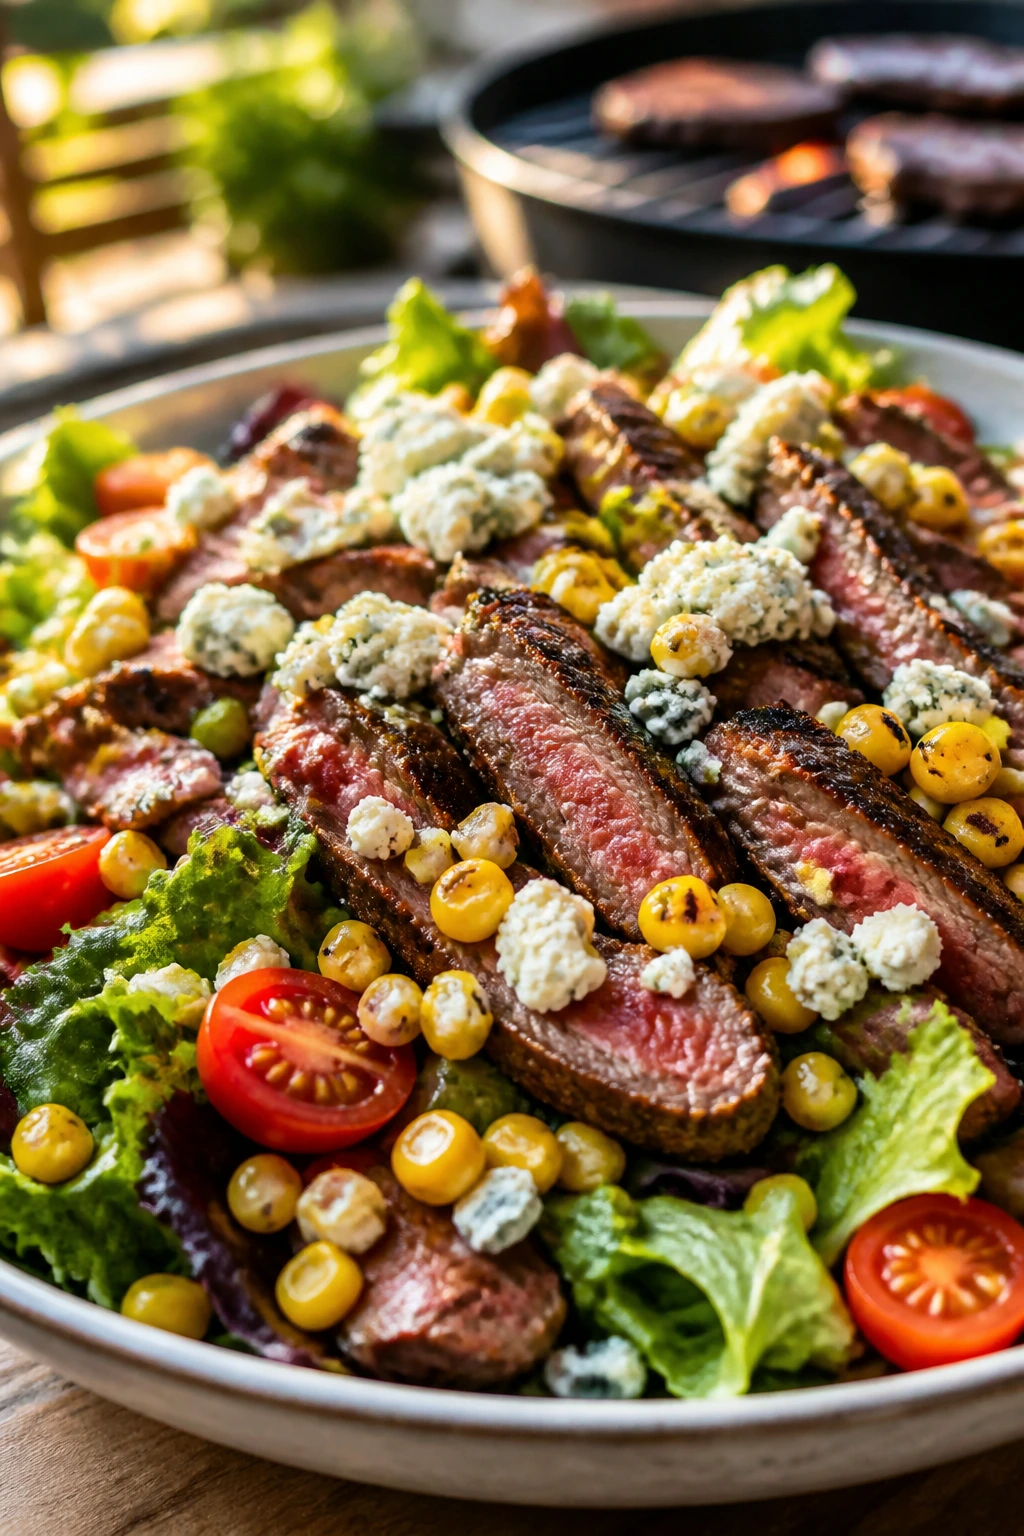
Intro: This is the lunch for days when you want salad to act like a full meal, not a side dish. The steak brings smoke and chew, the blue cheese adds bite, and the corn slips in a little sweetness.
Why It Works: A hot grill gives the steak a crust, which is what keeps the salad from tasting too polite. Blue cheese and tomato handle the richness, and the corn gives you a summer note that ties back to the grill. I like this with a cold pilsner or sparkling water with lemon, depending on whether lunch is casual or not.
Key Ingredients:
- 1 pound flank steak
- 1 tablespoon olive oil
- 1 teaspoon salt
- 1/2 teaspoon black pepper
- 4 cups salad greens
- 1 cup grilled or cooked corn kernels
- 1 cup cherry tomatoes
- 1/4 cup blue cheese crumbles
- 3 tablespoons vinaigrette
Quick Steps:
- Season the steak with oil, salt, and pepper.
- Grill or sear over high heat for 3 to 5 minutes per side, depending on thickness.
- Rest 10 minutes, then slice thinly against the grain.
- Toss greens, corn, and tomatoes with vinaigrette.
- Top with steak and blue cheese.
Equipment for This Recipe:
- Grill or skillet
- Cutting board
- Sharp knife
- Salad bowl
How to Serve This Dish: Plate it on a wide dish so the steak slices sit on top of the greens. A cold beer or iced tea both work, depending on how savory you want the meal to feel.
Pro Tips for This Recipe:
- Slice against the grain or the steak gets chewy.
- Add the cheese at the end so it doesn’t disappear into the dressing.
- Let the steak cool slightly before slicing to keep the juices in the meat.
Variations on This Dish:
- Avocado Version: Add sliced avocado for extra softness.
- Herby Vinaigrette: Use basil or tarragon in the dressing for a greener finish.
Common Mistakes to Avoid with This Dish:
- Cutting with the grain: The steak turns stringy.
- Overdressing the greens: The salad loses its crunch.
- Skipping the rest: Juice runs out instead of staying in the meat.
14. Pesto Chicken Panini
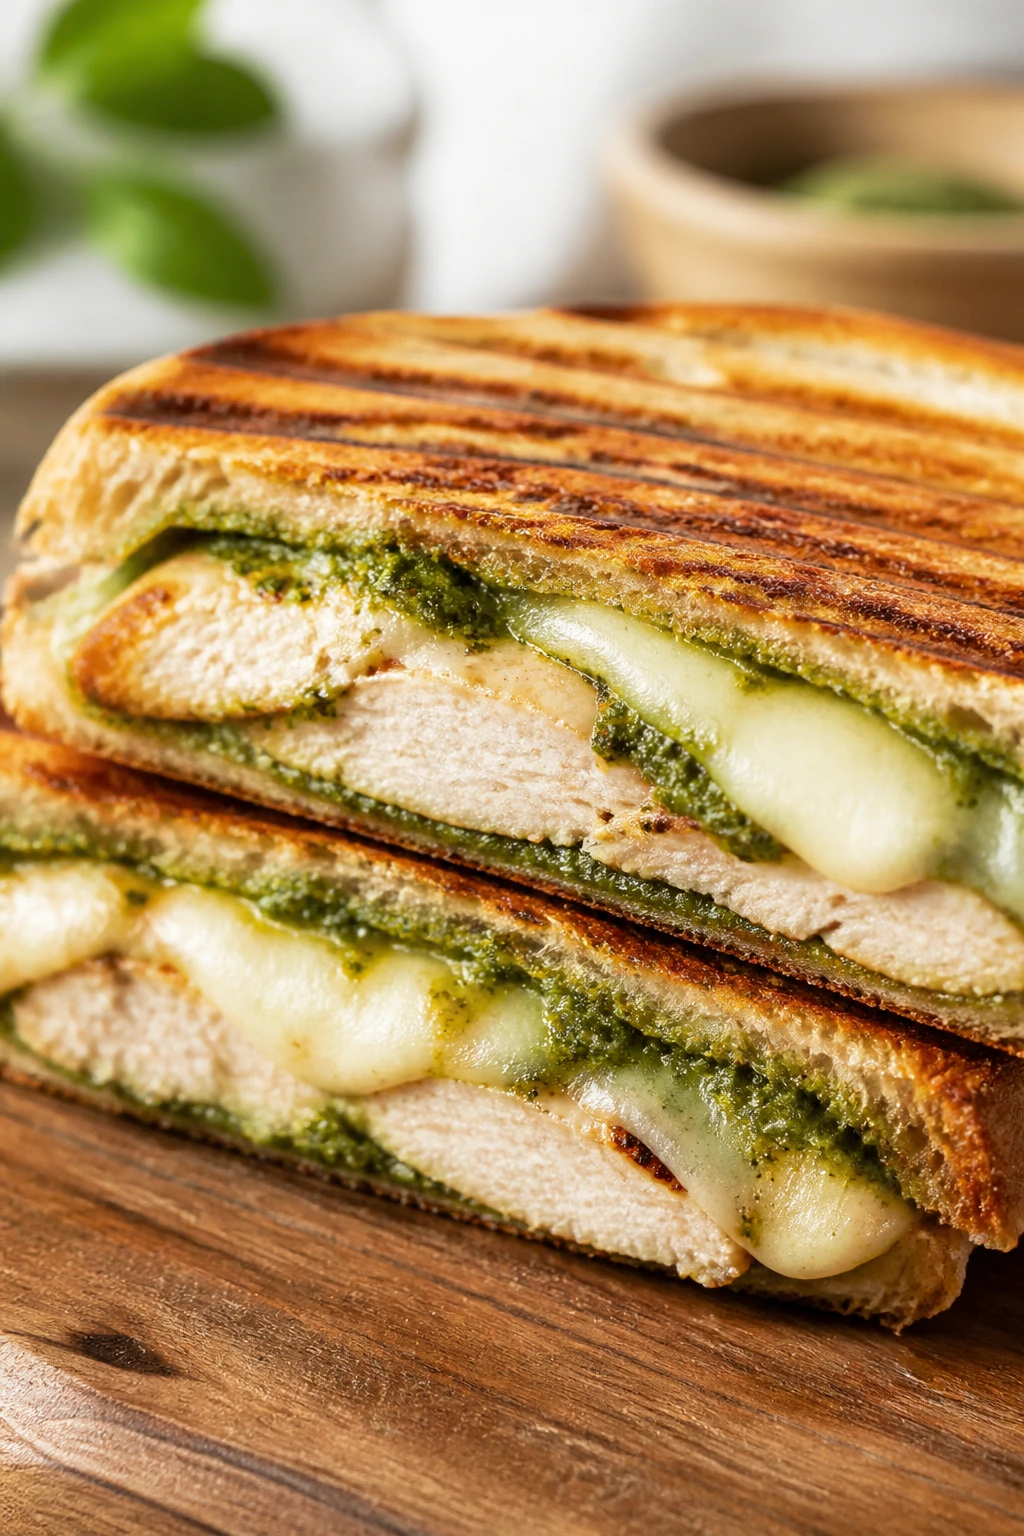
Intro: This sandwich belongs in the lunch rotation because it hits three needs at once: toasted bread, melted cheese, and something green that doesn’t feel like an afterthought. Pesto does the heavy lifting.
Why It Works: Pesto brings herbs, garlic, oil, and salt in one spoonful, which is why it can carry chicken and mozzarella without needing much else. Pressing the sandwich makes the bread crisp and the cheese melt into the chicken. A cold lemonade or fizzy water keeps the richness from sticking around too long.
Key Ingredients:
- 4 slices sturdy bread
- 1 cup cooked chicken, sliced
- 2 tablespoons pesto
- 4 slices mozzarella
- 2 slices tomato
- 1 teaspoon olive oil
Quick Steps:
- Spread pesto on the bread.
- Layer chicken, mozzarella, and tomato between the slices.
- Brush the outside of the bread lightly with olive oil.
- Cook in a panini press or skillet with a heavy pan on top for 3 to 4 minutes per side, until golden and melted.
- Rest for 1 minute before cutting.
Equipment for This Recipe:
- Panini press or skillet
- Heavy pan or foil-wrapped brick
- Knife
- Spatula
How to Serve This Dish: Cut in half and serve with pickles. A cold iced tea with lemon suits the pesto and keeps the cheese from feeling too rich.
Pro Tips for This Recipe:
- Pat the tomato dry so the bread stays crisp.
- Use thin chicken slices for cleaner melting.
- Don’t overfill; panini press sandwiches need room to compress.
Variations on This Dish:
- Turkey Pesto Panini: Swap in sliced turkey.
- Caprese Version: Skip the chicken and add extra tomato and basil.
Common Mistakes to Avoid with This Dish:
- Too much pesto: The bread gets greasy.
- Cold cheese from the fridge: It melts unevenly.
- Pressing too hard: The filling spills out the sides.
15. Watermelon Feta Quinoa Salad
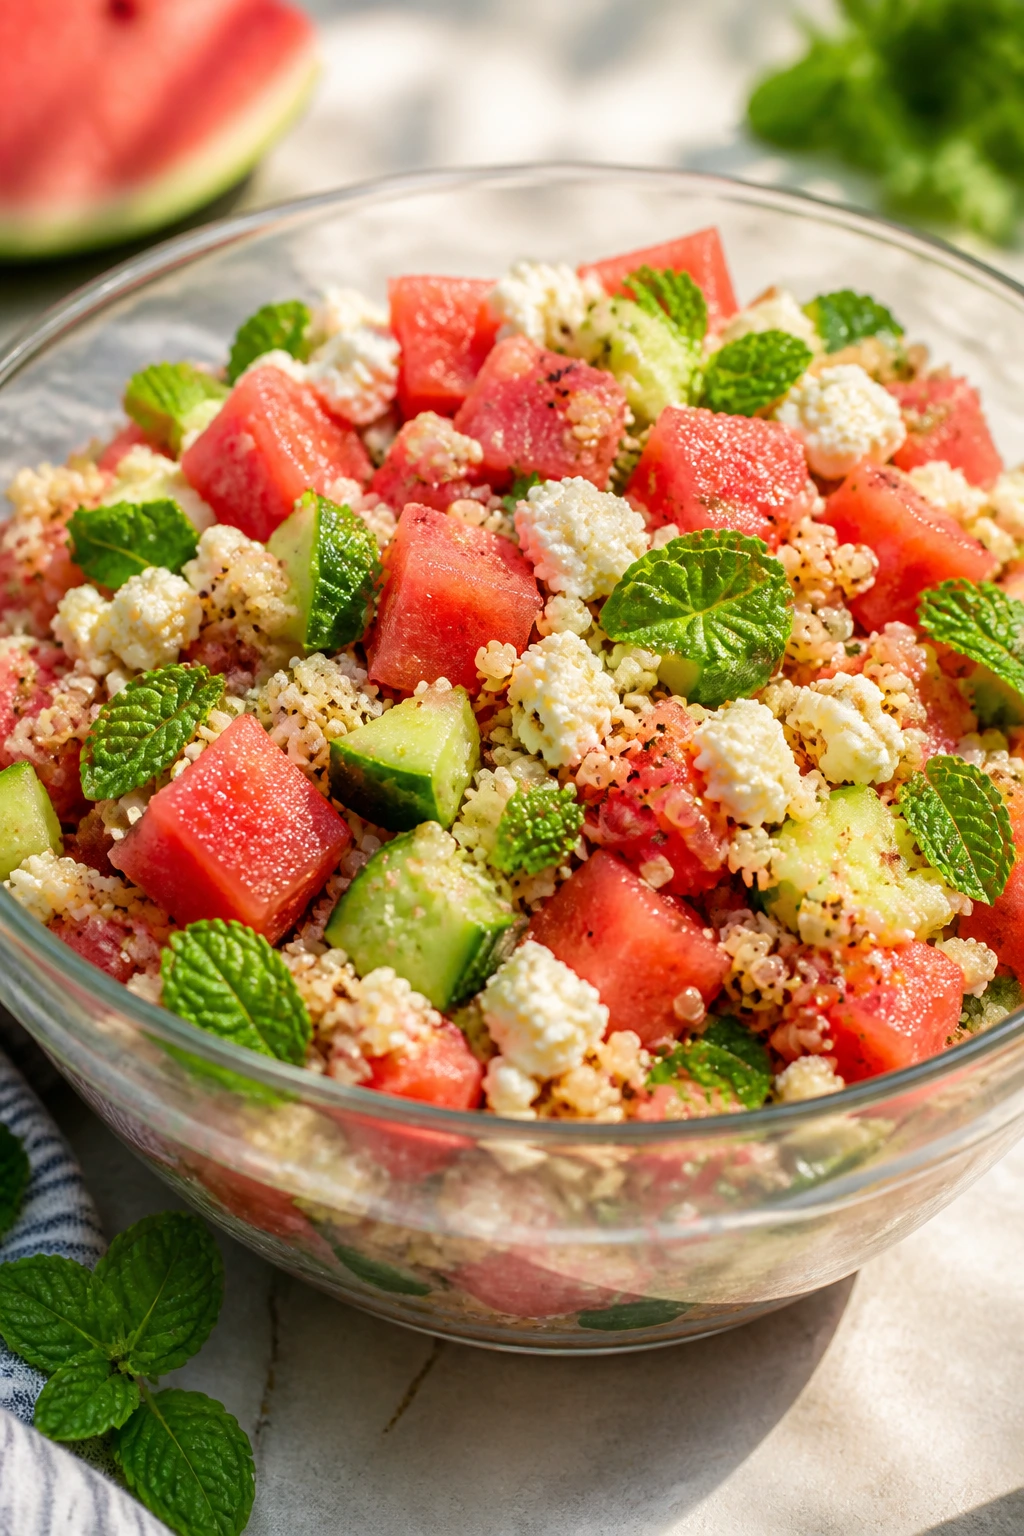
Intro: Watermelon in salad can sound like a trick until you taste it with feta and mint. Then it makes perfect sense. The sweetness, salt, and cool crunch all land in the same bite.
Why It Works: Quinoa gives the salad enough body to count as lunch, while watermelon keeps it juicy and fresh. Feta and lime sharpen the edges, and mint makes the whole bowl smell like a shaded patio. I’d pour cold sparkling water with lime over this and call it a good afternoon.
Key Ingredients:
- 1 cup quinoa
- 2 cups water
- 3 cups watermelon, cubed
- 3/4 cup feta, crumbled
- 1/2 cucumber, diced
- 1/4 cup mint leaves, chopped
- 2 tablespoons olive oil
- 1 lime, juiced
- Pinch of salt
Quick Steps:
- Simmer the quinoa in water for about 15 minutes, then cool it to room temperature.
- Toss quinoa with watermelon, feta, cucumber, mint, olive oil, lime juice, and salt.
- Chill for 10 minutes if you want the flavors tighter.
- Taste and add another squeeze of lime if needed.
Equipment for This Recipe:
- Medium saucepan
- Fine strainer
- Mixing bowl
- Fork
How to Serve This Dish: Serve in shallow bowls with extra mint on top. A cold cucumber soda or very light lemonade matches the salty-sweet mix.
Pro Tips for This Recipe:
- Cool the quinoa fully or it softens the watermelon.
- Use firm watermelon, not the overripe end of the melon.
- Crumble the feta by hand for a cleaner texture.
Variations on This Dish:
- Arugula Version: Toss in a handful of peppery arugula.
- Add Chickpeas: Stir in chickpeas for more protein and a firmer bite.
Common Mistakes to Avoid with This Dish:
- Mixing while the quinoa is hot: The melon breaks down.
- Too much dressing: The salad turns watery.
- Very salty feta plus extra salt: Taste before seasoning twice.
16. Egg Salad with Dill and Pickles
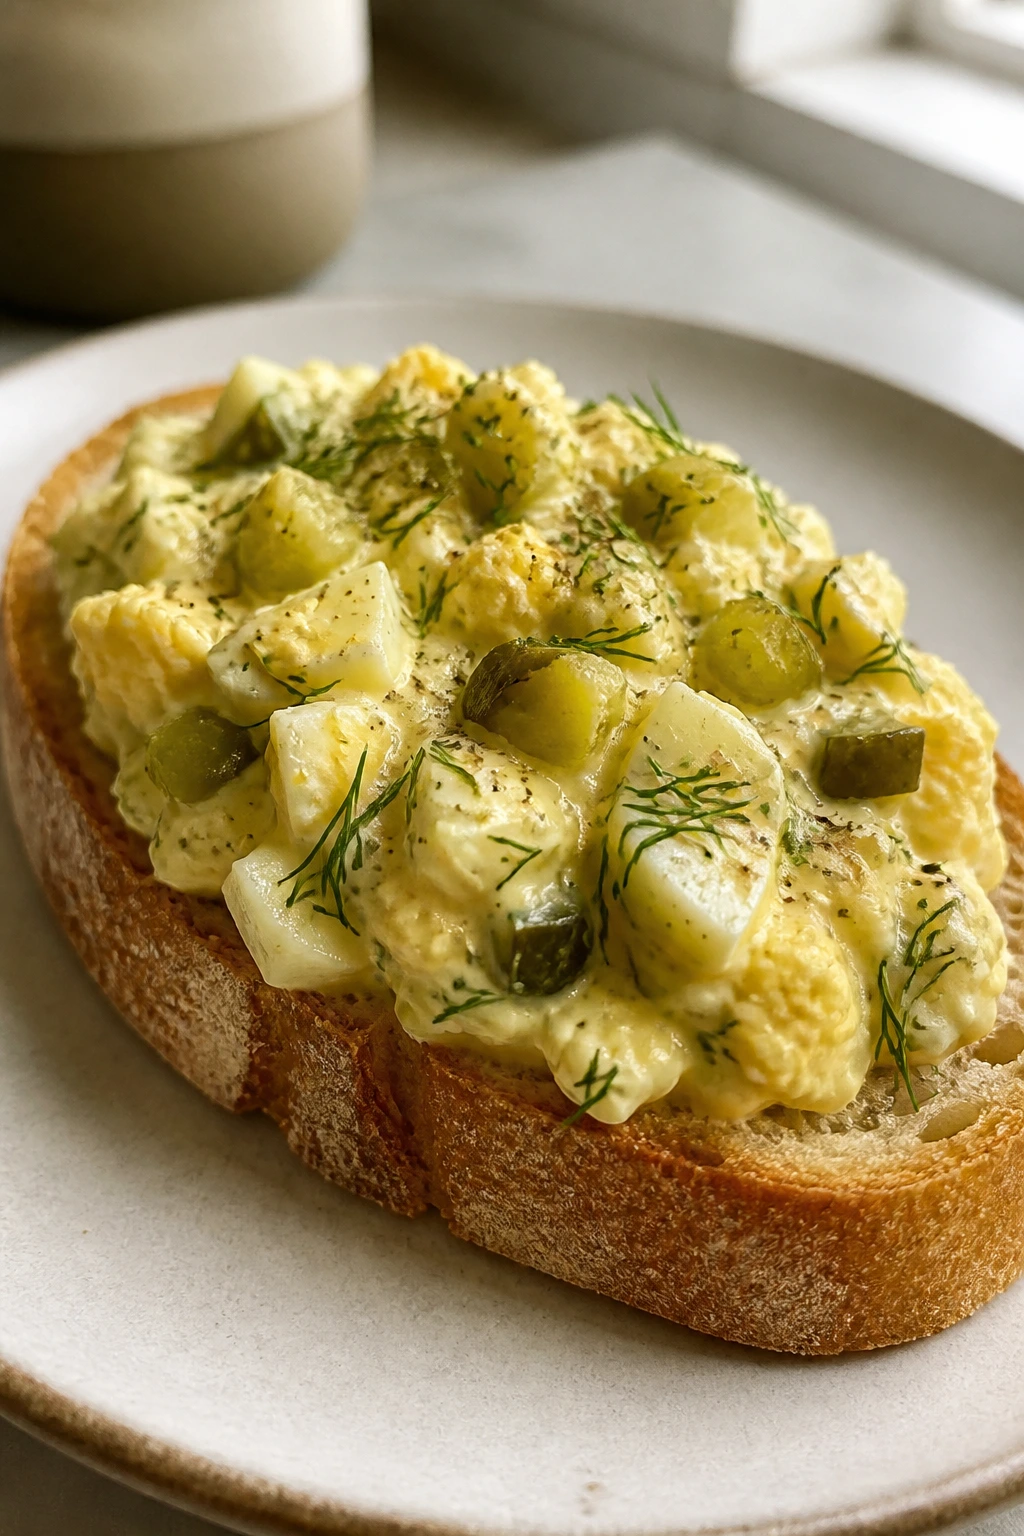
Intro: Egg salad gets better when it’s cool, sharp, and a little briny. Dill and pickles keep the filling from drifting into blandness, which is a common problem with egg salad.
Why It Works: Eggs bring creamy richness, pickle juice or chopped pickles bring acid, and dill makes the whole thing taste fresher. This is a very good lunch for crackers, toast, or lettuce cups, depending on how much bread you want. A cold tomato juice or iced tea suits it better than something sweet.
Key Ingredients:
- 6 large eggs
- 1/4 cup mayonnaise
- 1 tablespoon chopped dill pickles
- 1 teaspoon Dijon mustard
- 1 tablespoon chopped dill
- 1 tablespoon chopped chives
- Salt and black pepper
- Bread, crackers, or lettuce for serving
Quick Steps:
- Hard-boil the eggs, cool them in ice water, and peel them.
- Chop the eggs into small pieces.
- Mix with mayo, pickles, mustard, dill, chives, salt, and pepper.
- Chill for 15 minutes if you have time.
- Serve on bread, crackers, or lettuce.
Equipment for This Recipe:
- Saucepan
- Slotted spoon
- Mixing bowl
- Fork or spoon
How to Serve This Dish: Serve with sliced cucumber or tomato on the side. A cold unsweetened drink keeps the richness from feeling too thick.
Pro Tips for This Recipe:
- Slightly undercook the eggs if you want a tender yolk and a clean chop.
- Chop the eggs by hand, not in a food processor, or the texture goes pasty.
- Add a spoonful of pickle brine if you want more tang.
Variations on This Dish:
- Curried Egg Salad: Add curry powder and a few raisins.
- Avocado Egg Salad: Replace half the mayo with mashed avocado.
Common Mistakes to Avoid with This Dish:
- Overcooking the eggs: The yolks get chalky and gray around the edges.
- Too much mixing: You want chunks, not paste.
- Serving it warm: Egg salad tastes cleaner when fully chilled.
17. Mediterranean Mezze Lunch Plate
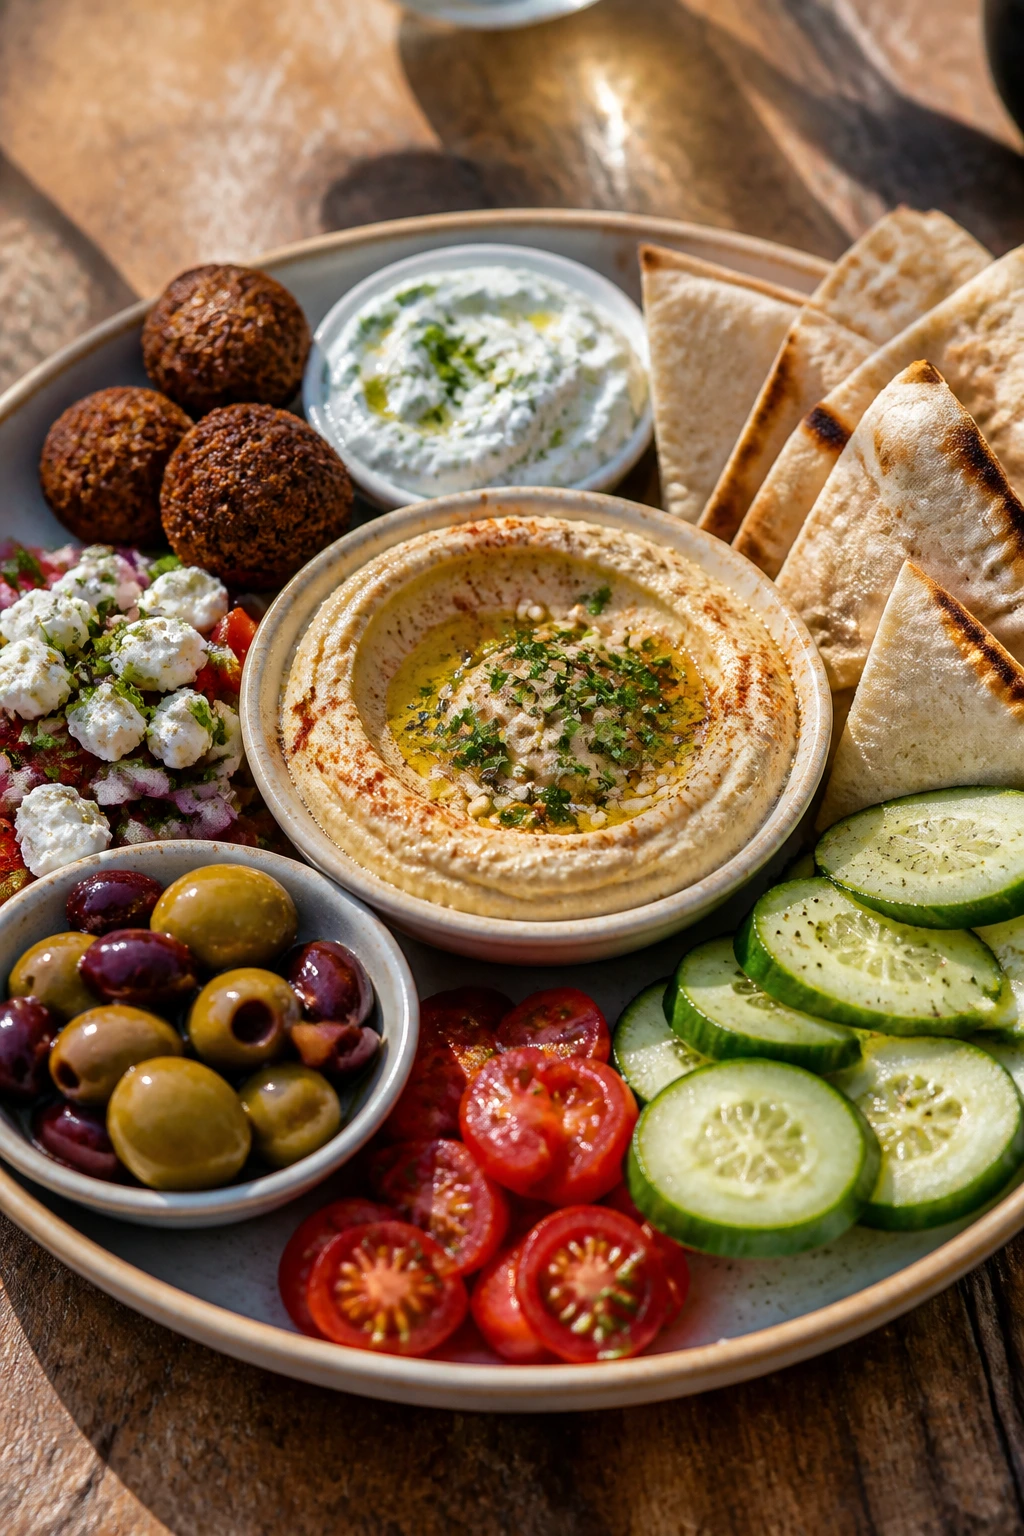
Intro: Some lunches don’t need cooking so much as arranging. A mezze plate is one of those meals, and if you get the balance right, it feels generous without making you slow down.
Why It Works: Hummus, olives, cucumbers, tomatoes, pita, and feta each play a different role, so no single element has to carry the plate. The contrast is the point: creamy, briny, crisp, and soft all in one tray. I’d serve this with sparkling water, mint tea over ice, or a very cold lemon soda.
Key Ingredients:
- 1 cup hummus
- 4 pita rounds, warmed and cut
- 1 cucumber, sliced
- 1 cup cherry tomatoes
- 1/2 cup olives
- 3 ounces feta
- 1 cup cooked falafel or chickpeas
- 2 tablespoons olive oil
Quick Steps:
- Warm the pita briefly so it bends instead of cracking.
- Spoon hummus onto a plate or tray.
- Arrange the vegetables, olives, feta, and falafel or chickpeas around it.
- Drizzle with olive oil and serve with pita.
Equipment for This Recipe:
- Cutting board
- Knife
- Serving plate or tray
- Small bowl for olive oil
How to Serve This Dish: Build it family-style so everyone can tear off pita and scoop. A cold cucumber-lime drink or sparkling water fits the fresh, salty profile.
Pro Tips for This Recipe:
- Serve the hummus at room temperature so it spreads easily.
- Salt the tomatoes lightly for a minute before plating.
- If you use chickpeas, toss them with olive oil and sumac.
Variations on This Dish:
- Chicken Mezze Plate: Add sliced grilled chicken.
- Spicy Version: Add harissa or chili oil to the hummus.
Common Mistakes to Avoid with This Dish:
- Serving cold hummus straight from the fridge: It firms up and tastes dull.
- Letting pita go stale: Warm it at the last minute.
- Overcrowding the plate: Leave room for scooping.
18. BBQ Pulled Chicken Sliders
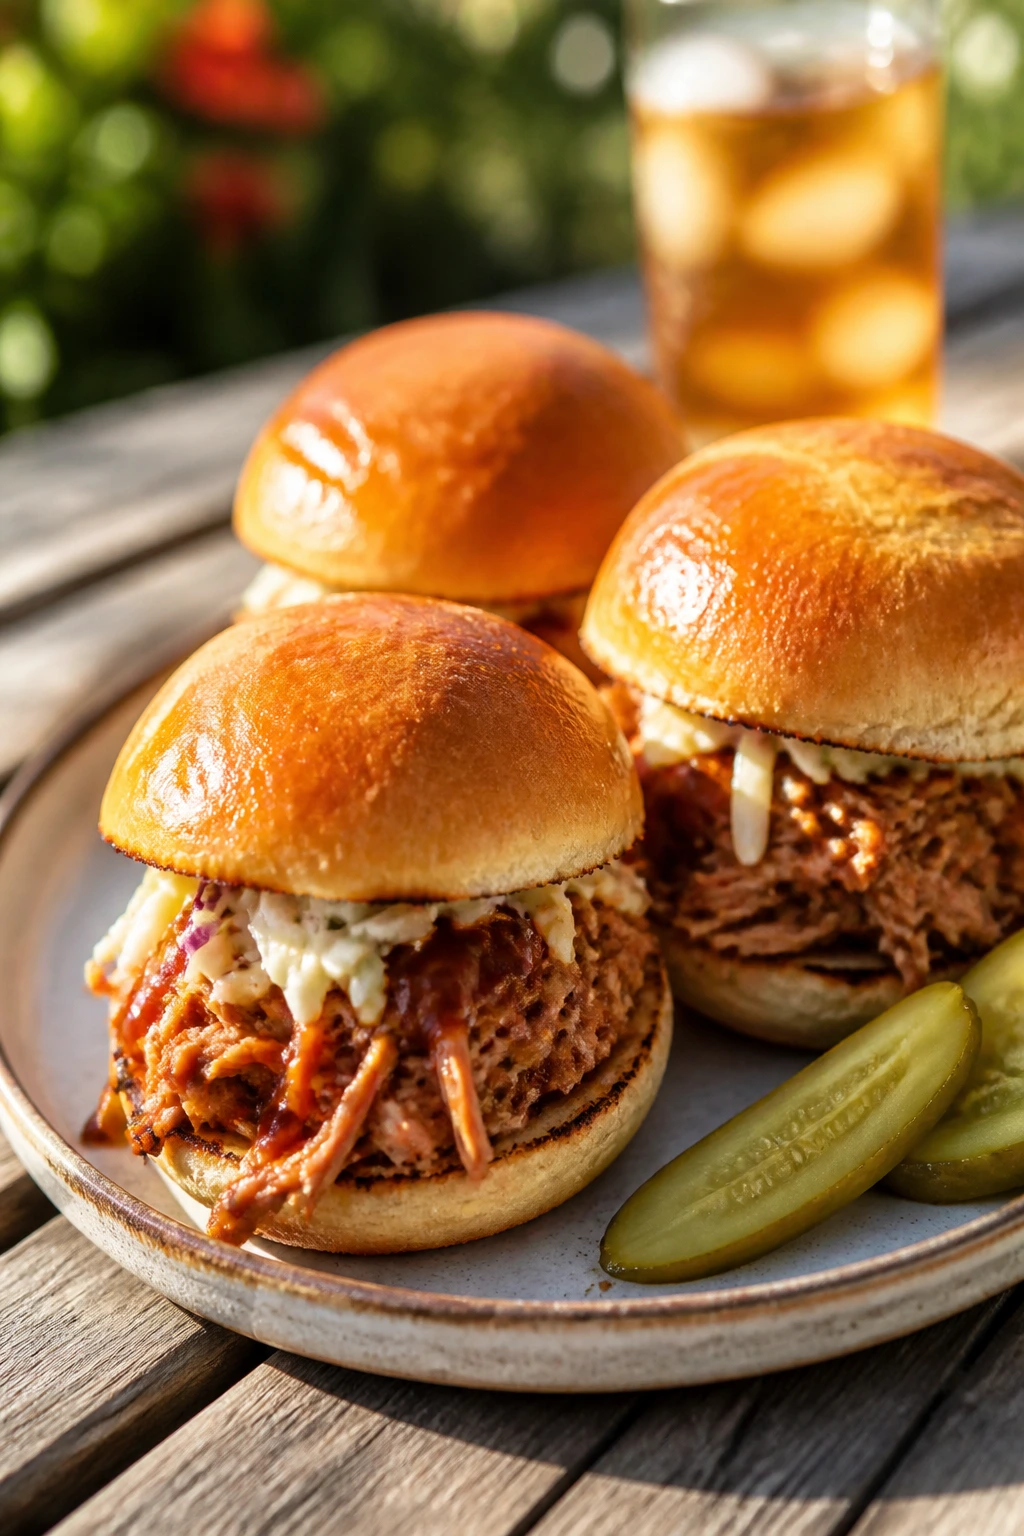
Intro: Pulled chicken has a way of feeling casual without being sloppy when the sauce is balanced. On a soft slider bun with a little slaw, it becomes the kind of lunch that goes down fast with an ice-cold drink.
Why It Works: The chicken soaks up barbecue sauce without needing much fat, which keeps the filling light enough for lunch. Slaw gives you crunch and vinegar, and the buns catch the sauce without falling apart if you toast them first. Cold cola, iced tea, or a sharp lemonade all work here.
Key Ingredients:
- 2 cups cooked shredded chicken
- 1/2 cup barbecue sauce
- 8 slider buns
- 1 cup coleslaw mix
- 2 tablespoons mayonnaise
- 1 teaspoon vinegar
- 1/2 teaspoon salt
- Pickles for serving
Quick Steps:
- Warm the chicken with barbecue sauce in a skillet over low heat.
- Stir coleslaw mix with mayo, vinegar, and salt.
- Toast the slider buns lightly.
- Fill each bun with sauced chicken, slaw, and pickles.
- Serve while warm.
Equipment for This Recipe:
- Skillet
- Mixing bowl
- Spoon
- Baking sheet or skillet for toasting buns
How to Serve This Dish: Stack the sliders on a tray with pickles on the side. A very cold cola or lemonade handles the sticky barbecue sauce well.
Pro Tips for This Recipe:
- Keep the sauce at a simmer, not a boil, or the chicken dries out.
- Toast the buns so they stand up to the sauce.
- Use a tangy slaw; sweet slaw makes the sliders taste too heavy.
Variations on This Dish:
- Buffalo Chicken Sliders: Swap barbecue sauce for buffalo sauce.
- Pineapple BBQ Version: Add chopped pineapple for a sweeter edge.
Common Mistakes to Avoid with This Dish:
- Saucing the chicken too early and too hard: It can turn stringy.
- Wet slaw: It makes the bun collapse.
- Serving on untoasted buns: They go soggy by the second bite.
19. Nicoise-Inspired Potato Salad
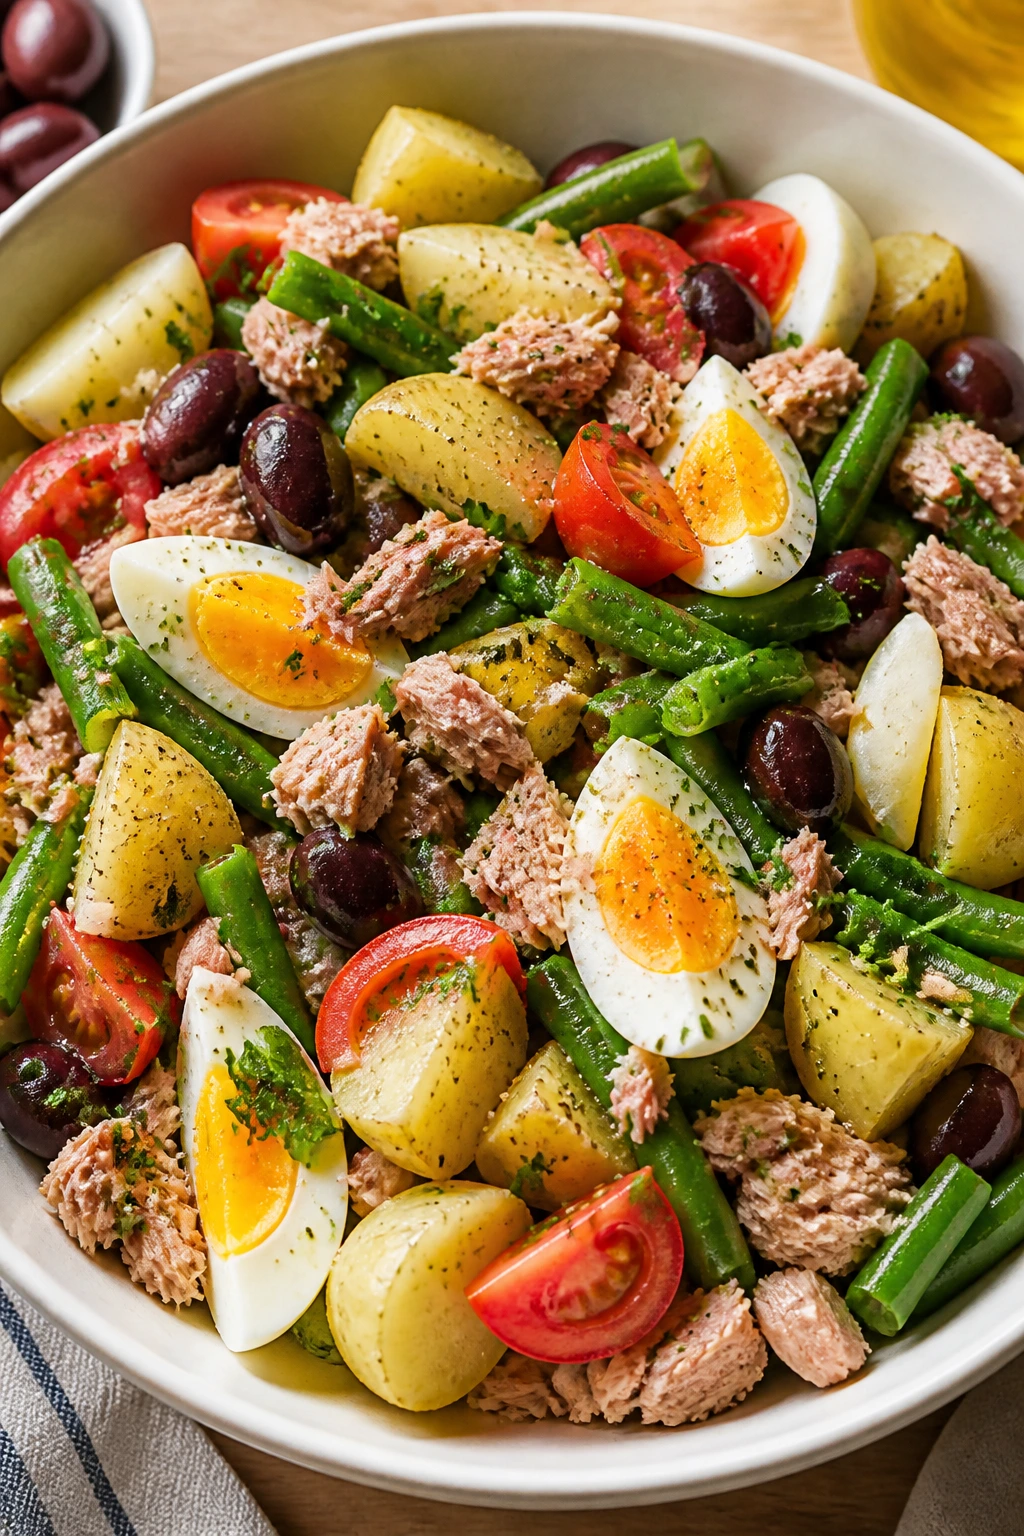
Intro: Potato salad gets a bad reputation when it’s all mayo and no brightness. A Nicoise-style version fixes that with tuna, eggs, green beans, olives, and a vinaigrette that keeps the potatoes awake.
Why It Works: The potatoes give the salad substance, but the green beans and tomatoes add bite and freshness. Tuna and eggs make it feel like lunch instead of a side dish, and olives bring the salty edge that cold drinks love. I’d pour a crisp sparkling water or a dry iced tea with this one.
Key Ingredients:
- 1 1/2 pounds small potatoes
- 1 cup green beans, trimmed
- 2 hard-boiled eggs, halved
- 1 can tuna, drained
- 1 cup cherry tomatoes, halved
- 1/4 cup olives
- 3 tablespoons vinaigrette
- Salt and black pepper
Quick Steps:
- Boil the potatoes until tender, then cool slightly and halve them.
- Blanch the green beans for 2 minutes and cool them in cold water.
- Toss potatoes with vinaigrette, salt, and pepper.
- Arrange with green beans, eggs, tuna, tomatoes, and olives.
- Serve at room temperature.
Equipment for This Recipe:
- Saucepan
- Colander
- Mixing bowl
- Knife
How to Serve This Dish: Plate it on a wide platter so the eggs and tuna stay visible. A cold lemon soda or dry sparkling water cuts through the olive oil nicely.
Pro Tips for This Recipe:
- Dress the potatoes while they’re still warm so they absorb more flavor.
- Don’t overboil the green beans; they should stay snappy.
- Use a tuna packed in olive oil if you want a richer finish.
Variations on This Dish:
- Anchovy Upgrade: Add chopped anchovies to the vinaigrette.
- Herb Garden Version: Add dill, parsley, and tarragon.
Common Mistakes to Avoid with This Dish:
- Mashing the potatoes in the bowl: Keep the pieces intact.
- Putting everything in hot: Eggs and tuna taste better once the potatoes cool a bit.
- Too much mayo: This version should stay vinaigrette-forward.
20. Salmon Salad Toasts
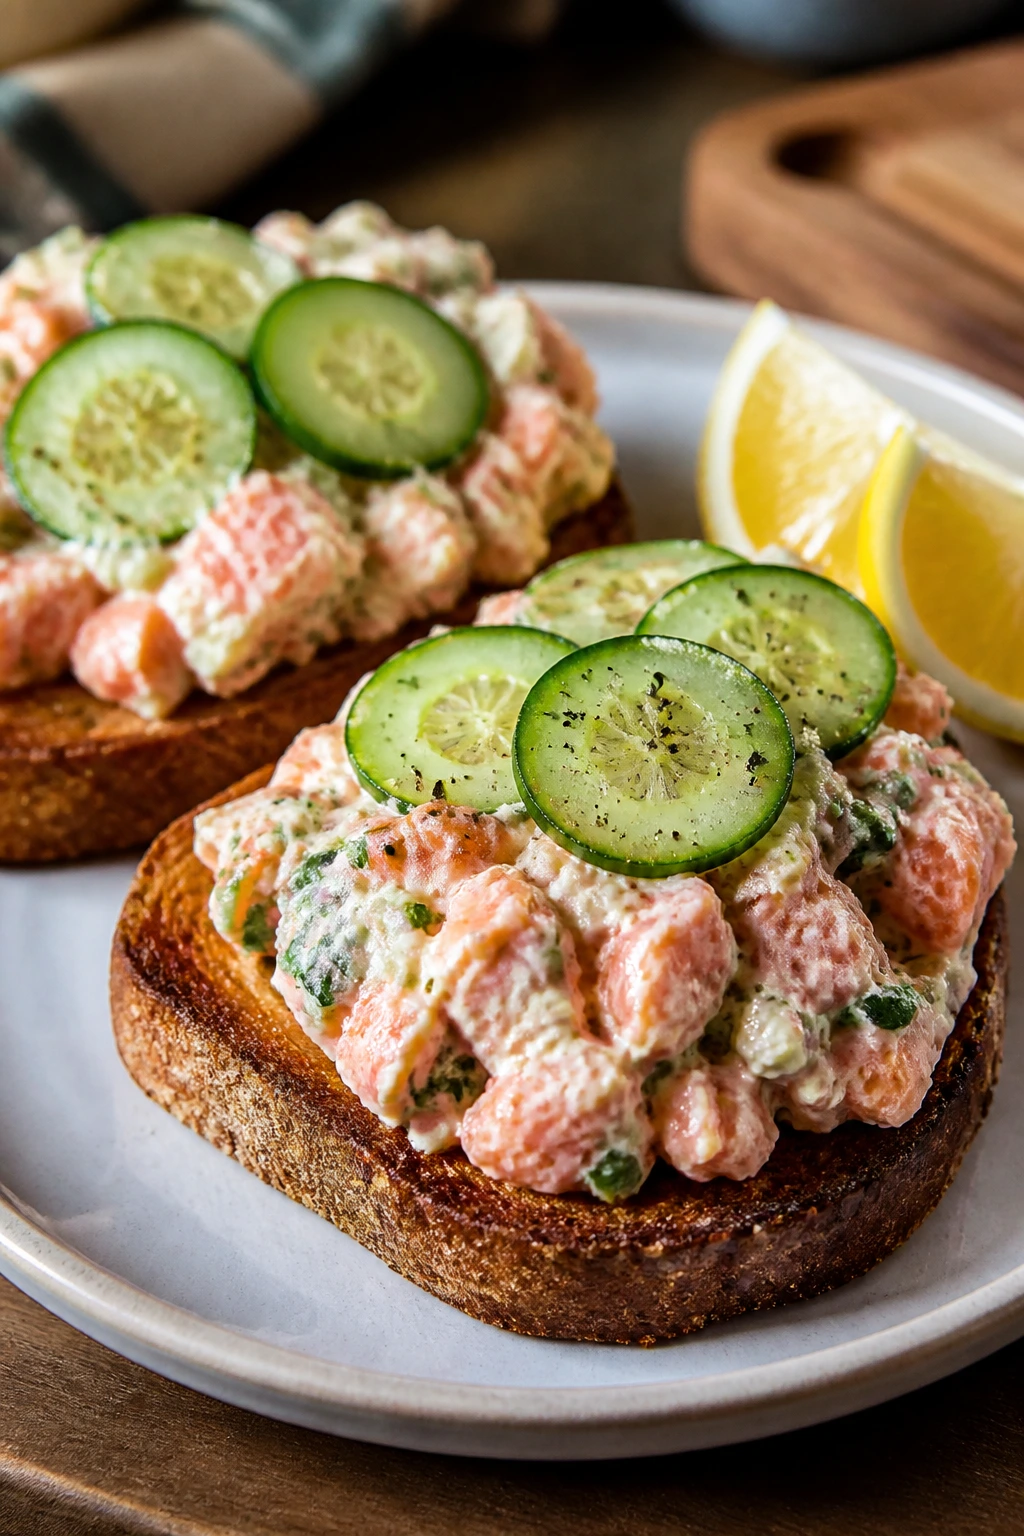
Intro: Salmon salad has the same easy charm as tuna salad, but the flavor is softer and a little richer. Spread it on toast, add cucumber, and you’ve got a lunch that feels finished without much work.
Why It Works: Salmon brings a buttery texture that pairs well with yogurt or mayo, and lemon keeps it from tasting heavy. Toasted bread gives the salad structure, while cucumber adds a cold, clean crunch. A cold white grape spritz or iced tea with lemon works well here.
Key Ingredients:
- 1 can salmon or 1 cup cooked flaked salmon
- 2 tablespoons mayonnaise or Greek yogurt
- 1 teaspoon lemon juice
- 1 tablespoon chopped dill
- 1 tablespoon finely chopped celery
- 4 slices toasted bread
- 1/2 cucumber, thinly sliced
- Salt and pepper
Quick Steps:
- Mix the salmon with mayo, lemon, dill, celery, salt, and pepper.
- Toast the bread until golden.
- Spoon the salmon salad onto the toast.
- Top with cucumber slices and more dill if you like.
- Serve immediately.
Equipment for This Recipe:
- Mixing bowl
- Fork
- Toaster or skillet
- Knife
How to Serve This Dish: Serve the toasts open-faced with a simple green salad. A cold sparkling lemon drink keeps the salmon from feeling too rich.
Pro Tips for This Recipe:
- Drain canned salmon well or the toast gets damp.
- Thin cucumber slices keep the bite tidy.
- A little mustard gives the salad a sharper backbone.
Variations on This Dish:
- Smoked Salmon Version: Use smoked salmon and skip the celery.
- Avocado Toast Base: Add mashed avocado under the salmon salad.
Common Mistakes to Avoid with This Dish:
- Using soft bread: It gives out under the filling.
- Too much dressing: The salmon should be coated, not swimming.
- Skipping acid: Lemon keeps the fish from tasting flat.
21. Roasted Veggie Hummus Wraps
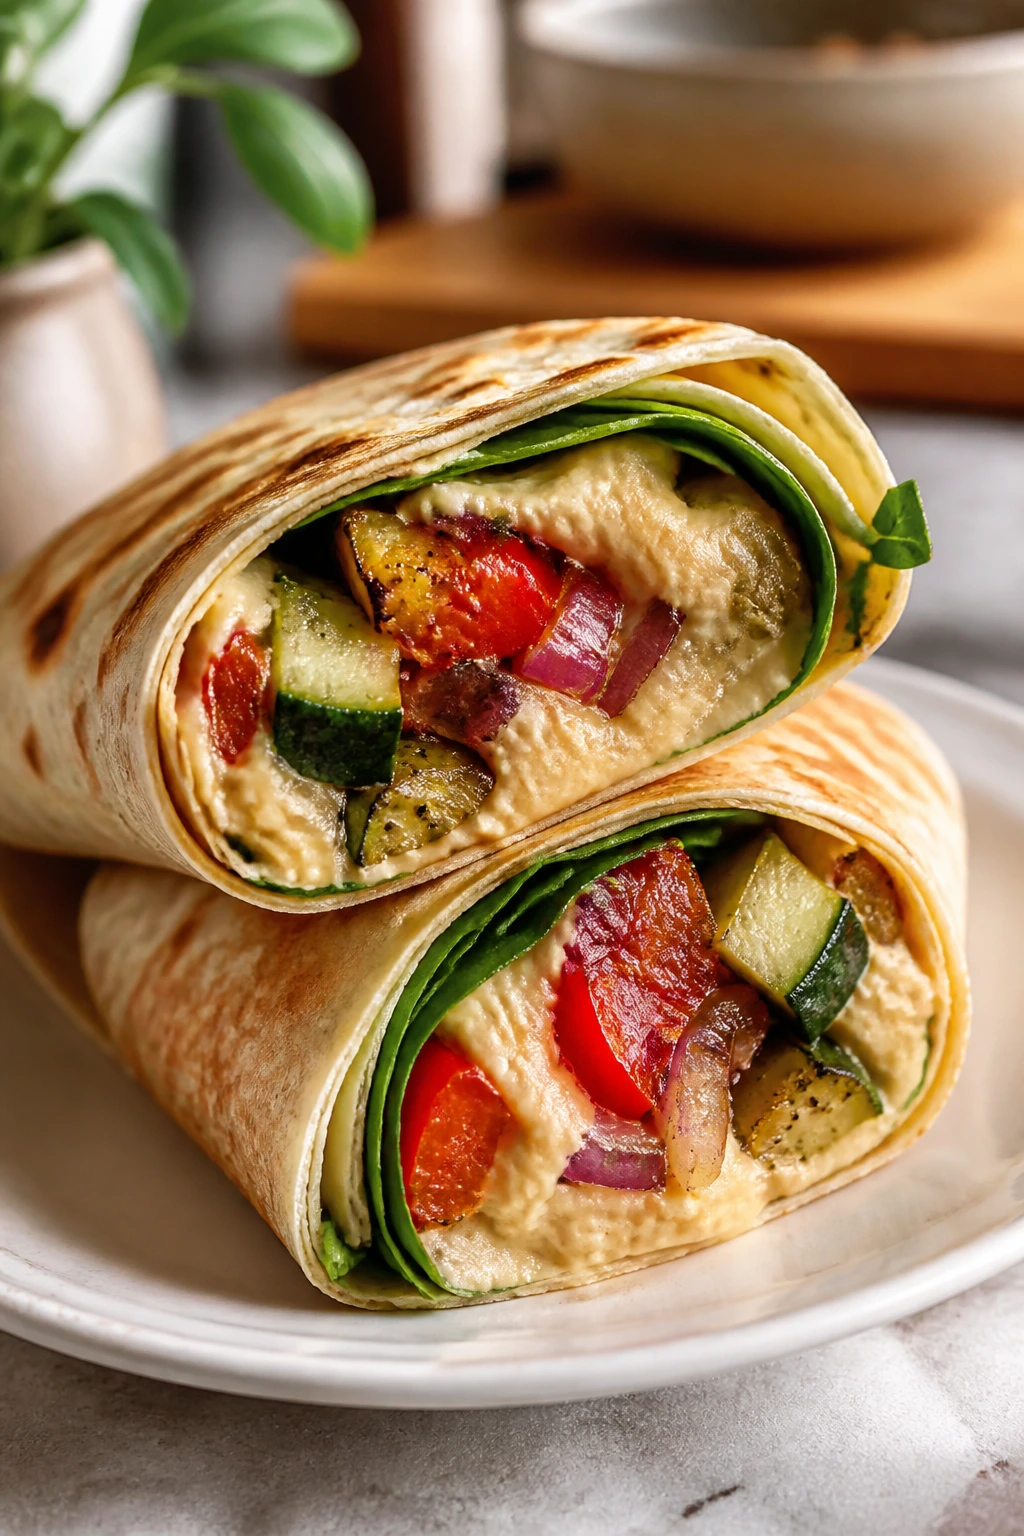
Intro: These wraps work because roasted vegetables bring sweetness and a little char, while hummus keeps everything creamy without making the wrap heavy. They taste good hot, warm, or cooled to room temperature, which is a rare and useful thing.
Why It Works: Zucchini, peppers, and onions roast into something softer and deeper than raw vegetables ever will. Hummus acts like glue, keeping the filling together, and spinach adds a fresh finish. I’d pair this with mint iced tea or cucumber water because both drinks echo the vegetables instead of overpowering them.
Key Ingredients:
- 1 zucchini, sliced
- 1 red bell pepper, sliced
- 1 small red onion, sliced
- 1 tablespoon olive oil
- 1/2 teaspoon salt
- 1 cup hummus
- 4 large tortillas
- 2 cups spinach
- 1/4 cup feta, optional
Quick Steps:
- Roast the vegetables at 425°F for 18 to 20 minutes, until browned at the edges.
- Warm the tortillas briefly.
- Spread each tortilla with hummus.
- Fill with vegetables, spinach, and feta.
- Roll tightly and slice in half.
Equipment for This Recipe:
- Sheet pan
- Parchment paper
- Spatula
- Knife
How to Serve This Dish: Slice the wraps in half and wrap the bottoms in parchment if you’re packing them. A cold lemon water or iced mint tea keeps the roasted vegetables feeling bright.
Pro Tips for This Recipe:
- Roast the vegetables in one layer or they steam instead of caramelize.
- Let the vegetables cool a little before wrapping so they don’t wilt the spinach instantly.
- Use thick hummus; thin hummus leaks.
Variations on This Dish:
- Falafel Wrap: Add falafel for more protein and crunch.
- Harissa Version: Stir harissa into the hummus for heat.
Common Mistakes to Avoid with This Dish:
- Overcrowding the pan: The vegetables go soft instead of browned.
- Assembling while the vegetables are piping hot: The wrap gets limp.
- Using watery hummus: It slips right out.
22. Greek Orzo Salad with Chicken
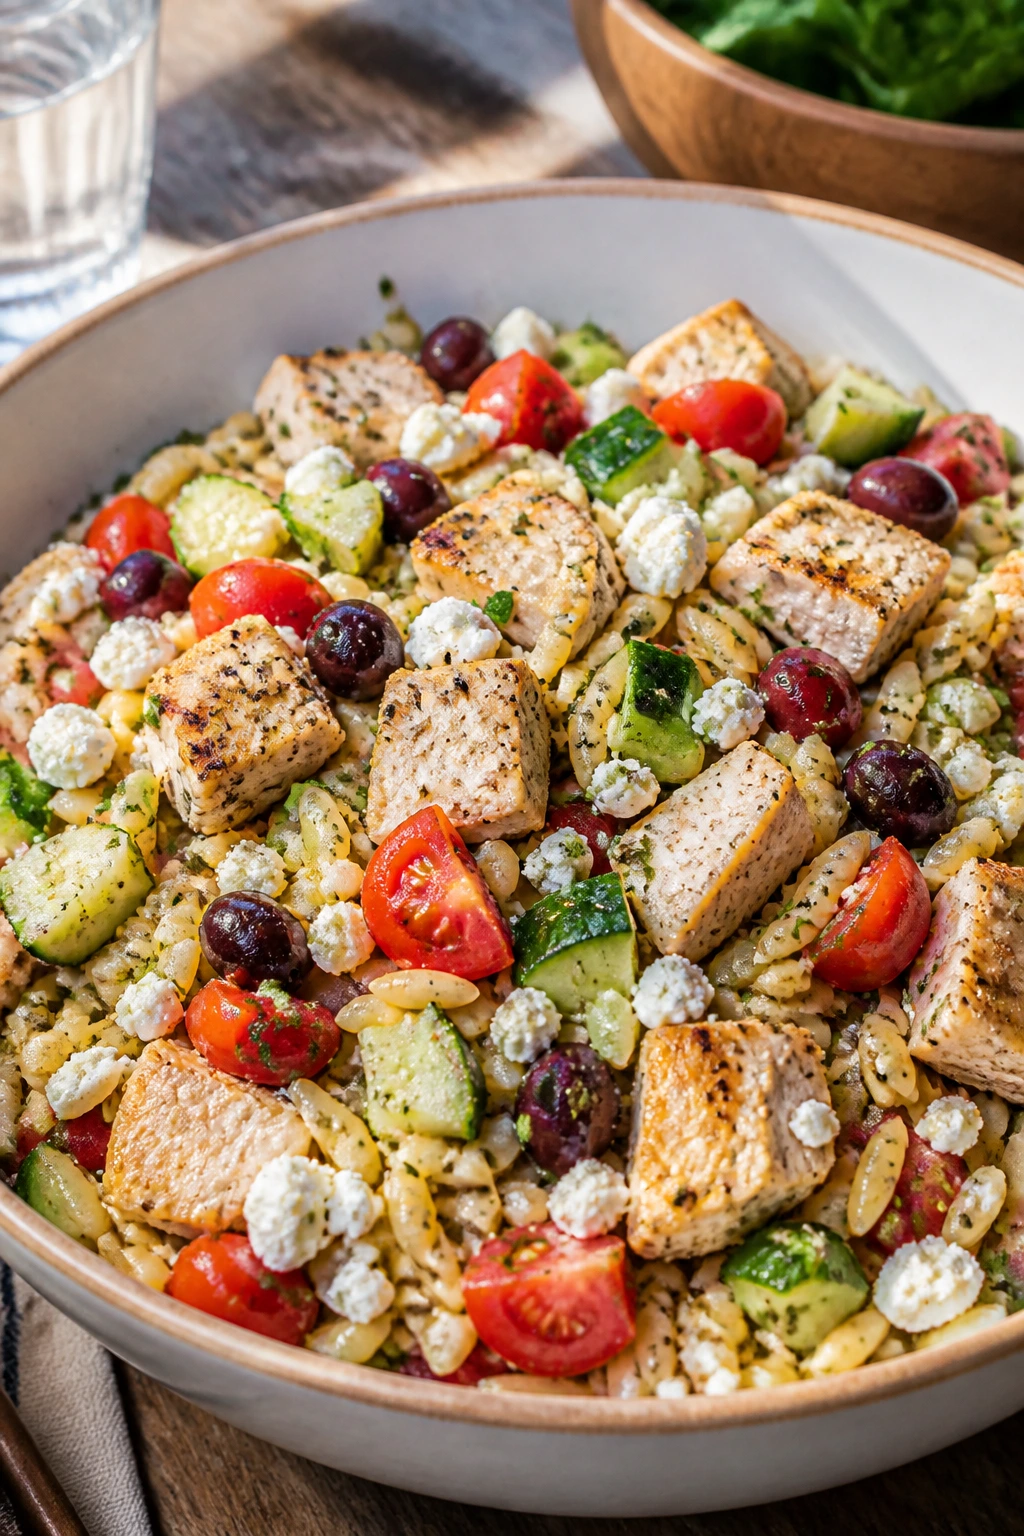
Intro: Orzo salad eats like a pasta dish but packs like a grain salad, which makes it a smart lunch for a cooler bag or a long table outside. The chicken turns it from side dish to meal.
Why It Works: Orzo catches vinaigrette in its curves, while cucumber, tomato, olive, and feta give you the Greek salad backbone. Chicken makes the bowl more filling without burying the fresh flavors. This one is excellent with a cold mint tea or sparkling water with lemon.
Key Ingredients:
- 8 ounces orzo
- 2 cups cooked chicken, chopped
- 1 cup cucumber, diced
- 1 cup cherry tomatoes, halved
- 1/2 cup olives
- 1/2 cup feta
- 3 tablespoons olive oil
- 1 1/2 tablespoons red wine vinegar
- 1 teaspoon oregano
- Salt and pepper
Quick Steps:
- Cook the orzo until just tender, then rinse cool.
- Whisk olive oil, vinegar, oregano, salt, and pepper.
- Toss the orzo with chicken, cucumber, tomatoes, olives, feta, and dressing.
- Chill for 15 minutes or serve right away.
- Taste and adjust salt before serving.
Equipment for This Recipe:
- Pot
- Colander
- Large bowl
- Whisk
How to Serve This Dish: Serve in a shallow bowl with extra feta on top. A cold cucumber-lime drink or plain sparkling water fits the briny, herb-heavy flavor.
Pro Tips for This Recipe:
- Cool the orzo before dressing so it doesn’t absorb everything at once.
- Chop the cucumber small enough to fit on a fork with the pasta.
- If the salad sits, save a little dressing to refresh it.
Variations on This Dish:
- Lemony Version: Add lemon zest and extra lemon juice.
- Vegetarian Swap: Leave out the chicken and add chickpeas.
Common Mistakes to Avoid with This Dish:
- Overcooked orzo: It goes mushy fast.
- Too little salt: Cold pasta needs more seasoning than you think.
- Large vegetable chunks: They don’t mix well with the pasta shape.
23. Avocado Corn Toast with Cotija
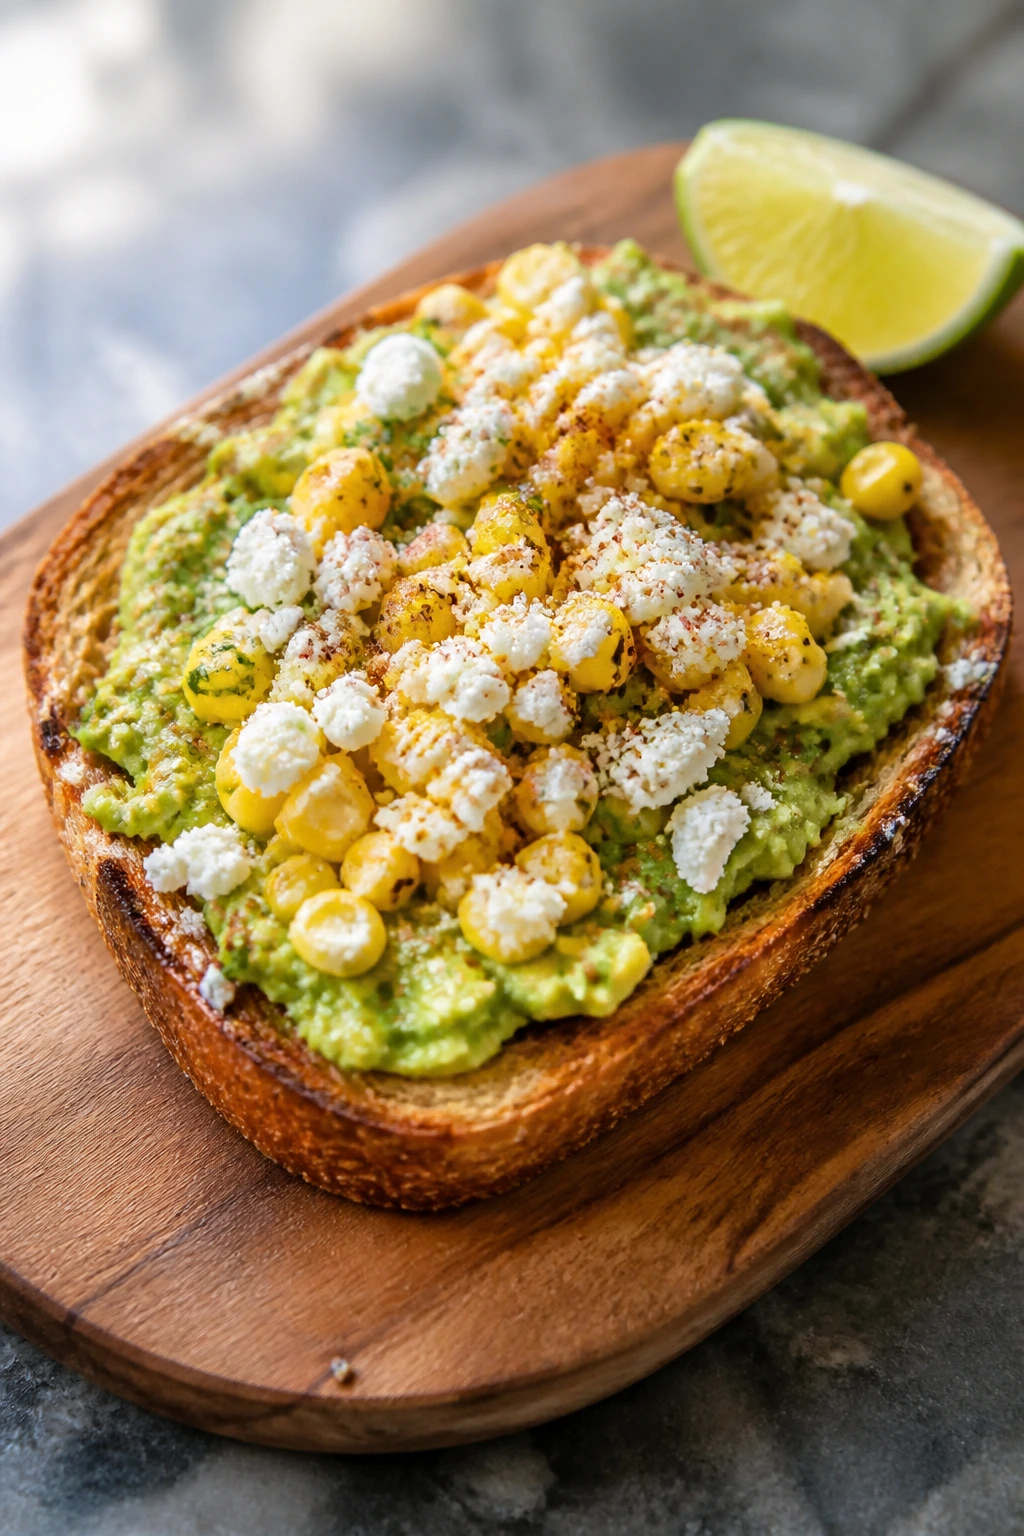
Intro: Toasted bread, mashed avocado, sweet corn, and salty cheese give you a lunch that feels fresh but not dainty. The corn adds enough texture that the avocado doesn’t disappear.
Why It Works: Creamy avocado wants something sharp beside it, and cotija plus lime do that job well. Charred corn brings sweetness and a little bite, while radish or chili flakes give the toast a final lift. I’d drink cold lime sparkling water with this and call it done.
Key Ingredients:
- 4 thick slices bread
- 2 ripe avocados
- 1 cup corn kernels, fresh or thawed
- 1 tablespoon olive oil
- 1 lime, juiced
- 1/2 teaspoon salt
- 1/4 cup cotija
- Chili flakes, optional
- 2 radishes, thinly sliced, optional
Quick Steps:
- Cook the corn in a hot skillet with olive oil until browned in spots.
- Mash the avocados with lime juice and salt.
- Toast the bread until crisp.
- Spread avocado on the toast and top with corn, cotija, and radishes.
- Finish with chili flakes if you want heat.
Equipment for This Recipe:
- Skillet
- Toaster or oven
- Fork
- Knife
How to Serve This Dish: Serve open-faced with a cold glass of citrus water. If you want more substance, add a fried egg, but the toast stands on its own.
Pro Tips for This Recipe:
- Choose avocados with a little give, not mush.
- Salt the avocado right after mashing so the flavor lands.
- Toast sturdy bread; thin slices get soggy under the avocado.
Variations on This Dish:
- Tomato Corn Toast: Add chopped tomatoes for extra juiciness.
- Smoky Version: Add smoked paprika to the corn.
Common Mistakes to Avoid with This Dish:
- Undertoasting the bread: It buckles under the toppings.
- Skipping lime: Avocado tastes flat without acid.
- Using too much corn: The toast should still taste like avocado first.
24. Cold Peanut Noodle Salad with Edamame
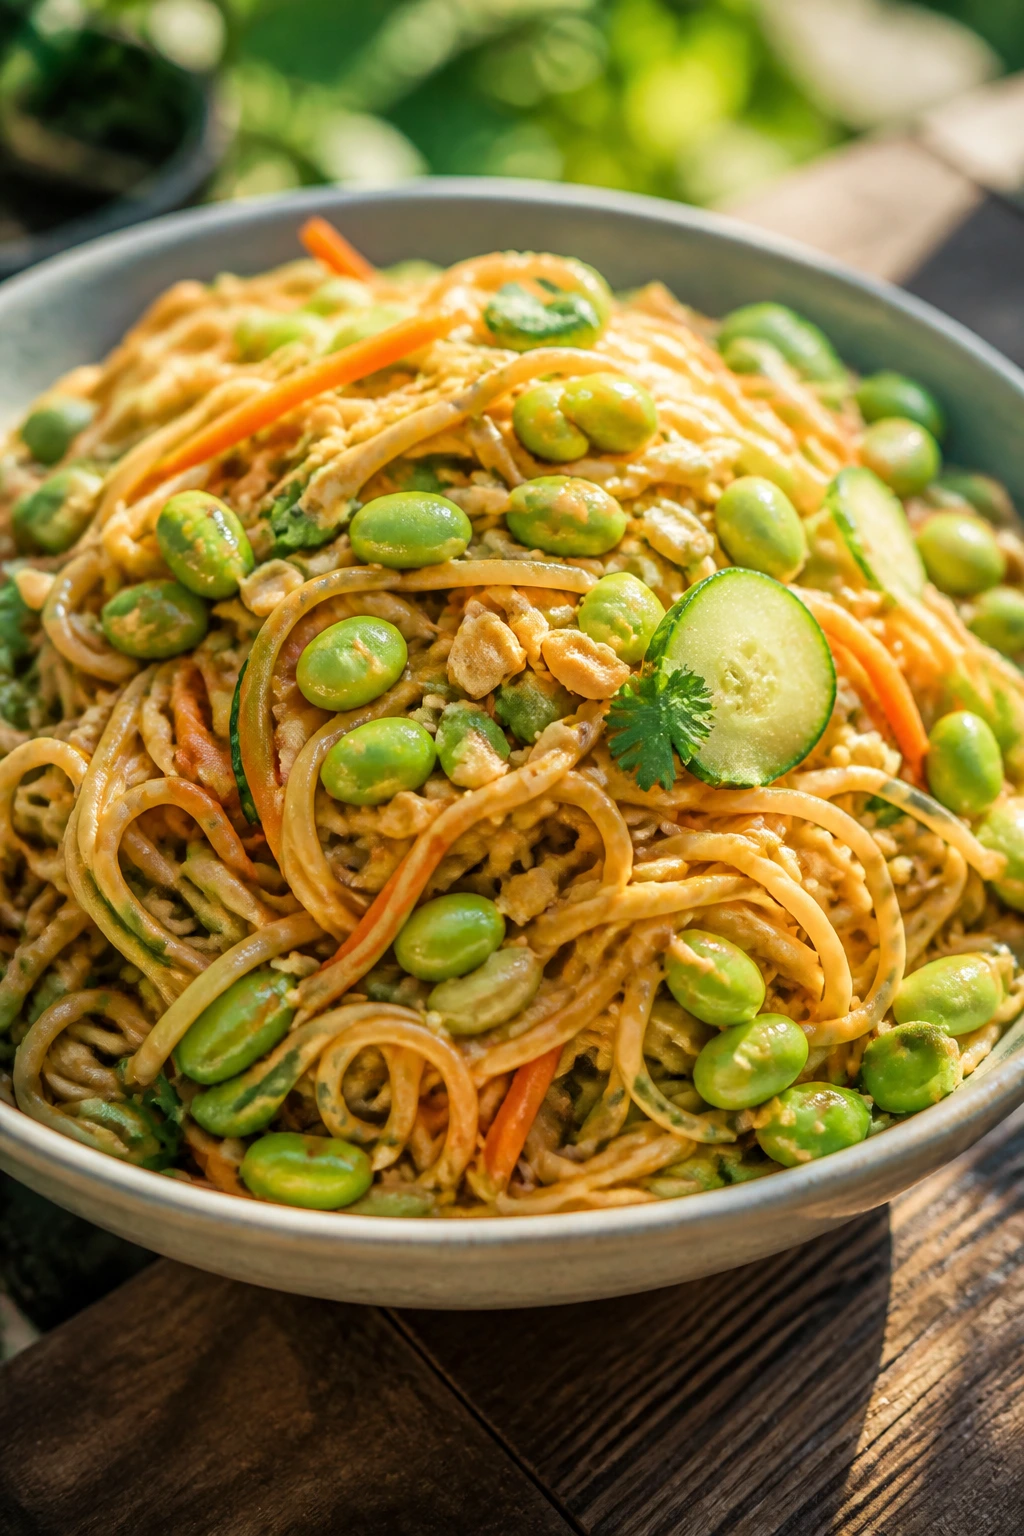
Intro: Peanut noodles have a way of disappearing fast because the sauce clings to every strand. Served cold with crisp vegetables, they make a lunch that’s rich enough to satisfy but still fits a hot day.
Why It Works: Peanut butter, soy, lime, and a little sweetener make a sauce that hits salty, tangy, and creamy all at once. Edamame adds protein, cucumber cools the bowl down, and carrots bring crunch. This is excellent with iced green tea because the tea cuts the peanut sauce without competing with it.
Key Ingredients:
- 8 ounces noodles or spaghetti
- 1/4 cup peanut butter
- 2 tablespoons soy sauce
- 1 tablespoon lime juice
- 1 tablespoon rice vinegar
- 1 teaspoon honey
- 1 cup shelled edamame
- 1 cucumber, thinly sliced
- 1 carrot, julienned
- 2 tablespoons chopped peanuts
Quick Steps:
- Cook the noodles until tender, then rinse under cold water.
- Whisk peanut butter, soy sauce, lime juice, vinegar, and honey with a splash of warm water.
- Toss the noodles with edamame, cucumber, carrot, and sauce.
- Top with chopped peanuts.
- Chill briefly or serve right away.
Equipment for This Recipe:
- Pot
- Whisk
- Colander
- Large bowl
How to Serve This Dish: Serve in bowls with extra lime wedges on the side. A cold jasmine tea or sparkling water with lime suits the peanut and soy profile.
Pro Tips for This Recipe:
- Add the sauce slowly so it coats instead of clumping.
- Rinse the noodles well or they seize up.
- Cut the cucumber thin so it blends into the noodle tangle.
Variations on This Dish:
- Spicy Peanut Noodles: Stir in chili crisp or sriracha.
- Sesame Swap: Add sesame oil and toasted sesame seeds for a different finish.
Common Mistakes to Avoid with This Dish:
- Sauce too thick: Thin it with a spoonful of warm water.
- Warm noodles: They soak up too much sauce and dry out.
- Heavy vegetables: Keep the cut small so the noodles stay the star.
25. BLT Pasta Salad
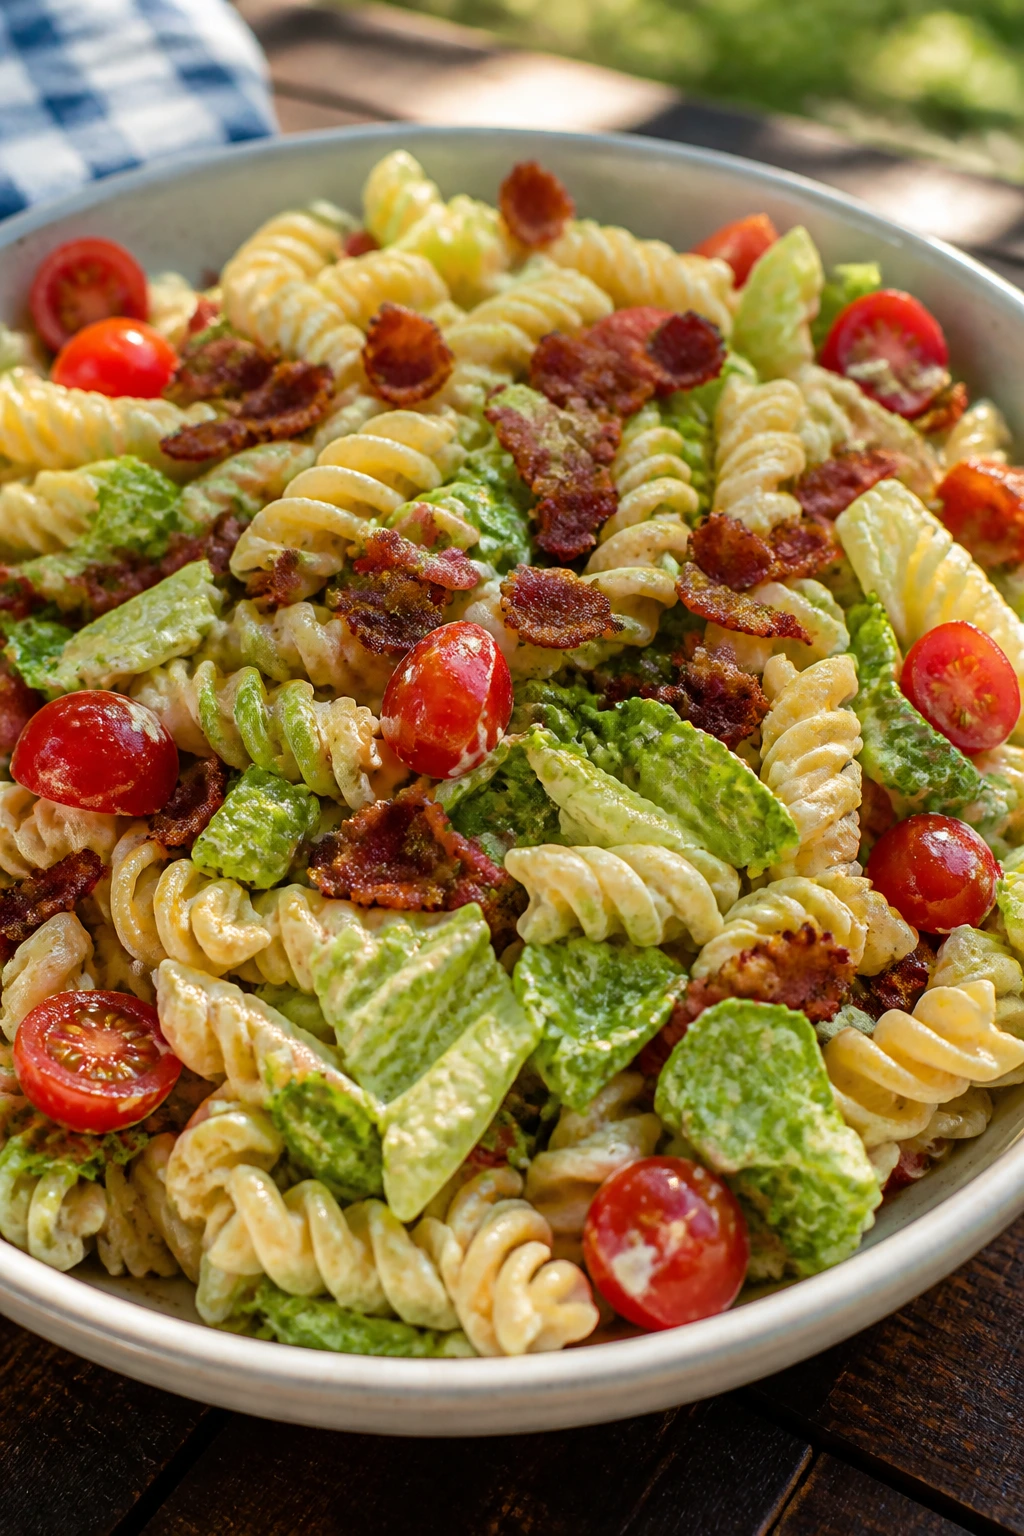
Intro: A BLT becomes a different animal when you turn it into pasta salad. The bacon still gives smoke, the tomatoes still pop, and the pasta catches the dressing in a way bread never could.
Why It Works: Pasta makes the lunch portable, bacon gives it backbone, and lettuce added at the end keeps a nod to the original sandwich without going limp too soon. A light mayo-vinegar dressing pulls the whole bowl together. I like this with a very cold lemonade or unsweetened iced tea because the drink balances the bacon and mayo.
Key Ingredients:
- 12 ounces short pasta
- 8 slices bacon, cooked and crumbled
- 2 cups cherry tomatoes, halved
- 2 cups chopped romaine
- 1/3 cup mayonnaise
- 2 tablespoons vinegar or lemon juice
- 1 teaspoon Dijon mustard
- Salt and pepper
Quick Steps:
- Cook the pasta until al dente, then rinse cool.
- Whisk mayo, vinegar, Dijon, salt, and pepper.
- Toss the pasta with bacon and tomatoes.
- Fold in romaine right before serving.
- Chill briefly if you want a firmer salad.
Equipment for This Recipe:
- Pot
- Colander
- Mixing bowl
- Whisk
How to Serve This Dish: Serve cold in a big bowl with extra bacon scattered on top. A crisp lemonade gives the salad the right sharp finish.
Pro Tips for This Recipe:
- Add the lettuce at the end or it goes limp.
- Keep back a little dressing if the salad sits for more than a short while.
- Use a pasta shape with ridges so the dressing clings.
Variations on This Dish:
- Avocado BLT Salad: Add diced avocado right before serving.
- Chicken BLT Pasta Salad: Stir in chopped cooked chicken for more protein.
Common Mistakes to Avoid with This Dish:
- Overcooking the pasta: It turns mushy once dressed.
- Adding lettuce too early: The crunch disappears.
- Too much dressing: The salad should be coated, not slick.
Why These Recipes Taste Better on a Hot Day
A summer lunch doesn’t need to be complicated to feel right. It needs contrast. A little crunch against something creamy, a little acid against something rich, and enough salt to make the drink beside it taste cleaner after every bite.
That’s why grilled chicken wraps, cold noodle bowls, tomato sandwiches, and bright salads keep showing up in good warm-weather lunch rotations. They don’t sit around asking for attention. They show up, they work, and they leave you with a glass that actually makes sense next to the plate.
Essential Equipment for These Recipes
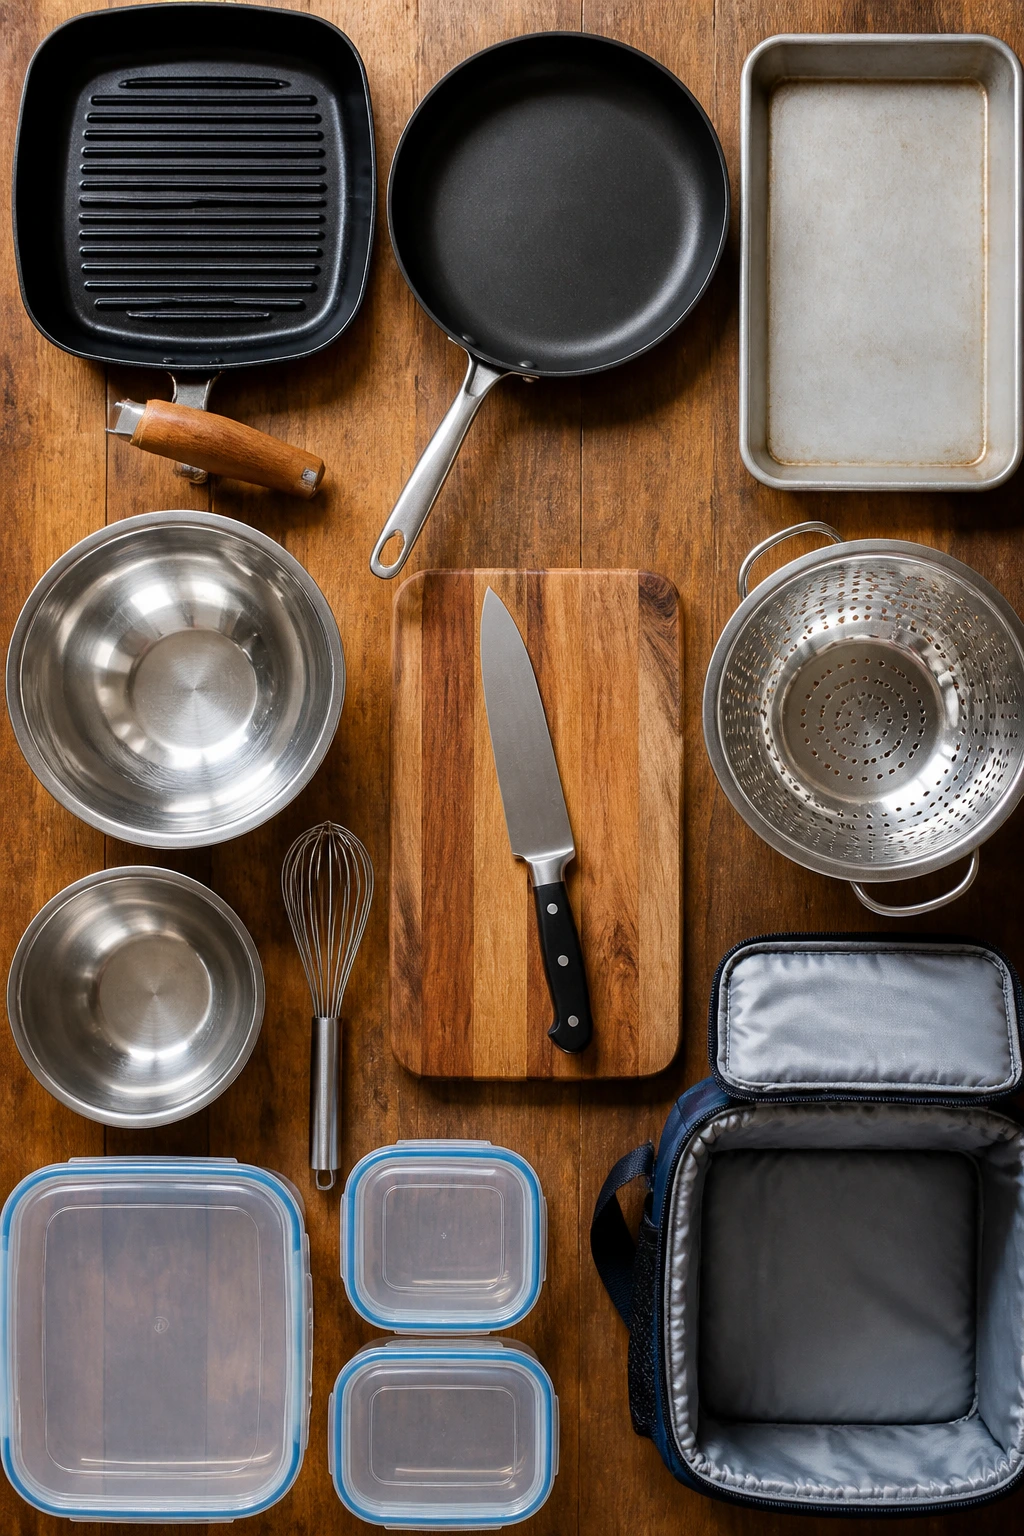
- Grill or grill pan: Useful for chicken, shrimp, halloumi, corn, and peaches.
- Large skillet: Good for bacon, shrimp, steak, and quick searing.
- Sheet pan: Best for roasting vegetables and toasting bread or flatbreads.
- Mixing bowls: You’ll want at least two sizes for dressings and salad fillings.
- Sharp chef’s knife: The difference between tidy tomato slices and a smashed mess.
- Cutting board: A sturdy board keeps fast prep from turning slippery.
- Colander: Needed for pasta, soba, or anything that has to cool fast.
- Whisk or fork: Either one handles simple dressings and sauces.
- Airtight containers: Handy for packing lunch components separately.
- Cooler pack or insulated lunch bag: Worth it for mayo-based salads and grilled leftovers.
Smart Shopping and Ingredient Tips
Ripe produce makes half of these lunches better before you even start cooking. Tomatoes should smell like tomatoes near the stem, peaches should give slightly at the shoulders, and avocados should yield without feeling mushy. If the tomato is pale and hard, leave it alone.
Bread matters more than people think. Focaccia, pita, sturdy sandwich bread, and slider buns all hold up better than soft white slices that collapse under juicy fillings. For cold lunches, I’ll usually buy bread one notch firmer than I think I need. It’s a small thing. It saves the whole sandwich.
For proteins, choose convenience based on the dish. Rotisserie chicken, canned tuna, and canned salmon are fine here; they’re not a compromise when the rest of the lunch has good acid and crunch around them. For grilling, look for even thickness so the meat cooks at the same pace all the way through. Thin spots dry out before the thick middle is done.
Herbs should be fresh enough to tear cleanly. Basil and mint that look limp in the store are already past their best use. And if you’re buying cheese for a cold lunch, get the version that holds shape: halloumi, feta, cotija, and fresh mozzarella all behave well in heat and in chilled dishes.
How to Serve These Recipes
Presentation:
Spread lunches out instead of stacking them in narrow piles. Wraps cut on a bias, salads in shallow bowls, and sandwiches halved or quartered all look more inviting because you can actually see the filling. For hot-weather lunches, I like a plate or tray that isn’t packed tight; breathing room makes everything feel fresher.
Accompaniments:
Simple sides do the job best. Chips, pickles, melon slices, cucumber spears, olives, and a handful of crunchy crackers all match these lunches without asking for extra work. If the lunch is already carb-heavy, lean on fruit or a plain salad. If the lunch is mostly vegetables, add bread, pita, or a crisp flatbread.
Portions:
Most of these recipes serve one hungry adult or two light lunches per batch. For a bigger crowd, double the salad-style recipes before you double the sandwich ones; sandwiches get awkward when they’re overbuilt. If you’re packing lunch for later, keep dressings, lettuce, and bread separate until the last minute.
Beverage Pairing:
Lemonade is the easy answer for salty or smoky lunches. Iced tea works better with creamy fillings, and sparkling water with citrus keeps the lighter salads from feeling dull. For a more savory lunch, a cold lager or hard seltzer can fit, but plain drinks are often the smartest move because they don’t crowd the food.
Additional Tips and Flavor Boosters
Flavor Enhancement:
A few spoonfuls of pickled onion or quick-pickled cucumber can rescue almost any of these lunches. Acid wakes up chicken salad, grain bowls, and wraps in a way more mayo never will. If something tastes a little flat, it probably needs salt and lemon before it needs another sauce.
Customization:
Turn grilled chicken into turkey, shrimp into salmon, or pasta into orzo when that’s what’s in the pantry. These recipes are flexible as long as you keep the crunch and the acid. Cold lunches fall apart when every part is soft, so always keep one crisp ingredient in play.
Serving Suggestions:
Finish with torn herbs, sesame seeds, cracked pepper, or a drizzle of good olive oil. On a hot day, those last little touches matter because they lift aroma before the first bite. A lunch that smells fresh often tastes fresher than one that just looks neat.
Make-It-Yours:
For gluten-free meals, use lettuce cups, rice bowls, or gluten-free bread that toasts firmly. For dairy-free versions, lean on hummus, avocado, or olive-oil dressings instead of yogurt and cheese. For higher protein, add beans, chickpeas, eggs, tuna, or extra chicken; don’t just pile on more bread and call it lunch.
Make-Ahead, Storage, and Reheating Guidance
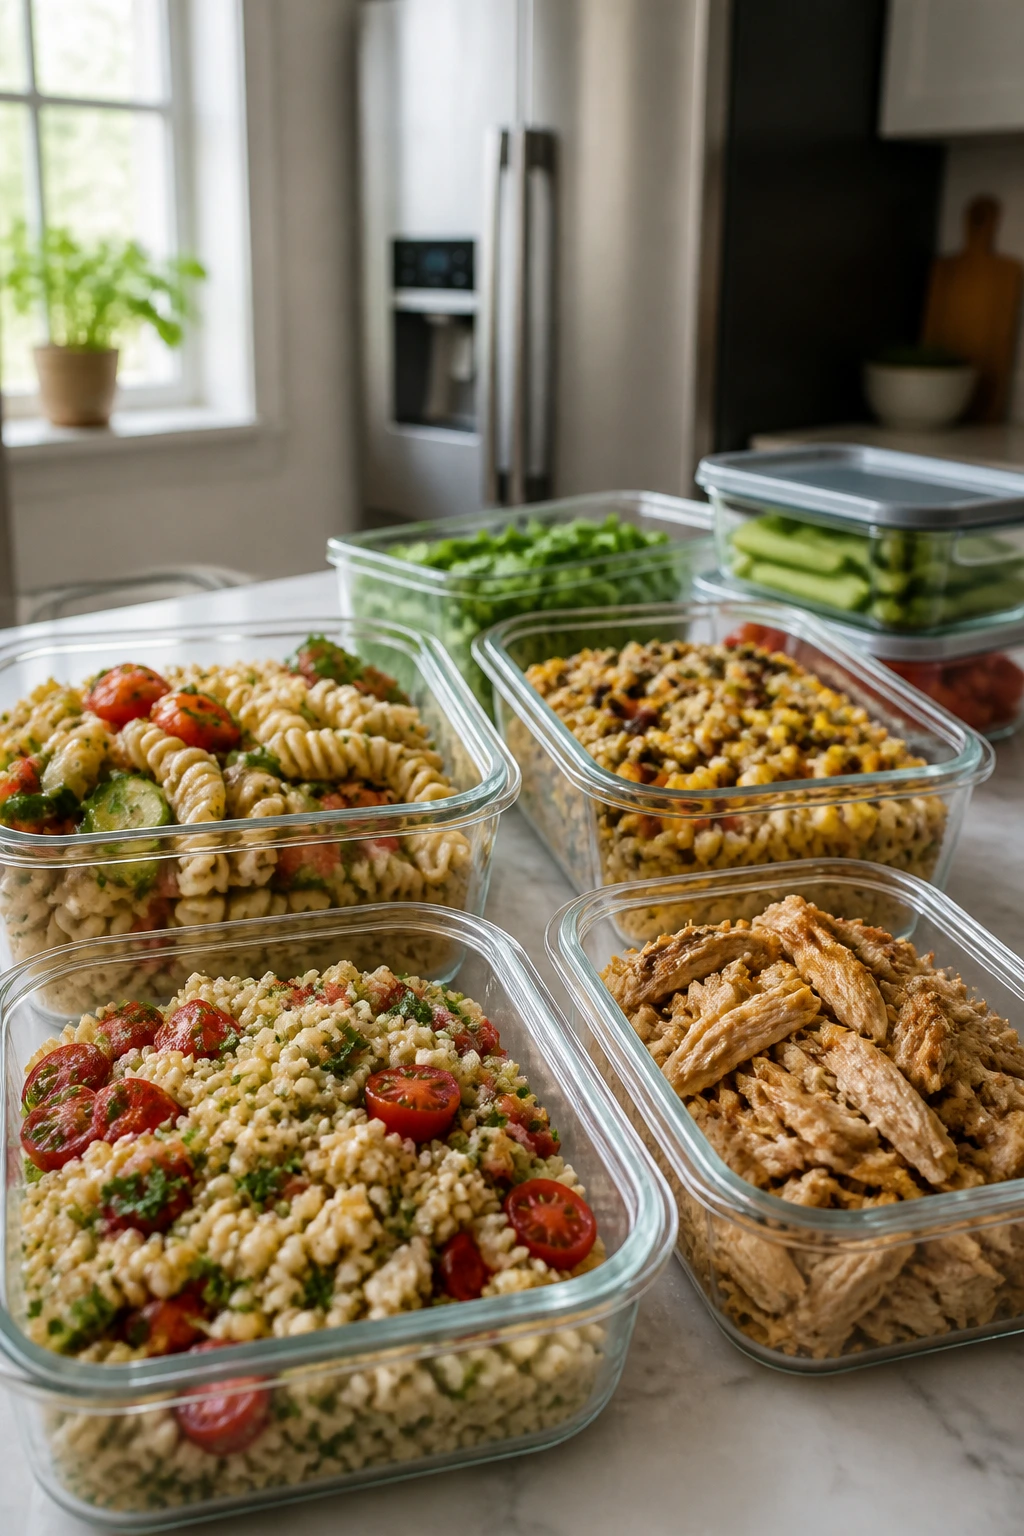
Most of these lunches hold well for 3 to 4 days in the fridge if you store the wet and dry parts separately. Grilled chicken, cooked grains, pasta salad, and pulled chicken all keep in sealed containers, but bread, lettuce, and cut tomatoes should usually be packed apart until serving time. That one habit saves more sandwiches than any recipe trick.
Cold salads with mayo or yogurt need a little more care. Keep them chilled and eat them within 2 to 3 days for the best texture. If the filling looks loose after resting, stir in a spoonful of fresh mayo or yogurt and a pinch of salt. The flavor often needs a small refresh after sitting overnight.
Grilled items reheat best in a skillet over medium-low heat or in a 300°F oven for 8 to 10 minutes. That keeps chicken, shrimp, and steak from drying out the way a blasting microwave can. If you’re packing a lunch that will be eaten cold, let the cooked part cool before sealing it, but do not leave it out long enough to get warm all the way through on the counter.
Fresh herbs bruise quickly, so add basil, mint, dill, and chives at the last minute when you can. Grain salads and pasta salads often taste tighter after a short rest, which is one of the few cooking truths that feels like a small reward. If a salad looks dry on day two, a drizzle of olive oil and a squeeze of lemon usually fixes it.
Variations and Adaptations to Try
Gluten-Free Lunch Box:
Use lettuce cups, rice bowls, or corn tortillas in place of bread and wheat wraps. The rest of the meal stays the same, but you need to be stricter about moisture because gluten-free breads can go soft fast.
Dairy-Free Rework:
Swap yogurt for tahini, olive oil, or dairy-free mayo, and leave out the cheeses unless they’re central to the dish. Halloumi and caprese-style lunches lose part of their character without dairy, so for those, it’s better to choose a different recipe from the list.
Extra-Protein Version:
Add chickpeas to salads, eggs to wraps, or more chicken to grain bowls. The lunch should still eat like lunch, not like a protein shake with toppings, so keep the vegetables and acid in place.
Picnic-Ready Pack:
Choose lettuce cups, grain salads, pasta salads, and sandwiches made with toasted bread. Pack dressing in a separate container and use an insulated bag with a cold pack. That little bit of planning keeps mayonnaise-based lunches from drifting into dangerous territory.
Spice-Forward Lunch:
Harissa, chili crisp, jalapeños, hot sauce, and chili flakes all fit naturally here. I’d rather add heat through one strong ingredient than scatter it everywhere; a focused burn tastes cleaner beside a cold drink.
Vegetarian Swap:
Replace chicken, tuna, or shrimp with chickpeas, white beans, halloumi, eggs, or roasted vegetables. The trick is to keep enough salt and texture so the meal doesn’t turn into a bowl of soft ingredients that all taste the same.
Common Mistakes to Avoid
Packing everything together too soon:
Bread goes soggy, lettuce wilts, and tomatoes leak. Keep the wet stuff separate until the moment you eat, even if that means carrying one extra container.
Under-salting cold food:
Chilled dishes mute flavor. Pasta salad, grain bowls, and tuna salad all need a touch more salt than you think, especially after they’ve had time in the fridge.
Forgetting texture:
If every component is soft, lunch feels heavy fast. Add toast, raw cucumber, cabbage, nuts, seeds, or a crisp green every time.
Cooking proteins too far ahead without cooling correctly:
Hot chicken or shrimp sealed into a container turns steamy and dull. Cool it briefly, then refrigerate it uncovered for a few minutes before sealing if you want to preserve texture.
Using watery tomatoes or cucumbers without prep:
Those ingredients are fine, but they need a little help. Salt them briefly and blot them dry, or they’ll dilute dressings and make bread collapse.
Overdressing salads:
A good summer lunch should look lightly coated, not glossy and wet. Start with less dressing than you think you need, then add more only if the bowl actually looks dry.
Frequently Asked Questions
Can these lunches be packed for work or a picnic?
Yes, and several of them are better packed than plated. Grain salads, pasta salads, wraps, and lettuce cups travel well if you keep wet ingredients separate and use a cold pack for anything with mayo, yogurt, eggs, or seafood.
What cold drinks work best with savory lunches?
Iced tea, sparkling water with citrus, lemonade, and cucumber water are the easiest matches. If the lunch is salty or smoky, pick a sharper drink; if the lunch is creamy, choose something dry or lightly sweet.
How do I keep sandwiches from getting soggy?
Toast the bread, dry the tomatoes, and put lettuce or a thin layer of mayo between the bread and the wet ingredients. For packed lunches, wrap the sandwich tightly and keep it cold until eating.
Can I make these recipes the night before?
Most of them, yes. Pasta salads, chicken salad, tuna salad, and grain bowls often taste better after a short rest, but sandwiches and lettuce cups are best assembled close to serving.
What if I don’t have a grill?
A grill pan or heavy skillet does the job for most of these recipes. For peaches, corn, chicken, shrimp, and halloumi, a hot cast-iron pan gives you enough browning to keep the flavor in place.
Which recipes are the most filling?
The steak salad, Greek orzo salad with chicken, BBQ pulled chicken sliders, and cold peanut noodle salad carry the most weight. If you want a lighter lunch, lean toward avocado toast, lettuce cups, or mezze plates.
How can I make these lunches vegetarian without making them feel bland?
Use chickpeas, white beans, eggs, halloumi, hummus, avocado, or roasted vegetables, then keep the acid strong. Lemon, vinegar, pickles, tomatoes, olives, and herbs matter more in vegetarian lunches because they keep the meal from going flat.
What’s the safest way to handle mayo-based salads in warm weather?
Keep them cold until serving and do not leave them out for long stretches. Use an insulated bag with an ice pack for transport, and if a salad has been sitting in heat for too long, don’t try to rescue it with more dressing.
A Better Lunch for Long, Hot Afternoons
A cold drink beside lunch should feel like part of the meal, not an afterthought. That’s why these dishes lean on crisp vegetables, grilled edges, tangy dressings, and enough salt to make each sip taste cleaner than the last.
Pick one that matches what you’ve already got in the fridge, and don’t be afraid to keep it simple. The best summer lunch is the one that holds together, tastes fresh halfway through, and leaves you with a glass that still feels worth finishing.