
The best summer picnic recipes are the ones that still taste sharp after a long walk from the kitchen to the park table. A good picnic dish has to do a little more work than dinner at home: it needs to survive a cooler, tolerate a few minutes in the sun, and keep its shape when somebody balances a paper plate on one knee.
A soggy sandwich ruins the mood fast. So does pasta salad that turns slick, or a fruit dish that leaks juice into everything nearby. I usually build a picnic menu around foods that hold their texture on purpose: sturdy herbs, crisp vegetables, chilled salads with enough acid to stay lively, and a few sweet bars that cut cleanly even after they’ve been packed twice.
That’s the sweet spot here. These easy summer recipes for a summer picnic lean on ingredients you can find anywhere, but the real trick is in the construction—how the dressing sits, how the bread is protected, how the fruit is cut, how much moisture gets left on the cucumbers. That part matters more than the cute napkins.
Why These Recipes Earn Space in the Basket
-
Cooler-Friendly: These dishes are built to sit over ice or in a chilled tote without turning limp, greasy, or sad by the time you reach the blanket.
-
Low-Mess Serving: Skewers, wraps, bars, salads, and lettuce cups beat anything that needs a fork, a knife, and perfect table balance.
-
Make-Ahead Friendly: Most of these recipes taste better after a short rest in the fridge, when the lemon, salt, and herbs have had time to settle in.
-
Easy to Portion: You can scale them for a two-person lunch or a crowded park spread without changing the method much.
-
Balanced Menu Pieces: There’s a mix of savory, crisp, creamy, fruity, and sweet, so the basket doesn’t feel like one note stretched across six containers.
-
No Fancy Gear Needed: A knife, a bowl, a cooler, and a few airtight containers will get you through almost every recipe here.
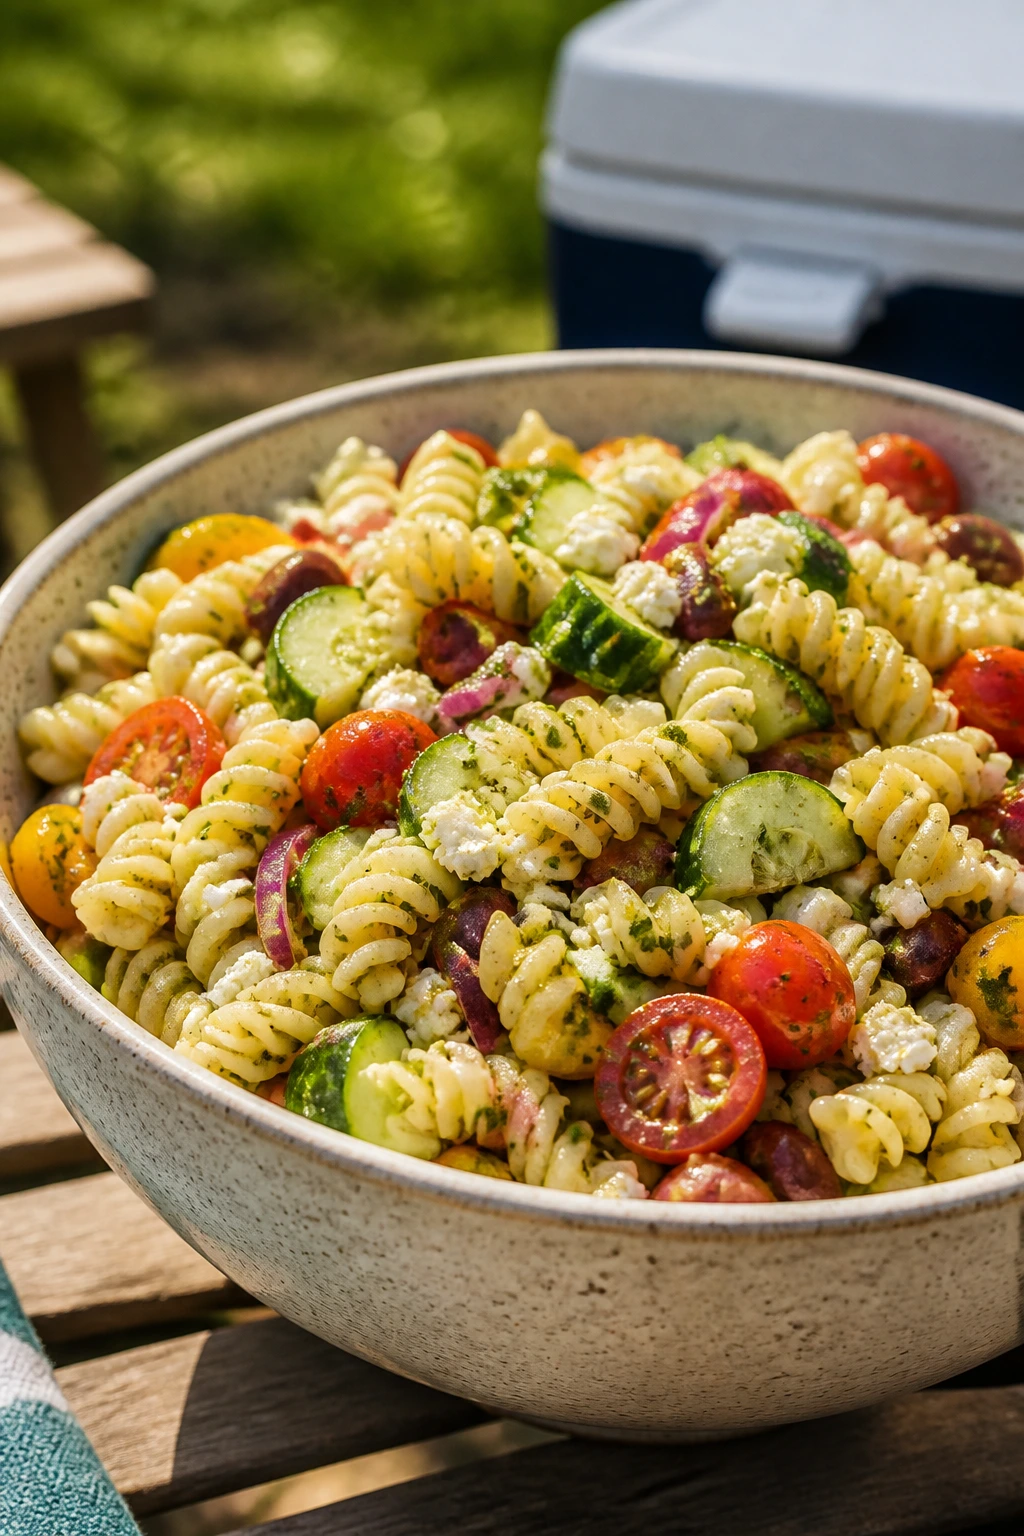
1. Lemon Herb Pasta Salad
The first forkful should taste cold, lemony, and a little briny, with the pasta carrying enough dressing to coat the ridges without drowning them. Rotini is my pick here because those curls grab the olive oil and lemon juice in a way straight noodles never quite do. Add cucumbers for crunch, tomatoes for sweetness, and feta for the salty hit that wakes the whole bowl up.
Why It Works:
Pasta salad earns its picnic stripes when it tastes even better after 30 minutes in the cooler, and this one does. The lemon and red wine vinegar keep the oil from feeling heavy, while the vegetables stay crisp if you dry them well after chopping. Feta gives the salad enough punch that you do not need a big dressing pour.
Key Ingredients:
- 12 oz rotini pasta — the twists hold dressing better than smooth shapes.
- 1 cup cherry tomatoes, halved — use firm tomatoes so they do not leak much juice.
- 1 cup diced cucumber — peel only if the skin is thick.
- 1/2 cup diced red bell pepper — adds a sweet crunch.
- 1/3 cup thin-sliced red onion — soak in cold water for 5 minutes if you want it milder.
- 1/2 cup Kalamata olives, pitted and halved — for a salty, picnic-friendly bite.
- 1/2 cup crumbled feta — add at the end so it stays crumbly.
- 1/3 cup olive oil, 3 tbsp lemon juice, 1 tbsp red wine vinegar, 1 tsp Dijon, 1 grated garlic clove, 1 tsp oregano, 1/2 tsp salt, 1/4 tsp black pepper — the dressing that ties it together.
Quick Steps:
- Bring a large pot of salted water to a boil and cook the rotini until just al dente, usually 8 to 10 minutes.
- Drain the pasta and rinse briefly under cool water so it stops cooking and loses the sticky surface starch.
- Whisk the olive oil, lemon juice, vinegar, Dijon, garlic, oregano, salt, and pepper in a large bowl.
- Add the cooled pasta, tomatoes, cucumber, bell pepper, onion, and olives, then toss until every curl looks lightly coated.
- Fold in the feta, chill for 30 minutes, and taste again before packing; it usually wants one more pinch of salt.
Equipment for This Recipe:
- Large pot — you need room for the pasta to move.
- Colander — for a fast drain and cool rinse.
- Large mixing bowl — roomy enough to toss without spilling.
- Sharp knife and cutting board — for clean vegetable cuts.
How to Serve This Dish:
Pack it in a shallow, lidded container so the top stays tidy. It sits well beside grilled chicken, sliced melon, or simple sandwiches, and it makes a solid one-bowl lunch if you spoon a big scoop over greens.
Pro Tips for This Recipe:
- Toss the pasta with dressing while it is still slightly warm; it absorbs the flavor better.
- Dry the cucumber and tomato pieces on a towel if they seem watery.
- Save a spoonful of feta for the top right before serving. It looks cleaner.
- If the salad seems dry after chilling, add 1 tablespoon more lemon juice, not more oil.
Variations on This Dish:
- Chickpea Picnic Bowl: Add 1 can chickpeas, rinsed and drained, for more body and a little more staying power.
- Dill Garden Version: Swap oregano for 2 tablespoons chopped dill and use green olives instead of Kalamatas.
- Creamier Finish: Stir in 2 tablespoons Greek yogurt with the dressing for a softer, creamier edge.
Common Mistakes to Avoid with This Dish:
- Overcooking the pasta: Mushy rotini collapses in the cooler; stop at al dente.
- Adding wet vegetables: If the cucumber or tomato pieces are dripping, the dressing will thin out and pool.
- Dumping in all the feta at the start: It breaks down and disappears into the bowl.
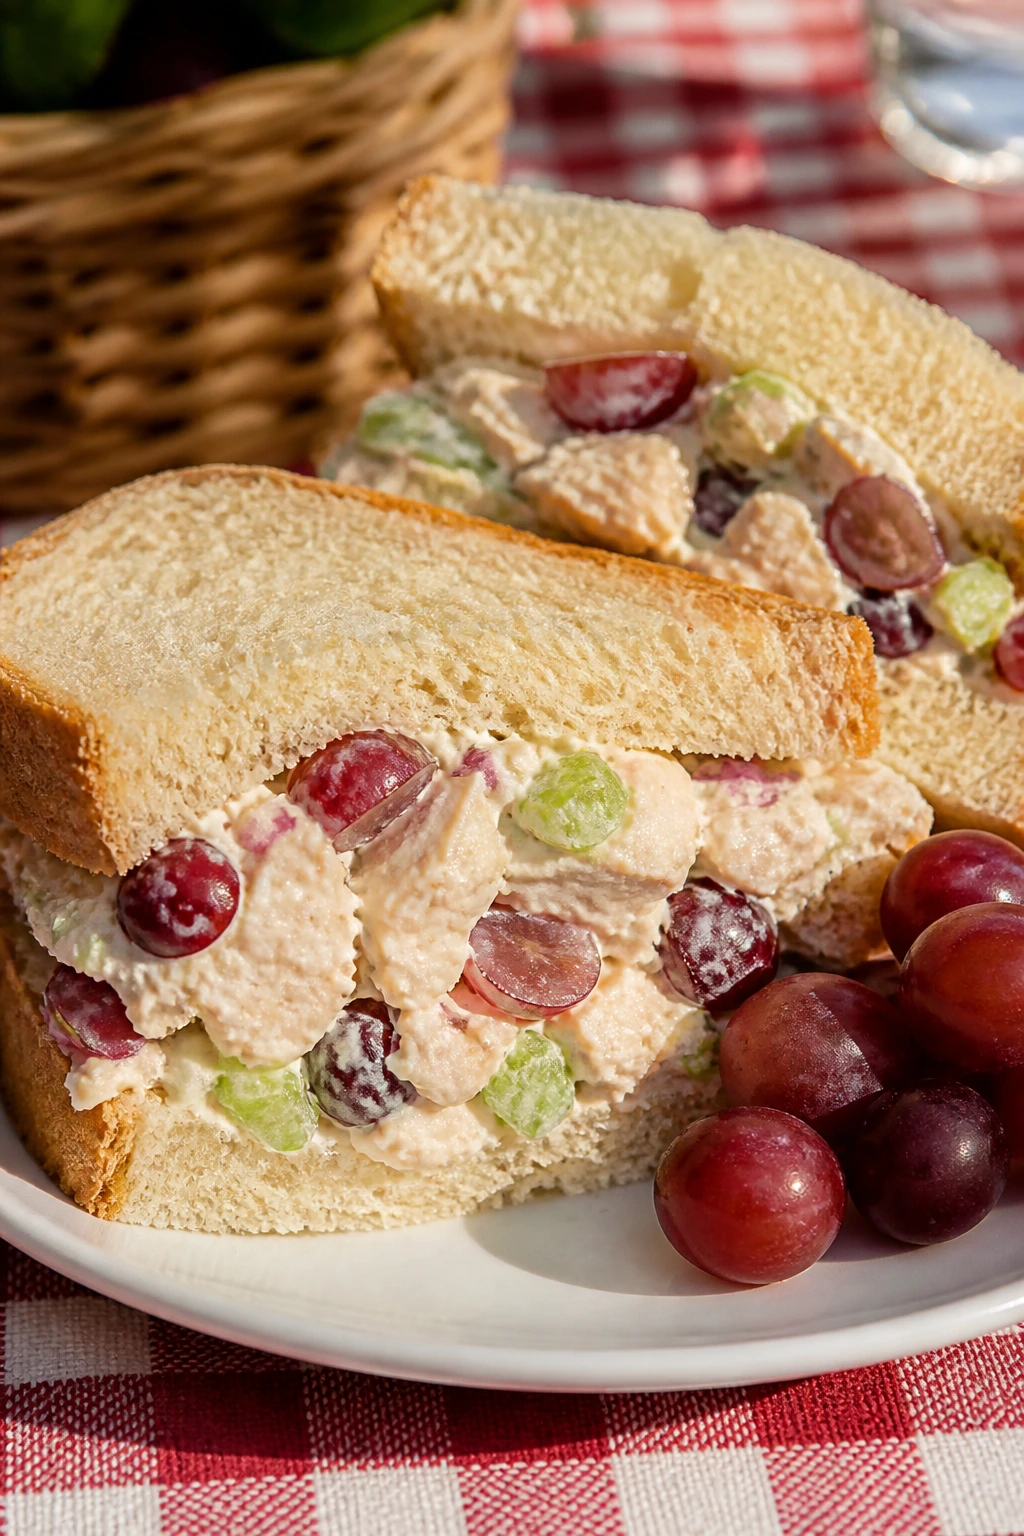
2. Chicken Salad Sandwiches with Grapes
Chicken salad gets dull fast when it turns greasy or sweet in the wrong way. The version I trust for a picnic keeps the mayo in check, uses enough celery for crunch, and leans on halved grapes for those cold bursts of juice. On soft bread, it feels classic; on croissants, it feels a little richer without getting fussy.
Why It Works:
Cooked chicken holds up far better than deli meat in a tote bag, and the salad can be made a day ahead. Greek yogurt lightens the mayonnaise so the filling stays cool and clean on the tongue, while lemon juice keeps the flavor from flattening. Grapes do the one thing chicken salad really needs: they make each bite feel fresh instead of heavy.
Key Ingredients:
- 3 cups cooked chicken, chopped — rotisserie chicken works well here.
- 1/2 cup mayonnaise — use enough to bind, not swamp.
- 1/4 cup plain Greek yogurt — adds tang and keeps the texture looser.
- 1/2 cup red grapes, halved — seedless and firm.
- 1/3 cup celery, diced small — for crunch.
- 2 tbsp red onion, minced — optional, but nice if you like bite.
- 1 tbsp lemon juice — keeps the mix bright.
- 1 tsp Dijon mustard, 1/2 tsp salt, 1/4 tsp black pepper.
- 8 slices sandwich bread or 4 croissants, plus lettuce leaves — choose bread that is soft but not airy.
Quick Steps:
- Chop the chicken into bite-sized pieces and let it cool completely if it is still warm.
- Stir together the mayonnaise, yogurt, lemon juice, Dijon, salt, and pepper in a medium bowl.
- Fold in the chicken, grapes, celery, and onion until everything is evenly coated.
- Taste and adjust with more lemon or a pinch more salt if the salad tastes flat.
- Chill for 20 to 30 minutes, then spoon onto bread with lettuce just before packing.
Equipment for This Recipe:
- Medium mixing bowl — keeps the salad easy to mix.
- Sharp knife — for chicken, grapes, and celery.
- Cutting board — use one with a towel underneath so it does not slide.
- Airtight container — for the filling on the way to the picnic.
How to Serve This Dish:
Assemble the sandwiches close to serving time so the bread stays intact. I like serving them cut into halves or quarters with kettle chips and a few cucumber spears on the side.
Pro Tips for This Recipe:
- Pat the chicken dry if it looks moist; extra surface water makes the salad loosen up.
- Use firm grapes so they hold their shape when sliced.
- Toast the bread lightly if you want a sturdier sandwich.
- Keep lettuce between the bread and the salad if you are packing ahead.
Variations on This Dish:
- Curry Chicken Salad: Add 1 teaspoon curry powder and 2 tablespoons chopped toasted almonds.
- Herb-Mayo Version: Swap the yogurt for extra mayo and add 1 tablespoon chopped parsley and 1 tablespoon chopped dill.
- Lettuce Cup Lunch: Spoon the filling into butter lettuce leaves instead of bread for a lighter picnic plate.
Common Mistakes to Avoid with This Dish:
- Using warm chicken: Warm filling melts the mayo and makes the sandwich soggy.
- Skipping the lemon: Without acid, the salad tastes flat and a little heavy.
- Assembling too early: Bread softens fast once it touches the filling.
3. Cucumber Tomato Feta Salad
The cucumbers are the trap here. If you cut them too thick, the salad feels clumsy; too thin, and they go floppy. I like bite-sized pieces with cherry tomatoes, a little red onion, and a sharp vinaigrette that clings without making a puddle at the bottom of the bowl.
Why It Works:
This salad tastes best cold and does not need reheating, which makes it easy picnic food. Salt pulls a little water from the cucumbers before the dressing goes on, so the bowl stays fresher longer. Feta adds enough salt that you do not need a heavy hand with seasoning.
Key Ingredients:
- 2 large English cucumbers, chopped — the thin skin and fewer seeds make a cleaner salad.
- 2 cups cherry tomatoes, halved — use ripe but firm tomatoes.
- 1/4 cup red onion, very thinly sliced — a little goes a long way.
- 3 tbsp olive oil — the base of the dressing.
- 2 tbsp red wine vinegar — keeps the flavors bright.
- 1 tsp honey — softens the vinegar without making it sweet.
- 1/2 tsp salt and 1/4 tsp black pepper.
- 1/2 cup feta, crumbled.
- 2 tbsp chopped dill or mint — both work, depending on the mood.
Quick Steps:
- Chop the cucumbers and toss them with a pinch of salt in a colander for 10 minutes.
- Whisk the olive oil, vinegar, honey, salt, and pepper in a large bowl.
- Pat the cucumbers dry, then add them to the bowl with the tomatoes and onion.
- Toss gently so the tomatoes do not burst.
- Fold in the feta and herbs right before packing.
Equipment for This Recipe:
- Colander — for draining the cucumbers.
- Large bowl — enough room to toss without mashing the tomatoes.
- Small whisk or fork — for the dressing.
- Sharp knife — for neat cuts.
How to Serve This Dish:
Serve it as a cold side next to grilled meat, pita, or a grain salad. It looks nicest in a wide shallow bowl so the tomatoes and feta stay visible.
Pro Tips for This Recipe:
- Salt the cucumbers first if they are especially watery.
- Chop the onion very thin so it blends in instead of taking over.
- Add herbs at the end so they stay green.
- Use a bowl with a lid if you are packing it for travel; the tossing step gets easier too.
Variations on This Dish:
- Greek-Style Bowl: Add kalamata olives and a handful of chickpeas.
- Minty Cooler Version: Swap dill for mint and add a little extra lemon juice.
- Vegan Option: Use a dairy-free feta or skip the cheese and add avocado just before serving.
Common Mistakes to Avoid with This Dish:
- Not draining the cucumbers: The dressing turns thin and watery.
- Chopping tomatoes too early: Their juices collect fast; cut them close to serving time if you can.
- Adding too much onion: A heavy onion hand takes over the whole bowl.
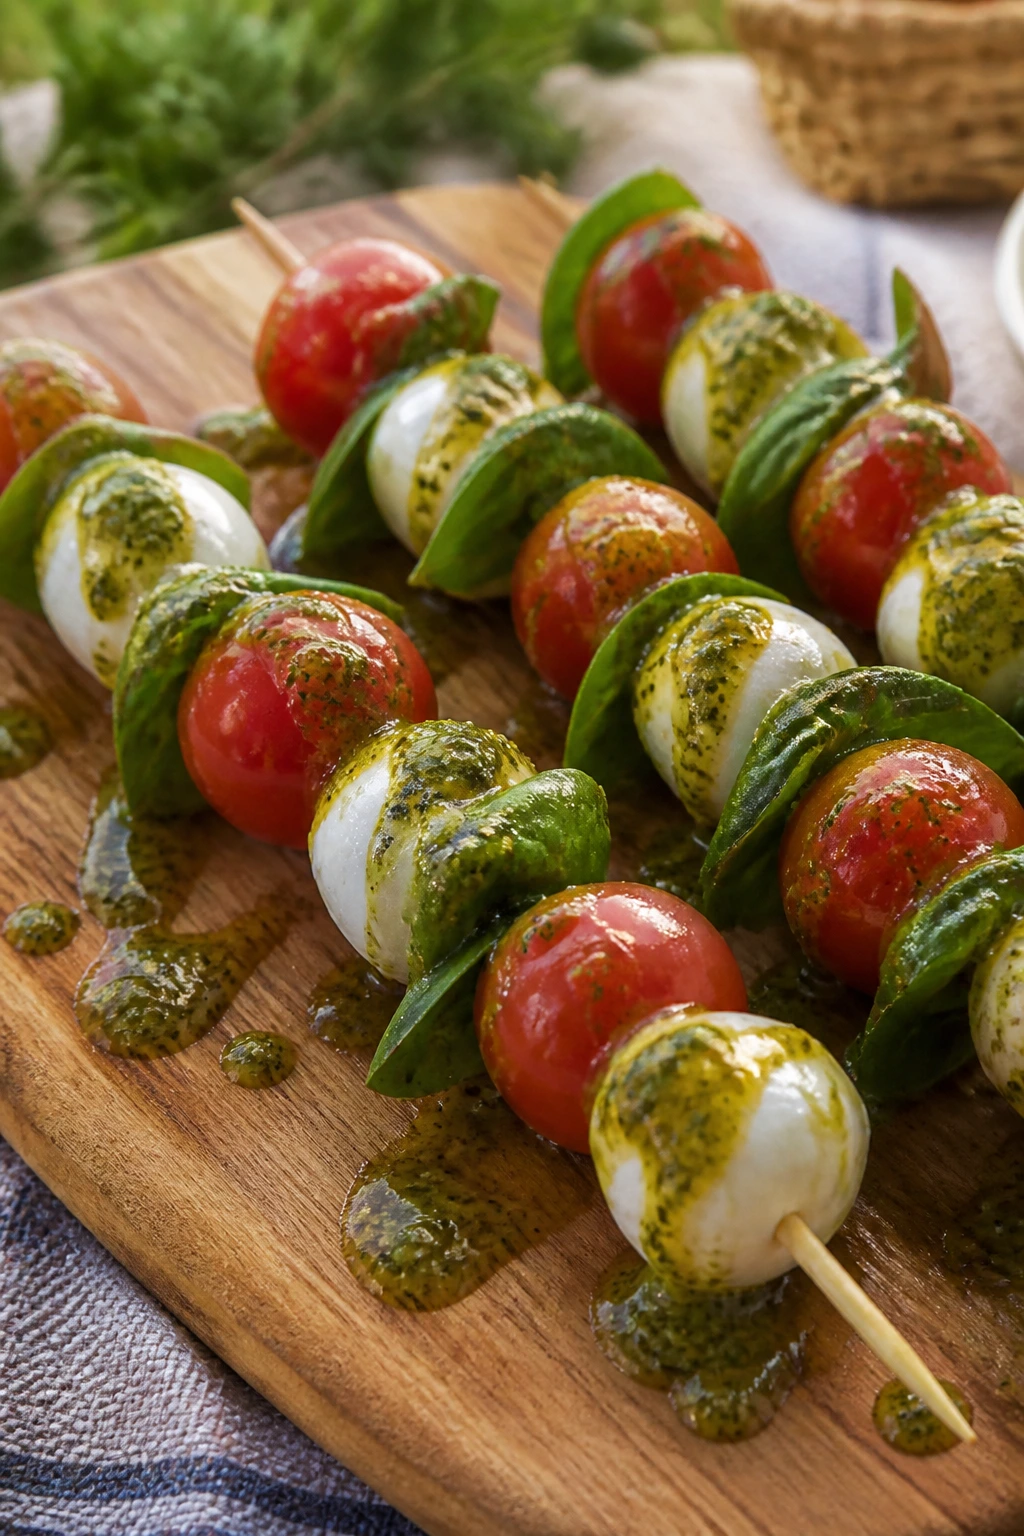
4. Caprese Skewers with Basil Pesto Drizzle
Threaded food belongs at picnics. It is neat, portioned, and easy to grab with one hand while somebody else is talking about sunscreen. These caprese skewers keep the classic tomato-mozzarella-basil trio, but the pesto drizzle gives them a little more depth than a plain caprese plate.
Why It Works:
The ingredients are already suited to room-temperature serving, so the recipe does not fight the setting. Skewers keep the tomatoes from rolling around and the mozzarella from getting smudged into the box. A small amount of pesto goes a long way, especially if you thin it with lemon juice or olive oil so it drizzles cleanly.
Key Ingredients:
- 24 cherry tomatoes — pick ones that feel firm and smell sweet.
- 24 mini mozzarella balls, drained — the dry surface matters.
- 24 small basil leaves — intact leaves look and taste better.
- 1/4 cup pesto — homemade or store-bought both work.
- 1 tbsp lemon juice or olive oil — to loosen the pesto slightly.
- 24 small skewers or toothpicks — short ones are easier for picnic trays.
- Pinch of salt and black pepper, if needed.
Quick Steps:
- Drain the mozzarella balls well and pat them dry with paper towels.
- Thread a tomato, basil leaf, and mozzarella ball onto each skewer.
- Whisk the pesto with lemon juice or olive oil until it drizzles easily.
- Arrange the skewers on a platter and spoon or drizzle the pesto over the top.
- Chill until serving, then pack in a flat container so they do not slide around.
Equipment for This Recipe:
- Small skewers or toothpicks — the whole recipe depends on them.
- Paper towels — to dry the cheese.
- Small bowl and spoon — for the pesto drizzle.
- Serving tray or shallow container — keeps the skewers neat.
How to Serve This Dish:
These are best arranged in a single layer with a little extra basil tucked around the edges. They sit nicely beside crackers, olives, and a chilled pasta salad.
Pro Tips for This Recipe:
- Dry the mozzarella well or the pesto slides off.
- If the basil leaves are large, fold them once before threading.
- Pack the drizzle separately if you want the skewers to look tidier on arrival.
- A little flaky salt right before serving sharpens the tomato flavor.
Variations on This Dish:
- Prosciutto Caprese: Add a folded ribbon of prosciutto to each skewer.
- Balsamic Finish: Swap pesto drizzle for a thick balsamic glaze.
- Marinated Mozzarella: Toss the mozzarella in olive oil, garlic, and herbs for 20 minutes before assembling.
Common Mistakes to Avoid with This Dish:
- Using wet cheese: The drizzle will slide right off.
- Making the skewers too long: They get awkward in a picnic box.
- Adding too much sauce: A light drizzle looks and tastes better than a heavy pour.
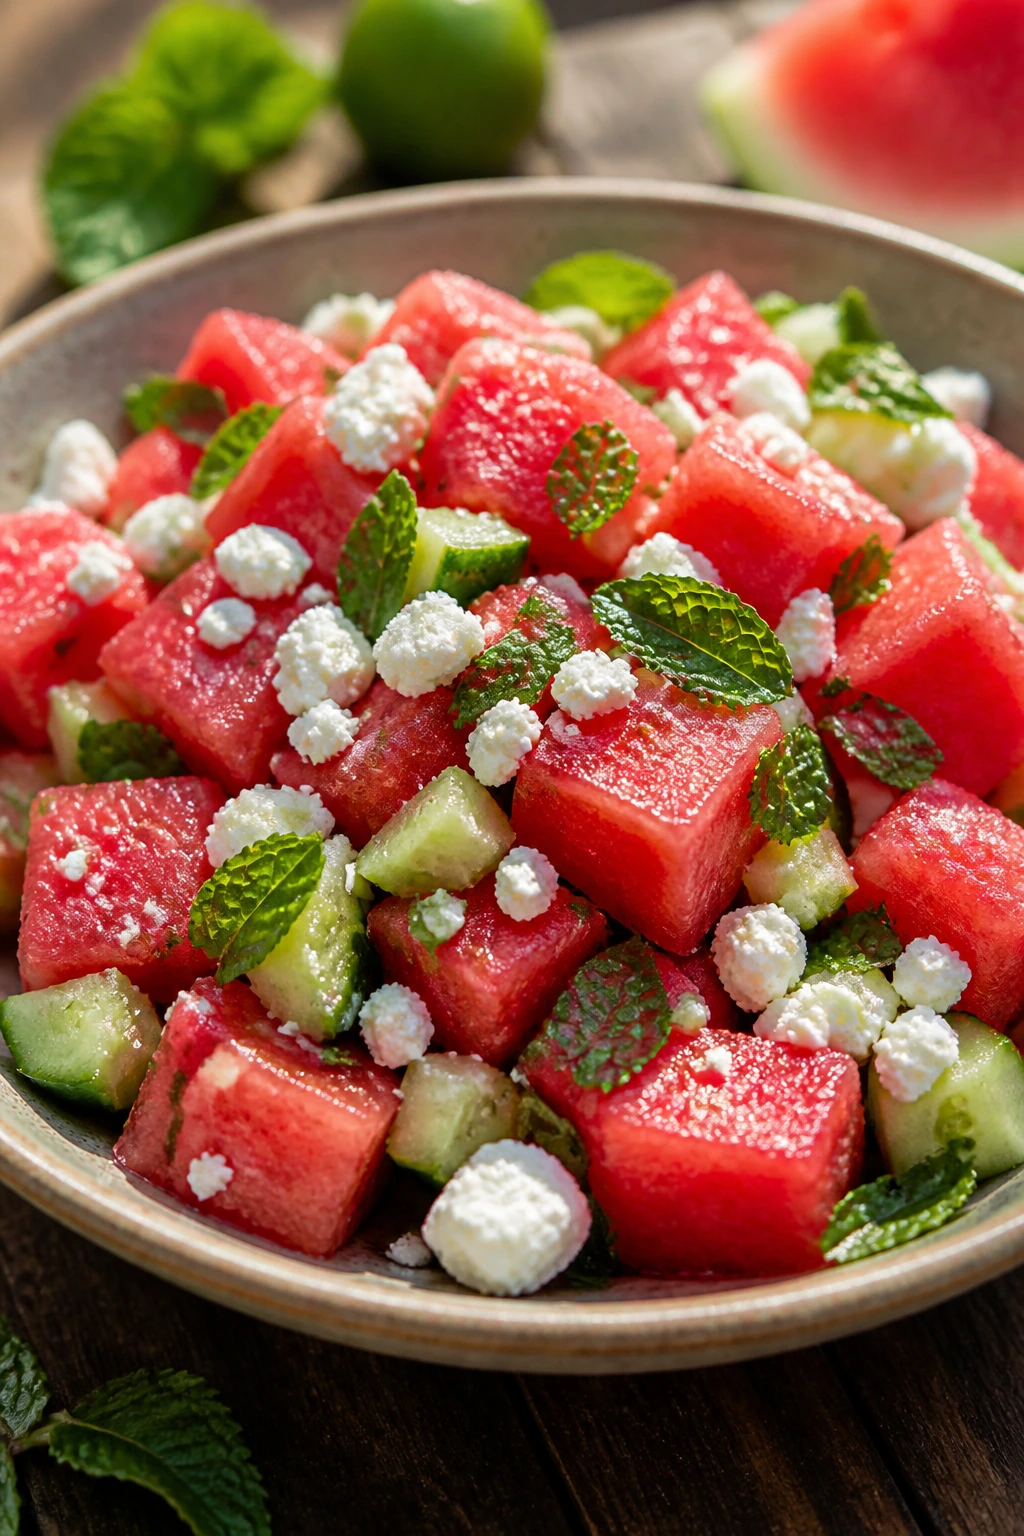
5. Watermelon Feta Mint Salad
Watermelon can be boring if it is served plain in a bowl and nothing else. Add salty feta, a little mint, and a squeeze of lime, and the whole thing wakes up. The cubes should stay big enough to feel juicy but not so big that they become hard to eat with a fork.
Why It Works:
Sweet fruit and salty cheese do the heavy lifting, which means you do not need much else. Lime juice keeps the watermelon from tasting flat, and mint gives the salad a cold, green smell the second the lid comes off. This is a dish that needs a gentle hand more than a complicated recipe.
Key Ingredients:
- 6 cups watermelon, cut into 1-inch cubes — seedless is easiest.
- 1 cup cucumber, chopped — gives the salad a crisp edge.
- 3/4 cup feta, crumbled.
- 1/4 cup fresh mint, torn.
- 2 tbsp lime juice — keep it fresh, not bottled if possible.
- 1 tbsp olive oil — optional, but it rounds the acid.
- Tiny pinch of salt — enough to sharpen the fruit.
Quick Steps:
- Cut the watermelon into even cubes and chill them before mixing if you have time.
- Combine the watermelon and cucumber in a large bowl.
- Whisk the lime juice, olive oil, and salt together, then drizzle it over the fruit.
- Toss gently, fold in the feta, and scatter mint on top.
- Pack cold and serve soon after mixing.
Equipment for This Recipe:
- Large bowl — roomy enough to toss without smashing the cubes.
- Sharp knife and cutting board — for clean watermelon cuts.
- Small whisk — for the dressing.
- Shallow container — helpful for transport.
How to Serve This Dish:
Serve it chilled in a shallow bowl so the mint stays visible on top. It works as a side for grilled meat or as a sweet-salty break between richer dishes.
Pro Tips for This Recipe:
- Buy a firm watermelon; soft spots mean watery fruit.
- Add the feta at the last minute if you want the cubes to stay crisp.
- If the melon seems very sweet, use the full lime juice and skip the oil.
- Keep the cubes large enough that they do not dissolve when tossed.
Variations on This Dish:
- Chili-Lime Version: Add a tiny pinch of chili flakes for a sharper finish.
- Berry Mix-In: Fold in a cup of strawberries or blueberries for extra color.
- Dairy-Free Bowl: Use avocado chunks and a little more salt instead of feta.
Common Mistakes to Avoid with This Dish:
- Overmixing: Watermelon bruises fast and turns slushy.
- Cutting the fruit too small: Tiny cubes leak juice and lose their texture.
- Salting too early: The melon starts sweating in the bowl.
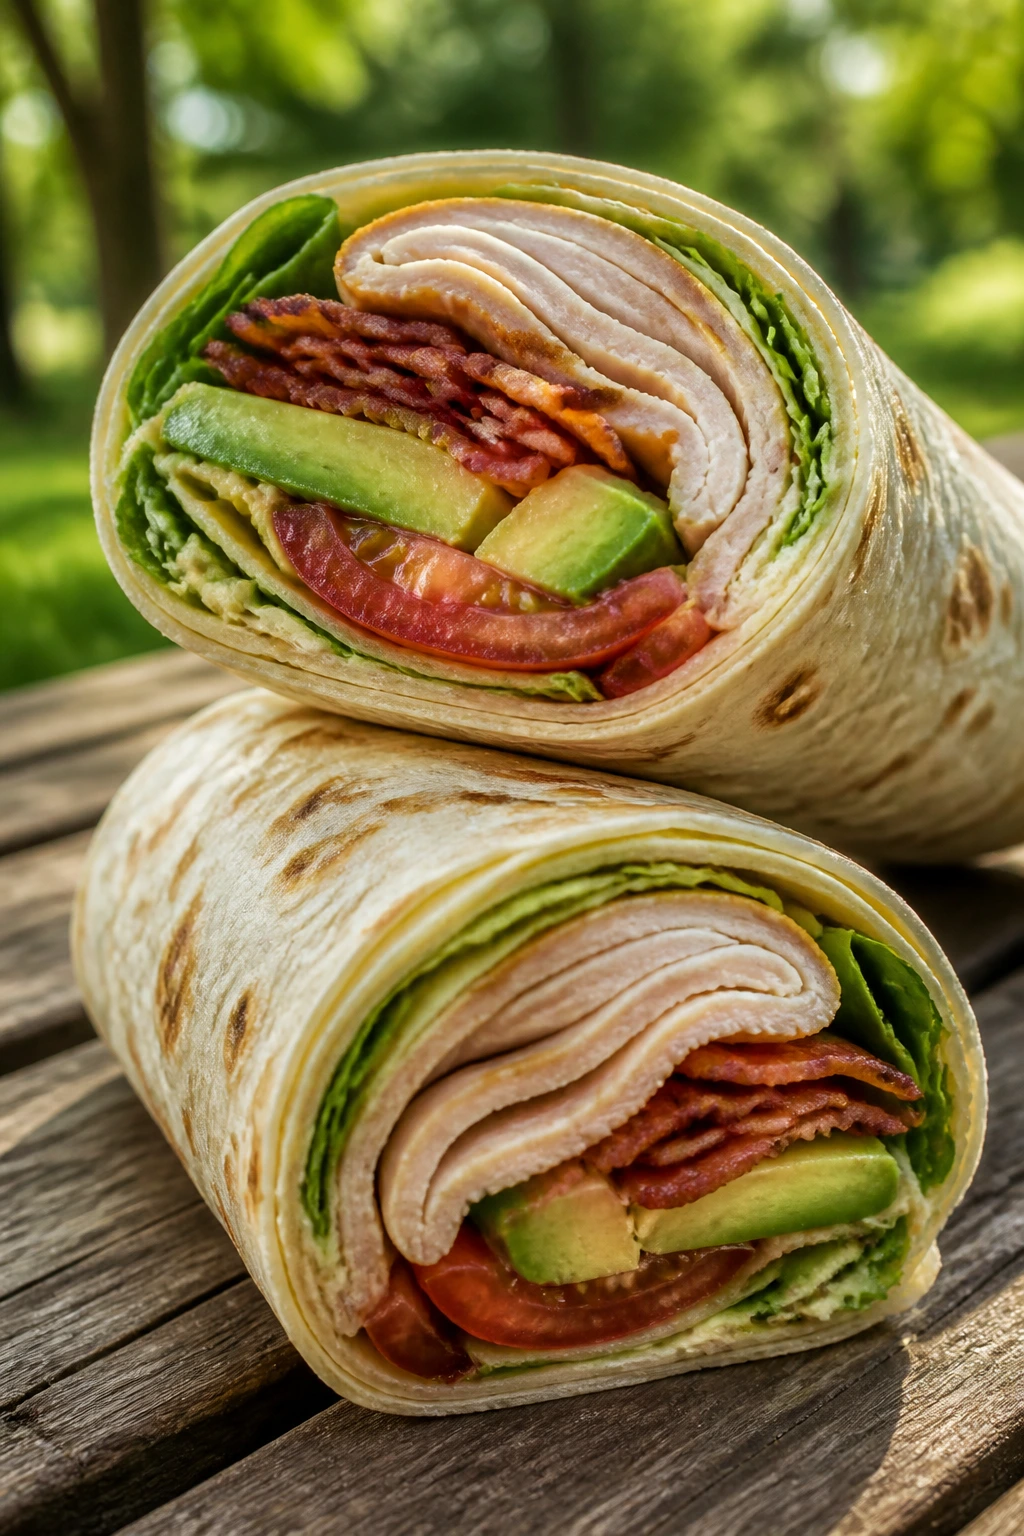
6. Turkey Club Wraps
A wrap solves two picnic problems at once: it keeps the filling contained and it keeps the bread from getting crushed. Turkey, bacon, lettuce, tomato, and avocado is a familiar combo, but it tastes sharper when the tomato is well drained and the wrap is rolled tightly enough to slice cleanly.
Why It Works:
Tortillas tolerate travel better than sliced bread, especially when you spread a thin layer of mayo-Dijon across the surface first. The bacon adds salt and crunch, the avocado keeps things creamy, and the lettuce gives enough structure that the wrap does not collapse halfway through lunch. If you chill them before slicing, the spiral holds better.
Key Ingredients:
- 4 large flour tortillas — choose the soft, flexible ones.
- 8 oz sliced turkey — not too thick.
- 8 slices cooked bacon — crisp and well drained.
- 1 large tomato, sliced and patted dry.
- 1 avocado, sliced.
- 1 cup shredded lettuce.
- 1/2 cup mayonnaise.
- 1 tbsp Dijon mustard.
- Salt and black pepper to taste.
Quick Steps:
- Mix the mayonnaise and Dijon in a small bowl.
- Spread the mixture over each tortilla, leaving a 1-inch border.
- Layer turkey, bacon, tomato, avocado, and lettuce down the center.
- Roll each tortilla tightly, tucking in the sides as you go.
- Wrap in parchment or foil and chill for 20 minutes before slicing.
Equipment for This Recipe:
- Large cutting board — for rolling and slicing.
- Sharp knife — gives cleaner wrap cuts.
- Small bowl and spoon — for the spread.
- Foil or parchment — keeps the wraps tight in transit.
How to Serve This Dish:
Cut each wrap into halves or thirds and arrange them cut-side up. They pair well with chips, pickles, and a handful of grapes.
Pro Tips for This Recipe:
- Dry the tomato slices or the wrap gets slippery.
- Slightly warm tortillas roll more easily than cold ones.
- Keep the avocado closer to the center so it does not smear out the ends.
- Chill before cutting so the layers settle.
Variations on This Dish:
- Club Salad Wrap: Add a little chopped celery to the mayo spread for extra crunch.
- Cheddar Version: Tuck in a thin slice of sharp cheddar for more bite.
- Roasted Pepper Swap: Replace tomato with roasted red peppers when you want less moisture.
Common Mistakes to Avoid with This Dish:
- Overstuffing: Too much filling makes the tortilla split.
- Using wet tomatoes: They turn the tortilla slick.
- Skipping the chill time: The wrap slices much cleaner after a short rest.
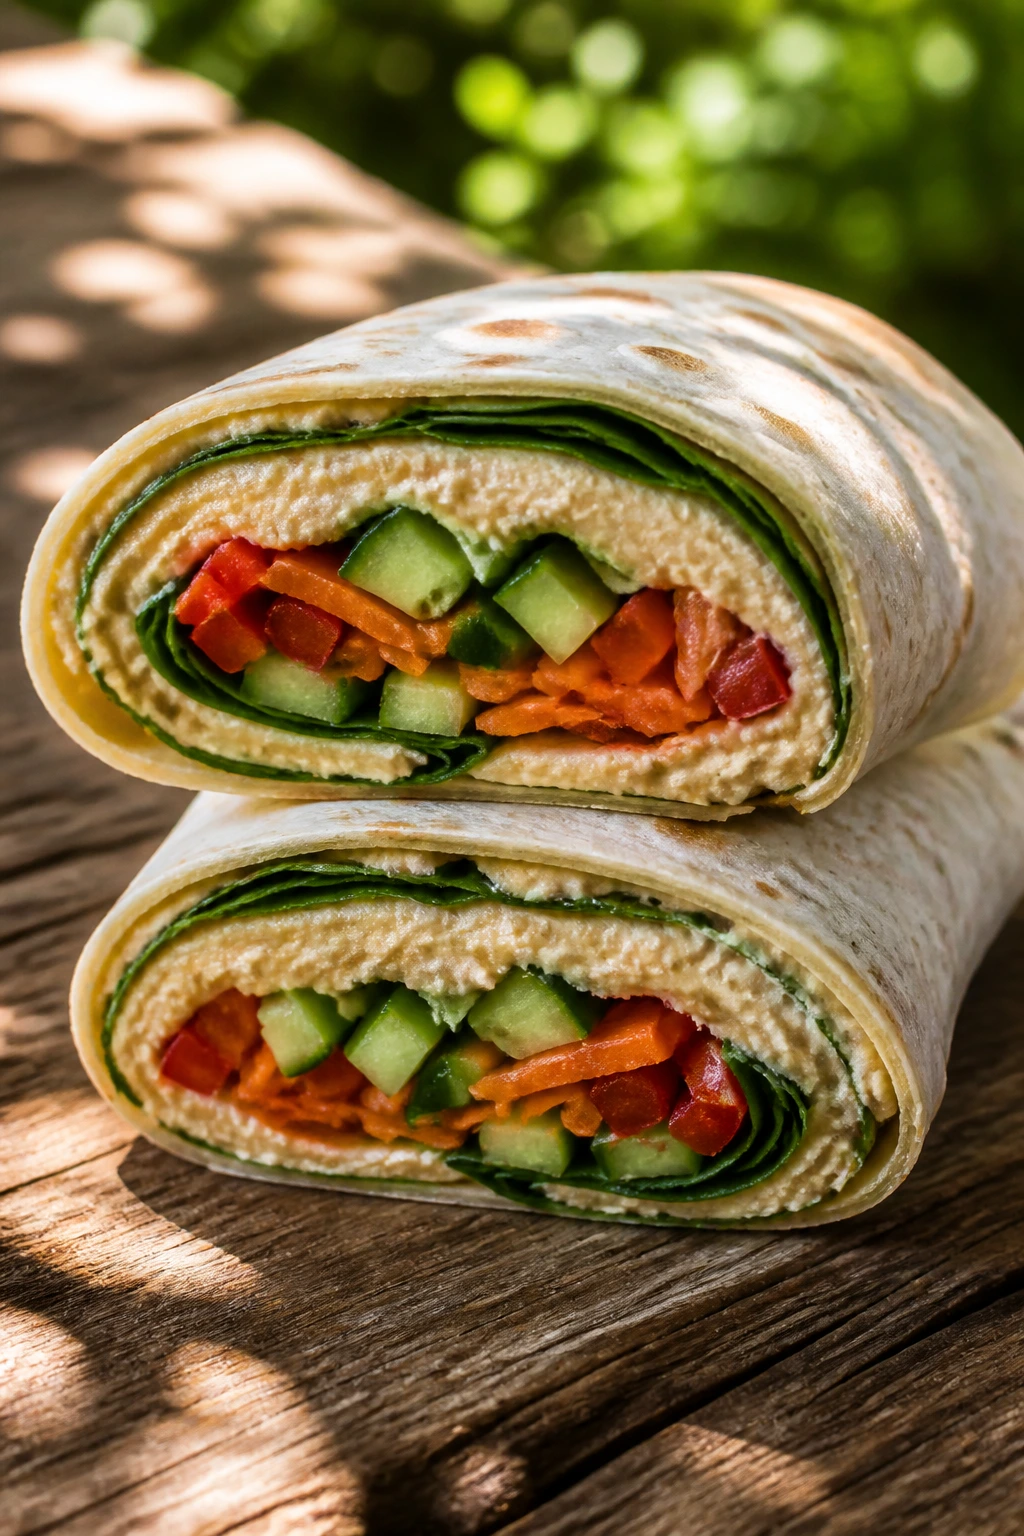
7. Hummus Veggie Wraps
These are the wraps I make when I want something cool, cheap, and sturdy enough to survive a tote bag. Hummus acts like glue, but in a good way—it locks the shredded carrots and sliced peppers in place and gives every bite a creamy base without needing mayo.
Why It Works:
Hummus holds moisture far better than most sandwich spreads, which keeps the tortilla from going soft too quickly. Crisp vegetables give the wrap a snap, and a little lemon juice keeps the hummus from tasting flat. This is also one of the easiest recipes to adjust if you have whatever vegetables are already in the fridge.
Key Ingredients:
- 4 large tortillas — whole wheat or plain.
- 1 cup hummus — classic, roasted garlic, or red pepper.
- 1 cucumber, cut into thin matchsticks.
- 1 large carrot, shredded.
- 1 red bell pepper, sliced thin.
- 1 cup baby spinach.
- 1/2 avocado, sliced.
- 1/4 cup feta, optional.
- 1 tbsp lemon juice, plus salt and pepper to taste.
Quick Steps:
- Lay each tortilla flat and spread a thick layer of hummus almost to the edges.
- Scatter spinach down the middle, then add cucumber, carrot, bell pepper, and avocado.
- Sprinkle with feta if using, then season with a little lemon, salt, and pepper.
- Roll tightly, folding the sides in as you go.
- Wrap snugly and chill for 15 minutes before slicing.
Equipment for This Recipe:
- Cutting board — for assembly and slicing.
- Sharp knife or mandoline — for thin vegetable strips.
- Small bowl — for seasoning the hummus if needed.
- Foil or parchment — to keep the wrap tight.
How to Serve This Dish:
Slice each wrap into chunky halves and pack them with hummus on the side if you want extra dip. They go well with fruit, olives, or a handful of roasted nuts.
Pro Tips for This Recipe:
- Pat the cucumber dry after cutting so it does not make the wrap slippery.
- Put the spinach closest to the tortilla; it forms a moisture barrier.
- Use a thick hummus layer. Thin smears do not hold the vegetables well.
- Add avocado only if you are serving the wraps the same day.
Variations on This Dish:
- Roasted Veggie Wrap: Swap raw peppers for cooled roasted zucchini and eggplant.
- Pesto Hummus Wrap: Stir 1 tablespoon pesto into the hummus for a greener flavor.
- Gluten-Free Roll-Up: Use a large gluten-free wrap or lettuce leaves.
Common Mistakes to Avoid with This Dish:
- Wet vegetables: They seep into the tortilla and weaken it.
- Too little hummus: The fillings slide around.
- Rolling loosely: The wrap falls apart once sliced.
8. Dill Deviled Eggs
Deviled eggs disappear from a picnic tray before almost anything else if the filling is seasoned properly. Dill gives them a fresh, grassy note that keeps the yolk mixture from tasting too rich, and a little lemon keeps them from feeling heavy.
Why It Works:
The egg whites act like neat little cups, which makes serving simple. A short ice bath after boiling keeps the yolks from going chalky, and the filling becomes smoother if you mash the yolks before adding mayo. Dill and chives are doing the work here, not a long ingredient list.
Key Ingredients:
- 6 large eggs — start with eggs that are not ultra-fresh so they peel more easily.
- 3 tbsp mayonnaise.
- 1 tsp Dijon mustard.
- 1 tsp lemon juice.
- 1 tbsp chopped fresh dill.
- 1 tbsp chopped chives.
- Salt and black pepper to taste.
- Paprika for the top.
Quick Steps:
- Place the eggs in a saucepan, cover with cold water, and bring to a boil.
- Turn off the heat, cover, and let them sit for 10 minutes.
- Move the eggs to an ice bath, then peel and halve them lengthwise.
- Mash the yolks with mayonnaise, Dijon, lemon juice, dill, chives, salt, and pepper until smooth.
- Spoon or pipe the filling into the whites and dust with paprika.
Equipment for This Recipe:
- Medium saucepan — for boiling.
- Bowl with ice water — stops the cooking fast.
- Fork or potato masher — for smooth filling.
- Spoon or piping bag — for filling the whites neatly.
How to Serve This Dish:
Keep them chilled and nestle them in a container so they do not slide around. A little paprika and dill on top makes the tray look finished without extra effort.
Pro Tips for This Recipe:
- Peel eggs under running water if the shells cling.
- Mash yolks while they are still a little warm for the smoothest filling.
- Chill the finished eggs before traveling.
- Use a piping bag if you want clean, tidy swirls.
Variations on This Dish:
- Spicy Pickle Eggs: Add 1 tablespoon finely chopped pickle and a pinch of cayenne.
- Avocado Filling: Replace half the mayo with mashed avocado and add extra lemon.
- Smoked Paprika Version: Use smoked paprika both inside and on top for a deeper flavor.
Common Mistakes to Avoid with This Dish:
- Overcooking the eggs: Gray yolks taste dry.
- Filling the eggs while hot: The mixture loosens and slides.
- Too much mustard: It can overpower the dill fast.
9. BBQ Chicken Sliders
Small buns, saucy chicken, and a little slaw make a sandwich that feels built for hands, not cutlery. The trick is balance: enough barbecue sauce to coat the chicken, not so much that the bottom bun goes soft before you get to the picnic blanket.
Why It Works:
Shredded chicken soaks up barbecue sauce faster than sliced meat, so the flavor is immediate. The slaw adds crunch and a vinegar bite that cuts through the sweetness, and slider buns are sturdier than full-size sandwich bread when they get warm in a cooler. These also reheat well if you want to serve them warm at the park.
Key Ingredients:
- 2 cups cooked chicken, shredded.
- 3/4 cup barbecue sauce.
- 12 slider buns.
- 2 cups coleslaw mix.
- 1/3 cup mayonnaise.
- 1 tbsp apple cider vinegar.
- 1 tsp sugar.
- 2 tbsp melted butter.
- 1 tsp garlic powder.
- Salt and pepper as needed.
Quick Steps:
- Toss the shredded chicken with barbecue sauce until coated.
- Stir the coleslaw mix with mayonnaise, vinegar, sugar, salt, and pepper.
- Split the slider buns and spoon chicken onto the bottom halves.
- Top with a mound of slaw, then close the sandwiches.
- Brush the tops lightly with melted butter if you want them extra soft and glossy.
Equipment for This Recipe:
- Mixing bowls — one for chicken, one for slaw.
- Baking sheet — if you want to warm the sliders briefly.
- Spoon or tongs — for easy assembly.
- Foil — useful for packing or warming.
How to Serve This Dish:
Serve them cut and stacked on a tray with extra slaw on the side. They pair well with chips, pickles, and a cold pasta salad.
Pro Tips for This Recipe:
- Drain excess sauce off the chicken if it looks too loose.
- Toast the buns lightly if you are serving them warm.
- Keep the slaw separate until assembly if you are packing ahead.
- Use a slightly smoky barbecue sauce; it keeps the sweetness in check.
Variations on This Dish:
- Spicy Sliders: Stir hot sauce into the barbecue sauce.
- Hawaiian Roll Version: Use sweet rolls for a softer, richer bite.
- Pulled Pork Swap: Replace the chicken with shredded pork if that is what you have.
Common Mistakes to Avoid with This Dish:
- Over-saucing the chicken: The buns soak through fast.
- Skipping the slaw drain: Wet slaw makes the sandwiches slippery.
- Packing them too early: Assemble close to serving if possible.
10. Corn and Avocado Salad
Corn and avocado together can be great or bland, depending on how they are handled. I like the kernels with a little char, the avocado in bigger chunks, and enough lime to make the whole bowl taste like it just left the cutting board.
Why It Works:
Corn brings sweetness, avocado brings creaminess, and lime keeps both from going heavy. If you briefly char the corn, you get a smoky note that makes the salad taste more finished without adding much work. Cilantro and red onion keep it sharp.
Key Ingredients:
- 4 ears corn or about 3 cups kernels — fresh or thawed frozen both work.
- 2 ripe avocados, diced.
- 1 red bell pepper, diced.
- 1/4 cup red onion, minced.
- 1/3 cup cilantro, chopped.
- 2 tbsp lime juice.
- 2 tbsp olive oil.
- Salt and black pepper to taste.
- 1/4 cup cotija or feta, optional.
Quick Steps:
- Cook or char the corn, then let it cool enough to handle.
- Cut the kernels from the cob if using fresh corn.
- Toss the corn with bell pepper, onion, cilantro, lime juice, olive oil, salt, and pepper.
- Fold in the avocado gently so it stays in chunks.
- Top with cheese if using and chill briefly before serving.
Equipment for This Recipe:
- Sharp knife — for cutting kernels safely.
- Large bowl — for tossing the salad.
- Grill pan or skillet — optional for charred corn.
- Citrus juicer — handy, not required.
How to Serve This Dish:
Spoon it into a shallow bowl and serve with grilled meat, tortilla chips, or spooned over greens. It also works as a filling for lettuce cups if you want a lighter plate.
Pro Tips for This Recipe:
- Add avocado at the end so it keeps its shape.
- If the corn is very sweet, use a little more lime and a pinch more salt.
- Frozen corn is fine; just thaw and dry it first.
- A few sliced scallions can stand in if red onion feels too sharp.
Variations on This Dish:
- Black Bean Corn Salad: Add 1 can black beans, rinsed and drained.
- Smoky Version: Use charred corn and a pinch of smoked paprika.
- No-Cheese Bowl: Skip the cotija and add diced cucumber for more crunch.
Common Mistakes to Avoid with This Dish:
- Cutting avocado too early: It browns and softens.
- Skipping the salt: Corn needs salt to taste sweet instead of flat.
- Using watery thawed corn without drying it: The bowl gets loose fast.
11. Strawberry Spinach Salad with Poppy Seed Dressing
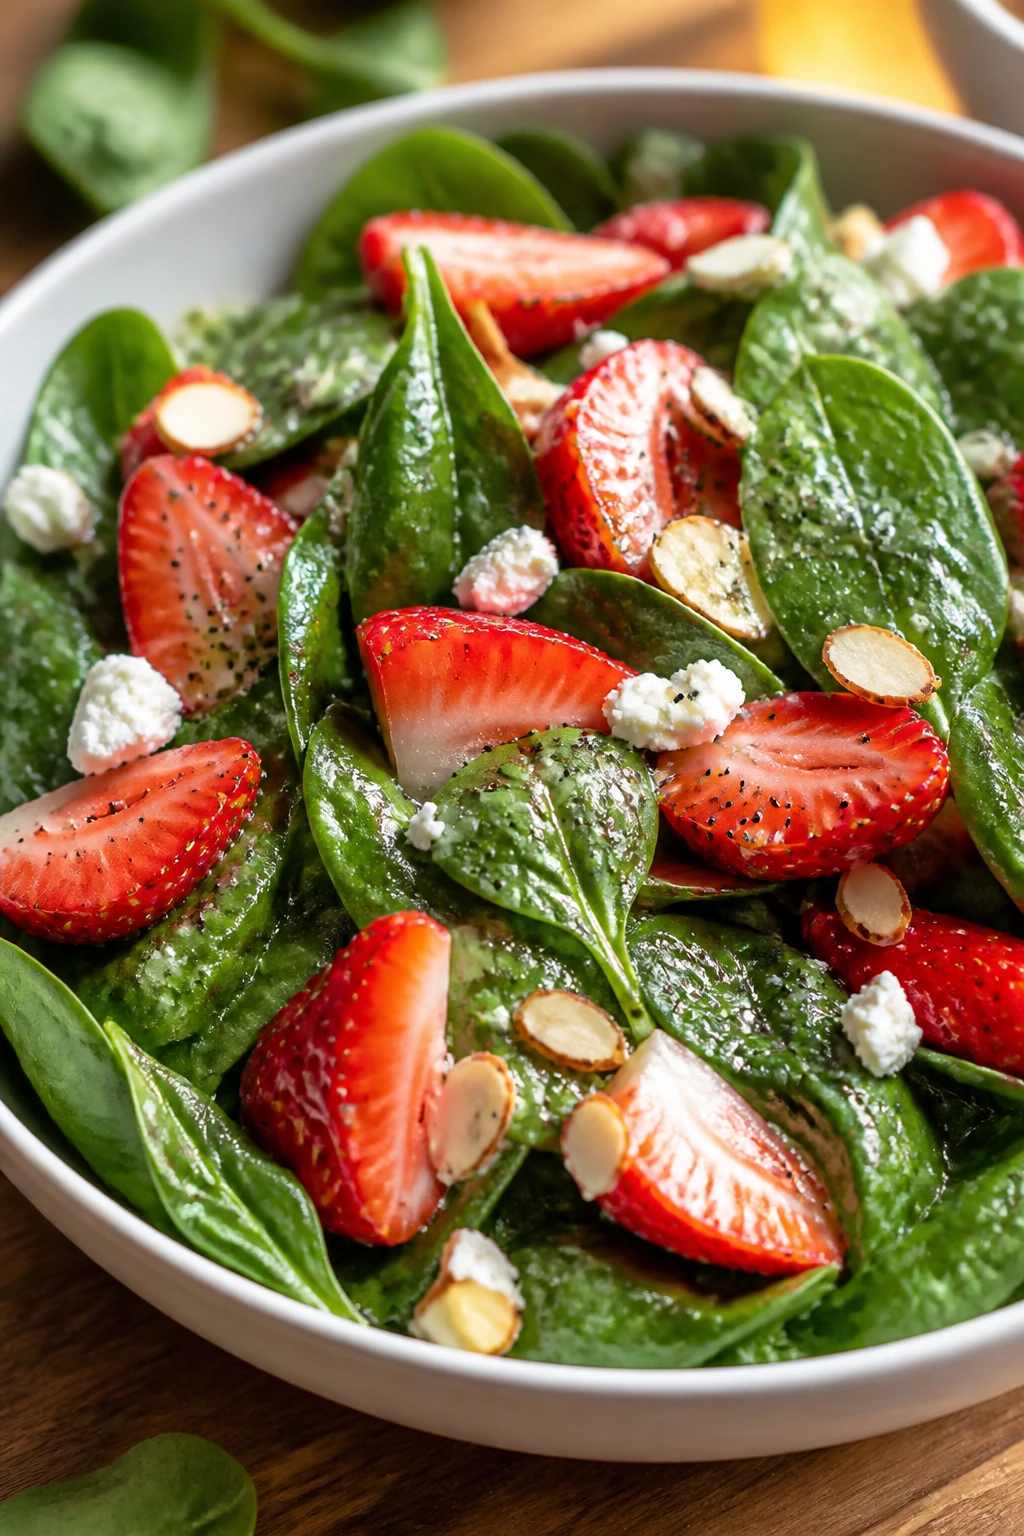
This is the salad that looks light but disappears fast because the strawberries bring sweetness, the spinach stays tender, and the almonds give just enough crunch to keep the bowl interesting. The dressing should be sweet-tart, not syrupy; if it tastes like dessert, it needs more vinegar.
Why It Works:
Baby spinach holds up better than delicate lettuce in a picnic setting. Strawberries are at their best when sliced just before serving, and poppy seed dressing gives the salad a picnic-table nostalgia that feels right without being cloying. A few toasted nuts help it stay satisfying.
Key Ingredients:
- 6 cups baby spinach.
- 2 cups strawberries, hulled and sliced.
- 1/2 cup sliced almonds, toasted.
- 1/2 small red onion, very thinly sliced.
- 1/2 cup feta or goat cheese, optional.
- 1/4 cup olive oil.
- 2 tbsp apple cider vinegar.
- 1 tbsp honey.
- 1 tsp poppy seeds.
- 1 tsp Dijon mustard.
- Salt to taste.
Quick Steps:
- Whisk the olive oil, vinegar, honey, poppy seeds, Dijon, and salt until smooth.
- Toast the almonds in a dry skillet until fragrant, then cool them.
- Combine spinach, strawberries, and red onion in a large bowl.
- Add the dressing right before serving and toss lightly.
- Finish with almonds and cheese on top.
Equipment for This Recipe:
- Salad bowl — wide enough for a gentle toss.
- Small whisk or jar — for the dressing.
- Dry skillet — for toasting nuts.
- Sharp knife — for neat strawberry slices.
How to Serve This Dish:
Serve it as the first cold salad on the table or alongside anything grilled. A shallow bowl keeps the strawberries from sinking and makes the top look brighter.
Pro Tips for This Recipe:
- Keep the dressing separate until the last minute.
- Toast the almonds; raw ones taste flat here.
- Slice the onion paper-thin so it does not take over.
- If the strawberries are especially sweet, cut the honey back a little.
Variations on This Dish:
- Blueberry Swap: Replace half the strawberries with blueberries.
- Chicken Salad Version: Add sliced grilled chicken for a fuller lunch.
- Dairy-Free Bowl: Skip the cheese and add avocado chunks instead.
Common Mistakes to Avoid with This Dish:
- Dressing too early: Spinach wilts fast.
- Using soft berries: They collapse and stain the greens.
- Too much onion: Keep it subtle.
12. Tuna Salad Lettuce Cups
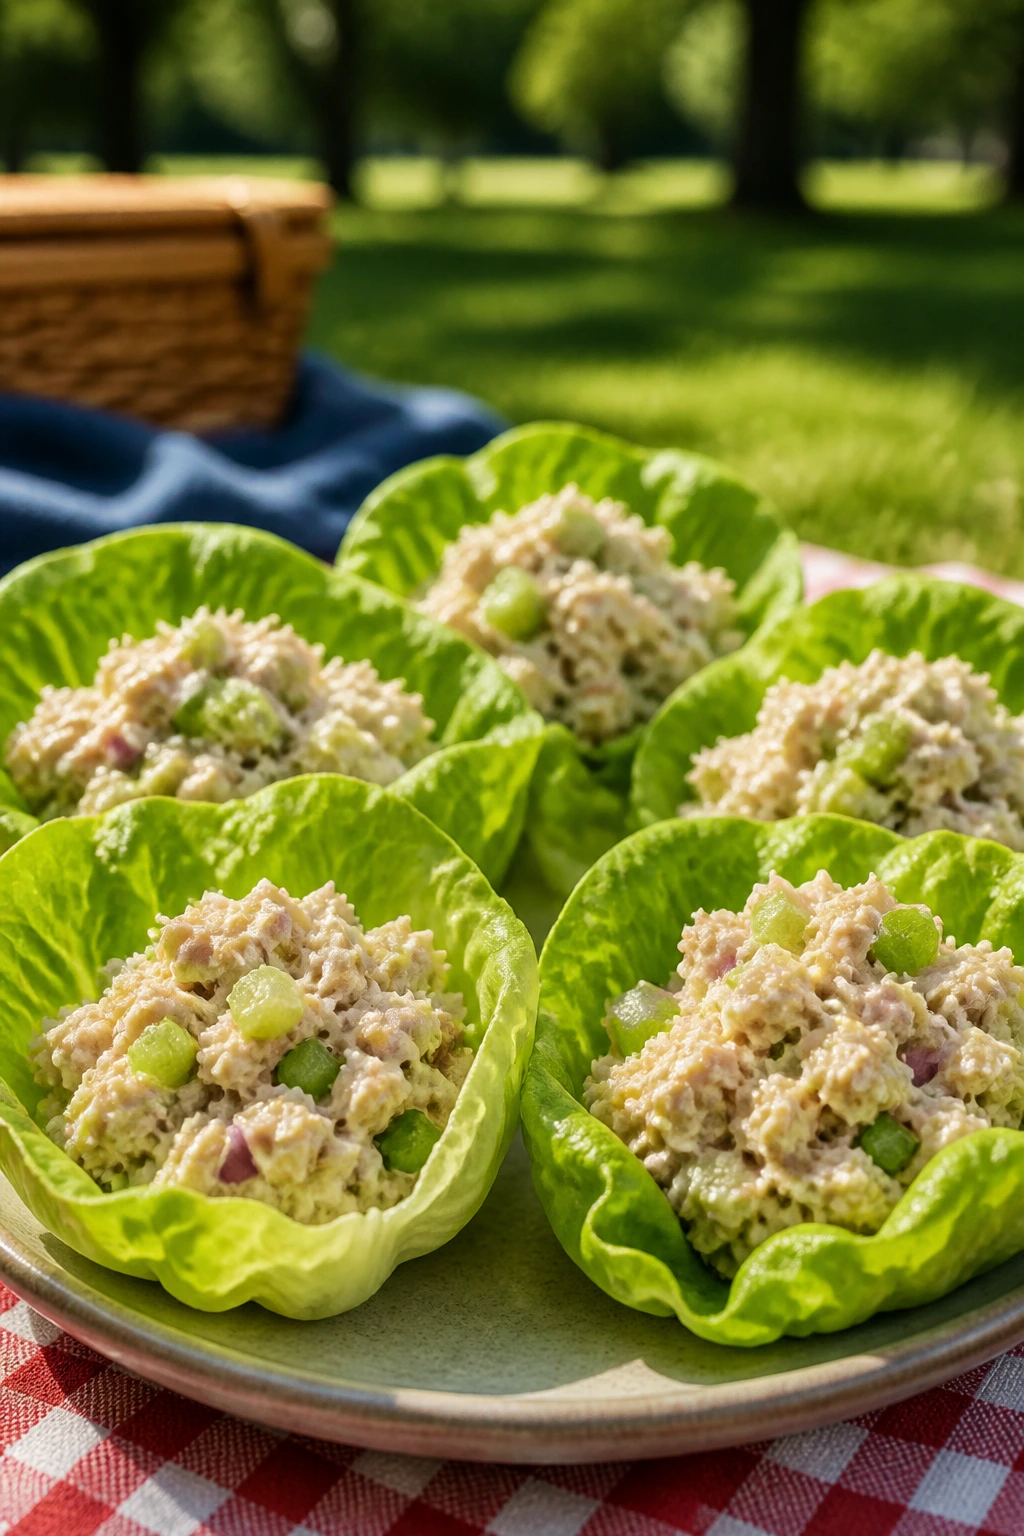
Tuna salad feels fresher when it stops pretending to be a sandwich filling. Spoon it into crisp lettuce leaves and the whole thing gets lighter, cleaner, and easier to handle on a picnic plate. The trick is draining the tuna well and keeping the mayo-to-tuna ratio sensible.
Why It Works:
Butter lettuce or romaine leaves act like edible cups that do not need a knife. Celery and onion add crunch, lemon keeps the tuna bright, and a little relish or caper brine gives the filling enough salt to taste alive. Because the cups stay open, the texture remains cleaner than a stuffed sandwich.
Key Ingredients:
- 2 cans tuna, 5 oz each, drained well.
- 1/4 cup mayonnaise.
- 2 tbsp plain Greek yogurt.
- 1 tbsp relish or chopped capers.
- 1 celery stalk, diced.
- 2 tbsp red onion, minced.
- 1 tbsp lemon juice.
- Salt and black pepper to taste.
- 1 head butter lettuce or 1 romaine heart, leaves separated.
Quick Steps:
- Drain the tuna until it feels as dry as you can get it.
- Mix the mayonnaise, yogurt, relish, lemon juice, salt, and pepper in a bowl.
- Fold in the tuna, celery, and onion.
- Chill the mixture for 15 minutes if you have time.
- Spoon into lettuce cups just before serving.
Equipment for This Recipe:
- Mixing bowl — for the tuna salad.
- Fork — useful for breaking up the tuna.
- Knife and cutting board — for celery and onion.
- Airtight container — for transport.
How to Serve This Dish:
Arrange the cups on a tray and keep the filling nearby so people can fill their own. They are good with crackers, sliced radishes, or a pile of cucumber rounds.
Pro Tips for This Recipe:
- Pack the filling and lettuce separately if you are traveling far.
- A tiny squeeze of extra lemon right before serving helps.
- Use butter lettuce if you want a softer, more delicate cup.
- Capers can replace relish if you want a sharper bite.
Variations on This Dish:
- Avocado Tuna: Replace half the mayo with mashed avocado.
- Curry Tuna Cups: Add a pinch of curry powder and some chopped apple.
- Cucumber Rounds: Spoon the salad onto thick cucumber slices instead of lettuce.
Common Mistakes to Avoid with This Dish:
- Leaving the tuna wet: The filling gets loose.
- Overloading the cups: They tear under too much weight.
- Packing the lettuce with the filling: Separate containers save the texture.
13. Greek Orzo Salad
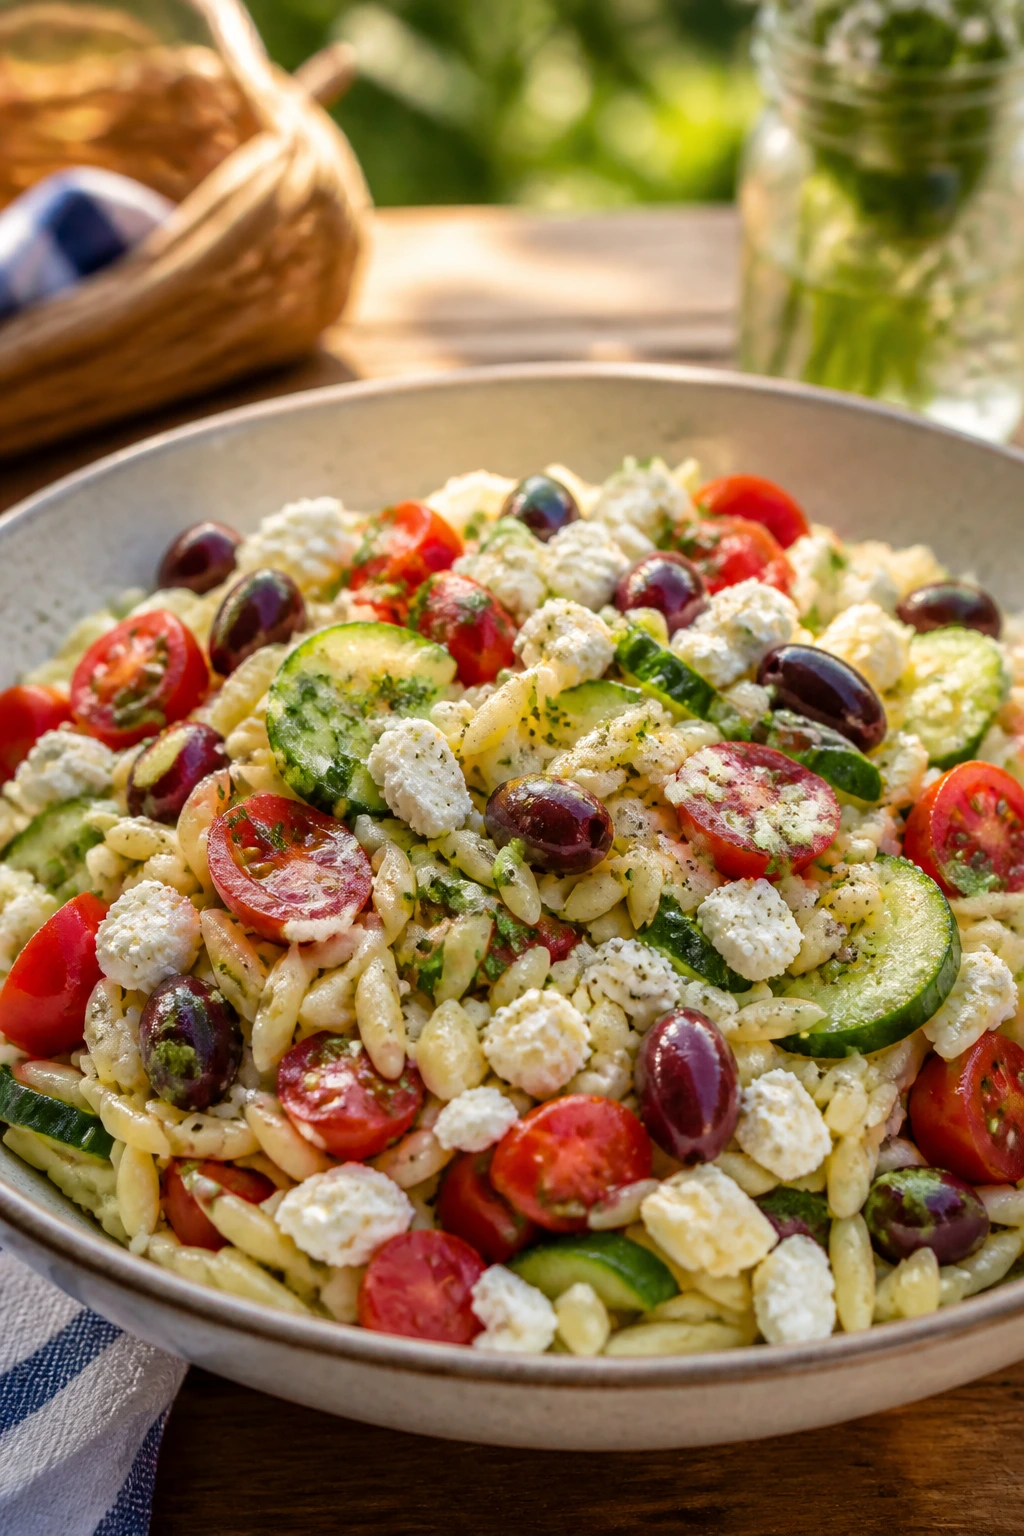
Orzo salad sits in that useful middle place between pasta salad and grain salad. The little rice-shaped pasta catches dressing well, and the mix of cucumber, tomato, olives, and feta gives each bite enough contrast that nobody gets bored halfway through the container.
Why It Works:
Orzo cooks fast and chills quickly, which makes it practical when time is short. Lemon, vinegar, and oregano keep the salad bright enough to taste good after sitting for a while, and the feta gives just enough salt to support the vegetables. It is sturdy enough for a picnic, but it still feels fresh.
Key Ingredients:
- 12 oz orzo.
- 1 cup cherry tomatoes, halved.
- 1 cucumber, diced.
- 1/2 red onion, very thinly sliced.
- 1/2 cup Kalamata olives, halved.
- 3/4 cup feta, crumbled.
- 1/4 cup parsley, chopped.
- 1/3 cup olive oil.
- 3 tbsp red wine vinegar.
- 2 tbsp lemon juice.
- 1 tsp oregano, 1 small garlic clove grated, salt, and pepper.
Quick Steps:
- Cook the orzo in salted water until tender, then drain and cool it slightly.
- Whisk the olive oil, vinegar, lemon juice, oregano, garlic, salt, and pepper.
- Toss the warm orzo with the dressing so it absorbs flavor.
- Fold in tomatoes, cucumber, onion, olives, and parsley.
- Finish with feta and chill before packing.
Equipment for This Recipe:
- Medium pot — for boiling the orzo.
- Colander — for draining.
- Large bowl — for tossing.
- Small whisk — for the dressing.
How to Serve This Dish:
Serve it chilled or just cool, in a shallow bowl so the herbs and feta stay on top. It pairs well with grilled chicken, skewers, or a simple pile of roasted peppers.
Pro Tips for This Recipe:
- Salt the pasta water well; orzo needs seasoning from the start.
- Toss the orzo with dressing while it is still warm.
- Keep a little extra lemon on hand for refreshing the bowl after chilling.
- If the salad seems dry, add 1 tablespoon olive oil, not a flood.
Variations on This Dish:
- Chicken Orzo Bowl: Add shredded rotisserie chicken.
- Chickpea Version: Add 1 can chickpeas for more bulk.
- Gluten-Free Swap: Use gluten-free pasta shapes that hold their form.
Common Mistakes to Avoid with This Dish:
- Overcooking orzo: It turns mushy fast.
- Skipping the cooling step: Hot pasta softens the vegetables.
- Underseasoning: The salad needs enough salt to wake up the lemon.
14. No-Bake Lemon Cheesecake Bars
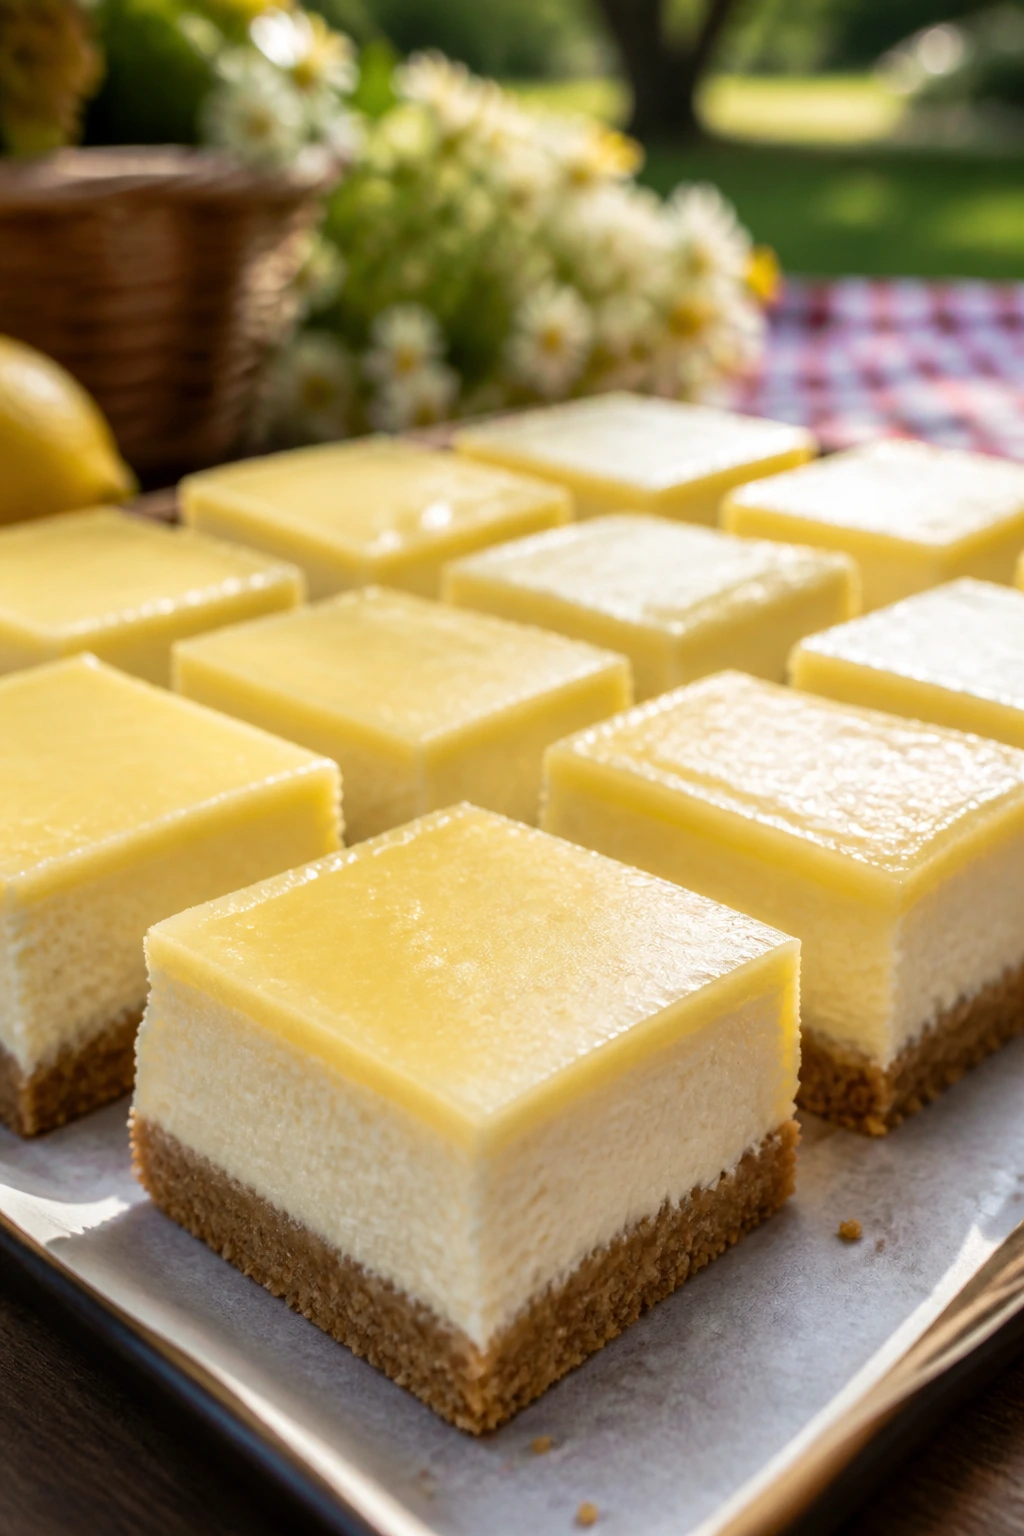
Picnic desserts should slice cleanly and hold their shape. These bars do both if you give them enough chilling time, and the lemon keeps the filling from feeling too rich. The crumb crust gives you a firm base, which matters more than people think when the tray gets passed around.
Why It Works:
A no-bake filling is a smart summer move because you do not have to heat the kitchen. Cream cheese, lemon juice, and powdered sugar create a smooth filling that firms up in the fridge, while a graham crust gives enough structure to carry the bar without crumbling apart. The bars taste best cold and cut much neater after a full chill.
Key Ingredients:
For the crust:
- 2 cups graham cracker crumbs.
- 1/2 cup unsalted butter, melted.
- 2 tbsp sugar.
- Pinch of salt.
For the filling:
- 16 oz cream cheese, softened.
- 1 cup powdered sugar.
- 1 tbsp lemon zest.
- 1/4 cup lemon juice.
- 1 tsp vanilla extract.
- 1 cup whipped topping or 1 cup heavy cream whipped to stiff peaks.
For the top:
- Fresh berries, optional.
Quick Steps:
- Line an 8×8-inch pan with parchment paper.
- Mix the graham crumbs, melted butter, sugar, and salt, then press firmly into the pan.
- Beat the cream cheese, powdered sugar, lemon zest, lemon juice, and vanilla until smooth.
- Fold in the whipped topping or whipped cream.
- Spread over the crust, chill for at least 4 hours, and cut with a warm knife.
Equipment for This Recipe:
- 8×8-inch baking pan — the bars need a firm shape.
- Parchment paper — helps lift them out cleanly.
- Mixer or sturdy whisk — for the filling.
- Offset spatula — useful for smoothing the top.
How to Serve This Dish:
Serve the bars cold, with berries scattered over the top if you want color. They are easy to pack in parchment squares and stack in a container with a little wax paper between layers.
Pro Tips for This Recipe:
- Soften the cream cheese fully or the filling turns lumpy.
- Chill long enough. Four hours is the minimum; overnight is better.
- Warm the knife under hot water before slicing.
- Add a little extra lemon zest if you want a brighter finish.
Variations on This Dish:
- Lime Bars: Swap lime juice and zest for lemon.
- Berry Swirl: Spoon a little mashed berry puree into the top before chilling.
- Gluten-Free Crust: Use gluten-free graham-style crumbs.
Common Mistakes to Avoid with This Dish:
- Rushing the chill: Soft bars cut badly.
- Using cold cream cheese: The filling stays grainy.
- Pressing the crust too lightly: It crumbles under the filling.
15. Peanut Sesame Noodle Salad

Cold noodles are one of the easiest picnic lunches to get wrong and one of the best when done right. The sauce has to be loose enough to coat, thick enough to cling, and strong enough to stay interesting after a few hours in the cooler. Peanut butter and sesame oil do that work for you.
Why It Works:
This salad gives you a full meal feel without needing heat. The noodles soak up the dressing, the vegetables keep things crisp, and the sauce gets better after a short rest because the ginger and garlic settle in. It is also easy to make vegetarian without changing the method.
Key Ingredients:
- 12 oz noodles, such as spaghetti, soba, or rice noodles.
- 1 cup shredded carrots.
- 1 cucumber, cut into matchsticks.
- 1 red bell pepper, thinly sliced.
- 3 green onions, sliced.
- 1/2 cup chopped peanuts.
- 1/3 cup peanut butter.
- 2 tbsp soy sauce.
- 2 tbsp rice vinegar.
- 1 tbsp honey.
- 1 tbsp sesame oil.
- 2 tbsp warm water.
- 1 tsp grated ginger.
- 1 small garlic clove grated.
Quick Steps:
- Cook the noodles until tender, then rinse under cool water and drain well.
- Whisk the peanut butter, soy sauce, vinegar, honey, sesame oil, water, ginger, and garlic until smooth.
- Toss the noodles with the dressing while they are cool but not ice cold.
- Fold in the carrots, cucumber, bell pepper, and green onions.
- Top with peanuts and chill until serving.
Equipment for This Recipe:
- Large pot — for cooking noodles.
- Colander — for cooling and draining.
- Large mixing bowl — enough room for tossing.
- Whisk — for the sauce.
How to Serve This Dish:
Pack it in a shallow container with extra peanuts on the side so they stay crunchy. It works as a main or a sturdy side beside skewers, tofu, or sliced chicken.
Pro Tips for This Recipe:
- Add warm water to the sauce a teaspoon at a time until it loosens.
- Rinse noodles well so they do not clump.
- Keep some cucumber and peanuts back for the top.
- If the salad sits overnight, refresh it with a splash of vinegar before serving.
Variations on This Dish:
- Spicy Peanut Version: Stir in chili crisp or sriracha.
- Tahini Swap: Replace peanut butter with tahini for a different nut-free profile.
- Tofu Bowl: Add cubes of baked tofu for extra protein.
Common Mistakes to Avoid with This Dish:
- Sauce too thick: It coats unevenly and turns pasty.
- Warm noodles in the fridge container: They make condensation and dilute the dressing.
- Skipping the vinegar: The peanut flavor needs acid to stay lively.
16. Ham and Cheese Puff Pastry Pinwheels

These are the kind of picnic snack that disappear during the first round of conversation. Puff pastry gives you crisp, buttery layers, and ham with cheese keeps the filling salty and familiar. They are easy to bake, easy to carry, and easy to eat with one hand.
Why It Works:
Puff pastry bakes into tidy spirals if it stays cool long enough to slice cleanly. Dijon gives the filling some bite, and the cheese melts just enough to bind the ham to the pastry without spilling everywhere. They are just as good warm as they are at room temperature, which is rare and useful.
Key Ingredients:
- 1 sheet puff pastry, thawed but still cold.
- 3 tbsp Dijon mustard.
- 6 oz sliced ham.
- 6 oz shredded Swiss or cheddar.
- 1 egg, beaten.
- 1 tbsp sesame seeds or poppy seeds, optional.
Quick Steps:
- Heat the oven to 400°F and line a baking sheet with parchment.
- Unfold the puff pastry and spread it lightly with Dijon.
- Layer the ham and cheese evenly over the pastry.
- Roll it into a log, chill for 10 minutes, then slice into 1/2-inch pinwheels.
- Brush with egg, sprinkle with seeds if using, and bake 15 to 18 minutes until puffed and golden.
Equipment for This Recipe:
- Baking sheet — for the pinwheels.
- Parchment paper — keeps the pastry from sticking.
- Sharp knife — slices cleaner than a dull one.
- Pastry brush — for the egg wash.
How to Serve This Dish:
Serve them warm or at room temperature with grapes, pickles, or a simple salad. They also make a good savory snack to set beside fruit and bars on the same tray.
Pro Tips for This Recipe:
- Keep the pastry cold while working so it puffs well.
- Chill the rolled log before slicing if it feels too soft.
- Use parchment so the cheese does not glue itself to the pan.
- A light egg wash gives the cleanest browning.
Variations on This Dish:
- Pesto Turkey Pinwheels: Use pesto instead of mustard and swap in turkey.
- Spinach Feta Spiral: Replace ham with chopped spinach and crumbled feta.
- Everything Bagel Finish: Sprinkle the top with everything seasoning instead of seeds.
Common Mistakes to Avoid with This Dish:
- Letting the pastry warm up too much: It gets sticky and hard to slice.
- Overfilling the log: The spirals burst open in the oven.
- Skipping the parchment: Cleanup turns annoying fast.
17. Pesto Potato Salad
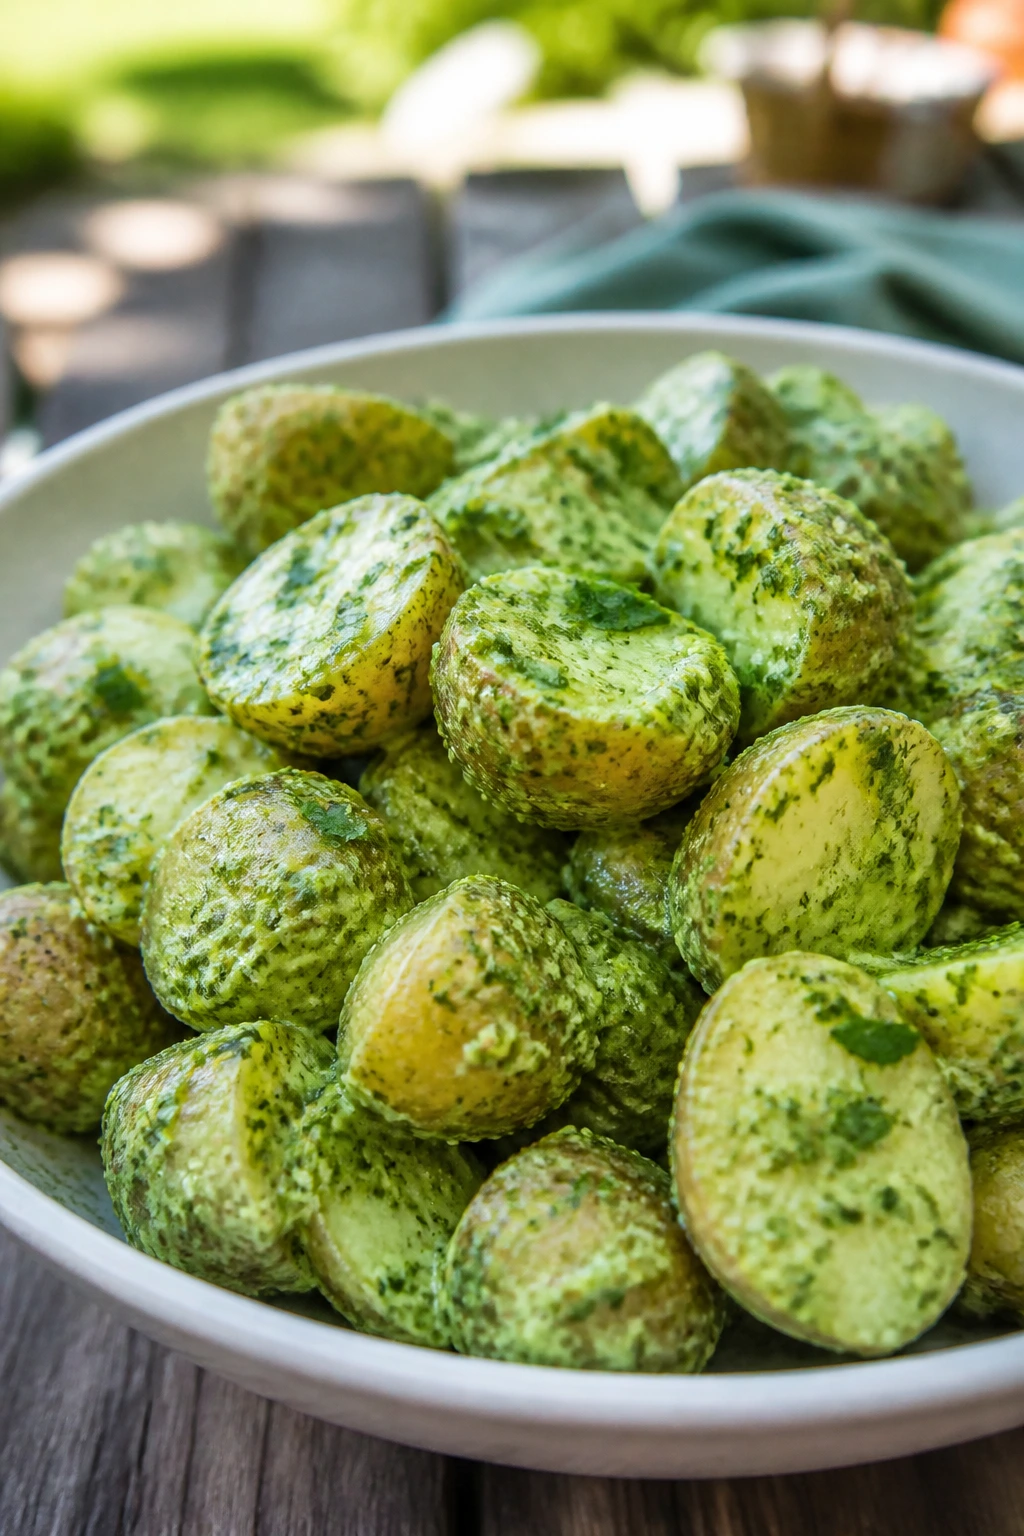
Potato salad can go heavy in a hurry, which is why I like pesto here. It brings herbs, garlic, and oil in one move, and the yogurt-mayo base keeps the potatoes coated without turning them dense. Baby potatoes also hold their shape better than big russets, which matters when they have to travel.
Why It Works:
Warm potatoes absorb seasoning better than cold ones, so the salad tastes more integrated if you dress them while they are still just warm. Pesto gives the bowl a green, herb-forward flavor that feels fresher than the usual mustard-heavy version. A little lemon keeps the potatoes from tasting flat after chilling.
Key Ingredients:
- 2 lbs baby potatoes, halved if large.
- 1/2 cup pesto.
- 1/4 cup Greek yogurt or mayonnaise.
- 2 tbsp lemon juice.
- 2 scallions, sliced.
- 2 tbsp chopped parsley or dill.
- Salt and black pepper to taste.
- 1 cup blanched green beans, optional for extra crunch.
Quick Steps:
- Boil the potatoes in salted water until tender but not falling apart, about 12 to 15 minutes.
- Drain well and let them steam off for a minute or two.
- Stir together the pesto, yogurt or mayo, lemon juice, salt, and pepper.
- Toss the warm potatoes with the dressing, then fold in scallions, herbs, and green beans if using.
- Chill and taste again before serving.
Equipment for This Recipe:
- Large pot — for boiling potatoes.
- Colander — for draining.
- Mixing bowl — for the dressing.
- Wooden spoon or spatula — gentle enough not to mash the potatoes.
How to Serve This Dish:
Pile it into a shallow bowl and finish with a few herb leaves on top. It works beside grilled sausages, chicken, or anything else that likes a creamy, herby side.
Pro Tips for This Recipe:
- Salt the cooking water well so the potatoes are seasoned inside.
- Toss while warm, not steaming hot, so the dressing clings.
- Use baby potatoes with thin skins; peeling is a waste here.
- If the salad tightens up in the fridge, loosen it with a spoonful of olive oil.
Variations on This Dish:
- Dairy-Free Pesto Salad: Use vegan pesto and skip the yogurt.
- Bacon Pesto Potato Salad: Add crisp chopped bacon and a little extra pepper.
- Pea-and-Potato Version: Fold in thawed peas for color and sweetness.
Common Mistakes to Avoid with This Dish:
- Overcooking the potatoes: They break apart when tossed.
- Dressing them stone cold: Flavor does not absorb as well.
- Using too much mayo: The pesto flavor gets buried.
18. Shrimp Avocado Salad Cups
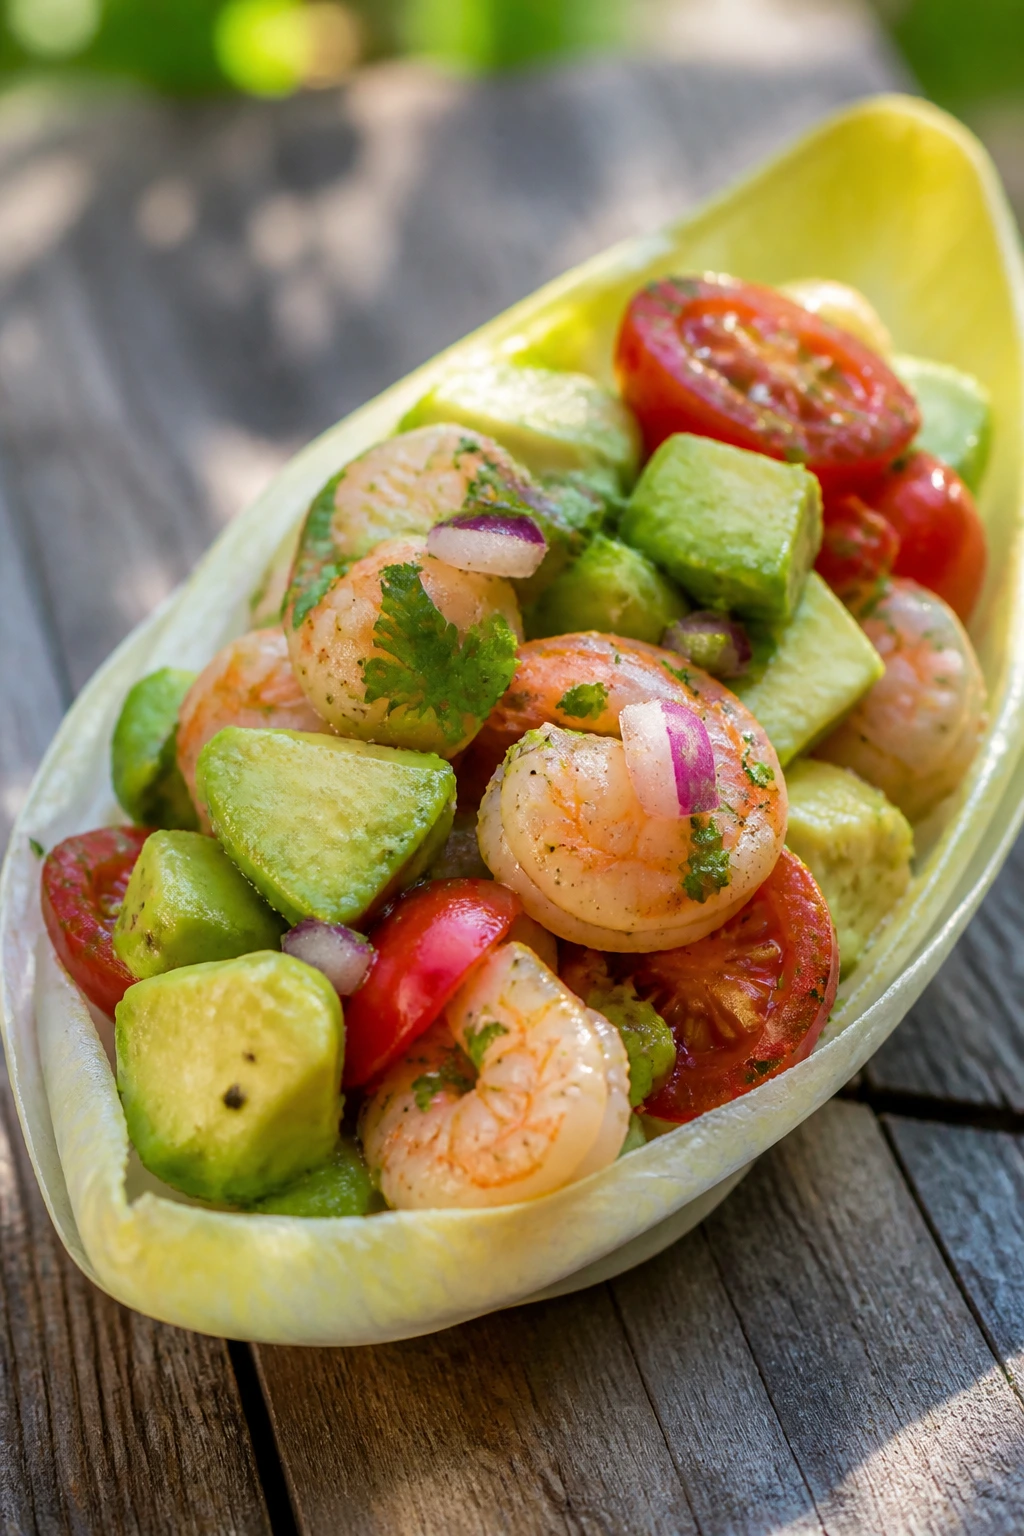
Shrimp and avocado make a picnic lunch that feels a little cleaner than a sandwich and a little more elegant than a scoopable salad. Endive or butter lettuce turns the mixture into neat cups, and the lime keeps the avocado from tasting flat.
Why It Works:
Cooked shrimp is quick, cold, and easy to portion, which makes it picnic gold if you keep it chilled. Avocado adds creaminess without needing mayo, and tomatoes bring enough acidity to brighten the bowl. A little jalapeño is welcome if you want the salad to wake up fast.
Key Ingredients:
- 1 lb cooked shrimp, chopped if large.
- 2 ripe avocados, diced.
- 1 cup cherry tomatoes, chopped.
- 1/4 cup red onion, finely diced.
- 1/4 cup cilantro, chopped.
- 2 tbsp lime juice.
- 1 tbsp olive oil.
- 1 jalapeño, minced, optional.
- Salt and black pepper to taste.
- Butter lettuce or endive leaves for serving.
Quick Steps:
- Chop the shrimp if needed and pat them dry.
- Toss the shrimp with lime juice, olive oil, salt, and pepper.
- Fold in avocado, tomatoes, onion, cilantro, and jalapeño if using.
- Taste and adjust with more lime or salt.
- Spoon into lettuce leaves right before serving.
Equipment for This Recipe:
- Cutting board and knife — for clean chopping.
- Medium bowl — for mixing.
- Citrus juicer — useful for lime.
- Spoon — for filling the cups.
How to Serve This Dish:
Serve in chilled lettuce cups with lime wedges on the side. They fit naturally into a seafood picnic plate with crackers, melon, or a handful of salty chips.
Pro Tips for This Recipe:
- Use shrimp that is already cooked and well chilled.
- Add the avocado close to serving so it stays green and intact.
- If the shrimp is salty, ease up on the added salt.
- Pack the cups and filling separately for the cleanest texture.
Variations on This Dish:
- Mango Shrimp Cups: Add small mango dice for a sweeter bite.
- Crab Swap: Replace the shrimp with lump crabmeat.
- Creamy Version: Stir in a spoonful of Greek yogurt if you want more binding.
Common Mistakes to Avoid with This Dish:
- Using warm shrimp: It softens the avocado.
- Overmixing: The avocado turns mushy.
- Packing the lettuce with the filling: Separate containers keep everything crisp.
19. Cornbread Muffins with Honey Butter
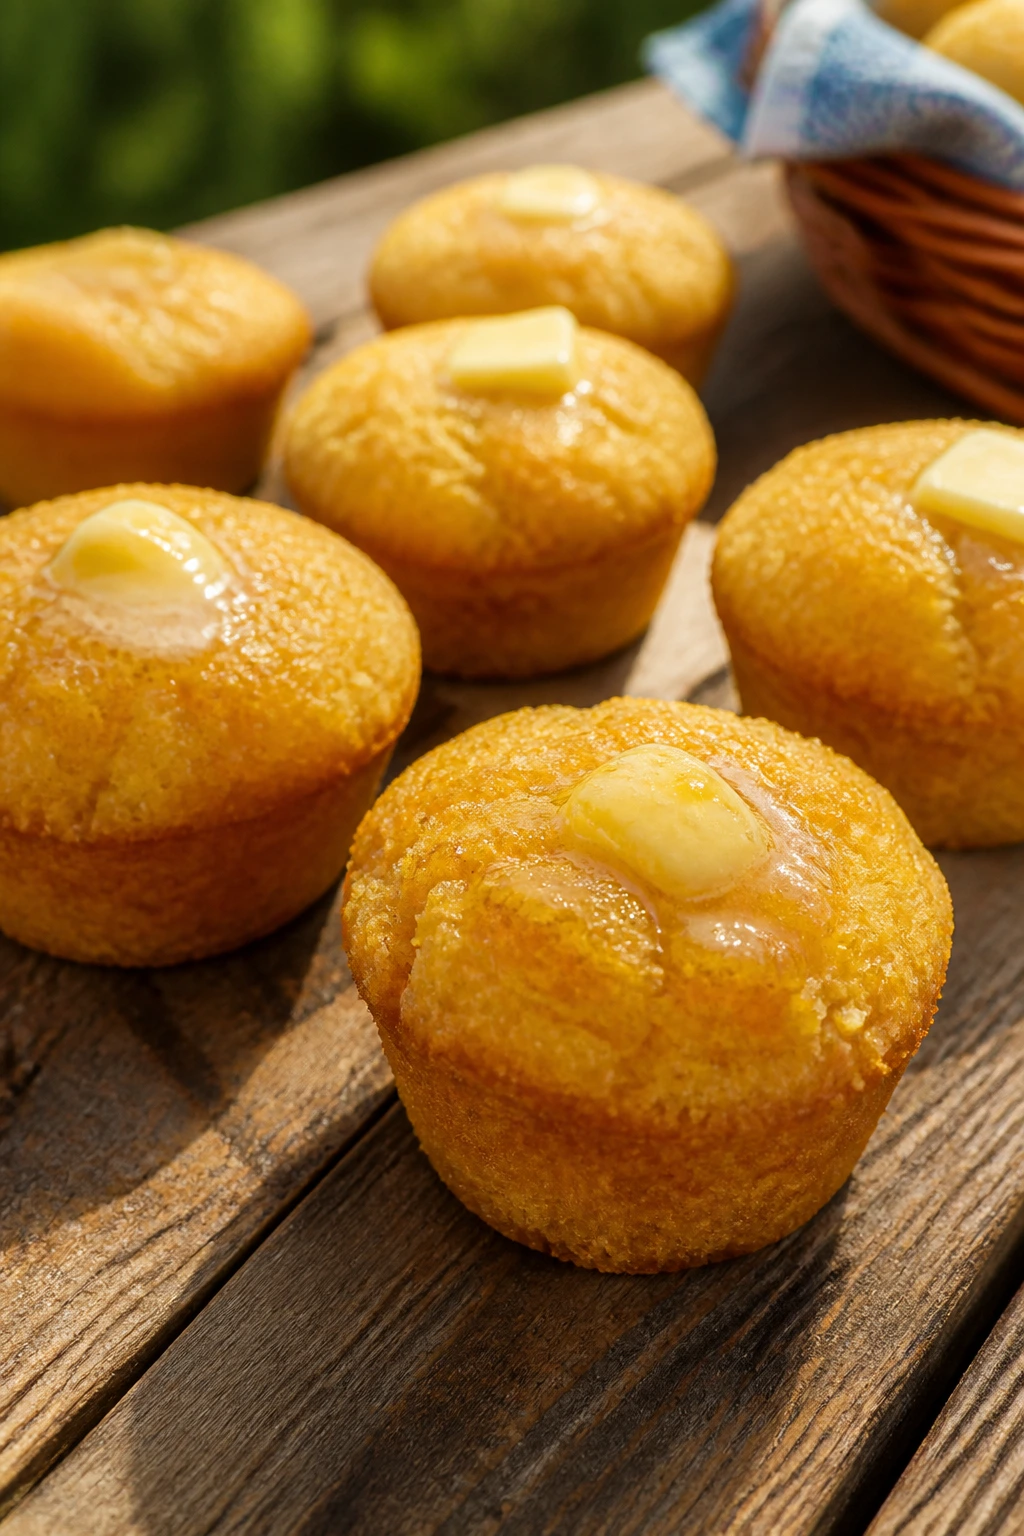
Cornbread muffins are one of the few picnic breads that make sense on their own. They do not need to be sliced, they do not demand a knife, and they pair with nearly everything else in the basket. Honey butter makes them feel finished without adding much work.
Why It Works:
Muffins are easier to carry than a full loaf, and the individual portions mean people can grab one and keep moving. Cornmeal gives a little texture, but the flour keeps the crumb soft enough to eat without crumbs flying everywhere. Honey butter melts into the warm tops in a way that plain butter never quite does.
Key Ingredients:
For the muffins:
- 1 cup cornmeal.
- 1 cup all-purpose flour.
- 1/4 cup sugar.
- 1 tbsp baking powder.
- 1/2 tsp salt.
- 1 cup buttermilk.
- 1/3 cup melted butter.
- 1 large egg.
- 1 cup corn kernels, optional.
For the honey butter:
- 1/2 cup butter, softened.
- 2 tbsp honey.
- Pinch of salt.
Quick Steps:
- Heat the oven to 400°F and grease or line a 12-cup muffin tin.
- Whisk cornmeal, flour, sugar, baking powder, and salt in a bowl.
- Stir in buttermilk, melted butter, and egg just until combined, then fold in corn if using.
- Divide the batter among the cups and bake 15 to 18 minutes until the tops spring back.
- Stir the honey butter ingredients together and serve with the warm muffins.
Equipment for This Recipe:
- Muffin tin — standard 12-cup size.
- Mixing bowls — one for dry, one for wet.
- Whisk and spatula — enough for the batter.
- Cooling rack — keeps the bottoms from steaming.
How to Serve This Dish:
Serve them warm or room temperature with honey butter in a small container. They work as a side for chili, barbecue, grilled meat, or a breakfast-style picnic spread.
Pro Tips for This Recipe:
- Mix the batter only until the flour disappears.
- Corn kernels are optional, but they give the muffins a juicy pop.
- Cool on a rack, not in the tin, or the bottoms get damp.
- A pinch of salt in the honey butter keeps it from tasting one-note.
Variations on This Dish:
- Jalapeño Cheddar Muffins: Add chopped jalapeño and shredded cheddar.
- Maple Butter Finish: Swap honey for maple syrup.
- Gluten-Free Version: Use a good 1:1 gluten-free flour blend.
Common Mistakes to Avoid with This Recipe:
- Overmixing the batter: The muffins turn tough.
- Overbaking: Cornbread dries out fast.
- Packing while hot: Steam softens the tops.
20. Fresh Lemonade

A picnic without a cold drink feels unfinished. Fresh lemonade is simple enough that the ingredient list barely needs explaining, but the way you balance the syrup and lemon juice matters a lot. Too much sugar and it turns sticky; too little and it tastes sharp in the wrong way.
Why It Works:
A quick simple syrup dissolves the sugar fully, so you do not get gritty lemonade at the bottom of the pitcher. Lemon juice brings brightness, cold water stretches it to the right level, and a short chill melds the edges. This is the kind of recipe that looks plain and then quietly saves the whole table.
Key Ingredients:
- 1 cup sugar.
- 1 cup water.
- 1 cup fresh lemon juice, about 6 to 8 lemons.
- 4 cups cold water.
- Ice, lemon slices, and mint for serving.
Quick Steps:
- Combine the sugar and 1 cup water in a saucepan and heat just until the sugar dissolves.
- Let the syrup cool slightly.
- Pour it into a pitcher with the lemon juice and remaining 4 cups cold water.
- Stir well, taste, and add a little more water if it is too sharp.
- Chill and serve over ice with lemon slices.
Equipment for This Recipe:
- Saucepan — for the syrup.
- Pitcher — wide enough to stir.
- Citrus juicer — helpful for fresh juice.
- Spoon or whisk — for mixing.
How to Serve This Dish:
Serve it ice-cold with mint or lemon wheels in the pitcher. It pairs with everything here, especially salty sandwiches and buttery bars.
Pro Tips for This Recipe:
- Roll the lemons on the counter before juicing.
- Chill the pitcher before filling it if you can.
- If you want a softer lemonade, use 4 1/2 cups water instead of 4.
- Add mint only for the last hour or it can get grassy.
Variations on This Dish:
- Strawberry Lemonade: Muddle 1 cup strawberries and strain them into the pitcher.
- Sparkling Version: Replace 2 cups of the water with chilled sparkling water right before serving.
- Basil Lemonade: Use basil instead of mint for a different herbal note.
Common Mistakes to Avoid with This Dish:
- Using bottled lemon juice: Fresh juice tastes brighter.
- Not cooling the syrup: Hot syrup fogs the pitcher and weakens the chill.
- Too little ice: Lemonade tastes flat when it warms up.
21. Peach Crumble Bars
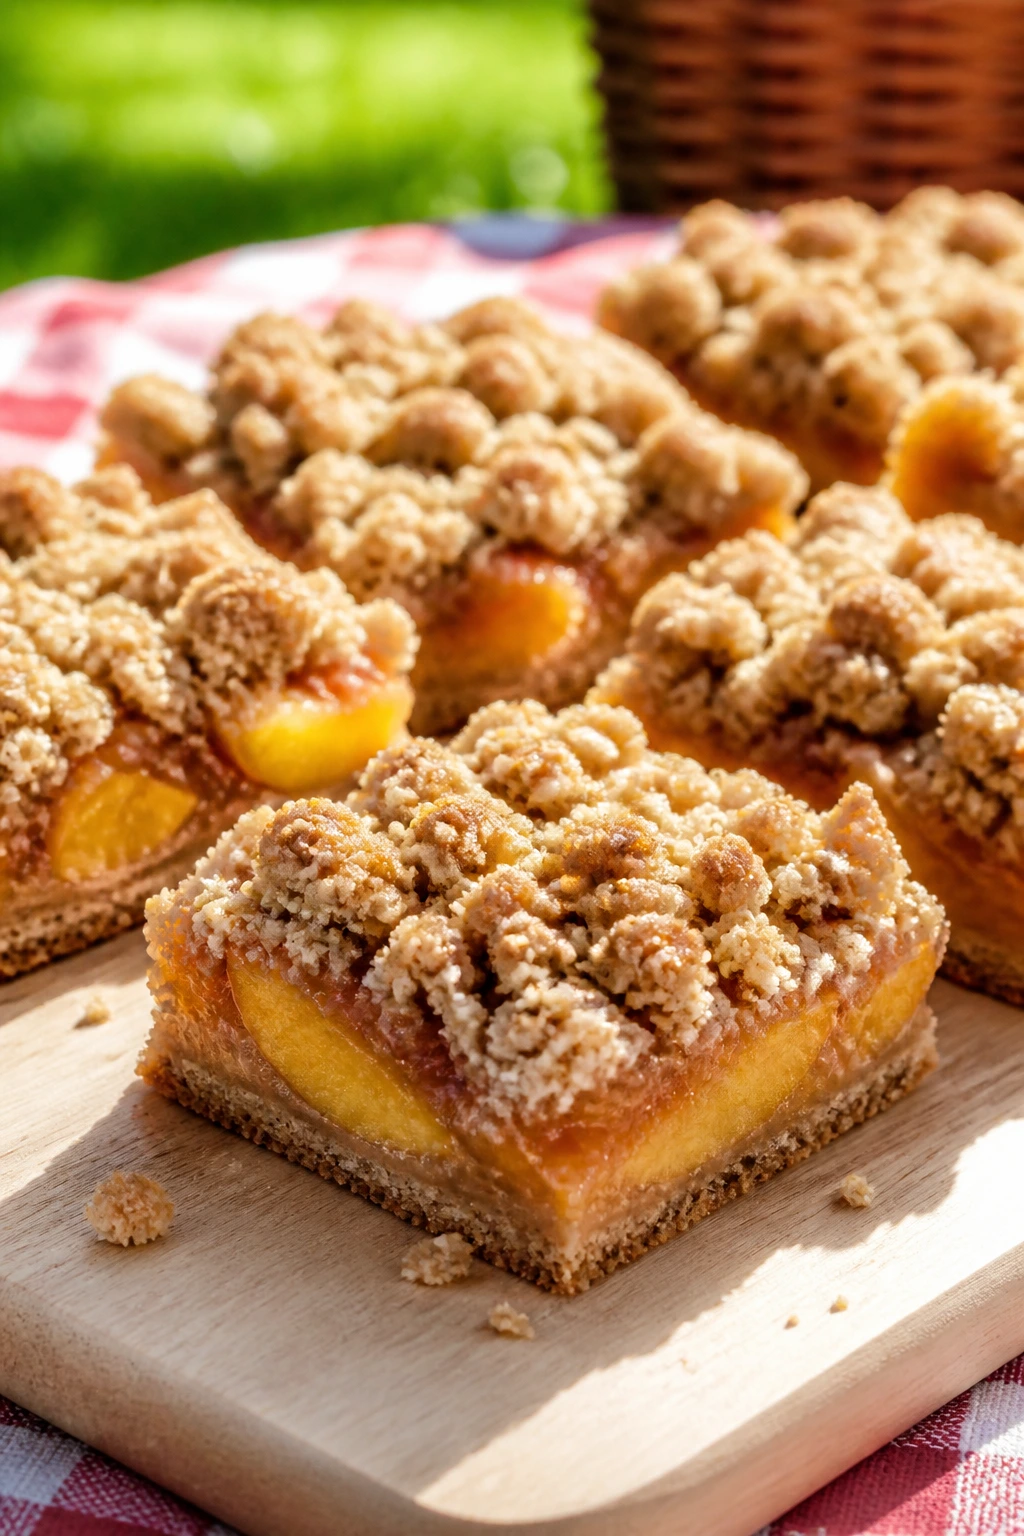
Peach bars feel like summer in a very practical shape. You get the soft fruit filling, the oat crumble, and a square that cuts neatly into picnic-sized pieces. They also hold up better than a slice of pie once they have cooled fully, which is half the battle.
Why It Works:
Cornstarch thickens the peach juices so the bars slice cleanly instead of sliding apart. Oats in the crust and topping give texture without requiring a second bowl of frosting or glaze. Lemon juice keeps the peaches tasting bright even after they sit in a container for a while.
Key Ingredients:
For the crust and crumble:
- 2 cups all-purpose flour.
- 1 cup old-fashioned oats.
- 3/4 cup brown sugar.
- 1/2 tsp salt.
- 1 cup unsalted butter, melted.
For the filling:
- 4 cups peeled or unpeeled peaches, chopped.
- 2 tbsp cornstarch.
- 1/4 cup sugar.
- 1 tbsp lemon juice.
- 1/2 tsp cinnamon.
Quick Steps:
- Heat the oven to 350°F and line a 9×13-inch pan with parchment.
- Mix flour, oats, brown sugar, and salt, then stir in the melted butter until crumbly.
- Press about two-thirds of the mixture into the pan and bake for 10 minutes.
- Toss the peaches with cornstarch, sugar, lemon juice, and cinnamon, then spread over the crust.
- Scatter the remaining crumble on top and bake 35 to 40 minutes until golden and bubbling. Cool completely before cutting.
Equipment for This Recipe:
- 9×13-inch baking pan — the right size for sturdy bars.
- Parchment paper — lifting is easier.
- Mixing bowls — one for crumble, one for filling.
- Spatula — for pressing the crust.
How to Serve This Dish:
Cut into squares and pack with parchment between layers. They are good cold, room temperature, or slightly chilled with a small scoop of whipped cream if you are serving them at home.
Pro Tips for This Recipe:
- Use ripe but not collapsing peaches.
- Let the bars cool fully before cutting or the filling runs.
- A little extra cinnamon is fine, but do not bury the peach flavor.
- If the peaches are very juicy, add 1 extra tablespoon cornstarch.
Variations on This Dish:
- Berry-Peach Bars: Add 1 cup blueberries or raspberries.
- Nectarine Version: Swap nectarines for peaches without changing the method.
- Gluten-Free Crumble: Use certified gluten-free oats and a GF flour blend.
Common Mistakes to Avoid with This Recipe:
- Cutting too early: The filling needs time to firm up.
- Using under-ripe peaches: They taste bland and dry.
- Too much topping: The bars should still feel like fruit bars, not granola squares.
22. Antipasto Skewers
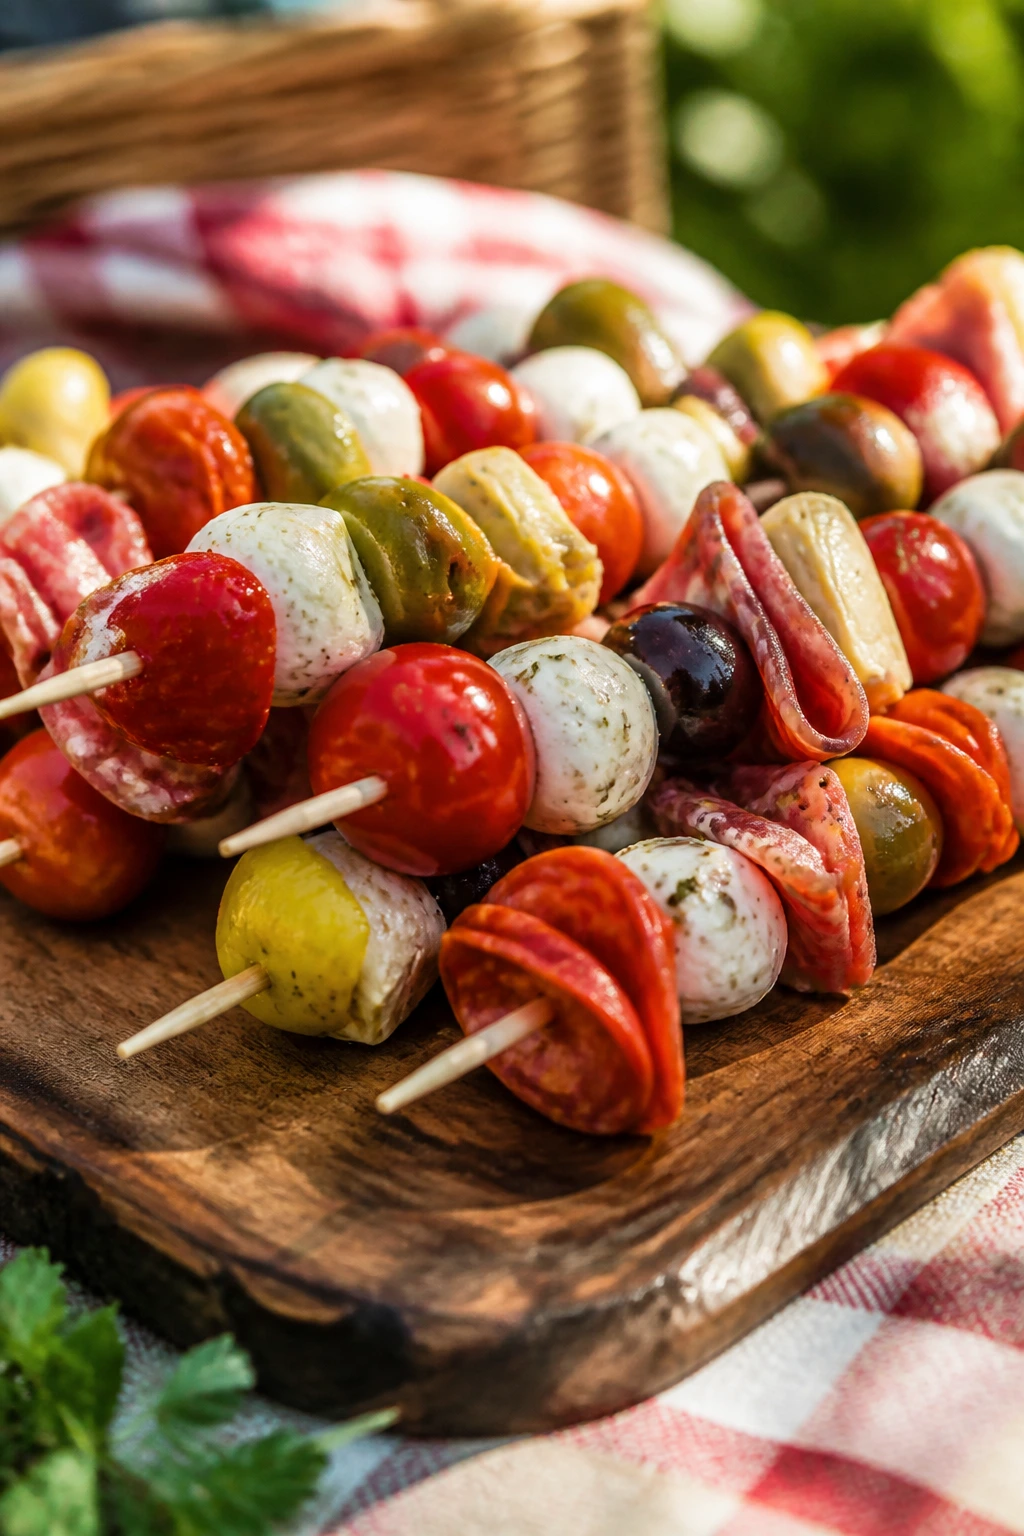
If a picnic needs one savory nibble that looks more dressed up than it feels to make, this is it. Antipasto skewers stack salty meats, cheese, tomatoes, olives, and peppers in a tidy line that tastes like a small deli plate on a stick. They also travel better than a mixed antipasto platter, which tends to slide around.
Why It Works:
Each skewer has enough contrast to stay interesting: meat, cheese, acid, and brine. The ingredients are all already picnic-friendly, and the skewer format prevents a soggy mess at the bottom of a bowl. A light dressing or herb oil can be added, but it is not required.
Key Ingredients:
- 20 slices salami, folded.
- 20 mini mozzarella balls, drained.
- 20 cherry tomatoes.
- 20 olives, pitted.
- 20 small pepperoncini pieces or roasted red pepper strips.
- 1/4 cup Italian dressing or olive oil with Italian herbs.
- Small skewers.
Quick Steps:
- Drain and dry the mozzarella balls.
- Fold the salami into loose ruffles so it looks tidy on the skewer.
- Thread salami, mozzarella, tomato, olive, and pepperoncini onto each skewer.
- Arrange on a tray and drizzle lightly with dressing if using.
- Chill until serving.
Equipment for This Recipe:
- Small skewers or toothpicks — essential.
- Paper towels — for drying ingredients.
- Tray or container — for transport.
- Small bowl — for dressing if you use it.
How to Serve This Dish:
Serve them alongside crackers, fruit, and a cold pasta salad. They are strong enough to stand in as a snack board without needing a knife.
Pro Tips for This Recipe:
- Dry the cheese or the skewers slip.
- Keep the tomato near the center of each skewer so it does not burst at the ends.
- If using dressing, drizzle lightly.
- Assemble on a tray, not in your hand; it goes faster.
Variations on This Dish:
- Vegetarian Antipasto: Use marinated artichokes and extra peppers instead of salami.
- Prosciutto Style: Swap salami for prosciutto ribbons.
- Spicy Version: Add hot cherry peppers or a pinch of chili flakes to the dressing.
Common Mistakes to Avoid with This Dish:
- Packing them in a deep pile: The skewers tangle.
- Skipping the drying step: Wet ingredients slide apart.
- Using huge skewers: They are awkward to carry and eat.
23. Black Bean and Corn Salsa
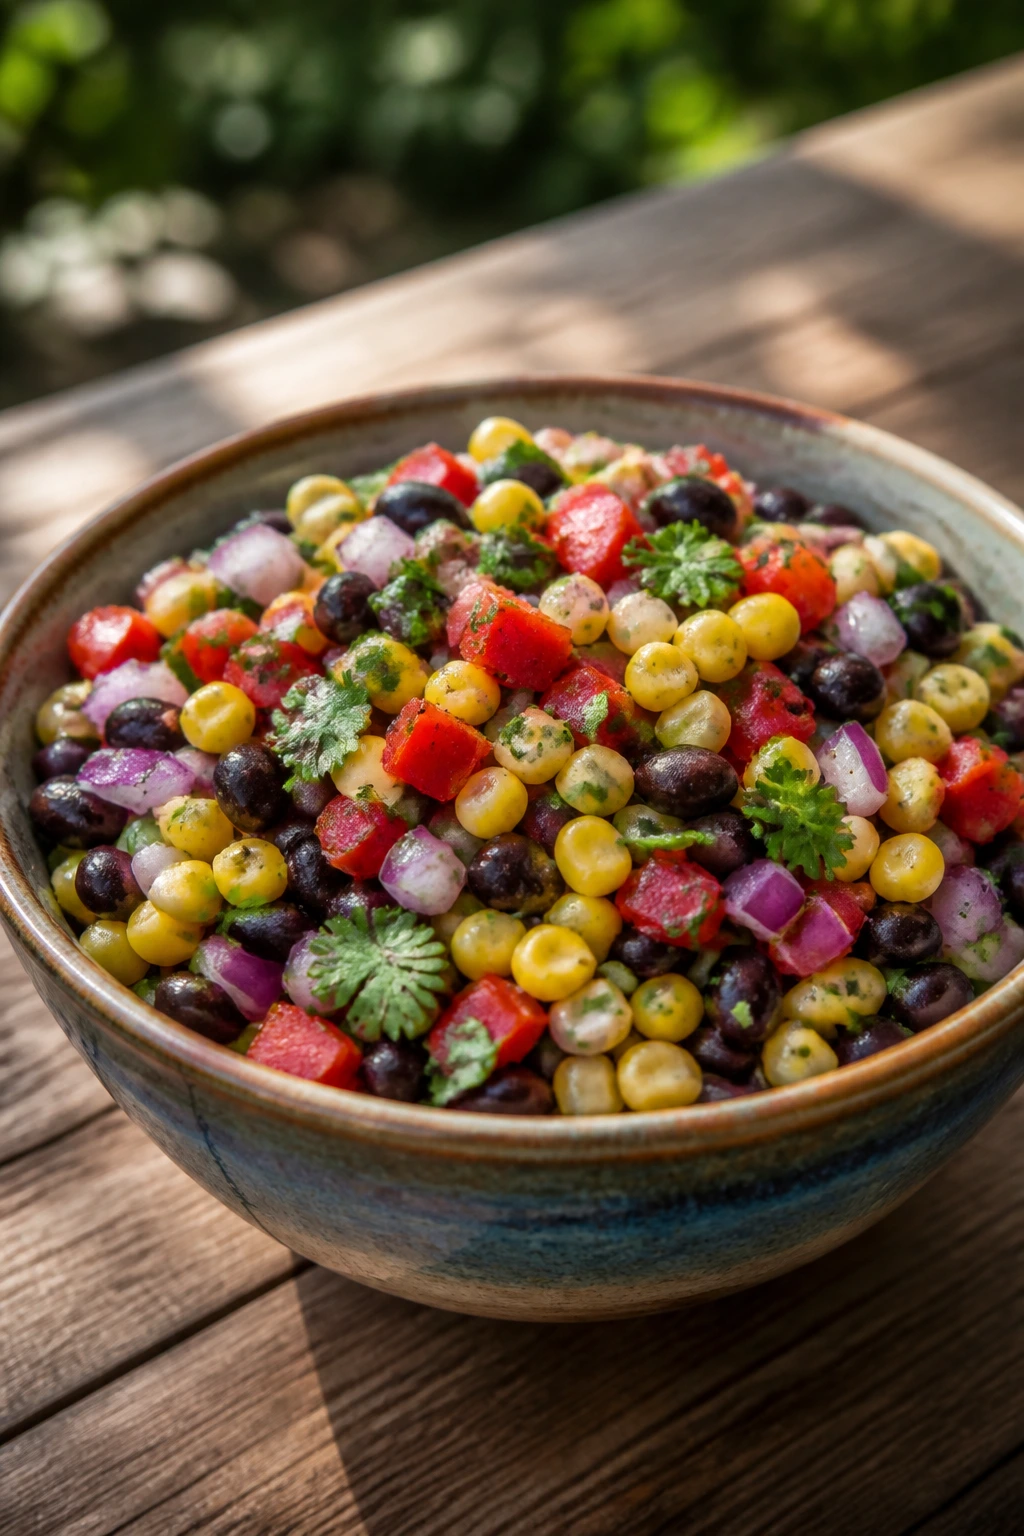
This is one of those bowls that works as a dip, a side, or a spooned-on-top-of-everything salad. Black beans give it body, corn brings sweetness, and lime keeps the whole thing from feeling heavy. It is sturdy enough to live in a cooler and tastes better after a short rest.
Why It Works:
The beans hold the salsa together so the vegetables do not sink to the bottom. Corn adds enough sweetness to balance the jalapeño and onion, and cumin gives the whole bowl a little warmth without making it feel spicy. It is also easy to make without any heat at all.
Key Ingredients:
- 2 cans black beans, rinsed and drained.
- 2 cups corn kernels, fresh, frozen thawed, or canned and drained.
- 1 red bell pepper, diced.
- 1/2 red onion, diced.
- 1 jalapeño, minced, optional.
- 1/3 cup cilantro, chopped.
- 1/4 cup lime juice.
- 2 tbsp olive oil.
- 1 tsp cumin.
- Salt to taste.
Quick Steps:
- Rinse and drain the black beans well.
- Combine the beans, corn, bell pepper, onion, jalapeño, and cilantro in a bowl.
- Whisk the lime juice, olive oil, cumin, and salt together.
- Pour the dressing over the bowl and toss gently.
- Chill for at least 20 minutes before serving.
Equipment for This Recipe:
- Colander — for the beans.
- Large bowl — for mixing.
- Small whisk — for the dressing.
- Sharp knife — for the vegetables.
How to Serve This Dish:
Spoon it into a bowl with tortilla chips or serve it over grilled chicken, greens, or rice. It also makes a bright filling for tacos if you want to stretch a picnic spread.
Pro Tips for This Recipe:
- Rinse the beans thoroughly so the liquid does not muddy the salsa.
- Let it chill so the lime and cumin settle in.
- If you want more crunch, add diced cucumber or radish.
- A diced avocado can go in right before serving.
Variations on This Dish:
- Mango Salsa Bowl: Add diced mango for a sweeter version.
- Fire-Roasted Corn: Use charred corn for more depth.
- Avocado Finish: Fold in avocado right before serving for creaminess.
Common Mistakes to Avoid with This Dish:
- Not rinsing the beans: The salsa tastes muddy.
- Too much jalapeño: It can take over quickly.
- Adding avocado too early: It browns and softens.
24. Broccoli Crunch Salad
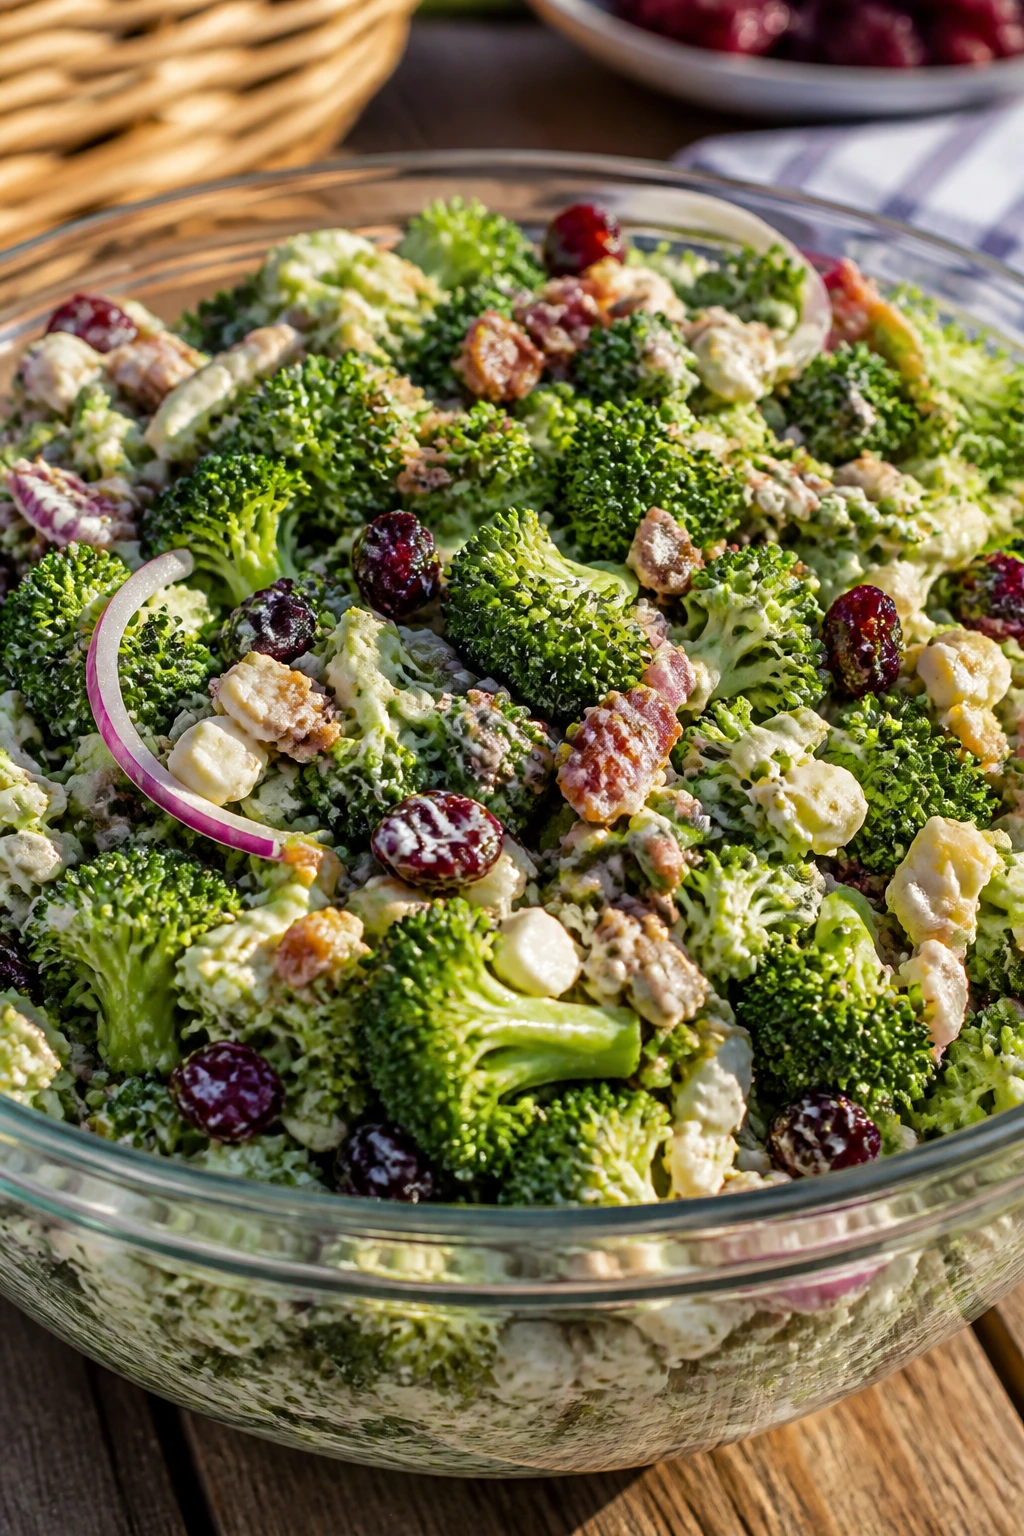
Broccoli salad should never feel like a chore to chew. The florets need to be chopped small enough to eat in one bite, and the dressing should coat them without drowning the whole bowl. Cranberries and sunflower seeds give the salad the sweet-salty crunch that people keep going back for.
Why It Works:
Raw broccoli holds up beautifully in a cooler because it does not wilt the way lettuce does. A mayo-vinegar dressing gives it enough richness to feel complete, while a little honey softens the edge. Bacon is optional, but it adds a smoky note that works surprisingly well with the sweet cranberries.
Key Ingredients:
- 6 cups broccoli florets, chopped small.
- 1/2 cup red onion, finely diced.
- 1/2 cup dried cranberries.
- 1/2 cup sunflower seeds.
- 4 slices bacon, cooked and chopped, optional.
- 1/2 cup mayonnaise.
- 2 tbsp apple cider vinegar.
- 1 tbsp honey.
- Salt and black pepper to taste.
Quick Steps:
- Chop the broccoli into small florets, trimming the stems if they are tough.
- Stir together the mayonnaise, vinegar, honey, salt, and pepper.
- Combine broccoli, onion, cranberries, sunflower seeds, and bacon if using.
- Toss with the dressing and let it sit for 20 to 30 minutes.
- Taste again and adjust the seasoning before packing.
Equipment for This Recipe:
- Large bowl — for tossing.
- Small bowl or jar — for the dressing.
- Sharp knife — for the broccoli and onion.
- Cutting board — sturdy enough for the florets.
How to Serve This Dish:
Serve it cold in a bowl with a spoon, because the dressing and crunch hold together best that way. It sits nicely next to grilled meat, sandwiches, or a pile of corn muffins.
Pro Tips for This Recipe:
- Chop the broccoli smaller than you think; big florets are awkward.
- Let the salad rest so the dressing softens the raw edge slightly.
- Toast the sunflower seeds if they taste bland.
- If you like sharper dressing, add another teaspoon of vinegar.
Variations on This Dish:
- Apple Crunch Version: Add diced apple instead of cranberries.
- Dairy-Free Salad: Use vegan mayo.
- Nutty Swap: Replace sunflower seeds with sliced almonds.
Common Mistakes to Avoid with This Recipe:
- Large broccoli pieces: They are hard to eat with a picnic fork.
- Too much dressing: The salad turns heavy.
- Skipping the rest time: The flavors stay separate.
25. Brown Sugar Oat Cookie Bars
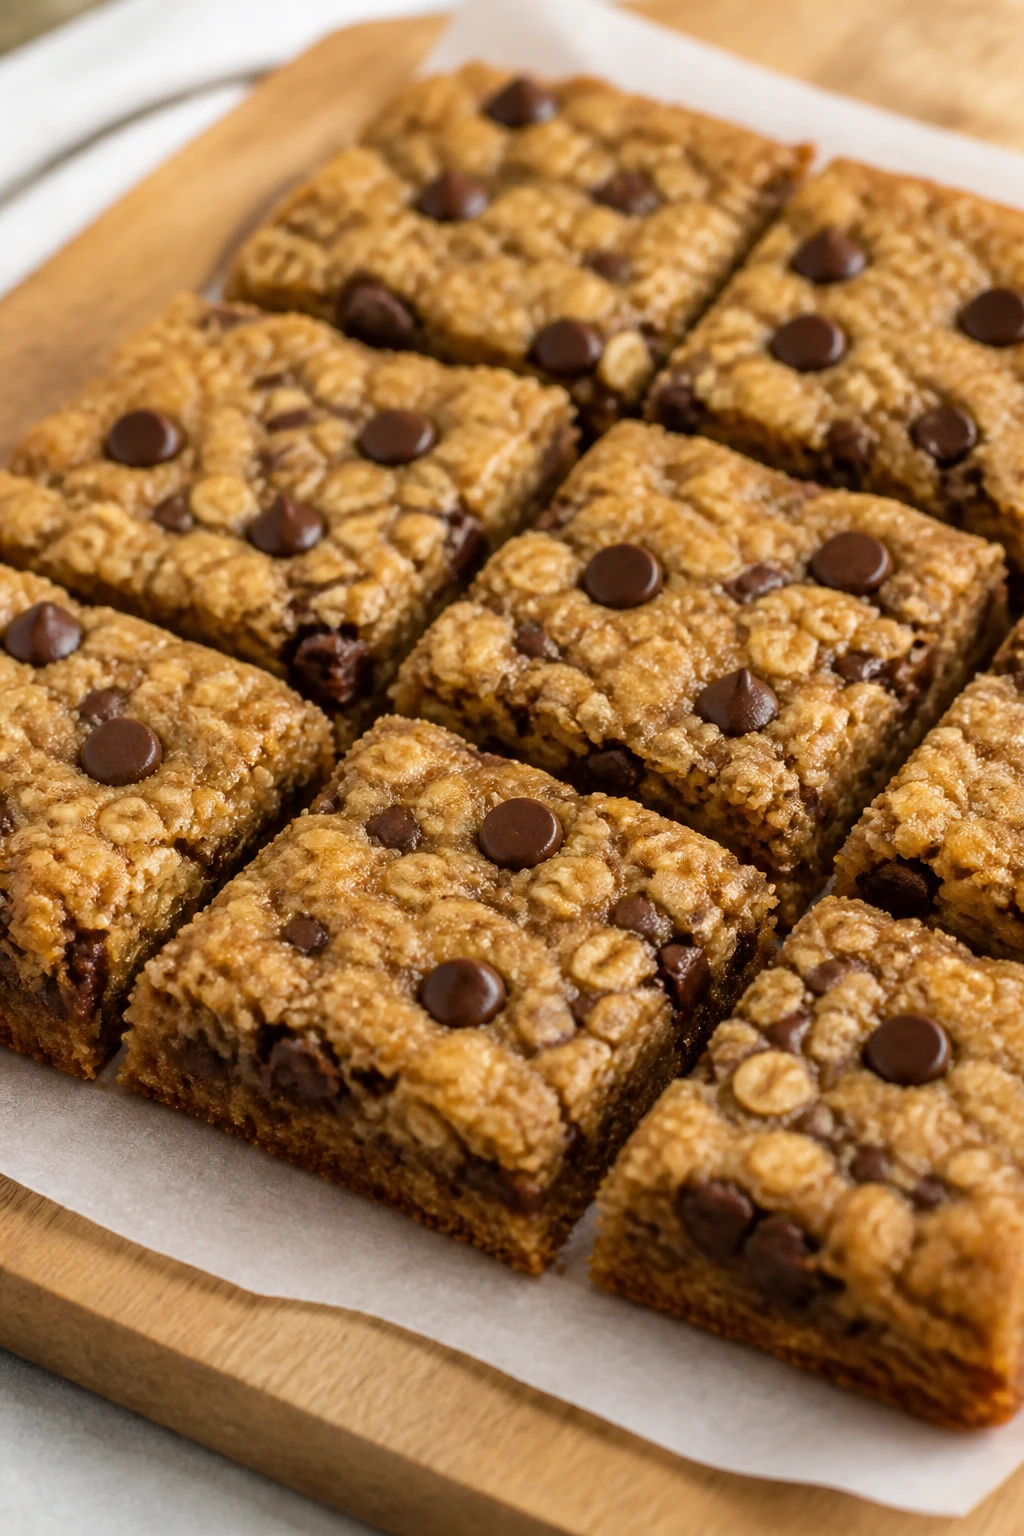
A picnic dessert needs to travel well, and cookie bars do that better than almost anything else. These are soft in the middle, a little chewy at the edges, and sturdy enough to stack in a container without turning into crumbs. Chocolate chips are optional, but I usually add them because the bars need a little lift.
Why It Works:
Brown sugar keeps the bars moist and gives them a caramel note that tastes good even when they are cold. Oats make the texture a little chewy, which helps the bars slice cleanly and hold together after sitting out for a bit. They are a strong choice when you want a sweet finish that does not require forks.
Key Ingredients:
- 1 cup unsalted butter, softened.
- 1 cup brown sugar.
- 1/2 cup granulated sugar.
- 2 large eggs.
- 2 tsp vanilla extract.
- 2 cups all-purpose flour.
- 1 cup old-fashioned oats.
- 1 tsp baking soda.
- 1/2 tsp salt.
- 1 cup chocolate chips or chopped dried cherries.
Quick Steps:
- Heat the oven to 350°F and line a 9×13-inch pan with parchment.
- Beat the butter, brown sugar, and granulated sugar until smooth and fluffy.
- Add the eggs and vanilla, then mix in the flour, oats, baking soda, and salt just until combined.
- Fold in the chocolate chips or dried cherries.
- Spread the dough in the pan and bake 22 to 25 minutes until the edges are golden and the center looks set. Cool fully before cutting.
Equipment for This Recipe:
- 9×13-inch pan — the bars need room to spread.
- Parchment paper — makes lifting easy.
- Mixing bowls and a spoon or mixer — both work.
- Cooling rack — helps the bars set cleanly.
How to Serve This Dish:
Cut them into squares and pack between layers of parchment. They are good as-is, or with berries and whipped cream if you are serving them at a backyard table rather than on a blanket.
Pro Tips for This Recipe:
- Pull them when the center still looks slightly soft; they firm up as they cool.
- Do not overbeat once the flour goes in.
- Use parchment so you can lift the whole slab out at once.
- If you want cleaner squares, chill the slab briefly before cutting.
Variations on This Dish:
- Cherry Chip Bars: Use dried cherries instead of chocolate chips.
- Peanut Butter Swirl: Add spoonfuls of peanut butter on top and swirl lightly.
- Gluten-Free Version: Use a 1:1 gluten-free flour blend and certified GF oats.
Common Mistakes to Avoid with This Recipe:
- Cutting while warm: The bars crumble.
- Overbaking: They dry out fast.
- Too much add-in candy or chips: The bars lose their structure.
Why Picnic Food Needs Fewer Surprises and More Structure
A picnic is a strange kind of meal. The food leaves the kitchen before it leaves your hands, which means every recipe has to survive a small journey, a bit of waiting, and a little heat. That is why the best picnic recipes are not the fanciest ones; they are the ones with enough structure to hold up while people chat, move around, and reach for seconds with one hand.
The rules are simple. Keep wet ingredients under control. Give sandwiches a barrier between bread and filling. Use acid where it helps, like lemon, vinegar, or lime, because those flavors stay lively when the food gets cold. And choose shapes that stack, scoop, or skewer cleanly. A fork-friendly salad or a square of bars is easier to love at a picnic than anything that needs a perfect plate and a tablecloth.
I also think picnic food should look calm. Not sterile. Calm. A tray of skewers lined up in rows, a bowl of pasta salad with herbs scattered over the top, a stack of bars cut into even squares—those things travel well because they already know what shape they are supposed to be.
Essential Equipment for These Recipes
-
Large mixing bowls: You will use these for salads, dressings, fillings, and anything that needs a gentle toss.
-
Sharp chef’s knife: Clean cuts matter for tomatoes, herbs, lettuce, fruit, and sandwich fillings.
-
Cutting board with a damp towel underneath: It keeps the board from skating around when you are slicing quickly.
-
Measuring cups and spoons: Picnic recipes often lean on simple dressings, and the ratios matter.
-
Colander: Essential for pasta, potatoes, beans, and anything that needs to drain cleanly.
-
Rimmed baking sheet: Useful for pinwheels, muffins, bars, and anything you want to bake and cool in one place.
-
8×8-inch and 9×13-inch baking pans: You will need both if you make the bars in this collection.
-
Paring knife or vegetable peeler: Handy for strawberries, cucumbers, peaches, and avocado prep.
-
Skewers or toothpicks: Needed for caprese and antipasto snacks.
-
Airtight containers with flat lids: Better than bowls wrapped in foil when you are carrying food.
-
Insulated cooler and ice packs: Not decorative. Required for eggs, shrimp, chicken, dairy, and any salad that should stay cold.
-
Salad spinner or clean kitchen towels: Dry greens and herbs hold up better than wet ones.
Smart Shopping and Ingredient Tips

Picnic food punishes weak produce, so start with ingredients that already feel sturdy in your hand. Tomatoes should smell like tomatoes at the stem end and feel firm without being rock-hard. Cucumbers should be crisp, not bendy. Peaches, strawberries, and watermelon should be ripe enough to taste sweet but not so soft that they collapse when you cut them.
For deli-style recipes, buy chicken, turkey, or ham that has been chilled properly and slice it at home if you can. Rotisserie chicken is a useful shortcut because it has enough flavor to stand alone, but let it cool completely before mixing it into salad. If you use cheese, block cheese usually keeps its shape better than pre-shredded in salads and sandwiches, while small mozzarella balls and feta are easier for skewers and cold bowls.
Herbs change everything here, so pick them with your nose as much as your eyes. Dill, mint, parsley, basil, cilantro—if the bunch looks tired, the flavor will be too. Buy lemons and limes that feel heavy for their size; that usually means more juice. And when a recipe calls for olives, beans, nuts, or pickles, drain them well before they touch the bowl. Extra brine is one of the fastest ways to turn a picnic dish sloppy.
Bread deserves a little thought, too. Soft sandwich bread is fine for chicken salad if you are serving fast, but wraps, slider buns, croissants, and pita all behave better once they have been stuffed. Pick the shape that matches the filling. It sounds small. It is not small.
How to Serve These Recipes
Presentation:
Pack cold dishes in shallow containers so the top stays neat and visible. Skewers, bars, and pinwheels look best when laid in a single layer. For salads, scatter a little extra herb, cheese, seed, or nut on top right before you close the lid; it keeps the surface from looking flat.
Accompaniments:
A strong picnic spread usually wants one creamy salad, one crunchy vegetable side, one sandwich or wrap, and one sweet bar. Chips, cut melon, whole fruit, crackers, pickles, and olives all fit easily around these recipes without creating extra work. If you are serving a bigger group, add one sturdy bread and one fresh salad and stop there.
Portions:
For a small picnic, plan on one sandwich or wrap, one scoop of salad, one sweet square, and a drink per person. For a larger spread, count on half a wrap or slider, plus a couple of sides. Dishes like pasta salad, potato salad, and bean salsa can stretch farther than sandwiches, so lean on them when you need to feed a crowd.
Beverage Pairing:
Fresh lemonade is the cleanest match for this mix, especially with salty sandwiches and herby salads. Unsweetened iced tea, sparkling water with lemon, or a lightly fizzy fruit spritz also fits the picnic mood without fighting the food.
Additional Tips and Flavor Boosters
Flavor Enhancement:
A small amount of acid goes a long way. Lemon juice, lime juice, red wine vinegar, or apple cider vinegar can wake up a cold dish faster than another spoonful of mayo or oil. If a salad tastes flat after chilling, add acid first, salt second, and only then think about more dressing.
Customization:
The easiest picnic upgrade is a texture swap. Add toasted nuts to salads, crisp bacon to potato dishes, or seeded crackers beside creamy fillings. You do not need to reinvent the recipe; you just need one crunchy thing and one fresh thing to keep the bites moving.
Serving Suggestions:
Finish savory dishes with herbs right before serving. Dill on egg salad, parsley on pasta salad, mint on watermelon, basil on caprese, chives on potato salad—those tiny green flashes make the food look fresher and taste brighter. A little flaky salt on tomatoes or sliced avocado also helps more than people expect.
Make-It-Yours:
For gluten-free eaters, use GF pasta, GF flour blends for bars, corn tortillas, lettuce cups, and naturally gluten-free salads and skewers. For dairy-free picnics, lean on hummus, olive oil dressings, avocado, and vegan mayo instead of forcing substitutes that do not fit. If you want a kid-friendlier spread, keep onion light, cut everything smaller, and put the most colorful dish front and center.
Make-Ahead, Storage, and Reheating Guidance
Most of these recipes hold best when the wet and dry parts meet late. Pasta salads, grain salads, bean salsa, broccoli salad, and potato salad keep well in the refrigerator for 3 to 4 days in airtight containers. Chicken salad, tuna salad, deviled eggs, shrimp salad, and any dish with mayo or seafood are better within 1 to 2 days, and I would keep them packed cold and eaten sooner rather than later.
Bars, muffins, cookie bars, and lemonade behave differently. The baked items usually keep 3 days at room temperature in airtight containers if your kitchen is cool, or up to 5 days in the fridge. They also freeze well for about 2 months, tightly wrapped. Lemonade keeps 4 to 5 days in the fridge, though the flavor is nicest in the first couple of days.
For reheating, only a few recipes need it. Puff pastry pinwheels and cornbread muffins warm nicely in a 300°F oven for about 8 to 10 minutes, wrapped loosely in foil if you want to avoid drying them out. Sliders can be warmed the same way, though I would keep the slaw off until serving. Most of the cold dishes should not be reheated at all; they are built to be eaten chilled or cool.
Food safety matters more outdoors than in the kitchen. Keep anything perishable at 40°F or below until serving, and do not let it sit out longer than 2 hours, or 1 hour if the day is hot and the food is sitting in direct sun. A cooler with real ice packs is worth carrying. So is packing one towel you can use as a shade cover over the container stack.
Variations and Adaptations to Try
All-Plant Basket:
Build the menu around hummus wraps, black bean and corn salsa, cucumber tomato feta salad with dairy-free cheese, broccoli crunch salad with vegan mayo, and fruit bars. Chickpeas, white beans, and tofu can stand in for the animal proteins in many of these recipes without changing the picnic logic. The key is keeping enough salt and acid in the mix so the plant foods do not feel flat.
Gluten-Free Spread:
Use gluten-free pasta in the pasta and orzo salads, cornmeal-based muffins, lettuce cups, naturally gluten-free skewers, and bars made with a 1:1 flour blend. Wraps and sandwiches are the easiest thing to swap out if you use lettuce leaves, GF tortillas, or rice-paper rolls. Watch the breadcrumbs or graham crumbs in desserts, because that is where hidden gluten likes to hide.
Cooler-First Menu:
If you know the food will sit in a cooler for a long time, lean on the hardest-working recipes: pesto potato salad, black bean and corn salsa, pasta salad, lemon bars, and skewers. These hold their shape and stay pleasant even after a few hours on ice. Save the lettuce cups and avocado-heavy dishes for the first half of the meal.
Spice-Up Version:
Add jalapeño, chili crisp, hot sauce, smoked paprika, or pepper jack to the dishes that can take it. Peanut noodles, shrimp salad, chicken salad, black bean salsa, and sliders all handle heat well if you keep the sweet and creamy elements in balance. A little spice is useful on a warm day because it makes cold food feel more alive.
Kid-Friendly Basket:
Keep the onion mild, the herbs easy, and the fruit obvious. Turkey wraps, chicken salad sandwiches, corn muffins, watermelon salad, cookie bars, and lemonade usually disappear first when the flavors are straightforward and the pieces are small. If a child is suspicious of green bits, keep them on the side rather than mixed in.
Regional Picnic Twist:
Shift the flavors depending on what you like to eat at home. Add dill and mustard for a more deli-style spread, lean on pesto and olives for a Mediterranean feel, or bring in barbecue sauce, slaw, and cornbread for a Southern edge. The shape of the meal stays the same; the seasonings do the changing.
Common Mistakes to Avoid
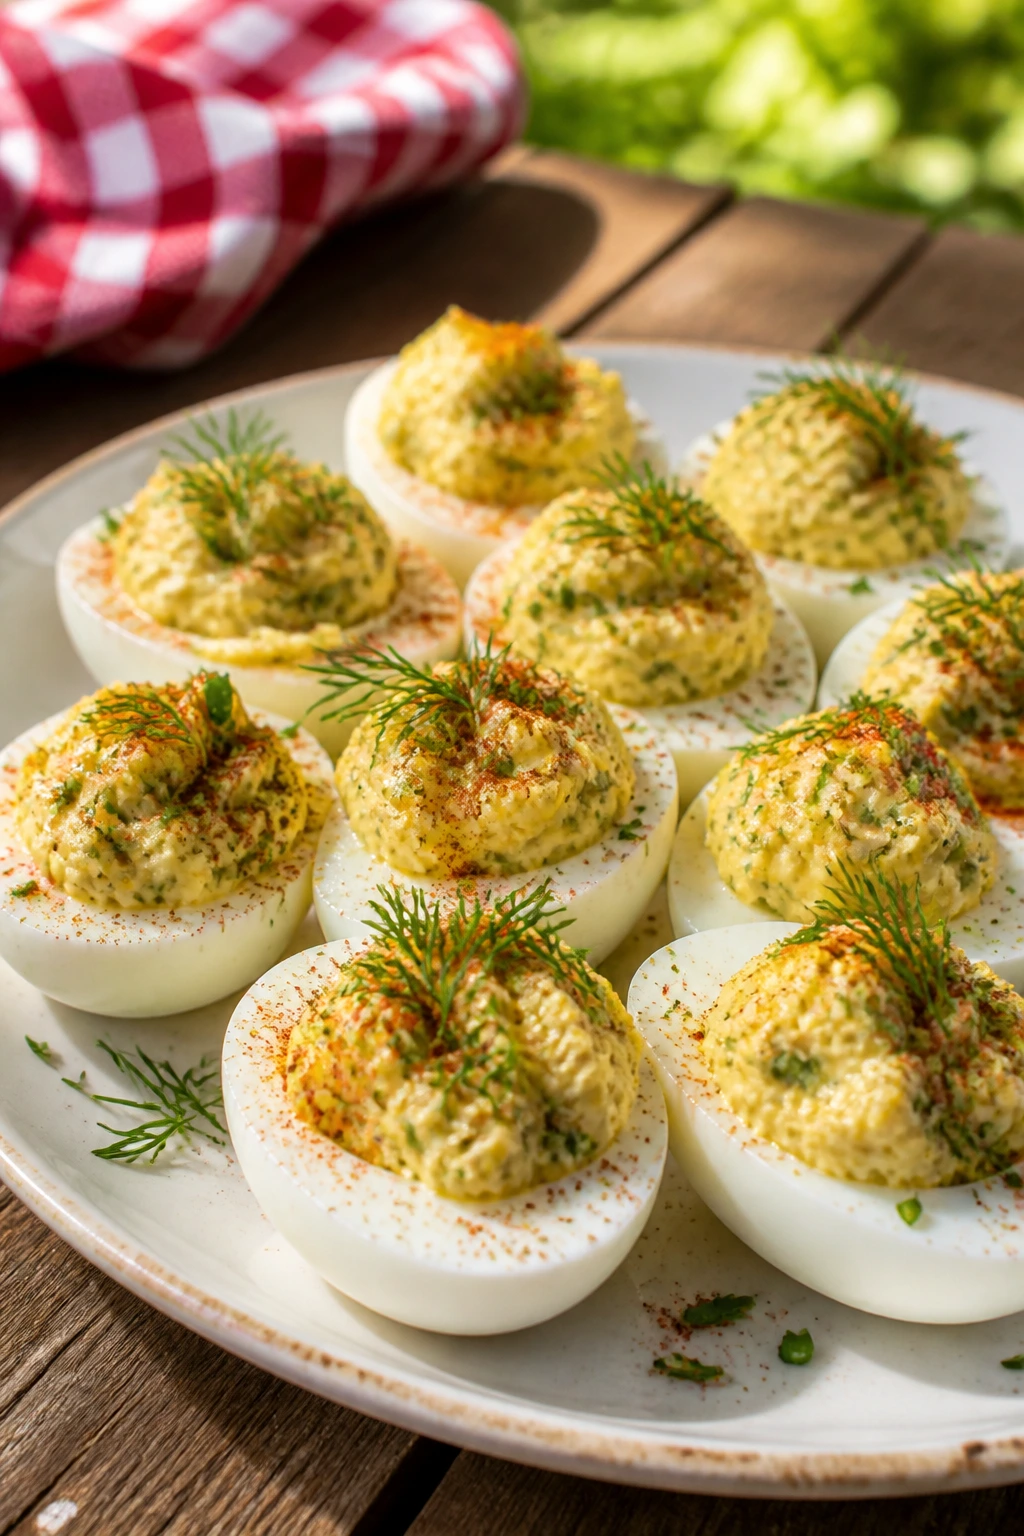
Packing wet food next to bread is the fastest way to ruin a picnic. Tomatoes, cucumbers, peaches, tuna, chicken salad, and watery dressings all leak if you let them. Keep dressings separate when you can, pat ingredients dry, and build sandwiches close to serving.
Another easy mistake is choosing foods that need knife-and-fork precision when you are eating on a blanket. If a dish has to be held upright, cut into small bites, or rescued with a napkin every 30 seconds, it will feel harder than it needs to. Skewers, wraps, bars, cups, and muffins solve a lot of that before it starts.
People also tend to forget how much cold food depends on temperature. Egg salads, shrimp salads, chicken salads, and anything with dairy need a real cooler, not a hopeful tote bag. If the container feels warm to the touch, the food is already losing the fight.
Underseasoning is a quieter problem, but it shows up fast in chilled food. Cold dulls flavor, so a salad that tasted fine on the counter may seem flat after an hour. Fix it with salt, acid, or fresh herbs, not with a flood of dressing.
And then there is the overstuffed basket. Too many soft dishes in a row make the meal feel mushy. That is why this collection leans on contrast: crisp next to creamy, salty next to sweet, cool next to buttery. Keep that balance in mind and the whole spread gets easier to manage.
Frequently Asked Questions

Which recipes here travel best for a picnic that lasts a few hours?
The best travelers are the pasta salads, potato salad, bean salsa, cookie bars, lemonade, skewers, and muffins. They keep their shape, do not depend on perfect heat, and stay pleasant after a short rest. Anything with avocado, lettuce, or soft bread is best packed very close to serving time.
How far ahead can I make picnic food?
Bars, muffins, and lemonade can be made a day ahead or even earlier if you store them well. Salads with pasta, beans, or potatoes are often better after a short chill and hold for 3 to 4 days. Sandwiches, wraps, shrimp dishes, and lettuce cups are best assembled the same day.
What should I keep cold the whole time?
Anything with mayo, eggs, seafood, chicken, or dairy should stay cold until it is eaten. That includes chicken salad, tuna salad, deviled eggs, shrimp avocado cups, and cheesecake bars. Use ice packs, keep the cooler closed, and avoid letting those dishes sit out in direct sun.
Can I swap rotisserie chicken into several of these recipes?
Yes, and it is one of the easiest shortcuts in the whole group. It works well in chicken salad, sliders, wraps, orzo salad, and even as a topping for a pasta salad if you want a more filling lunch. Just cool it fully before mixing it with cold ingredients.
How do I keep sandwiches from getting soggy?
Put dry ingredients next to the bread first: lettuce, spinach, cheese, or even a thin layer of mustard. Keep juicy tomatoes and wet fillings in the middle, or pack them separately and assemble on site. Toasting the bread lightly helps too, especially for chicken salad and turkey club sandwiches.
What if I do not have a cooler?
Focus on the dishes that can sit at room temperature for a short while without trouble: bars, muffins, skewers, lemonade, and some whole-fruit salads. Leave out the mayo-based salads, eggs, shrimp, and chicken unless you can keep them properly chilled. A basic insulated tote with a couple of frozen water bottles can solve a lot.
Are these recipes good for a potluck too?
Absolutely. Picnic food and potluck food want the same things: easy transport, neat serving, and a texture that survives a little waiting. The main difference is that a picnic usually asks for more finger food and fewer loose, saucy dishes.
How do I scale these recipes for a bigger group?
Double the salads and bars first; they scale cleanly and stretch well. For sandwiches and wraps, it is usually easier to make several modest batches than one giant batch, because the bread and fillings stay tidier. If you are feeding more than a dozen people, add one sturdy side like pasta salad or cornbread muffins so the basket does not disappear too quickly.
What is the easiest last-minute recipe in the group?
Caprese skewers, cucumber tomato feta salad, black bean and corn salsa, and lemonade are all fast enough to make close to departure. They rely on chopping, tossing, and chilling rather than cooking. If the clock is tight, pick one savory bowl, one sweet bar, and one drink, and let the rest be simple.
Picnic Ready
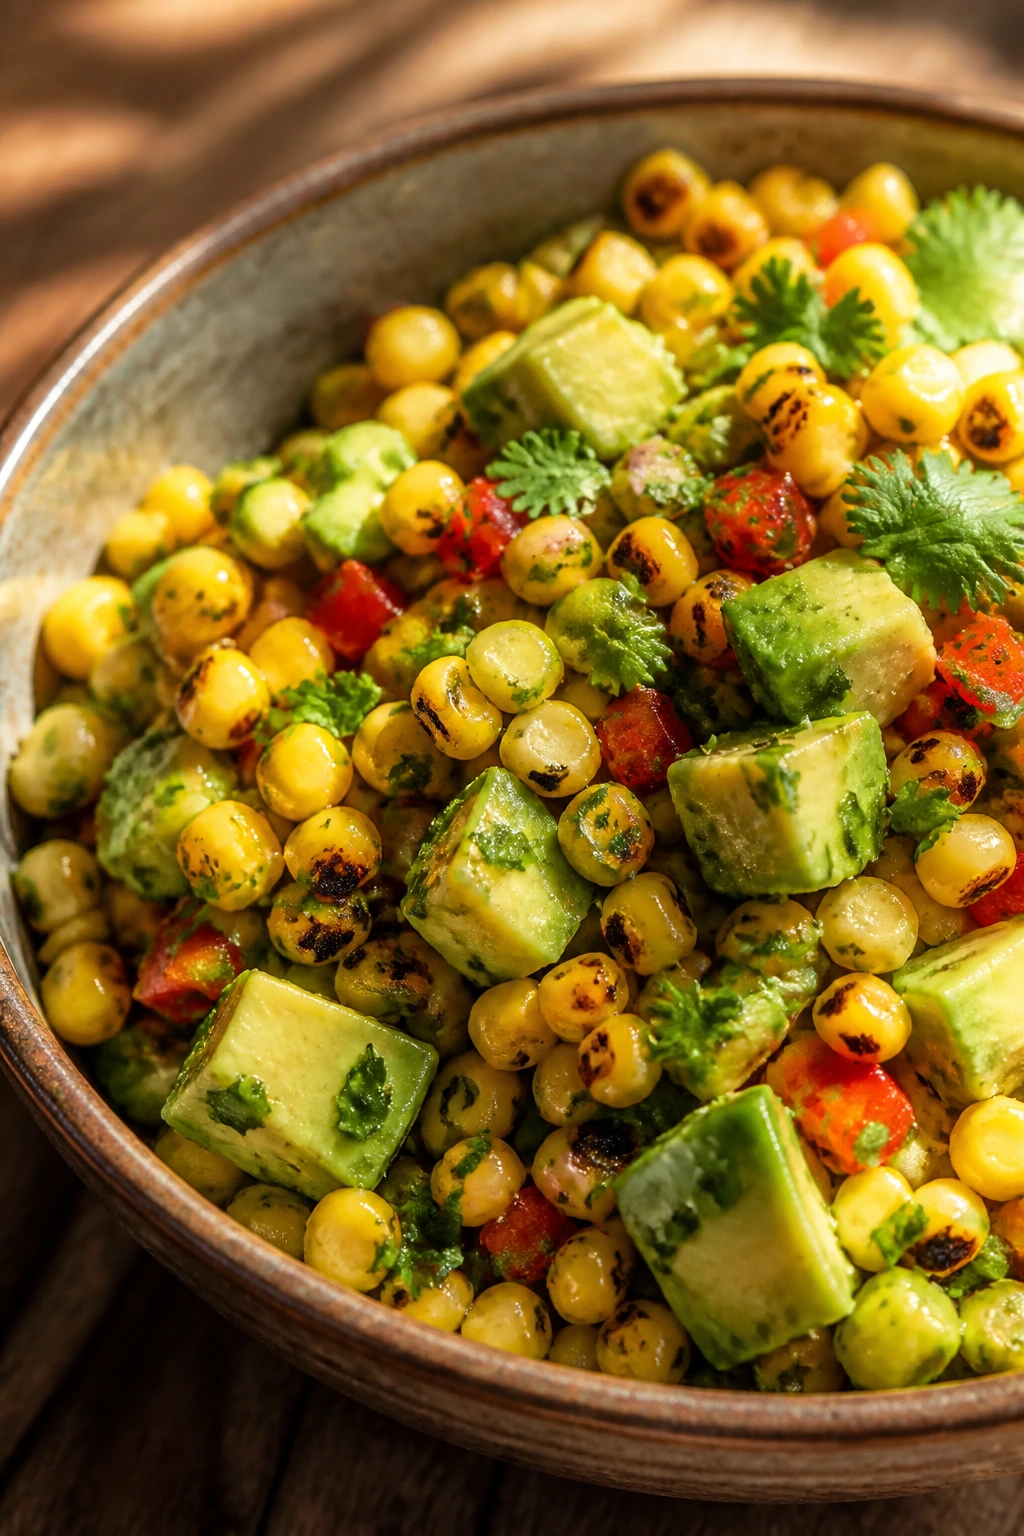
A good picnic spread does not need to be elaborate. It needs to be sensible, cool, and built from food that knows how to behave once it leaves the kitchen. That is why these easy summer recipes for a summer picnic work so well together: they cover the sharp, salty, creamy, crisp, and sweet corners of the meal without asking you to babysit anything.
Pick one or two sturdy salads, one sandwich or wrap, one snackable tray, and one dessert you can cut into squares. Keep the cold things cold, the wet things separate until needed, and the bread protected. The rest is just blankets, paper napkins, and people reaching for seconds.