
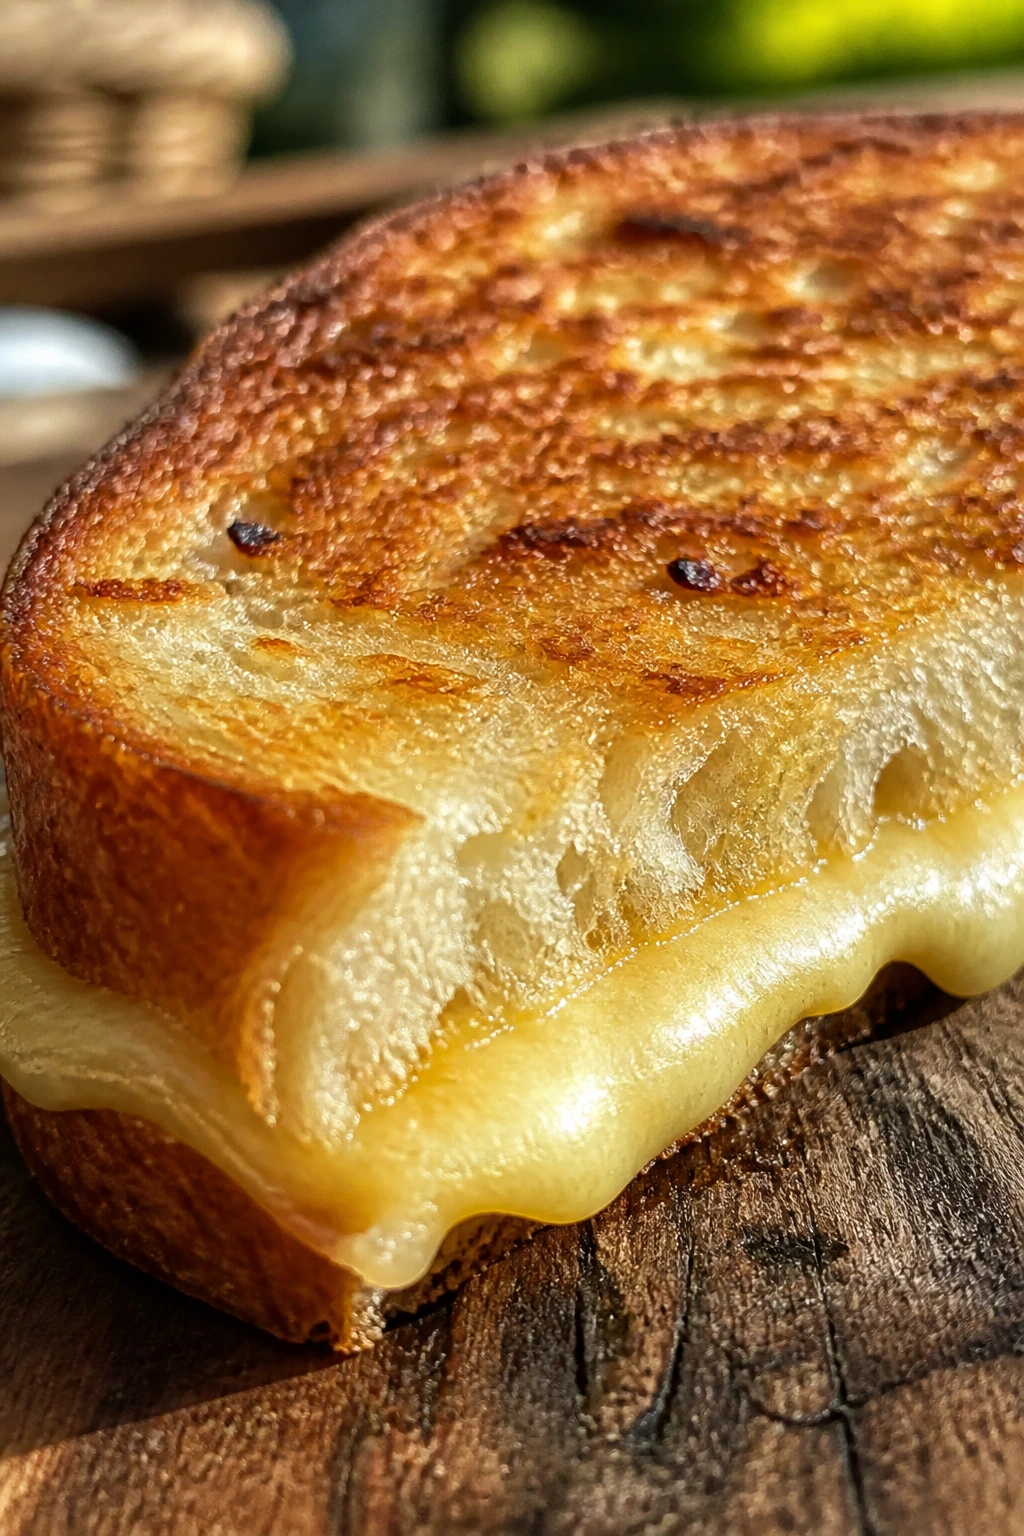
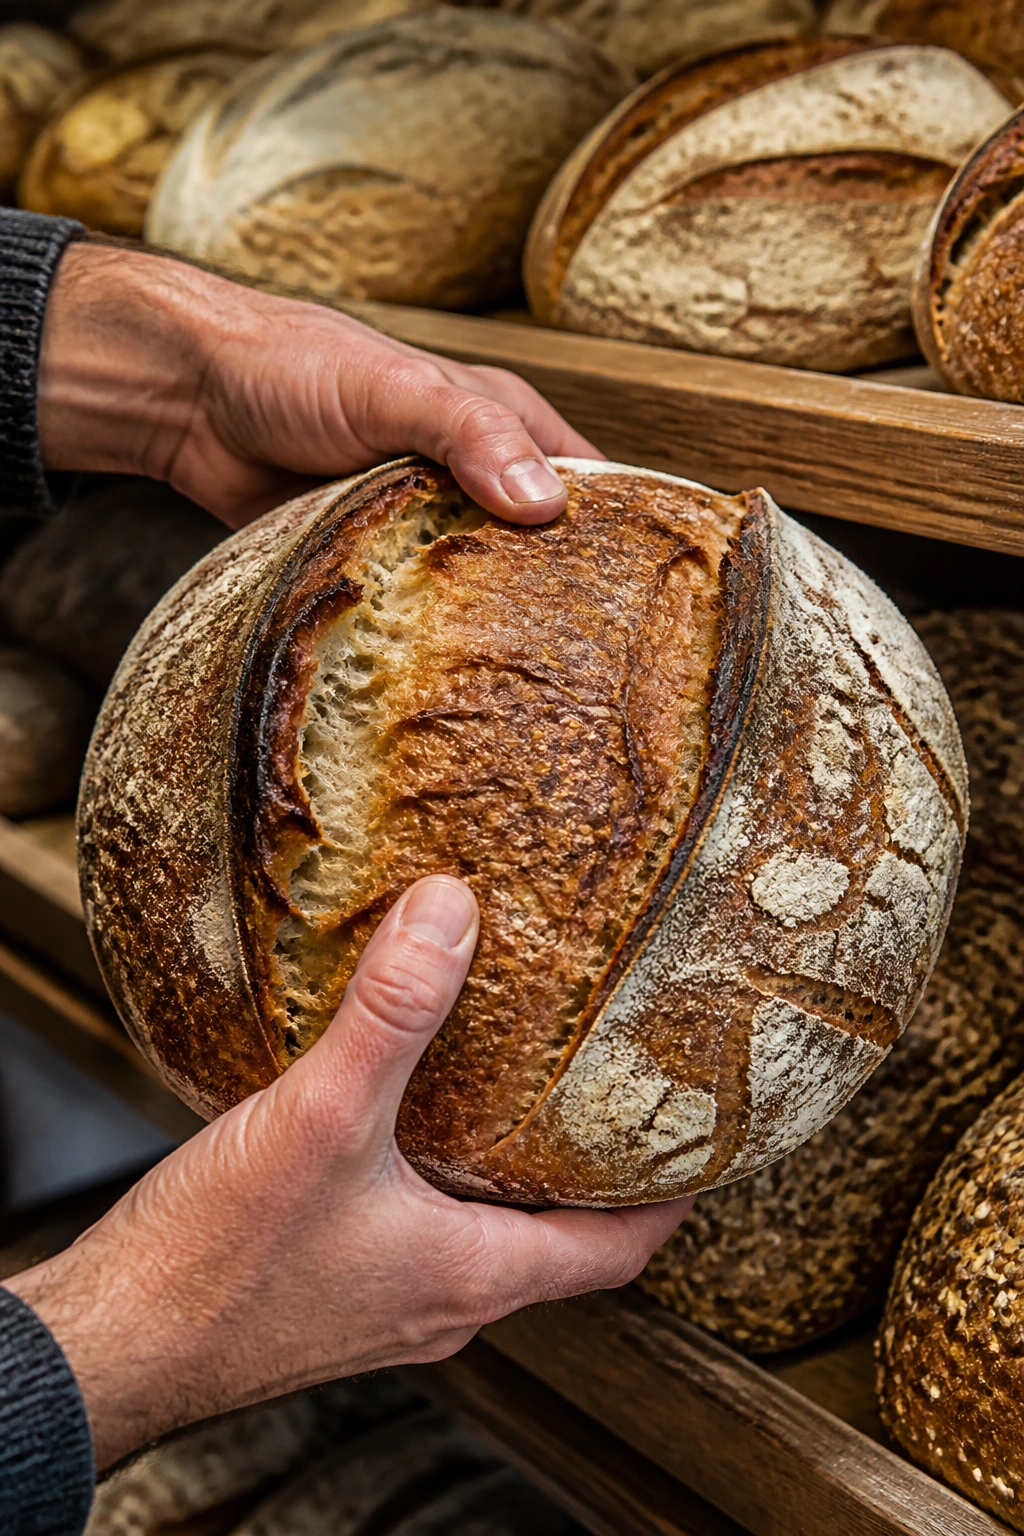
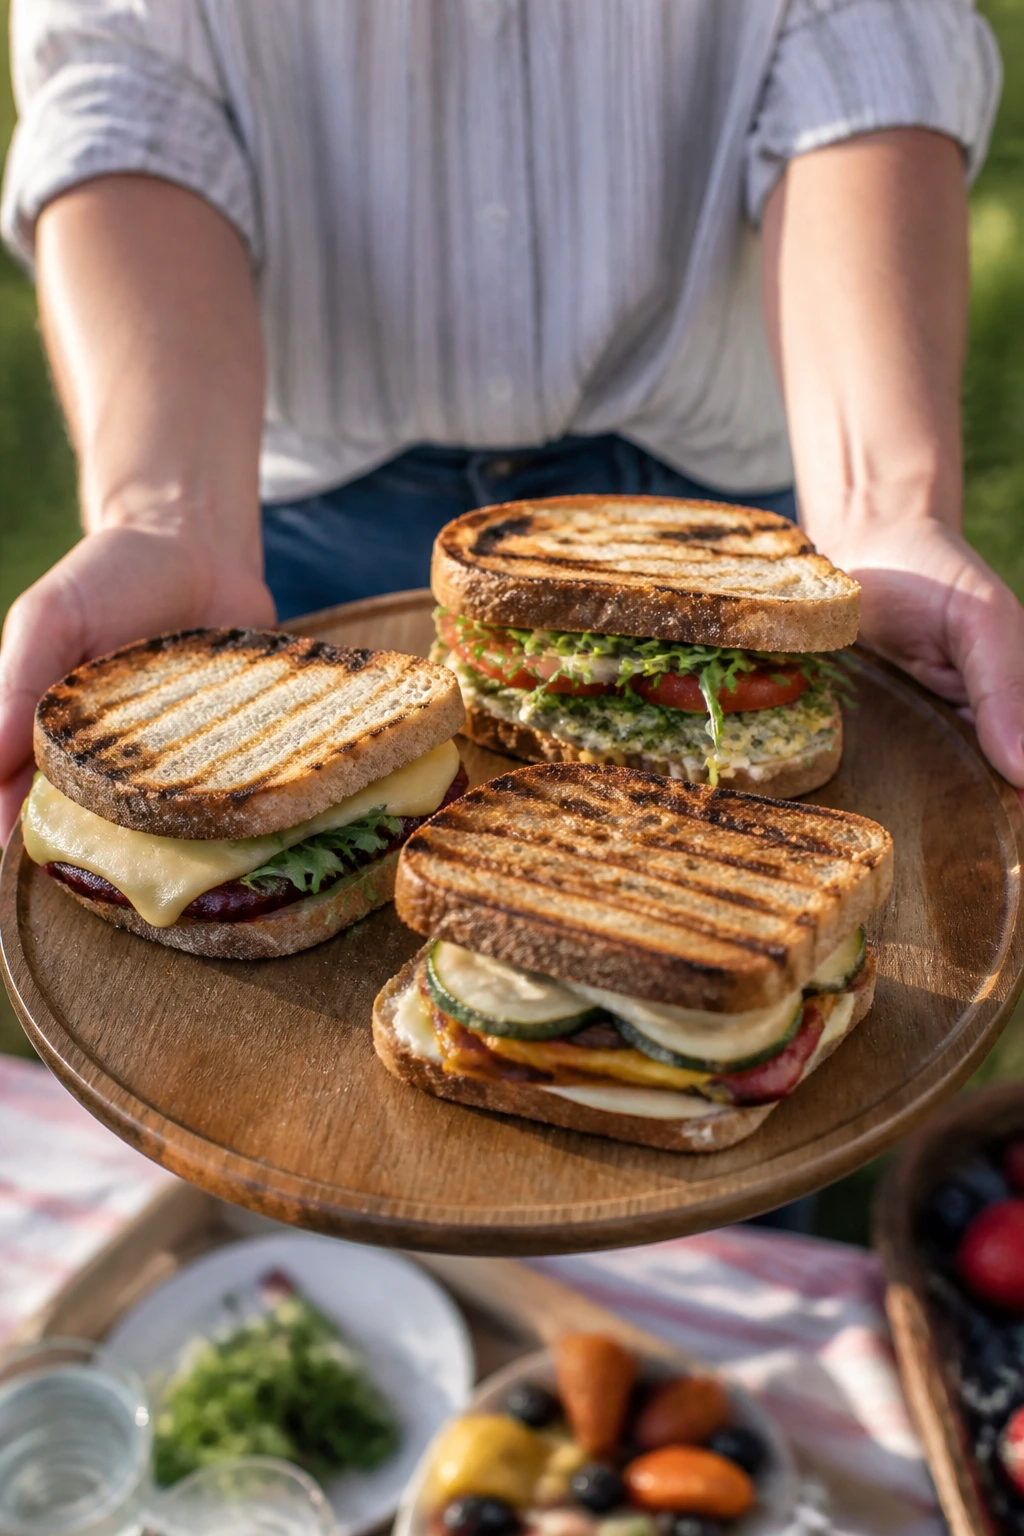
A grilled sandwich should have a little drama: a crackling crust, a molten middle, and one corner where the cheese leaks out and sizzles on the grate. The best picnic sandwiches for the grill do that without turning into a soggy stack or a lunchbox disaster. That balance matters more than people think.
The trick is simple, but not easy: bread sturdy enough to take heat, fillings dry enough to stay put, and enough fat on the outside to brown before the bread burns. I like sandwiches that go from cooler to grill in a straight line — no fiddly sauces, no loose handfuls of greens sliding everywhere, no mystery fillings that turn to steam. Just good bread, sensible layering, and a hot grate.
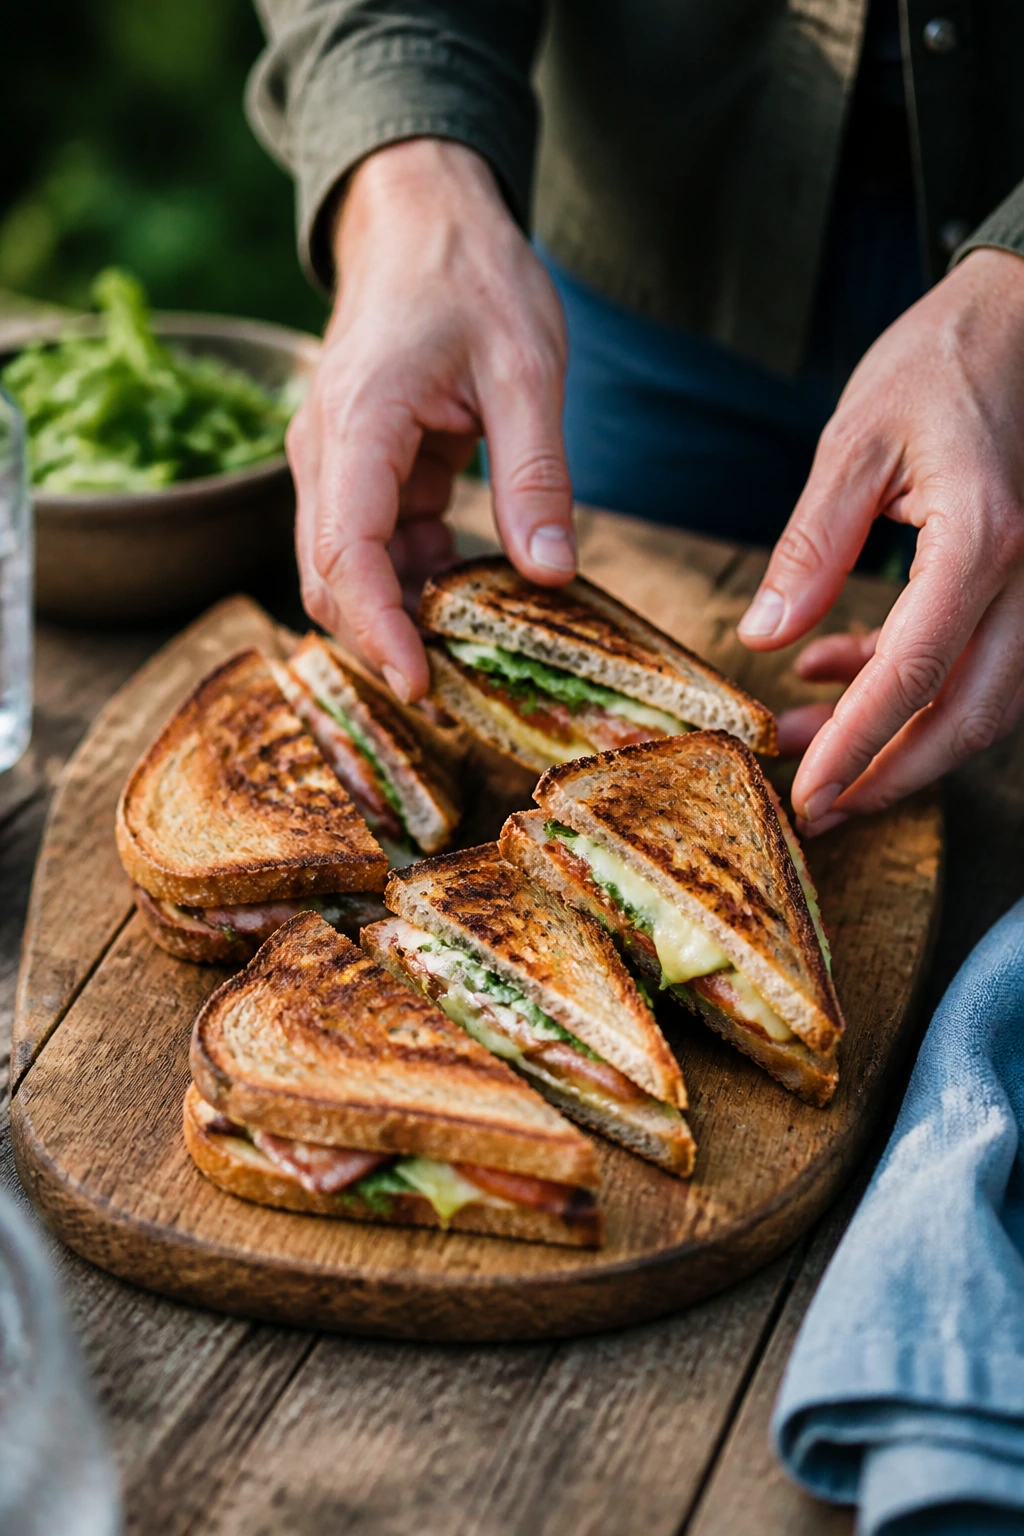
These 15 simple grilled sandwiches are built for that kind of cooking. Some are deli-thin and salty, some lean smoky and rich, and a few are the sort of warm-weather sandwiches I only make when I have a cold drink within reach and a platter ready for the table. If you’ve ever watched a great filling leak onto the coals while the bread charred too fast, you already know why structure matters. Get that right, and the rest is choosing the stack you want first.
Why These Grill Sandwiches Work So Well
-
They’re built around sturdy bread. Sourdough, rye, ciabatta, hoagie rolls, and brioche buns all handle butter, mayo, or oil on the outside without collapsing the second they hit heat.
-
Most fillings can be prepped ahead. Sliced meats, drained pickles, cooked vegetables, and mixed spreads keep the actual grilling part short, which is a gift when the grill is already hot.
-
They travel better than soft sandwiches. Once toasted, these hold up in foil for a short walk to a picnic table or a shaded yard chair without going limp in five minutes.
-
The grill adds more than marks. You get crisp edges, better cheese melt, and a faint smoky note that a toaster or skillet indoors doesn’t quite give you.
-
They scale up cleanly. Make two or make twelve; the method stays the same, which matters when people start drifting toward the platter before you’re done.
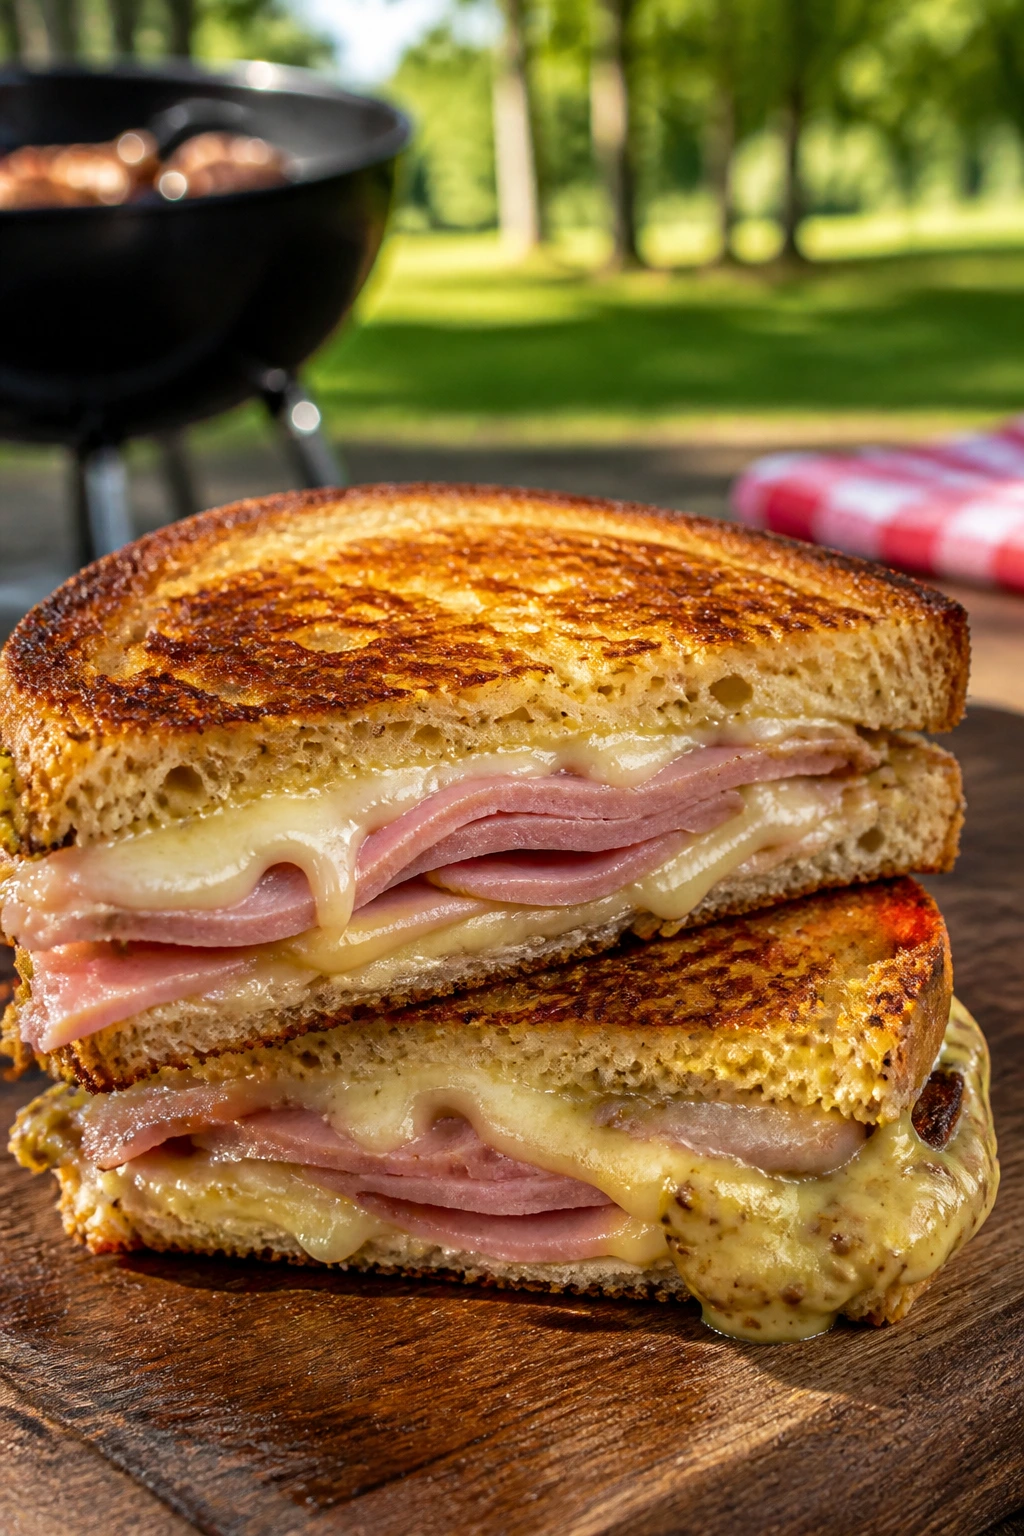
1. Ham, Swiss, and Dijon Picnic Press
A ham-and-Swiss sandwich can be boring if you let it be. On the grill, though, it wakes up fast: salty ham, nutty cheese, and Dijon cutting through the fat while the sourdough turns crisp and a little smoky at the edges. It’s the sort of sandwich that disappears while you’re still setting down the cutting board.
Why It Works:
Ham and Swiss melt into each other cleanly, which keeps this sandwich neat instead of greasy. Dijon gives the filling a sharp line, so every bite has a little lift. Sourdough is the right kind of stubborn here; it browns well at medium heat and doesn’t buckle when the cheese starts to soften.
Key Ingredients:
- 8 slices sourdough bread, about 1/2-inch thick — sturdy enough to hold the filling and grill evenly.
- 8 ounces thin-sliced deli ham — fold the slices so the sandwich stacks neatly.
- 8 ounces Swiss cheese, sliced — the melt is what makes this sing.
- 3 tablespoons Dijon mustard — sharp enough to cut through the ham.
- 2 tablespoons softened unsalted butter — for the outside of the bread.
- 1 tablespoon mayonnaise — optional, but it browns fast and evenly on the grill.
- 8 dill pickle chips — keep them dry so they don’t soak the bread.
Quick Steps:
- Preheat the grill to medium heat, about 375°F to 400°F, and clean the grates well.
- Spread Dijon on 4 slices of bread. Layer ham, Swiss, and pickle chips, then close with the remaining bread.
- Butter the outside of each sandwich, or spread mayonnaise on the outer faces if you prefer deeper browning.
- Place the sandwiches on the grill and cook for 3 to 4 minutes per side, pressing lightly with a spatula until the bread is golden and the cheese has softened. If the bread darkens too fast, move the sandwiches to a cooler spot.
- Rest for 1 minute, then cut each sandwich in half on a slight diagonal.
Equipment for This Recipe:
- Outdoor grill or grill pan — medium heat is the sweet spot.
- Metal spatula — for turning without tearing the bread.
- Basting brush — useful if you want melted butter instead of spreading it.
- Cutting board and sharp knife — a serrated knife works best.
How to Serve This Dish:
Serve these with kettle chips, a handful of cornichons, and a simple slaw with a sharp vinaigrette. They’re rich enough to stand alone, but a cold pickle on the side keeps the whole plate from feeling heavy.
Pro Tips for This Recipe:
- Use thin-sliced ham; thick cuts make the sandwich bounce on the grate instead of settling.
- Put cheese directly against the bread on both sides of the filling if you want a tighter seal.
- Let the grill settle before cooking; a roaring fire burns the bread before the cheese has time to melt.
- Wrap the finished sandwiches loosely in foil for 1 minute if you want the cheese to soften a little more.
Variations on This Dish:
- Honey Mustard Ham Melt: Swap half the Dijon for honey mustard and add a slice of sharp cheddar.
- Turkey Deli Swap: Use sliced turkey and keep the Swiss; it tastes cleaner and a little lighter.
- Rye and Caraway Version: Swap sourdough for rye bread and add a pinch of caraway to the butter.
Common Mistakes to Avoid with This Dish:
- Too much mustard: The sandwich turns sharp and wet. Use a thin layer, not a smear that runs.
- High heat: The bread browns too fast and the cheese stays stiff. Medium heat gives you more control.
- Wet pickle chips: Pat them dry first, or they’ll steam the bread from the inside.
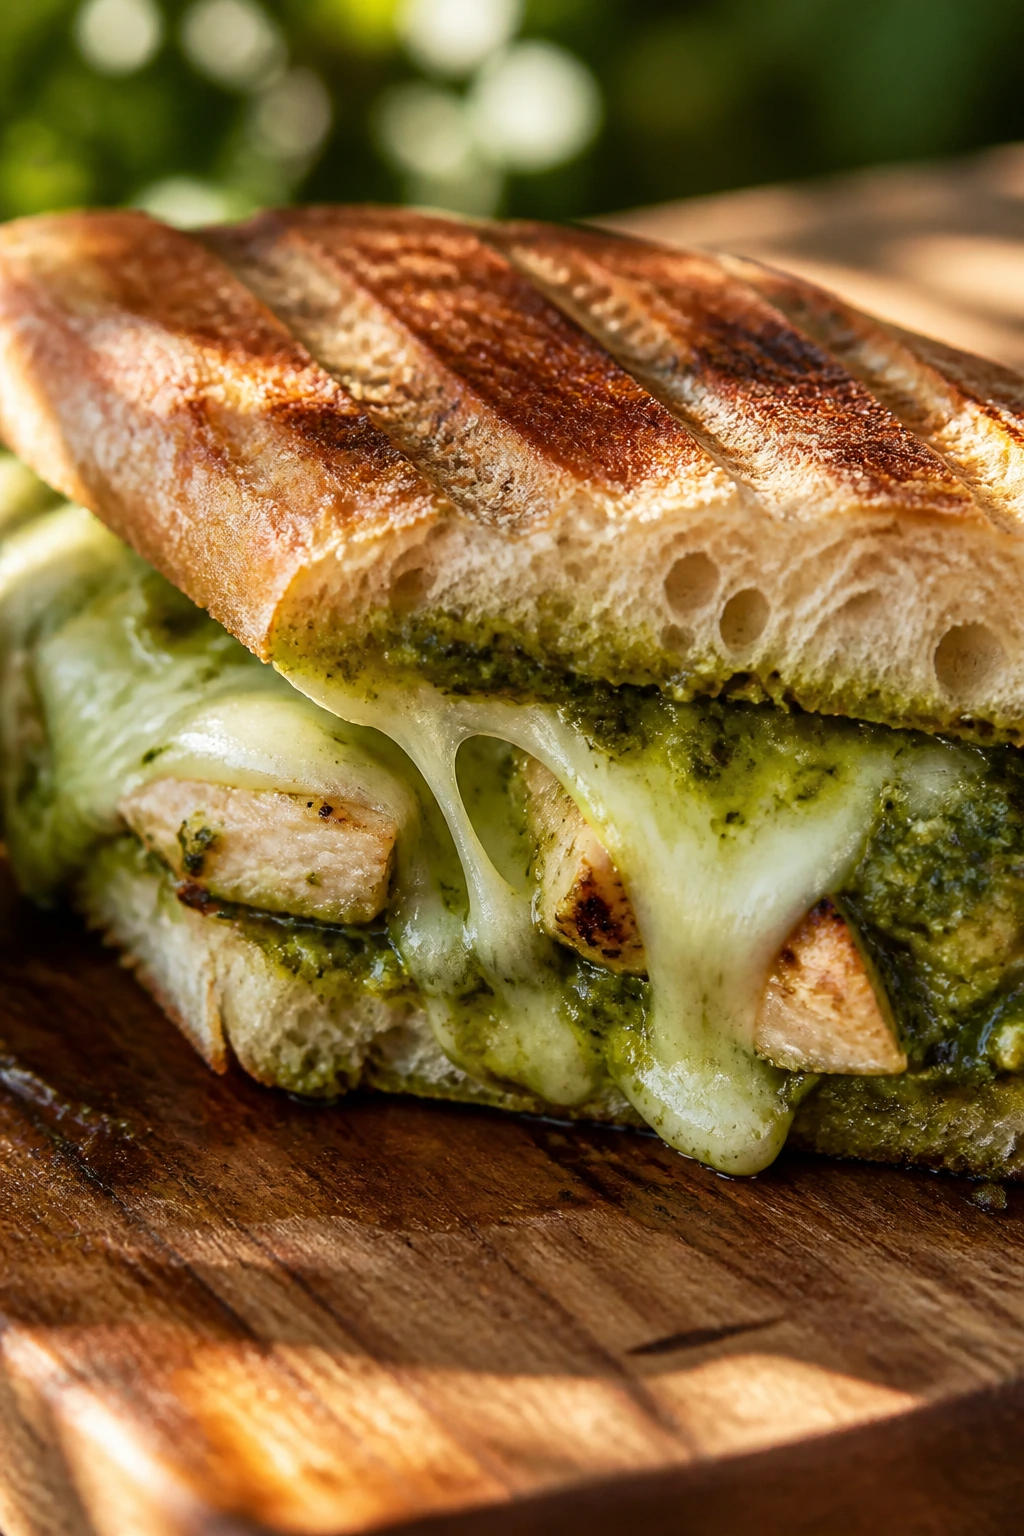
2. Chicken Pesto and Mozzarella Melt
This is the sandwich I make when I want something that tastes like it took more work than it did. Pesto brings the basil and garlic, mozzarella gives the stretch, and grilled chicken keeps the filling hearty without getting fussy. If you cut it open while it’s still warm, the cheese pulls in clean strings instead of slumping out in a puddle.
Why It Works:
Pesto is oily enough to keep the sandwich from drying out, but not so loose that it runs everywhere. Chicken holds the center, mozzarella melts evenly, and roasted red peppers add sweetness without flooding the bread. Ciabatta gives you those rough little ridges that crisp up in the grill grates.
Key Ingredients:
- 4 ciabatta rolls, split — or 8 slices ciabatta bread.
- 2 cups cooked chicken breast, sliced or shredded — grilled chicken has the best texture here.
- 1/3 cup basil pesto — homemade or store-bought both work.
- 8 ounces mozzarella, sliced — low-moisture mozzarella melts more neatly than fresh.
- 1/2 cup roasted red peppers, drained and patted dry — for sweetness and color.
- 2 tablespoons olive oil — to brush the outside of the bread.
- 1 tablespoon grated Parmesan — optional, but it sharpens the pesto.
Quick Steps:
- Heat the grill to medium, around 375°F.
- Split the rolls and spread pesto on the cut sides.
- Layer chicken, mozzarella, and roasted peppers on the bottom halves, then sprinkle with Parmesan if using.
- Close the sandwiches and brush the outside with olive oil.
- Grill for 3 to 5 minutes per side, until the bread is crisp and the mozzarella is fully softened. Use a grill basket or cast-iron skillet on the grates if your rolls are thin.
- Let the sandwiches rest for 1 minute before cutting.
Equipment for This Recipe:
- Grill basket or cast-iron skillet — helpful if your bread is soft.
- Basting brush — for the olive oil.
- Spatula or tongs — whichever feels steadier on your grill.
- Sharp knife — ciabatta cuts cleaner when the crust has a little rest.
How to Serve This Dish:
I like these with tomato wedges dressed in olive oil and salt, or with a little cucumber salad if the day is hot and sticky. One sandwich is a full lunch; half a sandwich works if you’re serving chips and fruit.
Pro Tips for This Recipe:
- Drain the roasted peppers until they feel almost dry in your hand.
- If the pesto is thick, loosen it with 1 teaspoon of olive oil so it spreads without tearing the bread.
- Slice the chicken thinly; thick chunks make the sandwich awkward to grill.
- Press lightly with the spatula, but don’t smash it flat.
Variations on This Dish:
- Sun-Dried Tomato Swap: Replace half the pesto with sun-dried tomato spread for a sharper tomato note.
- Spinach and Mozzarella: Add a small handful of baby spinach between the chicken and cheese for a little green.
- Dairy-Free Build: Use dairy-free pesto and a meltable plant-based cheese that actually softens, not the waxy kind.
Common Mistakes to Avoid with This Dish:
- Using fresh mozzarella without draining it: The sandwich turns watery fast.
- Overstuffing with chicken: You want layers, not a poultry avalanche.
- Grilling too long: Ciabatta can go from crisp to jaw-breaking if you forget it for a minute.
3. Classic Reuben on Rye
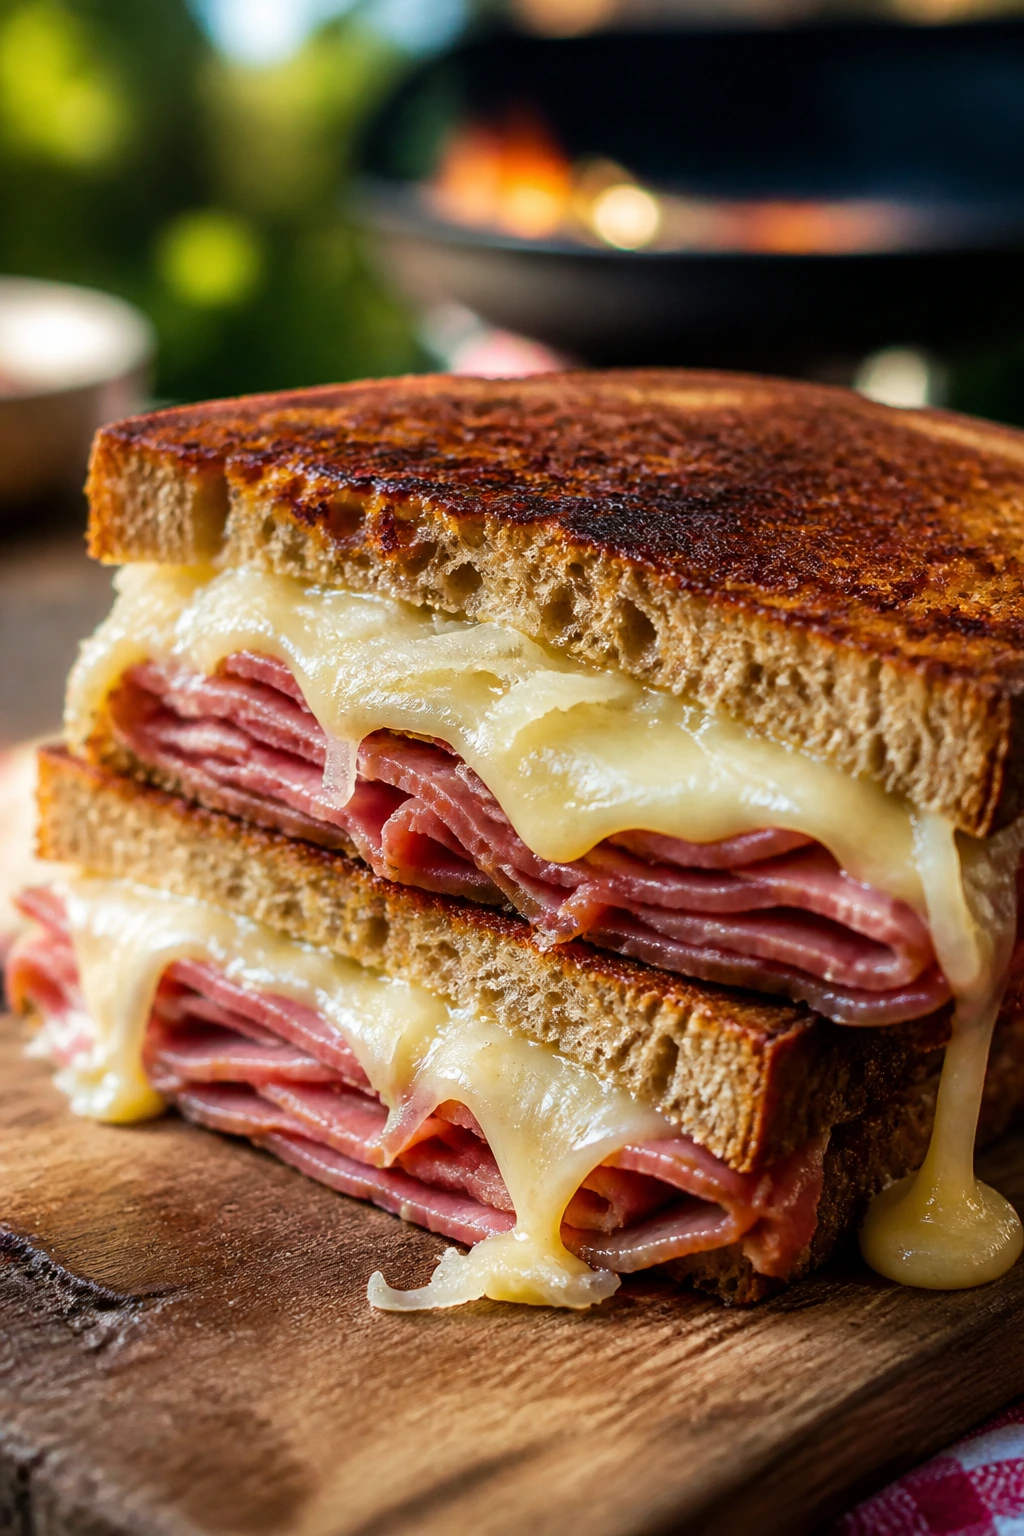
A Reuben on the grill tastes like the deli got a little smoke in its hair. The corned beef is salty and tender, the sauerkraut brings acidity, and Swiss cheese melts into the rye so the whole thing holds together in that slightly messy, necessary way. It’s not delicate. That’s the point.
Why It Works:
The combination of fat, acid, and salt is why this sandwich has stayed around for so long. Kraut can be wet, though, so squeezing it dry is what keeps the bread from turning into damp paper. Rye has enough character to stand up to both the beef and the dressing, and it grills beautifully when you butter the outside well.
Key Ingredients:
- 8 slices rye bread, preferably marble rye — sturdy and flavorful.
- 8 ounces corned beef, sliced thin — keep it tender, not shredded.
- 1 cup sauerkraut, well drained and squeezed dry — this is non-negotiable.
- 8 ounces Swiss cheese, sliced — the melt binds the sandwich.
- 1/4 cup Thousand Island dressing — enough for flavor, not enough to flood the bread.
- 3 tablespoons softened butter — for the outsides of the bread.
- 1 teaspoon caraway seeds — optional, but they play nicely with rye.
Quick Steps:
- Preheat the grill to medium heat and lightly oil the grates.
- Spread Thousand Island on 4 slices of bread. Layer Swiss, corned beef, sauerkraut, and a little more cheese if you want a tighter seal.
- Top with the remaining bread and butter the outsides generously.
- Grill for 3 to 4 minutes per side, using a spatula to press the sandwich just enough to help the cheese melt. If the rye starts browning too quickly, move the sandwich to indirect heat.
- Rest for 1 minute, then slice in half.
Equipment for This Recipe:
- Grill or grill pan — medium heat matters here.
- Spatula — for gentle pressing.
- Plate lined with paper towels — helps catch any excess moisture from the kraut.
- Sharp serrated knife — rye cuts best with a sawing motion.
How to Serve This Dish:
Serve it with dill pickles, potato chips, and a few extra sauerkraut spoonfuls for anyone who wants more tang. It’s a heavy sandwich, so I usually pair it with something crisp and cold rather than another rich side.
Pro Tips for This Recipe:
- Squeeze the sauerkraut in your hands, then pat it with a towel.
- Thin corned beef heats better and folds into the sandwich more cleanly.
- Don’t drown the rye in dressing; the sandwich needs room to breathe.
- Let the sandwich rest a minute so the cheese settles instead of spilling out in ribbons.
Variations on This Dish:
- Rachel Style: Swap corned beef for turkey and keep the kraut and Swiss.
- Spicy Reuben: Add a thin layer of horseradish to the dressing.
- Open-Faced Version: Use one slice of rye, pile the filling high, and finish under a grill lid until the cheese melts.
Common Mistakes to Avoid with This Dish:
- Too-wet sauerkraut: It turns the rye soggy from the middle out.
- Using too much dressing: A Reuben should feel rich, not slippery.
- High heat: Rye burns before the cheese has time to melt through.
4. Turkey, Apple, and Sharp Cheddar
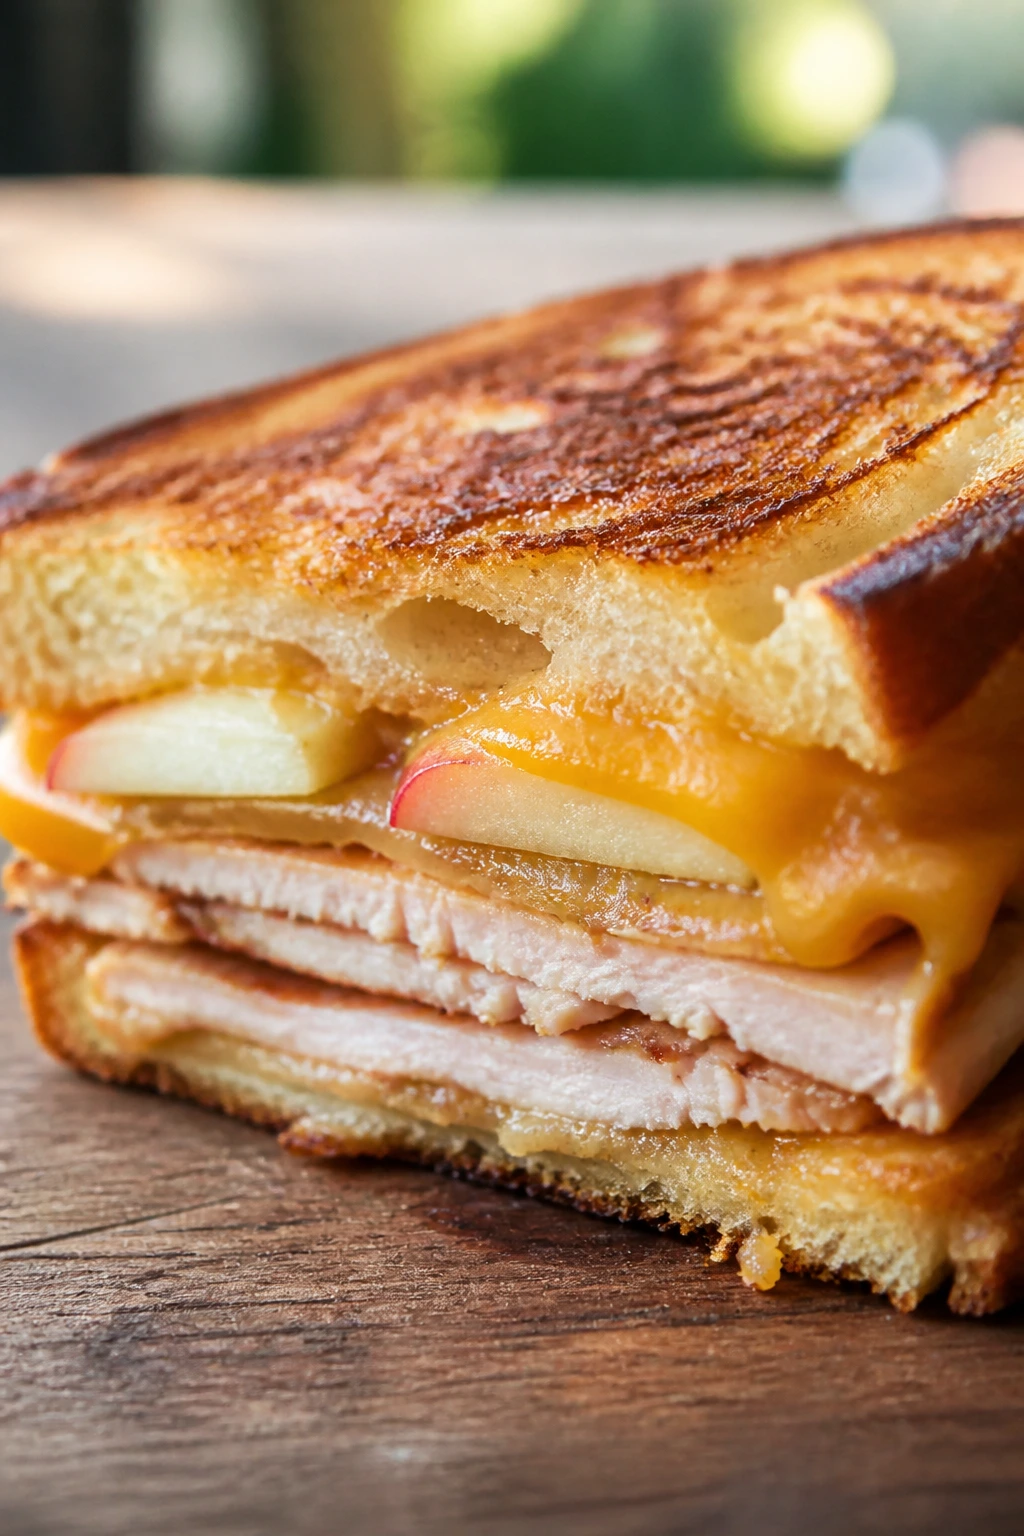
This sandwich is all about contrast. Turkey brings the lean base, cheddar gives you a hard little bite of salt, and thin apple slices add a cool snap that keeps the whole thing from tasting flat. On the grill, the bread crisps first, then the cheese softens around the apple and turkey, which is exactly what you want.
Why It Works:
Cheddar likes heat, but it doesn’t need a long time. That means you can grill this sandwich quickly without drying out the turkey. A crisp apple — I prefer Honeycrisp or Granny Smith — stays bright after a few minutes of heat, while a soft apple turns mushy and dull.
Key Ingredients:
- 8 slices whole wheat or sourdough bread — something sturdy with a little chew.
- 8 ounces sliced roasted turkey — deli turkey is fine if it’s not watery.
- 8 ounces sharp cheddar, sliced — sharper cheese keeps the sandwich from tasting bland.
- 1 medium apple, cored and sliced very thin — Honeycrisp, Granny Smith, or Pink Lady.
- 2 tablespoons grainy mustard — adds texture and bite.
- 3 tablespoons softened butter — for the bread.
- A handful of baby spinach — optional, but it adds freshness.
Quick Steps:
- Heat the grill to medium and set out all the fillings before you start assembling.
- Spread mustard on 4 slices of bread. Layer turkey, cheddar, apple, and spinach if using.
- Top with the remaining bread and butter the outside surfaces.
- Grill for 3 to 4 minutes per side until the bread is browned and the cheddar has softened. If you’re using whole wheat bread, watch the edges closely; they brown a little faster than sourdough.
- Rest briefly, then cut in half.
Equipment for This Recipe:
- Grill or grill pan — medium heat is enough.
- Sharp knife or mandoline — thin apple slices make the difference.
- Spatula — for turning without shifting the filling.
- Cutting board — the sandwich needs a clean slice to show the layers.
How to Serve This Dish:
I like this with slaw that leans vinegar-heavy, or with a bowl of grapes and chips if you’re keeping things simple. It’s a neat sandwich for a picnic because it tastes good warm or at room temperature.
Pro Tips for This Recipe:
- Slice the apple so thin you can bend the slices slightly.
- Keep the mustard on one side only; too much on both sides gets loud fast.
- If your turkey is thick-cut, tear it into smaller pieces so it sits flat.
- Use cheese on both sides of the filling if you want a better melt seal.
Variations on This Dish:
- Cranberry Turkey Melt: Add 1 tablespoon cranberry sauce to each sandwich for a sweet-tart edge.
- Brie and Apple Version: Swap cheddar for brie and use a little less mustard.
- Ham Swap: Use sliced ham instead of turkey if that’s what’s in the cooler.
Common Mistakes to Avoid with This Dish:
- Thick apple slices: They slide out and fight the bread.
- Bread that’s too soft: It compresses before it crisps.
- Too much spinach: A small handful is enough; more than that makes the sandwich bulky.
5. Pimento Cheese and Bacon Toastie
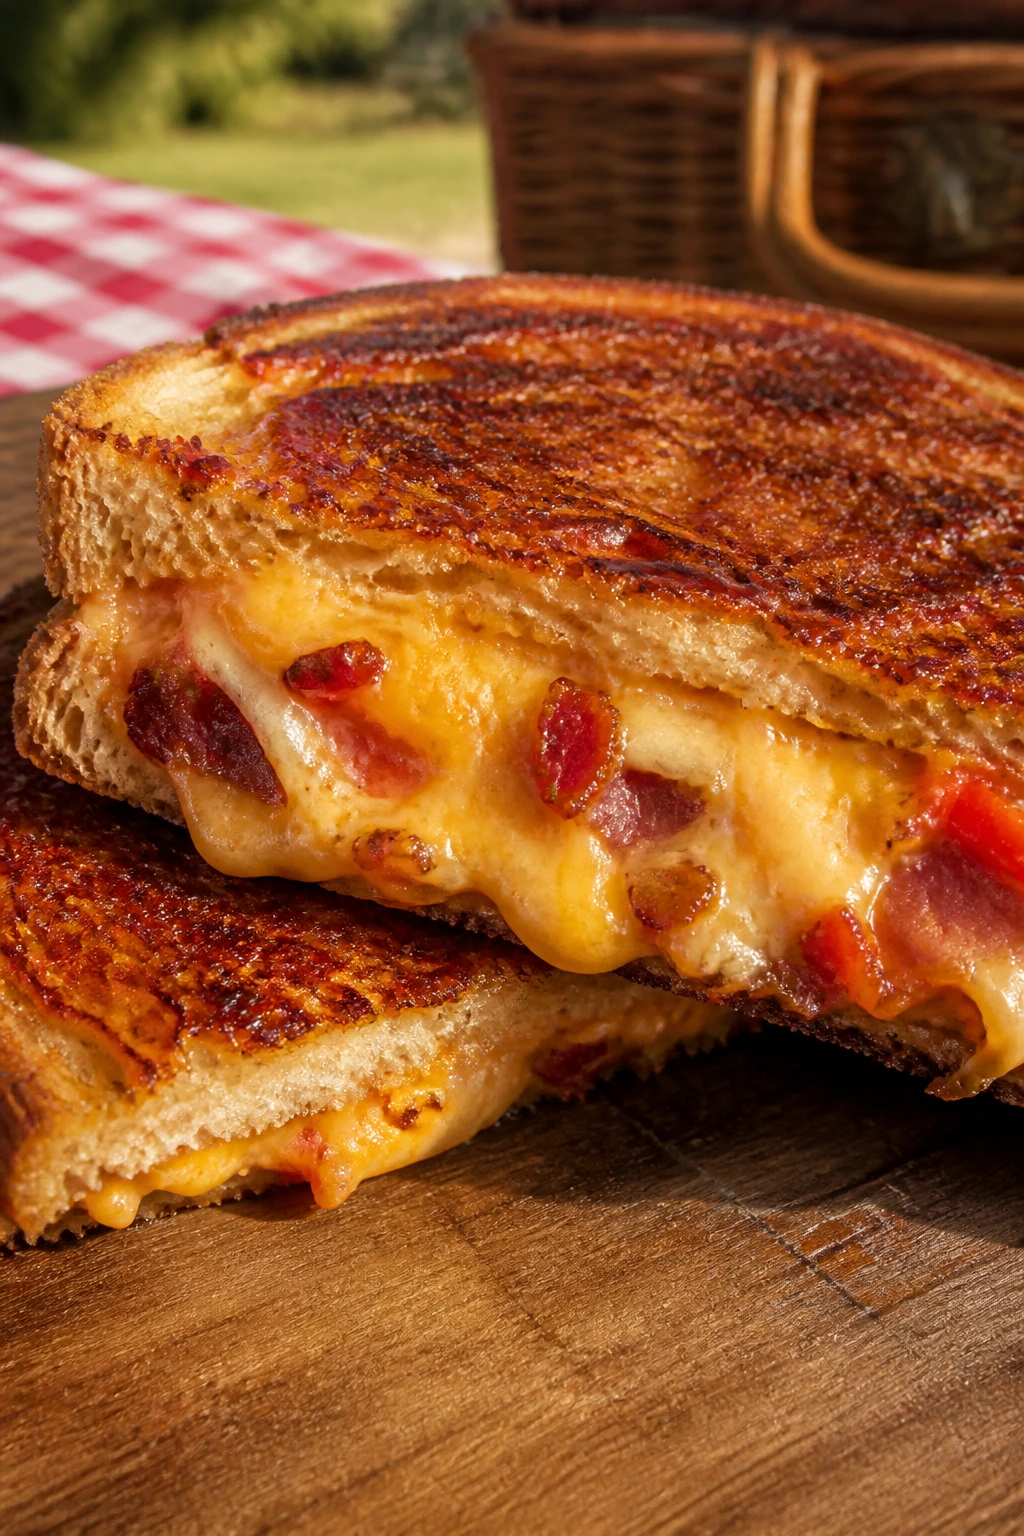
Pimento cheese was made for hot bread. On the grill, it softens into a salty, creamy layer that clings to the crust instead of running off the side, and the bacon adds the kind of smoky crunch that makes the whole sandwich feel finished. This is one of those sandwiches that looks humble and tastes like somebody paid close attention.
Why It Works:
Pimento cheese is already seasoned, so you don’t need much else. Bacon gives it structure and a little chew, while white bread or Texas toast turns deeply crisp without fighting the filling. The best version is the one where the outer bread gets lacquered with butter and the center stays soft and molten.
Key Ingredients:
- 8 slices white bread or Texas toast — the thicker the bread, the easier this is to handle.
- 1 1/2 cups pimento cheese — homemade or store-bought.
- 8 slices cooked bacon — crisp but not shattered.
- 2 tablespoons softened butter — for the outside.
- 4 slices ripe tomato, patted dry — optional and only if you like the extra juiciness.
- 1 tablespoon chopped chives — optional, for the finish.
Quick Steps:
- Heat the grill to medium-low, about 350°F to 375°F.
- Spread pimento cheese on 4 slices of bread. Top with bacon and tomato if using, then close with the remaining bread.
- Butter the outsides of the sandwiches.
- Grill for 3 to 4 minutes per side, until the bread is golden and the pimento cheese is hot through. If your bread is thick, cover the grill briefly with a lid to help the center warm faster.
- Rest for 1 minute, then cut and sprinkle with chives if you want.
Equipment for This Recipe:
- Grill or cast-iron skillet on the grill — both work well.
- Spatula — thick toasties need a firm turn.
- Paper towels — for drying tomato slices.
- Small bowl — useful if you’re stirring in chives or loosening the pimento cheese.
How to Serve This Dish:
Serve these with cucumber slices, kettle chips, or a very simple green salad with vinegar dressing. They’re rich, so I’d skip any side that leans creamy.
Pro Tips for This Recipe:
- Use pimento cheese that’s thick enough to hold shape on a spoon.
- Dry the tomato slices if you use them; a wet tomato can turn this into a spill.
- Bacon should be fully cooked before the sandwich hits the grill.
- Texas toast makes this sandwich easier to flip because it’s less fragile than thin sandwich bread.
Variations on This Dish:
- Jalapeño Pimento Melt: Stir in chopped pickled jalapeños for heat.
- Green Tomato Version: Swap fresh tomato for a thin slice of fried green tomato if you want more structure.
- No-Bacon Option: Use smoked paprika and a few sliced olives for a salty note without the meat.
Common Mistakes to Avoid with This Dish:
- Overloading the cheese: It escapes before the bread browns.
- Using wet tomato slices: They steam the middle and make the sandwich fall apart.
- Grilling too hot: Pimento cheese warms quickly; the bread doesn’t need a blast furnace.
6. Philly Cheesesteak Hoagies
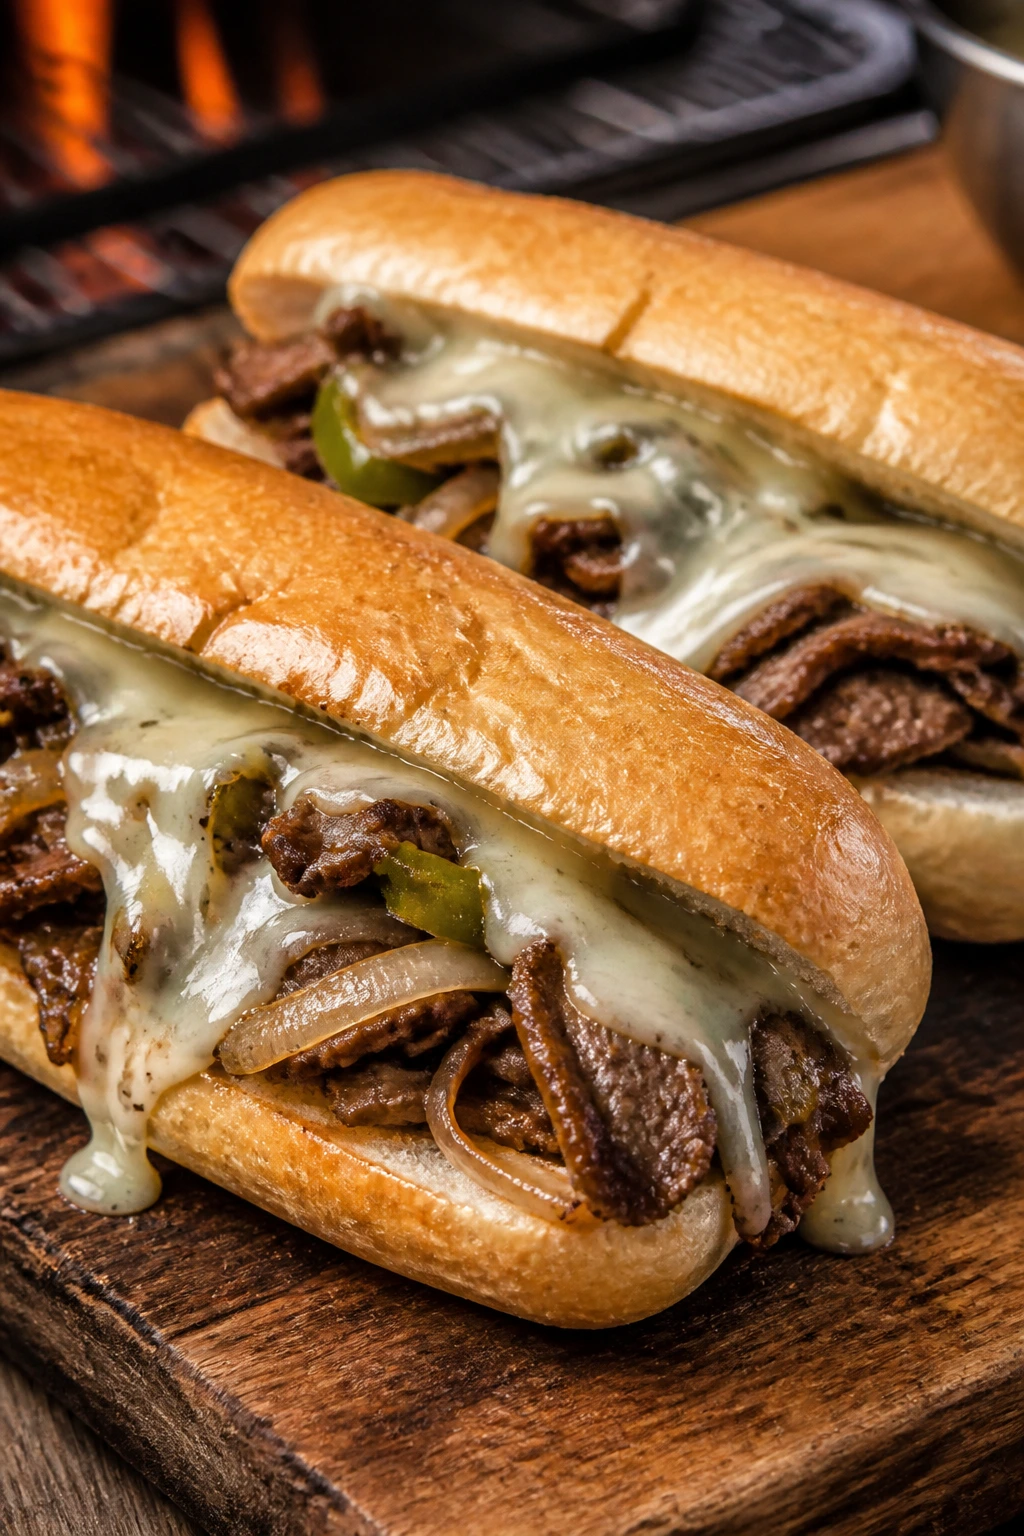
A cheesesteak made on the grill has a little more edge than the skillet version, and I like that. The steak gets a quick char, the onions soften into sweetness, and the cheese melts over everything in that slightly reckless way that makes a hoagie worth eating with a lot of napkins nearby. It’s messy, but not sloppy if you keep the fillings in line.
Why It Works:
Thin steak cooks fast, which is ideal for grill heat. Onions and peppers bring enough moisture to keep the filling from drying out, but not so much that they soak the bread if you cook them first. Provolone gives you a smoother melt than aged cheese, and that smooth melt is the whole game here.
Key Ingredients:
- 1 pound ribeye, shaved steak, or thin-sliced sirloin — the thinner the better.
- 1 large yellow onion, thinly sliced — cook until soft and lightly browned.
- 1 green bell pepper, thinly sliced — optional, but classic enough to keep.
- 8 ounces provolone cheese, sliced — the melt should drape, not clump.
- 4 hoagie rolls, split — sturdy rolls are non-negotiable.
- 2 tablespoons neutral oil — for the steak and vegetables.
- Salt and black pepper — season the meat, not the finished sandwich.
Quick Steps:
- Preheat the grill to medium-high and set a cast-iron skillet on the grates to heat.
- Add oil, onions, and peppers to the skillet and cook for 6 to 8 minutes, stirring occasionally, until soft and slightly golden.
- Push the vegetables to one side, add the steak, season with salt and pepper, and cook for 2 to 4 minutes, tossing until no pink remains.
- Split the hoagie rolls and fill them with the steak mixture, then top with provolone.
- Close the grill lid for 1 to 2 minutes, just until the cheese melts. Watch closely — thin rolls can dry out fast.
- Serve immediately.
Equipment for This Recipe:
- Cast-iron skillet or griddle — this is the easiest way to control the filling on a grill.
- Tongs — for stirring steak and vegetables.
- Hoagie rolls — look for a firm crust and soft interior.
- Heatproof gloves or mitts — the skillet gets hot fast.
How to Serve This Dish:
These want fries, potato chips, or a crunchy dill pickle on the side. If you’re feeding a crowd, slice each hoagie into thirds and pile them on a tray with wax paper underneath.
Pro Tips for This Recipe:
- Freeze the steak for 20 minutes before slicing if you’re cutting it yourself.
- Don’t crowd the skillet; steak steams when it sits on top of itself.
- Add cheese last so it melts onto the hot meat rather than the empty roll.
- Keep the rolls warm near the grill, but not directly over the fire.
Variations on This Dish:
- Mushroom Cheesesteak: Add sliced mushrooms to the onions for a deeper, earthier filling.
- Chicken Cheesesteak: Use thin-sliced chicken breast and cook it the same way.
- Pepper Jack Version: Swap provolone for pepper jack if you want some heat.
Common Mistakes to Avoid with This Dish:
- Using bread that’s too soft: The filling punches right through it.
- Overcooking the steak: Thin steak wants a fast cook, not a long one.
- Skipping the skillet: Directly grilling loose steak is asking for pieces to fall through the grate.
7. Cuban Sandwich with Pickles
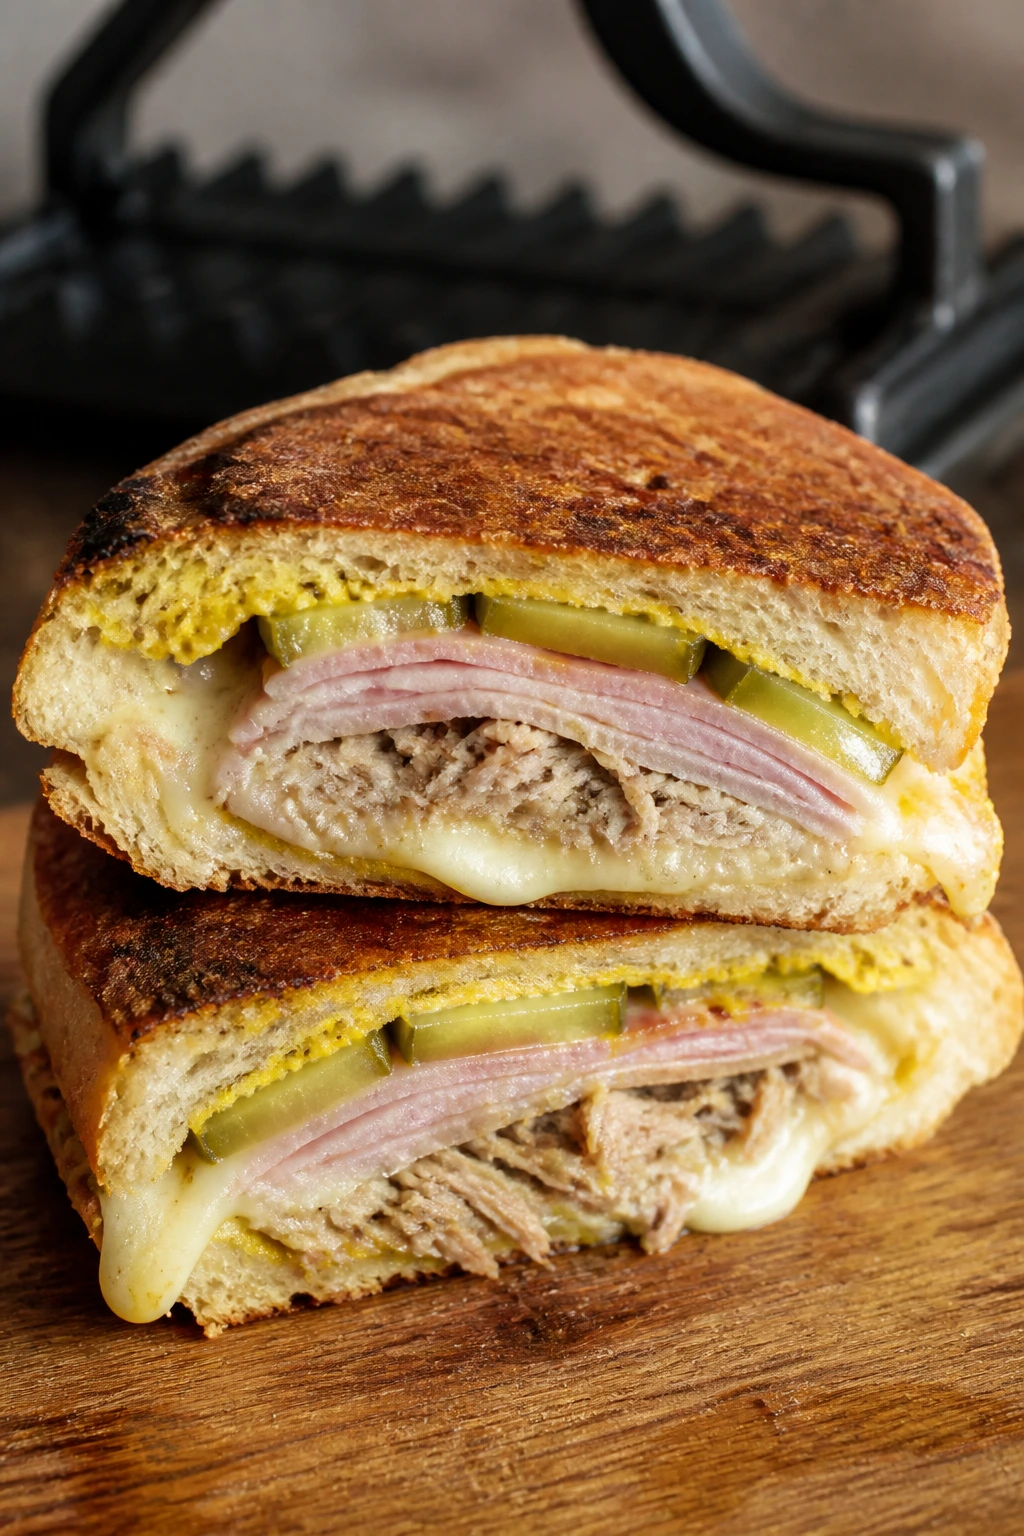
A Cuban sandwich has a specific kind of confidence. You get roast pork, ham, Swiss, mustard, and pickles pressed together until the bread crackles at the edges and the inside turns almost custardy with melted cheese. On the grill, it smells like garlic, mustard, and hot bread before you even cut it.
Why It Works:
The sandwich has enough fat and moisture to press well without becoming greasy. Pickles and mustard keep the rich pork from feeling heavy, and the bread benefits from a gentle crush that brings the fillings closer together. If you use a soft roll like Cuban bread or bolillo, you get a crust that stays crisp while the center softens.
Key Ingredients:
- 4 Cuban rolls, bolillo rolls, or soft French-style rolls — split lengthwise.
- 8 ounces roast pork, thinly sliced — leftover roast pork works nicely.
- 8 ounces sliced ham — thin deli ham is perfect.
- 8 ounces Swiss cheese, sliced — gives the sandwich its smooth melt.
- 1/4 cup yellow mustard — classic and sharp.
- 12 dill pickle chips — drained well.
- 2 tablespoons softened butter — for the outside of the bread.
Quick Steps:
- Heat the grill to medium and set a cast-iron skillet or grill press on the grates if you have one.
- Spread mustard on the inside of each roll. Layer Swiss, roast pork, ham, and pickles, then close the sandwich.
- Butter the outside of each roll.
- Grill for 3 to 4 minutes per side, pressing gently until the bread is crisp and the cheese melts. If you’re using a skillet, cover it loosely so the top heats at the same pace as the bottom.
- Rest for 1 minute before slicing.
Equipment for This Recipe:
- Grill or grill pan — steady medium heat is best.
- Cast-iron skillet or sandwich press — helps flatten the roll.
- Spatula — for turning without tearing the crust.
- Knife — a clean cut keeps the layers tidy.
How to Serve This Dish:
Serve it with plantain chips, salted potato chips, or a simple cucumber salad. A Cuban is rich enough that you don’t need much else on the plate.
Pro Tips for This Recipe:
- Drain the pickles on paper towels so their brine doesn’t soak the bread.
- Keep the mustard layer thin and even.
- If the roll is very soft, use a skillet instead of directly on the grates.
- Press only enough to bring the layers together; flattening it too hard pushes the filling out.
Variations on This Dish:
- Turkey Cuban: Swap roast pork for sliced turkey if that’s what you have.
- Spicy Cuban: Add a few sliced pickled jalapeños with the pickles.
- Mojo Pork Version: Toss the pork with a little orange juice and garlic before assembling.
Common Mistakes to Avoid with This Dish:
- Too many pickles: They should brighten the sandwich, not flood it.
- Using crusty bread that’s too hard: It won’t press well and can split.
- Not pressing enough: A Cuban should be compact, not airy.
8. Grilled Italian Sub Melt
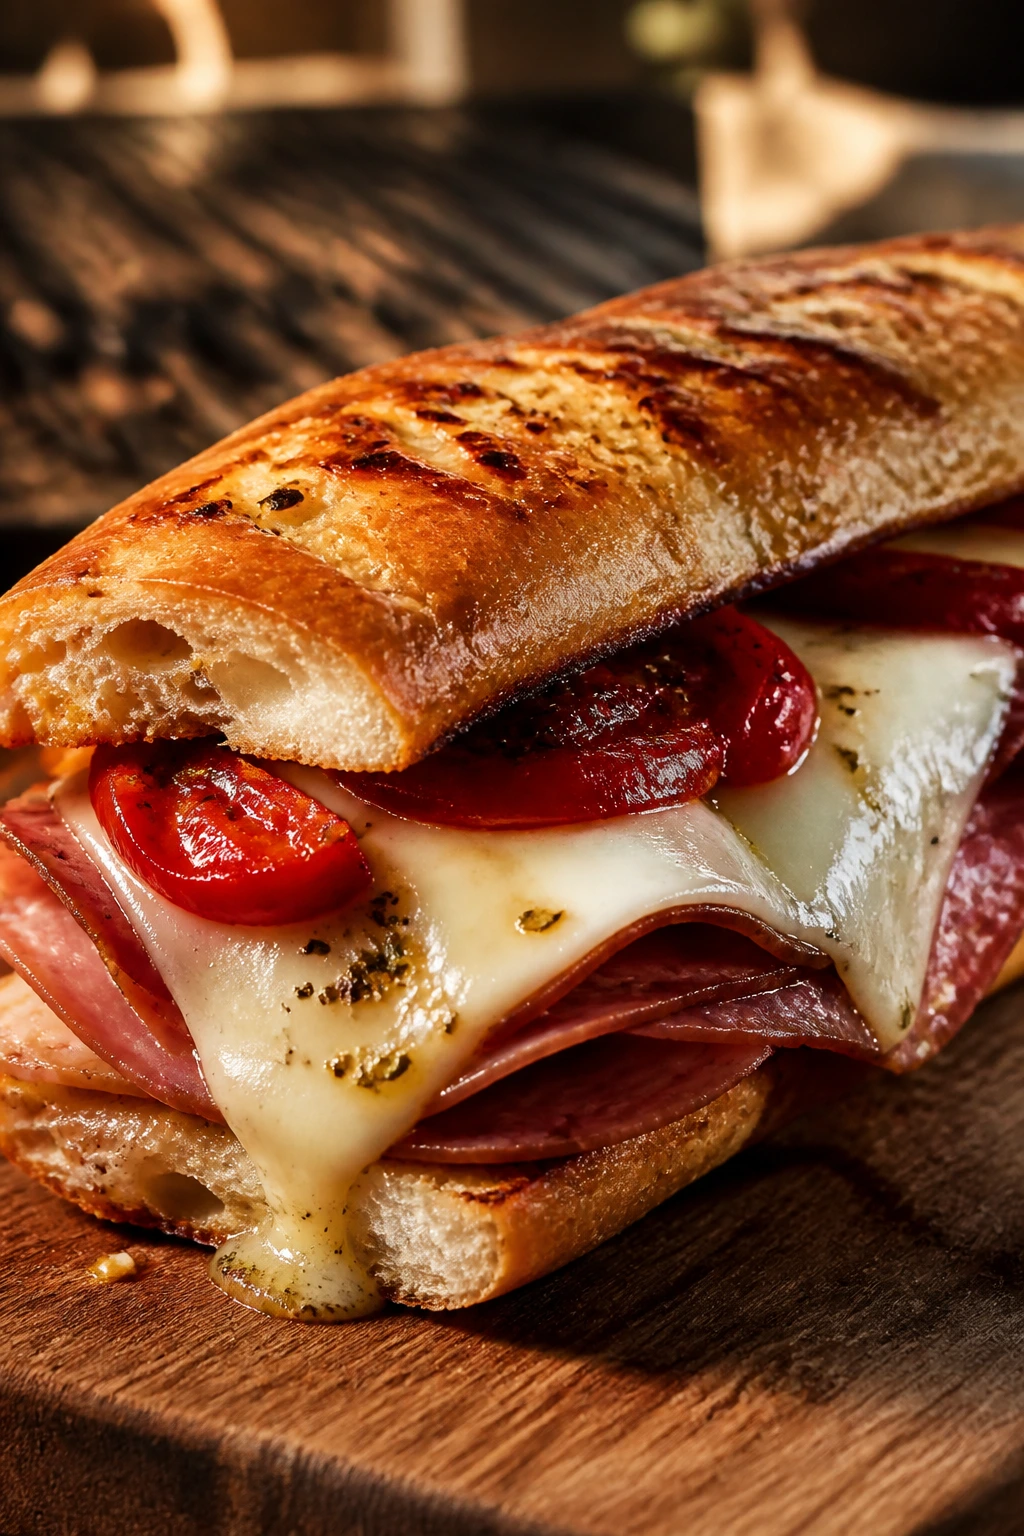
This is the sandwich for people who like their deli meat warmed, their cheese fully melted, and their onions just sweet enough to notice. The grill gives the salami and ham a smoky edge, the provolone melts into the bread, and a little oregano oil or vinegar at the end keeps the whole thing from tasting flat. It’s an Italian sub, but it got dressed for the heat.
Why It Works:
A good Italian sub uses a mix of salty meats and a cheese that melts without becoming greasy. Grilling the bread first helps it stand up to the oil from the meats and the moisture from the peppers. A little acidity at the end — vinegar, pepperoncini juice, or both — keeps the richness under control.
Key Ingredients:
- 4 sub rolls or Italian hoagie rolls — split.
- 4 ounces salami, sliced thin — soppressata or genoa both work.
- 4 ounces deli ham — thin slices layer better.
- 8 ounces provolone cheese, sliced — the main melt here.
- 1/2 cup roasted red peppers, drained — sweet and soft.
- 1/2 cup thinly sliced red onion — use sparingly.
- 2 tablespoons olive oil mixed with 1/2 teaspoon dried oregano — for brushing the bread.
- 2 tablespoons pepperoncini slices — optional, for a sharp finish.
Quick Steps:
- Heat the grill to medium heat and brush the cut sides of the rolls with the oregano oil.
- Layer provolone, salami, ham, roasted peppers, onion, and pepperoncini if using.
- Close the sandwiches and brush the outside lightly with olive oil.
- Grill for 2 to 3 minutes per side until the bread is toasted and the cheese is softened. Use a skillet on the grill if the rolls are especially soft.
- Open the sandwiches and add a few fresh arugula leaves if you want a peppery bite.
- Slice and serve right away.
Equipment for This Recipe:
- Grill or grill pan — medium heat keeps the bread from scorching.
- Basting brush — for the oregano oil.
- Sharp knife — sub rolls cut best on a stable board.
- Optional skillet — useful if you want more control.
How to Serve This Dish:
These are good with marinated olives, potato chips, or a simple tomato salad. If you’re serving a group, cut them into 4-inch pieces and line them up on a platter so people can grab one without dismantling the tray.
Pro Tips for This Recipe:
- Use just enough onion to give crunch; too much turns the sandwich sharp and crowded.
- Pat the roasted peppers dry before adding them.
- Put cheese closest to the bread so it acts like a moisture barrier.
- A little pepperoncini juice brushed on after grilling is excellent.
Variations on This Dish:
- Muffuletta-Inspired Version: Add chopped olives and a spoonful of olive salad.
- Turkey Italian Sub: Swap the ham and salami for sliced turkey.
- Veggie Sub Melt: Use grilled zucchini, peppers, and extra provolone instead of the meats.
Common Mistakes to Avoid with This Dish:
- Too much oil: The sandwich gets slippery fast.
- Ignoring the peppers’ moisture: Dry them or your bread softens.
- Using lettuce before grilling: It wilts and turns the sandwich into a limp mess.
9. Tuna Melt with Celery and Dill
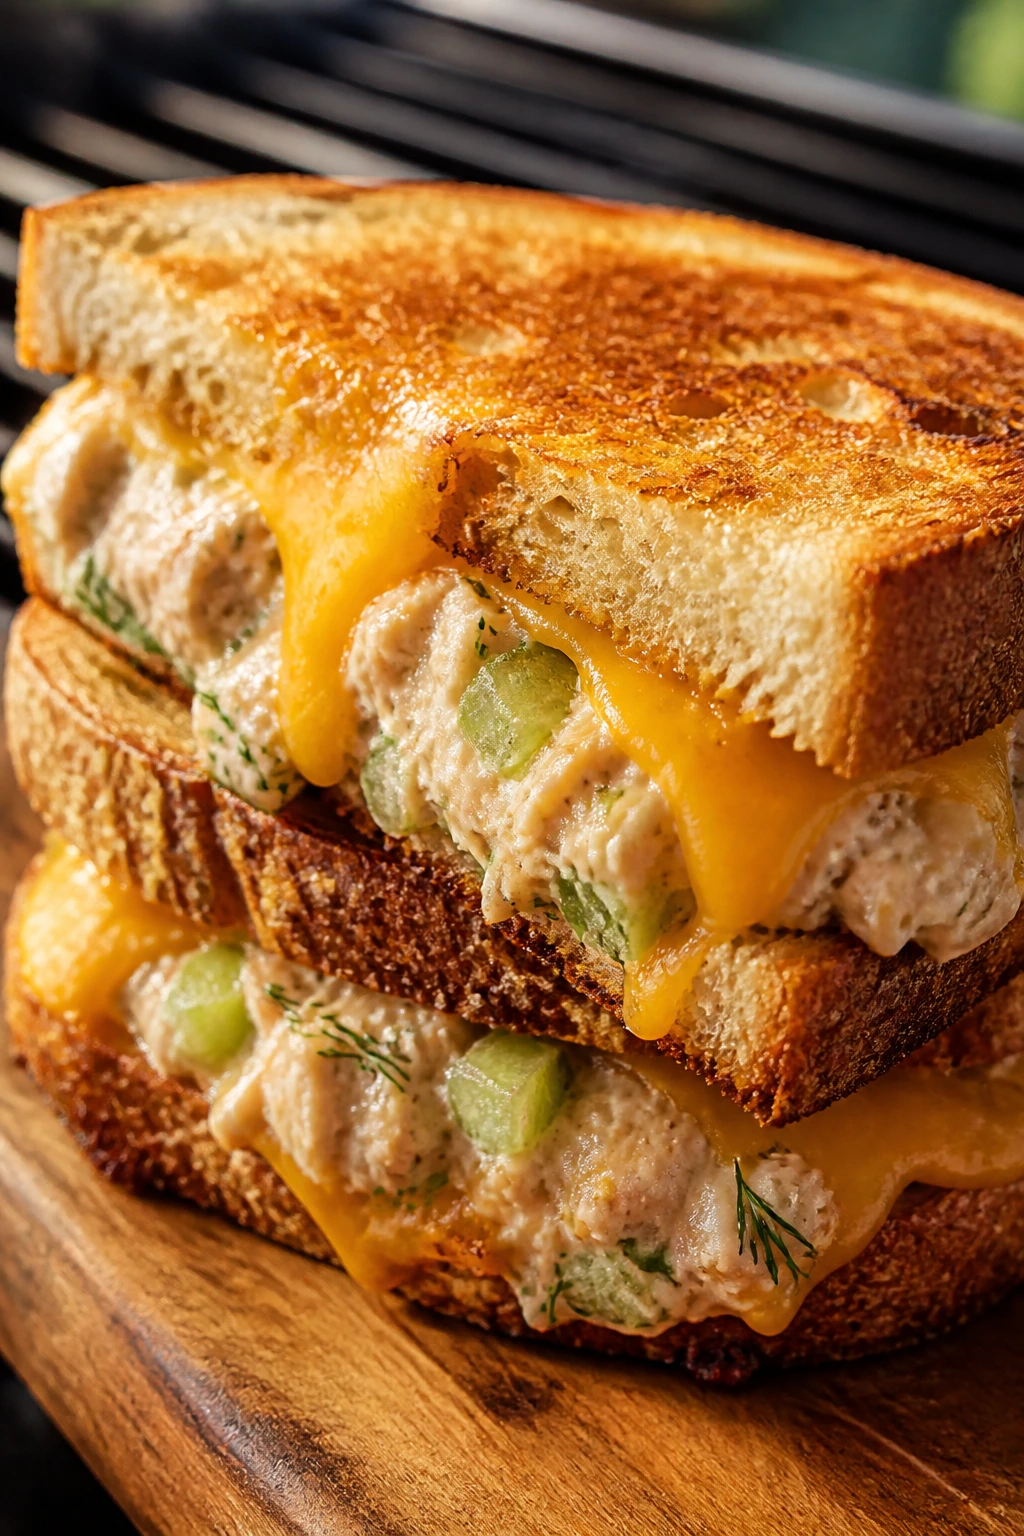
A tuna melt has to earn its place on the grill because tuna salad can go wrong in a heartbeat. Keep the salad dry, keep the bread sturdy, and the result is a crisp, creamy sandwich with enough dill and celery to stay interesting. The cheese melts into the tuna instead of floating on top like a lid.
Why It Works:
Tuna salad benefits from a little heat, but not too much. The bread toasts fast, the filling warms through, and cheddar or American cheese binds the whole thing into one solid bite. Celery gives the tuna some snap, which matters because tuna on its own can feel soft and one-note.
Key Ingredients:
- 2 cans tuna, 5 ounces each, drained well — packed in water or oil.
- 1/4 cup mayonnaise — enough to bind without making it wet.
- 2 celery ribs, finely diced — for crunch.
- 1 tablespoon chopped dill pickles or relish — optional, but helpful.
- 8 slices sourdough or white bread — sturdy enough for the filling.
- 8 slices cheddar or American cheese — American melts softer, cheddar tastes sharper.
- 2 tablespoons softened butter — for the outside.
Quick Steps:
- Mix tuna, mayonnaise, celery, and dill pickles in a bowl until just combined.
- Preheat the grill to medium-low, about 350°F.
- Divide the tuna salad between 4 slices of bread and top each with 2 slices of cheese.
- Close the sandwiches and butter the outsides.
- Grill for 2 to 3 minutes per side, until the bread is golden and the cheese has melted. If the tuna salad is very cold from the fridge, give the sandwich an extra minute with the lid down.
- Let rest for 1 minute before slicing.
Equipment for This Recipe:
- Grill or grill pan — lower heat is kinder to tuna.
- Mixing bowl and fork — for the tuna salad.
- Spatula — for a gentle turn.
- Paper towels — useful if the tuna seems wet after draining.
How to Serve This Dish:
Serve it with sliced cucumbers, kettle chips, or a bowl of tomato soup if you’re making the meal a little more old-school. It’s also good cut into small triangles for a picnic plate.
Pro Tips for This Recipe:
- Drain the tuna until it feels almost dry.
- Keep the mayonnaise modest; tuna salad should hold shape when scooped.
- American cheese gives you the softest melt if that’s what you like.
- A few chopped chives on top after grilling make the sandwich taste fresher.
Variations on This Dish:
- Dill Pickle Tuna Melt: Increase the chopped pickles and skip the relish.
- Mediterranean Tuna Melt: Add chopped olives and a little lemon zest.
- Spicy Tuna Melt: Stir in a small spoonful of hot sauce or chopped pepperoncini.
Common Mistakes to Avoid with This Dish:
- Watery tuna: It turns the bread soft from the middle out.
- Too much mayonnaise: The filling slides.
- Cooking on high heat: Tuna needs warm-through, not scorched bread.
10. BBQ Pulled Pork and Slaw
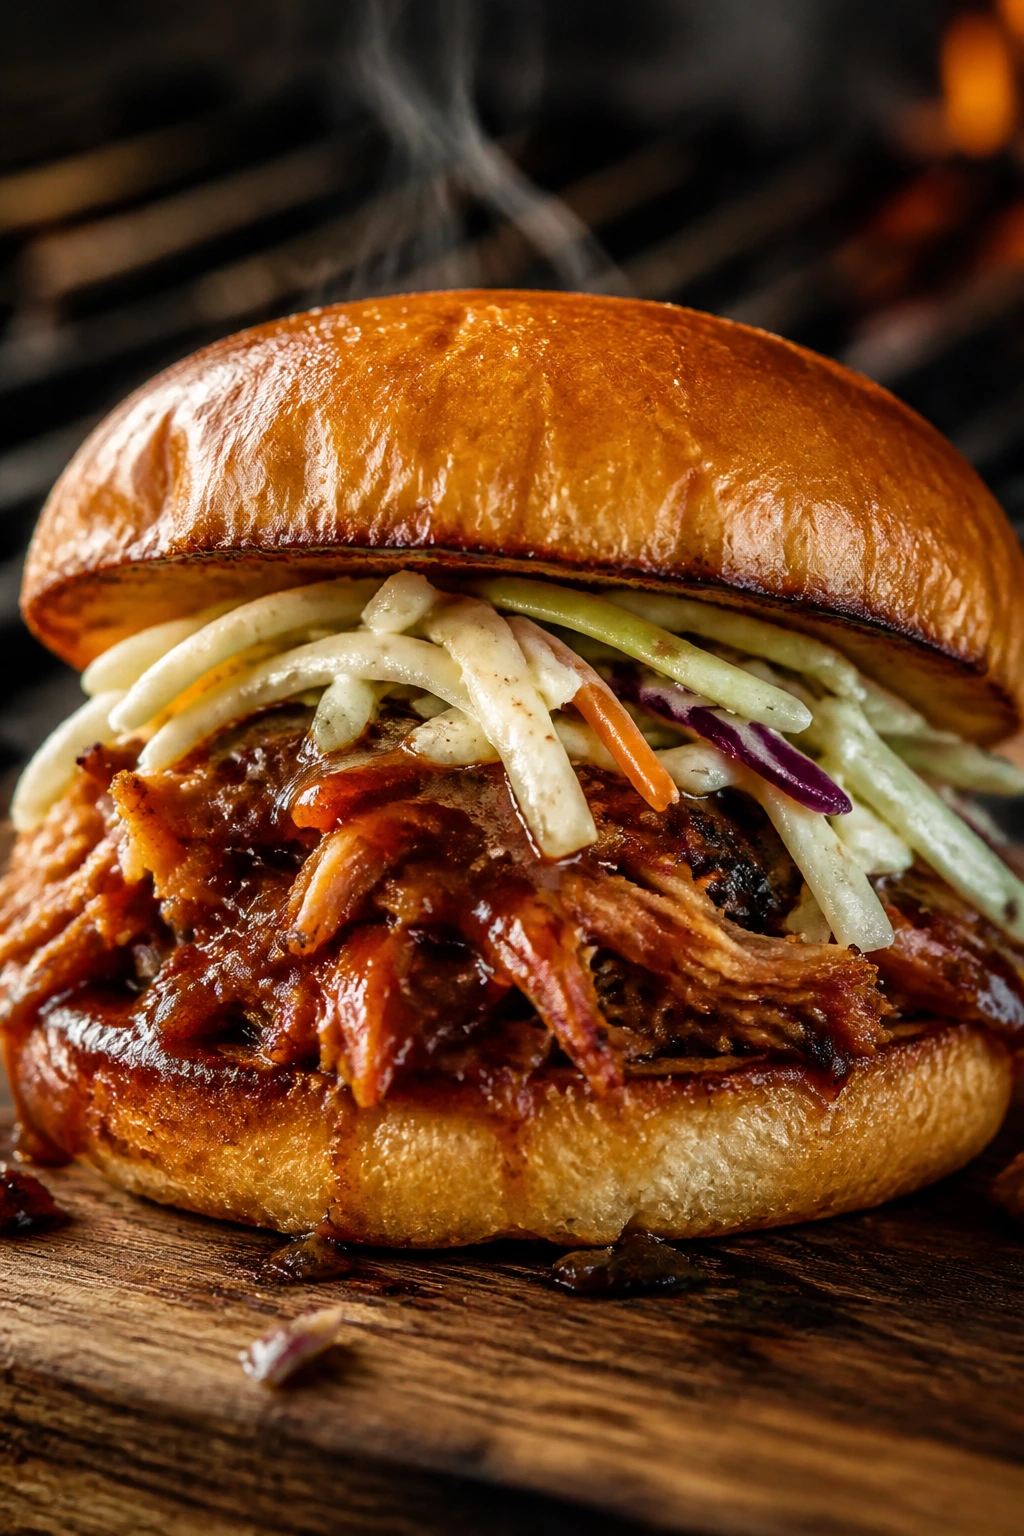
Pulled pork on a grill feels redundant until you taste it toasted on the outside and sauced just enough to glisten. The pork stays rich and smoky, the slaw brings crunch and vinegar, and a soft bun soaks up the edges without disintegrating. This is the sandwich that makes people hover near the platter.
Why It Works:
Pulled pork reheats well, which makes it one of the easiest grill sandwiches to pull off. The trick is warming the meat without drowning it in sauce, then keeping the slaw separate until the last minute. Brioche or potato buns give you enough softness to bite through, but they should still be sturdy enough to toast.
Key Ingredients:
- 4 cups cooked pulled pork — chopped slightly if the strands are very long.
- 1/2 cup barbecue sauce — use enough to coat, not flood.
- 4 brioche buns or potato rolls — split.
- 1 1/2 cups coleslaw — lightly dressed and not swimming in mayo.
- 1/4 cup dill pickle chips — optional, but excellent.
- 2 tablespoons butter — for toasting the buns.
Quick Steps:
- Heat the grill to medium and place a cast-iron skillet on the grates.
- Add the pulled pork and barbecue sauce to the skillet, stirring until the meat is hot and glossy, about 5 to 7 minutes.
- Split the buns, butter the cut sides, and toast them on the grill for 1 to 2 minutes.
- Spoon the pork onto the bottom buns, top with slaw and pickles if using, then cap with the top buns.
- Serve immediately. If the slaw is very wet, drain off a spoonful of dressing before adding it.
Equipment for This Recipe:
- Cast-iron skillet — ideal for warming the pork on the grill.
- Tongs — for bun toasting.
- Small bowl — for loosening the barbecue sauce if needed.
- Serving tray — this sandwich is best brought out all at once.
How to Serve This Dish:
Serve it with chips, baked beans, or a vinegar slaw if you want the plate to lean sharper. One sandwich is usually enough for a meal, especially with a couple of sides.
Pro Tips for This Recipe:
- Keep the slaw lightly dressed so it stays crunchy.
- Warm the pork first, then toast the buns. That order matters.
- Add pickles only if the barbecue sauce is sweet; they help cut the sugar.
- Potato buns toast nicely but can tear if you handle them too roughly.
Variations on This Dish:
- Carolina Style: Swap the sauce for a vinegar-heavy version and skip the slaw dressing.
- Spicy Pork Sandwich: Add chopped pickled jalapeños to the pork.
- Pulled Chicken Version: Use shredded chicken with the same sauce and assembly.
Common Mistakes to Avoid with This Dish:
- Soggy slaw: Drain it before it goes on the bun.
- Saucing the pork too early and too heavily: It gets wet instead of sticky.
- Skipping the bun toast: Soft buns slump fast under warm pork.
11. Halloumi, Zucchini, and Roasted Red Pepper
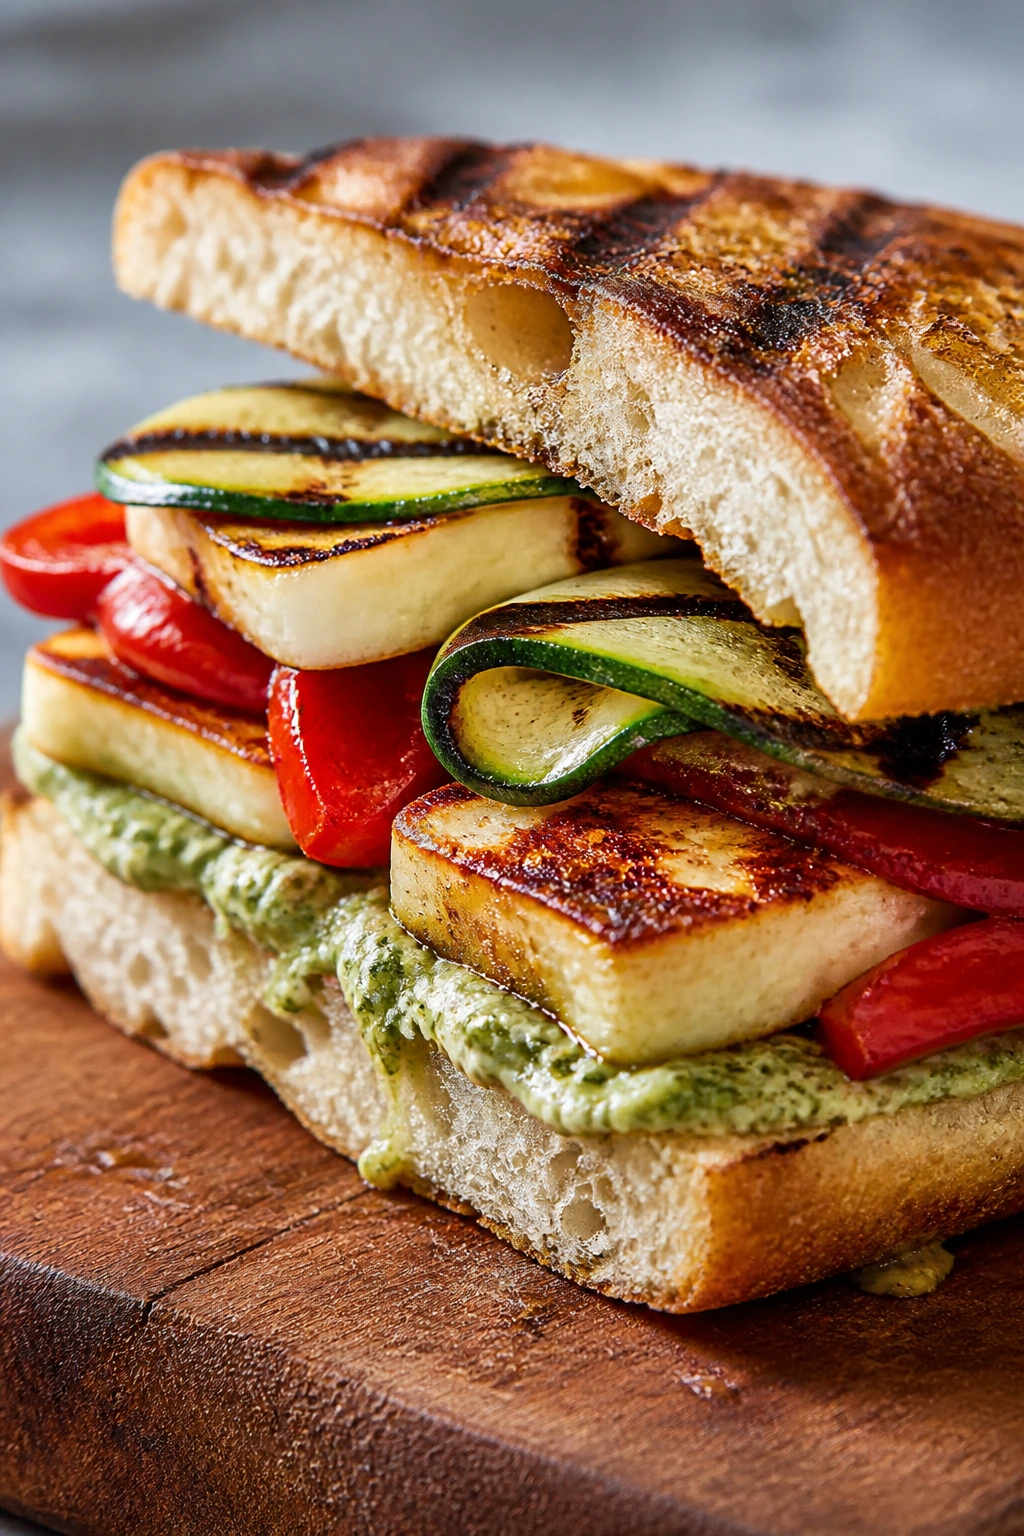
Halloumi is one of the few cheeses that actually wants to meet direct heat. It browns on the outside, stays springy in the middle, and makes a vegetarian sandwich feel like it was built for the grill rather than adapted to it. Add zucchini and roasted peppers, and you get smoke, salt, and sweetness in one neat stack.
Why It Works:
Halloumi holds its shape, so you can grill it without losing the filling to the flames. Zucchini gets tender and slightly charred, roasted red peppers bring a mellow sweetness, and hummus or pesto gives the bread something creamy to grip. Ciabatta or a thick country loaf is the right move because it can handle both oil and moisture.
Key Ingredients:
- 8 ounces halloumi, sliced into 1/3-inch slabs — thick enough to grill cleanly.
- 1 large zucchini, sliced lengthwise — about 1/4-inch thick.
- 1/2 cup roasted red peppers, drained and patted dry.
- 1/3 cup hummus or pesto — choose one, not both, unless you like a very rich sandwich.
- 8 slices ciabatta or 4 split rolls — sturdy bread only.
- 2 tablespoons olive oil — for brushing vegetables and bread.
- 1 lemon wedge — optional, for squeezing at the end.
Quick Steps:
- Heat the grill to medium and brush the zucchini slices with olive oil.
- Grill the zucchini for 2 to 3 minutes per side until tender with dark grill marks.
- Grill the halloumi for 1 to 2 minutes per side until golden and lightly blistered.
- Spread hummus or pesto on the bread, then layer zucchini, halloumi, and roasted peppers.
- Close the sandwich and give it 1 to 2 minutes on the grill just to warm the bread. Do not overcook the halloumi or it turns rubbery.
- Finish with a small squeeze of lemon if you like.
Equipment for This Recipe:
- Grill basket or grates — either works for the zucchini.
- Tongs — halloumi is easy to flip with them.
- Basting brush — for the oil.
- Sharp knife — for slicing the cheese and vegetables evenly.
How to Serve This Dish:
Serve it with a tomato-cucumber salad or a pile of herbed couscous. This is one of the better sandwiches to pack for a picnic because it’s good warm and still good after it cools a little.
Pro Tips for This Recipe:
- Pat the halloumi dry before grilling.
- Slice the zucchini evenly so it cooks at the same rate.
- Use one creamy spread only; too much makes the sandwich heavy.
- A squeeze of lemon at the end wakes up the cheese.
Variations on This Dish:
- Eggplant Swap: Use thin eggplant slices instead of zucchini.
- Spicy Hummus Version: Add chili hummus and a few pickled onions.
- Tofu Grill Sandwich: Swap halloumi for very firm, pressed tofu if you need a dairy-free build.
Common Mistakes to Avoid with This Dish:
- Halloumi cut too thin: It dries out before it browns.
- Skipping the lemon or another acid: The sandwich can taste blunt without it.
- Using watery vegetables: They make the bread soft fast.
12. BLT with Avocado and Basil Mayo
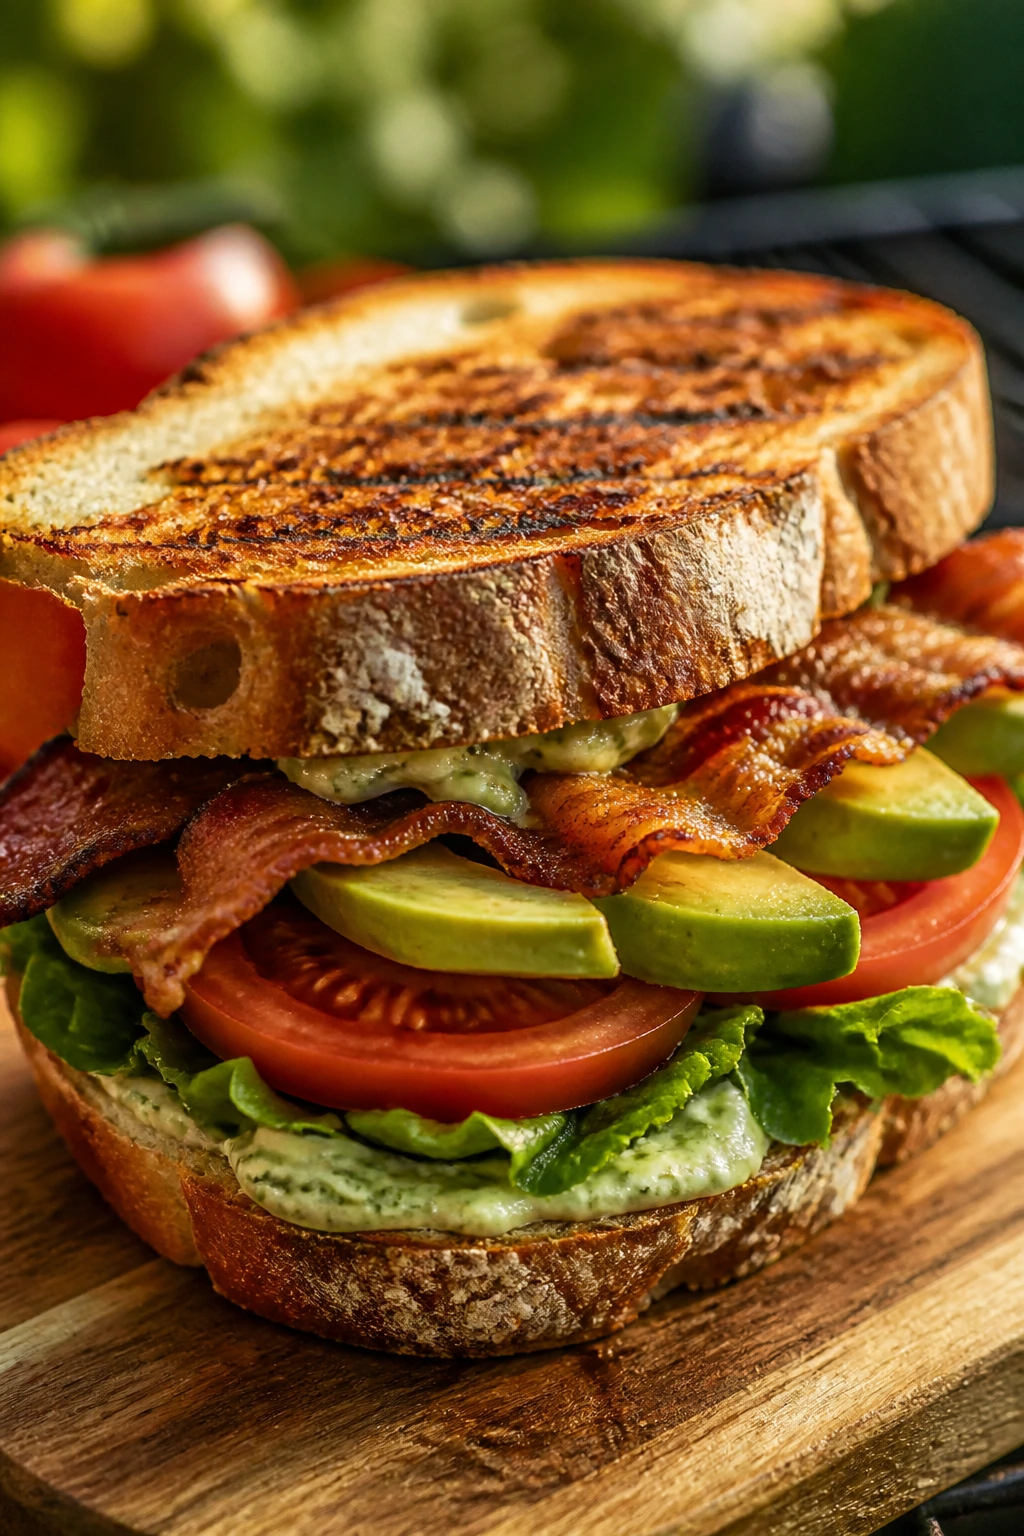
A BLT on the grill is really about the bread and the bacon. You toast the slices until the edges turn crisp, then stack in cool lettuce, ripe tomato, avocado, and a basil mayo that smells like summer before it even reaches the plate. It’s not complicated. It just works if you keep the tomato dry and the bread sturdy.
Why It Works:
Bacon brings the salt and crunch, avocado adds softness, and basil mayo gives the sandwich a green, savory note that plain mayo can’t match. Grilled bread gives the BLT enough structure to hold the tomato, which is where most versions fall apart. If the tomato is ripe but not watery, the whole sandwich stays balanced.
Key Ingredients:
- 8 slices country bread or sourdough — sliced thick enough to grill.
- 8 slices cooked bacon — crisp and drained.
- 2 ripe tomatoes, sliced and lightly salted — then patted dry.
- 4 lettuce leaves, such as romaine or butter lettuce — dry and crisp.
- 1 avocado, sliced — not too soft.
- 1/3 cup mayonnaise mixed with 1 tablespoon finely chopped basil — for the spread.
- 2 tablespoons softened butter — for the bread.
Quick Steps:
- Heat the grill to medium and toast the bacon if you want it warmed through, or keep it cooked and ready.
- Spread basil mayo on 4 slices of bread. Layer lettuce, tomato, bacon, and avocado.
- Top with the remaining bread and butter the outside surfaces.
- Grill for 2 to 3 minutes per side until the bread is crisp and lightly marked.
- Slice diagonally and serve at once. If the tomato is especially juicy, add it between the lettuce and bacon so the lettuce shields the bread.
Equipment for This Recipe:
- Grill or grill pan — medium heat is enough.
- Small bowl — for mixing the basil mayo.
- Sharp knife — for clean tomato and avocado slices.
- Paper towels — for drying the tomato and bacon.
How to Serve This Dish:
Serve it with chips, melon wedges, or a simple cucumber salad. A BLT is one of those sandwiches that feels complete with almost nothing beside it.
Pro Tips for This Recipe:
- Salt the tomato lightly and wait 2 minutes before patting it dry.
- Use bacon that snaps, not bacon that bends like a belt.
- Avocado should be ripe enough to slice but not so soft that it smears.
- Spread the mayo thinly; too much makes the bread greasy.
Variations on This Dish:
- Turkey BLT: Add thin turkey slices for a larger sandwich.
- Cheddar BLT: Slip in a slice of cheddar if you want more heft.
- Spicy Basil Mayo: Stir in a little hot sauce or cracked pepper.
Common Mistakes to Avoid with This Dish:
- Wet tomatoes: They sink the bread fast.
- Soft bacon: It disappears into the sandwich instead of crunching.
- Using under-toasted bread: The BLT turns floppy before you finish the first half.
13. Sausage, Peppers, and Onion Hero
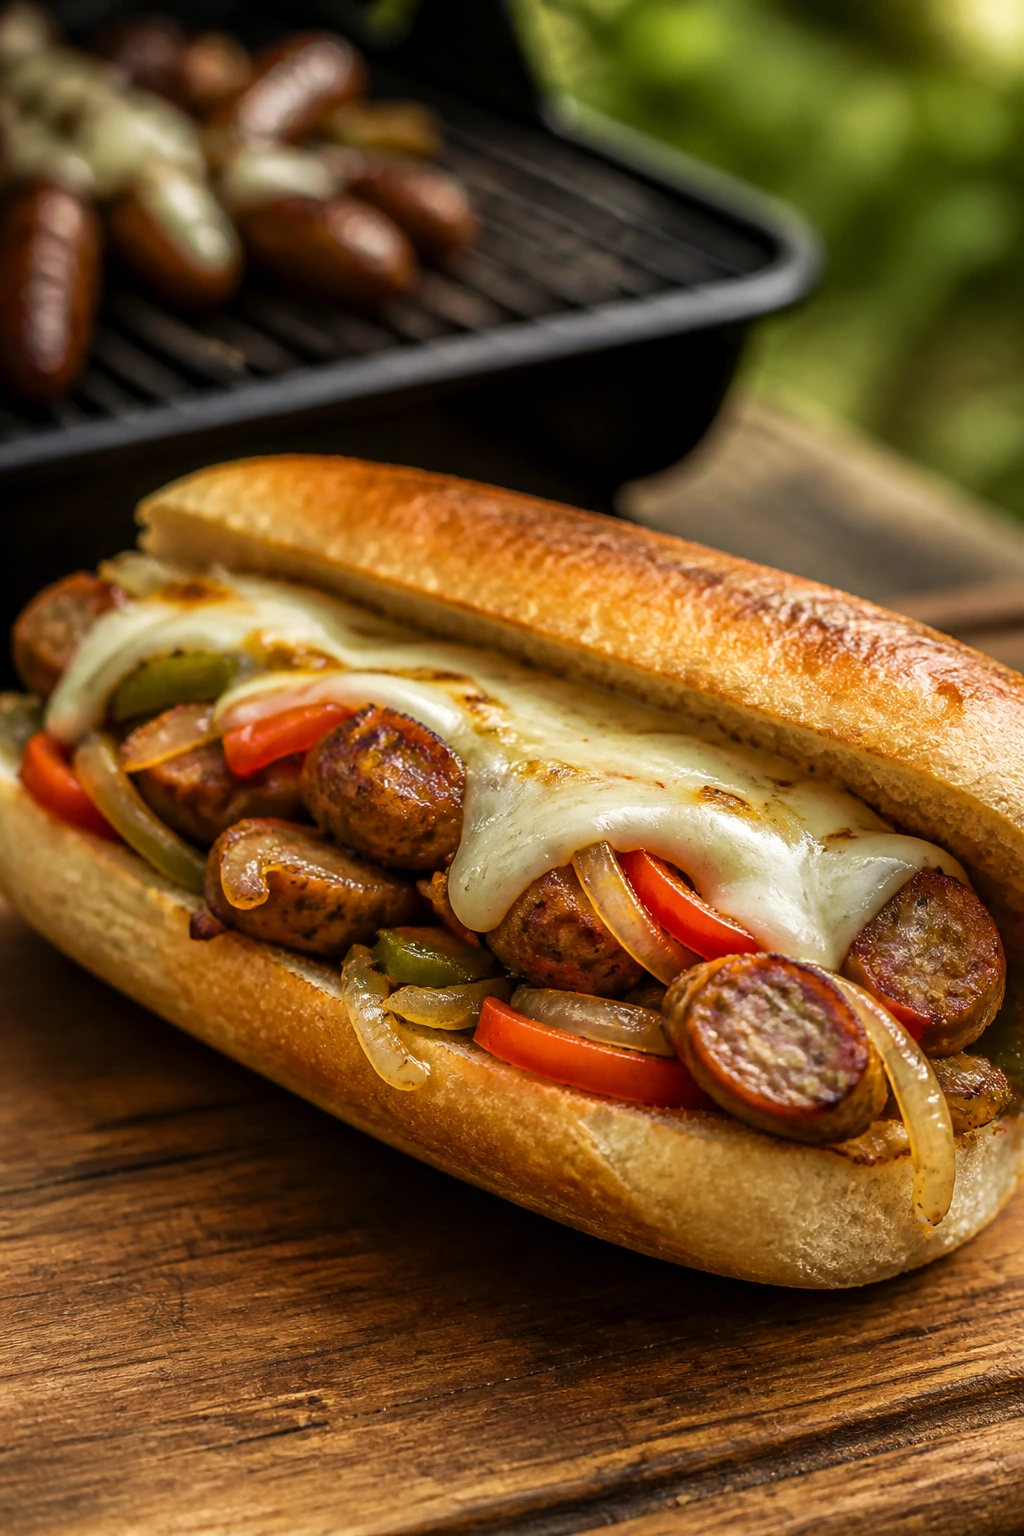
This sandwich is loud in the best way. The sausage brings smoke and spice, the peppers soften and sweeten, and the onions turn jammy if you give them enough time. Put it in a toasted hero roll and you get a sandwich that tastes like the grill did some real work.
Why It Works:
Sausage cooks beautifully over direct heat, but the peppers and onions do better in a skillet or grill basket so they can soften without slipping through the grates. Provolone melts into the sausage and vegetables, holding everything together. The hero roll should be sturdy enough to stay open for filling and soft enough to bite without a fight.
Key Ingredients:
- 4 Italian sausage links, sweet or hot — about 1 pound total.
- 2 bell peppers, sliced — use a mix of colors if you like.
- 1 large yellow onion, sliced — it turns sweet as it cooks.
- 4 hero rolls or sub rolls — split.
- 8 slices provolone cheese — or 1 cup shredded, if that’s what you have.
- 2 tablespoons olive oil — for the vegetables.
- 1 teaspoon dried oregano — optional, but good.
Quick Steps:
- Preheat the grill to medium-high and set a skillet or grill basket on the grates.
- Toss the peppers and onions with olive oil and oregano, then cook for 10 to 12 minutes, stirring now and then, until soft and browned at the edges.
- Grill the sausage links for 10 to 12 minutes, turning often, until they reach 160°F and feel firm but springy.
- Split the rolls, nestle in the sausage, pile on peppers and onions, and top with provolone.
- Return the assembled sandwiches to the grill for 1 to 2 minutes with the lid closed, just until the cheese melts. Use indirect heat if the rolls are browning too fast.
Equipment for This Recipe:
- Grill basket or skillet — the vegetables need containment.
- Tongs — for the sausage links.
- Meat thermometer — helpful for checking doneness.
- Sheet tray — good for holding the cooked components before assembly.
How to Serve This Dish:
Serve it with mustard on the side, chips, or a vinegary potato salad. It’s a full meal on its own, so I keep the sides plain and sharp.
Pro Tips for This Recipe:
- Don’t split the sausage before cooking; you’ll lose juice.
- Cook the onions until they look soft and glossy, not just translucent.
- Warm the rolls for a minute before filling them.
- If you want extra flavor, splash a teaspoon of balsamic or red wine vinegar over the peppers after cooking.
Variations on This Dish:
- Chicken Sausage Version: Use pre-cooked chicken sausage for a lighter sandwich.
- Spicy Sausage Hero: Choose hot sausage and add pickled peppers.
- Mushroom Pepper Hero: Add sliced mushrooms to the skillet with the peppers and onions.
Common Mistakes to Avoid with This Dish:
- Undercooked onions: They stay sharp and watery.
- Burned sausage casings: Medium-high heat is enough; don’t chase a charred shell.
- Filling the roll too high: The sandwich falls apart before the last bite.
14. Brie, Fig, and Prosciutto
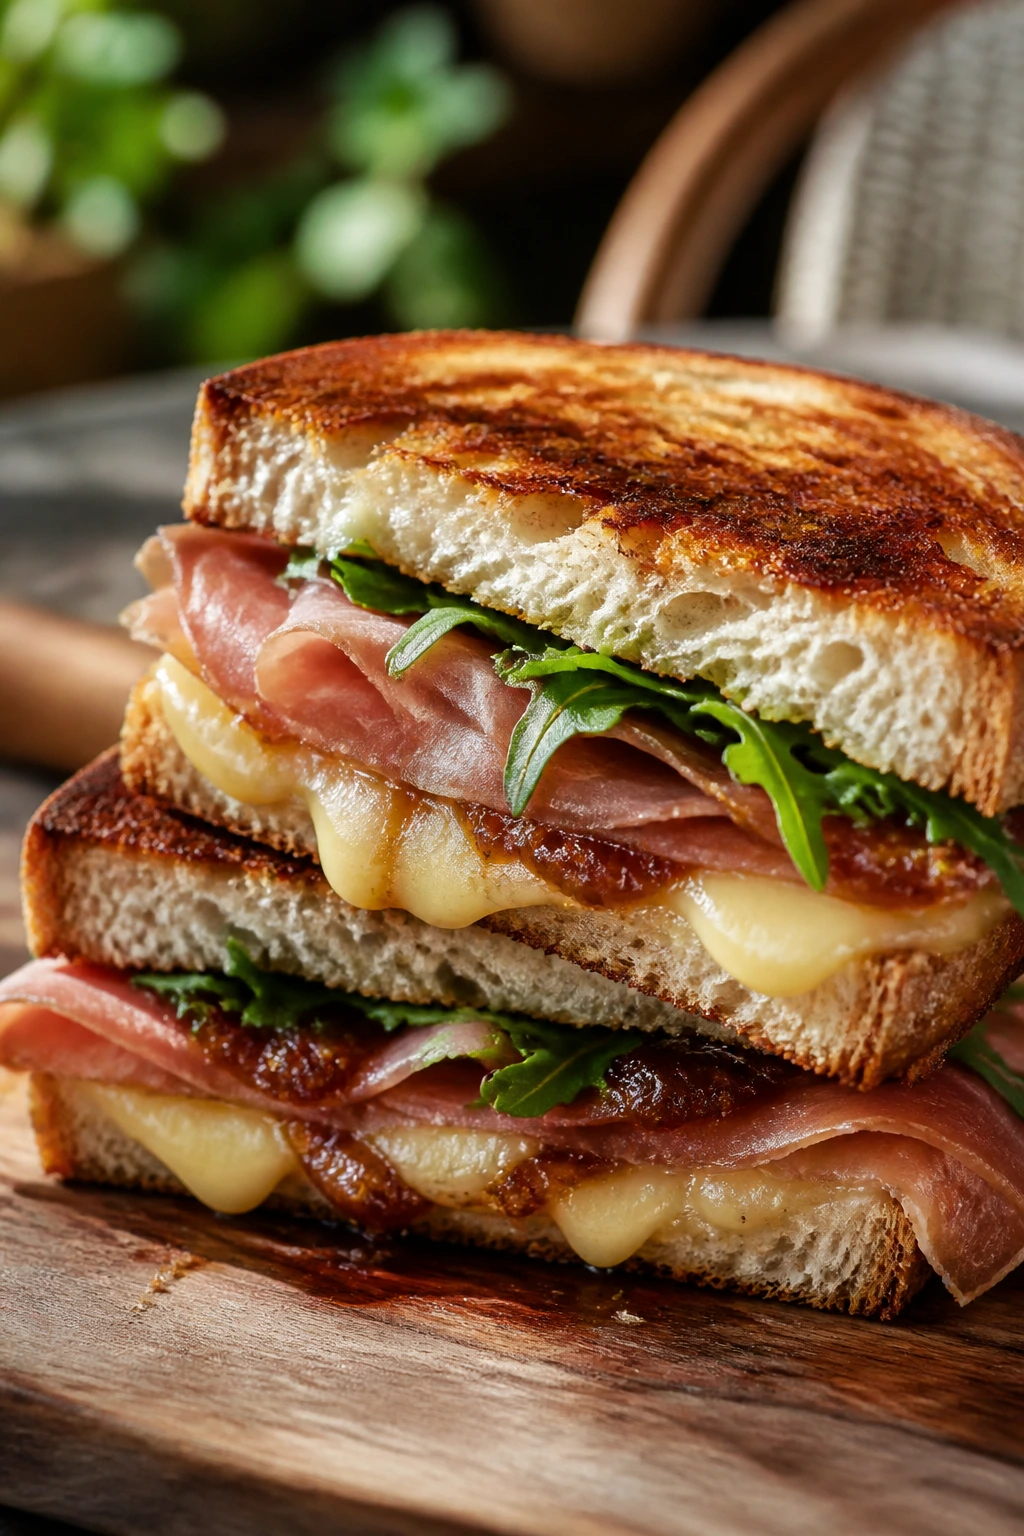
This is the sandwich that feels a little dressed up without asking much of you. Brie melts into a soft, creamy layer, fig jam adds sweetness, and prosciutto brings salt so the whole thing tastes balanced instead of rich for the sake of being rich. On the grill, it becomes warm, sticky, and just a little fancy.
Why It Works:
Brie softens fast, so it doesn’t need a long grill time. Fig jam gives the bread a sweet base, prosciutto is thin enough to warm without drying out, and arugula adds a peppery finish after the sandwich comes off the heat. A rustic loaf or good sourdough is the best match because it can handle the soft cheese.
Key Ingredients:
- 8 slices rustic bread or sourdough — not too airy, not too soft.
- 6 to 8 ounces brie, sliced — rind on is fine.
- 4 ounces prosciutto — folded into loose ribbons.
- 1/4 cup fig jam — spread thinly.
- 1 cup arugula — add after grilling.
- 2 tablespoons softened butter — for the outside of the bread.
- 1 teaspoon lemon juice — optional, for the arugula.
Quick Steps:
- Heat the grill to medium-low, about 350°F to 375°F.
- Spread fig jam on 4 slices of bread, then layer brie and prosciutto.
- Close the sandwiches and butter the outside surfaces.
- Grill for 2 to 3 minutes per side, just until the bread is golden and the brie feels soft when pressed. Do not overcook brie; it should melt, not pour out.
- Open the sandwiches slightly, tuck in arugula, and finish with a small squeeze of lemon if you like.
Equipment for This Recipe:
- Grill or grill pan — lower heat protects the brie.
- Spatula — gentle pressure only.
- Small knife — for spreading jam cleanly.
- Cutting board — this sandwich slices best after a brief rest.
How to Serve This Dish:
Serve it with grapes, salty chips, or a handful of olives. It works especially well cut into smaller pieces for a picnic board where people are sampling a few different sandwiches.
Pro Tips for This Recipe:
- Use thin slices of brie so the cheese warms before the bread burns.
- Keep the fig jam thin; too much makes the sandwich sticky and hard to grill.
- Add arugula after grilling so it stays fresh and sharp.
- If the bread is soft, toast the cut sides lightly before assembling.
Variations on This Dish:
- Pear and Brie Version: Swap fig jam for thin pear slices.
- Apricot Prosciutto Melt: Use apricot jam instead of fig for a brighter sweetness.
- Salami Swap: Replace prosciutto with very thin salami if that’s what you have.
Common Mistakes to Avoid with This Dish:
- Overheating the brie: It leaks everywhere and loses its shape.
- Too much jam: The sandwich turns sticky and unbalanced.
- Skipping the arugula or another fresh finish: It needs something bright to cut the richness.
15. Buffalo Chicken and Blue Cheese Melt
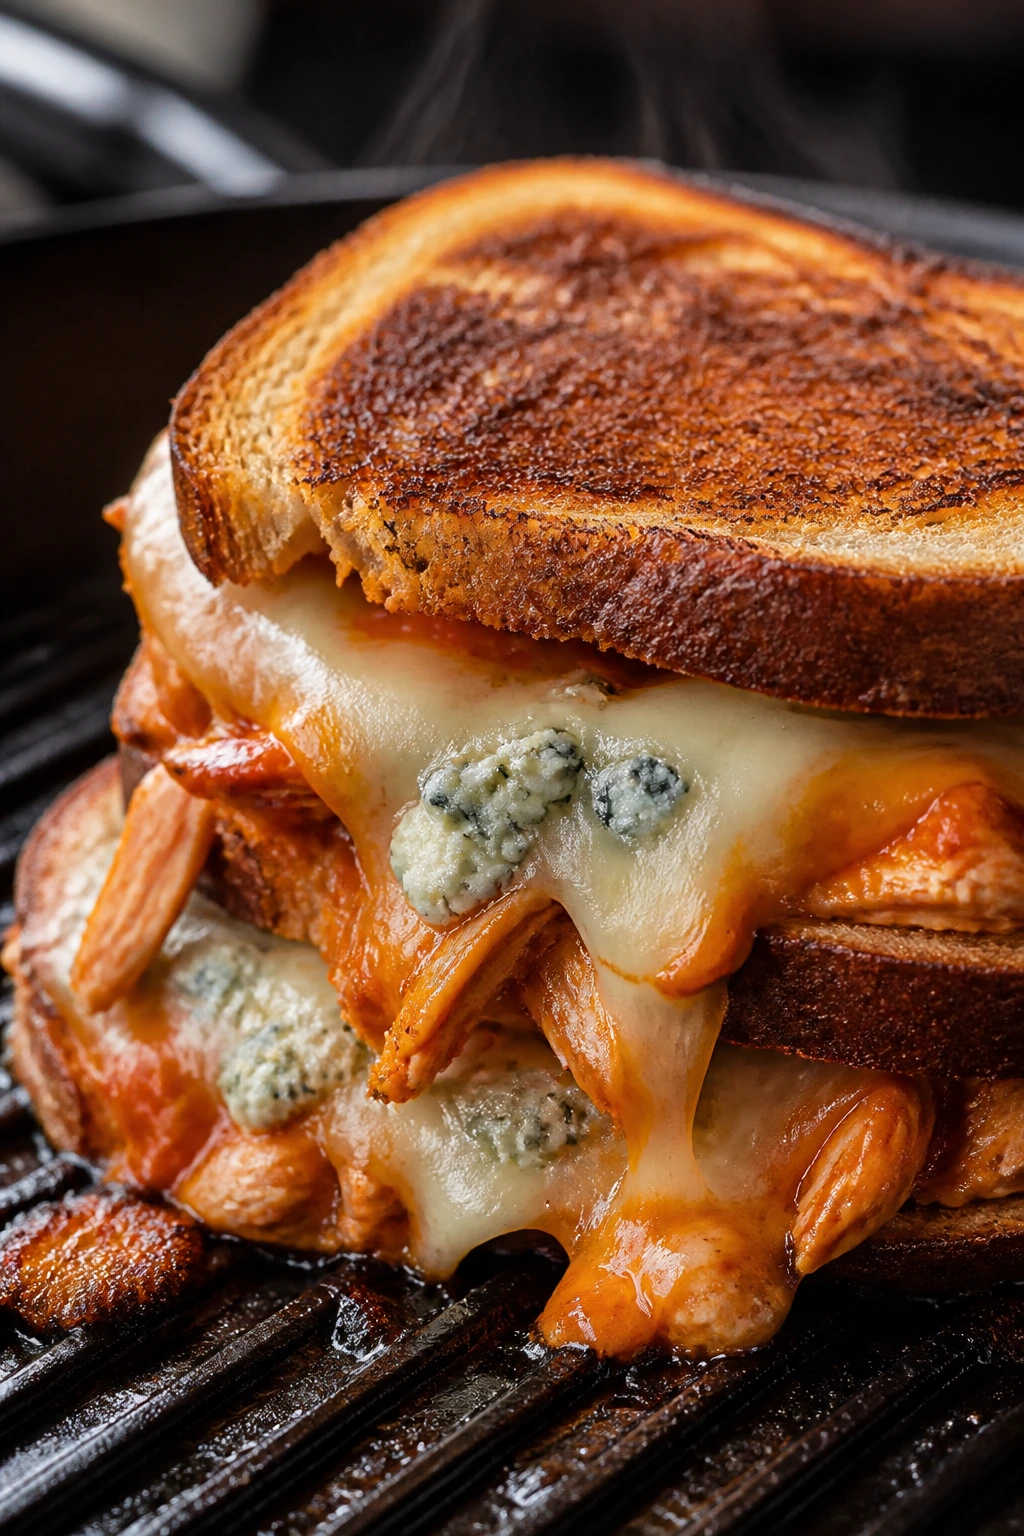
If you like your sandwiches with a little heat and a lot of personality, this is the one. Buffalo chicken brings the tang, blue cheese adds sharp salt, and the bread crisps around the filling in a way that makes every bite taste loud. It’s messy in the way good grilled sandwiches often are.
Why It Works:
Buffalo sauce already carries vinegar and butter, which means it tastes right on hot bread. Blue cheese gives the sandwich a hard, savory edge, while mozzarella or provolone helps everything melt together instead of breaking into separate parts. Celery on the side or inside the sandwich keeps the flavor from running too hot.
Key Ingredients:
- 2 cups cooked chicken, shredded — grilled or rotisserie chicken both work.
- 1/3 cup Buffalo sauce — enough to coat, not drown.
- 4 slices sturdy bread or 4 split sandwich rolls — something that handles heat well.
- 4 ounces mozzarella or provolone, sliced — for the melt.
- 1/4 cup blue cheese crumbles — the sharp finish.
- 2 tablespoons softened butter — for the bread.
- 1 celery stalk, very thinly sliced — optional, for crunch.
Quick Steps:
- Mix the chicken with Buffalo sauce in a bowl until evenly coated.
- Preheat the grill to medium and set a cast-iron skillet on the grates if you want extra control.
- Build the sandwiches with chicken, mozzarella or provolone, blue cheese, and a few celery slices if using.
- Butter the outside of the bread.
- Grill for 3 to 4 minutes per side until the bread is golden and the cheese has melted. If the Buffalo sauce is very loose, use a skillet so it stays inside the sandwich.
- Rest for 1 minute before slicing.
Equipment for This Recipe:
- Grill or grill pan — medium heat works best.
- Cast-iron skillet — useful for saucy chicken.
- Spatula — for steady turning.
- Mixing bowl — to coat the chicken evenly.
How to Serve This Dish:
Serve it with celery sticks, carrot sticks, ranch or blue cheese dressing, and plenty of napkins. A cold cucumber salad or potato salad also works if you want the plate to stay bright.
Pro Tips for This Recipe:
- Use just enough Buffalo sauce to coat the chicken lightly.
- Put the melty cheese under or over the chicken, not both places, or the sandwich gets too thick.
- Thin celery slices work better than big chunks.
- If you want a cleaner melt, cover the grill briefly while the sandwich cooks.
Variations on This Dish:
- Ranch Chicken Melt: Skip the blue cheese and add ranch dressing after grilling.
- Cauliflower Buffalo Version: Swap the chicken for roasted cauliflower florets.
- Cheddar Buffalo Melt: Use sharp cheddar instead of blue cheese if you want a milder finish.
Common Mistakes to Avoid with This Dish:
- Too much sauce: The bread softens and the filling slips out.
- Using only blue cheese with no meltable cheese: The sandwich stays crumbly.
- Grilling on high heat: Buffalo sauce can scorch faster than you expect.
Why the Grill Makes Sandwiches Better
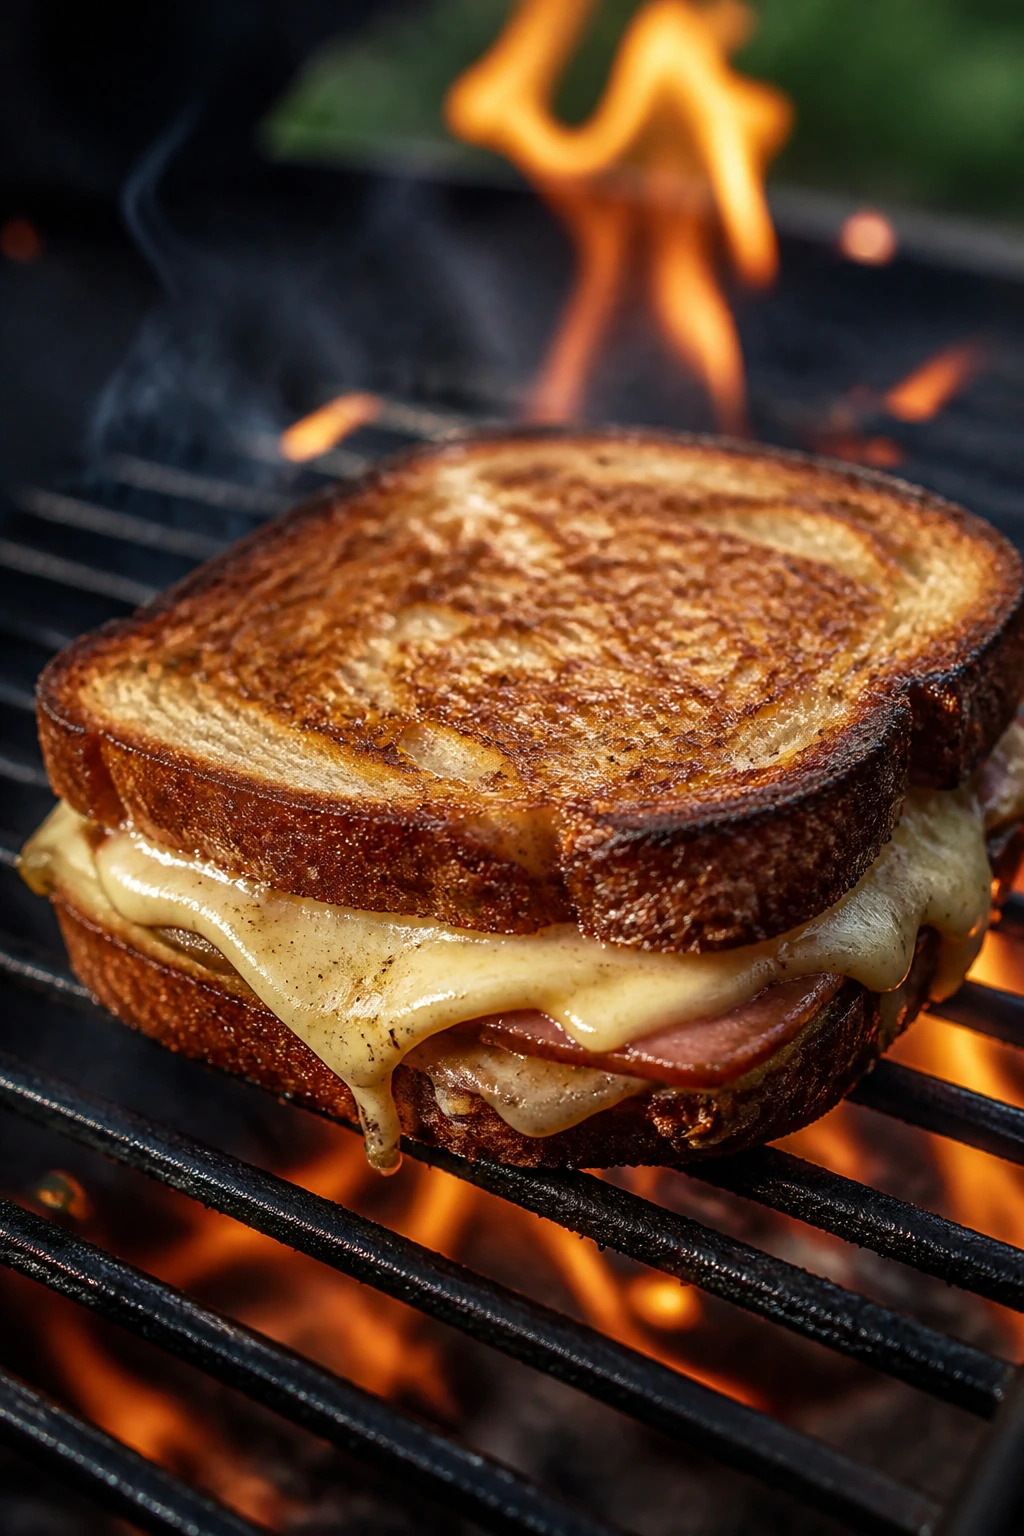
A grill changes a sandwich in three useful ways. First, it gives the bread direct heat, which means the crust crisps before the center goes stale or soggy. Second, it melts cheese from the outside in, so the edges seal while the middle stays warm. Third, a little open-flame smoke — even a faint amount — makes simple fillings taste more layered than they do in a skillet indoors.
The biggest practical advantage is control. If one side of the grill is running hot, move the sandwich. If a roll is browning too fast, cover it with foil for a minute. If the filling is taking its time, set a cast-iron skillet on the grates and let the lid do the work. That flexibility is why grilled sandwiches are easier than they look.
And no, you do not need a perfect sear. You need medium heat, a watchful eye, and bread that can handle a little butter or oil on the outside. That’s the whole formula, and it’s enough.
Essential Equipment for These Recipes
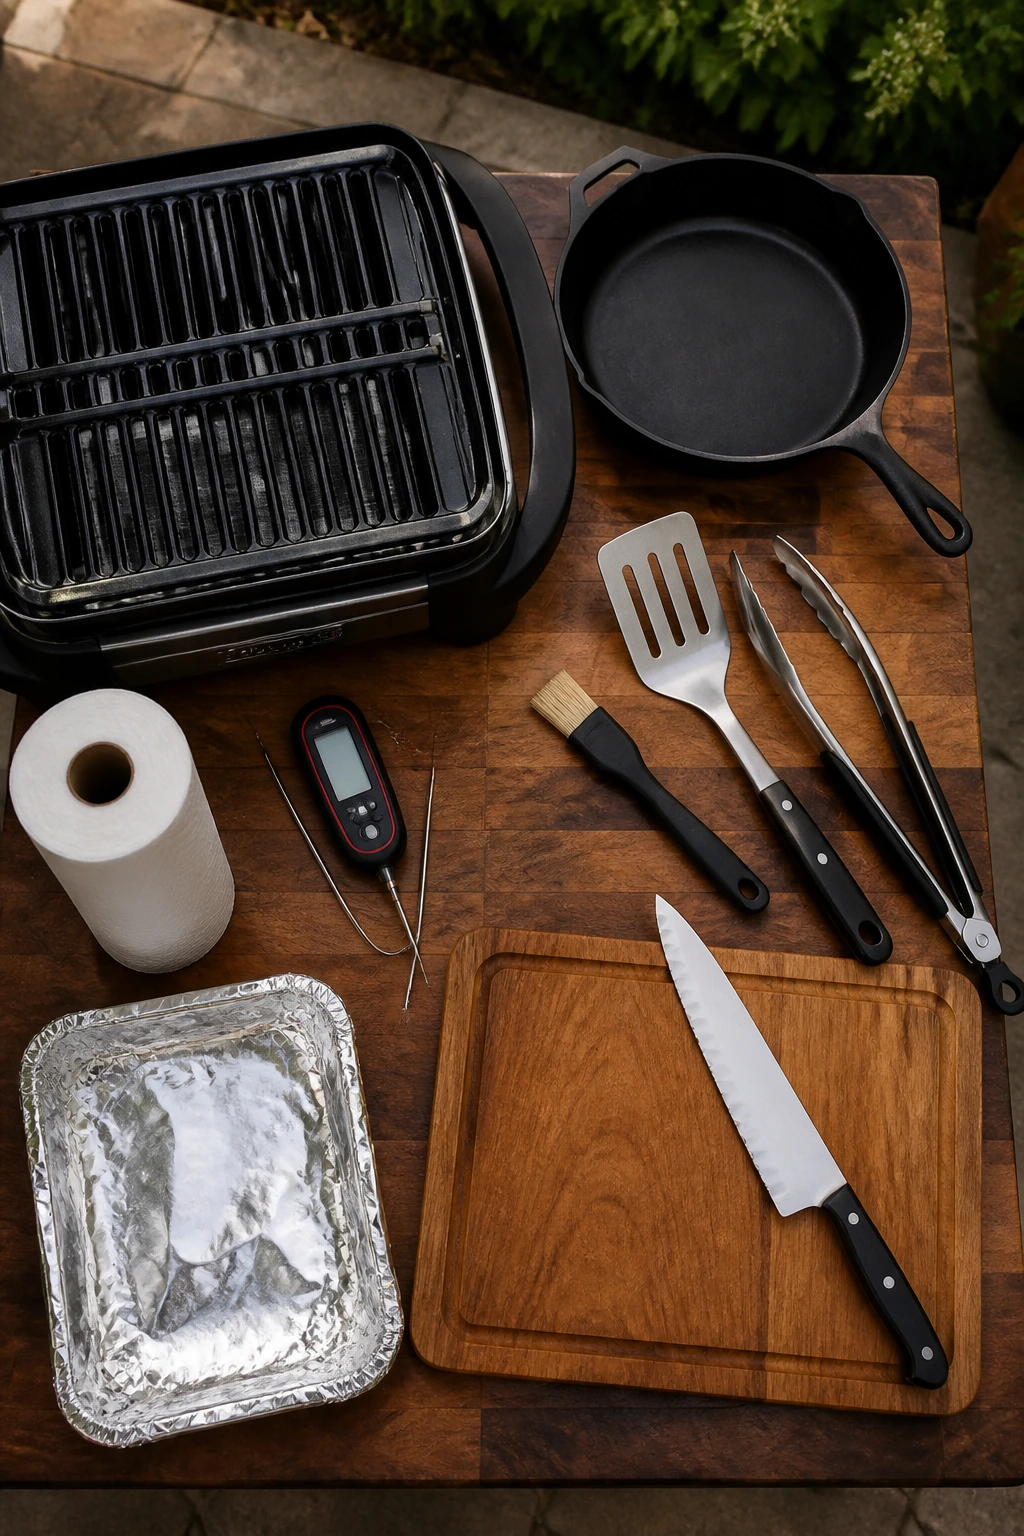
- Outdoor grill or grill pan: Medium heat is the baseline for nearly every sandwich here.
- Cast-iron skillet or griddle: The best backup plan for loose fillings, soft rolls, or saucy meats.
- Metal spatula: Helps turn sandwiches without tearing the bread.
- Tongs: Useful for bread, sausage, peppers, and quick handling on the grates.
- Basting brush: Makes butter, oil, or mayo easier to spread on the outside of the bread.
- Sharp serrated knife: Gives you a clean cut through crisp bread and melted cheese.
- Cutting board: A stable board matters more than people admit when a hot sandwich is involved.
- Paper towels: Essential for drying pickles, tomatoes, peppers, and roasted vegetables.
- Meat thermometer: Handy for sausage, chicken, and pork if you’re grilling the filling separately.
- Heavy-duty foil: Useful for wrapping finished sandwiches briefly or warming them away from direct heat.
Smart Shopping and Ingredient Tips
Bread is the first thing I look at, and I’m picky about it. For grilled sandwiches, choose loaves and rolls with structure: sourdough, rye, ciabatta, hoagie rolls, or thick sandwich bread. Thin, soft white bread can work for a tuna melt or a pimento cheese toastie, but only if you keep the heat gentle and the filling modest. If the bread squishes easily in your hand at the store, it will usually squish on the grill too.
Cheese matters more than people expect. Sliced cheddar, Swiss, provolone, mozzarella, American, and brie all melt differently, and the cut changes everything. Pre-sliced cheese often melts more evenly than a thick chunk from a block, and low-moisture mozzarella behaves better than fresh mozzarella if you want a neat melt. Fresh mozzarella can still work, but it needs to be drained and used with a lighter hand.
For meats, think thin and evenly sliced. Deli ham, turkey, roast pork, and corned beef should be sliced so they stack without making the sandwich feel lumpy. For steak and sausage, cook the meat properly before it reaches the sandwich; the grill should finish the job, not rescue underdone filling. Pulled pork and Buffalo chicken are at their best when the sauce coats the meat lightly instead of soaking it.
Wet ingredients need a little discipline. Pickles, sauerkraut, tomatoes, roasted peppers, and slaw all deserve a paper towel moment before they go into the sandwich. That tiny step saves you from soggy bread and sliding layers later. If you only remember one shopping rule, make it this one: buy the fillings that taste good cold, because the grilled version will only concentrate that flavor.
How to Serve These Recipes
Presentation: Slice each sandwich on a diagonal and stack the halves so the cut side faces up. That shows off the layers — the cheese, the meat, the pickles, the peppers — and makes even a simple sandwich platter look considered. A wooden board works better than a white plate because it catches crumbs and feels right for outdoor cooking.
Accompaniments: Keep the sides crisp and sharp. Kettle chips, dill pickles, slaw with vinegar dressing, tomato salad, cucumber salad, potato salad, fruit, or marinated olives all fit this collection without fighting the sandwiches. If a sandwich is already rich — looking at you, Reuben, Cuban, and pimento cheese — choose a side with acid or crunch instead of another creamy dish.
Portions: One full sandwich is enough for most lunches if the filling is substantial. If you’re serving a spread with chips and salad, half a sandwich per person is fine, especially when you’ve made several varieties and people want to sample more than one. For larger appetites, plan on one whole sandwich plus a side.
Beverage Pairing: I like these with iced tea, lemonade, sparkling water with citrus, or a dry cider if you want something that cuts through fat. For a richer sandwich like pulled pork or Reuben, a cold lager or a simple beer with a clean finish pairs well. Keep the drink cold. These sandwiches are warm enough on their own.
Additional Tips and Flavor Boosters
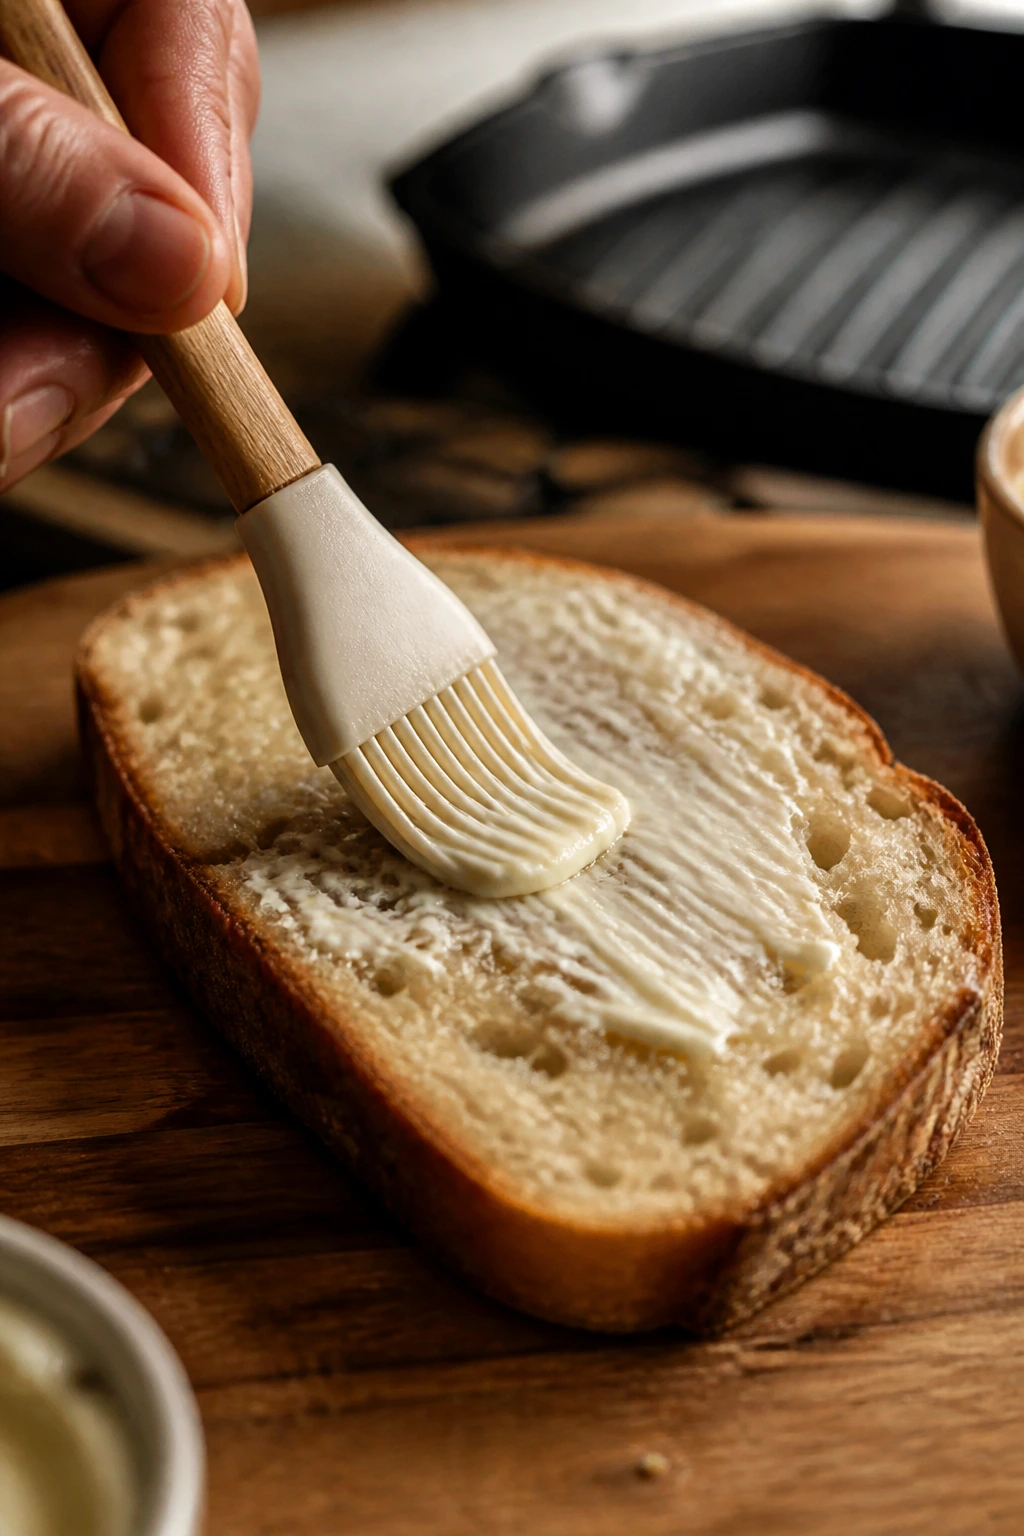
Flavor Enhancement: A thin swipe of mayo on the outside of the bread browns better than butter on some loaves, especially sourdough and white bread. Mayo sounds odd until you see how evenly it colors in the grill marks. For a little extra pop, add a whisper of pickle brine or lemon juice to rich sandwiches just before serving.
Customization: If you like heat, use pickled jalapeños, pepperoncini, or a spoonful of hot sauce in the filling, not just on the side. If you prefer a softer, rounder flavor, add a slice of ripe tomato only after the sandwich comes off the grill. That keeps the bread safe and still gives you the freshness.
Serving Suggestions: A sandwich tastes better when it’s cut cleanly and served right away. Rest it for a minute, then use a serrated knife and a firm sawing motion. A few herbs on top — basil on the chicken pesto, chives on the pimento melt, dill on the tuna — make the sandwich look like someone cared about the finish.
Make-It-Yours: For gluten-free bread, choose a loaf with enough structure to toast without crumbling, then grill it gently and use slightly less filling. For dairy-free builds, brush the bread with olive oil, use a good melting plant-based cheese, and keep the sandwiches on the cooler side of the grill so the substitute cheese has time to soften. For lower-salt versions, lean on mustard, herbs, citrus, and vinegar instead of extra deli meat.
Make-Ahead, Storage, and Reheating Guidance
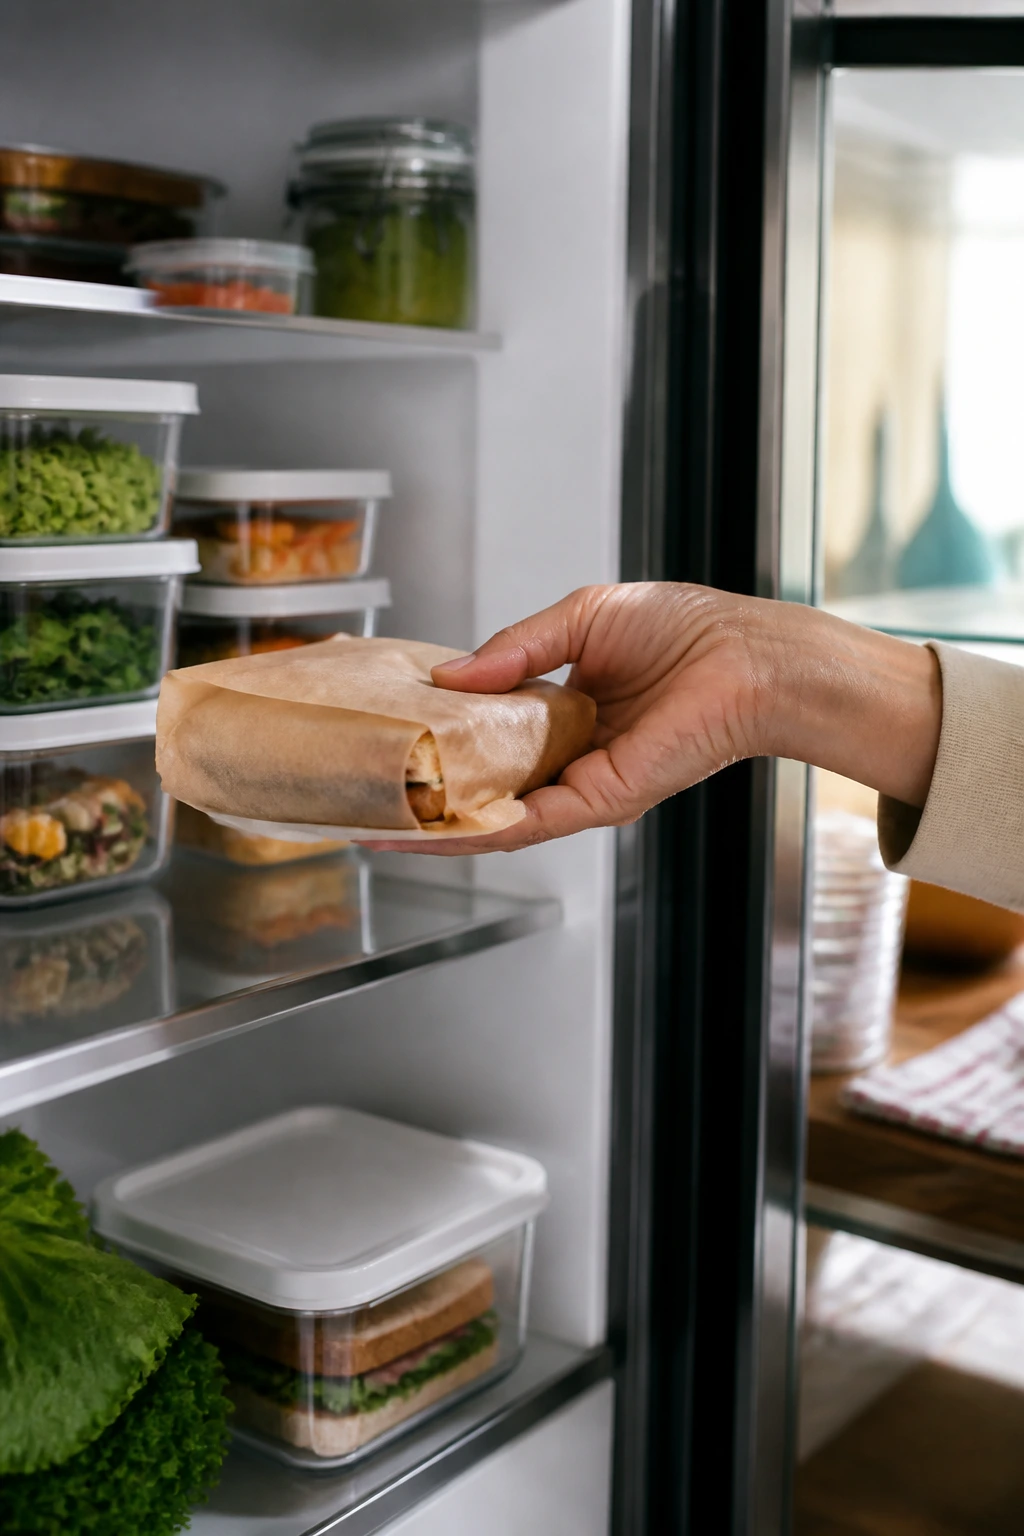
Most of the fillings here can be made ahead, and that’s part of the appeal. Tuna salad, chicken pesto chicken, pulled pork, sliced vegetables, sautéed onions and peppers, and even sausage filling will keep well in the refrigerator for 3 to 4 days in airtight containers. Pulled pork freezes well for up to 2 months; cheesesteak filling and cooked sausage also freeze well, though the vegetables soften a bit after thawing. Slaw, tomatoes, lettuce, and avocado should stay out of the freezer and, honestly, out of the sandwich until the last minute.
Assembled but ungrilled sandwiches can be wrapped tightly and kept in the refrigerator for up to 24 hours if the fillings are dry and the bread is sturdy. I would not push that much farther unless the sandwich is very simple, because tomatoes, pickles, and dressed slaw keep creeping into the bread. If you want to prep ahead for a picnic, build the sandwiches without tomatoes, lettuce, or slaw, wrap them in parchment, then foil, and grill them just before eating.
Leftover grilled sandwiches are best the same day, but they can be refrigerated for up to 1 day. Reheat them in a skillet over medium-low heat for 2 to 3 minutes per side, or in a toaster oven at 375°F for 6 to 8 minutes until the bread crisps again. The microwave is a bad fit here; it makes the bread limp and the cheese rubbery. If you have to reheat a sandwich that already has a wet filling, wrap it in foil and warm it gently in the oven instead.
Variations and Adaptations to Try
Gluten-Free Picnic Stack: Use a sturdy gluten-free loaf with some density, not a feather-light sandwich bread. Grill it on lower heat, because gluten-free bread tends to brown faster on the outside while staying cool in the middle.
Dairy-Free Grill Melt: Swap in olive oil or dairy-free mayo for the outside of the bread, and choose a plant-based cheese that actually softens. Some substitutes hold shape but never melt, so test one slice first before building a whole tray of sandwiches.
Low-Sodium Deli Build: Lean on roast chicken, turkey, or unsalted pulled pork, then add flavor with mustard, pickles, herbs, and a squeeze of lemon. A sandwich doesn’t need a salt bomb to taste finished.
Vegetarian Grill Stack: Halloumi, grilled zucchini, roasted peppers, mushrooms, and briny spreads like hummus or pesto make the easiest meat-free versions. The main job is to keep the vegetables dry and the bread thick enough to carry them.
Kid-Soft Sandwiches: Use softer bread, milder cheese, and fewer sharp toppings. Turkey and cheddar, ham and Swiss, or chicken and mozzarella usually land better than sauerkraut, blue cheese, or a heavy mustard spread.
Spice-Forward Version: Add pepper jack, pickled jalapeños, spicy mustard, or a spoonful of hot sauce to the filling. Just keep one ingredient in charge of the heat, or the whole sandwich loses shape and flavor balance.
Common Mistakes to Avoid
Starting with bread that’s too soft: If the loaf collapses in your hand, it will collapse on the grill. Choose something with a crust or toast the bread first if you’re not sure.
Using fillings that are too wet: Tomatoes, pickles, roasted peppers, kraut, slaw, and juicy sauces all need draining or blotting. If you skip that step, the bread softens from the inside while the outside is still browning.
Running the grill too hot: This is the fastest way to get dark bread and cold cheese. Medium heat gives you enough time to melt the center before the crust crosses the line into burnt.
Overstuffing the sandwich: A thick sandwich looks generous for about ten seconds and then starts shedding filling. Keep the layers even, and use cheese near the bread to help lock everything in place.
Cutting too soon: The sandwich needs a brief rest so the cheese settles. Cut immediately and you’ll lose half the filling onto the board.
Ignoring a skillet when the sandwich needs one: Loose fillings, soft rolls, and saucy meats often do better in cast iron on the grill than directly on the grates. That is not cheating. That is paying attention.
Frequently Asked Questions
What bread holds up best for grilled picnic sandwiches?
Sourdough, rye, ciabatta, hoagie rolls, and thick country bread are the safest choices. Soft sandwich bread can work, but only for lighter fillings and gentler heat.
Can I use a cast-iron skillet instead of grilling directly on the grates?
Yes, and for some sandwiches it’s the better move. Reubens, cheesesteaks, sausage-and-pepper fillings, and anything saucy behave more predictably in a hot skillet on the grill.
How do I keep the filling from spilling out?
Use cheese against the bread, keep wet ingredients dry, and avoid overstuffing. A light press with the spatula helps, but mashing the sandwich flat pushes the filling out the sides.
Can I make these ahead for a picnic?
You can prep the fillings the day before and even assemble some sandwiches a few hours ahead. Keep tomatoes, lettuce, and slaw separate until just before serving, or the bread will soften.
What if my grill has hot spots?
Use them. Start the sandwich where the heat is moderate, then move it as needed so the bread doesn’t burn before the cheese melts. A cooler zone and a foil tent fix a surprising number of problems.
Which sandwiches reheat best?
Pulled pork, cheesesteak, ham-and-Swiss, and Buffalo chicken reheat well in a skillet or toaster oven. BLTs, tuna melts, and anything with fresh greens are better fresh, because the textures change fast.
Can I make these without an outdoor grill?
Absolutely. A grill pan, cast-iron skillet, or even a heavy griddle gives you the same toasted bread and melted center. The outdoor grill adds smoke, but it is not the only route to a good sandwich.
How do I stop the bread from getting greasy?
Use a thin, even coat of butter or mayo on the outside and don’t overfill with oily ingredients. If the sandwich is rich — pimento cheese, brie, Cuban, Reuben — pair it with something acidic or crunchy on the side.
What’s the safest way to handle chicken, pork, or sausage fillings?
Cook them to the proper internal temperature before assembling the sandwich, then keep them hot until serving. Once the filling is cooked, the grill is there to crisp and melt, not finish raw meat from scratch.
A Cooler Full of Good Choices
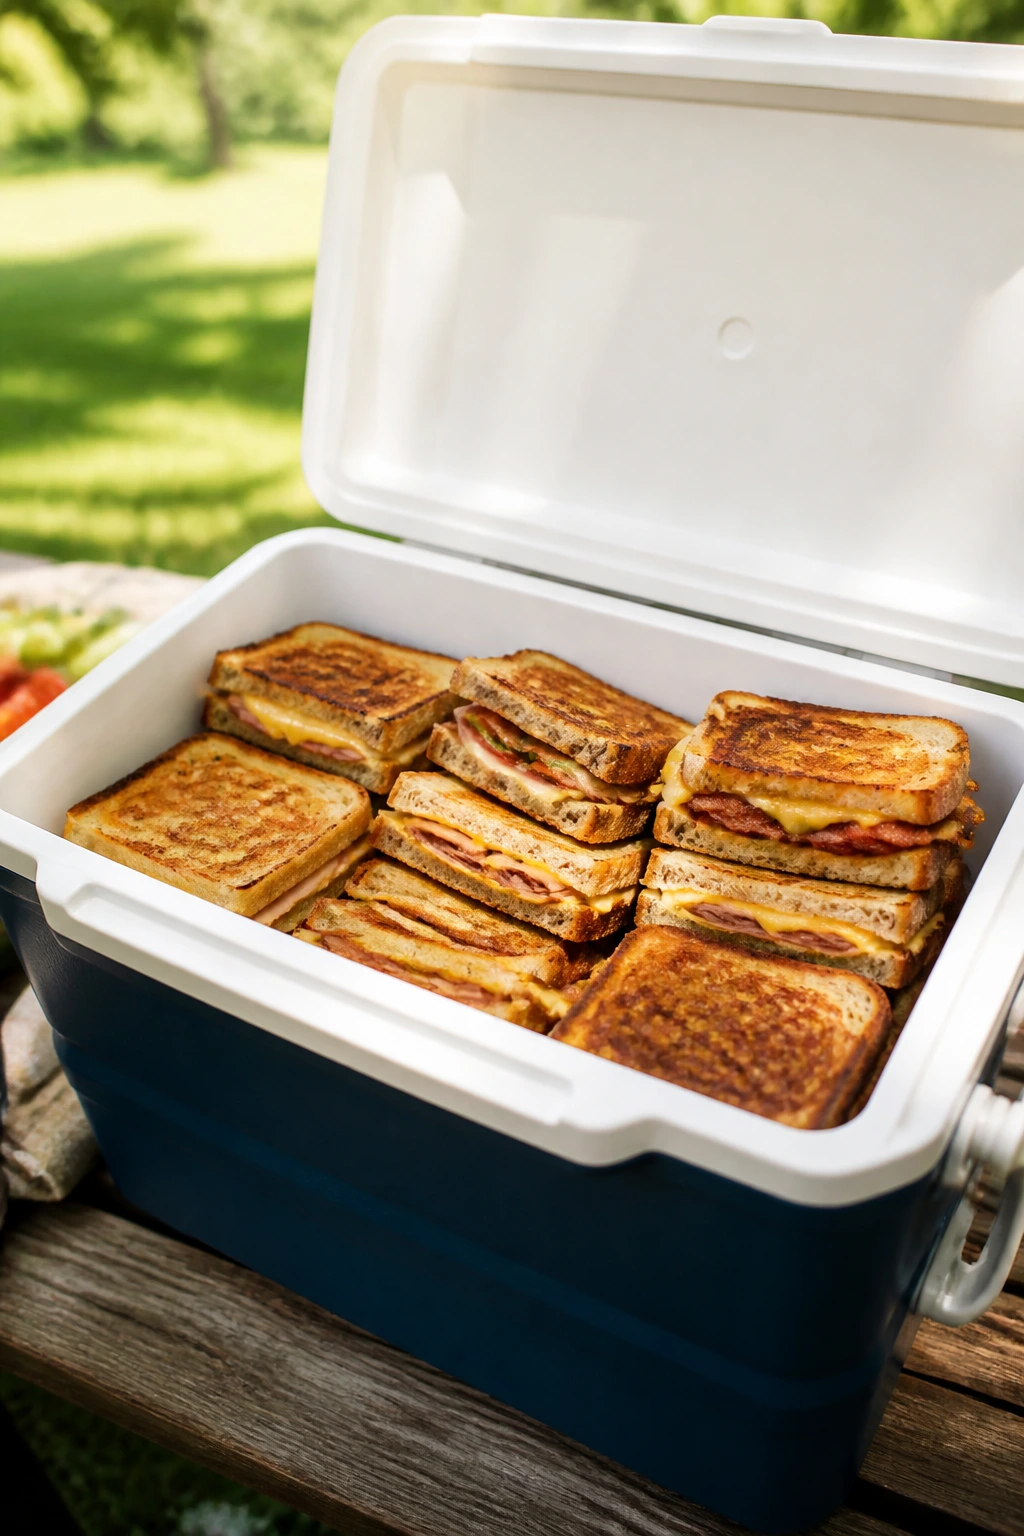
A good grilled sandwich doesn’t need a lot of ceremony. It needs bread that can take heat, fillings that know their place, and a little patience at the grill so the crust turns crisp before the middle turns sloppy.
That’s why this kind of picnic food works so well. You can prep the pieces ahead, mix and match what’s in the cooler, and still end up with something that tastes like it was thought through — because it was. Pick one sandwich or make three, but keep the heat moderate and the bread sturdy, and the weekend lunch takes care of itself.