
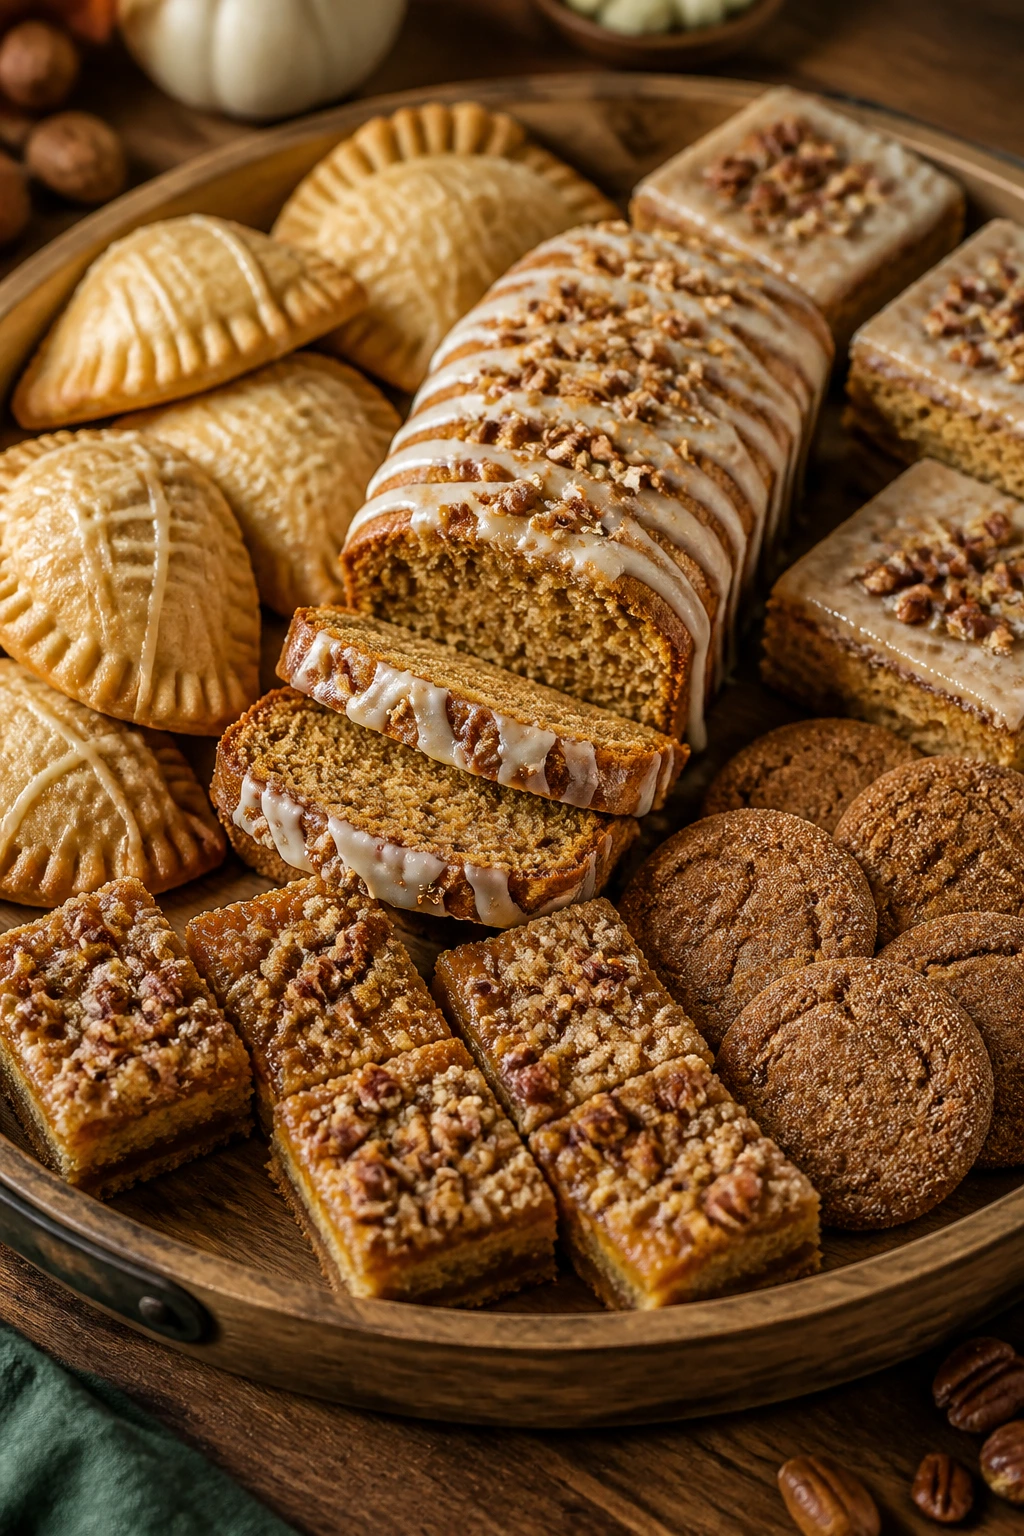
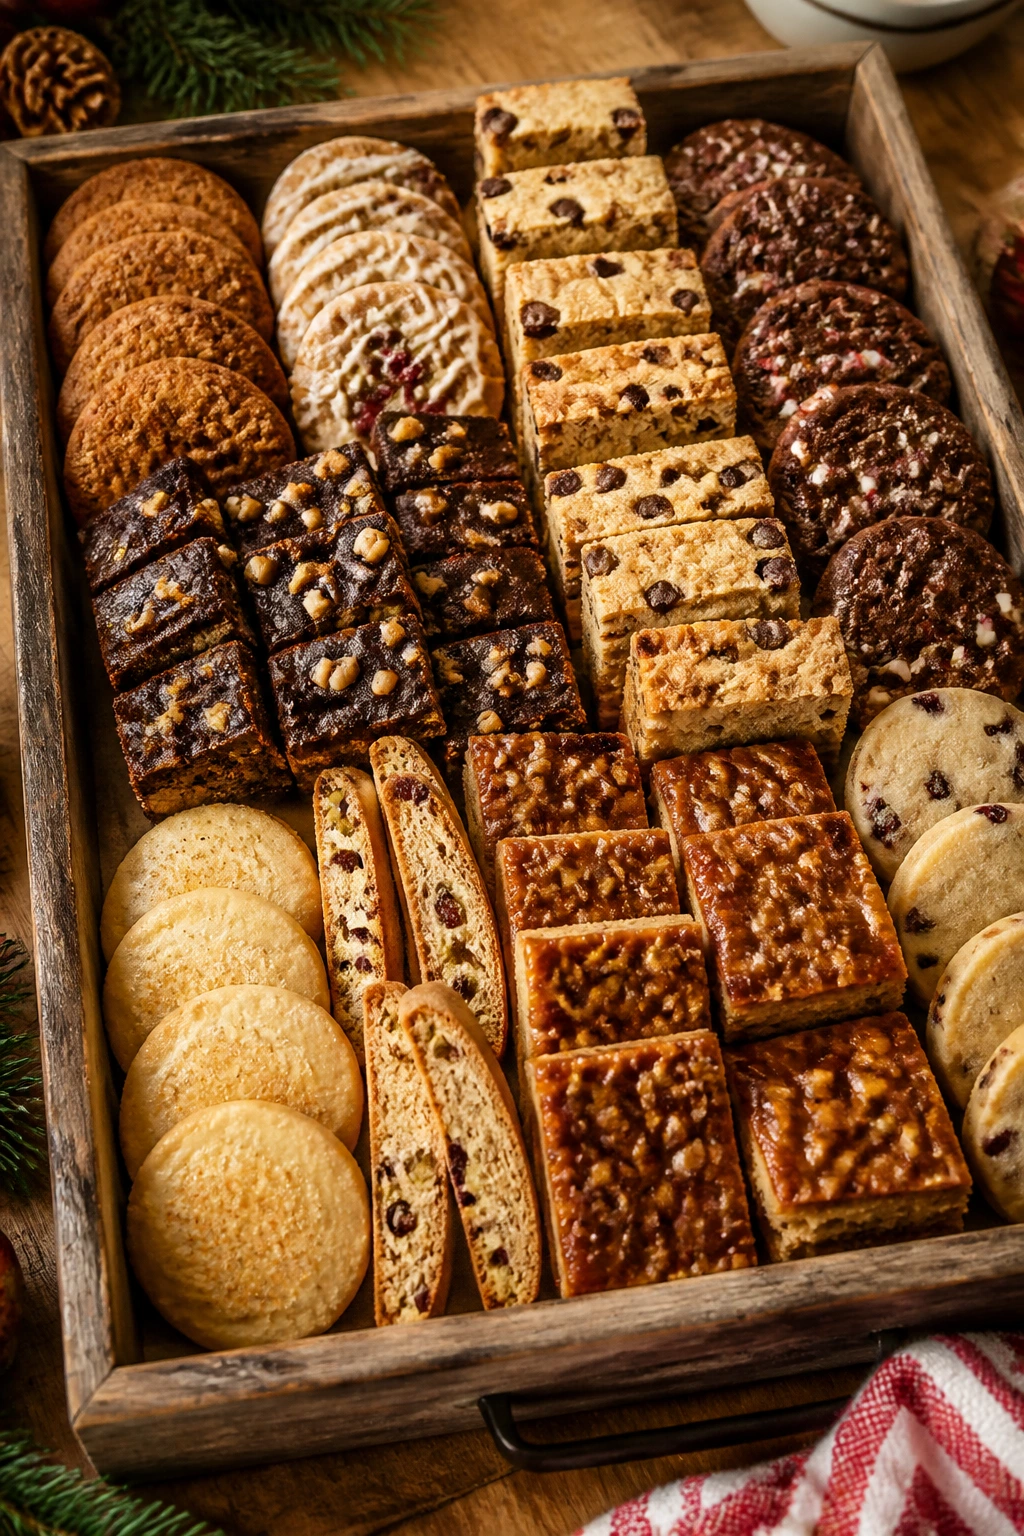
The best holiday trays don’t start with the showpiece dessert. They start with the thing people keep sneaking from the corner of the pan while pretending they’re “just trying a bite.” That’s the sweet spot for easy fall desserts for holiday baking: sturdy enough to travel, friendly enough to slice into neat squares, and spiced in a way that smells like the kitchen has been awake all day.
Apples, pumpkin, pears, maple, cranberries, brown butter, toasted nuts—those flavors don’t need much help. What they need is good structure. A crisp crust that doesn’t go soggy under fruit. A cookie that stays soft in the center after it cools. A glaze that sets instead of sliding off the pan in a glossy puddle. That’s the kind of detail that makes a dessert work on an actual holiday table, not just in a photo.
Some of the recipes below lean old-school and cozy. Some are a little sharper and brighter. A few are the sort of thing you can bake on a Tuesday, then quietly claim at Thanksgiving like you planned them that way from the start. Either way, they all earn their place by being easy to make, easy to share, and easy to love once the pan hits the table.
Why These Easy Fall Desserts Belong on a Holiday Tray
- They travel well: Bars, cookies, loaf cakes, and hand pies hold their shape better than fragile frosted layer cakes when you have to carry dessert across town.
- They use real fall flavors: Apple, cinnamon, maple, pecan, cranberry, pear, ginger, and pumpkin show up in ways that taste specific, not generic.
- They batch nicely: Most of these recipes double cleanly in a 9×13-inch pan or on two sheet pans, which is handy when one dessert is never enough.
- They don’t need fussy finishing: A dusting of powdered sugar, a thin glaze, or a quick caramel drizzle is usually enough. No piping bags. No drama.
- They hold up on a buffet: These desserts stay tidy after sitting out for a while, which matters when the dessert table is crowded and people are circling back for seconds.
- They fit more than one holiday: The spice level and fruit flavors work across gatherings, from casual family dinners to a more polished spread.
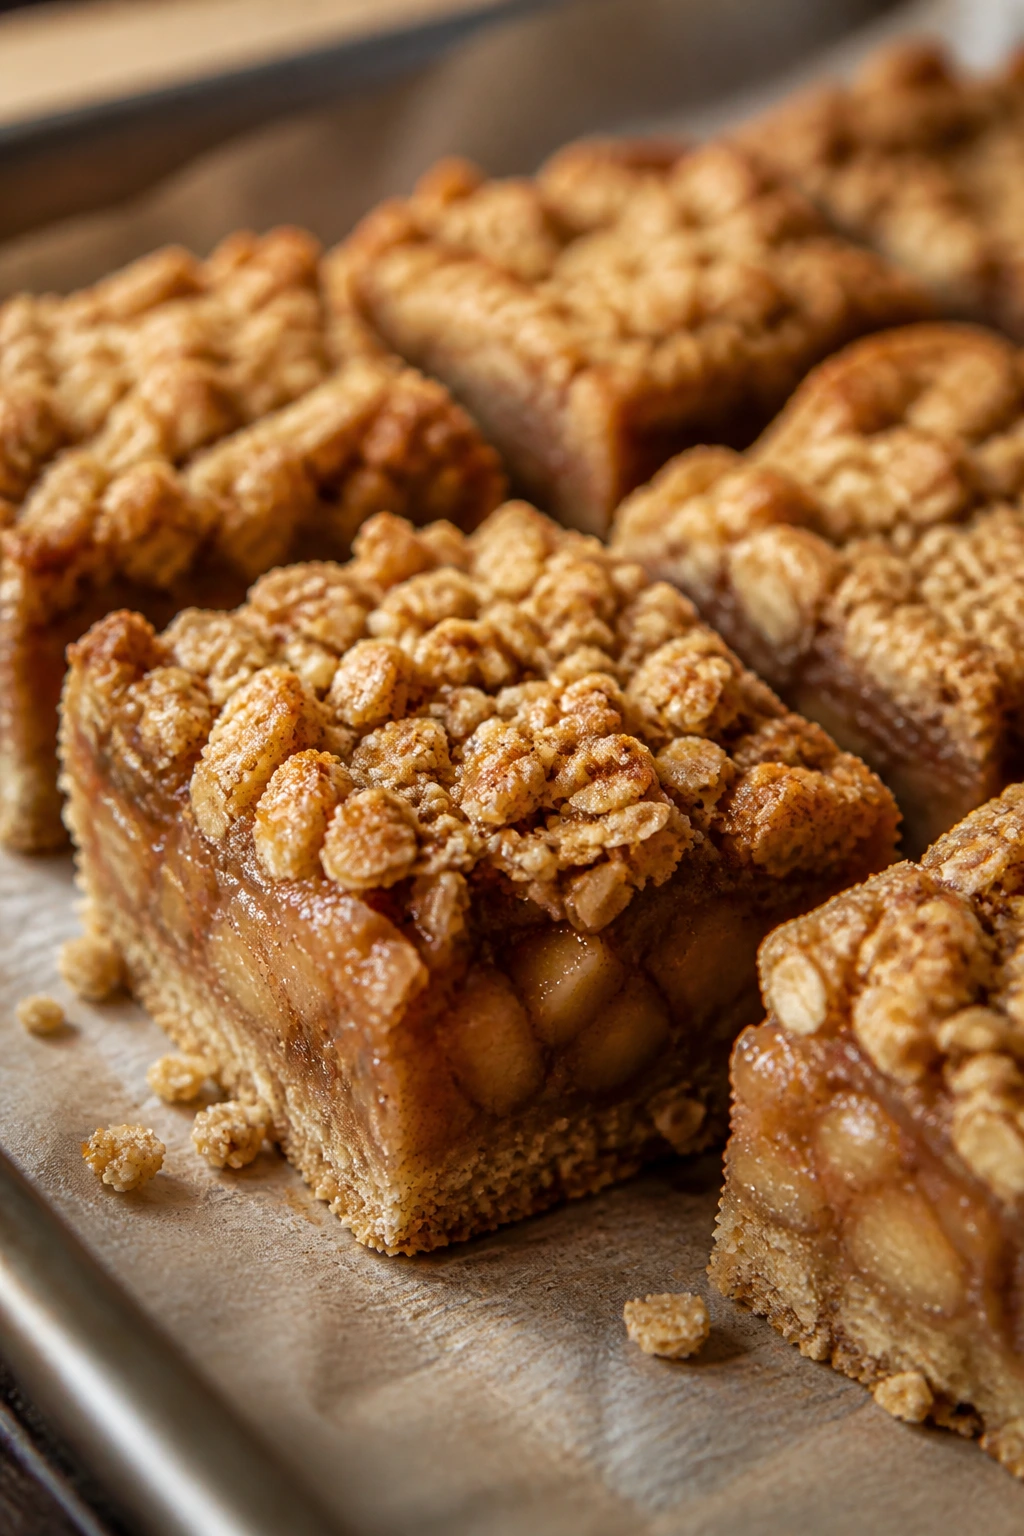
1. Cinnamon Apple Crisp Bars
Intro: These bars taste like apple crisp that learned to behave in a neat square. The bottom bakes into a buttery oat crust, the middle turns jammy with cinnamon and lemon, and the top stays crumbly enough to give you that little crack when you bite in. I like them warm, but they slice cleanly once they cool, which is the whole point when you’re baking for a crowd.
Why It Works: Apple crisp is already doing the heavy lifting flavor-wise. Turning it into bars gives you structure, portion control, and less mess on the serving plate. The oat crust keeps the base from going soft, and a mix of tart and sweet apples gives the filling a brighter edge than all-sweet fruit would. Bake them until the top is deep gold and the fruit bubbles at the edges.
Key Ingredients:
- 1 1/2 cups all-purpose flour
- 1 1/2 cups old-fashioned oats
- 1 cup packed light brown sugar
- 1/2 teaspoon baking soda
- 1/2 teaspoon fine salt
- 1 cup unsalted butter, melted
- 3 large apples, peeled and diced small
- 2 tablespoons lemon juice
- 1 1/2 teaspoons cinnamon
- 2 tablespoons cornstarch
Quick Steps:
- Heat the oven to 350°F and line a 9×13-inch pan with parchment.
- Mix flour, oats, brown sugar, baking soda, and salt, then stir in melted butter until crumbly.
- Press about two-thirds of the mixture into the pan for the crust.
- Toss apples with lemon juice, cinnamon, and cornstarch, then spread over the crust.
- Sprinkle the remaining crumble over the top and bake 35 to 40 minutes, until golden and bubbling.
- Cool fully before slicing so the filling sets instead of oozing.
Equipment for This Recipe:
- 9×13-inch baking pan
- Parchment paper
- Mixing bowls
- Rubber spatula
How to Serve This Dish: Serve these bars at room temperature with a spoonful of whipped cream or a small scoop of vanilla ice cream. They look nice dusted with powdered sugar right before serving, and they’re sturdy enough to stack on a platter.
Pro Tips for This Recipe:
- Use firm apples like Granny Smith, Honeycrisp, or Braeburn so the filling keeps a little shape.
- Let the bars cool for at least 2 hours before cutting; the cornstarch needs that time to set.
- If your apples are very juicy, add another teaspoon of cornstarch.
- A pinch of nutmeg in the crumble is nice, but keep it light or it starts to drown the apples.
Variations on This Dish:
- Maple Apple Bars: Replace 1/4 cup of the brown sugar with maple sugar and add 1 tablespoon maple syrup to the filling.
- Apple Cranberry Bars: Fold 3/4 cup fresh cranberries into the fruit layer for a sharper finish.
- Gluten-Free Crumble Bars: Swap in a 1:1 gluten-free flour blend and certified gluten-free oats.
Common Mistakes to Avoid with This Dish:
- Don’t cut them while warm; the filling will slump and the bars will look messy.
- Don’t make the crumble too fine or it bakes up dense instead of sandy.
- Don’t skip the parchment overhang. It makes lifting the whole slab out much easier.
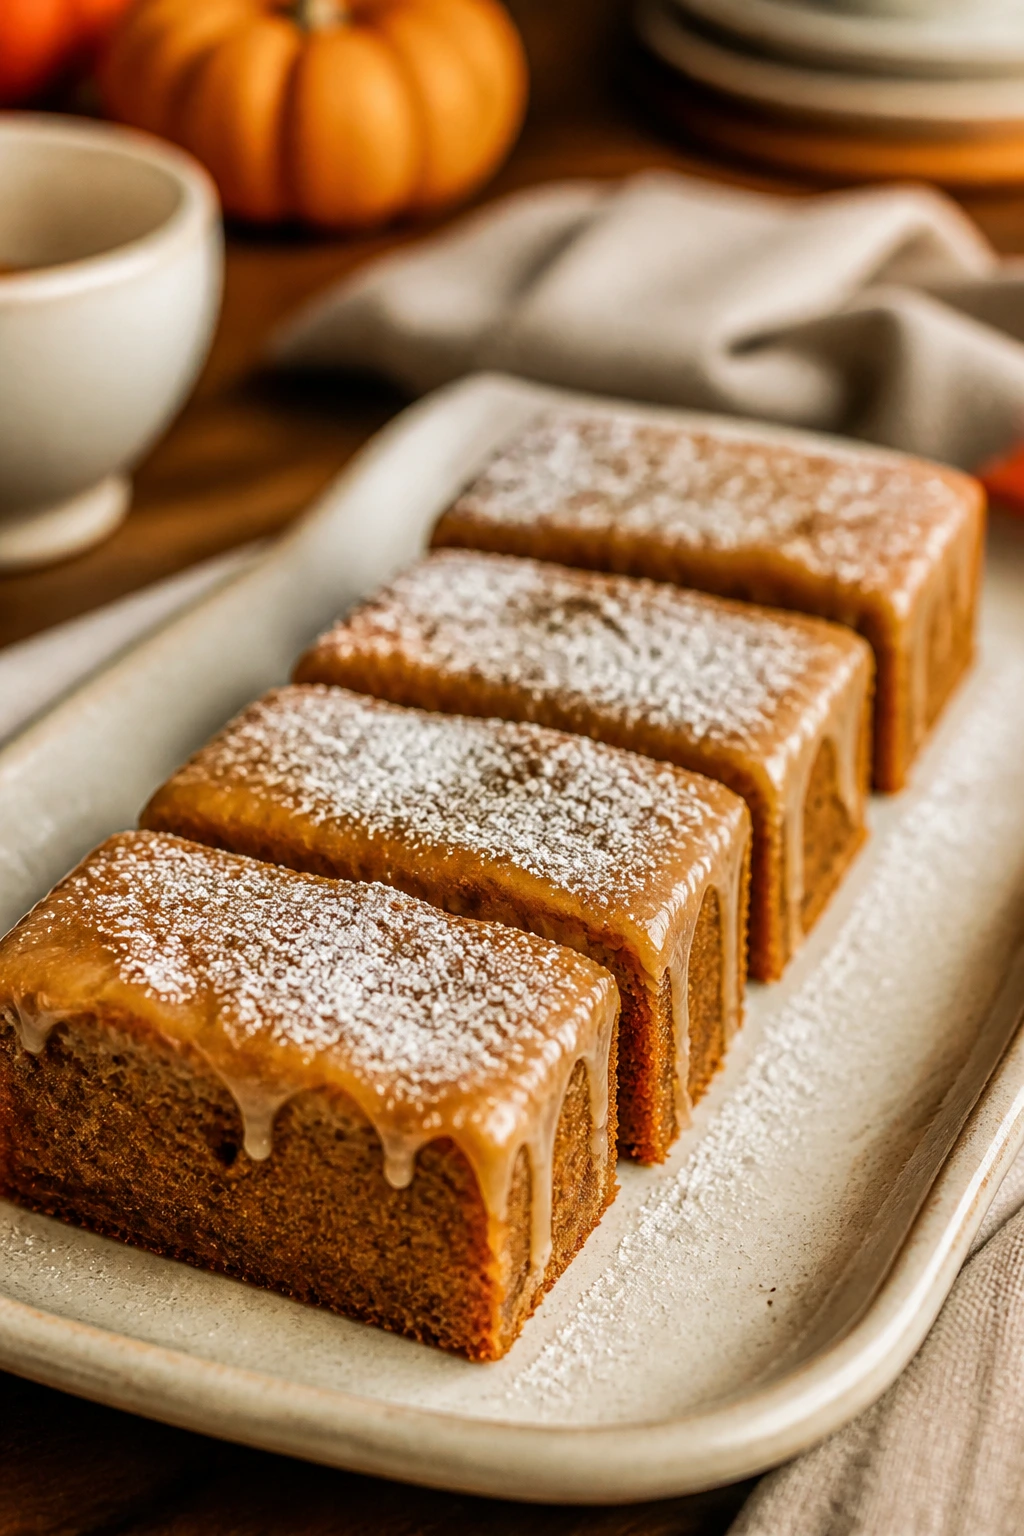
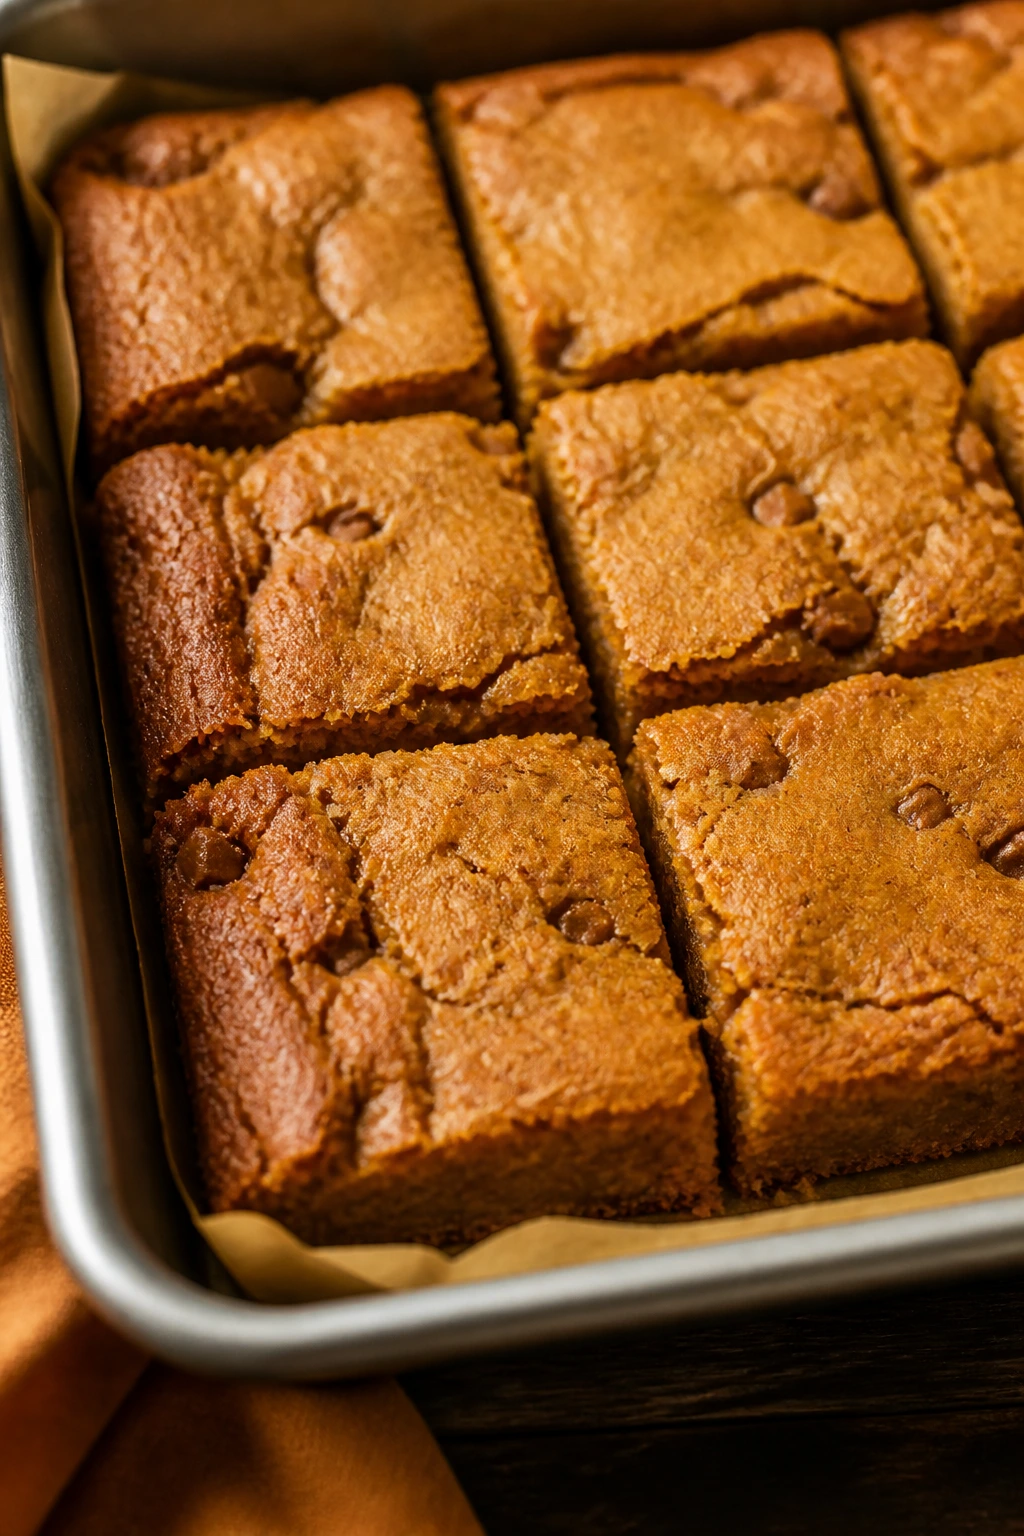
2. Brown Butter Pumpkin Blondies
Intro: These are the pumpkin bars I reach for when I want something a little richer than a cookie and less fussy than cake. Brown butter gives the edges a toasty, almost hazelnut smell, while pumpkin keeps the center soft and slightly dense. They’re the kind of dessert that disappears fast because the pan slices into tidy little squares people can take with one hand.
Why It Works: Pumpkin puree brings moisture, but the real trick is browning the butter first. That extra step adds depth and keeps the blondies from tasting flat, which pumpkin desserts can do if you lean too hard on spice alone. These bake best in a shallow pan so the middle sets without drying out the edges.
Key Ingredients:
- 1 cup unsalted butter
- 1 cup packed light brown sugar
- 1/2 cup granulated sugar
- 3/4 cup pumpkin puree
- 2 large eggs
- 2 cups all-purpose flour
- 1 1/2 teaspoons pumpkin pie spice
- 1/2 teaspoon baking powder
- 1/2 teaspoon fine salt
- 1 cup white chocolate chips or chopped pecans
Quick Steps:
- Brown the butter in a saucepan over medium heat until it smells nutty and the milk solids look amber.
- Whisk the browned butter with both sugars, then beat in the pumpkin and eggs.
- Stir in flour, spice, baking powder, and salt just until combined.
- Fold in white chocolate chips or pecans.
- Spread into a lined 9×13-inch pan and bake at 350°F for 24 to 28 minutes.
- Cool before slicing so the center sets.
Equipment for This Recipe:
- Saucepan
- 9×13-inch baking pan
- Mixing bowls
- Whisk and spatula
How to Serve This Dish: Cut these into small squares and serve with coffee, tea, or a dollop of cinnamon whipped cream. They look especially nice on a plain white platter because the brown butter color does the talking.
Pro Tips for This Recipe:
- Brown the butter in a light-colored pan so you can see the color shift.
- Don’t overbake; the center should still look a touch soft when you pull it out.
- If using chocolate chips, chill the batter for 10 minutes first so they don’t sink.
- Pecans bring more texture; white chocolate makes them sweeter and softer.
Variations on This Dish:
- Spiced Pecan Blondies: Skip the chips and double the pecans for a more nut-forward bar.
- Pumpkin Chocolate Blondies: Replace the white chocolate with dark chocolate chunks.
- Dairy-Free Version: Use a plant butter that browns well and check that your mix-ins fit the diet.
Common Mistakes to Avoid with This Dish:
- Don’t use pumpkin pie filling; it has extra sugar and spices that throw off the texture.
- Don’t cut before cooling, or the center will smear.
- Don’t overmix after adding flour, or the blondies can turn cakey.
3. Maple Pecan Pie Bars
Intro: Pecan pie is lovely, but a bar version is easier to serve and much less annoying to slice. The shortbread base stays crisp under a glossy maple-pecan topping that tastes like toasted nuts and dark syrup in one bite. These are rich. Small pieces are the move.
Why It Works: The shortbread crust acts like a shell for the filling, so you get the flavor of pecan pie without the fragile, underbaked middle that can happen in a whole pie. Maple syrup gives the filling a deeper flavor than plain corn syrup, and a little brown sugar helps it set. Toasting the pecans first makes a real difference.
Key Ingredients:
- 2 cups all-purpose flour
- 1/2 cup powdered sugar
- 1 cup unsalted butter, cold and cubed
- 3 large eggs
- 1 cup pure maple syrup
- 3/4 cup packed brown sugar
- 2 cups pecan halves, toasted
- 1 teaspoon vanilla extract
- 1/2 teaspoon fine salt
Quick Steps:
- Heat the oven to 350°F and line a 9×13-inch pan with parchment.
- Cut flour, powdered sugar, and cold butter together until the crust looks like damp sand.
- Press into the pan and bake 15 to 18 minutes, until just pale gold.
- Whisk eggs, maple syrup, brown sugar, vanilla, and salt.
- Stir in pecans, pour over the crust, and bake 20 to 25 minutes more.
- Cool completely before slicing into bars.
Equipment for This Recipe:
- 9×13-inch baking pan
- Parchment paper
- Mixing bowls
- Pastry cutter or fork
How to Serve This Dish: Serve these in small squares with strong coffee or black tea. A tiny pinch of flaky salt on top right before serving sharpens the sweetness and keeps the bars from feeling sticky.
Pro Tips for This Recipe:
- Toast the pecans for 8 minutes at 350°F first; raw nuts taste flatter.
- Line the pan well, because the filling will glue itself to bare metal.
- Chill the bars before cutting if you want very neat edges.
- If the top browns too fast, lay foil loosely over the pan for the last 10 minutes.
Variations on This Dish:
- Bourbon Maple Bars: Add 1 tablespoon bourbon to the filling for a warmer finish.
- Chocolate Pecan Bars: Scatter 1/2 cup mini chocolate chips over the crust before adding the filling.
- Gluten-Free Crust: Use a 1:1 gluten-free flour blend in the shortbread base.
Common Mistakes to Avoid with This Dish:
- Don’t underbake the filling; it should jiggle only slightly in the center.
- Don’t skip the parchment overhang or you’ll wrestle the bars out of the pan.
- Don’t slice while hot; pecan filling needs time to set.
4. Soft Molasses Crinkle Cookies
Intro: These cookies smell like a spice cabinet in the best way. They bake up with crackly tops, chewy centers, and a dark molasses flavor that feels right at home with coffee after dinner. The sugar coating gives them that old-fashioned sparkle that always looks better on a plate than it sounds on paper.
Why It Works: Molasses carries warmth and depth that plain brown sugar can’t touch. The dough benefits from a short chill, which helps the cookies stay thick and crackly instead of spreading into flat rounds. Rolling them in sugar before baking gives the crinkled tops more contrast when the cookies burst open in the oven.
Key Ingredients:
- 2 1/4 cups all-purpose flour
- 2 teaspoons ground ginger
- 1 teaspoon cinnamon
- 1/2 teaspoon cloves
- 1 teaspoon baking soda
- 3/4 cup unsalted butter, softened
- 1 cup packed brown sugar
- 1 large egg
- 1/4 cup unsulfured molasses
- 1/4 cup granulated sugar for rolling
Quick Steps:
- Whisk flour, spices, baking soda, and salt in one bowl.
- Cream butter and brown sugar until fluffy, then beat in the egg and molasses.
- Stir in the dry ingredients just until combined.
- Chill the dough 30 minutes.
- Scoop into balls, roll in granulated sugar, and bake at 350°F for 9 to 11 minutes.
- Cool on the pan for 5 minutes before moving them.
Equipment for This Recipe:
- Mixing bowls
- Hand mixer or stand mixer
- Baking sheet
- Cookie scoop
How to Serve This Dish: Pile them on a plate with napkins nearby. They’re lovely with coffee, hot cider, or a mug of chai, and they stay soft enough for a day or two if stored right.
Pro Tips for This Recipe:
- Chill the dough if it feels sticky; warm molasses dough spreads fast.
- Pull them when the tops look set but the centers still look a little soft.
- Use unsulfured molasses, not blackstrap, or the flavor turns bitter.
- A second roll in sugar before baking gives a brighter crinkle.
Variations on This Dish:
- Orange Molasses Cookies: Add 1 tablespoon orange zest to the dough.
- Ginger-Heavy Version: Increase the ginger to 2 1/2 teaspoons if you like a sharper bite.
- Dairy-Free Cookies: Use a plant butter that behaves well in baking.
Common Mistakes to Avoid with This Dish:
- Don’t overbake them; molasses cookies dry out fast.
- Don’t skip the chill time if your kitchen is warm.
- Don’t use blackstrap molasses unless you want a darker, more bitter cookie.
5. Cranberry Orange Shortbread Bars
Intro: These bars are buttery first, bright second, and that balance keeps them from feeling heavy next to the richer desserts on a holiday table. The shortbread base is tender and crumbly, the cranberry layer brings a tart pop, and the orange glaze on top keeps the whole thing from tasting too sweet. They’re also one of the easiest desserts here to slice into little tidy squares.
Why It Works: Shortbread is a smart base because it bakes firm and slices clean. Cranberries need sugar and citrus to wake them up, and orange zest gives the bars a smell that cuts through all the butter. If you’re baking for a mixed crowd, this is one of the more refreshing desserts in the bunch.
Key Ingredients:
- 2 cups all-purpose flour
- 1/2 cup powdered sugar
- 1 cup unsalted butter, softened
- 1 cup fresh or frozen cranberries
- 1/2 cup granulated sugar
- 1 tablespoon orange zest
- 2 tablespoons orange juice
- 1 cup powdered sugar for glaze
- 1 to 2 tablespoons milk
Quick Steps:
- Heat the oven to 350°F and line an 8×8-inch or 9×9-inch pan.
- Cream butter, flour, and powdered sugar into a soft shortbread dough.
- Press into the pan and bake for 15 minutes.
- Cook cranberries, granulated sugar, orange zest, and orange juice until the berries burst.
- Spread the cranberry layer over the base and bake 10 minutes more.
- Drizzle with a simple orange glaze after cooling.
Equipment for This Recipe:
- 8×8-inch or 9×9-inch pan
- Saucepan
- Mixing bowls
- Zester
How to Serve This Dish: Serve these bars chilled or at room temperature. They look especially sharp next to chocolate desserts because the cranberry layer brings color and brightness.
Pro Tips for This Recipe:
- Use frozen cranberries straight from the freezer; no need to thaw.
- Don’t overload the glaze or it will hide the cranberry layer.
- Line the pan so the shortbread lifts without breaking.
- If you want a cleaner cut, chill the bars for 20 minutes before slicing.
Variations on This Dish:
- Lemon Cranberry Bars: Swap lemon for orange if you want a sharper citrus line.
- White Chocolate Finish: Scatter a few white chocolate shavings on top after glazing.
- Almond Shortbread: Add 1/2 teaspoon almond extract to the crust for a sweeter nut note.
Common Mistakes to Avoid with This Dish:
- Don’t spread the cranberry layer too thick or the bars can slump when sliced.
- Don’t bake the shortbread until deeply brown; pale gold is enough.
- Don’t skip cooling before glazing, or the icing will melt into the bars.
6. Pear and Ginger Crumble
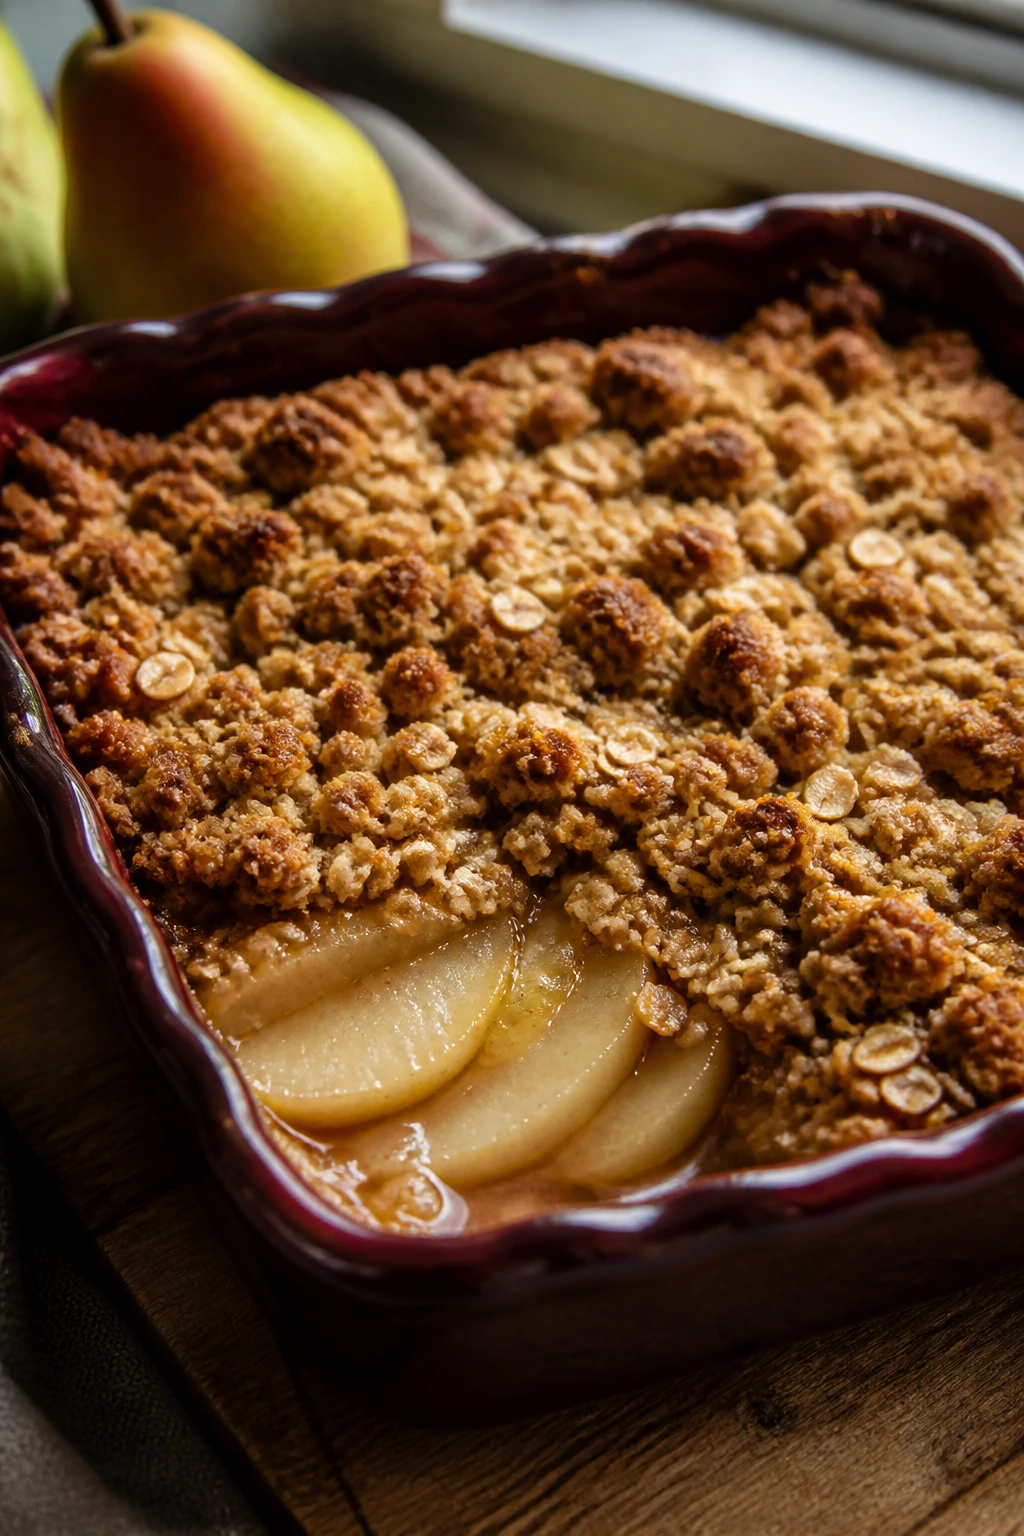
Intro: Pears are quieter than apples, and that’s why I like them here. They soften into a silky filling under a crisp ginger-oat topping, and the whole dish feels a little more elegant than a basic fruit crisp without getting fussy. Serve it warm, and the scent alone will bring people back to the kitchen.
Why It Works: Pears bake quickly and can turn mushy if overhandled, so a crumble is a better fit than a pie with a complicated crust. Ginger gives the fruit some lift, while oats and butter create that rough, crunchy top that breaks nicely under a spoon. A splash of lemon keeps the pears from tasting flat.
Key Ingredients:
- 5 ripe but firm pears, peeled and sliced
- 2 tablespoons lemon juice
- 1 tablespoon grated fresh ginger
- 1/2 cup granulated sugar
- 1 tablespoon cornstarch
- 1 cup old-fashioned oats
- 3/4 cup all-purpose flour
- 3/4 cup brown sugar
- 1/2 cup unsalted butter, cold and cubed
- 1 teaspoon cinnamon
Quick Steps:
- Heat the oven to 375°F and butter a 9-inch baking dish.
- Toss pears with lemon juice, ginger, sugar, and cornstarch.
- Spread into the dish.
- Cut oats, flour, brown sugar, butter, and cinnamon together until crumbly.
- Scatter the topping over the pears.
- Bake 35 to 40 minutes, until the top is golden and the filling bubbles at the edges.
Equipment for This Recipe:
- 9-inch baking dish
- Mixing bowls
- Pastry cutter or fork
- Peeler and knife
How to Serve This Dish: Spoon it into bowls with vanilla ice cream or plain whipped cream. A drizzle of honey over the top makes the pears taste even rounder.
Pro Tips for This Recipe:
- Choose pears that give slightly at the stem but still feel firm in the middle.
- Fresh ginger is better here than powdered ginger; it tastes brighter.
- If the topping browns too fast, cover loosely with foil for the last 10 minutes.
- Let it rest 10 minutes before serving so the juices settle.
Variations on This Dish:
- Pear Cranberry Crumble: Add 1 cup cranberries for a sharper, more colorful filling.
- Maple Ginger Crumble: Swap half the sugar for maple syrup and reduce other liquid slightly.
- Nutty Crumble Top: Add 1/2 cup chopped walnuts to the topping.
Common Mistakes to Avoid with This Dish:
- Don’t use pears that are already soft all over; they’ll collapse into sauce.
- Don’t press the topping down. Keep it loose and craggy.
- Don’t serve it straight from the oven unless you want a runny dish.
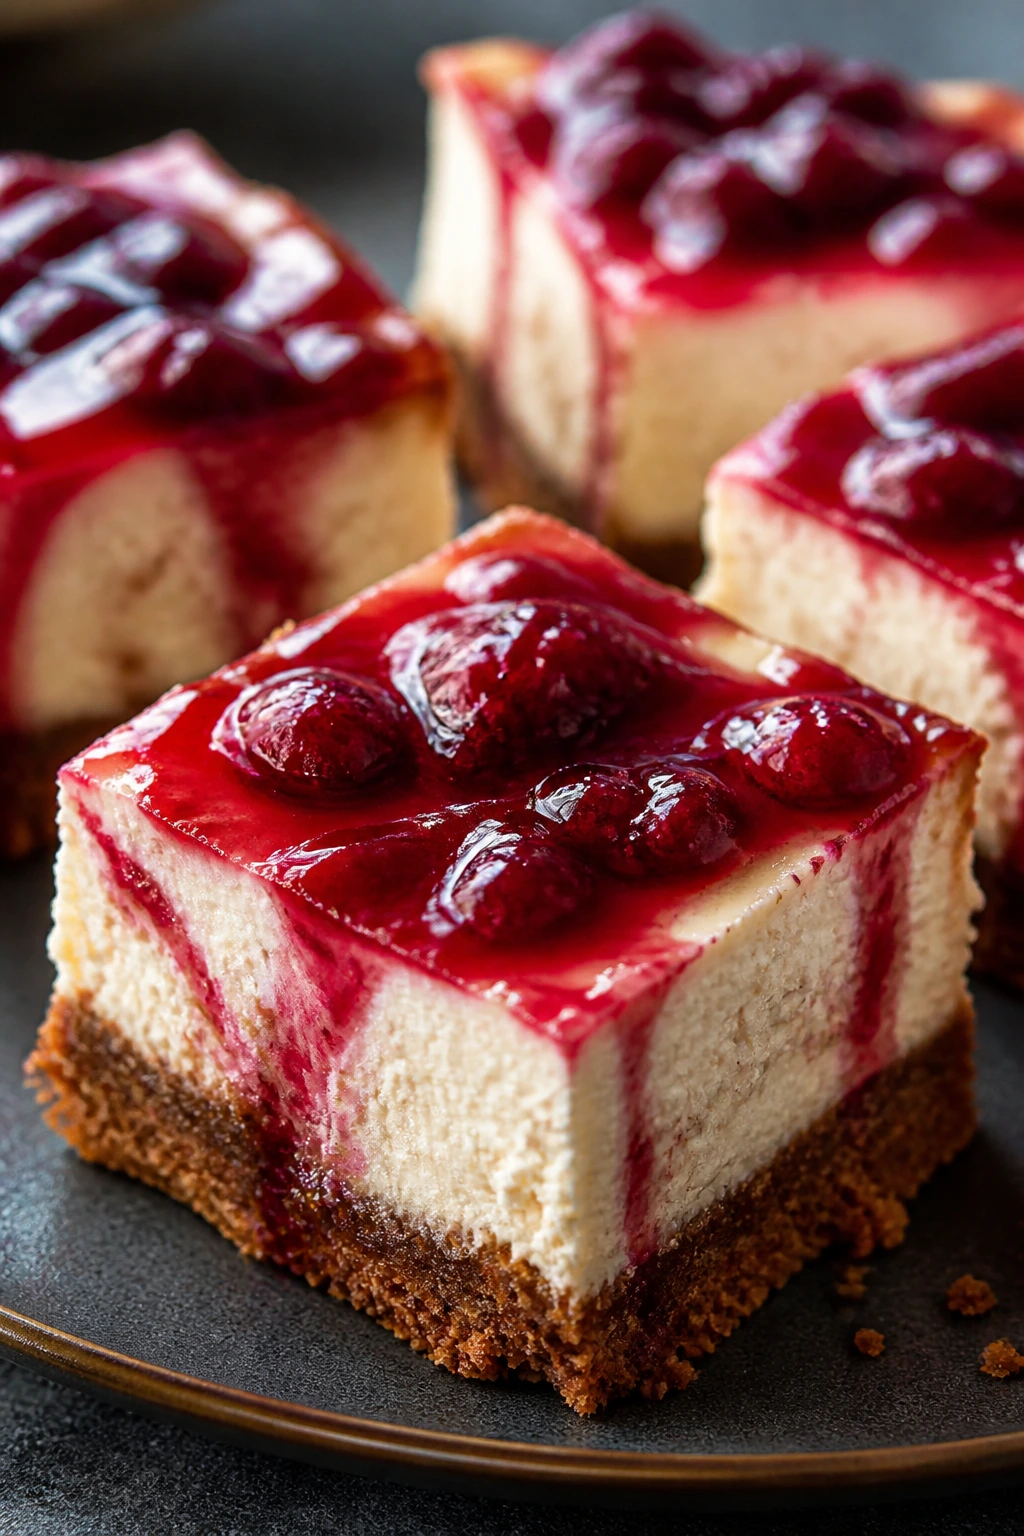
7. Pumpkin Cheesecake Swirl Brownies
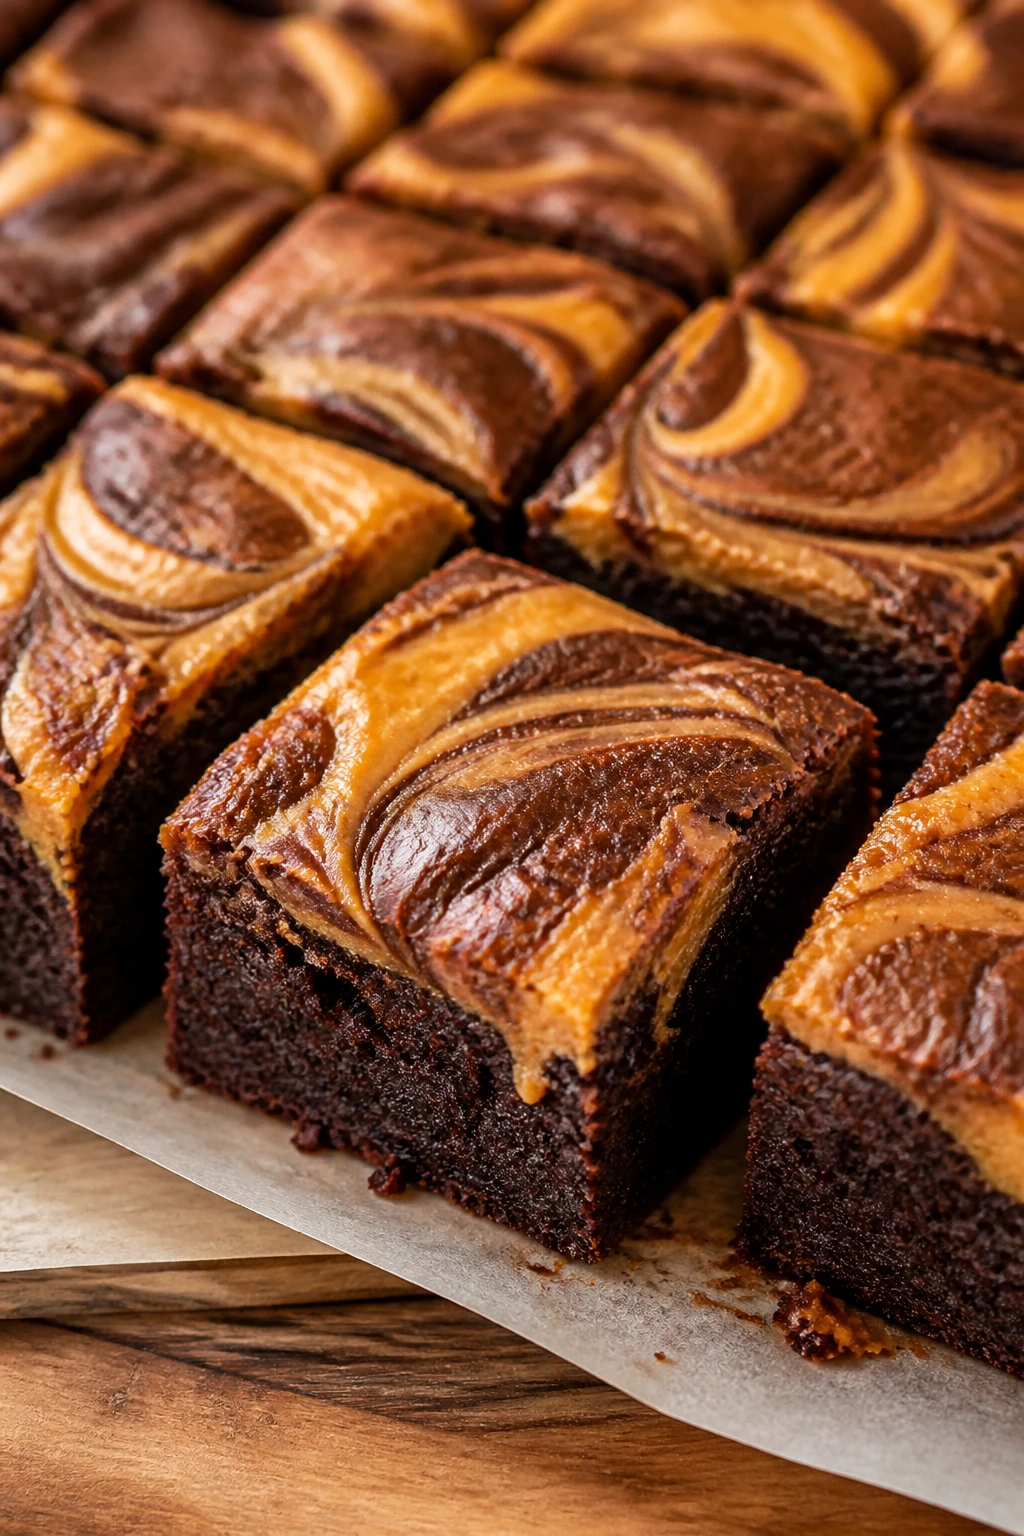
Intro: These are the dessert equivalent of a good argument settled with a spoon. The brownie layer is dense and chocolatey, the pumpkin cheesecake swirl adds tang and spice, and the top comes out with those marbled ridges that look far more difficult than they are. They cut best when chilled, which is handy because this is one of the richer desserts in the batch.
Why It Works: Brownies already bring structure, so the pumpkin layer can stay soft without turning the pan into a puddle. The key is not overmixing the swirls; you want visible ribbons, not fully blended batter. A lower oven temperature keeps the cheesecake layer from cracking before the brownies finish.
Key Ingredients:
- 1 cup unsalted butter
- 8 ounces dark chocolate, chopped
- 1 1/4 cups granulated sugar
- 3 large eggs
- 1 cup all-purpose flour
- 1/3 cup cocoa powder
- 8 ounces cream cheese, softened
- 1/2 cup pumpkin puree
- 1/4 cup brown sugar
- 1 teaspoon pumpkin pie spice
Quick Steps:
- Heat the oven to 325°F and line a 9×13-inch pan.
- Melt butter and chocolate together until smooth, then whisk in sugar and eggs.
- Stir in flour and cocoa just until combined.
- Beat cream cheese, pumpkin, brown sugar, and spice until smooth.
- Spread brownie batter in the pan, dollop pumpkin cheesecake over it, and swirl with a knife.
- Bake 40 to 45 minutes, then cool and chill before slicing.
Equipment for This Recipe:
- 9×13-inch pan
- Mixing bowls
- Hand mixer
- Offset spatula or butter knife
How to Serve This Dish: Serve these cold or slightly cool with nothing else, or add a small spoon of whipped cream if you want to soften the chocolate edge. The marbled top is the whole visual payoff.
Pro Tips for This Recipe:
- Use room-temperature cream cheese or the swirl will stay lumpy.
- Don’t over-swirl; two or three figure-eight passes are enough.
- Chill the brownies for cleaner squares.
- A pinch of espresso powder in the brownie batter deepens the chocolate.
Variations on This Dish:
- Extra Dark Version: Use bittersweet chocolate and Dutch-process cocoa.
- Graham Cracker Swirl: Scatter crushed graham crackers on top before baking for a cheesecake feel.
- Gluten-Free Brownies: Use a 1:1 gluten-free flour blend.
Common Mistakes to Avoid with This Dish:
- Don’t bake until the center is rock solid; it should have a slight wobble.
- Don’t use cold cream cheese, or the swirl won’t blend smoothly.
- Don’t slice warm brownies if you want those neat marbled edges.
8. Apple Cider Donut Cake
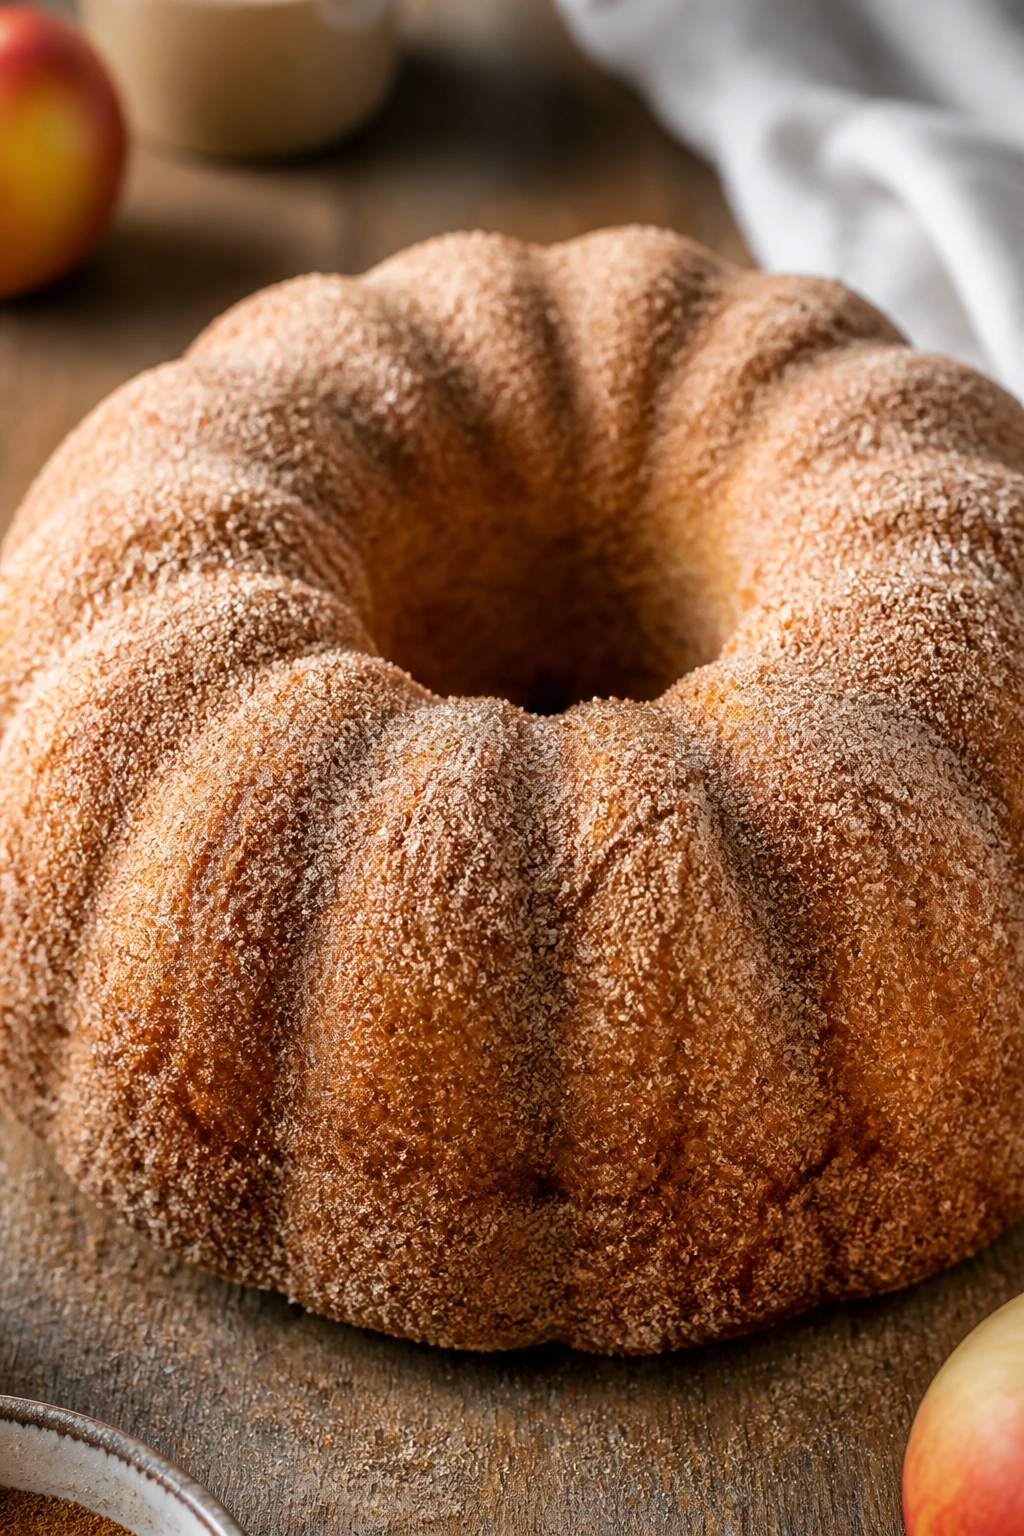
Intro: If you like the cinnamon sugar coating on cider donuts, this cake is your shortcut. The crumb is tender, the cider flavor runs through the batter, and the outside gets rolled in cinnamon sugar so every slice has a little sparkle. It smells like a bakery counter, which is a nice thing to have going on in your house.
Why It Works: Reducing the apple cider first concentrates the flavor so the cake doesn’t taste like sweet milk bread with cinnamon on it. A bundt pan gives you lots of surface area for the sugar coating, which is half the pleasure here. It’s sturdy enough to slice after cooling and still soft enough to feel indulgent.
Key Ingredients:
- 2 cups apple cider, reduced to 3/4 cup
- 3 cups all-purpose flour
- 2 teaspoons baking powder
- 1 teaspoon cinnamon
- 1/2 teaspoon nutmeg
- 1 cup unsalted butter, softened
- 1 3/4 cups granulated sugar
- 3 large eggs
- 1 cup sour cream
- 1/2 cup cinnamon sugar for coating
Quick Steps:
- Simmer the cider until reduced to 3/4 cup, then cool.
- Heat the oven to 350°F and grease a 10-cup bundt pan.
- Cream butter and sugar, then beat in eggs.
- Mix in sour cream and reduced cider, then fold in the dry ingredients.
- Bake 45 to 55 minutes, until a tester comes out clean.
- Cool 15 minutes, turn out, and coat with melted butter and cinnamon sugar.
Equipment for This Recipe:
- 10-cup bundt pan
- Saucepan
- Mixer
- Cooling rack
How to Serve This Dish: Serve thick slices with coffee or hot cider. It looks nicest on a cake stand with the sugar coat still visible, not buried under glaze.
Pro Tips for This Recipe:
- Reduce the cider first or the flavor stays too faint.
- Grease every ridge of the bundt pan well so the cake releases cleanly.
- Let the cake cool before coating or the sugar melts off.
- Sour cream keeps the crumb tender and helps it stay soft the next day.
Variations on This Dish:
- Glazed Cider Cake: Skip the sugar coating and finish with a thin cider glaze.
- Maple Cider Cake: Replace 1/4 cup of sugar with maple syrup and reduce other liquid slightly.
- Mini Bundts: Bake in smaller pans for neat individual servings.
Common Mistakes to Avoid with This Dish:
- Don’t skip reducing the cider; it’s the difference between okay and memorable.
- Don’t unmold too early or the cake can tear.
- Don’t overfill the bundt pan. Leave room for the rise.
9. Sweet Potato Cupcakes with Cinnamon Cream Cheese Frosting
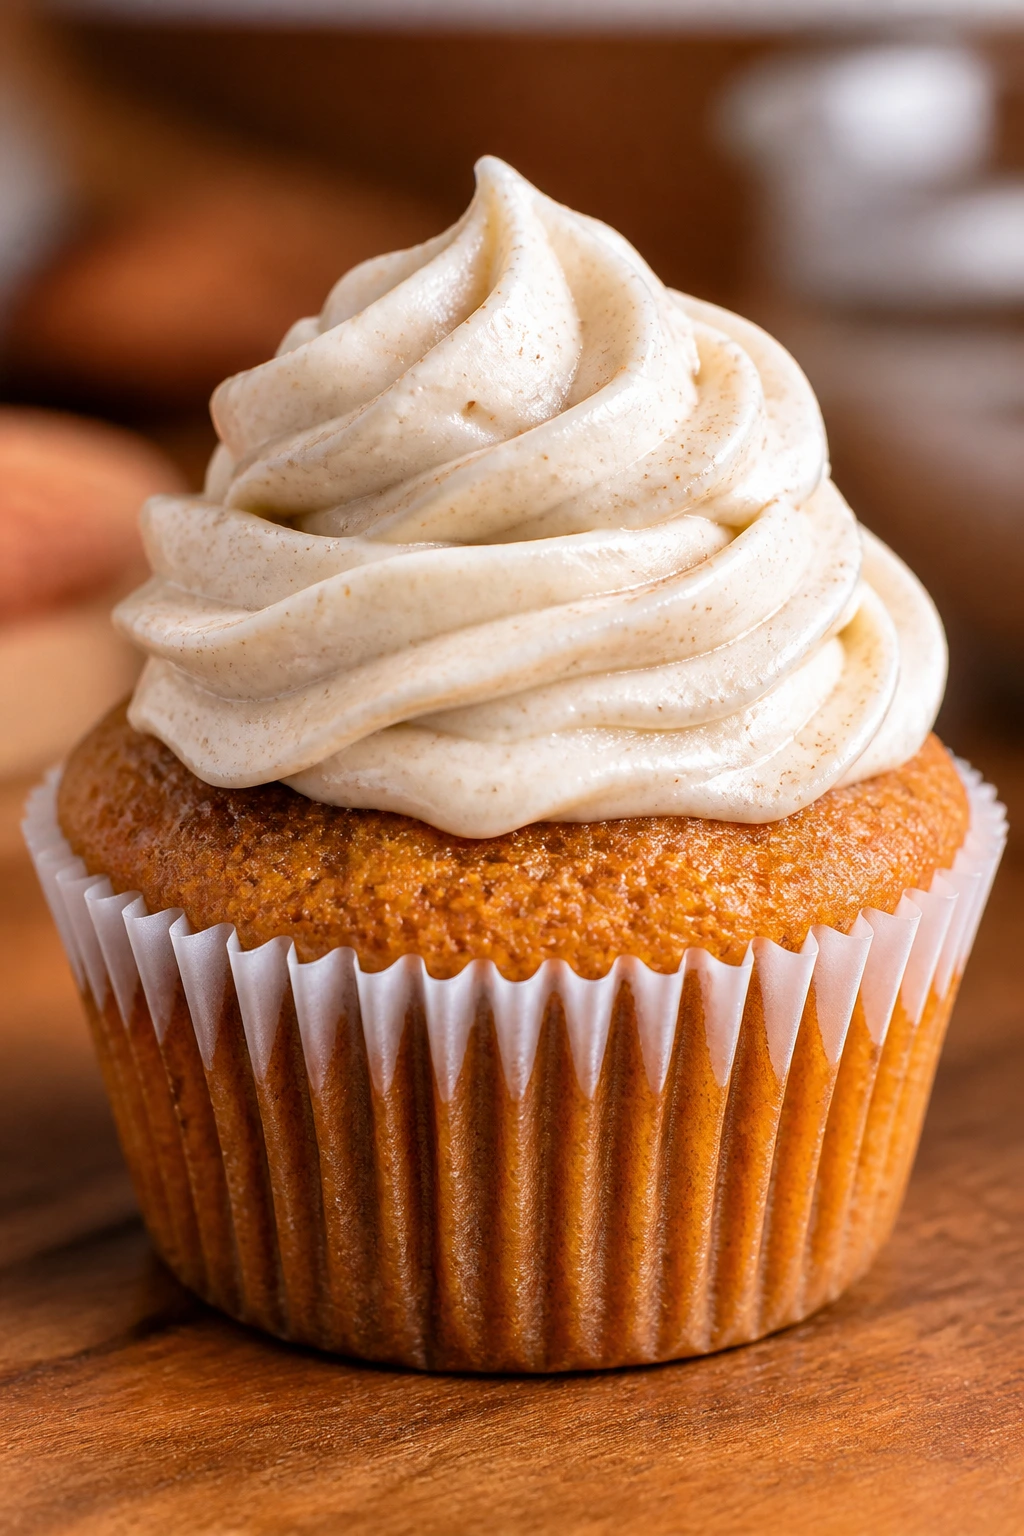
Intro: Sweet potato in dessert is one of those ideas people either grow into or reject too early. In cupcakes, it works because the puree keeps the crumb moist and the spice stays gentle, not loud. The frosting brings the tang, and the whole thing tastes like the softer, richer cousin of carrot cake.
Why It Works: Sweet potato has a natural sweetness and a creamy texture that plays well with warm spices. It also bakes into a very tender crumb, which is exactly what you want in a cupcake. Cream cheese frosting balances the sweetness, and a little cinnamon on top gives you the holiday signal without piling on decorations.
Key Ingredients:
- 1 cup mashed cooked sweet potato
- 1 3/4 cups all-purpose flour
- 1 teaspoon baking soda
- 1 teaspoon cinnamon
- 1/2 teaspoon nutmeg
- 1/2 cup unsalted butter, softened
- 3/4 cup brown sugar
- 2 large eggs
- 1/2 cup buttermilk
- 8 ounces cream cheese
- 4 cups powdered sugar
Quick Steps:
- Heat the oven to 350°F and line a muffin pan with paper cups.
- Whisk flour, baking soda, cinnamon, nutmeg, and salt.
- Cream butter and brown sugar, then beat in eggs and sweet potato.
- Add dry ingredients and buttermilk in turns, mixing just until smooth.
- Bake 18 to 22 minutes, until the tops spring back.
- Cool completely, then frost with cinnamon cream cheese frosting.
Equipment for This Recipe:
- Muffin pan
- Paper liners
- Mixer
- Cooling rack
How to Serve This Dish: Pipe or swirl the frosting high, then finish with a tiny shake of cinnamon or chopped pecans. These are easy to serve on a holiday dessert tray because each one is already portioned.
Pro Tips for This Recipe:
- Use fully cooked, mashed sweet potato with no stringy bits.
- Let the cupcakes cool fully before frosting or the frosting softens fast.
- If your puree is wet, blot it with a paper towel first.
- A pinch of salt in the frosting keeps it from tasting one-note.
Variations on This Dish:
- Maple Frosted Cupcakes: Add 1 tablespoon maple syrup to the frosting.
- Pecan Top: Sprinkle chopped toasted pecans on the frosting.
- Dairy-Free Cupcakes: Use plant milk with vinegar and a dairy-free frosting.
Common Mistakes to Avoid with This Recipe:
- Don’t use candied sweet potato casserole filling; it’s too sweet and spiced.
- Don’t overfill the liners or the domes will spill over.
- Don’t frost warm cupcakes or the topping will slide off.
10. Oatmeal Scotchies
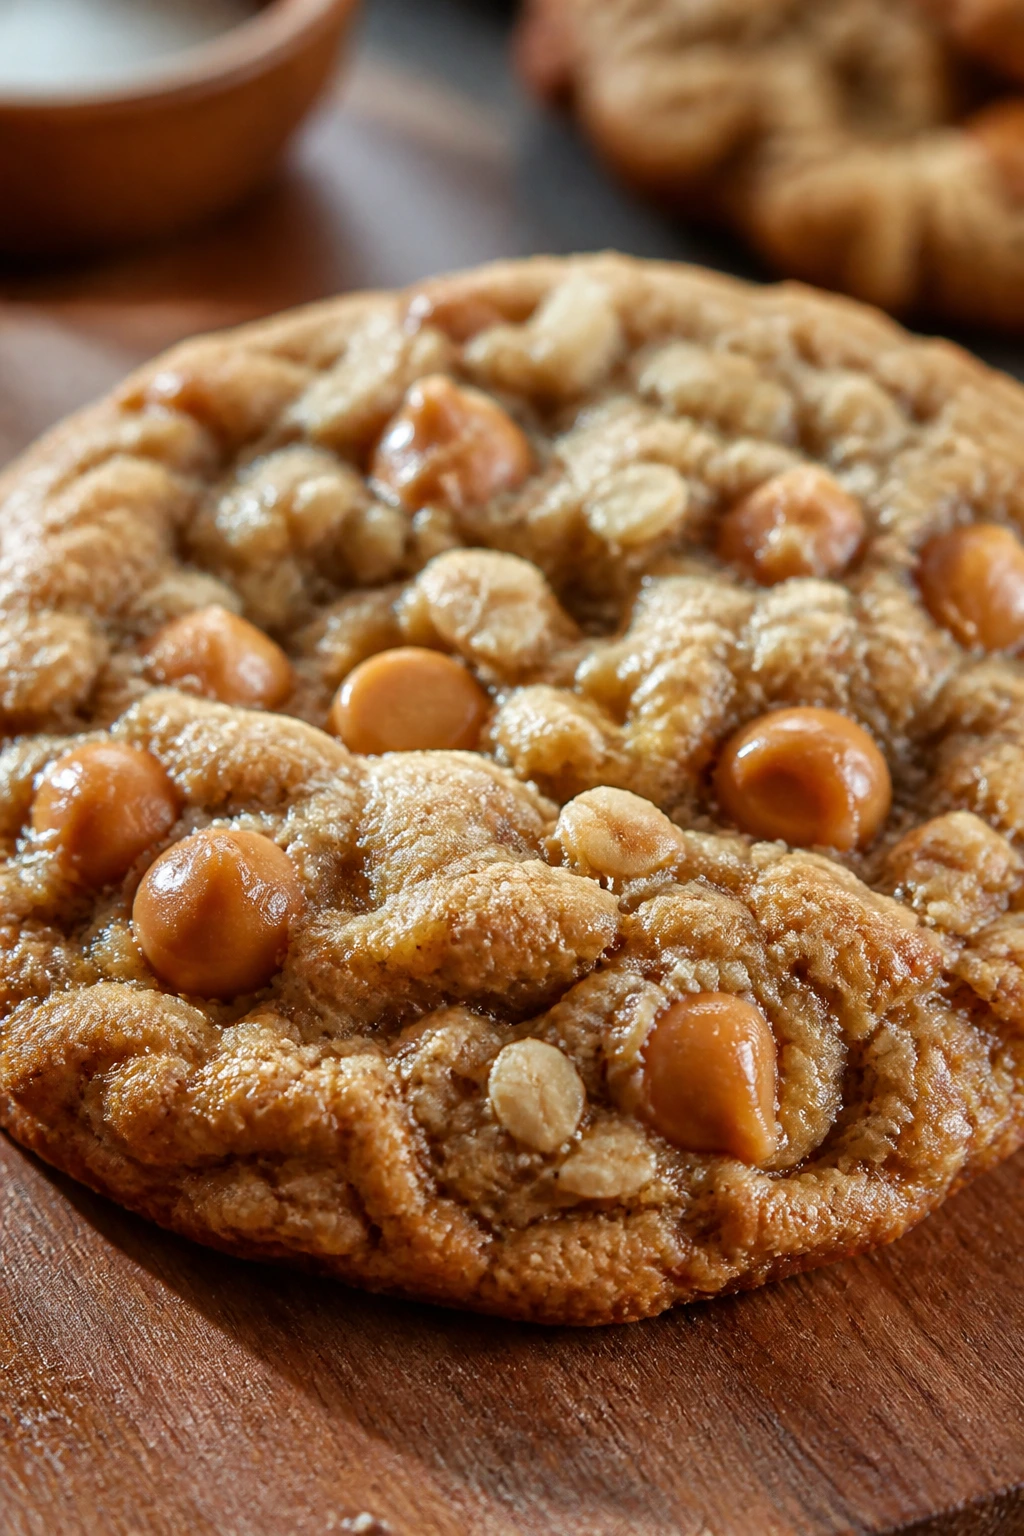
Intro: These are the cookies you make when you want something chewy, buttery, and a little old-fashioned without dragging out a long ingredient list. Butterscotch chips melt into the oats and cinnamon, and the whole cookie comes out with crisp edges and a soft middle. They’re not flashy. They don’t need to be.
Why It Works: Oats keep the crumb hearty, while butterscotch chips bring a caramel note that plays especially well with brown sugar. The dough can be mixed fast, which makes these useful when you need something good with minimal fuss. A short chill helps the cookies stay thick.
Key Ingredients:
- 1 cup unsalted butter, softened
- 1 cup brown sugar
- 1/2 cup granulated sugar
- 2 large eggs
- 1 1/2 cups all-purpose flour
- 3 cups old-fashioned oats
- 1 teaspoon cinnamon
- 1 teaspoon baking soda
- 2 cups butterscotch chips
Quick Steps:
- Heat the oven to 350°F and line two baking sheets.
- Cream butter and sugars, then beat in eggs.
- Stir in flour, oats, cinnamon, baking soda, and salt.
- Fold in butterscotch chips.
- Scoop onto sheets and bake 10 to 12 minutes.
- Cool on the pan for 5 minutes, then move to a rack.
Equipment for This Recipe:
- Baking sheets
- Mixer
- Cookie scoop
- Cooling rack
How to Serve This Dish: Stack them in a tin or bowl and serve with milk, coffee, or black tea. They hold their texture well, so they’re excellent for gift boxes.
Pro Tips for This Recipe:
- Don’t use quick oats; old-fashioned oats give better chew.
- Chill the dough 20 minutes if the kitchen is warm.
- Pull them when the centers still look a little soft.
- A few flaky salt crystals on top sharpen the sweetness.
Variations on This Recipe:
- Raisin Scotchies: Swap half the chips for raisins if you want a more classic oatmeal cookie.
- Walnut Version: Add 1 cup chopped walnuts for crunch.
- Pumpkin Spice Scotchies: Replace the cinnamon with pumpkin pie spice for a warmer profile.
Common Mistakes to Avoid with This Recipe:
- Don’t overbake or they’ll turn hard after cooling.
- Don’t pack the flour into the measuring cup.
- Don’t use stale chips; butterscotch should taste buttery, not dusty.
11. Pumpkin Whoopie Pies
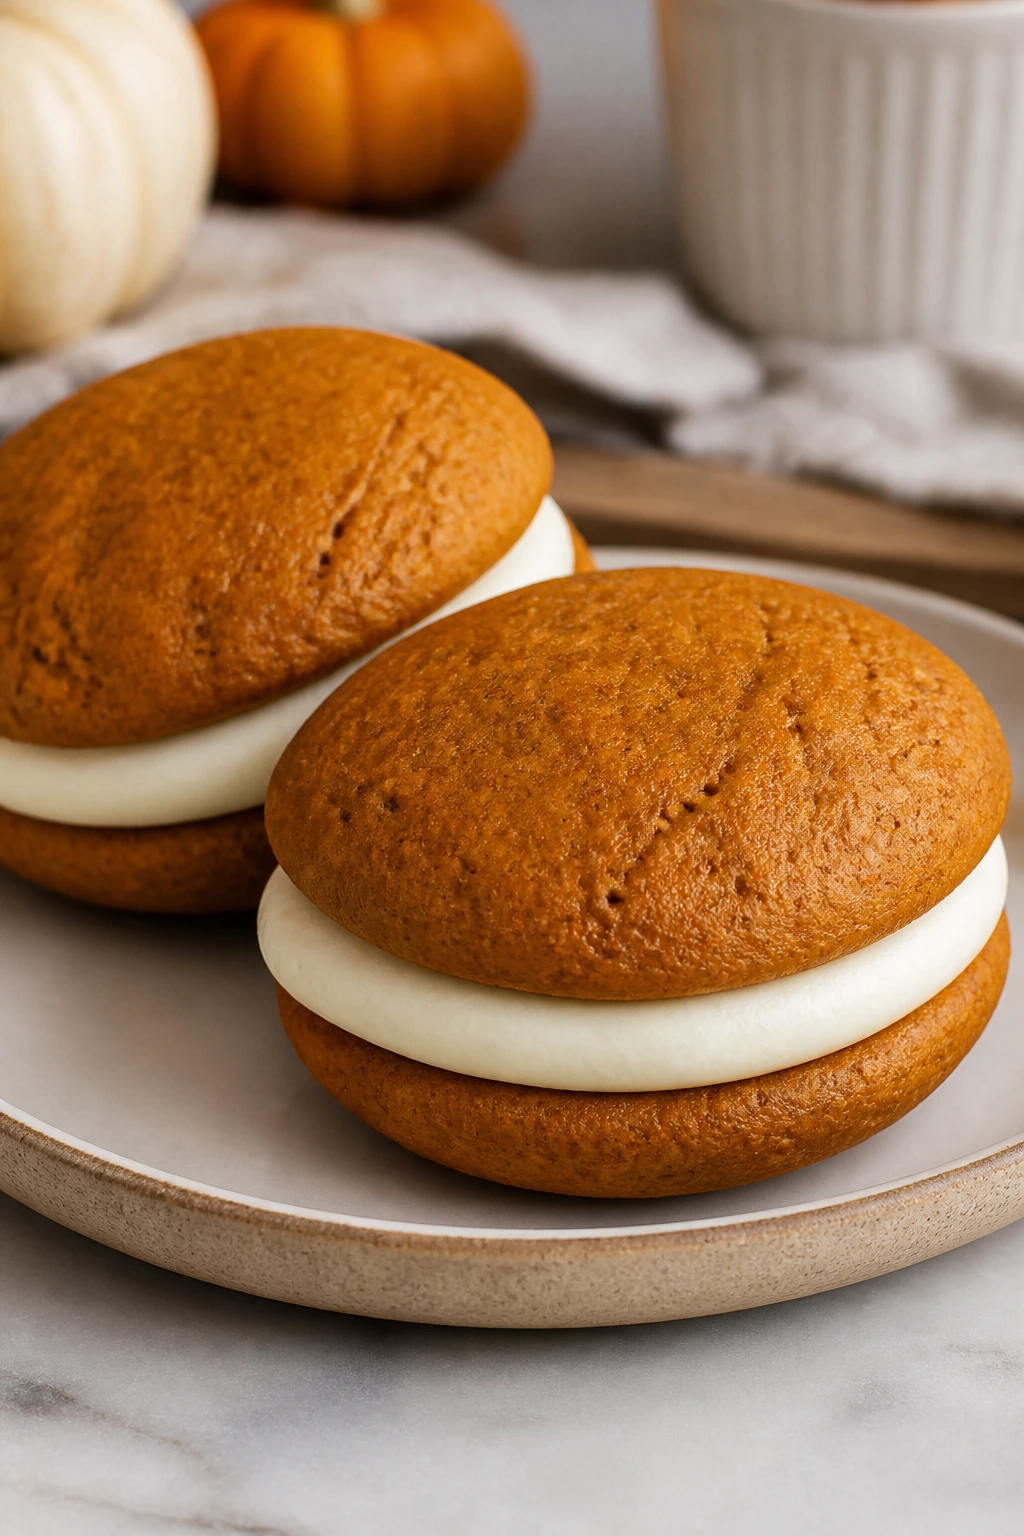
Intro: These are soft little pumpkin cakes with a cream cheese filling that squishes out at the edges when you bite in. They feel a bit festive, a bit nostalgic, and far more interesting than a plain cookie sandwich because the cakes themselves are tender and spiced. If you’ve never made whoopie pies, this is a friendly place to start.
Why It Works: Pumpkin keeps the cakes moist and soft, which is exactly what whoopie pies need. The batter is spooned, not rolled, so the shapes stay rustic and approachable. The filling needs to be thick enough to hold the sandwich together without oozing everywhere, so keep the cream cheese cold enough to beat into a spreadable frosting, not soup.
Key Ingredients:
- 2 cups all-purpose flour
- 1 teaspoon baking soda
- 2 teaspoons pumpkin pie spice
- 1 cup pumpkin puree
- 1/2 cup brown sugar
- 1/2 cup granulated sugar
- 1/2 cup vegetable oil
- 1 large egg
- 8 ounces cream cheese
- 3 cups powdered sugar
Quick Steps:
- Heat the oven to 350°F and line two baking sheets.
- Whisk the flour, baking soda, spice, and salt.
- In another bowl, mix pumpkin, sugars, oil, and egg.
- Stir the dry ingredients into the pumpkin mixture.
- Scoop rounds onto the sheets and bake 12 to 14 minutes.
- Cool, fill with cream cheese frosting, and sandwich.
Equipment for This Recipe:
- Baking sheets
- Parchment paper
- Cookie scoop
- Mixer
How to Serve This Dish: Serve them slightly chilled so the filling stays firm. They’re a little messy in the best way, so line the plate with parchment if you want easier cleanup.
Pro Tips for This Recipe:
- Keep the cakes the same size so the sandwiches line up.
- Chill the filling 10 minutes if it feels soft.
- Let the cakes cool fully before filling.
- A tiny pinch of salt in the frosting keeps it from tasting flat.
Variations on This Dish:
- Maple Filling: Add maple syrup to the frosting and reduce the powdered sugar slightly.
- Chocolate Drizzle: Drizzle the finished pies with melted dark chocolate.
- Mini Whoopies: Make smaller scoops for bite-size trays.
Common Mistakes to Avoid with This Recipe:
- Don’t overbake; the cakes should spring back, not dry out.
- Don’t fill them while warm or the frosting melts out.
- Don’t use too much filling or the sandwiches slide apart.
12. Caramel Apple Hand Pies
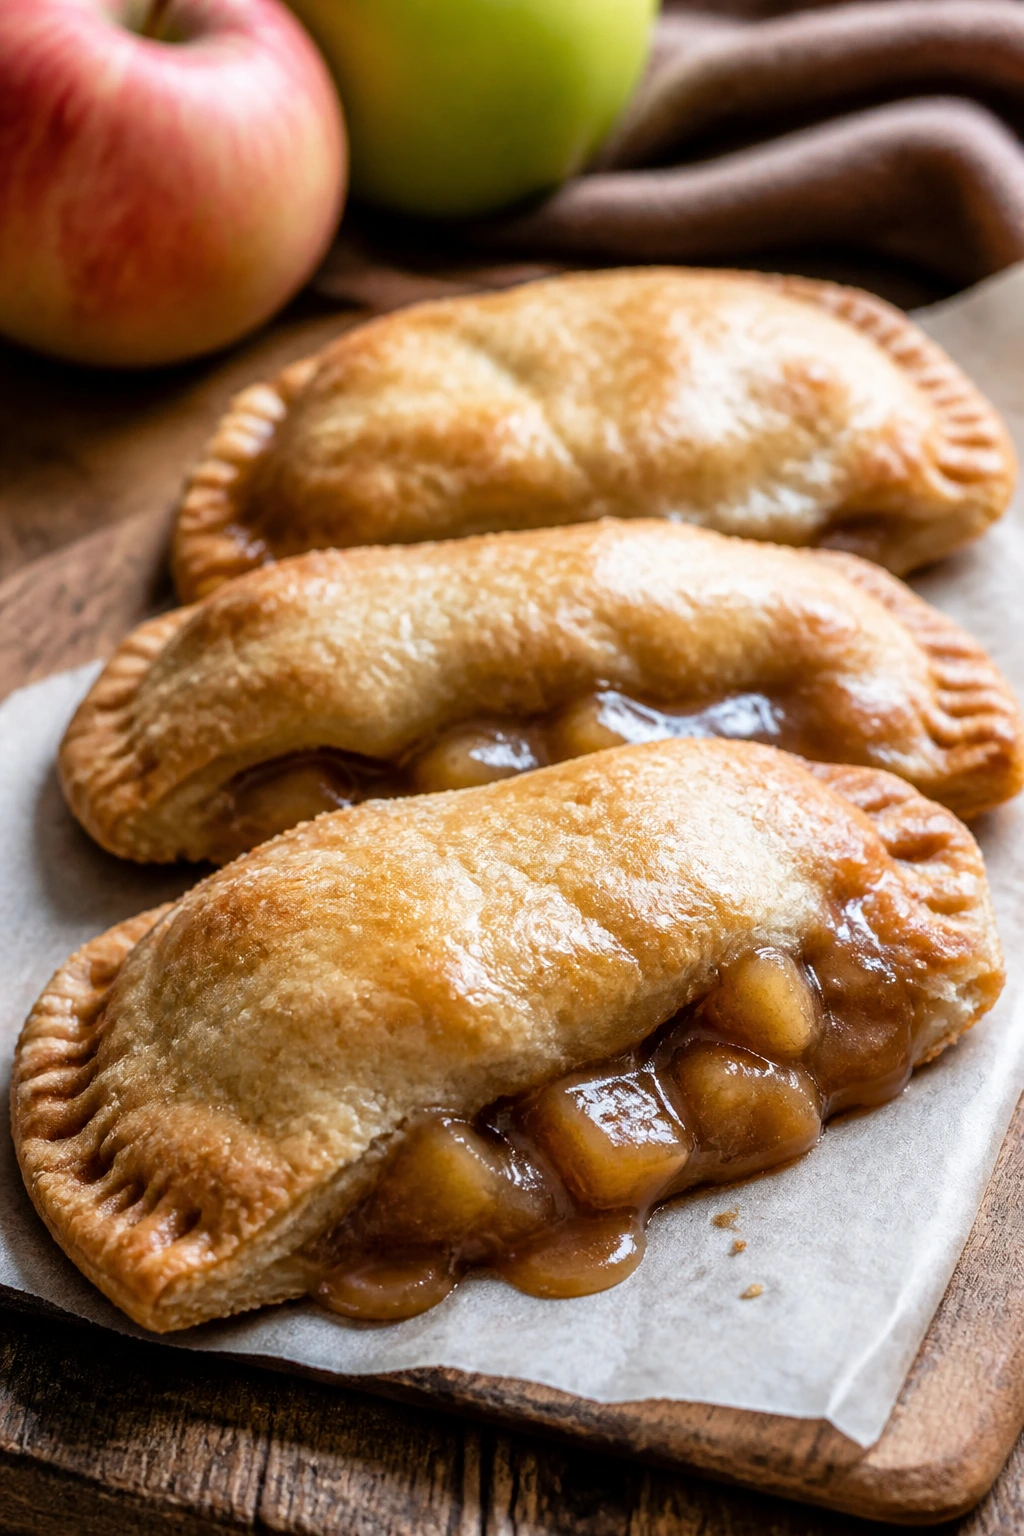
Intro: These are the portable version of apple pie, and that’s already half the appeal. The crust turns flaky and golden, the apple filling cooks down into soft little cubes, and the caramel turns the whole thing into a sticky, cozy bite that people can eat without a fork. They’re also one of the easier recipes here to freeze before baking.
Why It Works: Hand pies solve the biggest apple pie problem: you get more crust per bite and less risk of a soupy filling. Small diced apples cook fast, caramel brings depth, and a sealed edge keeps the filling where it belongs. Brush them with egg wash and you get that bakery shine without extra work.
Key Ingredients:
- 2 sheets pie dough, homemade or store-bought
- 3 apples, peeled and diced
- 1/4 cup brown sugar
- 1 teaspoon cinnamon
- 1 tablespoon flour
- 2 tablespoons caramel sauce
- 1 egg, beaten for egg wash
- 1 tablespoon coarse sugar
Quick Steps:
- Heat the oven to 400°F and line a baking sheet.
- Toss apples with brown sugar, cinnamon, flour, and caramel.
- Cut dough into circles or rectangles and place filling on one side.
- Seal with a fork, brush with egg wash, and sprinkle with coarse sugar.
- Bake 18 to 22 minutes, until deep gold.
- Cool slightly before serving.
Equipment for This Recipe:
- Baking sheet
- Rolling pin if using homemade dough
- Pastry brush
- Fork
How to Serve This Dish: Serve warm with extra caramel on the side or a scoop of vanilla ice cream. They look especially nice stacked on a wooden board or lined up on a platter.
Pro Tips for This Recipe:
- Dice the apples small so the filling cooks through before the crust overbrowns.
- Don’t overfill; leaks start fast once the dough warms up.
- Chill the assembled pies for 10 minutes before baking to help the edges seal.
- A tiny slit on top lets steam escape.
Variations on This Dish:
- Salted Caramel Version: Add a pinch of flaky salt to the filling and topping.
- Cheddar Crust Hand Pies: Use a savory-sweet pie crust with a little sharp cheddar.
- Pear Hand Pies: Swap in pears and a little ginger for a softer filling.
Common Mistakes to Avoid with This Recipe:
- Don’t forget the flour in the filling or it can leak.
- Don’t seal on a pile of loose juice.
- Don’t skip the egg wash if you want that deep brown finish.
13. Gingersnap Cheesecake Bars
Intro: These bars sit right in the middle of spice cookie and cheesecake, which is a very good place to be during holiday baking. The gingersnap crust is crisp and spicy, the cheesecake layer is smooth and tangy, and the top can take a spoonful of cranberry sauce if you want a brighter finish. They cut into neat squares and feel more polished than they really are.
Why It Works: A crushed cookie crust is faster than a homemade pastry crust and gives the bars a stronger spice base. Cream cheese bakes into a smooth layer at a moderate temperature, so the texture stays dense and creamy instead of soufflé-like. The bar format makes them far easier to portion than a whole cheesecake.
Key Ingredients:
- 2 cups gingersnap cookie crumbs
- 1/2 cup melted butter
- 16 ounces cream cheese, softened
- 2/3 cup granulated sugar
- 2 large eggs
- 1 teaspoon vanilla extract
- 1/2 teaspoon cinnamon
- 1/2 cup sour cream
- 1/2 cup cranberry sauce or chopped candied ginger for topping
Quick Steps:
- Heat the oven to 325°F and line an 8×8-inch pan.
- Mix cookie crumbs with melted butter and press into the pan.
- Beat cream cheese and sugar until smooth.
- Add eggs, vanilla, cinnamon, and sour cream.
- Pour over the crust and bake 30 to 35 minutes.
- Cool, chill, and top before slicing.
Equipment for This Recipe:
- 8×8-inch pan
- Mixer
- Mixing bowls
- Parchment paper
How to Serve This Dish: Serve chilled with a spoonful of cranberry sauce or a few sugared cranberries on top. They’re rich, so small squares are enough.
Pro Tips for This Recipe:
- Beat the cream cheese until no lumps remain before adding eggs.
- Don’t overbake; the center should still wobble slightly when you pull it.
- Chill for several hours before slicing.
- Use a firm cookie crumb layer so the bars don’t crumble apart.
Variations on This Dish:
- Orange Cheesecake Bars: Add orange zest to the filling.
- Chocolate Crust Bars: Use chocolate gingersnaps or mix cocoa into the crumb crust.
- No-Cranberry Version: Top with a thin maple glaze instead.
Common Mistakes to Avoid with This Recipe:
- Don’t use cold cream cheese; it never smooths out fully.
- Don’t rush the chilling time.
- Don’t press the crust so hard it turns dense and hard.
14. Maple Glazed Bundt Cake
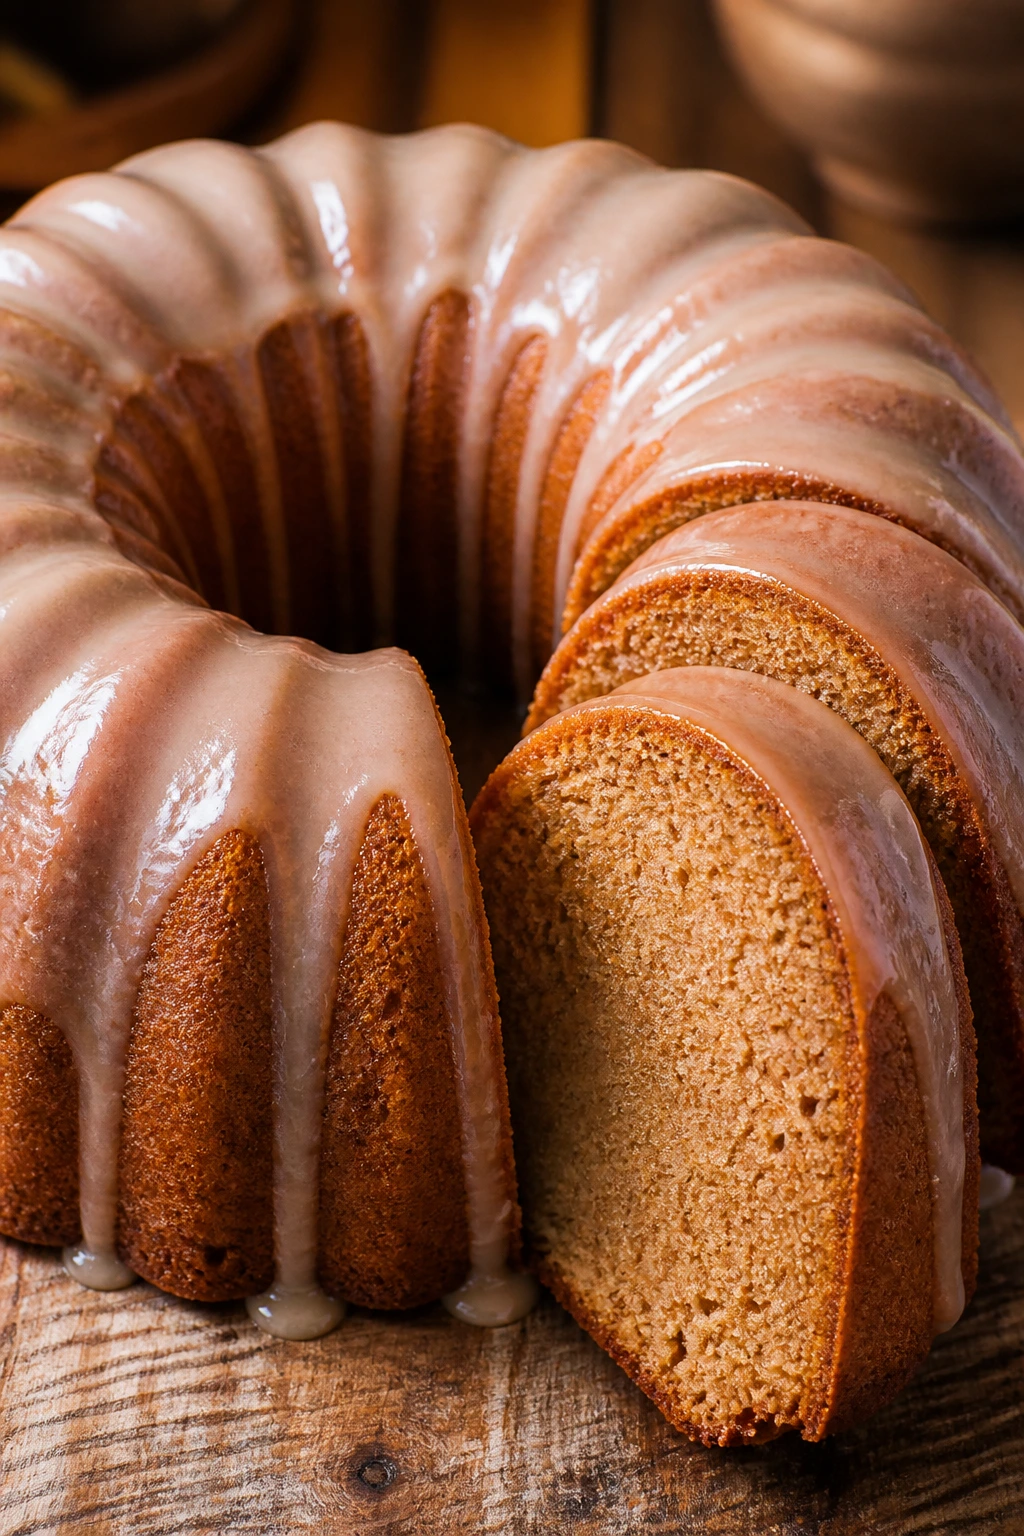
Intro: This is the kind of cake that looks like you spent all afternoon on it, even though the steps are plain and the ingredients are familiar. The cake crumb is soft but sturdy, the maple flavor comes through cleanly, and the glaze runs into the ridges in all the right places. It’s a good one for a dessert table because it slices clean and looks finished with almost no decoration.
Why It Works: Bundt cakes need a batter that can hold shape but still stay tender, and this one does both. Maple syrup in the batter gives the cake a deeper sweetness than plain sugar alone, while the glaze adds a glossy finish that sets thin and neat. A well-greased Bundt pan is the whole game.
Key Ingredients:
- 3 cups all-purpose flour
- 2 teaspoons baking powder
- 1 teaspoon cinnamon
- 1 cup unsalted butter, softened
- 1 1/2 cups granulated sugar
- 3 large eggs
- 3/4 cup pure maple syrup
- 1 cup sour cream
- 1 cup powdered sugar for glaze
- 2 to 3 tablespoons maple syrup for glaze
Quick Steps:
- Heat the oven to 350°F and grease a 10-cup Bundt pan very well.
- Whisk flour, baking powder, cinnamon, and salt.
- Cream butter and sugar, then beat in eggs and maple syrup.
- Mix in sour cream and dry ingredients just until combined.
- Bake 45 to 55 minutes, until a tester comes out clean.
- Cool 15 minutes, turn out, and glaze once the cake is cool.
Equipment for This Recipe:
- 10-cup Bundt pan
- Mixer
- Mixing bowls
- Cooling rack
How to Serve This Dish: Serve plain slices or add a spoonful of lightly sweetened whipped cream. It pairs nicely with coffee and looks best when the glaze is thin enough to show the cake’s ridges.
Pro Tips for This Recipe:
- Grease every curve of the pan, then flour it lightly.
- Use real maple syrup, not pancake syrup.
- Cool the cake before glazing or the glaze melts away.
- A little orange zest in the glaze sharpens the maple.
Variations on This Recipe:
- Pecan Maple Bundt: Fold in 1 cup chopped pecans.
- Cinnamon Sugar Finish: Skip the glaze and brush with melted butter, then dust with cinnamon sugar.
- Mini Loaf Version: Divide the batter between small loaf pans for giftable cakes.
Common Mistakes to Avoid with This Dish:
- Don’t under-grease the pan. Bundt cakes punish shortcuts.
- Don’t overmix once the flour goes in.
- Don’t glaze a warm cake unless you want the finish to slide off.
15. Cranberry Apple Crumble Bars
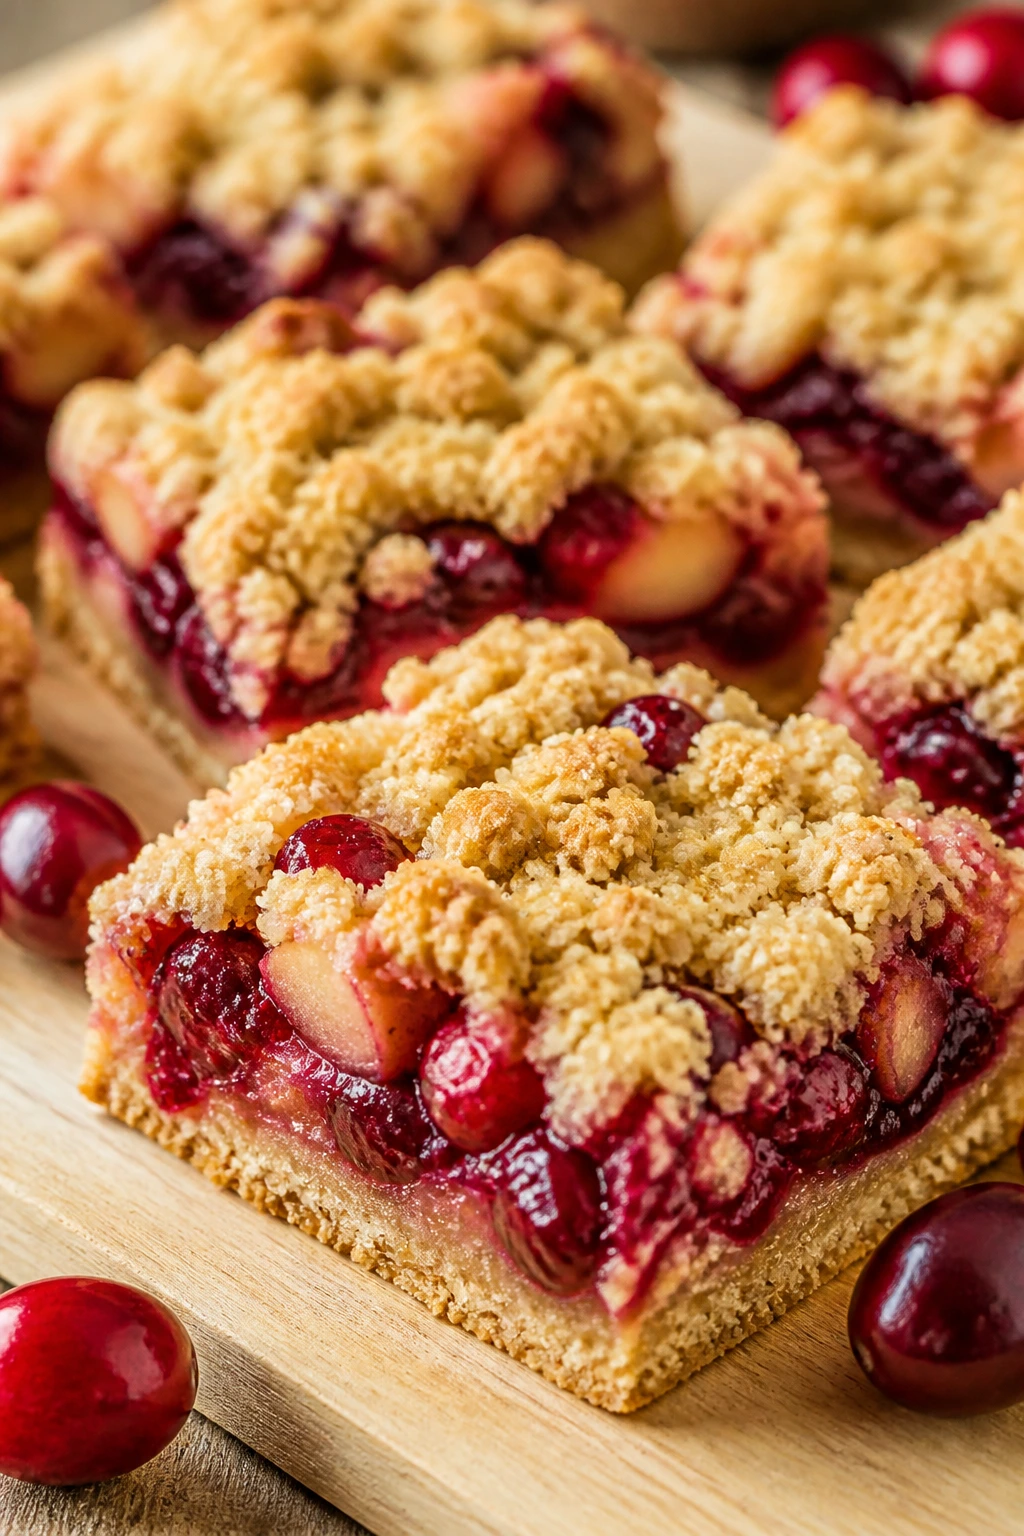
Intro: If apple crisp and cranberry sauce had to share a pan, this would be the result. The apples turn soft and sweet, the cranberries break into tart bursts, and the crumble top brings enough butter to keep the whole thing cozy. It’s a useful dessert when you want something colorful and still easy to cut into bars.
Why It Works: Apples provide body, cranberries provide edge, and together they stop the filling from leaning too sweet. The crumble works as both crust and topping, which saves time and makes the bars feel more rustic in a good way. Bake until the fruit visibly bubbles through the top layer.
Key Ingredients:
- 2 cups flour
- 1 1/2 cups oats
- 1 cup brown sugar
- 1 cup unsalted butter, melted
- 3 cups apples, diced
- 1 1/2 cups cranberries
- 1/2 cup granulated sugar
- 2 tablespoons cornstarch
- 1 teaspoon cinnamon
Quick Steps:
- Heat the oven to 350°F and line a 9×13-inch pan.
- Mix flour, oats, brown sugar, and melted butter to make the crumble.
- Press most of it into the pan for the base.
- Toss apples and cranberries with sugar, cornstarch, and cinnamon.
- Spread the fruit over the base, then sprinkle the remaining crumble on top.
- Bake 40 to 45 minutes and cool before slicing.
Equipment for This Recipe:
- 9×13-inch pan
- Mixing bowls
- Parchment paper
- Spatula
How to Serve This Dish: Serve these with whipped cream or vanilla ice cream. The red filling makes them especially pretty on a holiday platter.
Pro Tips for This Recipe:
- Use tart apples if you can; the cranberries already bring sugar.
- Fresh or frozen cranberries both work.
- Cool completely before cutting or the filling slides.
- A little orange zest in the fruit layer wakes the whole pan up.
Variations on This Dish:
- Pear Apple Cranberry Bars: Swap half the apples for pears.
- Walnut Crumble Bars: Add chopped walnuts to the topping.
- Vegan Version: Use plant butter and confirm your sugar is vegan-friendly.
Common Mistakes to Avoid with This Recipe:
- Don’t skip the cornstarch; it keeps the fruit layer from running.
- Don’t press the topping down too hard.
- Don’t cut while hot.
16. Brown Butter Pecan Sandies
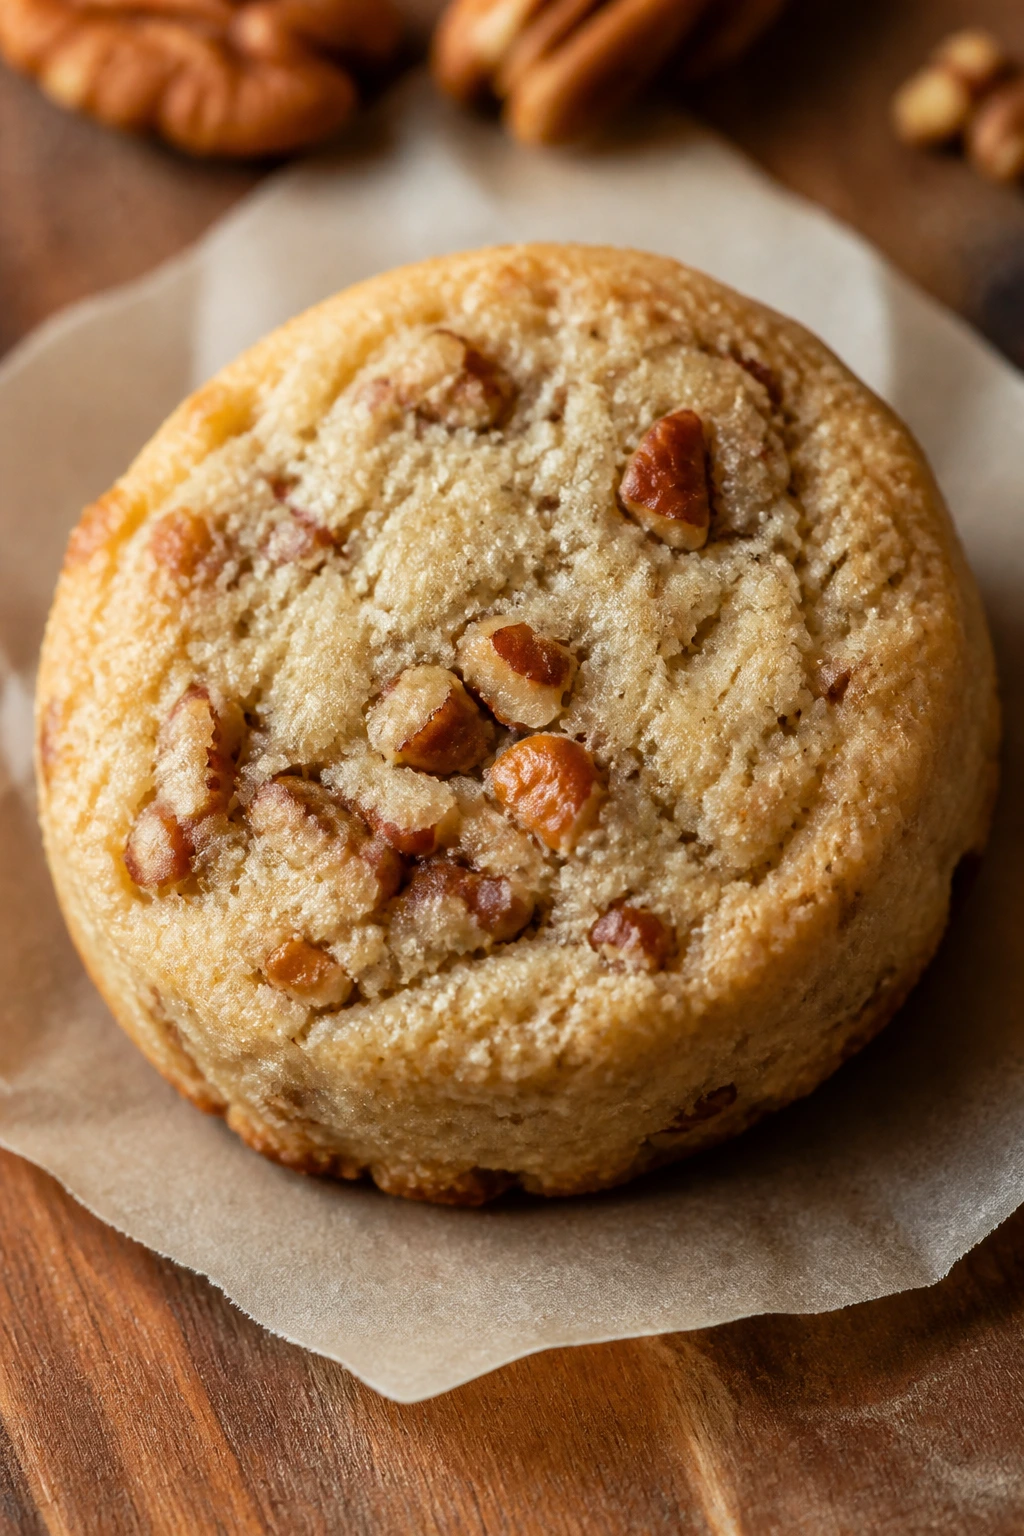
Intro: These cookies are all about the brown butter. Once it cools and gets mixed into the dough, the flavor turns nutty and warm, and the toasted pecans push it further. They’re crumbly in the best shortbread way, which makes them good for tea, coffee, or a little plate by the cookie tray.
Why It Works: Sandies are basically a butter-forward cookie, so browning the butter adds another layer without making the dough complicated. Pecans bring texture and a toasty finish that stands up well to the delicate crumb. If you like cookies that dissolve a little before they chew, this is your lane.
Key Ingredients:
- 1 cup unsalted butter
- 1/2 cup powdered sugar
- 2 cups all-purpose flour
- 1 cup finely chopped toasted pecans
- 1 teaspoon vanilla extract
- 1/2 teaspoon cinnamon
Quick Steps:
- Brown the butter, then cool until soft but not solid.
- Beat the butter with powdered sugar and vanilla.
- Stir in flour, pecans, cinnamon, and salt.
- Shape into logs, chill 30 minutes, and slice.
- Bake at 325°F for 14 to 16 minutes, until pale gold.
- Cool on the sheet before moving.
Equipment for This Recipe:
- Saucepan
- Mixer or bowl and spoon
- Baking sheet
- Sharp knife
How to Serve This Dish: Serve them with tea, coffee, or a small bowl of chocolate ganache for dipping. They look nice stacked in a tin, which also keeps them from breaking.
Pro Tips for This Recipe:
- Chop the pecans finely so the cookies slice cleanly.
- Chill the logs well or the cookies lose their round shape.
- Bake just until the bottoms color; pale tops are fine.
- A light dusting of powdered sugar makes them look finished.
Variations on This Dish:
- Orange Pecan Sandies: Add orange zest to the dough.
- Chocolate-Dipped Sandies: Dip half of each cookie in melted dark chocolate.
- Walnut Version: Swap in walnuts if that’s what you have.
Common Mistakes to Avoid with This Recipe:
- Don’t use hot brown butter; it should be cooled before mixing.
- Don’t overbake or the crumb becomes dry.
- Don’t skip chilling the logs.
17. Pumpkin Oatmeal Cookies
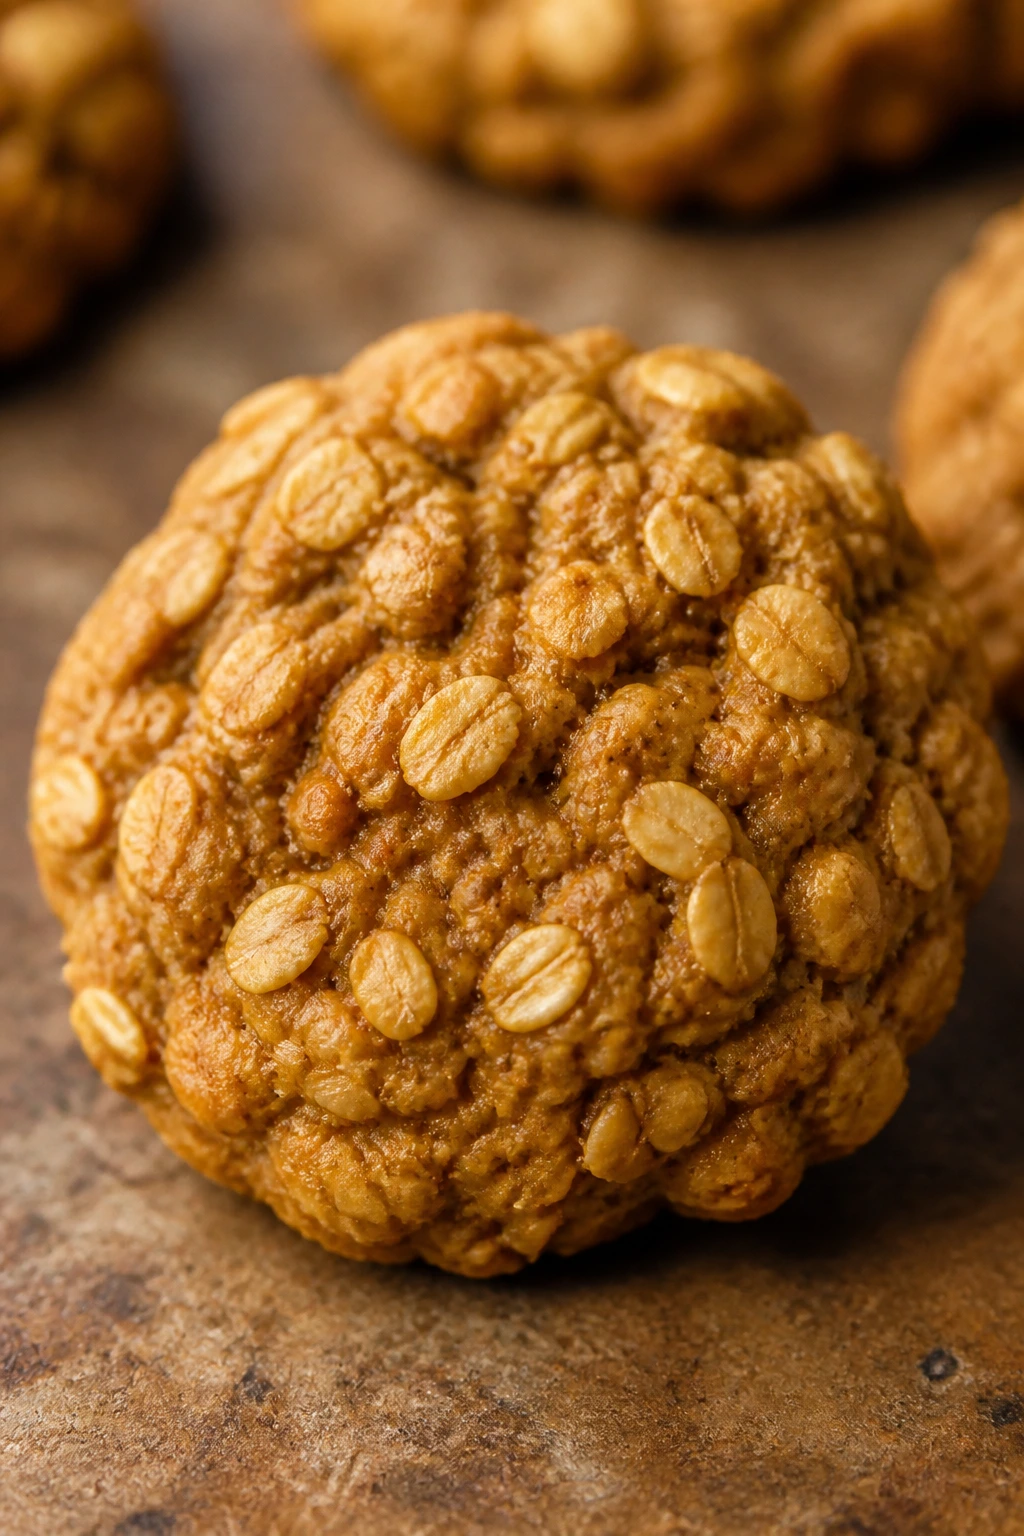
Intro: Pumpkin in cookies can go too soft fast, which is why oats help here. They give the cookies some body, a little chew, and a rough, homey look that fits the flavor. These are the cookies I’d make when I want pumpkin spice without a cupcake liner in sight.
Why It Works: Oats soak up pumpkin moisture and keep the cookies from spreading too thin. Brown sugar and cinnamon bring the expected fall flavor, but the oatmeal keeps things honest. A small scoop and a short bake are the difference between chewy cookies and cakey blobs.
Key Ingredients:
- 1 cup pumpkin puree
- 1 cup brown sugar
- 1/2 cup granulated sugar
- 1/2 cup unsalted butter, softened
- 1 large egg
- 1 3/4 cups flour
- 2 cups old-fashioned oats
- 1 teaspoon cinnamon
- 1/2 teaspoon nutmeg
- 1 cup raisins or chocolate chips
Quick Steps:
- Heat the oven to 350°F and line baking sheets.
- Cream butter and sugars, then beat in pumpkin and egg.
- Stir in flour, oats, cinnamon, nutmeg, and salt.
- Fold in raisins or chips.
- Scoop and bake 11 to 13 minutes.
- Cool on the sheet so they firm up.
Equipment for This Recipe:
- Baking sheets
- Mixer
- Cookie scoop
- Cooling rack
How to Serve This Dish: Serve these warm with milk or coffee. They’re also good packed into lunch boxes because the oats keep them from feeling fragile.
Pro Tips for This Recipe:
- Use old-fashioned oats, not quick oats.
- If the dough feels very loose, chill it 20 minutes.
- Don’t bake until browned all over; the edges should set first.
- Chocolate chips make the cookie richer; raisins keep it more old-school.
Variations on This Dish:
- Cranberry Oatmeal Cookies: Swap raisins for dried cranberries.
- Maple Oatmeal Cookies: Add 1 tablespoon maple syrup and reduce sugar slightly.
- Walnut Pumpkin Cookies: Fold in chopped walnuts for crunch.
Common Mistakes to Avoid with This Recipe:
- Don’t use too much pumpkin or the cookies turn cakey.
- Don’t overmix after adding oats.
- Don’t skip the cooling time on the baking sheet.
18. Apple Butter Thumbprint Cookies
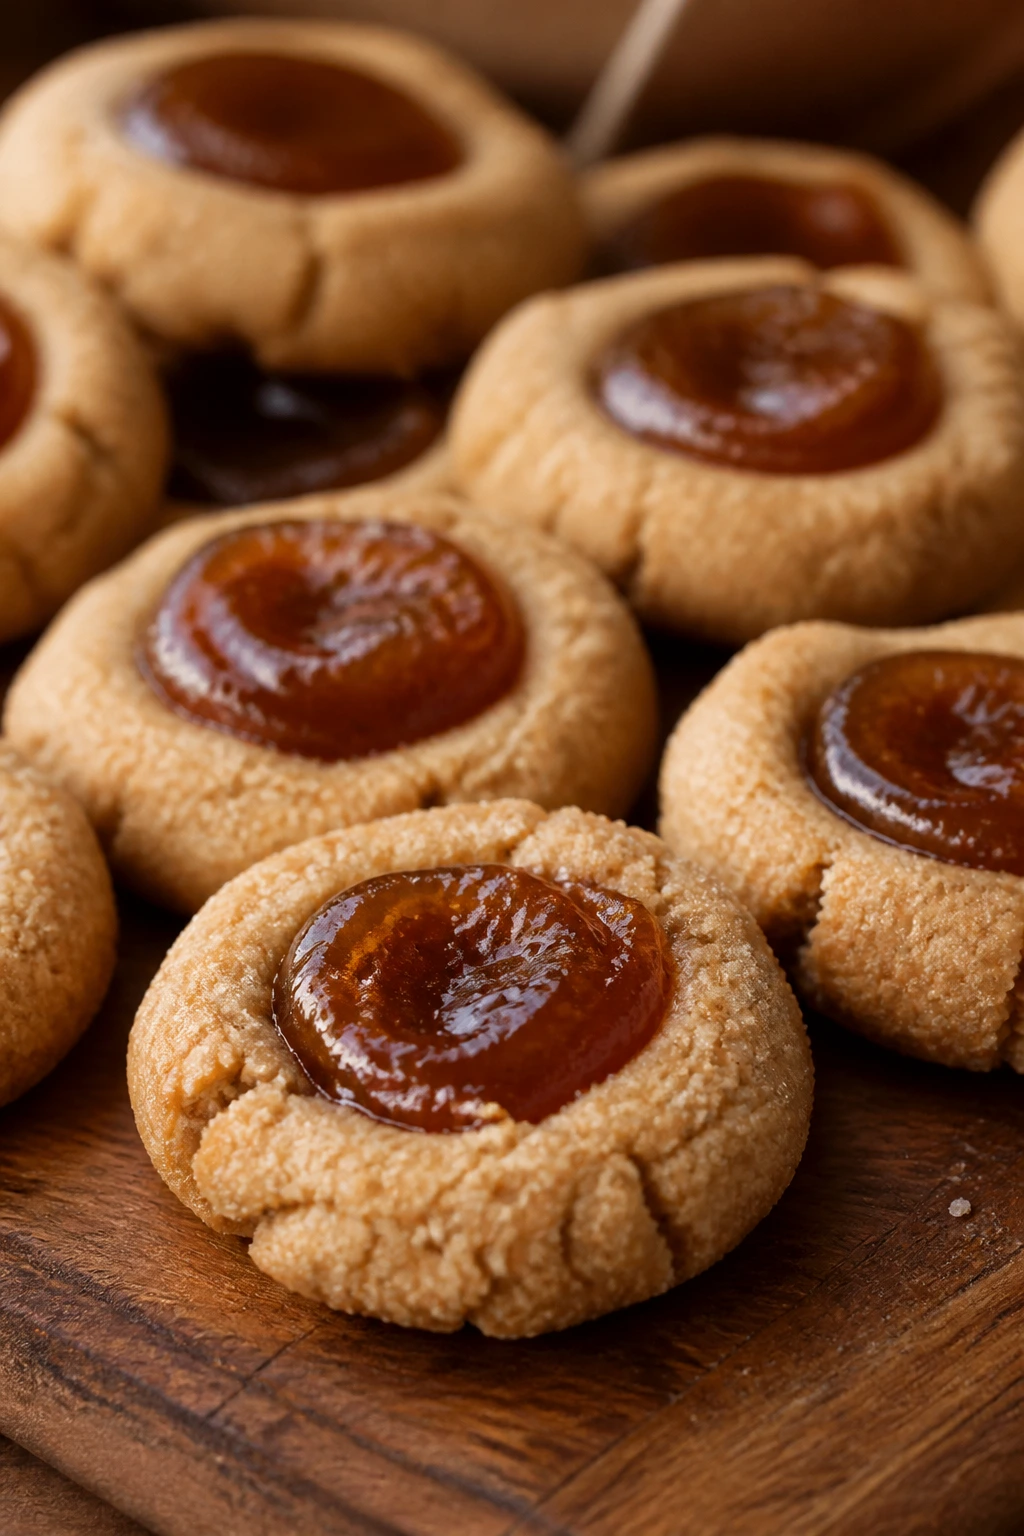
Intro: These cookies are small, buttery, and a little nostalgic in the best way. The center holds a spoonful of apple butter that bakes down into a thick, spiced jewel, and the edges stay tender rather than crisp. They’re the kind of cookie people grab because they look bite-size and harmless, then go back for three more.
Why It Works: Thumbprints are made for concentrated fillings, and apple butter gives you that cooked-apple flavor without needing to pre-cook fruit. The cookie base should be sturdy enough to hold the well, but soft enough that the center stays tender after baking. A quick chill before baking helps the shape stay round.
Key Ingredients:
- 1 cup unsalted butter, softened
- 1/2 cup granulated sugar
- 2 cups all-purpose flour
- 1/2 teaspoon cinnamon
- 1/2 teaspoon salt
- 1/2 cup apple butter
- 1/2 cup chopped walnuts or powdered sugar for finishing
Quick Steps:
- Heat the oven to 350°F and line baking sheets.
- Cream butter and sugar, then mix in flour, cinnamon, and salt.
- Roll into balls and place on the sheet.
- Press a thumb or spoon into each center.
- Fill with apple butter and bake 12 to 14 minutes.
- Cool before finishing with nuts or a dusting of sugar.
Equipment for This Recipe:
- Baking sheets
- Mixer
- Measuring spoon or your thumb
- Cooling rack
How to Serve This Dish: Serve them on a tray with tea or cider. They’re tidy enough for cookie tins and pretty enough to mix with sugar cookies.
Pro Tips for This Recipe:
- If the dough cracks when you press it, let it warm 5 minutes.
- Don’t overfill the centers; the apple butter spreads a bit.
- Chill the dough if the kitchen is warm.
- A tiny dab of coarse sugar on the apple butter adds shine.
Variations on This Dish:
- Cream Cheese Thumbprints: Add a little cream cheese to the filling for a cheesecake note.
- Pecan Thumbprints: Roll the edges in finely chopped pecans before baking.
- Apricot Version: Use apricot preserves if apple butter is hard to find.
Common Mistakes to Avoid with This Recipe:
- Don’t press too deep or the bottoms can thin out.
- Don’t bake them too long; pale is right.
- Don’t fill after baking only if you want the filling to stay glossy.
19. Pear Almond Galette
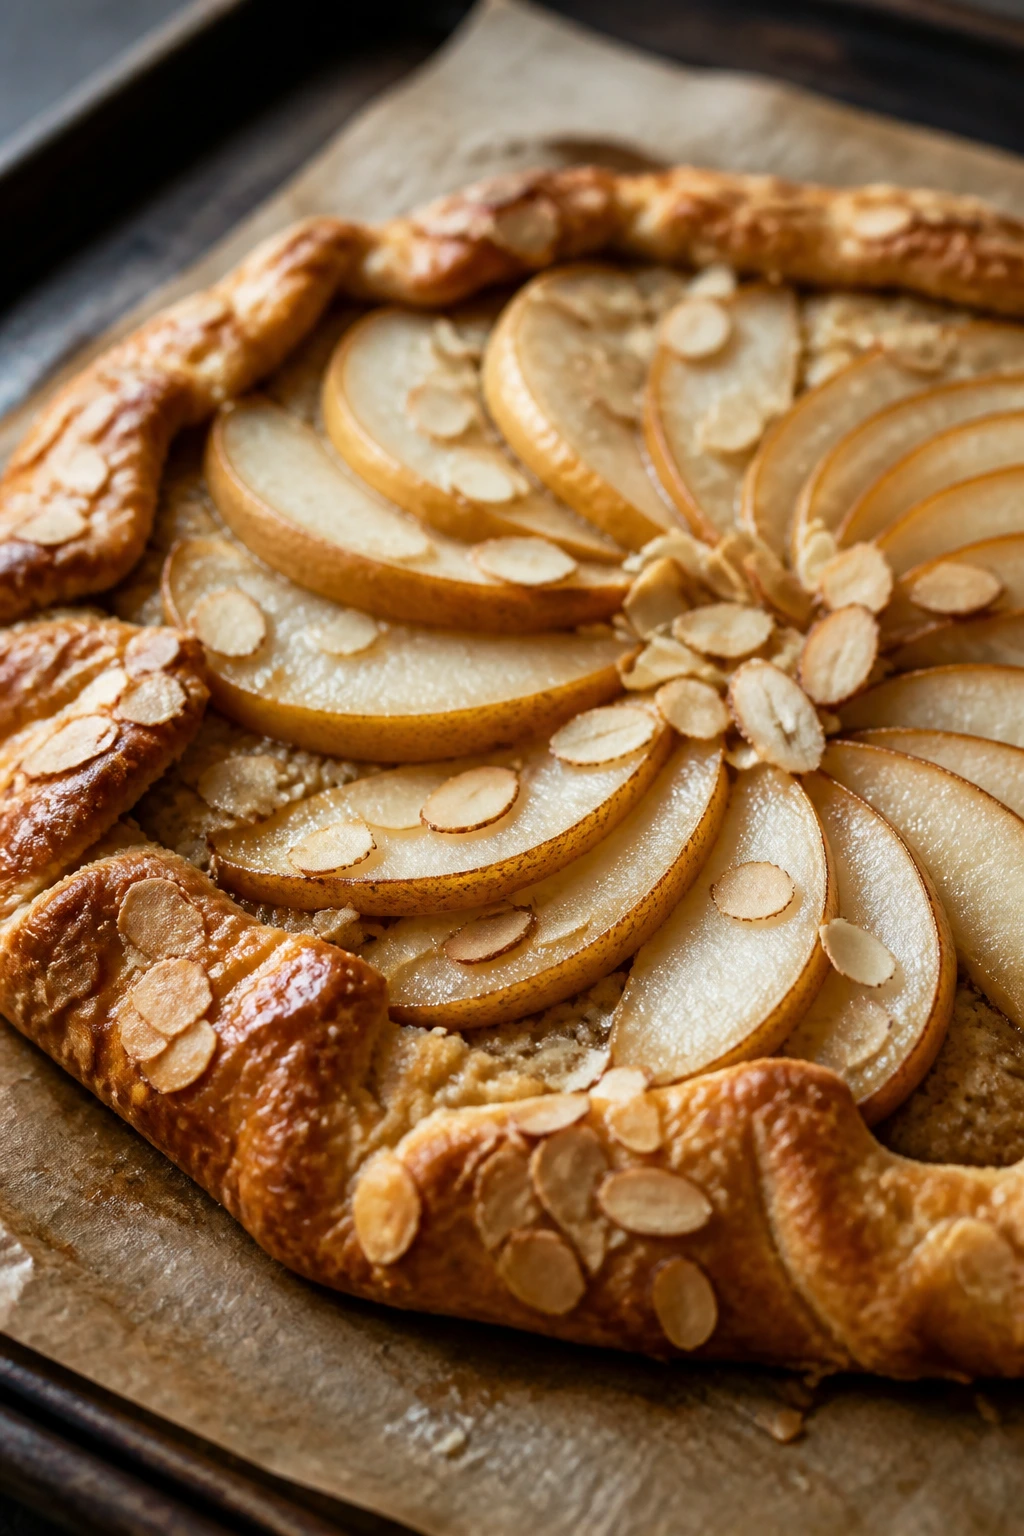
Intro: A galette is pie’s more relaxed cousin, which is why it earns a spot here. The crust folds up around pear slices and a thin almond layer, and the result feels rustic in the actual sense of the word, not the fake “rustic” way people use when they mean rough and unfinished. It’s forgiving, and that’s a relief.
Why It Works: Pears and almond are a natural pair, and a galette gives them room to shine without the pressure of a perfect pie shell. The frangipane-style almond layer keeps the base from getting soggy and adds a rich, almost marzipan flavor. Rustic edges are part of the charm, so you don’t need pastry perfection.
Key Ingredients:
- 1 pie crust round
- 3 pears, sliced
- 1/3 cup almond flour
- 2 tablespoons sugar
- 1 egg yolk
- 2 tablespoons unsalted butter, softened
- 1 teaspoon vanilla extract
- 1 tablespoon lemon juice
- 1 egg, beaten for brushing
Quick Steps:
- Heat the oven to 400°F and line a baking sheet.
- Mix almond flour, sugar, yolk, butter, and vanilla into a thick paste.
- Spread it in the center of the crust, leaving a border.
- Fan the pears on top and drizzle with lemon juice.
- Fold the crust edges over the fruit, brush with egg, and bake 35 to 40 minutes.
- Cool slightly before slicing.
Equipment for This Recipe:
- Baking sheet
- Parchment paper
- Rolling pin if needed
- Pastry brush
How to Serve This Dish: Serve warm with whipped cream or mascarpone. A little honey drizzled over the pears makes the almond flavor pop.
Pro Tips for This Recipe:
- Keep the crust cold before baking so it stays flaky.
- Slice pears evenly so they bake at the same pace.
- Almond flour layer should be thin; too much makes the base heavy.
- A sprinkle of turbinado sugar on the crust adds crunch.
Variations on This Dish:
- Pear Cranberry Galette: Add a handful of cranberries around the pears.
- Chocolate Almond Galette: Scatter a little chopped dark chocolate under the pears.
- Apple Almond Galette: Swap apples for pears if you want a firmer filling.
Common Mistakes to Avoid with This Dish:
- Don’t pile the filling too high; the crust won’t fold cleanly.
- Don’t forget the lemon juice or the pears dull out.
- Don’t slice immediately from the oven; the juices need a minute to settle.
20. Sweet Potato Pudding Cake
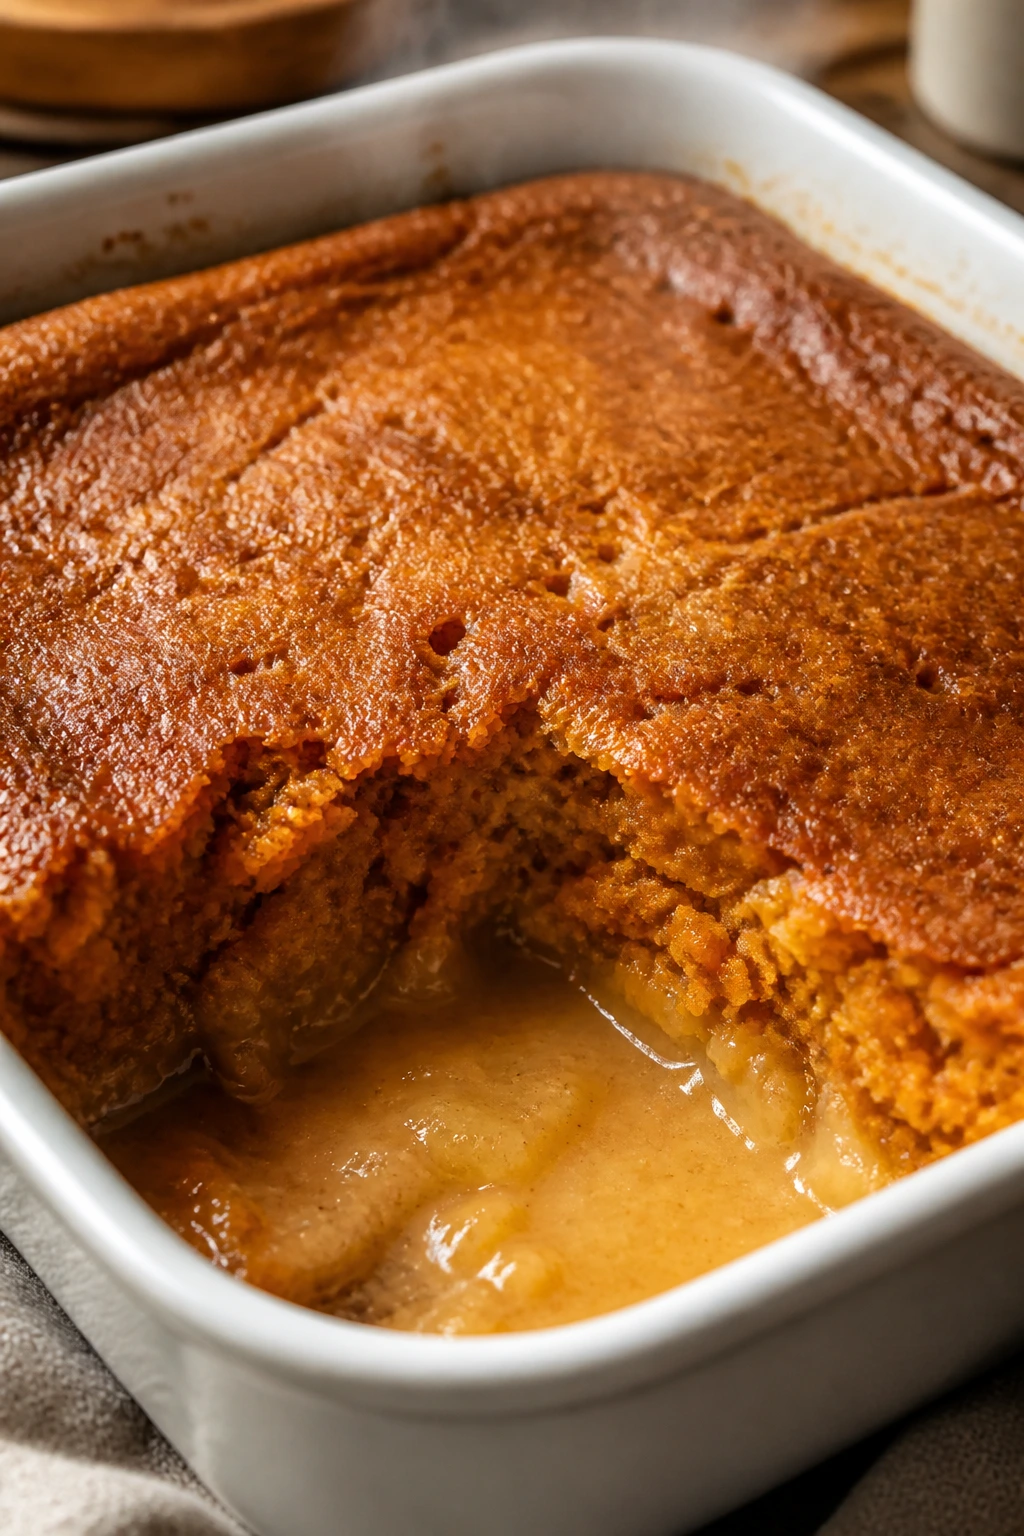
Intro: This one looks a little old-fashioned, which suits it. The top bakes into a soft cake while the bottom turns creamy and spoonable, almost like a sauce. Sweet potato gives the whole dish a deep color and a mellow sweetness that tastes more interesting than a plain vanilla pudding cake.
Why It Works: The self-saucing style happens because the batter and liquid are layered instead of fully mixed. Sweet potato adds body and a velvety texture, and the spices keep the flavor from feeling too quiet. Serve it warm, because the pudding layer is the whole reason to make it.
Key Ingredients:
- 1 cup mashed sweet potato
- 1 cup flour
- 1 cup brown sugar
- 2 teaspoons baking powder
- 1 teaspoon cinnamon
- 1/4 teaspoon nutmeg
- 1 cup milk
- 1/4 cup melted butter
- 1 cup hot water
- 1 teaspoon vanilla extract
Quick Steps:
- Heat the oven to 350°F and butter an 8×8-inch baking dish.
- Mix flour, 1/2 cup brown sugar, baking powder, cinnamon, nutmeg, and salt.
- Stir in sweet potato, milk, melted butter, and vanilla.
- Spread the batter in the dish.
- Sprinkle the remaining brown sugar over the top and pour hot water over everything.
- Bake 35 to 40 minutes, then serve warm.
Equipment for This Recipe:
- 8×8-inch baking dish
- Mixing bowls
- Whisk
- Spoon
How to Serve This Dish: Spoon it into bowls and add whipped cream or vanilla ice cream. You want some of the sauce from the bottom in each serving.
Pro Tips for This Recipe:
- Do not stir after adding the hot water.
- Use a deep dish so the bubbling sauce has room.
- Bake until the top is set and the center still looks saucy underneath.
- Freshly mashed sweet potato gives better texture than watery canned puree.
Variations on This Dish:
- Maple Sweet Potato Cake: Replace part of the brown sugar with maple syrup.
- Pecan Top: Add chopped pecans to the sugar layer.
- Dairy-Free Version: Use plant milk and plant butter.
Common Mistakes to Avoid with This Recipe:
- Don’t overbake or the sauce disappears.
- Don’t use a shallow pan.
- Don’t expect clean slices; this is a spoon dessert.
21. Chocolate Pecan Brownies with Sea Salt
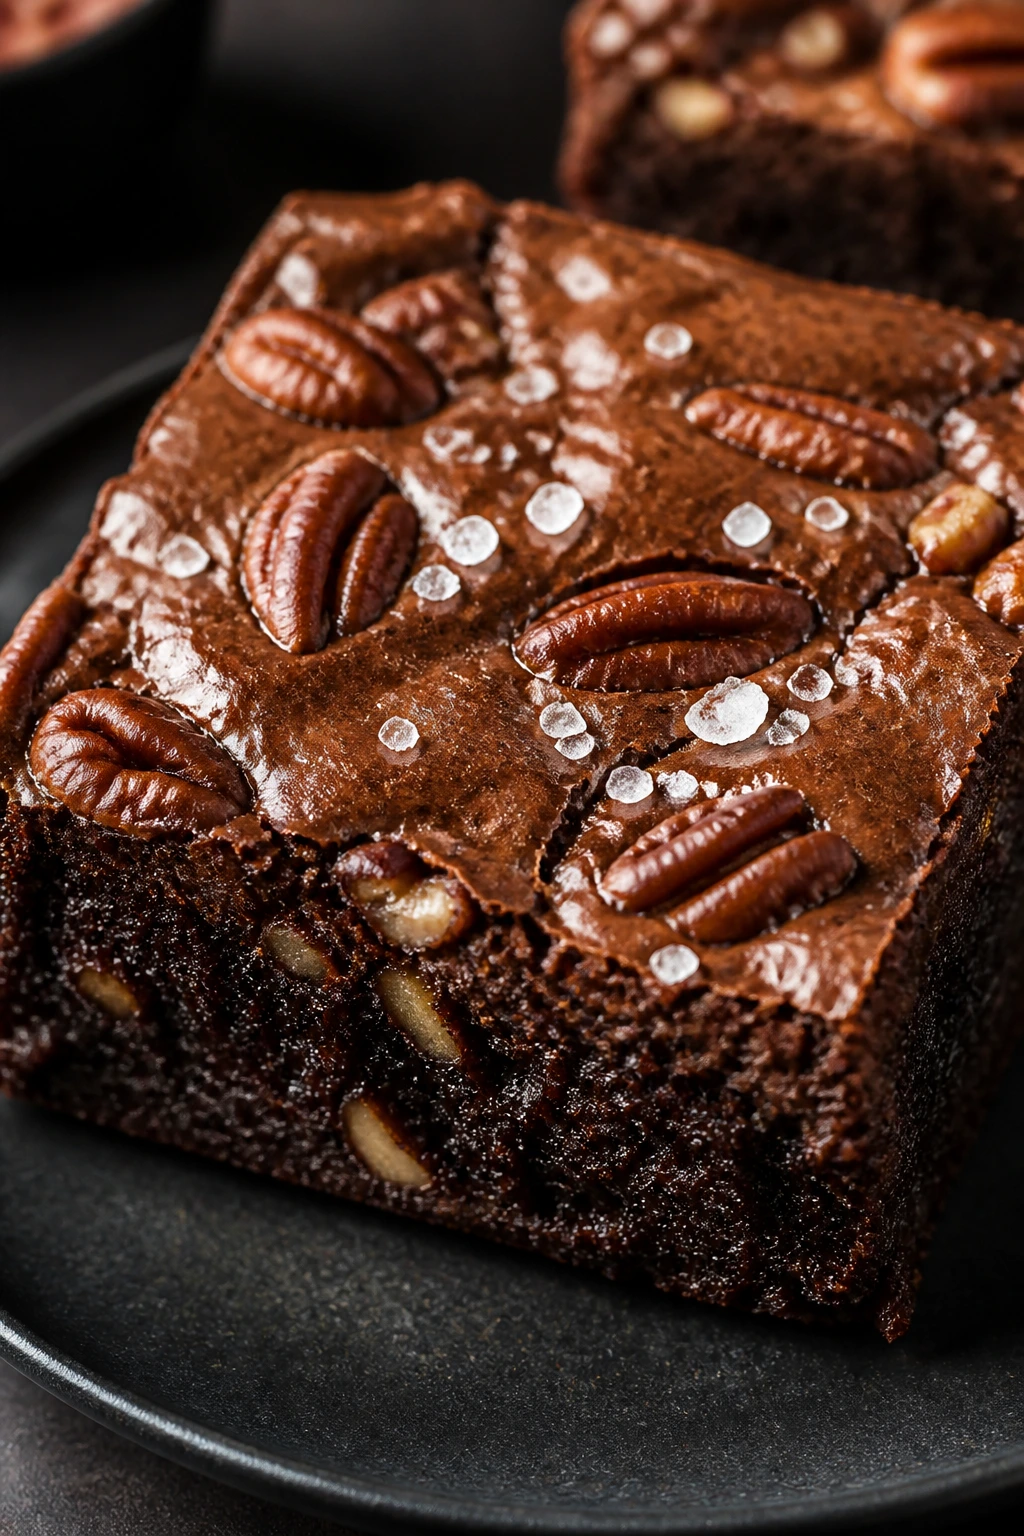
Intro: Brownies don’t automatically read as fall, but pecans fix that in a hurry. Toasted nuts bring warmth and crunch, while the sea salt on top keeps the chocolate from collapsing into sweetness. These are dense, fudgy, and not remotely shy.
Why It Works: Chocolate and pecans give you richness and texture without needing much decoration. The salt on top keeps the finish sharp, and a slightly underbaked center makes the brownies feel plush instead of dry. If you want a dessert that survives being stacked in a tin, this is a good one.
Key Ingredients:
- 1 cup unsalted butter
- 8 ounces dark chocolate
- 1 1/2 cups granulated sugar
- 3 large eggs
- 1 cup all-purpose flour
- 1/3 cup cocoa powder
- 1 cup toasted pecans
- 1 teaspoon vanilla extract
- 1 teaspoon flaky sea salt
Quick Steps:
- Heat the oven to 350°F and line an 8×8-inch or 9×9-inch pan.
- Melt butter and chocolate, then whisk in sugar, eggs, and vanilla.
- Stir in flour, cocoa, and salt.
- Fold in pecans and spread in the pan.
- Bake 28 to 32 minutes.
- Cool, then finish with flaky sea salt before cutting.
Equipment for This Recipe:
- Saucepan or microwave-safe bowl
- Baking pan
- Mixing bowls
- Spatula
How to Serve This Dish: Serve in small squares, plain or with whipped cream. They’re rich enough that you don’t need much on the plate.
Pro Tips for This Recipe:
- Toast the pecans before adding them.
- Pull the brownies when the center is set but still soft.
- Chill before cutting for the cleanest edges.
- Use good dark chocolate if you want a deeper flavor.
Variations on This Recipe:
- Espresso Pecan Brownies: Add 1 teaspoon espresso powder to the batter.
- Chocolate Chip Version: Fold in extra chips for a more molten texture.
- Gluten-Free Brownies: Use a 1:1 flour blend.
Common Mistakes to Avoid with This Recipe:
- Don’t overbake or they lose the fudgy center.
- Don’t skip the salt; it matters here.
- Don’t cut hot brownies if you want neat squares.
22. Chai Spiced Sugar Cookies
Intro: These are the sugar cookies that got a little more interesting without getting complicated. The chai spices bring cardamom, cinnamon, ginger, and clove into the dough, and the cookies bake up soft with lightly crisp edges. They’re easy to dress up with a glaze or leave plain if the tray is already busy.
Why It Works: Sugar cookies are a clean slate, which means the spice blend carries all the personality. Chai flavor works well because it’s warm without leaning only on cinnamon. A simple drop-cookie version keeps the process fast and avoids the time sink of rolling and cutting.
Key Ingredients:
- 1 cup unsalted butter, softened
- 1 cup granulated sugar
- 1 large egg
- 2 1/2 cups all-purpose flour
- 2 teaspoons cinnamon
- 1 teaspoon ginger
- 1/2 teaspoon cardamom
- 1/4 teaspoon cloves
- 1/2 teaspoon baking powder
- 1/2 cup powdered sugar and milk for optional glaze
Quick Steps:
- Heat the oven to 350°F and line baking sheets.
- Cream butter and sugar, then beat in the egg.
- Stir in flour, spices, baking powder, and salt.
- Scoop onto sheets and flatten slightly.
- Bake 10 to 12 minutes until the edges set.
- Cool and glaze if you want extra sweetness.
Equipment for This Recipe:
- Baking sheets
- Mixer
- Cookie scoop
- Cooling rack
How to Serve This Dish: Serve with tea, unsurprisingly, or with coffee if you want the spices to read sharper. A thin glaze makes them more holiday-ready, but they’re fine plain.
Pro Tips for This Recipe:
- Don’t overload the cloves; they take over fast.
- Chill the dough briefly if it gets sticky.
- Bake just until the edges set and the centers still look pale.
- A dusting of cinnamon sugar is enough if you don’t want glaze.
Variations on This Dish:
- Orange Chai Cookies: Add orange zest to the dough.
- Glazed Chai Cookies: Finish with a cardamom glaze.
- Iced Cutout Version: Chill the dough and roll it for cutout shapes.
Common Mistakes to Avoid with This Recipe:
- Don’t make the spice mix too heavy-handed.
- Don’t overbake or they lose the soft center.
- Don’t glaze warm cookies unless you want a messy plate.
23. Apple Fritter Muffins
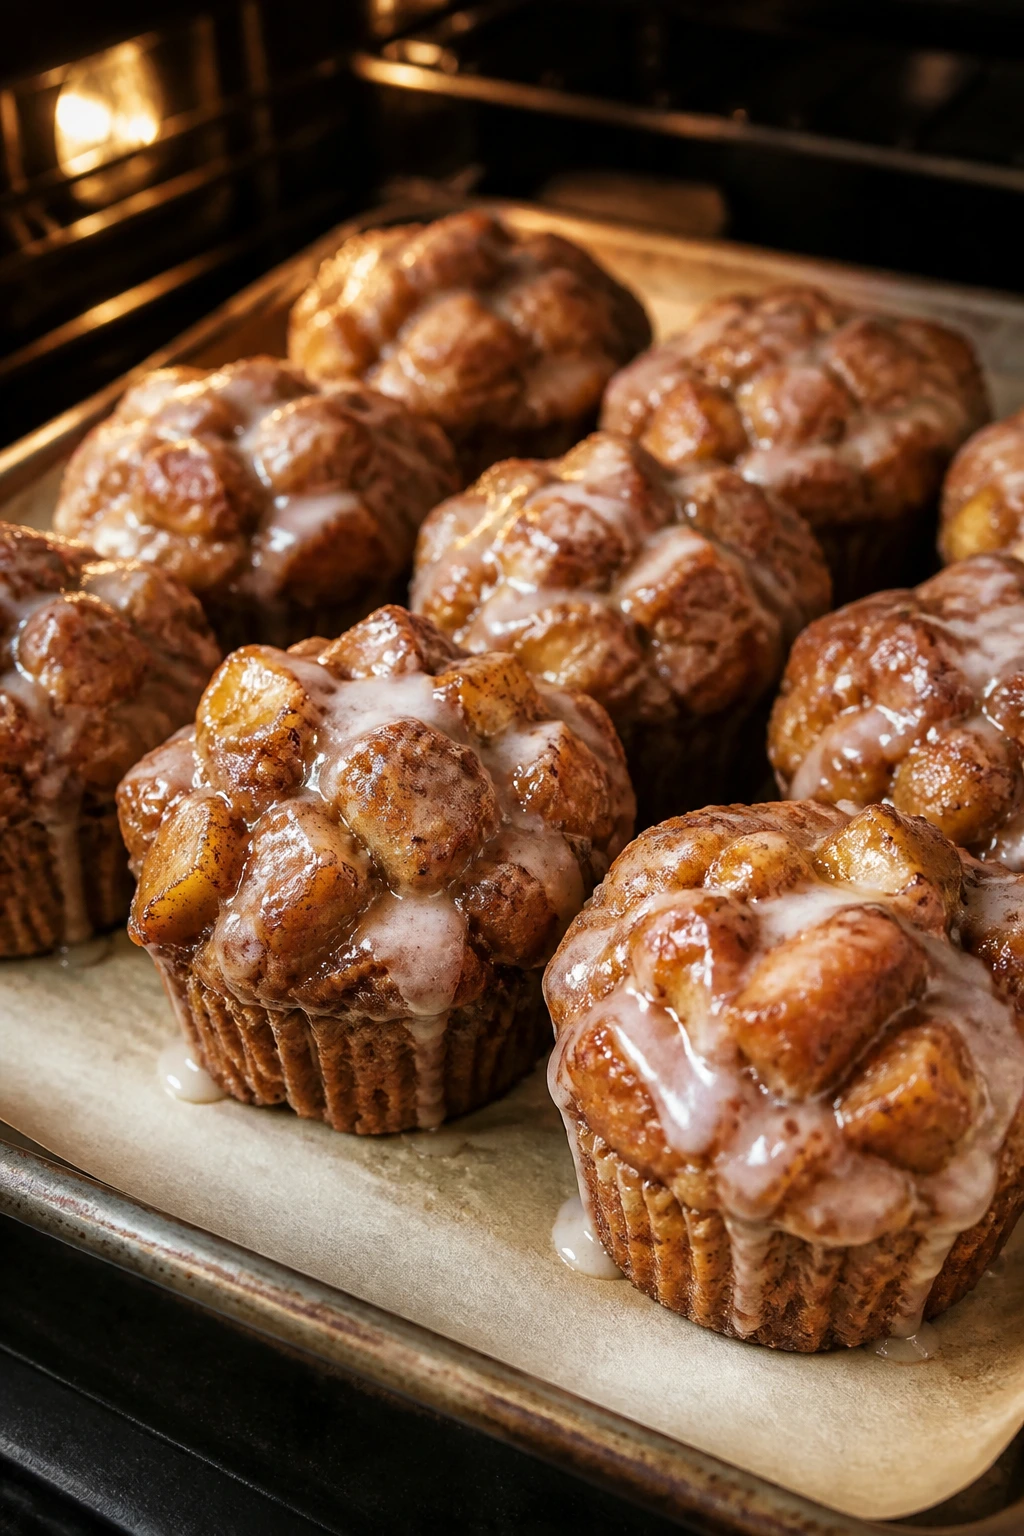
Intro: These taste like bakery apple fritters but skip the frying pot and sticky cleanup. The muffin crumb stays soft, the apple pieces soften into little sweet pockets, and the glaze clings to the top just enough to make each one look finished. They’re excellent for brunch tables that lean dessert-heavy.
Why It Works: Apples stay tender when folded into muffin batter, and the cinnamon batter gives the finished muffins that fritter smell without a vat of oil. A hot oven helps the tops dome before the center sets, which is how you get that nice bakery shape. The glaze adds the fritter feeling without frying.
Key Ingredients:
- 2 cups flour
- 2 teaspoons baking powder
- 1 teaspoon cinnamon
- 1/2 cup butter, softened
- 3/4 cup sugar
- 2 large eggs
- 1/2 cup milk
- 2 cups peeled diced apples
- 1 cup powdered sugar
- 2 tablespoons milk for glaze
Quick Steps:
- Heat the oven to 400°F and line a muffin pan.
- Whisk flour, baking powder, cinnamon, and salt.
- Cream butter and sugar, then beat in eggs and milk.
- Fold in dry ingredients and apples.
- Fill muffin cups and bake 18 to 20 minutes.
- Cool slightly, then drizzle with glaze.
Equipment for This Recipe:
- Muffin pan
- Paper liners
- Mixer
- Small bowl for glaze
How to Serve This Dish: Serve warm, with the glaze still a little tacky, alongside coffee or cider. They’re best on the same day, which is not a bad thing.
Pro Tips for This Recipe:
- Dice apples small so they soften through.
- Fill the cups almost full for good domes.
- Glaze while the muffins are just warm, not hot.
- A pinch of nutmeg in the batter works well.
Variations on This Dish:
- Apple Cinnamon Crumb Muffins: Add a streusel topping.
- Maple Glaze Muffins: Replace milk in the glaze with maple syrup.
- Mini Muffins: Bake for bite-size holiday trays.
Common Mistakes to Avoid with This Recipe:
- Don’t use giant apple chunks.
- Don’t glaze too early or it slides off.
- Don’t overmix the batter.
24. Cranberry Pecan Biscotti
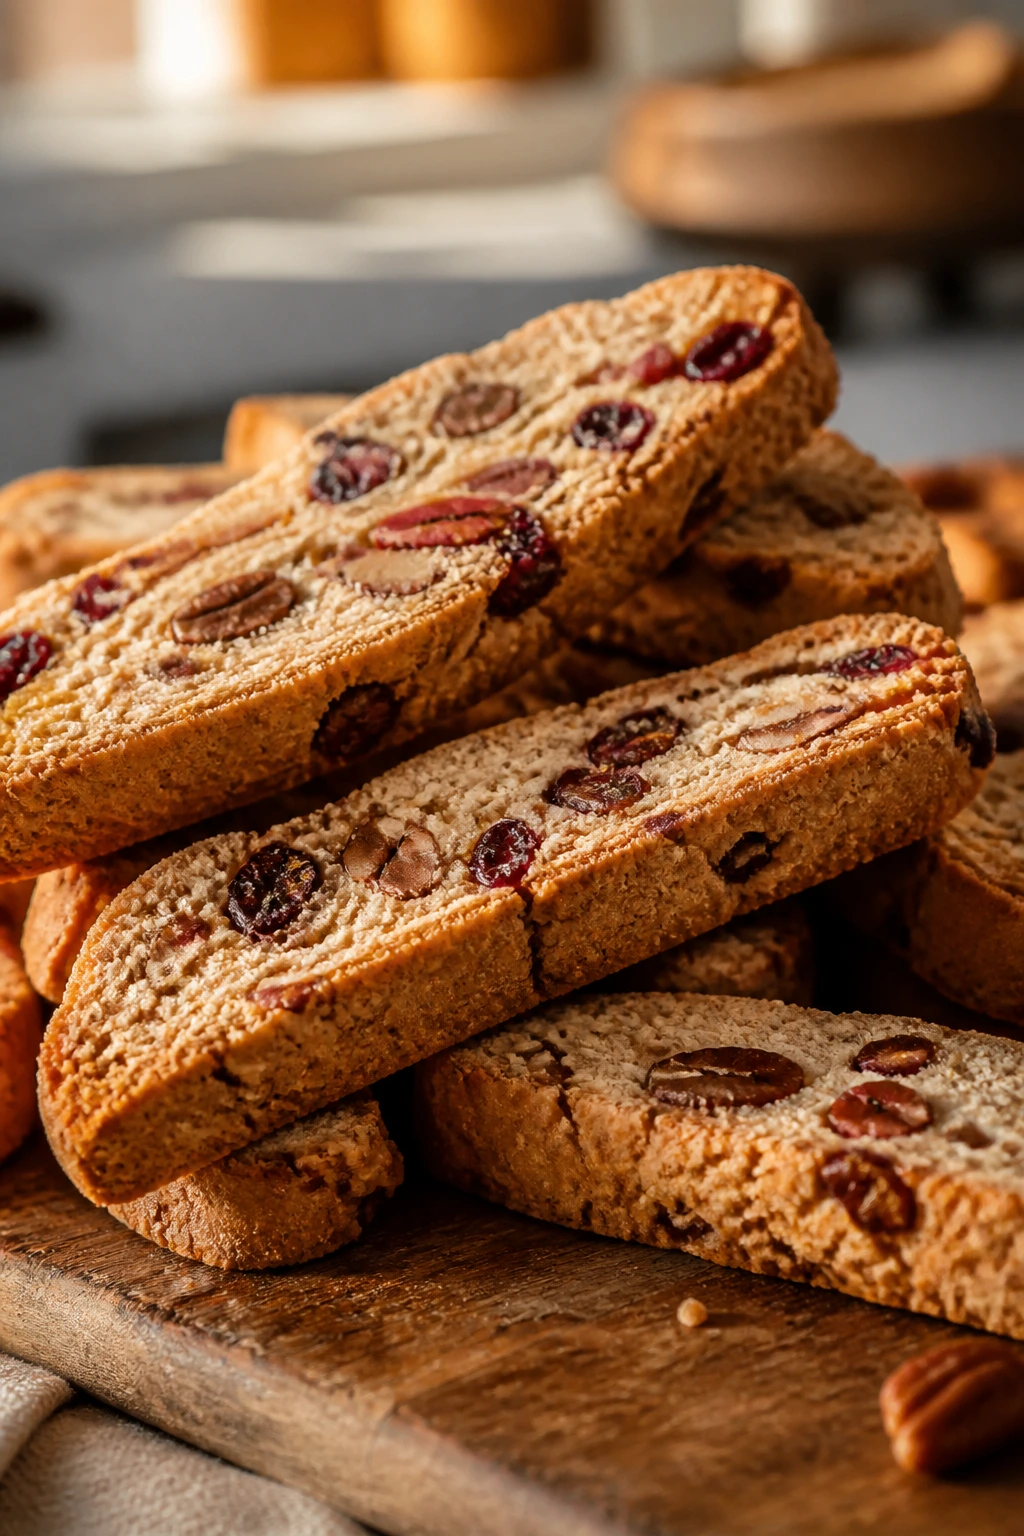
Intro: Biscotti are the sensible cookies of the holiday world, which is not a flaw. They’re crisp, sturdy, and built for dunking, and the cranberries and pecans give them just enough seasonal flavor to feel festive. If you’re putting together edible gifts, these are a smart choice.
Why It Works: Biscotti are baked twice, so the texture gets dry and crunchy in the right way. Cranberries bring sweet tart spots, pecans add richness, and the loaf shape makes them easy to slice into clean sticks. They keep for a long time, which is handy when baking ahead.
Key Ingredients:
- 2 cups flour
- 3/4 cup sugar
- 1 teaspoon baking powder
- 2 large eggs
- 1 teaspoon vanilla extract
- 3/4 cup dried cranberries
- 3/4 cup chopped pecans
- 1 teaspoon orange zest
- 1/2 teaspoon cinnamon
Quick Steps:
- Heat the oven to 350°F and line a baking sheet.
- Mix flour, sugar, baking powder, cinnamon, salt, and zest.
- Stir in eggs and vanilla, then fold in cranberries and pecans.
- Shape into one log and bake 25 to 30 minutes.
- Cool slightly, slice into sticks, and bake again at 325°F for 10 to 12 minutes per side.
- Cool fully so they crisp up.
Equipment for This Recipe:
- Baking sheet
- Serrated knife
- Mixing bowl
- Parchment paper
How to Serve This Dish: Serve with espresso, tea, or hot chocolate. Biscotti are also good wrapped in cellophane for gifting, which is one of the few times cellophane earns its keep.
Pro Tips for This Recipe:
- Slice while the log is still warm, not hot or cold.
- Use a serrated knife so the pieces don’t shatter.
- Dry cranberries work better than fresh here.
- Let them cool fully before storing or they soften.
Variations on This Recipe:
- Chocolate-Dipped Biscotti: Dip one end in melted dark chocolate.
- Almond Cranberry Biscotti: Swap pecans for sliced almonds.
- Lemon Cranberry Biscotti: Replace orange zest with lemon zest.
Common Mistakes to Avoid with This Recipe:
- Don’t wait too long to slice the first bake.
- Don’t cut too thin or they break on the second bake.
- Don’t store them before they are fully cool.
25. Pumpkin Roll with Cream Cheese Filling
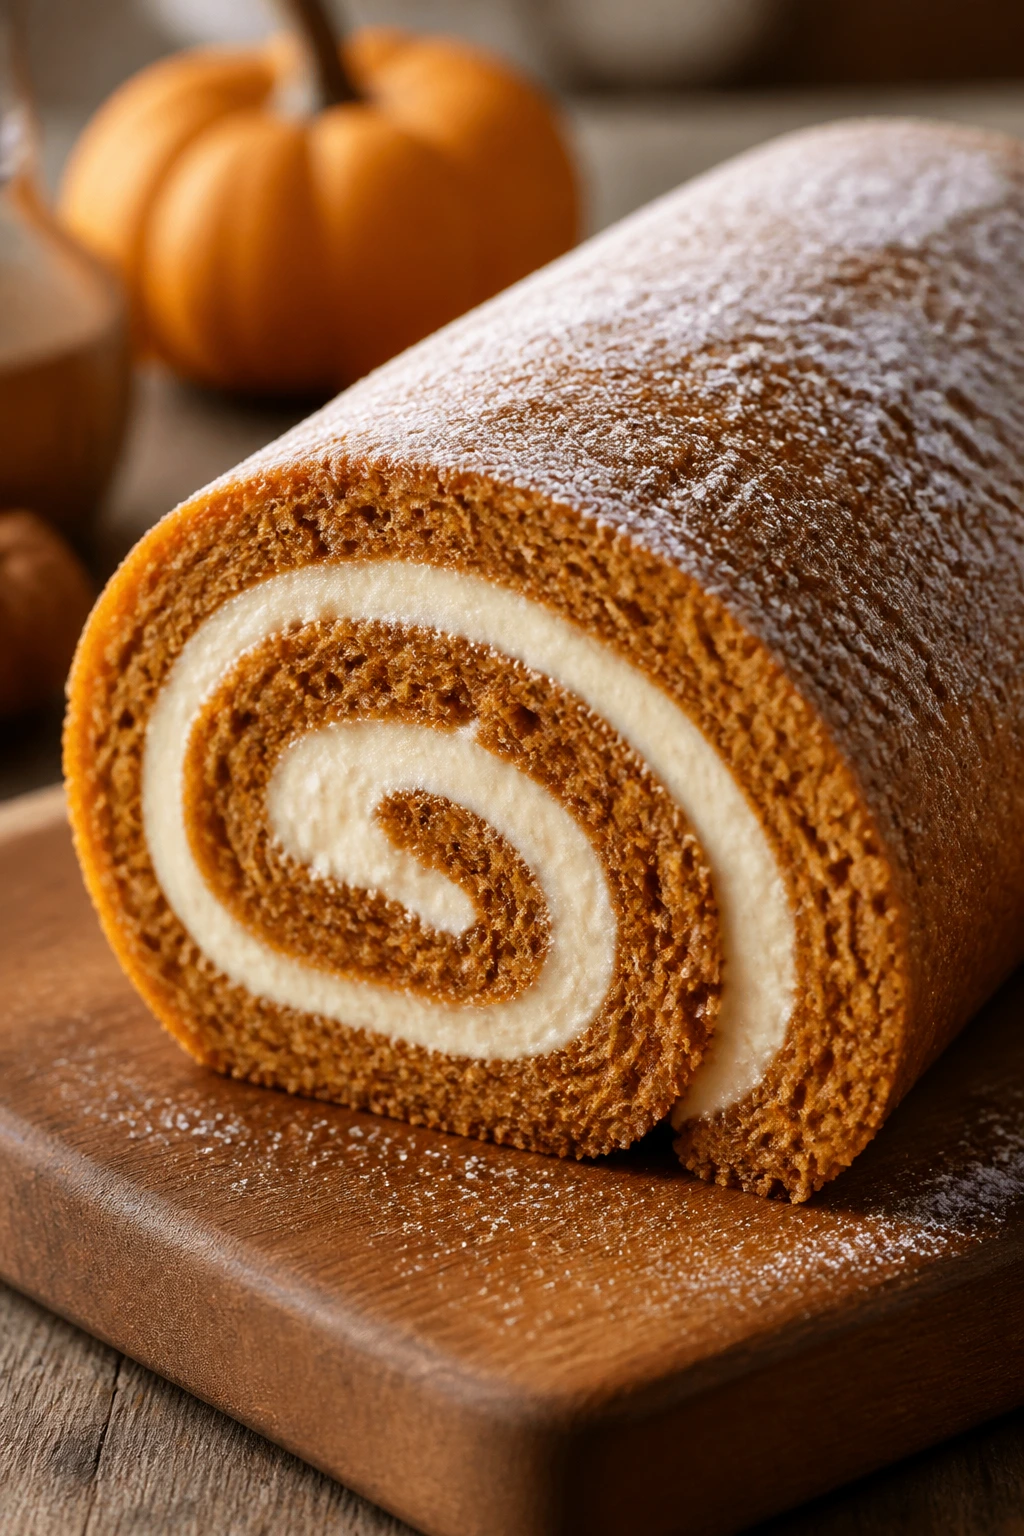
Intro: A pumpkin roll looks dramatic, but it’s mostly sponge cake and patience. The cake is thin and flexible, the cream cheese filling is cool and tangy, and the spiral slice always gets a little attention when it lands on the plate. It’s a holiday classic for a reason.
Why It Works: The thin sponge bakes fast and stays bendable enough to roll while warm. A towel helps train the cake into shape before the filling goes in, which reduces cracks later. The filling should be spread to the edges in a thin layer so the roll stays neat.
Key Ingredients:
- 3 eggs
- 1 cup sugar
- 2/3 cup pumpkin puree
- 3/4 cup flour
- 1 teaspoon cinnamon
- 1 teaspoon baking powder
- 8 ounces cream cheese
- 1 cup powdered sugar
- 1/4 cup butter, softened
- 1 teaspoon vanilla extract
Quick Steps:
- Heat the oven to 375°F and line a jelly-roll pan with parchment.
- Beat eggs and sugar until thick, then mix in pumpkin.
- Fold in flour, cinnamon, baking powder, and salt.
- Spread thinly in the pan and bake 12 to 14 minutes.
- Turn onto a towel dusted with powdered sugar and roll while warm.
- Cool, unroll, spread filling, reroll, and chill before slicing.
Equipment for This Recipe:
- Jelly-roll pan
- Parchment paper
- Clean kitchen towel
- Mixer
How to Serve This Dish: Slice with a sharp knife and serve chilled or slightly cool. A dusting of powdered sugar on top keeps the spiral visible.
Pro Tips for This Recipe:
- Roll the cake while it’s still warm.
- Don’t overbake or the sponge cracks.
- Chill before slicing for the cleanest spiral.
- Spread filling in an even thin layer.
Variations on This Recipe:
- Maple Cream Cheese Roll: Add maple syrup to the filling.
- Ginger Pumpkin Roll: Add a little ground ginger for sharper spice.
- Chocolate Drizzle Roll: Finish with thin lines of melted chocolate.
Common Mistakes to Avoid with This Recipe:
- Don’t let the cake cool flat before rolling.
- Don’t overfill or the spiral splits.
- Don’t use too much flour in the sponge or it gets stiff.
26. Caramel Pear Upside-Down Cake

Intro: Upside-down cakes have a nice little bit of theater built in, and this one gets it from pears and caramel. The fruit caramelizes in the pan, the cake bakes up around it, and the flip at the end reveals glossy slices arranged like they were planned. It’s plain in the best way.
Why It Works: Pears soften beautifully under heat and don’t fall apart as fast as some other fruits. The caramel base keeps the fruit sweet and sticky, while the cake batter stays light enough to balance the richness. Use a pan with straight sides if you want a cleaner release.
Key Ingredients:
- 3 pears, peeled and sliced
- 1/2 cup butter
- 3/4 cup brown sugar
- 2 cups flour
- 2 teaspoons baking powder
- 1 teaspoon cinnamon
- 1/2 cup butter, softened
- 1 cup sugar
- 2 eggs
- 1 cup milk
Quick Steps:
- Heat the oven to 350°F and melt butter with brown sugar in the cake pan.
- Arrange the pear slices over the caramel.
- Whisk flour, baking powder, cinnamon, and salt.
- Cream softened butter and sugar, then beat in eggs and milk.
- Spread batter over the pears and bake 40 to 45 minutes.
- Cool 10 minutes, then flip onto a serving plate.
Equipment for This Recipe:
- 9-inch cake pan or oven-safe skillet
- Mixing bowls
- Mixer
- Knife
How to Serve This Dish: Serve warm so the caramel stays soft. A spoonful of whipped cream or crème fraîche makes the pears taste even richer.
Pro Tips for This Recipe:
- Slice pears evenly so they caramelize at the same rate.
- Don’t let the caramel go too dark before adding batter.
- Wait the full 10 minutes before flipping.
- Use a pan that releases well; stuck caramel is a mess.
Variations on This Recipe:
- Apple Pear Upside-Down Cake: Mix pears with a few apple slices.
- Ginger Pear Cake: Add fresh ginger to the batter.
- Walnut Caramel Cake: Scatter chopped walnuts over the caramel layer.
Common Mistakes to Avoid with This Recipe:
- Don’t flip too soon or the caramel runs.
- Don’t overcrowd the fruit.
- Don’t bake in a pan that’s too shallow.
27. Apple Cider Snickerdoodles
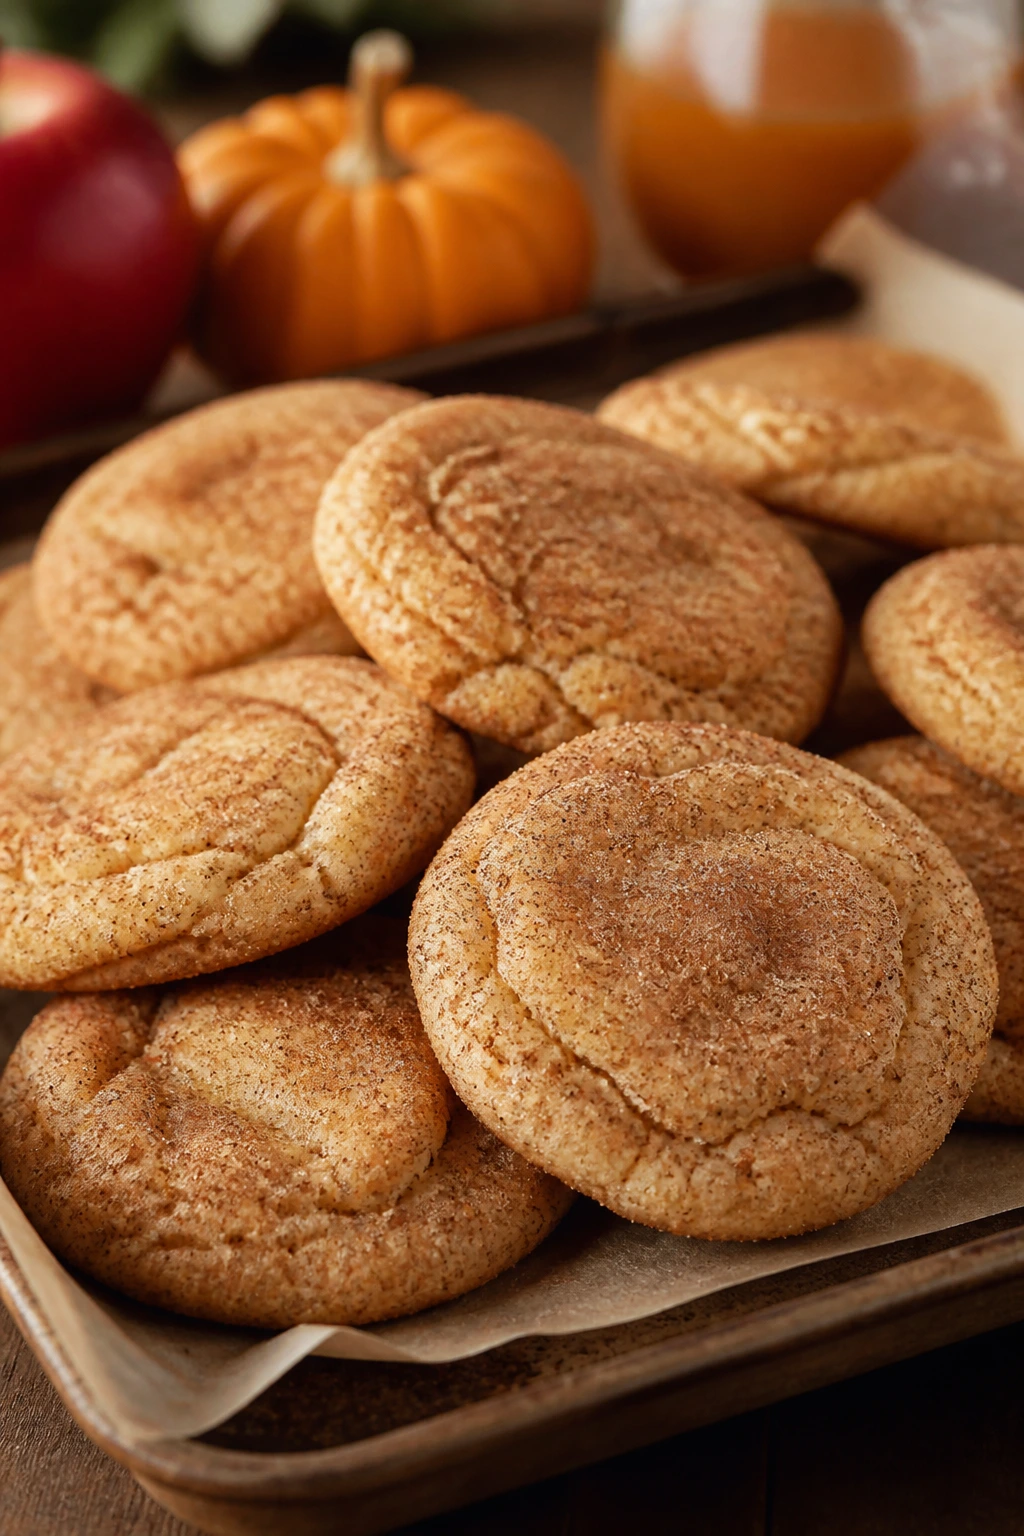
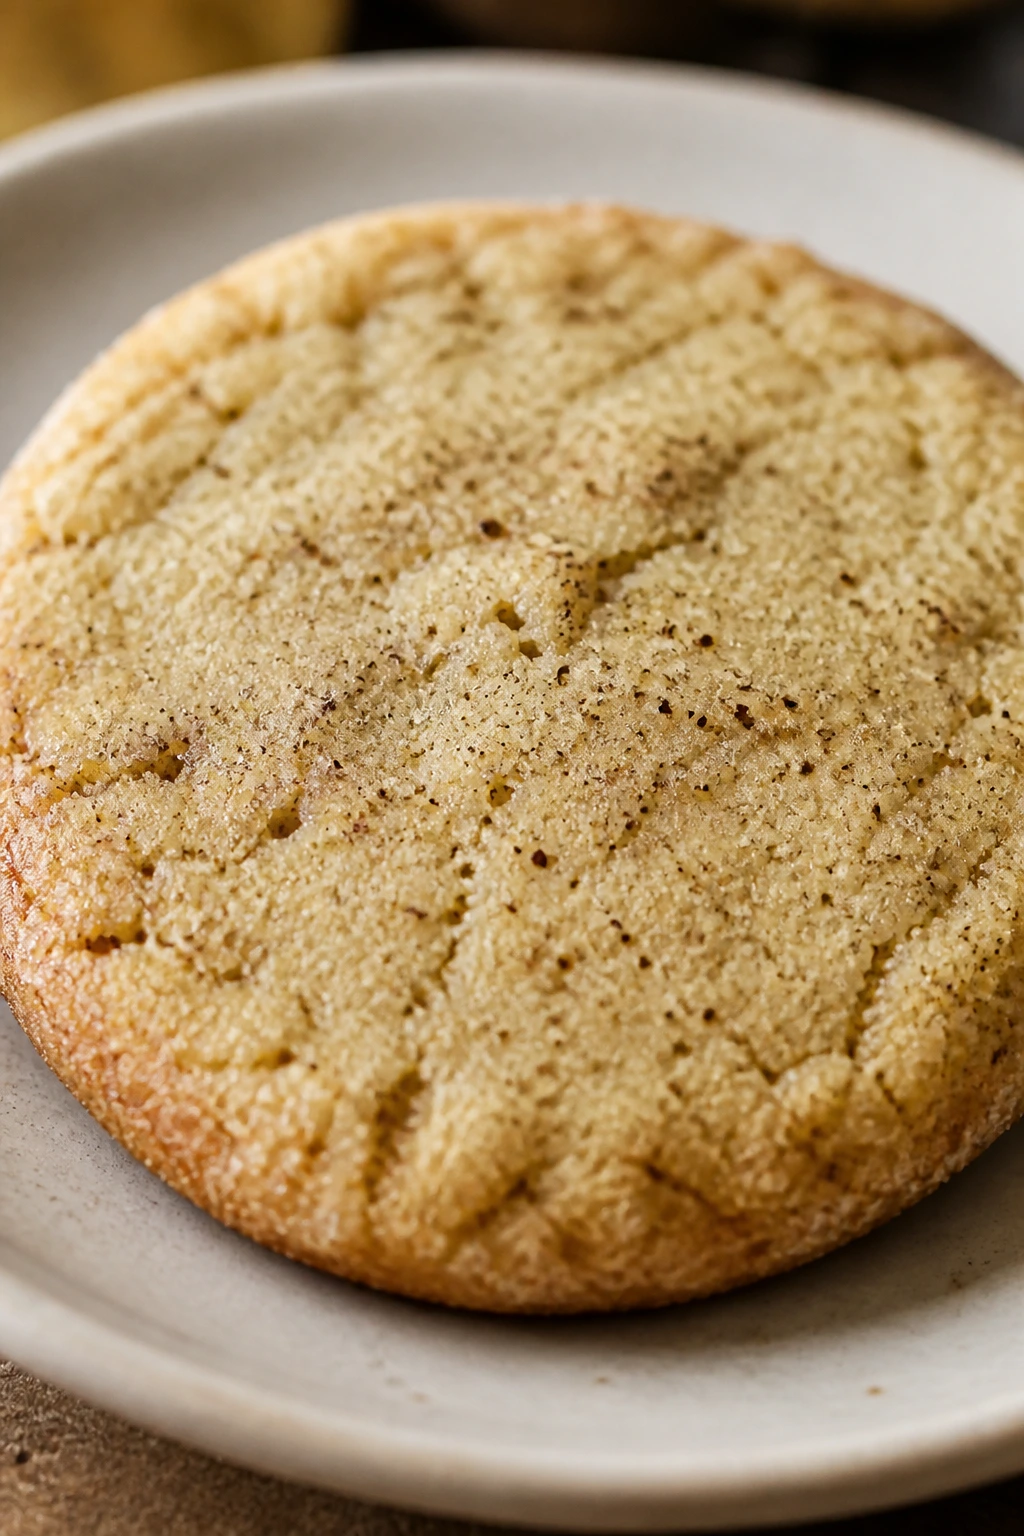
Intro: These cookies lean familiar, but the cider gives them a cleaner apple note than you’d expect. The centers stay soft, the cinnamon sugar coating makes the edges crackly, and the reduced cider keeps the flavor from fading into plain sugar cookie territory. They’re easy, and that’s the point.
Why It Works: Snickerdoodles already have the right texture for holiday trays: soft inside, lightly crisp outside. Reducing the cider concentrates apple flavor without adding too much liquid, and the cream of tartar keeps that classic tang. Roll them in cinnamon sugar before baking, and they smell like you know what you’re doing.
Key Ingredients:
- 1 cup apple cider, reduced to 1/4 cup
- 1 cup unsalted butter, softened
- 1 1/2 cups sugar
- 2 large eggs
- 2 3/4 cups flour
- 2 teaspoons cream of tartar
- 1 teaspoon baking soda
- 1 teaspoon cinnamon
- 1/4 cup sugar and 2 teaspoons cinnamon for rolling
Quick Steps:
- Simmer cider until reduced, then cool.
- Cream butter and sugar, then beat in eggs and cider.
- Stir in flour, cream of tartar, baking soda, cinnamon, and salt.
- Roll dough into balls, coat in cinnamon sugar, and place on sheets.
- Bake at 350°F for 10 to 12 minutes.
- Cool briefly on the pan before moving.
Equipment for This Recipe:
- Saucepan
- Baking sheets
- Mixer
- Cooling rack
How to Serve This Dish: Serve with milk, coffee, or hot cider. They are best the day they’re baked, which suits a busy holiday week just fine.
Pro Tips for This Recipe:
- Reduce the cider fully or the dough gets too loose.
- Chill the dough if it feels soft.
- Don’t overbake; soft centers are the whole appeal.
- Roll generously in cinnamon sugar for a thicker crust.
Variations on This Recipe:
- Maple Snickerdoodles: Swap part of the sugar for maple sugar.
- Pumpkin Snickerdoodles: Add a spoonful of pumpkin puree and a little extra flour.
- Thicker Bakery Style: Chill the dough overnight and bake slightly larger scoops.
Common Mistakes to Avoid with This Recipe:
- Don’t skip the cider reduction.
- Don’t bake until the cookies look firm all over.
- Don’t flatten the dough balls before baking.
28. Spiced Almond Cake with Orange Glaze
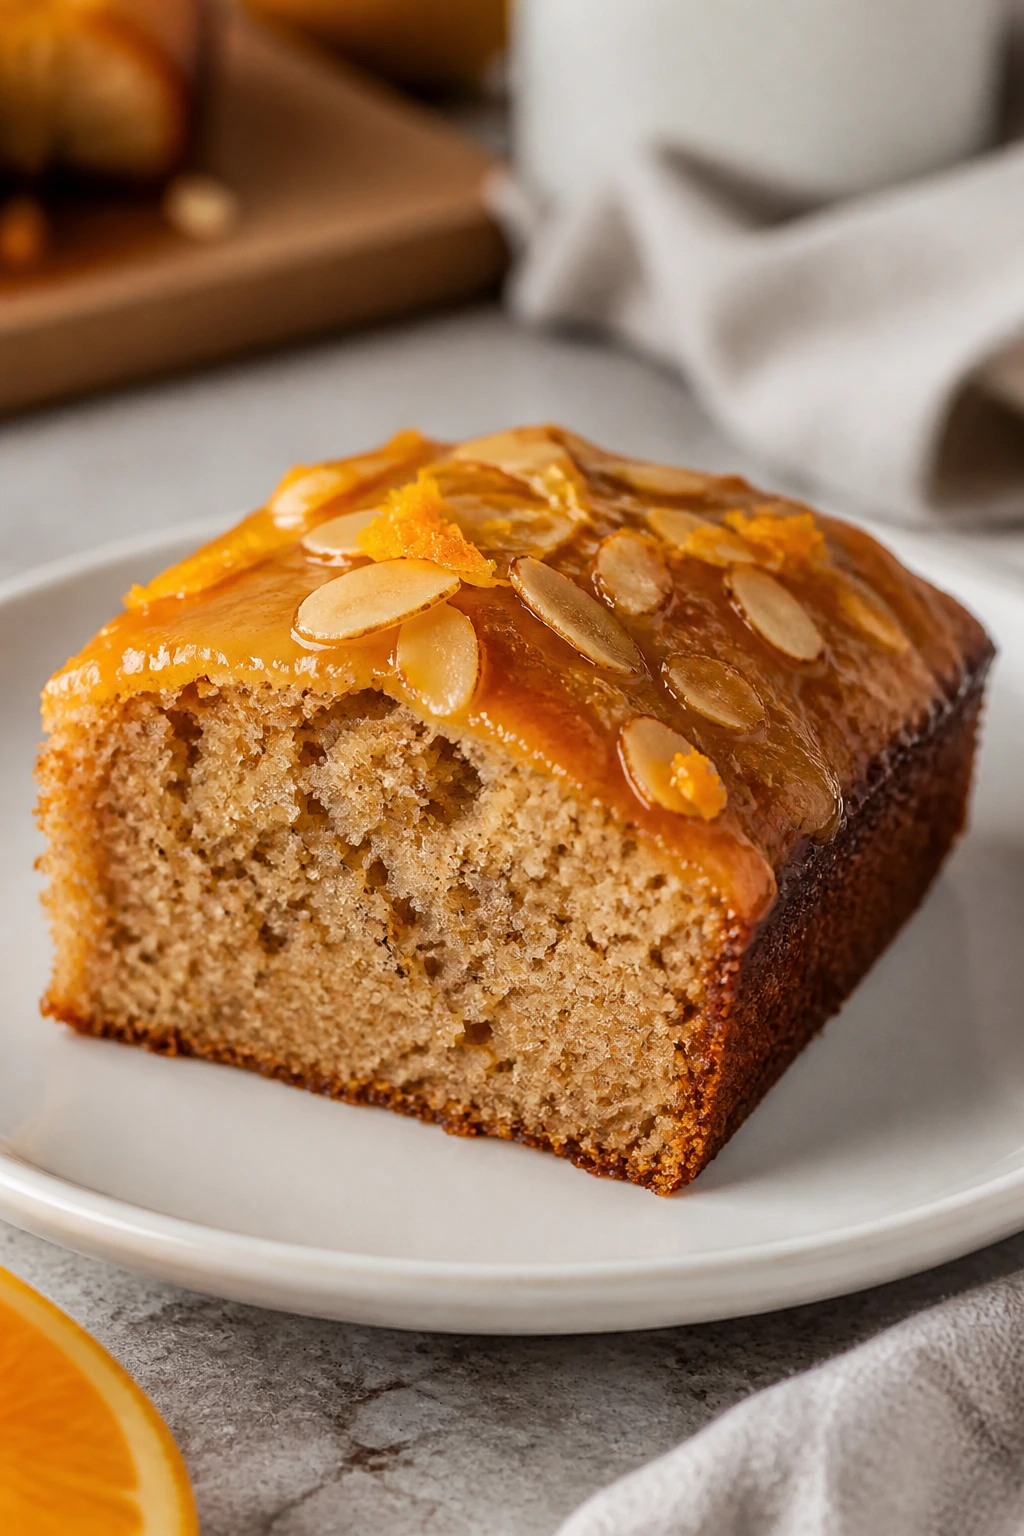
Intro: Almond cake usually gets ignored next to the louder seasonal desserts, which is a shame because it has a clean, delicate flavor that plays well with spice and citrus. This version adds cinnamon and cardamom to the batter, then finishes with an orange glaze that sinks into the top just enough to keep every slice moist. It feels calm on a very busy dessert table.
Why It Works: Almond extract gives the cake a fragrant backbone, while the spices keep it in the fall lane. Orange glaze brightens the crumb and stops the cake from tasting heavy after a big meal. A simple loaf or round cake works here; you don’t need layers to make it feel finished.
Key Ingredients:
- 2 cups all-purpose flour
- 1 teaspoon baking powder
- 1 teaspoon cinnamon
- 1/4 teaspoon cardamom
- 1 cup unsalted butter, softened
- 1 1/2 cups sugar
- 3 large eggs
- 1 teaspoon almond extract
- 1/2 cup sour cream
- 1/2 cup orange juice
- 1 cup powdered sugar for glaze
Quick Steps:
- Heat the oven to 350°F and grease a loaf pan or 9-inch round pan.
- Whisk flour, baking powder, cinnamon, cardamom, and salt.
- Cream butter and sugar, then beat in eggs and almond extract.
- Mix in sour cream and dry ingredients.
- Bake 35 to 45 minutes, until a tester comes out clean.
- Cool and drizzle with orange glaze.
Equipment for This Recipe:
- Loaf pan or round cake pan
- Mixer
- Mixing bowls
- Cooling rack
How to Serve This Dish: Serve slices with tea or coffee and a few orange zest curls on top if you want it to look extra polished. It’s a nice “quiet dessert” after a table full of richer sweets.
Pro Tips for This Recipe:
- Don’t overdo the almond extract; it can turn sharp fast.
- Use fresh orange juice for a brighter glaze.
- Let the cake cool before glazing so the top sets instead of soaking through.
- A little citrus zest in the batter lifts the spice.
Variations on This Recipe:
- Cranberry Almond Cake: Fold dried cranberries into the batter.
- Chocolate Almond Cake: Add a thin chocolate drizzle instead of orange glaze.
- Loaf Pan Gift Cake: Bake in smaller loaf pans for easier sharing.
Common Mistakes to Avoid with This Recipe:
- Don’t use too much almond extract.
- Don’t glaze a warm cake.
- Don’t underbake the center; this cake should be fully set before you unmold it.
Why These Desserts Work So Well for Holiday Baking
The common thread here is shape. Bars, cookies, loaf cakes, hand pies, and crumbles all hold up better than fragile layer cakes when the dessert has to sit on a buffet, ride in a foil pan, or get cut by someone with a plastic knife and no patience. That matters more than people admit. A dessert can taste great and still be a headache if it collapses the second it leaves the pan.
The other thing these recipes share is flavor that lands fast. Apple and cinnamon need only a little help. Pumpkin wants brown butter, cream cheese, or a sharper spice. Pears need citrus or ginger. Cranberries need sugar and fat to keep the tartness from taking over. These recipes are built around those pairings, so the flavor feels balanced instead of loosely seasonal.
There’s also a practical angle that I think makes or breaks holiday baking: most of these desserts improve after a rest. Bars slice cleaner the next day. Cookies settle into their chewy centers. Crumbles thicken slightly as they cool. That gives you breathing room, which is rare and valuable when the oven is already full of other things.
Essential Equipment for These Recipes
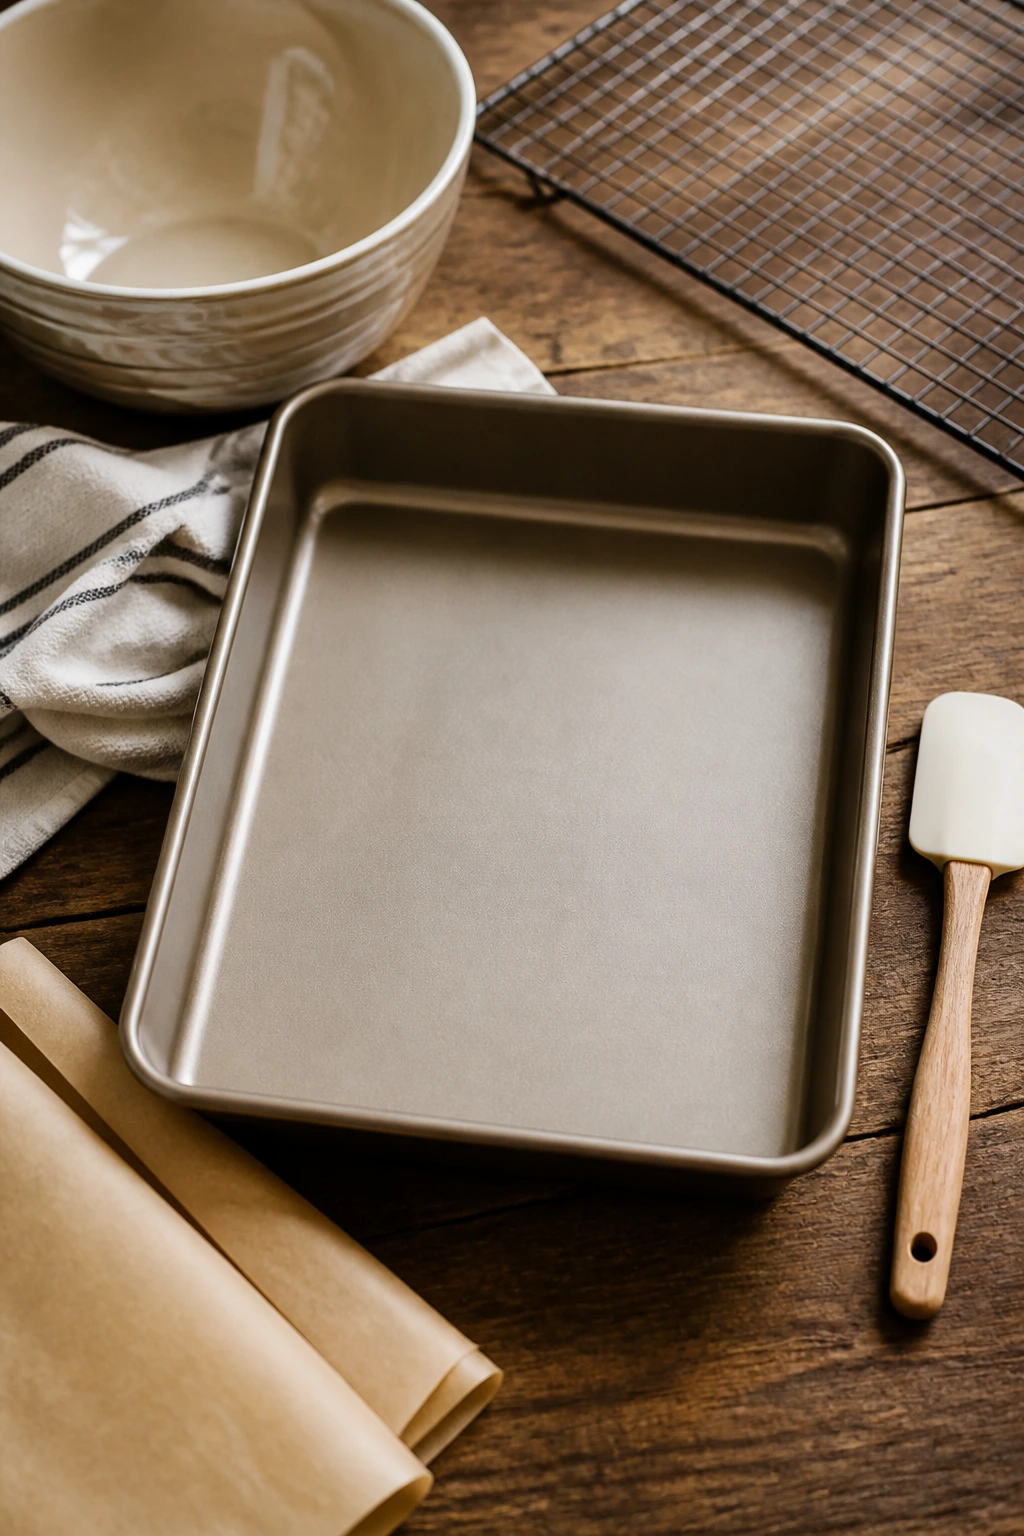
- 9×13-inch baking pan: Best for bars and layered sheet desserts that need clean, square portions.
- 8×8-inch or 9×9-inch pan: Handy for richer bars and smaller-batch desserts.
- Muffin pan: Needed for cupcakes and muffin-style bakes that portion themselves.
- Bundt pan: Great for cakes that rely on shape and glaze instead of frosting.
- Mixing bowls: Have at least two sizes so dry and wet ingredients stay separate until needed.
- Hand mixer or stand mixer: Useful for cream cheese fillings, cake batters, and cookie doughs.
- Rubber spatula: Better than a spoon for scraping thick batters and getting the last bit of glaze.
- Parchment paper: Makes bars and brownies lift out cleanly, which saves both time and cursing.
- Cooling rack: Helps baked goods set without getting soggy bottoms.
- Cookie scoop: Keeps cookies and muffin batter even so they bake at the same pace.
- Zester or microplane: Worth having for citrus zest in cranberry, orange, or maple desserts.
- Serrated knife: Best for biscotti, cakes, and anything with a crust that can crumble under pressure.
Smart Shopping and Ingredient Tips
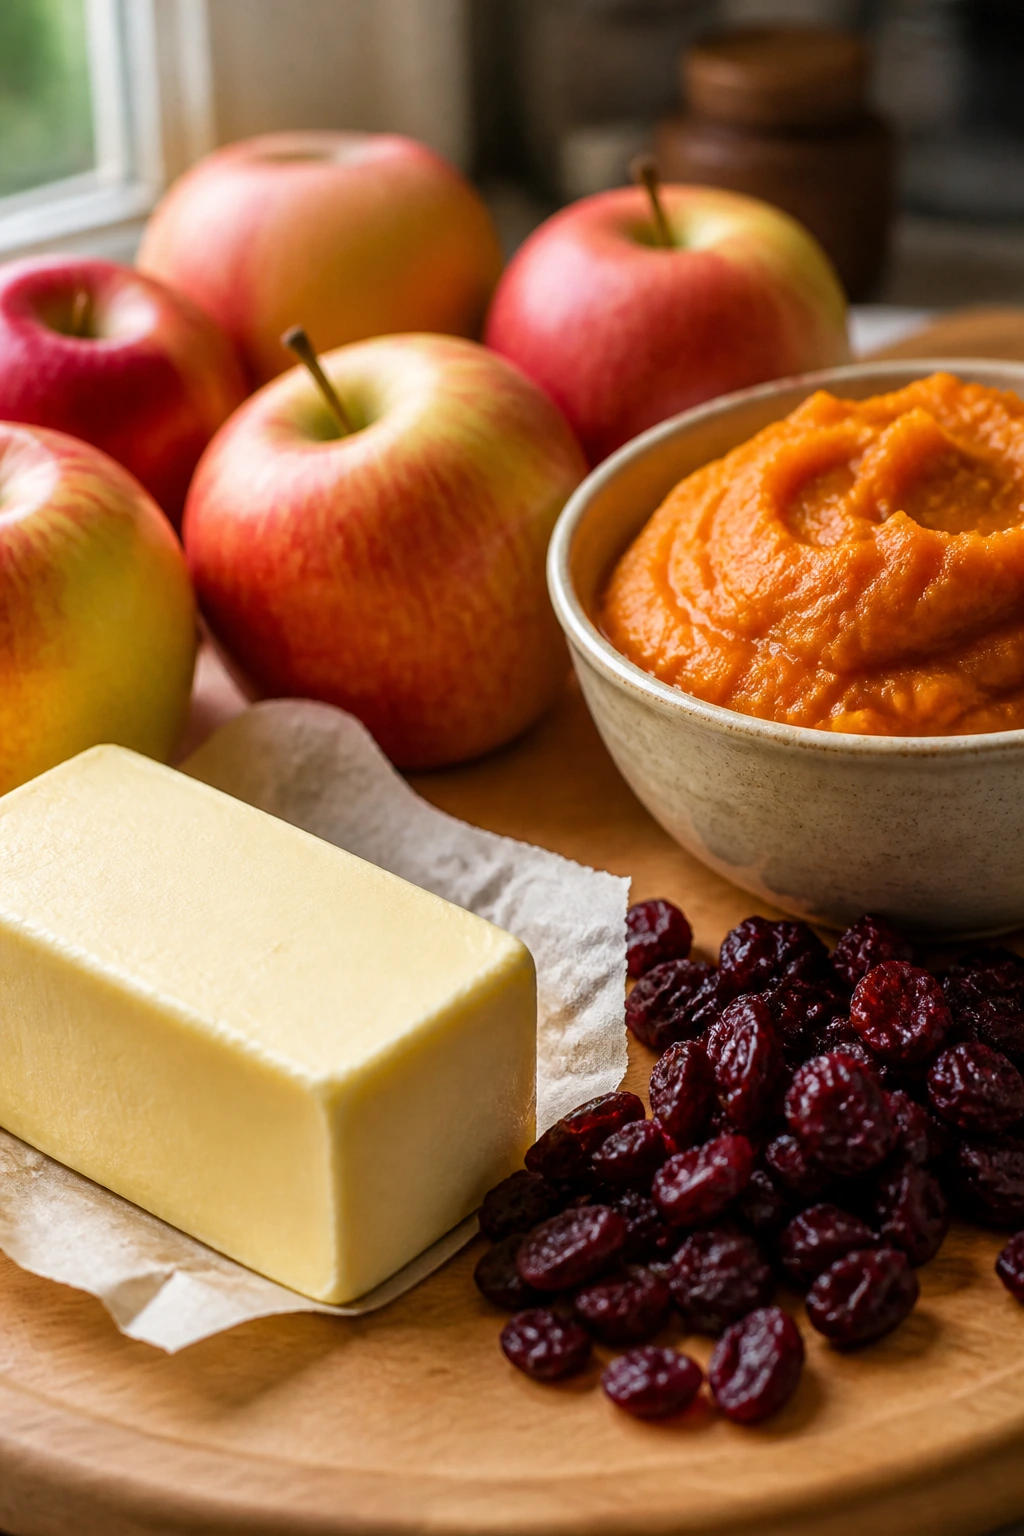
Butter matters more in these recipes than people think. When butter is a main flavor, as it is in shortbread bars, sandies, blondies, and pound-style cakes, buy butter that tastes clean and fresh. If you’re browning butter, use a light-colored saucepan so you can actually see the milk solids turn amber instead of guessing by smell alone.
Apples are the other place where choice matters. For bars, hand pies, and crisps, use a mix of firm tart apples and sweeter ones if you can. Granny Smith gives structure. Honeycrisp, Braeburn, and Pink Lady bring a softer sweetness. Do not use mealy apples for baking if you want fruit that still looks like fruit after the oven.
Pumpkin puree should be plain pumpkin, not pie filling. That sounds obvious until you’ve bought the wrong can once and had to pivot. If the puree looks watery, spoon it onto a paper towel-lined plate for a few minutes before mixing. That little step helps cupcakes, cookies, and bars hold their shape better.
For cranberries, frozen berries work just as well as fresh in bars, crumbles, and sauces. I usually buy frozen cranberries when the recipe needs a burst of tartness rather than a neat, glossy berry. For dried fruit, check the ingredient list if you care about added sugar or oil; some brands are sweeter and stickier than others.
Maple syrup should be real maple syrup. Pancake syrup is a different product with a different job, and the flavor difference shows up fast in maple bars, cakes, and glazes. The same goes for vanilla and cinnamon. They don’t need to be expensive, but they should taste like the thing they claim to be.
How to Serve These Desserts
Presentation: Keep the plating simple. Bars look best on a sheet of parchment or a plain platter; cakes need a dusting of powdered sugar, a glaze, or a few chopped nuts; crumbles want to be scooped into bowls while still warm. If the dessert already has a strong visual element, like a swirl or a flip, let that show.
Accompaniments: Whipped cream, vanilla ice cream, crème fraîche, lightly sweetened yogurt, and hot coffee are the easy partners that work across the collection. For brighter desserts like cranberry bars or orange-glazed cakes, lean on plain cream or tea. For richer desserts like brownies and cheesecake bars, serve smaller portions and keep the extras off the plate.
Portions: Bars and brownies are best cut small, especially in a holiday spread where people sample more than one dessert. Cookies should be medium-sized unless they’re gift cookies or sandwich cookies, which can be a touch larger. Cakes and crisps are easier to serve neatly if you let them cool long enough to set.
Beverage Pairing: Coffee is the safest answer, but not the only one. Chai works with pumpkin and molasses bakes. Black tea pairs well with biscotti, shortbread, and almond cake. Hot apple cider belongs beside the apple desserts, and a splash of cream in coffee is welcome with pecan, chocolate, or maple flavors.
Additional Tips and Flavor Boosters
Flavor Enhancement: Toast nuts before using them. Pecans, walnuts, and almonds taste flatter straight from the bag, and 8 to 10 minutes in the oven wakes them up without much effort.
Customization: If you want a dessert tray with more contrast, mix one brighter item into a lineup of rich ones. Cranberry-orange bars, citrus-glazed cake, or pear-ginger crumble stop the table from feeling like it’s all butter and cinnamon in the same lane.
Serving Suggestions: A tiny pinch of flaky salt on caramel, maple, or chocolate desserts does more than decoration. It sharpens the sweetness and makes the flavors taste cleaner.
Make-It-Yours: For a gluten-free swap, use a tested 1:1 flour blend in bars, cookies, and cakes rather than mixing random flours. For dairy-free baking, use a plant butter that can actually bake, not a spread that melts into oil. For lower-sugar versions, reduce the glaze or topping first; cutting the base sugar too hard usually hurts texture.
Make-Ahead, Storage, and Reheating Guidance
Most of these desserts keep well, which is one reason they work so nicely for holiday baking. Bars, brownies, and cookies usually hold at room temperature for 2 to 3 days in an airtight container, as long as they don’t contain a cream cheese filling or fresh fruit topping. Once you add cream cheese, move the dessert to the fridge and plan on 4 to 5 days.
Cakes and loaf cakes tend to stay moist for 3 to 4 days at room temperature if wrapped well, though glazed cakes are best kept in a single layer so the glaze doesn’t smear. Cheesecake bars, pumpkin rolls, whoopie pies, and anything with cream cheese should be refrigerated. For those, let them warm slightly before serving so the texture isn’t stiff.
Freezing works better than people expect. Blondies, bars, biscotti, brownies, cookies, and many cakes freeze for up to 2 months if wrapped tightly and stored in a freezer bag or container. Hand pies can be frozen unbaked, then baked from frozen with a few extra minutes in the oven. Crumbles and crisps can be frozen after baking, but they’re at their best when reheated in the oven at 325°F until the top crisps again.
For reheating, the oven beats the microwave almost every time. Use 300°F to 325°F for bars, crisps, hand pies, and cake slices until just warmed through. A microwave can help a square of brownie or a muffin, but keep it to short bursts or the texture turns rubbery. Cookies usually do not need reheating at all; they’re better stored than warmed.
If you’re baking ahead for a party, make the cookie dough or bar base a day early and bake fresh the next day. That gives you a quiet morning and better control over timing. Some desserts, especially spice bars and cheesecake bars, taste even better after an overnight rest.
Variations and Adaptations to Try
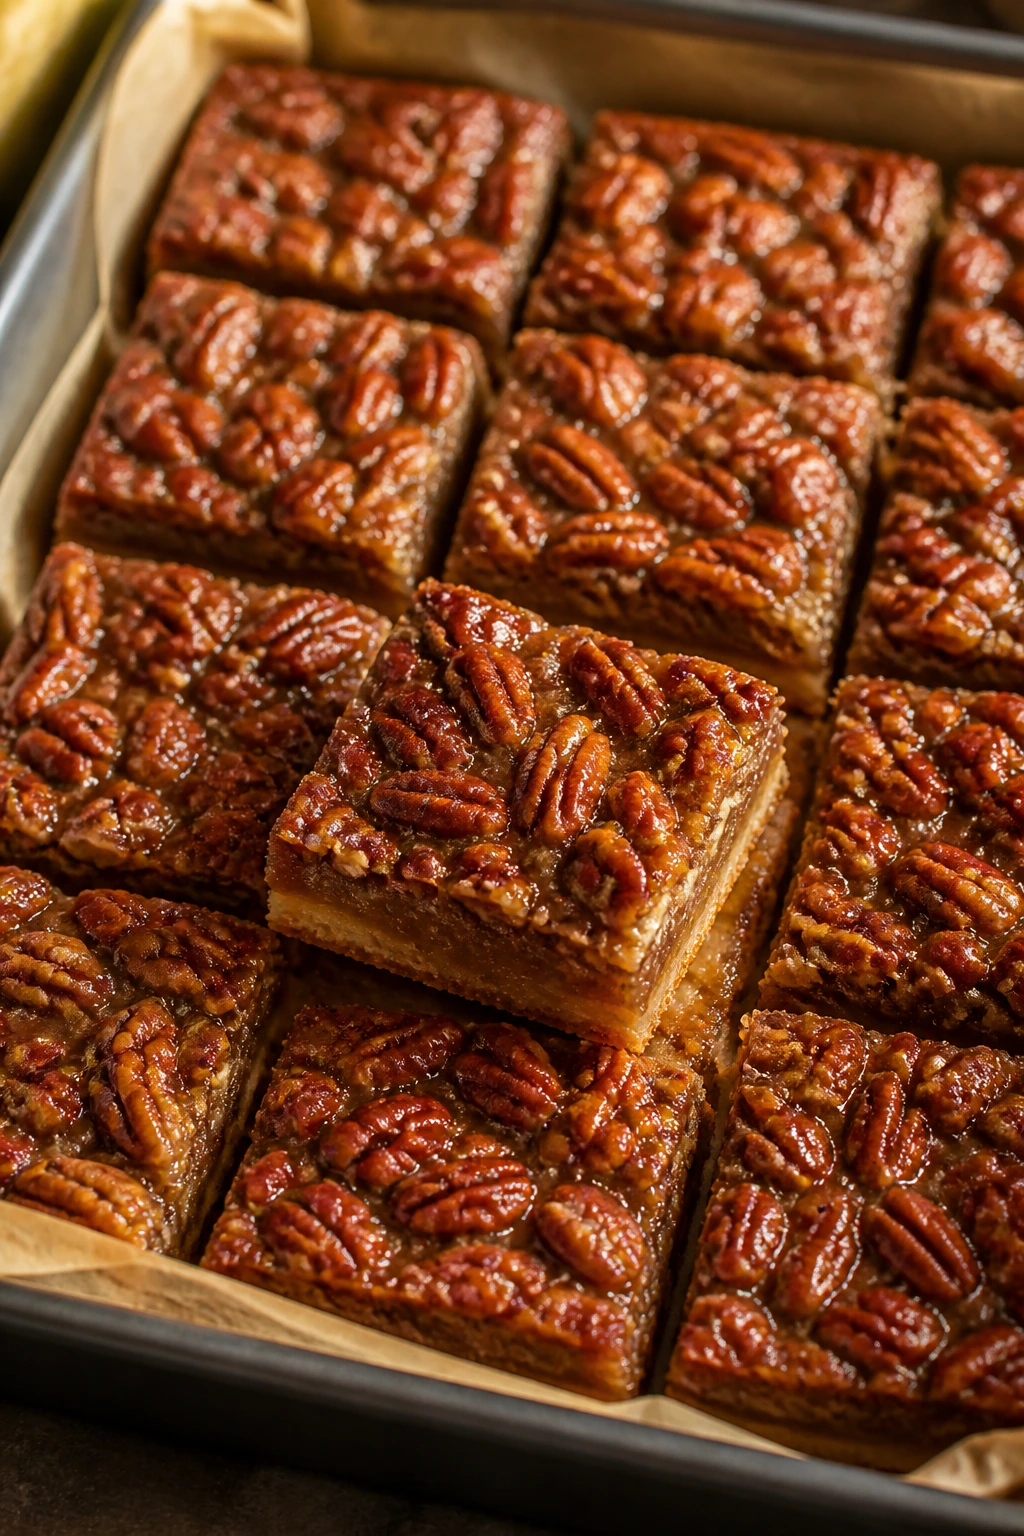
- Gluten-Free Tray: Swap in a 1:1 gluten-free flour blend for bars, blondies, cookies, and simple cakes. Keep an eye on bake time, since some blends brown faster at the edges.
- Dairy-Free Lineup: Use plant butter in cookies and bars, coconut cream where a topping is needed, and dairy-free cream cheese for filled desserts. Check labels carefully on chips and cookie crumbs.
- Lower-Sugar Cuts: Reduce glazes, skip powdered sugar finishes, and lean into tart fruit like cranberries or Granny Smith apples. That keeps the dessert balanced without wrecking the crumb.
- Extra-Spice Version: Add a little cardamom to apple and pear bakes, or a pinch of black pepper to molasses cookies. It sounds odd until you taste how it wakes up the molasses.
- Kid-Friendly Batch: Stick with bars, muffins, and cookies that can be eaten by hand and avoid heavy liqueur notes or bitter chocolate finishes. Simple glaze beats strong espresso or bourbon flavors here.
- Big-Crowd Bake: Double bars, crisps, and cookie recipes onto sheet pans or 9×13-inch dishes, but do not guess on timing. Bigger batches usually need a few extra minutes in the center.
Common Mistakes to Avoid
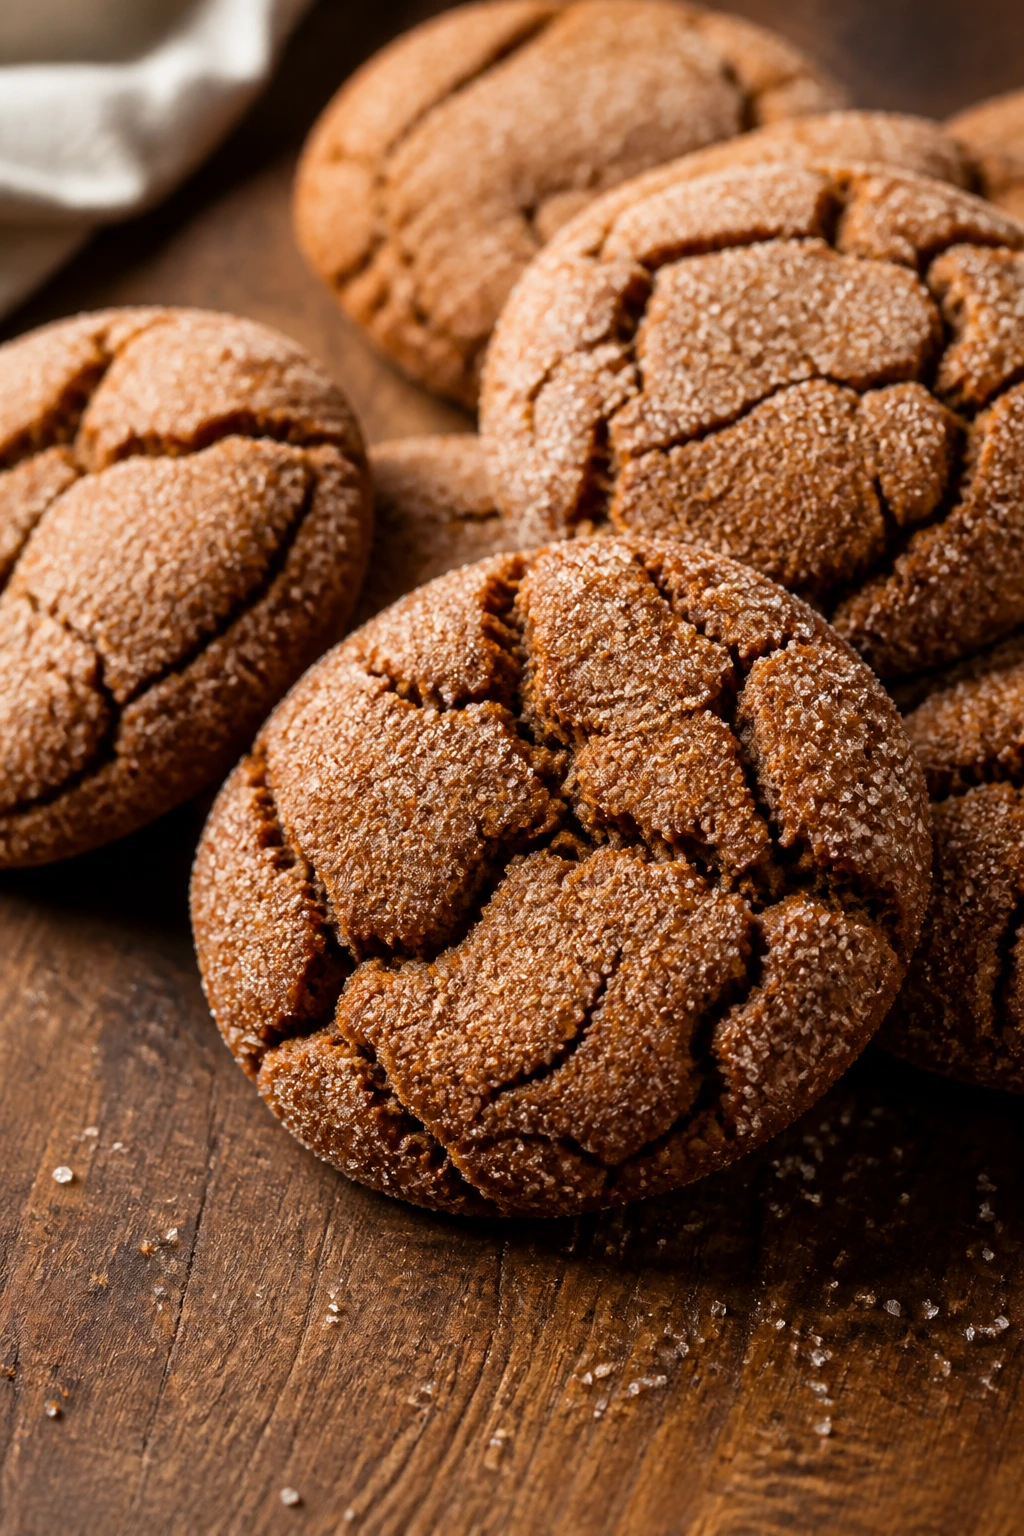
The first mistake is treating all fall desserts like they bake at the same pace. They don’t. A brownie and a fruit crumble may both seem “done” when the top looks set, but one still needs a soft center while the other needs bubbling fruit at the edges. Watch the texture, not just the clock.
The second is overdoing spice. Cinnamon is lovely; a heavy-handed spice mix is not. Pumpkin, apple, pear, and maple all carry their own flavor, and too much clove or nutmeg can flatten them. Start lighter than you think, then adjust with toppings or glaze if the dessert needs more punch.
Another common problem is skipping cooling time. Bars need to set, cakes need to release, and cheesecake needs to chill. Cutting too early is the fastest way to turn a neat dessert into a soft pile of crumbs and filling. If you’ve ever tried to rush a fruit bar, you already know the look.
Fruit choice causes trouble too. Too-soft pears collapse. Mealy apples disappear. Watery pumpkin thins the batter. Use fruit with enough structure to survive the oven, and if the puree looks loose, blot it before mixing.
Finally, people often under-salt sweet desserts. A pinch in the batter, a little flaky salt on caramel, or a salted nut topping keeps the whole pan from tasting one-note. It’s a small move. It changes a lot.
Frequently Asked Questions
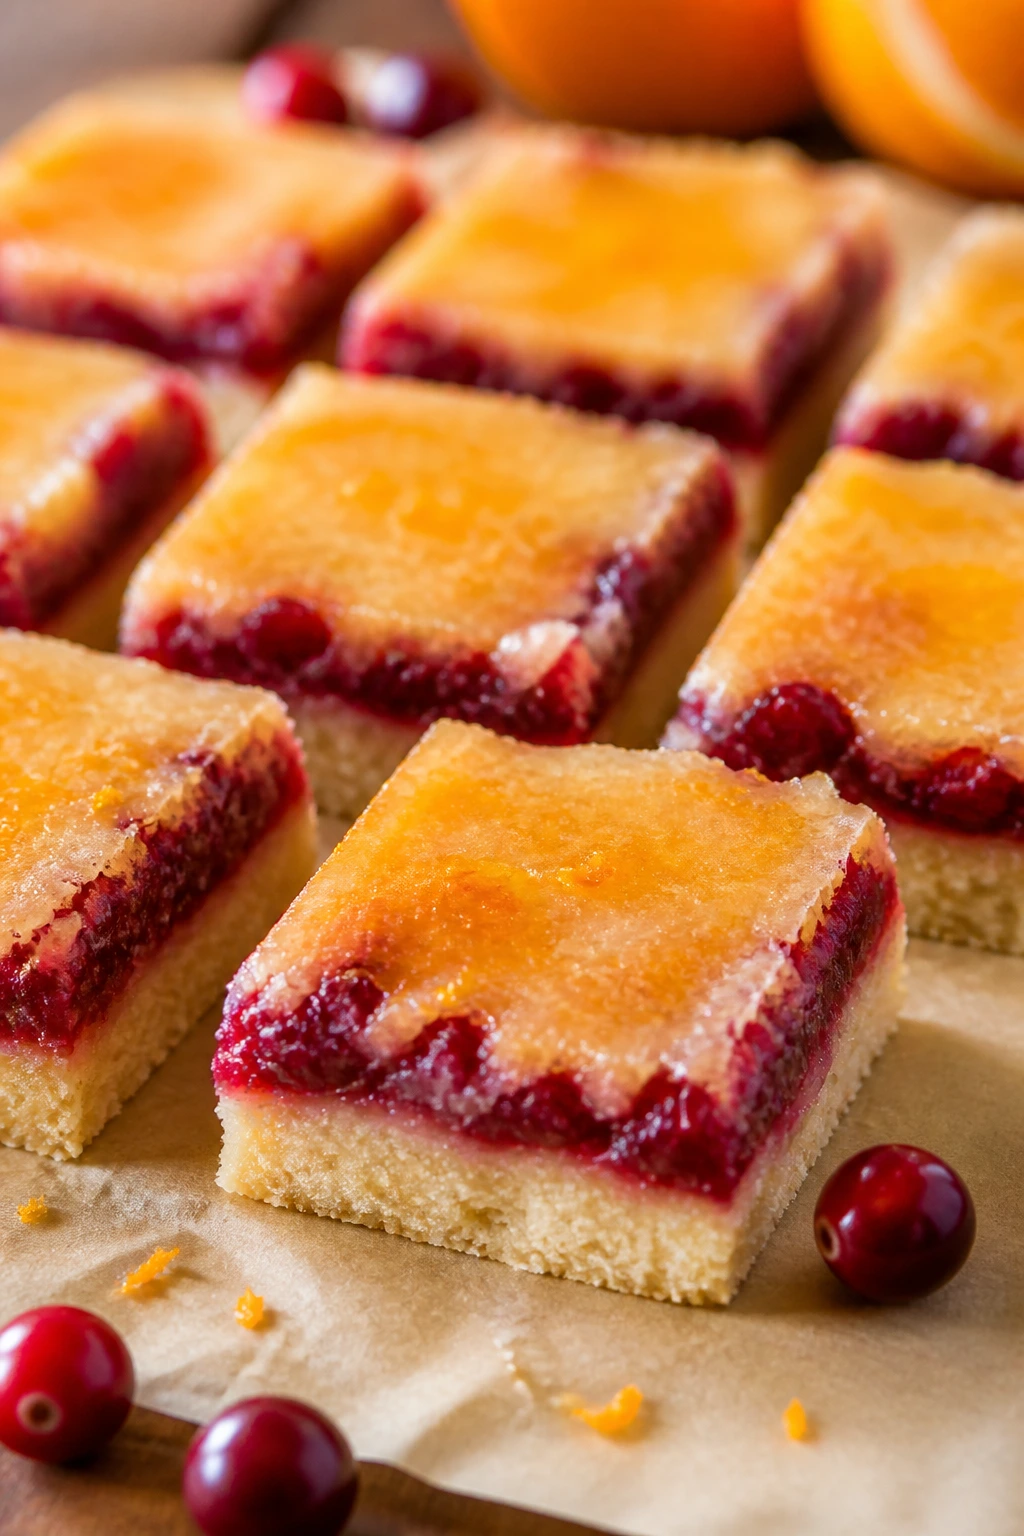
Can I bake these desserts a day ahead?
Yes, and a lot of them are better that way. Bars, brownies, biscotti, and many cookies slice or taste better after resting overnight, while cakes should be wrapped well once cool so they stay soft.
Which desserts are best for shipping or gifting?
Biscotti, sandies, crinkle cookies, thumbprints, and bars are the safest bets. Choose items that don’t rely on frosting or fragile fruit layers, and pack them in layers with parchment between them.
What if I only have one baking pan?
Start with recipes that use similar tools one at a time, and let the pan cool between batches. Cookies and biscotti are the easiest here because they move onto sheet pans, while bars and cakes need longer pan time.
Can I use canned pumpkin in every pumpkin recipe here?
Plain canned pumpkin puree works well in all the pumpkin bakes listed here. Just do not confuse it with pumpkin pie filling, which already contains sugar and spices and will throw off the recipe.
How do I keep apple desserts from getting watery?
Use firm apples, dice them small, and add cornstarch or flour where the recipe calls for it. If the apples seem very juicy, let them sit with the sugar for a few minutes, then drain off excess liquid before baking.
Can I freeze cheesecake bars and pumpkin roll slices?
Yes. Wrap slices tightly, then freeze them in a single layer before moving to a container or freezer bag. Thaw them in the refrigerator so the texture stays smooth instead of weeping.
What if my cookies spread too much?
The dough probably warmed up too much or the butter was too soft. Chill the dough for 20 to 30 minutes, and make sure the baking sheet isn’t hot from the previous batch.
Do I need fancy finishing touches for holiday trays?
No. A dusting of powdered sugar, a line of glaze, a few chopped nuts, or a drizzle of caramel is enough. The recipe should carry the flavor; the finish only needs to make the dessert look ready.
A Tray That Actually Gets Eaten
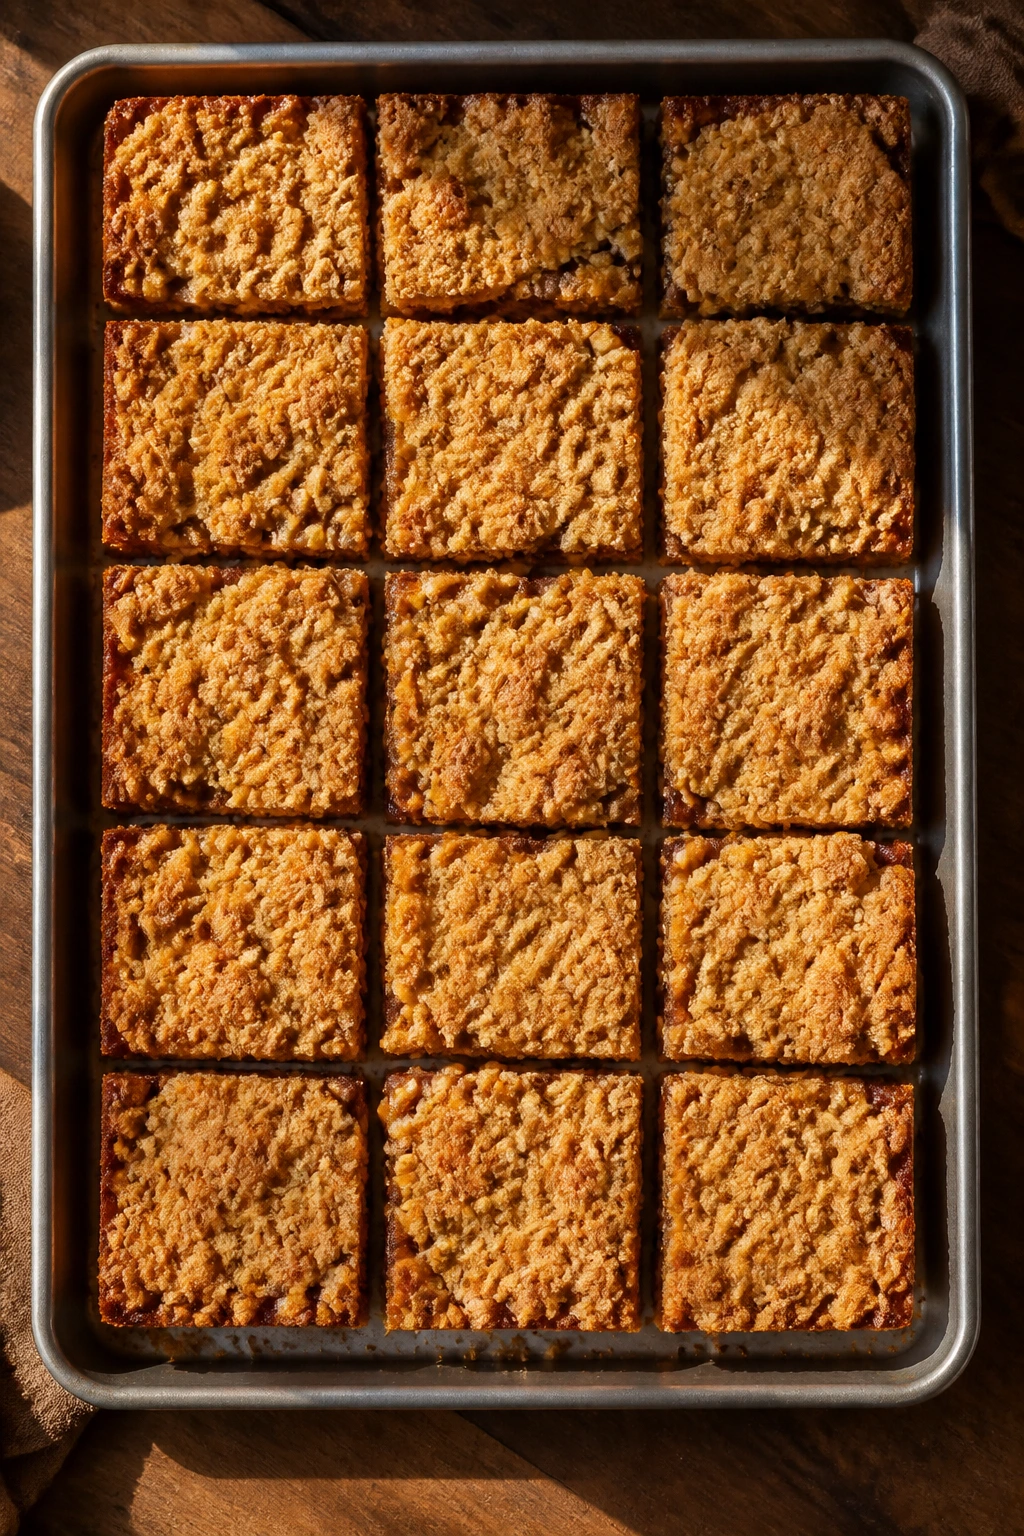
The nicest thing about a collection like this is how little ceremony it asks for. You do not need a pastry lab. You need a good pan, a few solid spices, and the sense to pick desserts that can sit on a table without falling apart the second somebody reaches for a slice.
That’s the real value of easy fall desserts for holiday baking: they taste like you spent more time than you did, and they behave like recipes that know they’re being served to a crowd. Bake one, bake three, or make a full tray if you’re feeling ambitious. Either way, the house ends up smelling like butter, spice, and fruit, and that’s usually the part people remember first.