
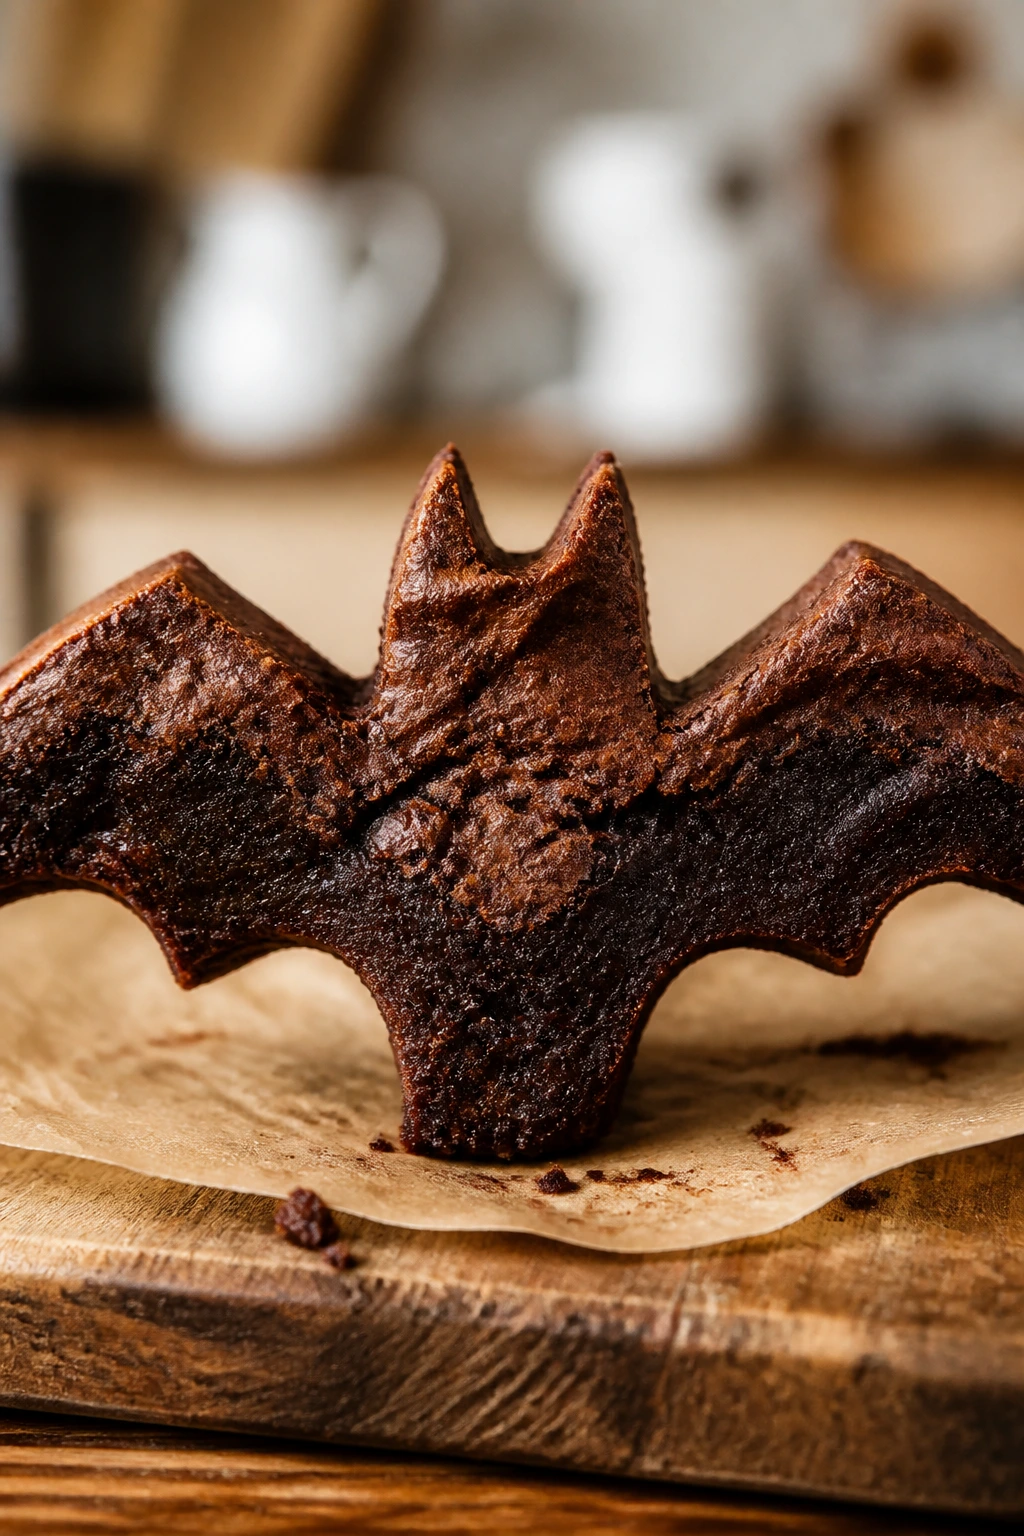
A pan of brownies usually disappears one square at a time. These don’t.
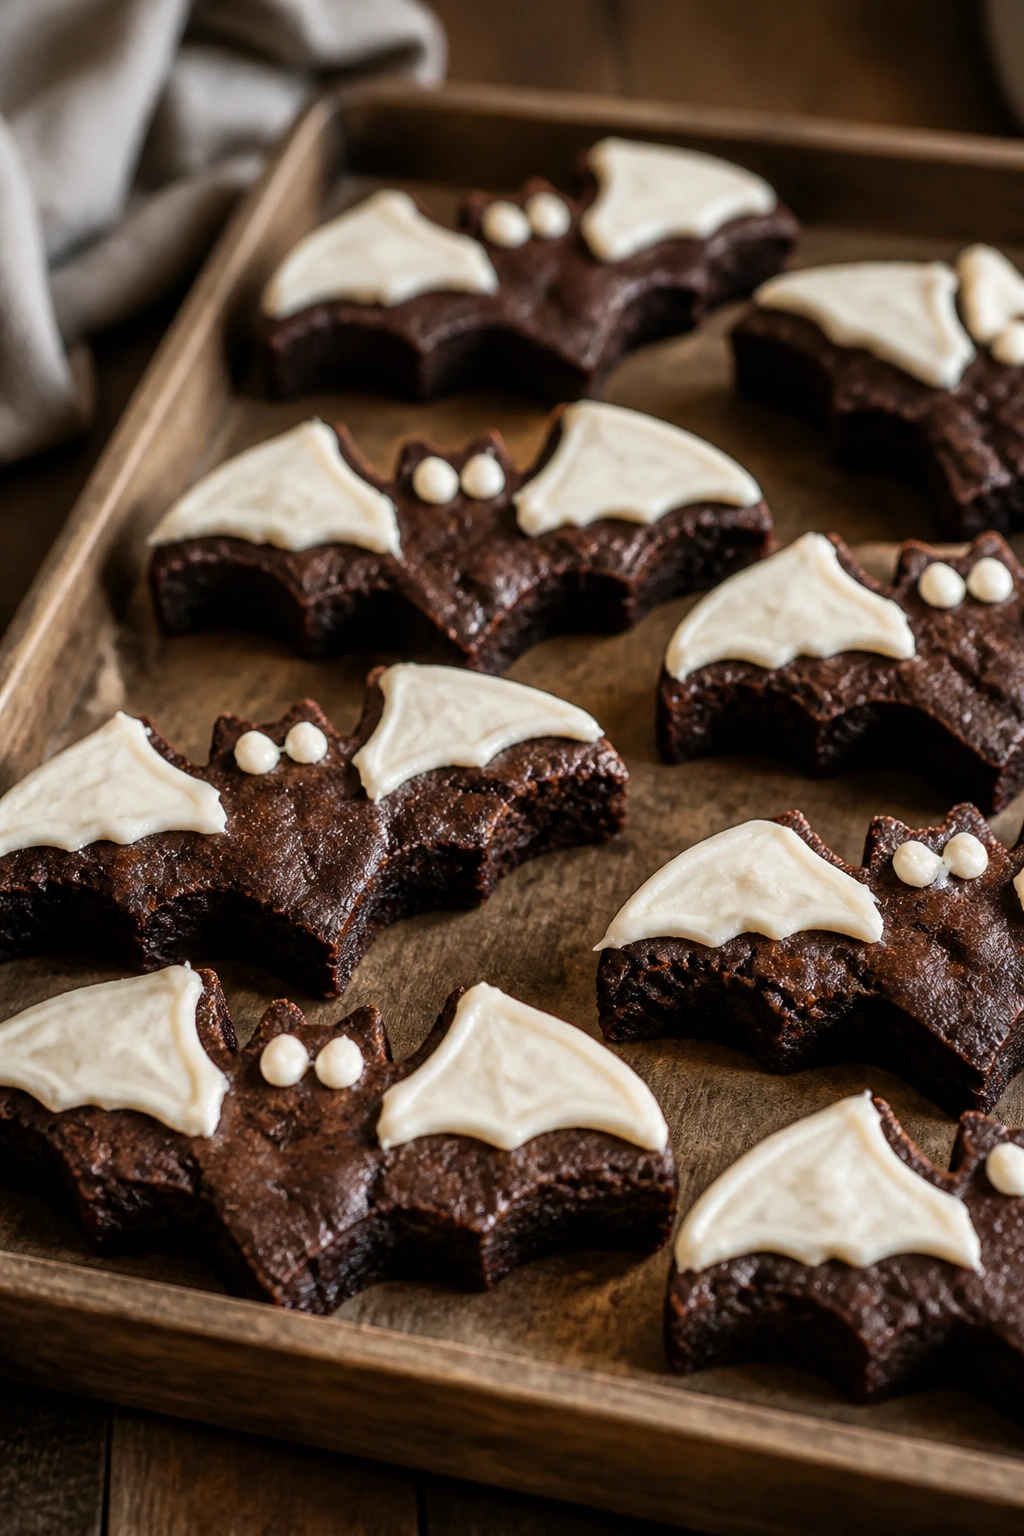
Once you cut them into bats and finish them with tangy cream cheese frosting, the tray stops being background dessert and turns into the thing people keep circling back to. The chocolate stays dark and fudgy, the edges cut cleanly, and the frosting gives each bat a cool, creamy bite that keeps the whole thing from feeling heavy. That contrast matters. A lot.
I like a brownie that can take a sharp cutter without crumbling into rubble, and I like frosting that tastes like more than sugar and air. That’s the sweet spot here: a butter-rich brownie slab that chills into neat shapes, then gets dressed up just enough to look festive without becoming fussy. The whole trick is getting the texture right before you ever think about the candy eyes.
The first thing to sort out is the pan, because the pan decides whether you get neat bats or a tray of chocolate wreckage.
Why These Brownie Bats Work So Well
- The butter carries the chocolate flavor: Melted butter gives the brownie a plush, dense crumb that holds up when you cut bat shapes with a cookie cutter.
- The cream cheese frosting brings the balance: That tangy frosting cuts through the sweetness, so every bite feels rich instead of cloying.
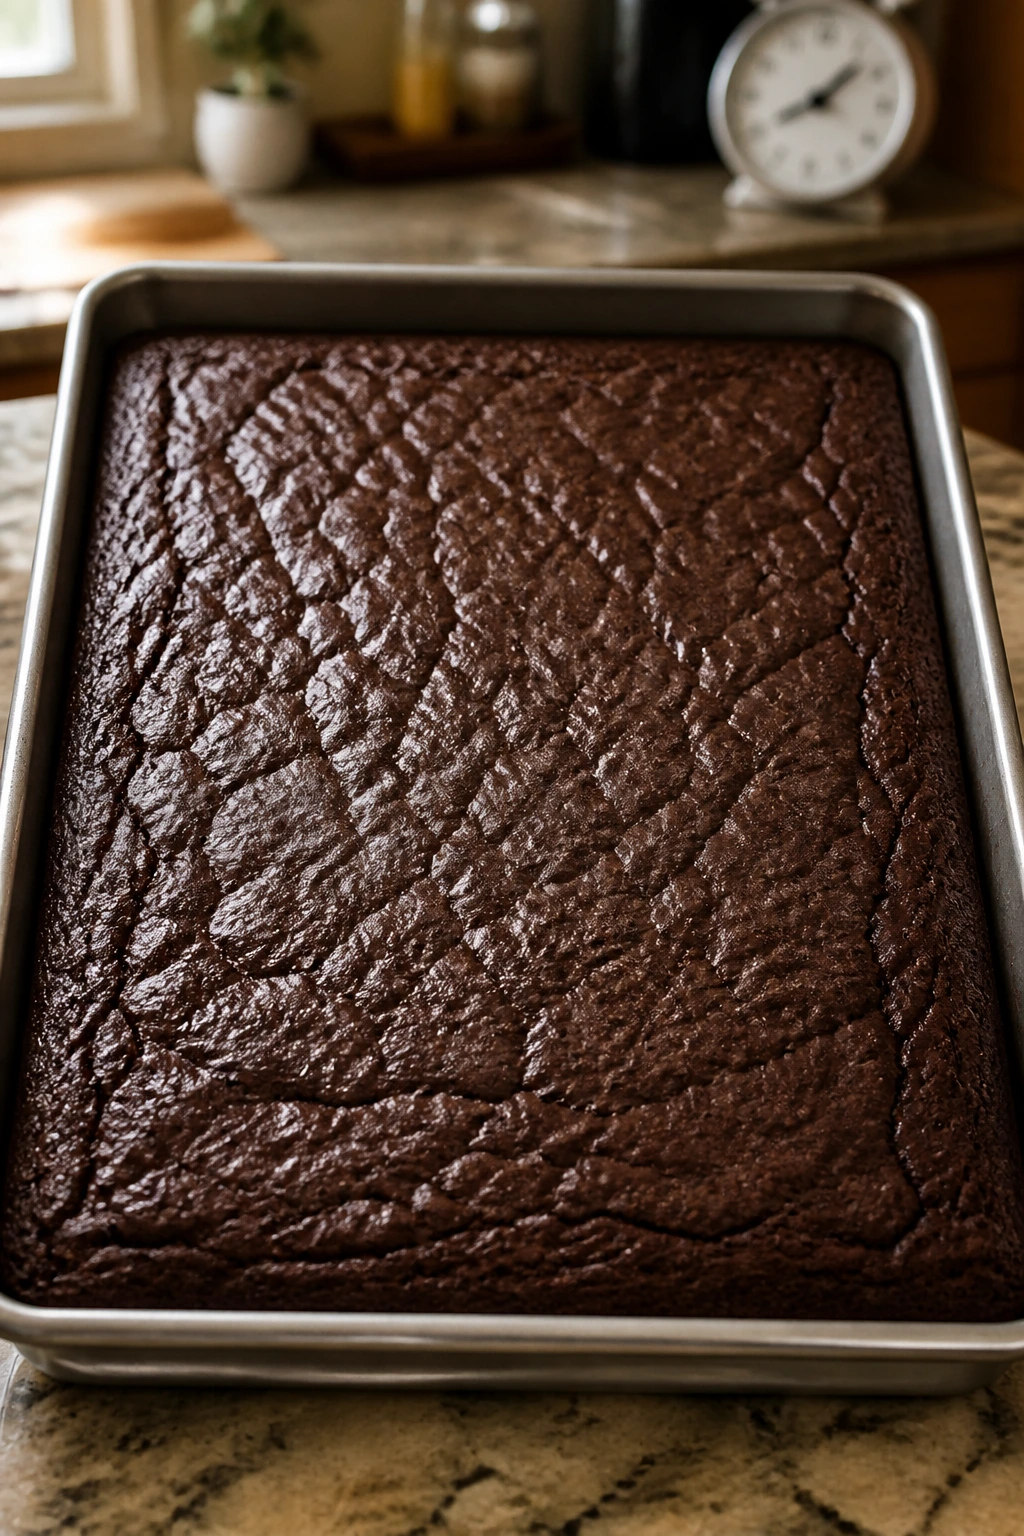
- The slab format keeps the shapes clean: Baking the brownies in a 9×13-inch pan gives you a flat surface that chills and slices better than a loose, cakey bake.
- The decoration is fast, not fussy: Mini chocolate chips, candy eyes, or a little sanding sugar do the job without turning this into a decorating marathon.
- The recipe works ahead of time: You can bake the brownies, chill them, and finish the bats later, which is a gift when the oven is already busy.
- The flavor reads as grown-up and kid-friendly at once: Bittersweet chocolate plus cream cheese frosting lands in that nice middle ground where the kids want the bats and the adults want seconds.
Pan Size, Yield, and the Clock on the Counter
Yield: Makes 12 to 14 bat-shaped brownies, depending on the size of your cutter
Prep Time: 25 minutes
Cook Time: 30 minutes
Total Time: 1 hour 40 minutes
Difficulty: Intermediate — the batter itself is straightforward, but the brownies need to cool fully before you cut and frost them.
Chill/Rest Time: 45 minutes total, including cooling and a short chill for cleaner cuts
Best Served: Slightly chilled or at cool room temperature
A 9×13-inch metal pan gives the best shape here. Glass pans tend to bake a little slower in the middle and darker at the edges, which is fine for some desserts and annoying for this one. You want a brownie slab that stays flat, slices neatly, and doesn’t fight the cutter.
If your bat cutter is large, you’ll end up with fewer pieces, but they’ll have better definition. If it’s small, the recipe stretches farther, though the wing tips can get delicate. That’s not a flaw. It’s just the price of a cute shape.
The Ingredients, Measured and Grouped
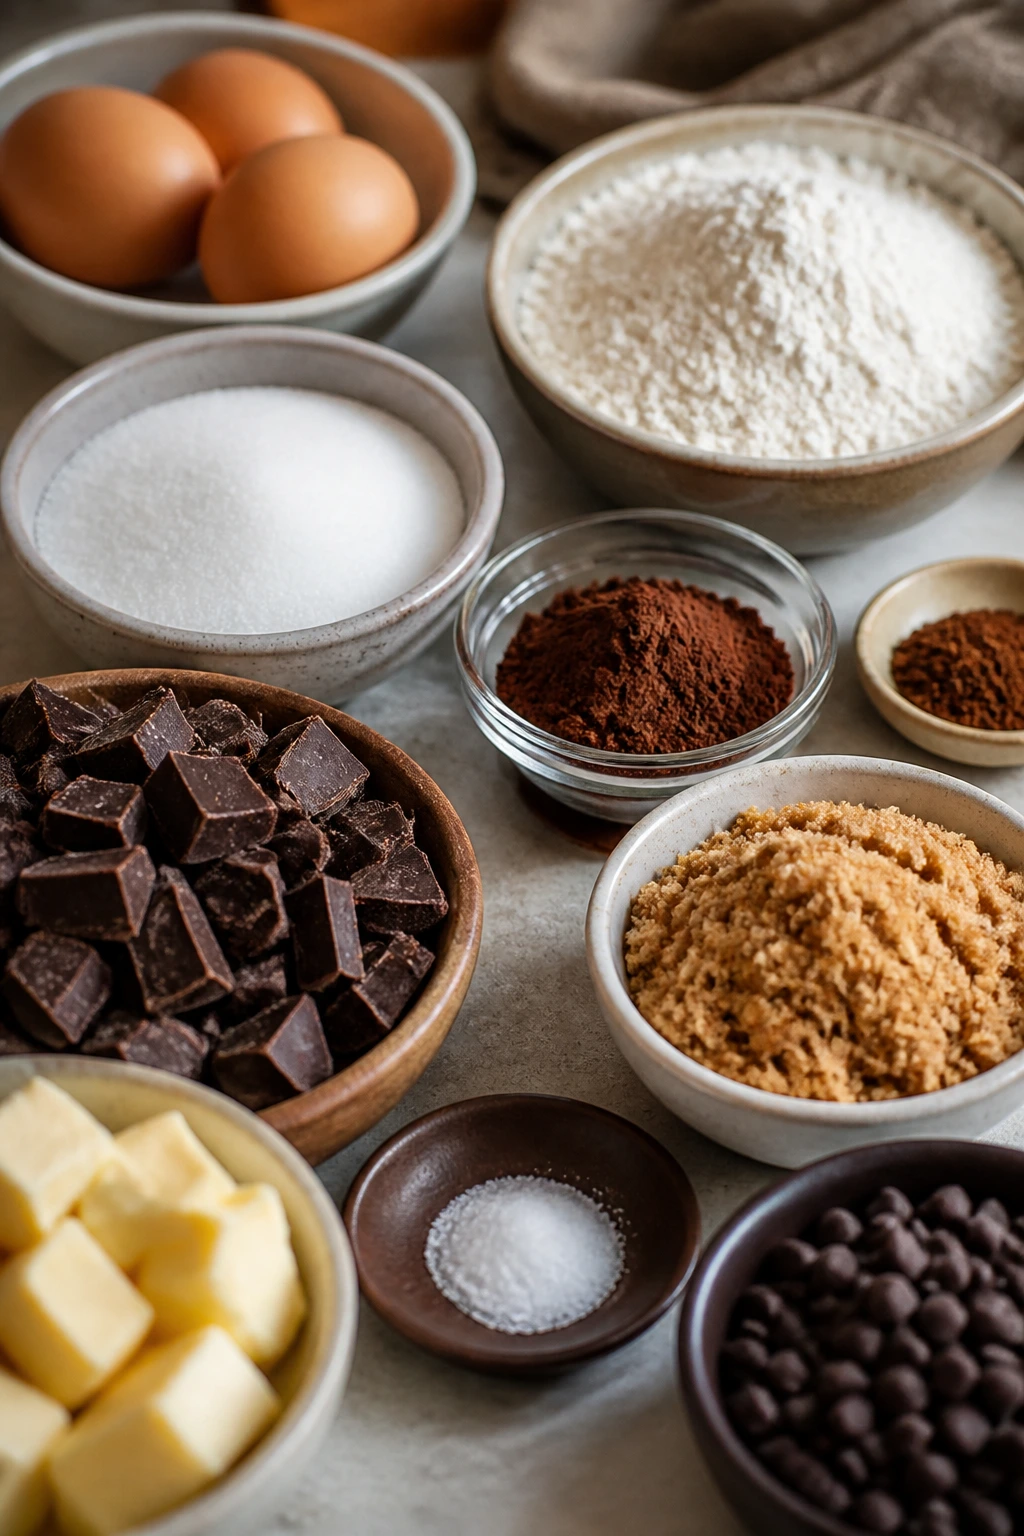
For the Brownie Base:
- 1 cup (2 sticks) unsalted butter, cut into pieces
- 8 ounces bittersweet chocolate, chopped
- 1 1/2 cups granulated sugar
- 1/2 cup packed light brown sugar
- 4 large eggs, at room temperature
- 2 teaspoons pure vanilla extract
- 1 cup all-purpose flour
- 1/2 cup Dutch-process cocoa powder, sifted if lumpy
- 1 teaspoon fine sea salt
- 1/2 teaspoon espresso powder, optional but helpful
- 3/4 cup semi-sweet chocolate chips, optional for extra pockets of chocolate
For the Cream Cheese Frosting:
- 8 ounces brick-style cream cheese, softened
- 1/2 cup unsalted butter, softened
- 2 cups powdered sugar, sifted
- 1 teaspoon pure vanilla extract
- Pinch of fine salt
- 1 to 2 tablespoons heavy cream or milk, only if needed for piping texture
For Decorating:
- 24 mini chocolate chips or candy eyes
- 1 to 2 tablespoons orange or black sanding sugar, optional
- A little melted chocolate, optional for tiny details
Why Each Ingredient Matters
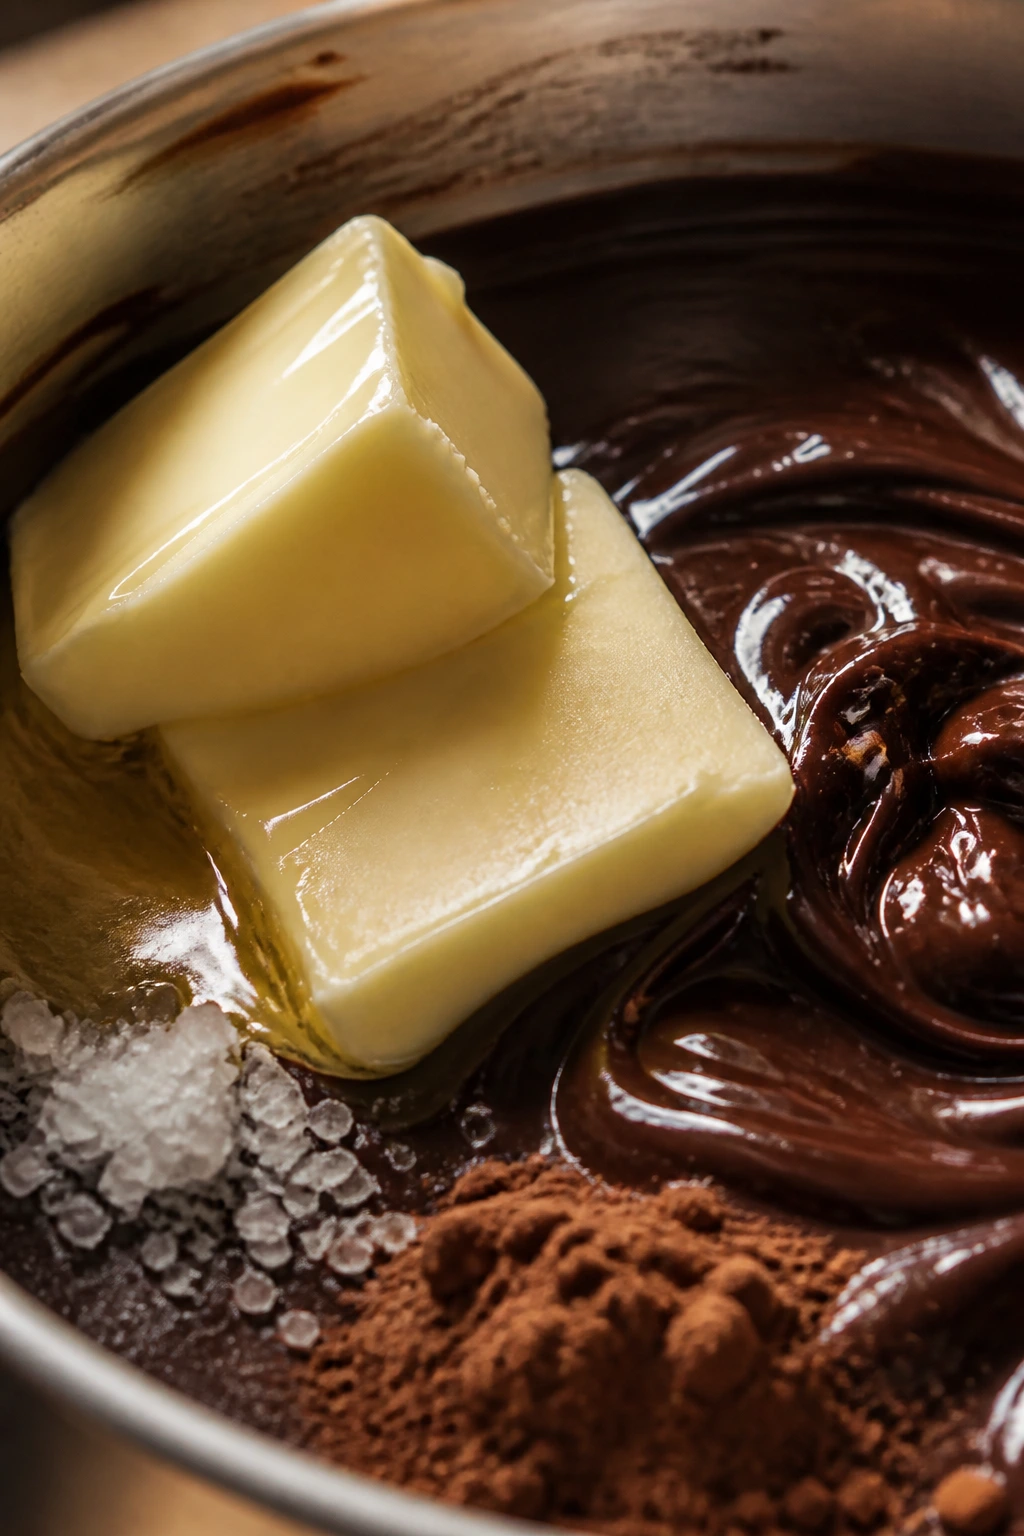
Butter, Chocolate, and Sugar
- What to use: 1 cup unsalted butter, 8 ounces bittersweet chocolate, 1 1/2 cups granulated sugar, and 1/2 cup light brown sugar.
- Preparation: Cut the butter into small pieces so it melts evenly with the chocolate, and chop the chocolate finely if it comes in a bar.
- Substitutions: Semisweet chocolate works if you want a sweeter brownie; if you only have cocoa and no chocolate bar, the texture changes, so I would not swap that in unless you’re prepared for a different result.
- Tips: Melt the butter and chocolate gently. If the mixture gets too hot, the brownies can turn greasy at the edges and lose that glossy top people love.
Eggs and Vanilla
- What to use: 4 large eggs and 2 teaspoons vanilla extract.
- Preparation: Bring the eggs to room temperature so they blend into the batter without turning it stiff or grainy.
- Substitutions: Vanilla bean paste gives a deeper vanilla note; a tiny splash of almond extract can work, but keep it light or the frosting and chocolate start fighting each other.
- Tips: Add the eggs one at a time. That keeps the batter shiny and helps it emulsify instead of looking broken and dull.
Flour, Cocoa, Salt, and Espresso Powder
- What to use: 1 cup all-purpose flour, 1/2 cup Dutch-process cocoa powder, 1 teaspoon fine sea salt, and 1/2 teaspoon espresso powder if you want the chocolate to taste deeper.
- Preparation: Whisk the dry ingredients together so the cocoa breaks up before it hits the wet batter.
- Substitutions: A good 1:1 gluten-free baking blend can replace the flour if it contains xanthan gum; natural cocoa will work, though the brownies look a little lighter and taste a touch sharper.
- Tips: Don’t spoon flour straight from the bag with a heavy hand. Too much flour is the quickest route to dry, cake-like brownies, and that’s not what these bats need.
Cream Cheese Frosting
- What to use: 8 ounces brick-style cream cheese, 1/2 cup unsalted butter, 2 cups powdered sugar, 1 teaspoon vanilla, a pinch of salt, and a little cream or milk if the frosting needs softening.
- Preparation: Soften the cream cheese and butter until they give slightly when pressed, but do not let them get warm and shiny.
- Substitutions: Mascarpone gives a milder tang; dairy-free cream cheese and butter alternatives can work, though the frosting will usually be a little softer.
- Tips: Beat the frosting until it looks fluffy, not soupy. If it starts looking loose, chill it for 10 minutes before piping.
Decorating Details
- What to use: Mini chocolate chips, candy eyes, and optional sanding sugar.
- Preparation: Put the decorations within reach before you frost, because the frosting starts to set faster than people expect.
- Substitutions: White chocolate chips can stand in for eyes; a tiny dab of melted chocolate can draw pupils if you want more expression.
- Tips: Press the decorations into the frosting while it’s still soft. If you wait too long, they slide around and the faces look crooked.
Mixing the Brownie Batter
Make the Brownie Base:
-
Preheat the oven to 350°F (175°C). Line a 9×13-inch metal baking pan with parchment paper, leaving a 2-inch overhang on the long sides, then lightly grease the parchment and exposed corners. That overhang is worth the minute it takes; it lets you lift the slab out instead of prying it free with a knife.
-
Set a medium saucepan over low heat and melt the butter and chopped bittersweet chocolate together, stirring often, until the mixture looks glossy and smooth with no visible chocolate pieces. Take it off the heat as soon as it comes together. Do not let it bubble. Hot chocolate fat can split and make the final texture oily.
-
Whisk in the granulated sugar and brown sugar until the mixture looks thick and grainy, almost like wet sand. Let it sit for 2 minutes so it cools slightly. That short rest matters; if the batter is too hot when the eggs go in, they can turn soft and stringy.
-
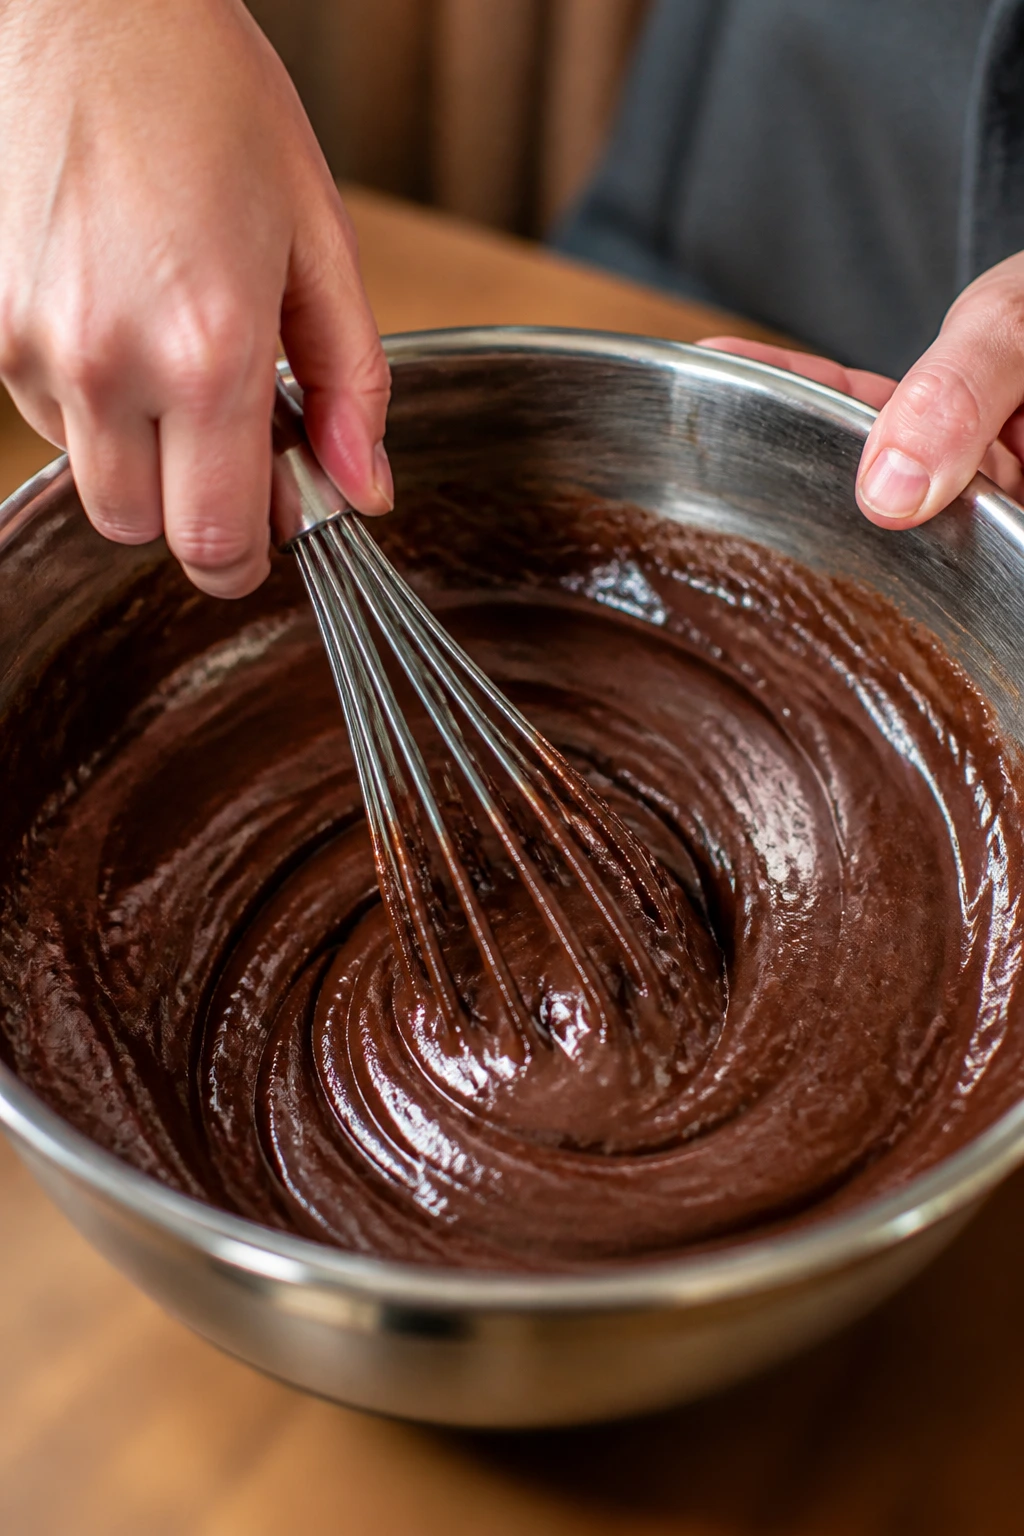
Whisk in the eggs, one at a time, beating well after each addition, then whisk in the vanilla. The batter should turn darker, thicker, and noticeably shinier. If you stir and it still looks streaky, keep going for another 20 to 30 seconds.
-
In a separate bowl, whisk the flour, cocoa powder, salt, and espresso powder until the cocoa is evenly distributed. Fold the dry ingredients into the chocolate mixture with a rubber spatula, stopping as soon as no flour streaks remain. If you’re adding chocolate chips, fold them in last. Do not overmix. The batter should look dense, not whipped.
Baking and Cooling the Slab
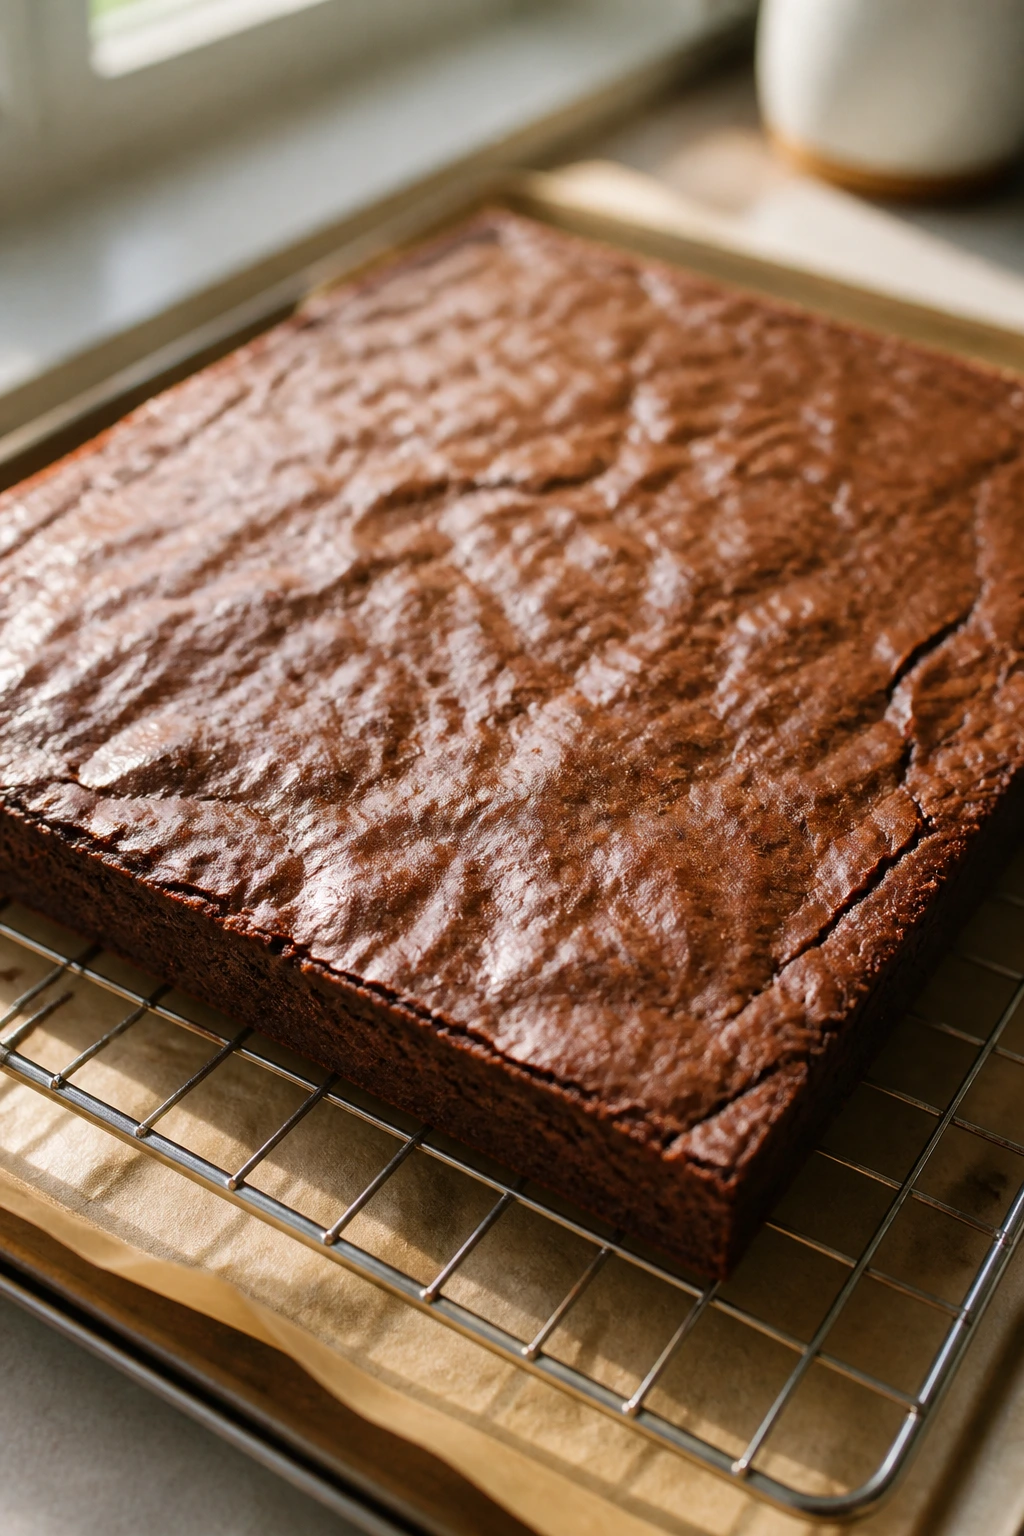
Bake the Brownies: 6. Scrape the batter into the prepared pan and spread it into an even layer with an offset spatula or the back of a spoon. Bake for 28 to 32 minutes, rotating the pan once halfway through, until the edges are set and the center looks just barely firm. A toothpick inserted near the middle should come out with moist crumbs, not wet batter. If the toothpick comes out squeaky clean, you’ve gone too far.
- Set the pan on a wire rack and let the brownies cool in the pan for 1 hour. Then lift the slab out using the parchment overhang and let it cool completely on the rack for another 15 to 20 minutes. If the kitchen is warm or the slab feels soft, slide it onto a tray and chill it for 15 minutes before cutting. A cold brownie cuts like a dream. A warm one smears into the cutter.
Whipping the Cream Cheese Frosting
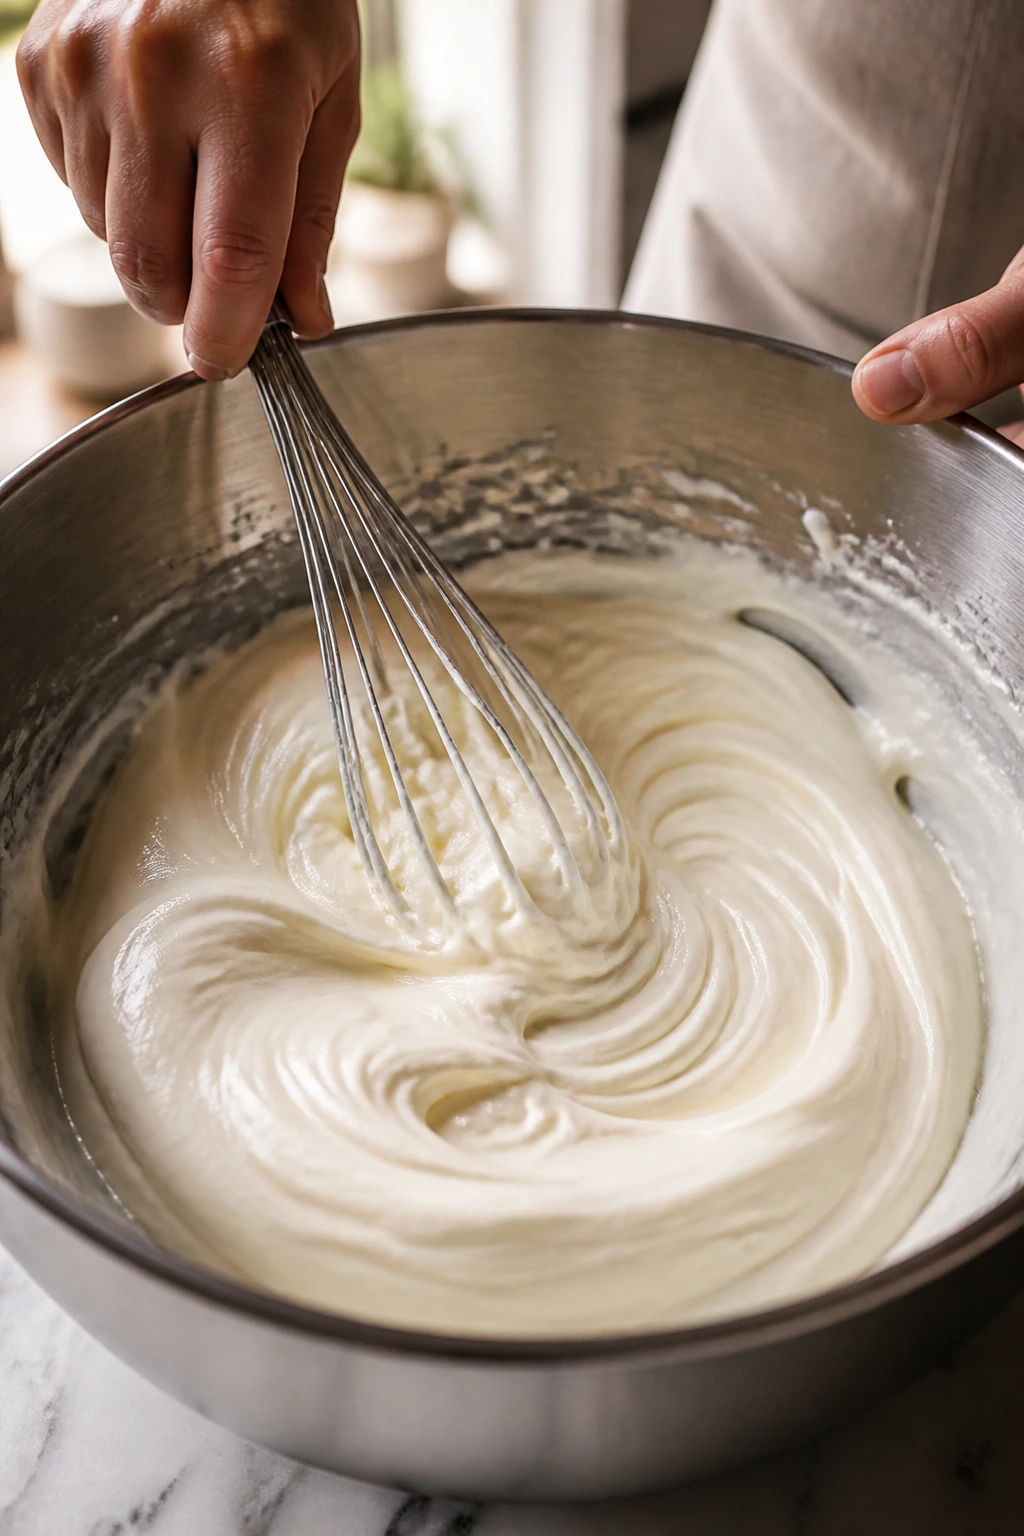
Beat the Frosting: 8. In a large bowl, beat the cream cheese and butter together on medium speed until smooth and fully combined, about 2 minutes. Scrape down the bowl once or twice. You want the mixture to look creamy and unified, with no pale lumps hiding at the bottom.
-
Add the powdered sugar, vanilla, and salt. Beat on low speed at first, then increase to medium and whip for another 1 to 2 minutes until the frosting looks fluffy and spreadable. If it feels too stiff to pipe, beat in 1 teaspoon of cream or milk at a time. If it feels loose, chill it for 10 minutes. That tiny chill usually fixes the problem.
-
Taste the frosting and adjust the salt if needed. Cream cheese frosting can go flat if it’s all sweet and no edge. A pinch of salt makes the chocolate taste deeper, which is exactly what you want here.
Cutting and Decorating the Bats
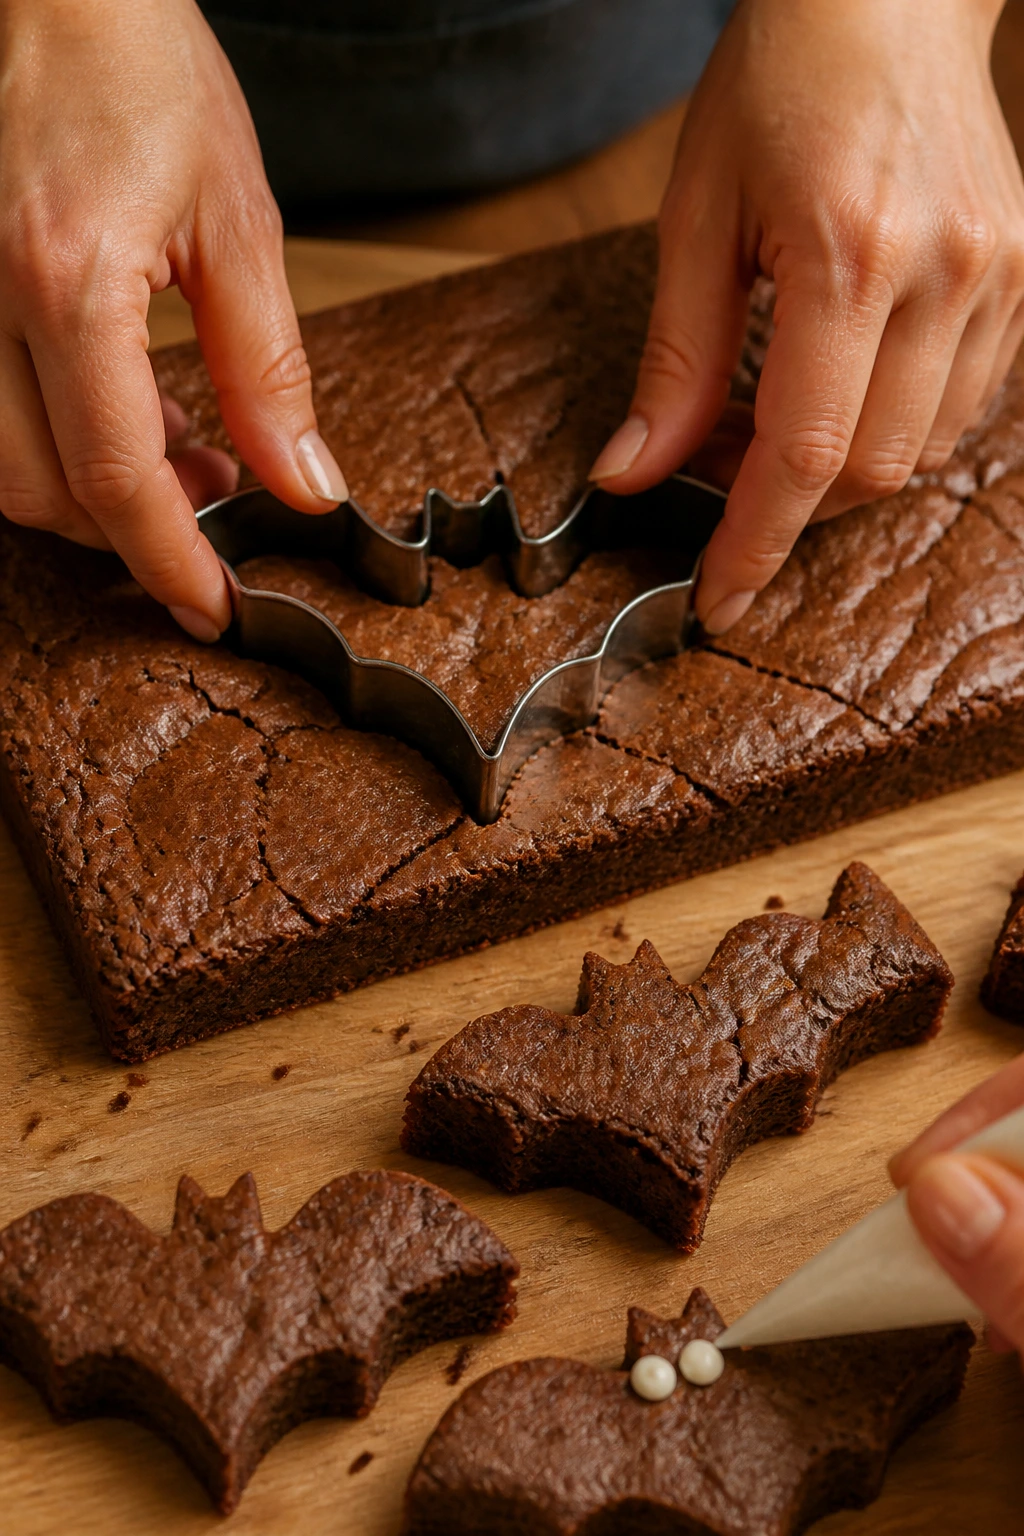
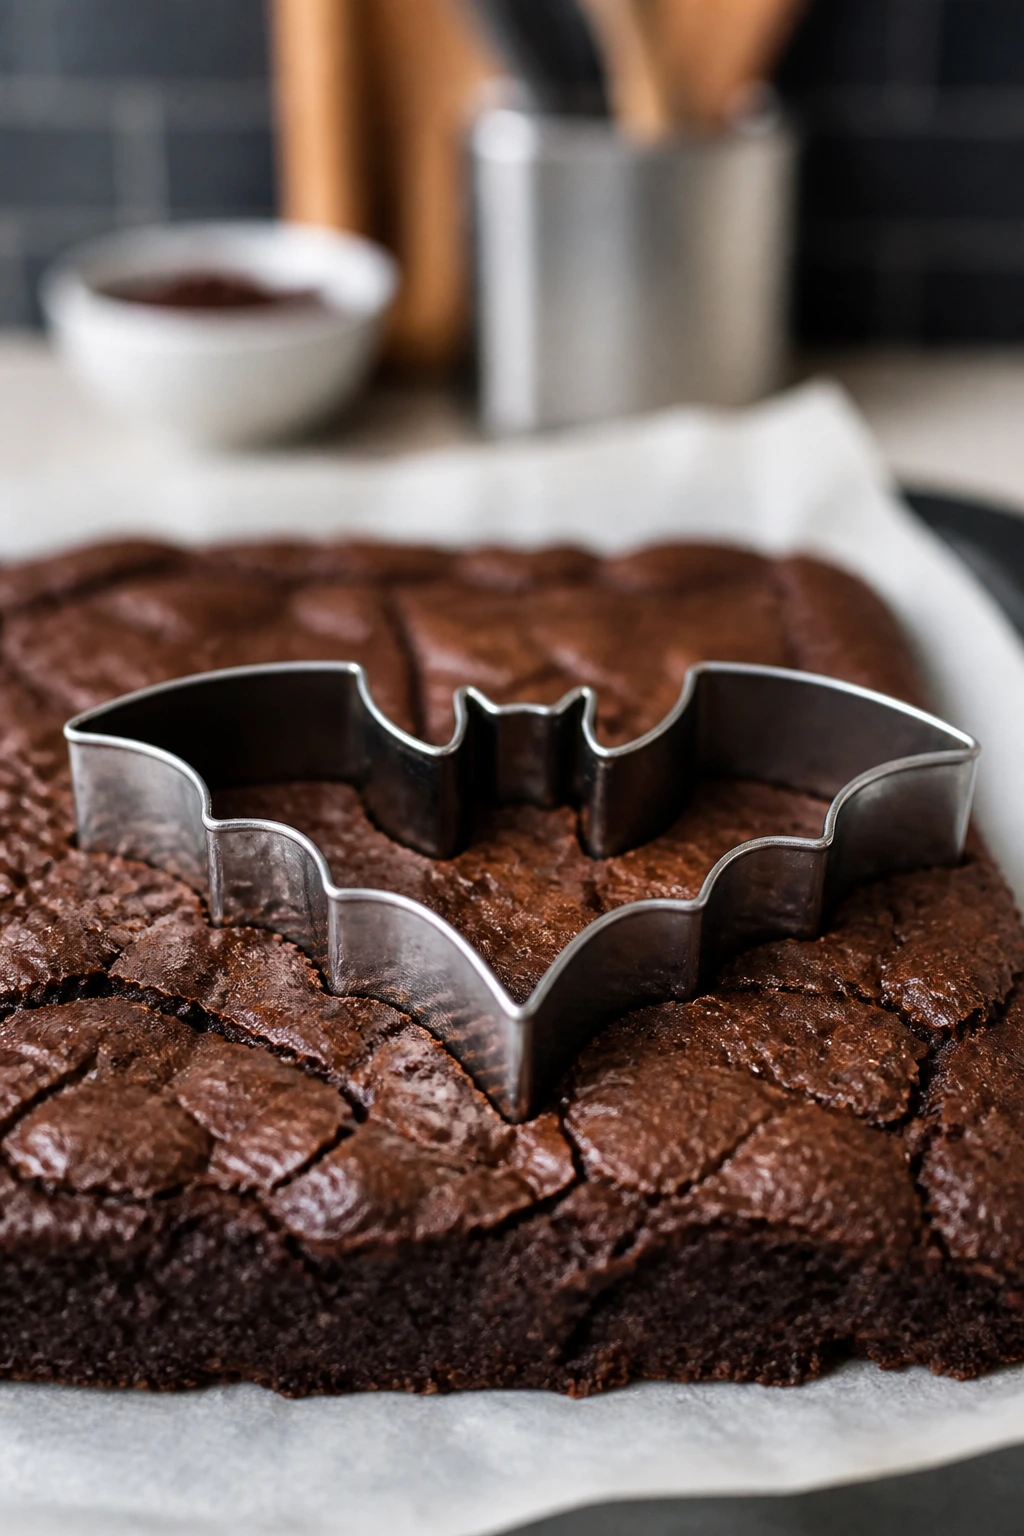
Shape and Finish: 11. Use a bat-shaped cookie cutter to cut the brownies into shapes once the slab is completely cool. Press straight down, then lift straight up. Wipe the cutter clean between cuts so the edges stay sharp. If the brownies resist, chill the slab a little longer instead of forcing it. Forcing the cutter tears the wings.
-
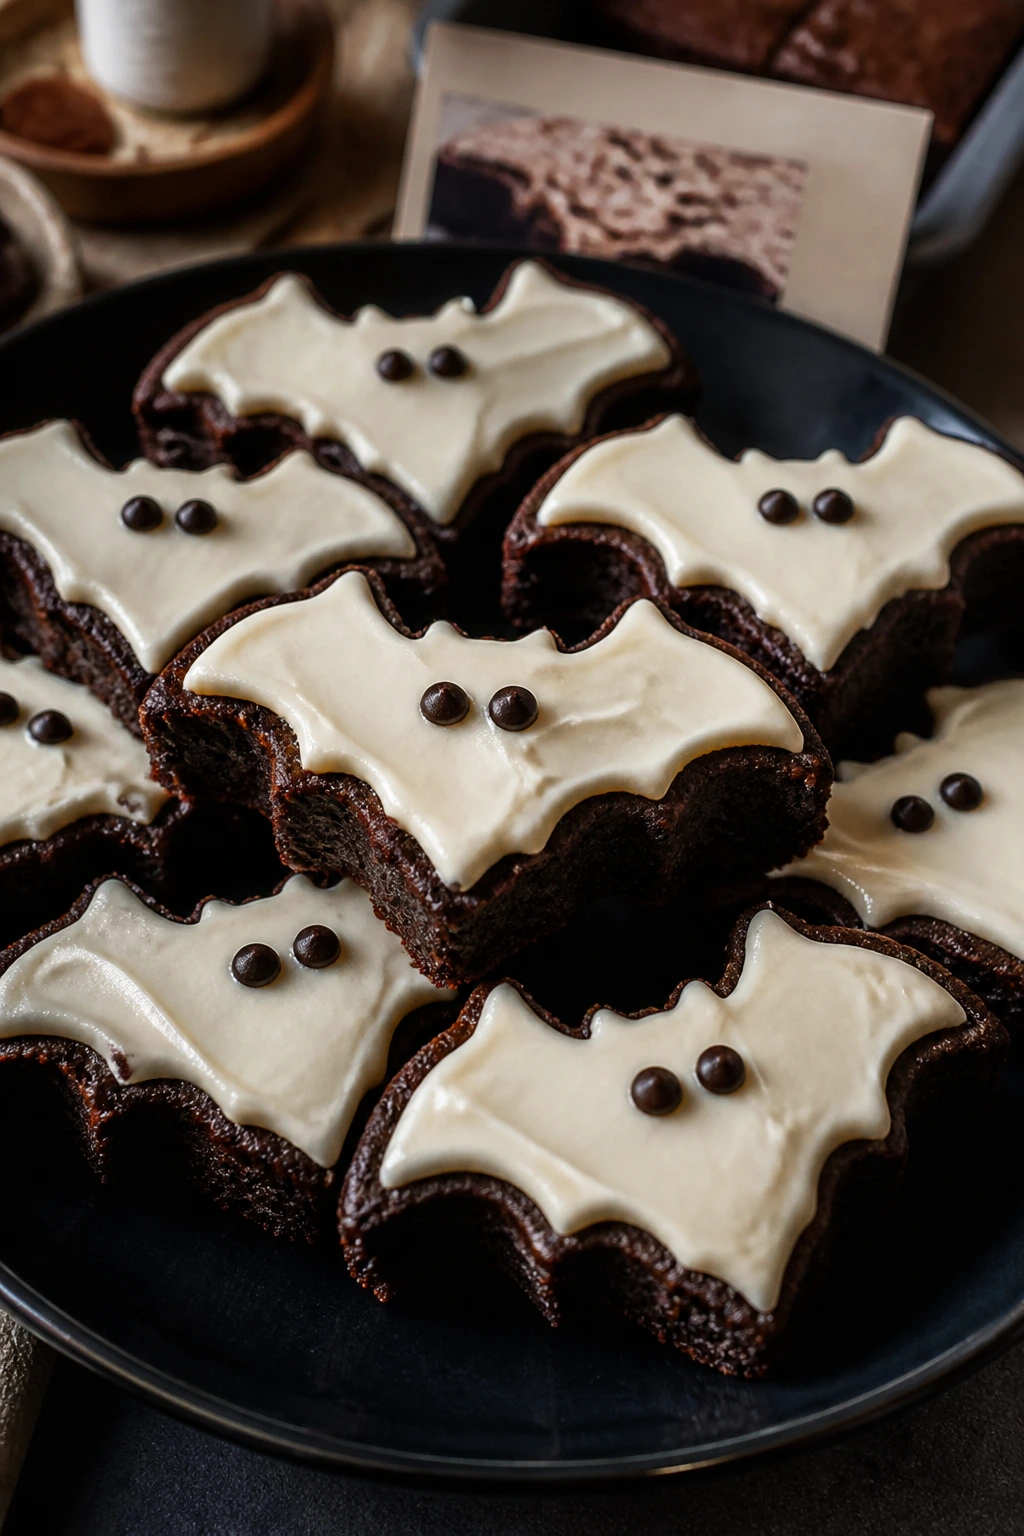
Transfer the bat shapes to a tray or platter. Frost each one with a thin swoop of cream cheese frosting, or pipe a small mound over the center body and leave the wing tips bare if you want the shape to stay bold. I prefer the second method. It looks cleaner, and you can still see the bat silhouette at a glance.
-
Press two mini chocolate chips or candy eyes into the frosting before it sets. Add a pinch of sanding sugar if you want sparkle, or leave them plain for a cleaner, darker look. Let the frosting set for 10 to 15 minutes before stacking or moving the bats. After that, they’re ready to serve or chill.
How to Serve Them at a Halloween Table
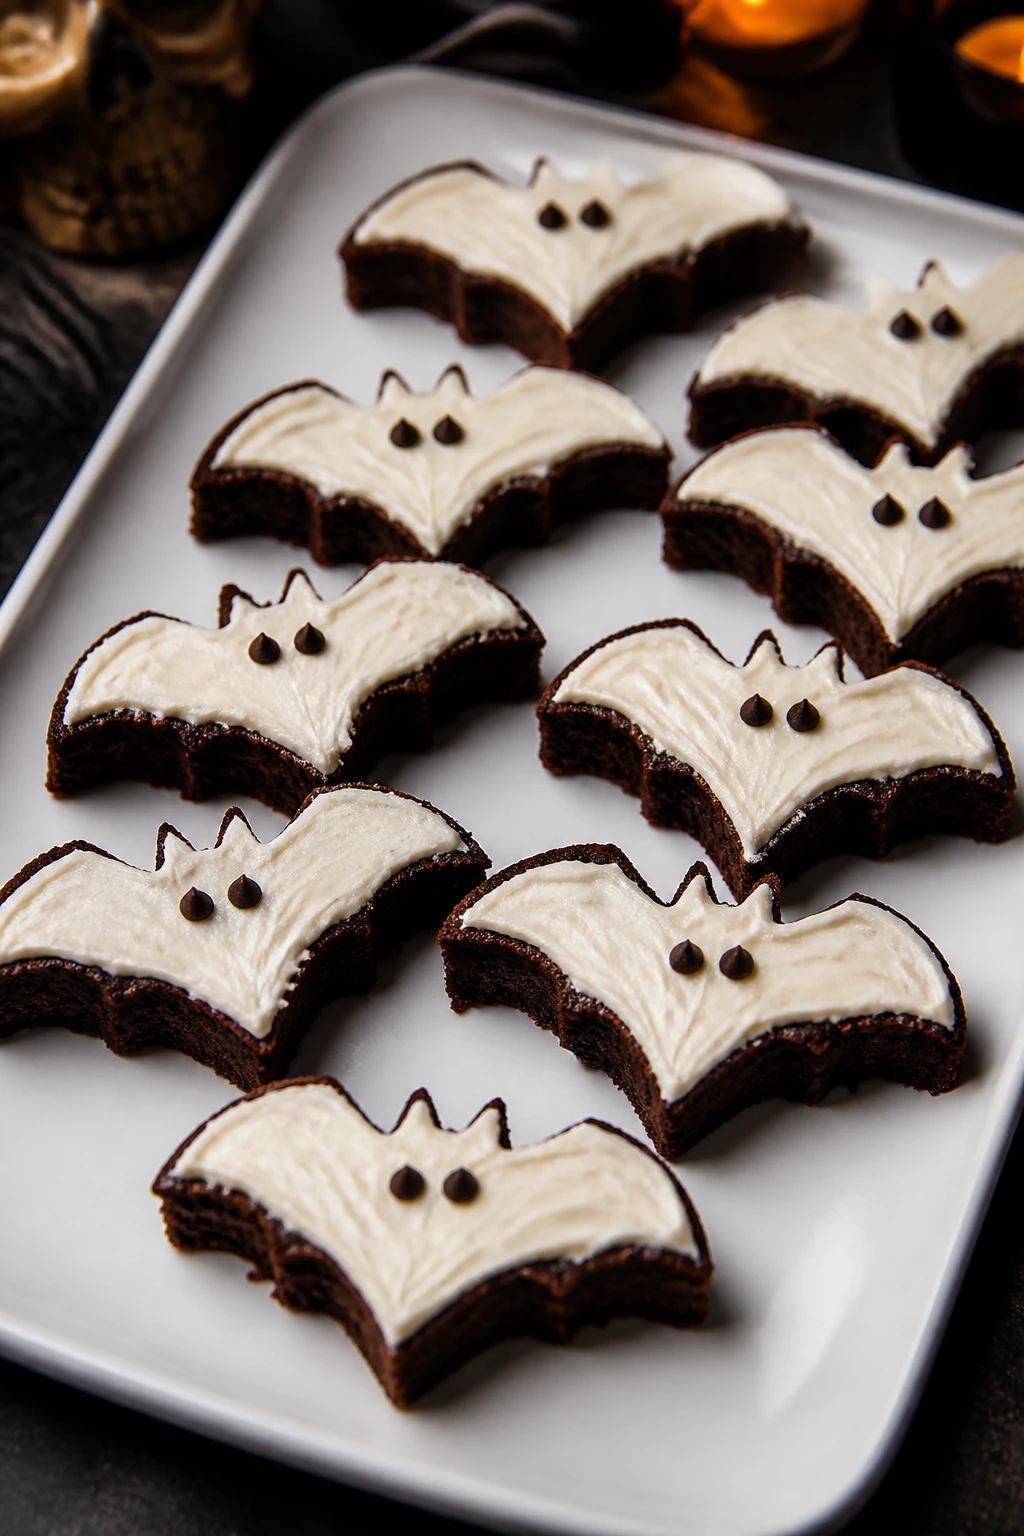
Presentation: Put the bats on a white platter, a dark cake stand, or a sheet of parchment so the frosting stands out against the chocolate. A few scattered chocolate crumbs around the tray make them look less staged, which I actually prefer.
Accompaniments: These sit nicely beside salted pretzels, orange segments, a bowl of berries, or a scoop of vanilla ice cream. If you’re serving them after a big meal, keep the plate simple. The brownie and frosting already bring enough drama.
Portions: Plan on one bat per person if you use a medium cutter, or two smaller bats if you’re cutting tiny ones. If the crowd is mixed and some people are “just tasting,” cut a few extra. They vanish faster than plain brownies because the shape does half the talking.
Beverage Pairing: Cold milk is the obvious choice, and it works. Dark roast coffee or a spiced chai is better if you want the cream cheese frosting to read a little less sweet. A mug of hot chocolate is a little indulgent, but I won’t argue with it.
Practical Tips for Better Cuts and Better Flavor
Flavor Enhancement: Stir 1/2 teaspoon of espresso powder into the melted chocolate if you want a deeper brownie flavor without making the dessert taste like coffee. It’s a small move, but it sharpens the chocolate in a way plain vanilla cannot.
Time-Saver: Bake the brownie slab the day before you plan to serve it. Cold brownies cut far cleaner, and you won’t be standing at the counter waiting for the tray to cool while everything else on the menu gets cold too.
Pro Move: Warm the bat cutter in hot water, then dry it completely before each cut. A slightly warm metal cutter slices through chilled brownies more cleanly, but a wet cutter drags frosting and leaves shiny smears on the edge.
Cost-Saver: Mini chocolate chips make perfectly good eyes. Candy eyes are fun, but they’re not necessary unless you want a more cartoon look. A tiny dab of frosting plus two chips does the job and costs less.
Texture Note: If you want the bats a touch firmer for transport, chill the cut brownies for 20 minutes before frosting. The frosting sits on top better, and the wings are less likely to bend if you’re stacking them in a container.
Common Mistakes That Ruin the Shape or Texture
The first mistake is cutting the brownies too soon. Warm brownies look harmless until the cutter hits them and pulls out soft crumbs instead of a clean bat silhouette. The fix is boring but effective: cool the slab fully, then chill it briefly if the room is warm.
Another one is baking until the toothpick comes out dry. That’s the fast track to dry, crumbly edges and a brownie that fractures when you press the cutter in. You want moist crumbs on the toothpick, not a clean stick.
Overmixing the flour is the quiet culprit behind cakey brownies. The batter turns lighter and puffier, then bakes up with a crumb that breaks instead of slicing. Fold only until the dry streaks disappear. Stop there. Really stop.
Then there’s frosting warm brownies. The cream cheese topping slides, thins, and turns the bat wings muddy. Let the slab cool completely. If you need the frosting firmer, chill it for 10 minutes rather than trying to speed up the brownie.
A fifth mistake is using a cutter that’s too thin or dull. Plastic cutters bend, and dull edges tear the brownie surface. Metal gives the sharpest result. If yours is dull, chill the slab longer and press with steady force instead of sawing.
Finally, don’t bury the shape under too many toppings. A heavy snowfall of sprinkles can hide the wings, and a thick frosting cap can make the bats look like blobs. A little goes farther here.
Variations for Different Tastes and Diets
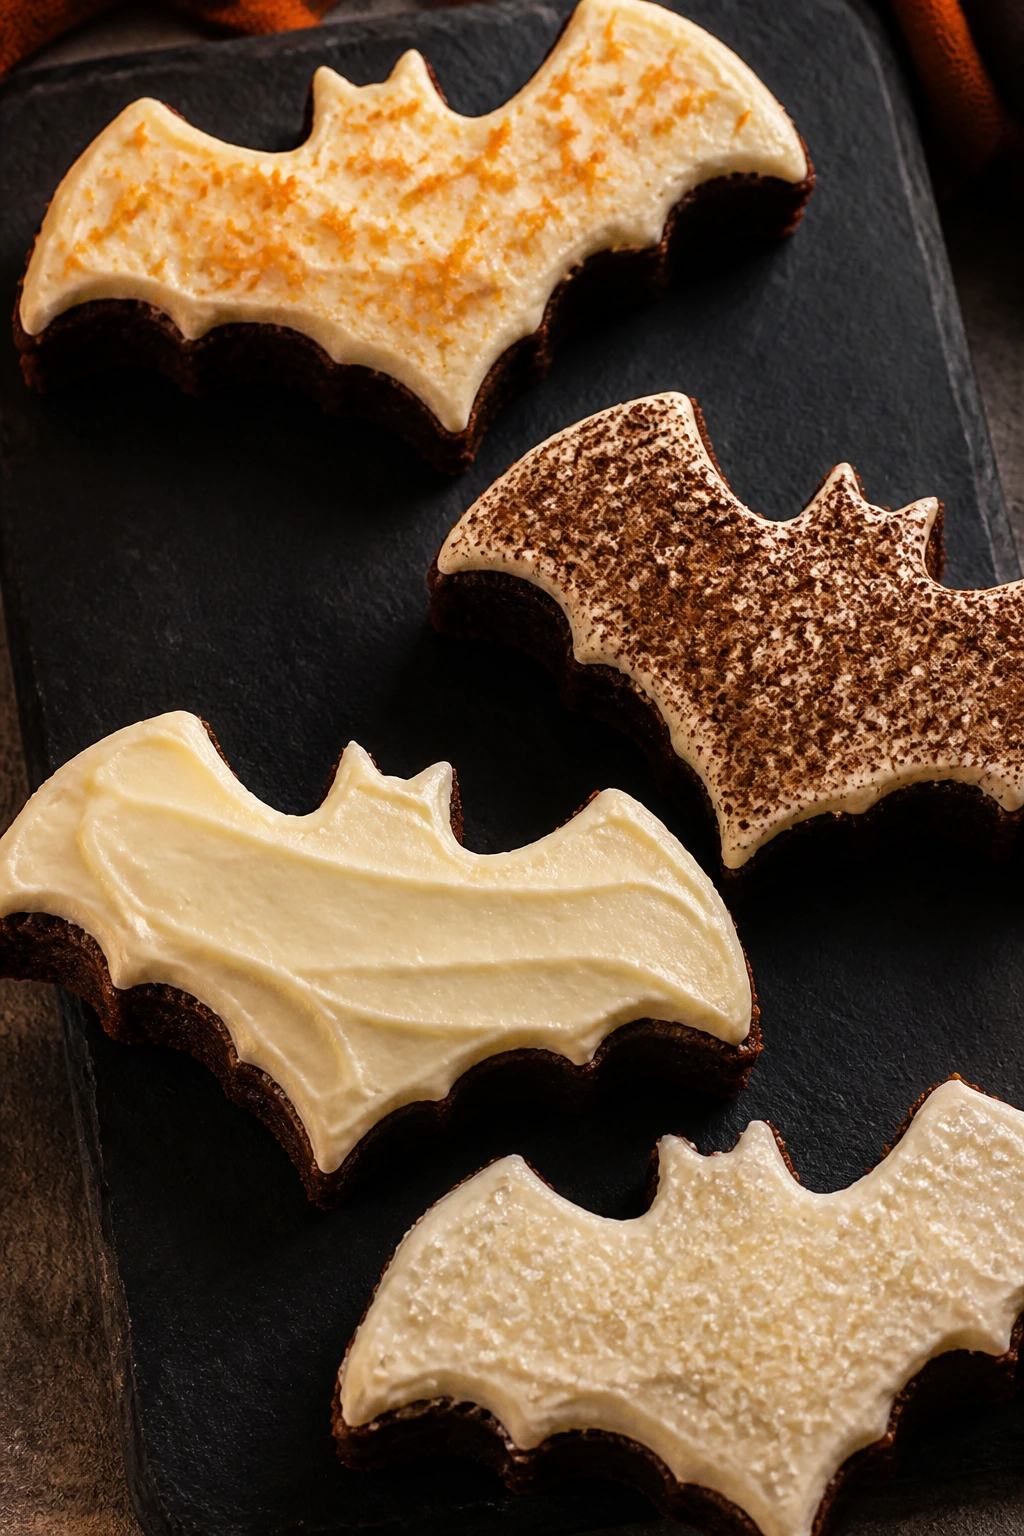
Orange Cream Midnight Bats: Add 1 teaspoon orange zest to the cream cheese frosting and use orange sanding sugar on top. The citrus lifts the chocolate and gives the frosting a cleaner, brighter finish.
Mocha Shadow Bats: Increase the espresso powder in the brownie batter to 1 teaspoon and finish the frosting with a tiny pinch of cocoa. The result tastes deeper and less sweet, which I like for older kids and adults who want something less candy-like.
Gluten-Free Graveyard Bats: Swap the all-purpose flour for a 1:1 gluten-free baking blend with xanthan gum. Let the batter rest for 10 minutes before baking so the flour hydrates and the final texture stays closer to the original.
Dairy-Free Dark Bats: Use dairy-free butter in both the brownies and frosting, plus a dairy-free cream cheese alternative for the topping. The frosting will usually be a little softer, so chill it before piping and keep the bat shapes on the flatter side.
Extra-Fudgy Slice-and-Serve Bars: Skip the bat cutter entirely and cut the chilled brownie slab into rectangles, then pipe little bat wings or eyes on top with frosting. It loses some of the shape drama but keeps the same chocolate-and-cream-cheese flavor, which is what matters if you’re short on time.
The Tools That Make the Shape Clean
- 9×13-inch metal baking pan: Best for even baking and sharp edges; a glass pan works, but the bake is less predictable.
- Parchment paper: Leave overhang on the long sides so you can lift the slab out without flipping it.
- Medium saucepan: Needed for melting the butter and chocolate together gently.
- Mixing bowls: One for the batter, one for the frosting, and one small bowl for the dry ingredients keeps things tidy.
- Whisk and rubber spatula: The whisk blends the sugars and eggs; the spatula keeps the batter from being overworked.
- Bat-shaped cookie cutter: The star of the show. A metal cutter gives the neatest edge.
- Offset spatula or small butter knife: Useful for spreading the frosting in a thin layer.
- Piping bag or zip-top bag: Handy if you want a more polished frosting swoop on each bat.
- Wire rack: Lets the brownies cool evenly instead of sweating in the pan.
- Kitchen scale, optional: Not required, but it makes flour and cocoa measurements more consistent if you bake often.
Storing, Freezing, and Making Them Ahead
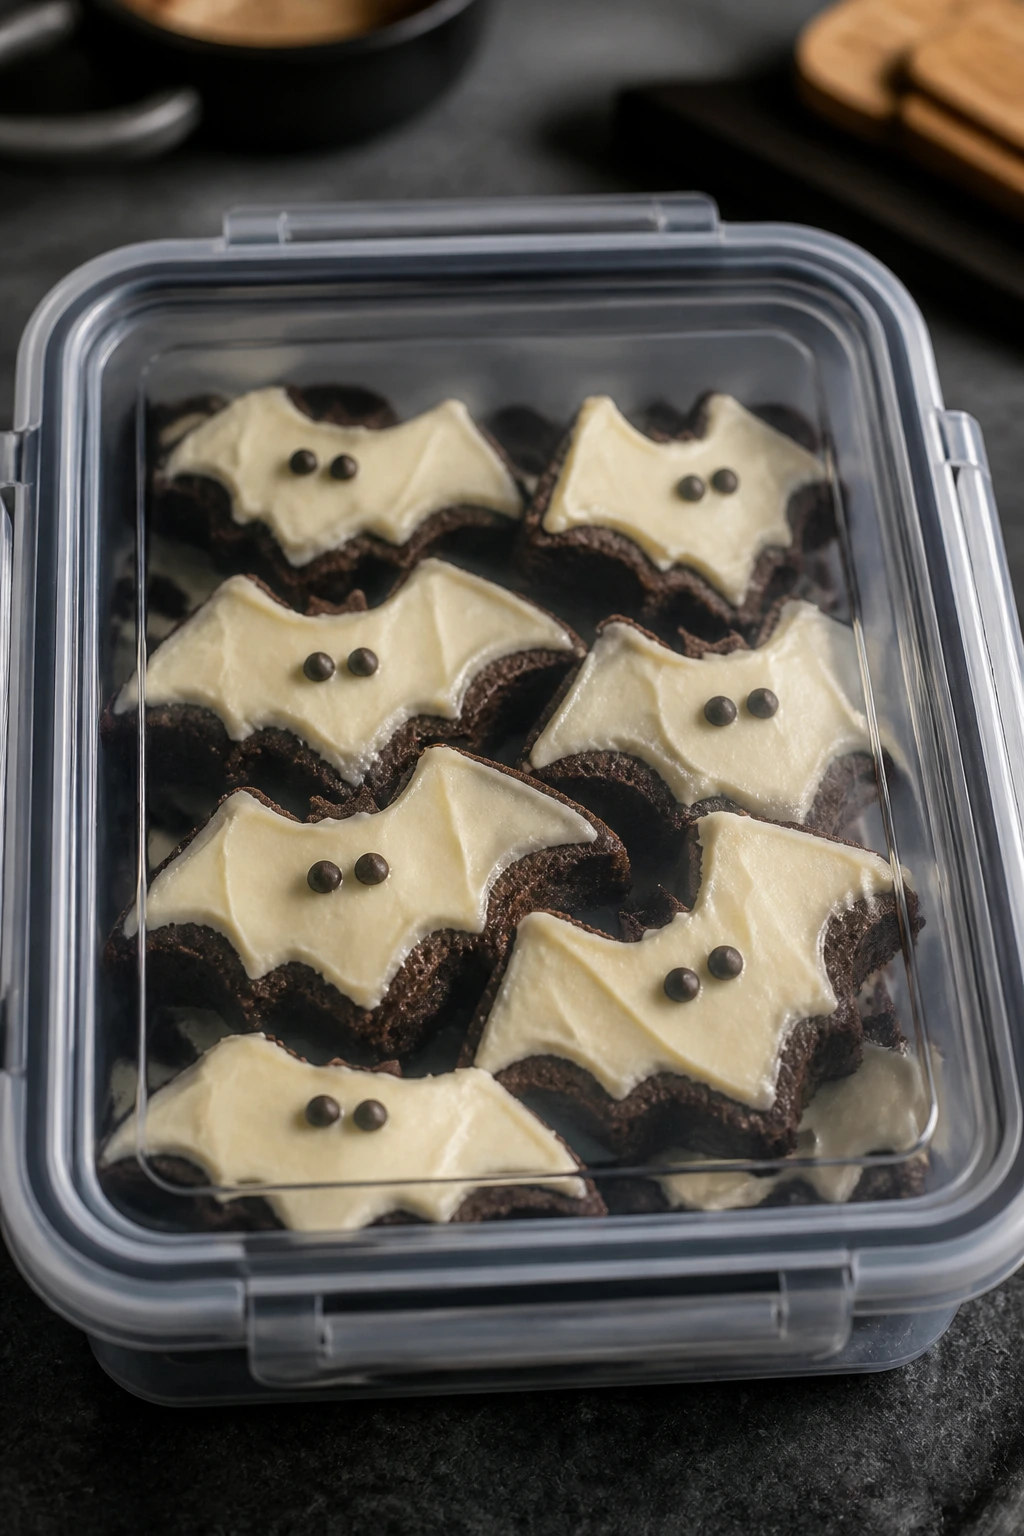
These brownies keep best when they’re treated like the cream cheese frosting matters, because it does. Once frosted, the bats can sit at cool room temperature for up to 2 hours, but after that they should go into the fridge. Store them in a single layer in an airtight container for up to 4 days. If you stack them, slip a sheet of parchment between layers so the frosting doesn’t smear.
For freezing, the cleanest method is to freeze the unfrosted brownie slab or cut bat shapes. Wrap them tightly and freeze for up to 2 months. Thaw them overnight in the refrigerator, then frost the next day. You can freeze frosted bats too, but the texture of the cream cheese topping softens a little on thawing, and the little eyes can shift if the frosting wasn’t fully set.
The frosting itself can be made 2 to 3 days ahead and kept chilled in a covered container. Give it a quick stir before piping. If it firms up too much in the fridge, let it sit on the counter for 10 to 15 minutes and beat it briefly again.
If you want the freshest look, bake the brownies one day and cut and frost them the next. That overnight chill does half the work for you. The bats slice cleaner, the frosting sits better, and the whole tray feels calmer.
Questions Bakers Ask Most

Can I use a boxed brownie mix instead of making the batter from scratch?
Yes, if you’re short on time, but pick a fudgy-style mix rather than a cakey one. Bake it in a metal 9×13 pan and cool it completely before cutting, or the bat shapes will tear at the wings.
Do I need a bat-shaped cookie cutter?
It helps, but it isn’t the only route. You can print a bat template, place it on chilled brownies, and trace around it with a sharp knife, wiping the blade clean between cuts. A cutter is faster, though, and the edges usually look neater.
Why is my cream cheese frosting runny?
Most of the time the cream cheese or butter was too warm. Beat in a little extra powdered sugar, then chill the bowl for 10 minutes and try again. Brick-style cream cheese also holds shape better than the soft tubs sold for spreading.
Can I make these ahead for a party?
Yes, and they improve with a little planning. Bake the brownie slab one day, chill it, cut it the next, and frost the bats shortly before serving. That gives you the cleanest edges and the neatest frosting finish.
How do I keep the brownie shape from crumbling when I cut it?
Use a fully cooled slab, then chill it briefly if the kitchen is warm. Press the cutter straight down instead of twisting, and lift it cleanly. If the edges still crumble, the brownies were probably overbaked or cut too soon.
Can I make them less sweet?
Use bittersweet chocolate, keep the espresso powder in the batter, and add the salt to the frosting. You can also frost the center of each bat lightly instead of covering the whole shape, which lets the chocolate stay in charge.
Do these need to stay refrigerated because of the frosting?
Yes. Cream cheese frosting should not sit out all afternoon. Give the bats a short rest before serving if they’re cold from the fridge, then return leftovers to the refrigerator once the party is over.
A Little Mischief on a Tray
There’s something satisfying about turning a familiar brownie into a shape that makes people smile before they even take a bite. The chocolate does the heavy lifting, but the bat cutout and cream cheese frosting give the whole thing a little theater. That’s the part I like most. Not the decoration, really. The pause before someone reaches for one.
Keep the brownie slab cold, keep the frosting thick, and don’t overthink the eyes. A dessert like this wins by being tidy, dark, and a little playful. Next time you want a tray that looks festive without asking you to spend all day decorating, this is the one I’d make.
Buttery Brownie Bats Halloween with Cream Cheese Frosting — Recipe Card
Recipe Name: Buttery Brownie Bats Halloween with Cream Cheese Frosting
Description: Fudgy, butter-rich brownies cut into bat shapes and finished with tangy cream cheese frosting and little chocolate-chip eyes. The dark chocolate base and cool frosting keep each bite rich, balanced, and cleanly shaped.
Prep Time: 25 minutes
Cook Time: 30 minutes
Total Time: 1 hour 40 minutes
Course: Dessert
Cuisine: American
Servings: 12 to 14 bat brownies
Calories: About 320 kcal per bat
Ingredients
For the Brownie Base:
- 1 cup (2 sticks) unsalted butter, cut into pieces
- 8 ounces bittersweet chocolate, chopped
- 1 1/2 cups granulated sugar
- 1/2 cup packed light brown sugar
- 4 large eggs, at room temperature
- 2 teaspoons pure vanilla extract
- 1 cup all-purpose flour
- 1/2 cup Dutch-process cocoa powder, sifted if lumpy
- 1 teaspoon fine sea salt
- 1/2 teaspoon espresso powder, optional
- 3/4 cup semi-sweet chocolate chips, optional
For the Cream Cheese Frosting:
- 8 ounces brick-style cream cheese, softened
- 1/2 cup unsalted butter, softened
- 2 cups powdered sugar, sifted
- 1 teaspoon pure vanilla extract
- Pinch of fine salt
- 1 to 2 tablespoons heavy cream or milk, only if needed
For Decorating:
- 24 mini chocolate chips or candy eyes
- 1 to 2 tablespoons orange or black sanding sugar, optional
- A little melted chocolate, optional
Instructions
-
Preheat the oven to 350°F (175°C) and line a 9×13-inch metal baking pan with parchment paper, leaving overhang on the long sides. Lightly grease the parchment.
-
Melt the butter and chopped bittersweet chocolate together over low heat until smooth and glossy. Remove from the heat.
-
Whisk in the granulated sugar and brown sugar, then let the mixture cool for 2 minutes.
-
Whisk in the eggs, one at a time, followed by the vanilla extract.
-
Fold in the flour, cocoa powder, salt, and espresso powder just until combined. Fold in the chocolate chips if using.
-
Spread the batter in the prepared pan and bake for 28 to 32 minutes, until the edges are set and the center still has moist crumbs on a toothpick.
-
Cool in the pan for 1 hour, then lift out and cool completely. Chill briefly if needed for cleaner cutting.
-
Beat the cream cheese and butter until smooth and creamy, about 2 minutes.
-
Add the powdered sugar, vanilla, and salt and beat until fluffy. Add a teaspoon or two of cream or milk only if the frosting needs softening.
-
Cut the cooled brownie slab into bat shapes with a bat-shaped cookie cutter.
-
Frost each bat with a thin layer or a small piped mound of cream cheese frosting.
-
Press on mini chocolate chips or candy eyes, then let the frosting set for 10 to 15 minutes before serving.
Notes: Chill the brownies before cutting for the cleanest edges. If the frosting gets soft, refrigerate it for 10 minutes before piping. For the best shape, keep the finished bats chilled until serving.