
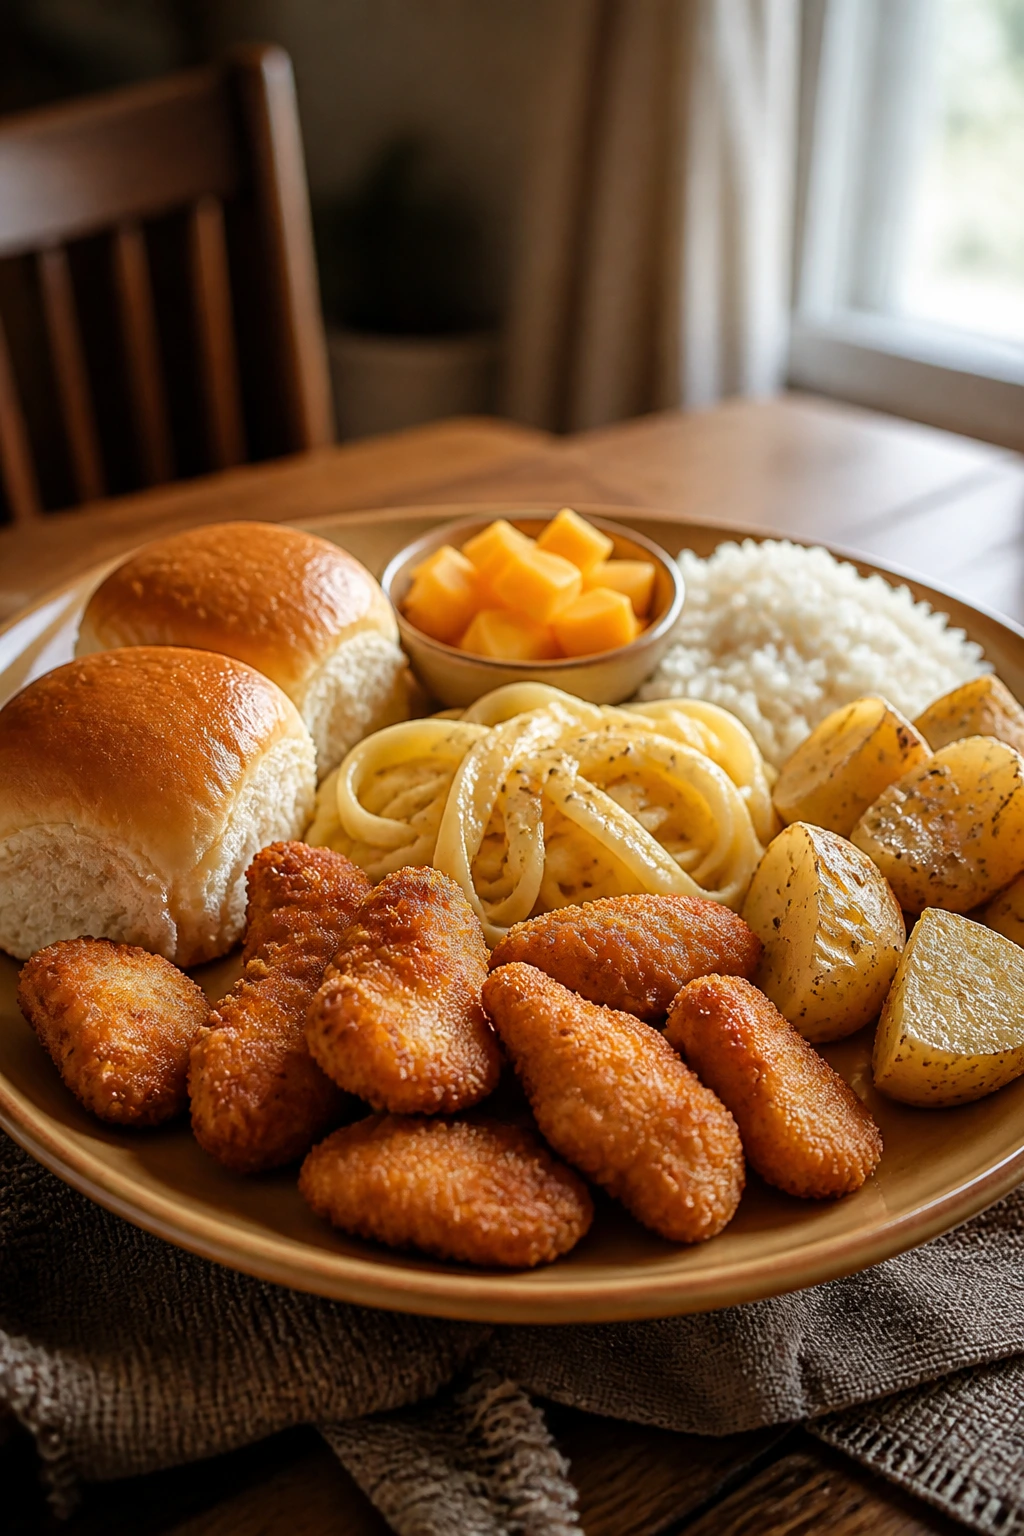
Hot-weather dinners get messy fast when the people at the table are suspicious of anything green, saucy, mixed together, or remotely “interesting.” That is exactly why summertime meals for picky eaters work best when they stay familiar: crisp chicken, buttered noodles, soft buns, mild cheese, rice, pasta, potatoes, and simple dips on the side. No performance. No lecture. Just food that looks like food before the first bite.
I’ve watched too many family dinners go sideways because the meal tried to do too much. A sauce spread everywhere. A vegetable snuck into the wrong corner. A casserole arrived looking like a science project. Summer punishes that kind of cooking. The heat dulls appetites, and picky eaters get even pickier when the plate feels heavy, wet, or unpredictable.
So the smart move is to cook like a person who knows the audience. Give kids and grown-ups a few dependable building blocks, keep the seasoning mild, and let the food stay distinct instead of turning into mush. You’ll see that pattern again and again here: meals that can be eaten with one hand, assembled at the table, cooled down fast, or served with the “problem parts” off to the side.
Why You’ll Love This Collection
- Familiar flavors first: These meals lean on chicken, cheese, pasta, rice, buns, and potatoes—the foods most picky eaters already trust.
- Less heat in the kitchen: Several recipes use the oven briefly, the stovetop once, or no-cook assembly so you are not standing over a burner for an hour.
- Easy to separate: A lot of these plates can be deconstructed, which helps when one child wants plain noodles and another wants sauce on the side.
- Lunch, dinner, and leftovers: Many of these hold up well in the fridge, so one batch can cover two meals without tasting tired.
- Kid-friendly, not babyish: Mild does not mean boring. A little browning, a little crunch, and a dip on the side go a long way.
- Real pantry ingredients: You will not be hunting down special flours, fancy cheeses, or obscure condiments to make these work.
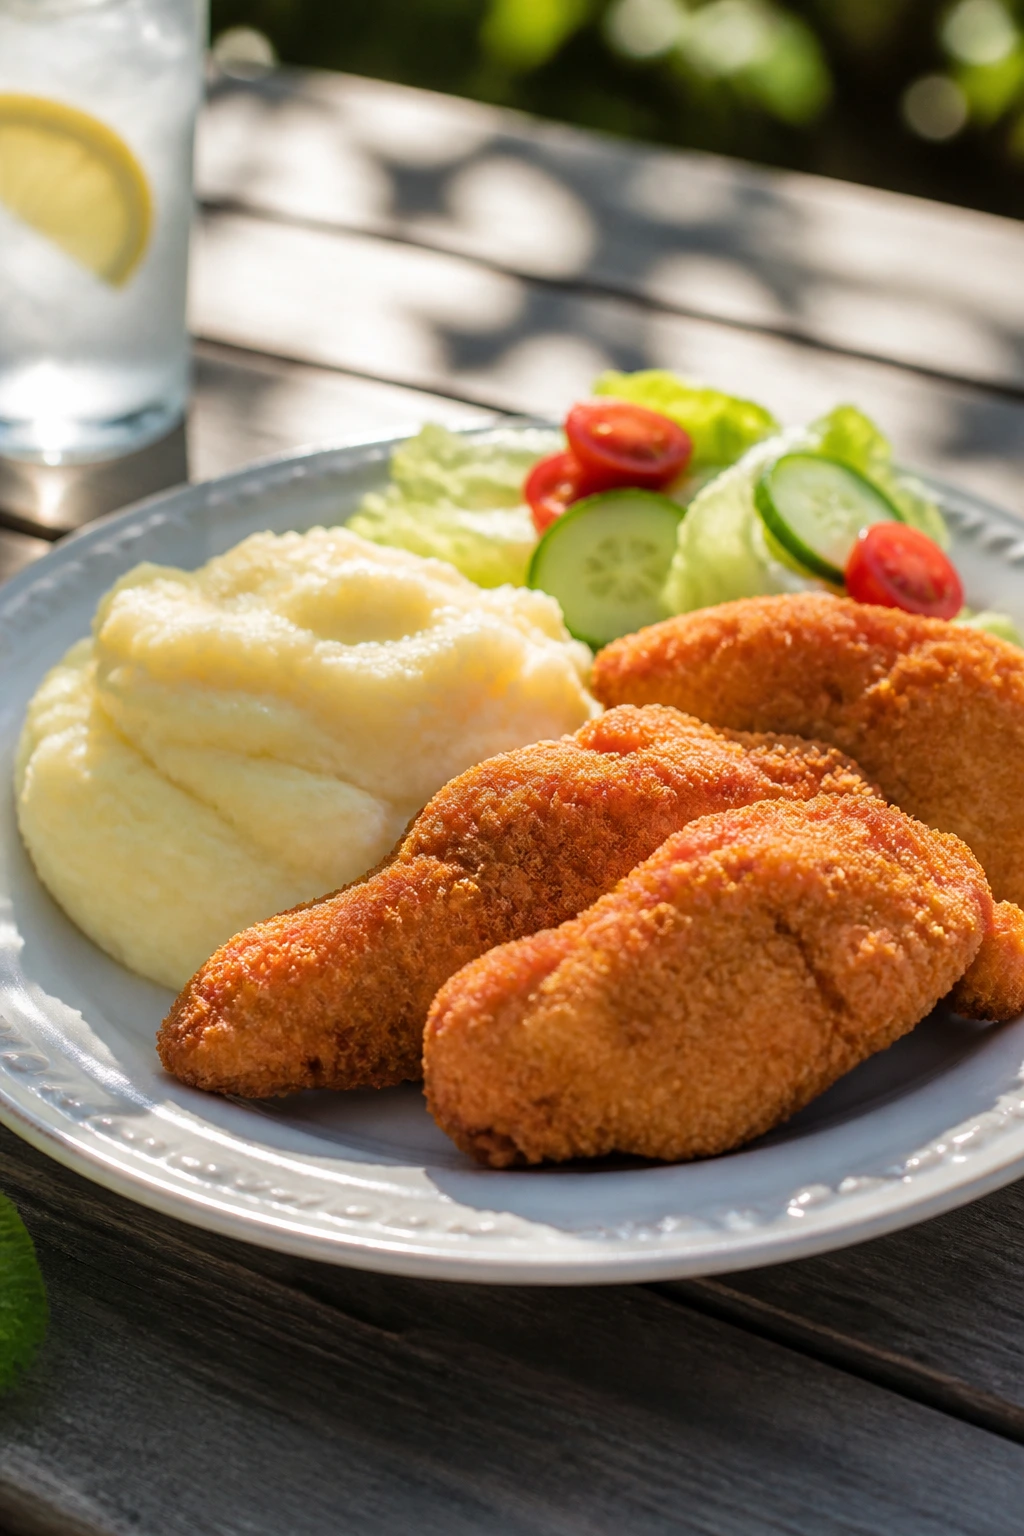
1. Crispy Oven Chicken Tenders
A tray of chicken tenders usually gets eaten faster than anything else on the table, and that is not an accident. The coating stays crunchy, the meat stays juicy, and the whole thing feels dependable in the way picky eaters like best. Serve them with a mild dip and a pile of fruit, and the plate disappears.
Why It Works:
The oven gives you that fried-food crunch without a greasy skillet, which matters when the kitchen is already warm. Panko makes a bigger, snappier crust than regular breadcrumbs, and a hot oven at 425°F gets the edges golden before the chicken dries out. This is one of those meals that looks plain in the best possible way.
Key Ingredients:
- 1½ pounds chicken tenders
- 1 cup all-purpose flour
- 2 large eggs
- 2 tablespoons milk
- 2 cups panko breadcrumbs
- 1 teaspoon fine salt
- 1 teaspoon paprika
- ½ teaspoon garlic powder
- Cooking spray, for browning
- ½ cup honey mustard or ranch, for serving
Quick Steps:
- Preheat the oven to 425°F and line a rimmed sheet pan with parchment or foil. Set a wire rack on top if you want extra crunch.
- Stir the flour, salt, paprika, and garlic powder together in a shallow bowl.
- Whisk the eggs and milk in a second bowl. Pour the panko into a third bowl.
- Dredge each tender in flour, dip in egg, then press into panko until fully coated.
- Arrange the tenders on the rack, spray lightly with cooking spray, and bake for 18 to 20 minutes. Flip once halfway through.
- Pull them when the crust is deep gold and the center reaches 165°F. Let them sit for 3 minutes so the juices settle.
Equipment for This Recipe:
- Rimmed baking sheet
- Wire rack
- Three shallow bowls
- Tongs
- Instant-read thermometer
How to Serve This Dish:
Pile the tenders on a platter with sliced watermelon, cucumber spears, or oven fries. Keep the dip in a small bowl on the side so kids can choose their own level of sauce. Two or three tenders per person is a normal dinner portion.
Pro Tips for This Recipe:
- Press the panko onto the chicken with your fingertips; loose crumbs fall off in the oven.
- Use tenders, not thick breast strips, or you will overbake the coating before the meat cooks through.
- A rack keeps the bottoms crisp. A bare pan works, but the underside softens faster.
- Salt the flour mixture, not just the chicken. That little layer matters.
Variations on This Dish:
- Parmesan Crunch: Add ¼ cup grated Parmesan to the panko for a sharper crust.
- Gluten-Free Version: Use gluten-free flour and gluten-free breadcrumbs; the method stays the same.
- Air-Fryer Batch: Cook at 390°F for about 10 to 12 minutes, flipping once, for a smaller batch.
Common Mistakes to Avoid with This Dish:
- Skipping the spray: Dry breadcrumbs stay pale and dusty. A light mist of oil helps them toast.
- Crowding the pan: If the tenders touch, they steam instead of crisping. Leave space.
- Cutting too soon: Slice one open too early and the juices run out. Give them those 3 resting minutes.
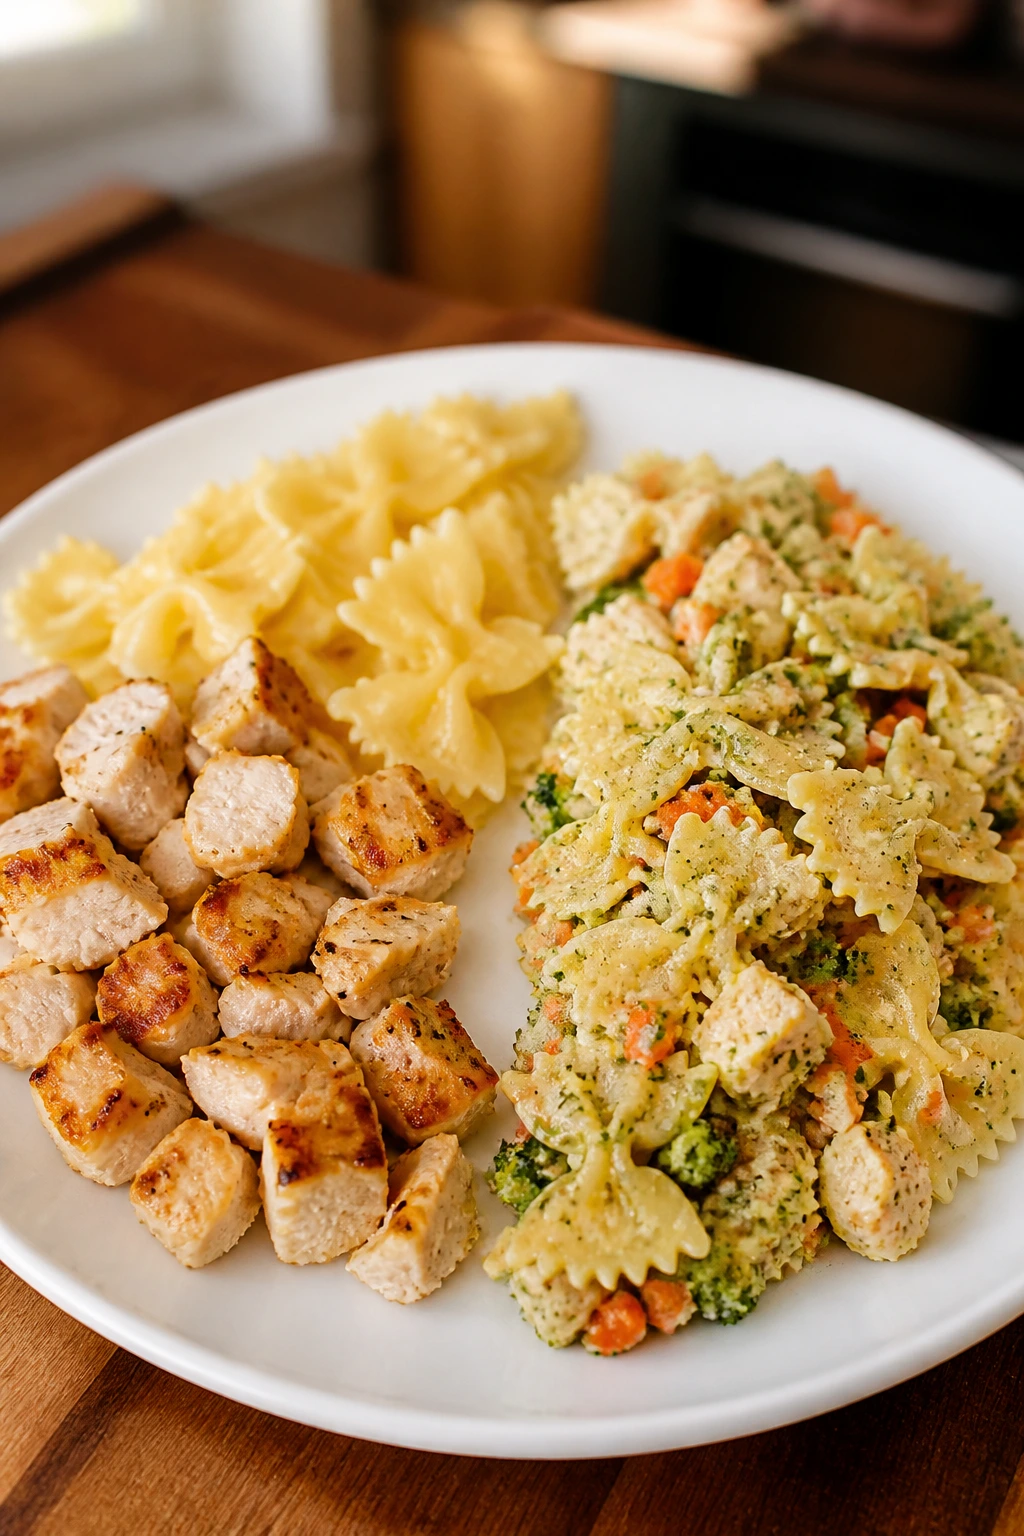
2. Buttered Parmesan Noodles with Chicken and Peas
This is the kind of dinner that gets accepted without debate. Soft noodles, mild chicken, a little cheese, and peas that blend into the background instead of shouting for attention. It tastes like the safe answer, which is exactly why it works.
Why It Works:
The sauce is barely a sauce—just butter, a splash of pasta water, and Parmesan—so the noodles stay glossy instead of heavy. Diced chicken gives it enough substance to count as dinner, and the peas add color without changing the whole mood of the plate. When a meal needs to be calm, this is the move.
Key Ingredients:
- 12 ounces rotini or penne
- 2 cups cooked chicken, chopped or shredded
- 1 cup frozen peas
- 4 tablespoons unsalted butter
- ¾ cup grated Parmesan
- ½ cup reserved pasta water
- ½ teaspoon salt
- ¼ teaspoon black pepper
Quick Steps:
- Bring a large pot of salted water to a boil and cook the pasta until just tender, about 9 to 11 minutes.
- Add the peas during the last 1 minute of cooking so they thaw and stay bright.
- Reserve ½ cup of the pasta water, then drain the pasta.
- Return the pasta to the warm pot with the butter, chicken, Parmesan, salt, pepper, and ¼ cup pasta water.
- Toss over low heat for 1 to 2 minutes until the butter melts and the cheese clings to the noodles.
- Add more pasta water a tablespoon at a time if the pan looks dry.
Equipment for This Recipe:
- Large pot
- Colander
- Wooden spoon
- Measuring cups
- Large serving bowl
How to Serve This Dish:
Serve warm in shallow bowls with a little extra Parmesan on top. A side of cucumber slices or apple wedges keeps the plate simple. This also packs well for lunch if you let it cool first.
Pro Tips for This Recipe:
- Use rotini or penne so the sauce catches in the grooves.
- Chop the chicken small; big chunks feel more like a surprise than a comfort.
- Keep the heat low once the cheese goes in or it can clump.
- If the pasta sits for 10 minutes, loosen it with a spoonful of warm water before serving.
Variations on This Dish:
- Extra-Cheesy Bowl: Add ½ cup shredded mozzarella for a softer, stretchier finish.
- Lemon Butter Finish: Stir in 1 teaspoon lemon zest for a brighter edge.
- No-Chicken Version: Leave out the chicken and add another cup of peas or diced steamed carrots.
Common Mistakes to Avoid with This Dish:
- Using too much cheese: A heavy hand makes the noodles sticky instead of silky. Start with the measured amount.
- Overcooking the pasta: Soft noodles turn mushy after tossing. Stop at just tender.
- Forgetting to save pasta water: That starchy water is what helps the butter and cheese coat evenly.
3. Turkey and Cheese Slider Bake
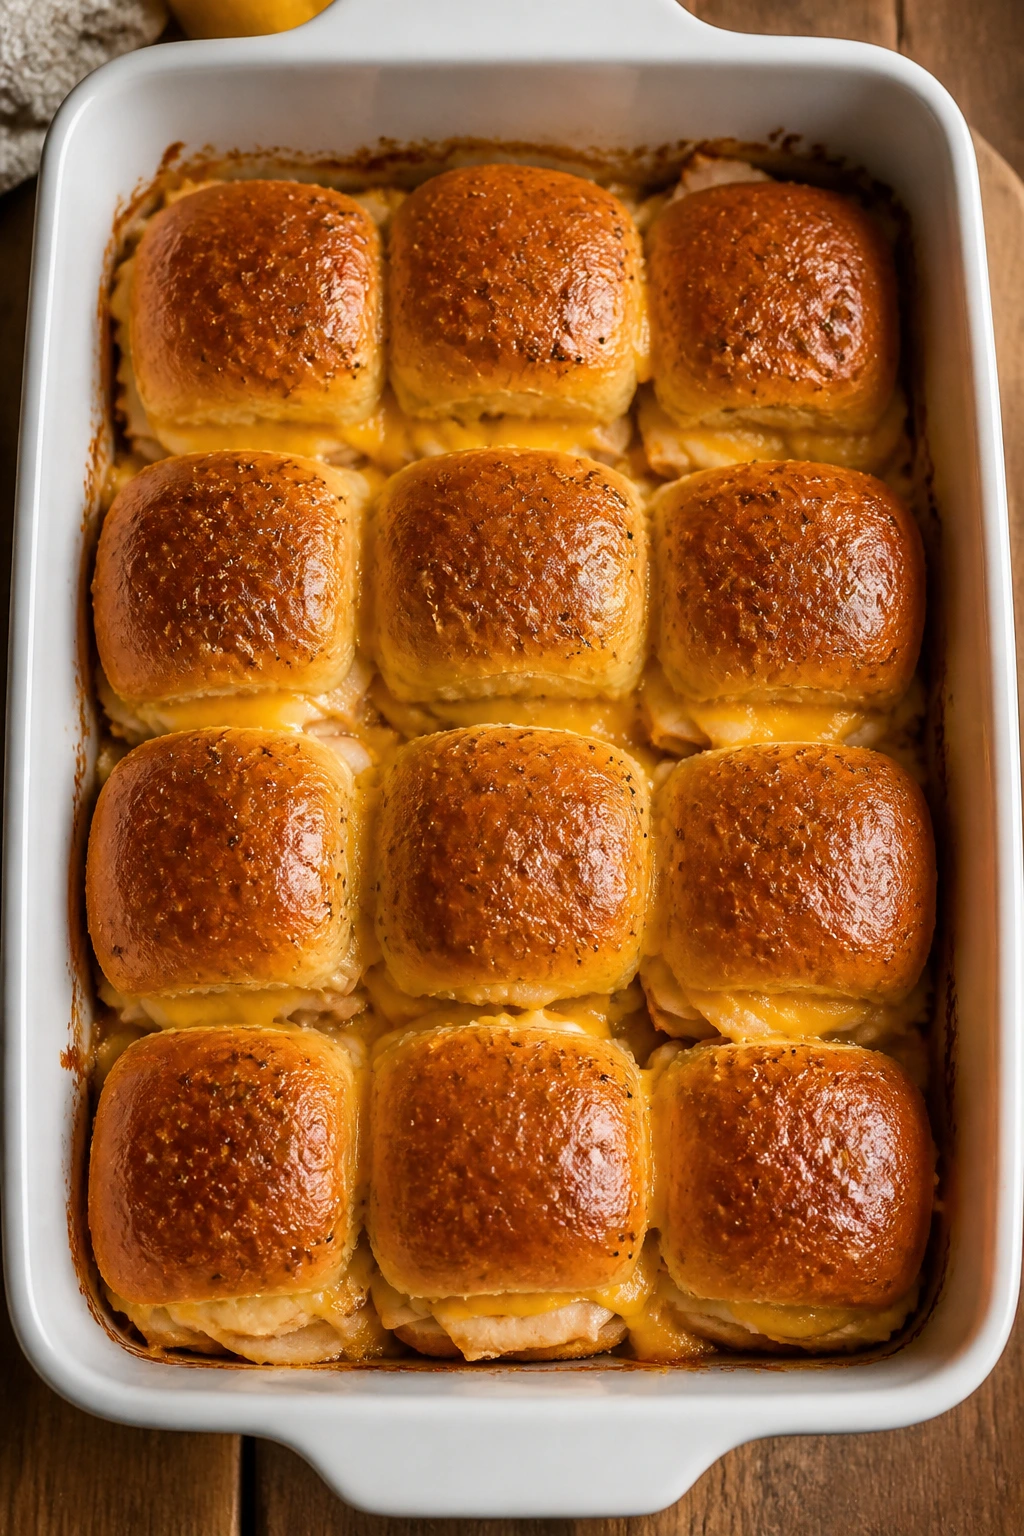
These sliders are soft, sweet, and tidy enough to hand to a child without handing over a disaster. The buns bake together, the cheese melts into the turkey, and the top gets a buttery finish that tastes like something you planned instead of something you threw together.
Why It Works:
Slider bakes solve the “too many separate sandwiches” problem. One pan gives you 12 little sandwiches in one shot, and the top stays warm while the bottoms do not get soggy. Sweet rolls are doing a lot of heavy lifting here; picky eaters tend to accept them faster than plain sandwich bread.
Key Ingredients:
- 1 package slider buns, 12-count
- 1 pound sliced deli turkey
- 8 slices mild cheddar or American cheese
- 4 tablespoons unsalted butter, melted
- 1 tablespoon Dijon mustard
- 1 tablespoon poppy seeds
- 1 teaspoon onion powder
- 1 tablespoon chopped parsley, optional
Quick Steps:
- Preheat the oven to 350°F and grease a 9×13-inch baking dish.
- Slice the slider buns in half horizontally and place the bottom half in the dish.
- Layer the turkey and cheese evenly over the buns, then set the tops back on.
- Stir the butter, Dijon, poppy seeds, and onion powder together, then brush it over the bun tops.
- Cover loosely with foil and bake for 12 minutes.
- Uncover and bake 5 to 7 minutes more, until the cheese is melted and the tops are lightly browned.
Equipment for This Recipe:
- 9×13-inch baking dish
- Pastry brush
- Foil
- Sharp knife
How to Serve This Dish:
Cut the sliders apart and serve them warm with grapes, baby carrots, or potato chips. They work for dinner, lunch, or a casual backyard meal where nobody wants a plate full of extra pieces.
Pro Tips for This Recipe:
- Slice the whole slab of buns in one go so the bottoms stay even.
- Use mild cheese if the eater is cheese-shy; sharper cheese can overpower the turkey.
- Bake covered first so the tops do not brown before the middles melt.
- A tiny swipe of mayo under the turkey keeps the bread soft if you like a richer sandwich.
Variations on This Dish:
- Ham and Swiss Slider Bake: Swap turkey for ham and use Swiss for a slightly saltier version.
- Chicken Ranch Sliders: Use shredded chicken and a thin layer of ranch dressing under the cheese.
- Plain Cheese Sliders: Leave the meat out and double the cheese for a lighter lunch option.
Common Mistakes to Avoid with This Dish:
- Overloading the filling: Too much meat makes the sliders fall apart. Keep the layer even and modest.
- Skipping the foil: Uncovered sliders brown too fast on top and dry out underneath.
- Using strong mustard in the butter: Dijon is enough; anything hotter takes over the whole pan.
4. Ham Pasta Salad with Sweet Peas
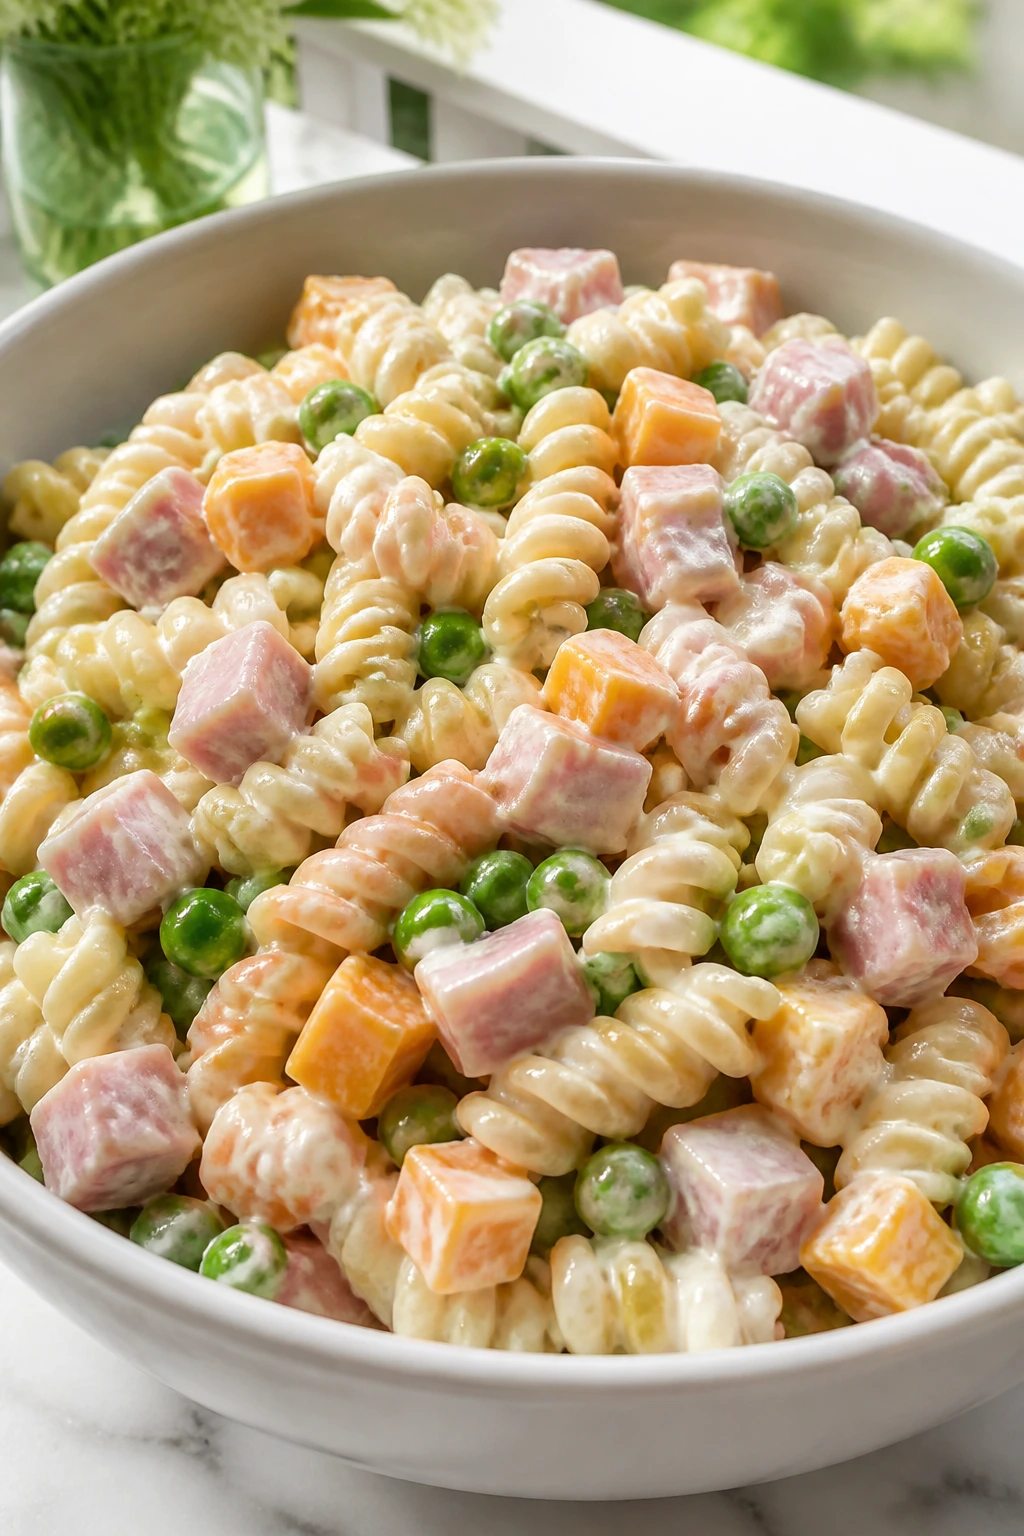
Cold pasta salad earns its keep in summer, especially when the dressing is creamy but light and the mix-ins stay recognizable. Ham, peas, cheddar, and small pasta shapes give every bite the same safe, familiar rhythm. That predictability matters more than people admit.
Why It Works:
The salad tastes best after a short chill because the dressing settles into the pasta instead of sitting on top. Diced ham gives a salty anchor, peas bring a little sweetness, and cheddar cubes keep the dish from feeling like a side salad pretending to be dinner. Small shells or elbows are easier for picky eaters than big, slippery shapes.
Key Ingredients:
- 12 ounces small pasta shells or elbows
- 1½ cups diced ham
- 1 cup frozen peas, thawed
- 1 cup cheddar cheese cubes
- ½ cup mayonnaise
- ½ cup plain Greek yogurt
- 1 tablespoon lemon juice
- 1 teaspoon salt
- ¼ teaspoon black pepper
Quick Steps:
- Cook the pasta in salted water until tender, then drain and rinse briefly under cool water.
- Whisk the mayonnaise, yogurt, lemon juice, salt, and pepper in a large bowl.
- Fold in the pasta, ham, peas, and cheddar cubes.
- Chill for at least 20 minutes so the flavors settle.
- Taste and add a spoonful of mayo or a pinch of salt if it seems dry.
Equipment for This Recipe:
- Large pot
- Colander
- Mixing bowl
- Rubber spatula
How to Serve This Dish:
Serve it cold in bowls or lunch containers with crackers and fruit. It works well next to grilled chicken or burgers, but it does not need much else. Keep the portion modest; a cold side like this can feel heavier than it looks.
Pro Tips for This Recipe:
- Rinse the pasta just enough to cool it, not so long that it turns watery.
- Cut the ham and cheddar small for better forkfuls.
- Make it earlier in the day if you can; the texture improves after a chill.
- If the salad stiffens in the fridge, stir in 1 to 2 tablespoons of milk or yogurt.
Variations on This Dish:
- Macaroni Salad Style: Use elbow macaroni and add a spoonful of sweet pickle relish if your crowd likes it.
- No-Mayonnaise Version: Replace all the mayo with Greek yogurt for a lighter, tangier bowl.
- Turkey Swap: Diced turkey works the same way if that is what you have.
Common Mistakes to Avoid with This Dish:
- Adding peas frozen: They cool the salad unevenly and water it down. Thaw them first.
- Overdressing it: The pasta keeps absorbing dressing as it sits. Start modest.
- Using huge cheese cubes: Small cubes blend better and do not hijack each bite.
5. Baked Chicken Quesadillas
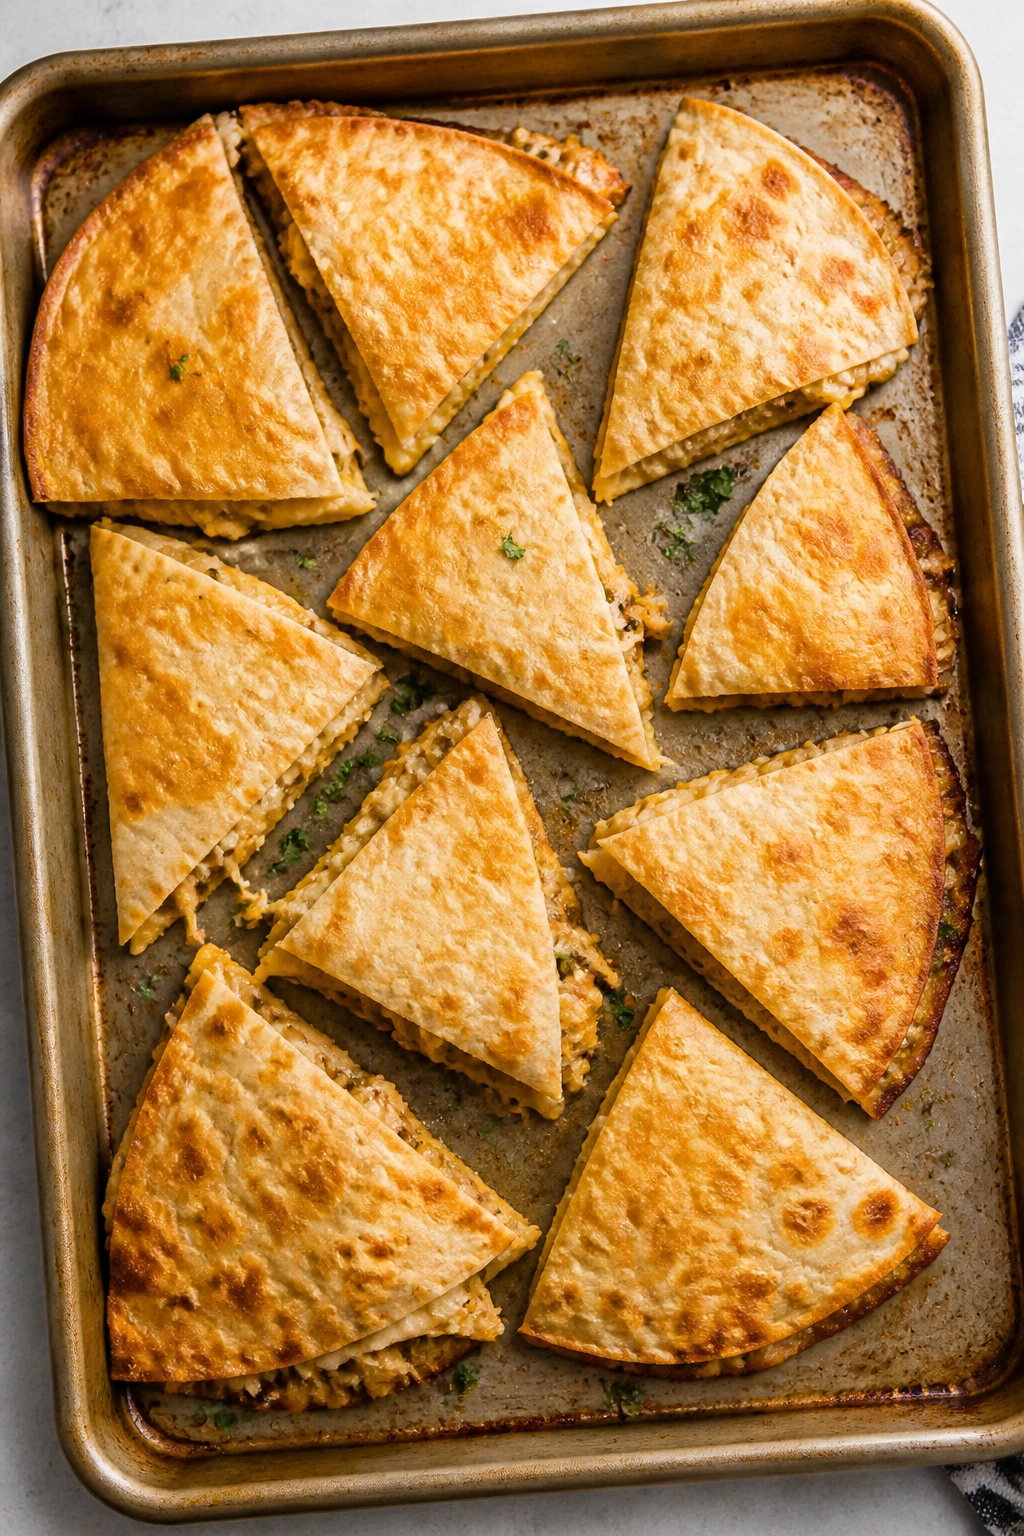
Quesadillas solve the picky-eater dinner problem fast because the filling stays hidden between tortillas and the cheese does the smoothing work. Bake them on a sheet pan, cut them into triangles, and suddenly dinner looks neat instead of improvised.
Why It Works:
The oven gives you a crisp tortilla without standing at the stove flipping one skillet at a time. Mild chicken and cheese are a safe pairing, and you can keep the salsa on the side for the adults who want more flavor. The best part? The triangles cool quickly, which matters when nobody wants to wait.
Key Ingredients:
- 2 cups cooked shredded chicken
- 2 cups shredded Monterey Jack or mild cheddar
- 8 flour tortillas, 8-inch
- 2 tablespoons melted butter or oil
- ½ teaspoon salt
- ½ teaspoon mild taco seasoning
- Salsa or sour cream, for serving
Quick Steps:
- Preheat the oven to 400°F and line two sheet pans with parchment.
- Mix the chicken with salt and taco seasoning.
- Lay 4 tortillas on the pans, sprinkle cheese over half of each tortilla, add chicken, then top with more cheese.
- Fold the tortillas closed and brush the tops with butter or oil.
- Bake for 8 to 10 minutes, flipping once halfway through, until the tortillas are golden and the cheese is melted.
- Rest for 2 minutes, then cut into triangles.
Equipment for This Recipe:
- Sheet pans
- Parchment paper
- Pastry brush
- Sharp knife or pizza cutter
How to Serve This Dish:
Serve the wedges with sour cream, diced avocado, or plain corn on the side. A little fruit on the plate keeps the meal bright and helps cut the cheese. Two small quesadillas usually feed four people if you add a side.
Pro Tips for This Recipe:
- Keep the filling thin; too much chicken makes the tortilla crack when folded.
- Use a pizza cutter for clean triangles.
- Let the quesadillas sit before slicing or the cheese will slide out.
- Mild cheddar melts better than aged cheddar here.
Variations on This Dish:
- Bean-and-Cheese Version: Replace half the chicken with refried beans for a cheaper filling.
- BBQ Chicken Twist: Swap taco seasoning for 2 tablespoons barbecue sauce.
- Breakfast Quesadillas: Fill with scrambled eggs and cheese for a morning version.
Common Mistakes to Avoid with This Dish:
- Overfilling the tortillas: They tear before the cheese melts. Keep the layer light.
- Baking too long: Tortillas turn brittle fast. Pull them when they are just golden.
- Serving immediately: The filling runs out if you cut too soon. Give them a short rest.
6. Mild Taco Rice Bowls
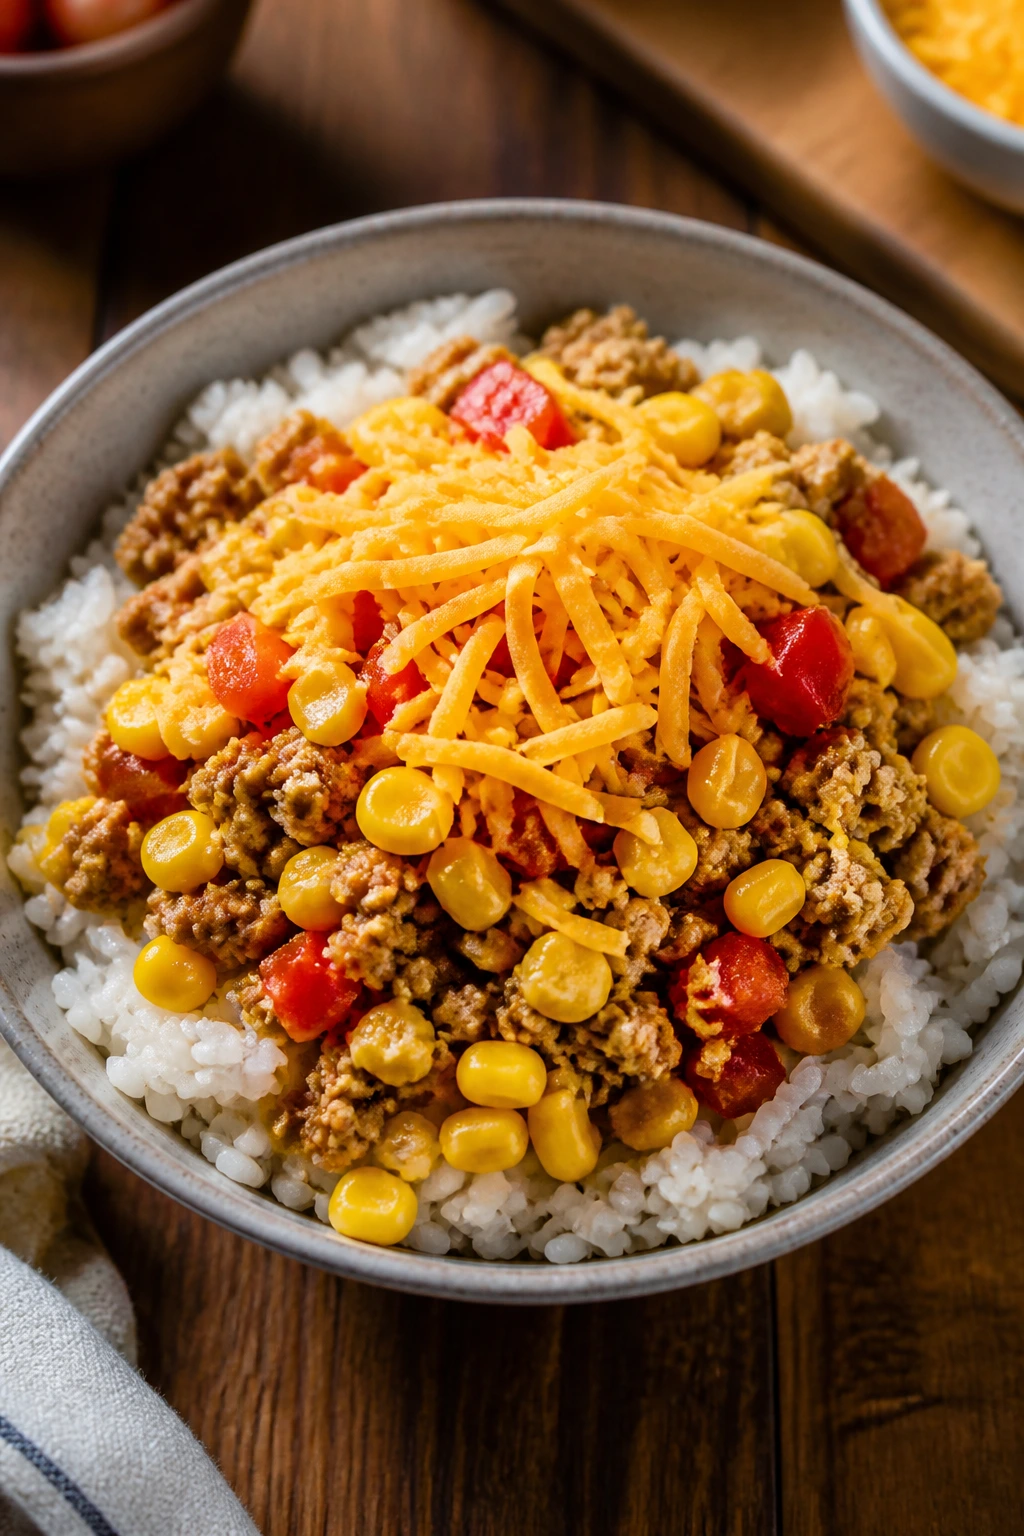
Rice bowls are a good compromise meal because everyone can build theirs differently, and no one has to eat the part they dislike. Keep the seasoning gentle, serve toppings separately, and you get a dinner that looks flexible instead of fussy.
Why It Works:
A mild taco bowl gives you the comfort of a burrito without the commitment of a wrapped one. Ground turkey cooks quickly, rice stretches the meal, and cheese melts into the warm base so the whole bowl feels familiar. The trick is letting the toppings stay optional, not mandatory.
Key Ingredients:
- 1 pound ground turkey
- 1 tablespoon olive oil
- 2 tablespoons mild taco seasoning
- 2 cups cooked white rice
- 1 cup canned corn, drained
- 1 cup shredded cheddar
- 1 tomato, diced, optional
- Sour cream or mild salsa, for serving
Quick Steps:
- Heat the oil in a skillet over medium heat and cook the turkey for 6 to 8 minutes, breaking it into fine crumbles.
- Stir in the taco seasoning and 2 tablespoons water, then cook 1 minute more.
- Warm the rice if needed and divide it into bowls.
- Top with turkey, corn, cheddar, and any optional toppings.
- Add sour cream or salsa at the table so each bowl stays customizable.
Equipment for This Recipe:
- Large skillet
- Wooden spoon
- Rice cooker or saucepan
- Serving bowls
How to Serve This Dish:
Keep the components in separate bowls for a build-your-own dinner. Add tortilla chips on the side if you want some crunch. The bowls are filling enough on their own, but a few cucumber sticks make the plate look more complete.
Pro Tips for This Recipe:
- Chop the turkey fine so it behaves more like taco meat and less like meatballs.
- Use white rice if the family prefers a softer texture.
- Drain canned corn well or the bowl gets watery fast.
- Offer salsa in a spoonable dish instead of pouring it over everything.
Variations on This Dish:
- Chicken Taco Bowl: Use shredded rotisserie chicken and warm it with the seasoning and a splash of broth.
- Bean Bowl: Add black beans for a cheaper, meatless version.
- Cheese-Only Child Version: Serve rice, turkey, and cheese plain, with toppings off to the side.
Common Mistakes to Avoid with This Dish:
- Making the seasoning too hot: Taco spice should not bully the bowl. Choose mild seasoning.
- Serving wet toppings on the rice: Tomatoes and salsa can flood the bowl. Drain them or add them last.
- Using cold rice straight from the fridge: Warm rice helps the cheese melt and makes the bowl feel finished.
7. Naan Pizza Rounds
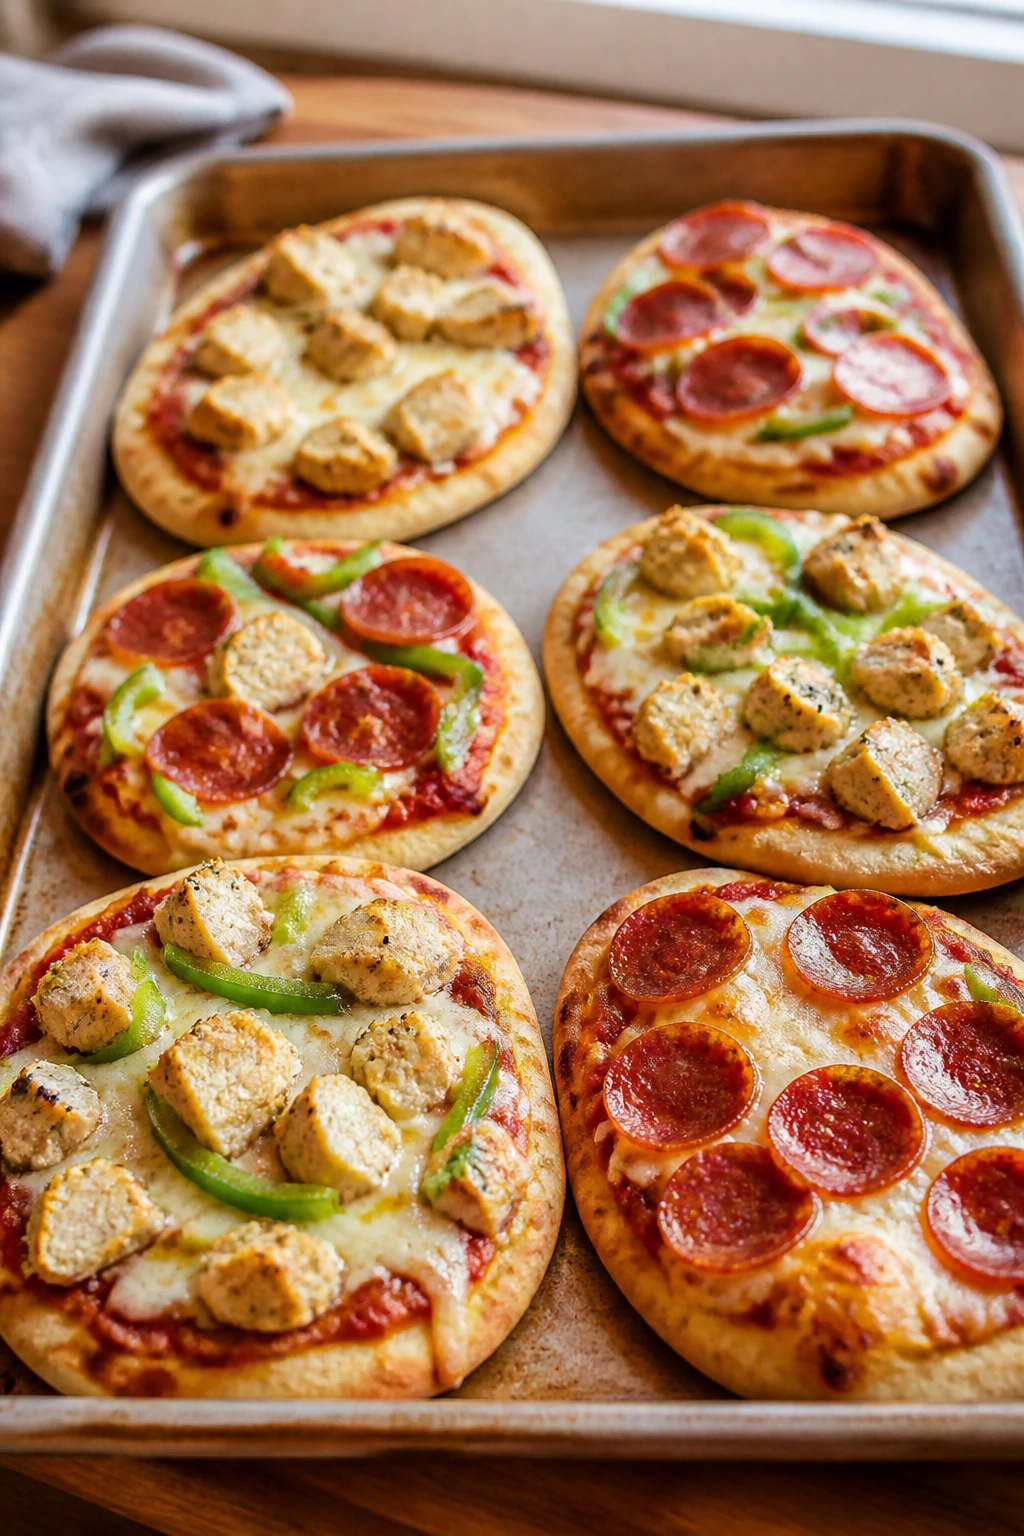
Pizza is one of the easiest wins with picky eaters, and naan makes it even easier. The crust bakes fast, the edges crisp up, and everyone gets their own small round so toppings can stay separate.
Why It Works:
Naan is soft enough for younger eaters but sturdy enough to hold sauce and cheese without collapsing. A hot oven gives you browned cheese in under 10 minutes, which is useful when dinner needs to happen before the family starts negotiating. Keep the toppings simple and you avoid the usual pizza argument.
Key Ingredients:
- 4 pieces naan
- ¾ cup pizza sauce
- 2 cups shredded mozzarella
- 1 cup mini pepperoni or diced cooked chicken
- ¼ cup grated Parmesan
- 1 tablespoon olive oil
- 1 teaspoon dried oregano
- Red pepper flakes, optional
Quick Steps:
- Preheat the oven to 450°F and place the naan on a sheet pan.
- Brush the edges lightly with olive oil.
- Spread 3 tablespoons of sauce over each naan, leaving a small border.
- Add mozzarella, pepperoni or chicken, Parmesan, and oregano.
- Bake for 8 to 10 minutes until the cheese bubbles and the edges are golden.
- Rest for 2 minutes before slicing.
Equipment for This Recipe:
- Sheet pan
- Spoon
- Pastry brush
- Pizza cutter or sharp knife
How to Serve This Dish:
Serve each round whole or cut into strips for dipping. A bowl of fruit or a plain salad on the side keeps the meal balanced without turning it into a project. This one works well for lunch, dinner, or even a backyard snack night.
Pro Tips for This Recipe:
- Bake the naan directly on the pan; no pizza stone needed.
- Use a light hand with sauce or the crust turns soft in the middle.
- Pre-cook watery toppings like mushrooms before adding them.
- Pepperoni crisps faster than chicken and gives a saltier bite.
Variations on This Dish:
- White Pizza Rounds: Swap red sauce for olive oil and extra mozzarella.
- BBQ Chicken Pizza: Use barbecue sauce, chicken, and a little red onion if tolerated.
- Cheese-Only Pizza: Keep one round plain for the most cautious eater.
Common Mistakes to Avoid with This Dish:
- Too much sauce: Naan is thin. A heavy layer makes the center damp.
- Overloading the top: Small pizzas fall apart if piled high.
- Underbaking the cheese: The edges should brown a little; pale cheese tastes flat.
8. Corn Dog Muffins

Corn dog muffins are a little silly, which is part of the appeal. They taste like a fair-food lunch but eat like a tidy muffin, and that makes them easier for small hands than actual corn dogs.
Why It Works:
The batter bakes around chopped hot dogs, so every bite has the same mild, familiar flavor. They hold up in lunchboxes and taste good warm or room temperature. That flexibility is worth more than fussier recipes that fall apart after 20 minutes.
Key Ingredients:
- 1 box cornbread mix
- 2 large eggs
- 1 cup milk
- 6 hot dogs, sliced into ½-inch pieces
- 1 cup shredded cheddar, optional
- 2 tablespoons melted butter
- Ketchup and mustard, for serving
Quick Steps:
- Preheat the oven to 375°F and grease a 12-cup muffin tin.
- Mix the cornbread batter with the eggs and milk according to the box directions.
- Fold in the hot dog pieces and cheddar, if using.
- Divide the batter among the muffin cups, filling each about ¾ full.
- Bake for 15 to 18 minutes until the tops are golden and a toothpick comes out clean.
- Brush with melted butter while warm.
Equipment for This Recipe:
- Muffin tin
- Mixing bowl
- Spoon or scoop
- Pastry brush
How to Serve This Dish:
Serve with ketchup and mustard on the side, plus grapes or raw carrots. Two muffins make a light lunch; three usually cover dinner for smaller eaters. They also work well packed into a cooler for a long afternoon away from home.
Pro Tips for This Recipe:
- Chop the hot dogs evenly so they distribute through the batter.
- Grease the muffin tin well; cornbread likes to cling.
- Let the muffins cool for a few minutes before removing or they may break.
- A little cheddar inside the batter gives them more staying power.
Variations on This Dish:
- Mini Cornbread Bites: Use a mini muffin pan and reduce the bake time to about 10 minutes.
- Turkey Dog Version: Swap in turkey hot dogs for a lighter flavor.
- Chili Cheese Muffins: Spoon a teaspoon of thick chili into each cup before baking.
Common Mistakes to Avoid with This Dish:
- Using too much batter in each cup: They rise and spill. Stick to ¾ full.
- Underbaking the center: The tops can look done before the middle sets. Test the middle muffin.
- Skipping the butter finish: That little brush of butter keeps the tops tender, not dry.
9. BLT Tortilla Wraps
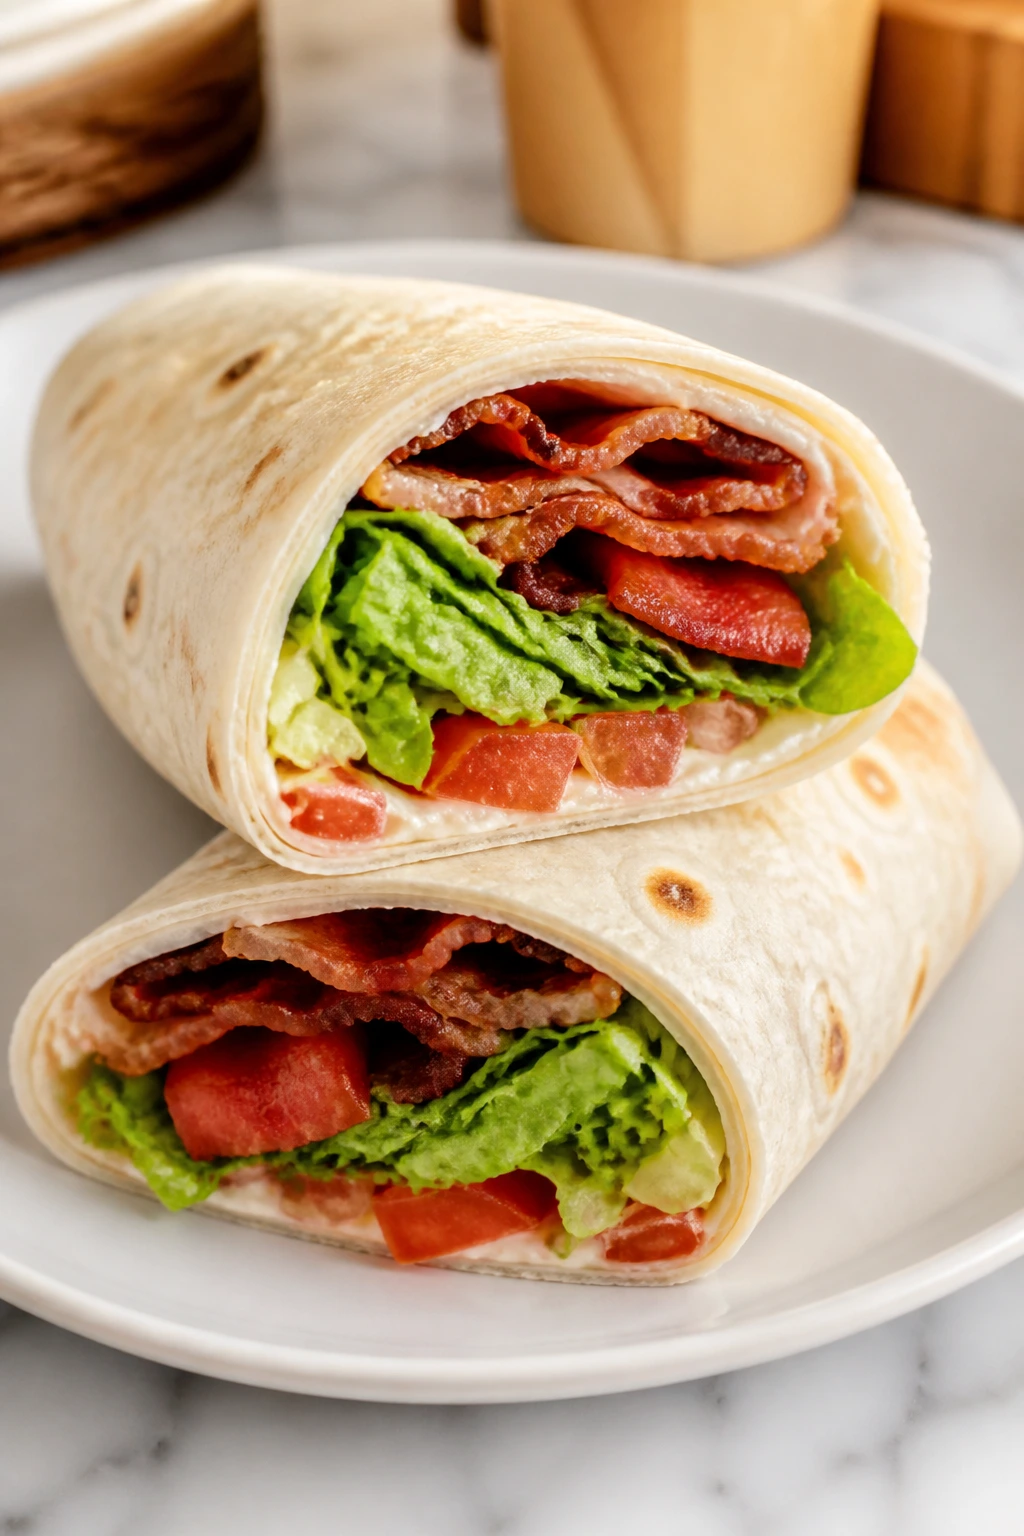
A BLT wrap is one of those meals that feels cooler than a sandwich and faster than a salad. The bacon brings the crunch, the tortilla keeps everything tidy, and the tomato can stay light instead of soaking the whole thing.
Why It Works:
The wrap format helps picky eaters because the filling is bundled and predictable. Bacon, lettuce, and tomato stay familiar, and a little mayo smooths the edges. If tomatoes are a problem, you can slide them out without changing the whole meal.
Key Ingredients:
- 4 large flour tortillas
- 8 slices bacon, cooked crisp
- 2 cups shredded romaine lettuce
- 1 large tomato, thinly sliced
- ¼ cup mayonnaise
- ½ cup shredded cheddar, optional
- 1 teaspoon black pepper
Quick Steps:
- Cook the bacon until crisp, then drain on paper towels.
- Lay the tortillas flat and spread each with a thin layer of mayo.
- Add lettuce, tomato, bacon, cheddar, and a pinch of pepper.
- Fold the sides in, roll tightly, and slice in half.
- Serve right away so the lettuce stays crisp.
Equipment for This Recipe:
- Skillet or baking sheet for bacon
- Cutting board
- Sharp knife
- Paper towels
How to Serve This Dish:
Serve the wraps with chips, melon, or plain pickles. If the eater is tomato-shy, keep the slices on the side and let them build the wrap themselves. These are best when they still have a little chill from the fridge.
Pro Tips for This Recipe:
- Cook the bacon ahead and keep it cold so the wrap assembly goes fast.
- Dry the lettuce well or the tortilla turns damp.
- Use thin tomato slices; thick ones slide everywhere.
- Warm tortillas for 10 seconds if they crack when rolled.
Variations on This Dish:
- Chicken BLT Wrap: Add sliced chicken for a fuller dinner.
- Turkey Bacon Swap: Use turkey bacon if that is the family preference.
- Ranch BLT: Replace mayo with ranch for a softer, tangier wrap.
Common Mistakes to Avoid with This Dish:
- Overstuffing: The wrap tears the second you bite it. Keep the filling moderate.
- Wet tomatoes: Juice makes the tortilla soggy. Pat slices dry first.
- Using stale tortillas: Fresh, soft tortillas roll much better than dry ones.
10. Plain Baked Ziti
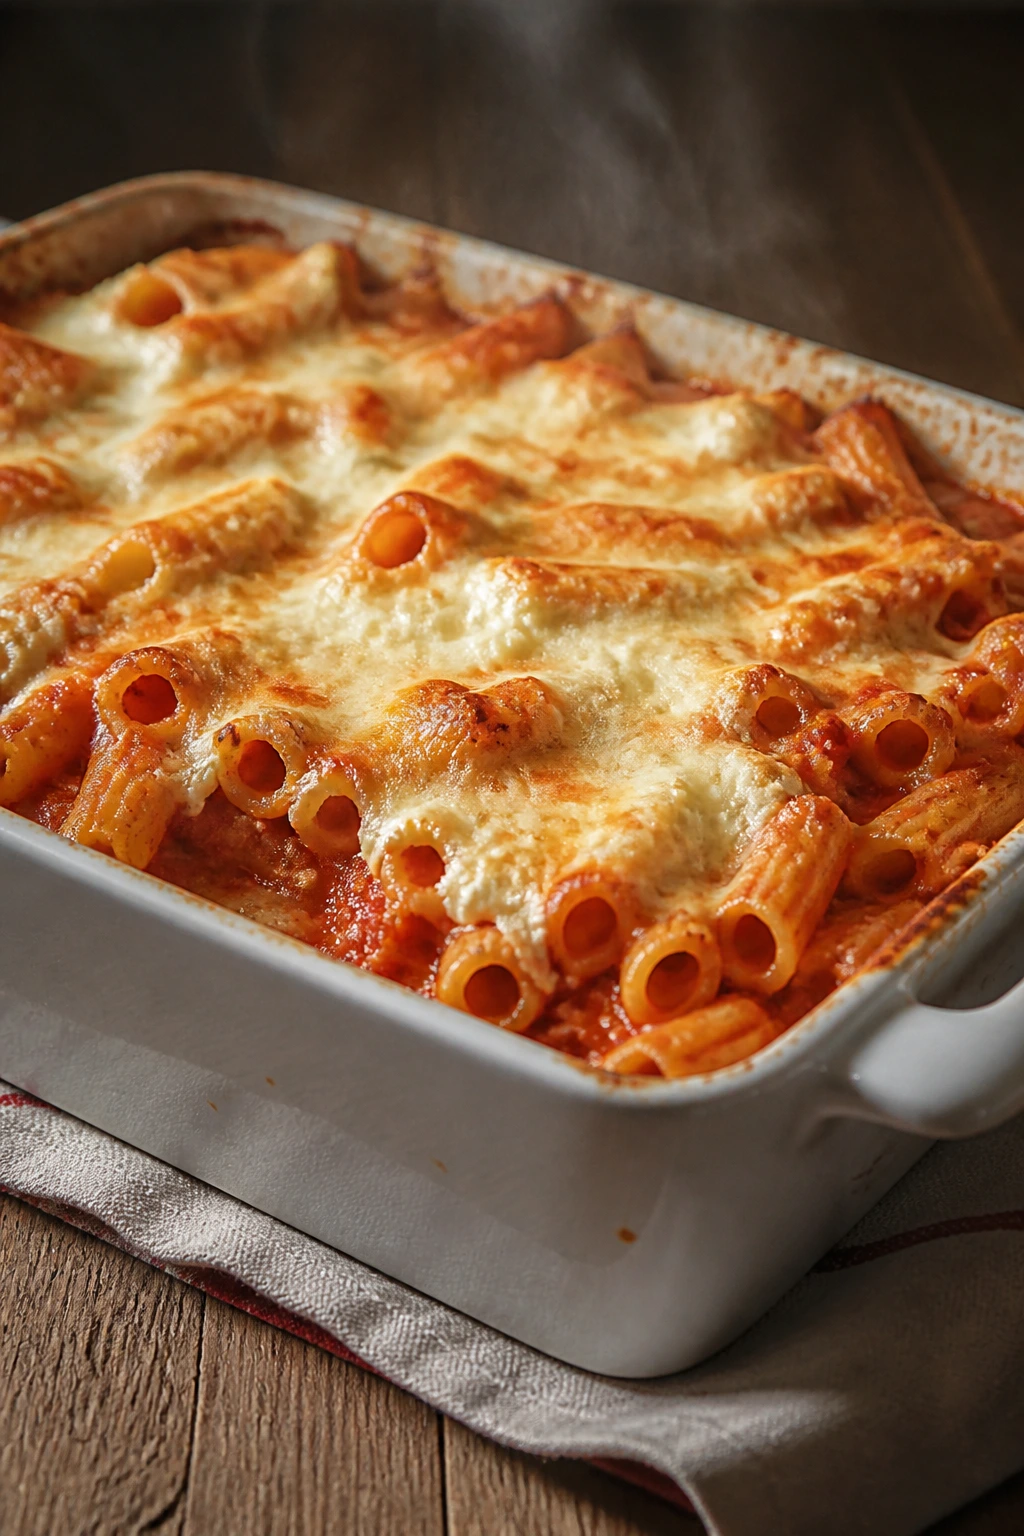
Plain baked ziti is comfort food with its volume turned down. It is soft, cheesy, and easy to portion, which makes it a strong choice when the family wants pasta but nobody wants surprises.
Why It Works:
The sauce stays inside the pasta instead of sitting on top like a watery layer. Ricotta makes the bake creamy, mozzarella gives you the melt, and the pasta shape traps enough sauce that each bite feels complete. It is the kind of dish that gets better after a short rest.
Key Ingredients:
- 1 pound ziti or penne
- 24 ounces marinara sauce
- 15 ounces ricotta cheese
- 2 cups shredded mozzarella
- ½ cup grated Parmesan
- 1 large egg
- 1 teaspoon salt
- ½ teaspoon dried basil
Quick Steps:
- Preheat the oven to 400°F and grease a 9×13-inch baking dish.
- Boil the pasta until just shy of tender, then drain.
- Stir the ricotta, egg, Parmesan, salt, and basil together in a bowl.
- Mix the pasta with the marinara and half the mozzarella, then spread half into the dish.
- Dollop the ricotta mixture over the pasta, add the remaining pasta, and top with the rest of the mozzarella.
- Bake for 25 minutes covered, then 10 minutes uncovered until bubbling and lightly browned.
Equipment for This Recipe:
- Large pot
- Mixing bowl
- 9×13-inch baking dish
- Foil
- Wooden spoon
How to Serve This Dish:
Cut it into neat squares and serve with garlic bread or a simple fruit bowl. Keep extra sauce off the table unless the eater wants it; too much sauce makes the meal feel heavier. A green salad can sit nearby for the adults.
Pro Tips for This Recipe:
- Undercook the pasta by 1 minute so it stays firm after baking.
- Let the bake rest 10 minutes before cutting or it will slump.
- Use mild marinara, not a spicy one.
- Shred your own mozzarella if you want a smoother melt.
Variations on This Dish:
- Meat Sauce Ziti: Add 1 pound browned ground beef or turkey to the marinara.
- Spinach Version: Stir 1 cup chopped spinach into the ricotta mixture if your crowd tolerates greens.
- Mini Bake Cups: Divide the mixture into muffin tins for smaller portions.
Common Mistakes to Avoid with This Dish:
- Overcooking the pasta before baking: Soft noodles turn mushy in the oven.
- Too much sauce: The casserole should be moist, not soupy.
- Cutting immediately: Ziti needs a rest or it slides apart.
11. Chicken Caesar Pasta Salad
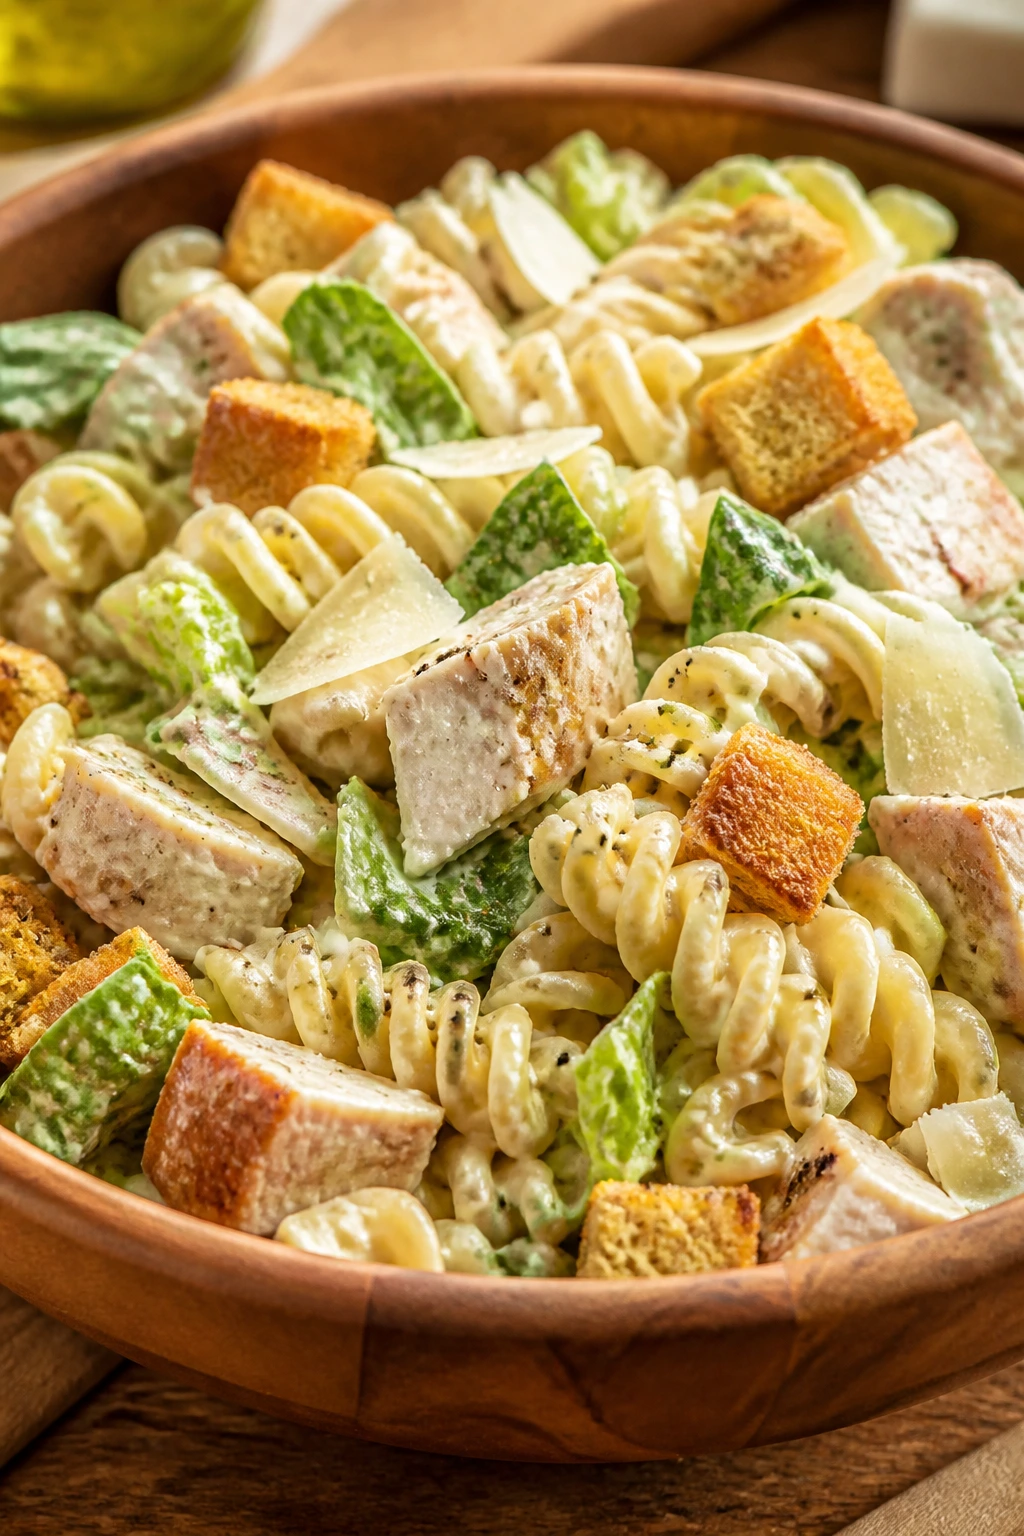
Caesar pasta salad is a smart bridge between cold lunch and dinner. It has enough chicken to feel like a meal, enough pasta to keep picky eaters calm, and a dressing that stays familiar if you keep it modest.
Why It Works:
The romaine adds crunch, the pasta softens the edges, and Parmesan gives the whole bowl a salty finish without going sharp. Caesar dressing is one of those flavors many kids accept because it tastes creamy, not complicated. Keep the croutons separate until serving so they stay crisp.
Key Ingredients:
- 12 ounces rotini or bow ties
- 2 cups cooked chicken, chopped
- 3 cups chopped romaine lettuce
- ¾ cup Caesar dressing
- ½ cup grated Parmesan
- 1 cup croutons
- ½ teaspoon black pepper
Quick Steps:
- Cook the pasta, drain it, and rinse it briefly under cool water.
- In a large bowl, toss the pasta with Caesar dressing and Parmesan.
- Fold in the chicken and romaine.
- Chill for 10 minutes if you want it colder, then top with croutons.
- Add black pepper right before serving.
Equipment for This Recipe:
- Large pot
- Colander
- Mixing bowl
- Salad tongs or spoon
How to Serve This Dish:
Serve in bowls with extra dressing on the side for anyone who wants more. This works well with melon, grapes, or a few cherry tomatoes for the adults. It is also one of the better make-ahead lunches in the whole pile.
Pro Tips for This Recipe:
- Dry the lettuce well or the dressing gets watered down.
- Add croutons last so they do not soften.
- Keep the dressing light; Caesar can take over fast.
- A little extra Parmesan helps the salad taste finished.
Variations on This Dish:
- Bacon Caesar: Add crumbled bacon for more crunch and salt.
- Lighter Yogurt Caesar: Use a yogurt-based Caesar dressing for a softer, tangier bowl.
- No-Lettuce Version: Leave out the romaine and serve it as a chilled pasta bowl.
Common Mistakes to Avoid with This Dish:
- Mixing in croutons early: They lose all crunch. Add them at the end.
- Using too much dressing: The salad should coat, not drown.
- Skipping the chill: A few minutes in the fridge helps the flavors settle.
12. Ham and Cheese Pinwheels
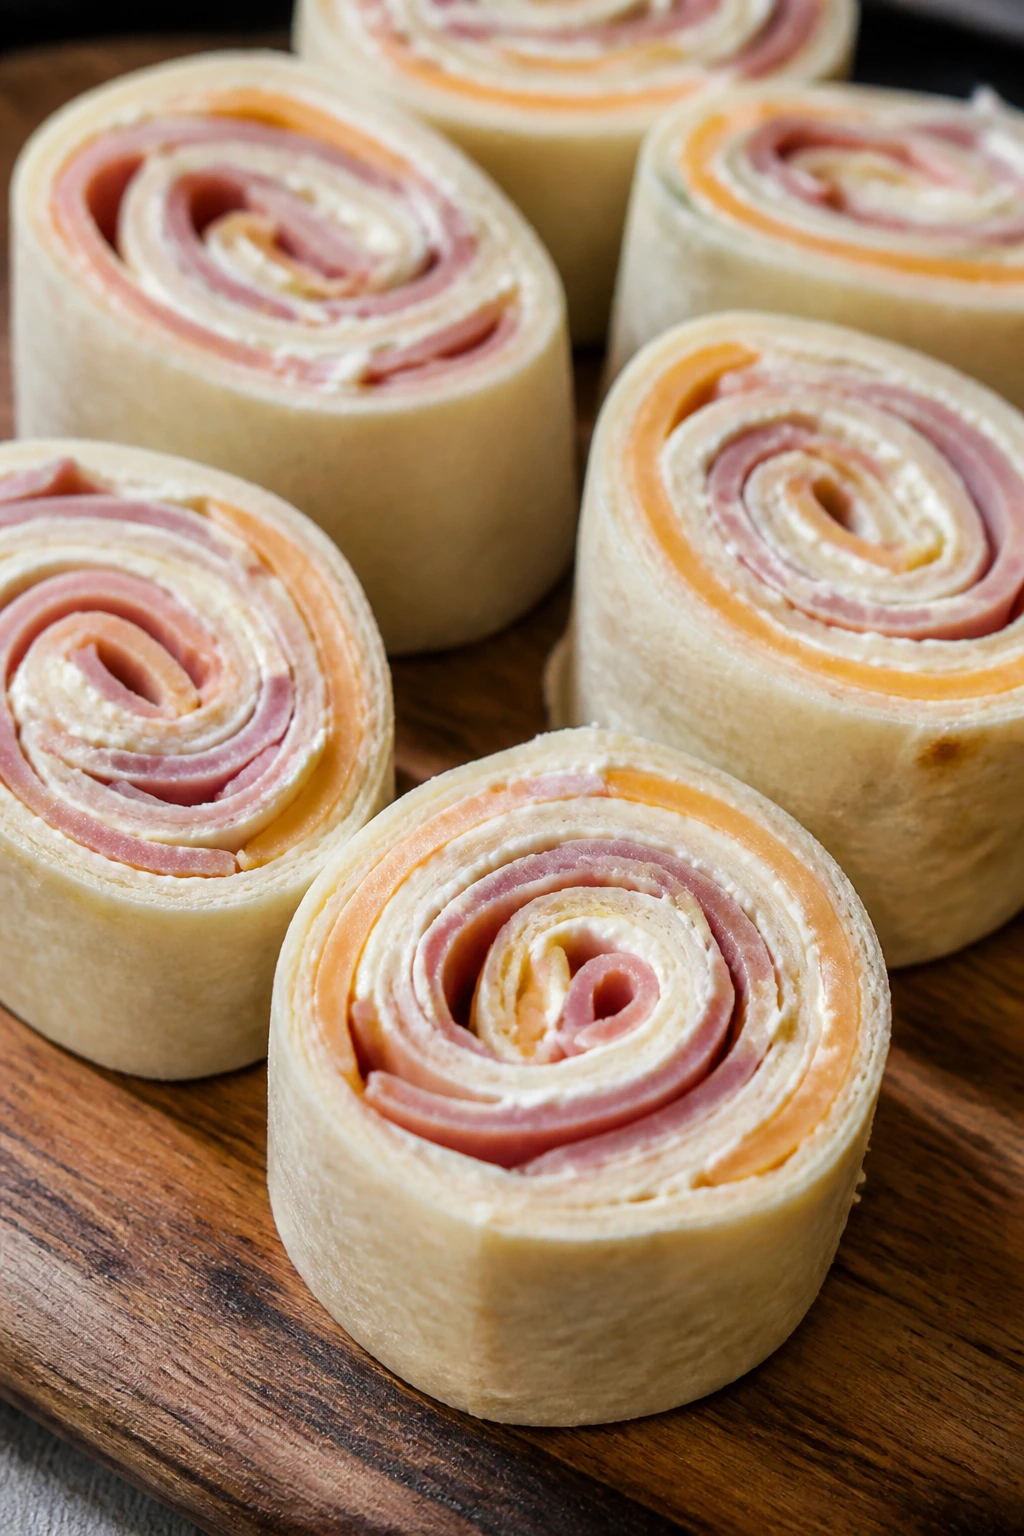
Pinwheels are tiny, tidy, and easy to hold, which is half their magic. They look like a snack but eat like lunch, and the swirl shape makes them feel playful without making the food more complicated.
Why It Works:
Tortilla pinwheels stay soft, slice cleanly, and let you control every bite. Cream cheese helps the filling stick, ham gives the salt, and mild cheese keeps the flavor predictable. They are one of the few meals that can sit in a lunchbox and still look nice.
Key Ingredients:
- 4 large flour tortillas
- 8 ounces cream cheese, softened
- 8 ounces sliced ham
- 8 slices mild cheese
- 2 tablespoons ranch dressing
- 1 tablespoon finely chopped chives, optional
Quick Steps:
- Stir the cream cheese, ranch, and chives together until smooth.
- Spread the mixture thinly over each tortilla.
- Layer ham and cheese across the tortillas.
- Roll tightly into logs, wrap, and chill for 20 minutes.
- Slice into 1-inch pinwheels with a sharp knife.
Equipment for This Recipe:
- Mixing bowl
- Spatula
- Plastic wrap
- Sharp knife
How to Serve This Dish:
Serve the pinwheels cold with fruit, crackers, or baby carrots. They work for lunch, picnic trays, and snacky dinners when nobody wants a hot plate. A small dip bowl of ranch on the side makes them disappear faster.
Pro Tips for This Recipe:
- Chill before slicing or the rolls squish flat.
- Keep the cream cheese layer thin so the tortillas do not get slippery.
- Use wide tortillas; small ones make messy spirals.
- Cut with a very sharp knife for clean edges.
Variations on This Dish:
- Turkey Ranch Pinwheels: Swap ham for turkey and keep the same method.
- Cheese-Only Pinwheels: Leave out the meat for a lighter snack lunch.
- Veggie Pinwheels: Add very fine shredded carrots if the eater will tolerate them.
Common Mistakes to Avoid with This Dish:
- Overfilling the tortillas: The log won’t hold. Keep the layer thin.
- Skipping the chill: Warm rolls smear when sliced.
- Using chunky add-ins: Big pieces poke through and make rolling harder.
13. BBQ Chicken Flatbreads
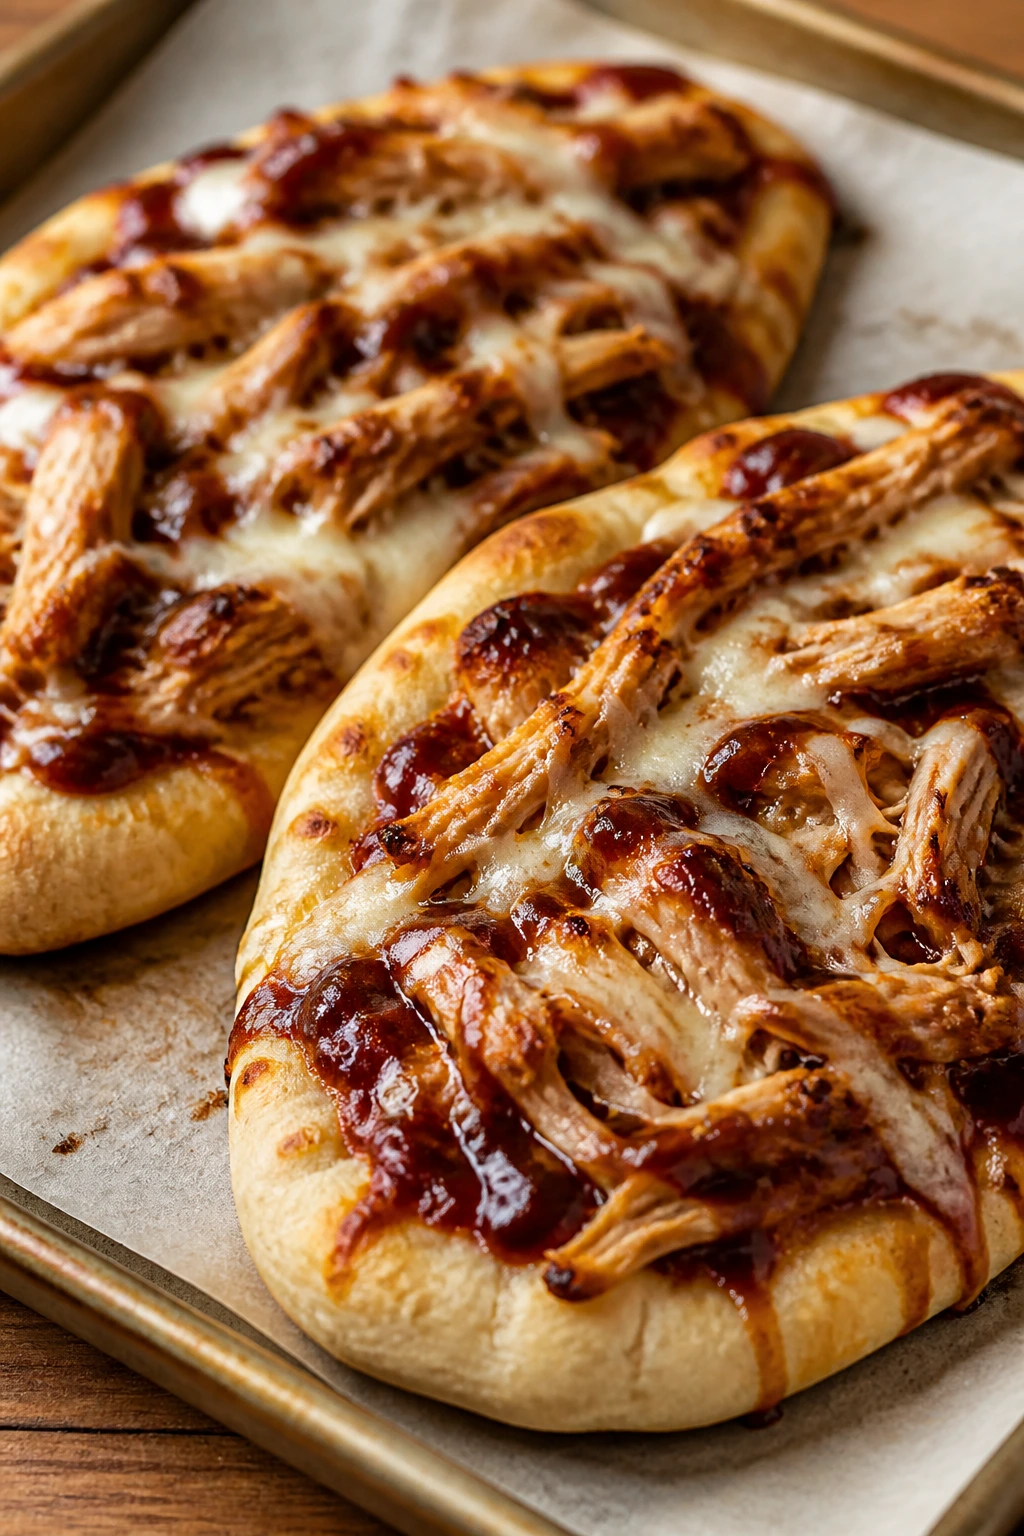
Flatbreads are pizza’s faster cousin, and that matters when the kitchen is hot. The crust is thin, the sauce is sweet, and the cheese blankets everything in a way that feels familiar even to reluctant eaters.
Why It Works:
Barbecue sauce gives sweetness before it gives smoke, which helps picky eaters accept it. Flatbread bakes in under 10 minutes, and shredded chicken spreads out enough that each bite feels balanced. Keep the onion optional and you avoid a lot of table drama.
Key Ingredients:
- 4 flatbreads or naan
- 2 cups cooked shredded chicken
- ¾ cup barbecue sauce
- 2 cups shredded mozzarella
- ¼ cup thinly sliced red onion, optional
- 1 tablespoon olive oil
- 1 tablespoon chopped parsley, optional
Quick Steps:
- Heat the oven to 425°F.
- Brush the flatbreads lightly with olive oil and place them on a sheet pan.
- Toss the chicken with barbecue sauce.
- Scatter the chicken and mozzarella over the breads, then add onion if using.
- Bake for 8 to 10 minutes until the cheese melts and the edges crisp.
- Sprinkle with parsley and slice.
Equipment for This Recipe:
- Sheet pan
- Pastry brush
- Mixing bowl
- Pizza cutter
How to Serve This Dish:
Serve each flatbread cut into strips with melon, corn on the cob, or a crisp salad. The strips are easier for kids than large wedges, and they cool fast enough for summer eating. This is one of those meals that looks casual but tastes like you tried.
Pro Tips for This Recipe:
- Use just enough sauce to coat the chicken; too much makes the crust soggy.
- Pre-cook the chicken if it’s not already done.
- Keep onions on one side if the family is split on them.
- Bake directly on the pan, not on a heavily oiled surface.
Variations on This Dish:
- Ranch BBQ Flatbreads: Drizzle with ranch after baking for a creamier finish.
- Cheddar Version: Swap mozzarella for cheddar if you want a stronger cheese flavor.
- Pepper-Free Version: Leave off the onion and parsley for the simplest possible plate.
Common Mistakes to Avoid with This Dish:
- Too much BBQ sauce: Flatbread gets limp fast. Use a light coat.
- Adding raw onion too thickly: It can overpower the whole slice. Slice it thin.
- Overbaking: Flatbread goes from crisp to dry in a hurry.
14. Stovetop Ham Mac and Cheese
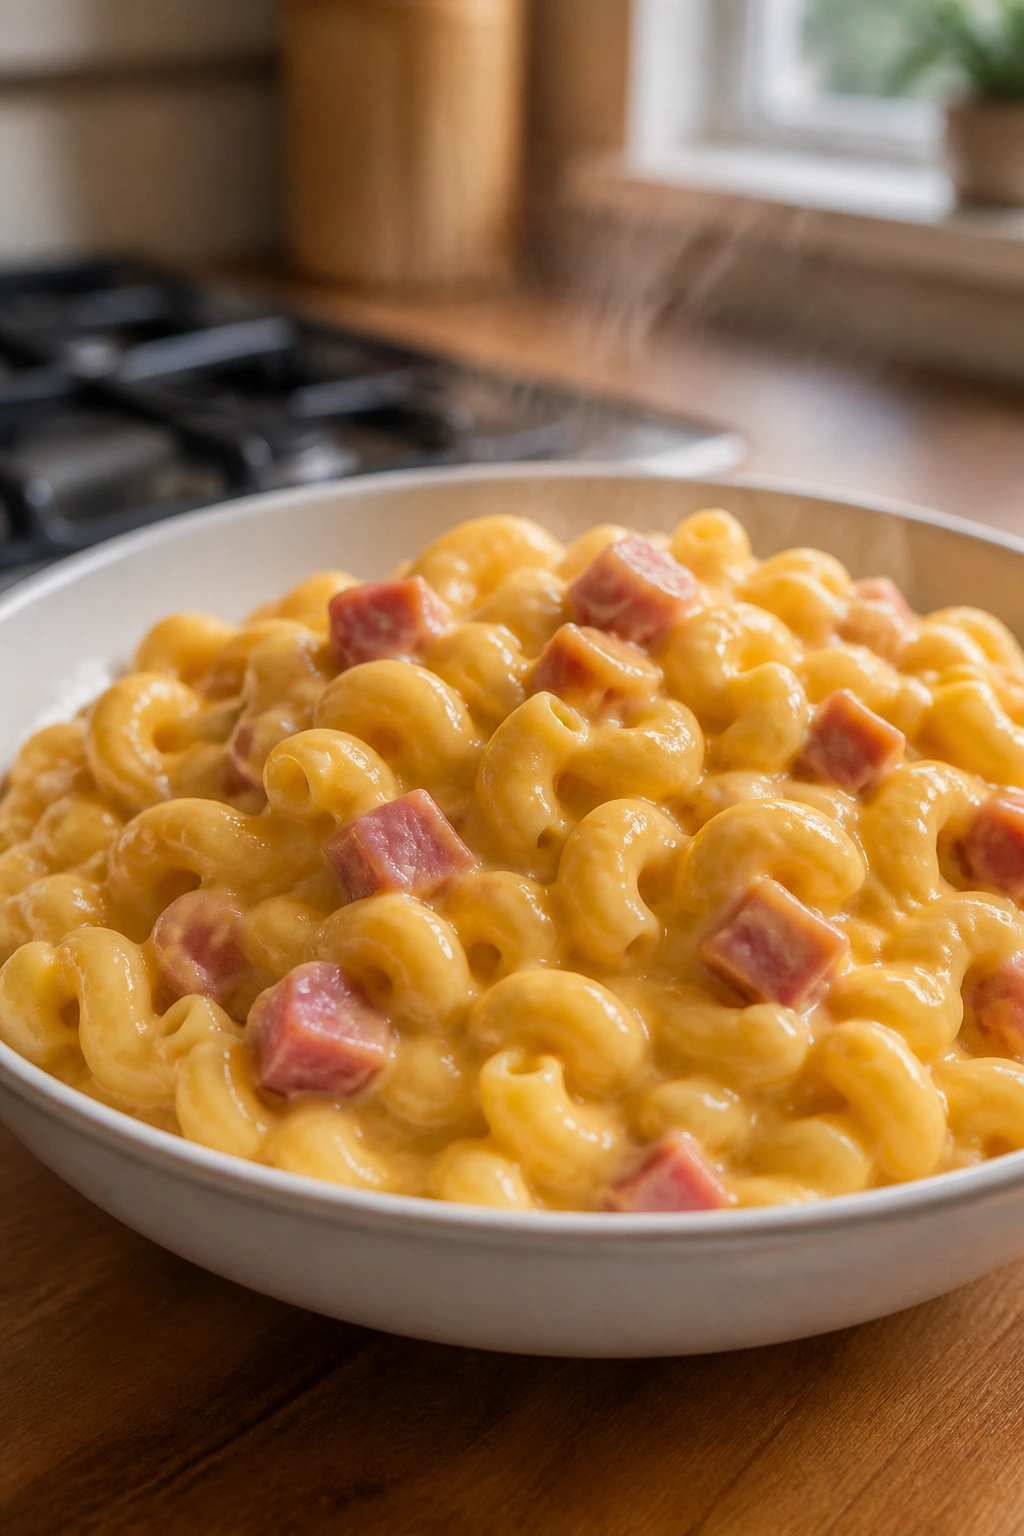
Mac and cheese is already a favorite, and adding ham turns it into a full meal without changing the basic comfort of the bowl. Keep it creamy, keep it mild, and do not overcomplicate the cheese blend.
Why It Works:
Ham gives this dish enough protein to stand on its own. The sauce stays smooth when you build it with a simple roux and stir in the cheese off the heat. That method matters; boiling cheese sauce is how you get grainy disappointment.
Key Ingredients:
- 12 ounces elbow macaroni
- 3 tablespoons unsalted butter
- 3 tablespoons all-purpose flour
- 2 cups milk
- 2 cups shredded cheddar
- 1 cup diced ham
- ½ teaspoon salt
- ¼ teaspoon black pepper
Quick Steps:
- Cook the macaroni in salted water until tender, then drain.
- Melt the butter in a saucepan over medium heat and whisk in the flour for 1 minute.
- Slowly whisk in the milk and cook until the sauce thickens enough to coat a spoon.
- Remove the pan from the heat and stir in the cheddar until smooth.
- Fold in the ham and macaroni, then season with salt and pepper.
- Serve right away while creamy.
Equipment for This Recipe:
- Saucepan
- Whisk
- Pasta pot
- Colander
How to Serve This Dish:
Serve it in bowls with peas, sliced tomatoes, or fruit on the side. If you want a browner top, spoon it into a casserole dish and broil it for a minute or two. That crusted edge is optional, not required.
Pro Tips for This Recipe:
- Shred your own cheese if you want the sauce smoother.
- Take the pan off the heat before adding cheese.
- Dice the ham small so every bite feels balanced.
- Add a splash of milk when reheating.
Variations on This Dish:
- Broccoli Ham Mac: Fold in small steamed broccoli florets if that still passes the table test.
- White Cheddar Version: Use white cheddar for a slightly sharper but still familiar flavor.
- Plain Mac: Leave out the ham for the most basic version.
Common Mistakes to Avoid with This Dish:
- Boiling the cheese sauce: Heat too high and it turns grainy. Gentle heat wins.
- Too little salt: Pasta and cheese need seasoning to taste alive.
- Letting it sit uncovered: The top dries fast. Serve promptly.
15. Teriyaki Meatballs and Rice
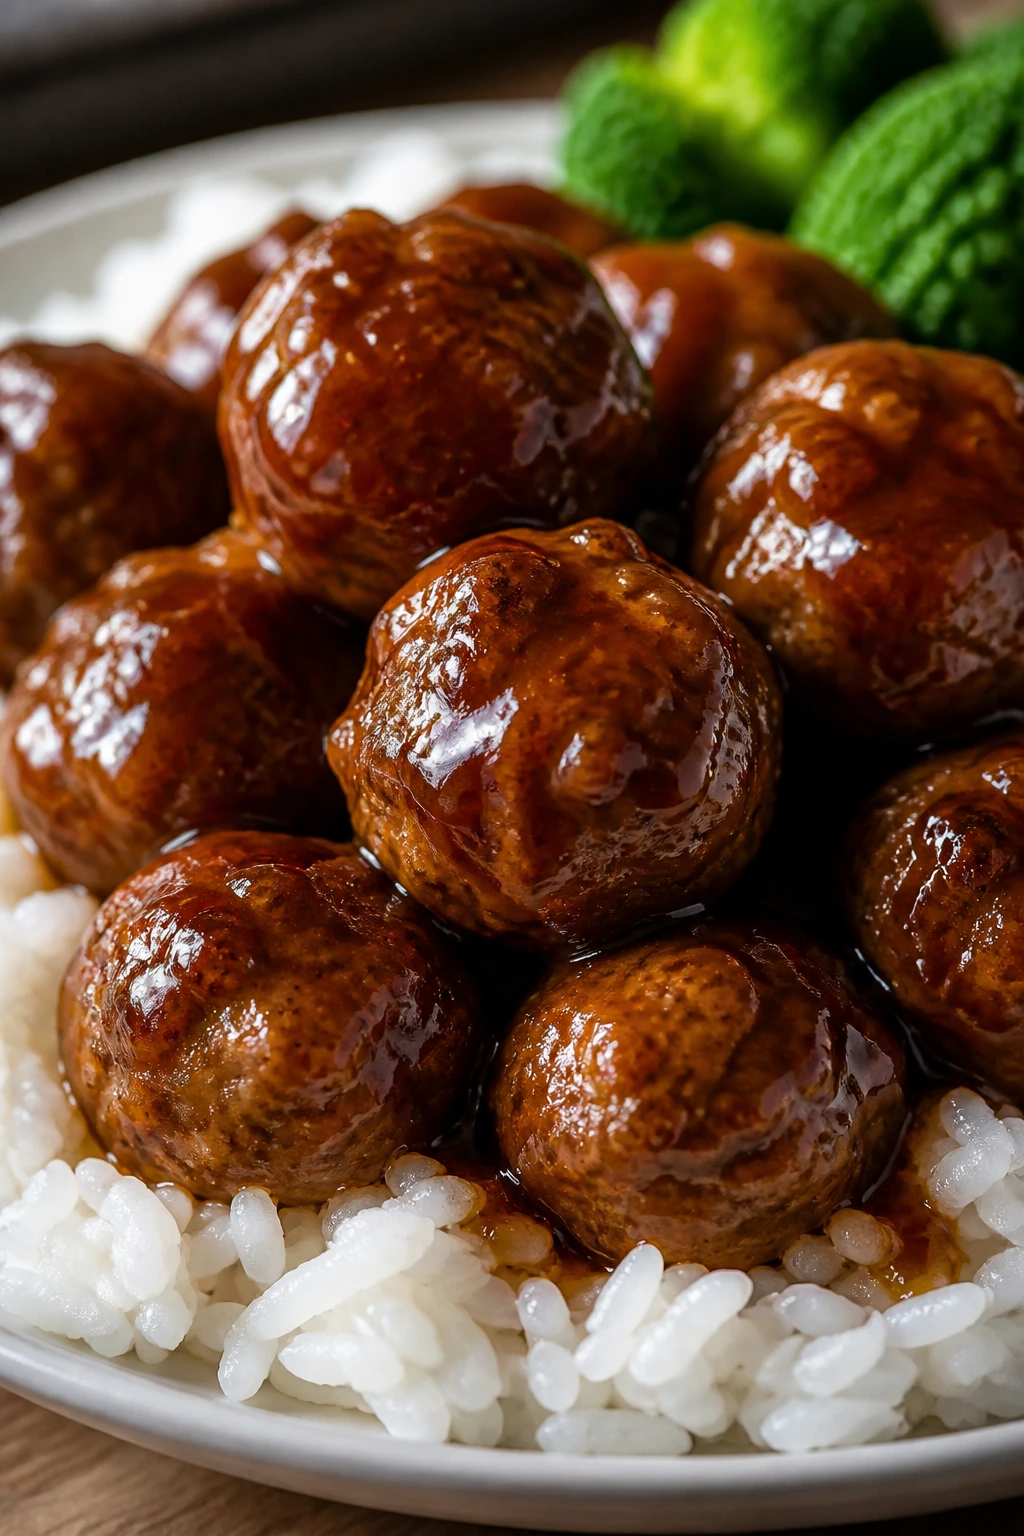
Sweet, glossy meatballs are a very forgiving dinner. The sauce sticks, the rice softens the edges, and the whole plate can be eaten with a fork without a lot of fuss. That matters more than flash.
Why It Works:
Teriyaki brings sweetness before it brings salt, which keeps it approachable. Baking the meatballs gives you even browning, and simmering them in sauce for just a few minutes makes them shiny without turning them soggy. Serve them over plain rice, and the meal stays steady.
Key Ingredients:
- 1 pound ground turkey
- 1 egg
- ½ cup breadcrumbs
- ¼ cup milk
- 1 teaspoon salt
- 1 cup teriyaki sauce
- 2 cups cooked white rice
- 1 cup steamed broccoli, optional
Quick Steps:
- Heat the oven to 400°F and line a sheet pan.
- Mix the turkey, egg, breadcrumbs, milk, and salt just until combined.
- Roll into 1½-inch meatballs and bake for 15 minutes.
- Warm the teriyaki sauce in a skillet, then add the meatballs and spoon sauce over them for 2 to 3 minutes.
- Serve over rice with broccoli on the side if using.
Equipment for This Recipe:
- Sheet pan
- Mixing bowl
- Large skillet
- Spoon or scoop
How to Serve This Dish:
Serve the meatballs in a shallow bowl so the sauce does not run everywhere. Rice on the bottom, meatballs on top, broccoli off to the side—that plate arrangement keeps picky eaters calmer. A few sesame seeds are fine, but not necessary.
Pro Tips for This Recipe:
- Do not overmix the meat or the meatballs turn dense.
- Use a small scoop for even sizes.
- A mild teriyaki sauce keeps the glaze kid-friendly.
- If the sauce thickens too much, loosen it with a tablespoon of water.
Variations on This Dish:
- Chicken Meatballs: Ground chicken works the same way.
- Pineapple Bowl: Add a few drained pineapple chunks to the serving bowl if tolerated.
- No-Broccoli Version: Serve with peas or nothing at all; the meatballs are enough.
Common Mistakes to Avoid with This Dish:
- Packing the meatballs too tightly: They end up rubbery. Shape them gently.
- Saucing too early: The glaze can burn if the meatballs are not cooked through first.
- Using overly sweet sauce: It should taste balanced, not like candy.
16. Sheet Pan Pancake Squares with Sausage
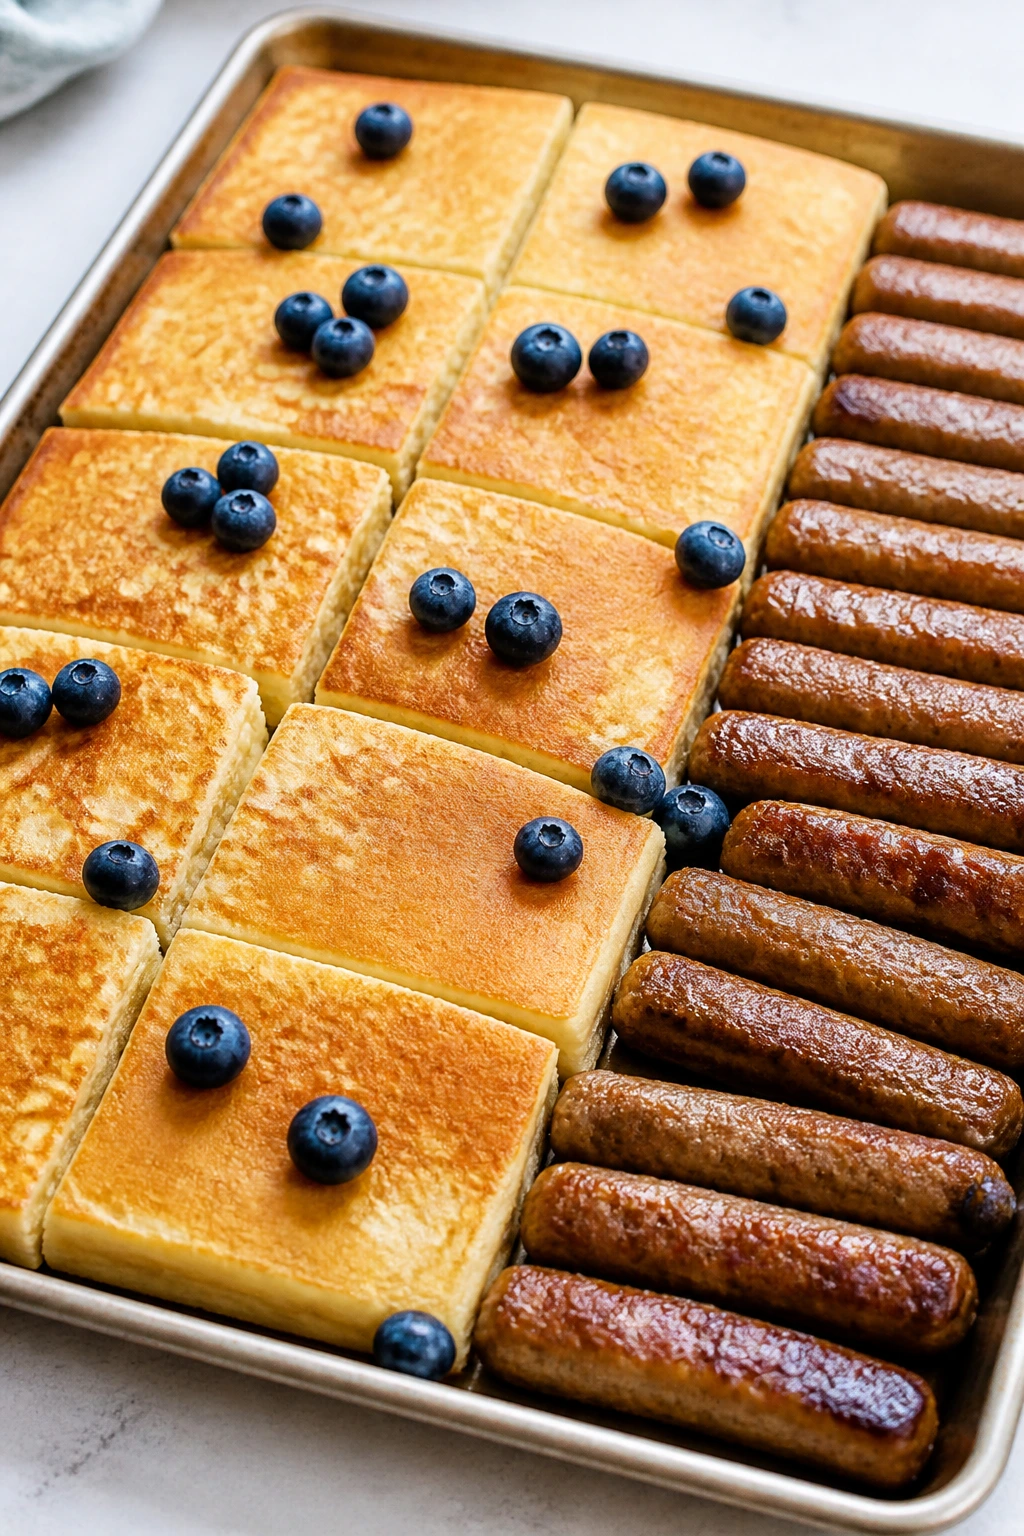
Breakfast for dinner works in summer because it is easy, light on dishes, and weirdly calming. Pancake squares feel less fiddly than a stack, and sausage on the side keeps the meal anchored.
Why It Works:
A sheet pan lets you bake one big pancake instead of standing at the stove flipping batches. Kids like the square shape because it feels a little like cake, and the sausage gives enough salt to make the meal feel finished. Serve fruit with it and nobody complains about the time of day.
Key Ingredients:
- 2 cups pancake mix
- 1½ cups milk
- 2 large eggs
- 2 tablespoons melted butter
- 8 breakfast sausage links, cooked
- 1 cup blueberries or sliced strawberries, optional
- Maple syrup, for serving
Quick Steps:
- Heat the oven to 425°F and grease a rimmed sheet pan.
- Whisk the pancake mix, milk, eggs, and butter until smooth.
- Pour the batter into the sheet pan and scatter berries on top if using.
- Bake for 12 to 15 minutes until puffed and lightly golden.
- Cook the sausage while the pancake bakes.
- Cut the pancake into squares and serve with syrup.
Equipment for This Recipe:
- Rimmed sheet pan
- Whisk
- Mixing bowl
- Spatula
How to Serve This Dish:
Serve squares with sausage links and a bowl of fruit. If you want a truly easy dinner, let everyone drizzle their own syrup at the table. Leftovers reheat well in a toaster oven.
Pro Tips for This Recipe:
- Do not overmix the batter; a few small lumps are fine.
- Grease the pan well so the edges release cleanly.
- Keep berries small or they sink into the batter.
- Cut the squares after a brief rest so they hold together.
Variations on This Dish:
- Chocolate Chip Version: Add a handful of chips for a sweeter plate.
- Plain Pancake Bake: Leave out fruit entirely for the simplest option.
- Turkey Sausage Swap: Use turkey sausage if that is the family preference.
Common Mistakes to Avoid with This Dish:
- Using a pan that is too deep: You want a sheet pan, not a casserole dish.
- Undercooking the middle: The center should spring back when touched.
- Serving without protein: Pancakes alone can fade fast; sausage helps.
17. Cheeseburger Lettuce Wraps
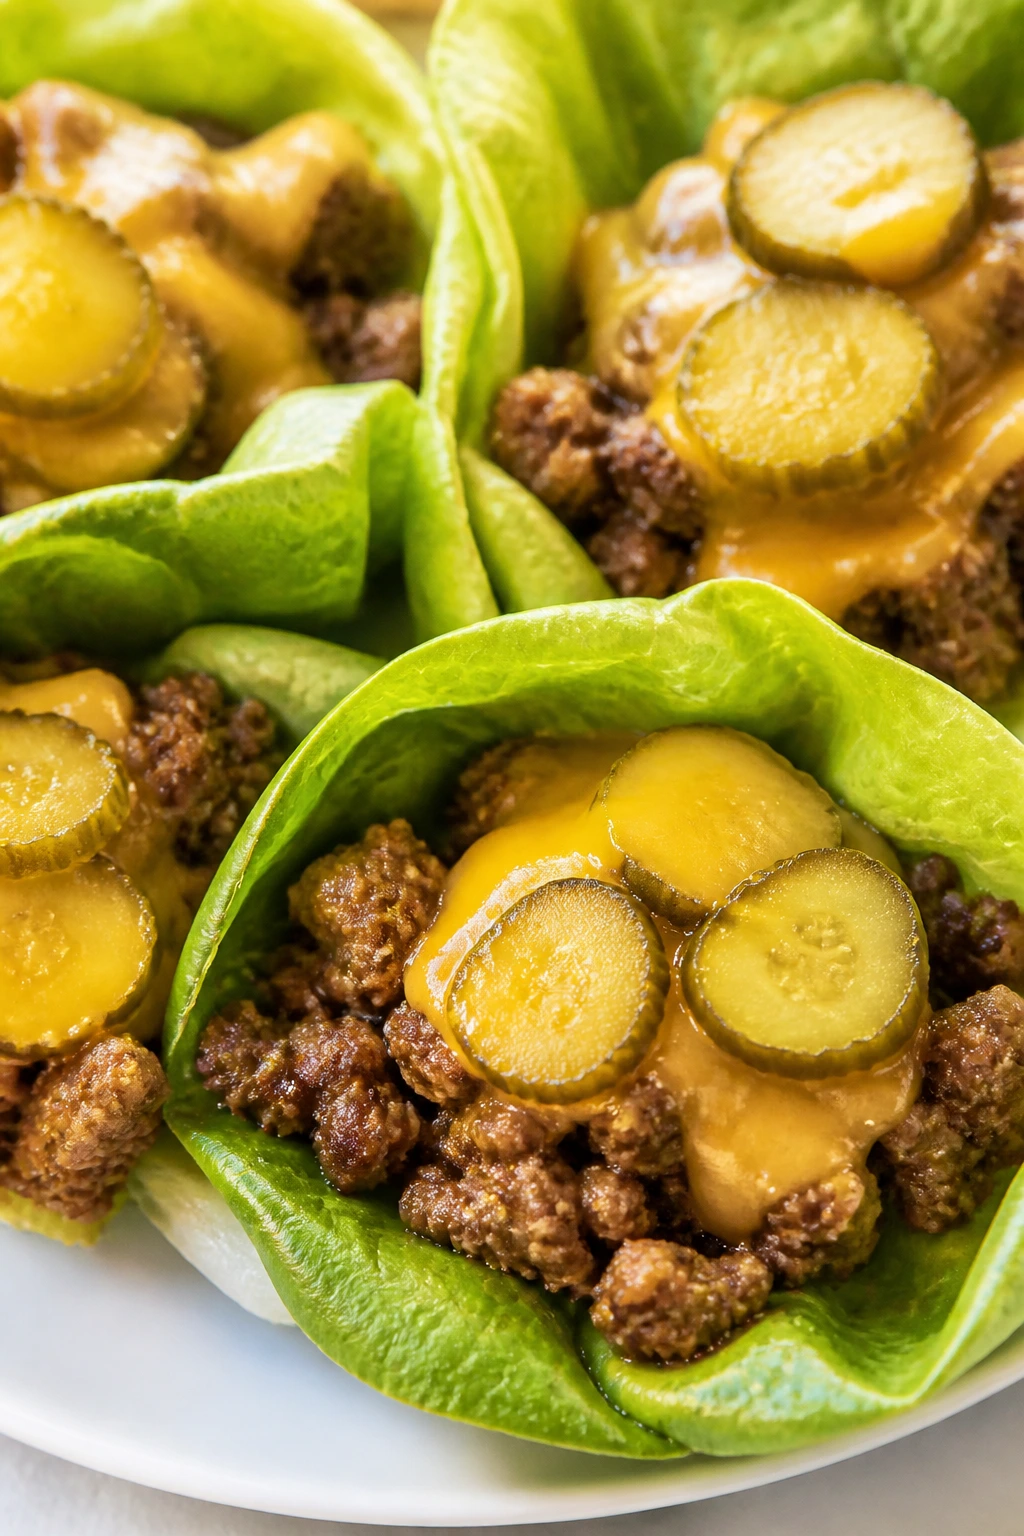
These are for the diner who wants burger flavor without the bun. The lettuce stays cool, the beef stays savory, and the toppings stay visible enough to reassure even a cautious eater.
Why It Works:
A lettuce wrap gives you the burger experience with less bread and less mess. The flavor is all familiar: beef, cheese, pickles, ketchup, mustard. And because the ingredients stay separate, a picky eater can build the wrap one layer at a time.
Key Ingredients:
- 1 pound ground beef
- 1 teaspoon salt
- ½ teaspoon garlic powder
- 8 large lettuce leaves, like iceberg or romaine
- 4 slices mild cheddar, halved
- ¼ cup diced pickles
- Ketchup and mustard, for serving
Quick Steps:
- Cook the beef in a skillet over medium heat with salt and garlic powder until browned.
- Drain any extra grease.
- Lay out the lettuce leaves and add a spoonful of beef to each.
- Top with cheese, pickles, ketchup, and mustard.
- Fold and serve immediately.
Equipment for This Recipe:
- Large skillet
- Wooden spoon
- Cutting board
- Serving platter
How to Serve This Dish:
Serve with oven fries, fruit, or chips so the meal feels complete. If the lettuce cups are too awkward for younger kids, spoon the beef into a bowl and let them eat it with a fork. That is still the same dinner.
Pro Tips for This Recipe:
- Use iceberg for the best crunch.
- Drain the beef well so the lettuce does not get slick.
- Keep the condiments on the side if someone dislikes a messy wrap.
- Warm the cheese on top of the beef for 20 seconds if you want a melt.
Variations on This Dish:
- Burger Bowl: Serve the same filling over chopped lettuce in a bowl.
- Chicken Burger Wrap: Swap in ground chicken.
- No-Pickle Version: Leave the pickles out entirely and the wrap still works.
Common Mistakes to Avoid with This Dish:
- Using fragile lettuce: Soft greens tear too easily. Choose sturdy leaves.
- Overfilling: A wrap that cannot close is just a pile.
- Serving the beef too hot: It wilts the lettuce. Let it cool slightly first.
18. Sloppy Joe Sliders
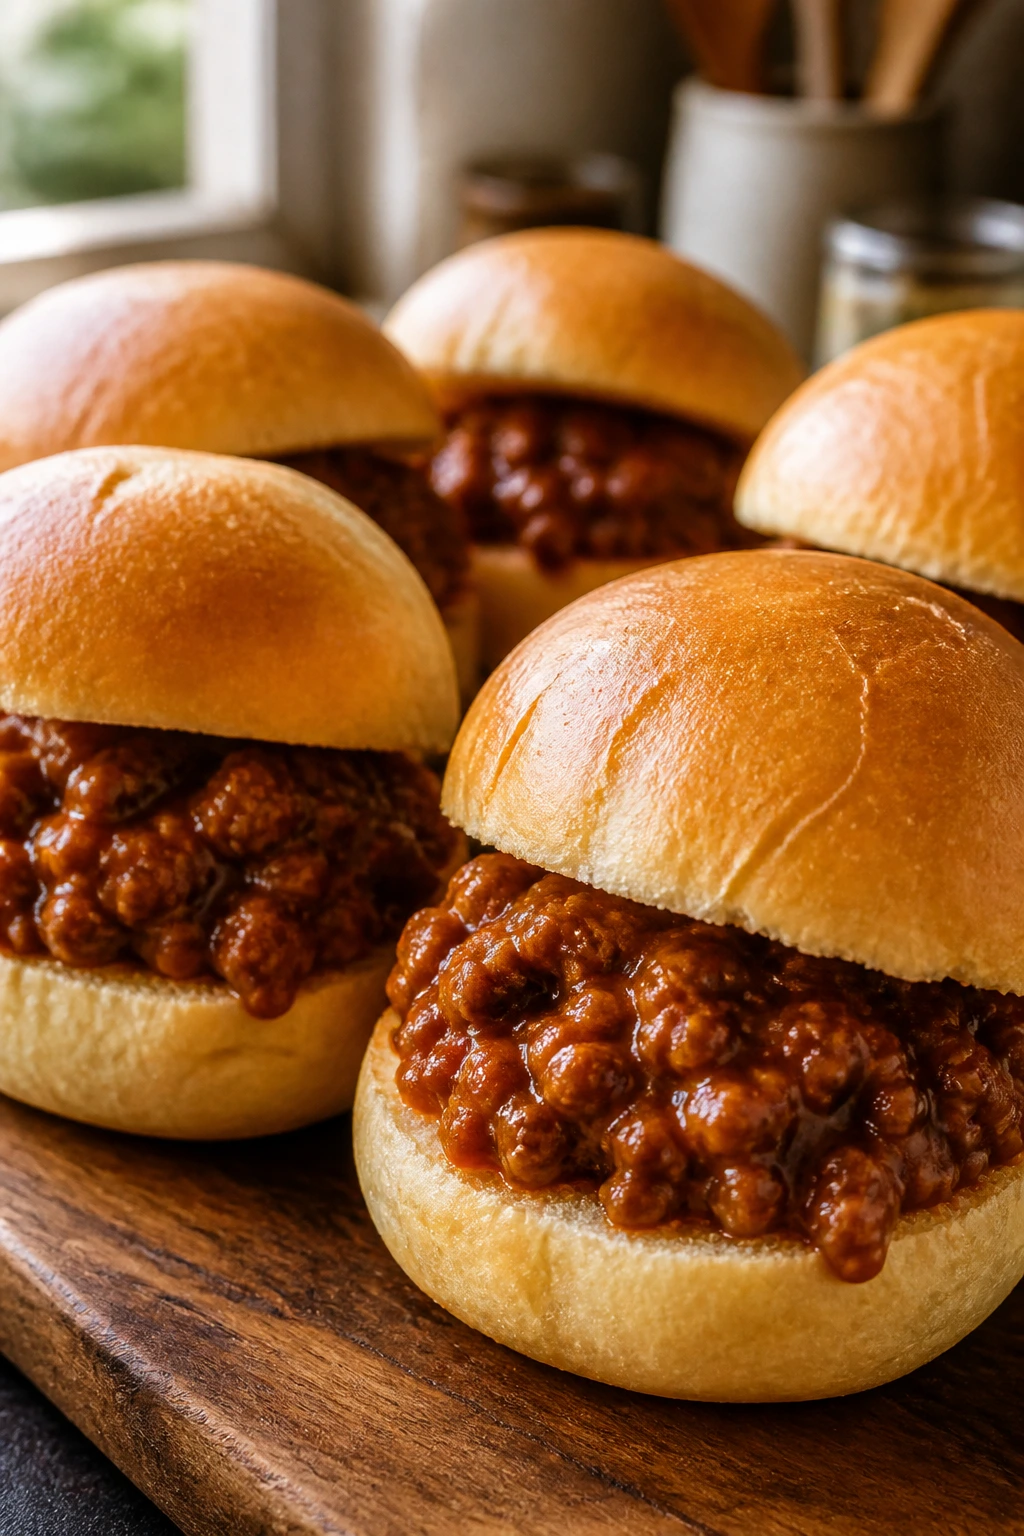
Sloppy joes are messy by name, not by necessity, if you keep the filling thick and the buns soft. The sweet-tangy sauce is familiar enough for picky eaters, and the slider size keeps the portion from feeling overwhelming.
Why It Works:
Ground beef cooks quickly, the sauce clings to the meat, and the small buns make the whole meal feel manageable. This is old-school lunchroom food in a slightly tidier outfit. That is not a bad thing.
Key Ingredients:
- 1 pound ground beef
- 1 small onion, finely diced
- 1 cup tomato sauce
- 2 tablespoons ketchup
- 1 tablespoon brown sugar
- 1 tablespoon Worcestershire sauce
- 12 slider buns
- 6 slices American cheese, optional
Quick Steps:
- Cook the beef and onion in a skillet over medium heat until browned, then drain.
- Stir in the tomato sauce, ketchup, brown sugar, and Worcestershire sauce.
- Simmer for 5 minutes until thickened.
- Spoon the mixture onto the slider buns and add cheese if using.
- Serve warm.
Equipment for This Recipe:
- Large skillet
- Wooden spoon
- Measuring cups
- Baking dish, optional for warming the assembled sliders
How to Serve This Dish:
Serve with corn, chips, or carrot sticks. Keep napkins nearby, because even a well-made sloppy joe wants a little chaos. For younger kids, open the slider and serve it like a little meat sandwich instead of a full bun.
Pro Tips for This Recipe:
- Let the sauce cook down until it is thick enough to mound on a spoon.
- Use American cheese for a softer melt.
- Toast the buns lightly if you want them to hold up better.
- Double the filling if you expect seconds.
Variations on This Dish:
- Mild BBQ Joe: Swap half the tomato sauce for barbecue sauce.
- Turkey Joe: Ground turkey works well and tastes a little lighter.
- Cheese-Only Slider: Use the same buns with meat on one half and cheese on the other for split preferences.
Common Mistakes to Avoid with This Recipe:
- Too much liquid: Runny filling turns the buns soggy. Reduce it until thick.
- Big onion chunks: Finely dice the onion so it disappears.
- Skipping the cheese for picky eaters: A little cheese softens the sharpness of the sauce.
19. Chicken Salad Pita Pockets
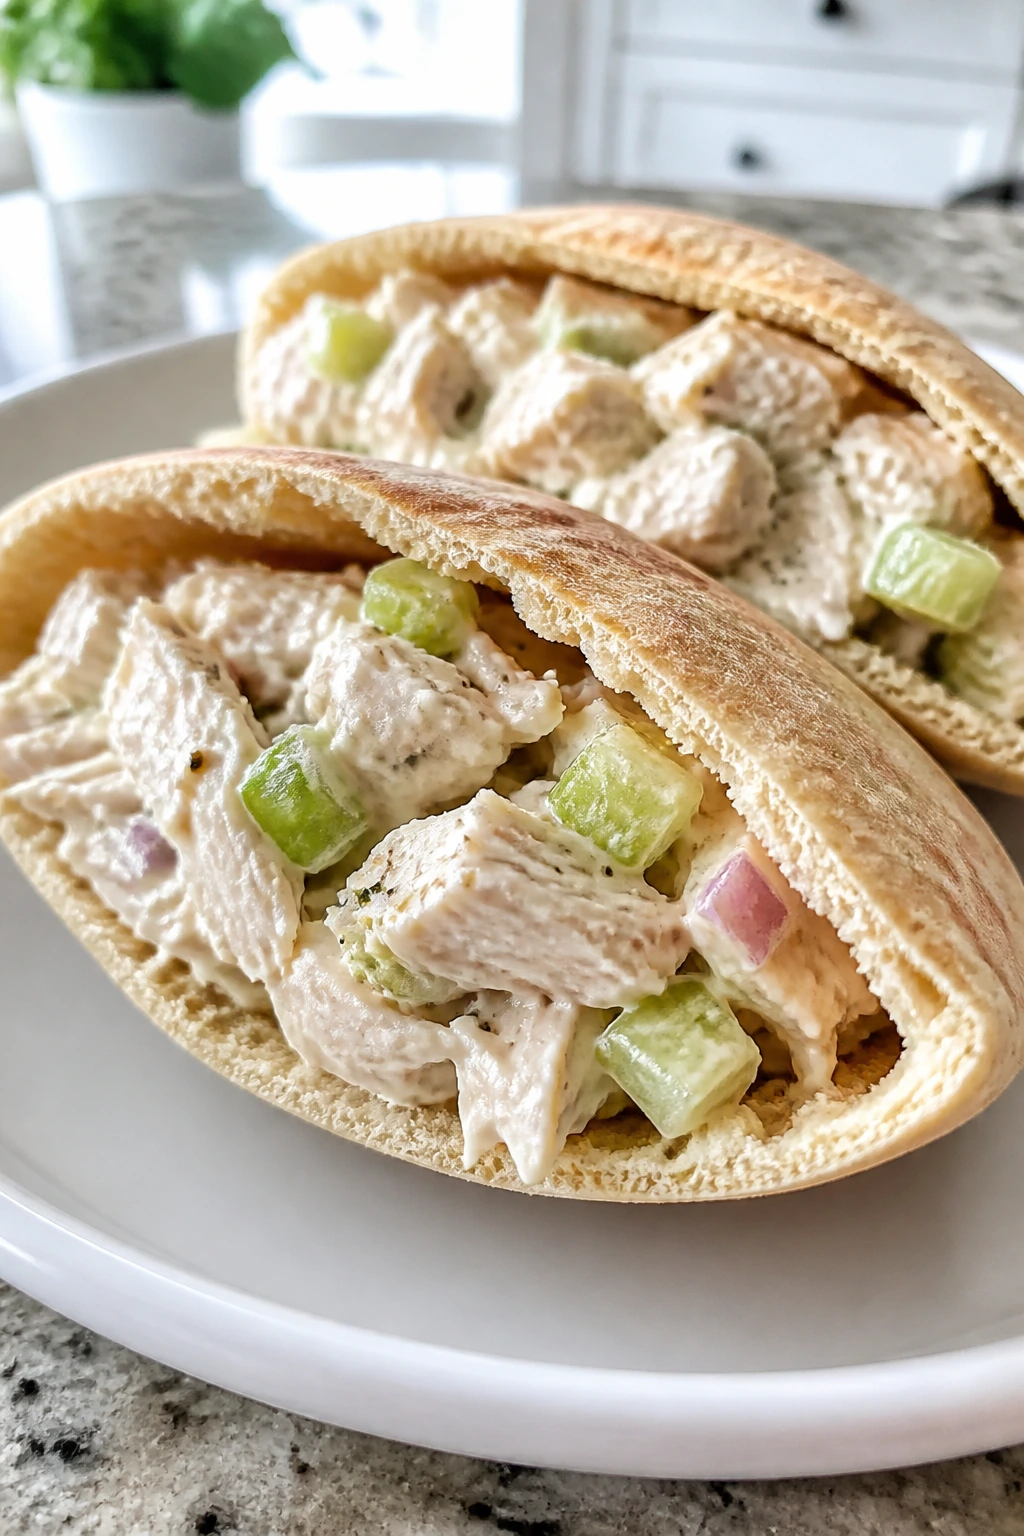
Chicken salad can be a lifesaver when the weather is hot and nobody wants another oven-baked meal. Pitas keep the filling neat, and the soft bread makes the whole thing feel more like a lunchbox favorite than a salad.
Why It Works:
The filling is creamy and cold, which suits summer better than a heavy hot dish. Pita pockets help contain the chicken salad, so it stays compact instead of slipping all over the plate. If your crowd is picky about texture, chop the chicken finely and keep the add-ins small.
Key Ingredients:
- 3 cups cooked chicken, chopped
- ½ cup mayonnaise
- 2 tablespoons plain Greek yogurt
- 1 tablespoon lemon juice
- ½ teaspoon salt
- ¼ teaspoon black pepper
- 4 pita breads
- 1 cup lettuce or thin cucumber slices, optional
- ½ cup halved grapes, optional
Quick Steps:
- Stir the mayonnaise, yogurt, lemon juice, salt, and pepper in a bowl.
- Fold in the chopped chicken and any optional add-ins.
- Chill for 15 minutes if you have time.
- Cut the pitas in half and open the pockets.
- Spoon the chicken salad into the pockets and serve cold.
Equipment for This Recipe:
- Mixing bowl
- Spoon or spatula
- Sharp knife
- Cutting board
How to Serve This Dish:
Serve with chips, melon, or a handful of carrots. The pita pocket keeps the meal neat enough for picnics or car rides. If the filling is too much for the bread, pile it beside the pita and let people scoop.
Pro Tips for This Recipe:
- Chop the chicken small for a smoother texture.
- Use chilled chicken, not warm, so the salad stays fresh.
- If grapes seem too controversial, leave them out.
- Dry the lettuce before adding it or the pita can get damp.
Variations on This Dish:
- Plain Chicken Salad: Skip grapes and celery entirely for the simplest version.
- Curry-Free Version: Do not add curry powder; keep the flavor mild and familiar.
- Wrap Version: Roll the same filling into tortillas if pita is a no-go.
Common Mistakes to Avoid with This Recipe:
- Overmixing the chicken: It turns paste-like. Fold gently.
- Wet add-ins: Extra moisture ruins the pocket. Drain well.
- Stuffing too much into the pita: It tears fast. Keep portions modest.
20. Burger Bowl Dinner with Special Sauce
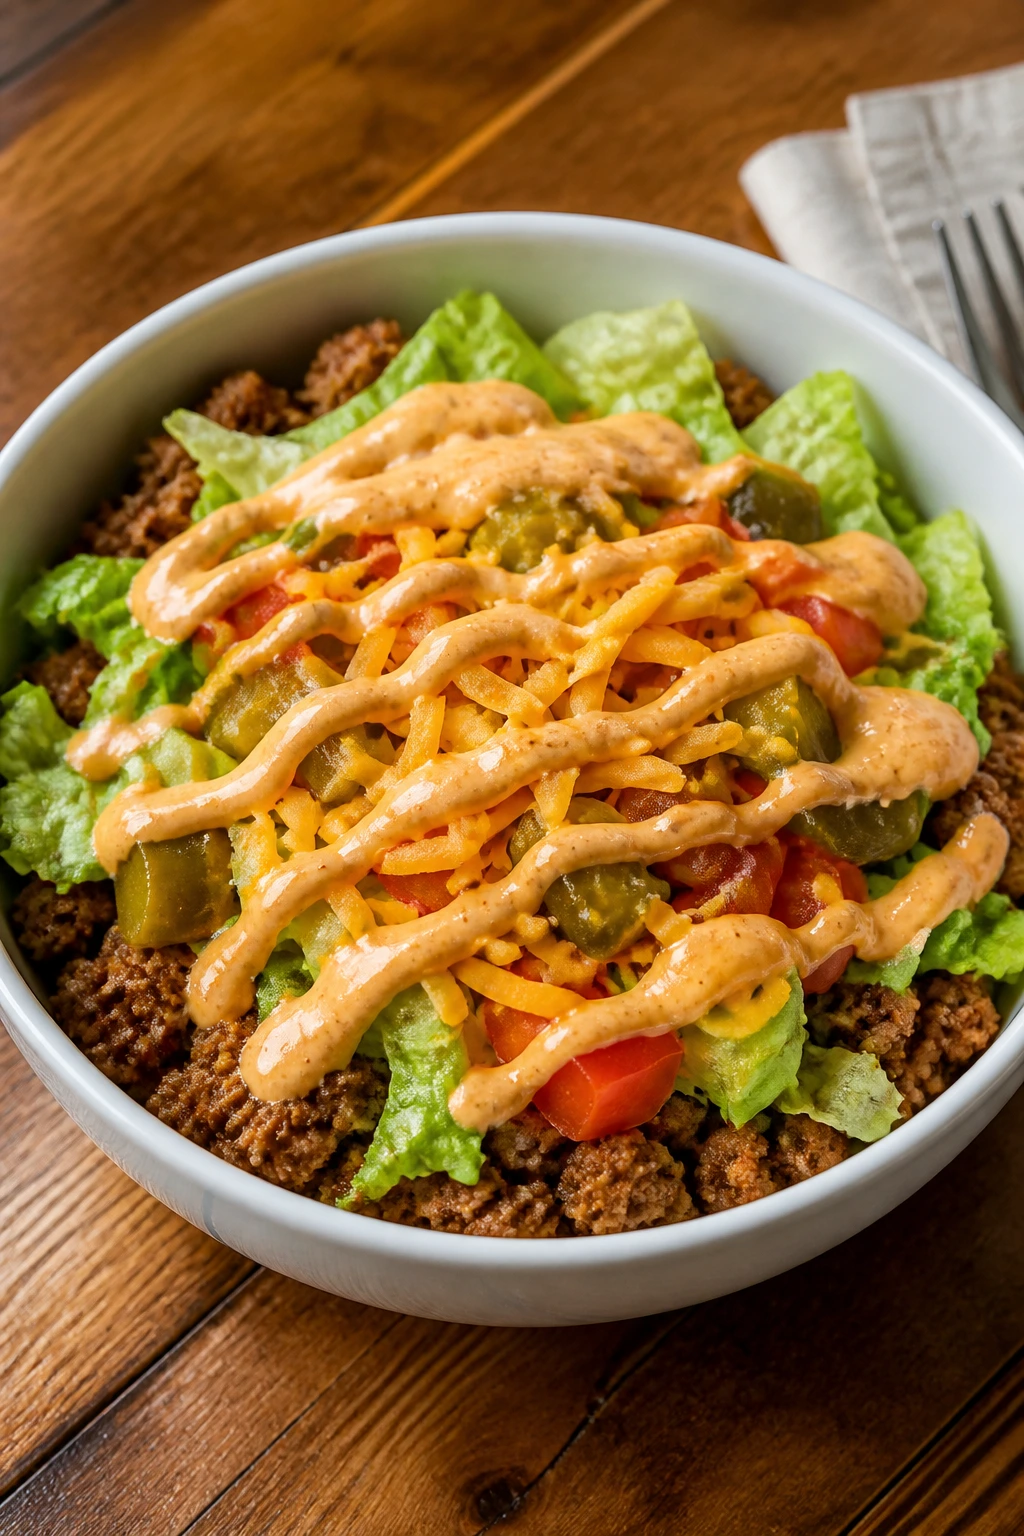
Burger bowls are what you make when everybody wants burger night but nobody wants a pile of broken buns. The flavors stay classic, the toppings stay visible, and picky eaters can choose exactly how much of each thing lands in their bowl.
Why It Works:
All the burger parts are still here—beef, cheese, pickles, ketchup, mustard—but the format is calmer. A bowl also lets you keep the components warm or cool as needed, which matters when you’re feeding different ages at the same table. The special sauce is just enough to make it feel deliberate.
Key Ingredients:
- 1 pound ground beef
- 1 teaspoon salt
- ½ teaspoon black pepper
- 2 cups chopped iceberg lettuce
- 1 cup diced tomatoes
- ½ cup diced pickles
- 1 cup shredded cheddar
- ¼ cup mayonnaise
- 2 tablespoons ketchup
- 1 teaspoon pickle juice
Quick Steps:
- Cook the beef in a skillet with salt and pepper until browned, then drain.
- Stir the mayonnaise, ketchup, and pickle juice together for the sauce.
- Divide the lettuce into bowls.
- Top with beef, tomatoes, pickles, and cheddar.
- Spoon the sauce over or serve it on the side.
Equipment for This Recipe:
- Skillet
- Mixing bowl
- Serving bowls
- Spoon
How to Serve This Dish:
Serve with oven fries, fruit, or plain chips. If a child dislikes tomatoes, leave them on the side and let the bowl stay basically a cheeseburger without the bun. That flexibility is the whole point.
Pro Tips for This Recipe:
- Cut the lettuce small so the bowl is easy to eat.
- Keep the sauce separate for the picky eaters who want control.
- Use cheddar that melts easily if you want to spoon the beef over it warm.
- Dry the pickles a little so the bowl does not puddle.
Variations on This Dish:
- Bacon Burger Bowl: Add crumbled bacon if you want a louder version.
- Chicken Burger Bowl: Ground chicken works with the same toppings.
- Cheese-Heavy Bowl: Double the cheese and keep the vegetables to a minimum.
Common Mistakes to Avoid with This Dish:
- Letting the beef sit in grease: Drain it or the bowl feels oily.
- Too many toppings: Keep it readable, not crowded.
- Using soggy lettuce: Crisp lettuce is the whole structure.
21. Mild Chicken Fried Rice
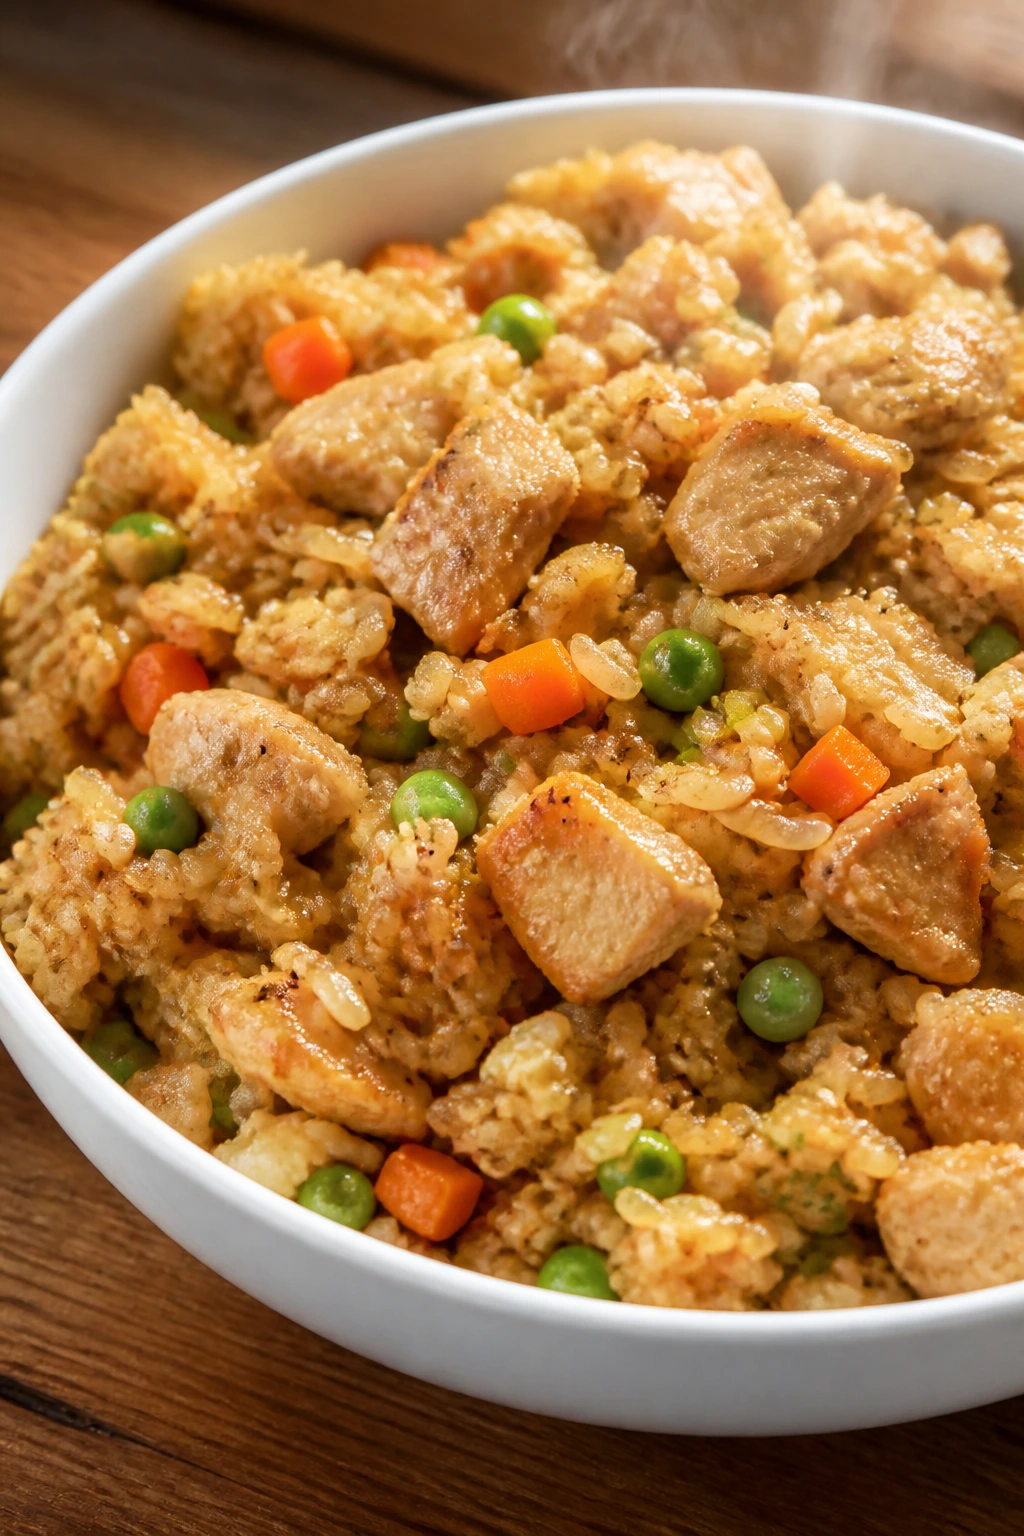
Chicken fried rice is one of the best leftover dinners around because it tastes intentional even when it starts with yesterday’s rice. Keep the seasoning mild and the vegetables small, and it lands well with picky eaters who dislike mixed textures.
Why It Works:
Cold rice fries better than fresh rice, which keeps the grains separate instead of gummy. Chicken adds bulk, eggs make the dish feel complete, and peas or carrots disappear enough to stay in the background. A little soy sauce goes a long way here; too much and the whole pan gets salty fast.
Key Ingredients:
- 3 cups cooked rice, chilled
- 2 cups cooked chicken, diced
- 2 eggs, beaten
- 1 cup frozen peas and carrots, thawed
- 2 tablespoons soy sauce
- 1 tablespoon butter or oil
- 2 green onions, sliced, optional
- ½ teaspoon garlic powder
Quick Steps:
- Heat the butter or oil in a large skillet over medium-high heat.
- Scramble the eggs in the pan, then push them aside.
- Add the chicken, peas, and carrots, and cook for 2 minutes.
- Stir in the rice and garlic powder, breaking up any clumps.
- Drizzle in the soy sauce and cook until the rice is hot and lightly toasted, about 3 to 4 minutes.
- Finish with green onions if using.
Equipment for This Recipe:
- Large skillet or wok
- Spatula
- Bowl for beaten eggs
- Measuring spoons
How to Serve This Dish:
Serve in bowls with cucumber slices or mandarin oranges. If someone wants it even plainer, leave the eggs in larger pieces so they can be picked around more easily. Fried rice is flexible like that.
Pro Tips for This Recipe:
- Use cold rice, not warm. Warm rice clumps.
- Chop the chicken small so it blends into the rice.
- Keep the pan hot enough to toast the grains a little.
- Add soy sauce gradually; you can always add more.
Variations on This Dish:
- Ham Fried Rice: Swap the chicken for diced ham.
- Egg-Forward Version: Add an extra egg for more protein.
- Plain Rice Bowl: Leave out the vegetables if the eater is extra cautious.
Common Mistakes to Avoid with This Dish:
- Fresh rice: It turns sticky and heavy. Chill the rice first.
- Too much soy sauce: The dish can get dark and salty fast.
- Crowding the pan: The rice needs room to fry, not steam.
22. Cheesy Bean and Rice Burritos
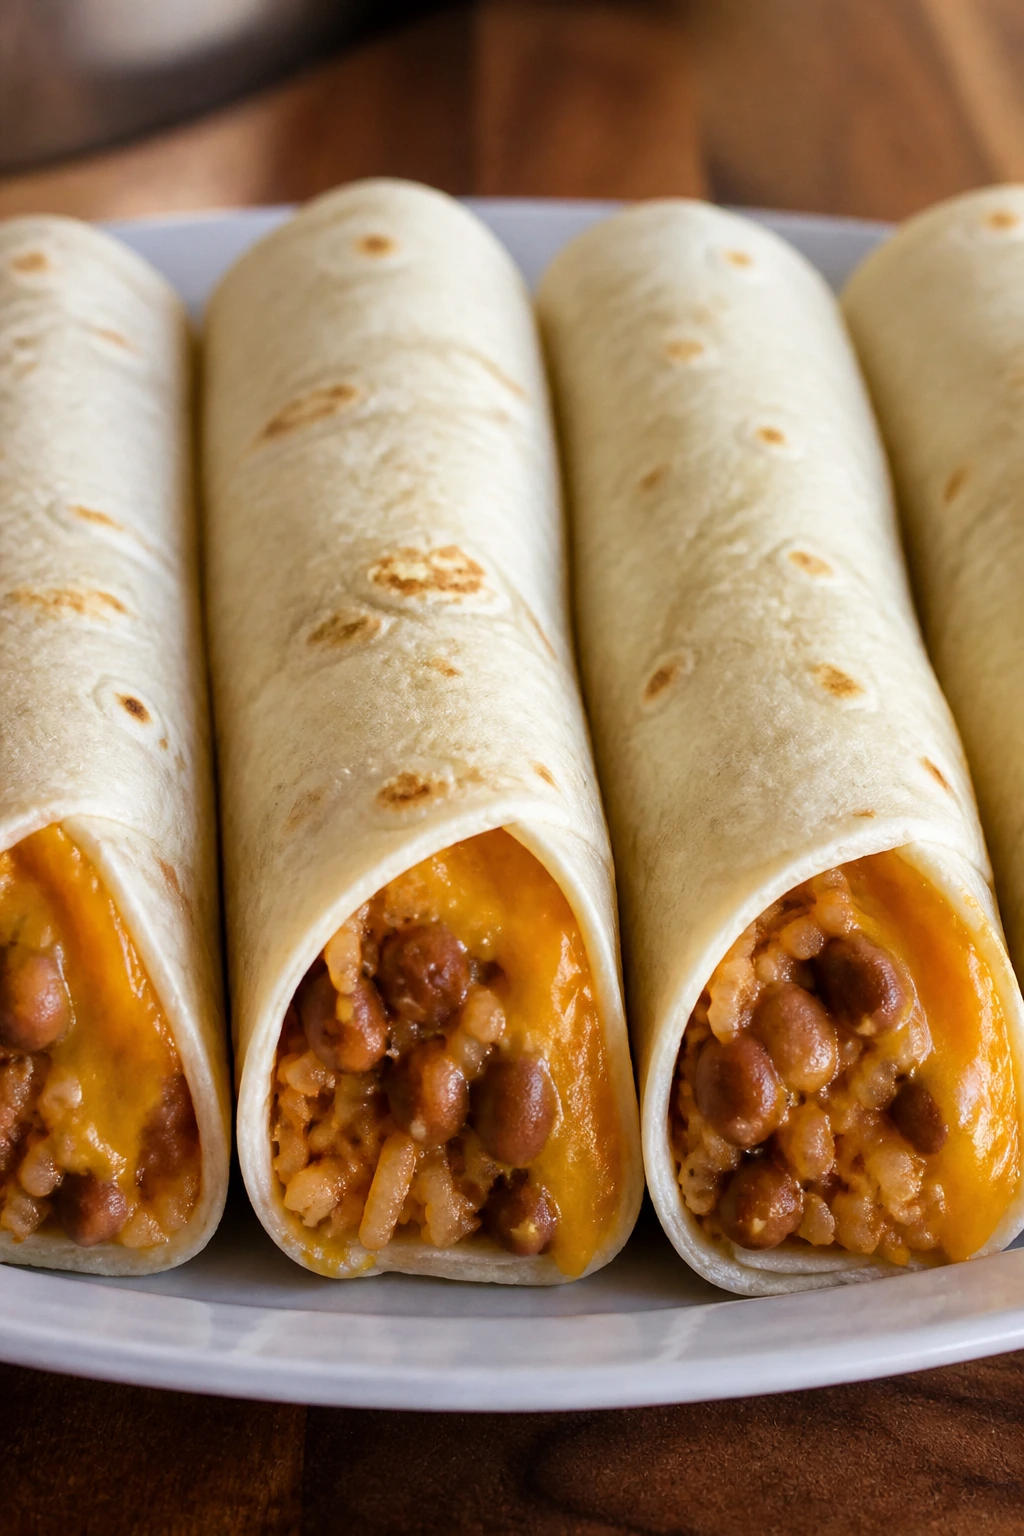
These burritos are cheap, filling, and easy to scale, which makes them one of the better low-drama dinners for a full house. The beans stay soft, the rice stretches the filling, and the cheese helps glue it all together.
Why It Works:
Refried beans and rice are familiar to a lot of picky eaters because neither one is flashy. Wrapped in a warm tortilla with cheese, they become hand-held and less intimidating. If you keep salsa on the side, you avoid the “everything got wet” problem.
Key Ingredients:
- 2 cups cooked white rice
- 1 can refried beans, about 16 ounces
- 1½ cups shredded cheddar
- 8 flour tortillas, 8-inch
- 2 tablespoons butter or oil
- ½ teaspoon salt
- Salsa, optional
Quick Steps:
- Warm the beans in a saucepan with a pinch of salt until spreadable.
- Heat the rice if needed.
- Lay out the tortillas and divide the rice, beans, and cheese among them.
- Fold in the sides and roll tightly.
- Warm the burritos in a skillet with a little butter or oil until the outsides are lightly crisp and the cheese melts.
Equipment for This Recipe:
- Saucepan
- Skillet
- Spoon
- Cutting board
How to Serve This Dish:
Serve the burritos whole or halved, with salsa or sour cream on the side. Add fruit or corn chips if you want the meal to feel more complete. They reheat well, which is half the reason people keep making them.
Pro Tips for This Recipe:
- Spread the beans thinly so the burrito rolls cleanly.
- Do not overfill the center or the tortilla splits.
- Warm the tortillas briefly before rolling if they feel stiff.
- Crisping the burritos in a pan keeps them from tasting flat.
Variations on This Dish:
- Chicken Bean Burrito: Add diced chicken for more protein.
- No-Salsa Version: Serve plain for a very cautious eater.
- Rice-and-Cheese Only: Skip the beans if texture is the issue.
Common Mistakes to Avoid with This Dish:
- Cold beans: They smear and cool the filling too fast. Warm them first.
- Too much filling: A burst burrito is a mess nobody enjoys.
- Skipping the skillet step: The light crisp on the outside gives the burrito structure.
23. Creamy Tomato Tortellini
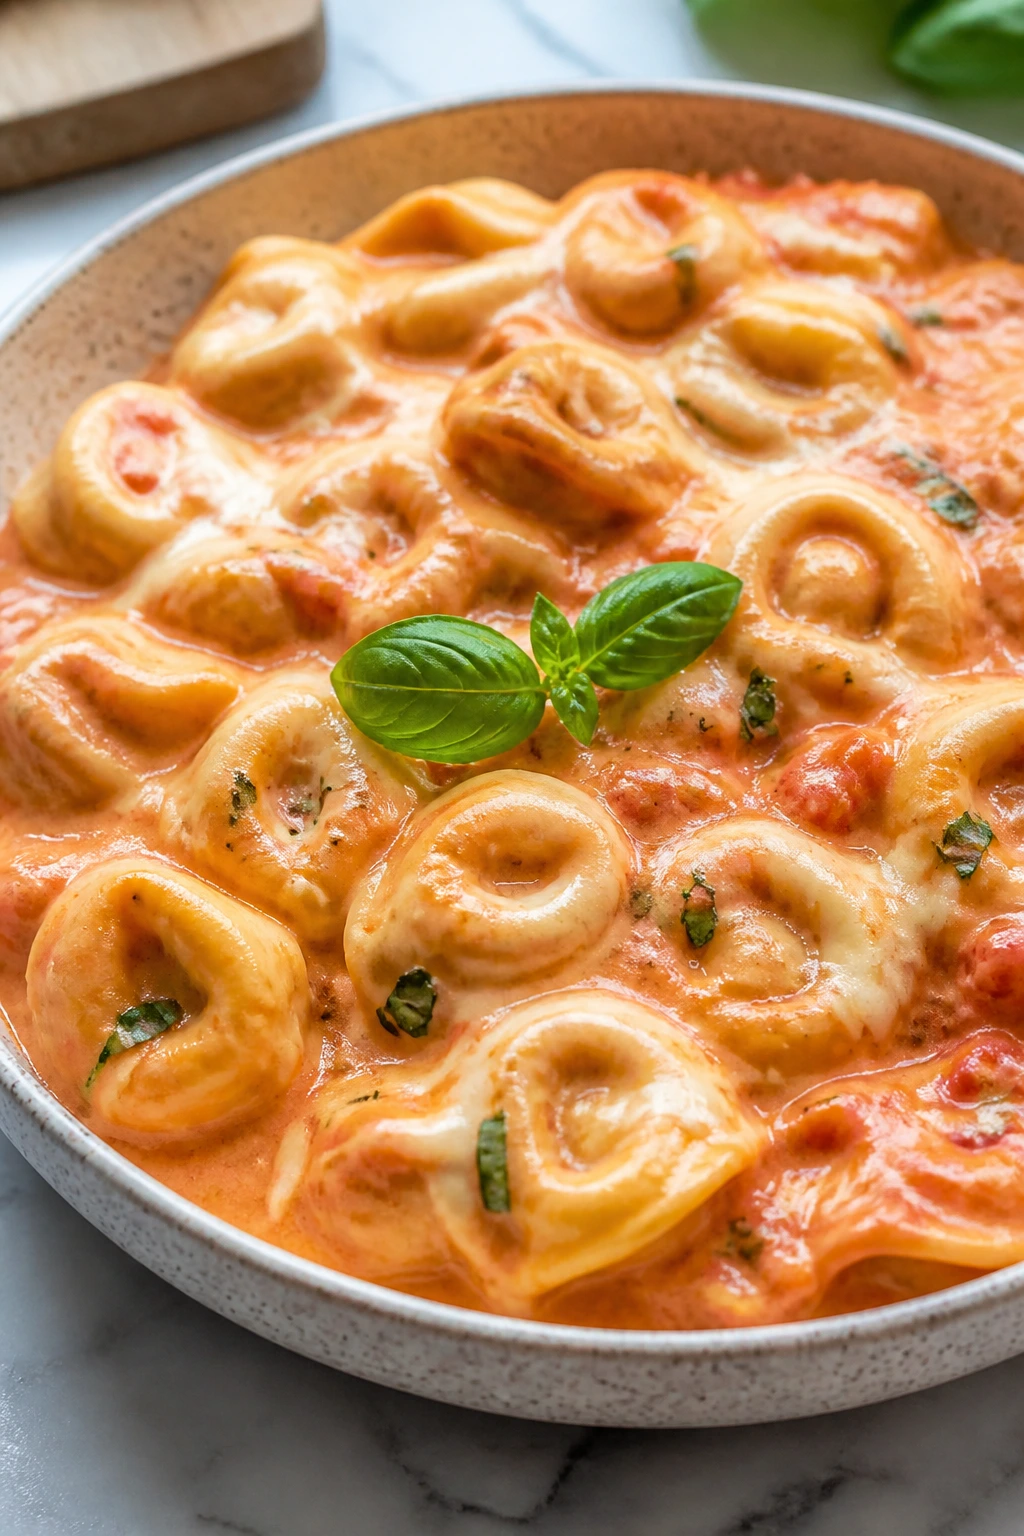
Tortellini makes an easy summer dinner because it cooks fast and feels like a whole meal with almost no effort from the eater. The sauce is creamy, the pasta is soft, and the shape is little enough not to scare anybody off.
Why It Works:
Cheese tortellini brings both starch and filling in one package, which simplifies the plate. Tomato sauce plus a little cream creates a pink, mellow sauce that tastes less sharp than straight marinara. It is a good place to stop if you want dinner to feel cozy without getting heavy.
Key Ingredients:
- 20 ounces refrigerated cheese tortellini
- 24 ounces marinara sauce
- 1 cup half-and-half or cream
- 1 cup shredded mozzarella
- ½ teaspoon salt
- ¼ teaspoon black pepper
- 1 tablespoon chopped basil, optional
Quick Steps:
- Boil the tortellini according to package directions, then drain.
- Warm the marinara and half-and-half in a large skillet over medium heat.
- Stir in the mozzarella until the sauce looks smooth and lightly thickened.
- Add the tortellini and toss gently to coat.
- Season with salt and pepper, then top with basil if using.
Equipment for This Recipe:
- Large pot
- Colander
- Large skillet
- Wooden spoon
How to Serve This Dish:
Serve in shallow bowls with garlic bread or plain breadsticks. The sauce is best when it stays centered on the pasta instead of all over the bowl. A little grated Parmesan on the side is enough.
Pro Tips for This Recipe:
- Don’t boil the sauce after the cream goes in or it can separate.
- Use refrigerated tortellini for the softest texture.
- Keep basil optional; it can read as “fancy” to some kids.
- If the sauce feels too thick, loosen it with a splash of pasta water.
Variations on This Dish:
- Chicken Tortellini: Add chopped cooked chicken to make it heartier.
- Plain Pink Sauce: Leave the basil out and keep it minimal.
- Extra-Cheese Version: Add a little ricotta on top for a softer finish.
Common Mistakes to Avoid with This Recipe:
- Overcooking tortellini: It gets mushy fast. Stop when just tender.
- Boiling the cream sauce: Gentle heat keeps it smooth.
- Too much basil: It can overwhelm the mild sauce. Use a little or none.
24. Breakfast Tacos with Eggs and Cheese
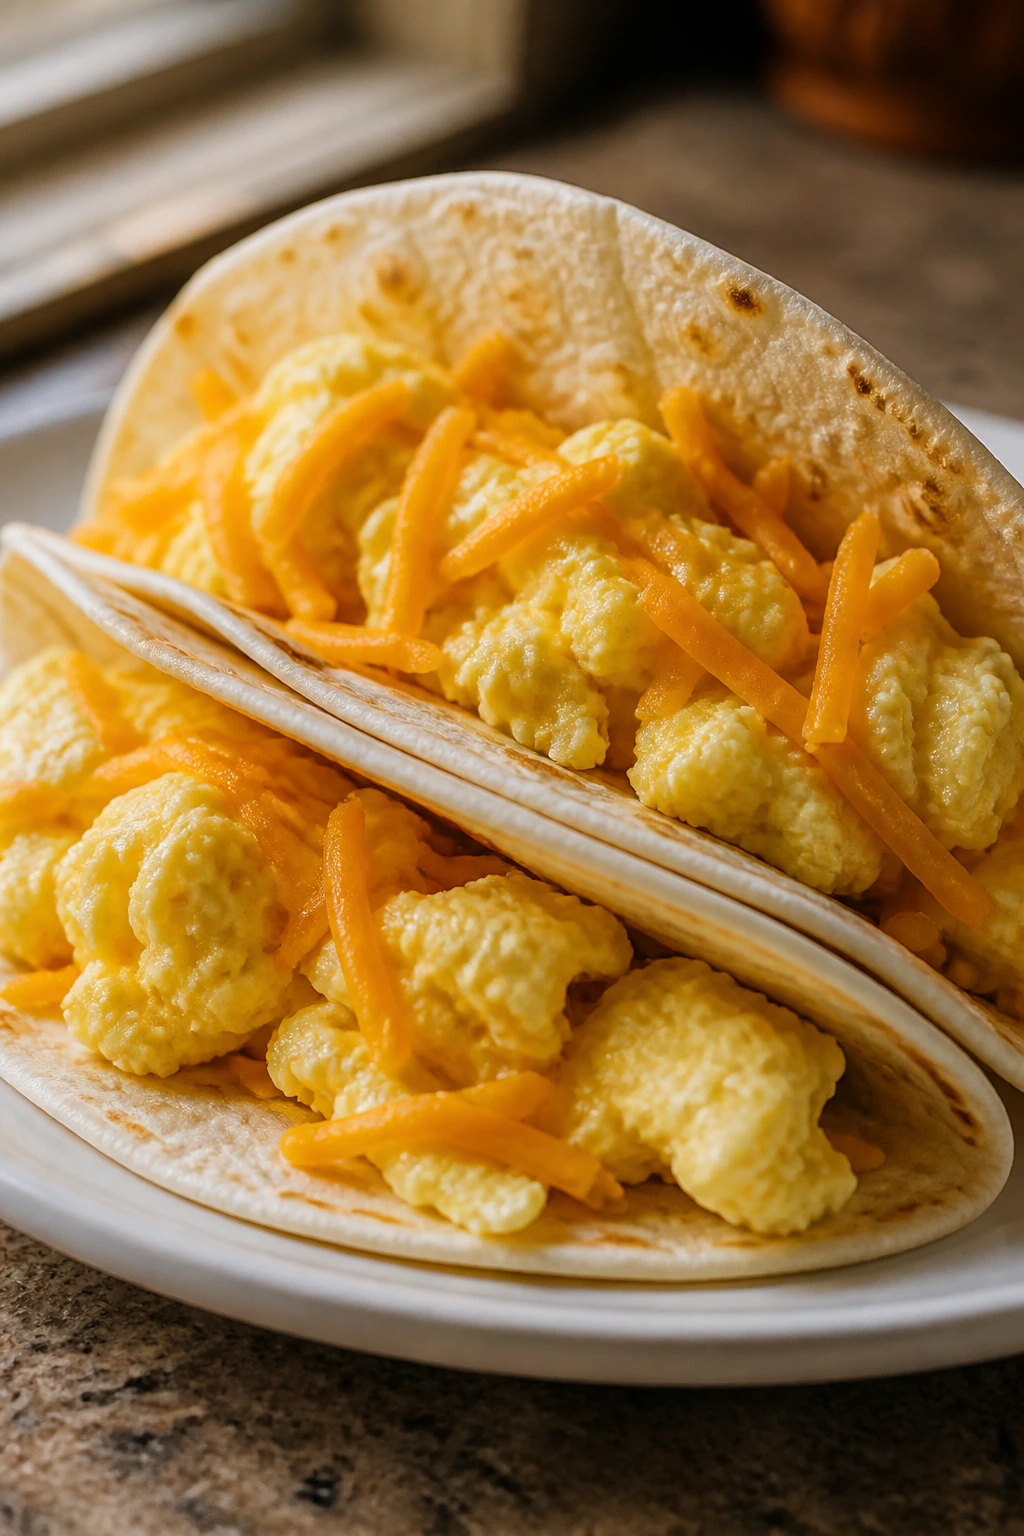
Breakfast tacos are a dinner loophole, and I mean that in the best way. Eggs, cheese, and soft tortillas stay familiar enough for picky eaters, and you can keep add-ins separate so no one gets a surprise bite.
Why It Works:
Scrambled eggs are soft, mild, and fast. Cheese helps the tacos feel satisfying, and sausage or bacon can be offered as an optional layer instead of being forced into every shell. Because tacos are hand-held, they feel fun without needing extra sides to feel complete.
Key Ingredients:
- 8 small flour tortillas
- 8 large eggs
- 2 tablespoons milk
- 2 tablespoons butter
- 2 cups shredded cheddar
- 1 cup cooked sausage crumbles or bacon, optional
- Salt and pepper to taste
- Salsa, optional
Quick Steps:
- Warm the tortillas in a dry skillet or microwave.
- Whisk the eggs with milk, salt, and pepper.
- Melt the butter in a skillet over medium-low heat and scramble the eggs gently until just set.
- Spoon eggs into the tortillas, add cheese and optional sausage or bacon.
- Fold and serve immediately.
Equipment for This Recipe:
- Skillet
- Whisk
- Mixing bowl
- Spatula
How to Serve This Dish:
Serve with fruit, hash browns, or cucumber slices. Keep salsa on the side so the tacos stay soft for cautious eaters. If someone prefers plain eggs and cheese, that version is already sitting there.
Pro Tips for This Recipe:
- Cook the eggs low and slow so they stay tender.
- Warm tortillas before filling or they crack when folded.
- Add cheese while the eggs are hot so it melts in.
- Keep fillings small; tacos collapse when overstuffed.
Variations on This Dish:
- Potato Taco: Add small crispy potatoes for more heft.
- Chicken Breakfast Taco: Use chopped chicken instead of sausage.
- Plain Egg Taco: Keep it to eggs and cheese for the simplest plate.
Common Mistakes to Avoid with This Dish:
- Dry scrambled eggs: High heat makes them rubbery. Stay gentle.
- Cold tortillas: They split at the fold. Warm them first.
- Too many add-ins: The taco becomes hard to eat. Keep it lean.
25. Meatloaf Muffins with Ketchup Glaze
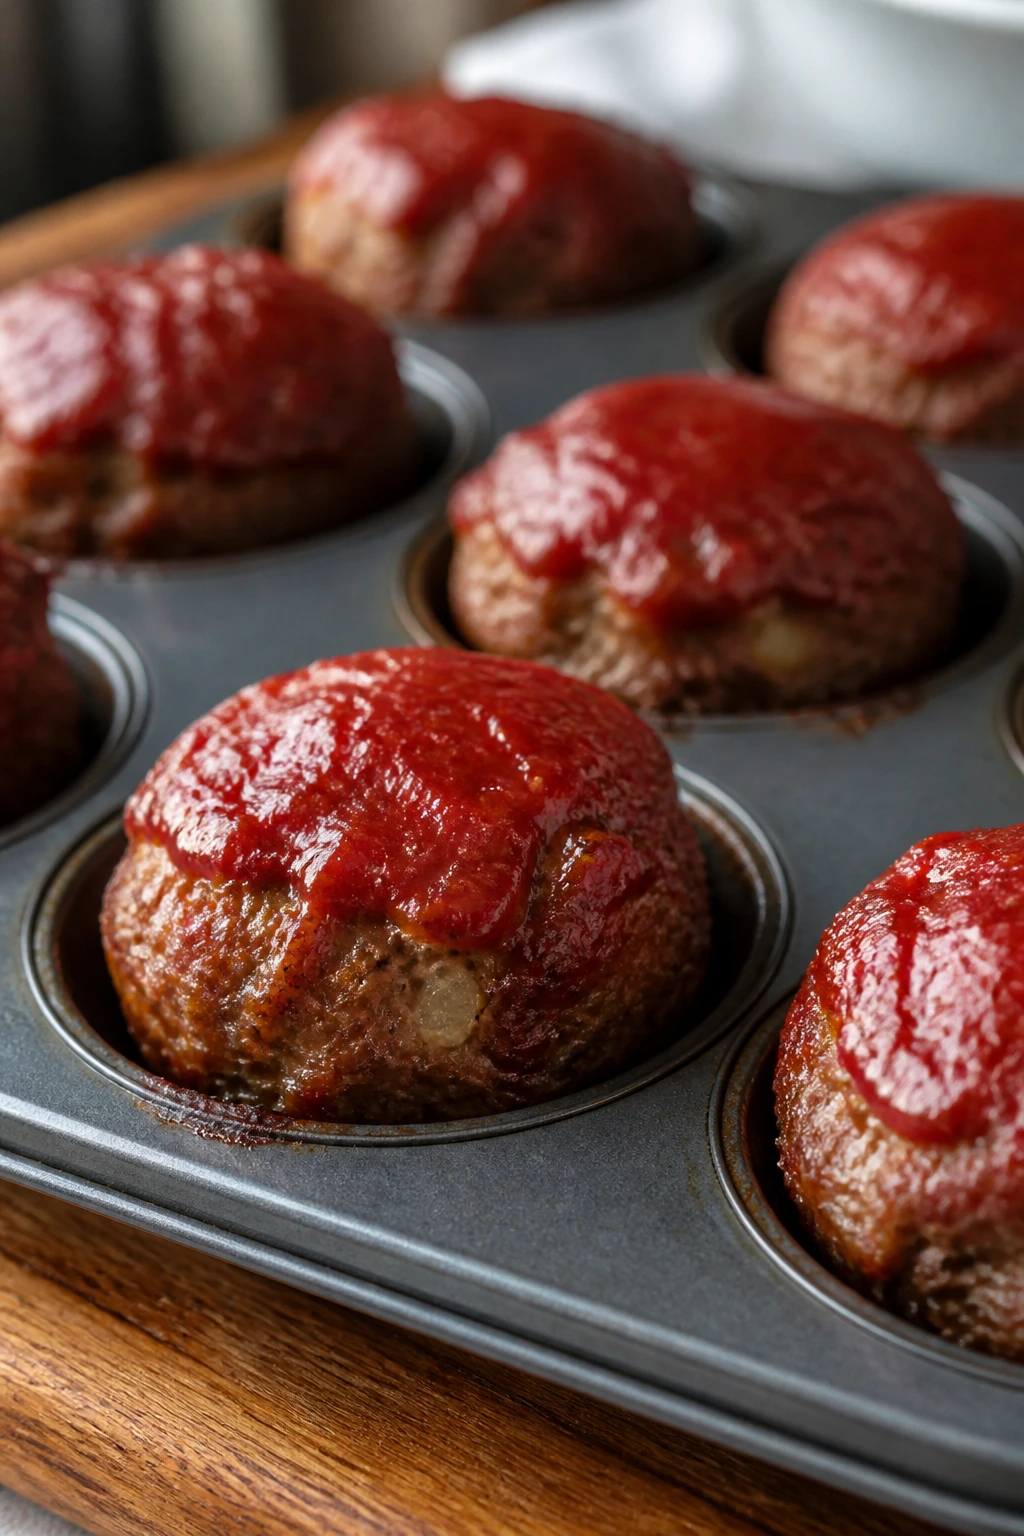
Meatloaf gets a better reception when it arrives in muffin form. The edges brown more, the centers cook evenly, and each little portion feels less like a giant commitment.
Why It Works:
Muffin tins make meatloaf feel manageable for kids who are suspicious of slices. The ketchup glaze gives a familiar sweet-tangy finish, and the smaller shape means quicker baking. That shorter cook time is a nice bonus when the oven is already making the room warm.
Key Ingredients:
- 1½ pounds ground beef
- 1 egg
- ½ cup breadcrumbs
- ¼ cup milk
- 1 teaspoon salt
- ½ teaspoon onion powder
- ½ cup ketchup
- 1 tablespoon brown sugar
Quick Steps:
- Heat the oven to 375°F and grease a 12-cup muffin tin.
- Mix the beef, egg, breadcrumbs, milk, salt, and onion powder just until combined.
- Divide the mixture among the muffin cups.
- Stir the ketchup and brown sugar together and spoon a little on top of each cup.
- Bake for 20 to 25 minutes until the centers reach 160°F.
- Rest for 5 minutes before serving.
Equipment for This Recipe:
- Muffin tin
- Mixing bowl
- Spoon
- Instant-read thermometer
How to Serve This Dish:
Serve the meatloaf muffins with mashed potatoes, corn, or cucumber slices. They also make strong leftovers for sandwiches the next day. If the eater dislikes glaze, keep a few muffins plain and brush the sauce on the rest.
Pro Tips for This Recipe:
- Mix lightly so the meat stays tender.
- Use a muffin tin with shallow cups for better browning.
- Let them rest so the juices stay inside.
- Make a double batch and freeze half.
Variations on This Dish:
- Turkey Muffins: Ground turkey works if you want a lighter version.
- Cheese-Stuffed Muffins: Press a small cube of cheese into the center before baking.
- BBQ Glaze: Replace ketchup with barbecue sauce for a sweeter finish.
Common Mistakes to Avoid with This Dish:
- Overmixing: It makes meatloaf dense. Combine just enough.
- Skipping the thermometer: Guessing here leads to dry muffins or undercooked centers.
- Using too much glaze: A thin top layer is enough.
26. Grilled Ham and Cheese Sandwiches with Fruit
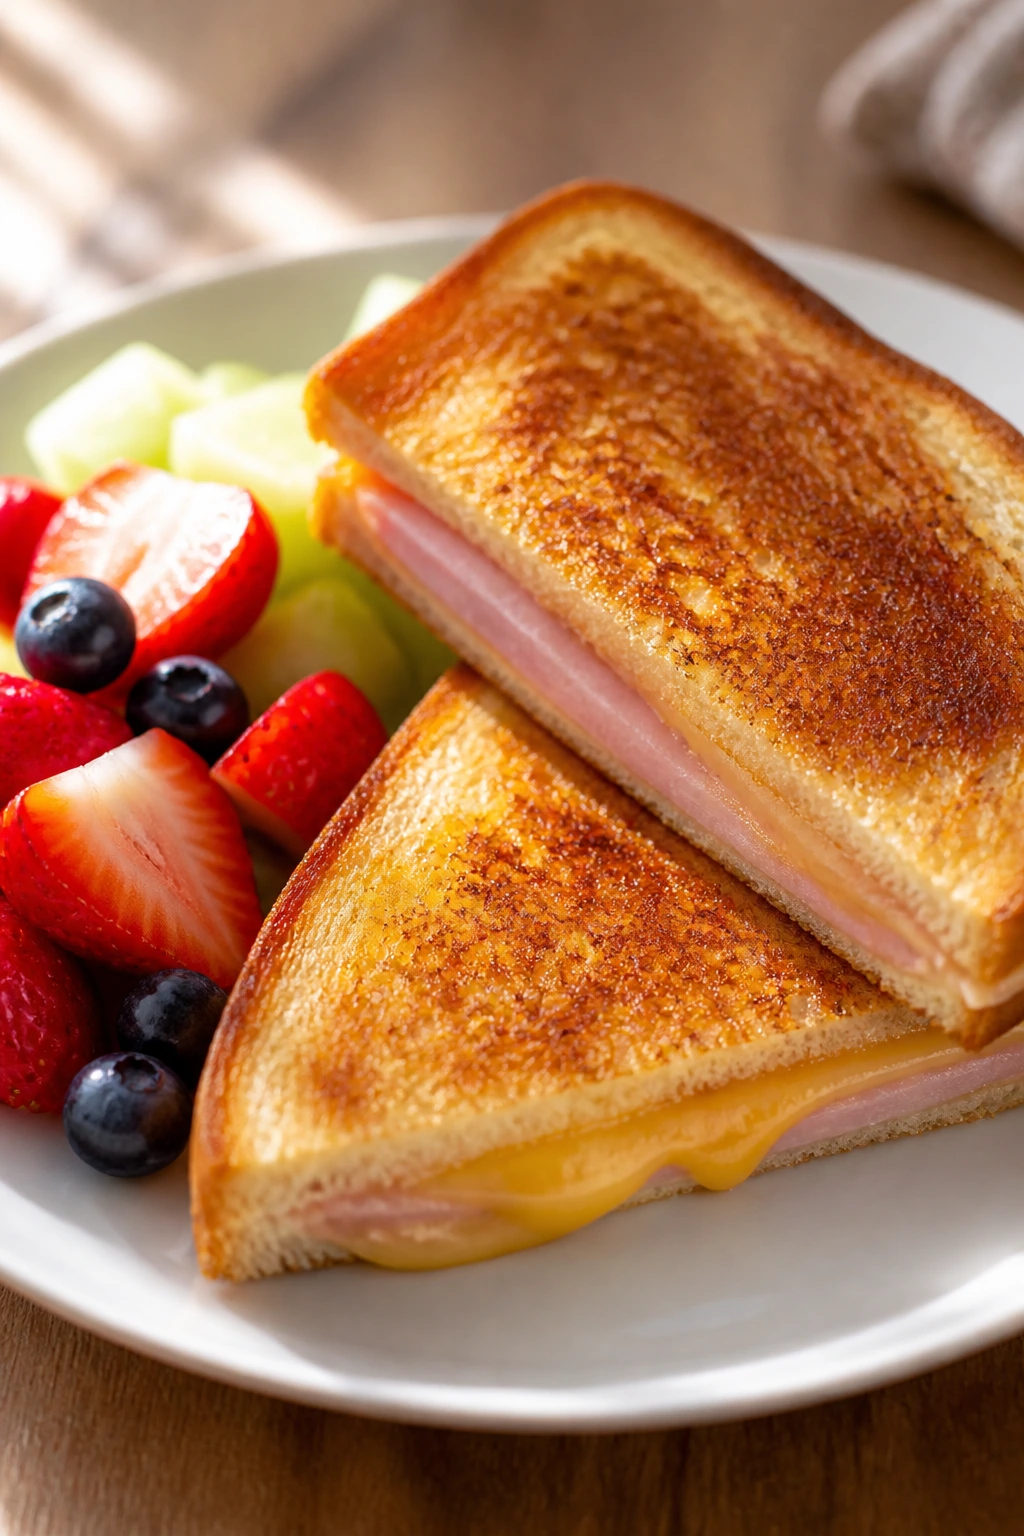
A grilled ham and cheese sandwich is about as reliable as lunch gets. The bread turns golden, the cheese melts into the ham, and a pile of fruit on the side keeps the plate feeling summer-friendly.
Why It Works:
The flavor is familiar enough that nobody has to think hard. Grilling the sandwich gives you crisp edges and a soft middle, which is a satisfying contrast without being weird. Add fruit and the meal stops feeling heavy, even on a hot day.
Key Ingredients:
- 8 slices sandwich bread
- 8 ounces sliced ham
- 8 slices mild cheese
- 4 tablespoons butter, softened
- 2 cups strawberries, grapes, or melon chunks
Quick Steps:
- Heat a skillet over medium-low heat.
- Butter the outside of each bread slice.
- Layer ham and cheese between two slices of bread.
- Cook the sandwich 3 to 4 minutes per side until golden and the cheese melts.
- Cut diagonally and serve with fruit.
Equipment for This Recipe:
- Skillet
- Spatula
- Butter knife
- Cutting board
How to Serve This Dish:
Serve the sandwich halves with cold fruit or a handful of chips. A little soup is fine if the weather is mild, but it is not required. The sandwich is satisfying on its own.
Pro Tips for This Recipe:
- Cook on medium-low heat so the bread browns before the cheese burns.
- Use mild cheese if the eater dislikes sharper flavors.
- Press the sandwich gently with the spatula for even browning.
- Slice diagonally; the triangle shape feels friendlier for some kids.
Variations on This Dish:
- Turkey and Cheese: Swap ham for turkey.
- Tomato Optional: Add one thin tomato slice only if tolerated.
- Ranch Melt: Spread a thin layer of ranch inside for a softer flavor.
Common Mistakes to Avoid with This Recipe:
- High heat: Burnt bread and cold cheese is a bad trade.
- Too much filling: The sandwich slips apart.
- Using wet fruit on the plate: Keep fruit dry so the bread does not absorb juice.
27. Mini Chicken Pot Pie Hand Pies
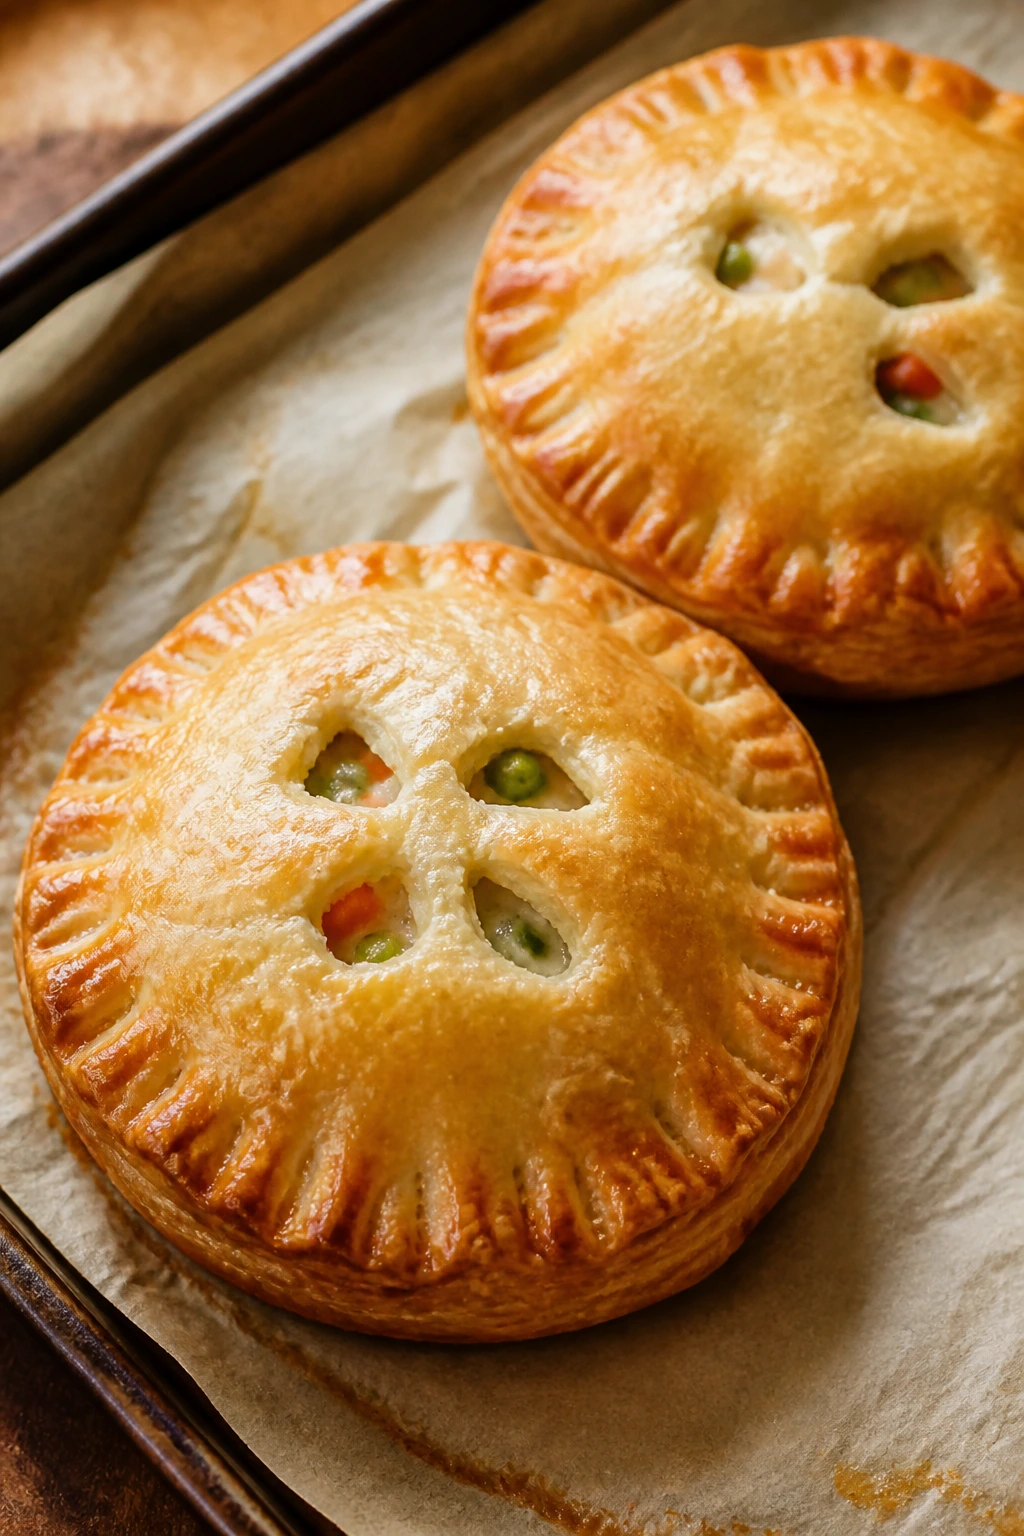
Hand pies are a sneaky way to serve comfort food without a fork. The filling stays sealed inside a flaky crust, which makes the meal portable, tidy, and less likely to trigger complaints about “things touching.”
Why It Works:
The crust gives you a little crunch, while the filling stays soft and mild. Chicken, peas, carrots, and gravy taste familiar in a format that feels smaller and less heavy than a full pie. They also cool faster, which is a real advantage when dinner needs to happen without a long wait.
Key Ingredients:
- 2 cups cooked chicken, chopped
- 1 cup frozen mixed vegetables, thawed
- 1 cup thick chicken gravy or cream sauce
- 2 refrigerated pie crusts
- 1 egg, beaten
- ½ teaspoon salt
- ¼ teaspoon black pepper
Quick Steps:
- Preheat the oven to 400°F and line a baking sheet.
- Stir the chicken, vegetables, gravy, salt, and pepper together.
- Roll out the pie crusts and cut into 6 circles or squares each.
- Spoon filling onto half the pieces, fold over, and seal the edges with a fork.
- Brush with egg wash and cut a small vent on top.
- Bake for 18 to 22 minutes until golden and hot.
Equipment for This Recipe:
- Baking sheet
- Rolling pin, optional
- Pastry brush
- Fork
- Knife or round cutter
How to Serve This Dish:
Serve the hand pies with fruit, cucumber sticks, or a small pile of mashed potatoes if you want a fuller dinner. They are good warm, but not lava-hot. That little cooling window matters.
Pro Tips for This Recipe:
- Keep the filling thick so it does not leak out.
- Seal the edges well or the pies burst open.
- Do not overfill; one heaped tablespoon is enough for smaller pies.
- Chill the assembled pies for 10 minutes if the crust gets soft.
Variations on This Dish:
- Turkey Pot Pie Pockets: Swap chicken for turkey.
- Cheddar Version: Stir a little cheddar into the filling.
- Biscuit Dough Shortcut: Use biscuit dough instead of pie crust for a softer bite.
Common Mistakes to Avoid with This Recipe:
- Watery filling: It ruins the crust. Cook the sauce thicker first.
- Thin seals: Press the edges firmly with a fork.
- Overbaking: The crust should be golden, not dark brown.
28. Loaded Baked Potato Bar with Broccoli, Cheese, and Bacon
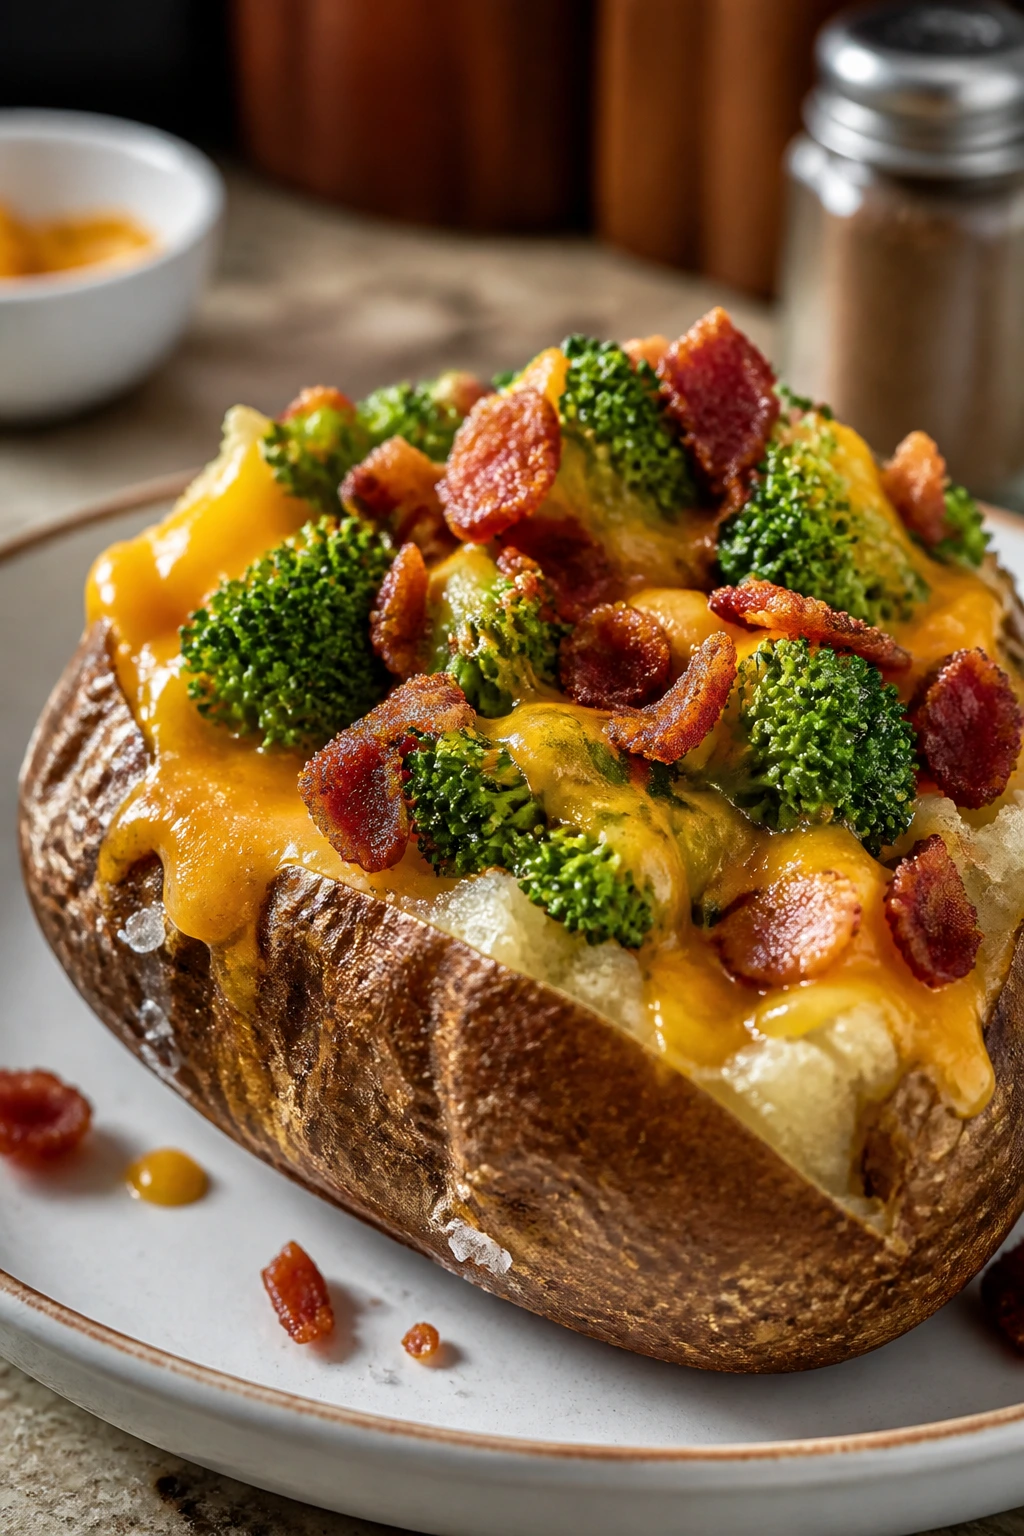
A potato bar is what you serve when everyone at the table wants control. The potatoes are plain and sturdy, and the toppings let each person build a meal that feels safe. Picky eaters like the choice.
Why It Works:
Baked potatoes are a blank canvas, but not a weird one. They are familiar, filling, and easy to customize with exactly as much cheese, bacon, or broccoli as a person can handle. If you keep the toppings in separate bowls, you avoid a lot of friction before it starts.
Key Ingredients:
- 4 large russet potatoes
- 2 tablespoons olive oil
- 1 teaspoon salt
- 4 tablespoons butter
- 1 cup sour cream
- 2 cups shredded cheddar
- 8 strips bacon, cooked and crumbled
- 2 cups steamed broccoli florets
Quick Steps:
- Heat the oven to 425°F.
- Scrub the potatoes, dry them well, rub with olive oil, and sprinkle with salt.
- Bake directly on the oven rack or a sheet pan for 50 to 60 minutes until the skins are crisp and a knife slides in easily.
- Split each potato open and fluff the insides with a fork.
- Set out the toppings and let everyone build their own potato.
Equipment for This Recipe:
- Baking sheet, optional
- Knife
- Fork
- Small bowls for toppings
- Oven mitts
How to Serve This Dish:
Serve the potatoes split open with the toppings in separate bowls. A baked potato bar works well with fruit or a simple side salad, but it does not need much else. Let each person top their own.
Pro Tips for This Recipe:
- Bake potatoes with dry skins for the best texture.
- Cut a cross in the top and squeeze the ends slightly to open them up.
- Steam the broccoli until tender, not mushy.
- Keep the toppings warm in small dishes if the meal will take a while.
Variations on This Dish:
- Chicken Potato Bar: Add shredded chicken for a bigger meal.
- Chili Potato Version: Spoon mild chili over the potato if your family likes it.
- Plain Butter Potato: Keep one potato bare for the most cautious eater.
Common Mistakes to Avoid with This Dish:
- Skipping the salt on the skin: The outside tastes flat without it.
- Undercooking the potato: A hard center ruins the whole thing.
- Mixing all the toppings together too soon: The whole point is letting people choose.
Why Mild, Familiar Summer Dinners Work So Well
The best summertime meals for picky eaters usually win by being calm, not clever. Heat changes how people want to eat. A heavy casserole feels wrong when the kitchen is warm, and a spicy, highly seasoned dish can feel like work when appetite is already down a notch. Mild food, served in smaller shapes or with separate components, gets a much easier yes.
There is also a texture issue that cooks ignore at their own risk. Picky eaters tend to dislike surprise softness, wet toppings, and foods that collapse before the first bite. That is why crisp chicken tenders, slider bakes, pita pockets, and potato bars keep showing up here. They let the eater see what they are getting. That matters.
The other quiet advantage is speed. Summer dinners should not demand long oven time or a sink full of pans. If you can bake one tray, boil one pot, or assemble a cold bowl, you are more likely to make dinner that everybody will actually eat. And if the food can be served warm or cold, even better. One less argument.
Essential Equipment for These Recipes
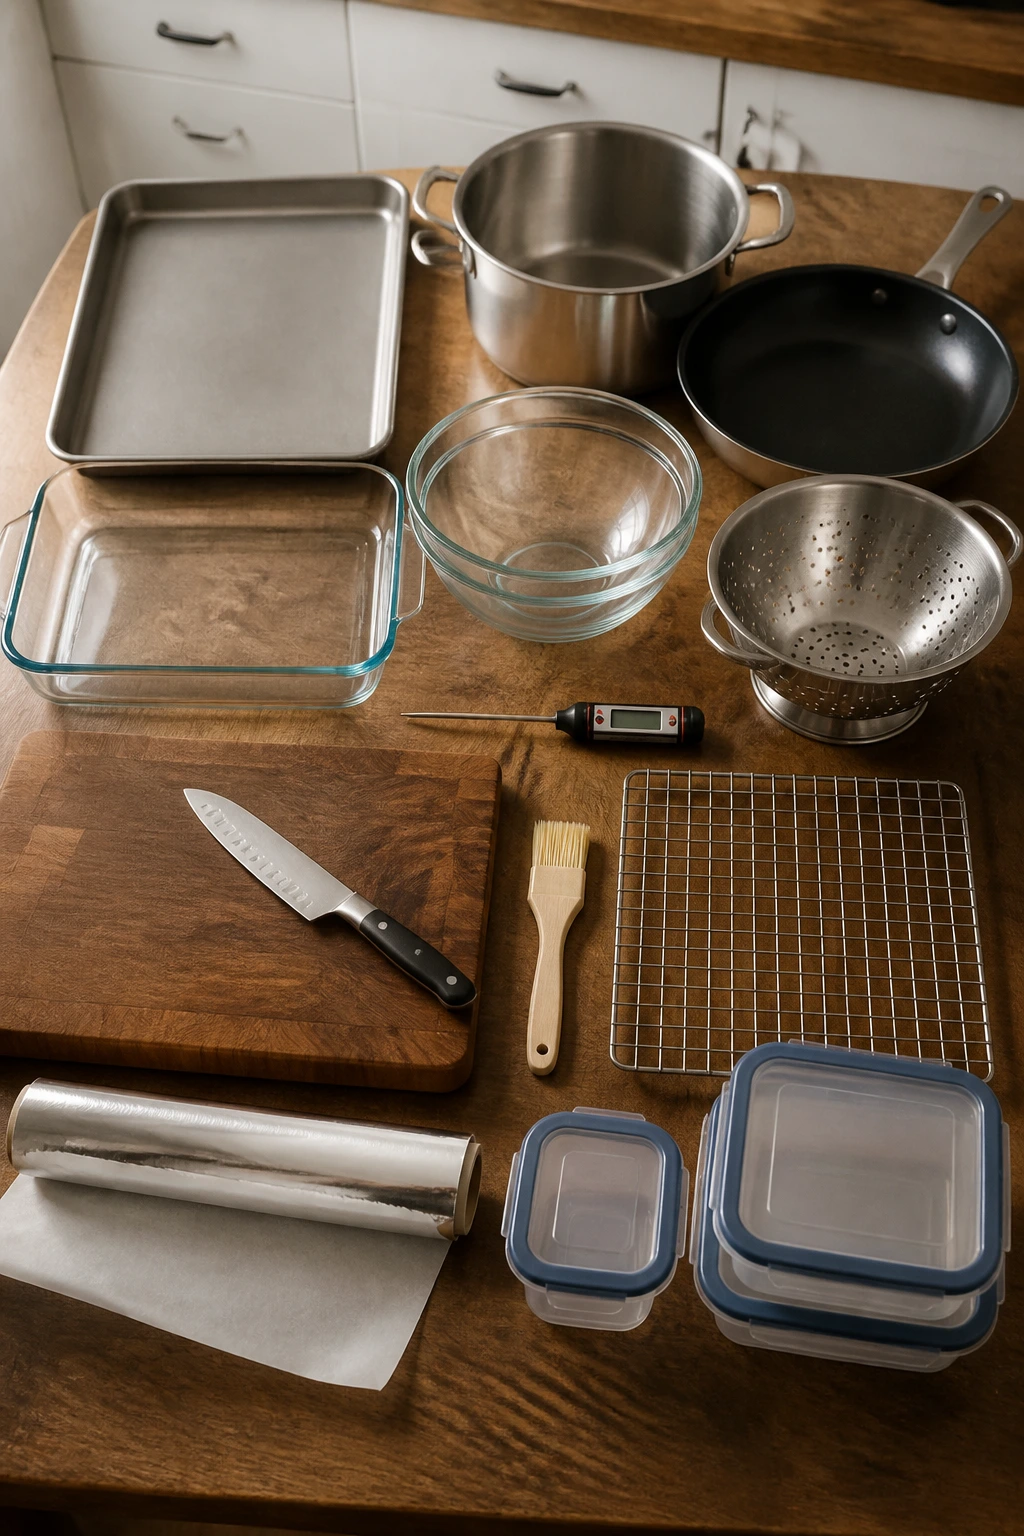
- Rimmed sheet pans: Useful for chicken tenders, quesadillas, flatbreads, pancake squares, and hand pies.
- Large pot: Needed for pasta, rice, and boiled noodle dishes.
- Large skillet: The workhorse for burgers, fried rice, sloppy joes, and grilled sandwiches.
- 9×13-inch baking dish: Best for slider bakes, baked ziti, and other layered meals.
- Mixing bowls: A few medium bowls keep sauces, fillings, and toppings separate.
- Colander: Makes pasta and tortellini dinners easier.
- Instant-read thermometer: Worth having for chicken, meatballs, and meatloaf muffins.
- Sharp knife and cutting board: Especially useful for wraps, pinwheels, and slider slicing.
- Pastry brush: Handy for buttering buns, flatbreads, and potato skins.
- Wire rack: Helps chicken tenders and other baked coatings stay crisp.
- Foil or parchment paper: Keeps cleanup sane on sheet-pan nights.
- Storage containers with lids: Cold pasta salads, chicken salad, and leftovers need good containers or they dry out.
Smart Shopping and Ingredient Tips
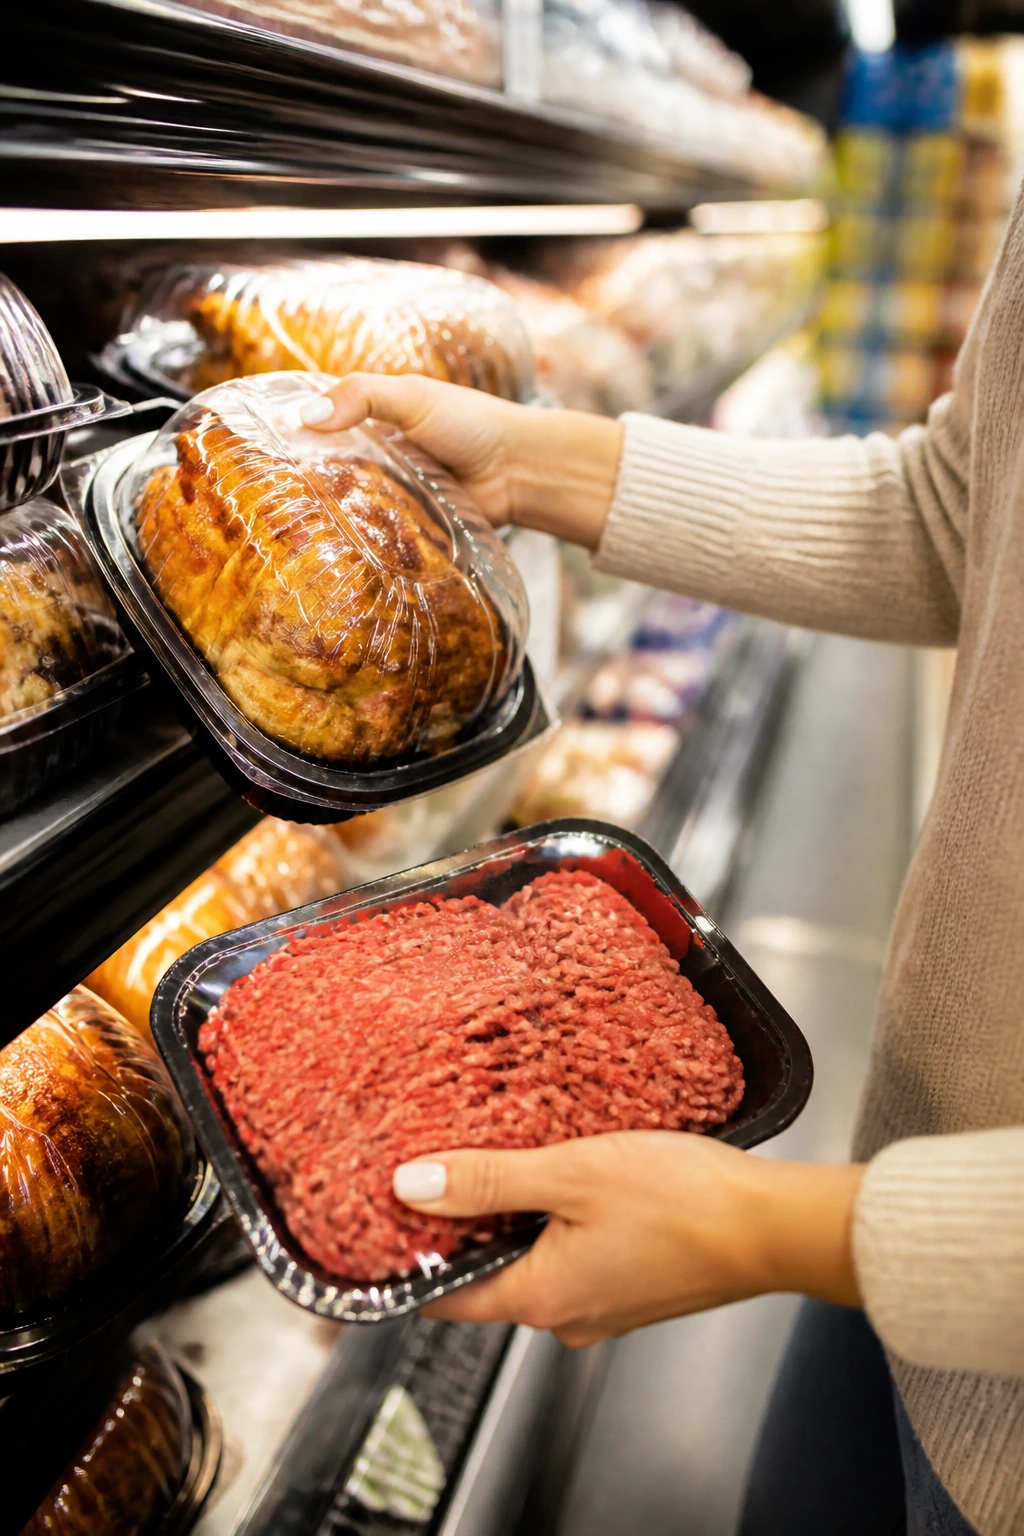
Pick ingredients that behave well under heat. For chicken recipes, tenders and pre-cooked rotisserie chicken save time and reduce the chance of dry meat. For burgers and meatballs, choose ground beef with enough fat to stay juicy, but not so much that the pan turns greasy. An 80/20 blend is a safe place to land.
Bread matters more than people think. Soft slider buns, flour tortillas, pitas, naan, and sandwich bread all have different jobs. Use soft, flexible breads when you want the food to feel easy; use sturdier breads when you want structure. Stale tortillas crack, thin buns split, and poor bread choices turn a neat dinner into a crumbling stack.
For pasta meals, choose shapes that hold sauce instead of sliding around: rotini, penne, shells, elbows, and tortellini all do the job well. Small shapes are friendlier for picky eaters because they look less dramatic on the fork. And if you are buying cheese, plain shredded cheddar, mozzarella, Monterey Jack, and American are the most useful crowd-pleasers. Sharp cheeses are lovely in theory. They are not always welcome at a kid’s table.
Frozen vegetables are your friend here, especially peas, corn, and mixed vegetables. They are picked at decent ripeness, they thaw quickly, and they do not make you wash or chop anything. Drain canned ingredients well, especially beans, corn, and tomatoes. Wet ingredients are the fastest way to wreck a tidy summer meal.
How to Serve These Recipes
Presentation:
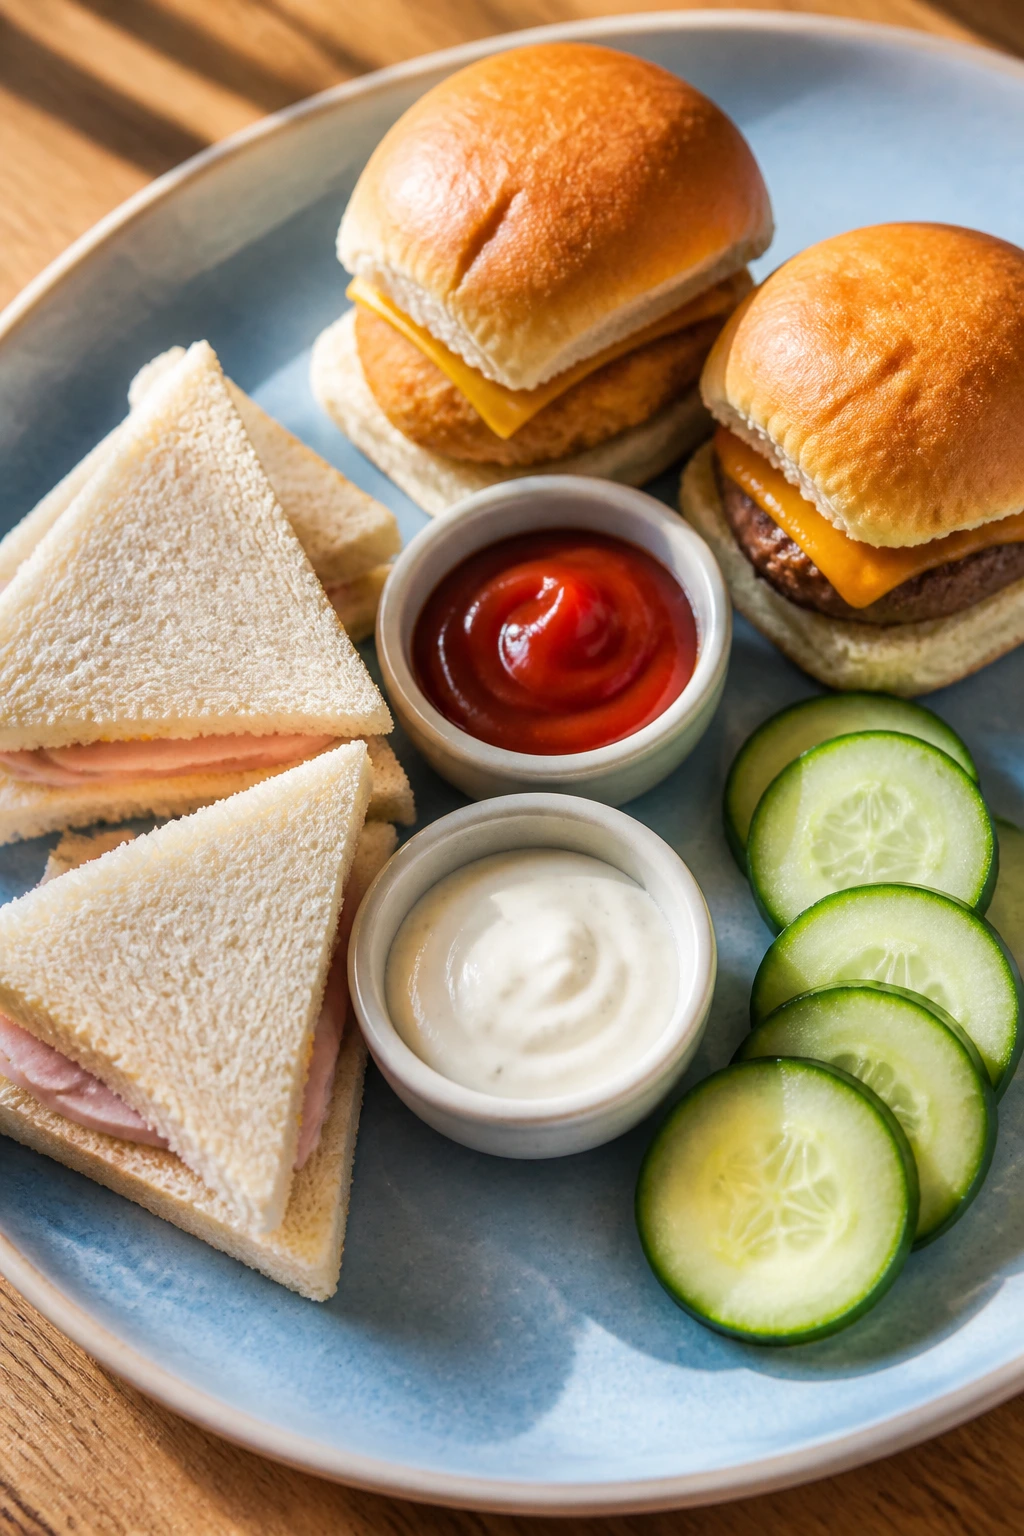
Serve picky-eater meals in simple shapes: triangles, halves, cups, bowls, sliders, and sticks. Small portions on separate plates usually work better than one crowded plate full of mixed food. A neat layout lowers resistance before the first bite.
Accompaniments:
Keep the sides familiar and low-pressure: fruit, cucumber slices, corn on the cob, potato chips, plain carrots, crackers, or a small salad for the adults. A dip on the side—ranch, honey mustard, ketchup, or sour cream—gives control back to the eater.
Portions:
Plan on 2 to 3 slider buns, 1 to 2 cups of pasta, 2 to 3 chicken tenders, or 1 stuffed potato per adult-size serving, then scale down for children with smaller appetites. If you are serving more than one highly specific eater, build the plate in small parts so nobody feels trapped by a giant serving they do not want.
Beverage Pairing:
Cold milk is still the easy answer for a lot of these meals, especially pasta and chicken dinners. Iced tea, sparkling water with lemon, or plain lemonade also fits the summer mood without fighting the food. For the adults, a crisp lager or a very dry cider works with burgers, sliders, and grilled sandwiches.
Additional Tips and Flavor Boosters
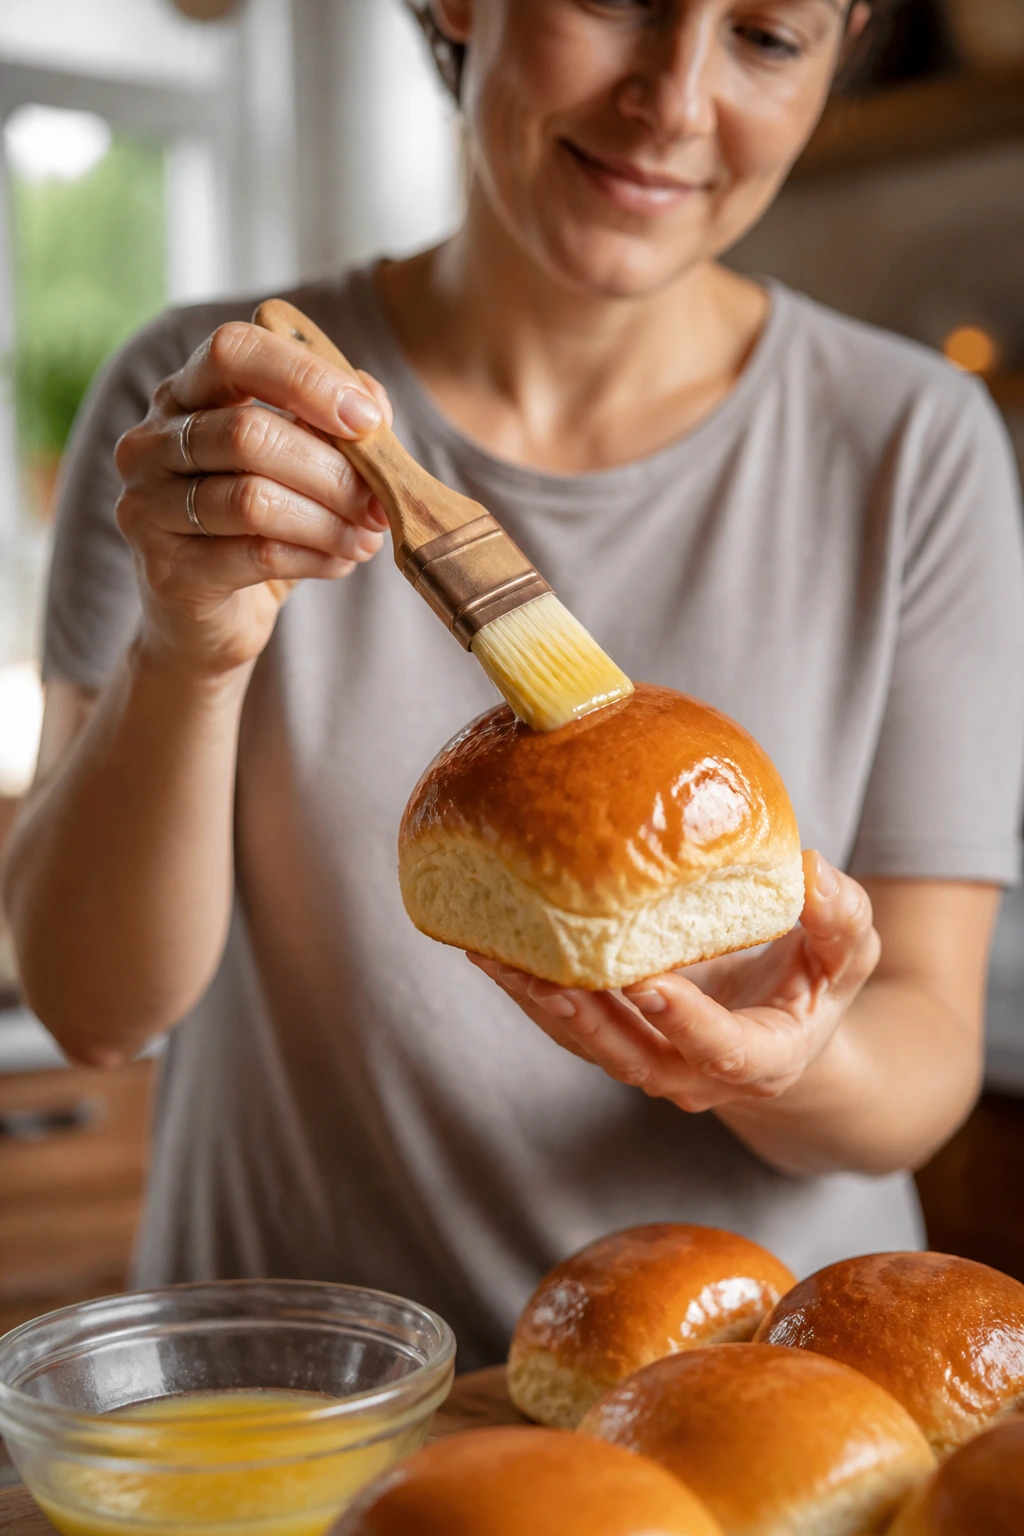
Flavor Enhancement: A little melted butter brushed on buns, tortillas, or potatoes changes the whole meal faster than most sauces. It gives a soft shine and a mild richness that picky eaters rarely object to.
Customization: Keep a topping bar for the meals that can handle it—pizza rounds, taco bowls, baked potatoes, burger bowls, and quesadillas all benefit. Put the “optional” foods in small bowls so the eater can choose without feeling ambushed.
Serving Suggestions: If you want a plate to feel finished, add one bright thing and one cool thing. Bright might mean fruit or tomatoes; cool might mean cucumber slices, sour cream, or a cold pasta salad. That contrast keeps summer dinners from feeling one-note.
Make-It-Yours: For dairy-free eaters, use non-dairy cheese on the pizzas, quesadillas, and burritos, and olive oil instead of butter where it makes sense. For gluten-free diners, swap tortillas, pasta, and breadcrumbs with certified gluten-free versions and keep the rest of the structure the same. For lighter meals, cut the cheese by a third and add more fruit or crunchy vegetables on the side.
Make-Ahead, Storage, and Reheating Guidance
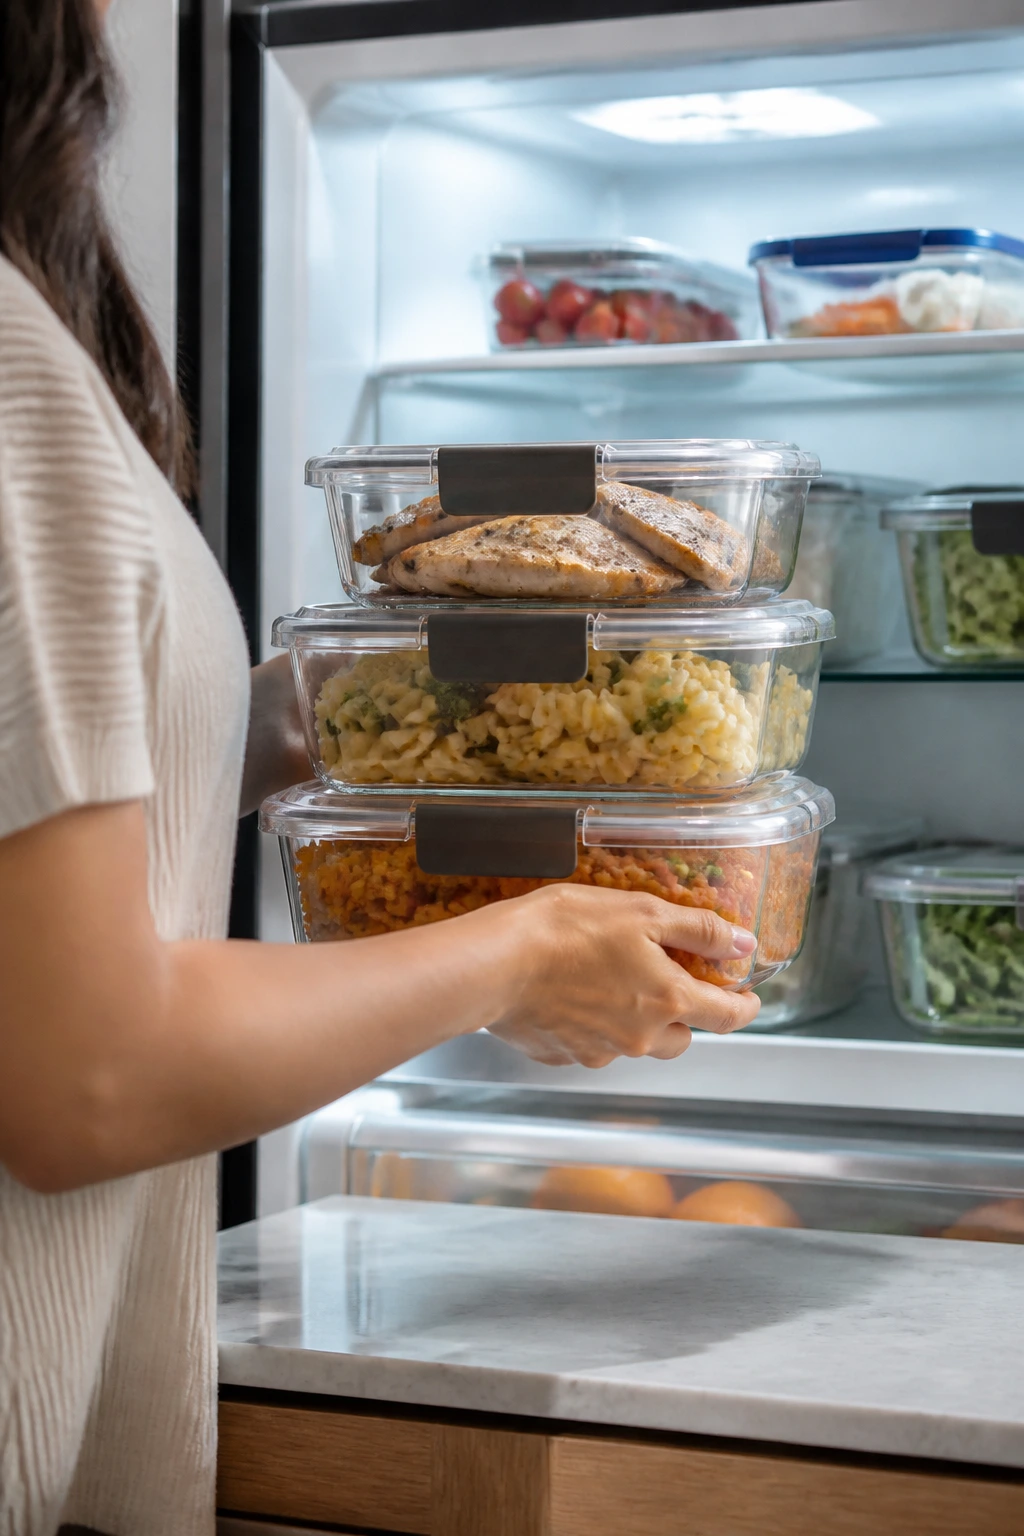
A few of these recipes are best eaten right away, but a lot of them hold up nicely if you plan ahead. Cooked chicken tenders, meatballs, sliders, mac and cheese, and baked ziti keep in the refrigerator for 3 to 4 days in airtight containers. Reheat hot dishes in a 350°F oven for 10 to 15 minutes or in the microwave in short bursts with a damp paper towel over the top so they do not dry out.
Cold meals need a little more care. Pasta salads, chicken salad, pinwheels, and burger bowl components keep for up to 3 days refrigerated if the wet toppings stay separate until serving. Tortilla wraps and slider bakes are better within 2 days, because bread softens and starts to blur the texture. If you know a meal will sit overnight, keep tomatoes, lettuce, sauces, and pickles apart until the last minute.
Some of these freeze well and some do not. Meatballs, meatloaf muffins, baked ziti, chicken tenders, and sloppy joe filling can be frozen for up to 2 months. Potato bars, lettuce wraps, and any fresh wrap with raw greens are not freezer candidates. For reheating frozen hot food, thaw in the fridge overnight if possible, then heat until the center is steaming hot. A toaster oven works well for chicken tenders and flatbreads because it brings the crunch back.
Make-ahead wins the night before a busy day. You can cook rice, boil pasta, shred chicken, cook bacon, and mix sauces ahead by a day or two. Just store each piece separately. That small bit of organization keeps summer dinners from turning limp before they even reach the table.
Variations and Adaptations to Try
The Plain Plate Version:
Strip every meal down to its most basic form: protein, bread or starch, and one optional dip. This helps when you are dealing with an eater who panics at mixed textures or visible herbs. Plain food is not a failure. Sometimes it is the bridge.
The Hidden-Vegetable Version:
Finely chop carrots, zucchini, or spinach and tuck them into meatballs, pasta sauce, taco meat, and mac and cheese. The trick is to keep the pieces small enough to disappear, not to pretend they will stay invisible in giant chunks. Grated vegetables blend better than diced ones.
The Dairy-Light Version:
Use olive oil instead of butter where possible, and choose smaller amounts of cheese with stronger melting power so you still get coverage. Tortillas, rice bowls, chicken tenders, and burgers adapt easily. The food still feels complete without swimming in dairy.
The Lower-Cost Version:
Lean on rice, pasta, potatoes, beans, eggs, and rotisserie chicken. Those ingredients stretch into full dinners without making the meal feel stripped down. Burritos, fried rice, slider bakes, and baked potatoes are especially forgiving here.
The Cooler-Kitchen Version:
Shift toward wraps, salads, pinwheels, chicken salad, pasta salad, and cold slider fillings. These meals need less oven time and leave the house less sticky by dinner. On hot days, that matters more than a fancy menu.
The Extra-Crunch Version:
Add toasted breadcrumbs, panko, crisp bacon, baked tortilla strips, or pan-crisped edges wherever the recipe allows it. Crunch gives picky eaters a clearer texture to lock onto. I would use this trick more often if more people talked about it.
Common Mistakes to Avoid
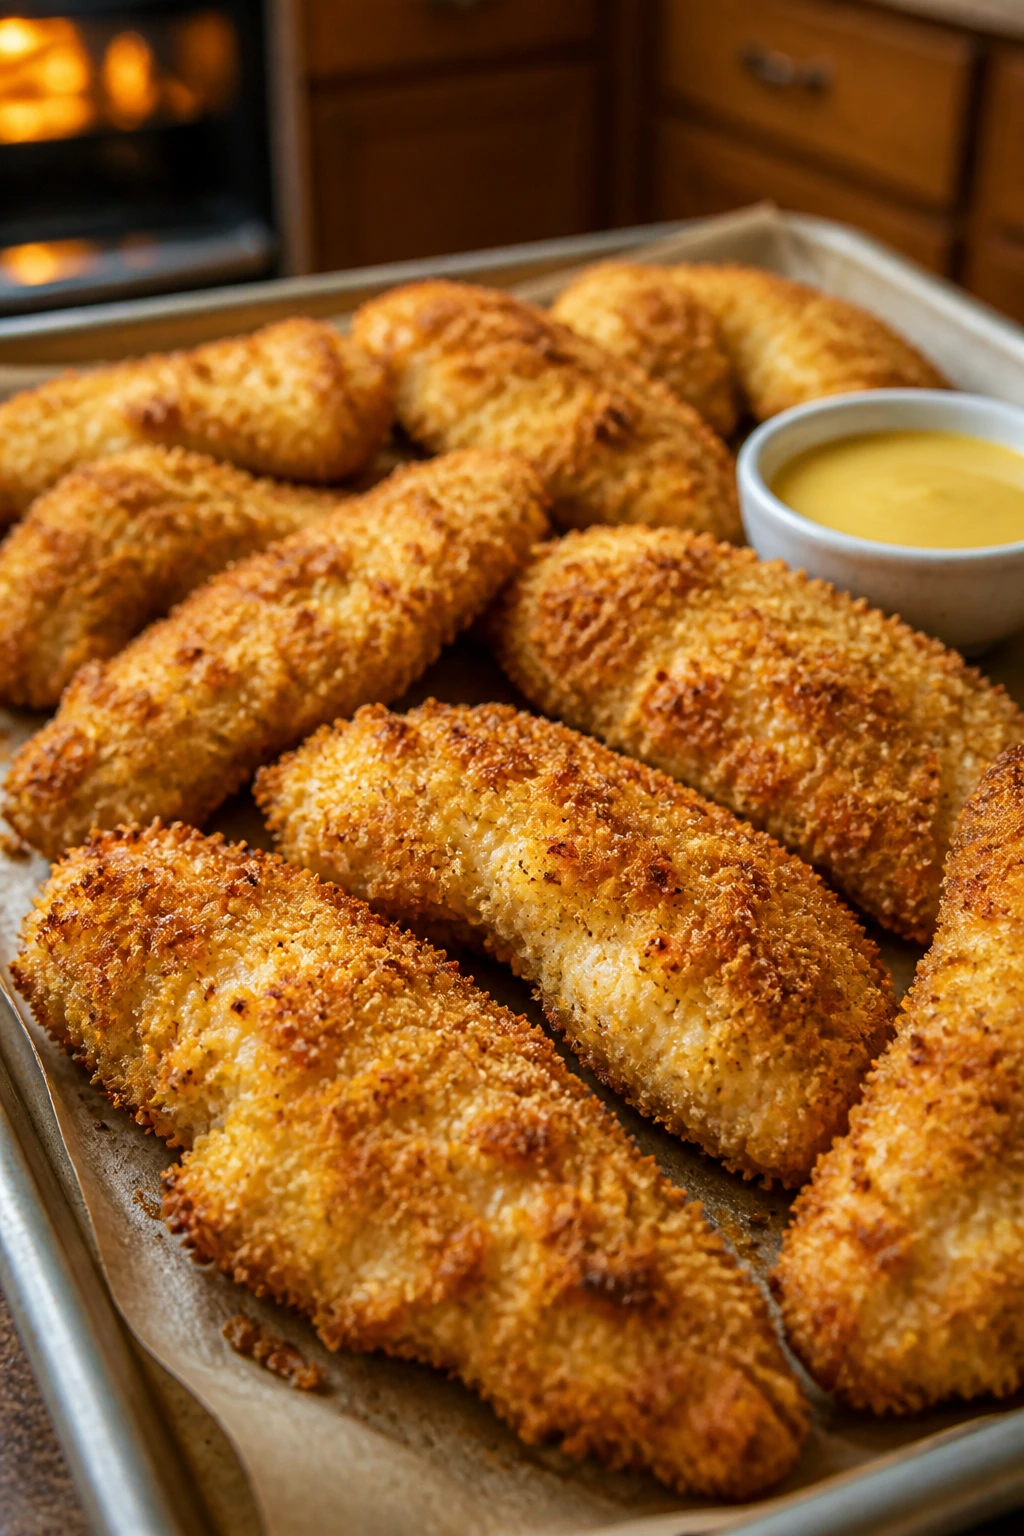
The biggest mistake is trying to hide too much. A plate buried under sauce, chopped vegetables, and mystery fillings usually makes picky eaters suspicious before they even try it. Keep the main parts visible. If you want to add vegetables, do it in small, familiar ways and let the eater see what they are getting.
Another easy mistake is serving food too wet. Pasta salad that swims in dressing, tacos with soggy salsa, wraps with undried lettuce, and burger bowls with watery tomatoes all slide into the same problem: the meal loses its shape. Drain, blot, or add the wet parts at the table. That one habit fixes more dinner complaints than most people expect.
Texture is the other culprit. Overcooked pasta, limp fries, dry chicken, and rubbery eggs are all less acceptable to a picky eater than to someone who eats anything. Keep an eye on the heat and pull the food at the first sign of done, not five minutes later because you got distracted. Summer meals are supposed to feel easy, not punished.
There is also a portion problem. A giant plate can overwhelm a cautious eater before the first bite. Smaller servings, split into separate pieces, usually get a better response. You can always offer more. You cannot un-serve a mountain.
Frequently Asked Questions
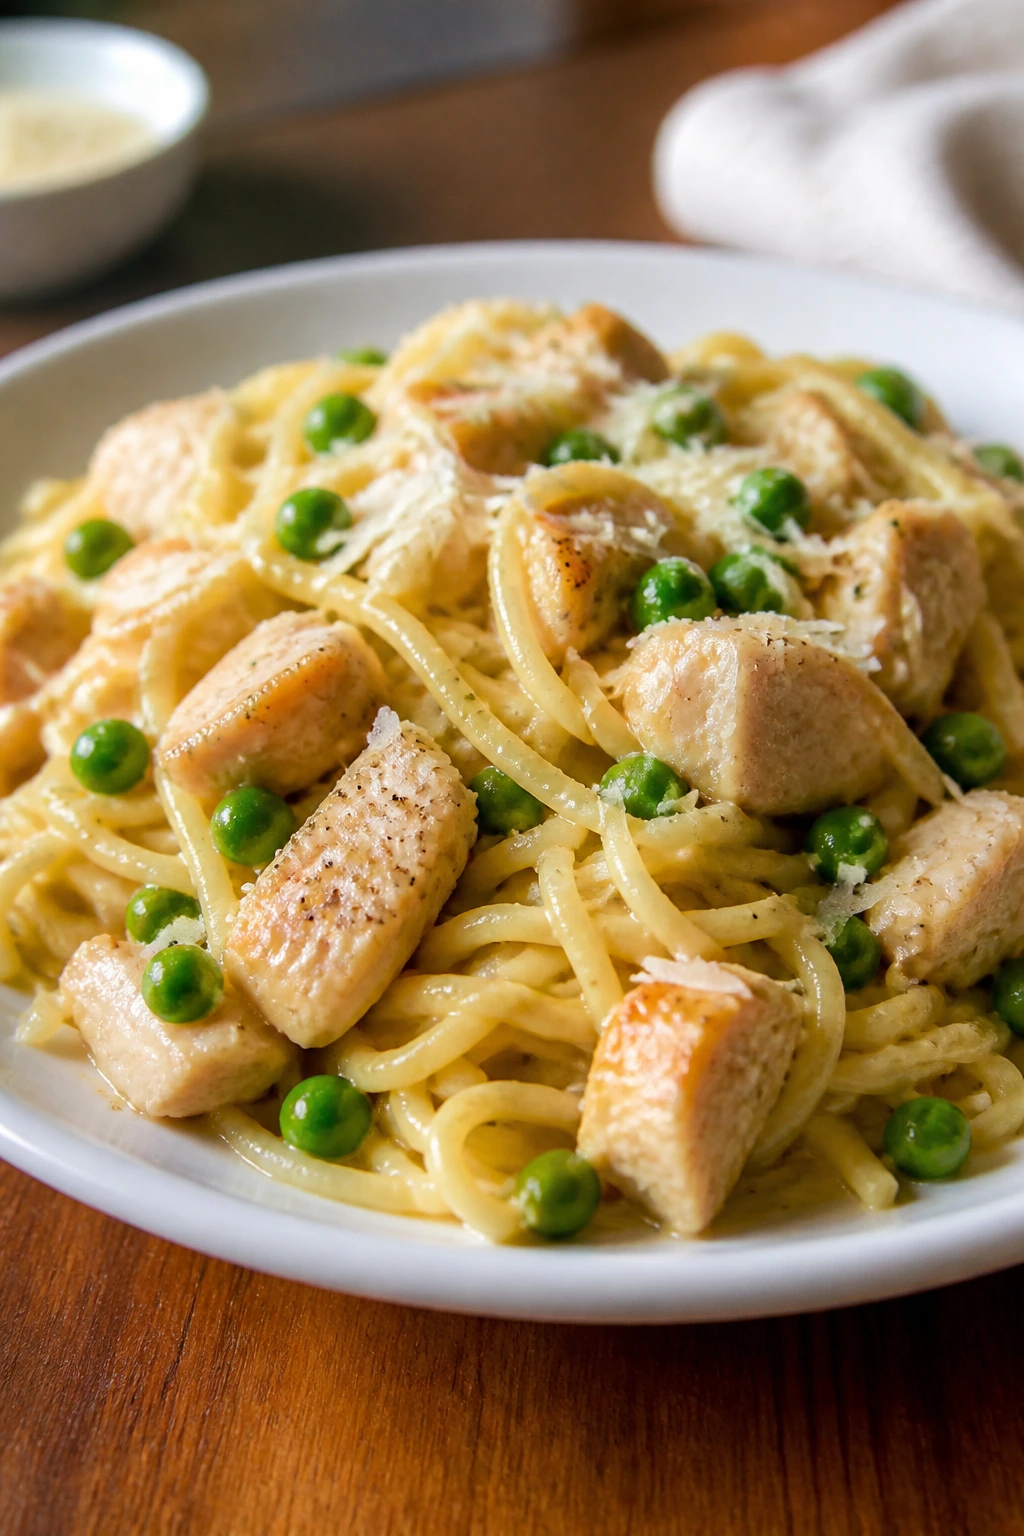
How do I make a new meal less scary for a picky eater?
Serve the familiar part first and the new part as an option, not a demand. Chicken tenders with fruit, tacos with toppings on the side, and pasta with sauce in a separate bowl all lower the pressure. The less “combined” the plate looks, the easier it usually goes.
What if my child refuses sauces?
Skip the sauce on the plate and serve it in a tiny cup on the side. A lot of kids will tolerate dipping better than coating, because they feel in control of each bite. That works for honey mustard, ranch, ketchup, BBQ sauce, and salsa.
Can I make these meals ahead for a busy day?
Yes, and some of them improve with a little planning. Slider fillings, chicken salad, pasta salad, meatballs, and rice dishes all benefit from advance prep, while crisp foods like tenders and quesadillas are better baked close to serving time. Assemble the texture-sensitive parts last.
Which recipes are best for a heatwave?
Cold pasta salad, chicken salad pita pockets, pinwheels, burger bowls, and lettuce wraps are the easiest on a hot kitchen. They need little or no oven time and still feel like dinner. Potato bars and chicken tenders are fine too, but they ask more of the stove or oven.
How can I get more protein into picky-eater meals without a fight?
Use familiar shapes and mild flavors. Shredded chicken, diced ham, ground beef, meatballs, eggs, and cheese usually cause less resistance than big, obvious chunks of protein. Mixing protein into sliders, pasta, burritos, and rice bowls tends to work better than serving a large piece on its own.
What should I do if a recipe turns out too dry?
Add a small amount of the same moisture it was built with: pasta water for noodles, a spoon of milk for mac and cheese, a little broth for rice, or an extra swipe of butter for bread and potatoes. Dry food usually needs a modest rescue, not a full rebuild.
Are these meals okay for lunch as well as dinner?
Absolutely. Slider bakes, pinwheels, pasta salads, quesadillas, chicken salad, and baked potato leftovers all travel well if packed in airtight containers. Just keep crunchy toppings separate until serving so they do not go limp.
How do I scale these recipes for a bigger family?
Multiply the main protein and starch first, then adjust cheese and sauce second. For picky eaters, it is usually smarter to make a second pan of the same safe food than to double the number of toppings. That keeps the meal from turning chaotic.
A Softer Summer Table
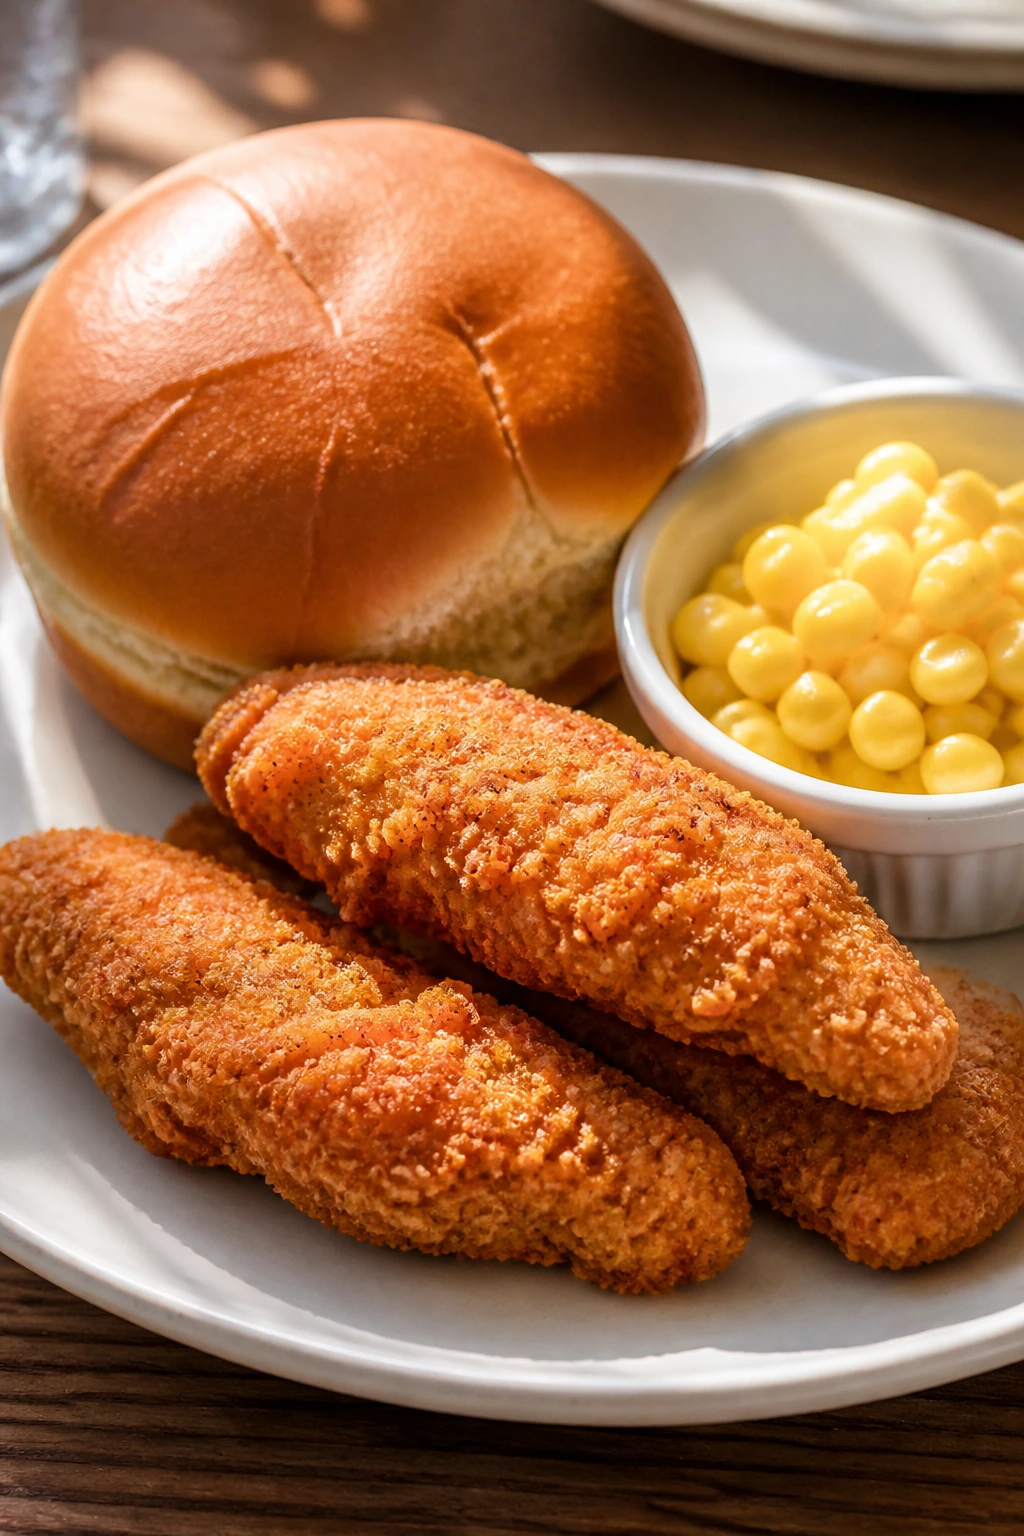
The nicest thing about these meals is not that they are fancy. It is that they remove tension from dinner. When the food is familiar, the textures stay clear, and nobody feels ambushed, picky eaters usually settle down enough to eat like actual people instead of tiny food critics.
A summer table does not need drama. It needs chicken tenders that stay crisp, pasta that stays simple, buns that hold together, and a few cold sides that can sit quietly beside the main dish. Keep the flavor mild, the choices obvious, and the portions manageable, and dinner starts behaving itself.