
A beginner baker learns fast that cookies are less about fancy technique and more about reading small clues: butter that dents under a finger, sugar that turns sandy before it goes fluffy, edges that go pale gold before the middle loses its shine. Classic cookies for beginner bakers are worth making because they teach those clues without punishing mistakes. If the dough is a little warm, you get a flatter cookie. If the flour lands a spoonful short, you usually still get something good enough to put on a plate.
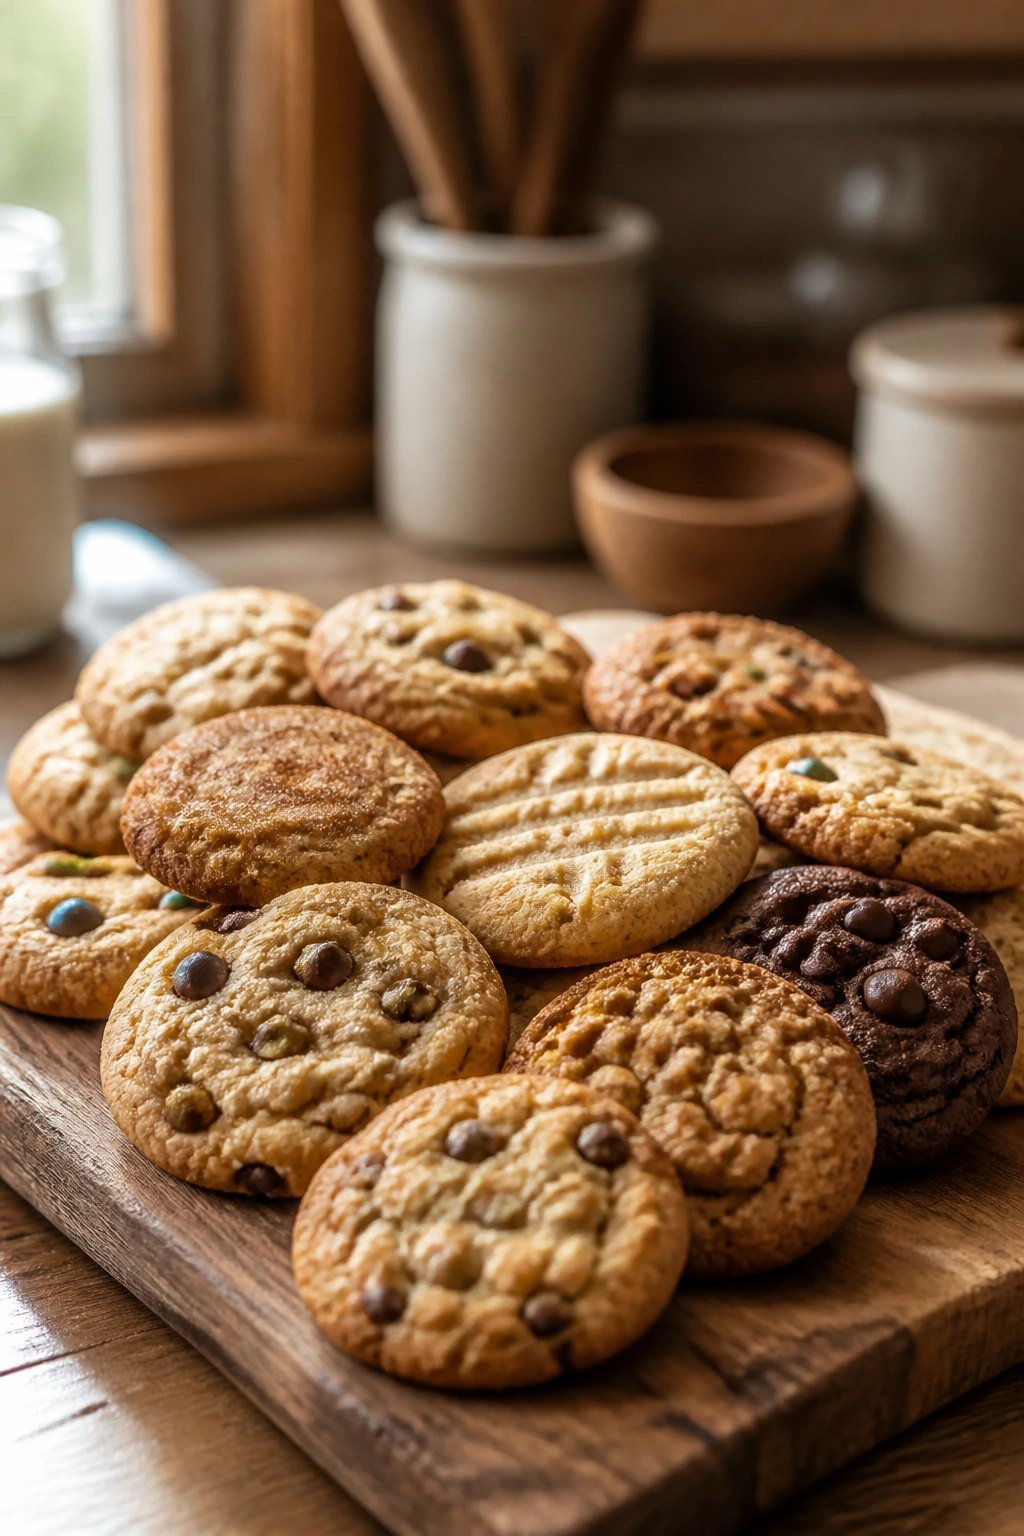
A tray of chocolate chip cookies tells you more about an oven than a hundred neat little internet tips ever will. So does a pan of snickerdoodles, where the crackly cinnamon-sugar top shows exactly when they’re done. These cookies stayed around for a reason. They are built on ordinary ingredients, ordinary tools, and ordinary kitchen habits that actually matter.
What makes this set useful is the mix. Some doughs are dropped by the spoonful, some are rolled into balls, some are sliced from a log, and a few ask for a little extra shaping or finishing. That range is the whole point. By the time you’ve made your way through a few of them, you stop guessing and start noticing what butter, sugar, flour, and time are doing in the bowl.
Why These Cookies Earn a Spot in a Beginner Kitchen
- Forgiving doughs: Most of these recipes tolerate a slightly soft butter or a flour scoop that wasn’t perfect, which matters when you’re still learning the feel of a dough.
- Pantry-first ingredients: Flour, sugar, butter, eggs, oats, peanut butter, cocoa, and jam cover a lot of ground here, so you’re not hunting for specialty items.
- Clear visual cues: Golden edges, cracked tops, and set centers tell you when to pull the tray, which is a lot better than staring at the timer and hoping.
- Skill building without stress: You’ll practice scooping, rolling, chilling, pressing, sandwiching, glazing, and decorating in small, manageable steps.
- Easy to share or freeze: A plate of cookies disappears fast, and the leftover dough or baked cookies can usually be frozen without much fuss.
- Enough variety to keep baking interesting: You can stay inside the same basic cookie lane and still get chocolate, citrus, spice, nuts, oats, jam, and melt-in-your-mouth shortbread.
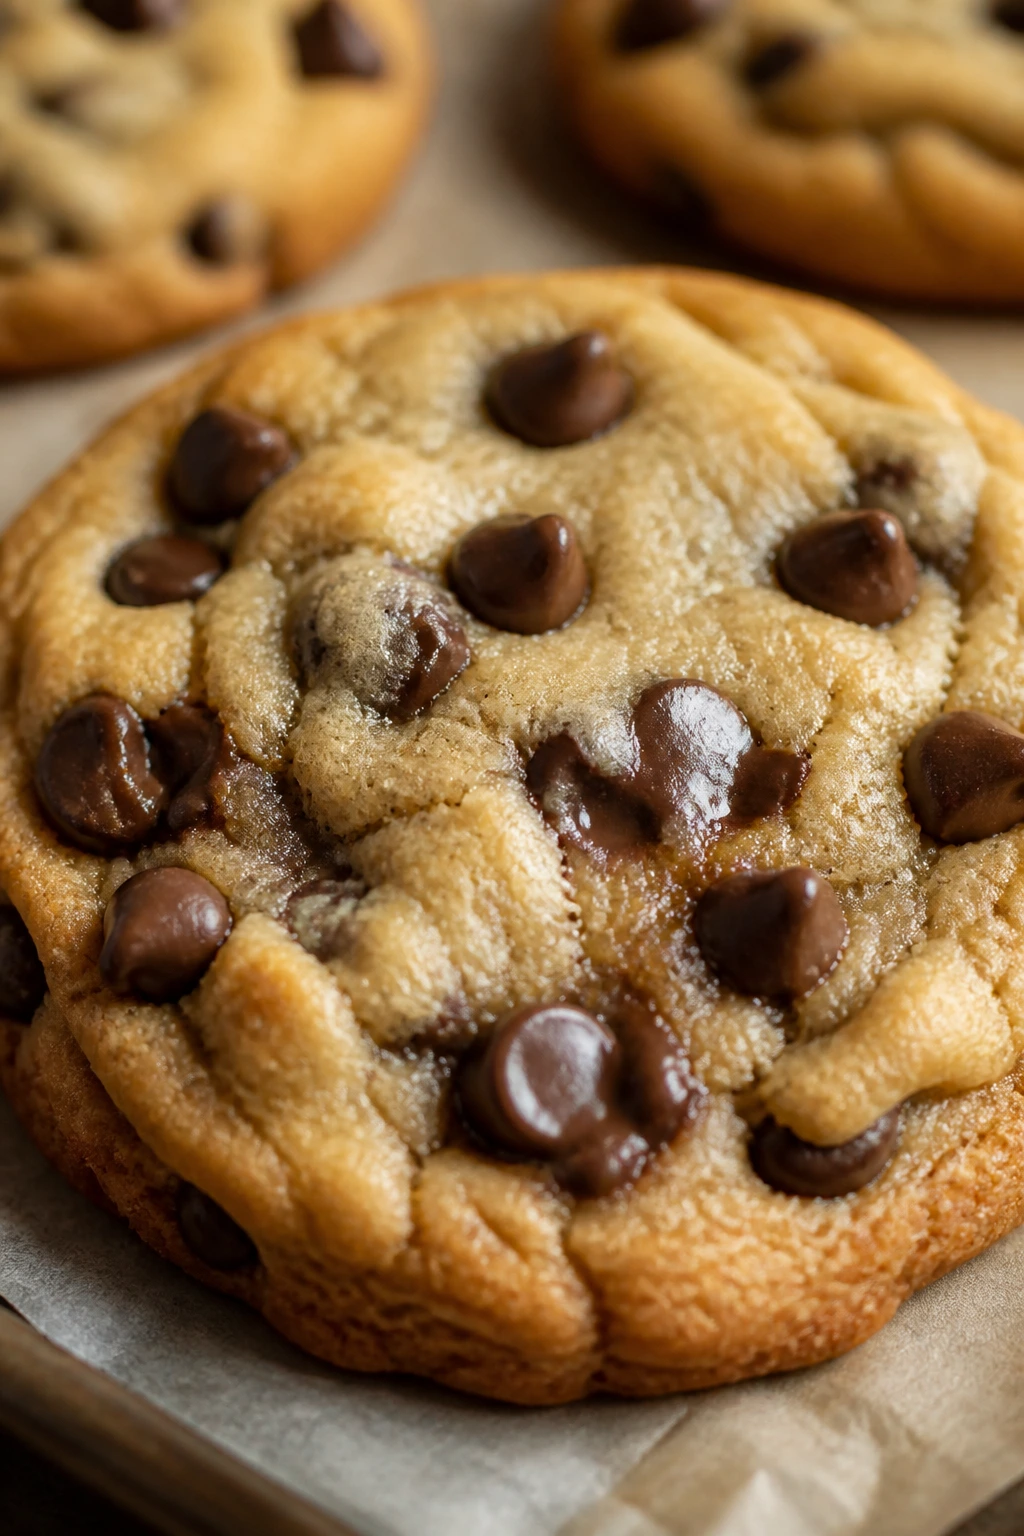
1. Chocolate Chip Cookies
Warm chocolate chip cookies smell like browned butter and vanilla within minutes of leaving the oven. The centers stay soft, the edges go a little crisp, and the chips melt into glossy pockets that make the whole tray look better than it has any right to.
Why It Works:
Brown sugar brings chew, granulated sugar helps spread, and a short bake at 375°F gives you those caramelized edges without drying the middle. This is the cookie that teaches timing. Pull them when the centers still look slightly underdone.
Key Ingredients:
- 1 cup unsalted butter, softened
- 3/4 cup packed brown sugar
- 3/4 cup granulated sugar
- 2 large eggs
- 2 teaspoons vanilla extract
- 2 1/4 cups all-purpose flour
- 1 teaspoon baking soda
- 1 teaspoon fine salt
- 2 cups semisweet chocolate chips
Quick Steps:
- Preheat the oven to 375°F (190°C) and line two baking sheets with parchment paper.
- Cream the butter and both sugars for 2 to 3 minutes until light and fluffy.
- Beat in the eggs and vanilla, then mix in the flour, baking soda, and salt until the dough just comes together.
- Fold in the chocolate chips.
- Scoop 2-tablespoon mounds onto the trays and bake for 9 to 11 minutes, until the edges are golden and the centers still look soft.
Equipment for This Recipe:
- Stand mixer or hand mixer
- Two parchment-lined baking sheets
- 2-tablespoon cookie scoop
How to Serve This Dish:
Stack them on a plate while they’re still a little warm and serve with cold milk or vanilla ice cream. One cookie is enough for a small snack; two is the amount people remember.
Pro Tips for This Recipe:
- Let the butter soften, not melt. Melted butter makes a flatter, greasier cookie.
- Chill the scooped dough for 20 minutes if your kitchen runs warm.
- Save a handful of chips to press on top before baking.
Variations on This Dish:
- Walnut Crunch: Add 3/4 cup toasted walnuts for more texture.
- Sea Salt Finish: Sprinkle flaky salt on the hot cookies the second they leave the oven.
Common Mistakes to Avoid with This Dish:
- Overbaking: If the centers look fully done in the oven, they’ll come out dry.
- Packing the flour: A heavy cup of flour makes the cookies thick and dull.
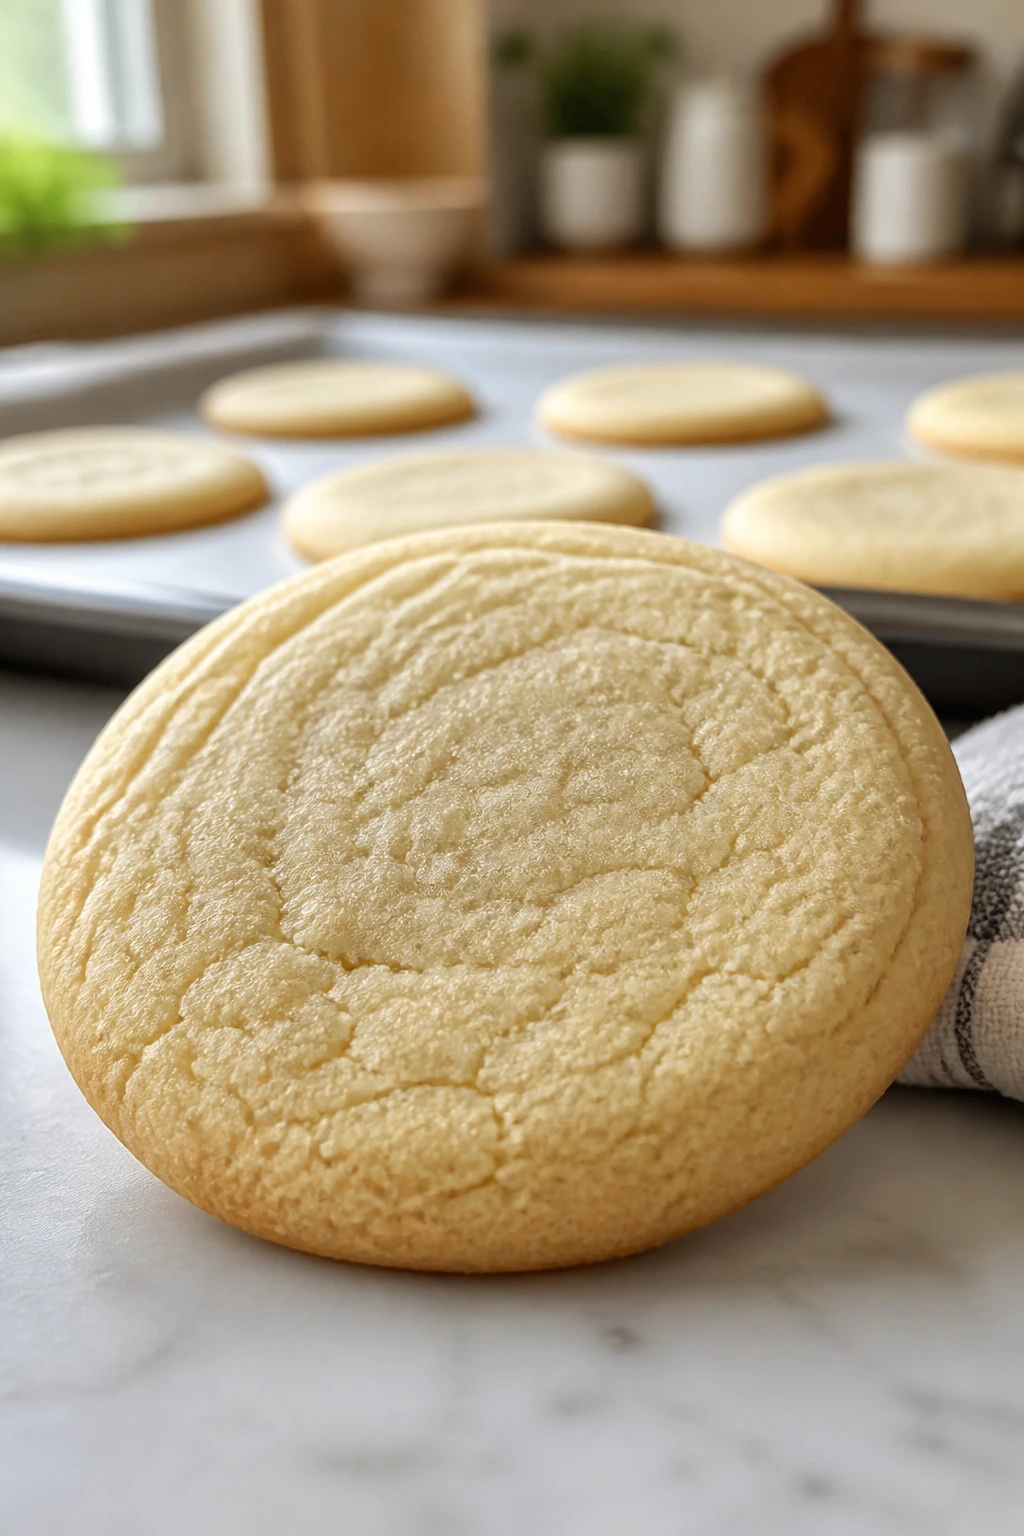
2. Sugar Cookies
Sugar cookies have a plain look and a better personality than people expect. Done right, they bake up pale-gold at the edges with a tender middle and a clean vanilla finish that lets sprinkles, sanding sugar, or frosting do the talking.
Why It Works:
This dough is simple enough to show you how creaming works without turning fussy. A modest amount of baking powder gives lift, while the butter keeps the crumb soft instead of dry and sandy.
Key Ingredients:
- 1 cup unsalted butter, softened
- 1 cup granulated sugar
- 1 large egg
- 2 teaspoons vanilla extract
- 2 3/4 cups all-purpose flour
- 1 teaspoon baking powder
- 1/2 teaspoon fine salt
Quick Steps:
- Heat the oven to 350°F (175°C) and line baking sheets with parchment.
- Beat the butter and sugar until the mixture looks pale and a little fluffy.
- Add the egg and vanilla, then mix in the flour, baking powder, and salt until a soft dough forms.
- Scoop or roll into 1 1/2-inch balls, flatten slightly, and bake for 10 to 12 minutes.
Equipment for This Recipe:
- Mixing bowl
- Hand mixer
- Parchment-lined sheet pan
How to Serve This Dish:
Serve them plain with coffee or frost them with a thin vanilla glaze and a scatter of colored sugar. They also stack neatly for gift tins, which is half their charm.
Pro Tips for This Recipe:
- Chill the dough for 30 minutes if you want cleaner edges.
- Underbake by a minute if you want a softer cookie.
- Roll in sugar before baking for a faint crunch.
Variations on This Dish:
- Lemon Sugar: Add 1 tablespoon lemon zest for a brighter finish.
- Frosted Bakery Style: Top cooled cookies with a simple powdered sugar glaze.
Common Mistakes to Avoid with This Dish:
- Skipping the salt: Without it, the cookies taste flat and one-note.
- Using too much flour on the bench: Extra flour dries the dough and makes the cookies chalky.
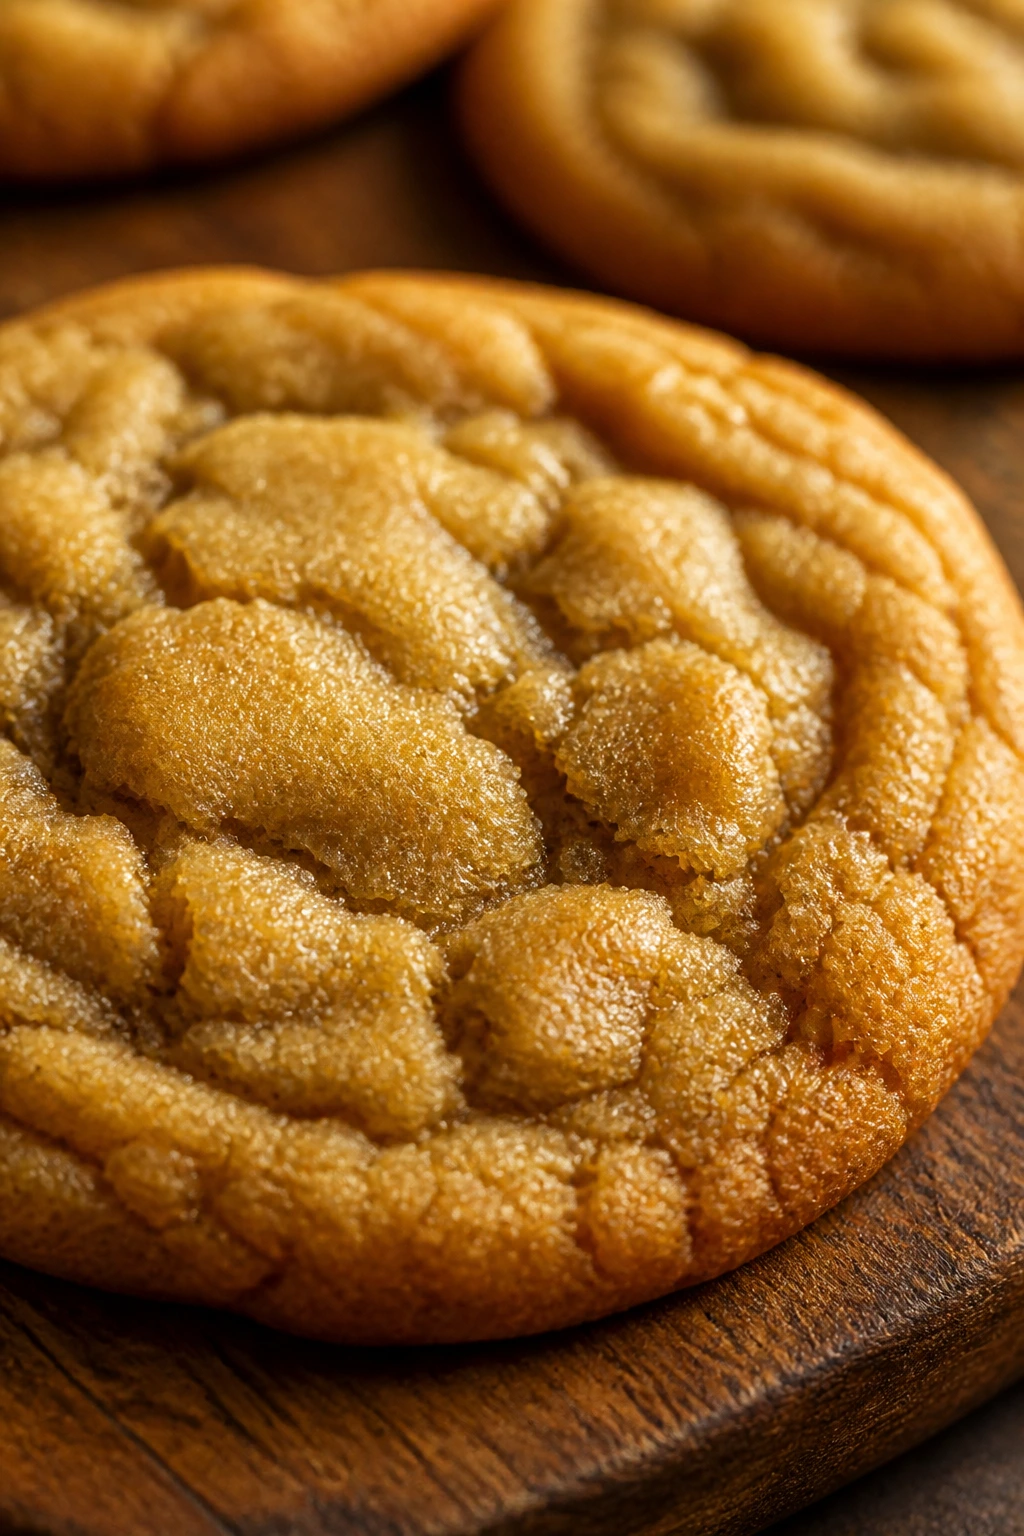
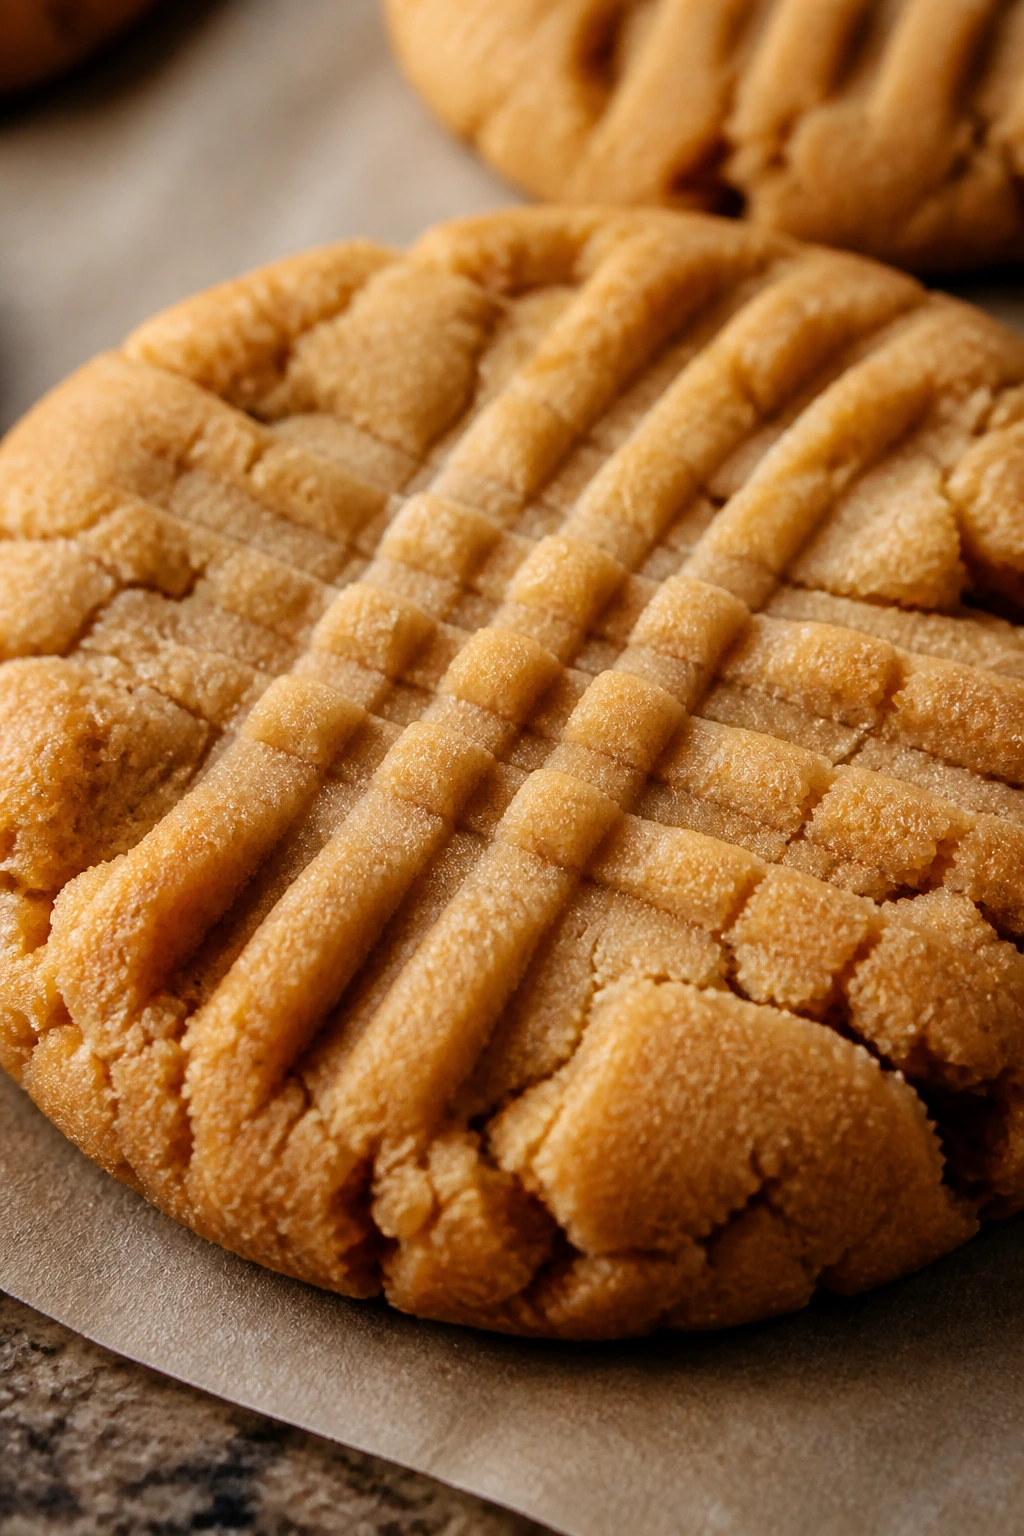
3. Peanut Butter Cookies
These are the cookies with the fork marks, the ones that smell like roasted peanuts and brown sugar before they even hit the oven. They bake dense in the best way, with a sandy, tender bite and a finish that lands somewhere between salty and sweet.
Why It Works:
Peanut butter does a lot of the heavy lifting here; it adds fat, flavor, and structure. The fork pattern isn’t decorative fluff. It helps the thick dough bake more evenly.
Key Ingredients:
- 1/2 cup unsalted butter, softened
- 1 cup creamy peanut butter
- 1 cup packed brown sugar
- 1/2 cup granulated sugar
- 1 large egg
- 1 teaspoon vanilla extract
- 1 1/4 cups all-purpose flour
- 1 teaspoon baking soda
- 1/2 teaspoon fine salt
Quick Steps:
- Preheat the oven to 350°F (175°C) and line a baking sheet with parchment.
- Cream the butter, peanut butter, and sugars until smooth.
- Beat in the egg and vanilla, then mix in the flour, baking soda, and salt.
- Roll into 1 1/2-inch balls, press with a fork in a crosshatch pattern, and bake for 10 to 12 minutes until the tops look set.
Equipment for This Recipe:
- Mixing bowl
- Fork for crisscross pattern
- Baking sheet
How to Serve This Dish:
These are excellent with a glass of milk or tucked between two scoops of vanilla ice cream. They also work well crumbled over yogurt if you like a little peanut-butter dessert chaos.
Pro Tips for This Recipe:
- Use regular peanut butter, not the natural kind that separates into oil and solids.
- Let the cookies rest on the tray for 5 minutes; they’re fragile when hot.
- A pinch of flaky salt on top sharpens the flavor.
Variations on This Dish:
- Chocolate Swirl: Add 1/4 cup cocoa to half the dough and marble it.
- Chunky Version: Swap creamy peanut butter for chunky and skip the fork marks if the dough tears.
Common Mistakes to Avoid with This Dish:
- Overmixing after the flour goes in: That makes them tough and dry.
- Baking until brown: Peanut butter cookies should stay pale with just a little color on the edges.
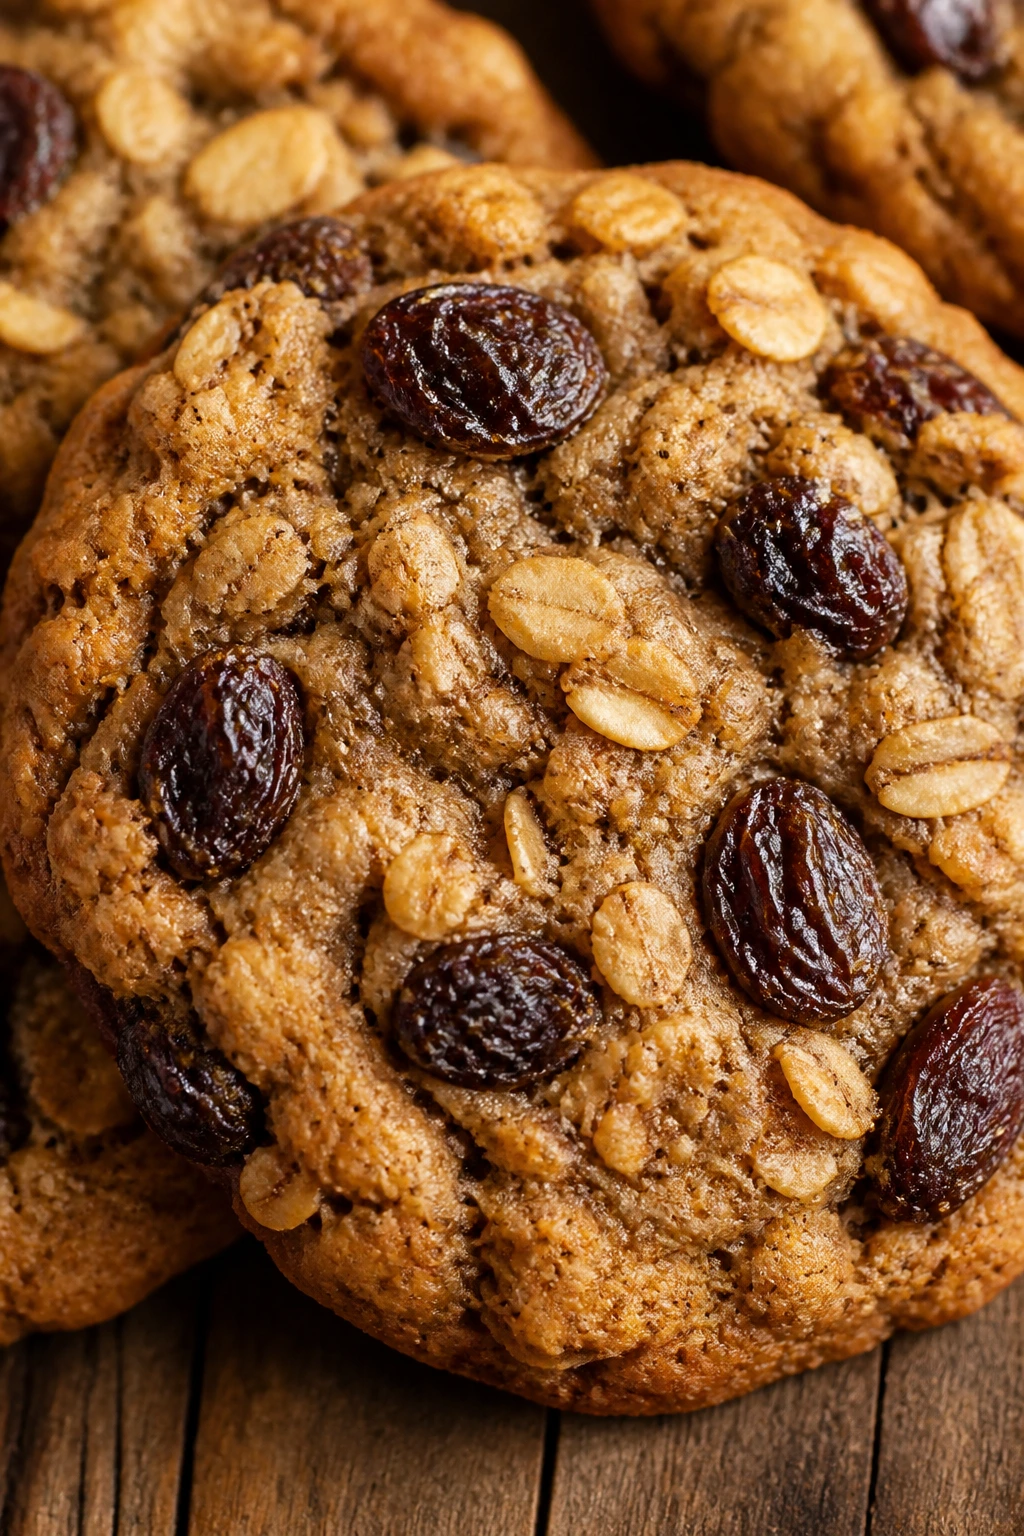
4. Oatmeal Raisin Cookies
Oatmeal raisin cookies have a chewy center, a little cinnamon warmth, and those plumped-up raisins that turn almost jammy in the oven. They’re old-school in the best sense. Nothing shiny, nothing fussy, just a cookie that eats like breakfast’s better cousin.
Why It Works:
Oats bring chew and body, while brown sugar keeps the crumb soft. The raisins soak up a bit of moisture from the dough and give the cookie little bursts of sweetness.
Key Ingredients:
- 1 cup unsalted butter, softened
- 1 cup packed brown sugar
- 1/2 cup granulated sugar
- 2 large eggs
- 1 teaspoon vanilla extract
- 1 1/2 cups all-purpose flour
- 1 teaspoon ground cinnamon
- 1 teaspoon baking soda
- 1/2 teaspoon fine salt
- 3 cups old-fashioned oats
- 1 cup raisins
Quick Steps:
- Heat the oven to 350°F (175°C) and line baking sheets with parchment.
- Cream the butter and sugars until smooth, then beat in the eggs and vanilla.
- Mix in the flour, cinnamon, baking soda, and salt, then stir in the oats and raisins.
- Scoop 2-tablespoon portions and bake for 10 to 12 minutes until the edges look set and the centers still feel soft.
Equipment for This Recipe:
- Large bowl
- Cookie scoop
- Parchment-lined sheet pans
How to Serve This Dish:
Serve warm with tea or pack them into lunch boxes once fully cool. They’re sturdy enough to travel, which is part of why they keep showing up in real kitchens.
Pro Tips for This Recipe:
- Soak the raisins in warm water for 10 minutes, then drain for plumper bites.
- Don’t use quick oats if you want the classic chewy texture.
- Pull them before the middles look fully set; they keep cooking on the tray.
Variations on This Dish:
- Cranberry Oatmeal: Swap raisins for dried cranberries and add orange zest.
- Chocolate Oatmeal: Replace half the raisins with chocolate chips.
Common Mistakes to Avoid with This Dish:
- Using instant oats: The texture gets mushy and flat.
- Skipping the cinnamon: The cookie tastes unfinished without it.
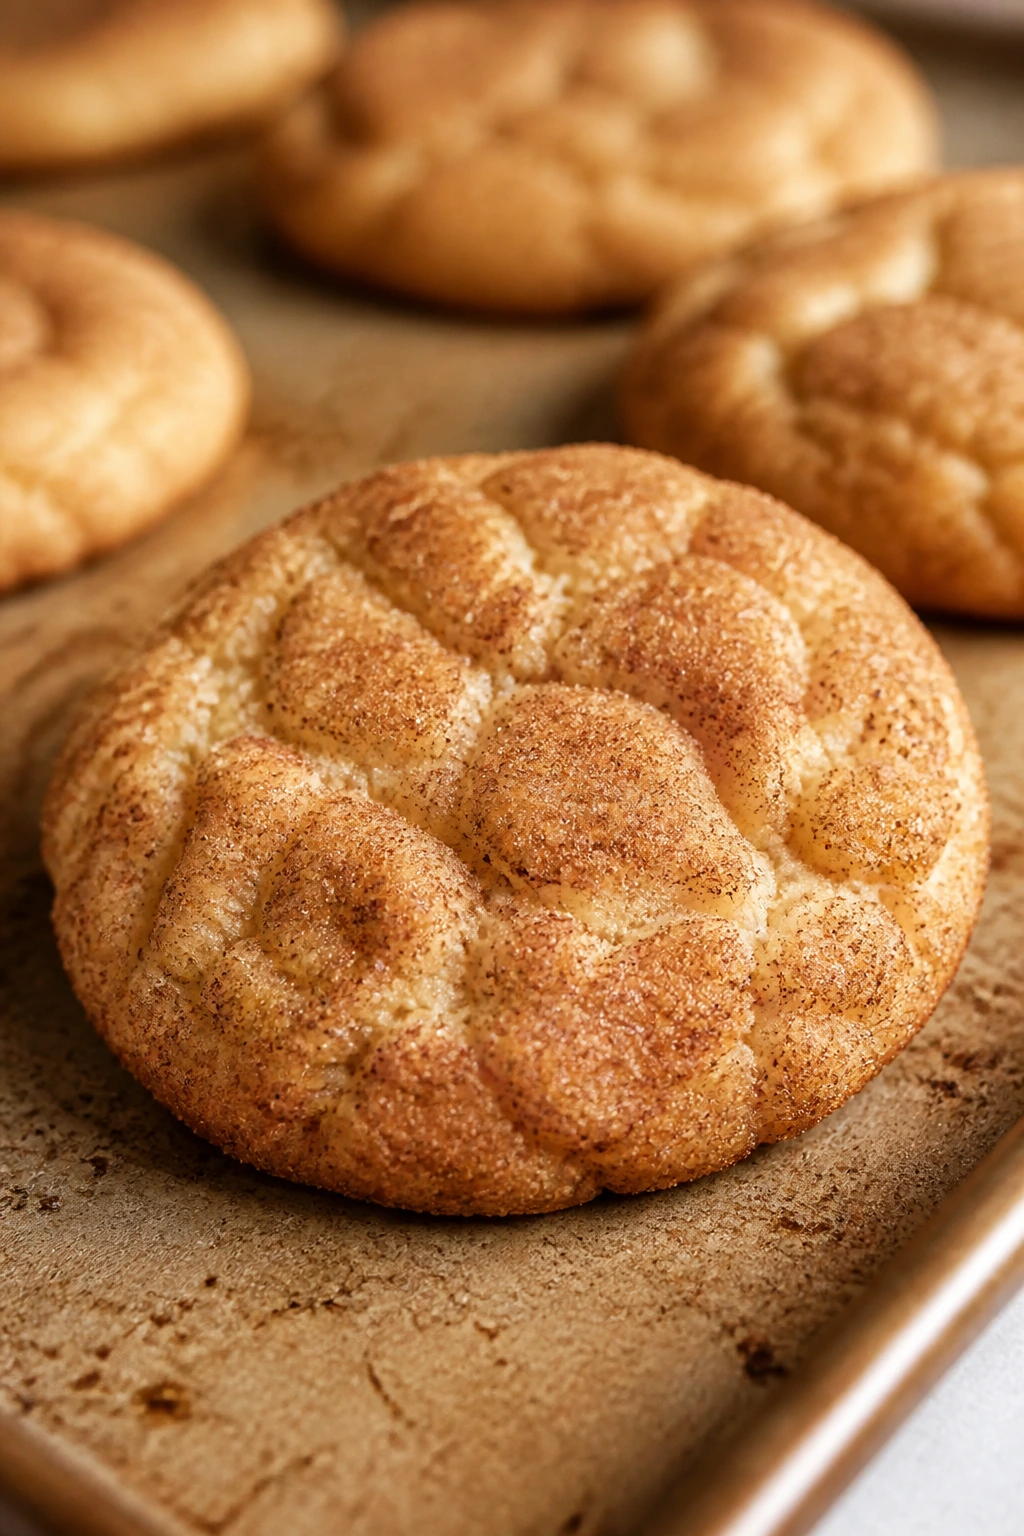
5. Snickerdoodles
Snickerdoodles are the cookies that crackle on top and stay soft underneath. The cinnamon-sugar coating bakes into a thin, sweet shell, and the tang from cream of tartar gives them that classic flavor people either grew up with or never knew they were missing.
Why It Works:
Cream of tartar is the whole trick. It keeps the crumb tender, adds a gentle tang, and helps the cookie puff and crack instead of spreading into a plain sugar round.
Key Ingredients:
- 1 cup unsalted butter, softened
- 1 1/2 cups granulated sugar
- 2 large eggs
- 2 3/4 cups all-purpose flour
- 2 teaspoons cream of tartar
- 1 teaspoon baking soda
- 1/2 teaspoon fine salt
- 1/4 cup granulated sugar, for rolling
- 1 tablespoon ground cinnamon, for rolling
Quick Steps:
- Preheat the oven to 375°F (190°C) and line sheet pans with parchment.
- Cream the butter and sugar, then beat in the eggs.
- Mix in the flour, cream of tartar, baking soda, and salt until the dough comes together.
- Roll into balls, coat in cinnamon sugar, and bake for 8 to 10 minutes until the tops are cracked and the centers are soft.
Equipment for This Recipe:
- Mixing bowl
- Small bowl for cinnamon sugar
- Baking sheets
How to Serve This Dish:
These are good with coffee in the afternoon or milk at night. Serve them while the cinnamon shell is still a little crisp; that texture is the point.
Pro Tips for This Recipe:
- Use a cookie scoop so every ball is the same size.
- Don’t flatten them before baking; the cracks come from the oven heat.
- Double-coat the balls in cinnamon sugar for a thicker shell.
Variations on This Dish:
- Pumpkin Spice Snickerdoodles: Add 1 teaspoon pumpkin pie spice and 1/4 cup pumpkin purée, then chill the dough.
- Brown Butter Snickerdoodles: Brown the butter first for a deeper, nuttier flavor.
Common Mistakes to Avoid with This Dish:
- Skipping cream of tartar: The cookies lose their signature tang and texture.
- Baking too long: They should still be soft in the center when they come out.
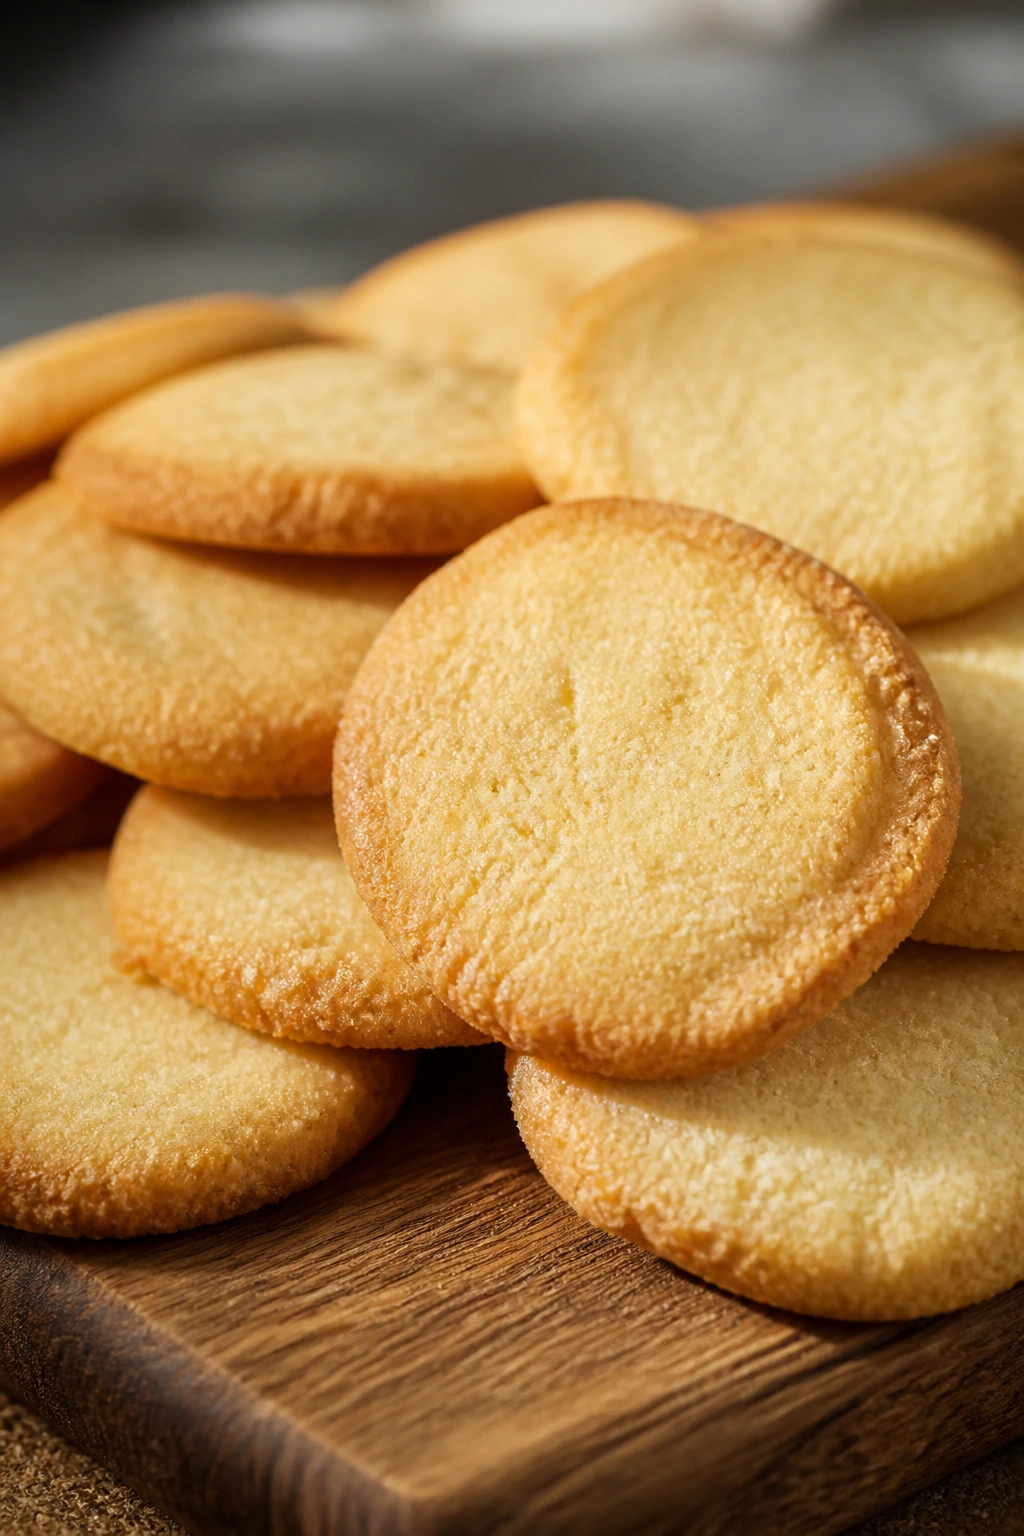
6. Shortbread Cookies
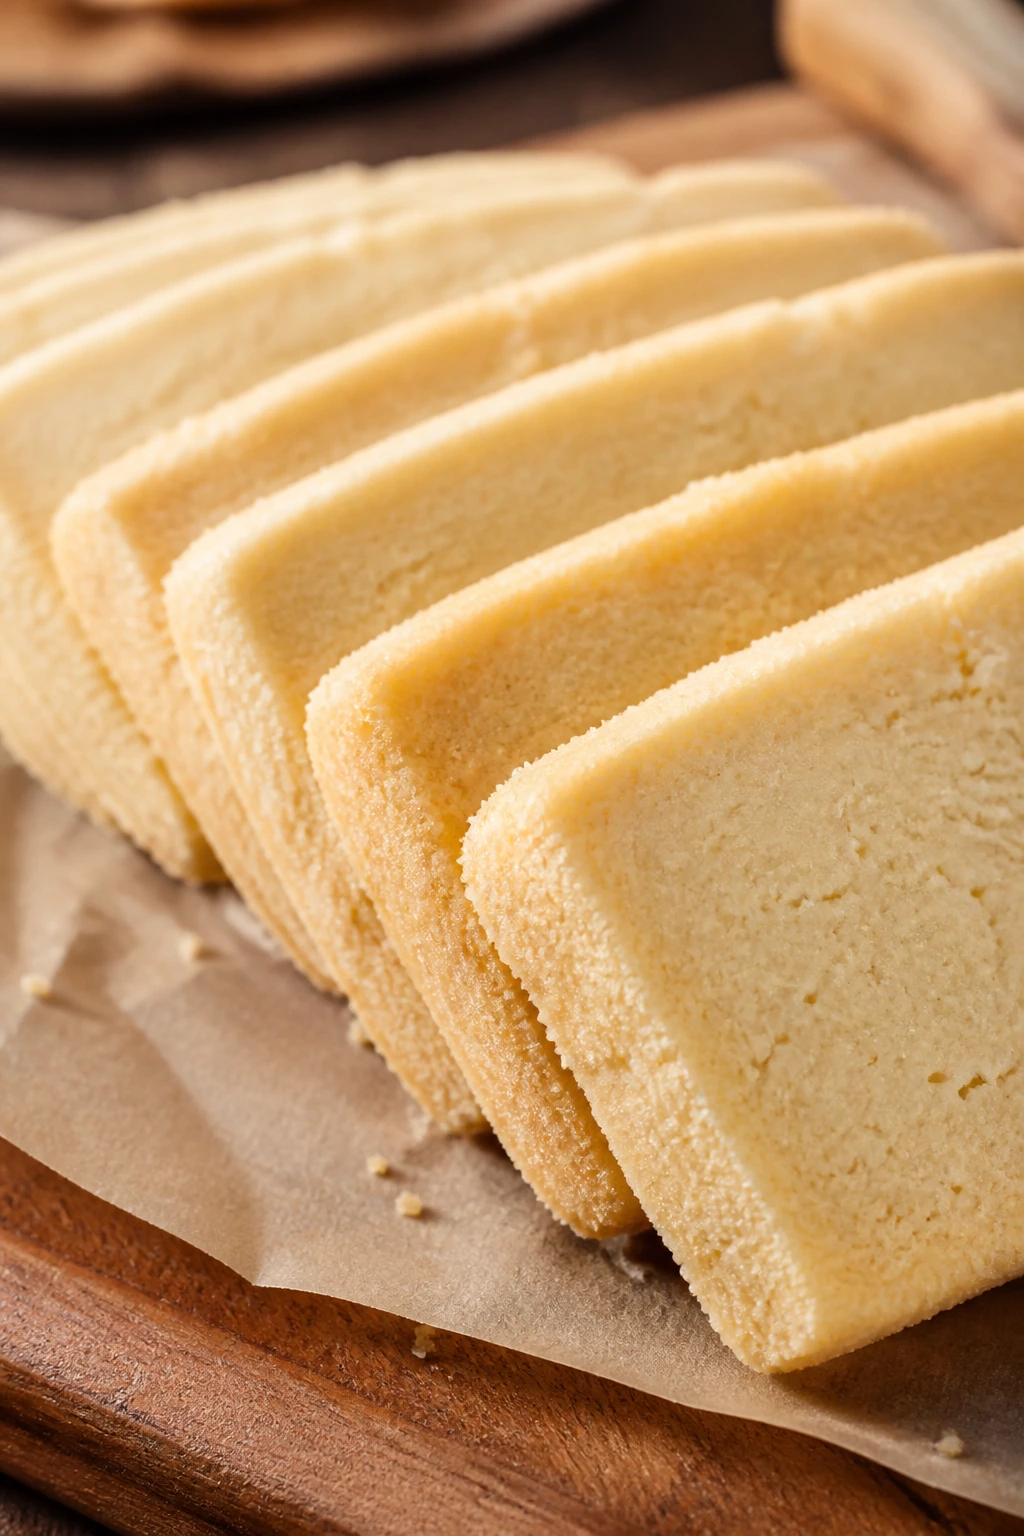
Shortbread is what happens when butter gets to be the main character. The cookie is pale, tender, and crumbly, with a clean finish that doesn’t lean on frosting, chips, or spices to carry the flavor.
Why It Works:
Shortbread uses a very short ingredient list, so technique matters in a quiet way. The low temperature and long bake dry the cookies just enough to keep them crisp at the edges and sandy in the middle.
Key Ingredients:
- 1 cup unsalted butter, softened
- 1/2 cup powdered sugar
- 2 cups all-purpose flour
- 1/4 teaspoon fine salt
- 1 teaspoon vanilla extract, optional
Quick Steps:
- Heat the oven to 325°F (165°C) and line a baking sheet.
- Cream the butter and powdered sugar until smooth, then mix in the vanilla, flour, and salt.
- Press or roll the dough to about 1/2-inch thickness and cut into fingers or rounds.
- Bake for 18 to 22 minutes until the edges are just turning pale gold.
Equipment for This Recipe:
- Mixing bowl
- Rolling pin or your hands
- Sharp knife or cookie cutter
How to Serve This Dish:
Serve shortbread with tea, berries, or a little dark chocolate for dipping. It’s a cookie that likes simple company.
Pro Tips for This Recipe:
- Chill cut shapes for 15 minutes before baking so they hold their edges.
- Bake on the pale side; overbaked shortbread tastes dry and dusty.
- Poke the tops with a fork if you want a traditional look.
Variations on This Dish:
- Lemon Shortbread: Add 1 tablespoon lemon zest.
- Chocolate-Dipped Shortbread: Cool fully, then dip one end in melted chocolate.
Common Mistakes to Avoid with This Dish:
- Overworking the dough: It makes the cookies tough instead of tender.
- Using too much flour during rolling: That dulls the buttery flavor.
7. Molasses Cookies
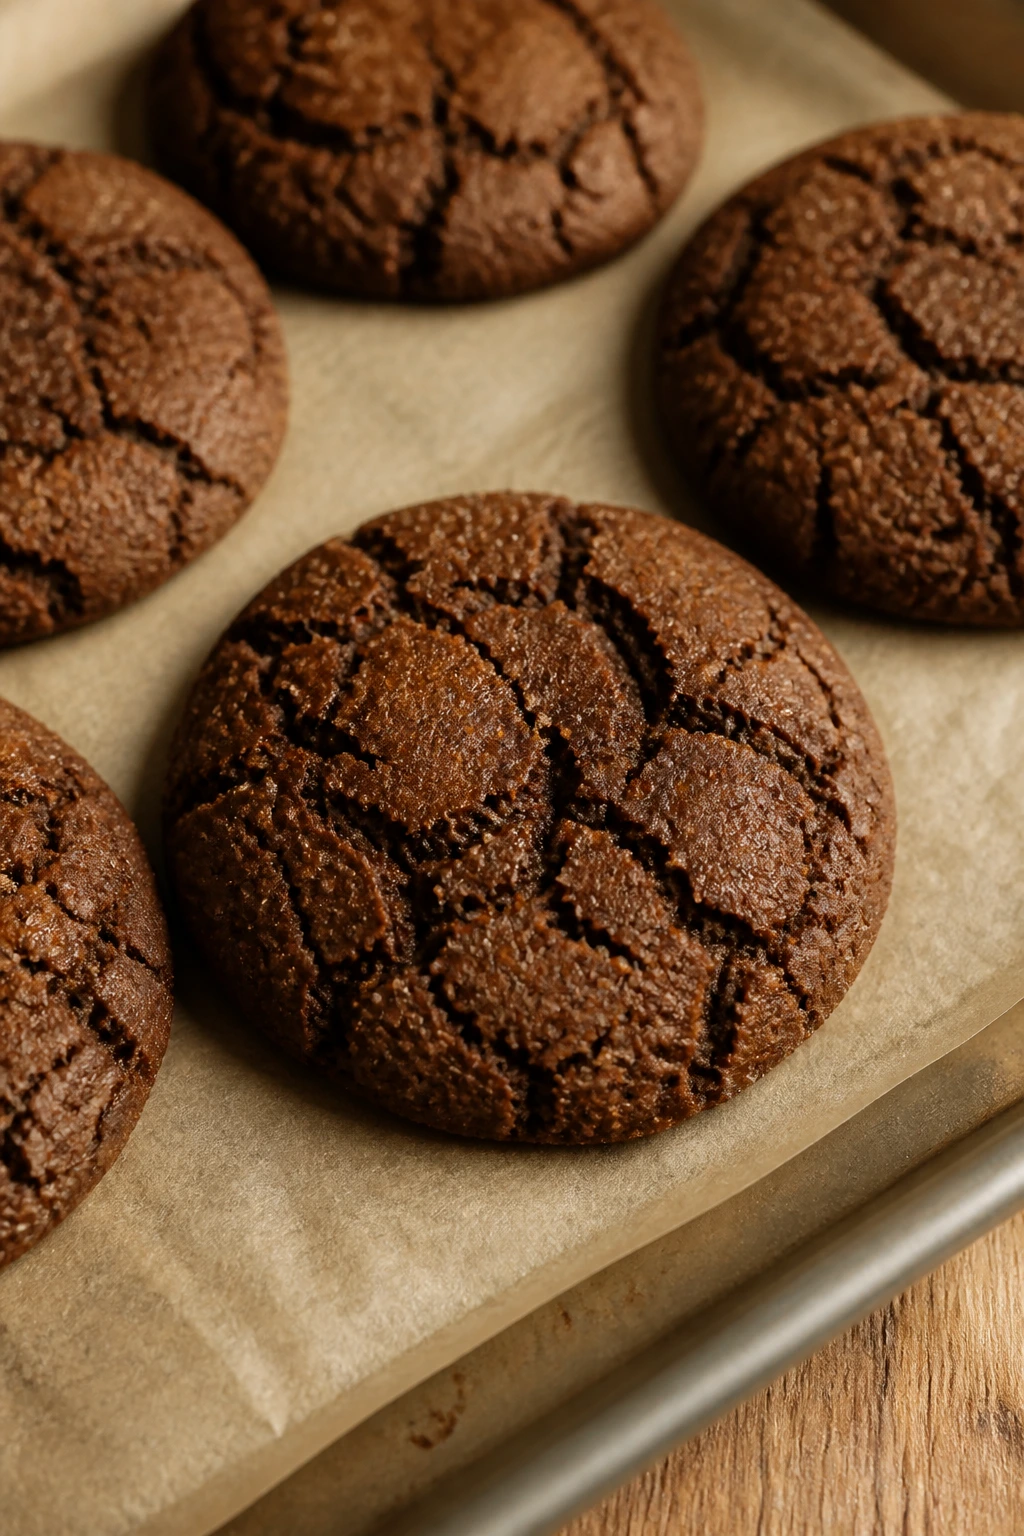
Molasses cookies are deep, dark, and a little spicy, with crackled tops that make them look more complicated than they are. The flavor lands between gingerbread and a chewy spice cake, which is a very good place for a cookie to be.
Why It Works:
Molasses keeps these cookies soft for days and gives them that rich, almost smoky sweetness. Ginger, cinnamon, and cloves build the classic old-fashioned flavor, while baking soda helps the tops crack in the oven.
Key Ingredients:
- 3/4 cup unsalted butter, softened
- 1 cup packed brown sugar
- 1/4 cup molasses
- 1 large egg
- 2 1/4 cups all-purpose flour
- 2 teaspoons ground ginger
- 1 teaspoon ground cinnamon
- 1/2 teaspoon ground cloves
- 1 teaspoon baking soda
- 1/2 teaspoon fine salt
Quick Steps:
- Preheat the oven to 350°F (175°C) and line baking sheets with parchment.
- Cream the butter and brown sugar, then beat in the molasses and egg.
- Mix in the flour, ginger, cinnamon, cloves, baking soda, and salt.
- Roll into balls, coat lightly in sugar if you want extra sparkle, and bake for 10 to 12 minutes.
Equipment for This Recipe:
- Hand mixer
- Measuring spoons
- Baking sheet
How to Serve This Dish:
They’re best with coffee, black tea, or a cold glass of milk. A few cookies on a plate will perfume the whole room with spice.
Pro Tips for This Recipe:
- Use unsulfured molasses for the cleanest flavor.
- Chill the dough for 30 minutes if it feels sticky.
- Pull them when the tops are cracked but the centers still look soft.
Variations on This Dish:
- Orange Spice Molasses: Add 1 tablespoon orange zest.
- Extra Gingery Batch: Add another 1/2 teaspoon ginger for more bite.
Common Mistakes to Avoid with This Dish:
- Using blackstrap molasses unless you mean to: It tastes bitter and heavy.
- Overbaking: These cookies firm up as they cool, so don’t wait for them to look dry.
8. Gingerbread Cookies

Gingerbread cookies can be soft, crisp, or somewhere in between, but the flavor always lands the same way: warm spice, dark molasses, and a smell that makes the kitchen feel busy. Cut them into people, stars, or simple rounds and they still read as gingerbread immediately.
Why It Works:
This dough is sturdy enough for rolling and cutting, which makes it a good early lesson in chilling and shaping. The flour load gives structure, while molasses and butter keep the cookie from tasting dry or flat.
Key Ingredients:
- 3/4 cup unsalted butter, softened
- 3/4 cup packed brown sugar
- 1/2 cup molasses
- 1 large egg
- 3 cups all-purpose flour
- 2 teaspoons ground ginger
- 1 teaspoon ground cinnamon
- 1/2 teaspoon ground cloves
- 1 teaspoon baking soda
- 1/2 teaspoon fine salt
Quick Steps:
- Mix the butter and brown sugar until smooth, then beat in molasses and egg.
- Add the flour, ginger, cinnamon, cloves, baking soda, and salt.
- Chill the dough for 1 hour so it rolls cleanly.
- Roll to 1/4-inch thickness, cut shapes, and bake at 350°F (175°C) for 8 to 10 minutes.
Equipment for This Recipe:
- Rolling pin
- Cookie cutters
- Parchment-lined sheet pans
How to Serve This Dish:
Serve plain, iced, or sandwiched with cream cheese frosting. They also make a good holiday tray cookie because they hold their shape and stack well.
Pro Tips for This Recipe:
- Roll the dough between two sheets of parchment to keep it from sticking.
- Chill cut shapes for 10 minutes before baking if the dough softens.
- Bake smaller cookies a minute less than large ones.
Variations on This Dish:
- Soft Gingerbread People: Pull them early for a bendy, tender cookie.
- Iced Gingersnaps: Roll in sugar and bake a minute longer for more snap.
Common Mistakes to Avoid with This Dish:
- Skipping the chill: Warm dough spreads before it sets.
- Rolling too thin: The cookies turn dry fast if they’re paper-thin.
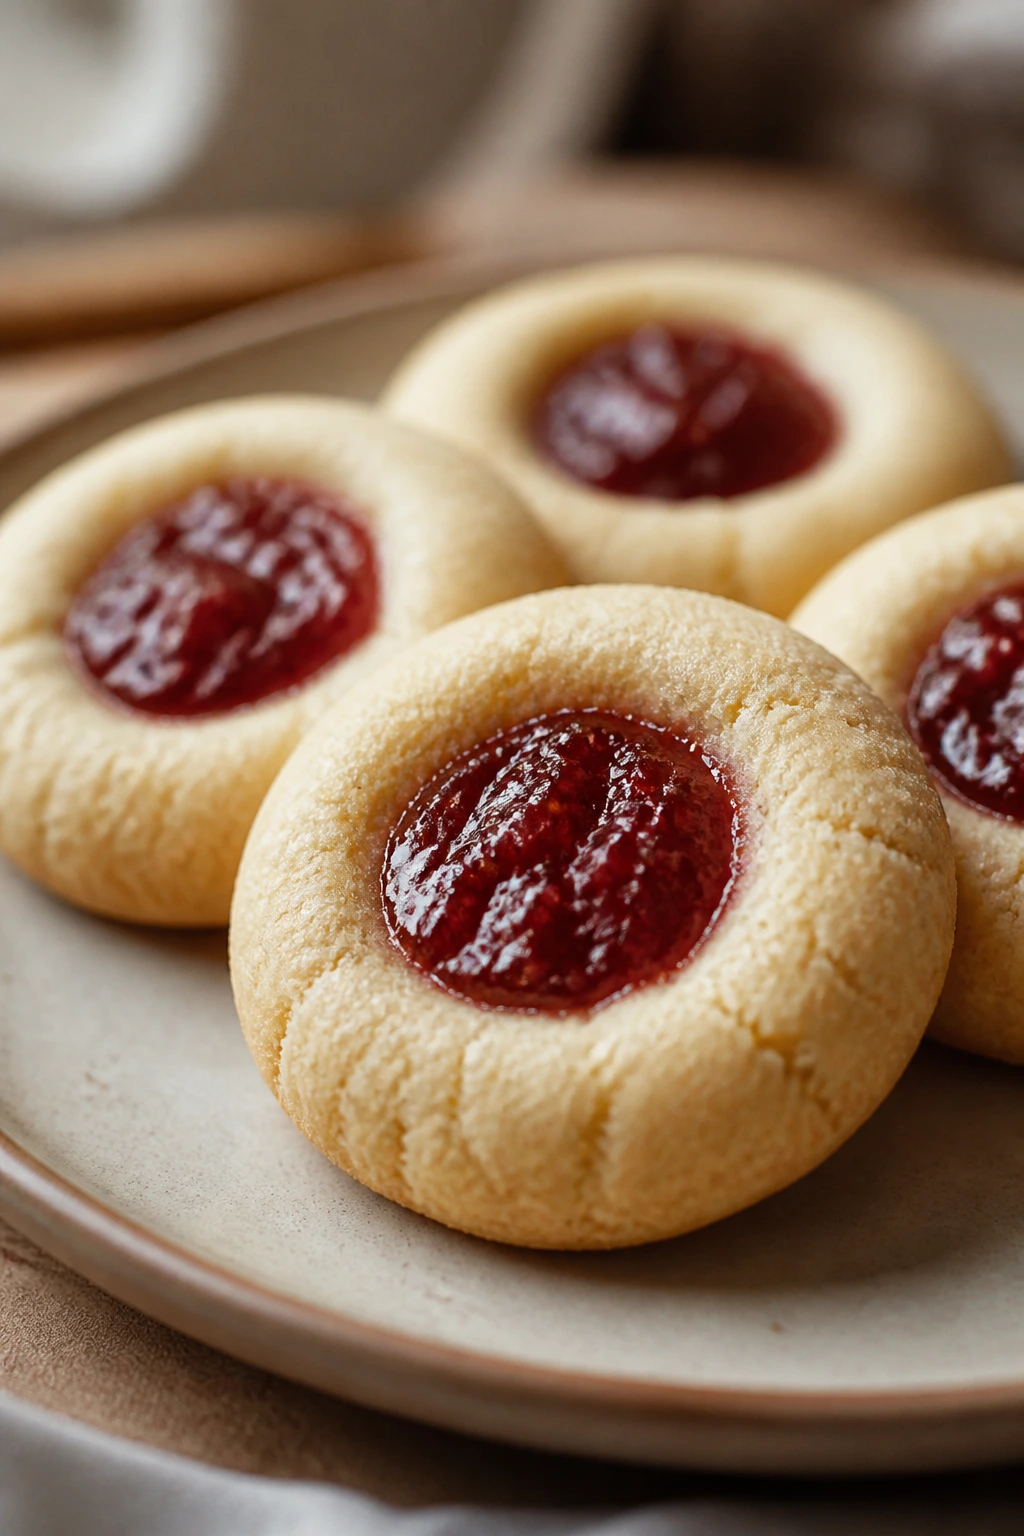
9. Thumbprint Cookies
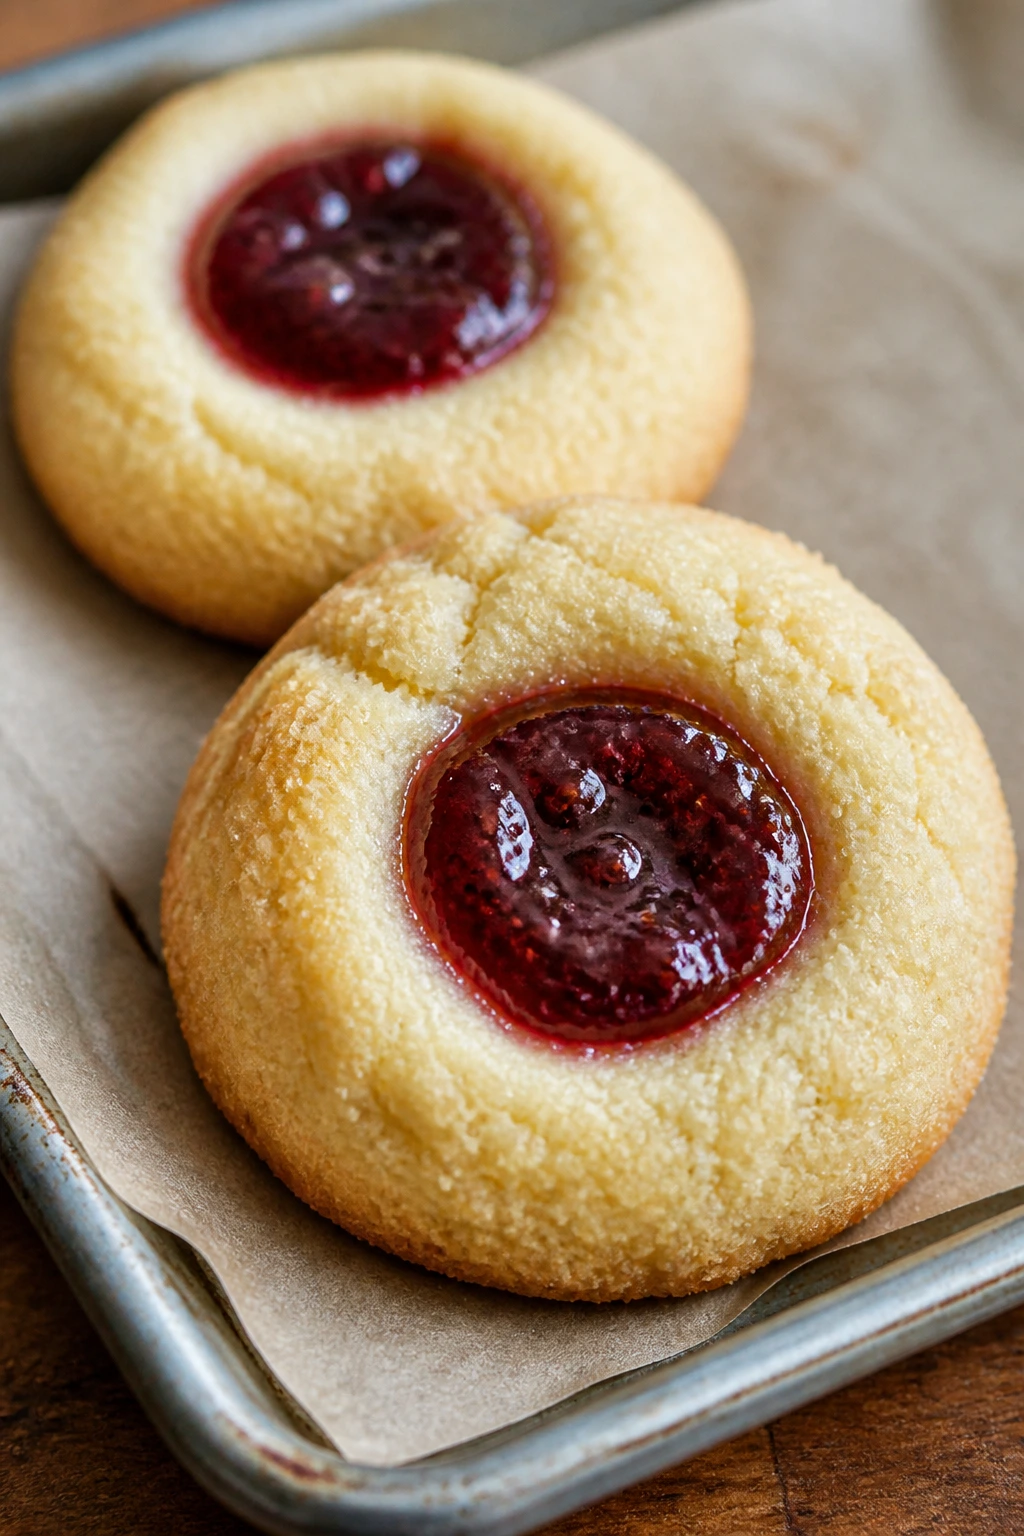
Thumbprint cookies are tiny, buttery rounds with a little jam pool in the middle. They’re the sort of cookie that looks fancier than the effort required, which is useful when you want that effect without a lot of fuss.
Why It Works:
The dough is rich and mild so the jam can shine. Making the thumbprint before baking keeps the center from puffing shut, and a short bake protects the buttery texture.
Key Ingredients:
- 1 cup unsalted butter, softened
- 2/3 cup granulated sugar
- 2 large egg yolks
- 1 teaspoon vanilla extract
- 2 cups all-purpose flour
- 1/4 teaspoon fine salt
- 1/2 cup jam or preserves
Quick Steps:
- Heat the oven to 350°F (175°C) and line baking sheets.
- Cream the butter and sugar, then mix in the egg yolks and vanilla.
- Add the flour and salt, then roll the dough into balls.
- Make a thumbprint in each one, fill with a small spoonful of jam, and bake for 12 to 14 minutes.
Equipment for This Recipe:
- Mixing bowl
- Measuring spoon or your thumb for indenting
- Baking sheet
How to Serve This Dish:
Set them on a platter where the jam is visible. Raspberry, apricot, and strawberry all work, and a mix of colors looks especially good.
Pro Tips for This Recipe:
- If the dough cracks when you press it, warm it for 5 minutes at room temperature.
- Use thick jam so it doesn’t run across the tray.
- Refill any sunken centers right after baking if needed.
Variations on This Dish:
- Citrus Thumbprints: Add lemon zest to the dough and use marmalade.
- Chocolate Thumbprints: Fill the centers with ganache after baking.
Common Mistakes to Avoid with This Dish:
- Overfilling the wells: Too much jam bubbles over and sticks.
- Pressing too hard before baking: You can crush the dough and make the cookies greasy.
10. M&M Cookies
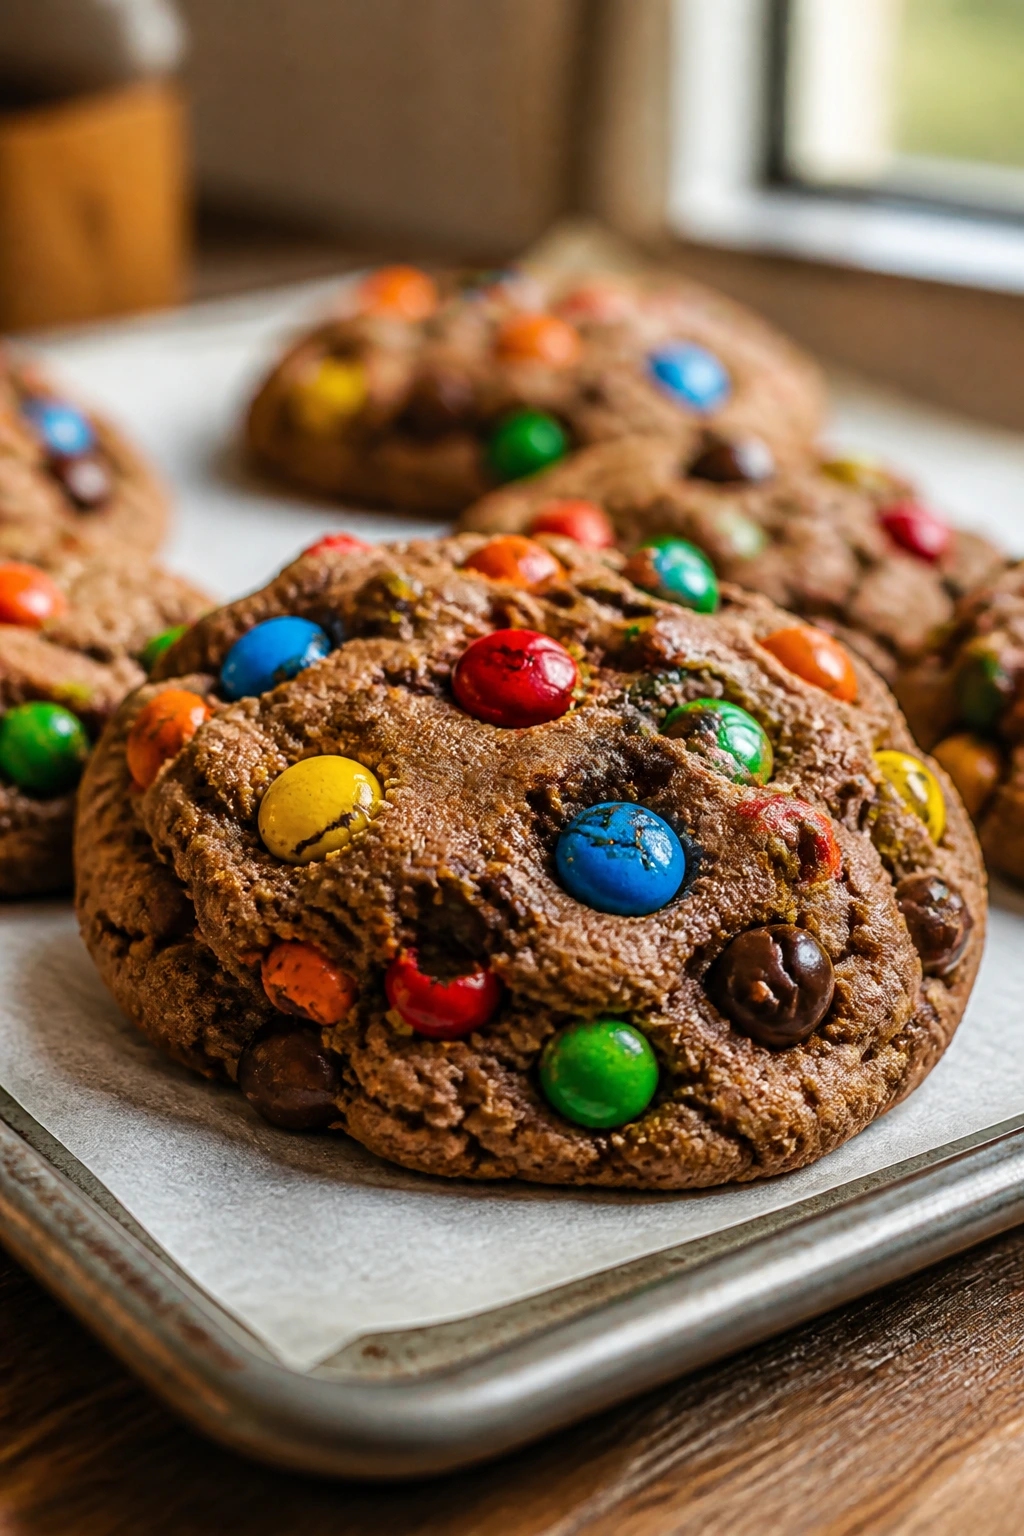
M&M cookies are bright, chewy, and a little nostalgic in the best way. The candy shells hold their color in the oven, so the tray comes out looking cheerful before you even taste one.
Why It Works:
This dough behaves like a classic chocolate chip cookie but gets extra texture from the candy coating. A mix of chips and M&Ms keeps the cookies from becoming too sweet in one note.
Key Ingredients:
- 1 cup unsalted butter, softened
- 3/4 cup brown sugar
- 1/2 cup granulated sugar
- 2 large eggs
- 2 teaspoons vanilla extract
- 2 1/4 cups all-purpose flour
- 1 teaspoon baking soda
- 1/2 teaspoon fine salt
- 1 1/2 cups M&M candies
- 1/2 cup semisweet chocolate chips
Quick Steps:
- Preheat the oven to 350°F (175°C) and line sheet pans.
- Cream the butter and sugars, then beat in the eggs and vanilla.
- Mix in the flour, baking soda, and salt, then fold in the M&Ms and chips.
- Scoop onto the tray and bake for 9 to 11 minutes until the edges are set.
Equipment for This Recipe:
- Mixer
- Cookie scoop
- Parchment paper
How to Serve This Dish:
Pile them in a bowl for parties or wrap them in wax paper for lunchboxes. They’re a little louder than a plain chocolate chip cookie, which is part of their appeal.
Pro Tips for This Recipe:
- Press a few extra M&Ms into the tops before baking.
- Chill for 20 minutes if the dough feels too soft.
- Use the same-size candies for even color distribution.
Variations on This Dish:
- Peanut M&M Batch: Swap in peanut M&Ms and skip the chips.
- Birthday Cake Version: Add 2 tablespoons sprinkles and use vanilla chips.
Common Mistakes to Avoid with This Dish:
- Overbaking until the candy colors dull: Pull them while the centers are still soft.
- Using too many mix-ins: The dough needs enough room to hold together.
11. Double Chocolate Cookies
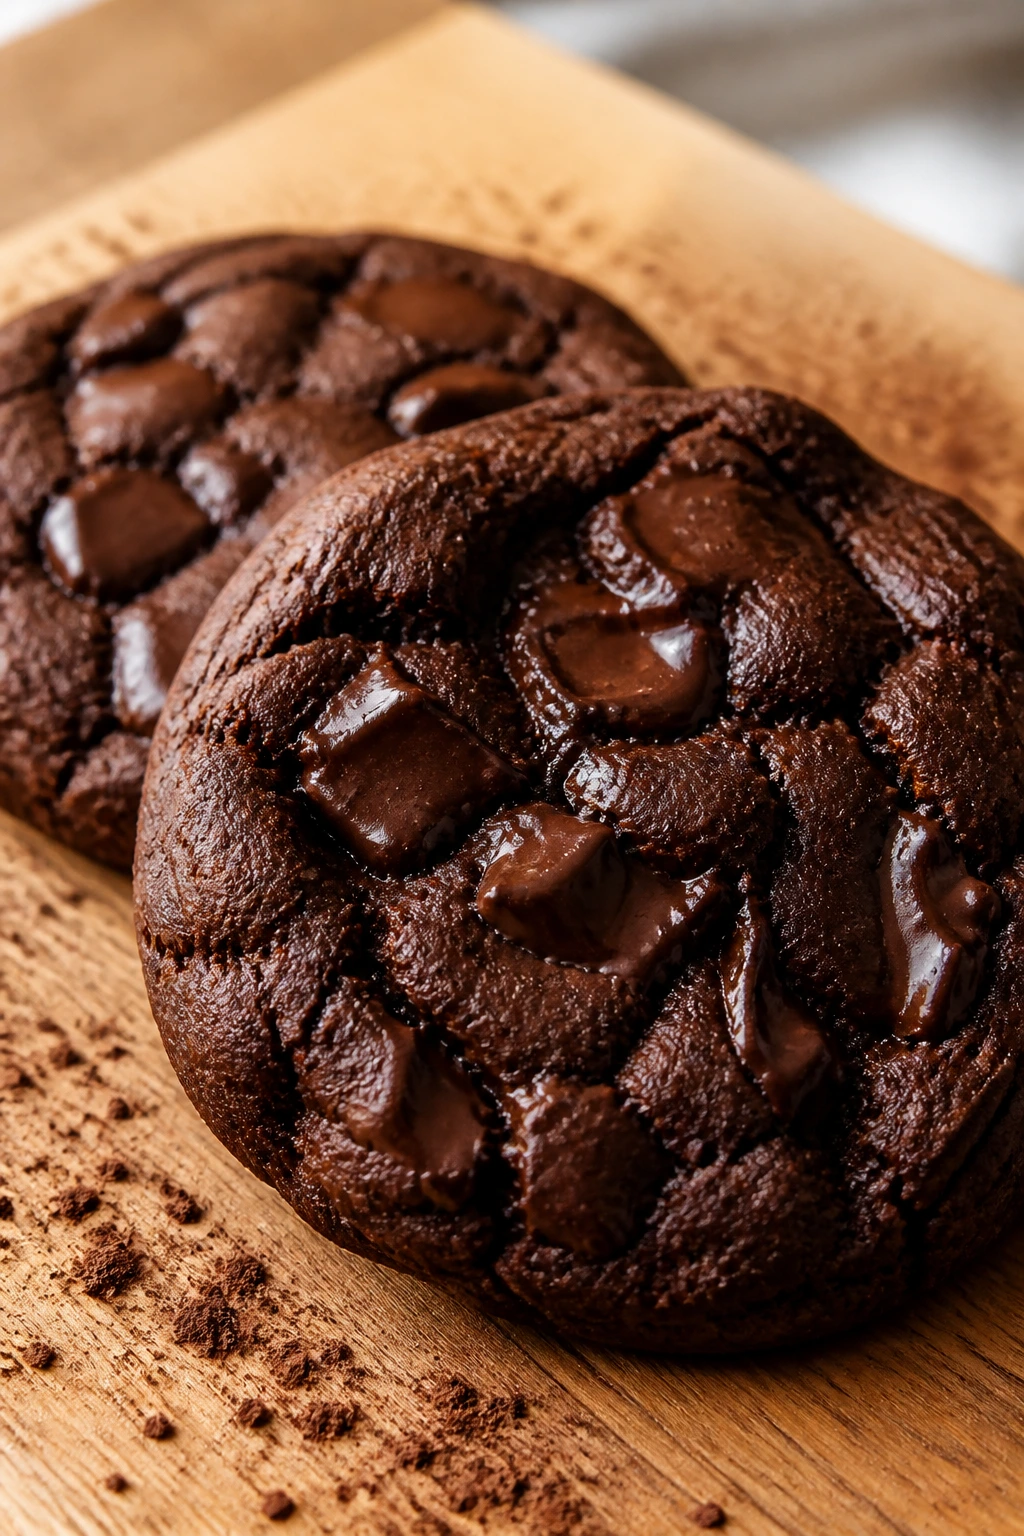
These are for the people who want their cookie to taste like cocoa before anything else. The crumb is soft and rich, the chips melt into dark streaks, and the whole cookie tastes like a brownie that decided to get in shape.
Why It Works:
Cocoa powder gives the dough depth, while the chocolate chips keep the texture from feeling dry. The extra egg helps the cookie stay tender, not crumbly.
Key Ingredients:
- 1 cup unsalted butter, softened
- 1 cup packed brown sugar
- 1/2 cup granulated sugar
- 2 large eggs
- 1 teaspoon vanilla extract
- 1 3/4 cups all-purpose flour
- 1/2 cup unsweetened cocoa powder
- 1 teaspoon baking soda
- 1/2 teaspoon fine salt
- 1 1/2 cups semisweet chocolate chips
Quick Steps:
- Preheat the oven to 350°F (175°C) and line baking sheets.
- Cream the butter and sugars, then beat in the eggs and vanilla.
- Mix in the flour, cocoa, baking soda, and salt until the dough turns dark and even.
- Fold in the chips, scoop, and bake for 10 to 12 minutes.
Equipment for This Recipe:
- Mixing bowl
- Rubber spatula
- Baking sheet
How to Serve This Dish:
Serve with coffee or a cold glass of milk. A dusting of powdered sugar makes the tops look a little more bakery-style.
Pro Tips for This Recipe:
- Sift the cocoa if it’s clumpy.
- Add 1 teaspoon espresso powder if you want the chocolate to taste deeper.
- Cool on the pan for 5 minutes before moving them.
Variations on This Dish:
- White Chocolate Swirl: Swap in white chips for contrast.
- Mint Chocolate Batch: Add 1/4 teaspoon peppermint extract.
Common Mistakes to Avoid with This Dish:
- Packing in too much cocoa: The cookies turn dry and bitter.
- Baking until the tops look fully dry: They should still be a bit soft when removed.
12. Peanut Butter Blossoms
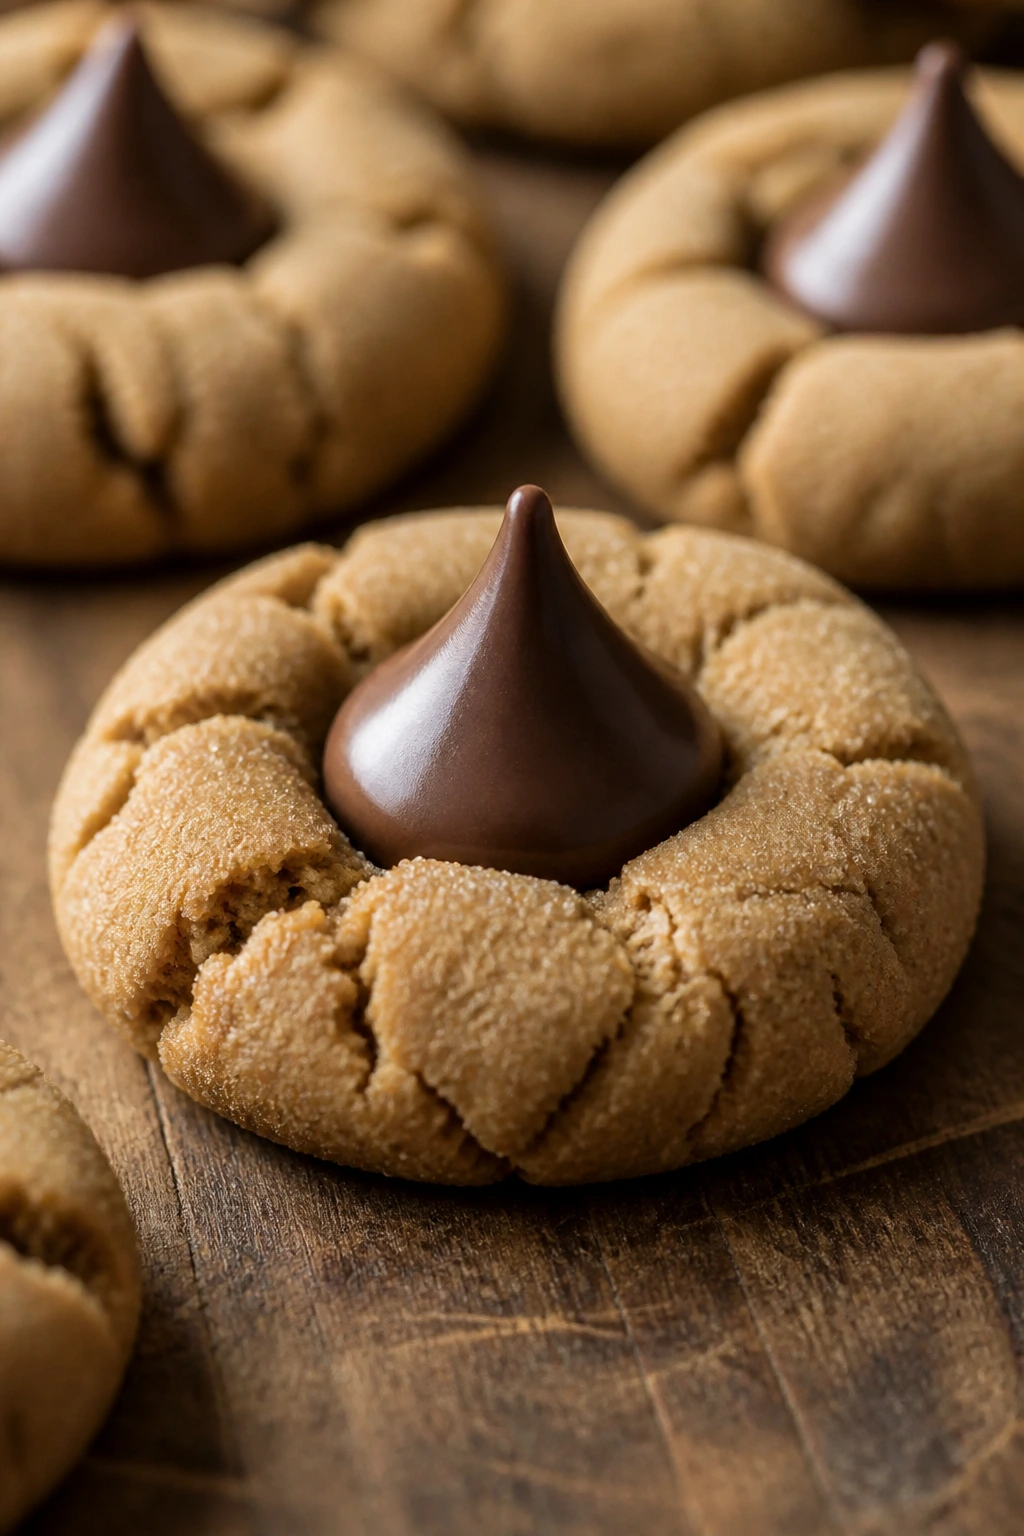
Peanut butter blossoms are a study in contrast: soft, salty cookie underneath, firm chocolate kiss on top. They’re festive without asking for precision piping or decorating skill, which is why they keep showing up at cookie swaps.
Why It Works:
The dough is sturdy enough to support the chocolate kiss after baking. Press the candy in while the cookie is still hot and it melts slightly at the base, which anchors it without turning the whole thing into a puddle.
Key Ingredients:
- 1/2 cup unsalted butter, softened
- 1 cup creamy peanut butter
- 3/4 cup granulated sugar
- 1/4 cup brown sugar
- 1 large egg
- 1 teaspoon vanilla extract
- 1 1/2 cups all-purpose flour
- 1 teaspoon baking soda
- 1/2 teaspoon fine salt
- 24 chocolate kisses, unwrapped
Quick Steps:
- Heat the oven to 350°F (175°C) and line a sheet pan.
- Cream the butter, peanut butter, and sugars, then mix in the egg and vanilla.
- Add the flour, baking soda, and salt, then roll into balls.
- Bake for 10 to 12 minutes, press a kiss into each cookie immediately, and cool on the tray.
Equipment for This Recipe:
- Mixing bowl
- Baking sheet
- Cooling rack
How to Serve This Dish:
These belong on a mixed cookie platter because the chocolate tops make them easy to spot. Serve at room temperature so the kisses stay firm but not hard.
Pro Tips for This Recipe:
- Unwrap the kisses before baking starts; you won’t want to do it later.
- Freeze the kisses for 10 minutes so they keep their shape when pressed in.
- Roll the dough in sugar for a little sparkle.
Variations on This Dish:
- Dark Chocolate Blossoms: Use dark chocolate kisses for a less sweet finish.
- Pretzel Crush: Roll the dough balls in crushed pretzels before baking.
Common Mistakes to Avoid with This Dish:
- Waiting too long to add the kisses: The cookies set fast and the candy won’t sink in.
- Using crunchy peanut butter if the dough feels crumbly: Creamy is easier for first-timers.
13. Spritz Cookies
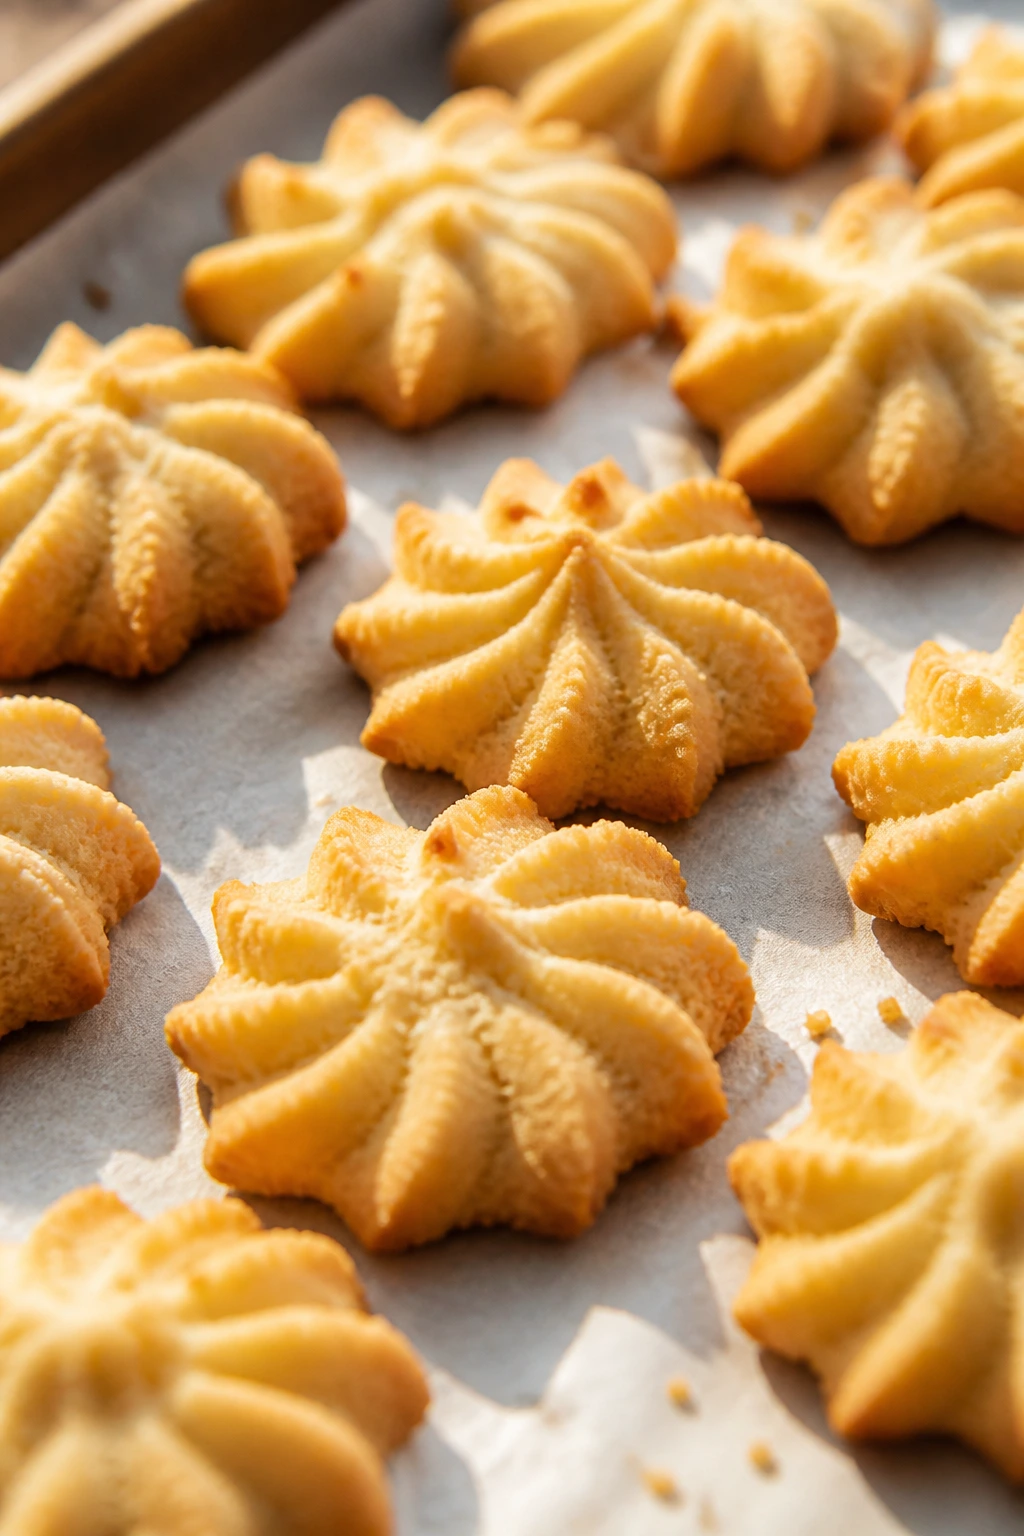
Spritz cookies are the press-and-bake cookies that come out in little ridges and wreaths if you’ve got a cookie press and a steady hand. They’re buttery, light, and a bit delicate, with a crisp edge that melts fast on the tongue.
Why It Works:
The dough is soft enough to pass through a press but firm enough to hold shape in the oven. That balance is the whole game. Too warm and it won’t release cleanly; too cold and the press clogs.
Key Ingredients:
- 1 cup unsalted butter, softened
- 3/4 cup granulated sugar
- 1 large egg
- 1 teaspoon vanilla extract
- 1/4 teaspoon almond extract, optional
- 2 1/4 cups all-purpose flour
- 1/4 teaspoon fine salt
Quick Steps:
- Preheat the oven to 375°F (190°C) and leave the sheet pan ungreased.
- Cream the butter and sugar, then beat in the egg and extracts.
- Mix in the flour and salt until the dough is smooth but not sticky.
- Press shapes directly onto the cool sheet pan and bake for 6 to 8 minutes.
Equipment for This Recipe:
- Cookie press
- Unlined or parchment-lined baking sheet, depending on your press
- Cooling rack
How to Serve This Dish:
Spritz cookies look especially good on a holiday plate with a few colored sprinkles on the raw dough. They’re bite-sized, so people tend to take more than they planned.
Pro Tips for This Recipe:
- Use a cool baking sheet; a warm tray makes the shapes slouch.
- If the dough won’t release from the press, chill it for 10 minutes.
- Don’t grease the pan unless your press says it needs it.
Variations on This Dish:
- Citrus Spritz: Add 1 tablespoon orange zest.
- Chocolate Spritz: Add 2 tablespoons cocoa and reduce the flour by 2 tablespoons.
Common Mistakes to Avoid with This Dish:
- Using a sticky dough: Press cookies need the right firmness or they collapse.
- Moving them too soon after baking: Let them sit for a minute so they set.
14. Mexican Wedding Cookies
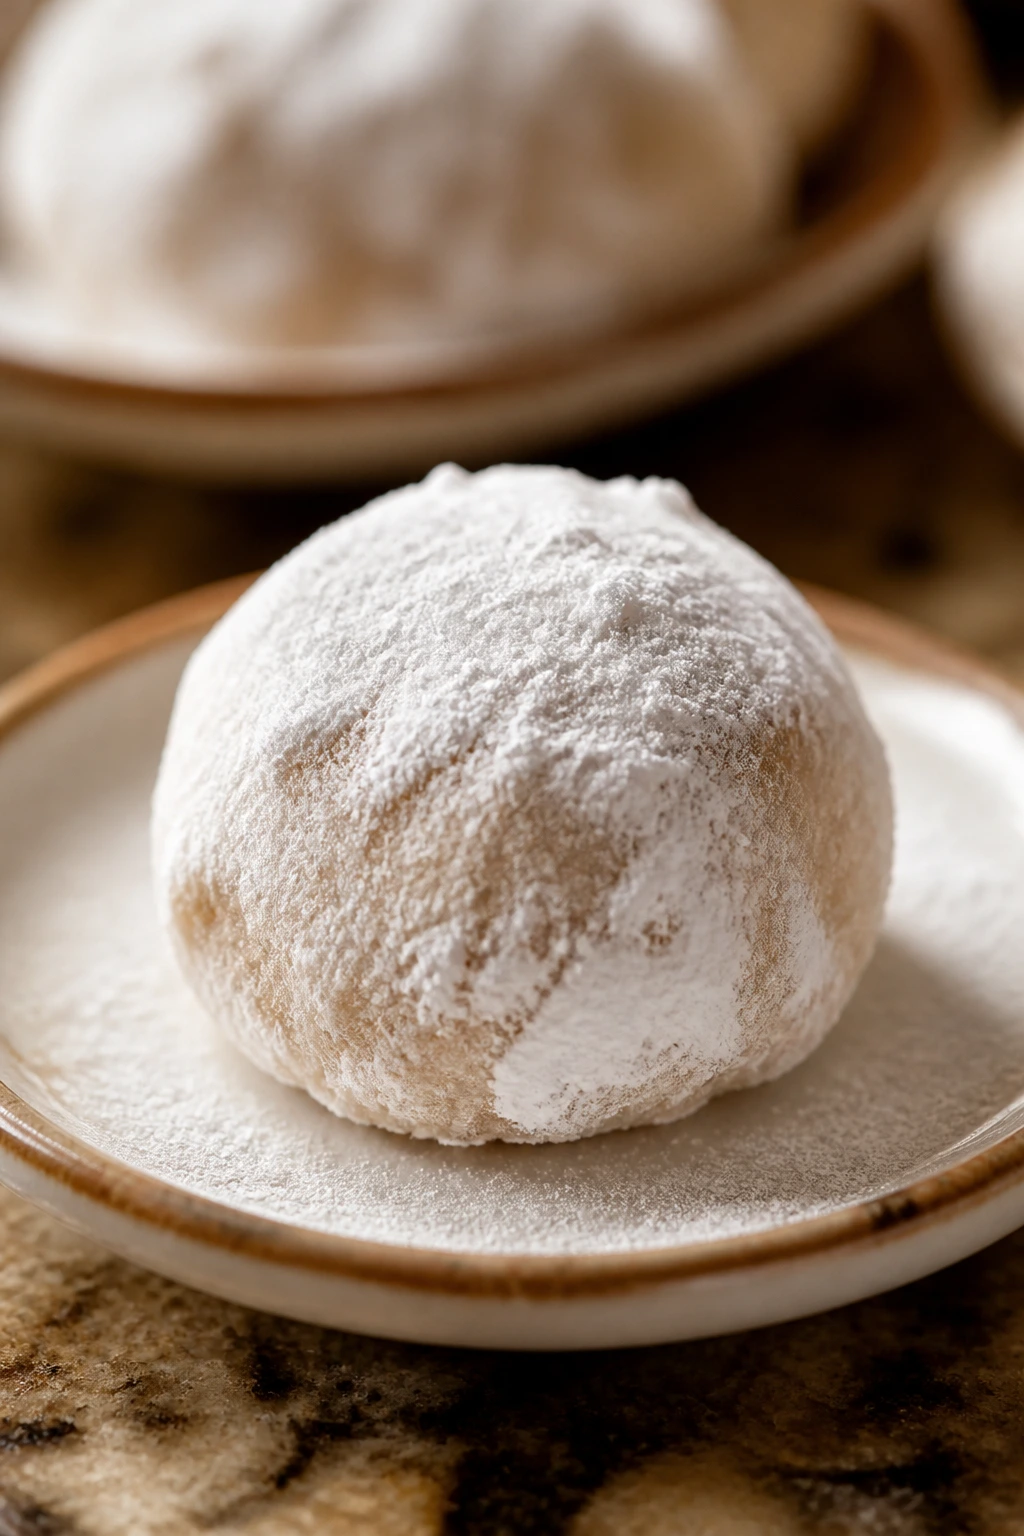
These little snowball cookies are crumbly, nutty, and covered in powdered sugar, which makes them look like someone dusted the tray with snow. They’re rich enough that one or two feels satisfying, and they keep their shape beautifully.
Why It Works:
Butter and finely chopped nuts make the cookie tender and sandy in a good way. The powdered sugar coating goes on twice, which gives the outside a soft, sweet shell.
Key Ingredients:
- 1 cup unsalted butter, softened
- 1/2 cup powdered sugar
- 2 teaspoons vanilla extract
- 2 1/4 cups all-purpose flour
- 1 cup finely chopped pecans or walnuts
- 1/4 teaspoon fine salt
- 1 cup powdered sugar, for rolling
Quick Steps:
- Preheat the oven to 350°F (175°C) and line a baking sheet.
- Cream the butter and powdered sugar, then mix in the vanilla.
- Stir in the flour, nuts, and salt until the dough holds together.
- Roll into balls, bake for 14 to 16 minutes, then roll the warm cookies in powdered sugar twice.
Equipment for This Recipe:
- Mixing bowl
- Cookie scoop
- Shallow bowl for powdered sugar
How to Serve This Dish:
Serve them with coffee after dinner or set them in mini paper cups for a pretty tray. They crumble a little when bitten, so napkins are wise.
Pro Tips for This Recipe:
- Chop the nuts finely so the dough rolls cleanly.
- Roll the cookies in sugar while warm, then again when cool.
- Don’t overbrown them; color is not the goal here.
Variations on This Dish:
- Almond Snowballs: Swap pecans for almonds and add almond extract.
- Coconut Snowballs: Replace half the nuts with finely shredded coconut.
Common Mistakes to Avoid with This Dish:
- Rolling in sugar only once: The second coat gives them their classic look.
- Using coarse nut pieces: They make the cookies crack as you roll them.
15. Jam Drop Cookies
Jam drop cookies are the close cousin of thumbprints, only a little softer and less fussy about the center. They’re buttery, mildly sweet, and best when the jam bakes into a glossy little pocket instead of running all over the sheet.
Why It Works:
A soft dough keeps the cookie tender, while a brief second press after baking keeps the jam center visible. This is a good beginner lesson in timing and restraint.
Key Ingredients:
- 1 cup unsalted butter, softened
- 3/4 cup granulated sugar
- 1 large egg
- 1 teaspoon vanilla extract
- 2 1/2 cups all-purpose flour
- 1 teaspoon baking powder
- 1/4 teaspoon fine salt
- 1/2 cup thick jam or preserves
Quick Steps:
- Preheat the oven to 350°F (175°C) and line baking sheets.
- Cream the butter and sugar, then beat in the egg and vanilla.
- Mix in the flour, baking powder, and salt until a soft dough forms.
- Roll into balls, make a small dent, bake for 12 to 14 minutes, then add jam to the center while the cookies are still warm.
Equipment for This Recipe:
- Mixing bowl
- Small spoon for jam
- Baking sheet
How to Serve This Dish:
These look nicest on a flat platter where the jam can be seen from above. Apricot and raspberry are the usual winners because they hold color and don’t turn watery.
Pro Tips for This Recipe:
- Use thick jam, not jelly.
- If the centers puff up, press them again right after baking.
- Let them cool fully before stacking.
Variations on This Dish:
- Apricot Almond: Add 1/2 teaspoon almond extract to the dough.
- Berry-Lemon Drop: Use lemon zest in the dough and raspberry jam in the center.
Common Mistakes to Avoid with This Dish:
- Adding too much jam before baking: It bubbles out and burns.
- Not re-pressing the center if it rises: The jam has nowhere to sit.
16. Lemon Crinkle Cookies
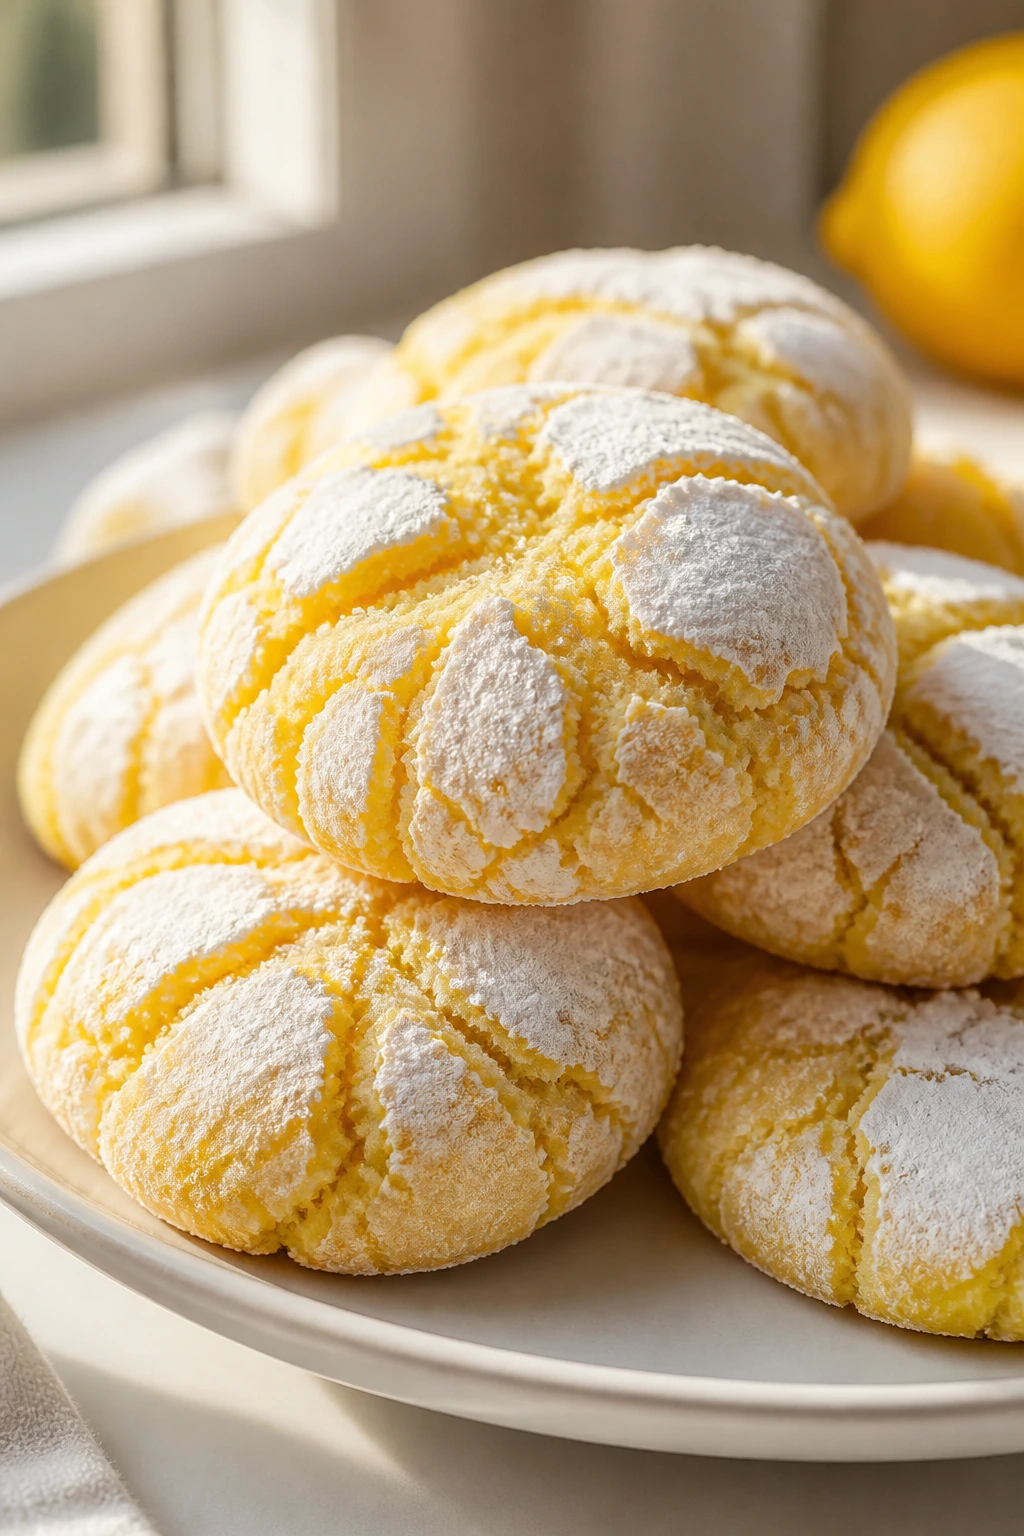
Lemon crinkles are bright, soft cookies with a powdered sugar shell that splits open as they bake. The citrus flavor lands clean and sharp, not candy-sweet, and the crackled tops make them look more involved than they are.
Why It Works:
The dough is chilled so the cookies puff before they spread. Powdered sugar on the outside creates the crinkled, snowy look when the dough expands in the oven.
Key Ingredients:
- 1/2 cup unsalted butter, softened
- 1 cup granulated sugar
- 1 large egg
- 2 tablespoons lemon juice
- 2 teaspoons lemon zest
- 1 3/4 cups all-purpose flour
- 1 teaspoon baking powder
- 1/2 teaspoon fine salt
- 1/2 cup powdered sugar, for coating
Quick Steps:
- Mix the butter and sugar until smooth, then beat in the egg, lemon juice, and zest.
- Stir in the flour, baking powder, and salt.
- Chill the dough for 30 to 45 minutes.
- Scoop, roll in powdered sugar, and bake at 350°F (175°C) for 10 to 12 minutes.
Equipment for This Recipe:
- Mixing bowl
- Zester or microplane
- Parchment-lined baking sheet
How to Serve This Dish:
They look best piled high so the cracked sugar tops stay visible. Serve them with tea or alongside chocolate cookies for contrast.
Pro Tips for This Recipe:
- Chill the dough or the cookies spread too quickly.
- Roll heavily in powdered sugar for a stronger crinkle effect.
- Fresh lemon zest gives the flavor more lift than bottled juice alone.
Variations on This Dish:
- Lemon Poppy Seed: Add 1 tablespoon poppy seeds for crunch.
- Orange Crinkle: Swap lemon for orange zest and juice.
Common Mistakes to Avoid with This Dish:
- Skipping the chill: Soft dough won’t crinkle as neatly.
- Undercoating with powdered sugar: Thin coverage leaves dull tops.
17. Brown Sugar Cookies
Brown sugar cookies are soft, chewy, and rich with caramel notes. They don’t need frosting, chips, or a lot of accessories. The flavor is warm enough to stand on its own.
Why It Works:
Brown sugar holds moisture, which keeps the cookies soft for days. A little baking soda gives them spread, while vanilla rounds out the caramel flavor.
Key Ingredients:
- 1 cup unsalted butter, softened
- 1 1/2 cups packed brown sugar
- 1 large egg
- 2 teaspoons vanilla extract
- 2 1/4 cups all-purpose flour
- 1 teaspoon baking soda
- 1/2 teaspoon fine salt
Quick Steps:
- Preheat the oven to 350°F (175°C) and line your pans.
- Cream the butter and brown sugar until fluffy.
- Beat in the egg and vanilla, then mix in the flour, baking soda, and salt.
- Scoop onto the tray and bake for 10 to 11 minutes.
Equipment for This Recipe:
- Mixer
- Cookie scoop
- Sheet pan
How to Serve This Dish:
Serve them plain with coffee or sandwich two cookies around a spoonful of whipped cream. They also make a good base for ice cream sandwiches because they stay tender.
Pro Tips for This Recipe:
- Use dark brown sugar if you want a deeper molasses note.
- Pull them when the centers look slightly underdone.
- Add a pinch of cinnamon if you want a warmer finish.
Variations on This Dish:
- Toffee Brown Sugar: Stir in 1/2 cup toffee bits.
- Cinnamon Brown Sugar: Add 1 teaspoon cinnamon to the dry ingredients.
Common Mistakes to Avoid with This Dish:
- Using too much flour: The soft chew disappears.
- Overbaking for color: These cookies should stay pale and tender.
18. Coconut Macaroons
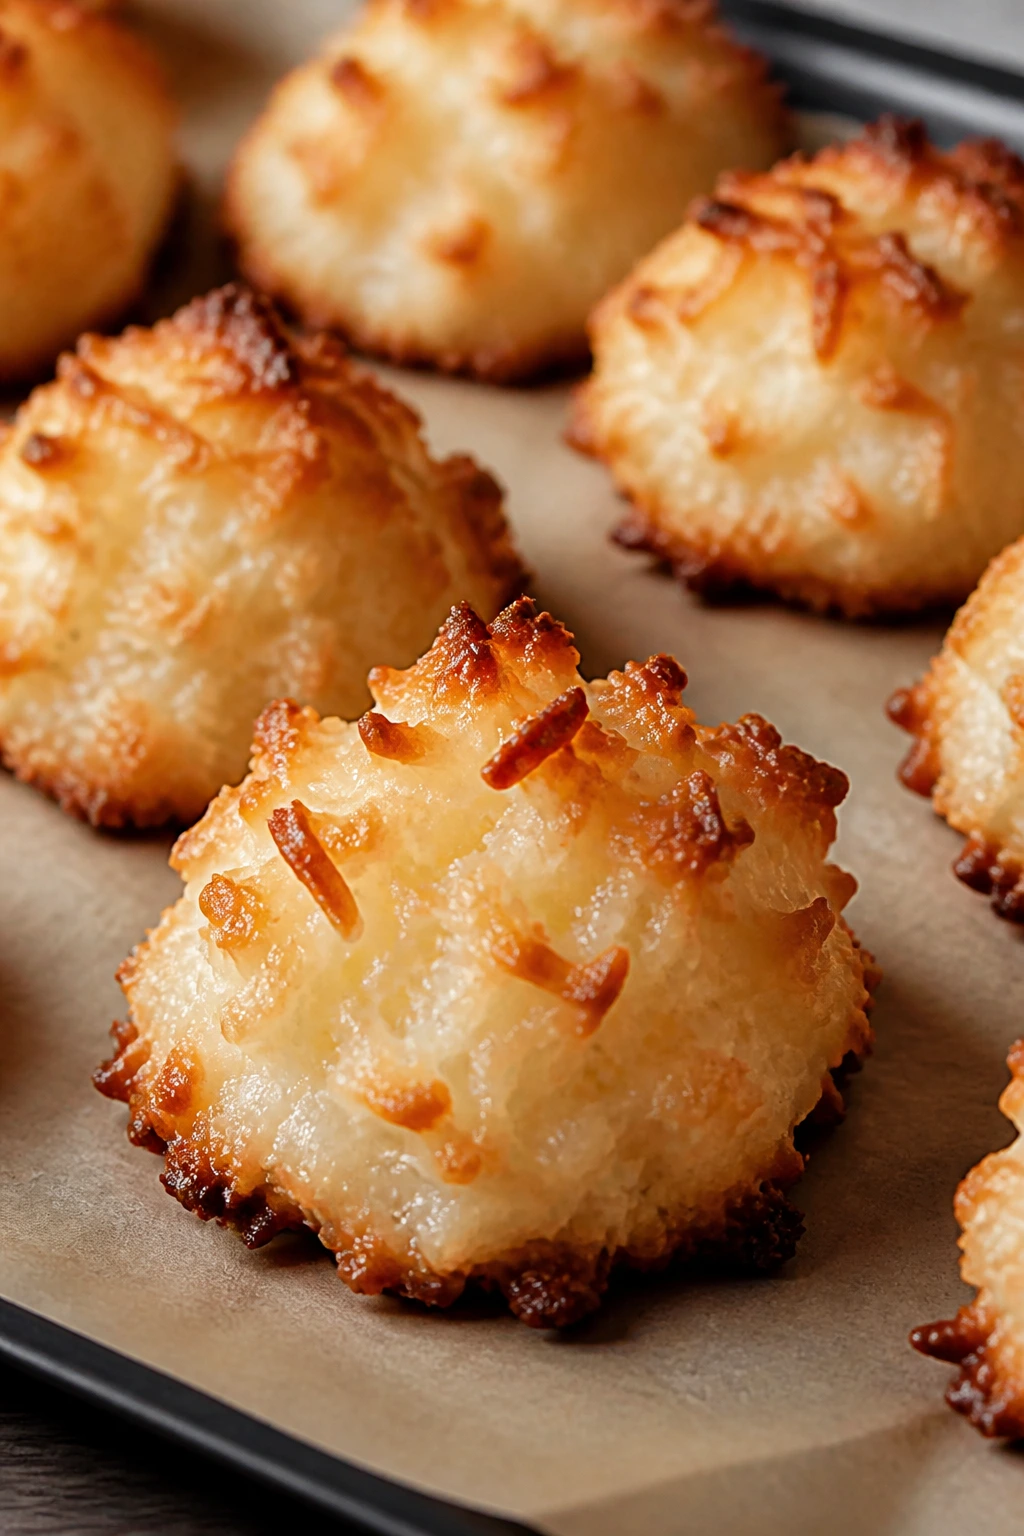
Coconut macaroons are sticky, chewy mounds with toasted edges and a sweet coconut center. They’re one of the easiest cookies on this list because the mixer does most of the work and the ingredient list is short.
Why It Works:
Egg whites bind the coconut, sugar sweetens it, and the oven dries the outside while leaving the middle chewy. You get crisp edges without needing a complicated dough.
Key Ingredients:
- 4 large egg whites
- 2/3 cup granulated sugar
- 1 teaspoon vanilla extract
- 1/4 teaspoon fine salt
- 3 cups sweetened shredded coconut
- 1/2 cup melted chocolate, optional for drizzling
Quick Steps:
- Preheat the oven to 325°F (165°C) and line a baking sheet.
- Whisk the egg whites, sugar, vanilla, and salt until frothy.
- Fold in the coconut until evenly coated.
- Scoop mounds onto the tray and bake for 20 to 22 minutes until the edges are golden.
Equipment for This Recipe:
- Mixing bowl
- Cookie scoop
- Parchment-lined baking sheet
How to Serve This Dish:
Serve them plain or drizzle with chocolate once cool. A macaroon tastes best after it has set for a few minutes, when the outside is crisp and the inside still gives a little.
Pro Tips for This Recipe:
- Use sweetened shredded coconut for the classic chewy texture.
- Line the tray well; coconut can stick.
- Let them cool fully before moving them.
Variations on This Dish:
- Chocolate-Dipped Macaroons: Dip the bottoms in dark chocolate.
- Lime Coconut Macaroons: Add 1 tablespoon lime zest.
Common Mistakes to Avoid with This Dish:
- Overwhipping the egg whites: You want frothy, not meringue-like peaks.
- Baking too hot: Coconut burns fast at higher heat.
19. Ranger Cookies
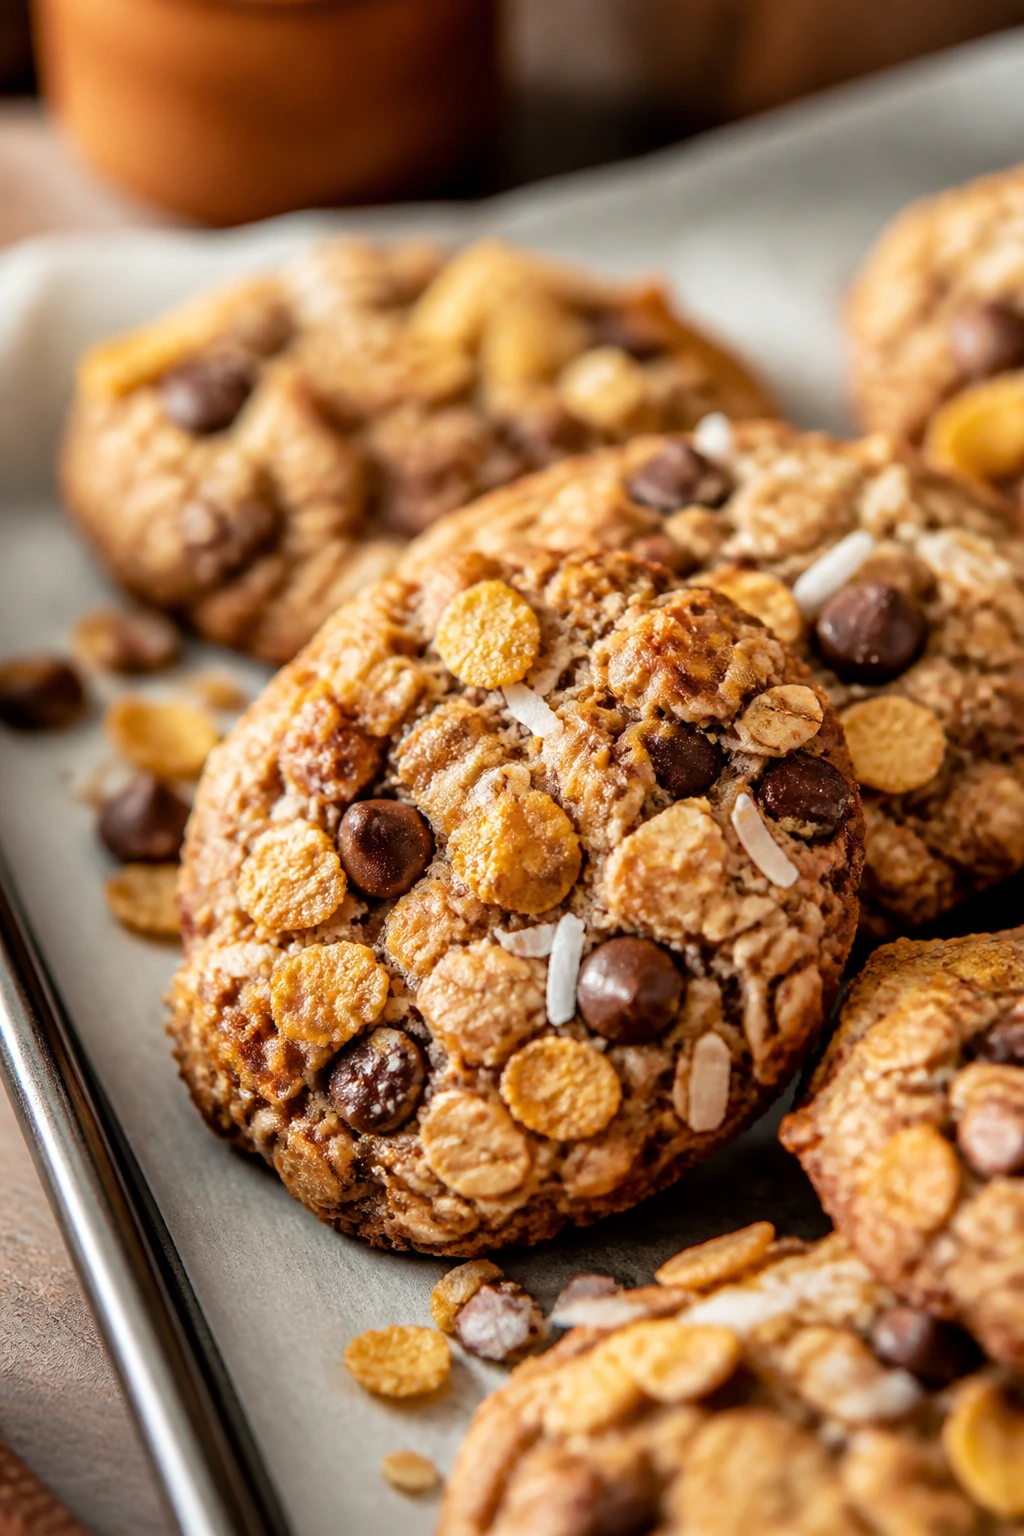
Ranger cookies are what happens when the pantry gets busy. Oats, cereal, coconut, and chocolate chips all show up, and somehow the result is still a recognizable cookie instead of a kitchen accident.
Why It Works:
There’s a lot of texture here, so the dough needs enough butter and sugar to keep everything bound together. The mix of oats and cereal gives crunch, while the chocolate softens the edges.
Key Ingredients:
- 1 cup unsalted butter, softened
- 1 cup packed brown sugar
- 1/2 cup granulated sugar
- 2 large eggs
- 1 teaspoon vanilla extract
- 1 1/2 cups all-purpose flour
- 1 teaspoon baking soda
- 1/2 teaspoon fine salt
- 2 cups old-fashioned oats
- 1 cup cornflakes, lightly crushed
- 1 cup shredded coconut
- 1 cup chocolate chips
Quick Steps:
- Heat the oven to 350°F (175°C) and line baking sheets.
- Cream the butter and sugars, then beat in the eggs and vanilla.
- Mix in the flour, baking soda, and salt, then stir in the oats, cornflakes, coconut, and chips.
- Scoop onto the tray and bake for 10 to 12 minutes until golden at the edges.
Equipment for This Recipe:
- Large mixing bowl
- Cookie scoop
- Parchment paper
How to Serve This Dish:
These are sturdy lunchbox cookies and one of the best choices for a cookie tin. They have enough texture that they don’t feel like a plain chocolate chip repeat.
Pro Tips for This Recipe:
- Crush the cornflakes lightly, not into powder.
- Let the dough sit for 10 minutes before scooping so the oats hydrate a bit.
- Press a few chips on top for a cleaner finish.
Variations on This Dish:
- Raisin Ranger: Swap the chocolate chips for raisins and add cinnamon.
- Peanut Butter Ranger: Add 1/2 cup peanut butter and reduce the butter slightly.
Common Mistakes to Avoid with This Dish:
- Overloading with mix-ins: The dough needs room to hold together.
- Using stale cereal: The flavor is off before the cookies even bake.
20. Oatmeal Chocolate Chip Cookies
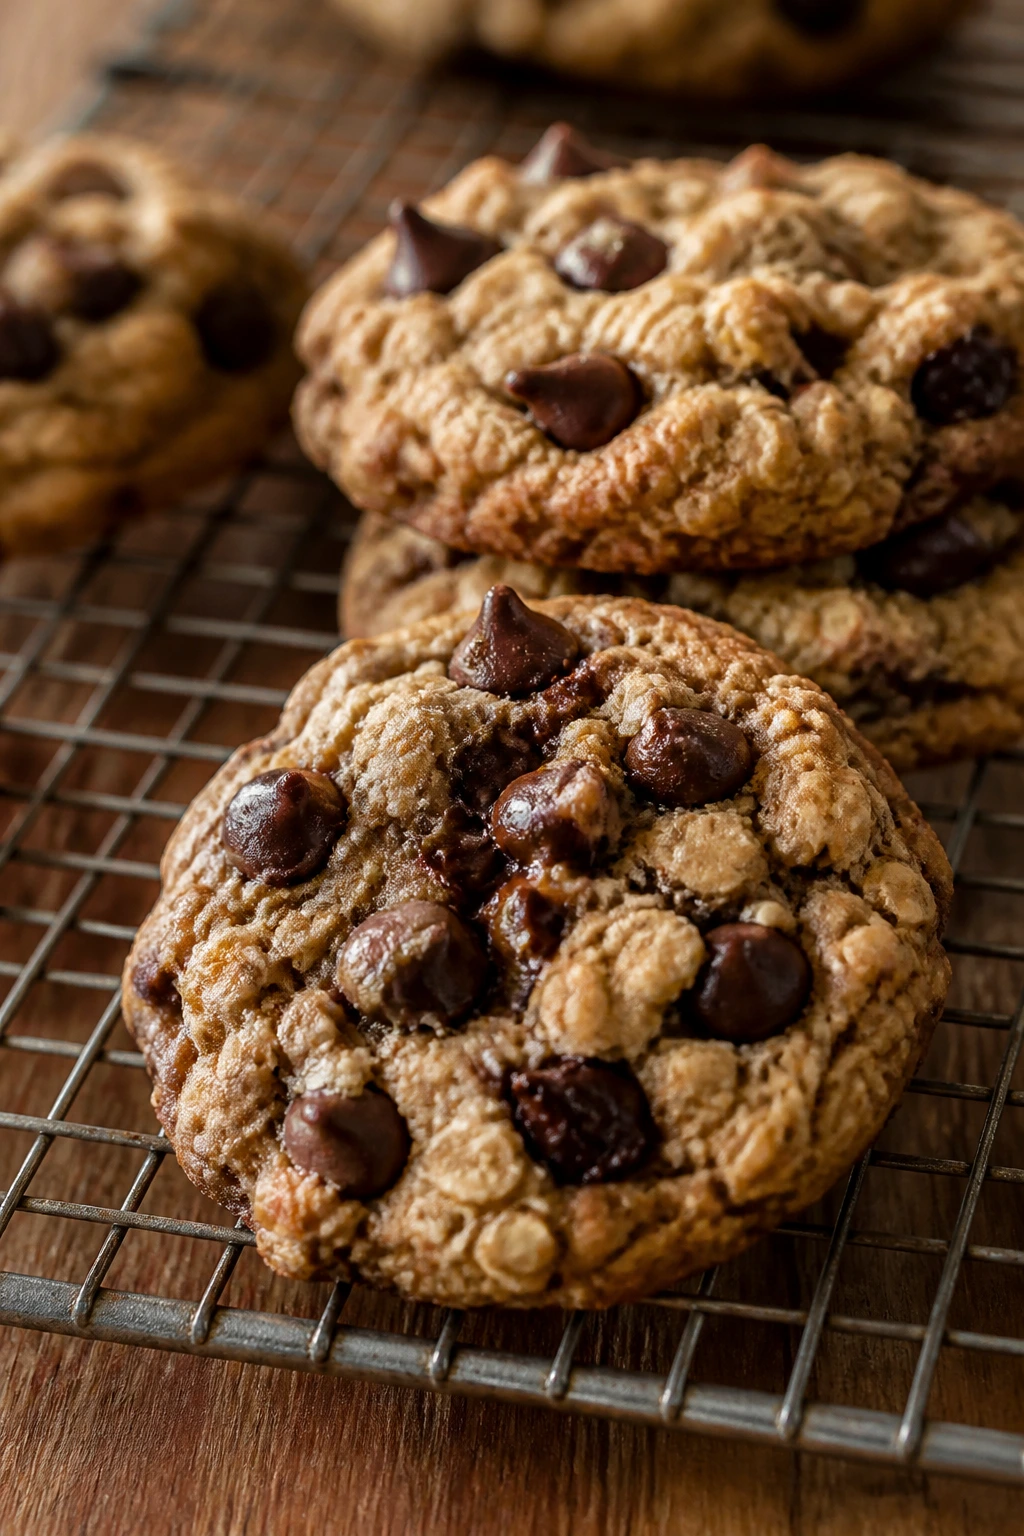
These taste like oatmeal raisin cookies that found a sweeter lane. The oats still bring chew and body, but the chocolate chips melt into the dough and make the whole cookie feel a little more playful.
Why It Works:
The oats add structure and keep the cookies from feeling cakey. Chocolate chips are less likely to bleed than chopped chocolate, so the dough stays neat for a beginner baker.
Key Ingredients:
- 1 cup unsalted butter, softened
- 1 cup packed brown sugar
- 1/2 cup granulated sugar
- 2 large eggs
- 1 teaspoon vanilla extract
- 1 1/2 cups all-purpose flour
- 1 teaspoon cinnamon
- 1 teaspoon baking soda
- 1/2 teaspoon fine salt
- 3 cups old-fashioned oats
- 1 1/2 cups semisweet chocolate chips
Quick Steps:
- Preheat the oven to 350°F (175°C) and line sheet pans with parchment.
- Cream the butter and sugars, then beat in the eggs and vanilla.
- Add the flour, cinnamon, baking soda, and salt, then stir in oats and chocolate chips.
- Scoop and bake for 10 to 12 minutes.
Equipment for This Recipe:
- Bowl
- Spatula
- Cookie scoop
How to Serve This Dish:
Serve them warm so the chips are soft but not melted apart. They make a good after-school cookie because they’re hearty without tasting heavy.
Pro Tips for This Recipe:
- Use old-fashioned oats, not quick oats, for better chew.
- Reserve a few chips to press into the tops.
- A 15-minute chill helps if the dough spreads too much.
Variations on This Dish:
- Coconut Oat Chip: Add 1/2 cup shredded coconut.
- Walnut Oat Chip: Add 3/4 cup chopped walnuts for crunch.
Common Mistakes to Avoid with This Dish:
- Using too much cinnamon: It can drown out the oats and chocolate.
- Baking until firm in the middle: They should finish setting as they cool.
21. Pecan Sandies
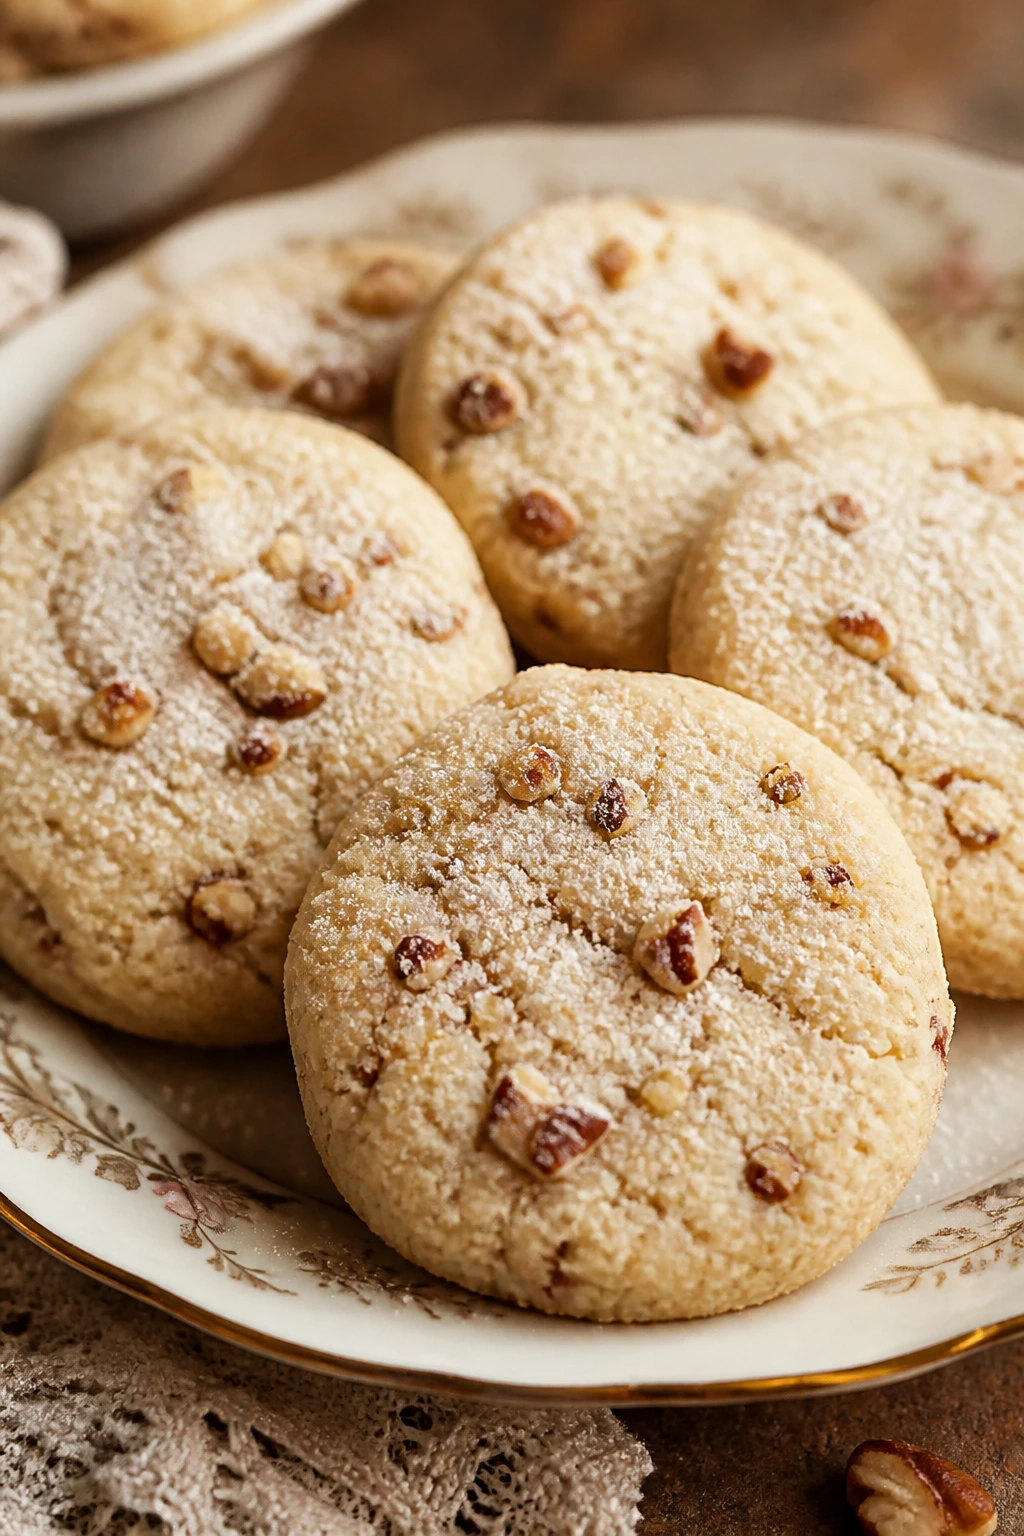
Pecan sandies are tender little cookies with a sandy crumb and a buttery finish. They almost dissolve when you bite them, then leave a soft nuttiness behind that makes people reach for a second one before they’ve finished the first.
Why It Works:
Finely chopped pecans spread flavor through the dough, and powdered sugar helps create that delicate texture. Lower heat keeps the cookies pale and prevents the nuts from turning bitter.
Key Ingredients:
- 1 cup unsalted butter, softened
- 1/2 cup powdered sugar
- 1 teaspoon vanilla extract
- 2 cups all-purpose flour
- 1 cup finely chopped pecans
- 1/4 teaspoon fine salt
Quick Steps:
- Heat the oven to 325°F (165°C) and line a sheet pan.
- Cream the butter and powdered sugar, then mix in vanilla.
- Stir in the flour, pecans, and salt until the dough holds together.
- Shape into small rounds or crescents and bake for 15 to 18 minutes.
Equipment for This Recipe:
- Mixing bowl
- Baking sheet
- Sharp knife for chopping pecans
How to Serve This Dish:
Serve them with tea or espresso. They fit neatly into holiday tins and are strong enough to stack without turning into rubble.
Pro Tips for This Recipe:
- Chop the pecans finely so the texture stays sandy.
- Chill the dough 20 minutes if the butter feels too warm.
- Let them cool fully before moving; they’re fragile at first.
Variations on This Dish:
- Pecan Crescent: Shape into crescents for the classic look.
- Maple Pecan: Add 1 tablespoon maple syrup and reduce the vanilla slightly.
Common Mistakes to Avoid with This Dish:
- Using coarse pecans: They make the cookies fall apart when shaped.
- Baking too hot: The nuts taste bitter if they brown too fast.
22. Butter Cookies
Butter cookies are plain in the same way a white shirt is plain: the whole point is the fit. They’re crisp at the edges, tender in the middle, and flavored enough with butter and vanilla that nobody asks for much else.
Why It Works:
The dough is balanced for piping, rolling, or cutting, and the butter does most of the flavor work. A steady bake gives them a light crunch without drying them out.
Key Ingredients:
- 1 cup unsalted butter, softened
- 1 cup granulated sugar
- 1 large egg
- 1 teaspoon vanilla extract
- 2 1/2 cups all-purpose flour
- 1/2 teaspoon fine salt
Quick Steps:
- Preheat the oven to 350°F (175°C) and line baking sheets.
- Cream the butter and sugar, then beat in the egg and vanilla.
- Mix in the flour and salt until a smooth dough forms.
- Shape into rounds or pipe rosettes, then bake for 10 to 12 minutes.
Equipment for This Recipe:
- Mixer
- Piping bag or cookie scoop
- Baking sheet
How to Serve This Dish:
They’re good on their own, or dipped halfway in chocolate for a more dressed-up tray. They also make a neutral base if you want to spread jam between two cookies.
Pro Tips for This Recipe:
- Pipe only if the dough feels soft enough to move cleanly.
- Chill cut shapes for better definition.
- Add a tiny pinch more salt if the butter tastes flat.
Variations on This Dish:
- Chocolate-Dipped Butter Cookies: Dip cooled cookies in melted dark chocolate.
- Almond Butter Cookies: Swap vanilla for almond extract.
Common Mistakes to Avoid with This Dish:
- Overcreaming until greasy: The dough gets slack and spreads.
- Waiting for dark color: Butter cookies should stay pale.
23. Icebox Cookies
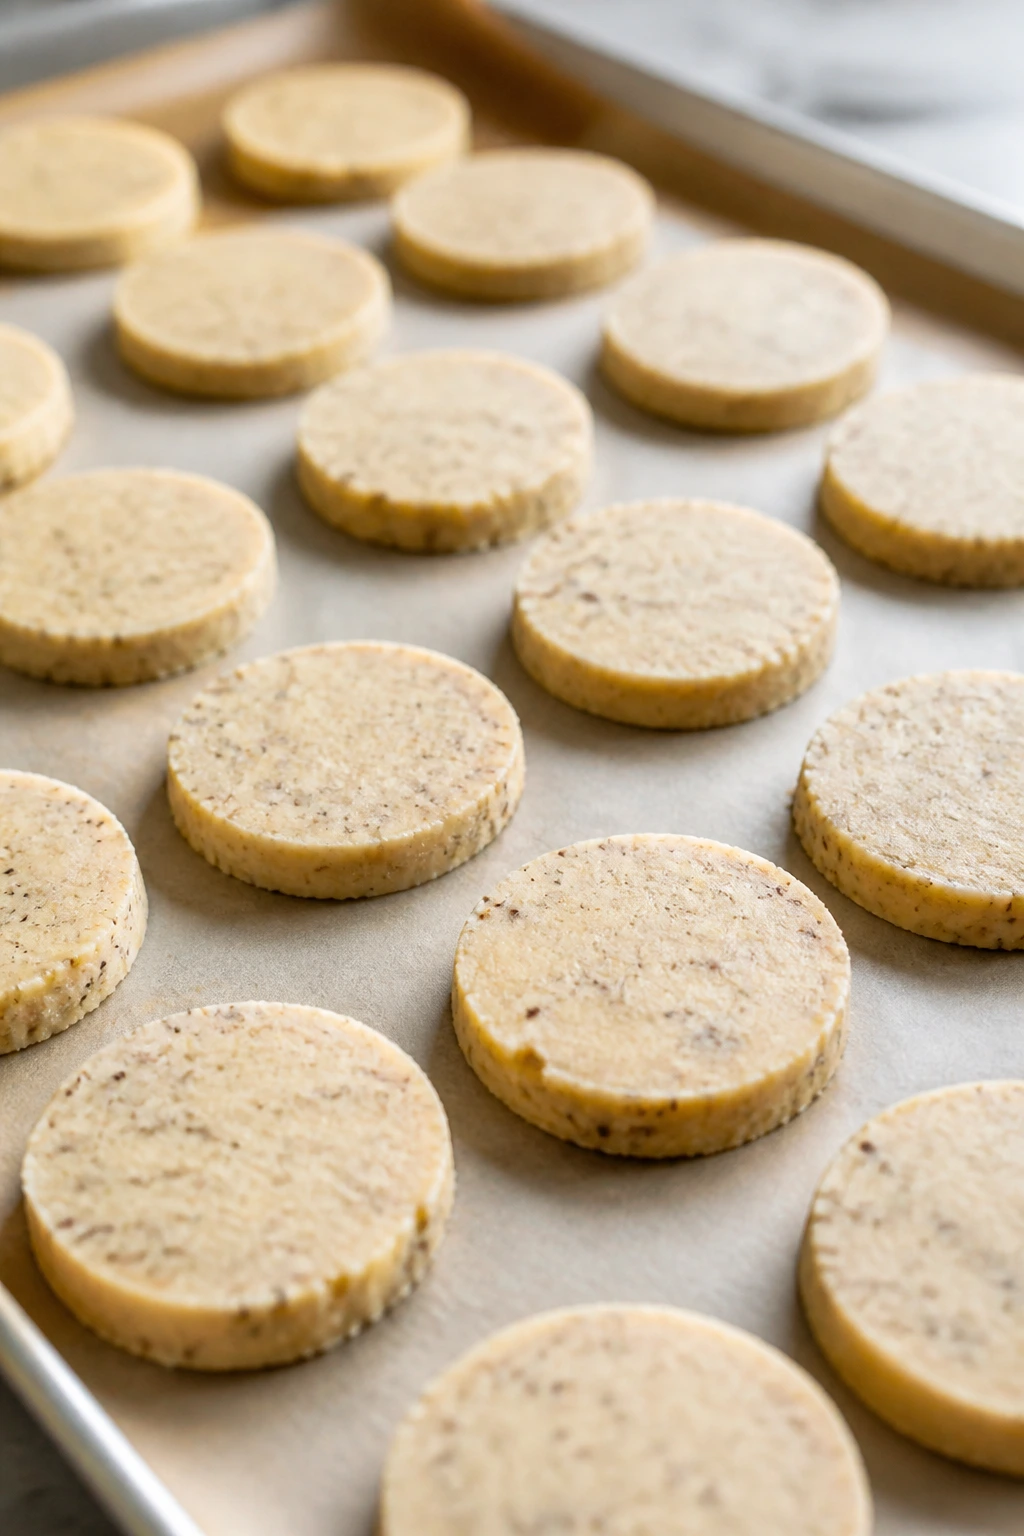
Icebox cookies are built for people who want to bake in parts. You mix the dough, roll it into logs, chill it, slice it later, and get neat little rounds with almost no stress. That’s a very good beginner habit.
Why It Works:
Chilling firms the dough, which makes slicing simple and keeps the cookies from spreading too much. The dough itself is plain enough to take on nuts, chocolate, or sprinkles without getting confused.
Key Ingredients:
- 1 cup unsalted butter, softened
- 1 cup granulated sugar
- 1 large egg
- 2 teaspoons vanilla extract
- 2 1/2 cups all-purpose flour
- 1/2 teaspoon fine salt
- 1/2 cup chopped nuts or mini chocolate chips, optional
Quick Steps:
- Cream the butter and sugar, then beat in the egg and vanilla.
- Add the flour and salt, plus any mix-ins.
- Form the dough into two logs, wrap tightly, and chill for 2 hours.
- Slice 1/4-inch rounds and bake at 350°F (175°C) for 10 to 12 minutes.
Equipment for This Recipe:
- Plastic wrap
- Sharp knife
- Baking sheet
How to Serve This Dish:
Serve them plain with coffee or sandwich two with jam. They’re useful when you need cookies on a schedule because the dough waits politely in the fridge.
Pro Tips for This Recipe:
- Round the log as you wrap it so the slices bake evenly.
- If the dough cracks when slicing, let it sit 5 minutes.
- Freeze the logs for up to a month.
Variations on This Dish:
- Pistachio Icebox: Add 3/4 cup chopped pistachios.
- Citrus Sugar Logs: Add orange or lemon zest to the dough.
Common Mistakes to Avoid with This Dish:
- Chilling in a soft, misshapen log: You’ll get odd flat sides.
- Slicing too thick: The centers won’t bake through evenly.
24. Chocolate Crinkle Cookies
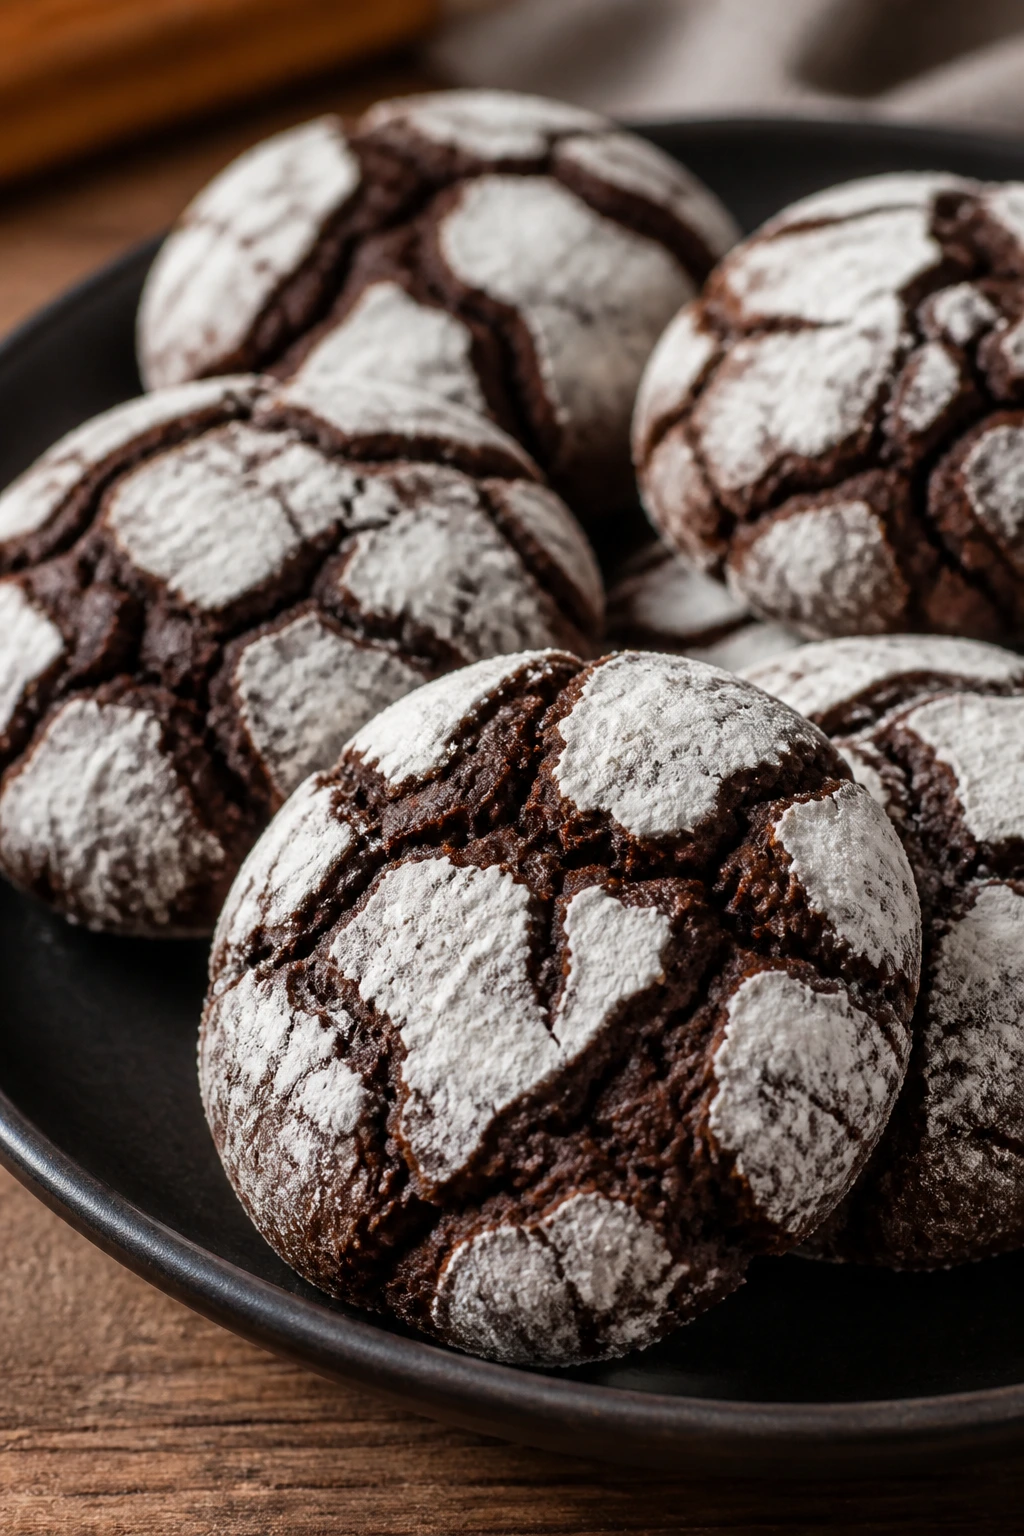
Chocolate crinkles have dramatic cracked tops and a fudgy middle that feels closer to brownie batter than a plain cookie. The powdered sugar coating turns into a white shell that splits apart as the dough rises.
Why It Works:
The dough is soft and needs chilling, which is why the cookies crack instead of spreading flat. Cocoa gives the deep chocolate flavor, while oil keeps the crumb tender.
Key Ingredients:
- 1/2 cup neutral oil
- 1 cup granulated sugar
- 2 large eggs
- 1 teaspoon vanilla extract
- 3/4 cup unsweetened cocoa powder
- 2 cups all-purpose flour
- 2 teaspoons baking powder
- 1/2 teaspoon fine salt
- 1/2 cup powdered sugar, for coating
Quick Steps:
- Mix the oil, sugar, eggs, and vanilla until smooth.
- Stir in cocoa, flour, baking powder, and salt.
- Chill the dough for 2 hours.
- Scoop, roll in powdered sugar, and bake at 350°F (175°C) for 10 to 12 minutes.
Equipment for This Recipe:
- Mixing bowl
- Cookie scoop
- Two bowls for chilling and coating
How to Serve This Dish:
These look best with the crackled sugar tops facing up on a dark plate. Pair them with coffee or milk; they’re rich enough that one or two makes sense.
Pro Tips for This Recipe:
- Chill the dough until it’s firm, not just cool.
- Coat the balls generously in powdered sugar.
- Leave space on the tray; these cookies spread.
Variations on This Dish:
- Peppermint Crinkles: Add 1/4 teaspoon peppermint extract.
- Espresso Crinkles: Add 1 teaspoon espresso powder.
Common Mistakes to Avoid with This Dish:
- Skipping the chill: The cookies run into puddles.
- Undercoating with sugar: The cracks won’t show well.
25. Almond Crescents
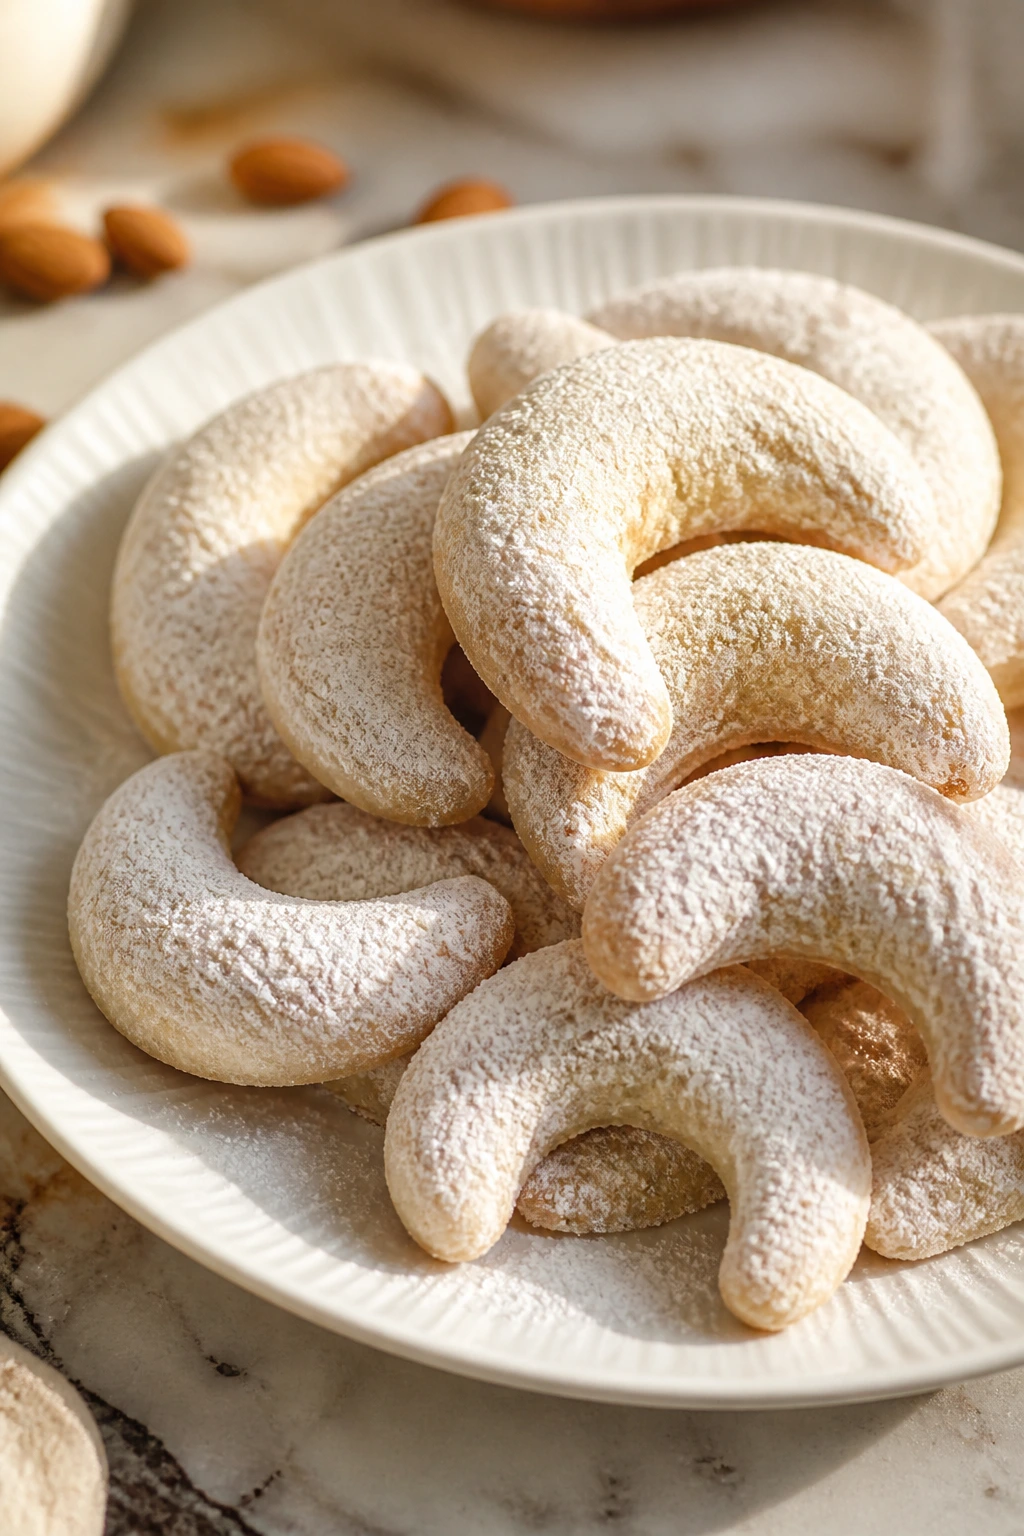
Almond crescents are delicate, pale cookies with a nutty flavor that lands softly instead of loudly. They’re rolled into little moons and finished with powdered sugar, which is enough to make them look like they came from a bakery shelf.
Why It Works:
Ground almonds give flavor and a fine crumb. The crescent shape bakes evenly and lets the powdered sugar cling to all those ridges and curves.
Key Ingredients:
- 1 cup unsalted butter, softened
- 1/2 cup granulated sugar
- 1 teaspoon almond extract
- 2 cups all-purpose flour
- 1 cup finely ground almonds
- 1/4 teaspoon fine salt
- 1 cup powdered sugar, for coating
Quick Steps:
- Preheat the oven to 325°F (165°C) and line a baking sheet.
- Cream the butter and sugar, then mix in almond extract.
- Add the flour, ground almonds, and salt.
- Shape into crescents and bake for 14 to 16 minutes, then roll warm cookies in powdered sugar.
Equipment for This Recipe:
- Mixing bowl
- Baking sheet
- Shallow bowl for sugar coating
How to Serve This Dish:
Serve them with tea or a spoonful of berry jam on the side. They look elegant on a plate, but the method is still easy enough for a first run.
Pro Tips for This Recipe:
- Grind the almonds finely so the dough shapes easily.
- Roll in sugar twice for the fullest coating.
- Cool them on the tray for a minute before handling.
Variations on This Dish:
- Vanilla Almond Crescents: Use half almond extract and half vanilla.
- Orange Almond Crescents: Add orange zest to the dough.
Common Mistakes to Avoid with This Dish:
- Using coarse almond meal: The dough can crack and crumble.
- Baking until brown: They should stay pale and tender.
26. Iced Oatmeal Cookies
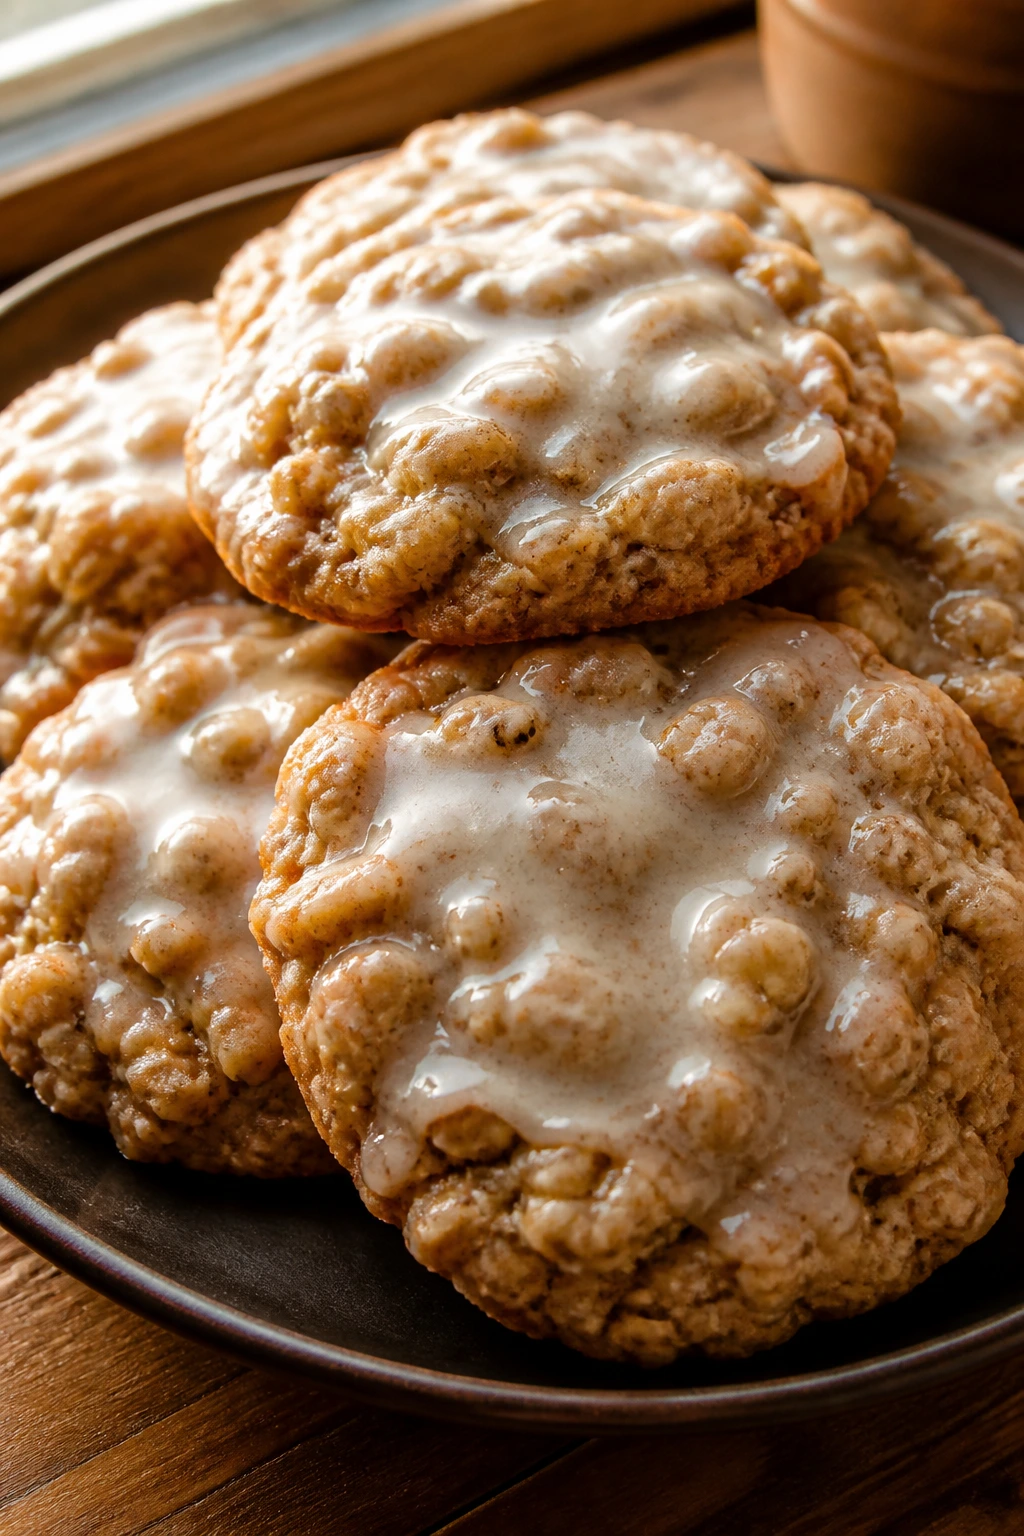
Iced oatmeal cookies have a soft chew, a little cinnamon, and a white glaze that turns a humble oatmeal cookie into something that looks like it belongs in a bakery case. They’re sturdy, familiar, and good at staying soft.
Why It Works:
The oats bring chew, the cinnamon brings warmth, and the glaze seals in a little softness after baking. That icing is not decorative fluff; it changes the texture.
Key Ingredients:
- 1 cup unsalted butter, softened
- 1 cup packed brown sugar
- 1/2 cup granulated sugar
- 2 large eggs
- 1 teaspoon vanilla extract
- 1 1/2 cups all-purpose flour
- 1 teaspoon ground cinnamon
- 1 teaspoon baking soda
- 1/2 teaspoon fine salt
- 3 cups old-fashioned oats
- 1 cup powdered sugar
- 2 tablespoons milk
- 1/2 teaspoon vanilla extract, for glaze
Quick Steps:
- Heat the oven to 350°F (175°C) and line baking sheets.
- Cream the butter and sugars, then add eggs and vanilla.
- Mix in flour, cinnamon, baking soda, salt, and oats.
- Bake scoops for 10 to 12 minutes, cool slightly, then drizzle with the powdered sugar glaze.
Equipment for This Recipe:
- Mixing bowl
- Whisk for glaze
- Cookie scoop
How to Serve This Dish:
Serve them once the glaze has set enough not to smudge. They’re a strong pick for brunch trays, lunch boxes, or any plate that needs a cookie with some heft.
Pro Tips for This Recipe:
- Use old-fashioned oats for the best chew.
- Let the cookies cool before icing or the glaze slides off.
- Make the glaze thick enough to cling, not run.
Variations on This Dish:
- Maple Iced Oatmeal: Replace vanilla in the glaze with maple extract.
- Orange Iced Oatmeal: Add orange zest to the dough and glaze.
Common Mistakes to Avoid with This Dish:
- Glazing too early: The icing melts into a mess.
- Baking until crisp: These should stay soft and chewy.
27. Hermit Cookies
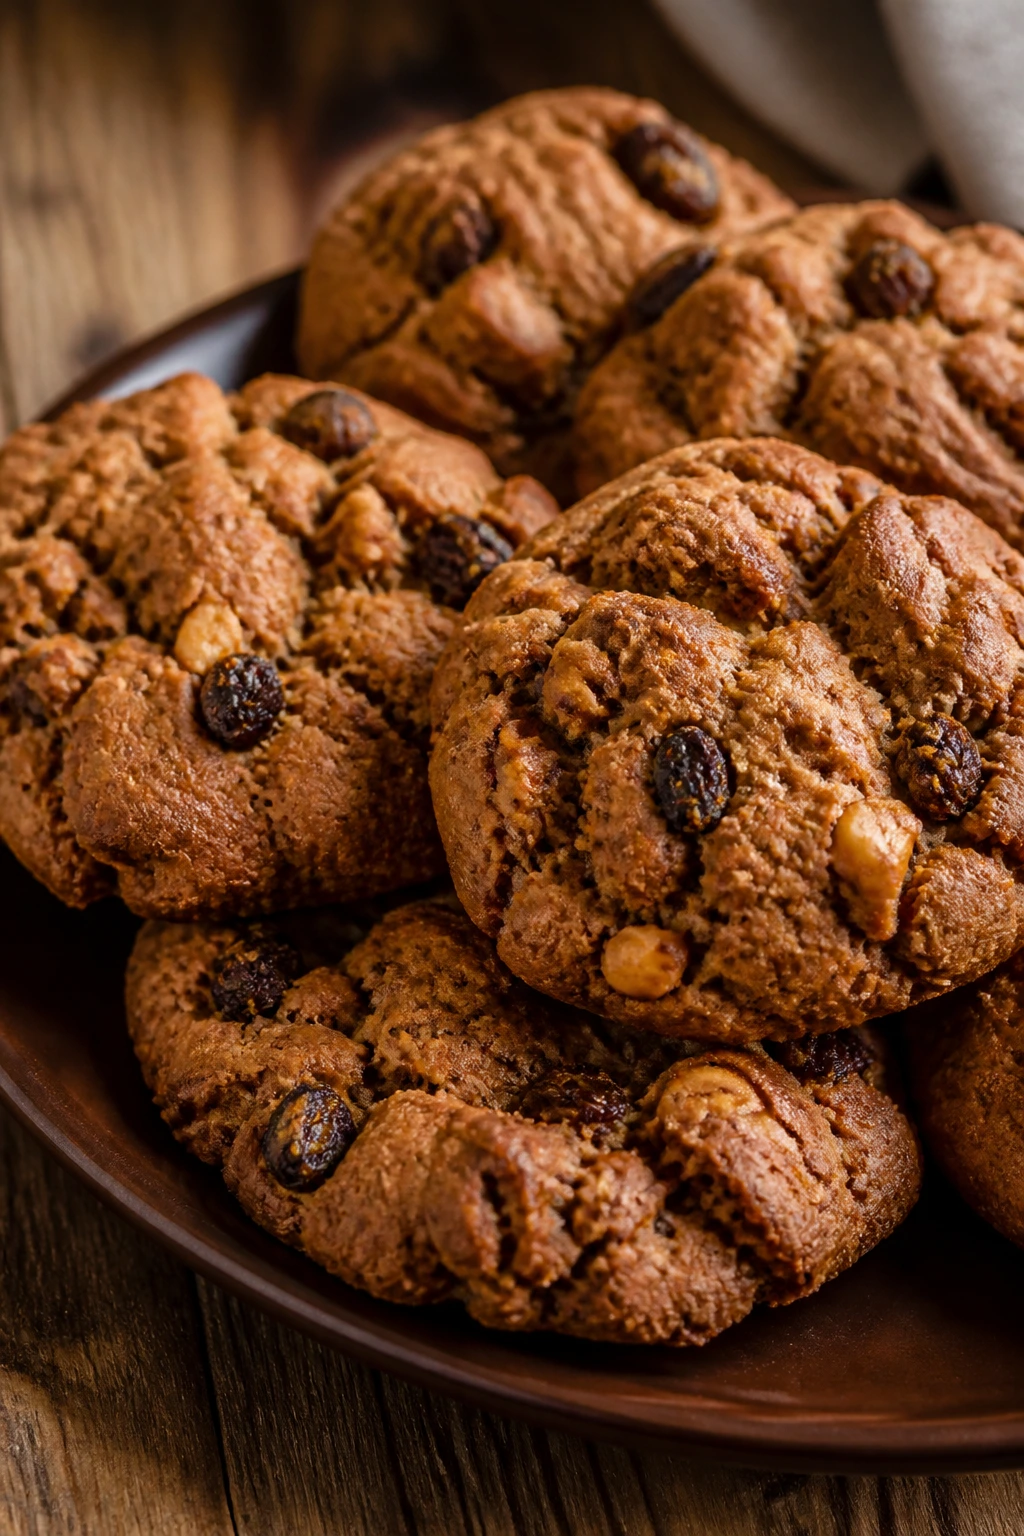
Hermit cookies are spiced, raisin-studded bars or cookies that taste like molasses, cinnamon, and old cookbook pages in the best possible way. They’re dense enough to travel well and soft enough to keep eating one more.
Why It Works:
Molasses and brown sugar keep the texture moist, while raisins and nuts add chew and crunch. The dough gets better after a short rest, which is a nice lesson in patience.
Key Ingredients:
- 1/2 cup unsalted butter, softened
- 1 cup packed brown sugar
- 1 large egg
- 1/2 cup molasses
- 2 cups all-purpose flour
- 1 teaspoon ground cinnamon
- 1 teaspoon ground ginger
- 1/2 teaspoon ground cloves
- 1 teaspoon baking soda
- 1/2 teaspoon fine salt
- 1 cup raisins
- 1/2 cup chopped walnuts
Quick Steps:
- Preheat the oven to 350°F (175°C) and line a baking sheet.
- Cream the butter and brown sugar, then add the egg and molasses.
- Stir in flour, spices, baking soda, and salt, then fold in raisins and walnuts.
- Drop spoonfuls onto the tray and bake for 10 to 12 minutes.
Equipment for This Recipe:
- Large bowl
- Wooden spoon
- Baking sheet
How to Serve This Dish:
Serve them with tea or coffee when you want something a little deeper than a standard sweet cookie. They’re also good packed into a tin because they stay moist.
Pro Tips for This Recipe:
- Let the dough rest 15 minutes before scooping so the flour hydrates.
- Soak the raisins if they’re dry and old.
- Don’t overbake; they keep firming up after the tray comes out.
Variations on This Dish:
- Apple Hermits: Add 1/2 cup chopped dried apples.
- Nut-Free Hermits: Leave out the walnuts and add extra raisins.
Common Mistakes to Avoid with This Dish:
- Making them too small: They dry out fast.
- Skipping the spices: Hermits need that warm backbone.
28. Cherry Winks
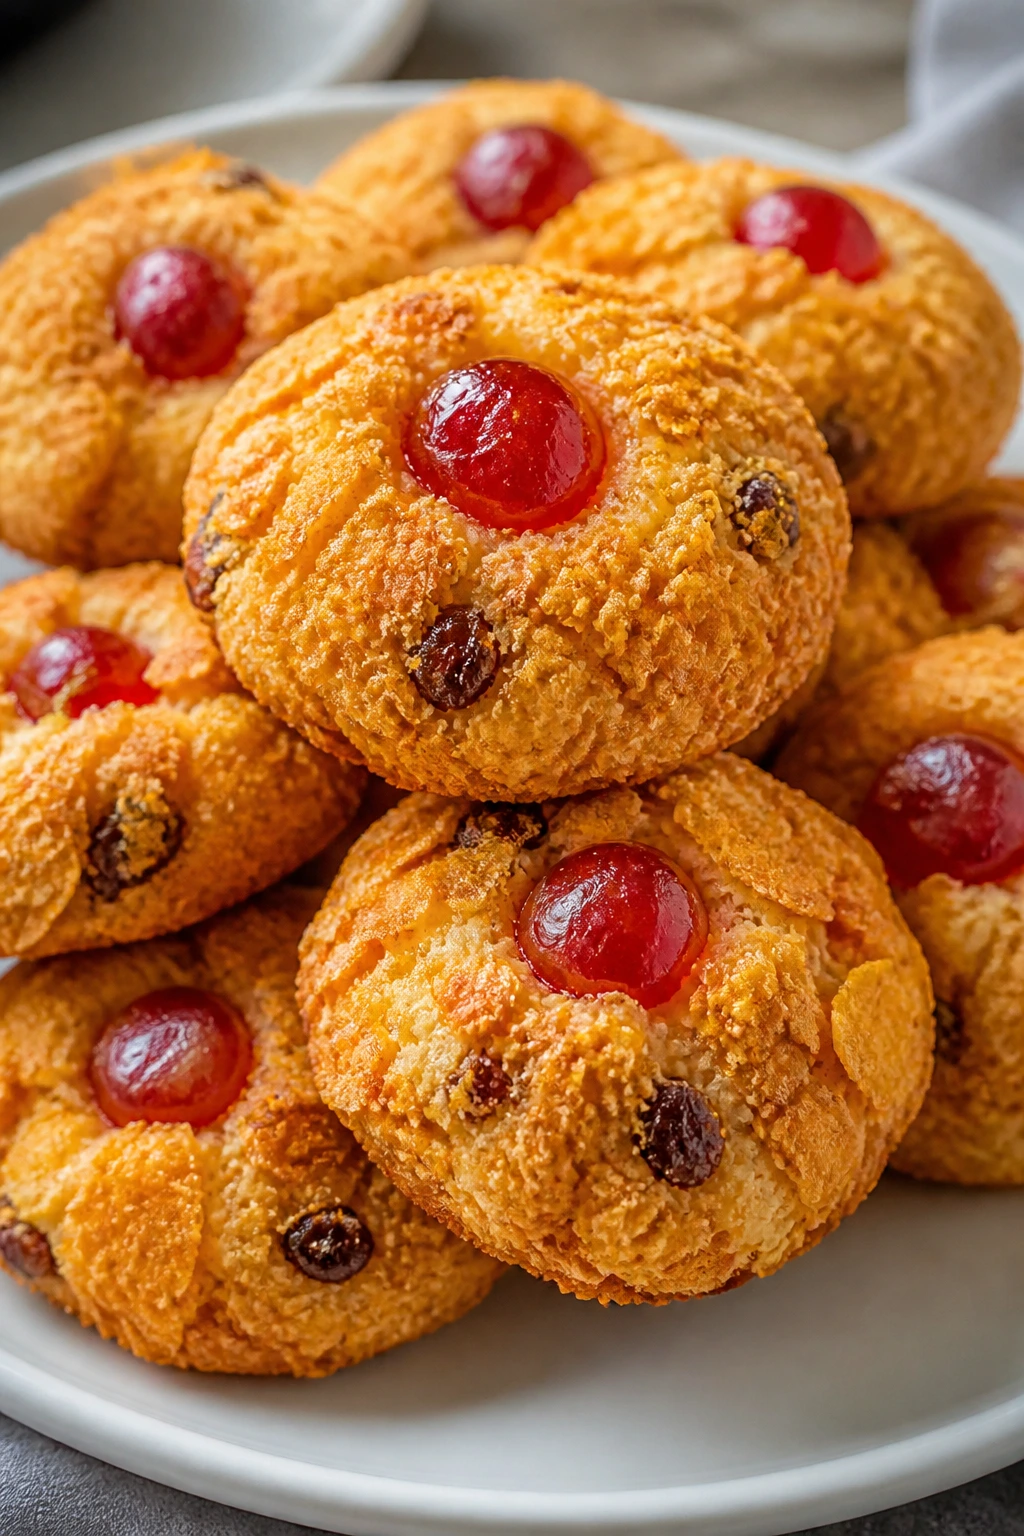
Cherry winks are the kind of vintage cookie that shows up with cereal on the outside and chopped fruit inside, then somehow tastes more balanced than the ingredient list suggests. They’re chewy, colorful, and a little quirky.
Why It Works:
The cereal coating gives crunch and a craggy look, while the chopped cherries and dates keep the center soft. This is a good beginner cookie because the shape can be rustic and still work.
Key Ingredients:
- 1/2 cup unsalted butter, softened
- 1 cup granulated sugar
- 2 large eggs
- 1 teaspoon vanilla extract
- 2 1/4 cups all-purpose flour
- 1 teaspoon baking powder
- 1/2 teaspoon fine salt
- 1 cup chopped candied cherries
- 1 cup chopped dates
- 1 cup chopped walnuts
- 2 cups crushed cornflakes
Quick Steps:
- Preheat the oven to 375°F (190°C) and line baking sheets.
- Cream the butter and sugar, then beat in the eggs and vanilla.
- Add the flour, baking powder, and salt, then stir in cherries, dates, and walnuts.
- Roll portions in crushed cornflakes and bake for 10 to 12 minutes.
Equipment for This Recipe:
- Mixing bowl
- Shallow dish for cereal
- Baking sheet
How to Serve This Dish:
Serve them on a platter where the colorful fruit shows through. They’re sweet enough for dessert but sturdy enough for a coffee break.
Pro Tips for This Recipe:
- Chop the cherries and dates finely so the dough holds together.
- Crush the cornflakes lightly for a rough coating, not dust.
- Let them cool on the tray before moving.
Variations on This Dish:
- Apricot Winks: Swap cherries for chopped dried apricots.
- Coconut Winks: Add 1/2 cup shredded coconut to the dough.
Common Mistakes to Avoid with This Dish:
- Using wet fruit pieces: The dough gets sticky and hard to shape.
- Skipping the cereal coating: That crunchy shell is part of the cookie.
29. Amish Sugar Cookies
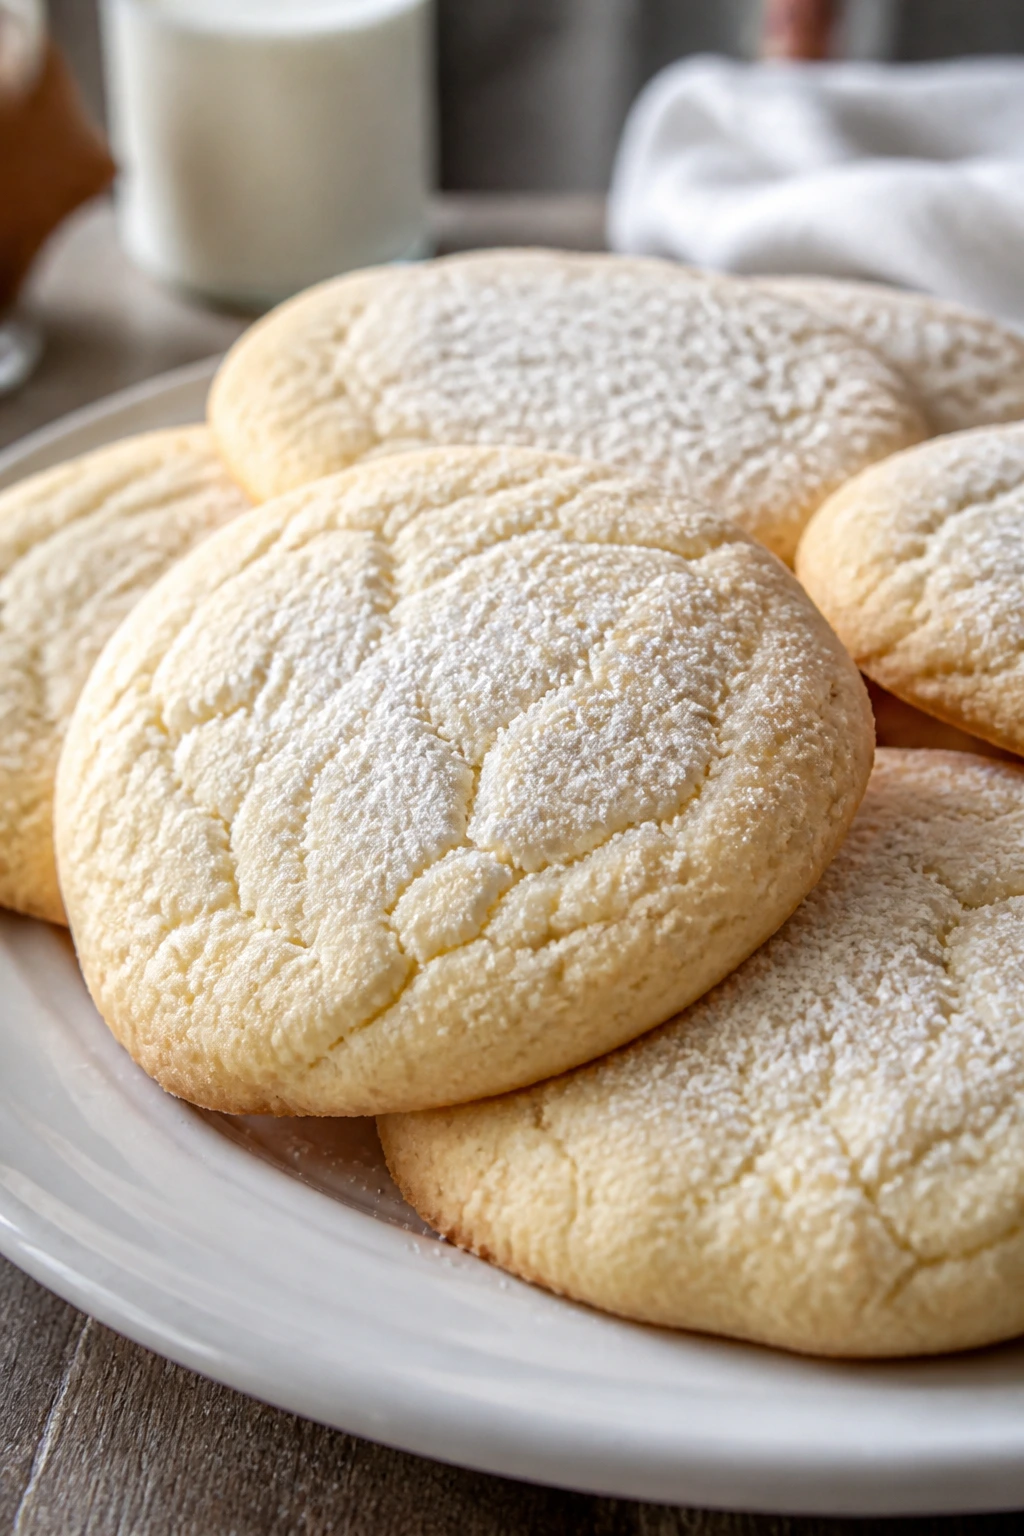
Amish sugar cookies are soft, tender, and almost cloudlike in the middle. They’re a little richer than a standard sugar cookie, and the dough makes a big batch, which is useful because these disappear fast.
Why It Works:
The mix of butter, oil, sugar, and powdered sugar gives the cookie a tender texture that stays soft after cooling. Cream of tartar adds the faint tang that keeps them from tasting flat.
Key Ingredients:
- 1 cup unsalted butter, softened
- 1 cup neutral oil
- 1 cup granulated sugar
- 1 cup powdered sugar
- 2 large eggs
- 1 teaspoon vanilla extract
- 5 cups all-purpose flour
- 1 teaspoon baking soda
- 1 teaspoon cream of tartar
- 1/2 teaspoon fine salt
Quick Steps:
- Preheat the oven to 350°F (175°C) and line your trays.
- Beat the butter, oil, and sugars until smooth, then add the eggs and vanilla.
- Mix in the flour, baking soda, cream of tartar, and salt.
- Scoop the dough and bake for 10 to 12 minutes until just set.
Equipment for This Recipe:
- Large mixing bowl
- Cookie scoop
- Baking sheets
How to Serve This Dish:
These are good plain, dusted with a touch of powdered sugar, or frosted with a thin glaze. They hold up well on a cookie tray because they stay soft for days.
Pro Tips for This Recipe:
- The dough is big; mix in stages so the flour doesn’t fly everywhere.
- Chill the dough if the kitchen is warm.
- Pull them early for a softer finish.
Variations on This Dish:
- Cinnamon Amish Cookies: Add 2 teaspoons cinnamon.
- Lemon Amish Cookies: Add lemon zest and a lemon glaze.
Common Mistakes to Avoid with This Dish:
- Using all butter instead of oil and butter: The texture changes and the cookies bake firmer.
- Overbaking: They should look slightly underdone in the center.
30. Tea Cakes
Tea cakes are simple, soft cookies with a vanilla-butter flavor and a tender crumb that lands somewhere between a sugar cookie and a little cake. They’re old-fashioned in the nicest way and easy enough to make on a lazy afternoon.
Why It Works:
The dough is straightforward, the texture stays soft, and the cookies bake evenly without much drama. That makes them one of the best confidence-builders on the list.
Key Ingredients:
- 1 cup unsalted butter, softened
- 1 cup granulated sugar
- 2 large eggs
- 1 teaspoon vanilla extract
- 2 3/4 cups all-purpose flour
- 1 teaspoon baking powder
- 1/2 teaspoon fine salt
Quick Steps:
- Preheat the oven to 350°F (175°C) and line baking sheets.
- Cream the butter and sugar until fluffy, then beat in the eggs and vanilla.
- Mix in the flour, baking powder, and salt until a soft dough forms.
- Scoop onto the tray and bake for 10 to 12 minutes until the edges are barely golden.
Equipment for This Recipe:
- Mixing bowl
- Hand mixer
- Sheet pan
How to Serve This Dish:
Serve them plain with tea, coffee, or a little fruit jam on the side. They’re a quiet cookie, which is not the same thing as a boring one.
Pro Tips for This Recipe:
- If you want a softer crumb, pull them at the first hint of color.
- Add a dusting of powdered sugar once cool.
- A touch of nutmeg gives them an old-fashioned bakery note.
Variations on This Dish:
- Nutmeg Tea Cakes: Add 1/2 teaspoon nutmeg.
- Almond Tea Cakes: Swap vanilla for almond extract.
Common Mistakes to Avoid with This Dish:
- Baking until brown all over: That dries them out fast.
- Scooping uneven portions: Mixed sizes finish at different times.
Why the Old Cookie Methods Still Work
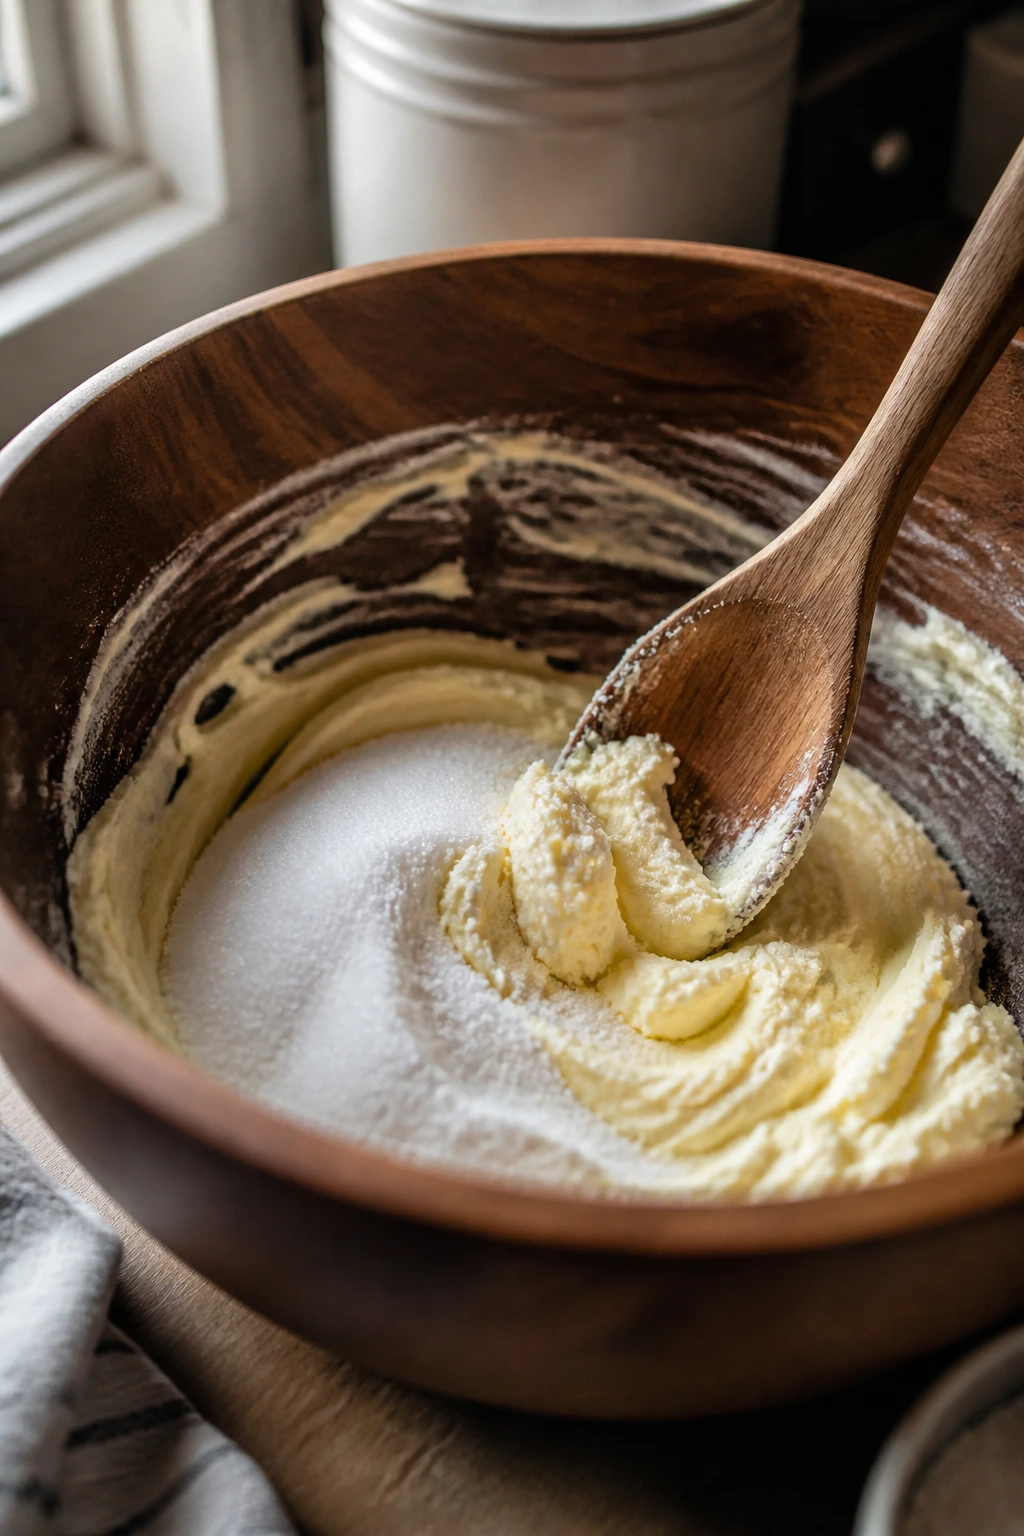
There’s a pattern running through all of these cookies, and it’s not subtle. Butter and sugar get creamed until the mixture changes color and texture. Flour gets added only until the dough comes together. Then the oven does the part that looks boring on paper but matters in real life: setting the edges, drying the surface, and turning a soft mound into something you can actually eat with your fingers.
Drop cookies teach confidence because they don’t need perfect shaping. Rolled cookies teach you what chilled dough feels like. Press cookies show you how temperature changes the dough in your hands. Slice-and-bake cookies are a lesson in patience. That mix is useful because beginner baking is not one skill. It’s a small stack of skills, and cookies let you learn them in plain sight.
There’s also a reason classic cookie recipes hang on while more elaborate desserts come and go. Cookies give fast feedback. If the tray is too dark, you know the oven runs hot. If the dough spreads too much, the butter was too soft or the flour was light. If the tops crack nicely, the texture is probably where it should be. That kind of feedback is gold when you’re still learning your own kitchen.
Tools That Make Cookie Baking Easier
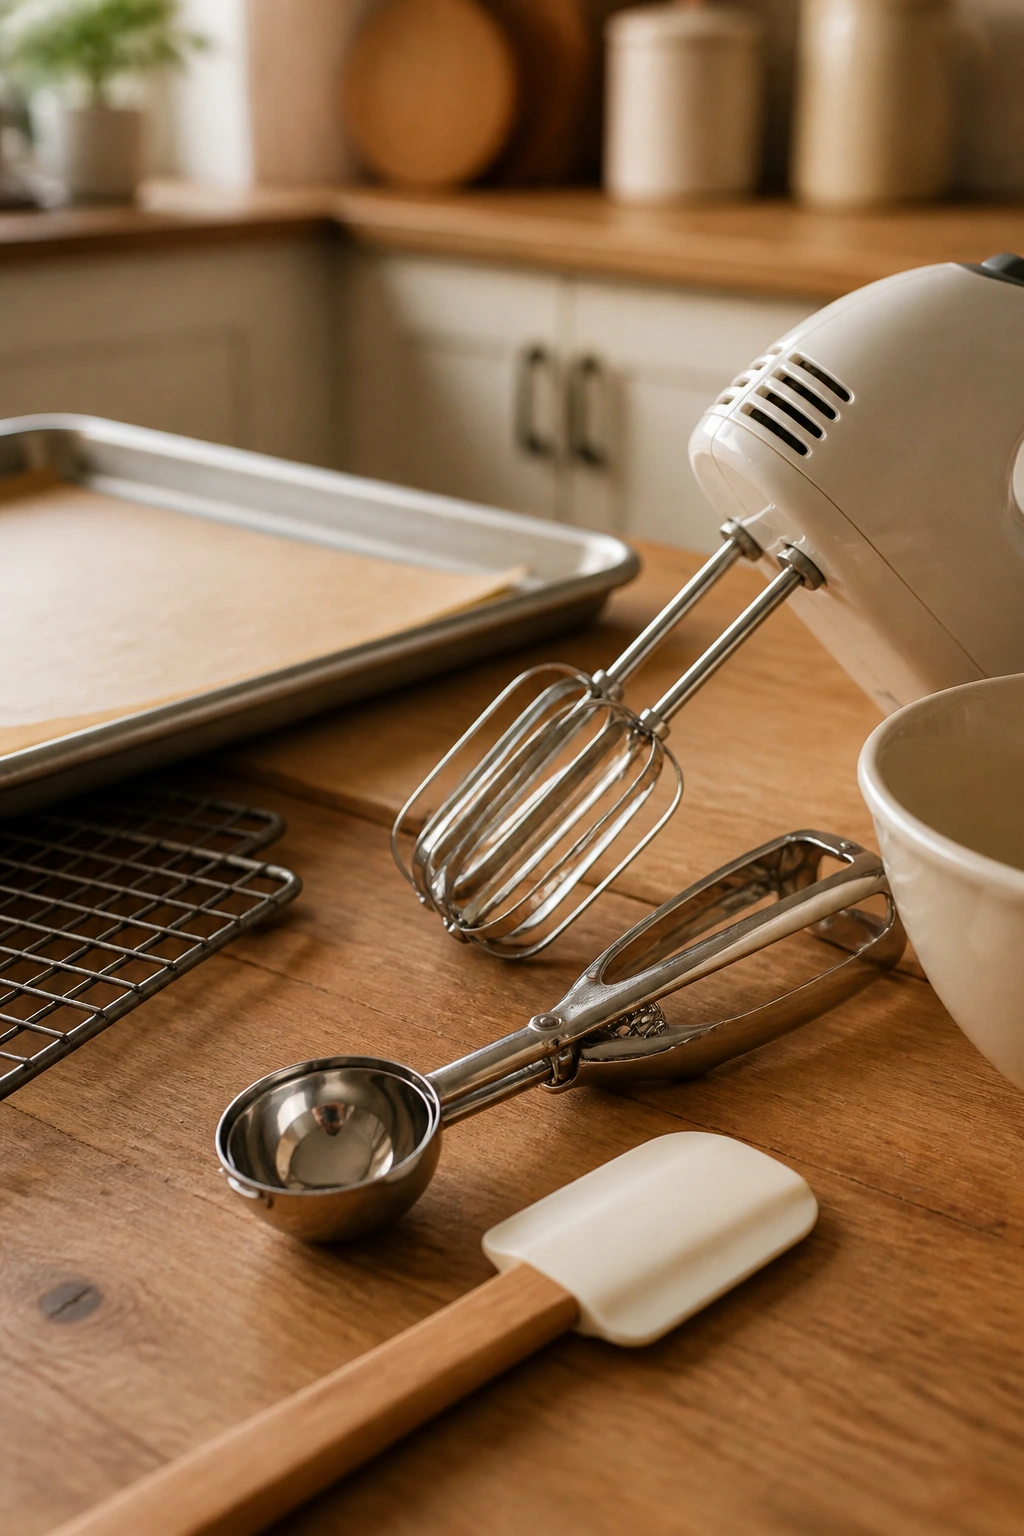
- Baking sheets with low rims: They let the hot air move around the cookies and keep the bottoms from steaming.
- Parchment paper: It prevents sticking and makes cleanup painless, especially with jam, sugar, or chocolate.
- Cookie scoop in two sizes: A 1 1/2-tablespoon scoop and a 2-tablespoon scoop cover most of these recipes.
- Hand mixer or stand mixer: Creaming butter and sugar is easier and more even with a mixer, though a wooden spoon can work for shortbread and sandies.
- Cooling rack: Cookies stop overbaking once you move them off the hot pan.
- Microplane or zester: Useful for lemon, orange, or spice-heavy cookies.
- Digital kitchen scale, if you have one: It removes flour guesswork, and cookie dough rewards that kind of precision.
- Airtight storage tins or containers: They keep soft cookies soft and crisp cookies crisp when you store them separately.
Shopping the Pantry Like a Cookie Baker
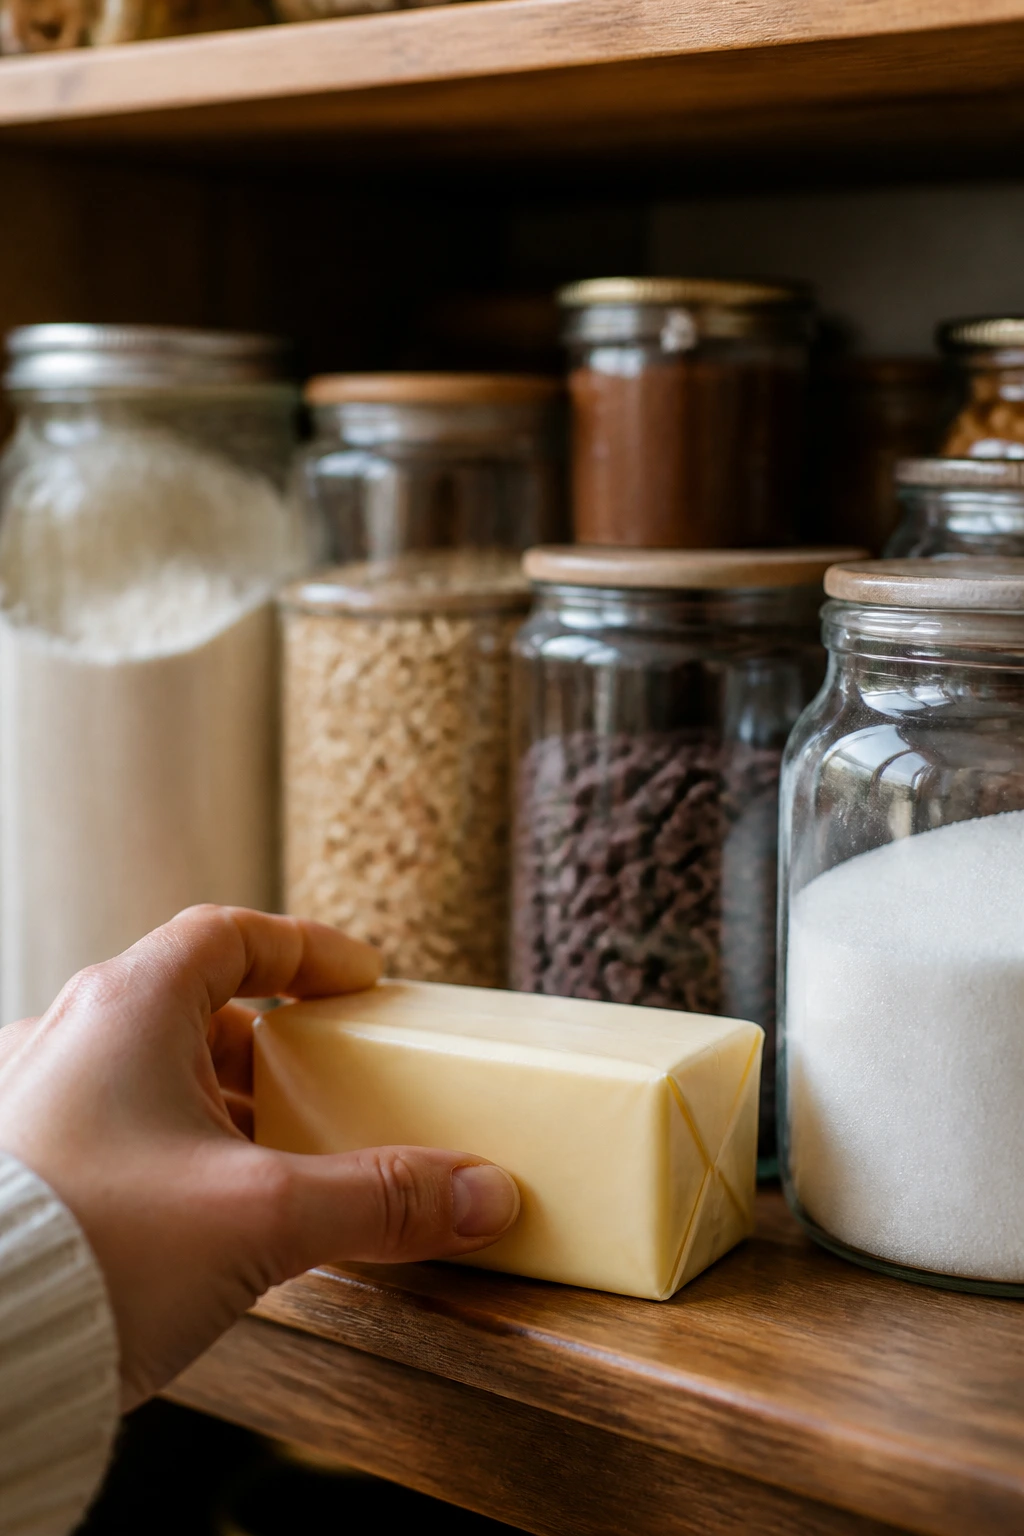
Butter matters more than people think. Buy unsalted butter when you can, because it lets you control the salt and keeps the flavor clean. Let it soften on the counter until a finger leaves a dent but doesn’t sink through. Melted butter changes the whole texture, and not in a charming way.
Sugar is not just sugar here. Granulated sugar helps cookies spread and crisp. Brown sugar brings moisture and chew. Powdered sugar belongs in shortbread, wedding cookies, icing, and crinkles, where that fine texture makes a visible difference. If a recipe calls for two kinds, use both. The balance is doing work.
Flour should be spooned into the measuring cup and leveled off, not packed down. That little habit saves a lot of dry, tough cookies. If you bake often, keep old-fashioned oats, semisweet chips, cocoa powder, vanilla, jam, and a jar of peanut butter around. Those ingredients cover half this list and a lot of spontaneous baking moods.
Nuts are worth buying fresh, not as an afterthought. Pecans and walnuts turn stale faster than people expect, and stale nuts taste dusty in cookies. If you’re not sure, smell them. If they don’t smell warm and nutty, they’re not helping.
The Best Ways to Serve a Mixed Cookie Tray
Presentation: Stack the cookies by shape and color instead of mixing them into one jumble. Chocolate chip, crinkles, and sugar cookies all look stronger when they each get a little space. A lined platter, an old tin, or a wood board all work, and a few mint leaves or citrus peels can break up the visual sameness without making the tray fussy.
Accompaniments: Cold milk is the obvious match, and it still earns the spot. Coffee works for shortbread, sandies, hermits, and molasses cookies. Tea suits tea cakes, lemon crinkles, and sugar cookies with glaze. If you want a dessert plate, add berries, vanilla ice cream, or a spoonful of whipped cream for thumbprints and jam drops.
Portions: Most of these cookies land in the 1 1/2- to 2-inch range, so plan on 2 to 3 per person for a light dessert and 4 if the tray is the whole point. For a bake sale or holiday spread, count on a dozen cookies disappearing faster than you think. That sounds dramatic. It isn’t.
Beverage Pairing: Brewed coffee fits the butter-heavy cookies. Black tea works with spice cookies. Milk is still the cleanest answer for chocolate chip, peanut butter, and chocolate crinkles, especially when the cookies are warm enough to soften at the edges.
Small Upgrades That Still Feel Like the Original
Flavor Enhancement: Toast nuts in a 350°F oven for 6 to 8 minutes before adding them to cookies. The flavor gets deeper, and the smell alone is worth the extra pan.
Customization: A pinch of espresso powder in chocolate cookies, a little orange zest in sugar dough, or a spoonful of cinnamon in oatmeal dough changes the mood without changing the cookie’s identity.
Serving Suggestions: Finish soft cookies with flaky salt, powdered sugar, a thin glaze, or a few extra chips pressed into the tops before baking. That tiny last step makes the tray look intentional instead of plain.
Make-It-Yours: If you need nut-free cookies, lean on chocolate chip, sugar, lemon crinkle, tea cakes, and M&M cookies. For dairy-free baking, choose coconut macaroons, some molasses cookies, or a butter-cookie-style dough made with plant butter that bakes cleanly. For a less-sweet tray, choose shortbread, pecan sandies, or butter cookies and skip frosting entirely.
Make-Ahead, Storage, and Reheating Guidance
Most baked cookies keep 3 to 5 days at room temperature in an airtight container, though soft cookies like brown sugar cookies, tea cakes, and oatmeal cookies stay nicest in the first 3 days. Separate crisp cookies, like shortbread and pecan sandies, from soft ones so the textures don’t blur together. A slice of sandwich bread tucked into a container with soft cookies can help keep them tender, but don’t use that trick for crisp cookies.
Unbaked dough usually keeps 2 to 3 days in the refrigerator and up to 2 months in the freezer if wrapped tightly. Icebox dough logs freeze especially well. Scoop-and-freeze dough balls work for chocolate chip, peanut butter, oatmeal, and M&M cookies; freeze them on a tray, then move them to a bag once solid. Bake straight from frozen and add 1 to 3 extra minutes.
Baked cookies freeze for up to 2 months if they’re fully cooled and layered with parchment. Jam cookies, iced cookies, and thumbprints need a gentle touch here; freeze them in a single layer first so the toppings don’t smear. To reheat, warm soft cookies at 300°F (150°C) for 3 to 5 minutes, or set them on the counter for 20 minutes after freezing. Crisp cookies need only a minute or two in the oven to wake up.
A few of these, especially shortbread, icebox cookies, and cookie logs, are actually better when they rest overnight because the flavor settles. Others, like chocolate chip and peanut butter blossoms, are at their best the same day they’re baked. That split is useful to know. Not every cookie wants the same treatment.
Easy Swaps and Adaptations for the Whole Set
Gluten-Free Pantry Swap: Use a reliable 1:1 gluten-free flour blend in chocolate chip, sugar, peanut butter, lemon crinkle, and brown sugar cookies. Shortbread and sandies can work too, but they need a blend that includes xanthan gum or another binder so they don’t crumble apart.
Dairy-Free Batch: Plant butter works best in drop cookies and sugar cookies, where the dough isn’t too delicate. Coconut macaroons, chocolate crinkles, and some oatmeal cookies also adapt cleanly. Avoid trying to force a dairy-free version of the most butter-forward shortbread unless you’re willing to accept a different texture.
Lower-Sugar Tray: Shortbread, pecan sandies, almond crescents, and butter cookies can take a modest reduction in sugar without falling apart. Cookies with lots of mix-ins or candy coatings need more sugar structure, so cutting too much changes the whole cookie.
Nut-Free School-Safe Cookies: Sugar cookies, lemon crinkles, chocolate chip cookies, tea cakes, and chocolate crinkles are easy choices. Skip peanut butter, almond, pecan, and wedding cookies, and check labels on chocolate chips and mix-ins for cross-contact if that matters in your kitchen.
Flavor-Rotation Cookies: Take one basic dough and move it around with citrus zest, cinnamon, cocoa, chopped nuts, or chips. Sugar-cookie dough is the best blank canvas here. It’s plain enough to take on almost anything without collapsing into a different dessert.
The Mistakes That Turn Good Dough into Flat Disks
Butter that’s too soft: If the butter is shiny, greasy, or starting to pool, the dough will spread early. The fix is simple: chill the dough 15 to 30 minutes before baking.
Flour measured with a heavy hand: Packed flour makes cookies dry, dense, and a little chalky. Spoon and level, or use a scale if you’re tired of guessing.
Baking until the tops look dry: A lot of cookies finish setting after they leave the oven. If you wait for a deep brown top, you’ve probably gone too far.
Crowding the tray: Cookies need room to spread and breathe. A packed pan traps steam and gives you soft bottoms, uneven edges, and more merging than you wanted.
Skipping the cooling step: Fresh cookies are fragile. Move them too soon and they break, smear, or crumble before they’ve had a chance to set.
Using one dough for every cookie style: A press cookie dough and a scoop cookie dough are not the same thing. A batch that works for chocolate chip cookies may be useless in a cookie press, and that’s not your fault. It’s chemistry being picky.
Cookie Questions People Ask All the Time
Which cookie on this list is easiest for a total beginner?
Chocolate chip cookies, peanut butter cookies, and sugar cookies are the least fussy. They use familiar ingredients, simple mixing, and clear doneness cues, so they’re good first bakes.
Do I need a mixer for these recipes?
Not always. A hand mixer makes creaming faster, but shortbread, sandies, and some oatmeal doughs can be mixed with a wooden spoon if the butter is properly softened.
Why do my cookies spread too much?
Usually the butter was too warm, the dough wasn’t chilled, or the flour was undermeasured. A hot baking sheet can do it too, which is why a cool pan matters.
Can I freeze cookie dough instead of baked cookies?
Yes, and for many of these recipes it’s the better move. Scoop dough balls, freeze them solid, then store them in a bag so you can bake one tray at a time.
Should I use salted or unsalted butter?
Unsalted gives you better control. If salted butter is what you have, reduce the added salt a little and pay attention to taste, especially in shortbread and sugar cookies.
How do I keep soft cookies soft?
Store them in an airtight container once fully cool. A slice of bread can help for a day or two, but the real trick is not overbaking them in the first place.
What if my cookies come out dry?
They were probably baked too long or the flour went in too heavy. Next time, pull them a minute earlier and measure the flour more lightly.
Can I make these without special tools?
Yes. A spoon can replace a cookie scoop, a fork can flatten peanut butter cookies, and a knife can shape icebox logs. Fancy tools help, but they’re not the gatekeeper here.
A Cookie Tin Worth Keeping
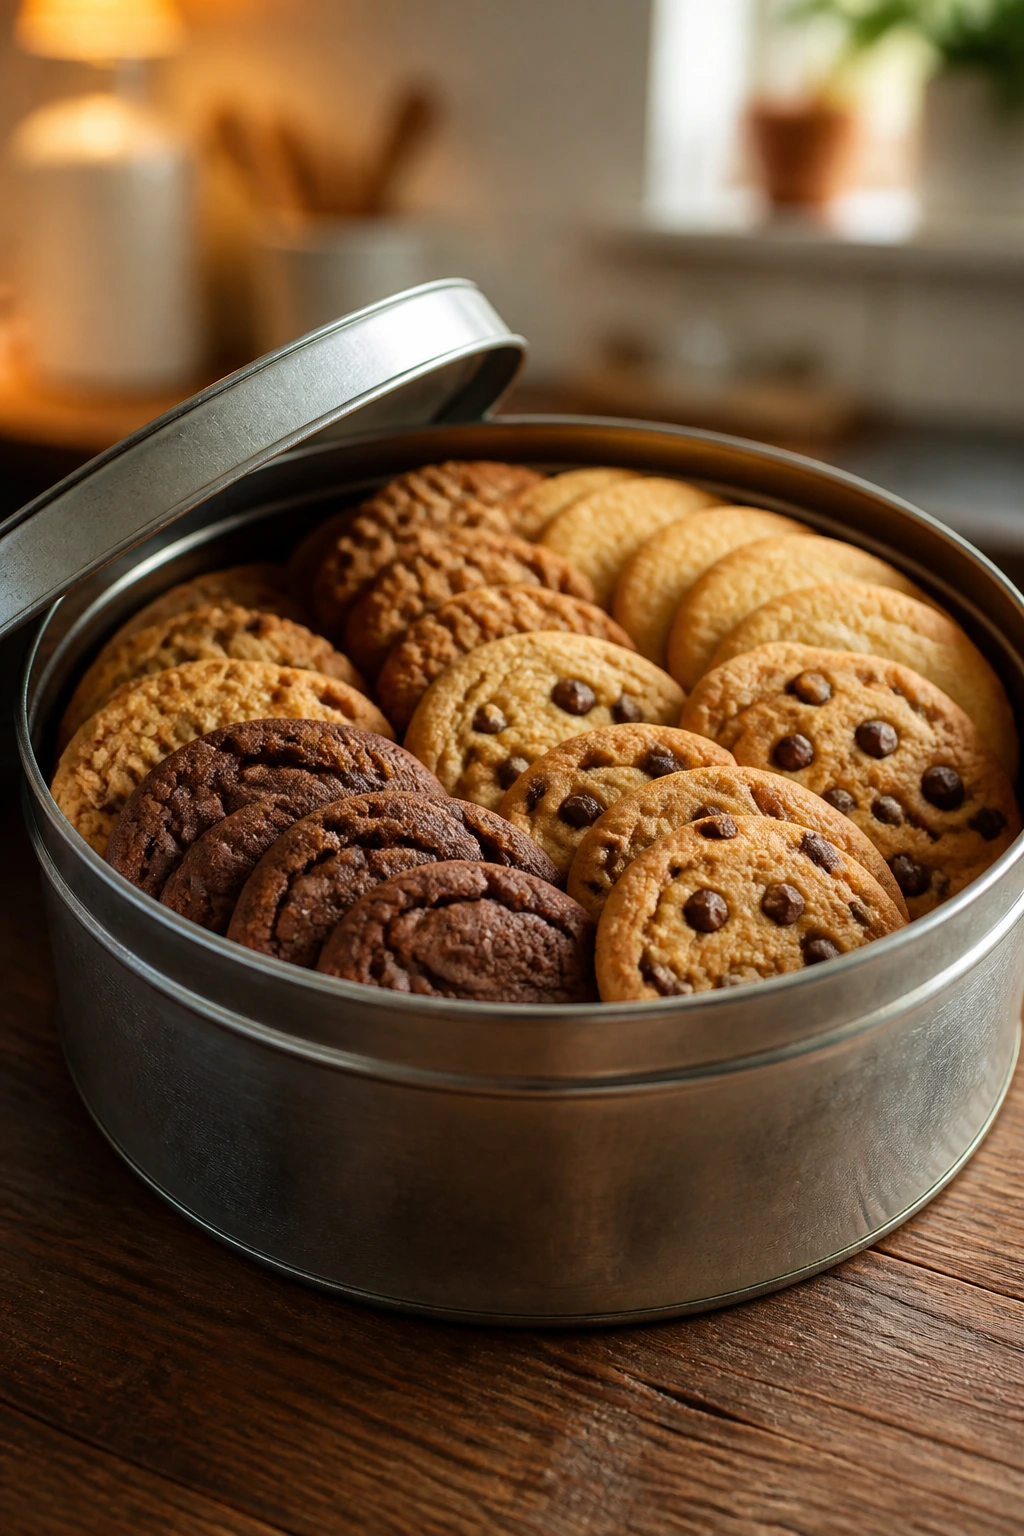
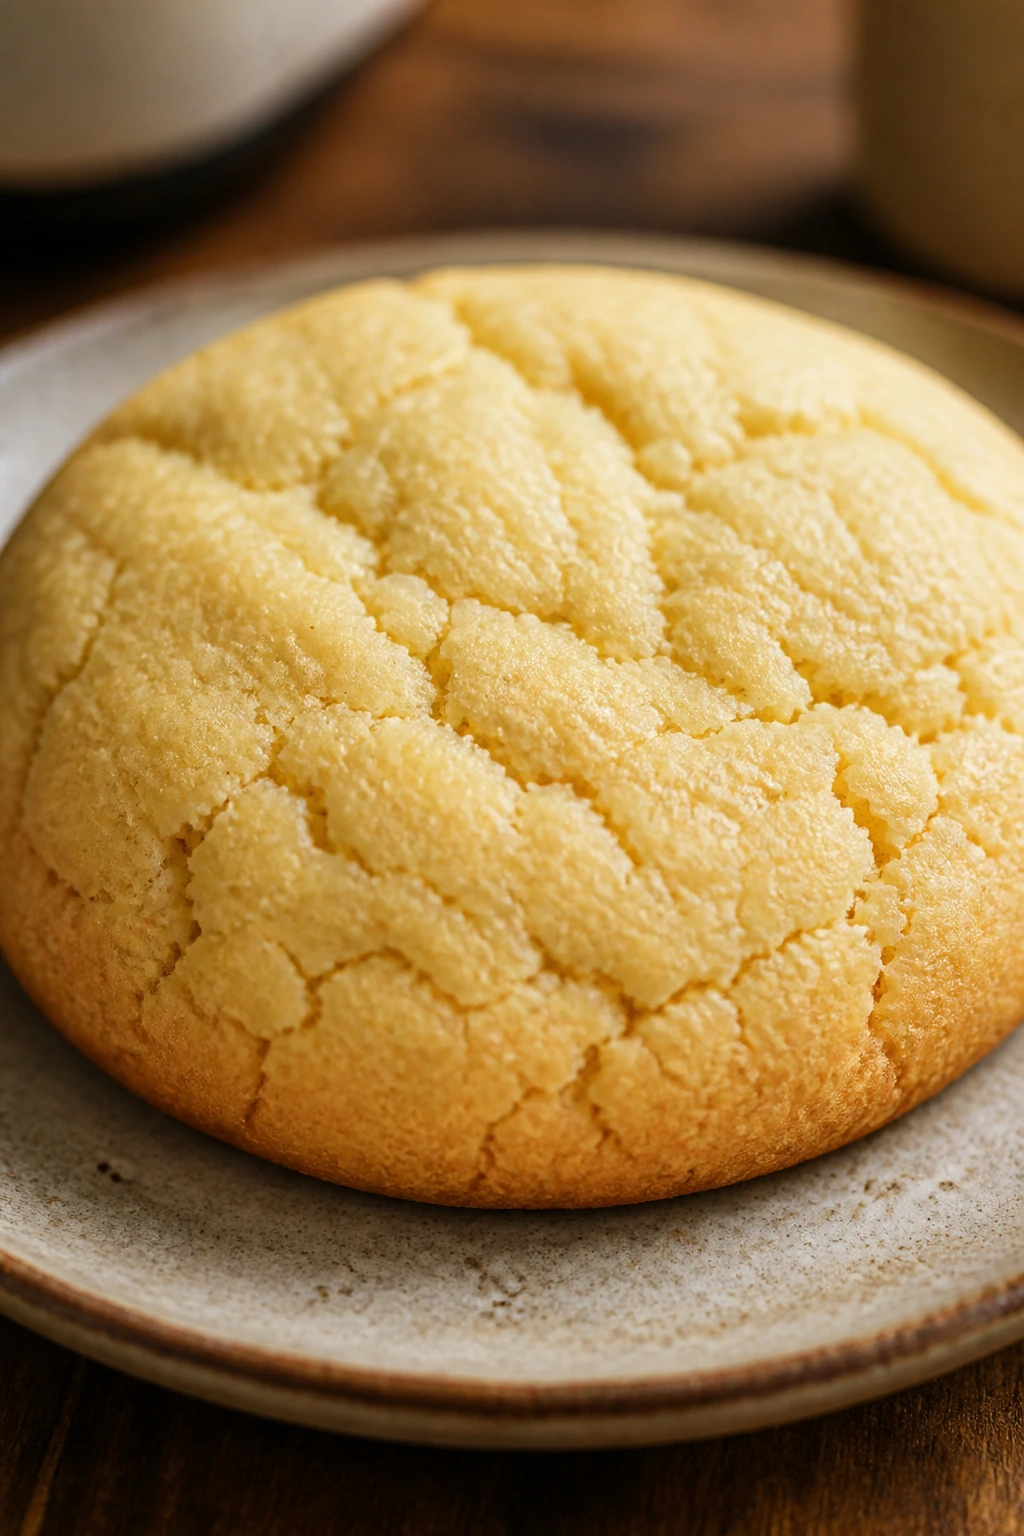
A tray of cookies tells a bigger story than it seems to. You can see where the butter was soft, where the sugar helped with spread, where the dough was chilled just long enough, and where the oven finished the job exactly on time. That’s why these old recipes stick around. They keep teaching the same lessons in ways that still taste good.
Start with the ones that feel friendly, then work outward into the more shaped or decorated cookies when you’re ready. That’s the nice part about classic cookies: they don’t ask you to be perfect before you begin. They ask you to pay attention, and that’s a much better deal.