
The easiest way to make an Easter dessert table look polished is also the least fussy one: bars. A pan of Easter bars dessert recipes gives you bright citrus, pastel candy, glossy swirls, and clean-cut squares that look deliberate even when you made them in a lined baking pan and a little common sense.
That’s the charm here. Instead of balancing a multi-layer cake, you get desserts that set up neatly, slice without a fight, and still manage to look dressed for the occasion — lemon curd shining on a pale crust, raspberry ribbons running through vanilla batter, chopped mini eggs tucked into blondies like confetti that happened to land exactly right. These are the desserts I reach for when I want color on the table and fewer dishes in the sink.
Bars also solve a very real Easter problem: the menu usually already has enough going on. Ham in the oven. Potatoes on the stove. Rolls warming somewhere they probably should not be warming. A tray of bars can be baked earlier, chilled, cut later, and carried out at the exact moment the coffee gets poured. They’re forgiving in a way layer cakes are not. And that matters.
Why These Bars Earn a Spot on the Easter Table
-
They cut cleanly after a chill: Most of these recipes set up in the fridge, which means sharp edges, neat squares, and fewer crumbly disasters on the platter.
-
They use color honestly: Lemon curd, raspberry swirls, pistachios, coconut, and pastel candies do the decorating for you, so you do not need piping bags or a steady hand.
-
They travel well: A sheet of parchment and a tight lid turn almost any pan of bars into something you can bring across town without it slumping.
-
They cover every flavor lane: Tart, creamy, chocolatey, nutty, fruity, and candy-studded all show up here, which keeps the dessert table from feeling one-note.
-
They work ahead of time: A lot of these bars taste better after a chill, especially cheesecake bars, custard bars, and anything with a jam swirl.
-
They still feel festive without being precious: One pan can look dressed up with powdered sugar, citrus zest, chopped nuts, or a scatter of mini eggs. That’s enough.
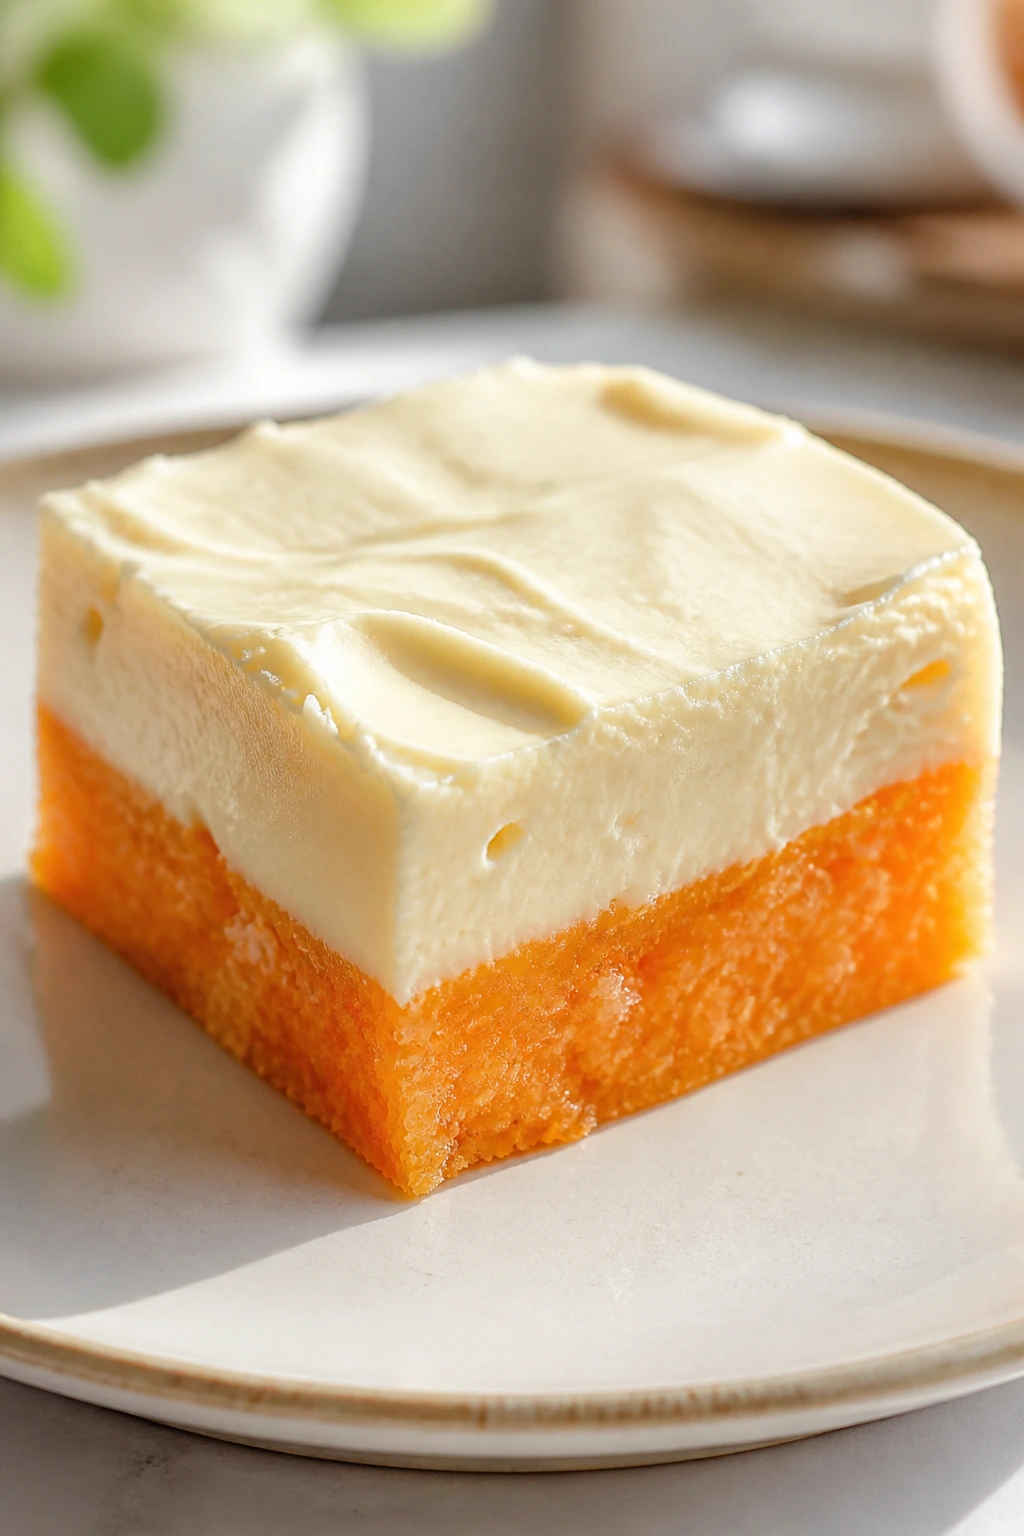
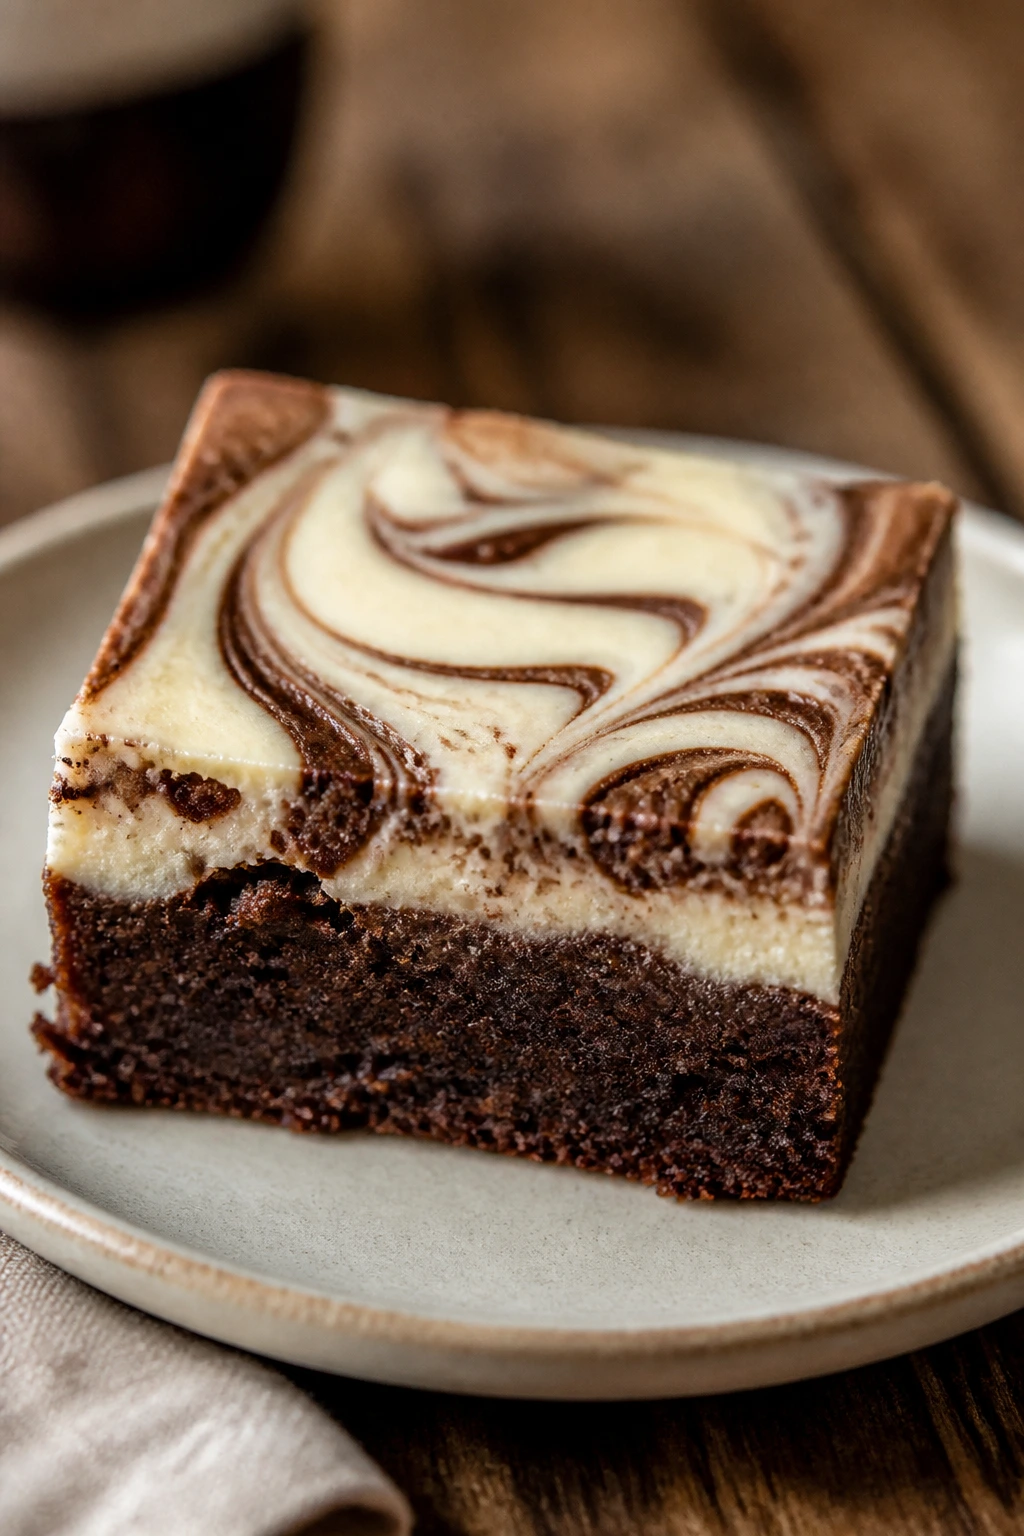
1. Carrot Cake Bars with Cream Cheese Swirl
Intro: These bars land somewhere between carrot cake and a soft blondie, with a tangy cream cheese ribbon running through the top like a little white marbling. The carrot shreds stay tender, the cinnamon gives the crumb warmth, and the whole pan smells like the good part of spring baking.
Why It Works: Carrot cake bars are a smart Easter move because they borrow the flavor people already expect from the holiday without asking you to stack layers or frost a cake. The grated carrots add moisture, while the cream cheese swirl bakes into a pale, slightly tart top that looks neat against the golden crumb.
Key Ingredients:
- 1/2 cup unsalted butter, melted
- 3/4 cup packed light brown sugar
- 2 large eggs
- 1 cup all-purpose flour
- 1 teaspoon ground cinnamon
- 1 1/2 cups finely grated carrots
- 4 ounces cream cheese, softened
- 2 tablespoons powdered sugar
- 1 teaspoon vanilla extract
- Pinch of salt
Quick Steps:
- Heat the oven to 350°F and line an 8×8-inch pan with parchment.
- Whisk butter, brown sugar, and eggs until glossy, then fold in flour, cinnamon, salt, and carrots.
- Beat cream cheese, powdered sugar, and vanilla until smooth, then dollop over the batter and swirl with a knife.
- Bake 28 to 32 minutes, until the center is set and the top springs back lightly.
Equipment for This Recipe:
- 8×8-inch baking pan
- Mixing bowls
- Whisk and spatula
- Small offset spatula or butter knife for swirling
How to Serve This Dish: Cut these into tidy squares and dust them with a little powdered sugar. A few curls of fresh carrot on the platter are overkill, honestly, but a good one. Keep them chilled until serving.
Pro Tips for This Recipe:
- Grate the carrots finely; thick shreds make the bars snaggy.
- Let the cream cheese soften fully so the swirl stays smooth.
- Chill before slicing if you want sharp edges.
Variations on This Dish:
- Pecan-Carrot Version: Stir 1/2 cup chopped toasted pecans into the batter for more crunch.
- Orange-Spice Version: Add 1 teaspoon orange zest and a pinch of nutmeg to the base.
Common Mistakes to Avoid with This Dish:
- Don’t use wet, pre-shredded carrots. They leak water and blunt the flavor.
- Don’t pull the pan early; the middle should look set, not shaky.
2. Lemon Raspberry Shortbread Bars
Intro: These are the bars that disappear first when you set out a dessert tray. The crust is sandy and buttery, the filling is sharp with lemon, and the raspberries break into little ruby streaks that look almost painted on.
Why It Works: Lemon and raspberry are a natural pair because the berry softens the citrus bite without smothering it. A shortbread base keeps the whole thing stable, so the bars cut cleanly after chilling and do not ooze when you lift them from the pan.
Key Ingredients:
- 1 cup unsalted butter, softened
- 1/2 cup powdered sugar
- 2 cups all-purpose flour
- 1/4 teaspoon salt
- 3 large eggs
- 1 cup granulated sugar
- 1/2 cup fresh lemon juice
- Zest of 2 lemons
- 1 cup raspberries
Quick Steps:
- Heat oven to 350°F and line a 9×9-inch pan.
- Mix butter, powdered sugar, flour, and salt, then press into the pan and bake 15 minutes.
- Whisk eggs, sugar, lemon juice, and zest, then scatter raspberries over the crust.
- Pour in the filling and bake 22 to 25 minutes, until the center no longer sloshes.
- Chill before cutting.
Equipment for This Recipe:
- 9×9-inch pan
- Whisk
- Citrus zester
- Fine-mesh sieve, if you want to dust powdered sugar on top
How to Serve This Dish: Serve these cold with a thin veil of powdered sugar. They look sharp on a white platter and need almost nothing else, though a few extra raspberries never hurt.
Pro Tips for This Recipe:
- Freeze the raspberries for 10 minutes if they’re very soft.
- Strain out lemon seeds before pouring the filling.
- Chill at least 2 hours so the filling slices cleanly.
Variations on This Dish:
- Blueberry Lemon Bars: Swap in blueberries for a softer, jammy finish.
- Poppy Seed Citrus Bars: Add 1 tablespoon poppy seeds to the filling for texture.
Common Mistakes to Avoid with This Dish:
- Don’t overbake the filling; it should jiggle slightly in the middle when you pull it out.
- Don’t skip the chill, or the slices will slump.
3. Cadbury Egg Blondie Bars
Intro: If Easter candy has a home, it’s in a chewy blondie. Chopped Cadbury eggs melt into pockets of milk chocolate and crisp sugar shell, which means every bite has a little crackle before the soft center gives way.
Why It Works: Blondies are built for mix-ins. The brown sugar base stays chewy, the butter gives them that faint caramel edge, and the candy bits don’t need much help to look festive once they’re baked into the top.
Key Ingredients:
- 1 cup unsalted butter, melted
- 1 1/2 cups packed light brown sugar
- 2 large eggs
- 2 teaspoons vanilla extract
- 2 cups all-purpose flour
- 1 teaspoon baking powder
- 1/2 teaspoon salt
- 1 1/4 cups chopped Cadbury mini eggs
- 1/2 cup milk chocolate chips
Quick Steps:
- Heat oven to 350°F and line a 9×13-inch pan.
- Stir butter and brown sugar, then mix in eggs and vanilla.
- Fold in flour, baking powder, salt, half the candy, and the chocolate chips.
- Spread in the pan, press the rest of the candy on top, and bake 24 to 28 minutes.
- Cool fully before cutting.
Equipment for This Recipe:
- 9×13-inch pan
- Mixing bowl
- Rubber spatula
- Sharp knife for slicing through candy shells
How to Serve This Dish: Cut into squares and stack them slightly offset on a tray so the candy on top shows. They’re rich, so smaller pieces work better than giant ones.
Pro Tips for This Recipe:
- Chop the candy with a heavy knife, not a rolling pin; you want pieces, not powder.
- Pull them when the center still looks a touch underdone. They firm up as they cool.
Variations on This Dish:
- Brown Butter Version: Brown the butter first for a toasty, nutty edge.
- White Chocolate Version: Swap half the chips for white chocolate chunks.
Common Mistakes to Avoid with This Dish:
- Don’t overmix after adding flour; the bars get cakey and dry.
- Don’t cut while warm or the candy will smear.
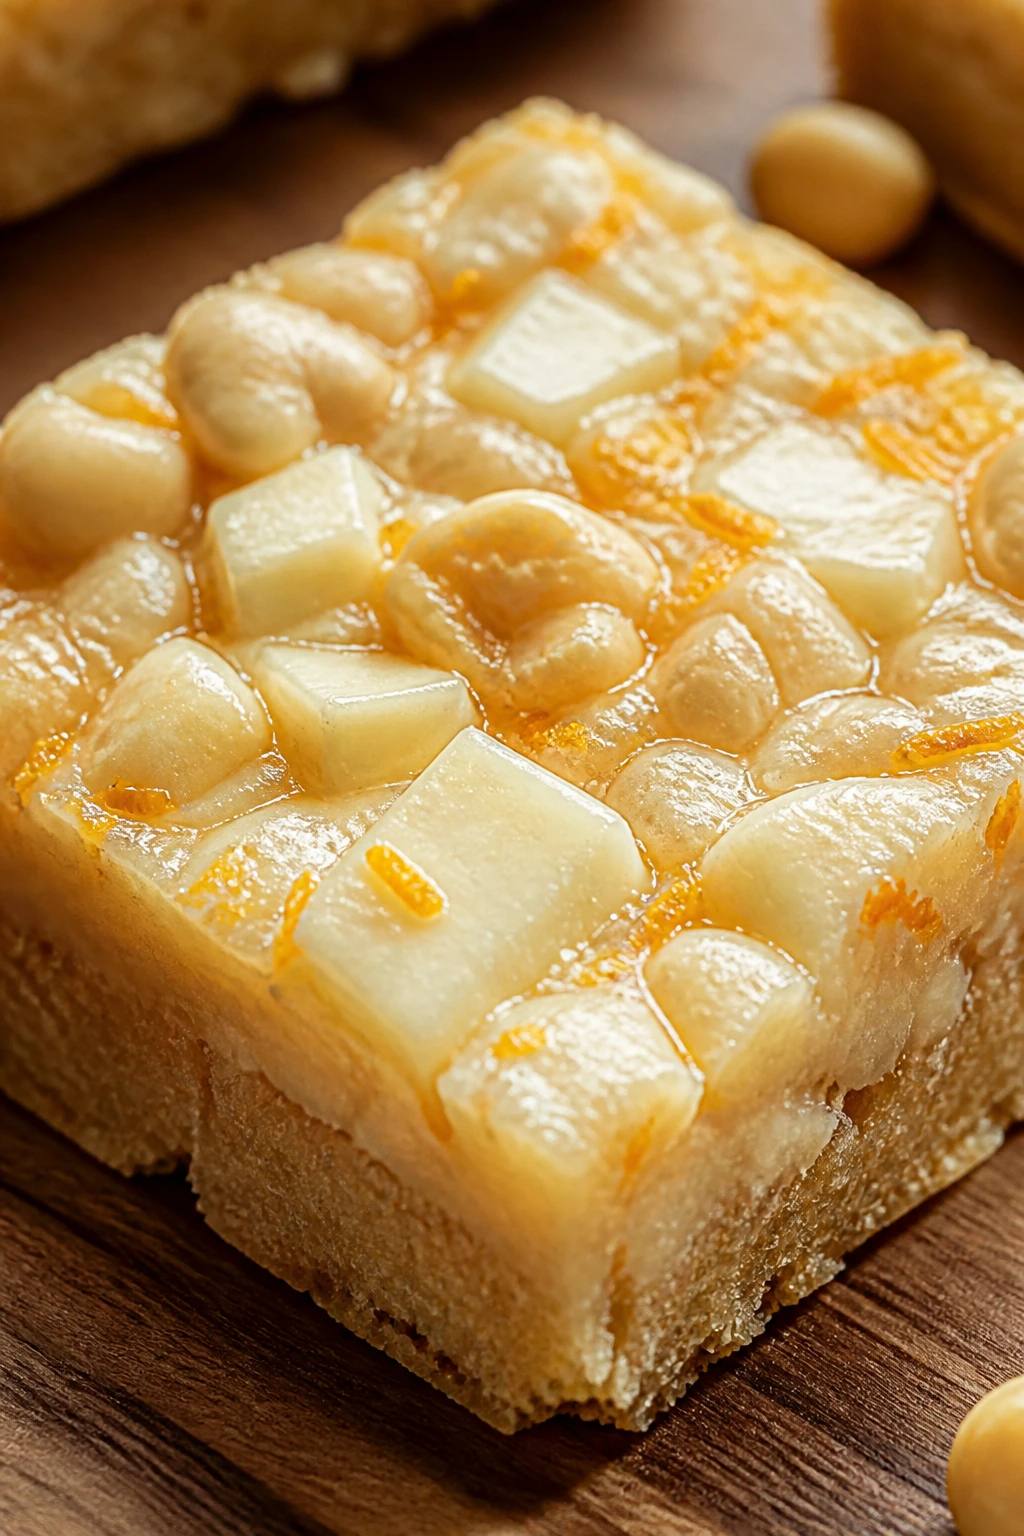
4. Coconut Macaroon Magic Bars
Intro: This is the pan that smells like toasted coconut the second it hits the oven. The layers are gooey, sticky, and sweet in the best old-school way, with a crisp crumb bottom and a glossy top that shatters a little when you slice it.
Why It Works: Magic bars need almost no handling. The crust gives structure, the condensed milk binds everything together, and the coconut browns just enough to create those little gold edges people always pick off first.
Key Ingredients:
- 1 1/2 cups graham cracker crumbs
- 1/2 cup melted butter
- 1 can sweetened condensed milk, 14 ounces
- 2 cups sweetened shredded coconut
- 1 cup semi-sweet chocolate chips
- 1/2 cup chopped pecans or walnuts
- Pinch of salt
Quick Steps:
- Heat oven to 350°F and line a 9×13-inch pan.
- Mix crumbs and butter, press into the pan, and bake 8 minutes.
- Pour on condensed milk, then sprinkle coconut, chips, nuts, and salt.
- Bake 22 to 25 minutes until the top is golden and the edges bubble.
- Cool completely before slicing.
Equipment for This Recipe:
- 9×13-inch pan
- Measuring cups
- Small bowl for the crust
- Offset spatula for pressing
How to Serve This Dish: These are rich, so cut them into narrow bars and serve at room temperature. A few flakes of toasted coconut on top make them look finished without much effort.
Pro Tips for This Recipe:
- Press the crumb base firmly or the bars will crumble at the first cut.
- Let them cool all the way; magic bars slice badly when warm.
Variations on This Dish:
- White Chocolate Coconut Bars: Swap the chips for white chocolate.
- Chocolate-Almond Version: Use sliced almonds and add 1/2 teaspoon almond extract.
Common Mistakes to Avoid with This Dish:
- Don’t pour the condensed milk over an unbaked crust if the base is still hot enough to steam.
- Don’t overload the top with mix-ins; the bars need milk to hold together.
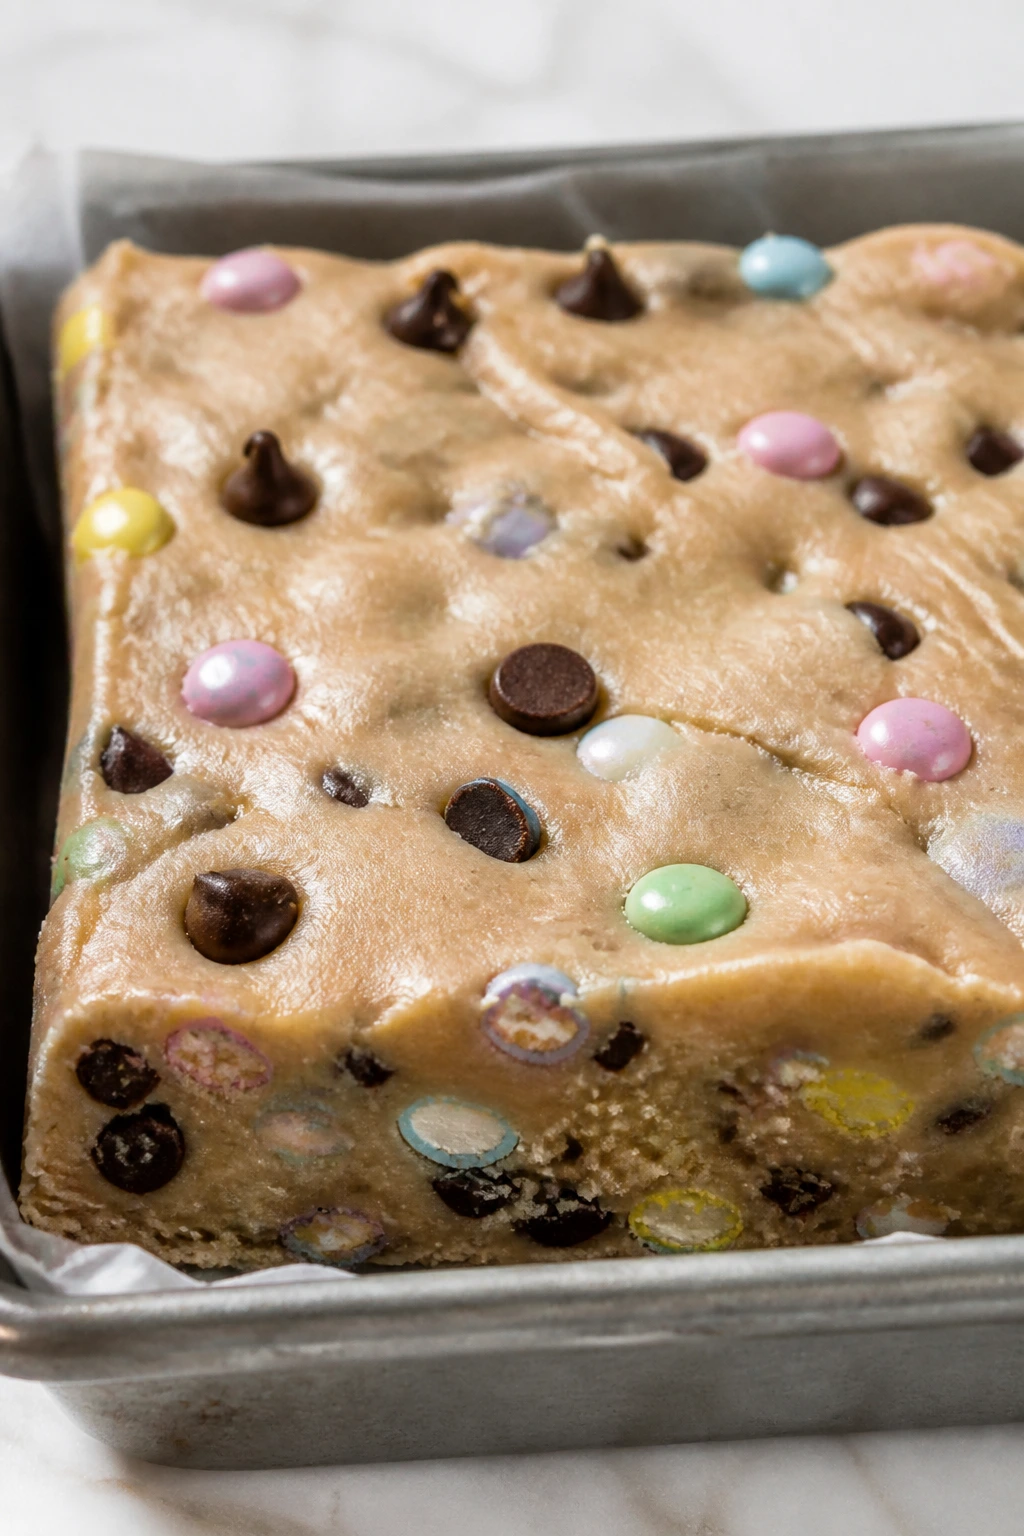
5. Pastel M&M Cookie Bars
Intro: These are the bars that make kids point at the pan before they’ve even cooled. Soft cookie dough, pockets of candy crunch, and those little pastel shells on top give the whole thing a confetti look that lands right in Easter territory.
Why It Works: Cookie bars are forgiving because they bake like a thick cookie in a single pan. You get chewy edges, a tender center, and a surface that accepts candy without collapsing under the weight of it.
Key Ingredients:
- 1 cup unsalted butter, softened
- 1 cup granulated sugar
- 1 cup packed light brown sugar
- 2 large eggs
- 2 3/4 cups all-purpose flour
- 1 teaspoon baking soda
- 1/2 teaspoon salt
- 1 cup pastel M&M candies
- 1/2 cup white chocolate chips
Quick Steps:
- Heat oven to 350°F and line a 9×13-inch pan.
- Cream butter and sugars, then beat in eggs and vanilla.
- Fold in flour, baking soda, salt, chips, and most of the candies.
- Spread into the pan, press the remaining candies on top, and bake 22 to 26 minutes.
- Cool before cutting.
Equipment for This Recipe:
- 9×13-inch pan
- Mixer or strong whisk
- Rubber spatula
- Parchment paper
How to Serve This Dish: Stack the squares in a staggered pile so the candy tops stay visible. They’re sturdy enough to serve with coffee, milk, or nothing at all.
Pro Tips for This Recipe:
- Save some candies for the top so the bars look bright after baking.
- Stop mixing once the flour disappears; that keeps the crumb soft.
Variations on This Dish:
- Chocolate Chip Version: Swap out the white chips for semi-sweet chocolate chips.
- Brown Butter Version: Brown the butter and let it cool before mixing.
Common Mistakes to Avoid with This Dish:
- Don’t overbake the center; cookie bars turn dry fast.
- Don’t press the dough too thin or the bars lose their chewy middle.
6. Peeps Marshmallow Krispie Bars
Intro: These are pure nostalgia, but cleaner and easier to slice than the cereal bars in the paper-wrapped pan from childhood. The Peeps melt into the marshmallow base, leaving pastel streaks and a faint vanilla sweetness on top.
Why It Works: Marshmallow cereal bars set up fast and don’t need oven time once the base is mixed. That makes them useful when your oven is already full, and the Peeps bring the color without requiring a frosting job.
Key Ingredients:
- 4 tablespoons unsalted butter
- 10 ounces marshmallows
- 1 teaspoon vanilla extract
- 6 cups crispy rice cereal
- 8 to 10 Peeps, halved
- 2 tablespoons pastel sprinkles
- Pinch of salt
Quick Steps:
- Line a 9×13-inch pan with parchment.
- Melt butter and marshmallows over low heat, then stir in vanilla and salt.
- Fold in cereal, spread into the pan, and press gently.
- Top with halved Peeps and sprinkles, then let set 30 minutes before cutting.
Equipment for This Recipe:
- 9×13-inch pan
- Large saucepan
- Spatula coated with butter or spray
- Parchment paper
How to Serve This Dish: Serve these the same day for the best chew. They look best cut into narrow rectangles, with the Peeps showing off along the top edge.
Pro Tips for This Recipe:
- Keep the heat low or the marshmallow base gets tough.
- Grease your hands lightly before pressing; sticky cereal bars are no joke.
Variations on This Dish:
- Chocolate Krispie Version: Stir in 1/2 cup mini chocolate chips after the mixture cools slightly.
- Peanut Butter Version: Add 1/3 cup peanut butter to the melted marshmallow base.
Common Mistakes to Avoid with This Dish:
- Don’t pack the mixture down hard; compressed bars turn brick-like.
- Don’t leave them uncovered, or they dry out by the next day.
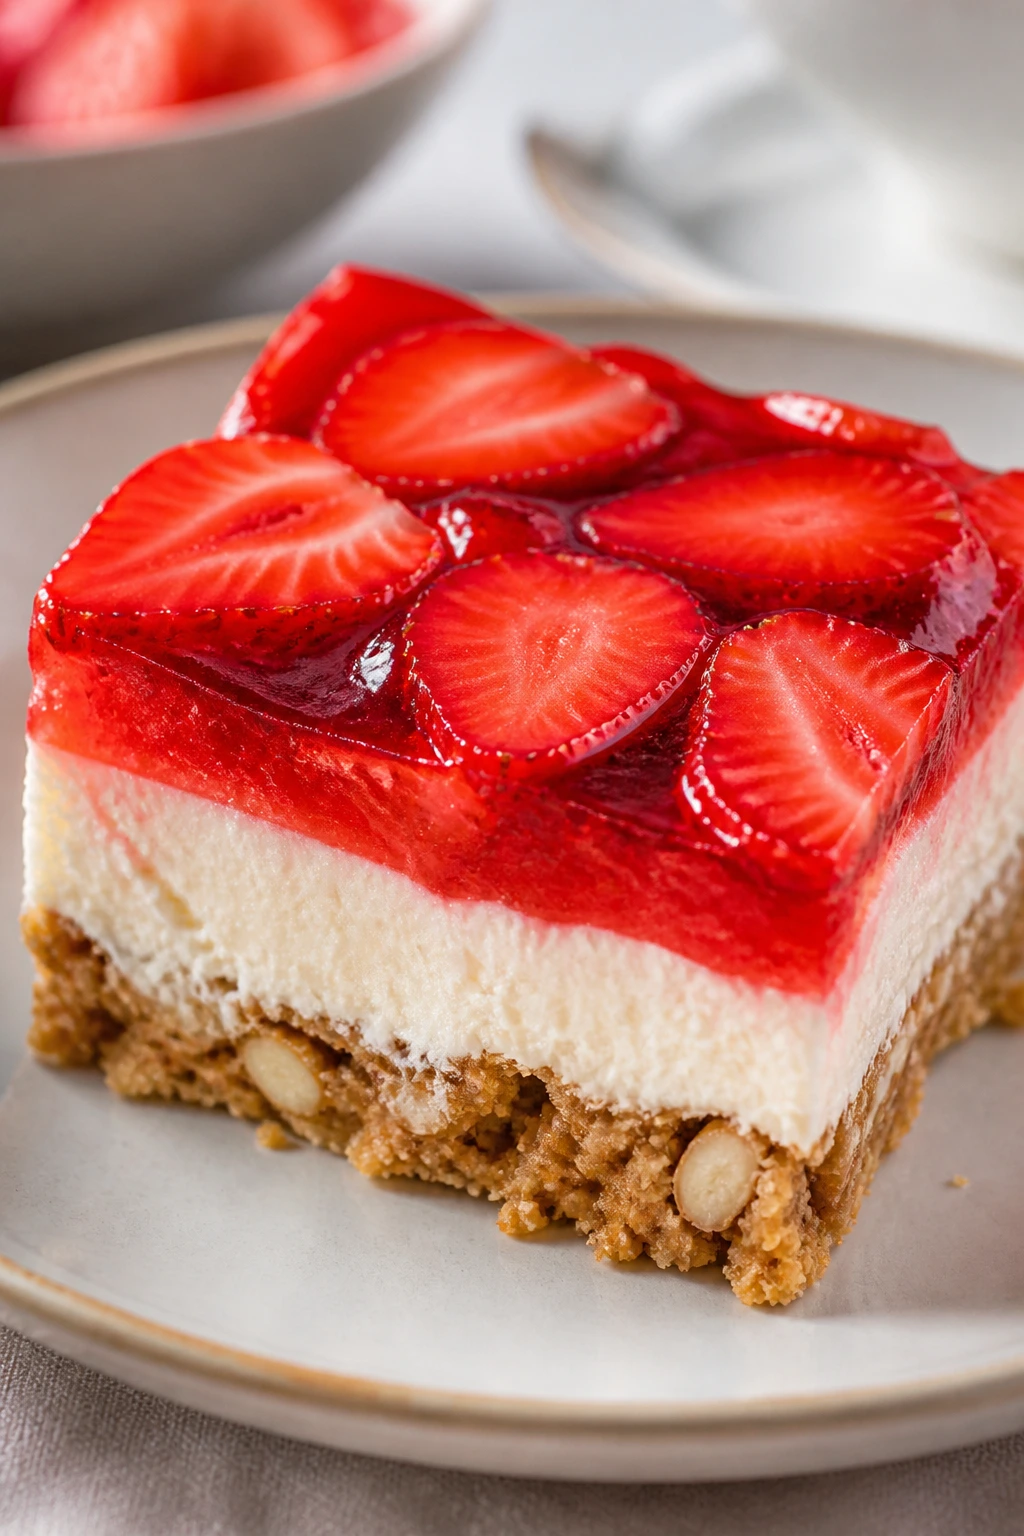
7. Strawberry Cheesecake Bars
Intro: Strawberry cheesecake bars look like dessert you spent all afternoon on, which is useful when you did not. The crust stays buttery and crisp, the filling is cool and tangy, and the strawberry layer brings a glossy pink finish that reads Easter immediately.
Why It Works: Cheesecake bars give you the rich center people expect from cheesecake without a springform pan or a water bath. The fruit layer keeps the top from feeling heavy, and the chilled texture makes the squares slice beautifully.
Key Ingredients:
- 1 1/2 cups graham cracker crumbs
- 1/2 cup melted butter
- 16 ounces cream cheese, softened
- 2/3 cup granulated sugar
- 2 large eggs
- 1 teaspoon vanilla extract
- 1/2 cup sour cream
- 1 cup strawberry jam or strawberry puree
Quick Steps:
- Heat oven to 325°F and line an 8×8-inch pan.
- Mix crumbs and butter, press into the pan, and bake 8 minutes.
- Beat cream cheese, sugar, eggs, vanilla, and sour cream until smooth.
- Spread over crust, swirl strawberry jam on top, and bake 28 to 32 minutes.
- Chill at least 3 hours.
Equipment for This Recipe:
- 8×8-inch pan
- Hand mixer
- Mixing bowls
- Offset spatula
How to Serve This Dish: Slice when fully chilled and serve cold. A few sliced strawberries on the side make the plate look thoughtful without crowding the bars.
Pro Tips for This Recipe:
- Use room-temperature cream cheese so the filling stays lump-free.
- Don’t overbake; a slight wobble in the center is correct.
Variations on This Dish:
- Raspberry Cheesecake Bars: Swap strawberry for raspberry jam.
- Lemon-Strawberry Version: Add 1 tablespoon lemon zest to the filling.
Common Mistakes to Avoid with This Dish:
- Don’t rush the chill, or the bars will smear when sliced.
- Don’t beat in too much air; cheesecake cracks less when mixed gently.
8. Pistachio White Chocolate Blondies
Intro: These bars have the kind of pale green-speckled look that feels tailor-made for a spring tray. Pistachios add crunch and a little savory edge, while white chocolate melts into soft pockets that keep the crumb plush.
Why It Works: Blondies are already built for nutty mix-ins, and pistachios bring both color and texture. The white chocolate adds sweetness without turning the bars sticky, which matters when you want a neat square rather than a gooey slab.
Key Ingredients:
- 1 cup unsalted butter, melted
- 1 1/2 cups packed light brown sugar
- 2 large eggs
- 2 teaspoons vanilla extract
- 2 cups all-purpose flour
- 1 cup chopped shelled pistachios
- 1 cup white chocolate chunks
- 1/2 teaspoon salt
Quick Steps:
- Heat oven to 350°F and line a 9×9-inch pan.
- Stir butter and sugar, then mix in eggs and vanilla.
- Fold in flour, salt, pistachios, and white chocolate.
- Spread in the pan and bake 24 to 28 minutes until the edges are golden.
- Cool fully before slicing.
Equipment for This Recipe:
- 9×9-inch pan
- Mixing bowl
- Spatula
- Knife for chopping pistachios
How to Serve This Dish: Serve these at room temperature with a few extra chopped pistachios scattered over the top. They pair nicely with tea because the sweetness stays in check.
Pro Tips for This Recipe:
- Toast the pistachios for 5 minutes if you want a deeper flavor.
- Reserve a few white chocolate chunks for the top.
Variations on This Dish:
- Orange Pistachio Bars: Add 1 tablespoon orange zest.
- Rosewater Version: Add 1/4 teaspoon rosewater to the batter.
Common Mistakes to Avoid with This Dish:
- Don’t use salted pistachios unless you cut the added salt.
- Don’t slice warm; the white chocolate needs time to set.
9. Brown Butter Toffee Bars with Mini Eggs
Intro: Brown butter gives these bars a deep, nutty smell before they even leave the bowl. Add toffee bits and chopped mini eggs, and you get a pan that’s crunchy at the edges, chewy in the middle, and bright enough for Easter without any frosting.
Why It Works: Brown butter turns a plain blondie into something with backbone. The toffee bits add shards of caramelized crunch, and the mini eggs make each square look dotted with little candy stones.
Key Ingredients:
- 1 cup unsalted butter, browned and cooled
- 1 1/2 cups brown sugar
- 2 large eggs
- 2 cups all-purpose flour
- 1 teaspoon baking powder
- 1/2 teaspoon salt
- 1 cup toffee bits
- 1 cup chopped mini eggs
Quick Steps:
- Heat oven to 350°F and line a 9×13-inch pan.
- Mix browned butter and sugar, then beat in eggs.
- Fold in flour, baking powder, salt, toffee bits, and half the mini eggs.
- Spread in the pan, press remaining candy on top, and bake 23 to 27 minutes.
- Cool before cutting.
Equipment for This Recipe:
- 9×13-inch pan
- Saucepan for browning butter
- Spatula
- Sharp knife
How to Serve This Dish: These are strong-flavored bars, so cut them small and serve with coffee. A little flake of sea salt on top before slicing makes the toffee pop.
Pro Tips for This Recipe:
- Brown the butter until it smells like toasted nuts, not burnt popcorn.
- Let it cool 10 minutes before mixing so the eggs don’t curdle.
Variations on This Dish:
- Chocolate Toffee Version: Stir in 1/2 cup chocolate chips.
- Pretzel Toffee Version: Add 1/2 cup chopped pretzels for salt and crunch.
Common Mistakes to Avoid with This Dish:
- Don’t skip cooling the butter or the batter gets greasy.
- Don’t overbake; the bars should stay chewy in the center.
10. Lemon Poppy Seed Yogurt Bars
Intro: These bars taste bright without feeling sharp. The yogurt keeps the crumb tender, the lemon zest perfumes the whole pan, and the poppy seeds give you that tiny speckled look that photographs well on a platter — even if the real charm is how cleanly they slice.
Why It Works: Yogurt adds moisture and a slight tang that pairs naturally with lemon. Poppy seeds give enough texture to keep the bars from reading flat, and a simple glaze lets you make them look finished with half a bowl and a spoon.
Key Ingredients:
- 1/2 cup unsalted butter, softened
- 3/4 cup sugar
- 2 large eggs
- 1 cup plain Greek yogurt
- 2 cups all-purpose flour
- 2 tablespoons poppy seeds
- Zest and juice of 2 lemons
- 1 teaspoon baking powder
- 1 cup powdered sugar for glaze
Quick Steps:
- Heat oven to 350°F and line an 8×8-inch pan.
- Cream butter and sugar, then beat in eggs, yogurt, lemon zest, and juice.
- Fold in flour, poppy seeds, and baking powder.
- Bake 28 to 32 minutes, cool, then drizzle with powdered sugar glaze.
- Let the glaze set before cutting.
Equipment for This Recipe:
- 8×8-inch pan
- Hand mixer
- Zester
- Small bowl for glaze
How to Serve This Dish: These work well as a lighter square among richer bars. Serve them with tea and a little extra lemon zest on top.
Pro Tips for This Recipe:
- Use full-fat yogurt if you want the best crumb.
- Whisk the glaze until it runs in a slow ribbon, not a watery spill.
Variations on This Dish:
- Orange Poppy Seed Bars: Swap lemon for orange zest and juice.
- Almond Lemon Bars: Add 1/2 teaspoon almond extract.
Common Mistakes to Avoid with This Dish:
- Don’t overmix the batter once the flour goes in.
- Don’t glaze while warm or the icing melts right off.
11. Chocolate Coconut Nest Bars
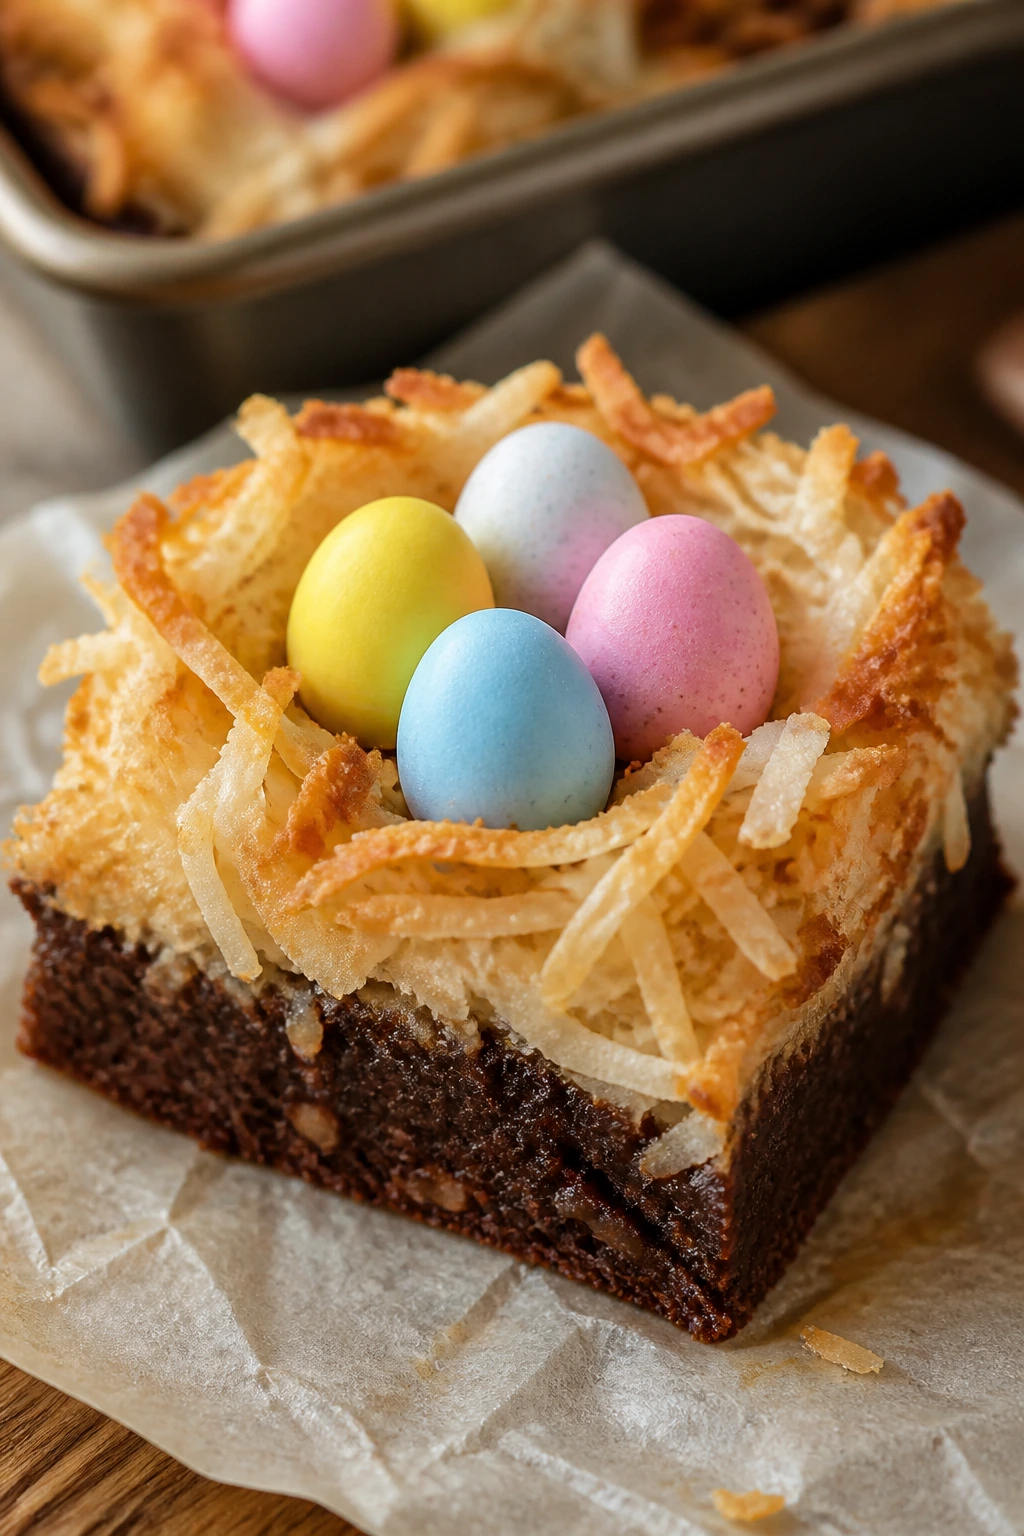
Intro: These are the bars that look like they were meant to sit beside dyed eggs. A chocolate base gives them depth, a coconut topping turns slightly toasted in the oven, and a few candy eggs on top finish the whole thing in one quick move.
Why It Works: Chocolate and coconut already know how to share a pan. The coconut layer mimics nest material, which gives these bars a playful Easter look without needing a complicated decoration step.
Key Ingredients:
- 1/2 cup butter, melted
- 1 cup sugar
- 2 large eggs
- 1/3 cup cocoa powder
- 1 cup flour
- 1/2 teaspoon salt
- 2 cups sweetened shredded coconut
- 1 can sweetened condensed milk, 14 ounces
- 1/2 cup candy eggs
Quick Steps:
- Heat oven to 350°F and line a 9×9-inch pan.
- Mix butter, sugar, eggs, cocoa, flour, and salt, then spread into the pan.
- Stir coconut with condensed milk and spoon over the chocolate layer.
- Bake 25 to 30 minutes until the coconut is golden.
- Press candy eggs on top after cooling slightly.
Equipment for This Recipe:
- 9×9-inch pan
- Mixing bowls
- Spatula
- Small spoon for topping
How to Serve This Dish: Cut into squares and let the coconut top stay visible. They’re best on a tray with plain paper liners underneath, because the sticky top can cling to plates.
Pro Tips for This Recipe:
- Wait 5 minutes before pressing in the candy eggs so they don’t melt.
- Cool fully for the cleanest layers.
Variations on This Dish:
- Dark Chocolate Version: Use Dutch-process cocoa for a deeper flavor.
- Almond Coconut Version: Add 1/2 teaspoon almond extract to the topping.
Common Mistakes to Avoid with This Dish:
- Don’t spread the coconut layer too thin; it should cover the chocolate base.
- Don’t cut hot, or the layers slide apart.
12. Almond Raspberry Linzer Bars
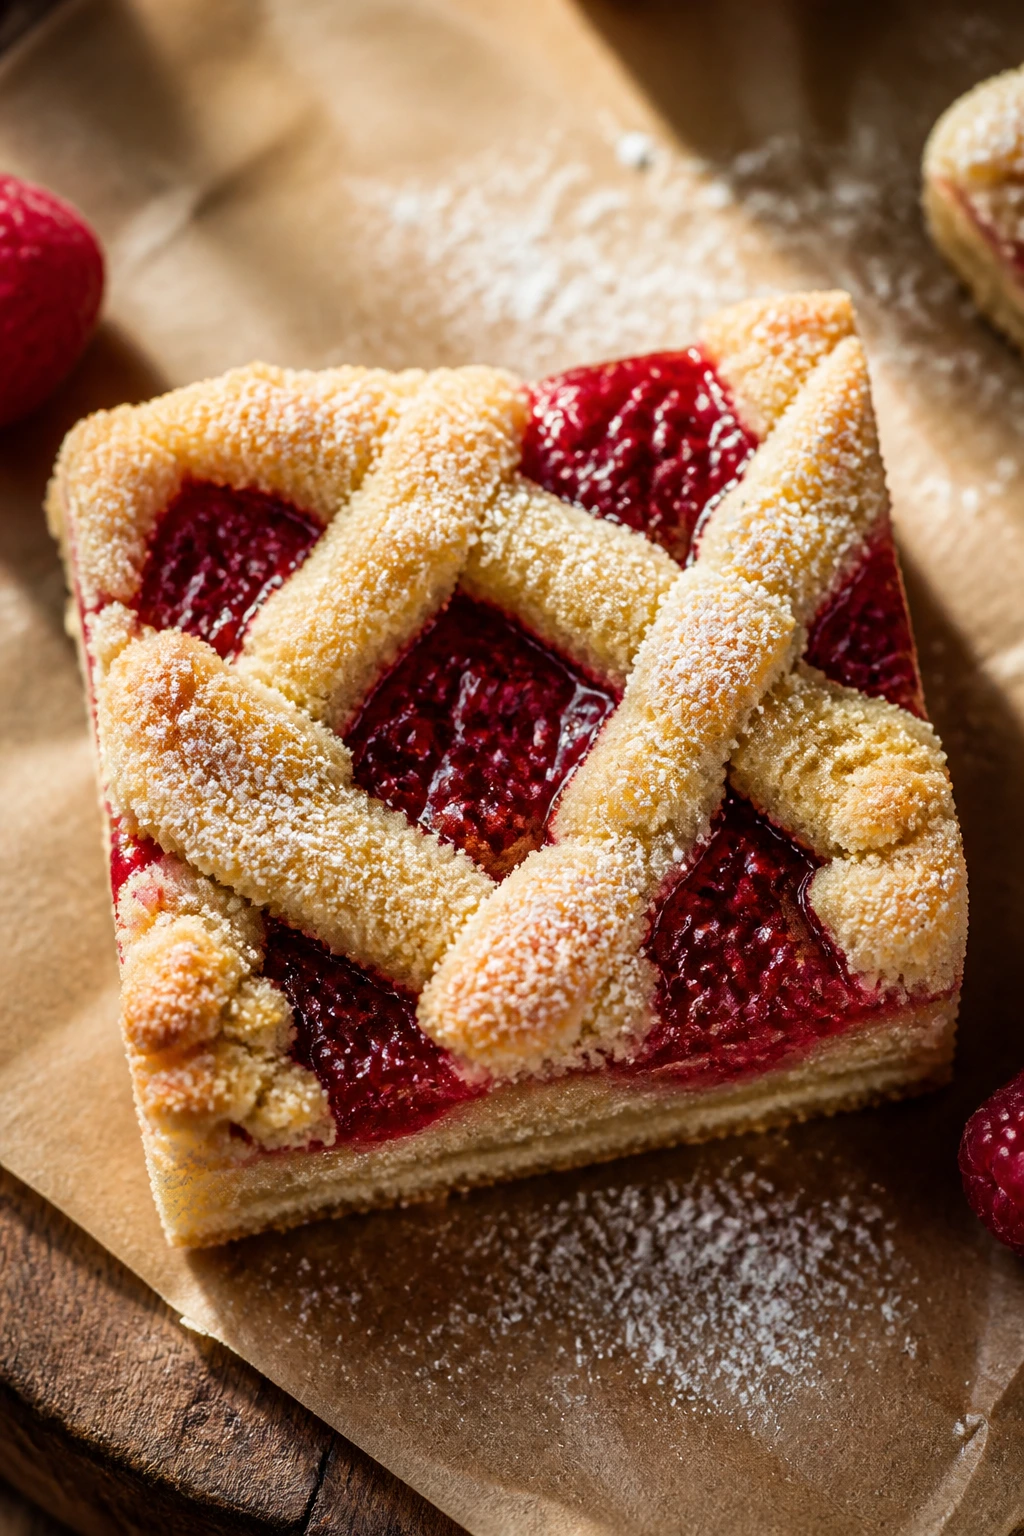
Intro: Linzer bars keep the pretty part of a linzer cookie but trade fiddly cutting and sandwiching for a single neat pan. Almond dough, bright raspberry jam, and a lattice-like crumble on top make these look carefully baked even when you made them in one afternoon.
Why It Works: Almond flour gives the crust a tender, almost sandy bite, while raspberry jam keeps the filling tart enough to balance the sugar. A crumb top bakes into ridges that dust well with powdered sugar.
Key Ingredients:
- 1 cup unsalted butter, softened
- 3/4 cup sugar
- 1 large egg
- 2 cups all-purpose flour
- 1 cup almond flour
- 1/2 teaspoon salt
- 1 cup raspberry jam
- 1/2 cup sliced almonds
Quick Steps:
- Heat oven to 350°F and line an 8×8-inch pan.
- Cream butter and sugar, then mix in egg.
- Stir in flours and salt; press two-thirds into the pan.
- Spread jam over the base, crumble the rest on top, and sprinkle with almonds.
- Bake 30 to 34 minutes, then cool and dust with powdered sugar.
Equipment for This Recipe:
- 8×8-inch pan
- Mixer or sturdy spoon
- Offset spatula
- Sifter for powdered sugar
How to Serve This Dish: Serve these at room temperature and cut them into small squares. They look especially good beside plain butter cookies or simple tea cakes.
Pro Tips for This Recipe:
- Chill the crumb topping for 10 minutes if the dough feels soft.
- Warm the jam slightly so it spreads without tearing the base.
Variations on This Dish:
- Apricot Almond Version: Swap raspberry jam for apricot preserves.
- Hazelnut Version: Replace half the almond flour with finely ground hazelnuts.
Common Mistakes to Avoid with This Dish:
- Don’t overfill with jam, or the bars leak at the edges.
- Don’t slice before cooling; the crumb needs time to set.
13. Blueberry Crumble Bars
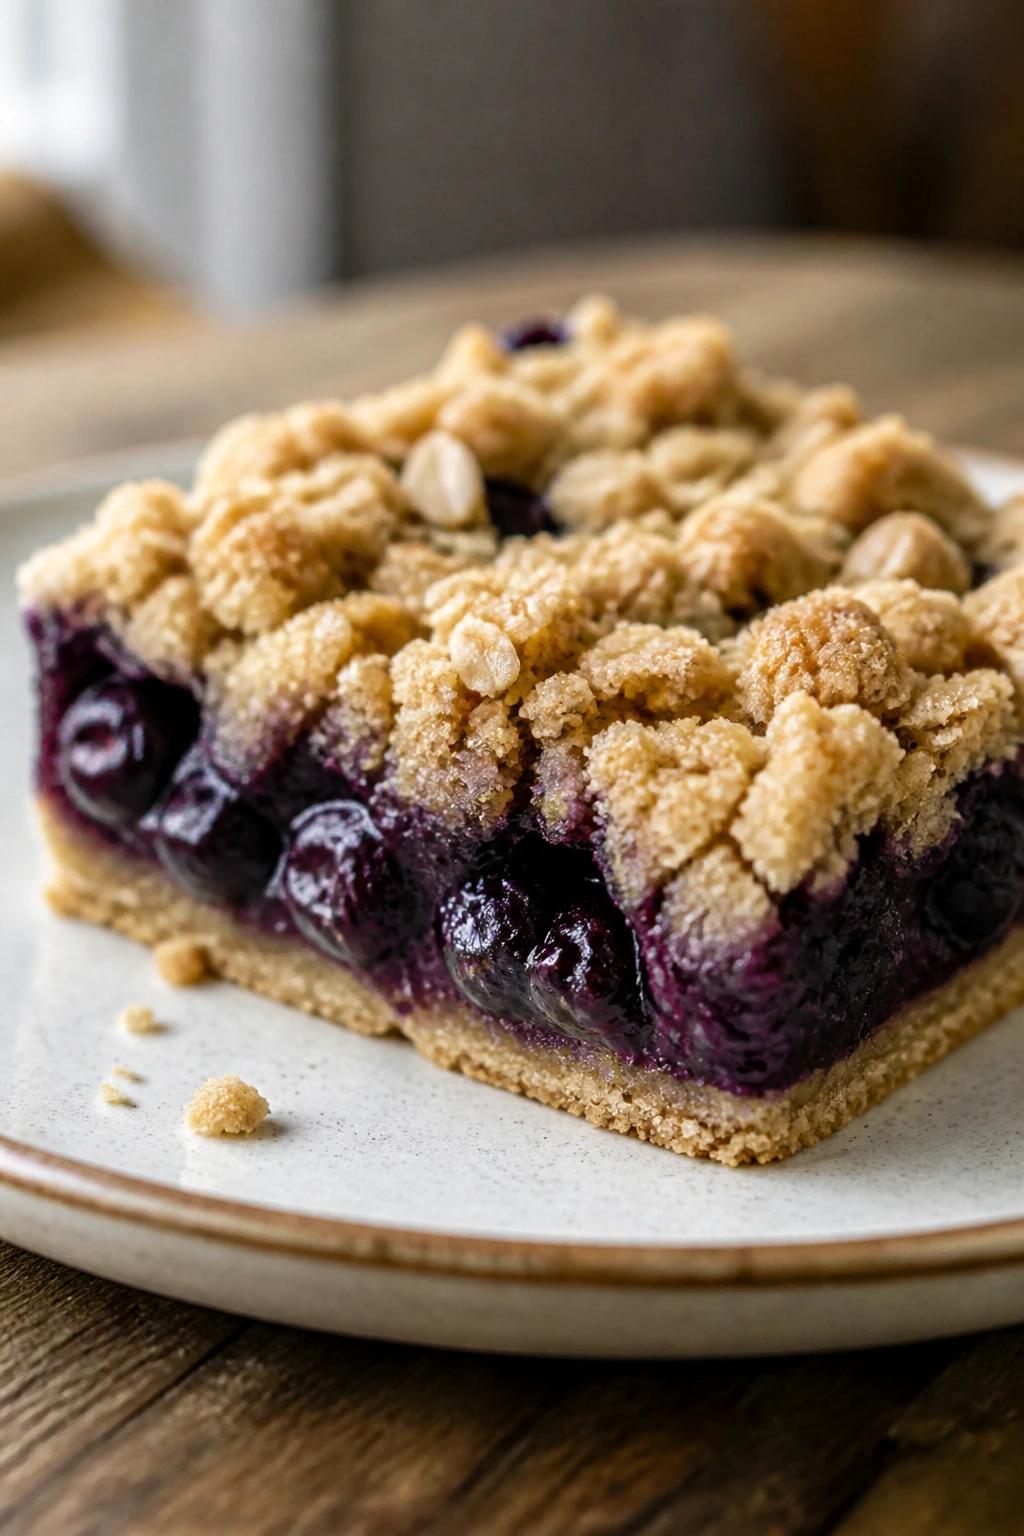
Intro: Blueberry crumble bars are a little rustic, which is why they work so well on a table full of shiny Easter desserts. The jammy filling runs purple-blue, the oat topping bakes into clusters, and the whole pan smells like warm berries and butter.
Why It Works: Oats and butter make a sturdy crumble that holds fruit without going soggy. Blueberries bring their own color, so these bars look lively with almost no decoration at all.
Key Ingredients:
- 1 1/2 cups flour
- 1 cup rolled oats
- 3/4 cup brown sugar
- 3/4 cup melted butter
- 2 cups blueberries, fresh or frozen
- 2 tablespoons cornstarch
- 2 tablespoons lemon juice
- 1/4 teaspoon salt
Quick Steps:
- Heat oven to 350°F and line a 9×9-inch pan.
- Mix flour, oats, sugar, butter, and salt; press half into the pan.
- Toss blueberries with cornstarch and lemon juice, then spread over the crust.
- Crumble the remaining mixture on top and bake 35 to 40 minutes.
- Cool fully before cutting.
Equipment for This Recipe:
- 9×9-inch pan
- Mixing bowls
- Wooden spoon
- Parchment paper
How to Serve This Dish: Serve warm or room temperature with a spoon of whipped cream. They cut into casual squares that look good on a tray with fresh berries scattered nearby.
Pro Tips for This Recipe:
- Use frozen berries straight from the freezer if fresh ones aren’t firm.
- Let the bars cool all the way or the fruit layer runs.
Variations on This Dish:
- Mixed Berry Version: Swap in raspberries and blackberries.
- Lemon Blueberry Version: Add 1 tablespoon lemon zest to the crumble.
Common Mistakes to Avoid with This Dish:
- Don’t skimp on cornstarch or the filling gets loose.
- Don’t press the crumble topping down too hard; keep it loose.
14. Oreo Cream Egg Bars
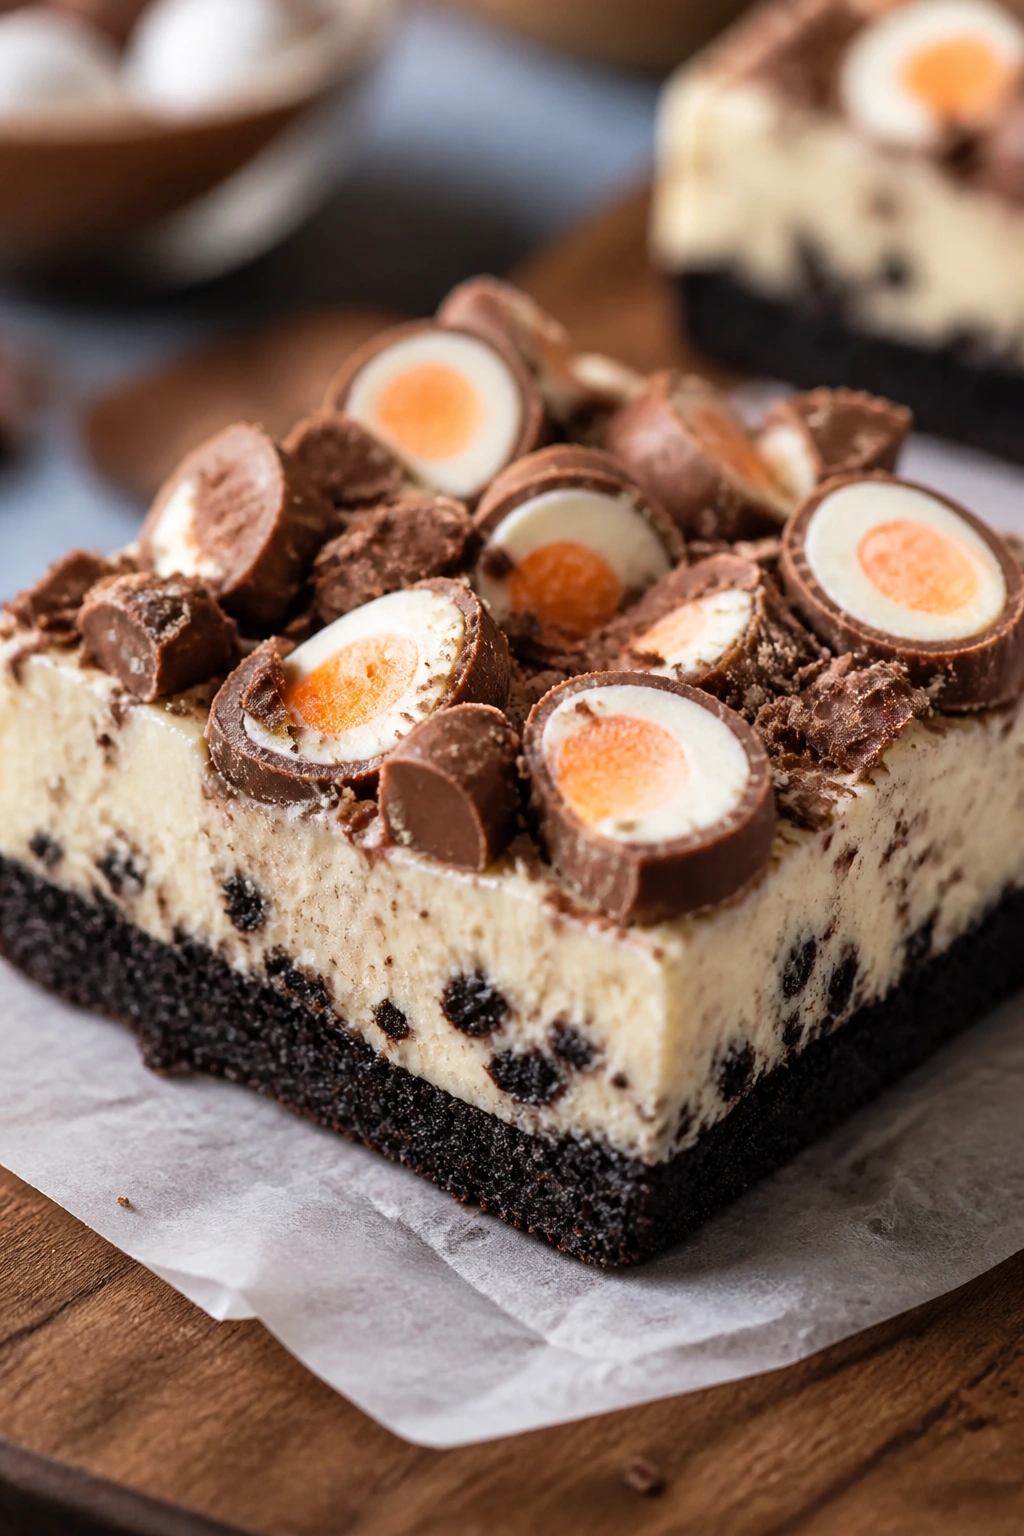
Intro: If you want a dessert that leans straight into candy-bar energy, this is it. Oreo crumbs make a dark, crunchy base, a creamy filling cushions the middle, and chopped cream eggs on top give every square that speckled Easter look.
Why It Works: The Oreo crust is firm enough to support a soft filling, and the cream egg pieces add both sweetness and texture. These bars chill into neat slices, which matters when the top is loaded with candy and cream.
Key Ingredients:
- 2 cups Oreo cookie crumbs
- 1/2 cup melted butter
- 16 ounces cream cheese, softened
- 3/4 cup powdered sugar
- 1 cup whipped topping or whipped cream
- 1 teaspoon vanilla extract
- 1 cup chopped cream eggs
- 1/2 cup mini chocolate chips
Quick Steps:
- Line an 8×8-inch pan with parchment.
- Mix crumbs and butter, press into the pan, and chill.
- Beat cream cheese, powdered sugar, and vanilla, then fold in whipped topping.
- Spread over crust, top with cream egg pieces and chips, and chill 3 hours.
- Slice with a warm knife.
Equipment for This Recipe:
- 8×8-inch pan
- Hand mixer
- Rubber spatula
- Sharp knife
How to Serve This Dish: Keep these chilled until the last minute. They’re rich, so small squares work better than large ones, and the candy top does the decorating on its own.
Pro Tips for This Recipe:
- Use full-fat cream cheese so the filling holds.
- Wipe the knife clean between cuts for neat edges.
Variations on This Dish:
- Mint Oreo Version: Use mint sandwich cookies for the crust.
- Peanut Butter Version: Add 1/4 cup peanut butter to the filling.
Common Mistakes to Avoid with This Dish:
- Don’t skip chilling the crust first or the filling can slide.
- Don’t cut with a dull knife; the candy will tear.
15. Funfetti Sugar Cookie Bars
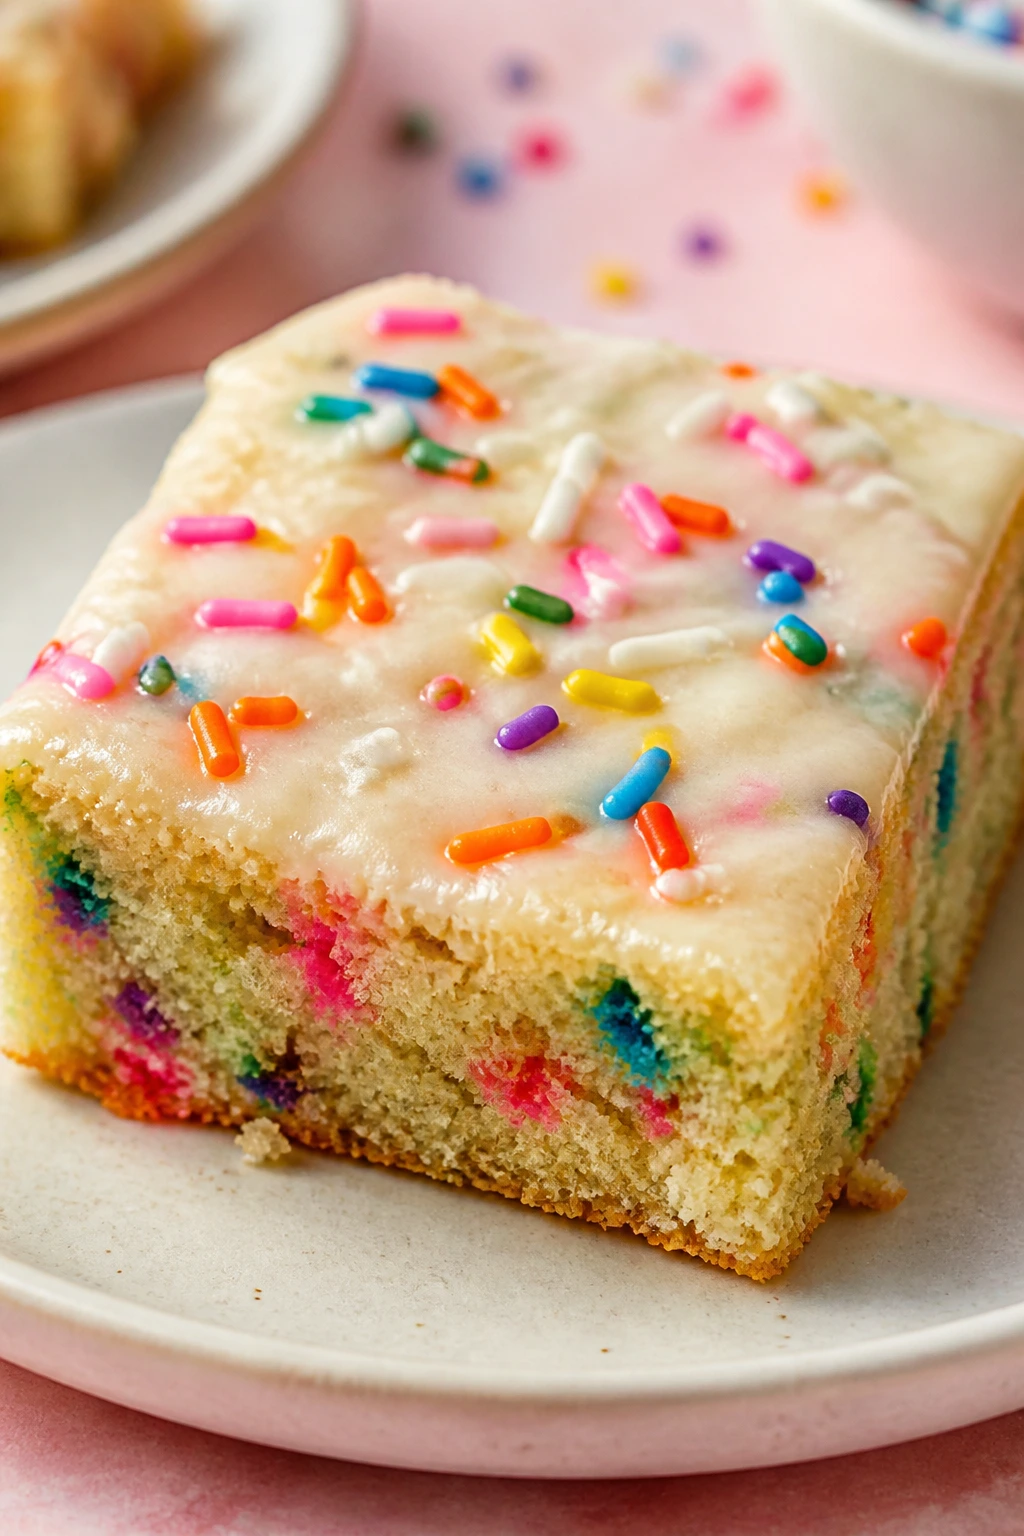
Intro: These are the bars that look cheerful before you even slice them. The crumb is soft and vanilla-heavy, the sprinkles stay bright, and the top accepts a thin glaze or frosting if you want a little more gloss on the pan.
Why It Works: Sugar cookie dough is built to hold sprinkles without bleeding them into the batter. In bar form, it bakes into a thicker, softer square than a standard cookie, which keeps the texture tender through the middle.
Key Ingredients:
- 1 cup unsalted butter, softened
- 1 1/2 cups sugar
- 2 large eggs
- 2 1/2 cups all-purpose flour
- 1 teaspoon baking powder
- 1/2 teaspoon salt
- 1 teaspoon vanilla extract
- 3/4 cup pastel sprinkles
- 1 cup powdered sugar for glaze
Quick Steps:
- Heat oven to 350°F and line a 9×13-inch pan.
- Cream butter and sugar, then beat in eggs and vanilla.
- Fold in flour, baking powder, salt, and sprinkles.
- Spread into the pan and bake 20 to 24 minutes.
- Cool, then drizzle with glaze if you want.
Equipment for This Recipe:
- 9×13-inch pan
- Mixer
- Spatula
- Small bowl for glaze
How to Serve This Dish: Cut into bright squares and stack them high on a platter. They make a nice bridge between chocolate-heavy bars and fruitier ones.
Pro Tips for This Recipe:
- Use jimmies, not nonpareils, if you want the colors to hold.
- Don’t overbake; the middle should stay soft.
Variations on This Dish:
- Lemon Funfetti Bars: Add lemon zest to the dough and glaze.
- Almond Sugar Bars: Swap half the vanilla for almond extract.
Common Mistakes to Avoid with This Dish:
- Don’t use too many sprinkles or the crumb turns muddy.
- Don’t frost before the bars cool or the glaze melts.
16. Salted Caramel Pretzel Bars with Mini Eggs
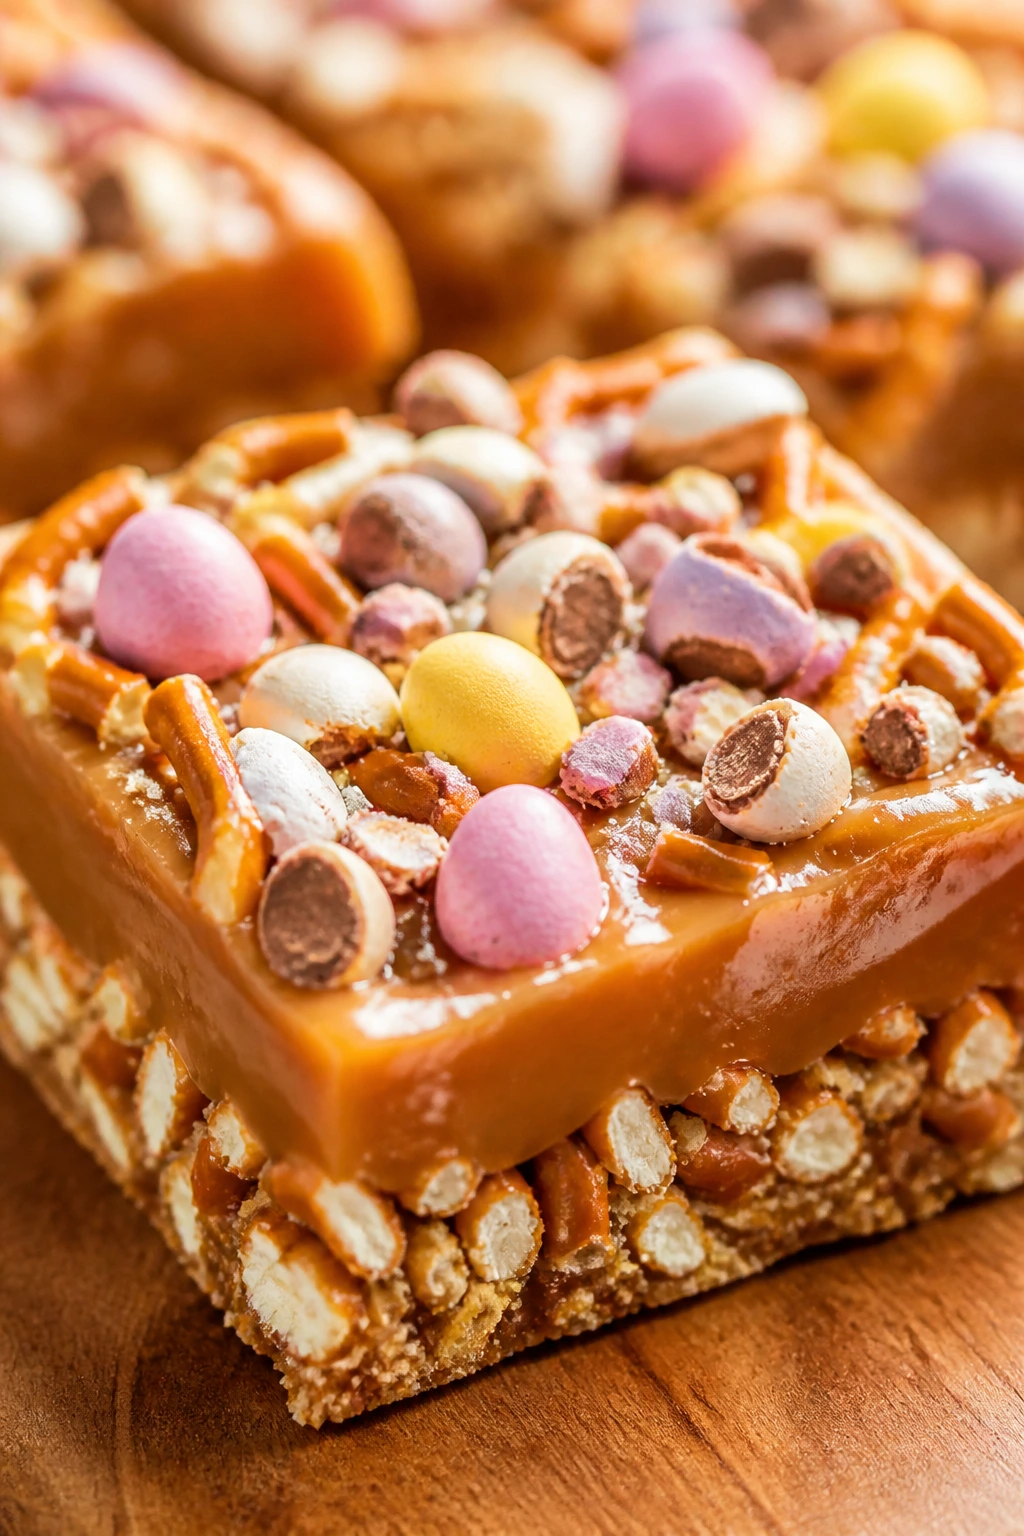
Intro: Sweet, salty, crunchy, chewy. These bars hit all four notes and do it without feeling busy. The pretzel base gives them snap, caramel fills the gaps, and mini eggs on top keep the Easter look firmly in place.
Why It Works: Pretzels stop a candy-heavy bar from tasting flat. Salt keeps the caramel from turning one-note, and the mini eggs give you color and crunch in the same bite.
Key Ingredients:
- 2 cups crushed pretzels
- 1/2 cup melted butter
- 1/4 cup brown sugar
- 1 can sweetened condensed milk, 14 ounces
- 1 cup soft caramel candies or caramel sauce
- 1 cup chopped milk chocolate
- 1 cup chopped mini eggs
- Flaky salt
Quick Steps:
- Heat oven to 350°F and line a 9×13-inch pan.
- Mix pretzels, butter, and brown sugar, then press into the pan and bake 8 minutes.
- Pour on caramel and condensed milk, then scatter chocolate and mini eggs.
- Bake 18 to 22 minutes until bubbling at the edges.
- Cool completely and finish with flaky salt.
Equipment for This Recipe:
- 9×13-inch pan
- Food processor or zip-top bag for crushing pretzels
- Heatproof spatula
- Knife for chopping candy
How to Serve This Dish: Serve these in small squares; they’re dense and rich. A little extra flaky salt on top makes the caramel taste cleaner.
Pro Tips for This Recipe:
- Chop the mini eggs into rough pieces so the shells don’t dominate.
- Line the pan well; sticky caramel bars need an easy lift.
Variations on This Dish:
- Peanut Pretzel Version: Add 1/2 cup chopped peanuts.
- Dark Chocolate Version: Use dark chocolate instead of milk chocolate.
Common Mistakes to Avoid with This Dish:
- Don’t underbake the caramel layer or it stays loose.
- Don’t cut while warm; the caramel will drag.
17. Coconut Cream Pie Bars
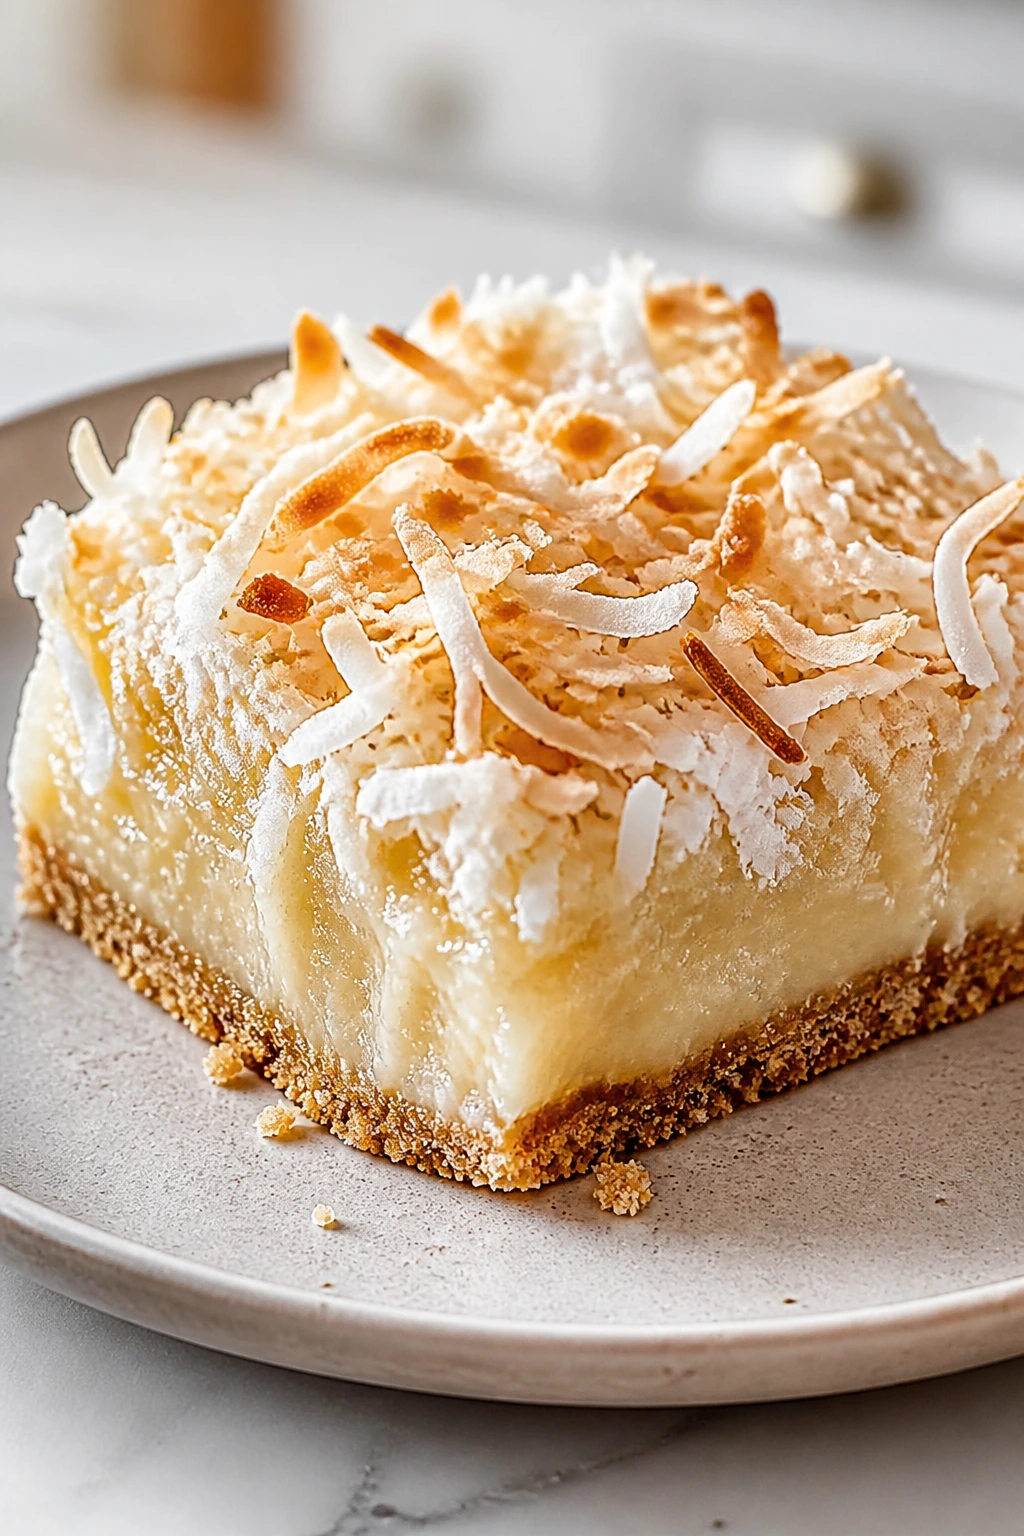
Intro: Coconut cream pie in bar form is a calmer, cleaner thing. The crust stays crisp, the filling is cool and pudding-like, and the toasted coconut on top gives a pale, snowy look that feels right at home on an Easter table.
Why It Works: Coconut cream pie usually needs careful slicing. Bars solve that problem by setting the filling in a pan, which makes the texture easier to serve and the presentation easier to control.
Key Ingredients:
- 2 cups vanilla wafer crumbs
- 1/2 cup melted butter
- 1 package instant coconut pudding, 3.4 ounces
- 1 1/2 cups cold milk
- 8 ounces cream cheese, softened
- 1 cup whipped topping
- 1 cup sweetened shredded coconut, toasted
Quick Steps:
- Line a 9×9-inch pan with parchment.
- Mix crumbs and butter, press into the pan, and chill.
- Whisk pudding with milk, then beat in cream cheese and fold in whipped topping.
- Spread over crust, top with coconut, and chill 3 hours.
- Slice cold.
Equipment for This Recipe:
- 9×9-inch pan
- Mixing bowls
- Whisk
- Hand mixer
How to Serve This Dish: Serve these very cold with toasted coconut scattered over the plate. They look especially nice beside pale lemon bars and fruit.
Pro Tips for This Recipe:
- Toast the coconut in a dry skillet until just golden.
- Chill long enough for the filling to firm before slicing.
Variations on This Dish:
- Pineapple Coconut Bars: Add a thin layer of well-drained pineapple between crust and filling.
- Chocolate Coconut Bars: Use chocolate wafer crumbs for the crust.
Common Mistakes to Avoid with This Dish:
- Don’t use warm milk; the pudding needs to set properly.
- Don’t skip toasting the coconut or the bars taste flat.
18. Matcha White Chocolate Raspberry Bars
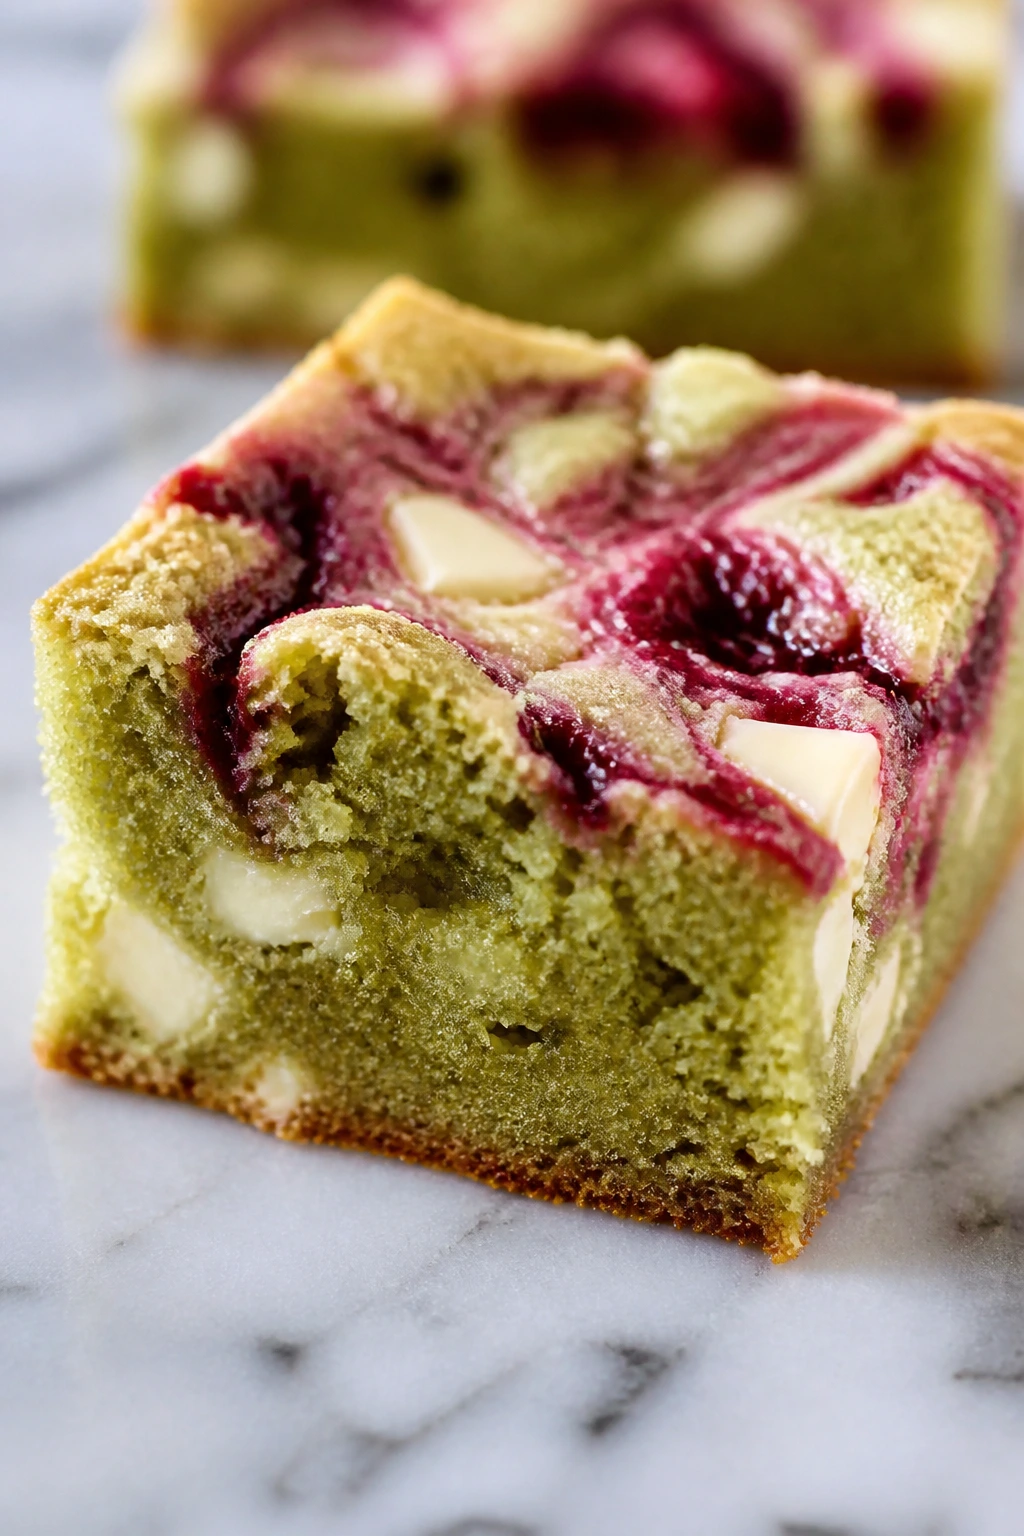
Intro: Matcha gives these bars a soft green color that feels almost botanical. White chocolate makes the crumb rounder and sweeter, while a raspberry swirl cuts through with a tart line that keeps the whole thing from tasting heavy.
Why It Works: Matcha can go bitter fast, but white chocolate smooths the edges and raspberry keeps the flavor bright. The color contrast does most of the visual work, which is handy when you want something elegant without much decorating.
Key Ingredients:
- 1 cup unsalted butter, softened
- 1 cup sugar
- 2 large eggs
- 2 cups all-purpose flour
- 2 teaspoons matcha powder
- 1 cup white chocolate chunks
- 1/2 cup raspberry jam
- 1/4 teaspoon salt
Quick Steps:
- Heat oven to 350°F and line an 8×8-inch pan.
- Cream butter and sugar, then beat in eggs.
- Fold in flour, matcha, salt, and white chocolate.
- Spread in the pan, dot with raspberry jam, and swirl lightly.
- Bake 25 to 30 minutes and cool fully.
Equipment for This Recipe:
- 8×8-inch pan
- Mixing bowl
- Spatula
- Butter knife for swirling
How to Serve This Dish: Cut these into slim bars and serve on a pale platter so the green stands out. A few fresh raspberries on the side are enough.
Pro Tips for This Recipe:
- Sift the matcha so you don’t get dark specks.
- Use a light hand with the jam swirl; too much mixing muddies the color.
Variations on This Dish:
- Blackberry Matcha Bars: Swap raspberry for blackberry jam.
- Citrus Matcha Bars: Add 1 teaspoon orange zest to the batter.
Common Mistakes to Avoid with This Dish:
- Don’t use too much matcha or the bars taste grassy.
- Don’t over-swirl, or the colors disappear.
19. Honey Lavender Shortbread Bars
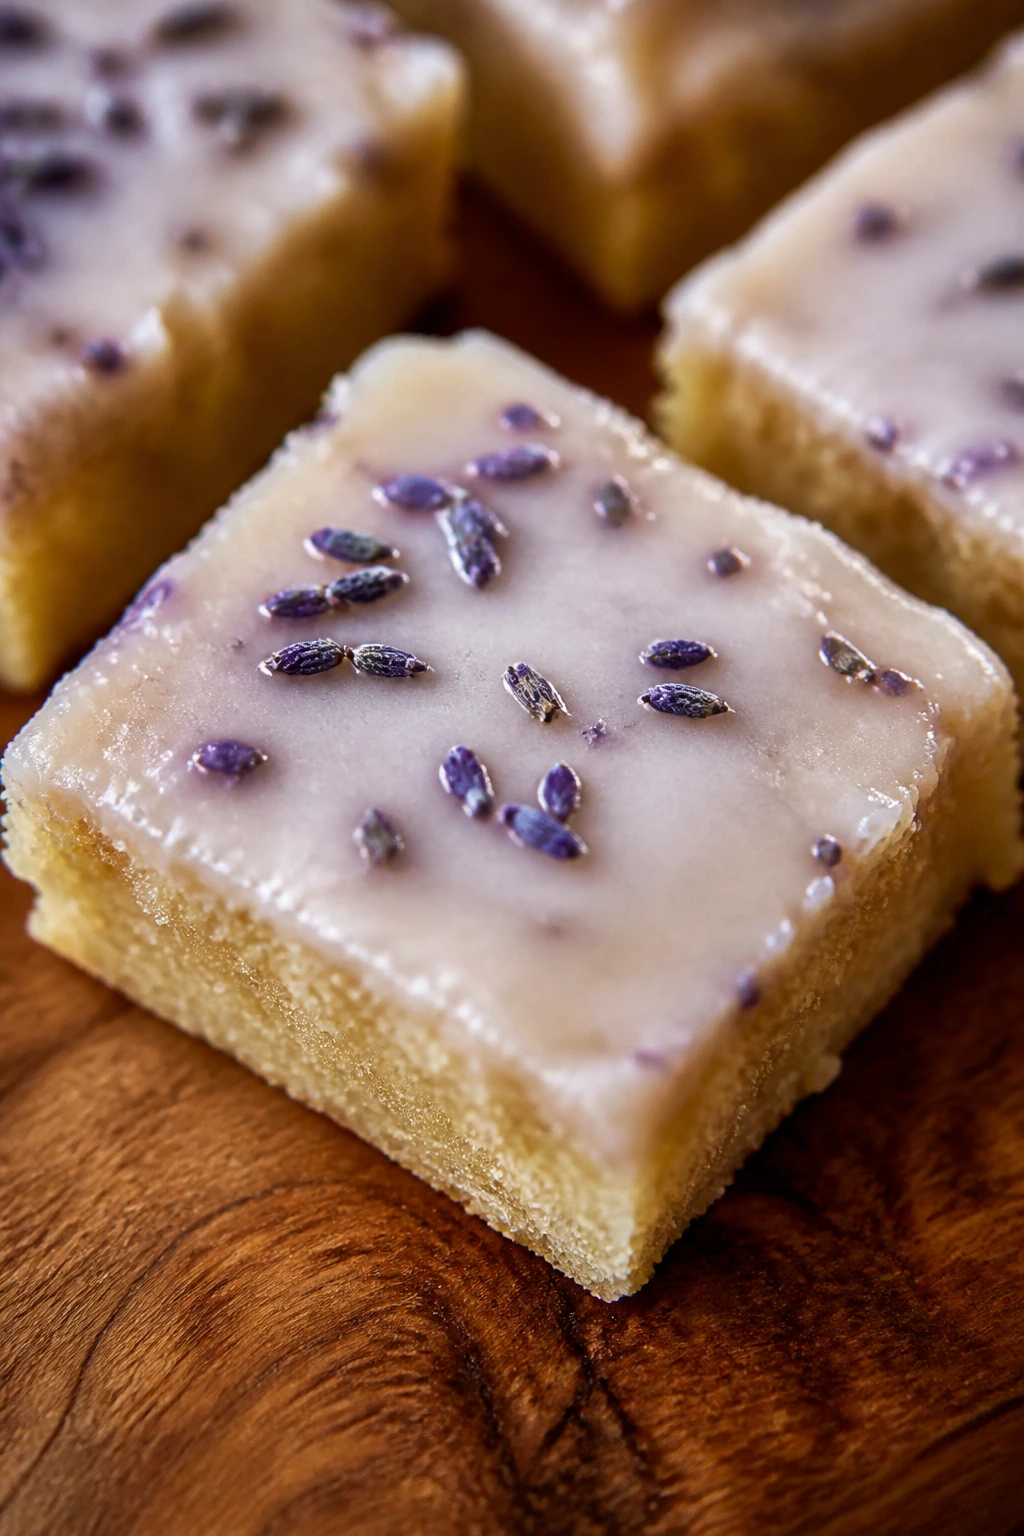
Intro: These are the quiet bars on the tray, the ones that smell like warm honey and a little floral steam. They’re crumbly, pale, and delicate-looking, with a glaze that settles into the top and makes them feel finished without a lot of fuss.
Why It Works: Shortbread handles honey well because the fat and flour keep the sweetness in check. Lavender needs a light hand, and bar form is ideal for that — enough to taste it, not enough to make the bars perfume-heavy.
Key Ingredients:
- 1 cup unsalted butter, softened
- 1/3 cup honey
- 1/2 cup powdered sugar
- 2 cups all-purpose flour
- 1 tablespoon culinary lavender, finely crushed
- 1/4 teaspoon salt
- 1 tablespoon lemon juice
- 3/4 cup powdered sugar for glaze
Quick Steps:
- Heat oven to 325°F and line an 8×8-inch pan.
- Cream butter, honey, and powdered sugar, then mix in flour, lavender, and salt.
- Press into the pan and bake 22 to 26 minutes until pale gold.
- Stir glaze ingredients, drizzle over cooled bars, and let set.
- Slice with a sharp knife.
Equipment for This Recipe:
- 8×8-inch pan
- Mixing bowl
- Citrus juicer
- Small whisk
How to Serve This Dish: These pair well with tea and fresh berries. Cut them small; the flavor is gentle, and the texture is more crumbly than chewy.
Pro Tips for This Recipe:
- Crush the lavender finely so it doesn’t feel woody.
- Let the bars cool before glazing or the honey softens the top.
Variations on This Dish:
- Rosemary Honey Bars: Use a pinch of finely chopped rosemary instead of lavender.
- Lemon-Honey Bars: Add lemon zest to the dough.
Common Mistakes to Avoid with This Dish:
- Don’t use too much lavender; the bars can turn soap-like fast.
- Don’t press the dough unevenly or the edges brown too quickly.
20. Banana Pudding Bars
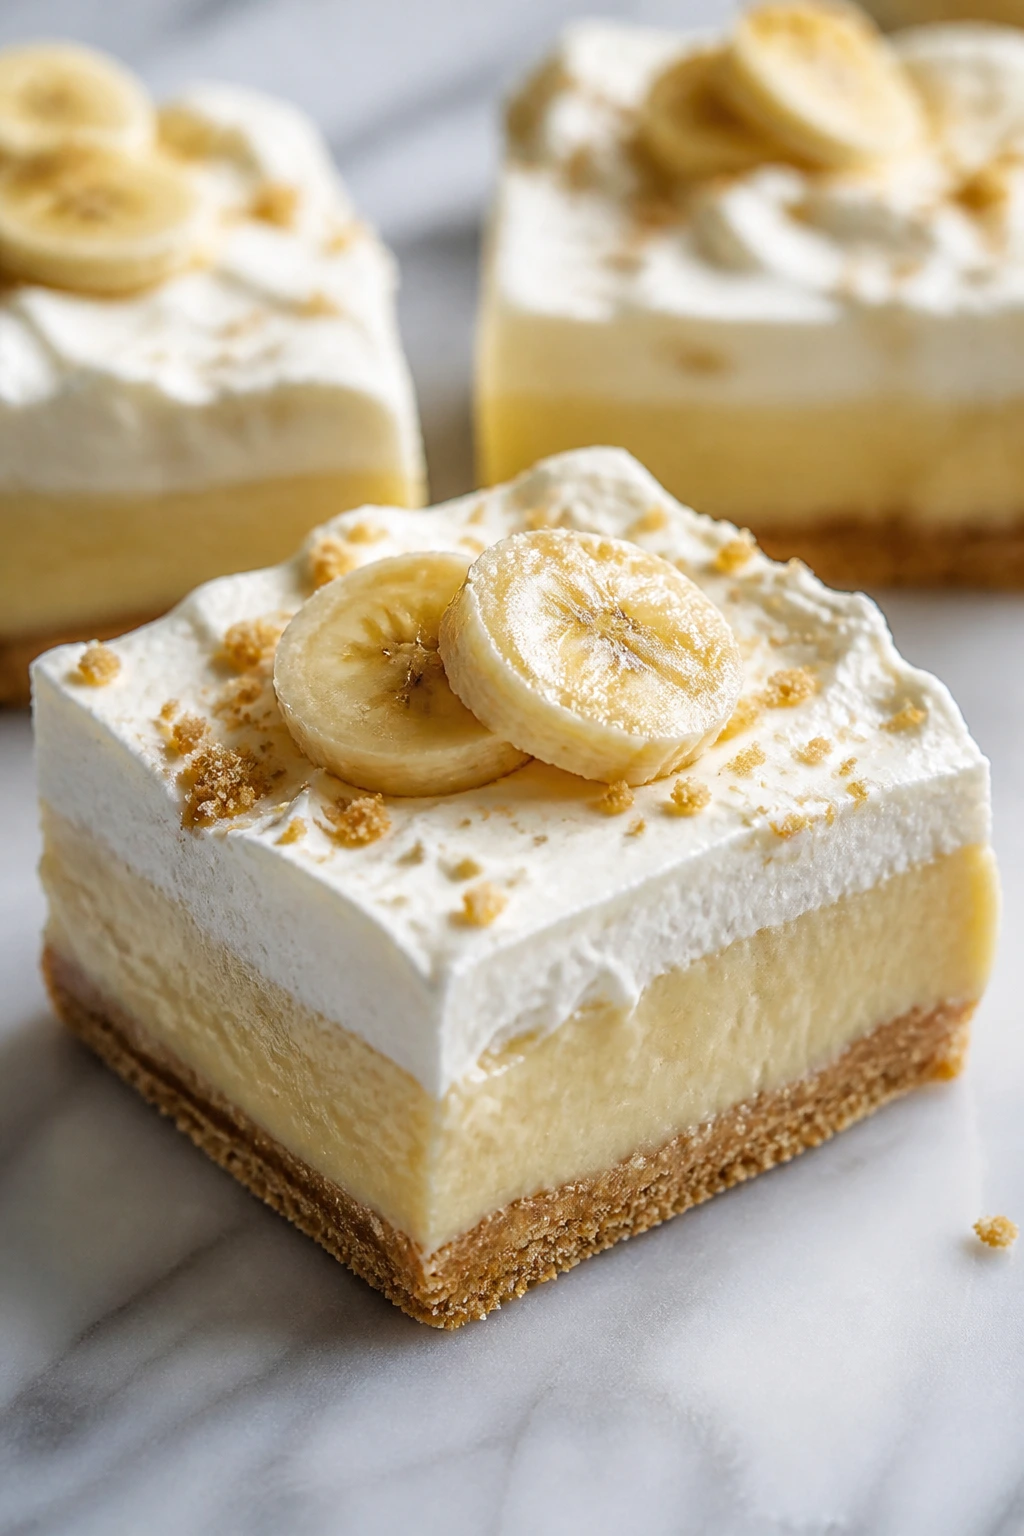
Intro: Banana pudding bars are the kind of dessert that feels familiar in a good way, but neater. Vanilla wafer crust, banana cream filling, and a whipped top give you all the parts of the classic spoon dessert, just turned into slices.
Why It Works: Banana pudding already has a soft, layered structure, so it adapts naturally to bars. A cookie crust gives enough support for the filling, and chilling helps the banana flavor settle instead of getting mushy.
Key Ingredients:
- 2 cups vanilla wafer crumbs
- 1/2 cup melted butter
- 1 package instant vanilla pudding, 3.4 ounces
- 1 1/2 cups cold milk
- 2 ripe bananas, sliced
- 8 ounces cream cheese, softened
- 1 cup whipped topping
- 1 teaspoon vanilla extract
Quick Steps:
- Line a 9×9-inch pan.
- Mix crumbs and butter, press into the pan, and chill.
- Whisk pudding with milk, then beat with cream cheese and vanilla.
- Fold in half the banana slices, spread over crust, and top with remaining bananas and whipped topping.
- Chill 3 to 4 hours.
Equipment for This Recipe:
- 9×9-inch pan
- Mixing bowls
- Whisk
- Offset spatula
How to Serve This Dish: Serve cold and garnish with a few crushed wafer crumbs. Banana pudding bars are softer than most, so cut them with a warm knife.
Pro Tips for This Recipe:
- Use bananas that are ripe but still firm.
- Add the banana slices close to serving if you want the freshest color.
Variations on This Dish:
- Cinnamon Banana Bars: Sprinkle cinnamon between the layers.
- Chocolate Wafer Version: Swap the crust for chocolate wafers.
Common Mistakes to Avoid with This Dish:
- Don’t use overripe bananas; they turn the filling watery.
- Don’t skip the chill time or the layers slide apart.
21. Chocolate Chip Marshmallow Bars
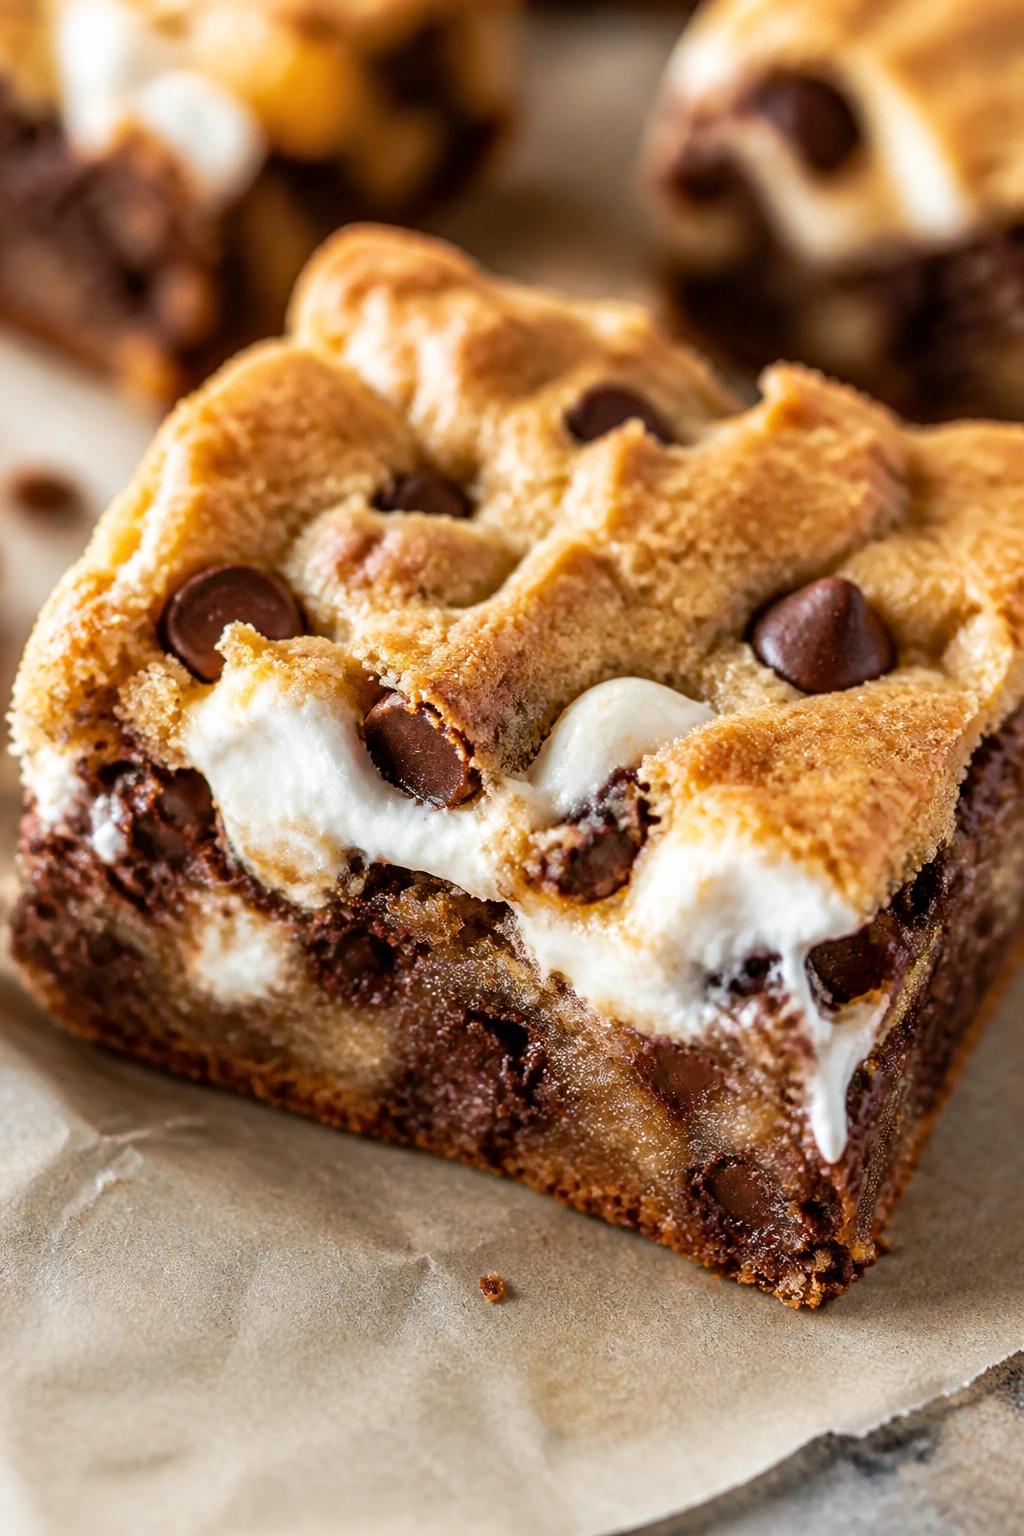
Intro: These bars look simple until you bite one and hit a warm pocket of marshmallow. The edges turn golden and a little crisp, the center stays chewy, and the chocolate chips give you the familiar cookie-bar comfort without any shaping.
Why It Works: A brown sugar base keeps these bars soft, while marshmallows create little melting pockets that stretch when the bars are still warm. That contrast is the whole trick.
Key Ingredients:
- 1 cup unsalted butter, softened
- 1 cup brown sugar
- 1/2 cup granulated sugar
- 2 large eggs
- 2 1/4 cups all-purpose flour
- 1 teaspoon baking soda
- 1/2 teaspoon salt
- 1 cup chocolate chips
- 1 1/2 cups mini marshmallows
Quick Steps:
- Heat oven to 350°F and line a 9×13-inch pan.
- Cream butter and sugars, then mix in eggs.
- Fold in flour, baking soda, salt, and chocolate chips.
- Spread in the pan, scatter marshmallows on top, and bake 22 to 25 minutes.
- Cool before slicing.
Equipment for This Recipe:
- 9×13-inch pan
- Mixing bowl
- Spatula
- Parchment paper
How to Serve This Dish: These are best cut while fully cool but served slightly warm. A drizzle of melted chocolate across the top makes them look more intentional.
Pro Tips for This Recipe:
- Press some marshmallows lightly into the surface, not all the way down.
- Use mini chips so the bars slice more cleanly.
Variations on This Dish:
- S’mores Version: Add crushed graham crackers to the dough.
- Peanut Butter Version: Replace 1/4 cup butter with peanut butter.
Common Mistakes to Avoid with This Dish:
- Don’t bake too long or the marshmallows harden.
- Don’t use jumbo marshmallows unless you chop them first.
22. Snickerdoodle Easter Egg Bars
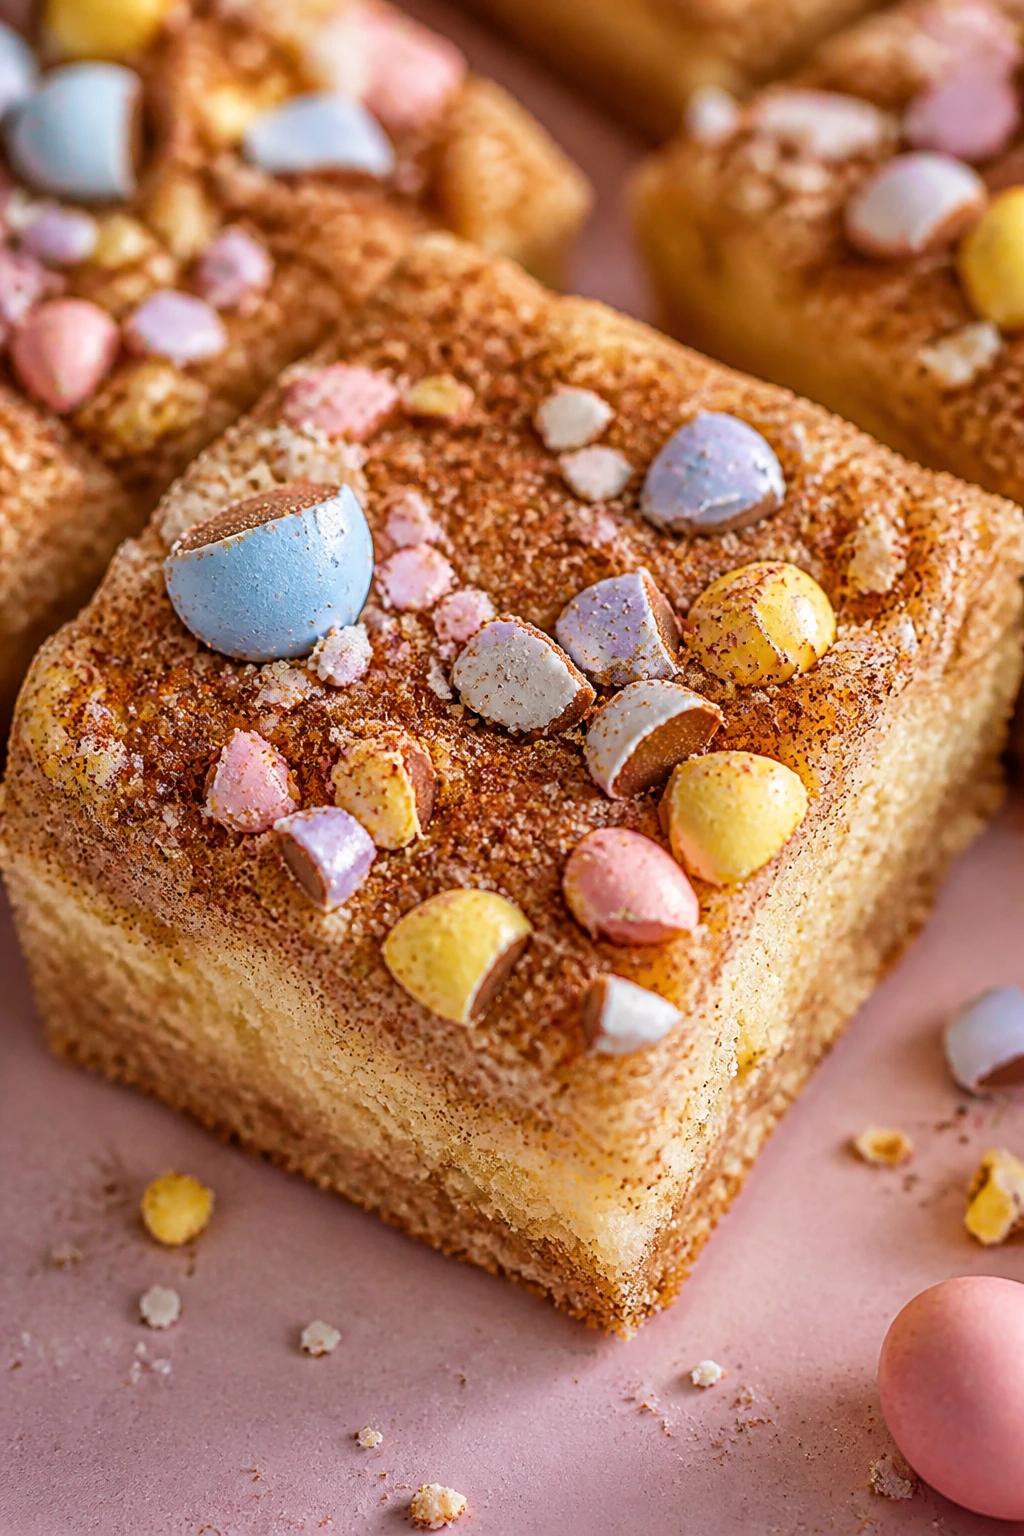
Intro: Snickerdoodle bars have that cinnamon-sugar crust people love, but in bar form the texture turns softer and more cake-like in the middle. Add chopped chocolate eggs, and you get a spring version that still smells like a bakery case.
Why It Works: Cream of tartar gives snickerdoodle flavor a little tang, which keeps the sweetness from running away. The egg pieces melt slightly into the top, which looks good and keeps the bars from feeling too plain.
Key Ingredients:
- 1 cup unsalted butter, softened
- 1 1/4 cups sugar
- 2 large eggs
- 2 1/2 cups all-purpose flour
- 1 teaspoon cream of tartar
- 1 teaspoon baking soda
- 1/2 teaspoon salt
- 1 teaspoon cinnamon
- 1 cup chopped Easter egg candies
Quick Steps:
- Heat oven to 350°F and line a 9×13-inch pan.
- Cream butter and sugar, then mix in eggs.
- Fold in flour, cream of tartar, baking soda, salt, cinnamon, and half the candy.
- Spread in the pan, top with remaining candy, and bake 20 to 24 minutes.
- Cool before cutting.
Equipment for This Recipe:
- 9×13-inch pan
- Hand mixer
- Spatula
- Knife for chopping candy
How to Serve This Dish: Dust the top with cinnamon sugar right before serving. The bars cut best when fully cool, but they taste nice at room temperature.
Pro Tips for This Recipe:
- Chop the candy into uneven pieces so the top looks more natural.
- Don’t skip the cream of tartar; it gives the flavor its edge.
Variations on This Dish:
- Apple-Cinnamon Version: Fold in 1/2 cup dried apple pieces.
- Brown Butter Version: Brown the butter for a deeper base.
Common Mistakes to Avoid with This Dish:
- Don’t overload the candy or the bars get greasy.
- Don’t underbake the middle; snickerdoodle bars need setting time.
23. Cherry Almond Bars
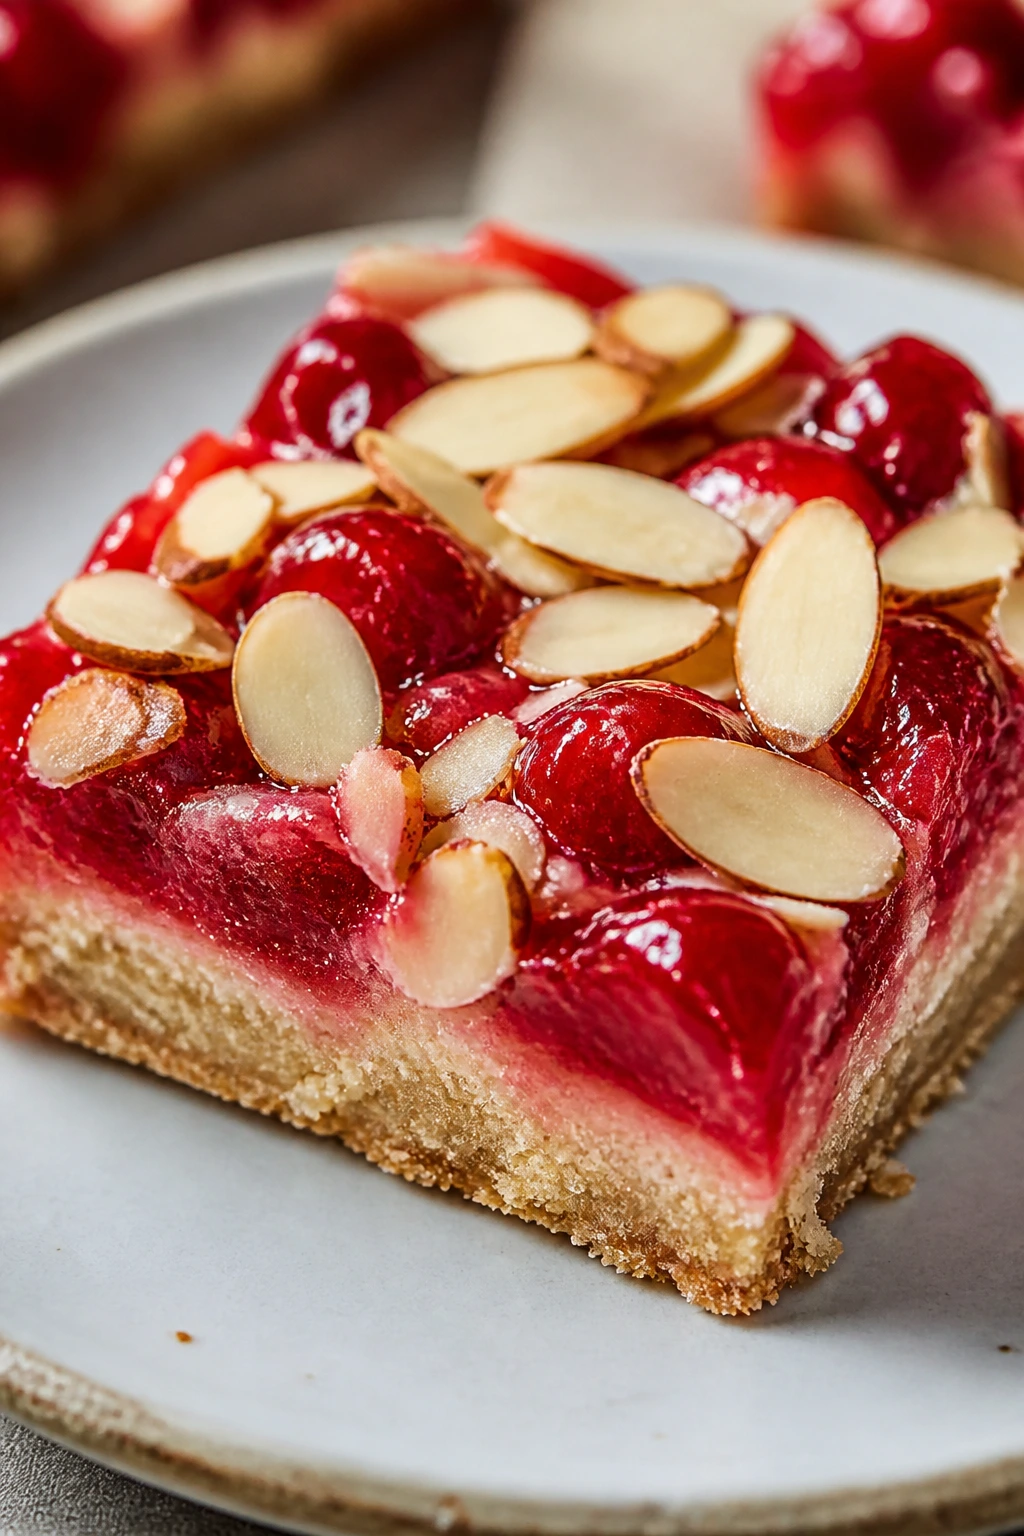
Intro: Cherry and almond have a classic bakery smell, and these bars lean right into it. The base is soft and buttery, the cherry layer goes glossy in the oven, and the sliced almonds give the top a pale, crisp finish.
Why It Works: Almond extract sharpens the cherry flavor without needing a lot of sugar. Jam or preserves spread more cleanly than fresh fruit in this format, so the bars hold together and slice neatly.
Key Ingredients:
- 1 cup unsalted butter, softened
- 3/4 cup sugar
- 2 large eggs
- 2 cups all-purpose flour
- 1/2 teaspoon almond extract
- 1 cup cherry preserves
- 1/2 cup sliced almonds
- 1/4 teaspoon salt
Quick Steps:
- Heat oven to 350°F and line an 8×8-inch pan.
- Cream butter and sugar, then beat in eggs and almond extract.
- Fold in flour and salt; spread most of the batter into the pan.
- Spoon cherry preserves on top, add remaining batter in dollops, and sprinkle almonds.
- Bake 30 to 34 minutes and cool.
Equipment for This Recipe:
- 8×8-inch pan
- Mixer
- Spoon
- Cooling rack
How to Serve This Dish: Serve these in modest squares with tea or coffee. A light dusting of powdered sugar makes the cherry color stand out.
Pro Tips for This Recipe:
- Warm the preserves slightly so they spread without tearing the batter.
- Toast the almonds first if you want a stronger nut flavor.
Variations on This Dish:
- Apricot Almond Bars: Use apricot preserves instead of cherry.
- Chocolate Cherry Version: Add 1/2 cup chocolate chips to the batter.
Common Mistakes to Avoid with This Dish:
- Don’t use runny preserves or the filling leaks.
- Don’t cut before the bars cool fully.
24. Key Lime Coconut Bars
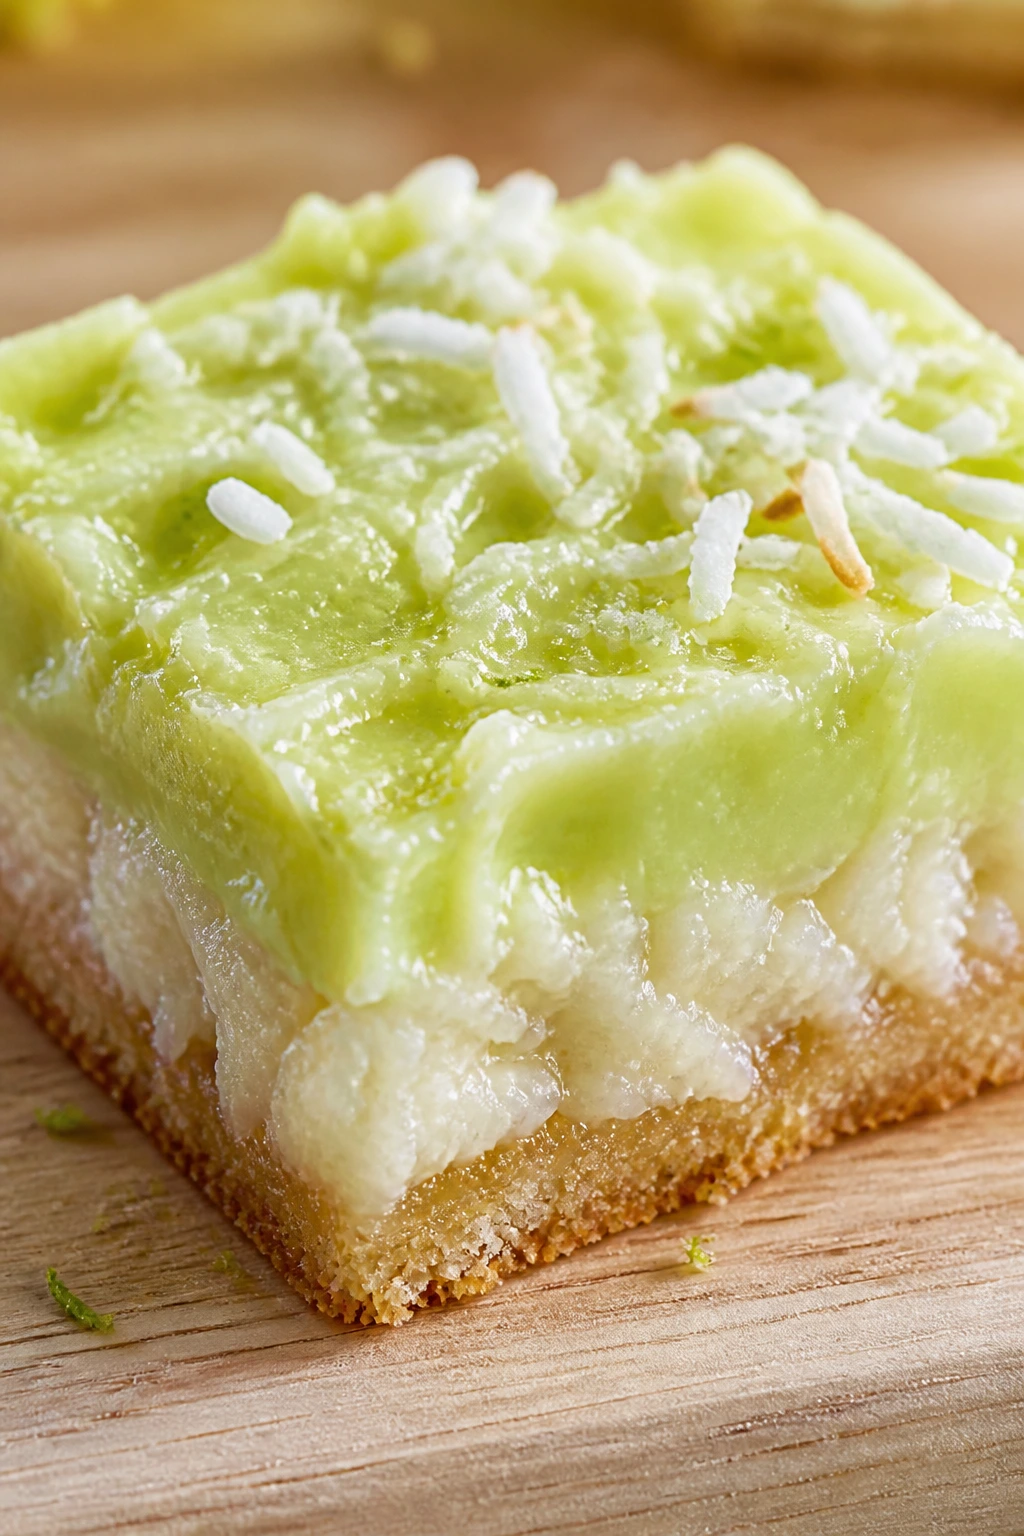
Intro: These are brighter and sharper than most Easter bars, which is exactly why they belong. Key lime brings a clean tartness, coconut softens the edges, and the pale top finishes with a look that feels sunny without being loud.
Why It Works: Lime filling can taste one-dimensional unless it has something creamy beside it. Condensed milk and coconut do that job here, while the crust holds the bar together after chilling.
Key Ingredients:
- 1 1/2 cups graham cracker crumbs
- 1/2 cup melted butter
- 2 large eggs
- 1 can sweetened condensed milk, 14 ounces
- 1/2 cup Key lime juice
- 1 tablespoon lime zest
- 1 cup shredded coconut
- Pinch of salt
Quick Steps:
- Heat oven to 350°F and line a 9×9-inch pan.
- Mix crumbs and butter, press into the pan, and bake 8 minutes.
- Whisk eggs, condensed milk, lime juice, zest, coconut, and salt.
- Pour over crust and bake 18 to 22 minutes.
- Chill until firm.
Equipment for This Recipe:
- 9×9-inch pan
- Whisk
- Zester
- Mixing bowls
How to Serve This Dish: These are best served cold with a little extra lime zest on top. They pair well with plain whipped cream if you want to soften the tartness.
Pro Tips for This Recipe:
- Don’t use bottled lime juice if you can help it; the flavor goes flat.
- Chill long enough for the filling to set before slicing.
Variations on This Dish:
- Meyer Lemon Coconut Bars: Swap in Meyer lemon juice.
- Toasted Coconut Version: Toast the coconut before mixing it in.
Common Mistakes to Avoid with This Dish:
- Don’t overbake the filling or it turns rubbery.
- Don’t skip the zest; the juice alone tastes thin.
25. Marshmallow Peep Brownies
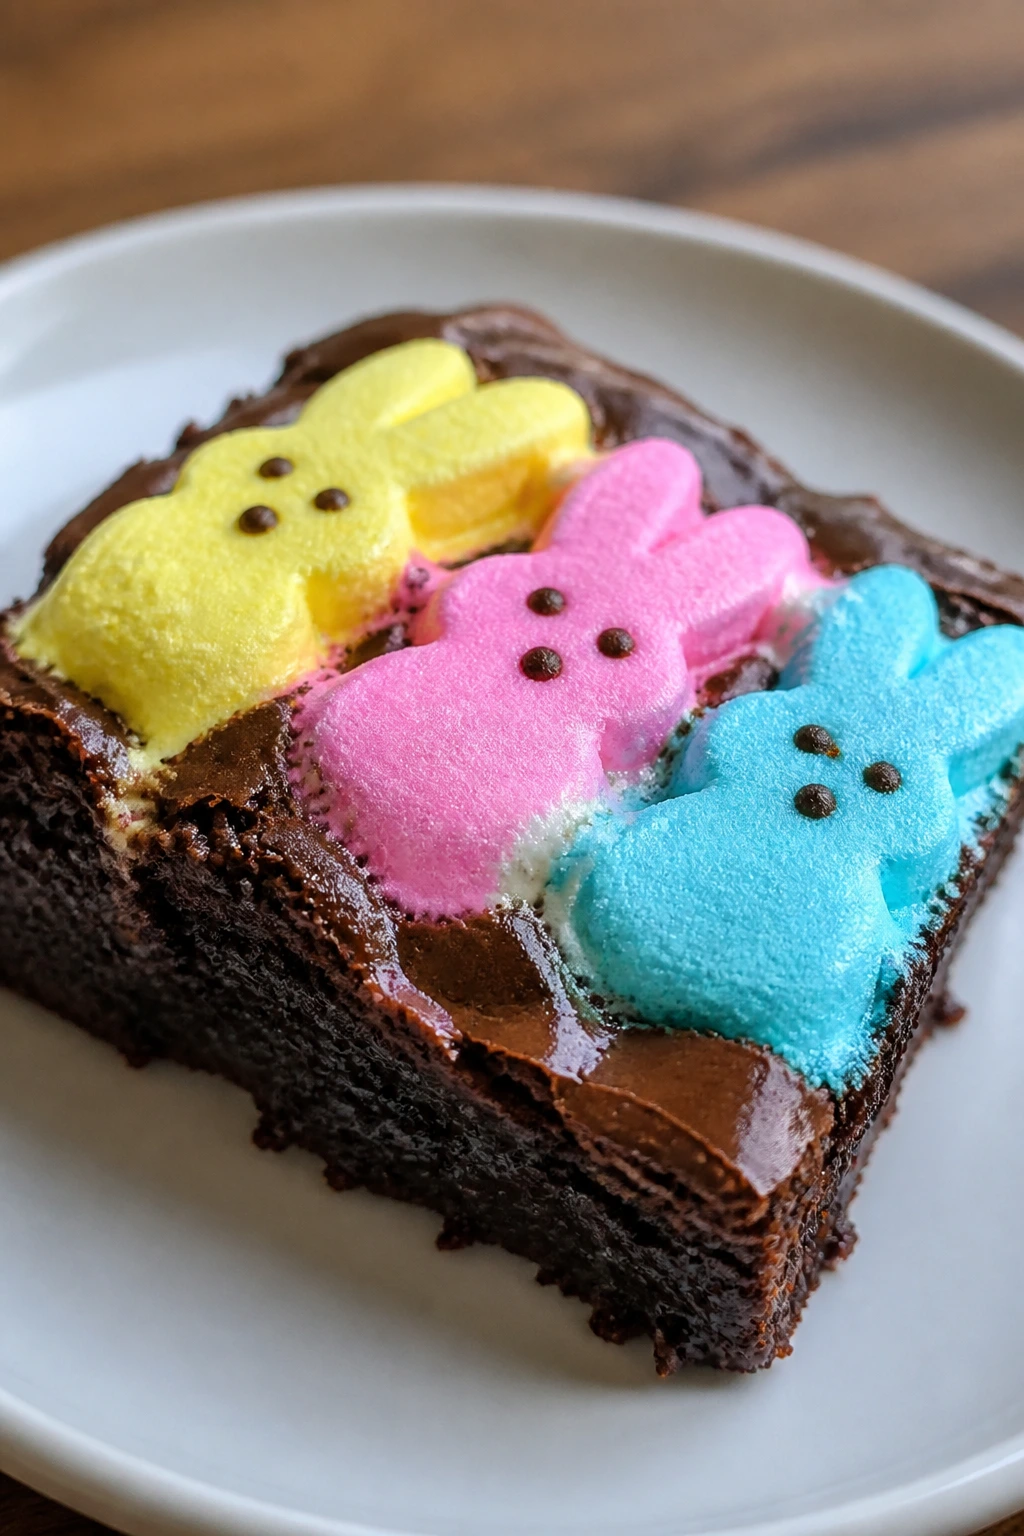
Intro: Brownies plus Peeps should sound messy, but somehow it works. The chocolate base gives you depth, the marshmallow candy melts into the top, and the bright colors make the pan look cheerful instead of heavy.
Why It Works: Brownies are strong enough to hold a sticky topping. The Peeps soften into glossy patches instead of disappearing, which gives the bars a playful top layer and a little chew around the edges.
Key Ingredients:
- 1/2 cup unsalted butter
- 1 cup sugar
- 2 large eggs
- 1/3 cup cocoa powder
- 3/4 cup flour
- 1/4 teaspoon salt
- 1 teaspoon vanilla extract
- 8 to 10 Peeps
- 1/2 cup chocolate chips
Quick Steps:
- Heat oven to 350°F and line an 8×8-inch pan.
- Melt butter, then whisk in sugar, eggs, vanilla, cocoa, flour, and salt.
- Spread into the pan and bake 20 minutes.
- Top with Peeps and chips, then bake 4 to 6 minutes more until softened.
- Cool before cutting.
Equipment for This Recipe:
- 8×8-inch pan
- Saucepan or microwave-safe bowl
- Whisk
- Knife
How to Serve This Dish: Serve these in small squares because the top is sweet. A few extra chocolate chips on the serving plate keep the look tidy.
Pro Tips for This Recipe:
- Add the Peeps near the end so they soften but do not melt away.
- Let the brownies cool fully before cutting through the marshmallow top.
Variations on This Dish:
- Peanut Butter Brownies: Swirl 1/4 cup peanut butter into the batter.
- Mint Brownies: Add a little peppermint extract to the batter.
Common Mistakes to Avoid with This Dish:
- Don’t overbake the brownie base or the top becomes sticky over dry cake.
- Don’t press the Peeps into the batter; leave them on top.
26. Red Velvet Cheesecake Bars
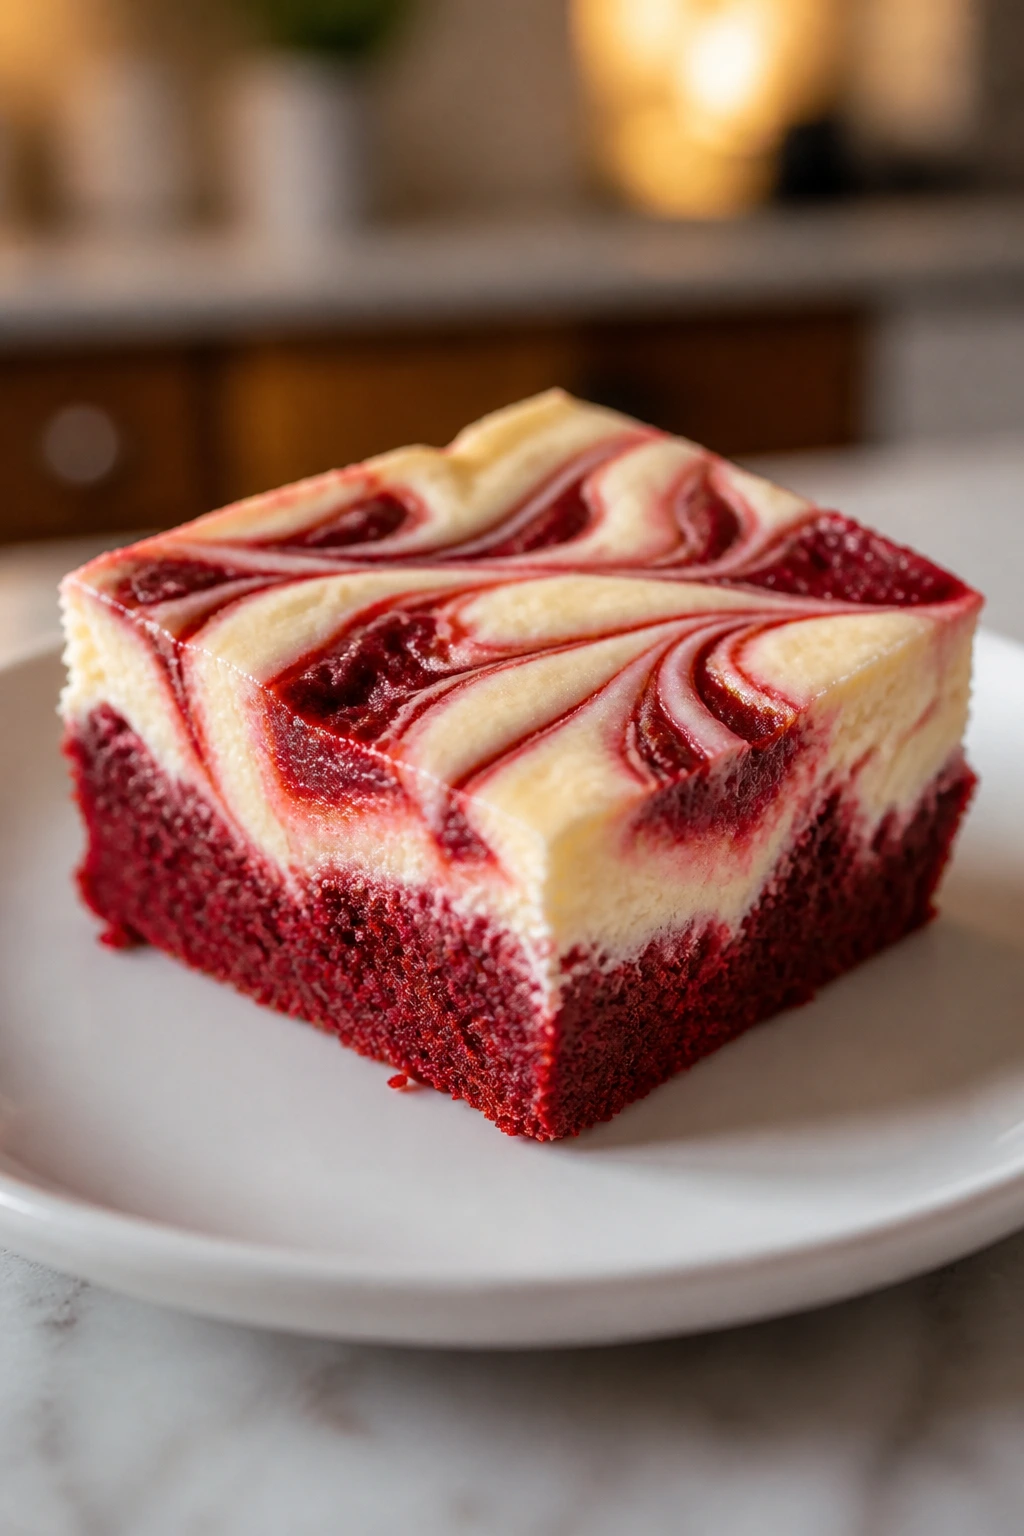
Intro: Red velvet bars make a strong visual case for Easter. The cocoa-red base looks dramatic next to the pale cheesecake swirl, and the flavor stays more tender than a full cake, which makes the bars easier to serve.
Why It Works: Red velvet needs just enough cocoa to taste like itself without becoming chocolate cake. Cheesecake adds a tangy white stripe that cuts the color and keeps the bars from feeling overly sweet.
Key Ingredients:
- 1/2 cup butter, softened
- 1 cup sugar
- 2 large eggs
- 1 1/2 cups flour
- 2 tablespoons cocoa powder
- 1 teaspoon red food coloring
- 8 ounces cream cheese, softened
- 1/3 cup powdered sugar
- 1 teaspoon vanilla extract
Quick Steps:
- Heat oven to 350°F and line an 8×8-inch pan.
- Mix butter, sugar, eggs, cocoa, flour, and red food coloring.
- Beat cream cheese, powdered sugar, and vanilla until smooth.
- Spread red velvet batter in the pan, swirl in cheesecake, and bake 30 minutes.
- Chill before slicing.
Equipment for This Recipe:
- 8×8-inch pan
- Hand mixer
- Spatula
- Butter knife for swirling
How to Serve This Dish: Cut these into neat squares and let the red and white layers show. They look best on a plain platter with nothing busy around them.
Pro Tips for This Recipe:
- Use gel food coloring for a stronger red without thinning the batter.
- Cool before chilling so the cheesecake layer doesn’t crack.
Variations on This Dish:
- Chocolate Red Velvet Bars: Add chocolate chips to the batter.
- Vanilla Bean Version: Add vanilla bean paste to the cheesecake layer.
Common Mistakes to Avoid with This Dish:
- Don’t overdo the food coloring or the batter gets loose.
- Don’t swirl too aggressively or the layers blur.
27. Orange Creamsicle Bars
Intro: These bars taste like orange sherbet and vanilla ice cream had a very tidy meeting in one pan. The color is soft and sunny, the filling is creamy, and the citrus aroma is the first thing people notice when the lid comes off.
Why It Works: Orange and vanilla work because one gives lift and the other gives body. In bar form, that balance becomes sliceable and cool, which suits a dessert table that’s already carrying plenty of rich chocolate.
Key Ingredients:
- 1 1/2 cups vanilla wafer crumbs
- 1/2 cup melted butter
- 8 ounces cream cheese, softened
- 1/2 cup sugar
- 1/2 cup orange juice
- 1 tablespoon orange zest
- 1 cup whipped topping
- 1 teaspoon vanilla extract
Quick Steps:
- Line a 9×9-inch pan.
- Press crumbs and butter into the pan and chill.
- Beat cream cheese, sugar, orange juice, zest, and vanilla, then fold in whipped topping.
- Spread over crust and chill 4 hours.
- Cut with a warm knife.
Equipment for This Recipe:
- 9×9-inch pan
- Mixer
- Zester
- Spatula
How to Serve This Dish: Serve these cold with a little extra orange zest or a few candied orange peel slivers. They’re a good bridge between fruit bars and creamier desserts.
Pro Tips for This Recipe:
- Use fresh orange juice for the cleanest flavor.
- Chill well or the filling won’t hold.
Variations on This Dish:
- Blood Orange Version: Use blood orange juice for a deeper color.
- Creamsicle Swirl Version: Swirl in 2 tablespoons orange marmalade.
Common Mistakes to Avoid with This Dish:
- Don’t add too much juice or the filling turns loose.
- Don’t cut before fully chilled.
28. Salted Peanut Butter Egg Bars
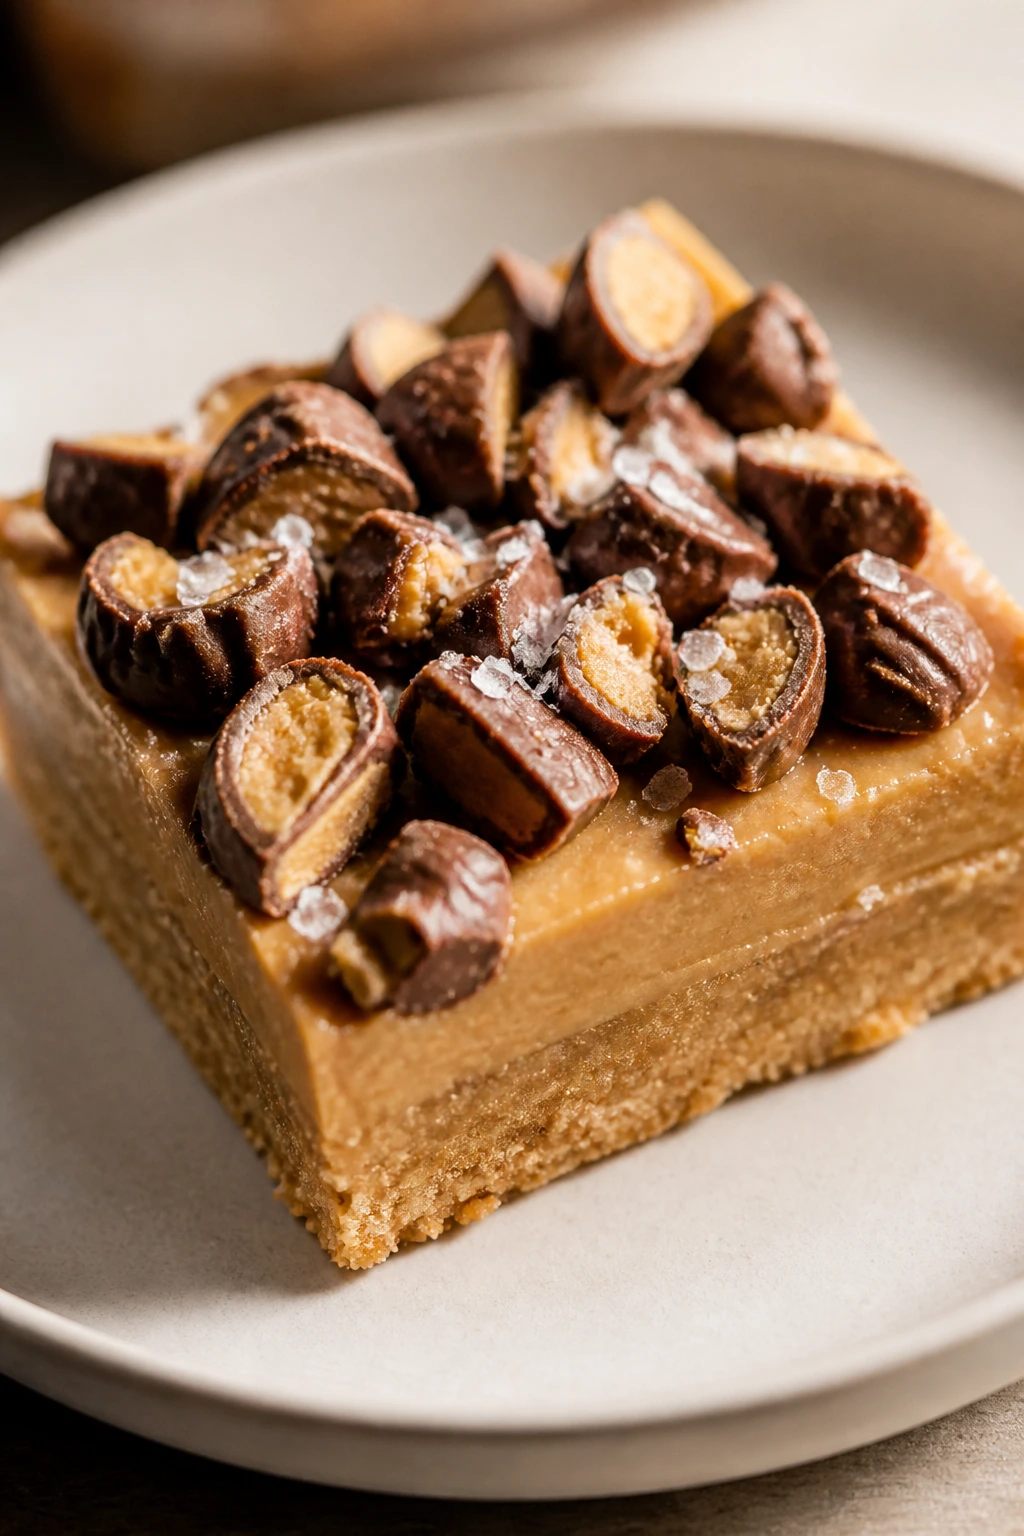
Intro: Peanut butter and chocolate eggs are a pretty hard pairing to beat. These bars lean chewy and rich, with a salty edge that keeps them from tasting like candy in one long line.
Why It Works: Peanut butter gives the bars structure and a warm, roasted flavor. Chopped chocolate eggs on top add color and crunch, while a pinch of salt keeps the sweetness in check.
Key Ingredients:
- 1 cup unsalted butter, softened
- 1 cup peanut butter
- 1 cup brown sugar
- 2 large eggs
- 2 cups all-purpose flour
- 1 teaspoon baking powder
- 1/2 teaspoon salt
- 1 cup chopped chocolate eggs
- Flaky salt
Quick Steps:
- Heat oven to 350°F and line a 9×13-inch pan.
- Cream butter, peanut butter, and brown sugar, then beat in eggs.
- Fold in flour, baking powder, salt, and half the chocolate eggs.
- Spread into the pan, top with remaining candy, and bake 22 to 26 minutes.
- Cool and finish with flaky salt.
Equipment for This Recipe:
- 9×13-inch pan
- Mixer
- Spatula
- Sharp knife
How to Serve This Dish: These are dense, so thin squares are enough. A light sprinkle of flaky salt right before serving gives the chocolate a sharper finish.
Pro Tips for This Recipe:
- Use creamy peanut butter for a smoother crumb.
- Cut the bars only after they’re fully cool.
Variations on This Dish:
- Chocolate Peanut Butter Bars: Add 1/2 cup cocoa powder to the dough.
- Pretzel Peanut Bars: Fold in crushed pretzels for more crunch.
Common Mistakes to Avoid with This Dish:
- Don’t use natural peanut butter that separates unless you stir it very well.
- Don’t overbake; peanut butter bars dry out fast.
29. Apricot Pistachio Oat Bars
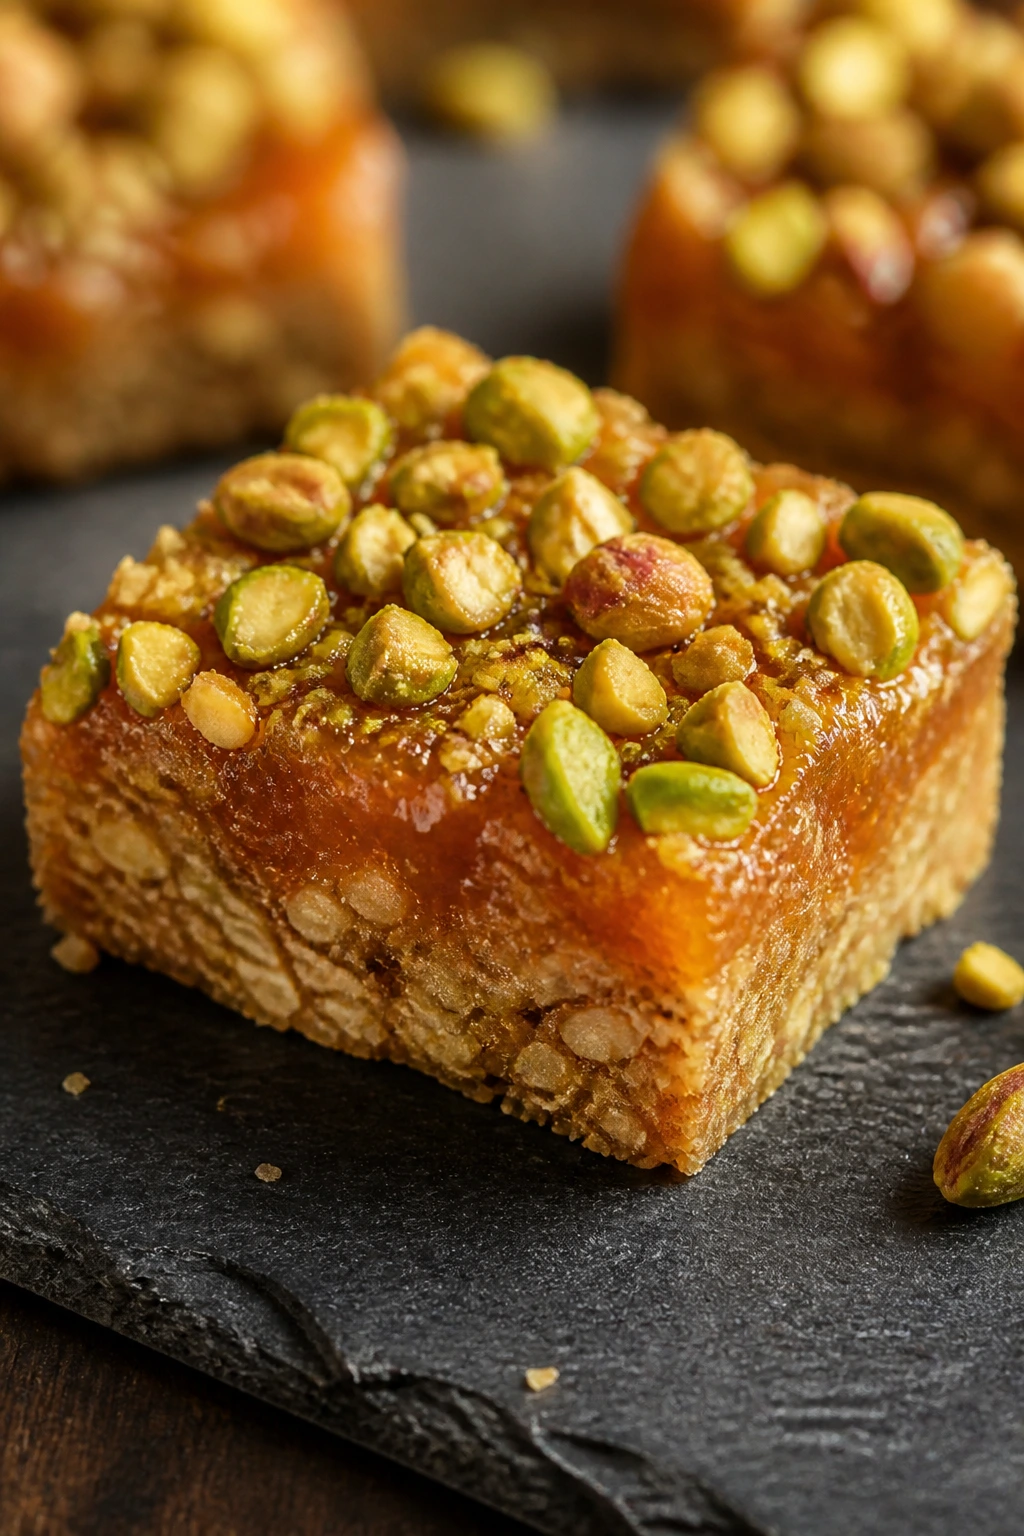
Intro: These have a soft golden look and a gentle fruit-nut balance that feels a little more grown-up than candy-topped bars. Oats keep the texture hearty, apricot adds a sunny edge, and pistachios give you those pale green flecks that make a tray look intentional.
Why It Works: Apricot jam spreads easily and bakes into a glossy layer, while oats and pistachios keep the bars from being one-note sweet. The combination holds up well at room temperature, which is useful if the tray sits out for a while.
Key Ingredients:
- 1 1/2 cups rolled oats
- 1 1/2 cups all-purpose flour
- 1 cup brown sugar
- 1 cup unsalted butter, melted
- 1 cup apricot preserves
- 3/4 cup chopped pistachios
- 1/4 teaspoon salt
Quick Steps:
- Heat oven to 350°F and line a 9×9-inch pan.
- Mix oats, flour, sugar, butter, and salt.
- Press half into the pan, spread apricot preserves over it, then scatter pistachios.
- Crumble the remaining mixture on top and bake 30 to 35 minutes.
- Cool completely.
Equipment for This Recipe:
- 9×9-inch pan
- Mixing bowl
- Spoon or spatula
- Cooling rack
How to Serve This Dish: These cut nicely into compact squares and look good beside tea cakes or citrus bars. A dusting of powdered sugar softens the apricot color.
Pro Tips for This Recipe:
- Warm the preserves if they’re stubborn to spread.
- Let the bars cool fully or the jam layer slips.
Variations on This Dish:
- Fig Pistachio Version: Swap in fig preserves.
- Honey Oat Version: Drizzle honey over the top before baking.
Common Mistakes to Avoid with This Dish:
- Don’t press the crumble too tightly, or it turns dense.
- Don’t overdo the jam layer or the bars go soft.
30. Tiramisu Bars
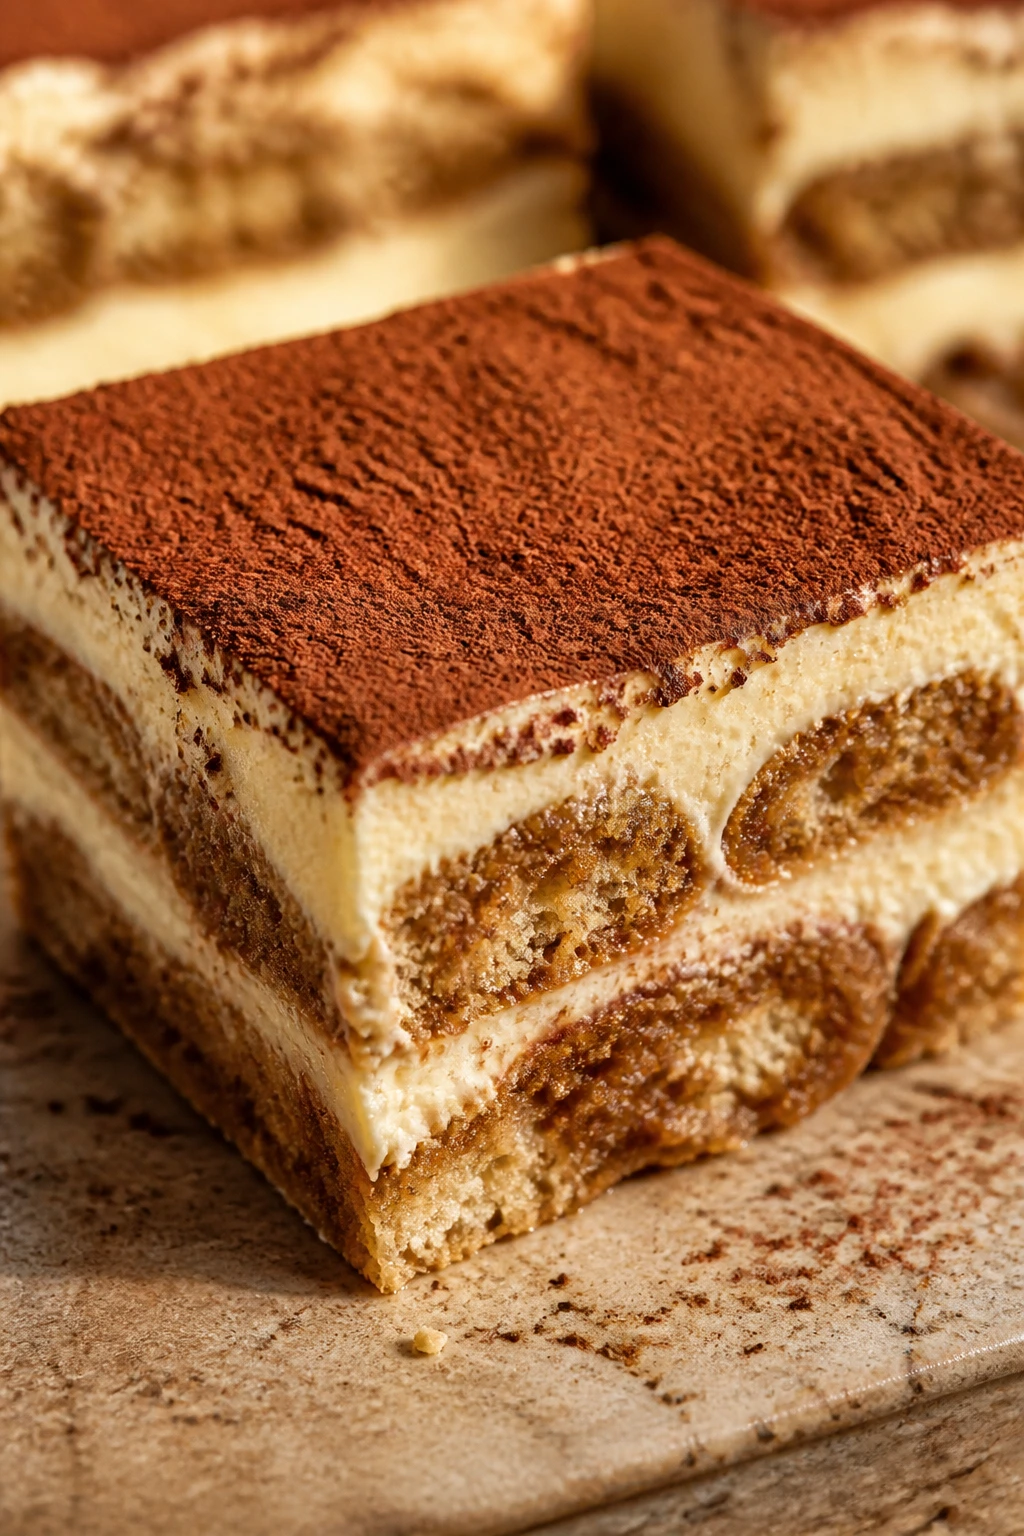
Intro: Tiramisu in bar form keeps the coffee-and-cream idea intact while making it easier to serve. You get a cocoa-dusted top, a smooth mascarpone layer, and a sturdy base that tastes like a bakery version of dessert layered in a square.
Why It Works: Tiramisu is already a layered dessert, so bars make sense. The chilled structure helps the mascarpone set, and the coffee flavor stays distinct instead of getting buried.
Key Ingredients:
- 1 1/2 cups ladyfinger crumbs or vanilla cookie crumbs
- 1/2 cup melted butter
- 8 ounces mascarpone
- 8 ounces cream cheese
- 1/2 cup powdered sugar
- 1 teaspoon vanilla extract
- 1/3 cup strong coffee or espresso, cooled
- 1 tablespoon cocoa powder
Quick Steps:
- Line a 9×9-inch pan.
- Mix crumbs and butter, press into the pan, and chill.
- Beat mascarpone, cream cheese, sugar, vanilla, and coffee until smooth.
- Spread over crust, dust with cocoa, and chill 4 hours.
- Slice cold with a hot knife.
Equipment for This Recipe:
- 9×9-inch pan
- Mixer
- Small sieve for cocoa
- Spatula
How to Serve This Dish: Serve these cold, straight from the fridge. A few chocolate curls on top look good, but a light cocoa dusting is enough.
Pro Tips for This Recipe:
- Use very strong coffee so the flavor survives the cream.
- Chill long enough for the filling to firm up.
Variations on This Dish:
- Chocolate Tiramisu Bars: Add shaved chocolate between the layers.
- Amaretto Version: Add a splash of almond liqueur if you use it.
Common Mistakes to Avoid with This Dish:
- Don’t use warm coffee or the filling loosens.
- Don’t overwhip the mascarpone or it can turn grainy.
31. Cookie Dough Easter Bars
Intro: These are for the person who wants the cookie dough taste without raw eggs in the bowl. The base is soft, the chocolate chips stay studded through the middle, and the candy on top gives it Easter color with almost no extra work.
Why It Works: Edible cookie dough bars need enough fat and sugar to taste like cookie dough but enough structure to slice. A buttery crumb and heat-treated flour give you the right texture without the worry.
Key Ingredients:
- 1 cup unsalted butter, softened
- 1 cup brown sugar
- 1/2 cup granulated sugar
- 2 cups heat-treated all-purpose flour
- 1 teaspoon vanilla extract
- 1/2 teaspoon salt
- 1 cup mini chocolate chips
- 1 cup chopped Easter candy
- 1/2 cup sweetened condensed milk
Quick Steps:
- Heat-treat the flour, then let it cool.
- Mix butter, sugars, vanilla, salt, and condensed milk.
- Fold in flour and chips, then press into a lined 8×8-inch pan.
- Top with candy and chill 2 hours.
- Slice with a warm knife.
Equipment for This Recipe:
- 8×8-inch pan
- Mixer or sturdy spoon
- Parchment paper
- Bowl for cooling flour
How to Serve This Dish: These are rich, so small squares work best. Serve cold with milk or coffee.
Pro Tips for This Recipe:
- Heat-treat the flour in a 350°F oven for about 5 minutes, then cool it.
- Press the top gently so the candy stays visible.
Variations on This Dish:
- Peanut Butter Cookie Dough Bars: Add 1/3 cup peanut butter.
- Birthday Cake Version: Swap half the chips for sprinkles.
Common Mistakes to Avoid with This Dish:
- Don’t skip heat-treating the flour.
- Don’t use too much condensed milk or the bars become sticky.
32. Blackberry Lemon Bars
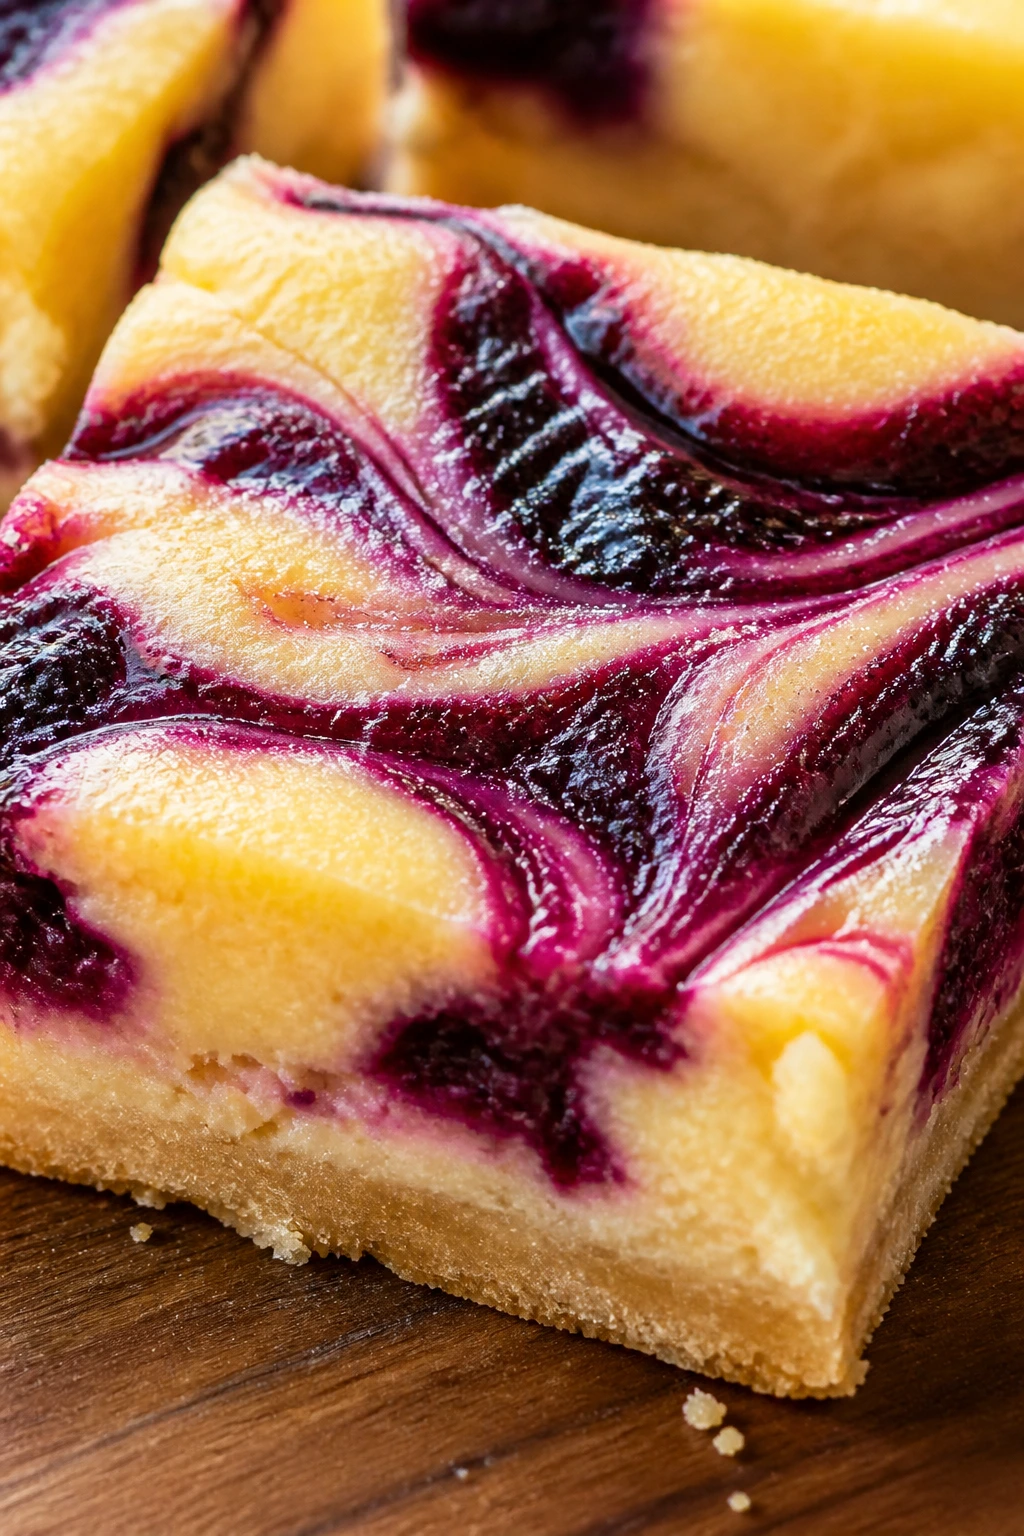
Intro: Blackberry lemon bars look dramatic in the best way. The blackberries leave dark purple ribbons through the bright filling, and the lemon keeps the sweetness from getting thick or syrupy.
Why It Works: Blackberries are more assertive than raspberries, so they stand up well to lemon. The crust gives the bars a firm base, and the swirl keeps them visually striking without needing extra decoration.
Key Ingredients:
- 1 1/2 cups flour
- 1 cup butter, softened
- 1/2 cup sugar
- 3 large eggs
- 3/4 cup sugar
- 1/2 cup lemon juice
- 1 tablespoon lemon zest
- 1 cup blackberry puree or jam
Quick Steps:
- Heat oven to 350°F and line a 9×9-inch pan.
- Mix flour, butter, and sugar, then press into the pan and bake 12 minutes.
- Whisk eggs, sugar, lemon juice, and zest.
- Spoon blackberry puree over the filling and swirl lightly.
- Bake 22 to 25 minutes, then chill.
Equipment for This Recipe:
- 9×9-inch pan
- Whisk
- Spoon for swirling
- Zester
How to Serve This Dish: Serve these cold for the sharpest slices. A few fresh blackberries on the side make the color contrast stronger.
Pro Tips for This Recipe:
- Strain the blackberry puree if you want a smoother swirl.
- Chill before slicing so the jam doesn’t smear.
Variations on This Dish:
- Blueberry Lemon Bars: Swap in blueberry puree.
- Lavender Lemon Version: Add a pinch of culinary lavender.
Common Mistakes to Avoid with This Dish:
- Don’t use too much puree or the filling becomes loose.
- Don’t pull the crust too early; it should be lightly set.
33. Coffee Walnut Bars
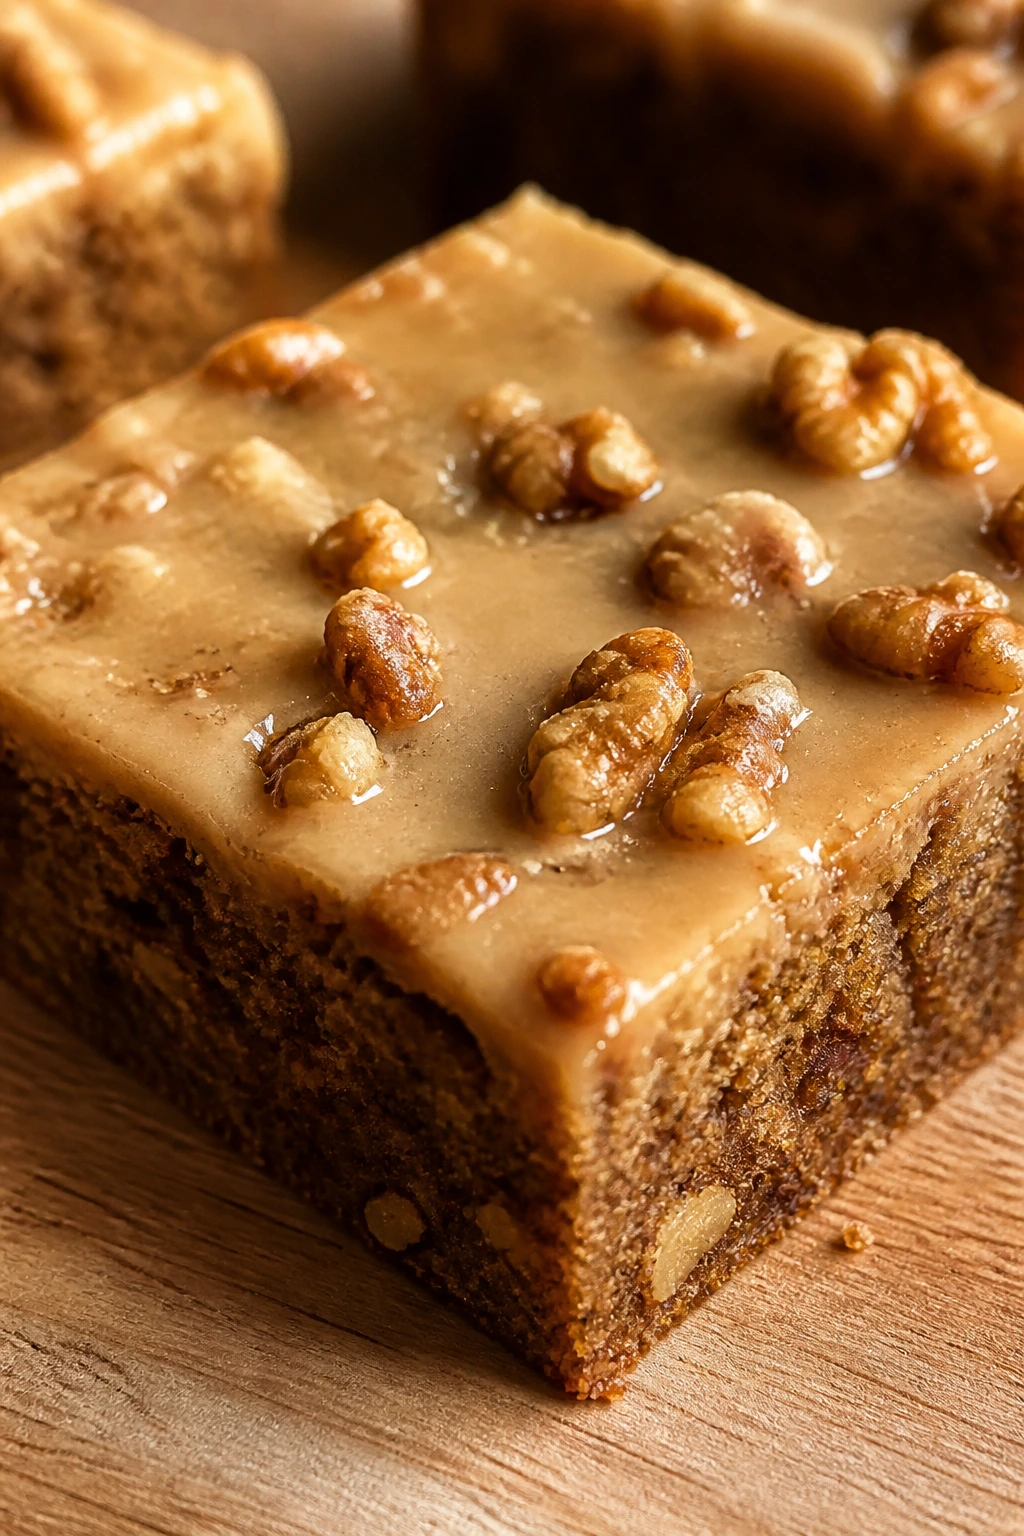
Intro: Coffee walnut bars are for the grown-up corner of the dessert tray. They’re deep, nutty, and a little bitter in a good way, with a glaze that settles into the top and gives the squares a neat, bakery-style finish.
Why It Works: Coffee gives the base a strong backbone, and walnuts bring texture that stands up even after chilling. A simple glaze keeps the bars from reading plain without burying the flavor.
Key Ingredients:
- 1 cup unsalted butter, softened
- 1 cup brown sugar
- 2 large eggs
- 2 cups all-purpose flour
- 2 teaspoons instant espresso powder
- 1 cup chopped walnuts
- 1/2 teaspoon salt
- 1 cup powdered sugar
- 1 to 2 tablespoons coffee or milk for glaze
Quick Steps:
- Heat oven to 350°F and line a 9×13-inch pan.
- Cream butter and sugar, then mix in eggs.
- Fold in flour, espresso powder, salt, and walnuts.
- Bake 22 to 26 minutes, cool, and drizzle with glaze.
- Slice once the glaze sets.
Equipment for This Recipe:
- 9×13-inch pan
- Mixer
- Small bowl for glaze
- Cooling rack
How to Serve This Dish: These work well after dinner with coffee. Keep the squares modest; the flavor is stronger than the average bar.
Pro Tips for This Recipe:
- Dissolve espresso powder well so you don’t get bitter specks.
- Toast the walnuts for more depth.
Variations on This Dish:
- Mocha Walnut Bars: Add 1/4 cup cocoa powder.
- Maple Coffee Version: Replace part of the glaze liquid with maple syrup.
Common Mistakes to Avoid with This Dish:
- Don’t overbake or the coffee flavor gets harsh.
- Don’t use stale walnuts; they taste dusty fast.
34. Maple Pecan Bars
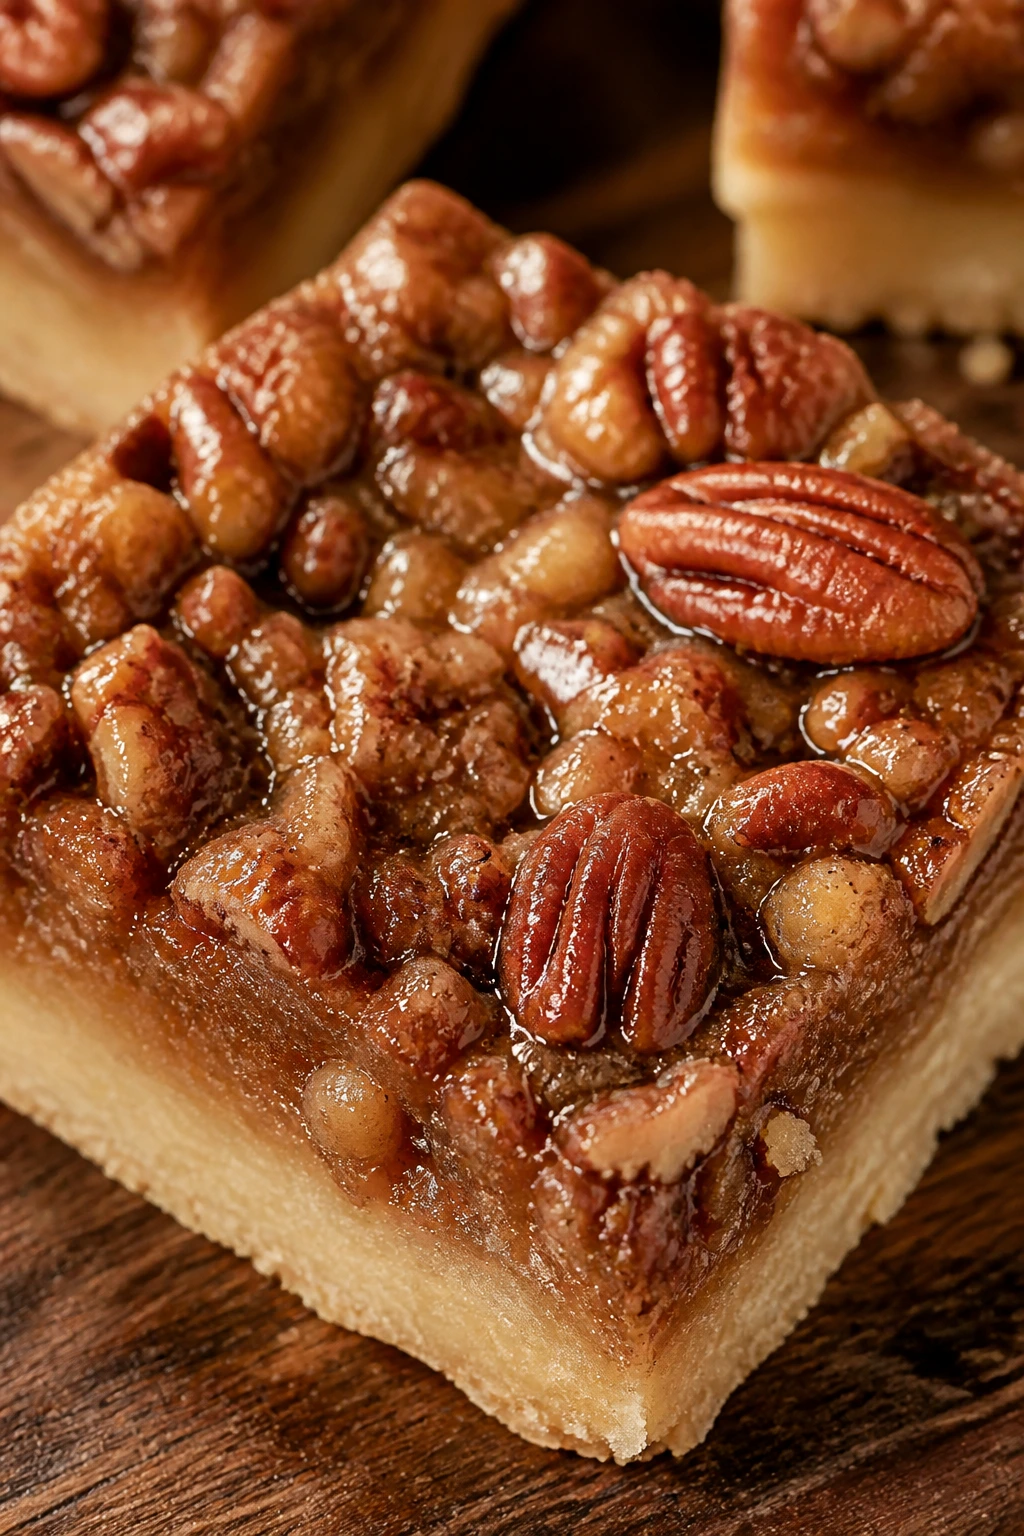
Intro: Maple pecan bars have a caramel smell that fills the kitchen fast. The base is buttery, the pecans toast right on top, and the maple layer gives them a shiny finish that feels at home on an Easter table, even if they’re a little more subtle than the candy bars.
Why It Works: Maple syrup brings a round sweetness that brown sugar alone can’t match. Pecans give crunch and shape, and the bars slice neatly once the filling sets.
Key Ingredients:
- 1 cup unsalted butter, softened
- 1/2 cup brown sugar
- 2 cups flour
- 1/2 teaspoon salt
- 3 large eggs
- 3/4 cup maple syrup
- 1 cup chopped pecans
- 1 teaspoon vanilla extract
Quick Steps:
- Heat oven to 350°F and line a 9×9-inch pan.
- Mix butter, brown sugar, flour, and salt, then press into the pan and bake 10 minutes.
- Whisk eggs, maple syrup, and vanilla.
- Pour over crust, scatter pecans on top, and bake 20 to 24 minutes.
- Cool before cutting.
Equipment for This Recipe:
- 9×9-inch pan
- Whisk
- Mixing bowl
- Cooling rack
How to Serve This Dish: Serve at room temperature with a cup of strong tea or coffee. They’re rich enough that small squares go a long way.
Pro Tips for This Recipe:
- Use real maple syrup, not pancake syrup.
- Toast the pecans if you want a stronger nut flavor.
Variations on This Dish:
- Chocolate Maple Bars: Add a few chocolate chips to the pecan topping.
- Orange Maple Bars: Add orange zest to the maple layer.
Common Mistakes to Avoid with This Dish:
- Don’t underbake the filling or it stays syrupy.
- Don’t use too much pecan topping; the bars need the custard underneath.
35. White Chocolate Macadamia Citrus Bars
Intro: White chocolate and macadamia already make a soft, buttery combo, but citrus gives the pair a better edge. These bars look pale and polished, with little golden nut pieces and a clean glaze that makes the top gleam.
Why It Works: Macadamias are rich enough to balance white chocolate, and citrus zest keeps the sweetness from flattening. In bar form, the nuts stay visible on the cut edge, which is part of the appeal.
Key Ingredients:
- 1 cup unsalted butter, softened
- 1 cup sugar
- 2 large eggs
- 2 1/4 cups flour
- 1 teaspoon orange zest
- 1 cup white chocolate chunks
- 1 cup chopped macadamia nuts
- 1/2 teaspoon salt
Quick Steps:
- Heat oven to 350°F and line a 9×13-inch pan.
- Cream butter and sugar, then add eggs and zest.
- Fold in flour, salt, nuts, and white chocolate.
- Spread in the pan and bake 22 to 26 minutes.
- Cool before slicing.
Equipment for This Recipe:
- 9×13-inch pan
- Mixer
- Citrus zester
- Knife
How to Serve This Dish: Serve these with fruit on the side; strawberries or orange slices work well. The bars are rich and best cut into smaller rectangles.
Pro Tips for This Recipe:
- Chop the nuts so they distribute evenly.
- Add a little lemon zest if you want the citrus sharper.
Variations on This Dish:
- Lime Macadamia Bars: Swap orange zest for lime.
- Coconut Macadamia Version: Add 1/2 cup toasted coconut.
Common Mistakes to Avoid with This Dish:
- Don’t overload the white chocolate or the bars get cloying.
- Don’t cut while warm; the nuts need time to settle.
36. Rhubarb Custard Bars
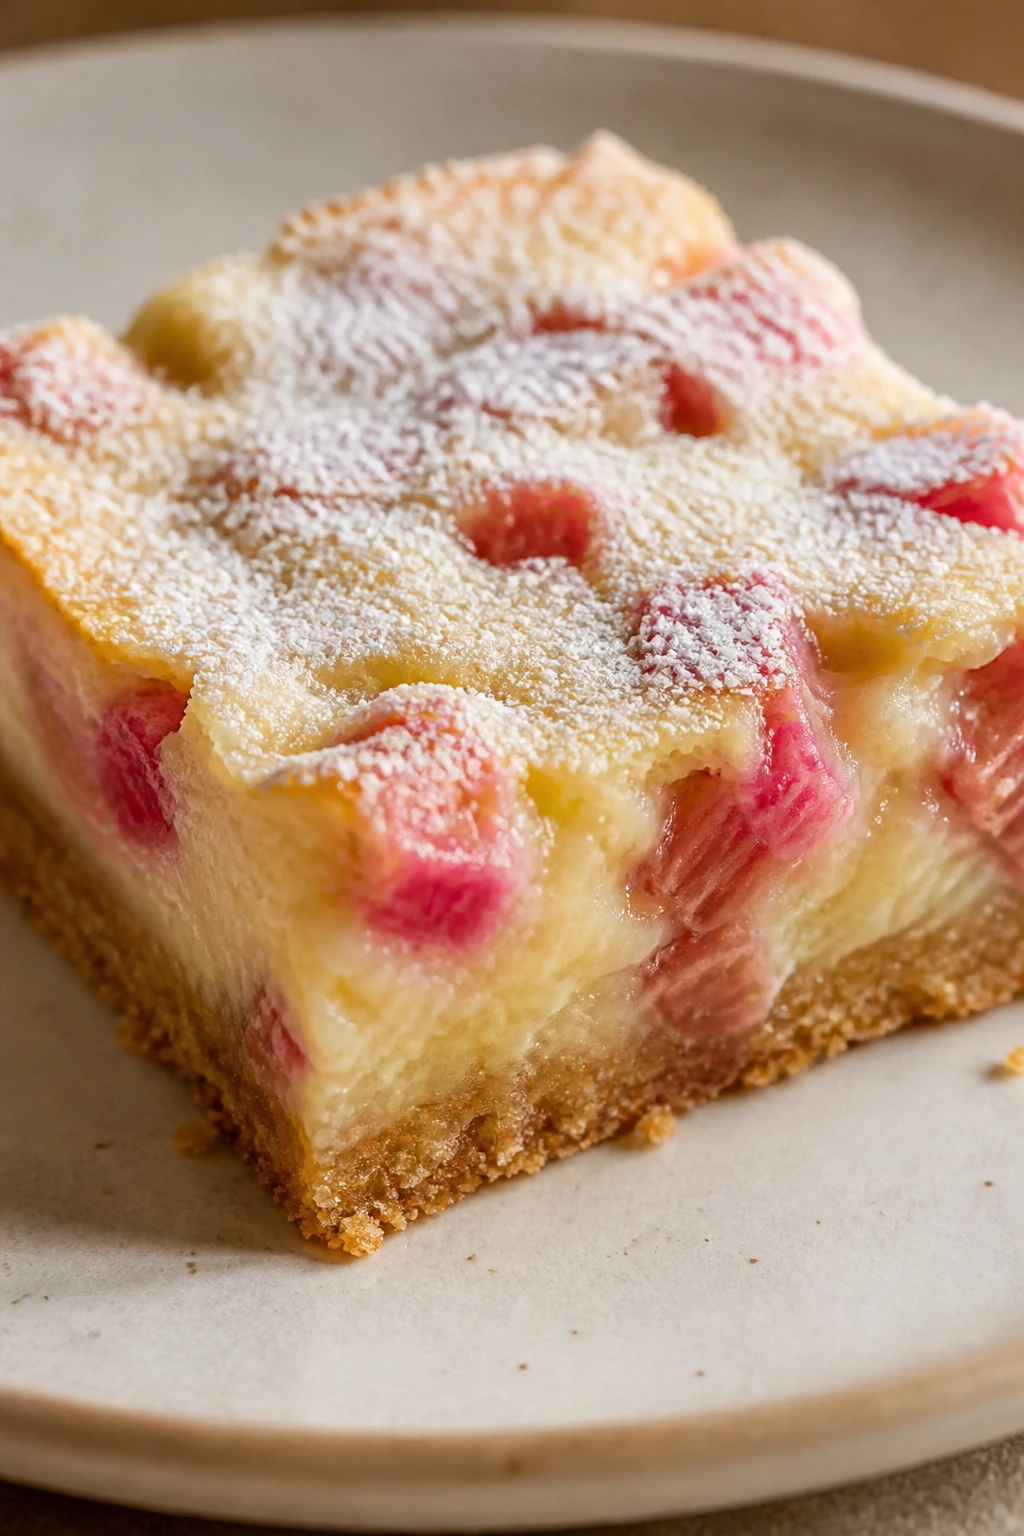
Intro: Rhubarb bars bring a bright, slightly old-fashioned tartness that cuts through all the candy on the table. The custard layer is soft and pale, the rhubarb turns tender in the oven, and the crust keeps everything from sliding around.
Why It Works: Rhubarb needs richness to smooth out its sharp edge, and custard is a natural fit. These bars give you both tart and creamy in one square, which makes them feel balanced instead of sugary.
Key Ingredients:
- 1 1/2 cups flour
- 1/2 cup butter, softened
- 1/2 cup sugar
- 2 cups chopped rhubarb
- 3 large eggs
- 1 cup sugar
- 1/2 cup heavy cream
- 1 teaspoon vanilla extract
Quick Steps:
- Heat oven to 350°F and line a 9×9-inch pan.
- Mix flour, butter, and sugar, press into the pan, and bake 10 minutes.
- Scatter rhubarb over the crust.
- Whisk eggs, sugar, cream, and vanilla, then pour over rhubarb.
- Bake 30 to 35 minutes and cool fully.
Equipment for This Recipe:
- 9×9-inch pan
- Whisk
- Knife for rhubarb
- Mixing bowl
How to Serve This Dish: Serve chilled or at room temperature. A light dusting of powdered sugar keeps the rhubarb color visible while softening the tartness a bit.
Pro Tips for This Recipe:
- Chop rhubarb small so it softens evenly.
- Cool completely before cutting or the custard runs.
Variations on This Dish:
- Strawberry Rhubarb Bars: Add sliced strawberries to the filling.
- Orange Rhubarb Version: Add orange zest to the custard.
Common Mistakes to Avoid with This Dish:
- Don’t use huge rhubarb chunks or they stay tough.
- Don’t serve warm; custard bars need a firm set.
37. Chocolate Mint Bars
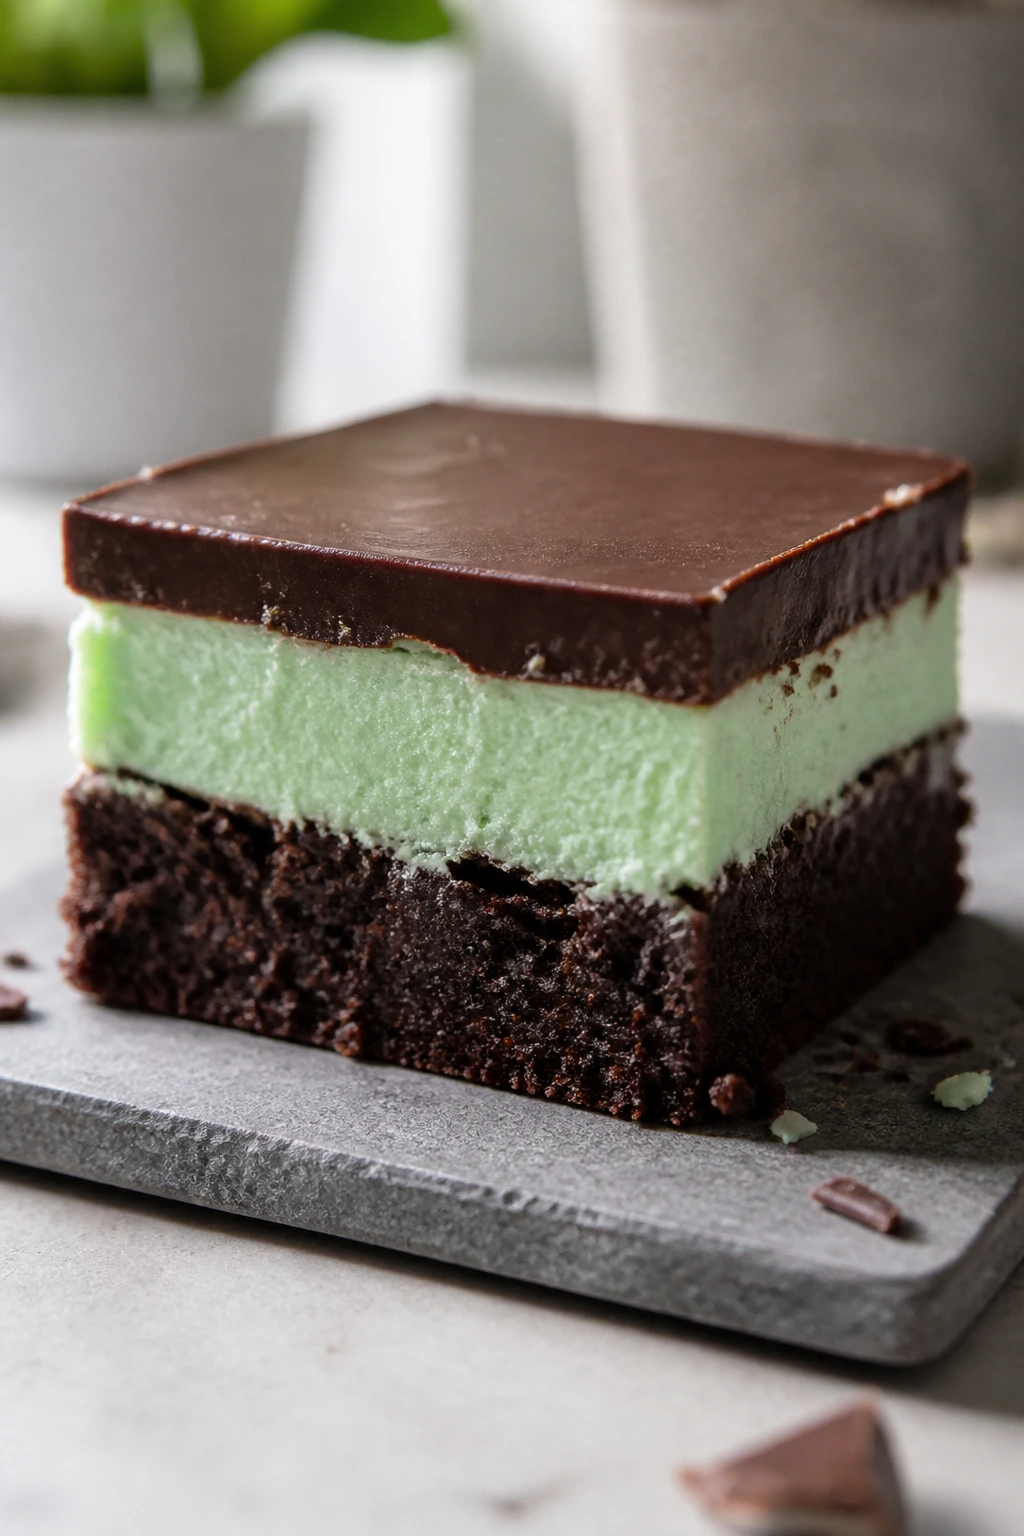
Intro: Chocolate mint bars have a classic after-dinner flavor, but the layered bar format makes them easier to cut and carry. A dark chocolate base, cool mint filling, and glossy top give the whole thing a clean, striped look.
Why It Works: Mint needs chocolate to anchor it. In bars, the contrast is visual and practical, because the filling sets firm enough to slice without losing that cool peppermint finish.
Key Ingredients:
- 1 cup unsalted butter, softened
- 1 cup sugar
- 2 large eggs
- 1 3/4 cups flour
- 1/3 cup cocoa powder
- 1/2 teaspoon salt
- 1 cup cream cheese, softened
- 1 cup powdered sugar
- 1/2 teaspoon peppermint extract
Quick Steps:
- Heat oven to 350°F and line an 8×8-inch pan.
- Mix butter, sugar, eggs, flour, cocoa, and salt, then bake the base 18 minutes.
- Beat cream cheese, powdered sugar, and peppermint extract; spread over cooled base.
- Chill, then drizzle with melted chocolate if you like.
- Slice cold.
Equipment for This Recipe:
- 8×8-inch pan
- Mixer
- Spatula
- Small bowl for chocolate drizzle
How to Serve This Dish: These are best served chilled so the mint layer stays clean. A few chocolate shavings on top make the squares look finished fast.
Pro Tips for This Recipe:
- Use peppermint extract sparingly; it gets sharp fast.
- Cool the base before adding the filling or it melts.
Variations on This Dish:
- Andes Mint Version: Fold chopped mint candies into the top layer.
- Dark Chocolate Version: Use extra cocoa in the base.
Common Mistakes to Avoid with This Dish:
- Don’t overdo the mint flavor.
- Don’t slice before the cream layer firms up.
38. Tres Leches Cake Bars
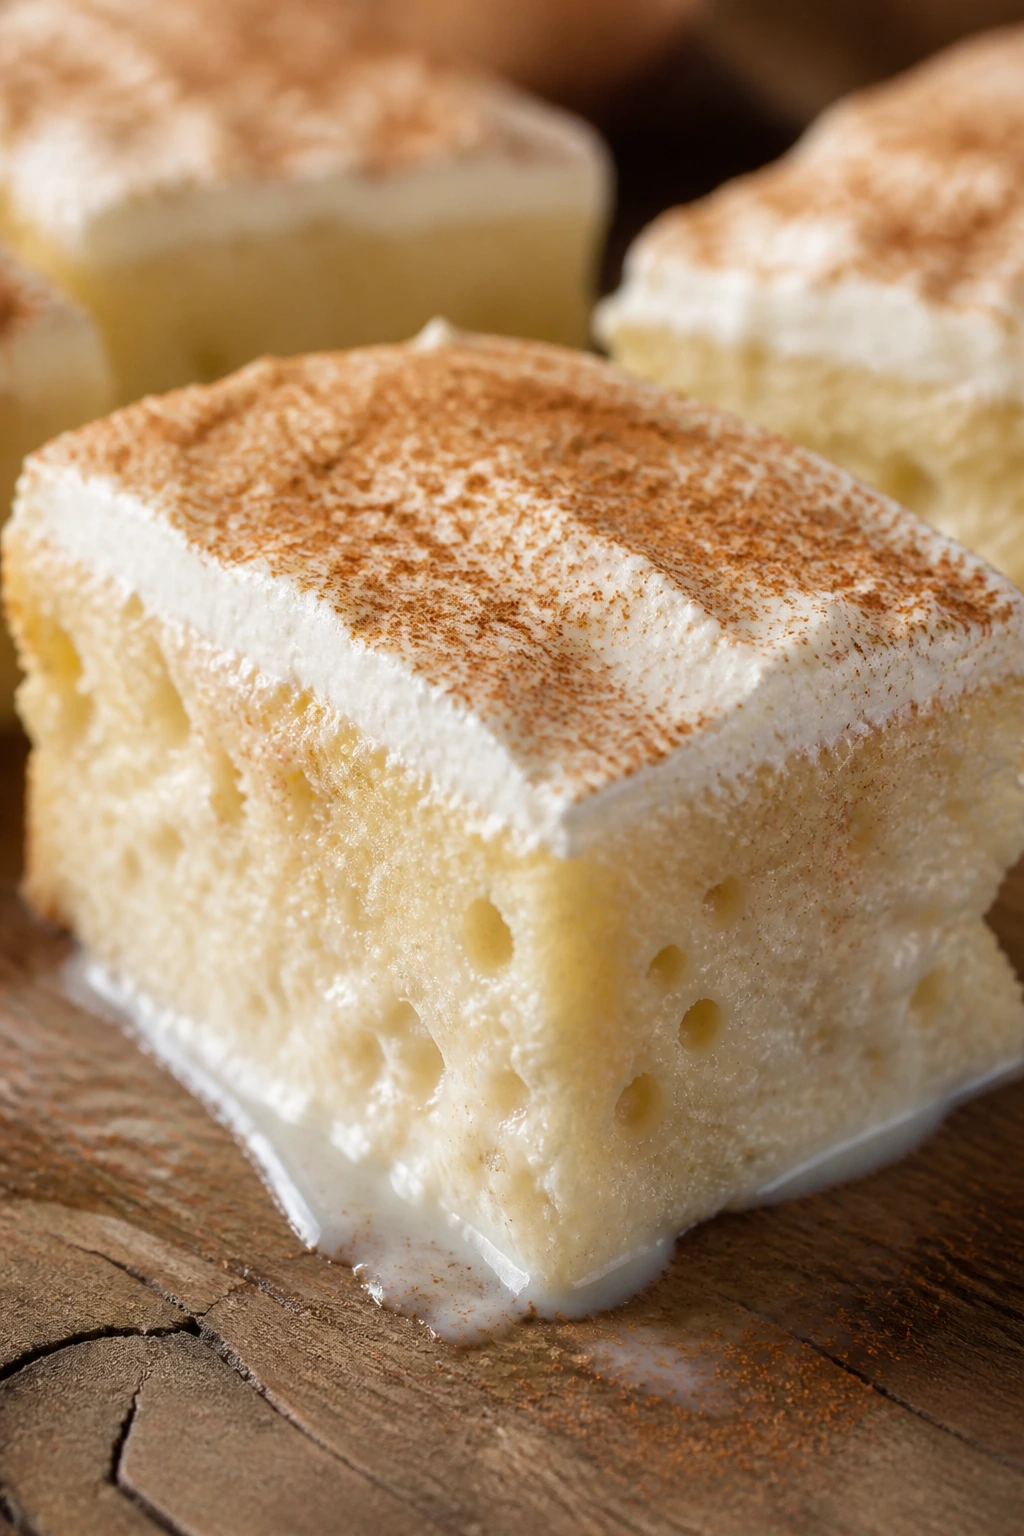
Intro: Tres leches bars take the soaked-cake idea and give it a tidier shape. The crumb absorbs the milk mixture, the top stays soft and cool, and the cinnamon dusting makes the whole pan smell like a bakery case.
Why It Works: Cake bars absorb the milk mixture more evenly than a thick cake layer. That means you get the creamy soak without the dessert turning into a puddle.
Key Ingredients:
- 1 1/2 cups flour
- 1 teaspoon baking powder
- 1/4 teaspoon salt
- 4 large eggs
- 1 cup sugar
- 1/2 cup milk
- 1 can evaporated milk, 12 ounces
- 1 can sweetened condensed milk, 14 ounces
- 1 cup heavy cream
- Cinnamon for topping
Quick Steps:
- Heat oven to 350°F and line a 9×13-inch pan.
- Beat eggs and sugar until pale, then fold in flour, baking powder, salt, and milk.
- Bake 20 to 24 minutes, then cool.
- Whisk evaporated milk, condensed milk, and cream; pour over the cooled cake.
- Chill 4 hours and dust with cinnamon.
Equipment for This Recipe:
- 9×13-inch pan
- Mixer
- Whisk
- Fork for poking holes in the cake
How to Serve This Dish: Serve cold with a little whipped cream if you want extra softness. The bars are moist, so a sharp knife helps keep the edges clean.
Pro Tips for This Recipe:
- Poke the cake all over so the milk soaks in evenly.
- Chill long enough or the soak stays loose.
Variations on This Dish:
- Coconut Tres Leches Bars: Add coconut milk to the soak.
- Coffee Tres Leches Version: Stir in cooled espresso.
Common Mistakes to Avoid with This Dish:
- Don’t pour in the soak before the cake cools.
- Don’t skip the chill, or the bars collapse when cut.
39. Strawberry Pretzel Dessert Bars
Intro: Strawberry pretzel bars are a little sweet, a little salty, and very easy to recognize from across the room. The crust is crunchy, the cream cheese layer is smooth, and the strawberry top gives the whole tray a bright red finish.
Why It Works: Pretzels keep the base from becoming too soft under the fruit and cream. The salty crust is what makes the strawberry layer taste brighter, and that’s why people keep reaching back for another square.
Key Ingredients:
- 2 cups crushed pretzels
- 3/4 cup melted butter
- 1/4 cup sugar
- 8 ounces cream cheese, softened
- 1/2 cup powdered sugar
- 1 cup whipped topping
- 1 package strawberry gelatin, 3 ounces
- 2 cups sliced strawberries
Quick Steps:
- Heat oven to 350°F and line a 9×13-inch pan.
- Mix pretzels, butter, and sugar; press into the pan and bake 10 minutes.
- Beat cream cheese and powdered sugar, then fold in whipped topping and spread over cooled crust.
- Dissolve gelatin, stir in strawberries, and pour over the cream layer.
- Chill until set.
Equipment for This Recipe:
- 9×13-inch pan
- Mixing bowls
- Hand mixer
- Spatula
How to Serve This Dish: Serve these cold and cut with a sharp knife. A few strawberry slices on the platter make the color pop even more.
Pro Tips for This Recipe:
- Cool the crust fully before adding the cream layer.
- Let the gelatin start to thicken before pouring so the berries stay suspended.
Variations on This Dish:
- Mixed Berry Version: Use raspberries and blueberries with the gelatin.
- Orange Pretzel Bars: Swap strawberry gelatin for orange.
Common Mistakes to Avoid with This Dish:
- Don’t pour the gelatin over a warm cream layer.
- Don’t crush the pretzels into dust; keep some texture.
40. S’mores Easter Bars

Intro: These bars bring campfire energy into a spring dessert tray. Graham crust, melted chocolate, and marshmallow top already do the heavy lifting, and a few pastel candies pressed into the top make them feel ready for Easter without changing the flavor much.
Why It Works: S’mores bars are sturdy and familiar. The graham base holds the layers together, marshmallows toast quickly under heat, and the chocolate stays soft enough to bite without becoming a mess.
Key Ingredients:
- 2 cups graham cracker crumbs
- 1/2 cup melted butter
- 1/4 cup brown sugar
- 1 cup chocolate chips
- 2 cups mini marshmallows
- 1/2 cup pastel candies or mini eggs
- Pinch of salt
Quick Steps:
- Heat oven to 350°F and line a 9×13-inch pan.
- Mix crumbs, butter, brown sugar, and salt; press into the pan and bake 8 minutes.
- Scatter chocolate chips over the crust, then marshmallows and candies.
- Bake 8 to 10 minutes until the marshmallows puff and brown slightly.
- Cool before slicing.
Equipment for This Recipe:
- 9×13-inch pan
- Mixing bowl
- Spatula
- Sharp knife
How to Serve This Dish: Serve these slightly warm if you want the chocolate soft, or fully cooled if you want tidy cuts. They’re happiest when cut into small squares.
Pro Tips for This Recipe:
- Watch the marshmallows closely; they move from toasted to scorched fast.
- Line the pan well so the melted chocolate lifts out cleanly.
Variations on This Dish:
- Peanut Butter S’mores Bars: Add peanut butter chips.
- Dark Chocolate Version: Use dark chocolate for a deeper finish.
Common Mistakes to Avoid with This Dish:
- Don’t overbake once the marshmallows go in.
- Don’t cut too soon or the layers slide.
41. Mocha Cream Cheese Bars
Intro: Mocha bars feel more composed than a brownie, but they still bring the same deep coffee-chocolate note. Cream cheese swirled through the top adds a pale contrast that makes the pan look sharp when sliced.
Why It Works: Espresso powder boosts the chocolate without turning it bitter. Cream cheese gives the bars a softer top layer and a visual stripe that stands out against the dark base.
Key Ingredients:
- 1 cup unsalted butter, softened
- 1 1/2 cups sugar
- 2 large eggs
- 1 3/4 cups flour
- 1/3 cup cocoa powder
- 2 teaspoons espresso powder
- 8 ounces cream cheese, softened
- 1/3 cup powdered sugar
- 1/2 cup chocolate chips
Quick Steps:
- Heat oven to 350°F and line an 8×8-inch pan.
- Mix butter, sugar, eggs, flour, cocoa, espresso powder, and chocolate chips.
- Beat cream cheese with powdered sugar.
- Spread base in the pan, dollop cream cheese on top, and swirl lightly.
- Bake 28 to 32 minutes and cool.
Equipment for This Recipe:
- 8×8-inch pan
- Mixer
- Knife
- Mixing bowls
How to Serve This Dish: Serve these in small squares after dinner or with coffee. A dusting of cocoa on top is enough to make them look finished.
Pro Tips for This Recipe:
- Use instant espresso powder, not brewed coffee, for better flavor.
- Don’t swirl too deep or the layers mix completely.
Variations on This Dish:
- Chocolate Chip Mocha Bars: Add extra chips to the base.
- Hazelnut Mocha Version: Add chopped hazelnuts.
Common Mistakes to Avoid with This Dish:
- Don’t use too much espresso powder or the bars turn sharp.
- Don’t undercool before slicing.
42. Pomegranate Dark Chocolate Bars
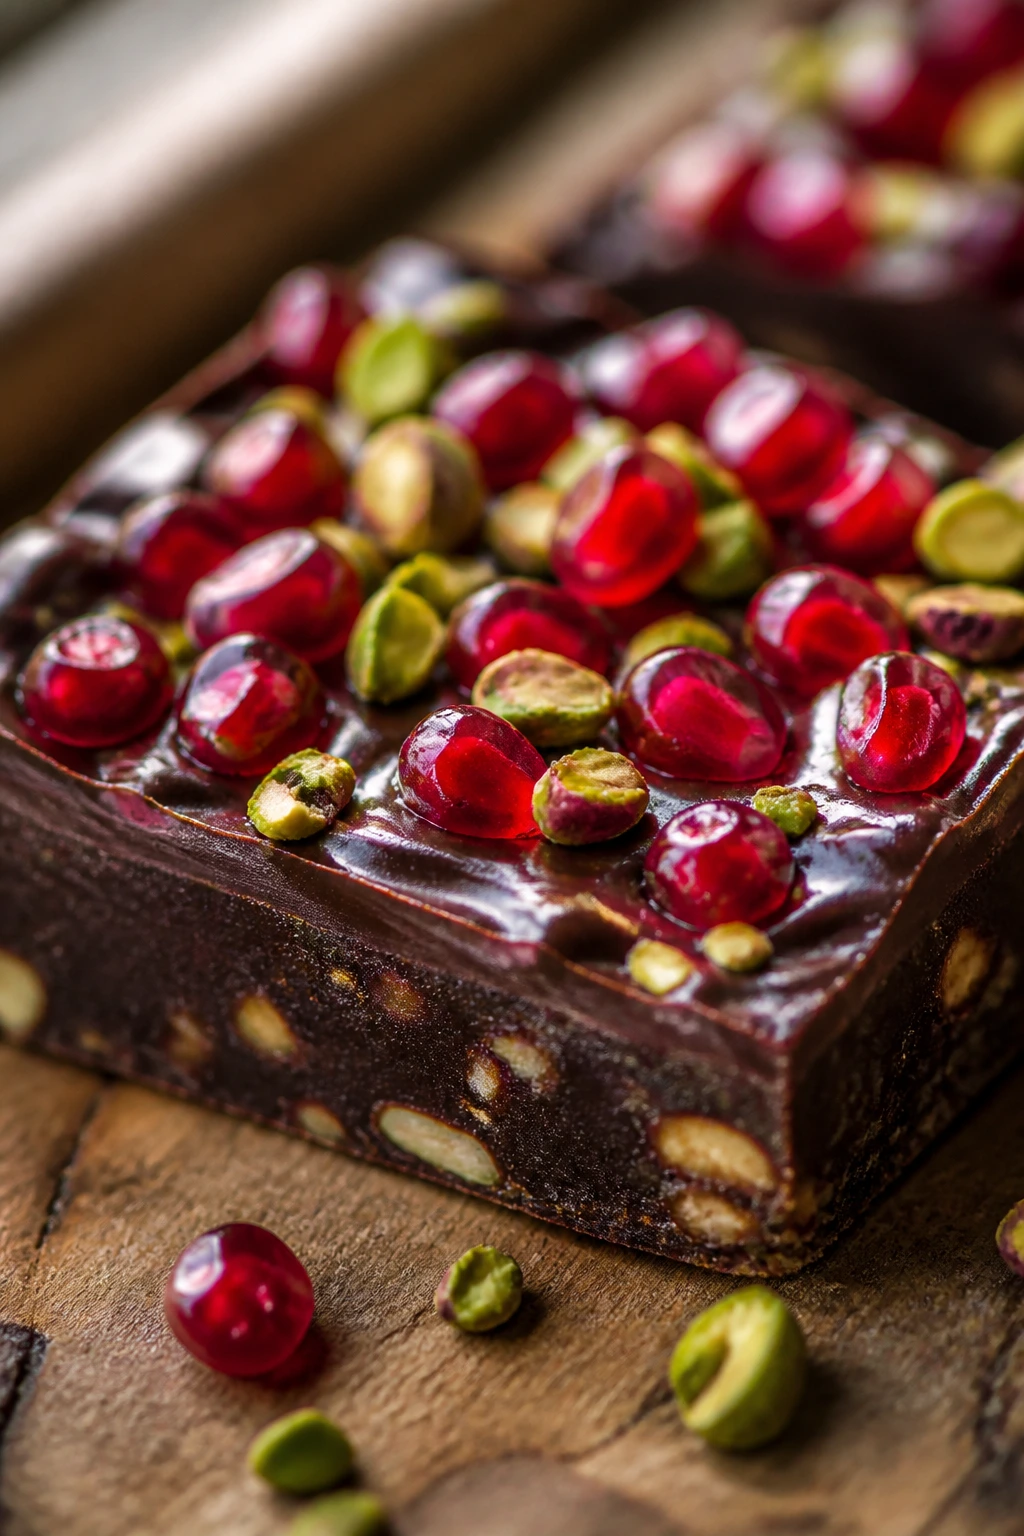
Intro: These bars have a jewel-box look that fits Easter surprisingly well. Dark chocolate gives the base depth, pomegranate seeds add bright red pops, and chopped pistachios bring a green note that looks festive without trying too hard.
Why It Works: Pomegranate arils stay juicy and glossy against dark chocolate, which creates a nice color contrast. The chocolate base also keeps the fruit from feeling too tart.
Key Ingredients:
- 1 cup unsalted butter, softened
- 1 cup brown sugar
- 2 large eggs
- 1 3/4 cups flour
- 1/2 cup cocoa powder
- 1 cup dark chocolate chunks
- 1/2 cup pomegranate arils
- 1/2 cup chopped pistachios
Quick Steps:
- Heat oven to 350°F and line an 8×8-inch pan.
- Cream butter and sugar, then mix in eggs.
- Fold in flour, cocoa, and chocolate chunks.
- Spread in the pan, press pomegranate and pistachios on top, and bake 24 to 28 minutes.
- Cool fully.
Equipment for This Recipe:
- 8×8-inch pan
- Mixer
- Spatula
- Sharp knife
How to Serve This Dish: Serve these at room temperature so the chocolate stays soft but not sticky. A little extra pomegranate on the plate makes them look polished fast.
Pro Tips for This Recipe:
- Pat the pomegranate arils dry before adding them.
- Use good dark chocolate; the bars rely on it.
Variations on This Dish:
- Orange Dark Chocolate Bars: Swap pomegranate for orange zest.
- Cherry Pistachio Version: Use dried cherries instead of pomegranate.
Common Mistakes to Avoid with This Dish:
- Don’t add wet fruit or the top gets tacky.
- Don’t overbake; dark chocolate bars dry out quickly.
43. Cinnamon Roll Bars with Cream Cheese Frosting
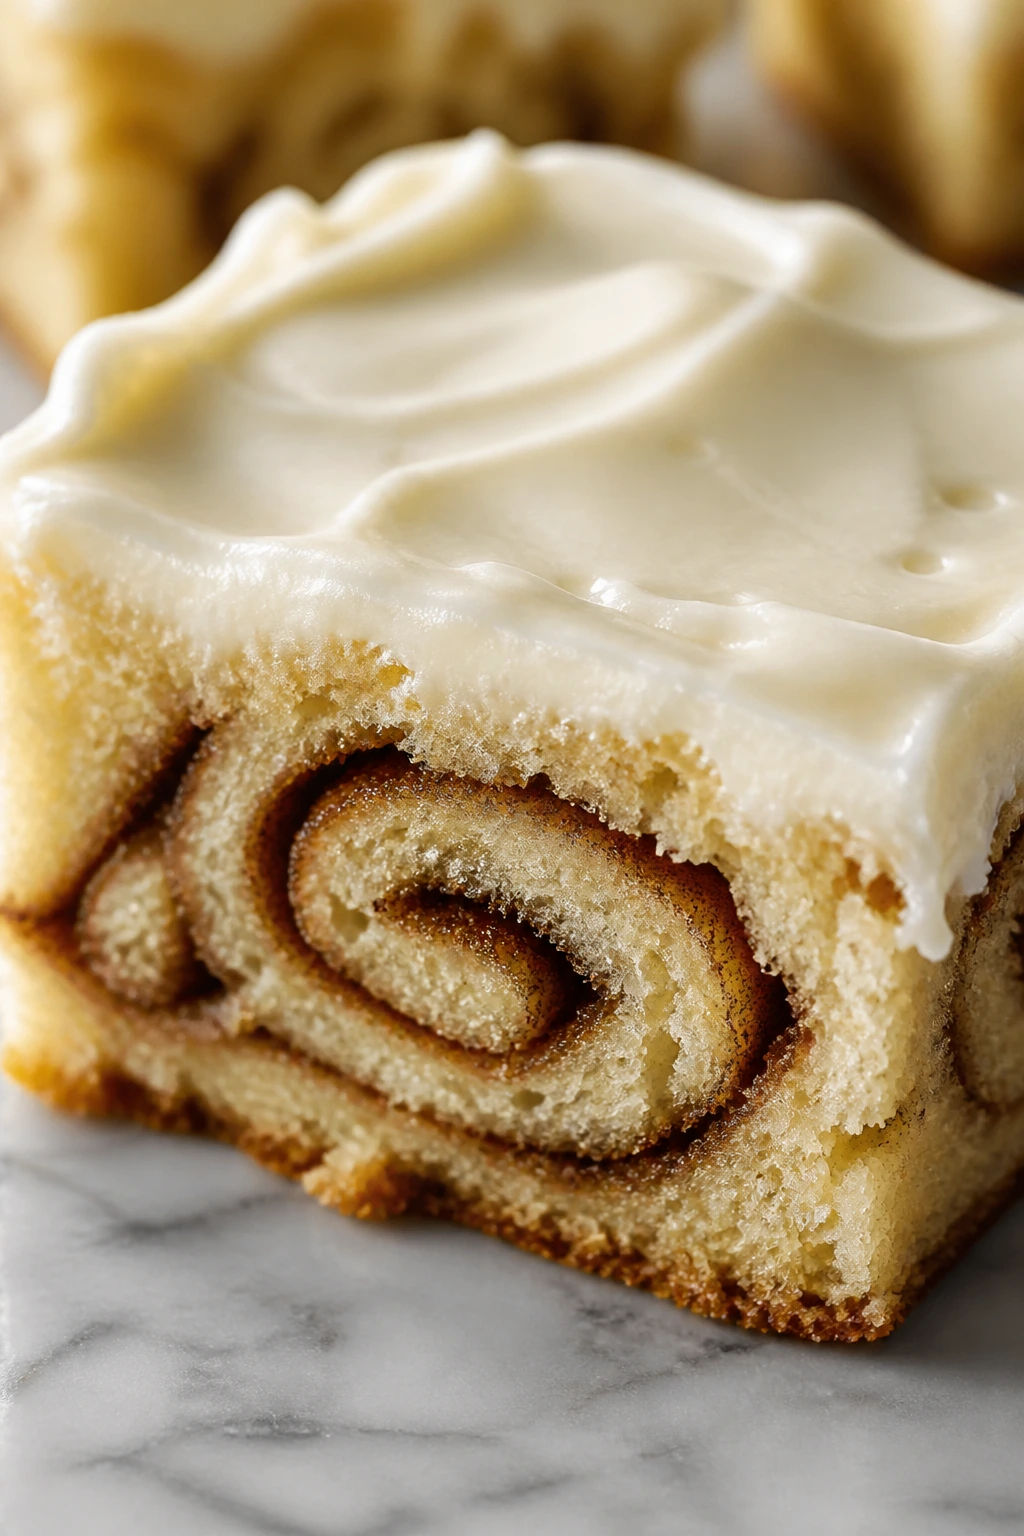
Intro: Cinnamon roll bars are what happens when a sweet breakfast pastry decides to become a dessert tray square. The swirl is obvious, the frosting is cool and tangy, and the whole pan smells like cinnamon sugar warm enough to pull people into the kitchen.
Why It Works: A cinnamon swirl gives you visual contrast without needing layers. Cream cheese frosting finishes the bars in the same way a good cinnamon roll glaze does, only faster and cleaner.
Key Ingredients:
- 1 cup unsalted butter, softened
- 1 cup sugar
- 2 large eggs
- 2 1/2 cups flour
- 1 teaspoon baking powder
- 1 teaspoon cinnamon
- 1/2 cup brown sugar
- 8 ounces cream cheese, softened
- 1 cup powdered sugar
Quick Steps:
- Heat oven to 350°F and line a 9×13-inch pan.
- Mix butter, sugar, eggs, flour, and baking powder.
- Spread most of the batter in the pan, then sprinkle cinnamon sugar over it and swirl lightly.
- Bake 22 to 26 minutes and cool.
- Beat cream cheese and powdered sugar, then frost the top.
Equipment for This Recipe:
- 9×13-inch pan
- Mixer
- Knife
- Spatula
How to Serve This Dish: Serve these at room temperature so the frosting softens slightly. They look best cut in clean rectangles with the swirl showing through.
Pro Tips for This Recipe:
- Keep the cinnamon layer thin so it doesn’t sink.
- Frost only after the bars are fully cool.
Variations on This Dish:
- Maple Cinnamon Version: Add maple syrup to the frosting.
- Apple Cinnamon Version: Fold in small diced dried apples.
Common Mistakes to Avoid with This Dish:
- Don’t swirl too much or the lines disappear.
- Don’t frost warm bars or the topping slides off.
44. Peach Almond Bars
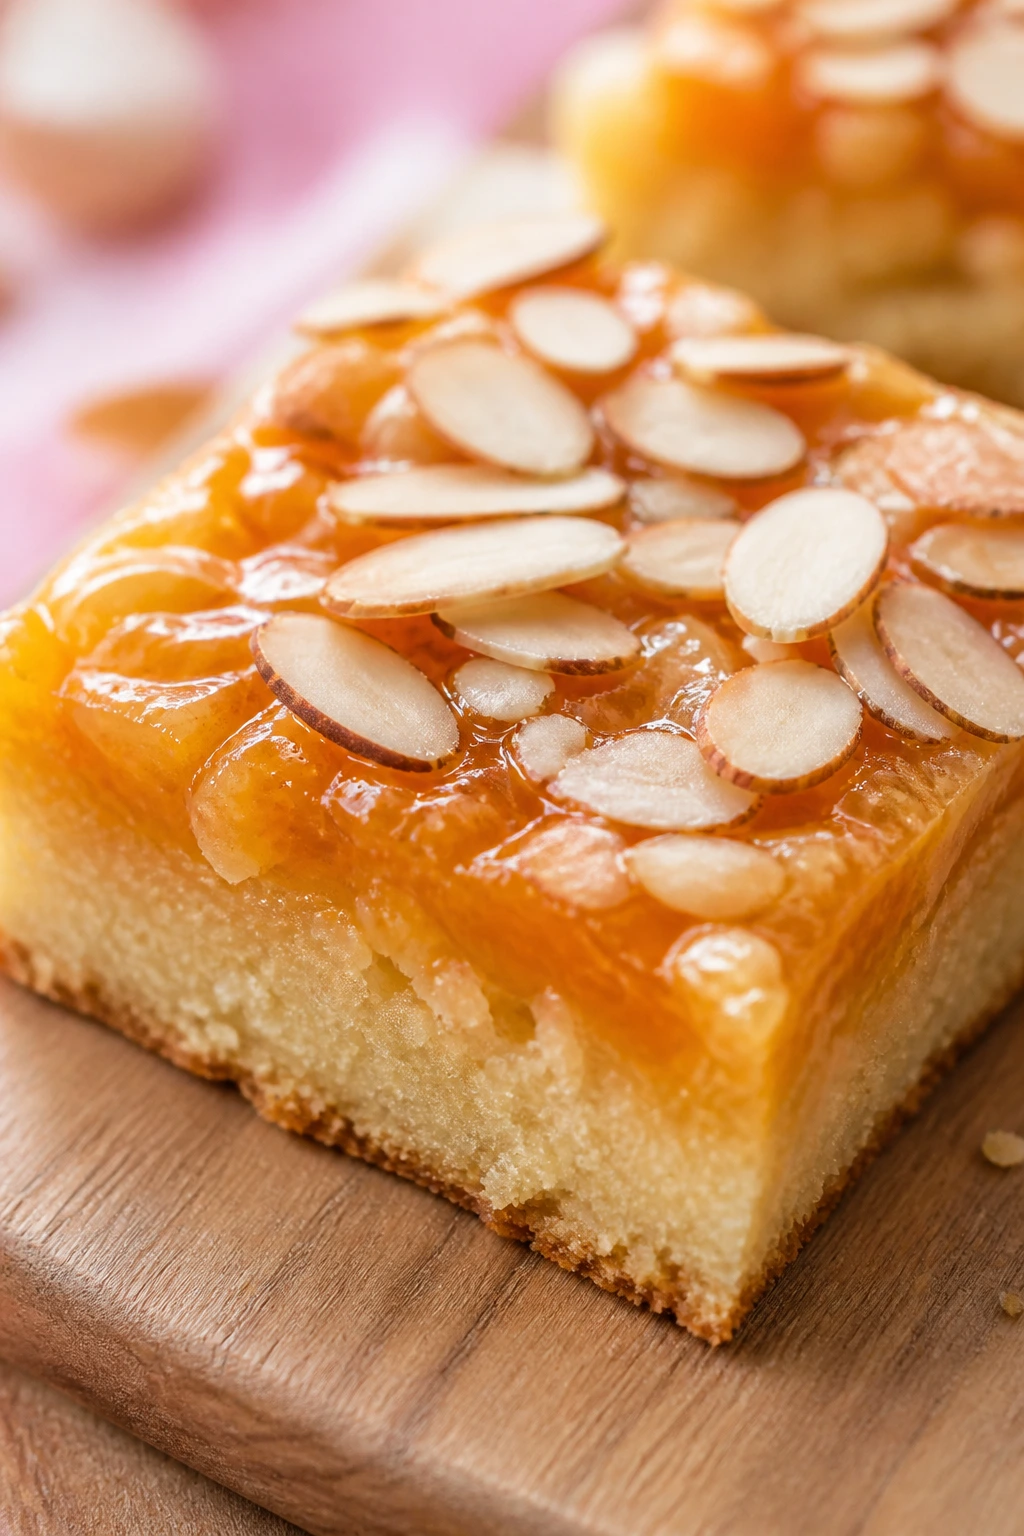
Intro: Peach almond bars bring a soft, sunny flavor that feels especially good when the table needs something less sugary. The almond base is tender, the peach layer turns jammy in the oven, and the top bakes into a pale golden finish.
Why It Works: Peach preserves spread neatly and hold their shape better than fresh slices alone. Almond extract gives the bars a bakery smell that pairs well with the fruit, and the result is tidy enough to cut into small squares.
Key Ingredients:
- 1 cup unsalted butter, softened
- 3/4 cup sugar
- 2 large eggs
- 2 cups flour
- 1/2 teaspoon almond extract
- 1 cup peach preserves
- 1/2 cup sliced almonds
- 1/4 teaspoon salt
Quick Steps:
- Heat oven to 350°F and line an 8×8-inch pan.
- Cream butter and sugar, then beat in eggs and almond extract.
- Fold in flour and salt; spread most of the batter in the pan.
- Spoon over peach preserves, top with remaining batter in small dollops, and sprinkle almonds.
- Bake 30 to 34 minutes.
Equipment for This Recipe:
- 8×8-inch pan
- Mixer
- Spoon
- Knife
How to Serve This Dish: Serve these with tea or sparkling lemonade. A tiny dusting of powdered sugar helps the peach color stand out.
Pro Tips for This Recipe:
- Warm the preserves if they’re too stiff to spread.
- Toast the almonds for a better crunch.
Variations on This Dish:
- Apricot Almond Bars: Swap peach preserves for apricot.
- Peach Coconut Version: Add 1/2 cup toasted coconut.
Common Mistakes to Avoid with This Dish:
- Don’t use too much filling or the bars collapse.
- Don’t slice while hot; the fruit needs time to settle.
45. Cheesecake Swirl Brownies with Mini Eggs
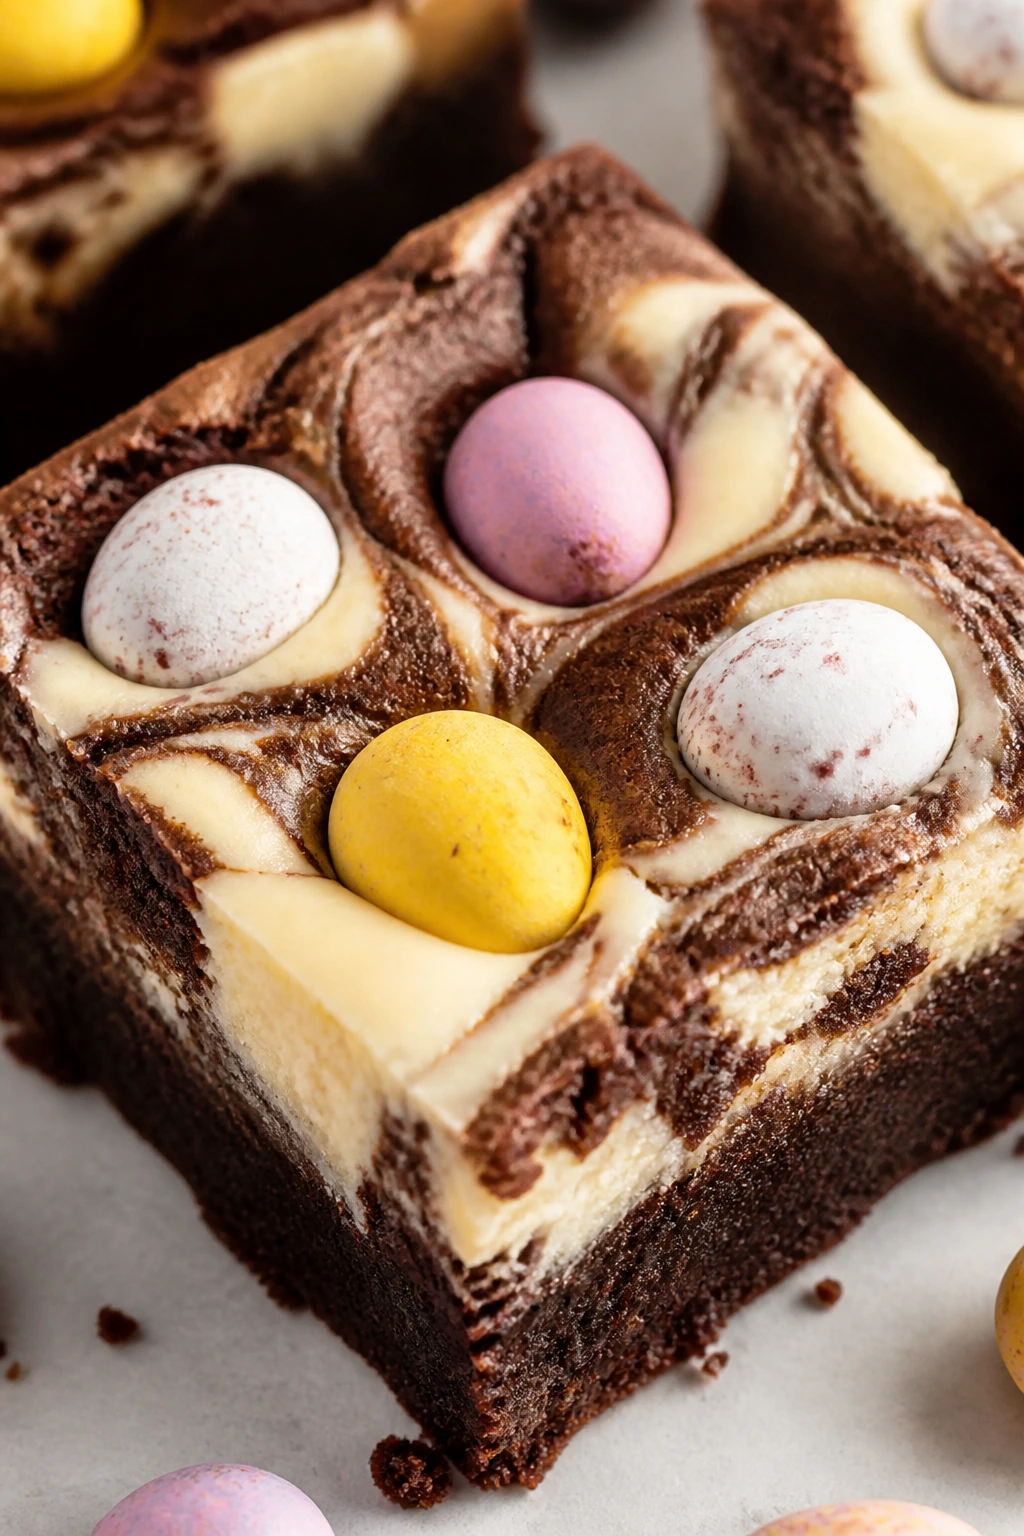
Intro: Brownies with a cheesecake swirl already have good contrast, and mini eggs make them look holiday-ready fast. The dark base, pale marbling, and candy shell on top create a pan that feels festive without being overworked.
Why It Works: Cheesecake softens the edges of rich brownies, and the candy adds crunch and color on top. The swirl gives each square a different look, which is part of the fun here.
Key Ingredients:
- 1/2 cup butter
- 1 cup sugar
- 2 large eggs
- 1/3 cup cocoa powder
- 3/4 cup flour
- 8 ounces cream cheese, softened
- 1/3 cup powdered sugar
- 1 cup chopped mini eggs
Quick Steps:
- Heat oven to 350°F and line an 8×8-inch pan.
- Mix butter, sugar, eggs, cocoa, flour, and salt for the brownie base.
- Beat cream cheese and powdered sugar until smooth.
- Spread brownie batter in the pan, swirl in cheesecake, and press mini eggs on top.
- Bake 28 to 32 minutes and cool.
Equipment for This Recipe:
- 8×8-inch pan
- Mixer
- Knife for swirling
- Spatula
How to Serve This Dish: These are rich, so cut them small. Serve them chilled or room temperature, depending on whether you want firmer edges or a softer center.
Pro Tips for This Recipe:
- Chop the mini eggs coarsely so they stay visible.
- Don’t overbake or the cheesecake layer dries out.
Variations on This Dish:
- White Chocolate Brownies: Swap the mini eggs for white chocolate chunks.
- Mocha Cheesecake Version: Add espresso powder to the brownie base.
Common Mistakes to Avoid with This Dish:
- Don’t swirl so hard that the layers mix fully.
- Don’t rush cooling; the bars need to set.
46. Birthday Cake Blondie Bars
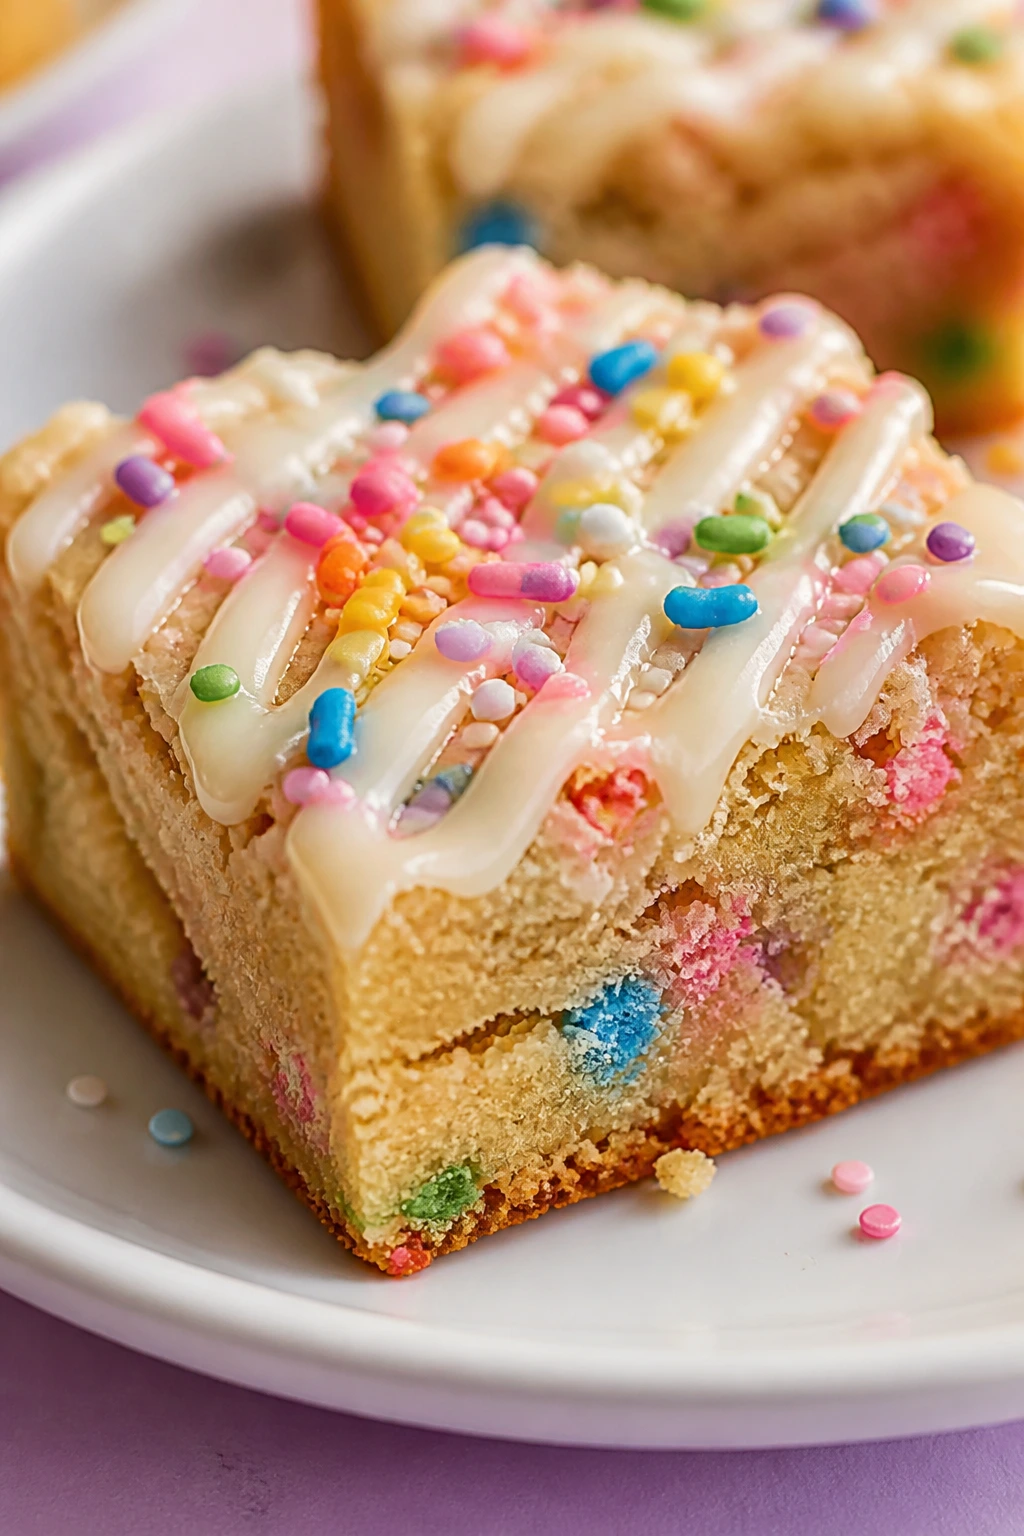
Intro: Birthday cake bars bring a strong sprinkle-and-vanilla energy to Easter, which is not a bad thing. They’re soft, sweet, and colorful, with a vanilla crumb that stays tender and a frosting drizzle that gives the top a glossy finish.
Why It Works: Blondie batter holds sprinkles better than a thin cake batter, so the colors stay bright. White chocolate chunks add extra sweetness and a little melt, which keeps the bars from tasting like plain sugar.
Key Ingredients:
- 1 cup unsalted butter, melted
- 1 1/2 cups brown sugar
- 2 large eggs
- 2 teaspoons vanilla extract
- 2 cups flour
- 1 teaspoon baking powder
- 1/2 teaspoon salt
- 3/4 cup pastel sprinkles
- 1/2 cup white chocolate chips
Quick Steps:
- Heat oven to 350°F and line a 9×13-inch pan.
- Stir butter and brown sugar, then mix in eggs and vanilla.
- Fold in flour, baking powder, salt, sprinkles, and chips.
- Bake 22 to 26 minutes and cool.
- Drizzle with simple vanilla glaze if you like.
Equipment for This Recipe:
- 9×13-inch pan
- Mixing bowl
- Spatula
- Small bowl for glaze
How to Serve This Dish: Cut these into cheerful squares and stack them on a bright platter. They work well among richer bars because the flavor is simple and familiar.
Pro Tips for This Recipe:
- Use jimmies, not tiny nonpareils, so the batter doesn’t streak.
- Keep the bake time short for a chewy center.
Variations on This Dish:
- Lemon Birthday Bars: Add lemon zest and a lemon glaze.
- Chocolate Confetti Version: Add mini chocolate chips along with the sprinkles.
Common Mistakes to Avoid with This Dish:
- Don’t overmix after adding sprinkles.
- Don’t bake until the top is deeply brown; that dries the bars out.
47. Grapefruit Almond Bars
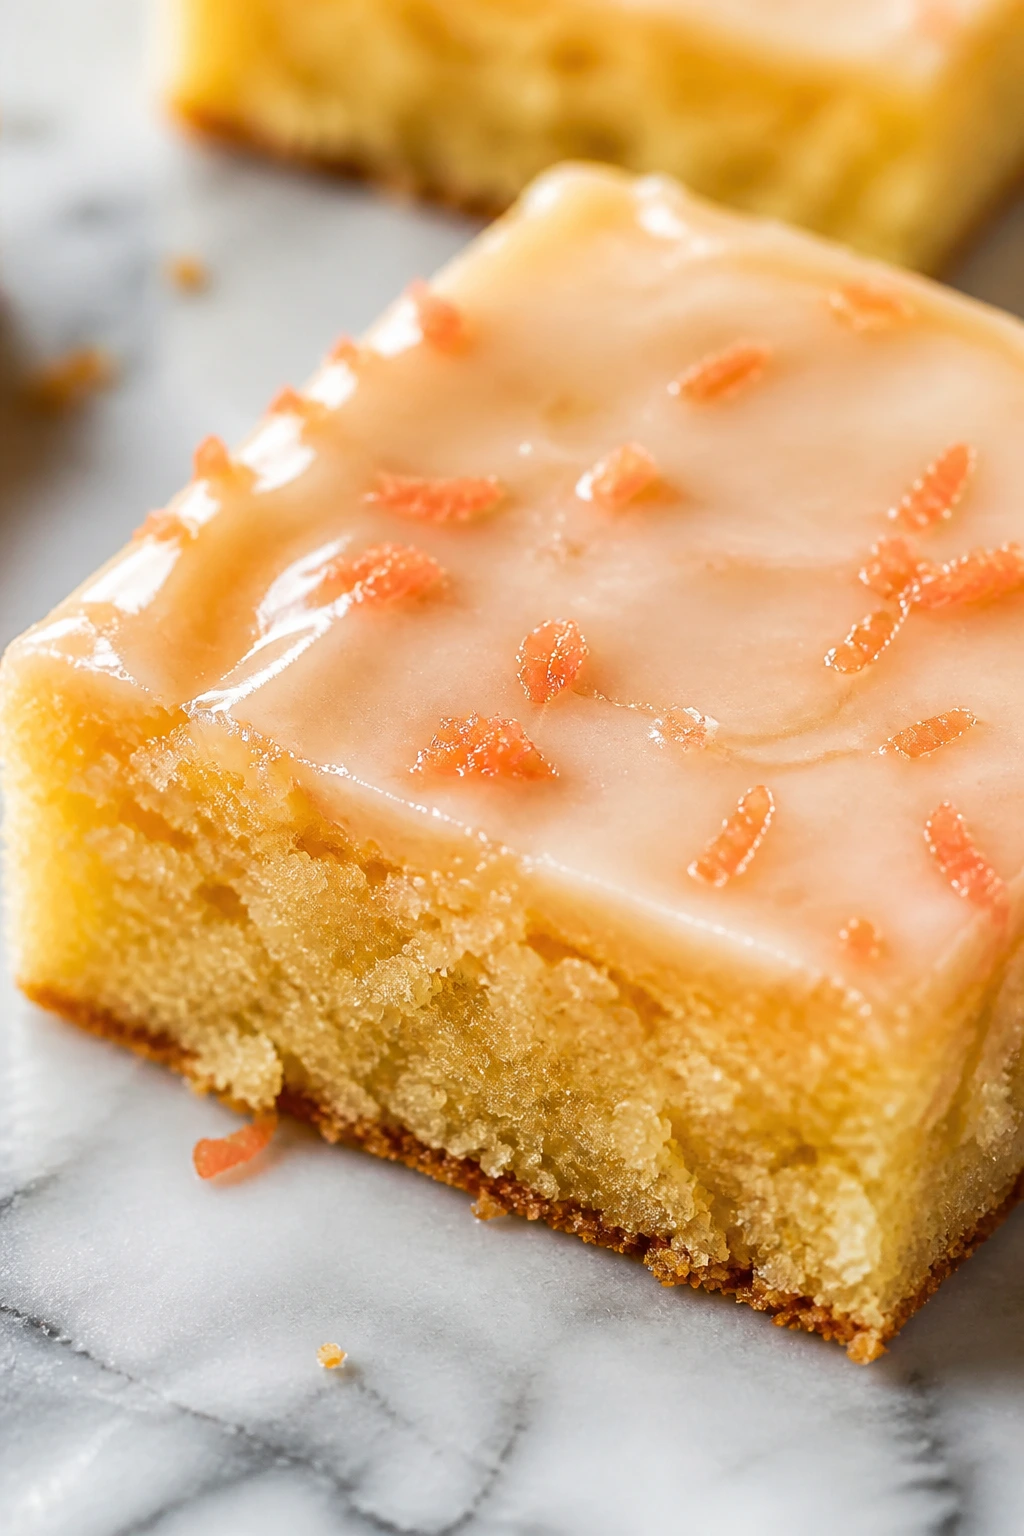
Intro: Grapefruit bars are bright, slightly bitter, and a little surprising in a tray full of candy and chocolate. Almond keeps the flavor rounded, and the pale glaze on top gives the bars a clean look that feels more polished than sweet.
Why It Works: Grapefruit needs something creamy or nutty to keep it from tasting sharp. Almond does that job here, and the bar format lets the citrus flavor stay vivid without dominating the rest of the dessert spread.
Key Ingredients:
- 1 cup unsalted butter, softened
- 3/4 cup sugar
- 2 large eggs
- 2 cups flour
- 1 tablespoon grapefruit zest
- 1/3 cup grapefruit juice
- 1/2 teaspoon almond extract
- 1/2 cup sliced almonds
- 1 cup powdered sugar for glaze
Quick Steps:
- Heat oven to 350°F and line an 8×8-inch pan.
- Cream butter and sugar, then add eggs, grapefruit zest, juice, and almond extract.
- Fold in flour and salt, spread in the pan, and sprinkle almonds on top.
- Bake 26 to 30 minutes and cool.
- Glaze once cold.
Equipment for This Recipe:
- 8×8-inch pan
- Zester
- Mixer
- Small bowl for glaze
How to Serve This Dish: Serve these with tea or sparkling water. They look best cut into narrow bars and dusted lightly with extra zest.
Pro Tips for This Recipe:
- Use fresh juice; grapefruit bottled juice tastes flat.
- Don’t glaze until the bars cool fully.
Variations on This Dish:
- Orange Almond Bars: Swap grapefruit for orange.
- Honey Grapefruit Version: Add a little honey to the glaze.
Common Mistakes to Avoid with This Dish:
- Don’t use too much juice or the batter gets loose.
- Don’t skip the almond; it softens the bitterness.
48. Vanilla Bean Lemon Curd Bars
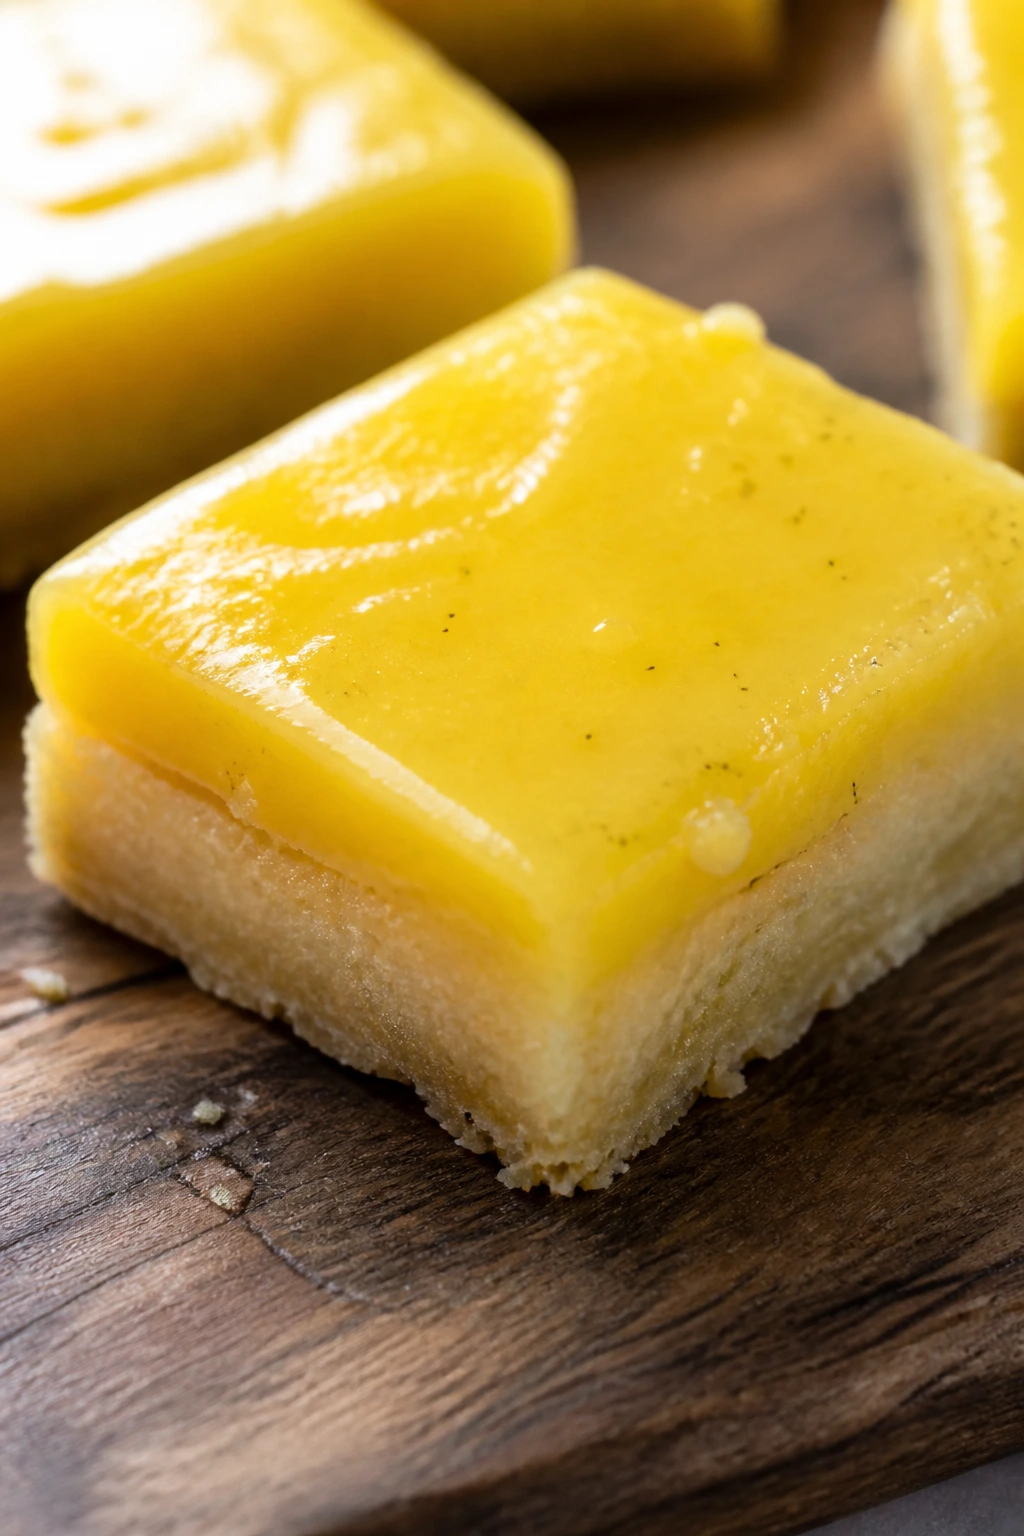
Intro: These bars look simple at first glance, then the lemon curd hits and the whole thing wakes up. A vanilla bean base gives them a gentle sweetness, and the curd layer sits on top like sunshine in a neat square.
Why It Works: Vanilla and lemon are a classic pairing because vanilla rounds the tart edges. Curd sets more firmly than plain lemon filling, so the bars cut cleanly and keep their bright color.
Key Ingredients:
- 1 cup unsalted butter, softened
- 1 cup sugar
- 2 large eggs
- 2 cups flour
- 1 vanilla bean or 1 tablespoon vanilla bean paste
- 1 cup lemon curd
- 1/4 teaspoon salt
- 1/2 cup powdered sugar for dusting
Quick Steps:
- Heat oven to 350°F and line a 9×9-inch pan.
- Cream butter and sugar, then beat in eggs and vanilla.
- Fold in flour and salt; spread into the pan and bake 12 minutes.
- Spread lemon curd over the warm base and bake 10 more minutes.
- Chill, then dust with powdered sugar.
Equipment for This Recipe:
- 9×9-inch pan
- Mixer
- Spatula
- Sifter
How to Serve This Dish: Serve these chilled and dusted with powdered sugar. A few curls of lemon zest on the platter are enough to make them look bright.
Pro Tips for This Recipe:
- Use good lemon curd; homemade or store-bought both work if the flavor is bright.
- Chill after baking so the curd sets firmly.
Variations on This Dish:
- Lime Curd Bars: Swap in lime curd.
- Raspberry Curd Bars: Add a thin raspberry swirl on top of the curd.
Common Mistakes to Avoid with This Dish:
- Don’t spread cold curd on a hot base; it can slide.
- Don’t skip the chill time or the top smears.
49. Coconut Lime Bars
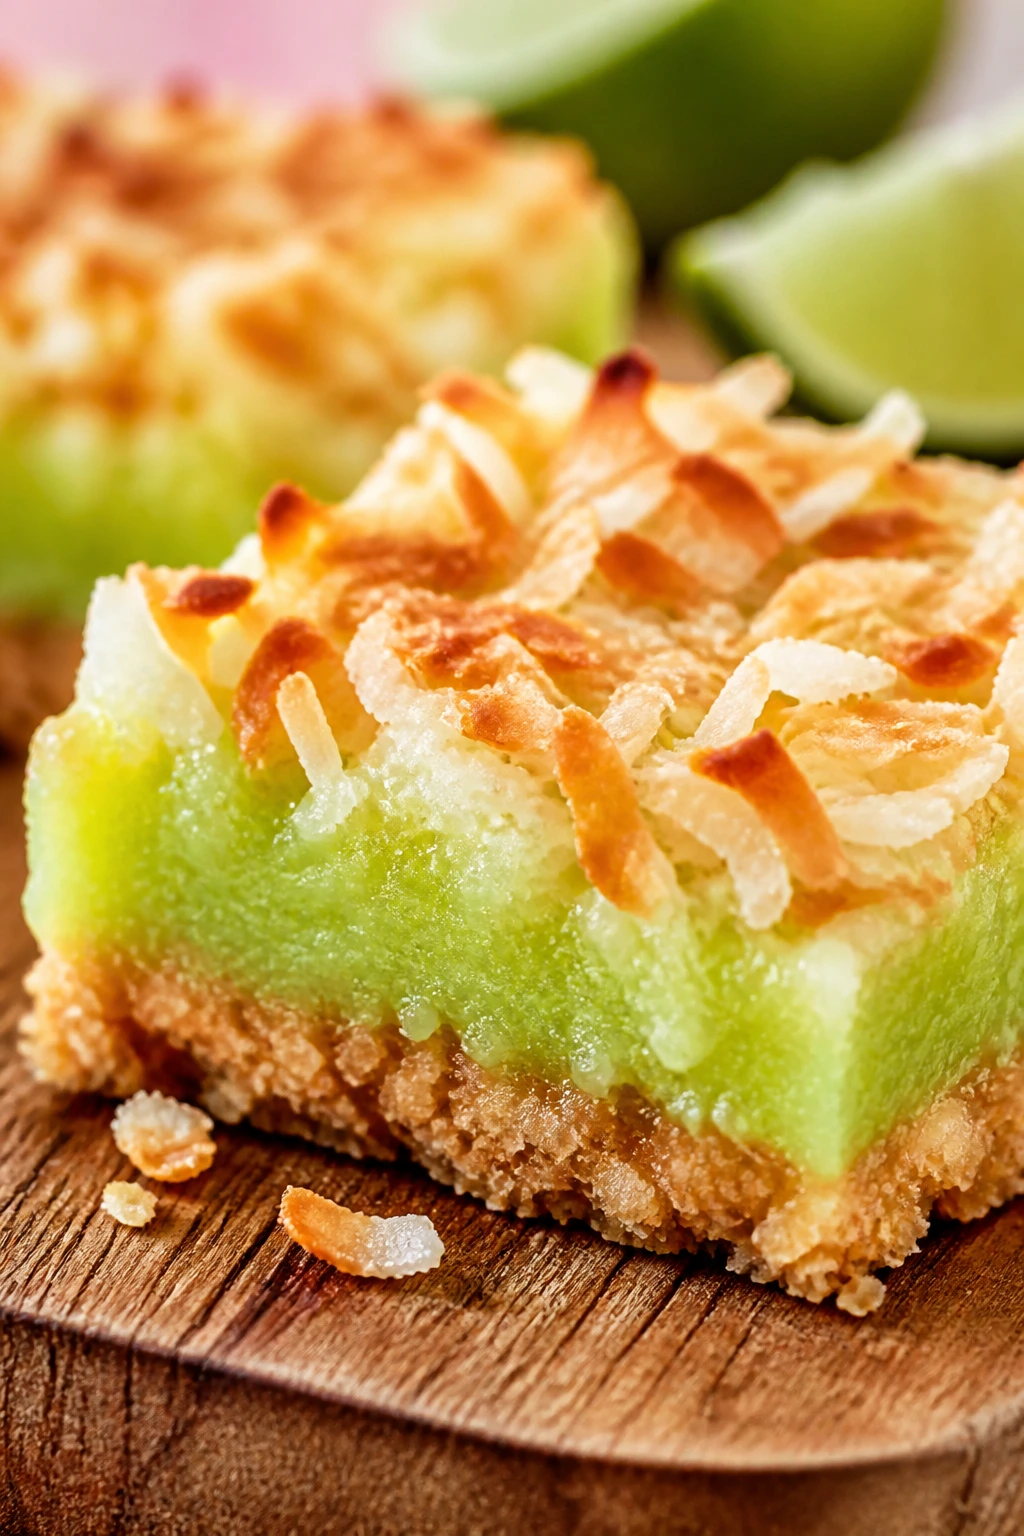
Intro: Coconut lime bars taste like a brighter, softer cousin of key lime pie. The coconut crust gives a toasty base, the lime filling stays clean and tart, and the pale top with toasted flakes looks breezy in the good sense.
Why It Works: Coconut adds body and texture to lime, which can sometimes taste too lean on its own. The crust and filling both benefit from the contrast, and the bars slice well after chilling.
Key Ingredients:
- 1 1/2 cups graham cracker crumbs
- 1/2 cup shredded coconut
- 1/2 cup melted butter
- 2 large eggs
- 1 can sweetened condensed milk, 14 ounces
- 1/2 cup lime juice
- 1 tablespoon lime zest
- 1/2 cup toasted coconut for topping
Quick Steps:
- Heat oven to 350°F and line a 9×9-inch pan.
- Mix crumbs, coconut, and butter; press into the pan and bake 8 minutes.
- Whisk eggs, condensed milk, lime juice, and zest.
- Pour over crust, bake 18 to 22 minutes, then chill.
- Top with toasted coconut before serving.
Equipment for This Recipe:
- 9×9-inch pan
- Whisk
- Zester
- Mixing bowls
How to Serve This Dish: Serve these cold with a little extra toasted coconut sprinkled over the top. They’re a bright reset between richer bars.
Pro Tips for This Recipe:
- Toast the topping coconut separately so it stays crisp.
- Use fresh limes if possible.
Variations on This Dish:
- Meyer Lime Bars: Use a sweeter citrus for a softer profile.
- Coconut-Orange Bars: Swap lime for orange and keep the coconut.
Common Mistakes to Avoid with This Dish:
- Don’t under-chill or the filling won’t cut cleanly.
- Don’t overbake the custard layer.
50. Hot Cross Bun Bars with Orange Glaze

Intro: Hot cross bun bars take the spice-and-citrus idea of the classic bun and turn it into something easier to slice and pass around. Currants, cinnamon, nutmeg, and orange glaze give the whole pan a warm bakery smell that feels especially right at Easter.
Why It Works: The familiar spice mix does a lot of visual and flavor work here, and the glaze cross on top nods to the original bun without forcing you into yeast dough. In bar form, the crumb stays softer and the cuts are cleaner.
Key Ingredients:
- 1 cup unsalted butter, softened
- 1 cup brown sugar
- 2 large eggs
- 2 cups flour
- 1 teaspoon cinnamon
- 1/4 teaspoon nutmeg
- 3/4 cup currants or raisins
- Zest of 1 orange
- 1 cup powdered sugar
- 1 to 2 tablespoons orange juice
Quick Steps:
- Heat oven to 350°F and line a 9×13-inch pan.
- Cream butter and sugar, then beat in eggs and orange zest.
- Fold in flour, cinnamon, nutmeg, salt, and currants.
- Bake 22 to 26 minutes, cool, then drizzle orange glaze in a cross pattern.
- Let the glaze set before slicing.
Equipment for This Recipe:
- 9×13-inch pan
- Mixer
- Zester
- Small bowl for glaze
How to Serve This Dish: Serve these at room temperature with tea or coffee. They look nicest when the glaze lines are neat and the currants peek out from the crumb.
Pro Tips for This Recipe:
- Soak the currants in warm water for 10 minutes if you want them plumper.
- Pipe the glaze with a spoon or zip-top bag for a cleaner cross.
Variations on This Dish:
- Apricot Hot Cross Bars: Swap currants for chopped dried apricots.
- Cardamom Orange Version: Add a pinch of cardamom to the batter.
Common Mistakes to Avoid with This Dish:
- Don’t glaze warm bars or the cross melts.
- Don’t overbake; the crumb should stay soft.
Why Bars Work So Well on an Easter Dessert Table
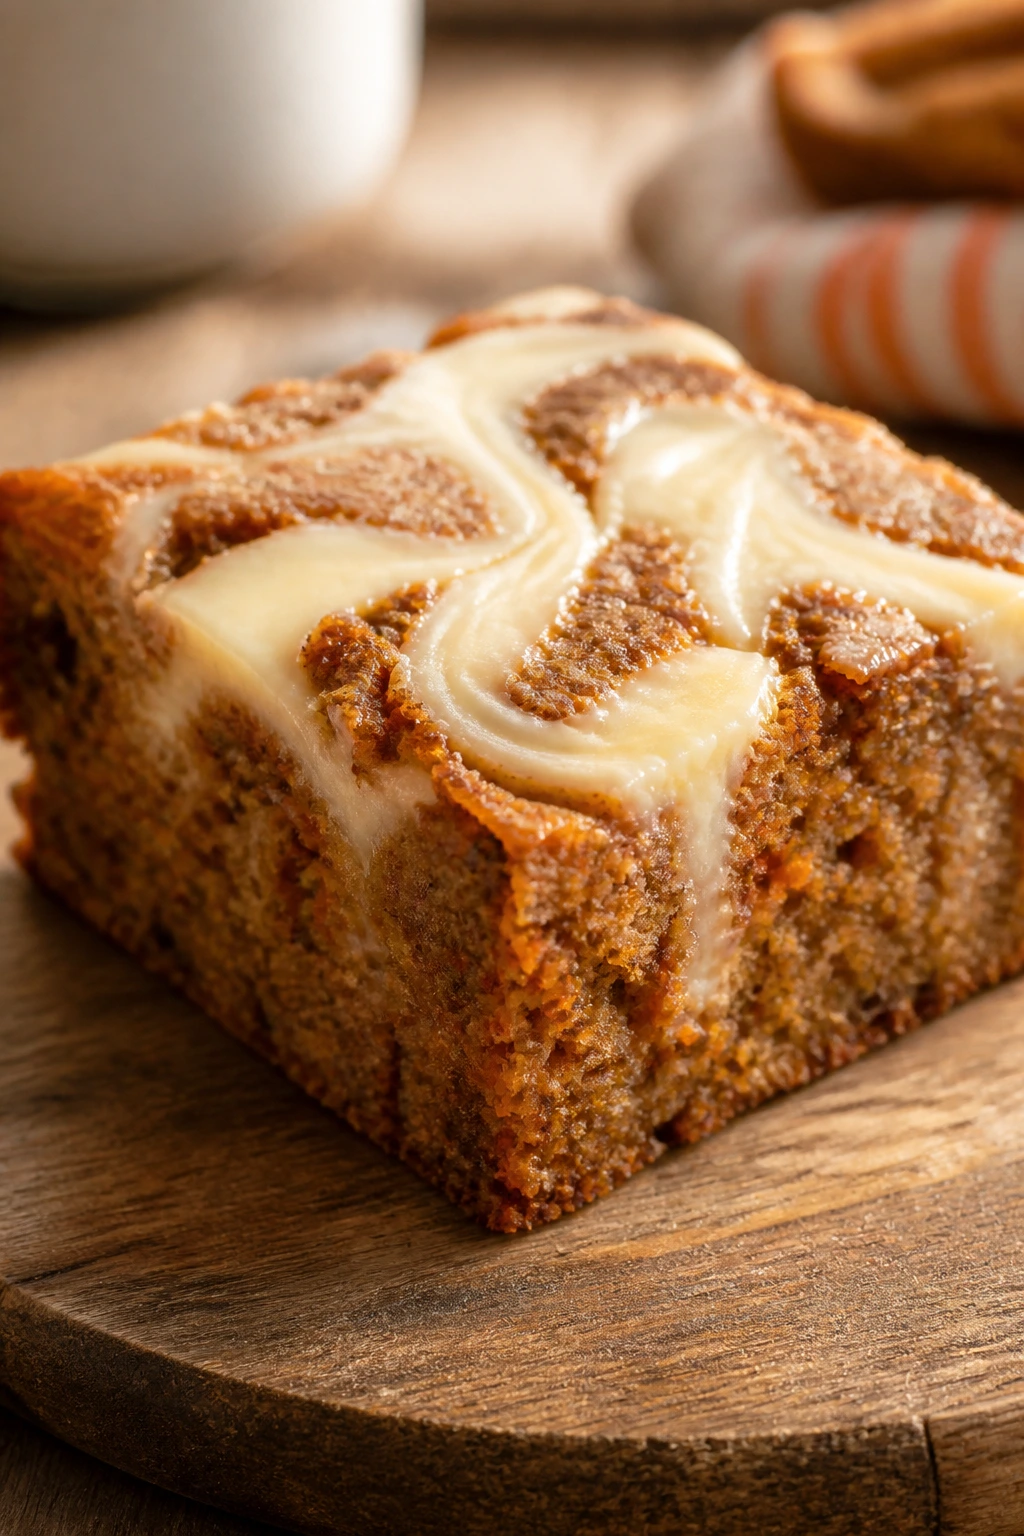
Bars bring order to a dessert spread that can get busy fast. One pan gives you twelve, sixteen, or twenty neat squares, and that matters when you’re balancing candy, fruit, chocolate, and something creamy beside all the savory dishes.
They also help you use your fridge like a tool instead of an afterthought. Cheesecake bars, custard bars, fruit bars, and chilled pudding bars all improve with time, which means you can bake earlier, cut later, and spend less time doing panic-cleanup while guests are already in the house. That’s the real advantage. Not glamour. Control.
And then there’s the visual part. A pan of bars can look dressed up with almost no decoration at all — powdered sugar over lemon, toasted coconut over cream, chopped pistachios over white chocolate, mini eggs pressed into blondies, a raspberry swirl dragged once through the batter and left alone. Leave them in the pan too long and they can look plain. Cut them cleanly and they look intentional.
Essential Equipment for These Recipes
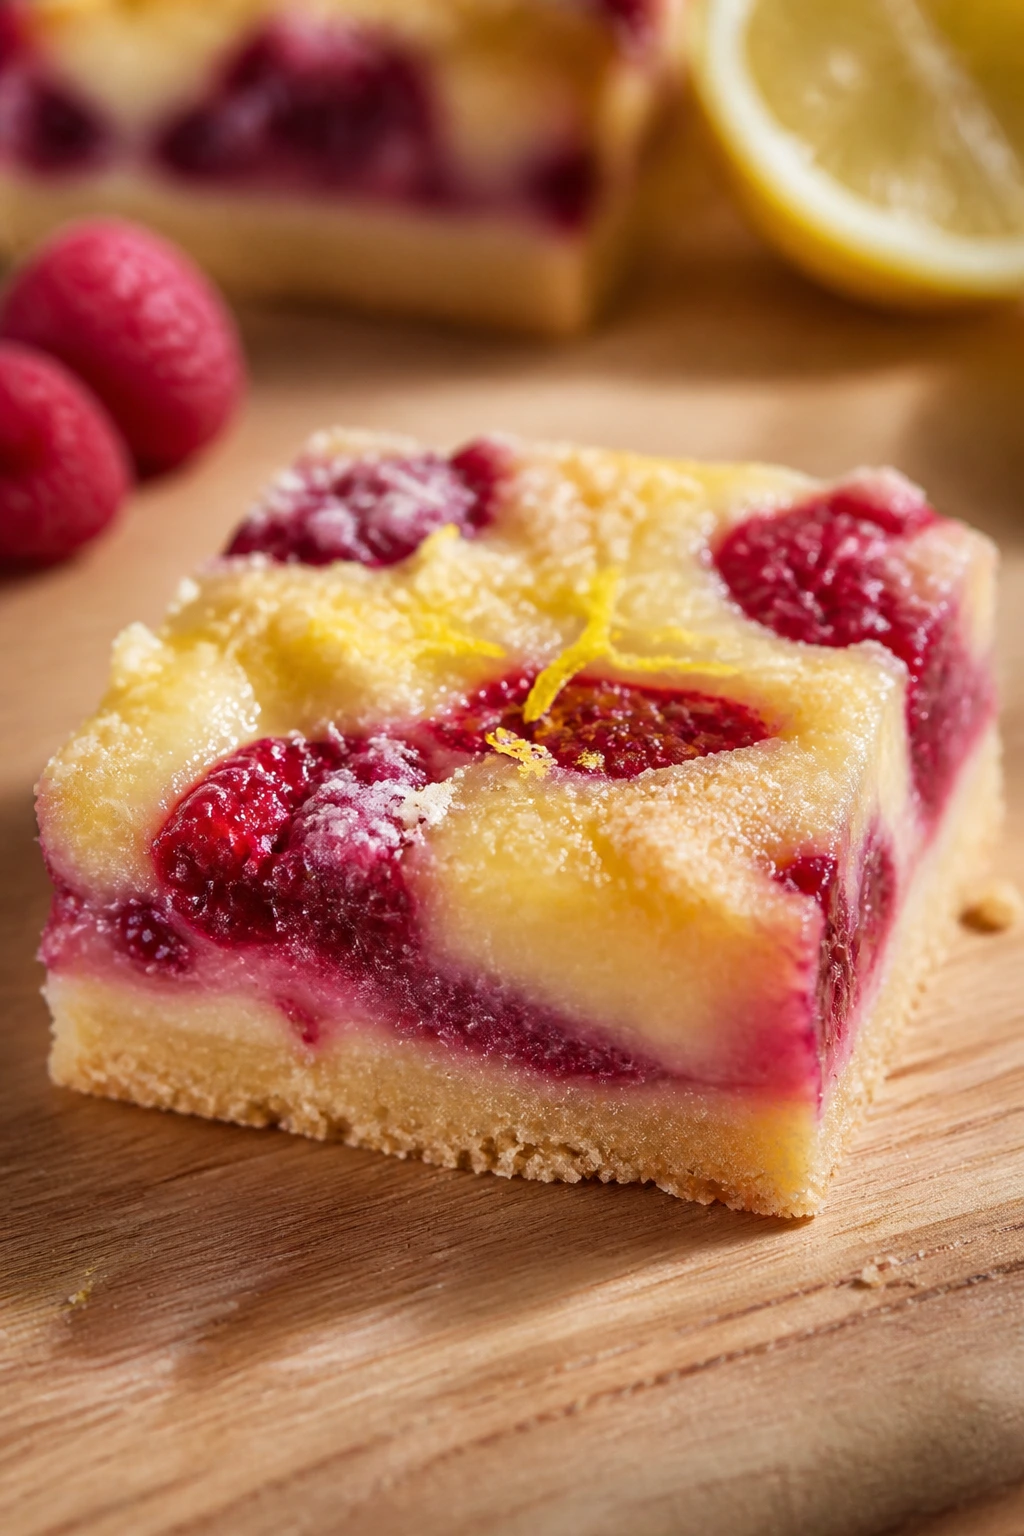
- 9×13-inch baking pan: Best for cookie bars, blondies, and layered candy bars that need a bigger yield.
- 8×8-inch or 9×9-inch pan: Better for richer bars like cheesecake, lemon, or mocha, where smaller squares make more sense.
- Parchment paper: Use enough to leave overhang on two sides; it makes lifting chilled bars much easier.
- Hand mixer or stand mixer: Useful for cream cheese fillings, cheesecake swirls, and any batter that starts with butter and sugar.
- Mixing bowls: Keep one large bowl for batters and one smaller bowl for glazes or swirls.
- Rubber spatula: The best tool for pressing crusts and folding in candy without smashing it.
- Whisk: Needed for smooth citrus fillings, custards, and quick glazes.
- Offset spatula or butter knife: Helps spread fillings evenly and make tidy swirls.
- Sharp chef’s knife: Bars slice cleaner with a long, thin blade that you can wipe between cuts.
- Microplane or zester: Citrus bars live or die on fresh zest.
- Cooling rack: Lets warm pans stop steaming so the bottom crust doesn’t turn soggy.
Smart Shopping and Ingredient Tips
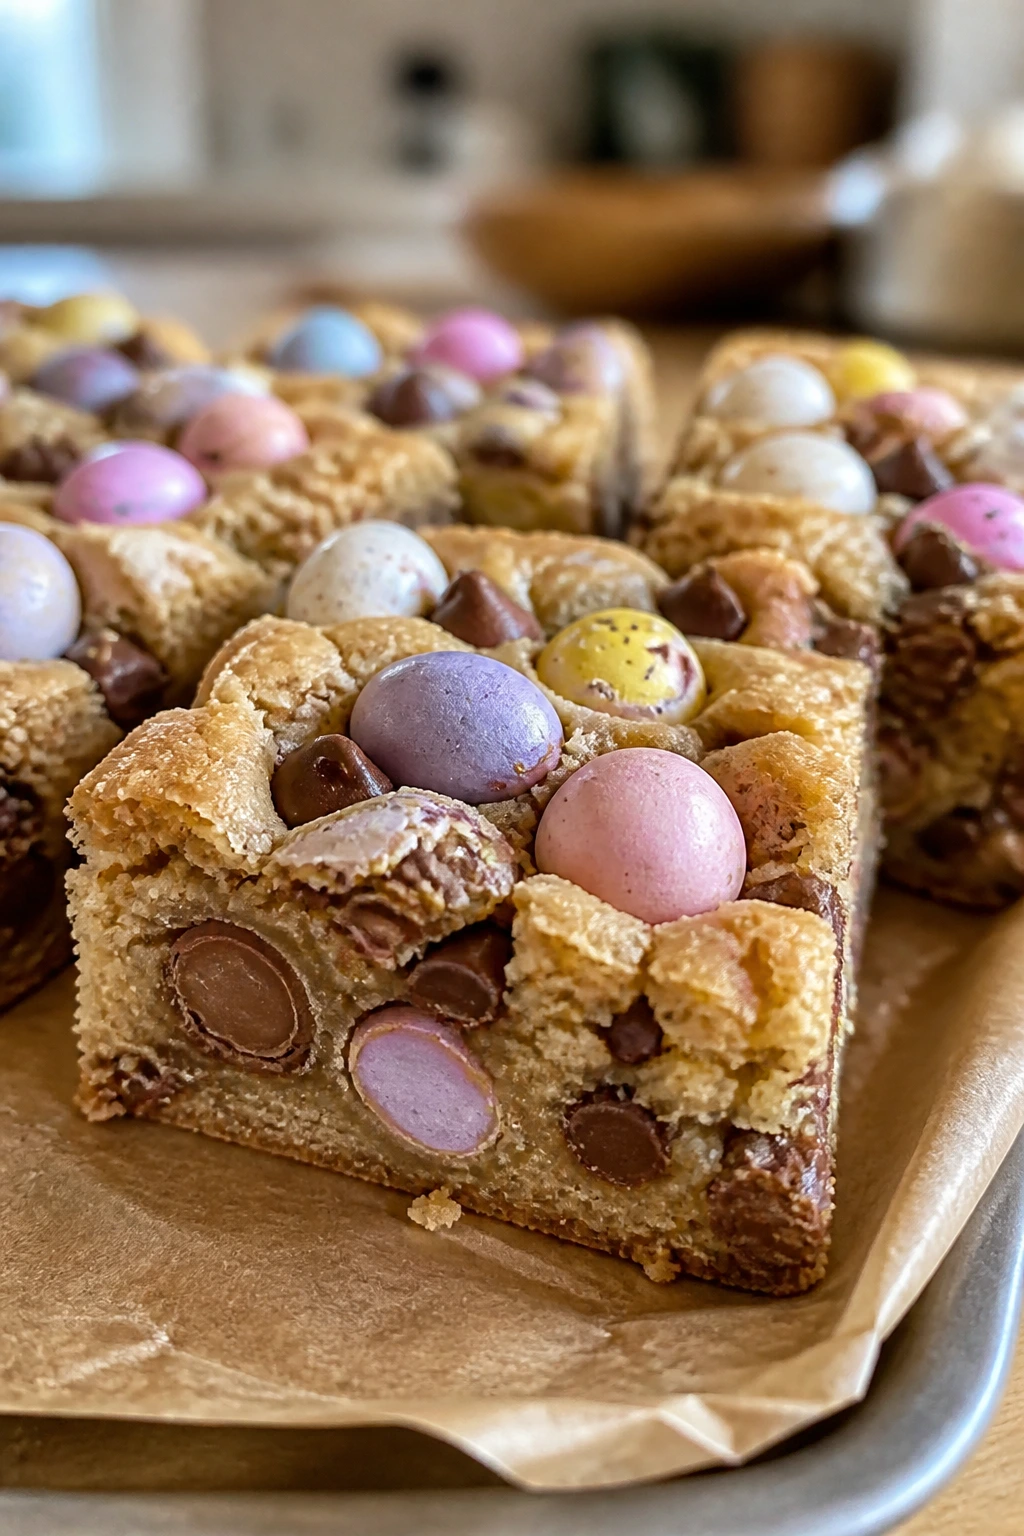
Use good butter. Not fancy, just solid butter with a clean smell and no freezer burn. Bars carry butter flavor front and center, which is why cheap, stale sticks taste off in shortbread and blondies much faster than they do in some other bakes.
Buy fruit with a plan. For raspberry, strawberry, blueberry, or blackberry bars, jam and preserves are often the cleaner choice because they spread evenly and bake without leaking. If you’re using fresh fruit, keep it firm and dry it off before it goes into the pan. Wet berries are one of the easiest ways to wreck a neat square.
For cheesecake and cream-layer bars, room-temperature cream cheese matters more than almost anything else. Cold cream cheese leaves little lumps that never fully melt out, and once those bars chill, the texture becomes uneven in a way you can taste. Eggs should come to room temperature too if the recipe asks for a smooth batter.
Easter candy should be chopped with intent, not smashed into dust. Mini eggs, chocolate eggs, and candy-coated chocolates look best when they’re in rough pieces with some size variation. That gives you color and crunch without turning the top into a gravel layer. If the candy is very hard, a chef’s knife with a little downward pressure works better than a rolling pin.
For citrus bars, buy more fruit than you think you need. Zest carries a lot of the flavor, and the juice needs to taste bright, not thin. One large lemon can be enough for a small pan, but a dessert table’s worth of citrus bars usually needs two or three lemons or limes to taste alive.
How to Serve These Bars
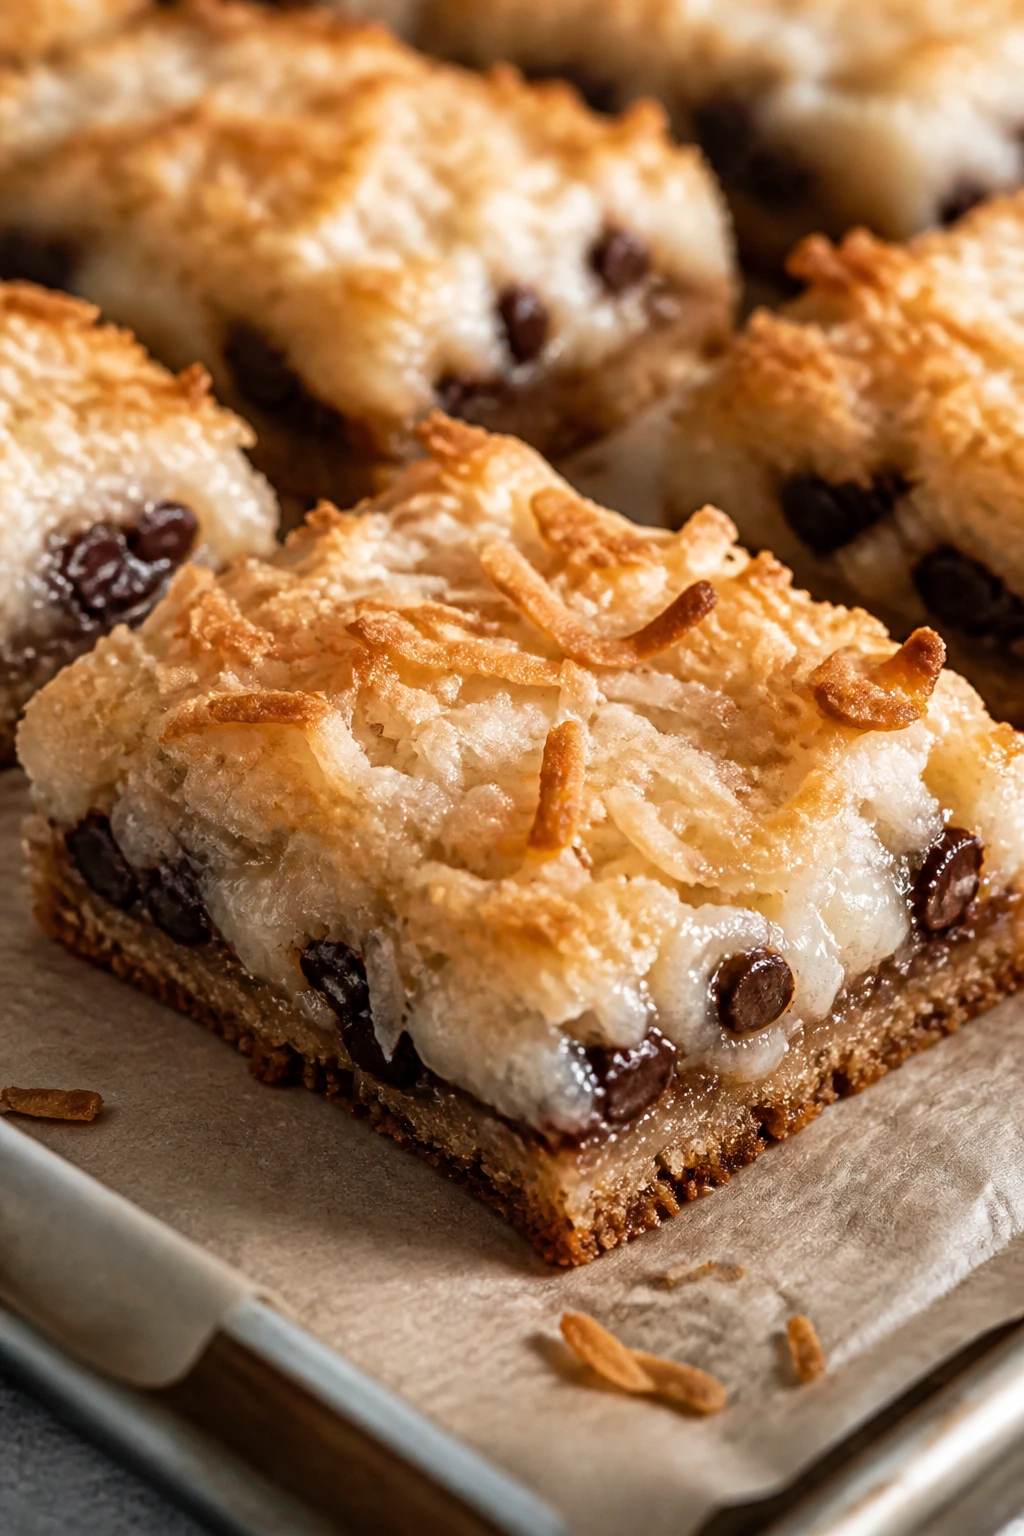
Presentation: Cut bars with a hot, dry knife and wipe the blade between slices. Stack some in staggered rows, lay others flat, and leave a few cut sides facing out so the layers, swirls, or candy tops are visible.
Accompaniments: Pair richer bars like cheesecake, blondies, or cookie bars with fresh berries, whipped cream, or plain vanilla ice cream. Lighter bars — lemon, lime, grapefruit, fruit crumble — sit nicely beside tea biscuits, a bowl of strawberries, or nothing at all. Coffee belongs near chocolate and caramel bars. Sparkling lemonade is a good match for the citrus-heavy tray.
Portions: Dense bars like brownies, peanut butter bars, and magic bars cut best into 1 1/2-inch squares. Lighter bars can be cut slightly larger. If the tray has ten different recipes, smaller cuts are smarter; people usually taste across the whole spread rather than commit to one giant piece.
Beverage Pairing: Strong coffee handles caramel, chocolate, and mocha bars. Earl Grey or jasmine tea works with citrus and floral bars. For a kid-heavy table, cold milk or sparkling water with lemon slices keeps the sweetness from piling up.
Additional Tips and Flavor Boosters
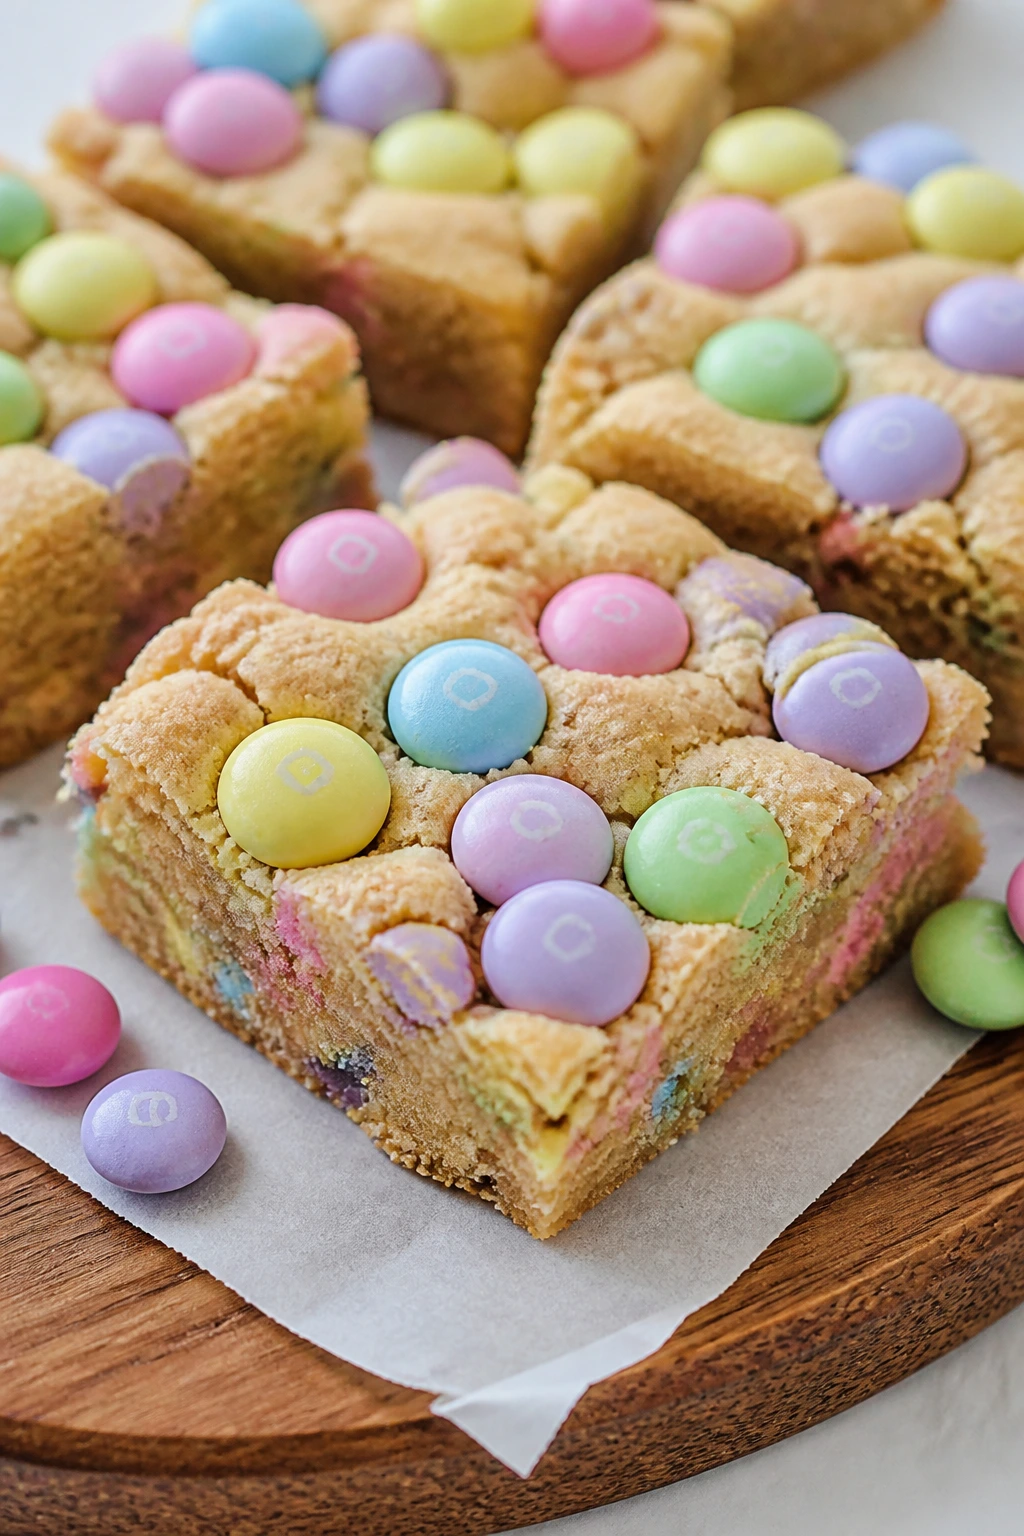
Flavor Enhancement: A tiny pinch of flaky salt on chocolate, caramel, or peanut butter bars changes the whole bite. It makes the sweetness read cleaner, not louder.
Customization: If you want more texture, add toasted nuts to blondies, crumble bars, or shortbread bars. If you want softer flavor, lean on white chocolate, vanilla bean, or a simple glaze rather than a thick frosting layer.
Serving Suggestions: Citrus zest right before serving makes lemon, lime, and grapefruit bars smell fresher. Toasted coconut, chopped pistachios, and candy pieces work well as finishing touches because they add color without making the bars hard to cut.
Make-It-Yours: For a nut-free tray, stick with fruit bars, lemon bars, strawberry bars, and marshmallow bars. For a dairy-free tray, choose oil-based or coconut-based recipes and finish with a simple fruit glaze instead of cream cheese frosting.
Make-Ahead, Storage, and Reheating Guidance
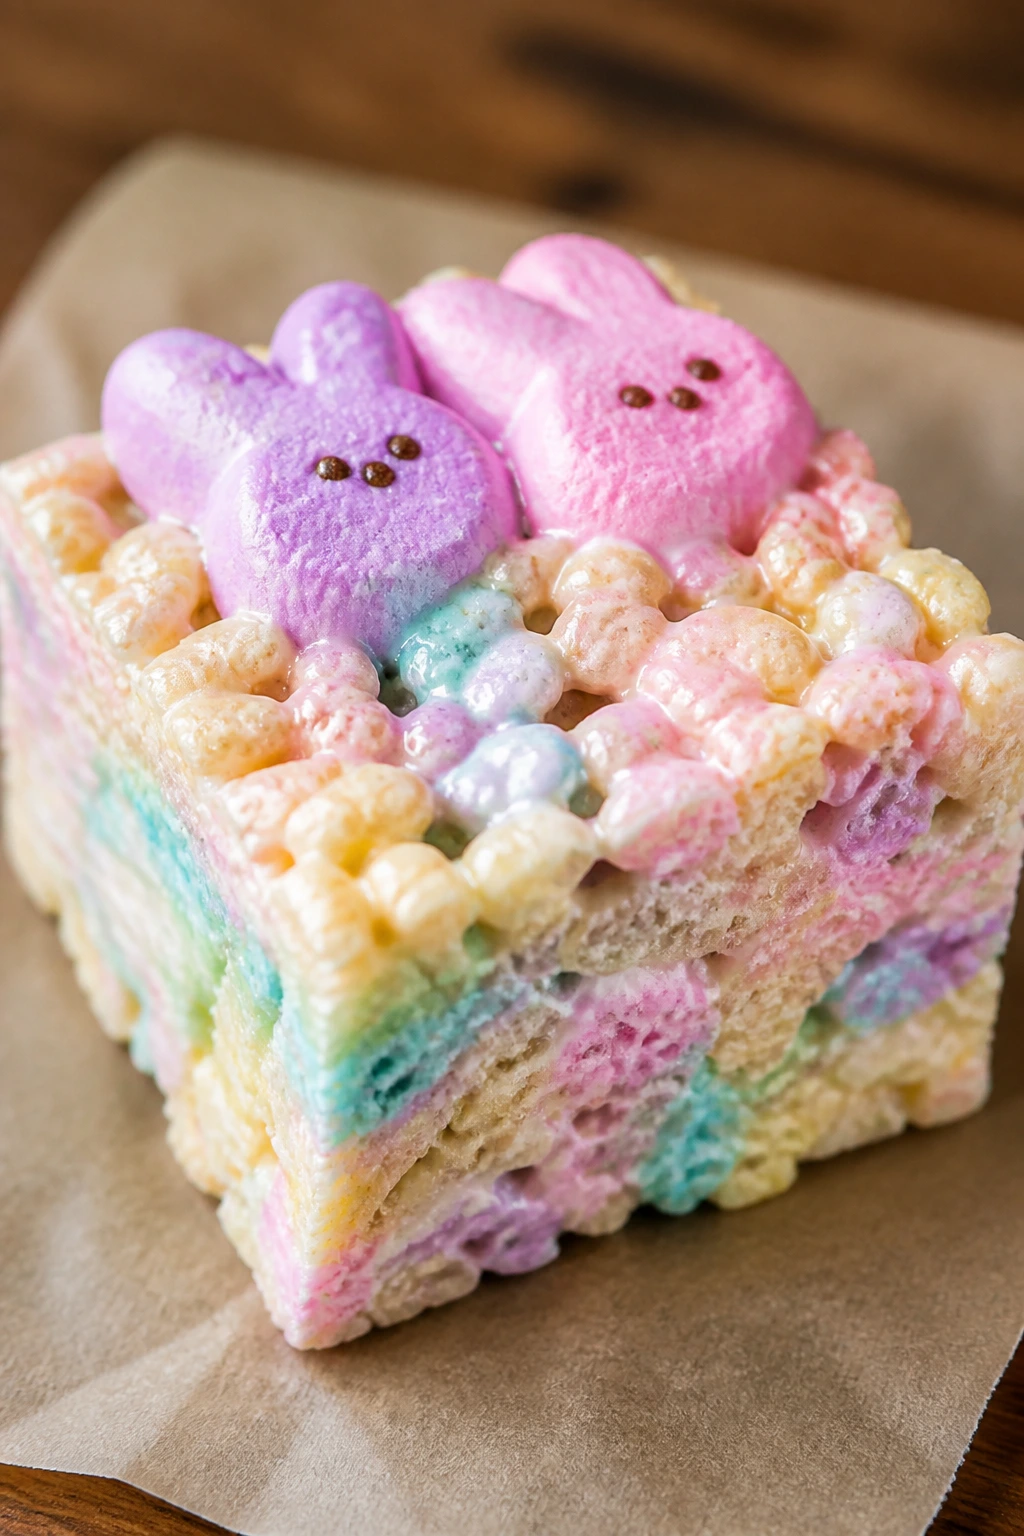
Most bars are happiest after they’ve had time to settle. Fruit bars, cheesecake bars, and cream-layer bars usually need at least 2 to 4 hours in the fridge before cutting, and overnight chilling gives the cleanest edges. Brownies, blondies, cookie bars, and shortbread bars can be baked a day ahead and stored covered at room temperature for about 2 days, though I still prefer the fridge for anything with cream cheese or fresh fruit.
Here’s the practical rule I use: room temperature for sturdy bars, refrigerator for soft or dairy-heavy bars, freezer for bars you want to save for later. Cheesecake bars, tres leches bars, banana pudding bars, and coconut cream bars keep well for 3 to 4 days refrigerated in an airtight container. Fruit crumble bars, blondies, and shortbread bars can usually sit at room temperature for 2 days if the kitchen is cool, but if they’re glazed or filled, the fridge is safer.
For freezing, wrap individual bars tightly and place them in a freezer bag or container with parchment between layers. Most baked bars freeze well for up to 2 months. Cheesecake bars and brownies freeze especially well; custard bars and gelatin-topped bars are a little fussier, but they still work if you freeze them uncut and thaw slowly in the fridge.
Reheating depends on texture. Blondies, cookie bars, and brownie bars can go in a 300°F oven for 5 to 8 minutes if you want them warm. Fruit bars are usually better at room temp or chilled. Cream cheese bars, pudding bars, and cheesecake bars should not be reheated at all — let them thaw in the refrigerator and serve cold. That keeps the texture creamy instead of grainy.
One more thing: if a bar recipe uses candy on top, freeze it with care. Candy shells can crack a little during thawing, which is fine, but the bars should be wrapped well so they don’t pick up freezer smell. Nobody wants a lemon bar that tastes faintly like onions.
Variations and Adaptations to Try
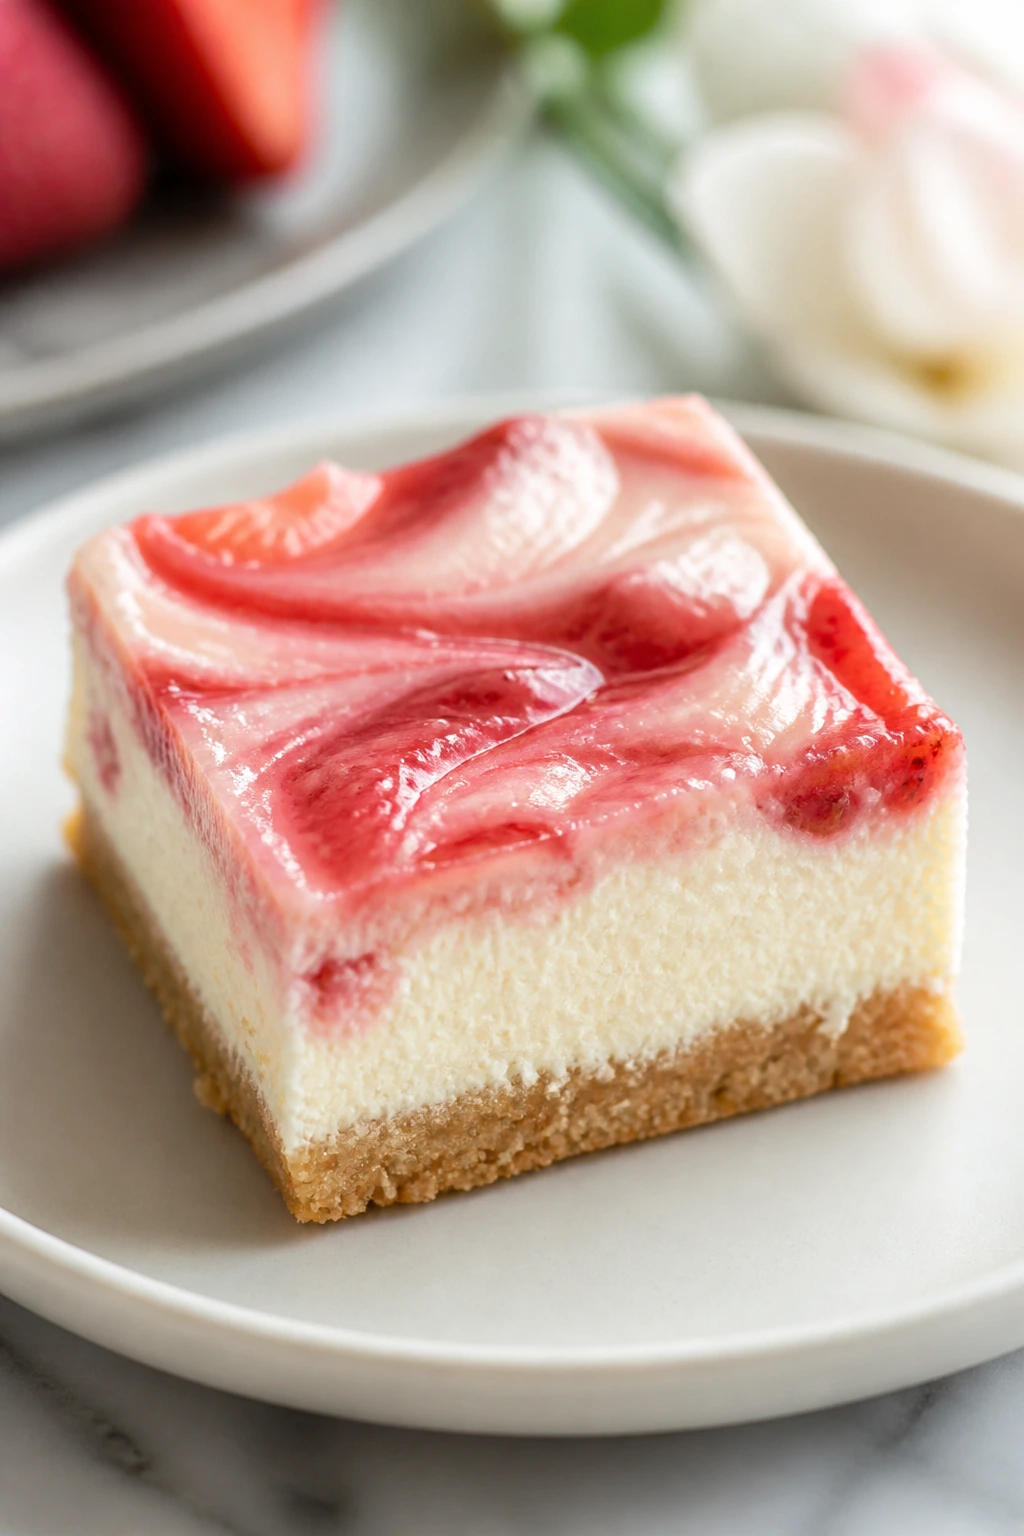
Gluten-Free Crust Swap: Use a certified gluten-free flour blend in blondies, shortbread bars, and cookie bars, or switch to a nut and oat crust for fruit and cheesecake bars. The trick is keeping the crumb moist enough to hold together without turning sandy.
Dairy-Free Easter Tray: Coconut oil, dairy-free butter, coconut milk, and whipped coconut topping can cover a lot of territory here. Coconut lime, fruit crumble, and some chocolate bars adapt especially well, while cream cheese bars usually need a more careful swap.
Lower-Sugar Candy Finish: If the table already has a lot of sweet desserts, make the bars look festive with toasted nuts, citrus zest, and fruit swirls instead of extra candy. A lighter glaze or a dusting of powdered sugar often does the same visual job with less sugar.
Nut-Free Version: Leave out pistachios, almonds, walnuts, and pecans, then replace the crunch with toasted coconut, pretzel pieces, or crushed cereal. That keeps the bars safe for school or family gatherings where nut-free matters.
Bright Citrus Set: If you like a tray that tastes fresh and clean, pull together lemon, lime, grapefruit, and orange bars instead of leaning on chocolate. The flavors change the whole mood of the platter. It feels lighter, sharper, and easier to keep eating.
Chocolate-Forward Version: Build the tray around brownies, mocha bars, peanut butter bars, and s’mores bars, then use a few fruit bars as contrast. That creates a stronger visual rhythm, especially if you finish the chocolate bars with pastel candy or a dusting of cocoa.
Common Mistakes to Avoid
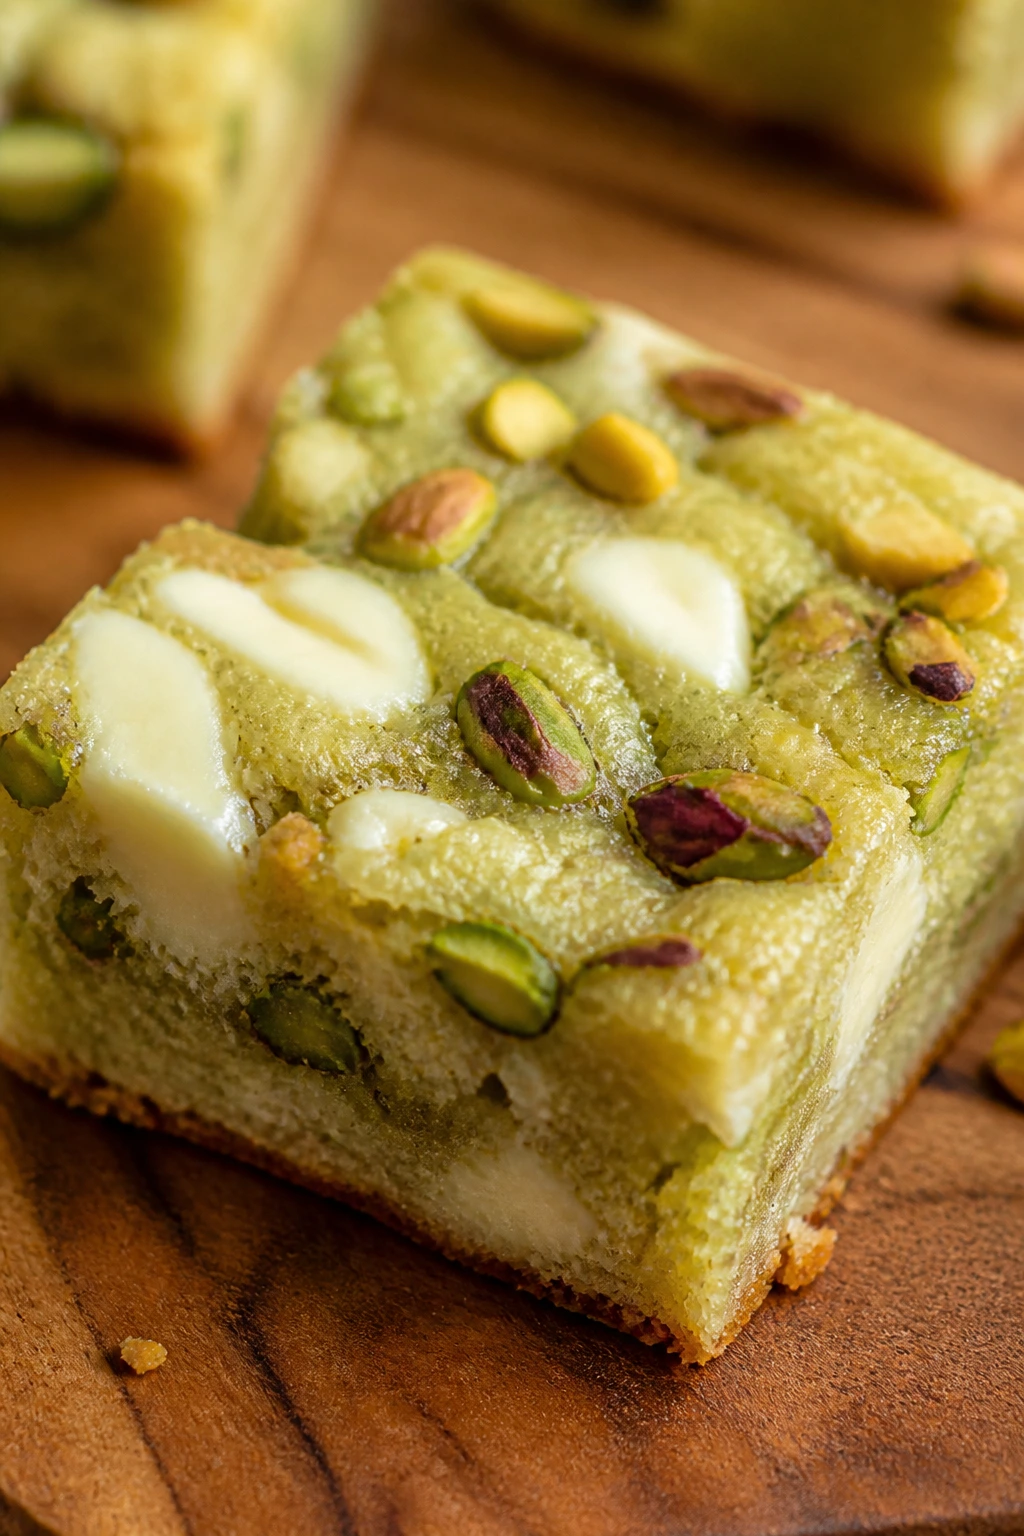
The first mistake is pulling bars too early. A center that still shivers may look done from the edge, but if the middle hasn’t set, your slices will slump. Brownies can stay a little soft; cheesecake, lemon, custard, and pudding bars need to firm up in the fridge before anyone reaches for a knife.
The second mistake is skipping parchment or leaving no overhang. Sticky bars — magic bars, caramel bars, cheesecake bars, pretzel bars — can weld themselves to the pan. Give yourself two handles of parchment and the whole thing lifts out cleanly, which saves the corners from being dug out with a spoon.
Third, don’t cut warm bars unless they’re meant to be eaten messy and warm. Blondies, cookie bars, and marshmallow bars are forgiving, but fruit and cream layers need cooling time or the fillings will smear. A warm knife helps, too. Run it under hot water, wipe it dry, cut once, and repeat.
Fourth, too much mix-in can wreck the texture. Candy, fruit, nuts, and chocolate all have a place, but if the add-ins crowd out the batter or filling, the bars can’t hold together. The pan should look decorated, not packed. That distinction matters.
Fifth, be careful with color-heavy candy toppings near the end of baking. Mini eggs, sprinkles, and chocolate-coated candies can crack, melt, or bleed if they’re left in a hot oven too long. For the cleanest look, add some candy after baking or press it on halfway through cooling.
Finally, don’t treat all bars like one category when it comes to storage. A shortbread bar that sits at room temperature is a different animal from a cream cheese square in the fridge. Read the texture, not the title.
Frequently Asked Questions
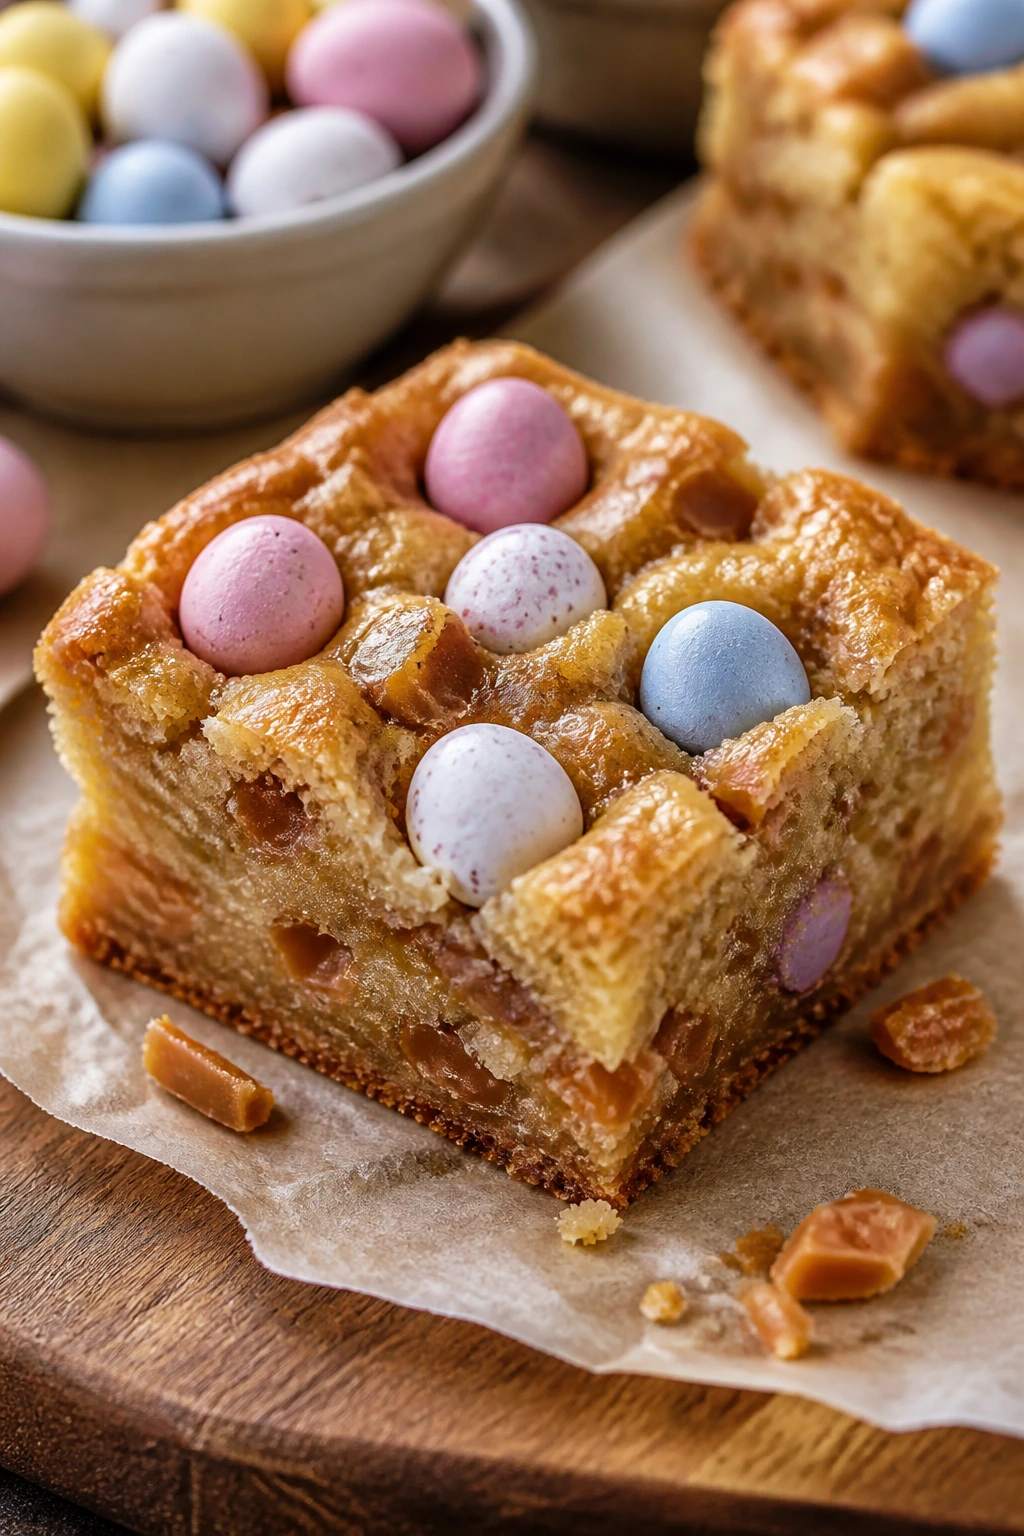
Can I make Easter bars the day before serving?
Yes, and for many of these recipes that’s the better move. Cheesecake bars, lemon bars, pudding bars, and custard bars need the extra chill to slice cleanly, while blondies and cookie bars stay chewy overnight in an airtight container.
Which bars travel best for a potluck or family gathering?
Blondies, shortbread bars, crumble bars, cookie bars, and magic bars travel best because they’re sturdy and less temperature-sensitive. Carry them in the pan if you can, and cut them after you arrive if the filling is soft.
How do I keep the edges neat when slicing?
Chill the bars first, use a long sharp knife, and wipe the blade after every cut. For sticky bars, warm the knife in hot water and dry it thoroughly before slicing again.
Can I use store-bought lemon curd or jam?
Absolutely. In bar recipes, a good store-bought curd or preserve often behaves better than a loose homemade one because it spreads evenly and bakes more predictably. Just taste it first so you know whether it needs a little extra zest or salt.
What if my cheesecake bars crack on top?
A crack usually means the bars baked a little too long or cooled too fast. A swirl, glaze, powdered sugar, or candy topping hides the crack easily, and the texture is still fine if the center is set.
Can I freeze bars with cream cheese or fruit filling?
Yes, but wrap them tightly and freeze them in a single layer first if possible. Thaw in the fridge overnight. Bars with gelatin or very soft whipped fillings are a bit fussier, but most cheesecake-style bars freeze well.
What size pan should I use if I want thinner bars?
Use a 9×13-inch pan for cookie bars, blondies, and layered sheet-style desserts. For richer bars like cheesecake or lemon, an 8×8-inch or 9×9-inch pan gives you thicker squares that feel more substantial.
Can I cut down the sugar in these recipes?
You can reduce sugar a little in blondies, shortbread bars, and fruit crumble bars, but not aggressively. In cheesecake, lemon, and custard bars, sugar does more than sweeten — it helps the texture set and keeps the filling balanced.
What’s the best way to stop candy from melting into the batter?
Reserve some candy for the top and add it near the end of baking or after the bars cool a bit. Candy with hard shells, like mini eggs or coated chocolates, can melt or bleed if it’s left in a hot oven too long.
A Tray Worth Cutting Into
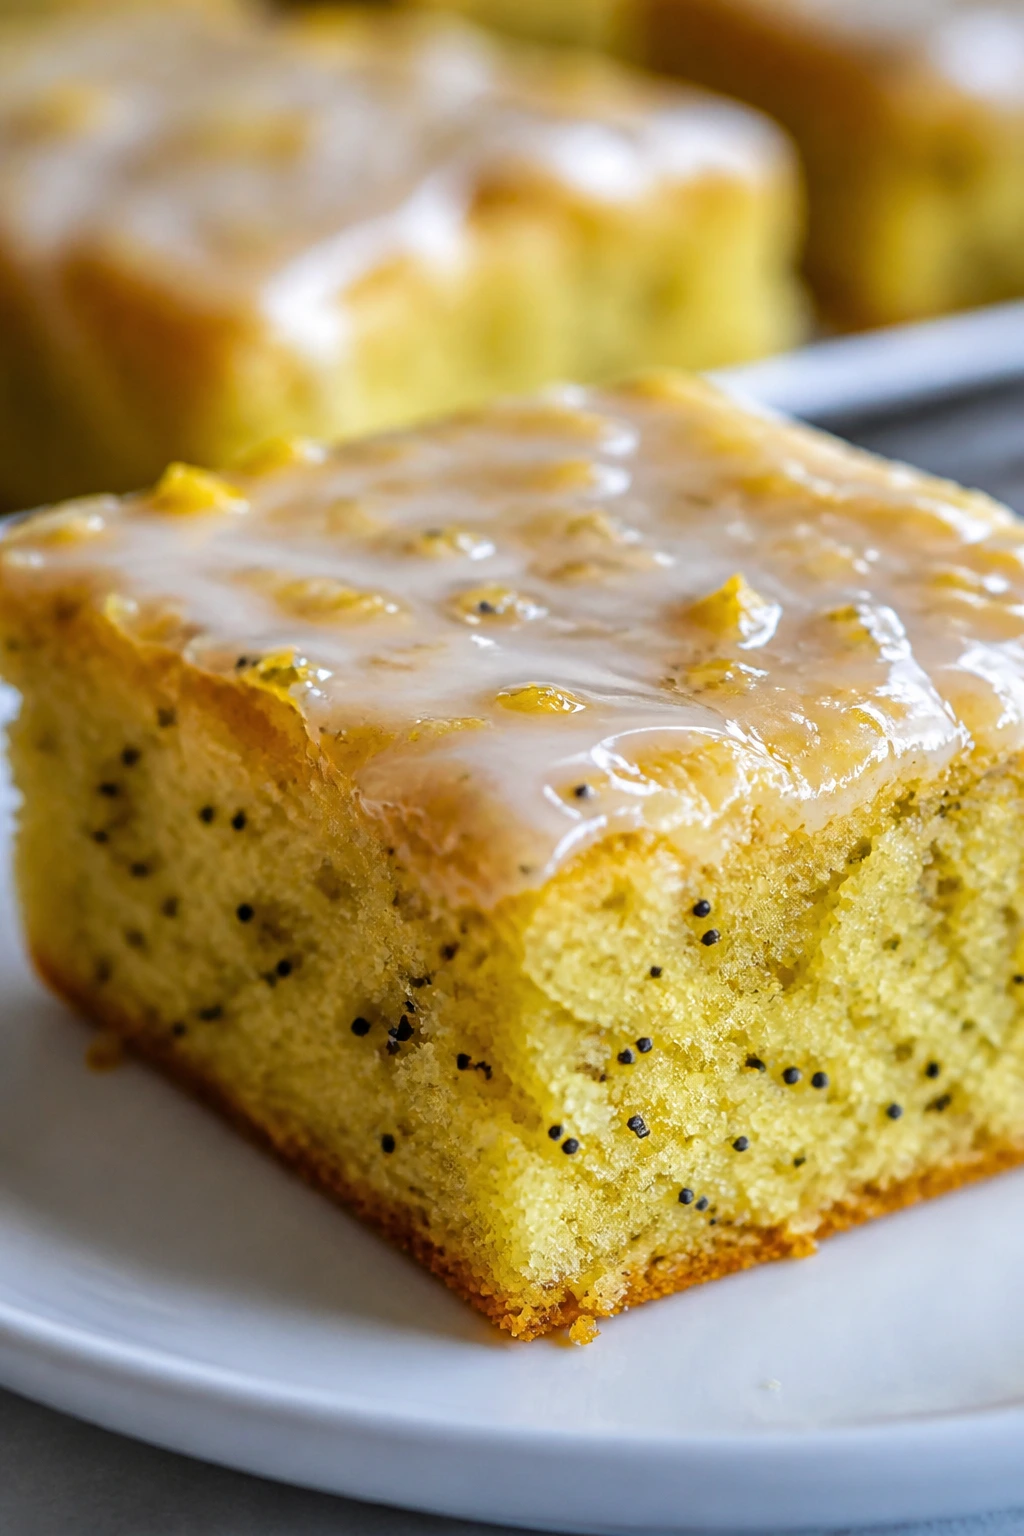
A good Easter dessert spread doesn’t need to look complicated to feel thoughtful. Bars do the heavy lifting for you: they bring color, slice neatly, and make room for flavor combinations that would be a hassle in layer-cake form.
What I like most about them is the range. One pan can be tart and lemony, one can be rich and candy-studded, one can lean old-fashioned with fruit and crumble, and another can be cool, creamy, and chilled until the last minute. That kind of mix keeps a dessert tray from getting dull halfway through the first round of coffee.
If you bake even three or four of these, you’ll have enough contrast to make the whole table look composed. If you bake ten, no one will complain. And if you bake all fifty, well, you’ll need a bigger tray.