
A dessert that goes dry by tomorrow is a waste of butter, sugar, and everyone’s good mood. The best desserts that stay soft for days have a specific kind of bite: a cookie that bends instead of snaps, a brownie that still looks a touch underbaked in the middle, a cake crumb that leaves a faint, damp trace on the knife. That texture is not accidental.
I keep coming back to bakes built on brown sugar, sour cream, yogurt, molasses, oil, pudding, and a little underbaking because they hold onto moisture instead of giving it up overnight. The trick is not magic. It’s chemistry, a steady hand, and knowing when to stop the oven before the edges turn into cardboard.
Some of these are tray bakes that cut cleanly on day two, some are cookies that stay bendy in a tin, and some are cakes that taste better after a rest. That’s the sweet spot here. These are the desserts I trust when I want people to come back for a second slice without any sad, crumbly surprises.
Why These Desserts Stay Soft Long After the First Slice
- Brown Sugar Does the Heavy Lifting: Brown sugar holds more moisture than white sugar, so it keeps cookies, bars, and cakes from drying into sand.
- Fat Helps the Crumb Stay Tender: Butter, oil, sour cream, cream cheese, and yogurt all soften the structure in different ways; oil keeps cakes plush, while dairy adds body and a little tang.
- A Small Underbake Pays Off: Pulling a dessert when the center is just set keeps the middle soft after cooling, especially in brownies, blondies, and sheet cakes.
- Starch Can Be a Good Thing: A spoonful of cornstarch or pudding mix changes the crumb in a way that reads as softer, not denser.
- Proper Storage Matters More Than People Think: An airtight container and a sheet of parchment between layers can buy you two or three extra days of good texture.
- Make-Second-Day Desserts On Purpose: Some cakes and bars settle overnight, which means the flavor smooths out and the crumb gets even better once everything relaxes.
1. Brown Sugar Chocolate Chip Cookies
Brown sugar chocolate chip cookies are the kind that stay a little bendy in the center even after a couple of days on the counter. The edges set, the middle stays soft, and the melted chocolate gives you those glossy pockets that make the whole batch feel richer than the ingredient list looks.
Why It Works: Brown sugar brings moisture and that deep caramel note, while a spoonful of cornstarch keeps the crumb tender. Pulling them at the moment the centers still look slightly puffy is the difference between chewy and dry.
Key Ingredients:
- 1 cup unsalted butter, softened
- 1 cup packed light brown sugar
- 1/2 cup granulated sugar
- 1 large egg plus 1 egg yolk
- 2 teaspoons vanilla extract
- 2 1/4 cups all-purpose flour
- 1 tablespoon cornstarch
- 1 teaspoon baking soda
- 1 teaspoon fine salt
- 2 cups semisweet chocolate chips
Quick Steps:
- Heat the oven to 350°F (175°C) and line two baking sheets with parchment.
- Beat the butter, brown sugar, and granulated sugar for 2 to 3 minutes until lighter and fluffy.
- Mix in the egg, yolk, and vanilla until glossy.
- Stir in the flour, cornstarch, baking soda, and salt just until the dough comes together, then fold in the chocolate chips.
- Scoop 2-tablespoon portions, bake for 9 to 11 minutes, and pull them when the edges are set but the centers still look soft.
Equipment for This Recipe:
- Stand mixer or hand mixer
- Parchment-lined baking sheets
- Cookie scoop or tablespoon
How to Serve This Dish: Stack them on a plate with a few extra chocolate chips scattered around the edge. They’re especially good with cold milk or coffee, and one cookie with a scoop of vanilla ice cream is the kind of small pleasure that disappears fast.
Pro Tips for This Recipe:
- Chill the dough for 30 minutes if your kitchen runs warm; the cookies spread less and stay thicker.
- Use a mix of chips and chopped chocolate if you want more puddles of melted chocolate.
- Let them cool on the pan for 5 minutes before moving them; that’s when the centers finish setting.
Variations on This Dish:
- Sea Salt Finish: Sprinkle flaky salt on top right after baking for a sharp, grown-up edge.
- Walnut Chew: Fold in 1 cup toasted walnuts for extra texture and a little bitterness.
Common Mistakes to Avoid with This Dish:
- Overbaking: If the whole cookie looks brown in the oven, it will feel dry once cooled. Pull it while the center still looks pale.
- Too Much Flour: Packing flour into the cup makes a cakey cookie. Spoon it in and level it off.
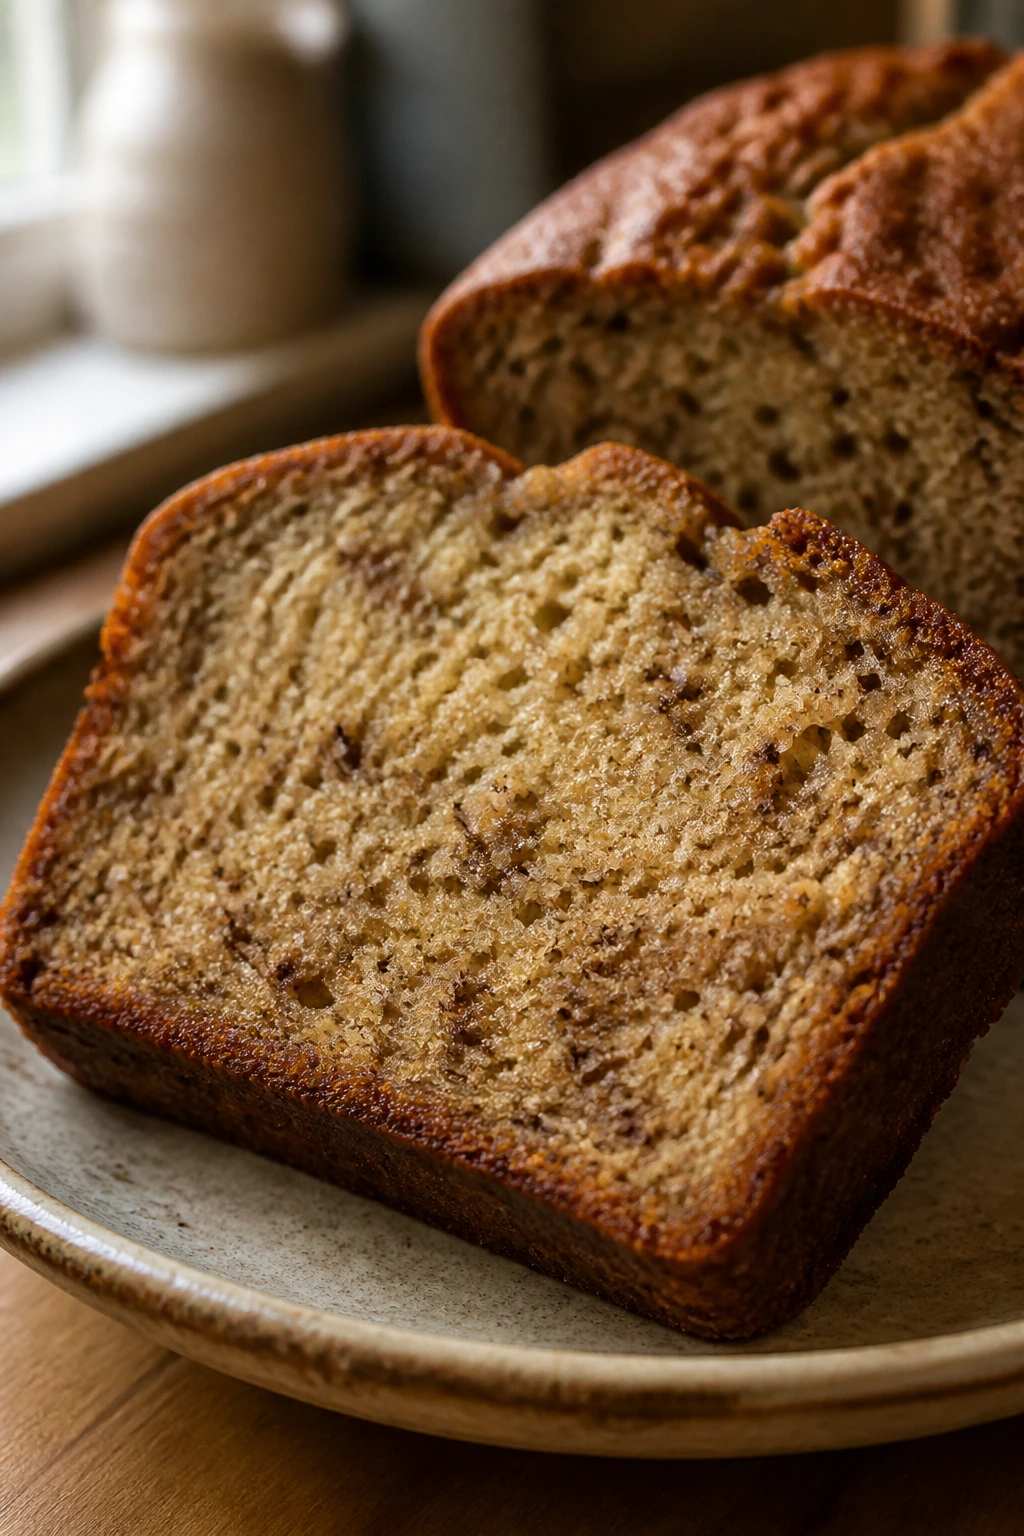
2. Sour Cream Banana Bread
Sour cream banana bread has a damp, tight crumb that stays soft for days, not hours. It smells like banana candy and browned butter even before it’s sliced, which is half the appeal.
Why It Works: Sour cream adds fat and acid, and both keep the loaf tender while giving the banana flavor a little lift. The bananas do the sweet, sticky work, while the loaf bakes low and slow so the center doesn’t dry out.
Key Ingredients:
- 1/2 cup unsalted butter, softened
- 3/4 cup packed brown sugar
- 2 large eggs
- 1 cup mashed very ripe bananas, about 3 medium
- 1/2 cup sour cream
- 1 teaspoon vanilla extract
- 1 3/4 cups all-purpose flour
- 1 teaspoon baking soda
- 1/2 teaspoon fine salt
- 1 teaspoon cinnamon
Quick Steps:
- Heat the oven to 350°F (175°C) and grease a 9×5-inch loaf pan.
- Cream the butter and brown sugar until fluffy, then beat in the eggs, bananas, sour cream, and vanilla.
- Stir in the flour, baking soda, salt, and cinnamon just until no dry streaks remain.
- Scrape the batter into the pan and bake for 55 to 65 minutes, until a toothpick comes out with a few moist crumbs.
- Cool in the pan for 15 minutes, then lift it out and let it cool fully before slicing.
Equipment for This Recipe:
- 9×5-inch loaf pan
- Large mixing bowl
- Rubber spatula
How to Serve This Dish: Slice it thick and serve it plain, or toast a piece lightly and spread it with salted butter. It’s also very good with coffee after lunch, especially when the loaf has had a full day to settle.
Pro Tips for This Recipe:
- Use bananas with black-speckled skins; underripe fruit won’t give you the right sweetness or moisture.
- Don’t overmix once the flour goes in, or the loaf turns tight.
- Wrap the cooled loaf overnight before cutting if you want the softest crumb.
Variations on This Dish:
- Chocolate Chip Banana Bread: Fold in 3/4 cup chocolate chips for a sweeter, more dessert-like loaf.
- Toasted Nut Version: Add 1/2 cup chopped walnuts or pecans for crunch without drying the crumb.
Common Mistakes to Avoid with This Dish:
- Cutting While Hot: The loaf can seem done, but the steam inside still needs time to settle. Slice too early and it gums up.
- Using Too Little Banana: Less banana means less moisture and a flatter flavor. Measure the mashed fruit.
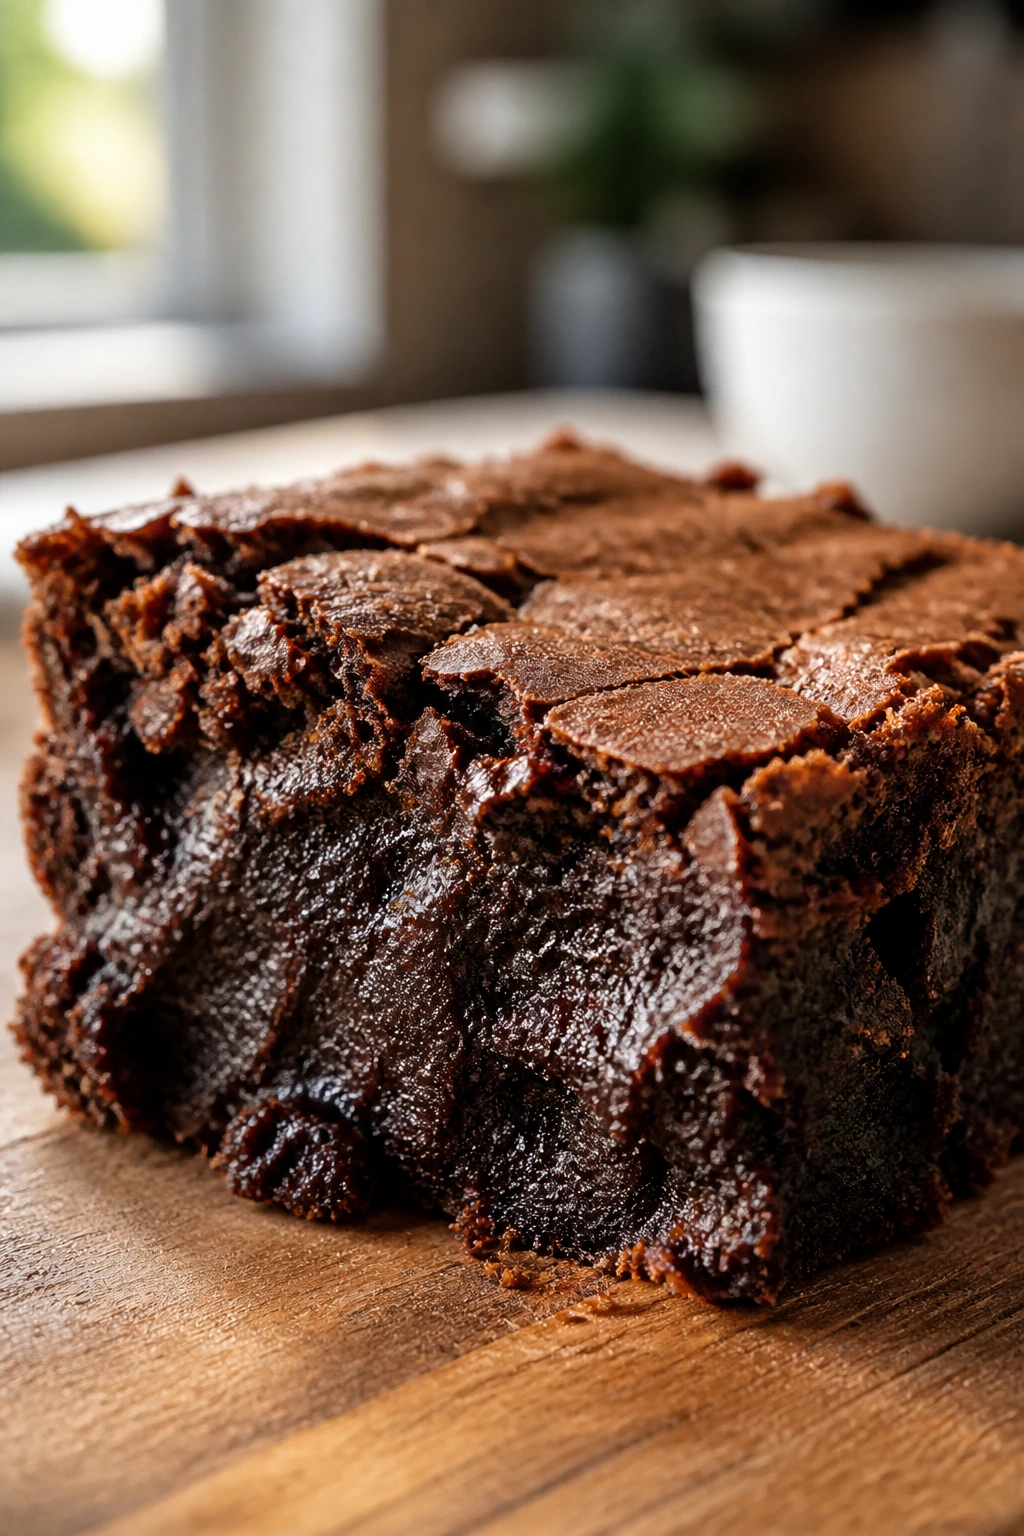
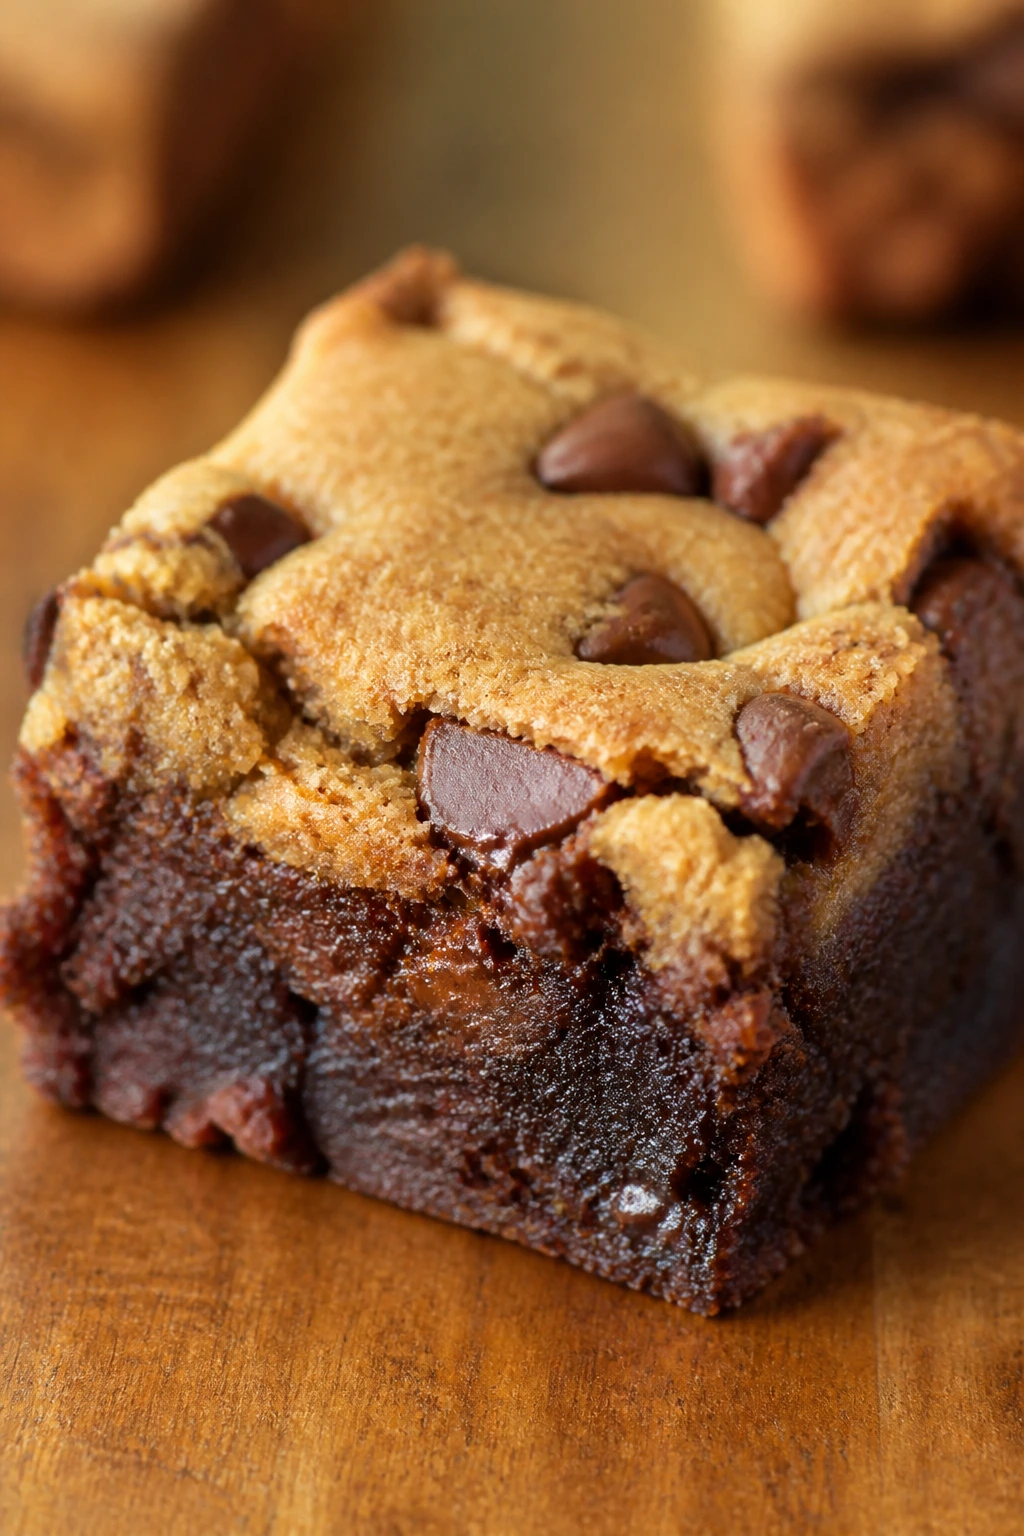
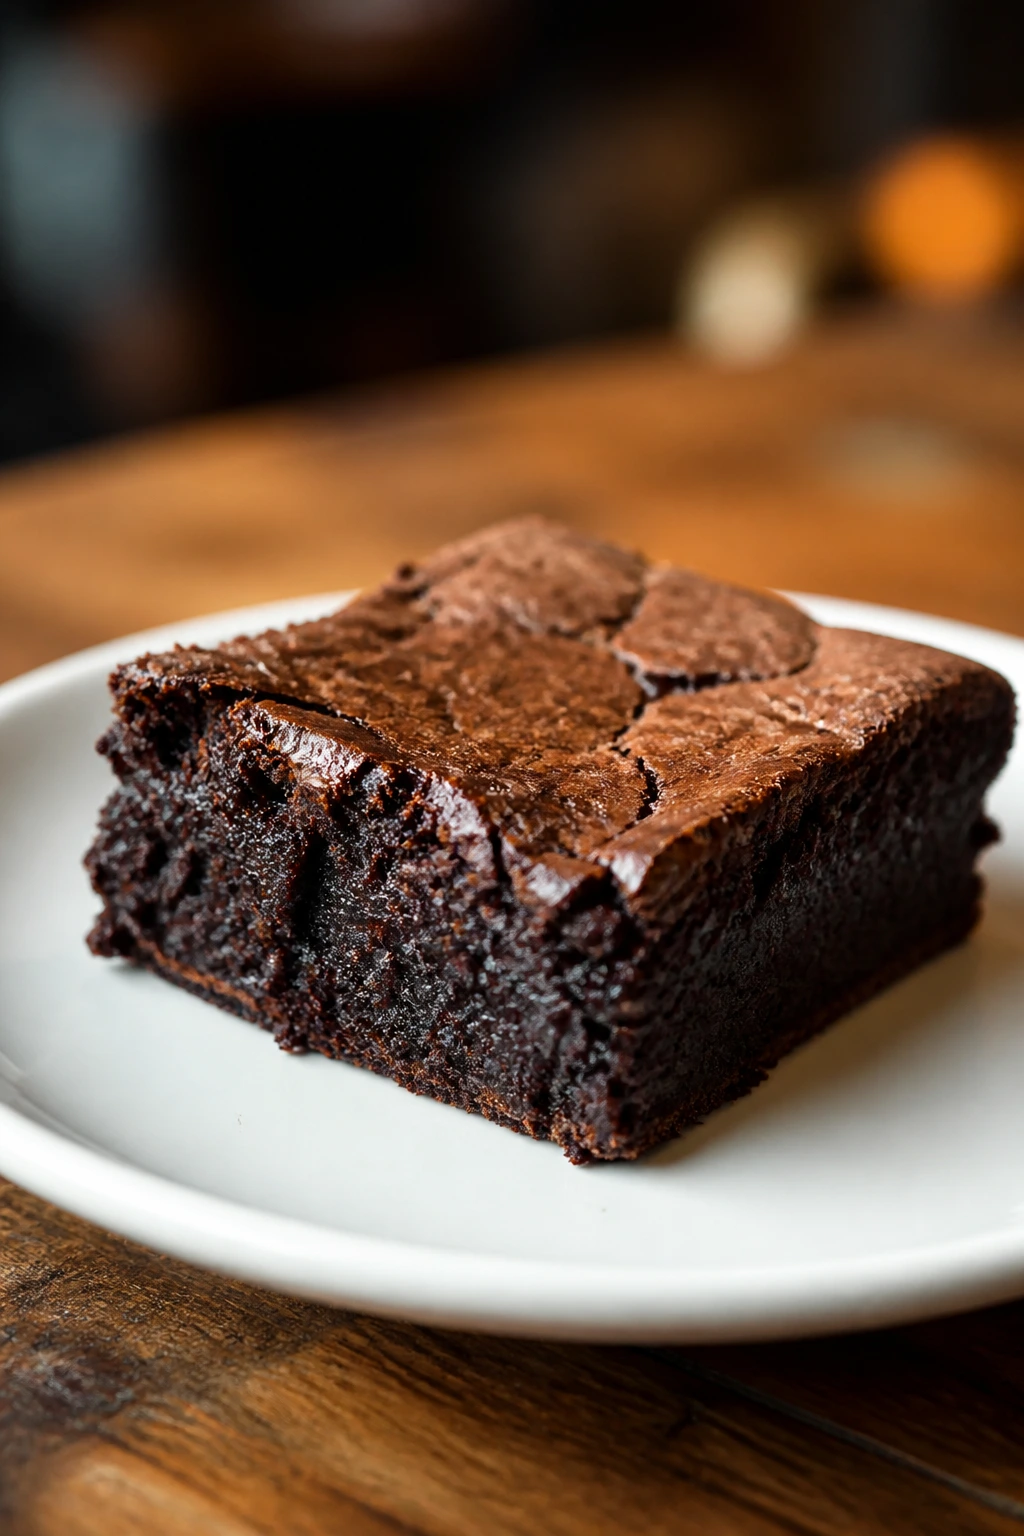
3. Fudgy Cocoa Brownies
These brownies are dense, glossy, and still soft in the middle on day three if you keep them wrapped. The top gets that thin, crackly shell, and underneath it the crumb stays rich and almost truffle-like.
Why It Works: Cocoa powder plus melted butter gives you a deep chocolate flavor without the dryness that can come from too much flour. Brown sugar and a short bake keep the center tender.
Key Ingredients:
- 1 cup unsalted butter
- 2 cups granulated sugar
- 3/4 cup packed brown sugar
- 4 large eggs
- 1 teaspoon vanilla extract
- 1 cup unsweetened cocoa powder
- 1 cup all-purpose flour
- 1/2 teaspoon fine salt
- 1/2 teaspoon baking powder
- 1 cup semisweet chocolate chunks
Quick Steps:
- Heat the oven to 350°F (175°C) and line a 9×13-inch pan with parchment.
- Melt the butter, whisk in the sugars, then beat in the eggs and vanilla until shiny.
- Fold in the cocoa, flour, salt, and baking powder until just combined, then add the chocolate chunks.
- Spread the batter into the pan and bake for 24 to 28 minutes, until the center still looks slightly soft.
- Cool completely before lifting out and cutting.
Equipment for This Recipe:
- 9×13-inch baking pan
- Parchment paper
- Whisk and spatula
How to Serve This Dish: Cut them into squares and serve at room temperature so the chocolate stays plush. A scoop of vanilla ice cream and a pinch of flaky salt turn them into a plate people stop talking over.
Pro Tips for This Recipe:
- Line the pan with parchment overhang; brownies are easier to remove cleanly that way.
- Start checking at 24 minutes. If the center is firm, you’ve gone too far.
- Chill before cutting if you want neat edges.
Variations on This Dish:
- Espresso Brownies: Add 1 tablespoon instant espresso powder to sharpen the chocolate.
- Peanut Butter Swirl: Dollop 1/2 cup warmed peanut butter over the batter and drag a knife through it once.
Common Mistakes to Avoid with This Dish:
- Overbaking by Habit: Brownies keep cooking in the hot pan. Pull them early.
- Too Much Flour: Level the cup carefully or the texture turns cakier than fudgy.
4. Maple Pumpkin Bars
These bars are soft, autumn-spiced, and almost pudding-like in the middle when made right. The maple glaze soaks into the top just enough to keep each square tender for days.
Why It Works: Pumpkin puree brings moisture, oil keeps the crumb loose, and maple syrup adds sweetness that doesn’t dry out the batter. The bars bake in a sheet pan, which means even heat and fewer dry edges.
Key Ingredients:
- 1 3/4 cups all-purpose flour
- 1 teaspoon baking powder
- 1 teaspoon baking soda
- 2 teaspoons pumpkin pie spice
- 1/2 teaspoon fine salt
- 1 cup canned pumpkin puree
- 1/2 cup vegetable oil
- 3/4 cup brown sugar
- 2 large eggs
- 1/4 cup maple syrup
Quick Steps:
- Heat the oven to 350°F (175°C) and line an 8×8-inch pan with parchment.
- Whisk the dry ingredients in one bowl and the pumpkin, oil, sugar, eggs, and maple syrup in another.
- Stir the dry into the wet just until smooth, then spread into the pan.
- Bake for 28 to 32 minutes, until the center springs back lightly and a tester comes out with moist crumbs.
- Cool, glaze if you like, and cut once fully set.
Equipment for This Recipe:
- 8×8-inch baking pan
- Two mixing bowls
- Offset spatula
How to Serve This Dish: Serve these bars chilled or at room temperature, with whipped cream if you want them to feel more dessert-like. They’re sturdy enough for lunchboxes, but soft enough to taste good straight from the counter.
Pro Tips for This Recipe:
- Use plain pumpkin puree, not pie filling.
- A quick maple glaze made with powdered sugar and maple syrup makes the top stay supple.
- Let the bars cool fully before cutting; warm pumpkin bars tear easily.
Variations on This Dish:
- Cream Cheese Frosted Bars: Add a thin layer of tangy frosting for a richer finish.
- Pecan Streusel Top: Scatter a cinnamon-pecan crumb over the batter before baking.
Common Mistakes to Avoid with This Dish:
- Overloading Spice: Too much spice buries the pumpkin and can taste dusty.
- Cutting Too Soon: The bars need time to firm up or they collapse at the knife.
5. Snickerdoodle Blondies
Snickerdoodle blondies taste like a cinnamon sugar cookie, but they stay softer because they’re baked in a bar pan instead of rolled and baked as individual cookies. The middle stays a little dense and fudgy, and the top gets that crackly cinnamon crust.
Why It Works: Brown sugar, butter, and an egg-heavy batter keep the bars tender. A generous cinnamon-sugar finish seals the top just enough to hold moisture underneath.
Key Ingredients:
- 1 cup unsalted butter, melted
- 2 cups packed light brown sugar
- 2 large eggs
- 2 teaspoons vanilla extract
- 2 cups all-purpose flour
- 1 teaspoon baking powder
- 1/2 teaspoon fine salt
- 2 teaspoons ground cinnamon
- 1/4 cup granulated sugar, for topping
Quick Steps:
- Heat the oven to 350°F (175°C) and line a 9×13-inch pan with parchment.
- Whisk together melted butter and brown sugar, then beat in the eggs and vanilla.
- Stir in the flour, baking powder, salt, and 1 teaspoon cinnamon until just combined.
- Spread into the pan and sprinkle with the cinnamon-sugar topping.
- Bake for 22 to 26 minutes, until the edges are set and the center still jiggles slightly.
Equipment for This Recipe:
- 9×13-inch pan
- Parchment paper
- Whisk
How to Serve This Dish: Cut into generous squares and serve with coffee or a glass of cold milk. If you warm a square for 10 seconds, the cinnamon smell jumps right back up.
Pro Tips for This Recipe:
- Don’t overbake; blondies should look a little underdone when you pull them.
- A pinch of cream of tartar in the cinnamon topping gives a sharper snickerdoodle flavor.
- Cool completely before slicing for neat bars.
Variations on This Dish:
- Apple Snickerdoodle: Fold in 1 cup finely diced apple, well-drained.
- Chai Spice Blondie: Replace part of the cinnamon with cardamom and ginger.
Common Mistakes to Avoid with This Dish:
- Using Hot Butter That’s Still Too Warm: If the batter feels oily, let the butter cool a few minutes first.
- Baking Until Golden All Over: The center should stay pale for softness.
6. Lemon Yogurt Loaf
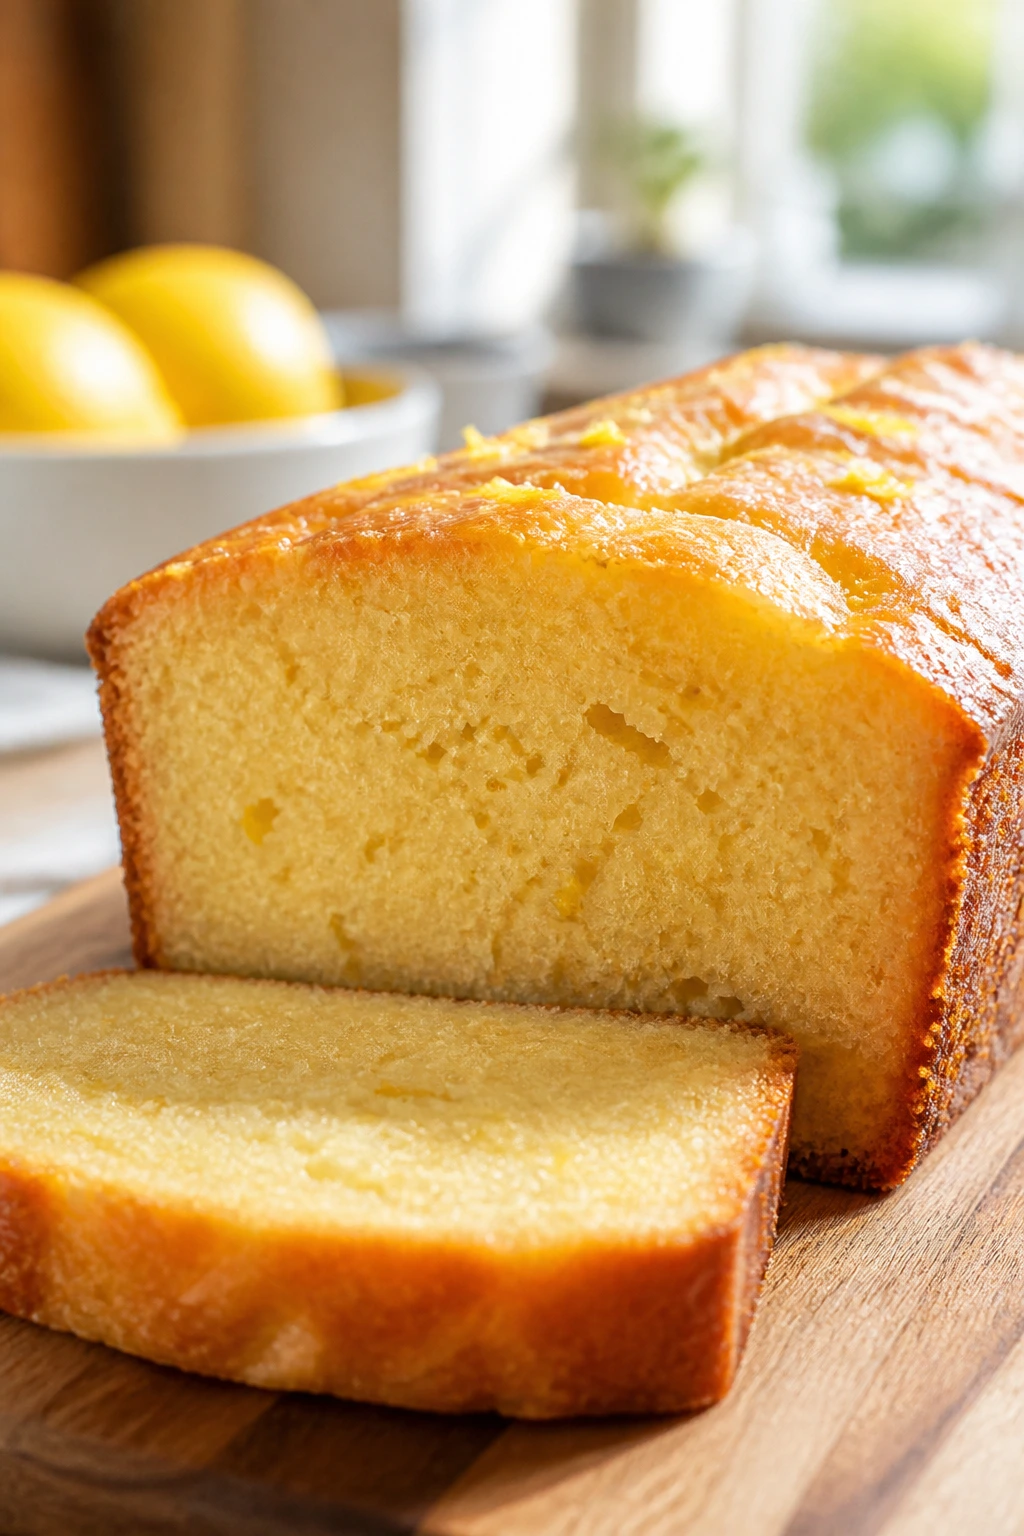
A lemon yogurt loaf gives you a soft crumb that stays damp and bright for several days. It slices cleanly, but the inside stays plush, with a citrus perfume that never turns heavy.
Why It Works: Yogurt brings acid and moisture in the same bite, and oil keeps the loaf tender even after chilling. Lemon zest gives the flavor a sharp edge without making the crumb dry.
Key Ingredients:
- 1 1/2 cups all-purpose flour
- 2 teaspoons baking powder
- 1/2 teaspoon fine salt
- 1 cup plain whole-milk yogurt
- 1 cup granulated sugar
- 3 large eggs
- 1/2 cup neutral oil
- 2 tablespoons lemon zest
- 1/4 cup lemon juice
Quick Steps:
- Heat the oven to 350°F (175°C) and grease a 9×5-inch loaf pan.
- Whisk the flour, baking powder, and salt in one bowl.
- Whisk the yogurt, sugar, eggs, oil, zest, and juice in another until smooth.
- Fold the dry ingredients into the wet just until combined, then pour into the pan.
- Bake for 48 to 55 minutes, until the top is golden and a tester comes out with a few moist crumbs.
Equipment for This Recipe:
- 9×5-inch loaf pan
- Two bowls
- Microplane or fine grater
How to Serve This Dish: A thin lemon glaze makes each slice shine and keeps the top from feeling dry. Serve it with tea, or toast a slice lightly and spread on a little butter if you want extra richness.
Pro Tips for This Recipe:
- Zest the lemons before juicing them; it’s easier.
- Use whole-milk yogurt for the softest crumb.
- Let the loaf cool in the pan for 10 to 15 minutes before turning it out.
Variations on This Dish:
- Blueberry Lemon Loaf: Fold in 1 cup blueberries, tossed with a teaspoon of flour.
- Poppy Seed Loaf: Add 1 tablespoon poppy seeds for a gentle crunch.
Common Mistakes to Avoid with This Dish:
- Skipping the Zest: Juice alone tastes thin; the oils in the zest carry the real lemon flavor.
- Overmixing the Batter: That makes the loaf tight instead of tender.
7. Soft Molasses Cookies
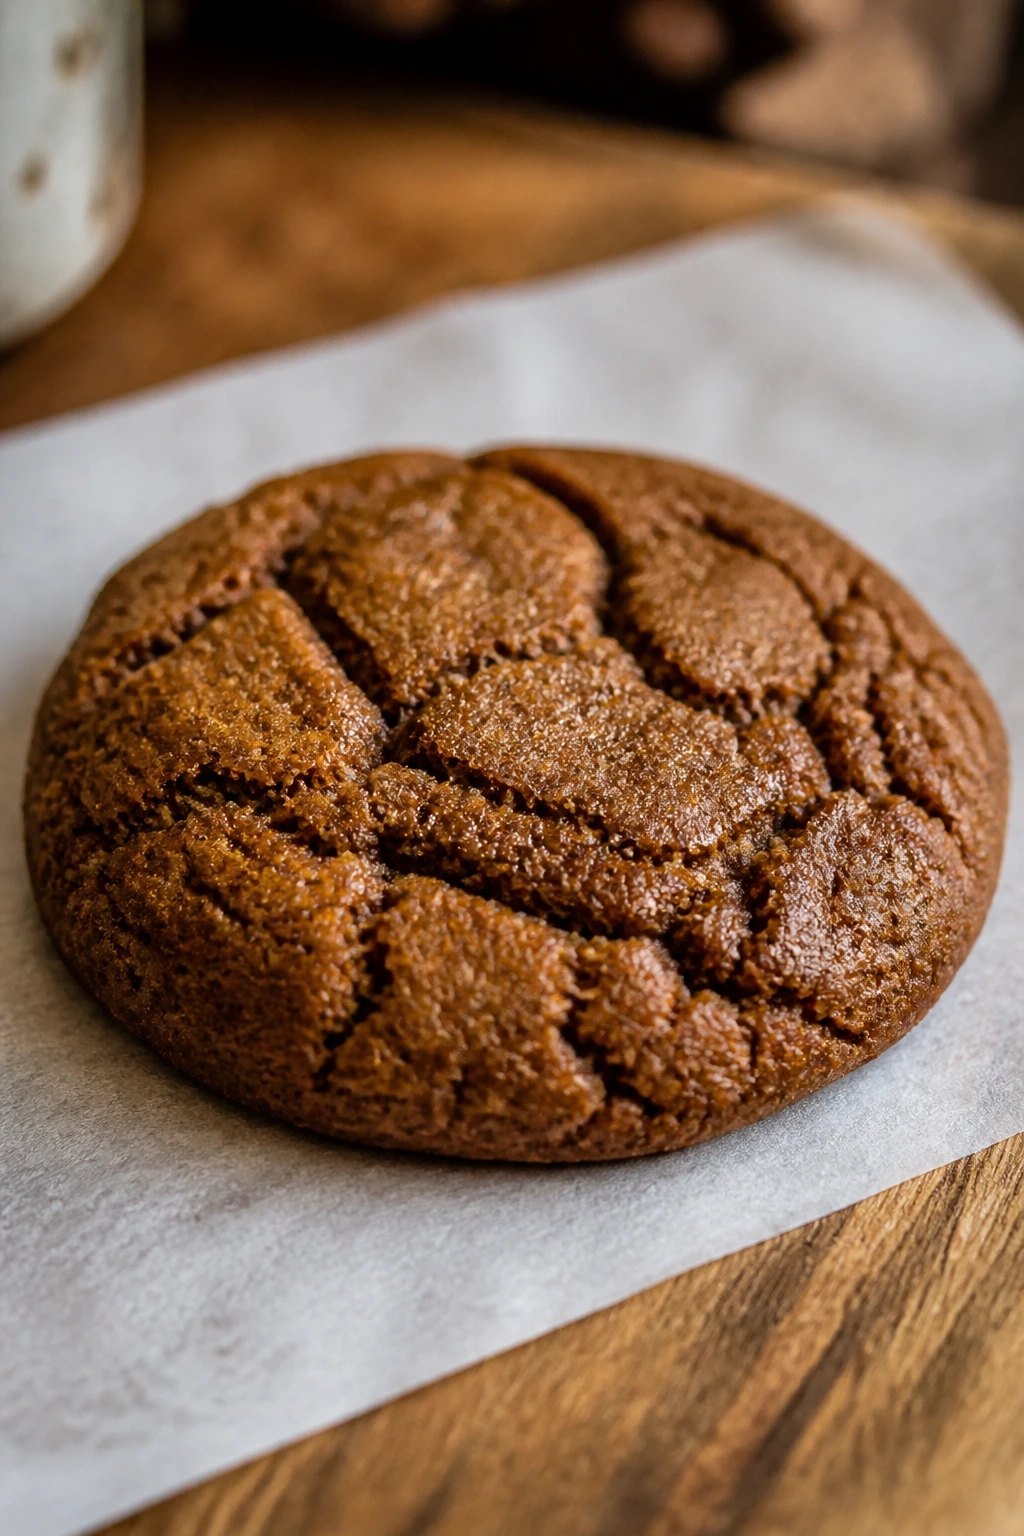
These are dark, warm, and chewy in the middle, with edges that only barely crisp. They stay soft because molasses pulls moisture into the dough and keeps the crumb from drying out too quickly.
Why It Works: Molasses, brown sugar, and a short bake give you cookies that bend when you break them. The spice mixture deepens the flavor without making the dough heavy.
Key Ingredients:
- 3/4 cup unsalted butter, softened
- 1 cup packed brown sugar
- 1 large egg
- 1/4 cup molasses
- 2 1/4 cups all-purpose flour
- 2 teaspoons ground ginger
- 1 teaspoon cinnamon
- 1/2 teaspoon baking soda
- 1/2 teaspoon fine salt
- 1/4 cup granulated sugar, for rolling
Quick Steps:
- Heat the oven to 350°F (175°C) and line a baking sheet with parchment.
- Cream the butter and brown sugar, then beat in the egg and molasses.
- Stir in the flour, ginger, cinnamon, baking soda, and salt.
- Roll the dough into balls, coat in granulated sugar, and place on the sheet.
- Bake for 10 to 12 minutes until the tops are cracked and the centers still look soft.
Equipment for This Recipe:
- Mixing bowl
- Baking sheet
- Cookie scoop
How to Serve This Dish: These cookies are best with coffee or hot tea, and they hold their chew well in a tin. I like them plain, but a little cream cheese spread between two makes a very old-school sandwich cookie.
Pro Tips for This Recipe:
- Chill the dough if it feels sticky.
- Pull the cookies while the centers are still slightly domed.
- Store them with a slice of bread if your kitchen is dry.
Variations on This Dish:
- Orange Molasses Cookies: Add 1 teaspoon orange zest for a brighter edge.
- Cracked Ginger Top: Roll the dough in coarse sugar instead of fine sugar.
Common Mistakes to Avoid with This Dish:
- Too Much Flour: Molasses dough already feels firm; extra flour makes it dry.
- Skipping the Rest: If the dough is too soft, the cookies spread into thin discs.
8. Red Velvet Cupcakes
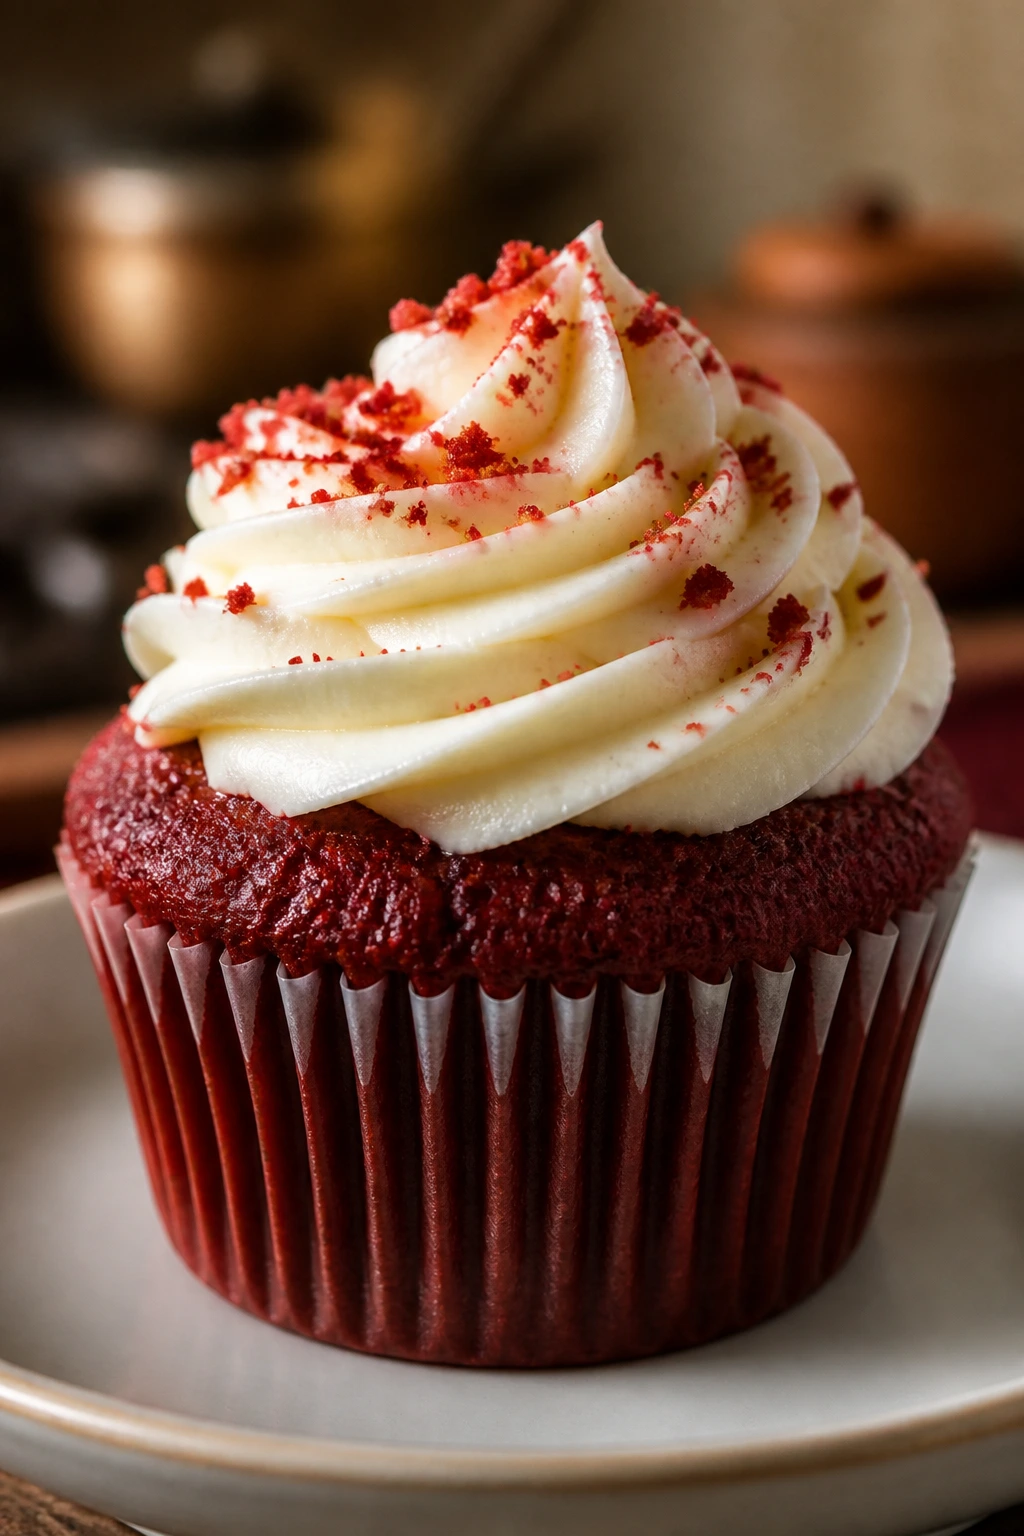
Red velvet cupcakes stay plush because the batter leans on buttermilk, oil, and a little cocoa instead of a dry chocolate load. The crumb is fine and tender, and the cream cheese frosting keeps every bite soft even after a day in the fridge.
Why It Works: Oil keeps the cupcakes moist, buttermilk adds tang and tenderness, and cream cheese frosting seals in the edges. The cocoa is there for depth, not for heaviness.
Key Ingredients:
- 1 1/2 cups all-purpose flour
- 1 tablespoon cocoa powder
- 1/2 teaspoon baking soda
- 1/2 teaspoon fine salt
- 1 cup granulated sugar
- 2 large eggs
- 1 cup buttermilk
- 1/2 cup vegetable oil
- 1 tablespoon red food coloring
- 1 teaspoon vanilla extract
Quick Steps:
- Heat the oven to 350°F (175°C) and line a 12-cup muffin tin.
- Whisk the dry ingredients in one bowl.
- Whisk the sugar, eggs, buttermilk, oil, food coloring, and vanilla in another.
- Fold the dry into the wet until the batter is smooth, then divide among the liners.
- Bake for 18 to 20 minutes, cool fully, and frost with cream cheese frosting.
Equipment for This Recipe:
- 12-cup muffin tin
- Cupcake liners
- Electric mixer
How to Serve This Dish: Frost them with a thick, swirled cap and let the frosting set for 20 minutes before serving. They’re easy to stack on a platter, and each one still tastes soft the next day if you keep them chilled.
Pro Tips for This Recipe:
- Use room-temperature eggs and buttermilk so the batter mixes evenly.
- Don’t overbake; cupcakes dry out fast.
- Chill the frosting briefly before piping if the kitchen is warm.
Variations on This Dish:
- Mini Cupcakes: Bake in a mini muffin tin for about 10 to 12 minutes.
- Chocolate Red Velvet: Add 2 extra teaspoons cocoa for a deeper chocolate note.
Common Mistakes to Avoid with This Dish:
- Heavy Cocoa Hand: Too much cocoa turns red velvet into dry chocolate cake.
- Warm Frosting on Warm Cupcakes: It melts and slides right off.
9. Peanut Butter Blossoms
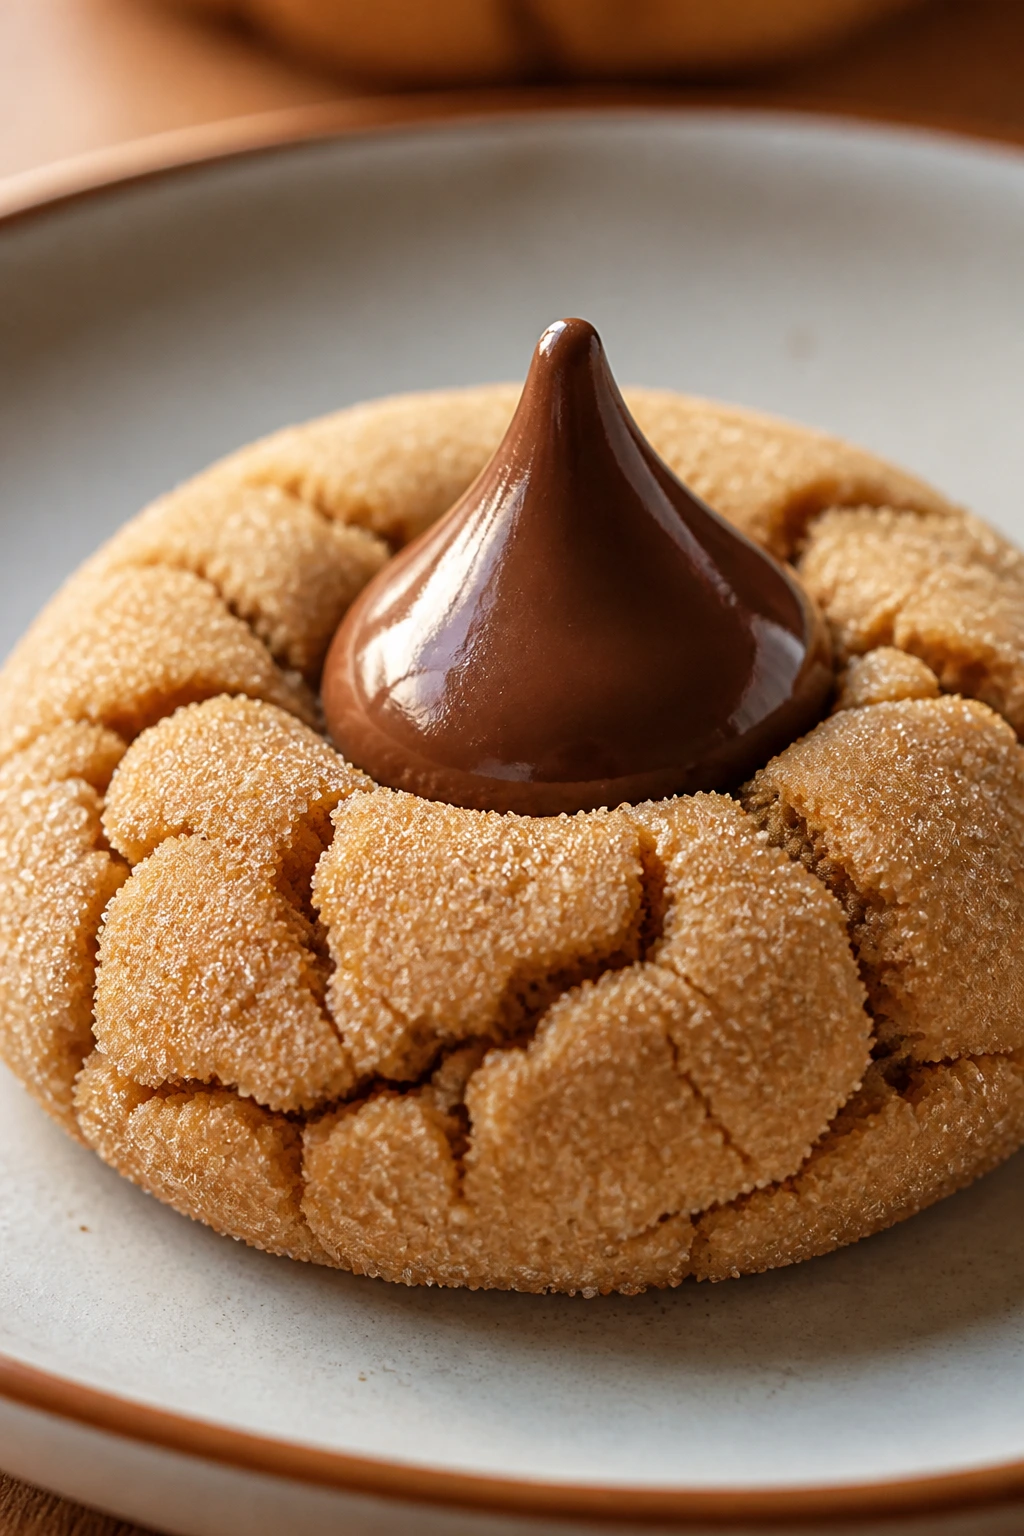
Peanut butter blossoms stay soft because the peanut butter fat keeps the centers tender and the dough is short and rich. The kiss on top turns glossy without turning the cookie brittle.
Why It Works: Peanut butter and brown sugar make a dough that bakes into a soft center, while the chocolate kiss melts just enough to lock everything together. A quick bake is all these need.
Key Ingredients:
- 1/2 cup unsalted butter, softened
- 1/2 cup creamy peanut butter
- 1/2 cup packed brown sugar
- 1/4 cup granulated sugar
- 1 large egg
- 1 1/4 cups all-purpose flour
- 1 teaspoon baking soda
- 1/4 teaspoon fine salt
- 24 chocolate kisses, unwrapped
Quick Steps:
- Heat the oven to 375°F (190°C) and line a baking sheet with parchment.
- Cream the butter, peanut butter, brown sugar, and granulated sugar.
- Beat in the egg, then mix in the flour, baking soda, and salt.
- Roll into balls, bake for 8 to 10 minutes, and press a chocolate kiss into each one right away.
- Cool on the sheet so the centers stay soft.
Equipment for This Recipe:
- Baking sheet
- Parchment paper
- Small cookie scoop
How to Serve This Dish: Arrange them in a circle with the chocolate kisses pointing up; it sounds fussy, but it looks neat on a plate. They travel well, and a tin of these disappears fast at a potluck.
Pro Tips for This Recipe:
- Press the kiss in while the cookies are hot so it sinks without cracking.
- Use creamy peanut butter for the softest texture.
- Store with a slice of bread in the container.
Variations on This Dish:
- Dark Chocolate Blossom: Swap in dark chocolate kisses for a less sweet finish.
- Salted Peanut Version: Sprinkle a few flakes of salt on top before the chocolate sets.
Common Mistakes to Avoid with This Dish:
- Baking Too Long: These should be pale and tender, not browned all over.
- Forgetting the Immediate Kiss Press: Wait too long and the cookie cracks when you try.
10. Cinnamon Roll Cake
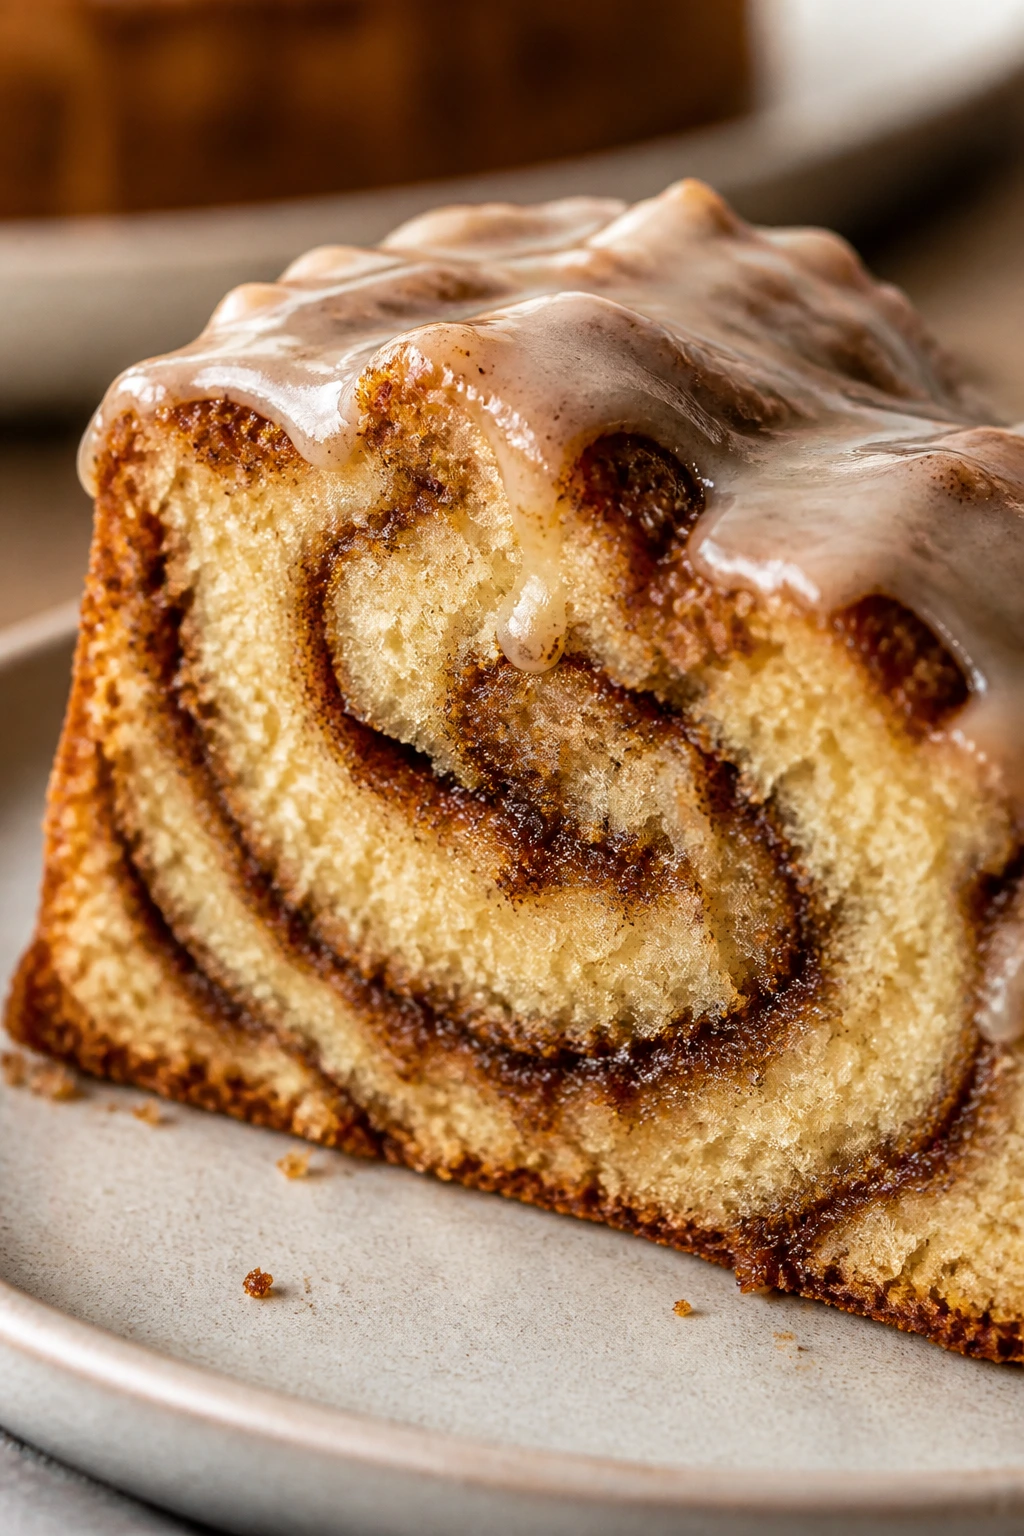
This cake tastes like the center of a cinnamon roll without the fussy shaping. It stays soft because the batter is rich with milk and butter, and the cinnamon swirl melts into the top instead of drying out.
Why It Works: A loose cake batter bakes around the cinnamon butter swirl, which keeps the crumb moist and gives you those sticky pockets people dig for first. The glaze sinks in while the cake is still warm.
Key Ingredients:
- 3 cups all-purpose flour
- 1 cup granulated sugar
- 4 teaspoons baking powder
- 1/2 teaspoon fine salt
- 1 1/2 cups milk
- 2 large eggs
- 1/2 cup unsalted butter, melted
- 1 cup brown sugar
- 2 tablespoons cinnamon
- 1 cup powdered sugar, for glaze
Quick Steps:
- Heat the oven to 350°F (175°C) and grease a 9×13-inch pan.
- Whisk flour, sugar, baking powder, and salt, then stir in milk, eggs, and melted butter.
- Spread the batter into the pan.
- Mix brown sugar and cinnamon with a little melted butter, then dollop and swirl it over the top.
- Bake for 28 to 32 minutes, then drizzle with glaze while warm.
Equipment for This Recipe:
- 9×13-inch baking pan
- Mixing bowls
- Spoon or knife for swirling
How to Serve This Dish: Serve warm in big squares, with the glaze still glossy on top. It’s rich enough to stand alone, but a few berries on the side cut through the sweetness well.
Pro Tips for This Recipe:
- Don’t swirl too deeply or the topping sinks to the bottom.
- Warm cake takes glaze better than cold cake.
- Use whole milk if you have it; skim milk gives less plushness.
Variations on This Dish:
- Apple Cinnamon Roll Cake: Add 1 cup diced apple to the batter.
- Pecan Swirl Cake: Fold chopped pecans into the cinnamon layer.
Common Mistakes to Avoid with This Recipe:
- Over-Swirling: You want ribbons, not a blended batter.
- Cutting Cold: The glaze sets up and the cake feels less soft.
11. Carrot Sheet Cake
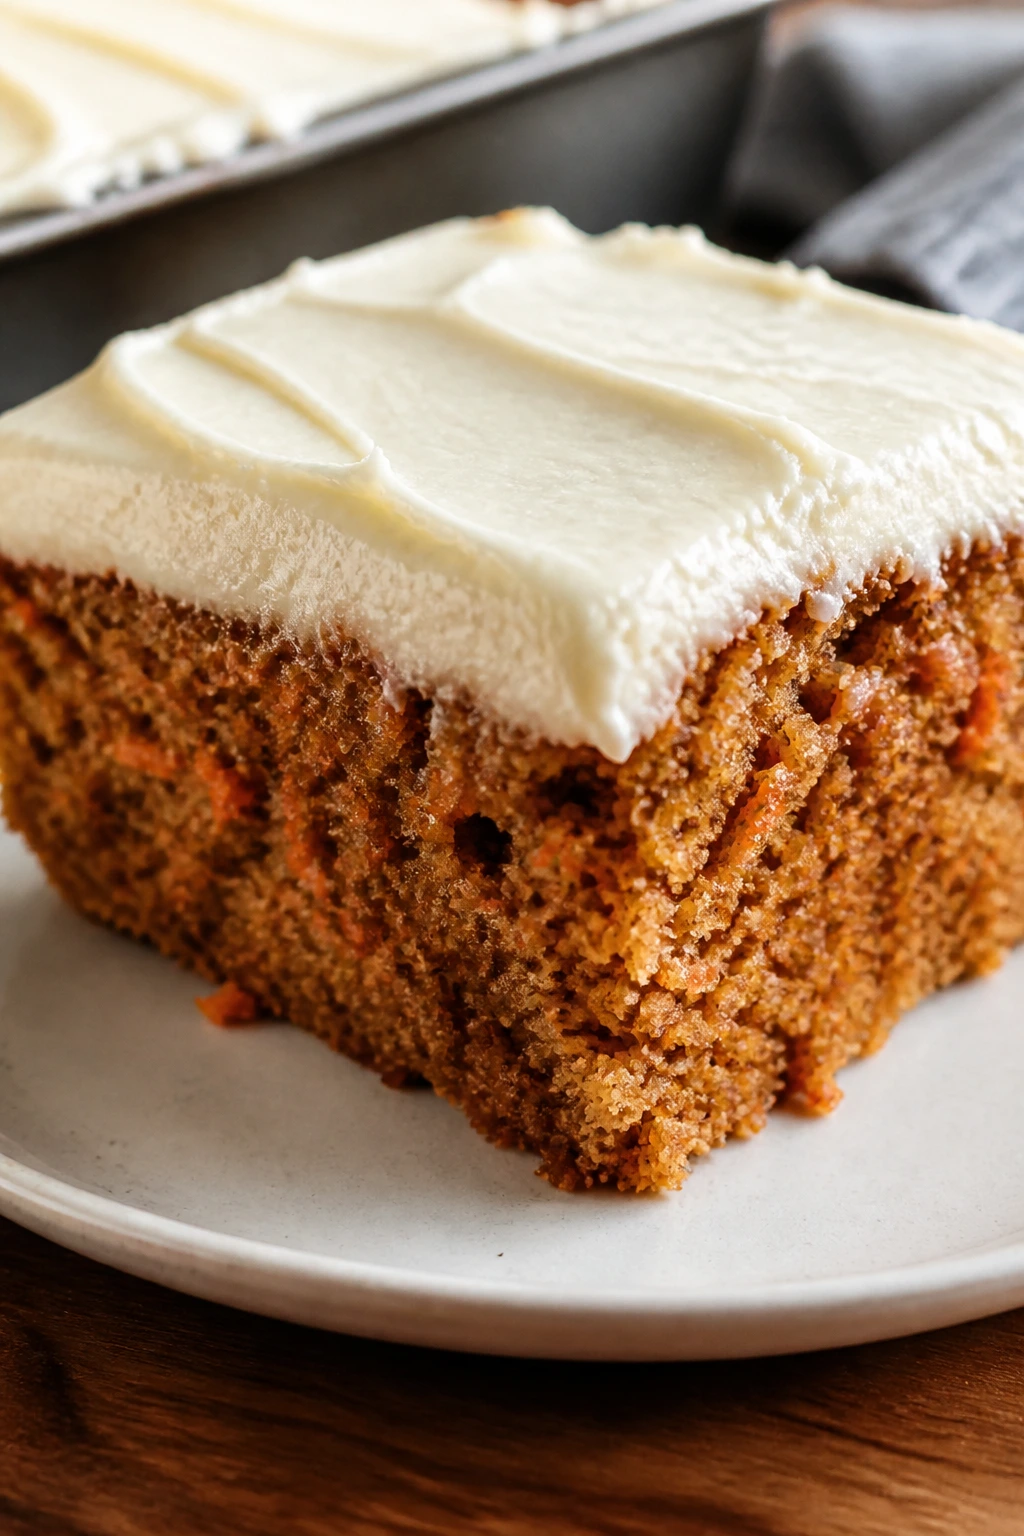
Carrot sheet cake is the kind of dessert that still tastes moist after a night in the fridge, especially with cream cheese frosting on top. The shredded carrots disappear into the crumb and leave behind sweetness, color, and softness.
Why It Works: Oil, carrots, and a bit of brown sugar keep the cake tender, while the cream cheese frosting blocks out drying air. Sheet-pan baking gives you even heat without overcooking the edges.
Key Ingredients:
- 2 cups all-purpose flour
- 2 teaspoons cinnamon
- 1 teaspoon baking soda
- 1/2 teaspoon fine salt
- 1 cup vegetable oil
- 1 cup brown sugar
- 1/2 cup granulated sugar
- 3 large eggs
- 2 cups finely grated carrots
- 1 teaspoon vanilla extract
Quick Steps:
- Heat the oven to 350°F (175°C) and line a 9×13-inch pan.
- Whisk the dry ingredients in one bowl.
- Whisk the oil, sugars, eggs, carrots, and vanilla in another.
- Fold the dry into the wet and spread into the pan.
- Bake for 28 to 32 minutes, cool fully, then frost.
Equipment for This Recipe:
- 9×13-inch pan
- Box grater
- Mixing bowls
How to Serve This Dish: Cut into neat squares and keep the frosting fairly thick. A cold slice with tea is excellent, though I like it even more the next day when the carrot flavor has settled.
Pro Tips for This Recipe:
- Grate the carrots finely so they melt into the crumb.
- Don’t pack the flour.
- Toast walnuts first if you add them; it makes the cake taste more finished.
Variations on This Dish:
- Pineapple Carrot Cake: Add 1/2 cup well-drained crushed pineapple.
- Spiced Walnut Version: Fold in 3/4 cup walnuts and a pinch of nutmeg.
Common Mistakes to Avoid with This Dish:
- Chunks of Carrot: Big shreds don’t soften as well and can leave stringy bites.
- Thin Frosting: It won’t protect the cake from drying at the cut edges.
12. Chocolate Zucchini Snack Cake
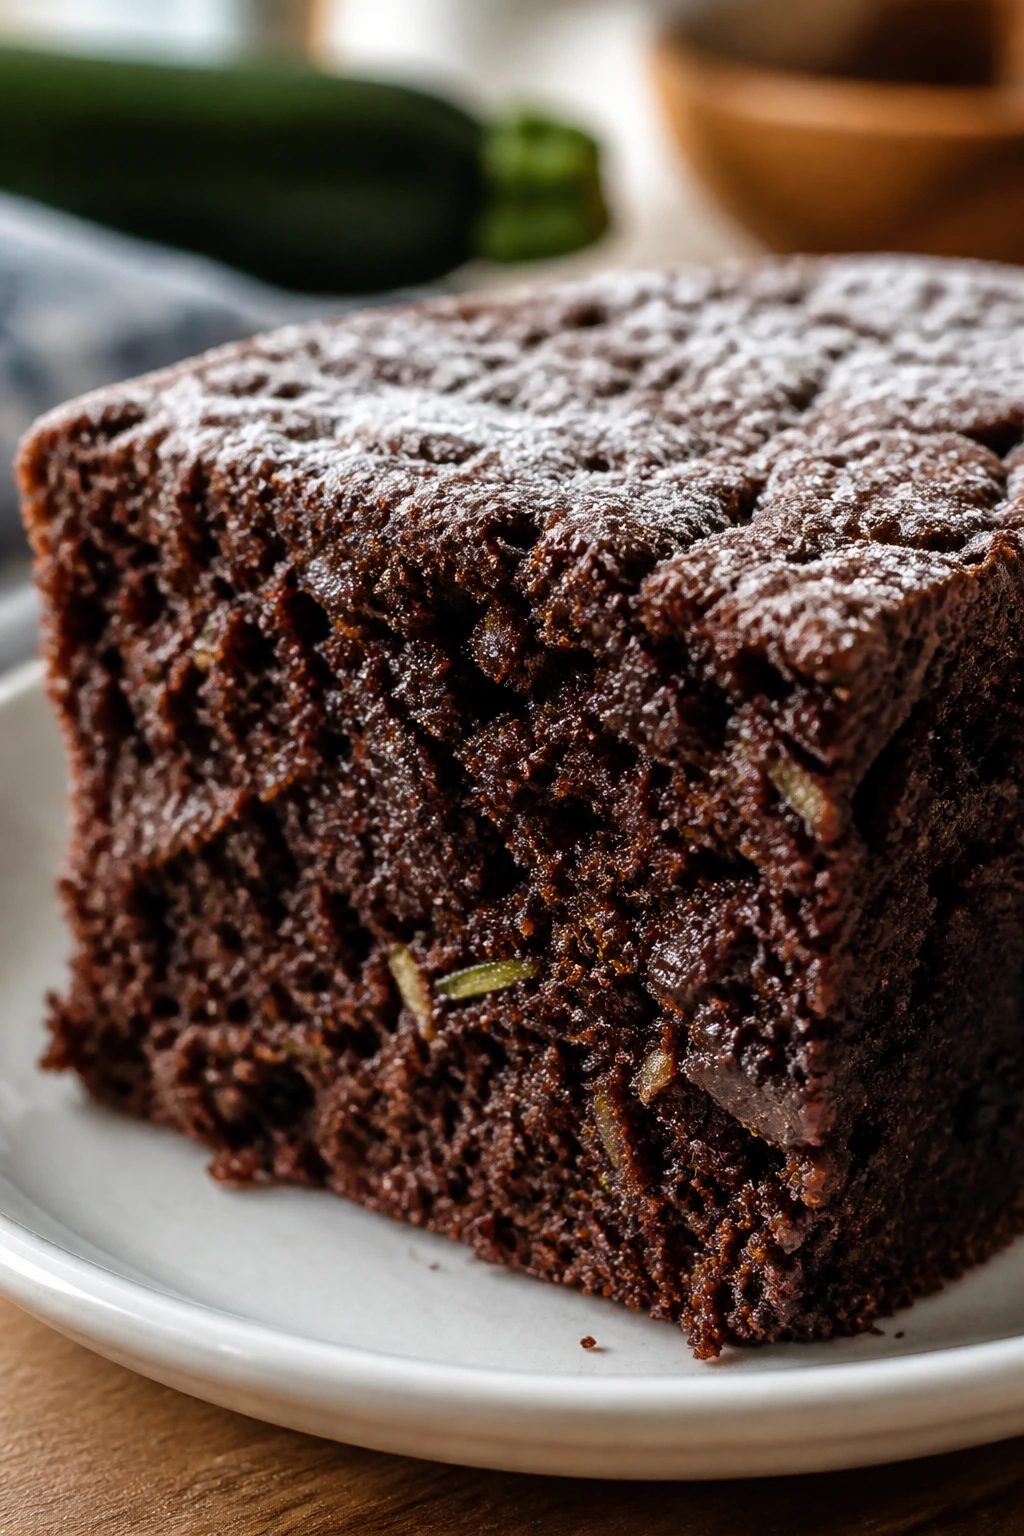
This cake is quiet about its zucchini, which is the point. The crumb stays moist and tender for days, and the chocolate flavor is deep enough that nobody is out here tasting vegetables.
Why It Works: Zucchini adds water without making the cake taste green, while oil and cocoa keep the crumb rich and soft. It’s a good cake for using up a pile of summer squash without any drama.
Key Ingredients:
- 2 cups all-purpose flour
- 3/4 cup cocoa powder
- 1 teaspoon baking soda
- 1/2 teaspoon baking powder
- 1/2 teaspoon fine salt
- 1 cup brown sugar
- 1/2 cup granulated sugar
- 2 large eggs
- 1/2 cup vegetable oil
- 2 cups finely grated zucchini
Quick Steps:
- Heat the oven to 350°F (175°C) and grease an 8×8-inch pan.
- Whisk the dry ingredients.
- Whisk the sugars, eggs, oil, and vanilla if using.
- Stir in the zucchini, then fold in the dry ingredients just until combined.
- Bake for 30 to 35 minutes, until a toothpick comes out with moist crumbs.
Equipment for This Recipe:
- 8×8-inch pan
- Box grater
- Mixing bowl
How to Serve This Dish: Dust the top with powdered sugar or spread on a thin chocolate glaze. It’s rich enough to serve plain, and it stays soft enough to pack for lunch the next day.
Pro Tips for This Recipe:
- Squeeze the zucchini lightly, but not bone-dry; you want some moisture left.
- A spoonful of espresso powder sharpens the chocolate.
- Cool completely before glazing so the topping doesn’t slide off.
Variations on This Dish:
- Walnut Crunch: Add 3/4 cup chopped walnuts.
- Chocolate Chip Upgrade: Fold in 1 cup chocolate chips for pockets of melty sweetness.
Common Mistakes to Avoid with This Dish:
- Over-Draining the Zucchini: The cake needs that moisture.
- Baking Until Dry: Check early; the cake should still feel soft in the center.
13. Oatmeal Cream Pies
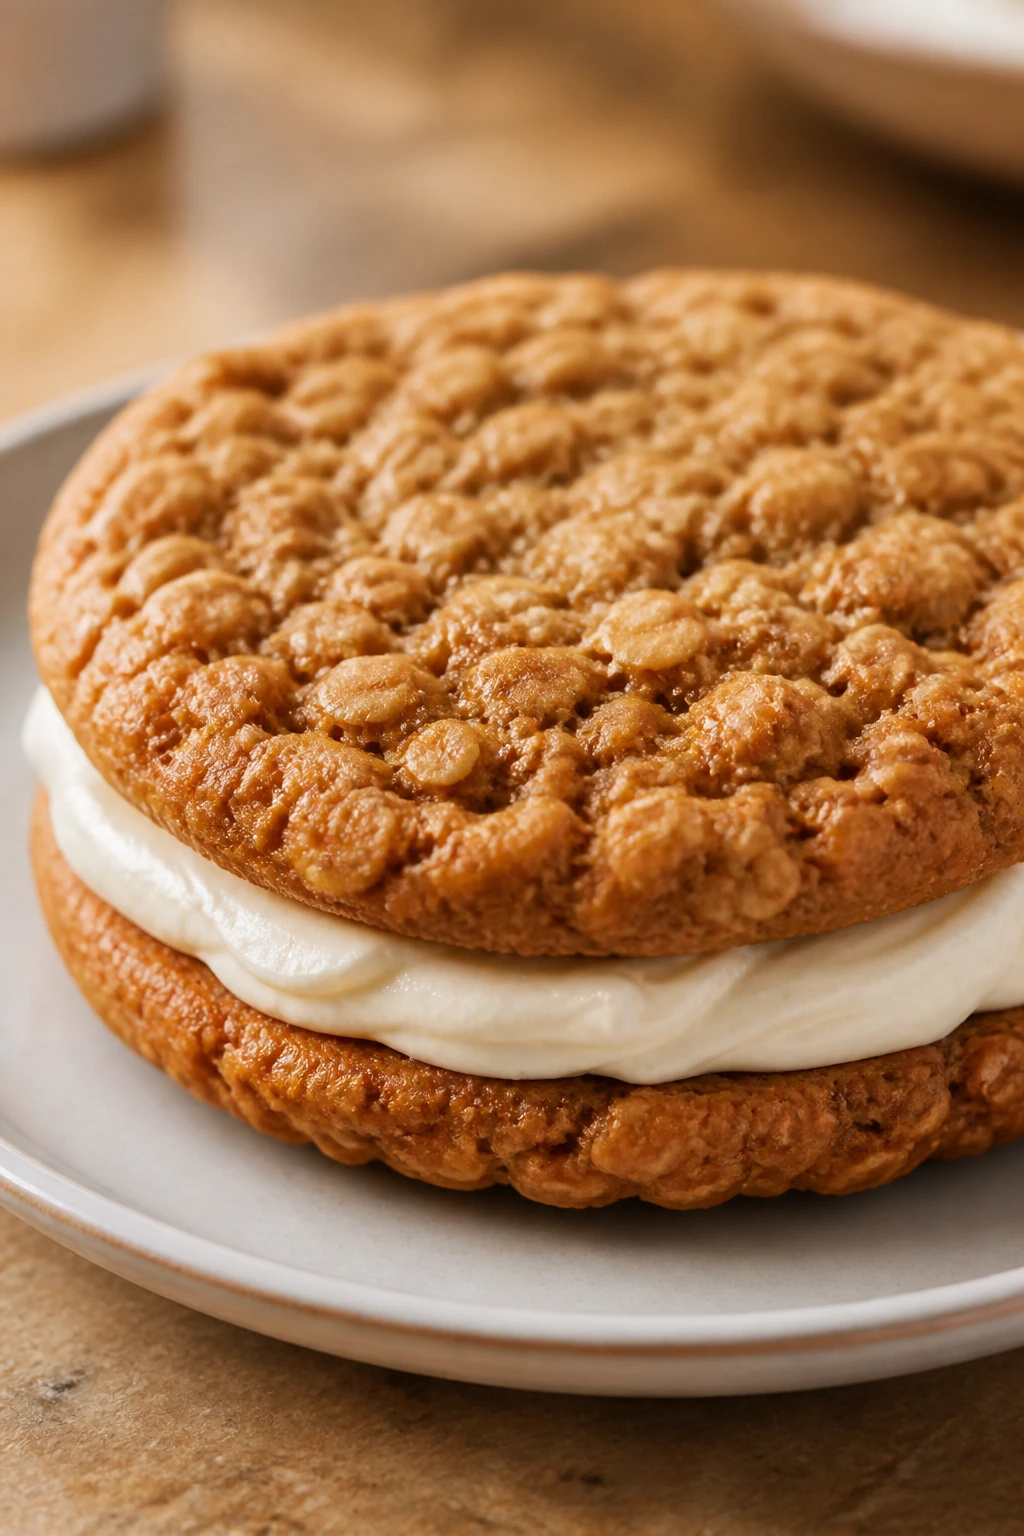
Oatmeal cream pies are soft cookies sandwiching a sweet filling, and they get better after a few hours in the fridge. The cookies absorb a little of the cream, which makes the whole thing plush instead of crumbly.
Why It Works: Molasses, brown sugar, and oats keep the cookies chewy, while the filling adds moisture at the center. They’re built to soften together, which is why they taste so good on day two.
Key Ingredients:
- 1 cup unsalted butter, softened
- 1 cup packed brown sugar
- 1/4 cup molasses
- 2 large eggs
- 2 cups all-purpose flour
- 2 1/2 cups old-fashioned oats
- 1 teaspoon cinnamon
- 1 teaspoon baking soda
- 1/2 teaspoon salt
- 1 1/2 cups powdered sugar, for filling
Quick Steps:
- Heat the oven to 350°F (175°C) and line baking sheets with parchment.
- Cream the butter, brown sugar, and molasses, then beat in the eggs.
- Stir in the dry ingredients and oats.
- Scoop and bake for 10 to 12 minutes, until set but still soft.
- Cool, then sandwich with a thick vanilla filling.
Equipment for This Recipe:
- Mixing bowls
- Baking sheets
- Cookie scoop
How to Serve This Dish: Serve chilled or at cool room temperature so the filling stays thick. They’re messy in the best way, and a stack of them on a plate is usually enough to make people forget forks exist.
Pro Tips for This Recipe:
- Slightly underbake the cookies; they firm up as they cool.
- Use quick oats only if that’s what you have, but old-fashioned oats give a better chew.
- Let the sandwiches rest an hour before serving.
Variations on This Dish:
- Chocolate Filling: Beat cocoa powder into the cream filling.
- Maple Oatmeal Pie: Swap some of the vanilla for maple extract.
Common Mistakes to Avoid with This Recipe:
- Filling the Cookies While Warm: The cream melts and slides.
- Making the Cookies Too Thin: These need body to hold the filling.
14. Tres Leches Cake
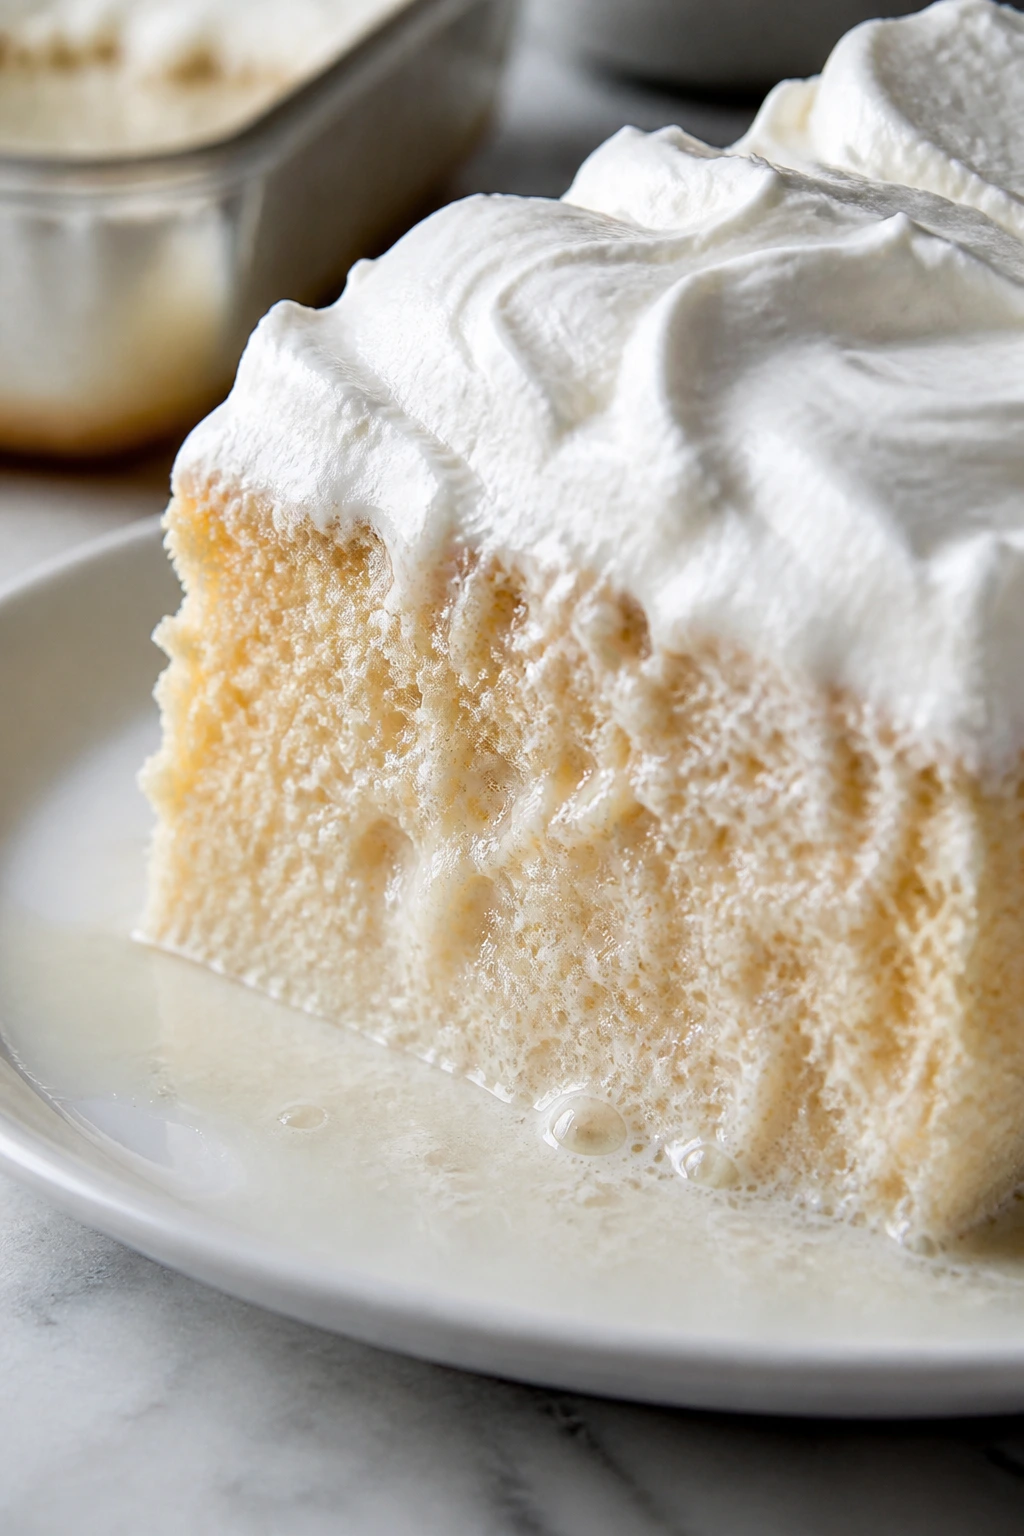
Tres leches cake is almost unfairly soft. The sponge drinks up the milk mixture and turns custardy without collapsing, so every forkful feels cool, rich, and soaked through in the best way.
Why It Works: A light sponge soaks up the three-milk mixture without becoming soggy if you use the right pan and chill time. Whipped cream on top locks in that soft texture and gives the cake a clean finish.
Key Ingredients:
- 1 cup all-purpose flour
- 1 1/2 teaspoons baking powder
- 1/4 teaspoon salt
- 5 large eggs, separated
- 3/4 cup granulated sugar
- 1/3 cup whole milk
- 1 can sweetened condensed milk
- 1 can evaporated milk
- 1 cup heavy cream, whipped
Quick Steps:
- Heat the oven to 350°F (175°C) and grease a 9×13-inch pan.
- Whip the egg whites to soft peaks, then beat in the sugar and yolks.
- Fold in the flour, baking powder, salt, and milk, then bake for 25 to 30 minutes.
- Poke the warm cake all over and pour over the condensed milk, evaporated milk, and cream mixture.
- Chill for at least 4 hours, then top with whipped cream.
Equipment for This Recipe:
- 9×13-inch pan
- Electric mixer
- Whisk or fork for poking holes
How to Serve This Dish: Serve it cold, cut into tidy squares with a spoonful of extra whipped cream and maybe cinnamon on top. It’s a dessert that wants a shallow bowl more than a plate.
Pro Tips for This Recipe:
- Poke plenty of holes so the milk soaks evenly.
- Chill long enough for the liquid to settle.
- Whip the cream to soft peaks, not stiff peaks, or it feels heavy.
Variations on This Dish:
- Coconut Tres Leches: Swap in coconut milk for part of the dairy.
- Chocolate Tres Leches: Add cocoa to the sponge and a little chocolate shavings on top.
Common Mistakes to Avoid with This Recipe:
- Dense Sponge: The cake needs air in the eggs, or it won’t soak properly.
- Warm Serving: It tastes flat if you skip the chill.
15. Cream Cheese Pound Cake
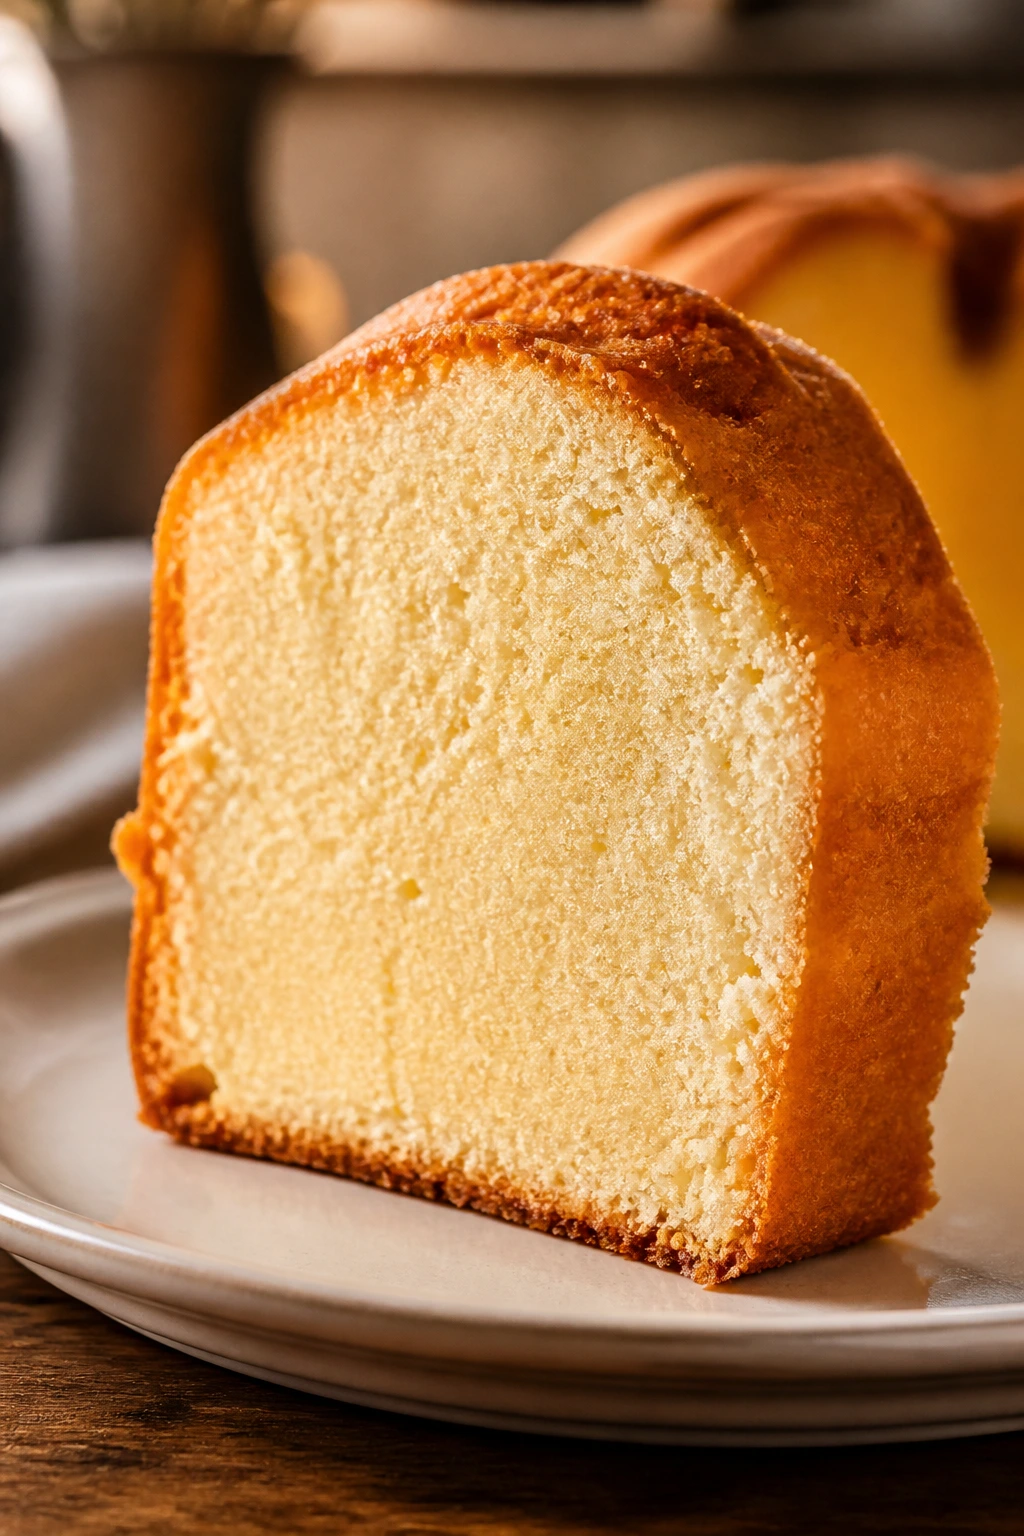
Cream cheese pound cake slices like velvet and stays soft for days because of the fat in the cream cheese and butter. The crust turns golden, but the center stays rich and dense without feeling dry.
Why It Works: Pound cake is built on fat and sugar, and cream cheese makes the crumb stay tender long after cooling. The long, low bake gives it structure without squeezing out the moisture.
Key Ingredients:
- 1 cup unsalted butter, softened
- 8 ounces cream cheese, softened
- 3 cups granulated sugar
- 6 large eggs
- 3 cups all-purpose flour
- 1/2 teaspoon fine salt
- 1 tablespoon vanilla extract
Quick Steps:
- Heat the oven to 325°F (165°C) and grease a loaf pan or bundt pan well.
- Beat the butter, cream cheese, and sugar until very light.
- Add the eggs one at a time, then beat in the vanilla.
- Fold in the flour and salt just until smooth.
- Bake for 70 to 80 minutes in a loaf pan, until a tester comes out with a few crumbs.
Equipment for This Recipe:
- Loaf pan or bundt pan
- Mixer
- Cooling rack
How to Serve This Dish: Serve thick slices plain or with berries and softly whipped cream. I like it best the next morning with coffee, when the crumb has settled and the flavor feels deeper.
Pro Tips for This Recipe:
- Let the butter and cream cheese soften fully or the batter won’t emulsify cleanly.
- Grease the pan thoroughly; pound cake likes to cling.
- Wrap the cooled cake overnight before slicing for cleaner cuts.
Variations on This Dish:
- Lemon Pound Cake: Add 2 tablespoons lemon zest and a lemon glaze.
- Almond Pound Cake: Swap half the vanilla for almond extract.
Common Mistakes to Avoid with This Recipe:
- Baking Too Hot: The crust burns before the center finishes.
- Rushing the Creaming Step: If the butter and sugar stay grainy, the cake won’t lift as well.
16. Lofthouse-Style Sugar Cookies
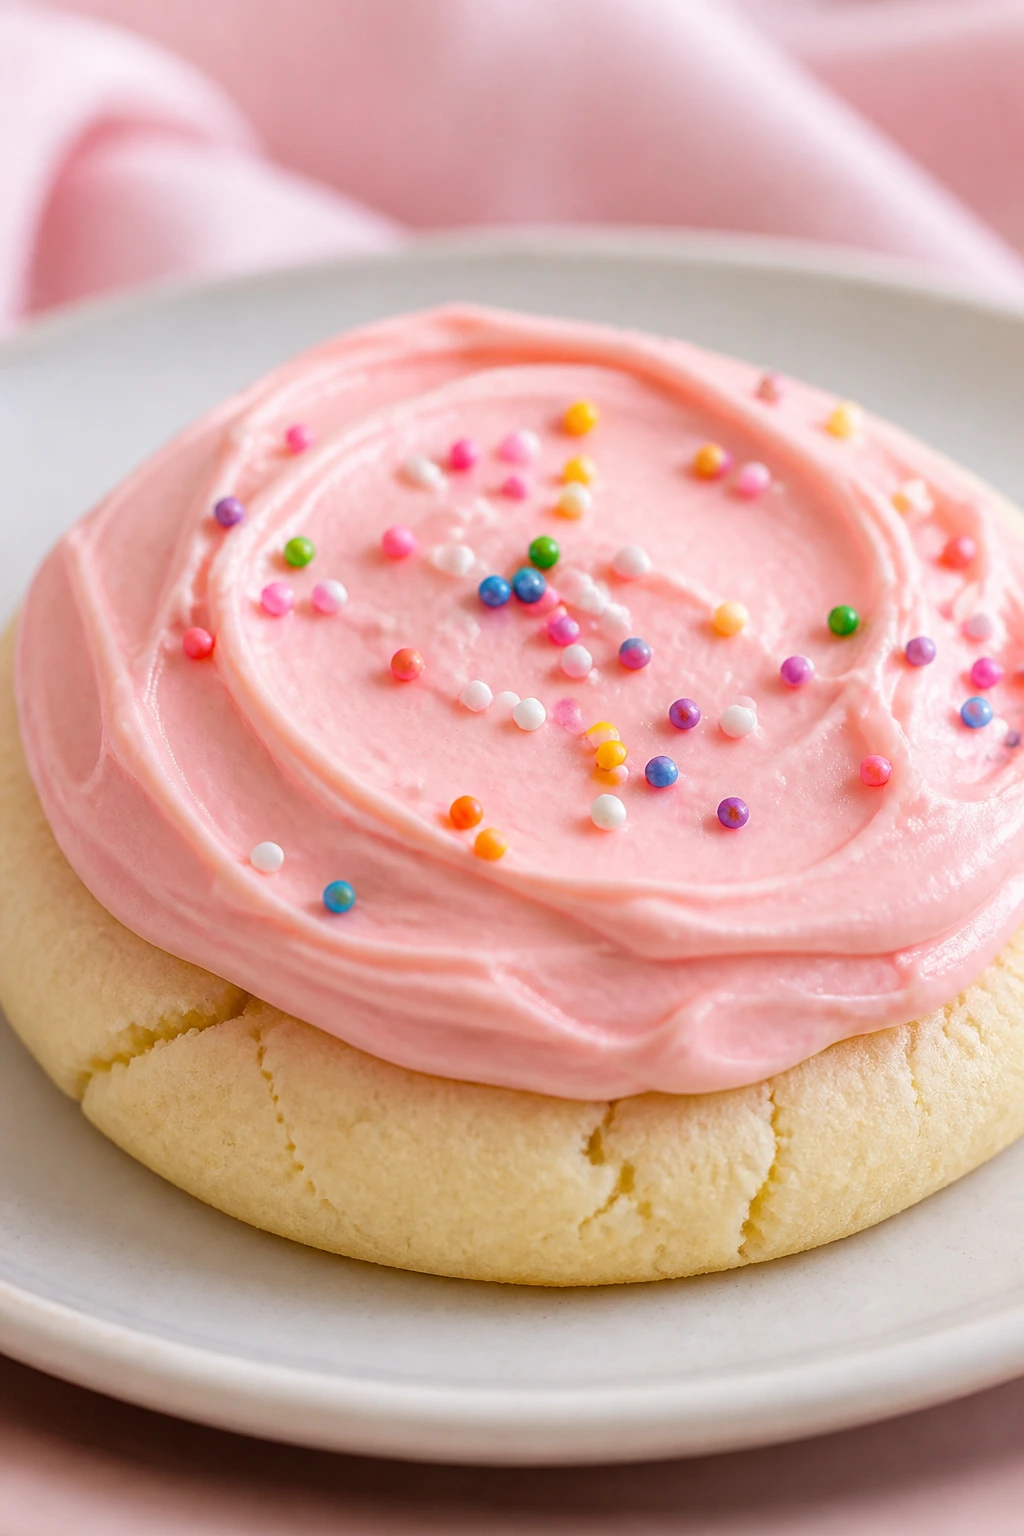
These frosted sugar cookies are soft in the middle, almost cake-like, and they stay that way because the dough is rich with sour cream and the cookies are baked pale. The frosting seals in the tenderness and gives you that bakery-style finish.
Why It Works: Sour cream, a short bake, and a generous layer of frosting keep these cookies plush. Cornstarch adds that soft, almost pillowy bite that makes them taste familiar in the best way.
Key Ingredients:
- 1 cup unsalted butter, softened
- 1 cup granulated sugar
- 1/2 cup sour cream
- 1 large egg
- 2 3/4 cups all-purpose flour
- 2 tablespoons cornstarch
- 1 teaspoon baking powder
- 1/2 teaspoon baking soda
- 1/2 teaspoon salt
- 2 cups powdered sugar, for frosting
Quick Steps:
- Heat the oven to 350°F (175°C) and line baking sheets with parchment.
- Cream the butter and sugar, then mix in the sour cream, egg, and vanilla.
- Stir in the dry ingredients until a soft dough forms.
- Roll, cut, and bake for 8 to 10 minutes, keeping the cookies pale.
- Cool fully and frost in a thick layer.
Equipment for This Recipe:
- Rolling pin
- Cookie cutters
- Baking sheets
How to Serve This Dish: These belong on a tray in bright colors, frosted thick and sprinkled with sanding sugar if you want them to feel festive. They’re soft enough to stack carefully in a tin with parchment between layers.
Pro Tips for This Recipe:
- Chill the dough before rolling if it feels sticky.
- Don’t wait for browning; pale cookies are the goal.
- Let the frosting crust over a little before stacking.
Variations on This Dish:
- Lemon Sugar Cookies: Add lemon zest to the dough and frosting.
- Funfetti Version: Fold in sprinkles just before rolling.
Common Mistakes to Avoid with This Recipe:
- Overbaking: Even a few extra minutes dries them out.
- Thin Frosting: It won’t give the cookie that soft top layer.
17. Sticky Toffee Pudding
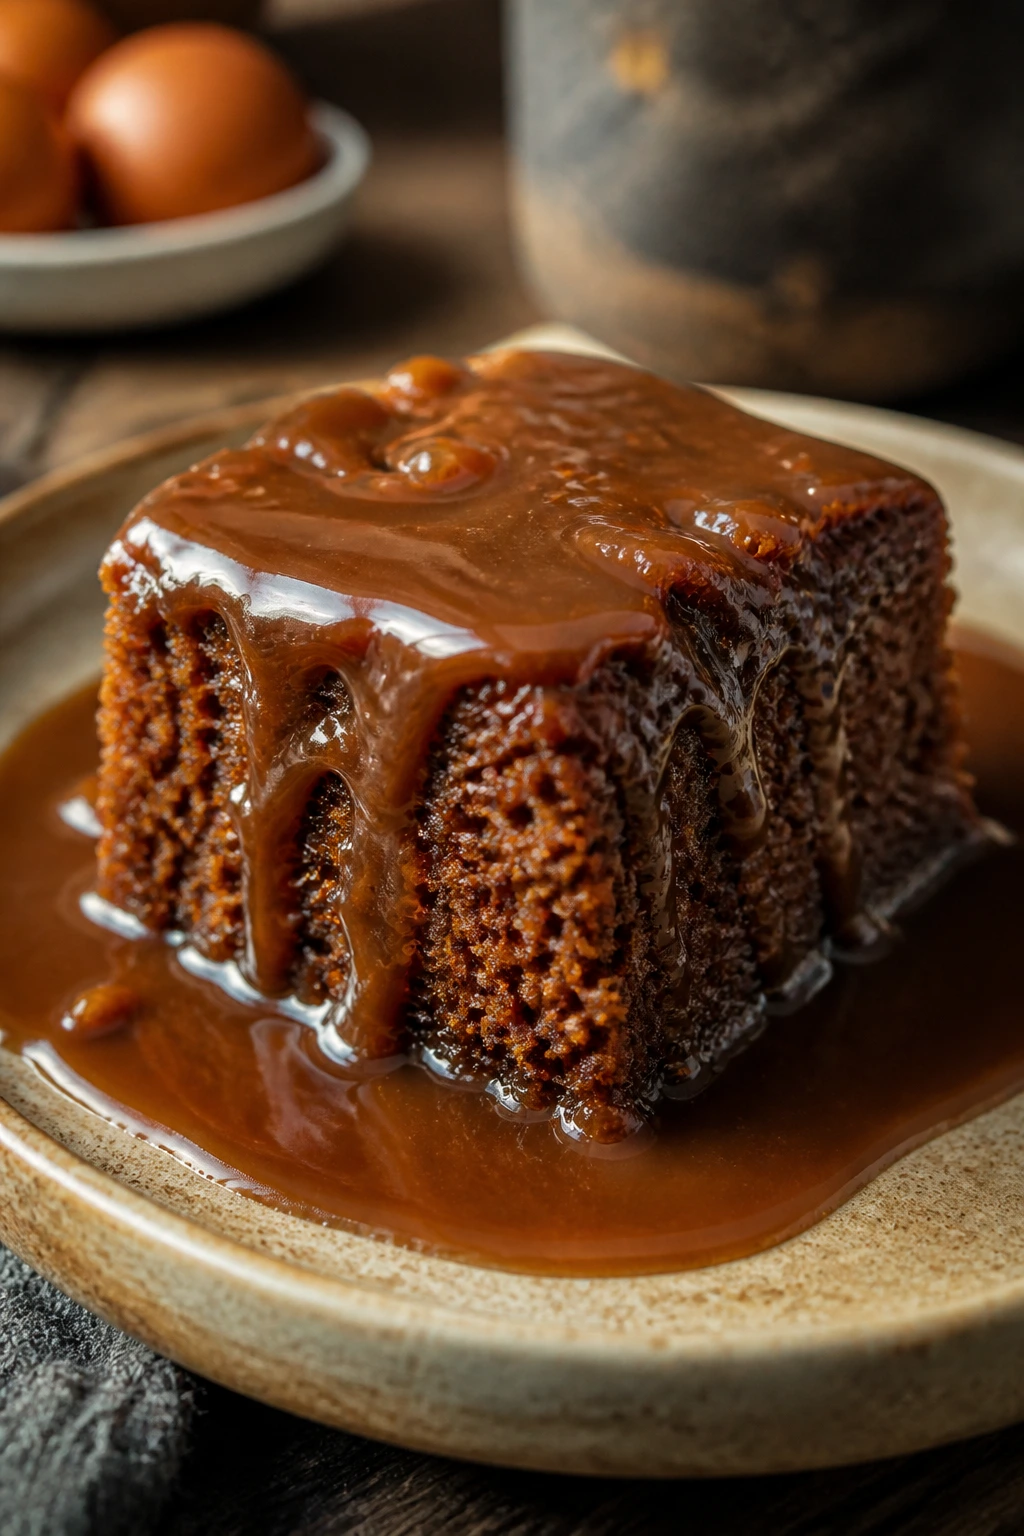
Sticky toffee pudding is a warm, dark cake soaked with toffee sauce so it stays tender for days, especially once the sauce settles in. The texture lands somewhere between sponge and caramel-soaked cake, which is why it disappears so fast.
Why It Works: Dates and brown sugar hold moisture, while the sauce soaks into the crumb instead of sitting on top. It’s one of those desserts that seems even softer the next day.
Key Ingredients:
- 1 cup pitted dates, chopped
- 1 teaspoon baking soda
- 1 cup boiling water
- 1/2 cup unsalted butter, softened
- 3/4 cup brown sugar
- 2 large eggs
- 1 1/2 cups all-purpose flour
- 1 teaspoon baking powder
- 1/2 teaspoon salt
- 1 cup toffee sauce, warmed
Quick Steps:
- Heat the oven to 350°F (175°C) and grease an 8×8-inch pan.
- Soak the dates in boiling water with baking soda for 10 minutes.
- Beat the butter and sugar, then add the eggs.
- Fold in the date mixture and dry ingredients.
- Bake for 30 to 35 minutes, then pour over warm toffee sauce.
Equipment for This Recipe:
- 8×8-inch pan
- Saucepan
- Mixing bowl
How to Serve This Dish: Serve it warm with extra sauce and a spoonful of whipped cream or custard. It’s rich, sticky, and better eaten from a bowl than a plate.
Pro Tips for This Recipe:
- Chop the dates finely so they melt into the cake.
- Don’t skip the sauce soak while the pudding is warm.
- Rewarm gently before serving if it has been chilled.
Variations on This Dish:
- Pecan Toffee Pudding: Add toasted pecans to the batter.
- Ginger Date Version: Add candied ginger for a sharper edge.
Common Mistakes to Avoid with This Recipe:
- Saucing a Cold Cake: The sauce doesn’t soak in as well.
- Overbaking: The cake should still feel soft in the center.
18. Hummingbird Cake
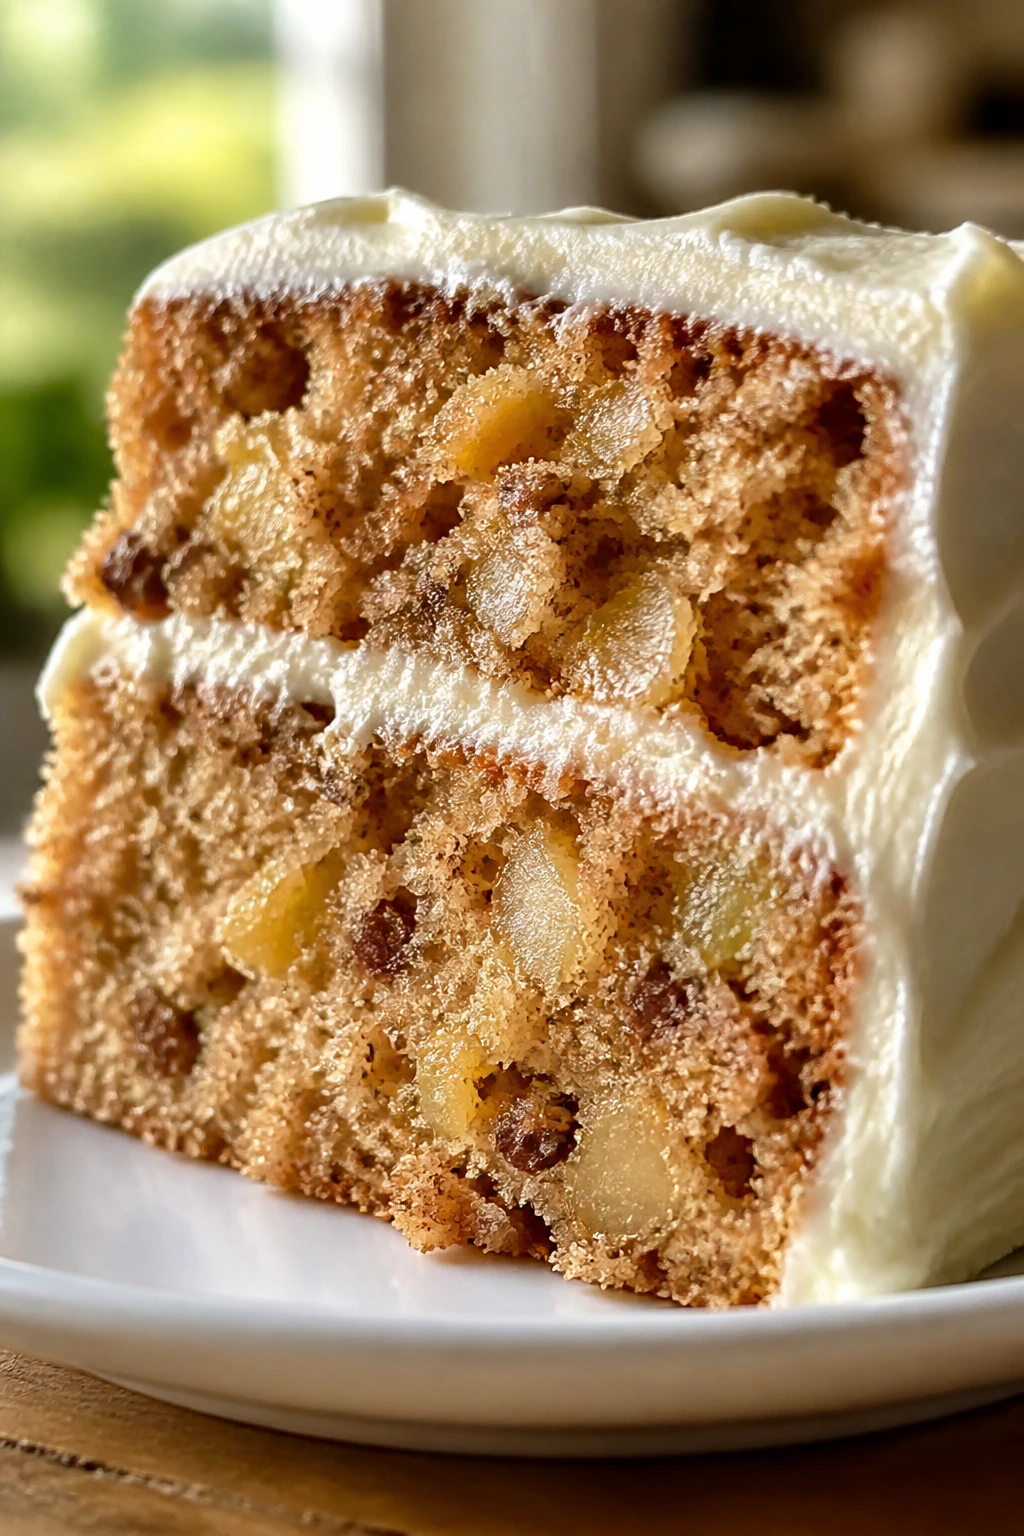
Hummingbird cake is banana, pineapple, spice, and cream cheese frosting in one soft, fragrant package. It keeps well because the fruit keeps the crumb damp, and the oil-based batter refuses to dry out quickly.
Why It Works: Mashed banana and crushed pineapple bring a lot of built-in moisture, while oil keeps the cake tender after chilling. The frosting adds a cool, creamy finish that holds the crumb together.
Key Ingredients:
- 3 cups all-purpose flour
- 1 teaspoon baking soda
- 1 teaspoon cinnamon
- 1/2 teaspoon salt
- 1 cup vegetable oil
- 1 1/2 cups sugar
- 3 large eggs
- 2 cups mashed banana
- 1 cup crushed pineapple, drained
- 1 teaspoon vanilla extract
Quick Steps:
- Heat the oven to 350°F (175°C) and prepare two cake pans.
- Whisk the dry ingredients together.
- Mix the oil, sugar, eggs, banana, pineapple, and vanilla.
- Fold the dry into the wet and divide into pans.
- Bake for 25 to 30 minutes, cool, and frost with cream cheese frosting.
Equipment for This Recipe:
- Two 8- or 9-inch cake pans
- Mixing bowls
- Cooling rack
How to Serve This Dish: Stack it tall with thick frosting between the layers and toasted pecans on top. It slices best after a chill, and the next-day flavor is deep and rounded.
Pro Tips for This Recipe:
- Drain the pineapple, but not to the point of dryness.
- Use very ripe bananas for better sweetness.
- Toast the nuts before using them; the flavor matters here.
Variations on This Recipe:
- Sheet Cake Hummingbird: Bake it in a 9×13-inch pan for easier slicing.
- Coconut Hummingbird: Add shredded coconut to the batter or frosting.
Common Mistakes to Avoid with This Recipe:
- Wet Pineapple: Too much liquid makes the cake heavy.
- Thin Frosting: Hummingbird cake wants a sturdy layer of cream cheese frosting.
19. Brown Butter Pumpkin Muffins
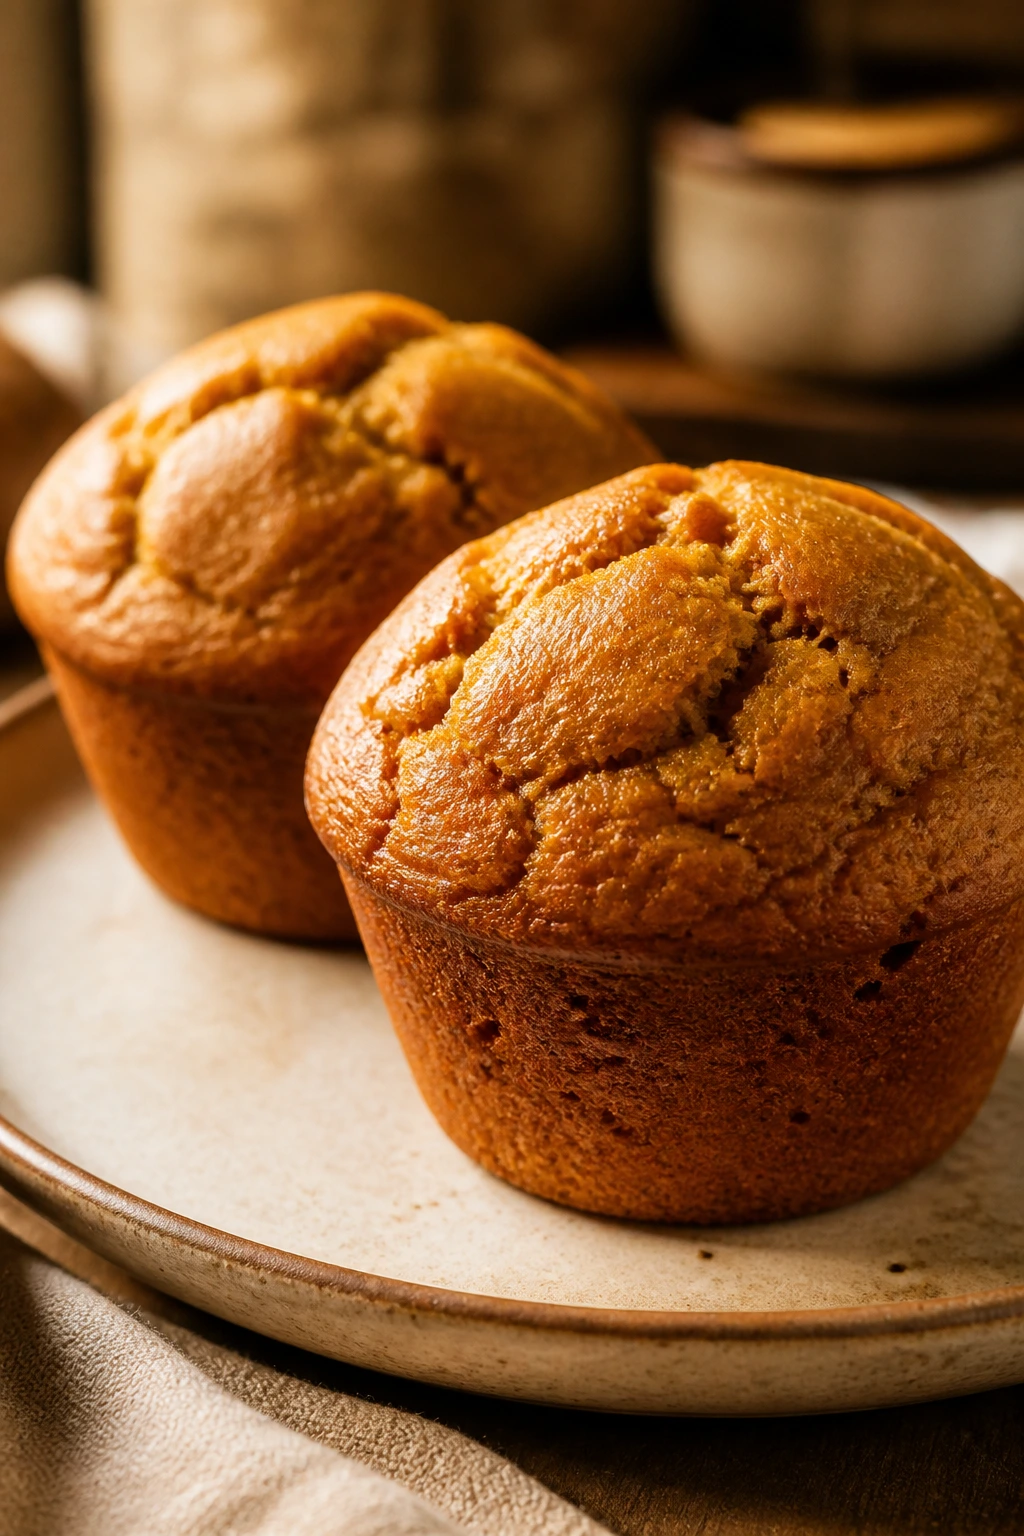
Brown butter pumpkin muffins smell like a bakery when they’re still in the tin. They stay soft because pumpkin puree and browned butter keep the crumb moist, while the tops bake up with a little dome and a tender split.
Why It Works: Pumpkin puree adds moisture, and browned butter gives a nutty depth that plain melted butter can’t match. The muffins stay soft enough to eat on day three without heating.
Key Ingredients:
- 2 cups all-purpose flour
- 1 teaspoon baking soda
- 1/2 teaspoon salt
- 2 teaspoons pumpkin pie spice
- 1 cup pumpkin puree
- 1/2 cup brown sugar
- 1/2 cup granulated sugar
- 2 large eggs
- 1/2 cup browned butter, cooled
- 1/4 cup milk
Quick Steps:
- Heat the oven to 375°F (190°C) and line a muffin tin.
- Whisk the dry ingredients.
- Mix the pumpkin, sugars, eggs, browned butter, milk, and vanilla.
- Fold in the dry ingredients until the batter is just combined.
- Bake for 18 to 22 minutes, until the tops spring back and a tester comes out with crumbs.
Equipment for This Recipe:
- Muffin tin
- Paper liners
- Whisk and spatula
How to Serve This Dish: Split one while it’s still warm and spread on soft butter. They’re good for breakfast, but they lean dessert enough to work with coffee after dinner too.
Pro Tips for This Recipe:
- Let the browned butter cool so it doesn’t scramble the eggs.
- Don’t overfill the cups; they need room to dome.
- A cinnamon sugar sprinkle on top gives a better crust.
Variations on This Recipe:
- Chocolate Chip Pumpkin Muffins: Fold in 3/4 cup chocolate chips.
- Cream Cheese Swirl: Add a spoonful of sweetened cream cheese to each cup.
Common Mistakes to Avoid with This Recipe:
- Overmixing Muffin Batter: It makes the crumb tough.
- Using Cold Brown Butter: It can seize when mixed and leave lumps.
20. Buttermilk Coffee Cake

Buttermilk coffee cake is soft, buttery, and lined with a crumb topping that stays sandy instead of hard. The cake itself has enough tang to keep it from tasting dull on day two.
Why It Works: Buttermilk tenderizes the crumb, and sour dairy pairs with the cinnamon streusel so the cake stays plush under the topping. It’s a good example of a cake that improves after resting overnight.
Key Ingredients:
- 2 1/2 cups all-purpose flour
- 1 teaspoon baking soda
- 1/2 teaspoon salt
- 1/2 cup unsalted butter, softened
- 1 cup granulated sugar
- 2 large eggs
- 1 cup buttermilk
- 1 cup brown sugar, for streusel
- 1 tablespoon cinnamon
- 1/2 cup cold butter, for streusel
Quick Steps:
- Heat the oven to 350°F (175°C) and grease a square baking pan.
- Mix the dry ingredients, then cream the butter and sugar.
- Add the eggs and buttermilk, then fold in the dry ingredients.
- Sprinkle half the batter into the pan, add streusel, then finish with the rest and more streusel.
- Bake for 35 to 40 minutes, until the center is set and a tester comes out clean.
Equipment for This Recipe:
- Square baking pan
- Mixing bowls
- Pastry cutter or fork
How to Serve This Dish: Serve in thick slabs with coffee, tea, or cold milk. It’s especially good the morning after baking, when the streusel softens just enough to meld with the crumb.
Pro Tips for This Recipe:
- Keep the streusel cold so it bakes into crumbs, not paste.
- Use real buttermilk rather than a quick substitute if you can.
- Don’t overbake; coffee cake dries quickly at the edges.
Variations on This Recipe:
- Berry Coffee Cake: Scatter blueberries or raspberries between layers.
- Apple Streusel Cake: Fold diced apple into the batter for a fruitier slice.
Common Mistakes to Avoid with This Recipe:
- Hot Streusel Butter: It melts right into the batter and loses the crumb.
- Thin Batter Layers: Spread each layer evenly so the cake bakes properly.
21. Soft Gingerbread Cake
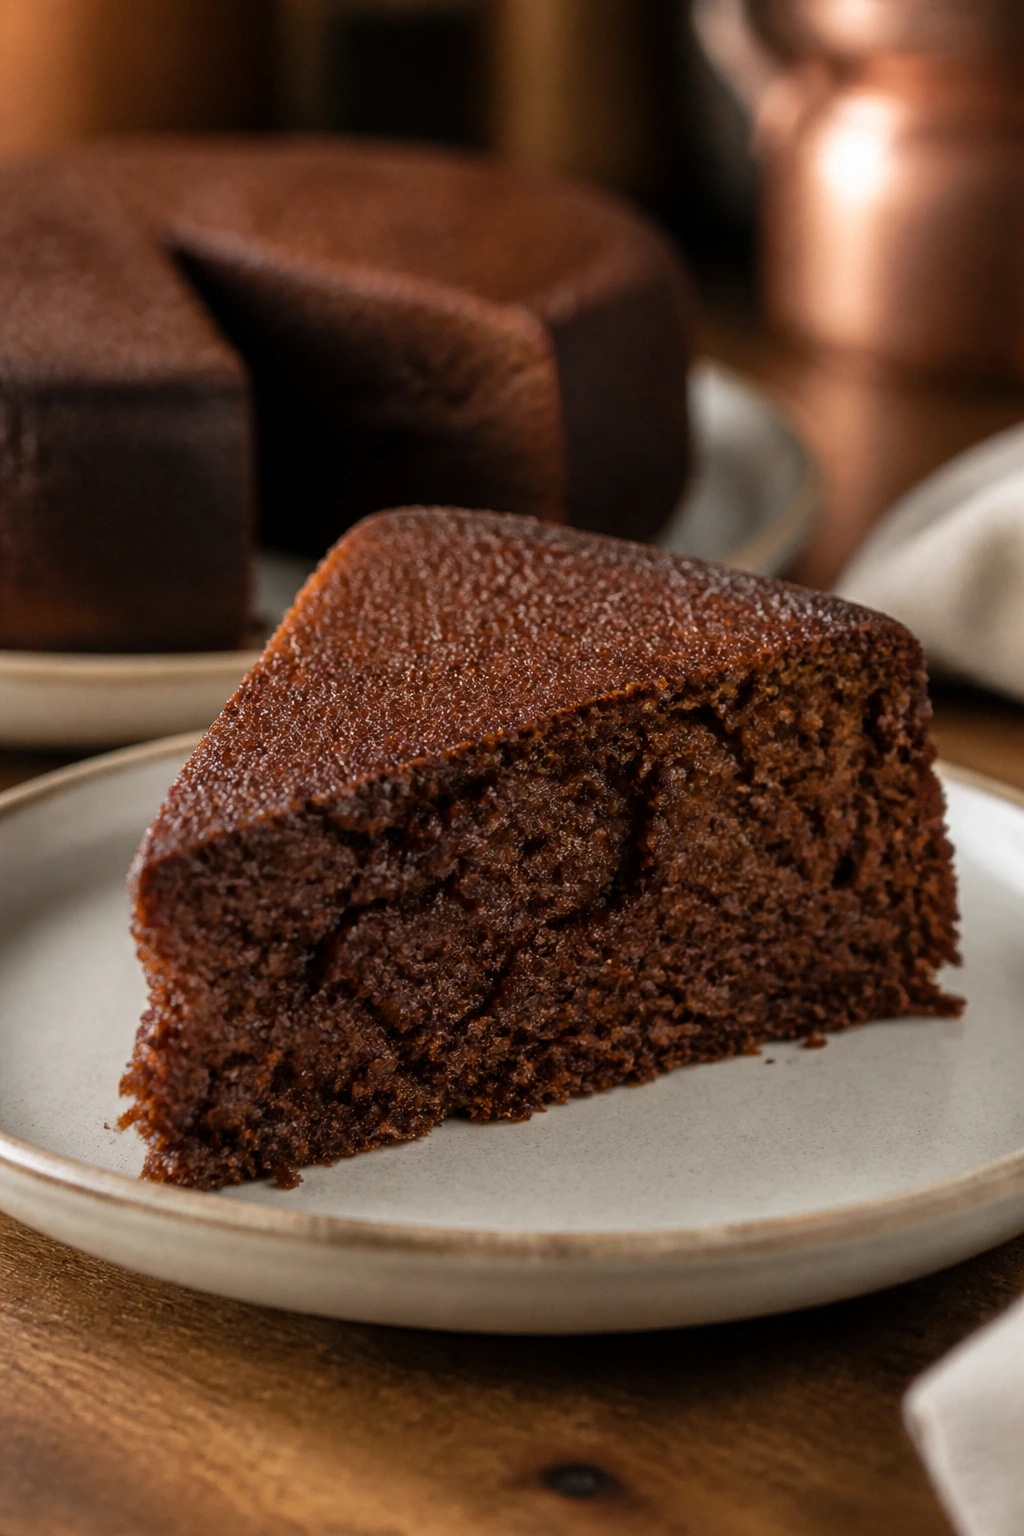
Soft gingerbread cake is dark, spiced, and moist enough to hold together without crumbling at the fork. Molasses does most of the work here, and a spoonful of hot water makes the batter loose and tender.
Why It Works: Molasses and brown sugar keep the cake damp, while the spice mix gives it a clean, warming flavor that doesn’t feel heavy. The cake is even better after it sits overnight.
Key Ingredients:
- 2 1/2 cups all-purpose flour
- 1 teaspoon baking soda
- 1 teaspoon ginger
- 1 teaspoon cinnamon
- 1/2 teaspoon cloves
- 1/2 teaspoon salt
- 1/2 cup unsalted butter, softened
- 3/4 cup brown sugar
- 1 cup molasses
- 2 large eggs
- 1 cup hot water
Quick Steps:
- Heat the oven to 350°F (175°C) and grease an 8×8-inch pan.
- Whisk the dry ingredients.
- Cream the butter and sugar, then beat in the molasses and eggs.
- Stir in the dry ingredients and hot water until the batter is smooth.
- Bake for 35 to 40 minutes, then cool before slicing.
Equipment for This Recipe:
- 8×8-inch pan
- Mixing bowls
- Whisk
How to Serve This Dish: Serve warm with whipped cream or a spoonful of lemon curd if you want contrast. It cuts neatly, but the crumb should stay soft enough to press with your thumb.
Pro Tips for This Recipe:
- Hot water loosens the batter and helps bloom the spices.
- Don’t overbake; the cake should still feel springy, not firm.
- Wrap leftovers tightly so the molasses keeps doing its job.
Variations on This Recipe:
- Orange Gingerbread: Add orange zest to the batter.
- Date Gingerbread: Fold in chopped dates for extra stickiness.
Common Mistakes to Avoid with This Recipe:
- Too Much Spice: Gingerbread should be warm, not dusty.
- Cutting While Hot: The cake sets more cleanly once it cools.
22. Coconut Macaroons
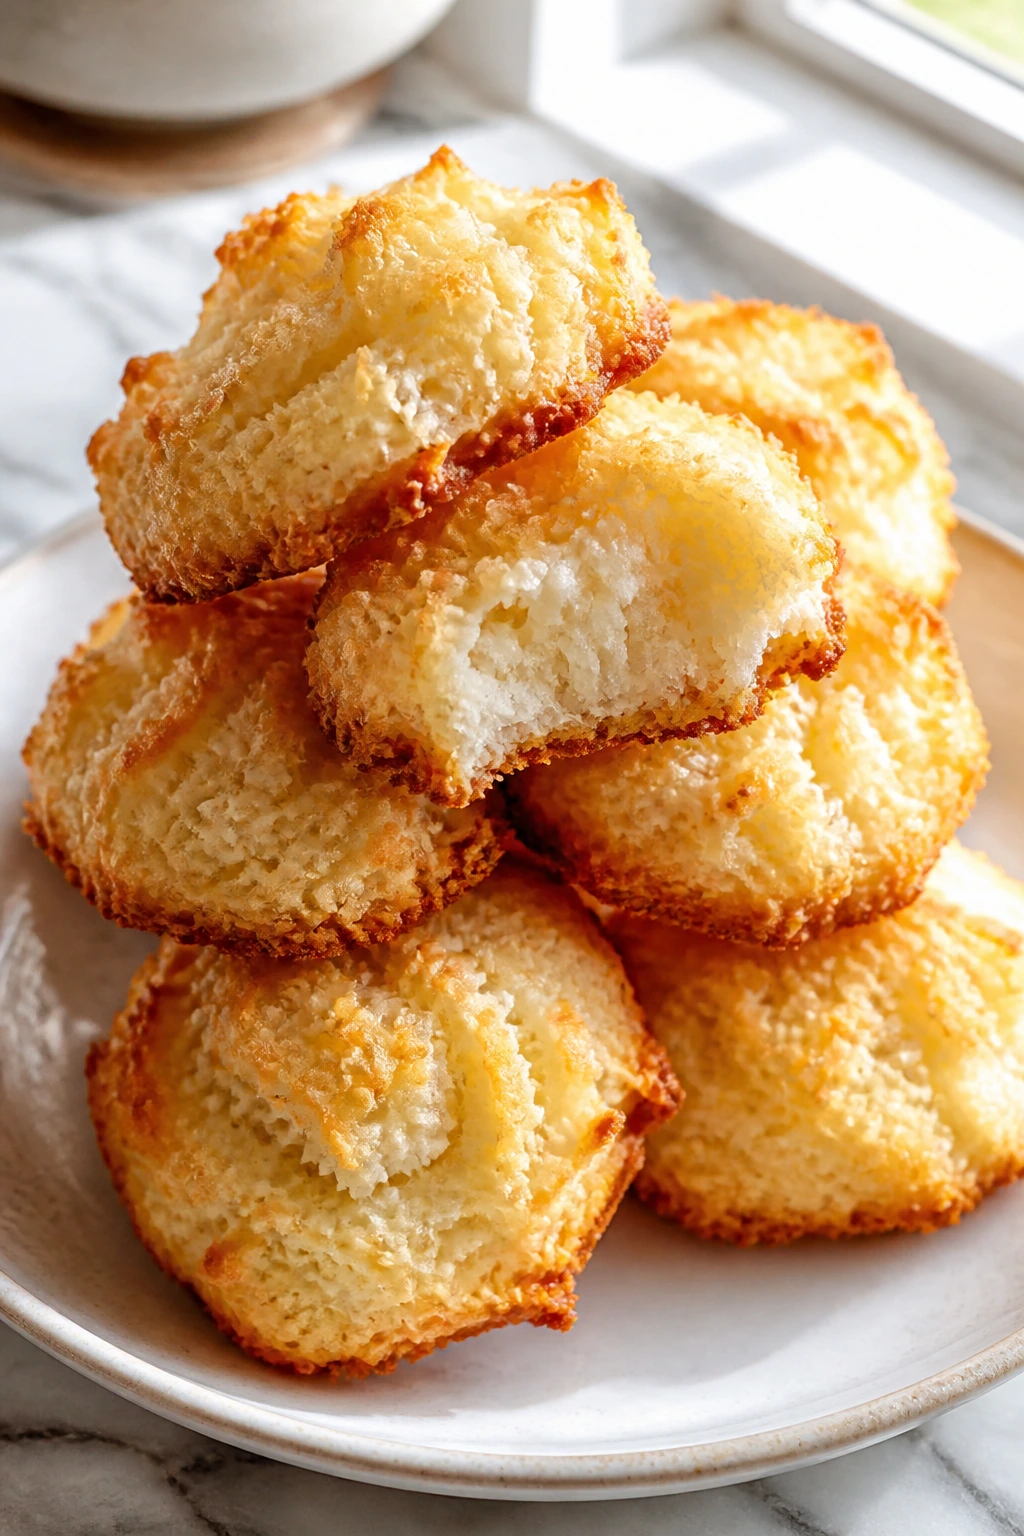
Coconut macaroons stay soft in the middle when you bake them until the edges are just kissed with gold. The sweet coconut strands keep the texture chewy, and a dip in chocolate makes them feel richer.
Why It Works: Egg whites bind the coconut without making the cookies heavy, and sweetened condensed milk keeps the centers tender. They’re one of the few cookies that can sit around a few days and still taste fresh.
Key Ingredients:
- 14 ounces sweetened shredded coconut
- 1/2 cup sweetened condensed milk
- 2 large egg whites
- 1/4 teaspoon salt
- 1 teaspoon vanilla extract
- 4 ounces semisweet chocolate, melted, optional
Quick Steps:
- Heat the oven to 325°F (165°C) and line a baking sheet with parchment.
- Stir the coconut, condensed milk, egg whites, salt, and vanilla until sticky.
- Scoop small mounds onto the sheet.
- Bake for 18 to 22 minutes, until the edges are golden and the tops are set.
- Cool, then dip the bottoms or drizzle with chocolate.
Equipment for This Recipe:
- Mixing bowl
- Baking sheet
- Parchment paper
How to Serve This Dish: Serve them as a small sweet bite with coffee or after a heavy meal. They look especially nice stacked in a shallow bowl with a few shards of chocolate around them.
Pro Tips for This Recipe:
- Pack the mounds firmly so they don’t fall apart.
- Watch the oven closely; coconut browns fast.
- Let them cool fully before moving them.
Variations on This Recipe:
- Lime Coconut Macaroons: Add lime zest for a brighter finish.
- Chocolate-Dipped Macaroons: Dip half the cookie in melted chocolate.
Common Mistakes to Avoid with This Recipe:
- Baking Too Hot: Coconut burns before the centers set.
- Loose Mounds: They spread and lose that chewy height.
23. Strawberry Cream Cheese Bars
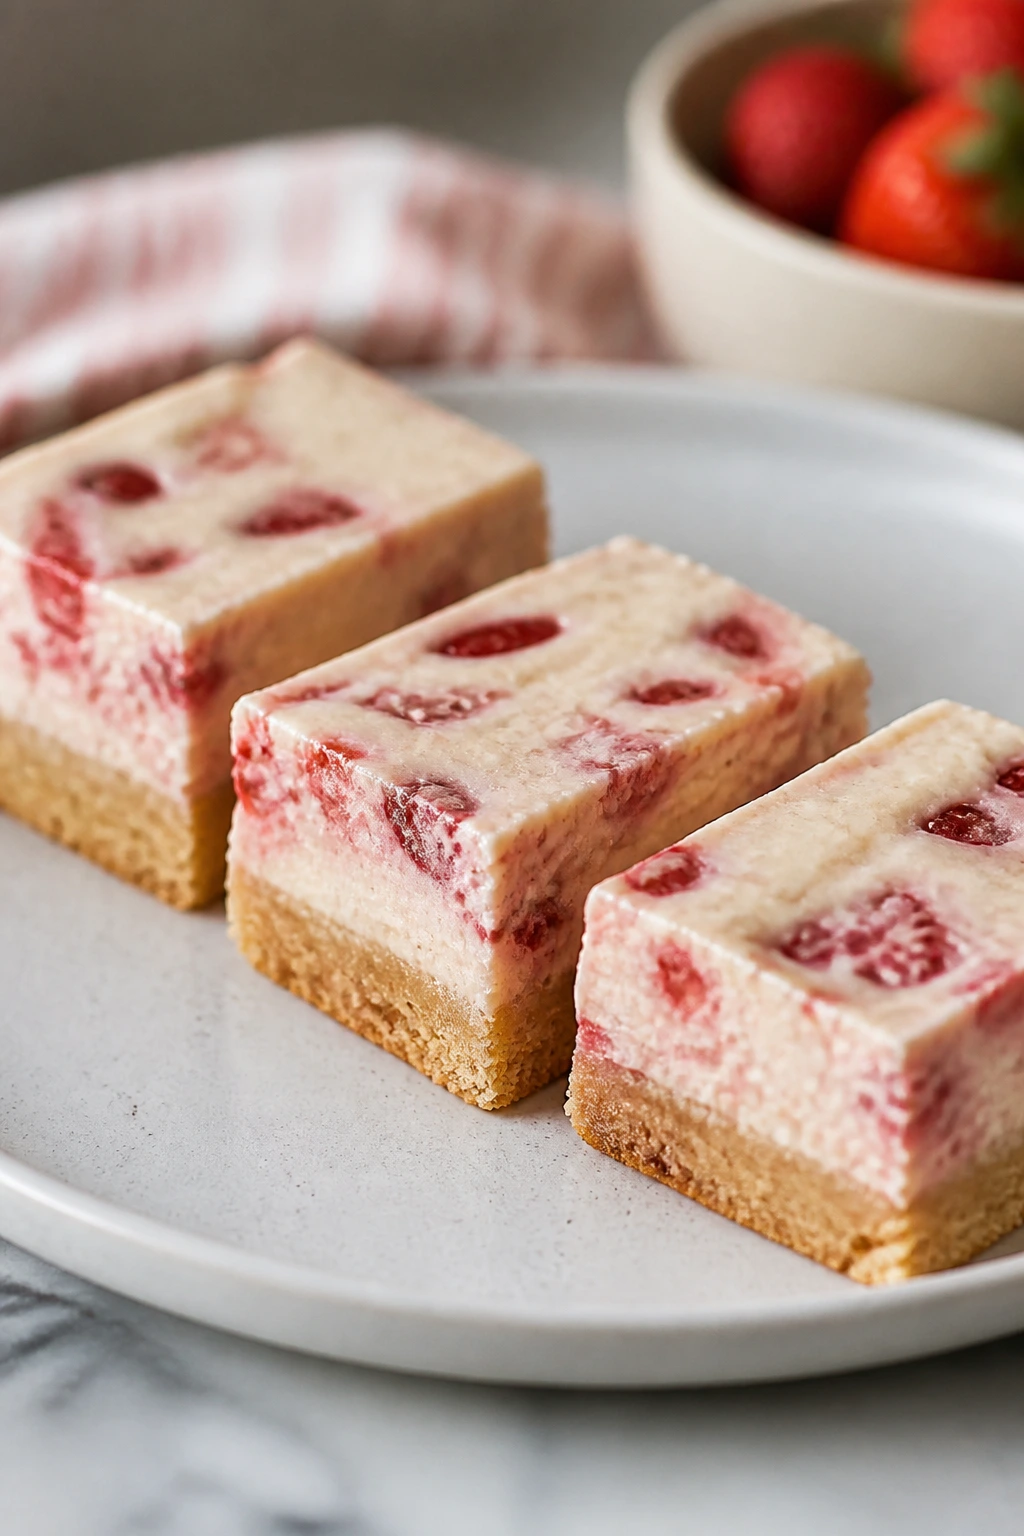
These bars taste like strawberry cheesecake in a softer, simpler form. The filling stays creamy, and the crust gives just enough structure to keep each square tender for days.
Why It Works: Cream cheese and strawberries bring moisture and richness, while a shortbread-style base keeps the bars from drying out. They’re especially good chilled, which means they’re make-ahead friendly without getting stiff.
Key Ingredients:
- 1 1/2 cups all-purpose flour
- 1/2 cup powdered sugar
- 3/4 cup unsalted butter, softened
- 8 ounces cream cheese, softened
- 1/2 cup granulated sugar
- 1 large egg
- 1 cup chopped strawberries, drained if very juicy
- 1 teaspoon vanilla extract
- 1 tablespoon cornstarch
Quick Steps:
- Heat the oven to 350°F (175°C) and line an 8×8-inch pan with parchment.
- Mix the flour, powdered sugar, and butter into a soft crust dough, then press it into the pan.
- Beat the cream cheese, sugar, egg, vanilla, and cornstarch until smooth, then fold in the strawberries.
- Spread over the crust and bake for 30 to 35 minutes.
- Chill fully before slicing.
Equipment for This Recipe:
- 8×8-inch pan
- Hand mixer
- Parchment paper
How to Serve This Dish: Serve them cold so the cream cheese layer cuts neatly and stays soft. A few extra sliced strawberries on top make them look finished without much effort.
Pro Tips for This Recipe:
- Pat the strawberries dry so the filling doesn’t get watery.
- Chill before cutting for clean squares.
- Use a little cornstarch to help the filling set without getting rubbery.
Variations on This Recipe:
- Raspberry Cream Cheese Bars: Swap in raspberries for a sharper flavor.
- Lemon Strawberry Bars: Add lemon zest to the filling.
Common Mistakes to Avoid with This Recipe:
- Wet Fruit: Too much juice turns the center sloppy.
- Cutting Warm: The filling needs time to set or it smears.
24. Banana Oat Muffins
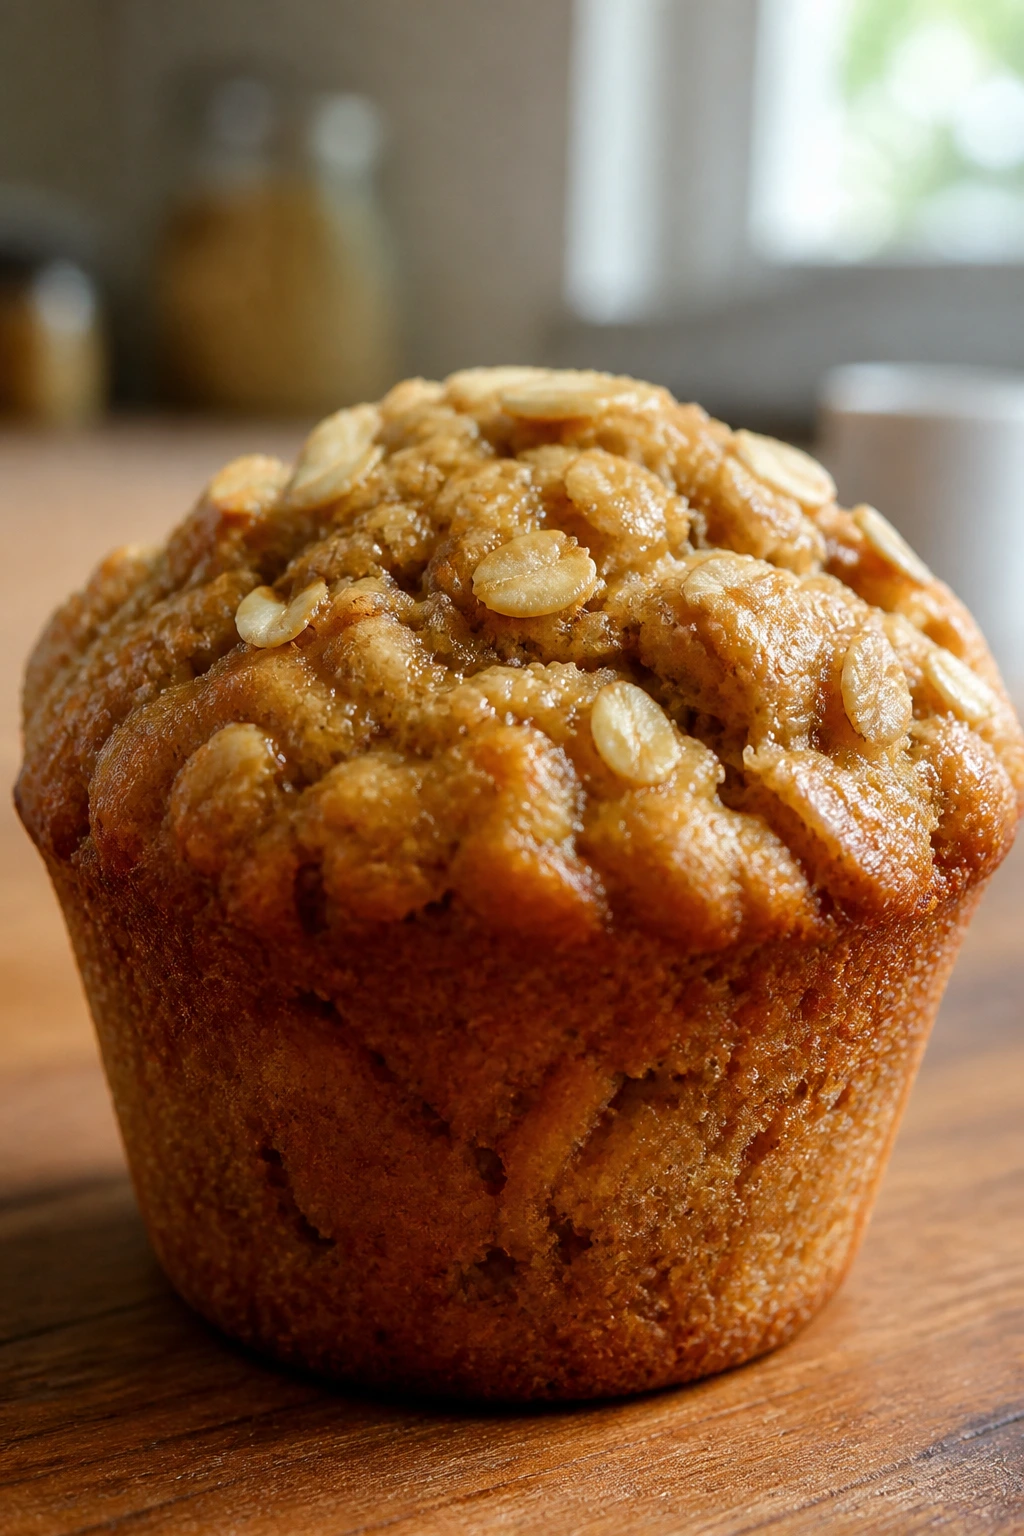
Banana oat muffins land somewhere between snack and dessert, and they stay soft because the bananas and oats hold moisture together. They’re sturdy enough for a lunch bag, but the crumb stays tender for days.
Why It Works: Bananas and a little yogurt keep the batter moist, while oats add body without making the muffins dry. A short bake keeps the tops rounded and soft.
Key Ingredients:
- 1 1/2 cups mashed ripe bananas
- 1/2 cup plain yogurt
- 1/3 cup vegetable oil
- 1/2 cup brown sugar
- 2 large eggs
- 1 1/2 cups old-fashioned oats
- 1 1/4 cups all-purpose flour
- 1 teaspoon baking soda
- 1 teaspoon cinnamon
- 1/2 teaspoon salt
Quick Steps:
- Heat the oven to 375°F (190°C) and line a muffin tin.
- Whisk the bananas, yogurt, oil, sugar, eggs, and vanilla.
- Stir in the oats and let the mixture sit for 5 minutes.
- Fold in the dry ingredients until just combined.
- Bake for 18 to 20 minutes, until the tops spring back.
Equipment for This Recipe:
- Muffin tin
- Paper liners
- Mixing bowl
How to Serve This Dish: These are good warm with butter, or cold with a smear of peanut butter. They’re sweet enough to count as dessert, especially if you serve them with coffee after dinner.
Pro Tips for This Recipe:
- Let the oat batter rest a few minutes so the oats soften.
- Use very ripe bananas for the best flavor.
- Don’t overfill the cups or the muffins lose their soft domes.
Variations on This Recipe:
- Chocolate Chip Banana Muffins: Fold in 3/4 cup chocolate chips.
- Walnut Banana Muffins: Add toasted walnuts for crunch.
Common Mistakes to Avoid with This Recipe:
- Dry Batter: If the batter looks stiff, the muffins will bake up firm.
- Overmixing: It makes the crumb tough and uneven.
25. Texas Sheet Cake
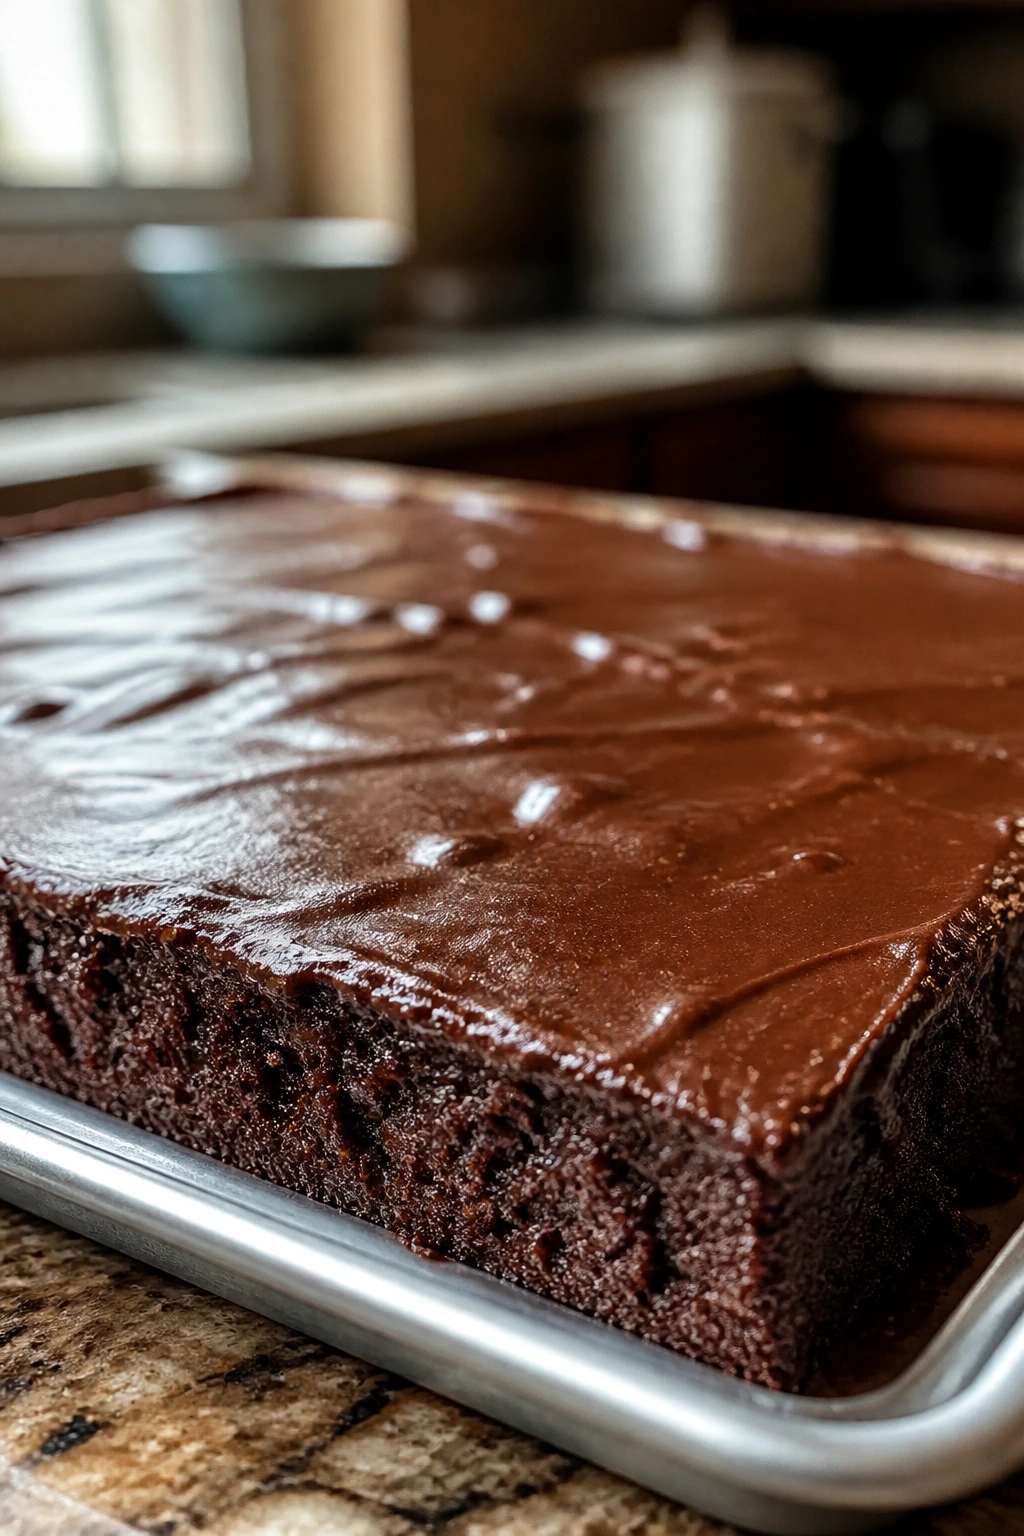
Texas sheet cake is thin, rich, and still soft after a night under plastic wrap. The warm frosting poured over the hot cake turns the top into a shiny, fudgy layer that keeps the whole thing moist.
Why It Works: The cake batter is loose and fast-baking, which keeps the crumb tender. The hot cocoa glaze soaks into the top surface and protects it from drying out.
Key Ingredients:
- 2 cups all-purpose flour
- 2 cups granulated sugar
- 1 cup unsalted butter
- 1 cup water
- 1/4 cup cocoa powder
- 2 large eggs
- 1/2 cup buttermilk
- 1 teaspoon baking soda
- 1 teaspoon vanilla extract
- 1/2 cup butter, 1/4 cup cocoa, and powdered sugar for frosting
Quick Steps:
- Heat the oven to 350°F (175°C) and grease a 10×15-inch sheet pan.
- Boil the butter, water, and cocoa, then whisk in the dry ingredients, eggs, buttermilk, and vanilla.
- Pour into the pan and bake for 18 to 22 minutes.
- Cook the frosting ingredients just until smooth, then pour over the hot cake.
- Let it cool until the frosting sets.
Equipment for This Recipe:
- Sheet pan
- Saucepan
- Mixing bowl
How to Serve This Dish: Cut it into squares right in the pan and serve at room temperature. A spoonful of whipped cream or a small scoop of ice cream works, but honestly, it’s strong enough to stand alone.
Pro Tips for This Recipe:
- Frost while the cake is still warm so the topping sinks in.
- Use buttermilk for the right tang and tenderness.
- Don’t overbake; sheet cake dries fast if you get distracted.
Variations on This Recipe:
- Pecan Texas Sheet Cake: Scatter toasted pecans into the frosting.
- Coffee Cocoa Sheet Cake: Add instant coffee to the boiling liquid.
Common Mistakes to Avoid with This Recipe:
- Letting the Cake Cool Before Frosting: The glaze sits on top instead of soaking in.
- Baking Too Long: Even 3 extra minutes can dry the edges.
26. Brookies
Brookies give you a fudgy brownie base and a soft cookie top in one pan, and they stay tender because neither layer is baked too hard. That’s the whole pleasure of them: dense chocolate under a chewy cookie lid.
Why It Works: The brownie batter keeps moisture in the base, while the cookie dough bakes just enough to stay soft at the center. They’re rich enough that one square goes a long way.
Key Ingredients:
- 1 batch brownie batter, about 9×13-inch pan worth
- 1/2 cup unsalted butter, softened
- 1/2 cup brown sugar
- 1/4 cup granulated sugar
- 1 large egg
- 1 1/4 cups all-purpose flour
- 1/2 teaspoon baking soda
- 1/2 teaspoon salt
- 1 cup chocolate chips
Quick Steps:
- Heat the oven to 350°F (175°C) and line a 9×13-inch pan.
- Spread the brownie batter in the pan.
- Make the cookie dough by creaming the butter and sugars, then adding the egg and dry ingredients.
- Drop spoonfuls of cookie dough over the brownie layer.
- Bake for 28 to 32 minutes, until the cookie top is set and the brownie layer still looks a little soft.
Equipment for This Recipe:
- 9×13-inch pan
- Mixing bowls
- Offset spatula
How to Serve This Dish: Cut brookies into small squares; they’re rich, so you don’t need huge pieces. A little flaky salt on top helps the chocolate taste sharper.
Pro Tips for This Recipe:
- Keep the brownie layer slightly underbaked for the best texture.
- Don’t spread the cookie dough too evenly; uneven blobs bake into better pockets.
- Cool before slicing so the layers stay distinct.
Variations on This Recipe:
- Peanut Butter Brookies: Swirl peanut butter into the cookie layer.
- White Chocolate Brookies: Swap chips for white chocolate chunks.
Common Mistakes to Avoid with This Recipe:
- Two Dry Layers: If both batters are overbaked, the bar feels heavy.
- Uneven Pan Spreading: Thick clumps can stay raw while edges dry out.
27. Peanut Butter Cup Blondies
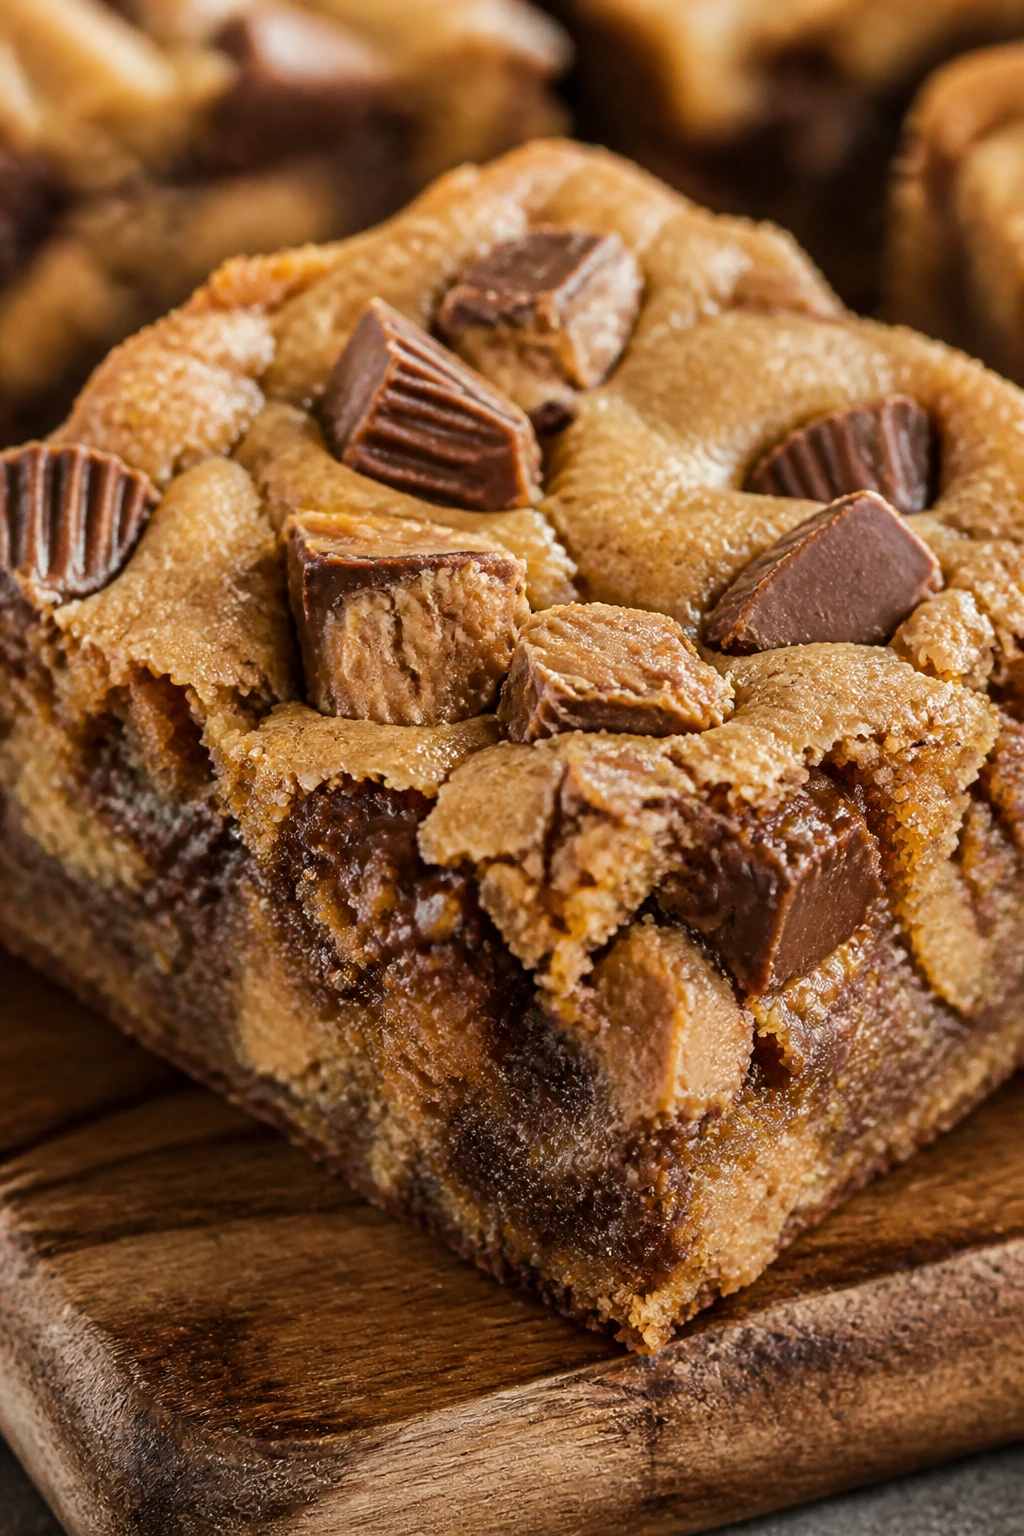
These blondies are soft, dense, and full of peanut butter cups that stay gooey in the middle after baking. Brown sugar keeps the bars chewy, and the peanut butter gives them a tender, almost fudge-like crumb.
Why It Works: The butter-and-sugar base bakes into a moist blondie, while chopped peanut butter cups melt into pockets instead of drying out. They keep well in a tin because the bars are built around fat, not lean flour.
Key Ingredients:
- 1 cup unsalted butter, melted
- 2 cups packed brown sugar
- 2 large eggs
- 2 teaspoons vanilla extract
- 2 cups all-purpose flour
- 1 teaspoon baking powder
- 1/2 teaspoon salt
- 1 cup chopped peanut butter cups
- 1/2 cup peanut butter chips, optional
Quick Steps:
- Heat the oven to 350°F (175°C) and line a 9×13-inch pan.
- Whisk the butter and brown sugar, then beat in the eggs and vanilla.
- Fold in the flour, baking powder, and salt.
- Stir in the peanut butter cups and chips, then spread into the pan.
- Bake for 22 to 26 minutes, until the center is just set.
Equipment for This Recipe:
- 9×13-inch pan
- Mixing bowl
- Spatula
How to Serve This Dish: Serve these slightly warm with a cold glass of milk. They’re dense enough to cut into small bars, which is a good thing because the peanut butter cup pieces are rich.
Pro Tips for This Recipe:
- Chop the peanut butter cups so they melt into the batter better.
- Pull the bars while the middle still looks a touch soft.
- Cool fully before cutting for cleaner edges.
Variations on This Recipe:
- Pretzel Blondies: Fold in crushed pretzels for a sweet-salty edge.
- Caramel Cup Blondies: Add caramel bits for more gooey pockets.
Common Mistakes to Avoid with This Recipe:
- Overmixing the Batter: The bars turn tight and lose their softness.
- Baking Until Firm in the Center: Blondies keep setting after the pan comes out.
28. Lemon Poppy Seed Muffins
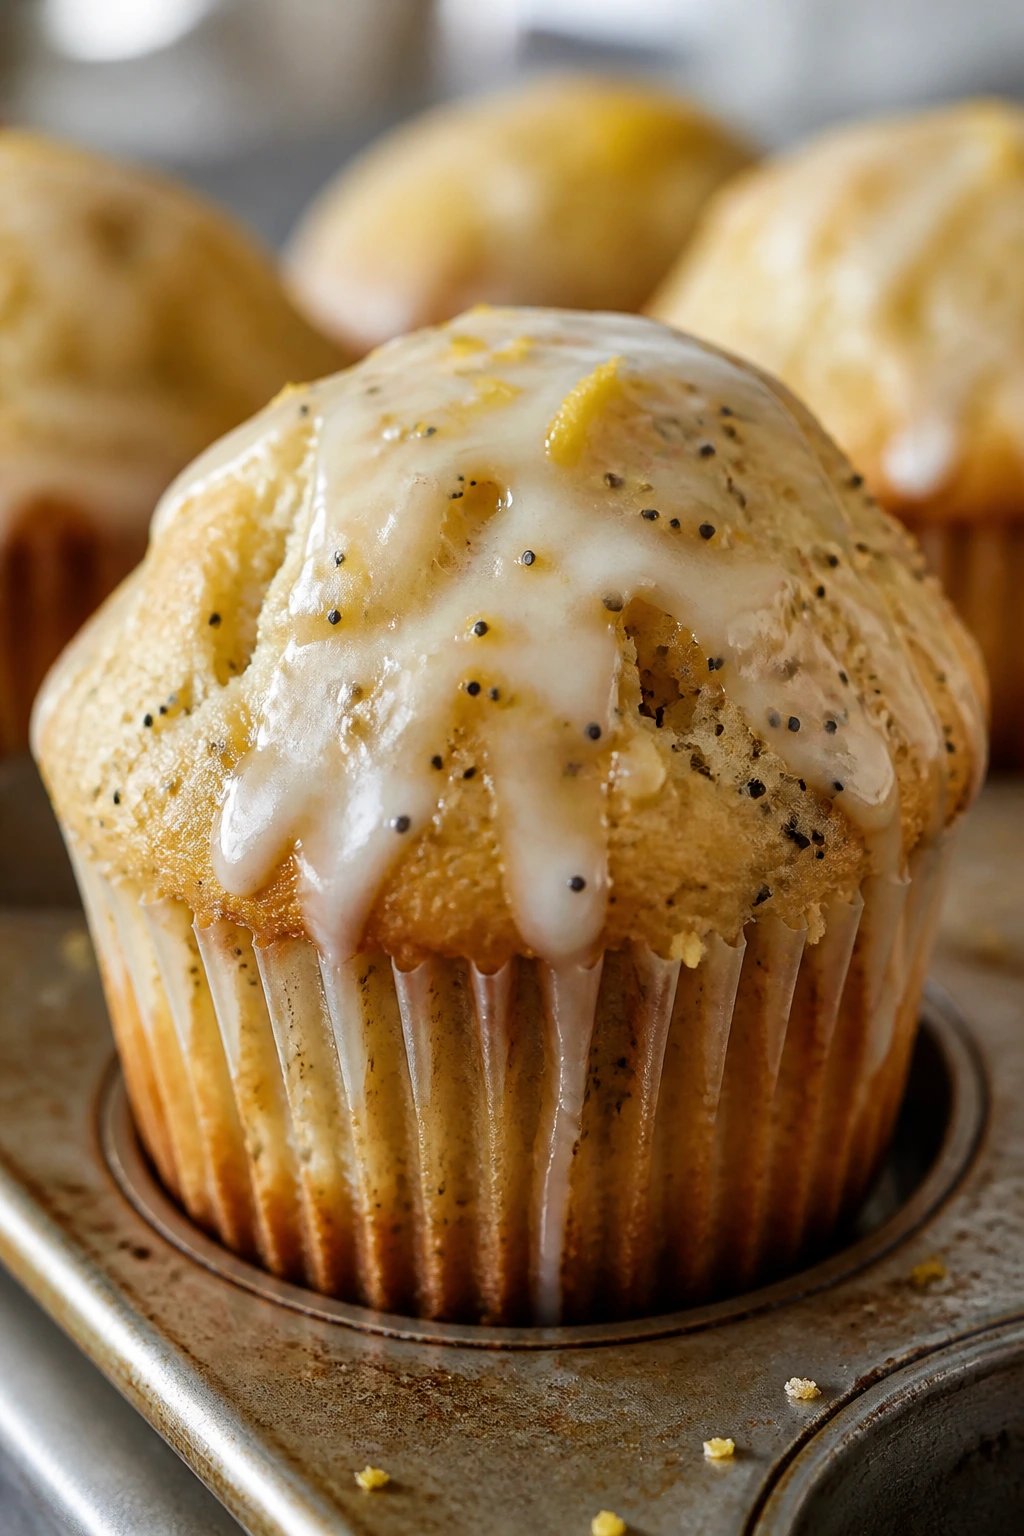
Lemon poppy seed muffins stay soft thanks to yogurt and oil, and the seeds add tiny crunch without making the crumb dry. The glaze on top gives them a sweet shell that keeps the interior tender.
Why It Works: The yogurt adds moisture and tang, and oil keeps the muffins soft even after refrigeration. Lemon zest carries the flavor so the crumb doesn’t need to dry out trying to taste like lemon.
Key Ingredients:
- 2 cups all-purpose flour
- 2 teaspoons baking powder
- 1/2 teaspoon salt
- 3 tablespoons poppy seeds
- 1 cup plain yogurt
- 3/4 cup sugar
- 2 large eggs
- 1/2 cup neutral oil
- 2 tablespoons lemon zest
- 1/4 cup lemon juice
Quick Steps:
- Heat the oven to 375°F (190°C) and line a muffin tin.
- Whisk the dry ingredients, including the poppy seeds.
- Whisk the yogurt, sugar, eggs, oil, zest, and juice.
- Fold the dry into the wet until just mixed.
- Bake for 18 to 20 minutes, then glaze while still warm.
Equipment for This Recipe:
- Muffin tin
- Paper liners
- Zester
How to Serve This Dish: Serve them plain with the glaze draped over the tops, or split one and add butter if you want more richness. They’re bright enough for breakfast but sweet enough to sit on a dessert tray.
Pro Tips for This Recipe:
- Don’t skip the zest; it matters more than extra juice.
- Use oil instead of butter if you want a softer, longer-lasting crumb.
- Brush the tops with glaze while the muffins are warm.
Variations on This Recipe:
- Blueberry Lemon Muffins: Fold in 1 cup blueberries.
- Orange Poppy Seed Muffins: Swap orange zest for the lemon.
Common Mistakes to Avoid with This Recipe:
- Too Much Lemon Juice: It can make the batter too thin.
- Overbaking: Muffins dry out fast once the tops turn dark.
29. Marshmallow Rice Krispie Treats
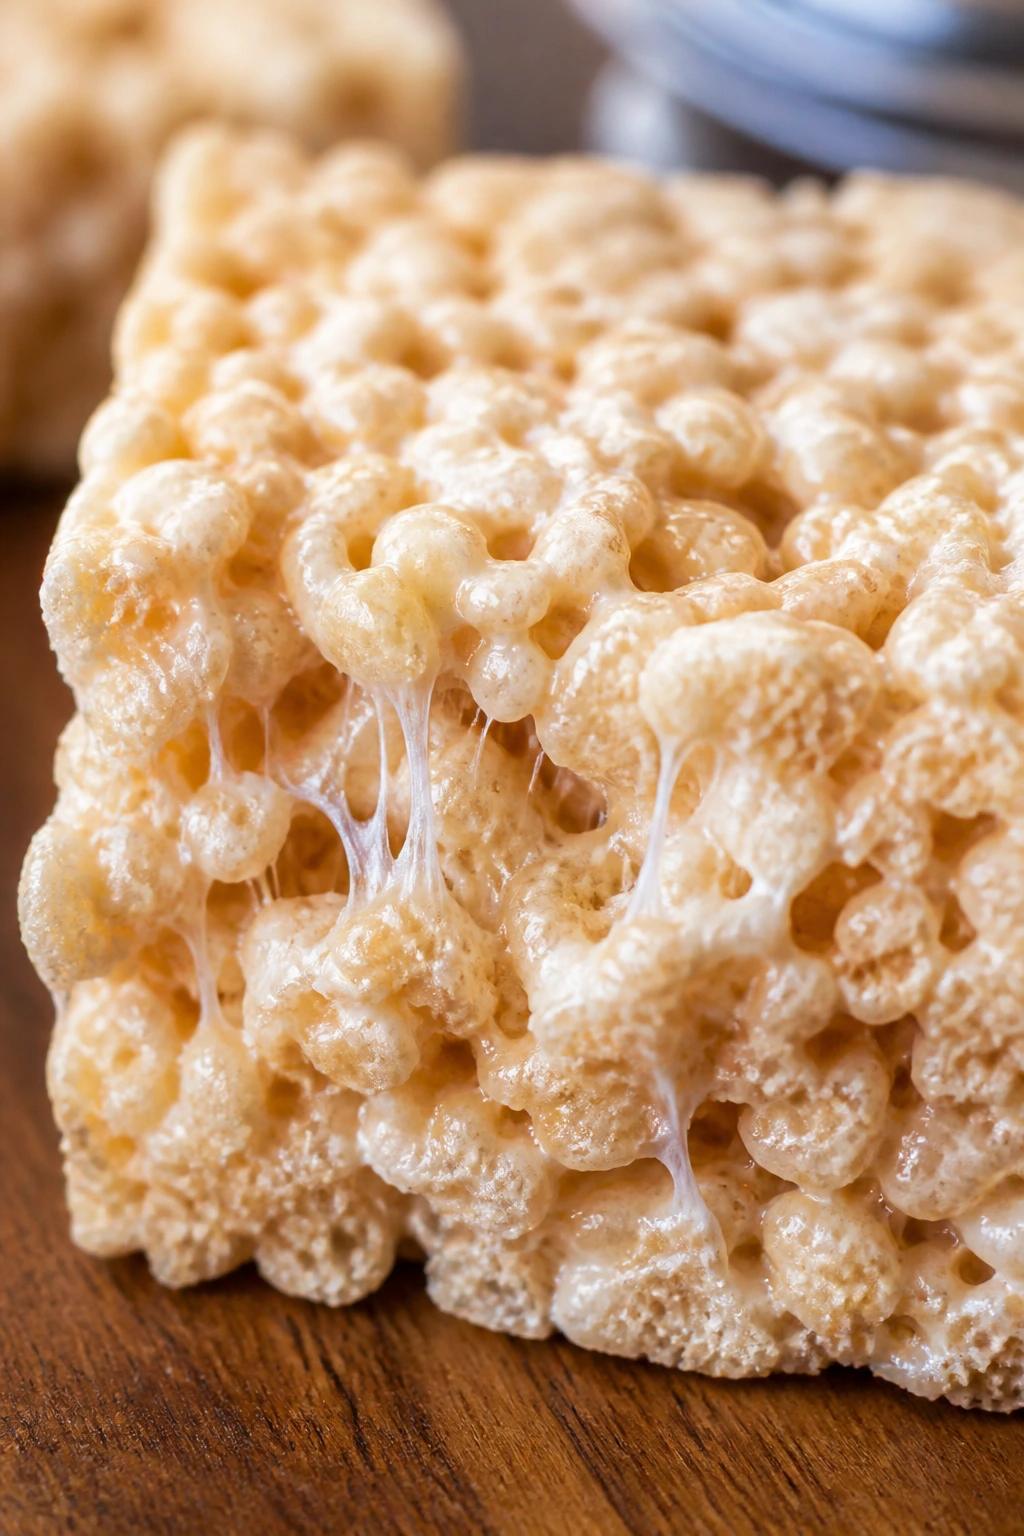
Rice Krispie treats are soft and stretchy when the marshmallow ratio is right, and they stay that way if you don’t pack them down too hard. They’re one of the easiest desserts on this list, and that softness is the whole point.
Why It Works: More marshmallow and enough butter keep the cereal bound without turning the bars stiff. A gentle press in the pan makes the texture airy instead of brick-like.
Key Ingredients:
- 6 cups crisp rice cereal
- 1 package mini marshmallows, about 10 ounces
- 4 tablespoons unsalted butter
- 1/4 teaspoon salt
- 1 teaspoon vanilla extract
- 1 cup extra mini marshmallows, optional for chunks
Quick Steps:
- Grease a 9×13-inch pan.
- Melt the butter and marshmallows over low heat, stirring until smooth.
- Stir in the salt and vanilla.
- Fold in the cereal and extra marshmallows.
- Press gently into the pan and let set before cutting.
Equipment for This Recipe:
- Large saucepan
- Spatula
- 9×13-inch pan
How to Serve This Dish: Cut into squares and serve at room temperature. They’re easiest to eat within a day or two, and a few chocolate drizzles or sprinkles make them feel more like dessert than lunchbox filler.
Pro Tips for This Recipe:
- Keep the heat low so the marshmallows don’t turn hard.
- Grease your hands or the spatula before pressing the mixture.
- Don’t pack the mixture down hard; that kills the softness.
Variations on This Recipe:
- Brown Butter Treats: Brown the butter first for a toasty flavor.
- Chocolate Marshmallow Treats: Stir in cocoa or drizzle with melted chocolate.
Common Mistakes to Avoid with This Recipe:
- High Heat: It makes the marshmallow stiff and brittle.
- Heavy Pressing: The bars get dense and hard to bite through.
30. Apple Cinnamon Crumble Bars
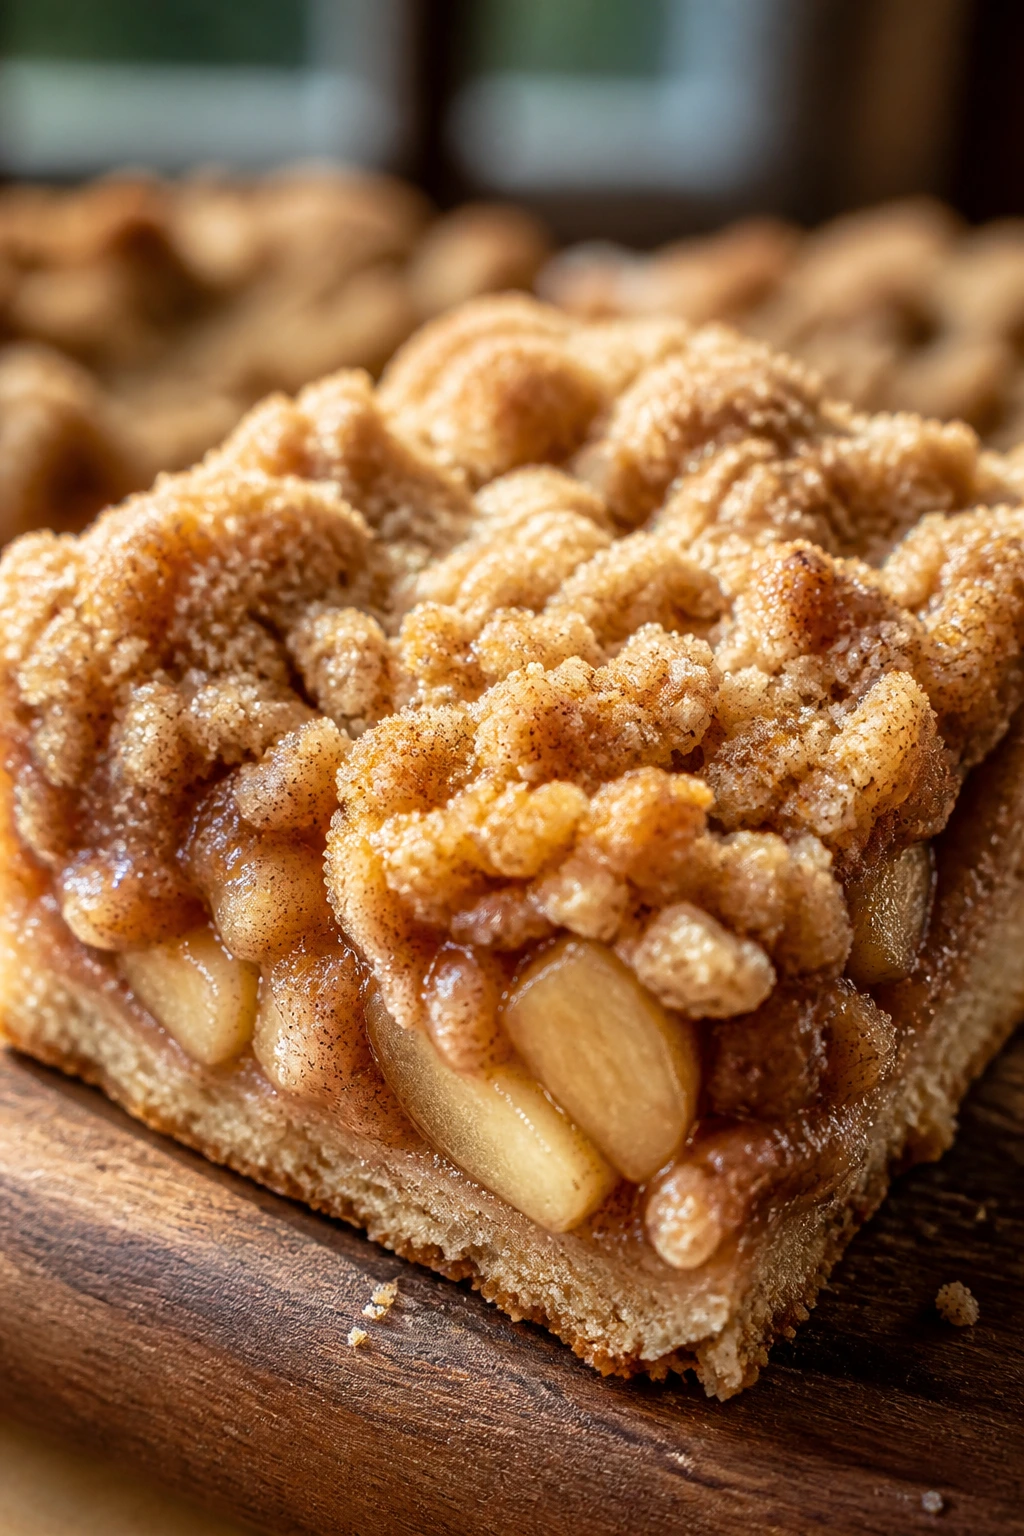
Apple cinnamon crumble bars give you a soft, jammy middle under a buttery topping that stays tender for days. The apples bake down into a thick layer instead of drying into slices, which is why the bars hold up so well.
Why It Works: The fruit filling keeps the center moist, while the crumble doubles as crust and topping. A little cornstarch helps the apples thicken without turning runny.
Key Ingredients:
- 2 cups all-purpose flour
- 1 cup rolled oats
- 3/4 cup brown sugar
- 1/2 teaspoon salt
- 1 cup unsalted butter, melted
- 3 medium apples, peeled and diced
- 2 tablespoons granulated sugar
- 1 teaspoon cinnamon
- 1 tablespoon cornstarch
- 1 teaspoon lemon juice
Quick Steps:
- Heat the oven to 350°F (175°C) and line an 8×8-inch pan.
- Mix flour, oats, brown sugar, salt, and melted butter until crumbly.
- Press half into the pan.
- Toss apples with sugar, cinnamon, cornstarch, and lemon juice, then spread over the crust.
- Top with the remaining crumble and bake for 35 to 40 minutes.
Equipment for This Recipe:
- 8×8-inch pan
- Mixing bowl
- Knife and cutting board
How to Serve This Dish: Serve the bars warm with a spoonful of vanilla ice cream if you want dessert-diner energy. They also slice neatly once chilled, which makes them easy to pack or stack.
Pro Tips for This Recipe:
- Use firm apples so the filling doesn’t turn to mush.
- Let the bars cool fully before cutting.
- A pinch of nutmeg in the filling gives the apples more depth.
Variations on This Recipe:
- Pear Crumble Bars: Swap pears for apples and keep the same spice.
- Salted Caramel Apple Bars: Drizzle caramel over the cooled bars.
Common Mistakes to Avoid with This Recipe:
- Watery Filling: Too much juice makes the bottom soggy.
- Hot Cutting: The bars need time to set or they fall apart.
31. Butterscotch Pudding Cake
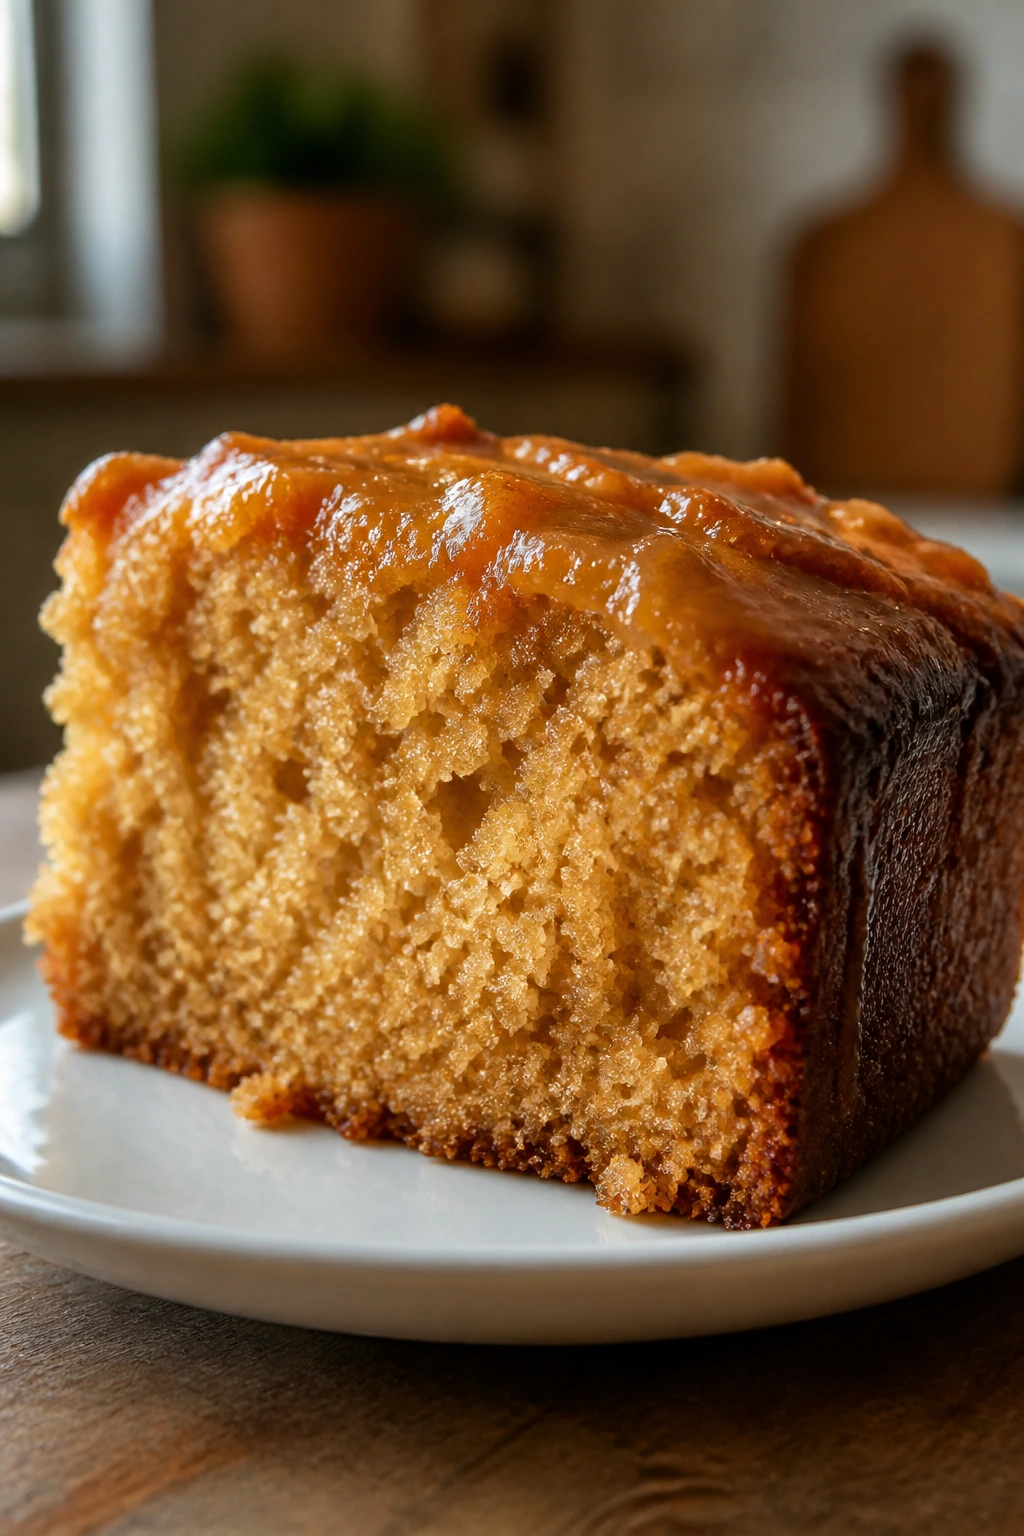
Butterscotch pudding cake tastes like caramel in cake form, and it stays soft because the batter is rich with brown sugar and instant pudding mix. It’s the sort of cake that is almost too easy to keep moist.
Why It Works: Pudding mix adds starch that traps moisture, while brown sugar and butter keep the crumb tender. The cake stays plush even after a night in the fridge.
Key Ingredients:
- 2 cups all-purpose flour
- 1 box instant butterscotch pudding mix, dry
- 1 teaspoon baking powder
- 1/2 teaspoon salt
- 1 cup brown sugar
- 1/2 cup unsalted butter, softened
- 3 large eggs
- 1 cup milk
- 1 teaspoon vanilla extract
Quick Steps:
- Heat the oven to 350°F (175°C) and grease a loaf pan or 8×8-inch pan.
- Whisk the dry ingredients.
- Beat the butter and sugar, then add the eggs, milk, and vanilla.
- Stir in the dry ingredients until smooth.
- Bake for 35 to 40 minutes, until the top springs back and a tester comes out with crumbs.
Equipment for This Recipe:
- Mixing bowls
- Loaf pan or square pan
- Whisk
How to Serve This Dish: Serve with a thin caramel drizzle or a cloud of whipped cream. A warm slice is especially good, but it keeps its softness well at room temperature too.
Pro Tips for This Recipe:
- Use instant pudding, not cook-and-serve.
- Don’t overbake; the cake should stay a little springy.
- Let it cool under a clean towel if your kitchen is dry.
Variations on This Recipe:
- Chocolate Pudding Cake: Swap in chocolate pudding mix.
- Toffee Chip Cake: Fold in toffee bits for crunch.
Common Mistakes to Avoid with This Recipe:
- Wrong Pudding Type: Cook-and-serve won’t behave the same way.
- Dry Baking: A few extra minutes can flatten the softness fast.
32. Chocolate Chip Sour Cream Muffins
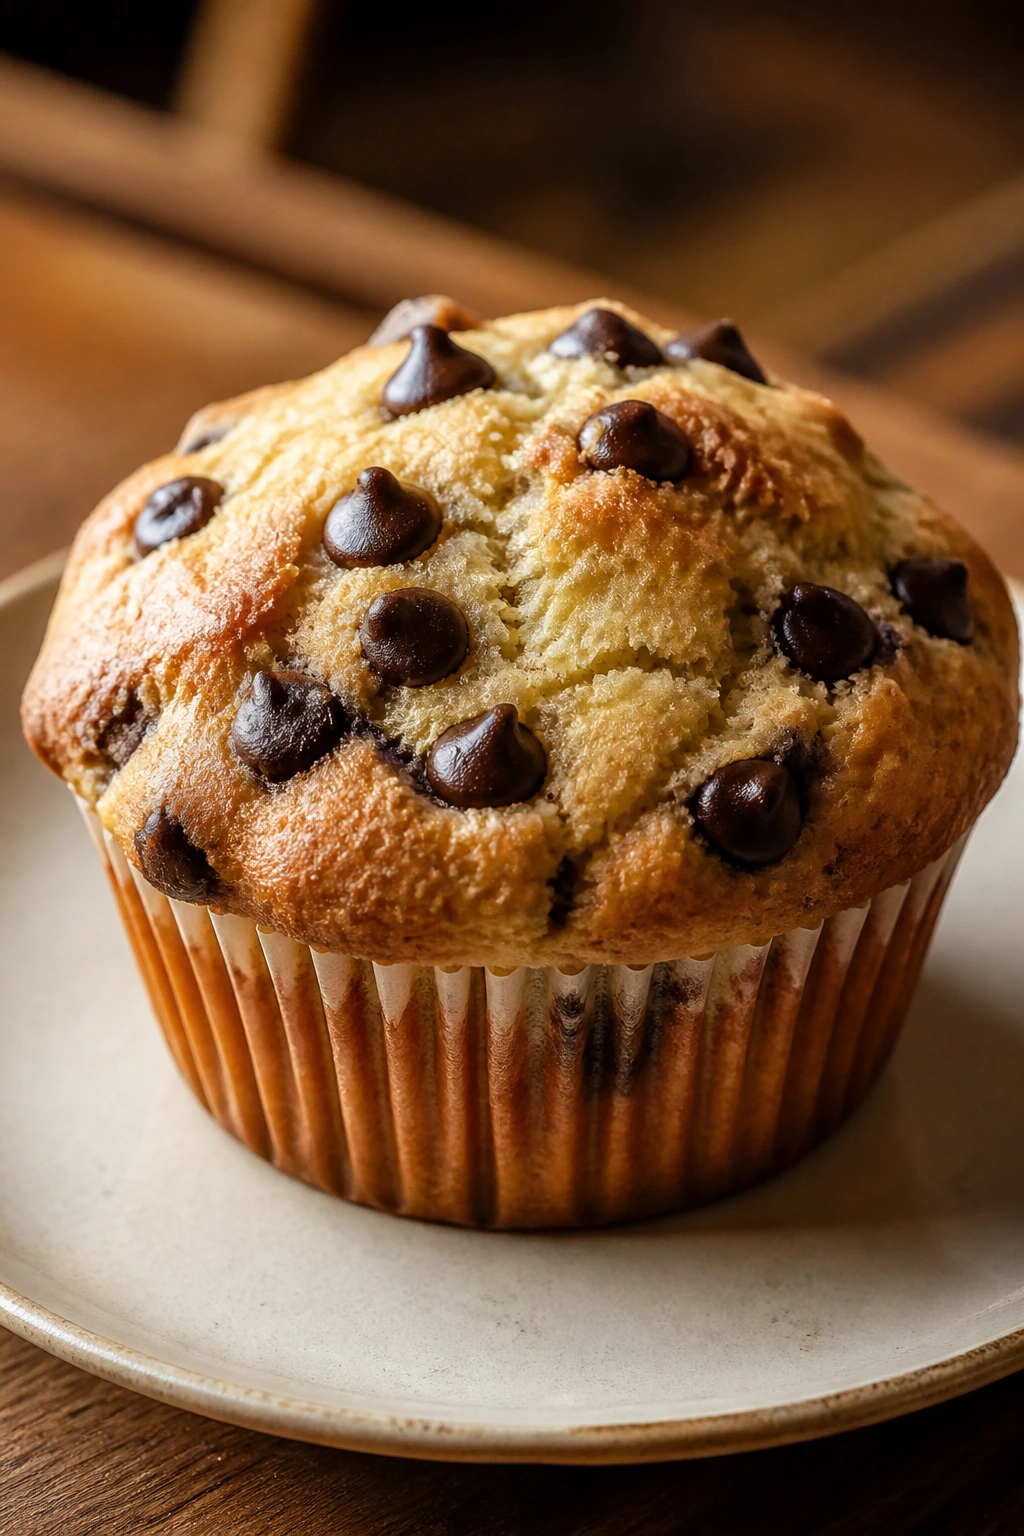
These muffins are soft enough to feel like a bakery treat and sturdy enough to eat with one hand. Sour cream keeps the crumb plush, and the chocolate chips melt into little pockets that stay gooey if you don’t overbake them.
Why It Works: Sour cream adds fat and moisture, and a quick muffin batter stays tender when mixed lightly. They’re one of the easiest ways to get a dessert-like muffin that still tastes good on day three.
Key Ingredients:
- 2 cups all-purpose flour
- 1 tablespoon baking powder
- 1/2 teaspoon salt
- 3/4 cup sugar
- 2 large eggs
- 1 cup sour cream
- 1/2 cup melted butter
- 1 teaspoon vanilla extract
- 1 1/2 cups chocolate chips
Quick Steps:
- Heat the oven to 375°F (190°C) and line a muffin tin.
- Whisk the dry ingredients and sugar in one bowl.
- Whisk the eggs, sour cream, butter, and vanilla in another.
- Fold the wet ingredients into the dry, then stir in the chips.
- Bake for 18 to 20 minutes, until the tops are set and a tester comes out with crumbs.
Equipment for This Recipe:
- Muffin tin
- Liners
- Whisk and spatula
How to Serve This Dish: Serve warm with coffee or as a late-night snack straight from the tin. They’re good plain, but a little salted butter on a split muffin is worth doing.
Pro Tips for This Recipe:
- Mix just until the flour disappears; muffin batter hates overworking.
- Use mini chocolate chips if you want more even melting.
- Cool on a rack so the bottoms don’t steam.
Variations on This Recipe:
- Orange Chocolate Chip Muffins: Add orange zest to the batter.
- Walnut Chip Muffins: Fold in chopped walnuts for a sturdier bite.
Common Mistakes to Avoid with This Recipe:
- Overmixing: It makes the tops tough and the crumb tight.
- Baking Until Browned Deeply: Pale tops mean softer muffins.
33. Soft M&M Cookies
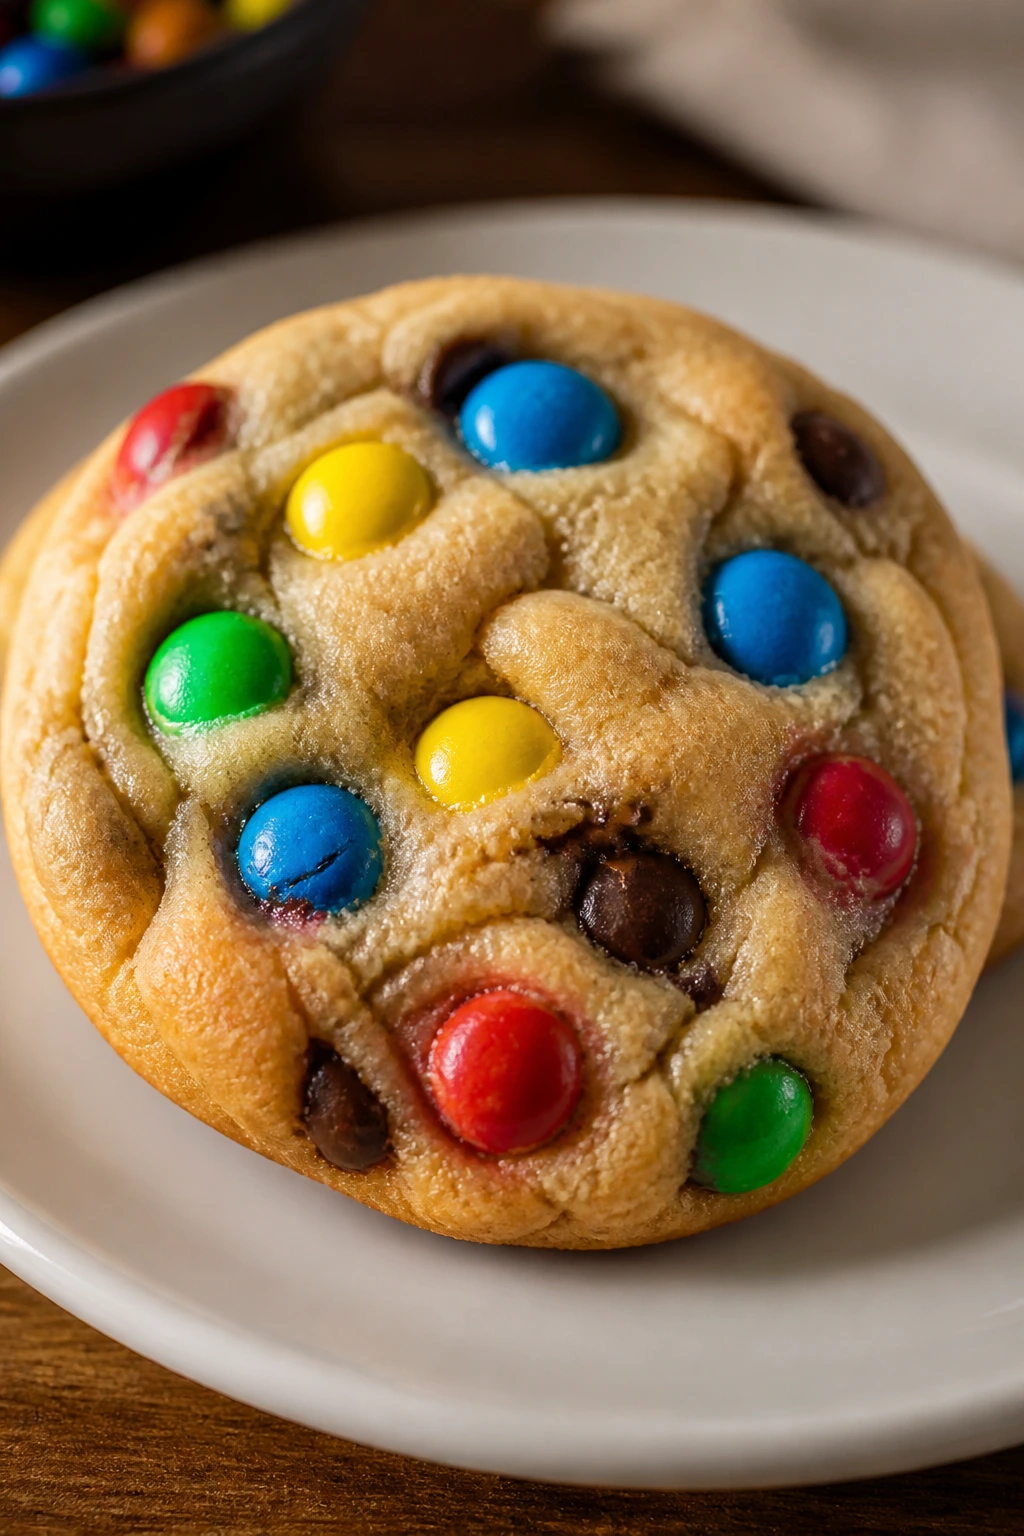
Soft M&M cookies are a little nostalgic and a lot practical: the candy shell keeps the top lively, while the dough stays soft because of brown sugar and a short bake. They’re the kind of cookie that still bends after a day in a tin.
Why It Works: Brown sugar and extra egg yolk help the centers stay chewy, and the candy-coated pieces keep their shape without drying the cookie out. A small scoop makes the cookies bake evenly and stay tender.
Key Ingredients:
- 1 cup unsalted butter, softened
- 3/4 cup packed brown sugar
- 1/2 cup granulated sugar
- 1 large egg plus 1 egg yolk
- 2 teaspoons vanilla extract
- 2 1/4 cups all-purpose flour
- 1 teaspoon baking soda
- 1/2 teaspoon salt
- 1 1/2 cups M&M candies
Quick Steps:
- Heat the oven to 350°F (175°C) and line baking sheets.
- Cream the butter and sugars, then beat in the egg, yolk, and vanilla.
- Stir in the flour, baking soda, and salt.
- Fold in the M&Ms.
- Bake spoonfuls for 9 to 11 minutes, until the edges are set and the centers still look soft.
Equipment for This Recipe:
- Baking sheets
- Parchment paper
- Cookie scoop
How to Serve This Dish: Pile them on a plate with the brightest candies facing up. They’re made for parties, but they also do a fine job of surviving a sealed container for several days.
Pro Tips for This Recipe:
- Add a few extra M&Ms to the tops before baking for better color.
- Underbake slightly; the center should look pale.
- Cool on the sheet so they finish setting gently.
Variations on This Recipe:
- Peanut M&M Cookies: Use peanut M&Ms for more crunch.
- Chocolate M&M Cookies: Add a spoonful of cocoa to the dough.
Common Mistakes to Avoid with This Recipe:
- Too Much Heat: Candy shells can crack and the cookie dries out.
- Crowding the Pan: The cookies need space to spread evenly.
34. Cream Cheese Brownies
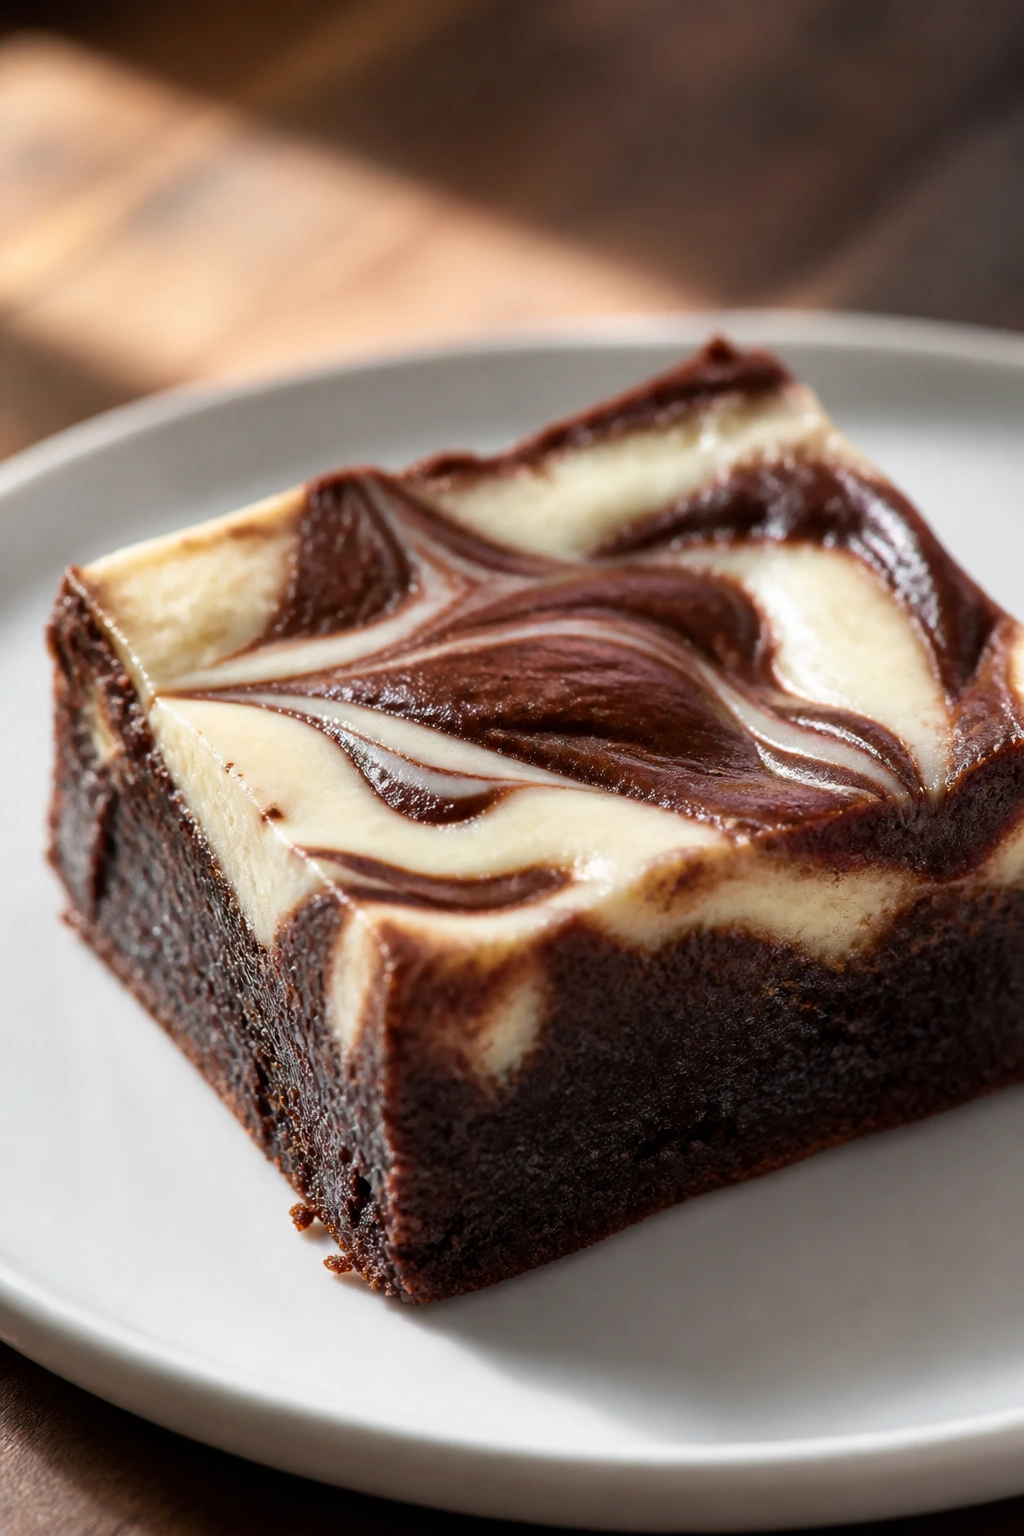
Cream cheese brownies give you a fudgy chocolate base with a tangy swirl on top, and they stay soft because the cheesecake layer keeps the surface from drying. The contrast is half the fun.
Why It Works: The chocolate batter is dense and moist, while the cream cheese swirl adds fat and tang that keep the brownies tasting rich even cold. They slice neatly after chilling, which is useful because the texture rewards a chill.
Key Ingredients:
- 1 cup unsalted butter
- 2 cups sugar
- 4 large eggs
- 1 cup cocoa powder
- 1 cup all-purpose flour
- 1/2 teaspoon salt
- 8 ounces cream cheese, softened
- 1/4 cup sugar
- 1 egg
- 1 teaspoon vanilla extract
Quick Steps:
- Heat the oven to 350°F (175°C) and line a 9×13-inch pan.
- Make the brownie batter by melting butter, whisking in sugar and eggs, then folding in cocoa, flour, and salt.
- Beat the cream cheese, sugar, egg, and vanilla until smooth.
- Spread the brownie batter in the pan and dollop the cream cheese mixture on top, then swirl once.
- Bake for 28 to 32 minutes, until the center is just set.
Equipment for This Recipe:
- 9×13-inch pan
- Mixer
- Parchment paper
How to Serve This Dish: Serve chilled for clean edges or room temperature for a softer bite. A few raspberries on the side help cut through the richness without making the dessert feel lighter than it is.
Pro Tips for This Recipe:
- Soften the cream cheese fully so the swirl doesn’t clump.
- Pull the pan when the center still has a slight wobble.
- Chill before cutting if you want the swirl to stay distinct.
Variations on This Recipe:
- Raspberry Swirl Brownies: Add a few spoonfuls of raspberry jam to the cream cheese layer.
- Espresso Cream Cheese Brownies: Add espresso powder to the chocolate batter.
Common Mistakes to Avoid with This Recipe:
- Over-swirling: The layers blur and the look gets muddy.
- Overbaking: The brownie base loses its fudgy center.
35. Honey Almond Snack Cake
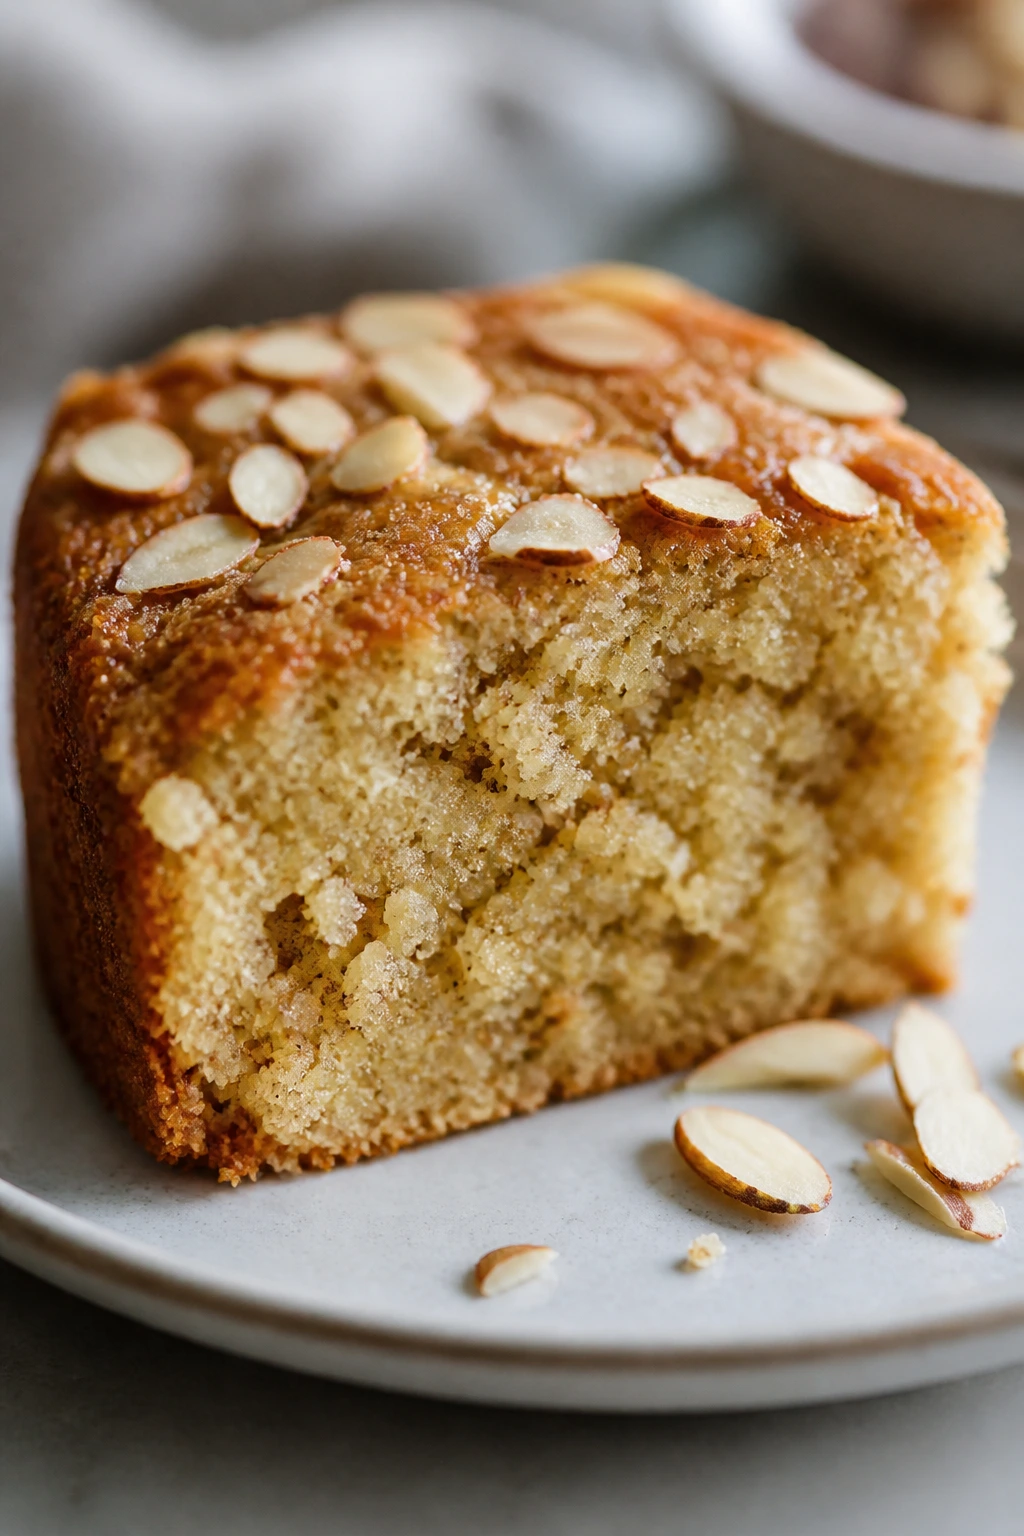
Honey almond snack cake stays soft because honey pulls moisture into the crumb and almond flour gives the cake a tender, almost plush texture. It’s not flashy, but it is the sort of cake that quietly gets better on day two.
Why It Works: Honey keeps the cake damp, and a mix of almond flour and regular flour softens the structure without making it dense. It’s an easy cake to slice for breakfast, dessert, or the middle of the afternoon when you want something sweet but not brittle.
Key Ingredients:
- 1 1/2 cups all-purpose flour
- 1/2 cup almond flour
- 1 teaspoon baking powder
- 1/2 teaspoon salt
- 1/2 cup unsalted butter, softened
- 3/4 cup honey
- 2 large eggs
- 1/2 cup plain yogurt
- 1 teaspoon vanilla extract
- 1/2 teaspoon almond extract
Quick Steps:
- Heat the oven to 350°F (175°C) and line an 8×8-inch pan.
- Whisk the dry ingredients.
- Beat the butter and honey, then add the eggs, yogurt, vanilla, and almond extract.
- Fold in the dry ingredients until smooth.
- Bake for 28 to 32 minutes, until the top is golden and a tester comes out with crumbs.
Equipment for This Recipe:
- 8×8-inch pan
- Mixer or whisk
- Cooling rack
How to Serve This Dish: Serve it plain, or finish with sliced almonds and a little extra honey. It works with tea, coffee, or a small bowl of berries if you want to lean lightly away from the cake’s richness.
Pro Tips for This Recipe:
- Use mild honey so the almond flavor doesn’t get buried.
- Don’t overbake; honey cakes go from plush to dry quickly.
- Let it cool completely before cutting or the crumb can tear.
Variations on This Recipe:
- Orange Honey Cake: Add orange zest to the batter and glaze.
- Pear Almond Cake: Fold in diced pear for a softer, fruitier crumb.
Common Mistakes to Avoid with This Recipe:
- Too Much Almond Extract: It can take over fast.
- Hot Slicing: The cake needs a full cool-down to stay neat and soft.
What Actually Keeps a Dessert Tender for Three Days or More

Soft desserts are not an accident of luck. They’re built from ingredients that hold water, fat that coats flour, and baking times that stop a little before the finish line looks obvious. Brown sugar, honey, molasses, yogurt, sour cream, oil, and cream cheese all matter because they change how the crumb dries out over time.
Essential Equipment for These Recipes
- 9×13-inch baking pan: The workhorse for sheet cakes, brownies, blondies, and bar cookies.
- 8×8-inch pan: Best for smaller batches where you want thicker bars and a slightly softer center.
- Loaf pan: Ideal for banana bread, pound cake, and snack cakes that need a tight, even crumb.
- Muffin tin: Needed for cupcakes and muffins that should stay soft but hold their shape.
- Hand mixer or stand mixer: Useful for creaming butter and sugar until the batter looks lighter and less grainy.
- Rubber spatula: Helps you fold batter without beating the air out of it.
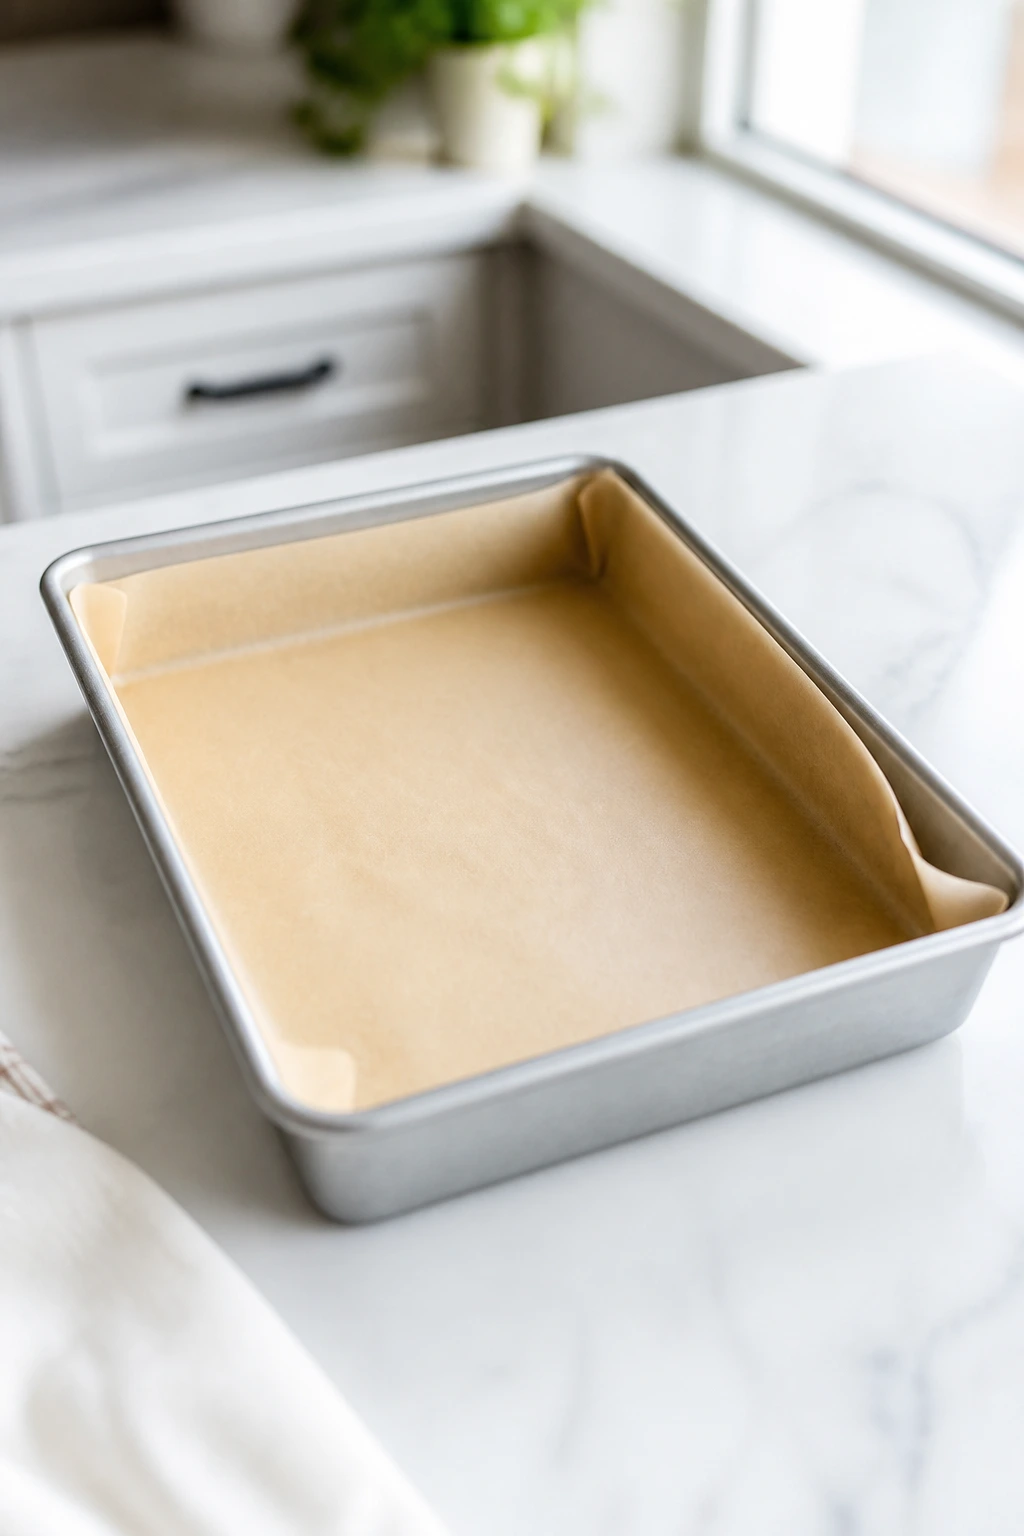
- Parchment paper: Makes bars and brownies lift out cleanly and keeps edges from sticking.
- Cooling rack: Lets steam escape so the bottoms don’t turn damp and gummy.
- Cookie scoop: Gives you even portions, which matters more than people think for soft cookies.
- Box grater or microplane: Good for carrots, zucchini, and citrus zest, where texture changes the whole dessert.
Smart Shopping and Ingredient Tips

Pick brown sugar that feels soft in the bag, not rock-hard. If it’s clumped into a brick, the moisture has already started escaping, and that matters in cookies and blondies where sugar does some of the softening work.
Use full-fat dairy when the recipe asks for sour cream, yogurt, cream cheese, or buttermilk. The low-fat versions can work in a pinch, but they usually bake a little drier and a little more sour, which is not the same thing as tender.
For fruit-based bakes, buy fruit that is ripe enough to smell like something. Bananas should have black speckles; apples should be firm; strawberries should be dry on the outside and sweet-smelling at the stem. Wet fruit ruins texture faster than most people expect, especially in bars and fillings.
Chocolate matters too. Chips hold their shape, chopped bars melt into bigger pockets, and cocoa powder gives you flavor without adding moisture. Use the version that matches the texture you want, because the wrong chocolate can change a soft dessert into something oddly stiff.
How to Serve These Desserts
Presentation: Soft desserts look best when you don’t overwork the plating. Stack cookies loosely, cut bars into clean squares, and leave a little crumb or glaze on the plate so the dessert still looks like food someone wants to eat, not a display case sample.
Accompaniments: Vanilla ice cream is the easy answer for brownies, sheet cake, and sticky pudding, but whipped cream, cold milk, black coffee, and hot tea all work across this list. Fresh berries are especially useful with rich chocolate and cream cheese desserts because they cut the sweetness without stealing attention.
Portions: Most of these desserts are richer than they look. A 2-inch square of brownie or blondie, one cupcake, one thick slice of loaf cake, or two medium cookies is enough for most people unless you’re serving them after a light meal.
Beverage Pairing: Coffee belongs with chocolate, caramel, banana, and cinnamon desserts. Tea works better with lemon, honey, almond, and spice cakes. Cold milk still has a place here, and honestly, a plain glass of it can beat a fancy drink if the cookie is warm.
Additional Tips and Flavor Boosters
Flavor Enhancement: A pinch of flaky salt on brownies, blondies, or caramel bars makes the sweet parts taste fuller. For chocolate desserts, a small spoonful of instant espresso powder deepens the flavor without turning the dessert into coffee cake.
Customization: Swap in chopped nuts when you want more crunch, or fold in shredded coconut, toffee bits, dried cherries, or citrus zest when a recipe needs a little more character. Keep add-ins modest; one cup is usually enough before the texture starts getting crowded.
Serving Suggestions: Warm cakes by the slice for 10 to 15 seconds in the microwave and finish with whipped cream or ice cream. Cookies can be sandwiched with frosting, jam, or peanut butter, but bars often need nothing more than a dusting of powdered sugar.
Make-It-Yours: For a gluten-free version, use a 1:1 baking blend in bars and cakes. For dairy-free baking, pick oil-based cakes and cookies, then use a plant butter for frosting. For lower sugar, don’t slash it aggressively; cut the topping or glaze first, because that’s where you can trim without wrecking softness.
Make-Ahead, Storage, and Reheating Guidance
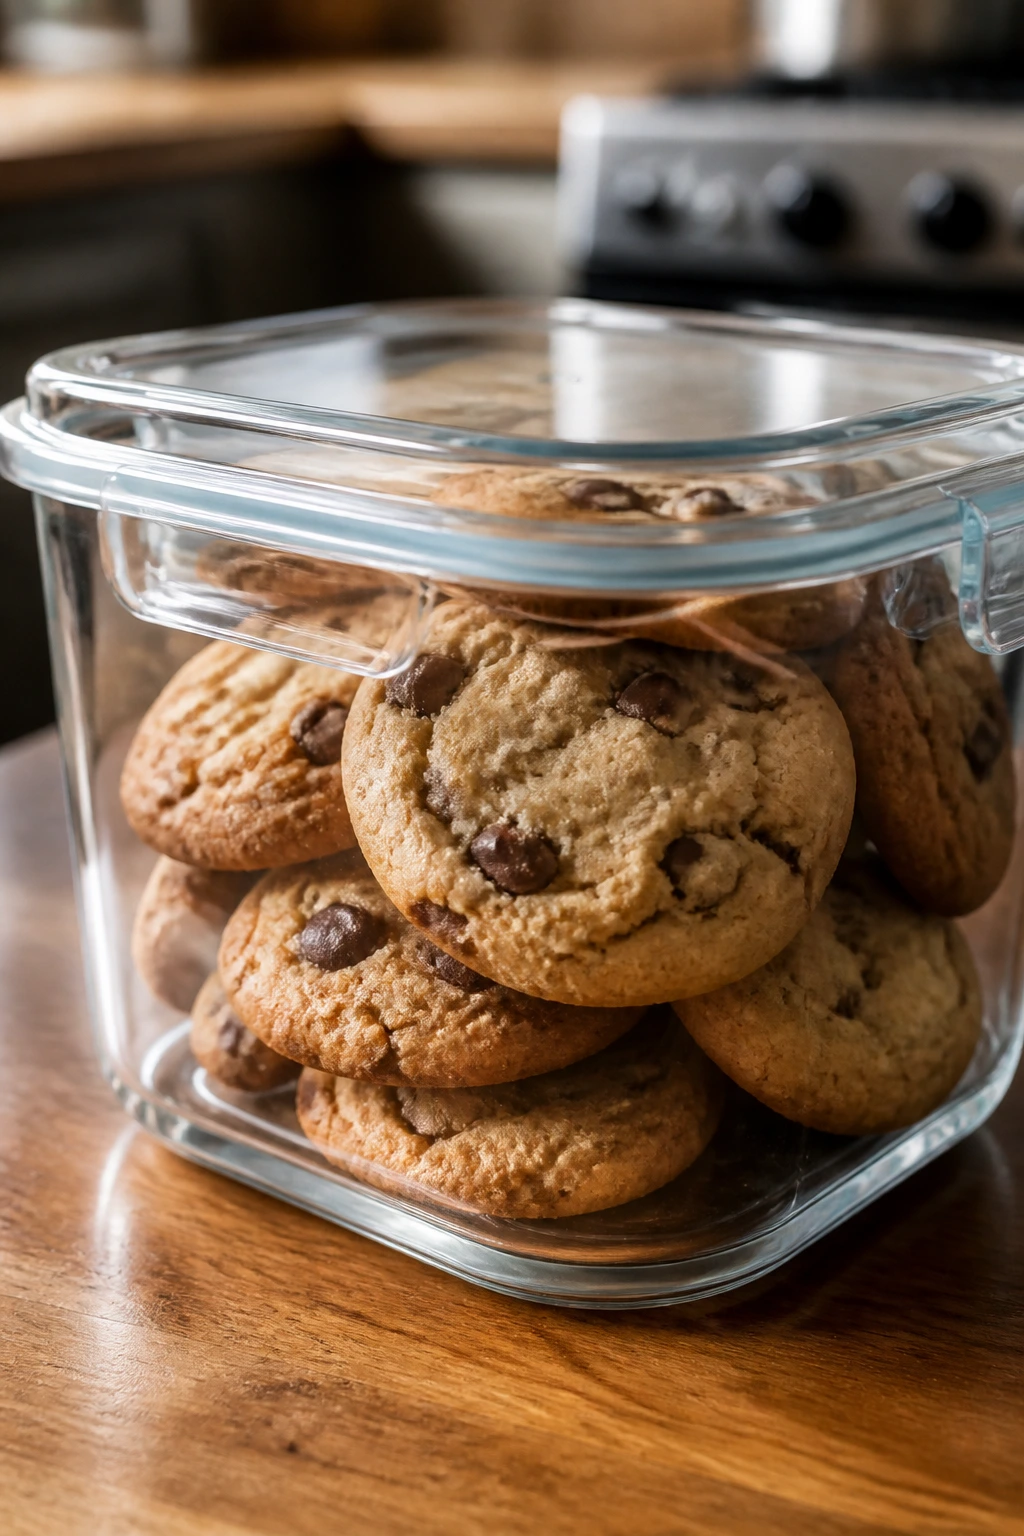
Most soft cookies stay good in an airtight container at room temperature for 3 to 4 days. If you stack them, put parchment between layers so the tops don’t stick and pull apart. A slice of plain bread in the container can help in a dry kitchen, though it should be replaced before it turns stale itself.
Bars and brownies usually keep 4 to 5 days at room temperature if they don’t have fresh fruit or cream cheese filling. Once cream cheese, whipped cream, or custard enters the picture, refrigerate them and aim for 3 to 4 days. Let chilled bars sit out for 20 to 30 minutes before serving so the crumb relaxes and the flavor opens up.
Loaf cakes and sheet cakes freeze well for up to 2 months when wrapped tightly in plastic and then foil. Freeze slices separately if you want single servings; they thaw faster and lose less texture. Muffins also freeze well, and a 15- to 20-second microwave warm-up brings them back without making the edges leathery.
If you’re reheating chocolate desserts, go low and short. Ten-second bursts in the microwave are safer than one long blast, which can turn soft centers rubbery in a hurry. For pudding cakes and sticky toffee pudding, rewarm gently and add sauce after heating so the top stays glossy instead of gummy.
Easy Swaps and Style Variations
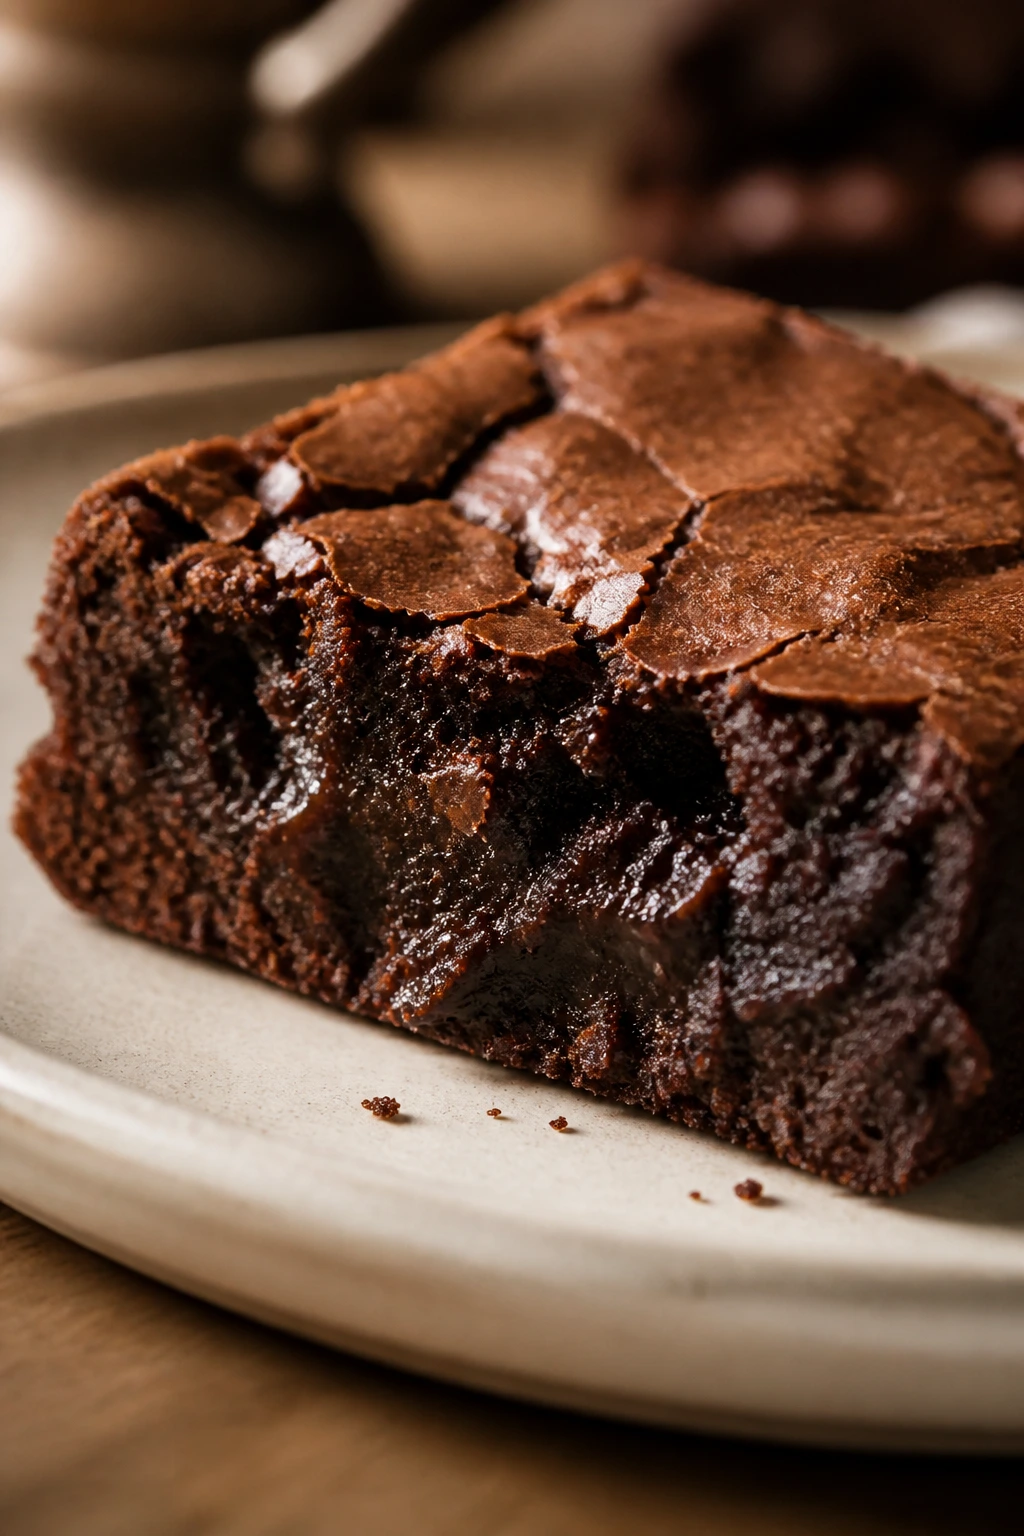
Gluten-Free Pantry Swap: Use a 1:1 gluten-free flour blend in brownies, blondies, cookies, and most sheet cakes. The crumb may be a touch more delicate, so let the baked goods cool fully before moving them.
Dairy-Light Versions: Oil-based cakes, fruit bars, and many muffin recipes can handle a dairy-free yogurt or milk substitute without losing softness. Frostings are trickier; coconut cream or plant butter can work, but they need a chill to set.
Lower-Sugar Route: Trim sugar a little in cakes and muffins, not cookies and bars, where sugar does more than sweeten. If you want less sweetness, skip the glaze, reduce the frosting, or use dark chocolate instead of milk chocolate.
Egg-Free Baking: Applesauce, mashed banana, or a commercial egg replacer can work in snack cakes and muffins. Dense batters like brownies and blondies need more care, so use a tested replacer and don’t change the flour too.
Holiday Spice Shift: Swap cinnamon-heavy profiles for ginger, cardamom, clove, or orange zest when you want a different mood. The base recipes stay soft; the spice combo does the talking.
Mini and Party-Sized Formats: Muffin tins and mini loaf pans bake faster and stay softer inside because the heat has less distance to travel. Watch the oven early, because mini versions go from tender to dry in a matter of minutes.
Common Mistakes That Dry Out Soft Desserts
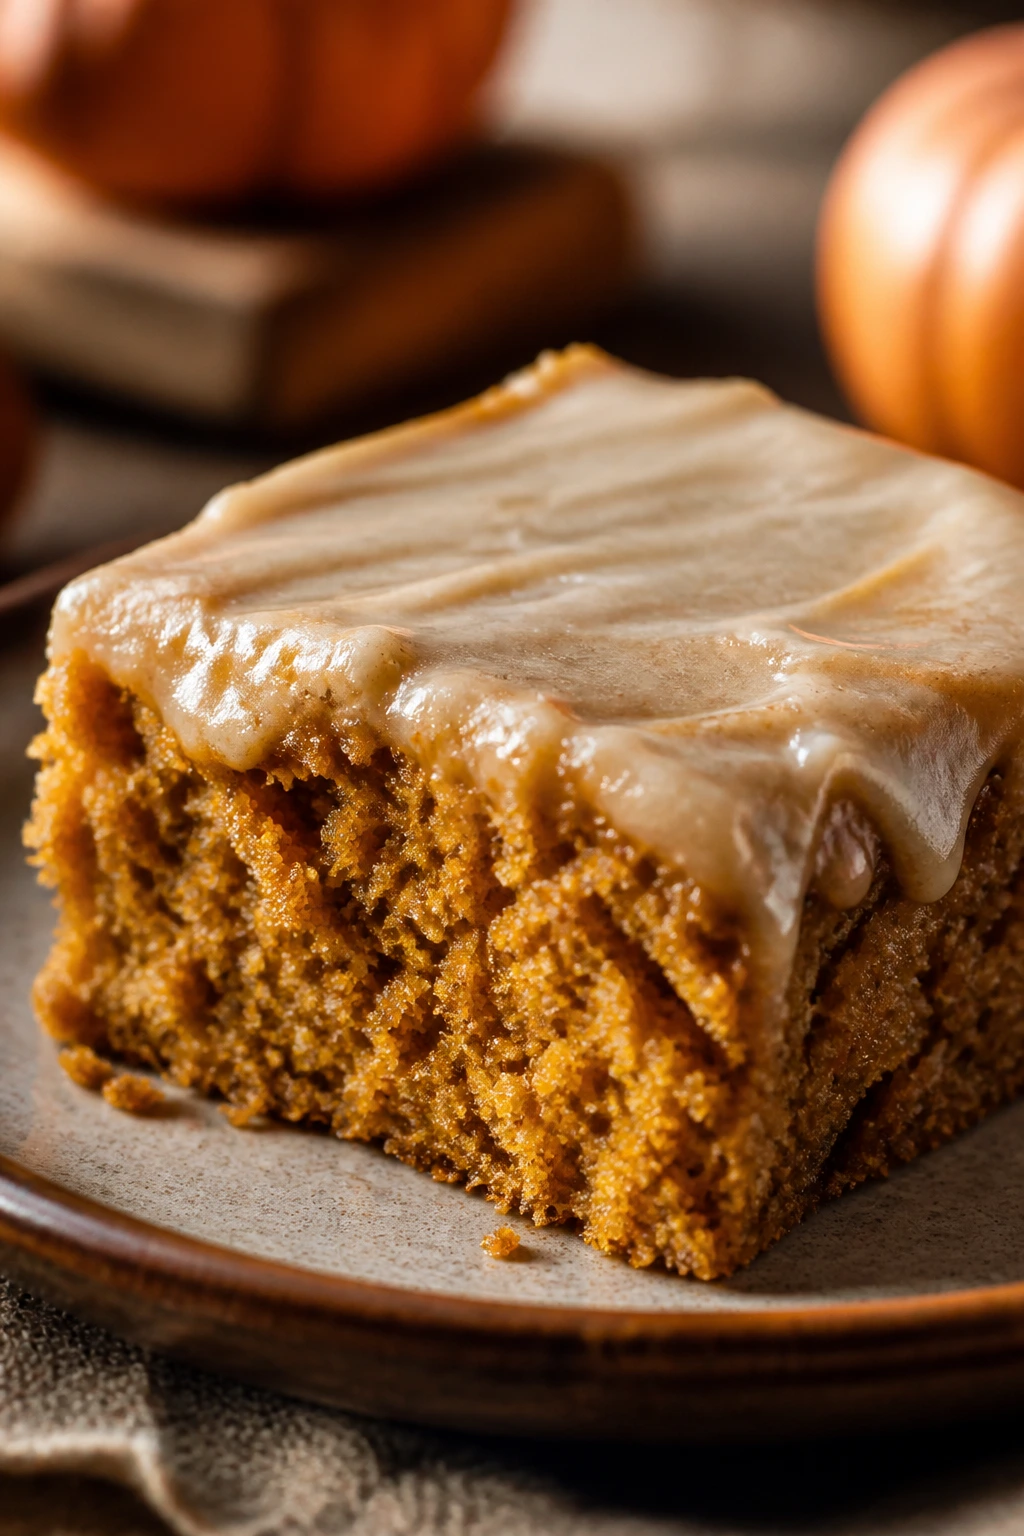
- Baking One Step Too Far: The most common dry-out point is not a disaster, just a few extra minutes in the oven. The fix is simple: pull desserts when the center still looks a little underdone, because the carryover heat keeps cooking them on the counter.
- Using Too Much Flour: Scooping flour straight from the bag packs in more than you think, and that extra flour soaks up moisture. Spoon it into the cup or weigh it if you can; the texture difference shows up fast in cookies, muffins, and loaf cakes.
- Cutting Before Cooling: Bars and cakes need time for steam to settle and structure to finish setting. If you cut too soon, the crumb tears, the filling slides, and the dessert seems drier than it actually is.
- Storing Without Sealing: Air is the enemy. Even a good brownie can go from fudgy to dull if it sits uncovered, so use an airtight box or wrap tightly once it’s cool.
- Choosing the Wrong Pan: Thin metal pans, dark pans, and oversized pans all change how fast the edges cook. If a recipe calls for a specific pan size, match it or expect the texture to shift.
- Skipping the Moisture-Rich Ingredients: Sour cream, yogurt, brown sugar, honey, and oil are not decorative. They’re part of the reason these desserts keep their softness, so don’t swap them out casually unless you’re ready for a different result.
Frequently Asked Questions
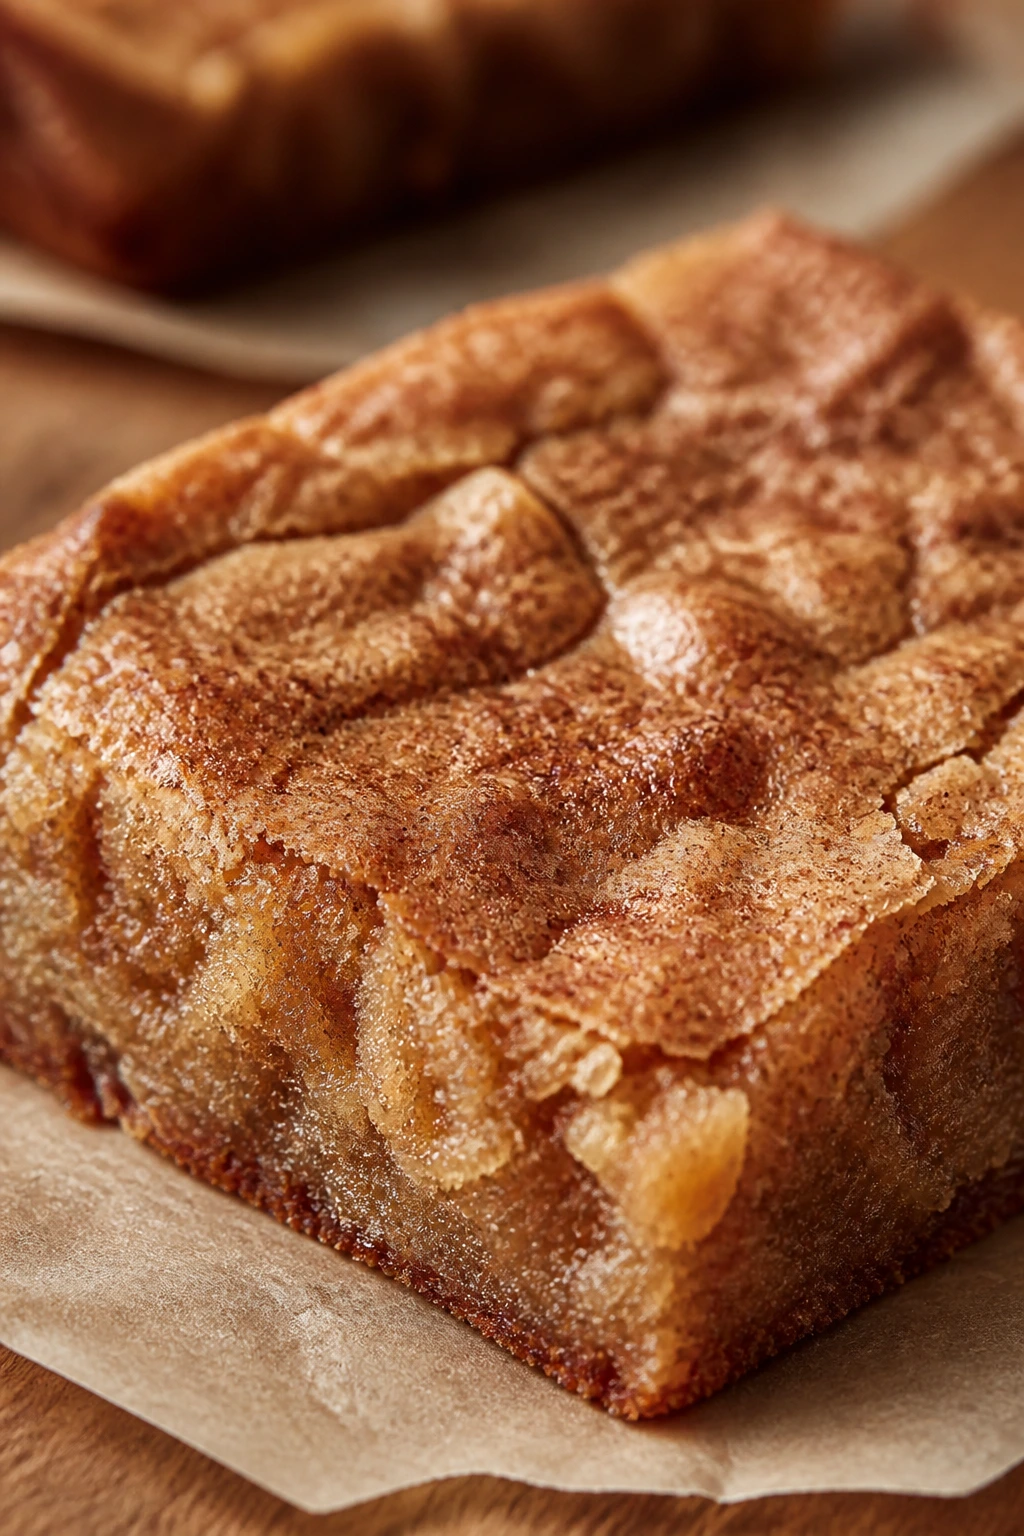
Which desserts on this list stay soft the longest?
Tres leches cake, cream cheese pound cake, carrot sheet cake, and sour cream banana bread are some of the best long-haulers. They hold moisture well and don’t rely on a fragile crust to stay appealing.
Why does brown sugar help desserts stay soft?
Brown sugar contains molasses, which brings moisture and a deeper flavor. It also helps cookies and bars keep a chewier bite instead of drying into a brittle texture.
Can I freeze soft desserts without ruining them?
Yes, most of these freeze well if they’re wrapped tightly and thawed at room temperature. Cakes, brownies, bars, and cookies all do fine; just avoid freezing items with whipped cream or very fresh fruit on top.
How do I keep cookies soft after the first day?
Store them airtight and don’t overbake them in the first place. If your kitchen is dry, add a slice of bread to the container and replace it when it goes stale.
Should soft cakes be refrigerated?
Only if they have cream cheese frosting, custard, or fresh fruit filling. Plain loaf cakes and snack cakes usually stay softer at room temperature for a few days than they do in the fridge.
What if my brownies came out dry anyway?
A dry brownie usually means too much flour, too long in the oven, or both. Next time, pull the pan earlier and test with crumbs, not a clean toothpick.
Can I make these desserts ahead for a party?
Yes, and many are better on day two. Brownies, blondies, loaf cakes, bars, and most cookies can be made the day before and stored tightly wrapped or boxed.
What desserts here travel best?
Blondies, brownies, cookies, sheet cake squares, muffins, and bars all travel well because they don’t rely on delicate frosting or a fragile crust. Pack them in a single layer if you can, or use parchment between layers.
Keeping the Crumb Tender
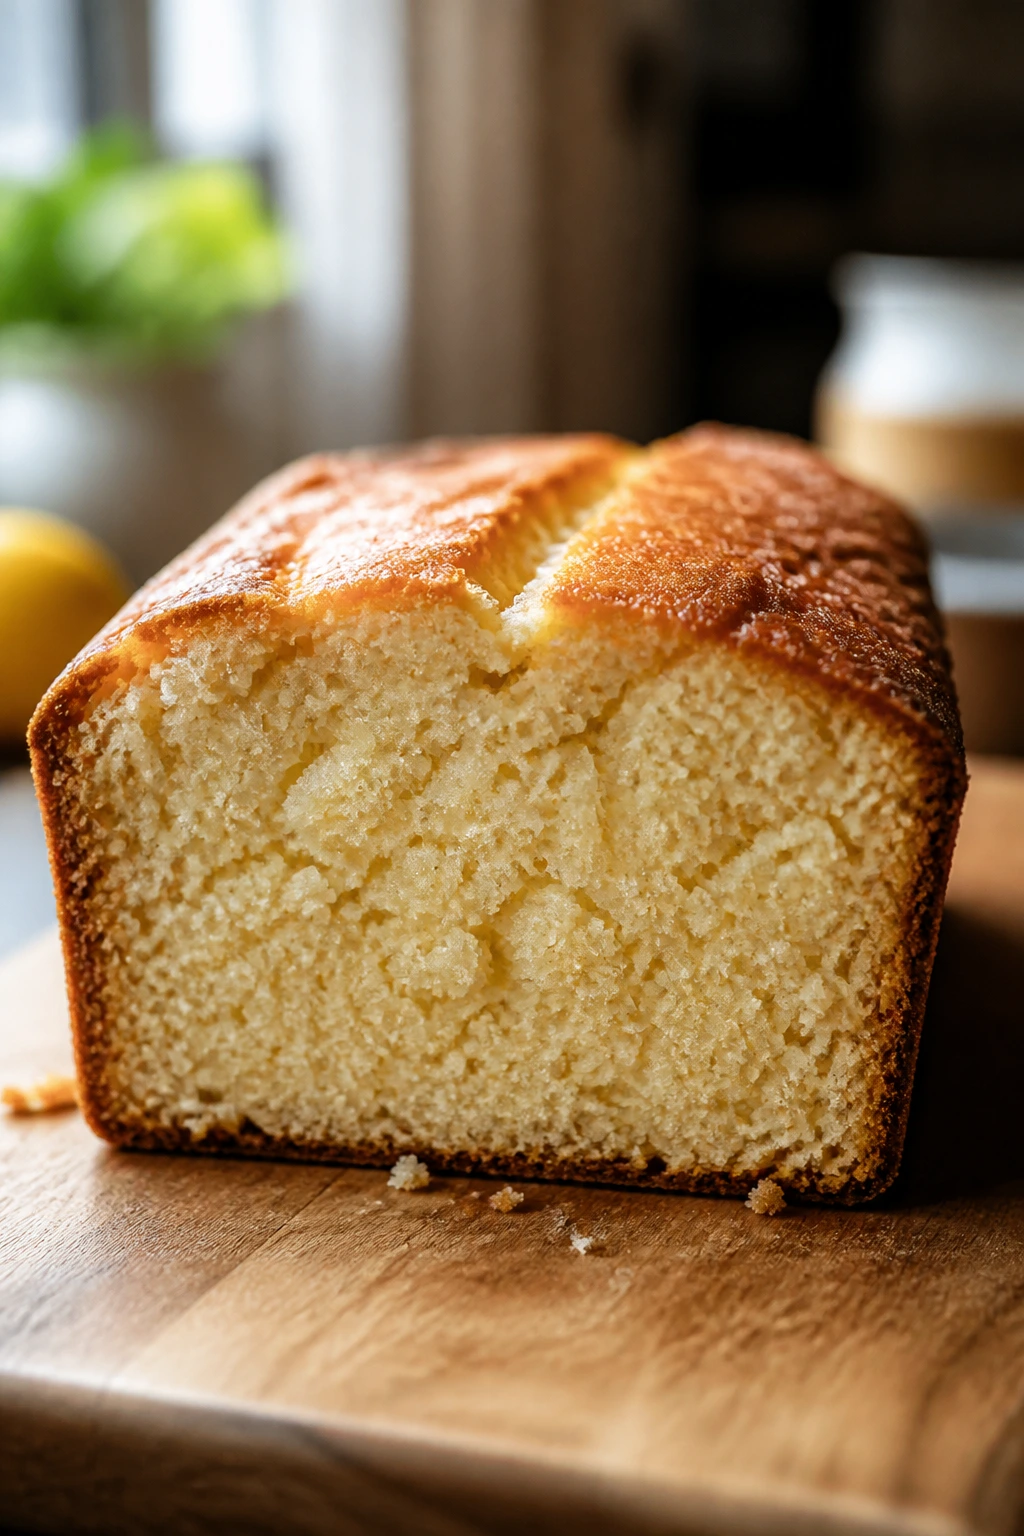
Soft desserts reward restraint. Pull them early, cool them properly, and give them a container that keeps air out, and they’ll keep doing their job long after the first serving is gone.
That’s why this kind of baking matters more than people admit. A dessert that still tastes good on day three feels thoughtful in a way a dry, overbaked cake never will, and once you’ve baked a few of these, you’ll start spotting the moisture tricks before you even preheat the oven.