
Picky eater vegetarian recipes usually fail for one boring reason: they ask too much of the eater and too little of the texture. A bowl of soft vegetables with a vague sauce is a hard sell at a table full of people who like browned cheese, crisp edges, and food that tastes like it was actually cooked.
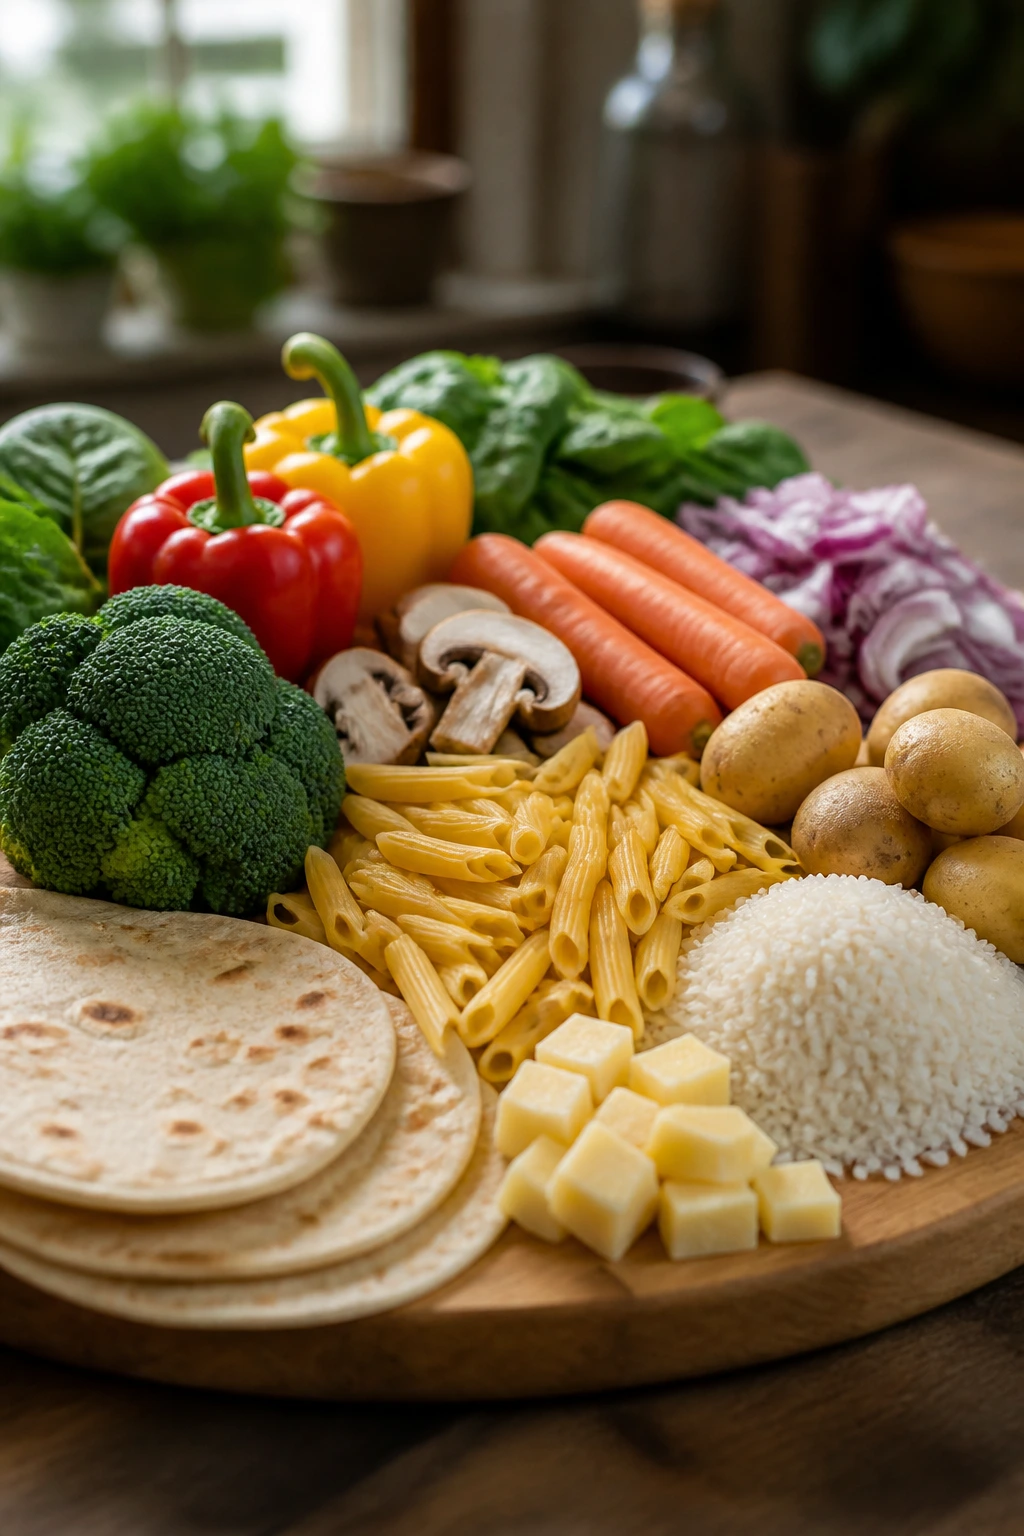
That’s why the recipes here lean hard on familiar shapes and familiar comfort-food tricks. Pasta, potatoes, tortillas, rice, bread, beans, cheese, puff pastry, char, crumbs. Nothing weird. Nothing fussy. And yes, a meat eater can absolutely enjoy a vegetarian plate when the food has a good crust, a little salt, and enough body to feel like dinner instead of an apology.
A useful rule runs through the whole collection: don’t hide the vegetables so much that they disappear, but don’t leave them naked either. Roast them, fold them into cheese, tuck them into crisp sandwiches, or put them under a blanket of sauce. That’s where the magic usually lives.
Why You’ll Love This Collection
- Familiar comfort: These recipes use pasta, potatoes, tortillas, rice, and cheese in ways that feel recognizable from the first bite.
- Low-risk vegetables: Broccoli, peppers, carrots, onions, mushrooms, and spinach show up in cooked, well-seasoned forms instead of raw, crunchy surprise mode.
- Real dinner energy: Most of these dishes land in the part of the menu that makes sense at a family table, not the side-dish corner.
- Flexible by design: If someone hates one vegetable, there’s usually a clean swap that won’t wreck the texture or the flavor.
- Meat-eater proofing: Browning, salt, fat, and acid do most of the heavy lifting here, which is why these plates feel satisfying instead of timid.
- Weeknight-friendly structure: A lot of these use one pan, one pot, a sheet tray, or a skillet, which makes cleanup less annoying than the food category might suggest.
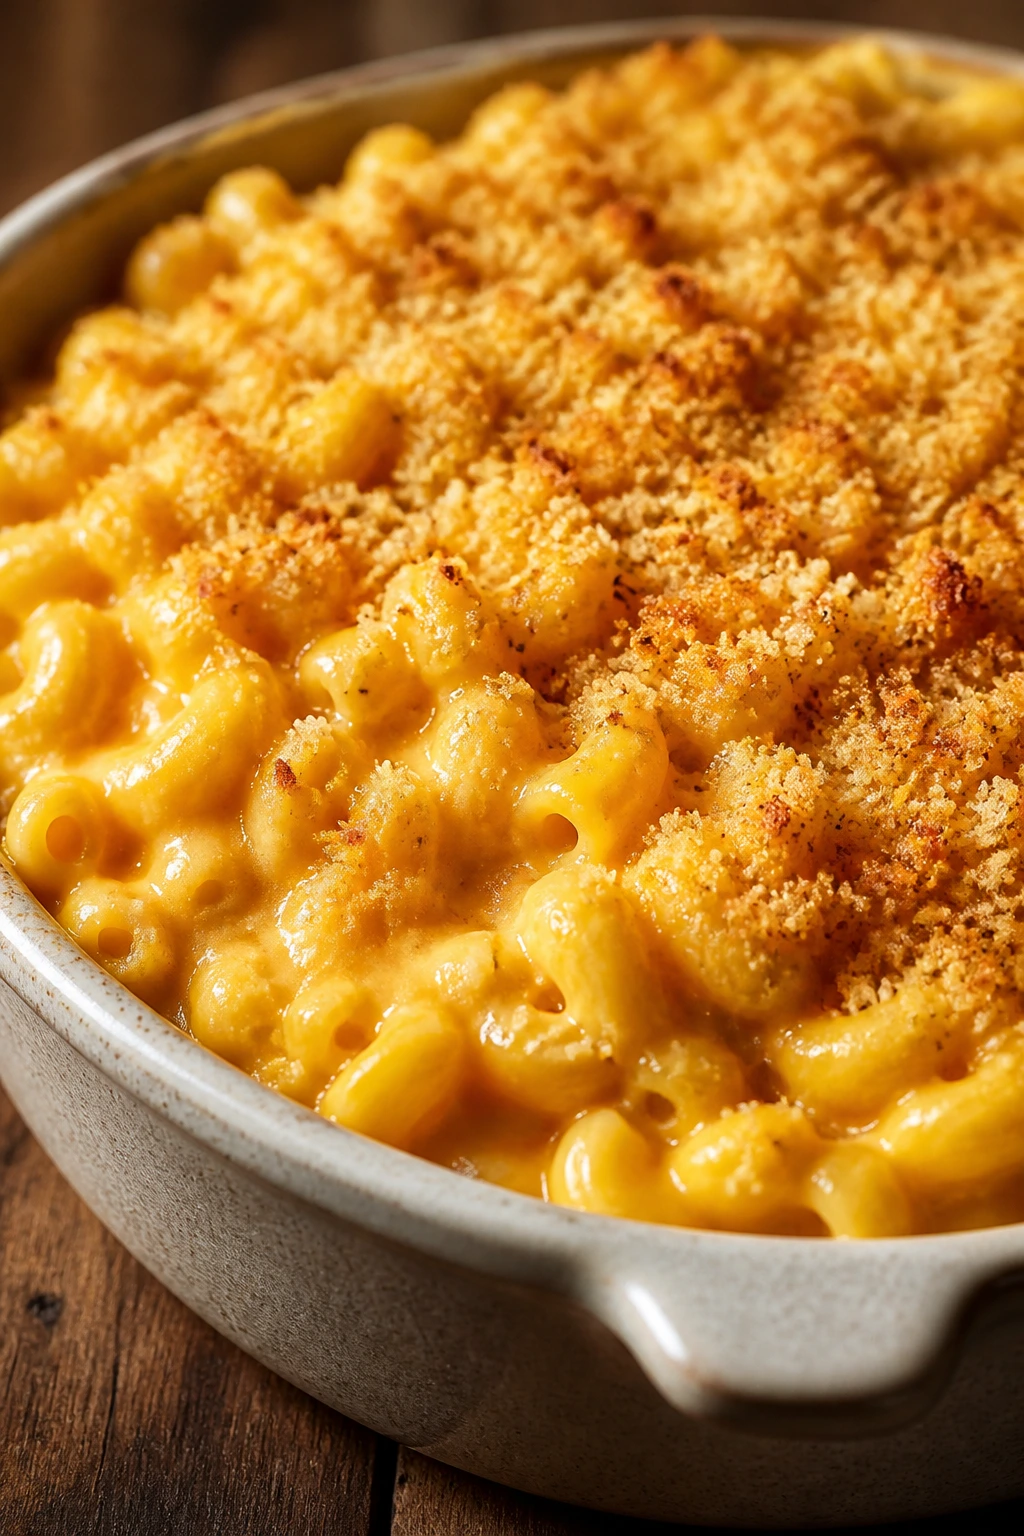
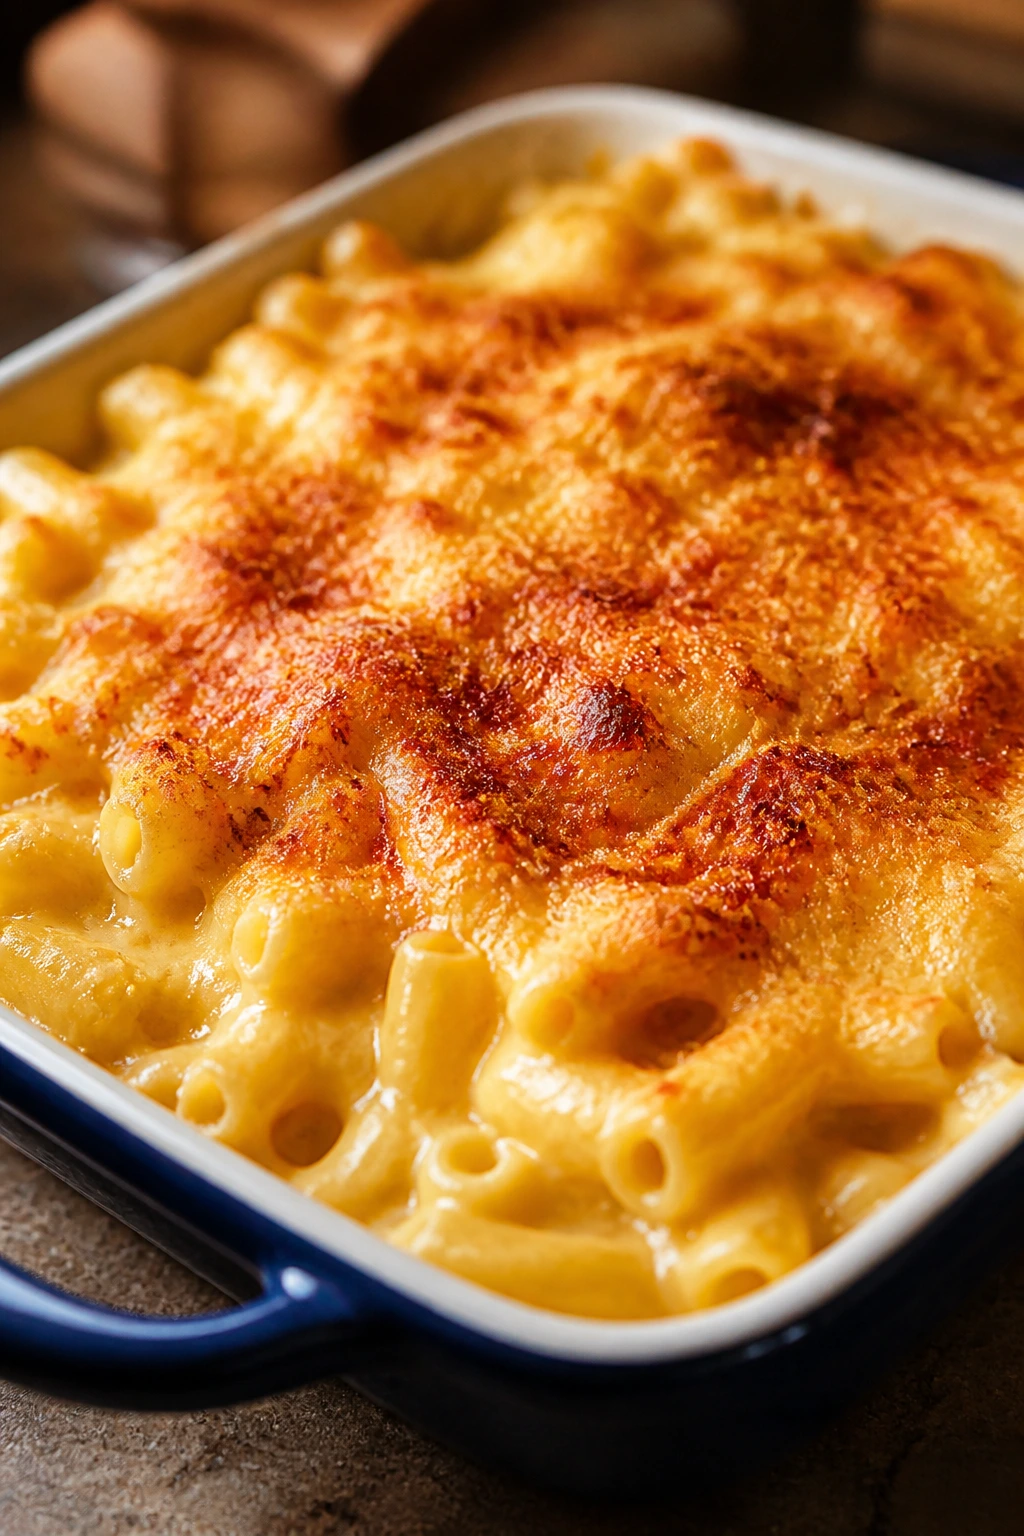
1. Baked Mac and Cheese with a Crisp Parmesan Top
A good baked mac and cheese can quiet the “where’s the meat?” question fast. The trick is a thick cheese sauce, a little mustard for depth, and a top that comes out browned and crackly instead of pale and sad.
Why It Works:
Mac and cheese is one of the easiest vegetarian dishes to win over a skeptical crowd because the pasta gives it weight and the cheese sauce gives it that rich, familiar finish. A small spoonful of Dijon sharpens the flavor without making it taste like mustard. The breadcrumb top gives you contrast, and contrast is what keeps a soft dish from feeling flat.
Key Ingredients:
- 8 oz elbow macaroni
- 3 tablespoons unsalted butter
- 3 tablespoons all-purpose flour
- 2 cups whole milk, warmed
- 2 cups sharp cheddar, shredded
- 1 cup Gruyère or Monterey Jack, shredded
- 1 teaspoon Dijon mustard
- 1/2 teaspoon kosher salt
- 1/2 cup panko breadcrumbs
- 2 tablespoons grated Parmesan
Quick Steps:
- Preheat the oven to 375°F (190°C) and grease an 8×8-inch baking dish.
- Boil the macaroni in salted water until just shy of tender, about 1 minute less than the package says.
- Melt butter in a saucepan, whisk in flour for 1 minute, then slowly whisk in warm milk until the sauce is smooth and lightly thickened.
- Stir in cheddar, Gruyère, Dijon, salt, and the drained pasta until glossy.
- Pour into the dish, top with panko and Parmesan, and bake 20 to 25 minutes until bubbling at the edges and golden on top.
Equipment for This Recipe:
- Medium saucepan
- Whisk
- 8×8-inch baking dish
- Colander
How to Serve This Dish:
Serve it straight from the dish with a sharp green salad or roasted broccoli. A spoonful should hold its shape on the plate, with the top crackling a little when you cut through it. It’s rich enough to stand alone, but a crisp vegetable side keeps the meal from feeling heavy.
Pro Tips for This Recipe:
- Warm the milk first; cold milk makes the roux lumpy faster than you’d think.
- Use freshly shredded cheese if you can stand the extra minute. It melts cleaner than pre-shredded.
- Bake until the edges are bubbling, not just the middle. That’s when the sauce settles into the pasta.
Variations on This Dish:
- Jalapeño Kick: Add 1 finely chopped jalapeño to the sauce for a little heat.
- Broccoli Fold-In: Stir in 2 cups small steamed broccoli florets before baking.
- Smoky Version: Swap 1/2 cup of the cheddar for smoked Gouda.
Common Mistakes to Avoid with This Dish:
- Sauce too thin: If the sauce never thickens on the stove, the bake turns loose. Let it coat the back of a spoon before adding cheese.
- Overbaking: If the top goes too dark before the center sets, cover loosely with foil for the last 5 minutes.
- Undersalting the pasta water: The noodles need seasoning from the start or the whole dish tastes flat.
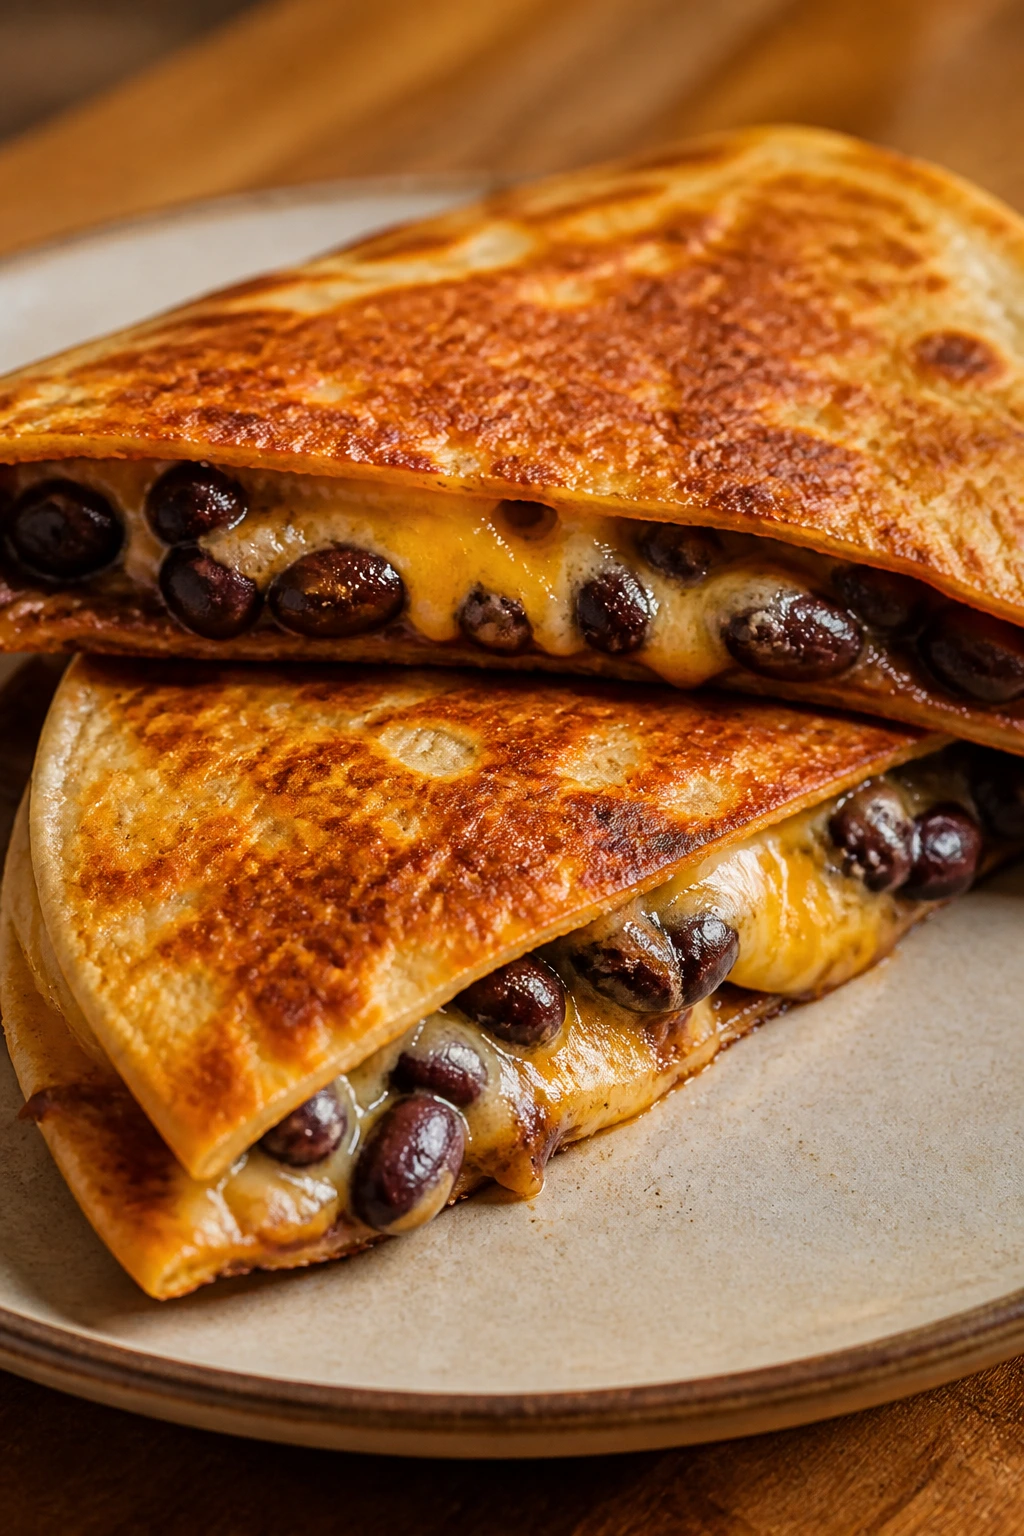
2. Crispy Bean and Cheese Quesadillas
These are the kind of vegetarian meal that vanishes before anyone starts discussing what’s missing. The tortillas go brittle and brown in spots, the cheese melts into the beans, and the whole thing eats like something you ordered from a place that knows what it’s doing.
Why It Works:
Quesadillas work because they’re portable, salty, and crisp at the edges. The beans bring body, but the cheese carries the flavor, and that matters when you’re cooking for people who flinch at too much vegetable texture. A little cumin and garlic powder give the filling enough warmth that it tastes intentional, not improvised.
Key Ingredients:
- 4 large flour tortillas
- 1 1/2 cups refried beans
- 2 cups shredded Monterey Jack
- 1 cup shredded cheddar
- 1 teaspoon ground cumin
- 1/2 teaspoon garlic powder
- 2 tablespoons butter or neutral oil
- Salsa and sour cream for serving
Quick Steps:
- Mix the refried beans with cumin and garlic powder in a bowl.
- Heat a skillet over medium and melt a little butter or oil.
- Lay one tortilla in the pan, spread beans over half, and top with cheese.
- Fold the tortilla over and cook 2 to 3 minutes per side until deeply golden and the cheese has fully melted.
- Cut into wedges and repeat with the rest.
Equipment for This Recipe:
- Large skillet
- Spatula
- Cutting board
- Small mixing bowl
How to Serve This Dish:
Serve with salsa that has enough acid to cut through the cheese, plus a spoon of sour cream or plain yogurt. Two wedges make a light lunch; four wedges turn into dinner when you add rice or a simple salad. A little guacamole on the side never hurts.
Pro Tips for This Recipe:
- Don’t overfill the tortillas or the filling will leak and burn in the pan.
- Medium heat is the sweet spot. High heat scorches the tortilla before the cheese melts.
- Let the quesadilla rest for 1 minute before cutting so the filling settles.
Variations on This Dish:
- Poblano Melt: Add roasted poblano strips for a gentle smoky note.
- Corn and Bean Crunch: Stir in 1/2 cup thawed corn for sweetness and texture.
- Breakfast Quesadilla: Crack in a scrambled egg filling for a morning version.
Common Mistakes to Avoid with This Dish:
- Cheese-only filling: It gets greasy and slippery. The beans help the center hold together.
- Pan too hot: You’ll get dark spots before the cheese melts. Lower the heat and give it time.
- Cutting too soon: The filling spills out. Wait that minute.
3. Veggie Fried Rice with Soy-Sesame Glaze
Cold rice is the whole point here. Freshly cooked rice gets sticky and clumpy, while day-old rice fries up into separate grains that soak in the soy-sesame seasoning. The vegetables stay small and tidy, which matters when you’re feeding picky eaters.
Why It Works:
Fried rice has a built-in advantage: everything is chopped small, browned fast, and coated in a salty glaze. The egg adds richness, peas add sweetness, and carrots bring a little crunch without shouting for attention. It tastes like takeout, which is often all the persuasion a dinner needs.
Key Ingredients:
- 3 cups cooked, chilled white rice
- 2 tablespoons neutral oil
- 2 eggs, lightly beaten
- 1 cup frozen peas and carrots, thawed
- 3 scallions, sliced
- 2 tablespoons soy sauce
- 1 teaspoon sesame oil
- 1 teaspoon grated fresh ginger
- 1 clove garlic, minced
Quick Steps:
- Heat oil in a large skillet or wok over medium-high heat.
- Scramble the eggs quickly, then push them to the side.
- Add garlic, ginger, peas, and carrots; cook for 1 minute until fragrant.
- Stir in the rice and break up any clumps with the back of the spoon.
- Add soy sauce and sesame oil, then cook until the grains look glossy and lightly toasted.
- Finish with scallions.
Equipment for This Recipe:
- Large skillet or wok
- Wooden spoon or spatula
- Small bowl
- Measuring spoons
How to Serve This Dish:
Pile it into shallow bowls and top with extra scallions or a fried egg if you want a little more drama. It works as a main dish on its own, but it’s also the sort of thing that sits nicely next to cucumber salad or simple steamed edamame. The grains should be loose, not wet.
Pro Tips for This Recipe:
- Use rice that has chilled at least 4 hours; overnight is better.
- Keep the heat high enough to sizzle, but don’t let the garlic burn.
- Add soy sauce around the edge of the pan so it hits the hot surface first.
Variations on This Dish:
- Mushroom Fried Rice: Add 1 cup chopped mushrooms and cook them until browned.
- Spicy Chili Crisp Rice: Stir in 1 teaspoon chili crisp at the end.
- Pineapple-Sesame Version: Add 1/2 cup diced pineapple for a sweet edge.
Common Mistakes to Avoid with This Dish:
- Using warm rice: It turns gummy. Chill it first.
- Crowding the pan: The vegetables steam instead of fry. Use a big skillet.
- Too much soy sauce: The rice goes muddy and wet. Start with 2 tablespoons.
4. Margherita Pizza on Store-Bought Dough
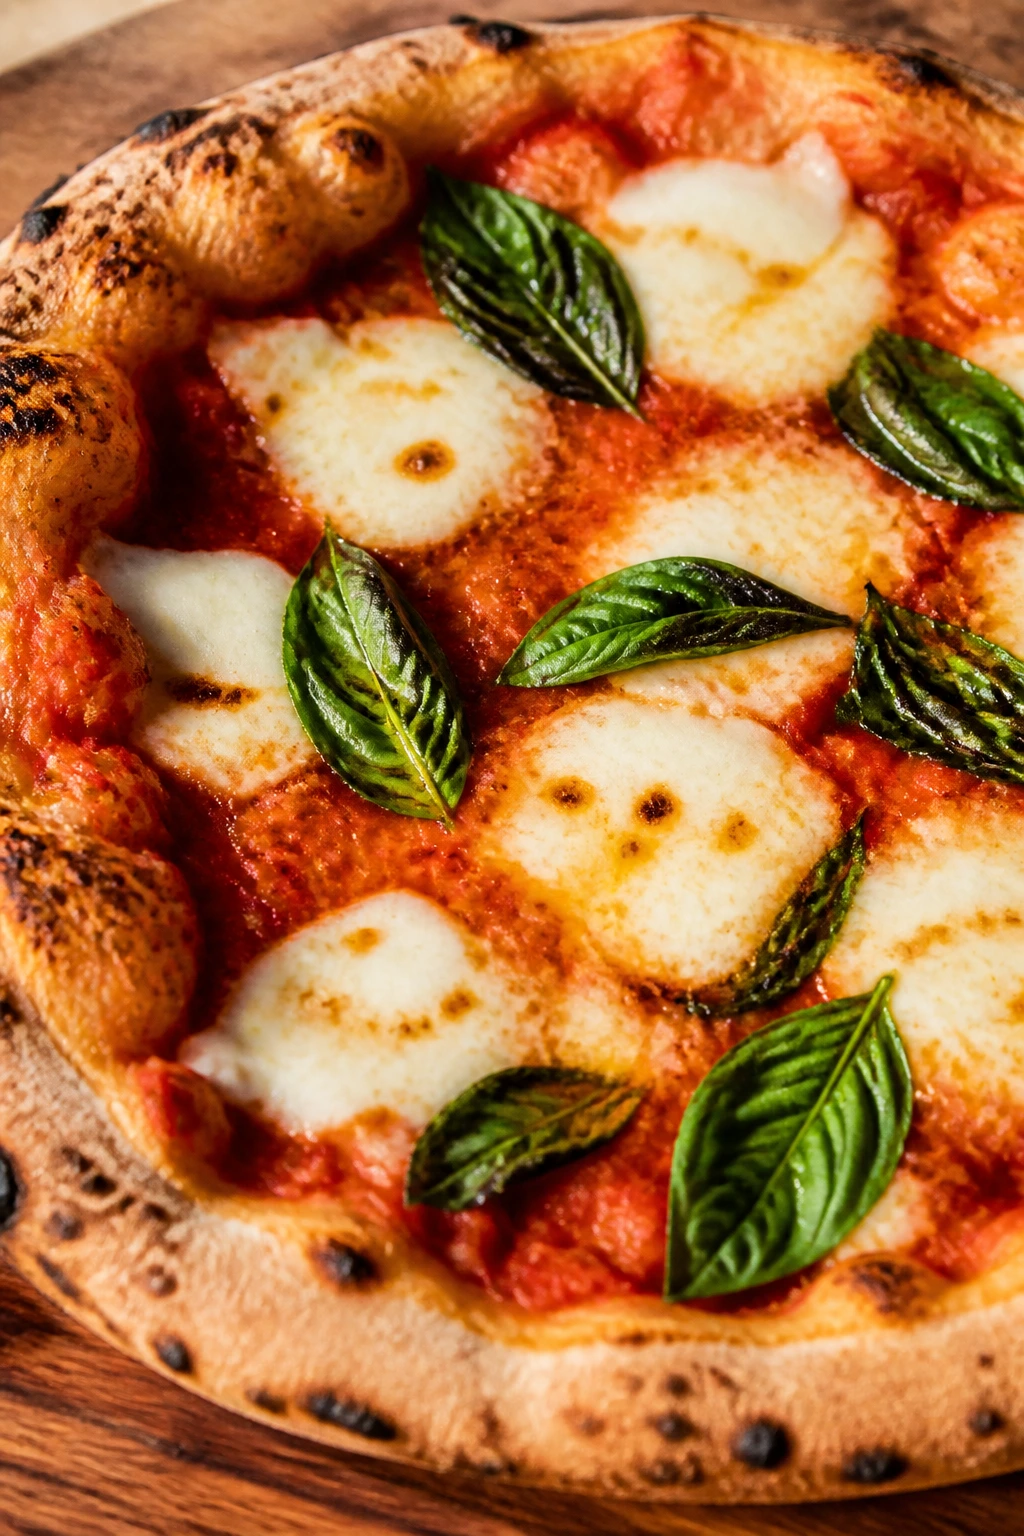
You do not need to make pizza dough from scratch to make a vegetarian dinner that feels worth eating. Store-bought dough, good tomatoes, and a serious handful of mozzarella can still produce a pie with blistered edges and a chewy center.
Why It Works:
Margherita pizza is simple in a way that helps picky eaters. The tomato sauce stays bright, the cheese melts into silky pools, and the basil adds a fresh hit at the end instead of dragging the whole thing into herb territory. The crust gives you the chew that people expect from real pizza.
Key Ingredients:
- 1 pound store-bought pizza dough
- 1/2 cup crushed tomatoes
- 1 teaspoon olive oil
- 1 small garlic clove, grated
- 8 oz fresh mozzarella, sliced
- 1/4 teaspoon salt
- 1/4 teaspoon dried oregano
- Handful of fresh basil leaves
Quick Steps:
- Preheat the oven to 475°F (245°C) with a pizza stone or baking sheet inside if you have one.
- Stretch the dough into a 12-inch round on parchment.
- Mix crushed tomatoes, olive oil, garlic, salt, and oregano, then spread a thin layer over the dough.
- Add mozzarella in even slices and bake 12 to 15 minutes until the crust is browned at the edges.
- Finish with basil after baking.
Equipment for This Recipe:
- Baking sheet or pizza stone
- Parchment paper
- Small bowl
- Pizza cutter or sharp knife
How to Serve This Dish:
Serve hot with a green salad dressed in lemon and olive oil. Slice it into six or eight pieces depending on appetite; two or three slices are plenty for most people when salad is involved. The basil should go on last so it stays bright and doesn’t blacken.
Pro Tips for This Recipe:
- Keep the sauce thin. Too much sauce makes the middle soggy.
- Use mozzarella that isn’t dripping wet, or pat it dry first.
- Let the crust get some color; pale pizza tastes unfinished.
Variations on This Dish:
- Tomato-Burrata Finish: Add torn burrata after baking for a richer center.
- Roasted Garlic Version: Swap fresh garlic for 2 tablespoons roasted garlic paste.
- Veggie Edge: Add paper-thin zucchini or mushrooms in a sparse layer.
Common Mistakes to Avoid with This Dish:
- Too much topping: The crust gets soft and dull. Less is better here.
- Cold oven: The dough won’t puff well. Preheat fully.
- Basil baked too long: It turns black. Add it at the end.
5. Creamy Tomato Soup with Grilled Cheese Dippers
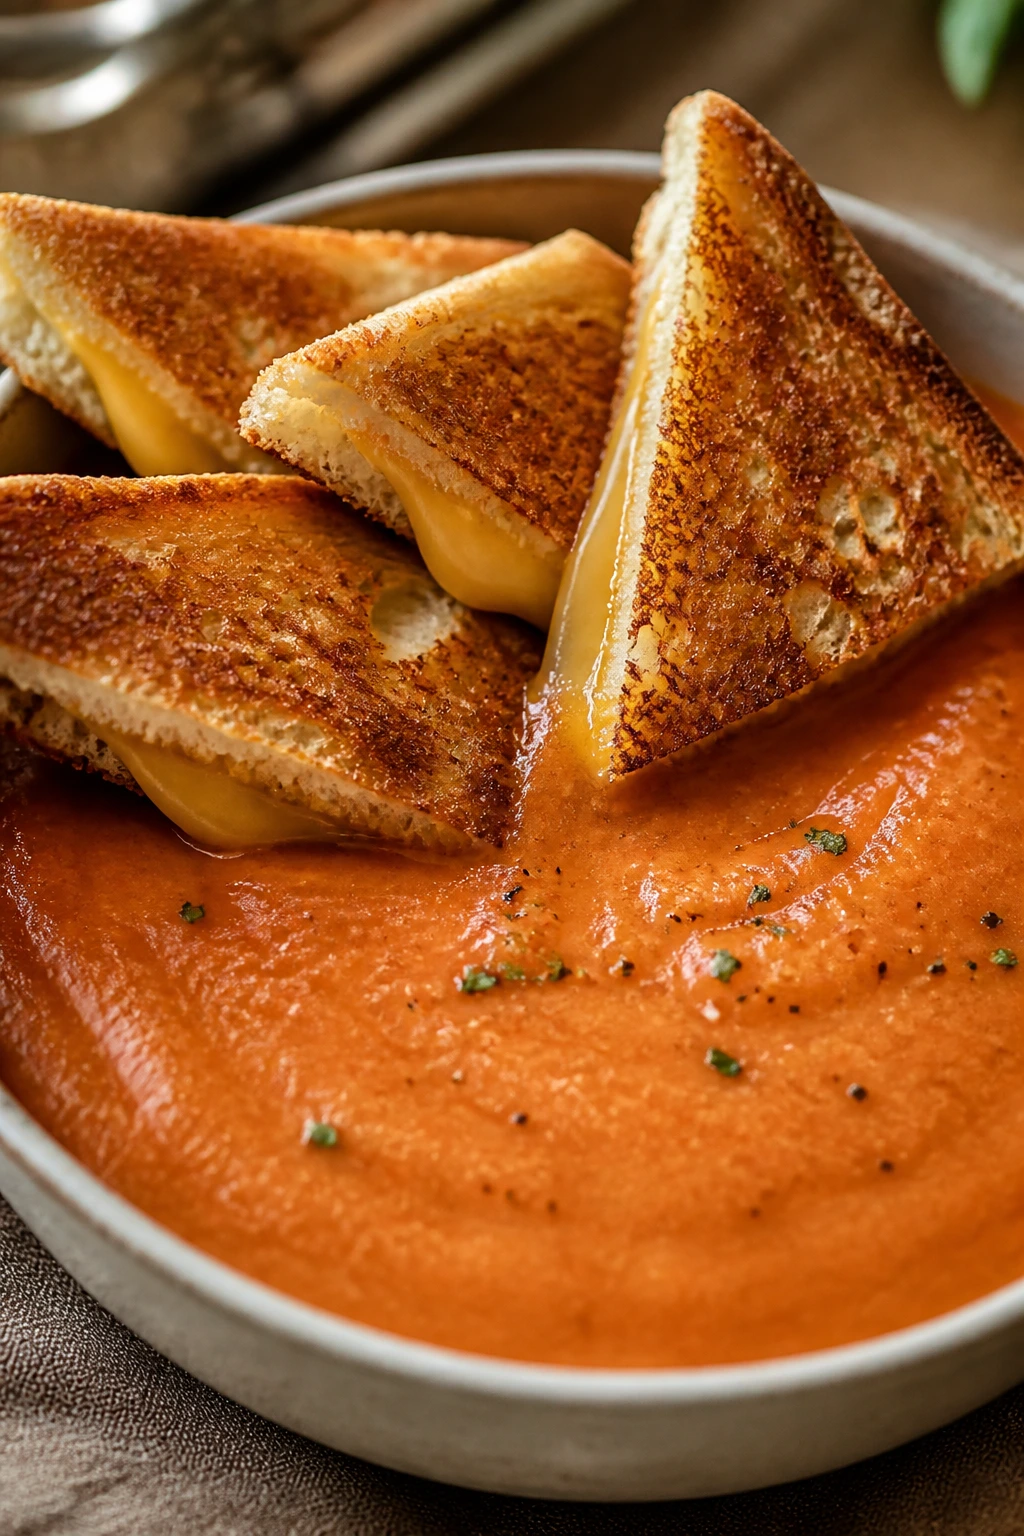
There’s a reason this combination keeps showing up in real kitchens. The soup is smooth, tangy, and a little sweet from the tomatoes, while the grilled cheese brings salt, butter, and crunch. Together, they feel complete.
Why It Works:
Tomato soup wins over wary eaters because it doesn’t try to be tricky. A little onion, a little garlic, and enough cream or milk to soften the acid give it a rounded flavor that tastes like lunch from a good diner. Grilled cheese on the side handles the texture problem by giving you toast and melt in the same bite.
Key Ingredients:
- 2 tablespoons butter
- 1 small onion, chopped
- 2 garlic cloves, minced
- 1 can (28 oz) crushed tomatoes
- 2 cups vegetable broth
- 1/2 cup heavy cream or whole milk
- 1 teaspoon sugar
- Salt and black pepper
- 4 slices bread
- 4 slices cheddar
Quick Steps:
- Melt butter in a pot and cook onion until soft, about 5 minutes.
- Add garlic, tomatoes, broth, and sugar, then simmer 15 minutes.
- Blend until smooth, then stir in cream and season to taste.
- Build grilled cheese sandwiches and cook in a skillet until golden on both sides.
- Serve the soup with the sandwiches cut into strips.
Equipment for This Recipe:
- Soup pot
- Blender or immersion blender
- Skillet
- Ladle
How to Serve This Dish:
Pour the soup into wide bowls and float a little black pepper on top. Serve grilled cheese in long fingers for dipping, because fingers behave better than full sandwiches here. A small side salad works if you want something green, but it isn’t required.
Pro Tips for This Recipe:
- Let the tomatoes simmer long enough to lose their sharp edge.
- Add cream off the heat if you want a silkier finish.
- Use a sturdy bread so the sandwich doesn’t collapse when dipped.
Variations on This Dish:
- Roasted Tomato Version: Use roasted tomatoes for a deeper, sweeter flavor.
- Pepper Jack Sandwiches: Swap cheddar for Pepper Jack if you want a little heat.
- Herby Finish: Stir in chopped basil or thyme at the end.
Common Mistakes to Avoid with This Dish:
- Skipping the sugar: Some canned tomatoes are sharp. A teaspoon helps balance them.
- Boiling after cream goes in: The soup can split. Keep it gentle.
- Thin bread for grilled cheese: It burns before the cheese melts.
6. Black Bean Burgers with Smoky Mayo

A black bean burger has to earn its place by staying together. When it’s done well, the crust is crisp, the middle is meaty in texture, and the smoky mayo makes the whole thing feel less like a substitute and more like a proper sandwich.
Why It Works:
Black beans bring that dense, savory bite people want from a burger, while breadcrumbs and egg hold everything in place. A little smoked paprika and onion keep the flavor grounded. The bun matters too; a soft toasted bun turns a decent patty into something worth repeating.
Key Ingredients:
- 2 cans black beans, drained and rinsed
- 1/2 cup breadcrumbs
- 1 egg
- 1/4 cup finely chopped onion
- 1 teaspoon smoked paprika
- 1 teaspoon cumin
- 1/2 teaspoon salt
- 2 tablespoons mayo mixed with 1 teaspoon chipotle sauce
- 4 burger buns
Quick Steps:
- Mash the beans until about three-quarters broken down.
- Mix in breadcrumbs, egg, onion, paprika, cumin, and salt.
- Form into 4 patties and chill 15 minutes so they firm up.
- Pan-fry in oil over medium heat for 4 to 5 minutes per side until browned.
- Serve on toasted buns with smoky mayo and your preferred toppings.
Equipment for This Recipe:
- Mixing bowl
- Skillet
- Spatula
- Sheet pan or plate for chilling
How to Serve This Dish:
Serve with oven fries, sliced tomatoes, or a crunchy slaw. The patties should sit snugly in the bun without falling apart at first bite. I like a few pickle chips on top because the acid sharpens the beans.
Pro Tips for This Recipe:
- Don’t over-mash the beans; some texture helps the patties feel hearty.
- Chill the patties before cooking. It keeps the edges cleaner.
- Toast the buns. Soft, untoasted bread gets mushy fast.
Variations on This Dish:
- Cheddar Bean Burger: Fold in 1/2 cup shredded cheddar for extra richness.
- Spicy Southwest: Add 1 tablespoon chopped pickled jalapeños.
- Mushroom Boost: Mix in 1 cup finely chopped sautéed mushrooms.
Common Mistakes to Avoid with This Dish:
- Too wet to shape: Add more breadcrumbs if the mix feels loose.
- Flipping too early: Wait for a dark crust so the patty holds.
- Cold center, dark outside: Lower the heat and cook a minute longer per side.
7. Spinach and Ricotta Stuffed Shells
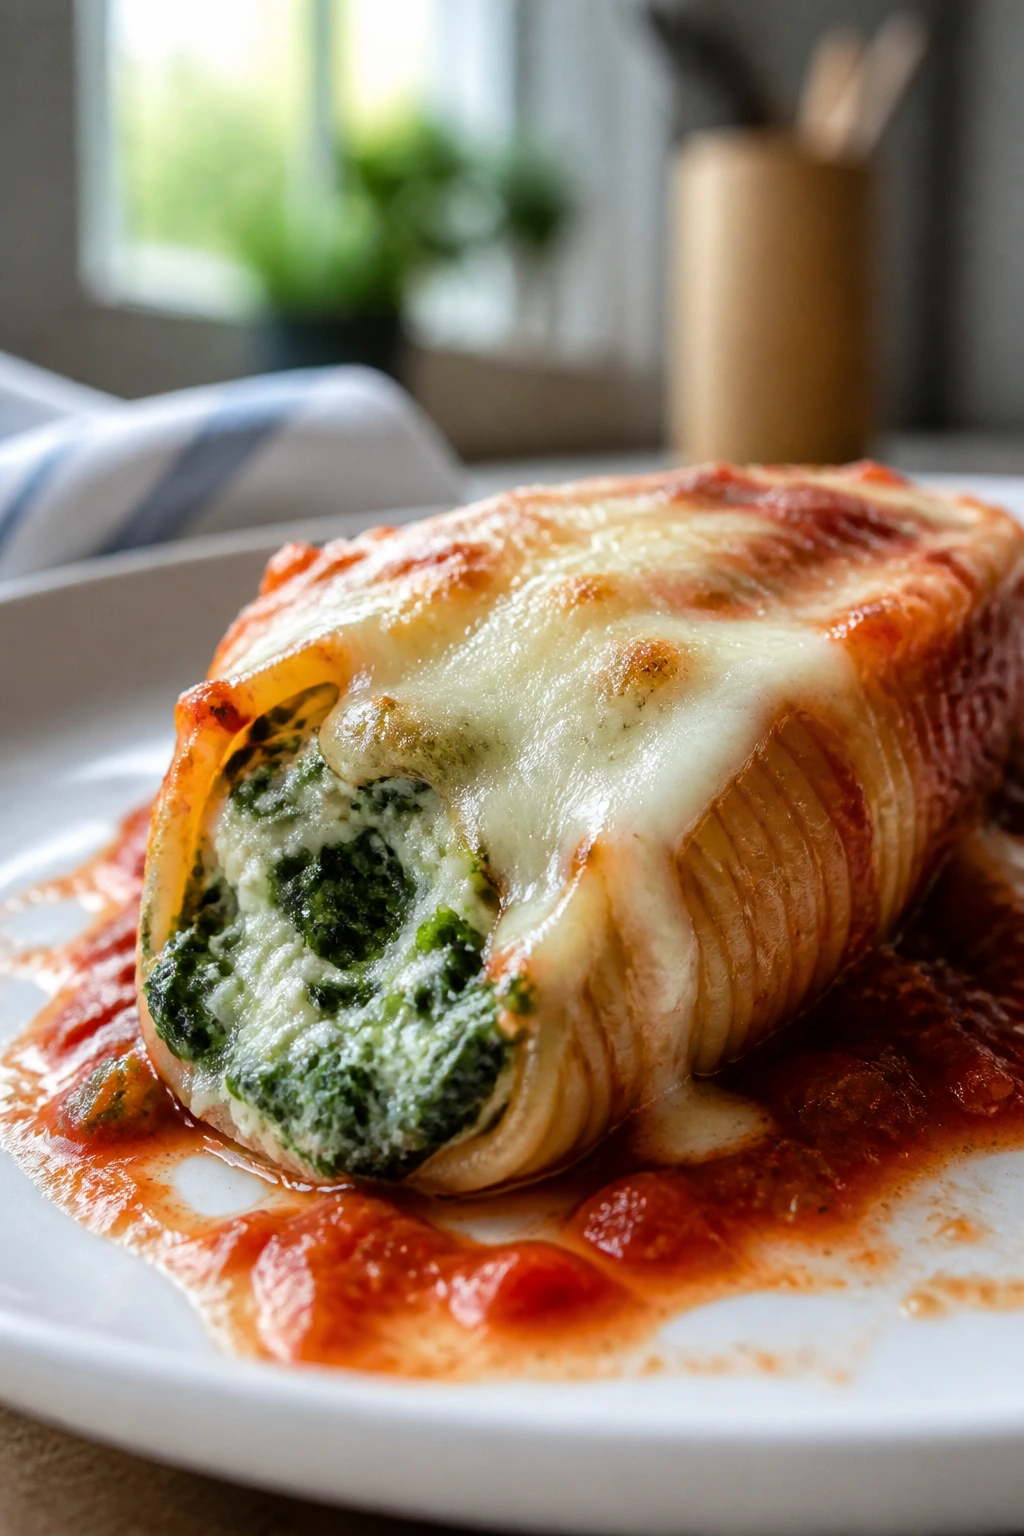
Stuffed shells are the kind of vegetarian dinner that looks fancier than it is. The pasta acts like a little boat for the ricotta filling, the tomato sauce keeps everything moist, and the baked cheese top makes the pan look generous.
Why It Works:
This recipe uses spinach the way picky eaters usually accept it best: chopped fine and mixed into cheese. Ricotta stays mild, mozzarella gives the pull, and marinara ties it all together. The result is soft, saucy, and easy to portion.
Key Ingredients:
- 20 jumbo pasta shells
- 15 oz ricotta
- 1 egg
- 2 cups chopped spinach, squeezed dry
- 1 cup shredded mozzarella
- 1/2 cup grated Parmesan
- 2 cups marinara sauce
- 1 teaspoon Italian seasoning
Quick Steps:
- Boil the shells until just al dente, then drain and cool slightly.
- Mix ricotta, egg, spinach, half the mozzarella, Parmesan, and seasoning.
- Spread marinara in a baking dish.
- Stuff each shell with filling and nestle it in the sauce.
- Top with remaining mozzarella and bake at 375°F (190°C) for 25 minutes until bubbling.
Equipment for This Recipe:
- Large pot
- Baking dish
- Spoon or small scoop
- Mixing bowl
How to Serve This Dish:
Serve 3 to 5 shells per plate with garlic bread and a simple salad. The sauce should puddle around the pasta, not drown it. A few extra Parmesan shavings on top help the whole dish look finished.
Pro Tips for This Recipe:
- Squeeze the spinach dry or the filling gets watery.
- Cook a couple extra shells; some always tear.
- Let the pan rest for 5 minutes before serving so the filling settles.
Variations on This Dish:
- Meaty-Tasting Mushroom Fill: Add 1 cup finely chopped sautéed mushrooms.
- Lemon Ricotta Version: Stir in 1 teaspoon lemon zest for brightness.
- Baked Ziti Shortcut: Skip stuffing and layer the filling with ziti instead.
Common Mistakes to Avoid with This Dish:
- Overcooked shells: They split when stuffed. Pull them early.
- Runny filling: Wet spinach is usually the culprit.
- Dry edges after baking: Cover with foil for the first 15 minutes if your oven runs hot.
8. Sheet Pan Gnocchi with Roasted Vegetables
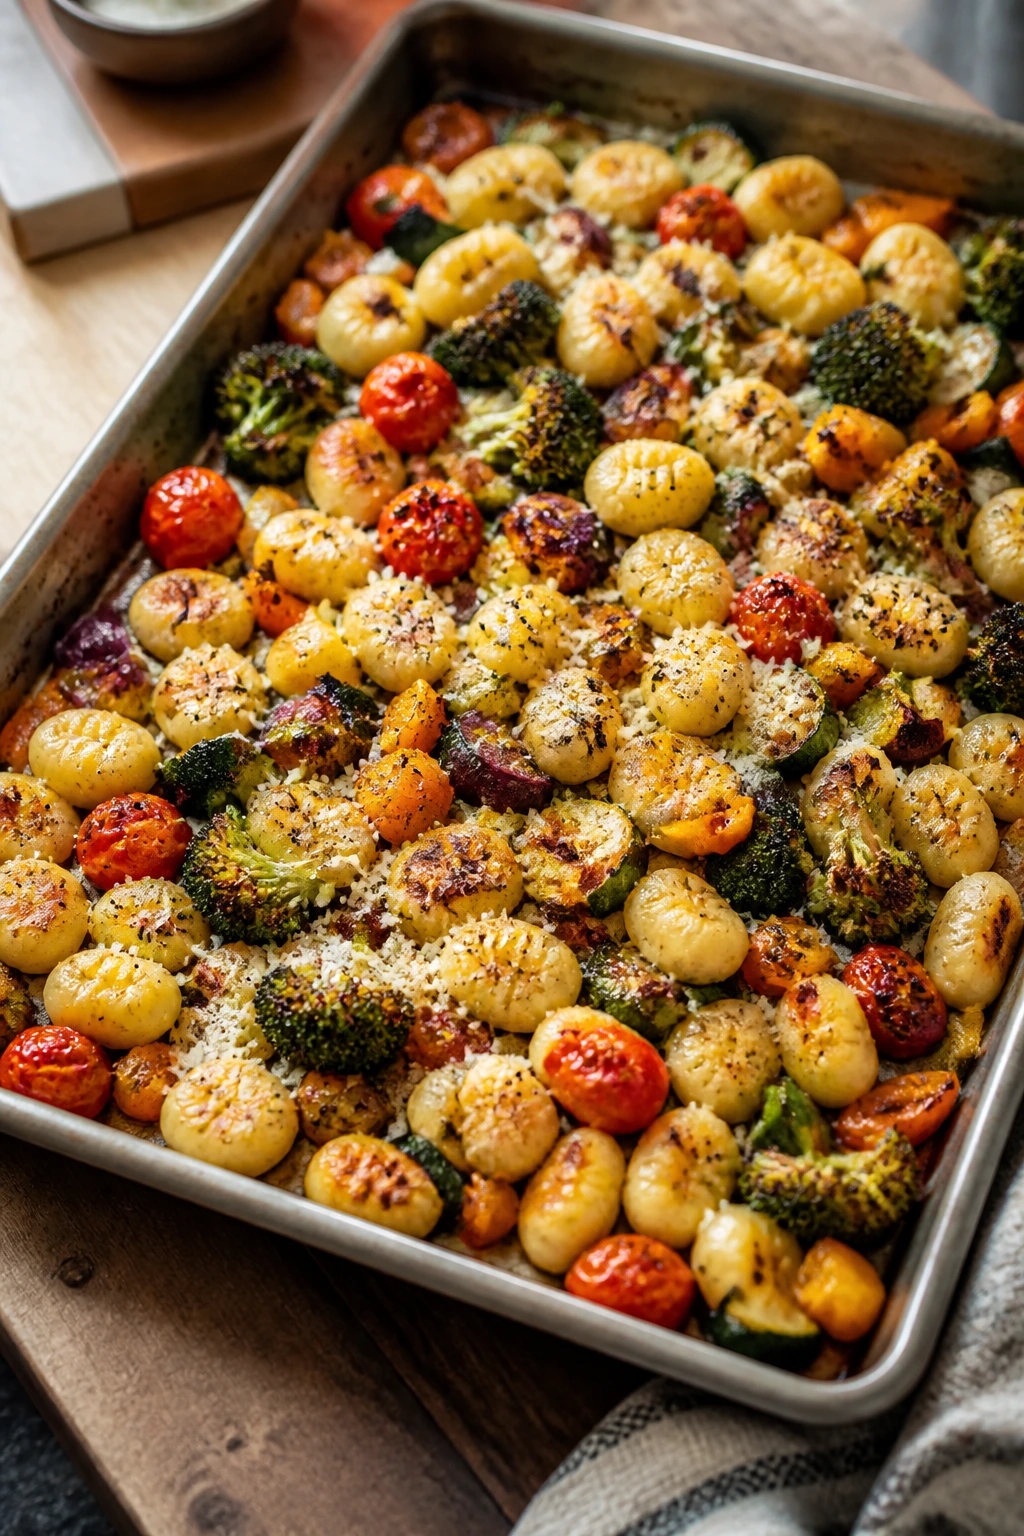
This is the kind of dinner that tastes like you worked harder than you did. The gnocchi roasts instead of boiling, so it picks up crisp spots, and the vegetables soften at the edges while keeping enough bite to stay interesting.
Why It Works:
Shelf-stable gnocchi is a shortcut with a good payoff. On a hot tray, it browns and turns chewy in the best way, while cherry tomatoes burst into a quick sauce and zucchini or peppers keep things colorful. A shower of Parmesan at the end pulls everything together.
Key Ingredients:
- 1 pound shelf-stable gnocchi
- 1 zucchini, sliced
- 1 red bell pepper, chopped
- 1 cup cherry tomatoes
- 1 small red onion, sliced
- 2 tablespoons olive oil
- 1 teaspoon Italian seasoning
- 1/2 cup grated Parmesan
Quick Steps:
- Heat the oven to 425°F (220°C) and line a sheet pan.
- Toss gnocchi and vegetables with oil, seasoning, salt, and pepper.
- Spread in a single layer and roast 20 to 25 minutes, stirring once.
- When the gnocchi looks browned and the tomatoes have burst, pull the pan.
- Finish with Parmesan and a little extra olive oil if needed.
Equipment for This Recipe:
- Rimmed sheet pan
- Large bowl
- Spatula
- Grater
How to Serve This Dish:
Serve it straight from the pan into shallow bowls. A spoonful should have crispy gnocchi, soft tomato, and a little char on the onions. A green salad or a fried egg on top can make it dinner without much effort.
Pro Tips for This Recipe:
- Don’t overcrowd the pan; the gnocchi needs space to brown.
- Use shelf-stable gnocchi, not the very soft fresh kind.
- Stir only once so the pieces get those browned sides.
Variations on This Dish:
- Pesto Finish: Toss with 2 tablespoons pesto after roasting.
- Sausage-Free “Italian” Style: Add white beans for extra heft.
- Garlic-Lover’s Version: Roast 4 smashed garlic cloves with the vegetables.
Common Mistakes to Avoid with This Dish:
- Too much oil: The vegetables go soggy. Use just enough to coat.
- Dense pan: Steam replaces roasting. Spread things out.
- Adding Parmesan too early: It can burn. Finish after roasting.
9. Eggplant Parmesan Stacks
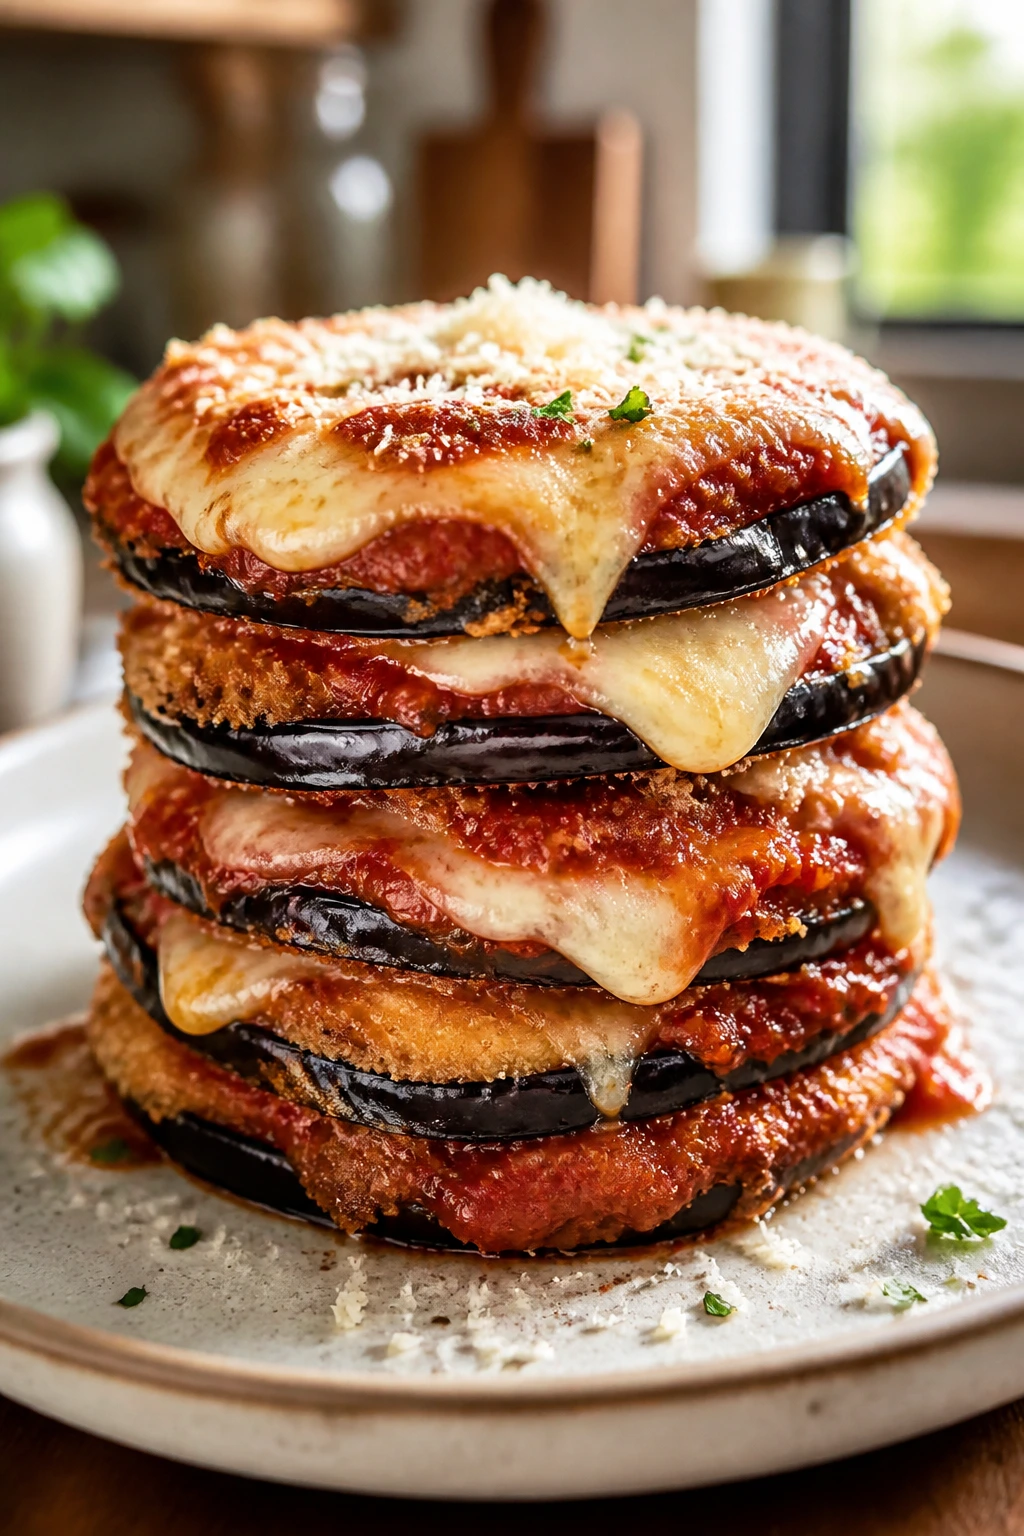
Eggplant Parmesan gets a bad reputation from bad eggplant Parmesan. The good version is crisp at the edges, saucy in the middle, and structured enough that each stack holds together when you cut it.
Why It Works:
Eggplant turns silky when it’s baked properly, and the breading gives it enough crunch to survive the sauce. Tomato sauce and mozzarella do the heavy lifting here, while Parmesan adds salt and sharpness. Even people who claim not to like eggplant tend to warm up once it’s layered with cheese and baked until it bubbles.
Key Ingredients:
- 1 large eggplant, sliced into 1/2-inch rounds
- 1 cup flour
- 2 eggs, beaten
- 1 1/2 cups breadcrumbs
- 1 teaspoon salt
- 2 cups marinara
- 2 cups shredded mozzarella
- 1/2 cup grated Parmesan
Quick Steps:
- Salt the eggplant slices and let them sit 20 minutes, then pat dry.
- Bread each slice in flour, egg, and breadcrumbs.
- Bake at 425°F (220°C) for 20 minutes, flipping once, until golden.
- Layer eggplant, marinara, mozzarella, and Parmesan in a baking dish or on a tray.
- Bake 15 minutes more until the cheese melts and the sauce bubbles.
Equipment for This Recipe:
- Baking sheets
- Shallow bowls
- 9×13-inch baking dish
- Tongs or spatula
How to Serve This Dish:
Serve the stacks with spaghetti, garlic bread, or a crisp Caesar-style salad. The best plate has a bit of sauce pooling at the bottom and a browned cheese cap on top. Keep the portions modest; eggplant is filling in a sneaky way.
Pro Tips for This Recipe:
- Salt the eggplant first. It pulls out bitterness and excess moisture.
- Bake the breaded slices instead of frying if you want less fuss.
- Let the finished pan rest 10 minutes so the layers stay put.
Variations on This Dish:
- Zucchini Swap: Use thick zucchini slices instead of eggplant.
- Spicy Marinara: Add red pepper flakes to the sauce.
- Polenta Base: Serve the layers over soft polenta instead of pasta.
Common Mistakes to Avoid with This Dish:
- Skipping the salting step: The eggplant can taste spongy.
- Wet breading: Press the crumbs on firmly so they stay put.
- Too much sauce: The stacks slide apart. Use enough to coat, not drown.
10. Loaded Baked Potatoes with Broccoli and Cheddar
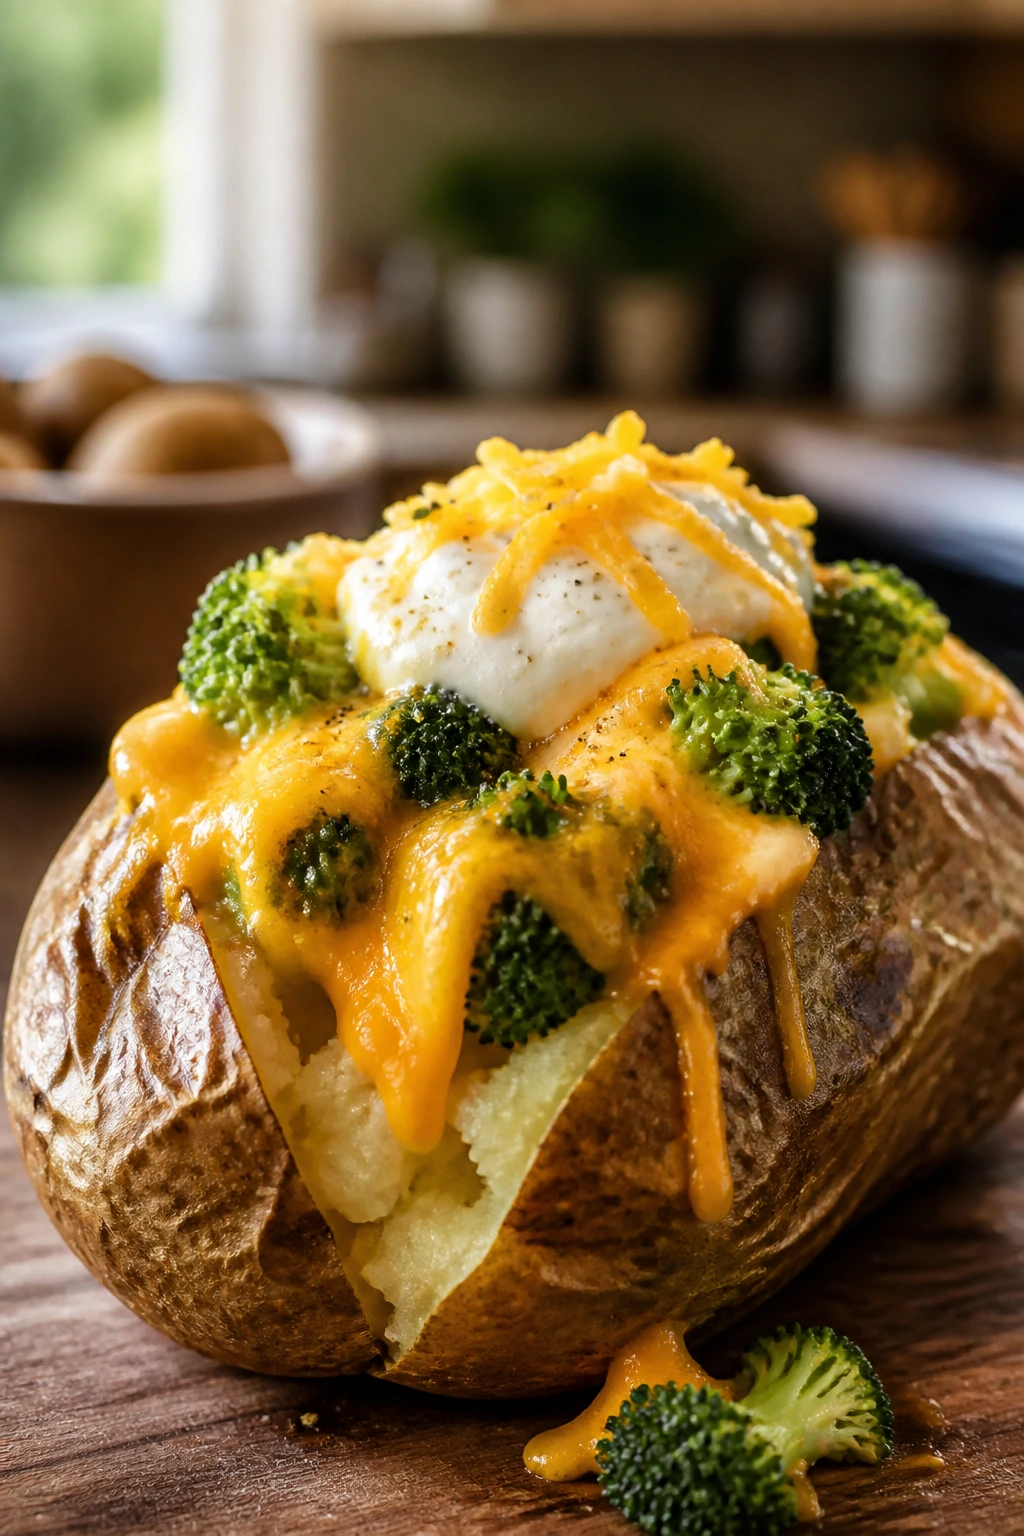
A baked potato with enough topping stops feeling like a side dish and starts acting like dinner. Broccoli brings a green note, cheddar melts into the fluffy potato, and a spoon of sour cream makes the whole thing taste rounded instead of one-note.
Why It Works:
Potatoes are already comforting, so they give vegetarian toppings a strong base. The steam inside the potato turns the flesh soft and fluffy, while the skin stays crisp enough to handle the filling. Broccoli and cheese make the dish look familiar, which matters more than people like to admit.
Key Ingredients:
- 4 russet potatoes
- 1 tablespoon olive oil
- 2 cups broccoli florets, steamed
- 2 cups shredded cheddar
- 1/2 cup sour cream
- 2 tablespoons butter
- Salt and black pepper
- Chopped chives for serving
Quick Steps:
- Heat the oven to 425°F (220°C), rub potatoes with oil and salt, and bake 50 to 60 minutes.
- Steam the broccoli until bright green and tender.
- Split the potatoes open and fluff the insides with a fork.
- Add butter, cheddar, broccoli, and sour cream.
- Return to the oven for 5 minutes if you want the cheese fully melted.
Equipment for This Recipe:
- Baking sheet
- Fork
- Steamer basket or microwave-safe bowl
- Sharp knife
How to Serve This Dish:
Serve each potato on its own plate with the skins intact and the topping spilling over the split. A side salad or tomato slices make a nice contrast. For bigger appetites, two small potatoes beat one giant one because the topping ratio stays better.
Pro Tips for This Recipe:
- Bake the potatoes on a rack or directly on the oven rack for drier skins.
- Don’t wrap them in foil; that steams the skin soft.
- Warm the broccoli before topping so it doesn’t cool the cheese too fast.
Variations on This Dish:
- Buffalo Style: Drizzle with hot sauce and add blue cheese.
- Mushroom Cheddar: Swap broccoli for sautéed mushrooms.
- Bean-Heavy Version: Add black beans under the cheese for more heft.
Common Mistakes to Avoid with This Dish:
- Undercooked potato: The center should feel soft when squeezed with an oven mitt.
- Cold toppings: They chill the whole potato fast.
- Tiny amount of salt: Potatoes need more seasoning than people expect.
11. Caprese Pasta Salad with Pesto
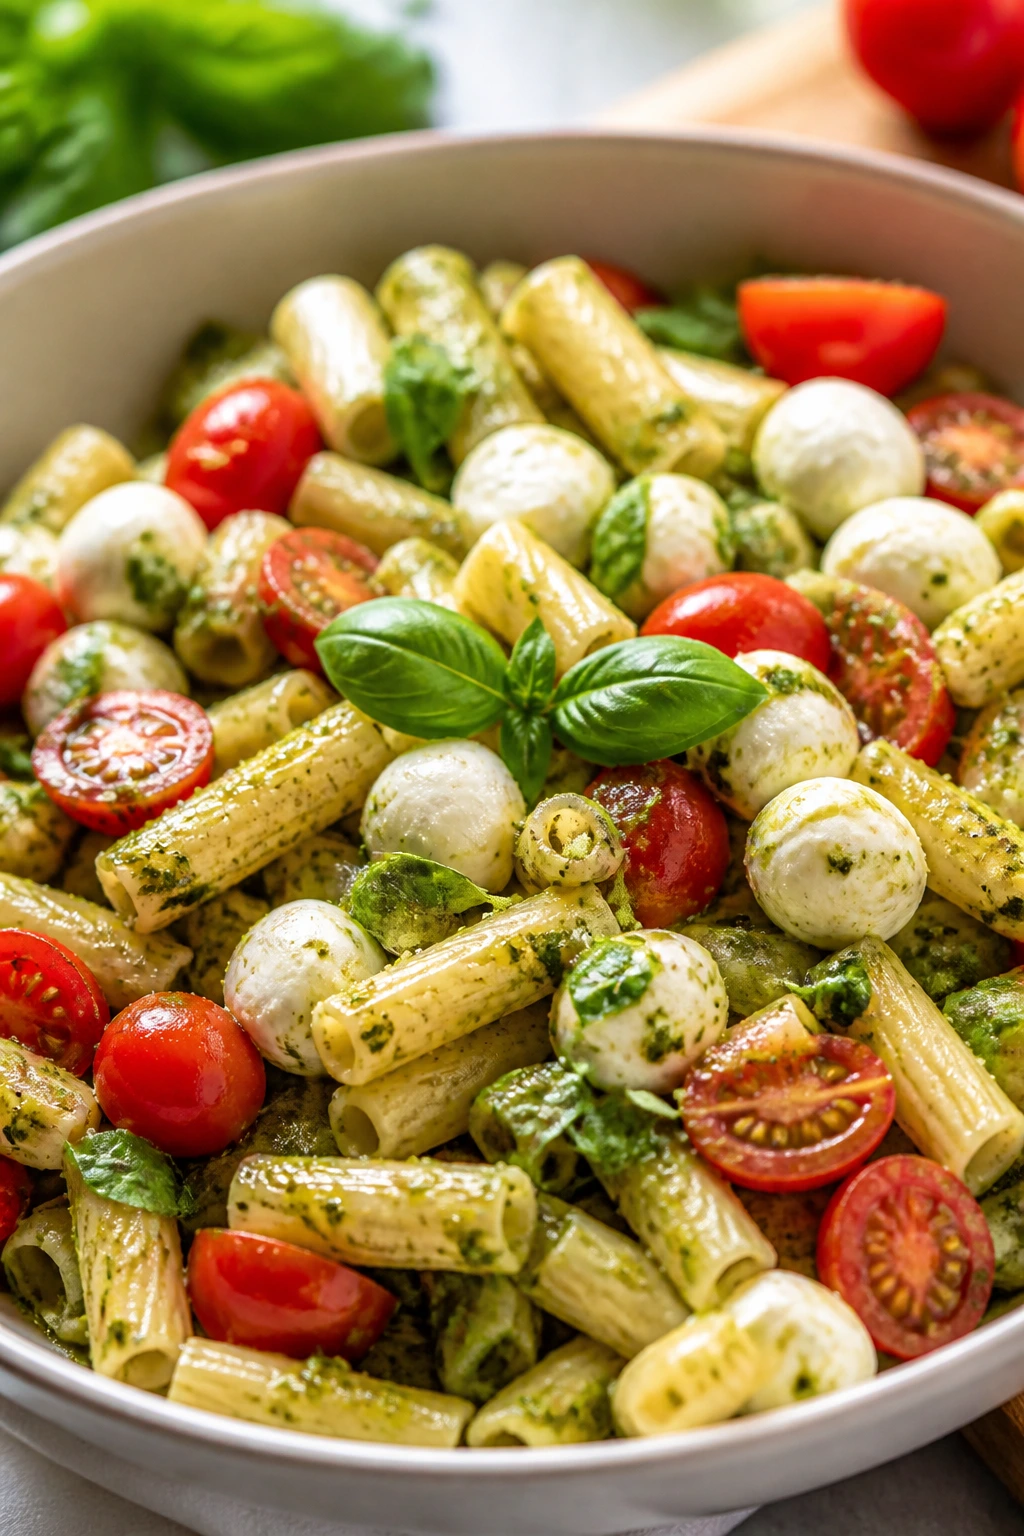
Caprese flavors work because they’re clean and blunt: tomato, mozzarella, basil, olive oil. Toss them with pasta and you get a cold dish that still eats like lunch, not a side salad pretending to be dinner.
Why It Works:
The pasta gives the dish backbone, while pesto coats the noodles so they taste seasoned from the first forkful. Cherry tomatoes bring juicy bursts, and mozzarella balls keep the texture soft without turning the salad watery. It’s the kind of vegetarian bowl that lands well at cookouts and packed lunches alike.
Key Ingredients:
- 12 oz pasta such as rotini or fusilli
- 1 cup basil pesto
- 2 cups cherry tomatoes, halved
- 8 oz mozzarella balls, drained
- 1 cup baby spinach
- 2 tablespoons olive oil
- Salt and black pepper
- 1 tablespoon lemon juice
Quick Steps:
- Cook the pasta in salted water until al dente, then drain and cool slightly.
- Toss the warm pasta with pesto, olive oil, and lemon juice.
- Fold in tomatoes, mozzarella, and spinach.
- Season with salt and pepper.
- Chill 20 minutes or serve right away.
Equipment for This Recipe:
- Large pot
- Colander
- Large mixing bowl
- Serving spoon
How to Serve This Dish:
Serve it in a wide bowl so the colors show up instead of getting buried. It works as a main lunch in a generous portion or as a side next to grilled vegetables. If you want to stretch it farther, add cucumbers or white beans, but don’t overload the bowl.
Pro Tips for This Recipe:
- Cool the pasta a little before adding the cheese so the mozzarella doesn’t get too soft.
- Salt the pasta water well; the dressing won’t fix bland noodles.
- Add spinach at the end so it stays fresh.
Variations on This Dish:
- Sun-Dried Tomato Version: Add 1/4 cup chopped sun-dried tomatoes.
- White Bean Lunch Bowl: Stir in 1 can drained cannellini beans.
- Creamier Pesto: Mix the pesto with 2 tablespoons Greek yogurt.
Common Mistakes to Avoid with This Dish:
- Rinsing pasta too much: The dressing won’t cling as well.
- Too much pesto: The salad can turn heavy and oily.
- Serving ice cold: A little room temperature makes the flavors louder.
12. Sweet Potato and Black Bean Tacos
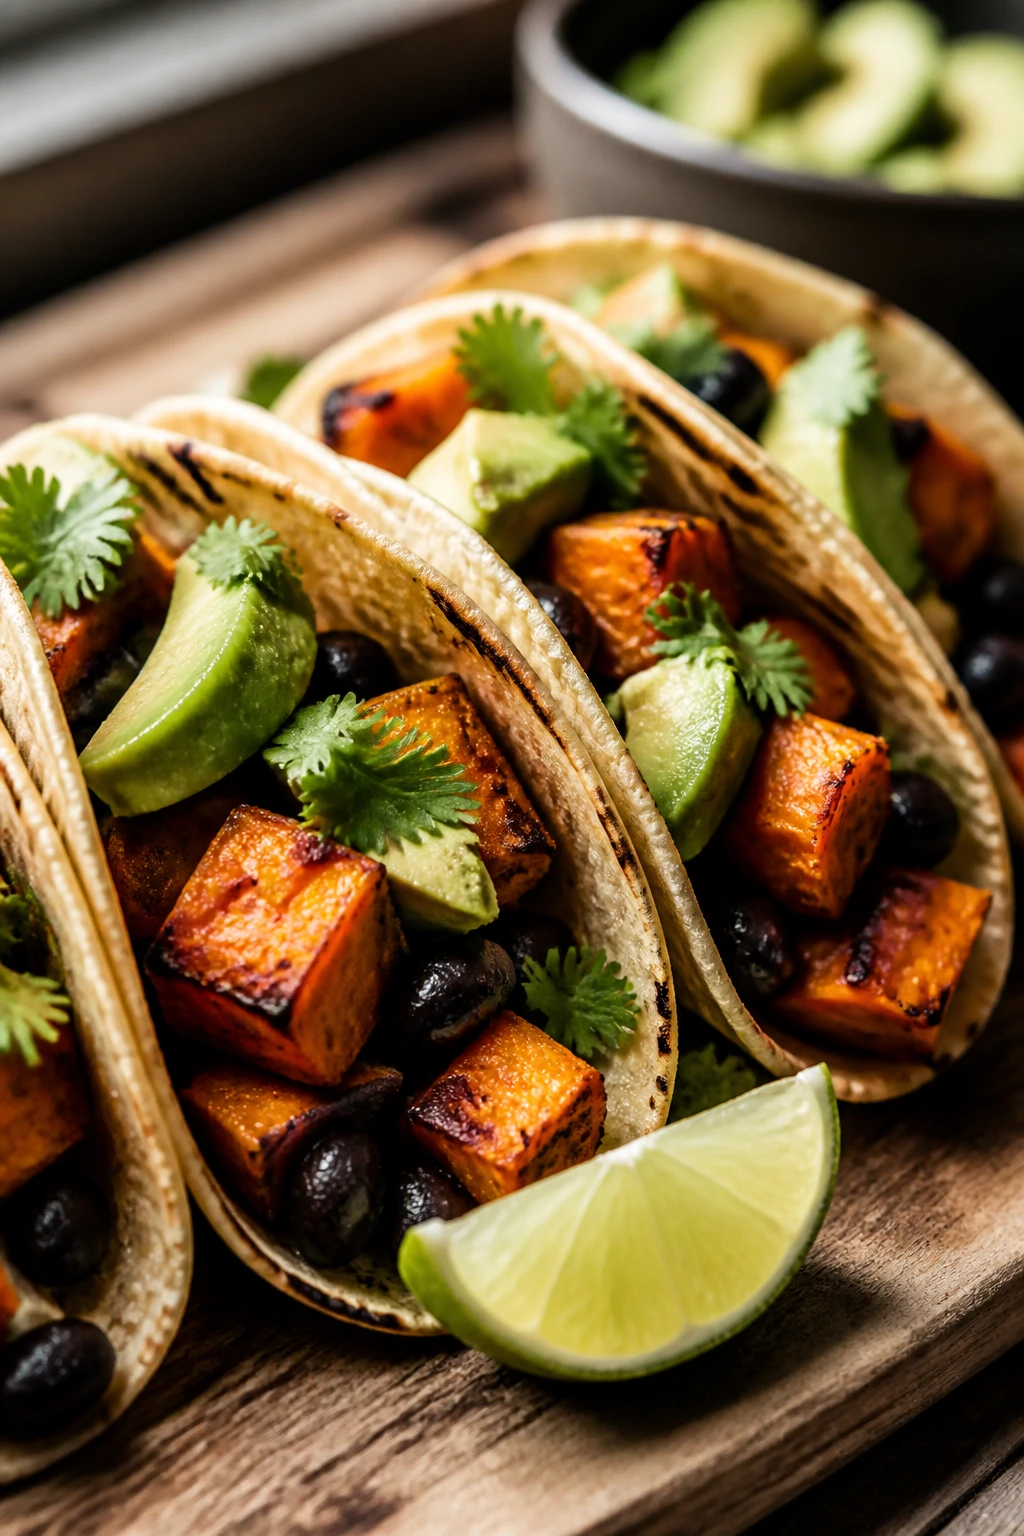
These tacos have enough color and contrast to keep the table interested. Sweet potatoes roast into soft edges, black beans bring the savory side, and avocado cools everything down without making the tacos bland.
Why It Works:
Sweet potato and black bean tacos work because the filling is hearty without being heavy. You get sweetness, salt, creaminess, and a little heat if you add chili powder or lime. The tortilla keeps the whole thing grounded, which matters when you’re feeding people who usually prefer familiar flavors.
Key Ingredients:
- 2 medium sweet potatoes, peeled and cubed
- 1 tablespoon olive oil
- 1 teaspoon chili powder
- 1/2 teaspoon cumin
- 1 can black beans, drained
- 8 small tortillas
- 1 avocado, sliced
- Lime wedges
- Crumbled cotija or feta, optional
Quick Steps:
- Roast sweet potatoes at 425°F (220°C) with oil, chili powder, cumin, and salt for 20 to 25 minutes.
- Warm the black beans in a small saucepan.
- Heat the tortillas in a skillet or directly over a low flame.
- Fill each tortilla with sweet potato and beans.
- Top with avocado, lime, and cheese if using.
Equipment for This Recipe:
- Sheet pan
- Small saucepan
- Skillet
- Cutting board
How to Serve This Dish:
Serve the tacos hot with extra lime on the side. Two tacos work for a lighter meal; three is a normal dinner portion. A simple cabbage slaw or corn salad makes the plate feel fuller without stealing attention from the filling.
Pro Tips for This Recipe:
- Cut the sweet potato cubes evenly so they roast at the same speed.
- Warm the beans; cold beans make the tacos feel flat.
- Don’t overstuff the tortillas or they split at the fold.
Variations on This Dish:
- Chipotle Version: Stir chipotle sauce into the beans.
- Street Corn Taco: Add a spoon of elote-style corn salad.
- Queso Drizzle: Finish with a thin drizzle of warm queso.
Common Mistakes to Avoid with This Dish:
- Soggy sweet potatoes: Roast on a hot pan with space around the cubes.
- Dry tortillas: Warm them or they crack.
- No acid: Lime is not optional if you want balance.
13. Vegetable Pot Pie with Puff Pastry
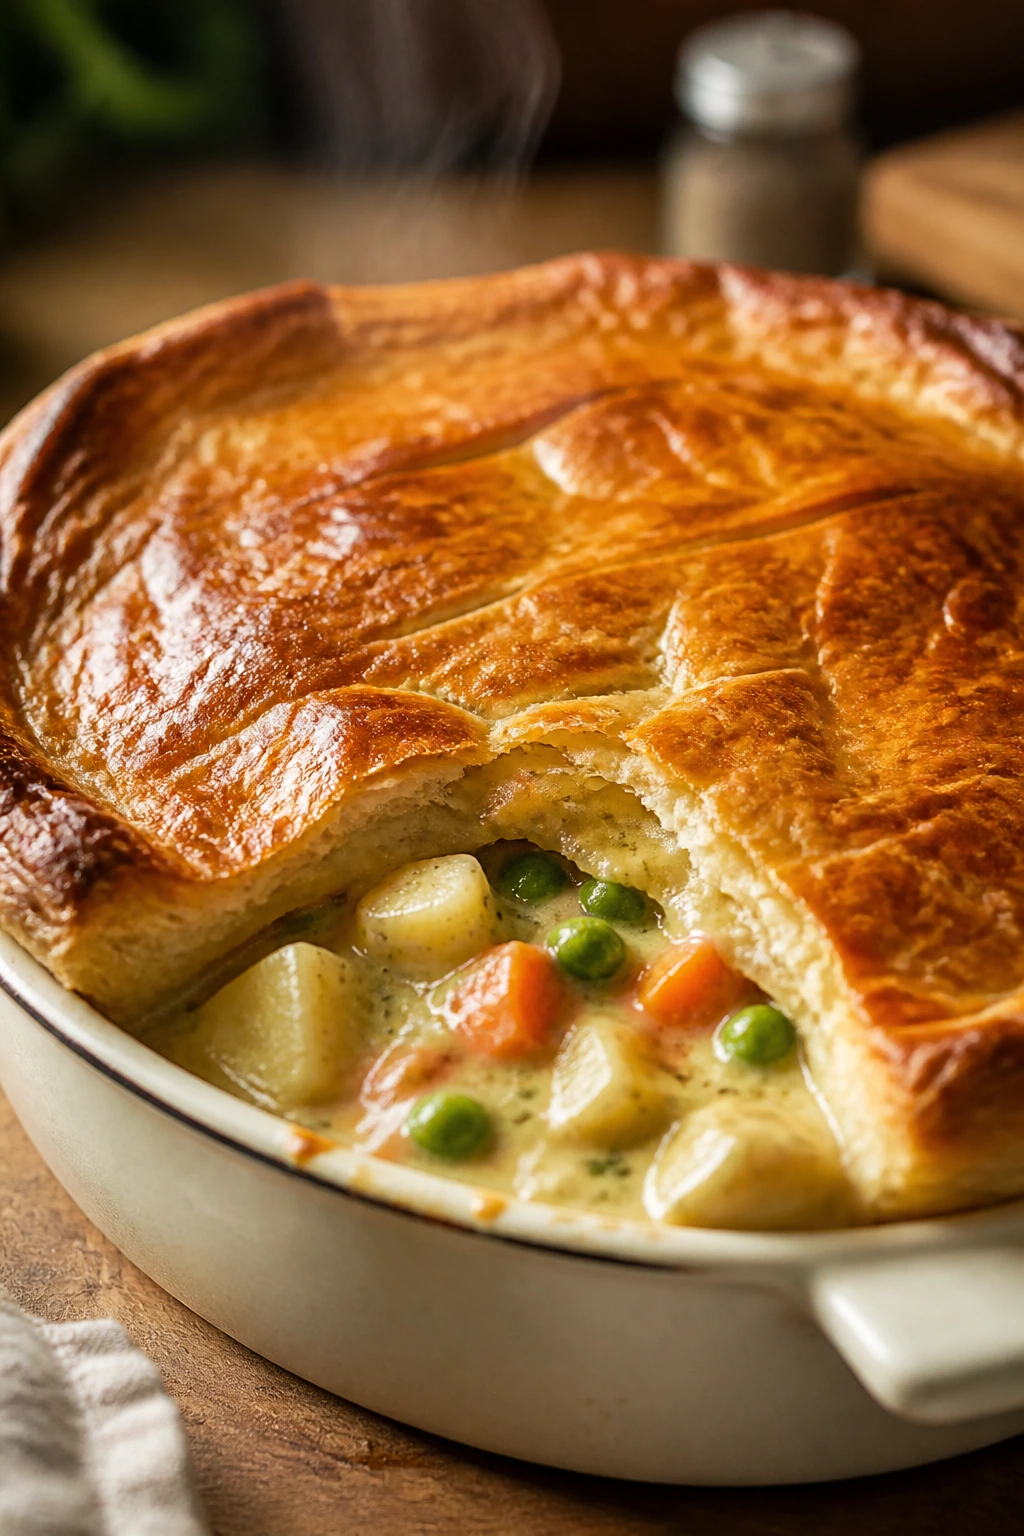
Pot pie is comfort food with a lid on it. Once the pastry puffs up and the filling bubbles underneath, even people who usually side-eye vegetables tend to lean in.
Why It Works:
The filling stays familiar because it’s built on carrots, peas, potatoes, and a creamy sauce. Puff pastry gives the top a buttery crunch that makes the whole dish feel richer than the ingredient list suggests. You can swap vegetables around without losing the basic shape of the meal.
Key Ingredients:
- 2 tablespoons butter
- 1 small onion, diced
- 2 carrots, diced
- 2 cups mixed vegetables
- 1 potato, diced small
- 2 tablespoons flour
- 1 1/2 cups vegetable broth
- 1/2 cup milk
- 1 sheet puff pastry, thawed
Quick Steps:
- Cook onion, carrots, and potato in butter until starting to soften.
- Stir in flour, then whisk in broth and milk to make a thick sauce.
- Add mixed vegetables and simmer until the filling is creamy.
- Pour into a baking dish and cover with puff pastry.
- Bake at 400°F (205°C) until the pastry is deeply browned.
Equipment for This Recipe:
- Skillet or saucepan
- Baking dish
- Rolling pin or knife
- Pastry brush
How to Serve This Dish:
Serve it hot and let the first spoonful break through the crust. A pot pie is already a full meal, but a sharp salad on the side cuts through the richness nicely. The filling should be thick enough to hold together, not soupy.
Pro Tips for This Recipe:
- Keep the puff pastry cold before baking so it rises well.
- Cut a few steam vents in the top.
- Let the pie rest 10 minutes before serving.
Variations on This Dish:
- Mushroom Herb Version: Add 1 cup sautéed mushrooms and thyme.
- Corn and Leek Pot Pie: Swap in leeks and sweet corn.
- Mini Pot Pies: Bake in ramekins for tighter portions.
Common Mistakes to Avoid with This Dish:
- Runny filling: Cook the sauce long enough to thicken.
- Soggy bottom: Put the dish on a hot baking sheet.
- Warm pastry: It won’t puff as high.
14. Chickpea Curry with Coconut Rice

A mild chickpea curry is one of those dishes that quietly wins people over. It’s creamy, spoonable, and easy to keep gentle on the heat scale, which helps when the room has mixed opinions about spice.
Why It Works:
Chickpeas give the curry enough structure that it doesn’t feel thin, while coconut milk softens the spices and makes the sauce cling to rice. The curry powder brings warmth without demanding much. If you want vegetarian food that eats like a proper main, this is a dependable route.
Key Ingredients:
- 1 tablespoon oil
- 1 small onion, chopped
- 2 garlic cloves, minced
- 1 tablespoon curry powder
- 1 can chickpeas, drained
- 1 can coconut milk
- 1 cup diced tomatoes
- Salt and lime juice
- 2 cups cooked rice, preferably with a splash of coconut milk
Quick Steps:
- Cook onion in oil until soft, then add garlic and curry powder.
- Stir in chickpeas and tomatoes.
- Pour in coconut milk and simmer 15 minutes until the sauce thickens.
- Season with salt and lime juice.
- Spoon over coconut rice.
Equipment for This Recipe:
- Saucepan or deep skillet
- Wooden spoon
- Rice pot
- Citrus juicer, optional
How to Serve This Dish:
Serve in bowls with a little rice peeking out from the sauce so it doesn’t look like soup. A spoon of yogurt on top can calm the spice and make the color look clean. If you want a brighter plate, add cilantro or quick-pickled onions.
Pro Tips for This Recipe:
- Let the onion cook down fully; rushed onion tastes sharp here.
- Simmer uncovered if the sauce seems too loose.
- Add lime at the end so it stays fresh.
Variations on This Dish:
- Spinach Chickpea Curry: Stir in spinach during the last 2 minutes.
- Sweet Potato Curry: Add diced sweet potato with the chickpeas.
- Peanut Finish: Swirl in 1 tablespoon peanut butter for depth.
Common Mistakes to Avoid with This Recipe:
- Burning the spices: Stir them in briefly, not over high heat.
- Watery sauce: Simmer longer without the lid.
- Skipping acid: Lime keeps the coconut from feeling heavy.
15. Pesto Tortellini with Peas and Lemon
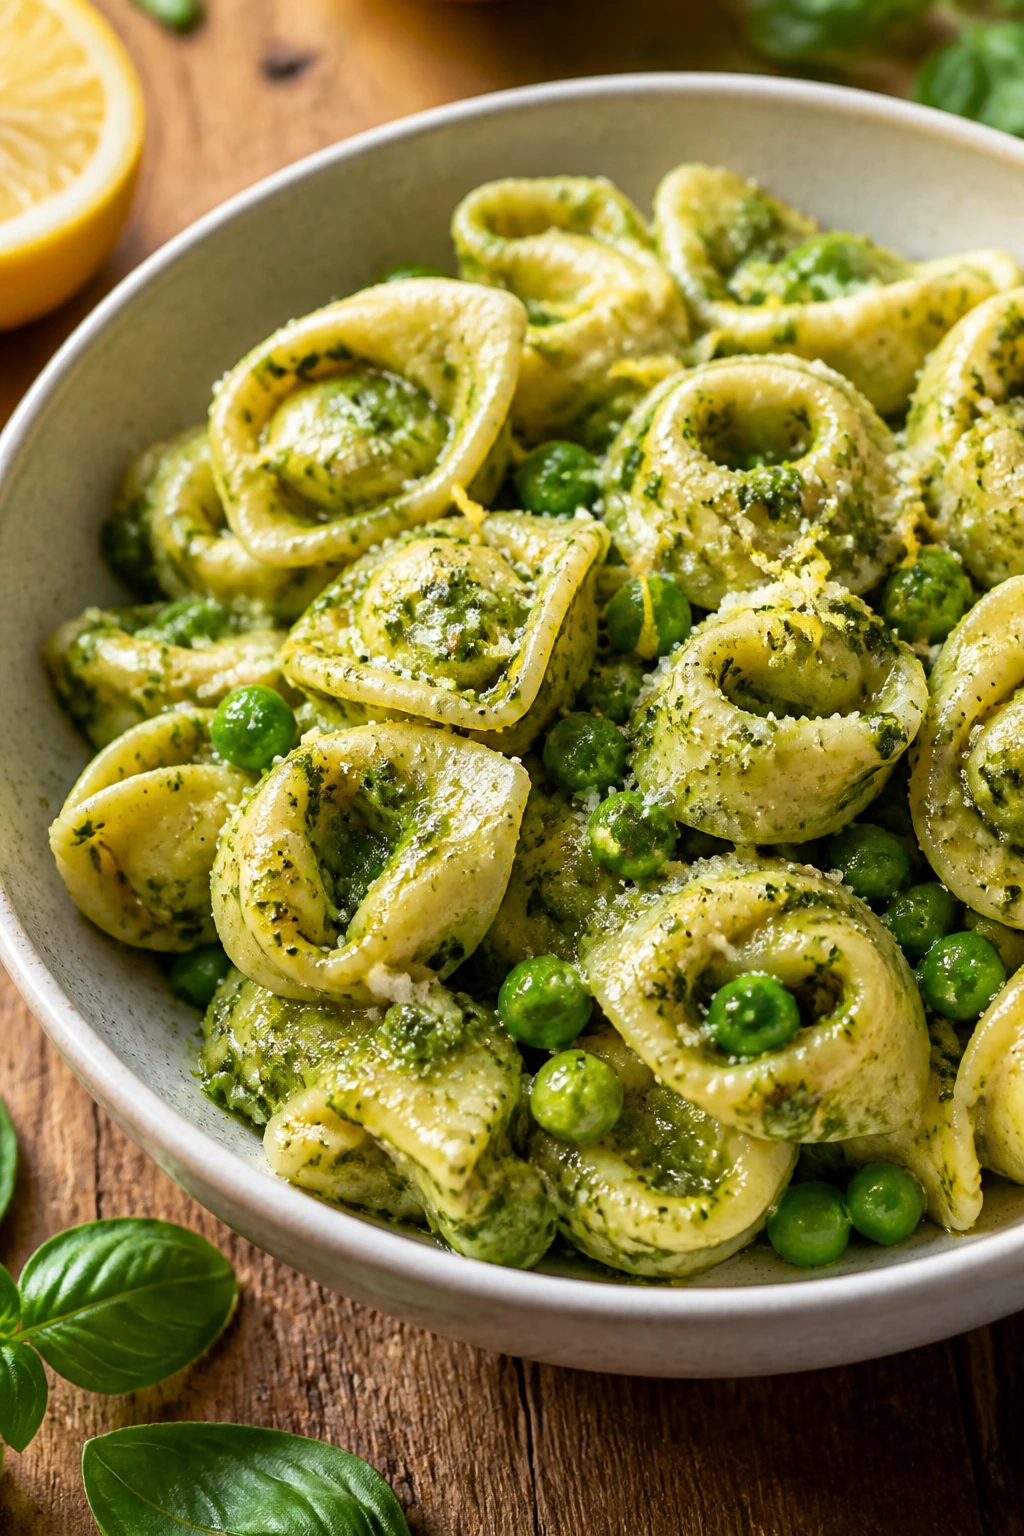
Tortellini does a lot of heavy lifting for you. It’s stuffed, soft, and already substantial, so once you toss it with pesto, peas, and a little lemon, the dish feels like it had a plan all along.
Why It Works:
The cheese-filled pasta brings richness without much work, and peas add sweetness that picky eaters usually tolerate without complaint. Lemon keeps the pesto from feeling sticky or too heavy. This is the sort of meal that works hot or warm, which makes it useful when dinner timing gets messy.
Key Ingredients:
- 1 pound cheese tortellini
- 1 cup basil pesto
- 1 cup frozen peas
- 1 lemon, zested and juiced
- 1/4 cup grated Parmesan
- 2 tablespoons olive oil
- Salt and black pepper
Quick Steps:
- Cook tortellini according to package directions.
- Add peas to the boiling water during the last 1 minute.
- Drain and toss with pesto, olive oil, lemon zest, and lemon juice.
- Add Parmesan and season to taste.
- Serve right away.
Equipment for This Recipe:
- Large pot
- Colander
- Mixing bowl
- Zester or fine grater
How to Serve This Dish:
Serve in shallow bowls with extra Parmesan on top. It works as a main dish with a side salad or as a side next to roasted vegetables. The sauce should coat the tortellini lightly, not pool at the bottom.
Pro Tips for This Recipe:
- Save a splash of pasta water in case the pesto feels thick.
- Add lemon juice slowly so it doesn’t overpower the basil.
- Don’t overcook the tortellini; it gets fragile fast.
Variations on This Dish:
- Tomato Pesto Version: Add halved cherry tomatoes.
- Spinach Tortellini Bowl: Fold in baby spinach while the pasta is still hot.
- Walnut Pesto Swap: Use a nutty pesto for extra depth.
Common Mistakes to Avoid with This Dish:
- Cold pesto from the fridge: Loosen it with a little warm pasta water.
- Skipping the peas’ last-minute timing: They go dull if boiled too long.
- Too much lemon: It should brighten, not dominate.
16. Vegetarian Chili with Cornbread
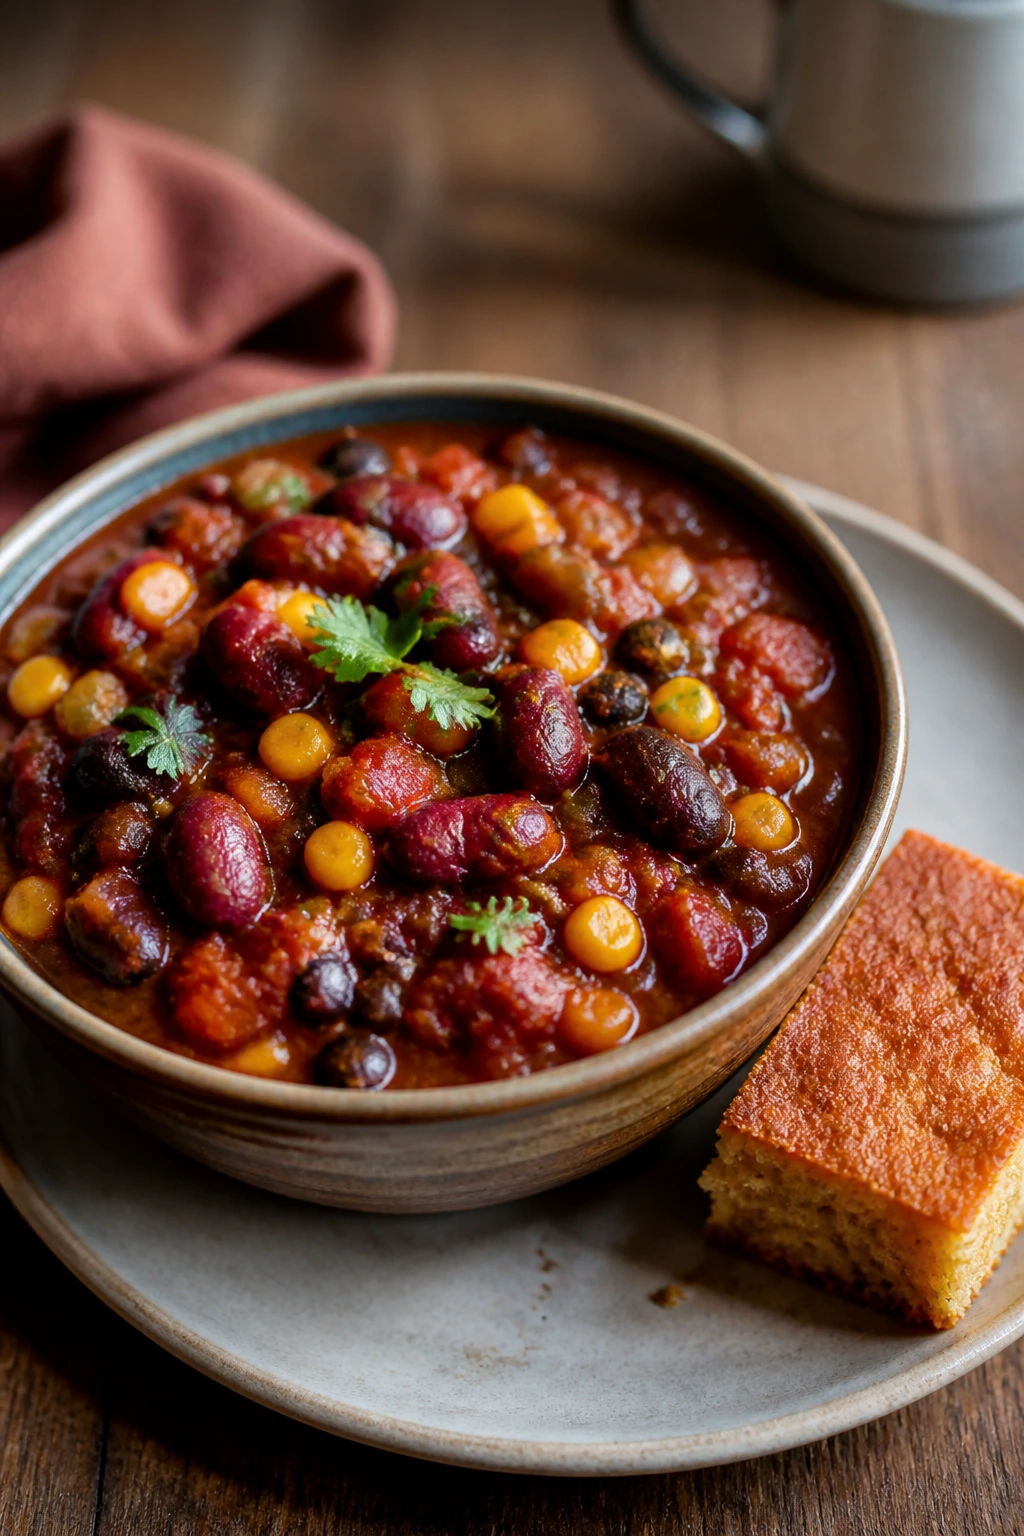
Chili is one of the easiest places to get vegetarian dinner right because the beans, tomatoes, and spices already have a built-in sense of purpose. With a square of cornbread, it stops feeling like a compromise and starts feeling like dinner.
Why It Works:
Beans bring the heft that meat usually provides, while tomato paste and chili powder build a deep, savory base. Corn adds little pops of sweetness. The texture matters most here: the chili needs to be thick enough to sit on a spoon, not slide off like soup.
Key Ingredients:
- 1 tablespoon oil
- 1 onion, chopped
- 1 bell pepper, chopped
- 2 tablespoons tomato paste
- 2 tablespoons chili powder
- 2 cans beans, drained
- 1 can diced tomatoes
- 1 cup corn
- Salt and pepper
Quick Steps:
- Cook onion and bell pepper in oil until softened.
- Stir in tomato paste and chili powder for 1 minute.
- Add beans, tomatoes, corn, and 1 cup water.
- Simmer 25 to 30 minutes until thick.
- Serve with warm cornbread.
Equipment for This Recipe:
- Large pot
- Wooden spoon
- Can opener
- Baking pan, if making cornbread
How to Serve This Dish:
Ladle it into bowls and top with cheese, sour cream, or scallions. Cornbread should sit on the side or under the chili, depending on how messy you want dinner to be. A thick chili also makes a good topping for baked potatoes the next day.
Pro Tips for This Recipe:
- Tomato paste browned in oil tastes deeper than tomato paste dumped in later.
- Mash a few beans against the side of the pot to thicken the base.
- Let it sit 10 minutes before serving; the flavor settles.
Variations on This Dish:
- Smoky Chipotle Chili: Add chopped chipotle in adobo.
- White Bean Chili: Use white beans and green chiles instead.
- Sweet Potato Chili: Add cubed sweet potato for extra body.
Common Mistakes to Avoid with This Recipe:
- Thin chili: Simmer longer or mash more beans.
- Weak seasoning: Chili needs more salt than you think.
- Burnt bottom: Stir often once it thickens.
17. Zucchini Fritters with Garlic Yogurt
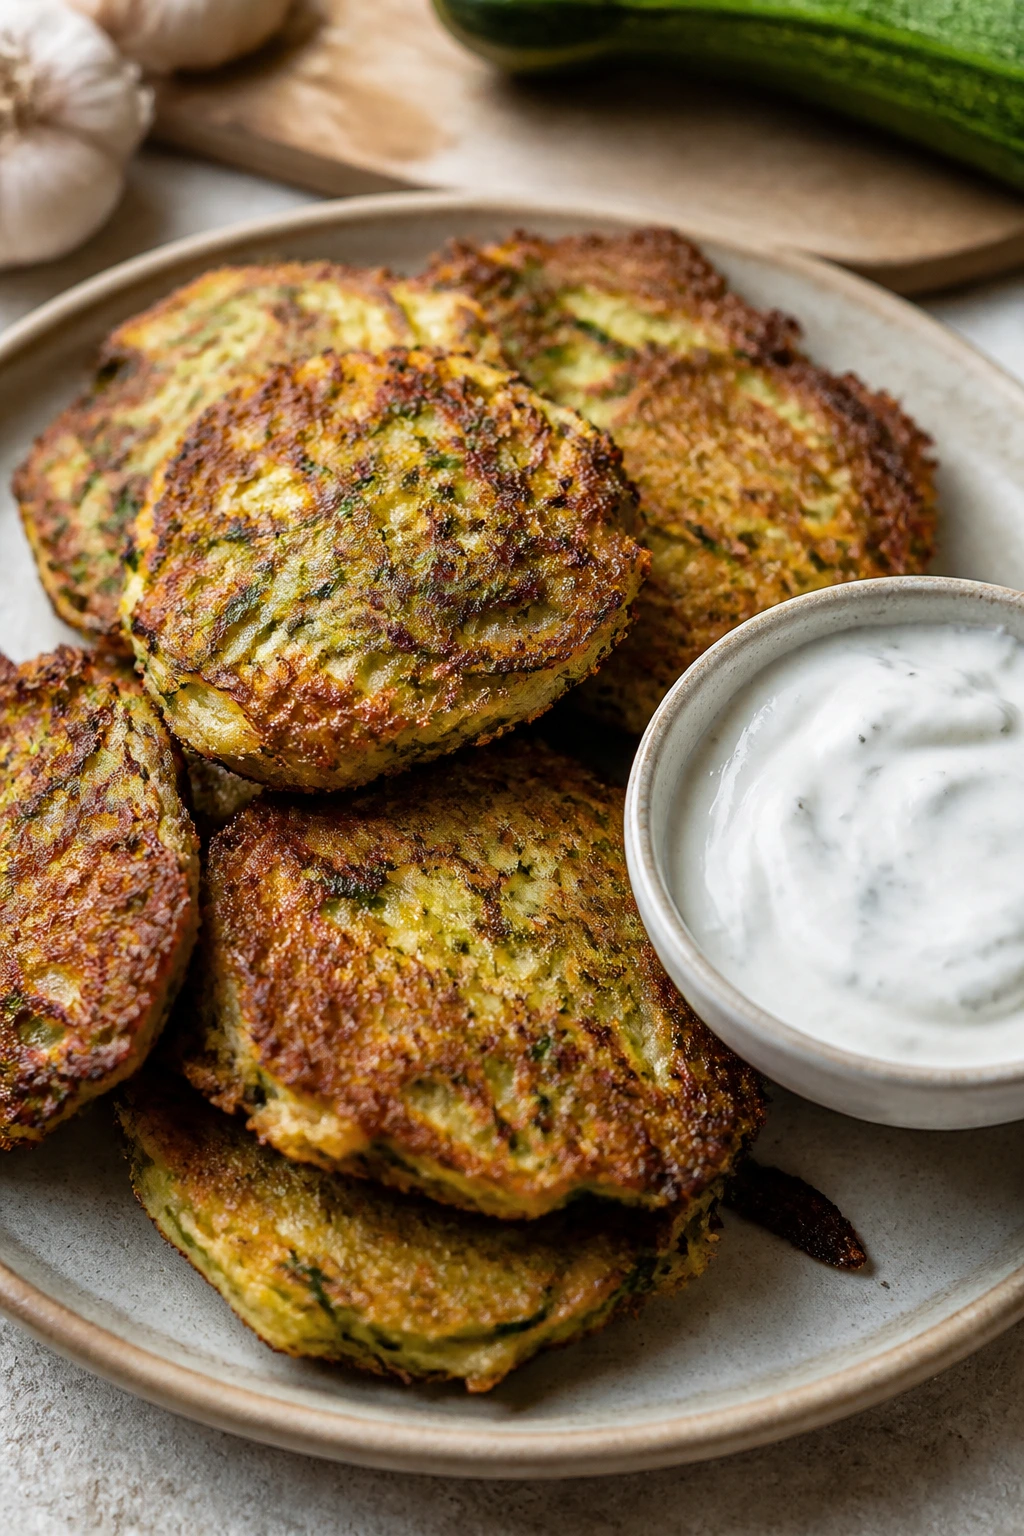
Zucchini fritters solve the usual zucchini problem, which is that the vegetable can get watery and forgettable if you don’t give it structure. Crisp edges, a soft center, and a garlic yogurt dip make the whole thing feel intentionally savory.
Why It Works:
Grated zucchini cooks fast, so the fritter gets tender without turning mushy. Egg and flour hold the shreds together, and Parmesan adds salt so the flavor doesn’t fade. The dip matters too; yogurt keeps the fritters from feeling fried and heavy.
Key Ingredients:
- 2 medium zucchini, grated
- 1 teaspoon salt
- 1 egg
- 1/3 cup flour
- 1/3 cup grated Parmesan
- 1/4 teaspoon black pepper
- 2 tablespoons oil
- 1/2 cup Greek yogurt
- 1 small garlic clove, grated
Quick Steps:
- Salt the zucchini and let it sit 10 minutes, then squeeze out as much water as possible.
- Mix with egg, flour, Parmesan, and pepper.
- Heat oil in a skillet over medium.
- Drop spoonfuls into the pan and flatten gently; cook 3 minutes per side until crisp.
- Stir garlic into yogurt and serve alongside.
Equipment for This Recipe:
- Box grater
- Clean kitchen towel
- Skillet
- Mixing bowl
How to Serve This Dish:
Serve warm with the yogurt dip and a lemon wedge. Three or four fritters make a side; six or seven can be dinner with a salad and bread. They should be crisp at the edges and not floppy in the middle.
Pro Tips for This Recipe:
- Squeeze the zucchini harder than feels polite.
- Keep the fritters small so they hold together.
- Let the pan reheat between batches for a better crust.
Variations on This Dish:
- Herb Fritters: Add dill or chives to the batter.
- Corn Zucchini Mix: Fold in 1/2 cup corn kernels.
- Feta Version: Swap some Parmesan for crumbled feta.
Common Mistakes to Avoid with This Dish:
- Wet zucchini: It makes the batter slide apart.
- Pan too cool: You’ll get pale fritters that absorb oil.
- Too much batter per fritter: Small ones cook cleaner.
18. Mushroom Risotto with Parmesan
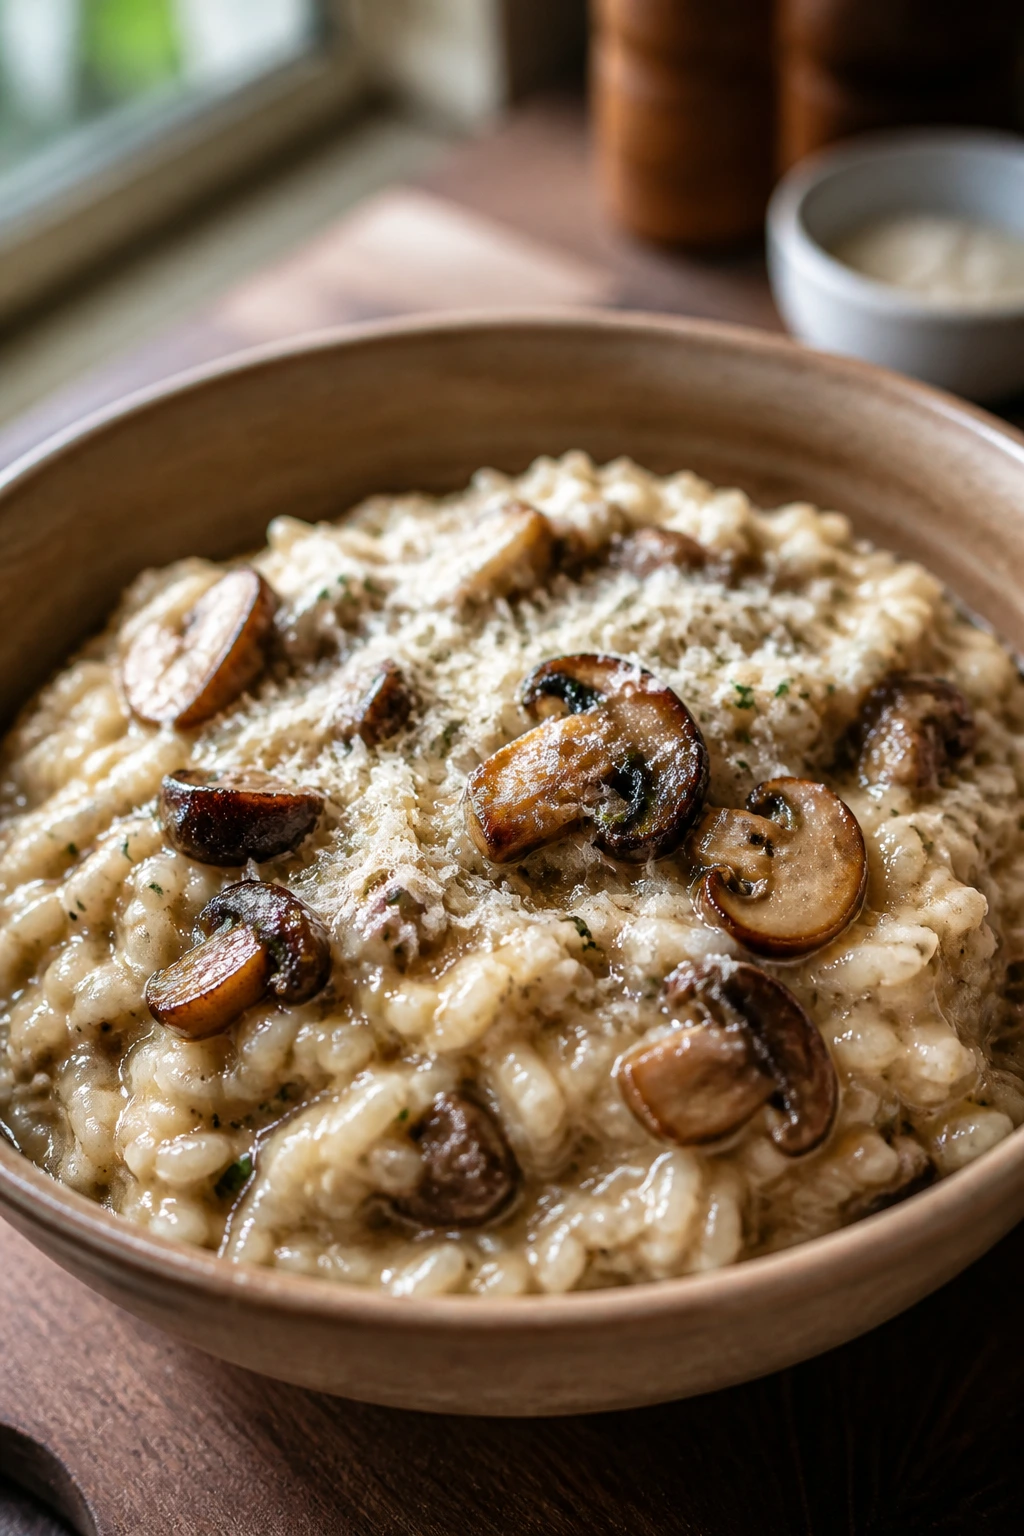
Risotto sounds fussy from a distance. In practice, it’s mostly patience, a wooden spoon, and the willingness to stand there while the rice turns creamy. Mushrooms give it the savory depth that keeps meat eaters from feeling cheated.
Why It Works:
The Arborio rice releases starch as you stir, which gives the dish its silky texture without cream. Mushrooms bring a browned, earthy taste that tastes more like depth than vegetables. Parmesan finishes it with salt and a little sharpness, and that’s usually enough.
Key Ingredients:
- 1 cup Arborio rice
- 4 cups warm vegetable broth
- 2 tablespoons butter
- 1 tablespoon olive oil
- 8 oz mushrooms, sliced
- 1 small onion, minced
- 1/2 cup dry white wine
- 1/2 cup grated Parmesan
Quick Steps:
- Sauté mushrooms until browned, then set aside.
- Cook onion in butter and oil until soft.
- Stir in rice, then add wine and cook until absorbed.
- Add warm broth one ladle at a time, stirring until each addition is absorbed.
- Fold in mushrooms and Parmesan when the rice is creamy and tender.
Equipment for This Recipe:
- Wide saucepan or Dutch oven
- Ladle
- Wooden spoon
- Small pot for broth
How to Serve This Dish:
Serve risotto in warm bowls so it stays loose and glossy. It should spread a little on the plate rather than sit in a stiff mound. A few extra mushrooms or parsley leaves on top make it look finished without much fuss.
Pro Tips for This Recipe:
- Keep the broth warm or the rice cooks unevenly.
- Don’t rush the broth additions.
- Brown the mushrooms hard; pale mushrooms taste muddy.
Variations on This Dish:
- Lemon Risotto: Add zest at the end for brightness.
- Pea and Mint Version: Stir in peas and a few mint leaves.
- Truffle Oil Finish: Use a tiny drizzle only if you want a bigger aroma.
Common Mistakes to Avoid with This Recipe:
- Cold broth: It slows the rice down.
- Walking away: Risotto needs regular stirring.
- Undercooked rice: It should be tender with a tiny bit of bite.
19. Veggie Breakfast Hash with Eggs
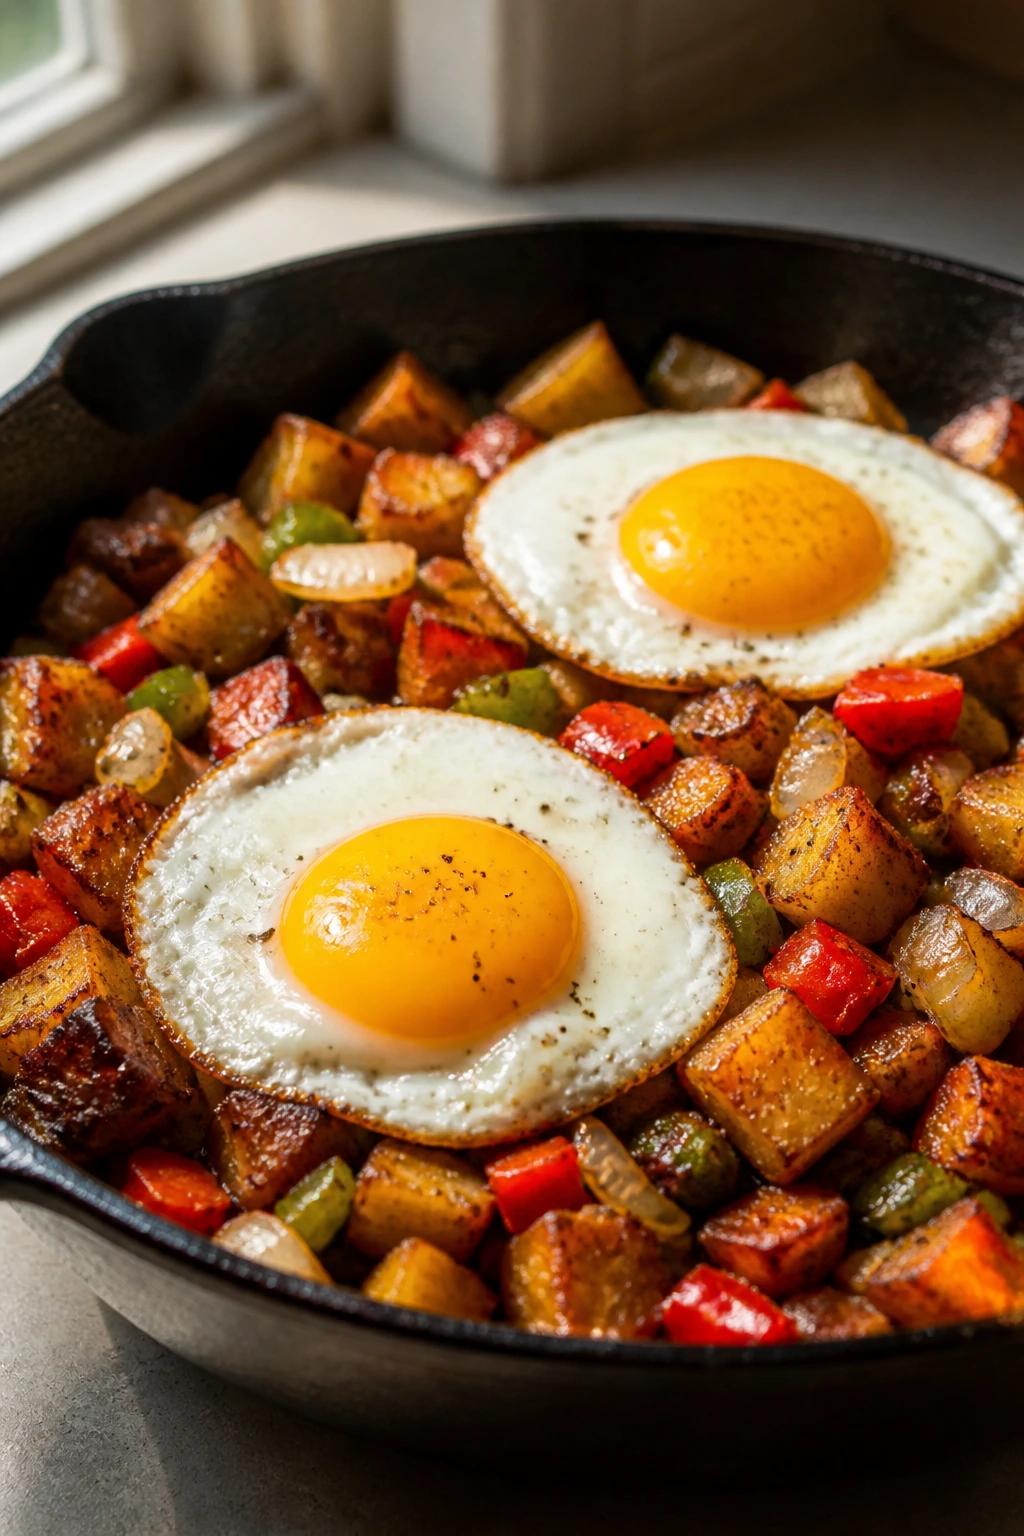
Breakfast hash works any time of day, and that’s part of its charm. Crispy potatoes, peppers, onions, and eggs make a plate that feels hearty enough to pass as dinner, which is often the real test.
Why It Works:
The potatoes give you crisp edges and a soft center, while the vegetables add color and enough sweetness to keep things from tasting stale. Eggs make the whole thing feel complete. If someone in the house is suspicious of vegetarian meals, this is usually not the plate that triggers a complaint.
Key Ingredients:
- 2 medium potatoes, diced
- 1 tablespoon oil
- 1 bell pepper, chopped
- 1 small onion, chopped
- 1 cup spinach
- 4 eggs
- 1/2 teaspoon paprika
- Salt and pepper
Quick Steps:
- Par-cook or microwave the diced potatoes until barely tender.
- Crisp the potatoes in oil in a skillet over medium-high heat.
- Add onion, pepper, and paprika; cook until softened.
- Stir in spinach until wilted.
- Make wells and fry the eggs on top.
Equipment for This Recipe:
- Large skillet
- Spatula
- Knife
- Bowl for cracking eggs
How to Serve This Dish:
Serve straight from the skillet with toast or hot sauce. One egg per person is fine for a light meal; two eggs makes it feel more like dinner. The hash should be crisp under the spatula, not greasy or mushy.
Pro Tips for This Recipe:
- Start with cooked potatoes if you want a faster breakfast.
- Don’t stir too much once the potatoes start browning.
- Salt at the end if the pan is reducing fast.
Variations on This Dish:
- Cheesy Hash: Add shredded cheddar before the eggs go on.
- Sweet Potato Hash: Swap in sweet potatoes for a softer sweet note.
- Southwest Hash: Add black beans and a pinch of cumin.
Common Mistakes to Avoid with This Recipe:
- Raw potatoes from scratch: They won’t crisp in time.
- Too many vegetables: The pan steams instead of browns.
- Eggs cooked too long: Yolk should stay soft unless you want it firm.
20. BBQ Jackfruit Sliders with Crunchy Slaw
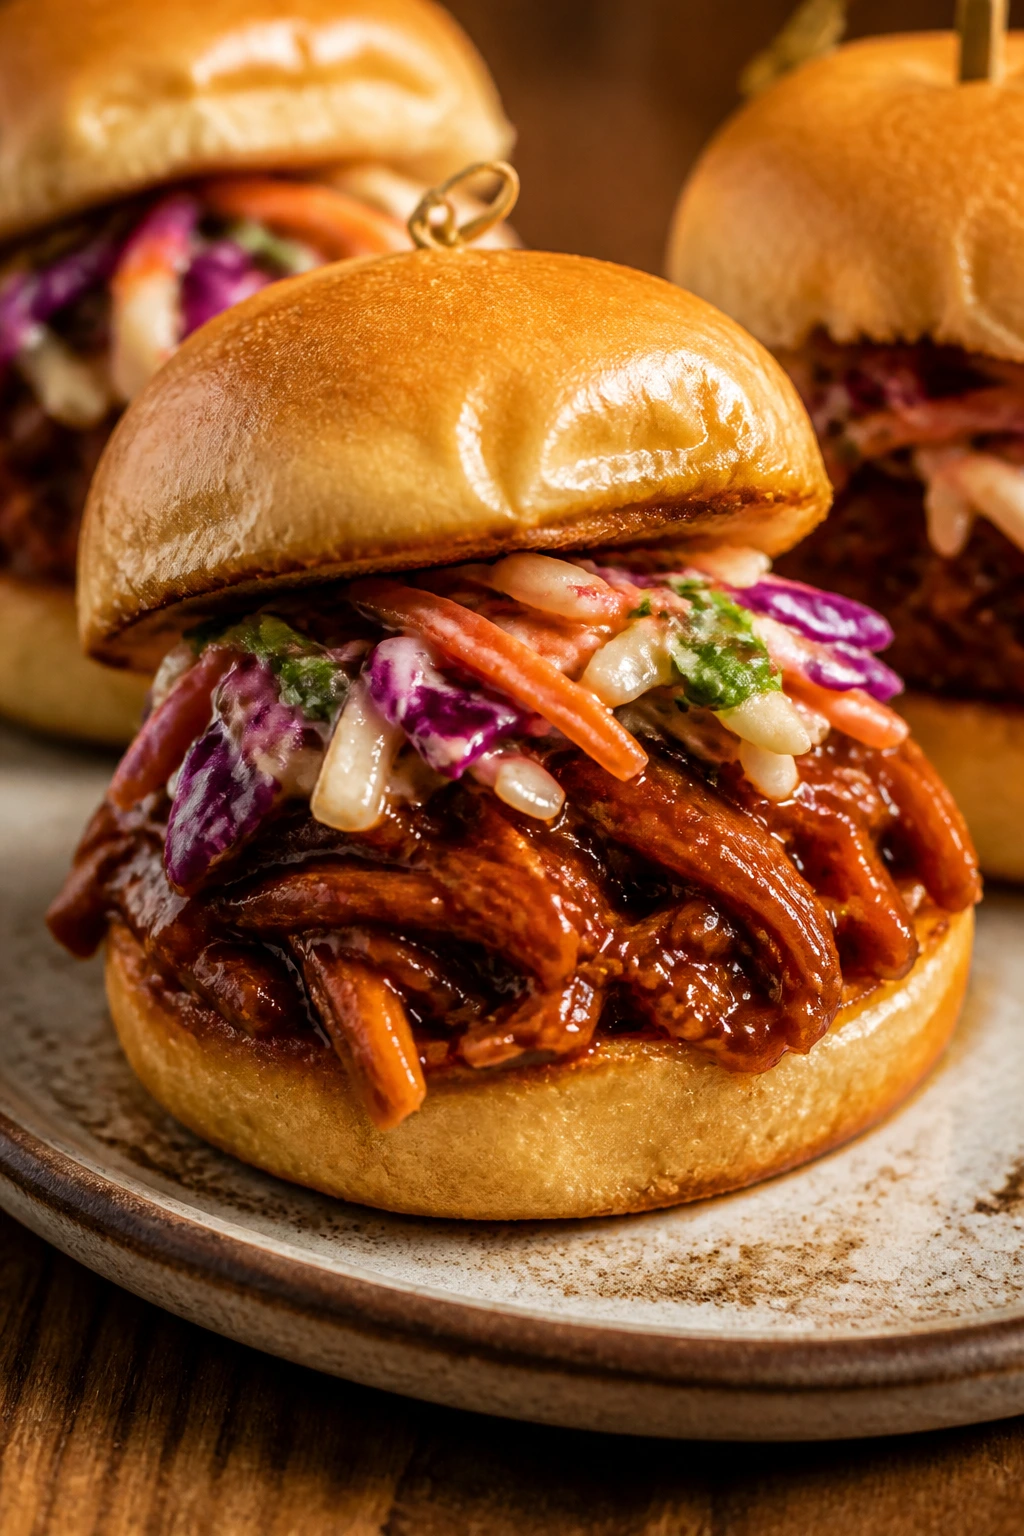
Jackfruit has a strange reputation, mostly because it needs seasoning to do anything useful. With barbecue sauce and a toasted bun, it becomes a shredded filling that gives the feel of pulled sandwiches without crossing into imitation that tastes like a joke.
Why It Works:
Young jackfruit shreds into strands that catch sauce well, and that texture is what sells the sandwich. The slaw adds crunch and acid, so the sliders don’t feel soft all the way through. Small buns make the portion easier to manage, which matters when the filling is sticky.
Key Ingredients:
- 2 cans young green jackfruit in brine, drained
- 1 tablespoon oil
- 1/2 onion, sliced
- 1 cup barbecue sauce
- 8 slider buns
- 2 cups shredded cabbage
- 2 tablespoons mayo
- 1 tablespoon vinegar
Quick Steps:
- Sauté onion until soft, then add jackfruit and cook 5 minutes.
- Shred the jackfruit with a fork and stir in barbecue sauce.
- Simmer until the sauce clings.
- Mix cabbage, mayo, and vinegar for the slaw.
- Fill buns with jackfruit and slaw.
Equipment for This Recipe:
- Skillet
- Forks for shredding
- Mixing bowl
- Knife and cutting board
How to Serve This Dish:
Serve the sliders warm with extra slaw on the side and napkins close by. They work well for a casual dinner or a spread where people want small portions. The bun should stay soft but not collapse under the saucy filling.
Pro Tips for This Recipe:
- Use jackfruit in brine, not syrup.
- Cook off some of the liquid before adding sauce.
- Toast the buns so they don’t fall apart.
Variations on This Dish:
- Spicy BBQ Sliders: Add hot sauce to the barbecue sauce.
- Mustard Slaw Version: Swap mayo slaw for a vinegar slaw.
- Cheddar Melt: Add a slice of cheese to each slider.
Common Mistakes to Avoid with This Recipe:
- Wrong jackfruit: The sweet canned kind tastes off here.
- Not shredding enough: The texture stays chunky.
- Sauce too watery: Simmer until it clings.
21. Falafel Pita Pockets with Tahini Sauce
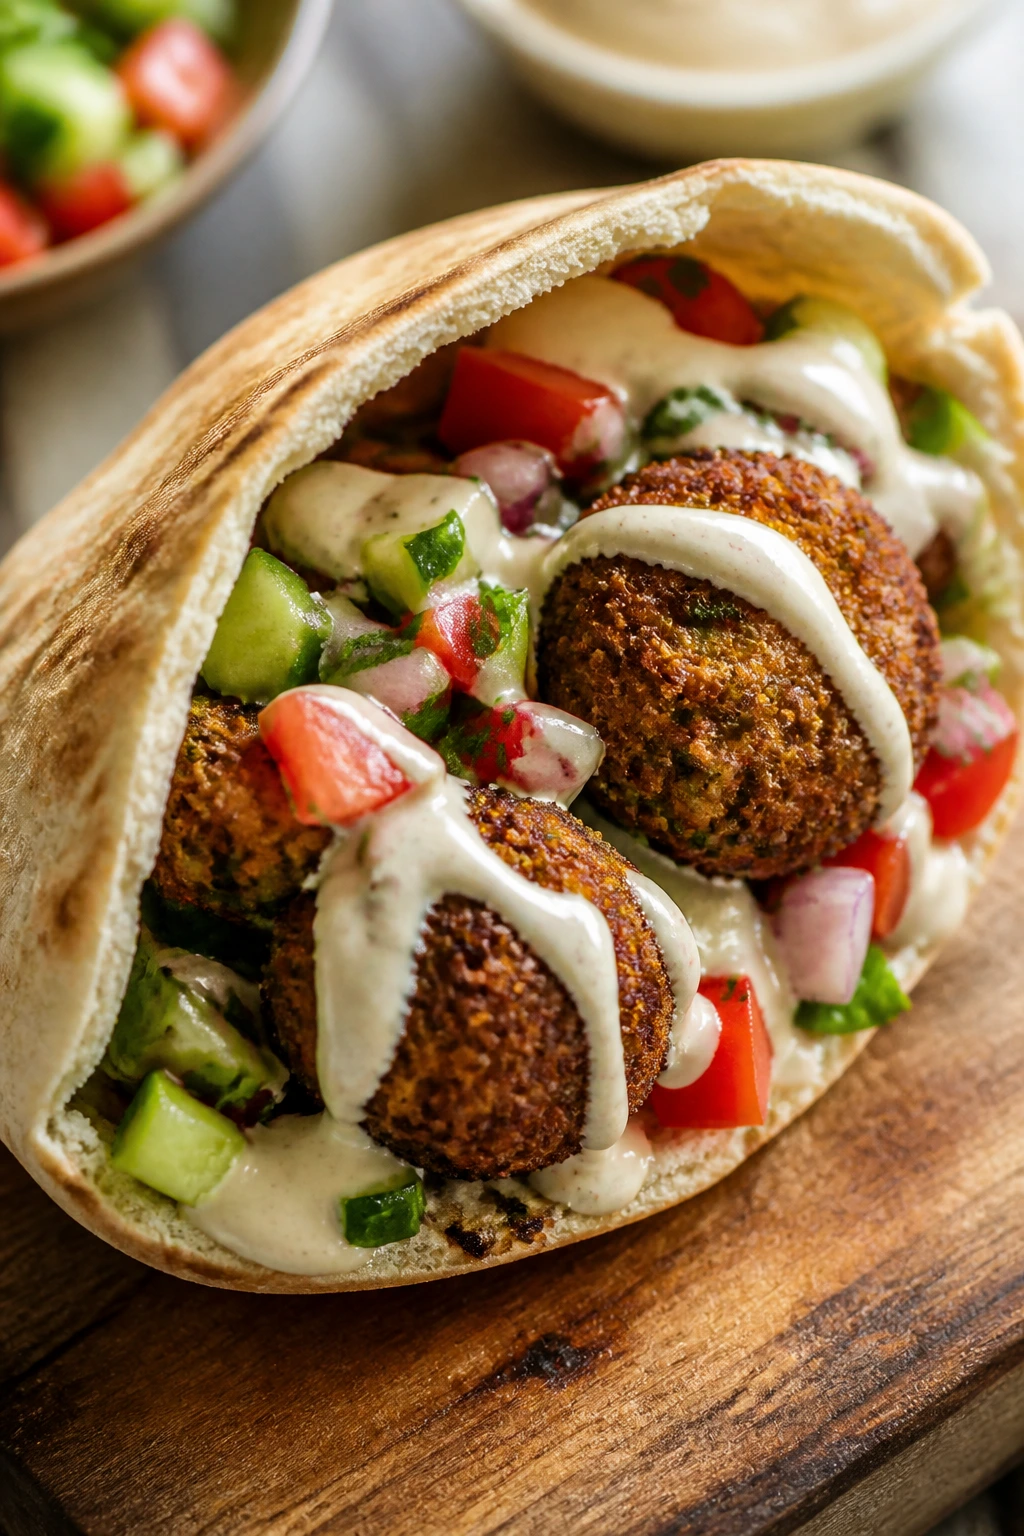
Falafel can win over reluctant eaters because it gives you crunch, warmth, and a filling that feels structured. In pita, with a cool sauce and a little chopped vegetable crunch, it eats like a proper handheld meal.
Why It Works:
Chickpeas and herbs form a patty that’s crisp outside and tender inside, which makes a stronger case than a mushy vegetarian filling ever could. Tahini sauce adds nutty richness, and pita bread turns the whole thing into something easy to hold. A few tomatoes or cucumbers keep it fresh.
Key Ingredients:
- 2 cans chickpeas, drained and patted dry
- 1 small onion
- 2 garlic cloves
- 1/2 cup parsley
- 1 teaspoon cumin
- 1 teaspoon salt
- 1/2 cup flour
- 4 pita breads
- Tahini, lemon juice, and water for sauce
Quick Steps:
- Pulse chickpeas, onion, garlic, parsley, cumin, salt, and flour until coarse.
- Shape into small patties or balls and chill 20 minutes.
- Pan-fry or bake until browned and crisp.
- Whisk tahini with lemon juice, water, and salt until pourable.
- Stuff pita with falafel, sauce, and chopped vegetables.
Equipment for This Recipe:
- Food processor
- Skillet or baking sheet
- Mixing bowl
- Spoon
How to Serve This Dish:
Serve the pita pockets warm with extra sauce drizzled over the top. The best version has a little crunch from cucumber or shredded lettuce and enough sauce to coat the falafel without soaking the bread. They’re filling enough for dinner if you make four to six patties per person.
Pro Tips for This Recipe:
- Keep the mixture coarse; smooth paste makes dense falafel.
- Chill the patties so they hold their shape.
- Thin the tahini sauce with water slowly.
Variations on This Recipe:
- Baked Falafel: Bake at 425°F (220°C) until crisp and browned.
- Herb-Heavy Version: Add dill or cilantro with the parsley.
- Rice Bowl Swap: Serve over rice instead of in pita.
Common Mistakes to Avoid with This Recipe:
- Wet mixture: Pat the chickpeas dry before processing.
- Overprocessing: The falafel turns heavy.
- Thick sauce: Tahini should drizzle, not sit like paste.
22. Broccoli Cheddar Rice Casserole
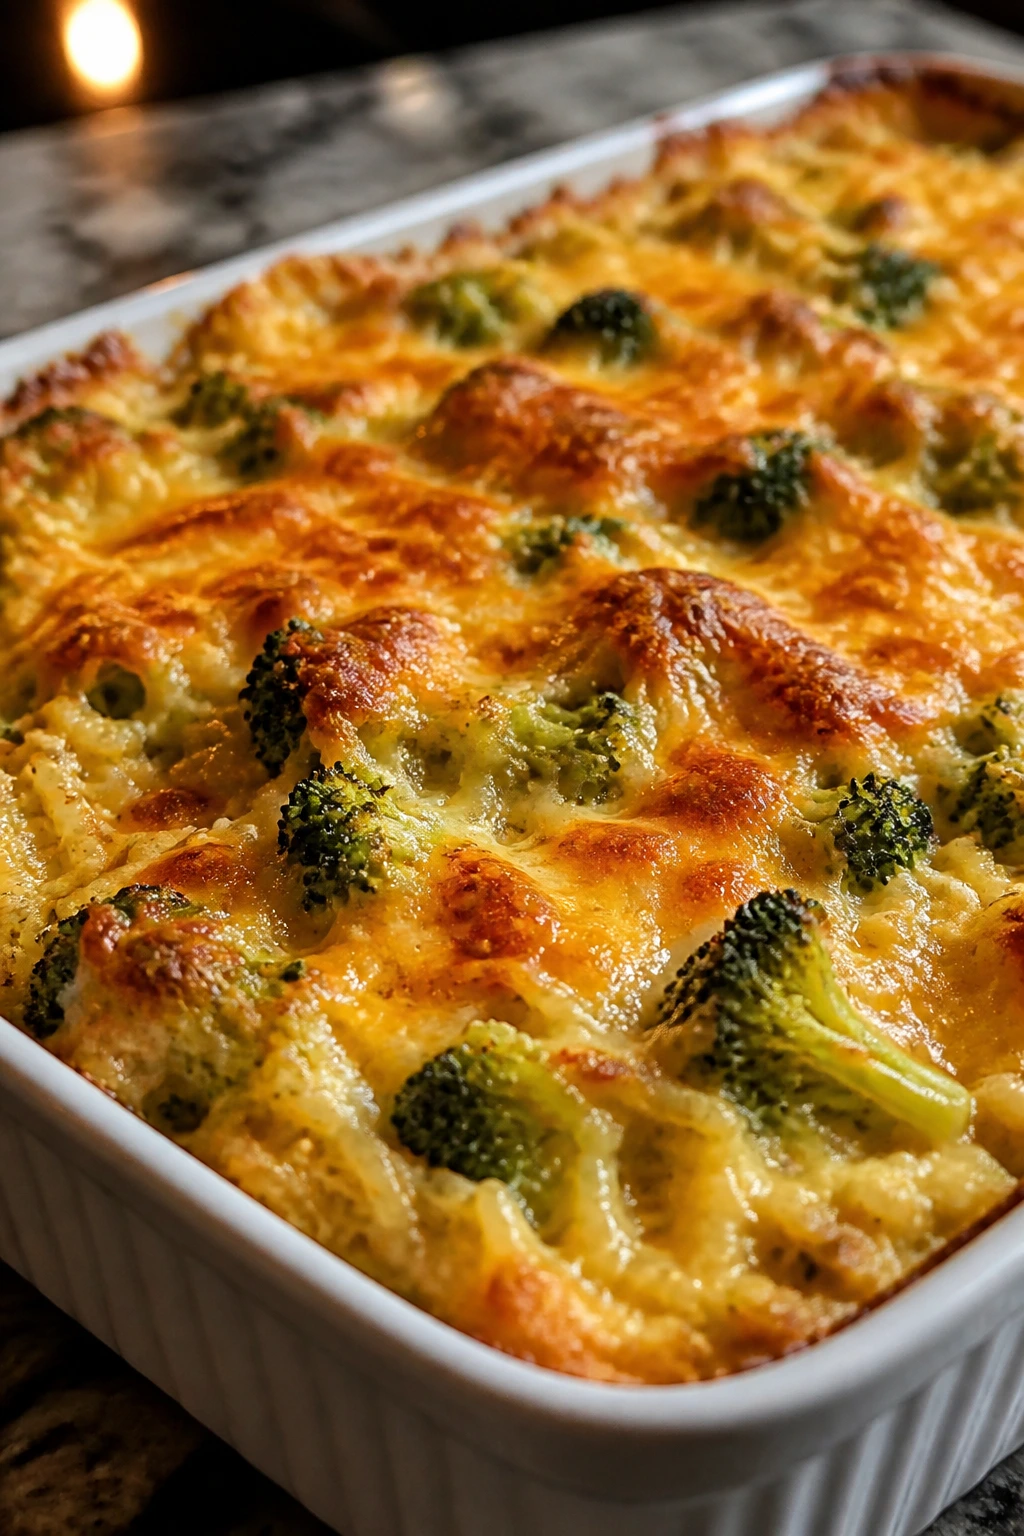
This casserole tastes like something that should be served from a well-worn dish at a family table. Broccoli brings the green, cheddar brings the salt, and rice gives the bake enough bulk that nobody leaves hungry.
Why It Works:
Rice catches the cheese sauce and makes the casserole feel cohesive instead of loose. Broccoli softens just enough in the oven to stay recognizable, which helps with picky eaters who prefer their vegetables to keep their shape. A crunchy topping gives the bake a little lift.
Key Ingredients:
- 2 cups cooked rice
- 3 cups broccoli florets, lightly steamed
- 2 tablespoons butter
- 2 tablespoons flour
- 1 1/2 cups milk
- 2 cups shredded cheddar
- 1/2 teaspoon mustard powder
- 1/2 cup breadcrumbs
Quick Steps:
- Make a simple cheese sauce with butter, flour, and milk.
- Stir in cheddar and mustard powder until smooth.
- Fold in rice and broccoli.
- Transfer to a baking dish and top with breadcrumbs.
- Bake at 375°F (190°C) for 20 minutes until bubbling.
Equipment for This Recipe:
- Saucepan
- Baking dish
- Whisk
- Spatula
How to Serve This Dish:
Serve it as a main with a salad or as a side next to roasted mushrooms. The top should be browned in spots, and the center should stay creamy. A spoonful should hold together just long enough to make its way to the plate.
Pro Tips for This Recipe:
- Steam the broccoli lightly so it doesn’t go soggy.
- Season the sauce well before mixing everything together.
- Let the casserole stand a few minutes before serving.
Variations on This Dish:
- Cauliflower Cheddar Bake: Swap half the broccoli for cauliflower.
- Jalapeño Rice Casserole: Add chopped pickled jalapeños.
- Extra Crunch Top: Mix the breadcrumbs with crushed crackers.
Common Mistakes to Avoid with This Dish:
- Dry casserole: Add a splash more milk if the sauce thickens too far.
- Underseasoned rice: The rice needs salt or it disappears.
- Browned top before hot center: Cover loosely if needed.
23. Stuffed Bell Peppers with Rice and Corn

Stuffed peppers can be bland, but they don’t have to be. Once you season the rice well and let the peppers soften enough to taste sweet, the whole dish feels structured and neat.
Why It Works:
Bell peppers turn sweet in the oven, which helps the filling taste balanced instead of heavy. Rice and corn make the stuffing feel substantial, and cheese on top gives you that familiar baked finish. It’s a good recipe for people who want their food separate and tidy.
Key Ingredients:
- 4 large bell peppers
- 2 cups cooked rice
- 1 cup corn
- 1 cup black beans
- 1 cup salsa
- 1 teaspoon cumin
- 1 cup shredded cheese
- Salt and pepper
Quick Steps:
- Halve and seed the peppers.
- Mix rice, corn, beans, salsa, and cumin.
- Fill the peppers and place them in a baking dish.
- Top with cheese.
- Bake at 375°F (190°C) for 35 to 40 minutes until the peppers are tender.
Equipment for This Recipe:
- Baking dish
- Mixing bowl
- Knife
- Spoon
How to Serve This Dish:
Serve two pepper halves per person. A dollop of sour cream or yogurt helps if the salsa is spicy. The peppers should be tender enough to cut with a fork, but still hold their shape.
Pro Tips for This Recipe:
- Par-bake the peppers for 10 minutes if you like them softer.
- Use leftover rice; it mixes better.
- Don’t overpack the filling or it dries out.
Variations on This Recipe:
- Italian Pepper Boats: Use marinara, mozzarella, and oregano.
- Tex-Mex Style: Add chopped jalapeños and cheddar.
- Quinoa Swap: Replace the rice with quinoa for a different texture.
Common Mistakes to Avoid with This Recipe:
- Raw filling: Warm the rice mixture before stuffing if possible.
- Peppers tipping over: Slice a tiny bit off the bottom to level them.
- Dry tops: Cover with foil early if the cheese browns too quickly.
24. Parmesan Roasted Cauliflower Steaks
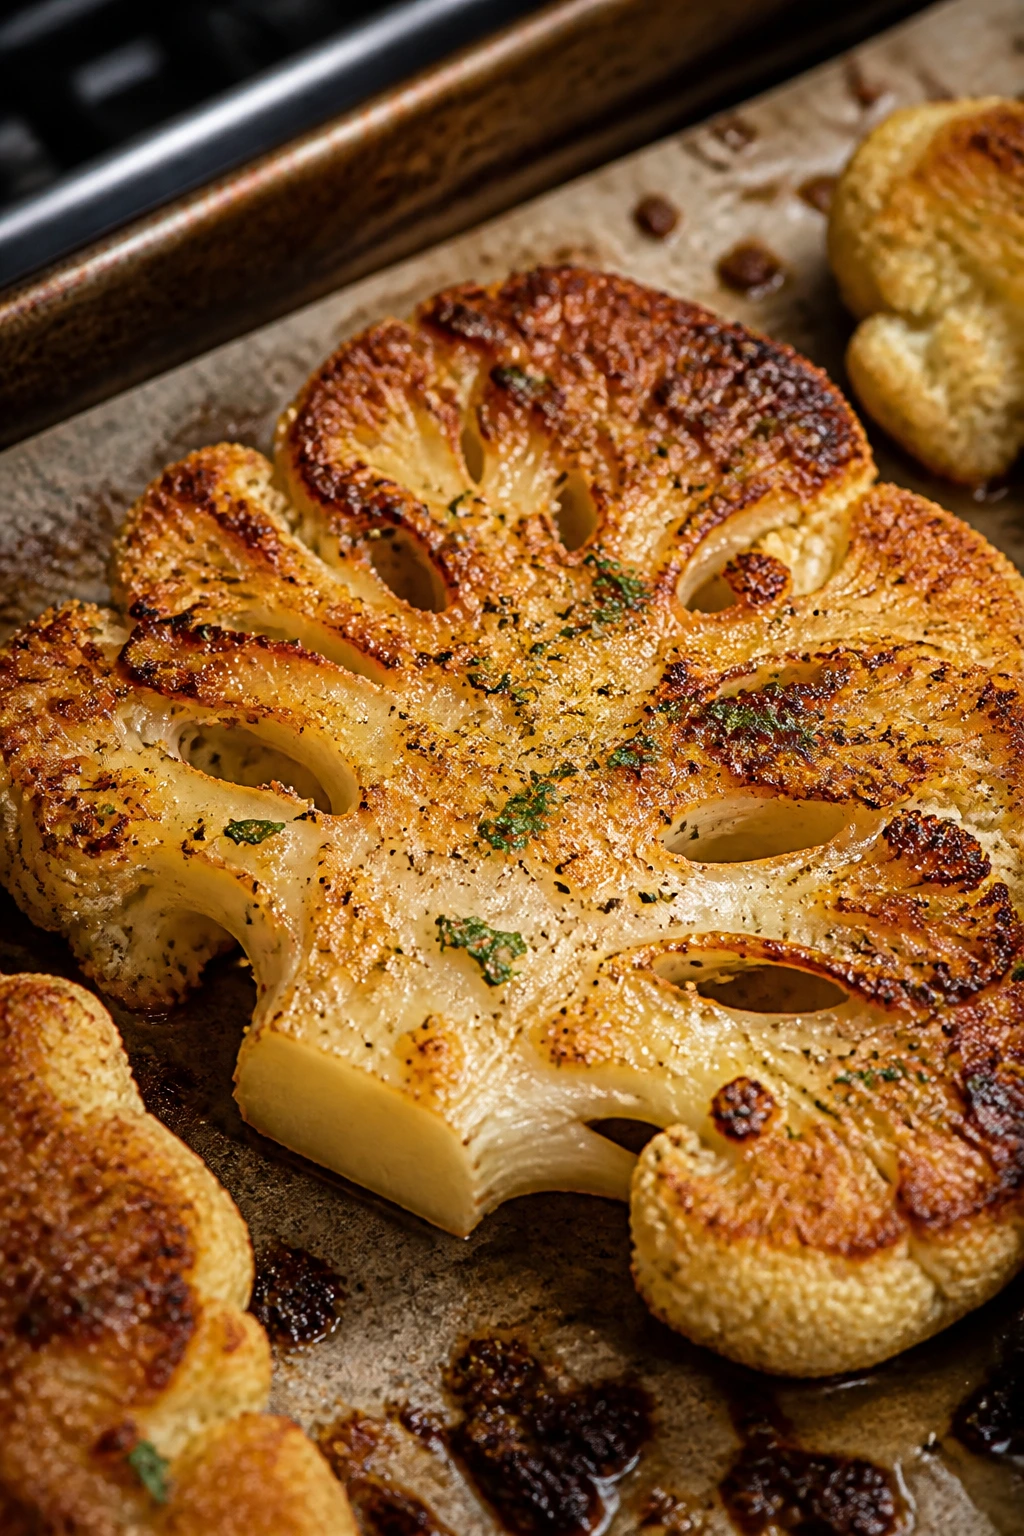
Cauliflower gets better when it’s treated like it deserves heat and salt. Thick slices roast into browned, nutty slabs, and the Parmesan crust gives them enough personality to hold their own on a plate.
Why It Works:
Roasting caramelizes the edges and softens the center without turning it to mush. Parmesan sticks to the surface and forms a salty crust, which helps the cauliflower taste richer than it looks. Even people who claim to hate cauliflower usually respond to browning.
Key Ingredients:
- 1 large head cauliflower
- 2 tablespoons olive oil
- 1 teaspoon garlic powder
- 1/2 teaspoon salt
- 1/2 cup grated Parmesan
- Black pepper
- Lemon wedges
Quick Steps:
- Slice the cauliflower into thick steaks.
- Brush with oil and season with garlic powder, salt, and pepper.
- Sprinkle Parmesan over the surface.
- Roast at 425°F (220°C) for 25 to 30 minutes until browned.
- Finish with lemon.
Equipment for This Recipe:
- Sharp knife
- Baking sheet
- Pastry brush or spoon
- Spatula
How to Serve This Dish:
Serve the steaks as a main with grains or as a side next to pasta. They should look browned on top and tender enough that a knife slides through the center. Lemon at the end keeps the flavor from getting too one-note.
Pro Tips for This Recipe:
- Keep the slices thick so they don’t fall apart.
- Save the loose florets to roast alongside the steaks.
- Turn the pan once if your oven has a hot spot.
Variations on This Dish:
- Curry Cauliflower: Add curry powder with the garlic powder.
- Breadcrumb Crust: Mix breadcrumbs into the Parmesan.
- Buffalo Finish: Toss with hot sauce after roasting.
Common Mistakes to Avoid with This Recipe:
- Slices too thin: They collapse.
- Too much oil: The crust won’t stick as well.
- Undercooking the center: The steak should be tender, not crunchy.
25. Mushroom and Swiss Grilled Sandwiches
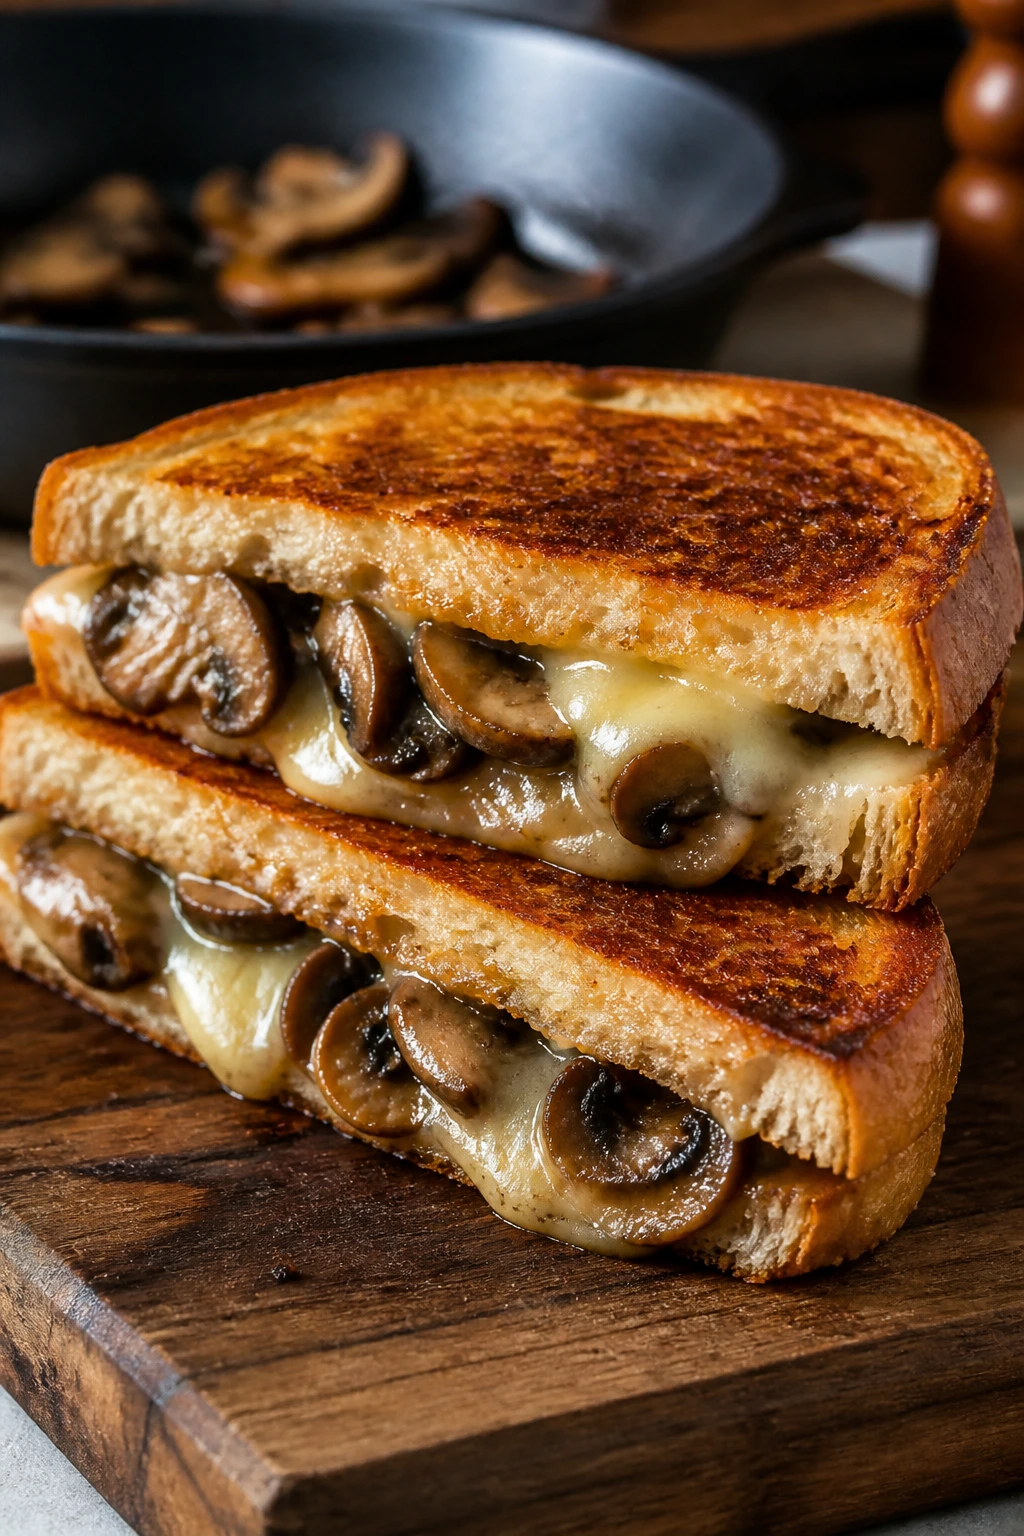
This is grilled cheese with a little more backbone. Mushrooms bring a browned, savory flavor, Swiss adds a nutty melt, and the bread crisps up in butter until it feels like diner food in the best way.
Why It Works:
Mushrooms can stand in for the savoriness people expect from meat if they’re cooked until they’ve given up their moisture and picked up color. Swiss cheese melts smoothly and plays nicely with the mushrooms, while bread and butter handle the rest. It’s straightforward and satisfying.
Key Ingredients:
- 8 oz mushrooms, sliced
- 1 tablespoon butter
- 1 teaspoon thyme
- 4 slices bread
- 4 slices Swiss cheese
- 2 tablespoons softened butter
- Salt and pepper
Quick Steps:
- Cook mushrooms in butter until browned and dry.
- Season with thyme, salt, and pepper.
- Butter the outside of the bread slices.
- Build sandwiches with Swiss and mushrooms.
- Grill in a skillet over medium heat until the bread is golden and the cheese melts.
Equipment for This Recipe:
- Skillet
- Spatula
- Knife
- Cutting board
How to Serve This Dish:
Serve hot with pickles, tomato soup, or a handful of chips. Cut the sandwiches diagonally so the cheese shows at the cut edge. The bread should crunch a little when pressed, not collapse under the filling.
Pro Tips for This Recipe:
- Cook the mushrooms until the pan is dry; watery mushrooms ruin the sandwich.
- Use medium heat so the bread browns evenly.
- Press lightly with the spatula, not hard.
Variations on This Dish:
- Gruyère Swap: Use Gruyère for a deeper nutty flavor.
- Onion Mushroom Melt: Add thinly sliced caramelized onion.
- Herbed Mayo Spread: Mix herbs into the butter or use mayo on the outside.
Common Mistakes to Avoid with This Recipe:
- Mushrooms not browned: They taste flat.
- Too much filling: The bread splits.
- Heat too high: The bread burns before the cheese melts.
26. Butternut Squash Mac and Cheese
Butternut squash mac and cheese works because the squash makes the sauce silky without losing the comfort-food shape. The color goes deep orange, the flavor stays mild, and the dish still tastes like mac and cheese first.
Why It Works:
The squash adds body and a little sweetness, which smooths out sharp cheddar and makes the sauce feel velvety. For picky eaters, that’s useful: the squash disappears into the cheese instead of announcing itself. A breadcrumb top gives you the bite people expect from baked pasta.
Key Ingredients:
- 8 oz pasta
- 2 cups butternut squash, cubed
- 2 tablespoons butter
- 2 tablespoons flour
- 2 cups milk
- 1 1/2 cups shredded cheddar
- 1/2 teaspoon salt
- 1/2 cup breadcrumbs
Quick Steps:
- Roast or boil the squash until very soft, then mash or blend it smooth.
- Make a roux with butter and flour.
- Whisk in milk and the squash puree.
- Stir in cheddar and pasta.
- Top with breadcrumbs and bake at 375°F (190°C) until browned.
Equipment for This Recipe:
- Pot
- Blender or potato masher
- Baking dish
- Whisk
How to Serve This Dish:
Serve it the same way you’d serve classic baked pasta, with a salad or roasted green beans. The squash should be invisible as a separate texture, but it should make the sauce taste fuller. If the top browns in spots, even better.
Pro Tips for This Recipe:
- Blend the squash fully smooth for the best texture.
- Use sharp cheddar so the flavor doesn’t get buried.
- Salt the sauce after the cheese goes in, not before.
Variations on This Dish:
- Smoked Gouda Version: Swap part of the cheddar for smoked Gouda.
- Sage Finish: Add a little fried sage on top.
- Roasted Garlic: Blend roasted garlic into the squash puree.
Common Mistakes to Avoid with This Recipe:
- Chunky squash: It can make the sauce feel grainy.
- Watery puree: Roast the squash if boiling leaves it too loose.
- Overbaked pasta: It gets gluey fast in the oven.
27. Pasta Primavera with Lemon Butter
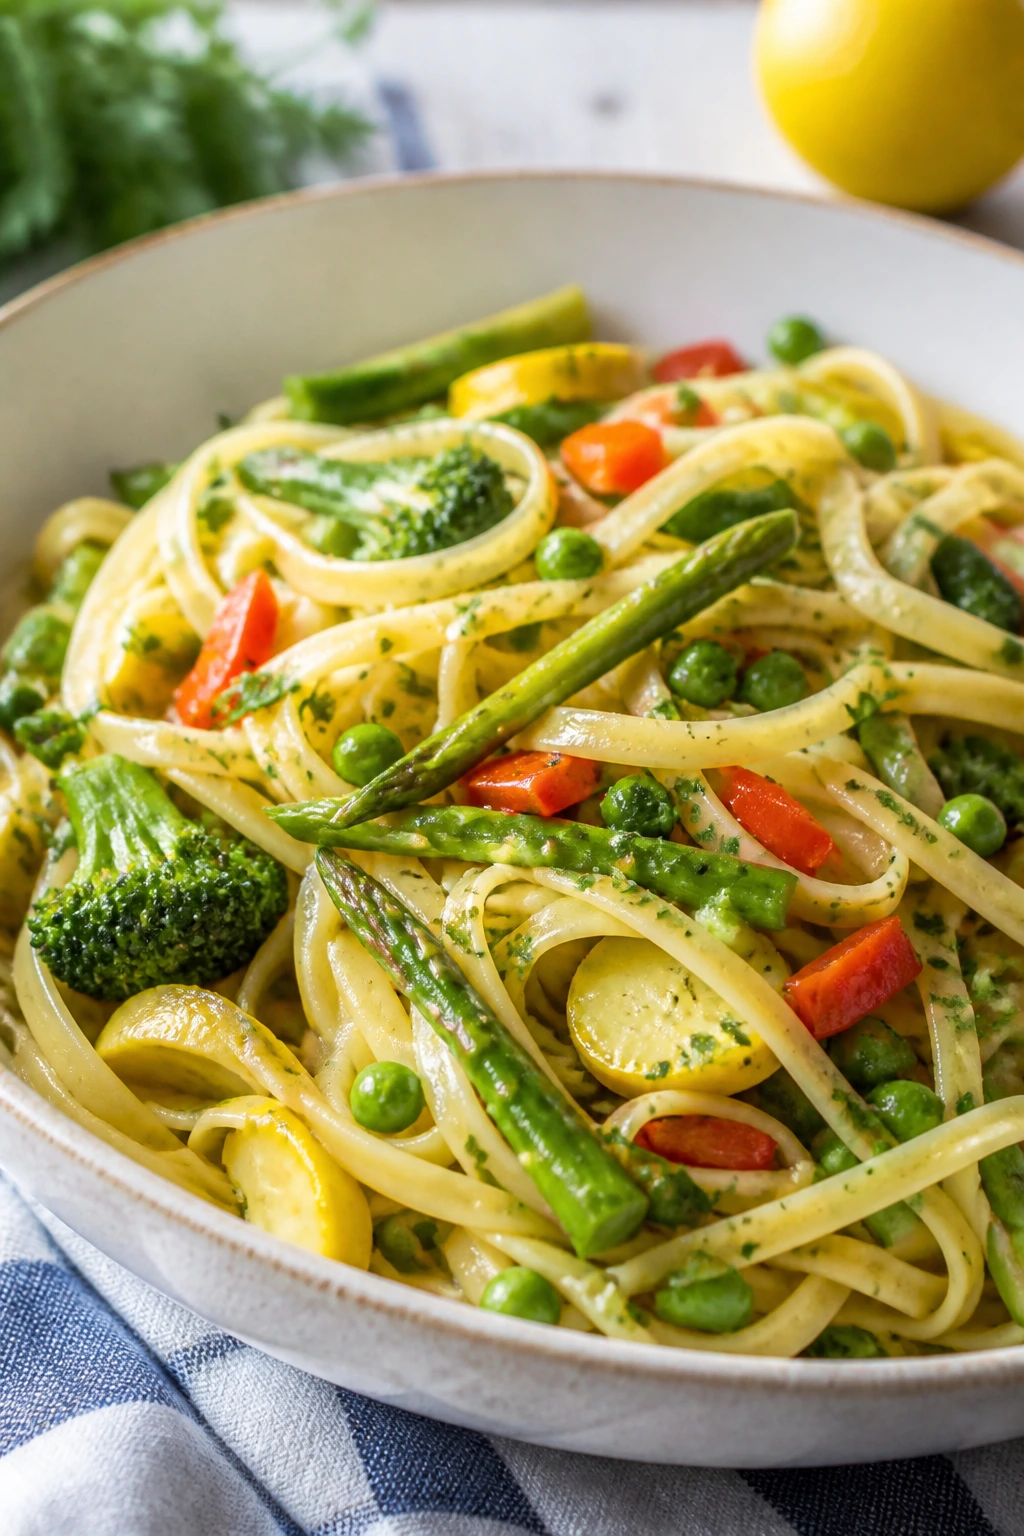
Pasta primavera often gets treated like a vegetable dump. It’s better when you keep the vegetables crisp-tender and let the butter, lemon, and Parmesan do the smoothing out. Then it feels bright, not messy.
Why It Works:
The trick here is balance: pasta for substance, vegetables for color, lemon for freshness, butter for gloss. The vegetables should still have shape, because mushy zucchini or broccoli makes the whole plate feel tired. A little Parmesan adds the salt that holds everything together.
Key Ingredients:
- 12 oz pasta
- 2 tablespoons butter
- 2 tablespoons olive oil
- 1 zucchini, sliced
- 1 bell pepper, sliced
- 1 cup broccoli florets
- 2 garlic cloves, minced
- 1 lemon, juiced
- 1/2 cup Parmesan
Quick Steps:
- Cook the pasta and reserve some pasta water.
- Sauté the vegetables in butter and oil until crisp-tender.
- Add garlic for the last 30 seconds.
- Toss in pasta, lemon juice, Parmesan, and a splash of pasta water.
- Season and serve immediately.
Equipment for This Recipe:
- Large pot
- Large skillet
- Tongs
- Citrus juicer, optional
How to Serve This Dish:
Serve it in warm bowls with extra Parmesan and black pepper. It works as a main when the vegetable ratio is generous, or as a side next to crusty bread. The sauce should coat the noodles lightly and leave a shiny film, not a puddle.
Pro Tips for This Recipe:
- Cut the vegetables to similar sizes so they cook evenly.
- Save pasta water; it helps the sauce cling.
- Add lemon at the end so it stays bright.
Variations on This Recipe:
- Creamier Primavera: Add 2 tablespoons cream.
- Asparagus Version: Swap in asparagus and peas.
- Pesto Primavera: Finish with a spoonful of pesto instead of lemon.
Common Mistakes to Avoid with This Recipe:
- Overcooking the vegetables: They lose their snap.
- Too much lemon: It can take over.
- Dry pasta: Use reserved water to loosen the sauce.
28. Veggie Nachos with Refried Beans

Nachos are useful because they never pretend to be elegant. They’re layered, salty, hot, and a little messy, which is exactly why they work for picky eaters. The refried beans add body, the cheese binds the tray together, and the toppings stay optional.
Why It Works:
A good nacho tray uses texture on purpose: crisp chips underneath, creamy beans in the middle, melted cheese on top, and cold toppings after baking. That contrast keeps the plate from getting boring after the first handful. You can also keep the vegetables chopped tiny, which helps if texture is the real enemy at your table.
Key Ingredients:
- 1 bag sturdy tortilla chips
- 1 can refried beans
- 2 cups shredded cheese
- 1 cup diced tomatoes
- 1/2 cup sliced jalapeños
- 1 avocado, diced
- 2 tablespoons sour cream
- 2 tablespoons chopped cilantro
Quick Steps:
- Spread chips on a sheet pan.
- Dollop refried beans over the chips.
- Sprinkle cheese evenly and bake at 400°F (205°C) for 8 to 10 minutes.
- Add tomatoes, jalapeños, avocado, sour cream, and cilantro after baking.
- Serve immediately before the chips soften.
Equipment for This Recipe:
- Sheet pan
- Spoon
- Knife
- Small bowl for toppings
How to Serve This Dish:
Serve straight from the tray or slide the nachos onto a big platter. They work best as a shared meal or a casual dinner with no formal structure. You want each chip to have at least one good topping, not a naked patch of chips at the bottom.
Pro Tips for This Recipe:
- Use sturdy chips or the weight of the beans will crush them.
- Bake only until the cheese melts; don’t wait for extra color.
- Keep wet toppings off until the end.
Variations on This Dish:
- Corn and Bean Nachos: Add corn and black beans for more heft.
- Queso Style: Drizzle with warm queso instead of shredded cheese.
- Mild Family Tray: Leave off jalapeños and add extra avocado.
Common Mistakes to Avoid with This Recipe:
- Overloading the tray: The chips collapse.
- Too many wet toppings before baking: Everything turns soggy.
- Baking too long: The cheese can split and the chips dry out.
29. Lentil Sloppy Joes
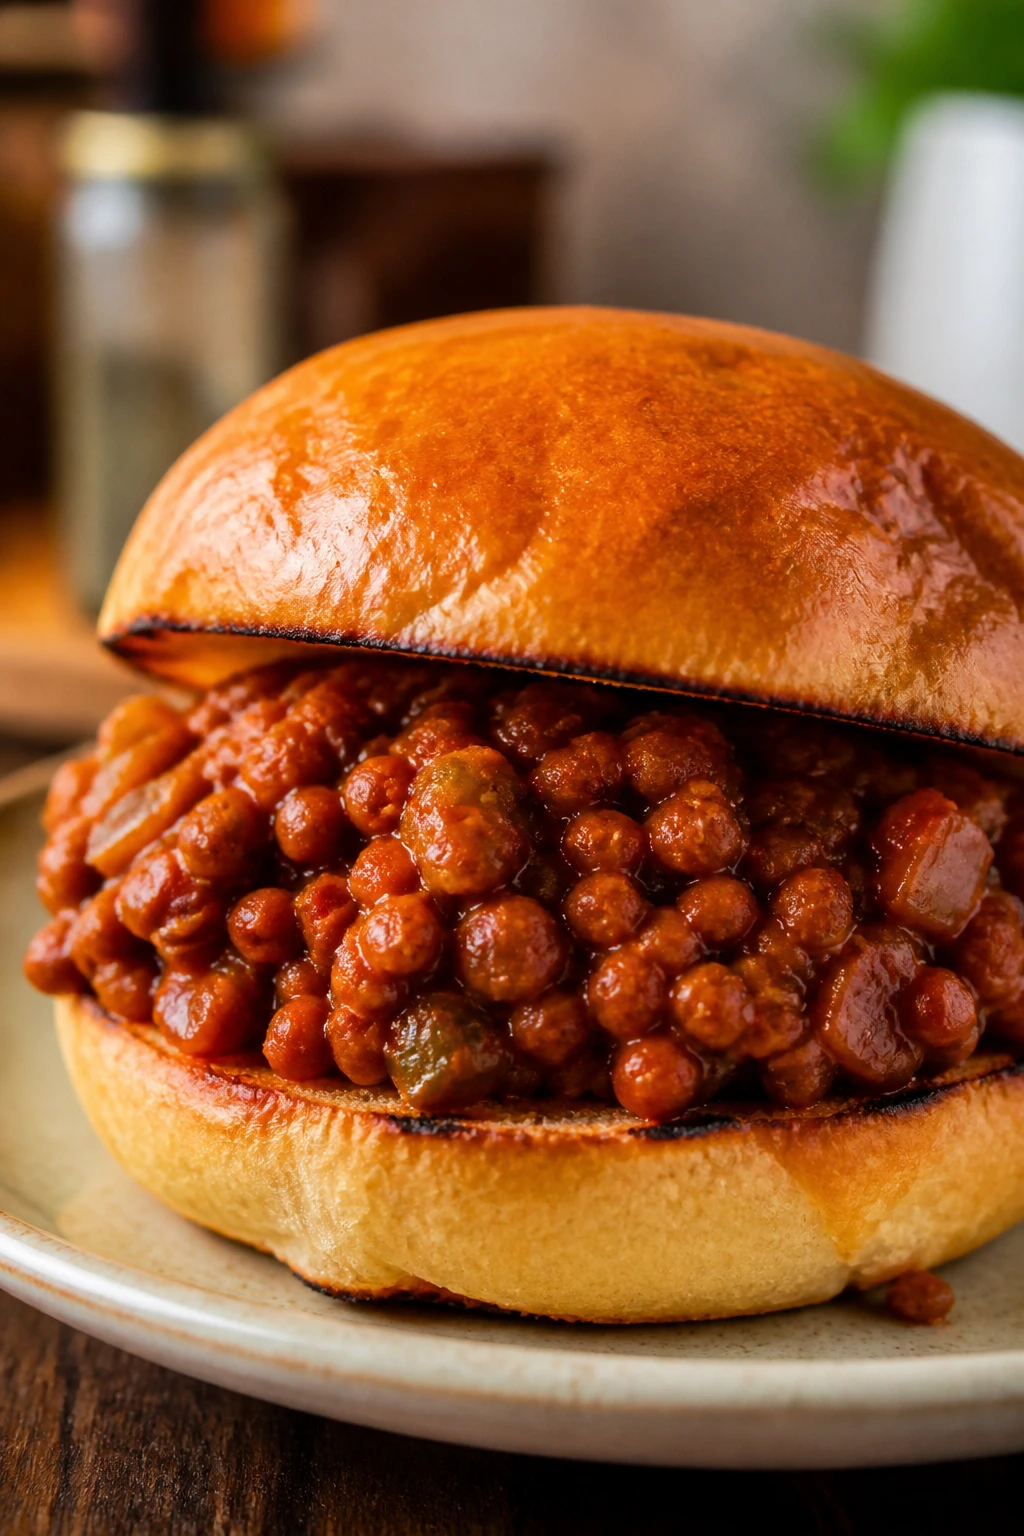
Lentil sloppy joes are messy in the right way. The filling is saucy, sweet, tangy, and thick enough to mound on a bun without immediately leaking out the sides.
Why It Works:
Lentils have enough bite to mimic the texture people expect from a loose sandwich filling, especially when you simmer them with onion, tomato paste, and a little Worcestershire-style seasoning if you use a vegetarian version. The bun softens under the sauce just enough to feel nostalgic. It’s familiar food with a better pantry bill.
Key Ingredients:
- 1 cup brown or green lentils
- 3 cups water or broth
- 1 tablespoon oil
- 1 small onion, chopped
- 2 tablespoons tomato paste
- 1/2 cup ketchup
- 1 tablespoon mustard
- 1 tablespoon brown sugar
- 4 sandwich buns
Quick Steps:
- Simmer lentils in water until tender but not mushy, about 20 to 25 minutes.
- Cook onion in oil until soft.
- Stir in tomato paste, ketchup, mustard, and brown sugar.
- Add lentils and simmer until thick and glossy.
- Spoon onto toasted buns.
Equipment for This Recipe:
- Saucepan
- Skillet
- Strainer, if needed
- Spoon
How to Serve This Dish:
Serve with pickles, coleslaw, or oven fries. Toasting the buns matters here because the filling is saucy and soft. You want the sandwich to hold together long enough to get from plate to mouth without collapsing in the middle.
Pro Tips for This Recipe:
- Cook the lentils just until tender; mushy lentils turn pasty.
- Let the filling simmer until it looks sticky, not watery.
- Toast the buns so they don’t get soggy immediately.
Variations on This Recipe:
- BBQ Lentils: Swap ketchup for barbecue sauce.
- Spicy Joe: Add hot sauce or chopped jalapeño.
- Sweet Onion Version: Stir in caramelized onion for more depth.
Common Mistakes to Avoid with This Recipe:
- Too much liquid: The filling runs off the bun.
- Overcooked lentils: They lose their shape.
- Untoasted bread: It turns to mush fast.
30. French Onion Grilled Cheese
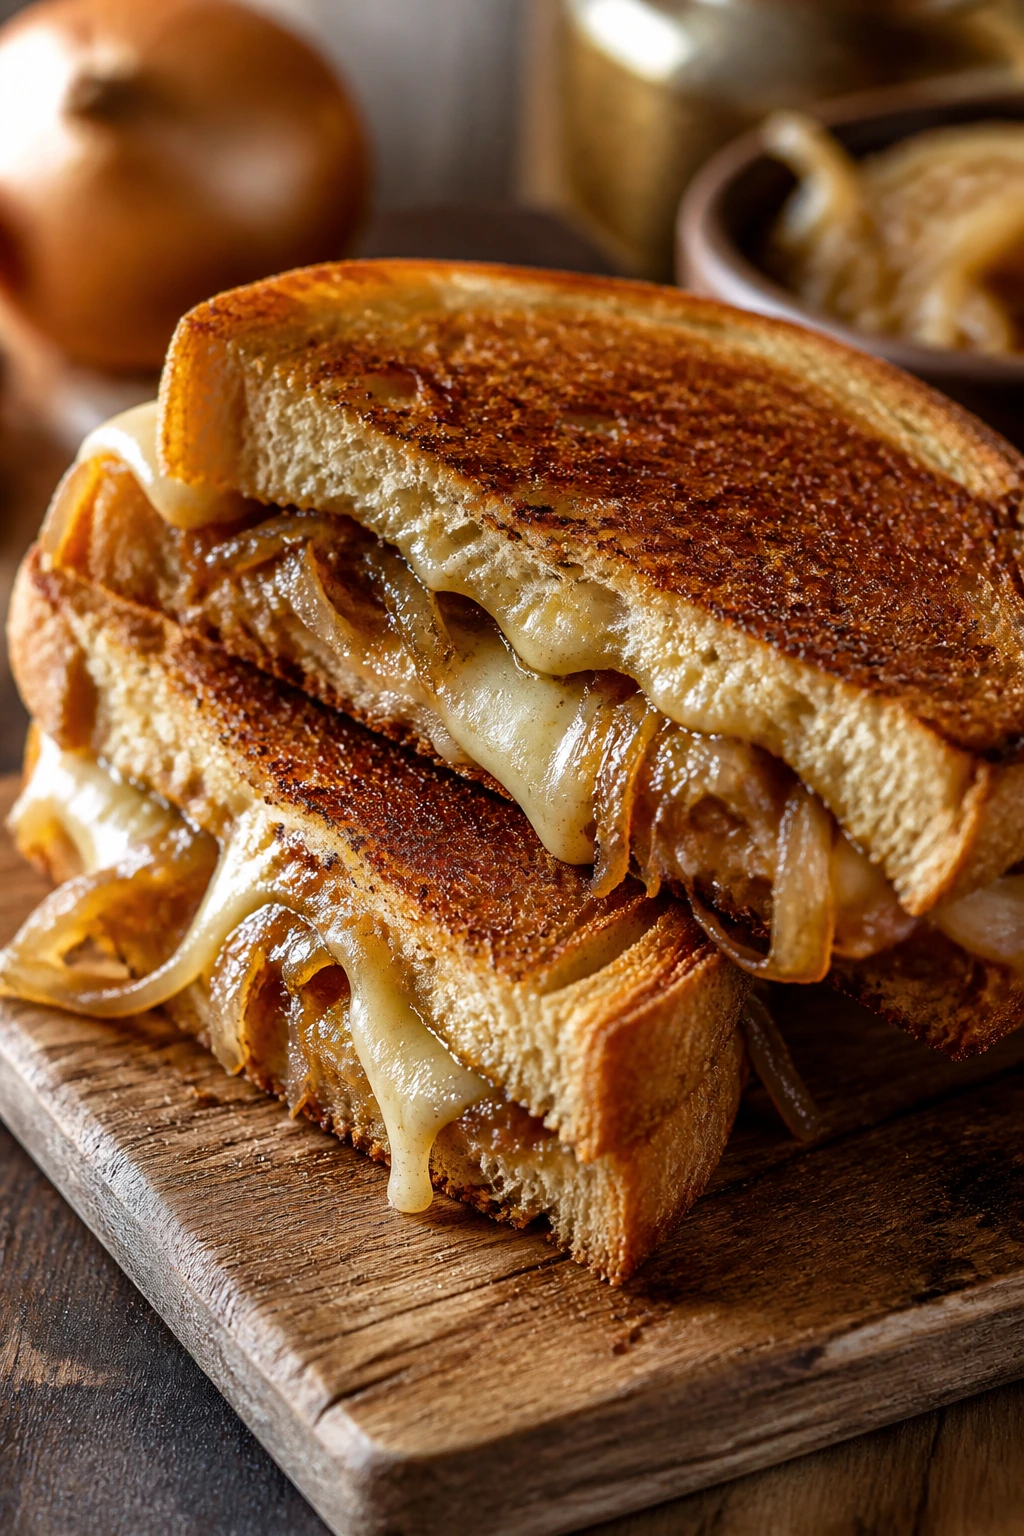
French onion grilled cheese is the sandwich for people who want something familiar with a little more drama. Sweet onions, melty cheese, and buttery bread give you the flavor of soup without the bowl.
Why It Works:
Caramelized onions bring sweetness and depth that make the sandwich taste slow-cooked. Gruyère or Swiss melts into the onions and gives you that stretchy, nutty pull. A good crust on the bread keeps the sandwich from feeling soft all the way through.
Key Ingredients:
- 2 large onions, thinly sliced
- 2 tablespoons butter
- 1 teaspoon sugar
- 4 slices bread
- 4 slices Gruyère or Swiss
- 1 tablespoon mayo or softened butter for the bread
- Salt and black pepper
Quick Steps:
- Cook onions in butter over medium-low heat with sugar and salt until deep golden, 25 to 35 minutes.
- Build sandwiches with cheese and onions between bread slices.
- Spread mayo or butter on the outside of the bread.
- Grill in a skillet over medium heat until crisp and browned, about 3 to 4 minutes per side.
- Rest 1 minute, then cut.
Equipment for This Recipe:
- Skillet
- Spatula
- Knife
- Cutting board
How to Serve This Dish:
Serve with tomato soup or a few cornichons if you want something sharp beside it. The bread should crackle at the first bite, and the cheese should stretch in a clean line. One sandwich is a solid lunch; two halves can easily become dinner.
Pro Tips for This Recipe:
- Take your time with the onions; rushing them leaves bitterness.
- Use medium heat for the sandwich so the cheese has time to melt.
- A little mayo on the bread gives a better brown than butter alone.
Variations on This Recipe:
- Sharp Cheddar Swap: Use cheddar for a louder cheese flavor.
- Mushroom Onion Melt: Add sautéed mushrooms to the filling.
- Thyme Version: Stir fresh thyme into the onions at the end.
Common Mistakes to Avoid with This Recipe:
- Onions too pale: They won’t taste sweet enough.
- Heat too high: The bread burns before the cheese melts.
- Too much filling: The sandwich becomes hard to flip.
Why These Meatless Recipes Work So Well
The best picky-eater vegetarian recipes do not try to act saintly. They taste like dinner because they’re built on the same things most people already trust: heat, salt, fat, cheese, bread, rice, pasta, and a little browning at the edges. That’s not cheating. That’s cooking with a clear head.
Vegetables alone can be a tough sell when they’re left watery or underseasoned. Put them into a lasagna, roast them on a sheet pan, tuck them into a grilled sandwich, or melt them under cheese, and the whole mood changes. Texture does half the persuading, maybe more.
There’s also a practical reason these dishes work at the family table. They’re easy to portion, easy to reheat, and easy to adapt without turning the recipe into a different animal. That matters when the person cooking wants one meal to cover different opinions without making three separate pans of dinner.
Essential Equipment for These Recipes
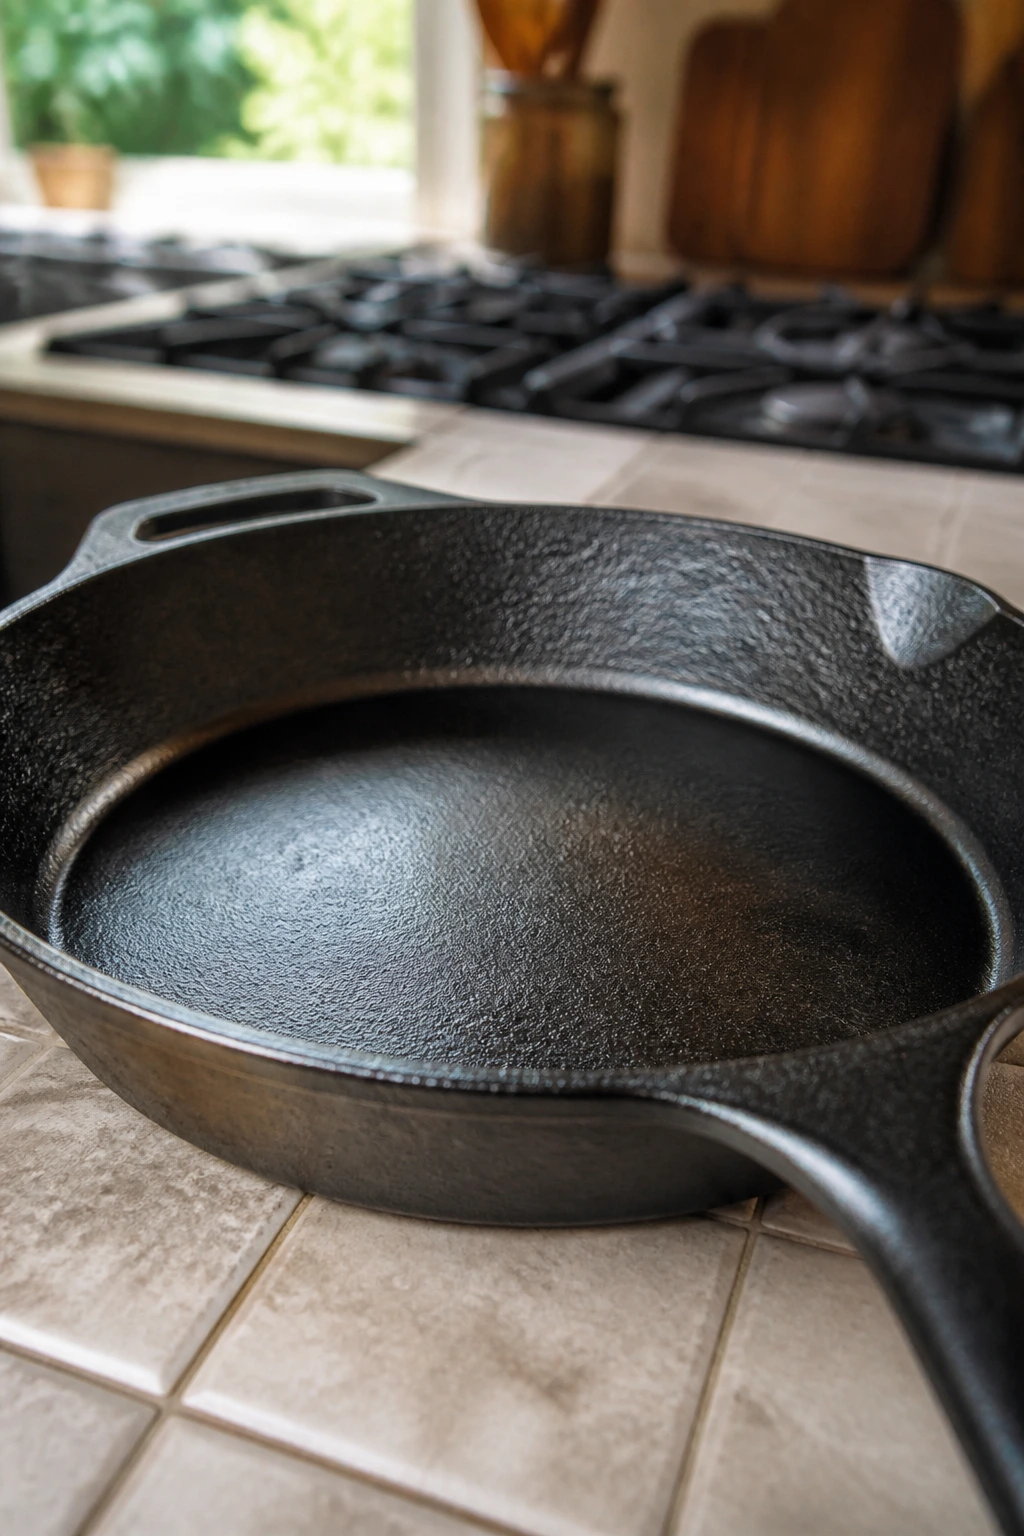
- Large skillet: Useful for quesadillas, fried rice, grilled sandwiches, and anything that needs a fast browning step.
- Rimmed sheet pan: The workhorse for roasted vegetables, gnocchi, cauliflower, and nachos.
- Medium saucepan or Dutch oven: Best for soups, sauces, risotto, chili, and cheese-based fillings.
- 9×13-inch baking dish: The standard size for casseroles, stuffed shells, pot pie, and baked pasta.
- Colander: Essential for pasta, rice-adjacent recipes, and anything that needs draining without a mess.
- Sharp chef’s knife: Keeps vegetables tidy and speeds up prep more than fancy gadgets ever do.
- Mixing bowls in two sizes: One for fillings, one for sauces or toppings; saves constant washing.
- Whisk: Helps roux, cheese sauce, and dressings come together without lumps.
- Spatula: A flexible one is handy for flipping patties, sandwiches, and fritters.
- Blender or immersion blender: Helpful for soup if you want a smooth finish instead of a rustic one.
- Measuring cups and spoons: A lot of these recipes rely on a correct sauce ratio, not guesswork.
- Airtight containers: Necessary if you want leftovers to stay worth eating the next day.
Smart Shopping and Ingredient Tips
The easiest way to make vegetarian food taste satisfying is to buy ingredients that already have some flavor of their own. Sharp cheddar tastes more interesting than mild cheddar. Real Parmesan gives you more salt and nuttiness than the shaker kind. Canned tomatoes vary a lot too; choose ones with a deep red color and no weird metallic aftertaste if you can manage it.
For vegetables, think about how they behave under heat. Zucchini, broccoli, mushrooms, onions, cauliflower, and bell peppers all handle roasting, sautéing, and baking without turning into gray mush. Spinach and herbs do better when folded in at the end or tucked into cheese. That’s the sort of detail that keeps picky eaters from noticing the vegetables in the wrong way.
Beans matter as much as people think meat does in these recipes. Black beans, chickpeas, lentils, and refried beans should be well-seasoned and properly drained. If a bean recipe tastes thin, it’s usually because the liquid-to-filling ratio is off, not because beans are boring. They can carry a lot of flavor when they’re cooked down with onions, tomato paste, garlic, or citrus.
Bread, tortillas, pasta, and potatoes deserve a little attention too. Choose sturdy sandwich bread for melts, not flimsy slices that collapse under cheese. Use pasta shapes with ridges or curves when you want sauce to cling. Pick russet potatoes for baking, because their dry interior makes a better base for toppings than waxy potatoes do.
Frozen vegetables are worth buying for fried rice, casseroles, and pot pie. They’re usually picked at a good stage and save time on busy nights. Just cook off the extra water. That one step keeps the finished dish from tasting like it was assembled in a hurry, even if it was.
How to Serve These Recipes
Presentation:
Plate these dishes with visible structure. A grilled cheese should be cut on the diagonal so the filling shows. Casseroles and pasta bakes look better when you let them rest before scooping, because the edges hold their shape and the serving looks deliberate. A spoon of sauce or a scatter of herbs goes a long way on anything beige.
Accompaniments:
Sharp salads, pickles, slaws, roasted greens, and simple fruit on the side keep these recipes from feeling too heavy. Tomato soup wants grilled bread. Mac and cheese likes broccoli or a bitter salad. Tacos and sliders benefit from something crunchy and acidic, like cabbage slaw or quick-pickled onions.
Portions:
For pasta, aim for about 2 ounces dry pasta per person as a side and 3 to 4 ounces as a main. For bean burgers, one patty plus a sturdy side usually works. For casseroles and bakes, cut the pan into firm squares so each serving includes crust, center, and sauce. That balance matters more than people think.
Beverage Pairing:
Lemon water, sparkling water with lime, or iced tea works across most of this collection. For richer dishes like baked pasta or French onion grilled cheese, a dry cider or a simple lager keeps things from feeling too dense. If you want a nonalcoholic pairing with more bite, ginger beer does a good job.
Additional Tips and Flavor Boosters
Flavor Enhancement:
A squeeze of lemon, a spoon of Dijon, or a little vinegar at the end can sharpen a whole dish without making it taste “healthy.” That tiny acid hit is often the difference between food that sits there and food people keep going back to.
Customization:
Keep chopped herbs, pickled jalapeños, hot sauce, and grated cheese on the table. These recipes already lean mild and familiar, so a topping station lets each person steer the flavor a little without changing the base recipe. That’s handy when one eater wants gentle and another wants heat.
Serving Suggestions:
Use crunchy toppings on soft dishes: toasted breadcrumbs on mac and cheese, fried onions on casseroles, sesame seeds on rice bowls, or crushed tortilla chips on chili. The contrast wakes up the plate. It also prevents the vegetarian food from reading as one long soft texture.
Make-It-Yours:
If you want more protein, add beans, eggs, Greek yogurt, or extra cheese before reaching for meat substitutes. If you need dairy-free, use olive oil instead of butter and a good meltable plant cheese where the dish can take it. If you need lower sodium, choose unsalted broth and season in layers instead of dumping salt in at the end.
Make-Ahead, Storage, and Reheating Guidance
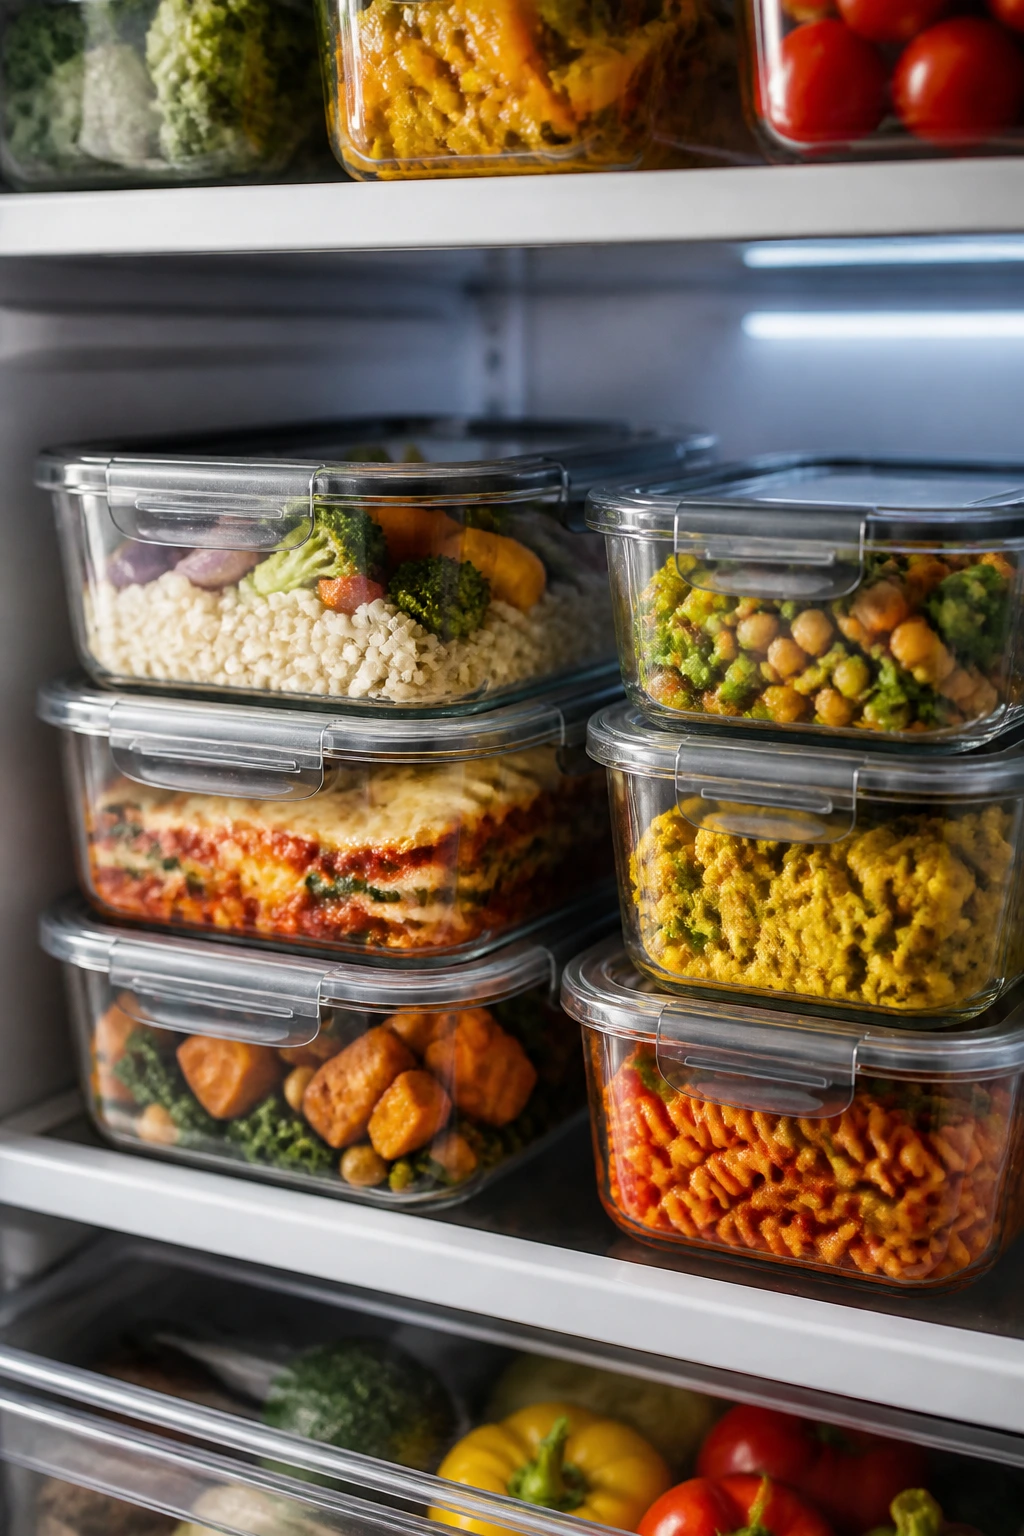
Most of these recipes keep well for 3 to 4 days in the fridge in airtight containers. Pasta bakes, chili, casseroles, pot pie filling, and fried rice all reheat nicely if you don’t scorch them. The one thing that usually degrades fastest is anything breaded or crisp, so grilled sandwiches, fritters, and nachos are best cooked fresh when you can.
For freezer storage, dishes with sauce or filling do best. Chili, mac and cheese, stuffed shells, lentil sloppy joe filling, pot pie filling, and black bean burger patties can usually be frozen for up to 2 months. Freeze in flat portions if possible. They thaw faster, which means less time sitting in the danger zone and less chance of a watery texture later.
Reheat pasta bakes and casseroles in a 350°F (175°C) oven covered with foil until hot in the center, usually 15 to 25 minutes depending on the portion size. Add a splash of milk or broth if the sauce has tightened up. Soup and chili reheat best on the stovetop over medium-low heat, stirred often, because microwaving can make the edges too hot while the center stays cool.
For fried rice, use a skillet rather than the microwave if you care about texture. A teaspoon of oil in a hot pan brings the grains back to life. Potato dishes and stuffed peppers can go back into the oven covered, then uncovered for the last few minutes if you want the top to crisp again.
A few of these dishes improve overnight. Chili, tomato soup, and lentil filling usually taste deeper after a rest in the fridge. Crisp dishes do not improve overnight. That’s not a flaw; it’s just the nature of bread and batter.
Variations and Adaptations to Try
The Dairy-Light Table:
Use olive oil instead of butter, vegetable broth instead of cream-heavy sauces, and a lighter hand with the cheese. Recipes like chili, tacos, fried rice, and pasta primavera adapt easily this way. They keep their shape without depending on dairy for every ounce of flavor.
The Extra-Protein Pass:
Add beans to tacos, grains to stuffed peppers, lentils to sloppy joes, eggs to fried rice, and chickpeas to curry. That gives the plate more staying power without changing the basic comfort-food feel. It’s a cleaner fix than trying to bolt on a meat substitute that fights the recipe.
The Mild-Only Version:
Skip jalapeños, hot sauce, pepper flakes, and chipotle, then lean on salt, lemon, garlic, and toasted cheese for flavor. This works especially well for quesadillas, mac and cheese, sandwiches, and baked pasta. Mild does not have to mean boring when the cooking is done well.
The Gluten-Free Path:
Use gluten-free pasta, corn tortillas, rice, potatoes, and polenta where they fit naturally. For casseroles and sauces, swap flour with a cornstarch slurry or a gluten-free all-purpose blend. The texture changes a bit, but the core idea stays intact.
The Freezer-Friend Batch:
Double the chili, burger patties, sloppy joe filling, pot pie filling, and stuffed shell sauce. Freeze in meal-sized containers so you’re not thawing a mountain of food. This is the route that saves the most weeknight sanity.
Common Mistakes to Avoid
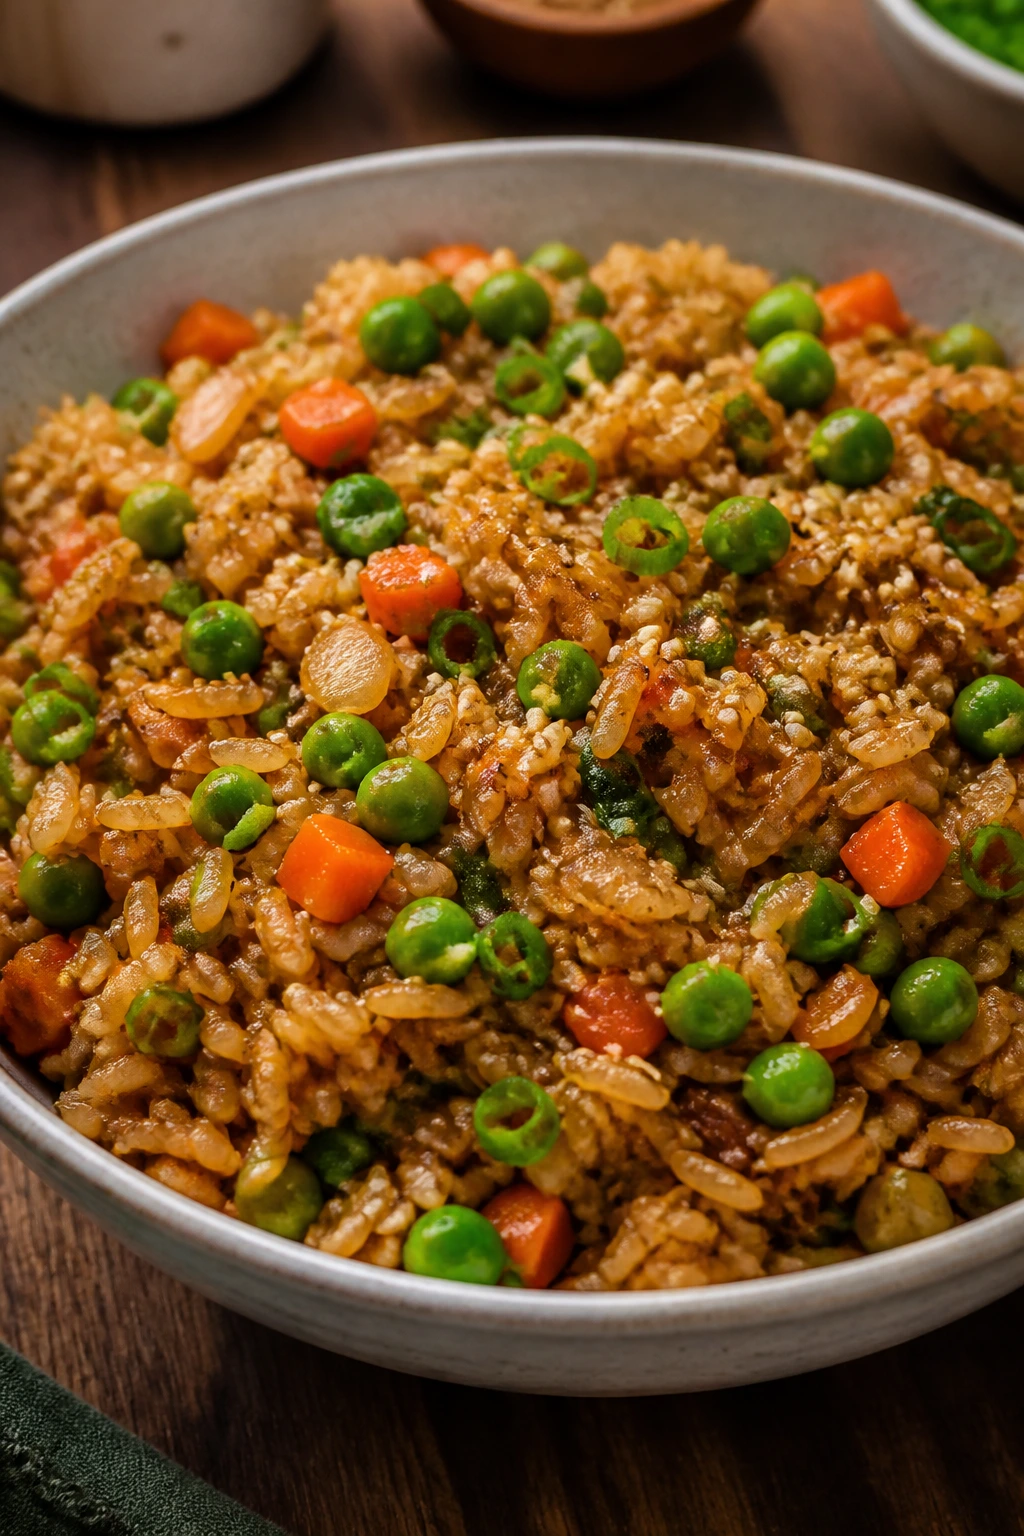
The biggest mistake is treating vegetables like the whole point of the dish. In recipes like these, vegetables usually work best as part of a larger texture story. If the broccoli is steamed into softness and the cheese sauce is thin, the meal falls flat. If the broccoli is lightly steamed and folded into a thick bake, it lands much better.
Another easy error is underseasoning at every stage. Pasta water, bean fillings, rice, roasted vegetables, and cheese sauces all need their own salt. If you wait until the end and sprinkle a little on top, the food will still taste hollow. Season the base, taste the sauce, then season again if needed.
Using the wrong pan size causes more trouble than people expect. A crowded sheet pan steams instead of roasts. A skillet that’s too small for fried rice gives you sticky clumps. A baking dish that’s too deep can hide a casserole’s crust under a wet center. Match the pan to the job and the food gets better almost immediately.
The final trap is serving crisp dishes too late. Nachos soften. Grilled sandwiches lose their bite. Fritters go limp if they sit under a lid. If the recipe depends on crunch, serve it the second it’s ready and keep the rest warm in the oven instead of covering it tightly.
Questions People Actually Ask

How do you make vegetarian food satisfying for meat eaters?
Start with dishes that already have familiar structure: pasta, rice, potatoes, tortillas, bread, beans, and cheese. Then add browned edges, enough salt, and a sauce with some body. People usually respond to texture first, so that’s where the work should happen.
What if someone hates mushrooms, beans, or spinach?
Swap within the same texture family. Mushrooms can become roasted cauliflower or zucchini. Beans can be replaced with lentils or eggs in some recipes. Spinach can disappear into cheese sauces, or you can leave it out and add peas, broccoli, or herbs instead.
Can I make these recipes ahead for a busy week?
Yes, but choose the right ones. Chili, casseroles, stuffed shells, mac and cheese, and curry hold well. Grilled cheese, nachos, and fritters are better cooked fresh because the texture falls off fast after chilling.
What’s the best cheese for melting?
Cheddar, Monterey Jack, mozzarella, Gruyère, and Swiss all behave well in these recipes. Sharp cheddar gives more flavor, while mozzarella gives better stretch. For the smoothest melt, shred it yourself if you have the patience.
How do I make these dishes more filling without adding meat?
Use beans, lentils, eggs, potatoes, rice, and pasta as the backbone. Those ingredients bring enough substance that the meal doesn’t feel thin. A sauce that clings to starch also goes a long way.
Can I use frozen vegetables instead of fresh?
Absolutely, especially for fried rice, pot pie, casseroles, and chili. Frozen vegetables are often a smart shortcut because they’re already trimmed and portioned. Just cook off extra water so the dish doesn’t turn soft.
What if my sauce is too thin?
Keep simmering it uncovered for a few more minutes, or stir in a bit more cheese, mashed beans, or a small flour slurry depending on the recipe. Don’t panic and dump in a random pile of ingredients. Thin sauce usually needs heat and time, not a rescue from the pantry.
What if the baked top browns too fast?
Cover it loosely with foil and keep going. That’s common with casseroles, mac and cheese, pot pie, and stuffed shells, especially if the oven runs hot. The goal is a cooked center and a colored top, not a burnt crust.
A Table That Doesn’t Miss the Meat
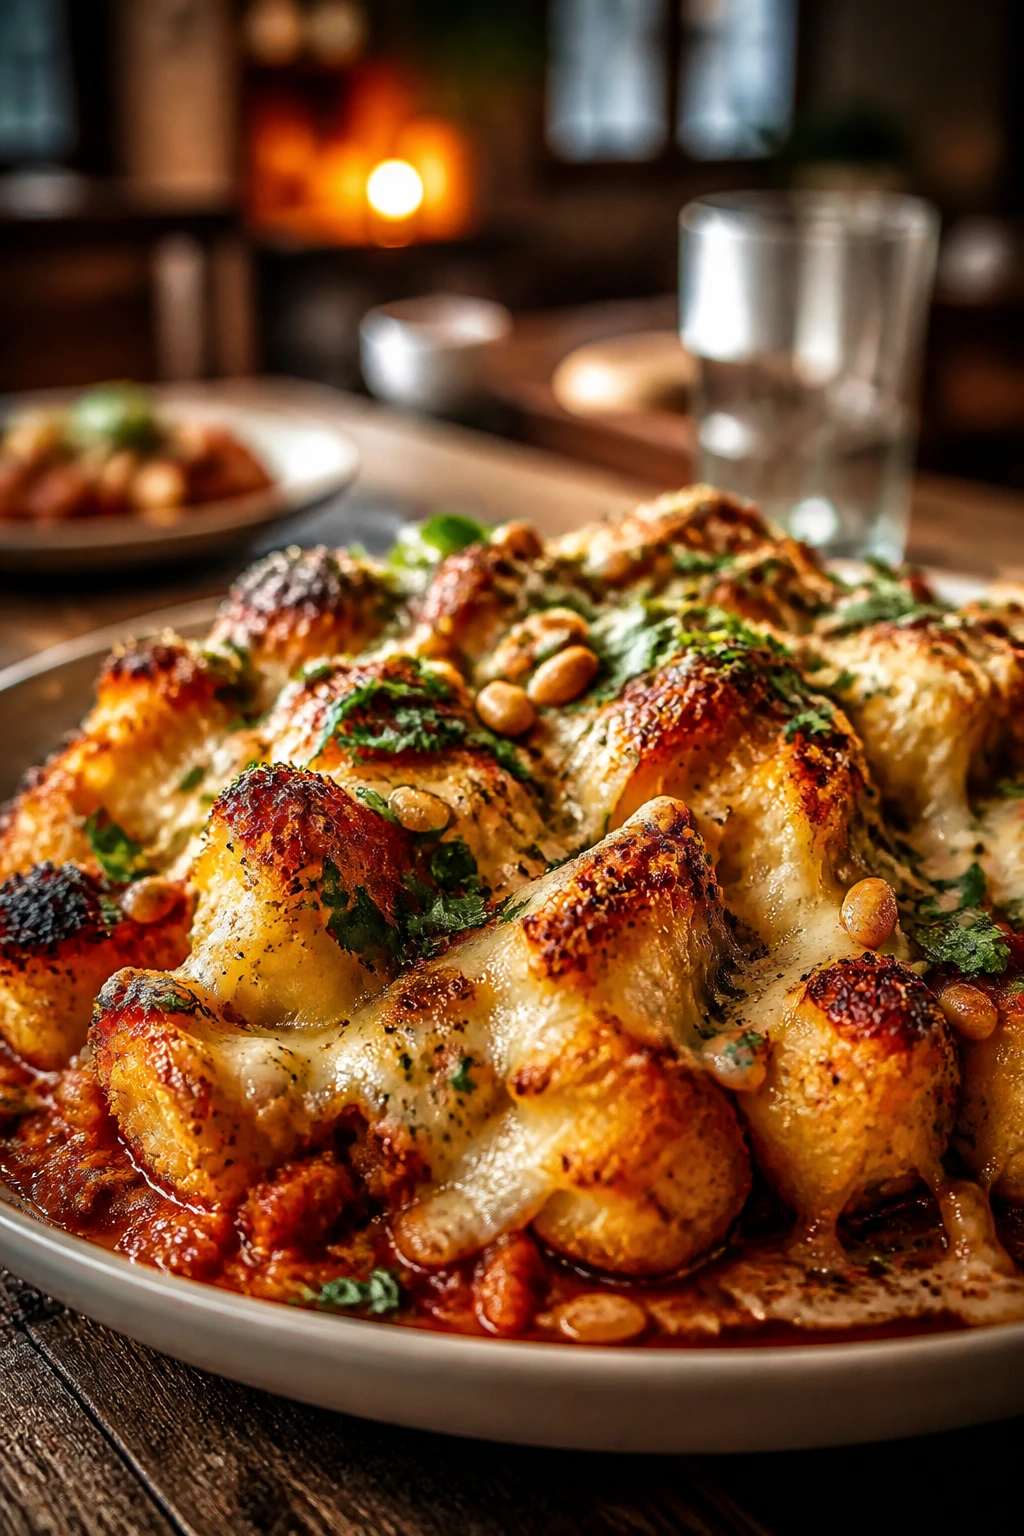
The smartest vegetarian cooking for picky eaters doesn’t try to sneak in a lecture. It builds plates with things people already trust, then makes those plates taste a little deeper than expected. Cheese helps. Browning helps more. A clean, salty sauce can rescue almost anything.
That’s why these recipes work when the table has mixed opinions. They’re familiar, sturdy, and easy to finish. No one needs to pretend they’re eating something glamorous. They just need dinner to show up hot, hold together on the fork, and taste worth another bite.