
Meatless Monday tends to fail when dinner starts looking like a side dish. A bowl of plain pasta with a few limp peas is not going to hold a family at the table, and it won’t calm down the five-minute-after-school question of, “What’s for dinner?” These family friendly vegetarian meals work because they still eat like dinner — bubbling cheese, browned onions, crisp tortillas, glossy sauce, and enough texture that nobody feels like they got the “light” option by accident.
The trick isn’t fake meat. It’s the parts that do the real work: beans that simmer into sauce, lentils that catch seasoning, mushrooms that brown like they mean it, and enough cheese, eggs, or coconut milk to give the dish some body. A good meatless dinner should smell good before it even leaves the oven. Tomato paste should darken in the pan. Garlic should go sweet, not bitter. Pasta should finish in sauce instead of swimming in it.
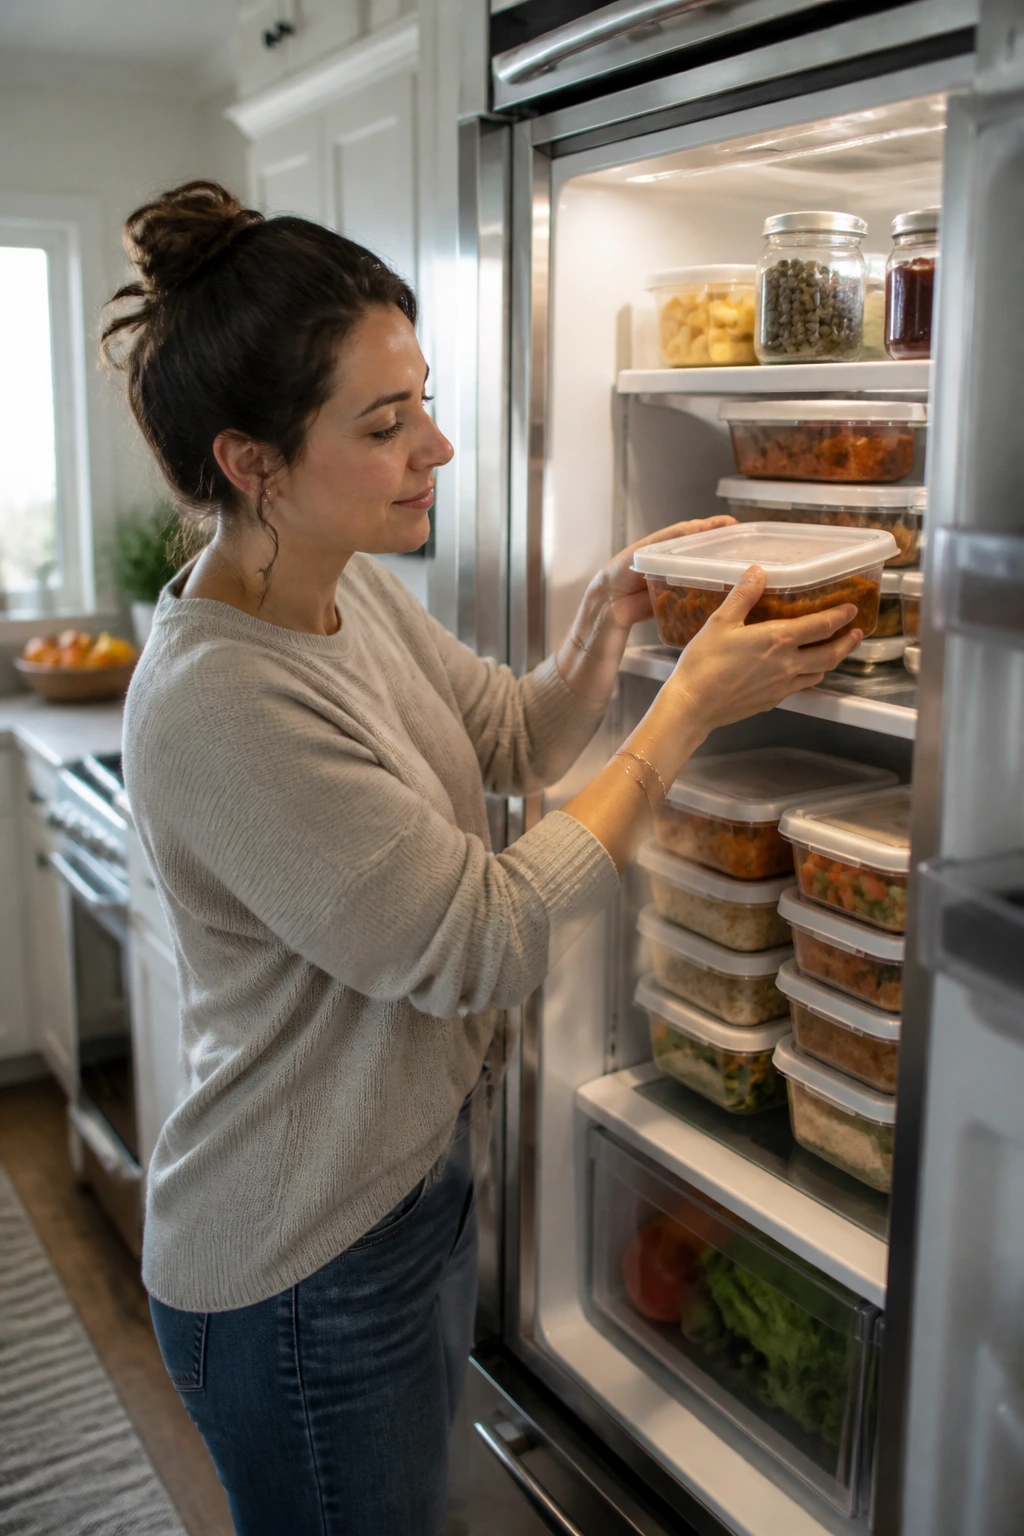
That balance is what keeps these meals from feeling like homework. Some are weeknight-fast, some are better for a Sunday batch cook, and all of them are built to land with adults and kids alike. A few are creamy. A few are crisp. One or two are the kind of dinner that leaves the skillet scraped clean. Start with the first one and the pattern shows itself fast.
Why These Dinners Earn a Permanent Spot on the Monday Rotation
-
Kid Recognition: These recipes look like pasta, tacos, soup, and casserole first, which means dinner feels familiar before anyone notices there’s no meat on the plate.
-
Pantry-Friendly: Beans, lentils, rice, pasta, tortillas, canned tomatoes, and frozen vegetables show up again and again, so you can cook most of this without a special trip.
-
Texture Matters: Each recipe has something soft and something browned, crisp, or creamy, and that contrast is what keeps a vegetarian meal from tasting flat.
-
Flexible for Leftovers: Saucy bakes, soups, curries, and skillet fillings hold up well the next day, and some of them taste even better after the flavors settle overnight.
-
Budget-Friendly by Design: A handful of vegetables, a pound of pasta, a can or two of beans, and a little cheese can feed a table for far less than most meat-heavy dinners.
-
Easy to Scale: Every recipe here can feed four, stretch to six, or get doubled for a bigger crew without much math beyond a bigger pan and a longer bake.
1. Cheesy Baked Ziti with Spinach
This is the baked pasta I reach for when I want a meatless dinner that nobody argues with. The sauce clings to the noodles, the ricotta stays creamy in the middle, and the mozzarella on top gets those browned blisters that make people hover around the oven door. Spinach disappears into the red sauce in the best way — it gives you the green without turning dinner into a lecture.
Why It Works:
Baked ziti is forgiving in a way stovetop pasta isn’t. The noodles finish cooking in the sauce, the ricotta keeps the center soft, and the whole pan holds together after a short rest, which means you can actually serve it instead of chasing it around a plate. A 9×13-inch pan also gives you that generous browned top, and that top layer matters more than people admit.
Key Ingredients:
- 1 pound ziti or penne pasta — use a sturdy shape with ridges so the sauce grabs on.
- 2 tablespoons olive oil — for softening the onion and building the base.
- 1 medium yellow onion, diced — gives the sauce sweetness after it cooks down.
- 4 garlic cloves, minced — add this after the onion so it doesn’t burn.
- 24 ounces marinara sauce — use a sauce you like straight from the jar.
- 15 ounces whole-milk ricotta cheese — part-skim works, but whole-milk stays creamier.
- 1 large egg — helps the ricotta layer set in the oven.
- 5 ounces baby spinach — fresh is easiest; frozen works if you squeeze it dry.
- 3 cups shredded low-moisture mozzarella, divided — melts cleanly and gives the top that stretchy finish.
- 1 cup grated Parmesan, divided — salty, sharp, and worth using.
- 1 teaspoon dried oregano, 1 teaspoon kosher salt, 1/2 teaspoon black pepper — enough seasoning to keep the pasta from tasting bland.
Quick Steps:
-
Preheat the oven to 400°F and grease a 9×13-inch baking dish. Bring a large pot of salted water to a boil and cook the pasta for 2 minutes less than the package says for al dente.
-
Reserve 1 cup of pasta water, then drain the noodles. They should still feel a little firm at the center. Do not overcook them now — they finish in the oven.
-
Heat the olive oil in a large skillet over medium heat. Add the onion and cook for 5 to 6 minutes, until soft and translucent. Stir in the garlic and cook for 30 seconds, just until fragrant.
-
Add the marinara, oregano, salt, pepper, and spinach. Simmer for 2 to 3 minutes, until the spinach wilts and the sauce looks a little thicker.
-
In a large bowl, mix the ricotta, egg, half of the Parmesan, and a pinch of salt. Stir until smooth.
-
Toss the pasta with the sauce and half of the mozzarella. Spread half into the baking dish, dollop on the ricotta mixture, add the rest of the pasta, then finish with the remaining mozzarella and Parmesan. Bake for 20 to 25 minutes, until bubbling around the edges and lightly browned on top. Let it rest for 10 minutes before cutting.
Equipment for This Recipe:
- Large pot — for boiling the pasta.
- Large skillet — for the sauce base.
- 9×13-inch baking dish — gives the pasta room to brown instead of steam.
- Mixing bowl — for the ricotta layer.
- Colander — for draining the pasta without a mess.
How to Serve This Dish:
Cut it into squares and slide each portion onto a plate with a spoonful of extra sauce from the edges. A crisp Caesar-style salad or a simple arugula salad keeps the plate from feeling heavy, and garlic bread is the move if you want everyone quiet for a minute.
Pro Tips for This Recipe:
- Underbake the pasta by a minute or two. The oven will finish the job.
- If you use frozen spinach, thaw it and squeeze it almost dry in a towel.
- Whole-milk mozzarella browns better and melts with a softer pull than low-fat cheese.
- Let the baked ziti sit for 10 minutes. If you cut too soon, it turns into a lava pile.
Variations on This Dish:
- Mushroom Ziti: Sauté 8 ounces of sliced cremini mushrooms with the onion for a deeper, earthier sauce.
- Four-Cheese Baked Ziti: Replace 1 cup of the mozzarella with provolone or fontina for a more savory melt.
- Gluten-Free Ziti: Swap in gluten-free penne and pull the bake 3 to 5 minutes early if the pasta starts to soften too much.
Common Mistakes to Avoid with This Dish:
- Cooking the pasta all the way first: It turns soft after baking. Stop early.
- Using watery spinach or ricotta: Too much moisture makes the casserole slide apart. Drain or squeeze both if needed.
- Skipping the rest time: The pan needs 10 minutes to settle, or the serving will fall apart in a spoonful mess.
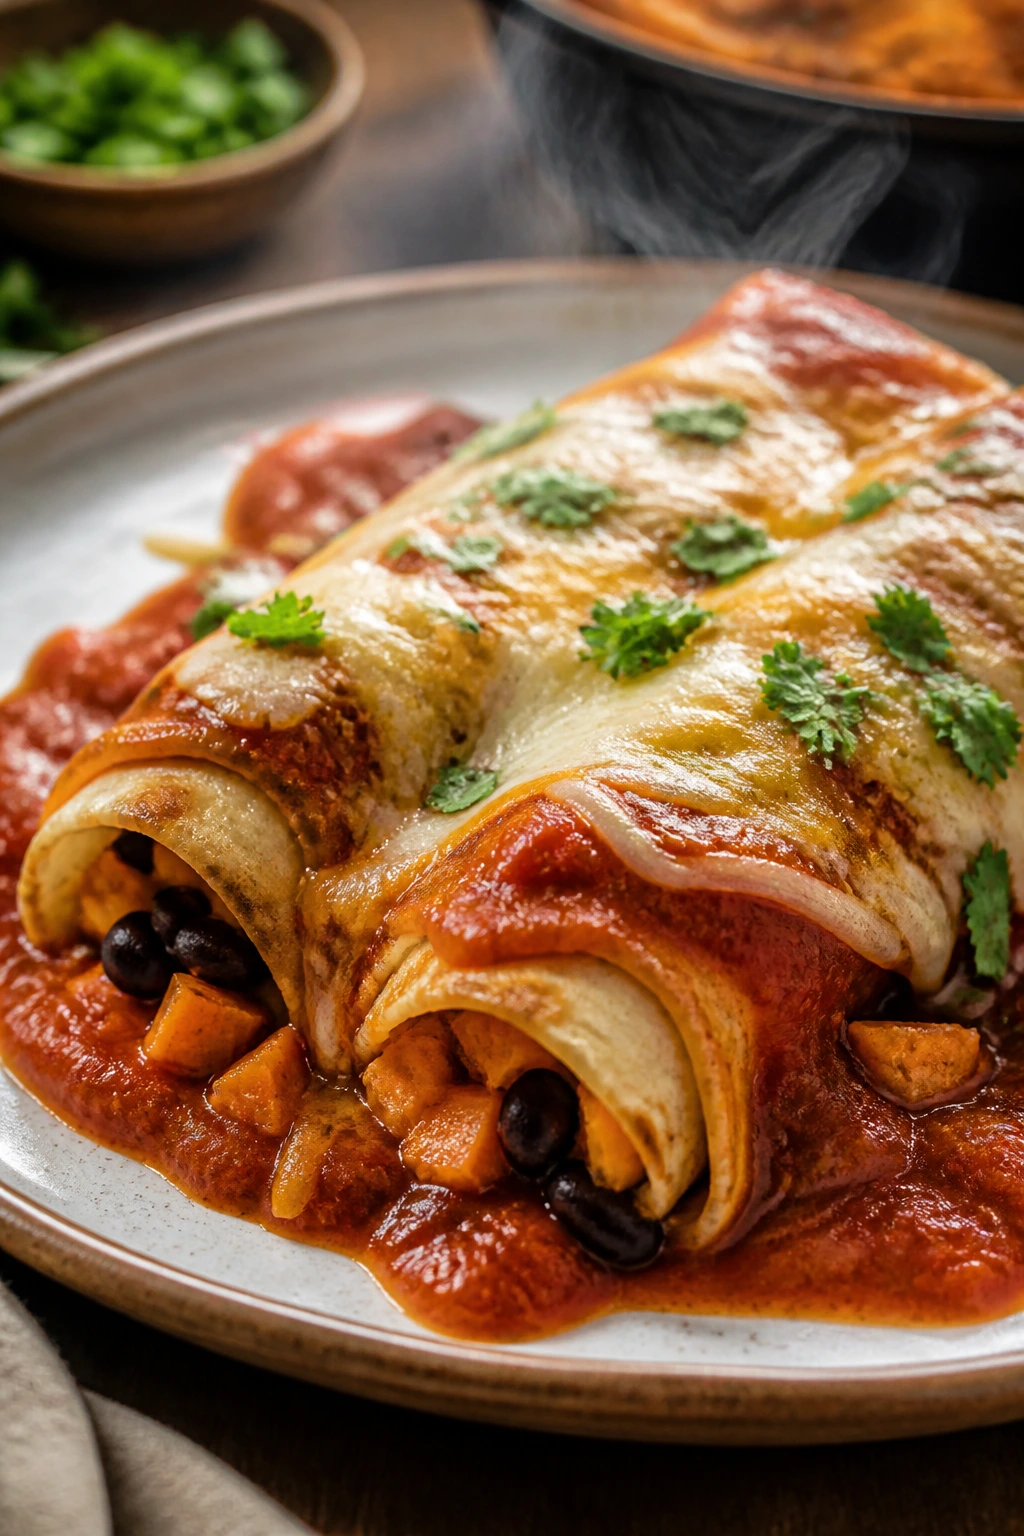
2. Black Bean and Sweet Potato Enchiladas
These are the enchiladas I make when I want dinner to feel a little fuller than a taco night but not much more complicated. Sweet potatoes go creamy in the oven, black beans bring the heft, and the red sauce does that thing it does where it makes the whole pan smell warm and a little smoky. If you’ve got kids who like orange food and cheese, you’re already halfway there.
Why It Works:
Sweet potato and black bean is a strong combination because one gives you softness and a little sweetness while the other gives you body and protein. The enchiladas bake in sauce, which keeps the tortillas pliable instead of dry and crackly. I prefer flour tortillas here because they roll without splitting, and that alone saves a lot of irritation.
Key Ingredients:
- 2 medium sweet potatoes, peeled and diced into 1/2-inch cubes — about 1 1/2 pounds total.
- 1 tablespoon olive oil — for roasting the potatoes.
- 1 small yellow onion, diced — gives the filling a savory edge.
- 2 garlic cloves, minced — enough to wake up the beans without stealing the show.
- 1 can (15 ounces) black beans, drained and rinsed — use low-sodium if you want more control.
- 1 teaspoon chili powder, 1 teaspoon ground cumin, 1/2 teaspoon smoked paprika, 1 teaspoon kosher salt — the seasoning that keeps the filling from tasting flat.
- 8 small flour tortillas — they roll more easily than corn tortillas.
- 2 cups red enchilada sauce — store-bought is fine if you like the flavor.
- 2 cups shredded Monterey Jack or cheddar cheese — use a blend if you want a softer melt.
- 2 tablespoons chopped cilantro — optional, but good for finishing.
Quick Steps:
-
Preheat the oven to 425°F and line a sheet pan with parchment. Toss the sweet potatoes with olive oil and a pinch of salt, then roast for 18 to 20 minutes, until tender and lightly caramelized at the edges.
-
While the potatoes roast, cook the onion in a skillet over medium heat for 4 to 5 minutes, until soft. Stir in the garlic, chili powder, cumin, and smoked paprika for 30 seconds.
-
Add the black beans and a splash of water, then stir until the beans are hot and lightly mashed at the edges. Fold in the roasted sweet potatoes and taste for salt.
-
Lower the oven to 375°F. Spoon a thin layer of enchilada sauce into a 9×13-inch baking dish.
-
Fill each tortilla with the sweet potato mixture and a little cheese, roll it up, and place seam-side down in the dish. Pour the remaining sauce over the top and scatter on the rest of the cheese.
-
Bake for 20 to 25 minutes, until the sauce bubbles around the edges and the cheese melts into a glossy layer. Let the pan rest for 8 to 10 minutes before serving.
Equipment for This Recipe:
- Sheet pan — for roasting the sweet potatoes.
- Large skillet — for the filling.
- 9×13-inch baking dish — to hold the rolled enchiladas snugly.
- Spatula or wooden spoon — for folding the filling together.
- Parchment paper — keeps the roasting pan from sticking.
How to Serve This Dish:
Serve the enchiladas with a spoonful of sour cream, chopped cilantro, and a pile of shredded lettuce if you like a little crunch. They’re good with Mexican rice, but honestly, a simple bowl of corn on the side does the job.
Pro Tips for This Recipe:
- Roast the sweet potatoes until the edges start to brown. Pale cubes taste fine; caramelized ones taste like dinner.
- If your tortillas are stiff, warm them for 20 seconds in the microwave so they roll without tearing.
- Let the filling cool for a few minutes before rolling. Hot filling makes the tortillas split.
- Use enough sauce under the enchiladas so the bottoms stay soft.
Variations on This Dish:
- Poblano Enchiladas: Stir in one diced roasted poblano pepper for a mild smoky note.
- Freezer Tray Version: Assemble the enchiladas, cover tightly, and freeze before baking. Add 15 to 20 minutes to the bake time straight from frozen.
- Mild School-Night Version: Skip the chili powder and use a mild enchilada sauce if your table gets nervous about spice.
Common Mistakes to Avoid with This Dish:
- Stuffing the tortillas too full: They split and spill. Keep the filling modest.
- Using dry sauce on top: The tortillas crisp up instead of staying tender.
- Skipping the rest: Like most baked dishes, enchiladas need a short pause before cutting or scooping.
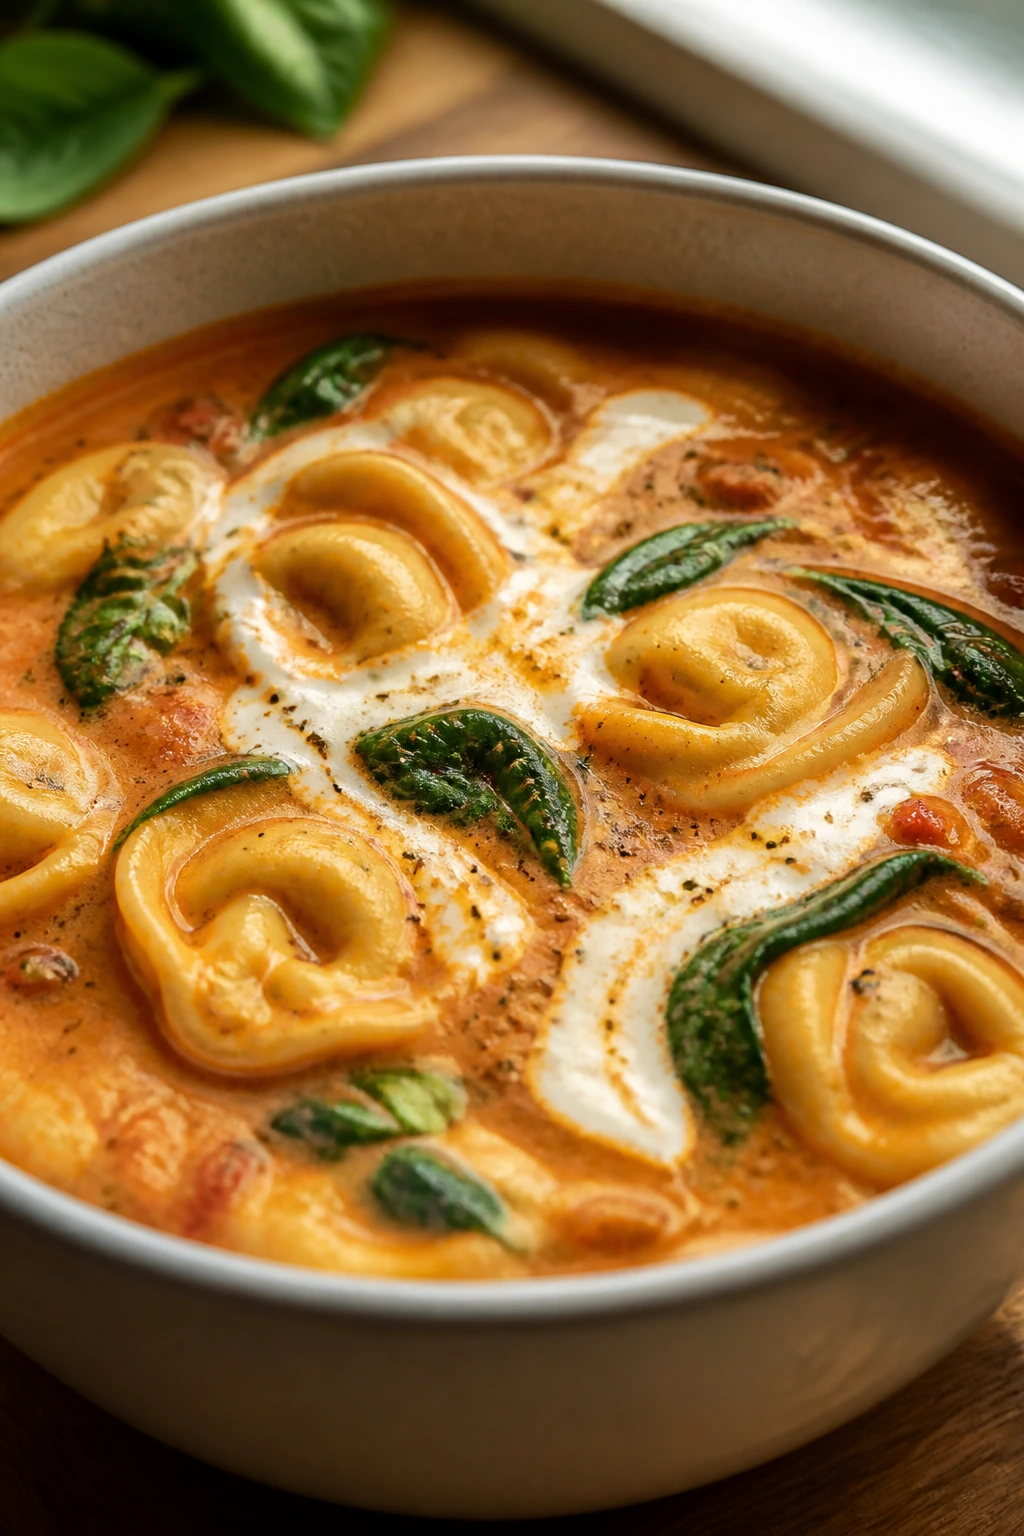
3. Creamy Tomato Tortellini Soup
This is the soup that tastes like you put in more work than you did. Tiny cheese tortellini float in a tomato broth that goes silky once the cream hits the pot, and the spinach melts in at the end without stealing attention. It’s the kind of bowl that makes a grilled cheese feel optional — though I still usually make the grilled cheese.
Why It Works:
Tortellini turns a simple tomato soup into a full meal because the pasta already brings cheese and a little chew. The soup gets depth from onion, carrot, and tomato paste, which is one of those small steps people skip and then wonder why the soup tastes thin. The cream doesn’t need to be heavy; even half-and-half gives the broth that soft, restaurant-style finish.
Key Ingredients:
- 2 tablespoons olive oil — for the vegetables at the start.
- 1 medium yellow onion, chopped — builds sweetness.
- 2 medium carrots, diced small — adds body and a faint natural sweetness.
- 3 garlic cloves, minced — stir in near the end of the sauté.
- 1 tablespoon tomato paste — deepens the tomato flavor.
- 2 cans (14 1/2 ounces each) crushed tomatoes — the base of the soup.
- 4 cups vegetable broth — enough to thin the tomatoes into a spoonable soup.
- 1 package (18 ounces) refrigerated cheese tortellini — the heart of the bowl.
- 1 cup half-and-half or heavy cream — adds the creamy finish.
- 2 cups baby spinach — wilts right into the broth.
- 1 teaspoon dried basil, 1 teaspoon kosher salt, 1/2 teaspoon black pepper — keep the seasoning simple and steady.
Quick Steps:
-
Heat the olive oil in a large pot over medium heat. Add the onion and carrots and cook for 6 to 7 minutes, stirring now and then, until the onion is soft and the carrots have started to lose their raw edge.
-
Stir in the garlic and tomato paste. Cook for 1 minute, until the paste darkens slightly and the garlic smells sweet.
-
Add the crushed tomatoes, vegetable broth, basil, salt, and pepper. Bring the pot to a simmer, then lower the heat and cook for 10 minutes.
-
Add the tortellini and cook according to the package, usually 4 to 6 minutes, until the pasta floats and feels tender.
-
Stir in the cream and spinach. Cook for 1 to 2 minutes more, just until the spinach wilts and the broth turns a soft orange-red.
-
Taste and adjust the salt. Ladle into bowls and finish with basil or a little Parmesan if you want more sharpness.
Equipment for This Recipe:
- Large Dutch oven or soup pot — gives the soup room to simmer.
- Cutting board and knife — for the onion and carrots.
- Wooden spoon — to keep the tomato paste from sticking.
- Ladle — for serving without dripping soup down the pot.
How to Serve This Dish:
A toasted grilled cheese cut into strips is the classic move, and I wouldn’t argue with it. If you want something lighter, serve the soup with a buttered slice of crusty bread and a handful of peppery greens on the side.
Pro Tips for This Recipe:
- Don’t add the tortellini too early. They’re small, and they go soft fast.
- Tomato paste tastes raw if you don’t cook it for at least a minute.
- If you want a smoother soup, blend half of it before adding the pasta.
- Add the spinach at the end so it stays bright instead of drab.
Variations on This Dish:
- Sausage-Free “Creamy Red” Soup: Add 1 cup of diced zucchini with the carrots for extra body.
- Lemon Herb Version: Stir in 1 teaspoon lemon zest and a handful of chopped parsley at the end.
- Dairy-Light Bowl: Swap the cream for evaporated milk or a plain unsweetened oat cream.
Common Mistakes to Avoid with This Dish:
- Boiling the tortellini too long: They split and turn gummy. Watch the package timing.
- Skipping the tomato paste step: The broth tastes flatter without that quick cook.
- Adding cream to a roaring boil: Lower the heat first so it stays smooth.
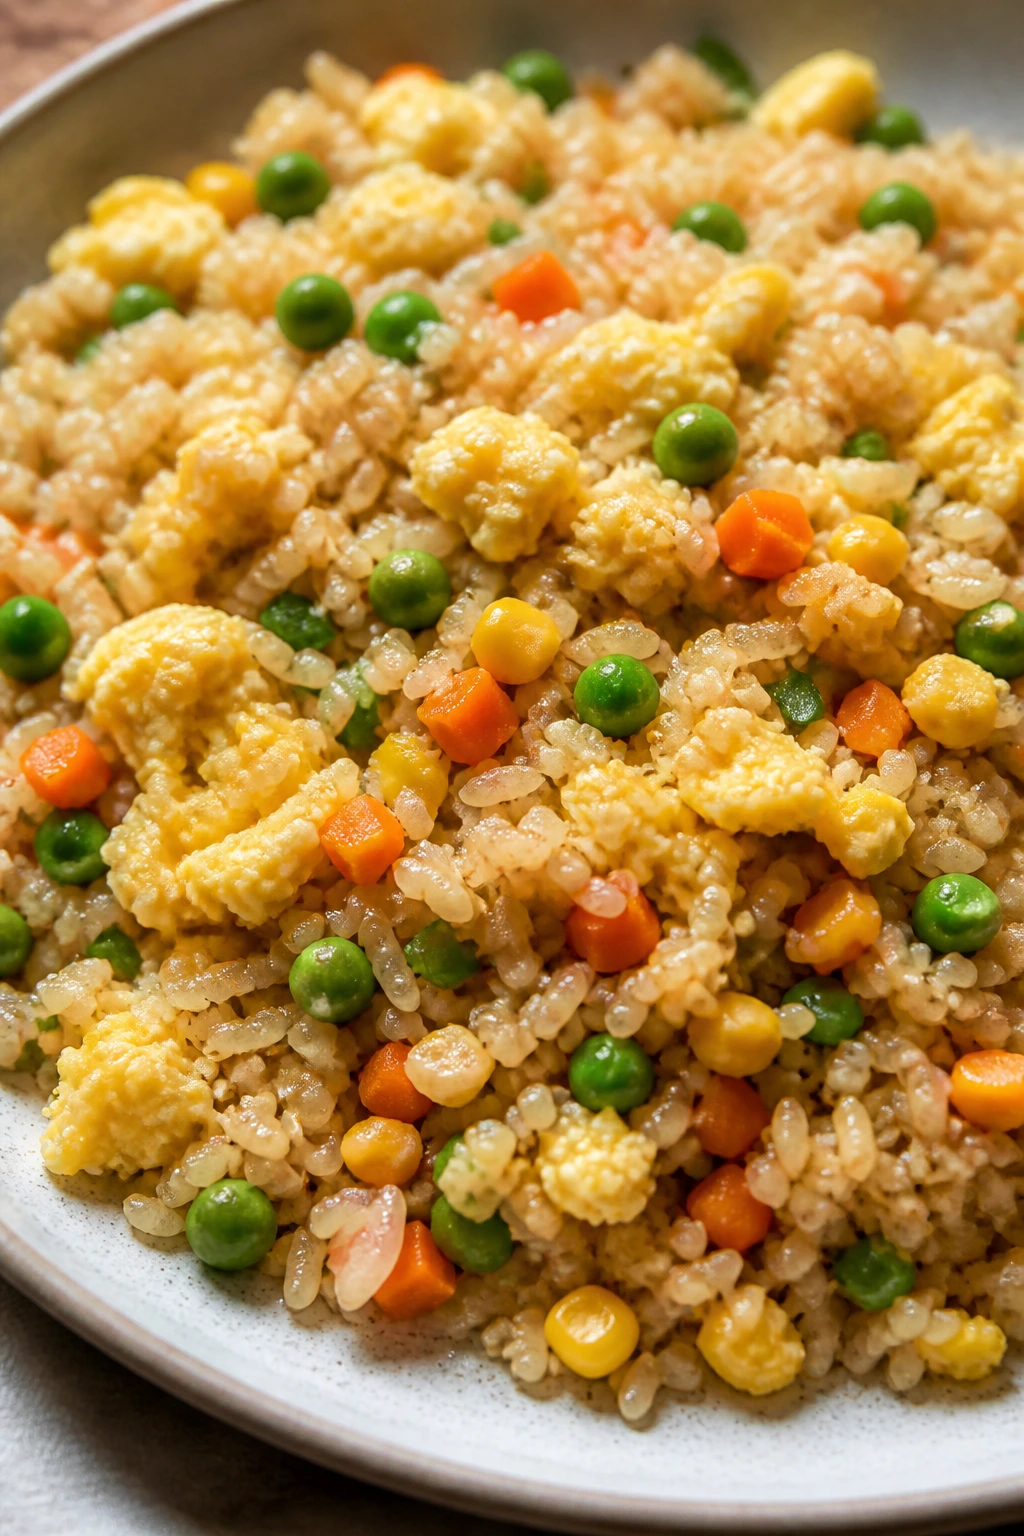
4. Veggie Fried Rice with Scrambled Eggs
This is the move when you’ve got cold rice in the fridge and not much else. The grains crisp a little in the pan, the eggs stay soft, and the soy-sesame smell that fills the kitchen is enough to make the whole thing feel bigger than it is. It’s fast, cheap, and oddly satisfying in a way that takes very little convincing.
Why It Works:
Fried rice needs cold rice because day-old grains are drier and separate in the skillet instead of collapsing into a clump. Eggs give you protein and that little bit of richness, while carrots, peas, and corn keep the pan colorful and sweet. The trick is high heat and quick stirring; that’s what gives you the toasty edges.
Key Ingredients:
- 4 cups cold cooked white rice — day-old rice works best.
- 3 large eggs — scrambled separately so they stay tender.
- 2 tablespoons neutral oil — for the pan.
- 1 small onion, finely diced — gives the base a little sweetness.
- 2 medium carrots, diced small — cooks quickly and stays crisp-tender.
- 1 cup frozen peas — no need to thaw.
- 1 cup frozen corn — adds sweetness and color.
- 3 garlic cloves, minced — stir in near the end so it doesn’t burn.
- 3 tablespoons soy sauce — use tamari for a gluten-free version.
- 1 tablespoon rice vinegar — gives the rice a lift.
- 1 teaspoon sesame oil — finish with this, not as your main cooking oil.
- 2 scallions, sliced — for the top.
Quick Steps:
-
Heat 1 tablespoon of the oil in a large skillet or wok over medium-high heat. Scramble the eggs in the pan just until set, then move them to a plate.
-
Add the remaining oil, onion, and carrots. Cook for 3 to 4 minutes, stirring often, until the onion is soft and the carrots have a little color.
-
Stir in the peas, corn, and garlic. Cook for 1 minute, just until the garlic smells nutty and the vegetables are hot.
-
Add the cold rice and break up any clumps with a spatula. Cook for 3 to 4 minutes, letting the rice sit against the pan in spots so some grains get a little crisp.
-
Pour in the soy sauce and rice vinegar. Stir well, then add the eggs back in and drizzle over the sesame oil.
-
Toss in the scallions, taste for salt, and serve right away while the edges still have a little bite.
Equipment for This Recipe:
- Large skillet or wok — a wide pan keeps the rice from steaming.
- Spatula — for breaking up clumps and flipping rice.
- Small bowl — for the eggs before they hit the pan.
- Knife and cutting board — for the vegetables.
How to Serve This Dish:
I like this in shallow bowls with extra scallions and a splash of chili crisp for the adults at the table. It’s also good with sliced cucumber or a simple sesame-dressed slaw if you want something cold and crunchy next to the rice.
Pro Tips for This Recipe:
- If your rice is clumping, spread it on a tray and chill it for 20 minutes before cooking.
- Add the soy sauce at the end so the rice doesn’t get soggy.
- Use a hot pan. Lukewarm fried rice tastes steamed.
- Keep the eggs soft; they’ll firm up again once they go back into the rice.
Variations on This Dish:
- Tofu Fried Rice: Add 1 cup of small cubed tofu, browned in the pan before the vegetables.
- Brown Rice Version: Use cold cooked brown rice and add a tablespoon of water with the soy sauce so it loosens a little.
- Low-Sodium Bowl: Use reduced-sodium soy sauce and add extra rice vinegar for brightness.
Common Mistakes to Avoid with This Dish:
- Starting with fresh rice: It turns sticky and heavy.
- Crowding the pan: You want sizzling, not steaming.
- Adding sesame oil too early: It tastes better as a finish than as a frying oil.
5. Lentil Sloppy Joes
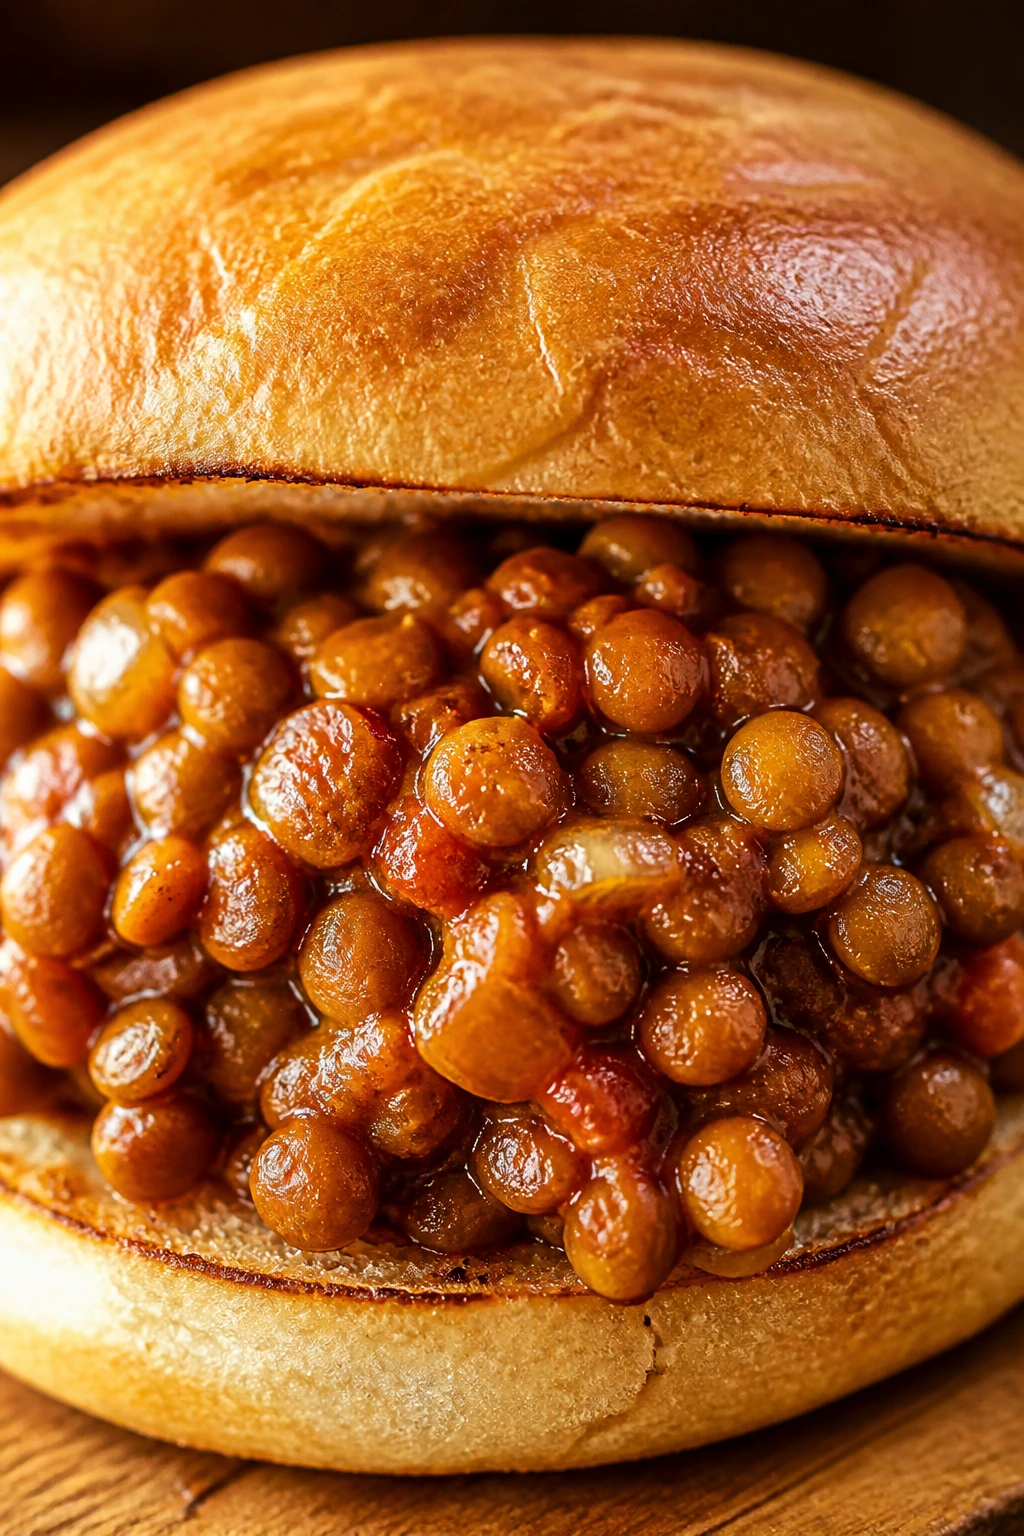
This is the vegetarian dinner that wins over people who think they want a burger. Lentils cook down into a thick, saucy filling that’s sweet, tangy, and a little smoky, and the toasted bun gives you the same messy, satisfying bite you expect from sloppy joes. If you put out pickles and a napkin stack, nobody complains.
Why It Works:
Brown or green lentils keep their shape just enough to stand in for the meat texture, which is why they work here better than red lentils would. The tomato-ketchup-mustard sauce gives you the familiar sloppy joe flavor, and the onion and bell pepper keep the filling from tasting one-note. It’s cheap, sturdy, and good at feeding a crowd without extra fuss.
Key Ingredients:
- 1 cup dry brown or green lentils — rinse them before cooking.
- 3 cups water — for simmering the lentils.
- 2 tablespoons olive oil — for the vegetables.
- 1 small onion, diced — adds sweetness.
- 1 green bell pepper, diced — brings a little crunch and savor.
- 2 garlic cloves, minced — cook briefly so they don’t burn.
- 2 tablespoons tomato paste — deepens the sauce.
- 1/2 cup ketchup — the main tangy-sweet element.
- 1 tablespoon yellow mustard — gives the filling the classic sloppy joe bite.
- 1 tablespoon soy sauce or tamari — adds salt and depth without meat.
- 1 tablespoon apple cider vinegar — keeps the sauce lively.
- 1 tablespoon brown sugar — balances the acid.
- 4 to 6 soft burger buns — toasted buns hold up better.
Quick Steps:
-
Rinse the lentils and add them to a saucepan with the water. Bring to a boil, then lower to a simmer and cook for 20 to 25 minutes, until tender but not falling apart. Drain any extra water.
-
Meanwhile, heat the olive oil in a large skillet over medium heat. Cook the onion and bell pepper for 5 to 6 minutes, until soft.
-
Stir in the garlic and tomato paste. Cook for 1 minute, until the paste darkens slightly.
-
Add the ketchup, mustard, soy sauce, vinegar, brown sugar, and cooked lentils. Stir well and simmer for 5 to 8 minutes, until the sauce is thick enough to mound on a spoon.
-
Taste and add salt or pepper if needed. If the filling gets too thick, stir in 2 to 3 tablespoons of water.
-
Spoon onto toasted buns and serve hot.
Equipment for This Recipe:
- Medium saucepan — for the lentils.
- Large skillet — for the sauce.
- Colander — to drain excess water if needed.
- Wooden spoon — for breaking up the lentils a little.
- Toaster or skillet — for the buns.
How to Serve This Dish:
Serve the lentils on toasted buns with dill pickles or a crunchy slaw on the side. If you want a less handheld version, pile the filling over baked potatoes or rice and call it dinner.
Pro Tips for This Recipe:
- Cook the lentils until tender, not mushy. They should still have a little bite.
- Toast the buns. Soft buns turn to paste the second the sauce hits them.
- If you like more smoke, add 1/2 teaspoon smoked paprika.
- The filling thickens as it sits, so loosen it with a splash of water when reheating.
Variations on This Dish:
- BBQ Lentil Joes: Replace half the ketchup with barbecue sauce for a sweeter, smokier filling.
- Mushroom Lentil Joes: Cook 8 ounces of finely chopped mushrooms with the onion for extra savor.
- Slider Night: Serve the filling on small rolls with a bowl of sliced pickles and let everyone build their own.
Common Mistakes to Avoid with This Dish:
- Undercooking the lentils: They stay crunchy inside the bun.
- Making the sauce too wet: The filling slides out of the bread.
- Skipping the vinegar: You need that sharp edge or the sauce tastes flat.
6. Sheet-Pan Gnocchi with Broccoli and Mozzarella
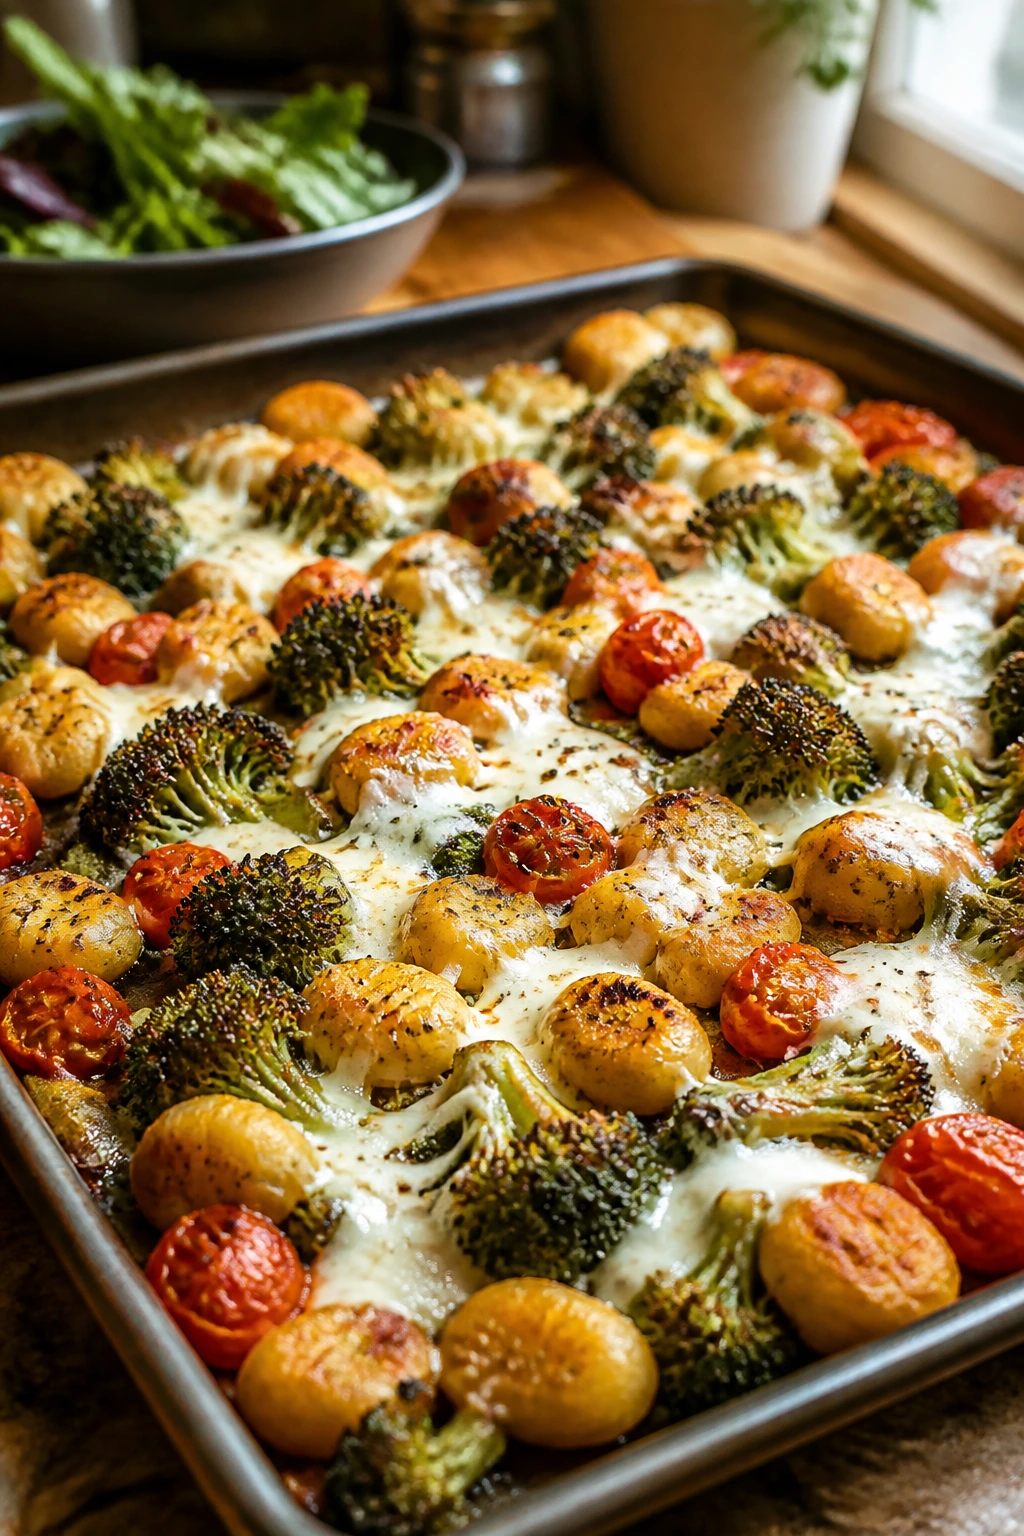
I have a soft spot for this one because it asks almost nothing from you and still lands like a real dinner. Shelf-stable gnocchi roast until the edges get a little crisp, broccoli goes brown in spots, cherry tomatoes slump into jammy little bursts, and mozzarella melts over the top in strings. It’s the sort of pan you carry to the table and people start eating before you finish setting down the salad.
Why It Works:
Gnocchi is one of those ingredients that behaves better in the oven than in a pot if you want texture. On a hot sheet pan, the outside turns lightly crisp while the middle stays soft. Broccoli and tomatoes roast on the same tray, which means the pan picks up sweet, browned bits without you having to stand at the stove.
Key Ingredients:
- 2 packages (16 ounces each) shelf-stable gnocchi — no need to boil first.
- 4 cups broccoli florets — cut them small enough to roast quickly.
- 1 pint cherry tomatoes — they soften and burst in the oven.
- 1 small red onion, cut into thin wedges — turns sweet as it roasts.
- 3 tablespoons olive oil — enough to coat everything lightly.
- 1 teaspoon garlic powder — easier than fresh garlic for this roast.
- 1 teaspoon kosher salt, 1/2 teaspoon black pepper — the basic seasoning.
- 8 ounces mozzarella pearls or 2 cups shredded mozzarella — for the finish.
- 1/4 cup pesto — stir in at the end for a fresh herbal hit.
- 1/4 cup grated Parmesan — optional, but good.
Quick Steps:
-
Preheat the oven to 425°F and line a large sheet pan with parchment. Put the gnocchi, broccoli, tomatoes, and onion on the pan.
-
Drizzle with olive oil and sprinkle over the garlic powder, salt, and pepper. Toss everything right on the tray until coated.
-
Spread the ingredients into a single layer. Roast for 20 to 25 minutes, stirring once halfway through, until the broccoli has brown edges and the gnocchi looks puffed and lightly crisp.
-
Scatter the mozzarella over the hot pan. Return it to the oven for 3 to 4 minutes, just until melted.
-
Spoon pesto over the top and finish with Parmesan if you want it.
-
Serve straight from the sheet pan or pile it into a shallow bowl.
Equipment for This Recipe:
- Large rimmed sheet pan — important for keeping the tomatoes from rolling off.
- Parchment paper — helps the gnocchi release.
- Large spoon or spatula — for turning everything halfway through.
- Measuring spoons — because the oil amount matters on a sheet pan.
How to Serve This Dish:
A lemony green salad is the cleanest thing to serve next to it, and I like to add crusty bread to catch the pesto and tomato juices. If you’ve got hungry people, serve it with an extra bowl of Parmesan on the side.
Pro Tips for This Recipe:
- Don’t overcrowd the pan. If the gnocchi piles up, it steams.
- Cut the broccoli small. Big florets stay raw in the stems.
- Add the mozzarella only after roasting so it melts instead of burning.
- Shelf-stable gnocchi browns better than refrigerated gnocchi here.
Variations on This Dish:
- Chickpea Gnocchi Pan: Add 1 can of drained chickpeas for more heft.
- Red Pepper Pesto Version: Swap basil pesto for red pepper pesto and use a little extra Parmesan.
- Spicy Crumble Finish: Add red pepper flakes and a spoonful of crumbled feta at the end.
Common Mistakes to Avoid with This Dish:
- Using too much oil: The tray gets greasy fast. A light coating is enough.
- Skipping the stir halfway through: The bottom side needs a chance to brown evenly.
- Adding pesto too early: It turns dull and loses its fresh flavor.
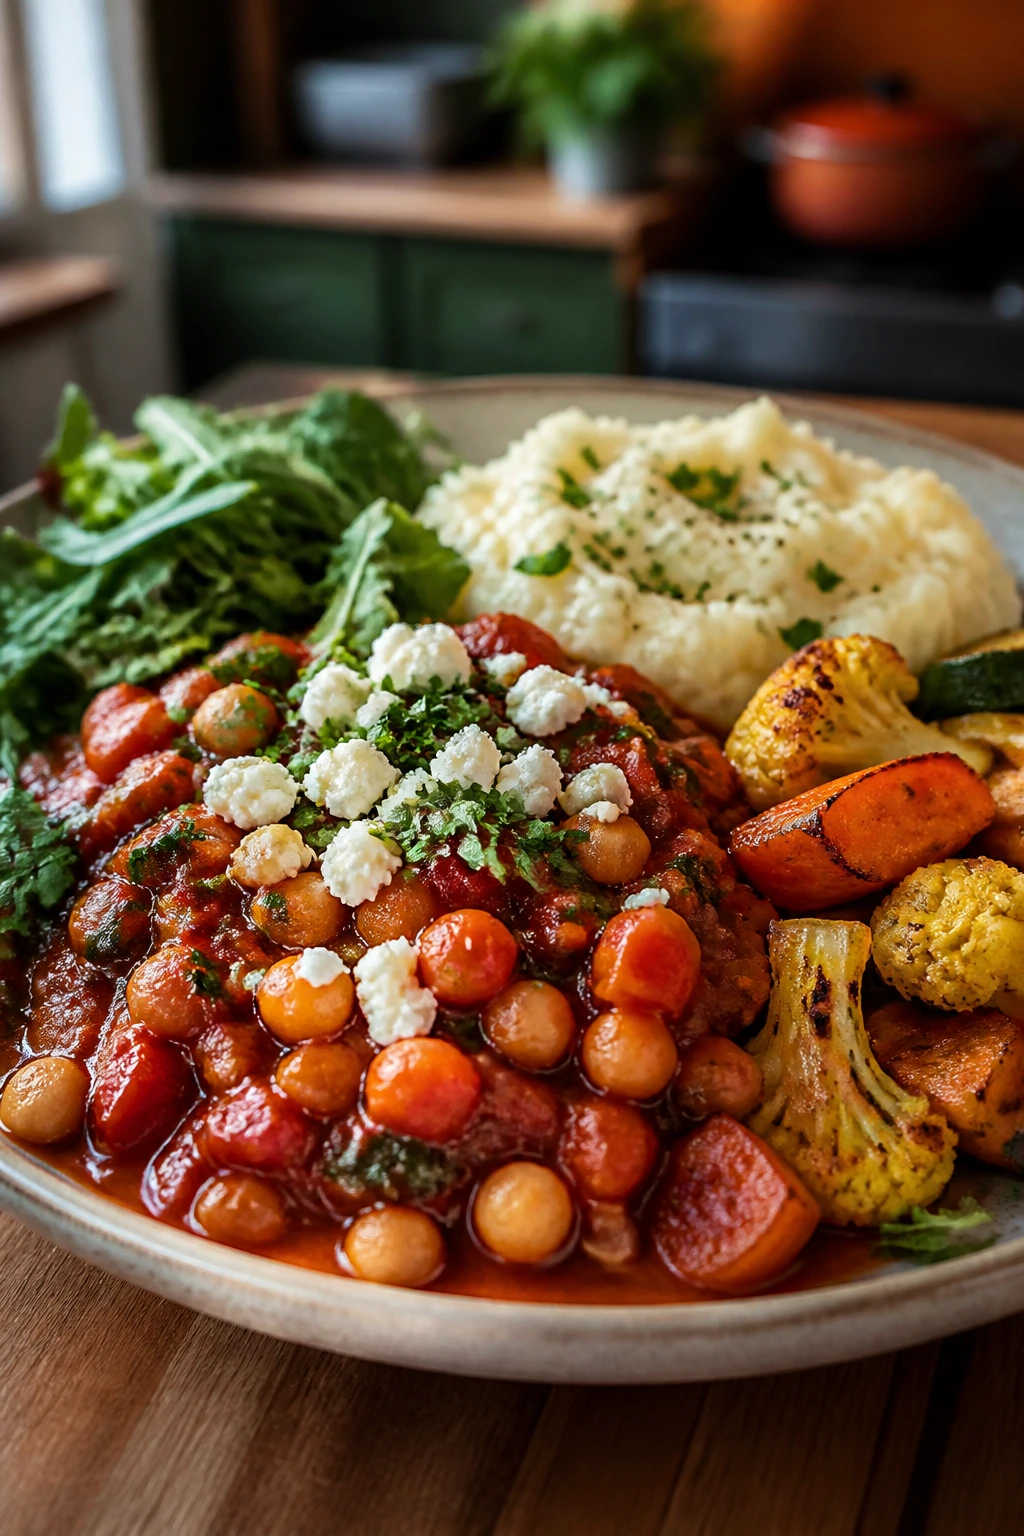
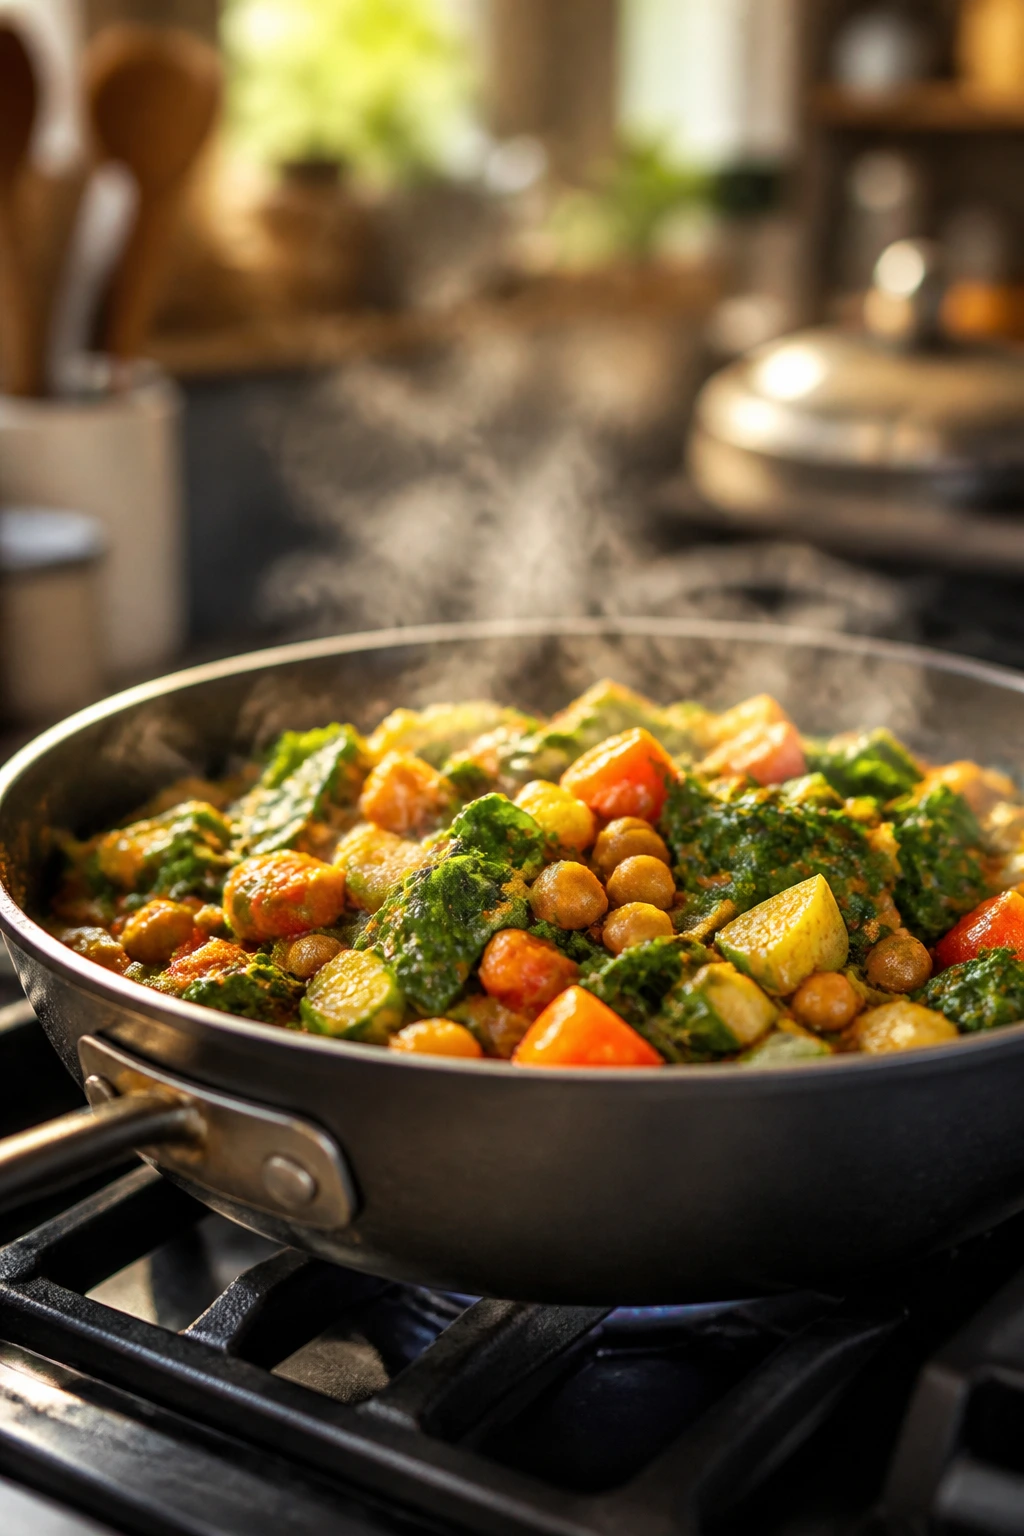
7. Mild Chickpea Curry with Rice
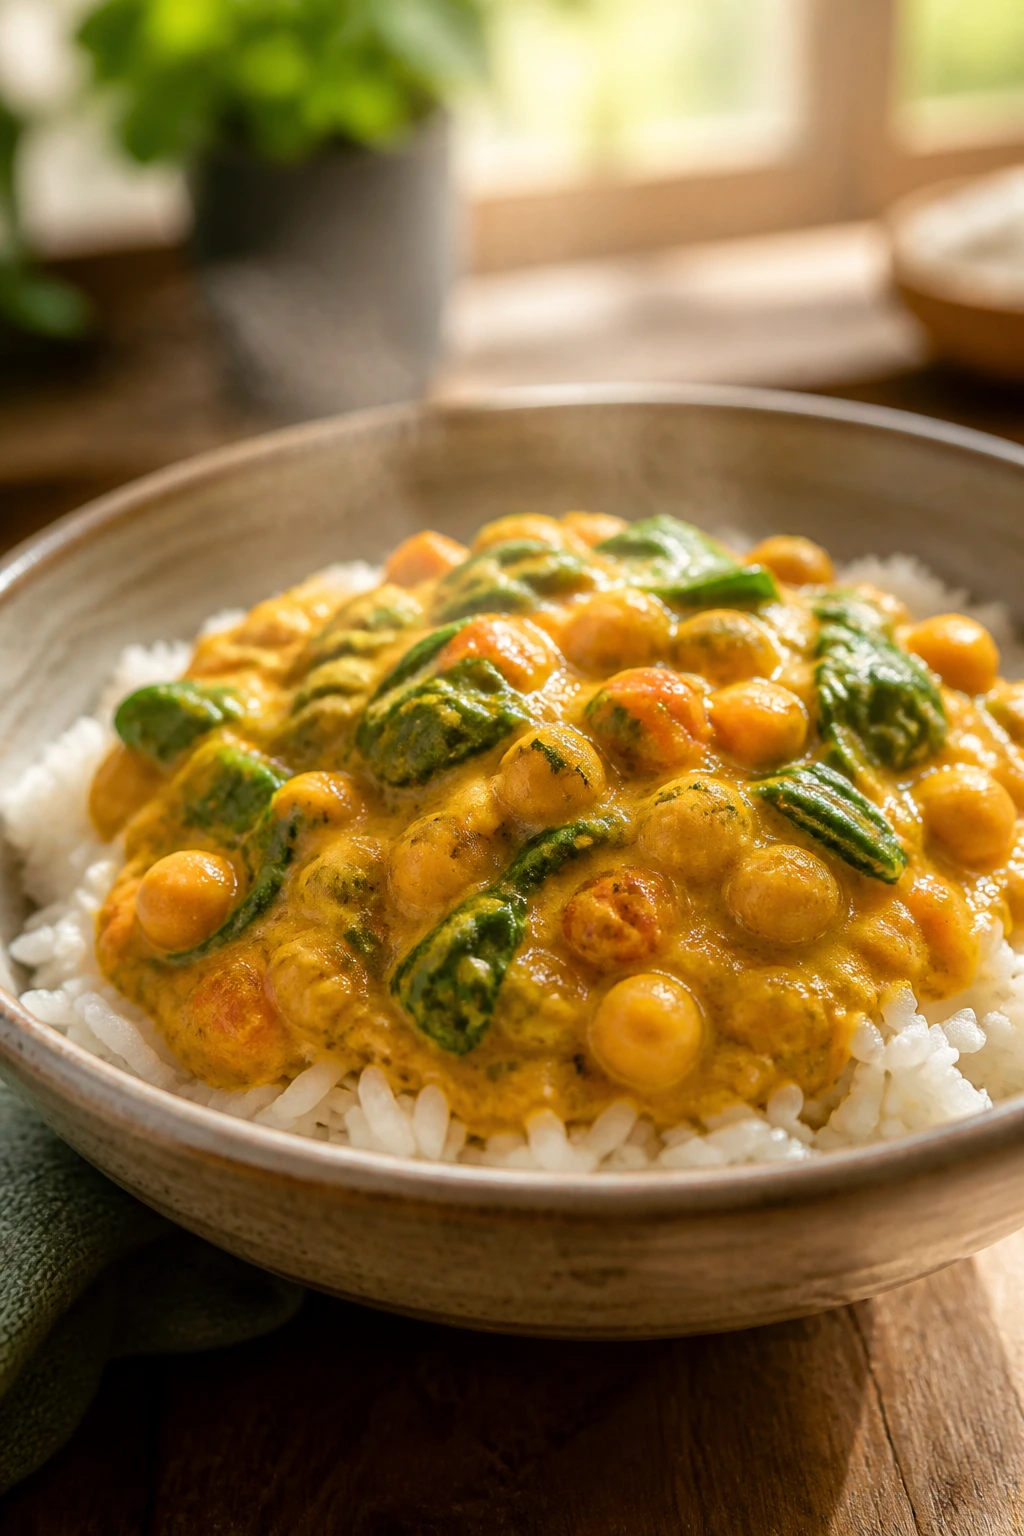
This is the curry I recommend when someone says they “don’t usually like curry,” which usually means they’ve only had it made too hot or too thin. Chickpeas hold their shape, coconut milk makes the sauce creamy, and a little tomato paste keeps the pot from tasting one-dimensional. Serve it over rice and the whole bowl turns into a soft, spoonable dinner that still feels complete.
Why It Works:
Chickpeas are sturdy enough to stand in for meat without going mushy, and coconut milk gives the sauce body without needing cream. Curry powder, cumin, onion, garlic, and ginger build the base, while spinach at the end gives you a little green without changing the character of the dish. Mild curry is often more family-friendly than aggressive spice, and this one can be adjusted at the table.
Key Ingredients:
- 2 tablespoons neutral oil — for the aromatics.
- 1 medium yellow onion, diced — the sweet base of the curry.
- 3 garlic cloves, minced — adds sharpness and depth.
- 1 tablespoon fresh ginger, grated — gives the curry a bright edge.
- 2 tablespoons mild curry powder — start here; add more only if needed.
- 1 teaspoon ground cumin — adds warmth.
- 1 tablespoon tomato paste — rounds out the sauce.
- 2 cans (15 ounces each) chickpeas, drained and rinsed — the main body.
- 1 can (13.5 ounces) coconut milk — use full-fat for the creamiest result.
- 1 cup vegetable broth — loosens the sauce.
- 4 cups baby spinach — wilts into the curry at the end.
- 1 lime, cut into wedges — the acid finish matters.
- Cooked rice for serving — basmati or jasmine both work.
Quick Steps:
-
Heat the oil in a large skillet or Dutch oven over medium heat. Add the onion and cook for 5 to 6 minutes, until soft.
-
Stir in the garlic, ginger, curry powder, cumin, and tomato paste. Cook for 1 minute, until fragrant and slightly darkened.
-
Add the chickpeas, coconut milk, and broth. Bring to a gentle simmer, then cook for 12 to 15 minutes, stirring now and then, until the sauce thickens slightly.
-
Stir in the spinach and cook for 1 to 2 minutes, until wilted.
-
Taste and add salt. If the curry tastes flat, squeeze in lime juice.
-
Spoon over rice and serve with extra lime on the side.
Equipment for This Recipe:
- Large skillet or Dutch oven — for enough simmering room.
- Measuring spoons — curry powder gets strong fast.
- Wooden spoon — for stirring without crushing the chickpeas.
- Citrus juicer or fork — optional, but useful for the lime.
How to Serve This Dish:
Pile the curry over a bowl of rice and add a spoonful of yogurt if your table likes a cool topping. A few chopped cilantro leaves or sliced scallions work too, but don’t let the garnish outshine the curry itself.
Pro Tips for This Recipe:
- Bloom the spices in the oil for a minute. That step matters more than people think.
- Use full-fat coconut milk if you want the sauce to stay creamy after reheating.
- Add lime at the end, not at the start.
- If the curry feels thin, simmer it uncovered for 3 to 4 minutes.
Variations on This Dish:
- Sweet Potato Chickpea Curry: Add 1 1/2 cups diced sweet potato with the broth and simmer until tender.
- Tomato-Forward Curry: Use an extra tablespoon of tomato paste for a redder, sharper sauce.
- Extra-Green Bowl: Stir in chopped kale instead of spinach and give it 3 extra minutes to soften.
Common Mistakes to Avoid with This Dish:
- Using high heat after the coconut milk goes in: It can separate. Keep the simmer gentle.
- Underseasoning: Chickpeas need salt more than you think.
- Adding the spinach too early: It turns dull and mushy.
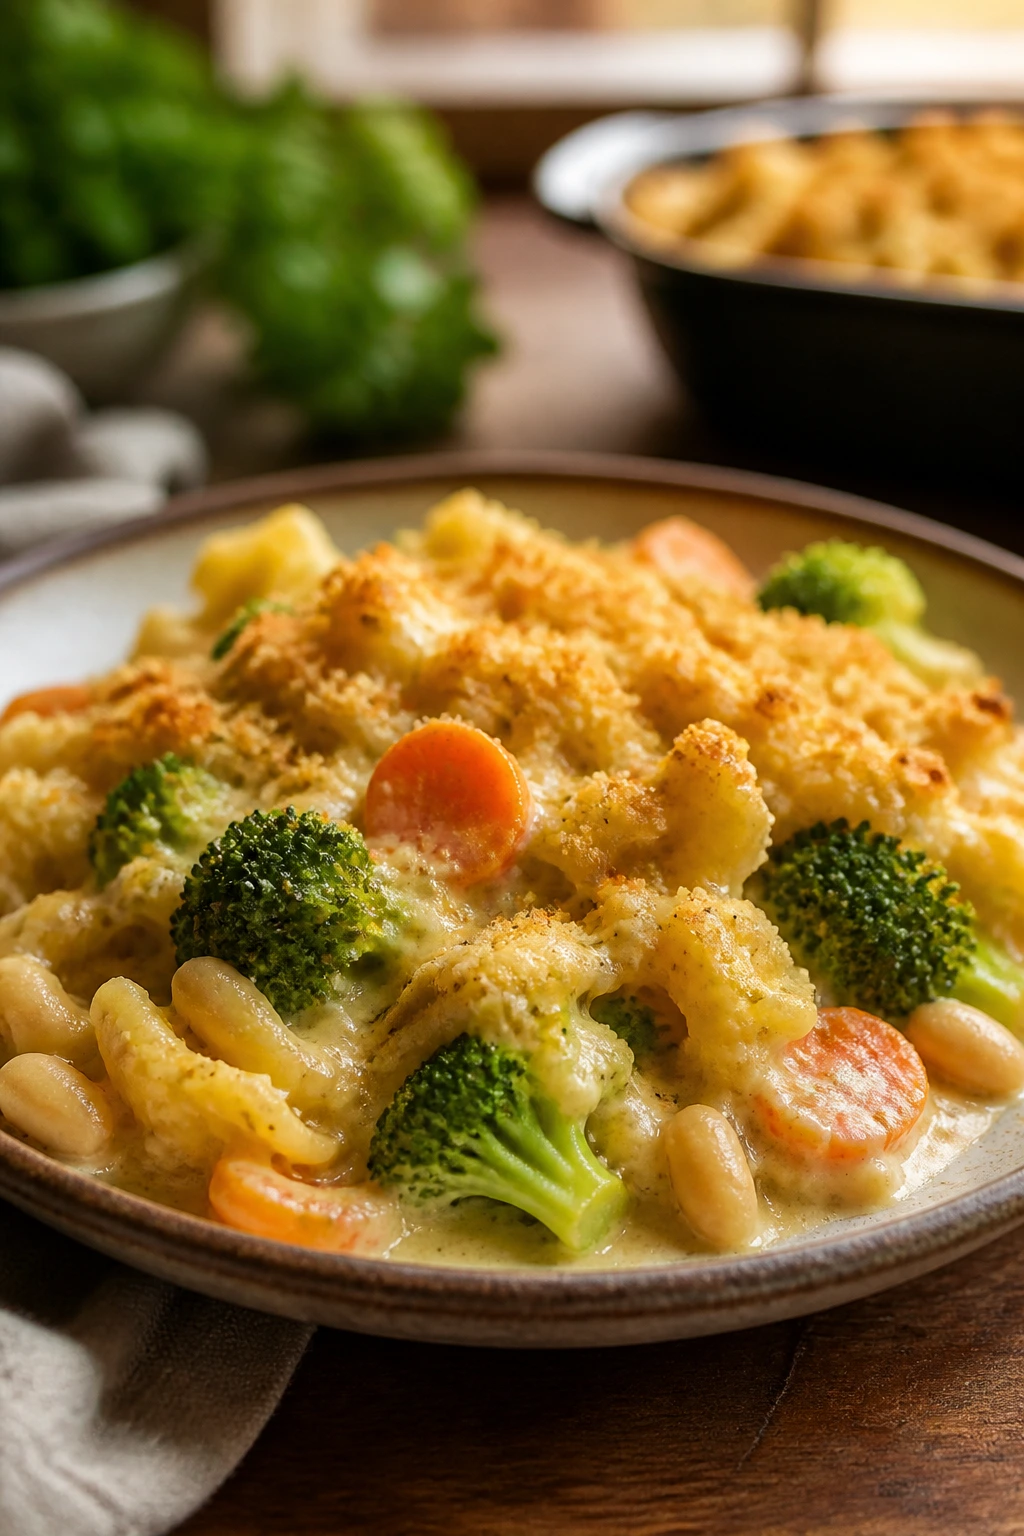
8. Broccoli Cheddar Stuffed Baked Potatoes
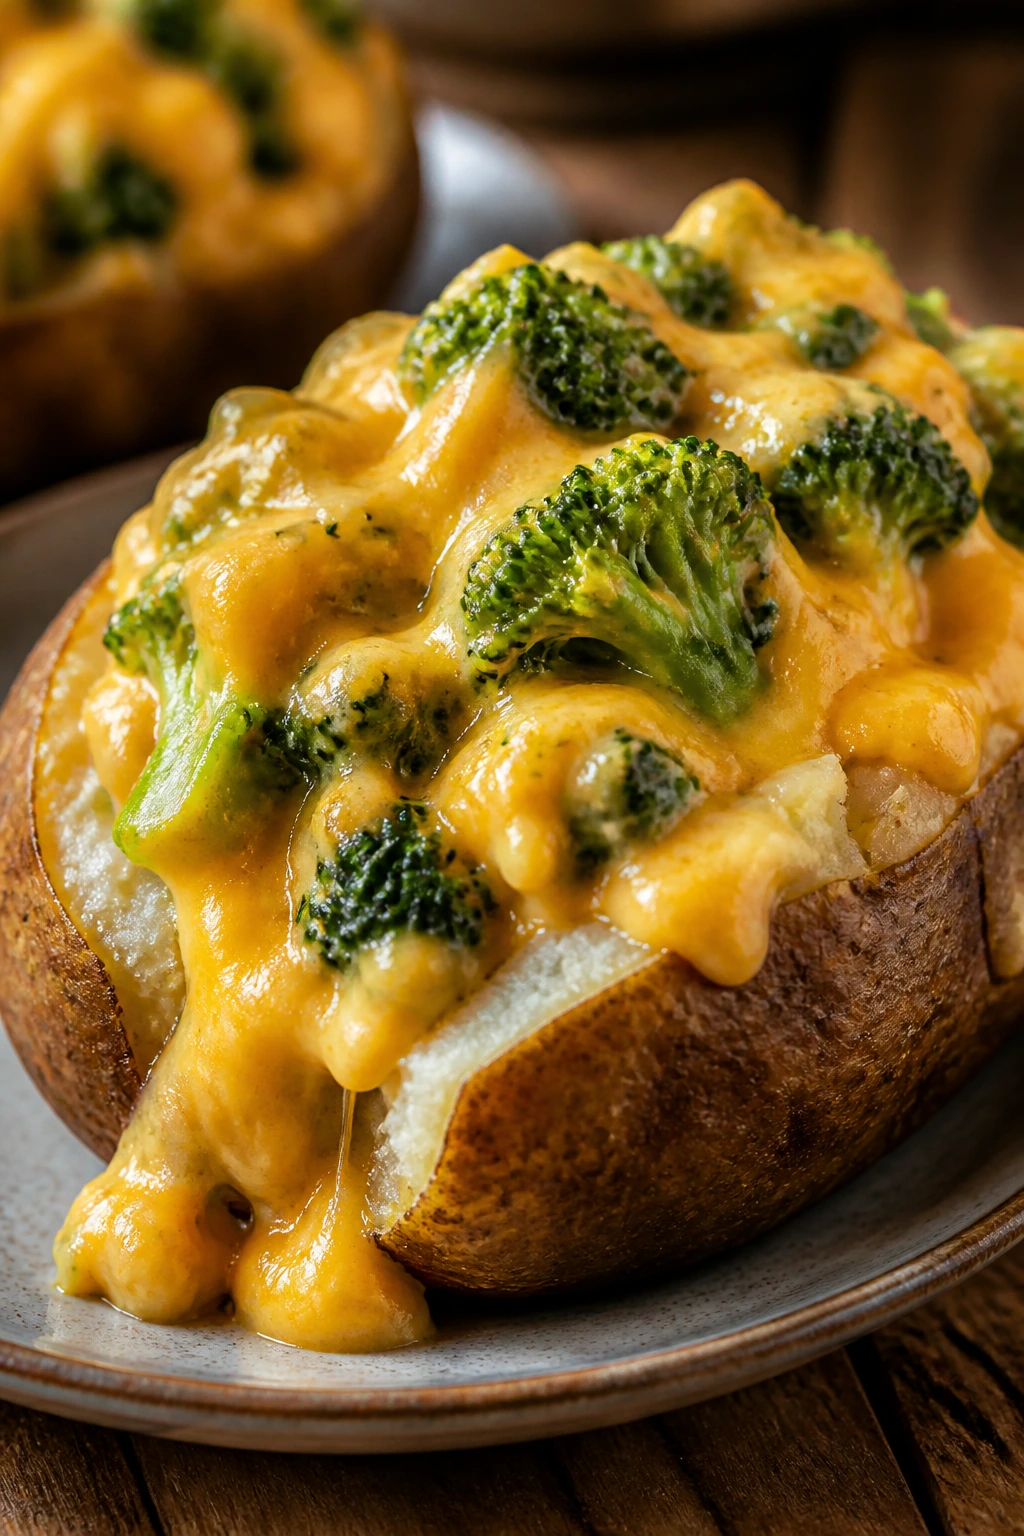
These are not tiny side potatoes pretending to be dinner. These are full-sized russets split open and filled with broccoli and a cheddar sauce that puddles into the fluffy middle. It’s the kind of meal that feels old-school in a good way — simple ingredients, no fuss, and enough cheese to make the whole thing feel generous.
Why It Works:
A baked potato gives you the starch, the broccoli adds a fresh bite, and the cheese sauce ties the whole thing together so it doesn’t taste like three separate items on one plate. Russets are the right choice because their flesh gets fluffy and dry enough to soak up the sauce. I like using a small cheddar sauce instead of just tossing cheddar on top, because the sauce actually coats the broccoli and keeps each bite from feeling dry.
Key Ingredients:
- 4 large russet potatoes — scrubbed clean and patted dry.
- 1 tablespoon olive oil — for the potato skins.
- 1 small head broccoli, cut into tiny florets — small pieces cook and eat more easily.
- 2 tablespoons butter — for the sauce.
- 2 tablespoons all-purpose flour — thickens the cheese sauce.
- 1 1/2 cups milk — whole milk makes the sauce richer.
- 2 cups shredded sharp cheddar cheese — the main flavor.
- 1/2 cup sour cream — stirred into the potatoes for creaminess.
- 1/2 teaspoon kosher salt, 1/4 teaspoon black pepper — for the filling.
- Chopped chives — for the top.
Quick Steps:
-
Preheat the oven to 425°F. Rub the potatoes with olive oil, prick each one a few times with a fork, and bake directly on the rack or on a sheet pan for 50 to 60 minutes, until the skins are crisp and a knife slides in easily.
-
While the potatoes bake, steam or microwave the broccoli until bright green and just tender. Chop it a little finer if the florets are large.
-
Melt the butter in a small saucepan over medium heat. Whisk in the flour and cook for 1 minute.
-
Slowly whisk in the milk and cook for 3 to 4 minutes, until the sauce thickens enough to coat a spoon. Add the cheddar and stir until smooth. Season with salt and pepper.
-
Split the potatoes open and fluff the insides with a fork. Stir in the sour cream, then fold in the broccoli.
-
Spoon the cheese sauce over the top and finish with chives.
Equipment for This Recipe:
- Oven and sheet pan — for the potatoes.
- Small saucepan — for the cheese sauce.
- Fork — for fluffing the potato centers.
- Steamer basket or microwave-safe bowl — for the broccoli.
- Sharp knife — to split the potatoes cleanly.
How to Serve This Dish:
Serve each potato on a plate with a spoon and a simple salad on the side. If you want to make it feel more complete, add roasted tomatoes or a cup of tomato soup, which sounds odd until you try it.
Pro Tips for This Recipe:
- Bake the potatoes until the skins are actually crisp. Soft skin is a missed opportunity.
- Cut the broccoli small so it fits in each forkful.
- Shred the cheese yourself if you want the smoothest sauce.
- If the sauce gets too thick, loosen it with a tablespoon or two of milk.
Variations on This Dish:
- Loaded Potato Style: Add sautéed mushrooms or chopped scallions on top.
- Cauliflower Cheddar Potatoes: Swap half the broccoli for small cauliflower florets.
- Baked Sweet Potato Version: Use sweet potatoes and a milder cheese for a sweeter, softer dinner.
Common Mistakes to Avoid with This Dish:
- Wrapping the potatoes in foil: The skins stay soft and steamy. Skip the foil.
- Using huge broccoli florets: They don’t fit neatly and feel clunky.
- Pouring in cheese before the sauce thickens: It can turn grainy.
9. Veggie Quesadillas with Corn and Peppers
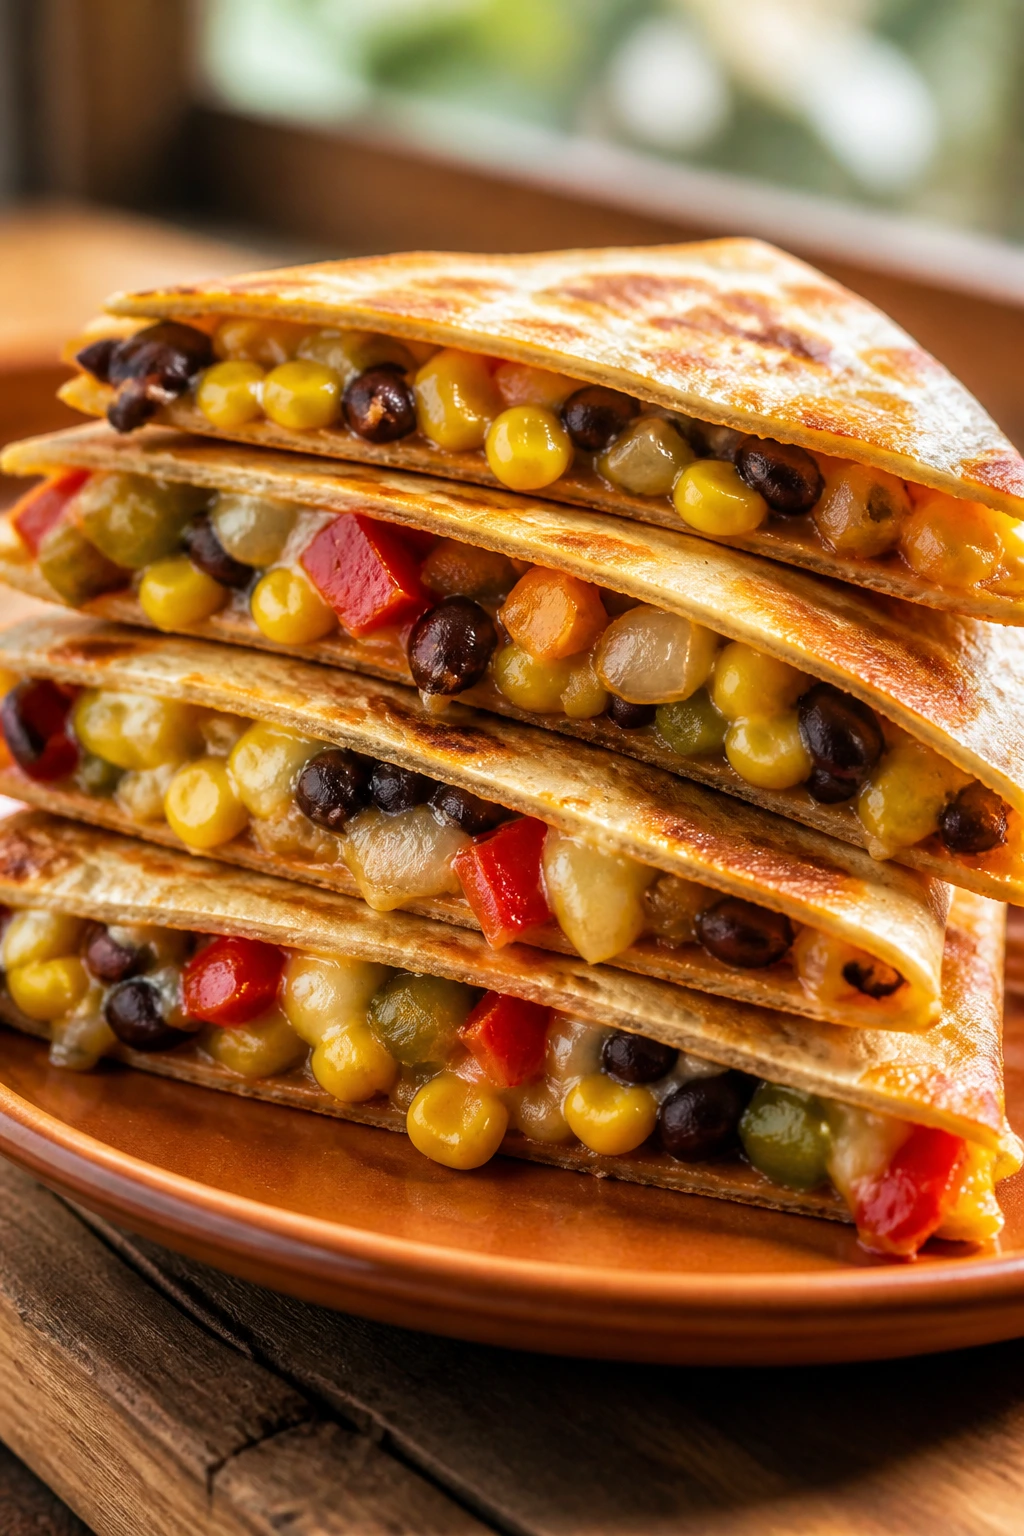
These are the kind of quesadillas that feel casual but still count as dinner. The tortillas go crisp in the skillet, the cheese melts into the vegetables, and the corn brings enough sweetness to keep the peppers from feeling sharp. If you want one meatless Monday dinner that can be on the table fast, this is near the top of the list.
Why It Works:
Quesadillas work because they turn a short list of ingredients into something that eats like a complete meal. A little sautéed onion, bell pepper, corn, and beans gives you texture and body, while the cheese acts as both glue and flavor. The key is to keep the filling dry enough that the tortillas brown instead of steam.
Key Ingredients:
- 8 flour tortillas — medium size works best for folding.
- 2 cups shredded Monterey Jack or cheddar cheese — or a mix of both.
- 1 red bell pepper, diced — sweet and colorful.
- 1 green bell pepper, diced — adds a little more savory bite.
- 1 small onion, diced — softens in the skillet.
- 1 cup corn — frozen or canned, drained.
- 1 can (15 ounces) black beans, drained and rinsed — the protein anchor.
- 1 teaspoon ground cumin, 1 teaspoon chili powder, 1/2 teaspoon salt — enough seasoning to make the filling taste intentional.
- 2 tablespoons butter or neutral oil — for the skillet.
Quick Steps:
-
Heat 1 tablespoon of the butter or oil in a skillet over medium heat. Cook the onion and peppers for 5 to 6 minutes, until softened.
-
Stir in the corn, black beans, cumin, chili powder, and salt. Cook for 2 minutes, just until everything is hot and any extra moisture has cooked off.
-
Remove the filling from the pan. Wipe the skillet if needed and lower the heat to medium-low.
-
Place a tortilla in the skillet, sprinkle cheese on one half, spoon over some of the filling, and add a little more cheese on top. Fold the tortilla over.
-
Cook for 2 to 3 minutes per side, until the tortilla is golden brown and the cheese melts. Press gently with a spatula so the center seals.
-
Slice into wedges and serve right away.
Equipment for This Recipe:
- Large skillet — for sautéing and crisping.
- Spatula — for flipping without tearing the tortilla.
- Knife and cutting board — for the vegetables.
- Plate — to hold cooked quesadillas while you finish the rest.
How to Serve This Dish:
Cut the quesadillas into triangles and serve with salsa, sour cream, and avocado slices. If you want to stretch the meal, add a simple bowl of black bean soup or a crunchy cabbage slaw on the side.
Pro Tips for This Recipe:
- Keep the heat at medium-low when the tortilla goes in. Too hot and the outside burns before the cheese melts.
- Drain the beans well or the filling turns soggy.
- Don’t overfill. A stuffed quesadilla is harder to flip and easier to split.
- Let each one sit for 30 seconds before slicing so the cheese settles.
Variations on This Dish:
- Breakfast Quesadilla: Add scrambled eggs to the filling and serve with salsa roja.
- Spinach and Mushroom Version: Swap the peppers for sautéed mushrooms and a handful of spinach.
- Corn Tortilla Stack: Use corn tortillas for a gluten-free version and make smaller, sturdier folds.
Common Mistakes to Avoid with This Dish:
- Putting the cheese only in the middle: It doesn’t seal well. Cheese on both sides of the filling helps.
- Cooking on high heat: The tortilla burns fast.
- Using wet vegetables: The steam softens the shell and ruins the crisp edge.
10. Mac and Cheese with Peas and Crispy Breadcrumbs
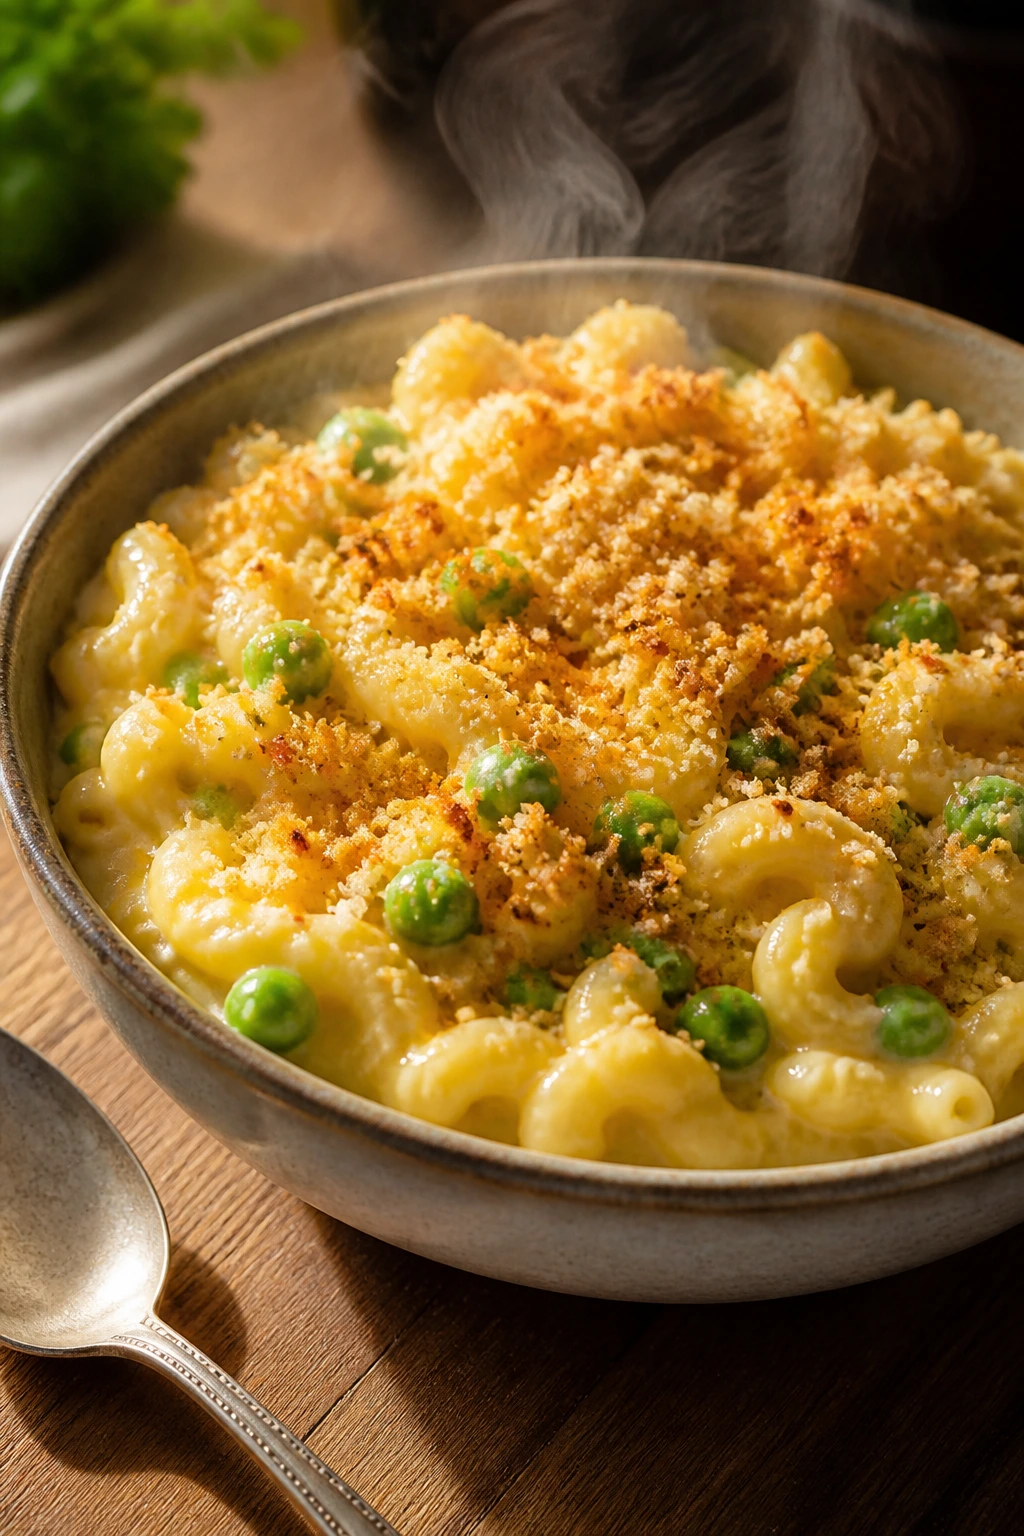
There’s a reason mac and cheese shows up in family dinner arguments as a peace offering. It’s creamy, familiar, and satisfying without needing any explanation. The peas give the dish a little green and a faint sweetness, and the panko on top brings the one thing boxed mac can’t: a crisp, buttery crunch.
Why It Works:
A proper cheese sauce gives mac and cheese the kind of clingy richness that makes each noodle taste coated instead of just mixed. Panko breadcrumbs are worth using because they stay lighter and crunchier than regular crumbs after baking. Peas fold in easily, which means they add color without turning the dish into a vegetable tray in disguise.
Key Ingredients:
- 12 ounces elbow macaroni — or another short pasta shape.
- 4 tablespoons butter — split between the sauce and topping.
- 1/4 cup all-purpose flour — for the roux.
- 3 cups milk — whole milk makes the sauce smoother.
- 3 cups shredded sharp cheddar cheese — the main flavor.
- 1 teaspoon Dijon mustard — makes the cheese taste sharper.
- 1 cup frozen peas — stir in near the end.
- 1 cup panko breadcrumbs — for the topping.
- 1/4 cup grated Parmesan — mixed into the crumbs.
- 1/2 teaspoon salt, 1/4 teaspoon black pepper — season the sauce.
- Pinch of paprika — optional, but nice on top.
Quick Steps:
-
Preheat the oven to 375°F and butter a 9×13-inch baking dish. Cook the macaroni in salted water until just shy of al dente, then drain.
-
Melt 3 tablespoons of the butter in a saucepan over medium heat. Whisk in the flour and cook for 1 minute until it smells a little nutty.
-
Slowly whisk in the milk and cook for 3 to 5 minutes, until the sauce thickens enough to coat a spoon.
-
Lower the heat and stir in the cheddar, Dijon mustard, salt, and pepper until smooth.
-
Fold in the macaroni and peas. Transfer to the baking dish.
-
Melt the remaining butter and toss it with the panko and Parmesan. Scatter over the top, dust with paprika, and bake for 15 to 18 minutes, until the edges bubble and the crumbs turn golden. Rest for 5 minutes before serving.
Equipment for This Recipe:
- Medium saucepan — for the sauce.
- Large pot — for the pasta.
- Whisk — to keep the sauce smooth.
- Baking dish — for the final bake.
- Small bowl — for the breadcrumb topping.
How to Serve This Dish:
Serve it in big spoonfuls with a sharp green salad or roasted broccoli if you want something crisp alongside it. If the table is full of kids, just set out extra black pepper and hot sauce for the adults and call it done.
Pro Tips for This Recipe:
- Shred the cheddar yourself if you want the smoothest melt.
- Don’t let the sauce boil once the cheese goes in.
- The pasta should still have some bite before it bakes.
- If the sauce gets too thick, splash in a little more milk.
Variations on This Dish:
- Three-Cheese Bake: Swap 1 cup of the cheddar for Gruyère or Monterey Jack.
- Cauliflower Mac: Fold in 2 cups of small roasted cauliflower florets with the peas.
- Stovetop Version: Skip the breadcrumb topping and serve it straight from the pot for a softer, creamier bowl.
Common Mistakes to Avoid with This Dish:
- Using low heat on the pasta water: The noodles stick and clump. Salt the water well and keep it moving.
- Boiling the cheese sauce after it thickens: It can turn grainy.
- Skipping the topping butter: Dry crumbs on dry pasta don’t taste like much.
11. White Bean and Kale Skillet Pasta
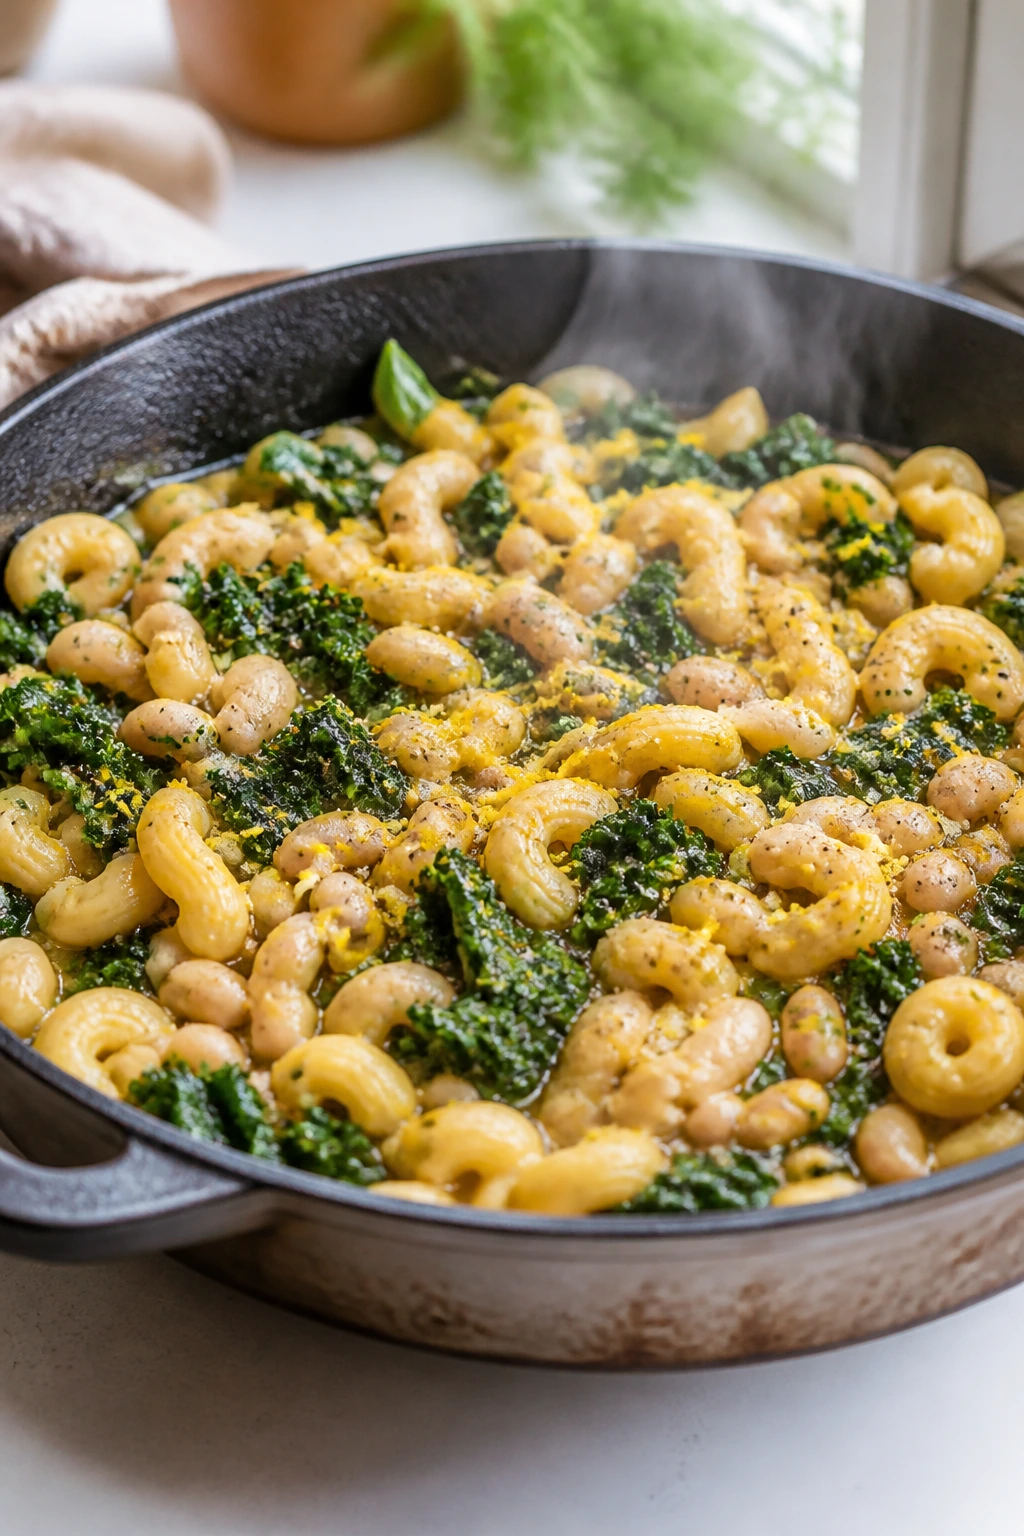
This is the pasta that tastes like you cared more than you actually had to. Cannellini beans bring a creamy bite, kale softens into the broth, and lemon keeps the whole skillet from tipping into heaviness. It’s one of those dinners I make when I want something green, filling, and not fussy enough to become a whole event.
Why It Works:
Cooking the pasta in the skillet with broth lets it absorb flavor instead of tasting like plain boiled noodles. White beans break down a little as they simmer, which naturally thickens the sauce without cream. Kale holds up better than delicate greens, so it stays satisfying instead of vanishing into the pot.
Key Ingredients:
- 12 ounces short pasta — shells, rotini, or orecchiette all work.
- 2 tablespoons olive oil — for the onions and garlic.
- 1 small yellow onion, thinly sliced — or 2 shallots if that’s what you have.
- 4 garlic cloves, minced — don’t skimp here.
- 2 cans (15 ounces each) cannellini beans, drained and rinsed — they soften into the sauce.
- 1 bunch kale, stems removed and leaves chopped — about 6 packed cups.
- 4 cups vegetable broth — enough to cook the pasta.
- 1 cup water — only if the skillet looks dry.
- 1 lemon, zested and juiced — brightens the beans and greens.
- 1 cup grated Parmesan — for finishing.
- 1/2 teaspoon red pepper flakes, 1 teaspoon kosher salt — optional heat and seasoning.
Quick Steps:
-
Heat the olive oil in a large deep skillet or sauté pan over medium heat. Add the onion and cook for 4 to 5 minutes until soft.
-
Stir in the garlic and red pepper flakes for 30 seconds.
-
Add the pasta, beans, broth, salt, and water. Bring to a simmer, then cook uncovered for 10 to 12 minutes, stirring often, until the pasta is tender and most of the liquid has been absorbed.
-
Stir in the kale and cook for 2 to 3 minutes, until it softens and turns darker green.
-
Add the lemon zest, lemon juice, and Parmesan. Stir until the pasta looks glossy.
-
Taste and adjust salt, then serve right away.
Equipment for This Recipe:
- Large deep skillet or sauté pan — you need space for the pasta and liquid.
- Wooden spoon — for stirring often.
- Microplane or grater — for the lemon zest and Parmesan.
- Lid — optional, if you want to trap steam for a minute.
How to Serve This Dish:
Serve it in shallow bowls with extra Parmesan and a few torn basil leaves if you have them. A slice of crusty bread on the side is not required, but it does help scoop up the lemony broth at the bottom.
Pro Tips for This Recipe:
- Stir often so the pasta doesn’t stick to the bottom.
- Add the lemon at the end or it can taste dull.
- If the skillet dries out too fast, add more hot water in 1/4-cup splashes.
- Cannellini beans make the sauce creamier than chickpeas here.
Variations on This Dish:
- Tuscan-Style Version: Add a handful of sun-dried tomatoes and swap half the kale for spinach.
- Extra Creamy Bowl: Mash half a cup of the beans with a fork before adding them to the skillet.
- No-Parmesan Version: Finish with a spoonful of olive oil and extra lemon if you need a dairy-free bowl.
Common Mistakes to Avoid with This Dish:
- Adding the kale too early: It overcooks and turns drab.
- Using a shallow skillet: The pasta needs room to simmer.
- Forgetting to stir: One forgetful moment and the pasta sticks.
12. Veggie Shepherd’s Pie with Lentils
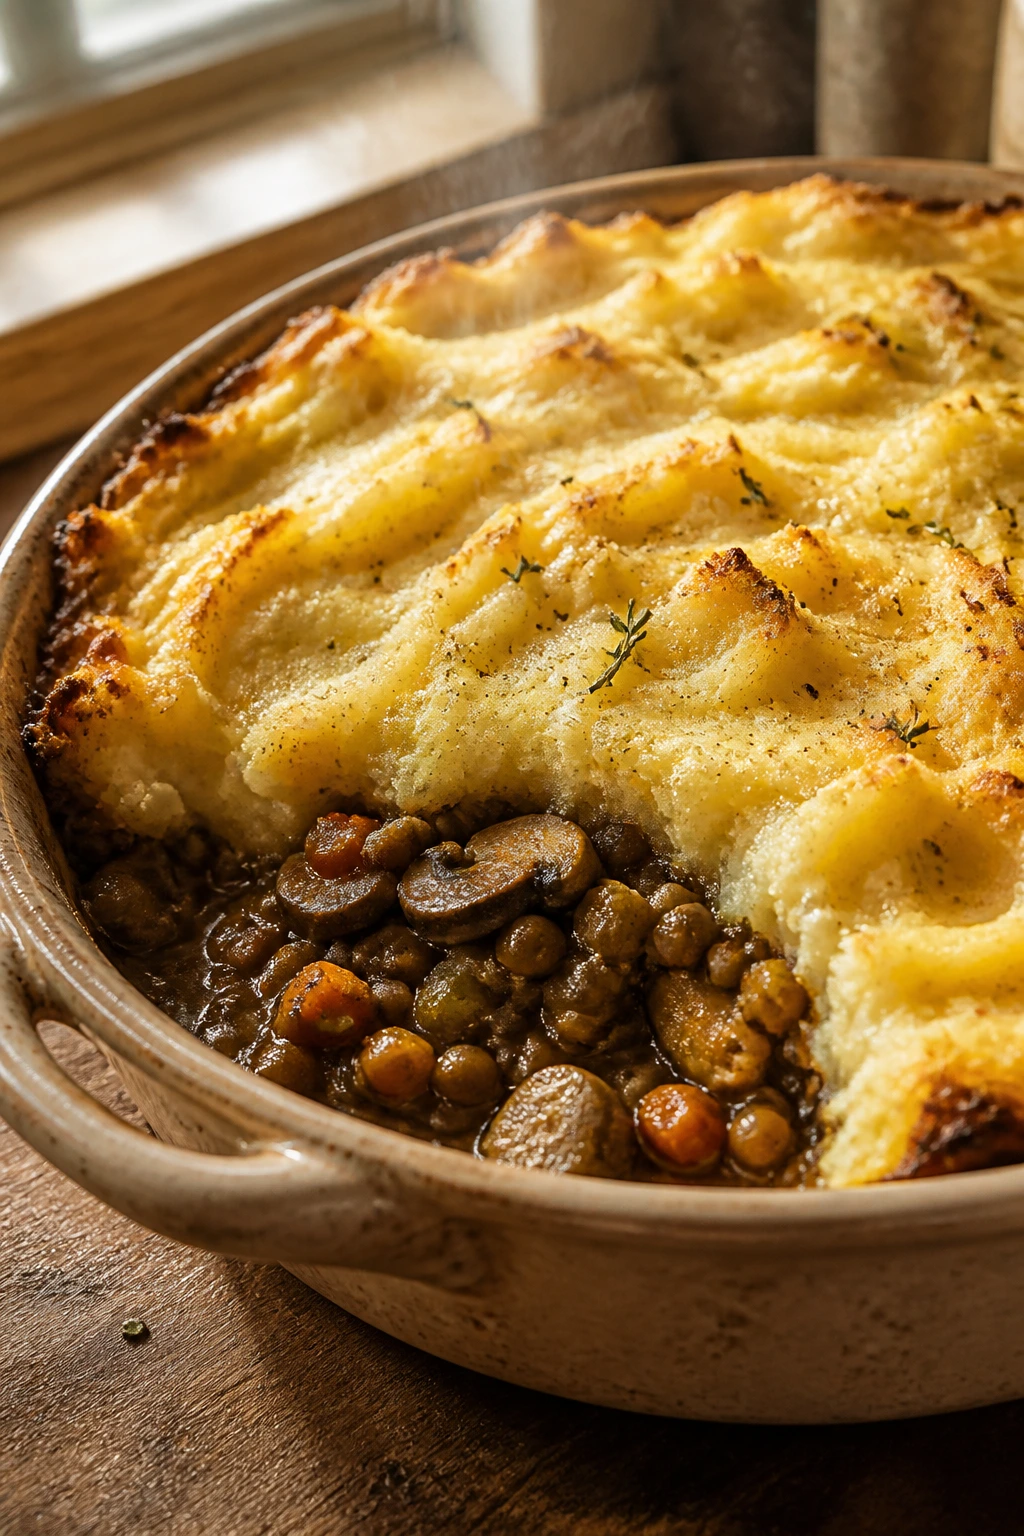
This is the casserole I want when the weather makes everyone walk in the door hungry and a little irritated. The lentil filling tastes like mushroom gravy’s smarter cousin, the vegetables melt into the sauce, and the mashed potatoes on top turn golden at the peaks in the oven. It’s old-fashioned food in the best sense — practical, filling, and not at all shy.
Why It Works:
Lentils stand in for the meat layer without falling apart, and mushrooms add the savory depth that keeps the filling from tasting like lentils in disguise. A thick mashed potato topping gives you the comfort factor and seals in the steam while the pie bakes. The whole thing is better than it looks in the dish, and that’s saying something.
Key Ingredients:
- 2 1/2 pounds Yukon gold or russet potatoes, peeled and cut into chunks — for the topping.
- 4 tablespoons butter — for the mash.
- 1/2 cup milk — more as needed.
- 1 teaspoon salt — for the potatoes.
- 2 tablespoons olive oil — for the filling.
- 1 medium onion, diced — the base.
- 2 carrots, diced — classic shepherd’s pie texture.
- 2 celery stalks, diced — adds a little backbone.
- 8 ounces cremini mushrooms, chopped small — for savory depth.
- 3 garlic cloves, minced — stir in near the end.
- 2 tablespoons tomato paste — gives the filling color and body.
- 1 1/2 cups cooked lentils — or 1 cup dry lentils cooked ahead of time.
- 1 1/2 cups vegetable broth — keeps the filling saucy.
- 1 cup frozen peas — stirred in at the end.
- 1 teaspoon dried thyme, 1 teaspoon kosher salt, 1/2 teaspoon black pepper — the seasoning.
Quick Steps:
-
Preheat the oven to 400°F. Boil the potatoes in salted water for 15 to 20 minutes, until very tender.
-
While the potatoes cook, heat the olive oil in a skillet over medium heat. Cook the onion, carrots, celery, and mushrooms for 8 to 10 minutes, until the vegetables soften and the mushrooms give up their moisture.
-
Stir in the garlic and tomato paste and cook for 1 minute.
-
Add the lentils, broth, thyme, salt, and pepper. Simmer for 5 to 8 minutes, until the filling thickens. Stir in the peas.
-
Drain the potatoes and mash them with the butter and milk until smooth. Taste for salt.
-
Spread the lentil mixture into a baking dish, top with the mashed potatoes, and rough up the surface with a fork. Bake for 20 to 25 minutes, until the filling bubbles and the potato peaks brown. Rest for 10 minutes before serving.
Equipment for This Recipe:
- Large pot — for the potatoes.
- Large skillet — for the filling.
- Potato masher — for a smooth top.
- Baking dish — to hold the pie.
- Fork — to texture the potato surface so it browns.
How to Serve This Dish:
Serve generous scoops in shallow bowls so the filling and potato layer both stay in view. A crisp green salad or simple buttered peas on the side is enough; this pie already does the heavy lifting.
Pro Tips for This Recipe:
- Dry potatoes mash better than wet ones, so drain them well.
- Cook the mushrooms until their liquid evaporates. That’s where the flavor comes from.
- Rough up the potato top with a fork so the edges brown.
- Let it rest before cutting or the filling slides everywhere.
Variations on This Dish:
- Cheddar Potato Top: Stir a cup of cheddar into the mashed potatoes before baking.
- Root Vegetable Pie: Swap half the potatoes for parsnips for a sweeter top.
- Stovetop Filling Bowl: Skip the bake and serve the lentil filling over mashed potatoes for a faster dinner.
Common Mistakes to Avoid with This Dish:
- Leaving the filling too thin: It turns soupy under the potatoes.
- Using watery mash: The topping won’t brown as well.
- Skipping the mushroom cook time: The filling loses that deep, savory note.
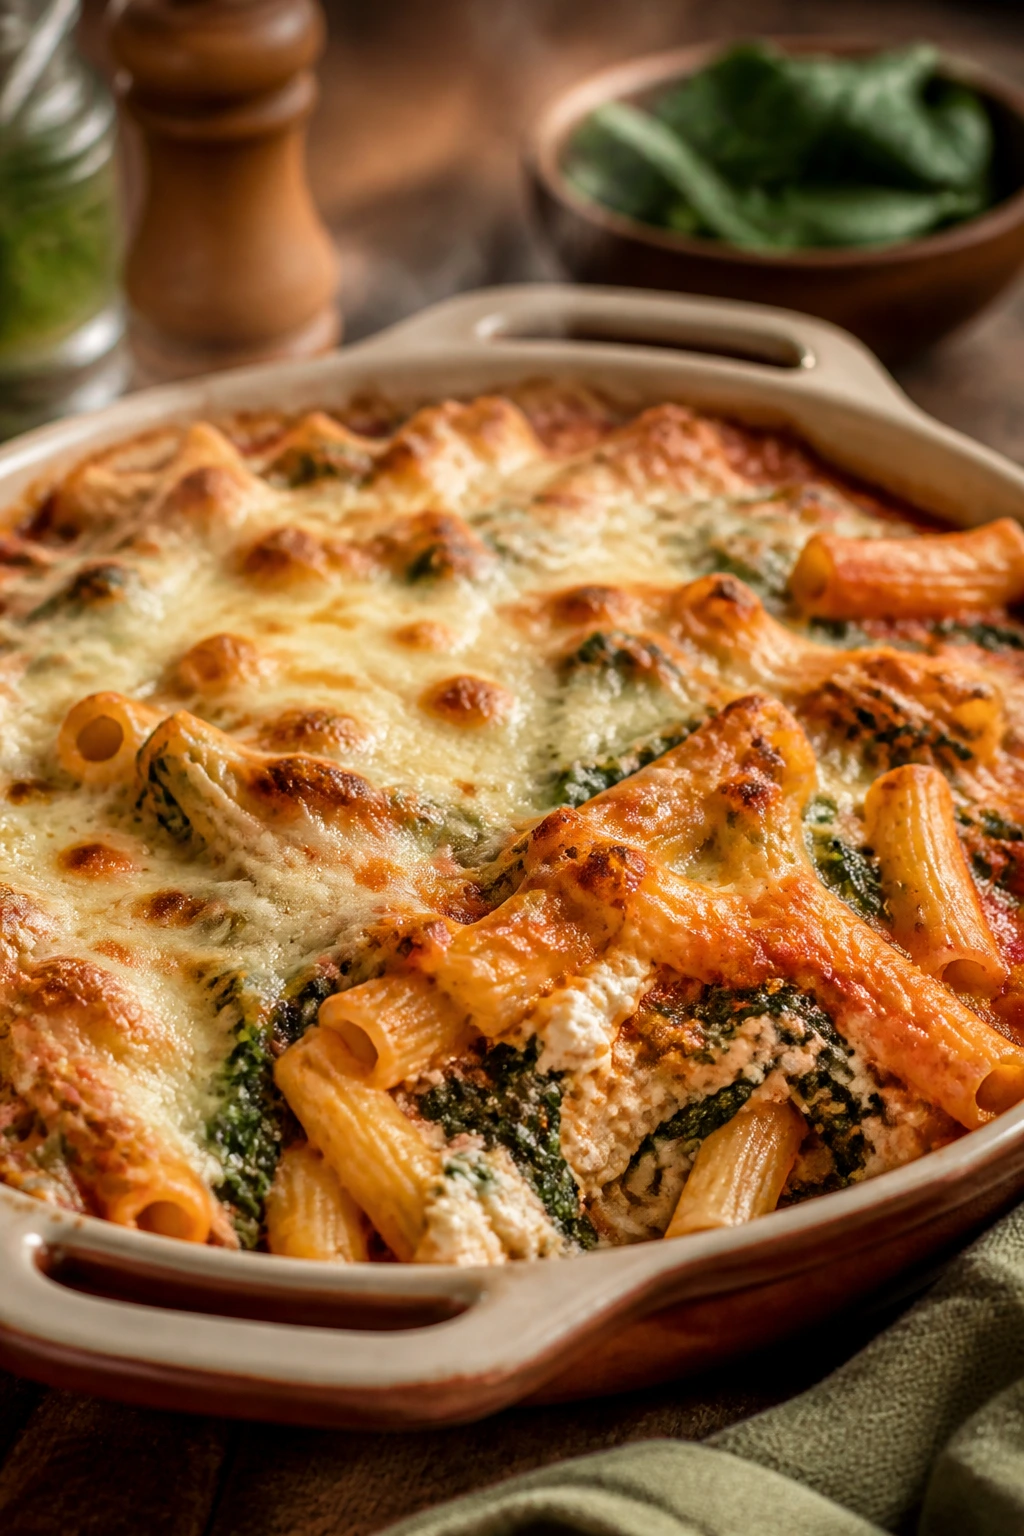
13. Spinach and Ricotta Stuffed Shells
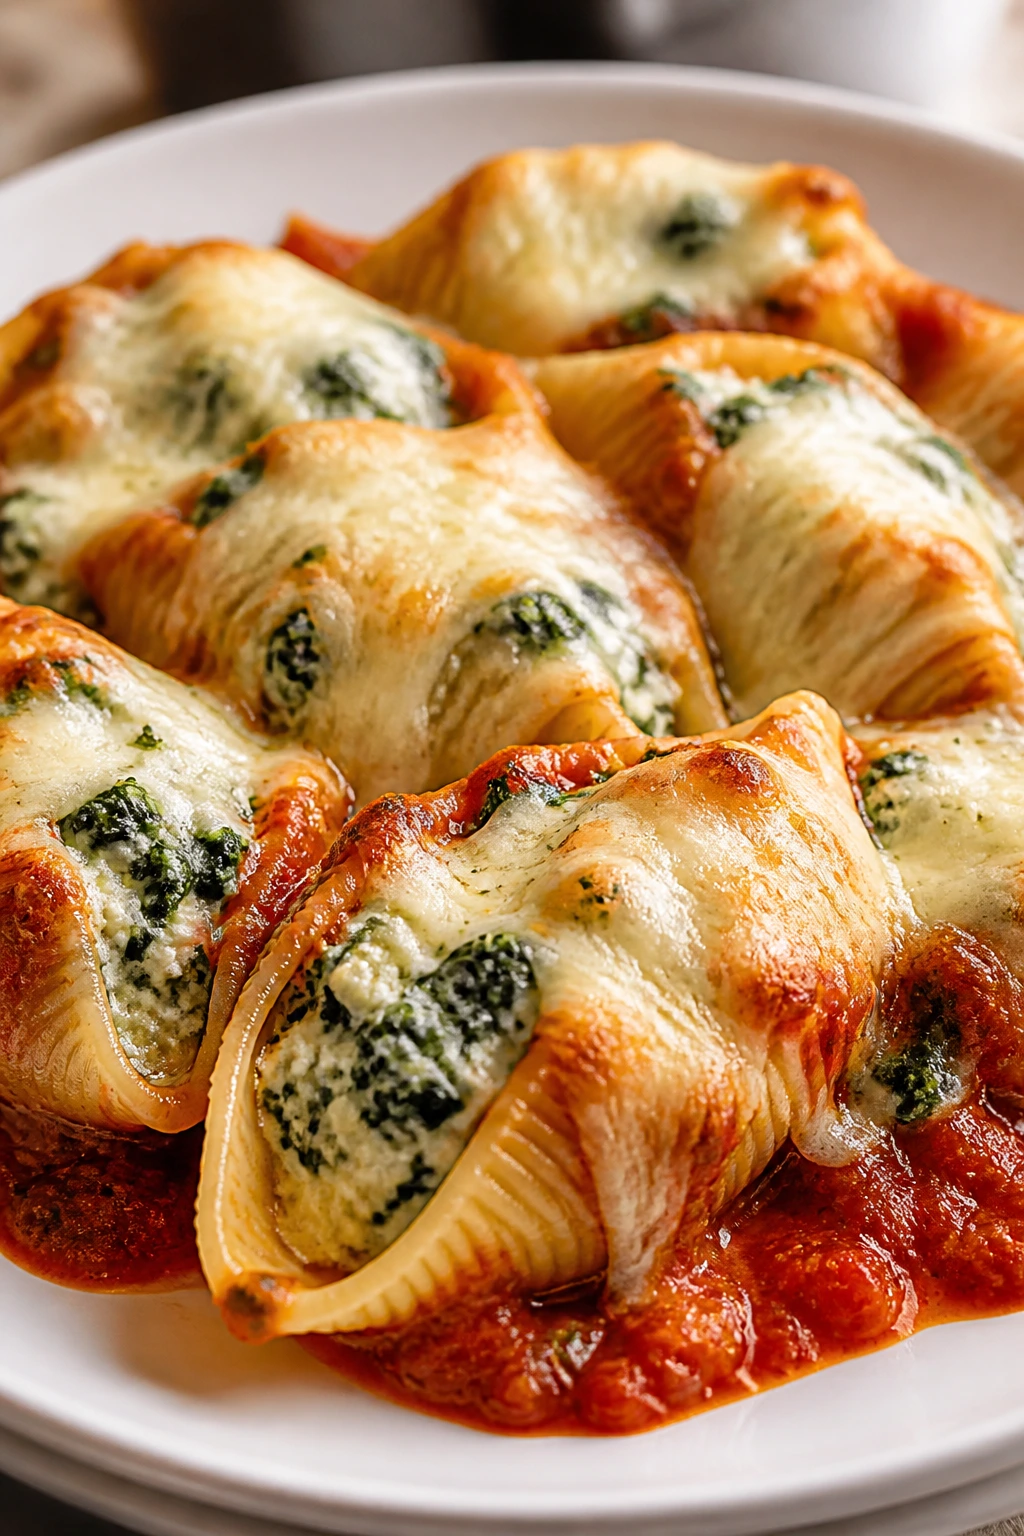
Stuffed shells are one of those dishes that looks like a project and eats like a favor to the whole table. The pasta shells hold a creamy ricotta filling, the spinach disappears into the mix, and the marinara bakes around the edges until it tastes more concentrated and sweet. If you want a vegetarian dinner that feels a little ceremonious without actually being hard, this is a smart pick.
Why It Works:
Jumbo shells are built for stuffing, so every bite gets pasta, cheese, and sauce together. Ricotta and Parmesan give the filling a soft, salty base, while spinach keeps it from feeling too heavy. The shells bake in sauce, which keeps them tender instead of leathery.
Key Ingredients:
- 20 jumbo pasta shells — cook a few extra in case some tear.
- 15 ounces ricotta cheese — whole-milk is the smoothest.
- 10 ounces frozen spinach, thawed and squeezed dry — or about 5 ounces fresh wilted spinach.
- 1 large egg — helps the filling hold together.
- 1 cup shredded mozzarella — mixed into the filling or sprinkled on top.
- 1/2 cup grated Parmesan — for salt and sharpness.
- 24 ounces marinara sauce — enough to line the dish and cover the shells.
- 1 teaspoon garlic powder, 1/4 teaspoon nutmeg, 1 teaspoon kosher salt, 1/2 teaspoon black pepper — simple seasoning that works.
- Chopped parsley — optional for the top.
Quick Steps:
-
Preheat the oven to 375°F. Boil the shells in salted water until just shy of al dente, then drain and cool them slightly so they’re easy to handle.
-
In a bowl, mix the ricotta, spinach, egg, mozzarella, Parmesan, garlic powder, nutmeg, salt, and pepper until combined.
-
Spread 1 cup of marinara in the bottom of a 9×13-inch baking dish.
-
Fill each shell with a generous spoonful of the ricotta mixture and place it seam-side up in the dish.
-
Spoon the remaining sauce over the top and scatter with a little extra mozzarella if you want more browning.
-
Cover with foil and bake for 25 minutes. Uncover and bake 10 minutes more, until the sauce bubbles and the cheese melts. Rest for 5 to 10 minutes before serving.
Equipment for This Recipe:
- Large pot — for the shells.
- Mixing bowl — for the filling.
- 9×13-inch baking dish — for the bake.
- Spoon or small scoop — for filling the shells without much mess.
- Foil — to keep the top from drying out too soon.
How to Serve This Dish:
Serve 3 to 5 shells per person depending on appetite, with extra marinara spooned around the plate. Garlic bread and a bitter green salad are the easy companions here.
Pro Tips for This Recipe:
- Cook a few extra shells. They tear more easily than you want.
- Squeeze the spinach dry. Wet filling will flood the dish.
- Don’t overfill the shells or they split in the oven.
- Cover the dish for the first part of baking so the pasta stays tender.
Variations on This Dish:
- Lemon Ricotta Shells: Add 1 teaspoon lemon zest to the filling for a brighter flavor.
- Three-Cheese Shells: Use part mozzarella, part provolone, and part Parmesan for a deeper cheese flavor.
- Garlicky Kale Shells: Swap spinach for finely chopped cooked kale if that’s what you have.
Common Mistakes to Avoid with This Dish:
- Overcooking the shells before stuffing: They tear and collapse.
- Skipping the sauce layer underneath: The bottoms stick and dry out.
- Making the filling too loose: It leaks out during baking.
14. Peanut Noodles with Edamame and Cucumber
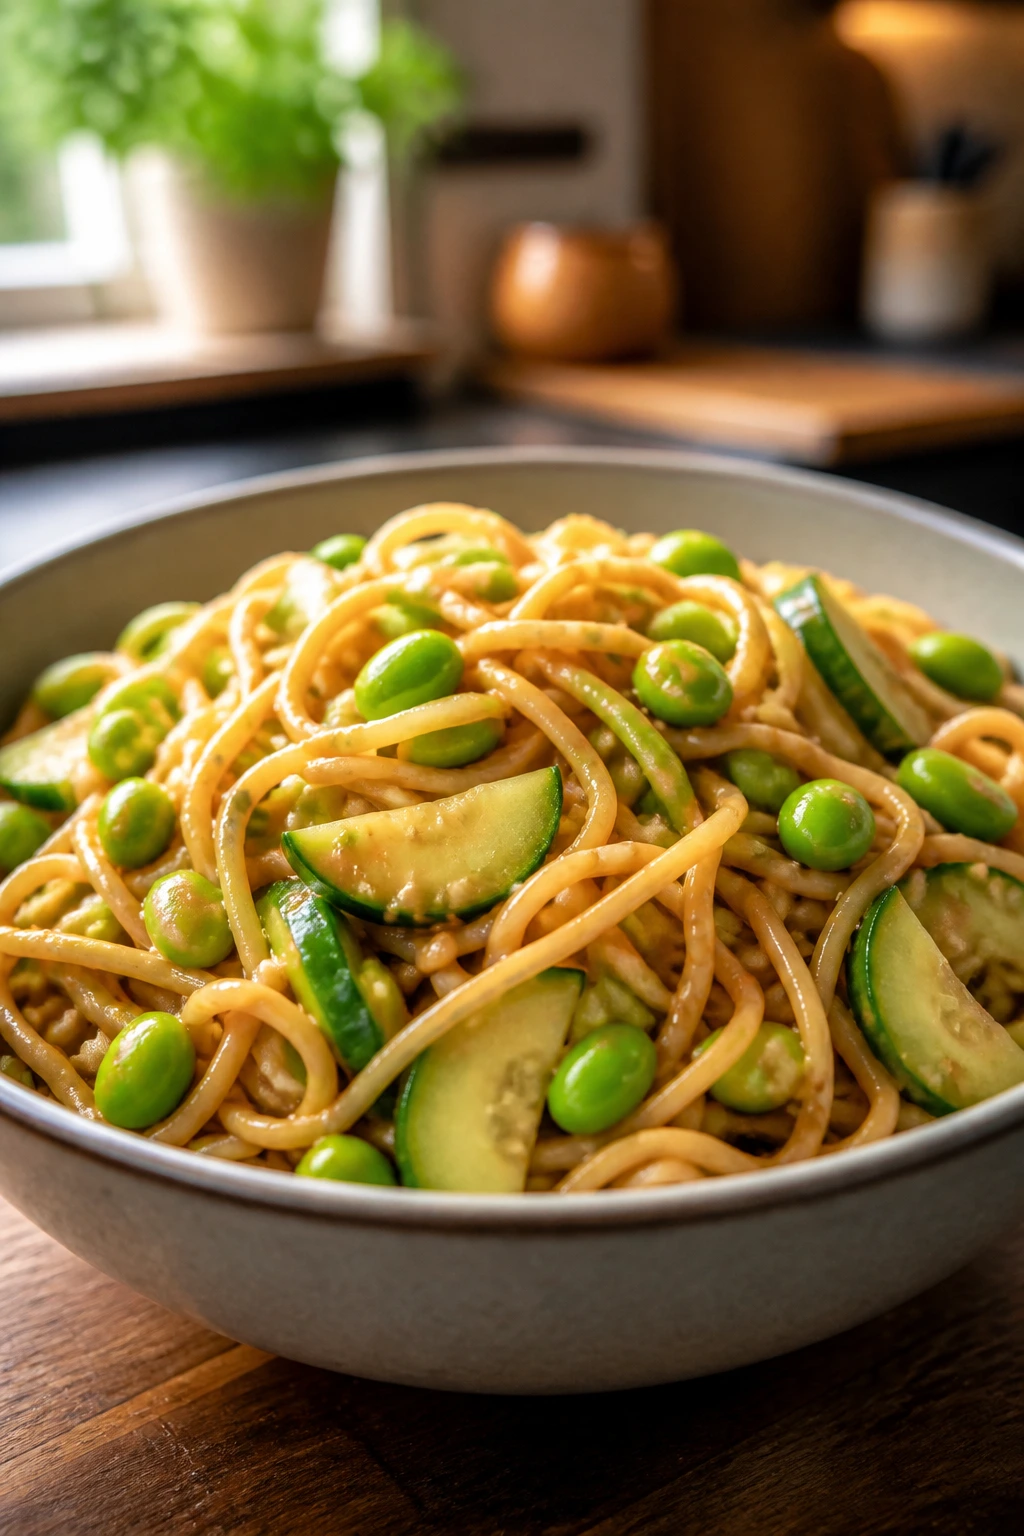
This is the recipe that lives comfortably between lunch and dinner, which is part of why I like it so much. The peanut sauce is salty, sweet, and thick enough to coat every strand, the cucumber stays cool and crisp, and the edamame brings enough protein that nobody starts rummaging for snacks an hour later. It can be served warm, room temperature, or chilled, which gives it some real flexibility.
Why It Works:
Peanut butter makes a fast sauce without needing cooking, and soy sauce plus rice vinegar keeps it from tasting heavy. Edamame adds a fresh green bite and a little chew, while cucumber and carrots give the noodles crunch. If you want a vegetarian meal that can sit on the counter for a few minutes without falling apart, this is it.
Key Ingredients:
- 12 ounces spaghetti or rice noodles — either one works; rice noodles make it lighter.
- 1 cup shelled edamame — thawed if frozen.
- 1 large cucumber, sliced into thin half-moons — keep the peel on for crunch.
- 2 medium carrots, julienned or grated — for color and texture.
- 1/3 cup creamy peanut butter — natural or regular both work.
- 3 tablespoons soy sauce or tamari — the salty backbone of the sauce.
- 2 tablespoons rice vinegar — brightens the sauce.
- 1 tablespoon honey or maple syrup — for balance.
- 1 tablespoon sesame oil — a little goes a long way.
- 1 garlic clove, grated — gives the sauce more punch.
- 2 to 4 tablespoons hot water — to thin the sauce until it clings.
- 2 scallions, sliced — for the top.
- Sesame seeds — optional, but nice.
Quick Steps:
-
Cook the noodles according to the package, then drain. If you want the dish cold, rinse the noodles under cool water and drain well.
-
Whisk the peanut butter, soy sauce, rice vinegar, honey, sesame oil, garlic, and 2 tablespoons of hot water in a bowl until smooth. Add more water a tablespoon at a time until the sauce is pourable but still thick.
-
Toss the noodles with the sauce while they’re still warm so the sauce coats evenly.
-
Fold in the edamame, cucumber, and carrots.
-
Taste and add more soy sauce or vinegar if needed.
-
Top with scallions and sesame seeds and serve warm, room temperature, or chilled.
Equipment for This Recipe:
- Large pot — for boiling the noodles.
- Mixing bowl — for the sauce.
- Whisk — to smooth out the peanut butter.
- Colander — for draining noodles cleanly.
- Tongs — helpful for tossing everything together.
How to Serve This Dish:
Serve it in shallow bowls with extra cucumber or a few crushed peanuts on top if your household likes crunch. It also works well packed in lunch containers, which is rare for a noodle dish that still tastes good later.
Pro Tips for This Recipe:
- Warm noodles grab the sauce better than cold ones.
- If the peanut butter is stiff, stir the sauce patiently with hot water instead of dumping in too much at once.
- Salt the noodle water well or the whole dish tastes flat.
- If you’re serving it later, keep the cucumber separate until just before eating.
Variations on This Dish:
- Spicy Peanut Noodles: Add sriracha or chili crisp to the sauce.
- Sesame-Lime Version: Swap half the vinegar for lime juice and add a little lime zest.
- Crunchy Slaw Bowl: Add shredded cabbage and skip the edamame for a colder, crunchier salad-style dinner.
Common Mistakes to Avoid with This Dish:
- Making the sauce too thick: It clumps instead of coating.
- Adding cucumber too early if serving later: It waters down the noodles.
- Underseasoning the sauce: Peanut butter needs enough salt to taste like dinner.
15. Mushroom and Bean Taco Skillet
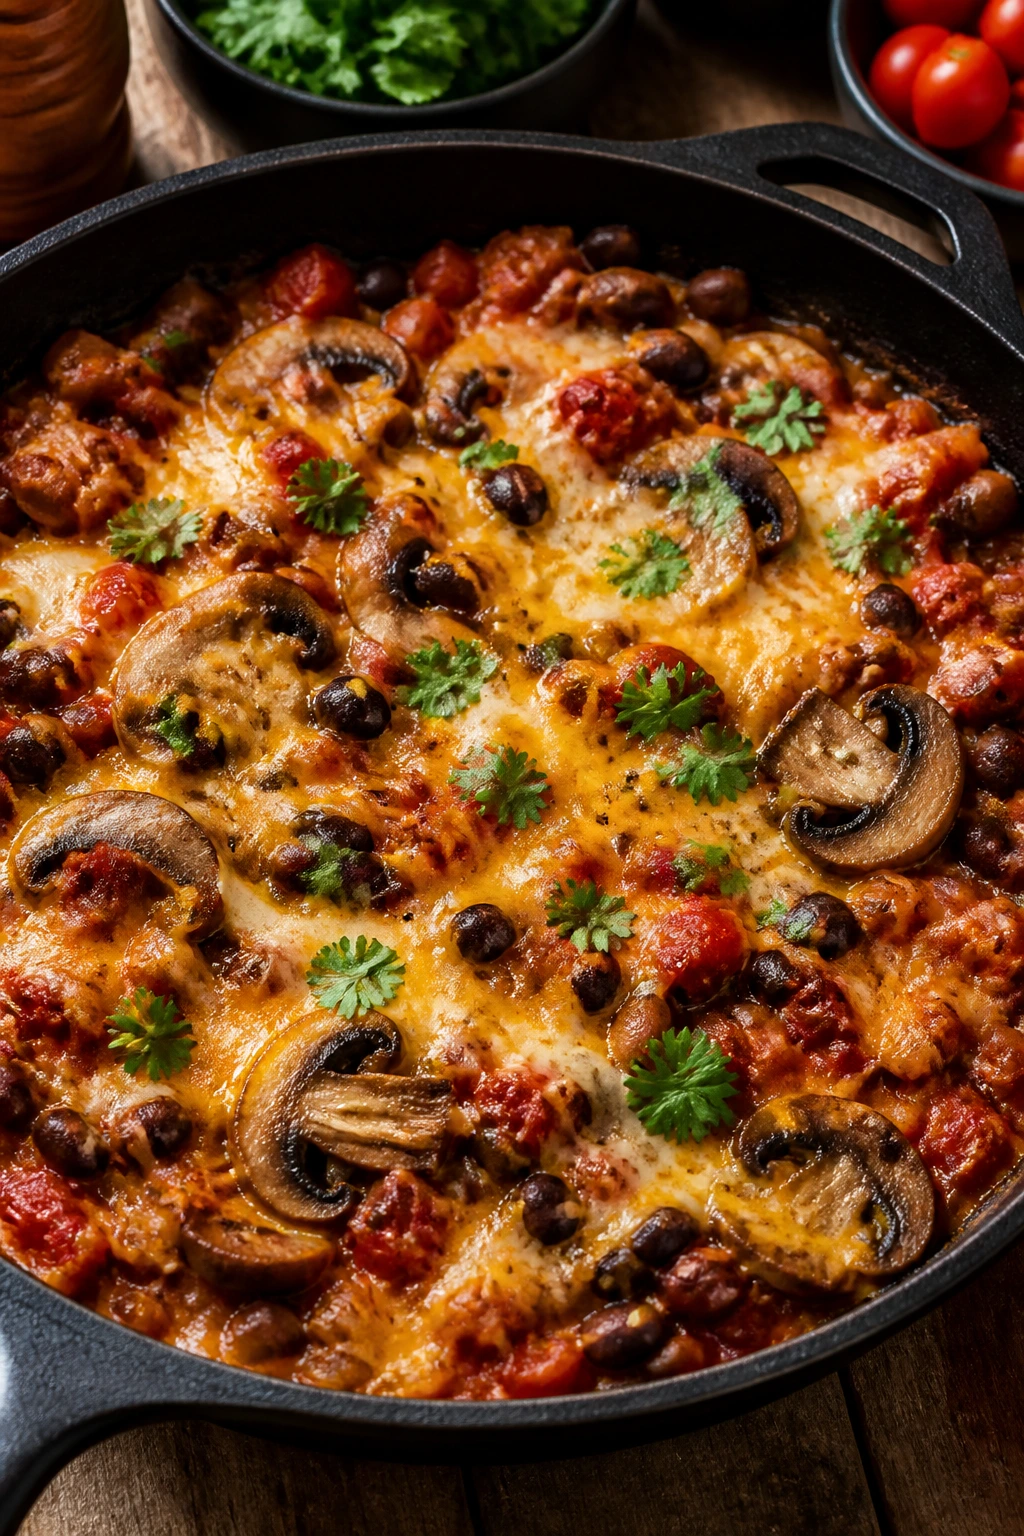
This is the skillet I make when I want taco night without the full production. Mushrooms brown into little savory bits, beans give the pan heft, salsa keeps the filling juicy, and melted cheese on top makes the whole thing feel like more than a shortcut. Put tortillas on the table and let everyone build their own, which is half the fun anyway.
Why It Works:
Mushrooms are the smart move here because they bring a meaty texture without trying to imitate meat. Beans make the filling substantial, salsa adds seasoning and moisture in one shot, and the skillet stays flexible enough for tacos, burritos, bowls, or nachos. It’s the kind of dinner that turns into leftovers without anyone being sad about it.
Key Ingredients:
- 2 tablespoons olive oil — for browning the vegetables.
- 1 medium onion, diced — the base.
- 12 ounces cremini mushrooms, chopped small — they shrink as they cook, so don’t chop them too tiny.
- 1 bell pepper, diced — any color works.
- 2 garlic cloves, minced — add once the vegetables soften.
- 2 tablespoons taco seasoning — store-bought or homemade.
- 1 can (15 ounces) black beans, drained and rinsed — for body.
- 1 can (15 ounces) pinto beans, drained and rinsed — for a softer, creamier texture.
- 1/2 cup salsa — adds moisture and seasoning.
- 1/2 cup water — helps the filling simmer without sticking.
- 1 cup shredded cheddar or Monterey Jack — for the top.
- Small tortillas, rice, or tortilla chips — for serving.
Quick Steps:
-
Heat the olive oil in a large skillet over medium-high heat. Add the onion, mushrooms, and bell pepper and cook for 8 to 10 minutes, stirring now and then, until the mushrooms have released their liquid and started to brown.
-
Stir in the garlic and taco seasoning. Cook for 30 seconds.
-
Add the black beans, pinto beans, salsa, and water. Simmer for 5 to 7 minutes, until the filling thickens and the beans start to break down slightly.
-
Taste and add salt if needed. If the pan looks dry, splash in another tablespoon or two of water.
-
Sprinkle the cheese over the top, cover the skillet for 1 to 2 minutes, and let it melt.
-
Serve with tortillas, rice, or chips and any toppings you like.
Equipment for This Recipe:
- Large skillet — wide enough for browning the mushrooms.
- Wooden spoon or spatula — for stirring and mashing a few beans.
- Lid or sheet of foil — to melt the cheese.
- Knife and cutting board — for the vegetables.
How to Serve This Dish:
Spoon the skillet filling into warm tortillas and top with lettuce, avocado, and a squeeze of lime. If you’re not doing tortillas, pile it over rice or use it as a nacho topping with salsa and sour cream.
Pro Tips for This Recipe:
- Brown the mushrooms fully. Pale mushrooms taste watery.
- Mash a few beans against the side of the pan for a thicker filling.
- Don’t rush the moisture off the mushrooms or the skillet gets soggy.
- Warm the tortillas before serving so they don’t crack.
Variations on This Dish:
- Street Corn Skillet: Stir in 1 cup of corn and top with cotija and chopped cilantro.
- Extra-Mild Taco Bowl: Use mild salsa and cut the taco seasoning in half for a gentler flavor.
- Rice Night Version: Spoon the filling over cilantro rice with shredded lettuce on top.
Common Mistakes to Avoid with This Dish:
- Crowding the mushrooms too soon: They steam instead of browning.
- Using watery salsa: The skillet turns soupy.
- Skipping a final taste: Beans can take more salt than you’d expect.
Why Meatless Monday Works Better When the Food Still Feels Like Dinner
The best vegetarian dinners for families do not apologize for being vegetarian. They lean into what makes dinner satisfying in the first place: hot starch, a savory sauce, browned edges, and enough richness to keep people at the table after the first bite. That’s why beans, lentils, pasta, eggs, and cheese show up so often here. They’re not trying to disappear. They’re helping.
There’s also a practical reason these meals work so well. A pot of soup, a tray of enchiladas, or a skillet of fried rice gives you room to cook once and eat twice. That matters on a Monday, when nobody wants dinner to become a project with five pans and a sink full of leftovers that still need to be washed. A meatless meal should make your evening easier, not weirder.
And, frankly, a lot of the old suspicion around vegetarian dinners comes from bad texture, not bad flavor. If you’ve ever eaten a plate of soft vegetables with no salt and no crunch, you know exactly what I mean. These recipes fix that problem by giving each dish contrast — creamy and crisp, tender and browned, rich and bright. That’s the part people remember.
Essential Equipment for These Recipes
-
Large skillet or sauté pan: You’ll use this for sauces, fried rice, curry, taco fillings, and anything that needs browning before it bakes.
-
Dutch oven or soup pot: Best for tomato soup, curry, and the kind of one-pot pasta that needs room to simmer.
-
9×13-inch baking dish: The workhorse for baked ziti, enchiladas, stuffed shells, mac and cheese, and shepherd’s pie.
-
Large rimmed sheet pan: Necessary for roasting sweet potatoes, gnocchi, and vegetables without spilling them onto the oven floor.
-
Colander: Pasta, potatoes, and shells all need draining, and a good colander saves a lot of annoyance.
-
Whisk: Essential for cheese sauces, cream sauces, and anything with flour that can lump up if you rush it.
-
Wooden spoon or heatproof spatula: Better than a fork for stirring beans, rice, and skillet fillings without scraping the pan too hard.
-
Measuring cups and spoons: These recipes rely on the balance between sauce, starch, and seasoning; guessing on the liquid usually backfires.
-
Lid or sheet of foil: Handy for melting cheese, steaming vegetables, and covering casseroles partway through baking.
-
Sharp knife and cutting board: A lot of the success here comes from even chopping, especially with onions, carrots, peppers, and mushrooms.
Smart Shopping and Ingredient Tips

The easiest way to make vegetarian dinners feel full is to shop like you mean it. Start with sturdy pantry items: pasta, rice, tortillas, canned beans, lentils, tomato paste, broth, and one or two sauces you actually like. If a jarred marinara tastes good on a spoon, it’ll taste good in baked ziti. If your enchilada sauce has a weird tinny edge, don’t expect cheese to hide it.
For vegetables, buy what can handle heat. Broccoli, carrots, peppers, mushrooms, kale, spinach, and sweet potatoes all behave well in these recipes because they either roast nicely or melt into sauce without turning to mush. Delicate vegetables can work too, but they need more care. The difference between a sharp, lively dinner and a soggy one often comes down to how much water the vegetables bring into the pan.
Cheese deserves a quick note. Block cheese usually melts cleaner than pre-shredded cheese because it doesn’t carry the anti-caking powder that can make sauces grainy. That said, pre-shredded cheese is fine for baked casseroles, quesadillas, and topping potatoes when convenience matters more than perfection. Ricotta should be thick, not watery. If it’s loose, drain it in a sieve for 10 minutes.
Beans and lentils are doing real labor here, so choose them with care. Canned beans should be rinsed unless you specifically want the canning liquid for a sauce. Lentils should be firm enough to hold shape in a skillet, which means brown and green lentils are the safest bets for sloppy joes and shepherd’s pie. Red lentils work, but they lean toward mush; that’s useful in soup, not here.
How to Serve These Recipes
Presentation:
Pile casseroles high enough to show the browned top, not just the saucy middle. Use shallow bowls for soups, curries, and noodle dishes so the toppings stay visible. For tacos, quesadillas, and sloppy joes, let people build at the table; the food looks better when it’s fresh and still a little imperfect.
Accompaniments:
A simple green salad, roasted broccoli, garlicky bread, citrusy slaw, or sliced cucumbers can keep these meals from feeling too heavy. Tomato-based dishes like baked ziti and stuffed shells like a bitter green salad. Creamy dishes like mac and cheese and baked potatoes benefit from something sharp and raw on the side.
Portions:
Most of these recipes feed 4 to 6 adults, but baked pastas and shepherd’s pie stretch farther because they’re dense and easy to slice. Soup and curry usually need bread or rice to feel complete. For hungrier groups, add a side salad and another starch rather than trying to overload the main dish.
Beverage Pairing:
Sparkling water with lemon works across nearly every dish here. For tomato-heavy meals, a light red like gamay or a chilled hibiscus iced tea is a nice match. Peanut noodles and curry go well with cold ginger tea, which clears the palate without fighting the sauce.
Additional Tips and Flavor Boosters
Flavor Enhancement:
Keep a few bright finishers around: lemon, lime, vinegar, pesto, pickled onions, chopped herbs, or a little chili crisp. These recipes already have body; what they often need at the end is a sharp edge to wake everything up.
Customization:
If your family likes more texture, add toasted breadcrumbs, roasted nuts, or crisp tortilla strips to the top of soups and casseroles. If they lean toward milder food, use less chili powder and serve hot sauce at the table instead of building heat into the whole dish. That small adjustment keeps the dinner table calmer.
Serving Suggestions:
A spoonful of sour cream or yogurt on enchiladas, curry, and taco skillets cools the heat and softens the edges. Fresh parsley or cilantro adds color, but only use it when it makes sense for the dish. There’s no prize for putting cilantro on everything.
Make-It-Yours:
For dairy-free eaters, use olive oil, coconut milk, or a plain unsweetened plant milk where appropriate, then lean harder on herbs, lemon, and well-browned vegetables. For extra protein, add an egg on top of fried rice, more beans to taco skillets, or extra lentils in shepherd’s pie. For kids who hate mixed textures, keep garnishes on the side and serve the components in separate piles.
Make-Ahead, Storage, and Reheating Guidance
Baked pastas, enchiladas, shepherd’s pie, stuffed shells, and mac and cheese keep well in the fridge for 3 to 4 days. Soup, curry, taco filling, and lentil sloppy joe mixture also hold for that same window, and in some cases the flavor is better on day two because the sauce settles down. Fried rice and quesadillas are the least forgiving; they’re best fresh, though fried rice can be revived in a skillet with a splash of water.
Freezer life depends on the recipe. Tomato-based casseroles, soup, curry, shepherd’s pie, and lentil fillings freeze well for up to 2 months in airtight containers. Creamy cheese sauces can freeze too, but they may separate a little when reheated; whisking in a splash of milk usually brings them back. Peanut noodles and cucumber-heavy dishes are poor freezer candidates. The cucumber turns limp, and nobody wants that.
For reheating, use the method that protects texture. Baked casseroles reheat best covered at 350°F until hot through, usually 20 to 30 minutes from the fridge depending on the size of the portion. Soups and curries do well on the stovetop over medium-low heat, stirred often. Rice dishes revive nicely in a skillet or microwave with a teaspoon or two of water. If a sauce looks thick after chilling, loosen it before serving rather than after the food has already dried out.
Variations and Adaptations to Try
The Dairy-Light Route:
Use olive oil instead of butter, swap coconut milk or oat milk where a recipe needs cream, and finish with herbs, citrus, or toasted crumbs instead of extra cheese. This works especially well in soups, curries, skillet pastas, and taco fillings, where the base flavor can carry the dish without a heavy dairy layer.
Fully Vegan Swaps:
Replace eggs with flax eggs where a binder is needed, use plant milk in cheese sauces, and lean on nutritional yeast, cashew cream, or vegan cheese only where they truly help. The baked pasta, enchiladas, curry, taco skillet, and lentil fillings adapt cleanly if you make the sauce rich enough up front.
Gluten-Free Table Night:
Pick corn tortillas, gluten-free pasta, and tamari instead of soy sauce. For roux-based sauces, use a gluten-free flour blend or thicken with cornstarch slurry. The fried rice, curry, soup, stuffed shells, and potato dishes are naturally easy to adapt, while baked pasta and mac and cheese need the pasta swap only.
Higher-Protein Version:
Add eggs to fried rice, extra beans to taco skillets and enchiladas, tofu to peanut noodles, or extra lentils to shepherd’s pie and sloppy joes. Plain Greek yogurt makes a good topping for curries and enchiladas, and it brings protein without changing the whole dish.
Kid-First Mild Mode:
Keep chili powder, hot sauce, and red pepper flakes on the side instead of in the main pan. Let kids choose toppings for quesadillas, pasta, and baked potatoes, which helps a lot more than trying to hide every vegetable in the kitchen. Familiar shapes plus mild seasoning usually get better results than overthinking the sauce.
Freezer-Batch Rotation:
Choose the recipes that freeze cleanly — baked ziti, enchiladas, shepherd’s pie, soup, curry, and lentil sloppy joes — and make two at once. One goes in the fridge for the week, the other into the freezer for the next Monday that shows up with no warning. That habit saves dinner more times than a fancy meal plan ever will.
Common Mistakes to Avoid
-
Treating vegetables like decoration: If the onion, mushroom, carrot, or pepper never gets cooked enough to soften and brown, the whole dinner tastes raw and unfinished. Give the vegetables time in the pan.
-
Underseasoning beans and lentils: They need salt, acid, and often a little fat to taste like dinner instead of a pot of legumes. Taste the filling before it goes into the dish and again after it’s assembled.
-
Using too much liquid: Soggy enchiladas, soupy casseroles, and wet skillet fillings all come from the same place — too much moisture. Roast vegetables dry, drain beans well, and cook sauces down until they actually cling.
-
Skipping the browning step: That golden edge on mushrooms, gnocchi, potato tops, or cheese isn’t just pretty. It’s flavor. If the food needs browning, give it time.
-
Trying to serve baked dishes immediately: Pasta bakes, shepherd’s pie, and stuffed shells need a few minutes to settle. If you cut them too soon, the layers slip and the plate turns sloppy in a bad way.
-
Cooking everything on low heat: Gentle heat has its place, but it won’t give you fried rice, crisp tortillas, or browned mushrooms. Some dishes need a hotter pan, and the difference is obvious.
Frequently Asked Questions
How do I make vegetarian dinners feel filling enough for a meat-and-potatoes crowd?
Use a real starch, a strong savory base, and at least one ingredient that brings protein or heft — beans, lentils, eggs, cheese, or tortellini do that job well. Texture matters just as much as protein. If the dish has a crispy edge, a creamy center, and enough salt, it usually lands.
Which recipes in this collection are best for picky eaters?
Baked ziti, mac and cheese, quesadillas, stuffed shells, broccoli cheddar potatoes, and fried rice are the safest bets because they look familiar. They’re built around shapes and flavors most kids already know. Keep garnishes on the side and let people choose their own toppings.
Can I make these meals ahead of time?
Yes, especially the baked casseroles, soups, curries, lentil fillings, and shepherd’s pie. Most of them can be assembled a day ahead and baked later, or cooked fully and reheated gently. If you’re doing a pasta bake, hold back a little cheese for the final topping so it browns fresh.
What should I freeze and what should I not freeze?
Freeze tomato-based casseroles, enchilada fillings, soup, curry, shepherd’s pie, and sloppy joe filling. Skip cucumber noodles, fried rice, and quesadillas if texture matters to you, because they don’t bounce back as cleanly. Always cool food before freezing so ice crystals don’t wreck the texture.
How do I keep vegetable fillings from getting watery?
Cook the moisture off first. Brown mushrooms, roast sweet potatoes, and let onions and peppers soften before mixing them into a dish. Beans should be drained, spinach squeezed dry if it’s frozen, and sauce reduced until it clings to a spoon.
Can I make these gluten-free without ruining the dinner?
Yes. Use gluten-free pasta, corn tortillas, and tamari where soy sauce appears. The curry, soup, stuffed potatoes, fried rice, and taco skillet are especially easy to adapt, while baked pasta and mac and cheese just need a pasta swap.
What if my family does not love beans?
Lean on recipes that hide the beans better, like lentil sloppy joes, taco skillets with mushrooms, fried rice, baked pasta, and curries where the beans get coated in sauce. You can also mash part of the beans into the skillet so the texture softens. That usually helps more than trying to force a bean-forward bowl.
How do I scale these recipes for a bigger group?
Double the ingredients and use a larger baking dish or a second sheet pan if needed. For casseroles, increase the bake time by 5 to 10 minutes and check the center for bubbling. For stovetop recipes, use a larger pot or skillet so the food isn’t packed in too tightly.
Do I need special ingredients like nutritional yeast or meat substitutes?
No, not for this collection. The point here is to make vegetarian dinner with ordinary ingredients that already work well: beans, lentils, pasta, tortillas, vegetables, cheese, eggs, and broth. Fancy substitutes can be useful, but they are not required for a good Monday night.
A Monday Dinner That Actually Stays on the Menu
The smartest vegetarian dinners are the ones that stop feeling like a category and start feeling like regular food. That’s what these recipes do. They use the shapes people already trust — casseroles, soups, skillets, tacos, noodles, baked potatoes — and build enough flavor and texture that nobody sits there calculating what’s missing.
Pick one baked dish, one quick skillet, and one soup or curry, and you’ve got a week of Meatless Monday options without repeating yourself into boredom. Keep the pantry stocked with beans, pasta, rice, tortillas, broth, and a couple of cheeses, and the whole thing gets easier than it looks.
The next time dinner is circling the drain around 5 p.m., choose the pan that feels least annoying and start there. That’s the habit that sticks.