
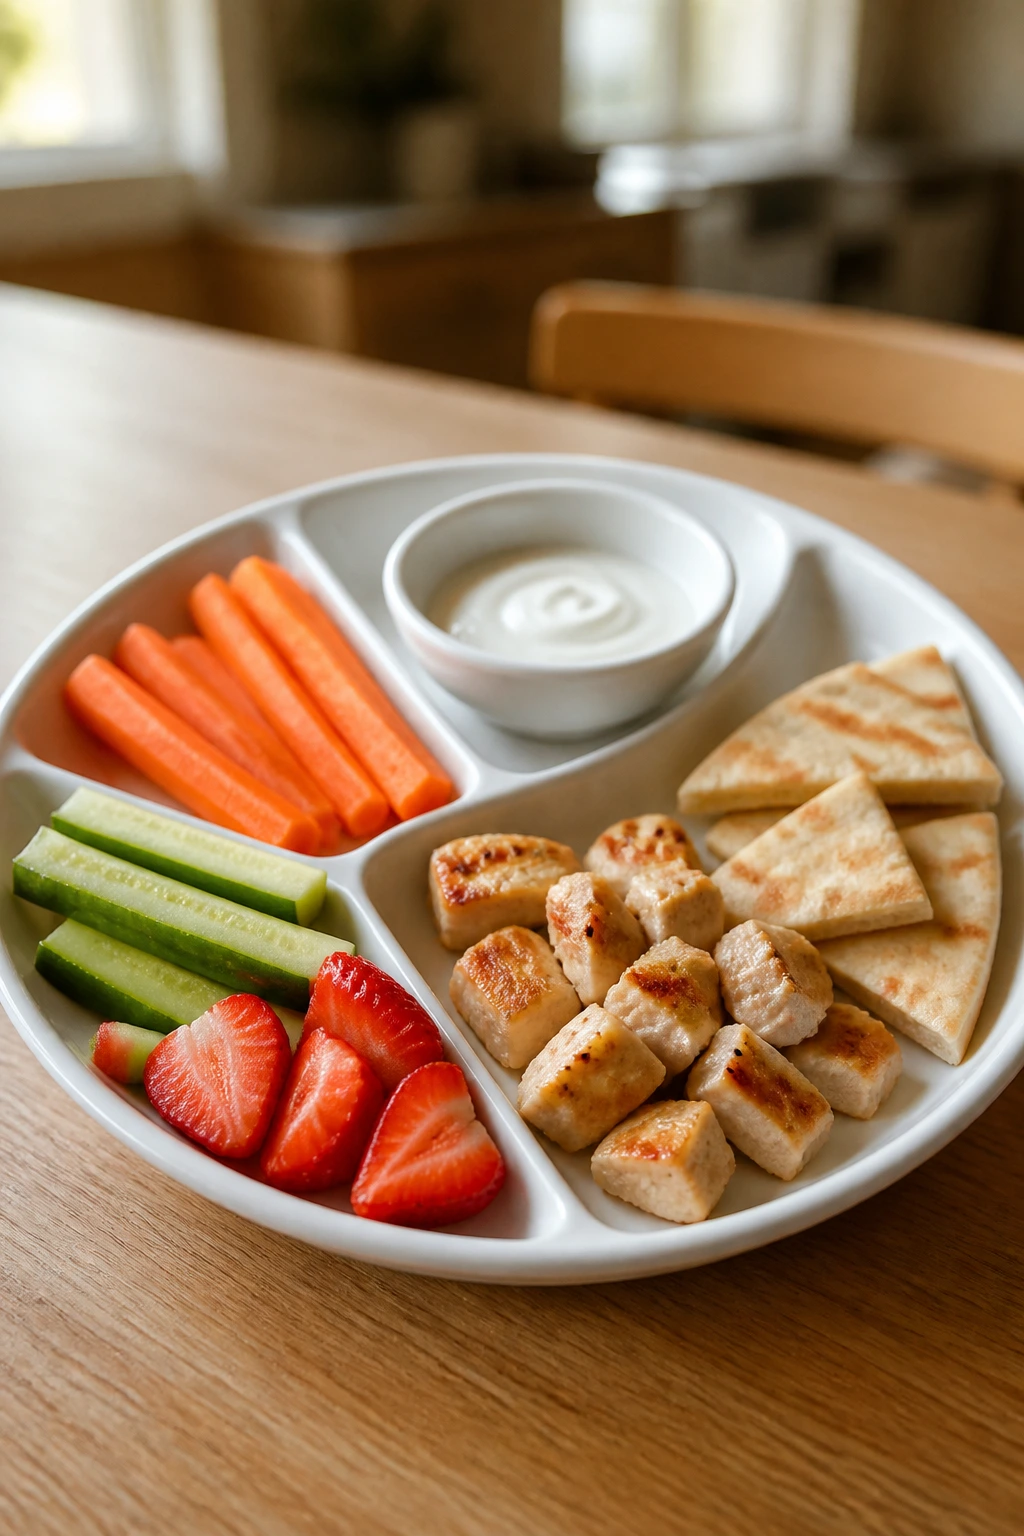
A dinner plate can turn into a negotiation fast when a child decides the sauce is “too wet,” the green flecks are suspicious, or the noodles touched the wrong thing. That is the whole messy reason picky eater recipes matter: not because kids need tiny food, but because they need familiar food that looks calm on the plate and tastes the way their brain expected.
The best kid-friendly dinners usually do three things at once. They keep the flavors plain enough to pass the sniff test, they make the texture predictable from bite to bite, and they leave room for add-ons on the side instead of forcing everything into one mixed-up pile. That last part matters more than people think. A bowl of creamy pasta with a few peas tucked on the edge feels very different from the same peas stirred through until the whole thing goes green.
So I favor recipes that are golden, soft, dippable, or build-your-own by nature. Things that crisp in the oven. Things that melt into each other in a skillet. Things that can be cut into sticks, wedges, sliders, or tiny pieces that look manageable instead of chaotic. And yes, there are still vegetables, beans, fish, and fruit in the mix — just used with a lighter hand, better texture, and no lecture attached.
Why These Picky Eater Recipes Earn a Second Serving
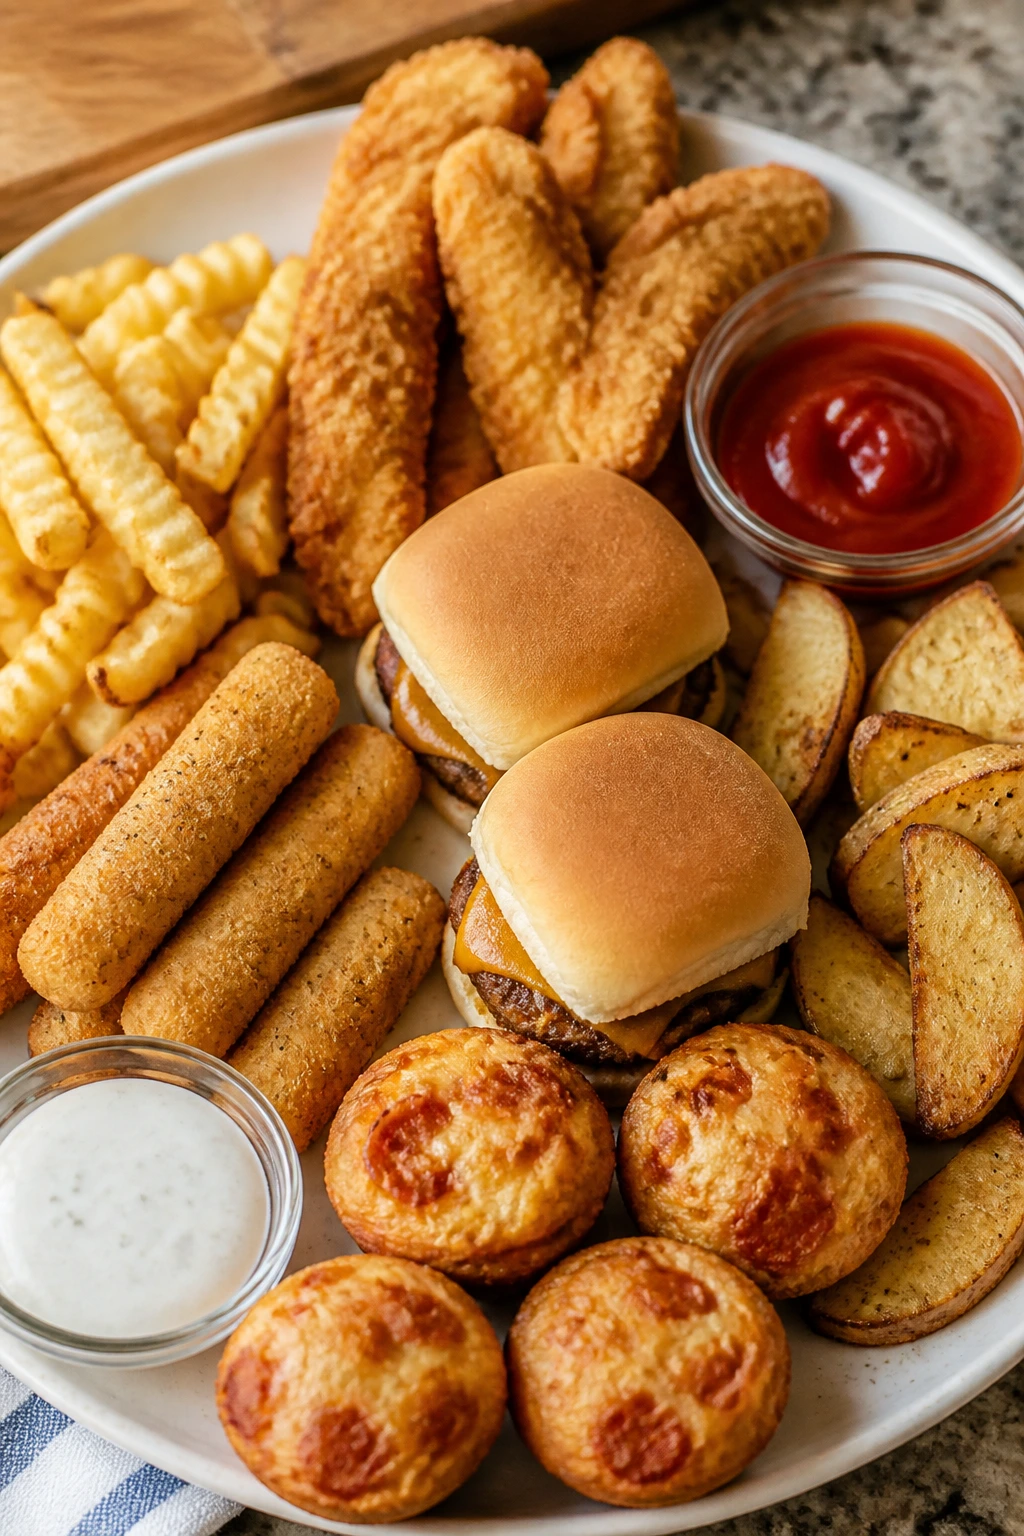
- Familiar shapes: Tenders, sticks, sliders, muffins, and wedges feel less risky than mixed casseroles with mystery layers.
- Plain flavors first: These recipes lean on butter, cheese, mild seasonings, and browned edges instead of spicy sauces or sharp heat.
- Dip-friendly builds: Ketchup, ranch, yogurt, marinara, and simple gravy give kids control over each bite.
- Texture stays predictable: Crispy things stay crispy, creamy things stay creamy, and soft foods don’t get buried under crunchy add-ins.
- Easy to split or swap: Many of these dishes can be made with chicken, turkey, beans, pasta, or veggies without changing the whole plate.
- No surprise ingredients: If there’s a hidden vegetable, it’s blended smooth or tucked into a sauce where it won’t show up as a chunk.
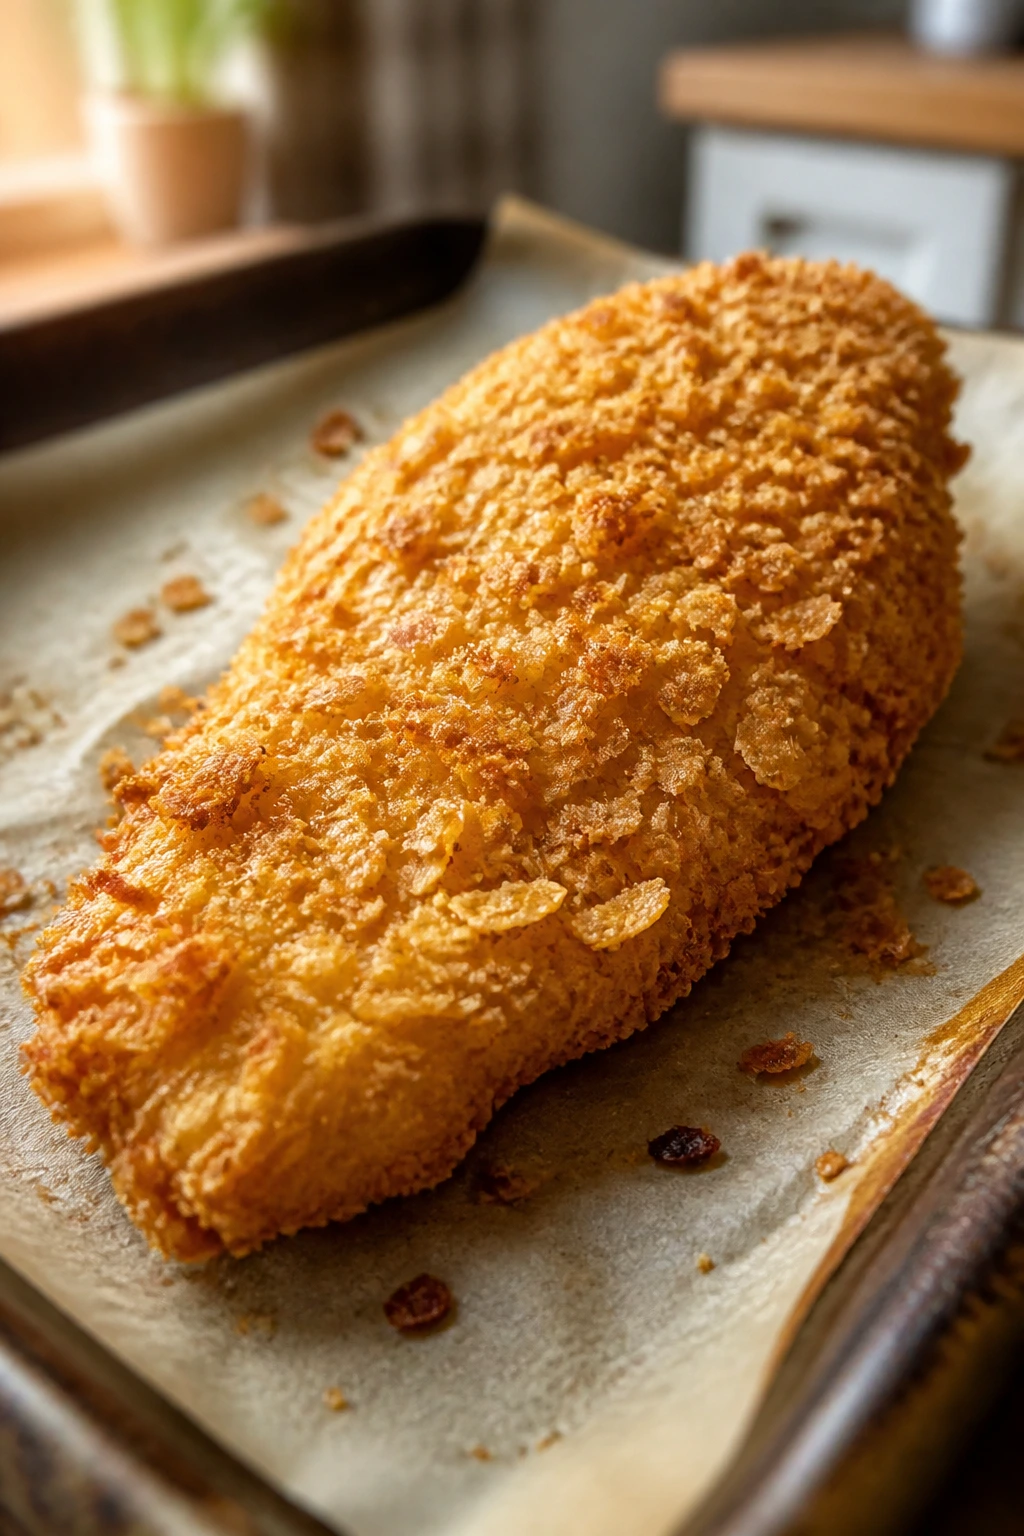
1. Crispy Baked Chicken Tenders
A good chicken tender should crack a little at the edges when you bite in, then give way to juicy meat inside. These bake up with a cornflake crust that stays crunchy enough to survive a few minutes on the table, which matters when dinner moves slowly and someone keeps asking for “one more minute.”
Why It Works:
The coating is familiar, the shape is easy to hold, and the chicken cooks fast at 425°F / 220°C. A little paprika adds color without heat, and the egg wash helps the crumbs cling instead of sliding off in the oven.
Key Ingredients:
- 1½ lbs chicken tenders
- 1½ cups crushed cornflakes
- ½ cup all-purpose flour
- 2 large eggs
- 1 teaspoon garlic powder
- 1 teaspoon salt
- ½ teaspoon paprika
- 2 tablespoons melted butter
Quick Steps:
- Preheat the oven to 425°F and line a sheet pan with parchment.
- Set up three bowls: flour and seasoning in one, beaten eggs in another, crushed cornflakes in the third.
- Dredge each tender in flour, then egg, then crumbs, pressing lightly.
- Place on the pan, drizzle with melted butter, and bake 16-18 minutes until the crust is deep golden and the chicken hits 165°F.
- Rest 3 minutes before serving.
Equipment for This Recipe:
- Rimmed sheet pan
- Parchment paper
- Three shallow bowls
- Instant-read thermometer
How to Serve This Dish:
Serve with ketchup, honey mustard, or ranch and a pile of oven fries. Cut the tenders into smaller bites for younger kids; the crunchy shell stays neater that way.
Pro Tips for This Recipe:
- Crush the cornflakes finely, but not into dust.
- Use melted butter for better browning.
- Do not crowd the pan; crowded tenders steam.
Variations on This Dish:
- Parmesan Crunch: Stir ¼ cup grated Parmesan into the crumbs for a saltier crust.
- Pretzel Coat: Swap half the cornflakes for crushed pretzels if your kids like a firmer crunch.
Common Mistakes to Avoid with This Dish:
- Skipping the flour: The coating can slide off in patches. The flour gives the egg something to grab.
- Overbaking: Dry chicken turns this from dinner into a complaint. Pull it at 165°F and rest briefly.
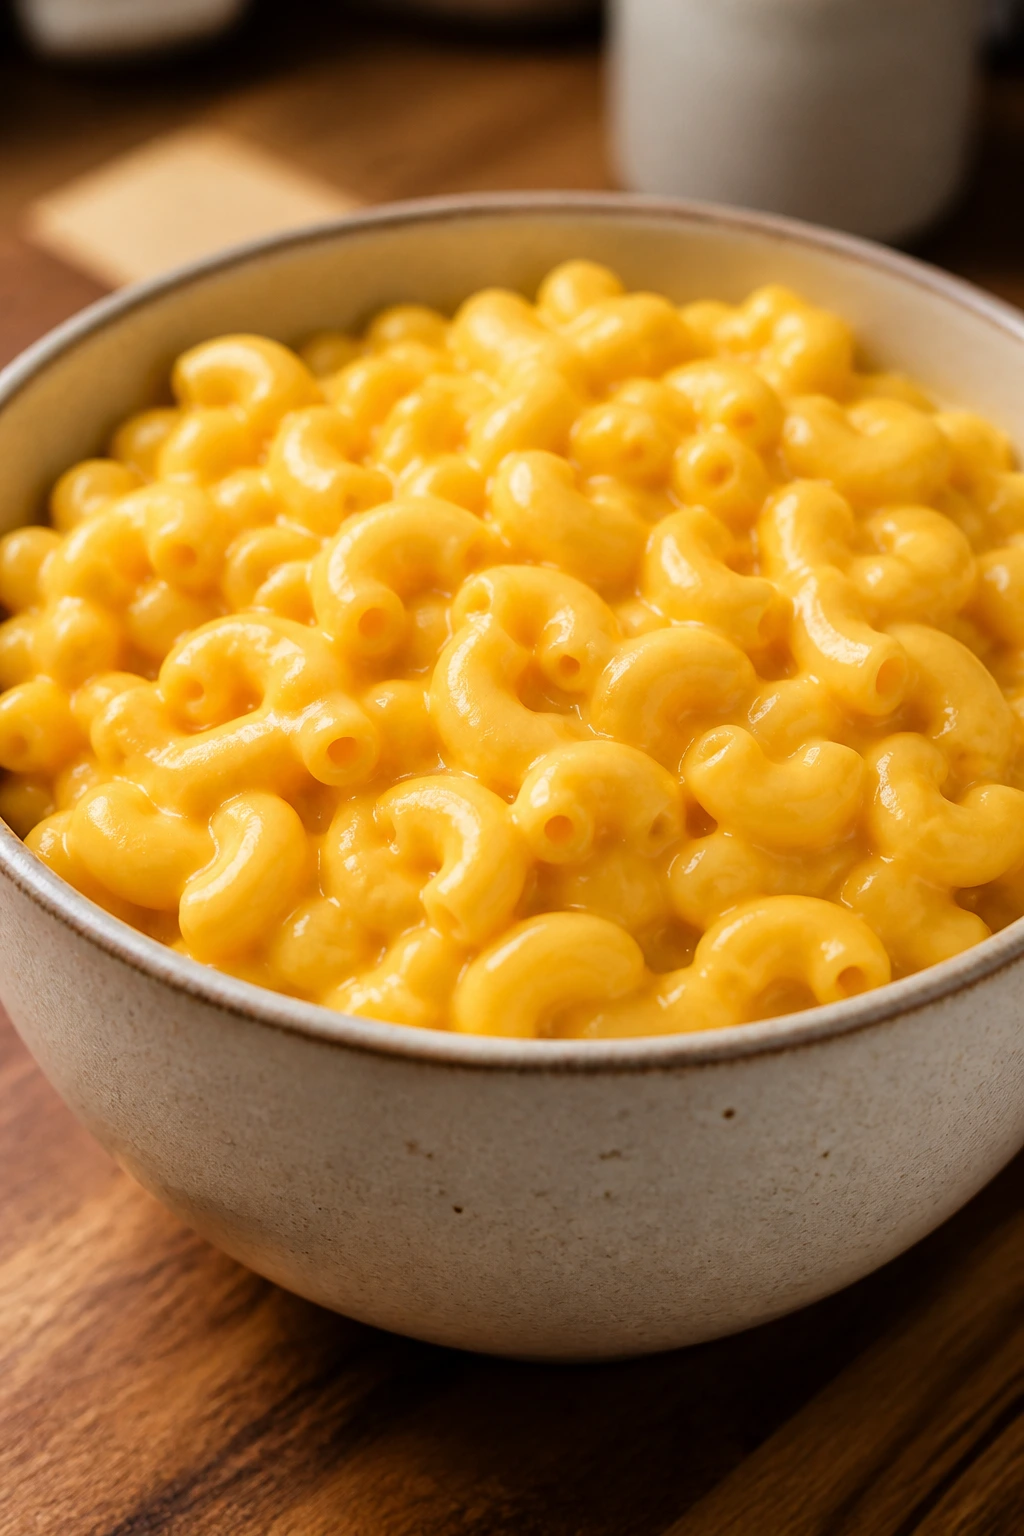
2. Creamy Stovetop Mac and Cheese
This is the bowl kids hover over before it even reaches the table. The sauce should cling to every elbow macaroni curve and leave a glossy orange trail on the spoon, not break into greasy puddles or turn gluey.
Why It Works:
The cheese sauce starts with a simple roux, which keeps it smooth and soft instead of grainy. Mild cheddar gives the familiar flavor most kids expect, and a little pasta water loosens the sauce without thinning it out too much.
Key Ingredients:
- 12 oz elbow macaroni
- 2 tablespoons butter
- 2 tablespoons flour
- 1½ cups milk
- 2 cups shredded mild cheddar
- ½ teaspoon salt
- ¼ teaspoon garlic powder
- ¼ teaspoon dry mustard
Quick Steps:
- Boil the macaroni in salted water until just tender, then drain.
- Melt butter in a saucepan over medium heat and whisk in the flour for 1 minute.
- Slowly whisk in the milk and cook until the sauce thickens enough to coat a spoon.
- Stir in cheddar, salt, garlic powder, and mustard until smooth.
- Fold in the pasta and serve right away.
Equipment for This Recipe:
- Medium saucepan
- Whisk
- Colander
- Wooden spoon
How to Serve This Dish:
Pile it into warm bowls and keep the toppings off to the side if your child is sauce-sensitive. It pairs well with apple slices, steamed peas, or plain chicken tenders.
Pro Tips for This Recipe:
- Shred your own cheese if you can; it melts cleaner.
- Pull the pasta a minute early so it finishes in the sauce.
- Add milk a splash at a time if the sauce tightens up.
Variations on This Dish:
- Buttery Breadcrumb Top: Add toasted breadcrumbs only for the kids who like crunch.
- Hidden Cauliflower: Blend ½ cup cooked cauliflower into the milk before making the sauce.
Common Mistakes to Avoid with This Dish:
- Using pre-shredded cheese only: It can make the sauce a little sandy. Mix in at least some freshly shredded cheese.
- Boiling the sauce after the cheese goes in: That can make it split. Keep the heat low once the cheese melts.
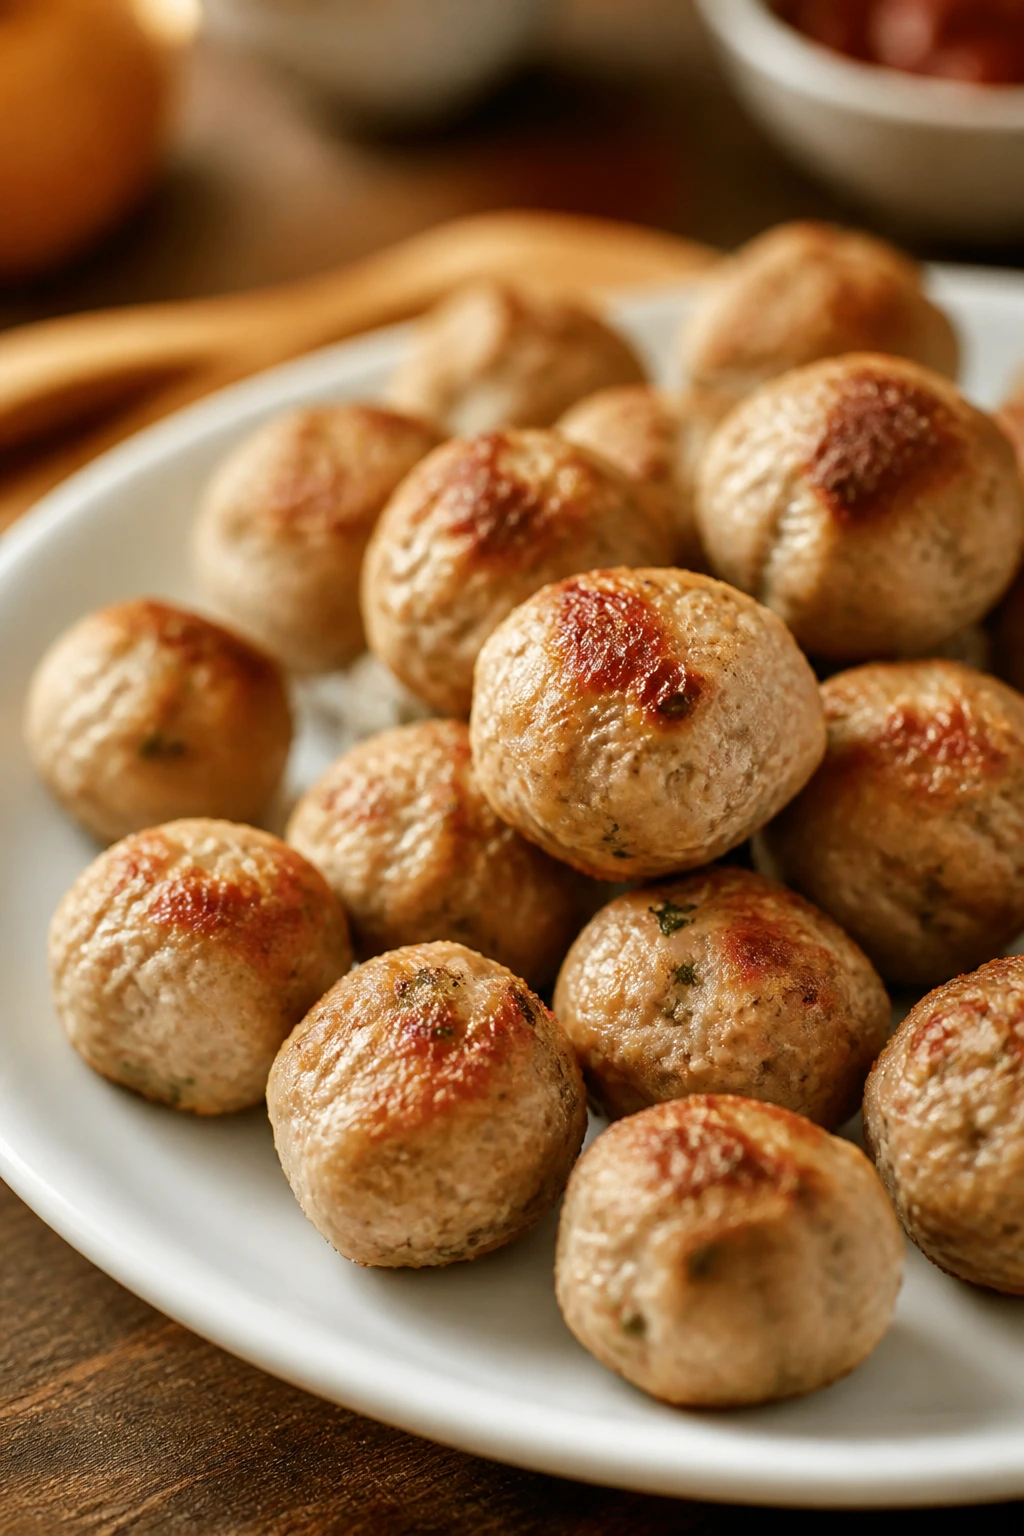
3. Mini Turkey Meatballs
Mini meatballs are easier on kids than a big, heavy portion of anything round and dense. These stay soft, mild, and small enough to eat with fingers or a fork, which is half the battle on a tired weeknight.
Why It Works:
Ground turkey takes on seasoning without tasting strong, and the small size means they cook evenly in about 12-14 minutes. A little breadcrumbs and egg keep them tender instead of rubbery.
Key Ingredients:
- 1 lb ground turkey
- ½ cup breadcrumbs
- 1 large egg
- 2 tablespoons grated Parmesan
- 1 teaspoon salt
- ½ teaspoon onion powder
- ½ teaspoon garlic powder
- 1 tablespoon olive oil
Quick Steps:
- Heat the oven to 400°F / 205°C.
- Mix turkey, breadcrumbs, egg, Parmesan, and seasonings just until combined.
- Roll into 1-inch balls and place on an oiled sheet pan.
- Bake 12-14 minutes until lightly browned and cooked through to 165°F.
- Serve with marinara or a little buttered pasta.
Equipment for This Recipe:
- Sheet pan
- Mixing bowl
- Small cookie scoop or spoon
- Thermometer
How to Serve This Dish:
Put them in a bowl with toothpicks or tuck them into buttered noodles. A little marinara on the side works better than pouring sauce over the top if your child dislikes mixed textures.
Pro Tips for This Recipe:
- Wet your hands before rolling; the mixture won’t stick as much.
- Mix lightly so the meatballs stay tender.
- Bake on parchment for easier cleanup.
Variations on This Dish:
- Cheesy Center: Hide a tiny cube of mozzarella in the middle of each meatball.
- Italian-Style: Add 1 teaspoon dried basil and serve with spaghetti.
Common Mistakes to Avoid with This Dish:
- Packing the mixture too tightly: Dense meatballs feel bouncy. Roll gently.
- Skipping the thermometer: Turkey needs to reach 165°F for safety.
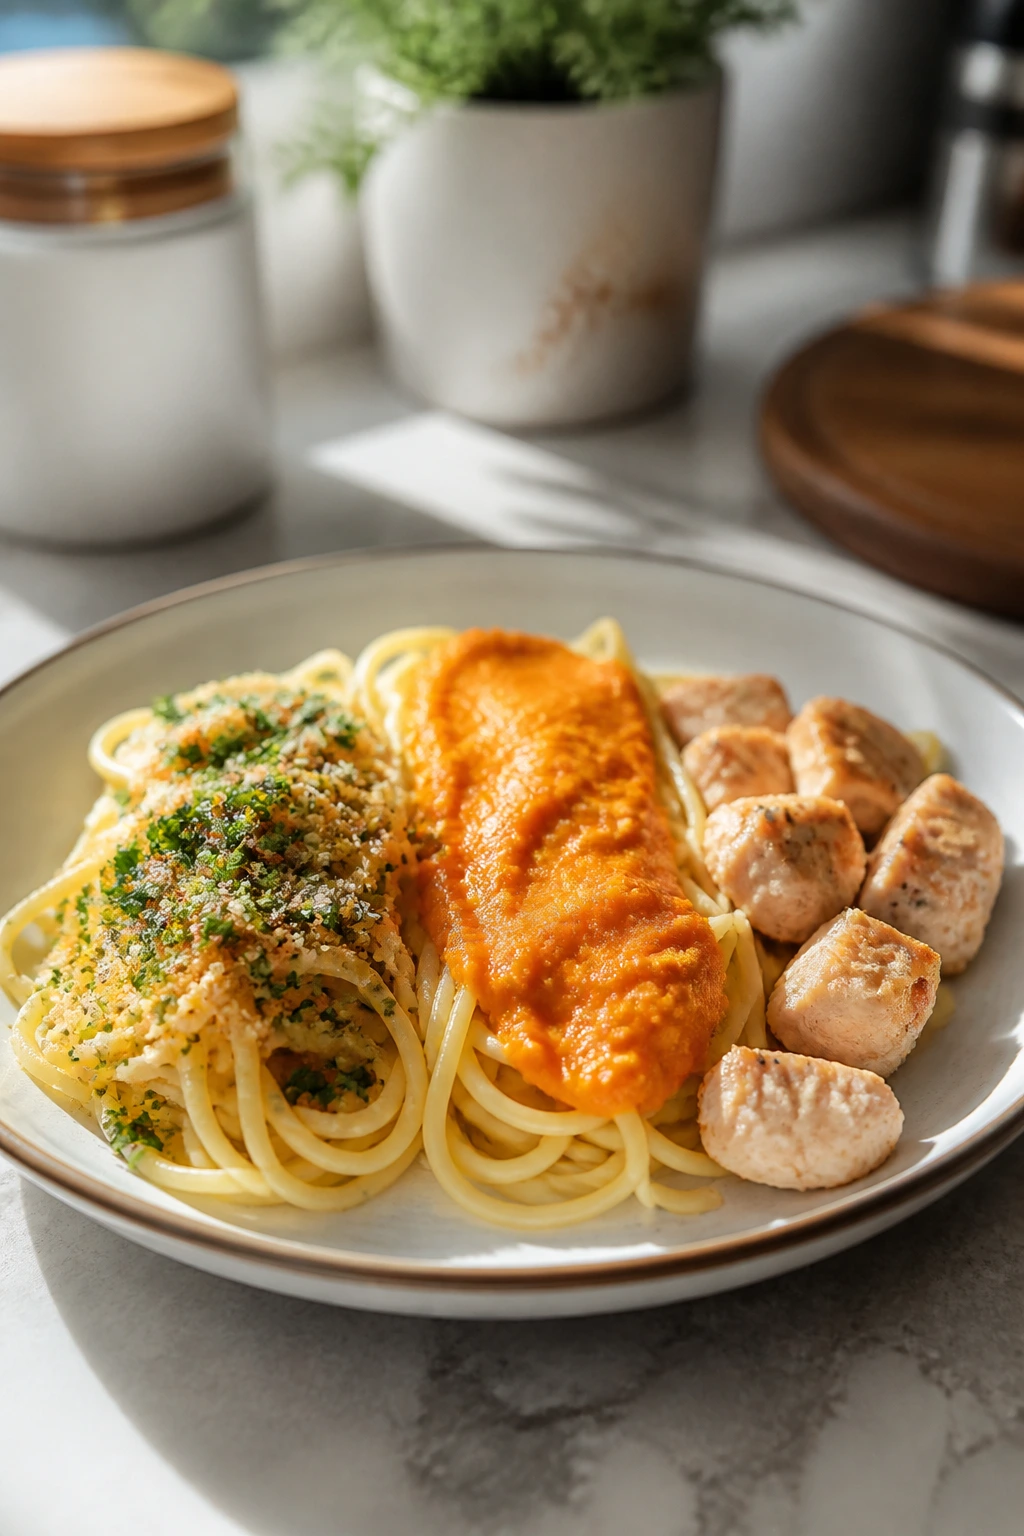
4. Buttery Garlic Noodles
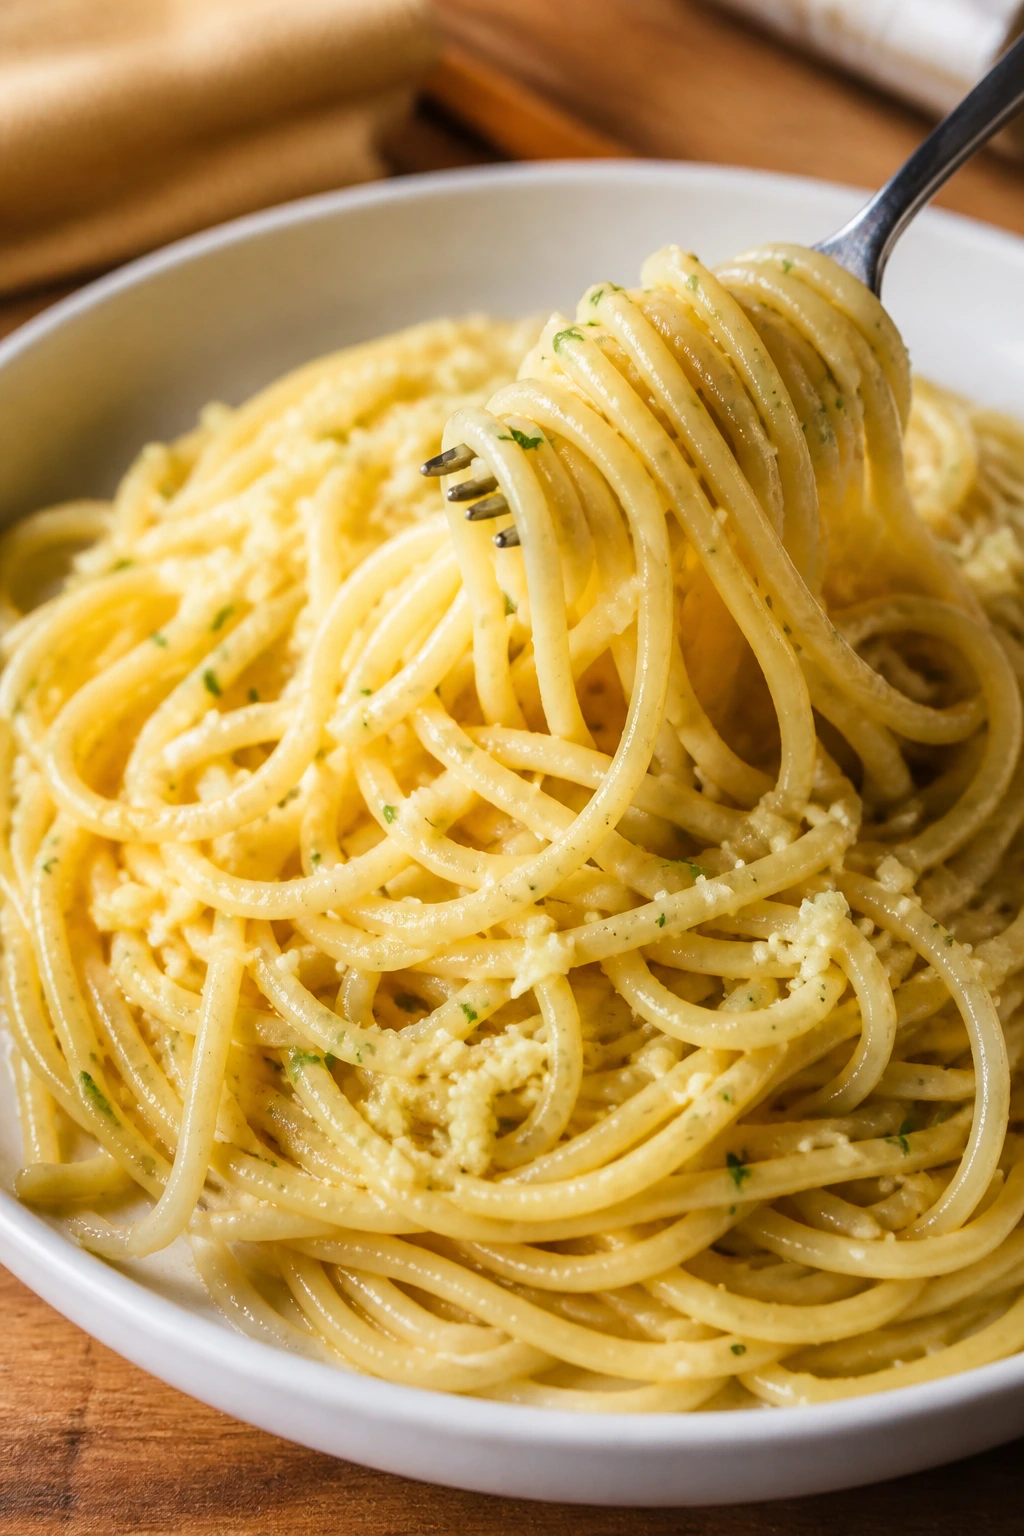
These are the noodles kids eat when they want “just noodles,” but you want something a little better than plain pasta from the pot. The butter should coat the strands with a soft shine, and the garlic should smell sweet, not sharp.
Why It Works:
Butter, garlic, and a little Parmesan make a familiar flavor without any heavy sauce. It takes about 15 minutes from start to finish, and the dish holds its shape well because there’s no cream to break or thicken.
Key Ingredients:
- 12 oz spaghetti or linguine
- 3 tablespoons butter
- 2 cloves garlic, minced
- ¼ cup grated Parmesan
- ¼ teaspoon salt
- 2 tablespoons pasta water
- 1 tablespoon chopped parsley
Quick Steps:
- Cook the pasta in salted water until al dente.
- Melt butter in a skillet over medium-low heat and cook garlic for 30 seconds.
- Toss in the drained pasta and 2 tablespoons pasta water.
- Add Parmesan and salt, tossing until glossy.
- Finish with parsley and serve warm.
Equipment for This Recipe:
- Large pot
- Large skillet
- Tongs
- Cheese grater
How to Serve This Dish:
Serve as a side next to chicken, meatballs, or a fried egg. If your child likes it plain, keep the parsley on your own plate and leave theirs as buttered noodles with cheese.
Pro Tips for This Recipe:
- Keep the garlic pale; brown garlic turns bitter fast.
- Reserve more pasta water than you think you’ll need.
- Use spaghetti for younger kids because it’s easier to twirl than long, slippery fettuccine.
Variations on This Dish:
- Lemony Finish: Add 1 teaspoon lemon juice for a brighter taste.
- Cheese-Free Version: Skip the Parmesan and add a pinch more salt.
Common Mistakes to Avoid with This Dish:
- Cooking the garlic too fast: It burns in a blink. Lower the heat.
- Letting the pasta drain dry: A little water helps the butter coat evenly.
5. Sheet-Pan Mini Pizzas
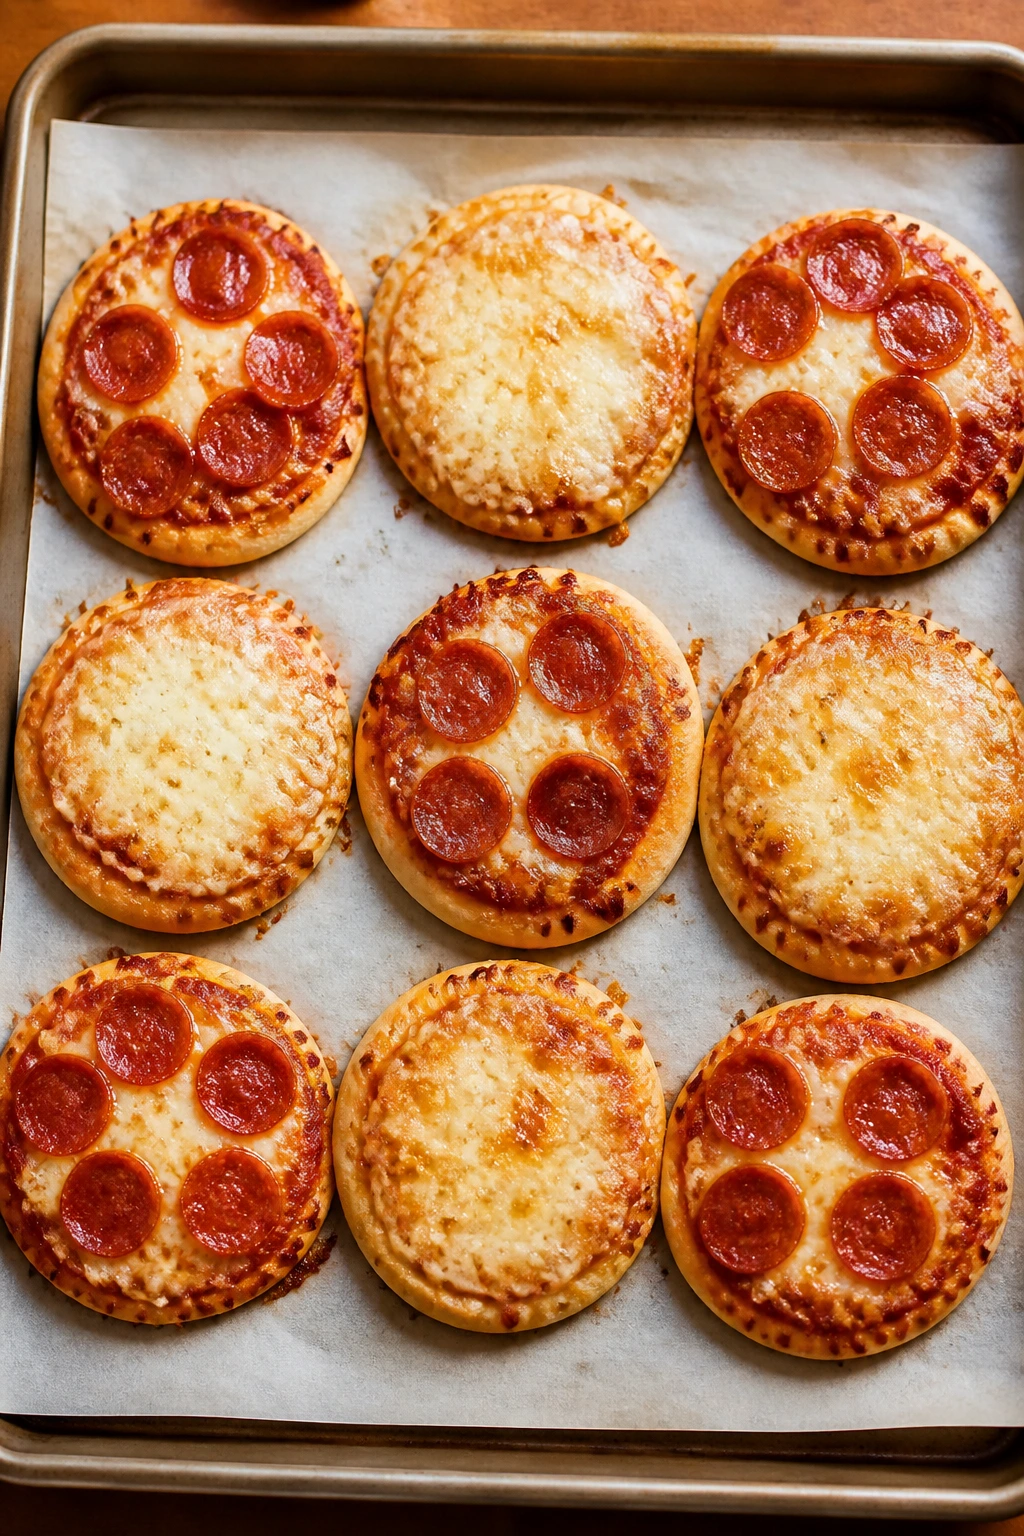
Pizza made on small rounds feels less intimidating than a big slice with “too much stuff.” These bake fast, come out with crisp bottoms, and let you keep each one plain, cheesy, or topped with exactly one olive if that’s the whole assignment.
Why It Works:
Mini pitas or English muffins create a sturdy base that won’t flop. The toppings stay shallow, so the cheese melts before the bread dries out, which is the line you want to walk here.
Key Ingredients:
- 6 mini pitas or 4 English muffins, split
- ½ cup pizza sauce
- 1½ cups shredded mozzarella
- ½ cup mini pepperoni or diced cooked sausage
- 1 tablespoon olive oil
- ½ teaspoon dried oregano
Quick Steps:
- Heat the oven to 425°F.
- Brush the bread lightly with olive oil.
- Spread on pizza sauce, then top with mozzarella and a few toppings.
- Bake 8-10 minutes until the cheese bubbles and the edges turn crisp.
- Cool 1 minute before serving.
Equipment for This Recipe:
- Sheet pan
- Pastry brush or spoon
- Small cutting board
- Oven mitts
How to Serve This Dish:
Serve two mini pizzas per child with carrot sticks or fruit on the side. Keep toppings separated if you’re dealing with a very cautious eater; plain cheese on one, one pepperoni on another.
Pro Tips for This Recipe:
- Use low-moisture mozzarella so the tops don’t go wet.
- Bake on the lower rack for a firmer bottom.
- Let them cool briefly so the cheese sets.
Variations on This Dish:
- Breakfast Pizza: Swap sauce for a thin layer of scrambled egg and cheddar.
- Margherita Mini: Use sliced mozzarella and a tiny basil leaf after baking.
Common Mistakes to Avoid with This Dish:
- Overloading toppings: Too much sauce makes the bread soggy.
- Skipping preheating: A hot oven is what crisps the bottoms quickly.
6. Fluffy Breakfast Egg Muffins

Egg muffins are sneaky in the best way. They look like little handheld breakfasts, smell like baked cheese, and can be made plain enough that a child who dislikes “stuff in eggs” still gives them a try.
Why It Works:
Baking eggs in a muffin tin gives a soft, even texture without the browned edges some kids hate in a skillet scramble. Small bits of cheese or ham can be mixed in, but the base stays smooth.
Key Ingredients:
- 8 large eggs
- ¼ cup milk
- ½ cup shredded cheddar
- ¼ cup diced ham
- ¼ teaspoon salt
- ¼ teaspoon pepper
- 1 tablespoon butter for the pan
Quick Steps:
- Heat the oven to 350°F / 175°C and butter a 12-cup muffin tin.
- Whisk eggs, milk, salt, and pepper until smooth.
- Stir in cheese and ham.
- Divide into muffin cups and bake 18-20 minutes until set.
- Cool 5 minutes before removing.
Equipment for This Recipe:
- Muffin tin
- Mixing bowl
- Whisk
- Measuring cup
How to Serve This Dish:
Serve warm with toast and fruit, or slide one into a lunchbox once it cools. For extra cautious eaters, bake half the batch with only cheese and leave the rest with ham mixed in.
Pro Tips for This Recipe:
- Grease the pan well; eggs cling hard.
- Don’t overfill the cups.
- A pinch of shredded cheese on top gives a nicer finish.
Variations on This Dish:
- Veggie-Quiet Version: Add 2 tablespoons finely chopped spinach, well squeezed dry.
- All-Cheese Batch: Skip the ham and double the cheddar.
Common Mistakes to Avoid with This Dish:
- Overbaking: The eggs turn rubbery fast. Pull them when the centers are just set.
- Adding wet vegetables: Too much moisture makes the muffins spongy.
7. Banana Oat Pancakes
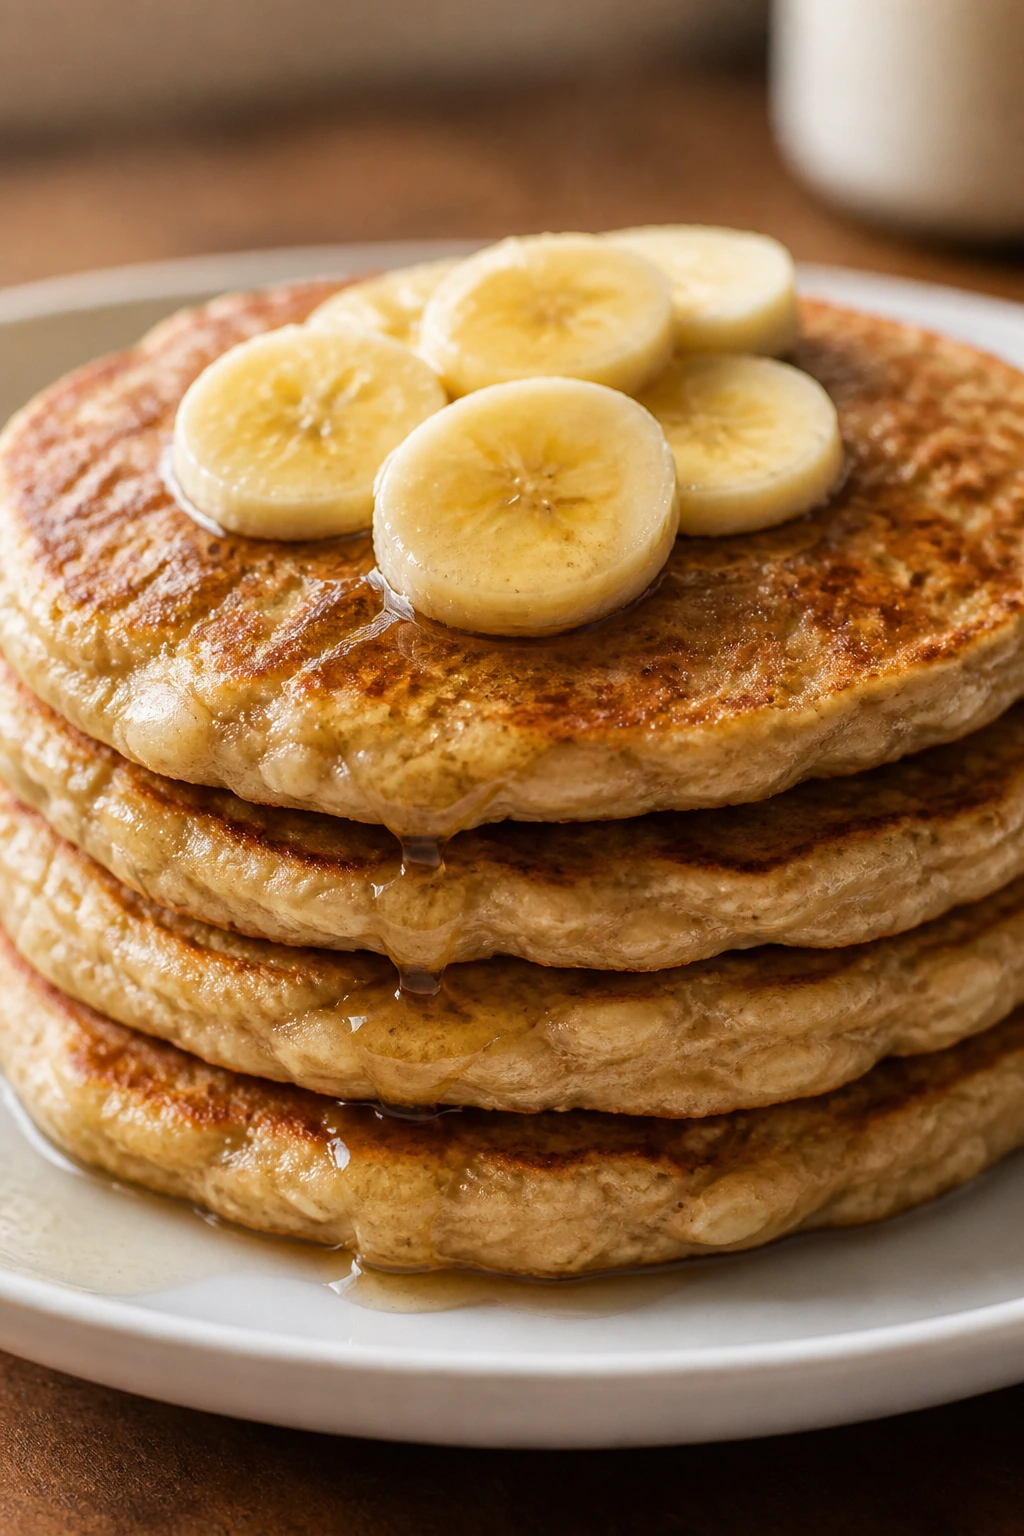
These pancakes land somewhere between breakfast and snack, which is part of their charm. They’re soft, lightly sweet, and made for small hands that want a pancake they can tear apart without syrup running everywhere.
Why It Works:
Banana does the sweetening, oats give a little body, and the batter cooks into tender cakes instead of fluffy diner-style stacks. A hot skillet and a thin layer of butter keep the edges golden.
Key Ingredients:
- 2 ripe bananas
- 2 large eggs
- 1 cup rolled oats
- ½ teaspoon cinnamon
- ½ teaspoon baking powder
- 1 tablespoon butter
- 1 teaspoon vanilla
Quick Steps:
- Blend bananas, eggs, oats, cinnamon, baking powder, and vanilla until mostly smooth.
- Heat a skillet over medium heat and melt the butter.
- Pour 2 tablespoons batter per pancake.
- Cook 2-3 minutes per side until the edges look set and the centers spring back.
- Serve warm with fruit or maple syrup.
Equipment for This Recipe:
- Blender or food processor
- Nonstick skillet
- Spatula
- Measuring cups
How to Serve This Dish:
Stack them in twos and cut into strips for younger kids. They’re good plain, but a little yogurt and strawberries on the side makes the plate look calmer and more finished.
Pro Tips for This Recipe:
- Use bananas with brown spots for the best flavor.
- Keep the pancakes small so they flip cleanly.
- If the batter gets too thick, add 1 tablespoon milk.
Variations on This Dish:
- Blueberry Dot Version: Stir in ¼ cup blueberries after blending.
- Peanut Butter Swirl: Add 1 tablespoon peanut butter to the batter.
Common Mistakes to Avoid with This Dish:
- Cooking on high heat: The outsides brown before the centers set.
- Making them too large: Bigger pancakes fall apart more easily.
8. Golden Grilled Cheese Sandwiches
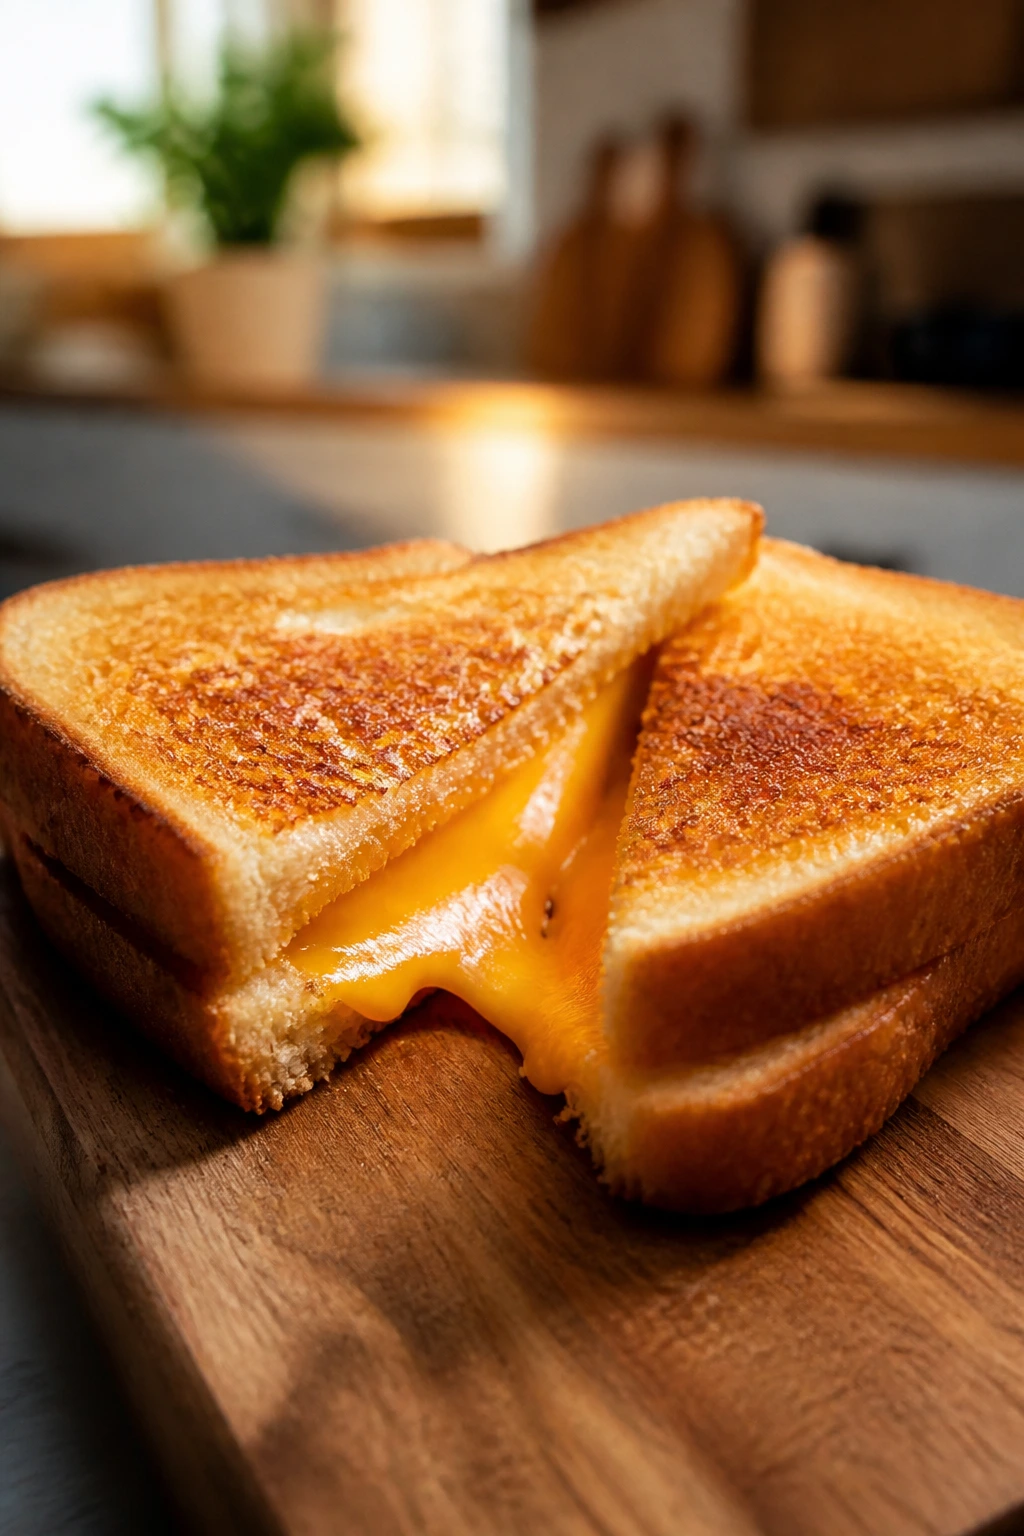
A grilled cheese done right is all about the crust. You want buttered bread with a deep golden finish and cheese that stretches when you pull the halves apart, but not so much filling that it leaks into the pan and burns.
Why It Works:
Mild cheese melts fast, and the sandwich format is familiar enough to pass the first look test. A low-and-slow skillet gives you control over browning before the bread gets too dark.
Key Ingredients:
- 8 slices sandwich bread
- 4 slices cheddar or American cheese
- 2 tablespoons butter
- 1 tablespoon mayonnaise, optional
- Tomato soup for serving, optional
Quick Steps:
- Butter one side of each bread slice, or spread a thin layer of mayonnaise.
- Place cheese between two slices, buttered side out.
- Cook in a skillet over medium-low heat 3-4 minutes per side.
- Press lightly with a spatula until the bread is golden and the cheese melts.
- Rest 1 minute before cutting.
Equipment for This Recipe:
- Skillet
- Spatula
- Butter knife
- Cutting board
How to Serve This Dish:
Cut diagonally and serve with tomato soup for dunking or apple slices for crunch. If your child dislikes mixed textures, keep the soup in a separate cup and let them decide.
Pro Tips for This Recipe:
- Medium-low heat keeps the bread from burning.
- American cheese melts the smoothest.
- Use a lid for 30 seconds if the cheese needs help melting.
Variations on This Dish:
- Ham and Cheese: Add one thin slice of deli ham.
- Three-Cheese Melt: Mix cheddar, mozzarella, and a slice of American.
Common Mistakes to Avoid with This Dish:
- Using high heat: The outside turns dark before the cheese softens.
- Stacking too much cheese: It leaks and scorches in the pan.
9. Sloppy Joe Sliders
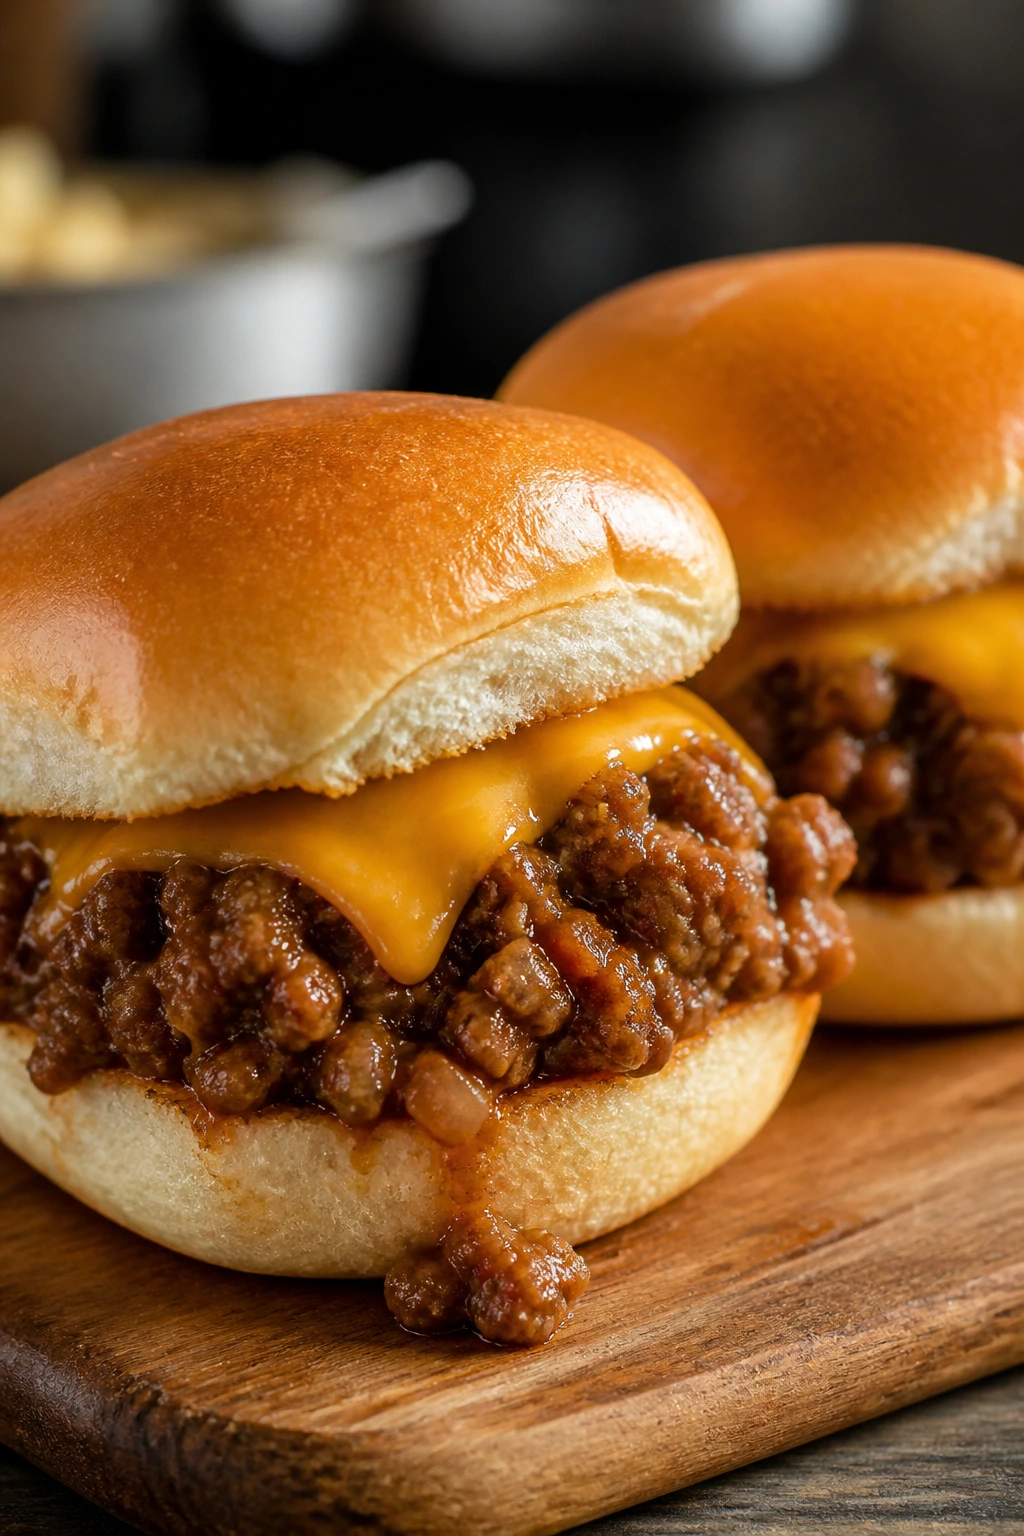
These are messy in the good way, but on a smaller scale. A soft bun, a thick meat sauce, and a little melted cheese make the whole thing feel like a mini event instead of a fork-and-knife dinner.
Why It Works:
Sloppy Joe filling has a sweet-savory flavor kids recognize quickly, and sliders reduce the intimidation factor. The soft buns stay tender, even under a warm filling.
Key Ingredients:
- 1 lb ground beef
- ½ cup onion, very finely diced
- ¾ cup ketchup
- 1 tablespoon brown sugar
- 1 tablespoon Worcestershire sauce
- 8 slider buns
- 1 cup shredded cheddar
Quick Steps:
- Brown beef and onion in a skillet over medium heat.
- Drain excess fat, then stir in ketchup, sugar, and Worcestershire.
- Simmer 5-7 minutes until thick and spoonable.
- Split slider buns, spoon on filling, and top with cheddar.
- Warm in a 350°F oven for 3-4 minutes.
Equipment for This Recipe:
- Large skillet
- Spoon
- Sheet pan
- Measuring cups
How to Serve This Dish:
Serve two sliders per child with cucumber sticks or corn on the side. Keep napkins nearby. The filling should be thick enough that it stays put, but a little dribble is part of the deal.
Pro Tips for This Recipe:
- Dice the onion very small so it disappears into the sauce.
- Let the filling simmer until it mounds on a spoon.
- Toast the buns lightly if you want less sogginess.
Variations on This Dish:
- Turkey Sloppy Joes: Use ground turkey and add 1 teaspoon oil.
- BBQ Sliders: Swap half the ketchup for barbecue sauce.
Common Mistakes to Avoid with This Dish:
- Leaving the sauce loose: Thin filling soaks the buns too fast.
- Serving too soon: A minute in the oven helps the cheese settle.
10. Mild Taco Rice Bowls
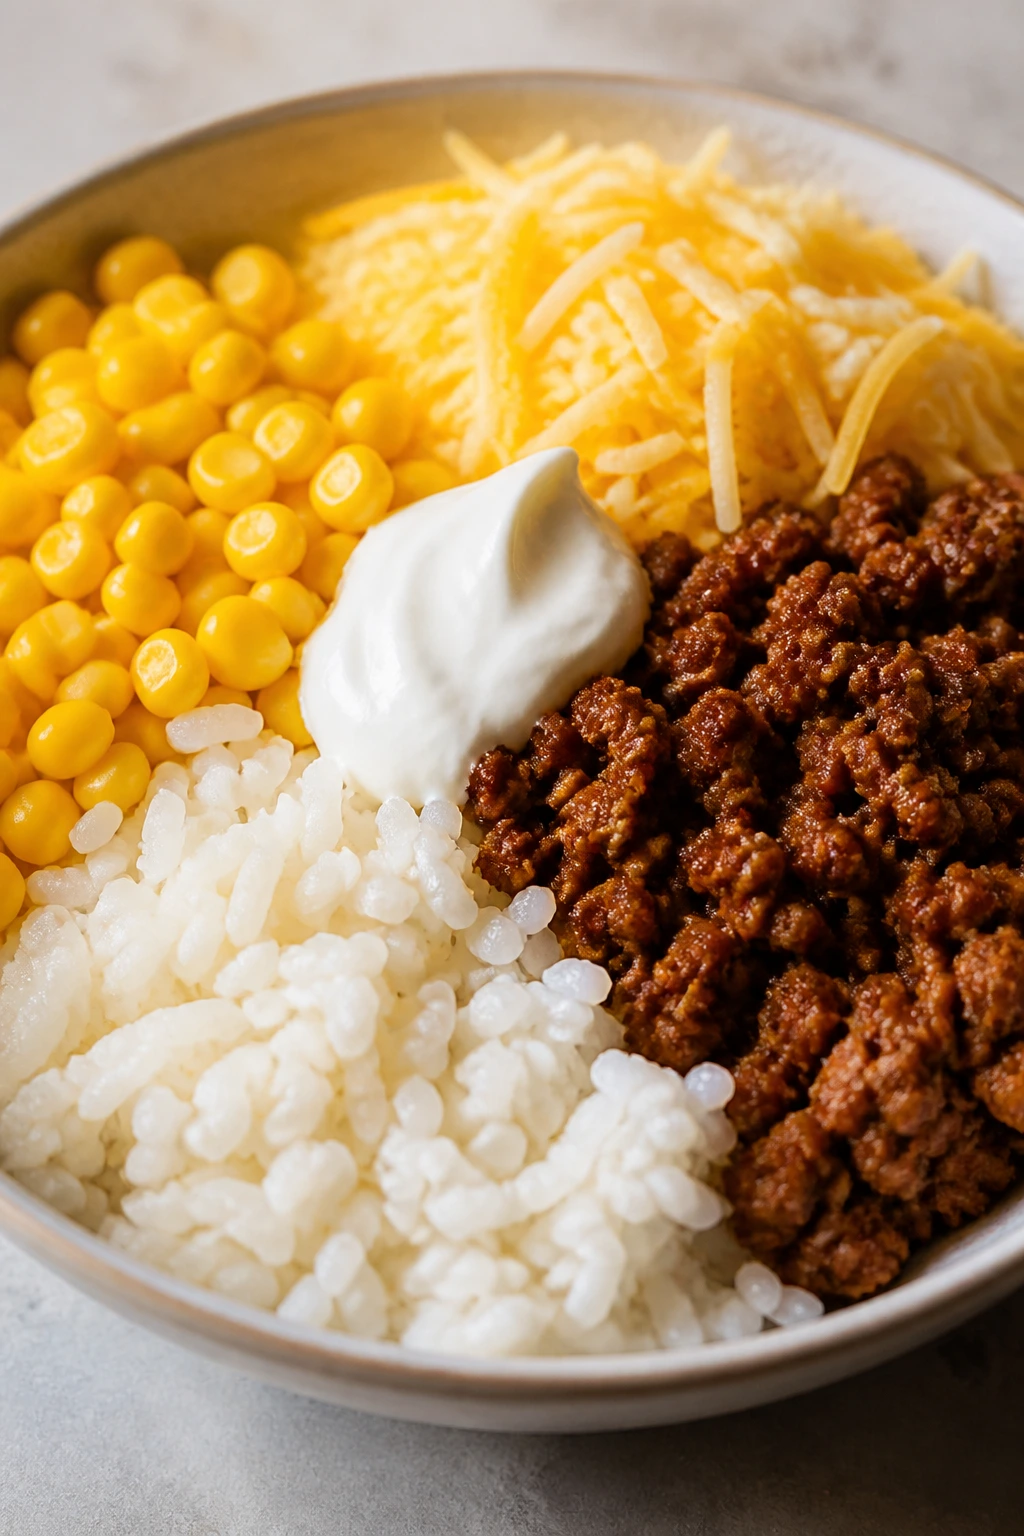
A taco bowl can be a picky eater’s best friend because nothing is forced together. Rice goes here, meat goes there, cheese gets its own corner, and salsa can stay off the plate entirely if that’s the deal.
Why It Works:
Separate components let kids choose what touches what. A mild seasoning blend keeps the beef from getting too sharp, and warm rice softens the whole bowl without changing the flavor much.
Key Ingredients:
- 1 lb ground beef or turkey
- 1 tablespoon taco seasoning
- 2 cups cooked rice
- 1 cup shredded cheddar
- 1 cup corn
- ½ cup mild salsa, optional
- 1 tablespoon olive oil
Quick Steps:
- Brown the meat in olive oil over medium heat.
- Stir in taco seasoning and 2 tablespoons water.
- Simmer 2 minutes until coated.
- Spoon rice into bowls, then add meat, corn, and cheese.
- Serve with salsa on the side.
Equipment for This Recipe:
- Skillet
- Rice pot or rice cooker
- Serving bowls
- Wooden spoon
How to Serve This Dish:
Set the toppings in little piles and let kids build their own bowls. A scoop of avocado or sour cream works well if they want a creamy bite without much spice.
Pro Tips for This Recipe:
- Use mild seasoning, not hot.
- Warm the rice so the cheese melts a little.
- Keep wet toppings on the side.
Variations on This Dish:
- Bean Bowl: Swap half the meat for black beans.
- Nacho Bowl: Add crushed tortilla chips right before serving.
Common Mistakes to Avoid with This Dish:
- Overseasoning the meat: Too much cumin or chili can make kids back off fast.
- Mixing everything too early: Separate components help picky eaters choose.
11. Oven-Baked Fish Sticks
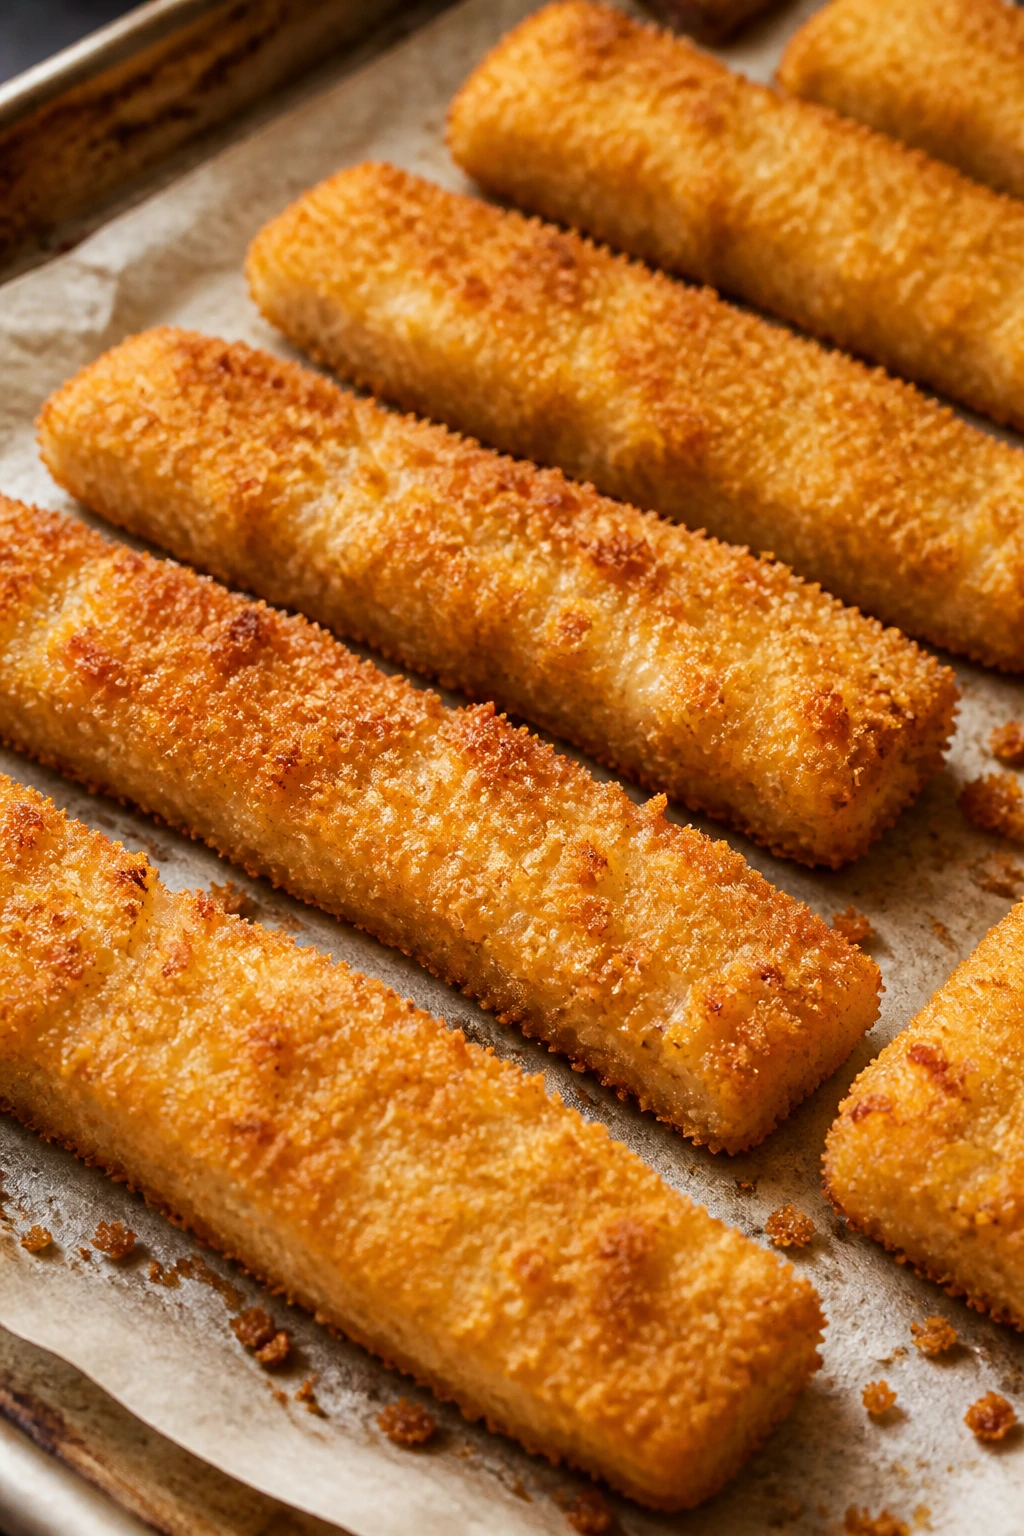
Fish sticks need a crisp shell and a mild center, not a fishy smell drifting through the kitchen. Baking them at high heat gives a better crunch than a limp freezer-box version, and the strips are easier for kids to handle than a whole fillet.
Why It Works:
Mild white fish like cod or pollock stays tender, and the breadcrumb coating seals in moisture. A quick oven bake at 425°F gets the edges browned before the fish dries out.
Key Ingredients:
- 1½ lbs cod or pollock fillets
- 1 cup flour
- 2 eggs
- 1½ cups panko breadcrumbs
- ½ teaspoon salt
- ½ teaspoon paprika
- 2 tablespoons oil
Quick Steps:
- Cut fish into stick shapes.
- Set up flour, beaten eggs, and panko in separate bowls.
- Coat each piece in flour, egg, then panko.
- Bake on an oiled sheet pan at 425°F for 12-15 minutes.
- Serve with tartar sauce or ketchup.
Equipment for This Recipe:
- Sheet pan
- Parchment paper
- Three shallow bowls
- Sharp knife
How to Serve This Dish:
Pair with oven fries and a lemon wedge on the side for adults. For kids, ketchup or a mild mayo dip usually gets more action than tartar sauce.
Pro Tips for This Recipe:
- Pat the fish dry first so the coating sticks.
- Use panko for a lighter crunch.
- Do not overbake; fish turns chalky fast.
Variations on This Dish:
- Parmesan Crust: Mix ¼ cup Parmesan into the panko.
- Gluten-Free: Use gluten-free flour and crumbs.
Common Mistakes to Avoid with This Dish:
- Starting with wet fish: The breading slips off.
- Cooking until it flakes apart too much: Pull it as soon as it reaches 145°F.
12. Chicken Quesadilla Wedges
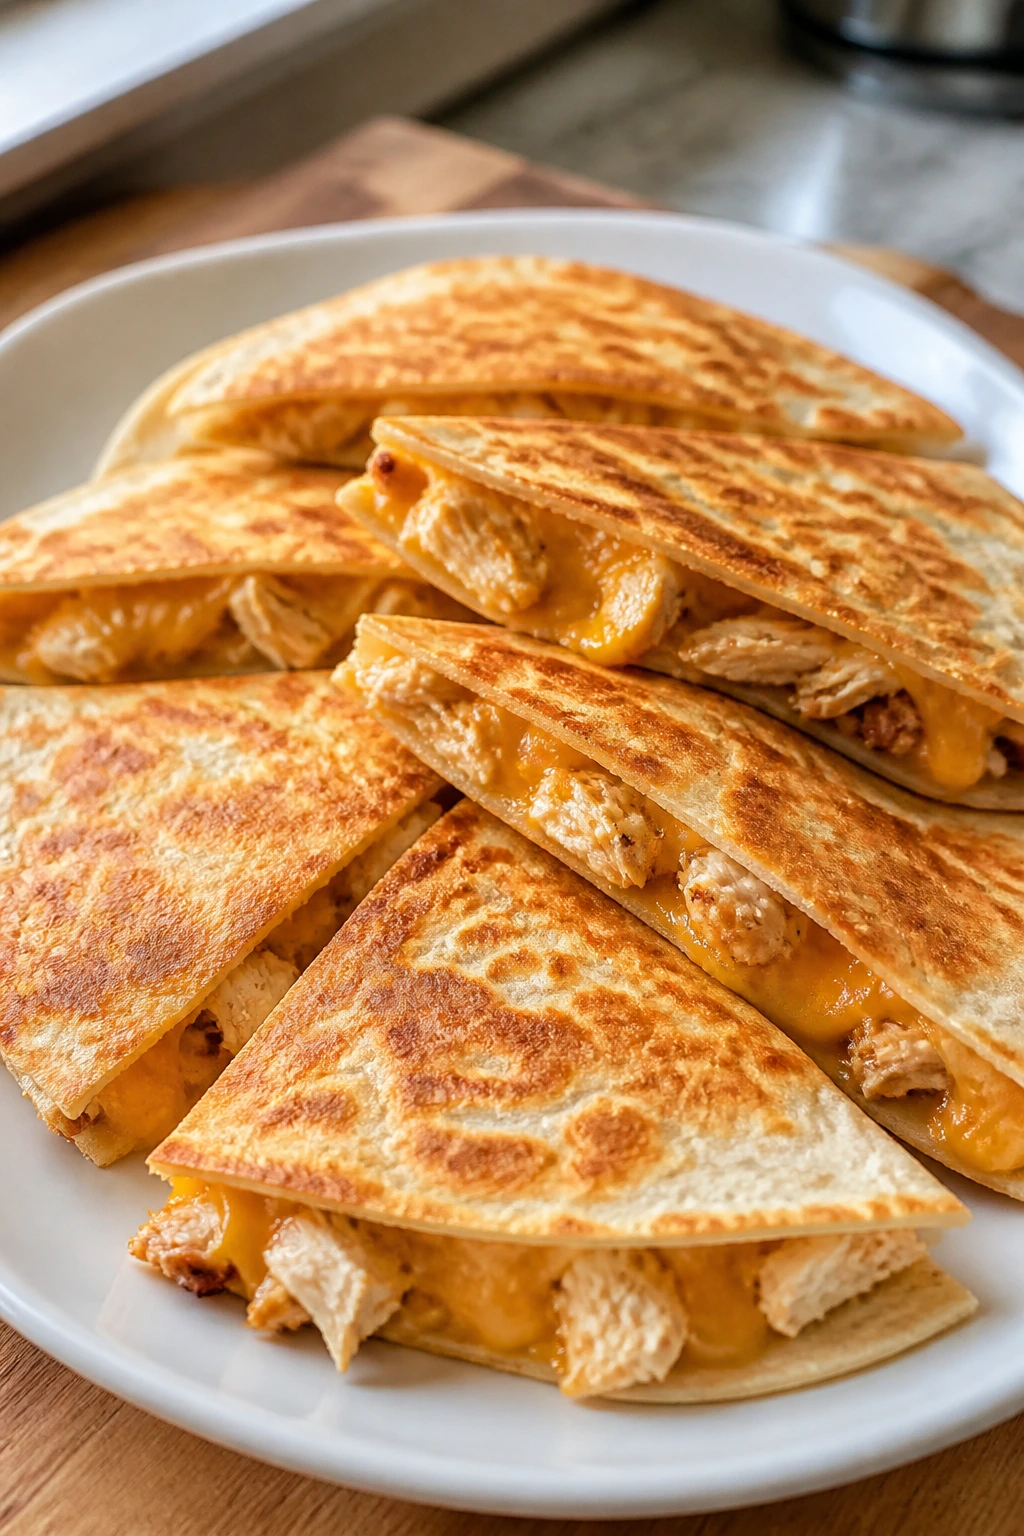
Quesadillas are one of those rare foods that can be plain and still feel complete. The tortilla gets toasted, the cheese melts into a soft sheet, and the chicken disappears into the middle without turning the whole thing into a mixed mess.
Why It Works:
The format is compact and familiar, and the filling can stay as simple as chicken and cheese. Once the tortilla browns, it holds together in wedges that are easy for small hands.
Key Ingredients:
- 2 cups cooked shredded chicken
- 2 cups shredded cheddar or Monterey Jack
- 4 flour tortillas
- 1 tablespoon butter
- ¼ teaspoon salt
- Salsa for dipping, optional
Quick Steps:
- Heat a skillet over medium heat and melt half the butter.
- Lay in one tortilla, sprinkle on cheese and chicken, then top with another tortilla.
- Cook 2-3 minutes per side until golden and the cheese melts.
- Slice into wedges and repeat.
- Serve warm.
Equipment for This Recipe:
- Skillet
- Spatula
- Sharp knife or pizza cutter
- Plate
How to Serve This Dish:
Cut into triangles and serve with sour cream or salsa on the side. Keep the filling modest; a thick, overstuffed quesadilla tends to spill before it gets to the plate.
Pro Tips for This Recipe:
- Use medium heat so the cheese melts before the tortilla burns.
- Shred the chicken fine for easier bites.
- A pizza cutter gives neat wedges fast.
Variations on This Dish:
- Bean and Cheese: Replace some chicken with mashed black beans.
- Pizza Quesadilla: Use mozzarella and a spoonful of pizza sauce.
Common Mistakes to Avoid with This Dish:
- Too much filling: The tortilla tears and the cheese leaks out.
- Cutting immediately: Let it rest 30 seconds so the cheese sets.
13. Hidden-Veggie Spaghetti Sauce
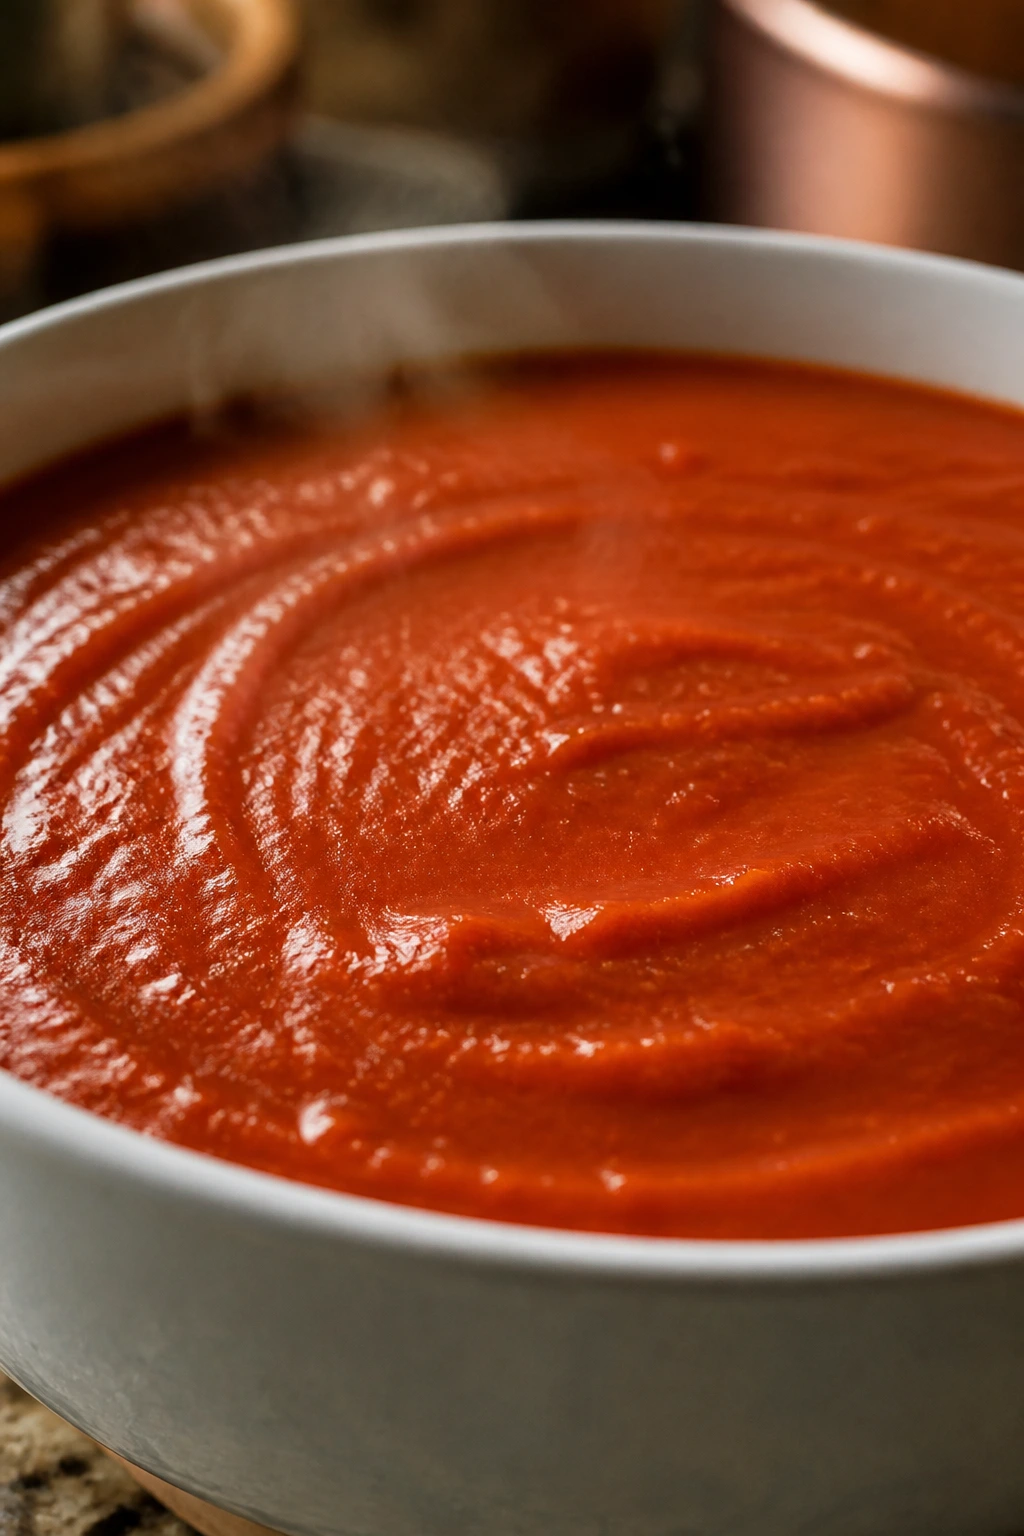
This is the sauce for children who inspect every speck of onion like they’re on a science mission. The vegetables melt down completely, leaving a smooth tomato sauce with a little sweetness and no visible chunks unless you want them.
Why It Works:
Carrot, zucchini, and onion cook long enough to soften into the tomato base. Once blended, they add body and mild sweetness without changing the familiar red-sauce flavor kids expect.
Key Ingredients:
- 1 tablespoon olive oil
- 1 small onion, chopped
- 1 carrot, chopped
- 1 small zucchini, chopped
- 2 cloves garlic
- 1 (24 oz) jar marinara or crushed tomatoes
- ½ teaspoon salt
- 1 teaspoon Italian seasoning
Quick Steps:
- Cook onion, carrot, and zucchini in oil over medium heat until soft, about 8 minutes.
- Add garlic and cook 30 seconds.
- Stir in tomatoes, salt, and seasoning.
- Simmer 15 minutes, then blend until smooth.
- Serve over spaghetti.
Equipment for This Recipe:
- Saucepan
- Blender or immersion blender
- Cutting board
- Knife
How to Serve This Dish:
Serve over plain spaghetti with Parmesan on the side. If the hidden vegetables make you nervous for a child, start with a small spoonful mixed into regular marinara so the change is gradual.
Pro Tips for This Recipe:
- Chop the vegetables small so they soften faster.
- Blend carefully; hot sauce expands.
- A pinch of sugar can smooth a sharp tomato edge.
Variations on This Dish:
- Meat Sauce: Brown ½ lb ground beef before the vegetables.
- Creamy Version: Stir in 2 tablespoons cream at the end.
Common Mistakes to Avoid with This Dish:
- Rushing the simmer: Raw carrot flavor will show through.
- Leaving the sauce chunky: The whole point here is a smooth finish.
14. Cheesy Broccoli Rice Casserole
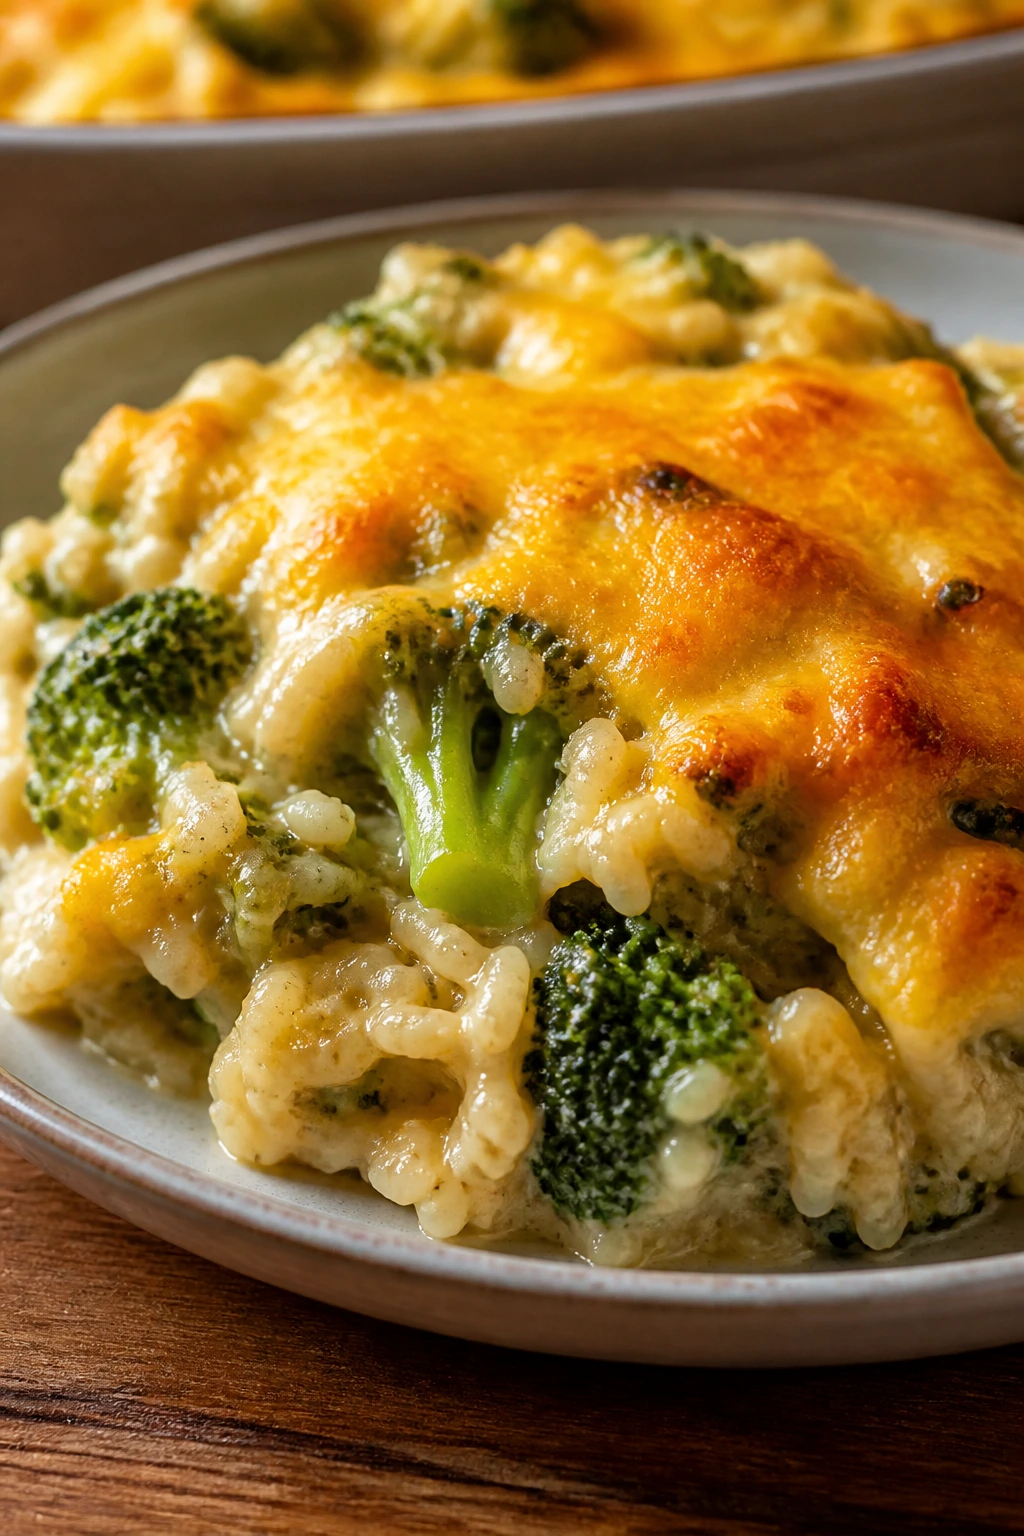
Broccoli is easier for many kids when it’s tucked into a creamy rice casserole and capped with melted cheese. The broccoli florets should be small enough that they blend into the spoonful instead of standing up like little green flags.
Why It Works:
Rice softens the broccoli’s texture, cheddar brings a familiar flavor, and the casserole bakes into one mild, scoopable dish. The top gets a thin crust while the middle stays soft.
Key Ingredients:
- 3 cups cooked rice
- 2 cups broccoli florets, chopped small
- 1 cup shredded cheddar
- 1 cup cream of chicken or mushroom soup
- ½ cup milk
- ½ teaspoon salt
- ¼ teaspoon garlic powder
Quick Steps:
- Heat the oven to 375°F / 190°C.
- Stir rice, broccoli, soup, milk, seasonings, and half the cheese together.
- Spread into a greased baking dish.
- Top with remaining cheese and bake 25 minutes until hot and bubbly.
- Rest 5 minutes before scooping.
Equipment for This Recipe:
- 9-inch baking dish
- Mixing bowl
- Spoon
- Measuring cups
How to Serve This Dish:
Scoop alongside plain chicken or serve as the main dish with sliced apples. If your kid dislikes “green things,” chop the broccoli tiny and mix it deep into the rice so the texture stays soft.
Pro Tips for This Recipe:
- Use pre-steamed broccoli if you want a softer bite.
- Chop the florets small so they disappear more easily.
- Add a little extra milk if the casserole feels stiff before baking.
Variations on This Dish:
- Ham Version: Stir in 1 cup diced ham.
- Crunch Top: Add buttered breadcrumbs during the last 10 minutes.
Common Mistakes to Avoid with This Dish:
- Using big broccoli pieces: They become the first thing kids pick out.
- Baking too long: The rice dries out fast if left uncovered too long.
15. Mini Breakfast Sausage Biscuits
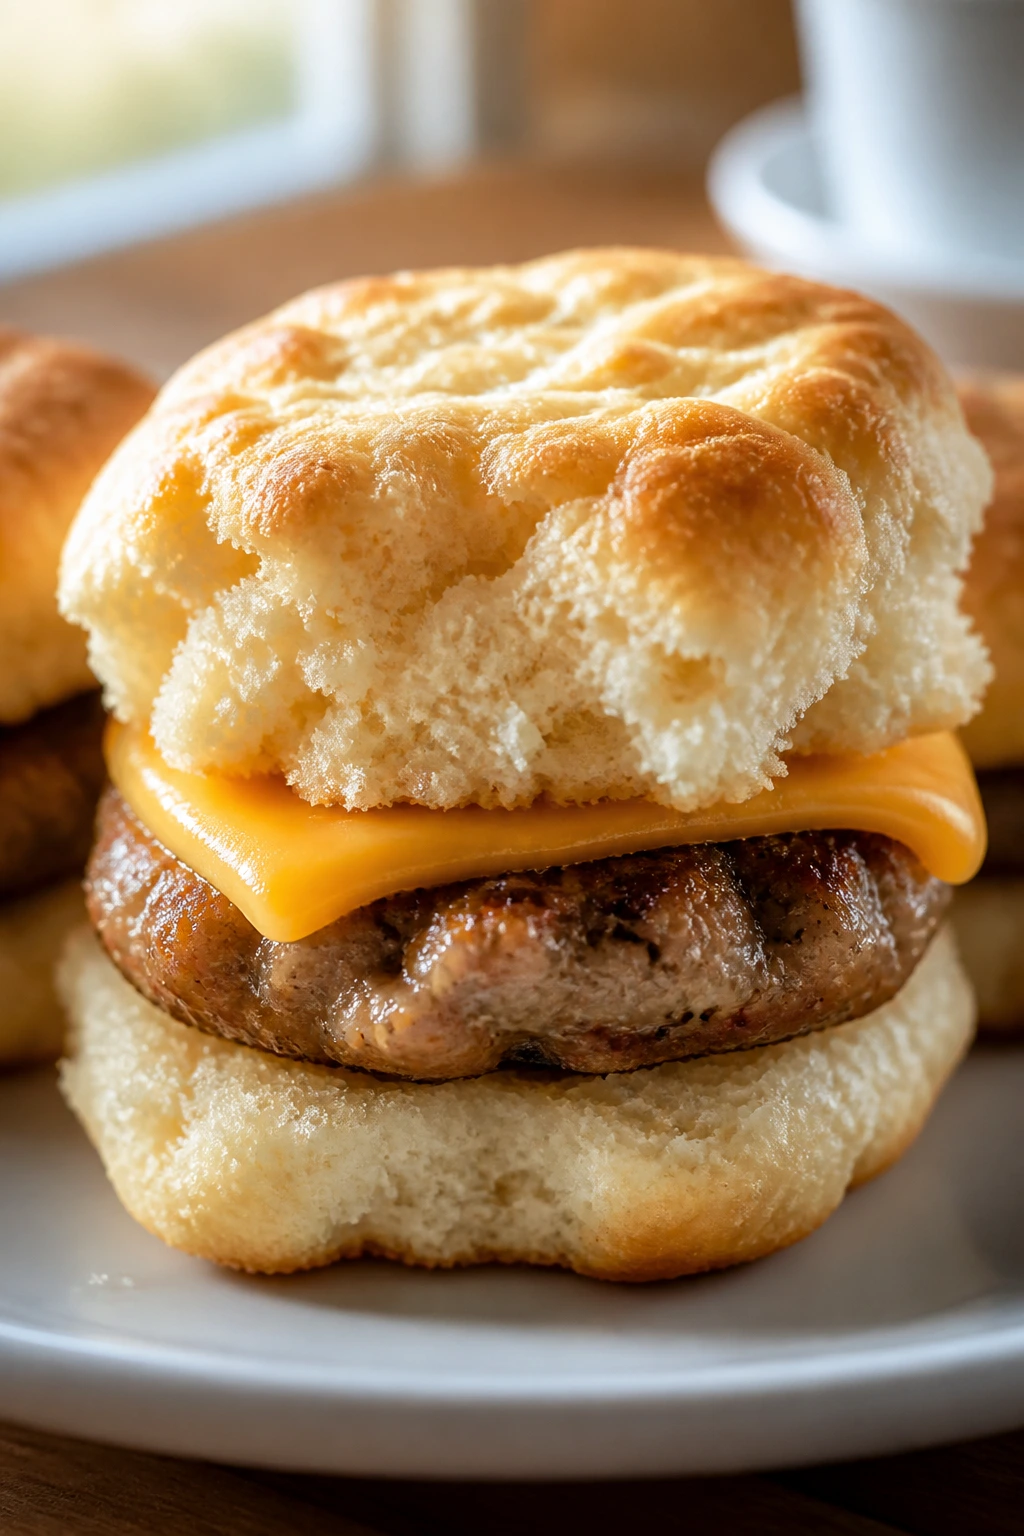
Soft biscuits split around a tiny sausage patty are one of those breakfasts kids recognize from a mile away. The key is keeping the biscuit tender and the sausage mild, not heavily spiced or greasy.
Why It Works:
The size makes them feel manageable, and the warm biscuit holds the sausage in place without falling apart. They also reheat well, which makes them useful for school mornings.
Key Ingredients:
- 1 can refrigerated biscuit dough
- 8 small breakfast sausage patties
- 4 slices American cheese
- 1 tablespoon butter, melted
Quick Steps:
- Bake the sausage patties at 400°F until cooked through, about 12-14 minutes.
- Bake the biscuits according to package directions.
- Split biscuits and tuck in sausage and half a slice of cheese.
- Brush tops with melted butter.
- Serve warm.
Equipment for This Recipe:
- Sheet pan
- Parchment paper
- Knife
- Pastry brush
How to Serve This Dish:
Serve with fruit and scrambled eggs if you want a fuller plate. These are easy to pack in foil for after-school snacks too, though they’re best when the biscuit is still warm.
Pro Tips for This Recipe:
- Use mild sausage, not hot.
- Let the sausage rest a minute before assembling.
- Warm the cheese on the hot sausage so it melts a little.
Variations on This Dish:
- Honey Biscuit: Add a tiny drizzle of honey inside.
- Egg Sandwich: Add a thin egg round for breakfast heft.
Common Mistakes to Avoid with This Dish:
- Serving the biscuits dry and cold: Warmth makes the texture softer and more welcoming.
- Choosing spicy sausage: It can scare off cautious eaters fast.
16. Ham and Cheese Pinwheels

Pinwheels look playful, and that matters. When food is rolled into a spiral and baked until the edges are lightly browned, it feels like a snack instead of a lecture about lunch.
Why It Works:
The crescent dough bakes up soft on the inside and crisp at the edges. Ham and cheese are already a familiar pairing, and the spiral shape makes the filling visible without making it look fussy.
Key Ingredients:
- 1 can crescent roll dough
- 6 slices deli ham
- 6 slices cheese
- 1 teaspoon Dijon mustard, optional
- 1 tablespoon melted butter
Quick Steps:
- Heat oven to 375°F.
- Unroll the dough and lay ham and cheese over the surface.
- Roll into a log, slice into 1-inch spirals.
- Place cut-side up on a sheet pan and brush with butter.
- Bake 12-14 minutes until golden.
Equipment for This Recipe:
- Sheet pan
- Sharp knife
- Pastry brush
- Parchment paper
How to Serve This Dish:
Serve warm with grapes or apple slices. They’re also good in lunchboxes once cooled, because the filling stays neatly tucked inside instead of spilling out.
Pro Tips for This Recipe:
- Roll the dough tightly so the spirals hold.
- Chill the log for 10 minutes if it feels soft.
- Slice with a serrated knife for cleaner rounds.
Variations on This Dish:
- Turkey and Swiss: Swap the ham and cheese for deli turkey and Swiss.
- Pizza Pinwheels: Use mozzarella, a thin layer of sauce, and pepperoni.
Common Mistakes to Avoid with This Dish:
- Overfilling: The spirals burst open in the oven.
- Cutting while too warm: The rolls squash if you rush them.
17. Applesauce Oat Muffins
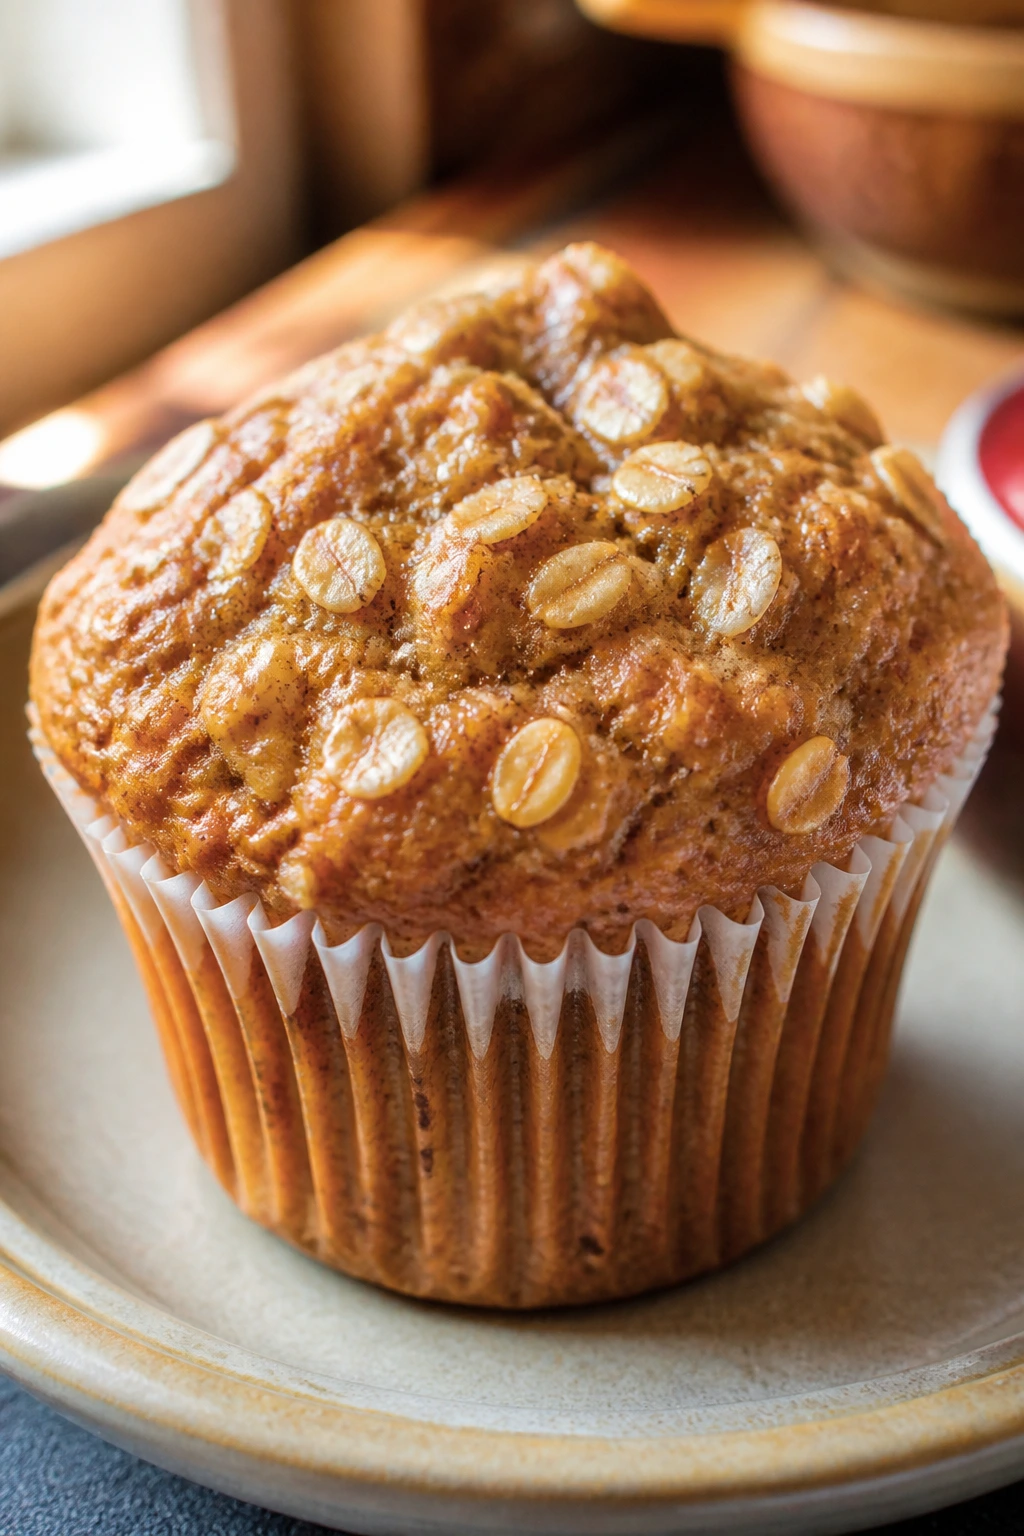
These muffins smell like cinnamon and warm apples when they come out of the oven, which is already halfway to a yes from many kids. They’re soft, not crumbly, and sweet enough to work for breakfast or a snack without frosting or fanfare.
Why It Works:
Applesauce keeps the crumb moist, and oats give the muffins a little more body. A small amount of cinnamon makes the kitchen smell like you did more work than you actually did.
Key Ingredients:
- 1½ cups flour
- 1 cup rolled oats
- 1 cup applesauce
- ½ cup milk
- 1 egg
- ⅓ cup sugar
- 1 teaspoon cinnamon
- 1 teaspoon baking powder
Quick Steps:
- Heat oven to 375°F and line a muffin tin.
- Stir dry ingredients together in one bowl.
- Whisk applesauce, milk, egg, and sugar in another bowl.
- Fold wet into dry until just combined.
- Bake 16-18 minutes until a toothpick comes out clean.
Equipment for This Recipe:
- Muffin tin
- Mixing bowls
- Whisk
- Measuring cups
How to Serve This Dish:
Serve warm with butter or plain yogurt. They’re mild enough for breakfast, but they also work in a lunchbox with a few cheese cubes and berries.
Pro Tips for This Recipe:
- Do not overmix; the muffins get tough.
- Use unsweetened applesauce if you want less sugar.
- Fill cups only two-thirds full for a neat dome.
Variations on This Dish:
- Banana Swap: Replace half the applesauce with mashed banana.
- Blueberry Dot: Fold in ½ cup blueberries.
Common Mistakes to Avoid with This Recipe:
- Overbaking: They dry out faster than people expect.
- Packing the batter hard: Light mixing keeps them soft.
18. Chicken and Rice Soup With Tiny Noodles
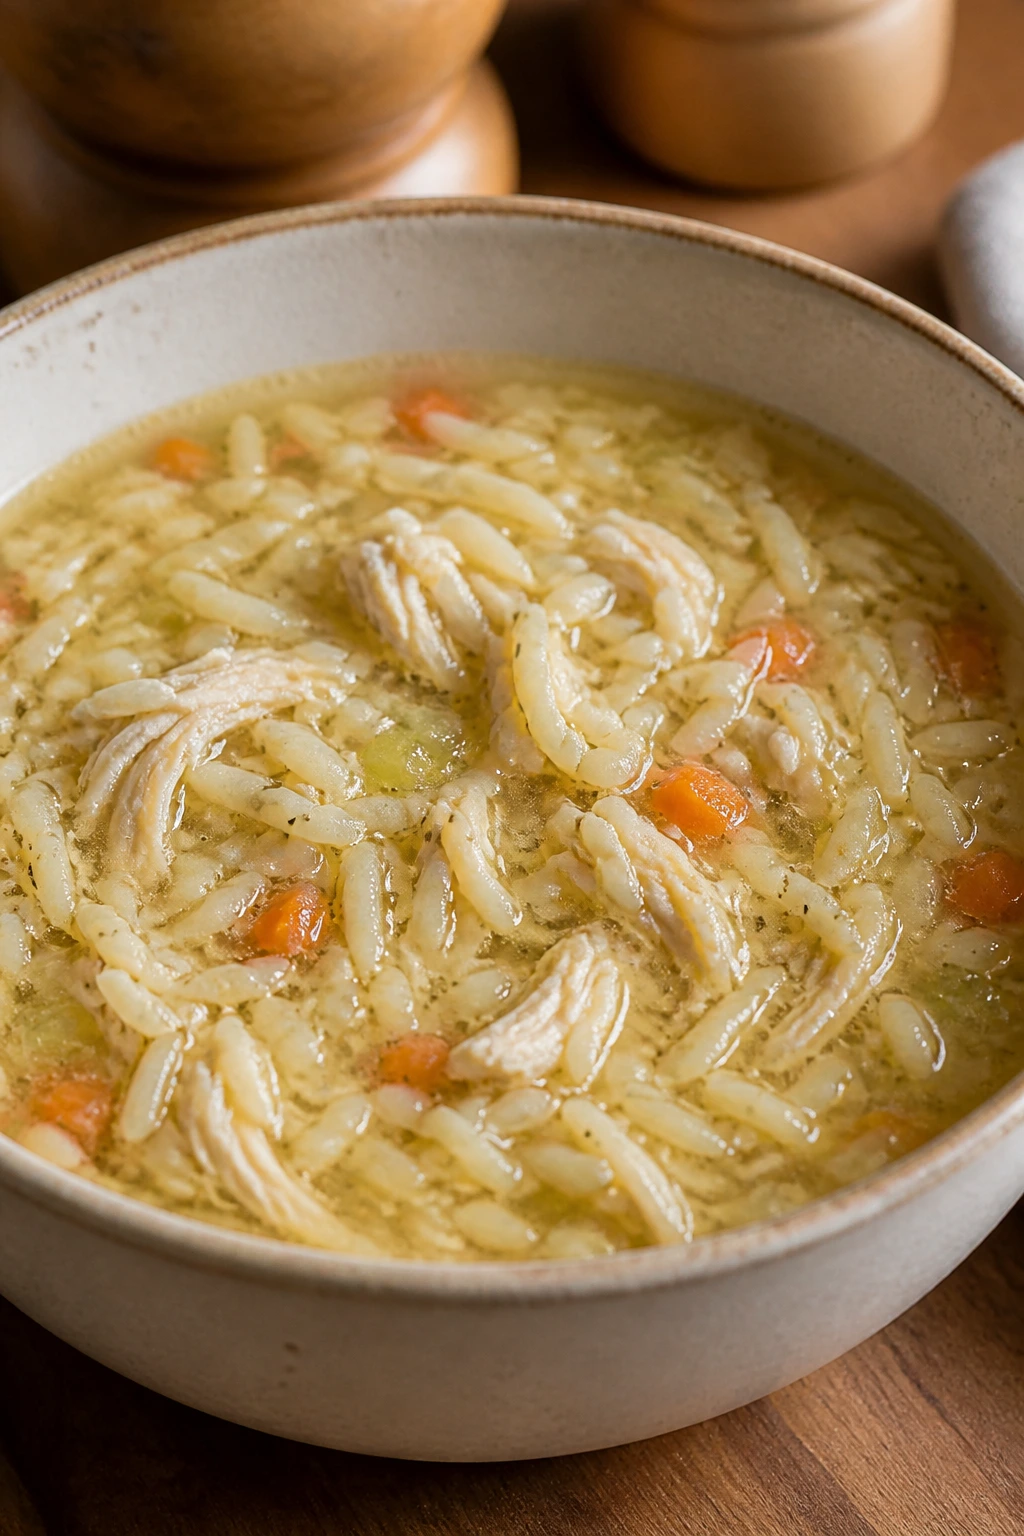
Soup gets a better reception when the pieces are small and easy to identify. Tiny noodles, soft chicken, and mild broth make this feel like a cozy bowl rather than a bowl of things floating around.
Why It Works:
Small pasta shapes are less annoying for kids than long noodles, and the broth stays clear and gentle. The chicken cooks until tender, then gets shredded into bite-size pieces that blend into the spoonful.
Key Ingredients:
- 1 tablespoon olive oil
- 1 carrot, diced very small
- 1 celery stalk, diced very small
- 6 cups chicken broth
- 1 cup cooked shredded chicken
- 1 cup tiny noodles
- ½ teaspoon salt
- ¼ teaspoon pepper
Quick Steps:
- Cook carrot and celery in oil for 3 minutes.
- Add broth and bring to a boil.
- Stir in noodles and simmer until tender.
- Add chicken, salt, and pepper.
- Serve hot.
Equipment for This Recipe:
- Large pot
- Ladle
- Knife
- Cutting board
How to Serve This Dish:
Serve with saltines or buttered toast. If a child dislikes visible vegetables, dice the carrot and celery very fine so they soften into the broth.
Pro Tips for This Recipe:
- Cook the noodles just until tender so they do not turn mushy.
- Add a squeeze of lemon only to adult bowls.
- Shred the chicken finely for easier spoonfuls.
Variations on This Dish:
- Lemon Chicken Soup: Add a little lemon juice at the end.
- Creamy Version: Stir in ¼ cup milk or cream.
Common Mistakes to Avoid with This Dish:
- Overcooking the noodles: They absorb broth and go soft fast.
- Using big vegetable chunks: Kids spot them immediately.
19. Crispy Oven Fries
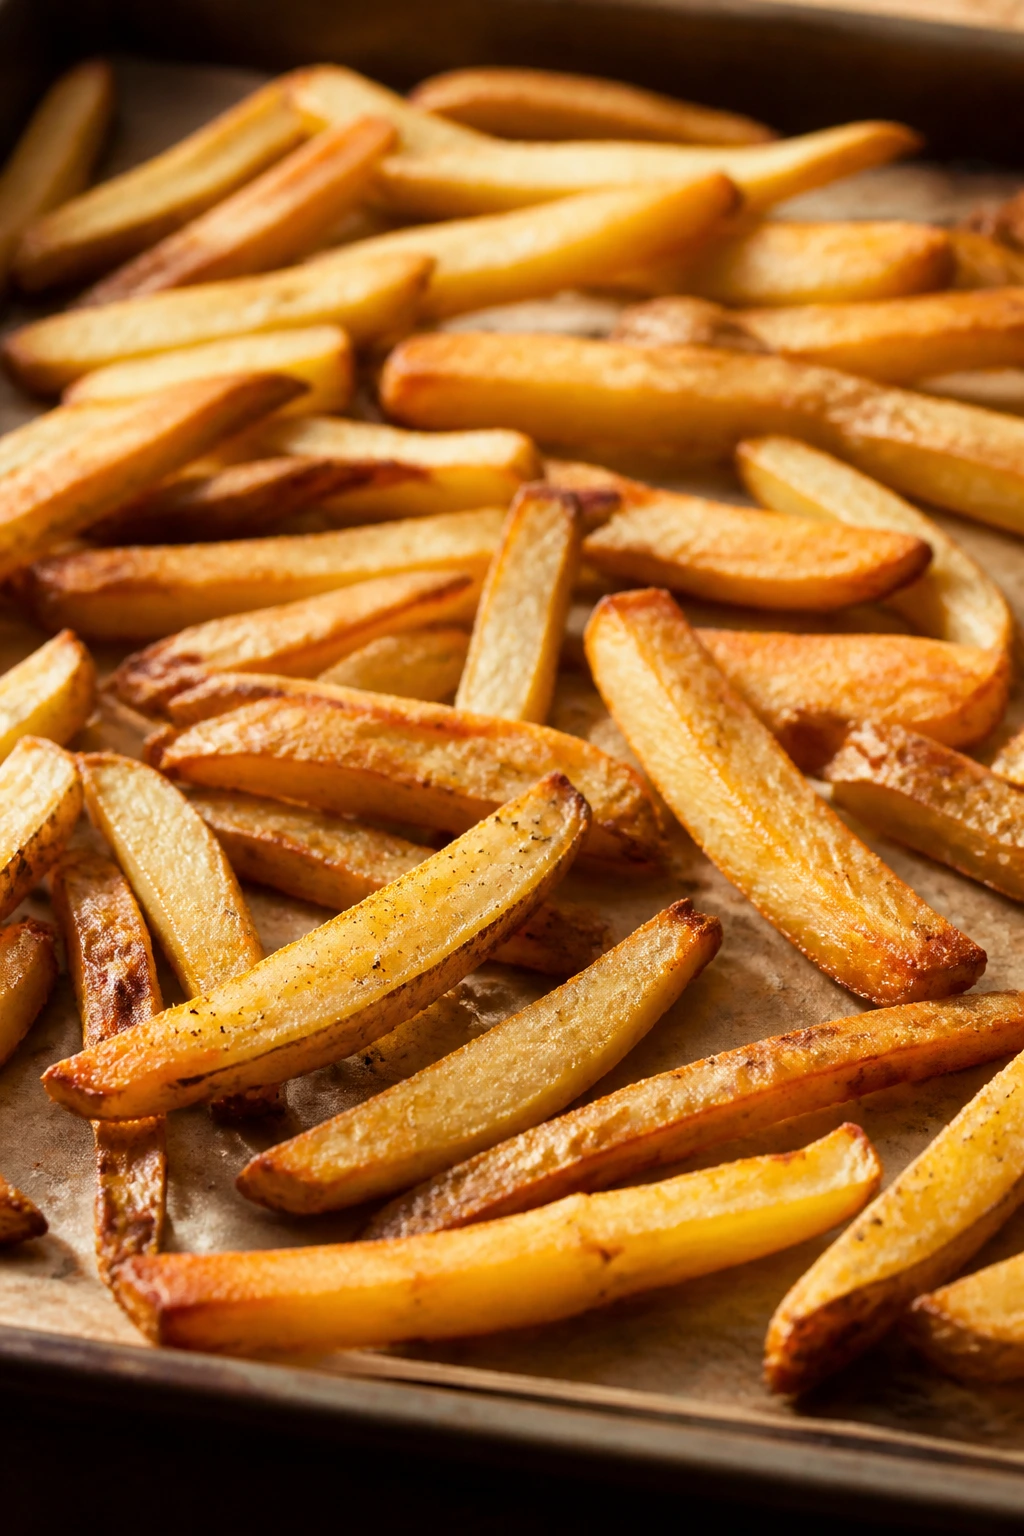
Fries are one of the safest bets in the whole book, but they still need attention. These bake up with brown edges and soft centers, which is the part kids usually care about most.
Why It Works:
Soaking the potato strips in cold water pulls out extra starch, which helps them crisp in the oven. A hot sheet pan and a thin coat of oil are doing a lot of the work here.
Key Ingredients:
- 3 large russet potatoes
- 2 tablespoons oil
- 1 teaspoon salt
- ½ teaspoon paprika
- ¼ teaspoon garlic powder
Quick Steps:
- Heat oven to 425°F and place a sheet pan inside.
- Cut potatoes into fry shapes and soak in cold water 15 minutes.
- Dry thoroughly, then toss with oil and seasonings.
- Spread on the hot pan in a single layer.
- Bake 25-30 minutes, flipping once, until browned.
Equipment for This Recipe:
- Sheet pan
- Large bowl
- Kitchen towel
- Knife
How to Serve This Dish:
Serve with chicken tenders, burgers, or grilled cheese. Ketchup is the obvious dip, but a little ranch or plain mayo works if your child wants something creamy.
Pro Tips for This Recipe:
- Dry the potatoes well or they steam.
- Don’t crowd the pan.
- Flip only once so the fries can brown properly.
Variations on This Dish:
- Sweet Potato Fries: Use sweet potatoes and reduce bake time slightly.
- Seasoned Wedges: Cut thicker wedges for a softer center.
Common Mistakes to Avoid with This Dish:
- Skipping the soak: The fries stay less crisp.
- Using too much oil: They turn limp, not crunchy.
20. Cheeseburger Pasta Skillet
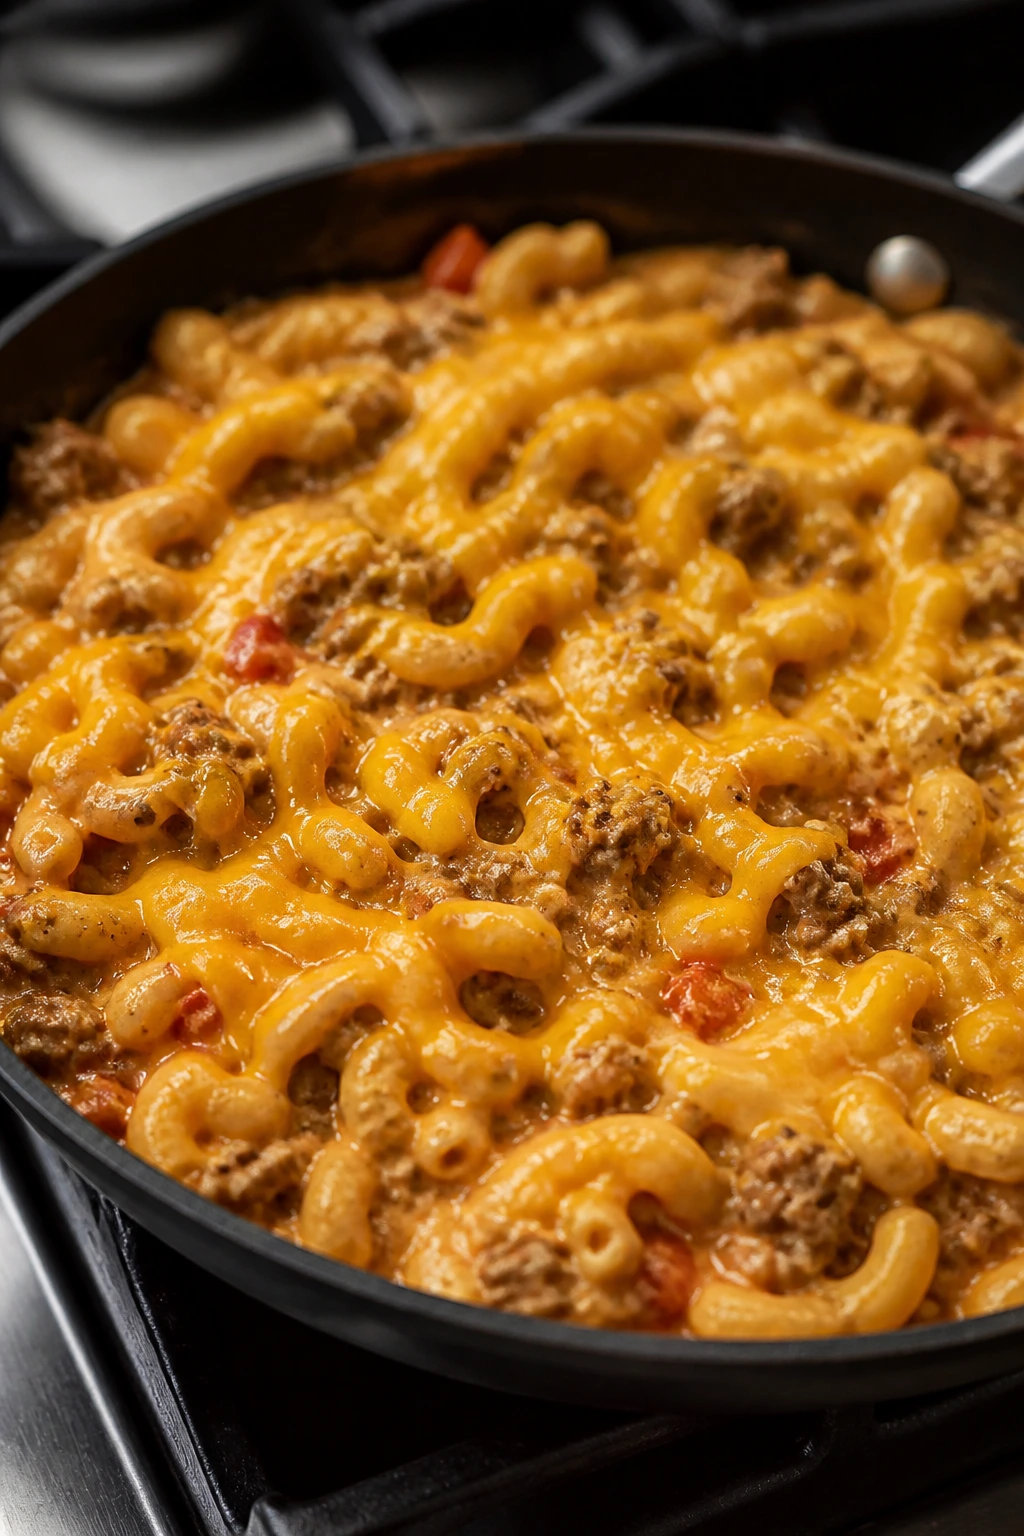
This dish tastes like a cheeseburger and eats like pasta, which is exactly why kids tend to trust it. Everything sits in one skillet, coated in a creamy tomato-cheese sauce that feels familiar from the first bite.
Why It Works:
Ground beef brings the burger flavor, small pasta makes it easy to fork, and cheddar melts into the sauce so you don’t need a separate side. It’s comfort food with a very short ingredient list.
Key Ingredients:
- 1 lb ground beef
- 2 cups small pasta
- 2 cups beef broth
- 1 cup milk
- 1 cup shredded cheddar
- 2 tablespoons ketchup
- ½ teaspoon salt
Quick Steps:
- Brown beef in a skillet and drain excess fat.
- Add pasta, broth, milk, ketchup, and salt.
- Simmer 12-14 minutes until the pasta is tender.
- Stir in cheddar until melted.
- Serve hot.
Equipment for This Recipe:
- Large skillet with lid
- Spoon
- Measuring cups
- Grater
How to Serve This Dish:
Scoop it into bowls with a little extra cheddar on top. A few pickle slices on the side make it taste more like a cheeseburger for kids who like that flavor profile.
Pro Tips for This Recipe:
- Stir often so the pasta doesn’t stick.
- Use small shapes like shells or elbows.
- Let the skillet sit 2 minutes before serving so the sauce thickens.
Variations on This Dish:
- Turkey Version: Use ground turkey and add a teaspoon of oil.
- Bacon Burger Style: Stir in a little cooked bacon at the end.
Common Mistakes to Avoid with This Recipe:
- Letting the pasta dry out: Keep a splash of broth nearby.
- Adding cheese too early: It melts best after the pasta softens.
21. Teriyaki Chicken Meatballs
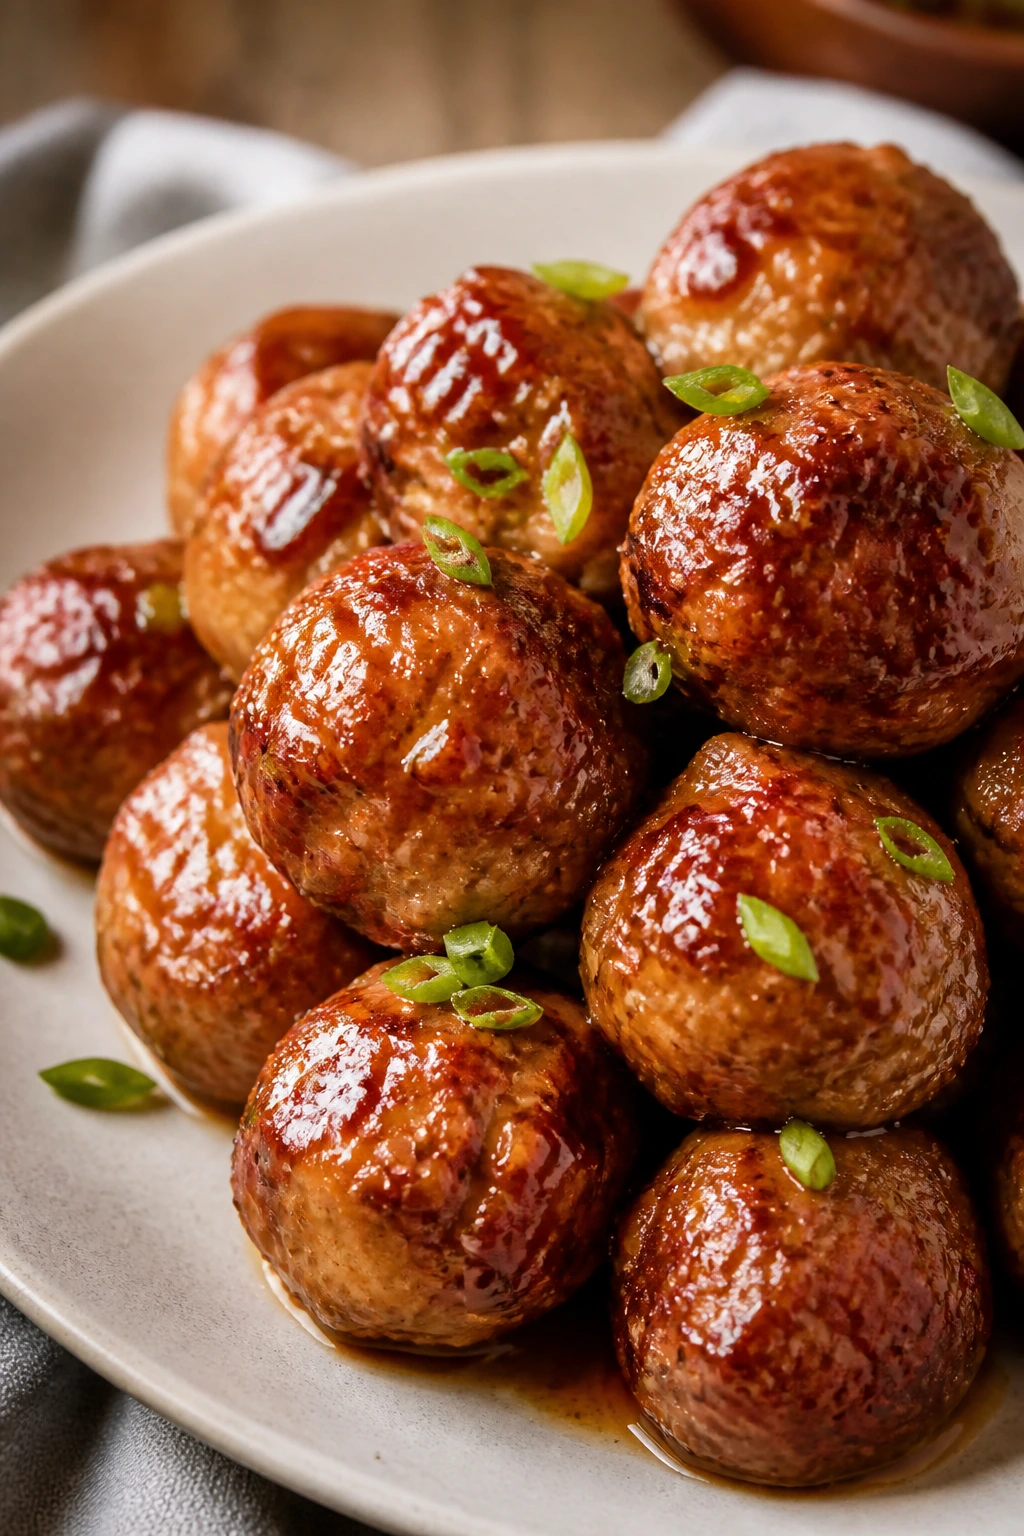
These are soft, glossy, and just sweet enough to feel like takeout without turning into a sugar bomb. The sauce clings to the meatballs instead of pooling at the bottom of the pan, which is exactly what you want.
Why It Works:
A mild teriyaki glaze gives a sticky finish kids tend to like, and the meatballs stay tender because they’re baked first, then tossed in sauce. The bite-size format helps a lot.
Key Ingredients:
- 1 lb ground chicken
- ½ cup breadcrumbs
- 1 egg
- 2 tablespoons soy sauce
- ¼ cup teriyaki sauce
- 1 tablespoon honey
- 1 teaspoon grated ginger, optional
Quick Steps:
- Heat oven to 400°F.
- Mix chicken, breadcrumbs, egg, and 1 tablespoon soy sauce.
- Roll into small meatballs and bake 12-13 minutes.
- Warm teriyaki sauce and honey in a skillet.
- Toss cooked meatballs in sauce and serve.
Equipment for This Recipe:
- Sheet pan
- Mixing bowl
- Skillet
- Spoon
How to Serve This Dish:
Serve with white rice or buttered noodles and a few steamed edamame beans if your kids are curious. Keep extra sauce on the side for the children who want more, not the ones who don’t.
Pro Tips for This Recipe:
- Keep the meatballs small for faster cooking.
- Do not overmix the chicken mixture.
- A tiny splash of water loosens thick sauce.
Variations on This Dish:
- Sesame Version: Add 1 teaspoon sesame oil and sesame seeds.
- Mild Orange Glaze: Swap teriyaki for orange sauce.
Common Mistakes to Avoid with This Dish:
- Searing too hard: These are meant to stay soft, not charred.
- Using too much ginger: It can overpower the glaze fast.
22. French Toast Sticks
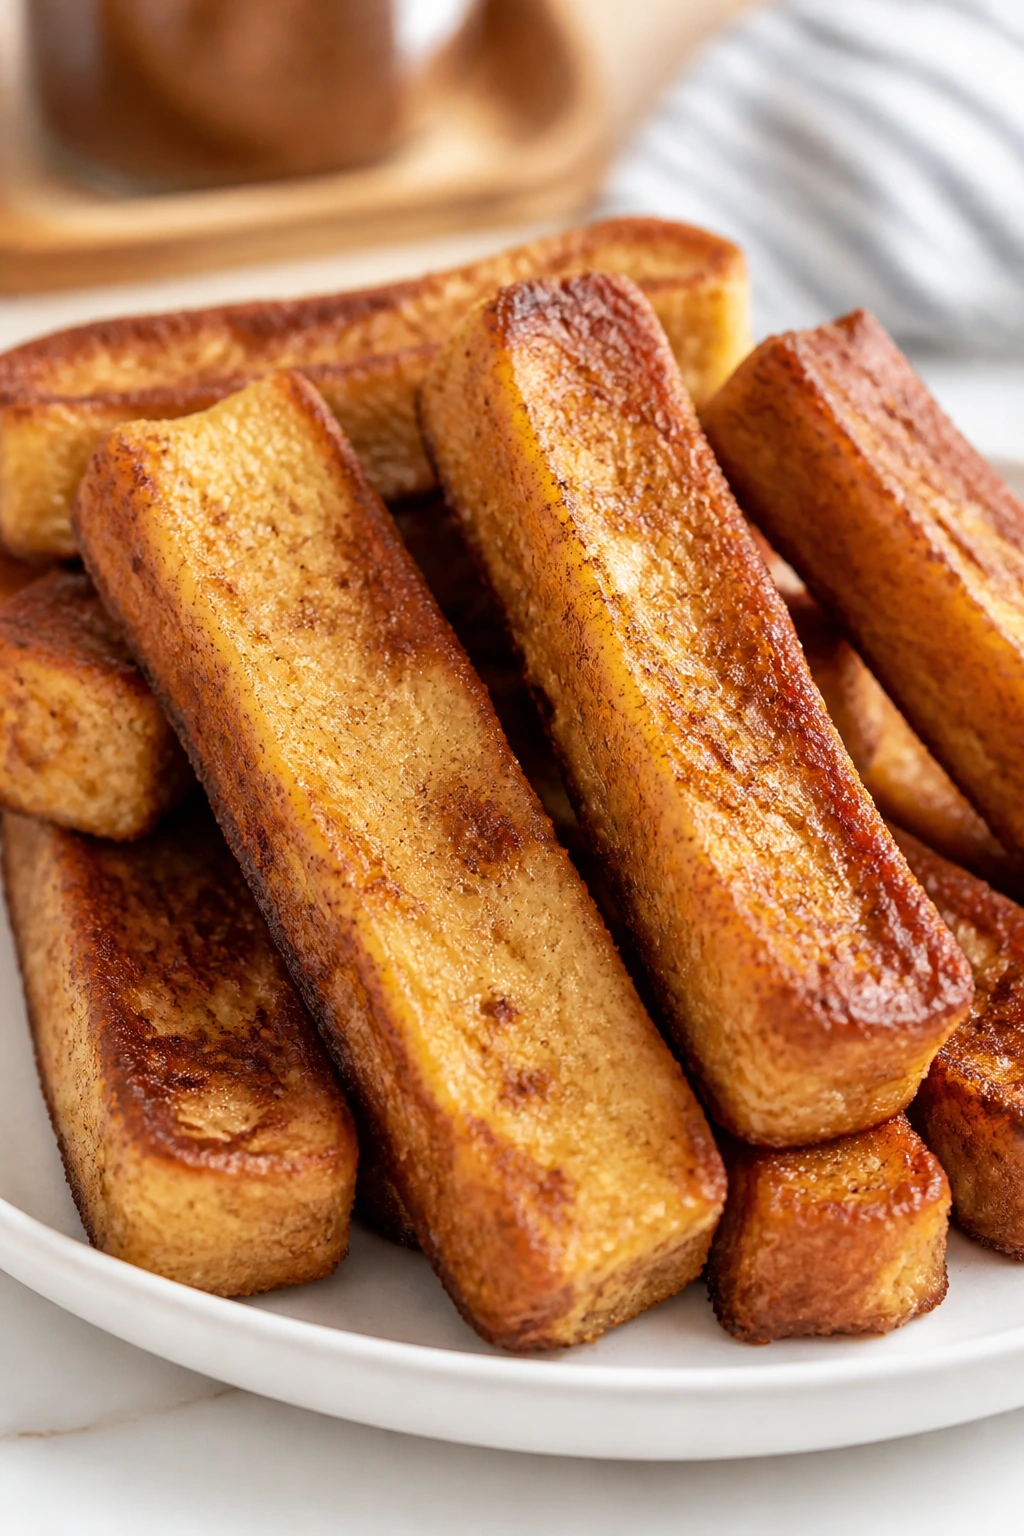
French toast sticks solve the “wet bread” problem by letting kids dip instead of dealing with syrup all over the plate. The edges should be lightly crisp, with a soft center that still tastes like custard.
Why It Works:
Cutting the bread into sticks before cooking makes the texture more uniform and easier to handle. A cinnamon-vanilla egg soak gives flavor without making the bread soggy.
Key Ingredients:
- 6 slices thick bread
- 3 large eggs
- ½ cup milk
- 1 teaspoon vanilla
- 1 teaspoon cinnamon
- 1 tablespoon butter
- Maple syrup for serving
Quick Steps:
- Cut bread into sticks.
- Whisk eggs, milk, vanilla, and cinnamon.
- Dip bread quickly, letting excess drip off.
- Cook in butter over medium heat 2-3 minutes per side.
- Serve warm with syrup.
Equipment for This Recipe:
- Skillet
- Shallow bowl
- Spatula
- Knife
How to Serve This Dish:
Stack the sticks in a small bundle and keep syrup in a separate cup. Fresh berries or banana slices make the plate look complete without complicating the flavor.
Pro Tips for This Recipe:
- Use thick bread so the center stays soft.
- Dip fast; long soaking makes it mushy.
- Cook in batches to keep the pan hot.
Variations on This Dish:
- Cinnamon Sugar: Toss the hot sticks in cinnamon sugar.
- Stuffed Version: Spread peanut butter between two slices before cutting.
Common Mistakes to Avoid with This Dish:
- Using thin sandwich bread: It falls apart too fast.
- Soaking too long: The sticks can collapse in the pan.
23. Creamy Tomato Basil Pasta

This is the pasta for kids who like red sauce but not a lot of sharp tomato bite. The cream softens the sauce, the basil stays gentle, and the whole thing coats short pasta in a smooth, rosy layer.
Why It Works:
Cream rounds out acidity, so the sauce tastes mellow instead of tangy. Short pasta gives kids manageable bites, and the sauce clings without becoming heavy.
Key Ingredients:
- 12 oz pasta shells or penne
- 1 tablespoon butter
- 1 cup marinara sauce
- ½ cup heavy cream
- 1 teaspoon dried basil
- ½ cup grated Parmesan
- ½ teaspoon salt
Quick Steps:
- Cook pasta until al dente.
- Melt butter in a skillet and add marinara, cream, basil, and salt.
- Simmer 3 minutes until smooth.
- Stir in pasta and Parmesan.
- Serve warm.
Equipment for This Recipe:
- Pot
- Skillet
- Colander
- Spoon
How to Serve This Dish:
Serve with garlic bread or plain green beans on the side. If your child dislikes visible herbs, use dried basil and keep the flecks small rather than adding fresh leaves.
Pro Tips for This Recipe:
- Use small pasta shapes.
- Add a splash of pasta water if the sauce gets thick.
- Keep the heat low after the cream goes in.
Variations on This Dish:
- Mozzarella Melt: Stir in ½ cup mozzarella right before serving.
- Meat Sauce: Brown ½ lb beef before adding the marinara.
Common Mistakes to Avoid with This Dish:
- Boiling the cream hard: It can split.
- Using too much basil: The sauce gets grassy fast.
24. Mini Corn Dog Muffins

Corn dog muffins are pure lunchbox bait. They have the sweet cornbread flavor kids recognize from fair food, and the little hot dog pieces make them easy to nibble without a skewer or a sticky mess.
Why It Works:
The batter bakes around the hot dog, so you get the flavor combination without deep frying. Mini muffin size means fast bake time and easy portion control.
Key Ingredients:
- 1 cup cornmeal mix
- 1 cup milk
- 1 egg
- 2 tablespoons sugar
- 6 hot dogs, chopped
- 1 tablespoon melted butter
Quick Steps:
- Heat oven to 375°F and grease a mini muffin tin.
- Whisk cornmeal mix, milk, egg, sugar, and butter.
- Fold in chopped hot dog pieces.
- Fill muffin cups ¾ full.
- Bake 12-14 minutes until golden.
Equipment for This Recipe:
- Mini muffin tin
- Mixing bowl
- Whisk
- Spoon
How to Serve This Dish:
Serve with ketchup and mustard on the side, or pack them into lunchboxes once cooled. They’re good warm, but they also hold up at room temperature for a little while.
Pro Tips for This Recipe:
- Chop hot dogs small so they distribute evenly.
- Grease the tin well.
- Do not overfill the cups.
Variations on This Dish:
- Cheddar Corn Dog Muffins: Add ½ cup shredded cheddar.
- Turkey Dog Version: Use turkey hot dogs.
Common Mistakes to Avoid with This Recipe:
- Uneven chopping: Big pieces sink and leave some muffins bare.
- Baking too long: They dry out and crack on top.
25. Peanut Butter Banana Smoothies
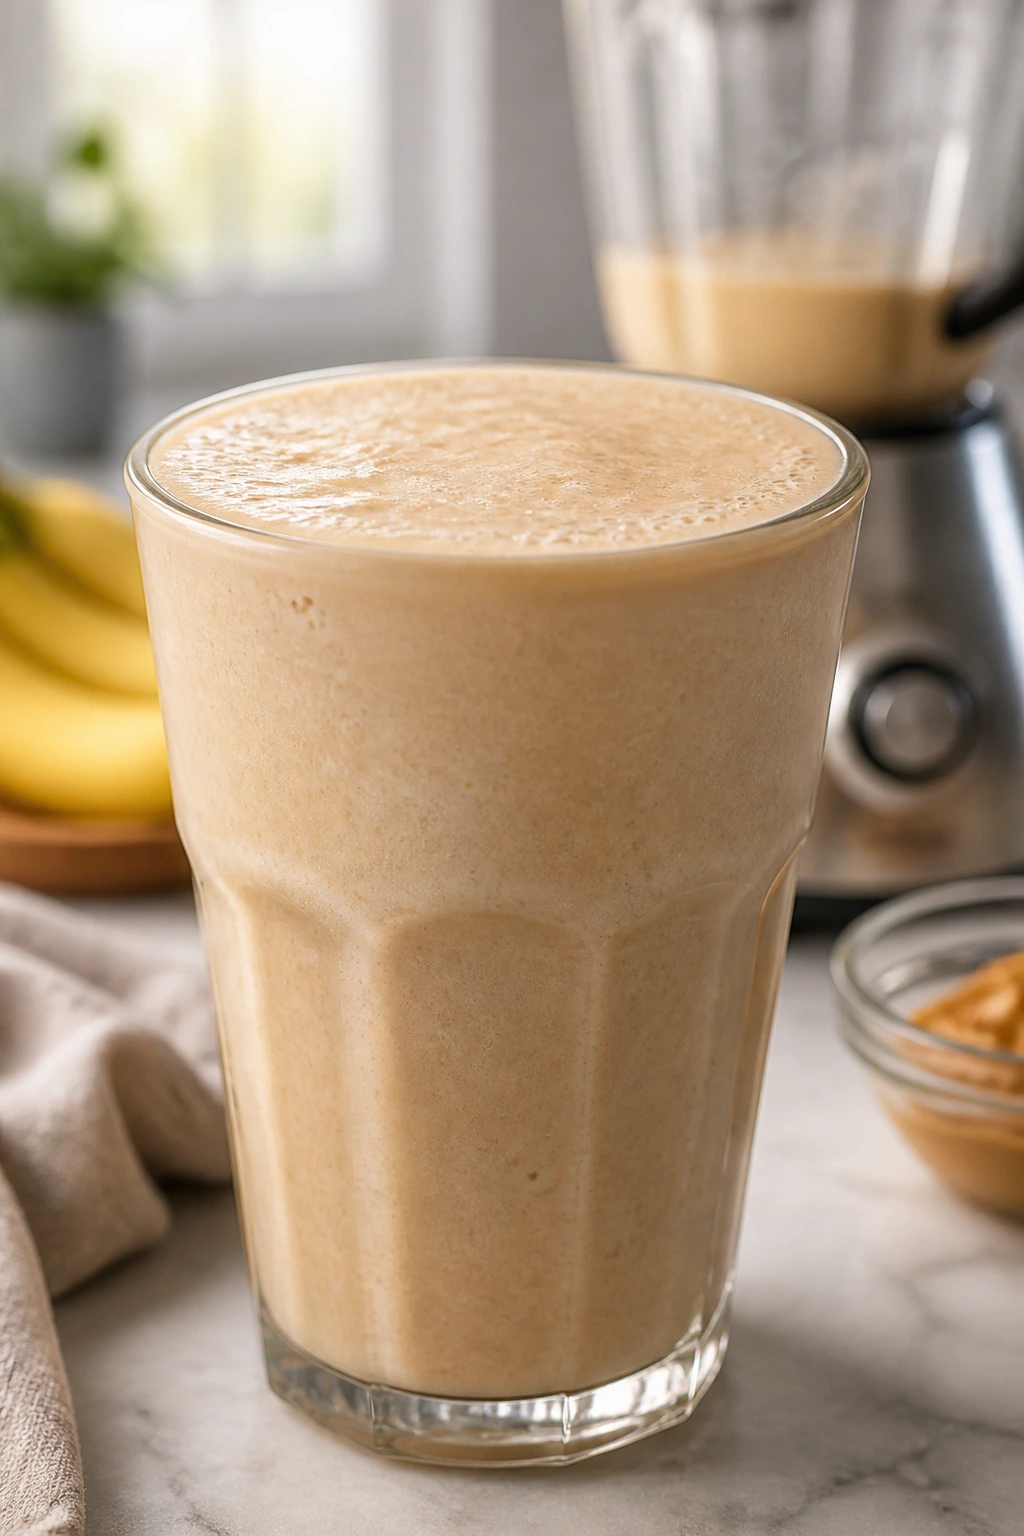
A smoothie can be a surprisingly easy win if it tastes like a milkshake but eats like breakfast. Peanut butter adds heft, banana brings sweetness, and the whole drink turns creamy without a long ingredient list.
Why It Works:
The flavors are familiar, the texture is smooth, and the drinkable format helps with kids who resist “chunks” in everything. Frozen banana also gives it a cold, thick feel without ice dilution.
Key Ingredients:
- 2 bananas, frozen
- 2 tablespoons peanut butter
- 1 cup milk
- ½ cup plain or vanilla yogurt
- 1 teaspoon honey, optional
- ½ teaspoon vanilla
Quick Steps:
- Add all ingredients to a blender.
- Blend 30-45 seconds until smooth.
- Add more milk if the smoothie is too thick.
- Pour into glasses.
- Serve right away.
Equipment for This Recipe:
- Blender
- Measuring cups
- Tall glasses
- Straw, optional
How to Serve This Dish:
Pour into small glasses with a straw and serve alongside toast or a muffin. If you want it even more snack-like, freeze it for 10 minutes so it thickens further.
Pro Tips for This Recipe:
- Use frozen banana for body.
- Start with less milk; you can always thin it.
- Almond butter works if peanut butter is off the table.
Variations on This Recipe:
- Chocolate Banana: Add 1 tablespoon cocoa powder.
- Berry Swap: Replace one banana with frozen strawberries.
Common Mistakes to Avoid with This Recipe:
- Adding too much milk at once: It turns thin fast.
- Skipping the frozen fruit: The smoothie loses its creamy texture.
26. Tuna Melt Melts
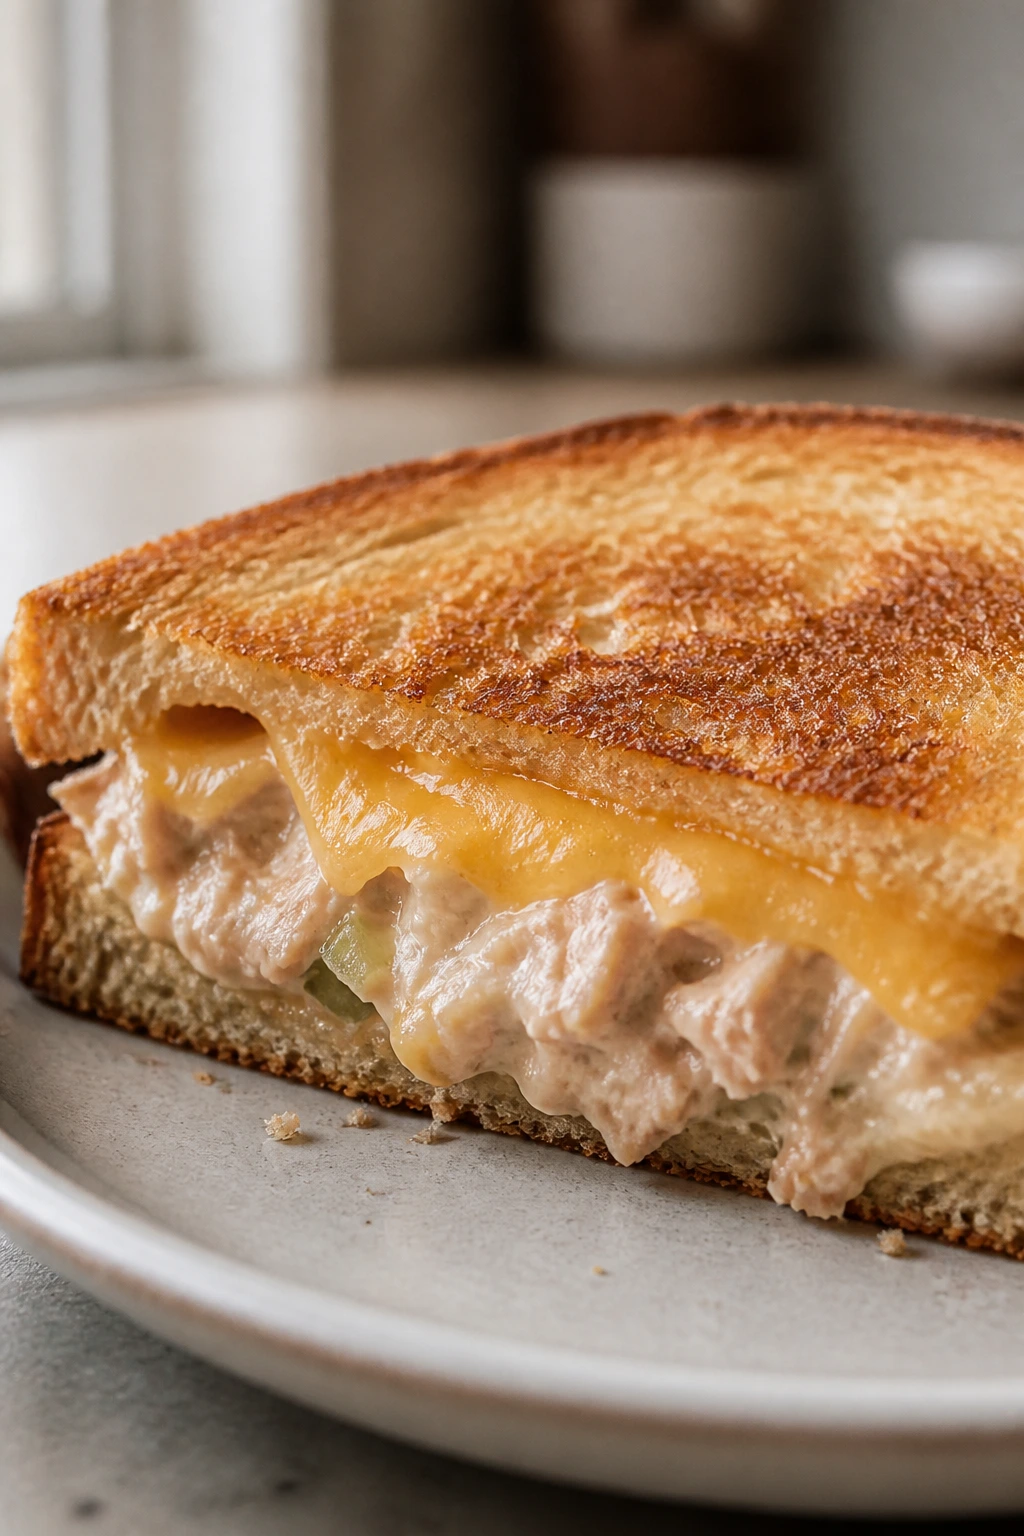
A tuna melt works best when the tuna filling is mild, creamy, and not overloaded with crunchy extras. Melted cheese and toasted bread hide a lot of hesitation, which is why this sandwich keeps showing up for picky eaters.
Why It Works:
The filling is soft, the bread is crisp, and the cheese gives the whole thing a familiar, salty edge. The tuna itself stays subtle when mixed with a little mayo and just a small amount of seasoning.
Key Ingredients:
- 2 cans tuna, drained
- ¼ cup mayonnaise
- 1 tablespoon relish, optional
- 4 slices bread
- 4 slices cheese
- 1 tablespoon butter
Quick Steps:
- Mix tuna, mayo, and relish if using.
- Butter the bread and place cheese on two slices.
- Add tuna filling, close the sandwiches, and cook in a skillet over medium-low heat.
- Brown 3-4 minutes per side until the cheese melts.
- Slice and serve.
Equipment for This Recipe:
- Skillet
- Bowl
- Spatula
- Butter knife
How to Serve This Dish:
Serve with carrot sticks or crackers. Keep the tuna mixture smooth and compact so the sandwich feels tidy instead of lumpy.
Pro Tips for This Recipe:
- Drain the tuna well.
- Use mild cheese like American or cheddar.
- Press gently with the spatula to seal the sandwich.
Variations on This Dish:
- Open-Face Melt: Broil on one slice of bread.
- Chicken Salad Swap: Use shredded chicken instead of tuna.
Common Mistakes to Avoid with This Recipe:
- Too much tuna filling: It falls out when you flip.
- High heat: The bread burns before the cheese melts.
27. Veggie-Loaded Queso Dip
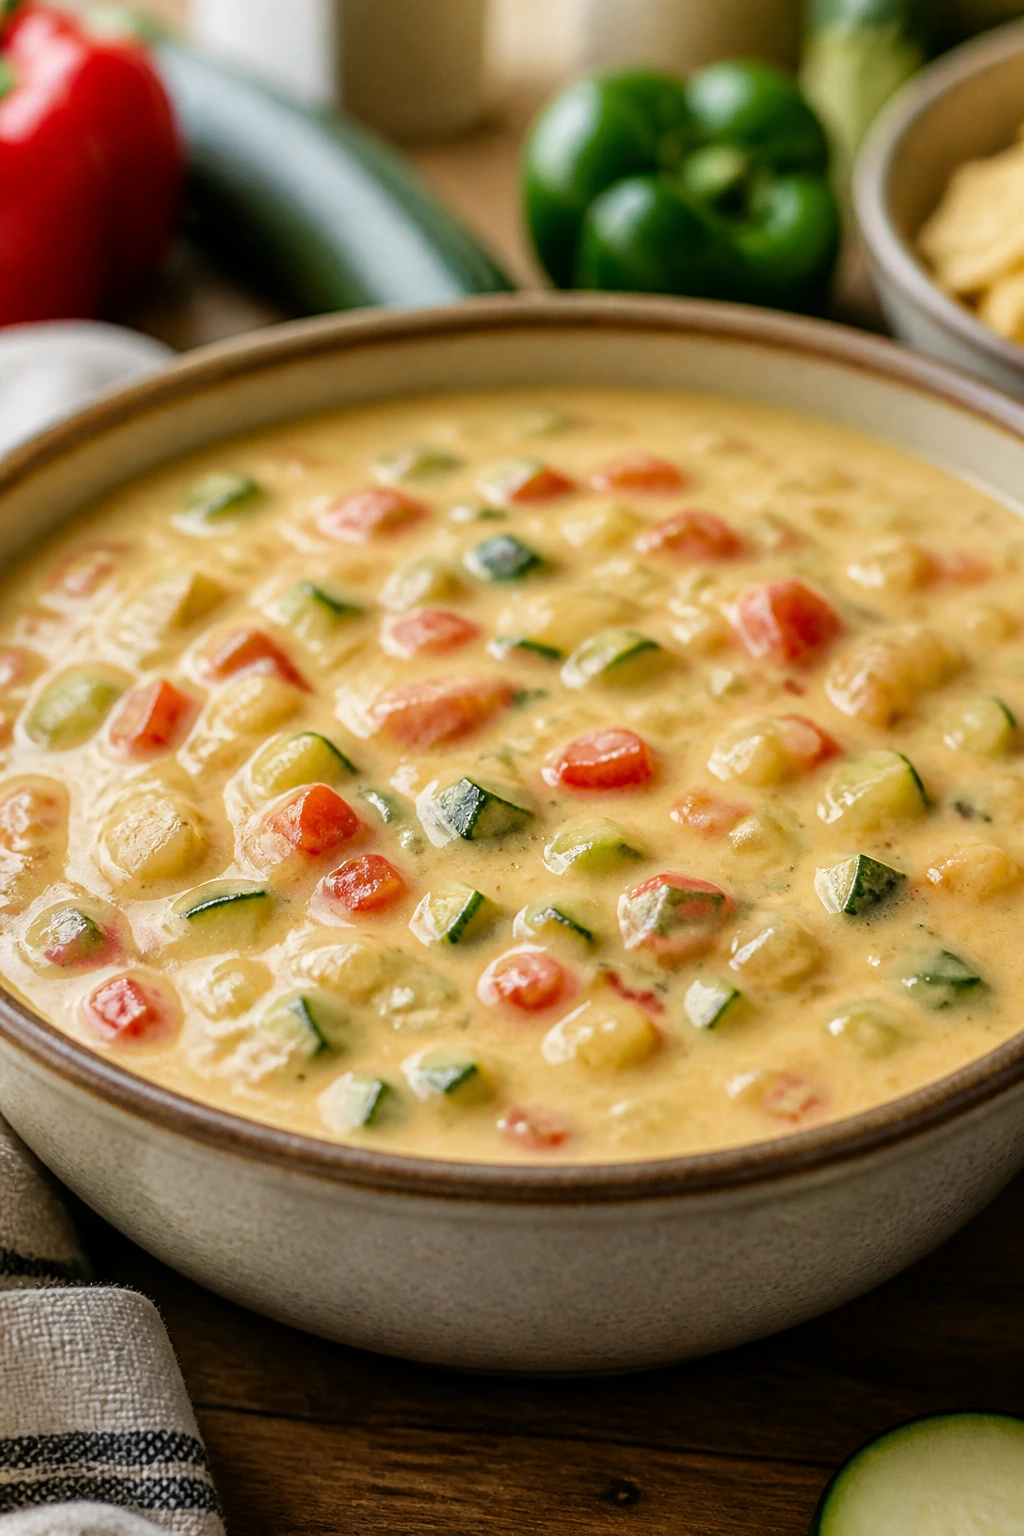
This dip works because it looks like queso first and vegetables second. When the veggies are finely diced and folded into a creamy cheese dip, kids who normally refuse anything green may still dip a chip without asking questions.
Why It Works:
The cheese base keeps the flavor familiar, and the vegetables are chopped small enough to blend in. Warm dip also softens the texture issue that scares some kids off cold salads or chunky salsa.
Key Ingredients:
- 2 tablespoons butter
- 1 tablespoon flour
- 1 cup milk
- 1½ cups shredded cheddar
- ½ cup very finely diced bell pepper
- ¼ cup finely diced zucchini
- ¼ teaspoon salt
Quick Steps:
- Melt butter in a saucepan and whisk in flour for 1 minute.
- Slowly whisk in milk and cook until thick.
- Add cheddar, salt, and diced vegetables.
- Stir over low heat until smooth and melty.
- Serve warm with chips or soft pretzels.
Equipment for This Recipe:
- Small saucepan
- Whisk
- Spoon
- Knife
How to Serve This Dish:
Serve in a small bowl with tortilla chips, soft pretzels, or steamed broccoli florets for dipping. Keep the vegetables very small so the dip stays scoopable instead of chunky.
Pro Tips for This Recipe:
- Dice the vegetables nearly minced.
- Keep the heat low once cheese is added.
- Thin with a splash of milk if needed.
Variations on This Dish:
- Mild Salsa Queso: Stir in 2 tablespoons salsa.
- Bean Dip: Blend in ¼ cup white beans for more body.
Common Mistakes to Avoid with This Recipe:
- Big vegetable chunks: That defeats the whole purpose.
- Boiling the cheese sauce: It can turn grainy.
28. Parmesan Roasted Carrots
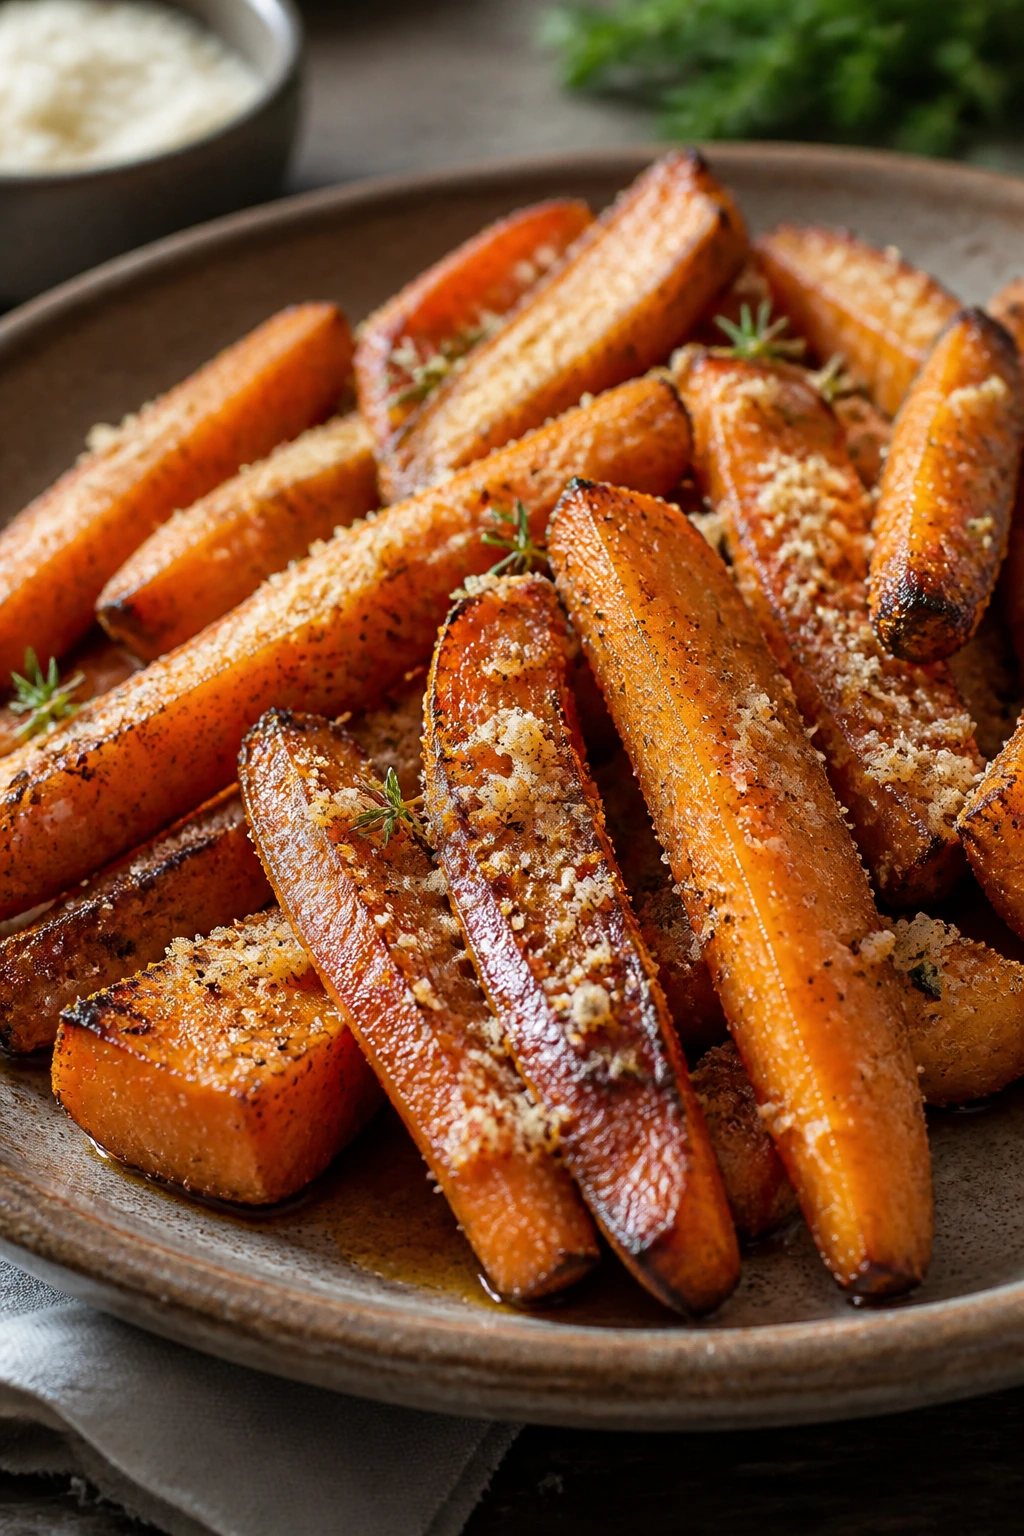
Carrots can win over picky eaters when they’re sweet, soft, and a little salty around the edges. Roasting brings out their natural sugar, and Parmesan adds a savory crust that feels more snack-like than vegetable-forward.
Why It Works:
Roasting at high heat creates caramelized edges, which softens the carrot flavor and gives the pieces a more familiar baked-potato feel. The cheese sticks to the surface and adds a salty finish.
Key Ingredients:
- 1 lb carrots, peeled and cut into sticks
- 1 tablespoon olive oil
- ¼ teaspoon salt
- ¼ teaspoon garlic powder
- ¼ cup grated Parmesan
Quick Steps:
- Heat oven to 425°F.
- Toss carrots with oil, salt, and garlic powder.
- Spread on a sheet pan and roast 18 minutes.
- Sprinkle with Parmesan and roast 3-5 minutes more.
- Serve warm.
Equipment for This Recipe:
- Sheet pan
- Vegetable peeler
- Mixing bowl
- Spatula
How to Serve This Dish:
Serve beside chicken nuggets, meatballs, or baked fish. If a child hates the look of orange vegetables, cut the carrots thinner so they roast into softer, less carrot-like strips.
Pro Tips for This Recipe:
- Cut evenly so they cook at the same pace.
- Add the Parmesan near the end so it doesn’t scorch.
- A tiny drizzle of honey can boost sweetness.
Variations on This Dish:
- Maple Carrots: Swap honey for a teaspoon of maple syrup.
- Herbed Version: Add a pinch of thyme.
Common Mistakes to Avoid with This Recipe:
- Overcrowding the pan: The carrots steam instead of roast.
- Cutting them too thick: They stay firm when kids want soft.
29. Sweet Potato Tater Tots

These taste like the freezer aisle version, only fresher and a little less salty. Crisp on the outside, soft in the middle, and shaped small enough for fingers, they tend to get eaten faster than the adults expect.
Why It Works:
Sweet potato brings natural sweetness, and a little flour holds the shreds together. Baking them in a mini muffin tin or shaping them by hand gives them the familiar tot look kids already know.
Key Ingredients:
- 2 medium sweet potatoes, cooked and mashed
- ¼ cup flour
- 1 egg
- ½ teaspoon salt
- ¼ teaspoon garlic powder
- 1 tablespoon oil
Quick Steps:
- Heat oven to 400°F.
- Mix sweet potato, flour, egg, salt, and garlic powder.
- Shape into small tots or press into mini muffin cups.
- Brush lightly with oil.
- Bake 18-20 minutes, flipping once if shaped by hand.
Equipment for This Recipe:
- Baking sheet or mini muffin tin
- Bowl
- Spoon
- Fork or potato masher
How to Serve This Dish:
Serve with ketchup or yogurt dip and keep them warm until the rest of dinner is ready. They work as a side, snack, or lunchbox item.
Pro Tips for This Recipe:
- Dry the mashed sweet potato a little if it seems watery.
- Use a small scoop to keep the tots even.
- Let them cool 2 minutes before moving them.
Variations on This Dish:
- Cheddar Tot: Add ¼ cup shredded cheese.
- Spiced Version: A tiny pinch of cinnamon works if your family likes sweet-savory food.
Common Mistakes to Avoid with This Recipe:
- Wet mash: The tots fall apart.
- Turning them too early: Wait until the bottoms set.
30. Strawberry Yogurt Parfaits
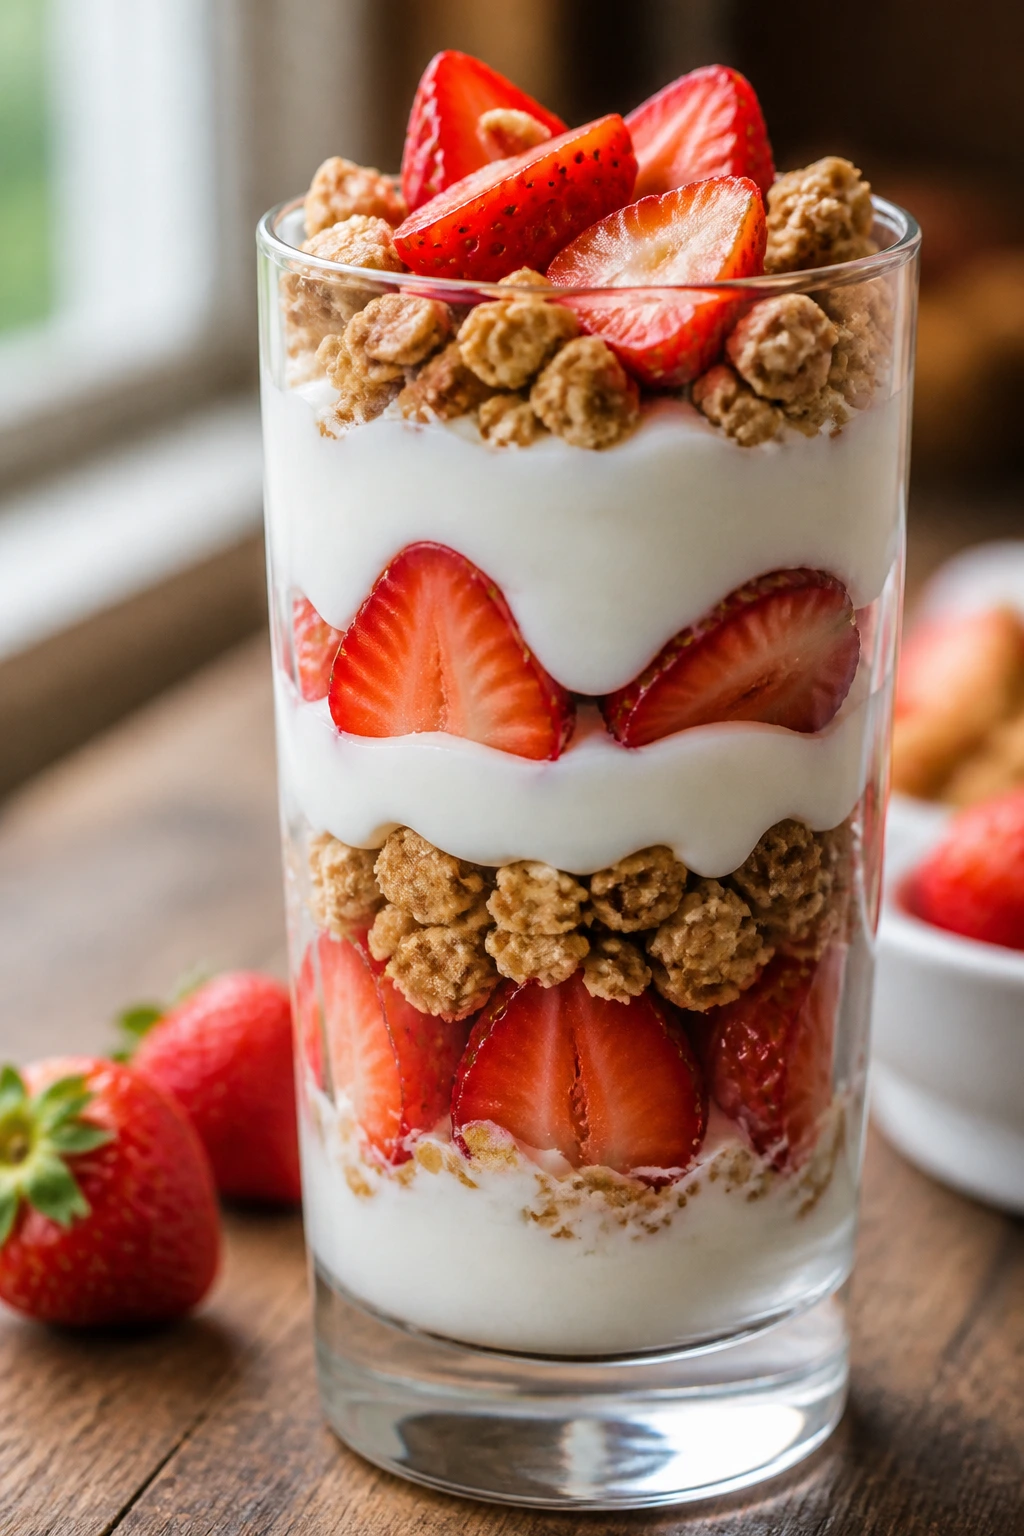
Parfaits are not dinner, and I won’t pretend they are. But as a breakfast, snack, or dessert that looks neat in a glass, they can calm down the “I don’t want that” reflex before it starts. The layers matter.
Why It Works:
The ingredients stay separate, so kids can see exactly what they’re getting. Strawberry, yogurt, and granola give you cold, creamy, crunchy, and sweet in clear layers rather than one blended spoonful.
Key Ingredients:
- 2 cups plain or vanilla yogurt
- 1½ cups sliced strawberries
- 1 cup granola
- 1 teaspoon honey, optional
- 1 teaspoon vanilla, optional
Quick Steps:
- Spoon a layer of yogurt into glasses.
- Add strawberries, then granola.
- Repeat the layers once more.
- Drizzle honey over the top if desired.
- Serve right away so the granola stays crunchy.
Equipment for This Recipe:
- Glasses or small bowls
- Spoon
- Knife
- Measuring cups
How to Serve This Dish:
Serve in clear cups so the layers show. If you’re dealing with a child who dislikes mixed textures, keep the granola in a separate little bowl and let them add it themselves.
Pro Tips for This Recipe:
- Dry the strawberries so they don’t water down the yogurt.
- Assemble just before eating.
- Vanilla yogurt tastes more dessert-like than plain.
Variations on This Dish:
- Berry Mix: Swap some strawberries for blueberries.
- Peanut Butter Crunch: Add a spoonful of granola mixed with chopped peanuts.
Common Mistakes to Avoid with This Dish:
- Assembling too early: The granola loses its crunch.
- Oversweetening the yogurt: Keep the balance light so it still feels fresh.
Why Simple Flavors Work at the Family Table
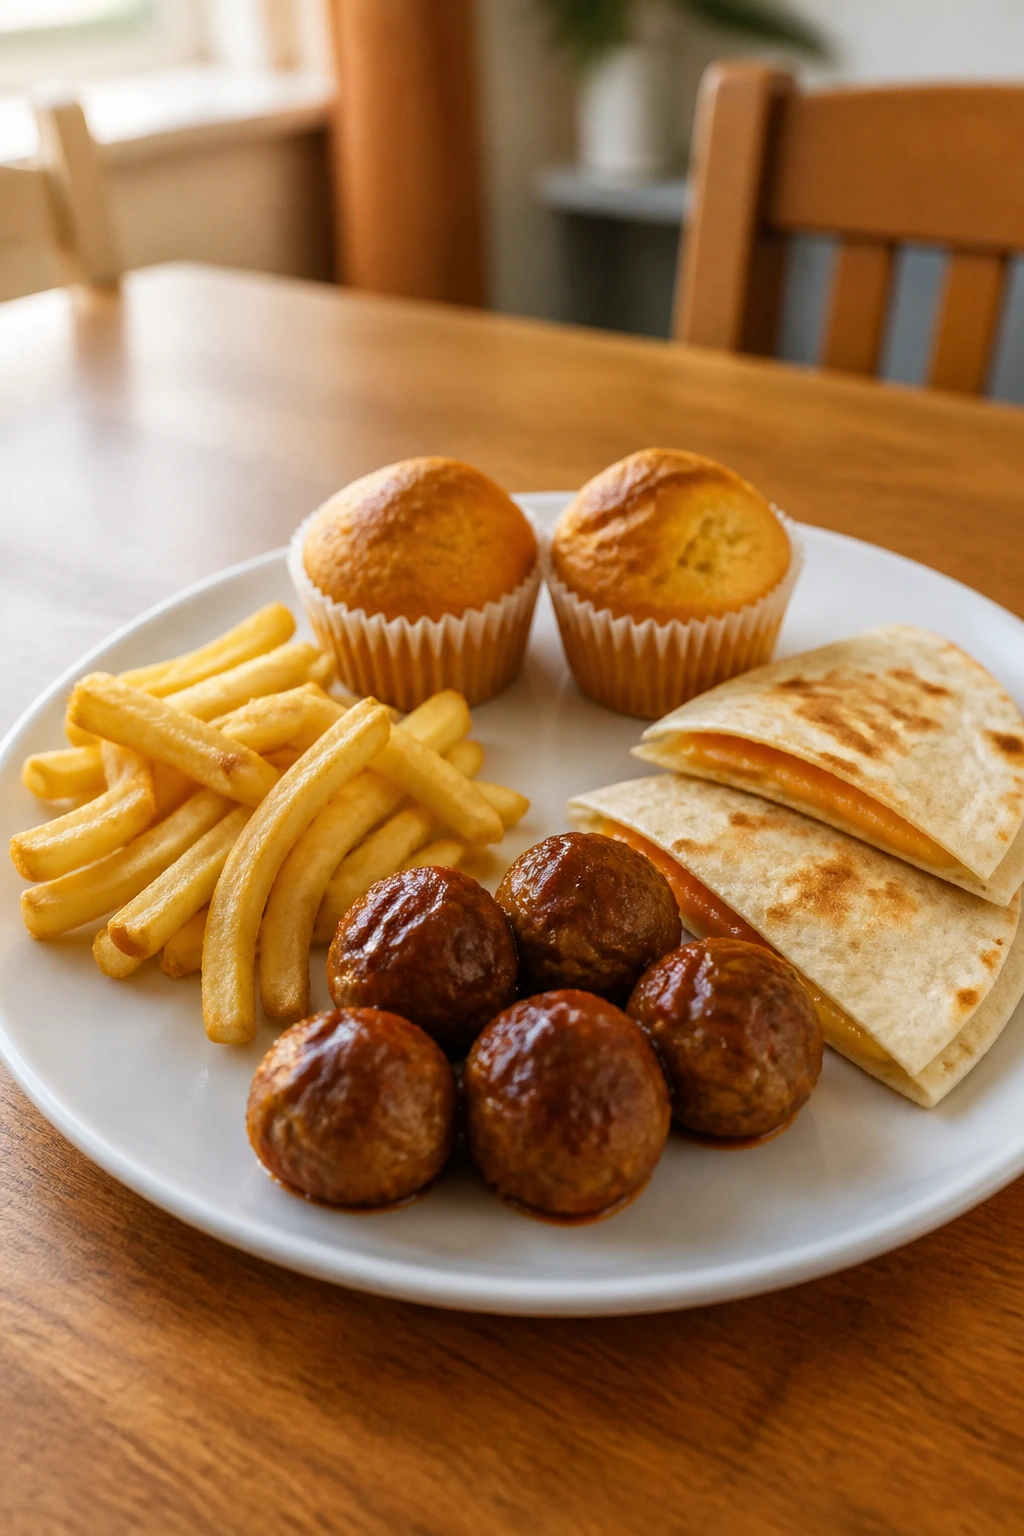
Picky eaters usually aren’t reacting to the idea of dinner. They’re reacting to surprise. A soft texture one night and a crunchy one the next can be fine for adults, but kids often want the opposite: a plate that behaves the same every time the fork goes in. That is why these picky eater recipes lean hard on familiar shapes, mild seasonings, and sauces that can stay on the side.
There’s also a visual trick at work. A small meatball looks less intense than a big one. A wedge of quesadilla feels easier than a stacked burrito. Fries, sticks, muffins, sliders, and bowls all give the child a clear grip on the food, which buys you a little trust before the first bite even happens.
And yes, a few vegetables can still show up. The trick is to stop treating them like a surprise performance. Blend them smooth, chop them tiny, roast them until sweet, or keep them separate so the kid can choose. That’s the difference between a plate that gets pushed away and one that disappears after a slow, skeptical first bite.
The Tools That Show Up Again and Again

- Sheet pans with rims: These handle chicken tenders, fries, fish sticks, and roasted vegetables without spills.
- Nonstick skillets: A good skillet makes grilled cheese, quesadillas, pasta sauces, and breakfast items easier to control.
- Muffin tins: Mini breakfast muffins, corn dog muffins, and even tot-style bites are easier with a tin.
- Instant-read thermometer: Use it for chicken, turkey, fish, and meatballs so you don’t guess.
- Mixing bowls in two sizes: One for dry ingredients, one for wet, and one spare for whatever gets tossed together at the last minute.
- Parchment paper: It saves cleanup and keeps sticky coatings from welding to the pan.
- Whisk and wooden spoon: A whisk handles sauces and batters; a spoon is better for thick fillings.
- Knife and cutting board: Keep the cuts small and even, especially for vegetables and sandwich fillings.
- Blender or immersion blender: Handy for smooth sauces and smoothies.
- Colander: Essential for pasta, soup, and rinsing potatoes before roasting.
Smart Shopping for Picky Eater Recipes

The ingredient list matters more than fancy technique here. Start with the kind of cheese kids already know: mild cheddar, mozzarella, American, or Monterey Jack. Sharp cheeses can work in adult food, but they often come across as loud and sour to a child who wants a softer bite. Low-moisture mozzarella is a quiet hero in quesadillas and mini pizzas because it melts cleanly and doesn’t leak water.
For proteins, choose cuts that stay tender with short cook times. Chicken tenders, ground turkey, ground beef, and mild white fish all fit that bill. With fish, cod, pollock, and haddock are easier sells than anything oily or strongly flavored. If you’re buying ground meat, look for a package with some fat — too lean, and the meatballs or patties can turn dry before the center is done.
Pantry items deserve a closer look too. Marinara should taste like tomatoes first, not sugar or raw onion. Bread crumbs should be plain unless the recipe says otherwise. Cornflakes, panko, tortillas, biscuit dough, and small pasta shapes are the sorts of things that keep this style of cooking moving fast. Frozen peas, corn, and berries are fine here. In a few recipes, they’re actually better than fresh because they stay sweet and don’t go limp.
How to Serve These Recipes
Presentation:
Keep the plate tidy. A child staring at a jumble of food is more likely to hesitate, so use small piles, clear sections, and familiar shapes. Wedges, sticks, sliders, and bowls all read as less intimidating than a heap of mixed food, and a little empty space on the plate helps more than people think.
Accompaniments:
Fruit, plain rice, buttered noodles, fries, toast, cucumber sticks, and simple dips fit this whole collection. If you want to make dinner feel complete without pushing flavor too hard, add one soft item and one crisp item. That contrast keeps the plate from feeling monotonous.
Portions:
Most of these recipes work well in child-sized portions of 1 tender, 2 meatballs, 1 small slider, 1 cup pasta, or 1-2 egg muffins, depending on age and appetite. For adults, scale with a second side instead of doubling the seasoning. Kids rarely need a bigger flavor; they need a plate that looks manageable.
Beverage Pairing:
Cold milk is the easy answer for cheese-heavy meals and breakfast recipes. For sweeter dishes like banana pancakes or muffins, water, milk, or a light fruit smoothie keeps things balanced. If you want a warm drink for the adults at the table, plain tea or coffee works without fighting the food.
Additional Tips and Flavor Boosters
Flavor Enhancement:
A small finishing touch can make a plain dish feel cared for. A pinch of Parmesan on pasta, a little melted butter on fries, or a teaspoon of honey brushed over roasted carrots can tilt the flavor toward something kids recognize as “good” without making it louder.
Customization:
Let the plate split before it hits the table. Cheese on one half of a quesadilla, plain meatballs on one side of the bowl, sauce in a cup, toppings in a tiny pile — that kind of control lowers the drama fast. It also gives you a chance to test what each child will actually eat instead of guessing.
Serving Suggestions:
Use small bowls, mini cups, and bite-size pieces. Food that fits a child’s hand feels less random. A little garnish is fine if it’s useful — parsley on garlic noodles, sliced fruit around breakfast plates, or a dip cup next to chicken tenders. Skip anything that exists only to look pretty and never gets touched.
Make-It-Yours:
For dairy-free eaters, use dairy-free cheese in the quesadillas and pizza rounds, or olive oil instead of butter on noodles. For gluten-free versions, swap in gluten-free crumbs, pasta, and flour blends where needed. For lower-sodium plates, season with garlic, paprika, and herbs first, then salt the adult portions separately.
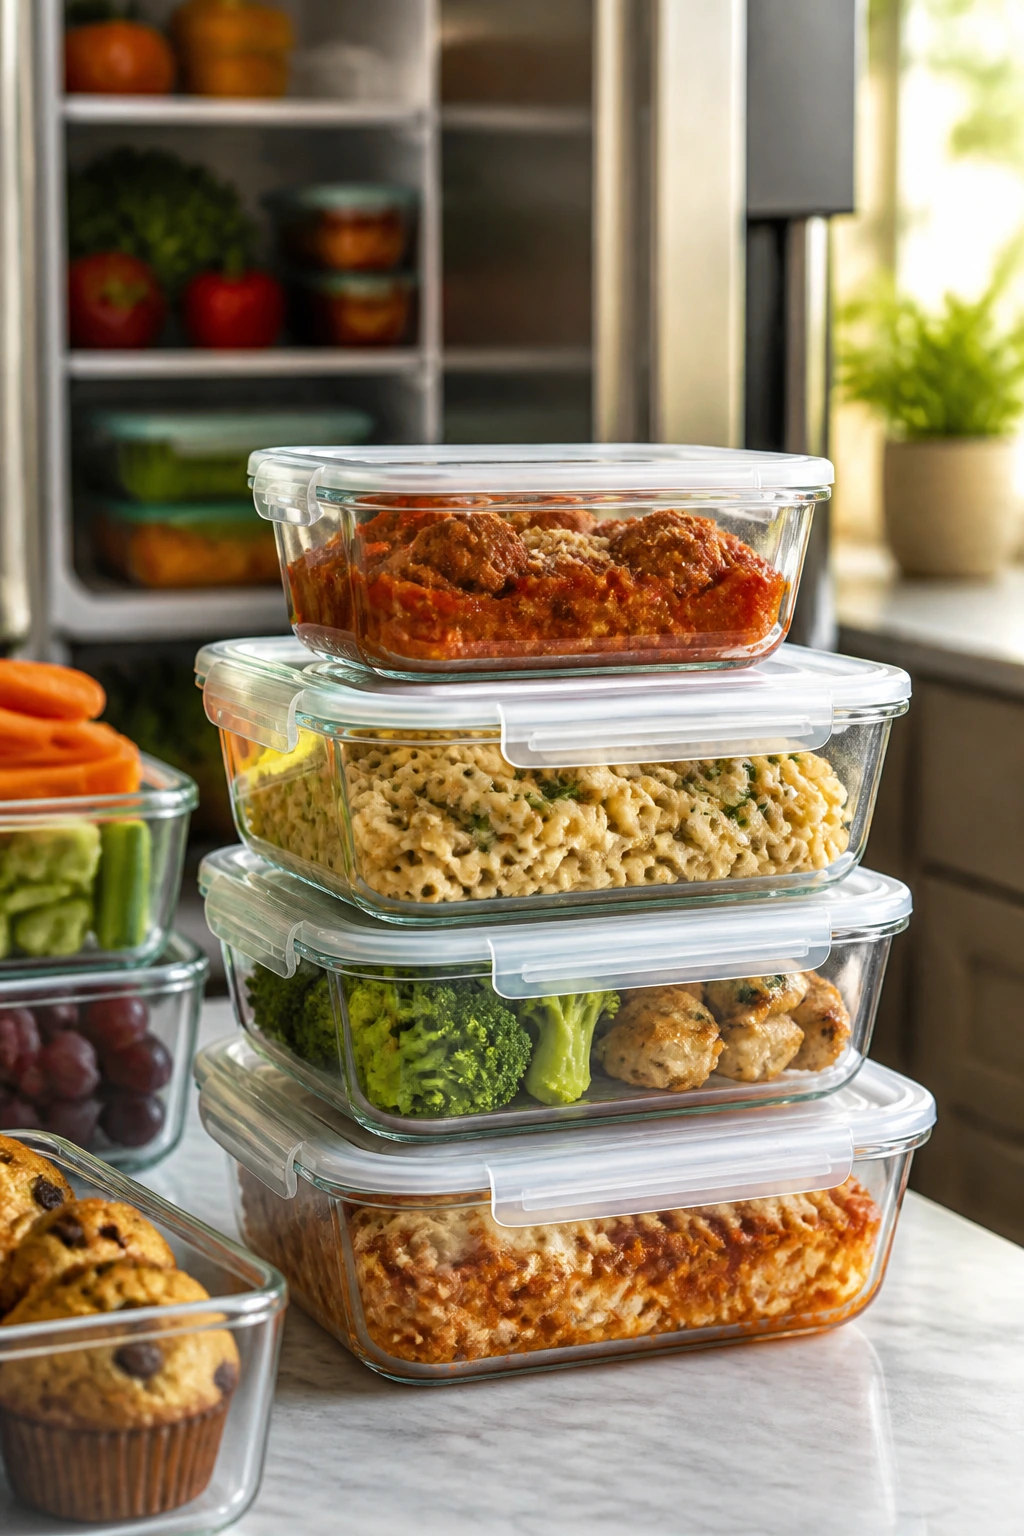
Make-Ahead, Storage, and Reheating Guidance
A few of these recipes are best the minute they’re made. Grilled cheese, oven fries, fish sticks, and quesadilla wedges lose their edge if they sit around too long. Reheat them on a 375°F sheet pan or in an air fryer for a few minutes so the outside wakes back up. Microwaving works in a pinch, but the texture goes soft fast.
Pasta dishes, meatballs, sliders, casseroles, soup, and sauces keep better. Most cooked meat-based dishes hold in the refrigerator for 3-4 days in airtight containers. Baked muffins, pinwheels, and breakfast sandwiches usually freeze well for up to 2 months if wrapped tightly. Store sauces separately when you can; that keeps bread and pasta from going soggy.
For breakfast food, cool completely before packing. Egg muffins, sausage biscuits, and pancakes can be reheated in the microwave for 20-40 seconds or warmed in a low oven if you want better texture. Smoothies don’t store well once blended, so freeze the fruit instead and blend fresh. For casseroles, add a splash of milk before reheating if the surface looks dry. That one small move keeps the leftovers from turning stiff.
Variations and Adaptations to Try
The Dairy-Free Table:
Use dairy-free butter, cheese, and yogurt where the recipe depends on creaminess. Quesadillas, pasta, smoothies, and parfaits adapt well with these swaps, and the change is less obvious when the food is served warm or blended.
The No-Spice Route:
Keep seasoning to salt, garlic, and mild herbs. Skip chili powders, pepper flakes, and sharp mustard unless you’re making a separate adult batch. Kids who are sensitive to heat usually do better with food that tastes savory rather than spicy.
The Hidden-Veggie Strategy:
Blend vegetables into sauces, grate them into meatballs, or roast them until sweet before chopping small. Don’t stuff too many vegetables into one recipe. One hidden vegetable done well beats three hidden vegetables that all change the texture.
The Freezer-Friend Plan:
Mini muffins, meatballs, sliders, quesadilla filling, pancakes, and breakfast biscuits all freeze neatly. Pack them in single layers first, then transfer to freezer bags so they don’t stick together. That way, you can pull out one portion instead of committing to a huge batch.
The Lunchbox Version:
Choose foods that stay decent at room temperature: pinwheels, muffins, meatballs, parfait components, and mini pizzas made on sturdy bread. Put wet items in separate compartments. Kids are far more likely to eat a lunch that still looks like the thing they expected when they opened it.
Common Mistakes to Avoid
The biggest mistake is hiding so much inside a recipe that the food no longer tastes like itself. If you add three vegetables, two sauces, and a strong spice blend to a dish meant for cautious eaters, the result may look clever and still get rejected. Keep the core flavor clear, then add extras slowly.
Another problem is mixing textures too aggressively. Crunchy crumbs soaked in sauce go soft. Crispy fries piled under wet toppings go limp. Soup with giant vegetable chunks feels like work. The fix is simple: keep the textures separate when you can, and add sauces at the end or on the side.
Overseasoning shows up fast in kid food. Garlic powder, paprika, onion powder, and salt are useful, but they should support the dish instead of taking it over. If a recipe has cheese, ketchup, or marinara, you usually need less seasoning than you think.
Cooking everything one minute too long is another quiet failure. Chicken dries out, fish turns chalky, eggs go rubbery, and pasta collapses into mush. Use the thermometer for meat and fish, and trust the visual cues for baked goods: golden edges, set centers, and bubbling cheese. That’s enough.
Frequently Asked Questions
How do I get a picky eater to try a new recipe without a fight?
Start with one familiar part of the plate and one tiny new part. A child who trusts the fries may be willing to nibble the chicken tender next to them. Keep the new food small, plain, and separate instead of burying it under a “you’ll love it” speech.
Can I make these recipes ahead for the week?
Yes, especially meatballs, muffins, soups, casseroles, and pasta sauces. Cook them fully, cool them fast, and store them in shallow containers so they chill evenly. Reheat with a little moisture added back in when the dish needs it.
What if my child refuses vegetables in every form?
Try them in three different ways before giving up: blended smooth, roasted until sweet, and chopped so small they melt into a sauce. The texture often matters more than the vegetable itself. Cold, raw chunks are the hardest sell for a lot of kids.
Are these recipes good for toddlers too?
Many are, but size matters. Cut food into pea-size or finger-size pieces, skip hard crusts if your child struggles with them, and avoid round foods that can roll away or pose a choking risk. Soft textures and mild seasoning are your friend here.
Can I freeze chicken tenders, meatballs, or muffins?
Yes. Freeze them after cooking and cooling, then reheat in a hot oven or air fryer so the texture comes back. Muffins and meatballs freeze especially well; fried or crisp foods need a little extra oven time to recover.
What’s the best cheese for kids who dislike strong flavor?
Mild cheddar, mozzarella, American, and Monterey Jack are the easiest starting points. They melt smoothly and don’t hit the tongue as hard as sharp cheddar or blue cheese. If a child is cheese-shy, American is often the easiest first step.
How do I keep sauces from making everything soggy?
Use thicker sauce and serve it on the side when possible. For pasta and casseroles, let the sauce simmer until it clings to a spoon instead of running off it. For sandwiches and fries, add sauce only at the table.
Can I swap proteins without ruining the recipe?
Usually, yes, if you keep the shape and cook time in mind. Ground turkey can replace beef in meatballs and sliders, shredded chicken can replace tuna in melts, and white fish can replace chicken in a breadcrumb coating. The seasoning may need a small adjustment, but the structure stays the same.
Dinner Without the Drama

Picky eating does not mean boring eating, and it definitely doesn’t mean every meal needs to be a standoff. The quiet little wins are what matter here: the tender meatball that gets eaten without comment, the cheese sauce that stays smooth, the carrot that disappears under Parmesan before anyone has time to object.
I’ve always liked recipes that solve the problem before the argument starts. A familiar shape. A mild flavor. A dip on the side. That combination goes a long way, and it leaves you with something better than a clean plate — it leaves you with a repeatable dinner that doesn’t ask for a speech.