
A can of beans, a box of pasta, and a half-forgotten jar of tomato paste can still turn into dinner before the sink is full. That’s the charm of pantry staples when you know how to treat them: they stop being emergency food and start acting like a real cook’s toolbox. A little heat, a little salt, one bright finish, and the whole thing changes shape.
I’ve always liked 30-minute meals that live mostly on the shelf because they don’t ask for much. No special shopping trip. No mystery ingredient you use once and shove behind the vinegar. Just the sturdy stuff that keeps showing up: dried pasta, rice, canned tomatoes, beans, tuna, coconut milk, tortillas, broth, eggs, olives, breadcrumbs, peanut butter. Boring on paper. Reliable in the pan.
The trick is not to make them fancy. It’s to make them taste deliberate. A smashed garlic clove in hot oil. Toasted spices for 20 seconds before the liquid goes in. Pasta water that turns a greasy tangle into a glossy sauce. That’s the difference between “I threw something together” and “I’d make this again on purpose.”
Why These 30-Minute Pantry Meals Earn a Spot in the Rotation
Shelf-Stable First: Every recipe here leans on ingredients that live well in a cupboard, freezer, or fridge drawer, so dinner doesn’t fall apart when the fresh produce bin looks sparse.
Fast Without Feeling Rushed: These meals are built around overlapping steps — pasta boils while sauce simmers, rice reheats while fillings warm, tortillas crisp while beans mash.
Cheap Ingredients, Real Flavor: Canned tomatoes, dried lentils, rice, beans, and eggs are doing the heavy lifting here, not expensive proteins or specialty sauces.
Flexible by Design: If you’re missing one item, most of these recipes have an easy swap built in: one bean for another, one noodle for another, one herb for another.
Good for Tired Nights: These are the recipes I’d reach for when I can cook, but I do not want to think very hard. That matters more than most people admit.
Built for Clean Plates, Not Clutter: Many of these use one pot, one skillet, or one baking sheet, which means the cleanup stays sane enough to repeat tomorrow.
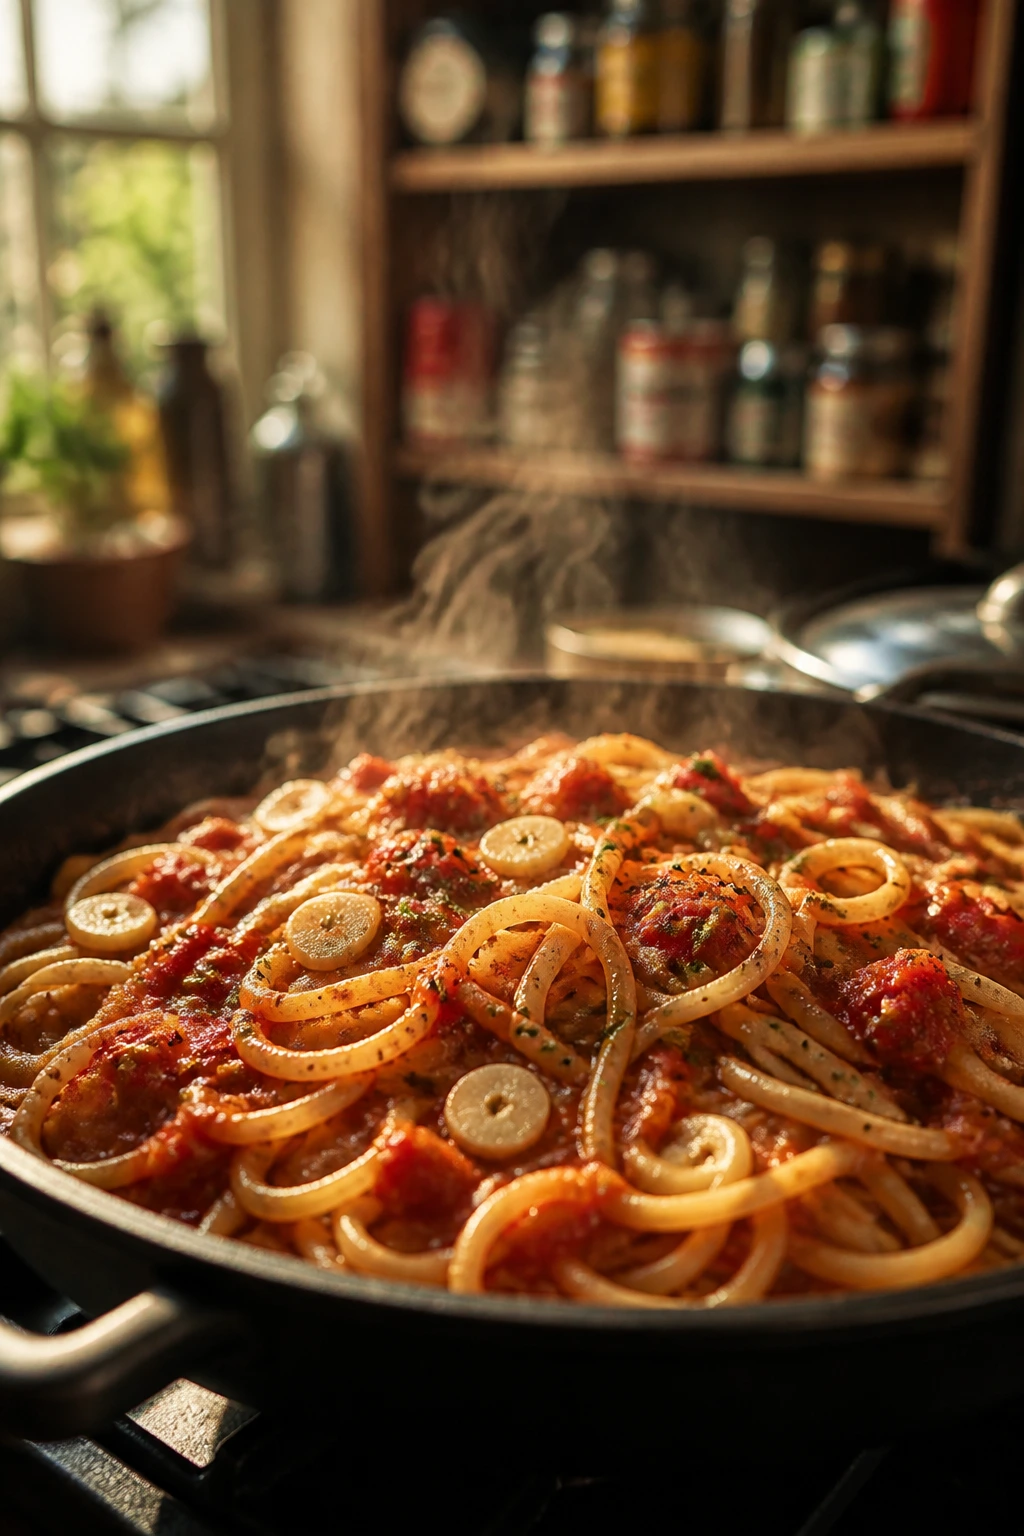
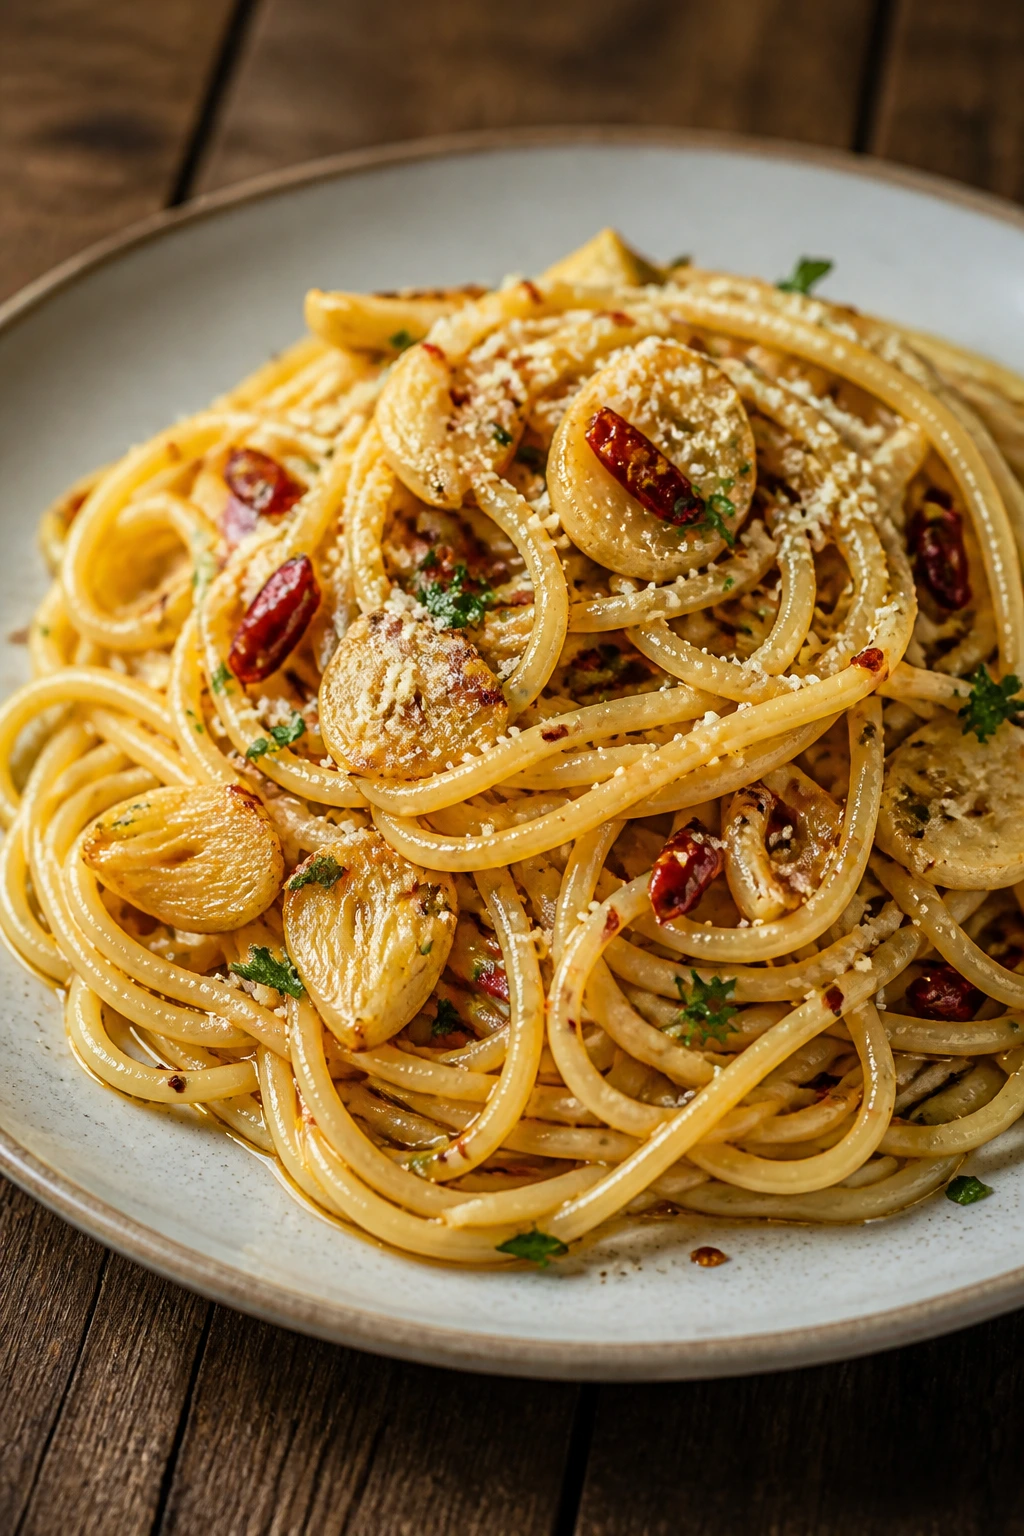
1. Garlic Chili Spaghetti
This is the kind of pasta that looks modest and tastes like somebody paid attention. The garlic softens in olive oil, the chili wakes everything up, and the starchy water turns the strands slick and glossy instead of dry and stringy.
Why It Works:
The whole dish depends on gentle heat. Garlic burns fast, so you want it pale gold, not brown. Once the pasta hits the pan with a splash of cooking water, the oil, starch, and cheese pull together into a sauce that clings instead of pooling.
Key Ingredients:
- 12 oz spaghetti
- 3 tbsp olive oil
- 6 garlic cloves, thinly sliced
- 1 tsp red pepper flakes
- 1 cup reserved pasta water
- 1/2 cup finely grated Parmesan
- 2 tbsp chopped parsley
- 1/2 tsp kosher salt, plus more for the pasta water
Quick Steps:
- Bring a large pot of salted water to a boil and cook the spaghetti until just shy of al dente, about 8 to 9 minutes.
- Warm the olive oil in a large skillet over medium-low heat, then add the garlic and cook for 1 to 2 minutes until it smells sweet and the edges barely color.
- Stir in the red pepper flakes for 10 seconds.
- Add the drained spaghetti and 1/2 cup pasta water, tossing until the strands look glossy and loose.
- Turn off the heat, add the Parmesan and parsley, and toss again until the cheese melts into the sauce.
Equipment for This Recipe:
- Large pot
- Large skillet
- Tongs
- Box grater or microplane
How to Serve This Dish:
Pile it into warm bowls and finish with extra Parmesan and a little black pepper. I like it with a simple green salad or a few olives on the side, mostly because the salty bite keeps the pasta from feeling too one-note.
Pro Tips for This Recipe:
- Slice the garlic, don’t mince it. Thin slices soften evenly and don’t scorch as fast.
- Keep at least 1 cup of pasta water. If the pan looks dry, add it in small splashes.
- Take the skillet off the heat before the Parmesan goes in so the cheese melts instead of clumping.
Variations on This Dish:
- Lemon-Garlic Finish: Add 1 teaspoon lemon zest and 1 tablespoon lemon juice at the end for a brighter, cleaner edge.
- Anchovy Depth: Melt 2 anchovy fillets into the oil with the garlic. They disappear, but the pasta tastes deeper.
- Breadcrumb Crunch: Toast 1/4 cup breadcrumbs in olive oil and scatter them over the top for texture.
Common Mistakes to Avoid with This Dish:
- Don’t let the garlic turn dark brown. It goes bitter in seconds and takes the whole pan with it.
- Don’t drain every drop of pasta water. That starch is the glue here.
- Don’t add the cheese while the pan is blazing hot or it can seize into little strings.
2. Tuna and Tomato Pasta
This is one of those cupboard dinners that quietly outperforms its ingredient list. The canned tuna brings salt and body, the tomatoes make a fast sauce, and the pasta drinks up all the savory bits left in the skillet.
Why It Works:
Tuna and tomato have a natural habit of liking each other. The tomato paste deepens the sauce in a way canned diced tomatoes alone can’t, and a little pasta water helps the sauce coat instead of puddle at the bottom of the bowl.
Key Ingredients:
- 12 oz penne or rigatoni
- 2 tbsp olive oil
- 1 small onion, finely diced
- 3 garlic cloves, minced
- 2 tbsp tomato paste
- 1 can (14.5 oz) diced tomatoes
- 1 can (5 oz) tuna in oil or water, drained
- 1 tsp dried oregano
- 1/2 cup reserved pasta water
Quick Steps:
- Boil the pasta in salted water until al dente, then save 1 cup of the water before draining.
- Warm the oil in a skillet over medium heat and cook the onion for 4 minutes until soft and translucent.
- Add the garlic and tomato paste, stirring for 30 seconds until the paste darkens slightly.
- Pour in the tomatoes and oregano, simmer for 8 minutes, then stir in the tuna.
- Toss in the pasta with a splash of pasta water until the sauce coats the tubes.
Equipment for This Recipe:
- Large pot
- Deep skillet
- Wooden spoon
- Colander
How to Serve This Dish:
Serve it with chopped parsley, extra black pepper, and a squeeze of lemon if you have one. A slice of toast on the side works better than people think, especially for scooping up the sauce.
Pro Tips for This Recipe:
- Oil-packed tuna gives a richer sauce, but water-packed tuna still works if that’s what you have.
- Let the tomato paste cook for a few seconds before adding liquid; that tiny step removes the raw edge.
- If the sauce tastes flat, add a pinch of salt and a splash of pasta water before reaching for more herbs.
Variations on This Dish:
- Olive Pantry Pasta: Stir in 1/3 cup sliced olives for a briny hit.
- Spicy Tomato Tuna: Add 1/2 teaspoon chili flakes with the garlic.
- Creamy Version: Finish with 2 tablespoons cream cheese for a softer, rounder sauce.
Common Mistakes to Avoid with This Dish:
- Don’t skip the tomato paste. The sauce can taste thin and a little tired without it.
- Don’t dump the tuna in too early or it can dry out.
- Don’t forget to save pasta water; a dry tuna sauce feels rough instead of silky.
3. Coconut Chickpea Curry
This one tastes far more layered than the clock suggests. Chickpeas bring the heft, coconut milk smooths the spice, and canned tomatoes keep the whole pot from drifting into sweetness.
Why It Works:
Curry powder blooms in hot oil in under a minute, which means the spices wake up before the liquid goes in. Chickpeas hold their shape, so the sauce gets thicker as it simmers, and that’s what makes the bowl feel satisfying instead of soupy.
Key Ingredients:
- 2 tbsp oil
- 1 onion, diced
- 3 garlic cloves, minced
- 2 tbsp curry powder
- 2 cans (15 oz each) chickpeas, drained and rinsed
- 1 can (13.5 oz) coconut milk
- 1 can (14.5 oz) diced tomatoes
- 2 cups baby spinach
- 1 tsp salt
- Cooked rice, for serving
Quick Steps:
- Cook the onion in oil over medium heat for 4 to 5 minutes until soft.
- Add the garlic and curry powder, stirring for 30 seconds until fragrant.
- Stir in the chickpeas, coconut milk, tomatoes, and salt.
- Simmer for 10 to 12 minutes until the sauce thickens and the chickpeas taste seasoned through.
- Fold in the spinach until just wilted, then serve over rice.
Equipment for This Recipe:
- Large skillet or saucepan
- Wooden spoon
- Measuring cups
- Rice cooker or pot, if serving with rice
How to Serve This Dish:
Spoon it over basmati rice or quick-cooked jasmine rice and add a spoonful of yogurt if you want contrast. The bowl should look loose and creamy, not dry and clumpy.
Pro Tips for This Recipe:
- Bloom the curry powder in the oil. If you skip that step, the curry tastes flatter.
- Use full-fat coconut milk for the best texture; the light version makes the sauce thin.
- Add the spinach at the very end so it stays bright instead of going swampy.
Variations on This Dish:
- Sweet Potato Curry: Add 1 small diced sweet potato with the onion and simmer 10 minutes longer.
- Peanut Curry: Stir in 2 tablespoons peanut butter for a thicker, nuttier sauce.
- Chickpea and Cauliflower: Replace the spinach with 2 cups small cauliflower florets.
Common Mistakes to Avoid with This Dish:
- Don’t boil the curry hard or the coconut milk can split.
- Don’t use too much salt before the sauce reduces. It concentrates fast.
- Don’t skip the simmer time; canned chickpeas need a few minutes to pick up flavor.
4. Black Bean Taco Skillet
This is tacos without the folding stress. Everything lands in one skillet, gets warmed through, and ends up somewhere between a taco filling and a fast nacho bowl.
Why It Works:
Black beans and salsa already carry seasoning, so the job here is mostly heat and texture. A little corn adds sweetness, and a handful of cheese at the end gives the pan enough stretch to feel complete.
Key Ingredients:
- 1 tbsp oil
- 1 small onion, diced
- 1 can (15 oz) black beans, drained and rinsed
- 1 cup corn kernels, frozen or canned
- 1 cup salsa
- 1 tsp ground cumin
- 1/2 tsp chili powder
- 1 cup shredded cheddar or Monterey Jack
- 6 small tortillas
Quick Steps:
- Cook the onion in oil over medium heat for 3 to 4 minutes until softened.
- Stir in the black beans, corn, salsa, cumin, and chili powder.
- Simmer for 5 to 6 minutes until the mixture thickens and smells like taco night.
- Sprinkle the cheese over the skillet and cover for 1 minute until melted.
- Spoon into warm tortillas and finish with any toppings you like.
Equipment for This Recipe:
- 10- or 12-inch skillet
- Spoon or spatula
- Cheese grater
- Dry skillet for warming tortillas
How to Serve This Dish:
Serve it straight from the pan with shredded lettuce, sour cream, or chopped onion if you’ve got them. I like to keep the tortillas warm in a towel so they bend instead of crack.
Pro Tips for This Recipe:
- Drain canned corn if it’s watery, or the filling turns loose.
- Warm tortillas in a dry skillet for 20 seconds per side; they taste better and tear less.
- If your salsa is thin, simmer a minute or two longer before adding the cheese.
Variations on This Dish:
- Rice Bowl Version: Spoon the skillet over rice instead of tortillas.
- Smoky Chipotle Swap: Add 1 teaspoon minced chipotle in adobo for deeper heat.
- Bean Blend: Use pinto beans if that’s what’s in the cupboard.
Common Mistakes to Avoid with This Dish:
- Don’t drown the skillet in salsa. Too much liquid makes the filling slide around.
- Don’t skip warming the tortillas. Cold tortillas crack at the fold.
- Don’t add the cheese too early or it can separate instead of melting cleanly.
5. Fast Tomato Soup with Grilled Cheese
Tomato soup can be plain in the wrong hands. Give it onion, butter, and a little simmer time, and it turns into a bowl that tastes like you meant to make lunch for yourself.
Why It Works:
Canned tomatoes bring acidity, butter smooths the sharp edges, and a short simmer gives the onion time to disappear into the pot. The grilled cheese adds fat and crunch, which matters more here than fancy garnish ever could.
Key Ingredients:
- 2 tbsp butter
- 1 onion, chopped
- 2 garlic cloves, minced
- 1 can (28 oz) crushed tomatoes
- 2 cups broth
- 1 tsp sugar, optional
- 4 slices bread
- 4 slices cheese, such as cheddar or American
Quick Steps:
- Melt the butter in a saucepan over medium heat and cook the onion for 5 minutes until soft.
- Add the garlic and cook for 30 seconds, then pour in the tomatoes and broth.
- Simmer for 10 minutes, then blend if you want it smooth.
- Toast the sandwiches in a skillet until the bread is golden and the cheese melts.
- Season the soup with salt and sugar if needed, then serve hot.
Equipment for This Recipe:
- Saucepan
- Blender or immersion blender
- Skillet
- Spatula
How to Serve This Dish:
Ladle the soup into shallow bowls and cut the grilled cheese into triangles for dipping. If you want a little crunch on top, crush a few saltines or scatter toasted breadcrumbs over the soup.
Pro Tips for This Recipe:
- Let the tomatoes simmer long enough to lose their canned edge.
- Blend carefully if the soup is hot; vent the lid a little so steam can escape.
- Add sugar only after tasting. Sometimes the tomatoes are already sweet enough.
Variations on This Dish:
- Creamy Tomato Soup: Stir in 1/4 cup cream or half-and-half at the end.
- Herbed Version: Add dried basil or oregano with the broth.
- Spicy Tomato Soup: A pinch of red pepper flakes gives the soup more lift.
Common Mistakes to Avoid with This Dish:
- Don’t rush the onion. Raw onion leaves the soup harsh.
- Don’t make the grilled cheese in a dry pan; butter on the outside matters.
- Don’t oversalt before the broth reduces.
6. White Bean and Kale Skillet
This skillet tastes like the sort of thing a cook makes when they want dinner to feel calm. The beans go creamy, the kale softens, and the garlic pulls the whole thing together with almost no drama.
Why It Works:
Cannellini beans break down a little as they heat, which thickens the pan without cream. Kale needs a splash of broth and a few minutes to lose its raw edge, so this one rewards a steady simmer.
Key Ingredients:
- 2 tbsp olive oil
- 1 onion, sliced
- 4 garlic cloves, minced
- 2 cans (15 oz each) cannellini beans, drained
- 1/2 cup broth
- 1 bunch kale, stems removed and chopped
- 1/4 tsp red pepper flakes
- 1/4 cup grated Parmesan
Quick Steps:
- Cook the onion in olive oil over medium heat for 5 minutes until soft.
- Add the garlic and red pepper flakes and stir for 30 seconds.
- Add the beans and broth, then mash a few beans with the back of the spoon.
- Fold in the kale and cook 4 to 5 minutes until wilted and tender.
- Stir in the Parmesan and taste for salt before serving.
Equipment for This Recipe:
- Large skillet
- Wooden spoon
- Knife and cutting board
- Measuring cup
How to Serve This Dish:
Pile it into bowls with crusty bread or spoon it over toast. The pan should be creamy enough to cling to the bread, but not so wet that it runs off the plate.
Pro Tips for This Recipe:
- Remove the tough stem from kale; it stays chewy even after cooking.
- Mash a few beans, not all of them. You want body, not puree.
- Add Parmesan at the end so it melts into the beans instead of clumping.
Variations on This Dish:
- Lemony White Beans: Finish with lemon juice and zest.
- Tomato Addition: Stir in 1/2 cup canned diced tomatoes for a looser, saucier pan.
- Sausage Option: Brown sliced sausage first if you want a meatier skillet.
Common Mistakes to Avoid with This Dish:
- Don’t skip chopping the kale. Long leaves are awkward to eat.
- Don’t let the garlic brown too much or it takes on a bitter note.
- Don’t add so much broth that the beans float; this should eat like a skillet, not a soup.
7. Egg Fried Rice with Frozen Vegetables
Leftover rice turns into dinner fast when you stop treating it like a side dish. Cold rice fries better, eggs give it richness, and frozen vegetables make the whole pan look fuller with almost no prep.
Why It Works:
Rice that has had time to dry out separates in the skillet instead of turning mushy. High heat, a hot pan, and quick stirring keep the grains distinct while the soy sauce coats everything evenly.
Key Ingredients:
- 3 cups cooked cold rice
- 2 tbsp neutral oil
- 3 eggs, beaten
- 1 cup frozen mixed vegetables
- 2 tbsp soy sauce
- 1 tsp sesame oil
- 2 scallions, sliced
Quick Steps:
- Heat the oil in a large skillet or wok over medium-high heat.
- Scramble the eggs for 30 to 45 seconds until just set, then push them to one side.
- Add the frozen vegetables and cook until the ice cooks off, about 2 minutes.
- Stir in the rice and soy sauce, breaking up clumps with the spatula.
- Finish with sesame oil and scallions, then serve right away.
Equipment for This Recipe:
- Large skillet or wok
- Spatula
- Mixing bowl
- Measuring spoons
How to Serve This Dish:
Serve it as-is in wide bowls, or add a fried egg on top if you want more richness. A spoon of chili crisp on the side is never a bad idea.
Pro Tips for This Recipe:
- Cold rice from the fridge fries best. Fresh rice turns sticky.
- Don’t overcrowd the pan; if it’s packed too full, the rice steams.
- Add sesame oil at the end because it tastes fresher that way.
Variations on This Dish:
- Vegetarian Protein Boost: Add diced tofu or edamame.
- Kimchi Fried Rice: Stir in chopped kimchi with the vegetables.
- Pineapple Fried Rice: Add a handful of canned pineapple chunks for a sweet edge.
Common Mistakes to Avoid with This Dish:
- Don’t use wet rice from the rice cooker. It clumps hard.
- Don’t pour in the soy sauce all at once if the pan is small; add it in splashes.
- Don’t overcook the eggs. They should stay tender, not dry and rubbery.
8. Pantry Shakshuka
Shakshuka looks like something that took more work than it did, which is part of its appeal. Eggs poach right in the sauce, and the whole skillet ends up tasting like tomato, pepper, garlic, and paprika all agreed to behave.
Why It Works:
The sauce has enough body to hold the eggs in place, which is the whole point. A lid traps steam so the whites set without the yolks turning chalky, and that tiny detail separates a good pan from a sloppy one.
Key Ingredients:
- 2 tbsp olive oil
- 1 onion, diced
- 1 bell pepper, diced or 1 cup jarred roasted peppers, chopped
- 3 garlic cloves, minced
- 1 tsp paprika
- 1 can (28 oz) crushed tomatoes
- 4 to 6 eggs
- 1/4 cup feta, crumbled
- Bread, for serving
Quick Steps:
- Cook the onion and pepper in olive oil over medium heat for 5 minutes until soft.
- Stir in the garlic and paprika for 30 seconds.
- Add the tomatoes and simmer for 8 minutes until the sauce thickens.
- Make little wells and crack in the eggs.
- Cover and cook 4 to 6 minutes until the whites set and the yolks are still soft.
Equipment for This Recipe:
- Large skillet with lid
- Wooden spoon
- Spoon for making wells
- Knife and cutting board
How to Serve This Dish:
Scatter feta and parsley over the top and bring the pan straight to the table. Scoop with toast, pita, or even a torn piece of naan if that’s what you have.
Pro Tips for This Recipe:
- Keep the sauce thick enough that the eggs don’t slide around.
- Crack each egg into a small cup first if you want neater placement.
- Pull the pan off the heat while the yolks still wobble slightly; carryover heat finishes them.
Variations on This Dish:
- Chickpea Shakshuka: Stir in 1 can chickpeas for a heartier pan.
- Spicy Version: Add harissa or extra chili flakes with the paprika.
- Green Shakshuka: Use spinach and canned green chiles instead of tomatoes.
Common Mistakes to Avoid with This Dish:
- Don’t let the sauce be watery. The eggs need a stable bed.
- Don’t overcook the yolks unless that’s your preference; they go chalky fast.
- Don’t forget the lid. Steam is doing half the work here.
9. Peanut Sesame Noodles
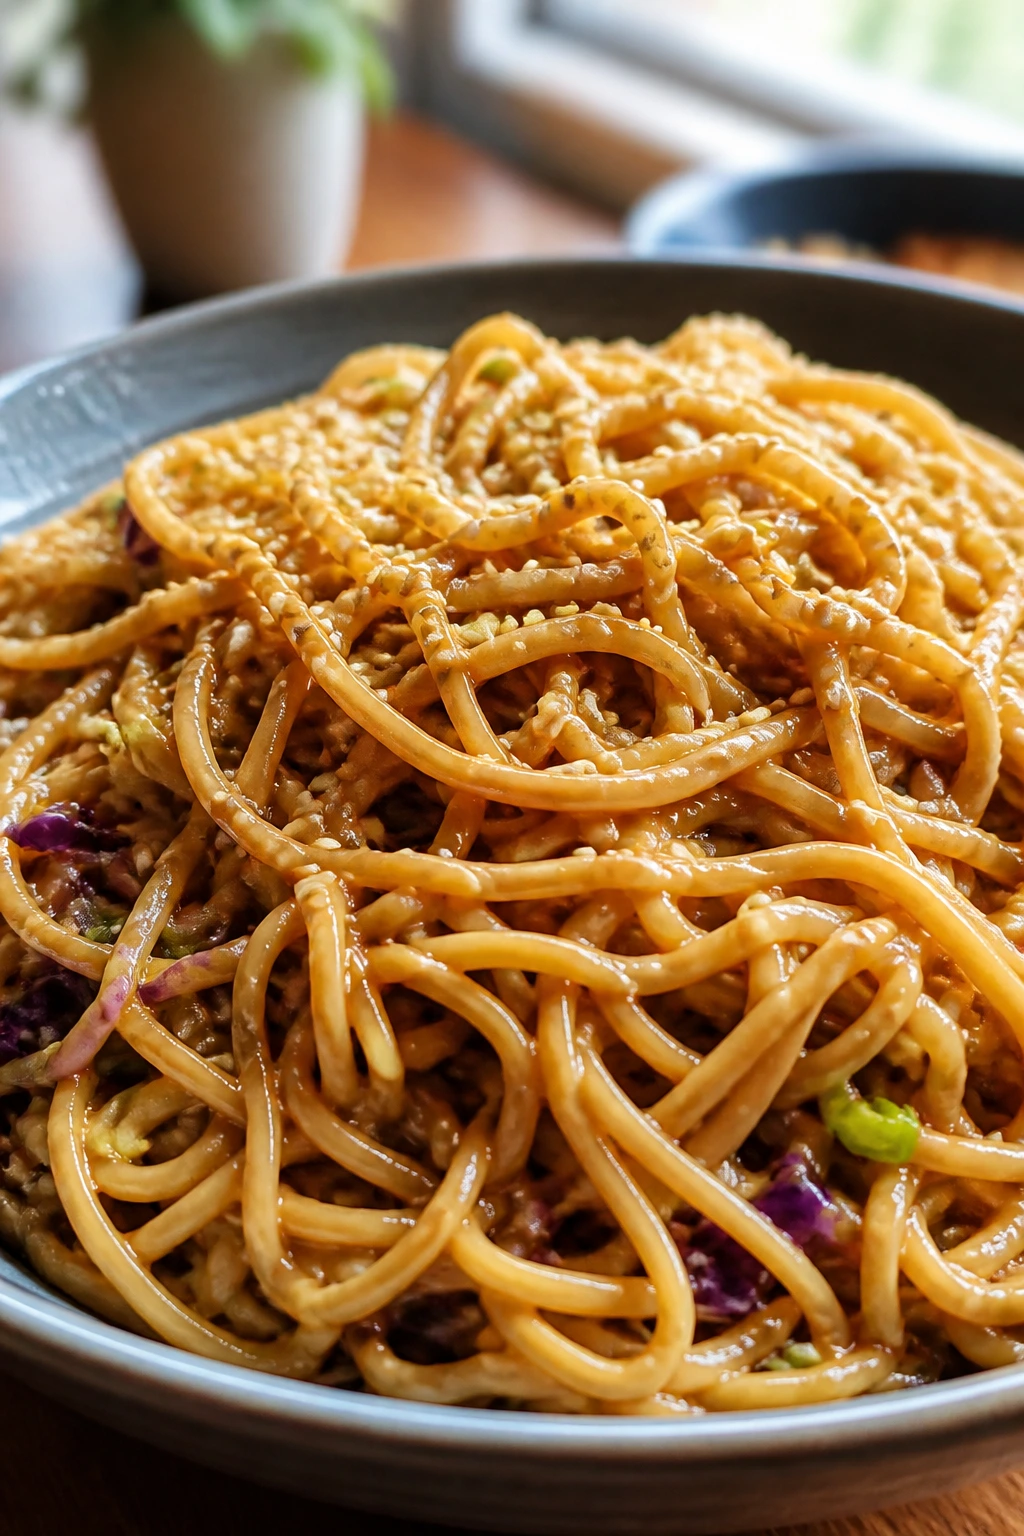
These noodles taste like takeout if takeout had better timing. Peanut butter, soy sauce, garlic, and a splash of vinegar make a sauce that clings to every strand instead of sliding to the bottom of the bowl.
Why It Works:
Peanut butter brings fat and body, soy sauce brings salt, and vinegar wakes the whole thing up so it doesn’t sit heavy. A little hot noodle water thins the sauce into something glossy and spoonable.
Key Ingredients:
- 12 oz spaghetti, linguine, or ramen noodles
- 1/3 cup peanut butter
- 2 tbsp soy sauce
- 1 tbsp rice vinegar or lime juice
- 1 garlic clove, grated
- 1 tsp sesame oil
- 1 to 3 tbsp hot water
- 1 cup shredded cabbage or carrots
Quick Steps:
- Cook the noodles until tender and save 1/2 cup of the cooking water.
- Whisk the peanut butter, soy sauce, vinegar, garlic, sesame oil, and hot water in a bowl until smooth.
- Toss the noodles with the sauce while they’re still warm.
- Add the cabbage or carrots and toss again until coated.
- Taste and adjust with more water if the sauce feels stiff.
Equipment for This Recipe:
- Pot
- Mixing bowl
- Whisk or fork
- Tongs
How to Serve This Dish:
Serve it warm or at room temperature with scallions, sesame seeds, or crushed peanuts if you keep them around. It’s good in a bowl, but it’s also good packed into a lunch container the next day.
Pro Tips for This Recipe:
- Warm noodles grab the sauce better than cold ones.
- If the peanut butter is thick, whisk in water a teaspoon at a time.
- Use shredded cabbage from a bag if you want crunch without cutting.
Variations on This Dish:
- Spicy Chili Peanut: Add chili crisp or sriracha.
- Miso Peanut Sauce: Stir in 1 teaspoon miso for deeper savoriness.
- Cold Noodle Salad: Chill the noodles and add cucumber sticks.
Common Mistakes to Avoid with This Dish:
- Don’t drown the sauce in water at the start.
- Don’t use sweetened peanut butter if you can help it; it throws off the balance.
- Don’t let the noodles sit dry after draining or they clump fast.
10. Lentil Sloppy Joes

Lentils make the old-school sandwich filling meatier in texture than you’d expect. They keep their shape, soak up the sweet-tangy sauce, and sit neatly in a bun instead of sliding out in one greasy mound.
Why It Works:
Brown or green lentils hold up better than red ones, which turn mushy too fast. Tomato paste, ketchup, and Worcestershire give the filling that familiar sloppy Joe flavor without needing long simmer time.
Key Ingredients:
- 1 tbsp oil
- 1 small onion, diced
- 1 carrot, finely diced
- 1 cup cooked lentils
- 2 tbsp tomato paste
- 1/3 cup ketchup
- 1 tbsp Worcestershire sauce
- 1/2 cup water
- 4 burger buns
Quick Steps:
- Cook the onion and carrot in oil over medium heat for 5 minutes until soft.
- Stir in the tomato paste and cook for 30 seconds.
- Add the lentils, ketchup, Worcestershire sauce, and water.
- Simmer for 8 to 10 minutes until the filling thickens and looks glossy.
- Spoon onto toasted buns and serve hot.
Equipment for This Recipe:
- Skillet
- Wooden spoon
- Knife and cutting board
- Toaster or dry pan for buns
How to Serve This Dish:
Serve the filling on toasted buns with pickles or a crisp cabbage slaw. I like a few potato chips on the side, mainly because the sandwich is soft and the crunch helps.
Pro Tips for This Recipe:
- Don’t overcook the lentils before adding them; they need some structure.
- Toast the buns so they don’t collapse under the filling.
- If the sauce tastes too sweet, add a splash of vinegar.
Variations on This Dish:
- Smoky Sloppy Joes: Add smoked paprika.
- Bell Pepper Version: Dice in 1 bell pepper with the onion.
- Spicy Mustard Twist: Stir in 1 teaspoon yellow mustard.
Common Mistakes to Avoid with This Dish:
- Don’t add too much water or the filling will run off the bun.
- Don’t use red lentils unless you want a softer, almost spreadable texture.
- Don’t skip the simmer; the sauce needs time to tighten up.
11. Refried Bean Quesadillas
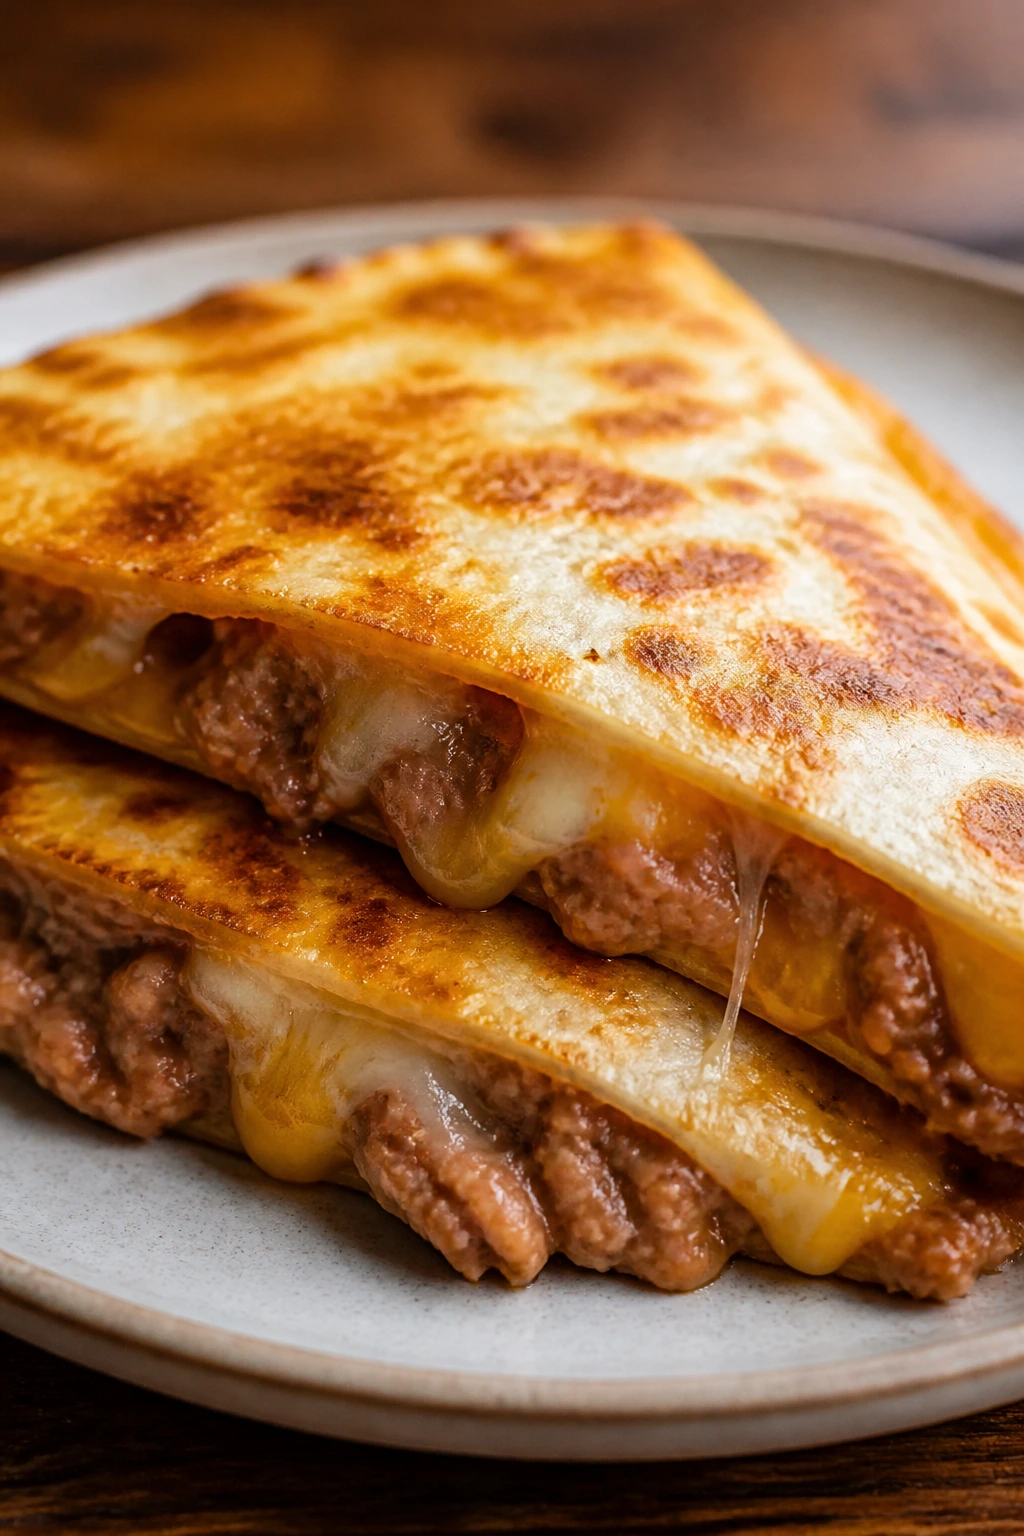
Refried beans and cheese are the kind of pantry pair that never need explaining. Put them between tortillas, crisp them in a skillet, and dinner starts behaving like it was planned.
Why It Works:
Refried beans spread neatly, which helps the tortillas seal around the filling. The cheese melts into the beans and keeps the center creamy while the outside turns crisp and speckled with brown spots.
Key Ingredients:
- 4 large flour tortillas
- 1 can refried beans, about 16 oz
- 1 1/2 cups shredded cheese
- 1/2 cup salsa
- 1/2 tsp cumin
- 1 tbsp butter or oil, for the skillet
Quick Steps:
- Stir cumin into the refried beans if you want extra flavor.
- Spread beans over half of each tortilla and top with cheese.
- Fold the tortillas closed.
- Cook in a buttered skillet over medium heat for 2 to 3 minutes per side until browned and crisp.
- Rest for 1 minute, then cut into wedges and serve with salsa.
Equipment for This Recipe:
- Skillet
- Spatula
- Knife
- Small bowl for mixing beans
How to Serve This Dish:
Serve the wedges with salsa, hot sauce, or sour cream. A little shredded lettuce on the side adds crunch, but the quesadilla is the main event.
Pro Tips for This Recipe:
- Use moderate heat. High heat burns the tortilla before the cheese melts.
- Don’t overfill them or the beans will squeeze out the sides.
- Let them rest before cutting so the filling settles.
Variations on This Dish:
- Corn Quesadillas: Add 1/4 cup corn to the filling.
- Chicken Addition: Stir in leftover shredded chicken if you have it.
- Green Chile Version: Add chopped green chiles for more bite.
Common Mistakes to Avoid with This Dish:
- Don’t put the filling all the way to the edge.
- Don’t skip the resting minute after cooking; the cheese is molten and slippery.
- Don’t use a dry pan unless it’s nonstick and well seasoned.
12. Sardine Toasts with Lemon
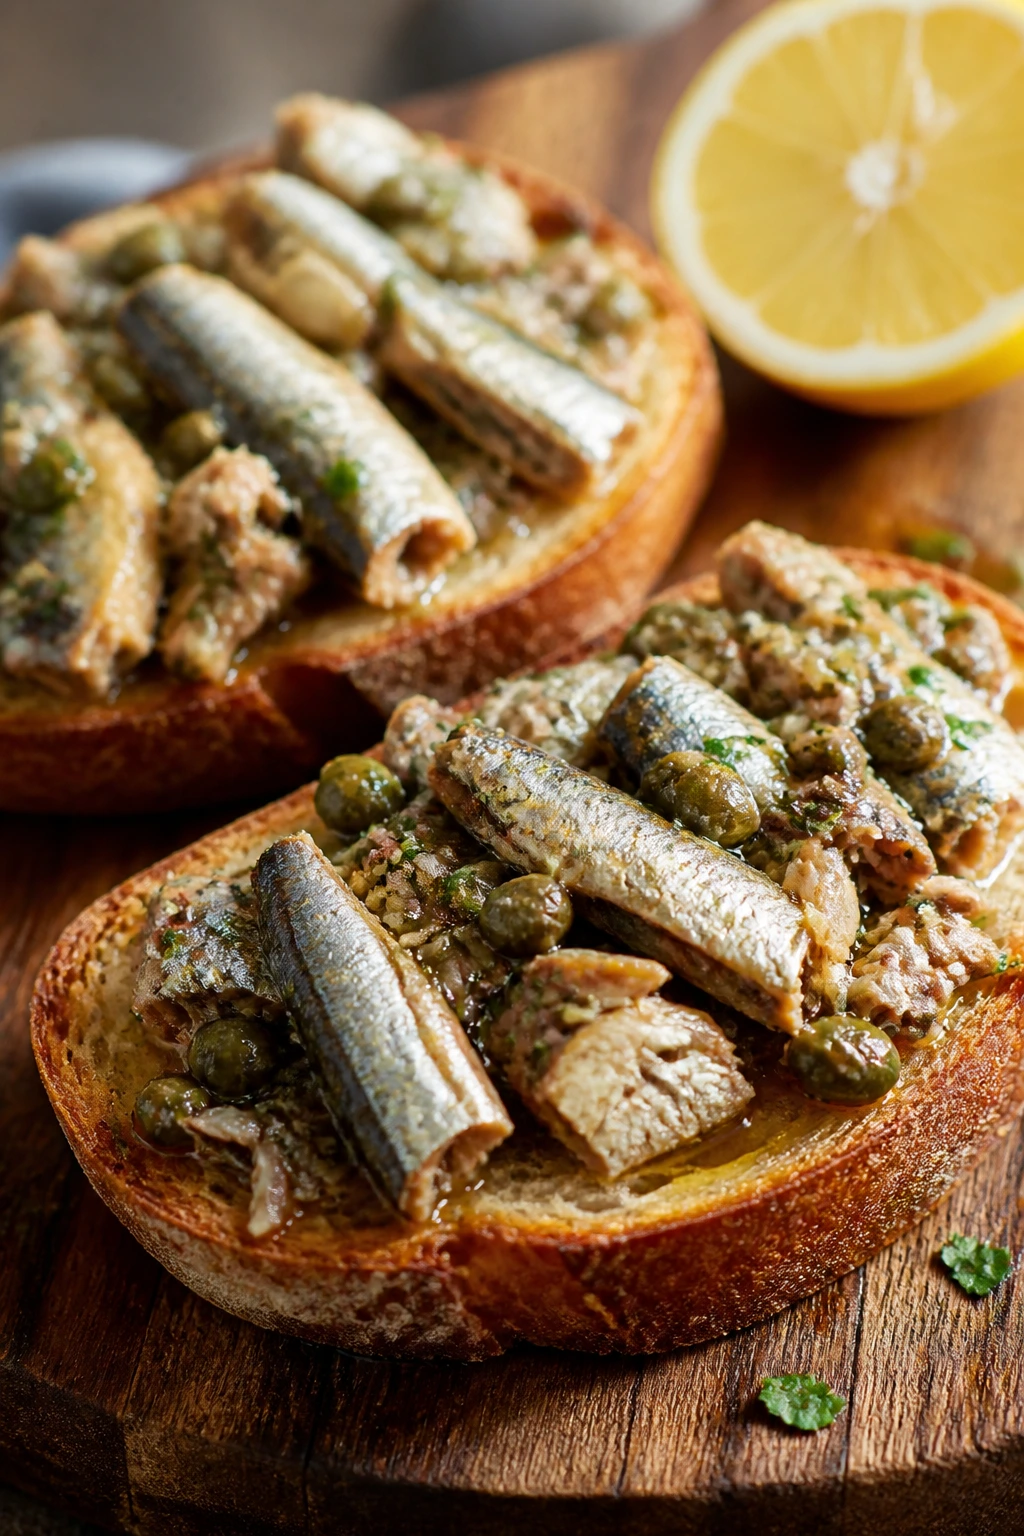
Sardines are one of the most underestimated shelf-stable foods in the kitchen. On toast, they turn salty, rich, and almost creamy, especially when lemon and capers cut through the oil.
Why It Works:
The bread gives the sardines a warm, crisp base, and acid keeps the fish from tasting heavy. Mustard or capers add enough sharpness that you don’t need much else.
Key Ingredients:
- 4 slices sturdy bread
- 1 can sardines, drained or lightly oiled
- 1 tbsp olive oil
- 1 tsp mustard
- 1/2 lemon, juiced
- 1 tbsp capers
- Black pepper
Quick Steps:
- Toast the bread until it’s deeply golden.
- Mix the sardines with olive oil, mustard, lemon juice, capers, and black pepper.
- Mash the mixture lightly with a fork.
- Spoon it onto the toast while the bread is still warm.
- Finish with extra pepper or a little parsley if you have it.
Equipment for This Recipe:
- Toaster or skillet
- Small bowl
- Fork
- Knife
How to Serve This Dish:
Serve two toasts per person with a simple salad or sliced tomatoes if they’re around. It works for lunch or dinner, and it’s one of the few meals here that feels almost too easy to be honest.
Pro Tips for This Recipe:
- Choose sardines packed in olive oil if you want a richer finish.
- Don’t smash them into paste unless you want a spread; a little texture is better.
- Use sturdy bread so the topping doesn’t soak through.
Variations on This Dish:
- Tomato Sardine Toasts: Add chopped tomato for freshness.
- Herbed Toasts: Mix in dill or parsley.
- Spicy Version: Add chili flakes or hot sauce.
Common Mistakes to Avoid with This Dish:
- Don’t use flimsy sandwich bread.
- Don’t skip the lemon; sardines need acid to sing.
- Don’t pile on so much topping that the toast loses its crunch.
13. Rosemary Cannellini Soup
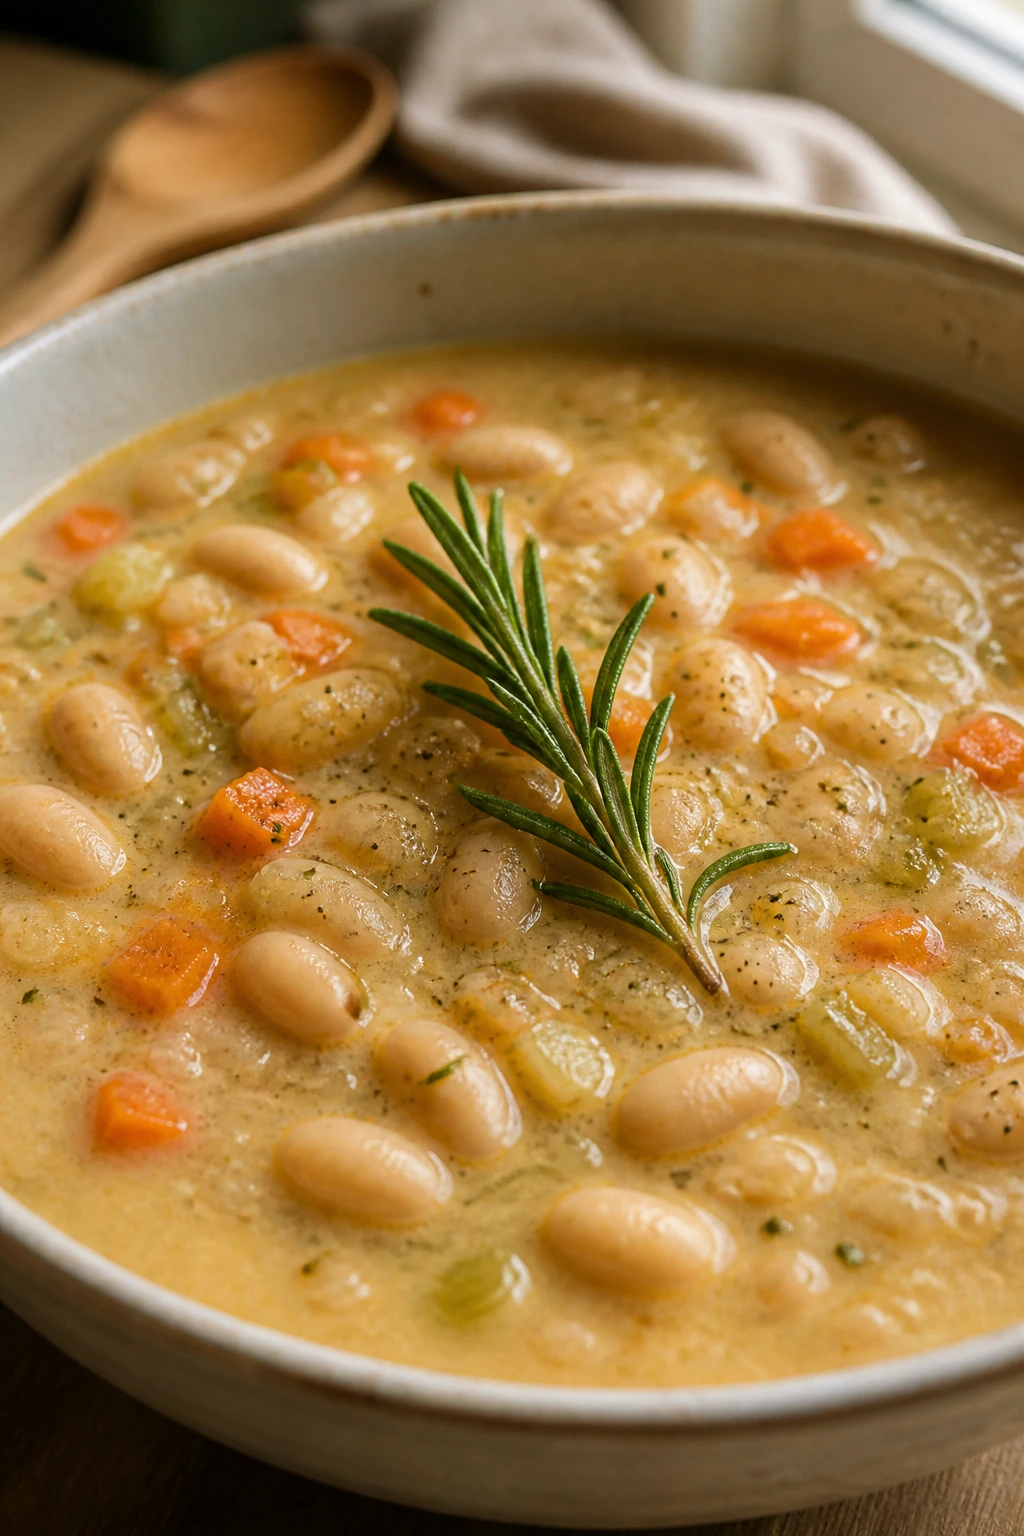
This soup tastes like it simmered longer than it did. Cannellini beans make it creamy, rosemary brings a piney note, and a little carrot-celery-onion base gives the pot actual depth.
Why It Works:
White beans break down just enough to thicken the broth without turning it gluey. A quick blitz with an immersion blender or a potato masher gives the soup body, which is the part too many bean soups miss.
Key Ingredients:
- 2 tbsp olive oil
- 1 onion, diced
- 1 carrot, diced
- 1 celery stalk, diced
- 3 garlic cloves, minced
- 1 tsp chopped rosemary
- 2 cans cannellini beans, drained
- 4 cups broth
- 1 cup spinach
Quick Steps:
- Cook the onion, carrot, and celery in oil over medium heat for 5 minutes.
- Add the garlic and rosemary and stir for 30 seconds.
- Pour in the beans and broth and simmer for 10 minutes.
- Mash some of the beans in the pot or blend briefly for a thicker texture.
- Stir in the spinach until wilted and season to taste.
Equipment for This Recipe:
- Soup pot
- Immersion blender or potato masher
- Wooden spoon
- Ladle
How to Serve This Dish:
Ladle it into bowls with olive oil on top and a piece of toast nearby. A shower of Parmesan or a squeeze of lemon is optional, but both help.
Pro Tips for This Recipe:
- Chop the vegetables small so they soften within the 30-minute window.
- Use dried rosemary sparingly; a little goes far.
- Blend only part of the soup so it still has beans you can see and eat.
Variations on This Dish:
- Tomato Rosemary Soup: Add 1/2 cup crushed tomatoes.
- Garlicky Version: Use 5 cloves garlic instead of 3.
- Tuscan Style: Stir in kale instead of spinach.
Common Mistakes to Avoid with This Dish:
- Don’t leave the vegetables in big chunks or they’ll stay firm.
- Don’t overblend until the soup turns pasty.
- Don’t forget to taste after the beans go in; canned beans need salt.
14. Chickpea Couscous Bowl
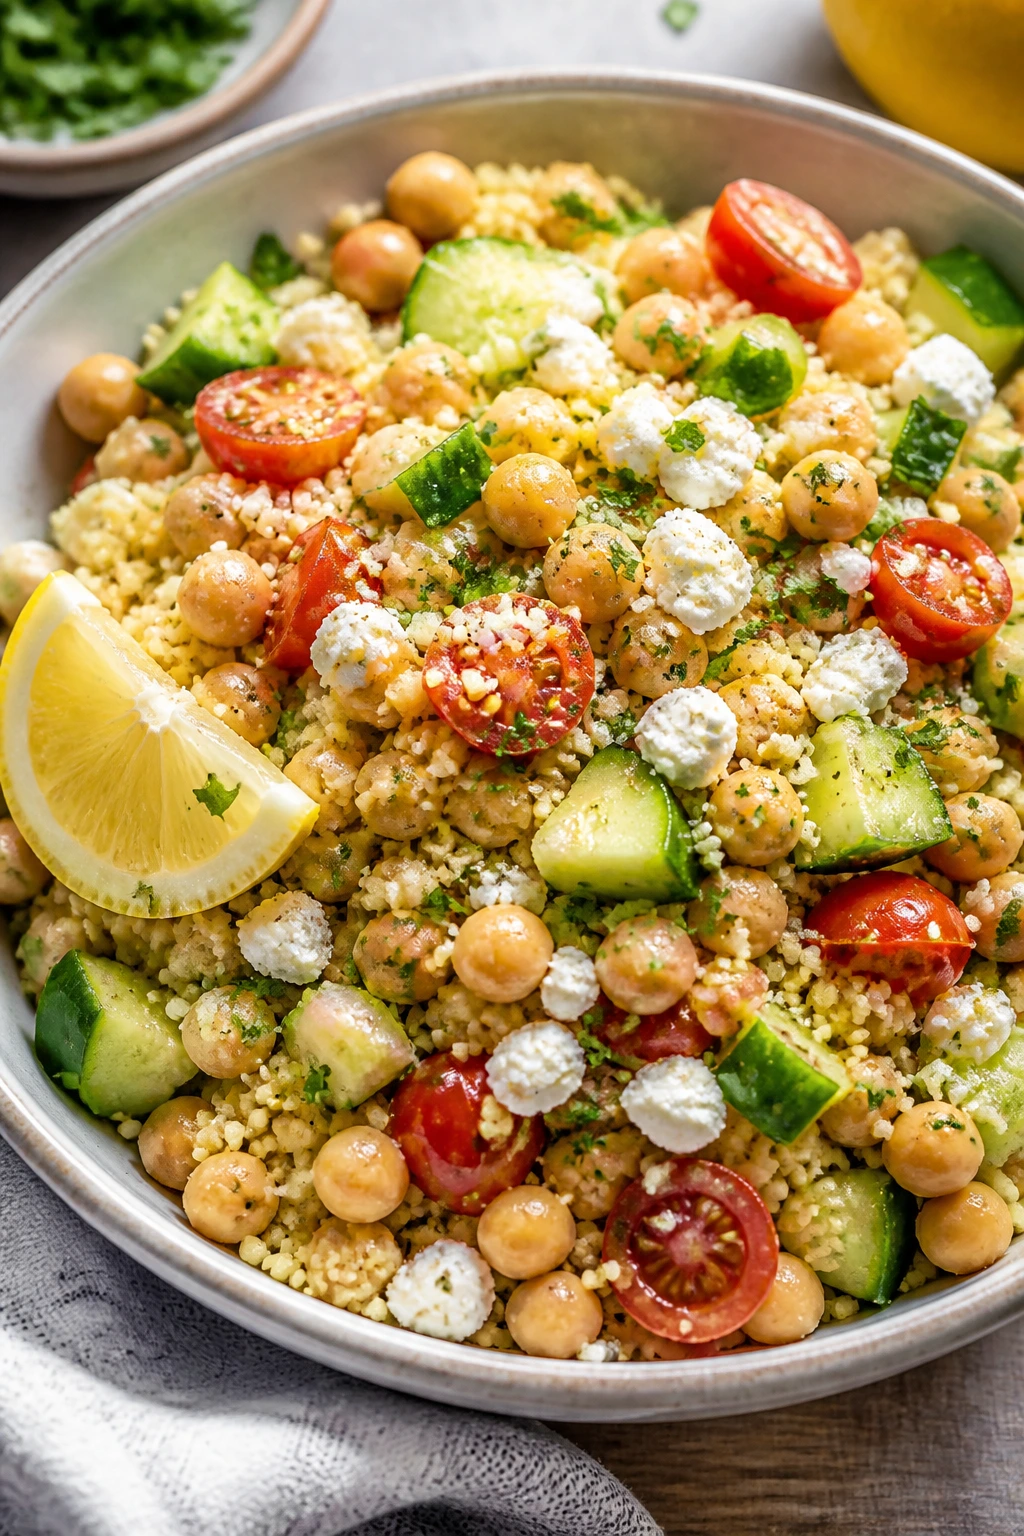
Couscous is one of the fastest starches in the cupboard, and it plays well with beans, lemon, and whatever herbs are left in the crisper. The result lands somewhere between salad and dinner, which is a useful place.
Why It Works:
Couscous cooks in hot broth in five minutes, so the whole bowl comes together without a long simmer. Chickpeas bring heft, and lemon or vinegar keeps the grain from tasting flat.
Key Ingredients:
- 1 cup couscous
- 1 cup boiling broth or water
- 1 can chickpeas, drained
- 1/2 cup diced cucumber or tomato
- 1/4 cup crumbled feta
- 2 tbsp olive oil
- 1 tbsp lemon juice
- 1 tsp cumin
Quick Steps:
- Put the couscous in a bowl and pour the boiling broth over it. Cover for 5 minutes.
- Fluff with a fork, then stir in olive oil, lemon juice, and cumin.
- Add chickpeas, cucumber or tomato, and feta.
- Taste and add salt if needed.
- Serve warm or at room temperature.
Equipment for This Recipe:
- Heatproof bowl
- Fork
- Kettle or saucepan
- Knife
How to Serve This Dish:
Spoon it into shallow bowls and add a drizzle of olive oil. It’s good as a light dinner or as a side that doesn’t act like a side.
Pro Tips for This Recipe:
- Use broth instead of plain water if you want the couscous to taste seasoned from the start.
- Fluff the grains immediately so they don’t clump.
- If the vegetables are watery, salt them lightly and drain for a minute before mixing.
Variations on This Dish:
- Tahini Couscous: Swap feta for a tahini drizzle.
- Roasted Pepper Version: Add jarred roasted red peppers.
- Warm Spice Bowl: Use paprika and coriander instead of cumin.
Common Mistakes to Avoid with This Dish:
- Don’t drown couscous in too much liquid.
- Don’t skip the fork-fluffing step; a spoon packs the grains.
- Don’t add the feta too early if you want it to stay distinct.
15. Bean and Cheese Burritos

A burrito only needs a few things to behave: warm beans, melted cheese, and tortillas that bend without cracking. Everything else is decoration.
Why It Works:
Refried or mashed beans spread evenly, which keeps the filling from falling out in one dense clump. Cheese acts as the glue, and a quick toast in a skillet seals the seam.
Key Ingredients:
- 4 large flour tortillas
- 1 1/2 cups refried or mashed pinto beans
- 1 cup shredded cheddar
- 1/2 cup cooked rice, optional
- 1/2 cup salsa
- 1 tbsp oil or butter
Quick Steps:
- Warm the beans in a small pan until spreadable.
- Layer beans, cheese, and rice down the center of each tortilla.
- Roll the tortillas into tight burritos.
- Toast seam-side down in a skillet with oil for 2 minutes per side.
- Serve with salsa.
Equipment for This Recipe:
- Skillet
- Small saucepan
- Spatula
- Spoon
How to Serve This Dish:
Cut the burritos in half and serve with salsa or hot sauce. If you have sour cream or yogurt, a spoonful on the side makes the filling feel less dense.
Pro Tips for This Recipe:
- Warm the tortillas for 10 seconds in the microwave or a dry skillet before rolling.
- Don’t overfill them; a smaller burrito rolls cleaner than a stuffed one.
- Toast seam-side down first so the roll stays closed.
Variations on This Dish:
- Breakfast Burrito: Add scrambled eggs.
- Bean and Corn Burrito: Stir corn into the filling.
- Spicy Burrito: Add pickled jalapeños or hot sauce.
Common Mistakes to Avoid with This Dish:
- Don’t roll them cold or the tortillas tear.
- Don’t make the filling wet; excess salsa belongs on the side.
- Don’t skip the skillet toast if you want the burrito to hold together.
16. Olive Tomato Pasta
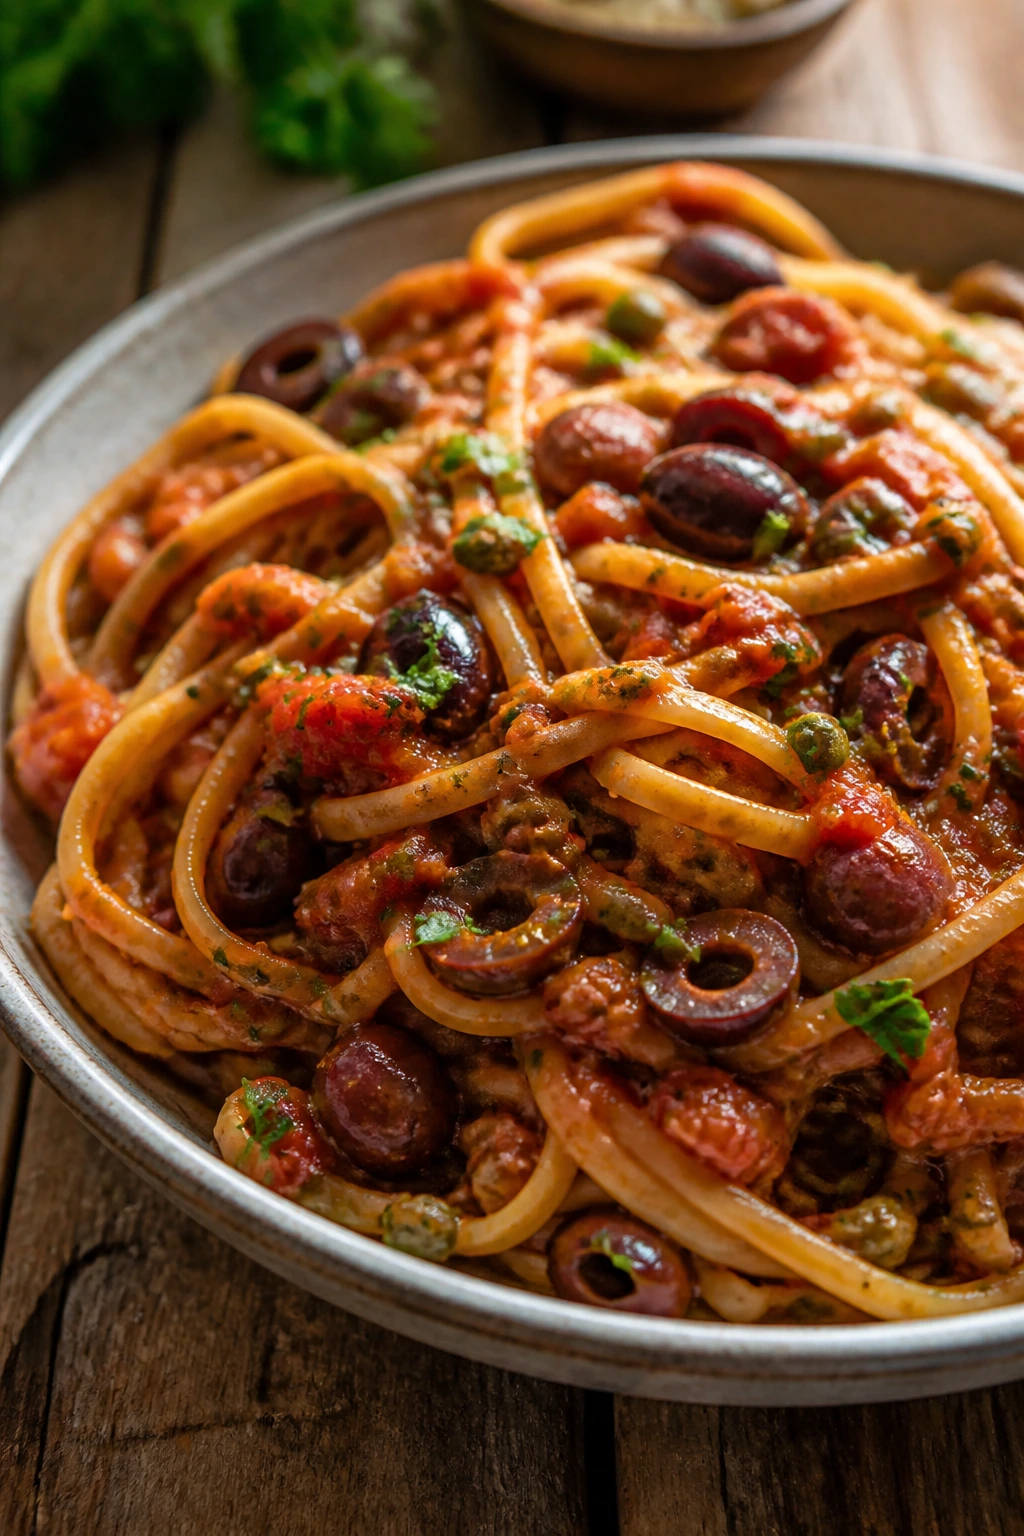
This pasta tastes like a jar of olives and a can of tomatoes knew each other well. The brininess wakes up the sauce, and the pasta gets enough salinity that you don’t need to overthink the seasoning.
Why It Works:
Olives and tomatoes bring different kinds of salt and acid, which gives the sauce shape fast. A little garlic and olive oil keep the whole thing from tasting like canned food.
Key Ingredients:
- 12 oz spaghetti or linguine
- 2 tbsp olive oil
- 3 garlic cloves, sliced
- 1 can (14.5 oz) crushed tomatoes
- 1/2 cup sliced olives
- 1 tbsp capers, optional
- 1/2 tsp chili flakes
- Parsley, for finishing
Quick Steps:
- Cook the pasta until al dente and save some cooking water.
- Warm the oil and cook the garlic for 1 minute over medium-low heat.
- Add the tomatoes, olives, capers, and chili flakes.
- Simmer for 8 minutes until the sauce thickens a little.
- Toss with the pasta and a splash of pasta water, then finish with parsley.
Equipment for This Recipe:
- Pot
- Skillet
- Tongs
- Colander
How to Serve This Dish:
Serve it with extra black pepper and maybe a little grated cheese if that’s your thing, though I often leave it as-is. A green salad helps, but honestly, bread does the job too.
Pro Tips for This Recipe:
- Rinse capers only if they’re packed very heavily in salt.
- Use the olive brine carefully; a tablespoon can help the sauce, but too much muddies it.
- Keep the garlic pale and soft, not browned.
Variations on This Dish:
- Anchovy Olive Pasta: Melt 1 anchovy into the oil first.
- Herb Finish: Add basil or oregano at the end.
- Meaty Version: Stir in canned tuna or cooked sausage.
Common Mistakes to Avoid with This Dish:
- Don’t skip pasta water.
- Don’t use so many olives that the sauce tastes one-note and aggressive.
- Don’t let the garlic darken in the pan.
17. Skillet Gnocchi with Tomato and Spinach

Shelf-stable gnocchi is one of the fastest cheats in the pantry, and I mean that kindly. It browns well, soaks up sauce, and gives you those little soft-chewy bites without boiling a separate pot of water.
Why It Works:
Pan-frying gnocchi before adding sauce gives it a better texture than boiling ever will. The tomato sauce finishes in the same skillet, which means the starch and flavor stay right where you need them.
Key Ingredients:
- 1 package shelf-stable gnocchi, about 16 oz
- 2 tbsp olive oil
- 2 garlic cloves, minced
- 1 can (14.5 oz) diced tomatoes
- 2 cups spinach
- 1/2 cup mozzarella or Parmesan
- 1/2 tsp salt
Quick Steps:
- Brown the gnocchi in olive oil over medium heat for 5 to 6 minutes until golden in spots.
- Add the garlic and cook for 30 seconds.
- Pour in the tomatoes and salt, then simmer for 5 minutes.
- Stir in the spinach until wilted.
- Top with cheese and let it melt before serving.
Equipment for This Recipe:
- Large skillet
- Wooden spoon
- Lid or foil
- Measuring cup
How to Serve This Dish:
Serve it in bowls with extra Parmesan and black pepper. It’s hearty enough to stand alone, though a crisp salad is a smart side if you want something fresh.
Pro Tips for This Recipe:
- Brown the gnocchi first; that step gives the dish texture.
- Don’t stir too often while the gnocchi is browning or the edges won’t color.
- Add the cheese after the heat drops a little so it melts cleanly.
Variations on This Dish:
- Creamy Gnocchi: Stir in 2 tablespoons cream cheese.
- Sausage Gnocchi: Brown sliced sausage before the gnocchi.
- Olive Gnocchi: Add sliced olives with the tomatoes.
Common Mistakes to Avoid with This Dish:
- Don’t boil shelf-stable gnocchi unless the package tells you to.
- Don’t add too much tomato liquid or the pan goes soupy.
- Don’t skip the browning step; it matters.
18. Classic Stovetop Mac and Cheese
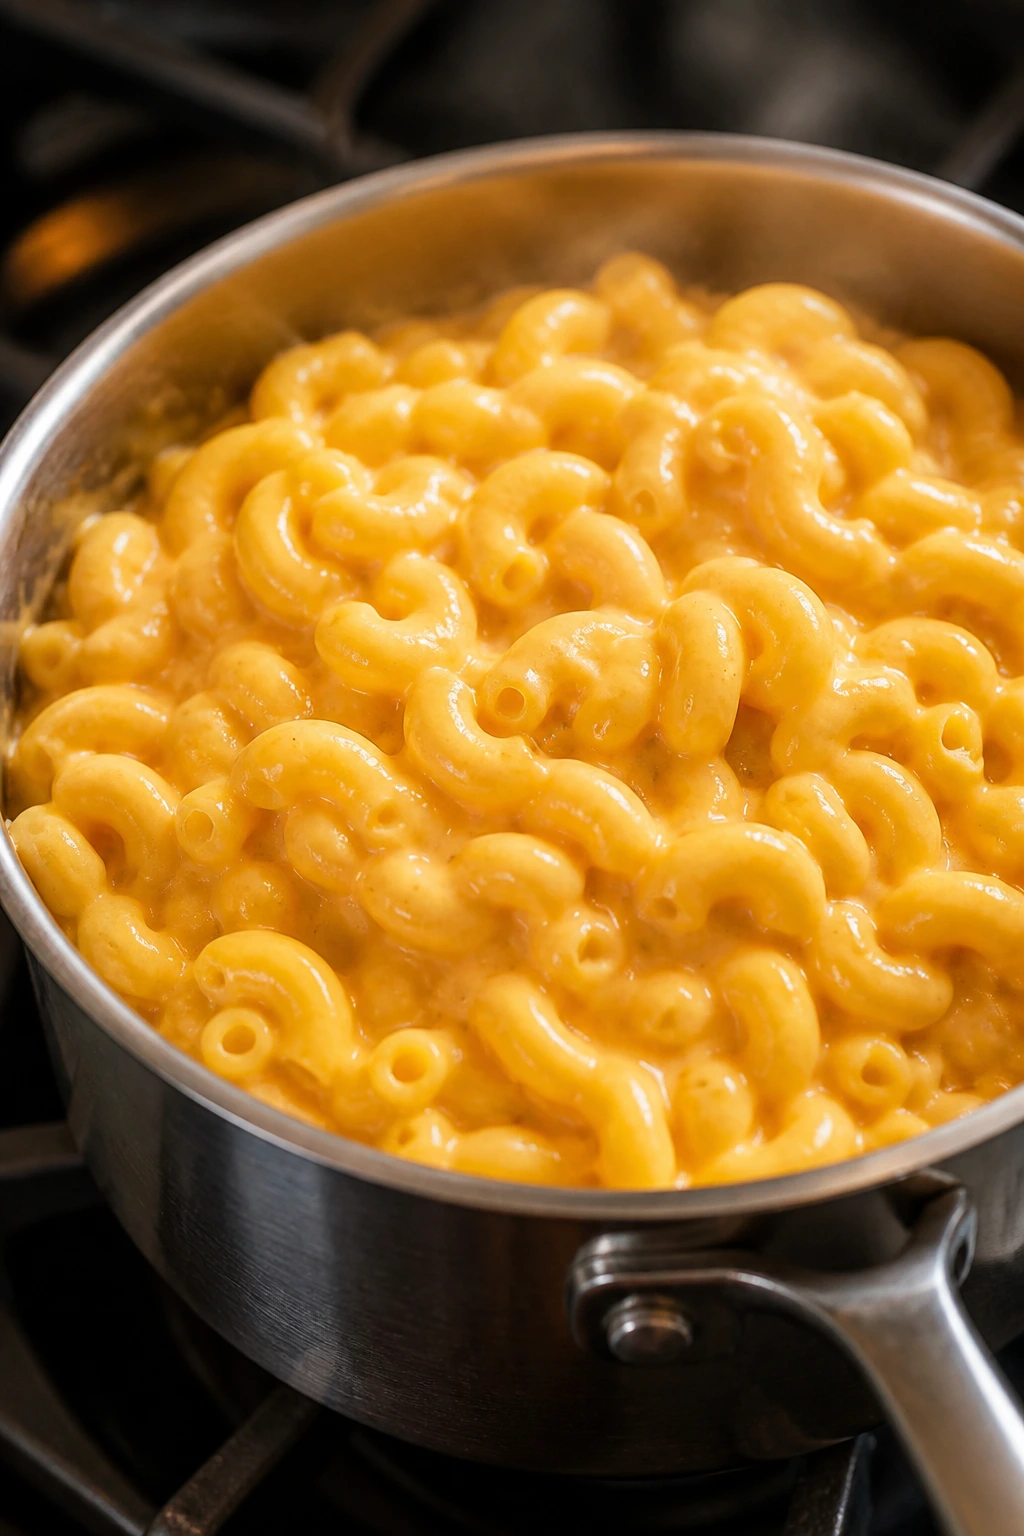
This is the version that saves you from boxed convenience and still gets dinner on the table fast. Evaporated milk gives the sauce body, cheddar gives it the pull, and mustard powder keeps it from tasting flat.
Why It Works:
Evaporated milk is stable enough to build a sauce quickly without a roux if you keep the heat moderate. The cheese melts better when you add it in small handfuls off the hottest part of the burner.
Key Ingredients:
- 12 oz elbow macaroni
- 1 can evaporated milk, 12 oz
- 2 tbsp butter
- 2 cups shredded sharp cheddar
- 1 tsp mustard powder
- 1/2 tsp salt
- Black pepper
Quick Steps:
- Cook the macaroni until just tender and drain.
- Warm the evaporated milk and butter in a saucepan over medium-low heat.
- Stir in the mustard powder and salt.
- Add the cheese a handful at a time, stirring until smooth.
- Fold in the macaroni and season with black pepper.
Equipment for This Recipe:
- Saucepan
- Pot
- Wooden spoon
- Grater
How to Serve This Dish:
Serve it hot with black pepper on top and maybe a spoonful of hot sauce if you like heat. If you want a firmer plate, let it sit for 2 minutes before scooping.
Pro Tips for This Recipe:
- Shred the cheese yourself if possible; pre-shredded cheese melts, but not as smoothly.
- Keep the heat low once the cheese goes in.
- Salt the pasta water well or the finished dish tastes dull.
Variations on This Dish:
- Breadcrumb Top: Scatter buttered breadcrumbs on top.
- Smoky Mac: Add smoked paprika.
- Green Mac: Stir in peas or spinach at the end.
Common Mistakes to Avoid with This Dish:
- Don’t let the sauce boil after the cheese goes in.
- Don’t overcook the pasta; it keeps softening in the sauce.
- Don’t underseason the milk base.
19. Canned Salmon Cakes

Salmon cakes are one of those pantry meals that feel older than the phrase “pantry meal,” and I mean that as a compliment. They’re crisp on the outside, soft in the middle, and they take to lemon like they were built for it.
Why It Works:
Canned salmon already has cooked protein and flavor, so the job is mostly binding and browning. Breadcrumbs, egg, and a little mayo give the cakes structure without making them dense.
Key Ingredients:
- 2 cans salmon, about 6 oz each, drained
- 1 egg
- 1/3 cup breadcrumbs
- 2 tbsp mayonnaise
- 1 tbsp Dijon mustard
- 2 tbsp chopped onion or scallion
- 2 tbsp oil, for frying
Quick Steps:
- Mix the salmon, egg, breadcrumbs, mayo, mustard, and onion in a bowl.
- Shape into 4 to 6 patties.
- Heat oil in a skillet over medium heat.
- Fry the patties for 3 to 4 minutes per side until browned and hot through.
- Drain briefly on paper towels and serve with lemon.
Equipment for This Recipe:
- Mixing bowl
- Skillet
- Spatula
- Paper towels
How to Serve This Dish:
Serve them with lemon wedges and a quick salad or a pile of rice. They also work in buns with tartar sauce, which is not fancy but does the job.
Pro Tips for This Recipe:
- If the mix feels too wet, add a spoonful more breadcrumbs.
- Chill the patties for 10 minutes if they keep falling apart.
- Press them gently in the pan so the crust forms before you flip.
Variations on This Dish:
- Spicy Salmon Cakes: Add a dash of hot sauce.
- Herbed Version: Mix in dill or parsley.
- Potato Salmon Cakes: Add leftover mashed potatoes for a softer interior.
Common Mistakes to Avoid with This Dish:
- Don’t fry on high heat or the outside burns before the center is hot.
- Don’t skip draining the salmon.
- Don’t overmix; you want the cakes to hold, not turn paste-like.
20. Creamy Chicken and Rice Soup
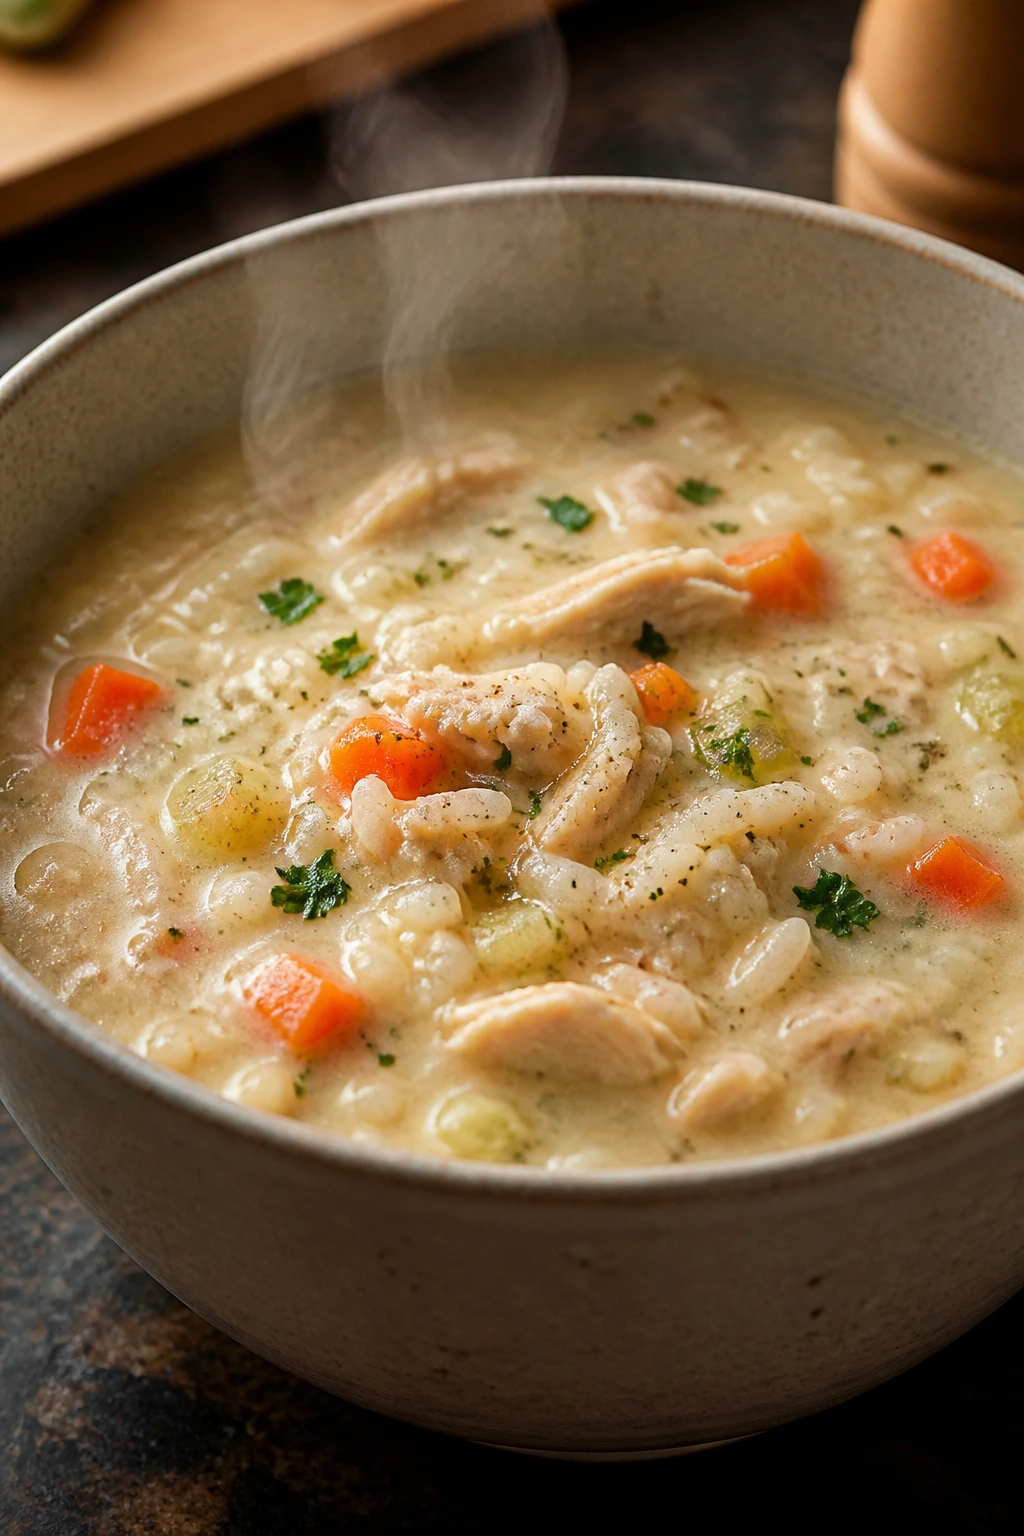
Canned chicken is not glamorous, and it doesn’t pretend to be. In a soup with rice, vegetables, and broth, though, it does the one job it’s meant to do: make the pot feel fuller without dragging out dinner.
Why It Works:
Rice thickens the broth as it simmers, which gives the soup body without flour. A little milk or cream at the end softens the edges and makes the soup taste more complete than the ingredients suggest.
Key Ingredients:
- 1 tbsp butter
- 1 onion, diced
- 2 carrots, diced
- 2 celery stalks, diced
- 6 cups broth
- 1/2 cup uncooked white rice
- 1 can shredded chicken, about 12 oz, drained
- 1/2 cup milk or cream
- 1 tsp dried thyme
Quick Steps:
- Cook the onion, carrots, and celery in butter for 5 minutes.
- Add the broth, rice, and thyme.
- Simmer for 12 to 15 minutes until the rice is tender.
- Stir in the chicken and cook for 2 minutes to warm it through.
- Add the milk or cream, then season and serve.
Equipment for This Recipe:
- Soup pot
- Wooden spoon
- Ladle
- Knife and cutting board
How to Serve This Dish:
Serve it with crackers or toast, especially if you want the soup to lean more filling than brothy. A little parsley on top keeps the bowl from looking pale.
Pro Tips for This Recipe:
- Rinse the rice if it’s extra starchy and you want a cleaner broth.
- Add the chicken near the end so it stays tender.
- If the soup thickens too much on standing, loosen it with more broth.
Variations on This Dish:
- Lemon Chicken Soup: Add a squeeze of lemon at the end.
- Mushroom Version: Sauté sliced mushrooms with the onion.
- Herb Rice Soup: Use rosemary instead of thyme.
Common Mistakes to Avoid with This Dish:
- Don’t overcook the rice or it swells into porridge.
- Don’t boil the milk after adding it.
- Don’t forget to taste after the chicken goes in; canned chicken varies a lot in salt.
21. Rice and Bean Burrito Bowls
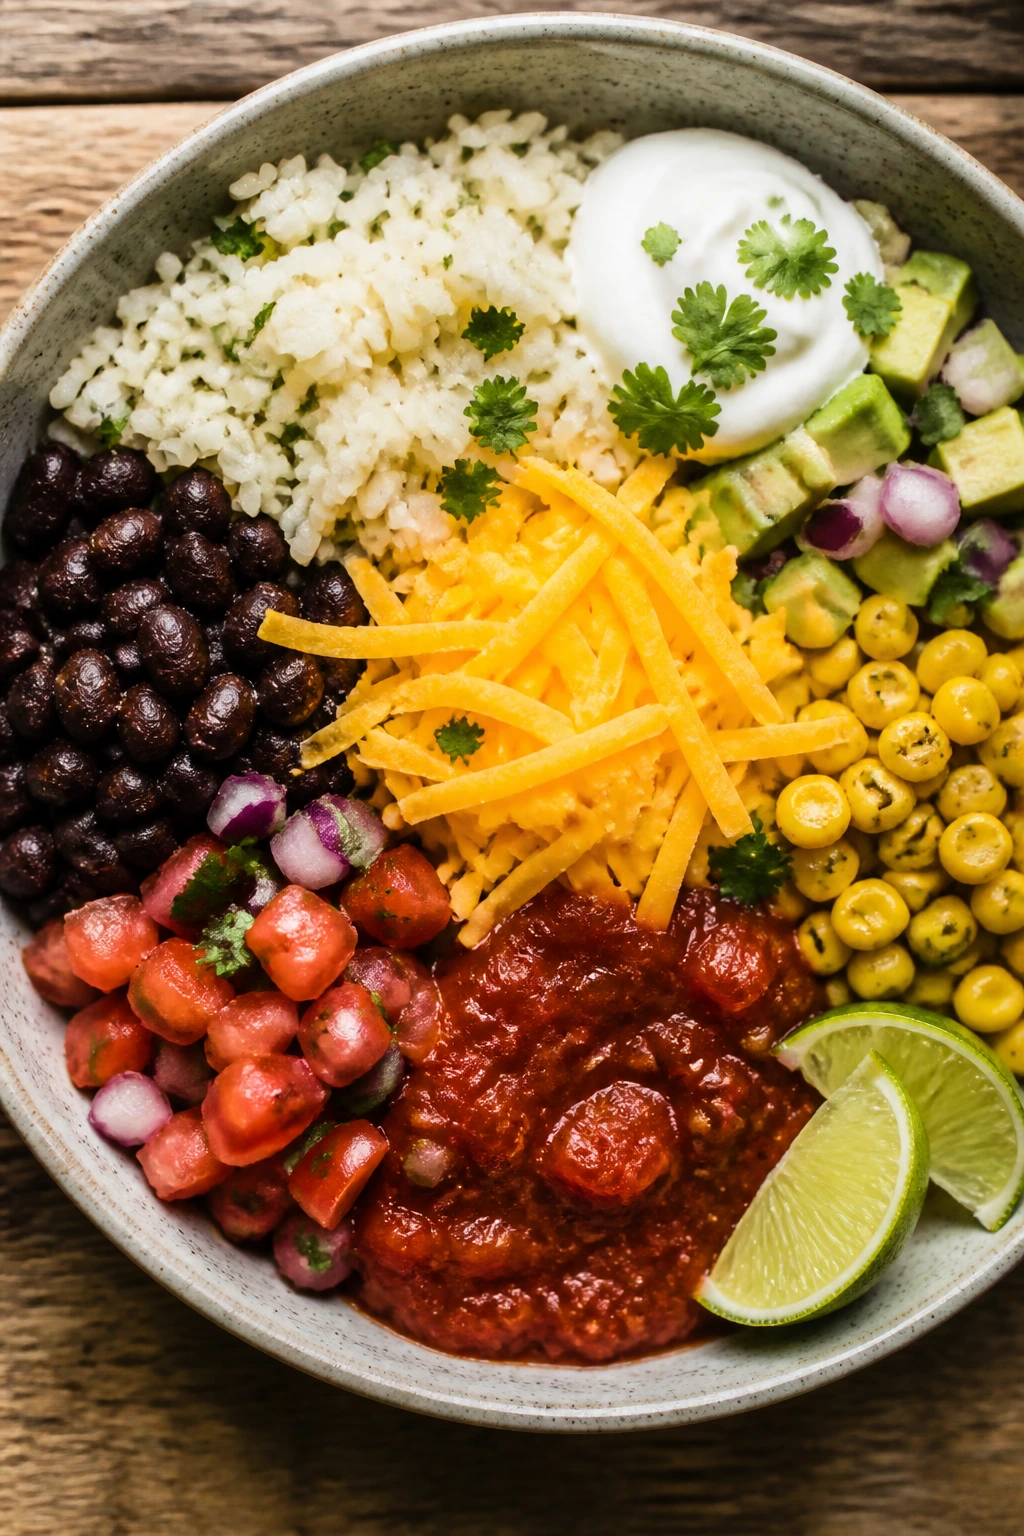
This is the cleanest way to turn pantry food into a dinner that still feels arranged. Rice, beans, corn, and salsa land in separate piles, which gives the bowl enough contrast to stay interesting.
Why It Works:
Rice gives the bowl a soft base, beans add heft, and salsa acts as both seasoning and sauce. A quick layer of warm toppings keeps the bowl from tasting like separate leftovers.
Key Ingredients:
- 2 cups cooked rice
- 1 can black or pinto beans, drained and rinsed
- 1 cup corn
- 1 cup salsa
- 1/2 tsp cumin
- 1/2 cup shredded cheese
- 1 avocado, optional
- Lime wedges, optional
Quick Steps:
- Warm the beans and corn in a saucepan with cumin.
- Heat the rice until steaming.
- Divide the rice into bowls.
- Spoon the beans, corn, salsa, and cheese on top.
- Add avocado and lime if you’ve got them.
Equipment for This Recipe:
- Saucepan
- Bowl
- Spoon
- Microwave or pot for rice
How to Serve This Dish:
Serve it layered and warm so the cheese softens a little on contact. It’s good for lunch boxes too, if you keep the salsa separate until eating.
Pro Tips for This Recipe:
- Warm each component before assembling; cold beans make the bowl feel flat.
- Add a pinch of salt to the rice if it was cooked plain.
- If you have crushed tortilla chips, scatter them on top right before serving.
Variations on This Dish:
- Chicken Bowl: Add leftover shredded chicken.
- Spicy Bowl: Use hot salsa and jalapeños.
- Veggie Bowl: Add sautéed onions or peppers.
Common Mistakes to Avoid with This Dish:
- Don’t serve it cold unless you mean to make a salad.
- Don’t overdo the salsa or the rice gets soggy.
- Don’t skip seasoning the beans; plain beans can taste like they’re waiting for help.
22. Tomato Chickpea Stew
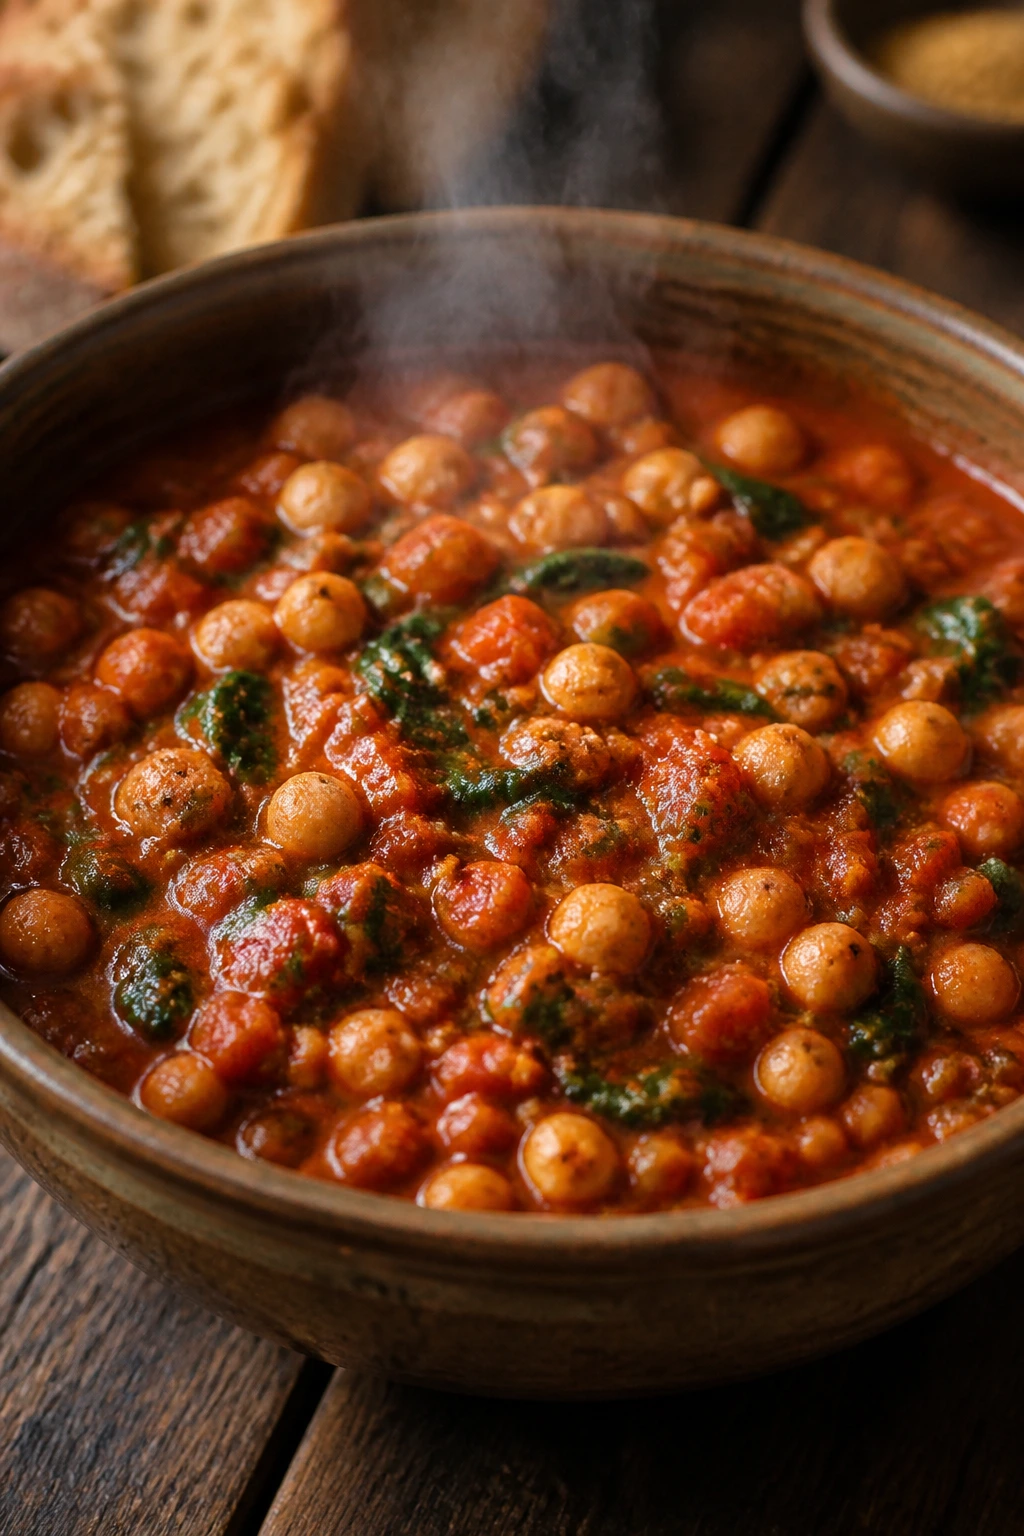
This stew sits in that useful middle ground between soup and sauce. It’s thick enough to eat with a spoon, but it clings to bread the way you want on a fast night.
Why It Works:
Tomatoes and chickpeas already have enough body to make a thick pot without flour or cream. Cumin and paprika pull the stew out of “canned” territory and into something that tastes built, not assembled.
Key Ingredients:
- 2 tbsp olive oil
- 1 onion, diced
- 3 garlic cloves, minced
- 1 tsp cumin
- 1 tsp paprika
- 1 can crushed tomatoes, 28 oz
- 2 cans chickpeas, drained
- 1 cup broth
- 2 cups spinach
Quick Steps:
- Cook the onion in olive oil over medium heat until soft, about 5 minutes.
- Add the garlic, cumin, and paprika and cook for 30 seconds.
- Stir in the tomatoes, chickpeas, and broth.
- Simmer for 10 minutes until thickened.
- Fold in the spinach and season before serving.
Equipment for This Recipe:
- Medium pot or deep skillet
- Wooden spoon
- Can opener
- Ladle
How to Serve This Dish:
Serve it with bread, rice, or couscous depending on what’s easiest. A little yogurt on top gives the stew a cooler, creamier finish.
Pro Tips for This Recipe:
- Mash a few chickpeas to thicken the broth naturally.
- Let the stew simmer uncovered so the tomato flavor tightens.
- Add spinach at the end so it stays bright green.
Variations on This Dish:
- Harissa Stew: Stir in a spoonful of harissa paste.
- Kale Version: Swap the spinach for chopped kale.
- Lemon Finish: Add lemon juice right before serving.
Common Mistakes to Avoid with This Dish:
- Don’t use too much broth or it turns into soup.
- Don’t skip the spice bloom at the start.
- Don’t add the greens too early or they lose color and bite.
23. Anchovy Breadcrumb Pasta
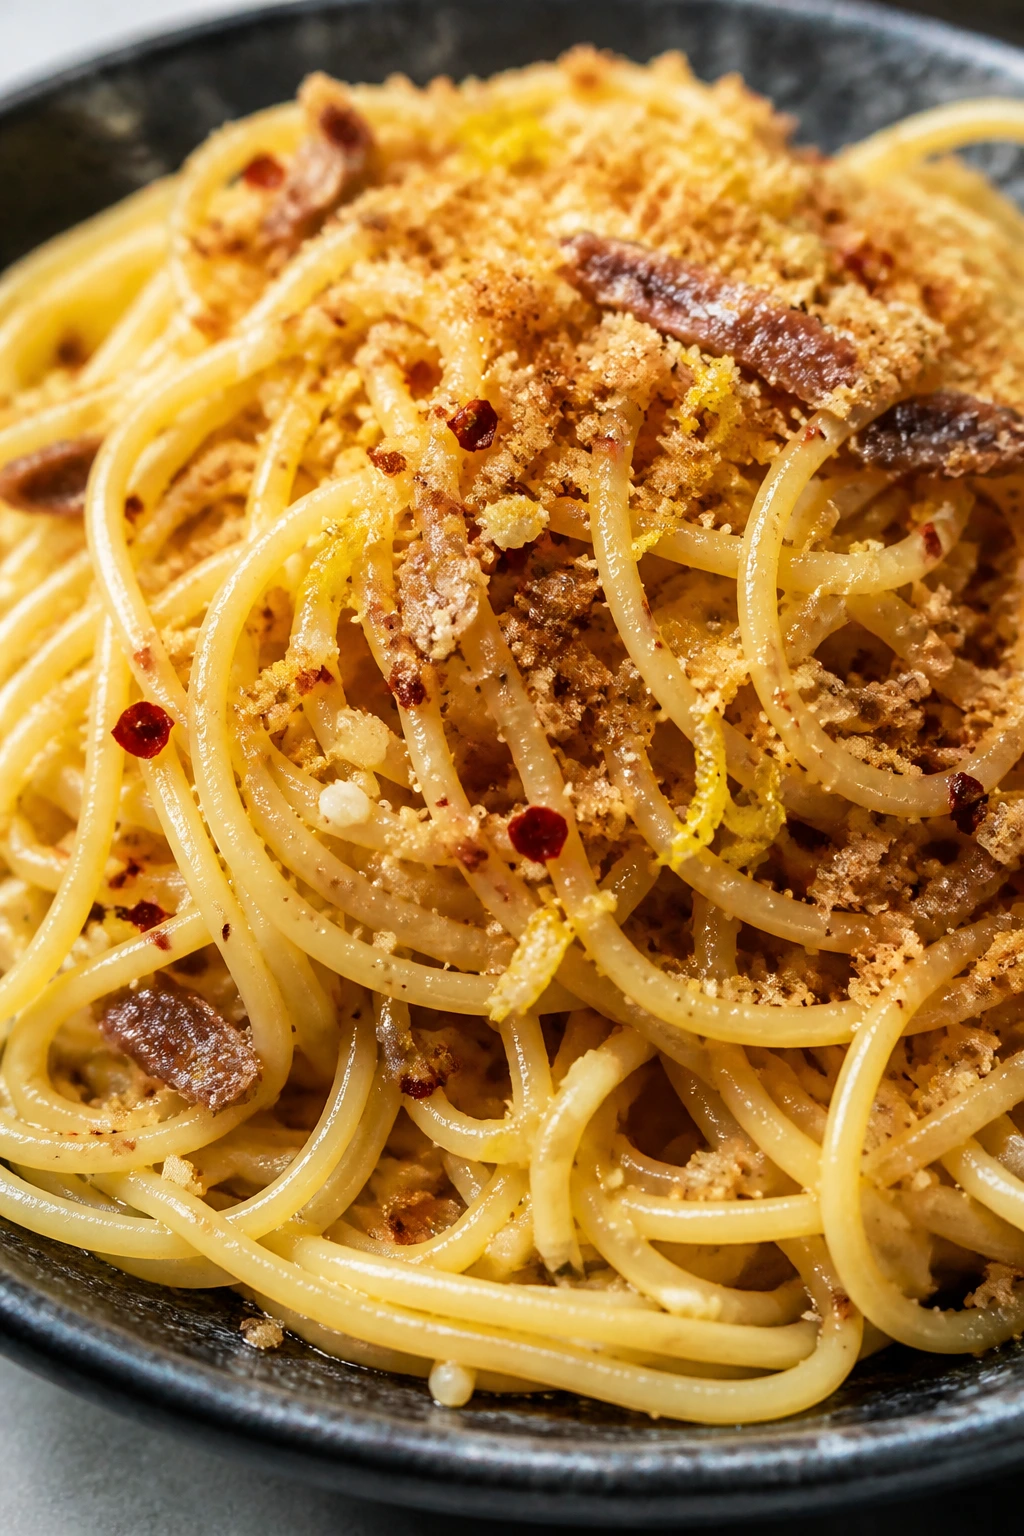
If anchovies make you nervous, this is the recipe that changes minds. They melt into the oil, leaving behind a savory backbone that tastes deep rather than fishy, and the breadcrumbs add a crisp finish that makes the bowl feel finished.
Why It Works:
Anchovies dissolve into fat almost instantly, which means they season the oil instead of sitting on top of the pasta. Toasted breadcrumbs bring crunch, and lemon keeps the whole thing from feeling too rich.
Key Ingredients:
- 12 oz spaghetti
- 2 tbsp olive oil
- 3 anchovy fillets
- 3 garlic cloves, sliced
- 1/2 cup breadcrumbs
- 1/2 tsp chili flakes
- 1/2 lemon, zested and juiced
- Parsley, for finishing
Quick Steps:
- Cook the pasta and save 1 cup of the water.
- Toast the breadcrumbs in 1 tablespoon of the oil until golden, then set aside.
- In the same pan, melt the anchovies into the remaining oil with the garlic and chili flakes.
- Toss in the pasta with a splash of water and the lemon juice.
- Finish with breadcrumbs, zest, and parsley.
Equipment for This Recipe:
- Pot
- Skillet
- Tongs
- Microplane
How to Serve This Dish:
Serve it immediately so the breadcrumbs stay crisp. A simple green vegetable on the side is enough, though I usually just make more pasta and call it dinner.
Pro Tips for This Recipe:
- Keep the heat moderate so the garlic softens without burning.
- Toast breadcrumbs separately so they don’t go soggy in the sauce.
- Use more pasta water than you think if the pan looks tight.
Variations on This Dish:
- Tomato Anchovy Pasta: Add 1/2 cup canned tomatoes.
- Herb Breadcrumbs: Mix parsley into the crumbs.
- Garlic-Lemon Version: Add extra lemon zest for more brightness.
Common Mistakes to Avoid with This Dish:
- Don’t fear the anchovies so much that you leave them in chunks.
- Don’t skip the breadcrumbs; they’re half the point.
- Don’t overcook the garlic once the anchovies melt.
24. Teriyaki Ramen with Egg
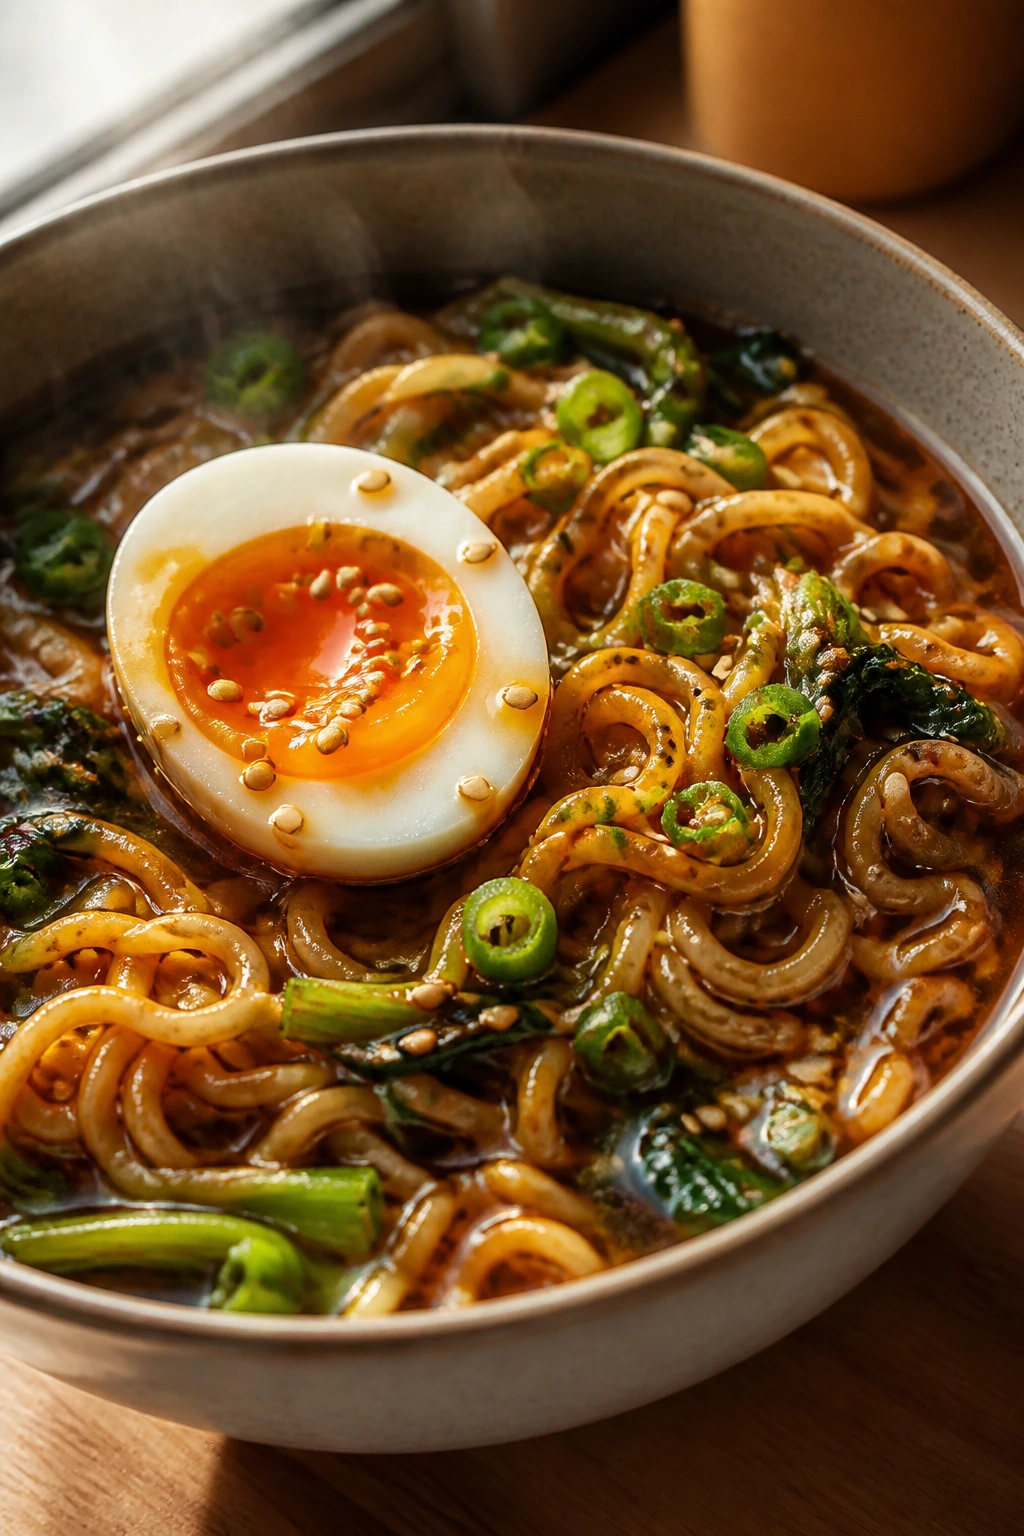
This is the sort of ramen you make with what’s already in the cupboard and still feel smug about. The noodles go fast, the sauce is salty-sweet, and the egg gives you something rich to break into at the end.
Why It Works:
Instant ramen is built for speed, but the seasoning packet alone can taste thin. Soy sauce, a little sugar, and garlic make the flavor less dusty, while a jammy egg makes the bowl feel complete.
Key Ingredients:
- 2 packs instant ramen noodles
- 2 eggs
- 2 tbsp soy sauce
- 1 tbsp brown sugar
- 1 garlic clove, minced
- 1 tsp sesame oil
- 1 cup frozen vegetables
Quick Steps:
- Soft-boil or fry the eggs and set aside.
- Cook the ramen noodles, then drain most of the water.
- Stir soy sauce, brown sugar, garlic, and sesame oil into the hot noodles.
- Add the frozen vegetables and heat until warmed through.
- Top with the eggs and serve right away.
Equipment for This Recipe:
- Small pot
- Bowl
- Spoon
- Skillet, if frying eggs
How to Serve This Dish:
Serve it in deep bowls with the eggs cut in half so the yolks run into the noodles. Scallions or chili crisp are good if they’re around, but the bowl works without them.
Pro Tips for This Recipe:
- Keep a little noodle water in the pot so the sauce can coat.
- Don’t overcook the eggs if you want that soft center.
- Taste before adding the full seasoning packet; soy sauce and seasoning can stack fast.
Variations on This Dish:
- Peanut Ramen: Stir in 1 tablespoon peanut butter.
- Spicy Ramen: Add chili oil or sriracha.
- Veggie Bowl: Add cabbage or frozen peas.
Common Mistakes to Avoid with This Dish:
- Don’t drain the noodles bone dry.
- Don’t let the sauce boil for long after the sugar goes in.
- Don’t skip the egg if you want the bowl to feel more substantial.
25. Peanut Butter Noodle Bowl

Peanut butter in savory noodles sounds odd until you taste it. Then it makes perfect sense: fatty, salty, a little sweet, and strong enough to carry a whole bowl without much else.
Why It Works:
Peanut butter emulsifies with hot water, soy sauce, and a touch of acid into a sauce that coats noodles cleanly. This is one of those meals where the sauce matters more than the noodle shape, so use what you have.
Key Ingredients:
- 12 oz noodles or spaghetti
- 1/3 cup peanut butter
- 2 tbsp soy sauce
- 1 tbsp rice vinegar or lime juice
- 1 tsp honey or sugar
- 1 garlic clove, grated
- 2 to 4 tbsp hot water
- Sliced cucumber or scallions, optional
Quick Steps:
- Cook the noodles and reserve a little cooking water.
- Whisk the peanut butter, soy sauce, vinegar, honey, garlic, and hot water until smooth.
- Toss with the noodles while they’re warm.
- Add cucumber or scallions if you have them.
- Taste and loosen with more water if needed.
Equipment for This Recipe:
- Pot
- Bowl
- Whisk or fork
- Tongs
How to Serve This Dish:
Serve it warm or chilled, depending on the day and your patience level. The bowl benefits from crunch, so cucumbers, peanuts, or even shredded carrots help.
Pro Tips for This Recipe:
- Warm the sauce before tossing if the peanut butter is stiff.
- Use a teaspoon of sugar or honey only if your peanut butter isn’t already sweet.
- Add acid at the end if the sauce tastes heavy.
Variations on This Dish:
- Thai-Inspired Bowl: Add lime and chili paste.
- Sesame Peanut Noodles: Stir in sesame oil.
- Cold Lunch Version: Chill the noodles and serve with cucumber.
Common Mistakes to Avoid with This Dish:
- Don’t make the sauce too thick before it hits the noodles.
- Don’t use sweet peanut butter if you want more control.
- Don’t forget a crunchy garnish if you have one; it changes the whole bowl.
26. Corn and Black Bean Chowder
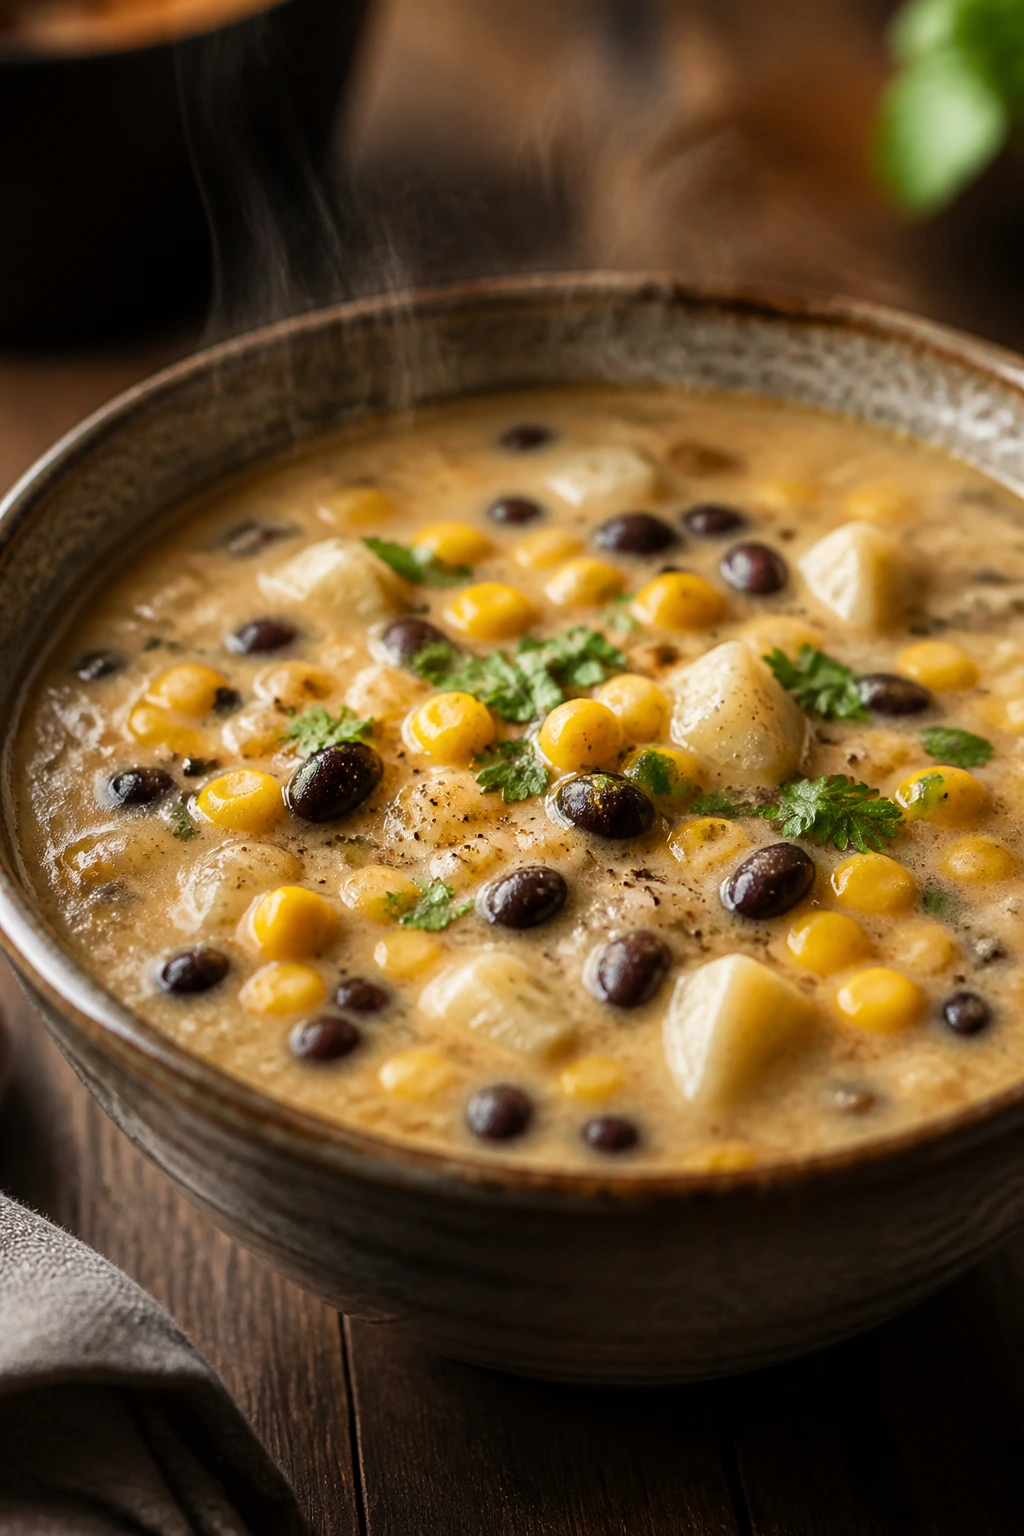
This chowder is hearty in a way that feels practical, not heavy. Potatoes make the broth thicker, corn gives it sweetness, and black beans keep it from feeling like a thin soup with good intentions.
Why It Works:
Potatoes release starch as they cook, which gives the chowder body without flour. A little milk at the end smooths the broth, and cumin keeps the corn from taking over.
Key Ingredients:
- 1 tbsp butter or oil
- 1 onion, diced
- 2 potatoes, peeled and diced small
- 1 can corn, drained
- 1 can black beans, drained
- 4 cups broth
- 1 cup milk
- 1 tsp cumin
Quick Steps:
- Cook the onion in butter or oil for 4 minutes.
- Add the potatoes, corn, beans, broth, and cumin.
- Simmer for 12 to 15 minutes until the potatoes are tender.
- Mash a few potato pieces against the pot wall to thicken the soup.
- Stir in the milk and season before serving.
Equipment for This Recipe:
- Soup pot
- Wooden spoon
- Potato masher or fork
- Ladle
How to Serve This Dish:
Serve it with crackers, tortilla chips, or a piece of toast. I like a pinch of shredded cheese on top because the warm soup melts it in just enough.
Pro Tips for This Recipe:
- Dice the potatoes small so they cook on time.
- Don’t boil hard after adding the milk.
- If the soup seems thin, mash more of the potatoes instead of adding flour.
Variations on This Dish:
- Smoky Chowder: Add smoked paprika.
- Green Chili Version: Stir in canned green chiles.
- Creamier Bowl: Use evaporated milk.
Common Mistakes to Avoid with This Dish:
- Don’t cut the potatoes too big.
- Don’t overcook the corn until it turns dull.
- Don’t salt too early if your broth is already salty.
27. Potato, Onion, and Egg Hash

Hash is what happens when you stop pretending breakfast food has a schedule. Potatoes crisp on the bottom, onions go sweet, and eggs slide right into the same skillet without much ceremony.
Why It Works:
The potatoes need enough time in the pan to develop color, which is why smaller dice help. Eggs cooked on top of the hash catch the heat gently and save you from another pan.
Key Ingredients:
- 2 medium potatoes, diced small
- 1 onion, sliced
- 2 tbsp oil
- 4 eggs
- 1/2 tsp paprika
- Salt and black pepper
- Hot sauce, optional
Quick Steps:
- Boil the diced potatoes for 5 minutes, then drain.
- Cook the onion in oil over medium heat for 3 minutes.
- Add the potatoes and paprika and fry until browned and crisp, about 8 minutes.
- Make little wells and crack in the eggs.
- Cover and cook until the whites set.
Equipment for This Recipe:
- Large skillet
- Pot
- Spatula
- Slotted spoon
How to Serve This Dish:
Serve it straight from the skillet with hot sauce on the side. A slice of buttered toast catches the yolk and makes the meal feel more complete.
Pro Tips for This Recipe:
- Parboil the potatoes first so they crisp faster.
- Don’t stir too often or you lose the crust.
- Cover the skillet once the eggs go in so the tops set.
Variations on This Dish:
- Pepper Hash: Add diced bell pepper.
- Cheesy Hash: Sprinkle cheese over the eggs near the end.
- Spanish-Style Hash: Use smoked paprika and chorizo.
Common Mistakes to Avoid with This Dish:
- Don’t use big potato chunks if you only have 30 minutes.
- Don’t crowd the pan or the potatoes steam.
- Don’t overcook the eggs unless you want firm yolks.
28. Pasta e Fagioli
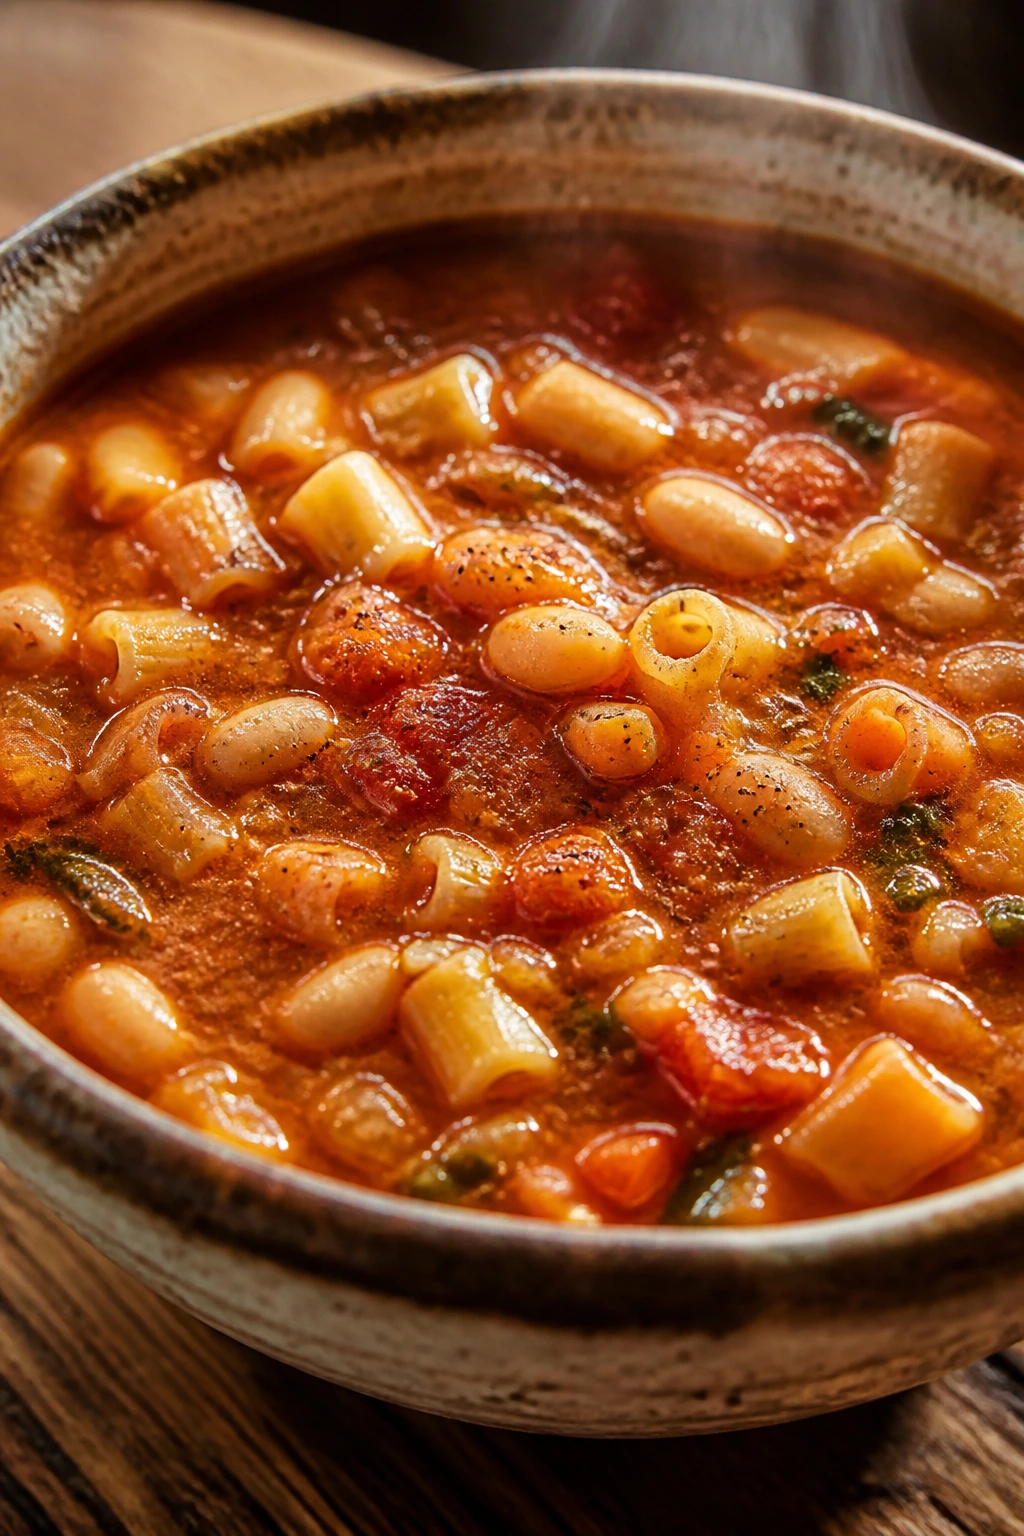
This is one of the cleanest examples of pantry cooking that doesn’t feel cheap. Beans, pasta, tomatoes, and broth make a thick, spoonable pot with enough texture to keep each bite a little different.
Why It Works:
Pasta cooks right in the broth, which gives the soup body and saves time. Beans thicken the base naturally, and the tomato broth gets richer if you let it simmer before adding the pasta.
Key Ingredients:
- 2 tbsp olive oil
- 1 onion, diced
- 1 carrot, diced
- 2 garlic cloves, minced
- 1 can diced tomatoes
- 2 cans cannellini or kidney beans, drained
- 4 cups broth
- 1 cup small pasta
- 1 tsp Italian seasoning
Quick Steps:
- Cook the onion and carrot in oil for 5 minutes.
- Add garlic and Italian seasoning and cook for 30 seconds.
- Add tomatoes, beans, and broth, then simmer for 10 minutes.
- Stir in the pasta and cook until tender, about 8 minutes.
- Taste and season before serving.
Equipment for This Recipe:
- Soup pot
- Spoon
- Can opener
- Ladle
How to Serve This Dish:
Serve it with Parmesan and cracked pepper if you like a little extra edge. The soup should be thick enough that a spoon stands up halfway, not watery.
Pro Tips for This Recipe:
- Use a small pasta shape so it cooks quickly.
- Stir the pot while the pasta cooks so nothing sticks.
- If it thickens on standing, loosen with broth.
Variations on This Dish:
- Turkey Pasta e Fagioli: Add cooked ground turkey.
- Kale Version: Stir in chopped kale near the end.
- Spicy Soup: Add chili flakes with the garlic.
Common Mistakes to Avoid with This Dish:
- Don’t overcook the pasta or it will go soft in the bowl.
- Don’t underseason the broth.
- Don’t let the soup sit too long before serving if you want the pasta to stay springy.
29. Pumpkin Sage Pasta
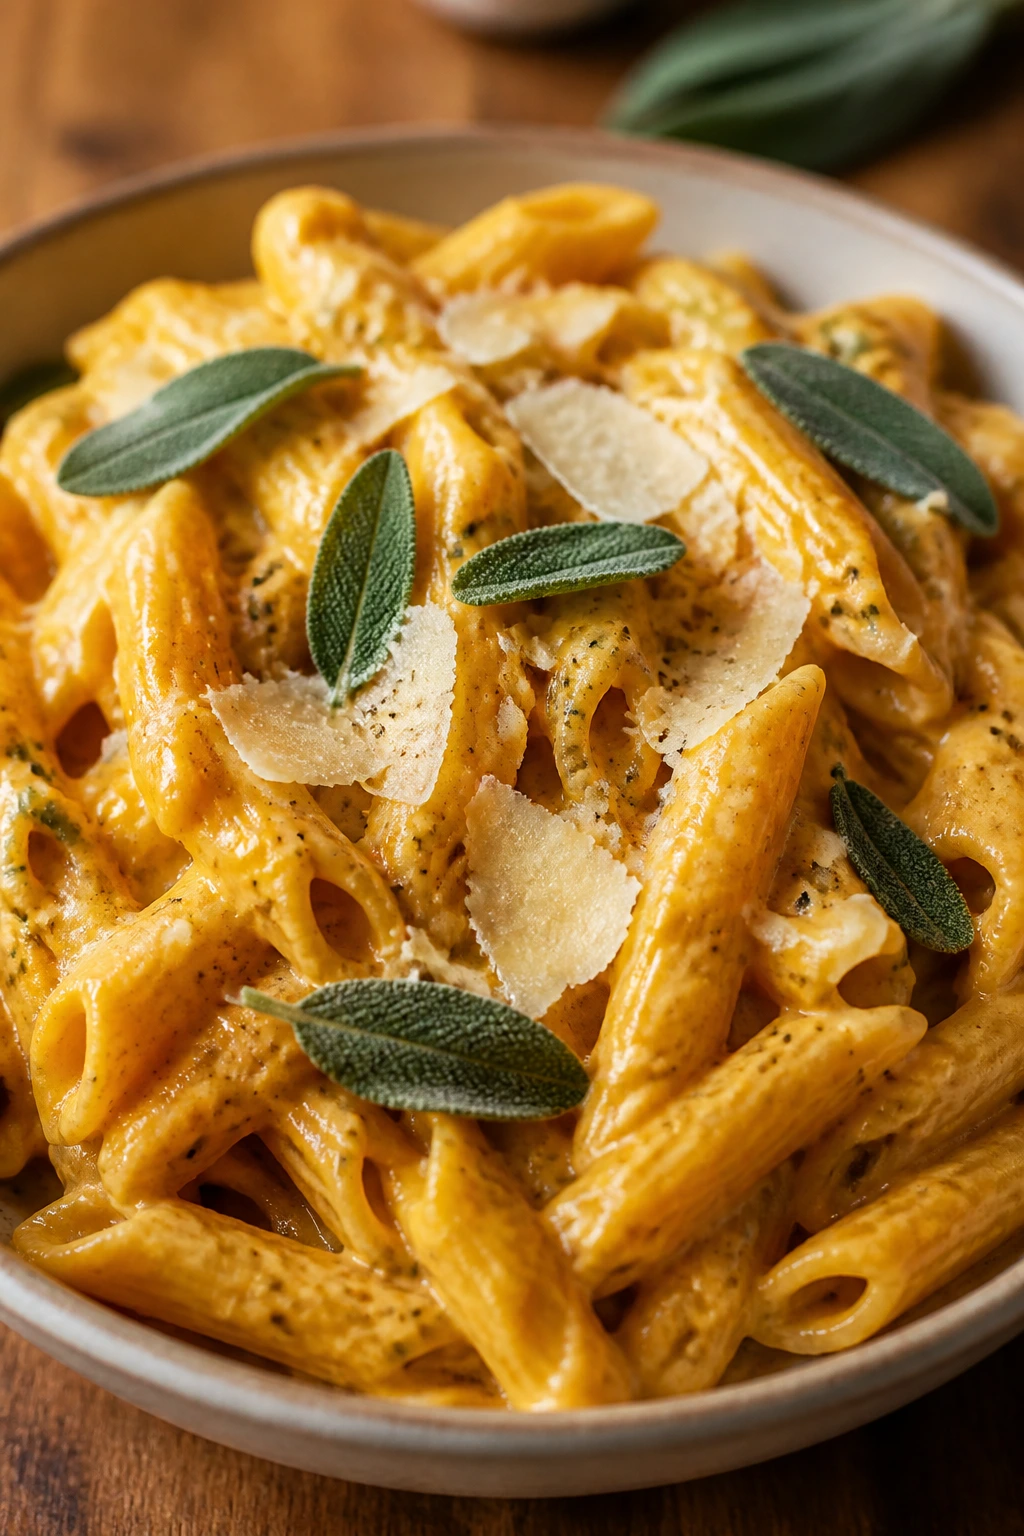
Pumpkin puree in pasta sauce sounds odd until you taste how smooth and savory it gets with garlic and cheese. The sauce is creamy without needing much cream, and sage keeps it from drifting into dessert territory.
Why It Works:
Pumpkin puree gives the sauce body fast, which is useful on a weeknight. A little pasta water thins it to a coatable texture, and sage brings a dry, earthy note that keeps the sauce grounded.
Key Ingredients:
- 12 oz penne or rigatoni
- 1 tbsp butter or oil
- 2 garlic cloves, minced
- 1 can pumpkin puree, about 15 oz
- 1/2 cup broth or pasta water
- 1 tsp dried sage or 6 fresh leaves, chopped
- 1/4 cup Parmesan
- Salt and black pepper
Quick Steps:
- Cook the pasta and reserve 1 cup of the water.
- Warm the butter or oil and cook the garlic for 30 seconds.
- Stir in the pumpkin, broth or water, and sage.
- Simmer for 3 to 4 minutes until smooth and warm.
- Toss with the pasta and Parmesan, then season to taste.
Equipment for This Recipe:
- Pot
- Skillet
- Whisk or spoon
- Grater
How to Serve This Dish:
Serve it with extra black pepper and a little Parmesan on top. If you have toasted walnuts or breadcrumbs, they give the soft sauce a needed crunch.
Pro Tips for This Recipe:
- Use plain pumpkin puree, not pie filling.
- Add pasta water slowly; pumpkin can go from thick to loose fast.
- Fresh sage is strong, so don’t overdo it.
Variations on This Dish:
- Brown Butter Version: Brown the butter before adding garlic.
- Sausage Pumpkin Pasta: Add browned sausage for more heft.
- Spicy Pumpkin Pasta: Add red pepper flakes.
Common Mistakes to Avoid with This Dish:
- Don’t use sweetened pumpkin filling.
- Don’t skip the pasta water; the sauce needs thinning.
- Don’t let the sauce boil hard after the pumpkin goes in.
30. Sloppy Joe Baked Potatoes

This is the sort of dinner that feels generous without costing much. The potato gives you a hot, fluffy base, and the savory filling settles into the split center like it belongs there.
Why It Works:
Baked potatoes are mostly waiting time, and the filling can cook while they’re in the microwave or oven. The contrast between crisp skin and saucy filling makes the plate feel bigger than the effort behind it.
Key Ingredients:
- 4 medium russet potatoes
- 1 tbsp oil
- 1/2 lb ground beef or turkey
- 1 small onion, diced
- 2 tbsp tomato paste
- 1/3 cup ketchup
- 1 tbsp Worcestershire sauce
- 1/4 cup water
Quick Steps:
- Pierce the potatoes and microwave or bake until tender.
- Cook the meat and onion in a skillet until no longer pink.
- Stir in tomato paste, ketchup, Worcestershire, and water.
- Simmer for 5 minutes until thick.
- Split the potatoes and pile the filling on top.
Equipment for This Recipe:
- Skillet
- Microwave or oven
- Knife
- Spoon
How to Serve This Dish:
Serve with a fork, a napkin, and maybe a little shredded cheese or chopped scallion on top. A simple green salad keeps the plate from feeling too heavy.
Pro Tips for This Recipe:
- Microwave potatoes if you need speed, but give them enough time to steam through.
- Let the sloppy Joe mixture thicken so it doesn’t run off the potato.
- Salt the potatoes after splitting them; the flesh needs it.
Variations on This Dish:
- Cheesy Potato Tops: Add cheddar before the filling.
- Vegetarian Version: Use lentils instead of meat.
- Spicy Joe Potatoes: Add hot sauce or chili flakes.
Common Mistakes to Avoid with This Dish:
- Don’t undercook the potatoes; hard centers ruin the contrast.
- Don’t make the filling soupy.
- Don’t overload the potato so the skin splits.
31. Curry Tuna Melt
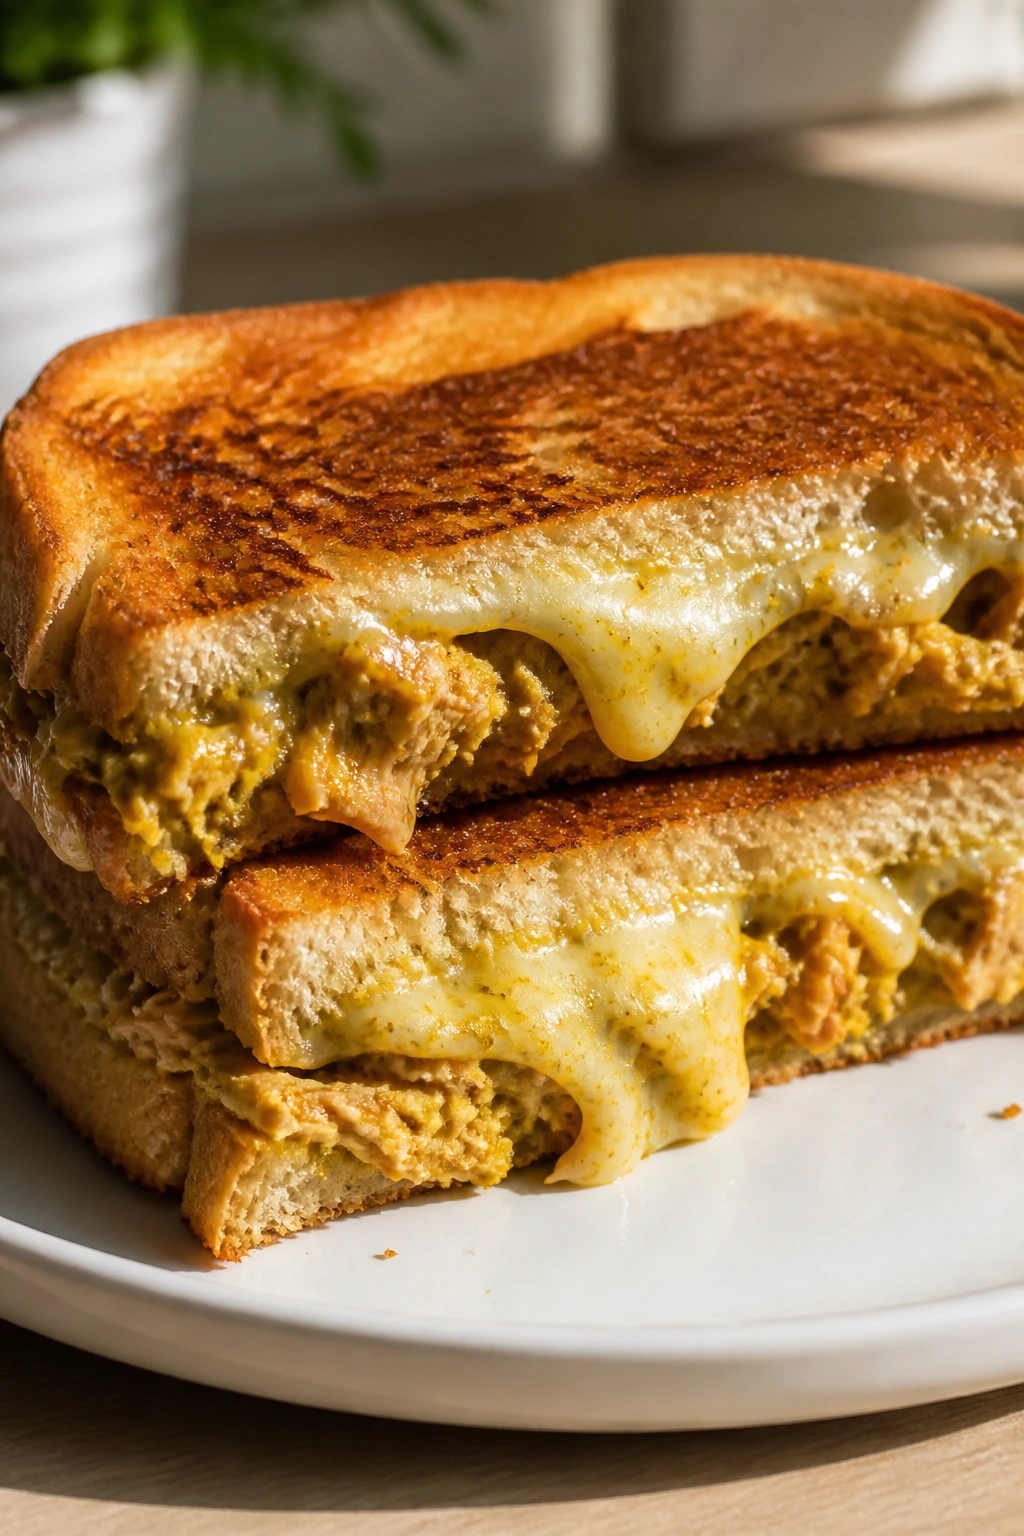
A tuna melt gets more interesting when curry powder shows up. The mayo keeps the filling soft, the curry adds warmth, and melted cheese on toasted bread holds the whole thing together.
Why It Works:
Curry powder cuts through tuna’s mildness without needing a long ingredient list. Cheese on the outside gives structure, while the filling stays creamy enough to spread easily.
Key Ingredients:
- 2 cans tuna, drained
- 3 tbsp mayonnaise
- 1 tsp curry powder
- 1 tbsp finely chopped celery or pickle relish
- 4 slices bread
- 4 slices cheese
- Butter, for grilling
Quick Steps:
- Mix the tuna, mayo, curry powder, and celery or relish.
- Butter the bread on one side.
- Sandwich the tuna filling and cheese between two slices, buttered sides out.
- Cook in a skillet over medium heat until golden on both sides and the cheese melts.
- Rest for 1 minute, then cut and serve.
Equipment for This Recipe:
- Skillet
- Bowl
- Spatula
- Knife
How to Serve This Dish:
Serve it with chips, pickles, or a small salad. The sandwich is rich, so something sharp or crunchy on the side makes sense.
Pro Tips for This Recipe:
- Don’t overdo the curry powder or the filling turns dusty.
- Butter the bread all the way to the edges for even browning.
- Let the sandwich rest before cutting so the filling settles.
Variations on This Dish:
- Apple Curry Tuna Melt: Add a little grated apple.
- Spicy Melt: Use curry paste or hot sauce.
- Open-Faced Version: Toast the bread and melt the cheese under the broiler.
Common Mistakes to Avoid with This Dish:
- Don’t use too much mayo or the filling gets slippery.
- Don’t grill on high heat or the bread burns before the cheese melts.
- Don’t skip draining the tuna.
32. Spanish Rice with Chorizo
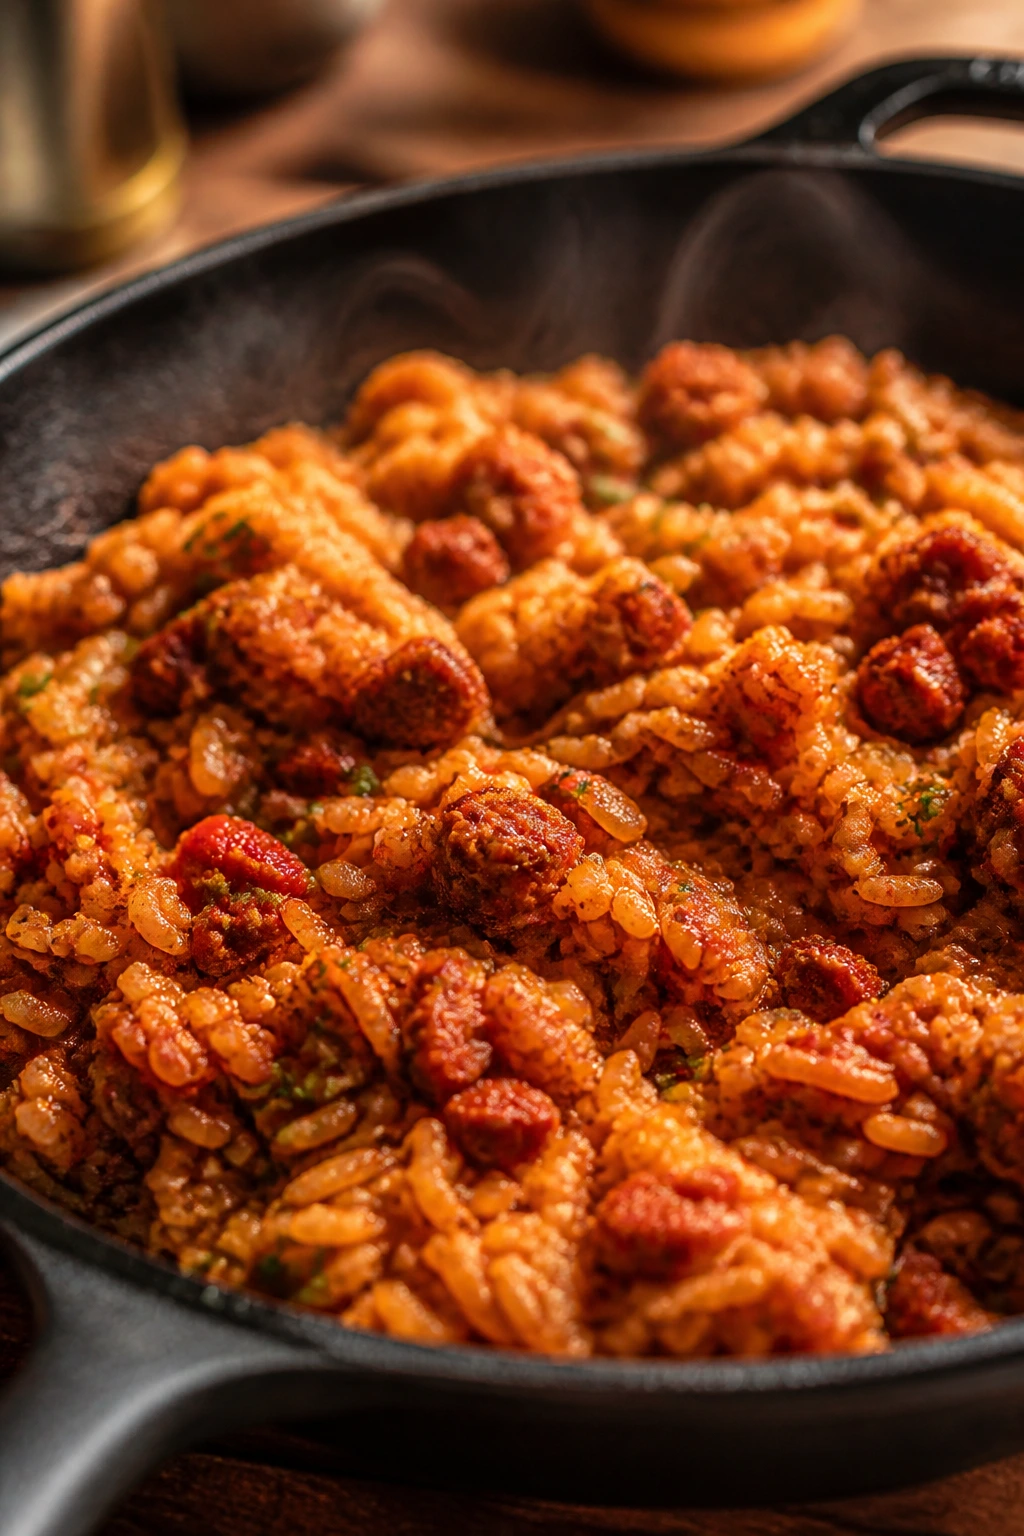
This is a pan that smells finished before the rice is even tender. Chorizo brings oil and spice, tomatoes add body, and the rice soaks up everything in the skillet.
Why It Works:
Chorizo releases seasoned fat, which flavors the rice as it cooks. A covered simmer keeps moisture in the pan, so the grains cook through without needing constant attention.
Key Ingredients:
- 1 tbsp oil
- 6 oz chorizo, sliced or crumbled
- 1 onion, diced
- 1 cup long-grain rice
- 1 can diced tomatoes
- 2 cups broth
- 1/2 cup frozen peas
- 1 tsp smoked paprika
Quick Steps:
- Brown the chorizo in oil over medium heat.
- Add the onion and cook until soft.
- Stir in the rice and smoked paprika for 30 seconds.
- Add tomatoes and broth, then cover and simmer for 18 minutes.
- Stir in peas and rest off heat for 5 minutes.
Equipment for This Recipe:
- Deep skillet or saucepan
- Lid
- Wooden spoon
- Measuring cup
How to Serve This Dish:
Serve it with a squeeze of lime or a little chopped parsley. It can stand alone, but a fried egg on top is an easy way to make it feel more like dinner.
Pro Tips for This Recipe:
- Rinse the rice if you want looser grains.
- Keep the lid on during the simmer so the rice cooks evenly.
- Rest the pan before serving so the steam finishes the rice.
Variations on This Dish:
- Bean Addition: Stir in canned beans with the peas.
- Chicken Version: Use diced cooked chicken instead of chorizo.
- Milder Rice: Use smoked sausage if chorizo is too strong.
Common Mistakes to Avoid with This Dish:
- Don’t stir constantly once the liquid goes in.
- Don’t use short-grain rice unless you want a softer texture.
- Don’t lift the lid over and over; the steam matters.
33. Mediterranean White Bean Pitas
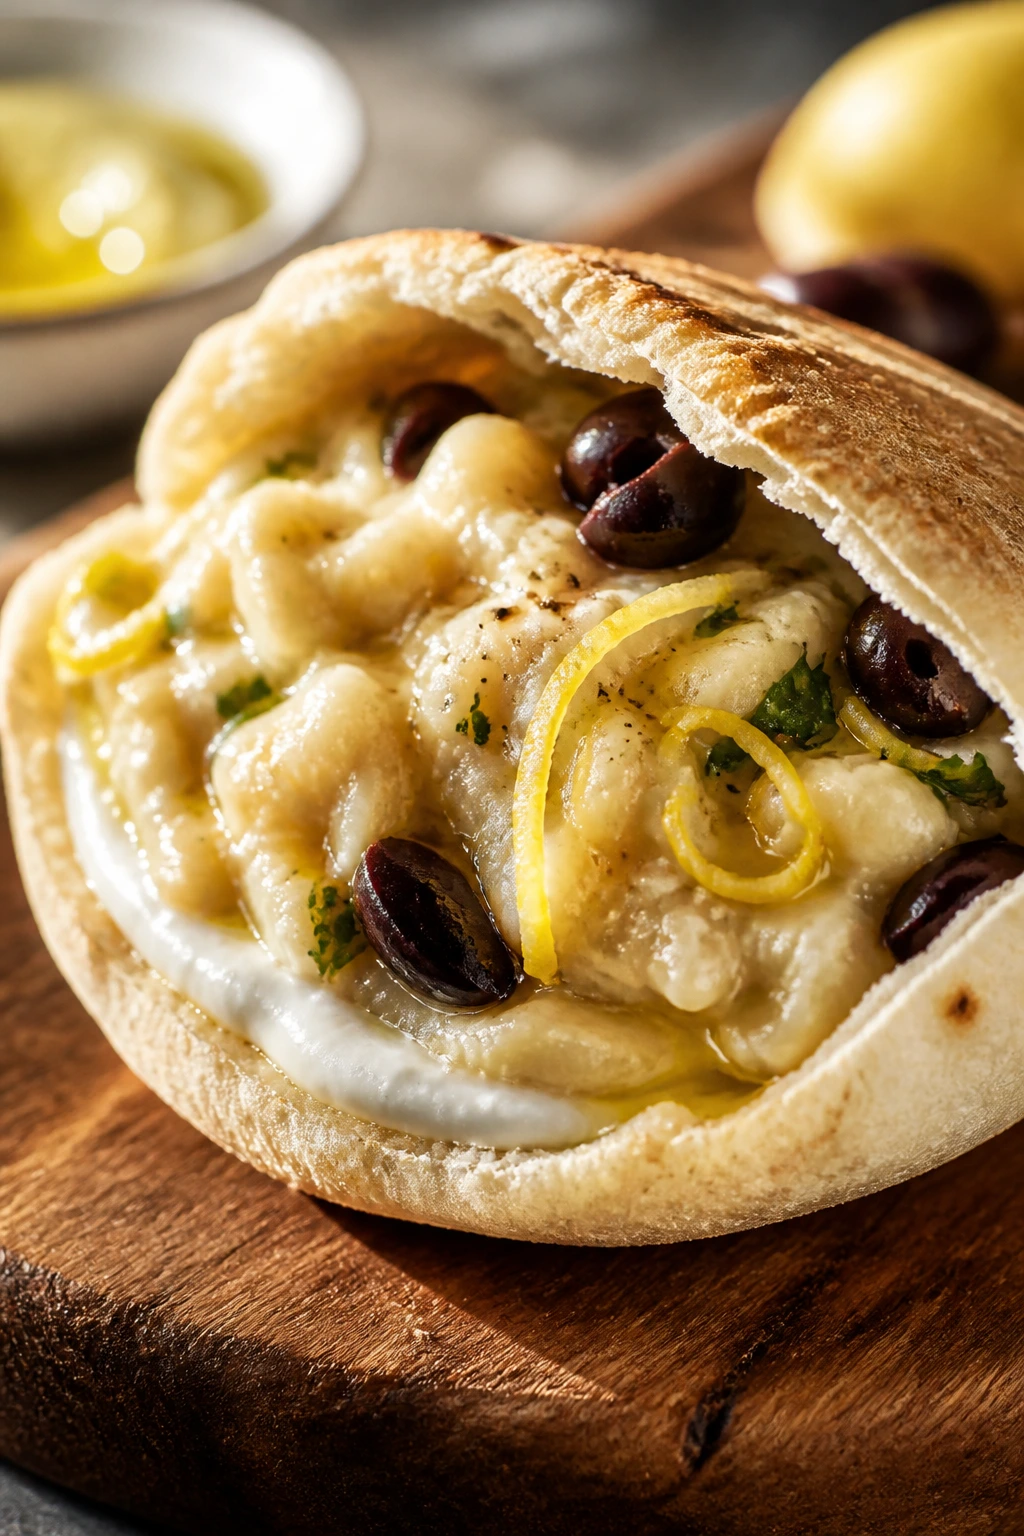
This meal tastes fresh without asking you to shop like it’s a picnic. Beans, yogurt, lemon, and olives make the filling bright enough to feel alive, while pita keeps the whole thing easy to eat.
Why It Works:
White beans mash into a creamy spread without needing a blender. Lemon and yogurt sharpen the flavor, and the pita acts like a built-in pocket, which is useful when dinner needs to be one-handed.
Key Ingredients:
- 2 cans white beans, drained
- 1/4 cup plain yogurt or tahini
- 1 tbsp lemon juice
- 1 tbsp olive oil
- 1/2 tsp dried oregano
- 4 pita breads
- 1/2 cup chopped cucumber or tomato
- 1/4 cup sliced olives
Quick Steps:
- Mash the beans with yogurt, lemon juice, olive oil, oregano, salt, and pepper.
- Warm the pita in a dry skillet or microwave.
- Fill each pita with the bean mixture.
- Add cucumber, tomato, and olives.
- Serve immediately.
Equipment for This Recipe:
- Bowl
- Fork or potato masher
- Skillet or microwave
- Knife
How to Serve This Dish:
Serve the pitas with extra olives or a handful of greens on the side. If you want less mess, turn the filling into a bowl and use the pita as a scoop.
Pro Tips for This Recipe:
- Mash the beans enough that the filling spreads, but keep some texture.
- Warm the pita so it bends without cracking.
- Taste for salt after the olives go in; they change the balance fast.
Variations on This Dish:
- Tahini Version: Use tahini instead of yogurt.
- Add Feta: Crumble feta into the filling.
- Herb Pitas: Add dill or parsley if you have it.
Common Mistakes to Avoid with This Dish:
- Don’t overstuff the pita or it tears.
- Don’t skip lemon juice; the filling needs brightness.
- Don’t serve the beans cold straight from the fridge.
34. Cacio e Pepe with Lemon
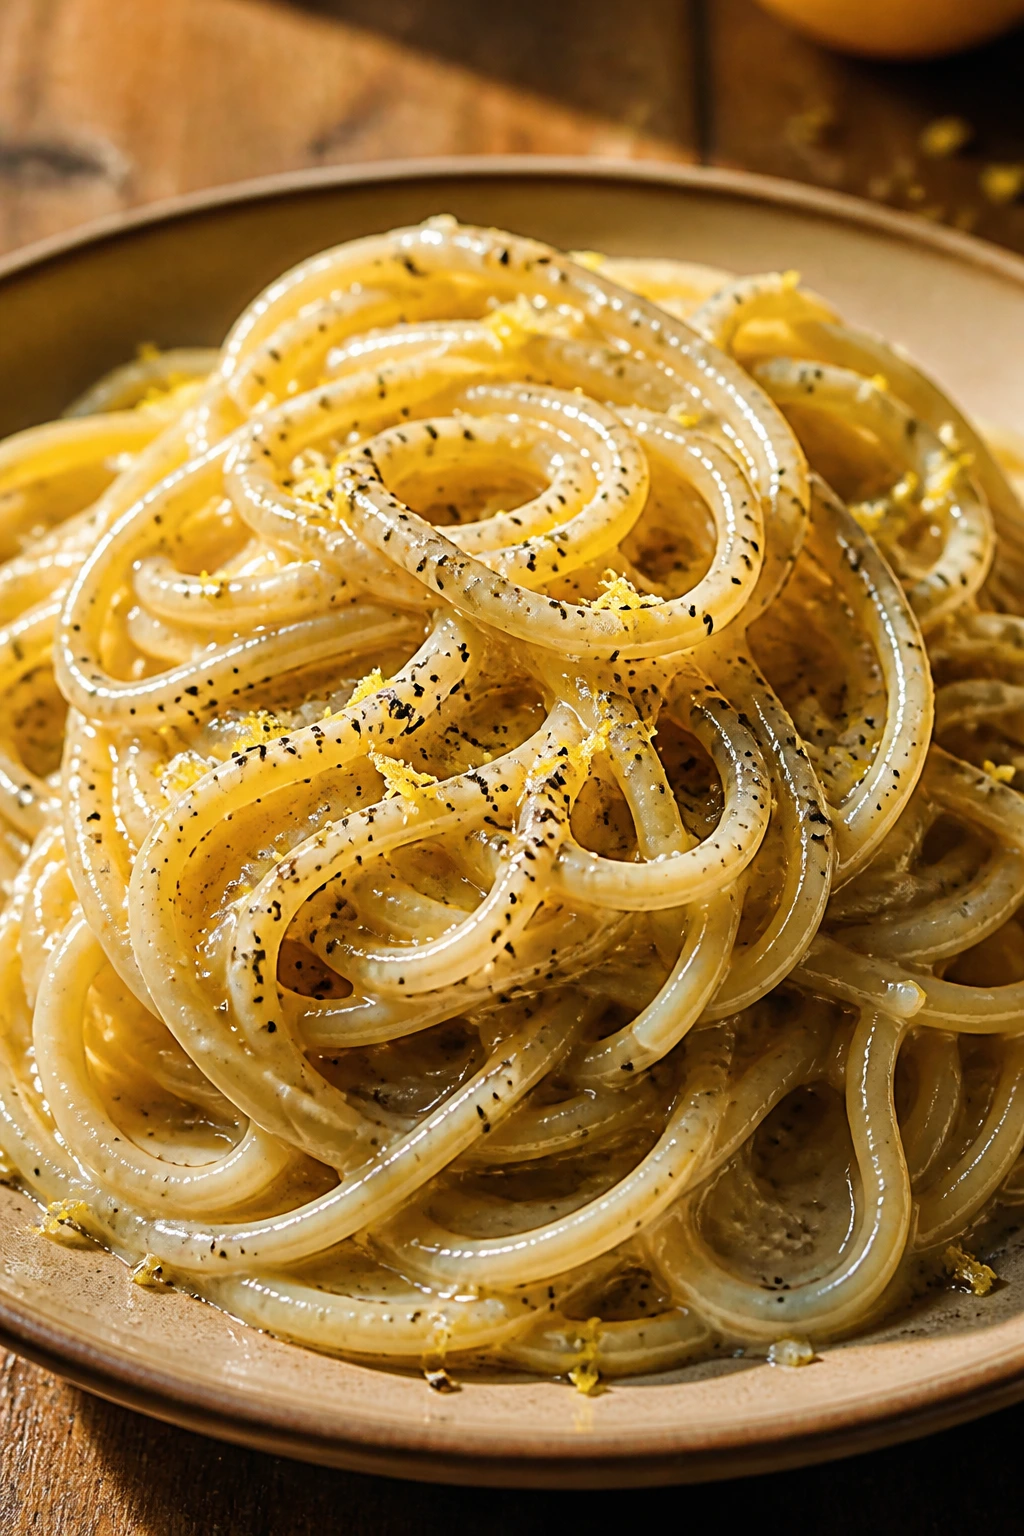
This pasta stays honest. Cheese, pepper, pasta water, and a little lemon are enough if you keep the heat under control and resist the urge to overcomplicate it.
Why It Works:
Pepper blooms in hot fat and gets aromatic fast, while finely grated cheese melts best when the pan isn’t scorching. Lemon zest adds a fresh edge that keeps the sauce from feeling too heavy.
Key Ingredients:
- 12 oz spaghetti
- 2 tbsp butter
- 2 tsp freshly cracked black pepper
- 1 1/2 cups finely grated Pecorino Romano or Parmesan
- 3/4 cup reserved pasta water
- 1 tsp lemon zest
- Salt, for the pasta water
Quick Steps:
- Cook the spaghetti in well-salted water and reserve 1 1/2 cups of the water.
- Melt the butter in a skillet and stir in the black pepper for 20 seconds.
- Add the pasta and a splash of water, tossing to coat.
- Remove from the heat and add the cheese gradually with more pasta water until creamy.
- Finish with lemon zest and serve immediately.
Equipment for This Recipe:
- Pot
- Skillet
- Tongs
- Fine grater
How to Serve This Dish:
Serve it in warm bowls with extra black pepper on top. The sauce should look glossy and clingy, not thick like a cheese pull contest.
Pro Tips for This Recipe:
- Grate the cheese very finely so it melts quickly.
- Add cheese off the heat to avoid clumps.
- Use enough pepper that you can smell it before you taste it.
Variations on This Dish:
- Lemony Cacio e Pepe: Add a touch more zest.
- Garlic Pepper Pasta: Infuse the butter with a smashed garlic clove.
- Whole Wheat Version: Works fine if you like a nuttier bite.
Common Mistakes to Avoid with This Dish:
- Don’t add cheese to a boiling-hot pan.
- Don’t use coarsely grated cheese.
- Don’t skimp on pasta water; the sauce needs it to emulsify.
35. Minestrone with Frozen Vegetables
Minestrone is the pantry soup that forgives almost everything except laziness with seasoning. Beans, pasta, tomatoes, and frozen vegetables make it feel full, and the broth gets better the longer the pot sits, even if only by a few minutes.
Why It Works:
Frozen vegetables cut the chopping time to almost nothing and still bring texture. Small pasta and beans thicken the broth naturally, so the soup ends up hearty without needing cream or flour.
Key Ingredients:
- 2 tbsp olive oil
- 1 onion, diced
- 3 garlic cloves, minced
- 1 can diced tomatoes
- 4 cups broth
- 1 can kidney or cannellini beans, drained
- 2 cups frozen mixed vegetables
- 1 cup small pasta
- 1 tsp Italian seasoning
Quick Steps:
- Cook the onion in olive oil for 4 to 5 minutes until soft.
- Add the garlic and Italian seasoning and stir for 30 seconds.
- Add tomatoes, broth, beans, and frozen vegetables.
- Simmer for 8 minutes, then stir in the pasta and cook until tender.
- Taste and adjust the seasoning before serving.
Equipment for This Recipe:
- Soup pot
- Ladle
- Wooden spoon
- Can opener
How to Serve This Dish:
Serve it with Parmesan, black pepper, and toast if you want a fuller meal. The soup should be thick enough that the spoon pulls up beans and pasta in the same bite.
Pro Tips for This Recipe:
- Add the pasta near the end so it doesn’t swell too much.
- Use frozen vegetables straight from the bag; no need to thaw.
- If the broth tastes thin, simmer uncovered for a few extra minutes.
Variations on This Dish:
- Pesto Finish: Stir in a spoonful of pesto before serving.
- Rice Minestrone: Swap pasta for cooked rice.
- Spicy Soup: Add red pepper flakes with the garlic.
Common Mistakes to Avoid with This Dish:
- Don’t let the pasta cook so long that it breaks apart.
- Don’t use too much broth for the amount of beans and vegetables.
- Don’t forget to taste at the end; minestrone needs a last salt check.
Why Pantry Staples Keep Dinner Moving

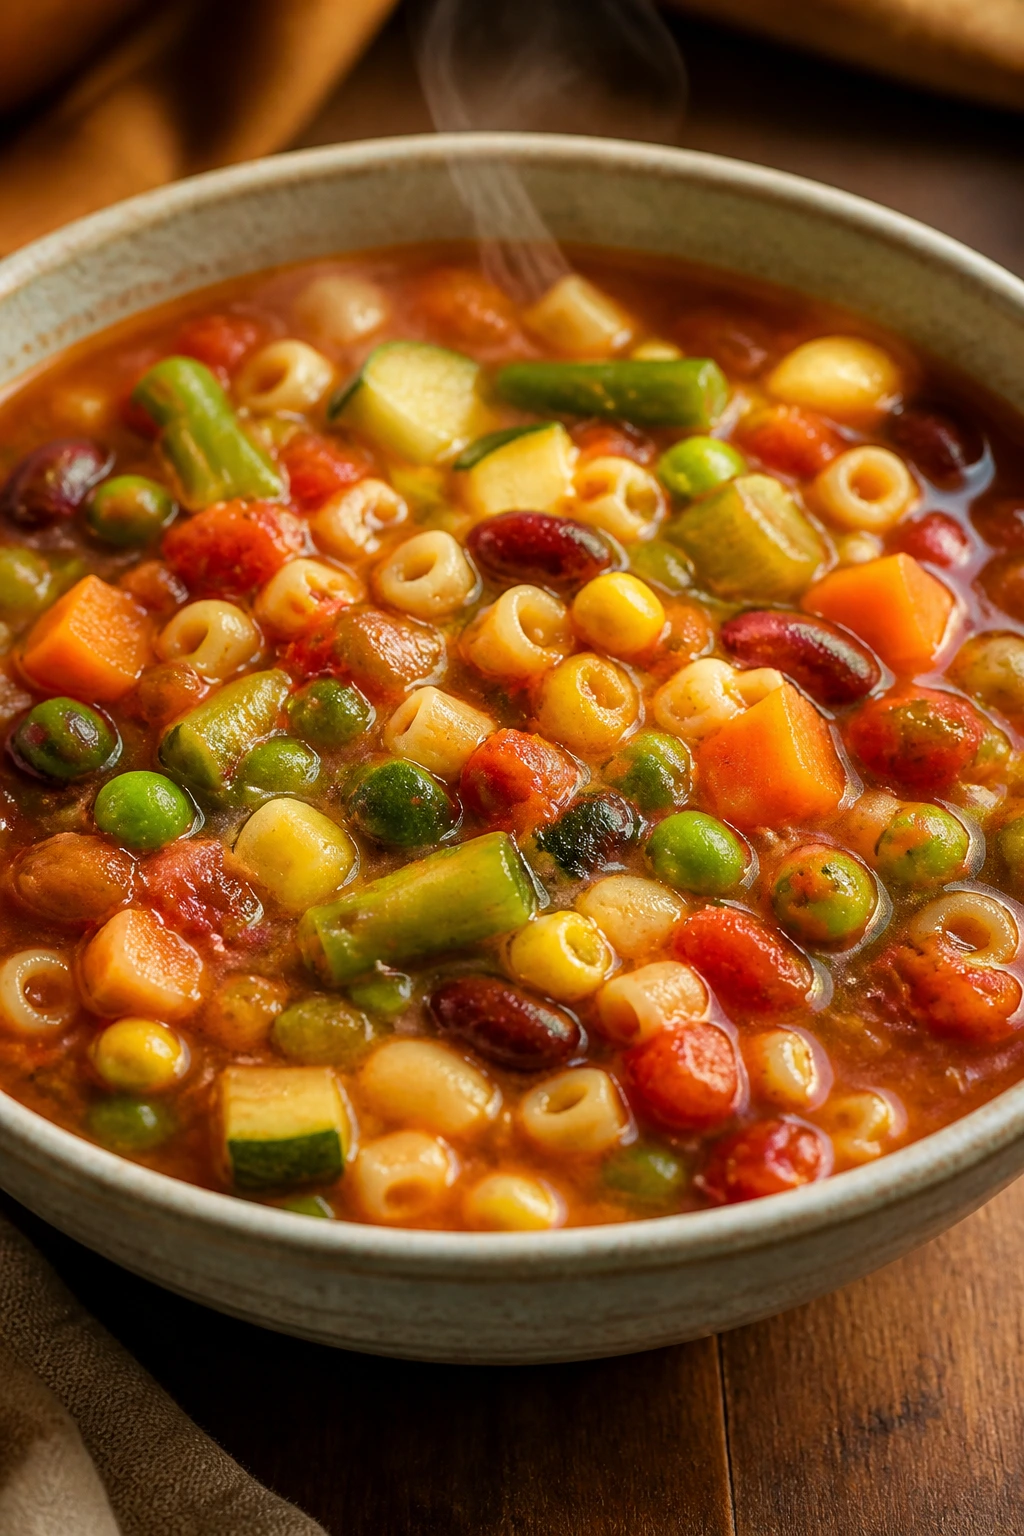
The best pantry dinners are rarely the ones with the longest ingredient list. They’re the ones that know how to use a little starch, a little acid, and a little fat to make something that tastes complete. Pasta water, bean liquid, tomato paste, broth, and a splash of vinegar are the quiet tools that keep these meals from tasting like “emergency dinner” and turn them into something you’d actually make again.
There’s also a practical reason pantry cooking holds up so well: the ingredients already come prepped in the ways that matter. Beans are cooked. Tomatoes are chopped. Coconut milk is ready to pour. Rice can be leftover. Even the noodles are usually doing most of the work for you. The job is to season them well, control the heat, and know when to stop.
That last part matters more than people think. Pantry food can go flat if you treat it too gently, and it can go muddy if you keep piling on more liquid, more cheese, more sauce, more everything. A good 30-minute meal usually needs one clear base, one supporting ingredient, and one finish that wakes the whole thing up. Not ten things. Three good ones.
Essential Equipment for These Meals

- Large pot: Needed for pasta, soup, rice, and anything that wants room to move without boiling over.
- 12-inch skillet or deep sauté pan: This is the workhorse for sauces, fried rice, bean skillets, and quick sautés.
- Lid that fits the skillet: Useful for shakshuka, rice, and anything that needs a little steam to finish.
- Colander: Keeps pasta and beans moving fast without fuss.
- Wooden spoon or heatproof spatula: Better control than a fork, especially with rice and beans.
- Tongs: Handy for pasta, tortillas, and turning grilled sandwiches.
- Box grater or microplane: Freshly grated cheese melts better and finishes dishes cleanly.
- Can opener: Obvious, but essential when half the recipes depend on it.
- Small mixing bowls: Useful for sauces, tuna mixes, and bean fillings.
- Potato masher or fork: Not mandatory, but it helps turn beans and potatoes into a better texture.
- Sheet pan or plate lined with paper towels: Good for resting fried items so they don’t go greasy.
Smart Shopping and Ingredient Tips
A good pantry meal starts before the pan is hot. When you buy canned tomatoes, choose the plain kind first: crushed, diced, or whole. The flavored versions can be useful, but they often come salted harder than you expect. For beans, go for low-sodium when possible so you can season the dish yourself. That gives you more control, especially in soups and stews where the liquid reduces.
Pasta shape matters more than people admit. Long noodles work for glossy garlic sauces and cacio e pepe. Short shapes like penne, rigatoni, and elbows catch thicker sauces, tuna, and cheese better. Small pasta is also kinder in soups because it cooks fast and doesn’t swallow all the broth. For rice dishes, long-grain rice stays separate; short-grain rice gets stickier and denser.
Frozen vegetables are worth keeping around because they’re picked and packed fast. They’re not a compromise in fried rice, chowders, or soups; they’re a shortcut that behaves. Same with canned fish. Tuna in oil gives a softer, richer result. Sardines and salmon bring more flavor than water-packed tuna, so don’t hide them under too much sauce.
One more thing: look at your spices. If the paprika smells like dust and the curry powder barely smells like anything, the dish will show it. Spices don’t need to be trendy. They just need to be alive enough to taste.
How to Serve These Meals
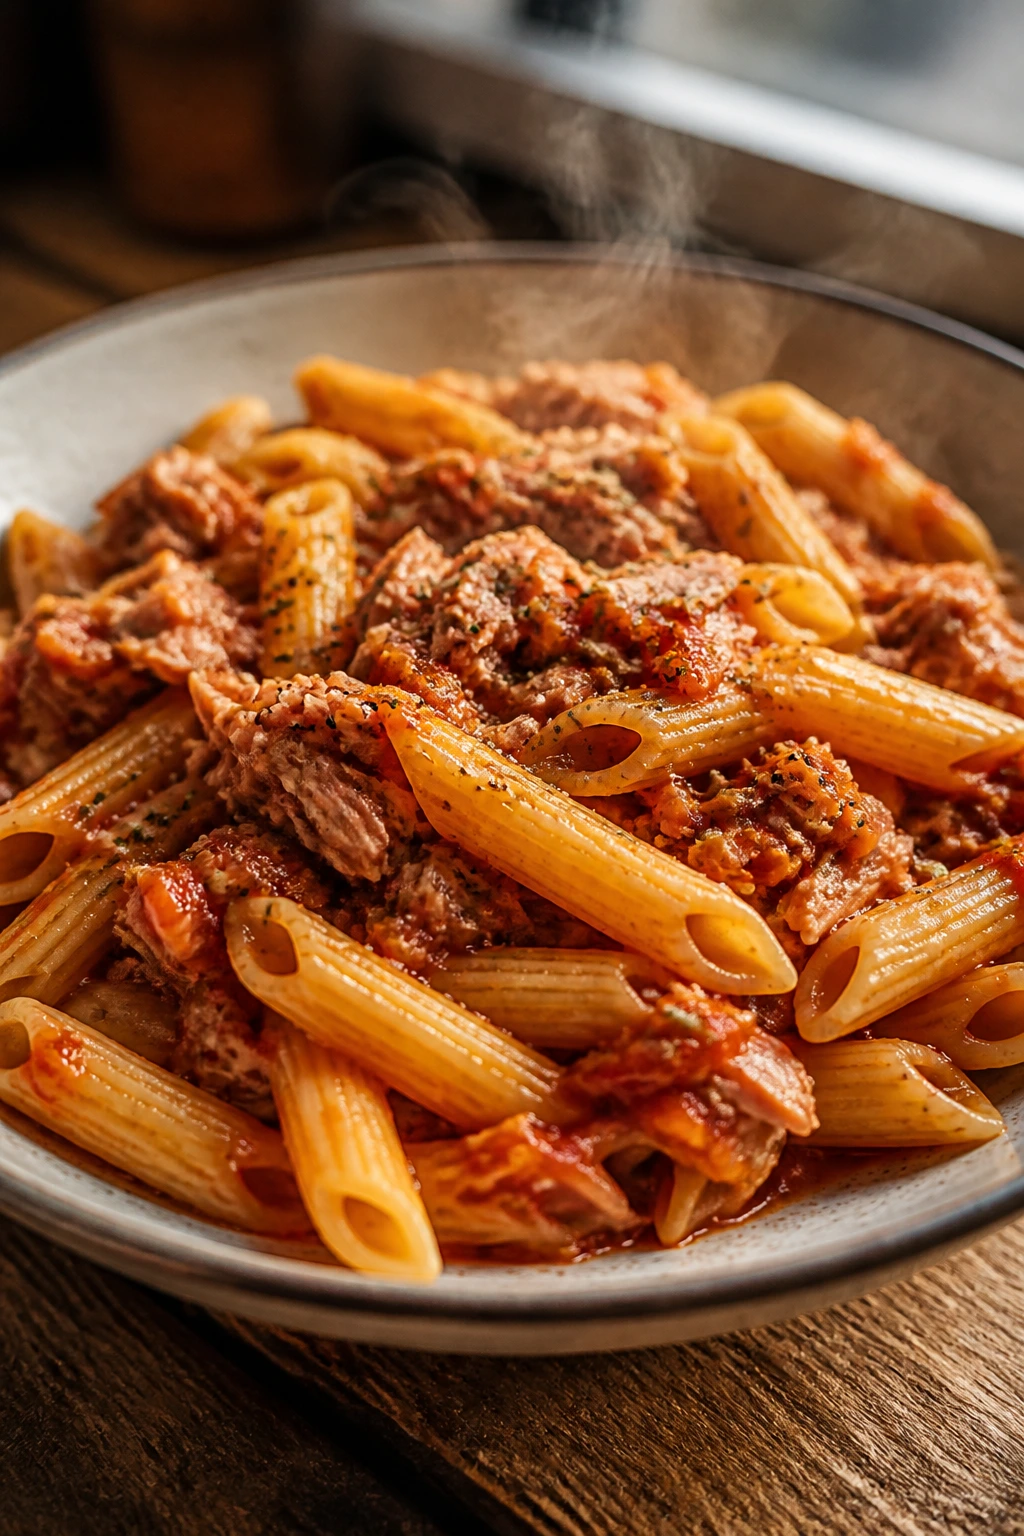
Presentation:
Keep these dishes in deep bowls, wide shallow pasta plates, or straight in the skillet when that makes sense. A handful of parsley, scallions, cracked pepper, or grated cheese goes a long way when the base is simple. Crisp edges and a final drizzle of olive oil make pantry meals look intentional instead of thrown together.
Accompaniments:
Toast, pita, tortillas, rice, and a basic green salad are the obvious helpers, but they matter because they stretch the meal. For soup and stew, bread or crackers are the right call. For pasta, a salad with lemon or vinegar keeps the plate from feeling heavy. For beans, rice turns a side into dinner.
Portions:
Most of these recipes serve 3 to 4 people as written, though bean-heavy bowls and soups can stretch farther if bread or rice is part of the plan. If you’re feeding bigger appetites, add another can of beans, a few more ounces of pasta, or an extra egg. If the meal is for one or two, the leftovers usually keep well enough to justify making the full batch.
Beverage Pairing:
Cold sparkling water with lemon is the simplest answer and works with nearly everything here. A light beer fits the cheesy, savory meals. For the tomato-based and bean-based dishes, iced tea or a dry white wine keeps the flavors clean.
Additional Tips and Flavor Boosters
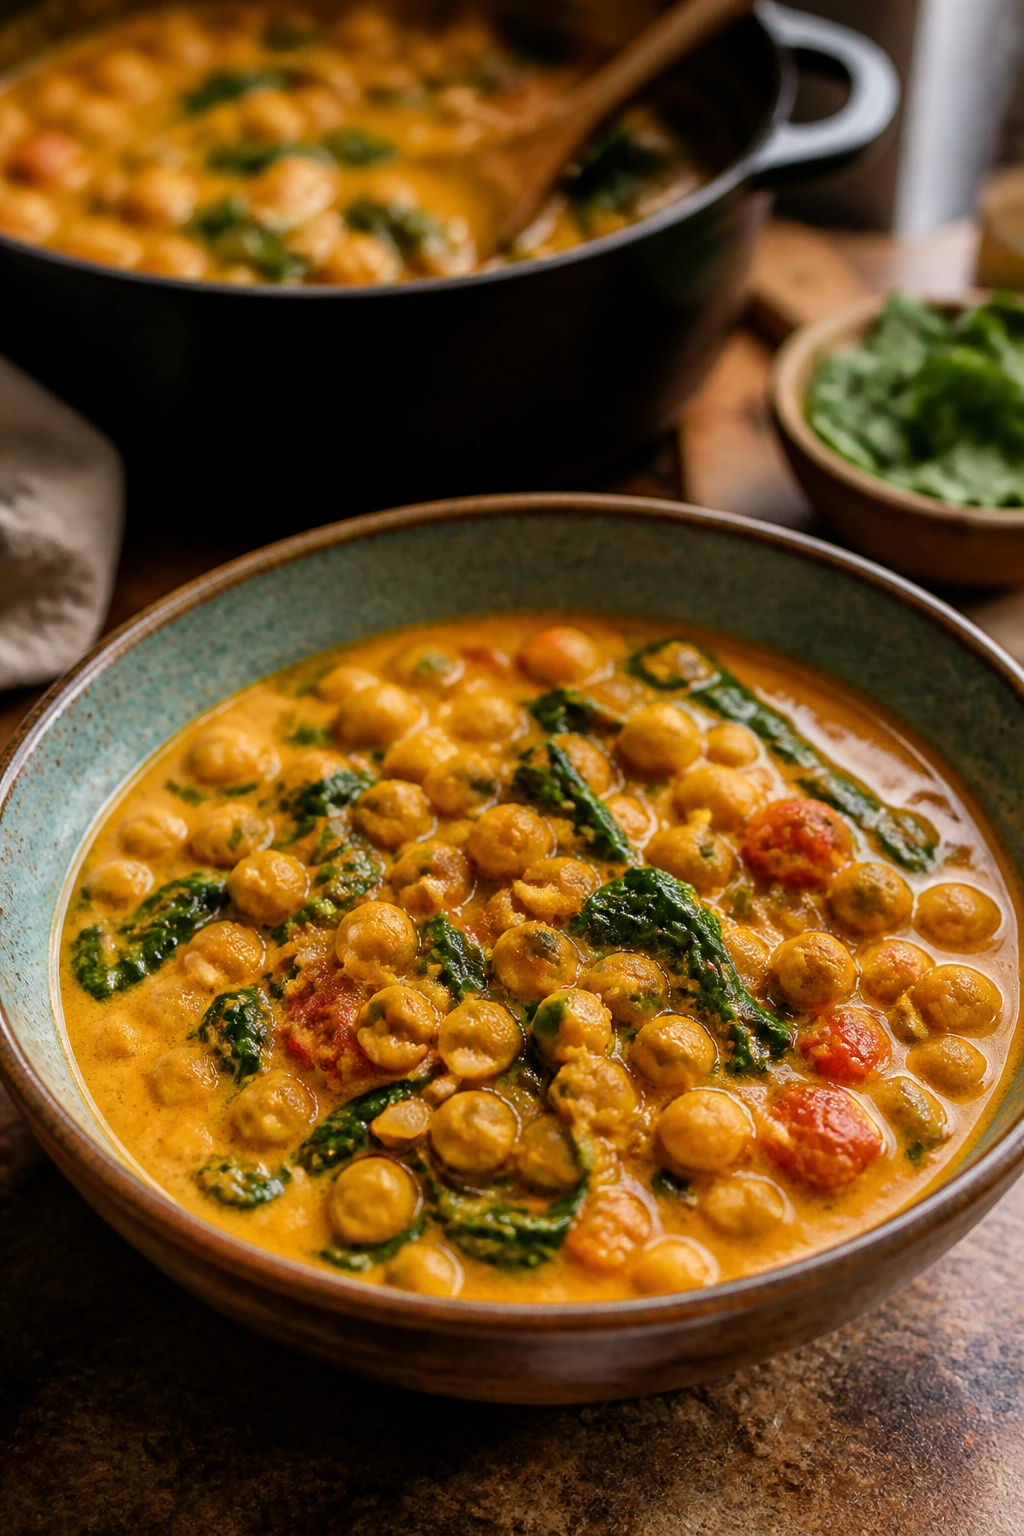
Flavor Enhancement:
A finishing acid changes more than people expect. Lemon juice, vinegar, pickle brine, or a spoonful of salsa at the end can wake up a flat pan without making it taste “tweaked.” For soups and bean dishes, a last-minute drizzle of olive oil or chili oil gives the bowl a warmer finish.
Customization:
Treat these recipes like templates, not laws. Swap black beans for pinto beans, spaghetti for linguine, rice for couscous, cheddar for jack cheese. If you like more heat, add chili flakes to the oil at the start. If you like things softer, add a spoon of cream cheese or yogurt at the end.
Serving Suggestions:
Fresh herbs are nice, but don’t chase them if the pantry is the real story. Scallions, parsley, cilantro, and dill all work as finishing notes. Toasted breadcrumbs, crushed tortilla chips, and sesame seeds add crunch when a dish feels too soft.
Make-It-Yours:
For vegetarian meals, keep a can of chickpeas, white beans, and lentils on hand. For dairy-free meals, olive oil and coconut milk cover a lot of ground. For gluten-free dinners, rice, potatoes, tortillas, and corn-based sides do the job without making the plate feel like a second choice.
Make-Ahead, Storage, and Reheating Guidance
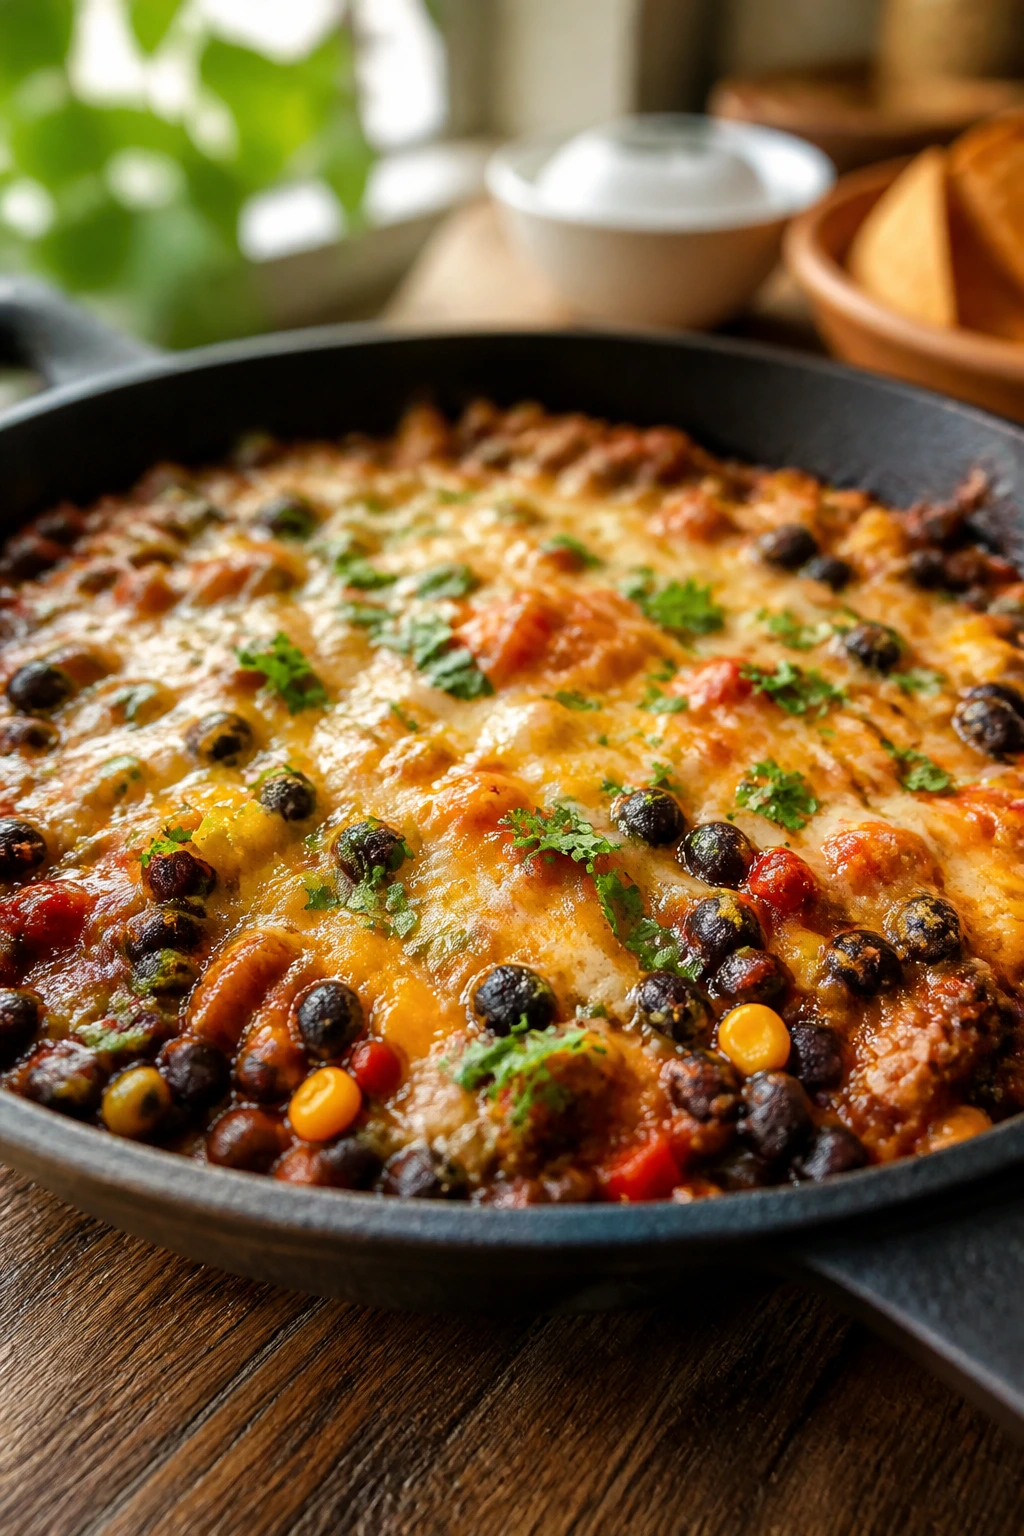
Most of these meals keep well because pantry cooking is often built from sturdy ingredients. Pasta dishes usually hold for 3 to 4 days in the fridge, though creamier ones can tighten up a bit. Soups and stews often keep for 4 days refrigerated and freeze well for up to 2 months. Bean skillets, rice bowls, and taco fillings sit in the safe, useful zone for 3 to 4 days when stored in airtight containers.
Reheat pasta with a splash of water in a skillet over medium-low heat. That brings the sauce back without drying the noodles out. Soups and stews do better on the stovetop than the microwave because you can adjust the thickness with a little broth or water as they warm. Rice dishes should be reheated covered, with a teaspoon or two of water to bring the steam back into the grains.
Fried items are the exception. Quesadillas, salmon cakes, and tuna melts are best fresh, but they can be reheated in a dry skillet or toaster oven so they regain some crispness. The microwave works in a pinch, though the texture will soften. If a recipe includes eggs, like shakshuka or hash, aim to reheat gently and only once.
A useful habit: store toppings separately when you can. Cheese, herbs, and crunchy toppings keep better that way. A bowl of soup with crackers on the side is still soup. A bowl of soup with soggy crackers mixed in is something else entirely.
Variations and Adaptations to Try

The Gluten-Free Pantry Swap:
Use rice, corn tortillas, potatoes, couscous alternatives like millet, or gluten-free pasta where needed. The biggest trap is assuming all canned sauces and seasonings are automatically safe; check labels on broth, soy sauce, and curry blends.
The Dairy-Free Shelf:
Olive oil, coconut milk, tahini, and nutritional yeast can stand in for butter, cream, and cheese in a lot of these recipes. The texture changes a little, but the meals still hold together if you keep the seasoning sharp.
The Lower-Sodium Route:
Choose low-sodium broth, rinse canned beans, and go easy on salty cheese and olives until the end. Then taste and adjust. That’s the part many cooks skip, and it matters more than people think.
The Extra-Protein Upgrade:
Canned salmon, tuna, chicken, eggs, lentils, beans, and chorizo all work as quick protein boosts. If you want a dish to go further, add one of these before you reach for a second starch. The bowl gets bigger without getting fussy.
The Kid-Friendly Shortcut:
Dial back the chili flakes and hot sauces, keep textures soft, and lean into cheese, rice, pasta, and mild tomato sauces. Quesadillas, mac and cheese, burritos, and pasta are the easiest wins because they don’t ask for much negotiation at the table.
Common Mistakes to Avoid
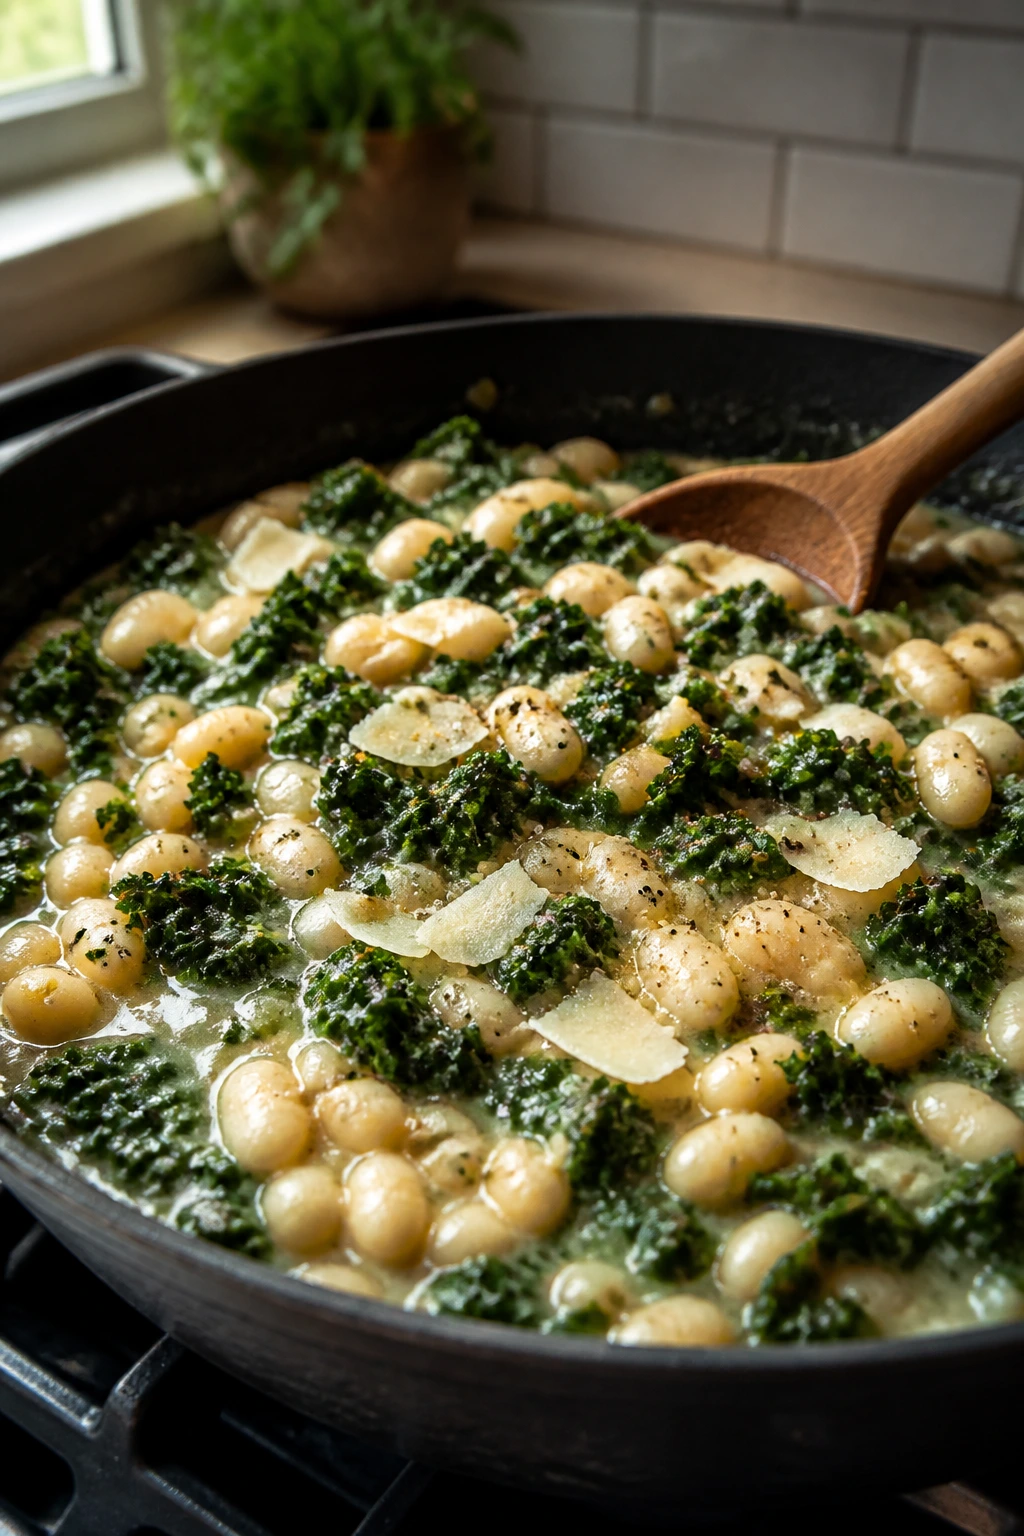
The biggest pantry-meal mistake is underseasoning at the start and overcorrecting at the end. Beans, rice, pasta, and canned tomatoes all need salt, but they need it in measured layers. If you dump salt in after everything is cooked, the dish can still taste flat because the flavor never had a chance to settle into the ingredients.
Another one: using too much liquid. Pantry staples often release moisture as they cook, especially canned tomatoes, beans, vegetables, and coconut milk. If you pour in broth too fast, the sauce stops reducing and the meal tastes thin. Add liquid in smaller amounts and let heat do its job.
A third trap is cooking everything at the same speed. Garlic burns before onions soften. Pasta overcooks while the sauce still simmers. Eggs set faster than the stew around them. A 30-minute meal doesn’t mean all the pieces should enter the pan at once. It means the order matters.
People also forget texture. A bowl of soft-on-soft-on-soft can feel exhausting by the third bite. That’s why toast, breadcrumbs, scallions, fried eggs, tortilla chips, and crisped tortillas show up so often in these recipes. They’re not decoration. They’re part of the meal.
Last, don’t let leftovers dry out in the fridge and then blame the recipe. Reheat with a little water, broth, or oil. Pantry food is forgiving, but it still needs a little care on the second day.
Frequently Asked Questions
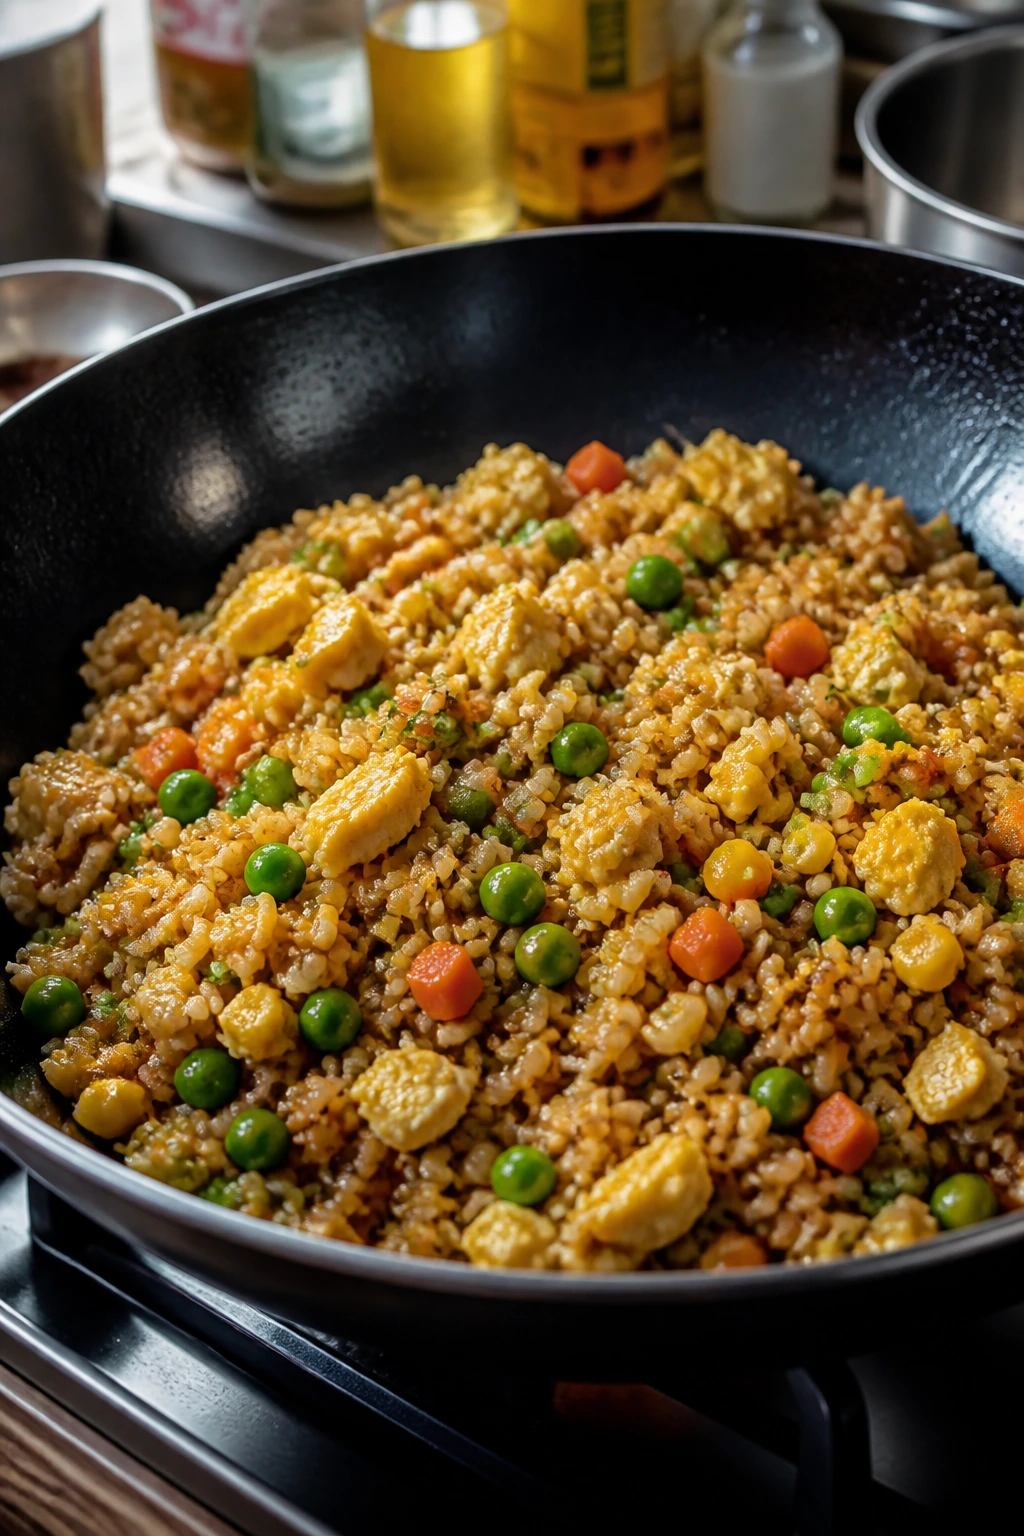
Can I swap canned beans freely in most of these recipes?
Usually, yes. Black beans, pinto beans, cannellini beans, and chickpeas all swap well as long as you think about texture. Chickpeas stay firm, cannellini beans go creamy, and black beans hold a little more bite.
What if I only have whole canned tomatoes instead of diced or crushed?
Use them. Crush the tomatoes with your hands or a spoon before they go into the pot. Whole canned tomatoes often taste better than diced anyway, because they tend to be packed with fewer additives.
Do frozen vegetables really work in fast meals, or are they a compromise?
They work. In soups, fried rice, chowders, and skillet dinners, frozen vegetables are often better than limp fresh ones because they were packed at their peak and cook fast. The only rule is to add them late enough that they stay bright.
How do I keep pasta from turning gluey when I reheat it?
Reheat it with a splash of water in a skillet or saucepan over medium-low heat, not high heat. Stir gently and stop as soon as the sauce loosens. A microwave can work too, but cover the bowl and add a tablespoon of water first.
Can I make any of these meals without cheese?
Yes. Use olive oil, tahini, yogurt, or a little extra bean mash to replace some of the richness. The dishes that depend on cheese for structure — like mac and cheese, quesadillas, and tuna melts — will change texture, but they still work.
What if I don’t have broth?
Water is fine in a pinch. Add a little more salt, maybe a bay leaf or extra garlic, and let the dish simmer a touch longer so the flavors have time to build. Broth helps, but it isn’t the only path.
Are these recipes good for meal prep?
Several of them are. Bean stews, soups, pasta sauces, fried rice, burrito fillings, and lentil mixtures all keep well for several days. Keep crisp toppings separate and reheat gently so the texture stays decent.
How do I make these meals feel less repetitive over a week?
Change the finish, not the whole recipe. Lemon on one night, chili oil the next, herbs on another. A different starch or a different crunchy topping can make a familiar pantry base feel new without sending you back to the store.
A Full Shelf and a Short Clock
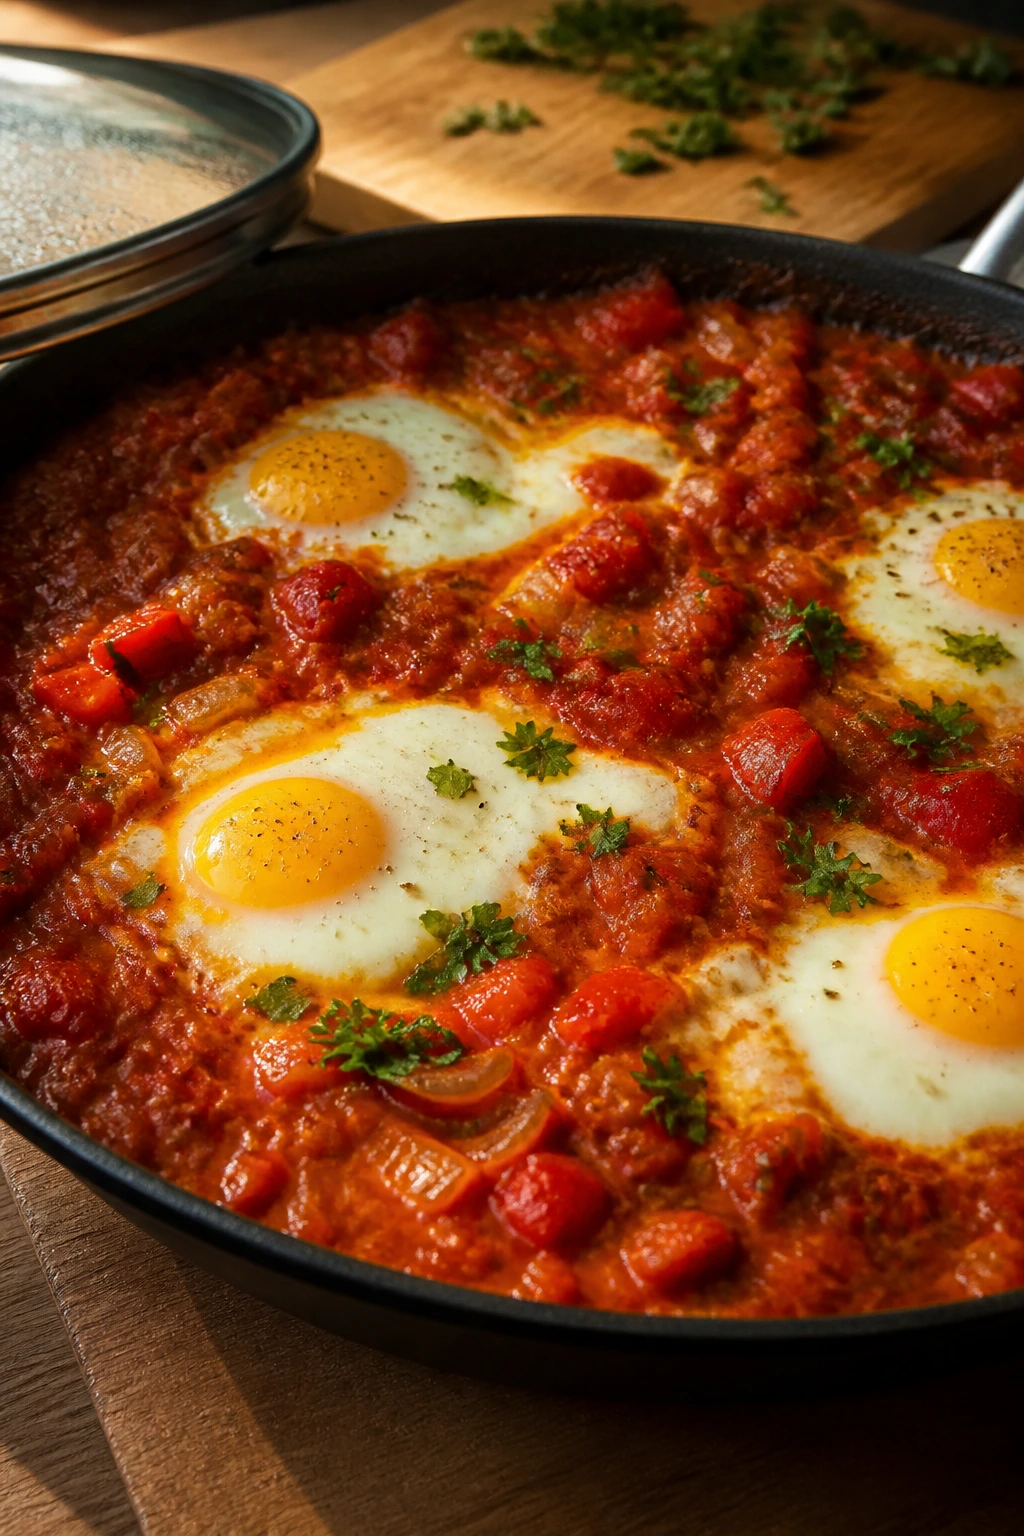
Pantry cooking works because it respects what’s already there. A can of beans doesn’t need a rescue mission. A box of pasta doesn’t need a speech. Give them salt, heat, and one or two sharp details, and dinner shows up with a lot less fuss than people expect.
That’s the real appeal of these 30-minute meals. They keep the evening moving. They spend less, waste less, and still land on the table with enough flavor to feel like a proper meal. Once you get used to that rhythm, the pantry stops looking like a backup plan and starts looking like a decent first choice.