
Packed lunches can be deceptively tricky. A sandwich that looks fine at 7 a.m. can turn limp by noon, roasted vegetables can go chewy or soggy if they’re boxed the wrong way, and anything with sauce has a talent for leaking into the one compartment you wanted to keep dry. The best nutrient dense family meals for lunchboxes do the opposite: they hold their shape, taste like real food after a few hours, and still have enough protein, fiber, and color to make the lunchbox feel worth opening.
I’ve always liked meals that pull double duty. Make them for dinner, stash the leftovers, and you’ve already solved tomorrow’s lunch. That’s the sweet spot here. Beans, eggs, chicken, salmon, tofu, whole grains, yogurt, nuts, and vegetables do more than “add nutrition” in some vague sense — they change how the lunch actually eats. They keep the meal from feeling thin, and they buy you a little staying power between meals.
There’s also a practical truth most lunchbox lists skip over: texture matters as much as nutrition. A cold wrap with crisp lettuce, a sturdy grain bowl, a soup that still steams when the lid opens, or a pasta salad that tastes better after a night in the fridge — those are the boxes people actually finish. The recipes below lean hard on that idea, one container at a time.
Why These Lunchbox Meals Earn Their Keep
-
Protein First: Each recipe leans on eggs, beans, chicken, fish, tofu, yogurt, or turkey so the meal doesn’t feel like snack food in disguise.
-
Fiber That Holds Up: Whole grains, legumes, fruit, and vegetables keep the box from becoming a quick sugar spike followed by a 2 p.m. crash.
-
Packable Texture: These meals are built for lids, backpacks, and a little time on the road; they don’t rely on delicate greens or flimsy sauces.
-
Make One, Eat Twice: A lot of these work as dinner first, lunch second, which is the only kind of meal prep I actually trust on a busy week.
-
Kid-Friendly Without Being Bland: Mild seasoning, familiar shapes, and smart dips keep things approachable while still giving the food some backbone.
-
Easy to Adapt: Most of these recipes can slide toward gluten-free, dairy-free, nut-free, or vegetarian with one or two clean swaps.
1. Turkey, Spinach, and Carrot Meatballs
These meatballs are small, tender, and a little sweet from the carrot, which is exactly why they work in a lunchbox. The spinach disappears into the mix, so you get the green without the drama. I like them with rice, pasta, or tucked into a pita with a smear of hummus.
Why It Works: Ground turkey can go dry fast, but grated carrot and a little Parmesan keep these meatballs soft after reheating. Baking them at 400°F gives you browned edges without frying, and that matters when you’re packing food for later. They hold their shape well, which means no crumbly mess in a container.
Key Ingredients:
- 1 lb ground turkey
- 1 cup finely grated carrot
- 1 cup finely chopped spinach, squeezed dry
- 1/2 cup breadcrumbs
- 1 large egg
- 2 tablespoons grated Parmesan
- 2 cloves garlic, minced
- 1 teaspoon Italian seasoning
- 1/2 teaspoon fine salt
- 1 tablespoon olive oil, for the tray
Quick Steps:
- Preheat the oven to 400°F (205°C) and line a baking sheet with parchment.
- Mix turkey, carrot, spinach, breadcrumbs, egg, Parmesan, garlic, seasoning, and salt until just combined.
- Shape into 1½-inch meatballs and set them on the tray.
- Brush or mist lightly with oil, then bake 15 to 18 minutes until the centers reach 165°F and the tops are lightly browned.
- Cool for 10 minutes before packing so they stay juicy instead of steaming themselves soft.
Equipment for This Recipe:
- Rimmed baking sheet
- Parchment paper
- Box grater
- Large mixing bowl
How to Serve This Dish: Pack 4 to 5 meatballs with pasta, rice, or a small container of marinara. They also sit nicely beside cucumber coins and apple slices for a balanced box. Warm or cold both work.
Pro Tips for This Recipe:
- Squeeze the spinach dry with your hands; wet spinach makes the mix loose.
- Don’t overwork the meat. A few streaks are better than a dense, rubbery ball.
- Make the meatballs uniform so they cook evenly.
- If you want a stronger lunchbox flavor, add 1 tablespoon of ketchup or tomato paste to the mix.
Variations on This Dish:
- Turkey Parmesan Minis: Add 2 tablespoons extra Parmesan and serve with a little marinara.
- Dairy-Free Version: Skip the cheese and add 1 extra tablespoon breadcrumbs plus 1 teaspoon olive oil.
- Spiced Lunchbox Meatballs: Add 1/2 teaspoon smoked paprika and a pinch of black pepper for a warmer flavor.
Common Mistakes to Avoid with This Dish:
- Don’t pack them hot. They’ll steam in the container and lose their browned edges.
- Don’t skip the grated carrot. That little bit of moisture is doing real work.
- Don’t bake until they look dark. When turkey meatballs overcook, the texture turns chalky fast.
2. Chickpea Crunch Pita Pockets
Chickpeas deserve more credit than they get. Mash them with yogurt, celery, apple, and herbs, and they turn into a filling that tastes fresh even after a few hours in a lunch bag. The apple gives it snap, not sweetness overload, which I appreciate.
Why It Works: Chickpeas bring fiber and steady energy, while Greek yogurt keeps the filling creamy without making it heavy. Celery and apple stay crisp if you dice them small, and whole-wheat pitas give the meal some structure. This one packs best when the filling and pita are kept separate until eating.
Key Ingredients:
- 2 cans chickpeas, drained and rinsed
- 1/3 cup plain Greek yogurt
- 1 tablespoon tahini
- 1 celery stalk, finely diced
- 1 small apple, finely diced
- 1/4 cup shredded carrot
- 2 tablespoons chopped dill
- 1 tablespoon lemon juice
- 1/2 teaspoon salt
- 4 whole-wheat pitas
Quick Steps:
- Mash about half the chickpeas in a bowl, leaving the rest whole for texture.
- Stir in yogurt, tahini, celery, apple, carrot, dill, lemon juice, and salt.
- Taste and adjust with a little more lemon if the filling feels flat.
- Split the pitas and line them with lettuce if you like, then spoon in the chickpea mixture.
- Pack extra filling in a small container if the lunch won’t be eaten right away.
Equipment for This Recipe:
- Mixing bowl
- Fork or potato masher
- Cutting board and knife
- Small lidded container for filling
How to Serve This Dish: Serve the pockets with cucumber sticks, grapes, or a few olives. If you’re packing for a child who dislikes messy bites, send the filling and pita separately. That tiny change makes the whole thing easier.
Pro Tips for This Recipe:
- Dry the chickpeas well after rinsing so the filling doesn’t turn watery.
- Dice the apple small. Big chunks poke holes in the pita.
- A little Dijon works if you want more bite.
- Keep the filling cold; it firms up and tastes cleaner that way.
Variations on This Dish:
- Curried Chickpea Pita: Add 1 teaspoon curry powder and a handful of raisins.
- Tuna-Free Protein Swap: Use mashed white beans instead of chickpeas if you want a softer texture.
- Seed-Forward Version: Stir in 2 tablespoons sunflower seeds for extra crunch without nuts.
Common Mistakes to Avoid with This Dish:
- Don’t add too much yogurt. The filling should hold, not slide.
- Don’t stuff the pita until it splits. It’s a pocket, not a balloon.
- Don’t skip the lemon juice. Chickpeas need acid or they taste dull.
3. Chicken Avocado Ranch Wraps
There’s a reason this style of wrap disappears from lunchboxes fast. Cold chicken, creamy avocado, and a sharp little hit of lemon make a wrap that still tastes alive after a morning in the fridge. It’s one of the few avocado meals I trust for packed lunches.
Why It Works: Greek yogurt lightens the ranch flavor and keeps the filling from feeling greasy. Lemon slows the avocado from browning and gives the chicken a cleaner taste. Rolling the wrap tightly and chilling it before slicing helps it stay neat instead of slumping open.
Key Ingredients:
- 2 cups cooked chicken, chopped or shredded
- 1 ripe avocado
- 1/3 cup plain Greek yogurt
- 1 tablespoon lemon juice
- 1 teaspoon dried dill
- 1/2 teaspoon garlic powder
- 1/2 cup shredded lettuce
- 1/2 cup shredded carrots
- 1/2 cup shredded cheddar
- 4 whole-wheat tortillas
Quick Steps:
- Mash the avocado with yogurt, lemon juice, dill, and garlic powder.
- Spread the mixture across each tortilla, leaving a small border at the edges.
- Layer on chicken, lettuce, carrots, and cheddar.
- Roll the tortillas tightly, then wrap them in parchment and chill for 15 minutes.
- Slice in half with a sharp knife before packing.
Equipment for This Recipe:
- Mixing bowl
- Spoon or spatula
- Sharp knife
- Parchment paper
How to Serve This Dish: Pair with celery sticks, cherry tomatoes, or a small fruit cup. For bigger appetites, cut the wraps into pinwheels and add a hard-boiled egg on the side. That box feels complete without being heavy.
Pro Tips for This Recipe:
- Use cold chicken. Warm chicken softens the tortilla faster.
- Salt the avocado mixture before you build the wrap; cold food needs a little more seasoning.
- Keep the lettuce dry. One damp leaf turns the tortilla soggy.
- If avocado browning bothers you, press plastic wrap directly onto the filling before rolling.
Variations on This Dish:
- Buffalo Chicken Wrap: Swap the ranch-style filling for 1 to 2 tablespoons buffalo sauce plus extra yogurt.
- Chickpea Avocado Wrap: Replace chicken with mashed chickpeas for a vegetarian lunch.
- Dairy-Free Version: Use mashed avocado plus hummus instead of yogurt.
Common Mistakes to Avoid with This Dish:
- Don’t overfill the tortilla. It will tear the second you try to roll it.
- Don’t skip the parchment wrap if you’re packing it sliced. It keeps the spiral together.
- Don’t let the avocado sit exposed for long before packing.
4. Spinach Cheddar Egg Muffins
Egg muffins are one of those plain-looking foods that earn their place by being useful. They’re sturdy, protein-heavy, and easy to eat with one hand. Spinach and cheddar make them taste like breakfast and lunch had a sensible meeting.
Why It Works: Eggs set into neat little domes at 375°F, which gives you a portioned lunch that doesn’t need utensils if you don’t want them. Chopped spinach disappears into the custardy egg base, and cheddar brings enough salt to keep them from tasting flat after chilling.
Key Ingredients:
- 8 large eggs
- 1/4 cup milk
- 1 cup chopped spinach
- 1/2 cup shredded cheddar
- 1/2 cup diced bell pepper
- 2 tablespoons minced onion
- 1/2 teaspoon salt
- 1/4 teaspoon black pepper
Quick Steps:
- Preheat the oven to 375°F (190°C) and grease a 12-cup muffin tin well.
- Whisk the eggs, milk, salt, and pepper until smooth.
- Stir in spinach, cheddar, bell pepper, and onion.
- Pour into the muffin cups, filling each about three-quarters full.
- Bake for 18 to 20 minutes until the centers are set and no longer glossy.
Equipment for This Recipe:
- 12-cup muffin tin
- Whisk
- Mixing bowl
- Measuring cup
How to Serve This Dish: Pack 2 or 3 muffins with fruit, whole-grain toast, or a small container of salsa. They also work tucked into a lunchbox with orange slices and cucumber spears. Cold is fine.
Pro Tips for This Recipe:
- Grease the tin well or use silicone liners; egg muffins cling if you’re careless here.
- Chop the vegetables small so the muffins slice cleanly.
- Let them cool before storing or they’ll get damp underneath.
- If your family likes more flavor, add a pinch of smoked paprika.
Variations on This Dish:
- Ham and Cheddar Muffins: Add 1/2 cup diced ham.
- Mushroom Herb Muffins: Use sautéed mushrooms and parsley instead of bell pepper.
- Dairy-Free Version: Skip the cheese and add 2 tablespoons nutritional yeast.
Common Mistakes to Avoid with This Dish:
- Don’t overfill the tin. The eggs puff, then spill.
- Don’t skip the cooling time. Warm egg muffins sweat in storage.
- Don’t use watery vegetables unless they’ve been cooked first.
5. Lemon Salmon Rice Bowls
A good salmon bowl feels clean and filling at the same time. The rice gives it heft, the cucumber and edamame add crunch, and the lemon-yogurt sauce wakes up the whole thing after a few hours in the fridge. I like this one cold, which saves you from fussing with reheating.
Why It Works: Salmon brings protein and healthy fat, and it stays tender when baked briefly at 400°F. Brown rice adds a chewy base that doesn’t collapse under the toppings. Keeping the sauce separate until lunch prevents the bowl from turning watery.
Key Ingredients:
- 1 lb salmon fillet
- 2 cups cooked brown rice
- 1 cucumber, diced
- 1 cup shelled edamame
- 1 avocado, sliced
- 1/4 cup plain Greek yogurt
- 1 tablespoon lemon juice
- 1 teaspoon lemon zest
- 1 tablespoon chopped dill
- 1 tablespoon olive oil
- Salt and pepper
Quick Steps:
- Preheat the oven to 400°F (205°C) and line a tray with parchment.
- Rub the salmon with olive oil, salt, and pepper, then bake 12 to 14 minutes until it flakes.
- Mix yogurt, lemon juice, lemon zest, and dill into a quick sauce.
- Divide rice, cucumber, edamame, and salmon into containers.
- Add avocado just before serving if you want the cleanest color.
Equipment for This Recipe:
- Baking sheet
- Parchment paper
- Small bowl for sauce
- Meal prep containers
How to Serve This Dish: Serve chilled or at room temperature with the sauce in a separate cup. A few sesame seeds on top and a wedge of lemon make the box feel finished. Add berries or snap peas if you want more crunch.
Pro Tips for This Recipe:
- Don’t overbake the salmon; dry fish gets stringy in a lunchbox.
- Chill the rice fast before assembling so it doesn’t steam the other ingredients.
- Cut the cucumber small enough to eat with a fork.
- Pack the avocado separately if your lunch sits a long time.
Variations on This Dish:
- Canned Salmon Shortcut: Use drained canned salmon and skip the oven.
- Quinoa Bowl: Swap the rice for quinoa if you want a nuttier base.
- Miso Lemon Version: Stir 1 teaspoon white miso into the yogurt sauce for deeper flavor.
Common Mistakes to Avoid with This Dish:
- Don’t pile the sauce directly onto the rice hours early.
- Don’t use fish that’s been cooked until flaky and dry.
- Don’t add avocado if the box will sit warm for too long.
6. Tomato Lentil Soup Thermos Lunch
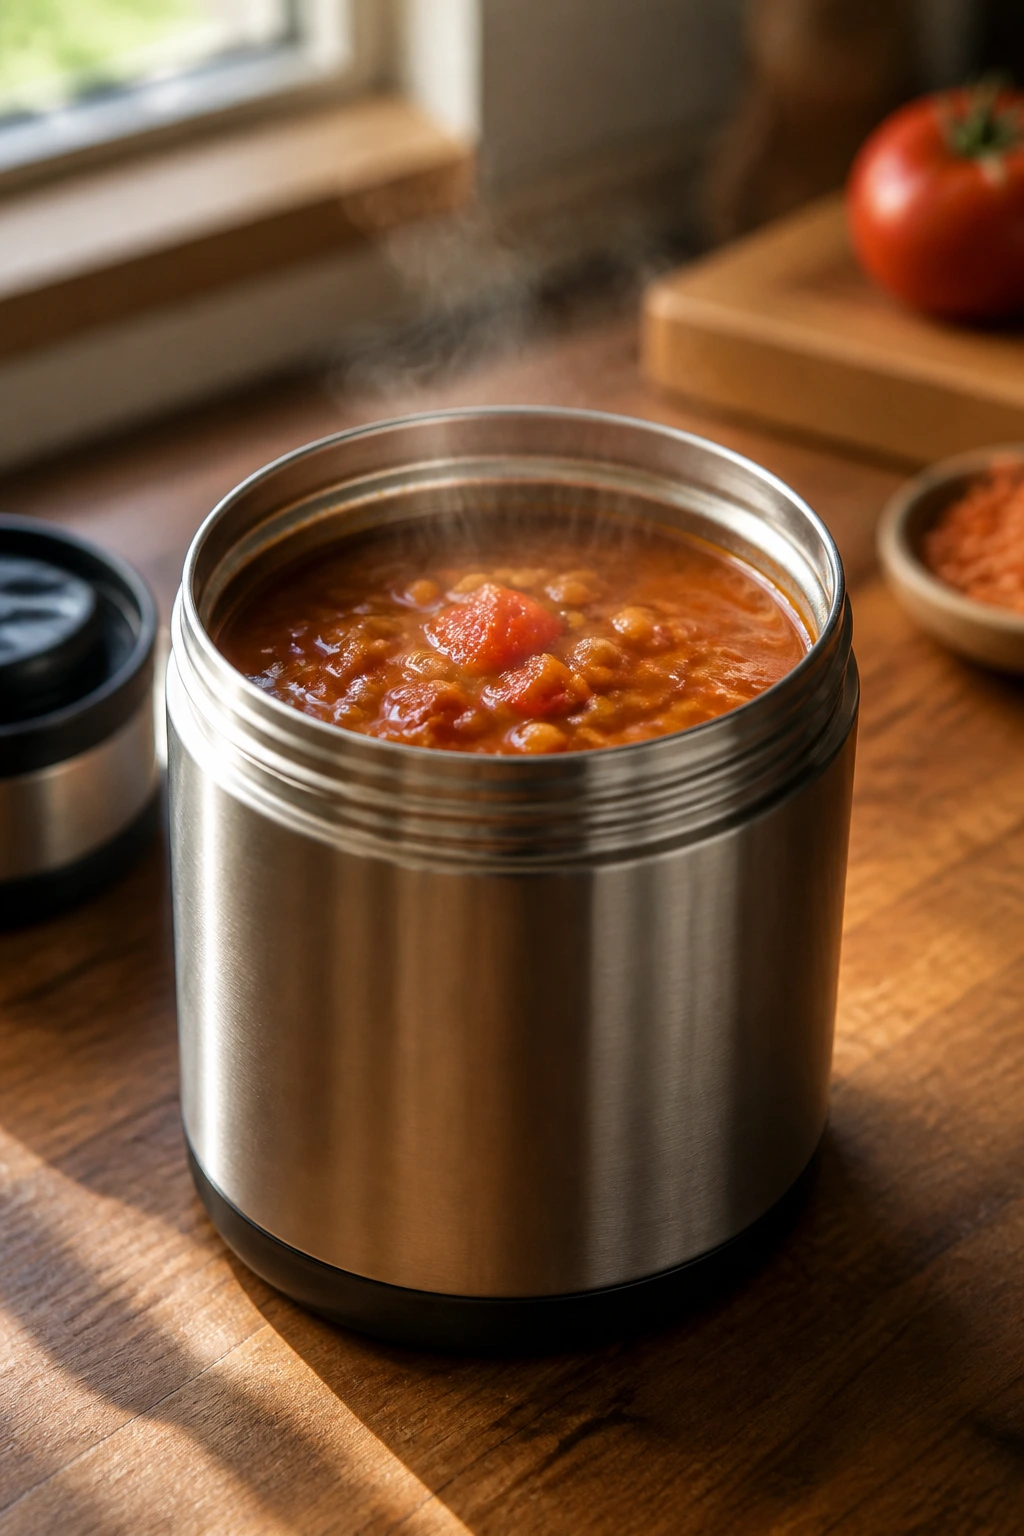
Soup in a thermos sounds old-school for a reason. It works. Lentils give this one body, tomato gives it brightness, and the broth keeps it loose enough to sip without feeling thin. It’s the sort of lunch that makes a cold day feel less irritating.
Why It Works: Brown lentils hold their shape better than red lentils, so the soup stays hearty even after reheating. The vegetables build sweetness at the base, and spinach stirred in at the end keeps the soup from looking drab. A preheated thermos makes a big difference here.
Key Ingredients:
- 1 tablespoon olive oil
- 1 onion, diced
- 1 carrot, diced
- 1 celery stalk, diced
- 2 cloves garlic, minced
- 1 cup brown lentils, rinsed
- 1 can diced tomatoes, 14.5 oz
- 4 cups broth
- 1 teaspoon dried thyme
- 2 cups baby spinach
- Salt and pepper
Quick Steps:
- Heat the oil in a pot over medium heat and cook onion, carrot, and celery for 5 to 6 minutes.
- Add garlic and thyme, then stir for 30 seconds until fragrant.
- Stir in lentils, tomatoes, and broth, then simmer 25 to 30 minutes until the lentils are tender.
- Season with salt and pepper, then stir in spinach until just wilted.
- Preheat the thermos with boiling water, empty it, and fill with steaming soup.
Equipment for This Recipe:
- Medium soup pot
- Thermos
- Wooden spoon
- Measuring cups
How to Serve This Dish: Pack with a whole-grain roll, crackers, or a cheese stick. The soup is filling enough on its own, but bread makes it feel like a meal instead of a sample. A pear on the side never hurts.
Pro Tips for This Recipe:
- Salt near the end so the broth doesn’t taste muddy.
- If you want a smoother soup for a younger eater, blend one cup and stir it back in.
- Don’t skip the thermos preheat.
- Add a splash of lemon at the end if the tomatoes taste flat.
Variations on This Dish:
- Sausage Lentil Soup: Brown sliced sausage with the vegetables.
- Red Lentil Version: Use red lentils for a softer, quicker soup.
- Vegetable-Heavy Bowl: Add zucchini or diced sweet potato for more texture.
Common Mistakes to Avoid with This Dish:
- Don’t pack lukewarm soup. It cools too fast in the thermos.
- Don’t overcook the lentils until they split apart.
- Don’t forget a sturdy thermos lid that seals tightly.
7. Beef and Broccoli Soba Noodle Boxes
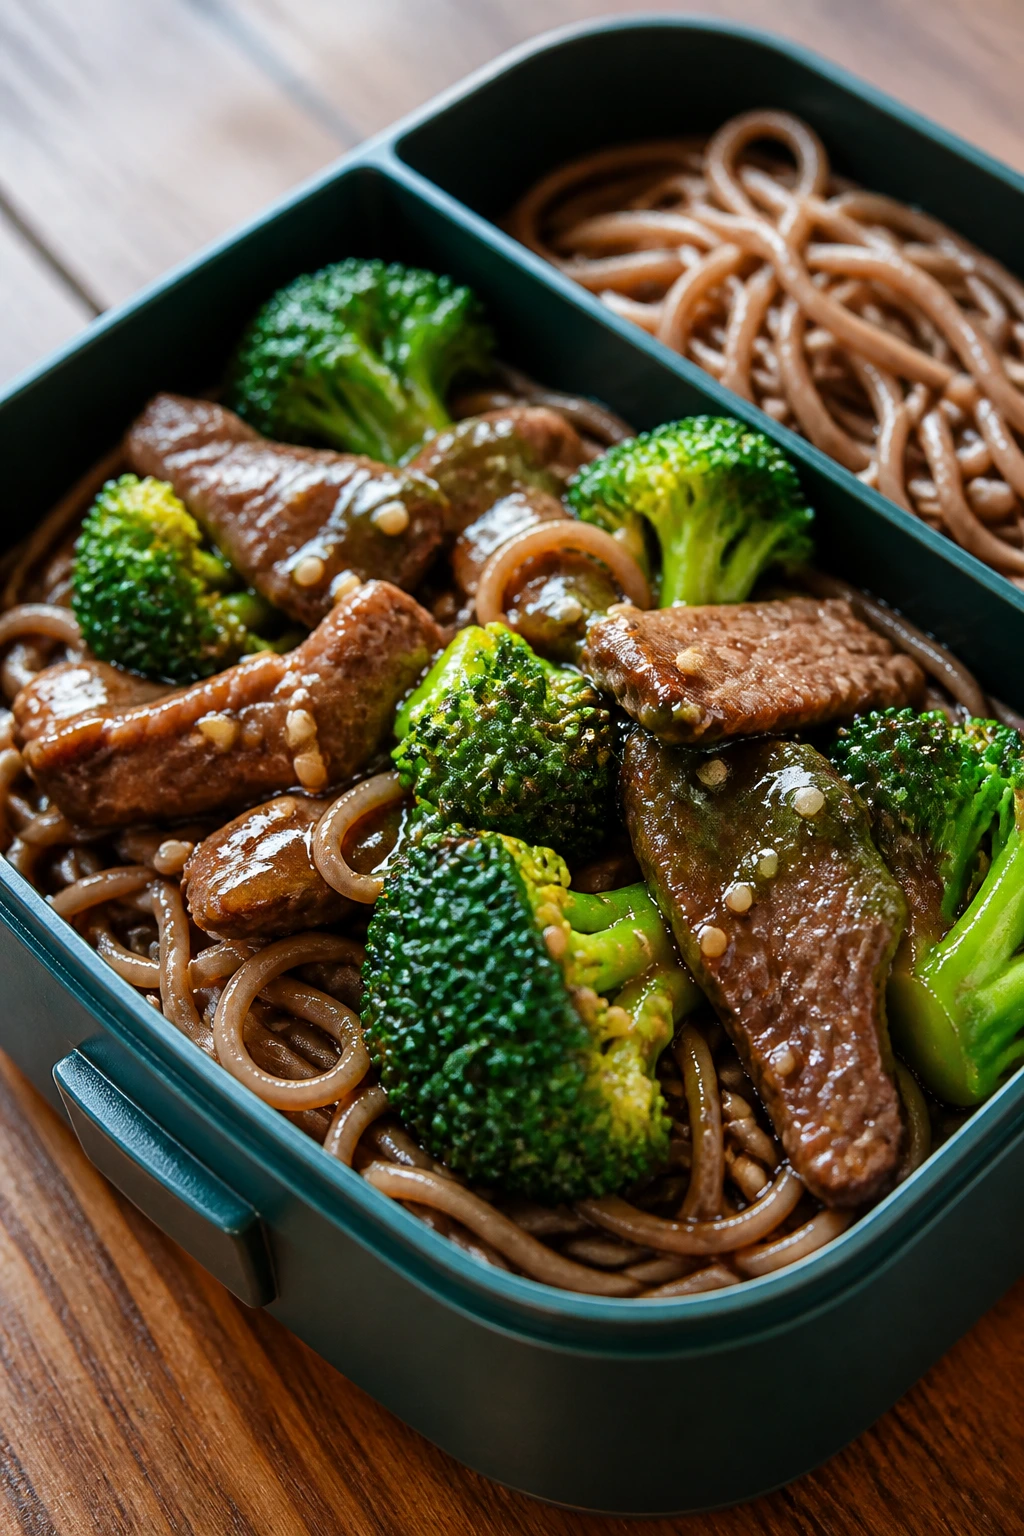
Cold noodle boxes can be excellent when they’re built with enough flavor. Beef, sesame, ginger, and soy give the soba a savory edge, while broccoli keeps the box from feeling like a pile of starch. It’s a lunch that tastes deliberate, not leftover-ish.
Why It Works: Soba noodles have a firmer bite than standard spaghetti, so they hold up after chilling. Thin-sliced beef cooks quickly and stays tender if you don’t blast it to death in the pan. A simple soy-honey glaze clings to the noodles without drowning them.
Key Ingredients:
- 8 oz soba noodles
- 1 lb flank steak, thinly sliced against the grain
- 4 cups broccoli florets
- 2 cloves garlic, minced
- 1 tablespoon fresh ginger, grated
- 2 tablespoons soy sauce
- 1 tablespoon sesame oil
- 2 tablespoons honey
- 1 tablespoon rice vinegar
- Sesame seeds
Quick Steps:
- Cook the soba, drain, and rinse under cold water to stop the cooking.
- Stir-fry the broccoli in a little oil for 3 to 4 minutes until bright green and crisp-tender.
- Cook the beef quickly over medium-high heat, then add garlic and ginger.
- Whisk soy sauce, sesame oil, honey, and vinegar, then toss with the noodles, beef, and broccoli.
- Cool before packing and sprinkle with sesame seeds.
Equipment for This Recipe:
- Large skillet or wok
- Pot for noodles
- Colander
- Tongs
How to Serve This Dish: Serve warm or cold, with extra sauce packed on the side if you want a stronger flavor at lunch. Add orange wedges or edamame for a fuller box. The noodles look best when they’re lightly glossy, not wet.
Pro Tips for This Recipe:
- Rinse the noodles well or they’ll glue together.
- Slice the beef thin so it stays tender.
- Don’t overcook the broccoli; the crunch is part of the point.
- A tiny splash of toasted sesame oil goes a long way.
Variations on This Dish:
- Chicken Soba Box: Swap flank steak for cooked chicken.
- Tofu Version: Use pan-seared tofu cubes instead of beef.
- Spicy Sesame Noodles: Add chili crisp or red pepper flakes to the glaze.
Common Mistakes to Avoid with This Dish:
- Don’t let the noodles sit in a clump after draining.
- Don’t cook the beef until it turns stiff.
- Don’t drown the lunchbox in sauce; a light coating is enough.
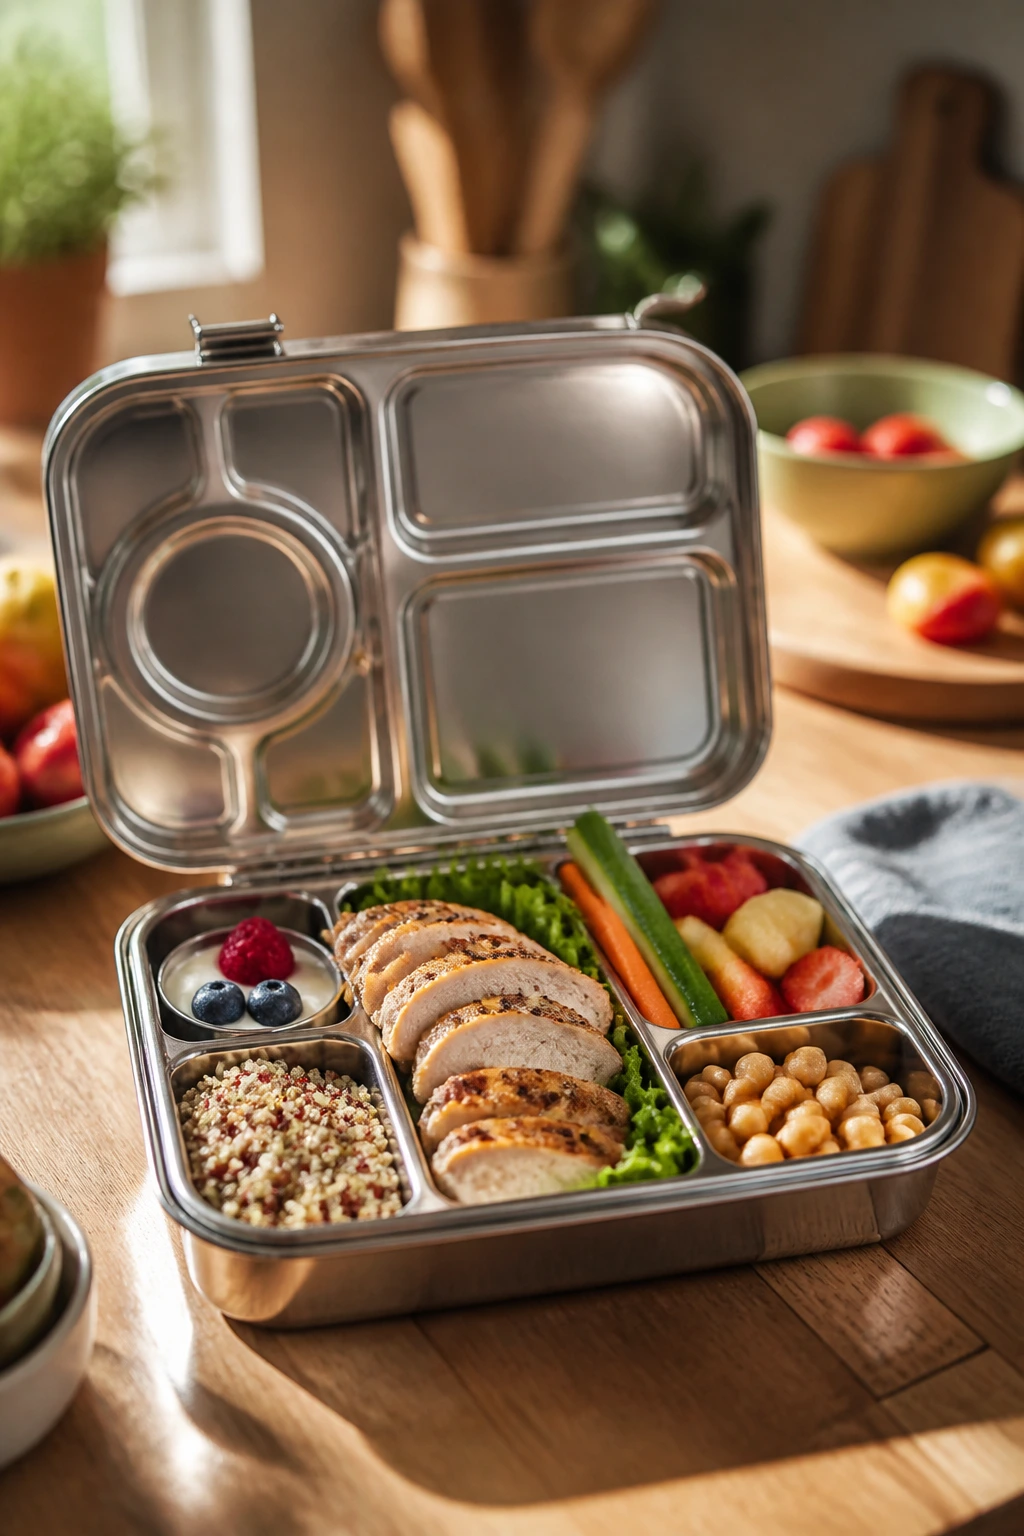
8. Hummus Roasted Veggie Bento
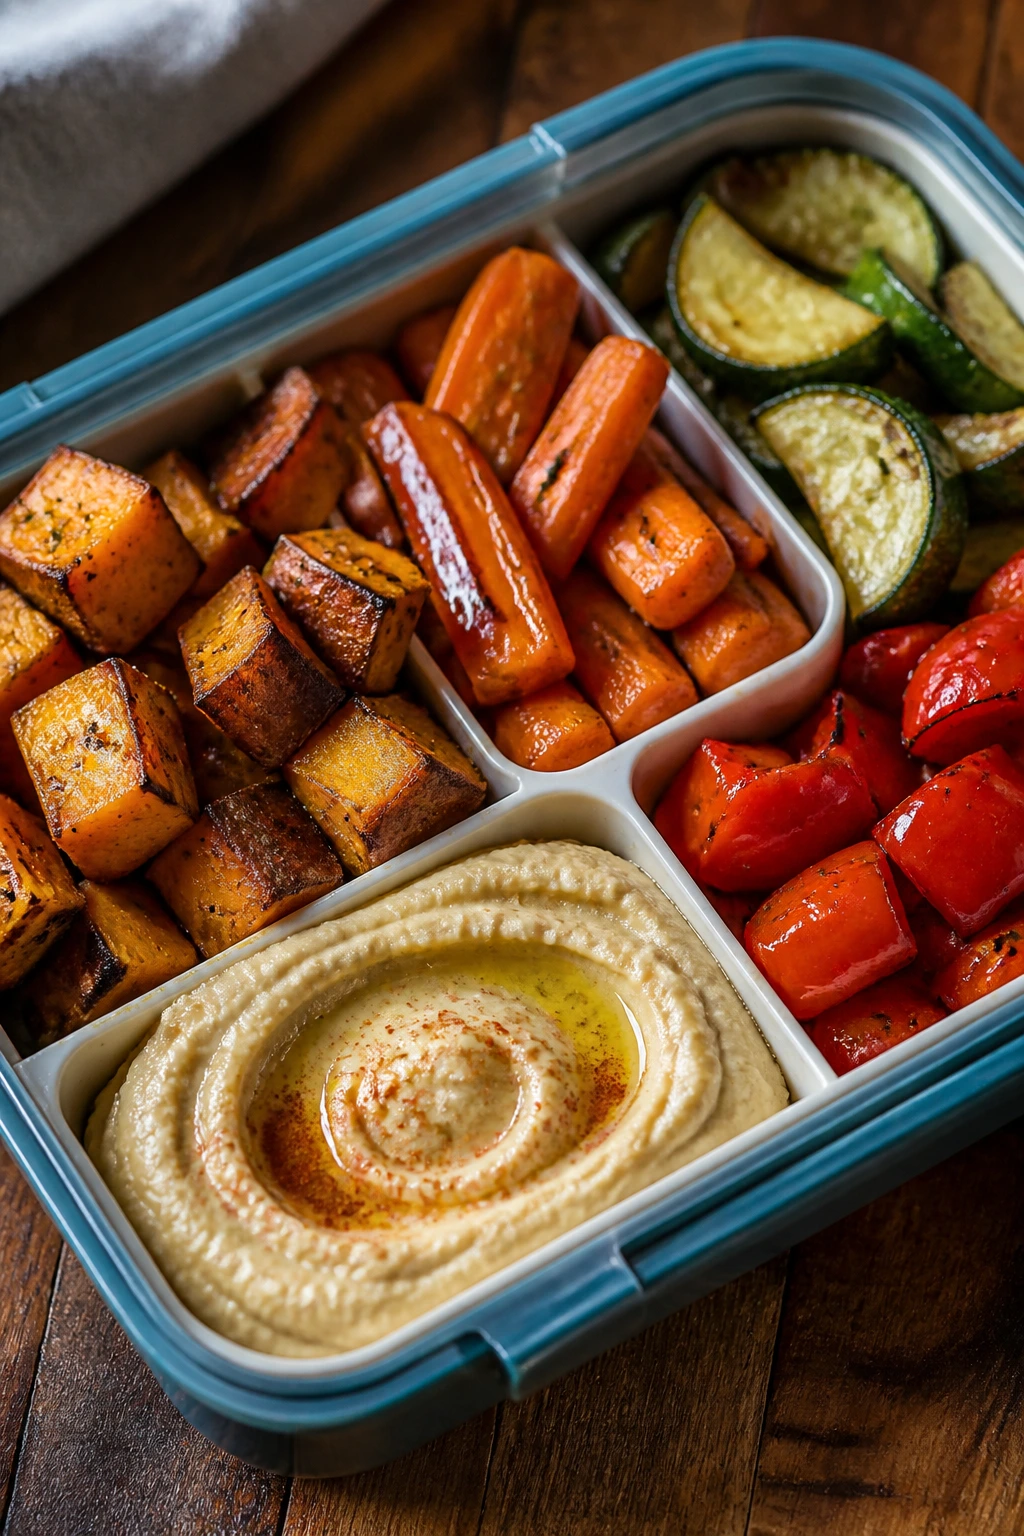
This is the box I make when I want the lunch to look colorful without turning fussy. Roasted sweet potato, carrots, zucchini, and peppers give you sweet edges and a little char, and hummus ties everything together. It eats like a calm, balanced plate.
Why It Works: Roasting concentrates the vegetables, which matters when you plan to eat them cold. Hummus provides creaminess and protein, while eggs and pita wedges make the box feel complete. The mix of soft and crisp textures keeps it from getting boring.
Key Ingredients:
- 1 cup hummus
- 1 medium sweet potato, cubed
- 2 carrots, cut into sticks
- 1 zucchini, sliced into half-moons
- 1 red bell pepper, cut into strips
- 1 tablespoon olive oil
- 4 hard-boiled eggs
- 4 pita wedges
- 1/2 teaspoon paprika
- Salt and pepper
Quick Steps:
- Preheat the oven to 425°F (220°C) and spread the vegetables on a tray.
- Toss with oil, paprika, salt, and pepper.
- Roast 20 to 25 minutes until the edges brown and the sweet potato is tender.
- Cool completely, then pack with hummus, eggs, and pita.
- Keep the hummus in a separate cup if you want the vegetables to stay dry.
Equipment for This Recipe:
- Rimmed baking sheet
- Parchment paper
- Knife and cutting board
- Small dip container
How to Serve This Dish: Build the box in sections so the colors stay bright. Add cucumber spears or grapes if you want something cold and crisp on the side. This one works well for adults and kids because every piece is easy to grab.
Pro Tips for This Recipe:
- Roast the vegetables in one layer so they caramelize instead of steaming.
- Let them cool before closing the lid or the box will sweat.
- Buy or make thick hummus; thin hummus runs everywhere.
- Hard-boiled eggs give the box staying power, especially for a long school day.
Variations on This Dish:
- White Bean Dip Bento: Swap hummus for a lemony white bean dip.
- Falafel Version: Add a few baked falafel balls instead of eggs.
- Seed Crunch Version: Sprinkle pumpkin seeds over the vegetables just before packing.
Common Mistakes to Avoid with This Dish:
- Don’t pack hot vegetables into a sealed container.
- Don’t cut the vegetables too small or they’ll dry out.
- Don’t forget salt; roasted vegetables without it taste flat.
9. Greek Yogurt Chicken Salad Sandwiches
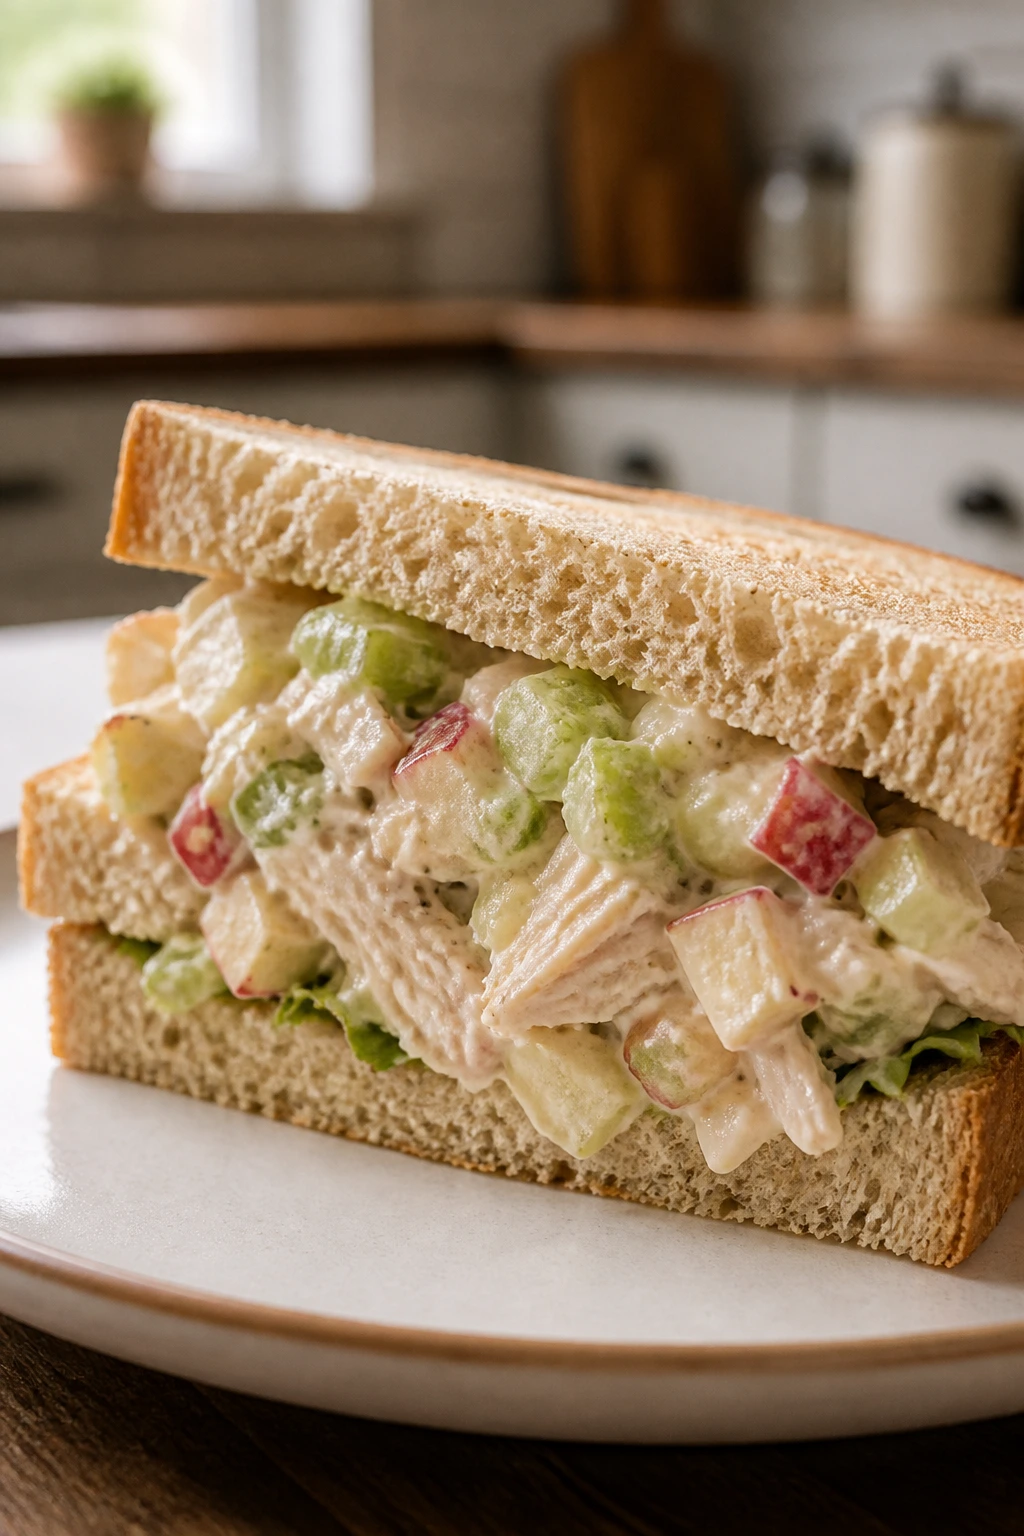
This chicken salad is creamy without being heavy, and that balance matters in a lunchbox. Celery gives it crunch, apple adds a clean snap, and the yogurt keeps it from feeling greasy. On good bread, it disappears fast.
Why It Works: Greek yogurt gives you protein and tang while using less mayo, so the filling stays bright after chilling. A small diced apple keeps the texture lively, and chopped celery prevents the mix from turning into paste. Thick bread or lettuce cups both work, which makes the filling flexible.
Key Ingredients:
- 2 cups cooked chicken, chopped
- 1/2 cup plain Greek yogurt
- 1 tablespoon mayonnaise, optional
- 1 celery stalk, finely diced
- 1 small apple, finely diced
- 1 tablespoon lemon juice
- 1 tablespoon chopped parsley
- 1/2 teaspoon salt
- 8 slices whole-grain bread or 8 large lettuce leaves
- Black pepper
Quick Steps:
- Combine chicken, yogurt, mayo, celery, apple, lemon juice, parsley, salt, and pepper.
- Stir until coated, but leave some texture in the chicken.
- Chill for 15 minutes so the filling firms up.
- Spoon onto bread or lettuce leaves.
- Pack sandwiches wrapped tightly in parchment so they don’t slide apart.
Equipment for This Recipe:
- Mixing bowl
- Spoon
- Knife and cutting board
- Parchment or sandwich wrap
How to Serve This Dish: Add grapes, carrot sticks, or a small bag of pretzels. If the bread tends to get soft, toast it lightly before filling. That one step makes a huge difference.
Pro Tips for This Recipe:
- Dice the apple very small so the sandwich doesn’t fall apart.
- Use cold chicken for the cleanest texture.
- Salt the mixture a little more than you think; chilled chicken salad can taste muted.
- Keep wetter add-ins to a minimum or the bread softens fast.
Variations on This Dish:
- Curry Chicken Salad: Add 1 teaspoon curry powder and a few raisins.
- Cranberry Walnut Version: Stir in 2 tablespoons dried cranberries and 2 tablespoons chopped walnuts.
- Dairy-Free Version: Use mayo only and skip the yogurt.
Common Mistakes to Avoid with This Dish:
- Don’t drown it in dressing.
- Don’t use warm chicken; the whole batch turns loose.
- Don’t pack the sandwich with watery lettuce unless you dry it well.
10. Black Bean Sweet Potato Quesadillas
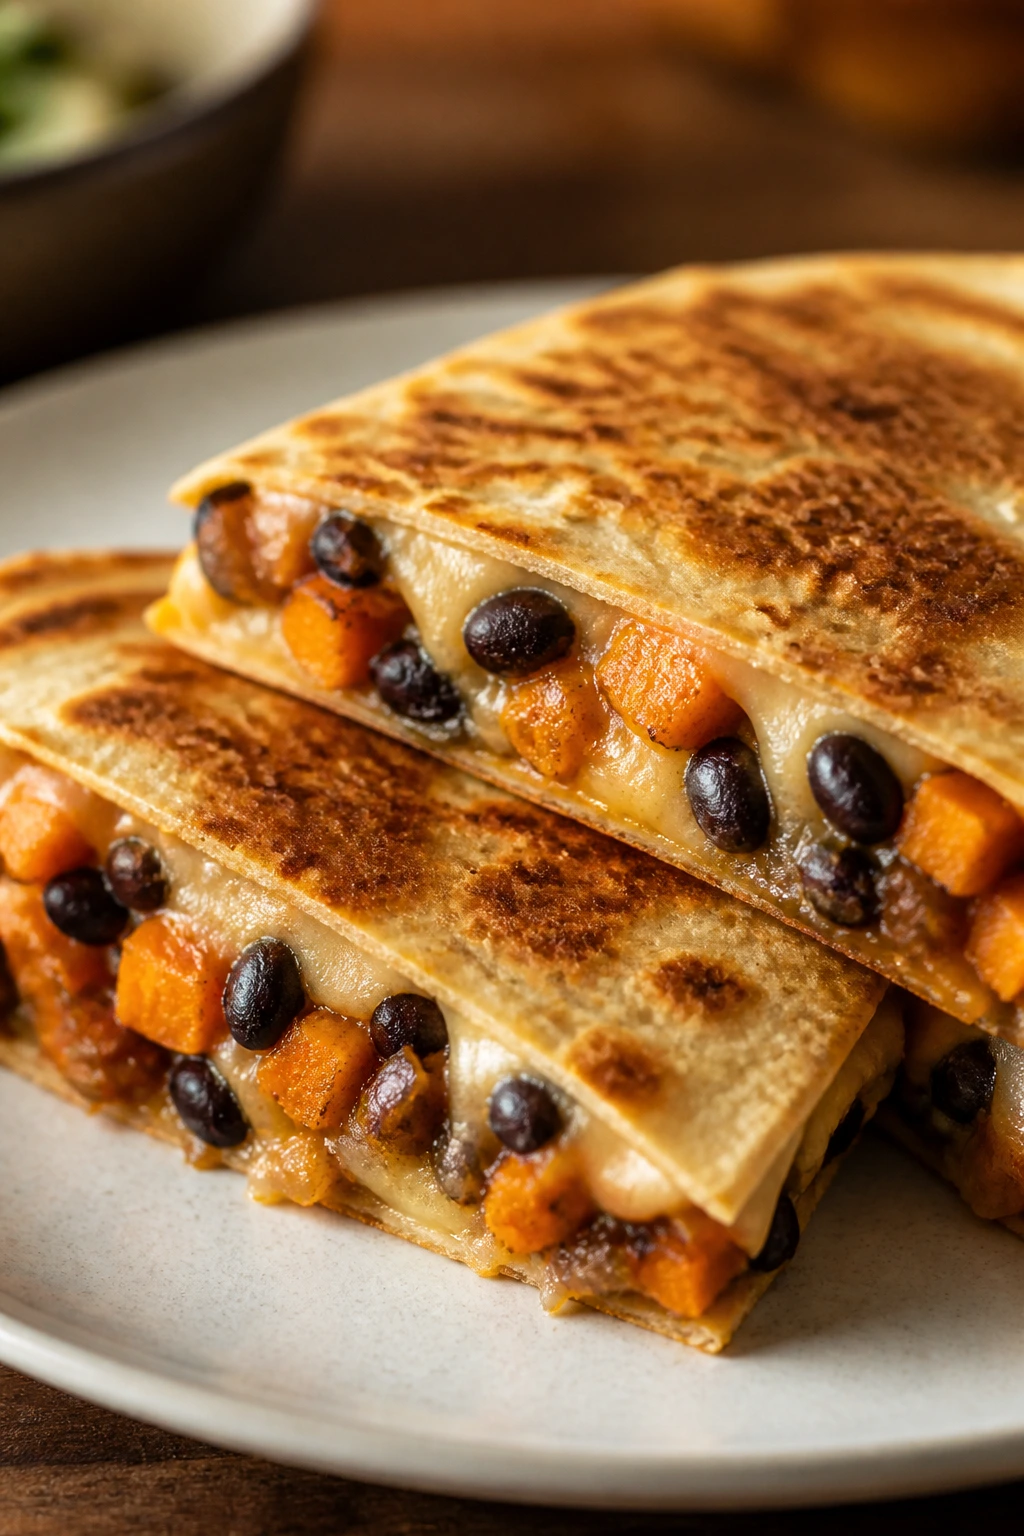
These quesadillas hit the sweet spot between easy and filling. The sweet potato softens the black beans, the cheese binds everything together, and the corn gives a little pop in each bite. They reheat well, which makes them a smart repeat lunch.
Why It Works: Sweet potato adds moisture and fiber, so the filling doesn’t feel dry after chilling. Black beans bring protein and hold their shape inside the tortilla. Crisping the quesadilla in a skillet gives you edges that survive the lunchbox instead of going rubbery.
Key Ingredients:
- 2 cups mashed roasted sweet potato
- 1 can black beans, drained and rinsed
- 1 cup shredded cheddar or Monterey Jack
- 1/2 cup corn
- 1 teaspoon cumin
- 1/2 teaspoon chili powder
- 8 flour tortillas
- 1 tablespoon oil
- Salt to taste
Quick Steps:
- Mix sweet potato, beans, corn, cumin, chili powder, and salt.
- Spoon the filling onto four tortillas, top with cheese, and cap with the remaining tortillas.
- Cook in a skillet over medium heat for 2 to 3 minutes per side until golden and crisp.
- Let rest 5 minutes, then cut into wedges.
- Cool before packing so the tortillas stay firm.
Equipment for This Recipe:
- Large skillet
- Spatula
- Mixing bowl
- Sharp knife or pizza cutter
How to Serve This Dish: Pack with salsa, sour cream, or guacamole in a separate cup. A few cucumber sticks or orange slices round out the box nicely. These wedges are easy for kids to hold and easy for adults to reheat.
Pro Tips for This Recipe:
- Roast the sweet potato until it’s dry and fluffy, not watery.
- Don’t overfill; a lean quesadilla browns better.
- Cut after resting or the filling spills out.
- If packing for later, let them cool on a rack so the bottom doesn’t soften.
Variations on This Dish:
- Turkey Quesadilla: Add a few tablespoons of cooked seasoned turkey.
- Spinach Version: Stir chopped spinach into the filling for more greens.
- Corn Tortilla Style: Use small corn tortillas for a gluten-free, taco-like version.
Common Mistakes to Avoid with This Dish:
- Don’t crank the heat too high or the tortilla burns before the cheese melts.
- Don’t pack while hot.
- Don’t use watery beans or filling; drain them well.
11. Hidden-Veggie Turkey Pasta

This is the kind of pasta that makes vegetables disappear without pretending they were never there. Zucchini, carrot, and spinach melt into marinara, while turkey adds enough heft to make the bowl feel like a real meal. The sauce clings nicely to short pasta shapes, which is what you want in a lunchbox.
Why It Works: Ground turkey gives lean protein, and the grated vegetables disappear into the sauce instead of sitting there like separate obligations. Short pasta such as penne or rotini traps sauce in every ridge. A slightly undercooked pasta finish keeps the texture intact after chilling.
Key Ingredients:
- 1 lb ground turkey
- 8 oz penne or rotini
- 1 zucchini, grated
- 1 carrot, grated
- 1 jar marinara, about 24 oz
- 2 cups baby spinach
- 1 tablespoon olive oil
- 2 cloves garlic, minced
- Salt and pepper
Quick Steps:
- Cook the pasta until just shy of tender, then drain.
- Brown the turkey in oil with garlic.
- Stir in zucchini and carrot, cooking until softened.
- Add marinara and spinach, then simmer until the greens wilt.
- Toss with pasta and cool before packing.
Equipment for This Recipe:
- Large skillet
- Pot for pasta
- Grater
- Colander
How to Serve This Dish: Pack with parmesan in a little shaker, plus a piece of fruit or a simple side salad. It reheats well in a microwave, but it also tastes fine at room temperature if you keep the sauce generous.
Pro Tips for This Recipe:
- Squeeze excess water from the grated zucchini before cooking.
- Undercook the pasta by a minute or two.
- Season the turkey layer properly before the sauce goes in.
- If the sauce looks thin, simmer it uncovered for a few minutes.
Variations on This Dish:
- Beef Version: Swap turkey for lean ground beef.
- Lentil Pasta: Use cooked brown lentils instead of meat.
- Dairy-Free Finish: Skip parmesan and add a spoonful of nutritional yeast.
Common Mistakes to Avoid with This Dish:
- Don’t use too much grated zucchini or the sauce thins out.
- Don’t overcook the pasta.
- Don’t pack it before it cools or the box will sweat.
12. Chicken Pesto Pasta Salad

Pesto pasta salad can get muddy if you’re careless with it. Done right, it tastes bright, herby, and useful, especially with chicken and peas folded in. It’s one of those lunches that looks casual but eats like a proper meal.
Why It Works: Pesto coats pasta without needing a heavy dressing, and chicken gives the salad enough substance to pass as lunch, not a side dish. Peas and tomatoes add color and sweetness, while mozzarella pearls keep the bite soft and familiar. The whole thing tastes better after a chill.
Key Ingredients:
- 3 cups cooked short pasta, cooled
- 2 cups cooked chicken, chopped
- 1/3 cup pesto
- 1 cup cherry tomatoes, halved
- 1 cup frozen peas, thawed
- 1/2 cup mozzarella pearls
- 1 tablespoon lemon juice
- Salt and pepper
Quick Steps:
- Toss the cooled pasta with pesto and lemon juice.
- Fold in chicken, tomatoes, peas, and mozzarella.
- Season lightly with salt and pepper.
- Chill for at least 20 minutes.
- Pack with extra tomatoes or cucumber if you want more crunch.
Equipment for This Recipe:
- Large mixing bowl
- Wooden spoon
- Pot for pasta
- Storage container
How to Serve This Dish: This one works cold straight from the container. Add a breadstick, apple slices, or a few crackers on the side. The colors pop best if you don’t drown the pasta in extra pesto.
Pro Tips for This Recipe:
- Toss the pasta while it’s cool so the pesto doesn’t get greasy.
- Add lemon juice for lift; pesto likes acid.
- Use small pasta shapes that catch the sauce.
- Keep tomatoes halved, not quartered, or they leak too much.
Variations on This Dish:
- Sun-Dried Tomato Version: Stir in chopped sun-dried tomatoes.
- Dairy-Free Pesto Pasta: Use a dairy-free pesto and skip the mozzarella.
- Chickpea Pasta Salad: Replace chicken with chickpeas for a vegetarian box.
Common Mistakes to Avoid with This Dish:
- Don’t toss pesto onto hot pasta and then seal it right away.
- Don’t skip salt entirely; cold pasta needs seasoning.
- Don’t use too much oil-heavy pesto or the salad turns slick.
13. Tofu Vegetable Stir-Fry Rice Boxes
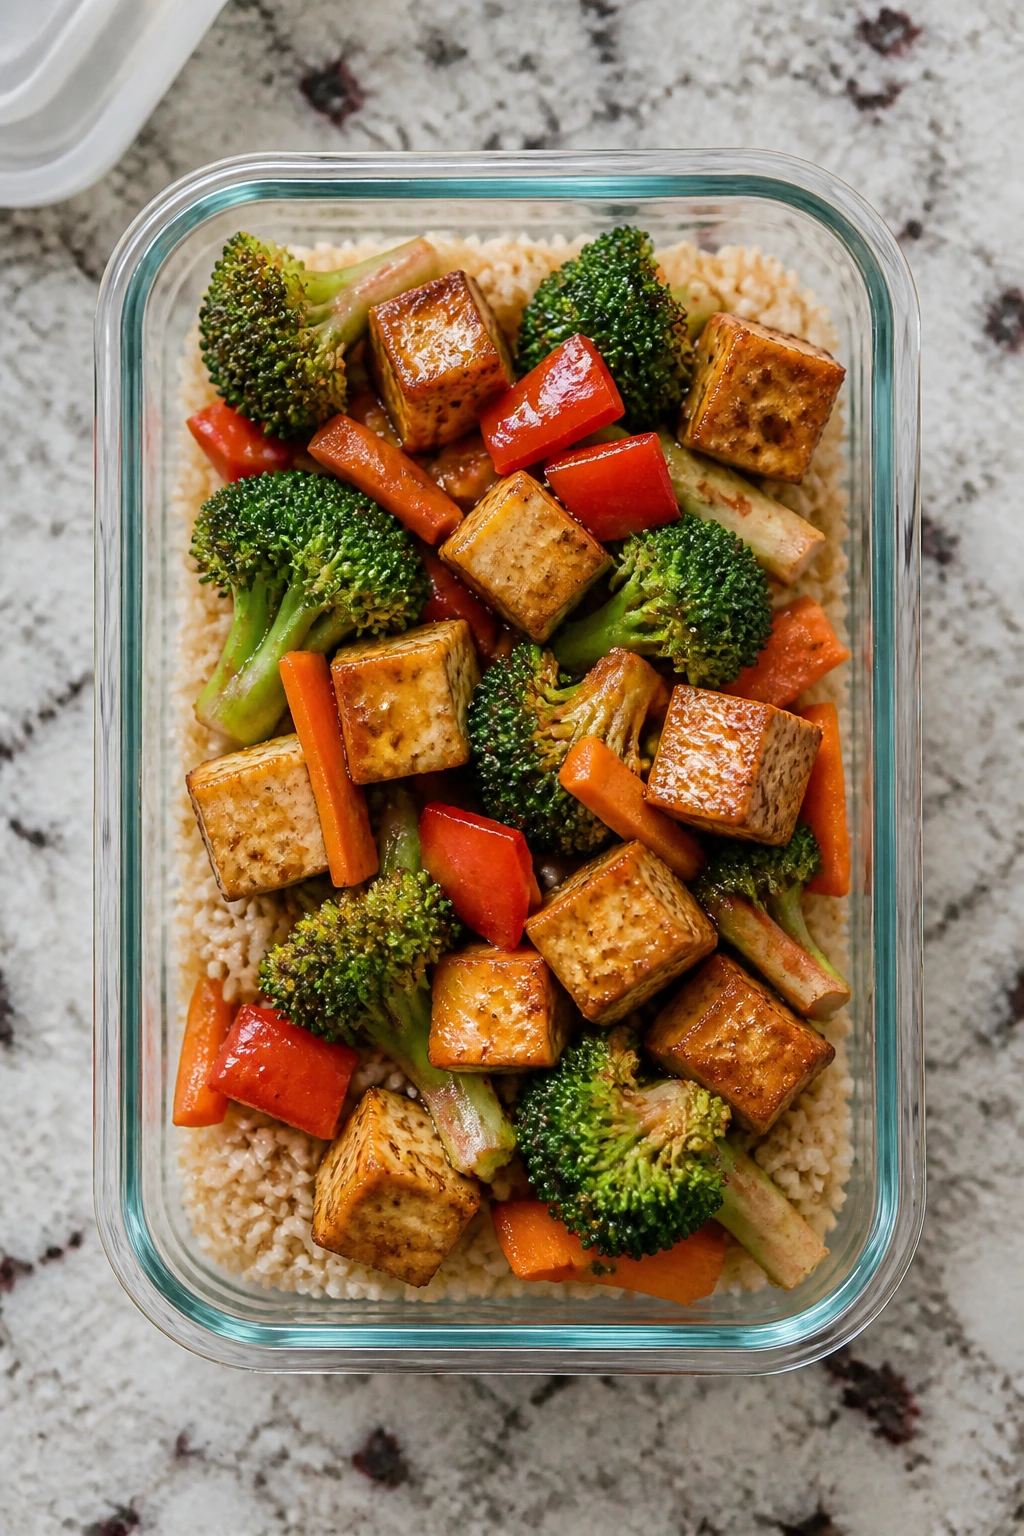
Tofu gets a bad reputation from people who keep cooking it badly. Press it, brown it, and pair it with crisp vegetables and rice, and it becomes one of the most useful lunchbox proteins around. The sauce is light, which keeps the whole box from feeling heavy.
Why It Works: Firm tofu takes on flavor well once the surface is dry and seared. Brown rice gives the box extra chew, and broccoli plus peppers add structure that still feels good after chilling. A quick soy-sesame glaze keeps it savory without making it wet.
Key Ingredients:
- 14 oz firm tofu
- 2 cups cooked brown rice
- 2 cups broccoli florets
- 1 red bell pepper, sliced
- 1 carrot, thinly sliced
- 2 tablespoons soy sauce
- 1 tablespoon sesame oil
- 1 tablespoon honey
- 1 tablespoon cornstarch
- 1 tablespoon neutral oil
Quick Steps:
- Press the tofu for 15 minutes, then cube it.
- Toss tofu with cornstarch and brown it in oil until crisp on several sides.
- Stir-fry broccoli, pepper, and carrot until crisp-tender.
- Whisk soy sauce, sesame oil, and honey, then toss with tofu and vegetables.
- Serve over rice or pack in separate layers.
Equipment for This Recipe:
- Skillet or wok
- Tofu press or paper towels
- Mixing bowl
- Spatula
How to Serve This Dish: Pack with a few sesame seeds and maybe mandarin orange segments for sweetness. It tastes good warm or cold, which gives you some freedom. Keep the sauce light if it has to sit a long time.
Pro Tips for This Recipe:
- Dry tofu matters. Wet tofu steams instead of browning.
- Use high heat so the vegetables stay crisp.
- Don’t drown the lunch in sauce.
- If you want more flavor, add grated ginger or garlic to the glaze.
Variations on This Dish:
- Chicken Stir-Fry Bowl: Swap tofu for diced chicken.
- Spicy Garlic Tofu: Add chili flakes and extra garlic.
- Nutty Version: Sprinkle chopped cashews on top just before packing.
Common Mistakes to Avoid with This Dish:
- Don’t skip pressing the tofu.
- Don’t cook the vegetables until they slump.
- Don’t overfill the container with sauce; a little gloss is enough.
14. Apple Cheddar Walnut Sandwiches
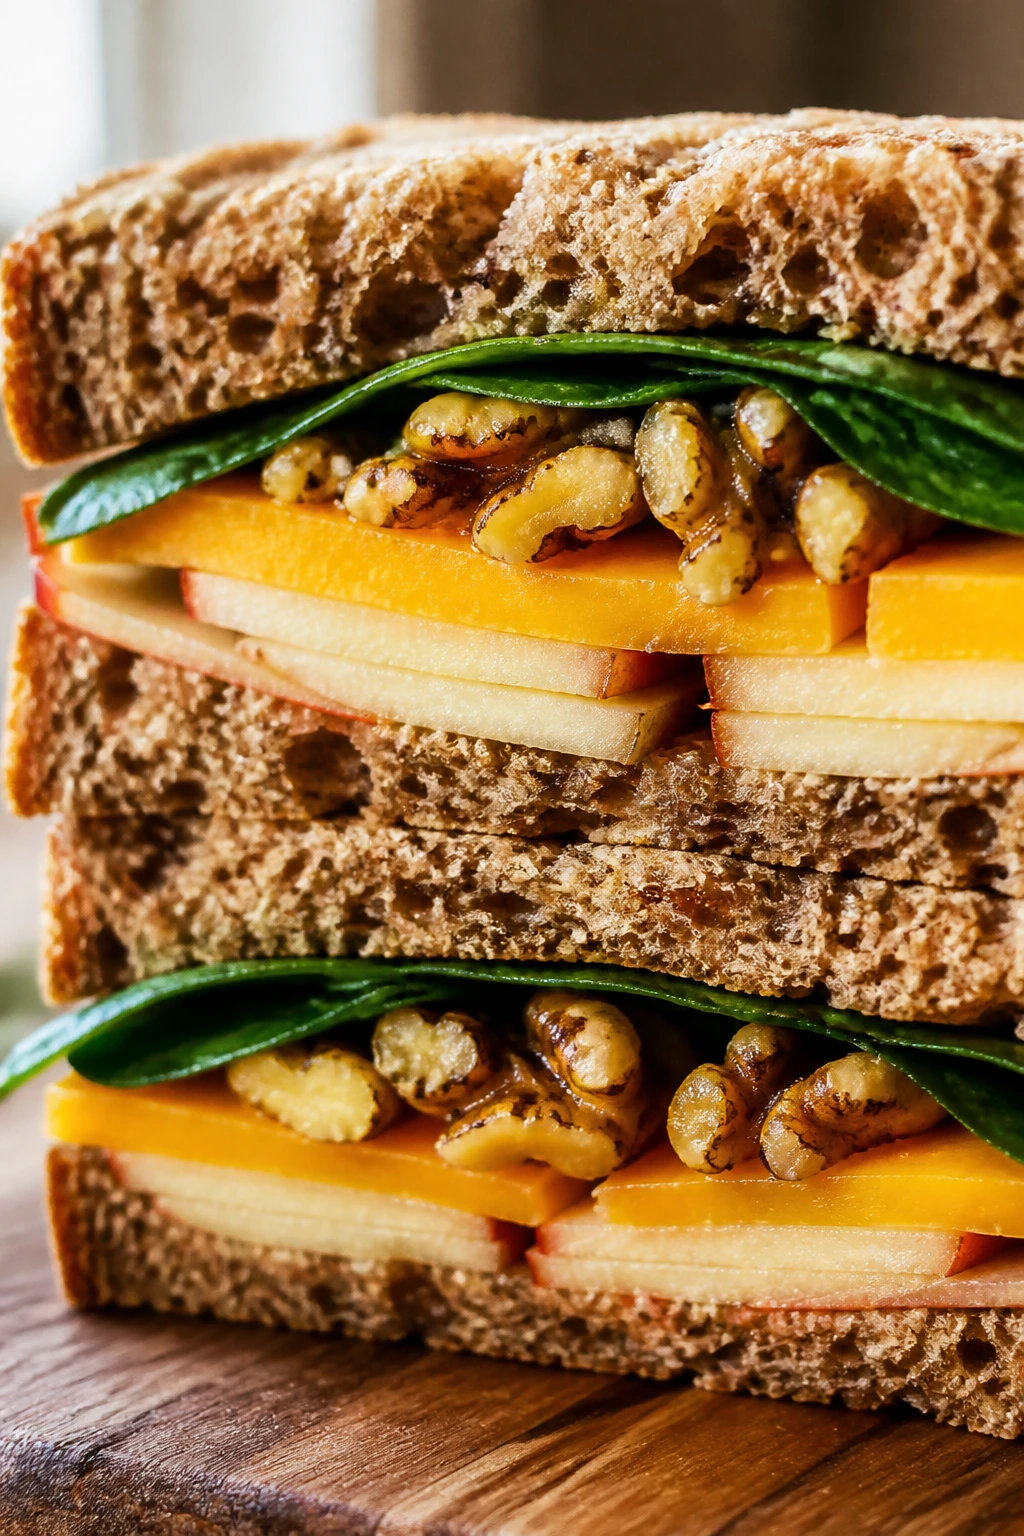
This sandwich sounds plain until you bite into it. Sharp cheddar, crisp apple, and toasted walnuts make each bite a little crunchy, a little salty, and a little sweet in a way kids often like more than they admit. It also packs better than most cheese sandwiches because the apple does real work.
Why It Works: The apple keeps the sandwich from feeling dense, and sharp cheddar stands up to chilling better than soft cheese. Whole-grain bread adds fiber and a sturdier crumb, while walnuts bring a little fat and crunch. A thin swipe of mustard gives the sandwich backbone.
Key Ingredients:
- 8 slices whole-grain bread
- 6 oz sharp cheddar, sliced
- 1 apple, thinly sliced
- 1 cup baby spinach
- 1 tablespoon Dijon mustard
- 1/2 cup walnuts, roughly chopped
- 1 teaspoon lemon juice
- Optional: 1 teaspoon honey
Quick Steps:
- Toss the apple slices with lemon juice to slow browning.
- Spread mustard on the bread and drizzle honey if you like a sweeter edge.
- Layer cheddar, apple, spinach, and walnuts.
- Close the sandwiches and press lightly.
- Slice and wrap tightly in parchment.
Equipment for This Recipe:
- Sharp knife
- Cutting board
- Small bowl
- Sandwich wrap or parchment
How to Serve This Dish: Add carrot sticks, a yogurt tube, or a handful of berries. If you’re packing for a long day, keep the apples very thin so the bread doesn’t split. This is one of those lunches that feels like a snack tray in sandwich form.
Pro Tips for This Recipe:
- Slice the apple thin enough to bend.
- Use sharp cheddar so the flavor doesn’t disappear.
- Toast the bread lightly if you want a better texture.
- Keep the walnuts coarse, not dusty.
Variations on This Dish:
- Turkey Apple Sandwich: Add sliced turkey for more protein.
- Pear and Cheddar Version: Swap the apple for thin pear slices.
- Hummus Version: Replace mustard with hummus for a softer, dairy-light sandwich.
Common Mistakes to Avoid with This Dish:
- Don’t use thick apple wedges.
- Don’t build it too early if the bread is very soft.
- Don’t skip the lemon juice unless you like brown fruit.
15. Tuna White Bean Salad Crackers
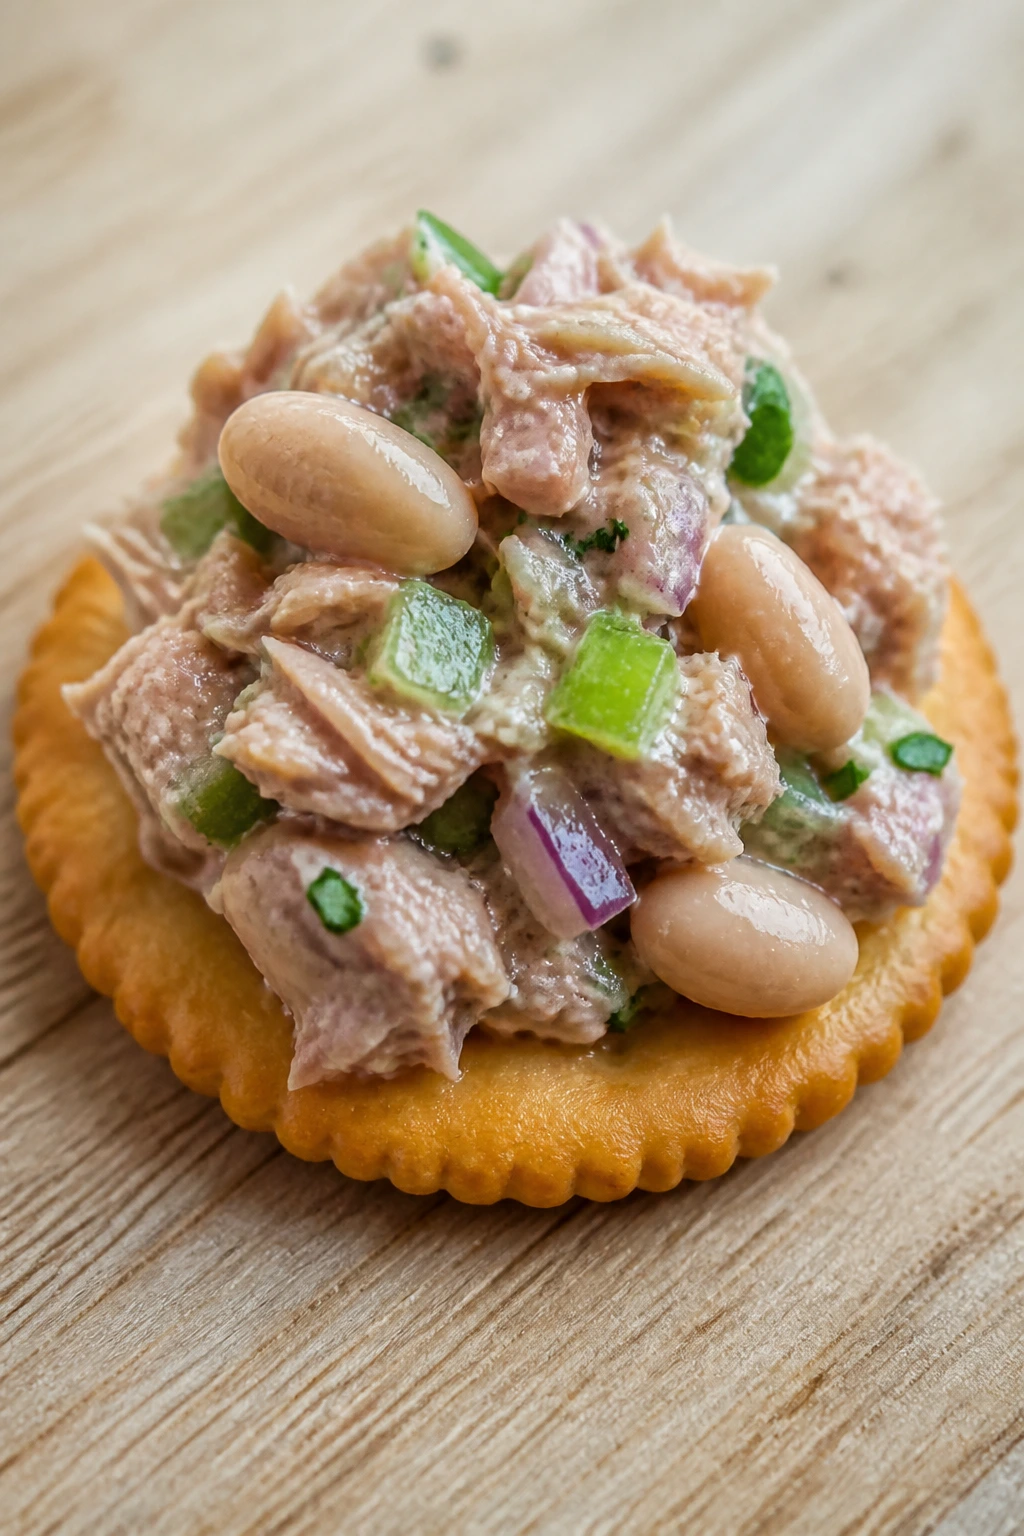
Tuna salad can go bland fast, which is why white beans help here. They make the mix creamier, bigger, and more filling without turning it into paste. With good crackers and a little lemon, this box feels tidy instead of old-fashioned.
Why It Works: Tuna brings protein, white beans add fiber, and together they make a lunch that’s more satisfying than a standard tuna sandwich. Celery and pickles sharpen the flavor, and the yogurt or mayo binds it just enough to spread. Keeping the crackers separate is non-negotiable.
Key Ingredients:
- 2 cans tuna, drained
- 1 can white beans, rinsed and drained
- 1/4 cup plain Greek yogurt or mayonnaise
- 1 celery stalk, diced
- 2 tablespoons chopped pickles
- 1 tablespoon lemon juice
- 1 tablespoon chopped dill
- 1/2 teaspoon salt
- Black pepper
- Crackers for serving
Quick Steps:
- Mash the white beans lightly in a bowl.
- Stir in tuna, yogurt, celery, pickles, lemon juice, dill, salt, and pepper.
- Taste and adjust with more lemon if needed.
- Chill for 15 minutes.
- Pack with crackers in a separate compartment.
Equipment for This Recipe:
- Mixing bowl
- Fork
- Small spoon
- Lidded container
How to Serve This Dish: Add cucumber slices, cherry tomatoes, or an orange. If you want it to feel more substantial, spoon the salad into lettuce cups and still send crackers on the side. That mix works for kids who want control over each bite.
Pro Tips for This Recipe:
- Drain the tuna well or the mixture gets sloppy.
- Use low-sodium tuna if the crackers are salted.
- Keep the beans partly whole for texture.
- Add a little extra dill if you want the flavor to feel fresher.
Variations on This Dish:
- Salmon and White Bean Salad: Swap tuna for canned salmon.
- Chickpea “Tuna” Salad: Use chickpeas for a vegetarian version.
- Avocado Version: Replace half the yogurt with mashed avocado and eat it the same day.
Common Mistakes to Avoid with This Dish:
- Don’t crush it into a smooth spread.
- Don’t pack the crackers with the salad.
- Don’t overdo the dressing or it turns soupy.
16. Spinach Ricotta Mini Calzones
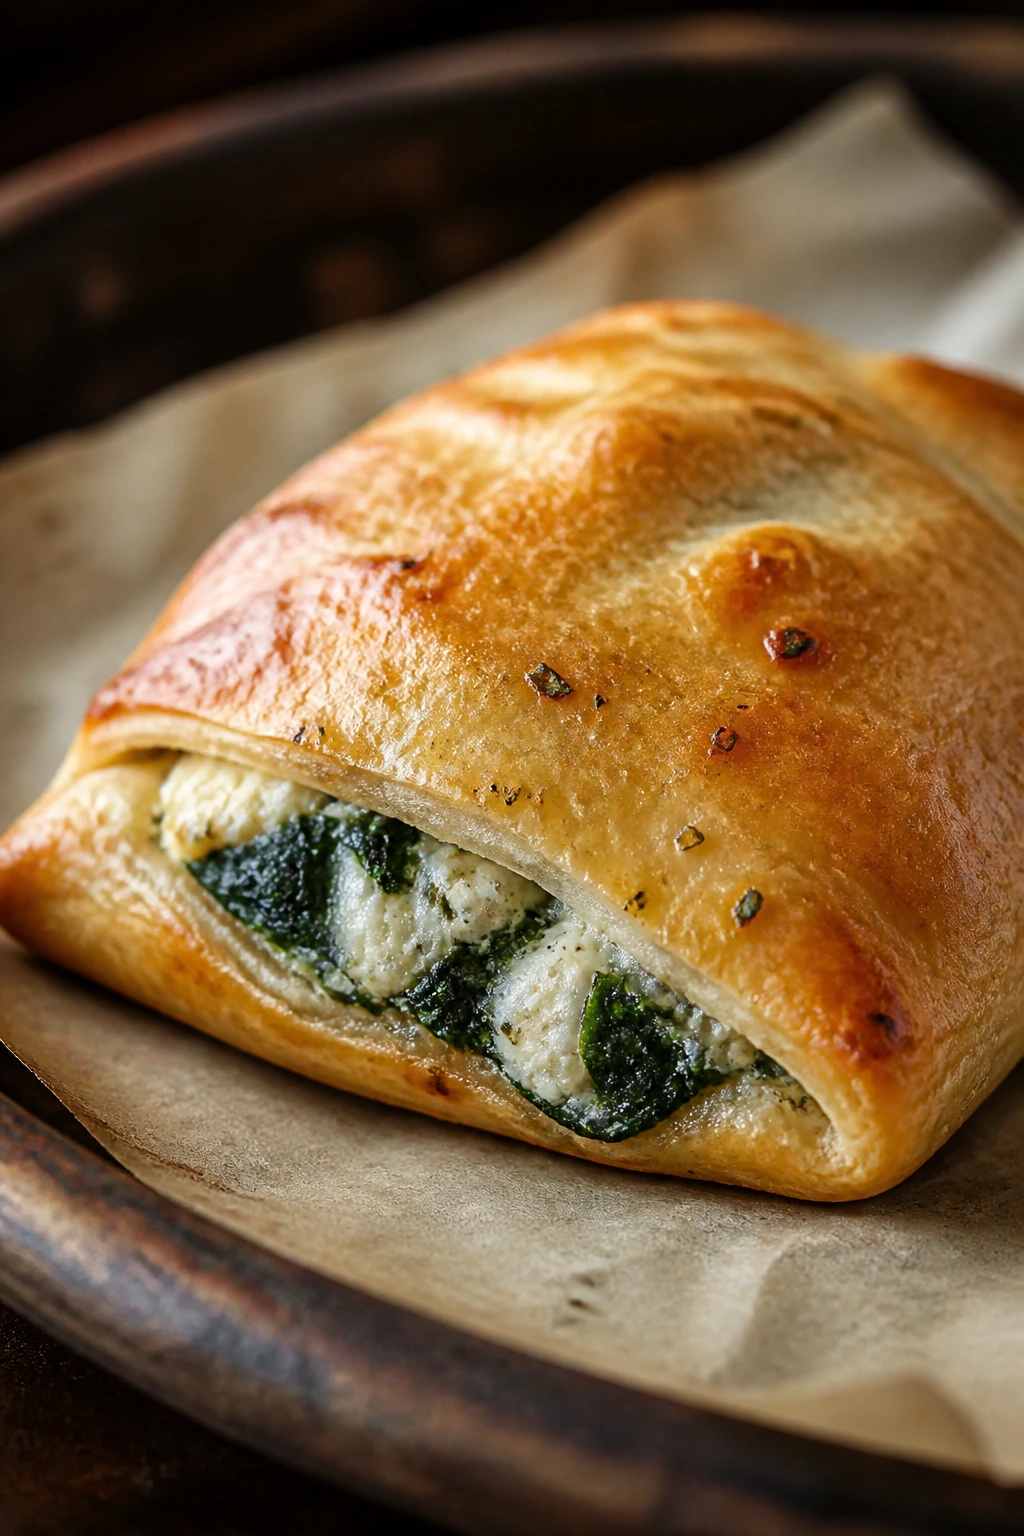
Mini calzones feel like a small promise fulfilled. They’re sealed, portable, and sturdy, which is more than I can say for many baked lunch foods. Spinach and ricotta keep the filling soft and mild, and the edges toast up nicely in the oven.
Why It Works: Pizza dough bakes into a pocket that protects the filling from drying out. Ricotta stays creamy, spinach adds green without too much moisture if you squeeze it dry, and mozzarella helps everything hold together. These are neat enough to eat with hands.
Key Ingredients:
- 1 lb pizza dough
- 1 cup ricotta
- 1 cup spinach, chopped and squeezed dry
- 1 cup shredded mozzarella
- 1/2 teaspoon garlic powder
- 1/2 teaspoon salt
- 1 egg, beaten, for brushing
- Marinara for serving
Quick Steps:
- Preheat the oven to 425°F (220°C) and line a baking sheet with parchment.
- Mix ricotta, spinach, mozzarella, garlic powder, and salt.
- Divide the dough into 6 to 8 portions and roll each into a small circle.
- Fill, fold over, seal the edges, and brush with egg.
- Bake 12 to 15 minutes until golden and puffed.
Equipment for This Recipe:
- Baking sheet
- Parchment paper
- Rolling pin
- Pastry brush
How to Serve This Dish: Pack with marinara in a separate cup and add fruit or a few snap peas on the side. These are best once fully cooled, which also makes them easier to transport. Warm is fine, but not required.
Pro Tips for This Recipe:
- Squeeze the spinach aggressively.
- Don’t overfill or the dough splits open.
- Seal the edges well with a fork.
- Cool on a rack so the bottoms stay crisp.
Variations on This Dish:
- Pepperoni Calzones: Add chopped pepperoni to the filling.
- Mushroom Version: Use sautéed mushrooms instead of spinach.
- Dairy-Free Pocket: Use a dairy-free ricotta alternative if you’ve got one you trust.
Common Mistakes to Avoid with This Dish:
- Don’t let the filling stay wet.
- Don’t cut them open while hot.
- Don’t bake on a damp pan or the bottoms soften.
17. Turkey Taco Rice Bowls
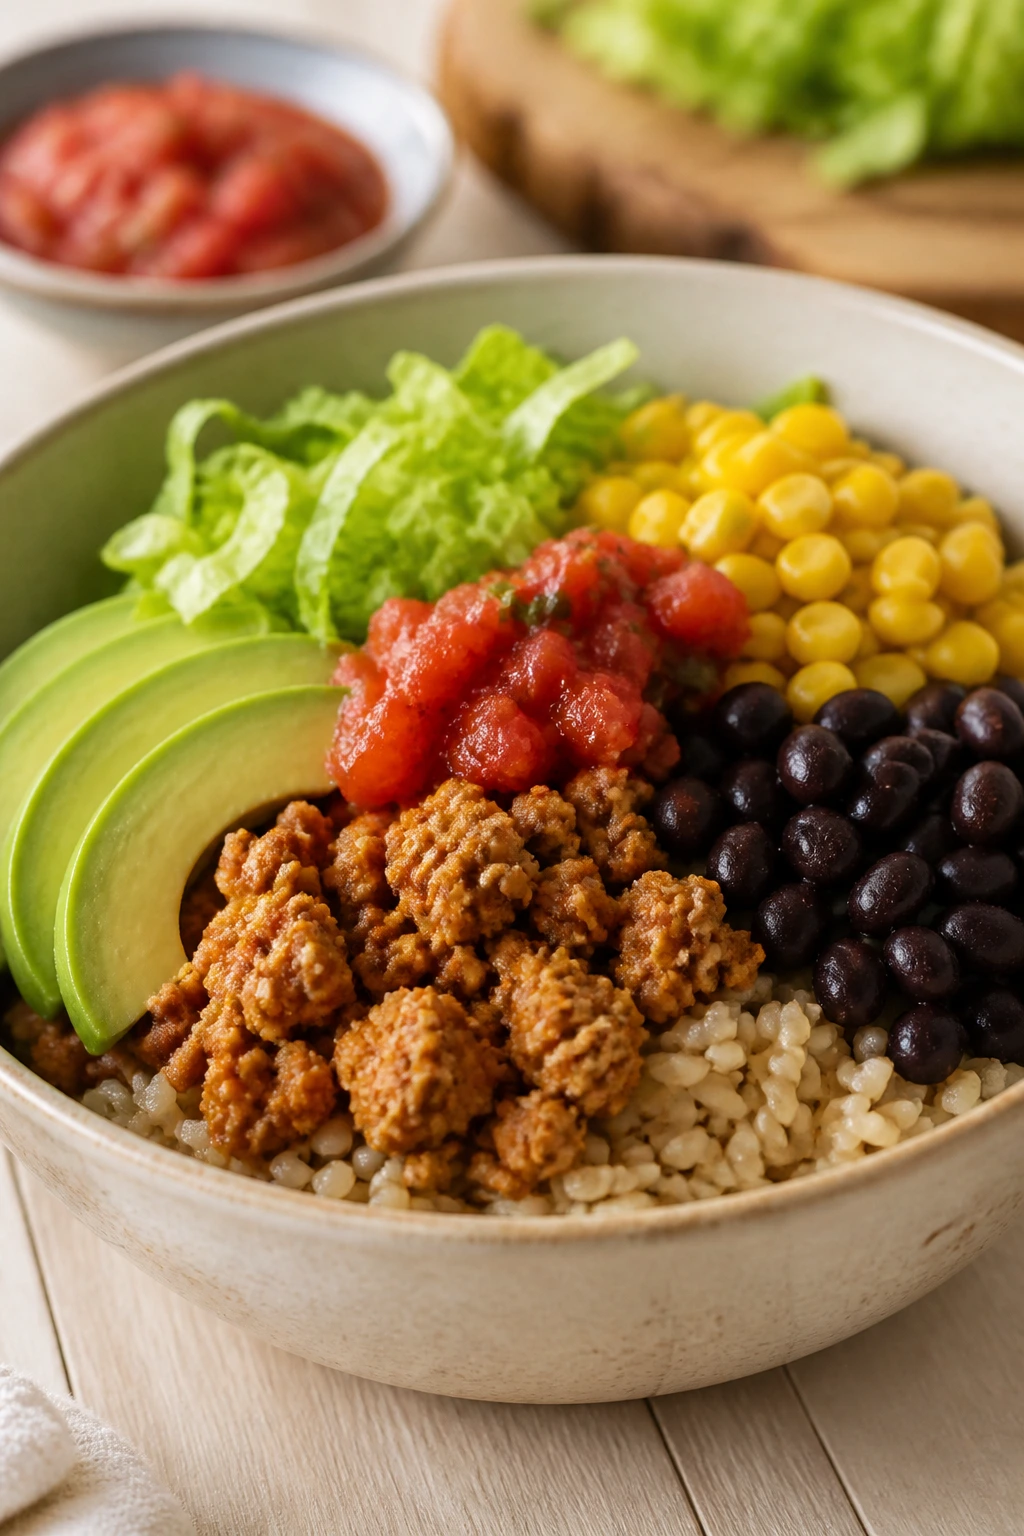
Taco bowls solve the lunchbox problem by separating the parts that need to stay fresh from the parts that need to stay dry. Seasoned turkey, black beans, rice, and corn give you a box with a little color and a lot of substance. Salsa on the side keeps the whole thing from getting soggy.
Why It Works: Brown rice gives the bowl structure, turkey provides lean protein, and black beans stretch the meal without making it feel heavy. Corn adds sweetness, avocado adds richness, and the salsa can be packed separately so the rice stays fluffy.
Key Ingredients:
- 1 lb ground turkey
- 2 cups cooked brown rice
- 1 can black beans, drained and rinsed
- 1 cup corn
- 2 teaspoons taco seasoning
- 1 cup salsa
- 1 avocado, sliced
- 1 cup shredded lettuce, optional
- Lime wedges
Quick Steps:
- Brown the turkey in a skillet and stir in taco seasoning.
- Heat the beans and corn just enough to warm through.
- Divide rice into lunch containers.
- Top with turkey, beans, corn, lettuce, and avocado.
- Pack salsa and lime separately.
Equipment for This Recipe:
- Large skillet
- Spoon
- Meal prep containers
- Small cup for salsa
How to Serve This Dish: Add tortilla chips if you want crunch, or keep it soft with a spoon-and-fork lunch. A few cilantro leaves and a lime wedge make the box taste sharper. It’s filling enough for older kids and adults without being clumsy.
Pro Tips for This Recipe:
- Season the turkey more than you think; rice tones it down.
- Keep avocado separate if it has to sit a long time.
- Drain the beans well before packing.
- Use salsa with some body, not the thinnest kind on the shelf.
Variations on This Dish:
- Beef Taco Bowl: Swap turkey for lean ground beef.
- Vegetarian Version: Use lentils or extra beans.
- Cauliflower Rice Bowl: Replace half the rice with cauliflower rice for a lighter box.
Common Mistakes to Avoid with This Dish:
- Don’t pour salsa over the rice too early.
- Don’t skip the lime; the bowl needs brightness.
- Don’t pack avocado against hot food.
18. Edamame Egg Fried Rice
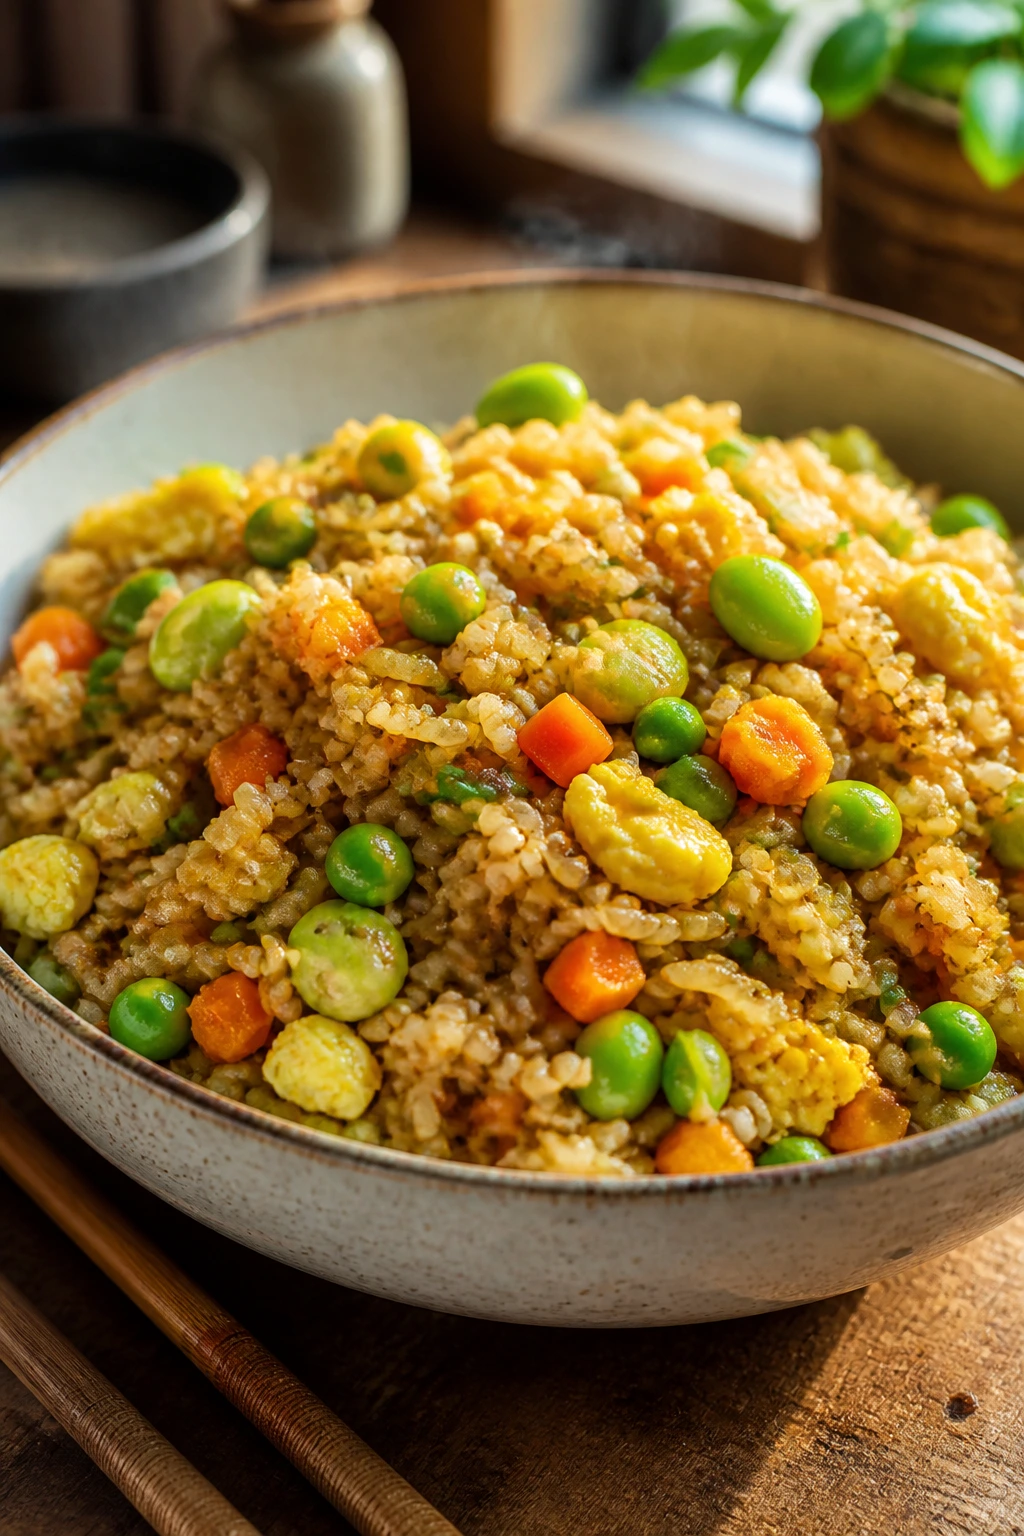
Fried rice is one of the most useful leftovers in the kitchen, and it’s even better in a lunchbox when it’s made on purpose. The eggs and edamame bring protein, the peas and carrots add color, and day-old rice gives you the right texture instead of mush.
Why It Works: Cold rice fries better than fresh rice because the grains stay separate. Egg adds richness, edamame gives a mild bean flavor and extra protein, and a small amount of sesame oil keeps the rice from tasting flat once it cools. This is a lunch that can be eaten warm or cold without much penalty.
Key Ingredients:
- 4 cups cooked rice, chilled
- 3 large eggs
- 1 cup shelled edamame
- 1 cup diced carrots
- 1 cup peas
- 2 green onions, sliced
- 2 tablespoons soy sauce
- 1 teaspoon sesame oil
- 1 tablespoon neutral oil
Quick Steps:
- Scramble the eggs in a hot skillet, then set them aside.
- Stir-fry carrots and peas in oil for 2 to 3 minutes.
- Add rice and break up any clumps with a spatula.
- Stir in edamame, eggs, soy sauce, and sesame oil.
- Finish with green onions and cool before packing.
Equipment for This Recipe:
- Large skillet or wok
- Spatula
- Mixing bowl
- Storage container
How to Serve This Dish: Pair with sliced cucumbers or a small container of fruit. If you want a stronger flavor at lunch, pack a little soy sauce or chili crisp separately. The rice should look loose, not oily.
Pro Tips for This Recipe:
- Use cold rice from the fridge.
- Don’t overcrowd the skillet.
- Add soy sauce around the edges of the pan so it sizzles a bit.
- A handful of chopped chicken works well if you want more protein.
Variations on This Dish:
- Chicken Fried Rice: Add diced cooked chicken.
- Shrimp Fried Rice: Use cooked shrimp if you want a faster version.
- Cauliflower Fried Rice: Replace half the rice with cauliflower rice.
Common Mistakes to Avoid with This Dish:
- Don’t use fresh, steaming rice.
- Don’t drown it in soy sauce.
- Don’t let the pan get too crowded or it steams instead of fries.
19. Broccoli Cheddar Quinoa Cakes
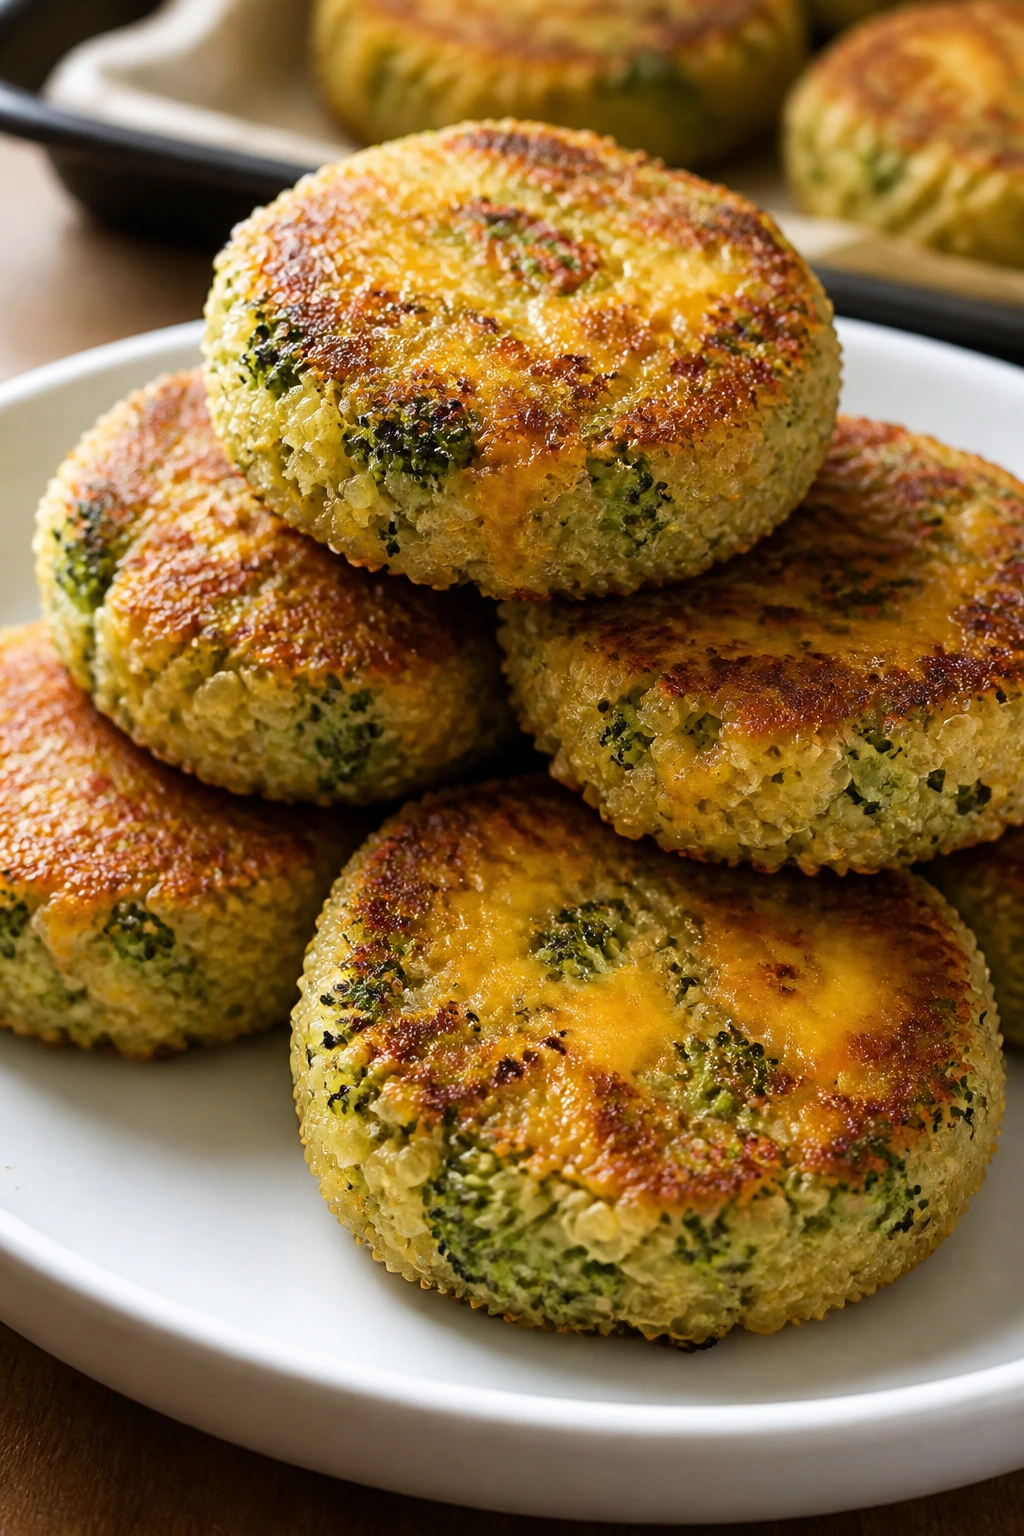
These little cakes are the kind of lunch item that looks modest and then quietly does the job. Quinoa makes them sturdier than most vegetable patties, broccoli adds texture, and cheddar keeps them from tasting austere. They’re good warm, cold, or somewhere in between.
Why It Works: Cooked quinoa binds well with eggs and breadcrumbs, so the cakes hold together without turning bready. Broccoli chopped fine gives you green bits in every bite, and cheddar melts into the mixture instead of sitting on top in a greasy layer. They reheat without much fuss.
Key Ingredients:
- 2 cups cooked quinoa
- 1 1/2 cups broccoli, finely chopped
- 1 cup shredded cheddar
- 2 large eggs
- 1/2 cup breadcrumbs
- 1/4 cup minced onion
- 1/2 teaspoon salt
- Black pepper
Quick Steps:
- Preheat the oven to 400°F (205°C) and line a tray with parchment.
- Mix quinoa, broccoli, cheddar, eggs, breadcrumbs, onion, salt, and pepper.
- Shape into small cakes and place on the tray.
- Bake 18 to 20 minutes until set and lightly browned.
- Cool on a rack before boxing them up.
Equipment for This Recipe:
- Baking sheet
- Mixing bowl
- Spoon
- Parchment paper
How to Serve This Dish: Pack with yogurt dip, ranch, or marinara, plus fruit and raw carrots. They also make a nice dinner leftover when warmed and topped with a fried egg. That’s a good trick to keep in your pocket.
Pro Tips for This Recipe:
- Chop the broccoli very small so the cakes hold together.
- Let the mixture sit for 5 minutes before shaping.
- Don’t flip them too early if you pan-fry instead of bake.
- Use sharp cheddar for more flavor.
Variations on This Dish:
- Cauliflower Version: Swap broccoli for finely chopped cauliflower.
- Feta Herb Cakes: Use feta and parsley instead of cheddar.
- Egg-Free Option: Use a flax egg if you need a plant-based binder.
Common Mistakes to Avoid with This Dish:
- Don’t make the cakes too thick.
- Don’t use wet broccoli straight from rinsing.
- Don’t pack them before they cool or they soften underneath.
20. Sloppy Joe Sweet Potato Boats
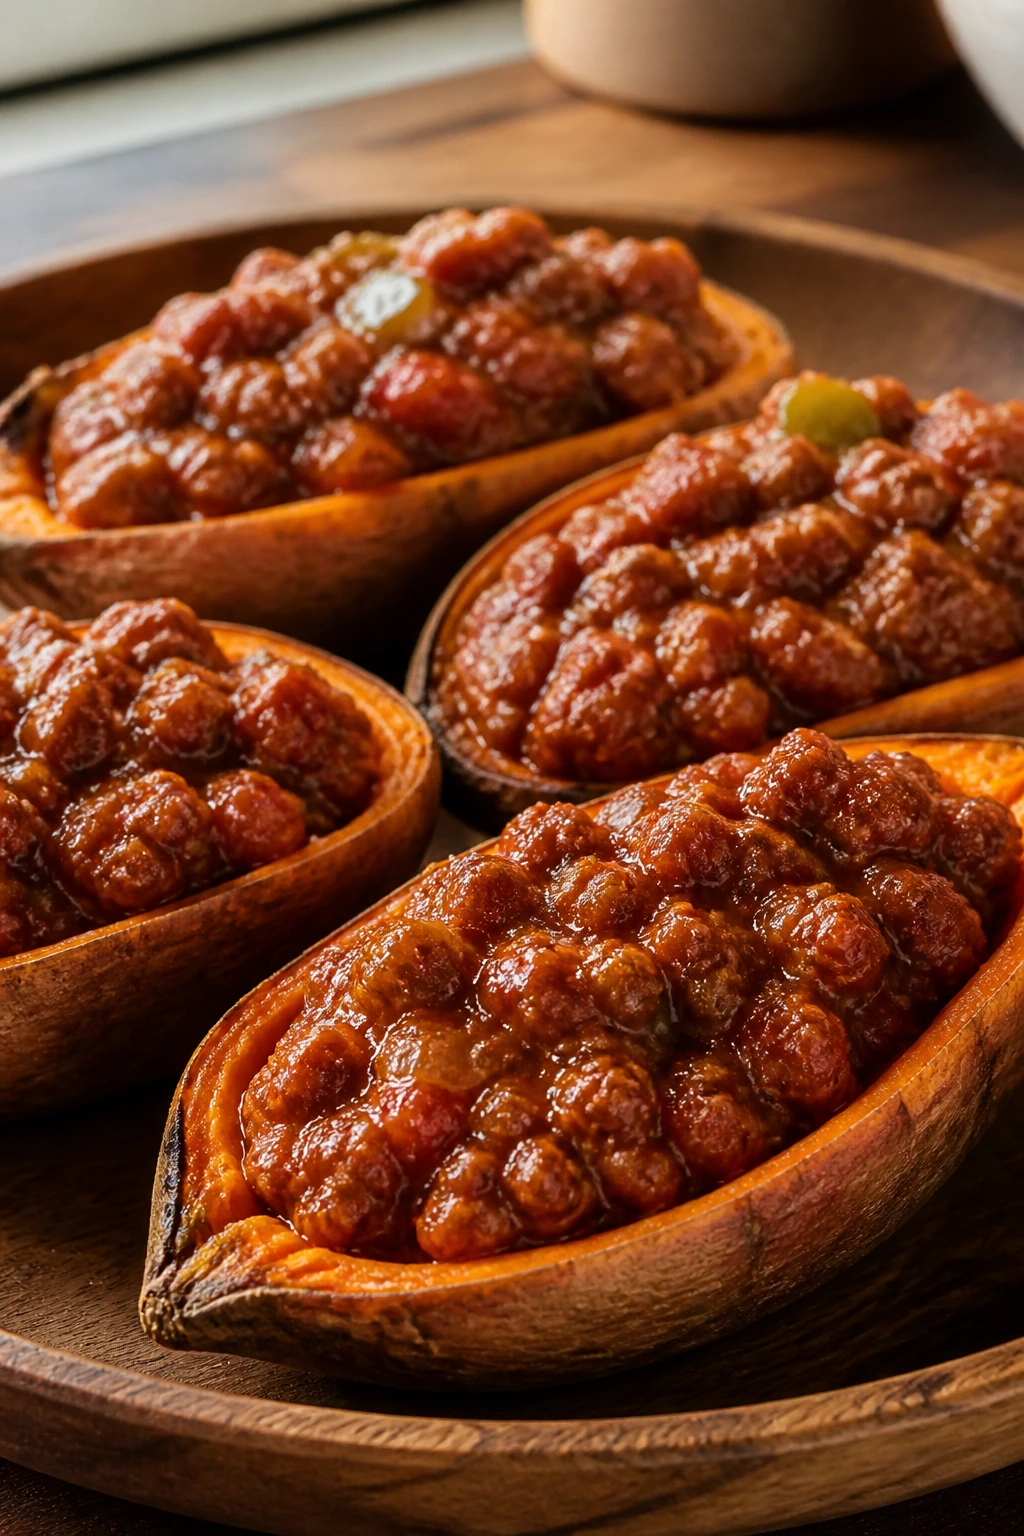
Sweet potatoes give sloppy joe filling a cleaner landing spot than a bun. The skin holds everything together, the beef or turkey gets a little sweetness from the sauce, and the whole meal packs surprisingly well if you cool it first. Messy name, tidy lunch.
Why It Works: Roasted sweet potatoes are sturdy enough to split and fill without collapsing. The filling is saucy but not soupy, which matters when it’s being boxed up and reheated later. This one is filling enough that you don’t need much else beside it.
Key Ingredients:
- 4 medium sweet potatoes
- 1 lb ground beef or ground turkey
- 1 onion, diced
- 1 cup tomato sauce
- 2 tablespoons ketchup
- 1 tablespoon Worcestershire sauce
- 1 teaspoon smoked paprika
- Salt and pepper
Quick Steps:
- Bake the sweet potatoes at 400°F (205°C) for 45 to 55 minutes until tender.
- Brown the meat with onion in a skillet.
- Stir in tomato sauce, ketchup, Worcestershire, paprika, salt, and pepper.
- Simmer 5 to 8 minutes until thick.
- Split the potatoes and spoon in the filling.
Equipment for This Recipe:
- Baking sheet
- Skillet
- Knife
- Spoon
How to Serve This Dish: Add a simple slaw or steamed broccoli on the side if you want vegetables with a little crunch. If you’re packing for lunch later, keep the filling separate and stuff the potato just before eating. That keeps the skin from getting soggy.
Pro Tips for This Recipe:
- Prick the potatoes with a fork before baking.
- Let the filling cook down until it clings to a spoon.
- Use lean meat so the sauce doesn’t float in grease.
- Pack in a divided container if you want to keep the potato skin firmer.
Variations on This Dish:
- Lentil Sloppy Joes: Use cooked lentils instead of meat.
- BBQ Version: Add a spoonful of barbecue sauce for a sweeter profile.
- Cheesy Boat: Top with a little shredded cheddar before packing.
Common Mistakes to Avoid with This Dish:
- Don’t underbake the potatoes.
- Don’t make the filling too loose.
- Don’t box it while piping hot.
21. Teriyaki Meatballs and Rice
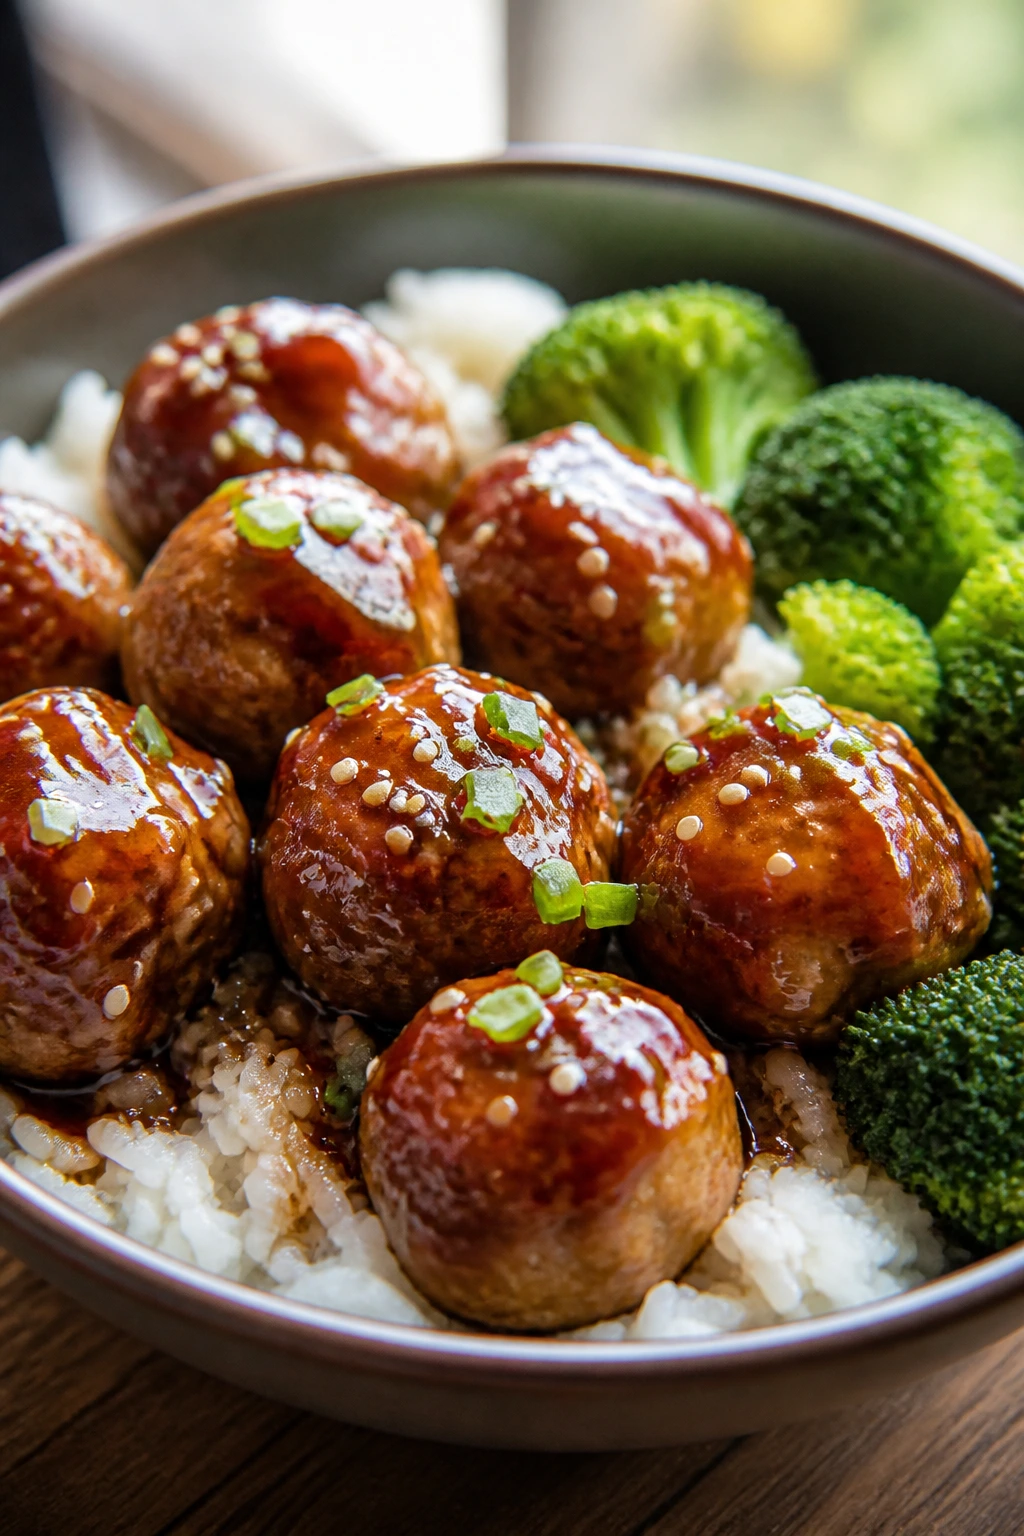
These meatballs lean savory-sweet without going sticky-sweet, and that matters when they’ve got to make it through a school bag. The teriyaki glaze clings to the meatballs, the rice catches the extra sauce, and steamed broccoli keeps the box from feeling one-note.
Why It Works: Ground turkey makes a light meatball that takes on teriyaki well. Baking keeps the meatballs tidy, while a short simmer in glaze makes them glossy without turning them candy-like. Rice underneath soaks up the sauce and keeps the box from drying out.
Key Ingredients:
- 1 lb ground turkey
- 1 egg
- 1/2 cup breadcrumbs
- 1 clove garlic, minced
- 1 teaspoon grated ginger
- 1/2 cup teriyaki sauce
- 2 cups cooked rice
- 2 cups broccoli florets
- Sesame seeds
Quick Steps:
- Preheat the oven to 400°F (205°C) and line a tray with parchment.
- Mix turkey, egg, breadcrumbs, garlic, and ginger, then shape into meatballs.
- Bake 15 minutes until cooked through.
- Simmer with teriyaki sauce for 2 to 3 minutes until glazed.
- Serve over rice with broccoli and sesame seeds.
Equipment for This Recipe:
- Baking sheet
- Small saucepan
- Mixing bowl
- Spoon
How to Serve This Dish: Add pineapple chunks or snap peas if you want a sweet, crisp side. Pack extra glaze separately if the lunch has to sit a while. This is a strong warm lunchbox candidate, but it still works cold.
Pro Tips for This Recipe:
- Keep the meatballs small so they heat evenly.
- Don’t let the sauce boil hard or it gets sticky in the wrong way.
- Steam the broccoli just until crisp-tender.
- Use a rice layer to catch drips.
Variations on This Dish:
- Chicken Meatballs: Use ground chicken instead.
- Beef Version: Lean ground beef gives a deeper flavor.
- Pineapple Teriyaki: Stir in a spoonful of pineapple juice for brightness.
Common Mistakes to Avoid with This Dish:
- Don’t overmix the meatball mix.
- Don’t drown the box in sauce.
- Don’t overcook the broccoli into dull green softness.
22. Mediterranean Couscous and Falafel Boxes
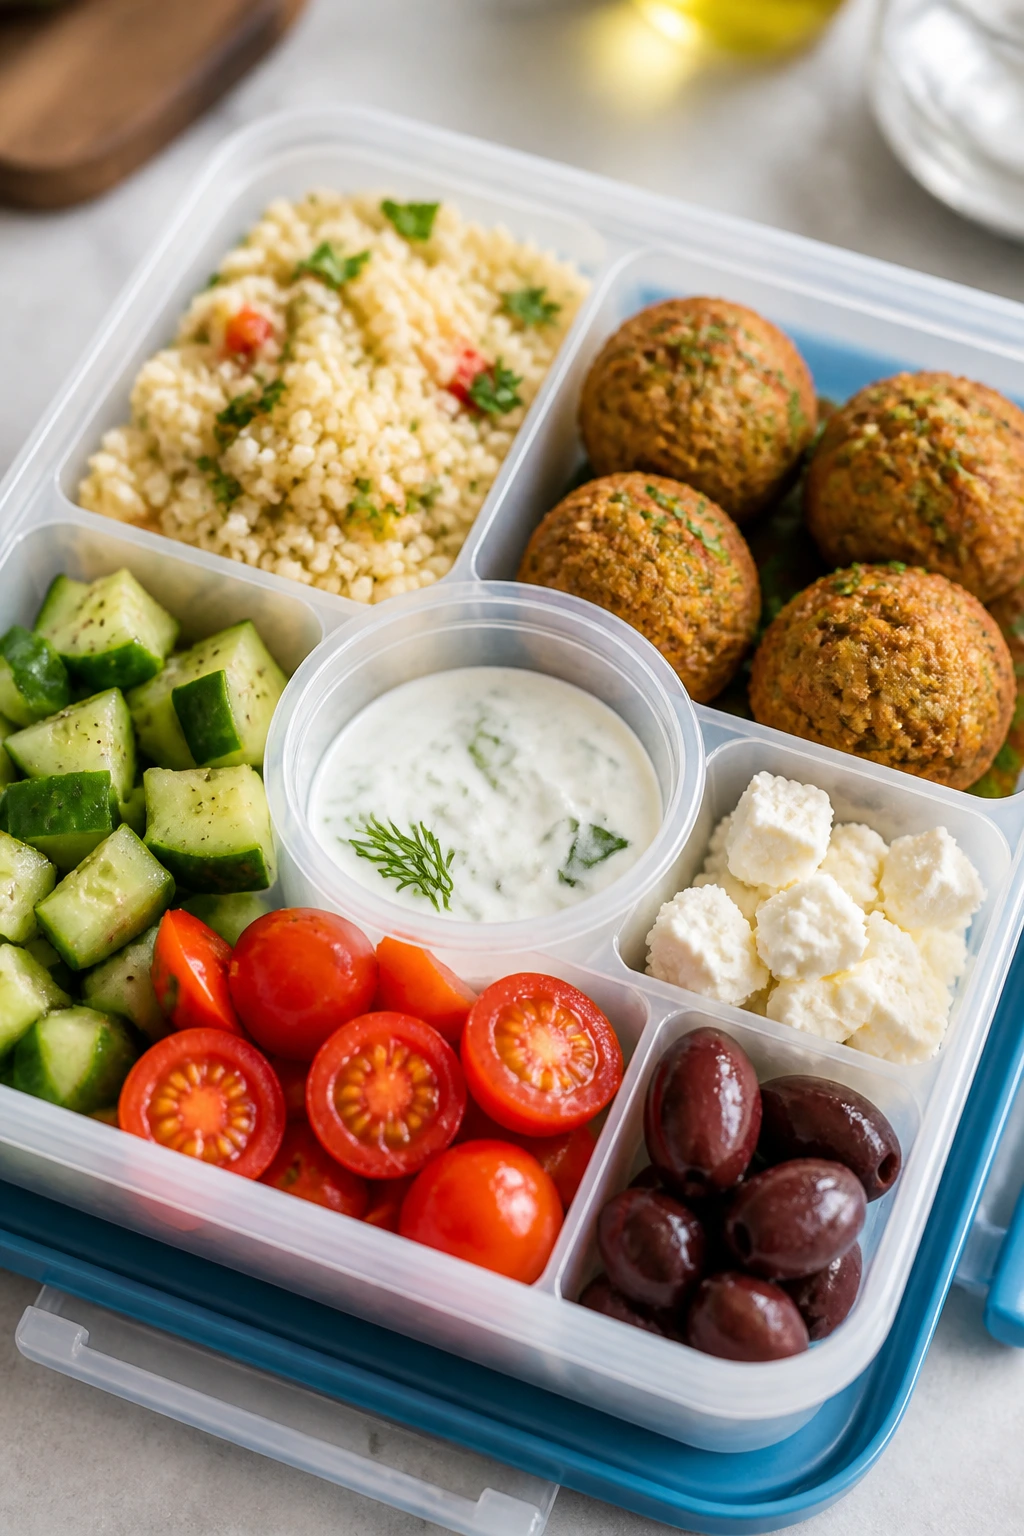
Falafel, couscous, tomatoes, cucumber, feta, and tzatziki make a lunchbox that feels bright even before you eat it. This one is all about keeping the wet and dry pieces separate until the right moment. If you like lunch to feel assembled rather than slopped together, this is your lane.
Why It Works: Couscous cooks fast and stays fluffy if you don’t overdo the liquid. Falafel gives the box protein and texture, while cucumber and tomato bring freshness. Tzatziki ties it together, but only if you keep it in its own cup.
Key Ingredients:
- 1 cup couscous
- 1 1/4 cups boiling broth or water
- 12 baked or store-bought falafel balls
- 1 cucumber, diced
- 1 cup cherry tomatoes, halved
- 1/2 cup feta
- 1/4 cup olives, sliced
- 1/2 cup tzatziki
- 1 tablespoon olive oil
- Salt and pepper
Quick Steps:
- Pour boiling broth over couscous, cover, and let sit 5 minutes.
- Fluff with a fork and stir in olive oil, salt, and pepper.
- Warm or bake the falafel if needed.
- Pack couscous, falafel, cucumber, tomatoes, feta, and olives in separate sections.
- Add tzatziki in a small lidded cup.
Equipment for This Recipe:
- Saucepan or kettle
- Fork
- Meal prep containers
- Small dip cup
How to Serve This Dish: Add pita wedges or a few grapes if you want more bulk. This lunch looks best when the colors stay separated, not mixed into one mass. The contrast is part of the appeal.
Pro Tips for This Recipe:
- Don’t add too much water to the couscous.
- Dry the cucumber after dicing so the box doesn’t get watery.
- Crisp the falafel if you can.
- A squeeze of lemon sharpens the whole tray.
Variations on This Dish:
- Quinoa Bowl: Replace couscous with quinoa.
- Chicken Shawarma Box: Swap falafel for sliced chicken.
- Dairy-Free Version: Skip feta and add extra olives or roasted peppers.
Common Mistakes to Avoid with This Dish:
- Don’t mix tzatziki into the grain too early.
- Don’t let couscous sit covered too long or it clumps.
- Don’t pack wet tomatoes against pita.
23. Bean and Cheese Burrito Bites

These are the kind of lunchbox bites that disappear before anyone calls them “healthy,” which is usually a good sign. Refried beans, black beans, corn, and cheese make a filling that sticks together and tastes familiar. Rolled tight and sliced, they’re easy to eat with little mess.
Why It Works: Beans and cheese give you protein, fiber, and enough fat to keep the bites satisfying. Warm filling spreads better, and a quick bake helps the tortilla seal. They’re sturdy once cooled, which makes them ideal for packed lunches.
Key Ingredients:
- 8 flour tortillas
- 1 can refried beans
- 1 can black beans, drained and rinsed
- 2 cups shredded cheddar
- 1 cup corn
- 1 teaspoon cumin
- 1/2 cup salsa, optional
- Salt to taste
Quick Steps:
- Warm the refried beans with cumin and a pinch of salt.
- Spread the beans on each tortilla, then top with black beans, corn, and cheese.
- Roll tightly and cut into pinwheels or fold into burrito bites.
- Bake at 400°F (205°C) for 10 to 12 minutes if you want them sealed.
- Cool before packing.
Equipment for This Recipe:
- Skillet or microwave-safe bowl
- Knife
- Baking sheet
- Parchment paper
How to Serve This Dish: Pack salsa in a small container, plus cucumber sticks or apple slices. These bites are neat enough for smaller hands, and the filling stays friendly even when cold. A little hot sauce on the adult version helps.
Pro Tips for This Recipe:
- Warm the beans so they spread thin.
- Don’t overfill or the tortilla tears.
- Seal with a quick bake if you want cleaner slices.
- Use medium tortillas rather than giant ones for better lunchbox portions.
Variations on This Dish:
- Chicken Burrito Bites: Add shredded cooked chicken.
- Veggie Version: Use extra corn and diced peppers.
- Gluten-Free Route: Use corn tortillas and make smaller folded tacos instead.
Common Mistakes to Avoid with This Dish:
- Don’t add too much salsa inside.
- Don’t slice before the roll has cooled a bit.
- Don’t pack them loose if you want the pinwheels to hold.
24. Chicken Noodle Soup Thermos Lunch
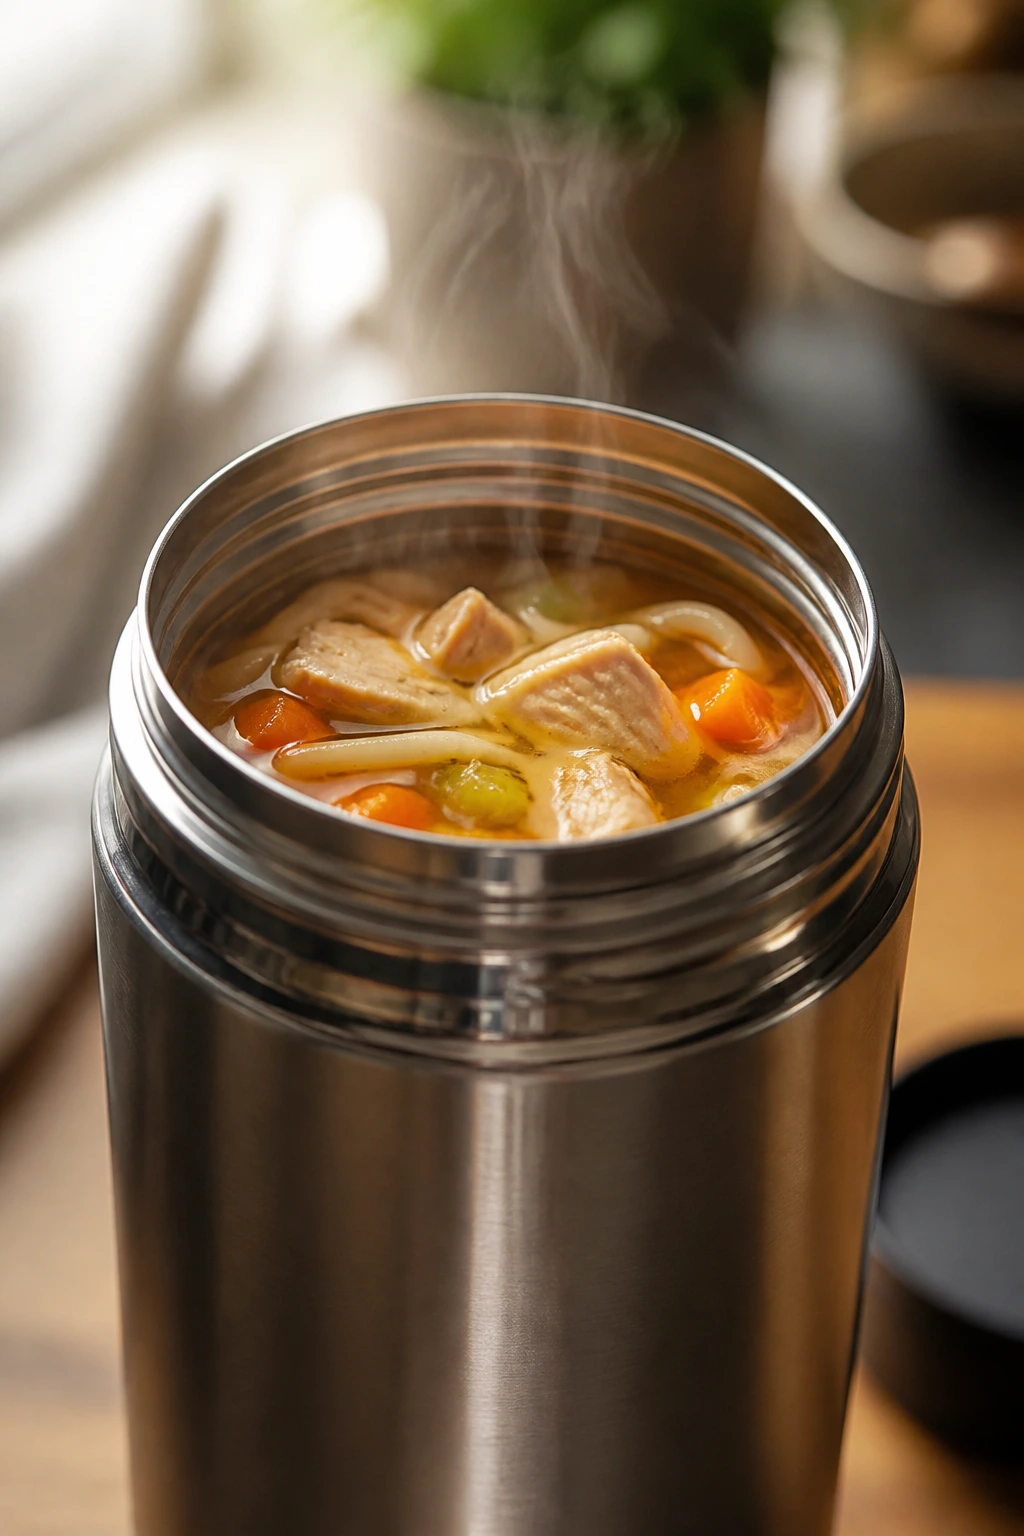
Chicken noodle soup in a thermos is a little old-fashioned in the best way. It’s familiar, gentle, and easy to eat when the day feels long. The trick is keeping the noodles from soaking up all the broth before lunch.
Why It Works: Chicken brings the protein, noodles make it feel complete, and carrots and celery give the broth something to taste like. Cooking the noodles separately or adding them near the end keeps them from going mushy. A preheated thermos keeps the soup hot enough to matter.
Key Ingredients:
- 1 tablespoon olive oil
- 1 onion, diced
- 2 carrots, sliced
- 2 celery stalks, sliced
- 6 cups broth
- 2 cups cooked chicken, shredded
- 2 cups egg noodles
- 1 teaspoon dried thyme
- 2 tablespoons chopped parsley
- Salt and pepper
Quick Steps:
- Sauté onion, carrot, and celery in oil for 5 minutes.
- Add broth and thyme, then simmer until the vegetables are tender.
- Cook egg noodles separately until just tender.
- Stir chicken and noodles into the broth, then season with salt and pepper.
- Preheat the thermos and fill it while the soup is steaming.
Equipment for This Recipe:
- Soup pot
- Thermos
- Strainer
- Ladle
How to Serve This Dish: Pair with crackers, a roll, or a cheese stick if the lunch needs more bulk. The soup works best when the noodles are cooked just to tender, not past it. A sprinkle of parsley makes the thermos open feel a bit brighter.
Pro Tips for This Recipe:
- Cook noodles separately if you want the soup to last.
- Preheat the thermos with boiling water.
- Add salt in stages so the broth stays balanced.
- Keep the chicken in bite-size pieces for easy spooning.
Variations on This Dish:
- Turkey Noodle Soup: Use shredded turkey.
- Gluten-Free Version: Swap in gluten-free pasta.
- Veggie Version: Use white beans instead of chicken.
Common Mistakes to Avoid with This Dish:
- Don’t pack soup that isn’t steaming hot.
- Don’t cook the noodles to mush.
- Don’t forget that thermos food should be sealed tightly.
25. Veggie Baked Ziti Cups
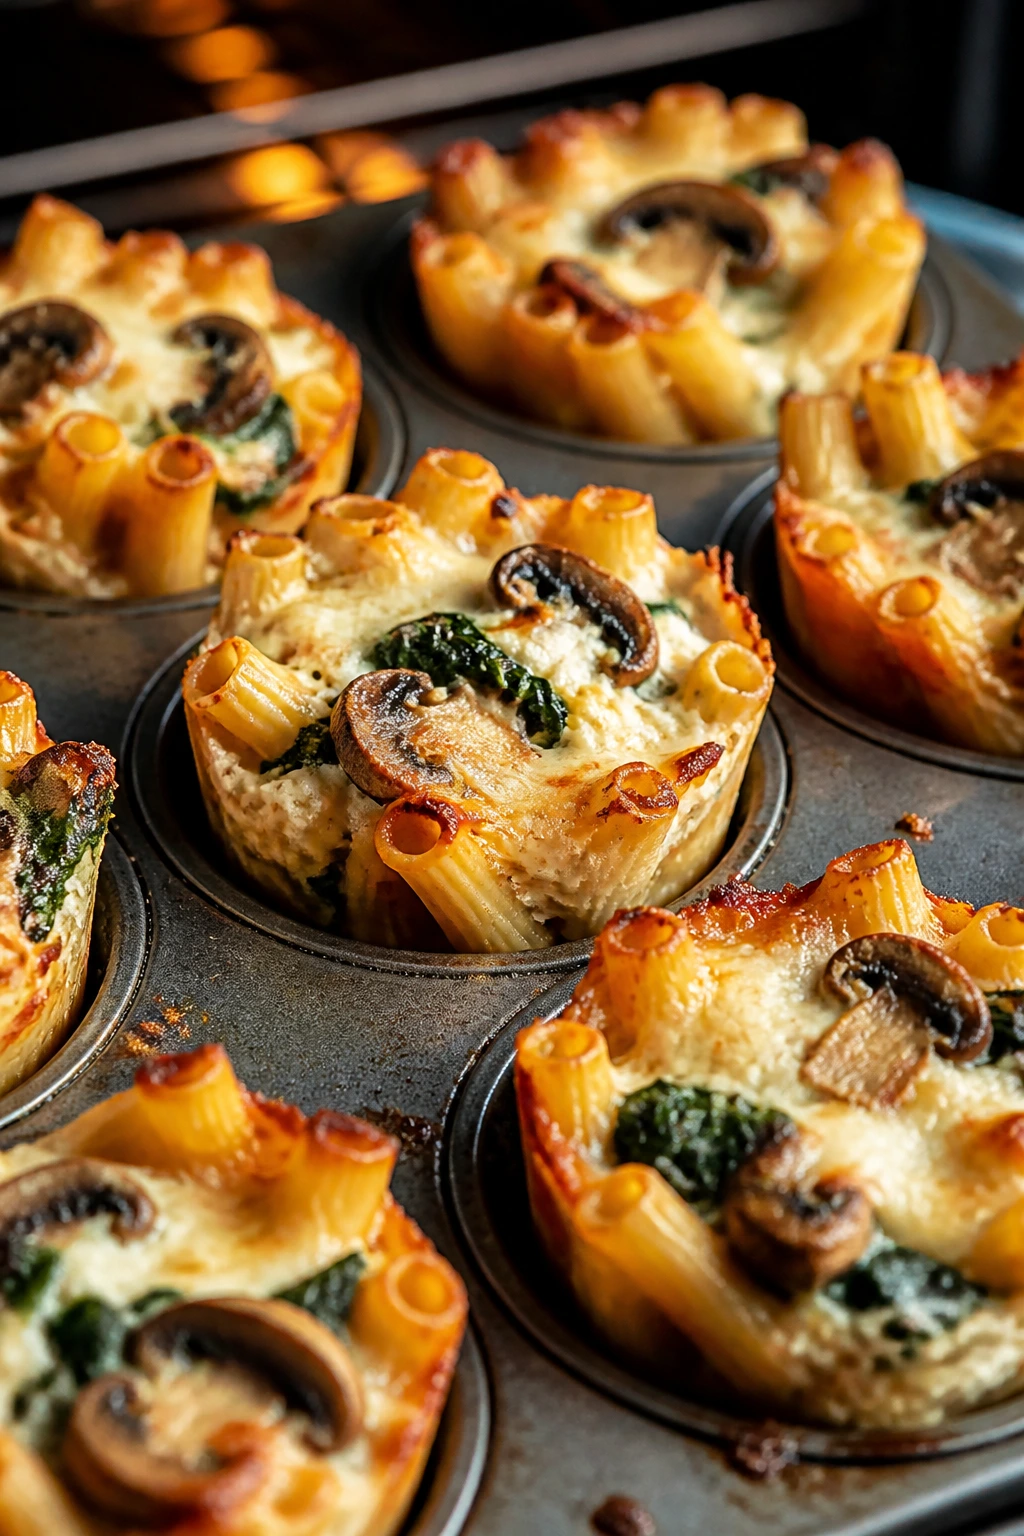
Baked ziti turns into something smarter when you portion it into muffin tins. The edges get chewy, the centers stay creamy, and the little cups make lunch packing easier than scooping from a casserole dish. Spinach and mushrooms keep the whole thing from feeling heavy.
Why It Works: Pasta mixed with ricotta and sauce bakes into a set shape that travels well. Adding vegetables to the filling gives the cups moisture and flavor without making them sloppy. A muffin tin is the secret here — it forces the pasta into lunchbox-friendly portions.
Key Ingredients:
- 12 oz ziti
- 2 cups marinara
- 1 cup ricotta
- 1 cup shredded mozzarella
- 1 cup chopped spinach
- 1 cup chopped mushrooms
- 1 egg
- 2 tablespoons grated Parmesan
- Salt and pepper
Quick Steps:
- Cook the ziti until just shy of tender, then drain.
- Mix pasta with marinara, ricotta, mozzarella, spinach, mushrooms, egg, Parmesan, salt, and pepper.
- Spoon into greased muffin cups and press lightly.
- Bake at 375°F (190°C) for 20 minutes until set.
- Cool for 10 minutes before removing.
Equipment for This Recipe:
- Muffin tin
- Mixing bowl
- Spoon
- Colander
How to Serve This Dish: Pack with a few broccoli florets, a fruit cup, or extra marinara in a small container. These cups can be eaten warm or cold, and they hold their shape best once completely cooled. They’re a strong lunchbox option for people who like pasta but hate mess.
Pro Tips for This Recipe:
- Undercook the pasta a bit so it doesn’t go soft in the oven.
- Grease the muffin tin well.
- Let the cups cool before lifting them out.
- Squeeze any excess liquid from the spinach.
Variations on This Dish:
- Meaty Version: Add cooked turkey or sausage.
- Zucchini Ziti Cups: Swap mushrooms for grated zucchini.
- Dairy-Light Version: Use less mozzarella and more sauce for a looser cup.
Common Mistakes to Avoid with This Dish:
- Don’t overfill the muffin tin.
- Don’t use watery vegetables unless they’re cooked down.
- Don’t try to remove the cups while they’re still soft and hot.
26. Pesto Chickpea Pasta Salad
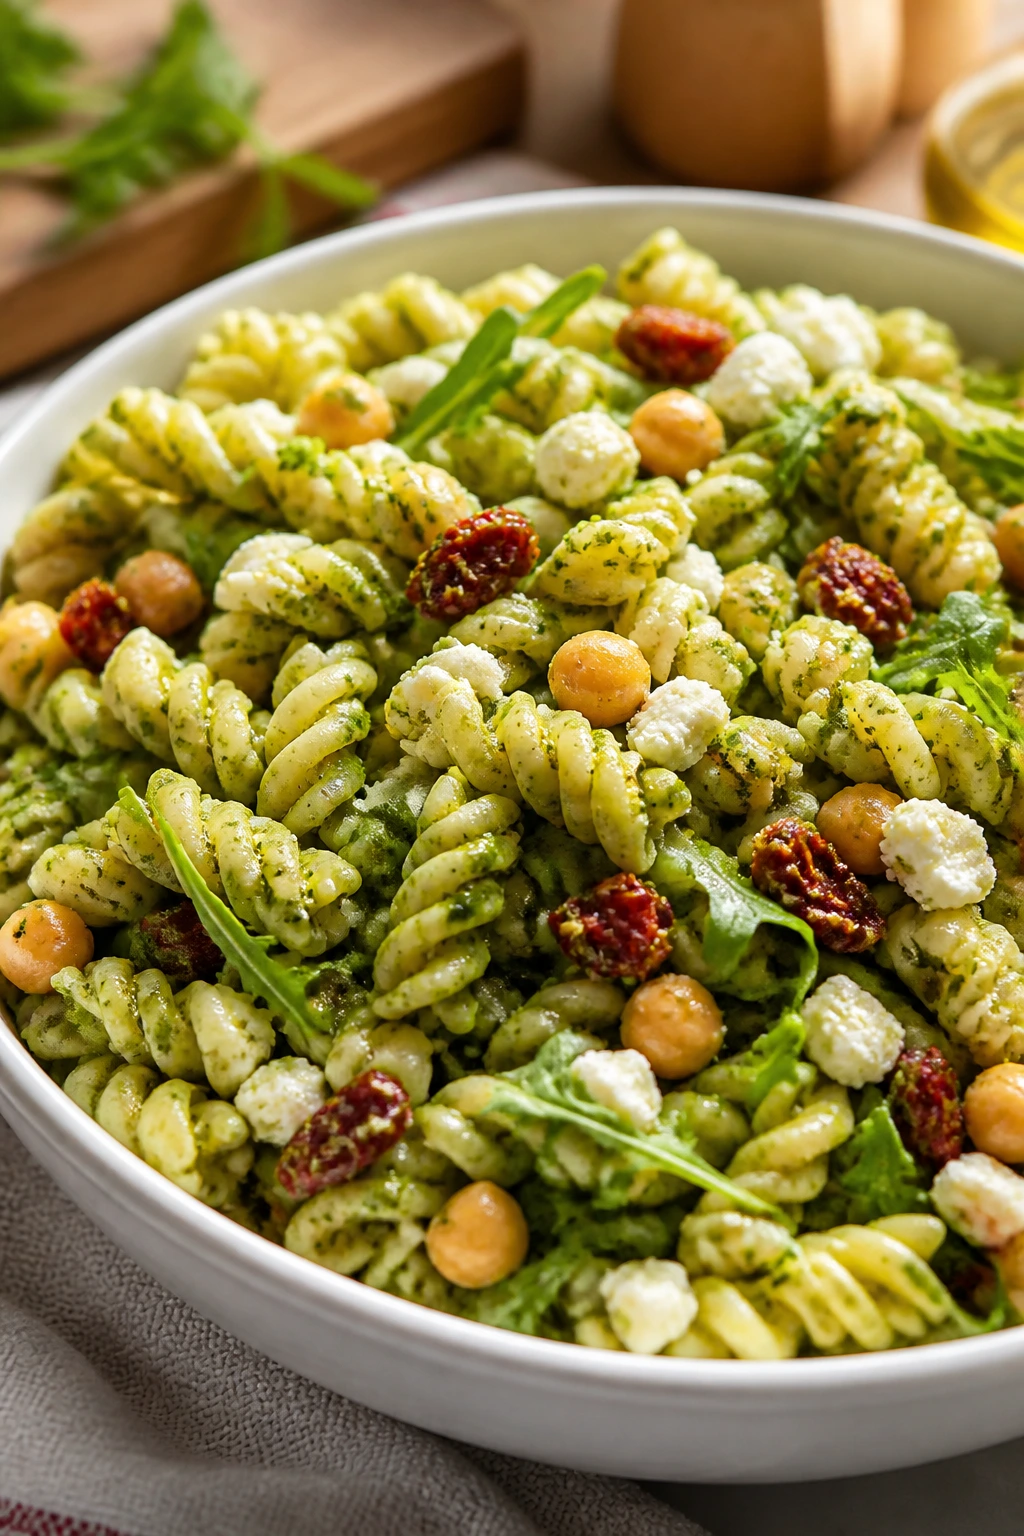
This is the pasta salad I make when I want something that tastes green and lively instead of oily and tired. Chickpeas give it some backbone, arugula adds peppery bite, and sun-dried tomatoes keep the flavor sharp enough to survive a few hours in the fridge.
Why It Works: Chickpeas stretch the meal without turning it heavy, and pesto coats the pasta in a way that tastes good cold. Arugula holds up better than soft lettuce, and feta adds a salty note that keeps the salad from fading. A little lemon cuts the richness.
Key Ingredients:
- 8 oz short pasta
- 1 can chickpeas, rinsed and drained
- 1/3 cup pesto
- 1 cup arugula
- 1/2 cup sun-dried tomatoes, chopped
- 1/2 cup cherry tomatoes, halved
- 1/4 cup feta
- 1 tablespoon lemon juice
Quick Steps:
- Cook the pasta, then cool it under cold water.
- Toss the pasta with pesto and lemon juice.
- Fold in chickpeas, arugula, sun-dried tomatoes, cherry tomatoes, and feta.
- Chill for 20 minutes.
- Pack with an extra spoonful of tomatoes or cucumber if you want more freshness.
Equipment for This Recipe:
- Pot
- Mixing bowl
- Colander
- Storage container
How to Serve This Dish: Add a bread stick, a boiled egg, or a few snap peas if you want more bulk. It makes a good cold lunch straight from the fridge. The arugula softens a little, but that’s fine.
Pro Tips for This Recipe:
- Don’t overdress the pasta.
- Use a small pasta shape that catches the pesto.
- Add feta last so it stays in chunks.
- If the pesto tastes thick, loosen it with a teaspoon of pasta water.
Variations on This Dish:
- Chicken Pesto Pasta: Add chopped cooked chicken.
- Dairy-Free Pesto Salad: Use dairy-free pesto and skip the feta.
- Quinoa Salad: Replace pasta with quinoa for a grain bowl feel.
Common Mistakes to Avoid with This Dish:
- Don’t serve it warm if you want the greens to stay perky.
- Don’t skip the lemon.
- Don’t use soft lettuce that collapses into the pasta.
27. Egg Salad Lettuce Wrap Kits
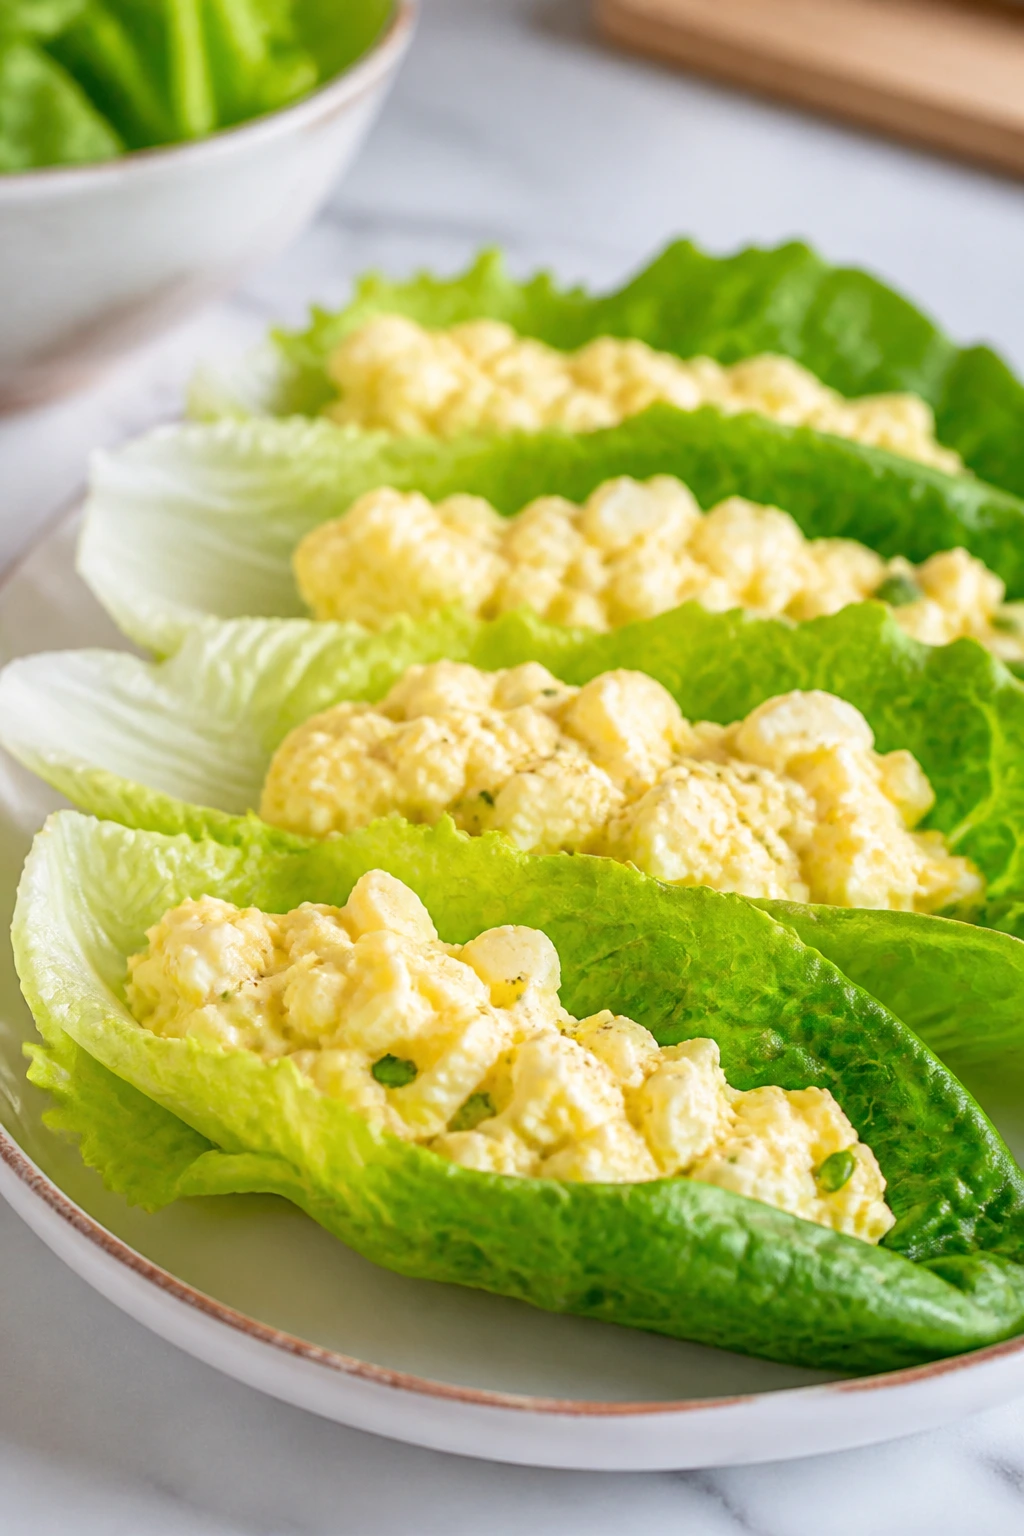
Egg salad gets a lot of side-eye, but it packs well if you keep it tight and fresh. The Greek yogurt makes it cleaner, the celery adds crunch, and the lettuce wraps keep the box from feeling like a sandwich clone. It’s a good one for people who want a low-carb lunch without being punished.
Why It Works: Eggs give you protein and richness, while yogurt keeps the filling lighter than a full mayo version. Celery and chives cut through the creaminess, and lettuce leaves act like a crisp, edible wrapper. Packing the lettuce separately keeps it from wilting.
Key Ingredients:
- 8 large eggs
- 1/3 cup plain Greek yogurt or mayonnaise
- 1 teaspoon Dijon mustard
- 1 celery stalk, finely diced
- 1 tablespoon chopped chives
- 1 teaspoon lemon juice
- 1/2 teaspoon salt
- Butter lettuce or romaine leaves
- Whole-grain crackers, optional
Quick Steps:
- Hard-boil the eggs, then cool them in ice water.
- Chop the eggs and mix with yogurt, mustard, celery, chives, lemon juice, and salt.
- Chill the filling so it firms up.
- Pack in one container and tuck lettuce leaves into another.
- Add crackers if you want a little crunch.
Equipment for This Recipe:
- Saucepan
- Bowl of ice water
- Mixing bowl
- Knife
How to Serve This Dish: Spoon the egg salad into lettuce cups or eat it with crackers. A few cherry tomatoes or cucumber spears fit nicely beside it. This is one of the easiest lunchboxes to scale up for adults and kids at once.
Pro Tips for This Recipe:
- Cool the eggs fast so they peel cleanly.
- Keep the filling thick, not runny.
- Use sturdy lettuce leaves with a good cup shape.
- Add a tiny pinch of paprika if you want more color.
Variations on This Dish:
- Avocado Egg Salad: Swap half the yogurt for mashed avocado and eat it the same day.
- Curry Egg Salad: Add curry powder and a few raisins.
- Tuna Salad Swap: Use the same formula with tuna instead of eggs.
Common Mistakes to Avoid with This Dish:
- Don’t leave the eggs warm when you mix the salad.
- Don’t use flimsy lettuce that tears immediately.
- Don’t add too much dressing or it slides around the box.
28. Baked Falafel with Tahini Dip
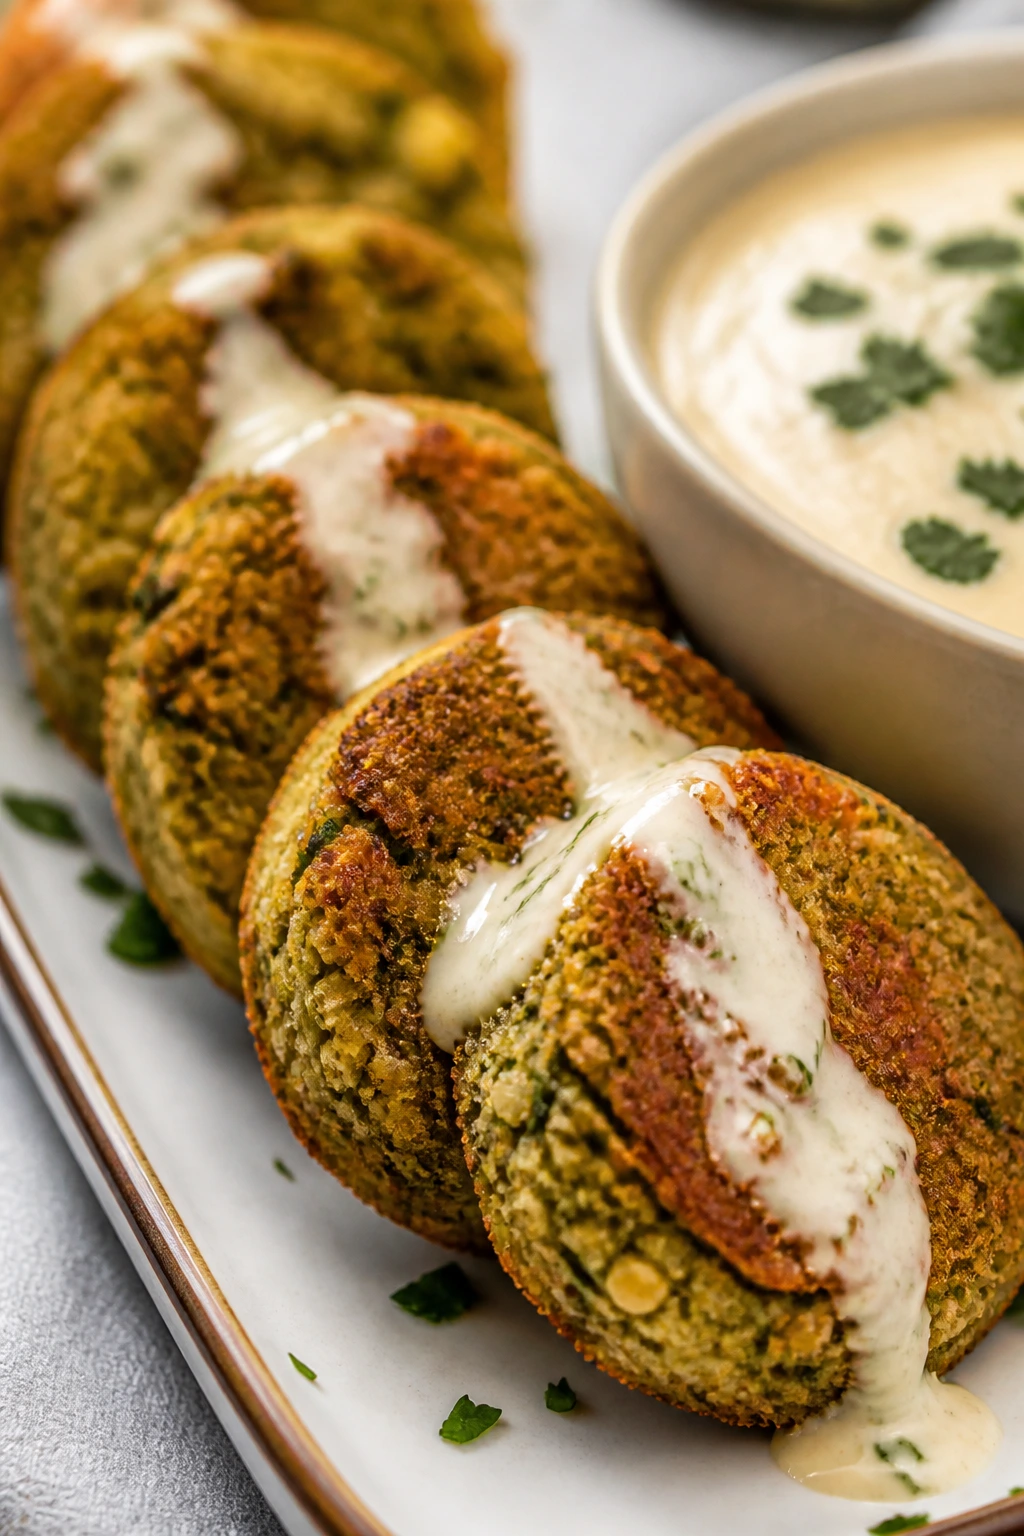
Baked falafel is less fussy than the fried version, but it still gives you that chickpea-and-herb flavor people keep coming back for. The outside gets crisp enough to matter, the inside stays pale and tender, and tahini dip gives the lunch a creamy finish. It’s a strong vegetarian lunchbox candidate.
Why It Works: Chickpeas, herbs, onion, garlic, and spices make falafel taste bold even when baked. Baking keeps the patties neat for transport, and tahini sauce adds fat and flavor without needing dairy. Served with pita and vegetables, it becomes a full meal instead of a snack board.
Key Ingredients:
- 2 cans chickpeas, drained and rinsed
- 1/2 cup parsley
- 1/2 cup cilantro
- 1 small onion, chopped
- 2 cloves garlic
- 2 tablespoons flour
- 1 teaspoon cumin
- 1 teaspoon coriander
- 1/4 teaspoon salt
- Tahini, lemon juice, and water for the dip
Quick Steps:
- Preheat the oven to 425°F (220°C) and line a tray with parchment.
- Pulse chickpeas, herbs, onion, garlic, flour, spices, and salt until the mixture holds together.
- Shape into small patties and set them on the tray.
- Bake 20 minutes, turning once if needed, until browned.
- Whisk tahini, lemon juice, water, and salt into a smooth dip.
Equipment for This Recipe:
- Food processor
- Baking sheet
- Parchment paper
- Small bowl for dip
How to Serve This Dish: Pack with pita wedges, cucumber, tomatoes, and the tahini sauce in a separate container. If you want a more filling lunch, add a hard-boiled egg or a scoop of couscous. These are best cooled before boxing.
Pro Tips for This Recipe:
- Drain the chickpeas very well.
- Chill the mixture for 15 minutes if it feels soft.
- Don’t make the patties too large or they crack.
- A squeeze of lemon over the finished falafel perks everything up.
Variations on This Dish:
- Spinach Falafel: Add a handful of spinach to the processor.
- White Bean Falafel: Use part white beans for a milder version.
- Nut-Free Sauce: Serve with yogurt dip if sesame is a concern.
Common Mistakes to Avoid with This Dish:
- Don’t make the mixture wet.
- Don’t skip the parchment or the bottoms stick.
- Don’t pack with sauce soaked into the falafel.
29. Whole-Wheat Pizza Pinwheels
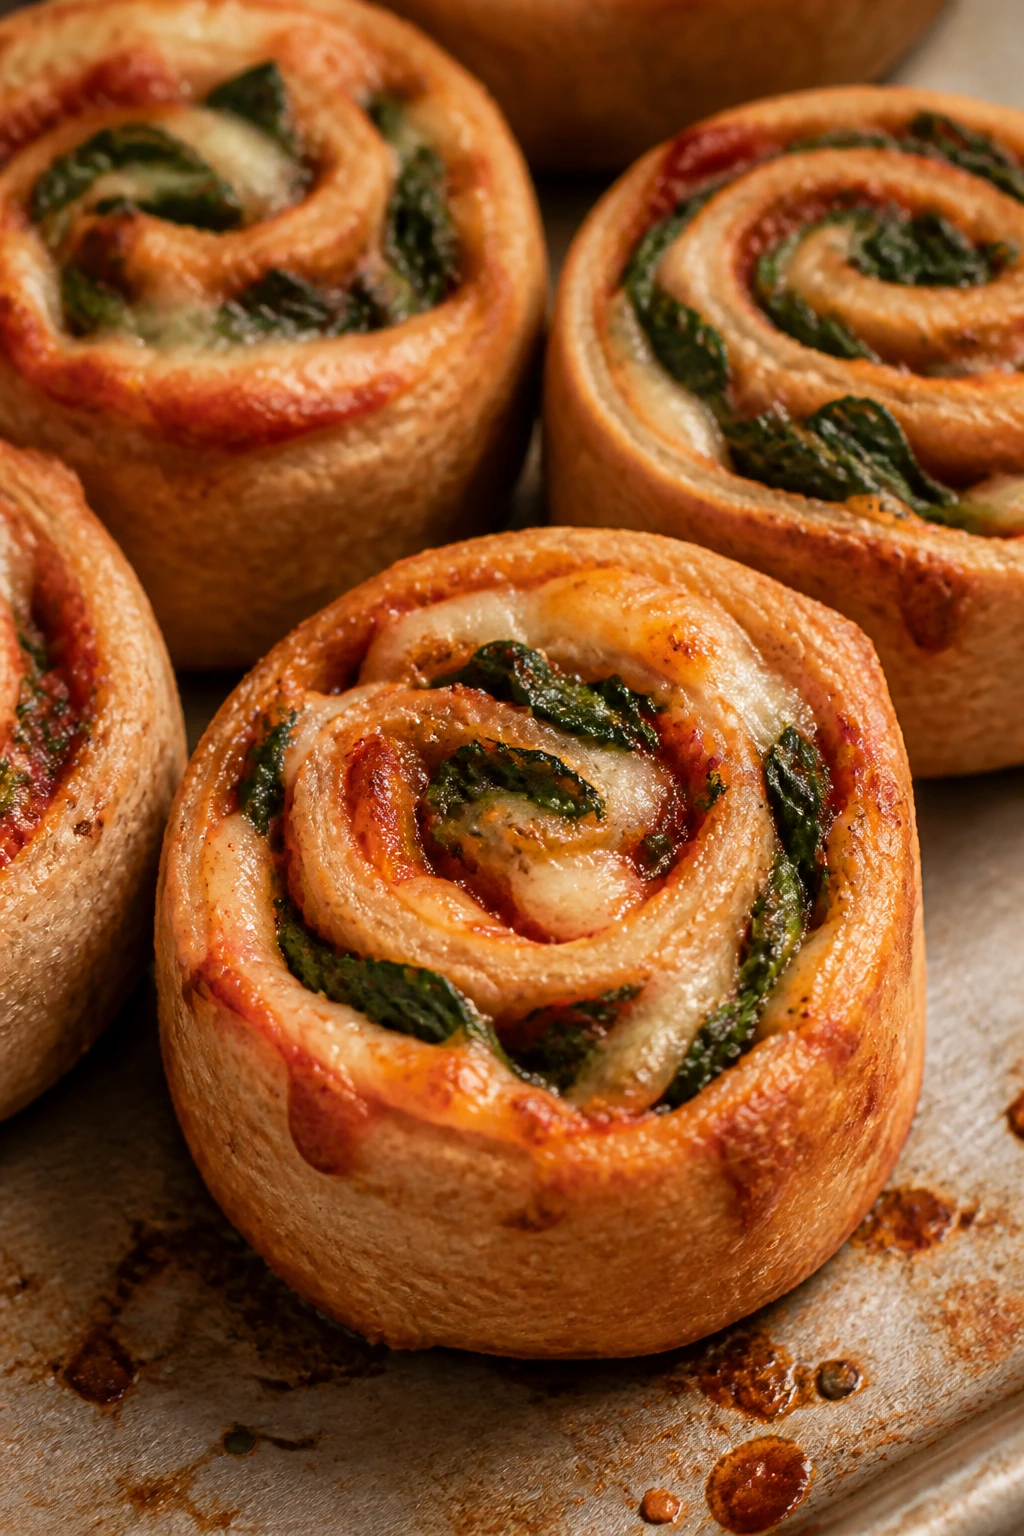
Pizza pinwheels are basically permission to make lunch more fun without turning it into junk. Whole-wheat dough gives them a sturdier bite, spinach sneaks in some green, and the cheese holds the spiral together. They reheat well and still taste fine cold, which is useful.
Why It Works: Pizza dough rolls thin and bakes into neat spirals that travel well. A modest amount of sauce keeps the pinwheels flavorful without making them soggy, and adding spinach or peppers helps the lunch feel less one-dimensional. The shape is what makes it lunchbox-friendly.
Key Ingredients:
- 1 lb pizza dough
- 1/2 cup pizza sauce
- 2 cups shredded mozzarella
- 1 cup chopped spinach
- 1/2 cup mini pepperoni or chopped mushrooms
- 1 teaspoon dried oregano
- 1 egg, optional for brushing
Quick Steps:
- Roll the dough into a rectangle on a floured surface.
- Spread a thin layer of sauce, then top with mozzarella, spinach, pepperoni or mushrooms, and oregano.
- Roll tightly into a log and slice into 1-inch pinwheels.
- Bake at 425°F (220°C) for 12 to 15 minutes until golden.
- Cool on a rack before packing.
Equipment for This Recipe:
- Rolling pin
- Baking sheet
- Sharp knife
- Parchment paper
How to Serve This Dish: Add fruit, carrot sticks, or a small salad cup. Marinara in a dip cup works if you want extra sauce at lunch. The pinwheels look neatest once fully cooled.
Pro Tips for This Recipe:
- Use less sauce than you think.
- Roll the log tightly so the spirals don’t open.
- Let the baked pinwheels cool on a rack.
- If the dough keeps springing back, rest it for 10 minutes.
Variations on This Dish:
- Veggie Pizza Wheels: Use peppers, mushrooms, and olives.
- Ham and Cheese Pinwheels: Swap pepperoni for diced ham.
- Dairy-Free Version: Use a good meltable dairy-free cheese if you like it.
Common Mistakes to Avoid with This Dish:
- Don’t overfill the dough.
- Don’t slice before the log has settled.
- Don’t pack them hot or the cheese goes soft and sticky.
30. Chicken Satay Noodle Boxes
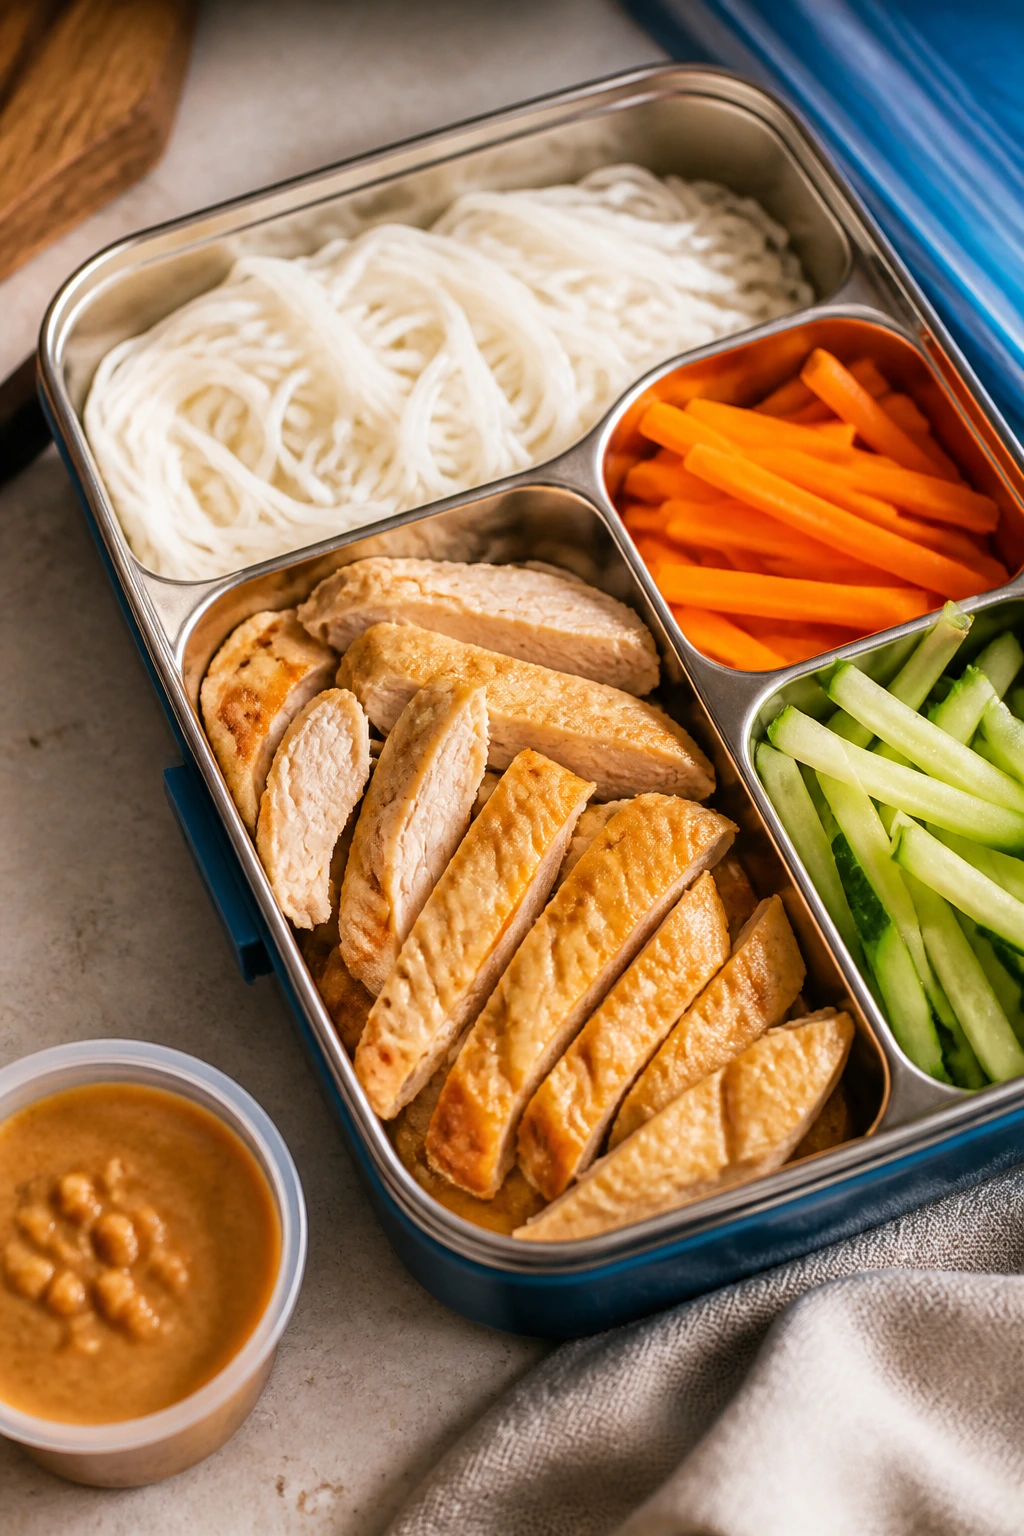
Peanut sauce gives these noodles a deep, savory edge that makes a packed lunch feel like more than a refill job. Chicken, rice noodles, cucumber, and carrot keep the box light enough to eat but substantial enough to carry a long afternoon. It’s one of my favorite cold noodle lunches.
Why It Works: Rice noodles absorb flavor without getting chewy if you rinse them properly. Peanut butter makes the sauce rich, lime keeps it bright, and chicken gives the dish enough protein to count as a full lunch. Packing the sauce separately preserves the texture.
Key Ingredients:
- 8 oz rice noodles
- 2 cups cooked chicken, sliced
- 1 carrot, julienned
- 1 cucumber, julienned
- 1/3 cup peanut butter
- 1 tablespoon lime juice
- 1 tablespoon soy sauce
- 1 teaspoon honey
- Warm water to thin
- Cilantro, optional
Quick Steps:
- Cook the noodles, then rinse them cold and drain well.
- Whisk peanut butter, lime juice, soy sauce, honey, and enough warm water to make a pourable sauce.
- Toss noodles lightly with chicken, carrot, and cucumber.
- Pack the sauce in a separate cup or drizzle a small amount over the noodles.
- Top with cilantro if you like.
Equipment for This Recipe:
- Pot
- Colander
- Mixing bowl
- Small sauce cup
How to Serve This Dish: A few lime wedges on the side brighten the lunch at eating time. If you need a nut-free version, swap sunflower seed butter and keep the same idea. Pack with snap peas or mango if you want more crunch and sweetness.
Pro Tips for This Recipe:
- Thin the sauce until it coats a spoon.
- Rinse the noodles thoroughly so they don’t clump.
- Keep cucumber dry or the box gets watery.
- Add a pinch of chili flakes if the family likes heat.
Variations on This Dish:
- Tofu Satay Noodles: Use baked tofu instead of chicken.
- Beef Satay Bowl: Thin-sliced cooked beef works well too.
- Nut-Free Version: Use sunflower seed butter in the sauce.
Common Mistakes to Avoid with This Dish:
- Don’t pack thick peanut sauce straight onto dry noodles.
- Don’t let the noodles sit in a hot pile after draining.
- Don’t forget the acid; lime keeps the sauce from tasting heavy.
31. Minestrone Thermos Lunch
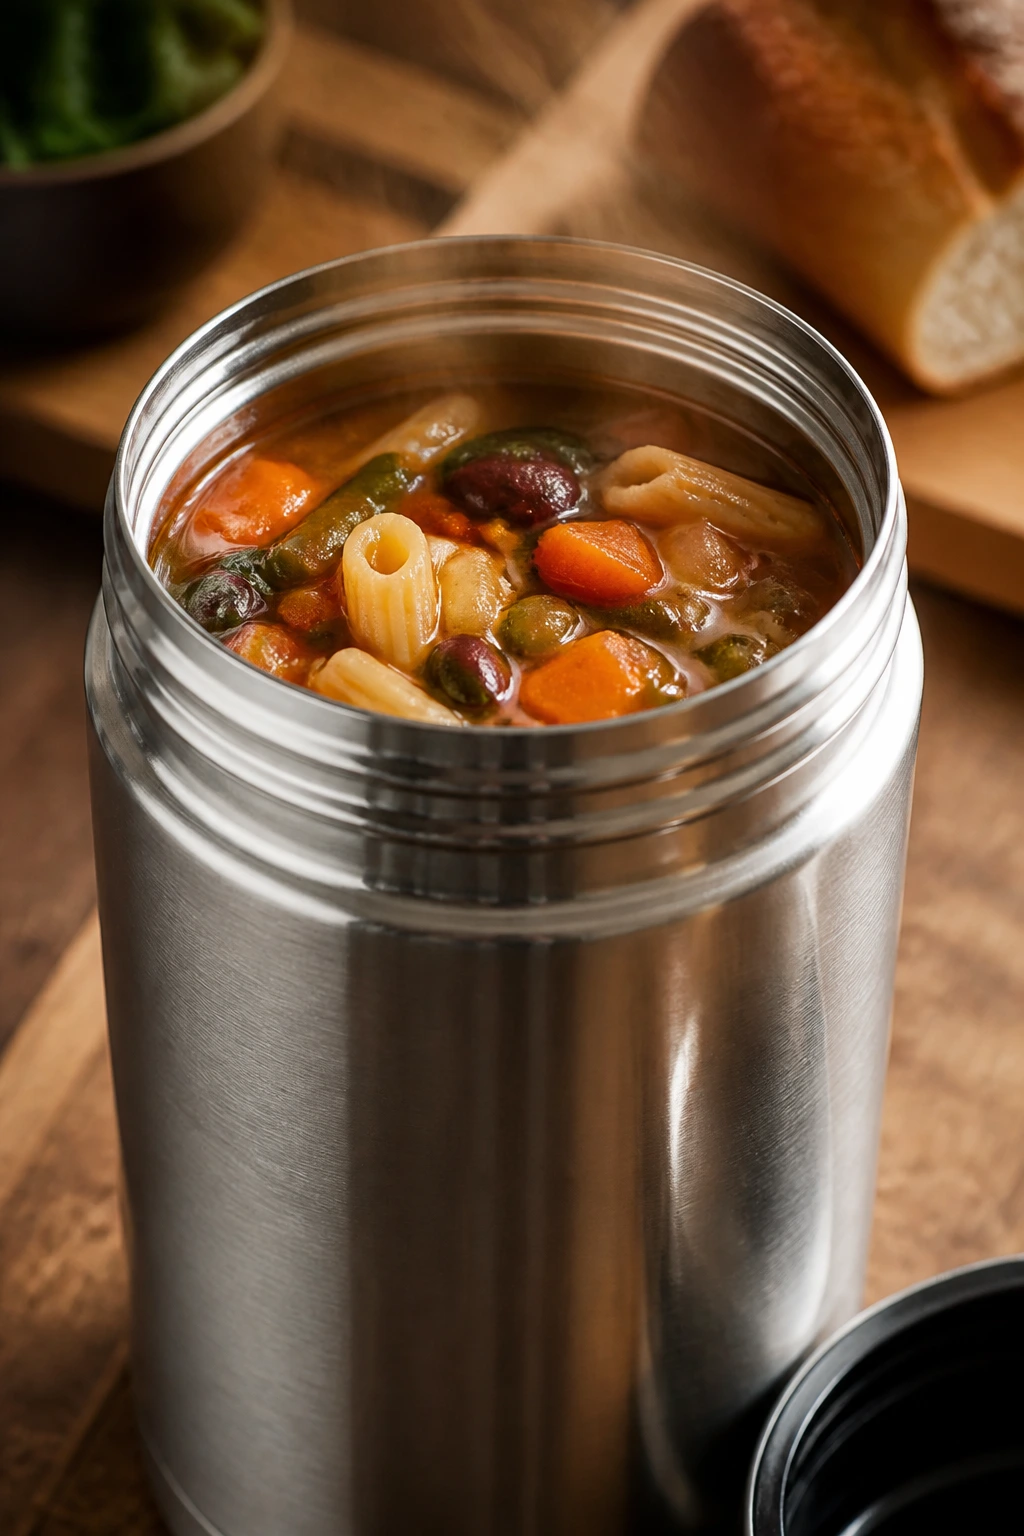
Minestrone is the kind of soup that makes a thermos earn its keep. Beans, pasta, tomatoes, and vegetables all do different jobs, and none of them feels decorative. It’s hearty without being sticky, which is a useful line for lunch food to walk.
Why It Works: Beans and pasta make the soup filling enough to stand on its own, while vegetables give the broth a real base of flavor. If you cook the pasta just until tender and add it near the end, it won’t absorb all the liquid by noon. This is one of the best thermos lunches in the pile.
Key Ingredients:
- 1 tablespoon olive oil
- 1 onion, diced
- 1 carrot, diced
- 1 celery stalk, diced
- 1 zucchini, diced
- 1 can diced tomatoes
- 1 can kidney beans, drained and rinsed
- 4 cups broth
- 1 cup small pasta
- 1 teaspoon Italian seasoning
Quick Steps:
- Sauté onion, carrot, and celery in oil for 5 minutes.
- Add zucchini, tomatoes, broth, and seasoning, then simmer 15 minutes.
- Stir in beans and pasta, and cook until the pasta is just tender.
- Taste and season with salt and pepper.
- Pack hot into a preheated thermos.
Equipment for This Recipe:
- Soup pot
- Thermos
- Ladle
- Knife and cutting board
How to Serve This Dish: Add parmesan crackers, a roll, or a piece of fruit. The soup tastes even better with a spoonful of grated parmesan at the table. Keep the thermos tight, and it does the rest.
Pro Tips for This Recipe:
- Cook the pasta in the soup only until it’s barely done.
- Preheat the thermos with boiling water.
- Use small pasta shapes that are easy to spoon.
- Add a pinch of chili flakes if you want more depth.
Variations on This Dish:
- White Bean Minestrone: Swap kidney beans for cannellini beans.
- Turkey Minestrone: Add cooked turkey for more protein.
- Gluten-Free Version: Use gluten-free pasta and check broth labels.
Common Mistakes to Avoid with This Dish:
- Don’t overcook the pasta.
- Don’t pack the soup lukewarm.
- Don’t forget that a thermos should be filled to the top for best heat retention.
32. Roasted Beet, Orange, and Farro Bowls with Cottage Cheese
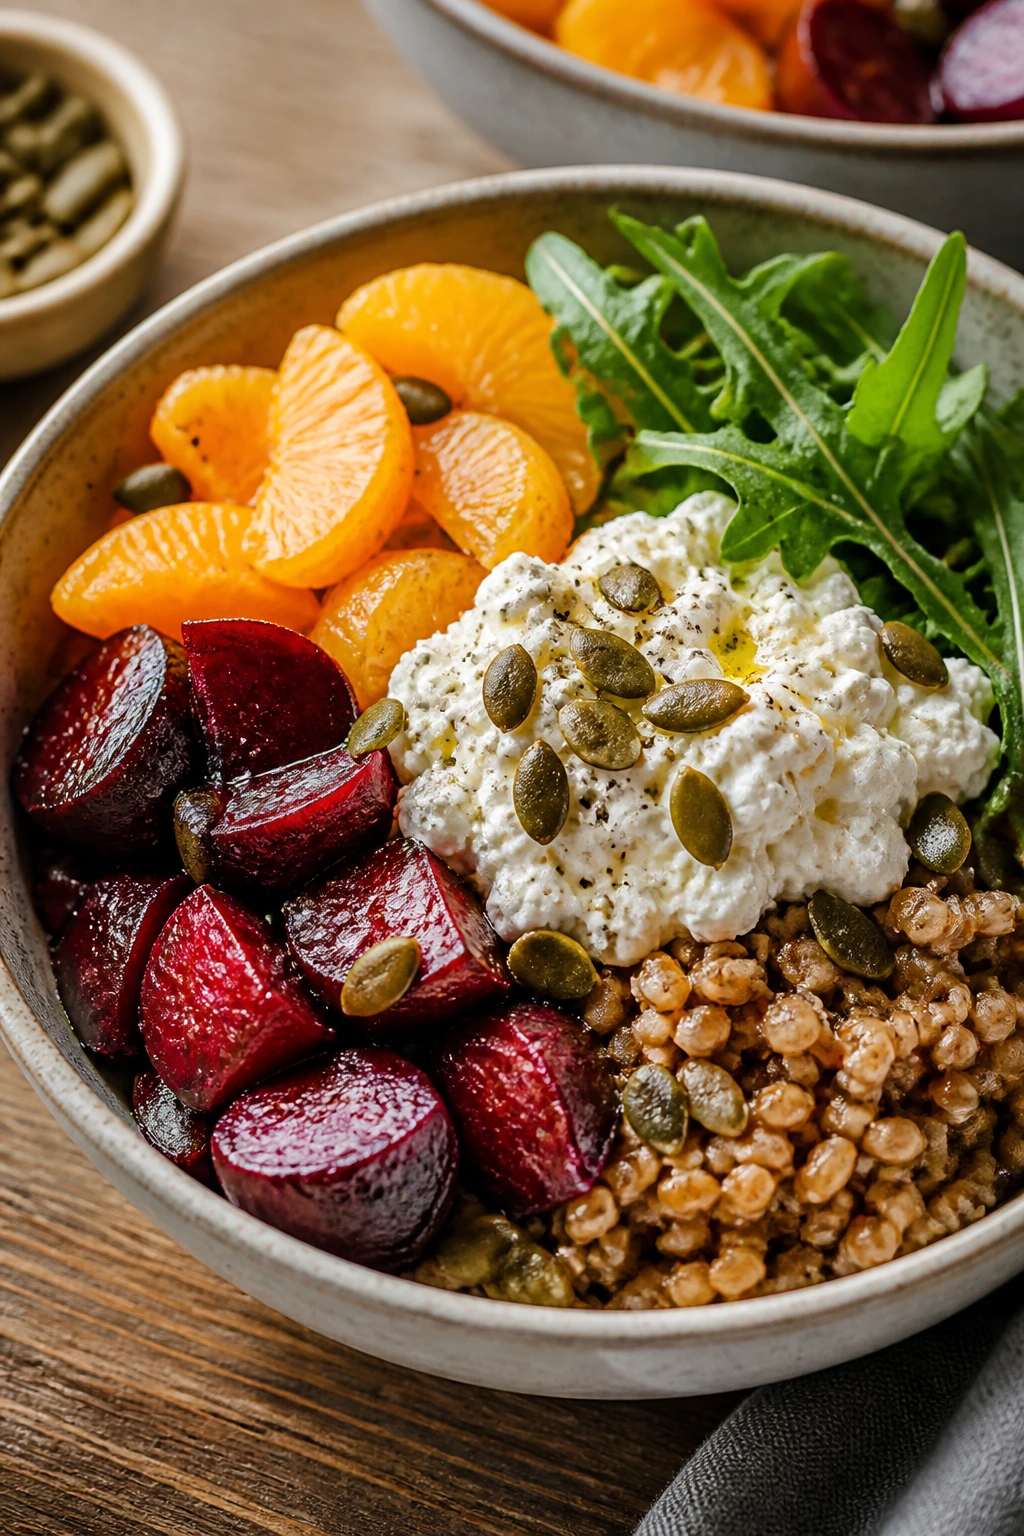
This bowl looks a little more grown-up than some of the others, but kids who like sweet fruit and chewy grains usually take to it quickly. Roasted beets, orange segments, farro, and cottage cheese make a lunch that feels both bright and substantial. The pumpkin seeds are the part that keeps me going back.
Why It Works: Farro has a chewy, nutty bite that survives chilling better than softer grains. Roasted beets bring earthiness, orange adds acid and sweetness, and cottage cheese gives the bowl creamy protein. A little oil and salt tie the whole thing together.
Key Ingredients:
- 1 cup farro
- 2 roasted beets, peeled and chopped
- 2 oranges, segmented
- 1 cup cottage cheese
- 2 cups arugula
- 1/4 cup pumpkin seeds
- 1 tablespoon olive oil
- Salt and pepper
Quick Steps:
- Cook the farro until tender, then cool slightly.
- Roast or use pre-cooked beets and chop them into bite-size pieces.
- Segment the oranges and pat them dry a little.
- Layer farro, beets, arugula, cottage cheese, and seeds in containers.
- Drizzle with olive oil and season lightly before packing.
Equipment for This Recipe:
- Saucepan
- Mixing bowl
- Knife
- Storage containers
How to Serve This Dish: Add whole-grain crackers if you want more crunch. Keep the orange and beets slightly separated if you hate pink grains; I don’t mind the color, but some people do. This one works cold and stays interesting.
Pro Tips for This Recipe:
- Dry the orange segments a bit so they don’t flood the bowl.
- Season the farro while it’s still warm.
- Use pre-cooked beets if you want to save time.
- Keep seeds separate if you want them crisp at lunch.
Variations on This Dish:
- Quinoa Bowl: Swap farro for quinoa.
- Feta Version: Use feta instead of cottage cheese.
- Chicken Add-On: Add sliced chicken for a more dinner-like lunch.
Common Mistakes to Avoid with This Dish:
- Don’t skip salt on the grains.
- Don’t let the oranges sit directly on the farro too long.
- Don’t pack the seeds with wet fruit if you want them crunchy.
33. Mini Salmon Cakes with Dill Yogurt
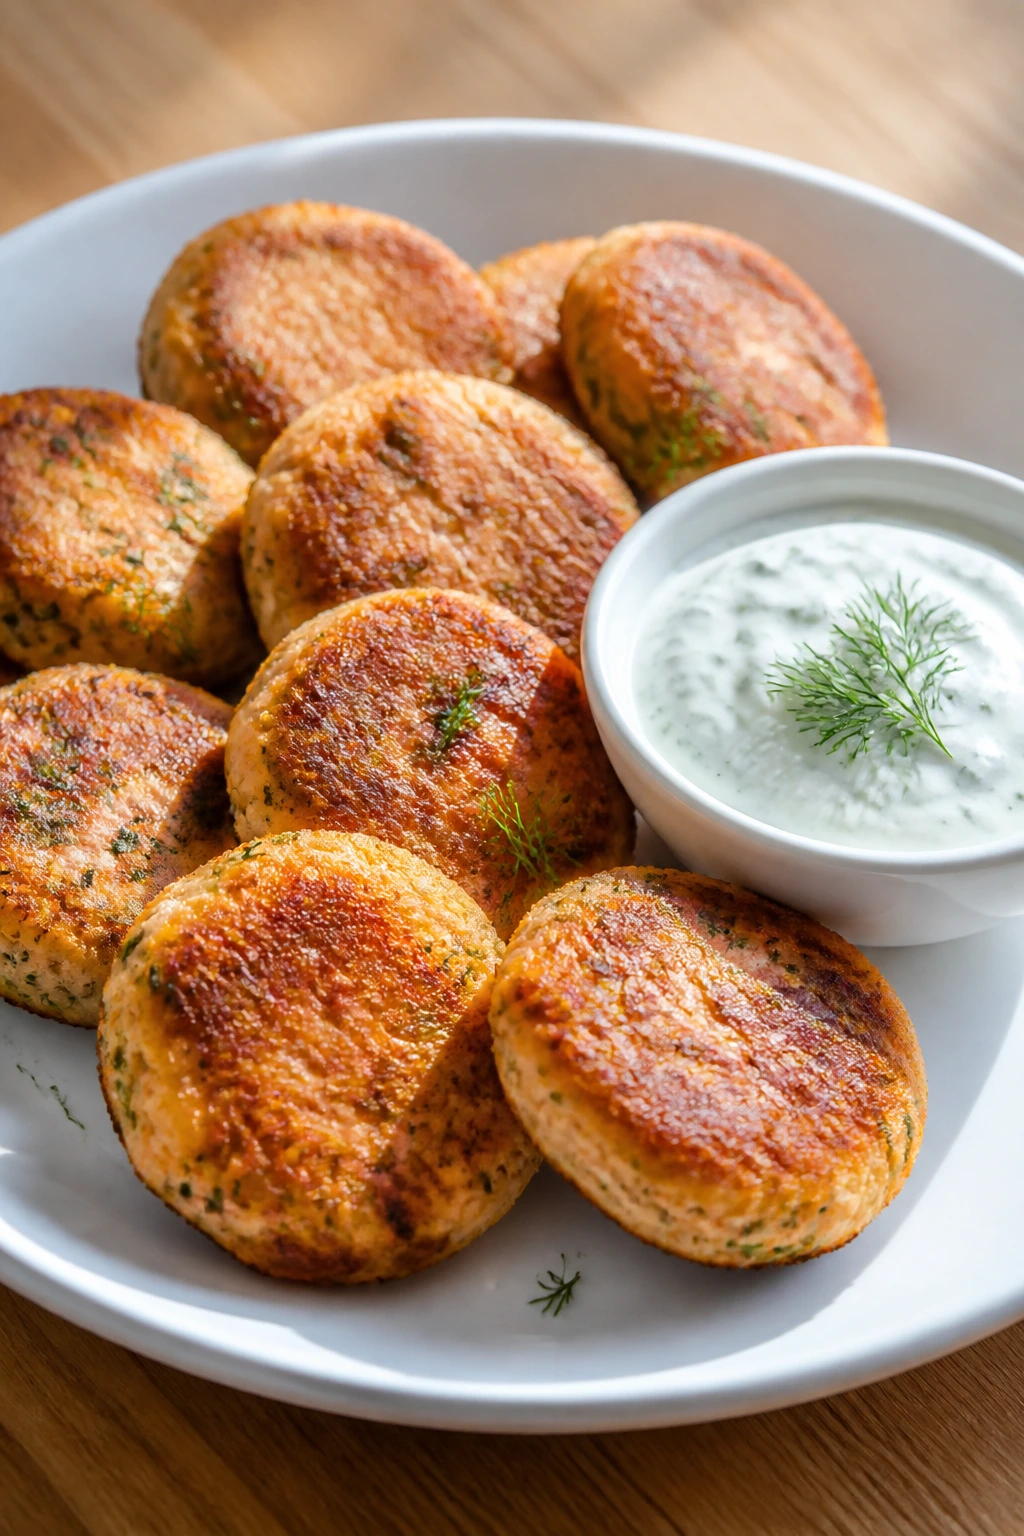
These salmon cakes are one of the easiest ways to make canned salmon feel like a real lunch. They crisp at the edges, stay tender inside, and pair beautifully with a dill yogurt dip that keeps the meal from feeling dry. They’re good cold, which is useful.
Why It Works: Salmon gives the cakes protein and healthy fat, while breadcrumbs and egg bind them into small, neat rounds. Baking or pan-searing sets the exterior, and the yogurt dip adds coolness and a little tang. They hold together better if you chill the mixture before shaping.
Key Ingredients:
- 2 cans salmon, drained
- 1 large egg
- 1/2 cup breadcrumbs
- 2 tablespoons mayonnaise
- 1 tablespoon Dijon mustard
- 1/4 cup chopped scallions
- 1/3 cup plain yogurt
- 1 tablespoon chopped dill
- 1 teaspoon lemon juice
- Salt and pepper
Quick Steps:
- Mix salmon, egg, breadcrumbs, mayo, mustard, scallions, salt, and pepper.
- Shape into small cakes and chill for 10 minutes.
- Bake at 400°F (205°C) for 12 to 14 minutes, or pan-sear until browned.
- Stir yogurt, dill, and lemon juice into a quick dip.
- Cool before packing with the dip separate.
Equipment for This Recipe:
- Mixing bowl
- Baking sheet or skillet
- Spatula
- Small dip cup
How to Serve This Dish: Pack with crackers, cucumber spears, or rice. These cakes also work tucked into a pita with lettuce and the dill sauce. They’re tidy enough for a lunchbox, which is more than I can say for many fish recipes.
Pro Tips for This Recipe:
- Drain the salmon really well.
- Chill the formed cakes so they don’t collapse.
- Keep the dip separate until eating.
- If the mixture feels too loose, add another spoonful of breadcrumbs.
Variations on This Dish:
- Tuna Cakes: Use canned tuna instead of salmon.
- Baked Lemon Version: Add extra lemon zest to the mix.
- Gluten-Free Route: Use almond flour or gluten-free crumbs.
Common Mistakes to Avoid with This Dish:
- Don’t skip chilling the patties.
- Don’t flip them before they’ve set.
- Don’t pack the dip on top of the cakes.
34. BBQ Chicken Corn Salad Bowls
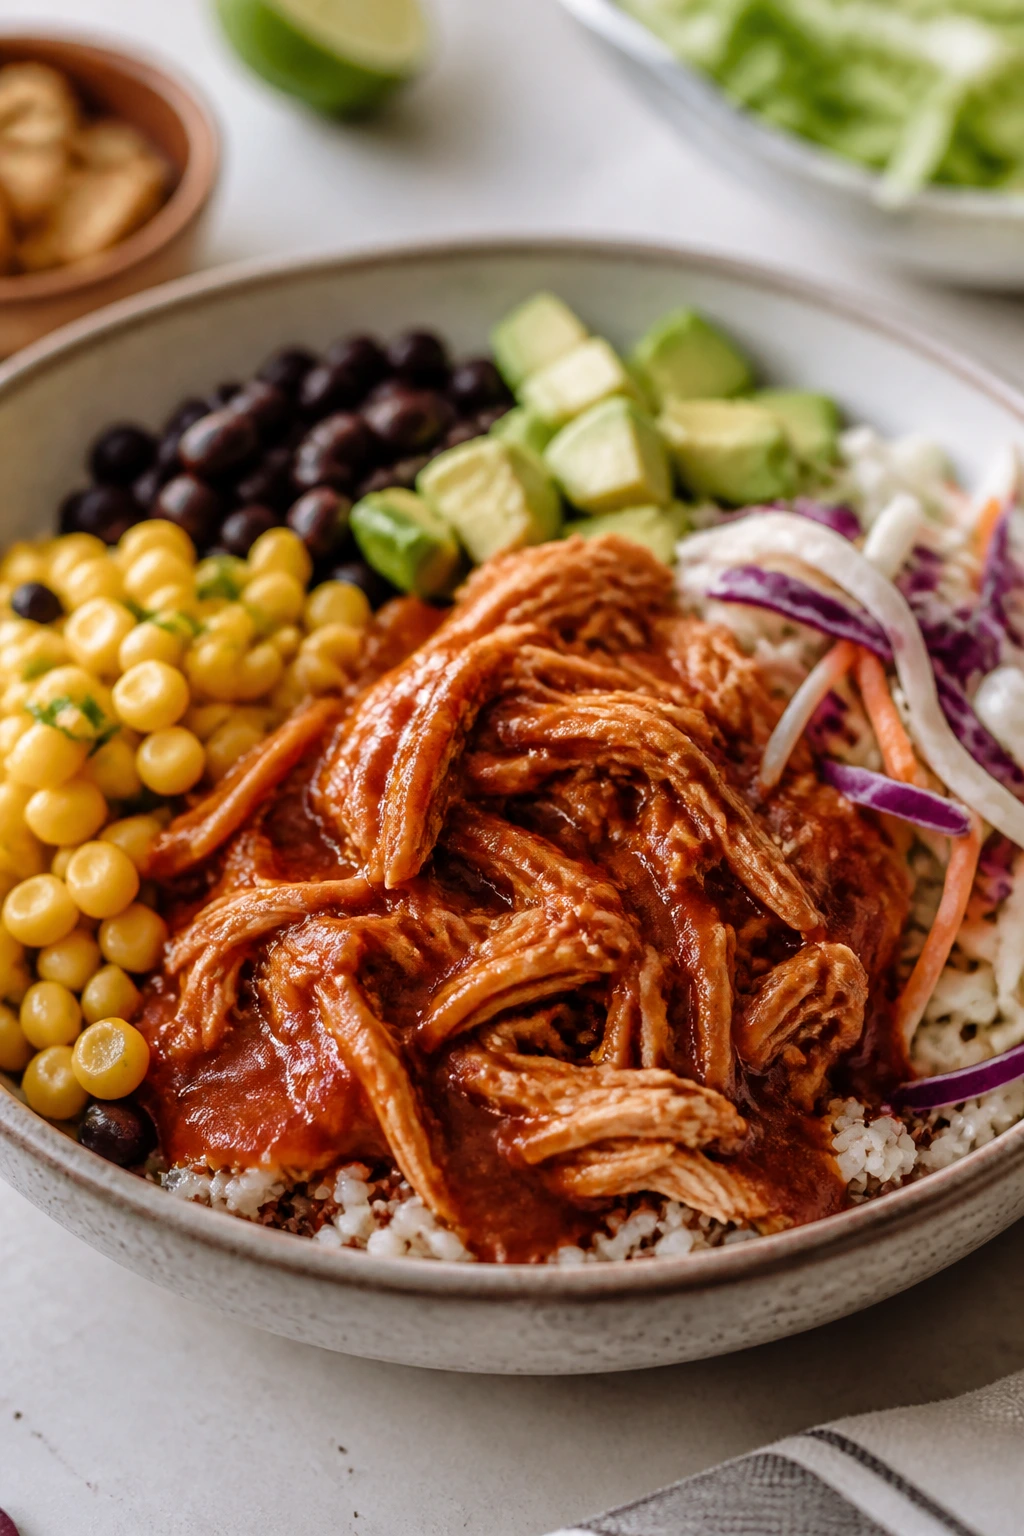
This bowl tastes like cookout leftovers in a good way. BBQ chicken, corn, black beans, cabbage, and avocado give you sweetness, crunch, creaminess, and enough protein to keep the lunch from feeling flimsy. It’s one of the better bowls to make from leftovers on purpose.
Why It Works: Shredded chicken takes on barbecue sauce easily, and cabbage stays crisp far longer than lettuce. Corn and black beans add fiber and body, while rice or quinoa turns it into a proper lunch. Lime keeps the sauce from tasting too heavy.
Key Ingredients:
- 2 cups cooked chicken, shredded
- 1/3 cup BBQ sauce
- 2 cups corn
- 1 can black beans, drained and rinsed
- 2 cups shredded cabbage
- 1 avocado, sliced
- 2 cups cooked rice or quinoa
- 1 tablespoon lime juice
- Salt to taste
Quick Steps:
- Toss the chicken with BBQ sauce until coated.
- Combine corn, black beans, cabbage, and lime juice.
- Divide rice or quinoa into bowls.
- Top with chicken, salad mixture, and avocado.
- Pack avocado separately if the lunch will sit for a while.
Equipment for This Recipe:
- Mixing bowls
- Knife
- Spoon
- Lunch containers
How to Serve This Dish: Add tortilla chips or a small yogurt cup if you want more crunch or creaminess. This one tastes great cold, which makes packing easy. The cabbage does the heavy lifting on texture.
Pro Tips for This Recipe:
- Use a BBQ sauce that isn’t too thin.
- Shred the cabbage finely so it’s easier to eat.
- Keep avocado separate until the last minute.
- Cool the rice before building the bowl.
Variations on This Dish:
- Pulled Pork Bowl: Swap chicken for pork.
- Tofu BBQ Bowl: Use cubed baked tofu.
- Spicy Slaw Version: Add a little chili powder and vinegar to the cabbage.
Common Mistakes to Avoid with This Dish:
- Don’t use lettuce as the base if it has to sit for hours.
- Don’t drown the chicken in sauce.
- Don’t pack avocado against hot grains.
35. Veggie Fried Rice with Cashews
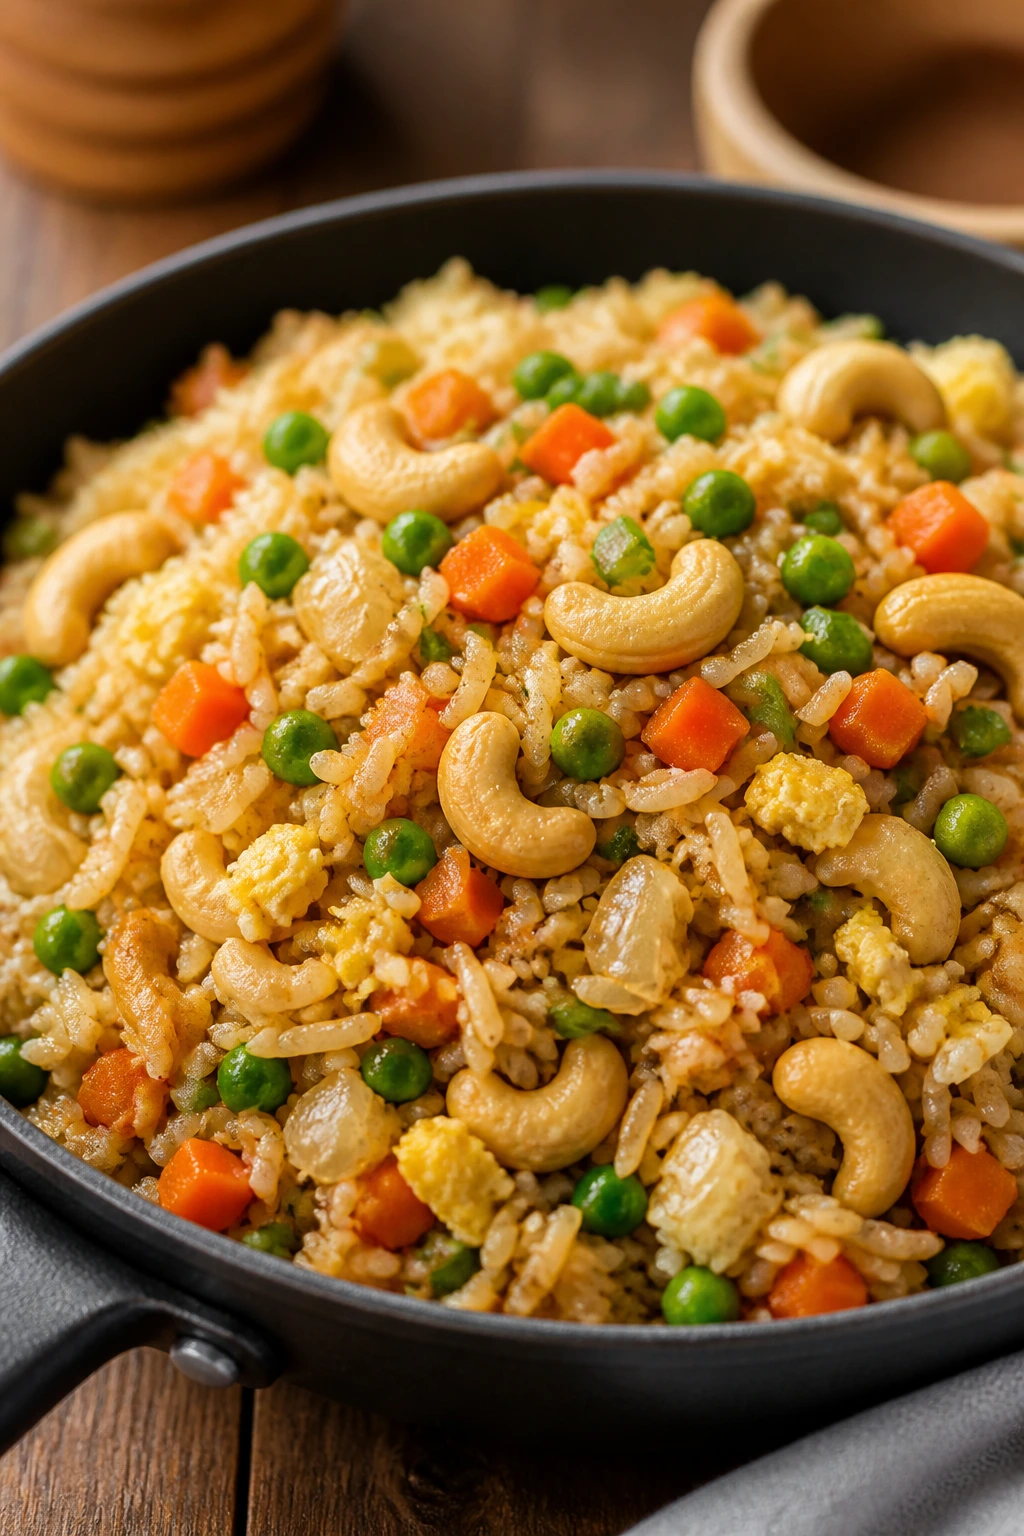
Veggie fried rice is what happens when you stop treating leftover rice like an afterthought. Eggs, peas, carrots, onion, and cashews make it filling, while sesame oil and soy sauce give the whole thing enough flavor to survive a packed lunch. It’s simple, but it’s not boring.
Why It Works: Day-old rice fries instead of steaming, so the grains stay separate. Eggs add richness, vegetables bring color and crunch, and cashews give a hard little snap that makes the lunch feel more finished. This one reheats well and also tastes fine cold.
Key Ingredients:
- 4 cups cooked rice, chilled
- 2 large eggs
- 1 cup peas
- 1 cup diced carrots
- 1 cup diced onion
- 1/2 cup cashews
- 2 tablespoons soy sauce
- 1 tablespoon sesame oil
- 1 tablespoon neutral oil
- 2 green onions, sliced
Quick Steps:
- Scramble the eggs in a hot skillet and set them aside.
- Cook onion, carrots, and peas in neutral oil until crisp-tender.
- Add the rice and break up the clumps.
- Stir in eggs, soy sauce, sesame oil, cashews, and green onions.
- Cool before packing so the rice stays separate.
Equipment for This Recipe:
- Large skillet or wok
- Spatula
- Bowl
- Storage container
How to Serve This Dish: Pack with cucumber slices or mandarin oranges for freshness. If you want a little more protein, add diced chicken or tofu. A spoonful of chili crisp on the side gives adults a stronger finish.
Pro Tips for This Recipe:
- Use rice that’s been chilled.
- Toast the cashews lightly first if you want more flavor.
- Don’t flood the pan with soy sauce.
- Keep the vegetables in small dice so the rice stays easy to eat.
Variations on This Dish:
- Chicken Fried Rice: Add diced cooked chicken.
- Shrimp Fried Rice: Use cooked shrimp.
- Nut-Free Version: Replace cashews with pumpkin seeds or skip them entirely.
Common Mistakes to Avoid with This Dish:
- Don’t use fresh rice from the cooker.
- Don’t crowd the pan.
- Don’t pack it before it cools or the container steams the rice soft.
Why Lunchbox Meals Need a Different Build
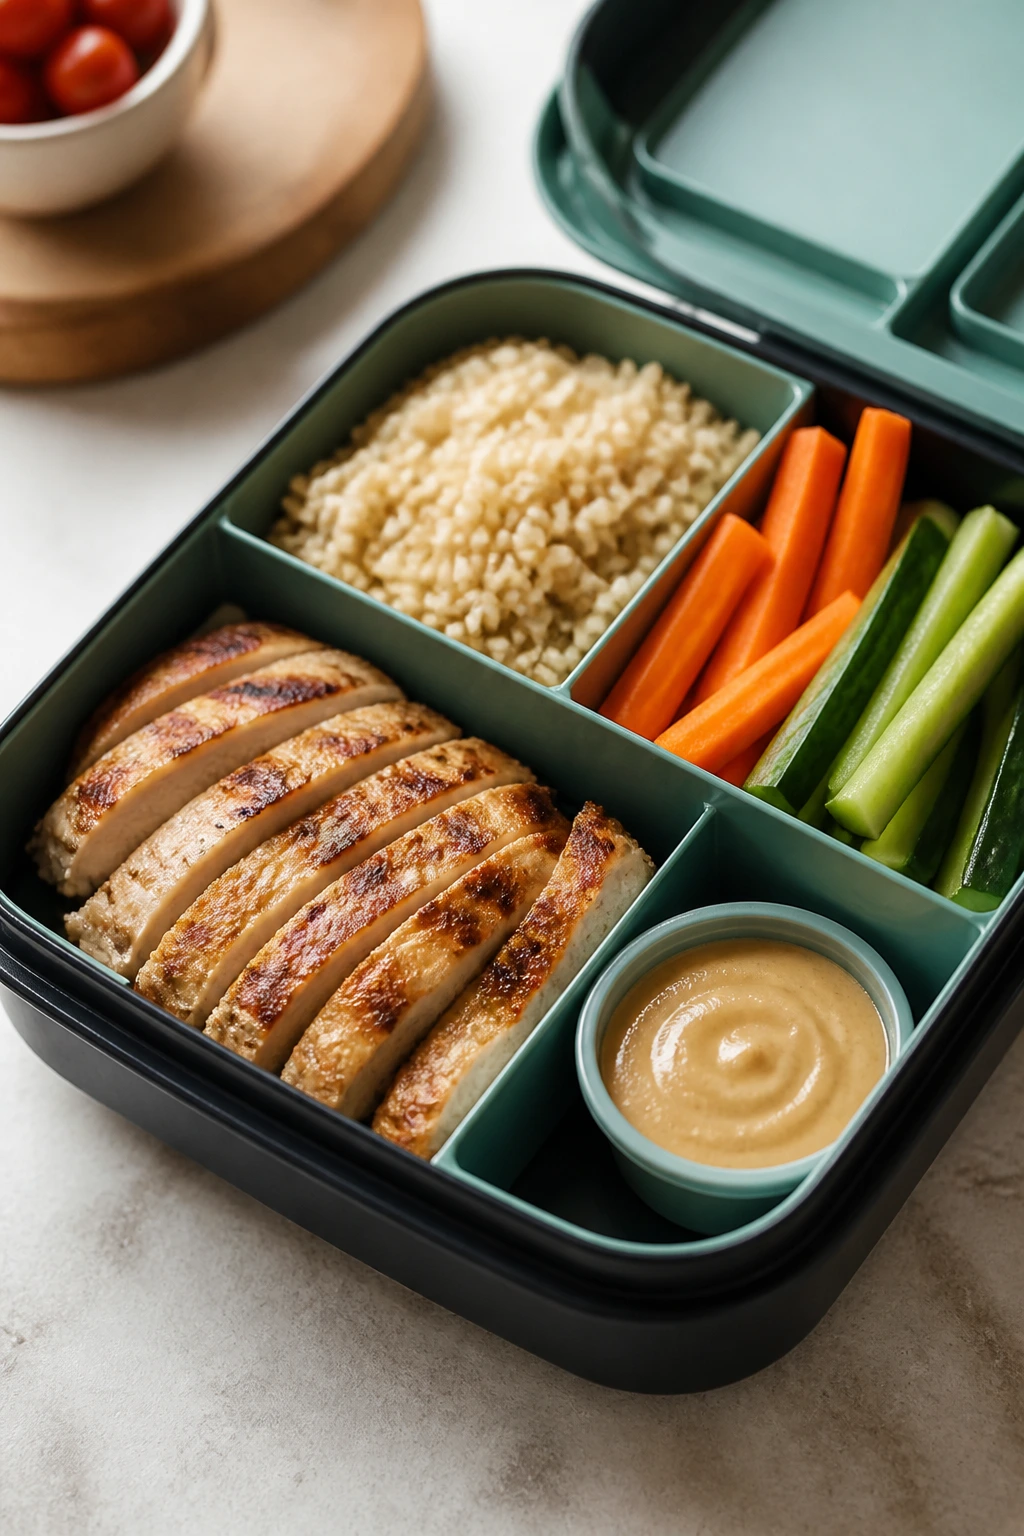
A dinner recipe and a lunchbox recipe are not the same animal. Dinner can lean on steam, last-minute sauce, or a crisp topping that disappears the moment the plate hits the table. A lunchbox meal has to keep working after it has sat, cooled, shifted, and maybe gotten banged around next to a notebook and a water bottle.
The best packed meals usually follow the same quiet formula: one sturdy protein, one grain or bread that can handle moisture, one vegetable with a little snap, and one sauce that stays separate until the end. That’s why chickpeas show up next to pitas, why pasta salads need pasta shapes with ridges, and why thermos soups need a broth that tastes good on its own. The pieces matter. So does the order.
Texture is the big separator. A roasted sweet potato can turn to mush if it’s boxed with salsa too early. A sandwich can turn dull if the filling is watery. A bowl can become excellent if the grains are seasoned first and the fresh stuff goes on top. I’d rather build a lunchbox around those rules than chase any abstract “healthy” label. That word is too vague anyway. What matters is whether the food still tastes like lunch at hour four.
Essential Equipment for These Recipes
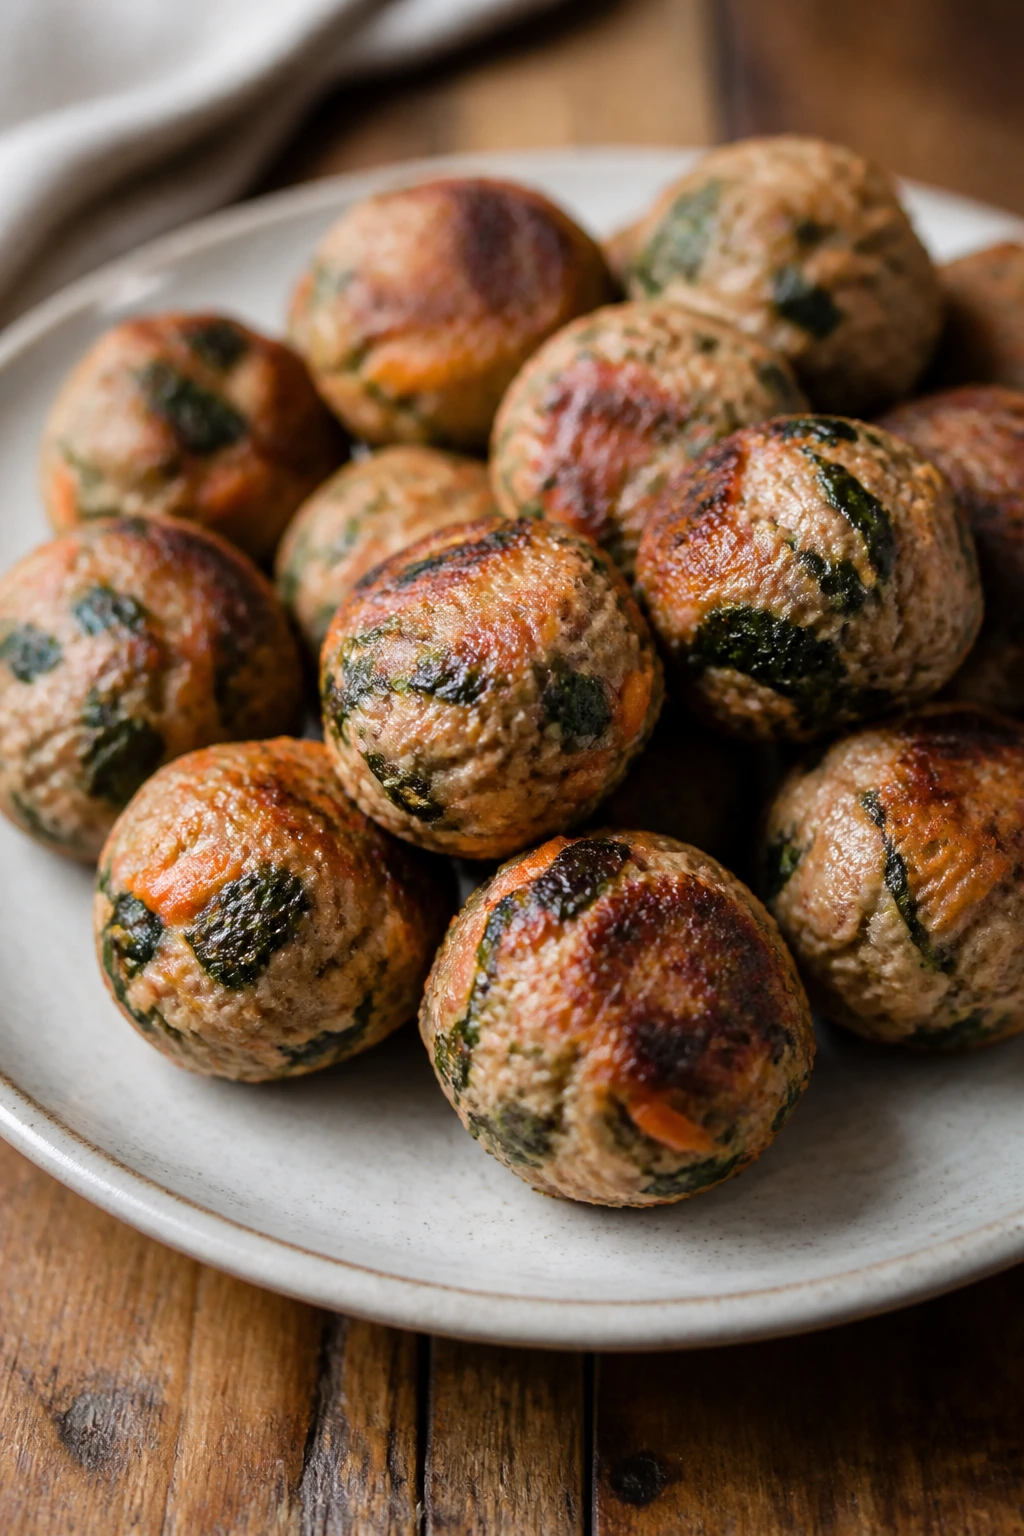
- Rimmed baking sheets: Needed for meatballs, calzones, falafel, pinwheels, and roasted vegetables.
- 12-cup muffin tin: Useful for egg muffins and baked pasta cups.
- Large skillet or wok: The easiest route for fried rice, stir-fries, and quick fillings.
- Soup pot or Dutch oven: Best for lentil soup, chicken noodle soup, and minestrone.
- Mixing bowls in two sizes: One for wet mixtures, one for grains, pasta, or chopped vegetables.
- Sharp knife and cutting board: A lot of these recipes depend on clean dicing so the lunchbox eats neatly.
- Box grater: Handy for carrots, zucchini, and cheese.
- Colander: Needed for pasta, rice, beans, and noodles.
- Meal prep containers with compartments: The best way to keep wet and dry ingredients from fighting each other.
- Small lidded sauce cups: Good for salsa, hummus, yogurt dips, tahini, and soup garnishes.
- Insulated thermos: Worth having for hot soups, fried rice, and noodle lunches.
- Parchment paper: Makes cleanup easier and helps baked items release cleanly.
Smart Shopping and Ingredient Tips
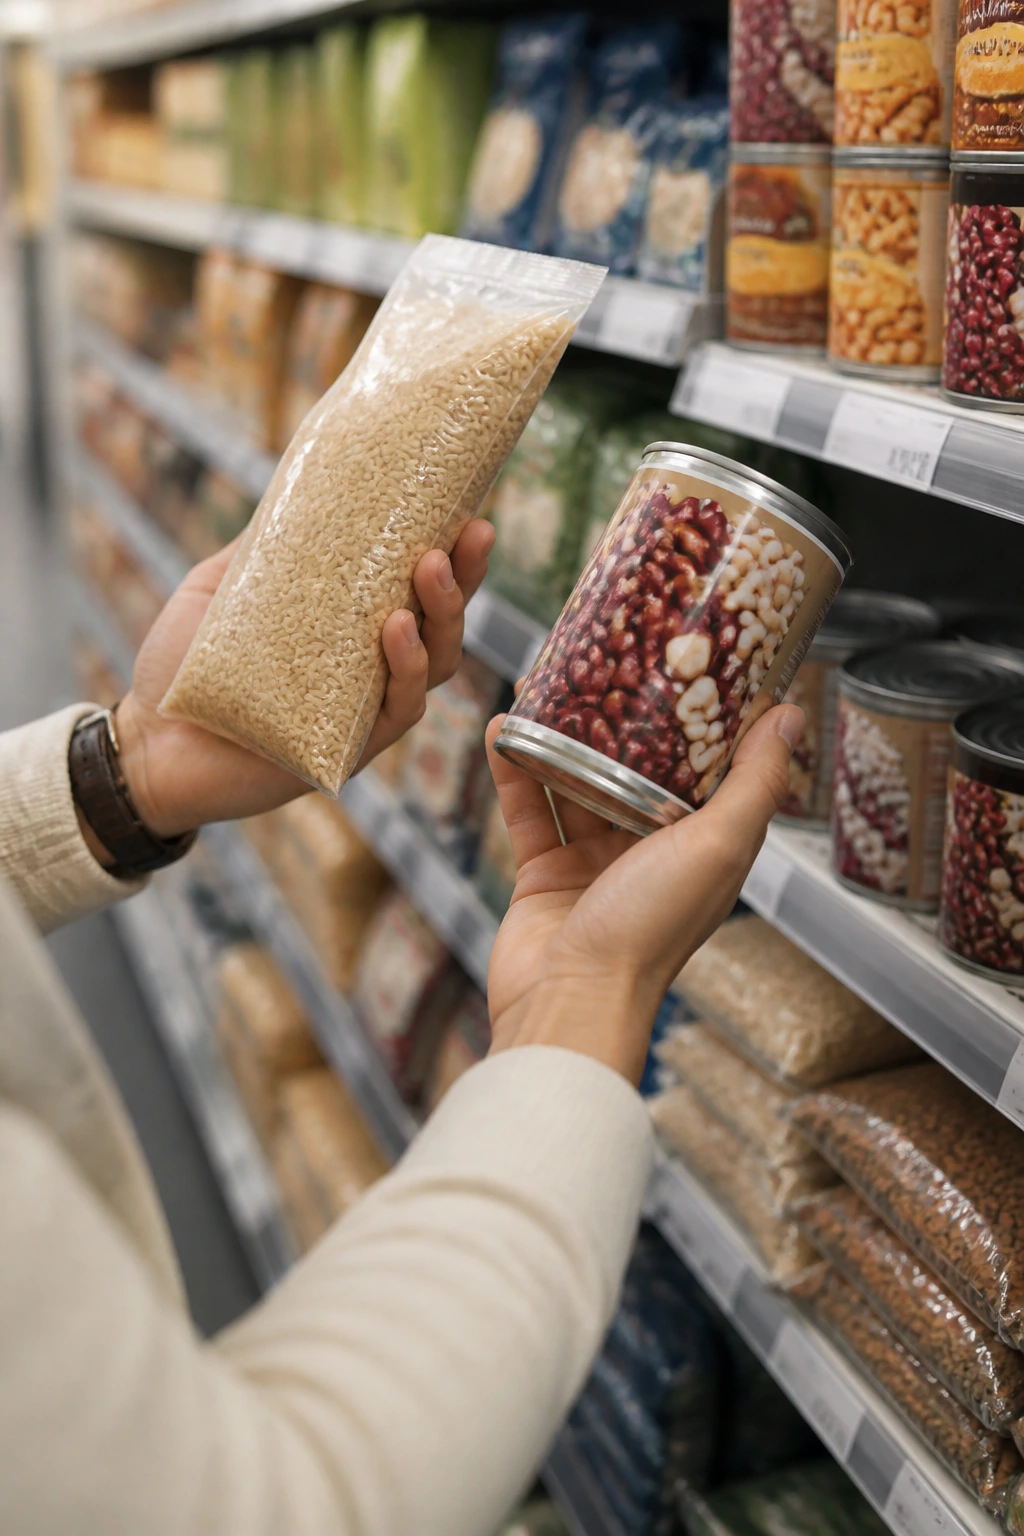
Buy the protein with lunch in mind, not just dinner in mind. Rotisserie chicken is fine for several of these recipes, but choose one that isn’t drowning in seasoning if you plan to use it in wraps or pasta salad. For turkey, look for a package that’s not overly wet in the tray. For salmon, thick fillets stay moister than thin tail pieces, and canned salmon is a good backup when you need speed.
Whole grains matter here more than people think. Brown rice, farro, quinoa, whole-wheat pasta, and whole-grain tortillas all bring a bit more chew and keep the lunch from feeling like a parade of soft foods. If you’re buying bread, choose a loaf with some structure — a squishy sandwich bread can collapse under chicken salad or apple slices. That’s not snobbery. It’s physics.
Canned beans are one of the cheapest ways to build a lunch that actually satisfies. Rinse them well so the canning liquid doesn’t muddy the flavor, and let them drain fully before they go into bowls or wraps. Frozen edamame, peas, and corn are also worth keeping around because they thaw quickly and hold their shape better than overcooked fresh versions. For yogurt-based dressings and dips, use plain Greek yogurt with enough body to stay put.
Vegetables should be chosen for resilience. Carrots, cucumbers, bell peppers, cabbage, broccoli, spinach, beets, and celery all work because they either stay crisp or they wilt in a controlled way. Soft lettuce and watery tomatoes can still be used, but they need discipline: dry them well and keep them away from bread until the last minute. For fruit, apples, oranges, grapes, pears, and berries travel better than peaches or sliced melon, which can leak and soften everything around them.
How to Serve These Recipes
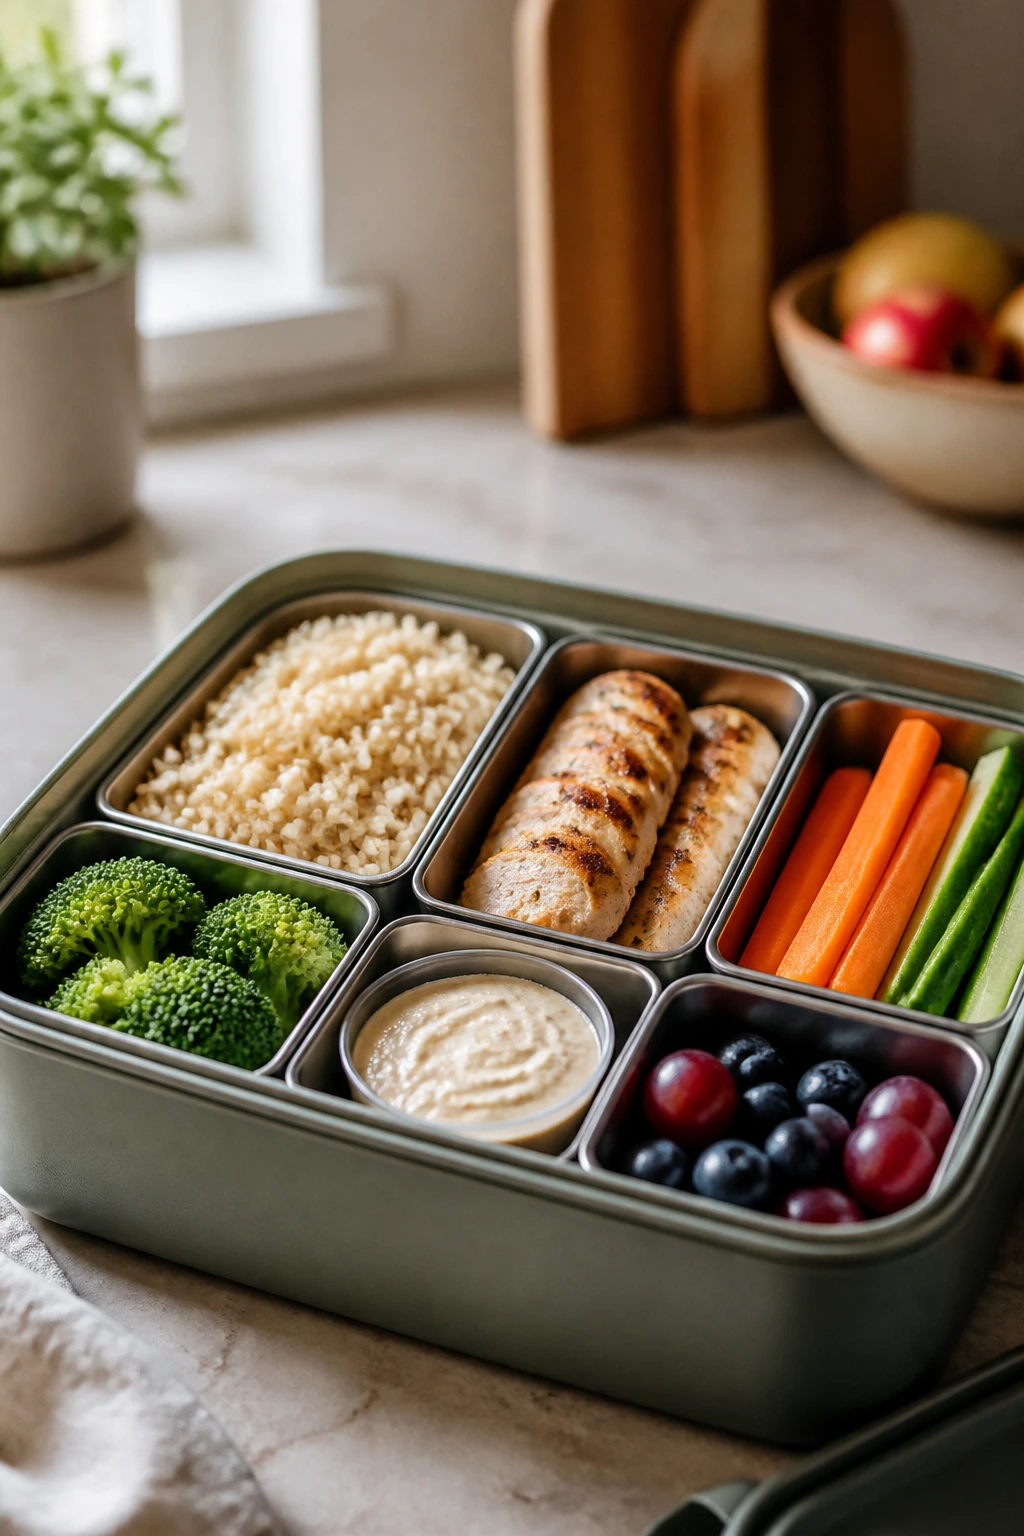
Presentation: Pack lunchboxes in sections so the food looks intentional instead of crowded. A neat row of vegetables, a pile of grain or pasta, and a separate dip cup make the meal feel calmer when the lid opens. For kids, cut wraps, calzones, and sandwiches into smaller pieces; for adults, keep the portions a little looser and let the box look abundant.
Accompaniments: Most of these recipes pair well with one crisp fruit, one crunchy vegetable, and one small extra like crackers, pita, pretzels, or a boiled egg. A thermos lunch wants bread or a roll beside it. A cold bowl usually benefits from something with snap — cucumber, carrot sticks, snap peas, or apple wedges. Don’t overcomplicate the sides. The main meal is already doing work.
Portions: For younger kids, 1 meatball recipe or 1 egg muffin with fruit is often enough. For older kids and adults, aim for 1 to 1½ cups of the main lunchbox meal plus a side or two. Grain bowls and pasta salads scale easily, while wraps and pinwheels usually need extra fruit or vegetables to feel complete. If someone is ravenous after sports or a long school day, make the protein portion larger, not the bread.
Beverage Pairing: Water is the default, but milk, unsweetened iced tea, or sparkling water with citrus all work well with these meals. Soup lunches pair nicely with plain water and a piece of fruit. Bowls and wraps like something cold and clean to drink, not a sugary bottle that makes the rest of the meal taste heavy.
Additional Tips and Flavor Boosters
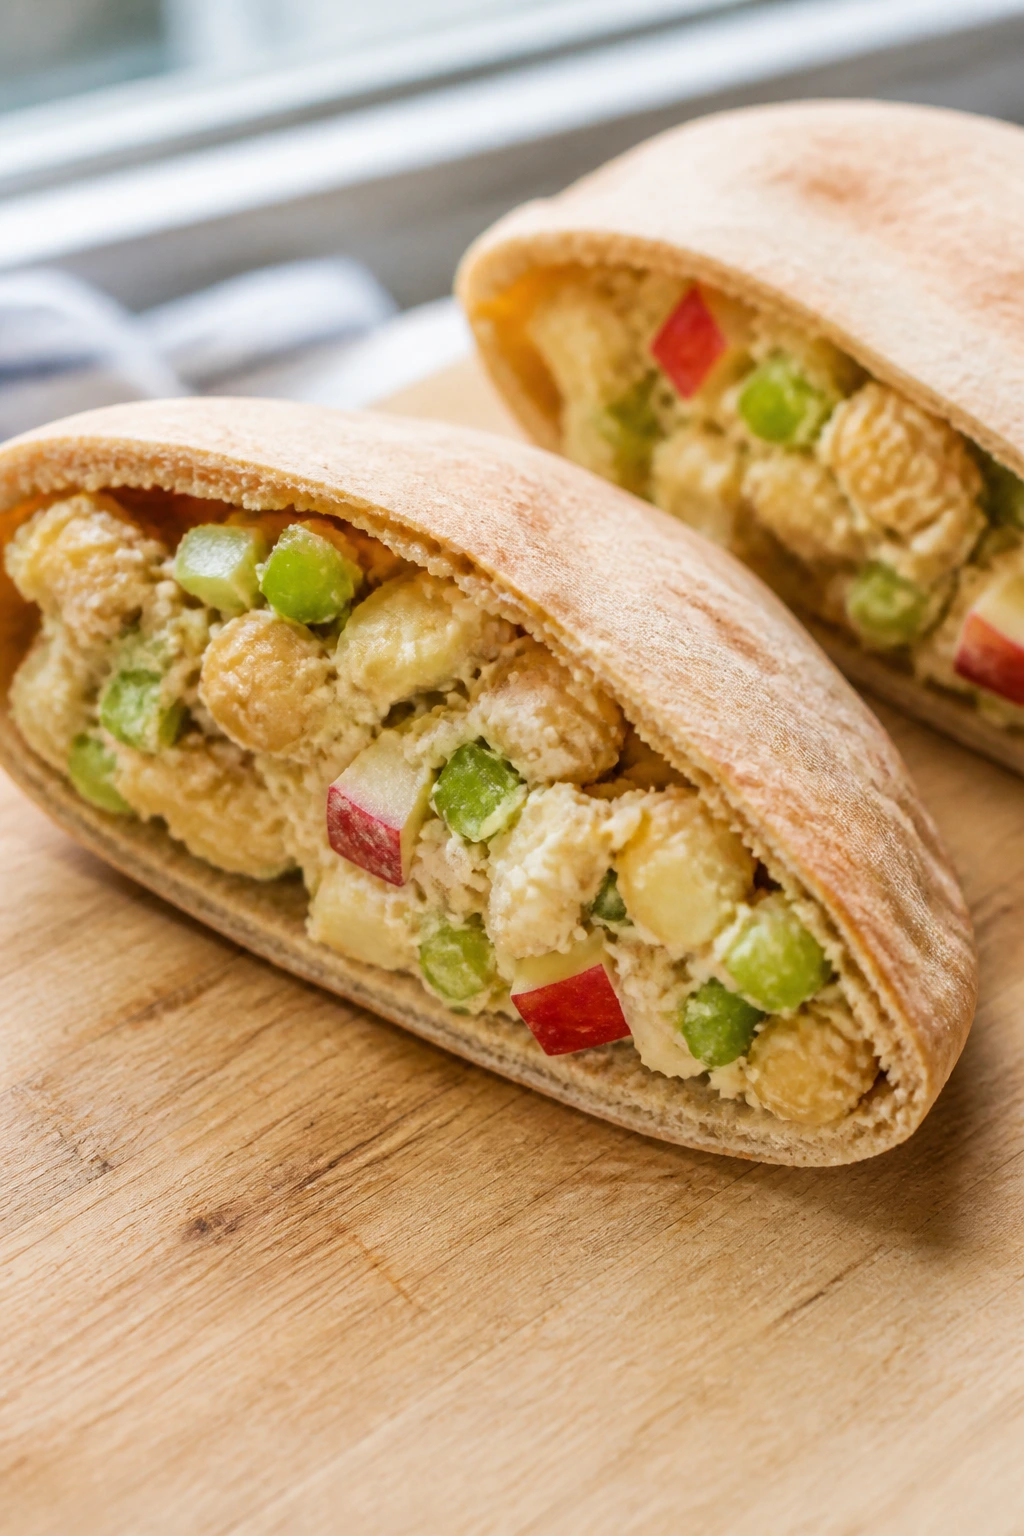
Flavor Enhancement: A spoonful of pesto, chimichurri, salsa, or tahini can wake up a lunchbox meal that tastes a little sleepy after chilling. Lemon juice matters too. Cold food often needs more acid than you think. If a bowl tastes flat on day two, a squeeze of citrus or a tiny splash of vinegar usually fixes it faster than more salt.
Customization: Swap grains freely. Rice can become quinoa, farro, or couscous; tortillas can become pita; pasta can become a bean-based version if that’s what you keep on hand. If you need more protein, add a hard-boiled egg, extra beans, or a little more chicken instead of piling on cheese. That keeps the meal balanced instead of just heavier.
Serving Suggestions: Toasted seeds, sliced herbs, chopped scallions, and small containers of dip make packed lunches feel finished. A few pumpkin seeds on a grain bowl or a pinch of sesame seeds over noodles changes the texture more than people expect. I also like to keep an extra lemon wedge or lime wedge in the box for older kids and adults.
Make-It-Yours: For nut-free boxes, use sunflower seeds, pumpkin seeds, hummus, or yogurt-based dips instead of nut butter sauces. For dairy-free versions, lean on olive oil, avocado, and bean spreads. For gluten-free lunches, rice, quinoa, corn tortillas, and gluten-free pasta carry the load without much trouble. For picky eaters, keep sauces separate and build the box from the food they already trust.
Make-Ahead, Storage, and Reheating Guidance

Most of these meals keep well in the fridge for 3 to 4 days if they’re stored in airtight containers. Pasta salads, grain bowls, meatballs, roasted vegetables, egg muffins, and quesadilla wedges all fit that window. Soups and stews can also last 3 to 4 days, though the noodles in chicken soup and minestrone are best when they’re cooked just shy of done so they don’t swell into mush.
Some items freeze better than others. Meatballs, salmon cakes, calzones, egg muffins, sloppy joe filling, and burrito bites can usually be frozen for up to 2 months if wrapped tightly and cooled first. Grain bowls with fresh vegetables usually don’t freeze well, and lunchbox lettuce should never go into the freezer unless you enjoy regret. Label the containers. Future-you will not remember what the foil packet in the back of the freezer is.
For reheating, use the oven or toaster oven for anything that should stay crisp: calzones, pinwheels, quesadillas, meatballs, and salmon cakes warm up best at 350°F (175°C) for 8 to 12 minutes. Microwave-friendly meals like fried rice, pasta, and soup can be reheated in short bursts, stirring once or twice so the edges don’t go rubbery. Add a spoonful of water or broth to rice and pasta before heating if they look dry.
Lunchbox packing changes the texture game. Cool hot food before sealing it, or condensation will soften everything. Keep dips, sauces, and dressings in separate cups whenever you can. For thermos lunches, preheat the thermos with boiling water, then fill it with steaming food so it stays properly hot until lunch. That tiny habit fixes a lot of disappointing soup.
Variations and Adaptations to Try
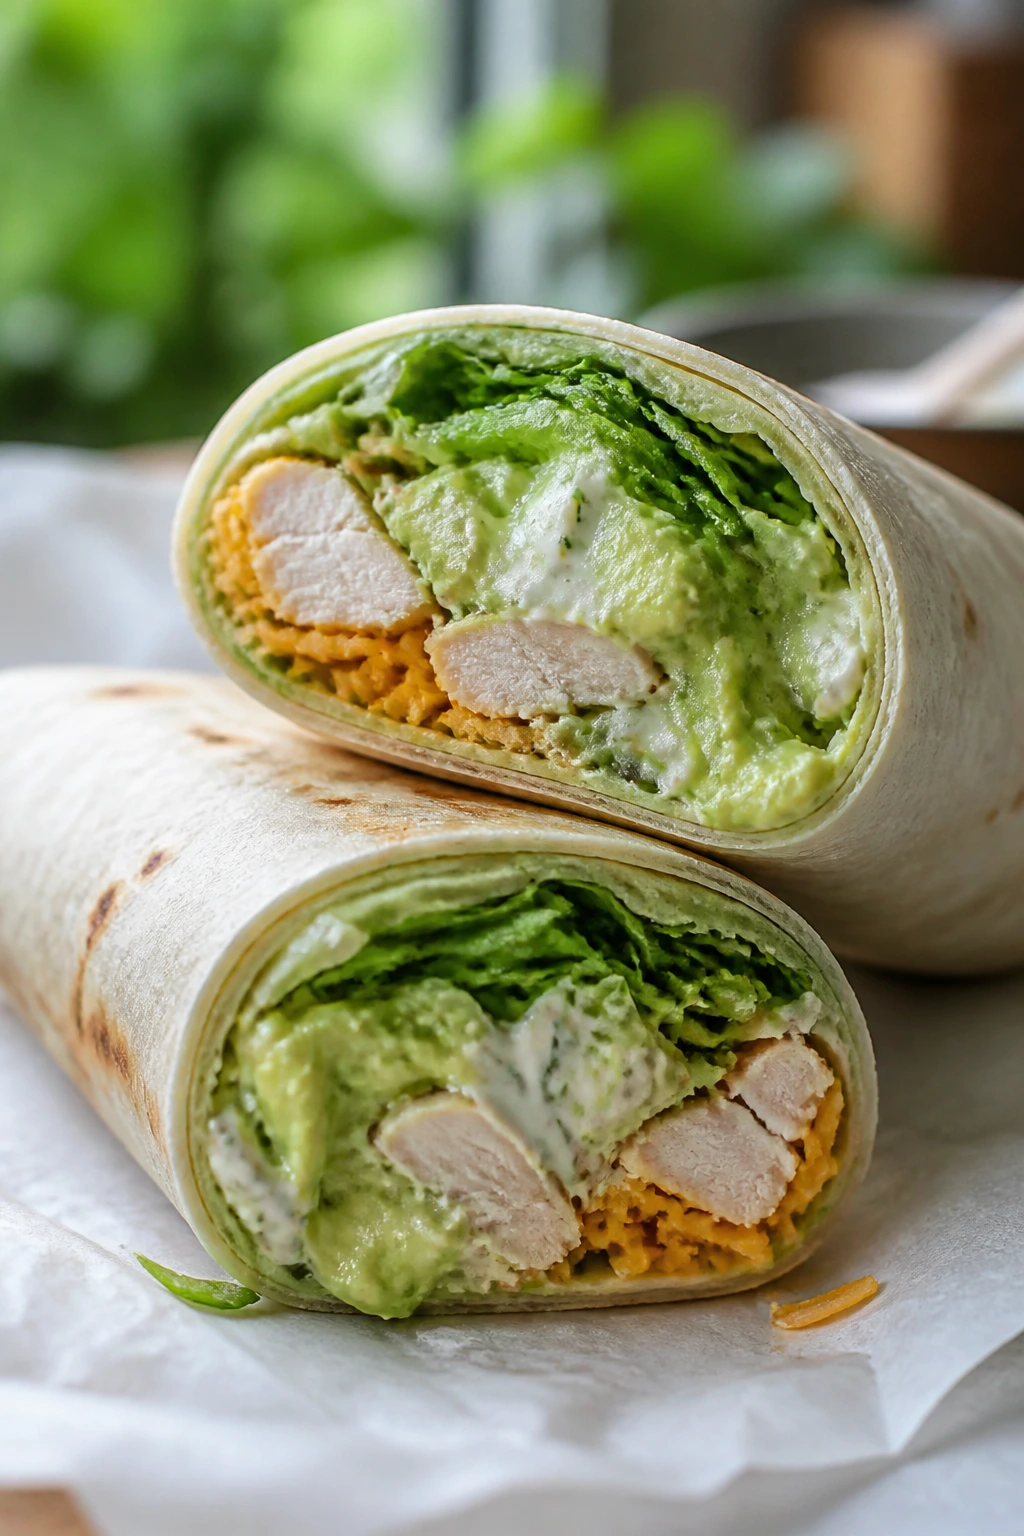
Gluten-Free Lunchbox Lane: Swap in gluten-free tortillas, rice, quinoa, corn tortillas, or gluten-free pasta where needed. This works cleanly for taco bowls, fried rice, soup, and salmon bowls, and it usually takes only one ingredient change to keep the meal intact.
Nut-Free School Boxes: Use sunflower seed butter, tahini, yogurt dips, hummus, or pumpkin seeds in place of peanuts and nuts. The satay noodles and apple-walnut sandwich need the most adjustment here, but both still work with simple swaps and a little attention to texture.
Dairy-Free Lunches That Still Feel Full: Hummus, avocado, olive oil dressings, and bean spreads carry a lot of weight in these recipes. You can skip the cheese in wraps, bowls, and pasta salads and still end up with something satisfying if you season the vegetables and grains properly.
Vegetarian and Vegan Turns: Chickpeas, black beans, lentils, tofu, falafel, quinoa, and egg-free binders can cover almost the whole list. The trick is not pretending vegetables alone do the job; pair them with a grain, a bean, and a sauce that tastes good cold.
Thermos-First Meals: Soups, fried rice, chicken noodle soup, minestrone, and even saucy meatball dishes work well when they’re packed hot in a preheated thermos. This approach is especially useful when you need one lunch to feel warm without building an entire reheating plan around it.
Picky-Eater Boxes: Keep sauces separate, cut everything into familiar shapes, and avoid piling too many mixed textures into one compartment. Pinwheels, egg muffins, meatballs, and quesadilla wedges usually win here because they’re easy to recognize and even easier to eat.
Common Mistakes to Avoid with These Recipes
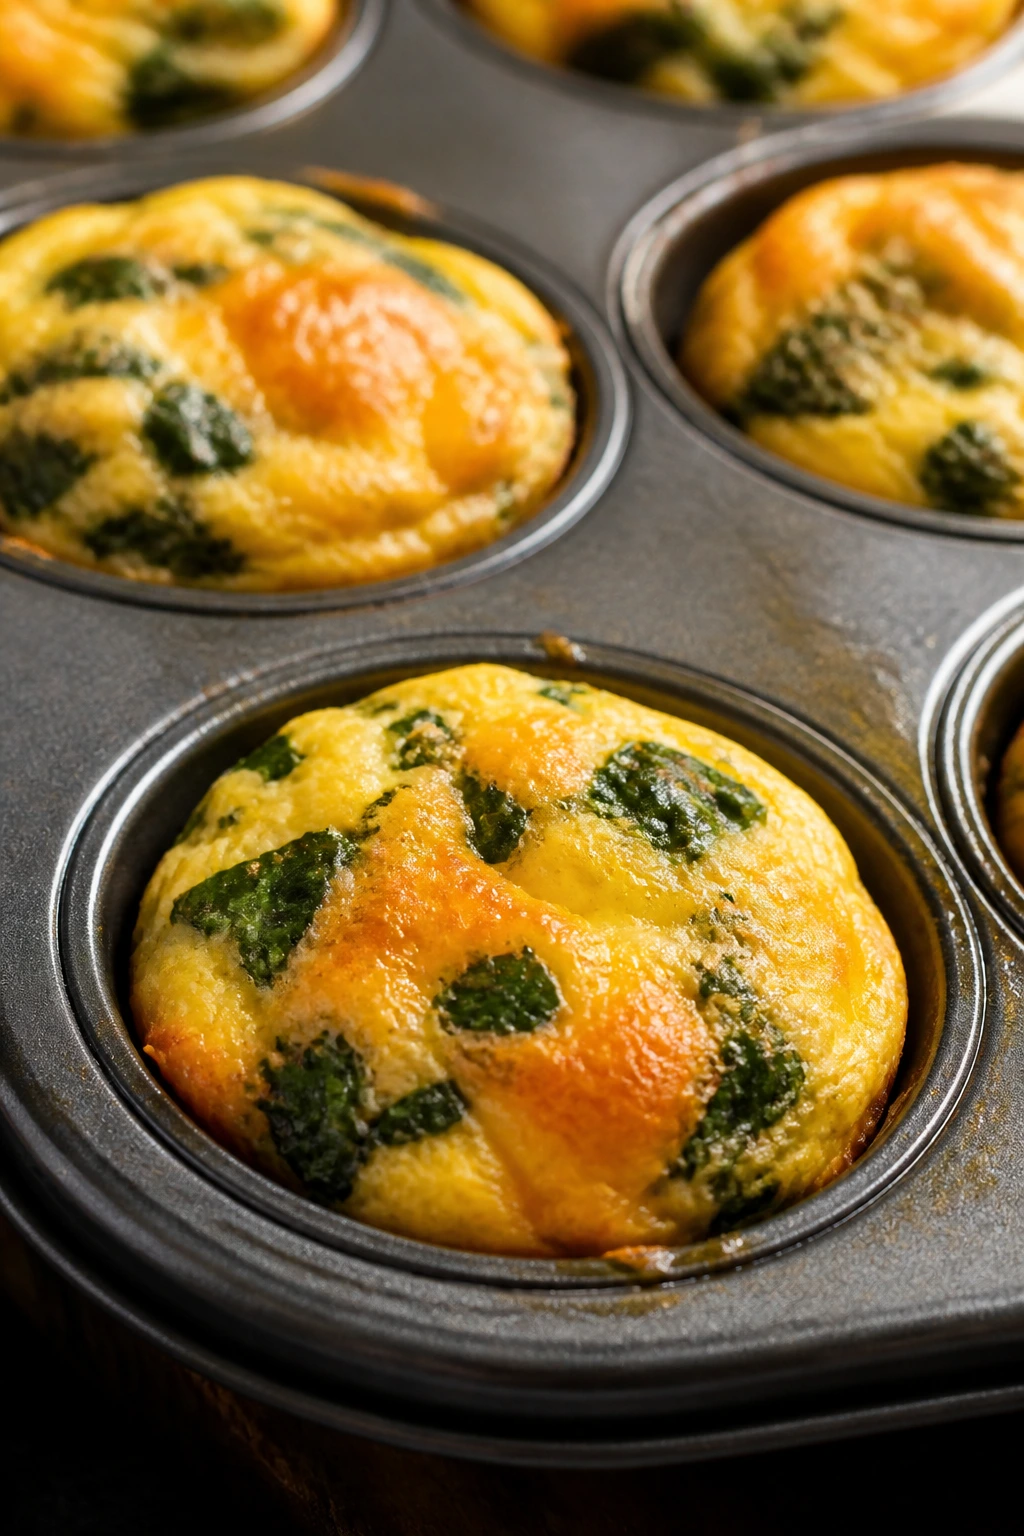
Packing hot food straight into a sealed box is the fastest way to ruin texture. Steam has nowhere to go, so bread softens, roasted vegetables go limp, and fried foods lose their edges. Cool the food first. It’s boring advice. It also works.
Overloading a lunchbox with wet ingredients is another problem that shows up fast. Salsa, tomatoes, dressings, yogurt dips, and avocado all have a place, but they should not be allowed to sit against bread, pasta, or tortillas for hours. Separate cups are not fussy. They’re insurance.
Under-seasoning cold food is a sneaky mistake. Food that tastes fine in the skillet can taste dull after it cools, so grains, beans, and proteins often need a little more salt, acid, or herb flavor than you think. Lemon juice, lime, vinegar, dill, parsley, mustard, and scallions all do real work here.
Another common error is choosing ingredients that collapse by noon. Tender lettuce, watery tomatoes, thin sauces, and flimsy sandwich bread all create lunchbox disappointment. Use sturdier vegetables, thicker breads, short pasta shapes, and sauces with enough body to stay where you put them. The meal will hold together, and so will the mood around it.
Skipping the chill time can also cause trouble. Wraps slice better after a short rest. Meatballs stay juicier when they cool before packing. Pasta salads and chicken salad taste cleaner after the flavors settle. The lunchbox rewards patience more than it rewards speed.
Frequently Asked Questions
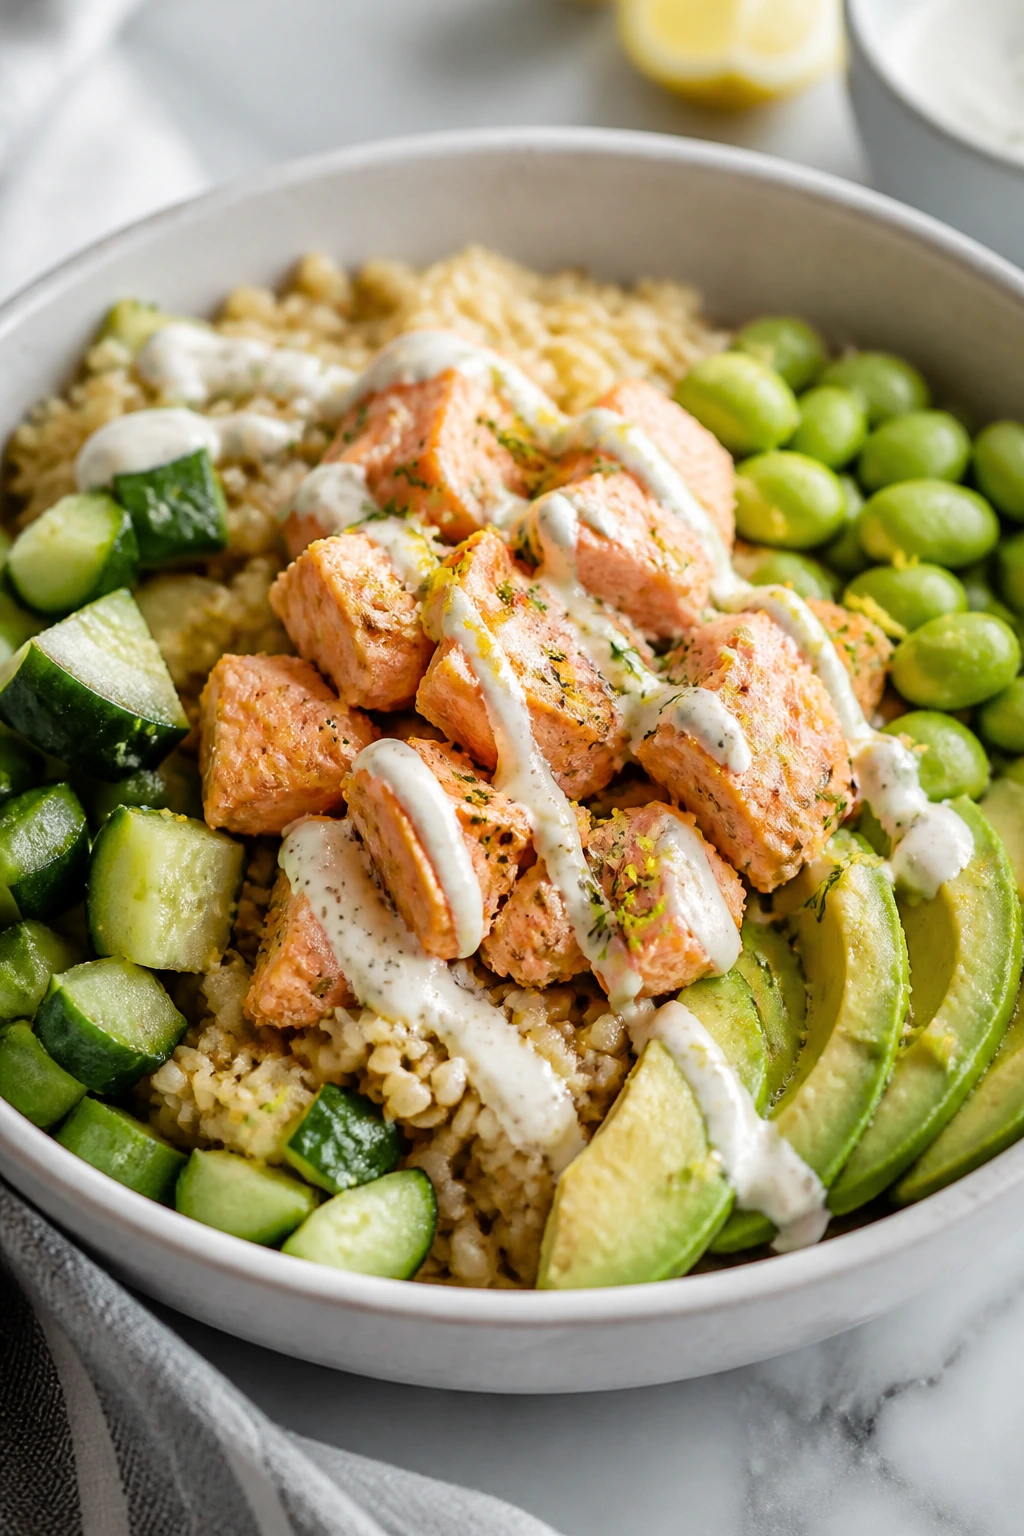
How far ahead can I make these lunchbox meals?
Most of the recipes here can be made 1 to 3 days ahead, and some hold well for 4 days if stored tightly in the fridge. Soups, meatballs, pasta salads, and grain bowls are the most forgiving; lettuce-based wraps and avocado dishes are better made closer to serving time.
Which recipes are best if I do not want to reheat lunch?
Chicken salad, tuna salad, pasta salad, rice bowls, egg muffins, falafel boxes, and fried rice all work cold. If you want the easiest cold lunches, start with items that already taste good at room temperature and build from there.
What’s the best way to keep wraps from getting soggy?
Use thick fillings, dry greens, and a barrier like cheese, hummus, or avocado spread against the tortilla. Roll the wrap tightly, wrap it in parchment, and keep any juicy fruit or dressing in a separate compartment.
Can I freeze any of these meals?
Yes. Meatballs, calzones, egg muffins, salmon cakes, burrito bites, and sloppy joe filling freeze well for up to 2 months. Pasta salads, lettuce wraps, and bowls with fresh vegetables are better made fresh because the texture takes a hit after thawing.
How do I pack hot soup or rice safely?
Preheat the thermos with boiling water, then fill it with steaming food and close it right away. The food should be hot when it goes in, not merely warm. That’s the difference between a cozy lunch and a lukewarm disappointment.
What if my child hates mixed foods?
Pack the parts separately. A few meatballs, a pile of rice, some fruit, and a dip cup can feel much safer than a fully mixed bowl. You can always let the lunch become more blended later; the box does not need to prove anything at first glance.
Can I use frozen vegetables in these recipes?
Absolutely. Frozen peas, corn, broccoli, spinach, and edamame are often better than tired fresh vegetables for lunchboxes. Just thaw and drain them well so they do not leak water into the rest of the meal.
How do I keep fruit from browning in the lunchbox?
A little lemon juice helps with apples and pears, and whole citrus segments are naturally easier to pack than cut melon or peaches. If you want zero fuss, grapes, berries, oranges, and kiwi hold up with far less drama.
Can I scale these meals for adults and kids from the same batch?
Yes, and that’s part of the appeal. Make the base batch once, then portion smaller containers for kids and fuller boxes for adults, adjusting the starch and protein first rather than trying to split the vegetables evenly by eye.
Lunchboxes They Actually Look Forward To
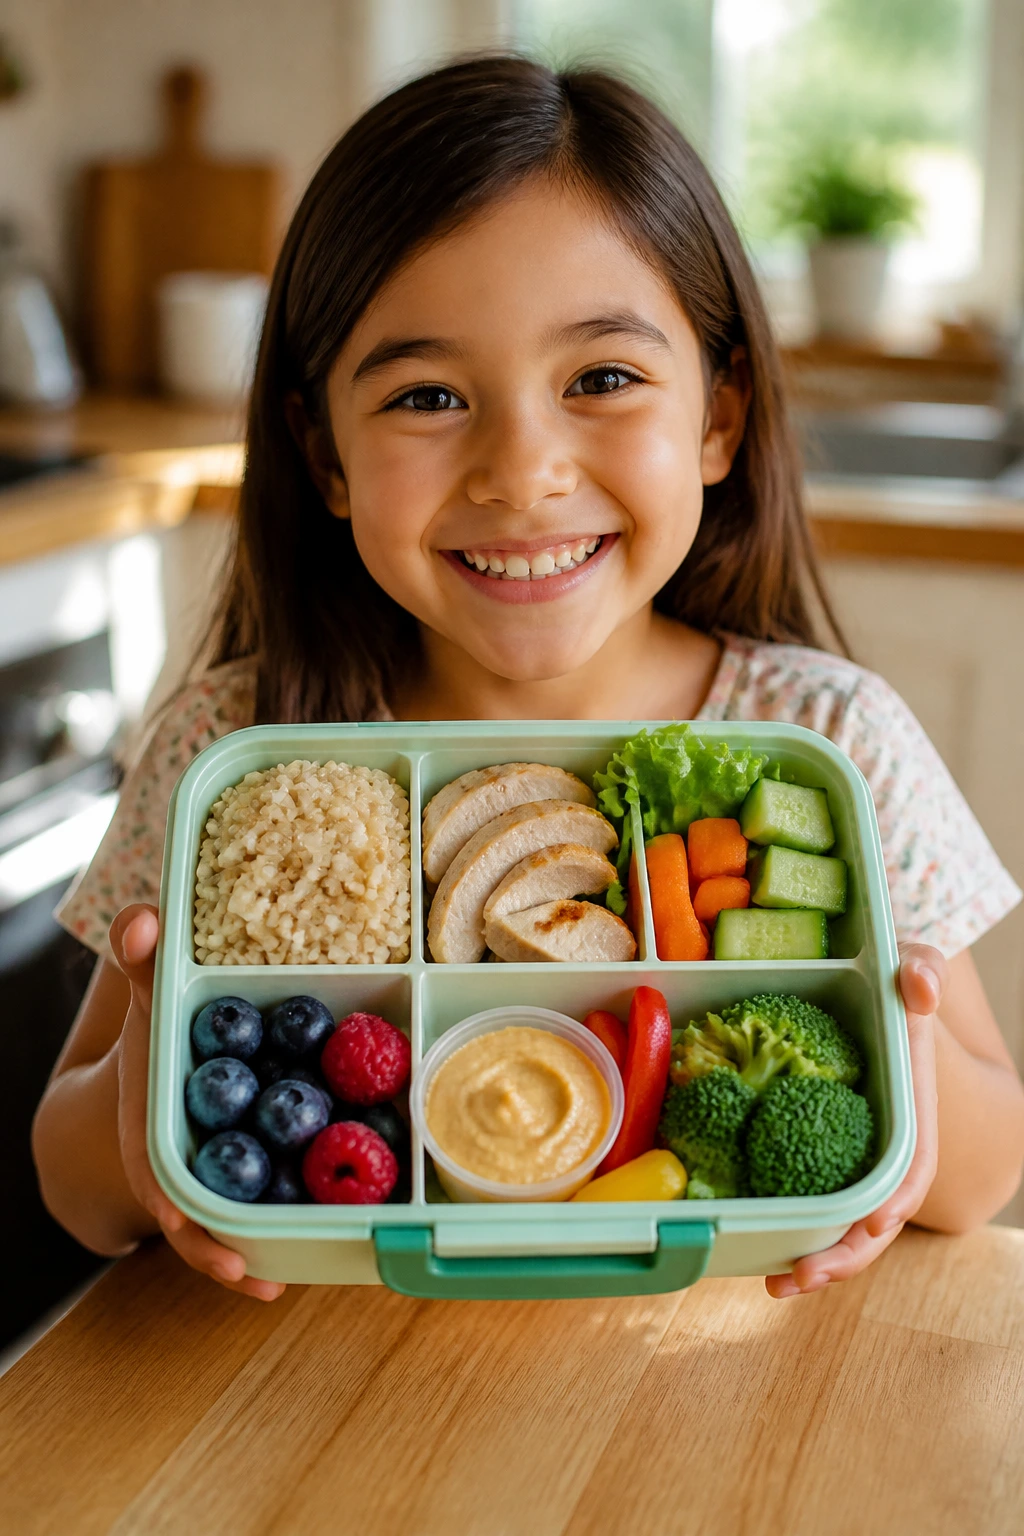
Good packed lunches are not about squeezing nutrition into a sad container and hoping for the best. They’re about building food that still has texture, color, and enough flavor to matter after a morning on the move. That’s why these recipes lean on sturdy grains, seasoned proteins, crisp vegetables, and sauces that know when to stay in their lane.
Start with three or four of these and rotate them. Meatballs one day, soup the next, a grain bowl after that. Once you see how much better lunch gets when it holds together, the rest of the week gets easier too.