
After-school hunger does not arrive politely. It barges in with backpacks on the floor, shoes kicked somewhere near the door, and a very clear opinion about what it wants: warm, salty, filling food that can be eaten fast enough to keep the peace. That is exactly where traditional family dinners earn their place. A square of baked mac and cheese, a meatloaf muffin with ketchup on top, a slider pulled from the pan, a small bowl of stew with buttered bread on the side — those are not afterthoughts. They are the food that keeps a kid from melting down before supper and gives the cook a little breathing room.
I’ve always liked the old-school dinners that hold up when you portion them smaller. The best ones are sturdy. They don’t collapse into a puddle if they sit for ten minutes, and they don’t turn weird when you reheat them later. A good tomato sauce clings. A good casserole sets. A good soup tastes even better after it has had a minute to settle. That’s why these recipes matter: they make sense at 4 p.m., at 6 p.m., and again at 8 p.m. when somebody comes back to the kitchen looking for “just one more bite.”
Some of these are true weeknight anchors. Some are the kind of dinner that becomes a snack plate later — a few meatballs, a spoonful of noodles, a crusty heel of bread, done. All of them lean on familiar flavors that kids recognize fast: beef, chicken, cheese, potatoes, noodles, gravy, bread, tomatoes. Nothing fussy. Nothing precious. Just the sort of food that disappears one spoonful at a time.
Why These Dinners Pull Double Duty
- They reheat cleanly: Tomato sauces, baked pasta, and creamy casseroles come back to life with a splash of water, broth, or milk and a covered bake in the oven.
- They make snack-sized portions easy: Muffin tins, sliders, cups, hand pies, and small bowls let you serve a little now without committing to a full plate.
- They use familiar pantry staples: Rice, noodles, canned tomatoes, broth, cheese, beans, and ground meat keep the shopping list steady and the cost manageable.
- They satisfy different ages at once: A saucy skillet, a crunchy topping, and a soft starch give you enough texture for picky eaters and hungry teens in the same meal.
- They stretch into leftovers on purpose: Roast chicken becomes a cold sandwich. Chili becomes cornbread bake. Meatballs become tomorrow’s lunch tucked into a roll.
- They do not need perfect timing: Most of these hold for 10 to 20 minutes without losing their shape, which matters when the stove and the front door are both busy.
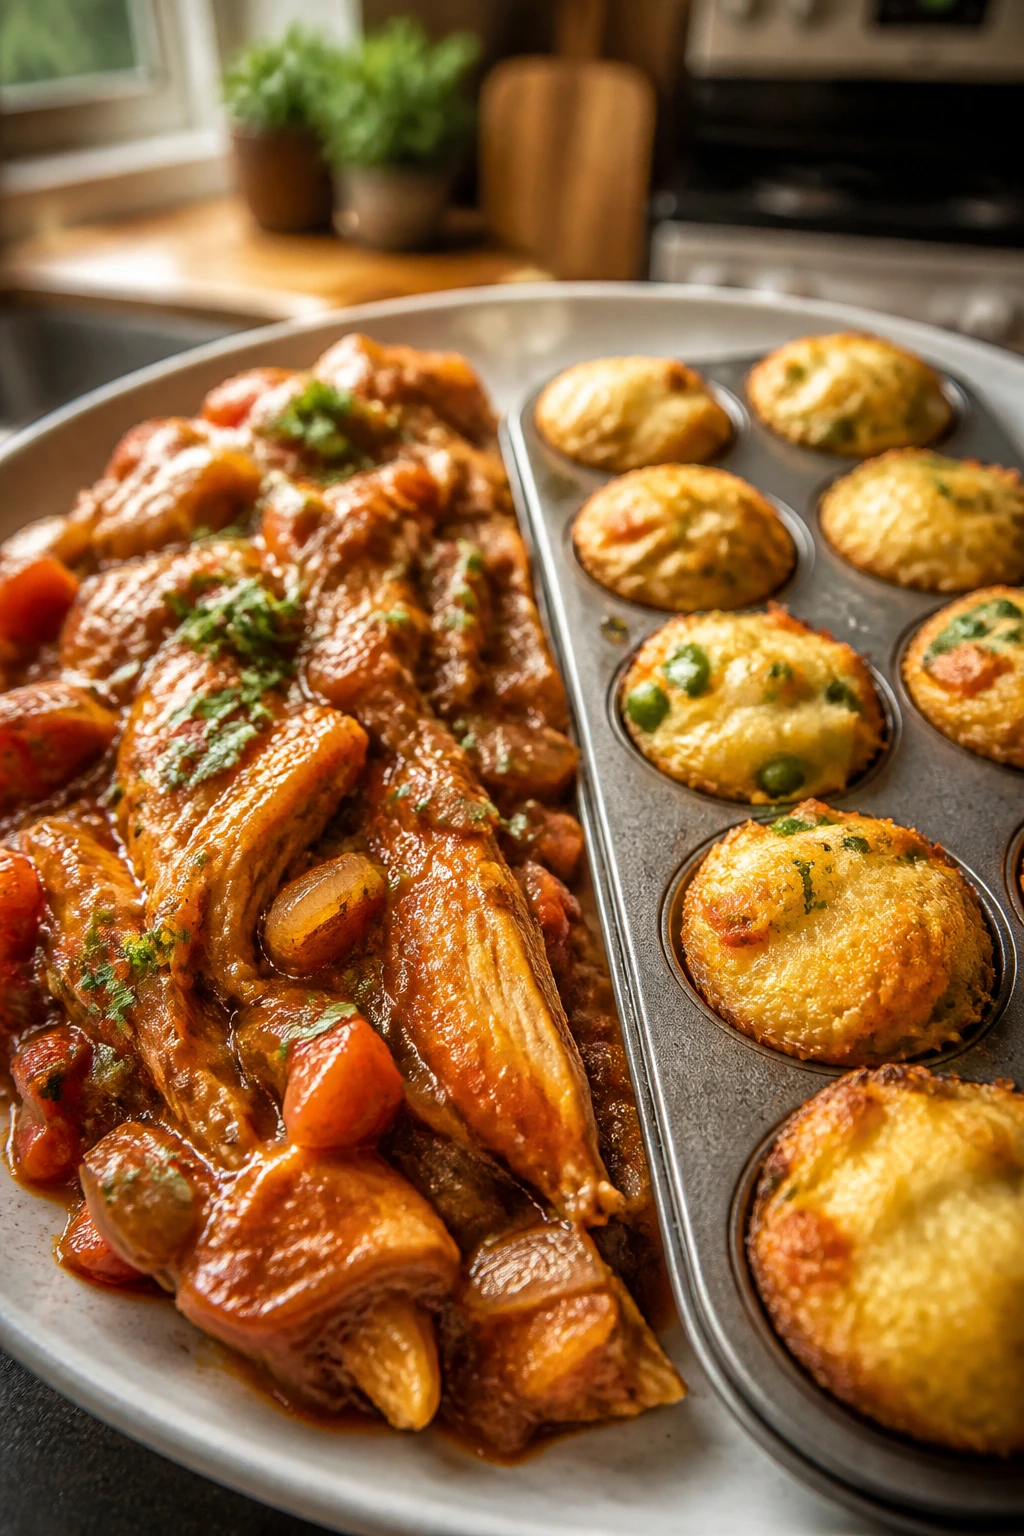
1. Mini Meatloaf Muffins
A meatloaf muffin is a small thing with a big job. You get browned edges on every side, a tender center, and that sweet ketchup glaze kids tend to swipe first. I like this version because it feels like dinner, but it eats like a snack.
Why It Works:
Baking meatloaf in a muffin tin shortens the cook time and gives each portion more surface area, which means more caramelized glaze and less waiting. The small shape also makes it easier to freeze, reheat, and pack into lunch containers later.
Key Ingredients:
- 1 1/2 lb ground beef, 85/15 for flavor
- 3/4 cup plain breadcrumbs, to hold the loaf together
- 1 large egg, for binding
- 1 small onion, grated so it disappears into the meat
- 1/4 cup milk, to keep the texture soft
- 2 tbsp ketchup, for moisture and a little tang
- 1 tbsp Worcestershire sauce, for depth
- 1 tsp kosher salt and 1/2 tsp black pepper, to season the meat
- 1/3 cup ketchup, 1 tbsp brown sugar, and 1 tsp yellow mustard for the glaze
Quick Steps:
- Heat the oven to 400°F (205°C) and grease a 12-cup muffin tin.
- Mix the beef, breadcrumbs, egg, onion, milk, ketchup, Worcestershire, salt, and pepper until just combined.
- Divide the mixture among the muffin cups, then spoon the glaze over each top.
- Bake for 18 to 20 minutes, until the centers reach 160°F (71°C) and the edges are browned; rest 5 minutes before removing.
Equipment for This Recipe:
- 12-cup muffin tin
- Large mixing bowl
- Box grater for the onion
- Small spoon for the glaze
How to Serve This Dish:
Serve two muffins with mashed potatoes, buttered peas, or a slice of soft bread to catch the glaze. They also work well on a snack plate with carrot sticks and a few pickle chips.
Pro Tips for This Recipe:
- Grate the onion instead of chopping it; that keeps the loaf from feeling bulky.
- If the mix looks dry, add 1 to 2 tablespoons more milk before baking.
- Line the muffin tin with parchment strips if you want the muffins to lift out cleanly.
Variations on This Dish:
- BBQ Muffins: Swap the ketchup glaze for barbecue sauce and a pinch of smoked paprika.
- Turkey Version: Use ground turkey and add 1 tablespoon olive oil so the muffins don’t dry out.
- Mushroom Gravy Style: Skip the glaze and serve with mushroom gravy over mashed potatoes.
Common Mistakes to Avoid with This Dish:
- Don’t pack the meat too tightly or the centers turn dense instead of tender.
- Don’t bake until the tops look dark and dry; pull them when the centers hit 160°F.
- Don’t skip the rest time. The juices need a few minutes to settle, or they run out when you lift the muffins.
2. Sloppy Joe Sliders
Sloppy joes are gloriously messy, and that’s part of the appeal. The sauce should be thick enough to cling to the beef, not run off the bun in a red puddle. On slider rolls, they feel less like a full dinner and more like the kind of second supper people keep reaching for.
Why It Works:
A quick simmer with tomato paste and brown sugar gives the filling that soft, sticky texture that stays put. Sliders also portion well, which matters when the goal is a snack-sized dinner that can stretch across a crowd.
Key Ingredients:
- 1 1/2 lb ground beef
- 1 small onion, finely chopped
- 1 green bell pepper, finely chopped
- 2 cloves garlic, minced
- 3/4 cup ketchup
- 1/4 cup tomato paste
- 2 tbsp brown sugar
- 1 tbsp Worcestershire sauce
- 8 soft slider buns
- Dill pickle chips for serving
Quick Steps:
- Cook the beef, onion, and bell pepper in a skillet over medium-high heat for 8 to 10 minutes, until the meat loses its pink color.
- Stir in the garlic, ketchup, tomato paste, brown sugar, Worcestershire, and 1/4 cup water.
- Simmer for 8 minutes, stirring until the sauce turns thick and glossy.
- Spoon onto buns and top with pickles; serve warm.
Equipment for This Recipe:
- Large skillet
- Wooden spoon
- Measuring cups
- Sheet pan for warming buns
How to Serve This Dish:
Serve the filling on lightly toasted buns with potato wedges or a handful of corn chips. I like a pickle on the side because the vinegar cuts the sweetness.
Pro Tips for This Recipe:
- Let the sauce reduce until it mounds on a spoon; thin sloppy joes soak the buns fast.
- Toast the buns for 2 to 3 minutes so they hold together better.
- Add a spoonful of mustard if you want a sharper, less sweet sauce.
Variations on This Dish:
- Cheesy School-Style: Melt cheddar over the filling before closing the buns.
- Turkey Sloppy Joes: Use ground turkey and add an extra tablespoon of tomato paste.
- Spicy Version: Stir in hot sauce or minced pickled jalapeños.
Common Mistakes to Avoid with This Dish:
- Don’t skip the simmer. The filling needs time to thicken or it slides right off the bread.
- Don’t use dry hamburger buns unless you like crumbs everywhere.
- Don’t overload each slider. A little filling goes further than you think.
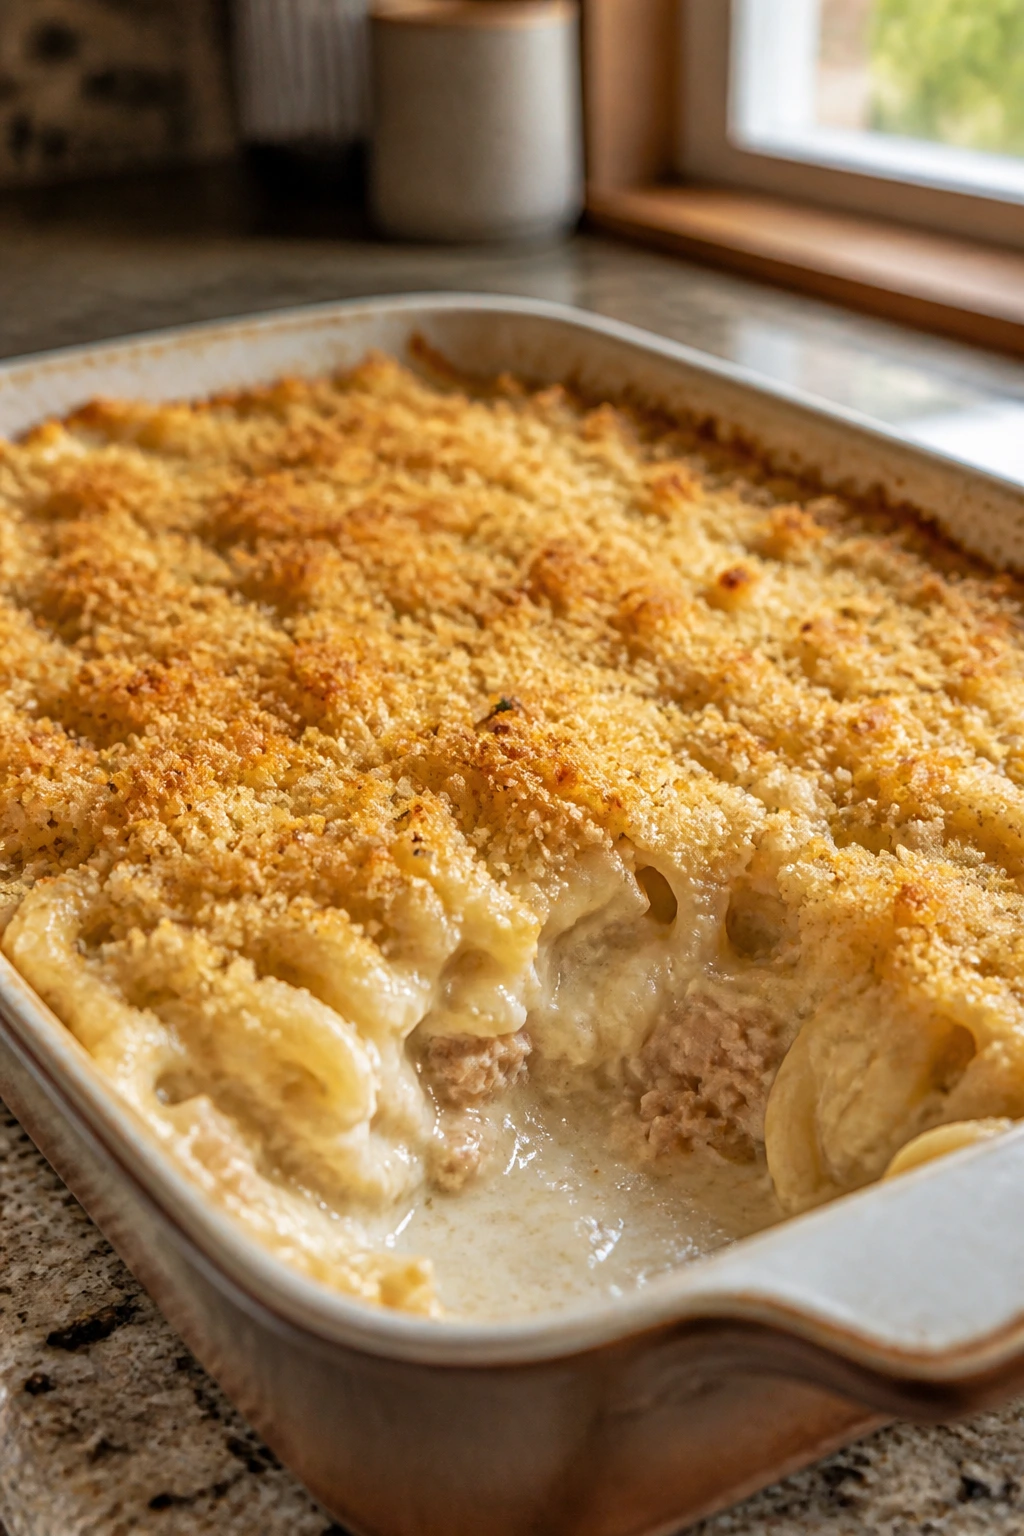
3. Baked Mac and Cheese
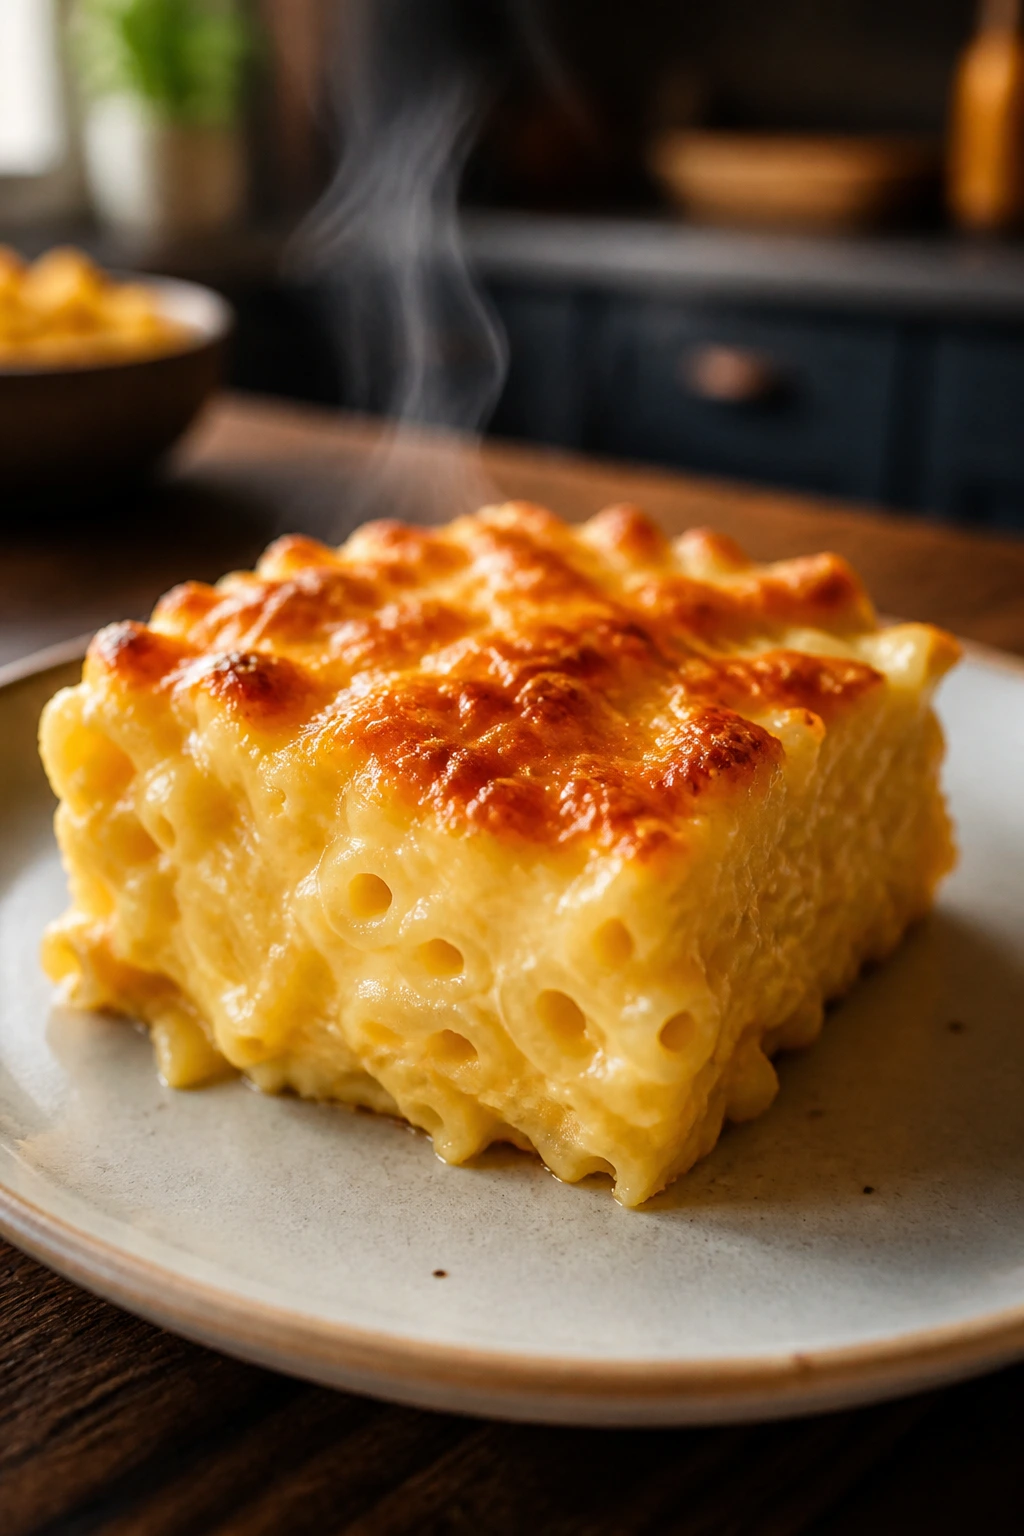
Good baked mac and cheese should cut in neat squares after a short rest and still give you a soft, stretchy middle. I prefer it with a sharp cheddar base and a little mozzarella for pull. Too many versions get all crust and no body.
Why It Works:
A simple white sauce keeps the cheese from turning grainy, and baking it adds a browned top that tastes different from the creamy center. The contrast is the whole point.
Key Ingredients:
- 12 oz elbow macaroni
- 4 tbsp unsalted butter
- 4 tbsp all-purpose flour
- 3 cups whole milk, warmed
- 2 cups sharp cheddar, shredded
- 1 cup mozzarella or Monterey Jack, shredded
- 1 tsp mustard powder
- 1/2 tsp paprika
- 1/2 tsp kosher salt
- 1 cup breadcrumbs, mixed with 1 tbsp melted butter
Quick Steps:
- Heat the oven to 375°F (190°C) and cook the macaroni until just shy of tender.
- Make a roux with butter and flour, then whisk in the milk until the sauce thickens.
- Stir in the cheese and seasonings, fold in the pasta, and top with breadcrumbs.
- Bake for 20 to 25 minutes, until the top is golden and the edges are bubbling.
Equipment for This Recipe:
- 9×13-inch baking dish
- Medium saucepan
- Whisk
- Colander
How to Serve This Dish:
Cut it into squares for a snack plate or scoop it into bowls with sliced tomatoes. It also sits nicely beside roast chicken or meatloaf if you want a bigger dinner.
Pro Tips for This Recipe:
- Shred the cheese yourself; pre-shredded cheese can make the sauce a little dull.
- Pull the pasta from the water early. It finishes in the oven.
- Let it stand 10 minutes before cutting, or it will slump apart.
Variations on This Dish:
- Cracker Top: Use crushed buttery crackers instead of breadcrumbs.
- Broccoli Bake: Stir in 2 cups small broccoli florets before baking.
- Jalapeño Cheddar: Add diced pickled jalapeños for a sharper bite.
Common Mistakes to Avoid with This Dish:
- Don’t boil the sauce after the cheese goes in or it can turn grainy.
- Don’t overcook the pasta or the bake turns soft and heavy.
- Don’t skip salt in the sauce. Cheese alone does not season the whole pan.
4. Chicken Pot Pie Hand Pies
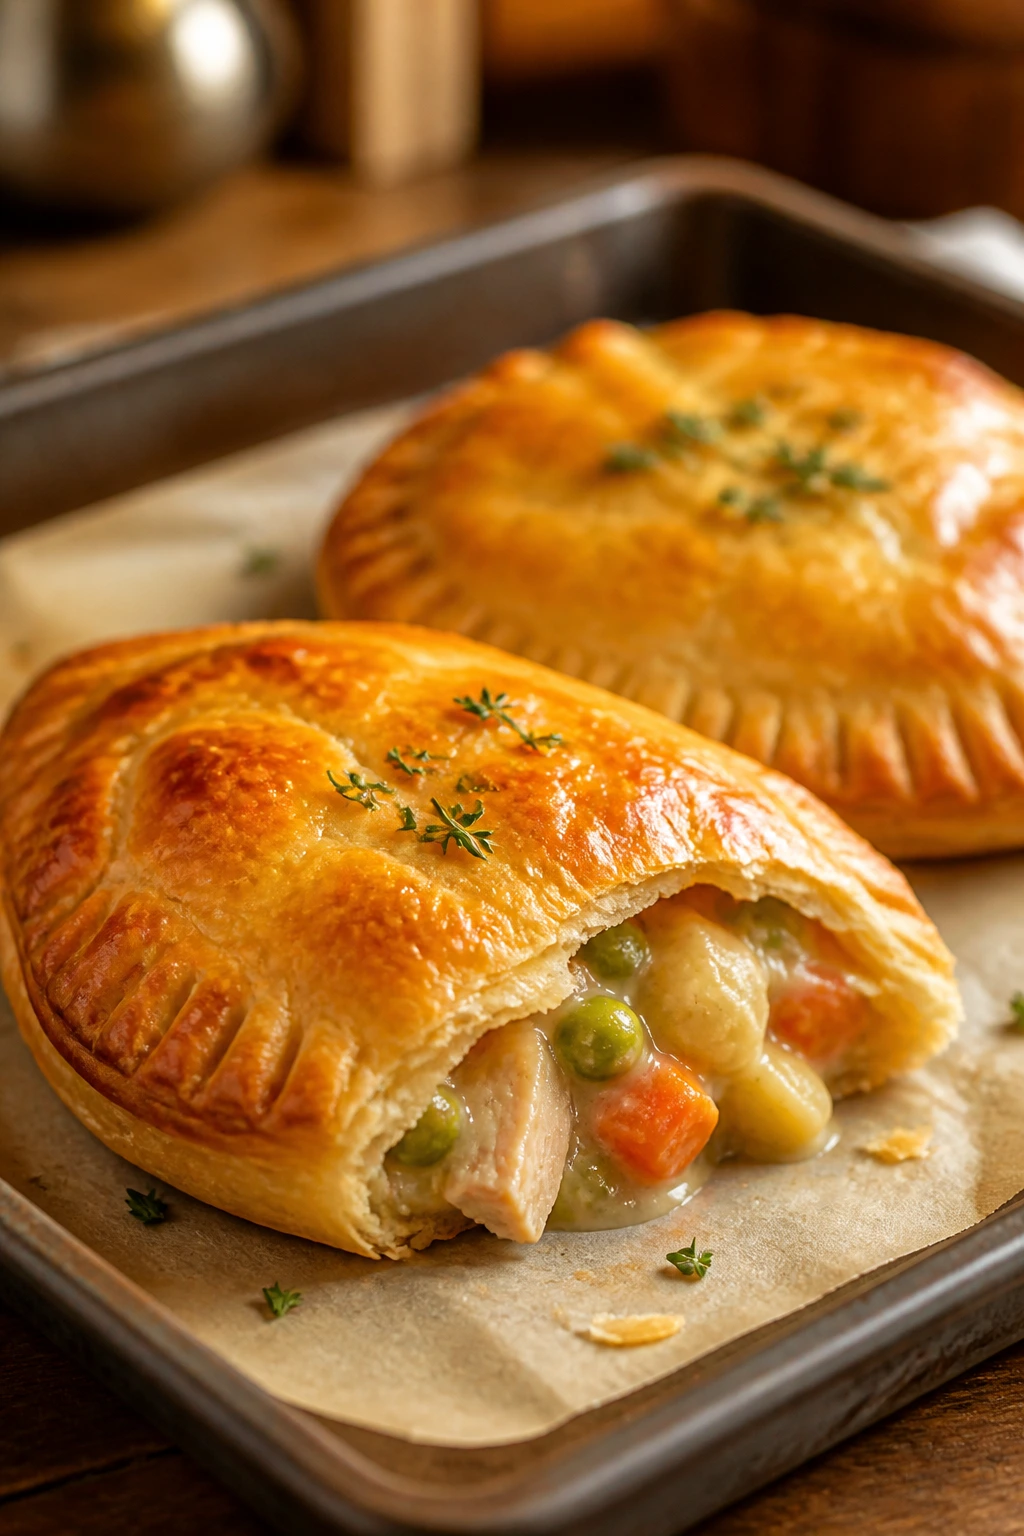
Butter, chicken stock, peas, carrots, and a flaky crust — this is the kind of dinner that smells like home from the moment the oven door opens. Hand pies make the whole thing portable, which is handy when the “snack” needs to be eaten standing at the counter.
Why It Works:
The filling is thick, not soupy, so it stays inside the crust when baked. Using cooked chicken keeps the process fast, and the small size means more crisp pastry per bite.
Key Ingredients:
- 2 tbsp unsalted butter
- 1/2 onion, diced
- 2 carrots, diced small
- 2 cups cooked chicken, chopped
- 1 cup frozen peas
- 1/4 cup all-purpose flour
- 1 3/4 cups chicken broth
- 1/2 cup whole milk
- 2 sheets pie crust or puff pastry, thawed
- 1 egg, beaten for egg wash
Quick Steps:
- Cook the onion and carrots in butter over medium heat for 6 minutes, until the onion softens.
- Stir in the flour, then whisk in broth and milk until the filling thickens.
- Fold in the chicken and peas, cool the mixture a bit, and cut the crust into rounds or squares.
- Fill, seal, brush with egg wash, and bake at 400°F (205°C) for 20 to 25 minutes.
Equipment for This Recipe:
- Skillet
- Baking sheet
- Pastry brush
- Fork for crimping
How to Serve This Dish:
Serve with apple slices or a small green salad if you want to keep the plate light. Two hand pies usually work as a snack-sized dinner for one child or a light meal for two.
Pro Tips for This Recipe:
- Cool the filling before sealing or the crust can go soggy.
- Cut a small steam vent in each pie so the filling doesn’t burst out.
- Puff pastry bakes faster than pie crust, so start checking at 18 minutes.
Variations on This Dish:
- Turkey Pot Pies: Use leftover turkey and a pinch of sage.
- Corn and Chicken Version: Swap peas for corn kernels and add a little black pepper.
- Mini Muffin Tin Pies: Line muffin cups with dough for smaller, snackier portions.
Common Mistakes to Avoid with This Dish:
- Don’t overfill the pies. A spoonful too much can break the seal.
- Don’t use hot filling. Steam makes the crust limp.
- Don’t forget to brush the tops. Egg wash gives the pastry that deep golden color.
5. Spaghetti with Meat Sauce
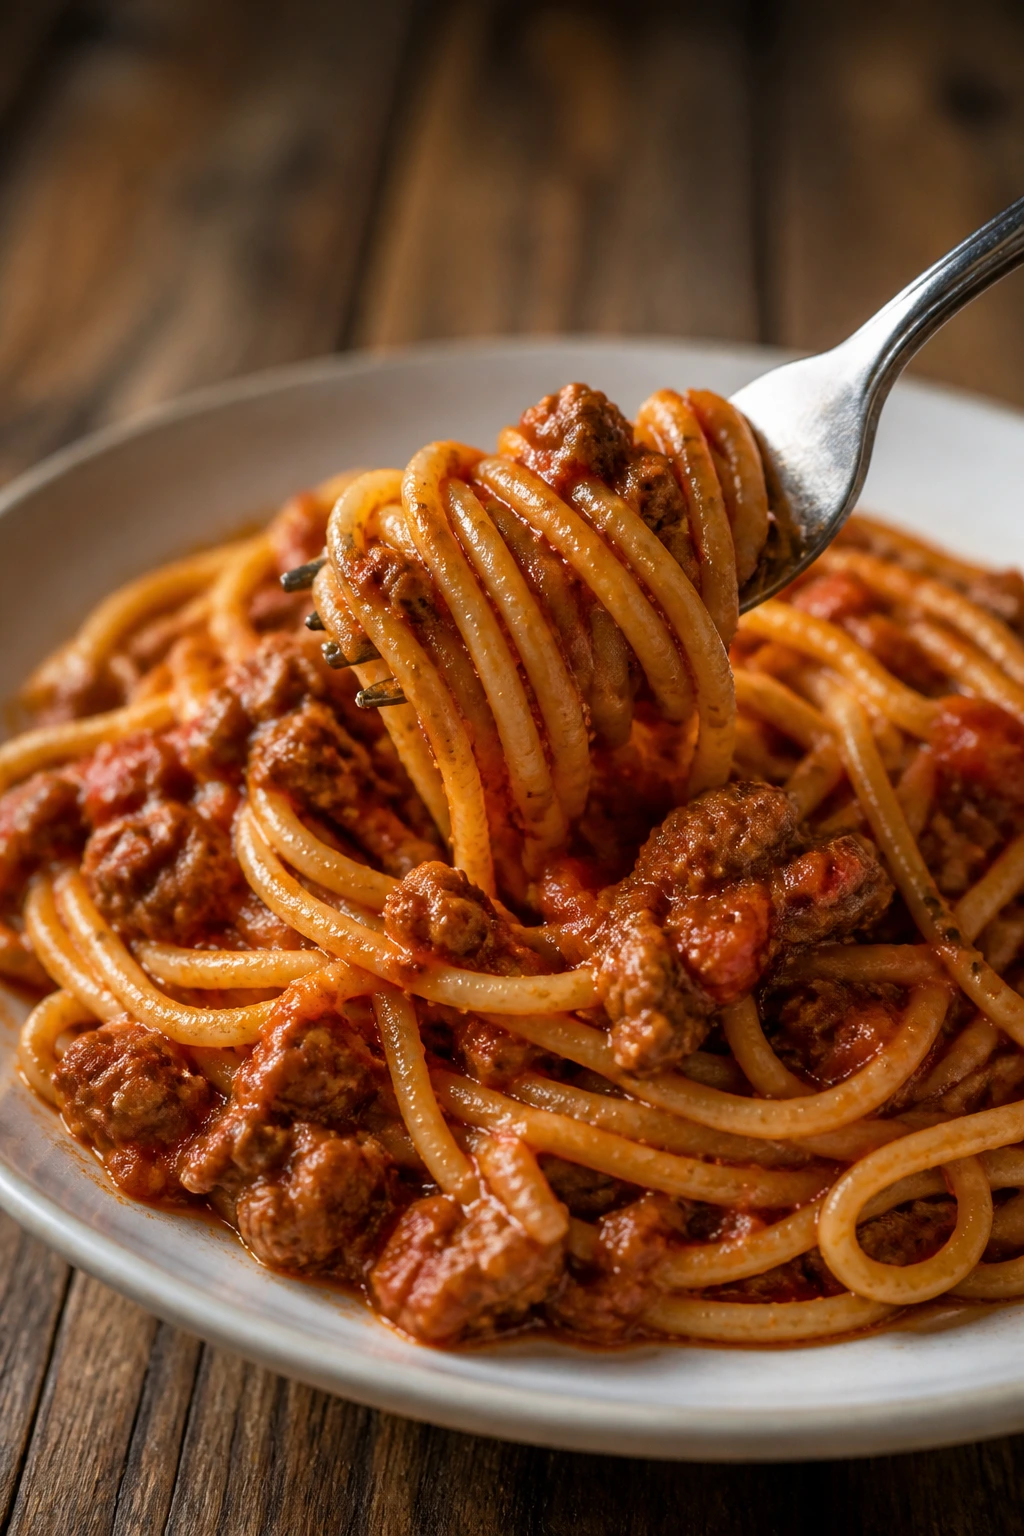
Spaghetti is the kind of dinner that never seems to lose its place. The sauce should cling to the noodles, not pool at the bottom of the bowl, and the meat should be broken up fine enough that every bite feels even. That makes it perfect for small after-school bowls.
Why It Works:
A longer simmer turns canned tomatoes, tomato paste, and beef into a sauce with enough body to coat pasta. It tastes better after a short rest, which is one reason leftovers are so useful here.
Key Ingredients:
- 1 lb spaghetti
- 1 1/2 lb ground beef
- 1 onion, chopped
- 3 cloves garlic, minced
- 2 tbsp tomato paste
- 1 can (28 oz) crushed tomatoes
- 1 can (14.5 oz) diced tomatoes
- 1 tsp Italian seasoning
- 1/4 cup grated Parmesan
- Salt and black pepper to taste
Quick Steps:
- Cook the spaghetti in salted water until al dente.
- Brown the beef with onion in a large skillet, then add garlic and tomato paste.
- Stir in the tomatoes and seasoning, then simmer for 20 minutes until thick.
- Toss with spaghetti and Parmesan; serve with extra sauce on top.
Equipment for This Recipe:
- Large pot
- Deep skillet or Dutch oven
- Colander
- Tongs
How to Serve This Dish:
A small bowl with extra Parmesan is enough for most after-school servings. Garlic bread on the side is nice, but plain buttered toast works just as well.
Pro Tips for This Recipe:
- Salt the pasta water well; bland noodles make the sauce work too hard.
- Reserve 1/2 cup pasta water in case the sauce tightens too much.
- Let the sauce simmer uncovered if it looks thin.
Variations on This Dish:
- Meatball Style: Stir in cooked meatballs instead of loose beef.
- Sausage Blend: Use half beef and half Italian sausage for more spice.
- Vegetable Boost: Add finely diced carrots, celery, or mushrooms to the sauce base.
Common Mistakes to Avoid with This Dish:
- Don’t rinse the pasta. The starch helps the sauce stick.
- Don’t rush the simmer or the tomatoes taste sharp and separate.
- Don’t drown the spaghetti. A coated noodle is better than a soupy plate.
6. Tuna Noodle Bake
Tuna noodle bake has a plain, honest kind of comfort to it. The noodles should be soft but not mushy, the sauce creamy, and the top crunchy enough to hear when you spoon into it. It’s a classic for a reason.
Why It Works:
The creamy base holds the tuna and noodles together, and the breadcrumb top gives you a little crunch. It is also one of those casseroles that slices neatly after a short rest, which helps with snack portions.
Key Ingredients:
- 12 oz egg noodles
- 2 cans tuna, 5 oz each, drained
- 1 cup frozen peas
- 1 celery stalk, finely chopped
- 2 tbsp unsalted butter
- 2 tbsp flour
- 2 cups milk
- 1 cup shredded cheddar
- 1 cup breadcrumbs
- 1/2 tsp dried dill or parsley
Quick Steps:
- Cook the noodles until just tender and heat the oven to 375°F (190°C).
- Make a quick white sauce with butter, flour, and milk, then stir in cheddar.
- Fold in tuna, peas, celery, noodles, and seasonings.
- Top with breadcrumbs and bake for 20 minutes, until bubbling and browned.
Equipment for This Recipe:
- 9×13-inch baking dish
- Saucepan
- Whisk
- Mixing bowl
How to Serve This Dish:
Serve it in small squares with sliced cucumbers or a few crackers. I like a little black pepper on top, because tuna bake can use a sharper finish.
Pro Tips for This Recipe:
- Drain the tuna well so the casserole does not turn watery.
- Chop the celery small enough that it softens while baking.
- If you want a less thick bake, add 1/4 cup extra milk.
Variations on This Dish:
- Corn Swap: Use corn instead of peas.
- Mushroom Version: Add sautéed mushrooms with the celery.
- No-Soup Style: This version already skips canned soup, but you can make it richer with a spoonful of Dijon.
Common Mistakes to Avoid with This Dish:
- Don’t overcook the noodles before baking or they go soft.
- Don’t forget to season the sauce. Tuna needs help.
- Don’t serve it straight from the oven if you want clean squares.
7. Shepherd’s Pie Cups
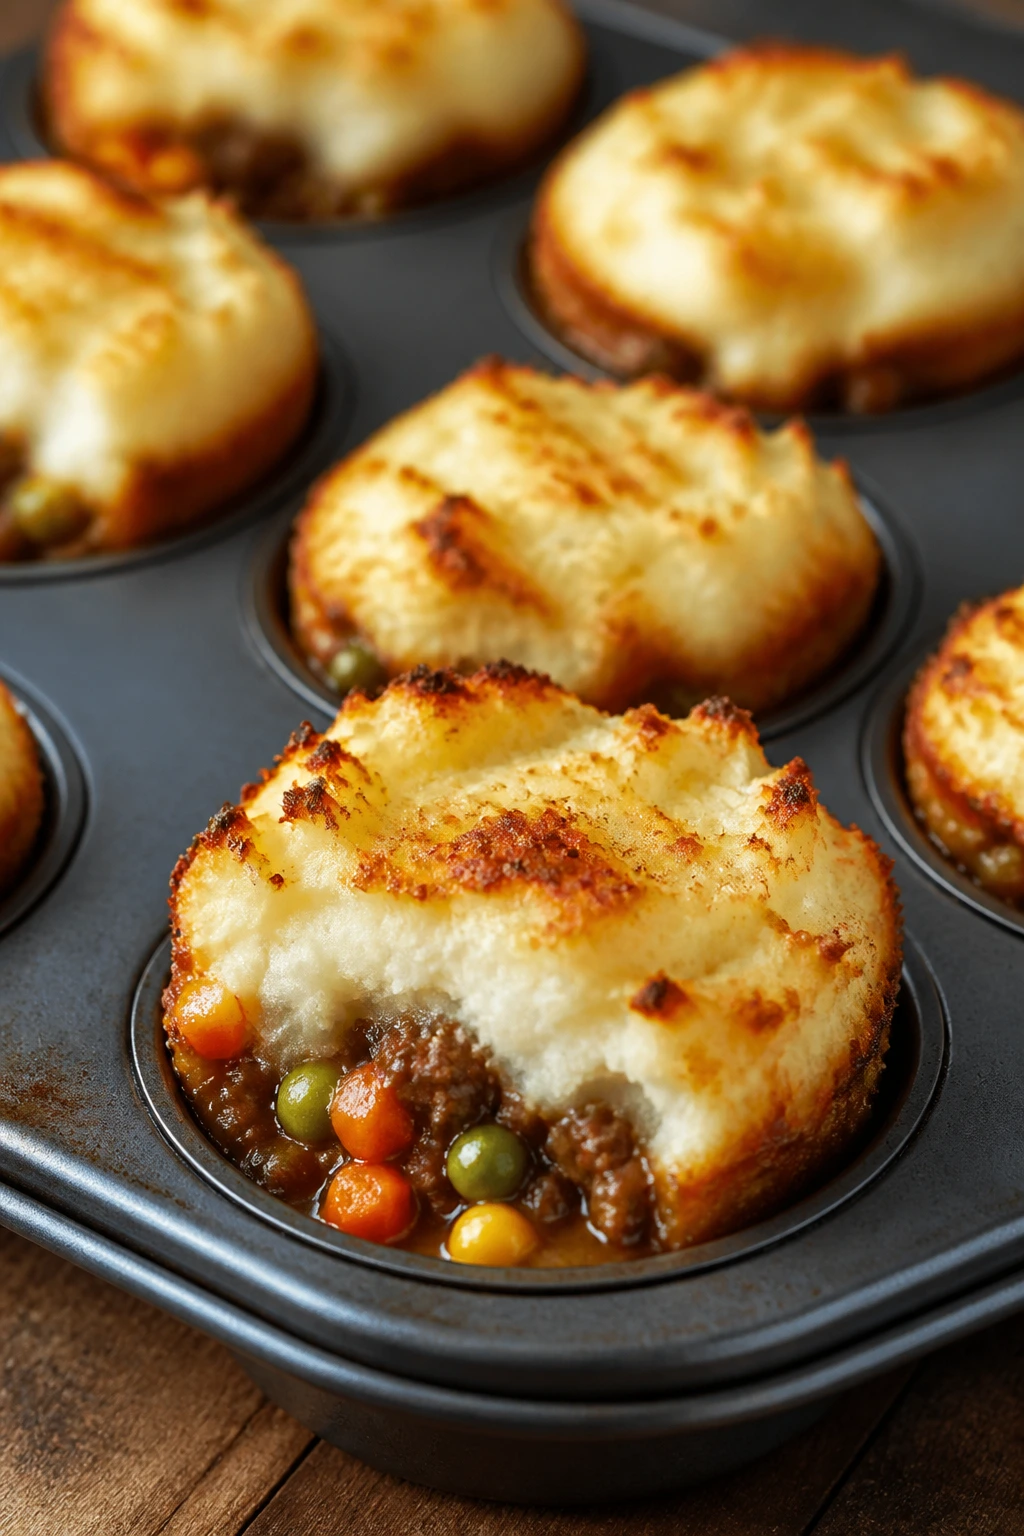
Shepherd’s pie cups solve the age-old problem of kids picking only the potato top and leaving the good stuff behind. Each one has beef, vegetables, gravy, and a cap of mashed potatoes that browns just enough at the edges.
Why It Works:
Baking the filling in muffin tins gives you crisp sides and a neat single serving. The potatoes act like a lid, so the meat mixture stays juicy underneath.
Key Ingredients:
- 2 cups mashed potatoes, made from about 2 1/2 lb Yukon Gold potatoes
- 1 lb ground beef or lamb
- 1 small onion, chopped
- 1 carrot, diced small
- 1/2 cup frozen peas
- 2 tbsp tomato paste
- 1 cup beef broth
- 2 tbsp flour
- 1/2 tsp thyme
- 1/2 cup shredded cheddar, optional
Quick Steps:
- Cook the beef, onion, and carrot until browned, then stir in tomato paste and flour.
- Add broth, peas, and thyme, and simmer until the filling thickens.
- Spoon into greased muffin cups, top with mashed potatoes, and sprinkle with cheddar.
- Bake at 400°F (205°C) for 15 to 18 minutes, until the tops brown.
Equipment for This Recipe:
- Muffin tin
- Skillet
- Potato masher
- Spoon or piping bag for the potatoes
How to Serve This Dish:
Two or three cups with a little gravy on the plate make a solid snack dinner. They also pair well with buttered green beans or a small bowl of applesauce.
Pro Tips for This Recipe:
- Make the filling thick or it leaks out when the cups bake.
- Pipe the potatoes if you want neat peaks that brown well.
- Let them rest 5 minutes before lifting from the tin.
Variations on This Dish:
- Sweet Potato Top: Swap in mashed sweet potatoes for a sweeter finish.
- Shepherd’s Pie Skillet: Bake the filling and potato topping in one dish if you do not want muffin cups.
- Extra Veg Version: Add corn or chopped green beans to the meat filling.
Common Mistakes to Avoid with This Dish:
- Don’t make the mashed potatoes too loose. Runny potatoes slide off.
- Don’t skip thickening the filling or the cups won’t hold.
- Don’t use a very shallow muffin tin unless you want overflow.
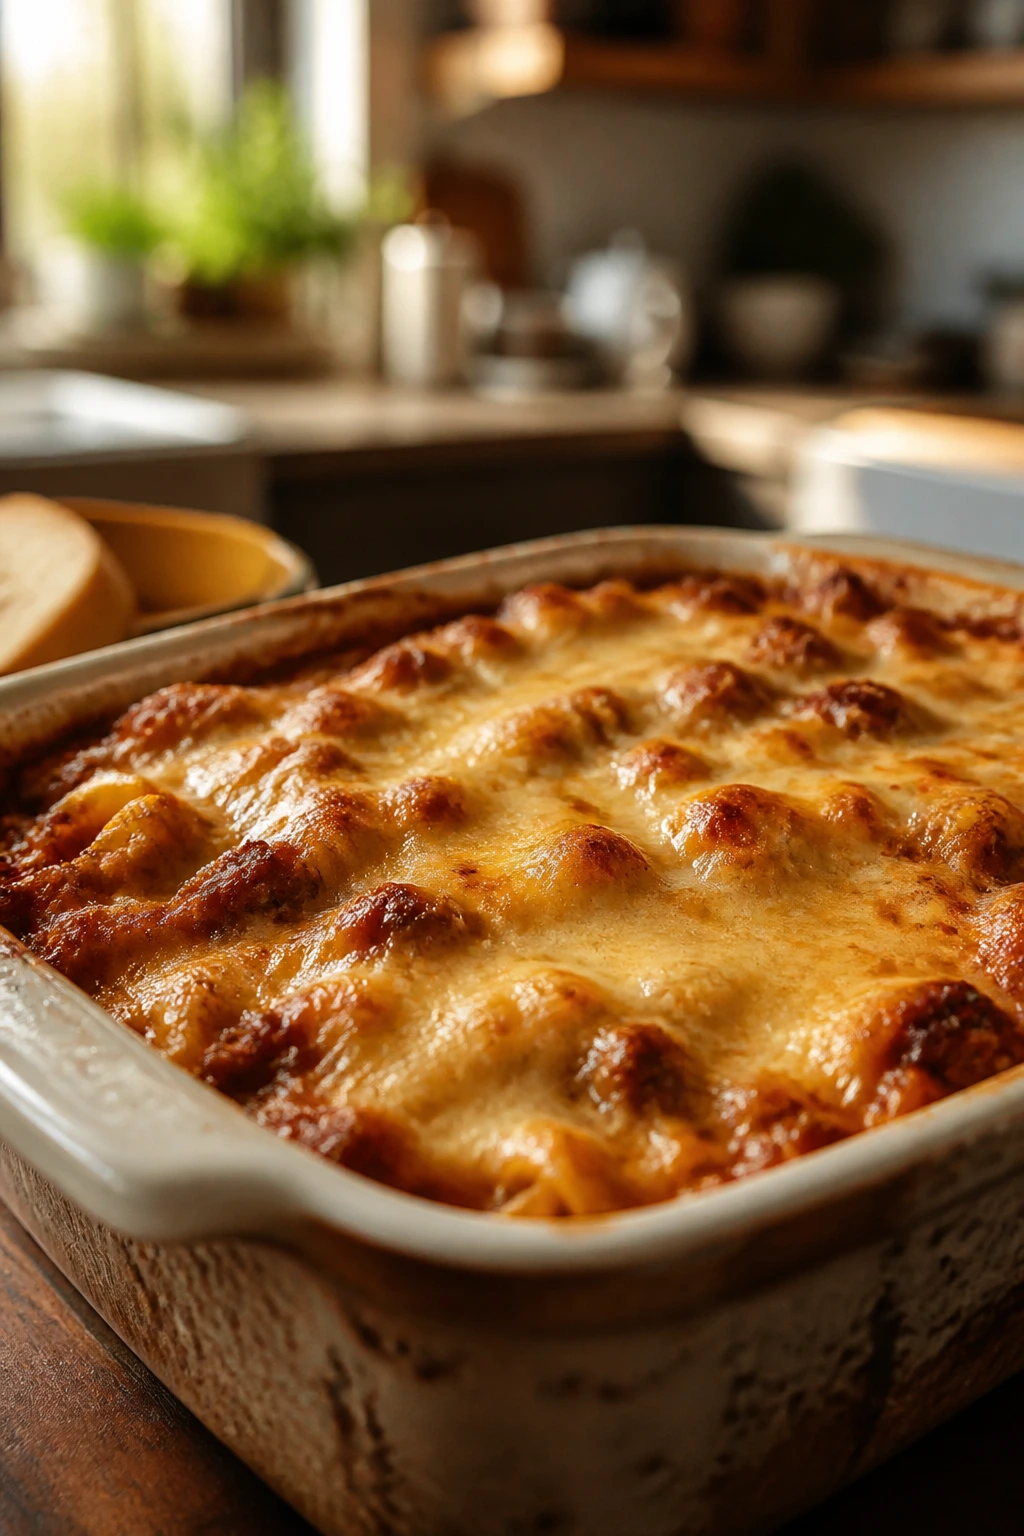
8. Baked Ziti
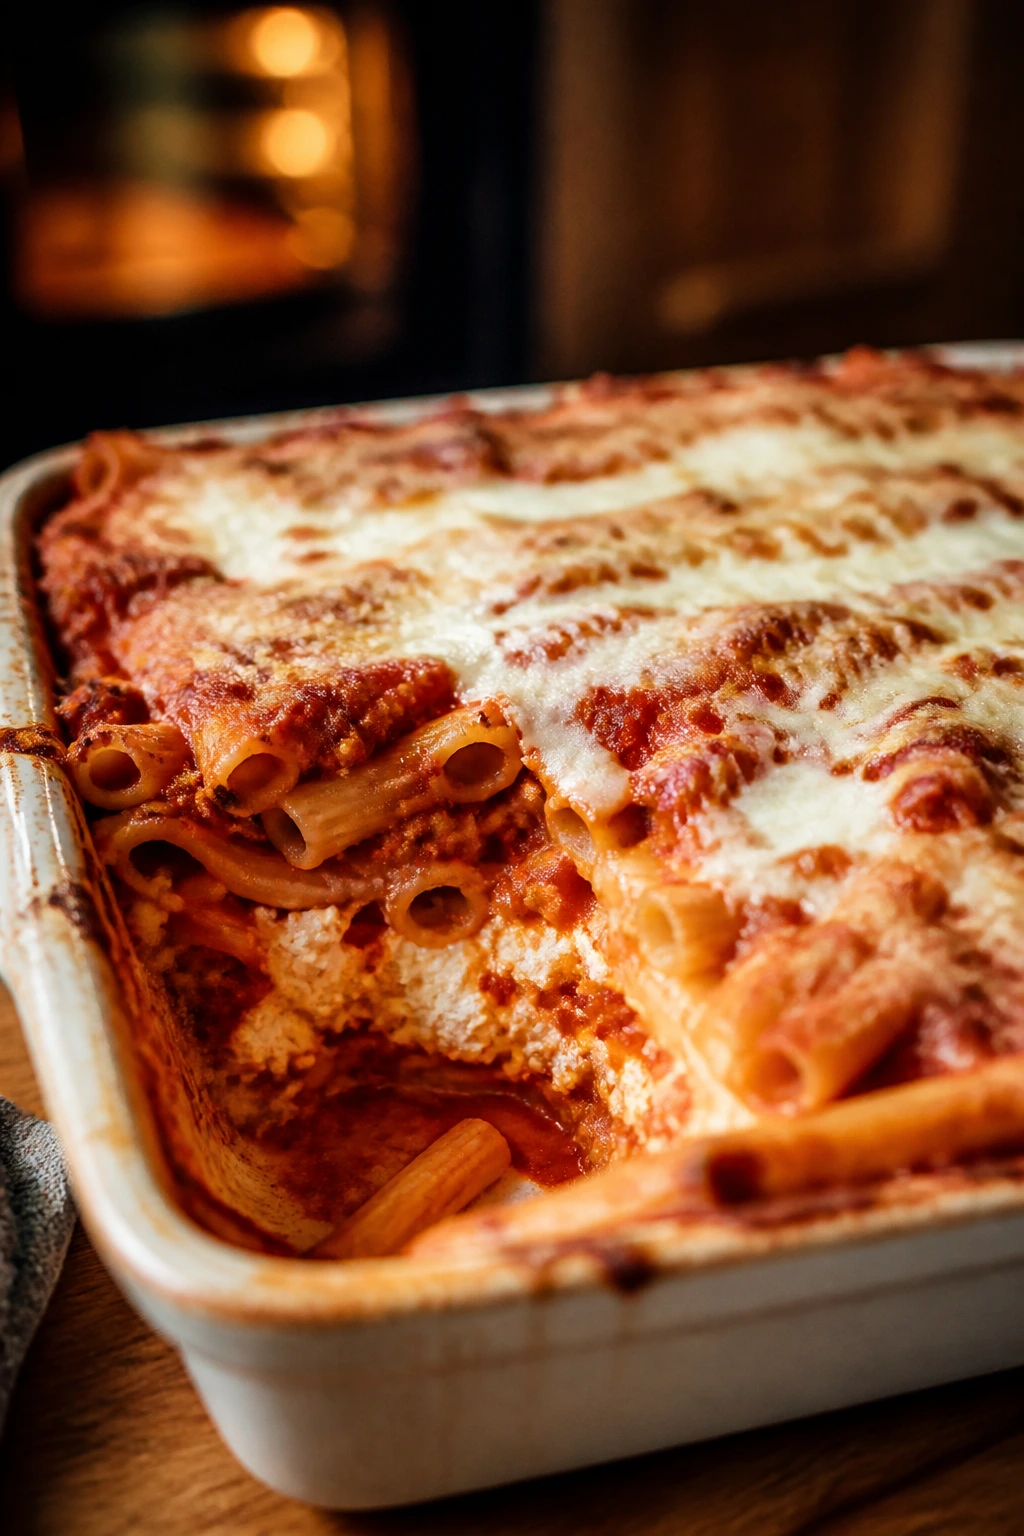
Baked ziti is one of those pans that looks a little messy in the best way. Sauce, cheese, and pasta melt into each other, and the corners at the edge of the dish are the part everyone fights over. That crispy edge is half the point.
Why It Works:
Ziti holds sauce in its ridges, and ricotta gives the bake a soft middle that keeps the whole pan from feeling dry. It reheats well, which makes it useful for after-school bowls the next day.
Key Ingredients:
- 1 lb ziti
- 1 lb Italian sausage or ground beef
- 1 jar marinara, about 24 oz
- 1 15 oz container ricotta
- 2 cups shredded mozzarella
- 1/2 cup grated Parmesan
- 1 egg
- 1 tsp Italian seasoning
- Salt and pepper to taste
Quick Steps:
- Cook the ziti until barely al dente and heat the oven to 375°F (190°C).
- Brown the sausage or beef, then stir in marinara and seasoning.
- Mix ricotta with egg and Parmesan, then layer pasta, sauce, and cheese in a baking dish.
- Bake for 25 minutes, until bubbling, then rest 10 minutes before serving.
Equipment for This Recipe:
- Large pot
- Skillet
- 9×13-inch baking dish
- Mixing bowl
How to Serve This Dish:
Serve in square scoops with a side salad or a slice of garlic bread. For snack time, a small bowl with extra mozzarella on top is usually enough.
Pro Tips for This Recipe:
- Undercook the pasta by 1 to 2 minutes.
- Save a little sauce for the top so the noodles do not dry out.
- Let the bake rest before cutting or it will spread.
Variations on This Dish:
- Spinach Ziti: Fold in chopped spinach with the ricotta.
- Sausage and Pepper Ziti: Add sautéed peppers to the meat sauce.
- Meatless Version: Use chopped mushrooms and lentils instead of meat.
Common Mistakes to Avoid with This Dish:
- Don’t overfill the dish or the cheese will burn at the edges.
- Don’t use watery ricotta. Drain it if it seems loose.
- Don’t skip the rest time. Hot ziti acts like soup.
9. Salisbury Steak with Mushroom Gravy
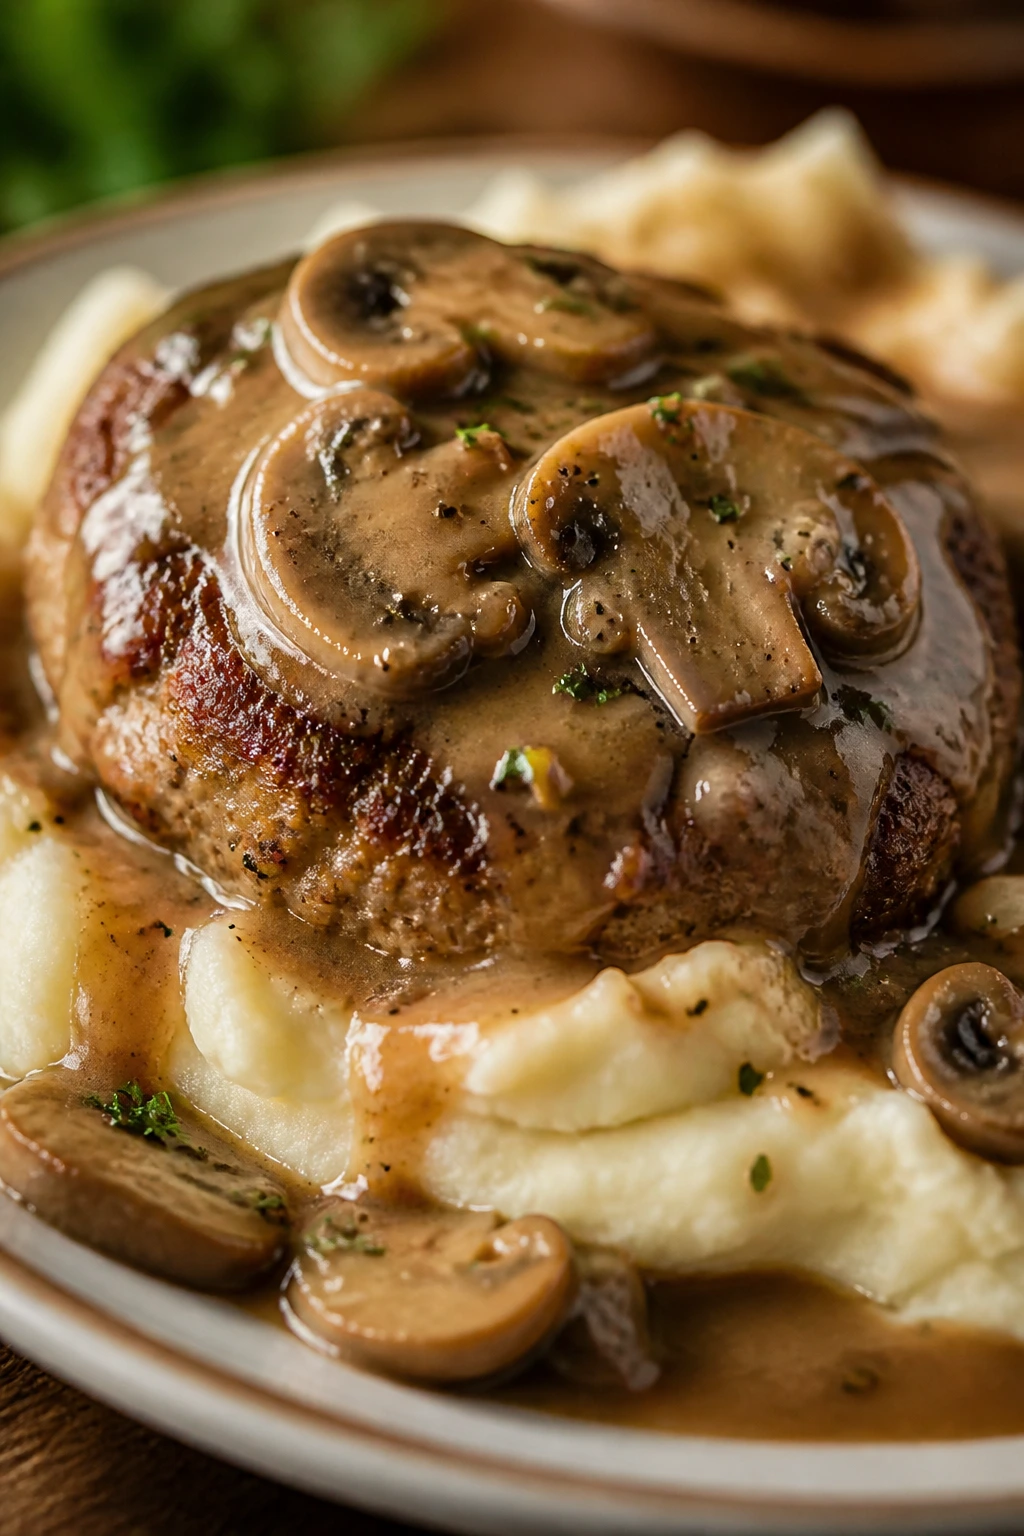
Salisbury steak is old-fashioned in the way good diner food often is. The patties should be tender, the gravy deep and brown, and the mushrooms soft enough to melt into the sauce. It’s a spoon-over-mashed-potatoes kind of dinner.
Why It Works:
Breadcrumbs and egg keep the patties soft, while the mushroom gravy turns a basic ground beef dinner into something with more body. The gravy also helps leftovers stay moist.
Key Ingredients:
- 1 1/2 lb ground beef
- 1/2 cup breadcrumbs
- 1 egg
- 1 small onion, grated
- 1 tsp kosher salt
- 1/2 tsp black pepper
- 8 oz mushrooms, sliced
- 2 cups beef broth
- 1 tbsp Worcestershire sauce
- 2 tbsp flour
Quick Steps:
- Mix the beef, breadcrumbs, egg, onion, salt, and pepper, then shape into oval patties.
- Brown the patties in a skillet and set them aside.
- Cook the mushrooms, whisk in flour, then add broth and Worcestershire to make gravy.
- Return the patties to the pan and simmer 10 minutes until cooked through.
Equipment for This Recipe:
- Large skillet with lid
- Mixing bowl
- Spatula
- Measuring cups
How to Serve This Dish:
Mashed potatoes are the classic move, but buttered noodles work too. A small scoop of peas on the side gives the plate some color and cuts the richness.
Pro Tips for This Recipe:
- Grate the onion so the patties stay tender and the flavor spreads evenly.
- Brown the patties in batches if your pan is crowded.
- If the gravy gets too thick, add broth 1 tablespoon at a time.
Variations on This Dish:
- Onion Gravy Only: Skip the mushrooms and build the gravy with extra onions.
- Turkey Salisbury: Use ground turkey and add 1 tablespoon olive oil.
- Mini Patties: Shape smaller steaks for after-school snack plates.
Common Mistakes to Avoid with This Dish:
- Don’t skip browning the patties; it gives the gravy more flavor.
- Don’t boil the gravy hard or it can tighten too much.
- Don’t shape the patties too thick or the centers lag behind.
10. Chicken and Rice Casserole
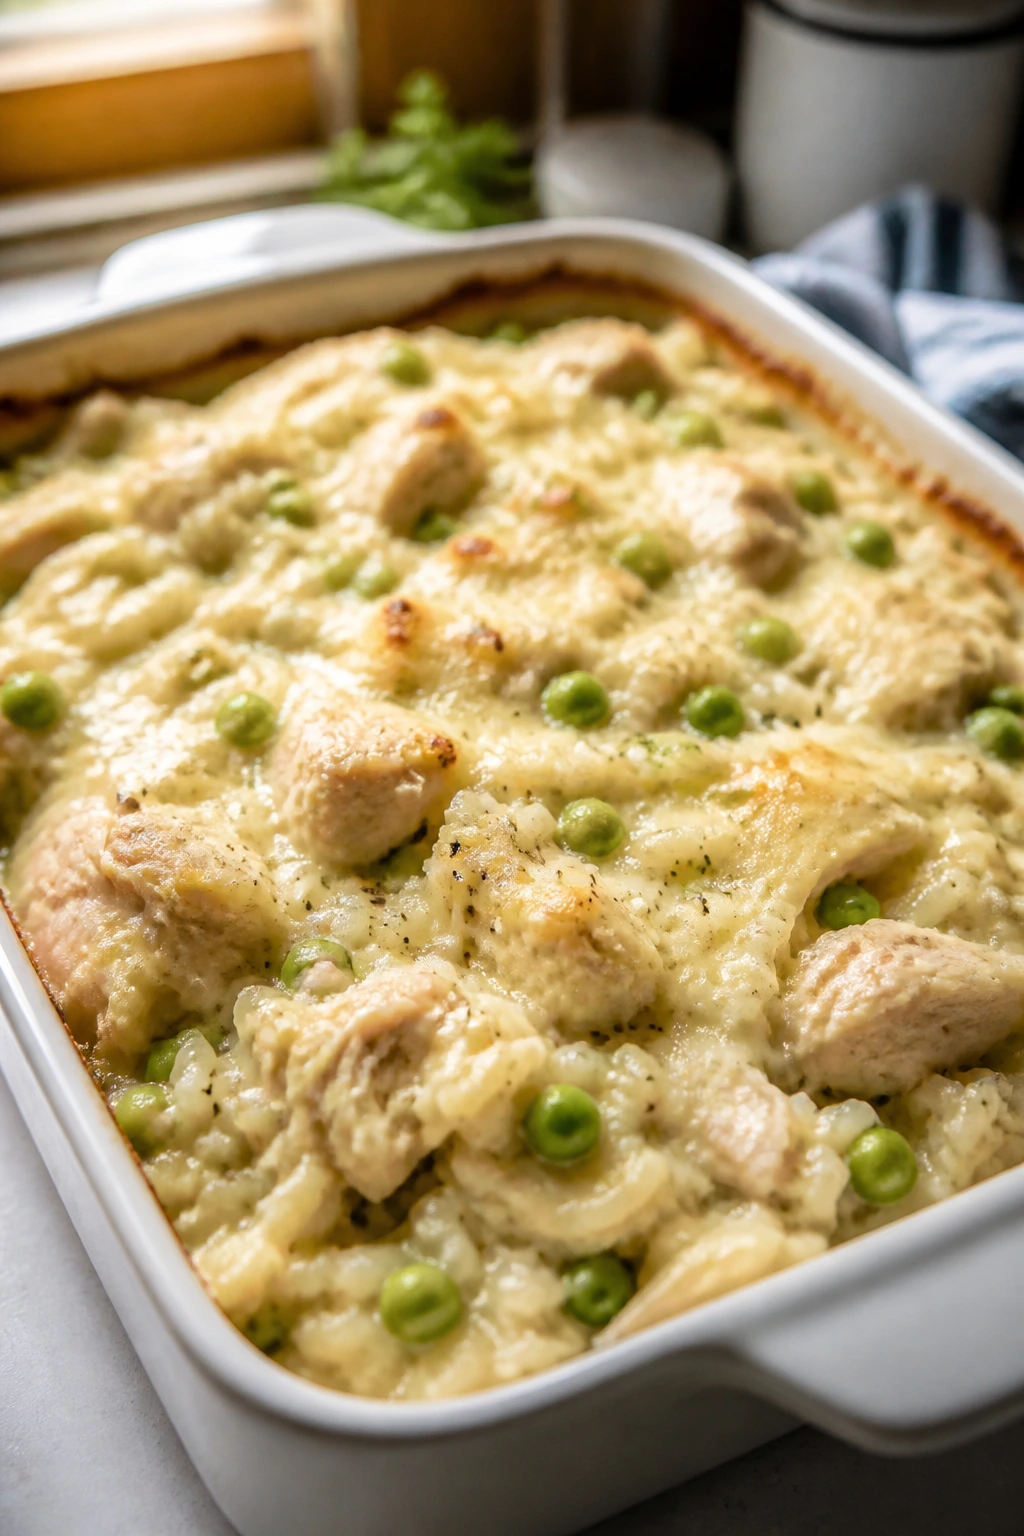
Chicken and rice casserole is soft, savory, and a little old-school in the best way. The rice should absorb the broth and the chicken juices so every spoonful tastes like it cooked together, because it did.
Why It Works:
Rice bakes underneath the chicken and catches the broth as it simmers in the oven. That makes it a one-dish dinner that feels complete without a pile of sides.
Key Ingredients:
- 1 lb chicken thighs or breasts, cut into pieces
- 1 cup long-grain white rice, uncooked
- 1 small onion, chopped
- 2 celery stalks, chopped
- 2 carrots, chopped
- 2 1/2 cups chicken broth
- 1/2 cup milk
- 1 tbsp butter
- 1 cup frozen peas
- Salt, pepper, and thyme
Quick Steps:
- Heat the oven to 375°F (190°C) and grease a baking dish.
- Mix rice, vegetables, broth, milk, butter, and seasoning in the dish.
- Nestle the chicken on top, cover tightly, and bake 45 minutes.
- Stir in peas, recover for 5 more minutes, then rest 10 minutes.
Equipment for This Recipe:
- 9×13-inch baking dish
- Foil or a tight lid
- Cutting board and knife
- Spoon
How to Serve This Dish:
Scoop it into bowls with a little extra butter on top or serve it beside a biscuit. It’s gentle enough for a snack meal and sturdy enough for supper.
Pro Tips for This Recipe:
- Use long-grain rice, not quick-cook rice.
- Keep the dish covered so the rice steams properly.
- Dice the vegetables small or they stay too firm.
Variations on This Dish:
- Creamy Version: Stir in 1/2 cup cream of chicken soup.
- Lemon Herb Chicken: Add lemon zest and parsley at the end.
- Broccoli Rice Bake: Swap peas for small broccoli florets.
Common Mistakes to Avoid with This Dish:
- Don’t use too much liquid or the casserole turns soupy.
- Don’t uncover it too early or the rice dries before it softens.
- Don’t slice the chicken too large; it cooks more evenly in smaller pieces.
11. Beef and Bean Enchiladas
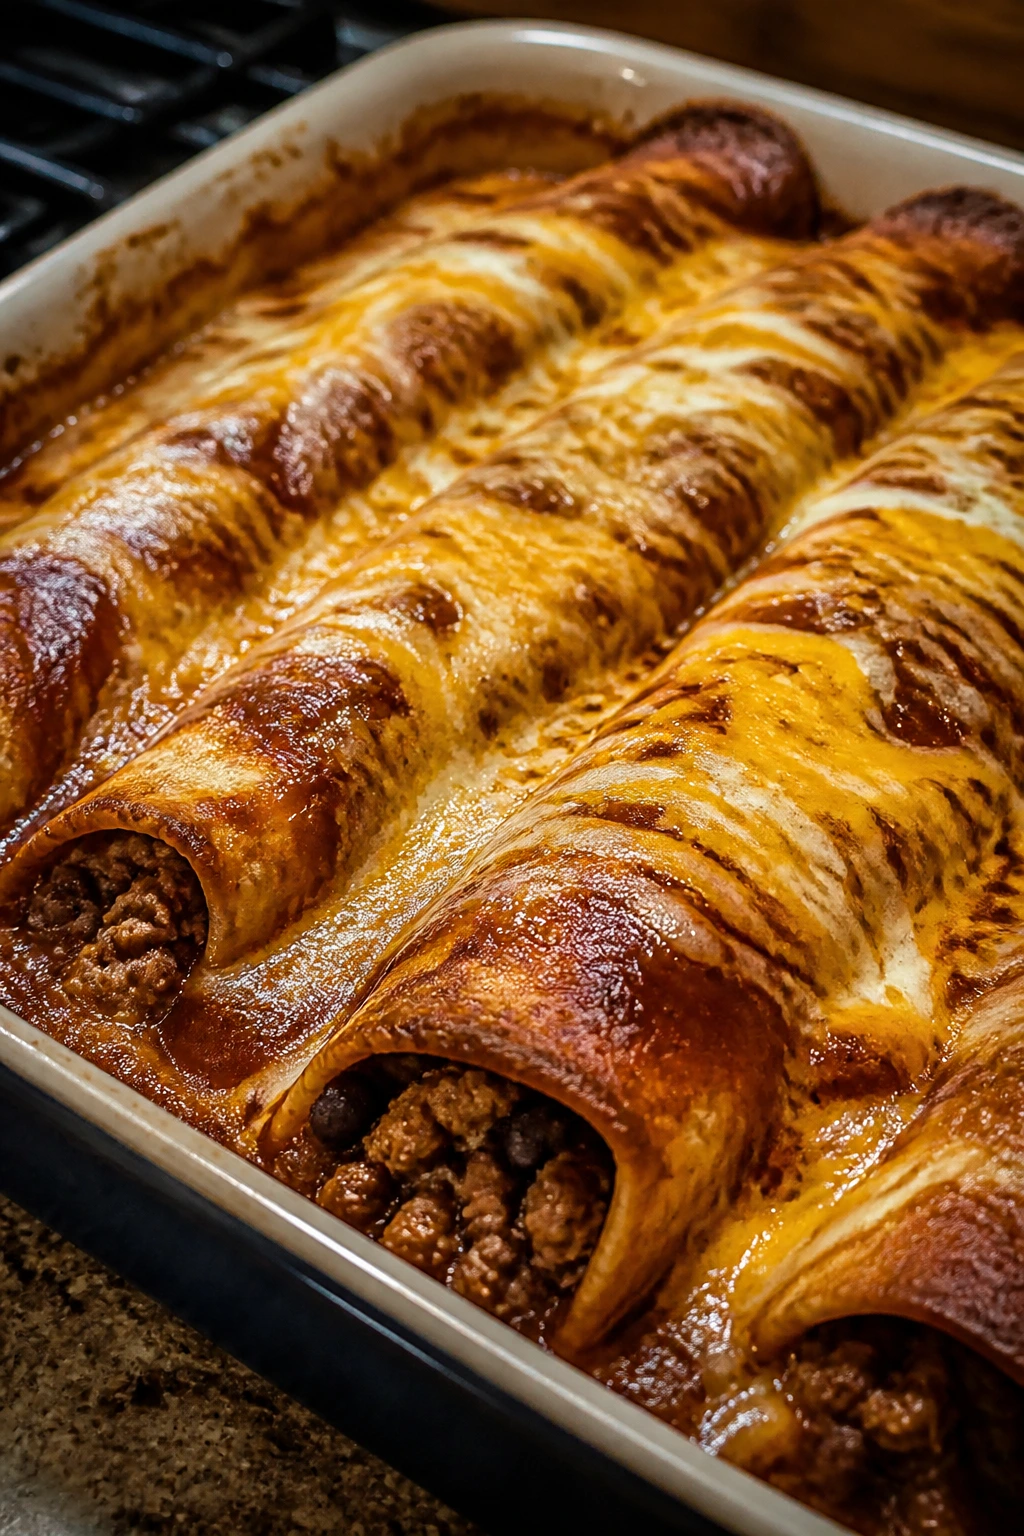
Enchiladas are one of those dinners that taste louder than they look. The sauce should soak the tortillas just enough to soften them, but not so much that they vanish. Beef, beans, and cheese do the heavy lifting here.
Why It Works:
The bean filling stretches the meat and gives the enchiladas a softer, creamier bite. Baking them with sauce and cheese turns the edges slightly crisp while the center stays saucy.
Key Ingredients:
- 1 lb ground beef
- 1 can black or pinto beans, 15 oz, drained
- 1 small onion, chopped
- 8 flour tortillas
- 2 cups enchilada sauce
- 2 cups shredded cheddar or Monterey Jack
- 1 tsp chili powder
- 1/2 tsp cumin
- Salt to taste
Quick Steps:
- Brown the beef and onion, then stir in beans and spices.
- Spoon filling into tortillas, roll tightly, and place seam-side down in a baking dish.
- Pour enchilada sauce over the top and cover with cheese.
- Bake at 375°F (190°C) for 20 minutes until hot and melted.
Equipment for This Recipe:
- Skillet
- 9×13-inch baking dish
- Spoon
- Foil
How to Serve This Dish:
Cut the enchiladas in half for smaller snack portions and serve with sour cream or salsa. A little shredded lettuce on the side keeps the plate from feeling too heavy.
Pro Tips for This Recipe:
- Warm the tortillas first so they roll without cracking.
- Do not overfill them or the seams burst open.
- If your sauce is thin, simmer it 5 minutes before pouring.
Variations on This Dish:
- Chicken Enchiladas: Swap in cooked shredded chicken.
- Green Sauce Version: Use green enchilada sauce and Monterey Jack.
- Bean-Heavy Batch: Reduce the beef and add an extra can of beans.
Common Mistakes to Avoid with This Dish:
- Don’t leave the tortillas dry and cold. They crack.
- Don’t drown the pan in sauce or the bottoms get too soft.
- Don’t skip the rest after baking if you want tidy slices.
12. Meatballs in Marinara

Meatballs in marinara are useful in a way that almost feels unfair. You can eat them over spaghetti, tuck them into rolls, or serve them with toothpicks for a snack plate. The sauce should be bright and the meatballs tender, not rubbery.
Why It Works:
A breadcrumb-and-egg mix keeps the meatballs soft, and simmering them in sauce finishes the cooking gently. That combination gives you a dinner that can split into many smaller meals later.
Key Ingredients:
- 1 lb ground beef
- 1/2 lb ground pork
- 1/2 cup breadcrumbs
- 1 egg
- 2 cloves garlic, minced
- 1/4 cup grated Parmesan
- 2 cups marinara sauce
- 1 tsp Italian seasoning
- Salt and pepper to taste
- Cooked spaghetti or rolls for serving
Quick Steps:
- Mix the meat, breadcrumbs, egg, garlic, Parmesan, and seasoning, then form 1 1/2-inch meatballs.
- Brown them in a skillet or bake at 425°F (220°C) for 12 minutes.
- Simmer the meatballs in marinara for 10 minutes until cooked through.
- Serve over pasta or in small rolls.
Equipment for This Recipe:
- Large bowl
- Baking sheet or skillet
- Saucepan
- Tongs
How to Serve This Dish:
Serve three or four meatballs with a little sauce and a roll for a snack-sized plate. They also work well in a thermos-style container if someone needs a warm after-school bite later.
Pro Tips for This Recipe:
- Do not overmix the meat or the texture turns tight.
- Wet your hands before rolling so the mixture does not stick.
- Simmer gently; a hard boil makes the meatballs tough.
Variations on This Dish:
- Turkey Meatballs: Use ground turkey and add a splash of olive oil.
- Herb Version: Add chopped parsley and basil.
- Cheesy Center: Tuck a small cube of mozzarella into each meatball.
Common Mistakes to Avoid with This Dish:
- Don’t skip salt in the meat mix or the meatballs taste flat.
- Don’t boil them in sauce too long.
- Don’t make them huge; smaller meatballs are easier to portion.
13. Chicken Parmesan Bites
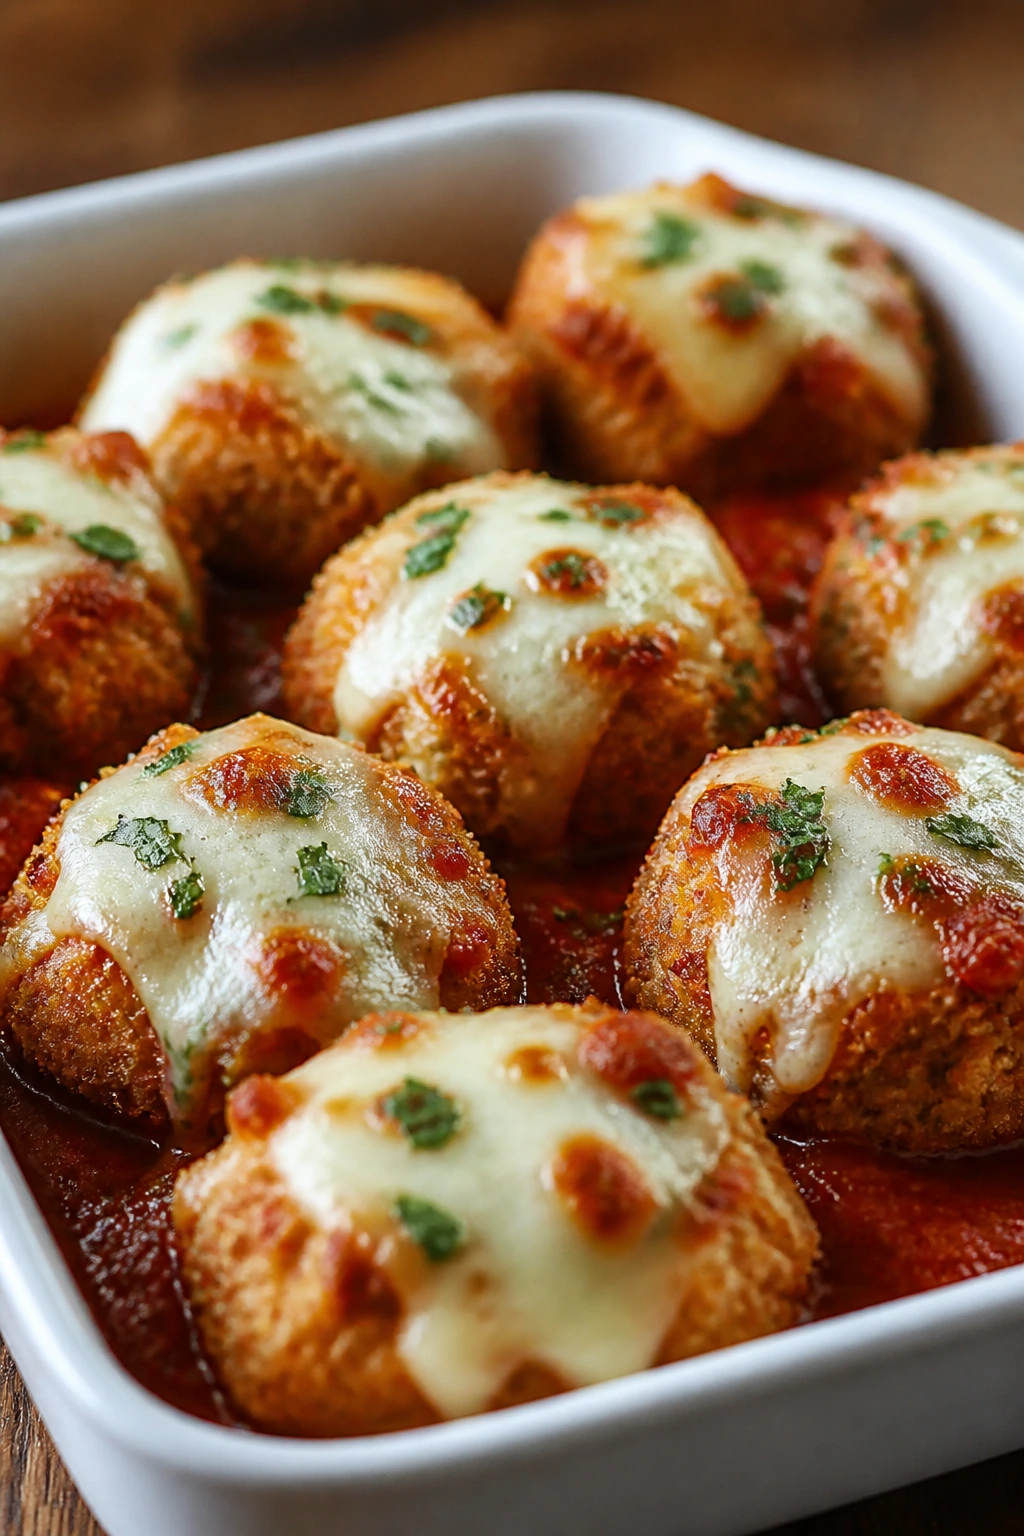
Chicken Parmesan Bites give you the same tomato-cheese comfort in a form that disappears fast from a tray. The breading should stay crisp enough to stand up to sauce, and the mozzarella should melt into little white puddles on top.
Why It Works:
Cutting the chicken into bite-size pieces shortens the bake and gives you more crunchy surface area. That makes it easier to serve as a snack or tuck into a roll.
Key Ingredients:
- 1 1/2 lb chicken breast, cut into bite-size pieces
- 1 cup flour
- 2 eggs, beaten
- 1 1/2 cups breadcrumbs or panko
- 1 tsp garlic powder
- 2 cups marinara sauce
- 1 1/2 cups shredded mozzarella
- 1/4 cup grated Parmesan
- 1 tsp dried oregano
Quick Steps:
- Heat the oven to 425°F (220°C) and set up flour, egg, and breadcrumb bowls.
- Coat the chicken pieces, place on a greased sheet pan, and bake 15 minutes.
- Spoon marinara over the chicken, then add mozzarella and Parmesan.
- Bake 5 to 7 minutes more until the cheese melts and the chicken is cooked through.
Equipment for This Recipe:
- Rimmed sheet pan
- Three shallow bowls
- Tongs
- Spoon for sauce
How to Serve This Dish:
Serve the bites over spaghetti, in a small bowl with toothpicks, or tucked into a soft roll. They also make a good plate with roasted broccoli and a little extra sauce for dipping.
Pro Tips for This Recipe:
- Use panko if you want a louder crunch.
- Do not drown the chicken in sauce before the second bake.
- Pull the pieces when they hit 165°F (74°C) in the center.
Variations on This Dish:
- Spicy Parm Bites: Add red pepper flakes to the breadcrumbs.
- Eggplant Version: Use thin eggplant rounds instead of chicken.
- Garlic Butter Finish: Brush the breading with a little garlic butter before baking.
Common Mistakes to Avoid with This Dish:
- Don’t overcrowd the pan or the coating steams.
- Don’t add the sauce too early or the crust goes soft.
- Don’t use chicken pieces that are too large; they cook unevenly.
14. Tater Tot Hotdish

Tater tot hotdish is one of those casseroles that knows exactly what it is. Beef on the bottom, vegetables in the middle, and a salty, crisp potato lid on top. It tastes like a weeknight with a better attitude.
Why It Works:
The tots protect the filling from drying out and give you a crunchy top without any extra work. The cream soup base keeps everything bound together and easy to scoop.
Key Ingredients:
- 1 1/2 lb ground beef
- 1 onion, chopped
- 1 bag frozen green beans, 12 oz
- 1 can cream of mushroom soup, 10.5 oz
- 1 cup milk
- 1 bag tater tots, about 32 oz
- 2 cups shredded cheddar
- Salt and pepper
Quick Steps:
- Brown the beef and onion, then stir in the soup, milk, green beans, and seasoning.
- Spread the mixture in a baking dish and top with cheddar.
- Arrange the tater tots over the top in a single layer.
- Bake at 400°F (205°C) for 35 to 40 minutes until the tots are crisp.
Equipment for This Recipe:
- Large skillet
- 9×13-inch baking dish
- Wooden spoon
- Sheet pan if you want to pre-crisp the tots
How to Serve This Dish:
Serve it in square scoops with ketchup or hot sauce on the side. It’s filling enough on its own, though a pickle spear beside it is a nice move.
Pro Tips for This Recipe:
- Keep the beef mixture thick or the bottom gets watery.
- Use the tots straight from frozen.
- Let it stand before serving so the layers hold.
Variations on This Dish:
- Corn Hotdish: Swap green beans for corn.
- Turkey Hotdish: Use ground turkey and add extra seasoning.
- Tex-Mex Hotdish: Stir in black beans and a pinch of cumin.
Common Mistakes to Avoid with This Dish:
- Don’t thaw the tots or they lose their shape.
- Don’t use too much milk in the filling.
- Don’t skip the cheese if you want the filling to stay cohesive.
15. Beef Stroganoff
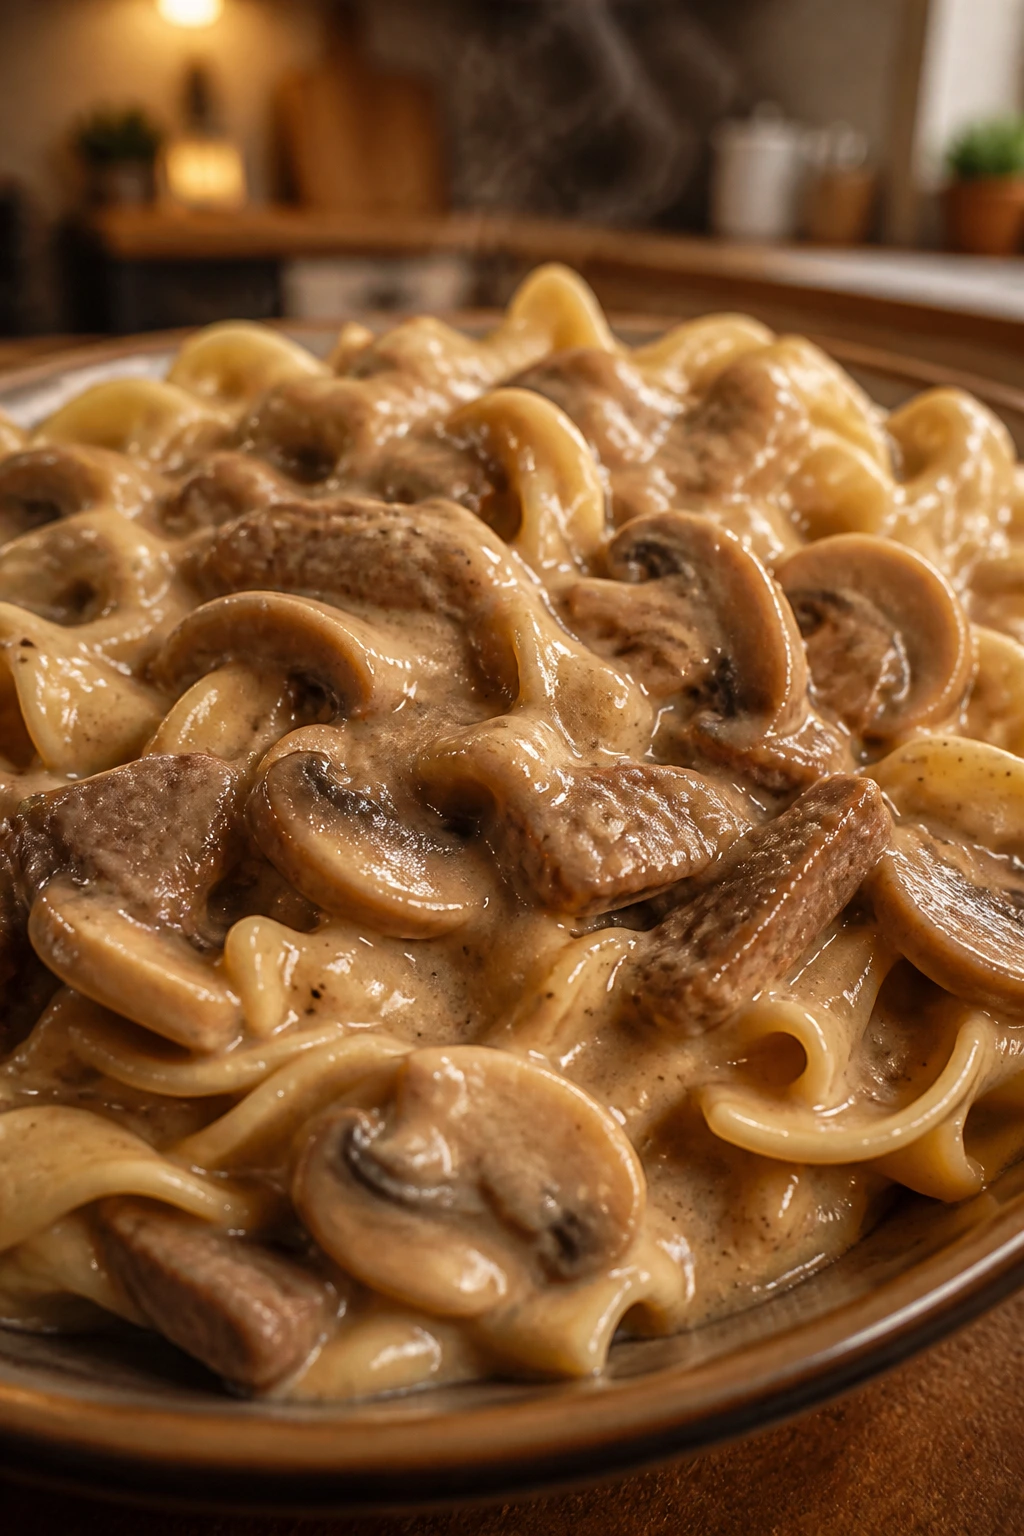
Beef stroganoff should taste silky, not heavy. The noodles catch the sauce, the mushrooms bring depth, and the sour cream gives the whole pan a soft tang that keeps you going back for another forkful.
Why It Works:
Quick-cooking beef and a sour cream finish make this dinner feel rich without needing a long simmer. It also reheats well if you keep a little broth nearby.
Key Ingredients:
- 1 1/2 lb beef sirloin or stew meat, sliced thin
- 8 oz mushrooms, sliced
- 1 onion, sliced
- 2 tbsp flour
- 2 cups beef broth
- 1 tbsp Dijon mustard
- 1 cup sour cream
- 12 oz egg noodles
- 2 tbsp butter
- Salt and pepper
Quick Steps:
- Cook the noodles and set them aside.
- Brown the beef in butter, then add onion and mushrooms.
- Stir in flour, broth, and mustard; simmer until the sauce thickens.
- Turn off the heat, stir in sour cream, and serve over noodles.
Equipment for This Recipe:
- Large skillet
- Pot for noodles
- Wooden spoon
- Whisk
How to Serve This Dish:
A small bowl over noodles is enough, but a few buttered peas or green beans fit right beside it. This one also works on toast if you want a more old-fashioned supper feel.
Pro Tips for This Recipe:
- Slice the beef thin so it stays tender.
- Add the sour cream off the heat or it can curdle.
- Keep a splash of broth ready for leftovers.
Variations on This Dish:
- Ground Beef Stroganoff: Use ground beef for a cheaper, faster version.
- Paprika Version: Add a teaspoon of paprika for deeper color.
- Mushroom-Heavy Style: Double the mushrooms and cut the beef a little.
Common Mistakes to Avoid with This Dish:
- Don’t boil the sour cream.
- Don’t overcook the noodles or they turn soft on reheating.
- Don’t crowd the skillet when browning the beef.
16. Stuffed Bell Peppers
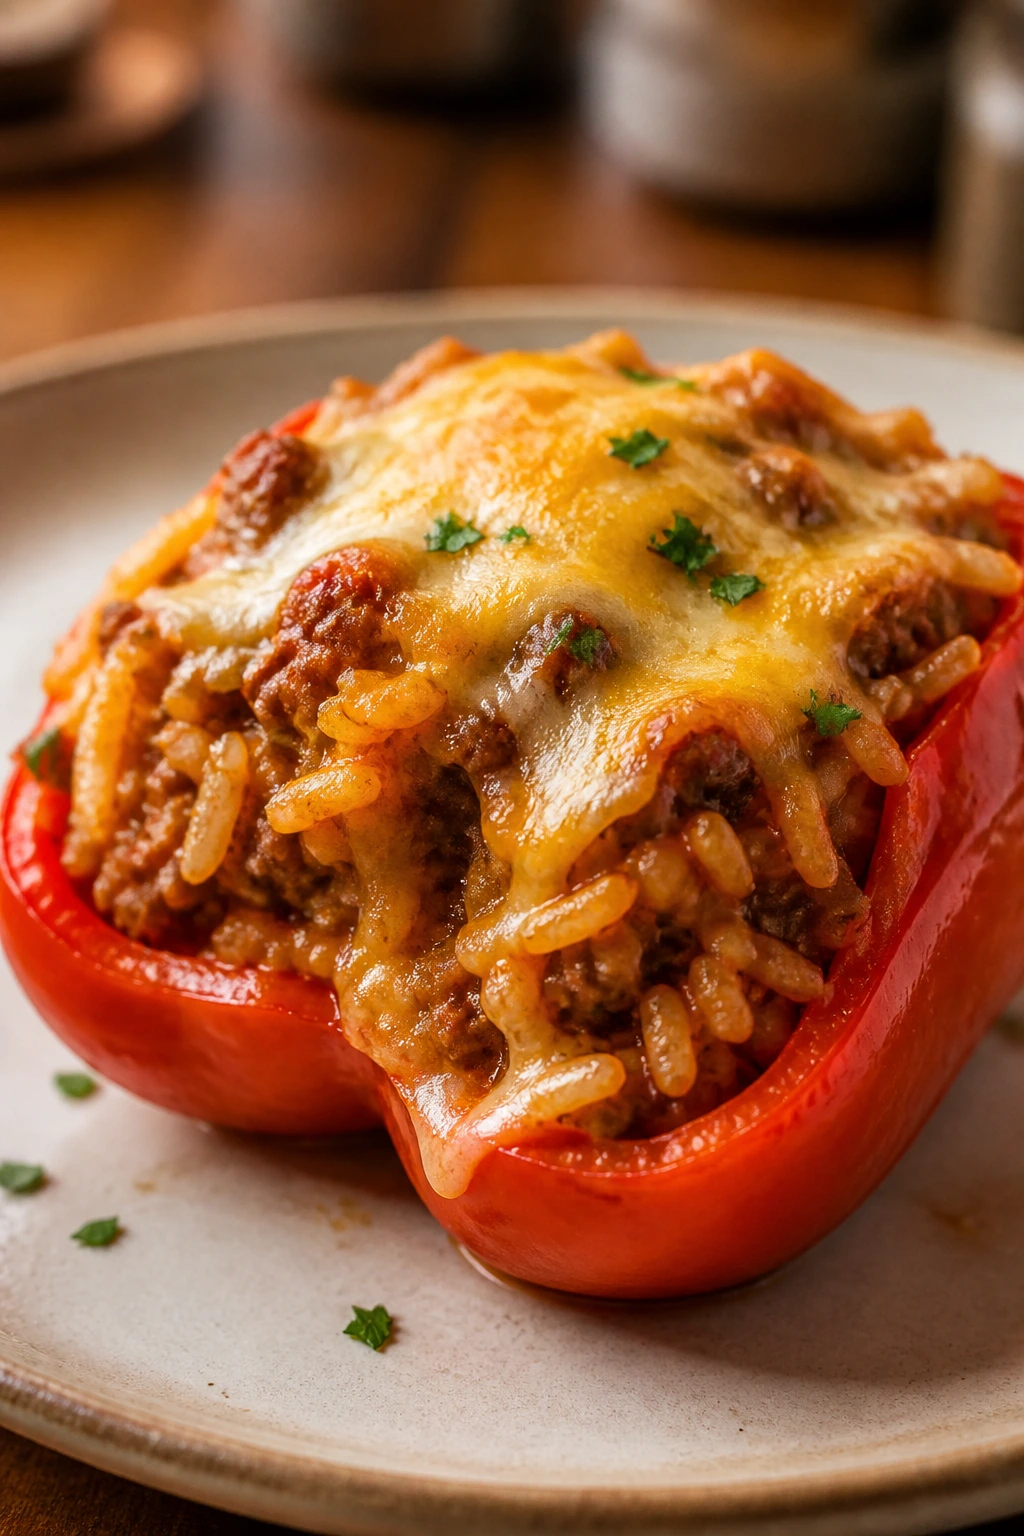
Stuffed peppers look neat on the plate and stay neatly portioned after baking. The pepper softens, the filling gets savory, and the cheese on top gives you that browned edge everyone wants first.
Why It Works:
Bell peppers act like built-in cups, so the filling stays in place and each pepper becomes its own little dinner. Rice stretches the meat without making the stuffing heavy.
Key Ingredients:
- 6 bell peppers, tops cut off and seeded
- 1 lb ground beef
- 1 cup cooked rice
- 1 can diced tomatoes, 14.5 oz
- 1 small onion, chopped
- 1 cup shredded cheese
- 1 tsp Italian seasoning
- Salt and pepper
Quick Steps:
- Heat the oven to 375°F (190°C) and soften the peppers in boiling water for 3 minutes.
- Brown the beef and onion, then stir in rice, tomatoes, and seasoning.
- Stuff the peppers, set them in a baking dish, and top with cheese.
- Bake for 30 to 35 minutes until the peppers are tender.
Equipment for This Recipe:
- Baking dish
- Skillet
- Knife and spoon
- Pot for blanching peppers
How to Serve This Dish:
Serve one pepper half as a snack plate or two halves as dinner. A spoonful of sour cream or a little hot sauce on the side works well.
Pro Tips for This Recipe:
- Choose peppers that can stand upright.
- Pre-cook the rice so the stuffing does not turn dry.
- If the tops brown too fast, tent with foil for the last 10 minutes.
Variations on This Dish:
- Turkey Pepper Version: Swap in ground turkey.
- Mexican-Style Stuffing: Use salsa and cheddar instead of tomatoes and Italian seasoning.
- No-Rice Option: Replace rice with cauliflower rice for a lighter fill.
Common Mistakes to Avoid with This Dish:
- Don’t skip blanching if you like softer peppers.
- Don’t overstuff to the point of tearing the walls.
- Don’t underseason the filling; peppers need help.
17. Chicken and Dumplings
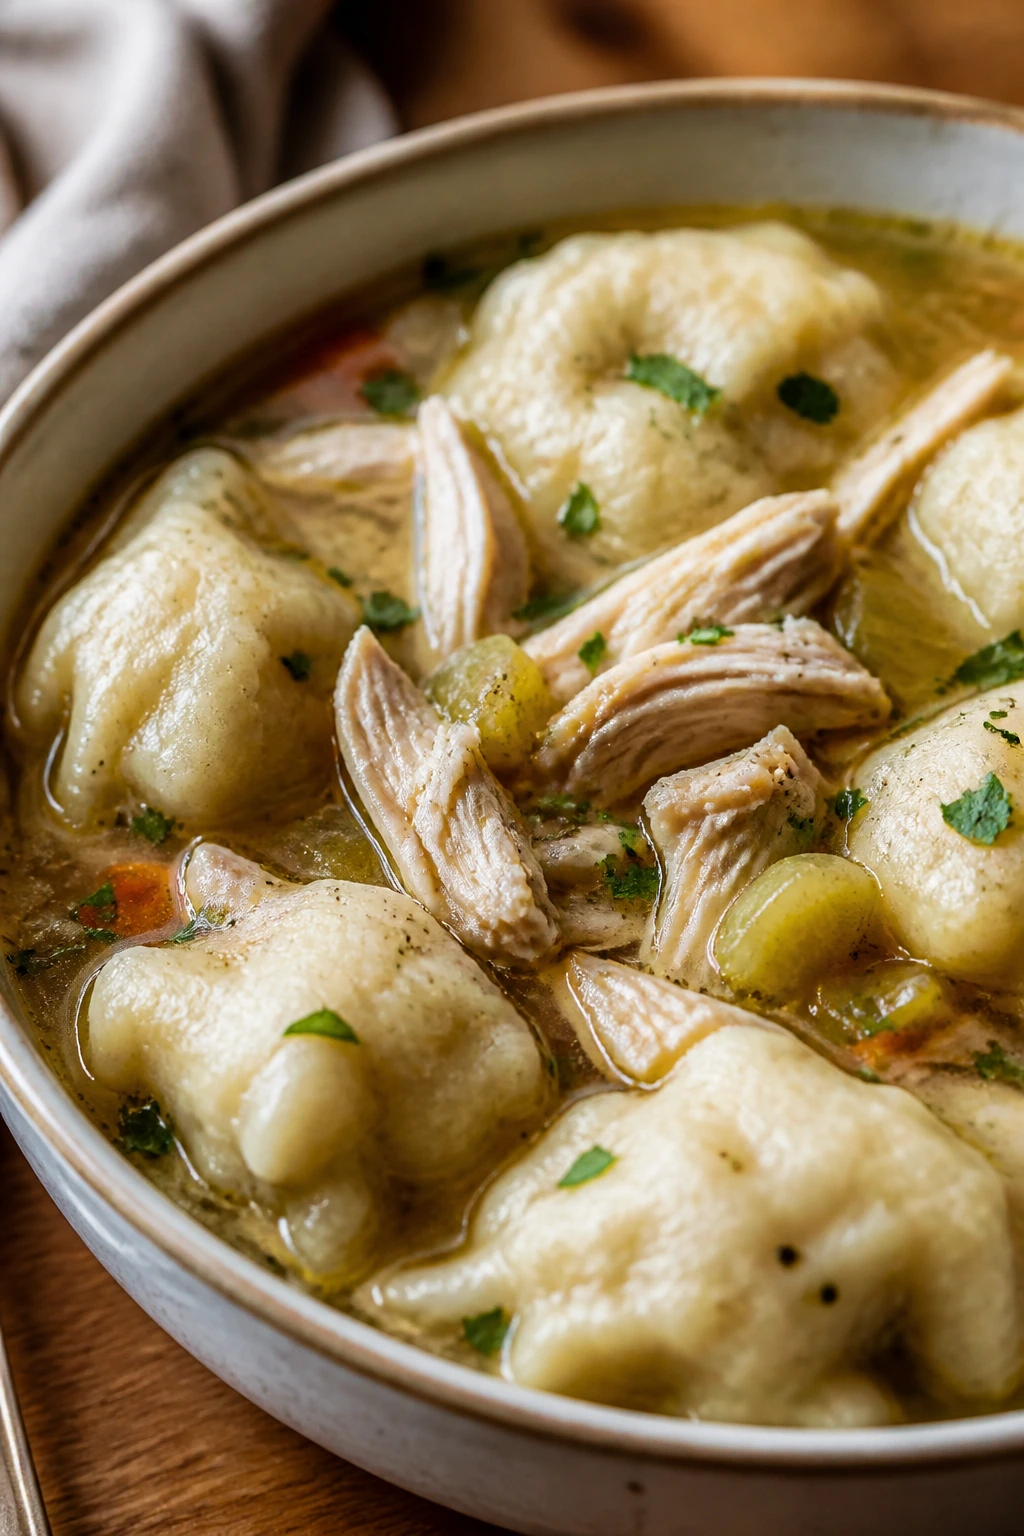
Chicken and dumplings is one of those bowls that feels quiet in a good way. The broth should be rich, the chicken tender, and the dumplings soft with a little bite in the center. It is not a fast dish, but it rewards the wait.
Why It Works:
The dumplings steam on top of the simmering broth, so they stay fluffy and soak up flavor without falling apart. That makes leftovers especially good the next day.
Key Ingredients:
- 1 lb chicken thighs or breasts
- 2 carrots, sliced
- 2 celery stalks, sliced
- 1 onion, chopped
- 6 cups chicken broth
- 1/2 cup milk
- 2 cups all-purpose flour
- 1 tbsp baking powder
- 3 tbsp butter
- 3/4 cup milk for the dumplings
Quick Steps:
- Simmer chicken, carrots, celery, onion, and broth until the chicken cooks through.
- Pull the chicken, shred it, and return it to the pot.
- Mix dumpling dough from flour, baking powder, butter, and milk.
- Drop spoonfuls into the simmering broth, cover, and cook 15 minutes without lifting the lid.
Equipment for This Recipe:
- Dutch oven or large pot
- Mixing bowl
- Spoon
- Fork or pastry cutter
How to Serve This Dish:
Ladle it into small bowls with black pepper on top. A biscuit on the side is extra, but I won’t argue with it.
Pro Tips for This Recipe:
- Keep the broth at a steady simmer, not a rolling boil.
- Do not peek while the dumplings cook.
- Use thighs if you want richer broth and more forgiving meat.
Variations on This Dish:
- Herbed Dumplings: Add parsley or chives to the dough.
- Creamy Version: Stir in 1/2 cup milk or cream before adding dumplings.
- Rotisserie Shortcut: Use cooked shredded chicken to cut the time.
Common Mistakes to Avoid with This Dish:
- Don’t stir after the dumplings go in.
- Don’t make the dough too wet or the dumplings sink.
- Don’t overcook the chicken if you are using breasts.
18. Lasagna Roll-Ups
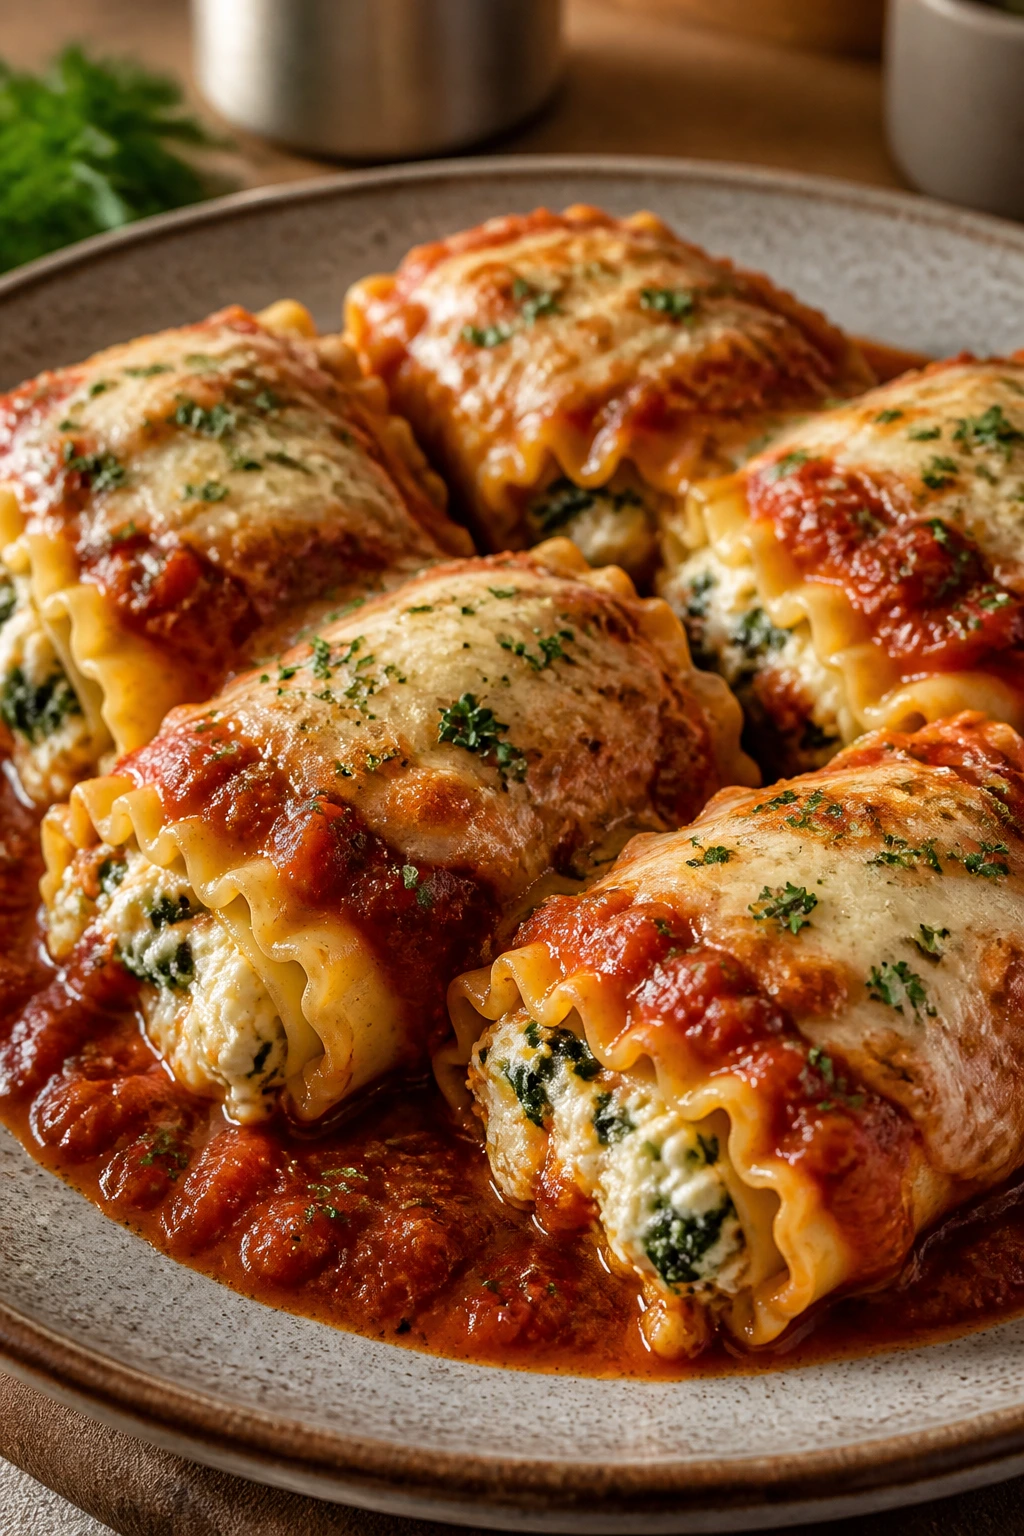
Lasagna roll-ups give you the lasagna taste without the giant slab. Each noodle gets its own ribbon of filling and sauce, which makes serving easier and leftovers cleaner. They look neat, too, which never hurts.
Why It Works:
Rolling the noodles instead of layering them shortens the baking time and creates built-in portions. The cheese filling keeps the center creamy while the sauce around it stays bright.
Key Ingredients:
- 12 lasagna noodles
- 1 1/2 lb ground beef
- 1 jar marinara, about 24 oz
- 15 oz ricotta
- 2 cups shredded mozzarella
- 1/2 cup grated Parmesan
- 1 egg
- 1 tsp Italian seasoning
- Salt and pepper
Quick Steps:
- Cook the noodles until flexible, then lay them flat.
- Brown the beef and mix ricotta, egg, Parmesan, and seasoning in a bowl.
- Spread filling on each noodle, roll up, and place seam-side down in a baking dish with sauce.
- Top with more sauce and mozzarella, then bake at 375°F (190°C) for 25 minutes.
Equipment for This Recipe:
- Large pot
- Baking dish
- Mixing bowls
- Spoon or offset spatula
How to Serve This Dish:
Two roll-ups make a good snack-size serving, three make dinner. Add garlic bread or a simple salad if you want a fuller plate.
Pro Tips for This Recipe:
- Do not overcook the noodles or they tear when rolling.
- Use a thick filling so it does not squeeze out.
- Let the pan rest before serving for cleaner slices.
Variations on This Dish:
- Spinach Roll-Ups: Fold chopped spinach into the ricotta.
- Sausage Roll-Ups: Swap in Italian sausage for the beef.
- Meatless Roll-Ups: Use sautéed mushrooms and spinach instead of meat.
Common Mistakes to Avoid with This Dish:
- Don’t pile on too much filling.
- Don’t skip sauce under the rolls or they dry out.
- Don’t try to roll hot noodles; they tear more easily.
19. Pork Chops with Apples and Onions
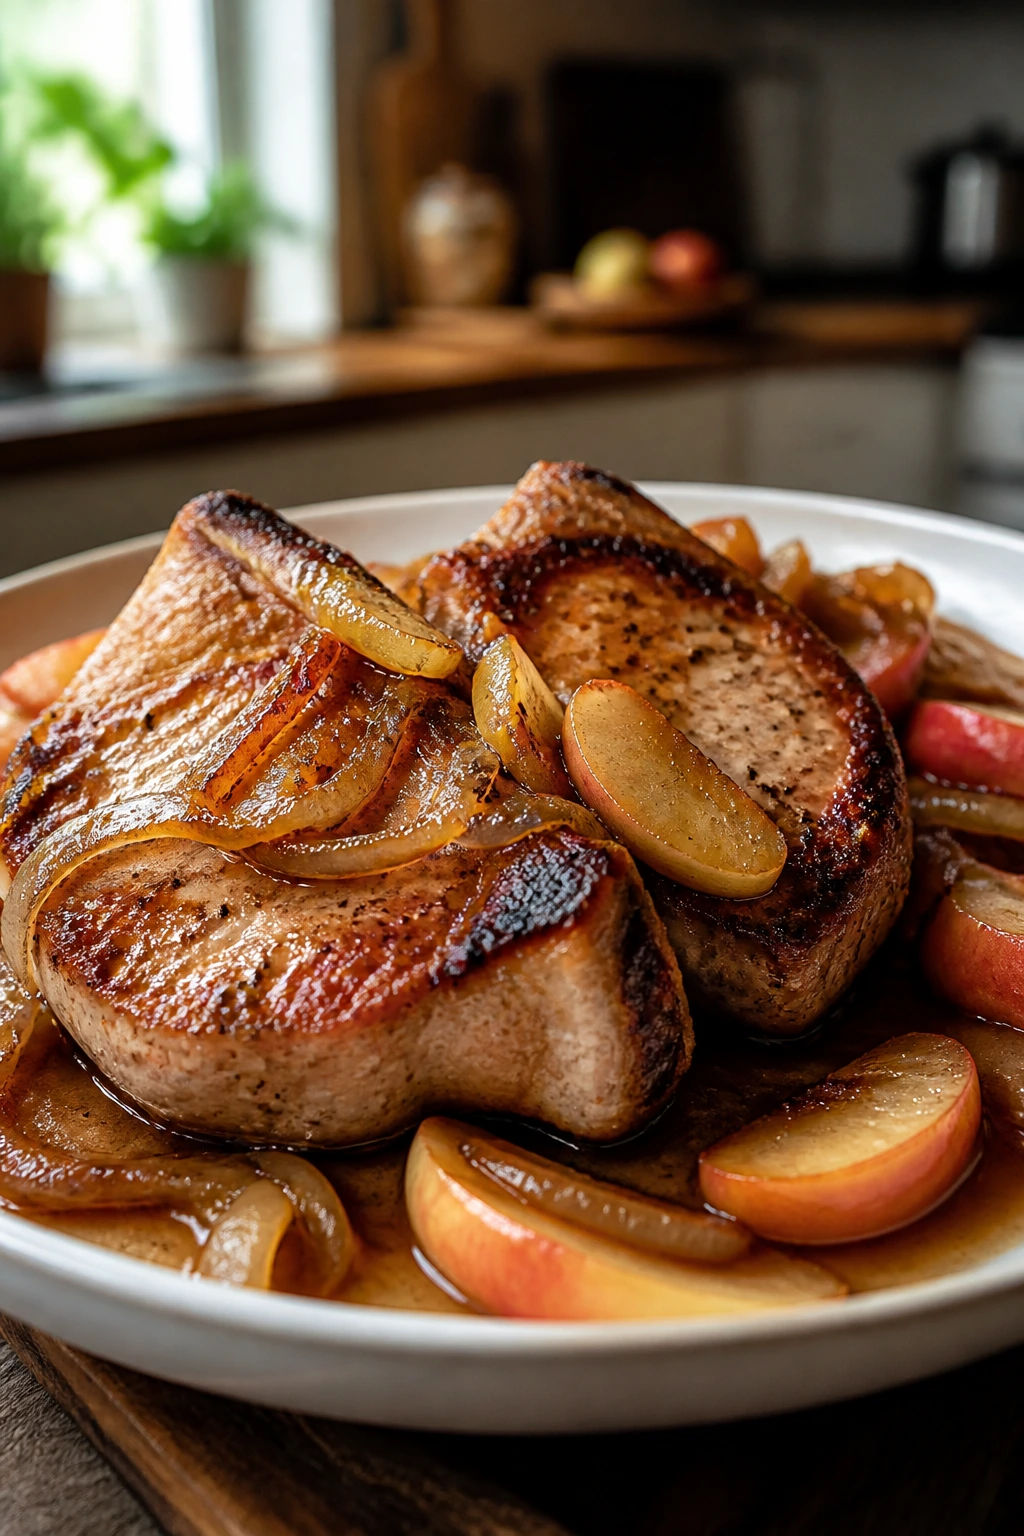
Pork chops with apples and onions has that sweet-savory balance that makes a plate feel finished without much fuss. The apples should soften into the onions and the pan juices should taste sharp and buttery at the same time.
Why It Works:
The fruit brings moisture and a little sweetness, which keeps pork chops from tasting flat. A quick pan sauce ties everything together and makes a small portion feel complete.
Key Ingredients:
- 4 bone-in pork chops
- 2 apples, sliced
- 1 large onion, sliced
- 1 cup apple cider
- 1 tbsp Dijon mustard
- 1 tsp thyme
- 2 tbsp flour
- 2 tbsp butter
- Salt and pepper
Quick Steps:
- Season and sear the pork chops in butter until browned on both sides.
- Cook the onions and apples in the same pan until soft.
- Stir in flour, cider, mustard, and thyme, then simmer until glossy.
- Return the chops and finish over low heat until cooked through.
Equipment for This Recipe:
- Large skillet
- Tongs
- Knife and cutting board
- Small whisk
How to Serve This Dish:
Serve one chop sliced over mashed potatoes or rice with some of the apples spooned on top. It also works well with buttered noodles if that is what you have.
Pro Tips for This Recipe:
- Use chops that are at least 3/4 inch thick so they do not dry out.
- Let the pan sauce reduce until it lightly coats a spoon.
- Pick apples that hold shape, like Granny Smith or Honeycrisp.
Variations on This Dish:
- Mustard Pan Sauce: Add an extra teaspoon of Dijon for more bite.
- Skillet With Cabbage: Add sliced cabbage with the onions.
- Boneless Version: Boneless chops work, but watch the cook time closely.
Common Mistakes to Avoid with This Dish:
- Don’t overcook the chops; pork dries out fast.
- Don’t use apples that turn to mush unless that is what you want.
- Don’t skip the sear or the pan sauce tastes thin.
20. Roast Chicken with Potatoes and Carrots
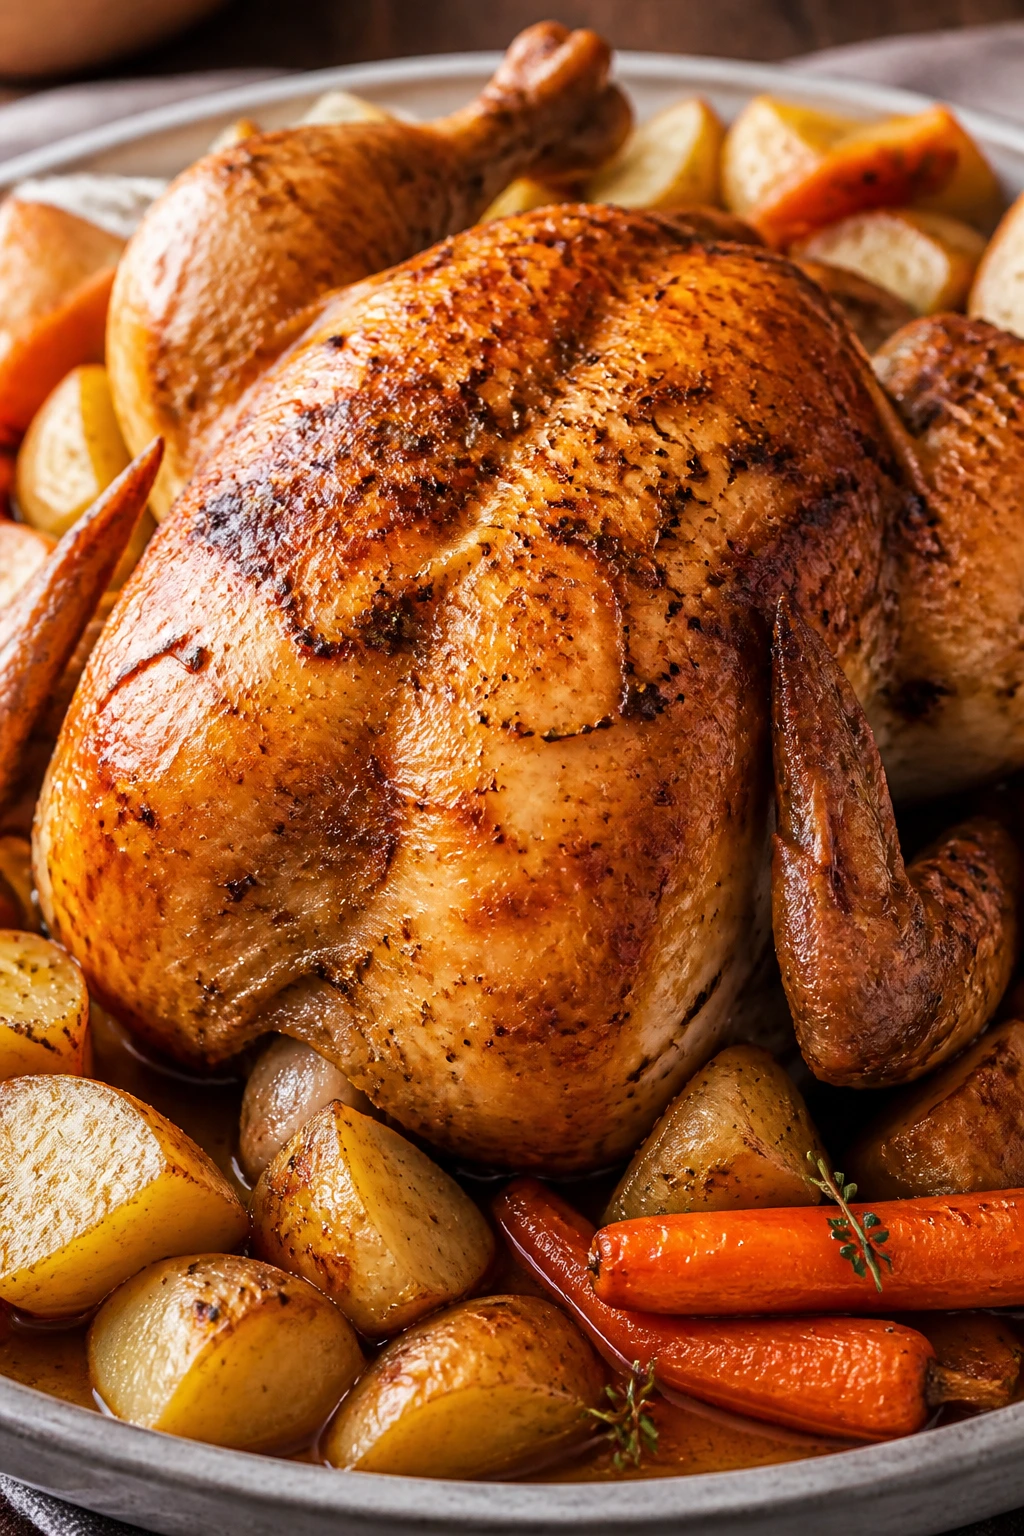
A roast chicken with potatoes and carrots gives you the kind of dinner that fills the kitchen with butter, herbs, and warm onions. The skin should turn golden, the potatoes should soak up drippings, and the carrots should go soft at the edges.
Why It Works:
Roasting everything in one pan means the vegetables pick up chicken fat and seasoning while the bird cooks. That creates a full meal without extra cleanup, and the leftovers carve into excellent snack-sized pieces.
Key Ingredients:
- 1 whole chicken, 4 to 5 lb
- 2 lb potatoes, cut into chunks
- 1 lb carrots, cut into sticks
- 1 onion, quartered
- 4 tbsp butter, softened
- 2 tbsp olive oil
- 2 cloves garlic, minced
- 1 tsp rosemary
- 1 tsp thyme
- Salt and pepper
Quick Steps:
- Heat the oven to 425°F (220°C) and place the chicken in a roasting pan.
- Rub with butter, oil, garlic, herbs, salt, and pepper, then scatter potatoes, carrots, and onion around it.
- Roast for 1 hour to 1 hour 15 minutes, until the chicken reaches 165°F (74°C).
- Rest 15 minutes before carving so the juices stay in the meat.
Equipment for This Recipe:
- Roasting pan
- Kitchen twine, optional
- Instant-read thermometer
- Sharp knife
How to Serve This Dish:
Carve the chicken and serve it with the roasted vegetables and a spoon of pan juices. Leftover slices also make a good after-school snack on toast with a little mustard.
Pro Tips for This Recipe:
- Dry the chicken skin before roasting for better browning.
- Cut vegetables evenly so they finish together.
- If the skin browns too fast, tent loosely with foil.
Variations on This Dish:
- Lemon Roast: Add lemon halves to the pan for brighter flavor.
- Paprika Roast: Rub the chicken with paprika and garlic powder.
- Root Vegetable Mix: Add parsnips or turnips with the carrots.
Common Mistakes to Avoid with This Dish:
- Don’t carve too soon or the chicken loses juice.
- Don’t crowd the pan; the vegetables need space to brown.
- Don’t forget to season the potatoes separately from the bird.
21. Ham and Potato Soup
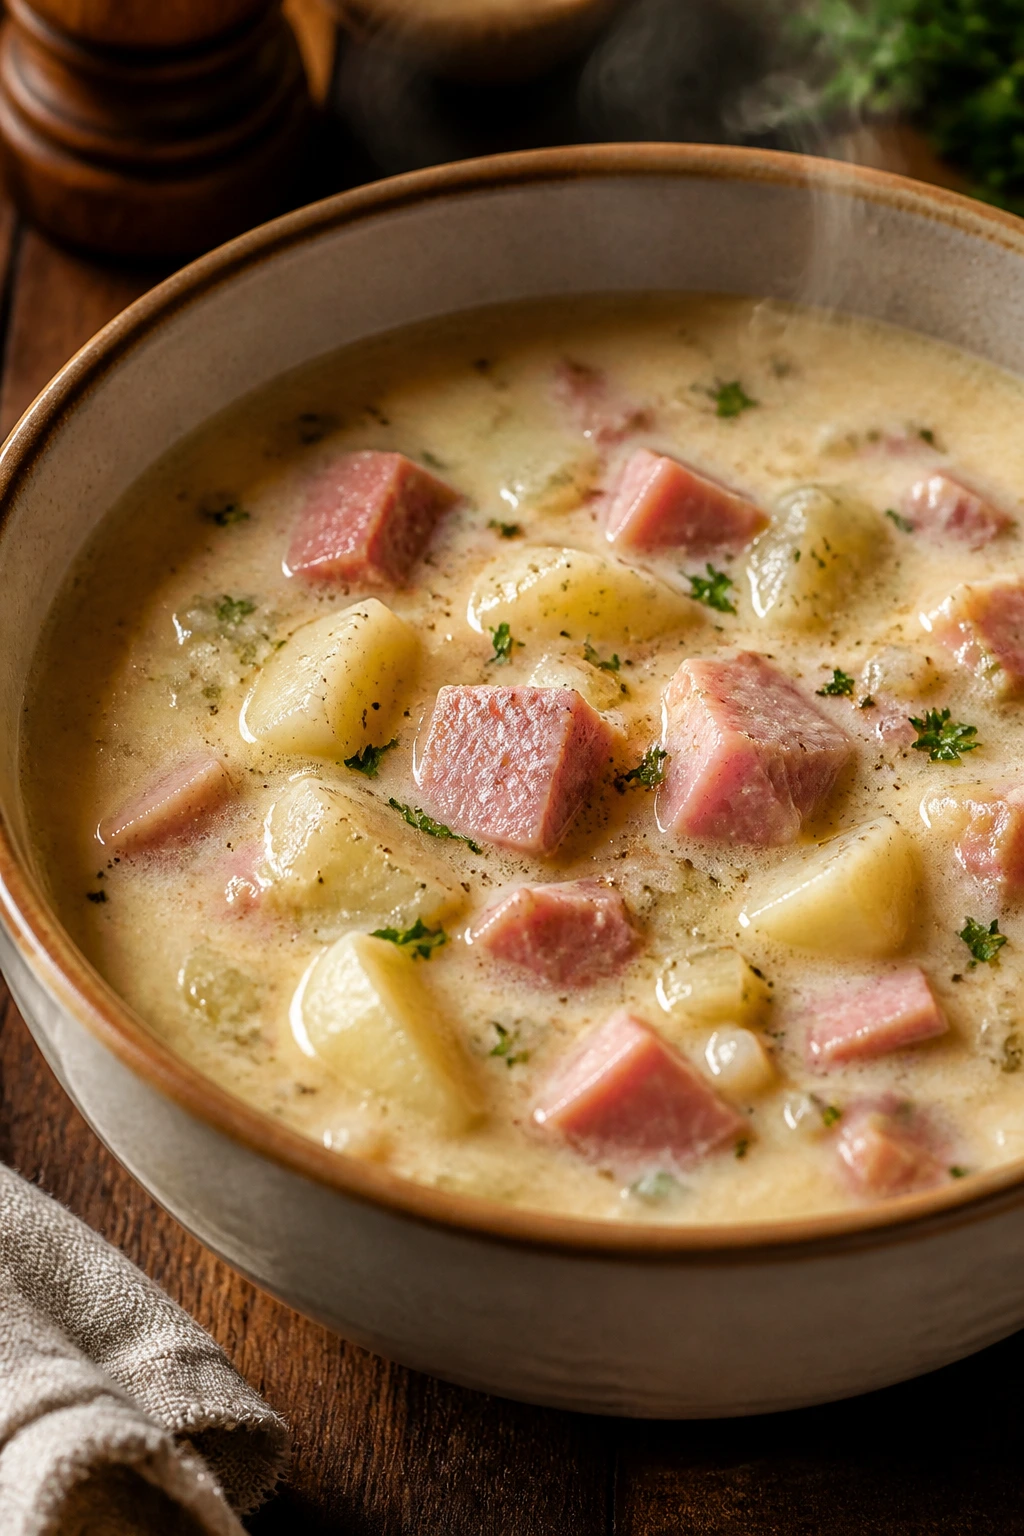
Ham and potato soup is thick, smoky, and practical. The potatoes soften into the broth and help thicken it, while the ham brings enough salt and smoke that you do not need much else. It’s a big spoon kind of supper.
Why It Works:
Potatoes give the soup body without cream-heavy heaviness, and diced ham makes it feel substantial with almost no extra work. It reheats well and gets thicker overnight.
Key Ingredients:
- 1 lb diced ham
- 2 lb potatoes, peeled and cubed
- 1 onion, chopped
- 2 celery stalks, chopped
- 4 cups chicken broth
- 2 cups milk
- 2 tbsp butter
- 2 tbsp flour
- Salt, pepper, and parsley
- Optional cheddar for topping
Quick Steps:
- Cook onion and celery in butter, then stir in flour.
- Add broth, potatoes, and ham, and simmer until the potatoes are tender.
- Stir in milk and simmer gently until the soup turns creamy.
- Season to taste and serve hot.
Equipment for This Recipe:
- Large pot
- Wooden spoon
- Ladle
- Potato peeler, if needed
How to Serve This Dish:
A mug or small bowl with crackers or buttered toast is enough for a snack. For dinner, add a green salad or cornbread on the side.
Pro Tips for This Recipe:
- Cut the potatoes small so they cook at the same pace.
- Add milk at low heat to keep the soup smooth.
- A splash of broth helps if the soup gets too thick on day two.
Variations on This Dish:
- Cheddar Potato Soup: Add 1 cup shredded cheddar at the end.
- Bacon Swap: Use cooked bacon instead of ham.
- Vegetable-Heavy Soup: Add diced carrots and peas.
Common Mistakes to Avoid with This Dish:
- Don’t boil after adding milk or it can split.
- Don’t leave the potatoes in large chunks.
- Don’t forget to taste before salting; ham already brings salt.
22. Cornbread Chili Bake
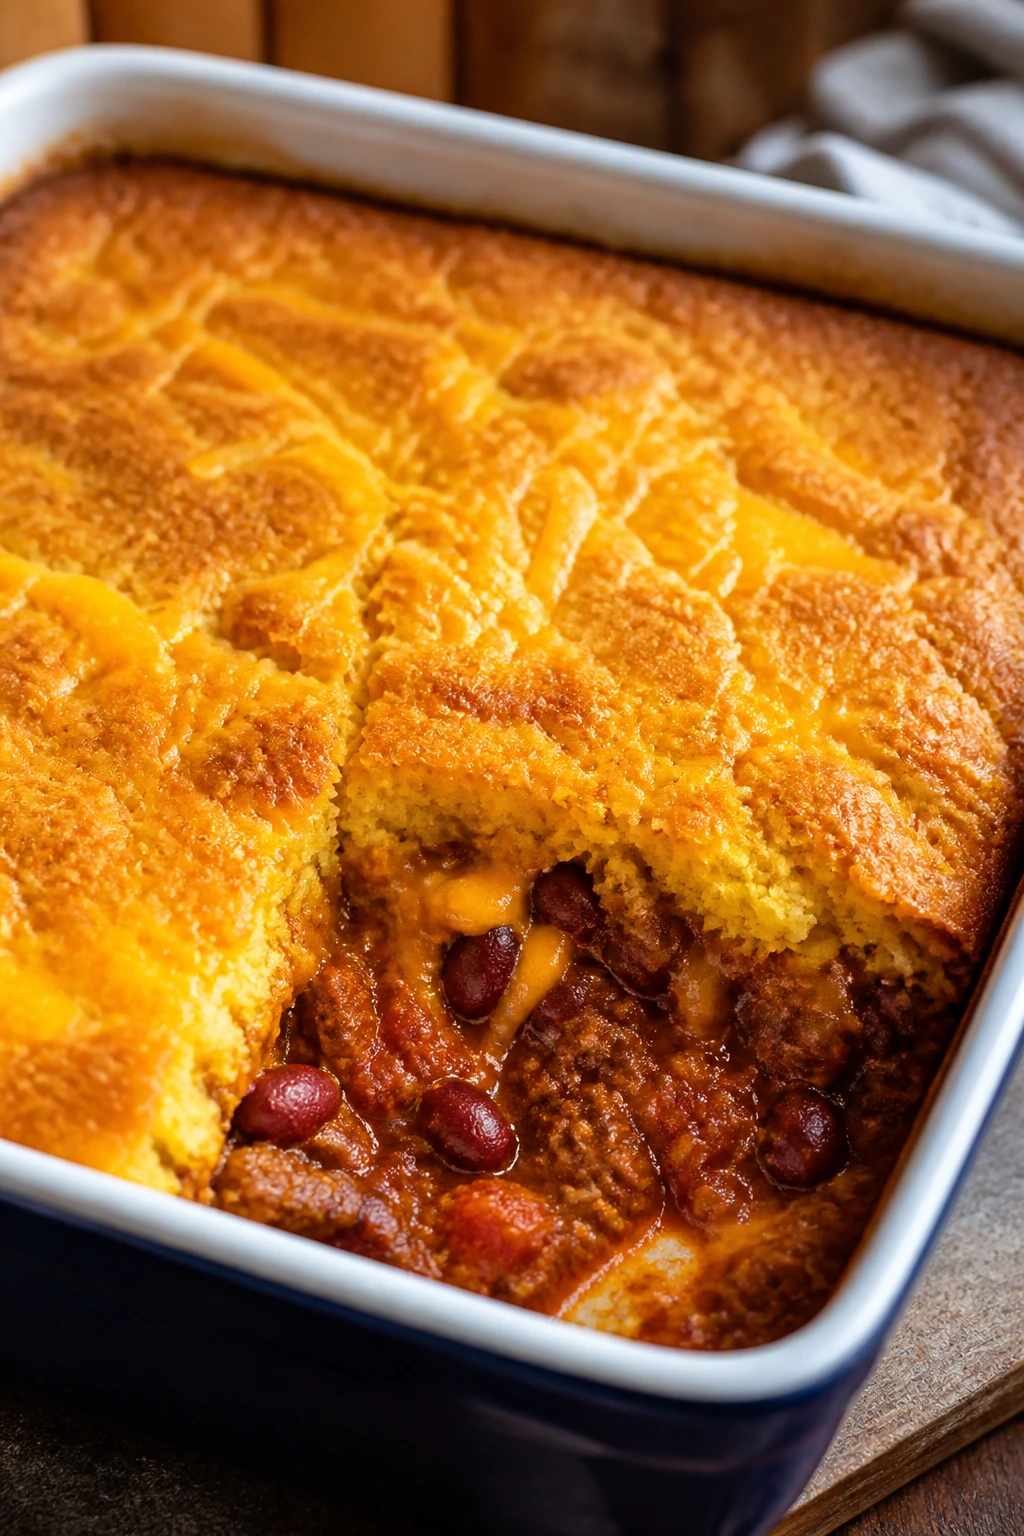
Cornbread chili bake is exactly what it sounds like: chili on the bottom, cornbread on top, and a cheesy crust in the middle. It tastes like a potluck dish that found a better home in your oven.
Why It Works:
The cornbread bakes over the chili and soaks up just enough sauce to stay tender. It’s filling, portable, and easy to cut into squares after a short rest.
Key Ingredients:
- 1 lb ground beef or turkey
- 1 onion, chopped
- 2 cans beans, drained
- 1 can diced tomatoes, 14.5 oz
- 2 tbsp chili powder
- 1 tsp cumin
- 1 box cornbread mix, or homemade batter
- 1 cup shredded cheddar
- Salt to taste
Quick Steps:
- Cook the beef and onion, then add beans, tomatoes, and spices and simmer for 10 minutes.
- Spread the chili in a baking dish.
- Spoon cornbread batter over the top and sprinkle cheese over that.
- Bake at 400°F (205°C) for 20 to 25 minutes until the cornbread is set.
Equipment for This Recipe:
- Skillet
- Baking dish
- Mixing bowl
- Spoon
How to Serve This Dish:
Serve a square with sour cream or sliced scallions. It’s also solid in a lunch container because the cornbread top keeps the chili from splashing around.
Pro Tips for This Recipe:
- Keep the chili thick before topping it.
- Do not spread the batter too thin or it bakes unevenly.
- Let it rest before cutting so the layers hold.
Variations on This Dish:
- Black Bean Chili Bake: Use all beans and no meat.
- Spicy Version: Add diced jalapeños.
- Corn-Heavy Topping: Fold fresh or frozen corn into the batter.
Common Mistakes to Avoid with This Dish:
- Don’t make the chili watery or the topping sinks.
- Don’t underbake the cornbread center.
- Don’t overseason the topping if your chili is already bold.
23. Sausage and Peppers Skillet
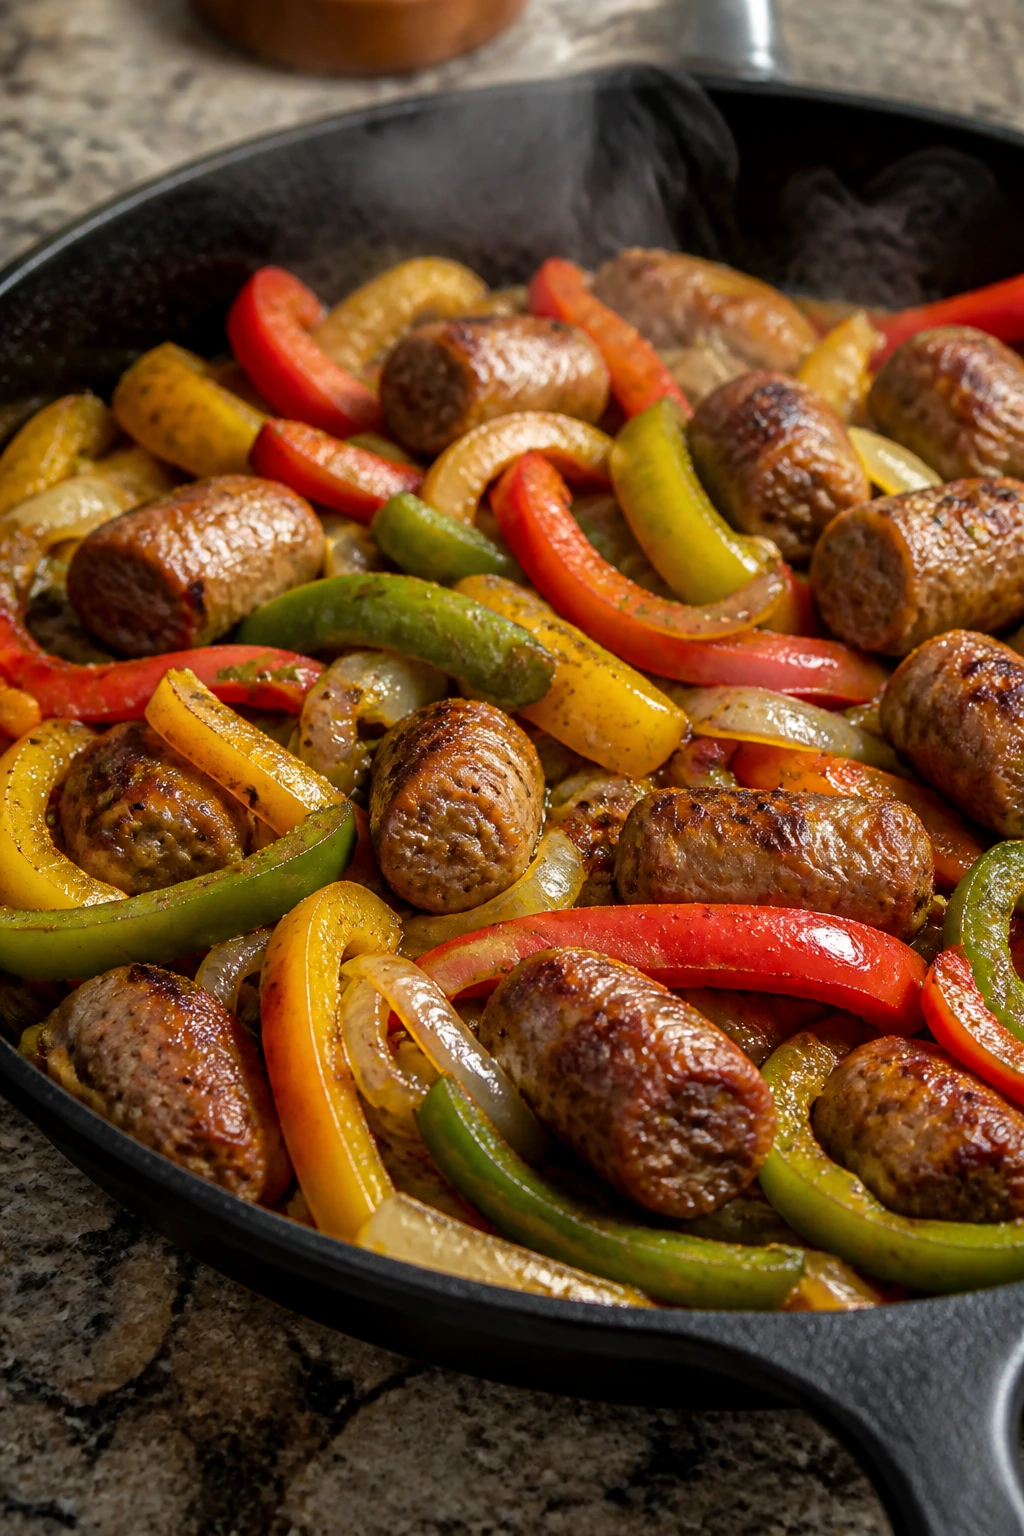
Sausage and peppers is noisy food in the best way. The sausage browns, the peppers soften, and the onions turn sweet in the same pan. Put it on rolls or over pasta, and it becomes dinner without needing much else.
Why It Works:
The skillet lets the sausage fat season the vegetables, which is half the flavor right there. It is also fast enough for weeknights and sturdy enough to reheat without complaint.
Key Ingredients:
- 1 1/2 lb Italian sausage
- 3 bell peppers, sliced
- 1 large onion, sliced
- 3 cloves garlic, sliced or minced
- 1 can diced tomatoes, 14.5 oz
- 1 tsp oregano
- Salt and pepper
- Hoagie rolls or cooked pasta for serving
Quick Steps:
- Brown the sausage in a large skillet, then set it aside.
- Cook the peppers and onion in the same pan until soft and browned at the edges.
- Add garlic, tomatoes, oregano, and sausage back in; simmer 10 minutes.
- Serve on rolls or spooned over pasta.
Equipment for This Recipe:
- Large skillet
- Tongs
- Knife and cutting board
- Spoon
How to Serve This Dish:
Pile it into toasted rolls for a hand-held snack dinner, or serve it over pasta for a bigger meal. A few pepperoncini on the side bring a nice sharp bite.
Pro Tips for This Recipe:
- Brown the sausage well before it comes out of the pan.
- Cut the peppers thick enough to keep some texture.
- Let the tomatoes cook down until the sauce looks glossy.
Variations on This Dish:
- Mild Sausage Version: Use sweet Italian sausage.
- Red Sauce Pasta Bowl: Serve over rigatoni instead of rolls.
- Peppers and Onions Only: Add white beans for a meatless skillet.
Common Mistakes to Avoid with This Dish:
- Don’t slice the peppers too thin or they disappear.
- Don’t skip browning or the dish tastes flat.
- Don’t overcook the sausages before they return to the pan.
24. Tomato Soup with Grilled Cheese Dippers
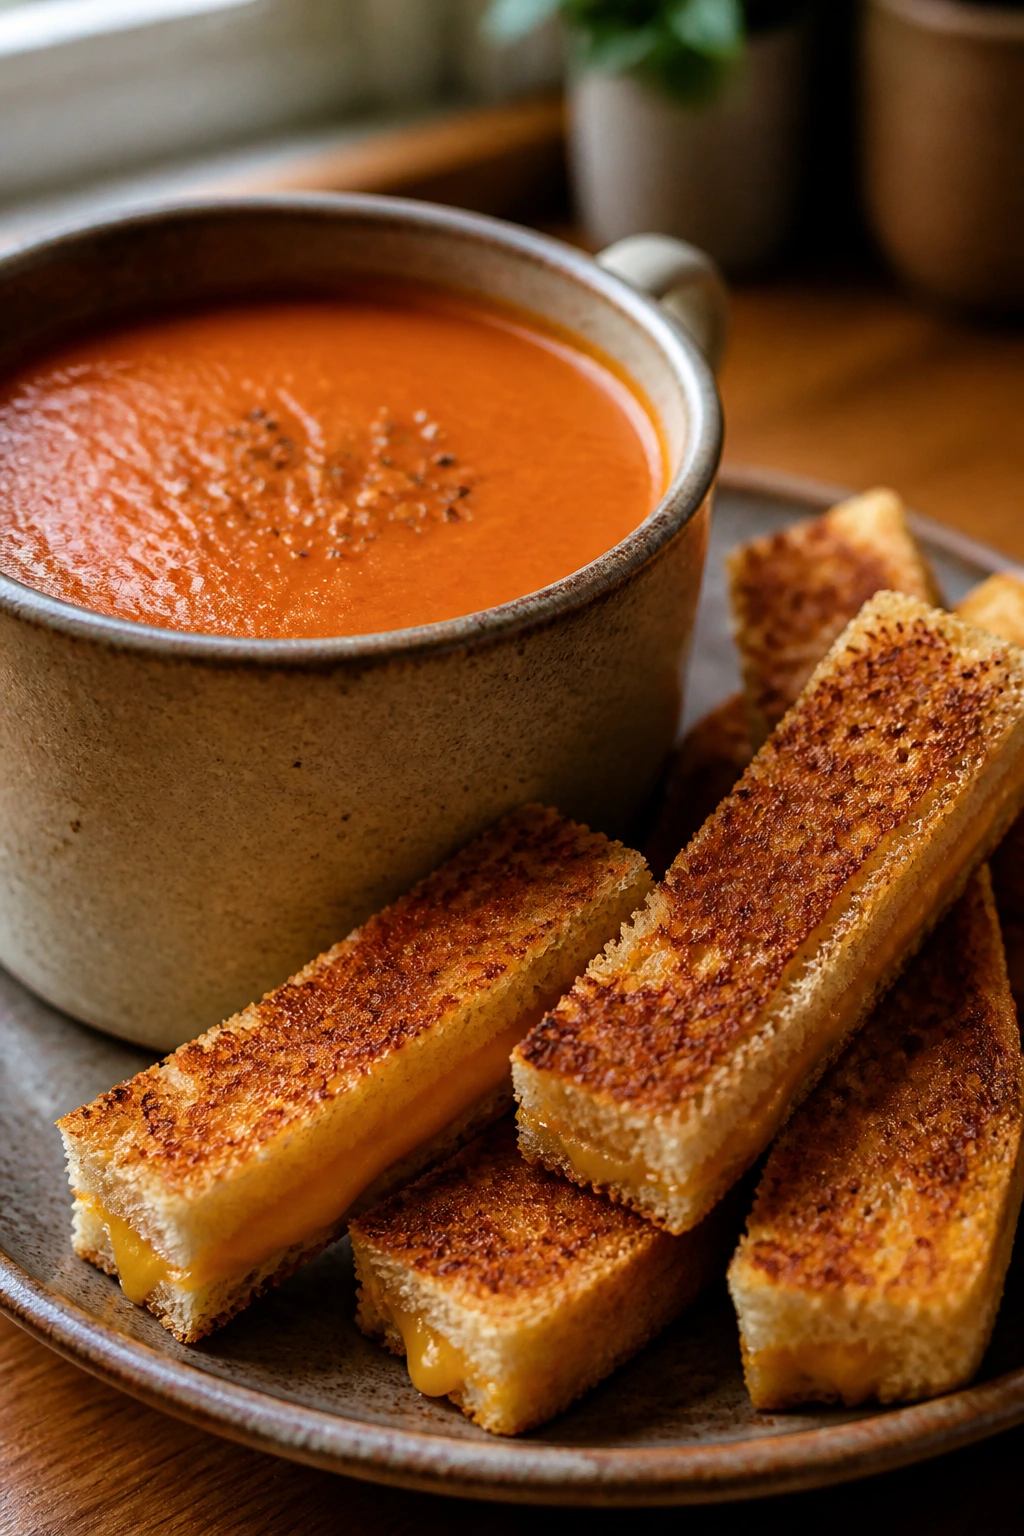
Tomato soup and grilled cheese is simple in the way a good sweater is simple. The soup should taste bright and a little creamy, and the sandwich should be crisp on the outside with melted cheddar inside. Dipping is part of the job.
Why It Works:
The soup gives you acid and warmth, while the grilled cheese adds fat and crunch. Together they make a complete snack-size dinner without much effort.
Key Ingredients:
- For the Soup:
- 2 tbsp butter
- 1 onion, chopped
- 2 tbsp tomato paste
- 1 can crushed tomatoes, 28 oz
- 3 cups chicken or vegetable broth
- 1/2 cup cream or milk
- Salt, pepper, and basil
- For the Sandwiches:
- 8 slices bread
- 8 slices cheddar
- 3 tbsp butter, softened
Quick Steps:
- Cook onion in butter, stir in tomato paste, then add tomatoes and broth.
- Simmer 15 minutes, blend if you want it smooth, and stir in cream.
- Build grilled cheese sandwiches and cook in a skillet until golden.
- Cut the sandwiches into strips for dipping.
Equipment for This Recipe:
- Soup pot
- Blender or immersion blender, optional
- Skillet
- Spatula
How to Serve This Dish:
Serve the soup in mugs or small bowls with grilled cheese cut into fingers. It’s one of the easiest ways to turn a late afternoon into something calm.
Pro Tips for This Recipe:
- Tomato paste adds body, so do not skip it.
- A pinch of sugar can help if the tomatoes taste sharp.
- Use medium heat on the sandwiches so the bread browns before the cheese leaks out.
Variations on This Dish:
- Herbed Tomato Soup: Add thyme or oregano with the basil.
- Cheddar-Apple Sandwich: Add thin apple slices to the grilled cheese.
- Cream-Free Soup: Leave out the dairy and finish with olive oil.
Common Mistakes to Avoid with This Dish:
- Don’t rush the soup; the onion needs time to soften.
- Don’t use high heat on the sandwiches or the bread burns first.
- Don’t blend boiling soup without venting the lid safely.
25. Fish Sticks and Oven Fries

Fish sticks and oven fries are a classic kid dinner because the shapes make sense before the first bite. Crisp coating outside, flaky fish inside, and salted potato wedges beside them. It’s a simple plate that still feels like a treat.
Why It Works:
Baking both on sheet pans keeps the coating crisp and the fries golden without a fry station. The meal also reheats better than you might expect if you keep the fish and fries separate.
Key Ingredients:
- 1 1/2 lb cod, pollock, or haddock
- 1 cup flour
- 2 eggs
- 2 cups panko breadcrumbs
- 2 lb potatoes, cut into wedges
- 3 tbsp oil
- 1 tsp paprika
- Salt and pepper
- Tartar sauce and lemon wedges
Quick Steps:
- Heat the oven to 425°F (220°C) and toss potatoes with oil, salt, and paprika.
- Bake fries for 20 minutes, then add breaded fish sticks to another pan.
- Bake the fish 12 to 15 minutes, until flaky and crisp.
- Serve with tartar sauce and lemon.
Equipment for This Recipe:
- Two rimmed sheet pans
- Three shallow bowls
- Wire rack, optional
- Fish spatula or wide spatula
How to Serve This Dish:
Put a few fish sticks and a handful of fries on a plate with lemon and tartar sauce. For a snack version, serve them in a paper-lined bowl with ketchup on the side.
Pro Tips for This Recipe:
- Pat the fish dry so the coating sticks.
- Space the pieces out or the breading steams.
- Flip the fries once for even browning.
Variations on This Dish:
- Parmesan Crust: Mix grated Parmesan into the panko.
- Sweet Potato Fries: Swap in sweet potatoes if that is what you have.
- Spiced Fish Sticks: Add a little cayenne or Old Bay to the coating.
Common Mistakes to Avoid with This Dish:
- Don’t crowd the pans or nothing crisps.
- Don’t cut the fish too small or it dries quickly.
- Don’t forget to season the potatoes well; plain wedges feel flat.
26. Macaroni and Tomatoes

Macaroni and tomatoes is the sort of old family dish that survives because it’s cheap, fast, and strangely satisfying. The tomatoes should coat the noodles, and the butter should make the whole bowl taste round instead of sharp.
Why It Works:
The starch from the pasta and the body of the tomatoes make a sauce without needing much fuss. It’s a good pantry dinner, and the leftovers hold up fine in the fridge.
Key Ingredients:
- 12 oz elbow macaroni
- 1 can crushed tomatoes, 28 oz
- 1 onion, chopped
- 2 tbsp butter
- 1 tbsp sugar
- 1/2 tsp black pepper
- 1 cup shredded cheddar, optional
- Salt to taste
Quick Steps:
- Cook the macaroni until tender and set aside.
- Simmer tomatoes, onion, butter, sugar, salt, and pepper for 15 minutes.
- Toss the sauce with the macaroni and top with cheddar if using.
- Serve hot with bread or crackers.
Equipment for This Recipe:
- Pot
- Saucepan
- Colander
- Wooden spoon
How to Serve This Dish:
A small bowl with a little cheese on top is enough for after-school hunger. It also works beside fried chicken or meatloaf if you want a more complete dinner.
Pro Tips for This Recipe:
- Simmer the tomatoes long enough to soften the sharp edge.
- A little sugar helps if the tomatoes taste too bright.
- Add a spoonful of butter at the end for gloss.
Variations on This Dish:
- Bacon Tomato Mac: Stir in crisp bacon pieces.
- Cheesy Version: Add more cheddar and a splash of milk.
- Herb Version: Finish with basil or parsley.
Common Mistakes to Avoid with This Dish:
- Don’t skip salting the pasta water.
- Don’t leave the tomatoes uncooked or the flavor stays raw.
- Don’t overdo the cheese if you want the tomato flavor to stay front and center.
27. Creamed Turkey on Biscuits
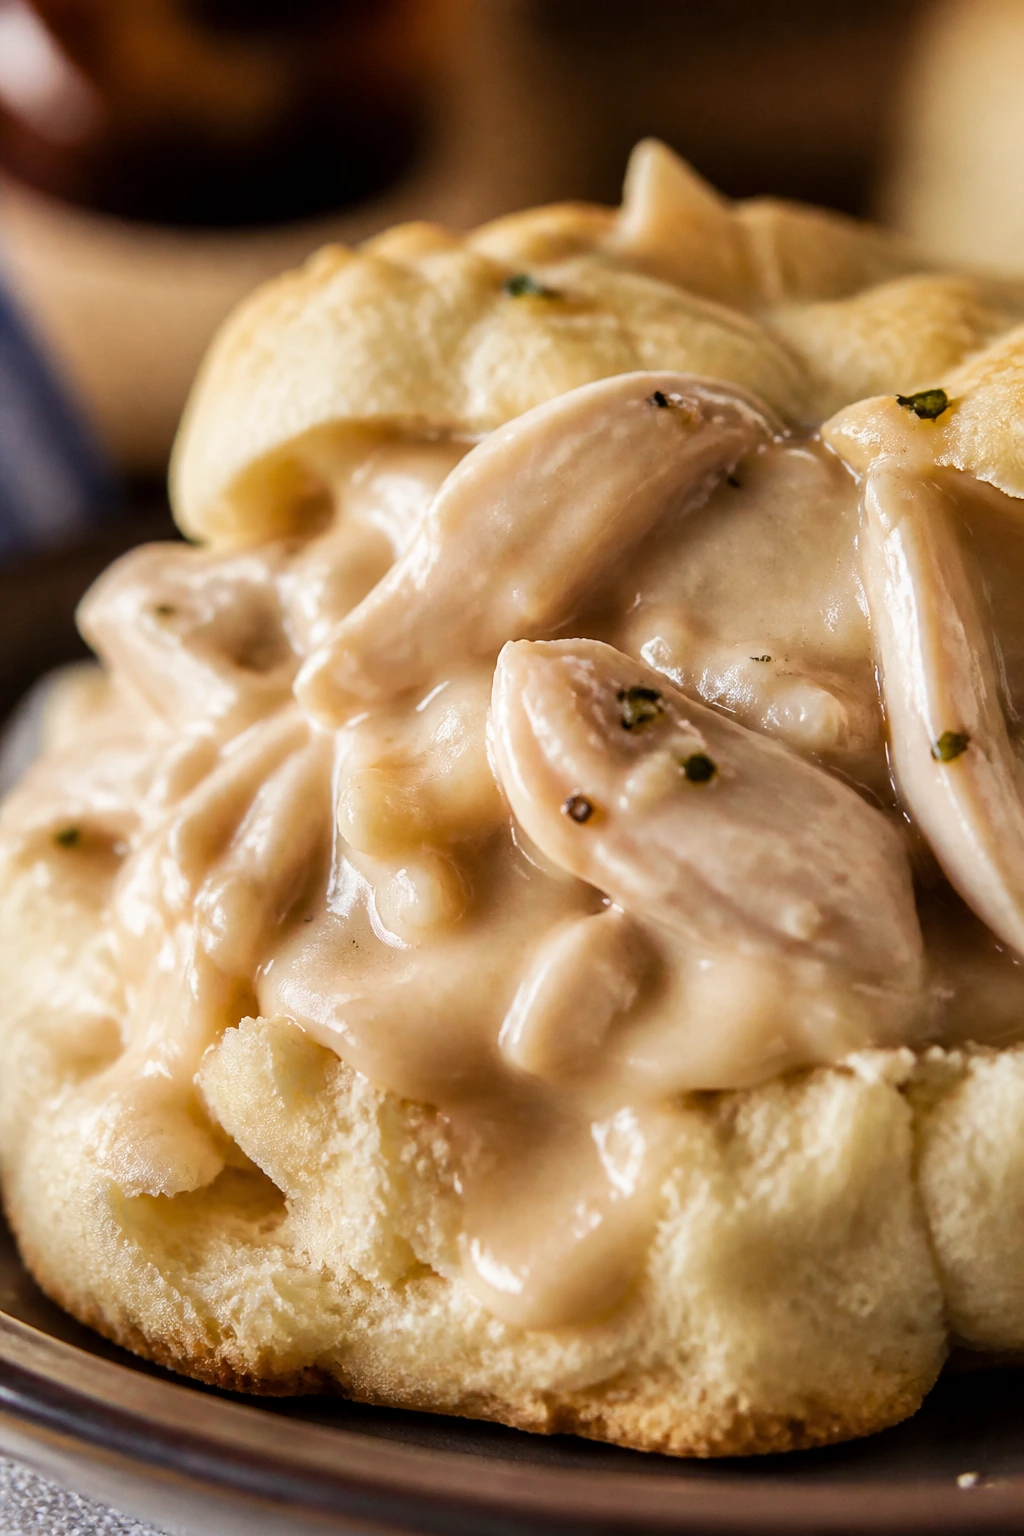
Creamed turkey on biscuits is a leftover dinner that still feels generous. The sauce should be smooth and peppery, the turkey tender, and the biscuit sturdy enough to catch the gravy without turning soggy too fast.
Why It Works:
A simple white sauce turns leftover turkey into a meal that feels new, and biscuits give it a crisp-edged base. It is also one of the easiest ways to use roast turkey without drying it out.
Key Ingredients:
- 1 lb cooked turkey, chopped
- 3 tbsp butter
- 3 tbsp flour
- 2 cups turkey or chicken broth
- 1 cup milk
- 1 cup peas, optional
- Salt, pepper, and parsley
- 8 biscuits, baked
Quick Steps:
- Melt butter and whisk in flour to make a pale roux.
- Slowly whisk in broth and milk until the sauce thickens.
- Stir in turkey and peas, then heat gently until steaming.
- Spoon over warm biscuits.
Equipment for This Recipe:
- Saucepan
- Whisk
- Spoon
- Biscuit sheet or baking tray
How to Serve This Dish:
Serve one biscuit split open with turkey gravy spooned over the top. A side of green beans or a few carrot sticks keeps the plate balanced.
Pro Tips for This Recipe:
- Keep the heat low once the sauce thickens.
- Season in small amounts because turkey broth can vary in saltiness.
- Warm the biscuits before topping them so they do not go cold fast.
Variations on This Dish:
- Chicken Version: Use cooked chicken instead of turkey.
- Mushroom Cream Sauce: Add sautéed mushrooms to the white sauce.
- Pea and Carrot Version: Stir in diced carrots for more color.
Common Mistakes to Avoid with This Dish:
- Don’t let the gravy boil hard after the flour goes in.
- Don’t use cold biscuits unless you want them to firm up too fast.
- Don’t skip pepper; this dish needs it.
28. Goulash
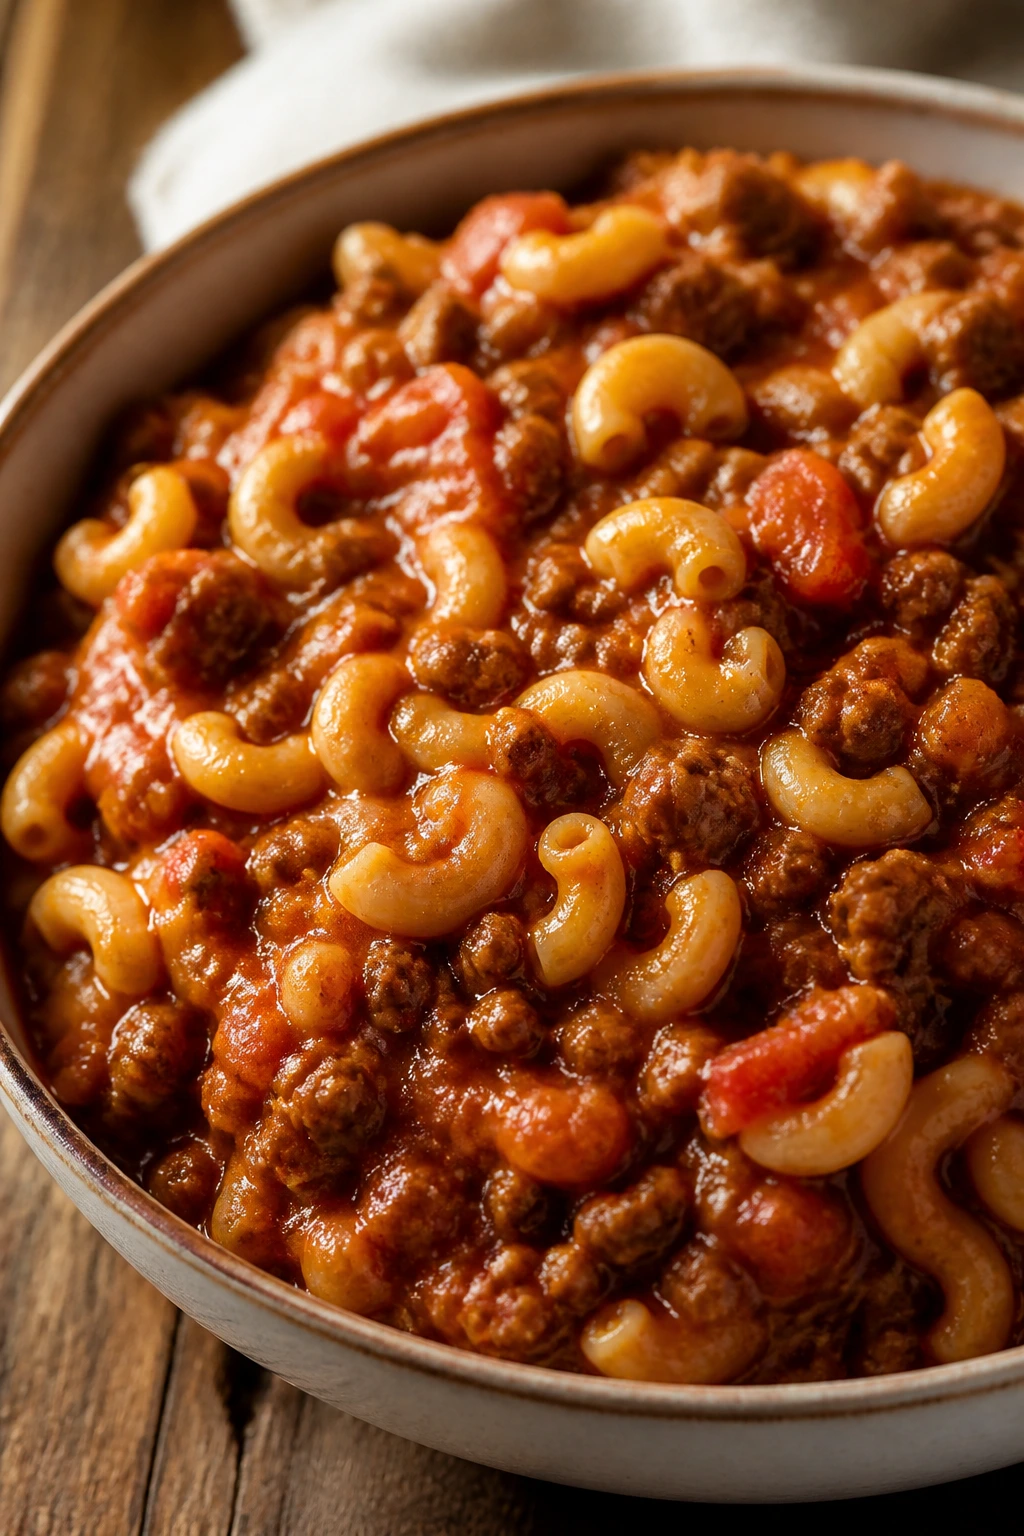
American goulash is one of those one-pot dinners that has no interest in being elegant. Beef, tomato, macaroni, and onion all cook together until the sauce thickens around the pasta. It tastes like a school-night staple because it is one.
Why It Works:
The pasta cooks in the sauce, so it picks up flavor instead of sitting off to the side. That makes it a strong choice when you want one pan and a dinner that reheats without drama.
Key Ingredients:
- 1 1/2 lb ground beef
- 1 onion, chopped
- 2 cups elbow macaroni, uncooked
- 1 can diced tomatoes, 14.5 oz
- 2 tbsp tomato paste
- 2 cups beef broth
- 1 tsp paprika
- 1 cup shredded cheddar
- Salt and pepper
Quick Steps:
- Brown the beef and onion in a deep skillet or pot.
- Stir in tomatoes, tomato paste, broth, paprika, and macaroni.
- Simmer covered until the pasta is tender and the sauce thickens.
- Top with cheddar and let it melt before serving.
Equipment for This Recipe:
- Deep skillet or Dutch oven
- Wooden spoon
- Lid
- Measuring cups
How to Serve This Dish:
Serve it in bowls with a little extra cheddar on top. A buttered roll or a green salad keeps the meal from feeling too heavy.
Pro Tips for This Recipe:
- Stir often so the pasta does not stick.
- Add broth if the pot looks dry before the macaroni is done.
- Cheddar on top gives the bowl a better finish than stirring it all in.
Variations on This Dish:
- Bell Pepper Goulash: Add diced peppers with the onion.
- Smoky Goulash: Use smoked paprika.
- Vegetable Goulash: Stir in corn or peas near the end.
Common Mistakes to Avoid with This Dish:
- Don’t walk away from the pot; the pasta can grab the bottom.
- Don’t use too little liquid.
- Don’t overcook it until the macaroni breaks down.
29. Pot Roast with Root Vegetables
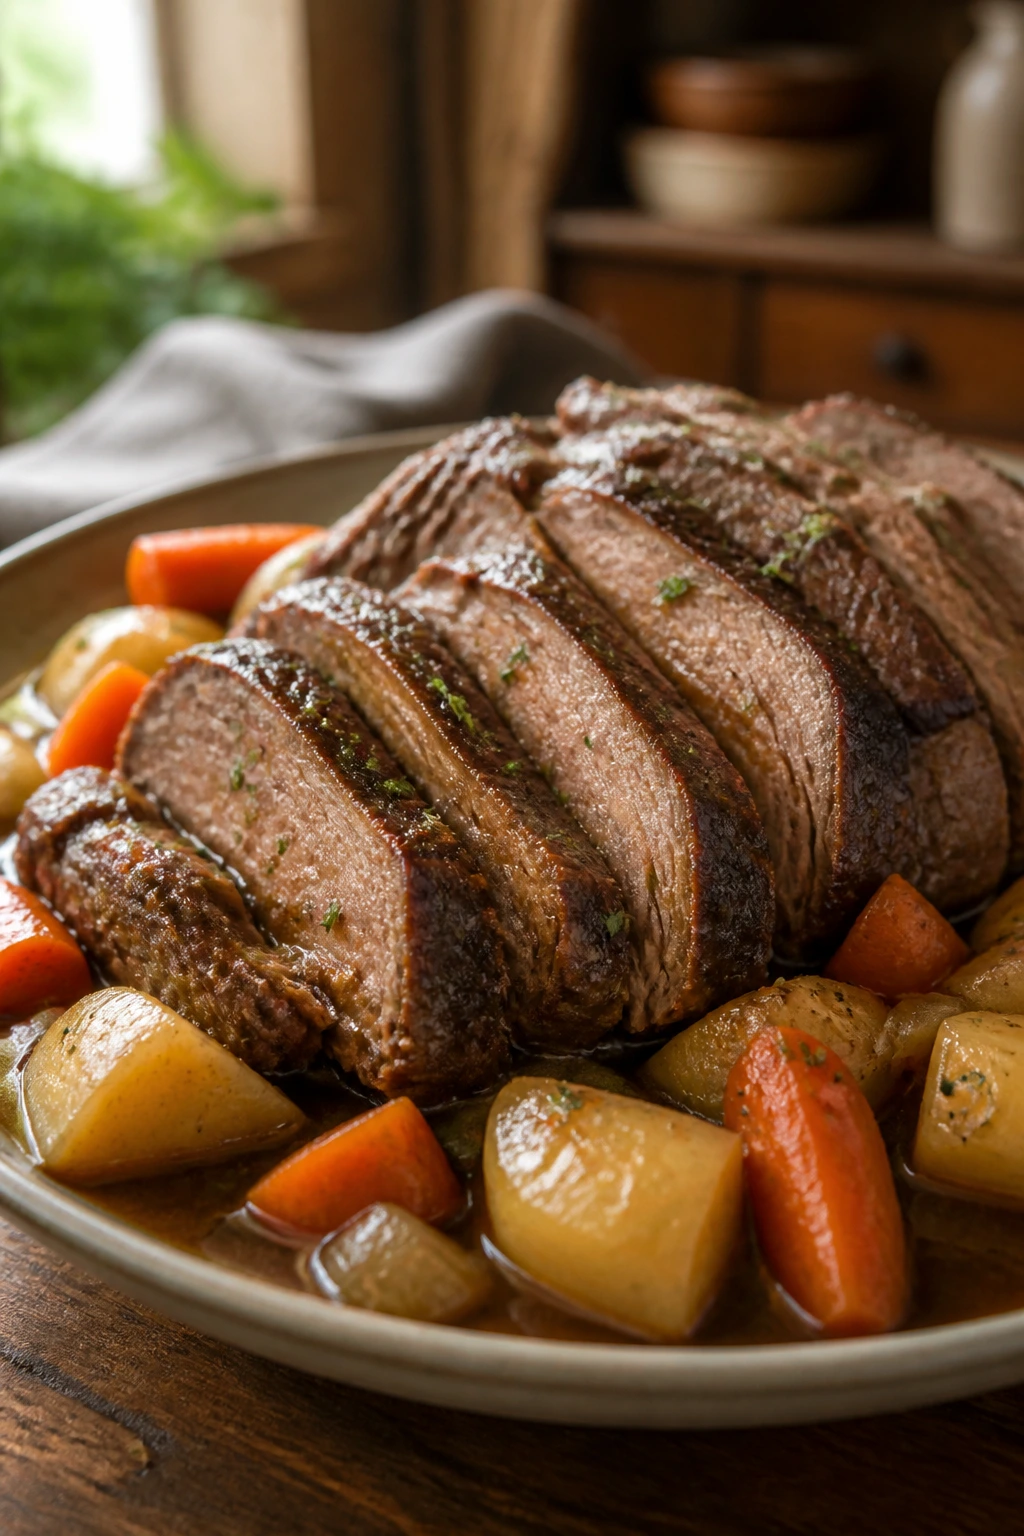
Pot roast is slow, sure, but it earns the time. The meat turns spoon-tender, the carrots and potatoes soak up beefy broth, and the whole pot smells like Sunday. Leftovers sliced cold are not a drawback here.
Why It Works:
Chuck roast has enough fat and connective tissue to soften into the sauce during a long braise. That makes it one of the best family dinners for turning into smaller meals later.
Key Ingredients:
- 3 lb chuck roast
- 2 lb potatoes, halved
- 1 lb carrots, cut into large pieces
- 1 onion, quartered
- 2 cups beef broth
- 2 tbsp tomato paste
- 2 tbsp flour
- 2 cloves garlic
- 1 tsp thyme
- Salt and pepper
Quick Steps:
- Brown the roast in a Dutch oven, then set it aside.
- Cook onion and garlic briefly, stir in tomato paste and flour, then add broth.
- Return the roast with vegetables, cover, and braise at 325°F (165°C) for about 3 hours.
- Rest before slicing and spooning over the vegetables.
Equipment for This Recipe:
- Dutch oven
- Tongs
- Knife
- Cutting board
How to Serve This Dish:
Slice the roast over potatoes with plenty of broth spooned over top. A small piece of roast and two carrots on a plate works as a serious snack when somebody comes home starving.
Pro Tips for This Recipe:
- Brown the meat well for better broth.
- Cut the vegetables big enough that they do not dissolve.
- Let the roast rest before slicing or the juices run out.
Variations on This Dish:
- Mushroom Pot Roast: Add mushrooms in the last hour.
- Red Wine Version: Replace half the broth with red wine.
- Herb Roast: Add rosemary with the thyme.
Common Mistakes to Avoid with This Dish:
- Don’t rush the braise. Tough meat needs time.
- Don’t use potatoes cut too small or they break apart.
- Don’t forget to season the broth early.
30. Biscuits and Sausage Gravy
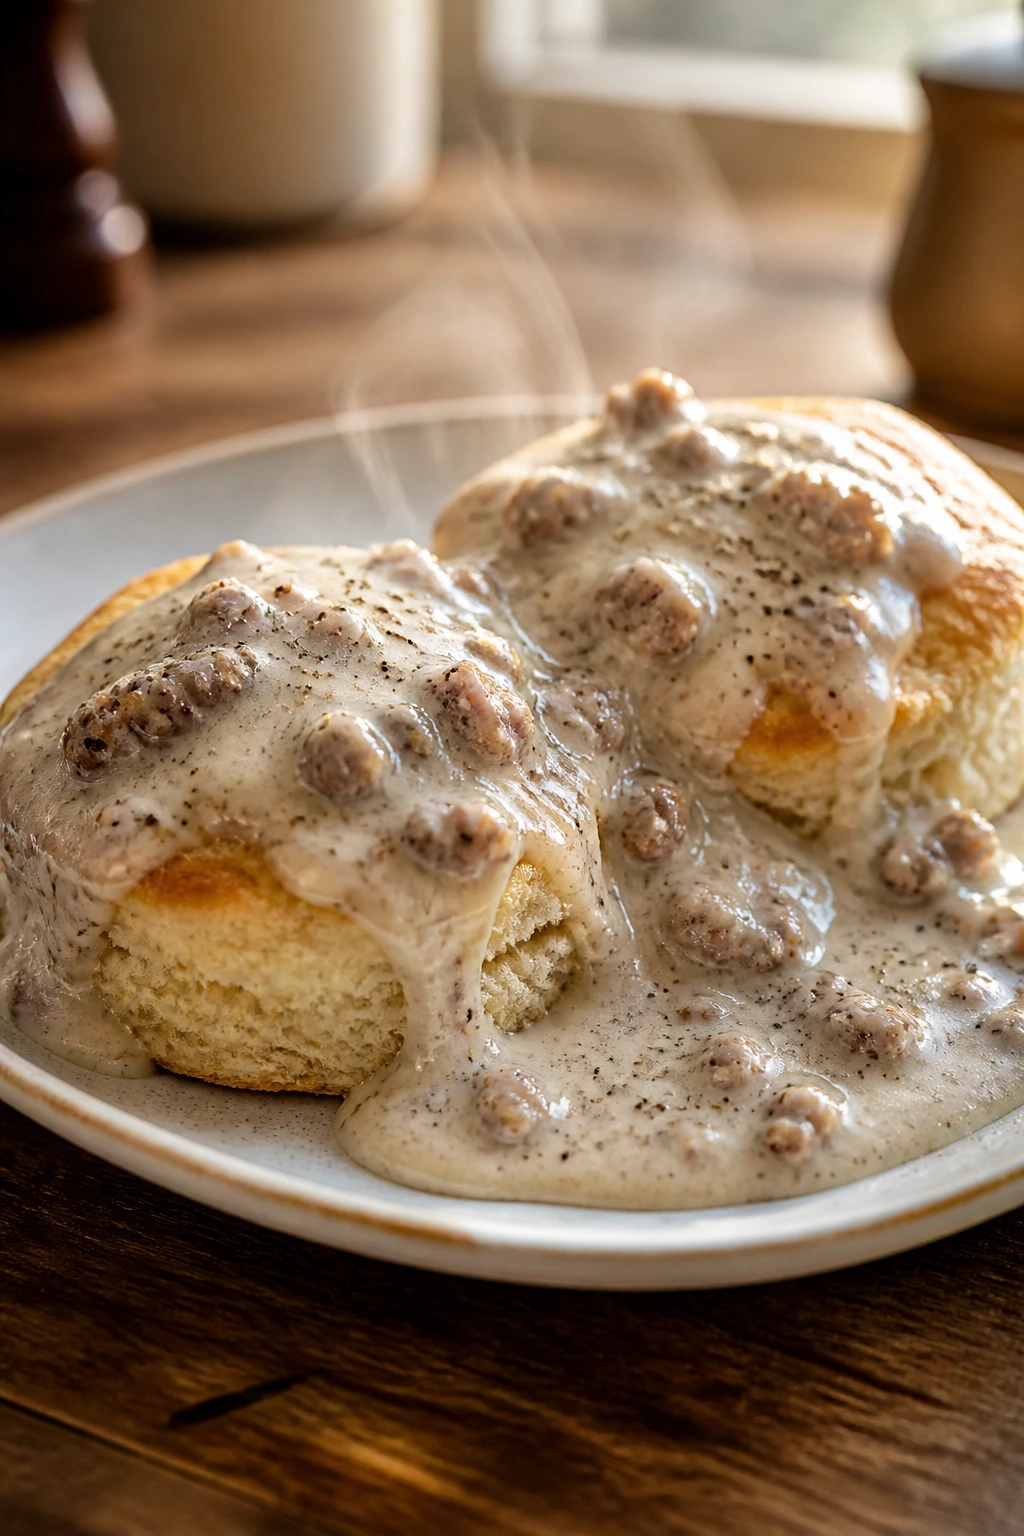
Biscuits and sausage gravy is breakfast food with enough weight to pass as dinner. The gravy should be peppery and thick enough to coat a spoon, and the biscuit should hold up under the sauce instead of melting away.
Why It Works:
The sausage provides fat and seasoning, and the flour-milk gravy turns that into something spoonable. It is quick, cheap, and one of the easiest ways to feed a hungry table.
Key Ingredients:
- 1 lb breakfast sausage
- 3 tbsp flour
- 3 cups milk
- 1/2 tsp black pepper, plus more to taste
- Pinch of sage, optional
- 8 baked biscuits
Quick Steps:
- Cook the sausage in a skillet until browned.
- Sprinkle in flour and stir for 1 minute.
- Slowly add milk, stirring until the gravy thickens.
- Season with pepper and sage, then spoon over warm biscuits.
Equipment for This Recipe:
- Large skillet
- Whisk
- Spoon
- Biscuit tray or baking sheet
How to Serve This Dish:
Serve one biscuit split open with a generous spoon of gravy. A fried egg on the side makes it feel more like a full meal if you need it.
Pro Tips for This Recipe:
- Use the sausage drippings; they are the sauce’s backbone.
- Whisk constantly when adding the milk so the gravy stays smooth.
- Add pepper at the end so you can control the heat.
Variations on This Dish:
- Turkey Sausage Version: Use turkey sausage and add a little butter.
- Cheddar Biscuit Plate: Serve with cheddar biscuits.
- Mushroom Gravy: Add chopped mushrooms with the sausage.
Common Mistakes to Avoid with This Dish:
- Don’t leave the flour raw.
- Don’t pour in all the milk at once or you’ll get lumps.
- Don’t make the gravy too thin; biscuits need something substantial.
31. Chicken Tetrazzini
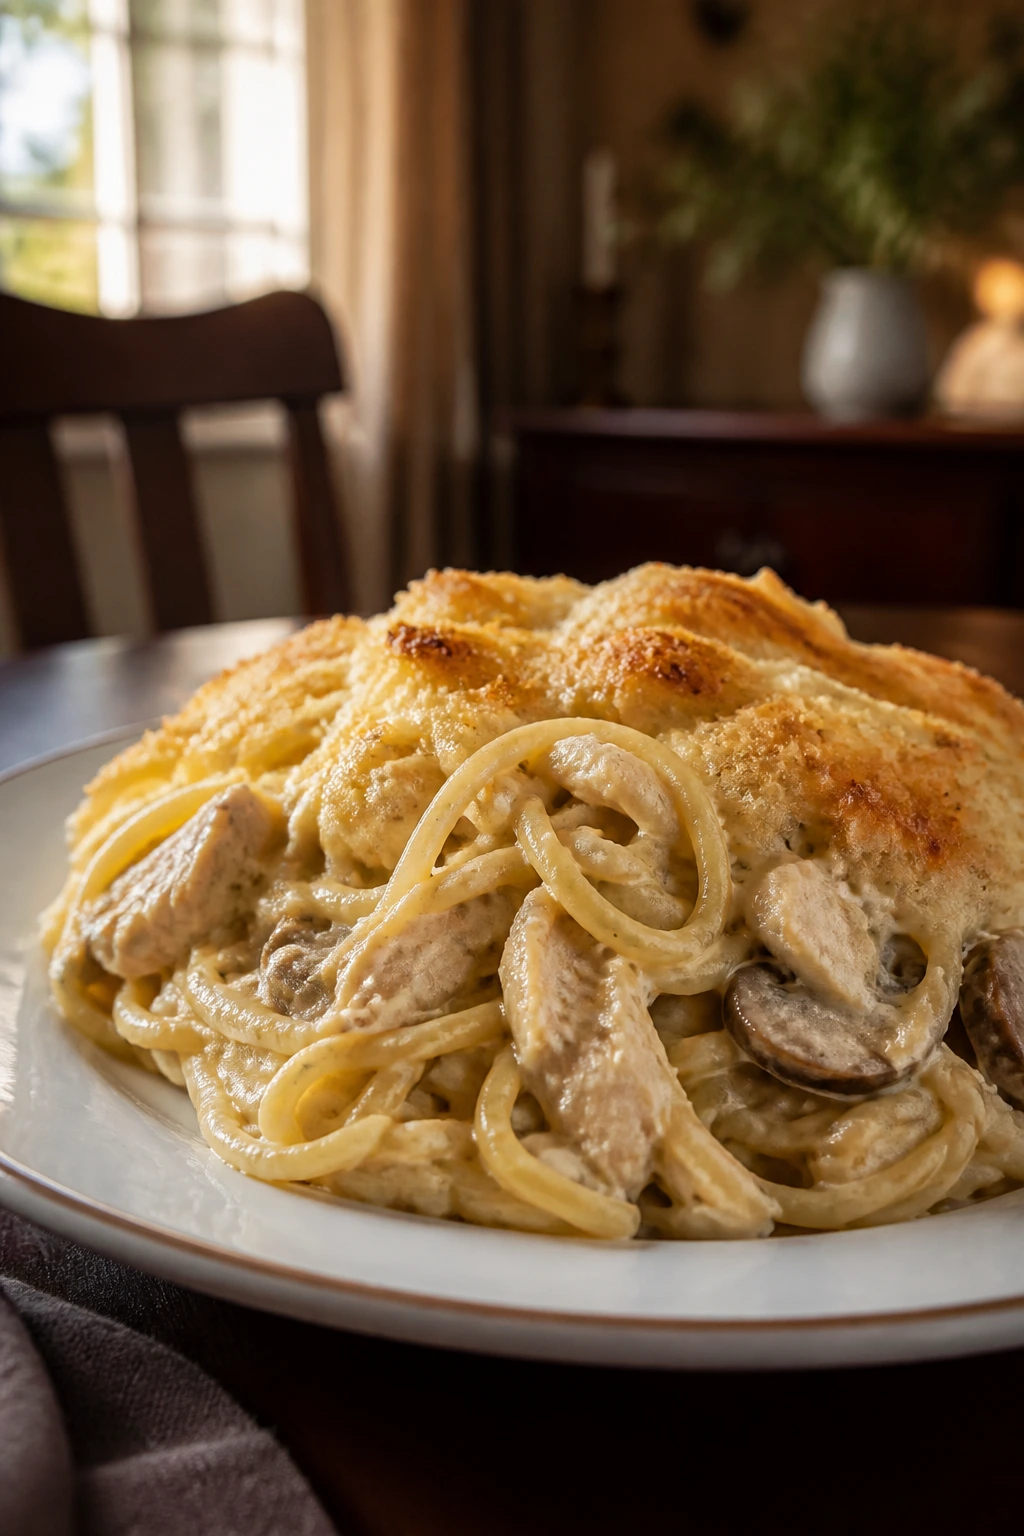
Chicken tetrazzini is creamy pasta casserole with a little mushroom flavor and a soft baked top. It’s the kind of dish that quietly handles leftovers and still feels like a real dinner when it comes out of the oven.
Why It Works:
Cooked chicken keeps the bake fast, and the creamy sauce wraps around the noodles so the casserole slices well. It is a useful one-pan meal for nights when you want comfort without a lot of moving parts.
Key Ingredients:
- 12 oz spaghetti or linguine
- 2 cups cooked chicken, chopped
- 8 oz mushrooms, sliced
- 3 tbsp butter
- 3 tbsp flour
- 2 cups milk
- 1 cup chicken broth
- 1 cup Parmesan
- 1 cup mozzarella
- 1 cup frozen peas
Quick Steps:
- Cook the pasta and heat the oven to 375°F (190°C).
- Cook mushrooms in butter, whisk in flour, then add milk and broth to make sauce.
- Stir in chicken, peas, pasta, and half the cheese.
- Bake in a casserole dish topped with the rest of the cheese for 20 minutes.
Equipment for This Recipe:
- Large pot
- Skillet
- Baking dish
- Whisk
How to Serve This Dish:
Spoon it into bowls with black pepper and maybe a slice of toast. It makes an easy after-school snack when cut into smaller squares and rewarmed.
Pro Tips for This Recipe:
- Cook the pasta a minute short.
- Let the sauce thicken before mixing everything together.
- Use freshly grated Parmesan if you want a sharper finish.
Variations on This Dish:
- Turkey Tetrazzini: Use leftover turkey instead of chicken.
- Spinach Version: Fold in chopped spinach.
- Garlic Tetrazzini: Add extra garlic to the mushroom base.
Common Mistakes to Avoid with This Dish:
- Don’t let the sauce get too thin.
- Don’t overcook the pasta before baking.
- Don’t skip the rest after baking if you want neat portions.
32. Hamburger Steaks and Onions
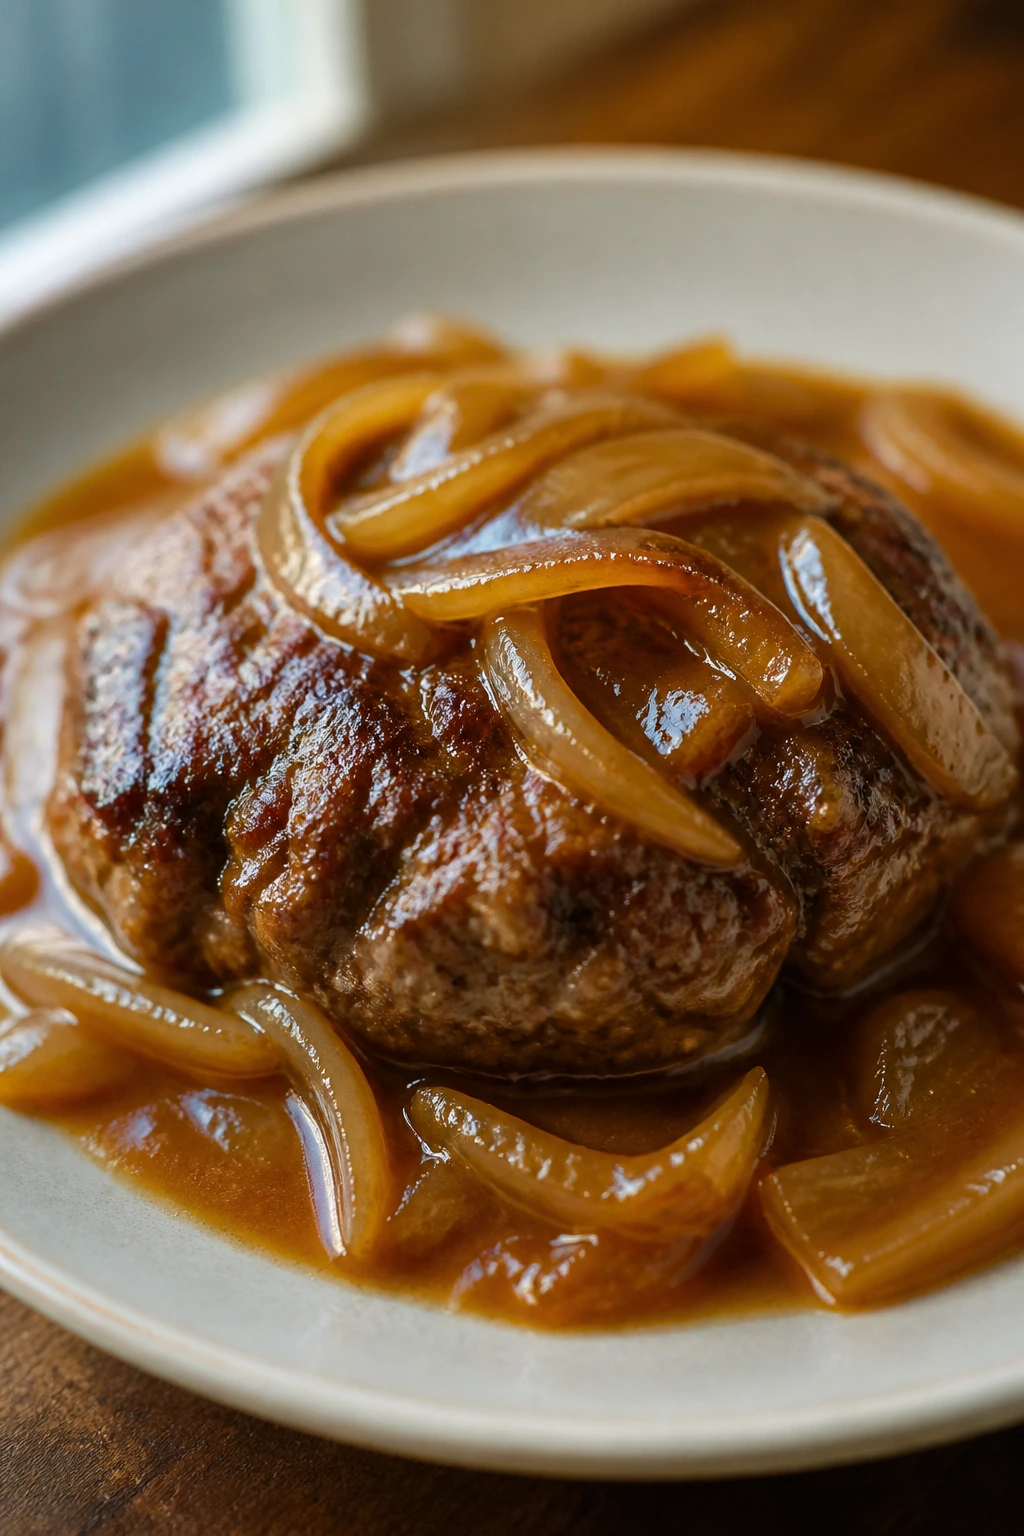
Hamburger steaks are basically a steak dinner built from ground beef, and that is part of their charm. The onion gravy is the real draw here, deep and soft and perfect with potatoes or bread. It is plain food, and plain food can be excellent.
Why It Works:
The patties stay tender because of the egg and crumbs, and the gravy catches every bit of flavor left in the pan. That’s the kind of economy I like in a family dinner.
Key Ingredients:
- 1 1/2 lb ground beef
- 1 egg
- 1/2 cup breadcrumbs
- 1 small onion, grated
- 1 tsp salt
- 1/2 tsp pepper
- 1 large onion, sliced
- 2 cups beef broth
- 2 tbsp flour
- Mashed potatoes, for serving
Quick Steps:
- Mix beef, egg, breadcrumbs, grated onion, salt, and pepper, then shape into oval patties.
- Brown the patties and remove them.
- Cook sliced onion in the same pan, add flour, then whisk in broth to make gravy.
- Return the patties and simmer 10 minutes.
Equipment for This Recipe:
- Large skillet
- Mixing bowl
- Spatula
- Whisk
How to Serve This Dish:
Serve a patty over mashed potatoes with onion gravy spooned all around. The same thing in a smaller bowl with a slice of bread becomes a serious snack.
Pro Tips for This Recipe:
- Grate one onion into the meat for moisture and flavor.
- Brown the patties before gravy for a better pan base.
- Thin the gravy with broth if it gets too tight.
Variations on This Dish:
- Mushroom Gravy Steaks: Add mushrooms with the onions.
- Turkey Steaks: Use ground turkey and season a little more aggressively.
- Mini Patty Plates: Form smaller patties for snack portions.
Common Mistakes to Avoid with This Dish:
- Don’t overmix the beef.
- Don’t undercook the onion before making gravy.
- Don’t skip salt in the patties themselves.
33. Tamale Pie
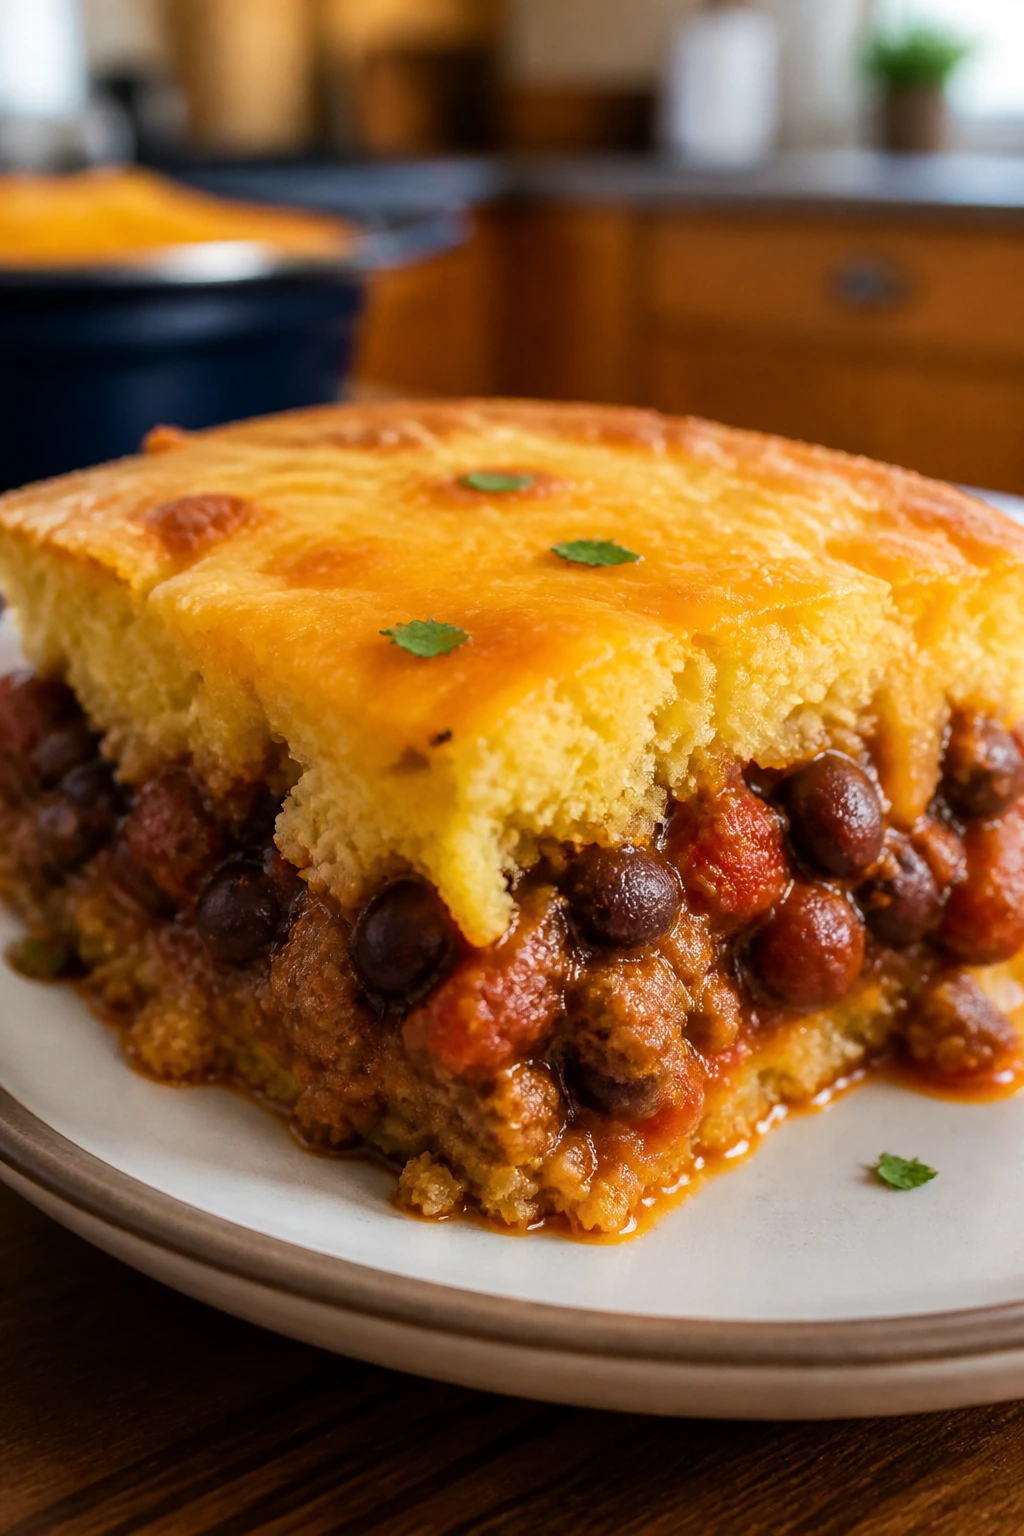
Tamale pie has the feel of a casserole that wandered in from a different part of the pantry. Savory beef and beans underneath, cornbread on top, and enough cheese to make the whole thing hold together. It’s hearty without being fussy.
Why It Works:
The cornbread top bakes over the filling, soaking up a little sauce while staying firm enough to cut. That makes it one of the better dishes on this list for leftovers and lunch boxes.
Key Ingredients:
- 1 lb ground beef
- 1 onion, chopped
- 1 can black beans, drained
- 1 can corn, drained
- 1 cup salsa
- 1 tsp cumin
- 1 cup cornmeal
- 1 cup flour
- 1 egg
- 1 1/2 cups milk
- 2 cups shredded cheddar
Quick Steps:
- Brown the beef and onion, then stir in beans, corn, salsa, and cumin.
- Spread the filling in a baking dish.
- Mix cornmeal, flour, egg, milk, and a little salt into a batter, then spoon over the top.
- Bake at 400°F (205°C) for 25 to 30 minutes until the top sets.
Equipment for This Recipe:
- Skillet
- Baking dish
- Mixing bowl
- Spoon
How to Serve This Dish:
Cut it into squares and serve with sour cream or chopped cilantro. A small scoop makes a good after-school snack, and it still feels like dinner.
Pro Tips for This Recipe:
- Keep the filling thick or the topping sinks.
- Use a salsa you already like, because its flavor leads the whole pan.
- Let it rest before cutting for clean squares.
Variations on This Dish:
- Turkey Tamale Pie: Swap in ground turkey.
- Spicy Green Chili Pie: Use green salsa and Monterey Jack.
- Veggie Pie: Replace the meat with extra beans and corn.
Common Mistakes to Avoid with This Dish:
- Don’t make the batter too thin.
- Don’t overfill the dish.
- Don’t cut it hot if you want neat slices.
34. Baked Beans and Franks Casserole
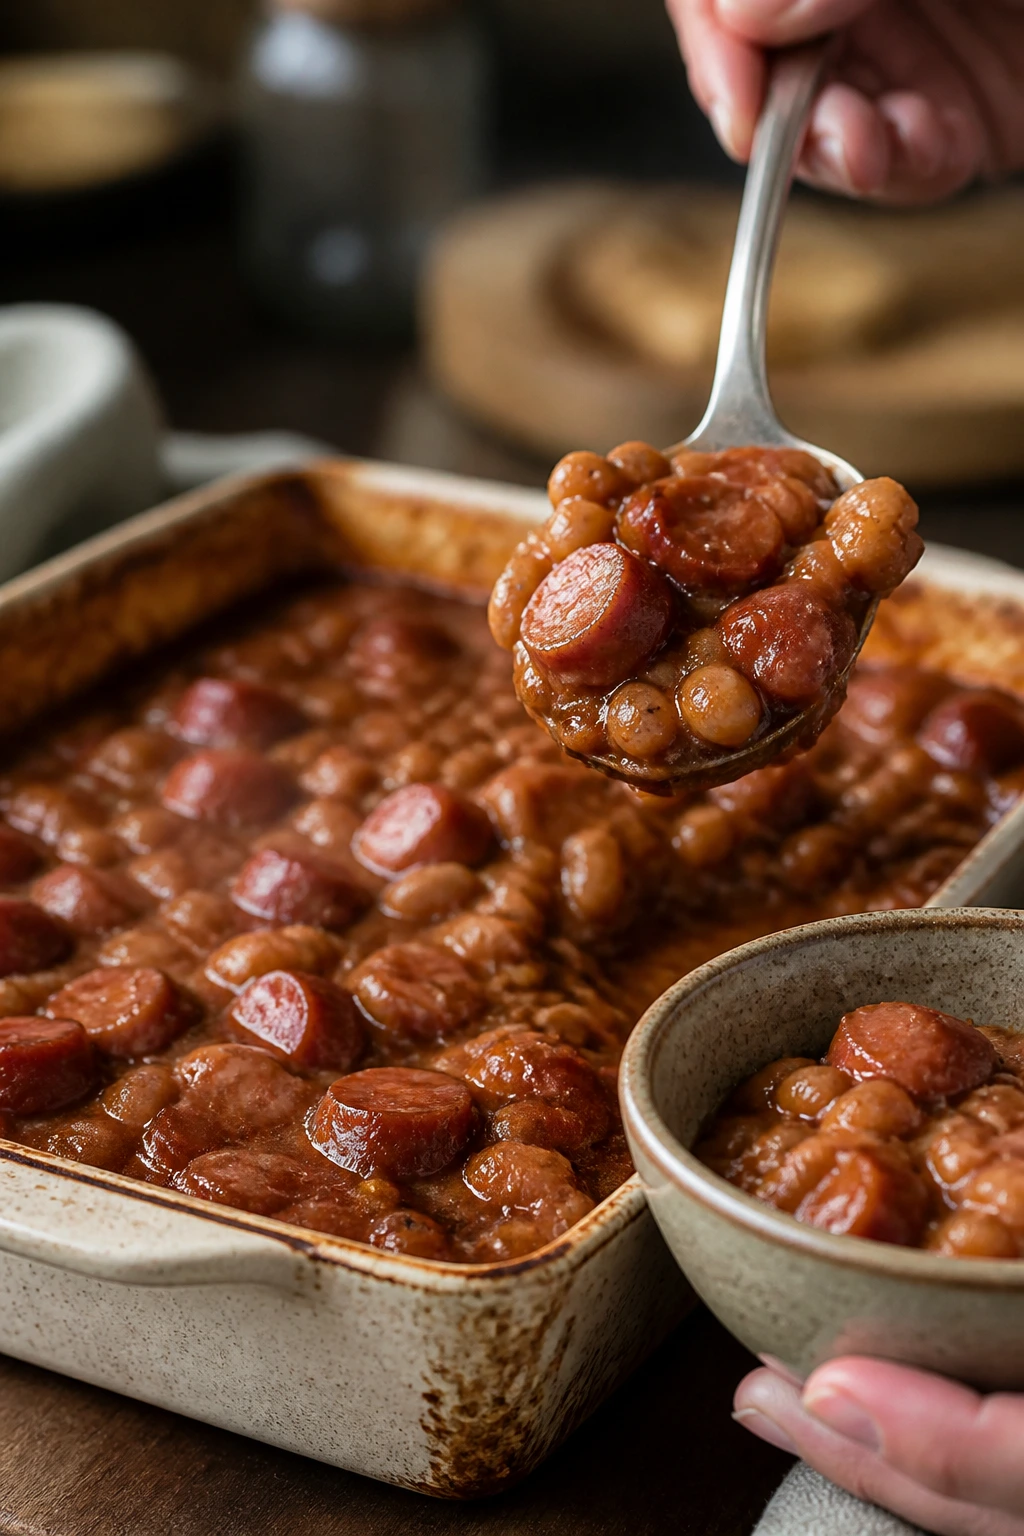
Baked beans and franks is humble, slightly sweet, and far more useful than people give it credit for. The beans cook down into a thick sauce, the franks stay juicy, and the whole thing tastes like a backyard dinner without the grill.
Why It Works:
The baked beans already carry a sweet-savory base, so the extra ingredients just deepen the flavor. It’s a good example of a dish that gets better when it bakes together instead of staying separate.
Key Ingredients:
- 2 cans baked beans, about 28 oz total
- 12 oz franks or smoked sausage, sliced
- 1 onion, chopped
- 1/4 cup brown sugar
- 2 tbsp mustard
- 2 tbsp ketchup
- 1 tsp Worcestershire sauce
- Optional breadcrumbs for topping
Quick Steps:
- Heat the oven to 375°F (190°C) and mix beans, onion, brown sugar, mustard, ketchup, and Worcestershire in a baking dish.
- Stir in the sliced franks.
- Top with breadcrumbs if you want a little crust.
- Bake for 30 minutes until bubbling and thick.
Equipment for This Recipe:
- Baking dish
- Spoon
- Knife and board
- Foil, if you want to cover first
How to Serve This Dish:
Serve it with toast, cornbread, or a pile of potato chips if you are keeping it casual. It is also easy to portion into a small bowl for a quick after-school bite.
Pro Tips for This Recipe:
- Slice the franks on a bias so they look better and hold sauce.
- Bake until the beans look glossy and thick.
- Add a splash of water if the beans get too sticky before baking.
Variations on This Dish:
- Sausage Bake: Use smoked sausage instead of franks.
- Molasses Style: Add 1 tablespoon molasses for a deeper sweetness.
- Spicy Beans: Stir in a little hot sauce or chili flakes.
Common Mistakes to Avoid with This Dish:
- Don’t overdo the sugar or it turns cloying.
- Don’t skip the onion; it keeps the flavor from tasting flat.
- Don’t serve it too soon or the sauce runs.
35. Cabbage and Noodles with Kielbasa
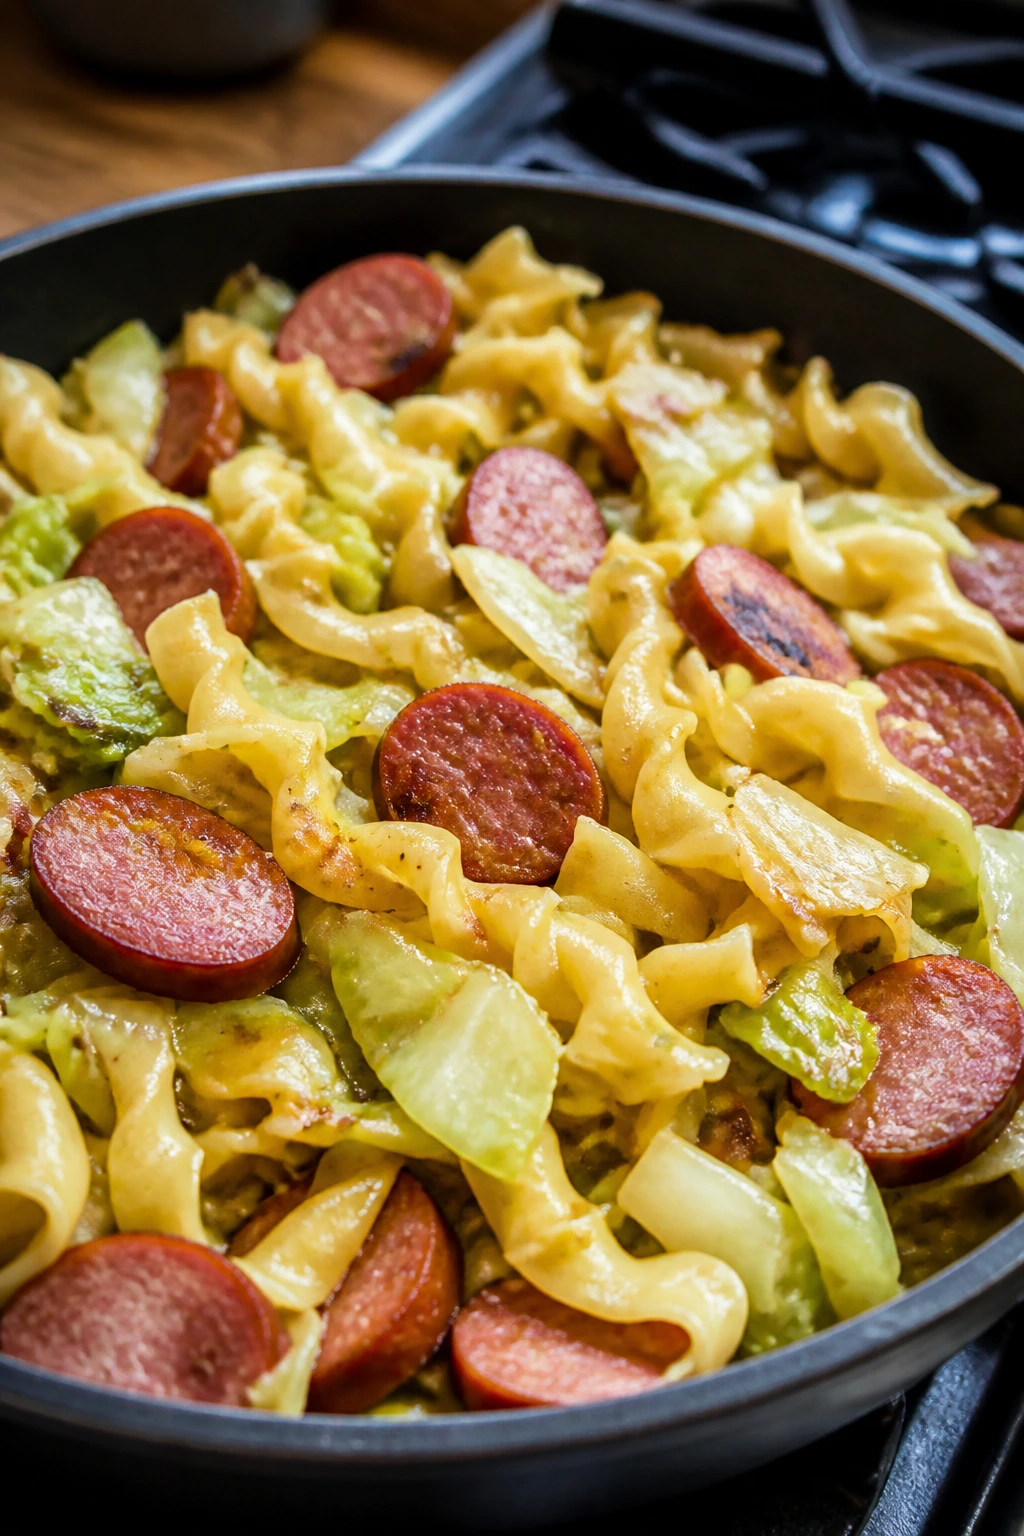
Cabbage and noodles with kielbasa is the sort of pan that smells better than it photographs, and that’s fine by me. The cabbage softens in butter, the noodles pick up the onion flavor, and the kielbasa brings smoke and salt.
Why It Works:
Butter, cabbage, and egg noodles make a simple base that is cheap, filling, and fast. The sausage adds enough richness that the whole skillet tastes like more than the sum of its parts.
Key Ingredients:
- 12 oz egg noodles
- 12 oz kielbasa, sliced
- 1 small head cabbage, shredded
- 1 onion, sliced
- 4 tbsp butter
- Salt and pepper
- 1 tsp caraway seeds, optional
Quick Steps:
- Cook the noodles and set them aside.
- Brown the kielbasa in a skillet, then add onion and cabbage with butter.
- Cook until the cabbage softens and turns lightly golden.
- Toss in the noodles, season well, and heat through.
Equipment for This Recipe:
- Large skillet
- Pot for noodles
- Wooden spoon
- Colander
How to Serve This Dish:
A small bowl with black pepper on top is enough, though rye bread makes a fine partner if you have it. It also works well reheated in a skillet with a little extra butter.
Pro Tips for This Recipe:
- Brown the kielbasa first for better flavor.
- Do not rush the cabbage; it needs time to soften and sweeten.
- A pinch of caraway gives it a more classic old-country feel.
Variations on This Dish:
- Ham and Cabbage Noodles: Use diced ham instead of kielbasa.
- Garlic Butter Version: Add minced garlic with the onion.
- Peppery Version: Finish with extra black pepper and a little vinegar.
Common Mistakes to Avoid with This Dish:
- Don’t undercook the cabbage or it tastes harsh.
- Don’t skimp on butter; this dish needs it.
- Don’t toss in the noodles too early or they break apart.
Why These Dinners Work So Well After School
The best after-school dinner ideas are not the ones with the loudest flavors. They are the ones that hold together when the clock gets messy. A casserole that waits on the counter for ten minutes still tastes fine. A skillet of chili can be portioned into small bowls without turning sad. A roast chicken can be carved, packed, and eaten warm or cold, and it still feels like real food. That kind of flexibility matters more than flashy ingredients ever will.
There is also a texture lesson hiding in plain sight. Soft food needs a crisp edge. Rich food needs something acidic nearby. Creamy dishes need a little salt and pepper at the table, not just in the pot. That is why these recipes keep showing up in family kitchens: they already know how to balance themselves, or at least how to let you finish the job with a pickle, a tomato slice, or a squeeze of lemon.
Essential Equipment for These Recipes
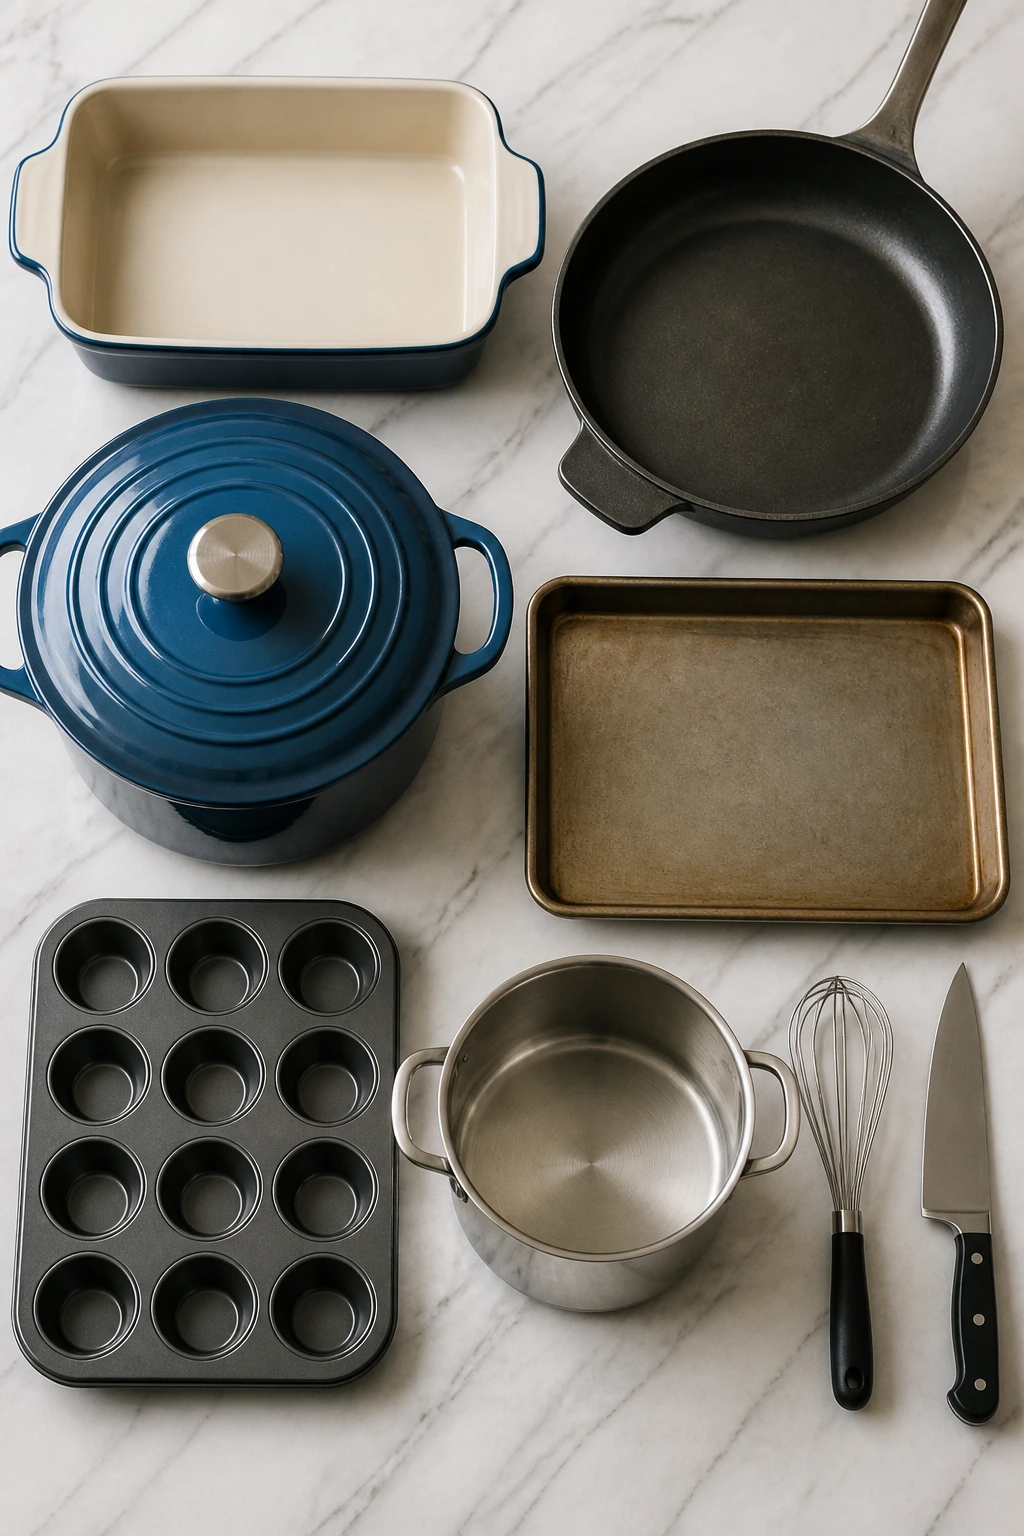
- 9×13-inch baking dish: The workhorse for casseroles, baked pasta, and hotdish-style dinners.
- Large skillet: Good for meat sauces, sausage dishes, Salisbury steak, and quick fillings.
- Dutch oven or heavy pot: Best for soup, chili, chicken and dumplings, and pot roast.
- Sheet pans with rims: Useful for fish sticks, hand pies, chicken bites, and roasted vegetables.
- Muffin tin: Handy for meatloaf muffins and shepherd’s pie cups.
- Large pot for pasta: You’ll need it for spaghetti, ziti, lasagna noodles, and tetrazzini.
- Whisk: Non-negotiable for white sauces and gravy.
- Sharp chef’s knife: Speeds up onions, carrots, peppers, and cabbage.
- Instant-read thermometer: Helps with chicken, pork, and meatloaf so you do not guess.
- Mixing bowls: At least two sizes. One is never enough.
- Colander: Pasta and potatoes need somewhere to drain.
- Airtight containers: Make leftovers easier to store in snack-size portions.
Smart Shopping and Ingredient Tips
Ground beef is the backbone of a lot of these dinners, and the fat ratio matters. For saucy skillets and meatballs, I like 80/20 or 85/15 because a little fat carries flavor and keeps the pan from tasting dry. For leaner dishes like chicken bites or turkey casseroles, add a spoonful of oil, butter, or cheese so the final result does not feel hollow.
Cheese is worth buying in blocks when you have the time to grate it. Pre-shredded cheese works in a pinch, but block cheddar, Parmesan, and mozzarella melt with a smoother finish. If the recipe leans on a sauce — mac and cheese, baked ziti, tetrazzini, tuna bake — the difference shows up in the texture right away.
Canned tomatoes, broth, and beans deserve a quick label check. Tomatoes should have a short ingredient list, broth should not taste like pure salt, and beans should be rinsed if the recipe does not need the canning liquid. For pasta dishes, choose shapes that catch sauce: ziti, elbow macaroni, egg noodles, spaghetti, and shells all do useful work. For potatoes, Yukon Golds are the safest all-around choice because they hold shape without turning waxy or mealy.
Rotisserie chicken is not cheating in this set of recipes. It is a practical shortcut. Use it for pot pies, tetrazzini, chicken and rice casserole, and creamed turkey’s cousin, and you cut a half hour off the clock without damaging the flavor.
How to Serve These Recipes
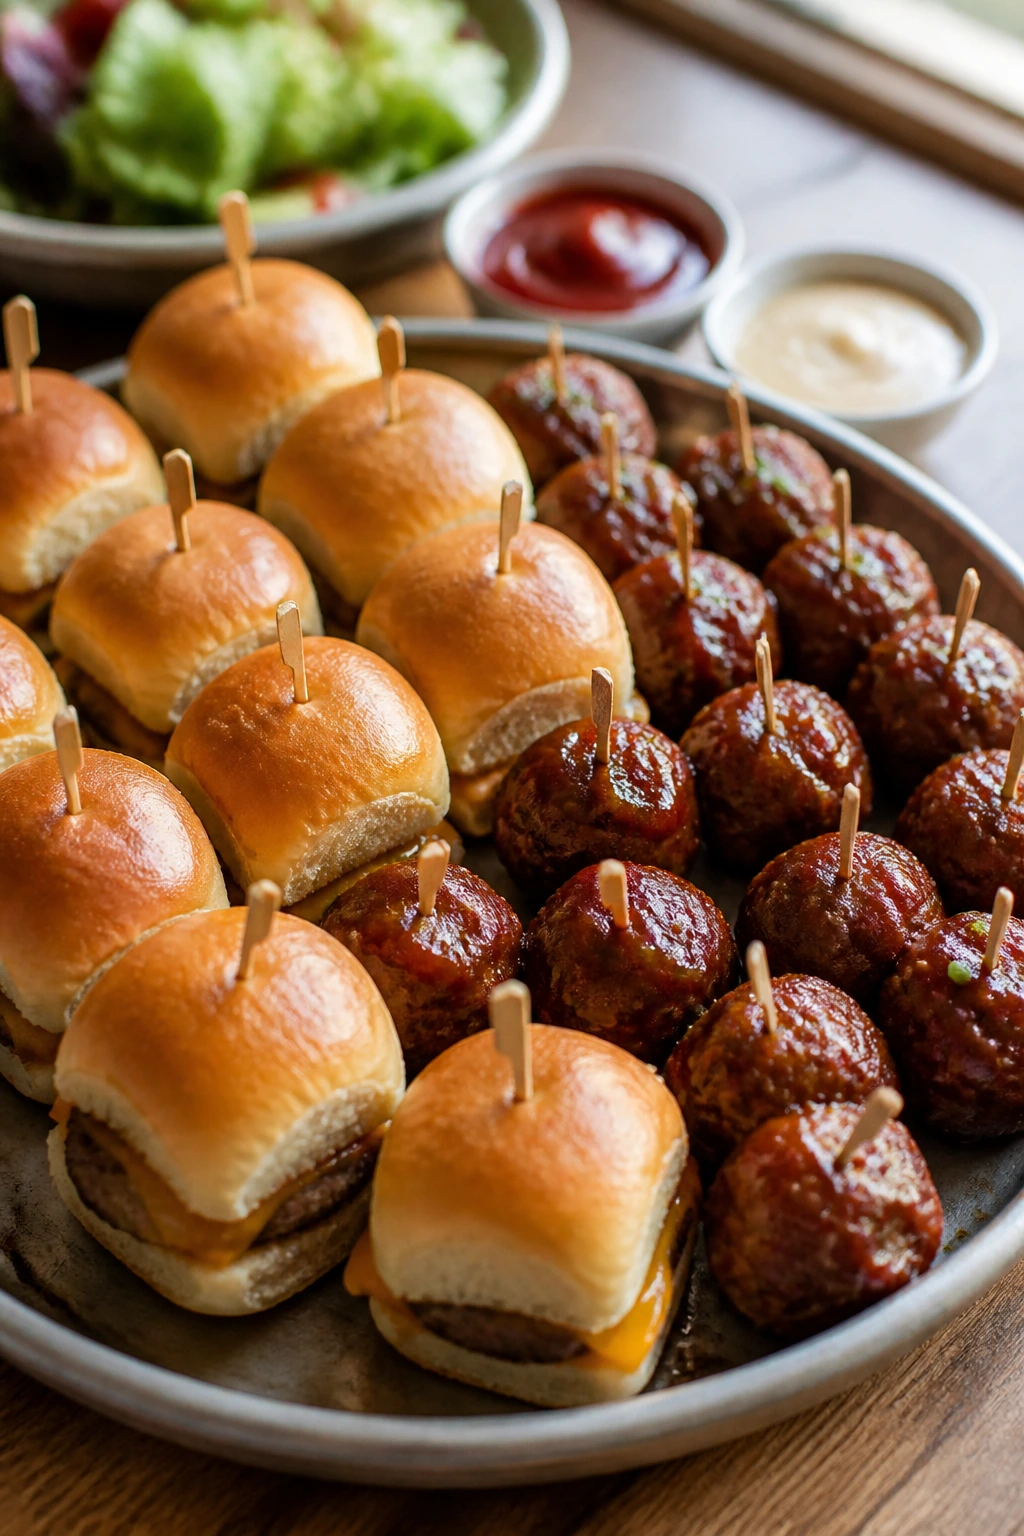
Presentation:
Serve baked dishes in shallow bowls or cut squares so they hold their shape. Sliders, hand pies, and chicken bites work best on a tray or a wide plate where people can grab them without wrecking the whole pile.
Accompaniments:
Pick one fresh thing and one starchy thing. That might mean a dill pickle spear with mac and cheese, buttered peas with meatloaf, a green salad with baked ziti, or toast with soup. Crusty bread, biscuits, simple slaw, apples, and sliced cucumbers all play well with this whole collection.
Portions:
After-school servings usually land smaller than dinner servings — think 1 cup of soup, 1 to 2 sliders, 2 meatballs, 1 square of casserole, or 1 muffin-tin portion. For a full family meal, build the plate around protein and starch, then add a vegetable or fruit on the side.
Beverage Pairing:
Cold milk is the quiet winner for most kid plates. Unsweetened iced tea, lemonade, and sparkling water with lemon also fit well, while a mug of broth or apple cider makes sense with soup, roast chicken, and pot roast.
Additional Tips and Flavor Boosters

Flavor Enhancement:
A small spoon of Dijon mustard in cheese sauces, a splash of Worcestershire in beef dishes, or a little lemon zest on chicken goes a long way. These are not big “chef” moves. They are the small touches that make old recipes taste awake.
Customization:
Add peas to tuna bake, corn to chili bake, spinach to tetrazzini, or mushrooms to stroganoff and Salisbury steak. Those swaps do not change the character of the dish; they just make the plate feel fuller and use what you already have.
Serving Suggestions:
Chopped parsley, scallions, crushed crackers, extra cheddar, or a few pickle chips can change the mood of a dish without changing the recipe. I especially like sharp toppings on soft food — they stop every bite from blending into one note.
Make-It-Yours:
For a gluten-free version, use gluten-free pasta, cornstarch-thickened gravies, and gluten-free breadcrumbs where needed. For dairy-free cooking, use unsweetened oat milk and a good plant-based cheese only where the recipe truly needs it; some dishes are better left with a smaller amount of dairy than with a fake version of the whole thing.
Make-Ahead, Storage, and Reheating Guidance
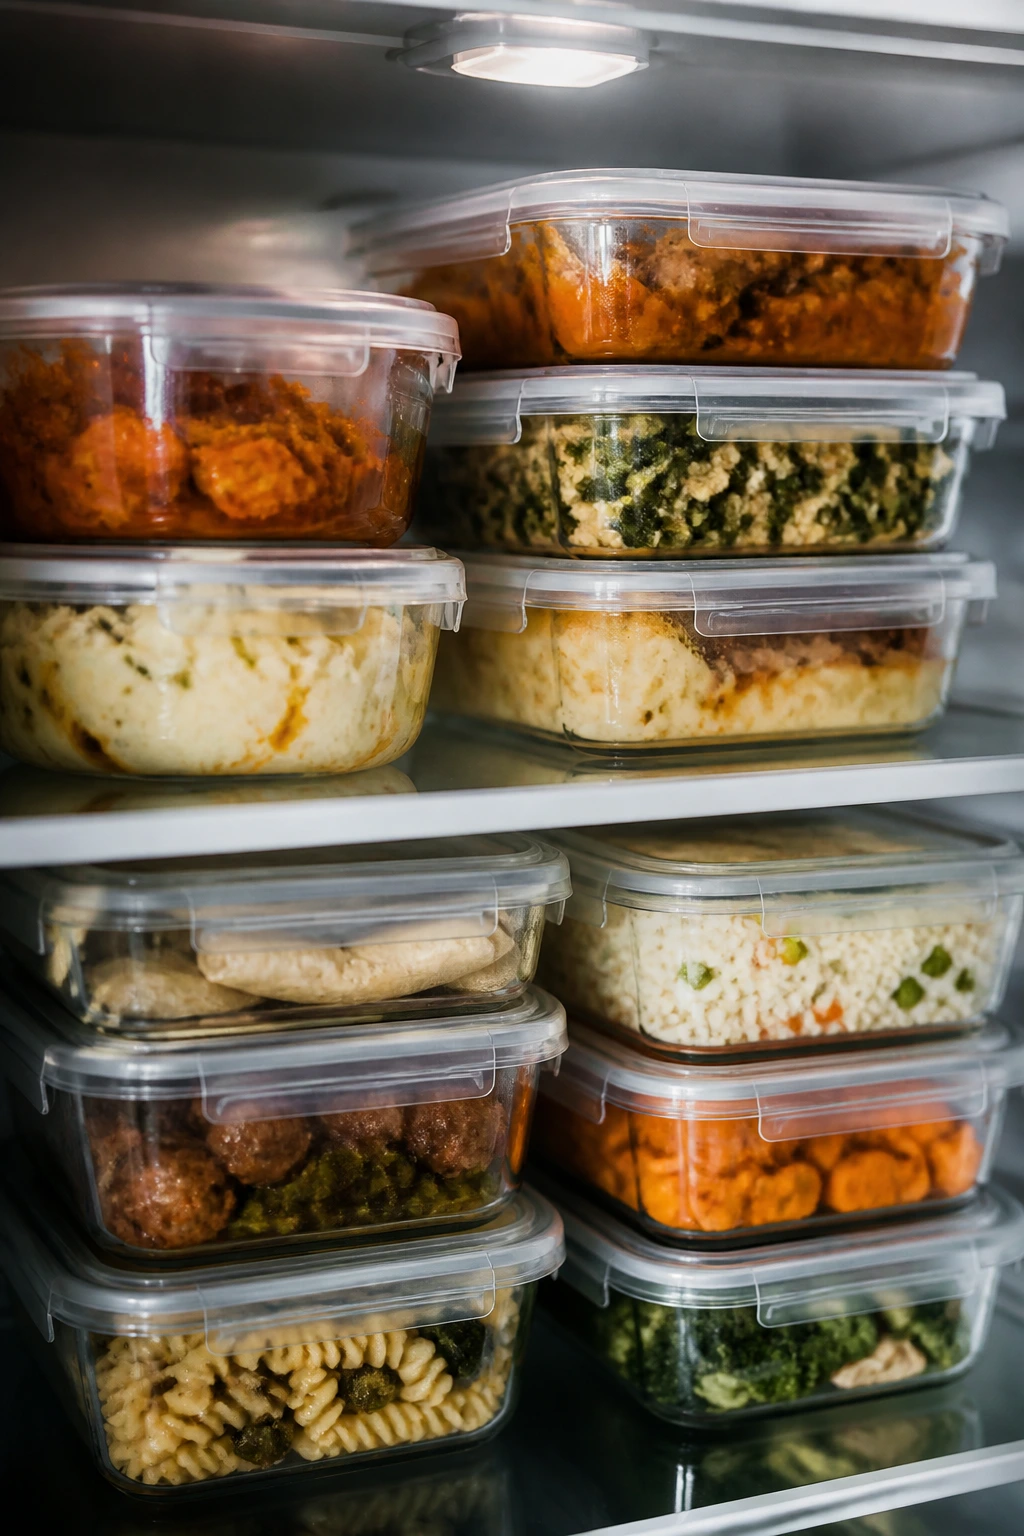
Most of these family dinners keep well in the refrigerator for 3 to 4 days when stored in shallow, covered containers. Soups and stews often hold for the full 4 days, while baked pasta and casseroles taste best within the first 2 or 3. Roasts and cooked chicken should be cooled, sliced, and tucked away as soon as they stop steaming hard; that keeps the texture from getting dry and the fridge from working too hard.
Freezing is useful for meatballs, meat sauces, chili bakes, pot roast, lasagna roll-ups, mac and cheese, and many casseroles. Wrap portions tightly and freeze for up to 2 months for the best texture. Hand pies, sliders, and fish sticks are better frozen before baking if you want crisp results later, while creamy soups can freeze but may need a brisk whisk after thawing.
For reheating, use the method that protects the texture. Casseroles and baked pasta do best at 350°F (175°C) covered with foil until hot in the center, usually 20 to 30 minutes for a family pan or 10 to 15 minutes for smaller portions. Soups and stews reheat best on the stovetop over medium-low heat with a splash of broth or water. Meatloaf muffins, sliders, and hand pies can be warmed in a toaster oven or regular oven so the bread or crust stays firm.
A lot of these recipes improve after a night in the fridge, especially spaghetti sauce, chili, sloppy joes, pot roast, and soup. The one caution is dairy-heavy dishes — mac and cheese, stroganoff, tetrazzini, and creamed turkey can tighten up, so add a spoonful of milk or broth while reheating and stir gently. Pack leftovers in smaller containers if the whole point is after-school snacking; nobody wants to thaw an entire casserole just to eat one square.
Variations and Adaptations to Try
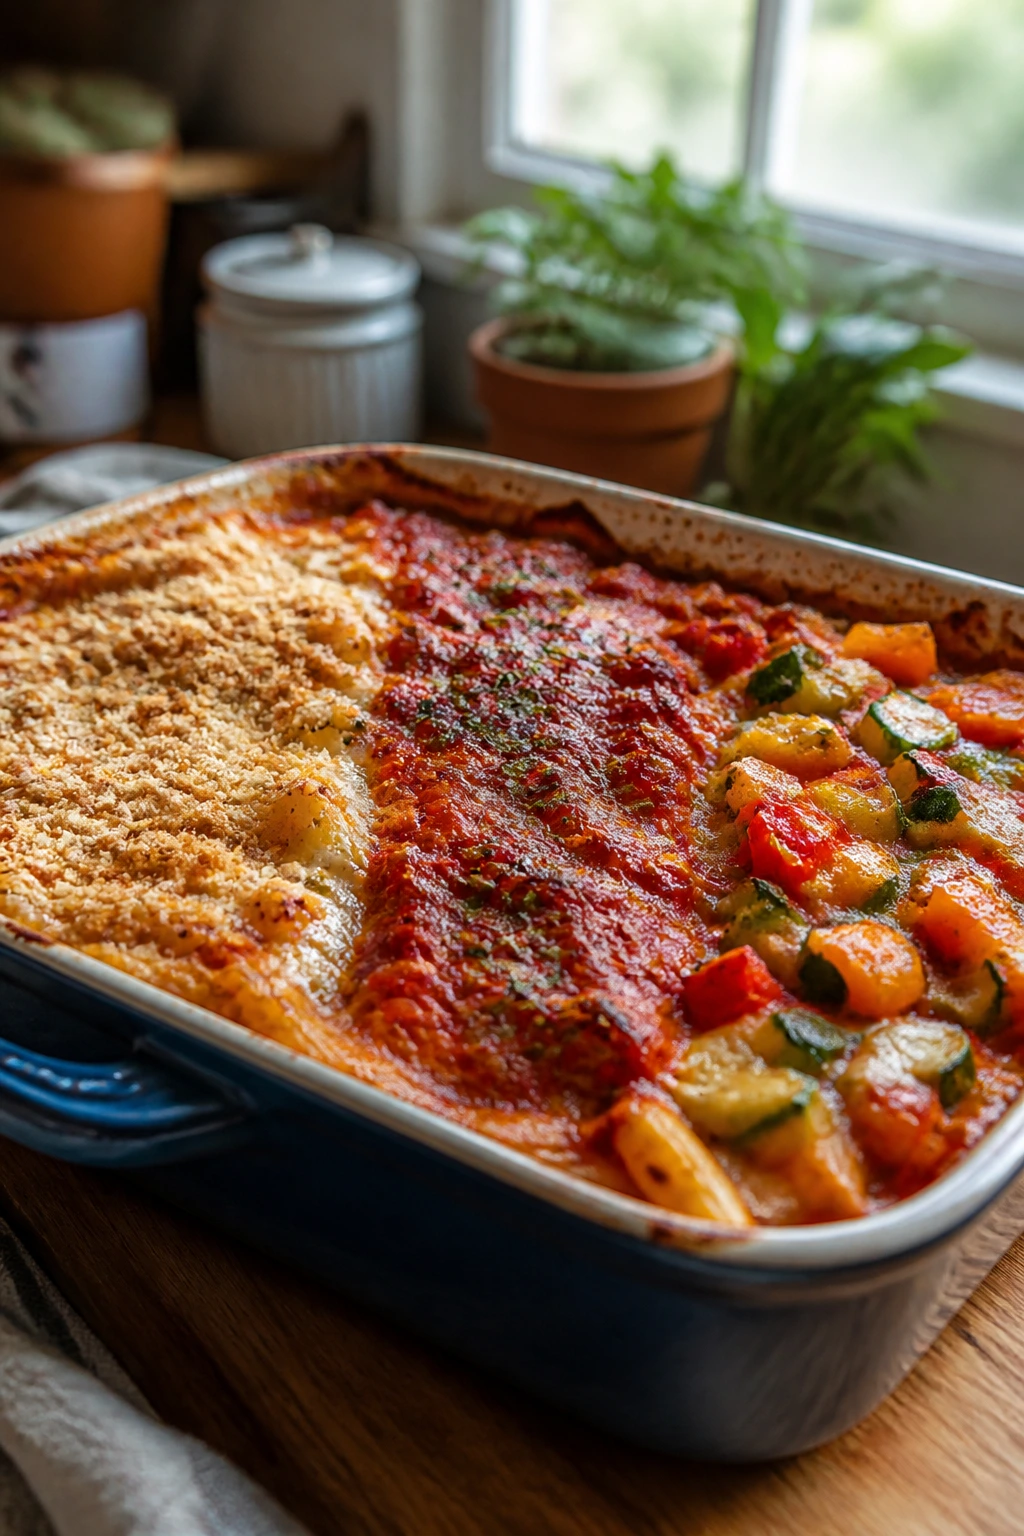
Gluten-Free Pantry Swap:
Use gluten-free pasta in baked ziti, mac and cheese, goulash, and spaghetti dinners. For thickening soups and gravies, cornstarch or arrowroot works well when mixed with cold liquid first. Breadcrumb toppings can be replaced with crushed gluten-free crackers or almond flour crumbs.
Dairy-Light Table:
For soups, stews, and roasts, lean on broth, tomato, mustard, and herbs instead of heavy cream. If you want a little richness without a full dairy load, use a smaller amount of sharp cheese rather than a large amount of mild cheese. That gives you flavor without turning the dish heavy.
Extra-Veggie Night:
Stir chopped carrots, celery, peppers, mushrooms, spinach, or peas into the pan wherever they fit naturally. The best places are meat sauces, chili, tetrazzini, casseroles, and stuffing-style fillings. Vegetables that are diced small enough disappear into the sauce without turning the meal into a vegetable tray in disguise.
Mild Kid Plate:
Keep the base recipe gentle and put the sharp stuff on the table. Pickles, hot sauce, mustard, pepper flakes, and extra cheese can sit beside the meal so each person handles their own heat level. That saves you from making two separate dinners.
Freezer-First Batch Cooking:
If you are cooking once and freezing once, pick dishes with sauce and structure: meatballs, sloppy joes, enchilada filling, chili bake, lasagna roll-ups, and pot roast. Freeze in flat bags or small containers so the portions thaw faster and fit better in the fridge.
Snack-Size Shifts:
Turn the same recipe into cups, sliders, bites, or hand pies when you want a second-round meal after school. Muffin tins, small rolls, and individual ramekins do the work for you, and they make reheating far less fussy.
Common Mistakes to Avoid
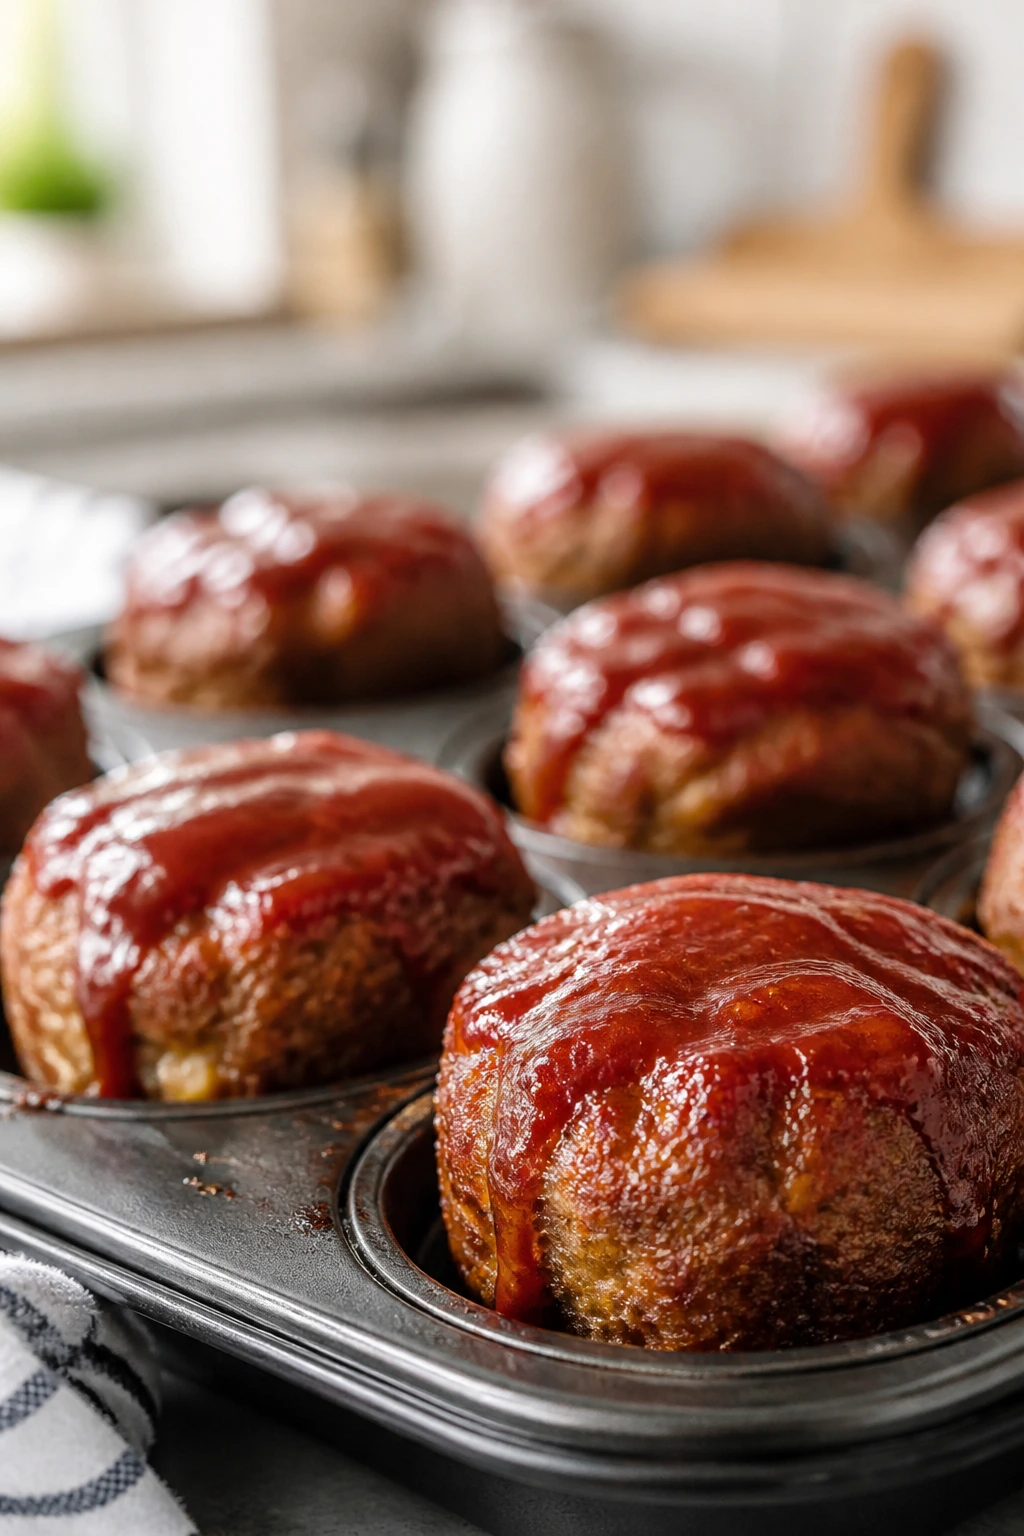
The first mistake is making everything too wet. A saucy dish is good; a soupy dish is frustrating. If the filling for enchiladas, hotdish, or hand pies looks loose before it goes into the oven, it usually comes out looser than you wanted. The fix is simple: simmer a little longer, use less liquid, and let the dish rest before serving.
The second mistake is trying to save every creamy dish with high heat. Mac and cheese, stroganoff, creamy soup, and tetrazzini all do better with gentle reheating. Hard boiling makes dairy separate and turns a smooth sauce grainy. Lower heat and a splash of broth or milk solve more problems than aggressive stirring ever will.
The third mistake is skipping seasoning layers. Ground meat, pasta, potatoes, and rice all need salt in their own right. If you only season the finished casserole, the flavor sits on top instead of running through the whole pan. Taste the filling before it goes in, taste the sauce before it hits the noodles, and taste the gravy before you call it done.
The fourth mistake is forgetting texture. A plate that is all soft feels flat by the third bite. That’s why a crisp topping, toasted bun, browned sausage, or crunchy vegetable matters so much here. If your dish is all cream and starch, add something with bite: breadcrumbs, pickles, fresh onions, or a good sear.
The fifth mistake is cutting or serving too soon. Most baked dishes need 5 to 15 minutes to settle. Skip that, and you lose structure. Give the pan a rest, then cut.
Frequently Asked Questions
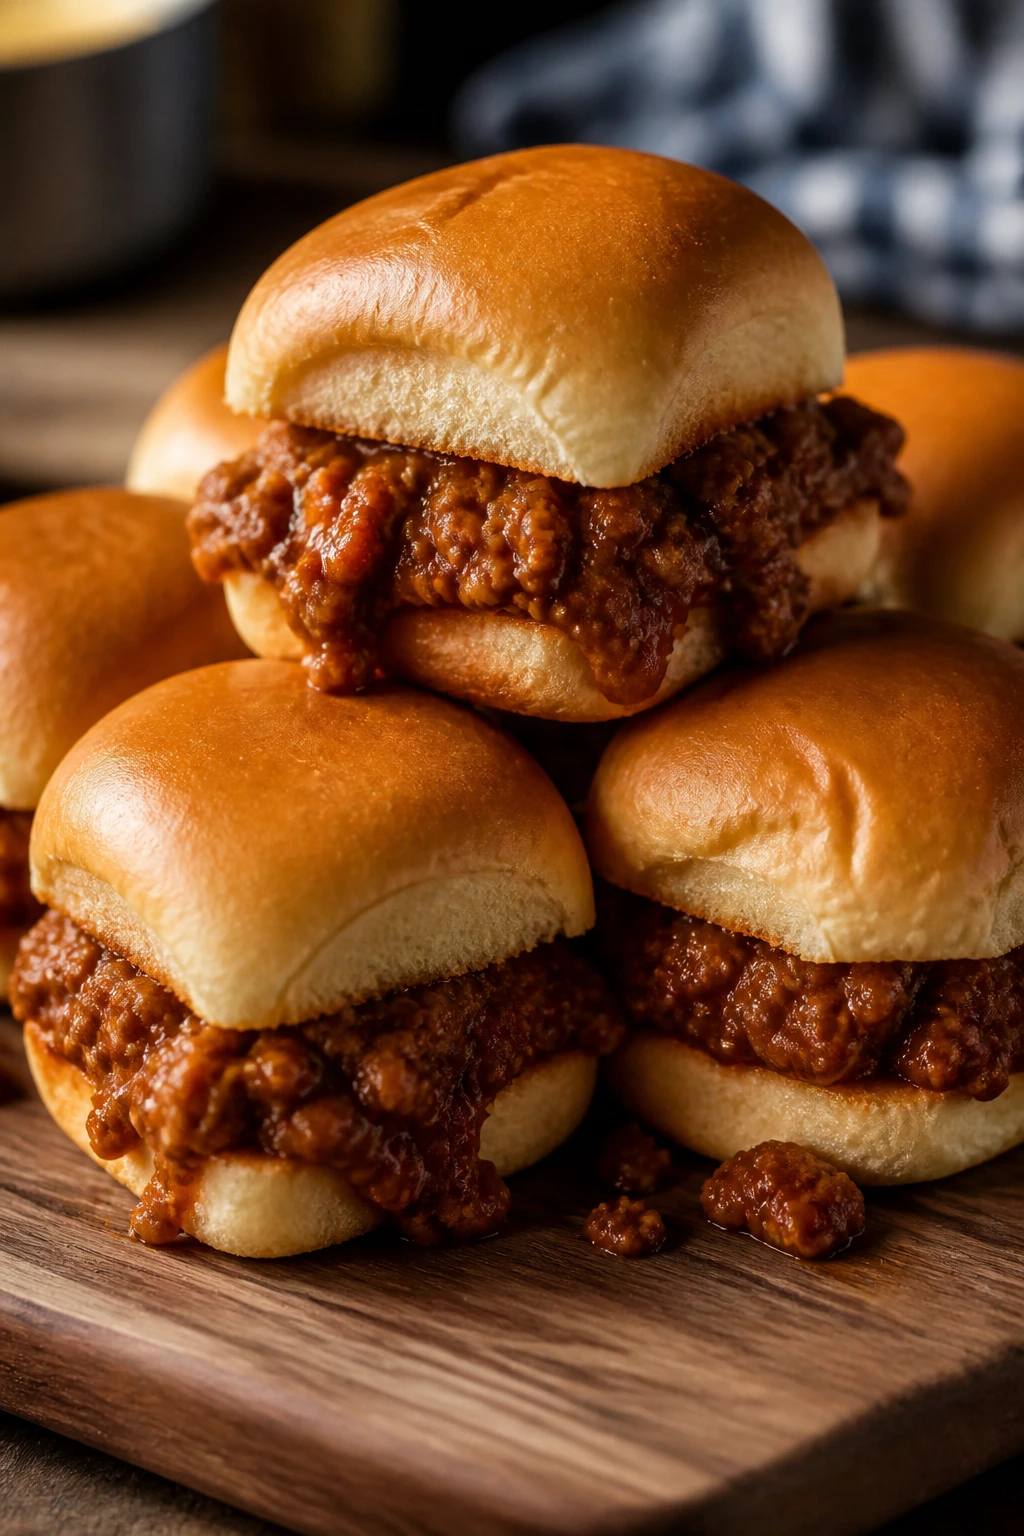
Which recipes in this collection work best as after-school snacks?
Mini meatloaf muffins, sloppy joe sliders, shepherd’s pie cups, chicken Parmesan bites, fish sticks, and hand pies are the easiest to serve in snack-sized portions. Baked mac and cheese, chili bake, and goulash also reheat well in small bowls.
Can I use rotisserie chicken in more than one of these recipes?
Yes. It works especially well in chicken pot pie hand pies, chicken tetrazzini, chicken and rice casserole, and creamed turkey on biscuits when you swap turkey for chicken. It is one of the fastest ways to shorten the cook time.
Which dishes freeze the best?
Meatballs in marinara, sloppy joe filling, chili bake, pot roast, stuffed pepper filling, lasagna roll-ups, and most casseroles freeze well for up to 2 months. Creamy pasta dishes freeze, too, but they usually need a splash of milk or broth after thawing.
How do I keep leftovers from turning dry?
Store them in smaller containers, not one big half-empty pan. When reheating, cover the dish and add a spoonful of broth, milk, or water if the food looks tight. That matters most for baked pasta, rice casseroles, and roast chicken.
What if my kids do not like mushrooms, onions, or peas?
Leave them out or chop them smaller so they disappear into the sauce. In dishes like shepherd’s pie, stroganoff, and tuna bake, carrots, corn, or spinach can step in without changing the whole recipe. You do not need to make every vegetable visible to get the benefit.
Can I make these dishes ahead of time and bake later?
Yes, especially baked ziti, mac and cheese, enchilada casserole, stuffed peppers, lasagna roll-ups, and hotdish. Assemble the dish, cover it, and refrigerate it for up to a day before baking. Add a few extra minutes in the oven if it goes in cold.
What is the best way to reheat a casserole without drying it out?
Cover it with foil and reheat at 350°F (175°C) until the center is hot. If it contains pasta, rice, or a cream sauce, add a small splash of broth or milk before covering. Uncover for the last few minutes if you want the top crisp again.
How can I make these dinners smaller for one child or a light snack?
Bake them in muffin tins, small ramekins, or mini loaf pans when the recipe allows it. For saucy dishes, portion them into half-cup containers and reheat only what you need. The food is often better when it is not sitting under a mountain of serving size.
Are these recipes still good the next day?
Many of them are better the next day. Chili, spaghetti sauce, pot roast, sloppy joes, soup, and goulash develop deeper flavor after resting overnight. Crisp items like fish sticks and grilled cheese are better freshly made, or reheated in the oven rather than the microwave.
The Dinners That Keep Their Shape
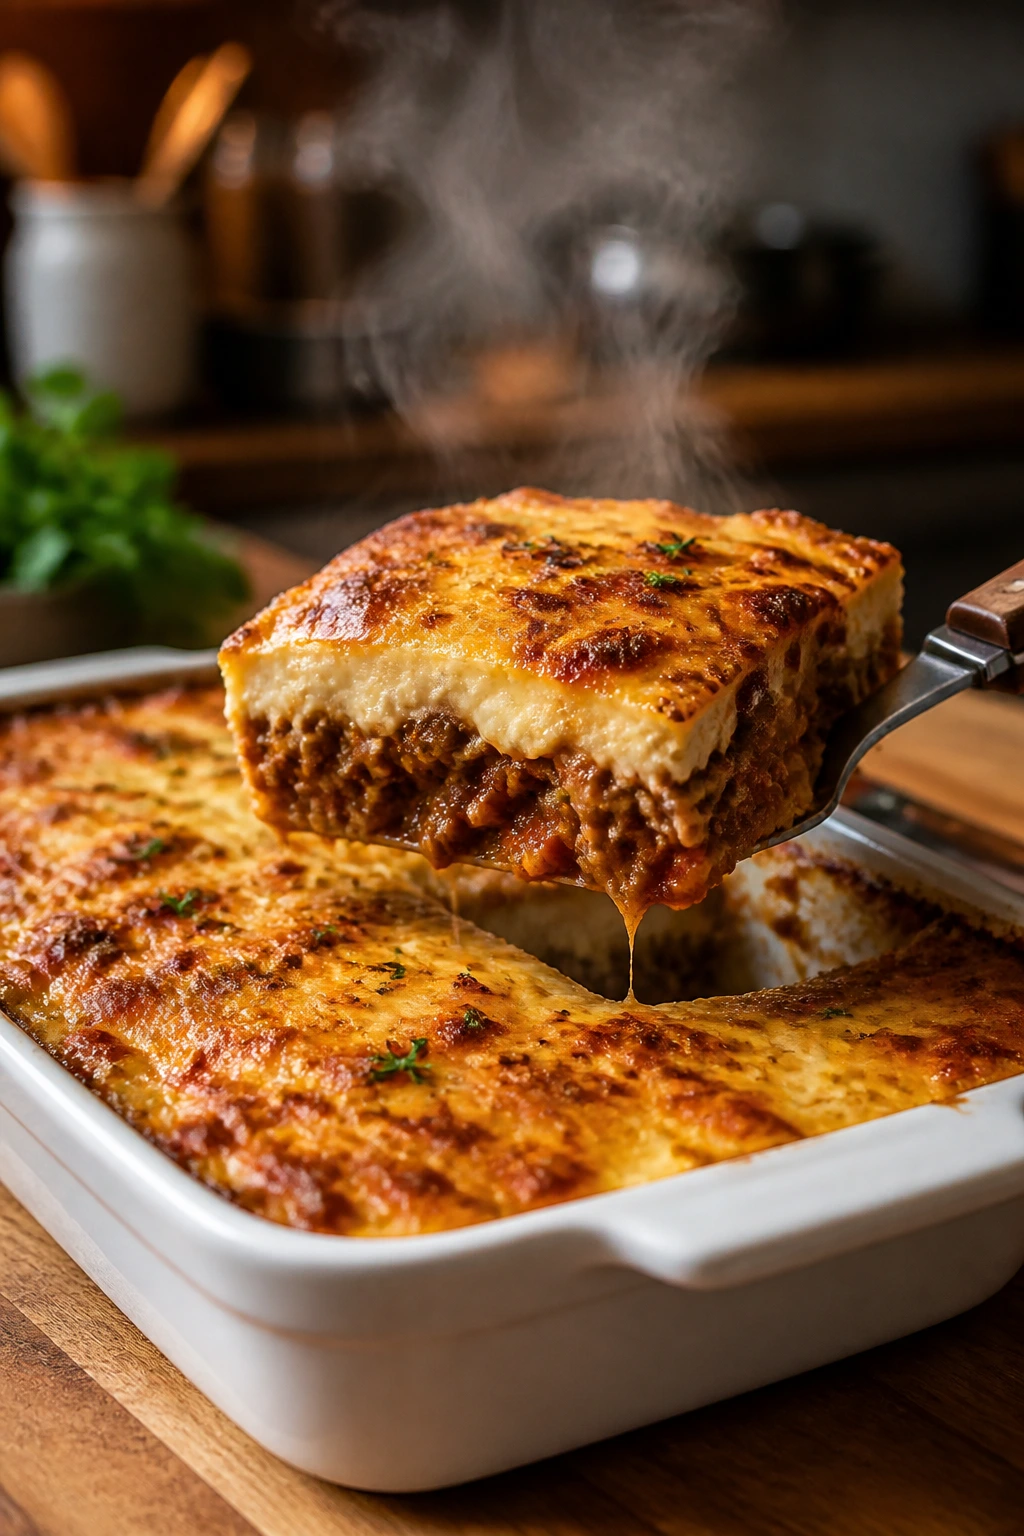
The useful family dinners are not the ones that look perfect in a photograph. They are the ones that survive a Tuesday. They sit well in the fridge, they reheat without falling apart, and they can be cut down into small portions when somebody gets home hungry before the main meal is ready.
That is what makes this collection worth keeping around. It gives you dinner, snack, leftovers, and backup plans without asking for much drama. Pick one casserole, one skillet, one soup, and one hand-held option, and you’ve got a week’s worth of after-school answers sitting in the kitchen already.