
A tray of Easter cookies can look a little like a jewel box someone left open on the kitchen counter: pale yellow glaze, pink swirls, speckled eggs, gold sugar, tiny dots of green, and the kind of glossy finish that makes you pause before you take a bite. That’s the fun of Easter baking. The cookies don’t have to be complicated to look special, but they do need a bit of intention — the right cut shape, a smooth icing, a dough that holds edges instead of slumping into puddles.
The smartest Easter cookie recipes usually do one of two things. They either lean into shape and decoration — bunny cutouts, eggs, flowers, nests — or they lean into flavor and texture so the prettiness feels earned, not forced. A crisp-edged shortbread with lemon glaze. A soft carrot cake sandwich cookie with cream cheese filling. A nest cookie with toasted coconut that looks like it came straight from a spring display. Those are the ones people reach for first, then secretly go back for another.
And yes, a lot of them are the sort of cookies that disappear before you finish arranging the platter. That’s part of the deal. The trick is picking a spread with enough variety that the tray feels playful instead of repetitive, and enough structure that the prettiest cookies actually bake well. The good ones are cute, sure. But they also taste like something you’d want on purpose, not just because they looked nice in a photo.
Why This Cookie Tray Works So Well

- Not every cookie is a sugar cookie: You get shortbread, sandwich cookies, thumbprints, macarons, biscotti, and nest cookies, so the tray has real texture contrast.
- Decoration has a job here: Royal icing, glaze, sanding sugar, and candy details do more than decorate; they help separate each cookie at a glance.
- You can mix easy and fussy recipes: Some of these bake in 10 minutes. Others ask for piping bags, chilling, or a little patience. That balance keeps the spread from feeling one-note.
- Spring flavors show up naturally: Lemon, coconut, raspberry, honey, almond, pistachio, and carrot all fit the season without needing a pile of food coloring.
- Most of these hold up well: Several doughs chill, freeze, or decorate ahead of time, which matters when you’re baking more than one style.
- They photograph like a dream, but taste better than they look: That sounds backwards, and that’s exactly why these recipes are worth making.
1. Bunny-Shaped Vanilla Sugar Cookies
Intro: These are the cleanest little showpieces on the tray: pale golden edges, a soft vanilla center, and bunny shapes that stay sharp after baking. They’re the cookie I reach for when I want one recipe that can wear any icing color you hand it.
Why It Works: A chilled dough keeps the bunny ears from drooping, and a touch of almond extract makes the vanilla taste fuller. Roll it to ¼ inch for a cookie that bakes through without turning dry.
Key Ingredients:
- 2½ cups all-purpose flour
- 1 cup unsalted butter, softened
- ¾ cup granulated sugar
- 1 large egg
- 2 teaspoons vanilla extract
- ¼ teaspoon almond extract
- 1 teaspoon baking powder
- ½ teaspoon fine salt
- 2 cups royal icing, for decorating
Quick Steps:
- Cream butter and sugar for 2 to 3 minutes until light.
- Beat in the egg, vanilla, and almond extract.
- Mix in flour, baking powder, and salt, then chill the dough for 1 hour.
- Roll to ¼ inch, cut bunny shapes, and bake at 350°F for 9 to 11 minutes.
- Cool completely, then decorate with royal icing and sprinkles.
Equipment for This Recipe: Stand mixer, rolling pin, bunny cutter, parchment-lined sheet pans, piping bags.
How to Serve This Dish: Stack them on a white platter with pastel jelly beans scattered around the edges. They’re best with tea, coffee, or a cold glass of milk.
Pro Tips for This Recipe:
- Chill the cut shapes on the tray for 15 minutes before baking.
- Flood icing should run slowly, not like water.
- Bake one test cookie first if your oven runs hot.
Variations on This Dish: Lemon Bunny: add 1 tablespoon lemon zest. Chocolate-Eared Bunny: dip the ears in melted dark chocolate after icing.
Common Mistakes to Avoid with This Dish:
- Don’t skip chilling, or the bunnies blur into blobs.
- Don’t ice warm cookies; the icing will slide right off.
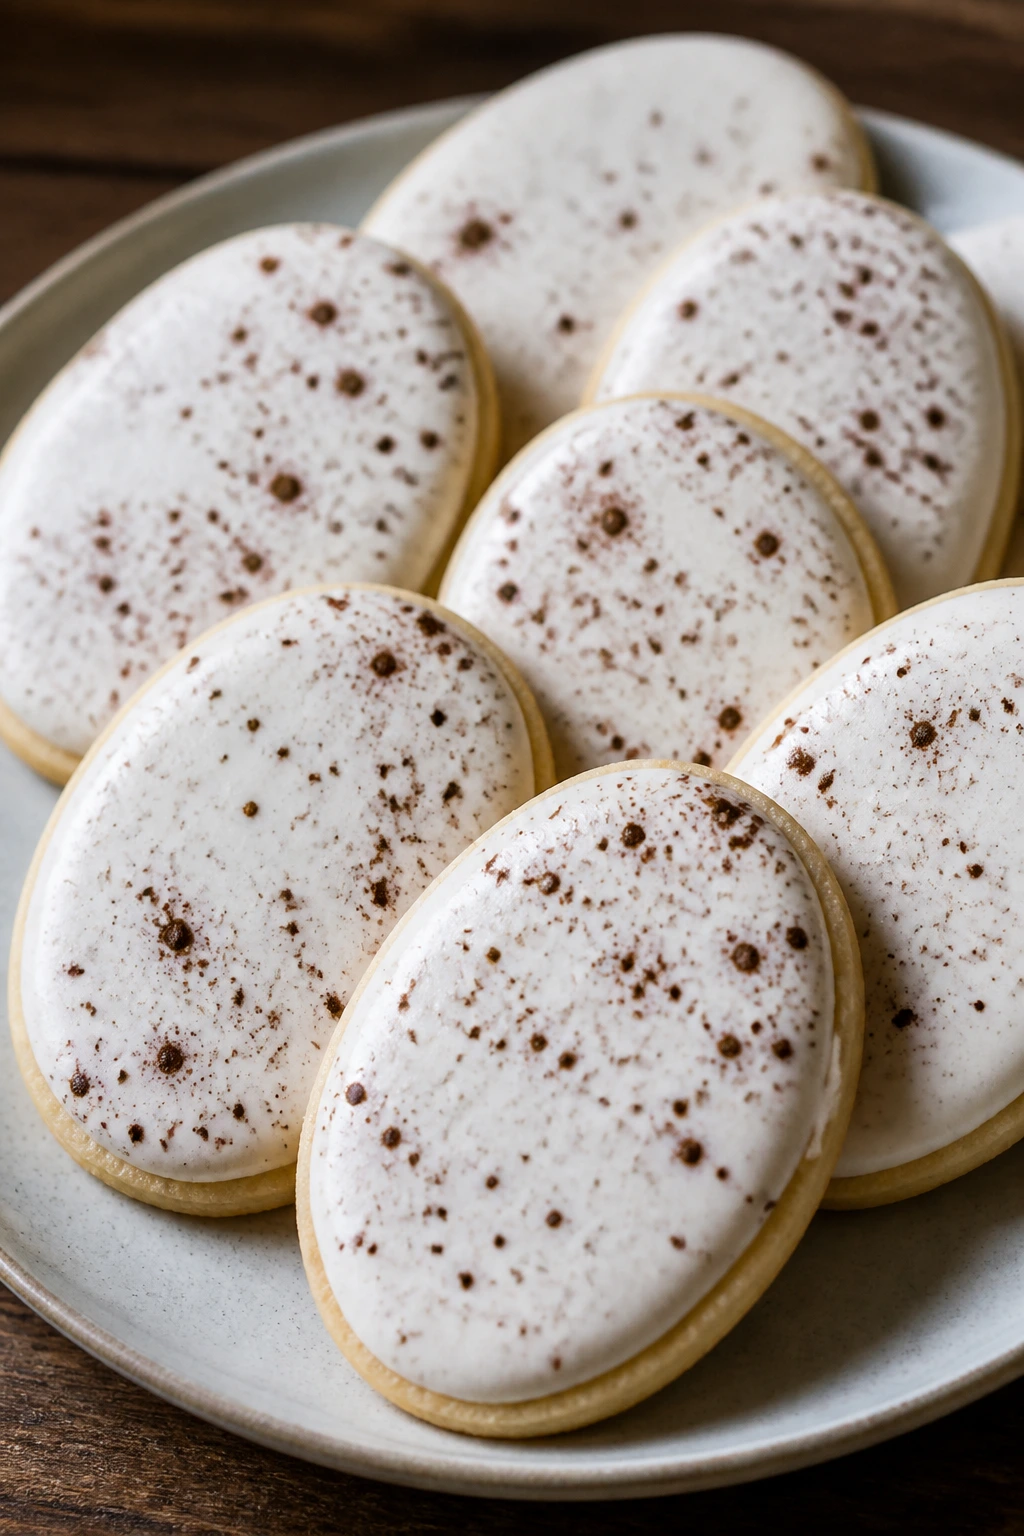
2. Speckled Egg Sugar Cookies
Intro: These cookies look like tiny painted eggs, especially when the white icing gets a cocoa speckle brushed over the top. They’re sweet, crisp at the edges, and a little more playful than plain cutouts.
Why It Works: Oval shapes are forgiving, and the speckled finish hides the odd shaky line, which is useful if you’re decorating with kids. The cookie itself is sturdy enough to handle a smooth glaze or a thick royal icing coat.
Key Ingredients:
- 2½ cups all-purpose flour
- 1 cup butter, softened
- ¾ cup sugar
- 1 egg
- 2 teaspoons vanilla extract
- 1 teaspoon baking powder
- ½ teaspoon salt
- 2 cups white icing
- 1 teaspoon cocoa powder mixed with 1 teaspoon water for speckling
Quick Steps:
- Make and chill the dough for 1 hour.
- Roll to ¼ inch and cut oval egg shapes.
- Bake at 350°F for 9 to 10 minutes.
- Cool, flood with white icing, and let set.
- Flick cocoa speckles over the surface with a clean pastry brush.
Equipment for This Recipe: Oval cookie cutter, pastry brush, sheet pans, cooling rack.
How to Serve This Dish: Arrange them in a shallow bowl lined with crinkled parchment for a nest effect. They look especially good beside chocolate eggs.
Pro Tips for This Recipe:
- Let the base icing dry before speckling.
- Use a stiff brush and tiny flicks, not a heavy hand.
Variations on This Dish: Pastel Wash: tint half the icing pale blue or mint. Gold Rim Egg: add a thin gold paint line around the edge after drying.
Common Mistakes to Avoid with This Dish:
- Don’t speckle while the icing is wet, or the cocoa blooms.
- Don’t use thick cocoa paste; it should be thin enough to flick.
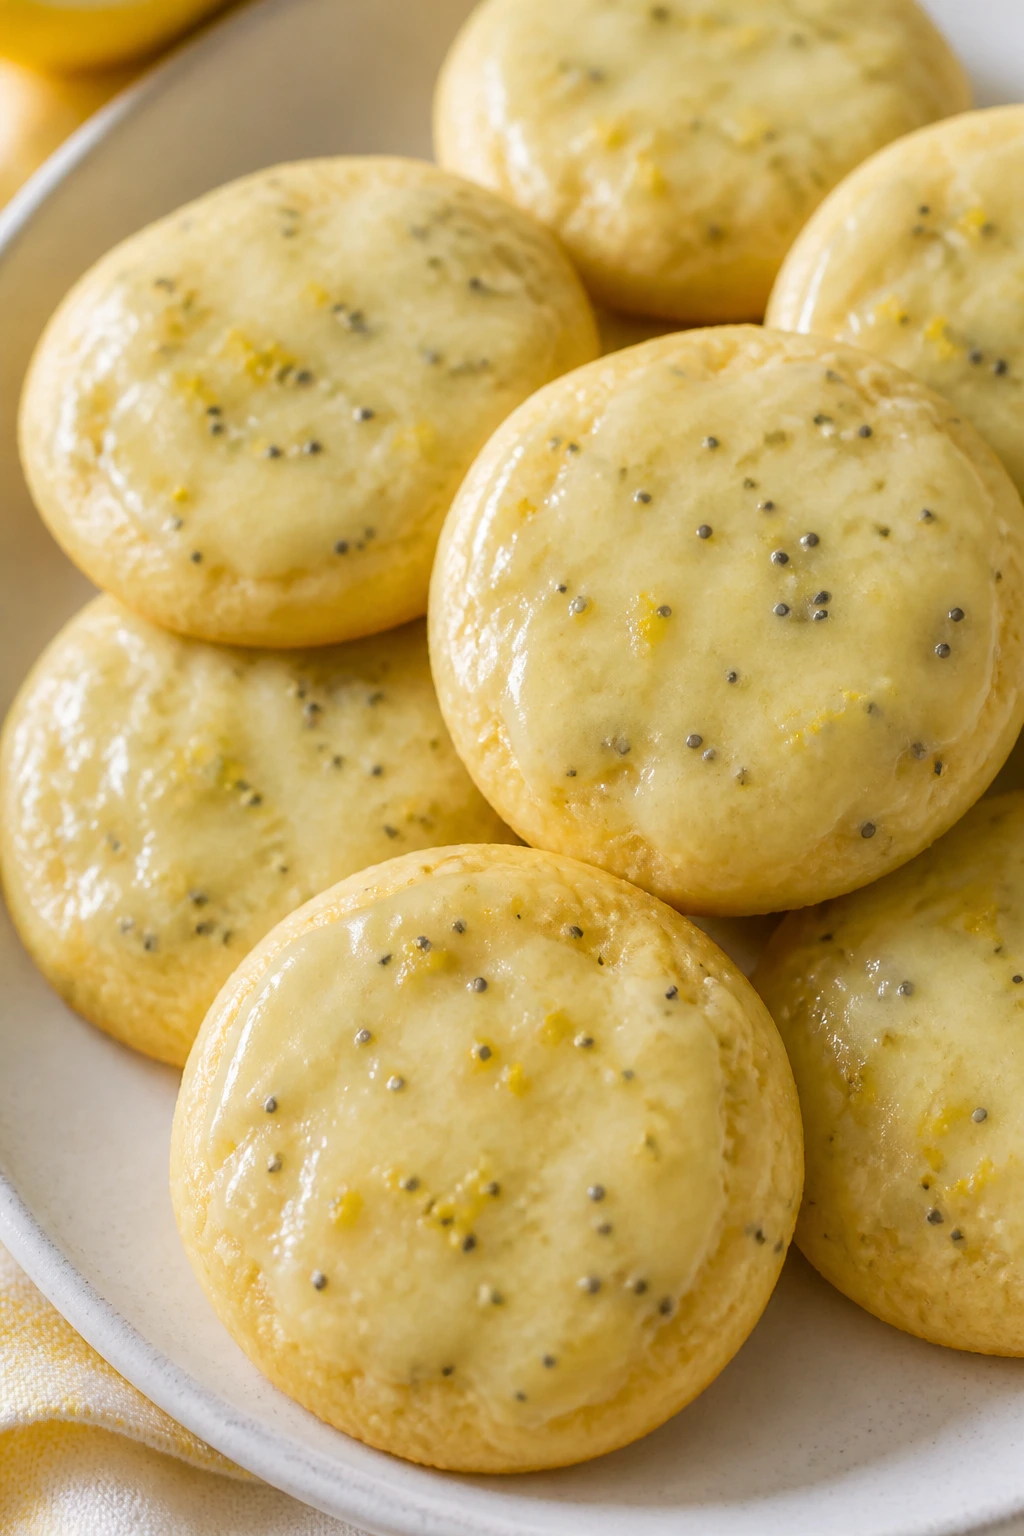
3. Lemon Poppy Seed Easter Cookies
Intro: Bright, pale, and dotted with tiny black seeds, these cookies taste like spring sunshine without being cloying. A thin lemon glaze sinks into the top and gives the whole cookie a shiny finish.
Why It Works: Lemon zest does the heavy lifting here, while poppy seeds keep the texture lively. The dough is simple, but the glaze brings the whole thing into Easter territory with almost no extra work.
Key Ingredients:
- 2 cups all-purpose flour
- 1 tablespoon poppy seeds
- 1 cup butter, softened
- ¾ cup sugar
- 1 egg
- Zest of 2 lemons
- 2 tablespoons lemon juice
- 1 teaspoon baking powder
- ½ teaspoon salt
- 1 cup powdered sugar for glaze
Quick Steps:
- Cream butter and sugar, then beat in egg, zest, and juice.
- Mix in flour, poppy seeds, baking powder, and salt.
- Scoop into rounds and bake at 350°F for 10 to 12 minutes.
- Whisk powdered sugar with lemon juice and drizzle over cooled cookies.
Equipment for This Recipe: Mixing bowl, hand mixer, microplane, parchment, wire rack.
How to Serve This Dish: Serve with berries or a little bowl of lemon curd on the side. They’re the cookie I’d put on a brunch table without thinking twice.
Pro Tips for This Recipe:
- Rub the zest into the sugar first for more lemon flavor.
- Pull them when the edges just start to color; they finish setting on the pan.
Variations on This Dish: Blueberry Lemon: fold in ½ cup dried blueberries. Pistachio Finish: add chopped pistachios on top of the glaze.
Common Mistakes to Avoid with This Dish:
- Don’t overbake; these dry out fast.
- Don’t add too much juice to the glaze unless you want it running off the sides.
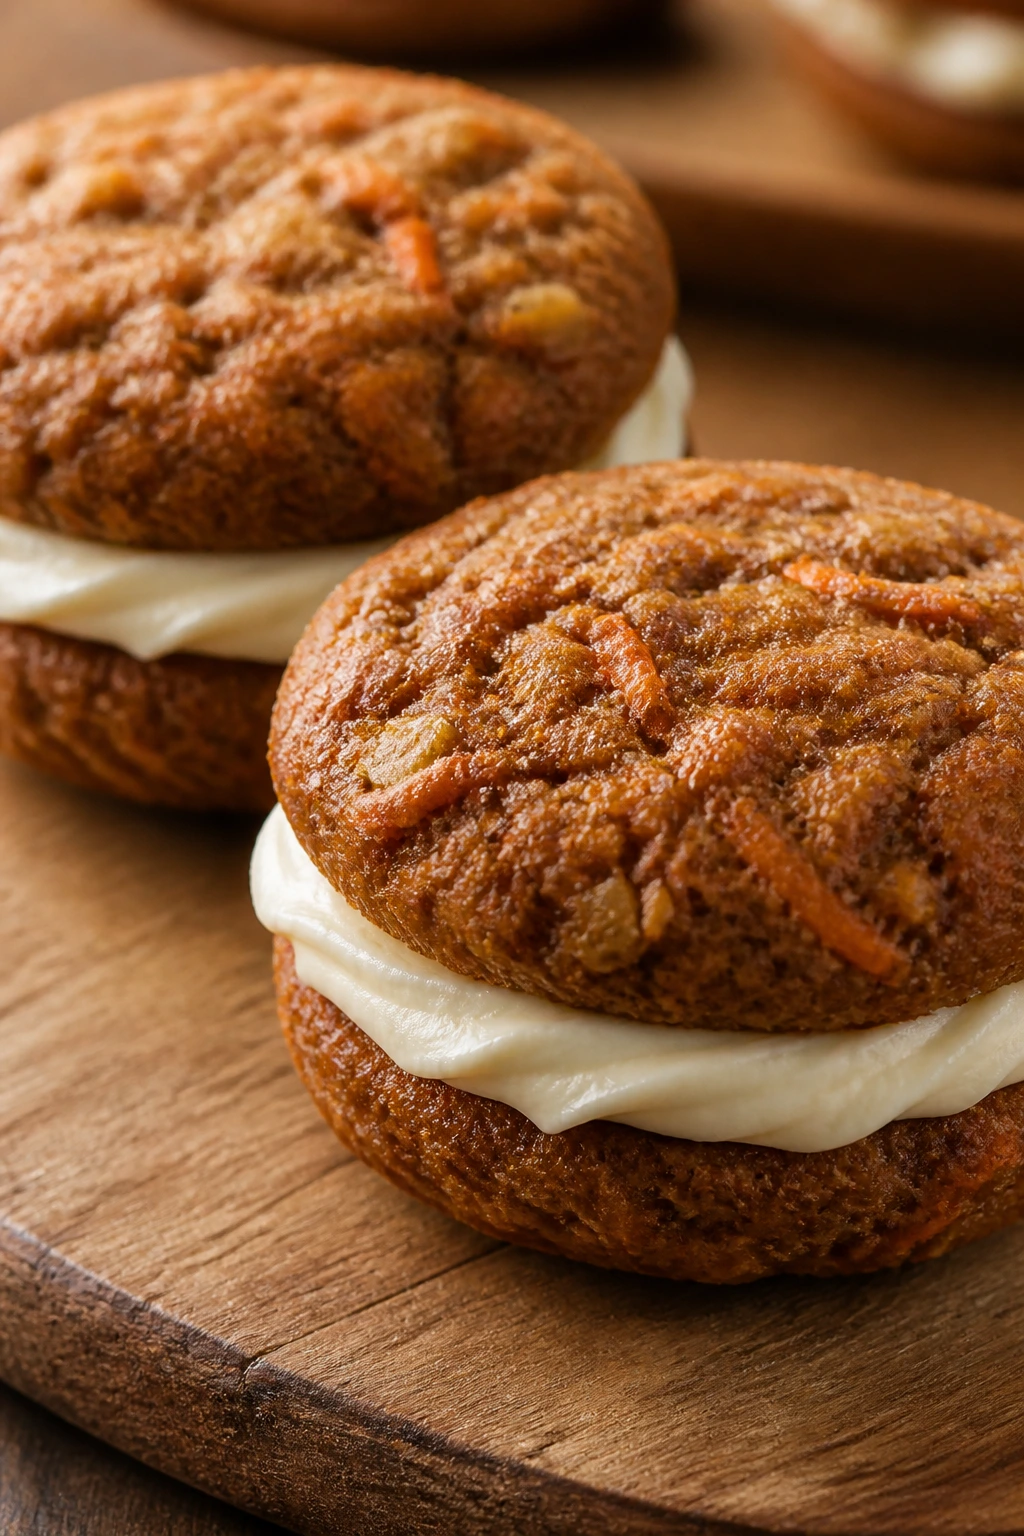
4. Carrot Cake Sandwich Cookies
Intro: Soft, spiced cookies with little flecks of carrot and a thick cream cheese filling in the middle — these are the cookies people stare at, then ask for the recipe. They taste like carrot cake got dressed up and cut into perfect little rounds.
Why It Works: Grated carrot keeps the cookies moist, and cinnamon plus nutmeg give them that familiar bakery smell. The filling firms up in the fridge, which makes the sandwich cookie easier to stack and serve.
Key Ingredients:
- 2 cups flour
- 1 teaspoon cinnamon
- ¼ teaspoon nutmeg
- ½ teaspoon baking soda
- ½ teaspoon salt
- ¾ cup butter, softened
- ¾ cup brown sugar
- 1 egg
- 1 cup finely grated carrot, squeezed dry
- 4 ounces cream cheese
- 1 cup powdered sugar
- 1 teaspoon vanilla
Quick Steps:
- Mix dry ingredients in one bowl.
- Cream butter and brown sugar, then beat in the egg and carrot.
- Stir in dry ingredients and scoop onto trays.
- Bake at 350°F for 11 to 13 minutes, then cool.
- Beat cream cheese, powdered sugar, and vanilla, then sandwich the cookies.
Equipment for This Recipe: Box grater, mixer, cookie scoop, cooling rack.
How to Serve This Dish: Dust the tops with cinnamon sugar and plate them in a single neat stack. They’re rich enough to serve in small portions.
Pro Tips for This Recipe:
- Squeeze the carrot dry so the dough doesn’t get soggy.
- Chill the filling for 10 minutes if it feels too soft.
Variations on This Dish: Walnut Crunch: add ½ cup chopped walnuts. Orange Frosting: swap vanilla in the filling for orange zest.
Common Mistakes to Avoid with This Dish:
- Don’t skip squeezing the carrots.
- Don’t overfill the sandwiches; a thin layer is cleaner and less messy.
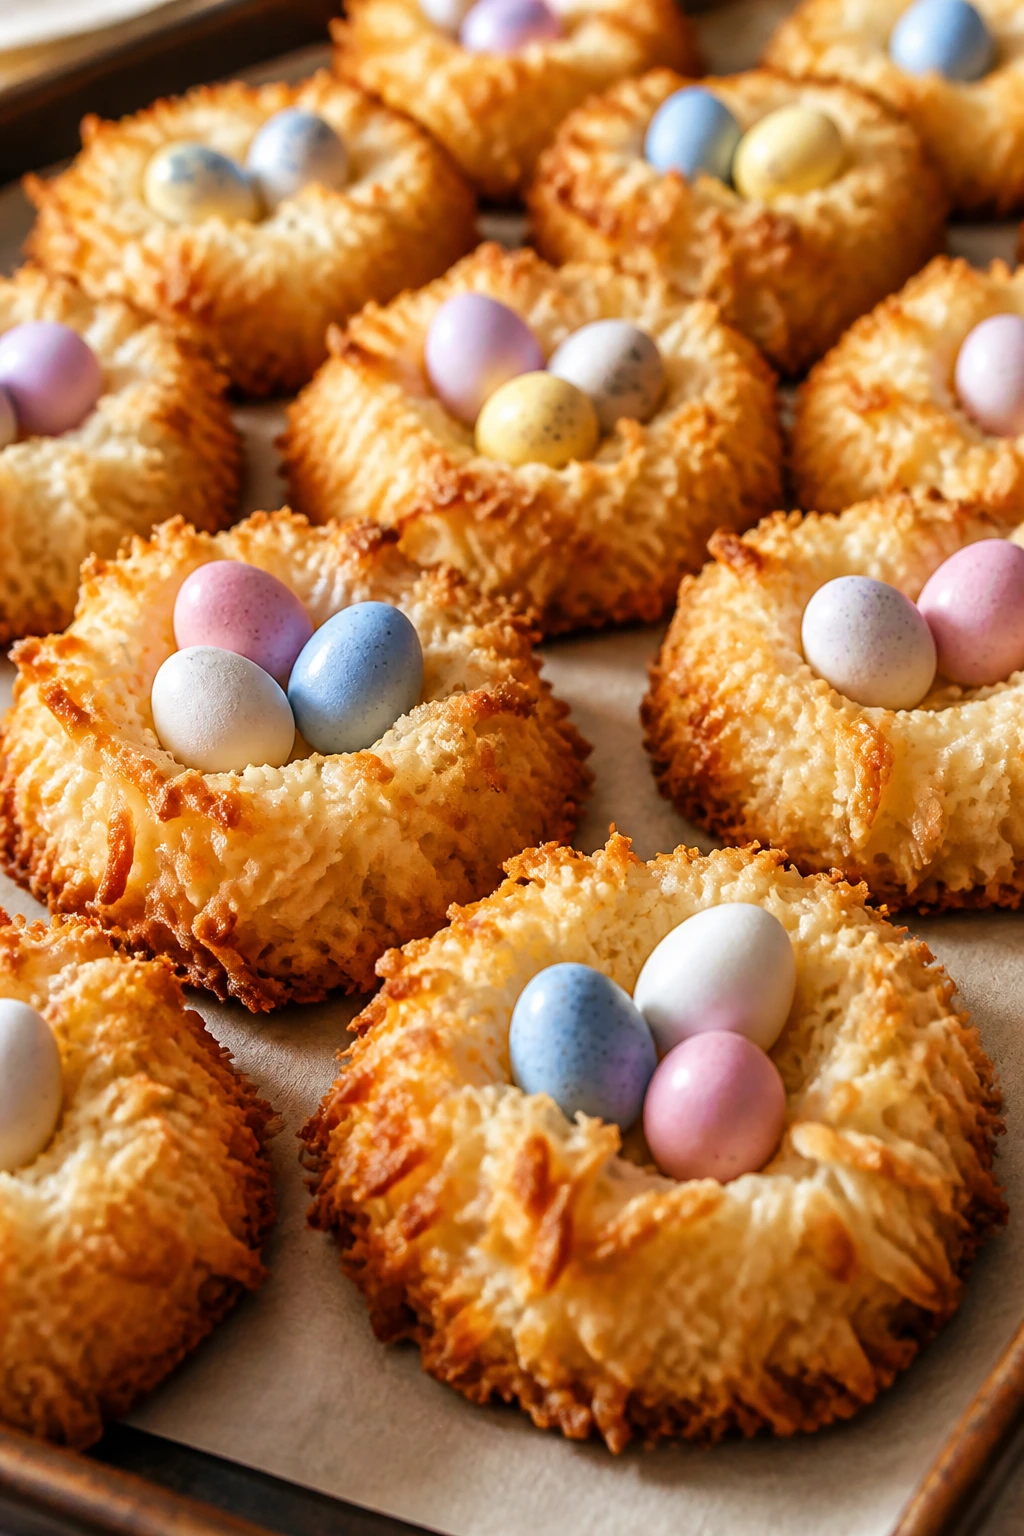
5. Coconut Macaroon Nests
Intro: These are the most literal Easter cookies on the list, and I mean that in the best way. Toasted coconut forms crisp little nests, and the mini candy eggs on top make them look like they were built for a spring table.
Why It Works: Egg whites bind the coconut without a lot of extra flour, so the nests bake up chewy in the middle and deeply golden on the edges. A low oven keeps the coconut from scorching.
Key Ingredients:
- 4 cups sweetened shredded coconut
- 2 egg whites
- ½ cup sugar
- 1 teaspoon vanilla extract
- ¼ teaspoon salt
- ½ teaspoon almond extract
- 24 mini candy eggs or chocolate eggs
Quick Steps:
- Whisk egg whites, sugar, vanilla, almond, and salt.
- Fold in coconut until evenly coated.
- Shape small nests on a lined tray.
- Bake at 325°F for 18 to 22 minutes until golden.
- Press candy eggs into the centers while warm.
Equipment for This Recipe: Mixing bowl, spoon, parchment, muffin tin or small scoop.
How to Serve This Dish: Set them in paper candy cups so the edges stay neat. They work well as a dessert-table centerpiece or tucked into a gift box.
Pro Tips for This Recipe:
- Wet your fingers before shaping the nests.
- Bake one tray at a time for even color.
Variations on This Dish: Chocolate Nest: drizzle with melted dark chocolate. Lemon Coconut: add 1 teaspoon lemon zest to the mix.
Common Mistakes to Avoid with This Dish:
- Don’t bake too hot, or the coconut turns bitter.
- Don’t move the nests too soon; they need a few minutes to firm up.
6. Pastel Royal Icing Cutouts
Intro: If you want the prettiest possible Easter cookies, this is the clean, polished route: smooth sugar cookies, pastel icing, and edges so neat they almost look printed. They’re not hard, but they do reward patience.
Why It Works: Royal icing dries hard, which means stacked cookies won’t smear. The pastel colors look best when the base cookie is pale and the piping stays thin and controlled.
Key Ingredients:
- 2½ cups flour
- 1 cup butter
- ¾ cup sugar
- 1 egg
- 2 teaspoons vanilla
- 1 teaspoon baking powder
- ½ teaspoon salt
- 3 cups royal icing, divided and tinted
- Gel food coloring in soft pink, blue, yellow, and mint
Quick Steps:
- Make and chill the dough.
- Roll, cut into bunnies, eggs, and flowers, then bake at 350°F for 9 to 11 minutes.
- Beat and tint the icing.
- Outline, flood, and let dry overnight.
Equipment for This Recipe: Piping bags, small round tips, toothpicks, food coloring, drying rack.
How to Serve This Dish: Put them on a flat tray, not a pile, so the icing stays clean. They’re best when the colors are spaced out, not crowded together.
Pro Tips for This Recipe:
- Thin flood icing with water one teaspoon at a time.
- Outline first, then flood. Don’t reverse the order.
Variations on This Dish: Marbled Egg: drag two icing colors together with a toothpick. Floral Edges: pipe tiny dots or petals around the rim.
Common Mistakes to Avoid with This Dish:
- Don’t over-thin the icing.
- Don’t stack before they’re fully dry.
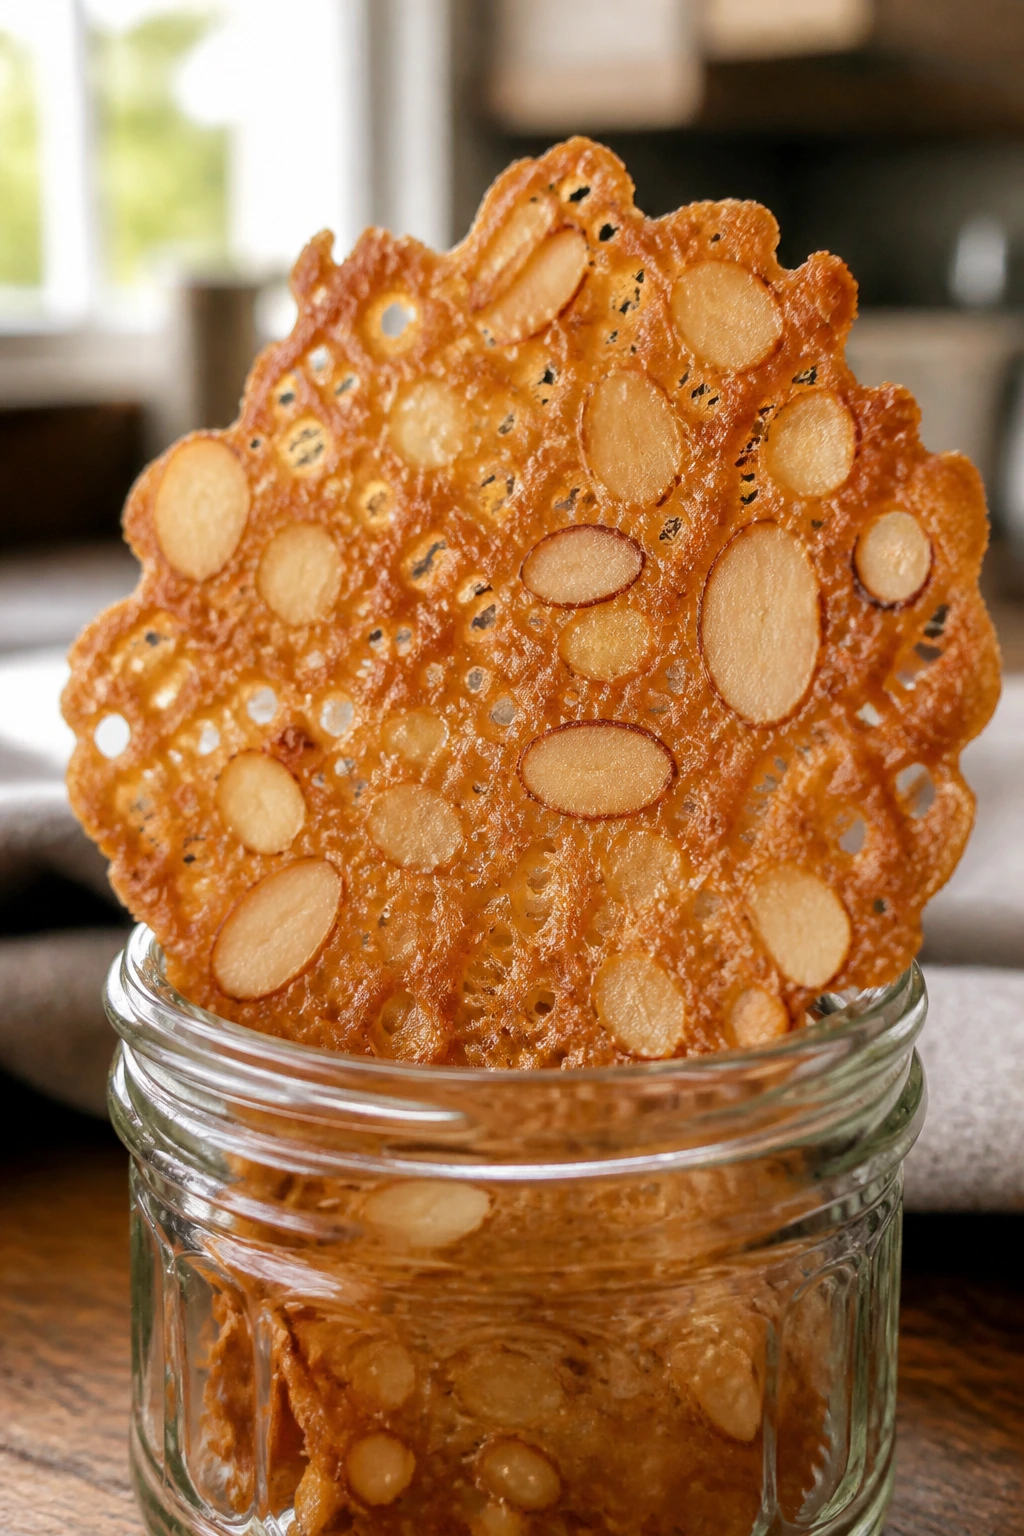
7. Almond Easter Lace Cookies
Intro: Thin, caramel-colored, and crisp enough to crack with a tap, these lace cookies feel delicate in a way that stops people mid-sentence. They’re the fancy cousin on the tray.
Why It Works: Butter and sugar spread into a lacy pattern while sliced almonds add structure and nutty crunch. A tiny cookie bakes fast, so you have to watch the pan closely.
Key Ingredients:
- ½ cup butter
- ½ cup brown sugar
- 2 tablespoons flour
- 1 tablespoon corn syrup
- 1 teaspoon vanilla
- 1 cup sliced almonds
- ¼ teaspoon salt
Quick Steps:
- Melt butter and stir in sugar, flour, corn syrup, vanilla, and salt.
- Fold in almonds.
- Drop teaspoon portions far apart on parchment.
- Bake at 350°F for 6 to 8 minutes until deep golden.
- Cool completely before moving.
Equipment for This Recipe: Heavy sheet pan, parchment, small spoon, cooling rack.
How to Serve This Dish: Serve beside fruit or a scoop of vanilla ice cream if you’re using them as dessert garnish. They look best standing up in a glass jar.
Pro Tips for This Recipe:
- Space them widely; they spread a lot.
- Let them cool on the tray for 5 minutes before lifting.
Variations on This Dish: Orange Almond: add 1 teaspoon orange zest. Chocolate Lace: dip one edge in melted chocolate.
Common Mistakes to Avoid with This Dish:
- Don’t underbake; pale lace cookies go limp.
- Don’t try to move them warm, or they tear.
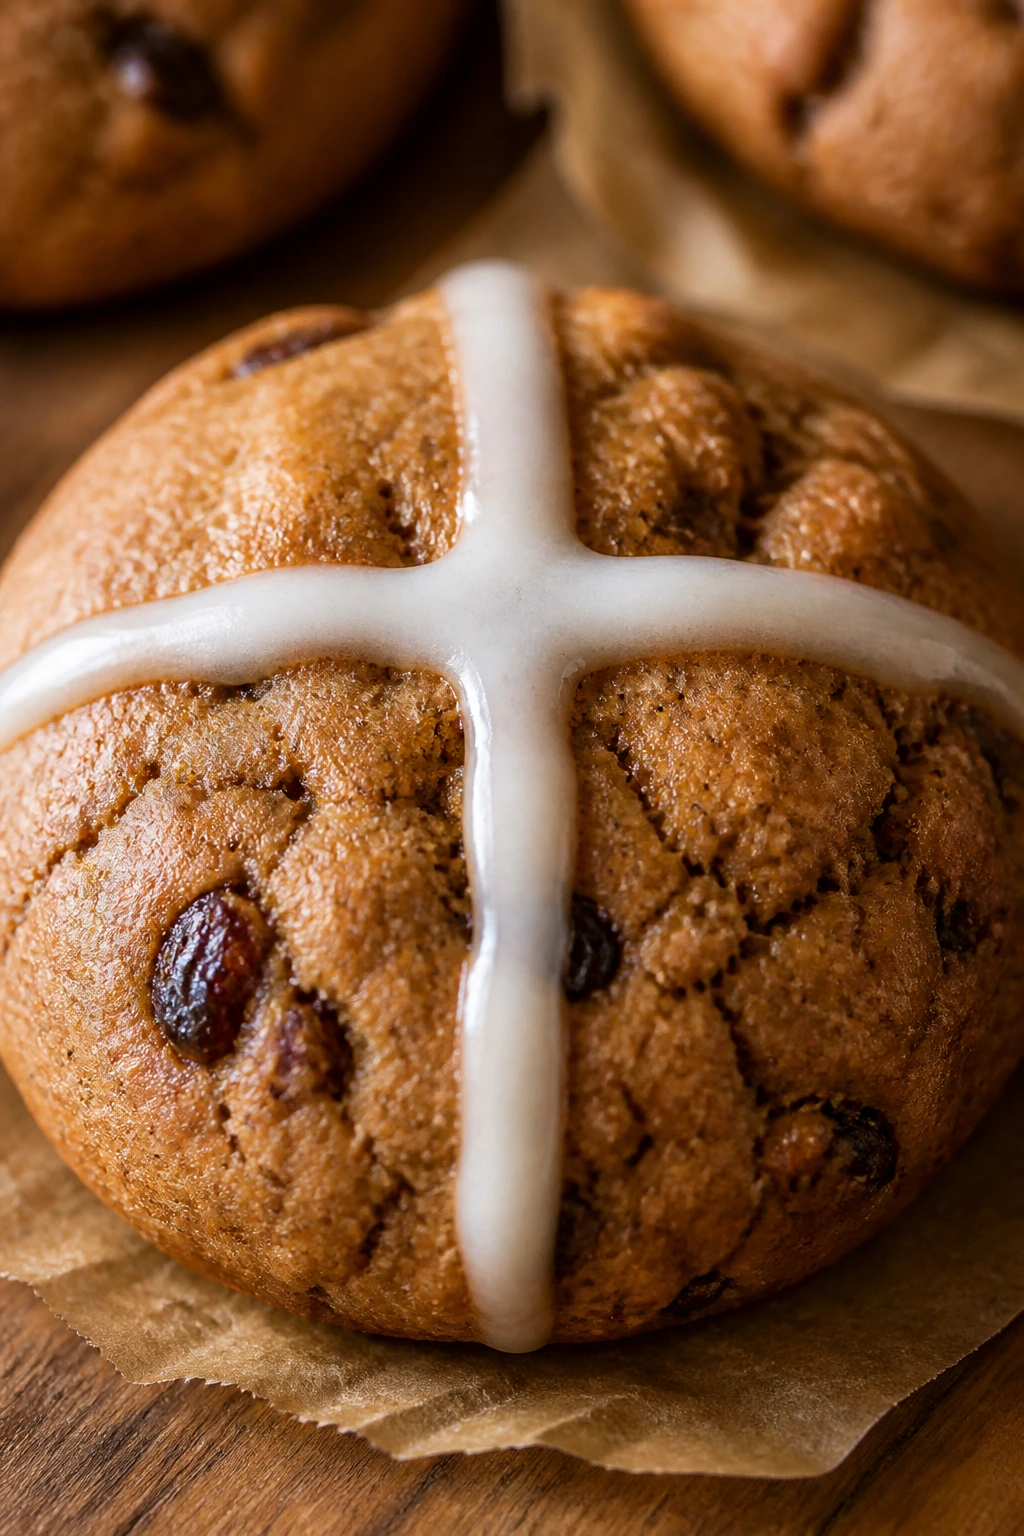
8. Hot Cross Bun-Inspired Spice Cookies
Intro: These taste like a warm bakery bun turned into a cookie: cinnamon, nutmeg, a little dried fruit, and a simple icing cross on top. They’re more restrained than the pastel cookies, which is exactly why I like them on an Easter spread.
Why It Works: The spice mix gives you that hot cross bun flavor without the kneading or proofing. Currants or raisins keep the centers chewy, and the icing cross makes the holiday connection plain.
Key Ingredients:
- 2¼ cups flour
- 1 teaspoon cinnamon
- ¼ teaspoon nutmeg
- ½ teaspoon baking soda
- ½ teaspoon salt
- ¾ cup butter
- ¾ cup brown sugar
- 1 egg
- ½ cup currants or raisins
- 1 cup powdered sugar for icing
Quick Steps:
- Cream butter and brown sugar, then add egg.
- Mix in dry ingredients and currants.
- Scoop and flatten slightly.
- Bake at 350°F for 10 to 12 minutes.
- Pipe a thin icing cross after cooling.
Equipment for This Recipe: Sheet pans, mixer, piping bag, parchment.
How to Serve This Dish: They’re best on a platter with tea and sliced fruit. The spice makes them feel more brunch than candy-shop sweet.
Pro Tips for This Recipe:
- Soak the currants for 10 minutes if they’re dry and hard.
- Pipe the cross only after the tops are cool.
Variations on This Dish: Orange Spice: add zest of 1 orange. Chocolate Chip Bun: swap currants for ½ cup mini chips.
Common Mistakes to Avoid with This Dish:
- Don’t overload with spice; the bun flavor should stay gentle.
- Don’t frost warm cookies, or the cross will melt.
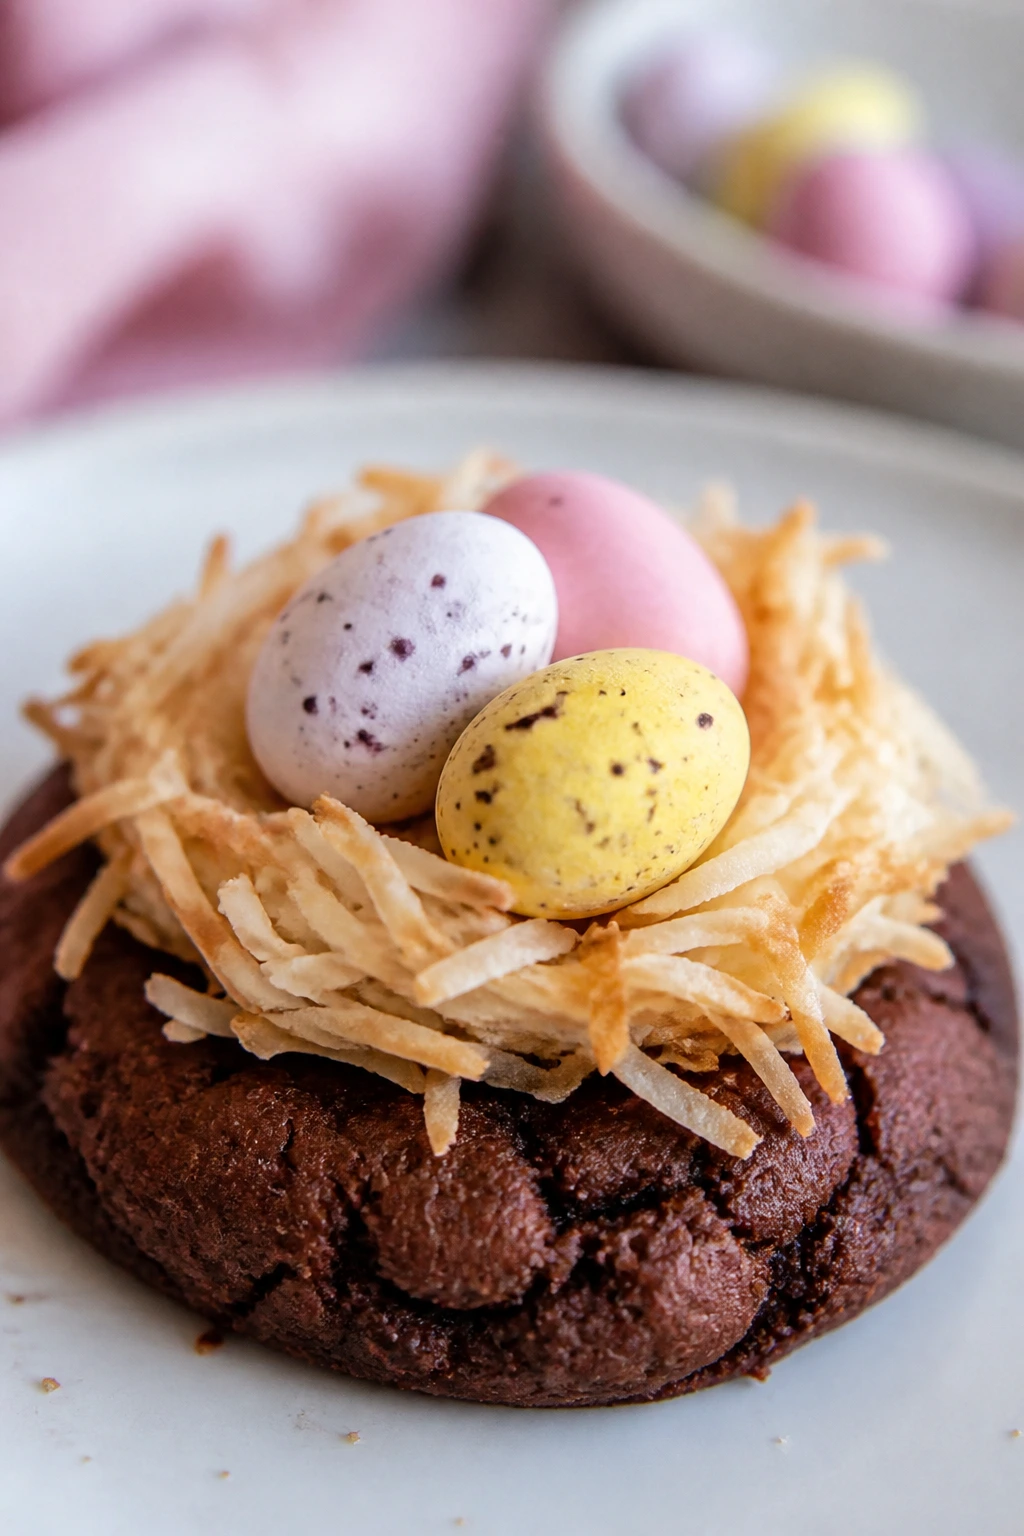
9. Chocolate Nest Cookies with Mini Eggs
Intro: These are the crowd-pleasers that look more difficult than they are. A cocoa cookie base, a little nest of frosting or coconut, and a handful of mini eggs on top — done.
Why It Works: Cocoa gives the cookie a dark backdrop, so the candy colors pop. The nest shape gives height, which is what makes them stand out on a crowded tray.
Key Ingredients:
- 2 cups flour
- ½ cup cocoa powder
- 1 teaspoon baking powder
- ½ teaspoon salt
- 1 cup butter
- ¾ cup sugar
- 1 egg
- 1 teaspoon vanilla
- 1 cup shredded coconut or chocolate frosting
- Mini chocolate eggs for topping
Quick Steps:
- Make cocoa dough and chill 30 minutes.
- Scoop and bake at 350°F for 9 to 11 minutes.
- Press a shallow center into each warm cookie.
- Fill with coconut or frosting and top with mini eggs.
Equipment for This Recipe: Cookie scoop, spoon, lined baking sheet, small offset spatula.
How to Serve This Dish: Put them in the middle of the tray so the colors anchor everything else. They’re rich enough to cut into small portions.
Pro Tips for This Recipe:
- Press the center while the cookies are still warm.
- Use bittersweet chocolate eggs if you want less sweetness.
Variations on This Dish: Peanut Butter Nest: fill the center with peanut butter frosting. Coconut Nest: toast the coconut before adding it.
Common Mistakes to Avoid with This Dish:
- Don’t overbake the cocoa dough.
- Don’t pile on too much filling, or the eggs roll off.
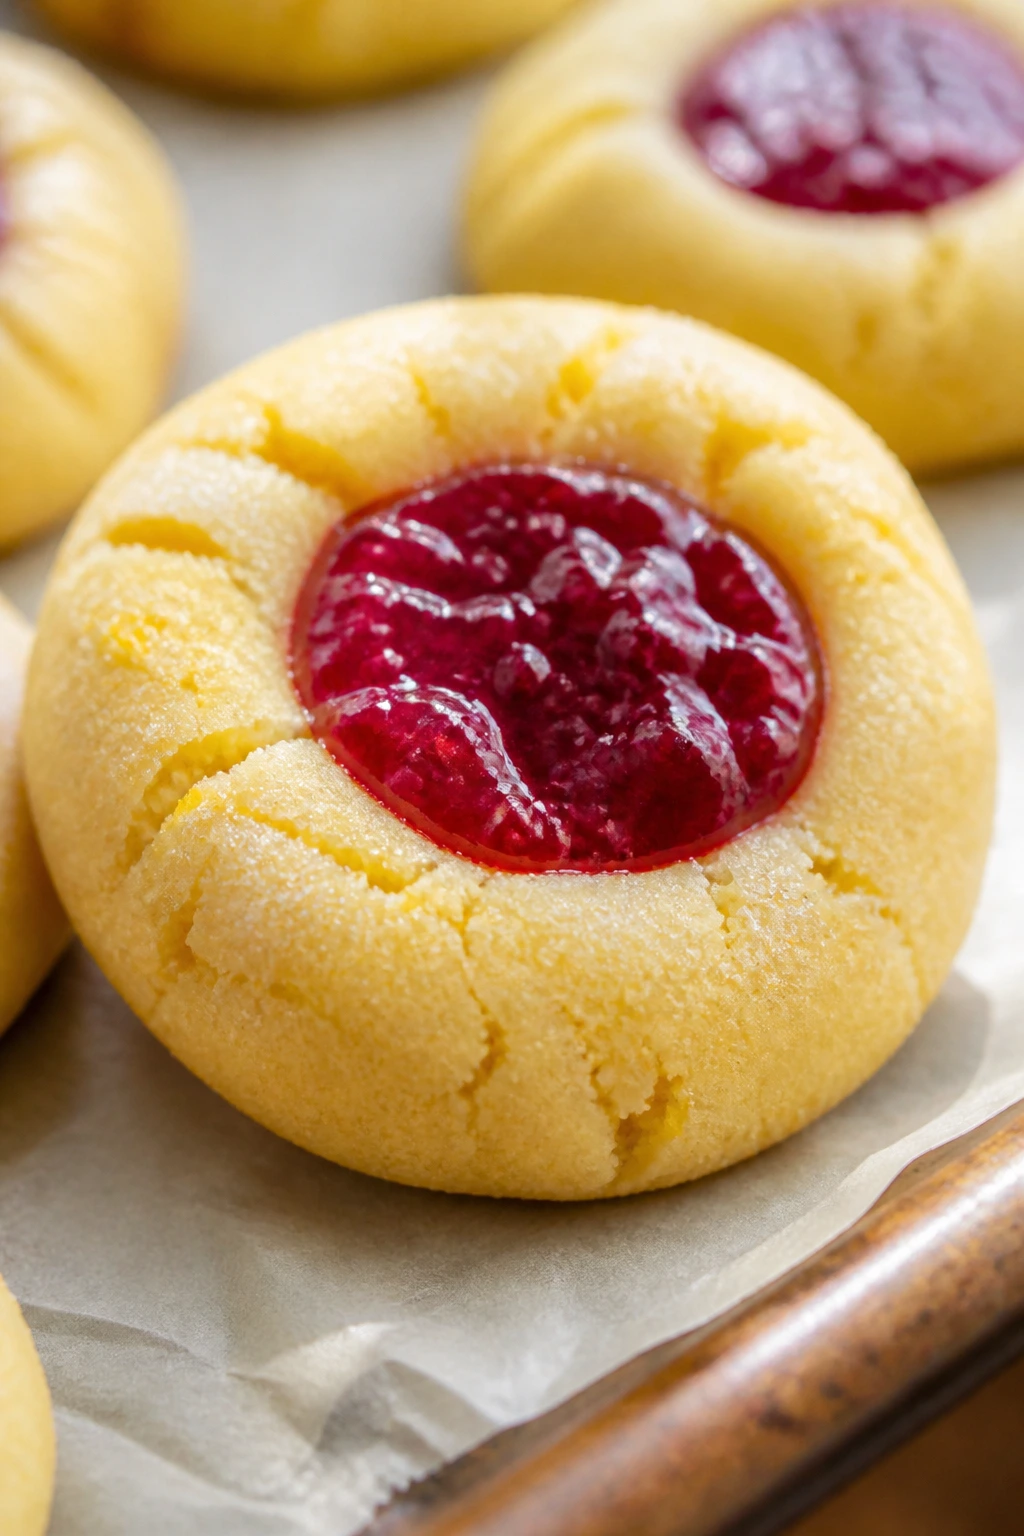
10. Lemon Thumbprint Cookies with Raspberry Jam
Intro: A buttery lemon cookie with a ruby-red jam center is one of those combinations that never gets old. It’s neat, bright, and just tart enough to keep the cookie from tasting heavy.
Why It Works: The thumbprint gives you a clean pocket for jam, and lemon zest keeps the dough from reading as plain butter cookie territory. Raspberry jam bakes into a glossy center that looks polished without extra decoration.
Key Ingredients:
- 2 cups flour
- 1 cup butter
- ⅔ cup sugar
- 1 egg yolk
- Zest of 1 lemon
- ½ teaspoon salt
- ½ cup raspberry jam
- 1 teaspoon vanilla
Quick Steps:
- Cream butter and sugar, then add yolk, zest, and vanilla.
- Stir in flour and salt.
- Shape into balls, press centers, and fill with jam.
- Bake at 350°F for 12 to 14 minutes.
Equipment for This Recipe: Baking sheet, spoon, cooling rack, small measuring spoon.
How to Serve This Dish: Arrange in tight little rows so the jam centers line up. They’re lovely with black tea or hot coffee.
Pro Tips for This Recipe:
- Thin jam with a teaspoon of water if it’s stiff.
- Repress the centers gently after baking if they puff up.
Variations on This Dish: Apricot Lemon: use apricot jam for a softer color. Almond Thumbprint: add ½ teaspoon almond extract to the dough.
Common Mistakes to Avoid with This Dish:
- Don’t overfill the centers.
- Don’t make the thumbprints too deep, or the bottoms may bake unevenly.
11. Marbled Easter Swirl Cookies
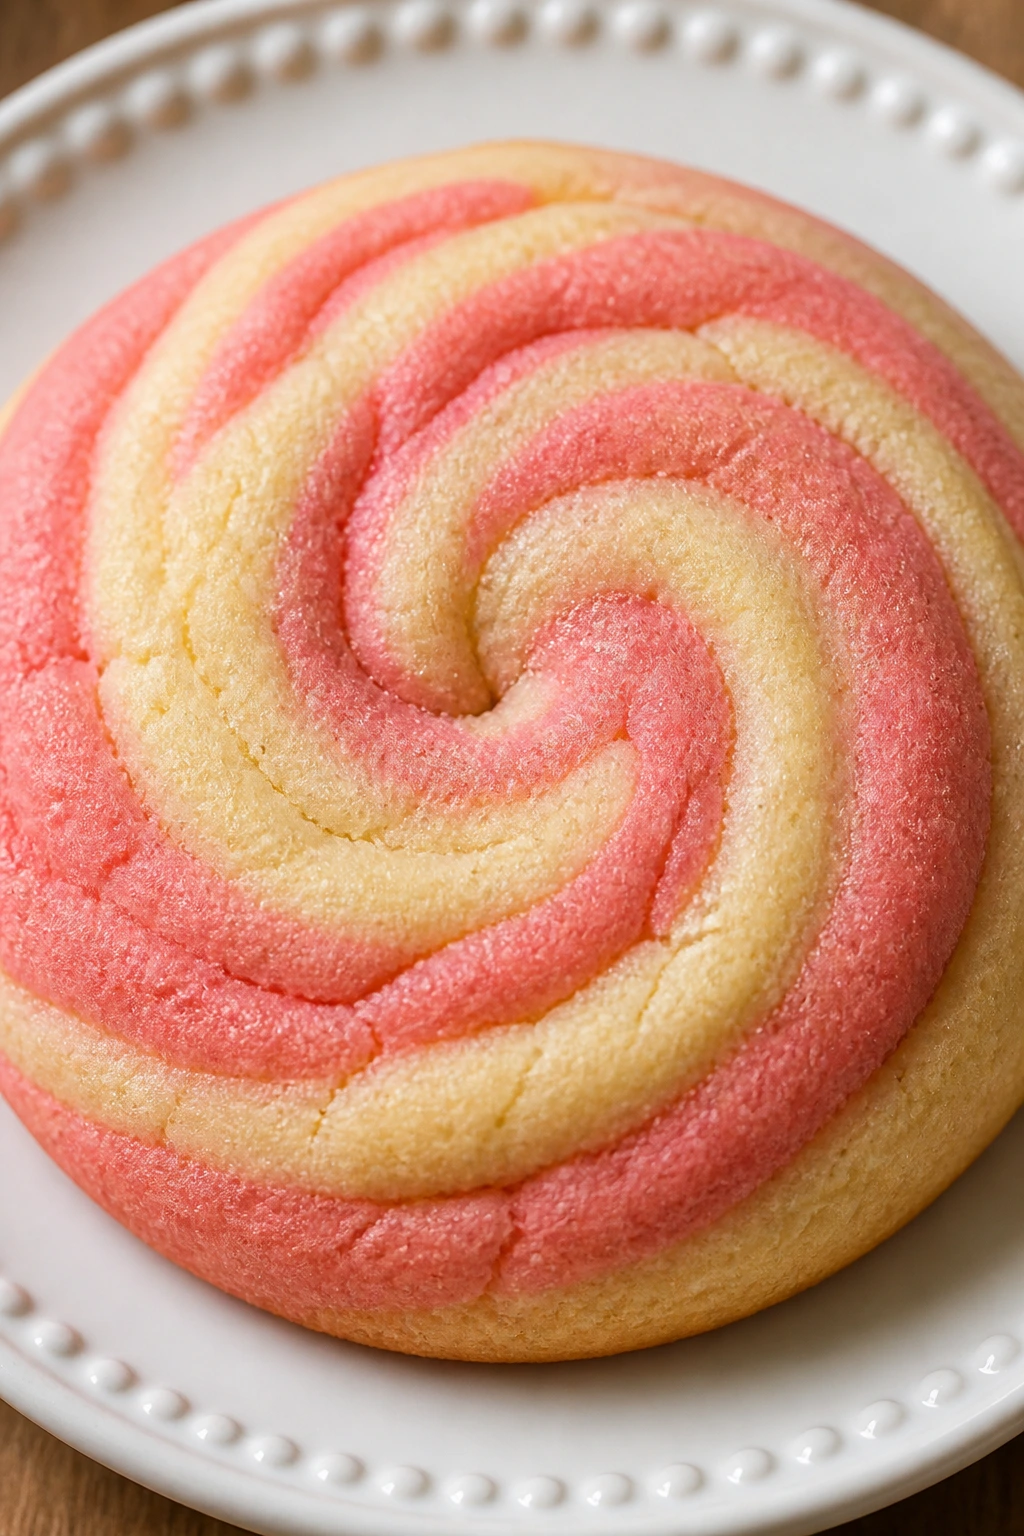
Intro: These cookies look like painted candy before you even add icing. Vanilla dough and strawberry dough twist together into a soft pink-and-cream swirl that always gets attention.
Why It Works: Two lightly flavored doughs bake at the same rate, so the swirl stays visible without one color overpowering the other. A slice-and-bake method gives you the cleanest marble.
Key Ingredients:
- 3 cups flour
- 1 cup butter
- 1 cup sugar
- 1 egg
- 2 teaspoons vanilla
- 1 tablespoon strawberry powder or 2 tablespoons freeze-dried strawberry crumbs
- ½ teaspoon salt
- 1 teaspoon baking powder
Quick Steps:
- Make one dough, split it in half, and mix strawberry powder into one half.
- Roll both halves into logs and twist together.
- Chill 1 hour.
- Slice and bake at 350°F for 10 to 12 minutes.
Equipment for This Recipe: Bench scraper, plastic wrap, sharp knife, sheet pans.
How to Serve This Dish: Serve them plain so the swirl shows. A clear glass cookie jar is better than a plate here.
Pro Tips for This Recipe:
- Don’t overmix the strawberry dough or the color goes muddy.
- Chill the log until it feels firm to the center.
Variations on This Dish: Lemon-Vanilla Swirl: swap strawberry for lemon zest. Chocolate Ribbon: replace the strawberry with cocoa.
Common Mistakes to Avoid with This Dish:
- Don’t twist too tightly or the lines disappear.
- Don’t slice before the log is cold.
12. Matcha Bunny Cookies
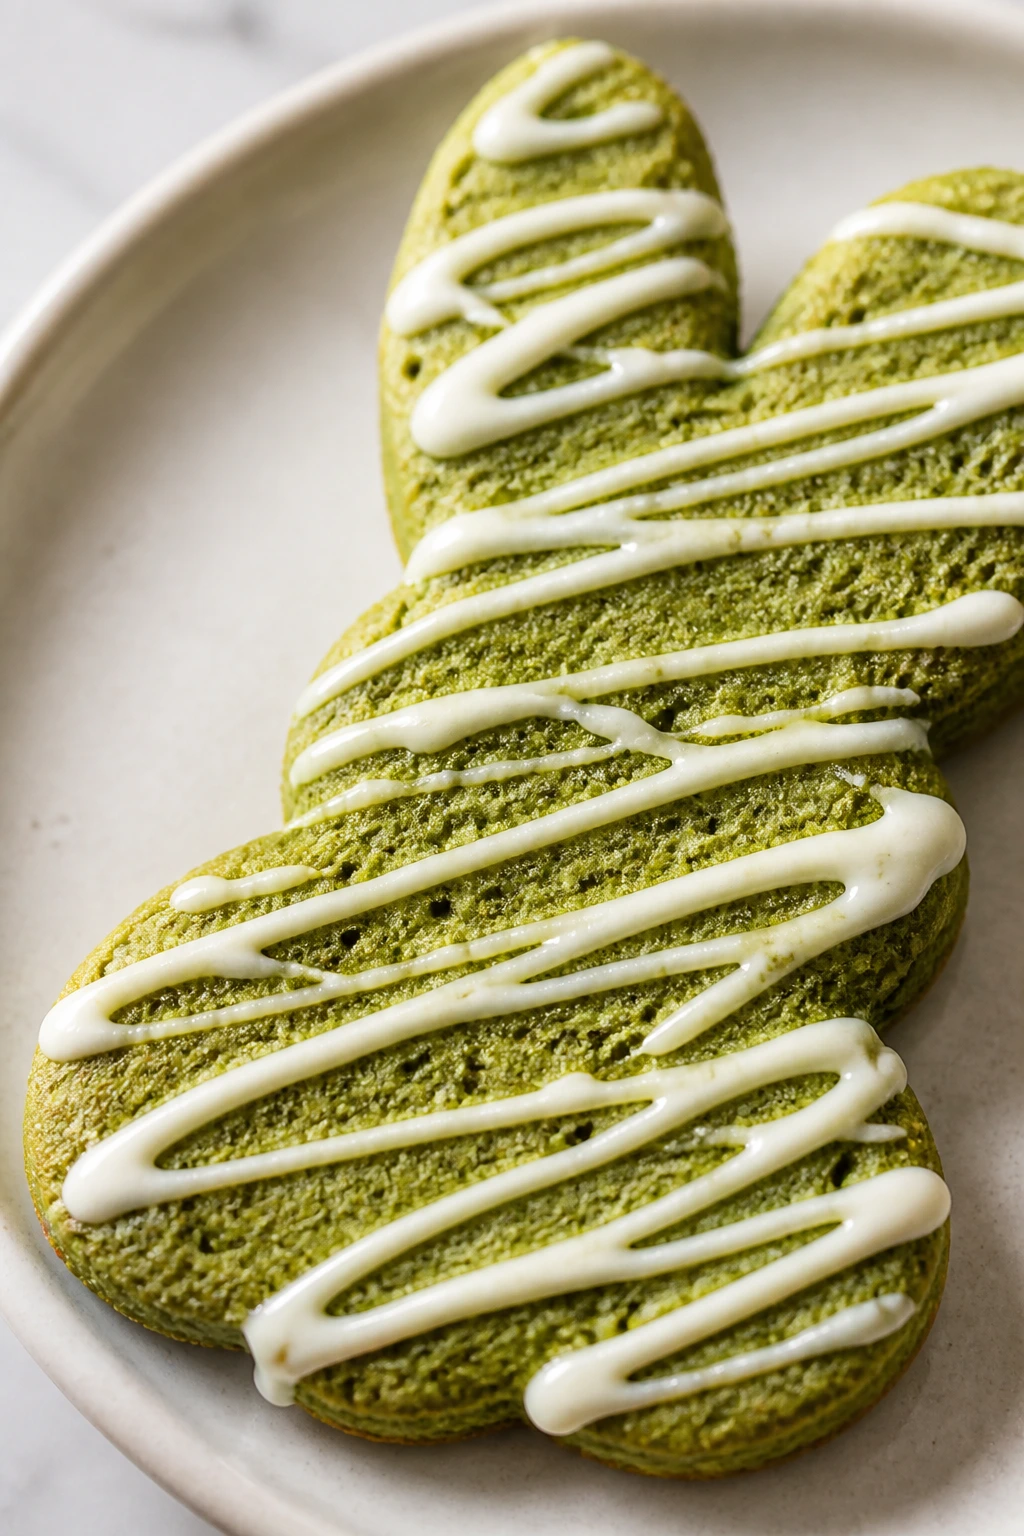
Intro: The green color is what makes these stand out, but the flavor matters too: grassy, lightly sweet, and a little earthy under a white chocolate drizzle. They look polished in a way that feels fresh, not fussy.
Why It Works: Matcha gives a natural spring color, and bunny cutters turn a simple dough into something seasonally obvious. White chocolate softens the edge of the matcha and keeps the flavor friendly.
Key Ingredients:
- 2¼ cups flour
- 1 to 2 tablespoons matcha powder
- 1 cup butter
- ¾ cup sugar
- 1 egg
- 1 teaspoon vanilla
- ½ teaspoon salt
- 4 ounces white chocolate, melted
Quick Steps:
- Whisk matcha into the flour.
- Cream butter and sugar, then add egg and vanilla.
- Mix in dry ingredients and chill 45 minutes.
- Cut bunnies and bake at 350°F for 9 to 11 minutes.
- Drizzle with melted white chocolate.
Equipment for This Recipe: Sifter, bunny cutter, piping bag or spoon, parchment.
How to Serve This Dish: Set them beside pale berries so the green color pops. They work well as the “surprise” cookie in the tray.
Pro Tips for This Recipe:
- Sift matcha first so there are no dark specks.
- Use a mild matcha if you want a softer flavor.
Variations on This Dish: Sesame Finish: sprinkle with white sesame seeds. Citrus Matcha: add orange zest to the dough.
Common Mistakes to Avoid with This Dish:
- Don’t use too much matcha or the cookies turn bitter.
- Don’t overbake; the color darkens fast.
13. Lavender-Honey Shortbread
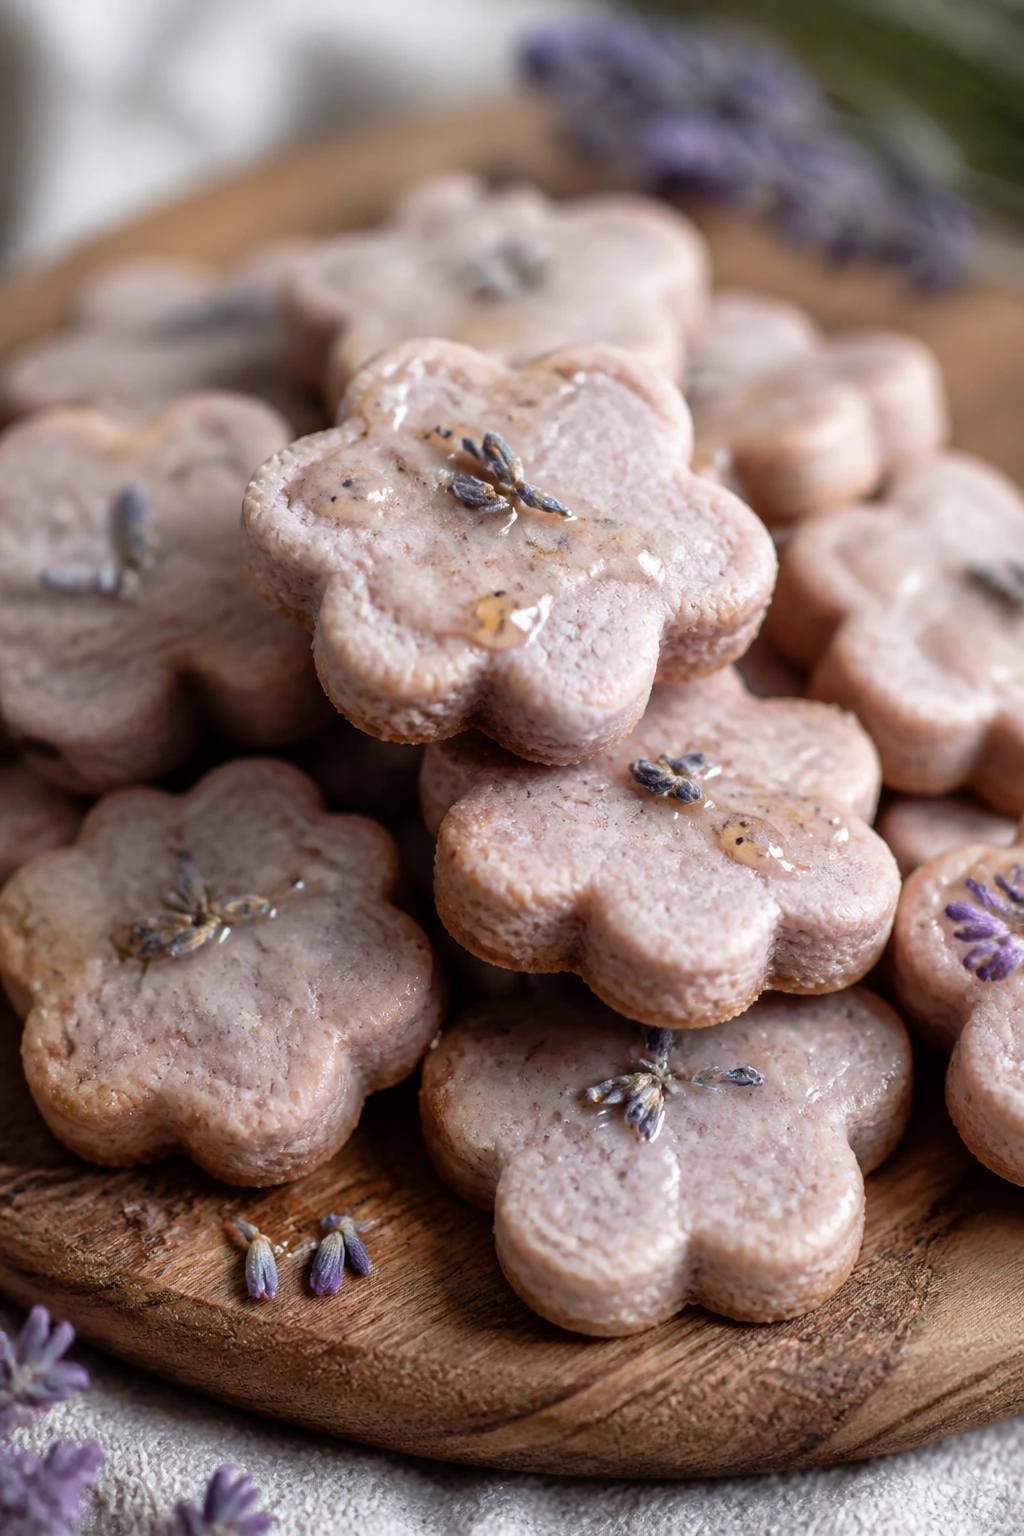
Intro: These are for the quiet corner of the tray. Buttery, crumbly, and lightly floral, they smell like honey warmed on a spoon and look best cut into tiny flowers or rectangles with pressed edges.
Why It Works: Shortbread needs very little leavening, so the lavender stays delicate instead of competing with the butter. Honey adds a gentle sweetness and a faint shine after baking.
Key Ingredients:
- 2 cups flour
- 1 cup butter, softened
- ⅓ cup honey
- ¼ cup sugar
- 1 teaspoon culinary lavender, crushed
- ½ teaspoon salt
- 1 teaspoon vanilla
Quick Steps:
- Cream butter, honey, sugar, and vanilla.
- Stir in flour, lavender, and salt.
- Chill the dough 30 minutes.
- Roll and cut, then bake at 325°F for 12 to 14 minutes.
Equipment for This Recipe: Rolling pin, flower cutter, lined sheet pans.
How to Serve This Dish: Pair with tea, especially something mild like Earl Grey or chamomile. They’re elegant on their own, no icing needed.
Pro Tips for This Recipe:
- Use culinary lavender, not potpourri-grade stuff.
- Crush the buds lightly so the flavor spreads.
Variations on This Dish: Lemon Lavender: add 1 teaspoon zest. Almond Honey: replace vanilla with almond extract.
Common Mistakes to Avoid with This Dish:
- Don’t overdo the lavender.
- Don’t bake until deeply browned; pale shortbread tastes cleaner.
14. Eggshell Mosaic Cookies
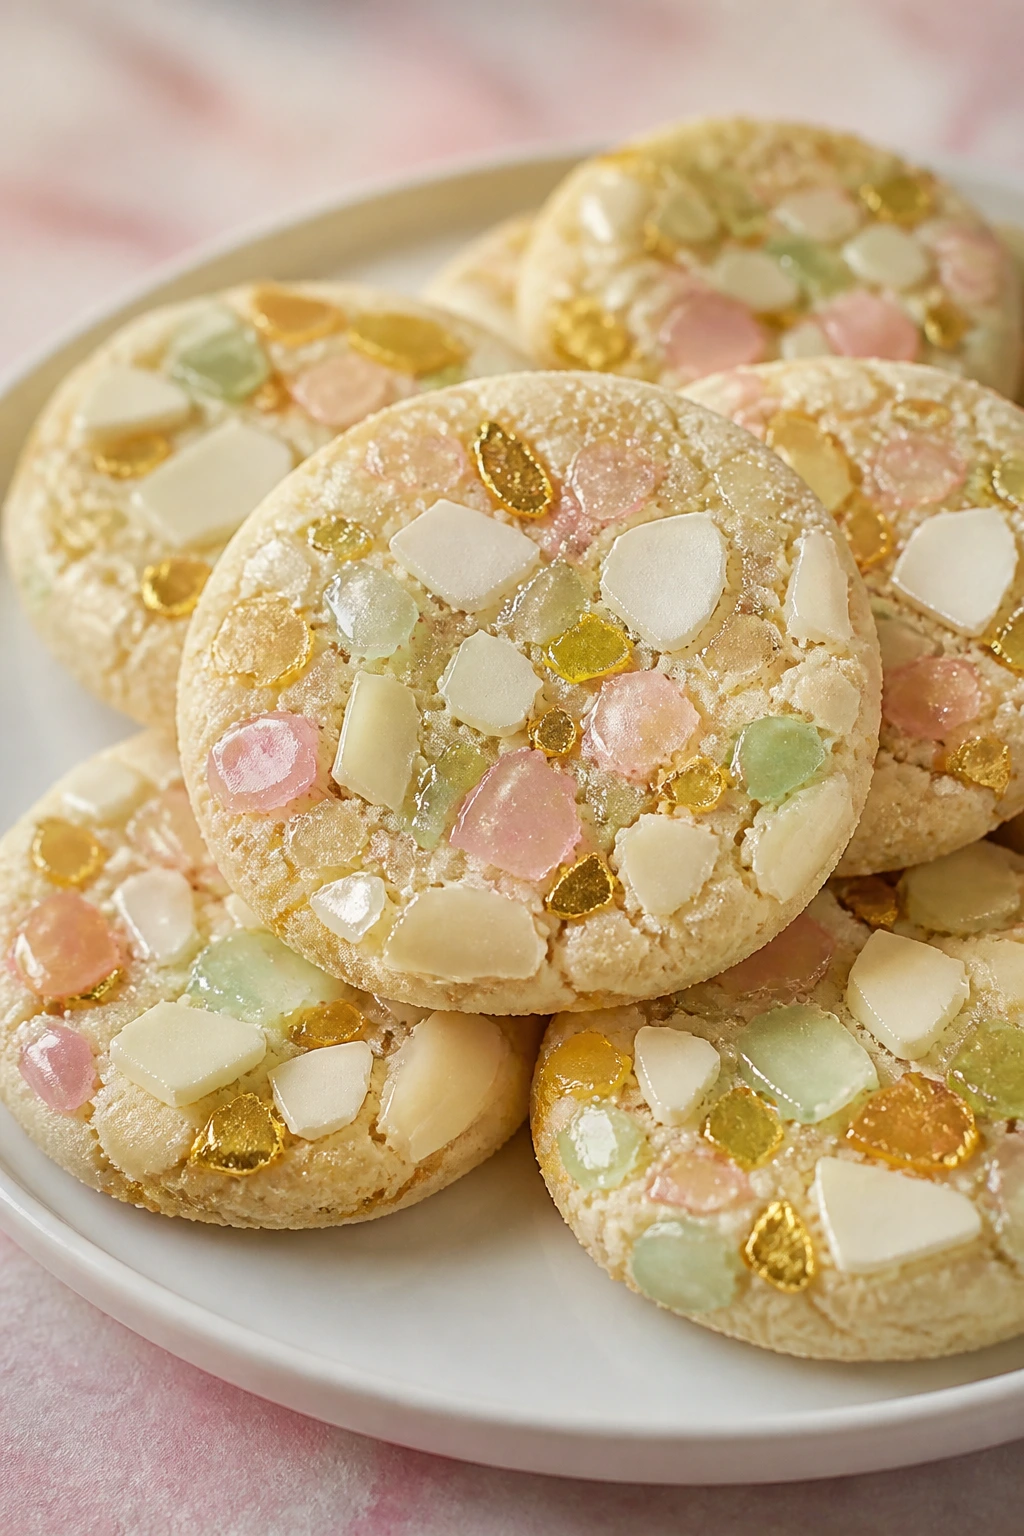
Intro: These are the cookies that make people lean in. A pale base, shards of candied sugar or white chocolate, and a crackled top that looks like tiny egg fragments laid into a pattern.
Why It Works: The “mosaic” effect gives texture without requiring perfect piping lines. A sturdy sugar-cookie base keeps the decorations from sliding around.
Key Ingredients:
- 2½ cups flour
- 1 cup butter
- ¾ cup sugar
- 1 egg
- 2 teaspoons vanilla
- 1 teaspoon baking powder
- ½ teaspoon salt
- 1 cup white chocolate, chopped
- Pastel sanding sugar or crushed candy shells
Quick Steps:
- Make the dough and chill it.
- Cut rounds or eggs and bake at 350°F for 9 to 11 minutes.
- Melt white chocolate and spread a thin layer on cooled cookies.
- Press in candy shards or sanding sugar before it sets.
Equipment for This Recipe: Offset spatula, small bowl, cooling rack, parchment.
How to Serve This Dish: Serve them singly, not stacked, so the mosaic stays intact. A plain plate gives the pattern more room to show.
Pro Tips for This Recipe:
- Keep the chocolate layer thin.
- Use a mix of pale pink, mint, and cream pieces.
Variations on This Dish: Dark Shell Mosaic: use milk chocolate instead. Coconut Mosaic: swap candy shards for toasted coconut bits.
Common Mistakes to Avoid with This Dish:
- Don’t overload the surface with toppings.
- Don’t let the chocolate cool too far before pressing in the pieces.
15. Chocolate-Dipped Coconut Cookies
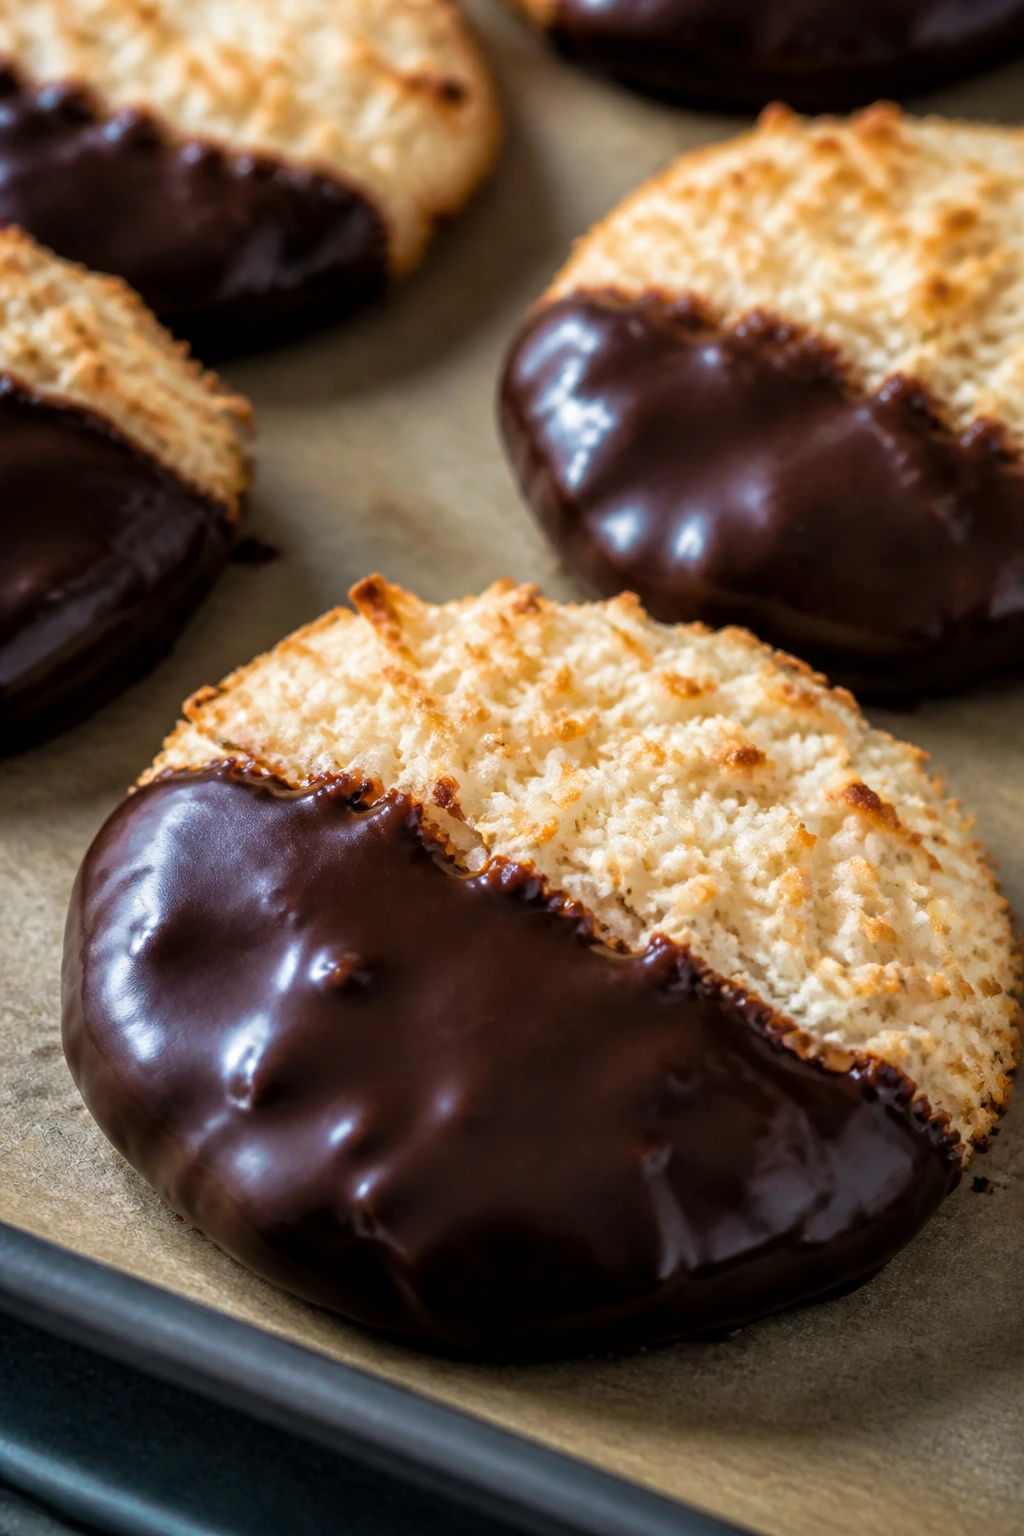
Intro: Crunchy around the edges, chewy in the center, and half-dipped in glossy chocolate — these feel richer than the pastel cookies, which is exactly why they earn a spot on the tray. Coconut and chocolate never argue with each other.
Why It Works: Coconut gives the cookie body, and dipping adds a clean visual line that looks deliberate even if you’re not a decorator. The plain cookie base also balances the sweeter, iced cookies nearby.
Key Ingredients:
- 2½ cups shredded coconut
- 1 cup flour
- ½ cup butter
- ¾ cup sugar
- 1 egg
- 1 teaspoon vanilla
- 1 cup semisweet chocolate, melted
- ¼ teaspoon salt
Quick Steps:
- Mix butter, sugar, egg, and vanilla.
- Stir in flour, coconut, and salt.
- Scoop and bake at 350°F for 11 to 13 minutes.
- Dip the cooled cookies halfway into melted chocolate.
Equipment for This Recipe: Cookie scoop, dipping bowl, parchment, sheet pans.
How to Serve This Dish: Let the chocolate set on parchment, then pile them in a shallow bowl. They’re good with coffee and even better after lunch.
Pro Tips for This Recipe:
- Toast half the coconut first if you want deeper flavor.
- Chill the dipped cookies for 10 minutes so the chocolate firms.
Variations on This Dish: White Chocolate Dip: use white chocolate for a softer look. Almond Coconut: add ½ teaspoon almond extract.
Common Mistakes to Avoid with This Dish:
- Don’t use overly wet coconut.
- Don’t dip warm cookies or the chocolate streaks.
16. Cinnamon Roll Cookies
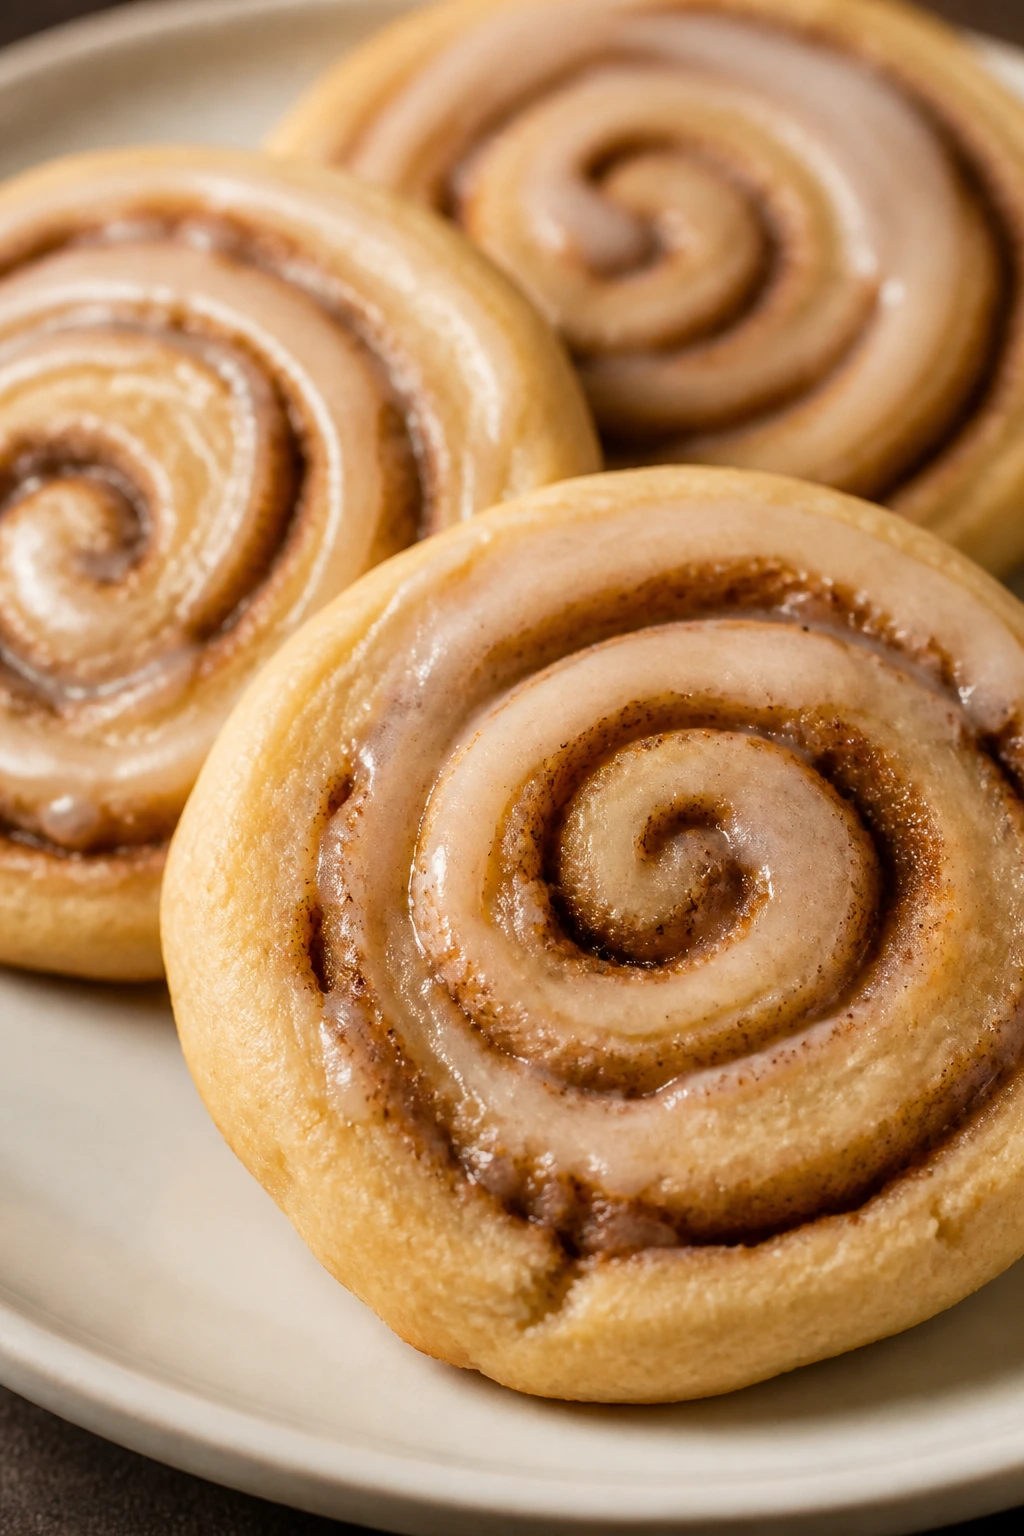
Intro: These slice-and-bake cookies look like tiny spirals of cinnamon bun dough, and when the glaze sets in little ribbons, they’re hard to ignore. They’re familiar in flavor, but neater and less sticky than actual rolls.
Why It Works: A cinnamon-sugar filling creates a clean spiral, and the dough chills into a firm log that slices without smearing. They’re a nice bridge between breakfast pastry and dessert cookie.
Key Ingredients:
- 2¾ cups flour
- 1 cup butter
- ¾ cup sugar
- 1 egg
- 1 teaspoon vanilla
- 1 teaspoon cinnamon
- ⅓ cup brown sugar
- 1 cup powdered sugar for glaze
Quick Steps:
- Make the dough and chill it briefly.
- Roll into a rectangle, sprinkle with cinnamon sugar, and roll into a log.
- Chill 1 hour.
- Slice and bake at 350°F for 10 to 12 minutes.
- Drizzle with glaze after cooling.
Equipment for This Recipe: Rolling pin, bench scraper, sharp knife, parchment.
How to Serve This Dish: Serve them with brunch coffee or milk. They look especially good arranged in a spiral pattern on the plate.
Pro Tips for This Recipe:
- Chill the log until it feels firm.
- Brush the dough lightly with melted butter before the filling if you want a deeper swirl.
Variations on This Dish: Orange Roll: add orange zest to the glaze. Cardamom Spiral: swap half the cinnamon for cardamom.
Common Mistakes to Avoid with This Dish:
- Don’t overfill the log.
- Don’t slice with a dull knife; it crushes the spiral.
17. Pistachio-Apricot Biscotti
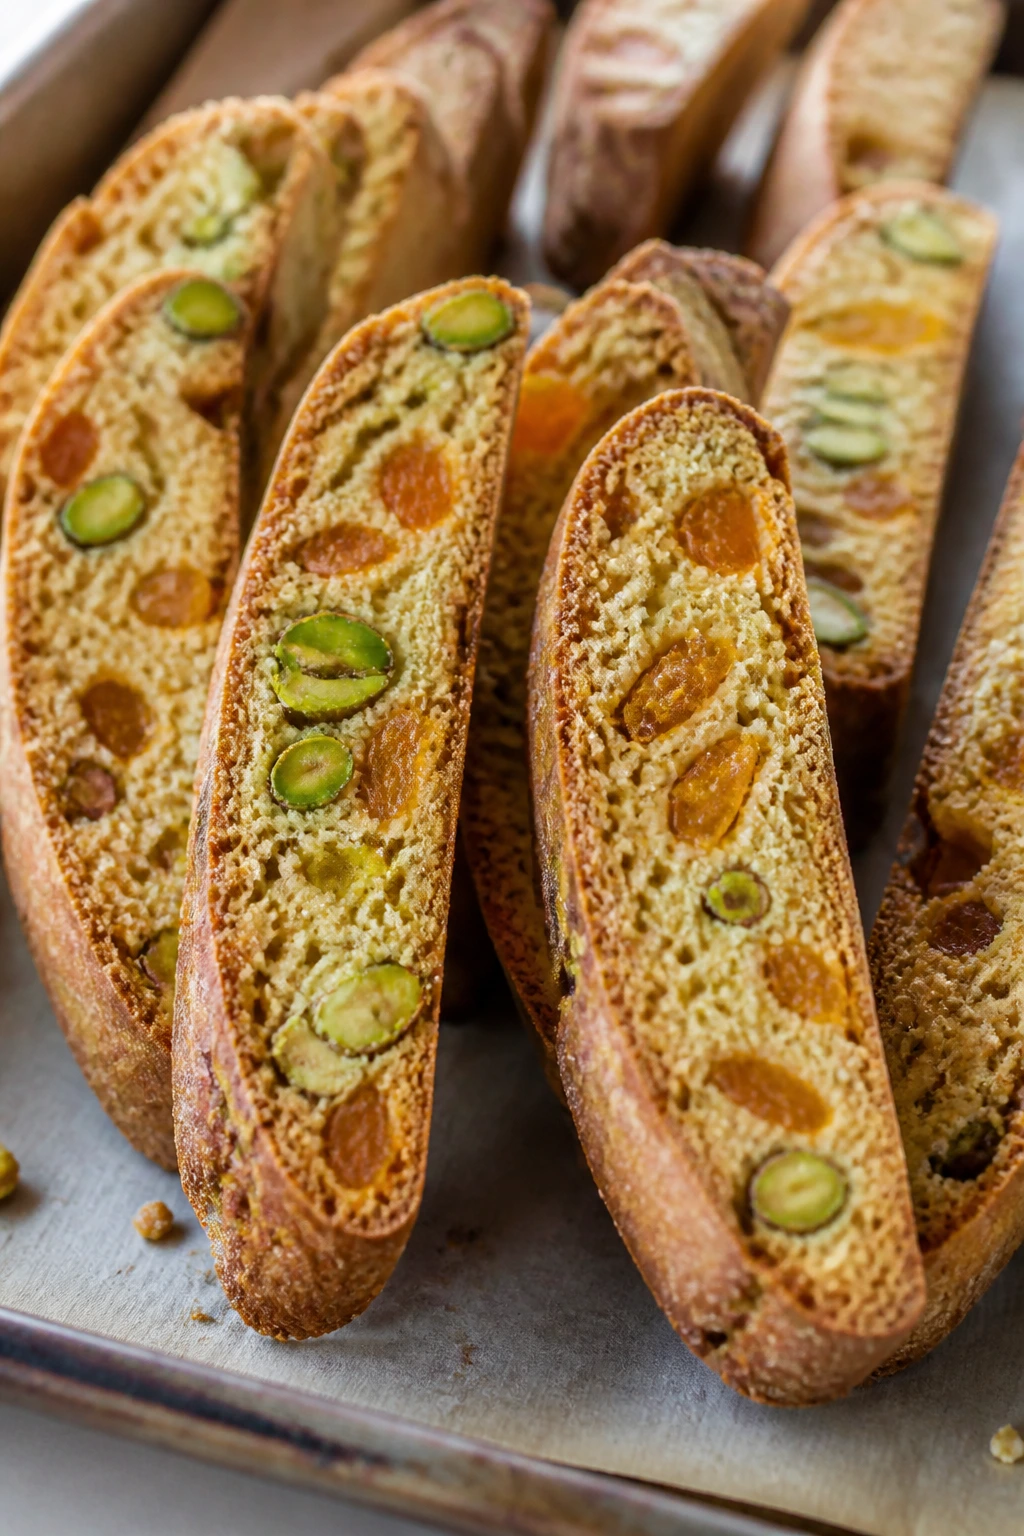
Intro: Biscotti bring a clean, grown-up look to an Easter cookie tray. The pale green pistachios and orange apricot bits make them feel festive without leaning on frosting at all.
Why It Works: Biscotti are baked twice, which gives you that crisp texture and the long shelf life that other cookies don’t have. The fruit and nuts keep every bite from feeling dry.
Key Ingredients:
- 2¼ cups flour
- ¾ cup sugar
- 1 teaspoon baking powder
- ½ teaspoon salt
- 2 eggs
- ½ cup chopped pistachios
- ½ cup chopped dried apricots
- 1 teaspoon vanilla
- ½ teaspoon almond extract
Quick Steps:
- Make a sticky dough and fold in nuts and fruit.
- Shape into two logs and bake at 350°F for 25 minutes.
- Cool 10 minutes, slice on a diagonal, and bake again for 10 minutes per side.
Equipment for This Recipe: Baking sheet, serrated knife, cooling rack, parchment.
How to Serve This Dish: Stack them in a tall glass jar or fan them across a narrow platter. They’re made for coffee and tea.
Pro Tips for This Recipe:
- Let the first bake cool a little before slicing.
- Use a serrated knife so the fruit doesn’t tear the loaf apart.
Variations on This Dish: Cranberry Almond: swap apricot for dried cranberries. Orange Pistachio: add zest for a brighter finish.
Common Mistakes to Avoid with This Dish:
- Don’t slice too early or the logs crumble.
- Don’t bake the second round too dark; you want crisp, not hard.
18. Blueberry Lemon Crinkle Cookies
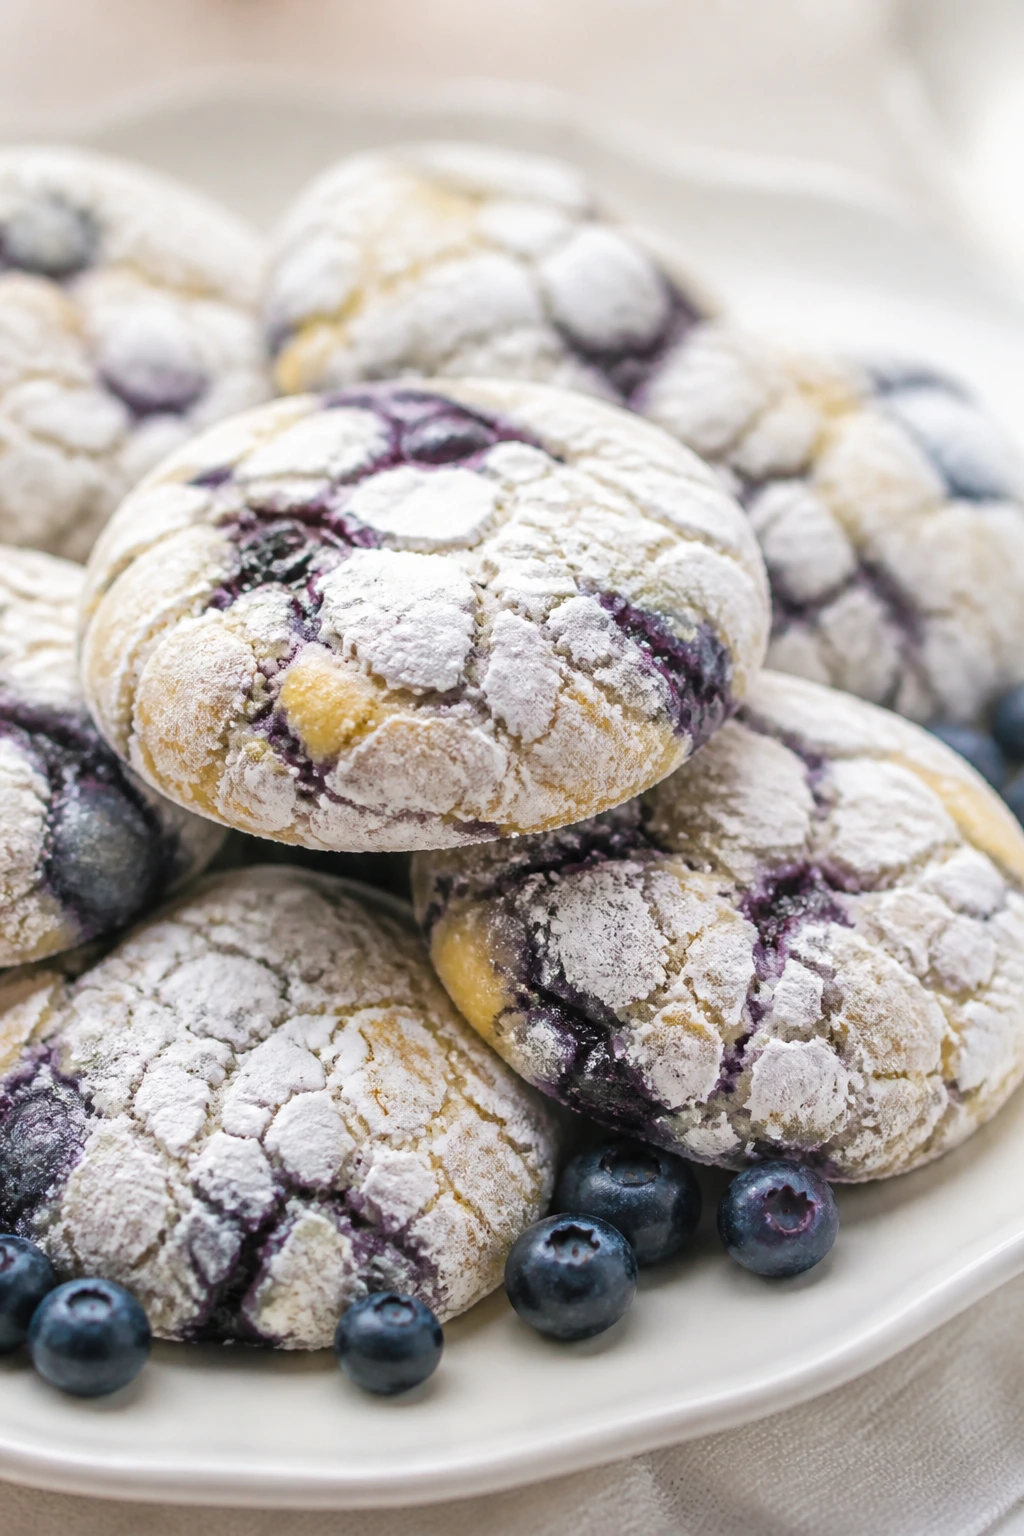
Intro: Powdered sugar cracks open during baking and leaves pale blue-violet edges around a soft lemon cookie. They’re a little messy in the best way, like spring fruit got dusted with snow.
Why It Works: Lemon keeps the dough sharp, while blueberry adds color and a tangy finish. The crinkle coating gives you contrast without needing icing.
Key Ingredients:
- 2 cups flour
- 1 cup butter
- ¾ cup sugar
- 1 egg
- Zest of 1 lemon
- ½ cup freeze-dried blueberries, crushed
- 1 teaspoon baking powder
- ½ cup powdered sugar for rolling
Quick Steps:
- Make the dough and chill 30 minutes.
- Scoop into balls and roll in powdered sugar.
- Bake at 350°F for 11 to 13 minutes.
- Cool on the tray before moving.
Equipment for This Recipe: Cookie scoop, mixing bowl, lined trays.
How to Serve This Dish: Pile them in a bowl with a few fresh blueberries around the edge if you’re serving them right away. They look softer and more homemade than polished iced cookies.
Pro Tips for This Recipe:
- Freeze-dried blueberries give color without adding water.
- Chill the dough if it feels too sticky to roll.
Variations on This Dish: Raspberry Crinkle: use crushed freeze-dried raspberries. Lime Version: swap lemon zest for lime.
Common Mistakes to Avoid with This Dish:
- Don’t skip the powdered sugar coating.
- Don’t overmix once the blueberries go in.
19. Easter M&M Monster Cookies
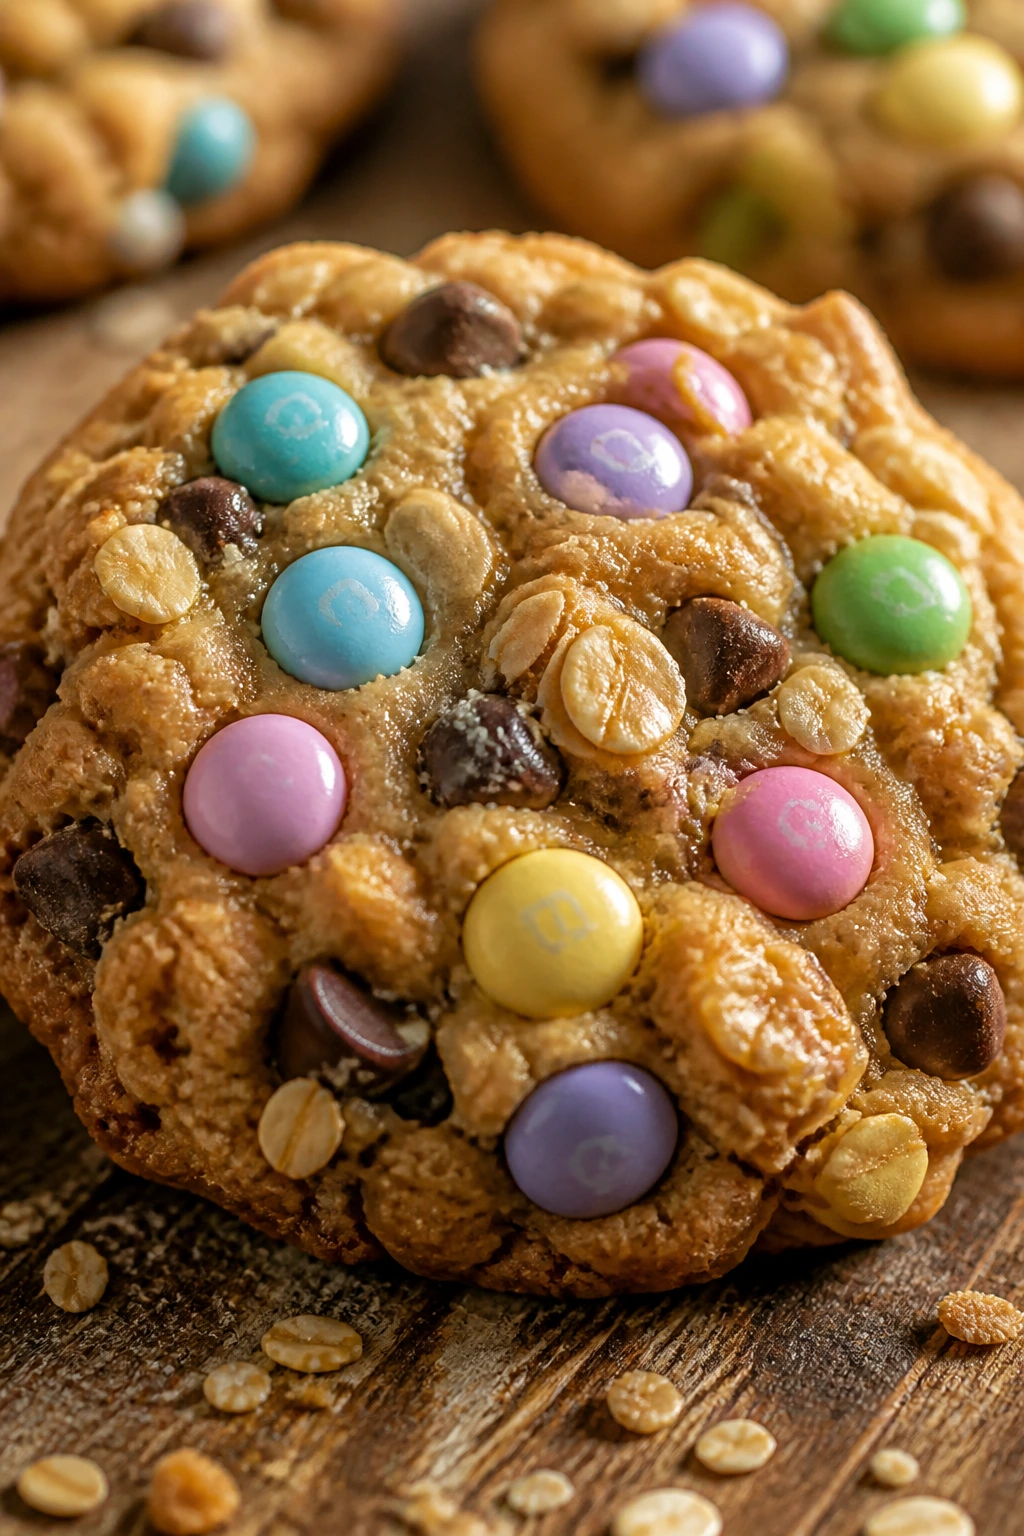
Intro: Big, chunky, and a little chaotic, these are the cookies kids grab first. Oats, peanut butter, chocolate chips, and pastel candies make the surface look busy in a way that feels right for Easter.
Why It Works: Monster cookie dough is forgiving, so the candies stay bright and the oats keep the cookies chewy. You get a lot of texture, which helps when the tray has several softer cookies beside them.
Key Ingredients:
- 1 cup peanut butter
- ½ cup butter
- ¾ cup brown sugar
- 2 eggs
- 1 teaspoon vanilla
- 2 cups oats
- 1 cup flour
- 1 teaspoon baking soda
- 1 cup pastel M&Ms
- ½ cup chocolate chips
Quick Steps:
- Cream peanut butter, butter, and sugar.
- Beat in eggs and vanilla.
- Stir in oats, flour, and baking soda.
- Fold in candies and chips, then bake at 350°F for 10 to 12 minutes.
Equipment for This Recipe: Mixer, cookie scoop, sheet pans, cooling rack.
How to Serve This Dish: These belong on the edge of the tray, not the center, because they’re hefty. A napkin underneath never hurts.
Pro Tips for This Recipe:
- Press a few extra candies on top right after baking.
- Don’t overbake; the centers should stay soft.
Variations on This Dish: Sunflower Seed Swap: use sunflower butter for a nut-free version. White Chocolate Monster: replace chips with white chocolate chunks.
Common Mistakes to Avoid with This Dish:
- Don’t use too much flour or they get dry fast.
- Don’t skip the cooling time; they firm up as they rest.
20. Strawberry Jam Butter Cookies

Intro: These taste like a bakery thumbprint and a tea cookie had a softer, prettier cousin. The jam center shines through the pale butter dough like stained glass in a tiny window.
Why It Works: The dough is rich enough to hold shape, and strawberry jam gives a classic spring color without extra decoration. A small piped swirl on top turns them from plain to polished.
Key Ingredients:
- 2 cups flour
- 1 cup butter
- ½ cup powdered sugar
- 1 egg yolk
- 1 teaspoon vanilla
- ¼ teaspoon salt
- ½ cup strawberry jam
- ¼ cup extra powdered sugar for dusting
Quick Steps:
- Cream butter and powdered sugar.
- Beat in yolk and vanilla, then add flour and salt.
- Shape into rounds and press centers.
- Fill with jam and bake at 350°F for 12 minutes.
Equipment for This Recipe: Cookie scoop, teaspoon, lined tray, rack.
How to Serve This Dish: Dust lightly with powdered sugar and serve on a small cake stand. They look especially nice beside sliced strawberries.
Pro Tips for This Recipe:
- Use thick jam so it doesn’t boil over.
- Chill shaped cookies 20 minutes before baking for cleaner edges.
Variations on This Dish: Apricot Shine: use apricot preserves. Raspberry Almond: add almond extract to the dough.
Common Mistakes to Avoid with This Dish:
- Don’t overfill the centers.
- Don’t bake until browned; they should stay pale.
21. Carrot Patch Oreo Dirt Cookies

Intro: This one leans playful. Chocolate cookie crumbs, a fudgy base, and little piped “carrot tops” make the cookie tray feel like a spring garden, even if the actual garden outside is still a mess.
Why It Works: Chocolate and cream cheese or buttercream hold the crumbs together, while a bright orange candy or frosting carrot gives the joke its punch. The texture is soft, not crunchy, which makes them easy to stack.
Key Ingredients:
- 2 cups chocolate cookie crumbs
- 6 tablespoons butter, melted
- 4 ounces cream cheese
- 1 cup powdered sugar
- 1 teaspoon vanilla
- Orange and green frosting or candy melts
- ½ cup extra crushed cookies for topping
Quick Steps:
- Mix crumbs and melted butter.
- Stir cream cheese, powdered sugar, and vanilla into a filling.
- Shape into mounds and press more crumbs on top.
- Pipe carrots and greens, then chill 30 minutes.
Equipment for This Recipe: Food processor, piping bags, bowl, tray.
How to Serve This Dish: Place them in mini cupcake liners so the “dirt” stays neat. They’re a fun change from the prettier, quieter cookies.
Pro Tips for This Recipe:
- Chill before serving so the filling firms.
- Make the carrots small; oversized ones look clumsy.
Variations on This Dish: Peanut Butter Dirt: add peanut butter to the filling. Vegan Dirt Cup Cookie: use dairy-free cream cheese.
Common Mistakes to Avoid with This Dish:
- Don’t make the filling too soft.
- Don’t overdo the crumbs; you still want a little filling visible.
22. Vanilla Bean Sandwich Cookies with Buttercream
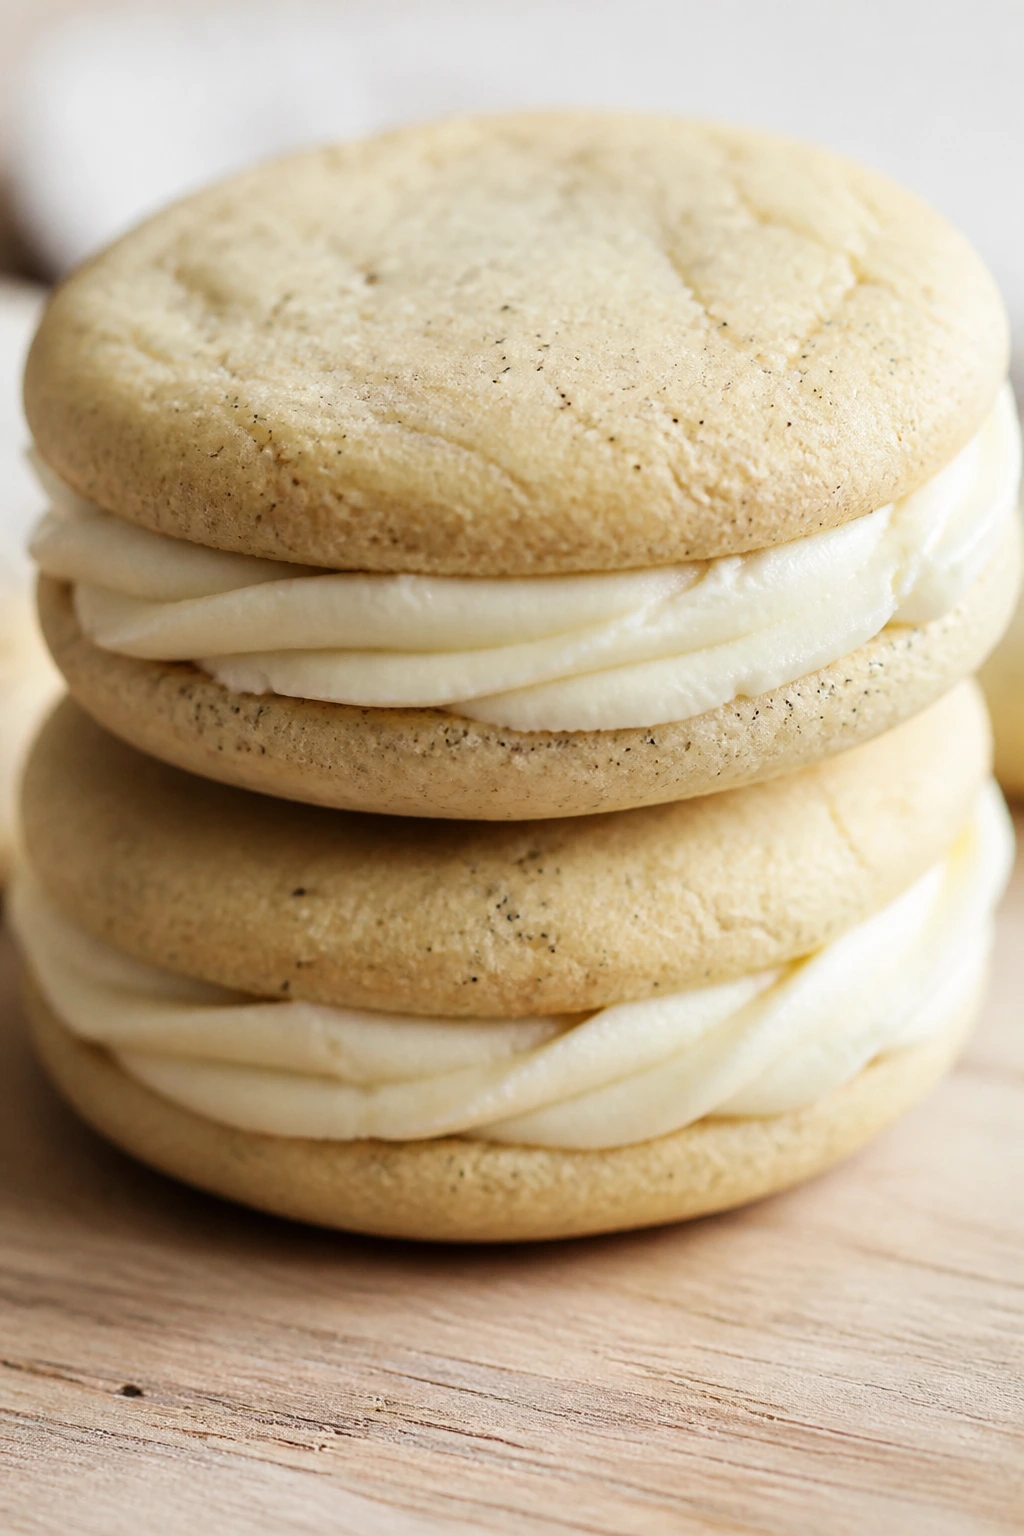
Intro: These are the neat little dinner-party cookies of the bunch. Pale vanilla bean flecks in the dough, a smooth buttercream center, and a clean sandwich shape that looks more tailored than cute.
Why It Works: Vanilla bean gives more aroma than extract alone, and the buttercream holds its shape better than loose frosting. If you want a cookie that slices cleanly and stacks well, this is a strong pick.
Key Ingredients:
- 2¼ cups flour
- 1 cup butter
- ¾ cup sugar
- 1 egg
- 1 vanilla bean, seeds scraped
- 1 teaspoon baking powder
- ½ teaspoon salt
- 1 cup buttercream filling
Quick Steps:
- Make dough and chill.
- Roll, cut rounds, and bake at 350°F for 9 to 10 minutes.
- Cool fully.
- Pipe buttercream on one cookie and sandwich with another.
Equipment for This Recipe: Piping bag, round cutter, sheet pan, mixer.
How to Serve This Dish: Stack in twos on a cake pedestal. They look lovely with pale tea cups and napkins in soft green or cream.
Pro Tips for This Recipe:
- Use real vanilla bean if you want those tiny specks.
- Match the cookie sizes so the edges align.
Variations on This Dish: Lemon Cream: swap vanilla for lemon zest in the filling. Berry Stripe: tint half the buttercream pink.
Common Mistakes to Avoid with This Dish:
- Don’t overfill or the buttercream squishes out.
- Don’t sandwich warm cookies.
23. Earl Grey Tea Cookies

Intro: If you like cookies that feel calm instead of loud, these are it. The bergamot note from Earl Grey gives the butter cookie a perfume-like edge that pairs beautifully with spring tea service.
Why It Works: Tea leaves steeped into the butter or finely ground into the dough give the cookie flavor without a separate glaze. The flavor is subtle, but it lingers.
Key Ingredients:
- 2 cups flour
- 1 cup butter
- ¾ cup sugar
- 2 Earl Grey tea bags, contents removed
- 1 egg yolk
- ½ teaspoon salt
- 1 teaspoon vanilla
- 2 tablespoons sugar for sprinkling
Quick Steps:
- Rub tea leaves into the sugar.
- Cream with butter, then add yolk and vanilla.
- Mix in flour and salt.
- Shape and bake at 325°F for 12 minutes.
Equipment for This Recipe: Grinder or mortar, sheet tray, cooling rack.
How to Serve This Dish: Serve plain with tea and small fruit tartlets if you’re building a bigger dessert spread. They’re more refined than decorative, which has its own charm.
Pro Tips for This Recipe:
- Crush the tea finely so no bitter bits stand out.
- Bake low and pale for the cleanest flavor.
Variations on This Dish: Lemon Earl Grey: add zest. Honey Tea Cookie: replace part of the sugar with honey.
Common Mistakes to Avoid with This Dish:
- Don’t leave whole tea bits in the dough.
- Don’t overbake or the bergamot note disappears.
24. Marshmallow Chick Cookies

Intro: These are silly in the best way: soft sugar cookies topped with marshmallow heads, candy eyes, and little piped beaks. They look like they wandered out of a candy shop and into a baking tray.
Why It Works: A sturdy cookie base supports the marshmallow topping, and a quick toast or drizzle gives the chicks some definition. They’re pure decoration, but the cookie underneath still needs to taste good.
Key Ingredients:
- 2½ cups flour
- 1 cup butter
- ¾ cup sugar
- 1 egg
- 2 teaspoons vanilla
- 1 teaspoon baking powder
- ½ teaspoon salt
- 12 large marshmallows, halved
- Yellow frosting and candy eyes
Quick Steps:
- Bake sugar cookies and cool.
- Pipe a little frosting on top and press on marshmallow halves.
- Add candy eyes and beaks.
- Let set 15 minutes before serving.
Equipment for This Recipe: Piping bag, small round tip, sheet pans, cooling rack.
How to Serve This Dish: Put these front and center if you want the tray to feel playful. They’re the ones kids point at first.
Pro Tips for This Recipe:
- Use fresh marshmallows so they stay soft.
- Keep the beaks tiny; big ones look awkward.
Variations on This Dish: Coconut Chick: roll the marshmallow in coconut crumbs. Lemon Chick: use lemon icing under the topping.
Common Mistakes to Avoid with This Dish:
- Don’t add marshmallows to warm cookies.
- Don’t overload with frosting or the details slide.
25. Peanut Butter Egg Cookies
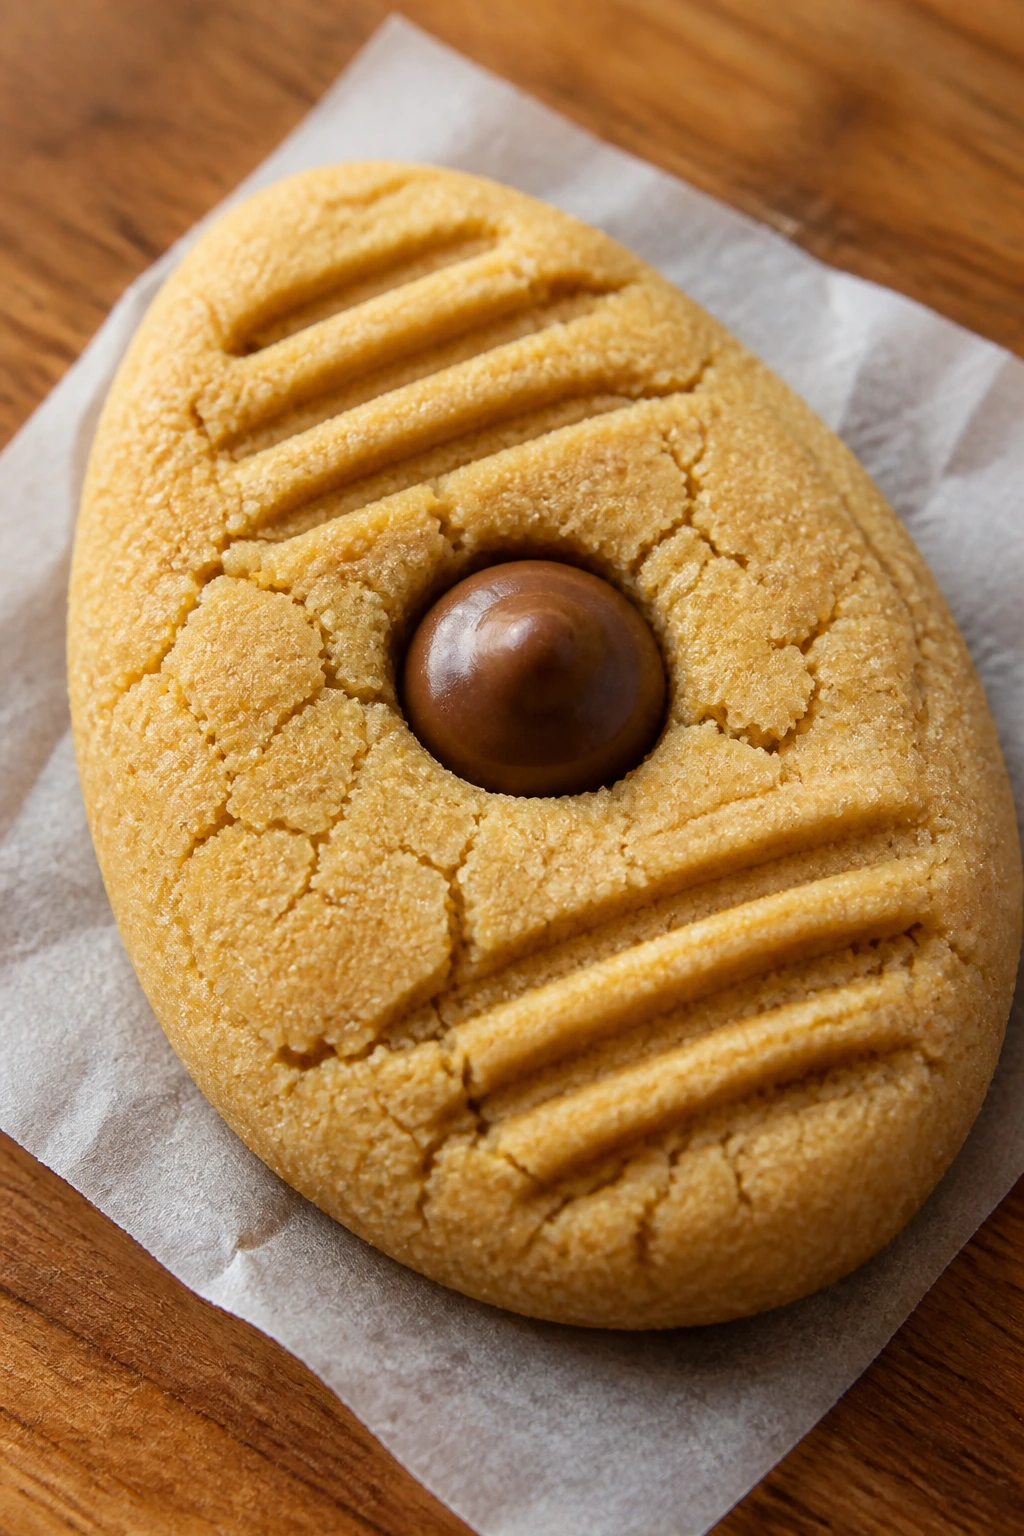
Intro: These taste like a peanut butter cup dressed up for Easter. Shaped like eggs and topped with a little chocolate center, they’re richer than the sugar cookies and a lot more satisfying than they have any right to be.
Why It Works: Peanut butter keeps the cookie chewy, and the egg shape makes the theme obvious without needing a lot of decoration. A chocolate kiss or candy egg in the middle gives you a clean focal point.
Key Ingredients:
- 1 cup peanut butter
- ½ cup butter
- ¾ cup brown sugar
- 1 egg
- 1¾ cups flour
- 1 teaspoon baking soda
- ½ teaspoon salt
- 24 mini chocolate eggs or chocolate kisses
Quick Steps:
- Cream peanut butter, butter, and sugar.
- Add egg, then dry ingredients.
- Shape into eggs and bake at 350°F for 9 to 11 minutes.
- Press a candy into the center while warm.
Equipment for This Recipe: Sheet pans, cookie scoop, fork, cooling rack.
How to Serve This Dish: These work well on a plate with other rich cookies, since they bring their own candy center. They disappear fast near the coffee pot.
Pro Tips for This Recipe:
- Press the candy in while the cookie is still soft.
- Chill the shaped dough if it feels sticky.
Variations on This Dish: Dark Chocolate Center: use dark chocolate eggs. Nut-Free: swap sunflower butter.
Common Mistakes to Avoid with This Dish:
- Don’t overbake; the cookies harden as they cool.
- Don’t use runny peanut butter.
26. Honey Almond Biscotti
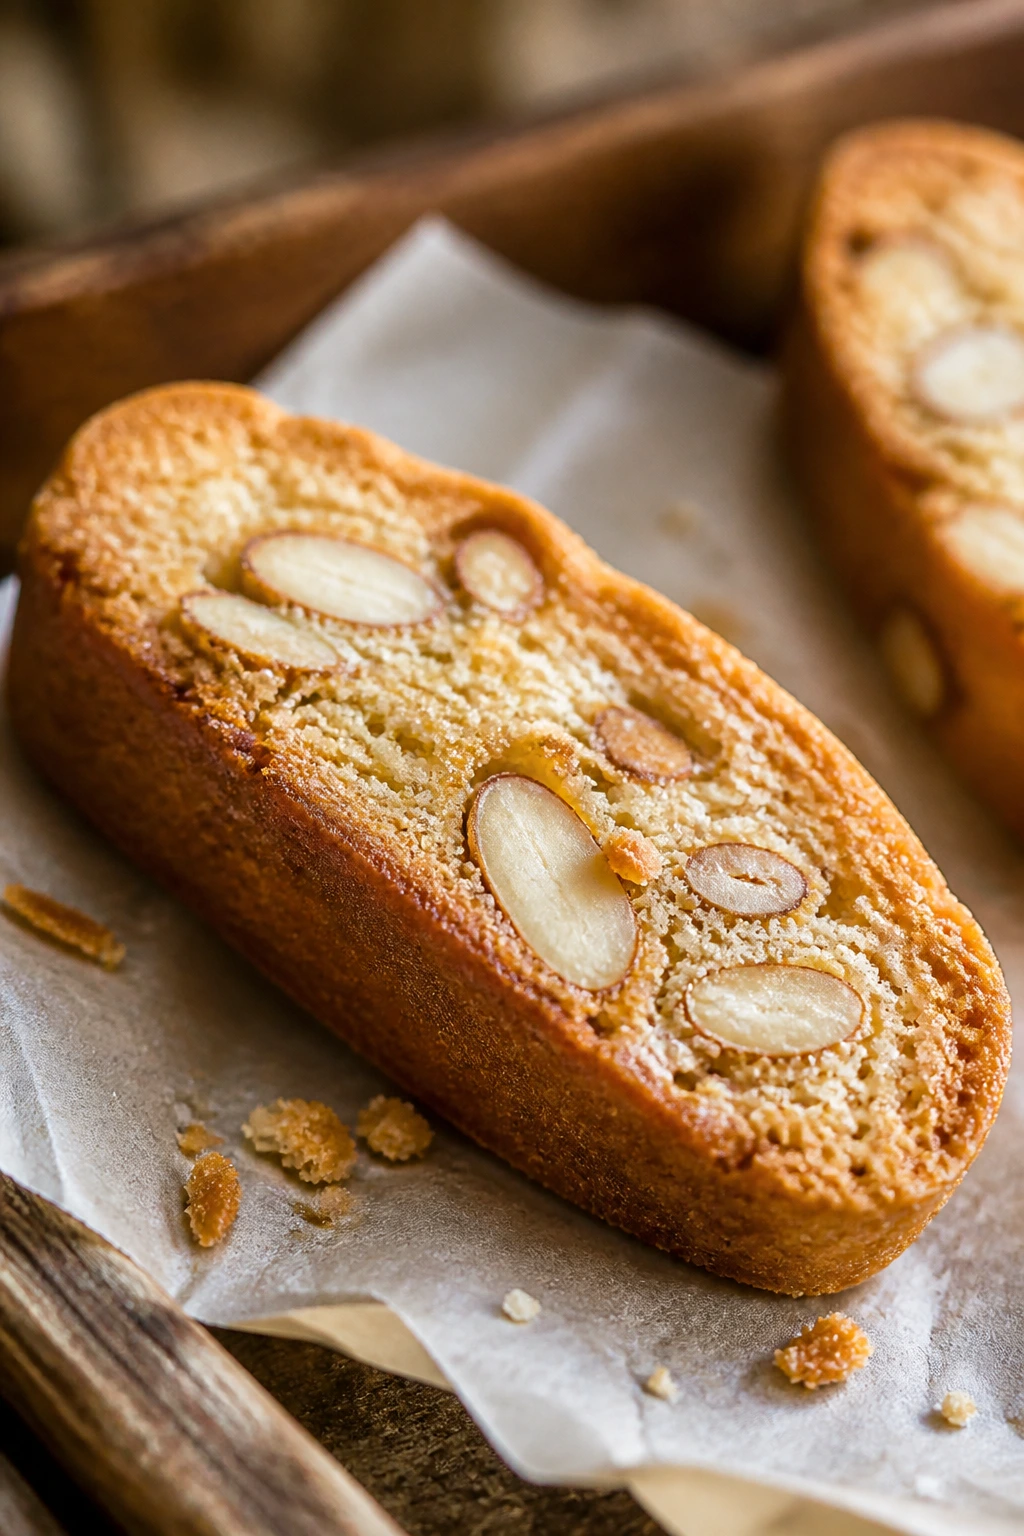
Intro: Crisp, golden biscotti bring a different kind of beauty to the Easter spread. They’re not frosted, and that’s the point — the sliced almonds and honey glaze do enough on their own.
Why It Works: Biscotti hold up for days, which makes them useful when the rest of the tray is soft or iced. Honey keeps the flavor round, and almonds make the slices look clean and springlike.
Key Ingredients:
- 2¼ cups flour
- ¾ cup sugar
- 2 eggs
- ⅓ cup honey
- 1 teaspoon almond extract
- 1 teaspoon baking powder
- ½ teaspoon salt
- ¾ cup sliced almonds
Quick Steps:
- Mix dough, fold in almonds, and shape two logs.
- Bake at 350°F for 25 minutes.
- Cool 10 minutes, slice, and bake again 8 to 10 minutes per side.
- Drizzle with a little honey if you want shine.
Equipment for This Recipe: Serrated knife, baking sheet, cooling rack, parchment.
How to Serve This Dish: Serve with espresso or tea in a small basket. They’re a nice counterpoint to the softer cookies.
Pro Tips for This Recipe:
- Cool the logs before slicing to keep them from crumbling.
- Toast the almonds first if you want a deeper flavor.
Variations on This Dish: Orange Almond: add orange zest. Chocolate Dip: dip one end in melted dark chocolate.
Common Mistakes to Avoid with This Dish:
- Don’t slice too soon.
- Don’t bake the second time so long that they become tooth-breaking.
27. Orange Olive Oil Cookies
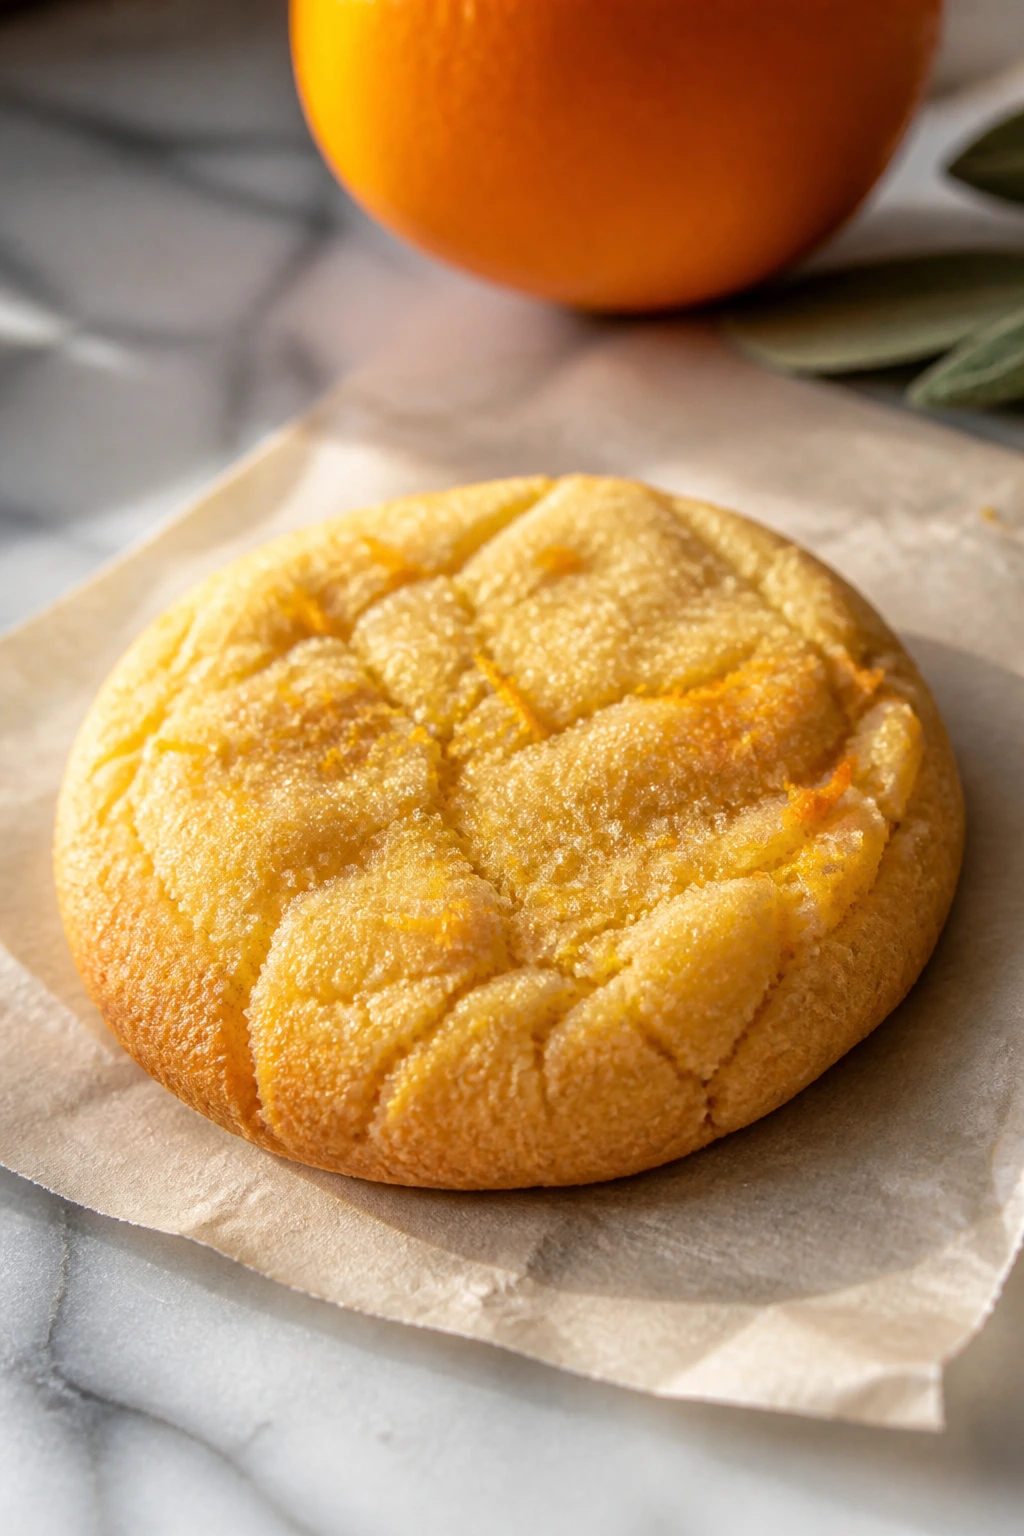
Intro: These have a cleaner, less sweet profile than most Easter cookies, and I like that. The olive oil keeps the crumb tender, while orange zest gives the cookies a bright, sunny finish.
Why It Works: Olive oil creates a soft bite that stays moist for several days. Orange and a little vanilla keep the flavor familiar enough for most people, even if they don’t usually reach for olive oil cookies.
Key Ingredients:
- 2 cups flour
- ½ cup olive oil
- ¾ cup sugar
- 1 egg
- Zest of 2 oranges
- 2 tablespoons orange juice
- 1 teaspoon baking powder
- ½ teaspoon salt
Quick Steps:
- Whisk oil, sugar, egg, zest, and juice.
- Stir in flour, baking powder, and salt.
- Scoop and flatten slightly.
- Bake at 350°F for 10 to 12 minutes.
Equipment for This Recipe: Mixing bowl, whisk, tray, cookie scoop.
How to Serve This Dish: Stack them with orange slices or candied peel nearby for a tidy spring look. They’re less sweet, so they’re nice after a big meal.
Pro Tips for This Recipe:
- Use a mild olive oil, not a peppery one.
- Let the dough sit 10 minutes before scooping if it feels loose.
Variations on This Dish: Lemon Olive Oil: swap the orange for lemon. Rosemary Citrus: add a tiny pinch of finely chopped rosemary.
Common Mistakes to Avoid with This Dish:
- Don’t use a strong, bitter oil.
- Don’t overbake or the oil flavor turns flat.
28. Chocolate Chip Bird’s Nest Cookies

Intro: These are the easiest “nest” cookie if you want something less fussy than macarons or meringue. A chewy chocolate chip base gets a shallow center and a little pile of candy eggs on top.
Why It Works: The dough is familiar enough to bake confidently, and the nest shape is just a thumb press or spoon press after baking. You get the Easter theme with minimal extra decorating.
Key Ingredients:
- 2¼ cups flour
- 1 cup butter
- ¾ cup brown sugar
- ½ cup sugar
- 1 egg
- 1 teaspoon vanilla
- 1 teaspoon baking soda
- 1½ cups chocolate chips
- Mini candy eggs
Quick Steps:
- Make chocolate chip dough.
- Scoop and bake at 350°F for 9 to 11 minutes.
- Press a shallow indent into the center while warm.
- Fill with candy eggs after cooling.
Equipment for This Recipe: Cookie scoop, sheet pan, spoon, cooling rack.
How to Serve This Dish: These are ideal in the middle of the tray because everyone recognizes them fast. They also pack well into boxes.
Pro Tips for This Recipe:
- Press the nest shape while the cookies are still soft.
- Use a mix of mini eggs and chocolate pearls for texture.
Variations on This Dish: Oat Nest: add ½ cup oats. Dark Chocolate Nest: use dark chips instead.
Common Mistakes to Avoid with This Dish:
- Don’t press the center too deep.
- Don’t add candy before the cookies cool a bit, or it sinks.
29. Maple Pecan Cookies
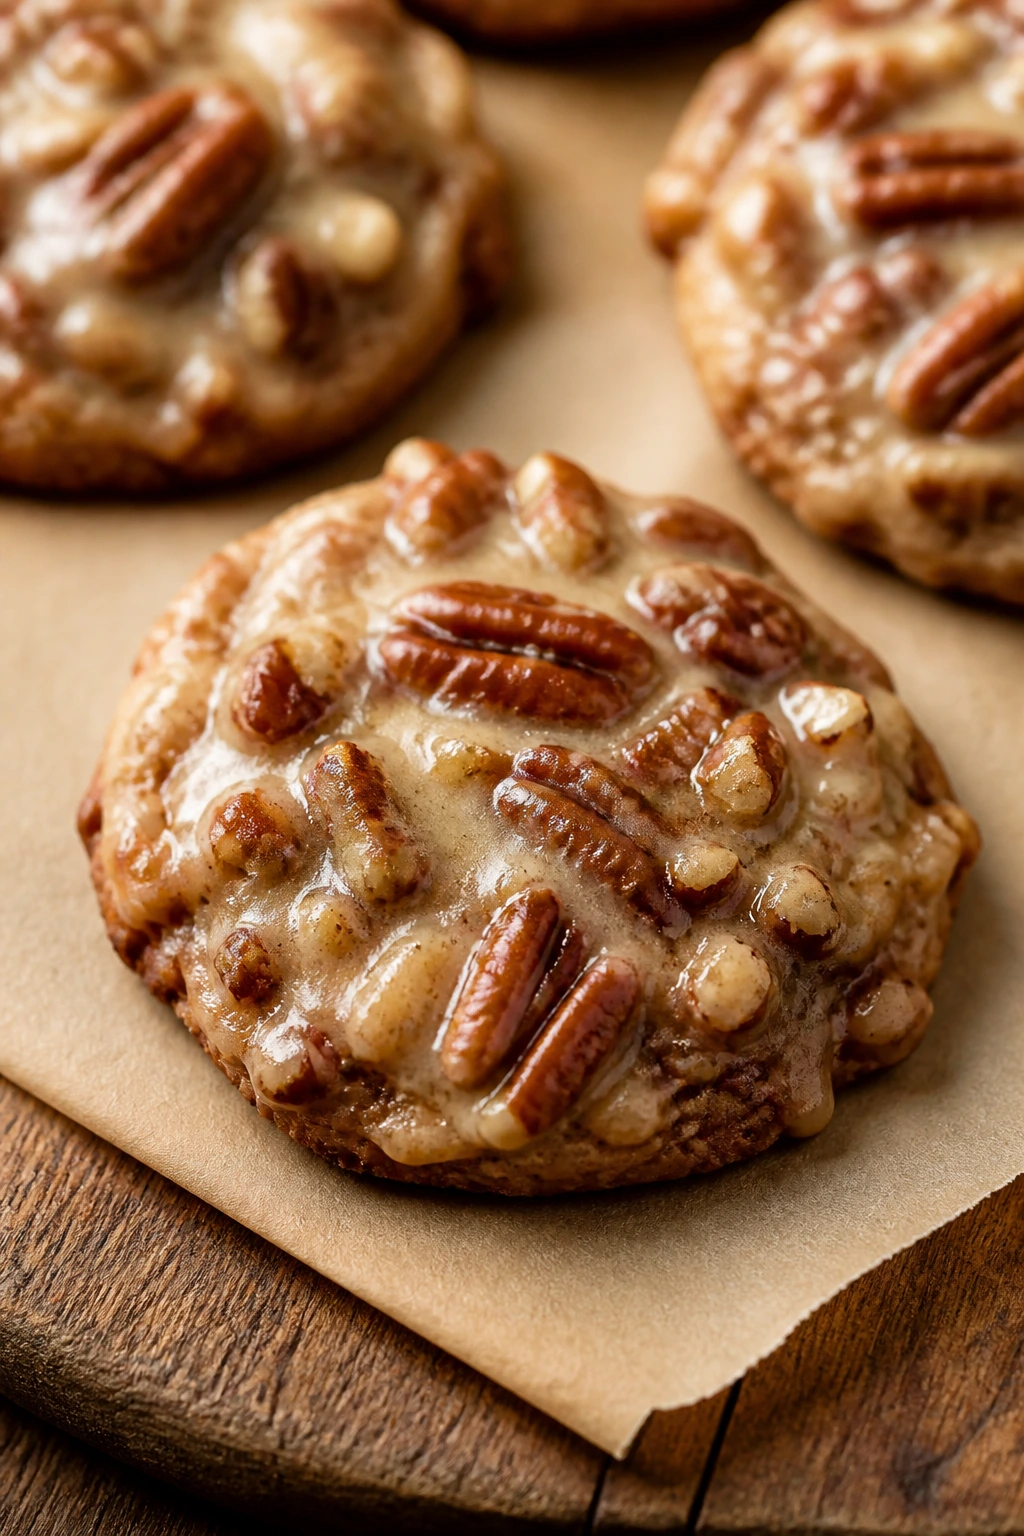
Intro: These bring a deeper, toastier note to the tray, which helps when everything else is leaning bright and pastel. Maple glaze, pecans, and a sandy crumb make them feel more like a proper bakery cookie.
Why It Works: Maple and pecan are naturally spring-friendly without shouting about it, and the nuts keep the cookies from reading too sweet. A thin glaze helps the tops shine.
Key Ingredients:
- 2¼ cups flour
- 1 cup butter
- ¾ cup brown sugar
- 1 egg
- ¼ cup maple syrup
- 1 cup chopped pecans
- 1 teaspoon baking powder
- ½ teaspoon salt
Quick Steps:
- Cream butter and sugar, then beat in egg and maple syrup.
- Add dry ingredients and pecans.
- Scoop and bake at 350°F for 10 to 12 minutes.
- Drizzle with maple glaze when cool.
Equipment for This Recipe: Mixer, tray, parchment, spoon.
How to Serve This Dish: Serve them beside coffee and darker cookies so the tray has some depth. They’re a good late-afternoon cookie.
Pro Tips for This Recipe:
- Toast the pecans first.
- Use real maple syrup, not pancake syrup.
Variations on This Dish: Brown Butter Maple: brown the butter first. Chocolate Pecan: add chips to the dough.
Common Mistakes to Avoid with This Recipe:
- Don’t overdo the syrup or the dough softens too much.
- Don’t skip cooling before glazing.
30. White Chocolate Cranberry Cookies
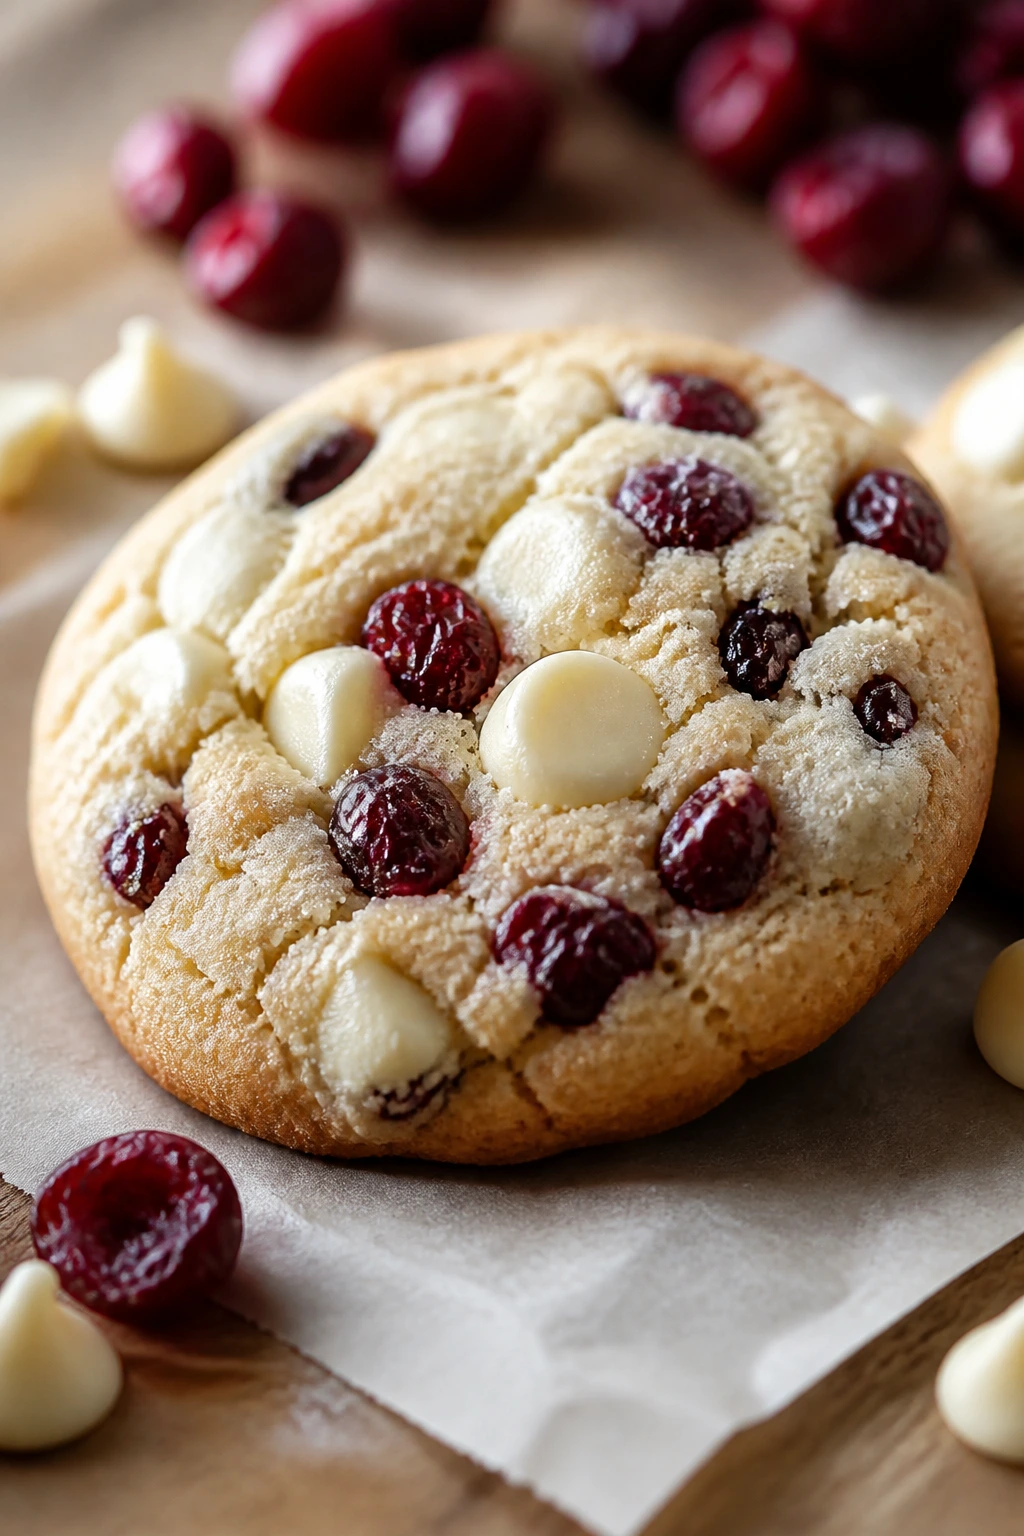
Intro: These lean red and white without requiring any frosting, which makes them useful when you want color and don’t want to pipe all afternoon. Tart cranberries and creamy white chocolate give you a nice sweet-sharp balance.
Why It Works: Dried cranberries bring color that reads well on a platter, and white chocolate keeps the cookies soft-looking and festive. They’re especially good if the rest of the tray is mostly pale.
Key Ingredients:
- 2¼ cups flour
- 1 cup butter
- ¾ cup sugar
- 1 egg
- 1 teaspoon vanilla
- 1 teaspoon baking powder
- ½ teaspoon salt
- 1 cup dried cranberries
- 1 cup white chocolate chips
Quick Steps:
- Make the dough and fold in cranberries and chips.
- Scoop onto trays.
- Bake at 350°F for 10 to 12 minutes.
- Cool on the pan before moving.
Equipment for This Recipe: Mixing bowl, scoop, sheet pan, rack.
How to Serve This Dish: Set these near the front of the tray so the red pieces catch the eye. They’re easy to box for gifting too.
Pro Tips for This Recipe:
- Chop the cranberries if they’re very large.
- Don’t overbake; white chocolate can get grainy when overdone.
Variations on This Dish: Orange Cranberry: add orange zest. Macadamia Swap: replace some chips with chopped macadamias.
Common Mistakes to Avoid with This Recipe:
- Don’t use too many cranberries or the dough gets dry.
- Don’t bake past pale gold.
31. Cream Cheese Sugar Cookies

Intro: Cream cheese in the dough gives these a soft, almost cake-like crumb that feels a little richer than standard sugar cookies. They take decoration well, but they’re good enough plain to eat warm off the rack.
Why It Works: The cream cheese keeps the texture tender and slightly tangy, which cuts the sweetness of royal icing or buttercream. That balance matters when you’re baking a whole tray.
Key Ingredients:
- 2¼ cups flour
- ½ cup butter
- 4 ounces cream cheese, softened
- ¾ cup sugar
- 1 egg
- 1 teaspoon vanilla
- 1 teaspoon baking powder
- ½ teaspoon salt
Quick Steps:
- Beat butter, cream cheese, and sugar.
- Add egg and vanilla.
- Mix in dry ingredients and chill 45 minutes.
- Roll, cut, and bake at 350°F for 9 to 10 minutes.
Equipment for This Recipe: Mixer, rolling pin, cutter, baking sheets.
How to Serve This Dish: They’re excellent with either plain sanding sugar or a smooth glaze. Use them as your “easy but polished” cookie on the tray.
Pro Tips for This Recipe:
- Chill longer if the dough feels sticky.
- Dust the cutter with flour sparingly; too much leaves rough edges.
Variations on This Dish: Lemon Cream Cheese: add lemon zest. Almond Cream Cheese: use almond extract instead of vanilla.
Common Mistakes to Avoid with This Recipe:
- Don’t let the dough get warm.
- Don’t roll too thin or the cream cheese crumb dries out.
32. Cocoa Egg Cookies with Marshmallow Centers
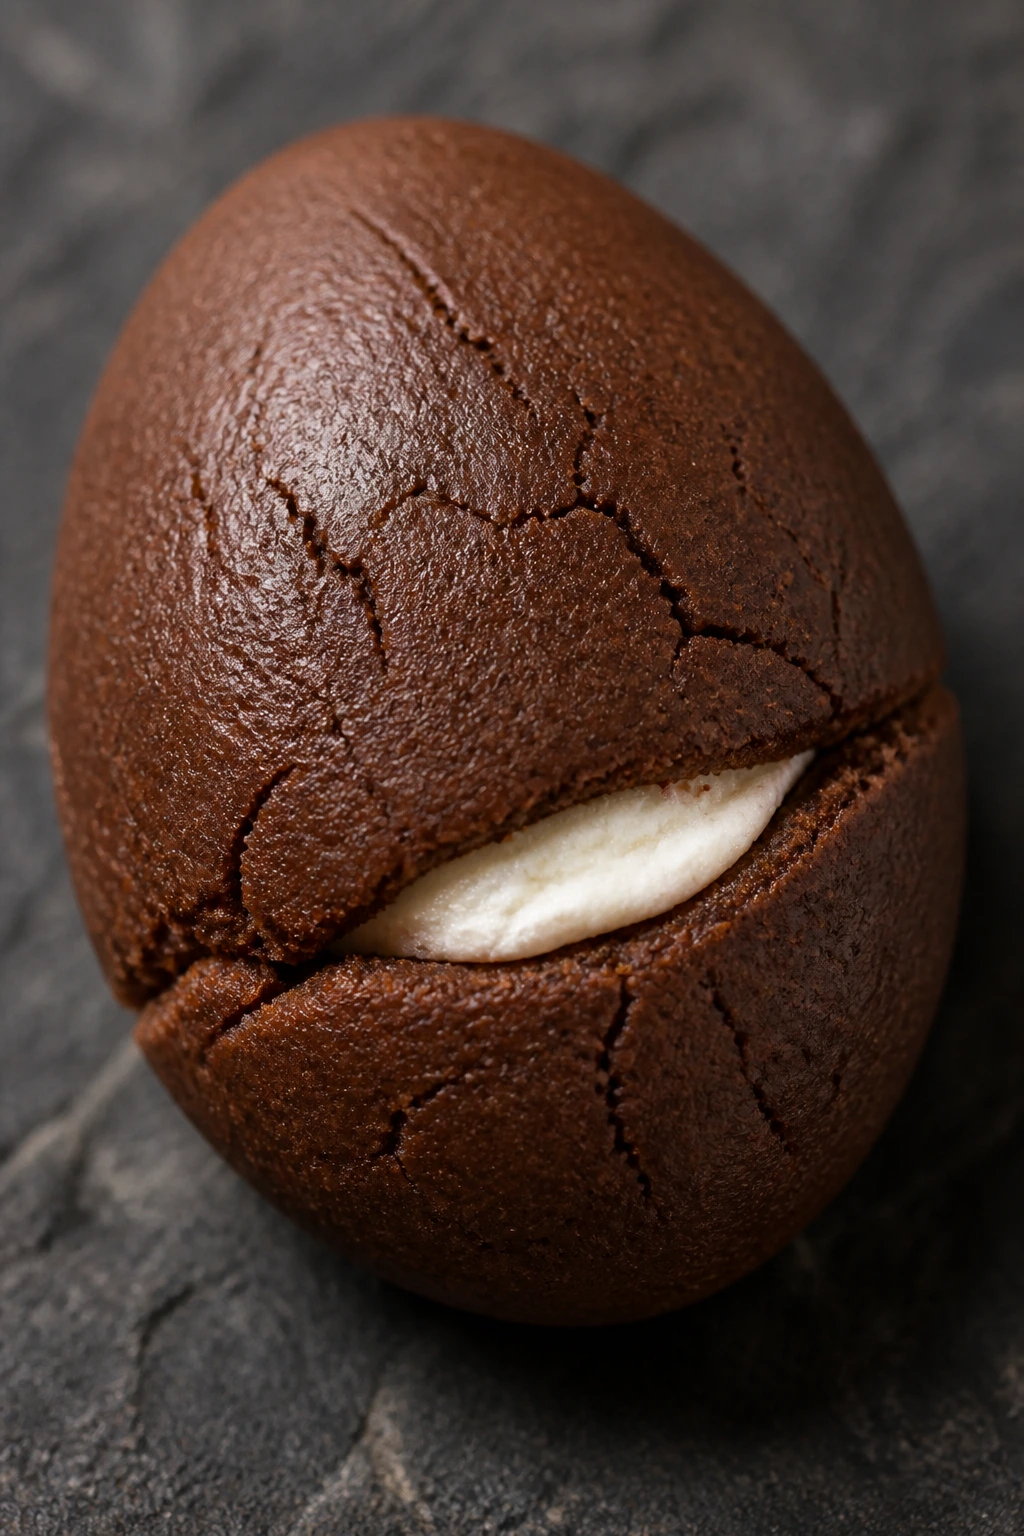
Intro: These are like tiny hot cocoa cups in cookie form. A chocolate base, a soft marshmallow center, and a glossy top make them look more involved than they are.
Why It Works: Cocoa dough gives the cookie depth, and the marshmallow center bakes into a soft pocket that feels playful when you bite in. Egg shapes make the theme obvious, even without a lot of decoration.
Key Ingredients:
- 2 cups flour
- ½ cup cocoa powder
- 1 cup butter
- ¾ cup sugar
- 1 egg
- 1 teaspoon vanilla
- ½ teaspoon salt
- 12 mini marshmallows, cut in half
- ½ cup chocolate drizzle
Quick Steps:
- Mix cocoa dough and chill 30 minutes.
- Shape egg ovals and press a marshmallow piece into each center.
- Bake at 350°F for 9 to 10 minutes.
- Drizzle with chocolate after cooling.
Equipment for This Recipe: Scoop, knife, sheet pan, cooling rack.
How to Serve This Dish: Put these near the chocolate nest cookies so the darker flavors group together. They’re a good choice for anyone who likes dessert to taste like dessert.
Pro Tips for This Recipe:
- Cut marshmallows cleanly with scissors or a greased knife.
- Add drizzle only after the cookies are cool.
Variations on This Dish: Peppermint Cocoa: add a tiny bit of peppermint extract. Peanut Butter Center: swap marshmallow for peanut butter filling.
Common Mistakes to Avoid with This Recipe:
- Don’t press the marshmallow too deep.
- Don’t overbake or the center disappears into the dough.
33. Raspberry Linzer Flower Cookies
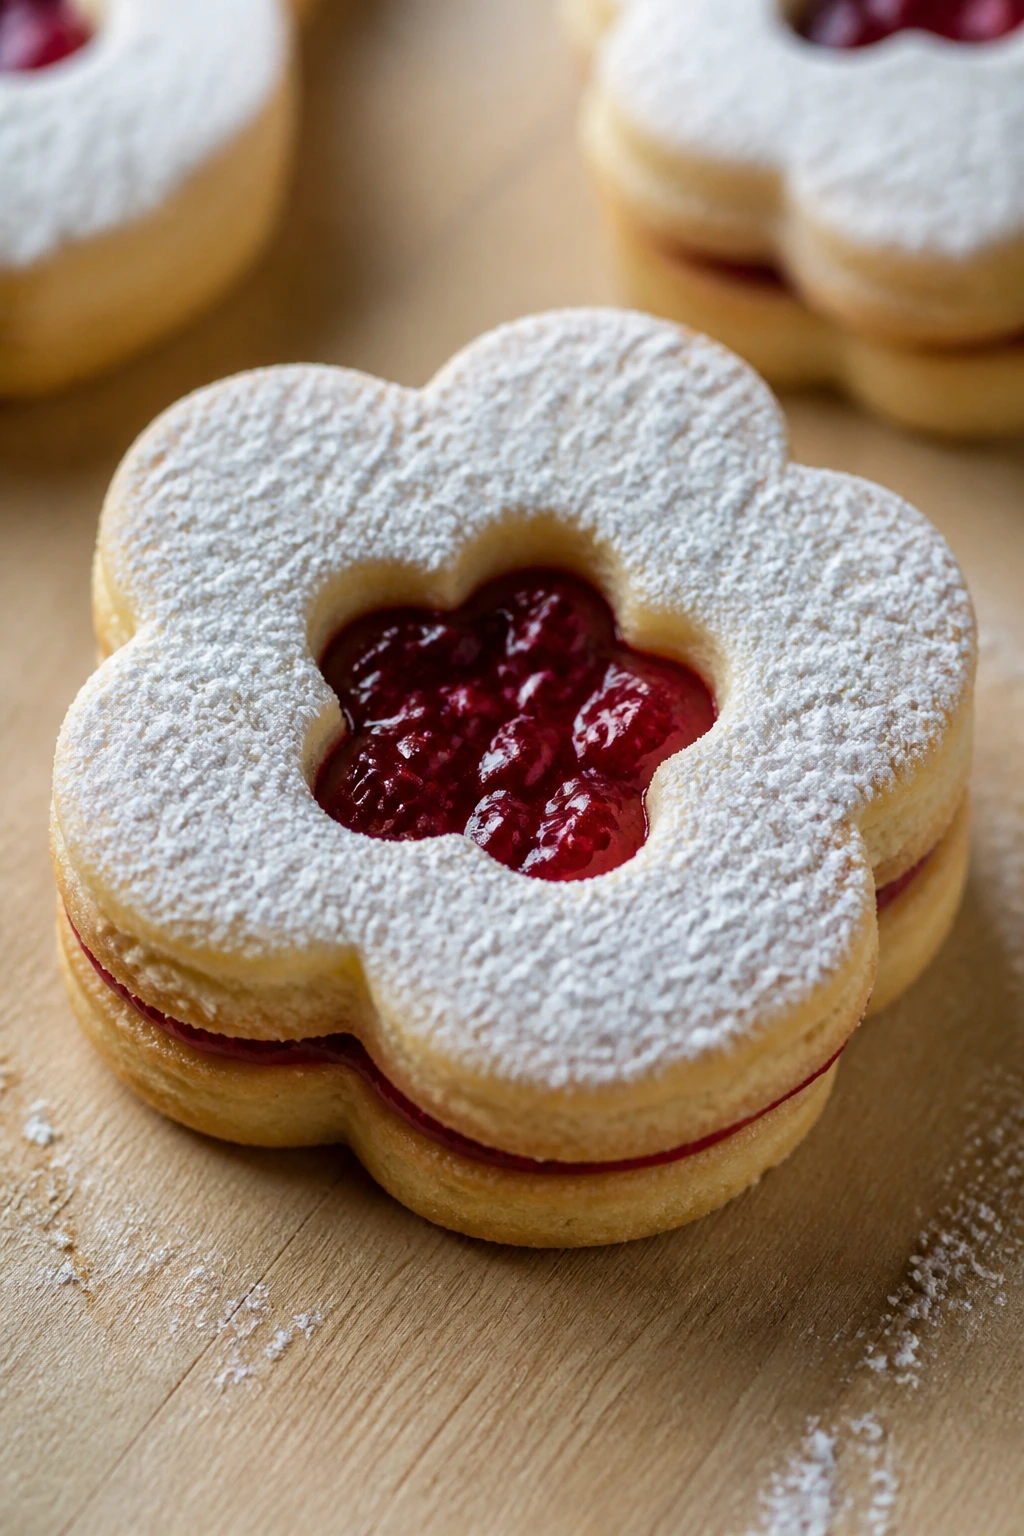
Intro: These are a little more formal than a bunny cookie, but that’s part of the appeal. A cutout top shows the jam center, and the powdered sugar makes the whole thing look like a bakery window display.
Why It Works: Linzer-style cookies give you clean edges and a bright center, which is exactly the kind of contrast that reads beautifully on a dessert table. The jam peeks through the cutout like stained glass.
Key Ingredients:
- 2 cups flour
- 1 cup almond flour
- 1 cup butter
- ¾ cup powdered sugar
- 1 egg yolk
- ½ teaspoon salt
- ½ teaspoon vanilla
- ½ cup raspberry jam
- Extra powdered sugar for dusting
Quick Steps:
- Make the dough and chill 1 hour.
- Roll and cut flower shapes with small centers removed.
- Bake at 350°F for 10 to 12 minutes.
- Sandwich with jam and dust the tops.
Equipment for This Recipe: Flower cutter, small round cutter, cooling rack, sieve.
How to Serve This Dish: Stack the tops slightly offset so the jam shows. They look best on a platter with open space between them.
Pro Tips for This Recipe:
- Dust before assembling so the sugar stays clean.
- Use seedless jam for the neatest finish.
Variations on This Dish: Apricot Linzer: swap the jam. Hazelnut Version: replace part of the almond flour with hazelnut flour.
Common Mistakes to Avoid with This Recipe:
- Don’t roll the dough too thin.
- Don’t overfill, or the jam squishes out.
34. Lemon Ricotta Cookies
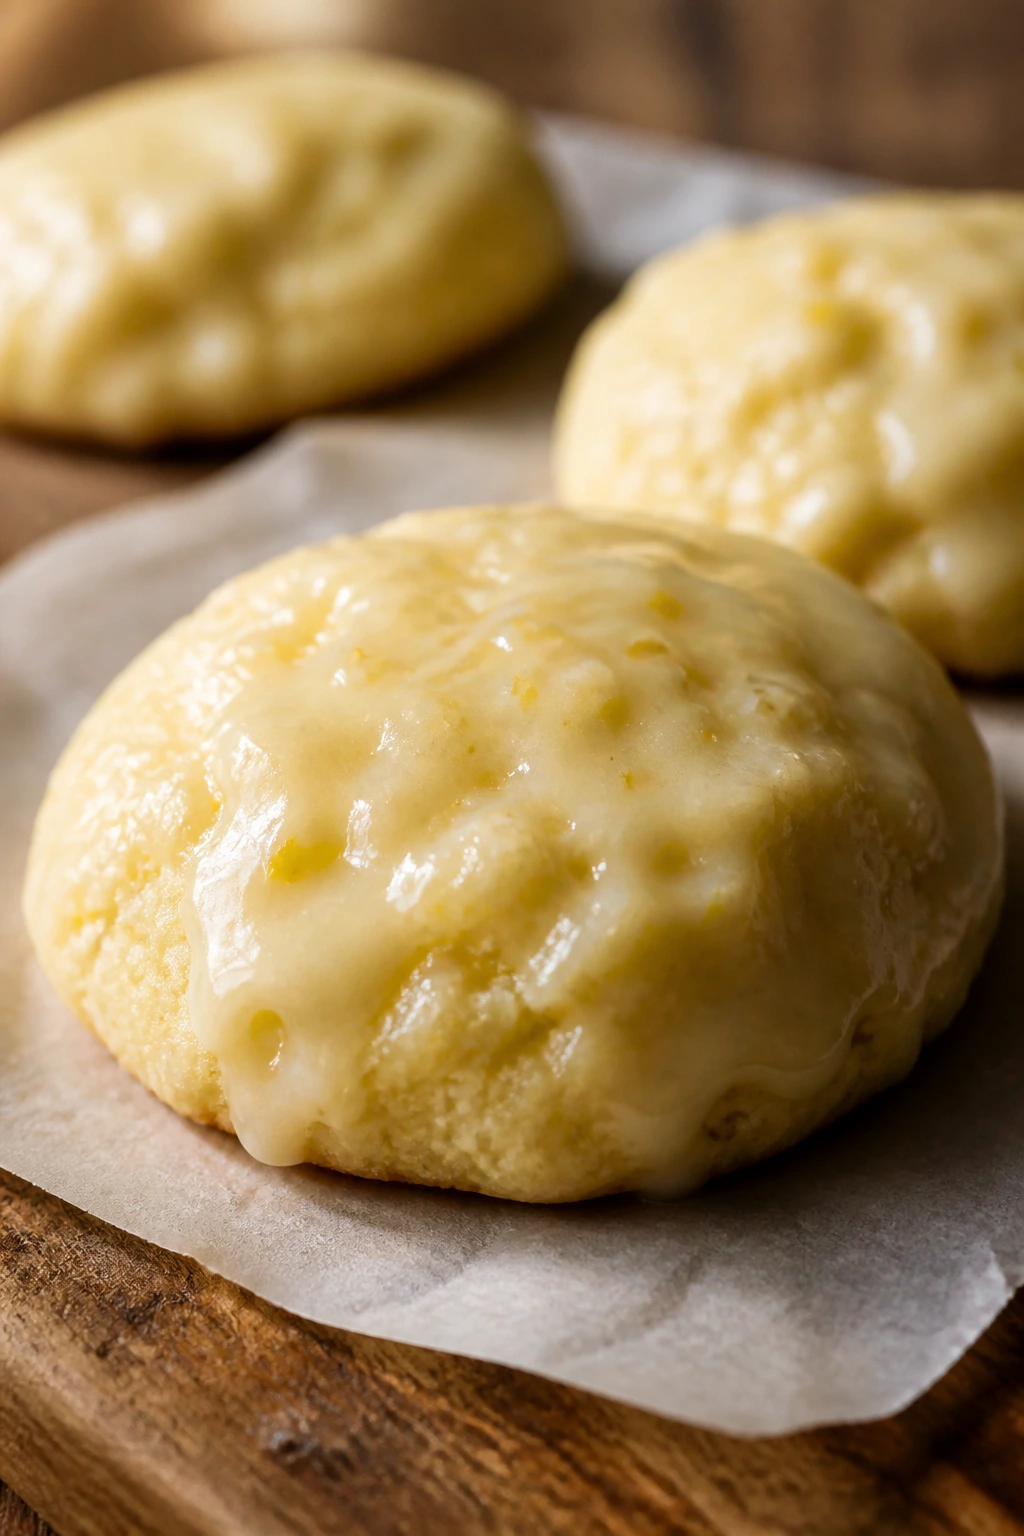
Intro: Soft, pale, and gently cakey, these cookies feel like a cross between a tea cake and a drop cookie. Ricotta keeps the crumb plush, and lemon glaze gives the tops a clean sheen.
Why It Works: Ricotta adds moisture without making the cookies heavy. Lemon keeps them bright, which matters when you’ve got a lot of rich frosting elsewhere on the tray.
Key Ingredients:
- 2½ cups flour
- 1 cup ricotta
- ½ cup butter
- ¾ cup sugar
- 1 egg
- Zest of 1 lemon
- 2 tablespoons lemon juice
- 1 teaspoon baking powder
- ½ teaspoon salt
Quick Steps:
- Cream butter and sugar, then add ricotta, egg, lemon, and zest.
- Stir in flour, baking powder, and salt.
- Scoop and bake at 350°F for 12 minutes.
- Glaze once cool.
Equipment for This Recipe: Mixing bowl, scoop, parchment, rack.
How to Serve This Dish: These look best in a loose pile with the glaze catching the light. They’re softer than the cutout cookies, so don’t stack them too high.
Pro Tips for This Recipe:
- Drain watery ricotta first if needed.
- Make the glaze thick enough to cling, not run.
Variations on This Recipe: Orange Ricotta: use orange zest instead. Berry Glaze: tint the icing with a little raspberry puree.
Common Mistakes to Avoid with This Recipe:
- Don’t overmix after adding flour.
- Don’t bake until browned; pale tops are the goal.
35. Sesame Tahini Cookies with Honey Glaze
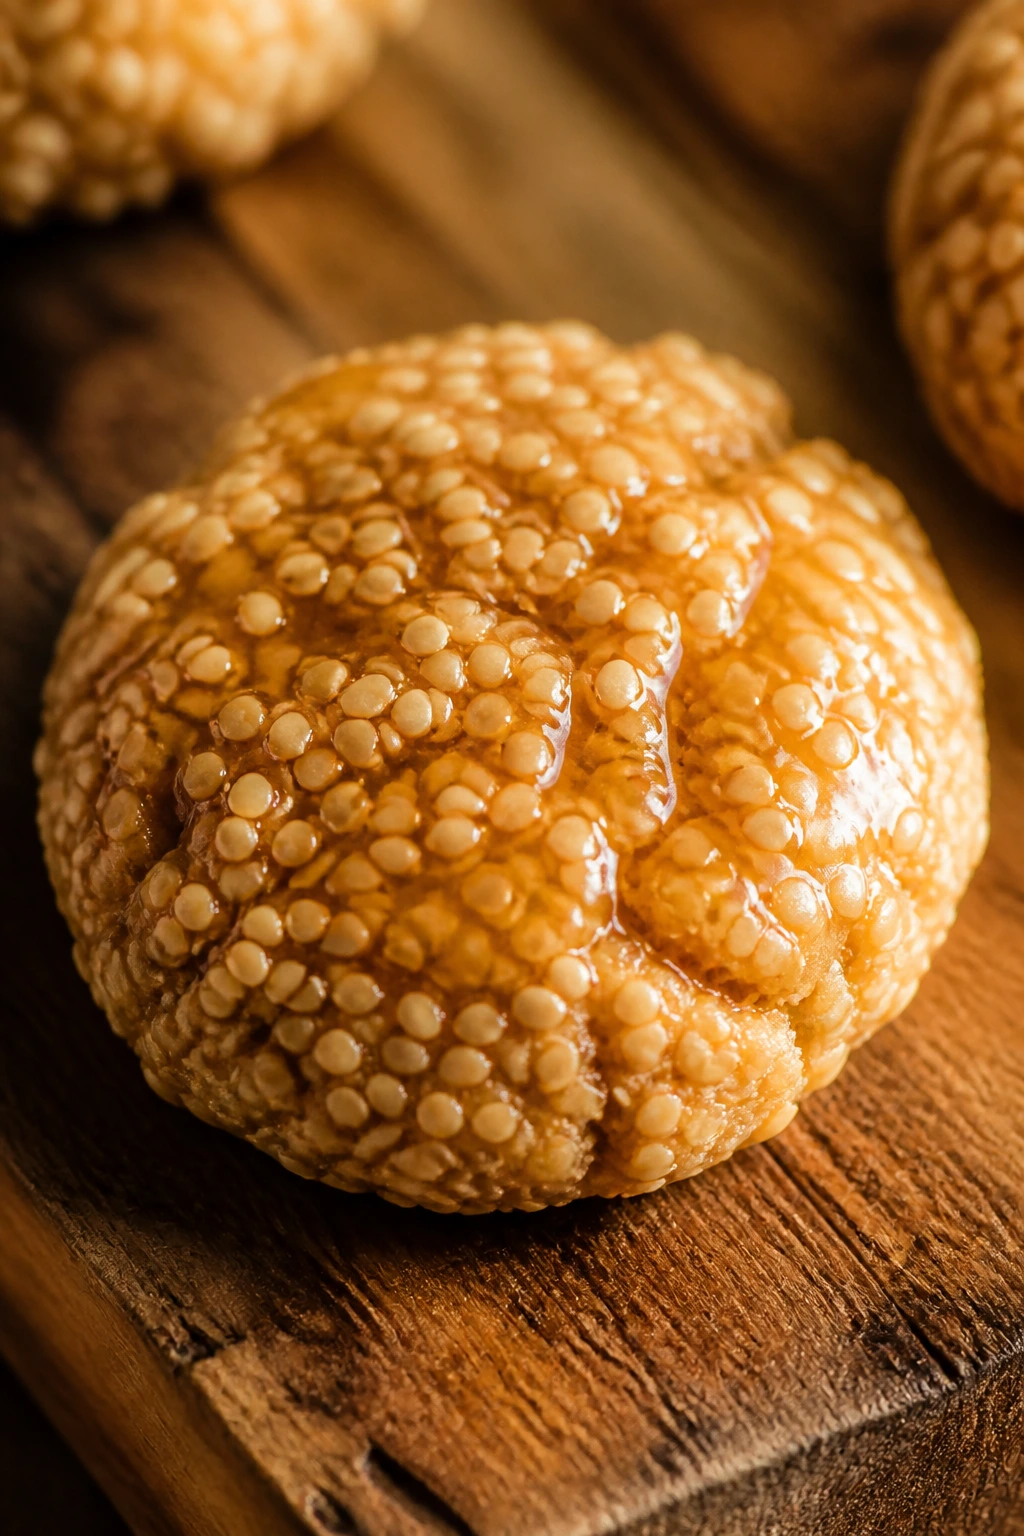
Intro: These are the surprise cookie on the tray. Nutty, a little savory, and finished with honey glaze and sesame seeds, they bring balance to an otherwise sweet spread.
Why It Works: Tahini gives a deep sesame flavor that stands up to honey, and the glaze glues on a few seeds for a clean finish. They’re an easy way to add variety without a new icing technique.
Key Ingredients:
- 2 cups flour
- ½ cup tahini
- ½ cup butter
- ¾ cup sugar
- 1 egg
- 1 teaspoon vanilla
- ½ teaspoon salt
- 2 tablespoons honey
- 2 tablespoons sesame seeds
Quick Steps:
- Cream tahini, butter, and sugar.
- Add egg and vanilla.
- Stir in flour and salt.
- Scoop, flatten, bake at 350°F for 10 to 12 minutes, then glaze and sprinkle.
Equipment for This Recipe: Mixer, tray, spoon, small brush.
How to Serve This Dish: Put these near fruit and tea cookies so the tray has a savory note. They’re the one people don’t expect and then keep thinking about.
Pro Tips for This Recipe:
- Use smooth tahini for the best texture.
- Toast the sesame seeds for more aroma.
Variations on This Dish: Chocolate Tahini: drizzle with dark chocolate. Orange Sesame: add zest to the dough.
Common Mistakes to Avoid with This Dish:
- Don’t use bitter tahini.
- Don’t overbake; the flavor gets flat.
36. Caramel-Stuffed Shortbread Eggs
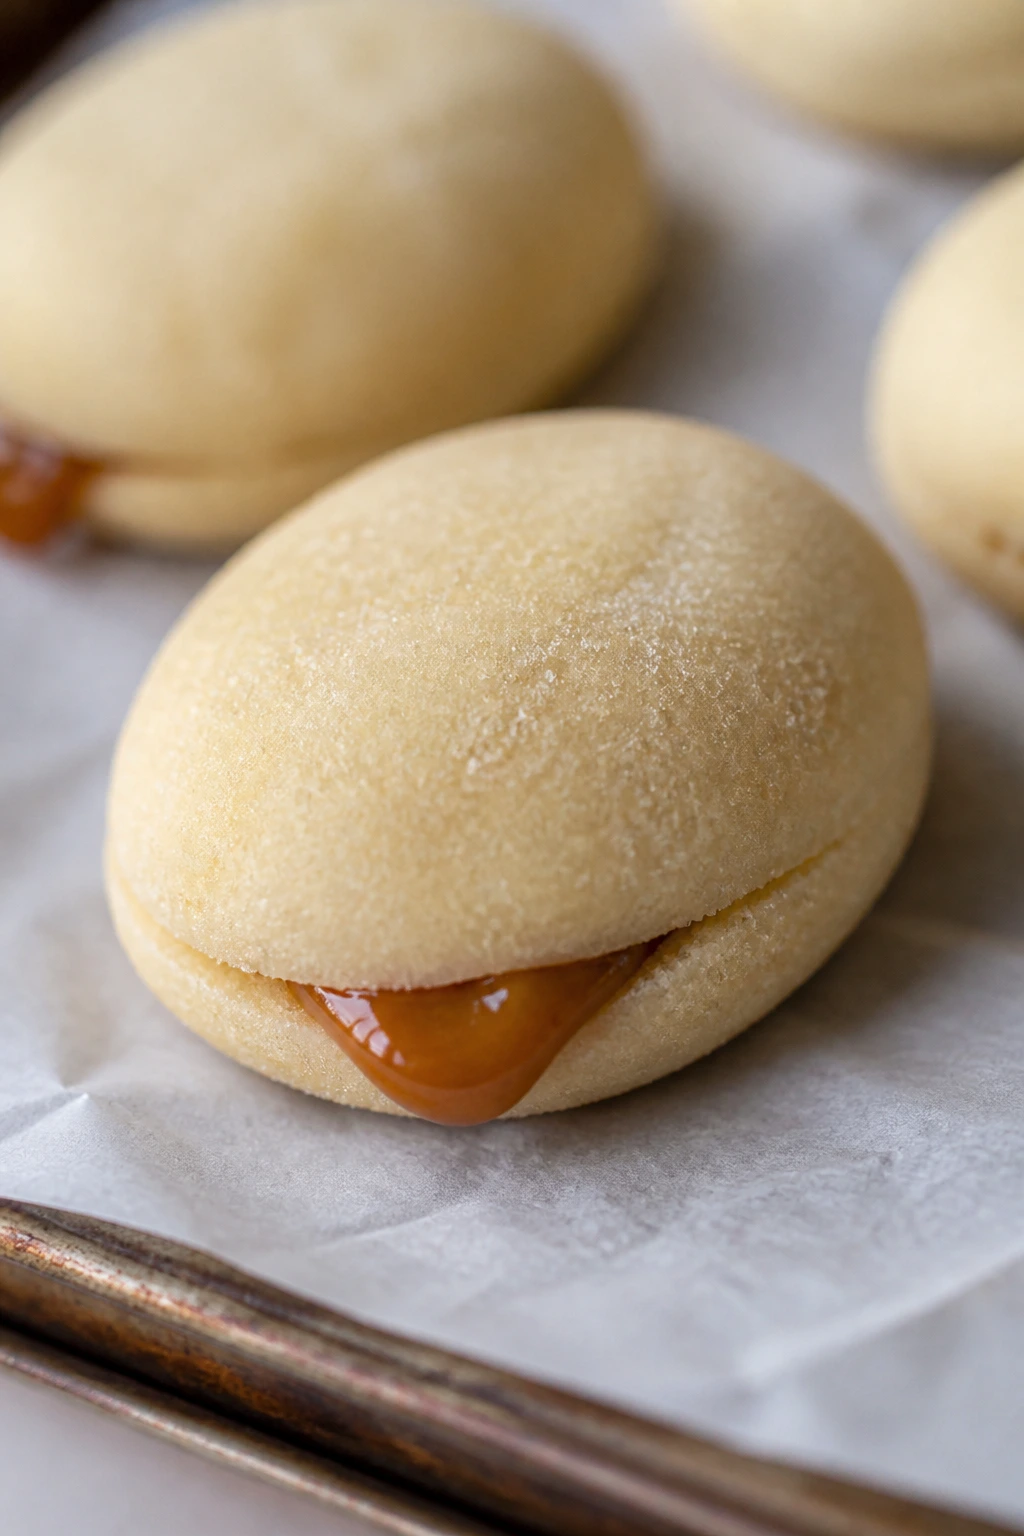
Intro: These are a little indulgent, and they should be. Butter-rich shortbread shaped like eggs, with a soft caramel center, makes for a cookie that feels more like a candy in disguise.
Why It Works: Shortbread gives you the crumbly shell, while the caramel center stays soft at room temperature. Egg shapes make the filling surprise feel seasonal rather than random.
Key Ingredients:
- 2 cups flour
- 1 cup butter
- ½ cup powdered sugar
- ½ teaspoon salt
- 1 teaspoon vanilla
- 24 soft caramel pieces
- 1 egg yolk for brushing
- Flaky salt, optional
Quick Steps:
- Make shortbread dough and chill it.
- Wrap dough around small caramel pieces into egg shapes.
- Brush with yolk and bake at 325°F for 14 to 16 minutes.
- Cool before moving; the caramel needs time to set.
Equipment for This Recipe: Parchment, sheet tray, cutter or hands, cooling rack.
How to Serve This Dish: Serve these at room temperature so the caramel stays soft but not runny. They’re best set apart from the iced cookies so they don’t get lost.
Pro Tips for This Recipe:
- Seal the dough well around the caramel.
- A tiny sprinkle of flaky salt makes them taste fuller.
Variations on This Dish: Chocolate Caramel Egg: add cocoa to the dough. Sea Salt Maple: swap vanilla for maple extract.
Common Mistakes to Avoid with This Recipe:
- Don’t leave gaps around the caramel.
- Don’t move them too early, or the filling leaks.
37. Funfetti Easter Cookies
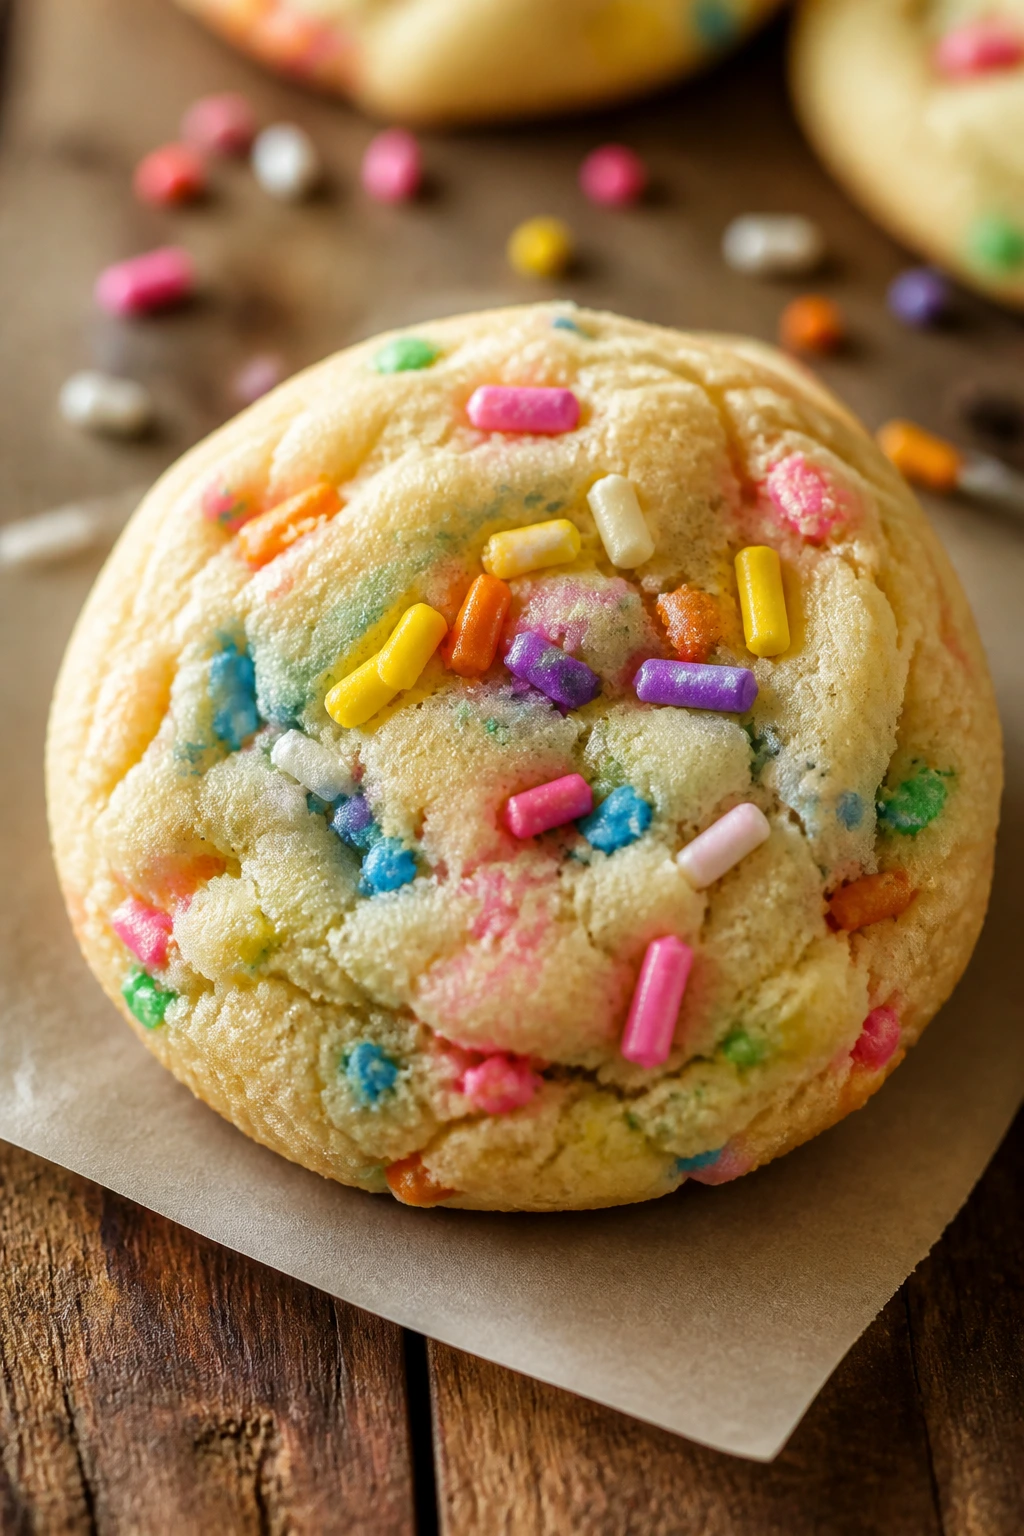
Intro: Rainbow sprinkles baked into soft vanilla cookies make them look like confetti caught in dough. They’re less refined than the glazed cookies, but they bring the kind of happy mess that Easter tables can use.
Why It Works: Sprinkles give color from the inside out, which means the cookie still looks festive even if you skip decoration. A soft center and crisp edge keep them from feeling one-dimensional.
Key Ingredients:
- 2¼ cups flour
- 1 cup butter
- ¾ cup sugar
- 1 egg
- 1 teaspoon vanilla
- 1 teaspoon baking powder
- ½ teaspoon salt
- ½ cup rainbow sprinkles
Quick Steps:
- Make a vanilla dough.
- Fold in sprinkles at the very end.
- Scoop and bake at 350°F for 10 minutes.
- Cool before stacking.
Equipment for This Recipe: Mixer, scoop, parchment, rack.
How to Serve This Dish: These work well in bowls for kids or tucked between the more polished cookies. They brighten the tray fast.
Pro Tips for This Recipe:
- Use jimmies, not tiny round nonpareils, so the color doesn’t bleed.
- Fold gently so the sprinkle colors stay bold.
Variations on This Recipe: Pastel Funfetti: use only pink, yellow, and mint sprinkles. Chocolate Funfetti: add white chips to the dough.
Common Mistakes to Avoid with This Recipe:
- Don’t overmix once the sprinkles go in.
- Don’t use watery icing unless you want the colors to smear.
38. Daffodil Flower Cookies
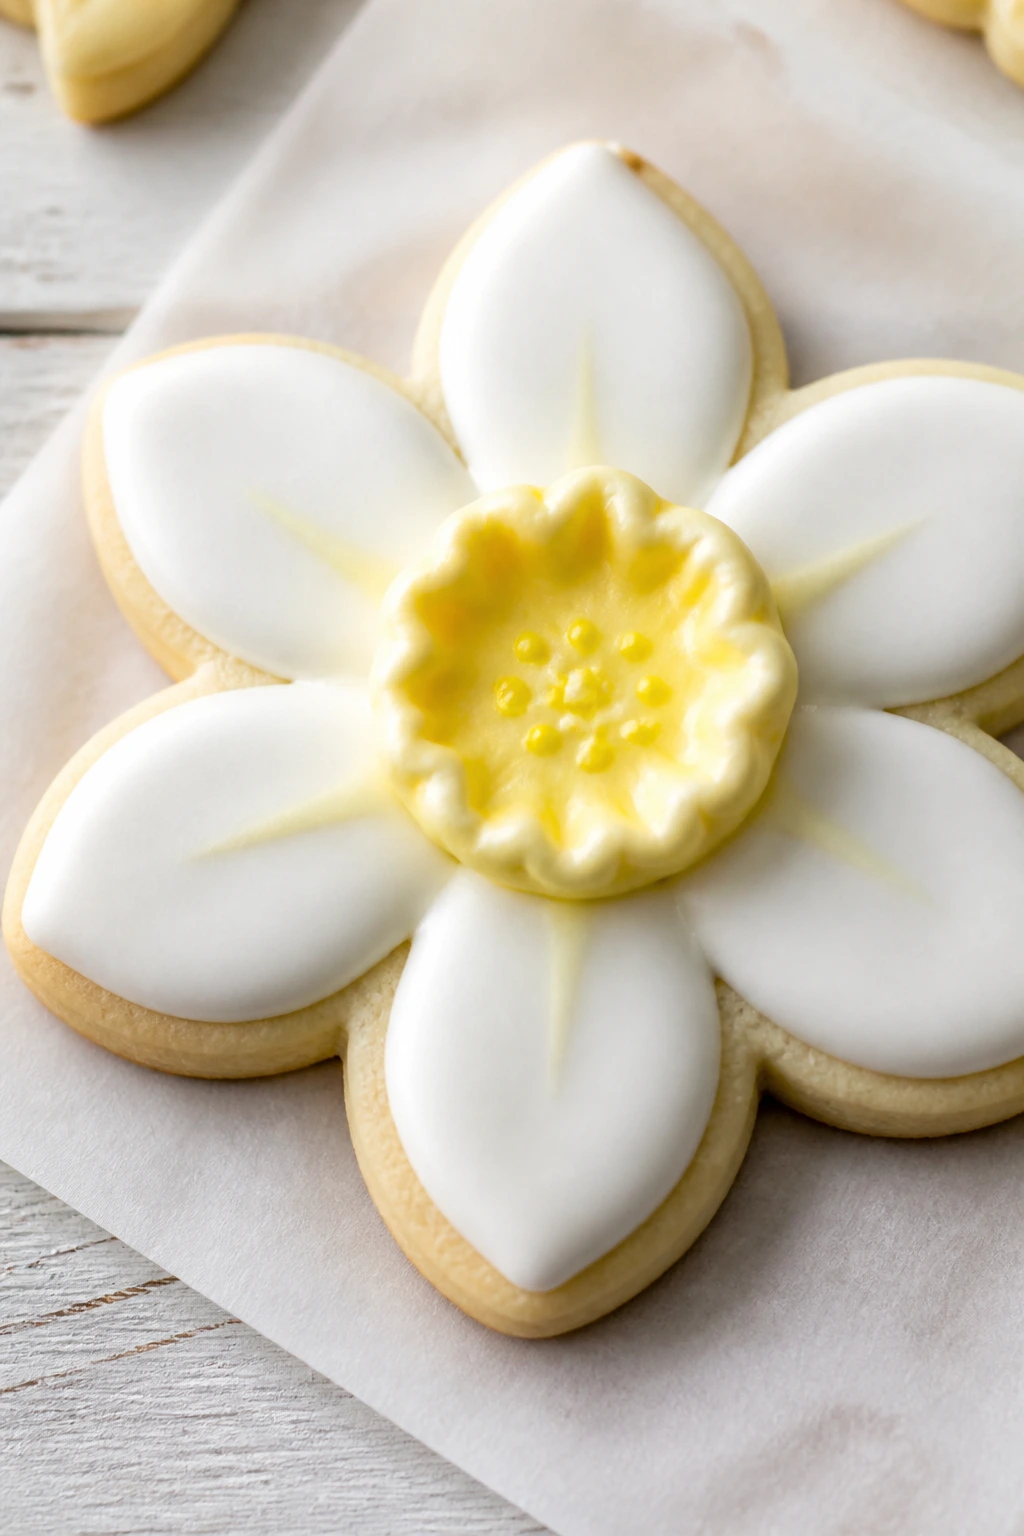
Intro: These are the cookies that most clearly belong on an Easter table without needing bunny ears or candy eggs. Flower-shaped cutouts, a yellow center, and a tidy piped edge make them look like spring on a plate.
Why It Works: A pale sugar cookie base gives the shape definition, and the flower design leaves room for color without crowding. They’re a clean choice if you like decorating but don’t want fussy details.
Key Ingredients:
- 2½ cups flour
- 1 cup butter
- ¾ cup sugar
- 1 egg
- 2 teaspoons vanilla
- 1 teaspoon baking powder
- ½ teaspoon salt
- Yellow and white icing
Quick Steps:
- Chill the dough well.
- Cut flower shapes and bake at 350°F for 9 to 11 minutes.
- Flood the centers with yellow icing and outline petals with white.
- Let dry fully before moving.
Equipment for This Recipe: Flower cutter, piping bags, small tips, sheet pans.
How to Serve This Dish: Cluster them in a bouquet-like arrangement, not a straight line. They do a lot of work visually.
Pro Tips for This Recipe:
- Use a pale cookie base so the colors stay bright.
- Let each color dry before adding the next.
Variations on This Dish: Sunflower Version: use gold and brown icing. Tulip Cookies: switch to a tulip-shaped cutter.
Common Mistakes to Avoid with This Recipe:
- Don’t rush the drying time.
- Don’t overload the petals with thick icing.
39. Salted Chocolate Toffee Cookies
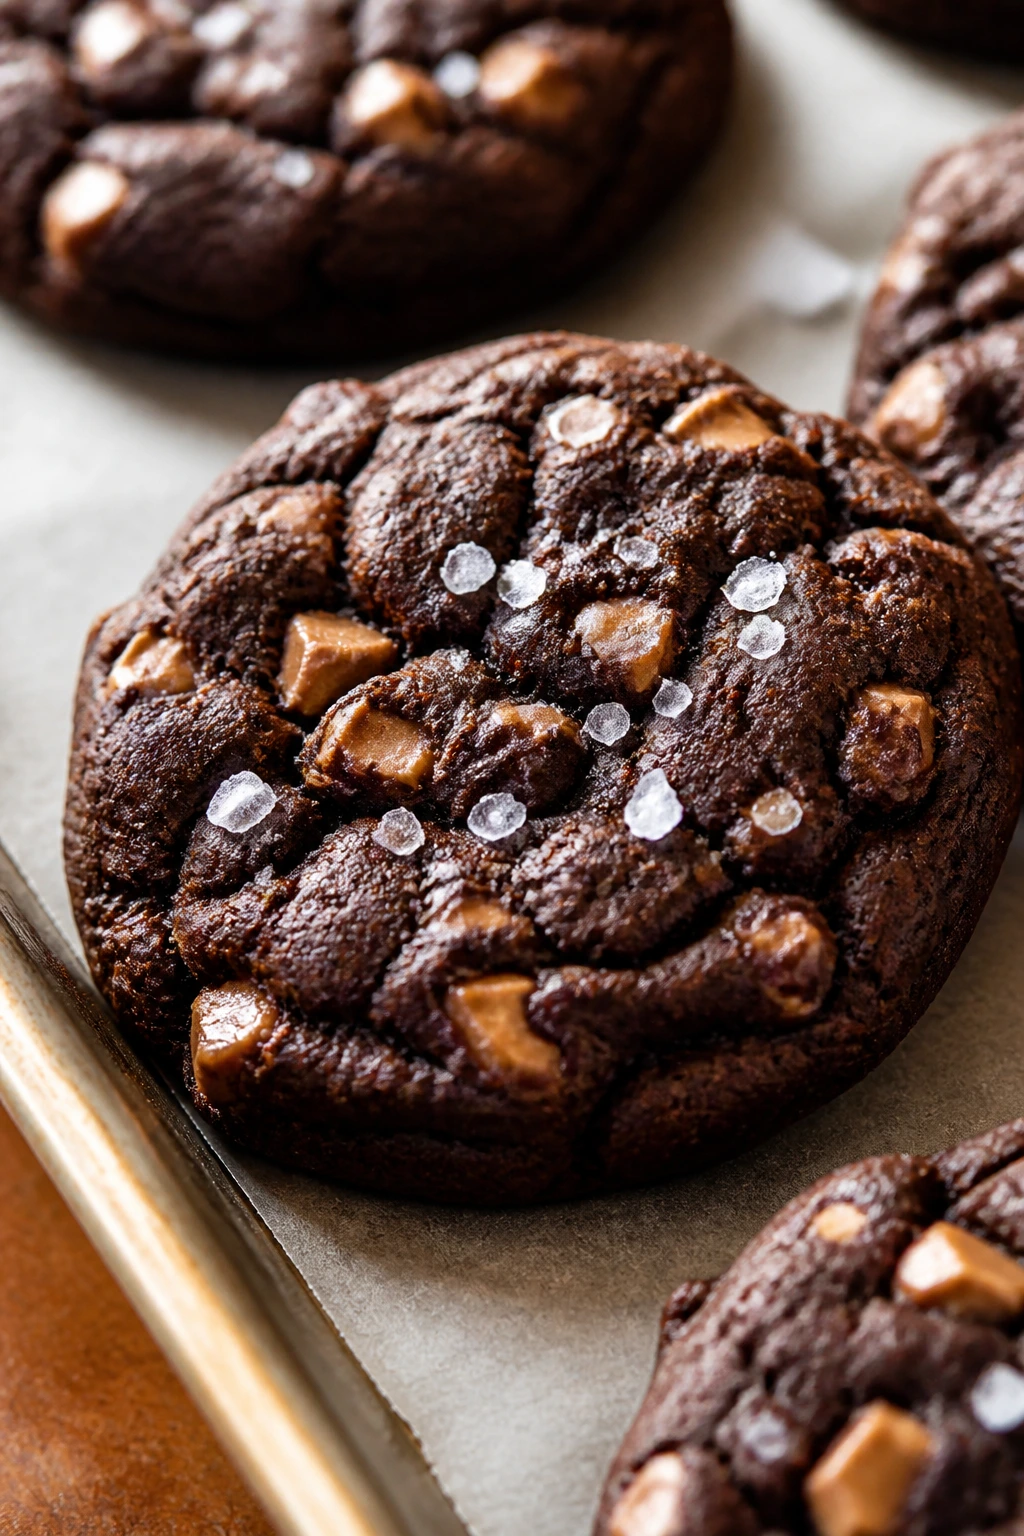
Intro: Rich chocolate, buttery toffee bits, and a few flakes of salt make these the darkest, deepest-flavored cookies in the bunch. They look elegant with almost no decoration, which is a nice relief.
Why It Works: Toffee brings crunch and a caramel note, while salt sharpens the chocolate so it doesn’t taste flat. A rough sprinkle of flaky salt on top gives the cookie a finished look.
Key Ingredients:
- 2 cups flour
- ½ cup cocoa powder
- 1 cup butter
- ¾ cup brown sugar
- 1 egg
- 1 teaspoon vanilla
- 1 teaspoon baking soda
- 1 cup toffee bits
- Flaky salt for topping
Quick Steps:
- Make chocolate dough and fold in toffee.
- Scoop and bake at 350°F for 10 minutes.
- Sprinkle with flaky salt while warm.
- Cool completely.
Equipment for This Recipe: Mixer, tray, scoop, rack.
How to Serve This Dish: Set these near the end of the tray after the lighter cookies, so the chocolate doesn’t visually swallow everything else. They’re best with coffee.
Pro Tips for This Recipe:
- Add the salt while the cookies are still hot.
- Use good toffee bits so they stay crisp.
Variations on This Dish: Espresso Chocolate: add 1 teaspoon instant espresso powder. Chocolate Orange: add orange zest.
Common Mistakes to Avoid with This Recipe:
- Don’t overbake; the toffee darkens fast.
- Don’t add too much salt unless you want a strong contrast.
40. Pastel Meringue Kisses
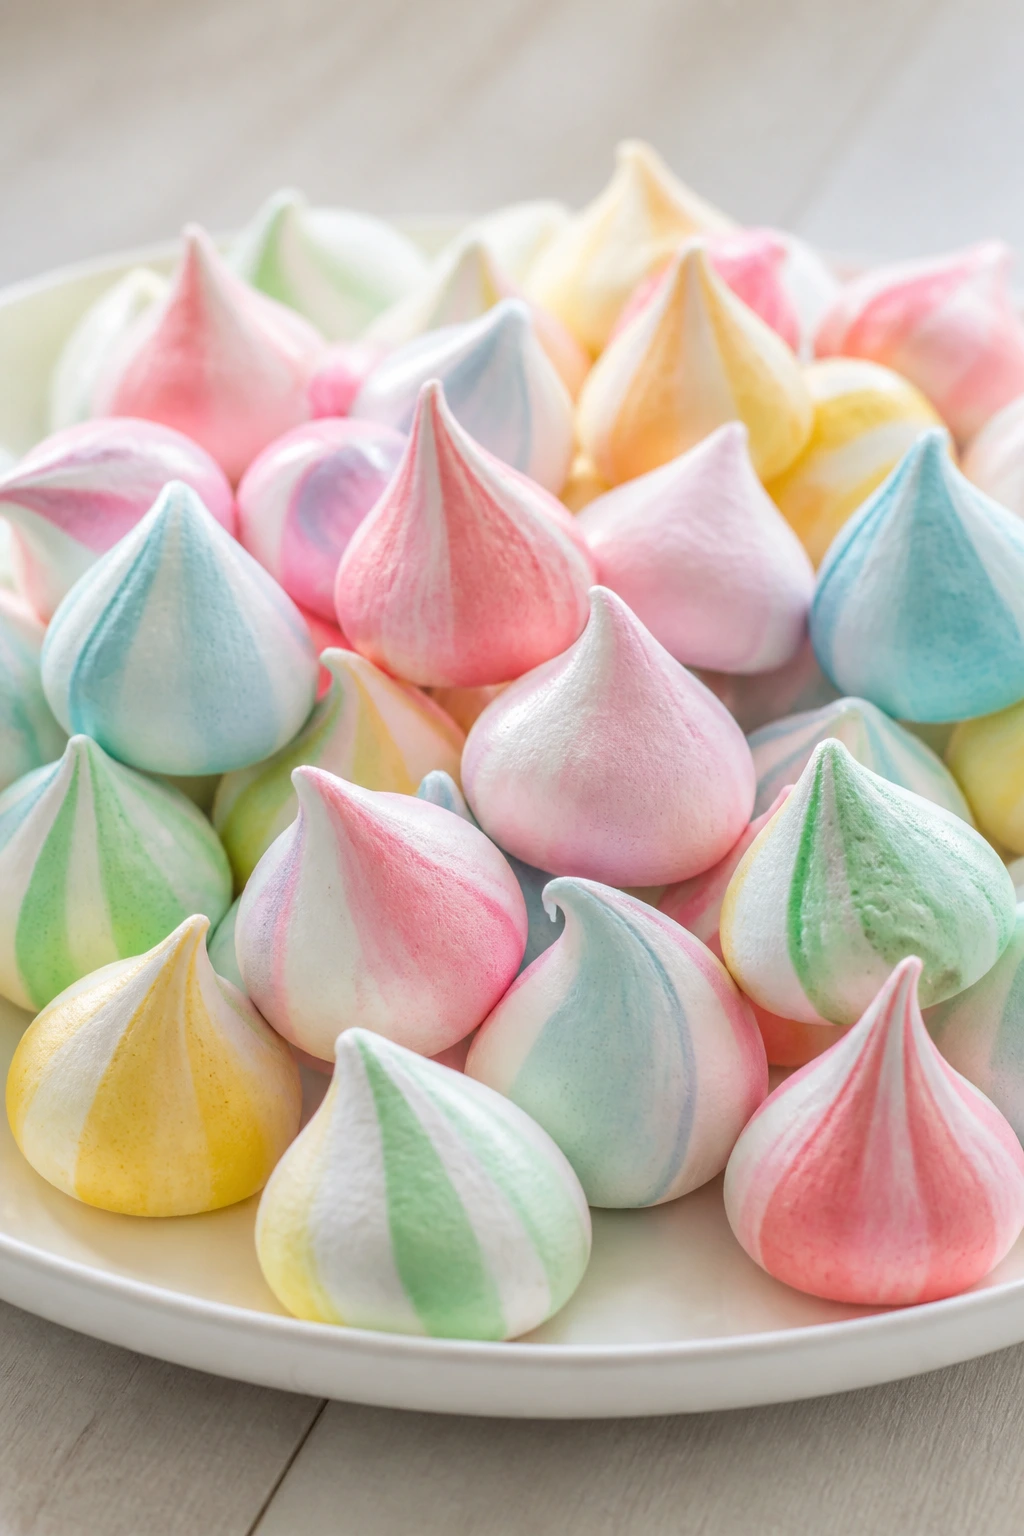
Intro: Light as air and striped in soft pink, mint, or yellow, these are the showpiece cookies that feel almost too fragile to touch. They’re crisp, sweet, and more decorative than substantial, which is sometimes exactly what a tray needs.
Why It Works: Meringue holds color beautifully and dries into tiny glossy clouds, so you get big visual payoff from egg whites and sugar alone. A low oven keeps them pale and crisp instead of browned.
Key Ingredients:
- 4 egg whites
- 1 cup superfine sugar
- ¼ teaspoon cream of tartar
- 1 teaspoon vanilla
- Gel food coloring in pastel shades
Quick Steps:
- Whip egg whites and cream of tartar to soft peaks.
- Add sugar slowly until stiff, glossy peaks form.
- Tint lightly and pipe small kisses.
- Bake at 200°F for 1½ to 2 hours, then cool in the oven.
Equipment for This Recipe: Stand mixer, piping bags, star tip, parchment, airtight storage tin.
How to Serve This Dish: Scatter them around heavier cookies rather than stacking them. They make the tray feel airy and delicate.
Pro Tips for This Recipe:
- Make sure the bowl is grease-free.
- Let them cool in the turned-off oven so they don’t crack.
Variations on This Dish: Speckled Kiss: flick with cocoa dust after cooling. Lemon Meringue: add a little lemon zest to the whites.
Common Mistakes to Avoid with This Recipe:
- Don’t make meringues on a humid day if you can help it.
- Don’t open the oven early.
Why a Mixed Tray Beats a Single Flavor Batch
A tray of Easter cookies looks better when it has a little tension in it. Soft and crisp. Bright and buttery. Iced and plain. If every cookie has the same texture and sweetness level, the plate goes flat fast, even if the decoration is perfect. That’s why the best spreads mix a few anchor cookies — usually one sugar cookie, one chocolate cookie, one fruit-forward cookie, and one oddball that people didn’t expect.
The other reason variety matters is simple: not every cookie holds the same job. A royal-iced bunny cookie gives you shape and color. A lemon thumbprint gives you brightness. A coconut nest gives you height. A biscotti gives the tray something dry and crisp so the soft cookies don’t all feel like cousins. That little bit of contrast makes the whole table taste more planned.
I also like that a mixed tray lets you cheat a little, in the nicest possible way. You can make one dependable dough and let it carry several shapes, then slip in a few lower-effort bakes like thumbprints or meringue kisses. Nobody at the table is grading your technique. They’re looking for something pretty, something sweet, and something they’ll remember when they open the cookie tin later.
Essential Equipment for These Cookies
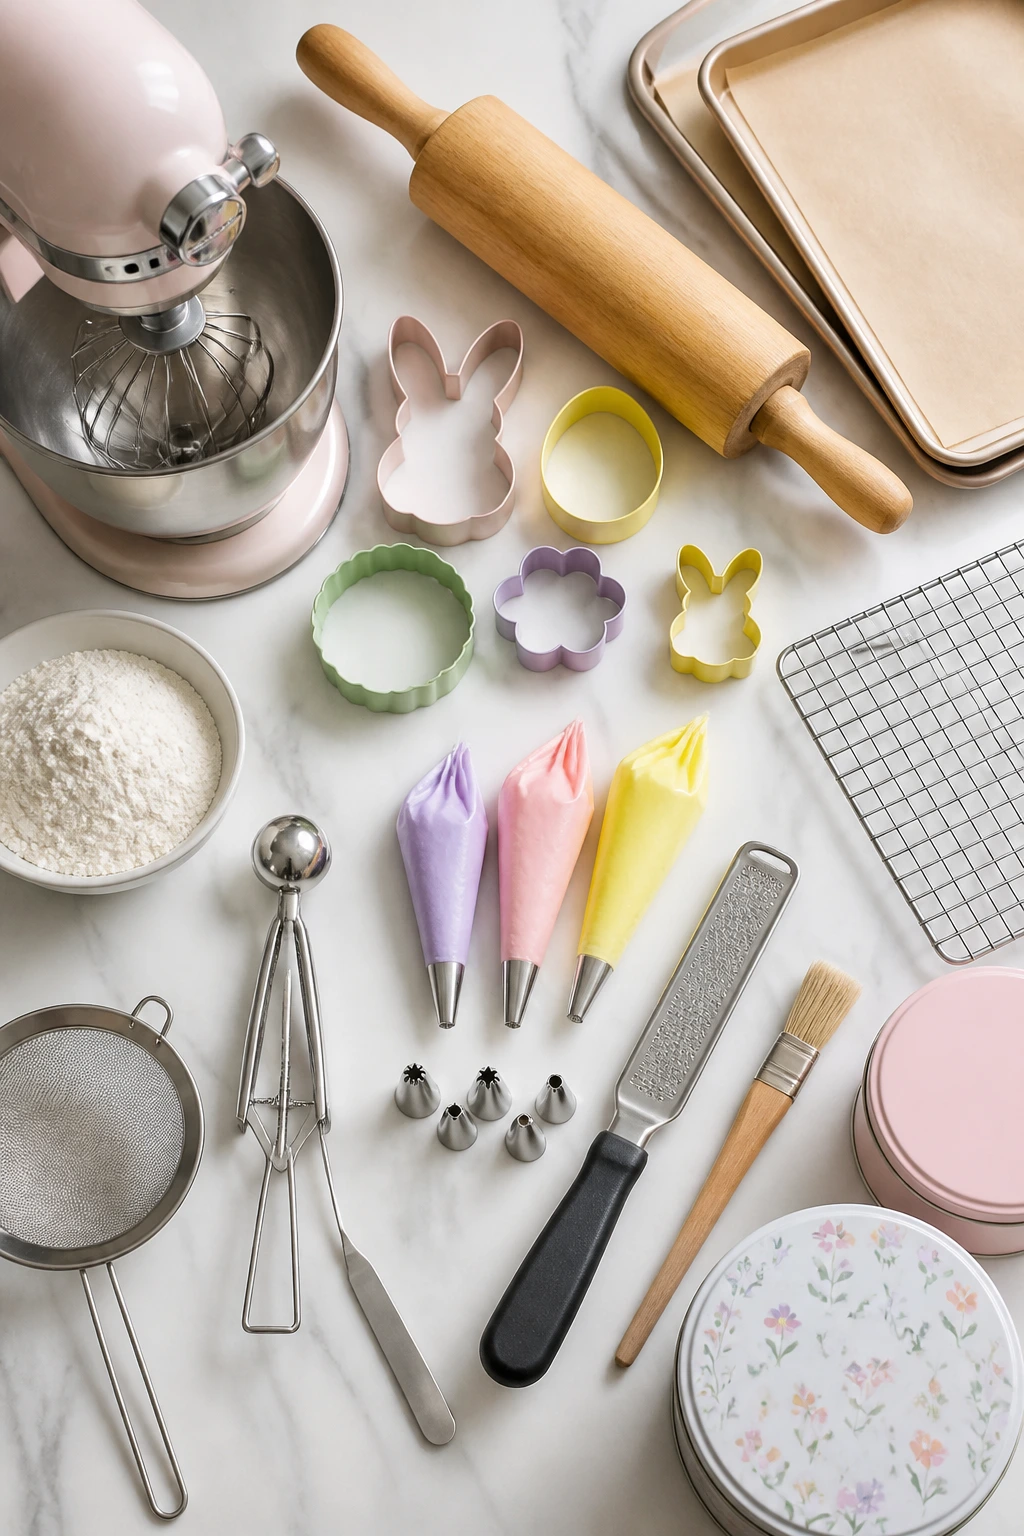
- Stand mixer or hand mixer: Helps with sugar cookie dough, buttercream, meringue, and stiff royal icing.
- Rolling pin: Needed for cutouts, linzer cookies, and slice-and-bake logs.
- Cookie cutters in bunny, egg, flower, and round shapes: The fastest way to make the tray look intentional.
- Sheet pans with parchment paper: Keeps delicate cookies from sticking and makes cleanup easier.
- Cooling racks: Let cookies set before glazing, filling, or stacking.
- Piping bags and small round or star tips: Useful for royal icing, buttercream, and tiny decorative details.
- Microplane or fine grater: Best for lemon zest, orange zest, and nutmeg.
- Cookie scoop: Keeps drop cookies the same size so they bake evenly.
- Offset spatula: Handy for glaze, frosting, and lifting delicate cookies.
- Airtight tins or containers: Important for keeping plain cookies crisp and soft cookies from drying out.
- Sifter: Helpful for powdered sugar, cocoa, and matcha.
- Food-safe brush: Good for speckling, glossing, or brushing on glaze.
Smart Shopping and Ingredient Tips
For Easter cookies, the smartest shopping choice is usually the simplest one: buy ingredients that behave predictably. That means unsalted butter with a short ingredient list, fresh eggs, good vanilla, and flour that’s not been sitting in a warm pantry forever. Butter gives you flavor and structure; old butter can pick up odd fridge smells that show up in plain cookies faster than you’d expect.
If you’re decorating, look closely at the icing ingredients. Royal icing made with meringue powder is easier to manage than raw-egg-white icing if you’re making a big batch or sharing the cookies outside your kitchen. Gel food coloring beats liquid color almost every time, because liquid thins the icing and makes bright shades harder to control. For pastel Easter shades, you need only a tiny dab anyway.
A few ingredients are worth spending a little more on. Real maple syrup tastes deeper than pancake syrup. Good cocoa powder gives chocolate cookies more color and less bitterness. Freeze-dried fruit is useful for color and flavor without adding extra moisture. And if you’re buying candy eggs, check the coating; some brands have a waxy shell that looks fine but eats a little dull.
How to Serve These Cookies
Presentation: Build the tray in layers of texture, not just color. Put the flat iced cookies toward the back, the nests and sandwich cookies in the middle, and the meringues or biscotti around the edges so the tallest pieces don’t hide everything else.
Accompaniments: Serve these with black tea, coffee, milk, lemon curd, fresh strawberries, or a few chocolate eggs. If the tray leans very sweet, a bowl of berries or sliced citrus helps reset the palate.
Portions: Plan on 2 to 4 cookies per person if you’re serving a mixed dessert spread, or 5 to 6 if cookies are the whole point. I’d make at least 3 distinct textures for a medium-sized gathering so nobody ends up with four versions of the same sweet thing.
Beverage Pairing: Earl Grey fits the floral and citrus cookies; coffee works with chocolate, toffee, and peanut butter; sparkling lemonade is a nice match for lemon and berry cookies.
Additional Tips and Flavor Boosters
Flavor Enhancement: A pinch of citrus zest in plain sugar-cookie dough changes the whole tray. Lemon for bunnies, orange for spice cookies, and a little almond for cutouts that need more depth.
Customization: Use the same vanilla sugar cookie base for several shapes, then split the dough and add cocoa, matcha, or freeze-dried strawberry powder to different portions. That trick gives you a mixed tray without making 10 separate doughs.
Serving Suggestions: Finish cookies with sanding sugar, edible glitter, crushed pistachios, toasted coconut, or a tiny brush of jam on the back of candy eggs. Small touches matter more than elaborate piping when the cookies already have good shape.
Make-It-Yours: For a dairy-free tray, use plant butter in the sugar cookies and coconut cream or dairy-free frosting in the filled cookies. For gluten-free baking, swap in a reliable cup-for-cup blend for the cutouts and the thumbprints first; those are the easiest to manage.
Make-Ahead, Storage, and Reheating Guidance

Plain sugar-cookie dough, shortbread dough, and many slice-and-bake logs can be made 2 to 3 days ahead and kept wrapped in the fridge. Most doughs also freeze well for up to 2 months, tightly wrapped and tucked into a freezer bag. If you freeze cut shapes on a tray first, then bag them, you can bake them straight from chilled with an extra minute or two in the oven.
Decorated cookies need a little more care. Royal-iced cookies should dry fully before stacking, then keep in a single layer or between sheets of parchment for 3 to 5 days at cool room temperature. Buttercream and cream cheese filled cookies belong in the fridge and are best eaten within 3 to 4 days. Bring them back to room temperature before serving so the texture softens again.
Crisp cookies like biscotti and lace cookies stay best in airtight tins with a dry paper towel underneath to catch stray moisture. Meringues need the driest container you have, and they hate humidity. If they soften, a low oven for a few minutes can help, but prevention is easier than rescue. Cookies with jam centers or soft fillings should not be left out all day in warm rooms; keep the food safety side sensible and the texture will follow.
Variations and Adaptations to Try
Gluten-Free Cutout Tray: Use a good 1:1 baking blend in the bunny, egg, flower, and round sugar cookies. Chill the dough a little longer, because gluten-free dough usually benefits from a firmer rest before rolling.
Dairy-Free Easter Box: Swap plant butter into the sugar cookies and shortbread, then use dairy-free chocolate and coconut-based frosting for the nests and dipped cookies. The texture changes a bit, but the tray still looks festive.
Lower-Sugar Mix: Lean harder on biscotti, tahini cookies, and almond shortbread, then use a thin glaze or a light dusting of powdered sugar instead of thick frosting. The tray stays pretty without every cookie being a sugar hit.
Kid-Decorating Set: Keep one tray of plain bunny or egg cutouts, then set out bowls of sprinkles, mini eggs, and simple glaze. Kids do better with a few large decorating choices than a dozen tiny ones.
Brunch Table Version: Focus on lemon poppy seed, Earl Grey, orange olive oil, biscotti, and ricotta cookies. That combination feels lighter and pairs better with coffee, fruit, and savory food.
Chocolate-Forward Spread: If your crowd prefers deeper flavors, double up on chocolate nest cookies, cocoa egg cookies, salted chocolate toffee cookies, and peanut butter egg cookies. Pastel color still fits as long as the shapes stay Easter-specific.
Common Mistakes to Avoid
The first mistake is baking a tray that is all one texture. It sounds safe, but it makes the cookies blur together. If every cookie is soft, sweet, and round, the platter starts to feel smaller than it is. Mix in at least one crisp cookie and one filled cookie.
The second mistake is decorating before the cookie is ready. Warm cookies smear icing, soft cookies collapse under heavy toppings, and meringues pull in moisture if you rush them. Cooling isn’t a formality. It’s part of the recipe.
The third mistake is ignoring thickness. Cutout cookies rolled too thin bake brittle; cookies rolled too thick lose their shape and can taste underbaked in the middle. For most of the decorated cookies here, ¼ inch is the sweet spot. Close enough matters.
Humidity is the fourth problem, and it hits meringues, royal icing, and crisp cookies harder than people expect. If the air is damp, dry cookies soften and piped details lose their clean edges. Use airtight containers, let decorated cookies dry overnight if needed, and don’t stack anything fragile until you’re certain it has set.
Frequently Asked Questions
Can I make the cookie doughs ahead of time?
Yes. Sugar cookie, shortbread, and slice-and-bake doughs can usually rest in the fridge for 2 to 3 days, and many freeze well for up to 2 months. Just wrap them tightly so they don’t pick up fridge smells or dry out at the edges.
Which cookies should I bake first if I’m short on time?
Start with the bunny sugar cookies, lemon thumbprints, chocolate chip bird’s nests, and orange olive oil cookies. Those give you a pretty tray without a lot of piping or waiting for icing to dry.
What’s the best cookie for kids to decorate?
The egg sugar cookies and bunny cutouts are easiest. Give kids glaze, sprinkles, and candy eggs instead of royal icing if you want less mess and faster setting time.
Can I use one dough for several shapes?
Absolutely. Vanilla sugar cookie dough is the easiest base to reuse for bunnies, eggs, flowers, and round sandwich cookies. If you want visual variety, split the dough and tint or flavor each portion a little differently.
How do I keep royal icing from looking dull?
Use gel color, let the icing dry in a single layer, and keep the cookies away from steam or humidity. A glossy finish usually comes from the right icing thickness and enough drying time, not from extra sugar.
What if my cookies spread too much?
The dough was probably too warm, too wet, or not chilled long enough. Chill the cut shapes before baking, and if a batch still spreads, add a tablespoon or two more flour to the next round.
Are these cookies okay to ship or gift?
Yes, but choose the sturdier ones: biscotti, shortbread, sugar cutouts, thumbprints, and chocolate chip nests. Pack fragile cookies like meringues and lace cookies separately, because they break if they rub against anything else.
Which cookies stay fresh the longest?
Biscotti, shortbread, and plain sugar cookies hold up best. Filled cookies and cream cheese sandwiches need refrigeration, and meringues are the fussiest of the bunch.
A Tray Worth Setting Out
The nicest thing about Easter cookies is that they let you decide how formal you want to be. You can go all in on royal icing and pastel color, or keep the tray soft and understated with shortbread, lemon, and a few well-placed candy eggs. Either way, the cookies should look like they were made by a person who cared about the details.
That’s the part that makes a tray memorable. Not perfection. Care. A clean edge on the cutout. A jam center that stays in the middle. Coconut browned just enough at the edges. A little contrast, a little restraint, and one or two cookies that make people reach across the table before they’ve even finished the one in their hand.