
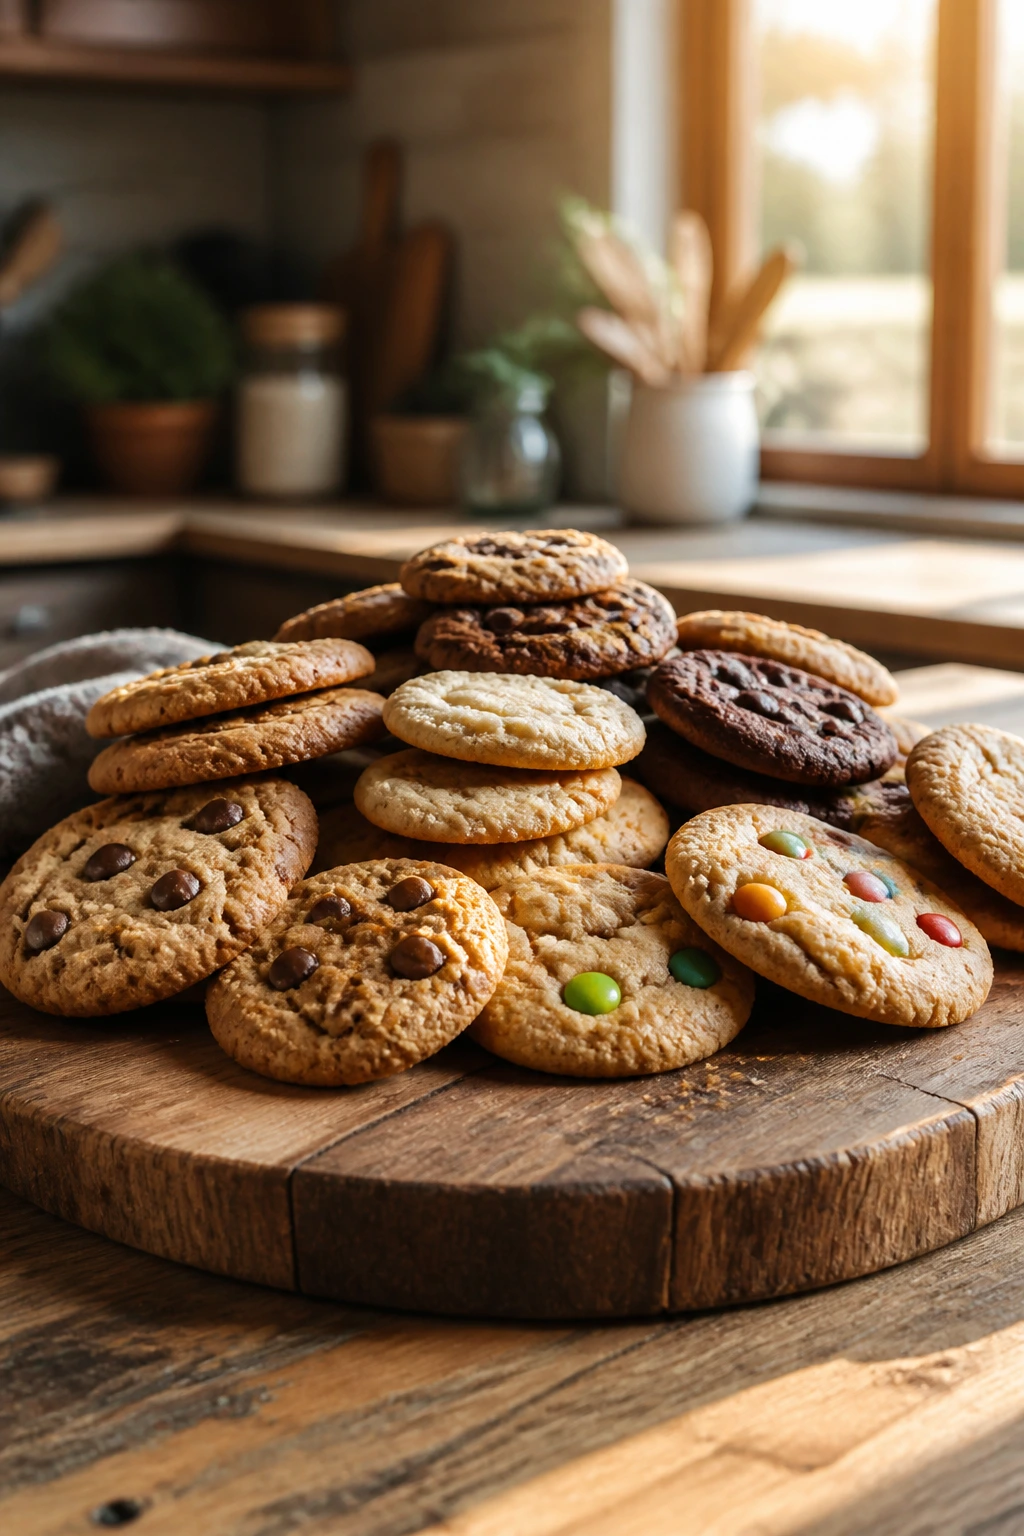
A child does not need a giant mixer, a pastry diploma, or a spotless kitchen to make a cookie that tastes worth eating. A bowl, a spoon, a measured pile of flour, and a recipe that forgives a slightly uneven scoop are enough. That’s why cookies kids can make for beginner bakers should be built around simple moves: stir, scoop, flatten, bake, cool.
The best beginner cookie recipes are the ones that teach a real skill without turning the counter into a disaster zone. You want doughs that come together without drama, batches that bake in a short window, and finishes that look cheerful even when the circles are a little lopsided. A rough edge can be charming. A dry, overbaked tray is not.
There’s also something quietly useful about cookies as a first bake. Kids learn what softened butter looks like, how a dough changes after flour goes in, why a tray needs parchment, and what “golden at the edges” actually means. Those are the habits that stick. The sprinkles are the fun part, but the measuring is where the real lesson lives.
Why You’ll Love This Cookie Collection
- Low-stress methods: Most of these recipes use a one-bowl stir, a basic cream-and-mix method, or a no-bake stir-and-chill setup, so the process stays clear from the first ingredient to the last tray.
- Short bake times: A lot of the cookies here finish in 8 to 12 minutes, which means kids get a fast reward and you spend less time hovering in front of the oven.
- Ingredient overlap: Butter, sugar, flour, oats, peanut butter, cocoa, and chocolate show up again and again, so the shopping list stays practical instead of sprawling.
- Real kitchen skills: Rolling, scooping, flattening, dipping, and drizzling all show up in this set, so beginners pick up useful techniques without being buried in hard steps.
- Room for personality: Sprinkles, jam centers, chocolate chips, cinnamon sugar, and powdered sugar finishes let kids make each tray look like theirs, even when the base dough is simple.
- Flexible for helpers: Several of these cookies work with a parent handling the oven while a child measures, stirs, or shapes the dough on the counter.
1. Classic Chocolate Chip Drop Cookies

These are the first cookies a lot of kids remember making because the dough is forgiving and the result looks familiar even when the scoops are uneven. The smell of butter, brown sugar, and melting chocolate is half the appeal.
Why It Works:
The dough uses both brown sugar and white sugar, which gives the cookie a soft center with lightly crisp edges. Baking soda helps the cookies spread just enough, and the chocolate chips keep the middle from drying out.
Key Ingredients:
- 1/2 cup unsalted butter, softened to room temperature
- 1/2 cup packed light brown sugar
- 1/4 cup granulated sugar
- 1 large egg
- 1 teaspoon vanilla extract
- 1 1/2 cups all-purpose flour
- 1/2 teaspoon baking soda
- 1/2 teaspoon fine salt
- 1 cup semisweet chocolate chips
Quick Steps:
- Preheat the oven to 350°F and line two baking sheets with parchment paper.
- Cream the butter, brown sugar, and granulated sugar until the mixture looks pale and fluffy, about 2 minutes.
- Beat in the egg and vanilla, then stir in the flour, baking soda, and salt until the dough just comes together.
- Fold in the chocolate chips, scoop 2-tablespoon mounds onto the sheets, and bake for 9 to 11 minutes, until the edges are golden and the centers still look slightly soft.
Equipment for This Recipe:
- Mixing bowl
- Hand mixer or sturdy wooden spoon
- Cookie sheet lined with parchment
- 2-tablespoon scoop or measuring spoon
How to Serve This Dish:
Serve these warm with cold milk, or stack them on a plate and let them cool completely for lunchbox packing. They also sit nicely next to vanilla ice cream if you want a warm cookie-and-scoop situation.
Pro Tips for This Recipe:
- Chill the scooped dough for 15 minutes if the butter felt very soft going in.
- Use chips, chunks, or a mix; chunks melt into bigger puddles.
- Pull the tray when the centers still look a little underdone. They keep cooking on the sheet.
Variations on This Dish:
- Double Chocolate Swap: Replace 1/4 cup of the flour with unsweetened cocoa for a darker dough.
- Mini Chip Version: Use mini chips for more chocolate in every bite and easier scooping for small hands.
Common Mistakes to Avoid with This Dish:
- Overmixing after the flour goes in: The dough turns tough and the cookies bake up dense. Stop as soon as the flour disappears.
- Baking until the whole cookie looks firm: That leads to dry centers. Look for set edges and soft middles.
2. Peanut Butter Blossoms
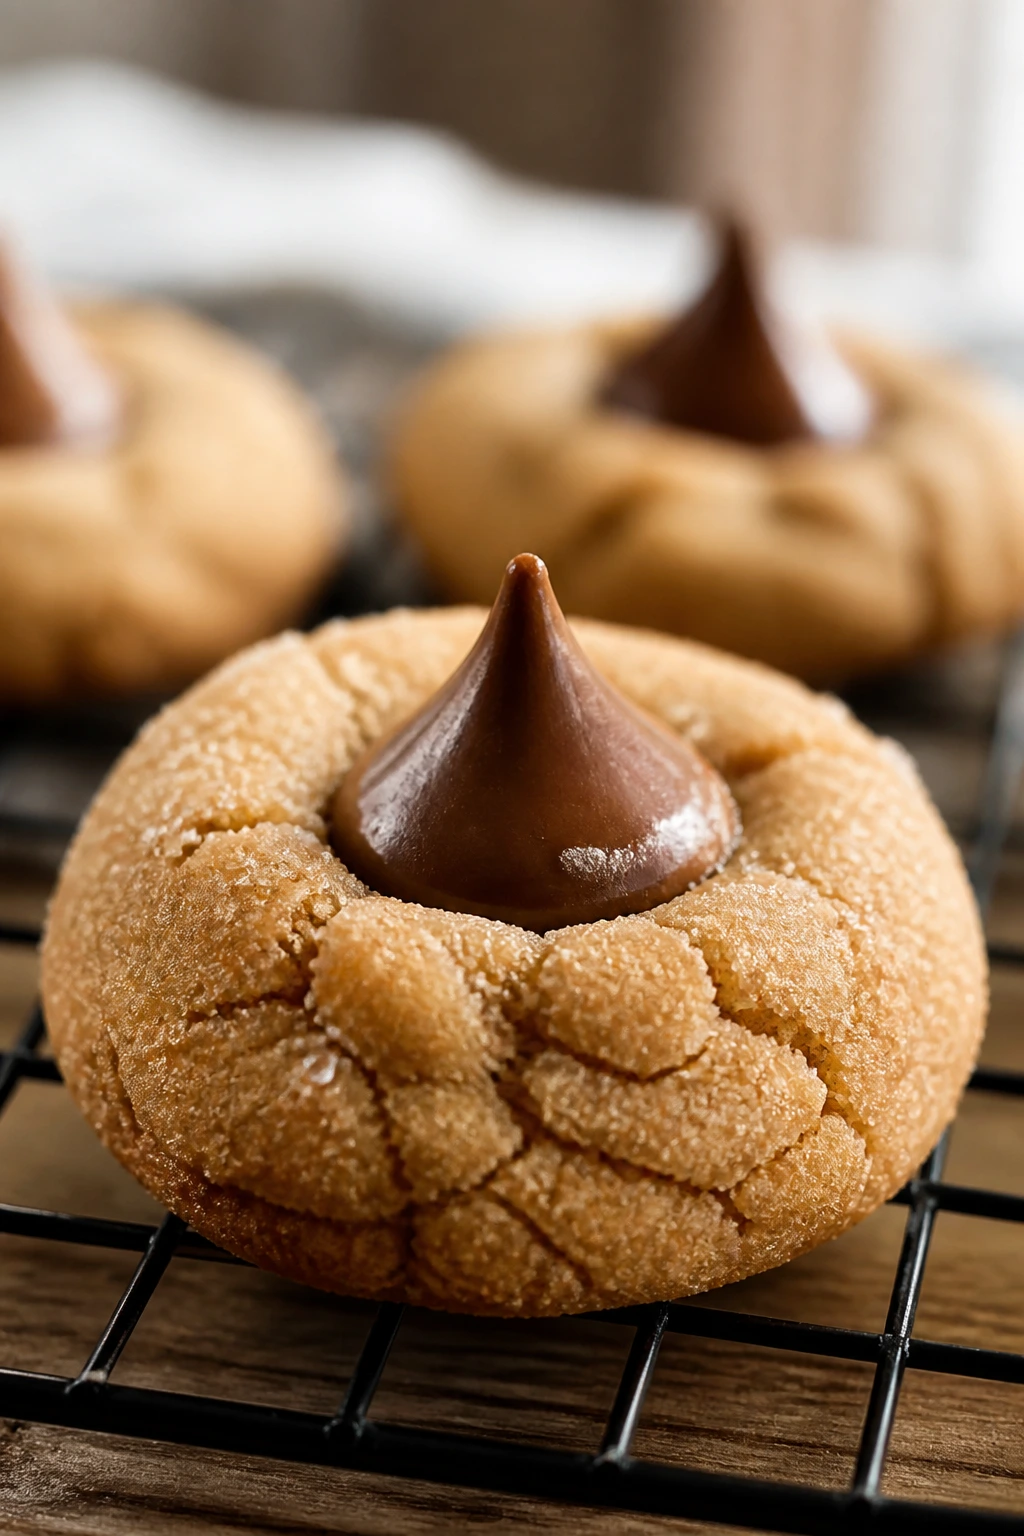
The Hershey’s Kiss in the middle turns a simple peanut butter cookie into something a kid can spot from across the room. The center melts just enough to make the top look a little dramatic.
Why It Works:
Peanut butter gives these cookies a dense, sandy crumb that holds its shape well. Rolling the dough in sugar adds a little sparkle and gives the outside a faint crunch.
Key Ingredients:
- 1/2 cup unsalted butter, softened
- 1/2 cup creamy peanut butter
- 1/2 cup granulated sugar
- 1/2 cup packed light brown sugar
- 1 large egg
- 1 teaspoon vanilla extract
- 1 3/4 cups all-purpose flour
- 1 teaspoon baking soda
- 1/4 teaspoon salt
- 36 chocolate kisses, unwrapped
- Extra granulated sugar for rolling
Quick Steps:
- Heat the oven to 375°F and line baking sheets with parchment.
- Beat the butter, peanut butter, sugars, egg, and vanilla until smooth.
- Mix in the flour, baking soda, and salt, then roll the dough into 1-inch balls.
- Roll each ball in sugar, bake for 8 to 10 minutes, and press a Kiss into the center as soon as the cookies come out of the oven.
Equipment for This Recipe:
- Mixing bowl
- Hand mixer
- Baking sheets
- Small bowl for rolling sugar
How to Serve This Dish:
Pile them on a cookie tray for a birthday spread or tuck them into a tin once they cool. They’re rich enough that one or two with a glass of milk feels like a full dessert moment.
Pro Tips for This Recipe:
- Unwrap the Kisses before you start baking. Nobody wants sticky fingers at the end.
- Press the Kiss in gently; if you shove too hard, the cookie cracks badly.
- If the dough feels sticky, chill it for 20 minutes before rolling.
Variations on This Dish:
- Mini Cup Center: Press a miniature peanut butter cup into the middle instead of a Kiss.
- Gluten-Free Batch: Use a 1:1 gluten-free flour blend and let the dough rest 10 minutes before scooping.
Common Mistakes to Avoid with This Dish:
- Pressing the Kiss too early: It melts into a blob. Wait until the cookies leave the oven.
- Using crunchy peanut butter without adjusting expectations: The dough will be less smooth and can crack more. Creamy peanut butter gives the cleanest texture.
3. Snickerdoodles
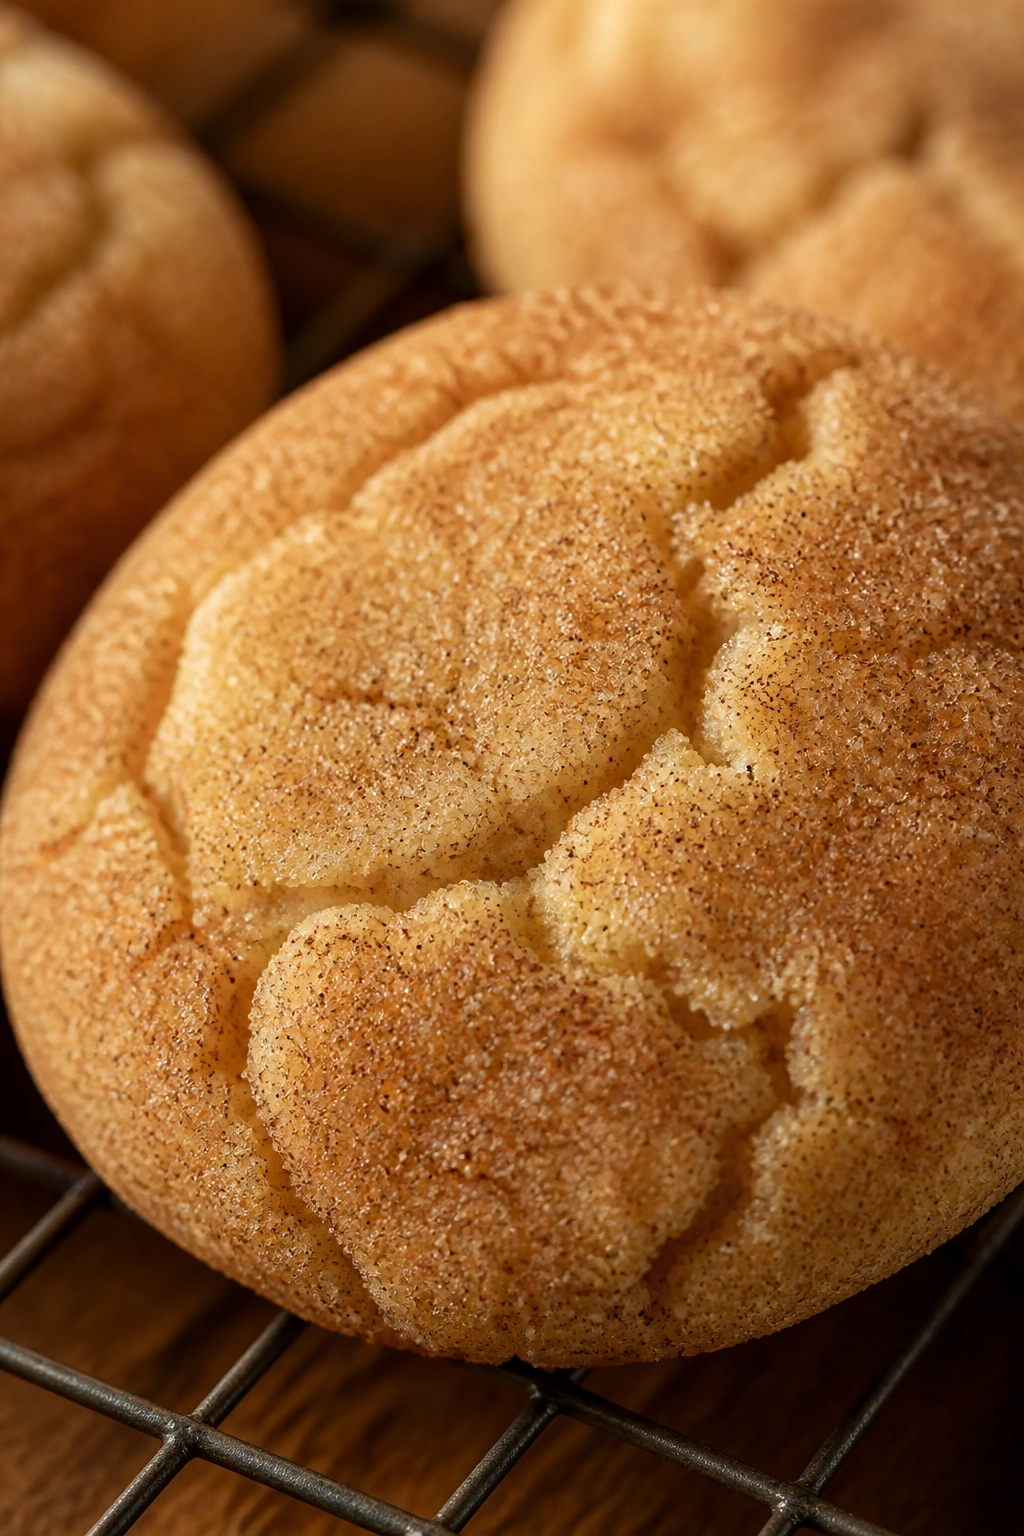
Snickerdoodles are the cookie version of a sugar-dusted pillow. They smell like cinnamon toast while they bake, and the tang from cream of tartar keeps the flavor from tasting flat.
Why It Works:
Cream of tartar gives snickerdoodles their small tang and chewy bite. Rolling the dough in cinnamon sugar before baking creates the crackly coating that makes these cookies so easy to recognize.
Key Ingredients:
- 1/2 cup unsalted butter, softened
- 3/4 cup granulated sugar
- 1 large egg
- 1 teaspoon vanilla extract
- 1 1/2 cups all-purpose flour
- 1/2 teaspoon cream of tartar
- 1/4 teaspoon baking soda
- 1/4 teaspoon salt
- 2 tablespoons granulated sugar mixed with 1 tablespoon cinnamon for rolling
Quick Steps:
- Preheat the oven to 375°F and line baking sheets with parchment paper.
- Cream the butter and sugar, then beat in the egg and vanilla.
- Stir in the flour, cream of tartar, baking soda, and salt until the dough forms.
- Roll into balls, coat in cinnamon sugar, and bake for 8 to 10 minutes until the tops are crackled and the edges are just set.
Equipment for This Recipe:
- Mixing bowl
- Measuring cups and spoons
- Cookie sheet
- Small bowl for cinnamon sugar
How to Serve This Dish:
These are excellent on their own, but they also sit nicely beside sliced apples if you’re serving a snack plate. The cookies are best once the heat leaves them and the cinnamon smell settles down a little.
Pro Tips for This Recipe:
- Don’t skip the cream of tartar; that’s the snickerdoodle flavor line.
- Roll the dough balls evenly so the cookies bake at the same speed.
- Pull them early. Snickerdoodles go dry fast if you wait for dark edges.
Variations on This Dish:
- Brown Sugar Snickerdoodles: Replace 1/4 cup of the white sugar with brown sugar for a deeper flavor.
- Pumpkin Spice Roll: Add 1 teaspoon pumpkin spice to the rolling sugar for a warmer finish.
Common Mistakes to Avoid with This Dish:
- Using baking powder instead of cream of tartar and baking soda: The cookies lose their classic tang and chew.
- Overcrowding the tray: They spread enough to need space.
4. Oatmeal Raisin Cookies
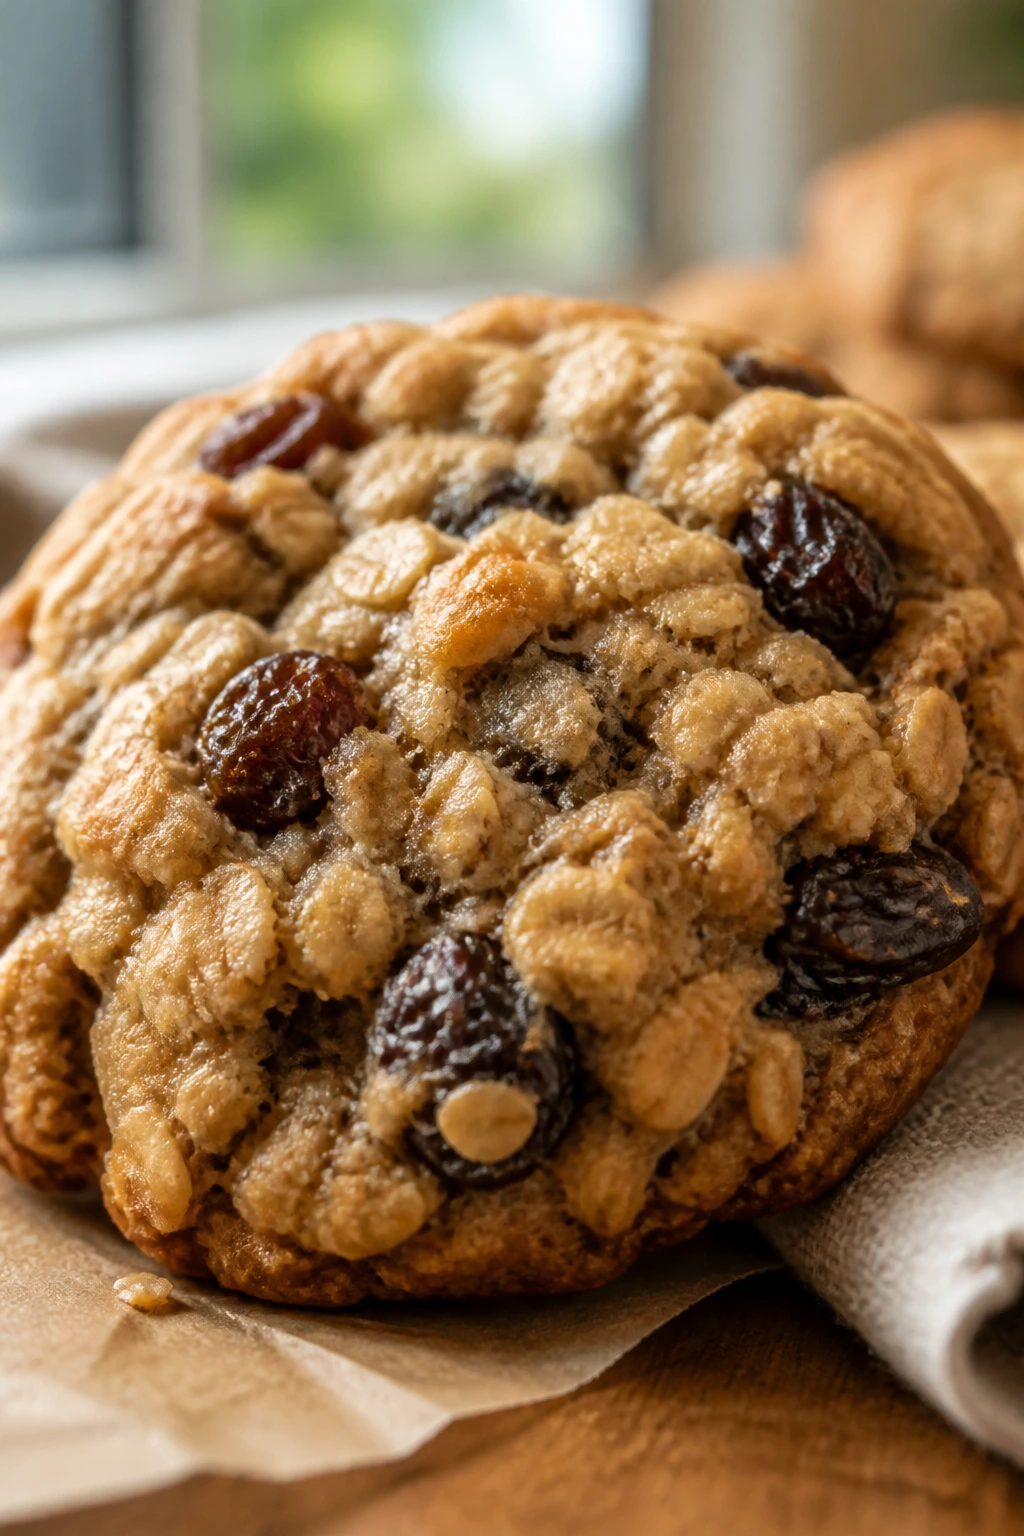
These are the cookies that feel a little more substantial than the usual sugar cookie, with chewy oats and softened raisins in every bite. The dough smells like cinnamon, brown sugar, and toast.
Why It Works:
Oats add chew and keep the cookies from tasting too sweet. Raisins soften as they bake, which means they blend into the dough instead of sitting there like dry little pebbles.
Key Ingredients:
- 1/2 cup unsalted butter, softened
- 3/4 cup packed light brown sugar
- 1 large egg
- 1 teaspoon vanilla extract
- 1 1/4 cups all-purpose flour
- 1 teaspoon ground cinnamon
- 1/2 teaspoon baking soda
- 1/2 teaspoon salt
- 1 1/2 cups old-fashioned oats
- 3/4 cup raisins
Quick Steps:
- Heat the oven to 350°F and line baking sheets with parchment.
- Cream the butter and brown sugar, then beat in the egg and vanilla.
- Stir in the flour, cinnamon, baking soda, and salt, then fold in the oats and raisins.
- Scoop 2-tablespoon portions and bake for 10 to 12 minutes until the edges are golden and the centers look set but soft.
Equipment for This Recipe:
- Mixing bowl
- Wooden spoon or hand mixer
- Baking sheets
- Cookie scoop
How to Serve This Dish:
Serve these with tea, hot chocolate, or plain milk. They’re sturdy enough to pack into a lunchbox and soft enough that kids usually do not mind the raisins.
Pro Tips for This Recipe:
- Soak the raisins in warm water for 5 minutes if you want them extra plump.
- Let the dough sit for 10 minutes before baking so the oats hydrate a bit.
- Old-fashioned oats give more chew than quick oats.
Variations on This Dish:
- Chocolate Chip Oatmeal: Swap the raisins for mini chocolate chips.
- Cinnamon Apple Version: Stir in 1/3 cup finely chopped dried apples with the raisins.
Common Mistakes to Avoid with This Dish:
- Using instant oats without adjusting the texture: The cookies bake up mushier. Old-fashioned oats hold shape better.
- Baking until the center looks dry: That usually means the tray went too far.
5. No-Bake Cocoa Oatmeal Cookies
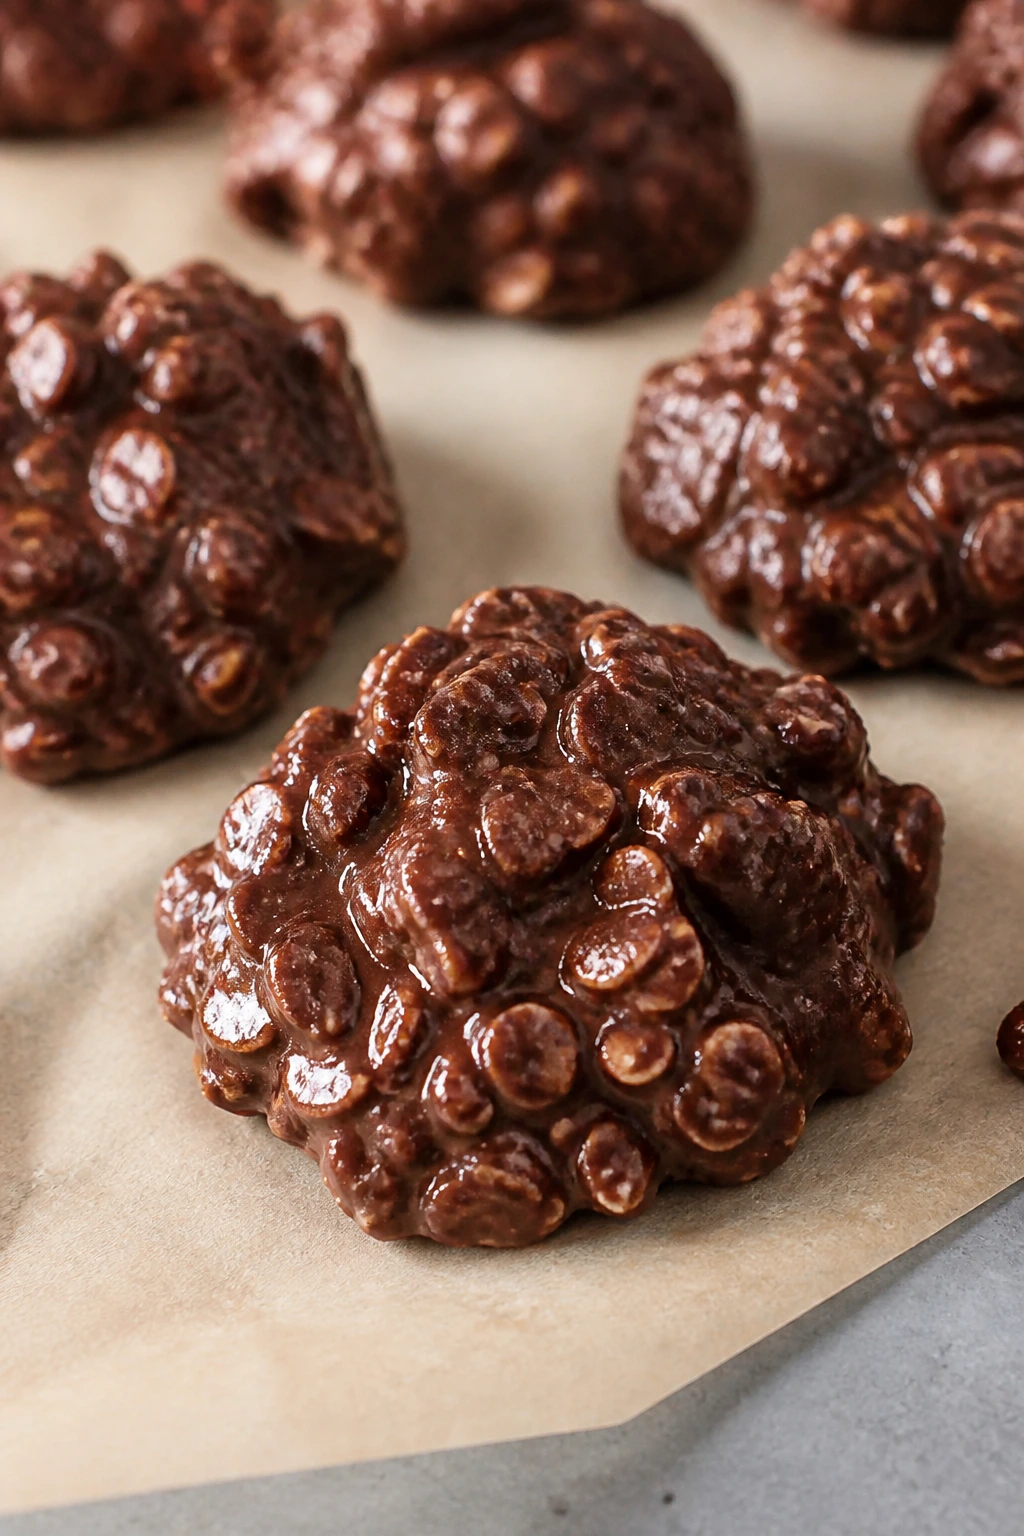
These are the cookies for the child who wants to help without waiting for the oven. The mixture sets into fudgy little mounds that taste like chocolate oatmeal candy.
Why It Works:
Boiling the sugar, milk, butter, and cocoa creates a syrup that firms up as it cools. The oats absorb that syrup fast, which is why the texture sets without baking.
Key Ingredients:
- 2 cups granulated sugar
- 1/2 cup whole milk
- 1/2 cup unsalted butter
- 1/4 cup unsweetened cocoa powder
- 1/2 cup creamy peanut butter
- 3 cups quick oats
- 1 teaspoon vanilla extract
- Pinch of salt
Quick Steps:
- Line the counter with parchment or wax paper.
- Bring the sugar, milk, butter, and cocoa to a rolling boil in a saucepan and boil for 1 minute.
- Remove from the heat, stir in the peanut butter, vanilla, salt, and oats until fully coated.
- Drop spoonfuls onto the paper and let them set for 20 to 30 minutes until firm.
Equipment for This Recipe:
- Medium saucepan
- Wooden spoon
- Spoon or cookie scoop
- Parchment paper
How to Serve This Dish:
Serve them once the tops feel dry to the touch, or chill them for a firmer bite. They make a good after-school plate when you want something sweet without heating the kitchen.
Pro Tips for This Recipe:
- Time the boil carefully. Underboiling leaves the cookies sticky.
- Stir quickly once the oats go in; the mixture thickens fast.
- Use quick oats, not steel-cut oats. That would be a mess.
Variations on This Dish:
- Coconut Cocoa Drops: Add 1/2 cup shredded coconut with the oats.
- Nut-Free Version: Replace the peanut butter with sunflower seed butter.
Common Mistakes to Avoid with This Dish:
- Letting the syrup boil too long: The cookies become dry and crumbly.
- Skipping the parchment: The cookies will glue themselves to the counter.
6. Simple Sugar Sprinkle Cookies
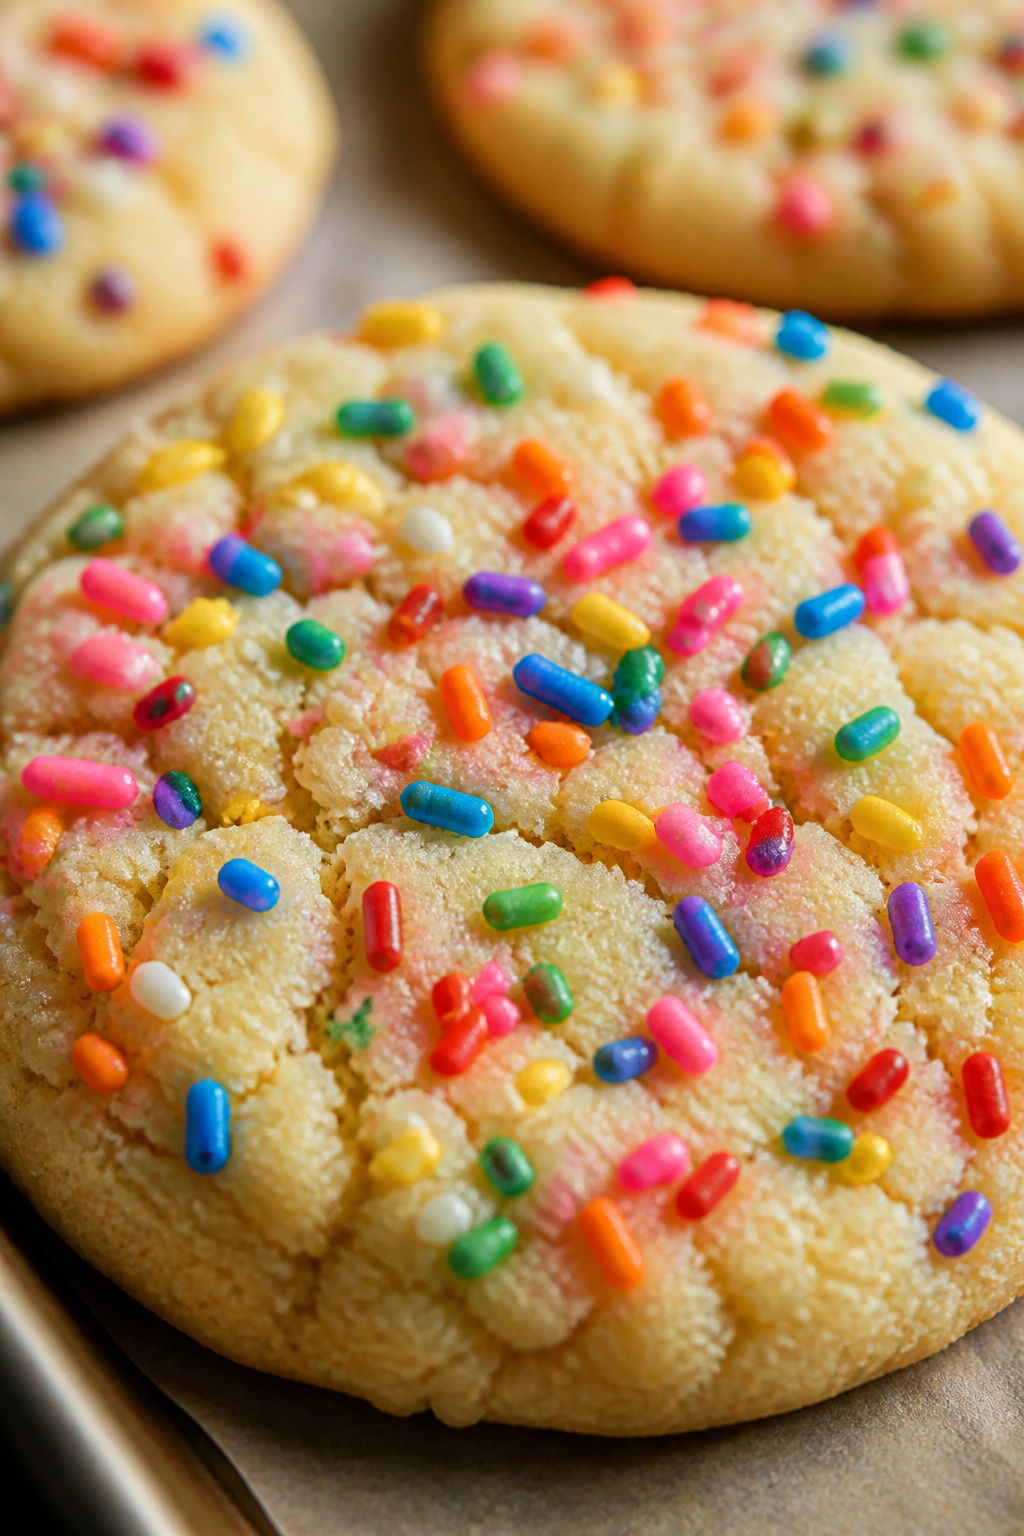
If a kid wants to decorate without frosting bags and piping tricks, this is the cookie. The dough is mild, buttery, and built to hold colorful sprinkles without getting fussy.
Why It Works:
A soft sugar dough bakes into a tender cookie that keeps its shape well enough for sprinkles to stay visible. The flavor is plain in the best way, which gives kids room to play with color.
Key Ingredients:
- 1 cup unsalted butter, softened
- 1 cup granulated sugar
- 1 large egg
- 2 teaspoons vanilla extract
- 2 1/2 cups all-purpose flour
- 1/2 teaspoon baking powder
- 1/2 teaspoon salt
- 1/2 cup sprinkles
Quick Steps:
- Preheat the oven to 350°F and line baking sheets with parchment.
- Cream the butter and sugar, then beat in the egg and vanilla.
- Stir in the flour, baking powder, and salt, then fold in the sprinkles with just a few turns.
- Scoop, flatten lightly, and bake for 10 to 12 minutes until the edges are barely golden.
Equipment for This Recipe:
- Mixing bowl
- Hand mixer
- Baking sheet
- Parchment paper
How to Serve This Dish:
These look cheerful on a dessert tray and fit any party where a bright cookie helps the table. Let them cool fully before stacking, or the sprinkles can smear.
Pro Tips for This Recipe:
- Use jimmies, not nonpareils, if you want the colors to stay put.
- Chill the dough for 20 minutes if the butter was very soft.
- Flatten only slightly. Too much pressure makes them thin and dull.
Variations on This Dish:
- Lemon Sprinkle Cookies: Add 1 teaspoon lemon zest for a sharper flavor.
- Birthday Cake Version: Use rainbow sprinkles plus 1/2 cup white chocolate chips.
Common Mistakes to Avoid with This Dish:
- Mixing the sprinkles too long: The colors bleed into the dough.
- Overbaking for color: Pale edges still taste better than dry centers.
7. M&M Cookies
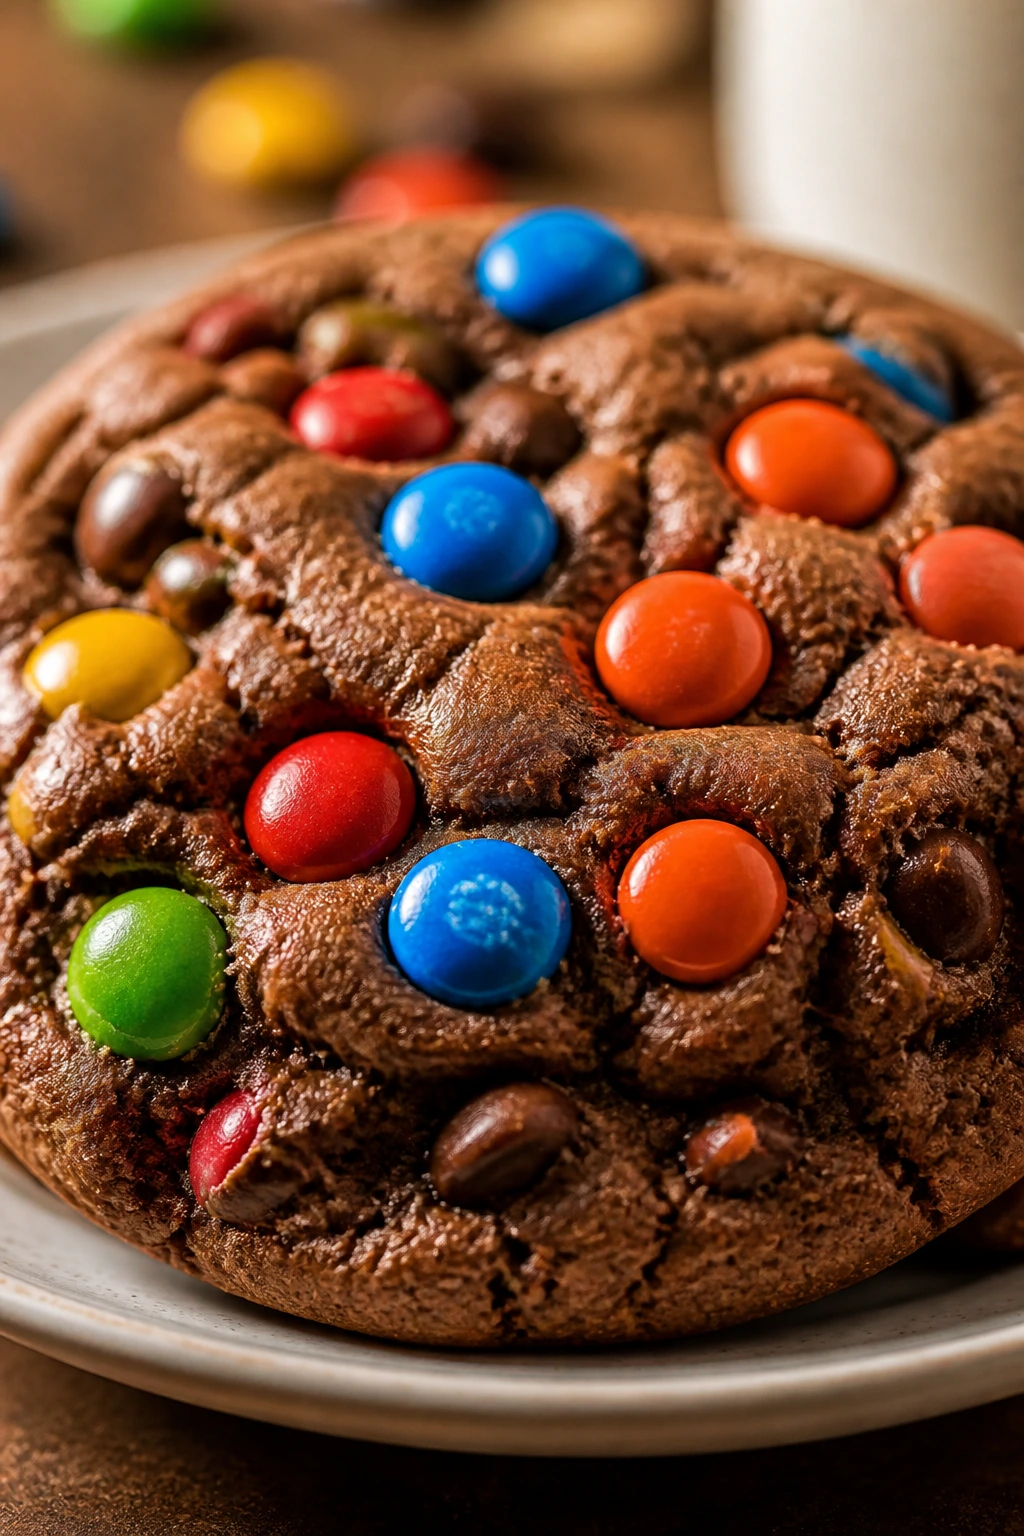
M&M cookies are bright, loud, and easy to love, which is probably why they disappear from a tray so fast. The candy shells stay colorful while the centers melt into the soft dough.
Why It Works:
Chocolate candies bring sweetness and a little crunch without extra prep. The cookie base uses the same reliable butter-and-sugar structure as chocolate chip dough, so beginners already know the rhythm.
Key Ingredients:
- 1/2 cup unsalted butter, softened
- 1/2 cup packed light brown sugar
- 1/3 cup granulated sugar
- 1 large egg
- 1 teaspoon vanilla extract
- 1 1/2 cups all-purpose flour
- 1/2 teaspoon baking soda
- 1/2 teaspoon salt
- 1 cup M&M candies
Quick Steps:
- Heat the oven to 350°F and line two baking sheets with parchment.
- Cream the butter and sugars, then beat in the egg and vanilla.
- Stir in the flour, baking soda, and salt, then fold in most of the M&Ms.
- Scoop the dough, press a few extra candies on top, and bake for 9 to 11 minutes until the edges are set.
Equipment for This Recipe:
- Mixing bowl
- Cookie sheet
- Spatula
- Scoop
How to Serve This Dish:
These are the cookie you put on the plate when you want color, not just flavor. They’re also easy to pack in a lunch container because the candies hold up well once cooled.
Pro Tips for This Recipe:
- Save a handful of candies for the tops so the cookies look lively after baking.
- Lightly press the dough balls before baking if you want wider cookies.
- If the kitchen is warm, chill the tray of dough balls for 10 minutes.
Variations on This Dish:
- Peanut Butter M&M: Swap 1/4 cup of the butter for peanut butter.
- Mini M&M Batch: Use mini candies for more color in every bite.
Common Mistakes to Avoid with This Dish:
- Adding all the candies inside the dough: The tops look flat and dull. Press some on after scooping.
- Overbaking until the edges darken too much: The candy coatings can taste bitter.
8. Shortbread Fingers
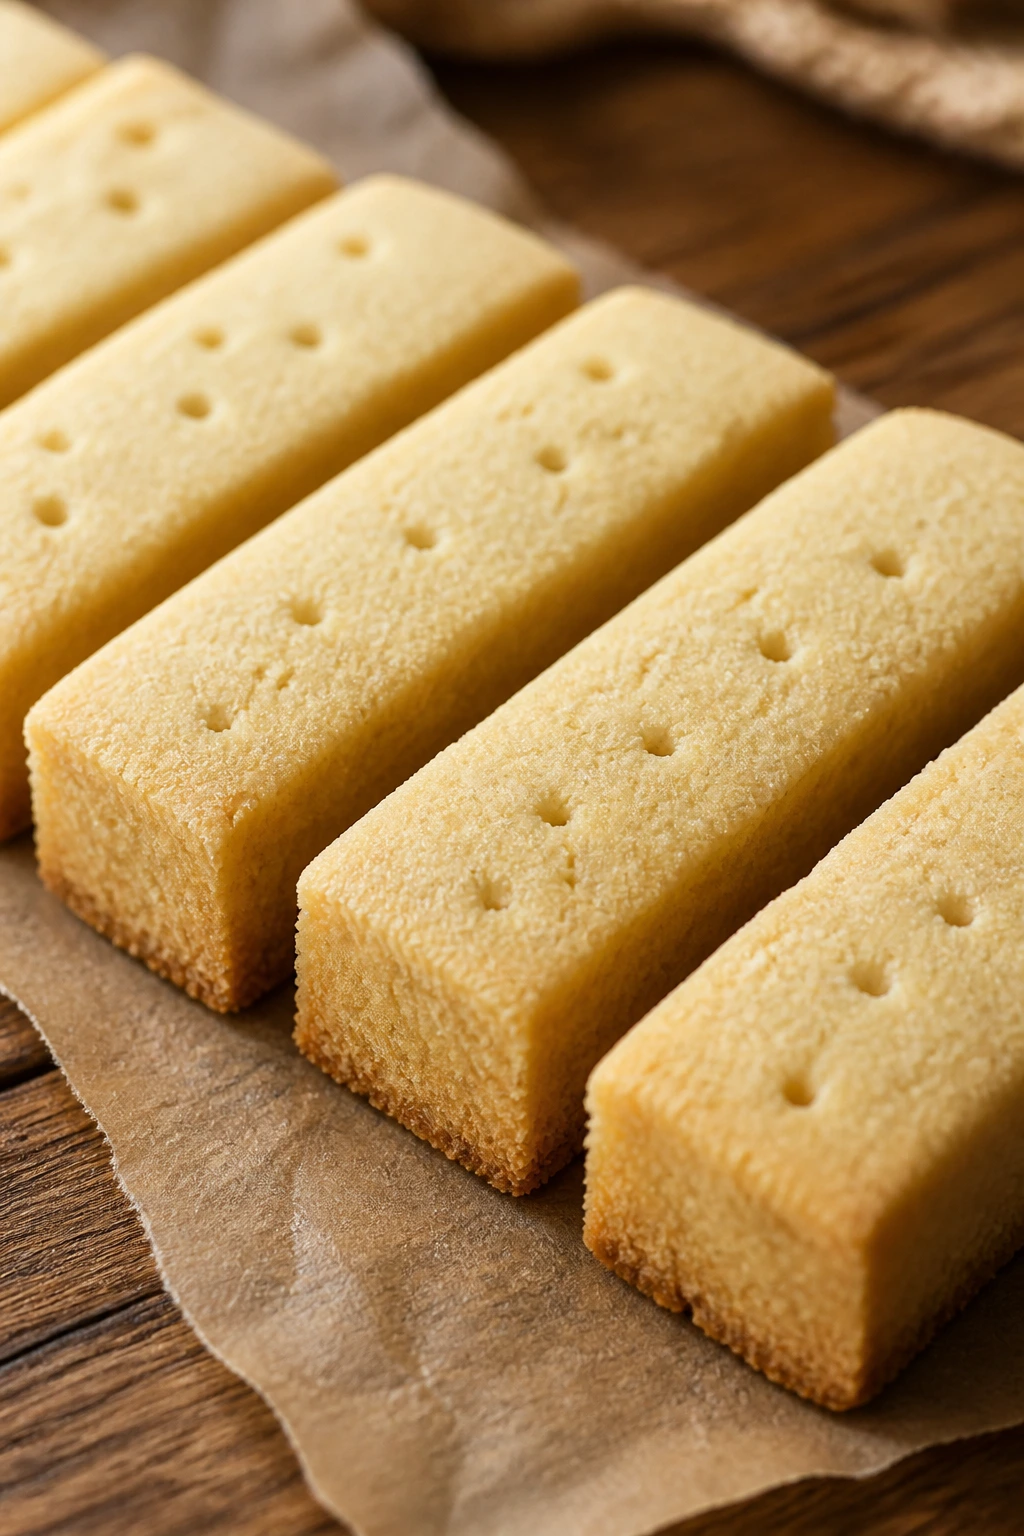
Shortbread is the quiet cookie in the group. No eggs, no chips, no frosting. Just butter, sugar, and flour turning into something crisp at the edges and sandy in the middle.
Why It Works:
Shortbread uses a high butter ratio, so the dough becomes tender instead of cakey. The lack of egg keeps the texture clean and crumbly, which is helpful for a beginner because the dough doesn’t get overworked easily.
Key Ingredients:
- 1 cup unsalted butter, softened
- 1/2 cup powdered sugar
- 2 cups all-purpose flour
- 1/4 cup cornstarch
- 1/2 teaspoon salt
- 1 teaspoon vanilla extract
Quick Steps:
- Preheat the oven to 325°F and line a square pan or baking sheet with parchment.
- Cream the butter, powdered sugar, and vanilla, then stir in the flour, cornstarch, and salt until the dough forms.
- Press the dough into a 1/2-inch-thick rectangle or log, score into fingers, and prick the tops with a fork.
- Bake for 20 to 25 minutes, until the edges are pale gold and the top looks dry.
Equipment for This Recipe:
- Mixing bowl
- Square pan or sheet pan
- Fork
- Sharp knife
How to Serve This Dish:
Serve shortbread with tea, fruit, or a small bowl of berries. The plain flavor makes it a good cookie to pair with jam or dip in melted chocolate later.
Pro Tips for This Recipe:
- Do not overmix once the flour goes in. Shortbread wants a gentle hand.
- Score the dough before baking if you want clean fingers.
- Cool completely before cutting, or it will crumble.
Variations on This Dish:
- Chocolate-Dipped Ends: Dip cooled fingers in melted chocolate.
- Lemon Shortbread: Add 1 tablespoon lemon zest to the dough.
Common Mistakes to Avoid with This Dish:
- Using too much flour while shaping: The cookie turns dry and chalky.
- Cutting while warm: The edges break apart instead of slicing cleanly.
9. Jam Thumbprint Cookies
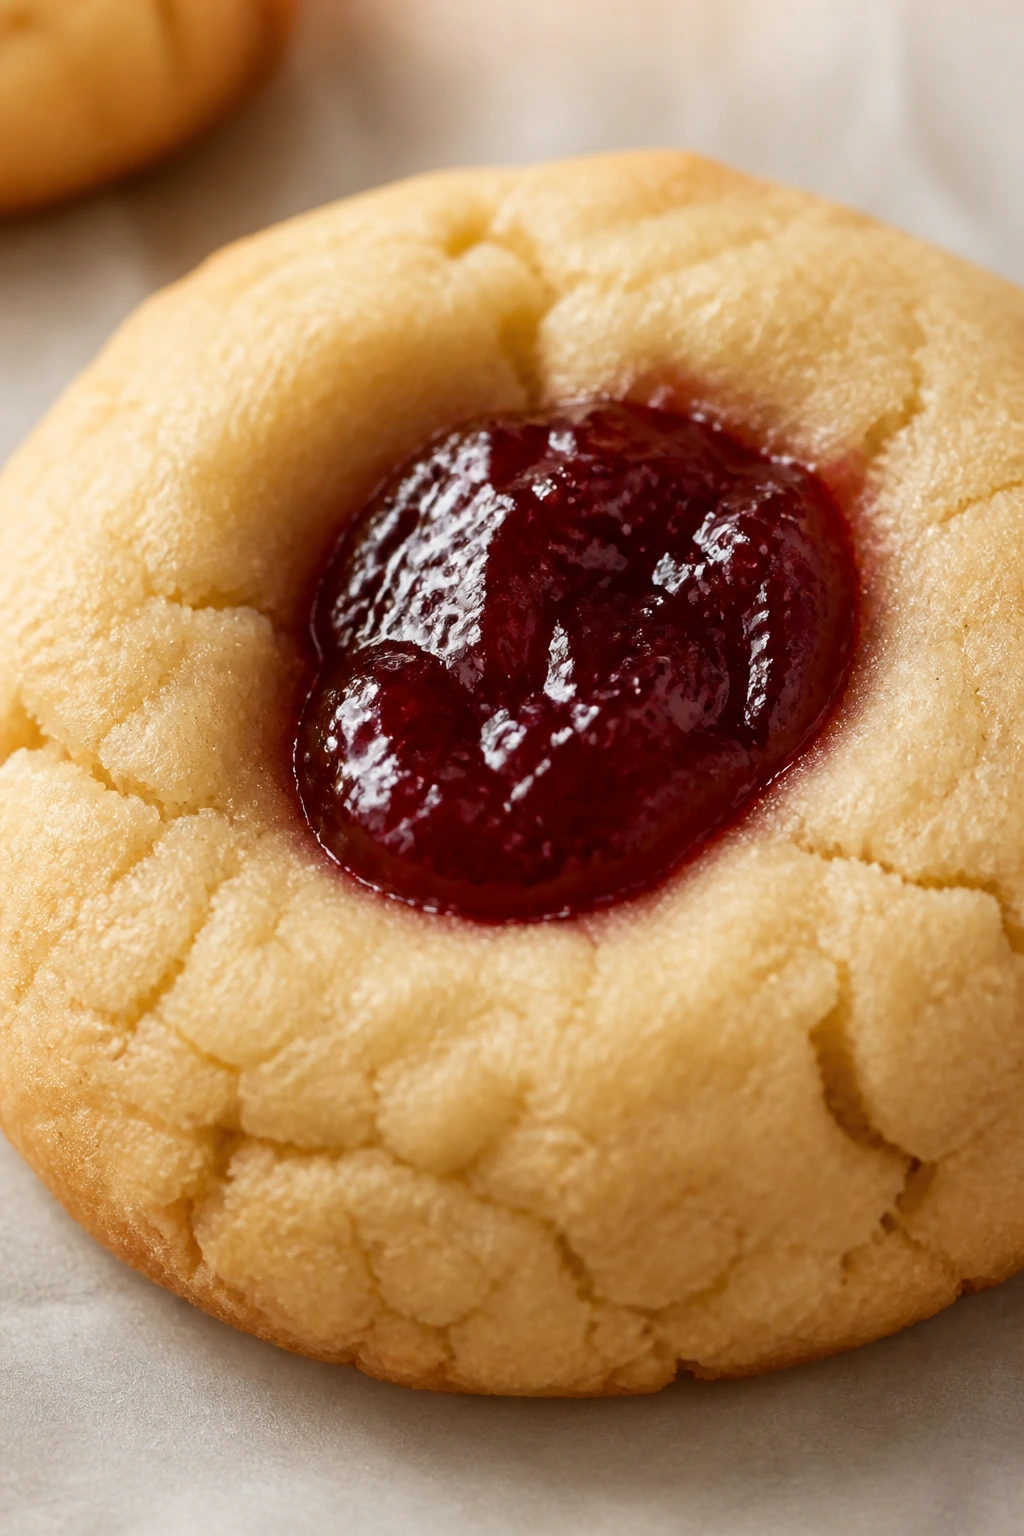
Thumbprint cookies feel a little magical because a small dent in the center becomes a bright pool of jam. They look more advanced than they are, which is always nice for a beginner baker.
Why It Works:
The cookie dough is sturdy enough to hold a jam well while baking. The center stays soft, and the jam thickens into a glossy finish instead of running off the tray.
Key Ingredients:
- 1 cup unsalted butter, softened
- 2/3 cup granulated sugar
- 1 large egg yolk
- 2 teaspoons vanilla extract
- 2 cups all-purpose flour
- 1/4 teaspoon salt
- 1/2 cup thick jam or preserves
Quick Steps:
- Preheat the oven to 350°F and line a baking sheet with parchment.
- Cream the butter and sugar, then beat in the egg yolk and vanilla.
- Stir in the flour and salt, roll into balls, and press a thumb or spoon into each center.
- Fill each well with a small spoonful of jam and bake for 12 to 14 minutes until the edges are set.
Equipment for This Recipe:
- Mixing bowl
- Baking sheet
- Measuring spoon
- Spoon or your thumb for the centers
How to Serve This Dish:
These look pretty on a platter because the jam spots add color right in the center. They’re good for holiday trays, tea trays, or any day when you want a cookie that looks intentional without being hard.
Pro Tips for This Recipe:
- Use thick jam, not runny jelly.
- If the wells puff up while baking, press them back gently as soon as the tray comes out.
- Chill the dough balls for 10 minutes if they feel soft.
Variations on This Dish:
- Apricot Center: Use apricot preserves for a brighter, tangier middle.
- Chocolate Thumbprint: Fill the centers with chocolate ganache after baking.
Common Mistakes to Avoid with This Dish:
- Overfilling the jam wells: It bubbles over and makes a sticky tray.
- Pressing too hard when making the dent: The bottoms crack and the cookie falls apart.
10. Banana Oat Cookies
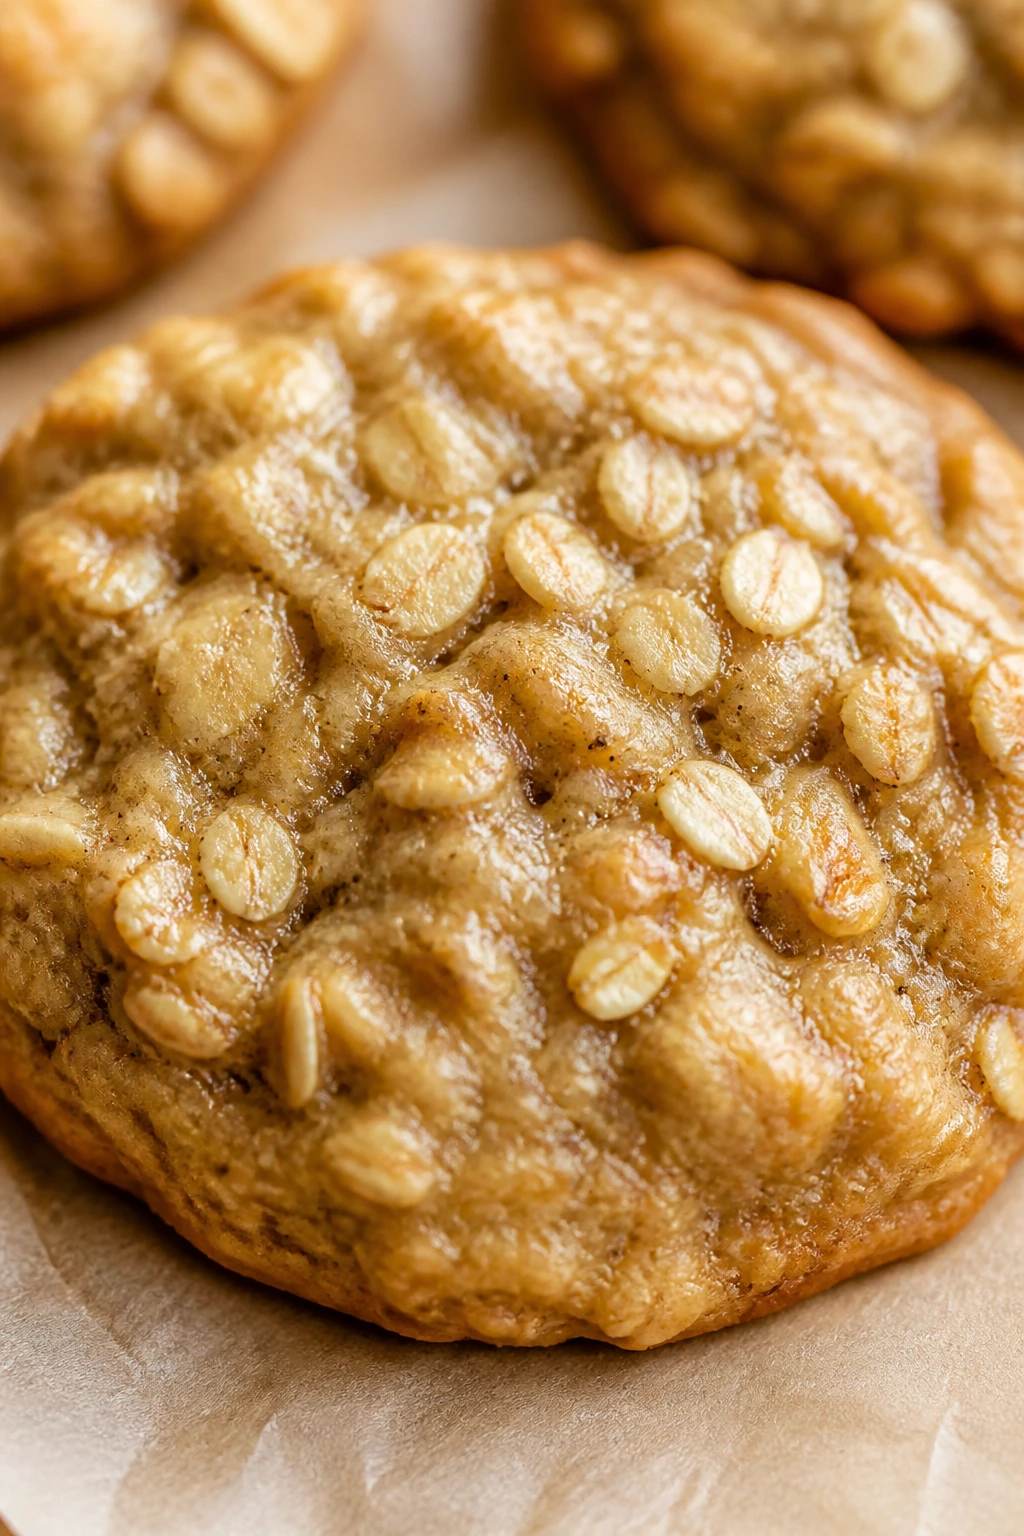
These are more like soft little breakfast cookies than a classic bakery cookie, and that’s part of the charm. They use up ripe bananas with almost no effort.
Why It Works:
Bananas act as the binder and sweetener, so the recipe can stay short. Oats give the cookies body, and a few chocolate chips make them feel like a treat instead of a compromise.
Key Ingredients:
- 2 very ripe bananas, mashed
- 1 1/2 cups old-fashioned oats
- 1/2 teaspoon cinnamon
- 1/4 teaspoon salt
- 1/3 cup mini chocolate chips
- 2 tablespoons peanut butter, optional
Quick Steps:
- Heat the oven to 350°F and line a baking sheet with parchment.
- Mash the bananas until mostly smooth, then stir in the oats, cinnamon, salt, peanut butter if using, and chocolate chips.
- Scoop the mixture onto the sheet and flatten each mound slightly with a spoon.
- Bake for 12 to 15 minutes until the edges look dry and the tops no longer feel wet.
Equipment for This Recipe:
- Mixing bowl
- Fork for mashing
- Baking sheet
- Spoon or cookie scoop
How to Serve This Dish:
Serve these warm or at room temperature with yogurt and fruit for a snack plate. They’re soft enough for small kids and easy to pack once cooled.
Pro Tips for This Recipe:
- Use bananas with lots of brown spots; pale bananas won’t taste sweet enough.
- If the mixture seems too loose, add 2 tablespoons more oats.
- Cool on the sheet for 5 minutes before moving them.
Variations on This Dish:
- Blueberry Banana: Replace the chocolate chips with dried blueberries.
- Apple Cinnamon: Use 2 tablespoons finely chopped dried apples instead of chips.
Common Mistakes to Avoid with This Dish:
- Using bananas that are not ripe enough: The cookies taste flat and need more sweetener.
- Expecting a crisp cookie: These stay soft and a little cakey.
11. Monster Cookies
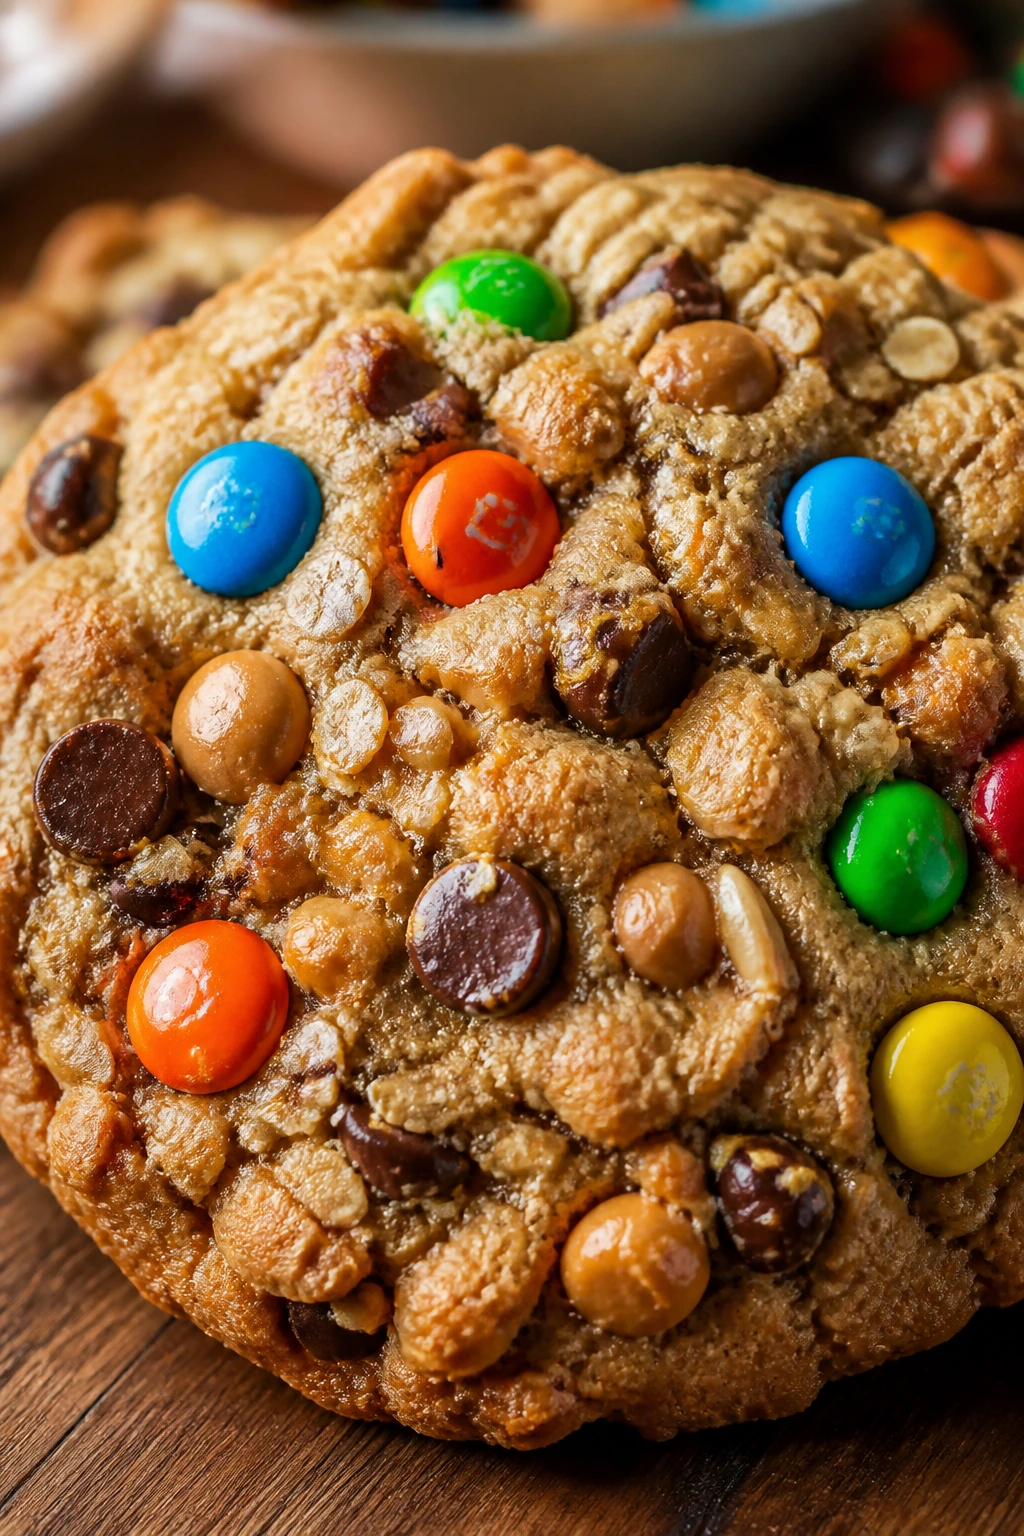
Monster cookies are what happens when a peanut butter cookie, an oatmeal cookie, and a candy jar all get invited to the same tray. Kids usually love them because the dough looks crowded in the best way.
Why It Works:
The oats give structure, the peanut butter adds richness, and the candies make each cookie look different. Because there’s no flour in this version, the dough stays easy to stir without getting tough.
Key Ingredients:
- 1/2 cup unsalted butter, softened
- 1/2 cup creamy peanut butter
- 3/4 cup packed light brown sugar
- 1 large egg
- 1 teaspoon vanilla extract
- 1 1/2 cups old-fashioned oats
- 1/2 teaspoon baking soda
- 1/2 cup chocolate chips
- 1/2 cup M&Ms
Quick Steps:
- Preheat the oven to 350°F and line baking sheets with parchment.
- Cream the butter, peanut butter, and brown sugar, then beat in the egg and vanilla.
- Stir in the oats and baking soda, then fold in the chips and candies.
- Scoop onto the sheets and bake for 10 to 12 minutes until the tops look set and the edges are lightly browned.
Equipment for This Recipe:
- Mixing bowl
- Wooden spoon or hand mixer
- Baking sheets
- Scoop
How to Serve This Dish:
These are big, chunky cookies that belong on a casual plate, not a delicate dessert tray. A cold glass of milk is the simplest pairing.
Pro Tips for This Recipe:
- Let the dough rest 10 minutes so the oats absorb some moisture.
- Press a few extra candies into the tops before baking if you want brighter color.
- Cool fully before stacking; the cookies firm as they sit.
Variations on This Dish:
- Nut-Free Monster Cookie: Use sunflower seed butter.
- All-Chocolate Monster: Swap the candies for more chocolate chips and chunks.
Common Mistakes to Avoid with This Dish:
- Scooping them too large: The centers can stay soft for too long. Keep portions moderate.
- Ignoring the rest time: The dough spreads more when baked immediately.
12. Chocolate Crinkle Cookies
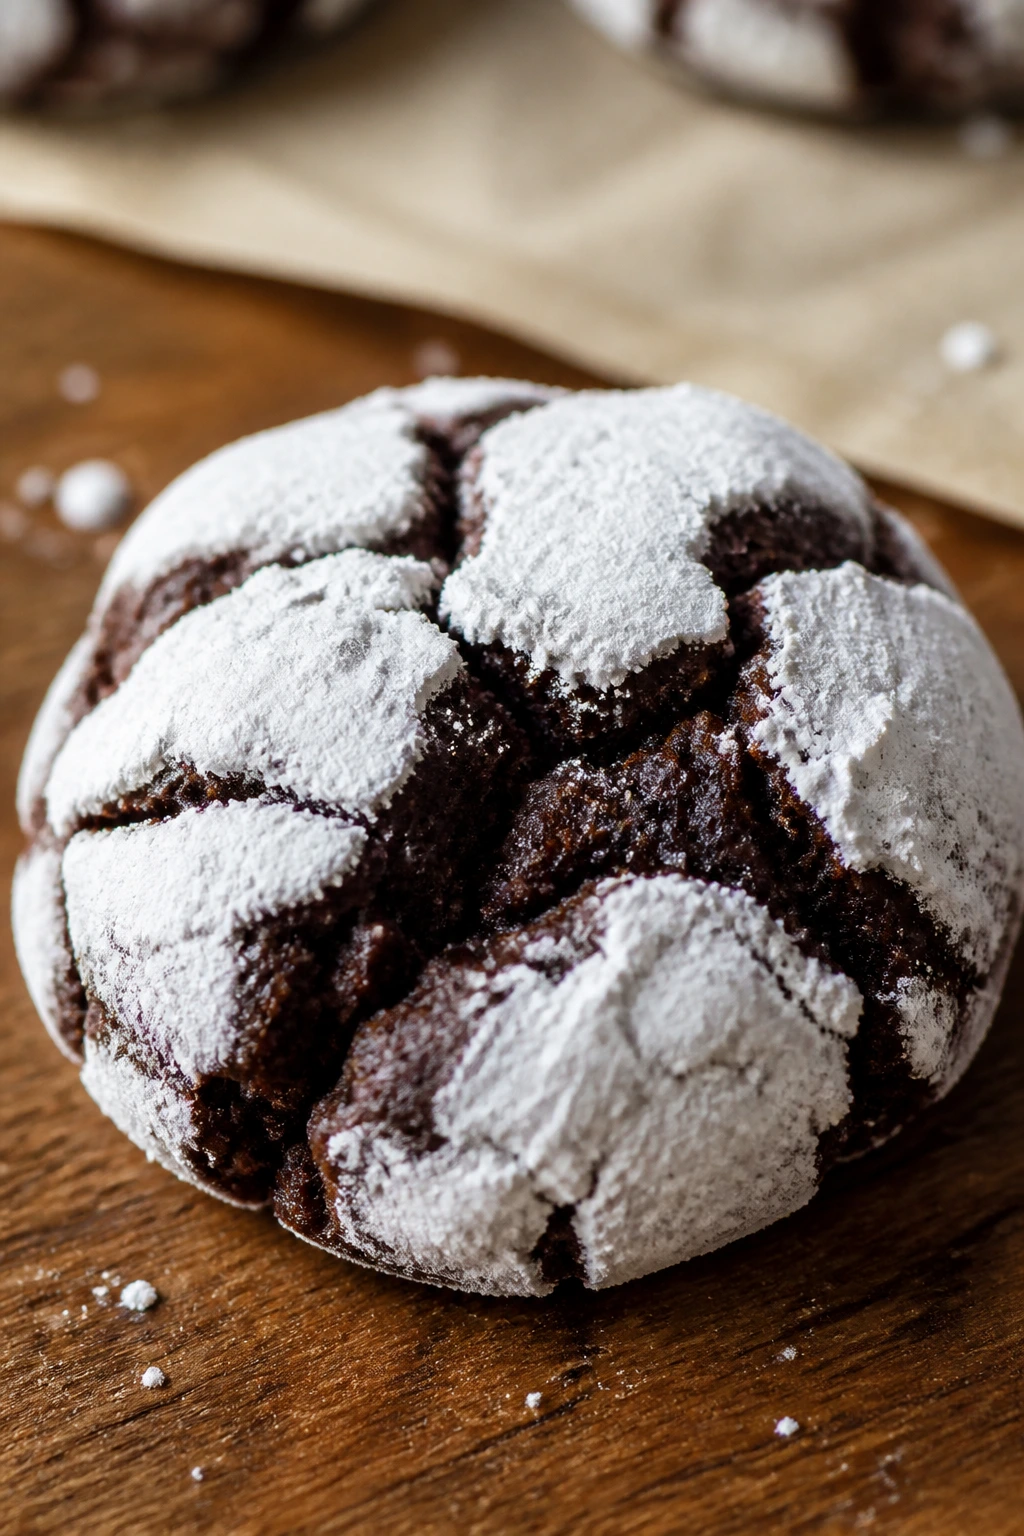
These cookies crack open in the oven like they’re wearing powdered sugar snow boots. The dark chocolate center against the white coating is half the fun.
Why It Works:
The cookie dough is rolled in powdered sugar before baking, and as the dough expands, the sugar cracks into those bright lines. Cocoa gives a deep flavor without needing melted chocolate.
Key Ingredients:
- 1/2 cup neutral oil
- 1 cup granulated sugar