
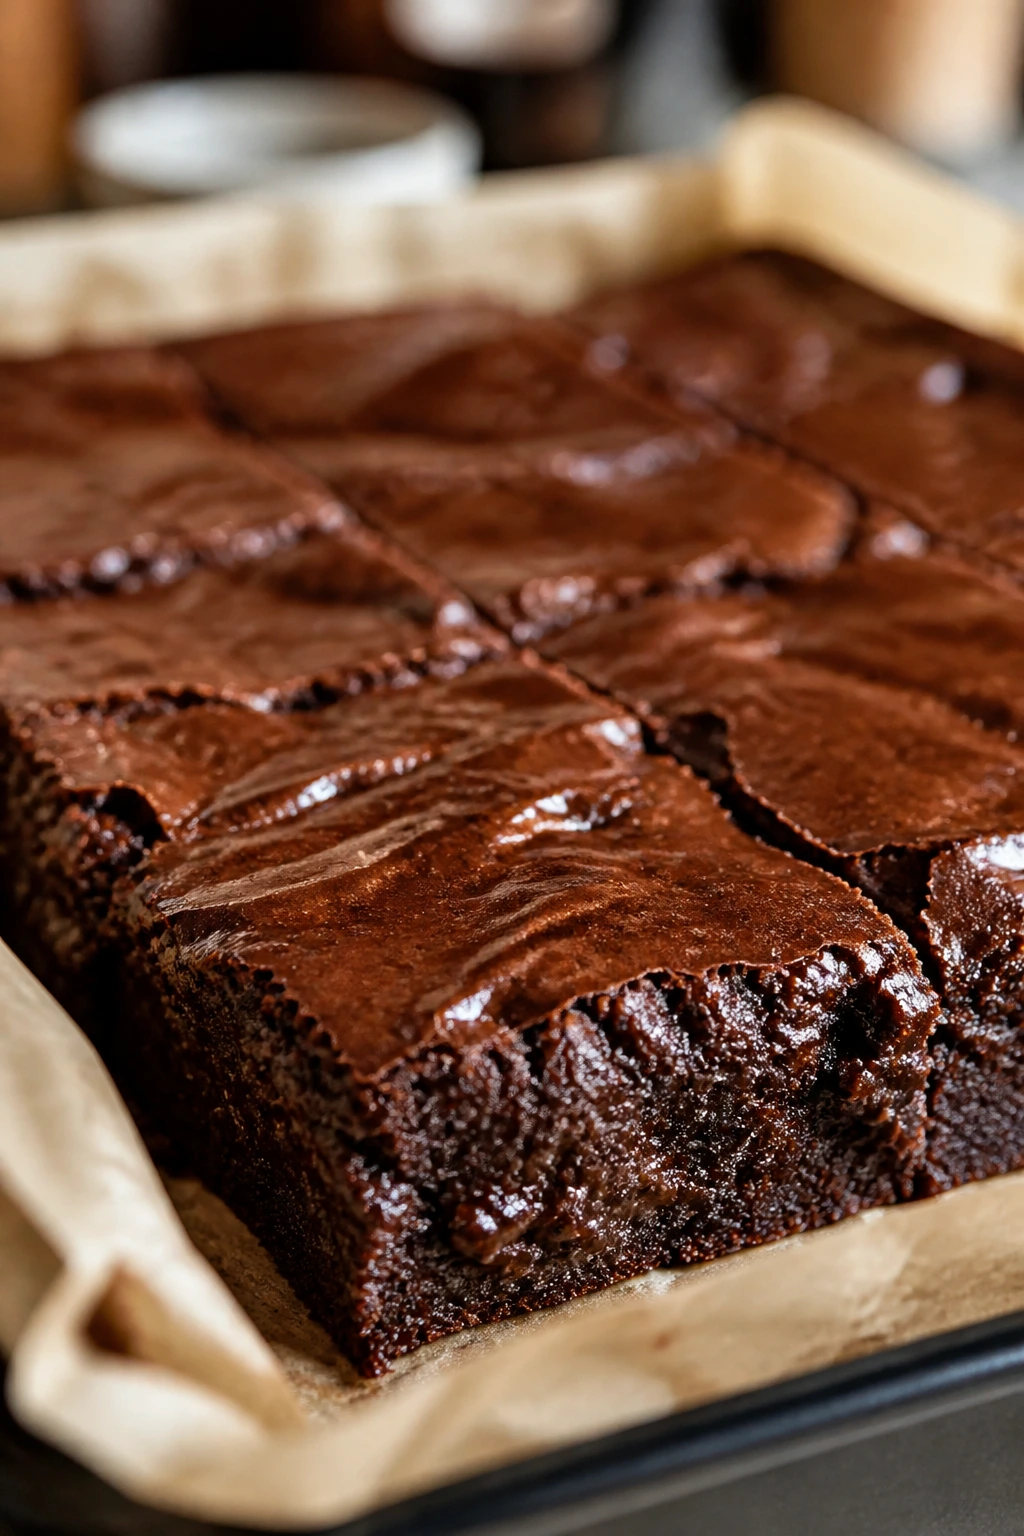
Nothing smells as merciful as brownies on a long weekday evening. Butter hits warm cocoa, the sugar melts into a dark syrupy batter, and ten minutes later the kitchen has that unmistakable bakery smell that makes people drift toward the oven without being called. The trick with gooey brownies is not to chase a cake crumb. It’s to stop baking at the exact moment the center still has a little life left in it.
That’s where most home bakers go wrong. They wait for a clean toothpick, and by the time they get it, the pan has gone from fudgy to dry around the edges, especially if the brownies sit in a hot metal pan for another ten minutes. The better target is a toothpick with sticky crumbs, a glossy top that crackles when cut, and a middle that firms up as it cools. Small move. Big difference.
So here’s a stack of brownie pans that actually fit real life: pantry-friendly, low-fuss, and rich enough to feel like dessert without turning dinner into a project. Some lean classic and dark. Some bring peanut butter, tahini, caramel, mint, coffee, or fruit into the mix. All of them aim for that soft, dense center that people remember the next day — if there’s any left.
Why You’ll Love This Collection
- Pantry-first comfort: Most of these brownie recipes use basics like butter, cocoa, eggs, flour, and sugar, so you can bake without a special trip.
- One pan, little cleanup: Nearly every batch lands in an 8×8-inch pan, which means less batter, fewer dishes, and no dessert mountain.
- Gooey centers on purpose: These are built for fudginess, not airy cake, so the instructions lean into shiny tops, soft middles, and short bake times.
- Flavor swaps that actually change the pan: Coffee, tahini, dulce de leche, miso, and fruit each push the brownies in a different direction instead of just adding noise.
- Easy to scale or stash: Most of these freeze well, slice neatly, and hold up after a day or two, which matters when dessert needs to stretch past one night.
- Weeknight-friendly, but not boring: A lot of brownie recipes taste like the same pan in a different wrapper. These do not.
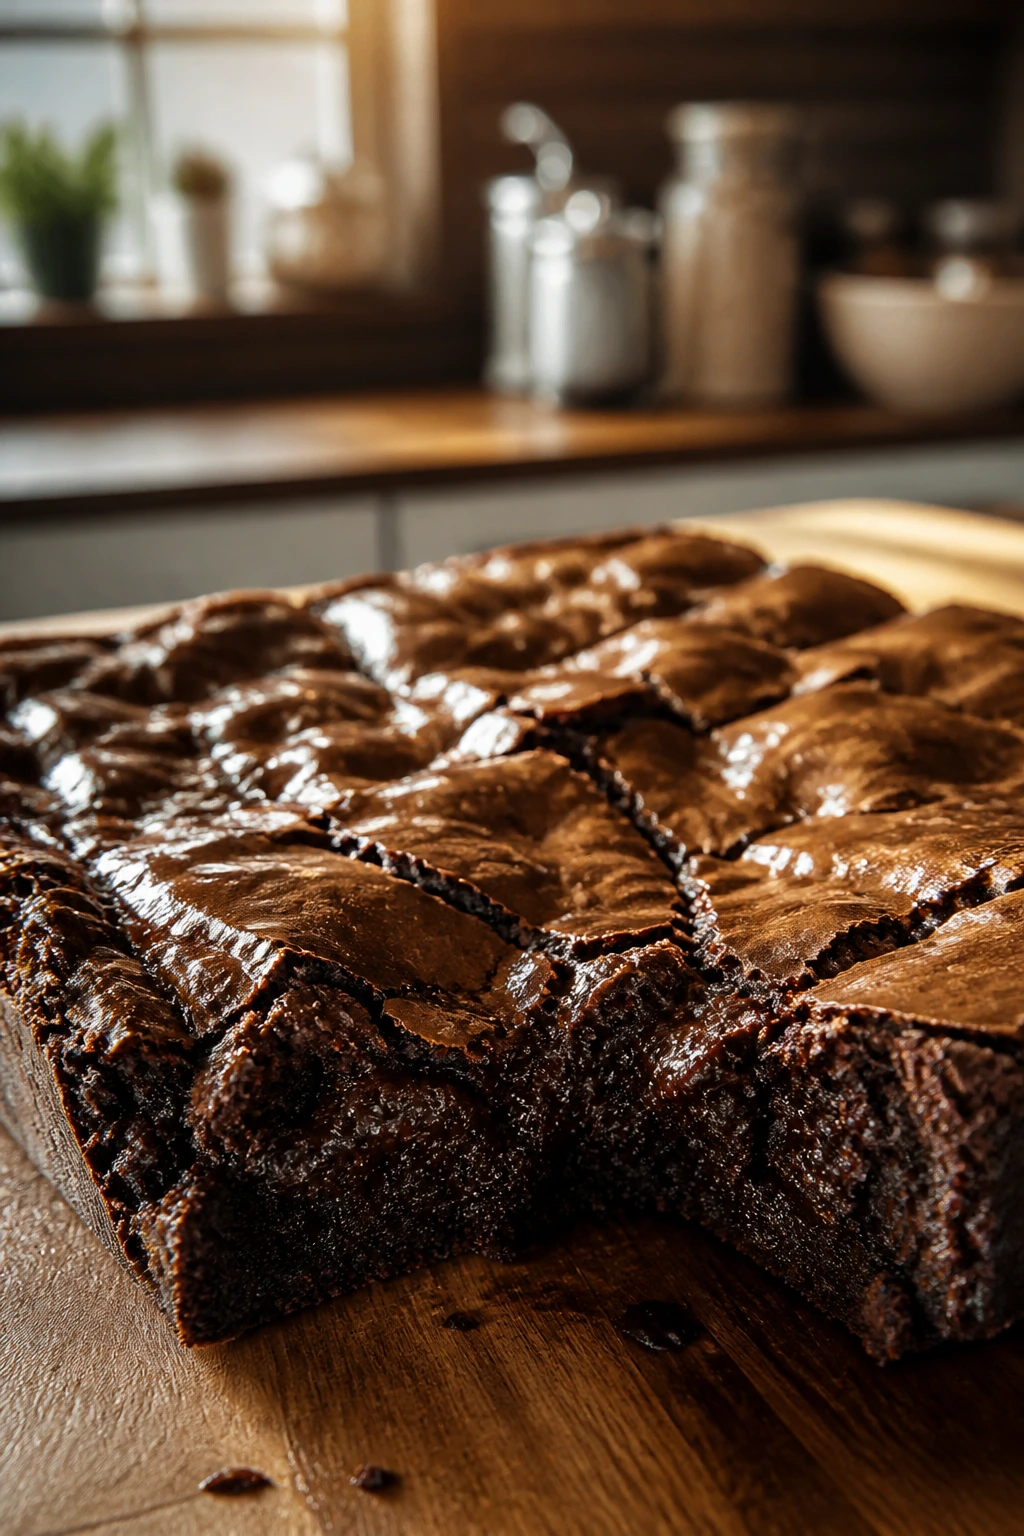
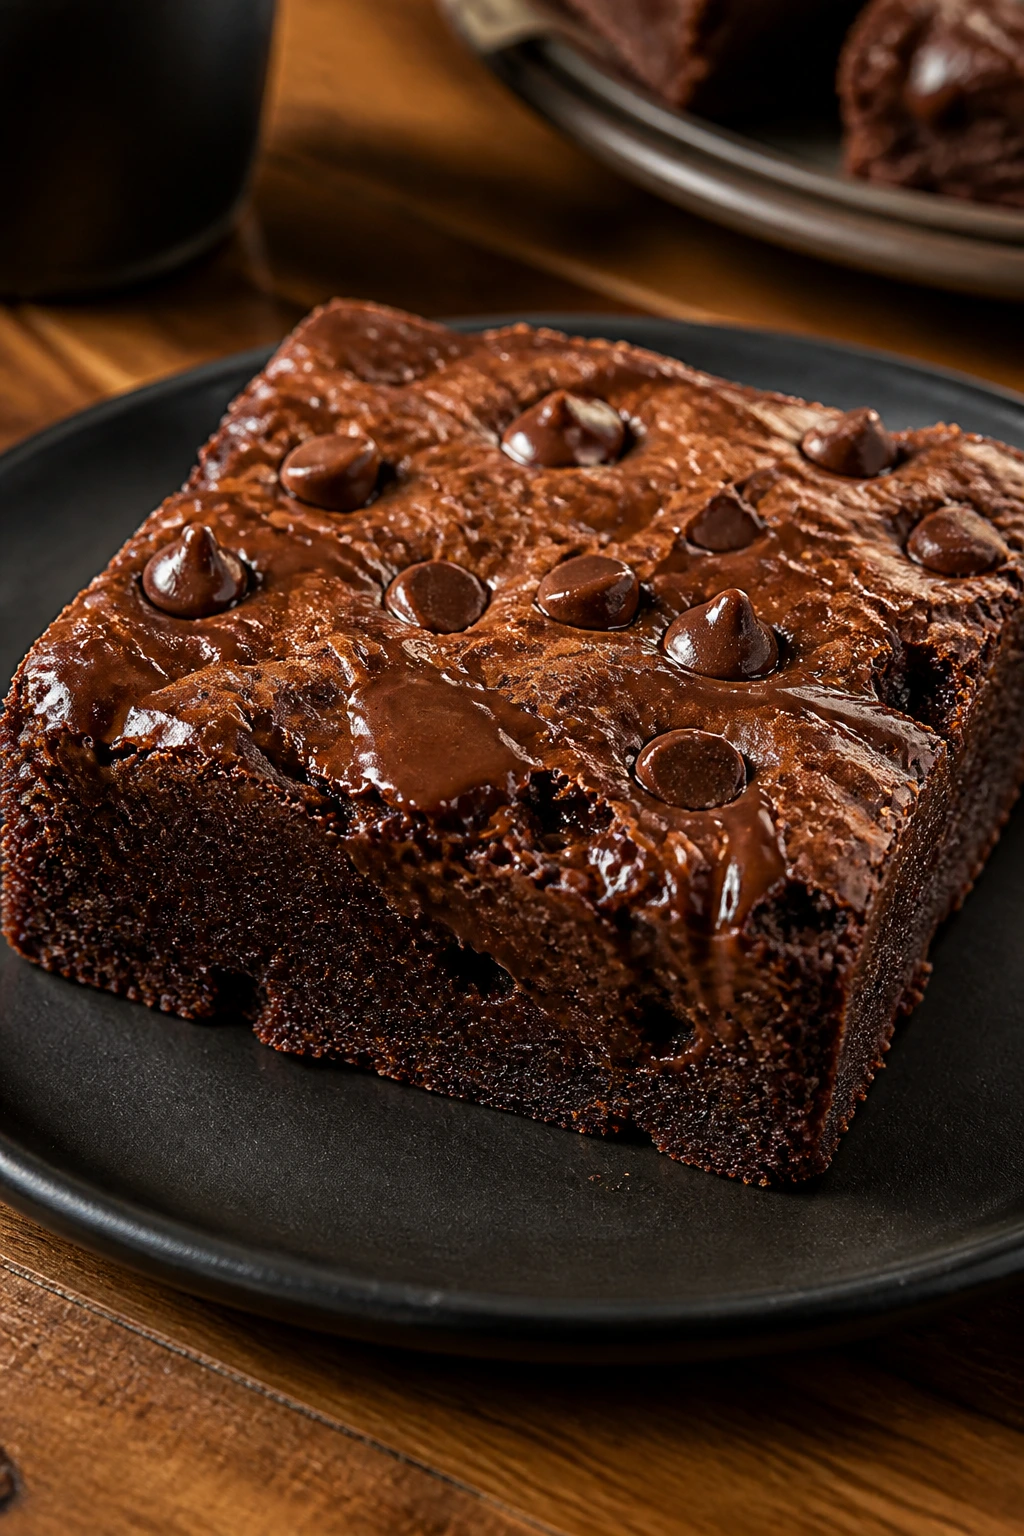
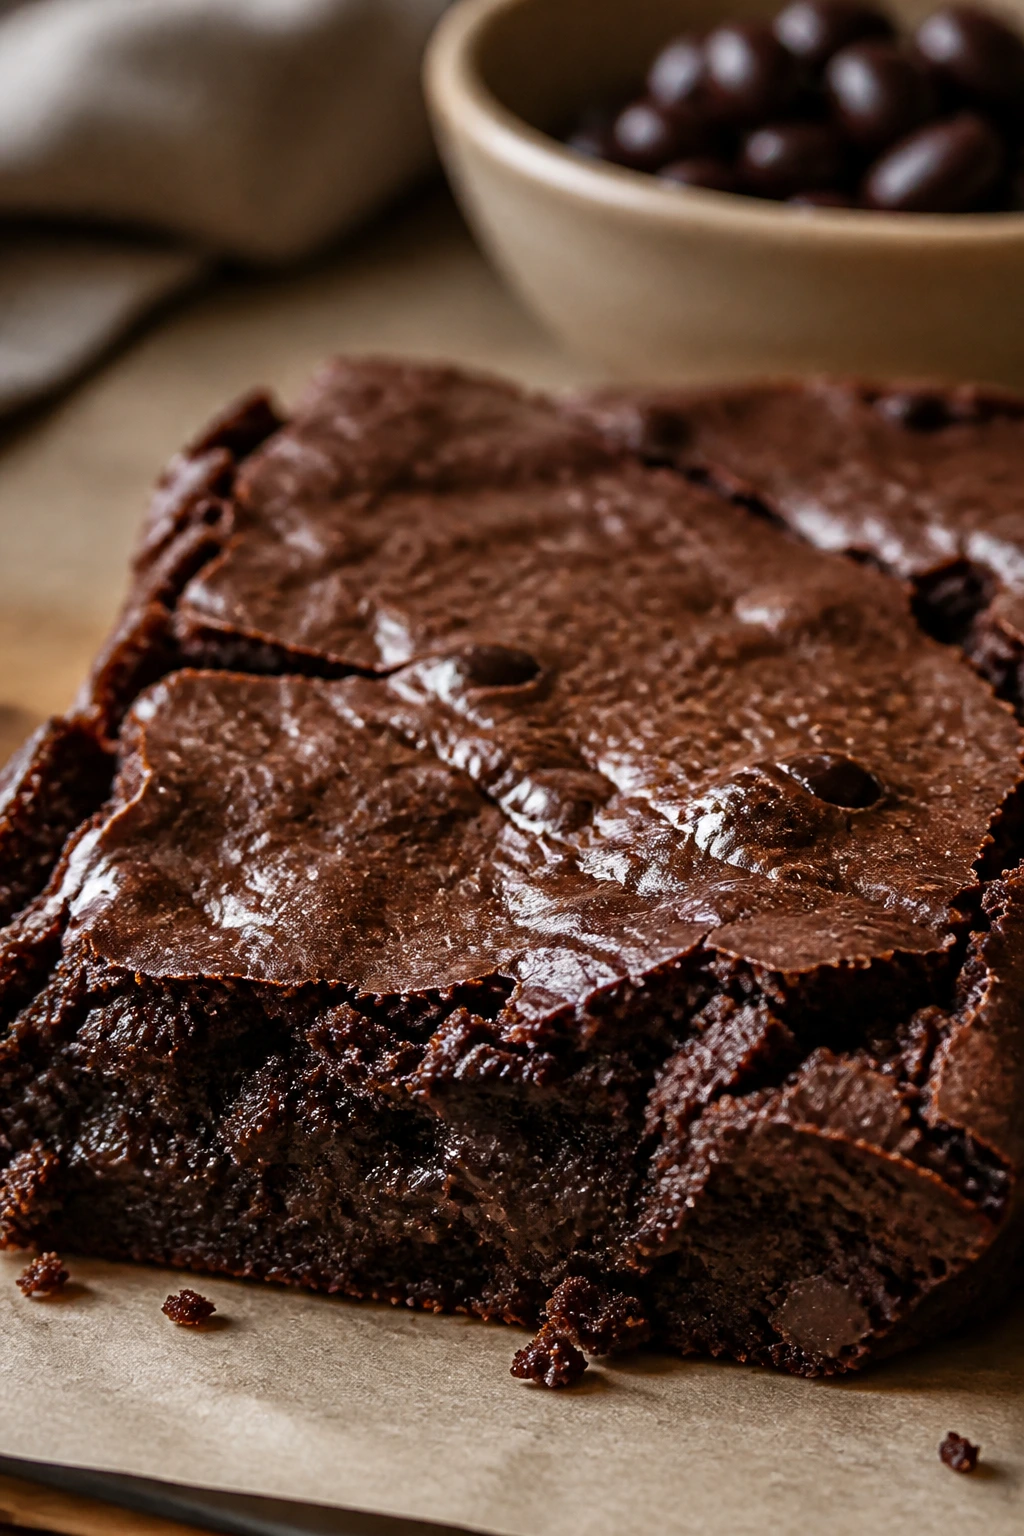
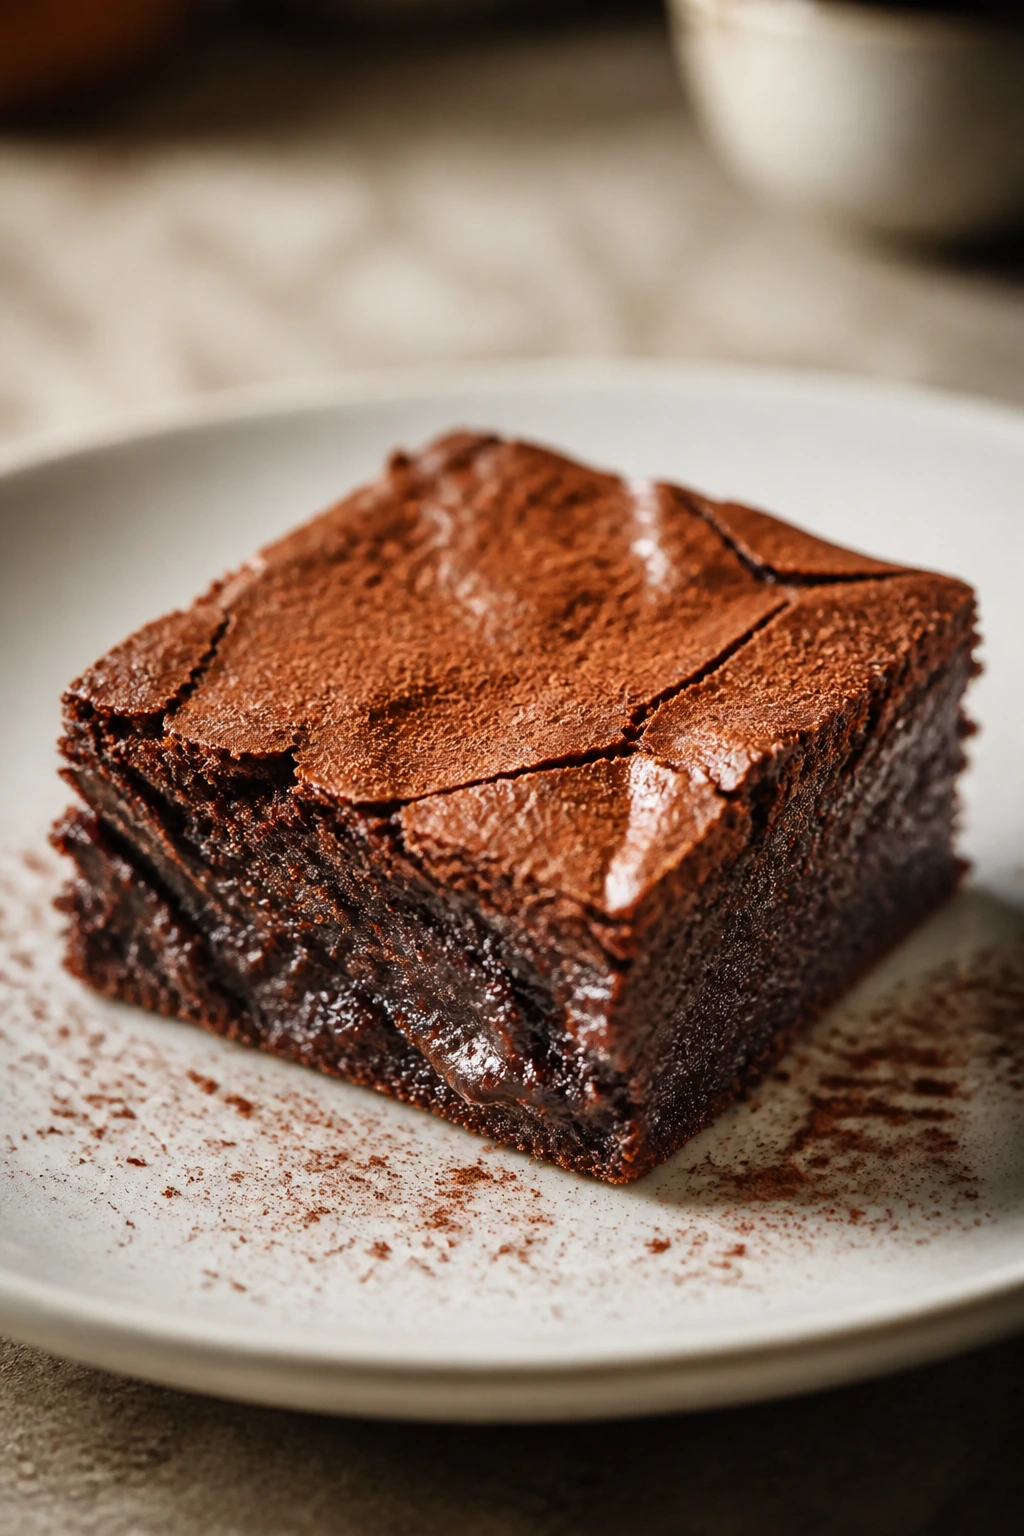
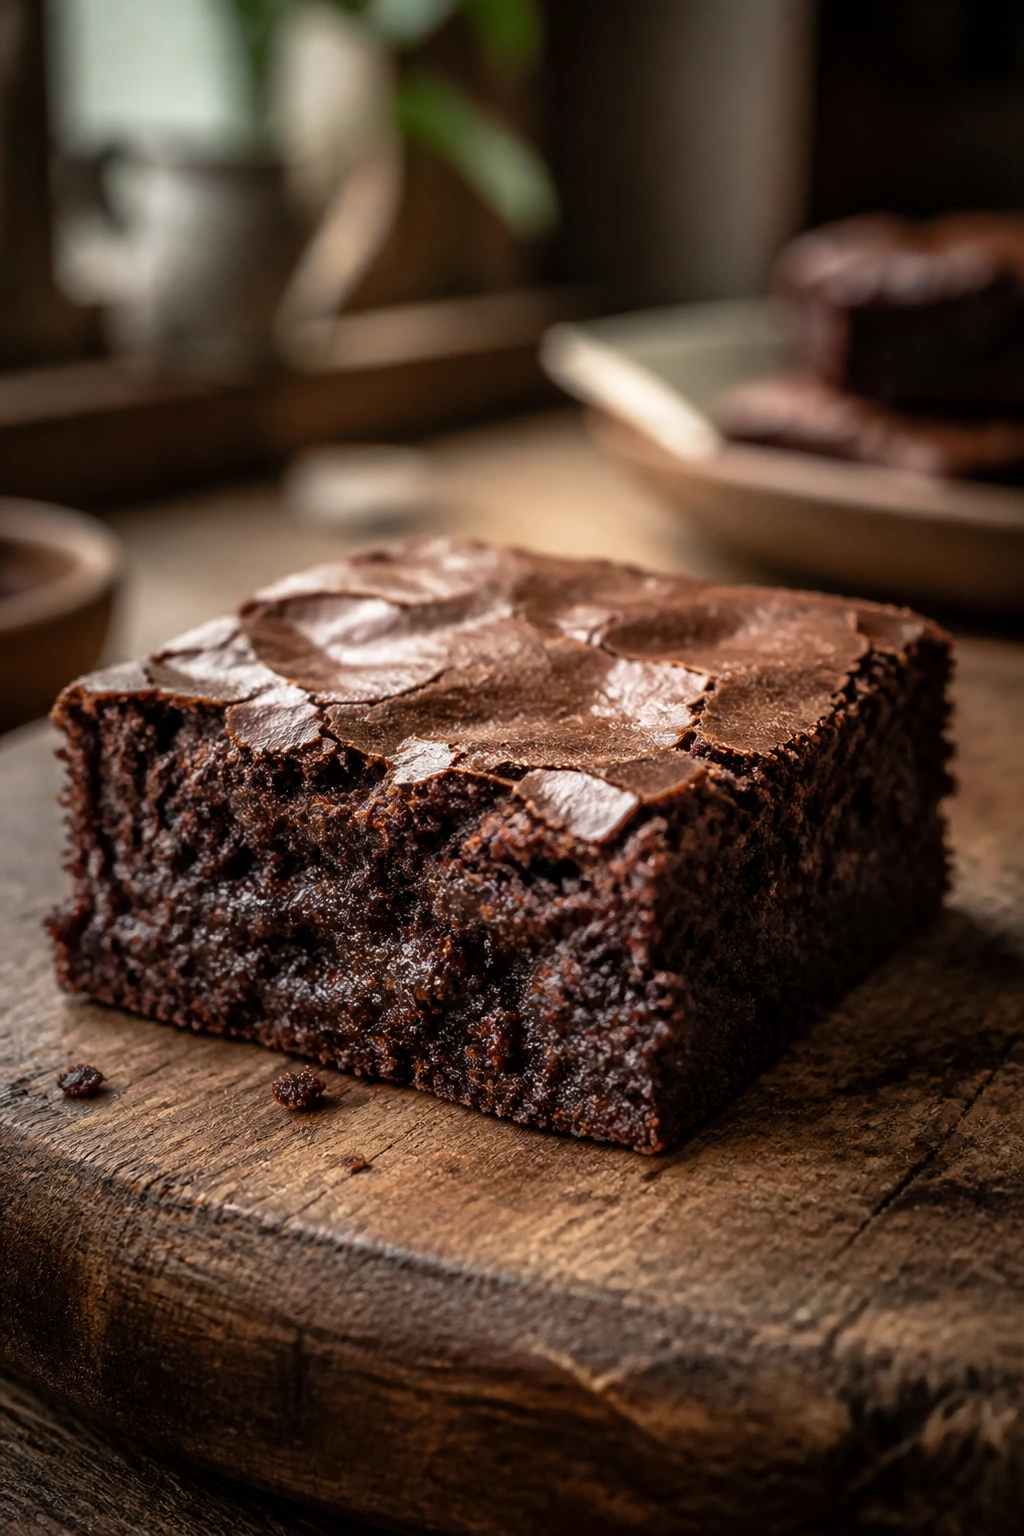
1. Classic Cocoa Pantry Brownies
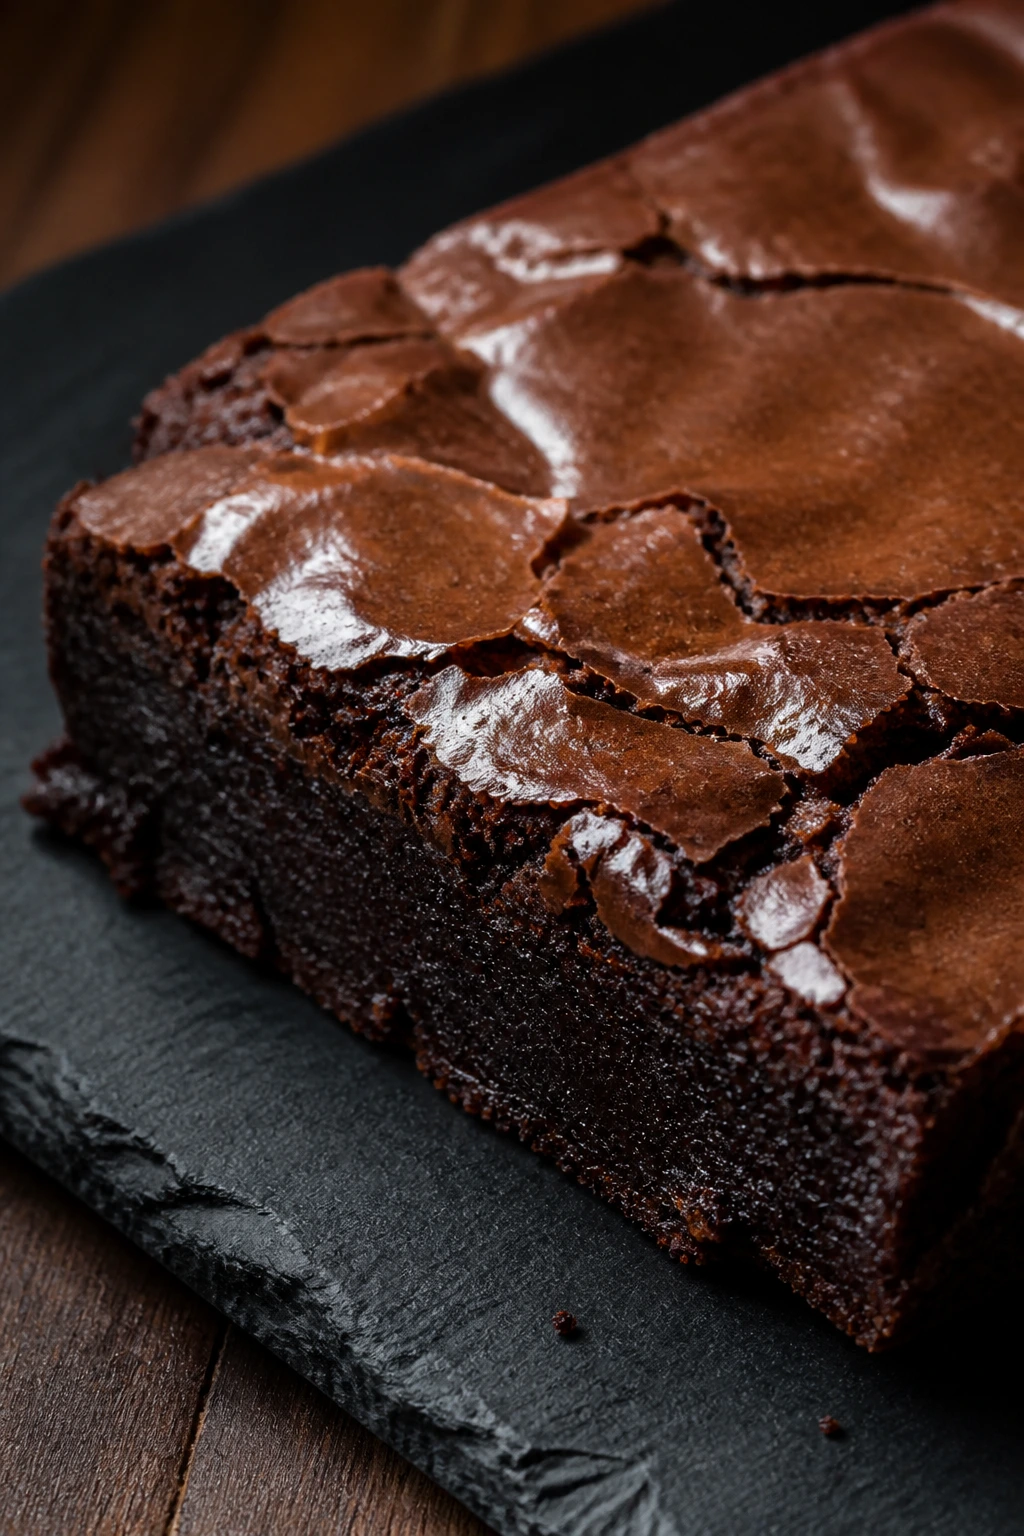
A good classic brownie should smell like melted butter and cocoa long before you cut into it. These are the kind I reach for when the cupboard looks bare but the evening still needs a proper ending. They bake into a dark, shiny slab with chewy edges and a middle that stays soft instead of turning crumbly.
Why It Works: The batter uses melted butter instead of creaming, which keeps the crumb dense and the method fast. A small amount of baking powder gives just enough lift to avoid a brick, but not so much that the pan turns cakey. The cocoa powder carries the chocolate flavor, and the chocolate chips give you pockets that go soft again when the brownies are still warm.
Key Ingredients:
- 1/2 cup unsalted butter, melted and slightly cooled
- 1 cup granulated sugar
- 2 large eggs, room temperature
- 1 teaspoon vanilla extract
- 1/2 cup unsweetened cocoa powder, sifted if lumpy
- 1/2 cup all-purpose flour
- 1/4 teaspoon fine sea salt
- 1/4 teaspoon baking powder
- 1/2 cup semisweet chocolate chips
Quick Steps:
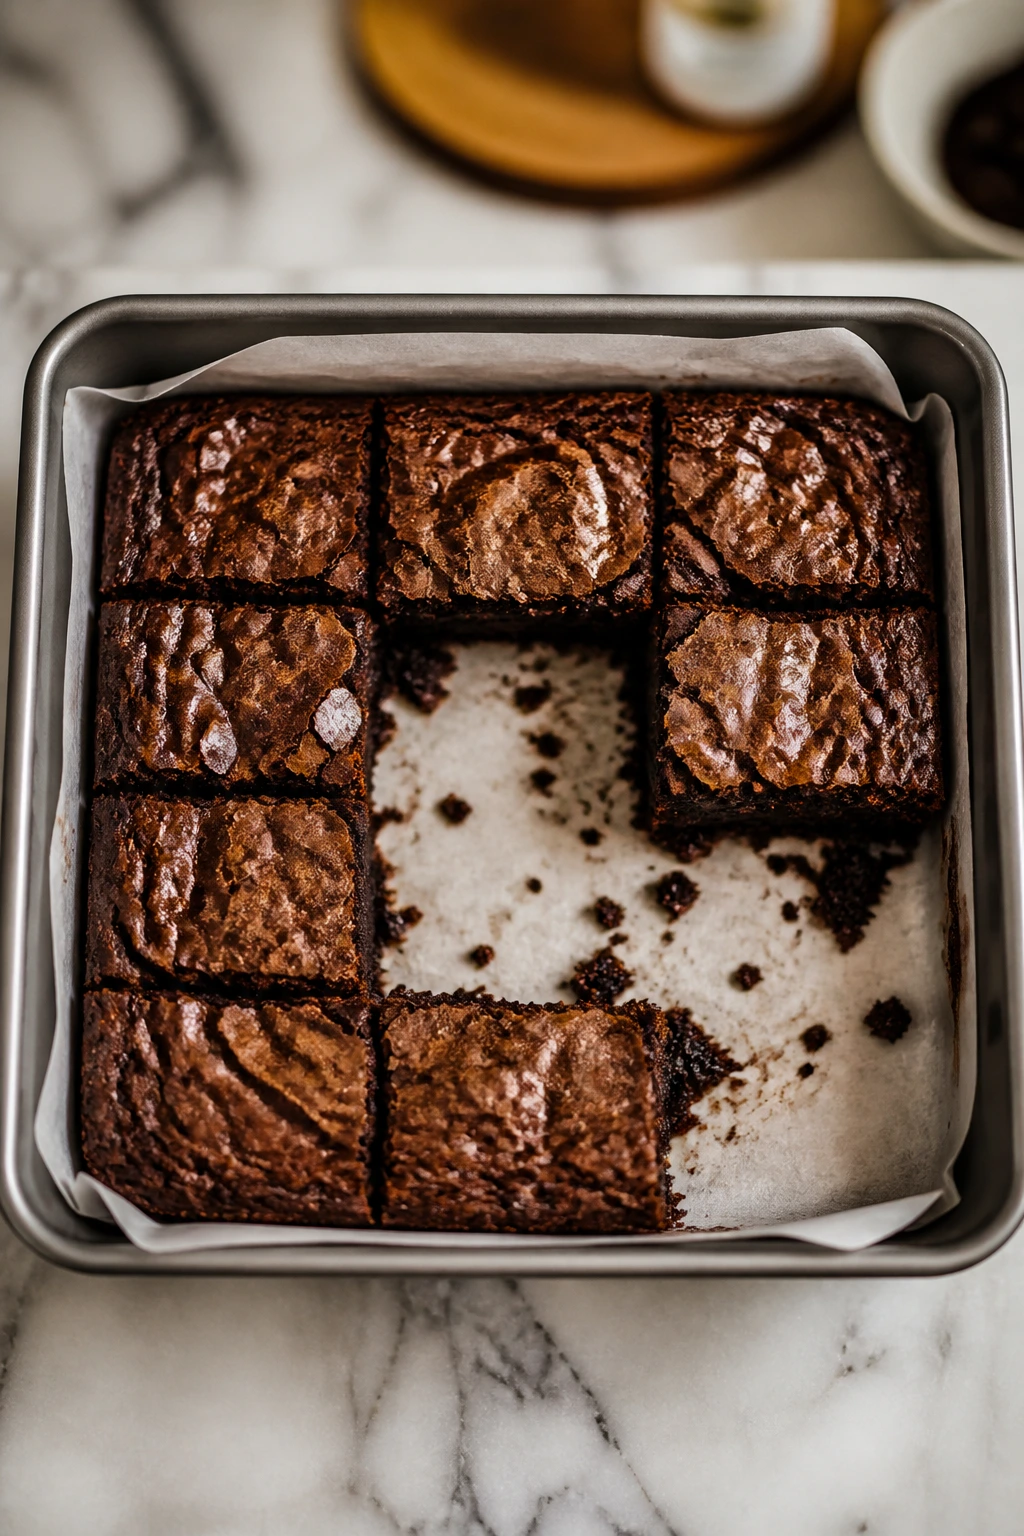
- Preheat the oven to 350°F and line an 8×8-inch metal pan with parchment, leaving overhang on two sides.
- Whisk the melted butter and sugar together for about 30 seconds, until the mixture looks glossy and grainy.
- Add the eggs and vanilla, then whisk hard for 45 seconds. The batter should look thicker and a little lighter.
- Stir in the cocoa, flour, salt, and baking powder just until no dry streaks remain, then fold in the chocolate chips.
- Spread the batter into the pan and bake for 22 to 25 minutes, until the edges are set and a toothpick in the center comes out with damp crumbs.
- Cool in the pan for at least 45 minutes before lifting and slicing.
Equipment for This Recipe:
- 8×8-inch metal baking pan, for even edges and a fudgy center
- Parchment paper, so the brownies lift cleanly
- Medium mixing bowl, big enough for one-bowl mixing
- Whisk and rubber spatula, for smooth batter and a clean scrape
How to Serve This Dish: Cut these into 9 squares while they’re still slightly warm and serve them with cold milk or a small scoop of vanilla ice cream. The plain chocolate flavor makes a good base for berries, caramel, or a dusting of powdered sugar.
Pro Tips for This Recipe:
- Whisk the eggs well after adding them. That’s what helps build the crackly top.
- Don’t overmeasure the flour. A heavy scoop pushes the pan toward dry, even if the center looks soft.
- Cool them fully before cutting if you want neat squares. Warm brownies are delicious, but they smear.
Variations on This Dish:
- Dark Chocolate Upgrade: Swap 2 tablespoons of cocoa for Dutch-process cocoa and add 1/4 cup chopped bittersweet chocolate.
- Walnut Crunch: Fold in 3/4 cup toasted walnuts for a firmer bite and a little bitterness.
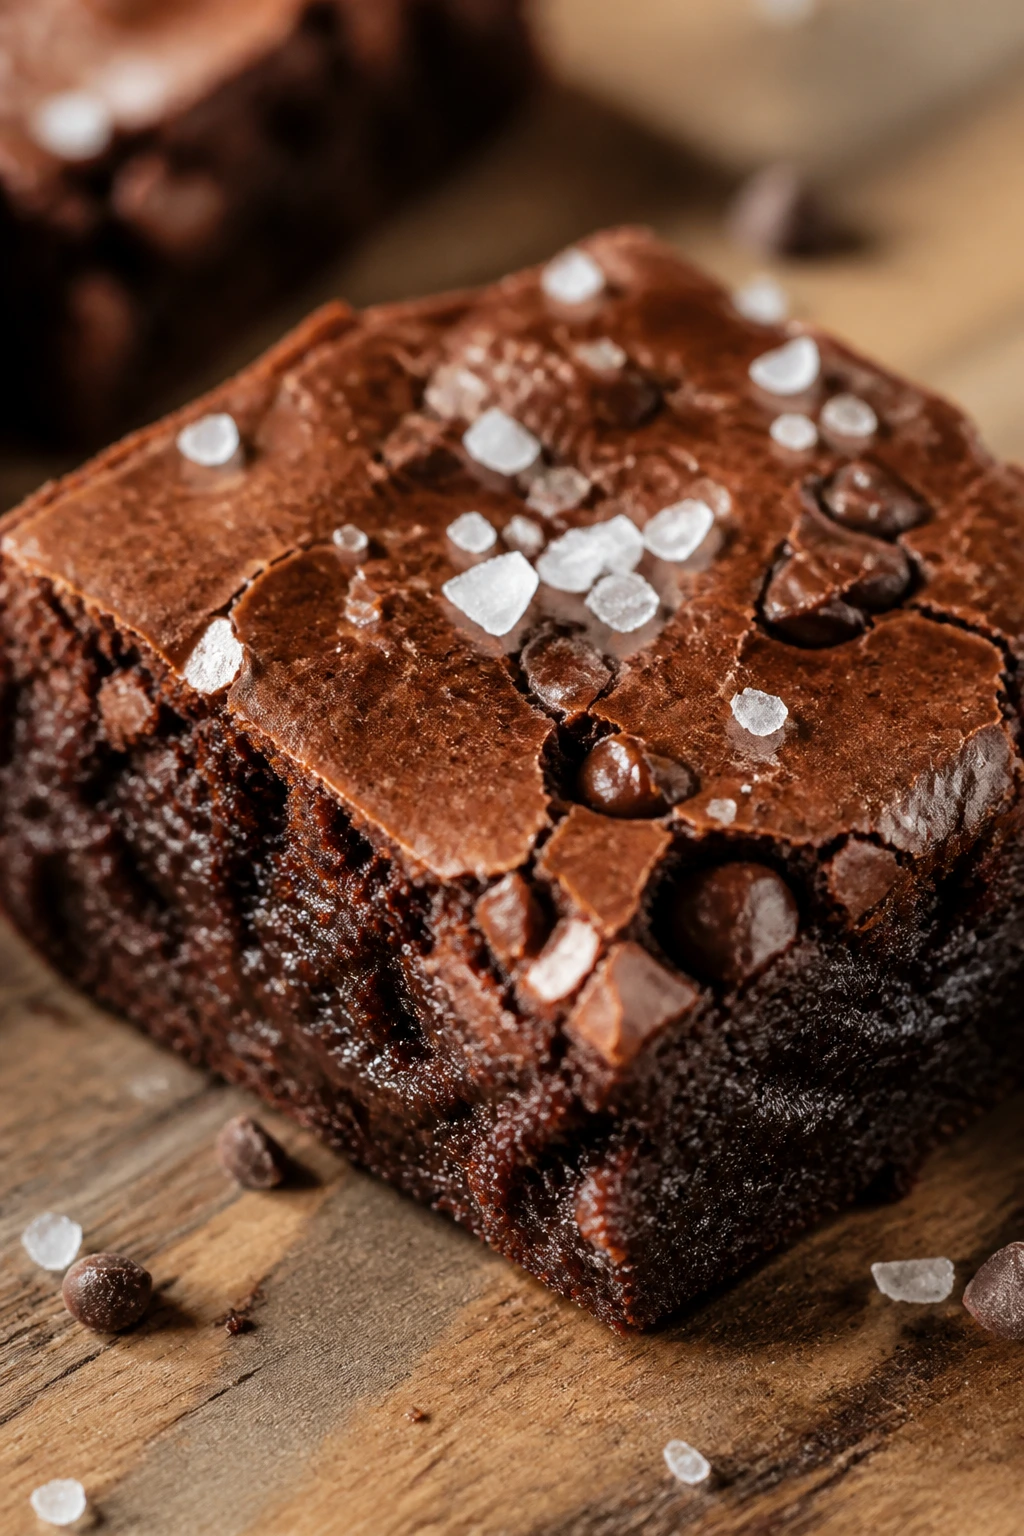
- Sea Salt Finish: Scatter flaky salt over the top right after baking for a sharper chocolate finish.
Common Mistakes to Avoid with This Dish:
- Pulling them too late: If the whole pan looks dry in the oven, you’ve waited too long. The center should still look slightly underbaked.
- Skipping the parchment sling: Brownies stick to corners more than people expect, especially sugary edges.
- Slicing too soon: Hot brownies collapse and smear. Give them time to set before cutting.
2. Espresso Fudge Brownies
Coffee doesn’t make these brownies taste like coffee cake. It sharpens the chocolate so the whole pan tastes darker, deeper, and less one-note. The result is glossy, dense, and a little more grown-up than the classic version.
Why It Works: Espresso powder wakes up cocoa in a way plain sugar can’t. A little chopped bittersweet chocolate melts into the batter and makes the middle taste like ganache without adding a frosting step. The pan still bakes fast, which is the whole point on a weeknight.
Key Ingredients:
- 1/2 cup unsalted butter, melted
- 1 cup granulated sugar
- 2 large eggs
- 1 teaspoon vanilla extract
- 1 teaspoon espresso powder
- 1/2 cup unsweetened cocoa powder
- 1/2 cup all-purpose flour
- 1/4 teaspoon fine salt
- 1/2 cup chopped bittersweet chocolate or chips
Quick Steps:
- Heat the oven to 350°F and line an 8×8-inch pan with parchment.
- Whisk the butter and sugar until glossy, then add the eggs, vanilla, and espresso powder.
- Stir in the cocoa, flour, and salt until the batter turns uniform and thick.
- Fold in the chopped chocolate, then spread the batter into the pan.
- Bake 21 to 24 minutes, until the top is crackly and the center still has a soft wobble.
- Cool for 1 hour before cutting.
Equipment for This Recipe:
- 8×8-inch baking pan
- Parchment paper
- Whisk
- Rubber spatula
How to Serve This Dish: These are strong enough to stand alone, but they turn excellent with a spoon of softly whipped cream. I also like them cold from the fridge; the coffee note gets sharper and the texture firms up.
Pro Tips for This Recipe:
- Use real espresso powder, not instant coffee granules. The flavor is cleaner and less muddy.
- If the batter looks too thick, resist the urge to add milk. That can loosen the structure fast.
- A little underbaking makes the chocolate pockets stay soft.
Variations on This Dish:
- Mocha Chip: Fold in 1/2 cup semisweet chips for more molten bits.
- Dark Roast Edge: Add 1 extra teaspoon espresso powder if you want the coffee note more obvious.
- Orange Mocha: Stir in 1 teaspoon finely grated orange zest for a bright finish.
Common Mistakes to Avoid with This Dish:
- Using weak coffee instead of espresso powder: Brewed coffee just waters the batter down.
- Overbaking to kill the shine: The top should crack, not turn matte and dry.
- Adding too much espresso: More than 1 teaspoon can make the pan taste bitter instead of rich.
3. Salted Caramel Swirl Brownies
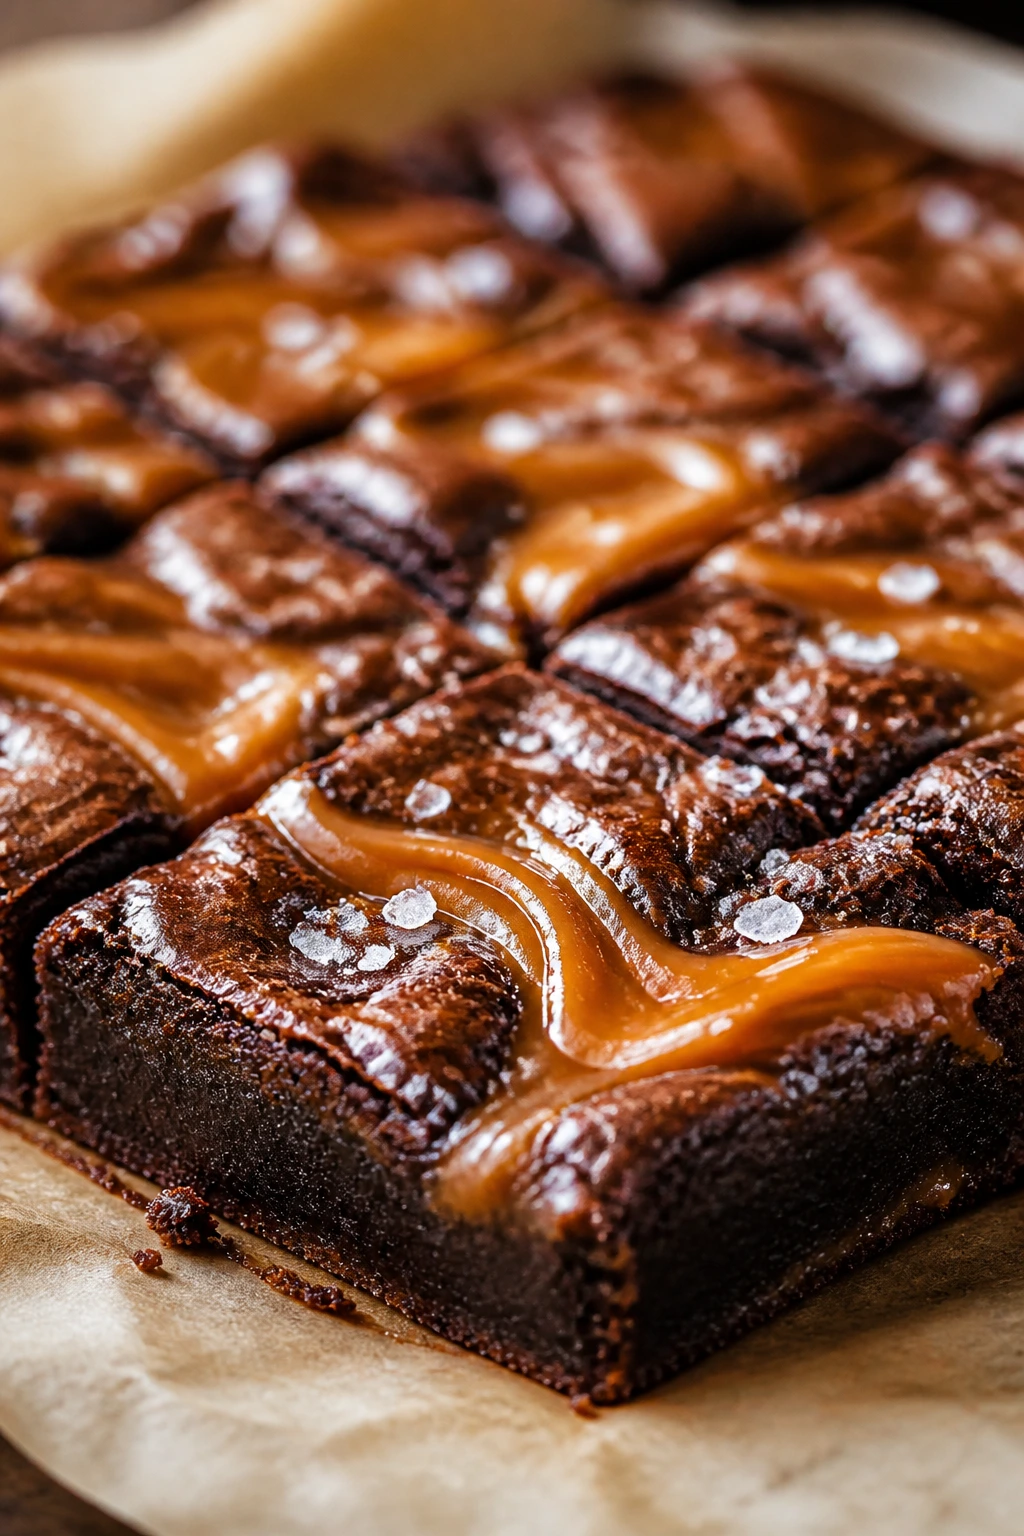
These are the kind of brownies that look more complicated than they are. A spoonful of caramel dragged through the top turns a plain pan into ribbons of sticky, browned sugar, and the flaky salt on top keeps the sweetness from flattening out.
Why It Works: Caramel gives you pockets of chew and a slightly sticky crust without needing a frosting. Swirling it in after the batter is spread keeps the brownie base intact, so you still get clean layers when you cut the pan. The salt finishes the job by making the chocolate taste darker.
Key Ingredients:
- 1/2 cup unsalted butter, melted
- 1 cup granulated sugar
- 2 large eggs
- 1 teaspoon vanilla extract
- 1/2 cup unsweetened cocoa powder
- 1/2 cup all-purpose flour
- 1/4 teaspoon fine salt
- 1/3 cup thick caramel sauce, warmed slightly
- 1/2 teaspoon flaky sea salt
Quick Steps:
- Preheat the oven to 350°F and line an 8×8-inch pan with parchment.
- Whisk the butter, sugar, eggs, and vanilla until smooth and glossy.
- Stir in the cocoa, flour, and fine salt just until the batter comes together.
- Spread the batter into the pan, then spoon the caramel over the top in 5 or 6 lines.
- Drag a butter knife through the caramel in figure-eight motions, then bake for 23 to 26 minutes.
- Sprinkle flaky salt over the brownies as soon as they come out, then cool before slicing.
Equipment for This Recipe:
- 8×8-inch pan
- Parchment sling
- Mixing bowl
- Butter knife for swirling
How to Serve This Dish: These brownies like a plain plate and maybe a small scoop of vanilla ice cream if you want a hot-and-cold contrast. The caramel can be sticky at the edges, so a sharp knife wiped clean between cuts helps a lot.
Pro Tips for This Recipe:
- Use a thick caramel, not a thin ice cream topping. Thin caramel tends to sink.
- Warm the caramel just enough to spoon easily; hot caramel can melt the batter surface too much.
- Don’t over-swirl. A few clear ribbons look better than a muddy brown pan.
Variations on This Dish:
- Bourbon Caramel: Stir 1 teaspoon bourbon into the caramel for a deeper note.
- Chocolate Salt Bomb: Add 1/4 cup chocolate chunks on top before baking.
- Shortbread Base: Press a thin layer of crushed shortbread crumbs under the batter for a firmer bottom.
Common Mistakes to Avoid with This Dish:
- Using runny caramel: It disappears into the batter instead of sitting on top.
- Swirling too hard: You’ll blend the caramel into the brownie and lose the ribbon effect.
- Forgetting the finishing salt: The pan tastes flatter without it.
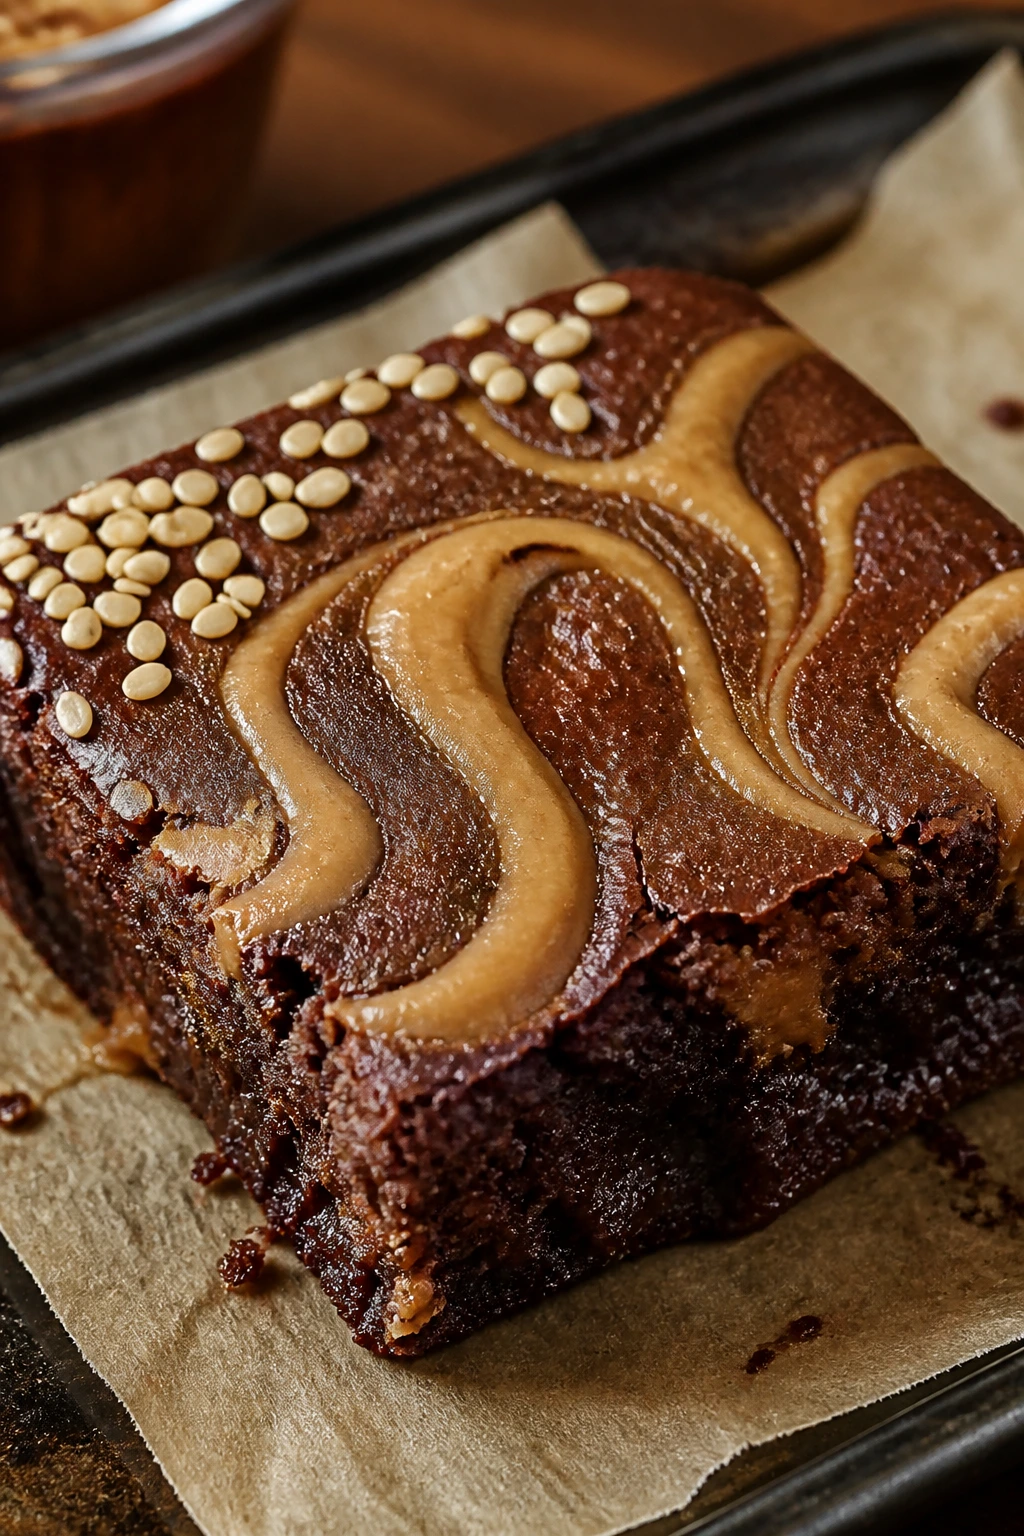
4. Peanut Butter Cup Brownies
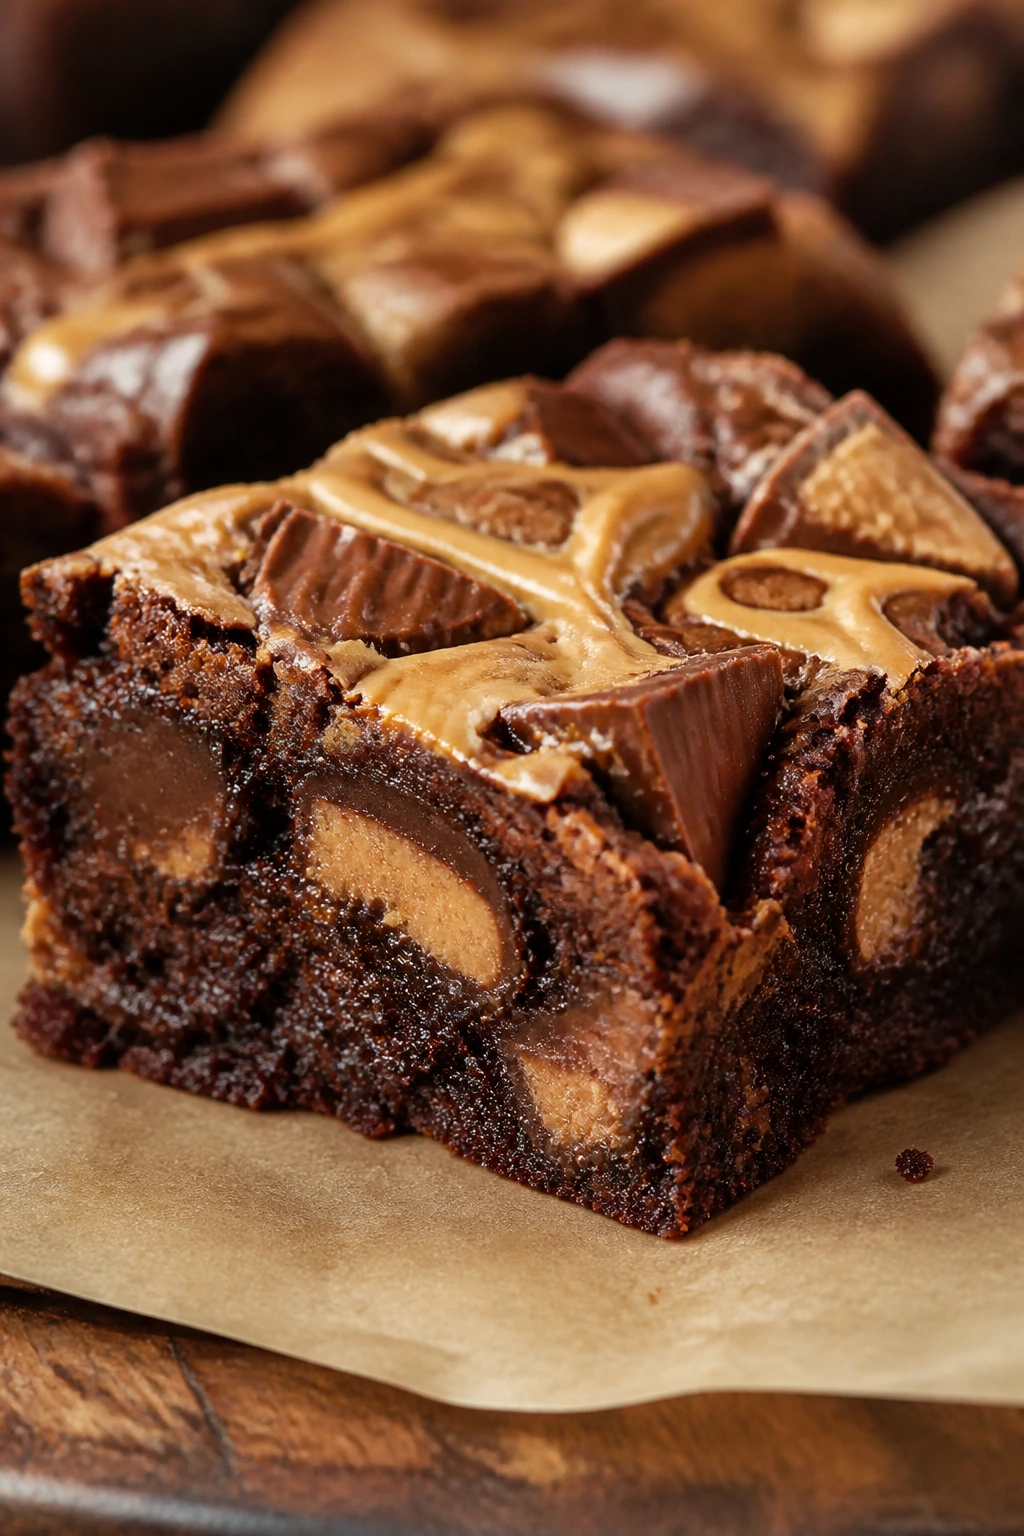
This is the pan for people who think chocolate should bring a friend. Peanut butter gives the brownie a salty, nutty edge, and chopped peanut butter cups melt into pockets that go soft and slightly messy the moment the knife hits them.
Why It Works: Peanut butter cuts through the richness of the brownie base, so the pan doesn’t taste heavy. A simple swirl on top keeps the peanut butter visible and gives you a little texture contrast in each square. The candy pieces melt just enough to stay soft without disappearing.
Key Ingredients:
- 1/2 cup unsalted butter, melted
- 1 cup granulated sugar
- 2 large eggs
- 1 teaspoon vanilla extract
- 1/2 cup unsweetened cocoa powder
- 1/2 cup all-purpose flour
- 1/4 teaspoon fine salt
- 1/2 cup creamy peanut butter
- 2 tablespoons powdered sugar
- 1 tablespoon milk
- 6 mini peanut butter cups, chopped
Quick Steps:
- Preheat the oven to 350°F and line an 8×8-inch pan.
- Whisk the butter, sugar, eggs, and vanilla until the mixture looks thick and shiny.
- Stir in the cocoa, flour, and salt. The batter will be dense.
- In a small bowl, mix the peanut butter, powdered sugar, and milk until spoonable, then dollop it over the batter.
- Drag a knife through the peanut butter, scatter the chopped peanut butter cups on top, and bake for 22 to 25 minutes.
- Let the pan cool at least 45 minutes so the candy settles.
Equipment for This Recipe:
- 8×8-inch pan
- Mixing bowl
- Small bowl for the swirl
- Knife for marbling
How to Serve This Dish: I like these in smaller squares because they’re rich enough to feel like two bites of dessert in one. A glass of cold milk or a cup of strong coffee is the right partner.
Pro Tips for This Recipe:
- Use creamy peanut butter, not the dry natural kind. Natural peanut butter can separate in the oven.
- Chop the peanut butter cups into uneven pieces so some melt into the brownie and some stay chunky.
- If the swirl disappears too much, the peanut butter was too warm.
Variations on This Dish:
- Crunchy Peanut Version: Swap 2 tablespoons of creamy peanut butter for crunchy peanut butter.
- Chocolate Overload: Add 1/2 cup chocolate chips to the batter for extra pockets.
- Pretzel Peanut Butter Cup: Press crushed pretzels over the top before baking.
Common Mistakes to Avoid with This Dish:
- Using too much peanut butter swirl: The top turns greasy and heavy.
- Adding the candy too early: Peanut butter cups can sink if you bury them under the batter.
- Cutting while warm: The peanut butter needs time to set or the squares slouch apart.
5. Cream Cheese Marble Brownies
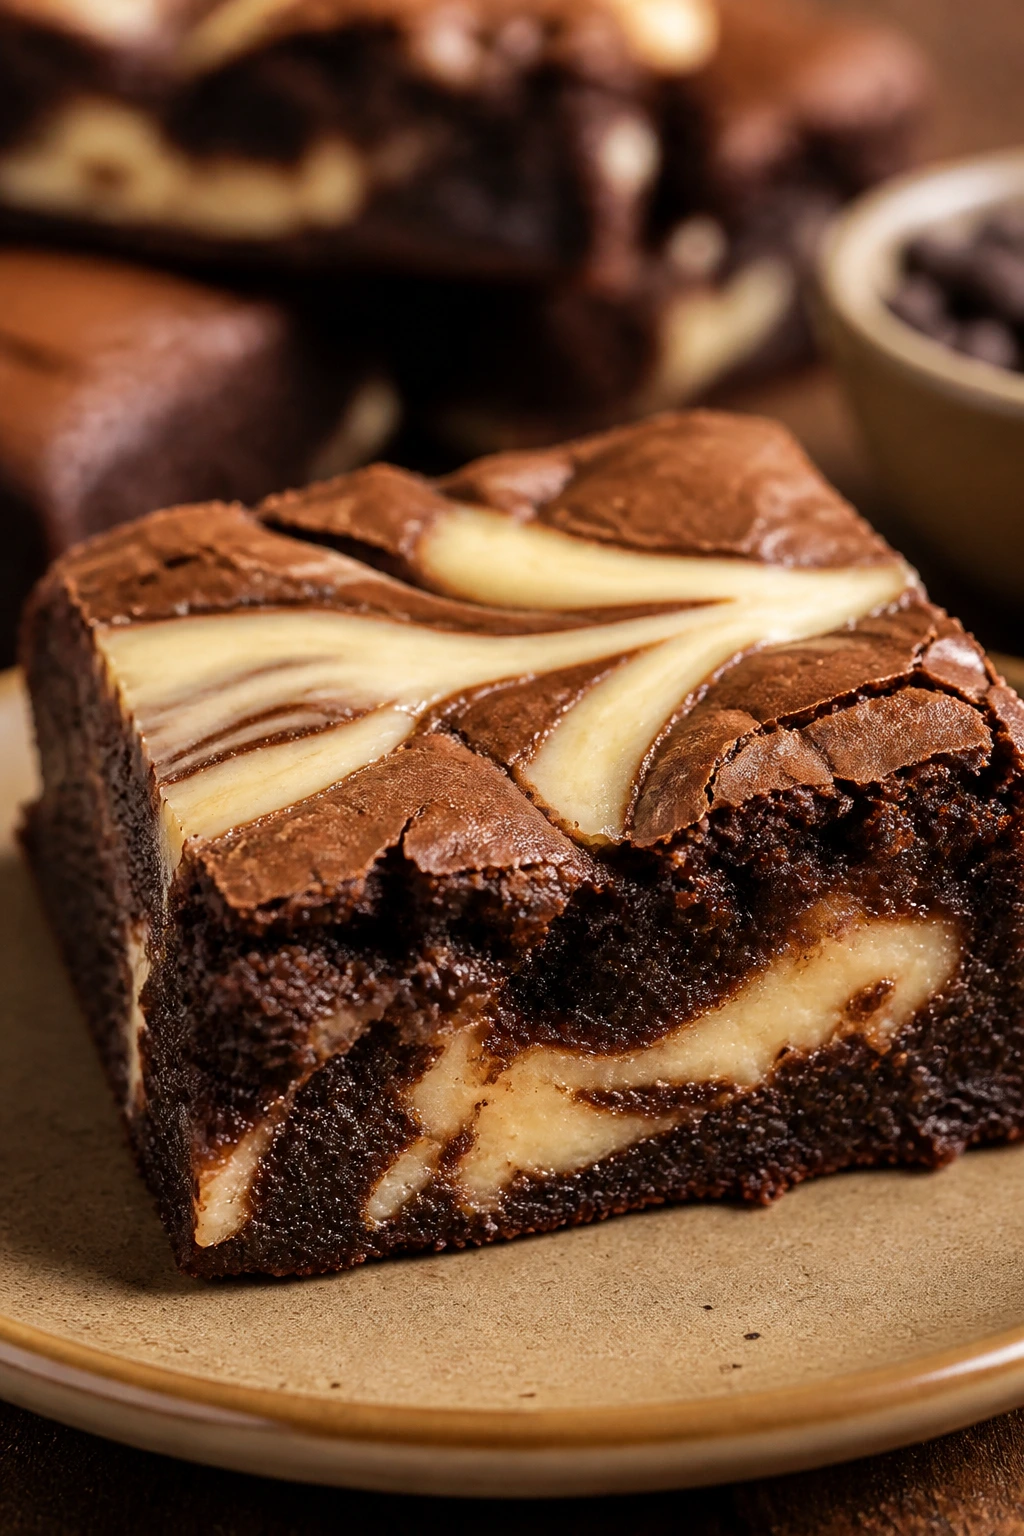
These brownies look fancy in the pan, but the method is plain and fast. The cream cheese ribbon bakes into a tangy, pale swirl that breaks up the dark chocolate and gives each bite a softer, almost cheesecake-like middle.
Why It Works: Cream cheese adds acidity and a little lift, which keeps the brownie from tasting flat. The swirl bakes just enough to set without drying out, so the pan stays gooey in the chocolate parts and creamy where the white ribbon runs through. It’s one of those combinations that feels more complicated than it is.
Key Ingredients:
- 1/2 cup unsalted butter, melted
- 1 cup granulated sugar
- 2 large eggs
- 1 teaspoon vanilla extract
- 1/2 cup unsweetened cocoa powder
- 1/2 cup all-purpose flour
- 1/4 teaspoon fine salt
- 6 ounces cream cheese, softened
- 1/4 cup granulated sugar
- 1 egg yolk
- 1/2 teaspoon vanilla extract
Quick Steps:
- Heat the oven to 350°F and line an 8×8-inch pan with parchment.
- Whisk the butter, sugar, eggs, and vanilla, then stir in the cocoa, flour, and salt.
- In another bowl, beat the cream cheese, sugar, egg yolk, and vanilla until smooth.
- Spread the brownie batter into the pan, spoon the cream cheese mixture over it, and swirl gently with a knife.
- Bake for 24 to 28 minutes, until the edges set and the cream cheese looks just firm.
- Cool completely before slicing so the swirl holds its shape.
Equipment for This Recipe:
- 8×8-inch pan
- Hand mixer or sturdy whisk
- Two mixing bowls
- Knife for swirling
How to Serve This Dish: These are good straight from the fridge, where the cream cheese layer firms up and slices cleanly. A few raspberries on the side work well because the tang echoes the filling.
Pro Tips for This Recipe:
- Soften the cream cheese fully or the swirl will stay lumpy.
- Don’t overbake waiting for the swirl to brown. Pale cream cheese is the goal.
- Use a light hand when swirling; too much mixing turns the whole pan beige.
Variations on This Dish:
- Lemon Cheesecake Swirl: Add 1 teaspoon lemon zest to the cream cheese mixture.
- Chocolate Chip Marble: Fold 1/2 cup chips into the brownie base.
- Cherry Cheesecake Brownies: Add 2 tablespoons chopped dried cherries to the cream cheese swirl.
Common Mistakes to Avoid with This Dish:
- Cold cream cheese: It leaves lumps that never disappear.
- Swirling too deeply: The bottom layers smear together and the marble disappears.
- Slicing warm: The cream cheese part needs a full cool-down or it pulls apart.
6. Mint Chocolate Brownies
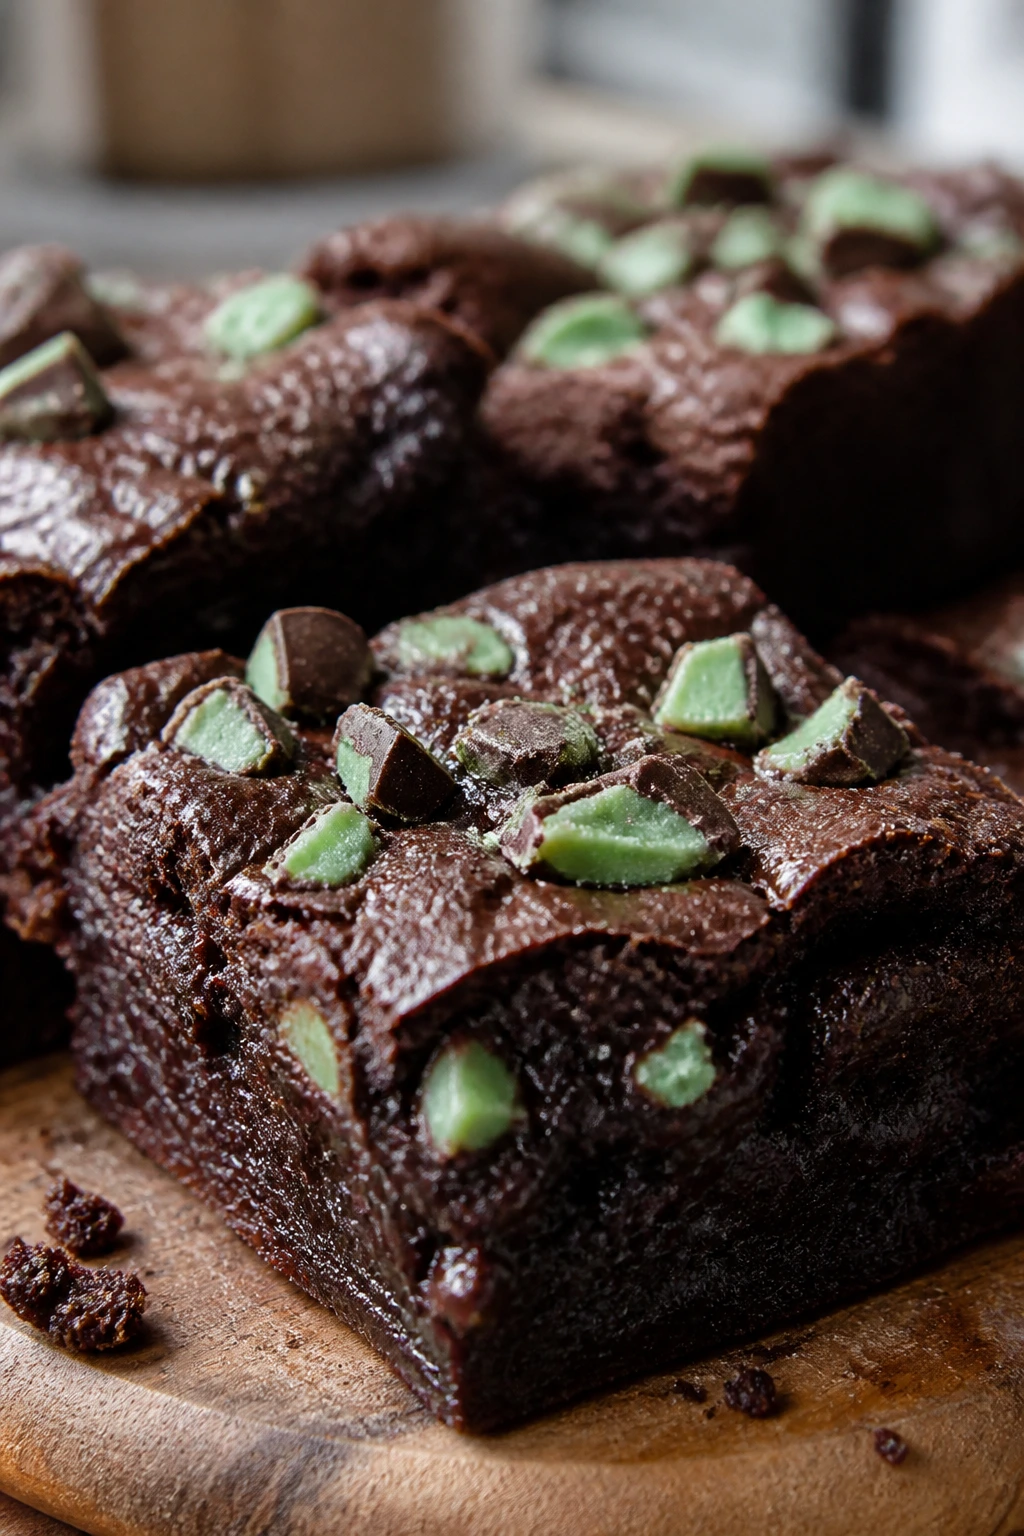
Mint brownies can go toothpaste fast if the mint is heavy-handed. These stay on the right side of the line: cool, dark, and clean-tasting, with chopped mint candies giving little bursts of sugar and a finish that feels almost chilled.
Why It Works: Peppermint extract is potent, so a small amount gives the brownie a sharp mint note without taking over. The chocolate chips stay in control of the sweetness, and the candy pieces on top add crunch. It’s a clean, bright spin on a dense chocolate pan.
Key Ingredients:
- 1/2 cup unsalted butter, melted
- 1 cup granulated sugar
- 2 large eggs
- 1 teaspoon vanilla extract
- 1/2 teaspoon peppermint extract
- 1/2 cup unsweetened cocoa powder
- 1/2 cup all-purpose flour
- 1/4 teaspoon fine salt
- 1/2 cup semisweet chocolate chips
- 1/2 cup chopped mint chocolates or thin mints
Quick Steps:
- Preheat the oven to 350°F and line an 8×8-inch pan.
- Whisk the butter, sugar, eggs, vanilla, and peppermint extract until smooth.
- Stir in the cocoa, flour, and salt, then fold in the chocolate chips.
- Spread the batter in the pan and scatter the chopped mint chocolates across the top.
- Bake for 22 to 25 minutes, until the center has a slight wobble.
- Cool before cutting so the mint pieces stay on the surface instead of sliding off.
Equipment for This Recipe:
- 8×8-inch pan
- Mixing bowl
- Spatula
- Sharp knife for slicing the candies
How to Serve This Dish: Mint brownies love a cold plate and a hot drink. I’d serve them with espresso, black tea, or a small scoop of chocolate ice cream if you want the flavor contrast to stay bold.
Pro Tips for This Recipe:
- Start with less peppermint than you think. You can add more next batch; you can’t pull it back.
- Chop the mint candies into uneven bits for better texture.
- Let the brownies cool fully or the mint topping can smear.
Variations on This Dish:
- Peppermint Bark Brownies: Add 1/4 cup white chocolate chips on top.
- Andes Mint Version: Press whole mint candies into the surface after baking.
- Mint Mocha: Add 1 teaspoon espresso powder to the batter.
Common Mistakes to Avoid with This Dish:
- Overdoing the extract: One heavy pour makes the pan taste sharp and odd.
- Using soft mint frosting candies: They melt into a slick layer.
- Skipping the cool time: The top candies need the brownies to firm up first.
7. Tahini Swirl Brownies
Tahini brownies are nutty, slightly savory, and a little unexpected in the best way. The sesame swirl keeps the chocolate from feeling one-dimensional, and the edges bake with a toasted note that makes the whole pan feel richer.
Why It Works: Tahini brings fat and depth without needing extra sweetness. A little maple syrup in the swirl smooths the sesame flavor and helps it ribbon instead of clump. The salt on top sharpens everything, especially once the brownies have cooled.
Key Ingredients:
- 1/2 cup unsalted butter, melted
- 1 cup granulated sugar
- 2 large eggs
- 1 teaspoon vanilla extract
- 1/2 cup unsweetened cocoa powder
- 1/2 cup all-purpose flour
- 1/4 teaspoon fine salt
- 1/3 cup tahini
- 1 tablespoon maple syrup
- 1 tablespoon sesame seeds
- Flaky salt, for finishing
Quick Steps:
- Heat the oven to 350°F and line an 8×8-inch pan.
- Whisk the butter, sugar, eggs, and vanilla until thick.
- Stir in the cocoa, flour, and fine salt.
- Mix the tahini with maple syrup, then dollop it over the batter and swirl lightly.
- Sprinkle sesame seeds across the top and bake for 23 to 26 minutes.
- Finish with flaky salt as soon as the pan comes out of the oven.
Equipment for This Recipe:
- 8×8-inch pan
- Mixing bowl
- Spoon for the tahini swirl
- Parchment paper
How to Serve This Dish: These taste excellent with plain yogurt or a scoop of vanilla ice cream because the cool dairy softens the sesame note. Cut them into small squares; tahini makes them feel richer than they look.
Pro Tips for This Recipe:
- Stir the tahini well before measuring. Separated tahini makes the swirl greasy.
- Maple syrup keeps the tahini from seizing into thick clumps.
- Flaky salt matters here. It gives the sesame flavor some lift.
Variations on This Dish:
- Halva Style: Crumble 1/4 cup halva over the top before baking.
- Chocolate Sesame Crunch: Add 2 tablespoons toasted sesame seeds to the batter.
- Orange Tahini: Add 1 teaspoon orange zest for brightness.
Common Mistakes to Avoid with This Dish:
- Using dry tahini from the bottom of the jar: It won’t swirl smoothly.
- Overmixing the swirl: You lose the streaks and end up with a brown pan.
- Too much sweetness: Tahini needs salt, not extra sugar.
8. Cherry Almond Brownies
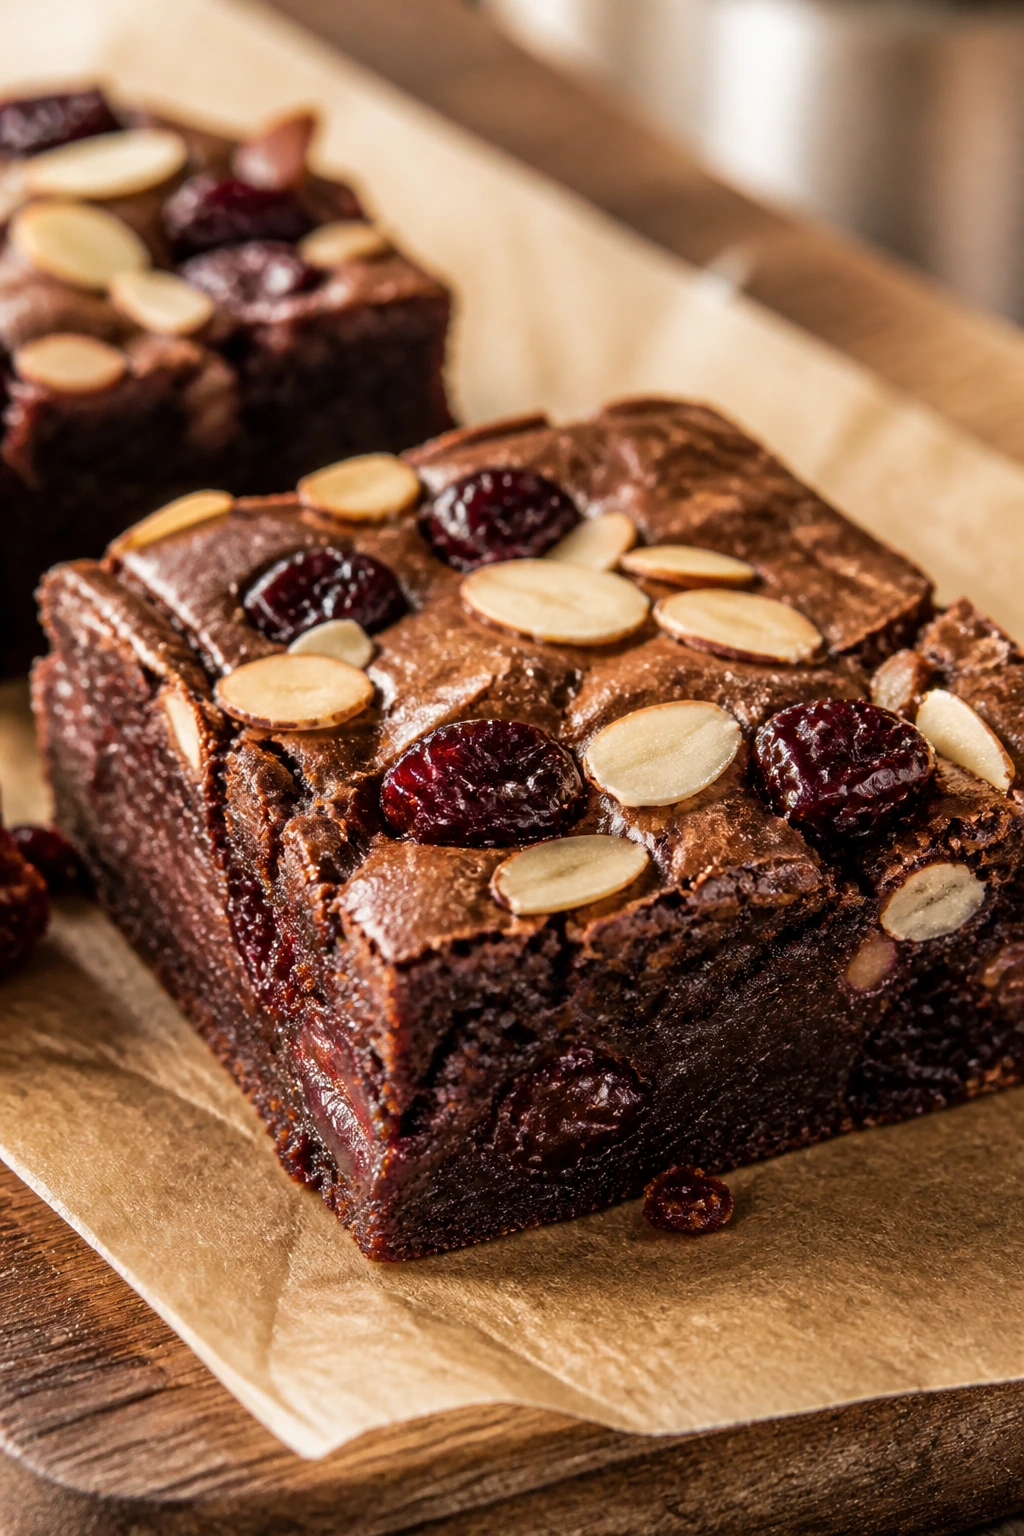
Cherry and almond taste like they were meant to land in a chocolate pan together. The cherries go chewy and a little tart, the almond extract gives the whole tray a bakery smell, and the sliced almonds toast on top as the brownies bake.
Why It Works: Dried cherries hold their shape in the oven, so you get pockets of fruit instead of wet spots. Almond extract is strong, so a small amount carries the flavor without making the brownies taste like marzipan. The nuts on top add crunch where the base stays soft.
Key Ingredients:
- 1/2 cup unsalted butter, melted
- 1 cup granulated sugar
- 2 large eggs
- 1 teaspoon vanilla extract
- 1/2 teaspoon almond extract
- 1/2 cup unsweetened cocoa powder
- 1/2 cup all-purpose flour
- 1/4 teaspoon fine salt
- 3/4 cup dried tart cherries
- 1/3 cup sliced almonds
Quick Steps:
- Preheat the oven to 350°F and line an 8×8-inch pan with parchment.
- Whisk the butter, sugar, eggs, vanilla, and almond extract until glossy.
- Stir in the cocoa, flour, and salt, then fold in the cherries.
- Spread the batter in the pan and scatter the sliced almonds over the top.
- Bake for 22 to 25 minutes, until the almonds are golden at the edges.
- Cool fully before slicing so the cherry pieces don’t drag the brownies apart.
Equipment for This Recipe:
- 8×8-inch pan
- Mixing bowl
- Spatula
- Measuring spoons for the almond extract
How to Serve This Dish: These brownies do nicely on a plate with a few fresh berries or a spoonful of cherry jam on the side. A cup of tea brings out the fruit better than milk does.
Pro Tips for This Recipe:
- Chop very large cherries so they spread through the pan.
- Toast the sliced almonds for a minute or two if your oven tends to bake slowly.
- Use almond extract sparingly; it goes loud fast.
Variations on This Dish:
- Black Forest Style: Add 1/2 cup chopped dark chocolate to the batter.
- Cherry Coconut: Swap 1/4 cup cherries for shredded coconut.
- Apricot Almond: Use chopped dried apricots when cherries aren’t around.
Common Mistakes to Avoid with This Dish:
- Using too much almond extract: It drowns the chocolate.
- Adding frozen cherries without drying them: They can streak the batter with extra moisture.
- Cutting before cool: The fruit pieces need the brownie to set.
9. Coconut Macaroon Brownies
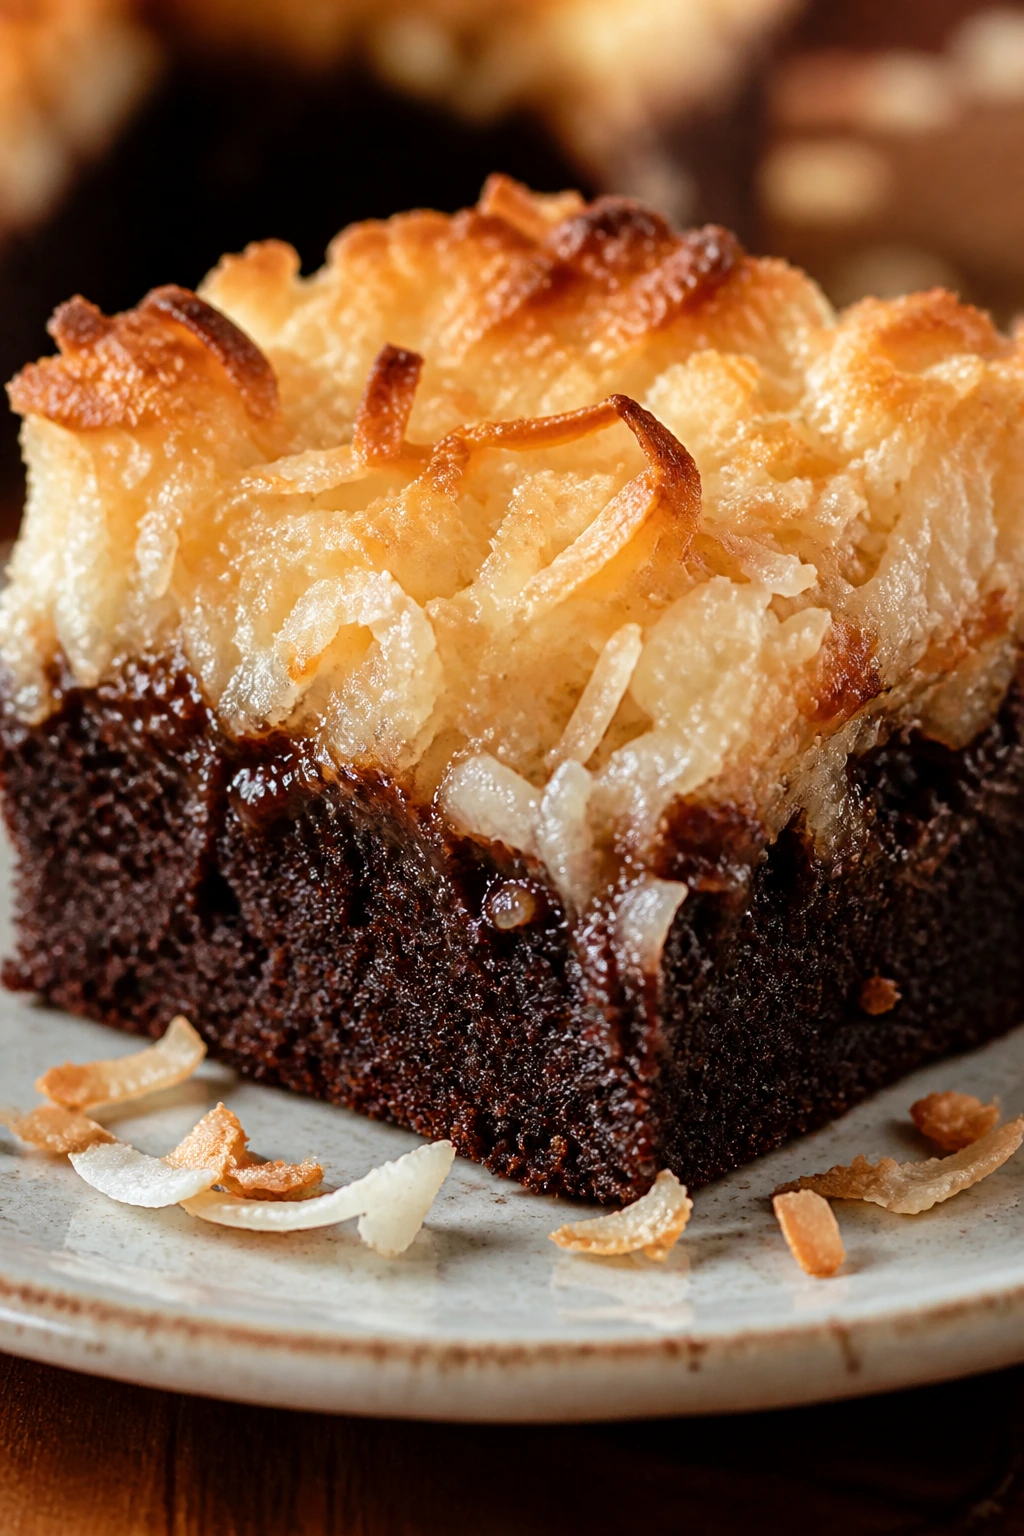
These smell like toasted coconut and melted chocolate at the same time, which is enough to get people hovering near the pan. The macaroon layer bakes into a sweet, chewy cap that sits on top of the brownie like a second dessert.
Why It Works: Sweetened shredded coconut bakes into a chewy top instead of turning dry if you give it a binder. Egg white and a little sugar help the coconut clump and brown, so the top tastes like a quick macaroon without needing a separate cookie recipe. The brownie base keeps the whole thing from feeling too sweet.
Key Ingredients:
- 1/2 cup unsalted butter, melted
- 1 cup granulated sugar
- 2 large eggs, separated
- 1 teaspoon vanilla extract
- 1/2 cup unsweetened cocoa powder
- 1/2 cup all-purpose flour
- 1/4 teaspoon fine salt
- 1 cup sweetened shredded coconut
- 2 tablespoons granulated sugar
- 1/2 teaspoon vanilla extract
Quick Steps:
- Preheat the oven to 350°F and line an 8×8-inch pan.
- Whisk the butter, sugar, egg yolks, and vanilla, then stir in the cocoa, flour, and salt.
- In another bowl, beat the egg whites until frothy, then stir in the coconut, sugar, and vanilla.
- Spread the brownie batter into the pan and spoon the coconut mixture over the top.
- Bake for 24 to 27 minutes, until the coconut is toasted and the brownie center still looks soft.
- Cool before cutting so the coconut cap doesn’t crumble away.
Equipment for This Recipe:
- 8×8-inch pan
- Two mixing bowls
- Whisk
- Spatula
How to Serve This Dish: Serve these in narrow bars rather than big squares; the coconut top feels richer than the brownie below. A small scoop of pineapple sorbet is a fun pairing if you want a dessert that leans tropical.
Pro Tips for This Recipe:
- Beat the egg whites only until frothy. You don’t need stiff peaks for a macaroon topping.
- Pack the coconut layer lightly, not tightly, so it browns evenly.
- If the coconut browns too quickly, tent the pan loosely with foil for the last few minutes.
Variations on This Dish:
- Chocolate Almond Coconut: Add 1/4 teaspoon almond extract to the topping.
- Toasted Coconut Crunch: Sprinkle extra coconut on top halfway through baking.
- Dark Coconut: Use dark cocoa powder for a deeper base.
Common Mistakes to Avoid with This Dish:
- Dry coconut straight from the bag: It can bake into flakes instead of a chewy layer.
- Overbaking the top: The coconut goes from toasted to bitter fast.
- Skipping the cool time: The topping needs time to settle before slicing.
10. S’mores Brownies

These taste like a campfire dessert that found a better oven. You get graham cracker bits, melted chocolate, and marshmallow in one pan, but the brownie base keeps the whole thing from turning into a sticky mess.
Why It Works: Crushed graham crackers give you that toasty crumb without building a whole crust. Marshmallows added near the end melt and blister instead of vanishing into the batter. The chocolate base keeps the sweetness grounded.
Key Ingredients:
- 1/2 cup unsalted butter, melted
- 1 cup granulated sugar
- 2 large eggs
- 1 teaspoon vanilla extract
- 1/2 cup unsweetened cocoa powder
- 1/2 cup all-purpose flour
- 1/4 teaspoon fine salt
- 1 cup crushed graham crackers, divided
- 1/2 cup milk chocolate chunks
- 1 cup mini marshmallows
Quick Steps:
- Heat the oven to 350°F and line an 8×8-inch pan.
- Whisk the butter, sugar, eggs, and vanilla, then stir in the cocoa, flour, salt, and half the graham crackers.
- Fold in the chocolate chunks and spread the batter into the pan.
- Bake for 18 minutes, then pull the pan out, scatter the marshmallows and remaining graham crumbs over the top, and return it to the oven.
- Bake 4 to 6 minutes more, just until the marshmallows puff and brown.
- Cool for 30 to 45 minutes before cutting.
Equipment for This Recipe:
- 8×8-inch pan
- Mixing bowl
- Spatula
- Small bowl for the graham crumbs
How to Serve This Dish: Serve them warm if you want the marshmallow to stay stretchy. Cold milk, hot cocoa, or black coffee all work; the brownies already bring enough sweetness for the drink to stay plain.
Pro Tips for This Recipe:
- Add the marshmallows late or they’ll disappear into the batter.
- Use large or tiny marshmallows, not jumbo ones. Jumbo pieces can make slicing awkward.
- Crush the grahams finely for the batter and leave a few bigger crumbs for the top.
Variations on This Dish:
- Peanut S’mores: Add 1/4 cup peanut butter chips to the batter.
- Dark Chocolate Campfire: Swap milk chocolate chunks for bittersweet chocolate.
- Torch Finish: Broil for 30 seconds at the end if you want deeper browning, but watch it closely.
Common Mistakes to Avoid with This Dish:
- Putting all the marshmallows in from the start: They melt away into nothing.
- Using too much graham cracker: The brownies dry out and turn sandy.
- Walking away during the broil: Marshmallows go from golden to burnt fast.
11. Brown Butter Toffee Brownies
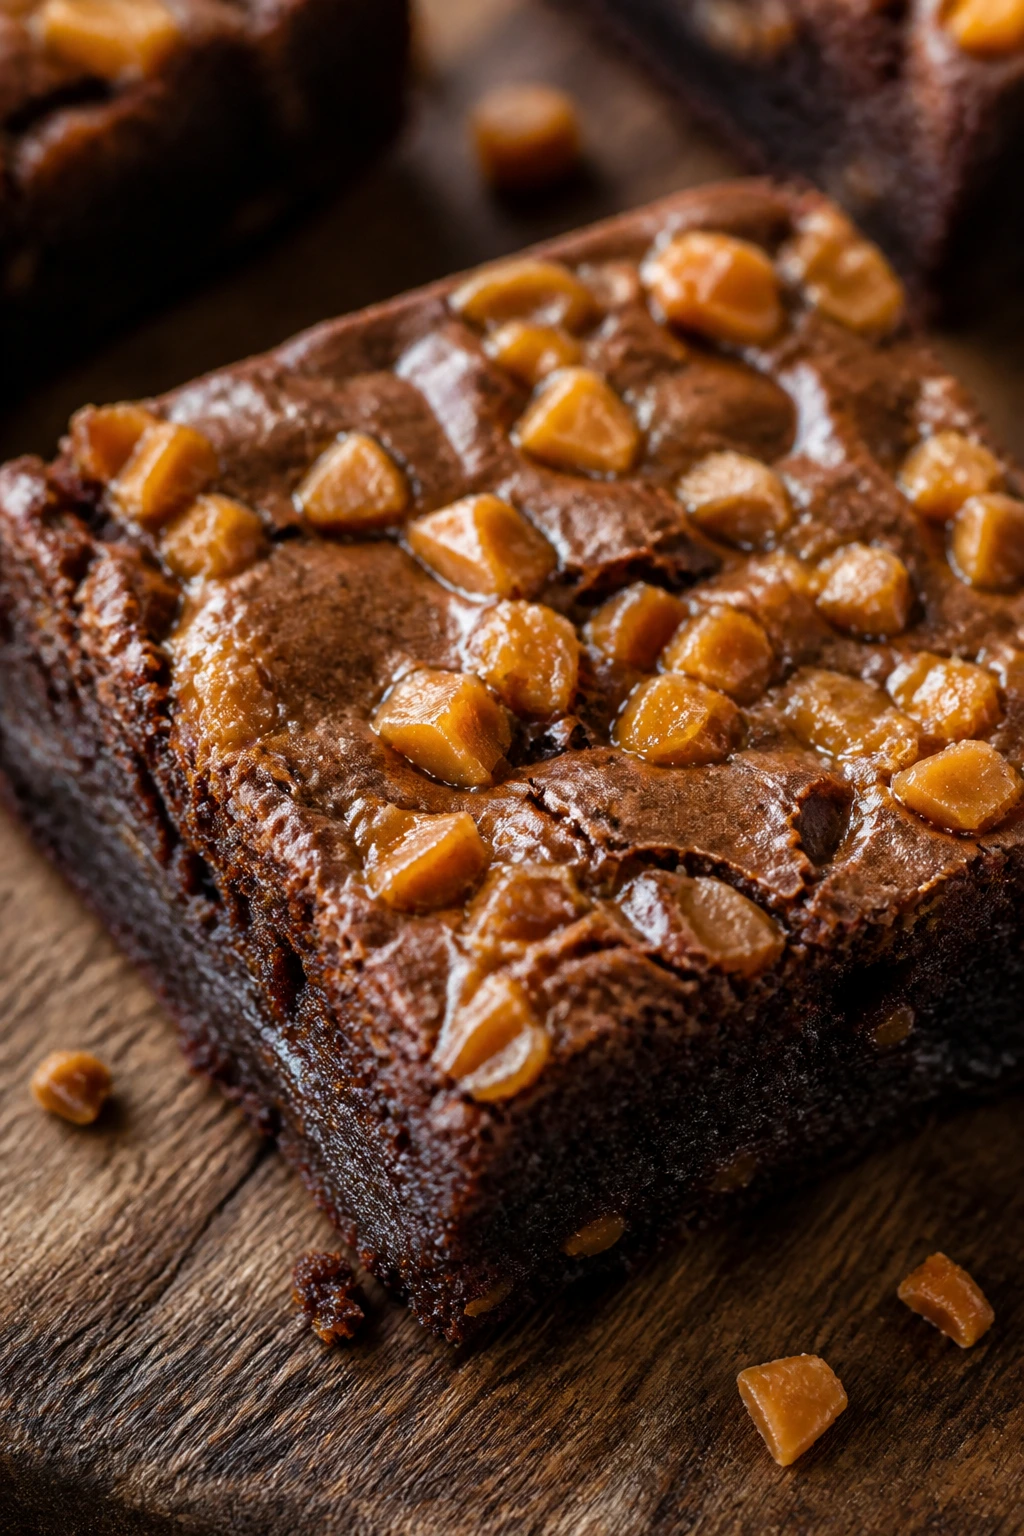
Brown butter gives these brownies a nutty smell that hits the kitchen before the pan even cools. Toffee bits add little hard-sweet sparks against the soft center, and the whole thing feels richer than the ingredient list suggests.
Why It Works: Browning the butter changes the flavor from plain fat to toasted, caramel-like depth. That means you get a more layered brownie without adding extra steps later. Toffee bits melt at the edges and stay crisp in the middle, which is exactly the contrast this pan needs.
Key Ingredients:
- 1/2 cup unsalted butter
- 1 cup granulated sugar
- 2 large eggs
- 1 teaspoon vanilla extract
- 1/2 cup unsweetened cocoa powder
- 1/2 cup all-purpose flour
- 1/4 teaspoon fine salt
- 1/2 cup toffee bits
- 1/4 teaspoon flaky salt, for topping
Quick Steps:
- Brown the butter in a saucepan over medium heat for 4 to 6 minutes, until it smells nutty and has amber specks.
- Pour the butter into a bowl, add the sugar, and whisk for 30 seconds.
- Whisk in the eggs and vanilla, then stir in the cocoa, flour, and fine salt.
- Fold in the toffee bits and spread the batter into a lined 8×8-inch pan.
- Bake at 350°F for 23 to 26 minutes, then finish with flaky salt.
- Cool at least 1 hour before cutting.
Equipment for This Recipe:
- Small saucepan for browning butter
- 8×8-inch pan
- Mixing bowl
- Whisk
How to Serve This Dish: These brownies are strong enough to stand on their own, but a scoop of coffee ice cream makes the toffee flavor pop. Slice them into small squares because the brown butter makes them taste deeper than most pans.
Pro Tips for This Recipe:
- Watch the butter closely once it starts foaming. Brown butter can cross from nutty to burnt in a minute.
- Use a light-colored pan or bowl so you can see the butter color.
- Hold back a spoonful of toffee bits to press on top before baking.
Variations on This Dish:
- Salted Toffee Crunch: Add extra flaky salt after baking.
- Walnut Toffee: Fold in 1/2 cup toasted walnuts with the toffee.
- Espresso Brown Butter: Stir in 1 teaspoon espresso powder with the cocoa.
Common Mistakes to Avoid with This Dish:
- Over-browning the butter: Burnt butter makes the brownies taste bitter.
- Skipping the cool-down on the butter: Hot butter can scramble the eggs.
- Too much toffee on top: The surface can turn hard and sticky.
12. Mocha Chip Brownies
Mocha brownies are for people who want chocolate to taste a little darker and a little more grown-up. Brewed espresso and chocolate chips make the pan taste deep and slightly bitter in a way that keeps each square from feeling sugary.
Why It Works: A small amount of cooled espresso gives the batter moisture and a coffee edge without making it loose. Chocolate chips in the batter melt into soft streaks that hold on to the mocha flavor. The result is less candy bar, more dense café dessert.
Key Ingredients:
- 1/2 cup unsalted butter, melted
- 1 cup granulated sugar
- 2 large eggs
- 1 teaspoon vanilla extract
- 2 tablespoons cooled strong espresso or very strong coffee
- 1/2 cup unsweetened cocoa powder
- 1/2 cup all-purpose flour
- 1/4 teaspoon fine salt
- 3/4 cup semisweet chocolate chips
Quick Steps:
- Preheat the oven to 350°F and line an 8×8-inch pan.
- Whisk the butter, sugar, eggs, vanilla, and espresso until the mixture looks thick and smooth.
- Stir in the cocoa, flour, and salt, then fold in the chocolate chips.
- Spread into the pan and bake for 22 to 25 minutes.
- Look for a set edge and a center that still has a little softness when the pan shakes gently.
- Cool before slicing.
Equipment for This Recipe:
- 8×8-inch pan
- Whisk
- Mixing bowl
- Spatula
How to Serve This Dish: These brownies pair well with plain whipped cream or a small scoop of coffee ice cream. If you’re serving them warm, a tiny pinch of flaky salt on top keeps the mocha flavor from reading flat.
Pro Tips for This Recipe:
- Make the coffee stronger than you’d drink it. Weak coffee disappears.
- Don’t add hot espresso to the eggs. Let it cool first.
- If you like a firmer chip texture, use chocolate chunks instead of chips.
Variations on This Dish:
- Double Mocha: Add 1 extra teaspoon espresso powder to the dry mix.
- Hazelnut Mocha: Fold in 1/3 cup chopped hazelnuts.
- White Mocha: Add 1/2 cup white chocolate chips for a sweeter pan.
Common Mistakes to Avoid with This Dish:
- Using watery coffee: It makes the batter thin and the flavor weak.
- Baking until dry in the middle: Mocha brownies need a soft center or the coffee note gets harsh.
- Too much sugar on top: The coffee flavor needs space to show up.
13. Pretzel Crunch Brownies
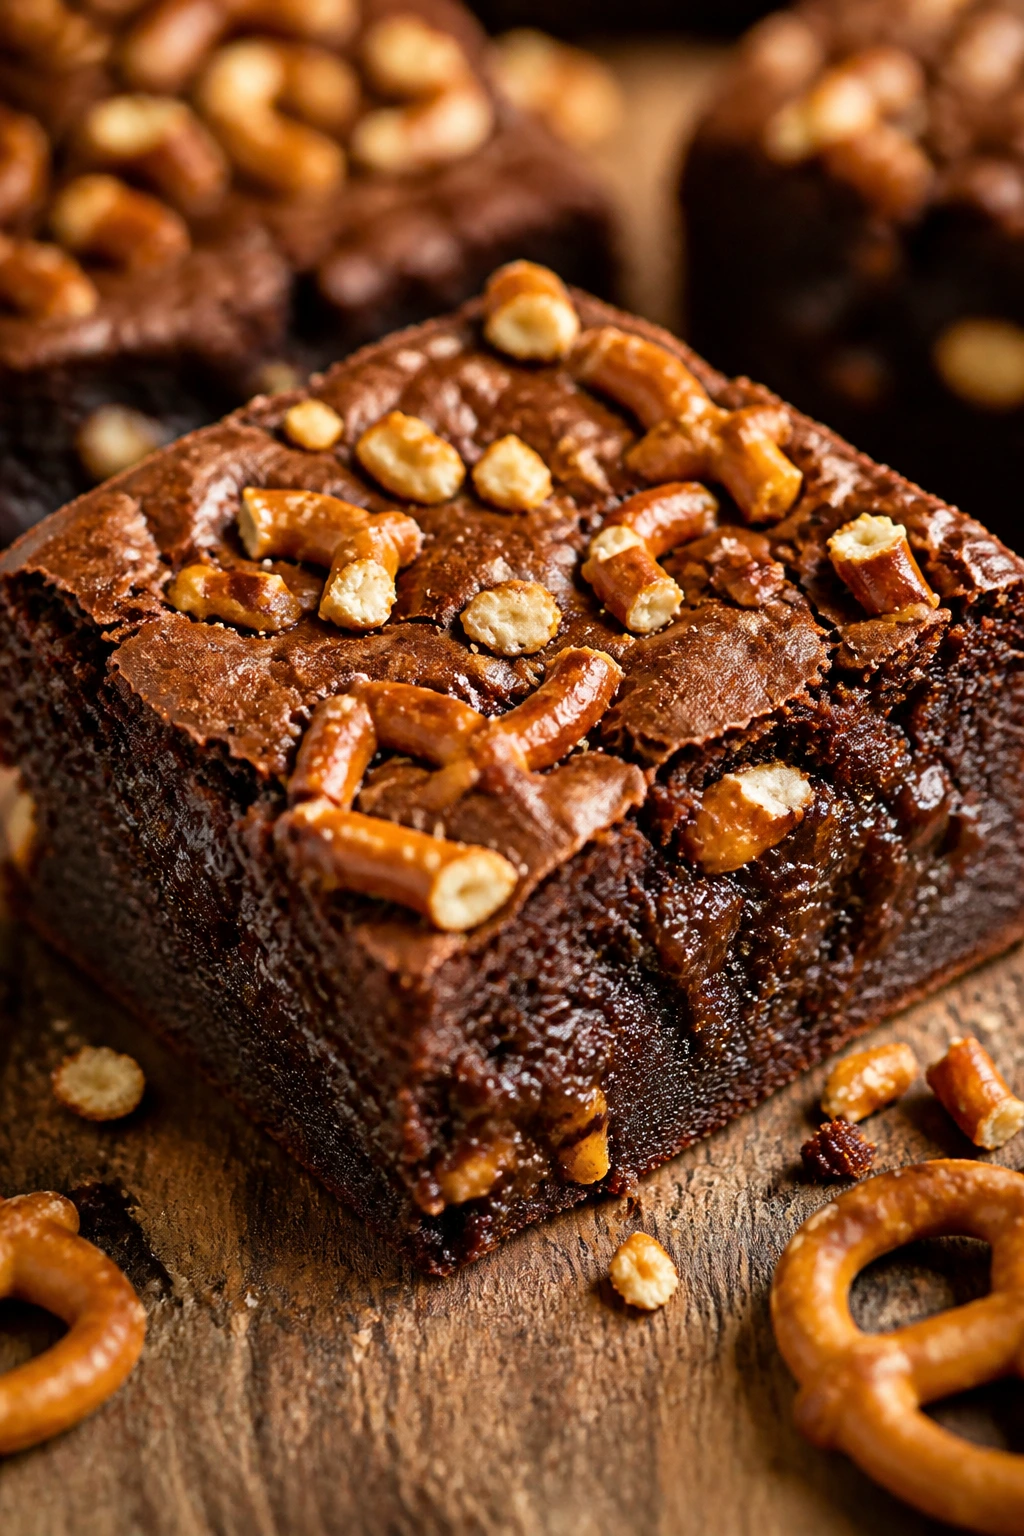
Pretzels bring a blunt little crunch that brownies usually lack. Salted, knobbly, and a bit irregular, they keep the pan from feeling one-note and give each bite a snap before the fudgy middle takes over.
Why It Works: The salt on pretzels cuts through rich chocolate better than plain nuts sometimes do. Adding some pretzels to the batter and some on top gives you two textures: chewy pockets and crisp edges. It’s a simple trick, but it changes the whole pan.
Key Ingredients:
- 1/2 cup unsalted butter, melted
- 1 cup granulated sugar
- 2 large eggs
- 1 teaspoon vanilla extract
- 1/2 cup unsweetened cocoa powder
- 1/2 cup all-purpose flour
- 1/4 teaspoon fine salt
- 1 cup mini pretzels, lightly crushed, divided
- 1/2 cup semisweet chocolate chunks
Quick Steps:
- Preheat the oven to 350°F and line an 8×8-inch pan.
- Whisk the butter, sugar, eggs, and vanilla until glossy.
- Stir in the cocoa, flour, and salt, then fold in half the pretzels and the chocolate chunks.
- Spread the batter into the pan and press the remaining pretzels over the top.
- Bake for 22 to 24 minutes, until the top is crackly and the pretzels look toasted.
- Cool before cutting so the pretzels don’t shatter out of the pan.
Equipment for This Recipe:
- 8×8-inch pan
- Mixing bowl
- Spatula
- Zip-top bag or bowl for crushing pretzels
How to Serve This Dish: These brownies work well as a snack-cut dessert: small squares, no fork needed. I like them with cold milk because the salt and chocolate both stay loud in a good way.
Pro Tips for This Recipe:
- Crush the pretzels lightly. Powder ruins the texture; giant pieces make slicing messy.
- Press the top pretzels in gently so they stick but don’t sink.
- Use mini pretzels for the top because they toast more evenly than big twists.
Variations on This Dish:
- Peanut Butter Pretzel: Add 1/4 cup peanut butter chips to the batter.
- Dark Salted Version: Use dark chocolate chunks and a touch more flaky salt.
- Honey Pretzel: Drizzle a teaspoon of honey over the top after baking.
Common Mistakes to Avoid with This Dish:
- Crushing pretzels too fine: You lose the crunch.
- Baking too long: Pretzels go dry and hard.
- Adding too many salted toppings: The pan can tip from salty to harsh.
14. Oreo-Stuffed Brownies
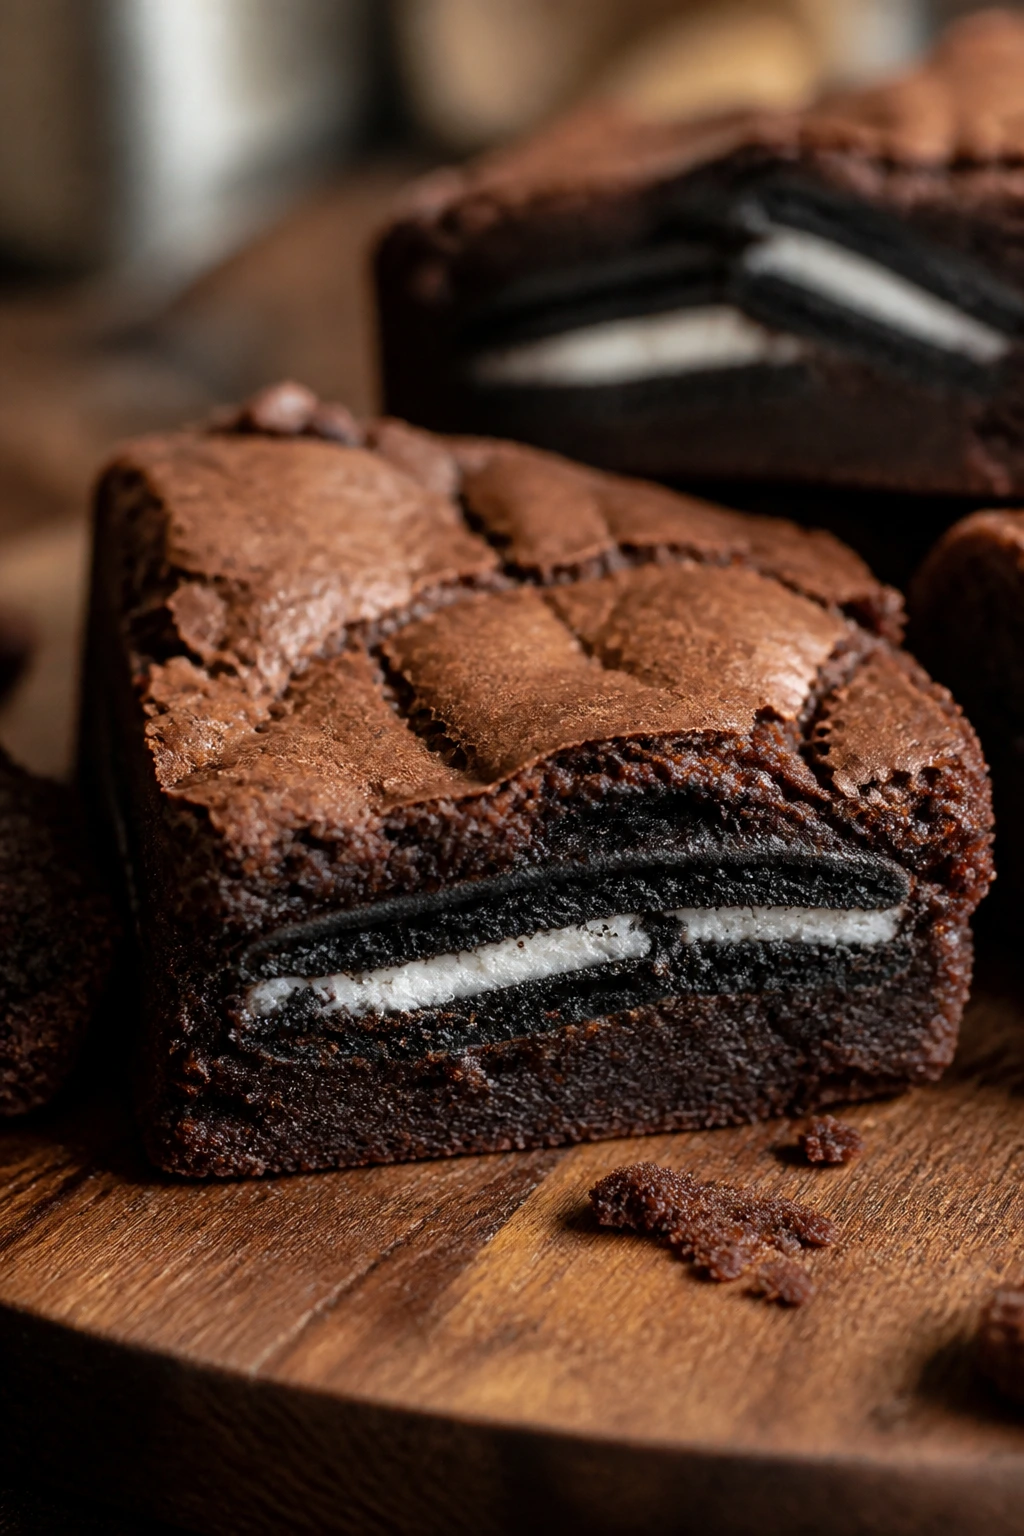
These are the easiest “wow” brownies in the group, which is part of their charm. You pour a little batter, add Oreos, cover them, and bake. That’s it. The cookies soften into a cake-like middle while the brownie around them stays dense.
Why It Works: Oreos bring built-in cream and crunch, so the brownies get a center that feels almost layered without needing frosting. The cookie layer holds its shape just enough to surprise you when you slice. Using enough batter to cover them keeps the cookies from burning on top.
Key Ingredients:
- 1/2 cup unsalted butter, melted
- 1 cup granulated sugar
- 2 large eggs
- 1 teaspoon vanilla extract
- 1/2 cup unsweetened cocoa powder
- 1/2 cup all-purpose flour
- 1/4 teaspoon fine salt
- 12 Oreo cookies
- 1/4 cup chopped chocolate chips, optional
Quick Steps:
- Preheat the oven to 350°F and line an 8×8-inch pan.
- Whisk the butter, sugar, eggs, and vanilla, then stir in the cocoa, flour, and salt.
- Spread half the batter in the pan and arrange the Oreos in a single layer.
- Spoon the remaining batter over the cookies and smooth the top.
- Bake for 24 to 27 minutes, until the top is set and the center still feels soft.
- Cool completely before slicing so the cookie layer holds together.
Equipment for This Recipe:
- 8×8-inch pan
- Mixing bowl
- Spatula
- Offset spatula or back of a spoon for smoothing
How to Serve This Dish: These are rich enough to cut small. A tall glass of milk is the obvious move, and I’m not ashamed of that. They also travel well because the cookie center makes them sturdy once cooled.
Pro Tips for This Recipe:
- Keep the Oreos in one even layer. Overlapping them makes the middle uneven.
- Don’t crush the cookies unless you want a different texture entirely.
- Let the brownies cool all the way before lifting them out of the pan.
Variations on This Dish:
- Golden Cookie Version: Swap in vanilla sandwich cookies.
- Mint Oreo Brownies: Use mint-filled cookies for a cool twist.
- Extra Creamy: Add a few tablespoons of cream cheese to the brownie batter for a softer crumb.
Common Mistakes to Avoid with This Dish:
- Covering the cookies with too little batter: They can dry out on top.
- Overbaking because the center feels gooey: The cookie layer needs that little softness.
- Slicing too soon: Warm Oreos slide apart more than you’d expect.
15. Black Bean Cocoa Brownies
These are the brownies that make skeptics go quiet after one bite. The black beans disappear into the batter once blended, leaving behind a dense, soft pan that tastes like chocolate and not like a stunt recipe.
Why It Works: Pureed black beans add body and moisture while replacing some of the flour load. Cocoa, sugar, and eggs do the heavy lifting on flavor, so the beans stay hidden. The texture lands somewhere between fudge and cake, but closer to fudge if you do not overbake it.
Key Ingredients:
- 1 can (15 ounces) black beans, drained and rinsed
- 2 large eggs
- 1/2 cup granulated sugar
- 1/4 cup unsalted butter, melted
- 1 teaspoon vanilla extract
- 1/2 cup unsweetened cocoa powder
- 1/2 teaspoon baking powder
- 1/4 teaspoon fine salt
- 1/2 cup semisweet chocolate chips
Quick Steps:
- Preheat the oven to 350°F and line an 8×8-inch pan.
- Blend the black beans, eggs, sugar, melted butter, and vanilla until the mixture is completely smooth.
- Add the cocoa, baking powder, and salt, then blend again until no specks remain.
- Stir in the chocolate chips and spread the batter into the pan.
- Bake for 22 to 26 minutes, until the top is set and the middle barely jiggles.
- Cool fully before slicing so the texture firms up.
Equipment for This Recipe:
- Blender or food processor
- 8×8-inch pan
- Parchment paper
- Spatula
How to Serve This Dish: Serve these once they’re fully cool, because the texture improves after resting. A dusting of cocoa powder on top helps them look like standard brownies, which is half the fun.
Pro Tips for This Recipe:
- Blend until the batter looks glossy and smooth; grainy beans will show up.
- Rinse the beans well or the pan can taste tinny.
- Use chocolate chips inside the batter so the flavor reads clearly.
Variations on This Dish:
- Peanut Butter Bean Brownies: Blend in 2 tablespoons peanut butter.
- Double Chocolate: Add 1/4 cup chopped dark chocolate.
- Walnut Bean Brownies: Fold in 1/2 cup chopped walnuts after blending.
Common Mistakes to Avoid with This Dish:
- Leaving the beans in chunks: The texture turns odd fast.
- Using too little sugar: The cocoa takes over and the pan tastes flat.
- Cutting warm: They need time to set or they’ll look underdone even when baked.
16. Zucchini Fudge Brownies
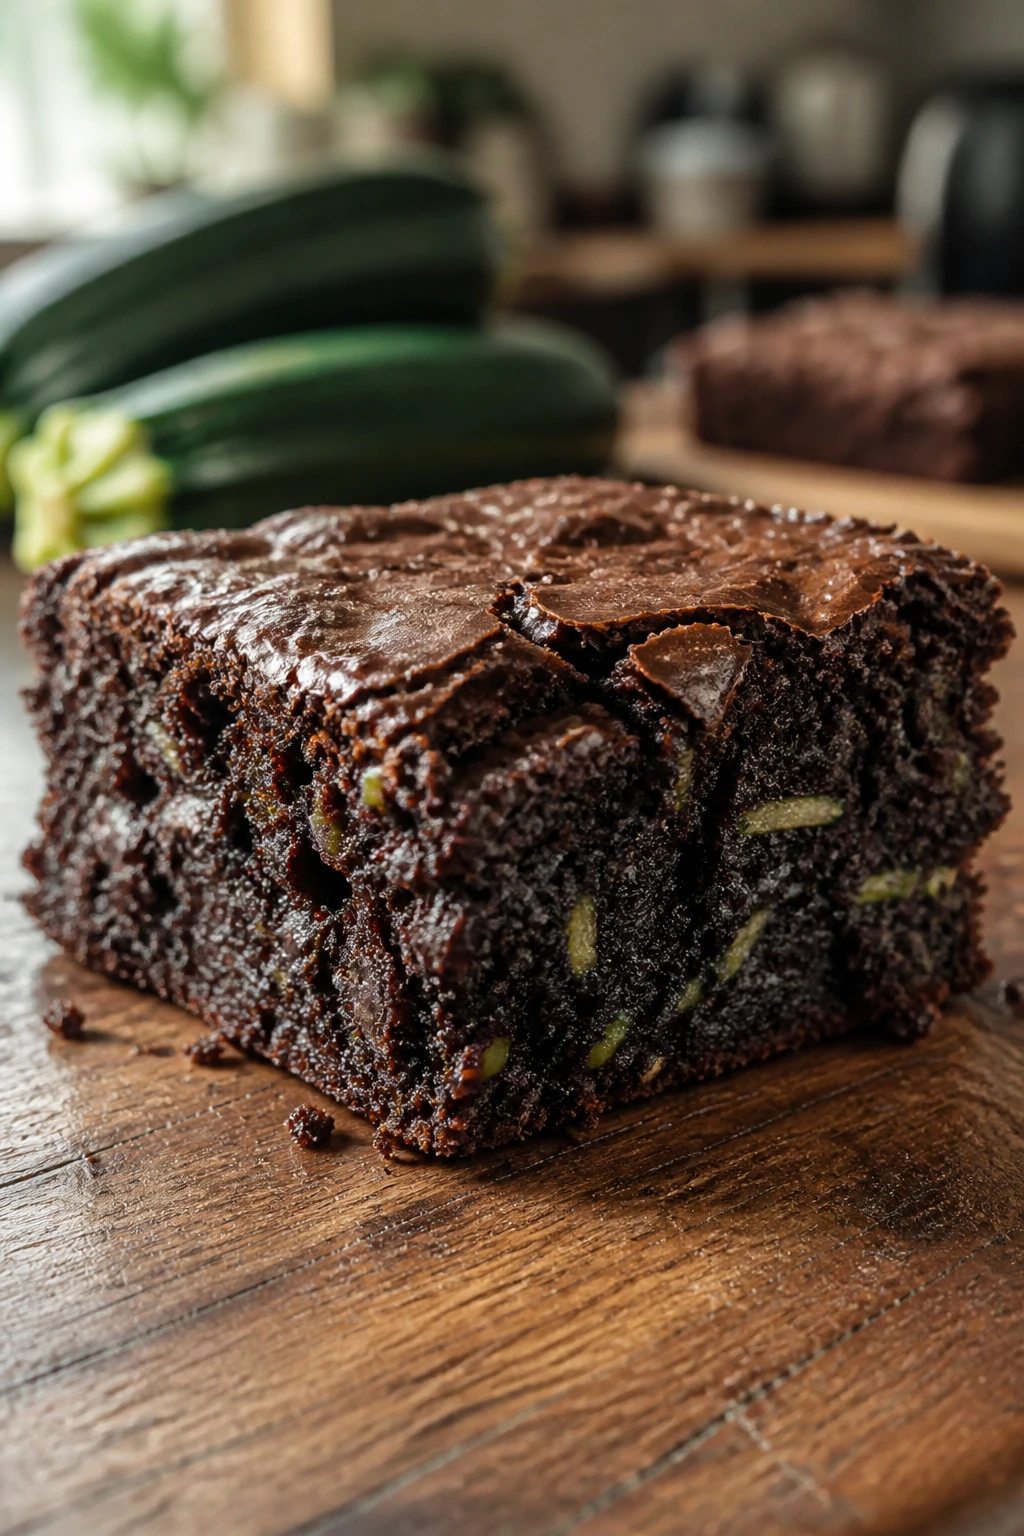
Zucchini brownies are not a trick so much as a very practical way to make the batter stay moist. The vegetable fades into the background, leaving behind a soft, dense crumb and a little extra tenderness that works well with dark chocolate chips.
Why It Works: Grated zucchini brings moisture without adding a strong flavor. Squeezing it dry first keeps the batter from turning watery. A modest amount of flour and enough cocoa keep the brownies fudgy instead of tasting like chocolate bread.
Key Ingredients:
- 1/2 cup unsalted butter, melted
- 1 cup granulated sugar
- 2 large eggs
- 1 teaspoon vanilla extract
- 1 cup finely grated zucchini, squeezed dry
- 1/2 cup unsweetened cocoa powder
- 3/4 cup all-purpose flour
- 1/2 teaspoon baking soda
- 1/4 teaspoon fine salt
- 1/2 cup semisweet chocolate chips
Quick Steps:
- Heat the oven to 350°F and line an 8×8-inch pan.
- Whisk the butter, sugar, eggs, and vanilla until smooth.
- Stir in the zucchini, cocoa, flour, baking soda, and salt until the batter thickens.
- Fold in the chocolate chips and spread the batter into the pan.
- Bake for 24 to 28 minutes, until the center is soft but not wet.
- Cool before cutting so the extra moisture settles.
Equipment for This Recipe:
- Box grater
- Clean kitchen towel for squeezing the zucchini
- 8×8-inch pan
- Mixing bowl
How to Serve This Dish: These taste best after they’ve sat for a while, which lets the zucchini melt fully into the crumb. I like them plain, maybe with a spoonful of Greek yogurt if you want a tart contrast.
Pro Tips for This Recipe:
- Squeeze the zucchini hard. Wet shreds can make the center gummy.
- Use fine grating so the zucchini disappears faster.
- Add the chocolate chips last so they don’t sink all at once.
Variations on This Dish:
- Walnut Zucchini: Add 1/3 cup chopped walnuts.
- Spiced Zucchini: Stir in 1/2 teaspoon cinnamon for a warmer flavor.
- Extra Dark: Swap in dark cocoa powder for a deeper color.
Common Mistakes to Avoid with This Dish:
- Leaving too much zucchini moisture in the batter: The brownies bake up soggy.
- Expecting the pan to look dry in the oven: That usually means it’s overbaked.
- Skipping the squeeze step: It’s the difference between fudgy and wet.
17. Pumpkin Swirl Brownies
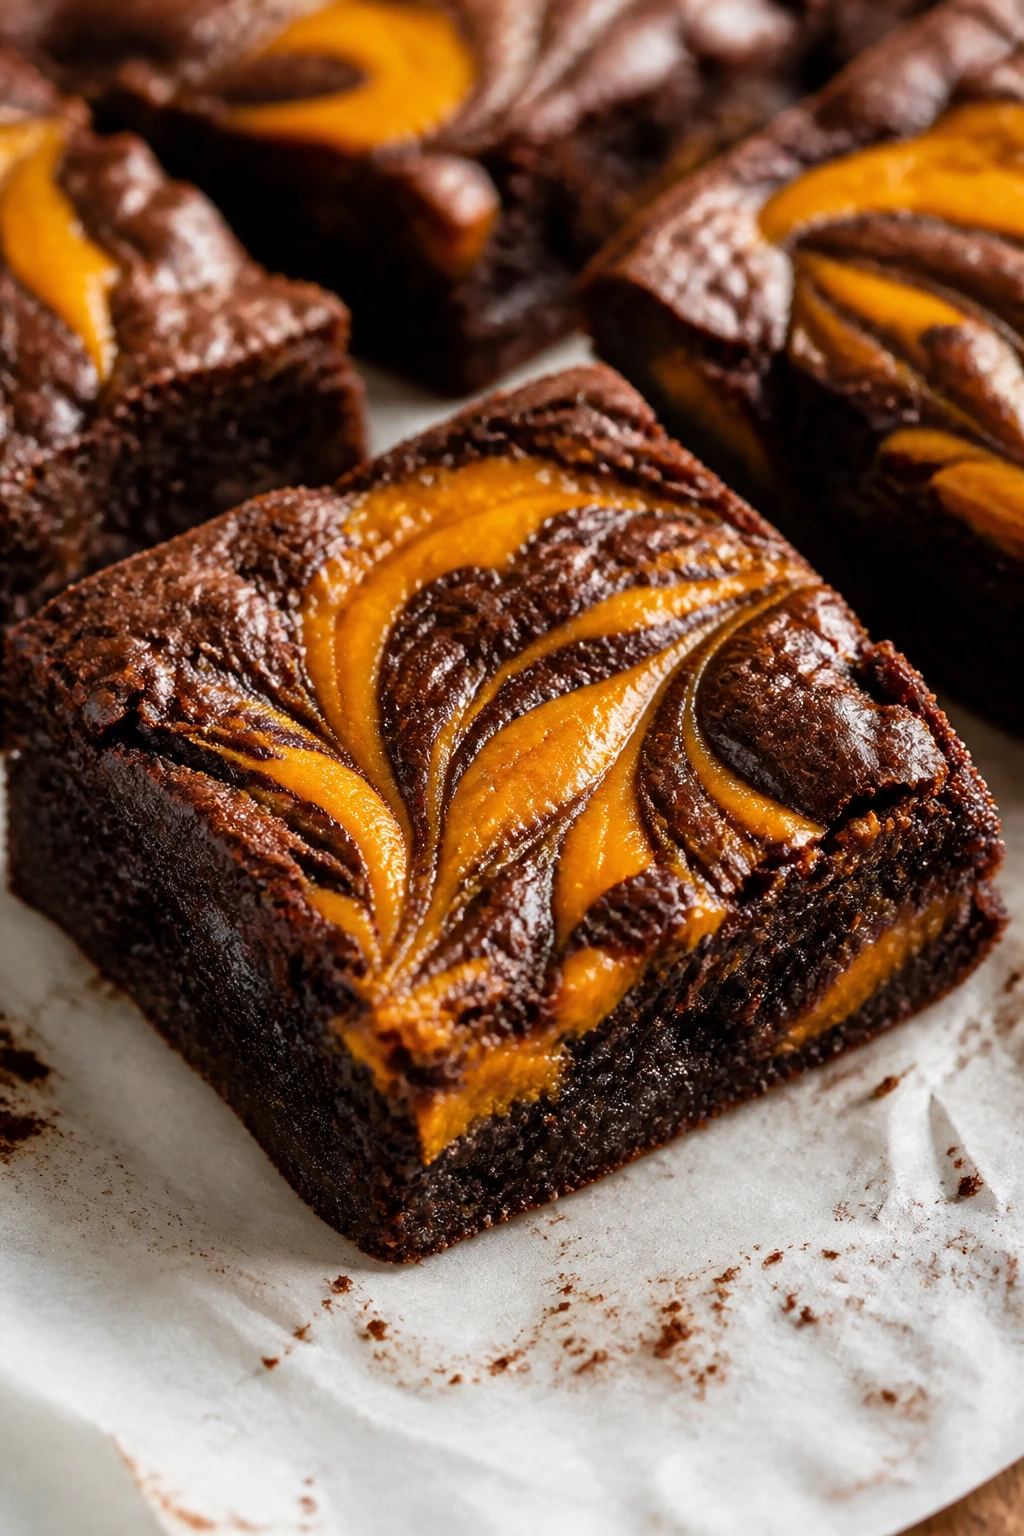
Pumpkin and chocolate can work together if you keep the pumpkin in a ribbon, not a blanket. That’s the move here. You get little pockets of spiced, earthy filling against a dark brownie base, and the effect feels cozy without becoming cake.
Why It Works: Pumpkin puree adds moisture and a mild sweetness, but it needs spices and a bit of sugar to read clearly. Swirling it through the top keeps the brownie side rich and the pumpkin side distinct. A small amount goes far.
Key Ingredients:
- 1/2 cup unsalted butter, melted
- 1 cup granulated sugar
- 2 large eggs
- 1 teaspoon vanilla extract
- 1/2 cup unsweetened cocoa powder
- 1/2 cup all-purpose flour
- 1/4 teaspoon fine salt
- 1/2 cup pumpkin puree
- 2 tablespoons granulated sugar
- 1 egg yolk
- 1/2 teaspoon pumpkin pie spice
Quick Steps:
- Preheat the oven to 350°F and line an 8×8-inch pan.
- Whisk the butter, sugar, eggs, and vanilla, then stir in the cocoa, flour, and salt.
- Mix the pumpkin puree, sugar, egg yolk, and pumpkin spice in a separate bowl.
- Spread the brownie batter into the pan and spoon the pumpkin mixture over the top.
- Swirl lightly with a knife, then bake for 24 to 27 minutes.
- Cool fully before slicing so the swirl sets.
Equipment for This Recipe:
- 8×8-inch pan
- Two bowls
- Knife for swirling
- Spatula
How to Serve This Dish: These are good with coffee or chai, because the spices meet the pumpkin halfway. Serve them in modest squares; the swirl makes them feel richer than a plain brownie.
Pro Tips for This Recipe:
- Use pure pumpkin puree, not sweetened pie filling.
- Keep the swirl on the surface instead of dragging it all the way through.
- If your pumpkin puree is watery, blot it lightly with paper towels.
Variations on This Dish:
- Maple Pumpkin: Swap 1 tablespoon of the sugar for maple syrup.
- Pecan Pumpkin: Sprinkle chopped pecans over the top.
- Ginger Pumpkin: Add 1/4 teaspoon ground ginger for more spice.
Common Mistakes to Avoid with This Dish:
- Using pie filling: It’s too sweet and too loose.
- Over-swirl: The layers blend into brown mush.
- Cutting before cool: The pumpkin layer needs to firm up.
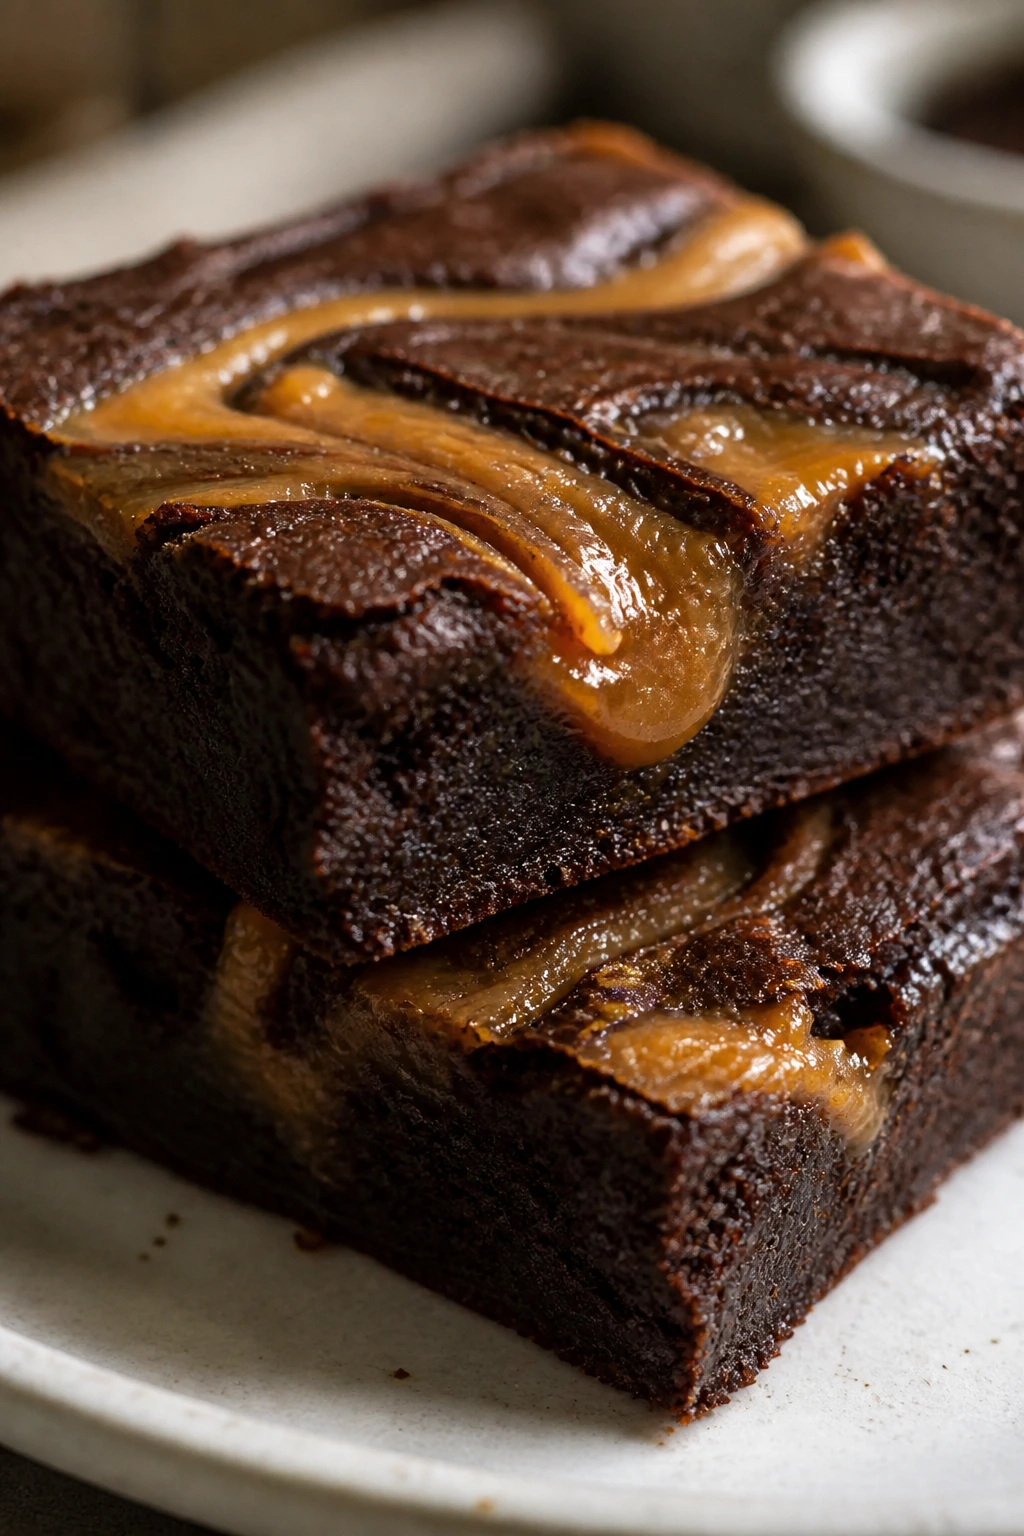
18. Dulce de Leche Brownies

Dulce de leche belongs in brownies because it brings milk-caramel richness without the stickiness of a loose caramel sauce. Swirled through the top, it gives every square a soft sweet ribbon and a little extra chew at the edges.
Why It Works: Dulce de leche is thick enough to sit on the batter instead of sinking. That means you keep a clear chocolate base and visible caramel streaks after baking. A pinch of salt keeps the whole pan from tasting flat.
Key Ingredients:
- 1/2 cup unsalted butter, melted
- 1 cup granulated sugar
- 2 large eggs
- 1 teaspoon vanilla extract
- 1/2 cup unsweetened cocoa powder
- 1/2 cup all-purpose flour
- 1/4 teaspoon fine salt
- 1/2 cup dulce de leche, slightly warmed
- Flaky salt, for topping
Quick Steps:
- Preheat the oven to 350°F and line an 8×8-inch pan.
- Whisk the butter, sugar, eggs, and vanilla until glossy.
- Stir in the cocoa, flour, and salt.
- Spread the batter into the pan, dollop the dulce de leche over the surface, and swirl gently.
- Bake for 23 to 26 minutes, then finish with flaky salt.
- Cool before cutting so the caramel ribbon sets.
Equipment for This Recipe:
- 8×8-inch pan
- Mixing bowl
- Spoon for dolloping
- Knife for swirling
How to Serve This Dish: These brownies are rich enough to cut small and serve on their own. If you want to go further, a few sliced strawberries cut the sweetness nicely.
Pro Tips for This Recipe:
- Warm the dulce de leche slightly if it’s too stiff to swirl.
- Don’t add too much on top or the pan can become sticky-sweet.
- Flaky salt makes a bigger difference here than a second caramel drizzle.
Variations on This Dish:
- Chocolate Coconut Dulce: Add 1/4 cup shredded coconut to the batter.
- Nutty Dulce: Sprinkle chopped pecans over the swirl before baking.
- Extra Dark Base: Use Dutch-process cocoa for a deeper chocolate color.
Common Mistakes to Avoid with This Dish:
- Thin caramel sauce instead of dulce de leche: It sinks and disappears.
- Using a heavy hand with the swirl: The brownie layer loses structure.
- Skipping the salt: The sweetness gets overwhelming.
19. Nutella Swirl Brownies
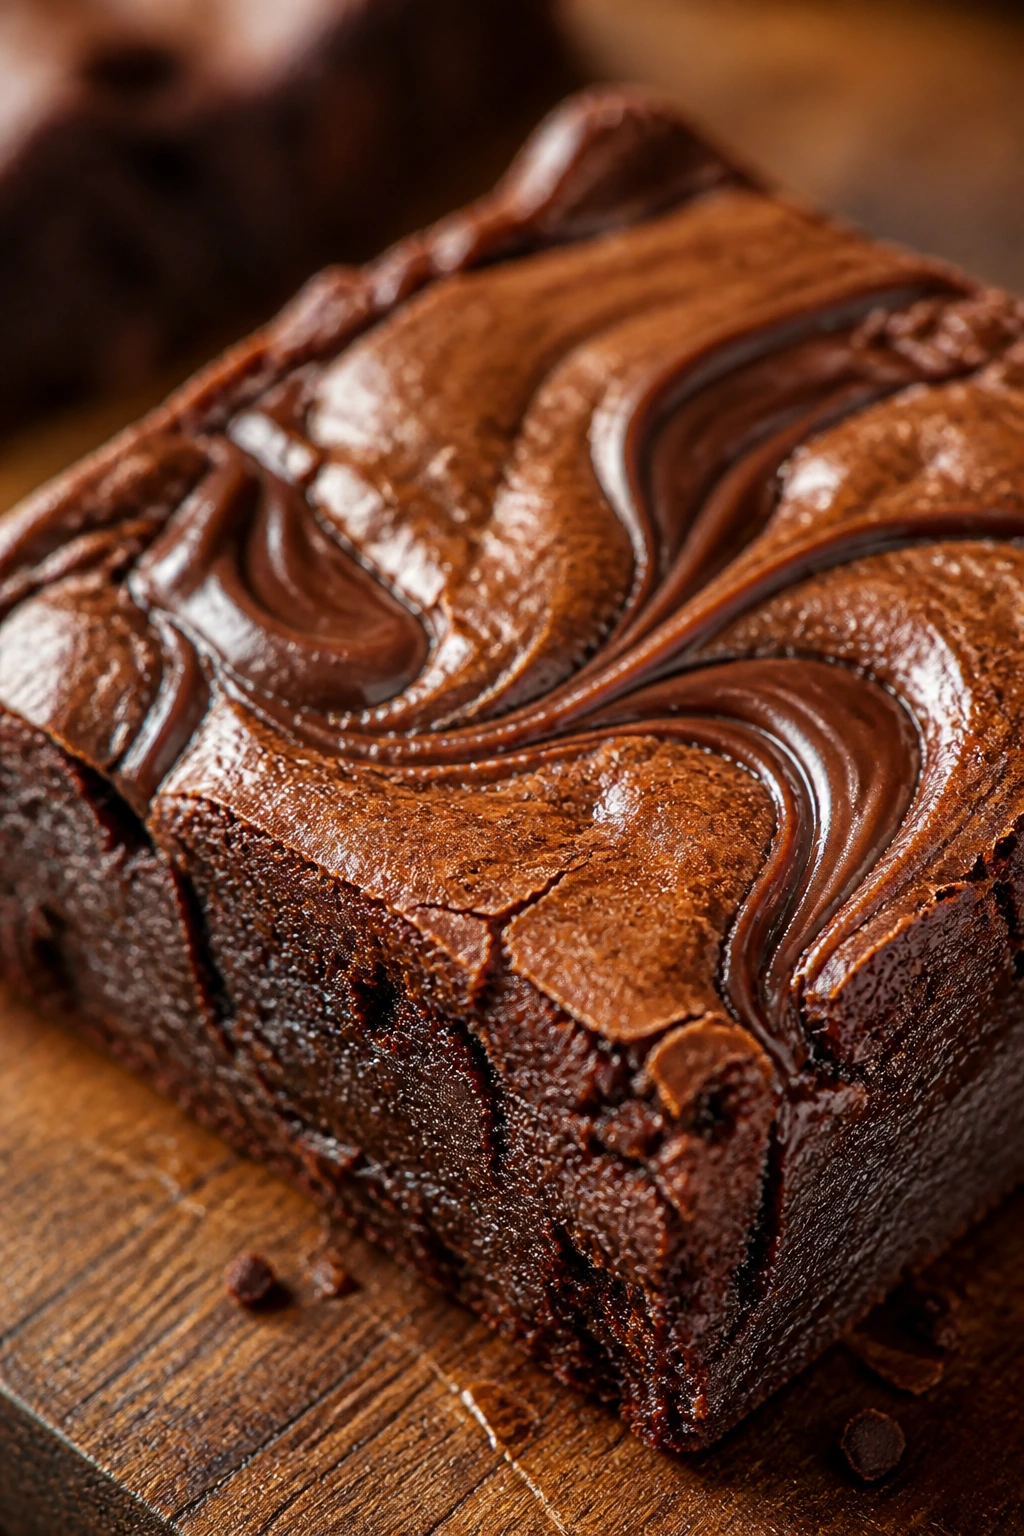
Nutella brownies bake like someone sneaked a chocolate-hazelnut spoonful into the middle of the pan. The swirl stays soft, a little glossy, and unmistakably nutty, which keeps the brownies from tasting like just another chocolate slab.
Why It Works: Nutella already carries sugar, fat, and cocoa, so it melts into the brownie cleanly. A swirl on top gives you visible stripes and a different texture in the center of each square. Chopped hazelnuts are optional, but I like them for a sharper bite.
Key Ingredients:
- 1/2 cup unsalted butter, melted
- 1 cup granulated sugar
- 2 large eggs
- 1 teaspoon vanilla extract
- 1/2 cup unsweetened cocoa powder
- 1/2 cup all-purpose flour
- 1/4 teaspoon fine salt
- 1/3 cup Nutella, slightly warmed
- 1/4 cup chopped hazelnuts, optional
Quick Steps:
- Preheat the oven to 350°F and line an 8×8-inch pan.
- Whisk the butter, sugar, eggs, and vanilla until thick.
- Stir in the cocoa, flour, and salt, then spread the batter into the pan.
- Spoon the Nutella over the surface and swirl lightly with a knife.
- Sprinkle hazelnuts over the top if using, then bake for 23 to 26 minutes.
- Cool before cutting so the swirl stays marbled.
Equipment for This Recipe:
- 8×8-inch pan
- Mixing bowl
- Spoon
- Knife for marbling
How to Serve This Dish: These go well with espresso or plain milk because the hazelnut flavor can be rich on its own. A dusting of cocoa powder before serving makes the top look finished without needing frosting.
Pro Tips for This Recipe:
- Warm the Nutella just enough to spoon. Too hot and it sinks.
- Use a light swirl; overmixing turns the whole pan brown.
- If you like a saltier finish, a pinch of flaky salt is enough.
Variations on This Dish:
- Hazelnut Crunch: Add extra chopped hazelnuts to the batter.
- White Chocolate Nutella: Scatter white chocolate chips over the top.
- Banana Nutella: Add 1/2 mashed ripe banana to the batter for a softer crumb.
Common Mistakes to Avoid with This Dish:
- Overheating Nutella: It gets too runny and disappears.
- Skipping the swirl contrast: If you blend it fully, the flavor loses its visual punch.
- Under-cooling before slicing: The hazelnut pieces shift around too much.
20. Olive Oil Sea Salt Brownies
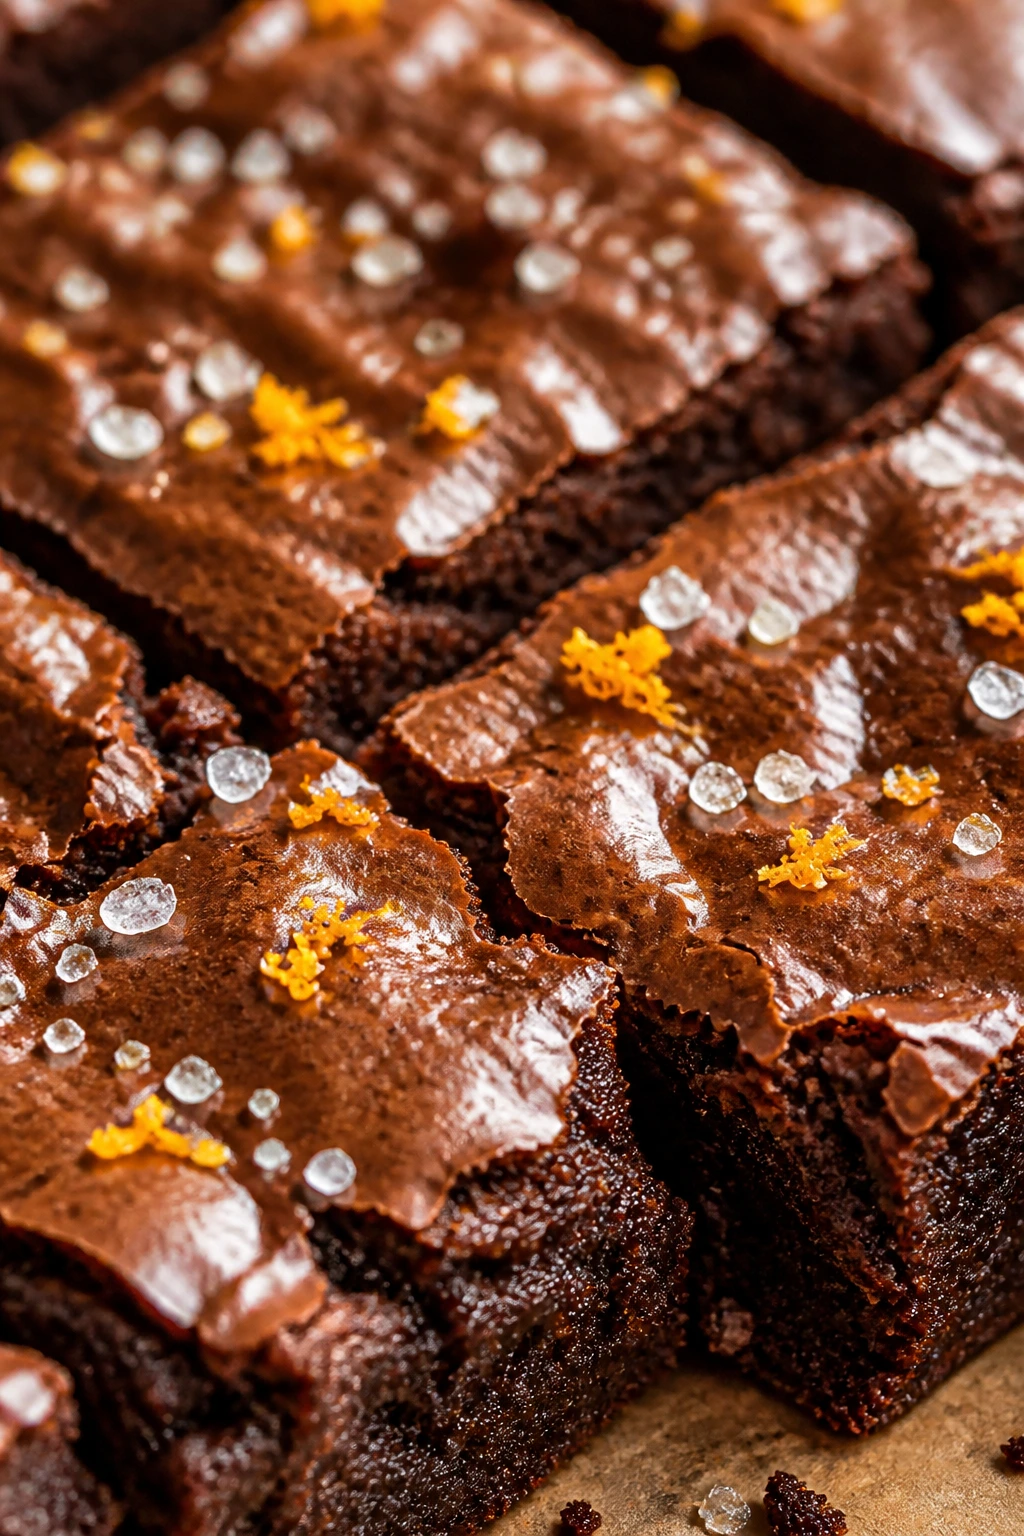
Olive oil brownies have a different feel from butter brownies. They taste a little fruitier, a little looser, and somehow more elegant without trying hard. The salt on top makes the chocolate taste even darker.
Why It Works: Olive oil keeps the texture moist for days and brings a subtle savory edge. A tiny bit of citrus zest gives the brownies lift without turning them into cake. Sea salt on top finishes the pan in the cleanest possible way.
Key Ingredients:
- 1/2 cup extra-virgin olive oil
- 1 cup granulated sugar
- 2 large eggs
- 1 teaspoon vanilla extract
- 1 teaspoon finely grated orange zest
- 1/2 cup unsweetened cocoa powder
- 1/2 cup all-purpose flour
- 1/4 teaspoon fine salt
- Flaky sea salt, for topping
Quick Steps:
- Preheat the oven to 350°F and line an 8×8-inch pan.
- Whisk the olive oil and sugar together, then add the eggs, vanilla, and orange zest.
- Stir in the cocoa, flour, and fine salt until the batter is smooth.
- Spread into the pan and bake for 22 to 25 minutes.
- Finish with flaky salt as soon as the brownies come out of the oven.
- Cool before cutting.
Equipment for This Recipe:
- 8×8-inch pan
- Mixing bowl
- Whisk
- Microplane for zest
How to Serve This Dish: These brownies are good with berries, whipped cream, or plain coffee because the olive oil flavor likes clean partners. I would slice them a little larger than average; they feel a touch lighter than butter brownies.
Pro Tips for This Recipe:
- Use a fruity olive oil, not a peppery one.
- Orange zest should be fine, not chunky.
- Don’t skip the flaky salt; it’s part of the flavor, not decoration.
Variations on This Dish:
- Lemon Olive Oil: Swap orange zest for lemon zest.
- Herbed Salt Finish: Use rosemary-infused salt for a savory edge.
- Chocolate Olive Oil Orange: Add 1/4 cup chocolate chunks to the batter.
Common Mistakes to Avoid with This Dish:
- Using bitter, aggressive olive oil: It can overpower the chocolate.
- Adding too much zest: The brownies start tasting like citrus cake.
- Baking until dry: Olive oil brownies should stay supple.
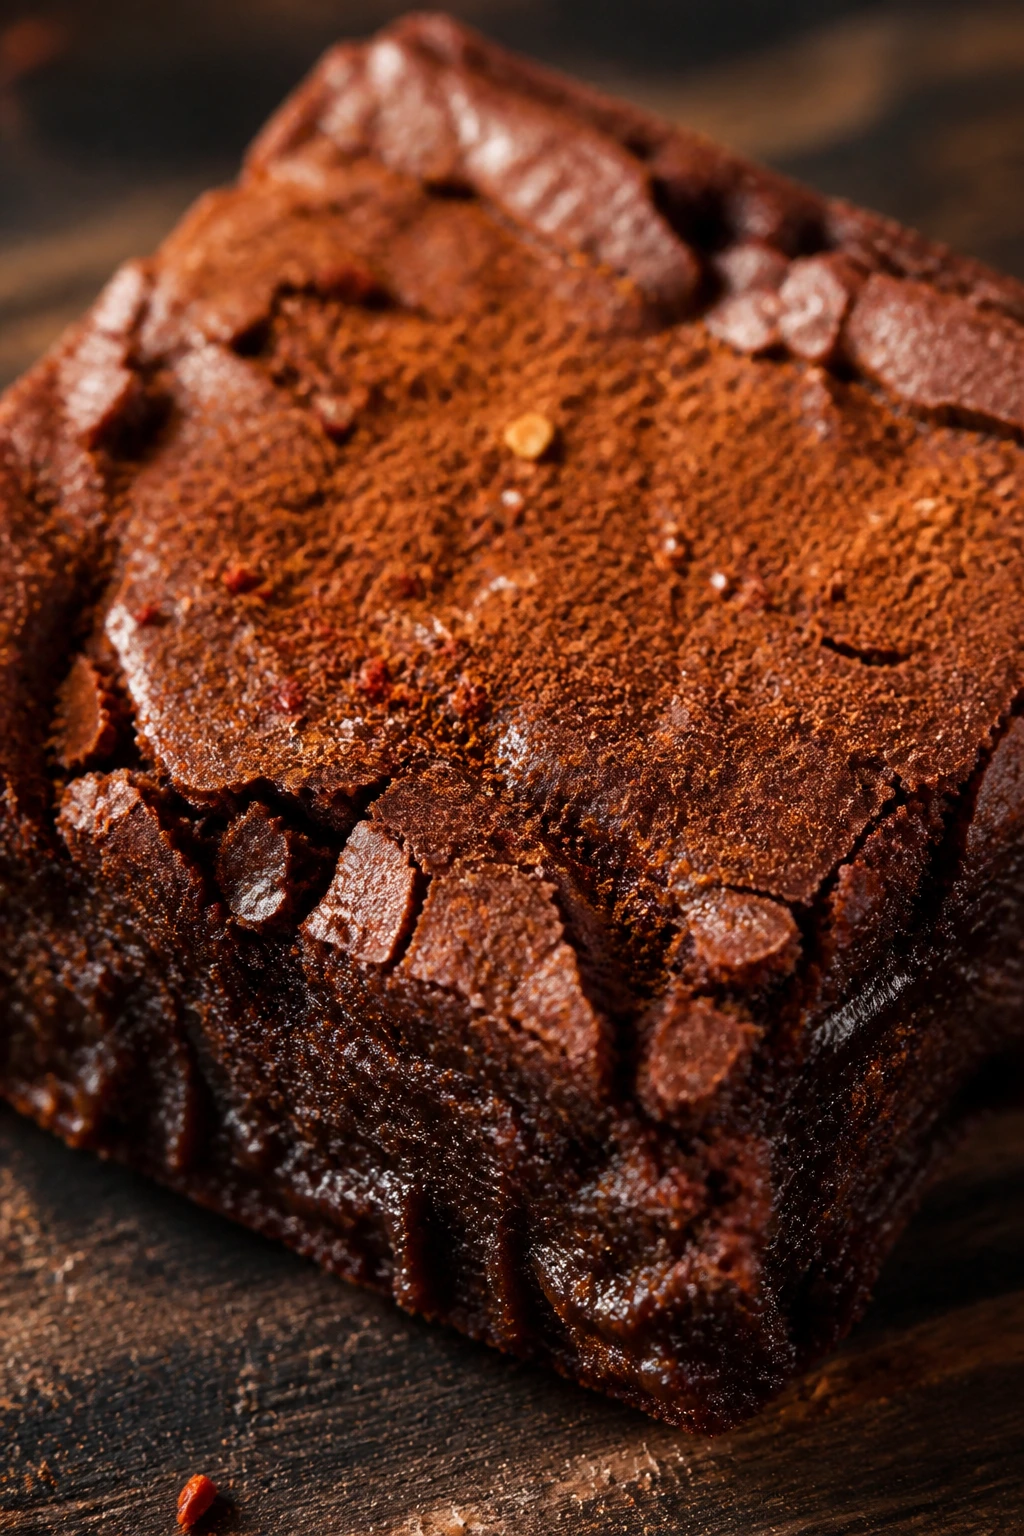
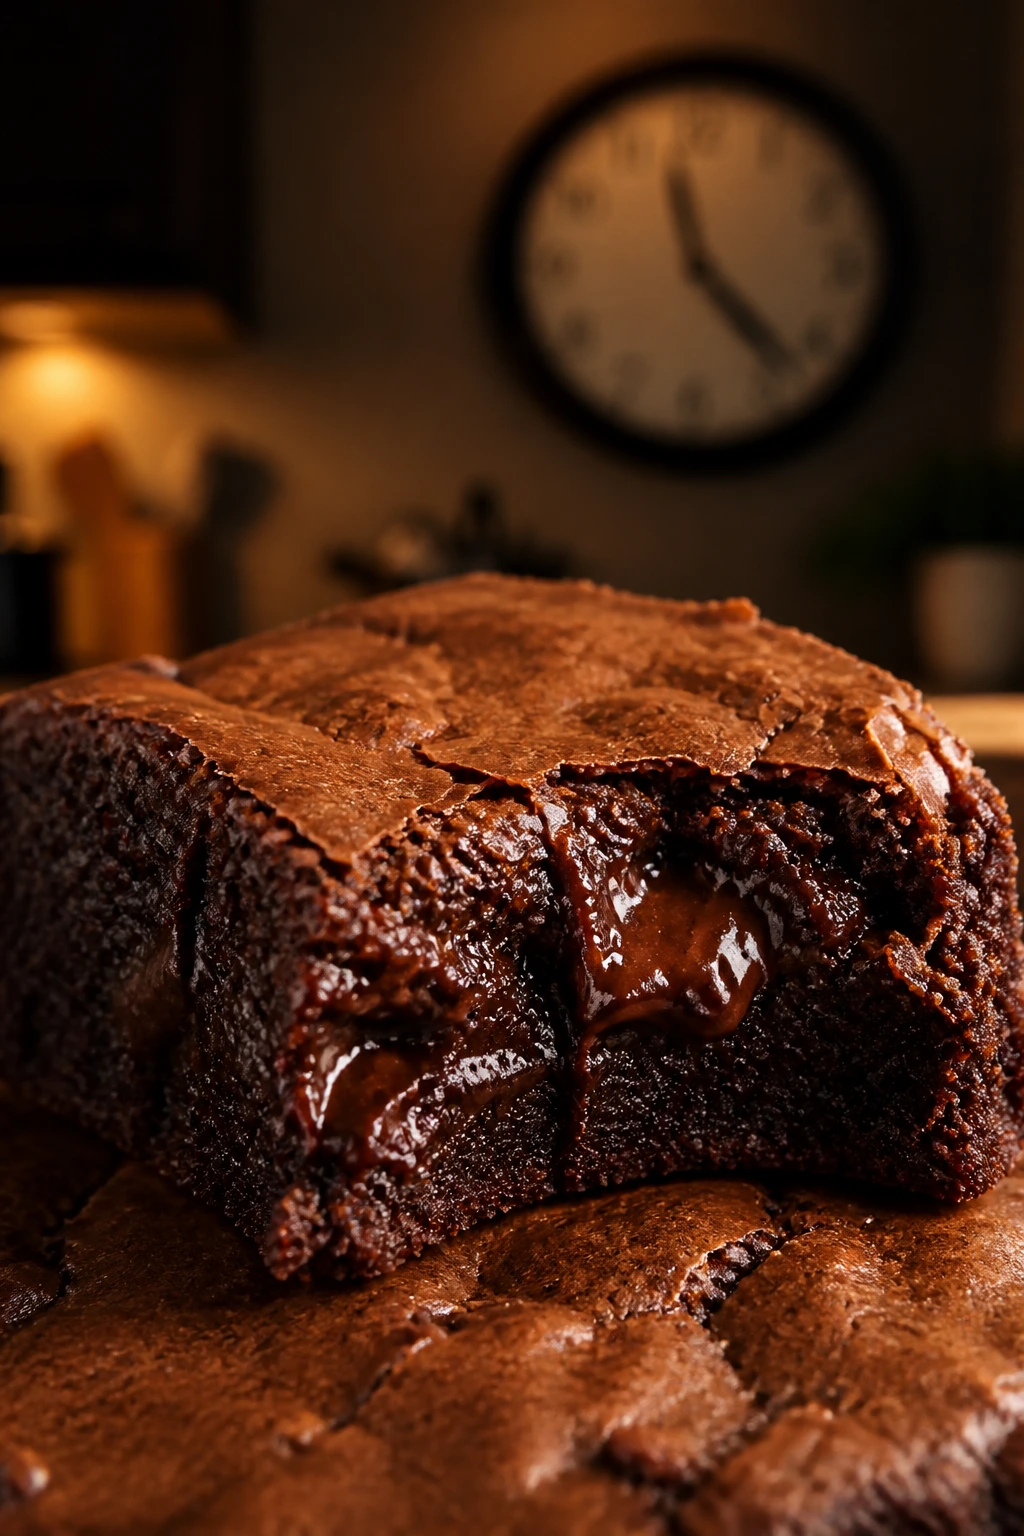
21. Flourless Dark Chocolate Brownies
These are dense, glossy, and almost truffle-like in the center. If you want a brownie that leans squarely into chocolate and leaves flour behind, this is the pan to make.
Why It Works: Without flour, the structure comes from eggs and melted chocolate. That’s why the texture lands so fudgy and rich. A little cocoa deepens the flavor, while sugar keeps the bar from baking up like a slice of mousse.
Key Ingredients:
- 1/2 cup unsalted butter
- 8 ounces bittersweet chocolate, chopped
- 3 large eggs
- 3/4 cup granulated sugar
- 1/2 cup unsweetened cocoa powder
- 1/4 teaspoon fine salt
- 1 teaspoon vanilla extract
- 1/2 cup chopped walnuts, optional
Quick Steps:
- Preheat the oven to 350°F and line an 8×8-inch pan.
- Melt the butter and chocolate together gently, then let the mixture cool for a few minutes.
- Whisk the eggs and sugar until foamy, then whisk in the vanilla.
- Stir in the melted chocolate mixture, cocoa, and salt; fold in walnuts if using.
- Spread into the pan and bake for 24 to 28 minutes.
- Cool fully so the brownies can set into slices.
Equipment for This Recipe:
- Small saucepan or microwave-safe bowl
- 8×8-inch pan
- Whisk
- Mixing bowl
How to Serve This Dish: These feel almost fancy enough to serve with nothing but a fork and a cup of coffee. A little whipped cream or fresh raspberries works if you want to soften the intensity.
Pro Tips for This Recipe:
- Cool the chocolate mixture before adding eggs if you’re nervous about scrambling.
- Don’t expect a toothpick to come out clean; sticky crumbs are the goal.
- Chill before slicing if you want very neat squares.
Variations on This Dish:
- Espresso Flourless: Add 1 teaspoon espresso powder to the melted chocolate.
- Orange Truffle: Stir in 1 teaspoon orange zest.
- Nutty Crunch: Add toasted almonds instead of walnuts.
Common Mistakes to Avoid with This Dish:
- Overbaking: Flourless brownies dry out faster than standard ones.
- Skipping the whisk on eggs and sugar: You need that air for structure.
- Serving too warm: They can look underdone until they cool.
22. Chili Cinnamon Brownies
Chocolate likes spice more than most people think. A little cinnamon and a small hit of chili round out the sweetness and leave a warm finish that sneaks up after the first bite.
Why It Works: Cinnamon softens bitterness, while chili adds heat that hangs at the back of the throat instead of burning the front of the tongue. The key is restraint. You want a slow glow, not a dare.
Key Ingredients:
- 1/2 cup unsalted butter, melted
- 1 cup granulated sugar
- 2 large eggs
- 1 teaspoon vanilla extract
- 1/2 cup unsweetened cocoa powder
- 1/2 cup all-purpose flour
- 1/4 teaspoon fine salt
- 1 teaspoon ground cinnamon
- 1/4 teaspoon cayenne pepper or chipotle powder
- 1/2 cup chocolate chips
Quick Steps:
- Preheat the oven to 350°F and line an 8×8-inch pan.
- Whisk the butter, sugar, eggs, and vanilla until thick and glossy.
- Stir in the cocoa, flour, salt, cinnamon, and chili powder.
- Fold in the chocolate chips and spread the batter into the pan.
- Bake for 22 to 25 minutes.
- Cool before slicing so the spice settles into the crumb.
Equipment for This Recipe:
- 8×8-inch pan
- Mixing bowl
- Whisk
- Spatula
How to Serve This Dish: Serve these with cold milk or vanilla ice cream. The dairy calms the heat and lets the cinnamon show up more cleanly.
Pro Tips for This Recipe:
- Start with the smaller chili amount if you’re unsure. You can always turn up the heat next time.
- Use chipotle for smoky warmth and cayenne for a sharper burn.
- Taste the dry mix before baking if you want to check the spice balance.
Variations on This Dish:
- Mexican Hot Chocolate Brownies: Add 1/4 teaspoon extra cinnamon and a pinch of nutmeg.
- Smoked Chili: Use chipotle powder for a softer heat.
- Orange Spice: Add 1 teaspoon orange zest for a brighter edge.
Common Mistakes to Avoid with This Dish:
- Too much chili: The brownies taste aggressive instead of warm.
- Using stale cinnamon: The flavor turns flat fast.
- Skipping dairy at serving: The spice feels stronger without it.
23. Raspberry Jam Brownies
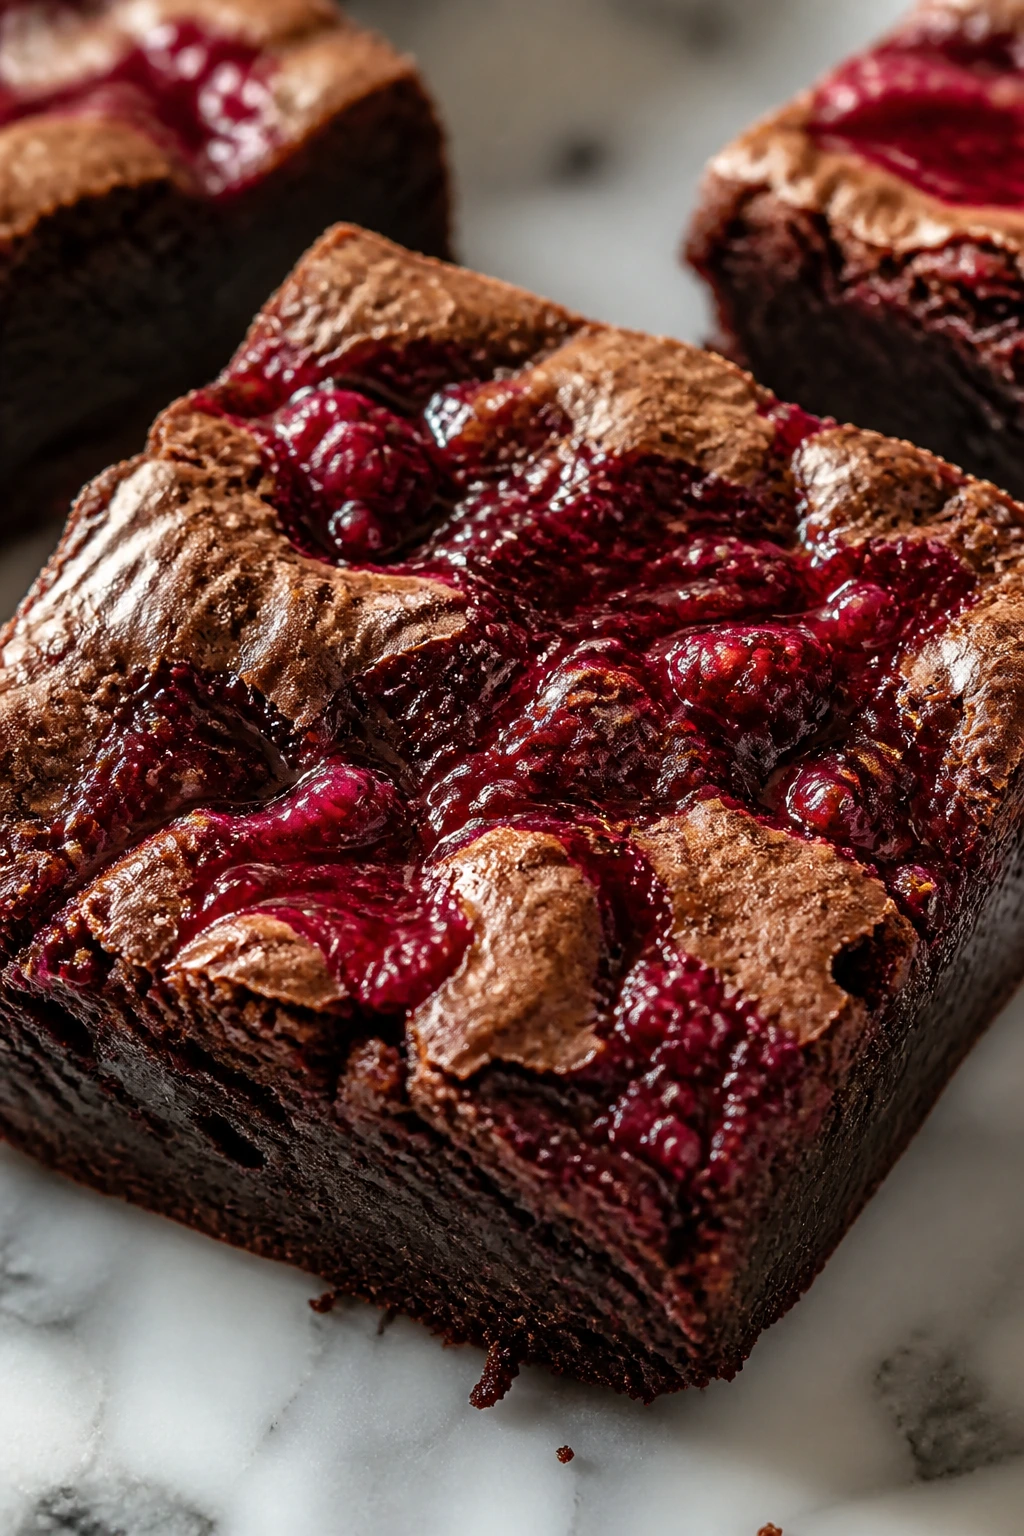
Raspberry and chocolate have a natural snap together. The jam brings acidity and shine, and the tart fruit streaks stop the pan from tasting like it came straight from a candy bar.
Why It Works: Jam swirls through brownie batter better than loose fruit, which keeps the moisture controlled. Seedless jam gives cleaner slices, though seeded works if you don’t mind the texture. The fruit cuts the richness in a way that makes people take a second square faster than they planned.
Key Ingredients:
- 1/2 cup unsalted butter, melted
- 1 cup granulated sugar
- 2 large eggs
- 1 teaspoon vanilla extract
- 1/2 cup unsweetened cocoa powder
- 1/2 cup all-purpose flour
- 1/4 teaspoon fine salt
- 1/3 cup seedless raspberry jam
- 1/4 cup freeze-dried raspberries, crushed, optional
Quick Steps:
- Preheat the oven to 350°F and line an 8×8-inch pan.
- Whisk the butter, sugar, eggs, and vanilla, then stir in the cocoa, flour, and salt.
- Spread the batter in the pan and spoon the raspberry jam across the top.
- Swirl gently with a knife, then sprinkle the freeze-dried raspberries over the surface if using.
- Bake for 22 to 25 minutes.
- Cool fully before cutting.
Equipment for This Recipe:
- 8×8-inch pan
- Mixing bowl
- Knife for swirling
- Spatula
How to Serve This Dish: These look good with a few fresh raspberries scattered around the plate. A small spoon of whipped cream balances the tartness if you want the dessert to feel softer.
Pro Tips for This Recipe:
- Use thick jam, not a loose spread.
- Don’t drag the swirl all the way through the batter or the color muddies.
- Freeze-dried raspberries add a sharp finish without extra wetness.
Variations on This Dish:
- Blackberry Swirl: Use blackberry jam instead of raspberry.
- White Chocolate Raspberry: Add 1/2 cup white chocolate chips.
- Raspberry Almond: Add 1/4 teaspoon almond extract to the batter.
Common Mistakes to Avoid with This Dish:
- Runny jam: It sinks and makes soggy pockets.
- Over-swirl: The fruit disappears into the chocolate.
- Cutting warm: The jam streaks smear if the pan is not set.
24. Pistachio Cardamom Brownies
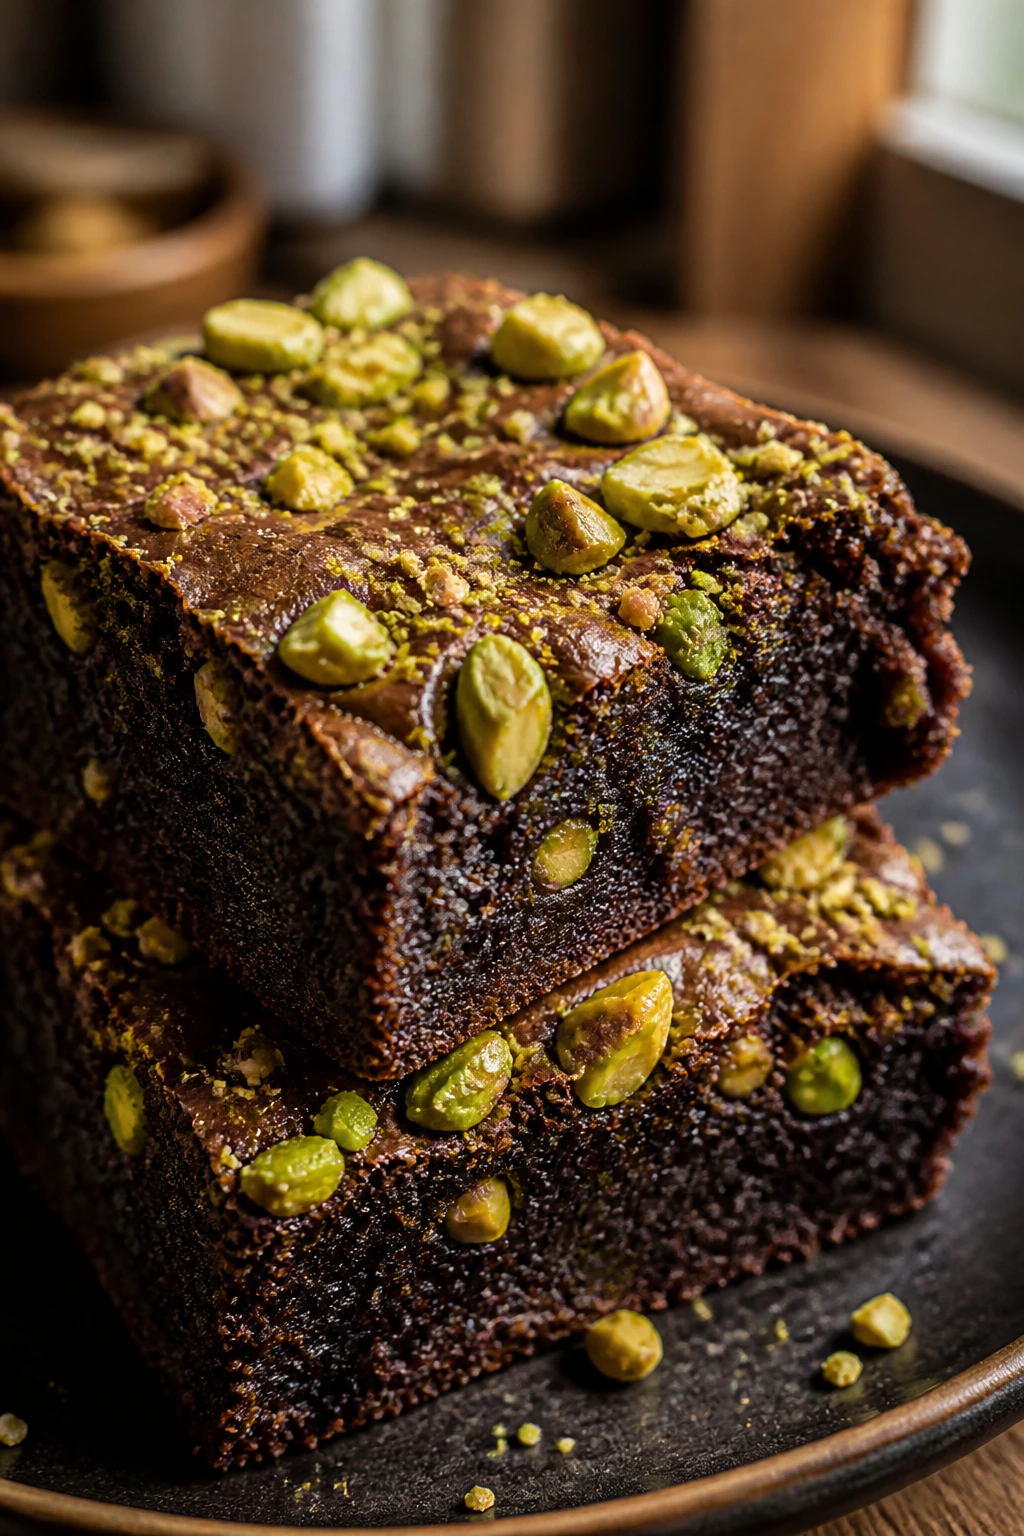
These brownies taste a little cooler, a little greener, and less expected than the usual chocolate stack. Pistachios add crunch and a soft nutty flavor, while cardamom brings a perfume note that wakes the whole pan up.
Why It Works: Cardamom is strong enough to read through cocoa without needing much. Pistachios hold their shape and add color, so the brownies look different before anyone even takes a bite. A little goes a long way, which is good because cardamom can take over fast.
Key Ingredients:
- 1/2 cup unsalted butter, melted
- 1 cup granulated sugar
- 2 large eggs
- 1 teaspoon vanilla extract
- 1/2 cup unsweetened cocoa powder
- 1/2 cup all-purpose flour
- 1/4 teaspoon fine salt
- 1/2 teaspoon ground cardamom
- 1/2 cup chopped pistachios
- 1/4 cup white chocolate chips, optional
Quick Steps:
- Preheat the oven to 350°F and line an 8×8-inch pan.
- Whisk the butter, sugar, eggs, and vanilla, then stir in the cocoa, flour, salt, and cardamom.
- Fold in the pistachios and white chocolate chips if using.
- Spread into the pan and bake for 22 to 25 minutes.
- Cool fully before slicing so the pistachios stay put.
- Sprinkle a few extra chopped pistachios on top if you want a sharper finish.
Equipment for This Recipe:
- 8×8-inch pan
- Mixing bowl
- Whisk
- Knife for chopping pistachios
How to Serve This Dish: These brownies feel especially good with tea. Earl Grey or cardamom tea both work, and the nutty top gives you enough texture that they don’t need frosting.
Pro Tips for This Recipe:
- Use freshly ground cardamom if you can. It’s brighter than old pantry spice.
- Chop pistachios unevenly so some pieces stay chunky.
- White chocolate is optional, but it softens the spice nicely.
Variations on This Dish:
- Rose Cardamom: Add 1/2 teaspoon rose water to the batter.
- Pistachio Orange: Add 1 teaspoon orange zest.
- Dark Spice: Use dark chocolate chips instead of white ones.
Common Mistakes to Avoid with This Dish:
- Too much cardamom: The brownies taste perfumed instead of rich.
- Overbaking the nuts: Pistachios turn dull and dry.
- Grinding the nuts too fine: You lose the crunch.
25. Miso Caramel Brownies
Miso in brownies sounds odd until you taste it. The saltiness deepens the caramel, the caramel softens the miso, and the chocolate ends up tasting darker without needing more sugar.
Why It Works: White miso brings salt and a quiet fermented depth that behaves well with sweet caramel. Mixed into the swirl, it melts into the top layer and gives the brownies a savory edge that keeps the second bite interesting. This is the pan I make when I want something familiar that still surprises people.
Key Ingredients:
- 1/2 cup unsalted butter, melted
- 1 cup granulated sugar
- 2 large eggs
- 1 teaspoon vanilla extract
- 1/2 cup unsweetened cocoa powder
- 1/2 cup all-purpose flour
- 1/4 teaspoon fine salt
- 1/3 cup caramel sauce
- 1 tablespoon white miso paste
- 1/4 cup chopped pecans, optional
Quick Steps:
- Preheat the oven to 350°F and line an 8×8-inch pan.
- Whisk the butter, sugar, eggs, and vanilla, then stir in the cocoa, flour, and salt.
- Mix the caramel and miso in a small bowl until smooth.
- Spread the brownie batter into the pan, dollop the miso caramel over the top, and swirl lightly.
- Scatter pecans over the surface if using, then bake for 23 to 26 minutes.
- Cool before cutting so the savory caramel ribbon sets.
Equipment for This Recipe:
- 8×8-inch pan
- Mixing bowl
- Small bowl for the miso caramel
- Knife for swirling
How to Serve This Dish: These brownies taste strongest once they’ve cooled to room temperature, when the miso reads as salt rather than soup base. A plain cup of coffee is the cleanest pairing.
Pro Tips for This Recipe:
- Use white miso, not dark. Dark miso can overpower the chocolate.
- Blend the miso into the caramel until no streaks remain.
- A few pecans are enough; too many can crowd the swirl.
Variations on This Dish:
- Sesame Miso: Sprinkle sesame seeds over the top for extra nuttiness.
- Salted Miso Dark Chocolate: Use dark cocoa for a deeper base.
- Miso Peanut: Add a few chopped peanuts on top for crunch.
Common Mistakes to Avoid with This Dish:
- Using too much miso: The pan tastes savory in the wrong way.
- Thin caramel: It disappears into the batter.
- Skipping the cool time: The swirl needs to set before slicing.
Why Gooey Brownies Work on a Busy Night
Brownies are one of the few desserts that reward restraint. You do not need to beat air into them, frost them, stack them, or wait for a dramatic rise. The best pans are mixed quickly, baked in a short window, and left alone while the center settles into that soft, dense middle that people keep asking about after the first bite.
That short baking window matters more than fancy add-ins do. A brownie can be chocolate-coffee, chocolate-caramel, chocolate-cherry, or chocolate-whatever-is-in-the-cabinet, but if it bakes too long, the whole thing tightens up and the flavor loses its shine. I’d rather have a slightly underbaked pan that cools into a fudgy square than a perfect-looking tray that eats like dry cake.
There’s also the practical side. An 8×8-inch pan is small enough for a weeknight, cheap enough to keep in the cupboard, and forgiving enough to make again without a note. You can swirl in jam, scatter pretzels, or leave the batter plain and still end up with a dessert that feels like more than the effort it took.
The Pans, Bowls, and Paper That Keep Brownies Simple
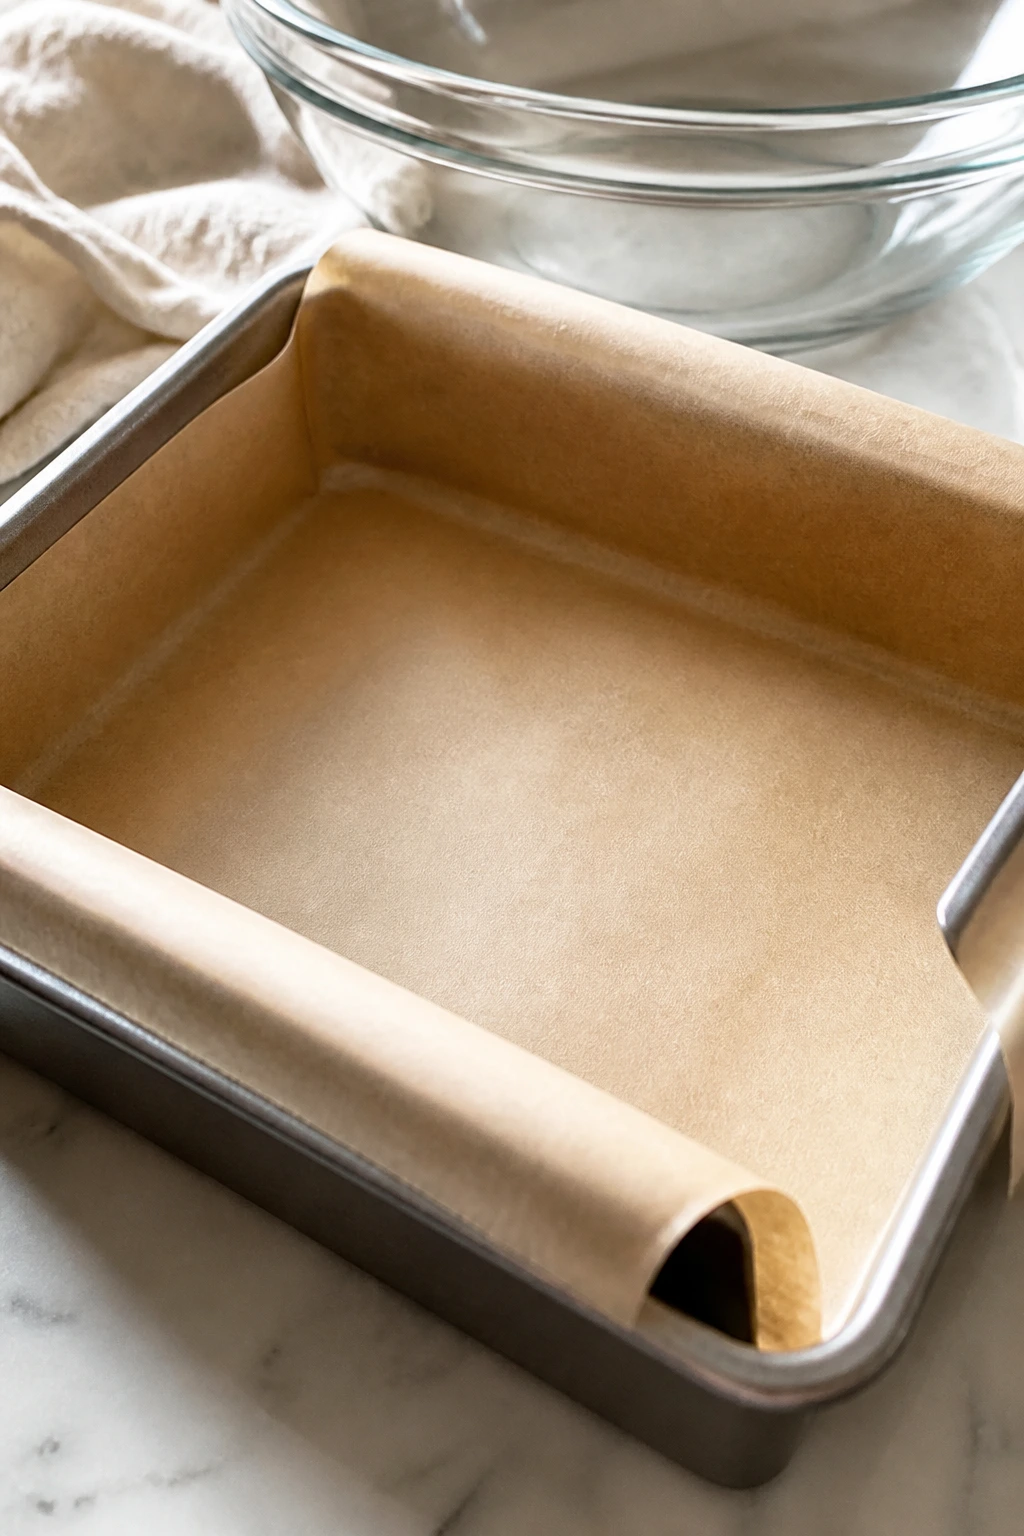
A brownie collection like this does not need much gear, which is part of the appeal. A sturdy 8×8-inch metal pan gives the edges enough heat to set while the middle stays fudgy, and parchment paper means you can lift the whole slab out instead of prying at one corner with a knife and a prayer.
A medium mixing bowl is enough for most of these recipes. If a recipe calls for a swirl, I like a second small bowl so the peanut butter, cream cheese, caramel, or miso mixture stays separate until the last minute. That keeps the base smooth and stops you from overmixing the chocolate batter while you’re fussing with the topping.
- 8×8-inch metal baking pan: Best for chewy edges and a soft center.
- Parchment paper: Leave a two-sided overhang for easy lifting.
- Mixing bowl: One good bowl handles most brownie batters.
- Whisk: Better than a spoon for the shiny top.
- Rubber spatula: Good for scraping the last streaks of batter.
- Small bowl: Useful for swirls, toppings, and quick mix-ins.
- Knife or skewer: Needed for marble patterns and caramel ribbons.
- Cooling rack: Lets heat escape so the brownies set evenly.
- Fine sieve: Handy when cocoa powder clumps.
One thing I’d skip buying separately is a brownie “tool.” You do not need one. A knife, parchment, and a decent pan do the job just fine.
Smart Shopping for Cocoa, Chocolate, and Mix-Ins
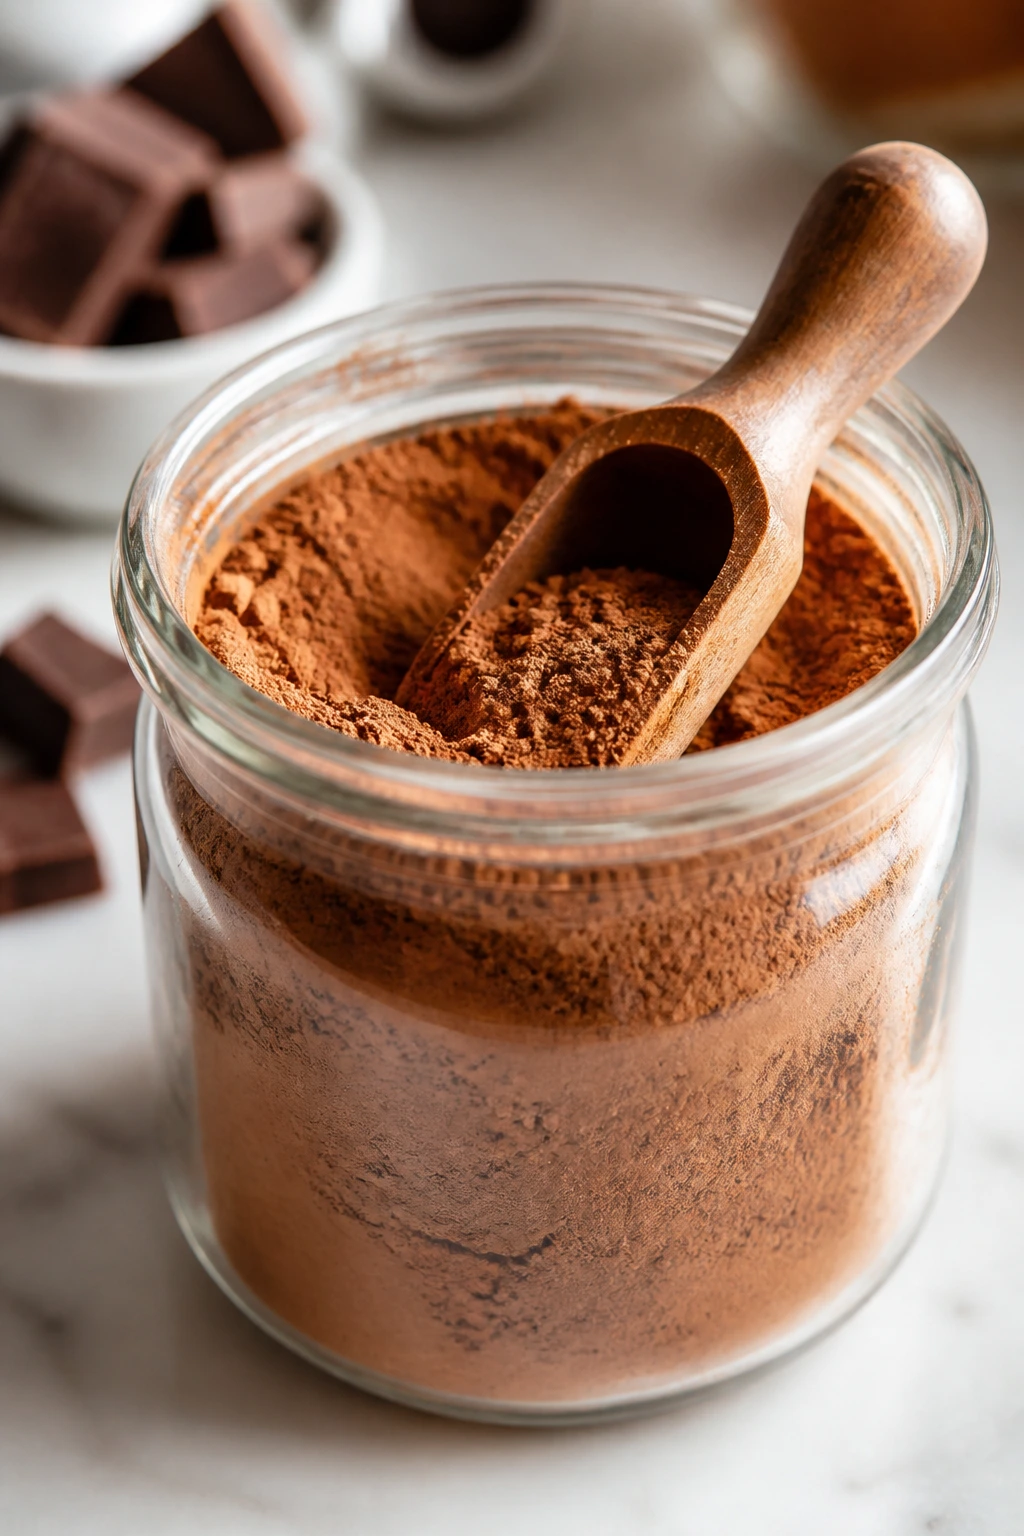
Cocoa powder matters more than most people think. Natural unsweetened cocoa gives you a sharper, lighter chocolate flavor, while Dutch-process cocoa tastes darker and smoother. Either one works in brownies, but mixing them without planning can tilt the flavor. If a recipe uses melted chocolate too, the cocoa only has to deepen the base, not carry the whole pan.
Chocolate chips are useful, but chopped chocolate behaves better when you want soft pockets. Chips keep their shape because of the stabilizers built into them. Chopped bars melt into a gentler puddle. I tend to use chips when I want neat chunks and chopped bars when I want streaks.
For add-ins, buy the thing that tastes like itself. Thick caramel sauce should pour slowly off a spoon. Peanut butter should be creamy and easy to swirl. Tahini should be well-stirred and smooth, not chalky at the bottom of the jar. Dried fruit should be soft enough to bend, not leathered into little pebbles.
If you’re using pantry mix-ins like Oreos, graham crackers, or pretzels, choose the freshest bag you can. Stale crackers and stale pretzels taste dusty once baked. And if a recipe asks for mint, espresso, miso, or cardamom, use a small amount and taste the batter before baking if the ingredient is safe to sample raw. Those flavors can dominate faster than chocolate can fight back.
How to Serve These Brownies Without Fussy Plating
Presentation: Brownies look best when you stop trying to make them look airy. A clean square, a little crackle on top, and one finish — maybe flaky salt, a dusting of cocoa, or a few crumbs from the mix-in — is enough. I like to cut them with a hot knife wiped dry between slices, especially for caramel, cream cheese, and jam swirls.
Accompaniments: Plain vanilla ice cream is the easy answer, but it’s not the only one. Espresso brownies like whipped cream, cherry brownies want fresh fruit, pretzel brownies like cold milk, and tahini or olive oil brownies do well with plain yogurt or crème fraîche. If you want a full plate, add berries and leave the brownies alone.
Portions: Most of these are rich enough to cut into 9 squares from an 8×8-inch pan, or 16 smaller pieces if you want snack-size bars. For a dessert plate after dinner, I’d go smaller than you think. People usually come back for a second piece if the first one doesn’t feel like a brick.
Beverage Pairing: Coffee works with nearly all of them, which is no accident. Hot black tea suits mint, cherry, and pistachio brownies. Cold milk is the safest bet for peanut butter, Oreo, and s’mores versions. For the brownies with salt or spice, a plain latte or even sparkling water on the side keeps the sweetness from taking over.
Small Tweaks That Change the Flavor Fast
Flavor Enhancement: A pinch of flaky salt on top changes more than a drizzle of frosting ever will. It sharpens chocolate, especially in caramel, miso, tahini, and brown butter pans. I also like to keep espresso powder in the cupboard because one teaspoon can deepen a whole batch without announcing itself.
Customization: If you want a brownie to feel different without changing the whole recipe, change the mix-in texture. Chopped chocolate gives soft pockets, crushed pretzels give crunch, dried fruit gives chew, and toasted nuts give a dry snap. That one shift can make a familiar batter feel new.
Serving Suggestions: Warm brownies are easiest with ice cream. Cold brownies are easier to slice and pack. Room-temperature brownies land in the sweet spot for flavor, especially the ones with swirls, fruit, or cream cheese. A little dusting of cocoa powder or powdered sugar can make the pan look finished without adding another layer of sweetness.
Make-It-Yours: For a dairy-free batch, use olive oil or coconut oil where the recipe allows, and stick with dark chocolate that has a clean ingredient list. For a gluten-free version, a 1:1 gluten-free flour blend works in the flour-based pans better than almond flour does. For lower sugar, cut the batter sugar by a few tablespoons and lean on dark chocolate, coffee, or salt to keep the flavor strong.
Stashing, Freezing, and Reheating Brownies
Most brownies keep well at room temperature for 2 to 3 days if you store them in an airtight container with a small sheet of parchment between layers. The fudgier the brownie, the better it tends to hold. Cream cheese, pumpkin, and jam swirls are better in the fridge, where they stay fresh for 4 to 5 days.
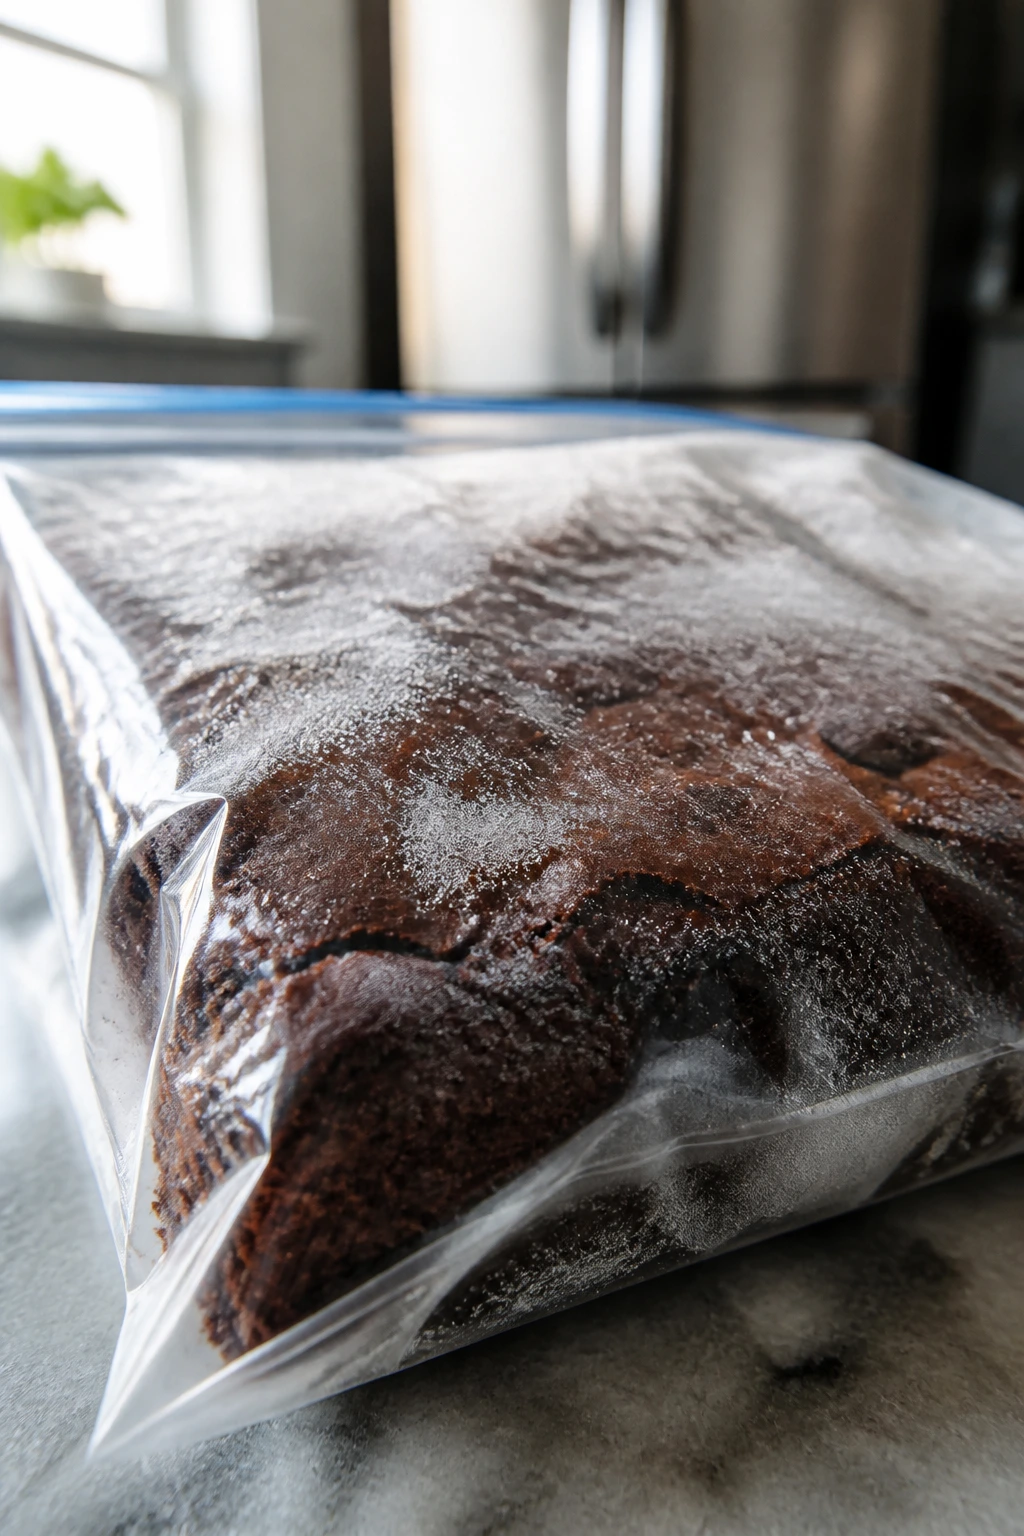
Freezing works well too. Wrap the whole slab or individual squares tightly, then tuck them into a freezer bag or airtight container. They’ll keep for up to 2 months without losing much texture. If you freeze individual squares, separate them with parchment so you can pull out one or two without thawing the whole batch.
For reheating, the microwave is fine in short bursts: 10 to 15 seconds for a single square, just enough to soften the middle without melting the edges into a puddle. An oven at 300°F for 5 to 8 minutes works better for a pan that needs warming through. Brownies with marshmallow, caramel, or Nutella do better with gentle heat because aggressive reheating makes the toppings run.
A lot of these brownies taste better on day two. The flavors settle, the center firms up, and the add-ins stop competing with the base. That’s especially true for coffee, brown butter, miso, and flourless versions, which can taste a little sharper right out of the oven.
Easy Swaps for Gluten-Free, Dairy-Free, and Smaller Batches
Gluten-Free Brownies: Use a good 1:1 gluten-free flour blend in any recipe that calls for all-purpose flour. The texture stays close to the original if the blend already includes xanthan gum. I would not use almond flour as a direct swap unless the recipe is built for it; it changes the texture too much and can make the pan greasy.
Dairy-Free Brownies: Olive oil brownies are the easiest place to start, but many of the butter-based recipes can handle melted coconut oil or a neutral dairy-free butter. Use dairy-free chocolate chips and skip cream cheese or marshmallow swirls unless you have a replacement you trust. The flavor stays strongest in the cocoa-heavy pans.
Egg-Free Brownies: These are trickier, but black bean brownies, zucchini brownies, and some olive oil versions tolerate egg substitutes better than flourless brownies do. A flax egg can work in a pinch, though it usually makes the crumb a little softer and less shiny. If the brownie depends on eggs for structure, I’d choose a different recipe.
Half-Batch Pans: If you don’t want a full 8×8 pan, most of these can be halved and baked in a loaf pan or a small square pan. The bake time drops, so start checking early. The edges will set faster than the center, and that’s fine as long as the middle still has a soft crumb.
Party Tray Scaling: Doubling brownies is easy if you move to a 9×13-inch pan and add a few minutes of bake time. Don’t assume the center is done just because the edges look dark; larger pans need a real check in the middle.
The Brownie Mistakes That Dry Out a Good Pan
The biggest mistake is baking until the toothpick comes out clean. That’s cake thinking, not brownie thinking. For fudgy brownies, the toothpick should come out with moist crumbs, and the middle should still look soft enough that you hesitate for a second before pulling the pan.
Another common problem is too much flour. A heavy scoop from the bag can add more flour than the recipe asks for, and brownies forgive that less than cookies do. Spoon-and-level your flour if you want a dense, soft crumb. If the batter looks thick, that might be fine; if it looks stiff and pasty, you may have gone too far.
People also overmix after the flour goes in. Once the dry ingredients hit the bowl, stir only until the last pale streak disappears. More mixing builds gluten, and gluten is what pushes brownies toward bread. Nobody wants brownie bread.
Then there’s the cooling issue. Brownies keep cooking in the pan after they leave the oven, especially in a dark metal pan. If you let them sit hot for too long, you get dry edges and a center that sets harder than you meant. Move them to a rack, give them time, and resist the knife.
Brownie Questions People Actually Ask
Why do brownies get that shiny crackly top?
That glossy top usually comes from whisking the sugar into the warm fat and eggs well enough that the sugar dissolves on the surface. It’s not magic. It’s just good mixing and not rushing the batter.
Can I use Dutch-process cocoa instead of natural cocoa?
Yes, in most of these recipes. Dutch-process cocoa tastes smoother and darker, while natural cocoa reads sharper and a little brighter. If a recipe uses baking powder only, the swap is usually safe, but the flavor will shift a bit.
How do I keep brownies gooey instead of cakey?
Use less flour, don’t overmix, and pull the pan while the center still has a slight wobble. Let the brownies cool before cutting. Gooey brownies are mostly about restraint at the oven door.
Can I bake these in a 9×13-inch pan?
Yes, but the brownies will be thinner and bake faster. Start checking several minutes earlier than the recipe says. A larger pan is good if you want snack-size pieces and crispier edges.
What if my swirls sink to the bottom?
That usually means the swirl mixture was too thin or the batter was too loose. Thicken the caramel, peanut butter, or cream cheese swirl a bit, and spoon it onto a more stable batter. Light swirling helps too.
Why did my brownies turn out dry even though I timed them right?
Your oven may run hot, the flour may have been packed too tightly, or the pan may have been darker than the recipe expected. Check them a few minutes earlier next time and trust the crumb, not the clock alone.
Can I freeze brownie squares individually?
Absolutely. Wrap each square in parchment or wax paper, then stash them in a freezer bag. That way you can thaw one at a time without thawing the whole pan.
Do brownies taste better the next day?
Many of them do, especially caramel, coffee, brown butter, and miso versions. The chocolate settles, the salt mellows, and the texture firms into that dense middle people keep chasing. Fresh is good. Day two can be better.
The Tray That Disappears First
Brownies are one of those desserts that look simple because they are simple, which is part of the appeal. A bowl, a whisk, an 8×8 pan, and a short bake are enough to make something that feels richer than the effort suggests. The magic lives in the timing: pull them a hair early, let them cool, and the pan rewards you.
The collection above gives you a lot of directions without forcing you into a complicated project. Some pans stay classic. Some lean salty, nutty, spiced, or fruity. All of them are built for the same basic payoff: a soft center, chewy edges, and the kind of square that leaves a faint chocolate streak on the knife.
Keep one or two of these in your back pocket, and weeknight dessert stops being a negotiation. It turns into a pan on the counter, a sharp knife, and a few quiet minutes before the tray starts to disappear.