
The difference between vegetables that feel like an obligation and vegetables people actually reach for is usually one hot oven and a seasoning that understands how browning works. This caramelized vegetable seasoning leans on sweet paprika, garlic, onion, cumin, thyme, and a pinch of brown sugar, so carrots, cauliflower, Brussels sprouts, and red onions pick up dark edges instead of a flat, steamed taste.
I like this kind of recipe because it makes dinner feel composed without dragging you through a sauce, a glaze, or a pile of extra dishes. You toss, roast, and finish with lemon or herbs. That’s the whole move.
And there’s a reason it works. Vegetables have natural sugars, and when their surfaces dry out in a hot oven, those sugars and amino acids start doing their thing. The pan smells sweet and savory at the same time, and once you’ve had carrots that taste a little like candy and onion wedges that collapse into soft, bronzed layers, plain boiled vegetables start feeling like a bad joke.
Why This Blend Earns a Spot Beside the Salt
-
Browning gets a nudge, not a mask: The teaspoon of brown sugar helps the edges color at 425°F without turning the pan sticky or dessert-like.
-
The seasoning stays savory: Paprika, garlic, onion, cumin, thyme, and black pepper build depth, so the vegetables taste roasted instead of sauced.
-
It handles mixed vegetables well: Cauliflower, Brussels sprouts, carrots, and red onion all hold onto the spices without one ingredient bulldozing the others.
-
It scales cleanly: Double the mix for two sheet pans, or keep a jar in the cabinet and use it on chickpeas, potatoes, or tofu on a different night.
-
Cleanup stays sane: One bowl, one pan, and a spoon are enough, which matters more than people admit when dinner needs to happen without a small kitchen cleanup saga.
-
It fits a lighter dinner without feeling puny: A thin coat of oil and a hot oven give you real flavor, not the sad little “health food” version of flavor that tastes like it was drafted by committee.
What Browning Needs from a Vegetable
Why do some pans turn mahogany while others go soft and beige? The answer is less mysterious than it sounds, and once you see it, you stop blaming the vegetables and start adjusting the heat, the spacing, and the moisture.
Browning in the oven comes from two related things. Caramelization is what happens when sugars brown under heat, and the Maillard reaction is the savory browning that comes from amino acids and sugars meeting on a dry, hot surface. In real kitchen life, both are happening at once. That’s why onions taste sweeter after roasting and cauliflower picks up that nutty, almost toasted flavor around the edges.
Caramelization vs. the Maillard Reaction
The brown sugar in this seasoning is not there to sweeten the whole pan. It gives the vegetables a tiny head start on color, which matters when you want a browned edge before the interior turns mushy. The Maillard reaction does the heavier lifting, though, especially on cauliflower, Brussels sprouts, and onion cut sides where the surface can actually dry out.
Why the Pan Has to Stay Dry
Water is the enemy of browning. If the vegetables hit the bowl damp from rinsing, the seasoning clumps, the oil slides around, and the oven spends its first 10 minutes steaming the produce instead of roasting it. That’s why a towel-dry step and a roomy sheet pan matter so much.
Why a Pinch of Sugar Helps, But Too Much Hurts
A teaspoon of brown sugar is enough. More than that and you’ve made a sticky glaze that can scorch before carrots and onions are tender. I’ve seen people bury vegetables under sweetness and then wonder why the pan smells burnt while the centers are still firm. That’s not caramelization. That’s a cautionary tale.
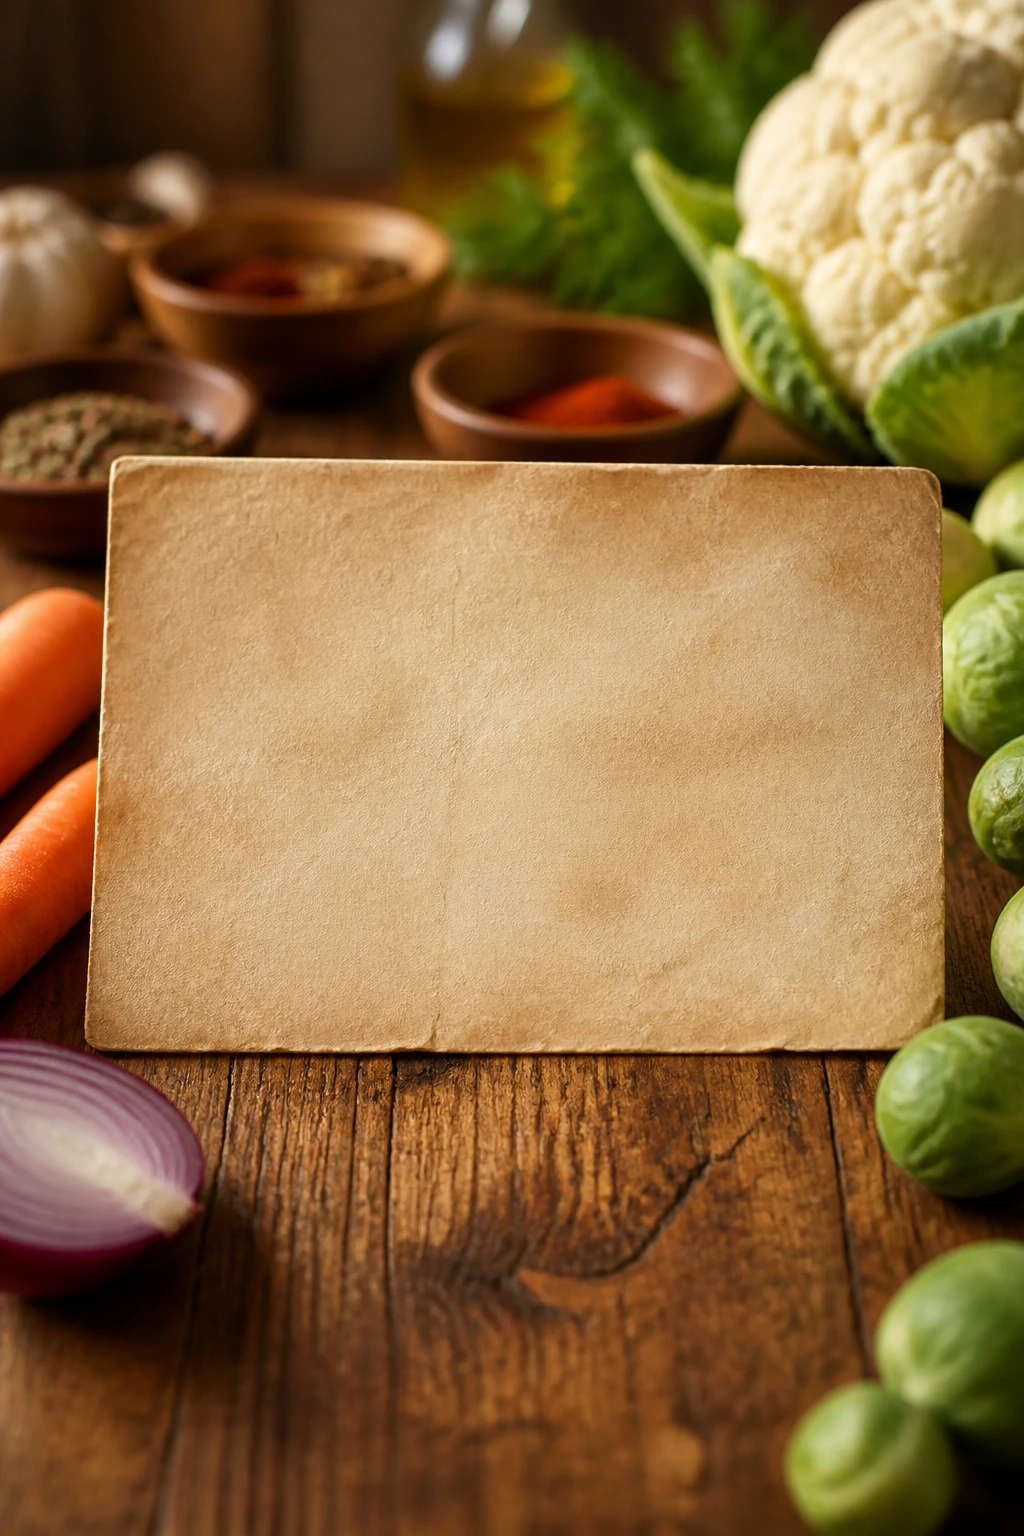
The Seasoning Mix and the Vegetables It Was Built For
Yield: Serves 4 as a side or 2 as a main
Prep Time: 15 minutes
Cook Time: 25 to 35 minutes
Total Time: 40 to 50 minutes
Difficulty: Beginner — the main skill is keeping the vegetables dry and spread out.
Best Served: Hot from the oven, or warm within 20 minutes.
Chill/Rest Time: None
The ingredient list is short, but every line has a job. The seasoning does not try to hide the vegetables; it gives them a deeper, roasted edge and then gets out of the way.
For the Caramelized Vegetable Seasoning
- 2 teaspoons kosher salt
- 1½ teaspoons sweet paprika
- 1 teaspoon garlic powder
- 1 teaspoon onion powder
- 1 teaspoon packed light brown sugar
- ¾ teaspoon ground cumin
- ½ teaspoon dried thyme
- ½ teaspoon freshly ground black pepper
- ¼ teaspoon ground coriander
- ⅛ teaspoon cayenne pepper, optional
For the Vegetables
- 1 medium head cauliflower, cut into 1½-inch florets, about 6 cups
- 12 ounces Brussels sprouts, trimmed and halved
- 2 large carrots, peeled and cut on the bias into ½-inch pieces
- 1 large red onion, cut into 1-inch wedges
- 2½ tablespoons extra-virgin olive oil
- 1 tablespoon balsamic vinegar
- 1 tablespoon chopped fresh parsley or chives, for serving
- 1 teaspoon fresh lemon juice, optional, for a brighter finish
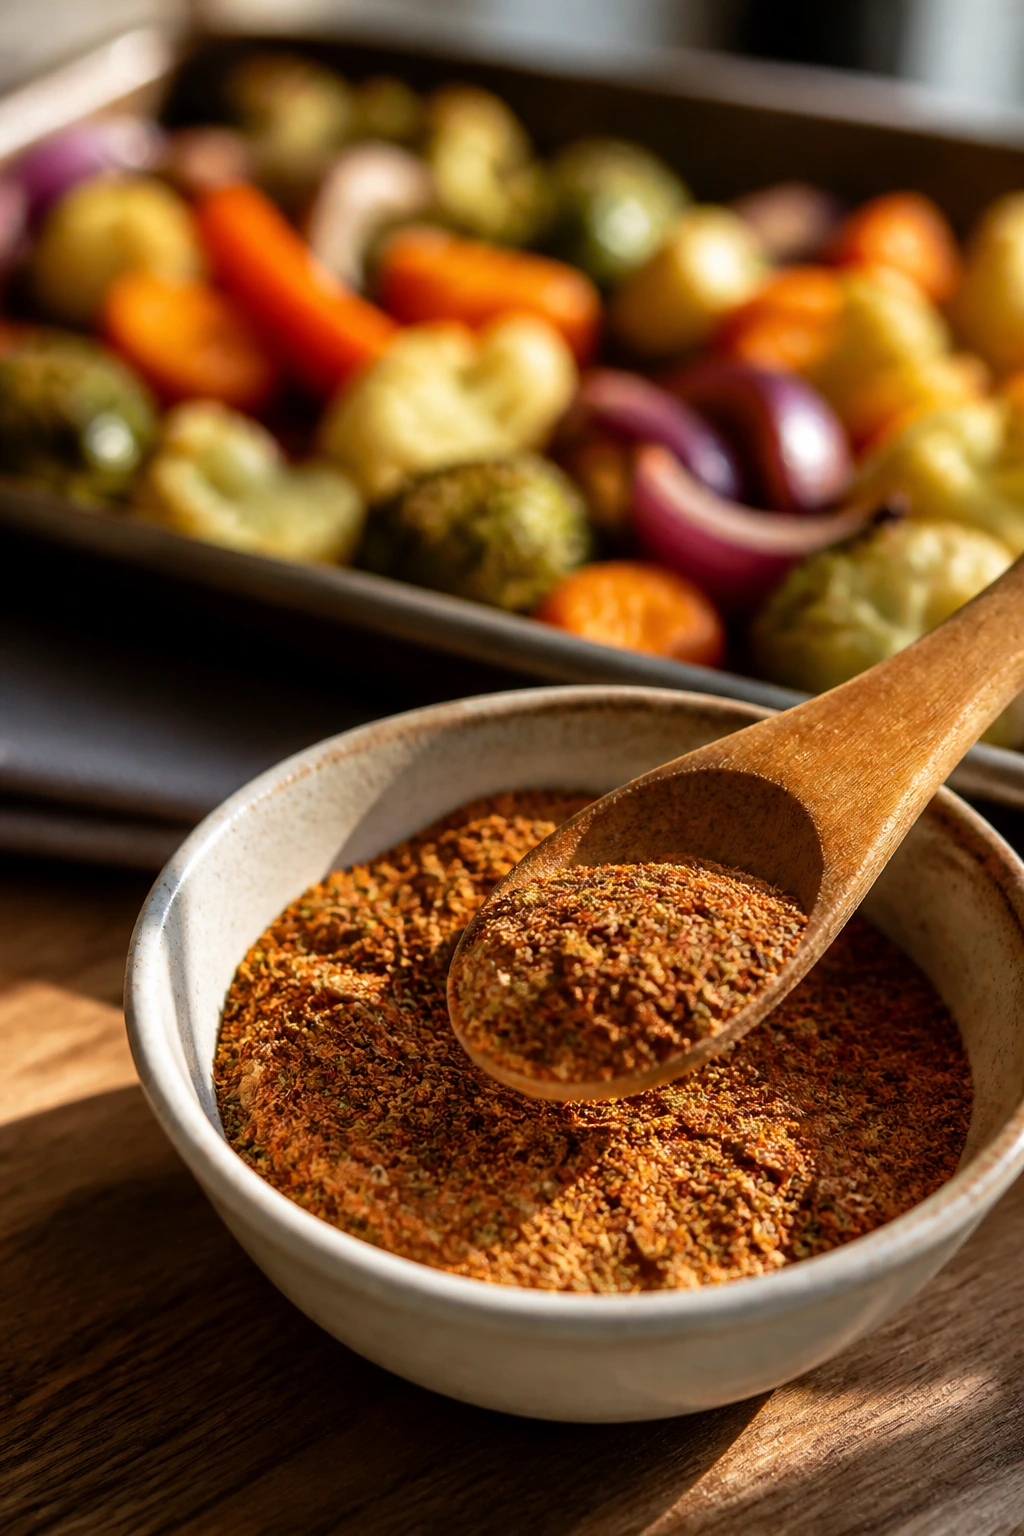
Seasoning Base
What to use: 2 teaspoons kosher salt, 1½ teaspoons sweet paprika, 1 teaspoon garlic powder, 1 teaspoon onion powder, 1 teaspoon packed light brown sugar, ¾ teaspoon ground cumin, ½ teaspoon dried thyme, ½ teaspoon black pepper, ¼ teaspoon ground coriander, and ⅛ teaspoon cayenne, if you want a whisper of heat.
Preparation: Whisk everything together in a small bowl until the brown sugar breaks apart and the color looks even. If you see a dark clump of sugar or a pile of paprika at the bottom, press it flat with the back of a spoon and keep mixing.
Substitutions: Maple sugar or coconut sugar can replace the brown sugar, though coconut sugar gives a darker, earthier note. Smoked paprika can stand in for sweet paprika if you want a deeper, campfire-style flavor, but I prefer it as a variation, not the default.
Tips: This blend should smell warm and savory, not like chili powder or taco seasoning. Keep the cumin modest. You want it to support the vegetables, not announce itself from across the kitchen.
Vegetable Base
What to use: 1 medium head cauliflower, 12 ounces Brussels sprouts, 2 large carrots, and 1 large red onion.
Preparation: Cut the cauliflower into bite-size florets, halve the Brussels sprouts, slice the carrots into pieces that are close in size to the florets, and cut the onion into thick wedges so the layers stay together in the oven.
Substitutions: Broccoli, parsnips, sweet potato, delicata squash, and fennel all work well with this seasoning. Zucchini and mushrooms can be used, but they need a different timing plan because they give off more water and can turn soft fast.
Tips: Keep the pieces similar in size where you can, and make the denser vegetables a little smaller than the quicker ones. The goal is even browning, not a bowl of mixed sizes that finish in separate decades.
Oil, Vinegar, and Finish
What to use: 2½ tablespoons extra-virgin olive oil, 1 tablespoon balsamic vinegar, 1 tablespoon chopped fresh parsley or chives, and 1 teaspoon fresh lemon juice, if you want a sharper finish.
Preparation: Toss the vegetables with oil and balsamic first so the seasoning sticks in an even film, then add the dry spices. The parsley and lemon go on at the end, after roasting, when their fresh edges still matter.
Substitutions: Avocado oil works if you want a more neutral flavor and slightly higher heat tolerance. Red wine vinegar can replace balsamic if you want less sweetness, though I’d keep the amount small so the pan still browns properly.
Tips: Use the balsamic like a background note, not a marinade. Too much liquid gives you gloss without color, and gloss is not the point here.
Which Vegetables Brown Best with This Blend
Not every vegetable behaves the same in a hot oven, and pretending otherwise is how people end up with one tray of crisp edges and another tray of disappointment. This seasoning works best on vegetables that can take a little heat and still hold their shape.
The Sturdy Vegetables
Cauliflower, Brussels sprouts, carrots, red onions, parsnips, sweet potatoes, and broccoli are the most dependable matches. They have enough structure to brown before collapsing, and they usually taste better when the edges go a little dark. If you’re choosing a vegetable because you want dinner to feel filling, these are the ones I’d reach for first.
The Quicker Vegetables
Bell peppers, green beans, asparagus, and thinly sliced fennel can take the seasoning too, but they need a shorter roast or a late addition. Add them during the last 10 to 12 minutes so they don’t go limp before the denser vegetables are done. Broccoli is a little strange here: the florets can brown fast, but the stems need more time, so I usually keep the stems smaller and the florets a bit larger.
The Tricky Ones
Zucchini, mushrooms, and cherry tomatoes are juicy, which means they can steam the whole pan if you crowd them in too early. That doesn’t mean they’re off-limits. It means they deserve their own plan. I add mushrooms in the final 12 to 15 minutes, zucchini in thick chunks late in the roast, and tomatoes only when I want them to burst and juice the pan a little.
Cut Size Matters More Than People Think
A carrot cut into ½-inch pieces and a cauliflower floret the size of a golf ball will not finish at the same moment. That’s not a flaw in the vegetables; it’s the physics of roasting. The smaller and denser the piece, the more carefully you need to watch it. The easiest fix is to cut the harder vegetables a touch smaller and keep the whole pan in the same rough size range.
Tools That Keep the Pan Hot and the Edges Crisp
The equipment list is short, and that’s part of the appeal. You do not need a fancy roasting setup or anything with a motor. You need a hot oven, a decent pan, and enough room to let the vegetables breathe.
-
Large rimmed sheet pan: A heavy one browns better than a thin, floppy pan that warps and pools oil at the edges.
-
Large mixing bowl: Big enough to toss the vegetables without flinging paprika across the counter.
-
Chef’s knife: A sharp blade gives you even cuts, which matters more than most people realize in a roast like this.
-
Cutting board: Use a stable board, and if it slides, tuck a damp kitchen towel under it.
-
Measuring spoons: The brown sugar and salt are doing real work here, so guessing is not smart.
-
Wooden spoon or silicone spatula: Better than bare hands once the spices hit the oil.
-
Parchment paper, optional: Helpful for cleanup, but bare metal browns more deeply.
-
Airtight jar or small container: Useful if you mix a larger batch of the seasoning and want it near the salt instead of buried in the spice drawer.
How to Mix, Toss, and Roast the Vegetables
The seasoning works best when the vegetables are dry before they hit the bowl. That one detail decides whether the spices cling in an even coat or slide around in a muddy patch on the bottom.
Prep the Oven and Build the Blend
-
Preheat the oven to 425°F (220°C) and position a rack in the middle. If you’re using two sheet pans, put both in the oven while it heats so the metal gets hot too.
-
In a small bowl, whisk together the salt, sweet paprika, garlic powder, onion powder, brown sugar, cumin, thyme, black pepper, coriander, and cayenne until the mixture looks even and the brown sugar is broken up.
Prepare the Vegetables
-
Wash the cauliflower, Brussels sprouts, carrots, and onion, then dry them thoroughly with a clean kitchen towel. Any lingering water will fight the browning you want.
-
Cut the cauliflower into 1½-inch florets, halve the Brussels sprouts, slice the carrots into ½-inch bias pieces, and cut the onion into thick wedges. Aim for pieces that are close in size, even if they are not identical.
-
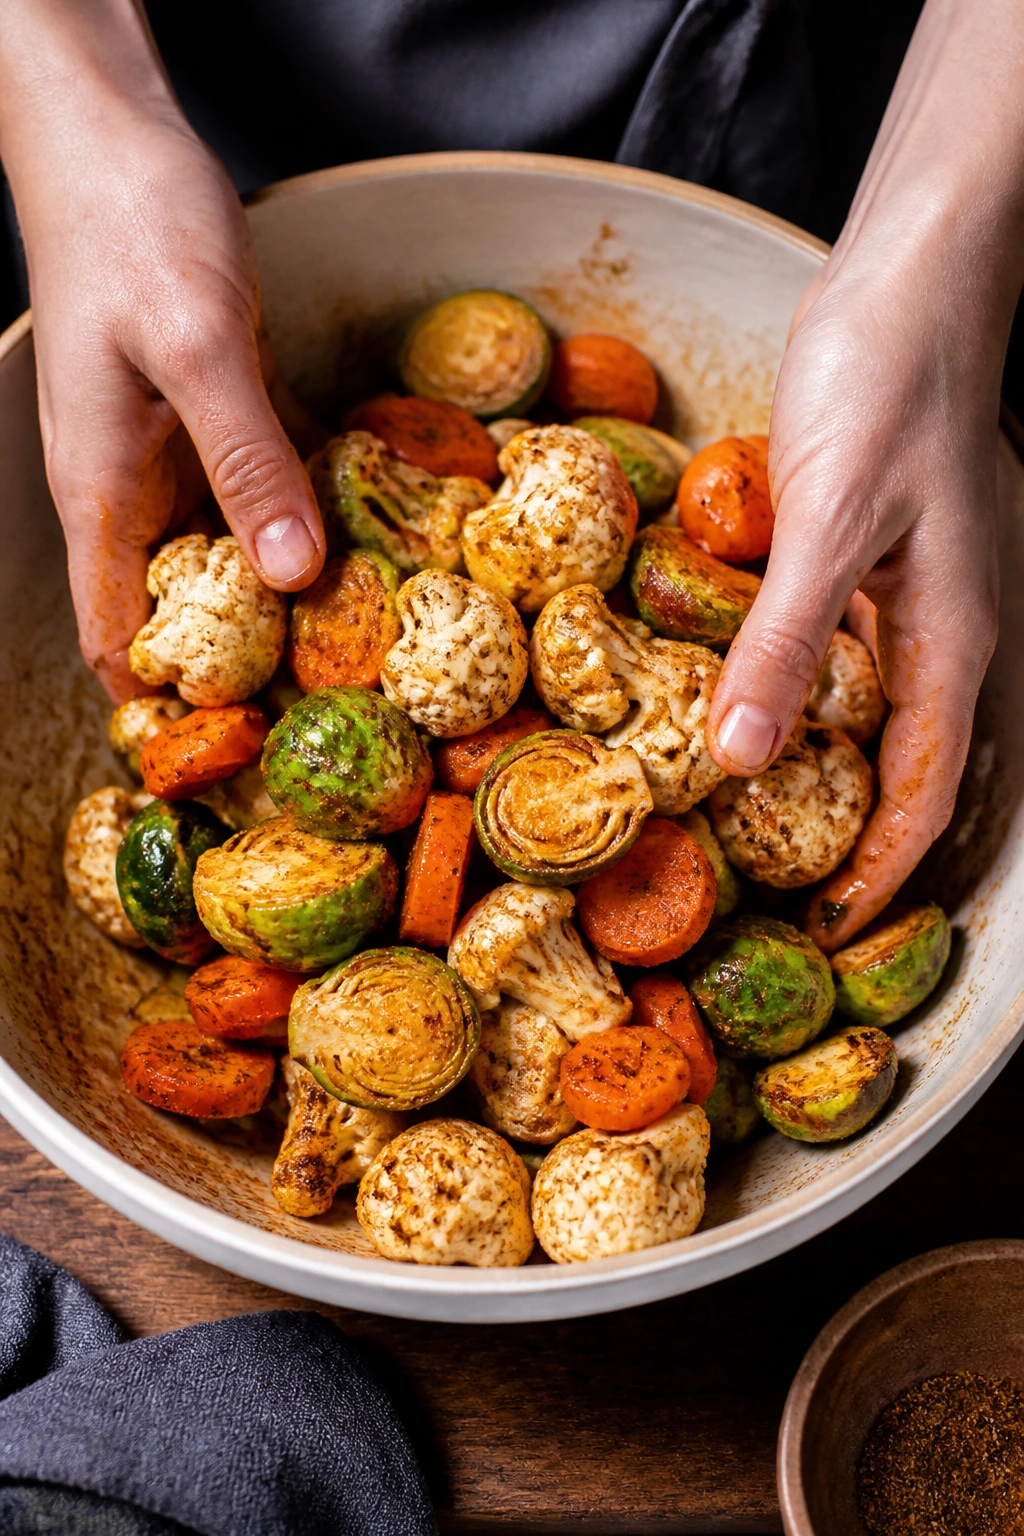
Put the vegetables in a large bowl and drizzle with the olive oil and balsamic vinegar. Toss until every surface looks lightly shiny, not slick. If oil pools in the bottom of the bowl, you have more liquid than you need.
-
Sprinkle the seasoning over the vegetables and toss again until the color is even and the dry spices are no longer sitting in little piles. Scrape the bottom of the bowl once or twice so nothing gets left behind.
Roast and Finish
-
Spread the vegetables on the hot sheet pan in a single layer, leaving space between the pieces. Use two pans if the vegetables look crowded; crowded vegetables steam, and steam is the enemy here.
-
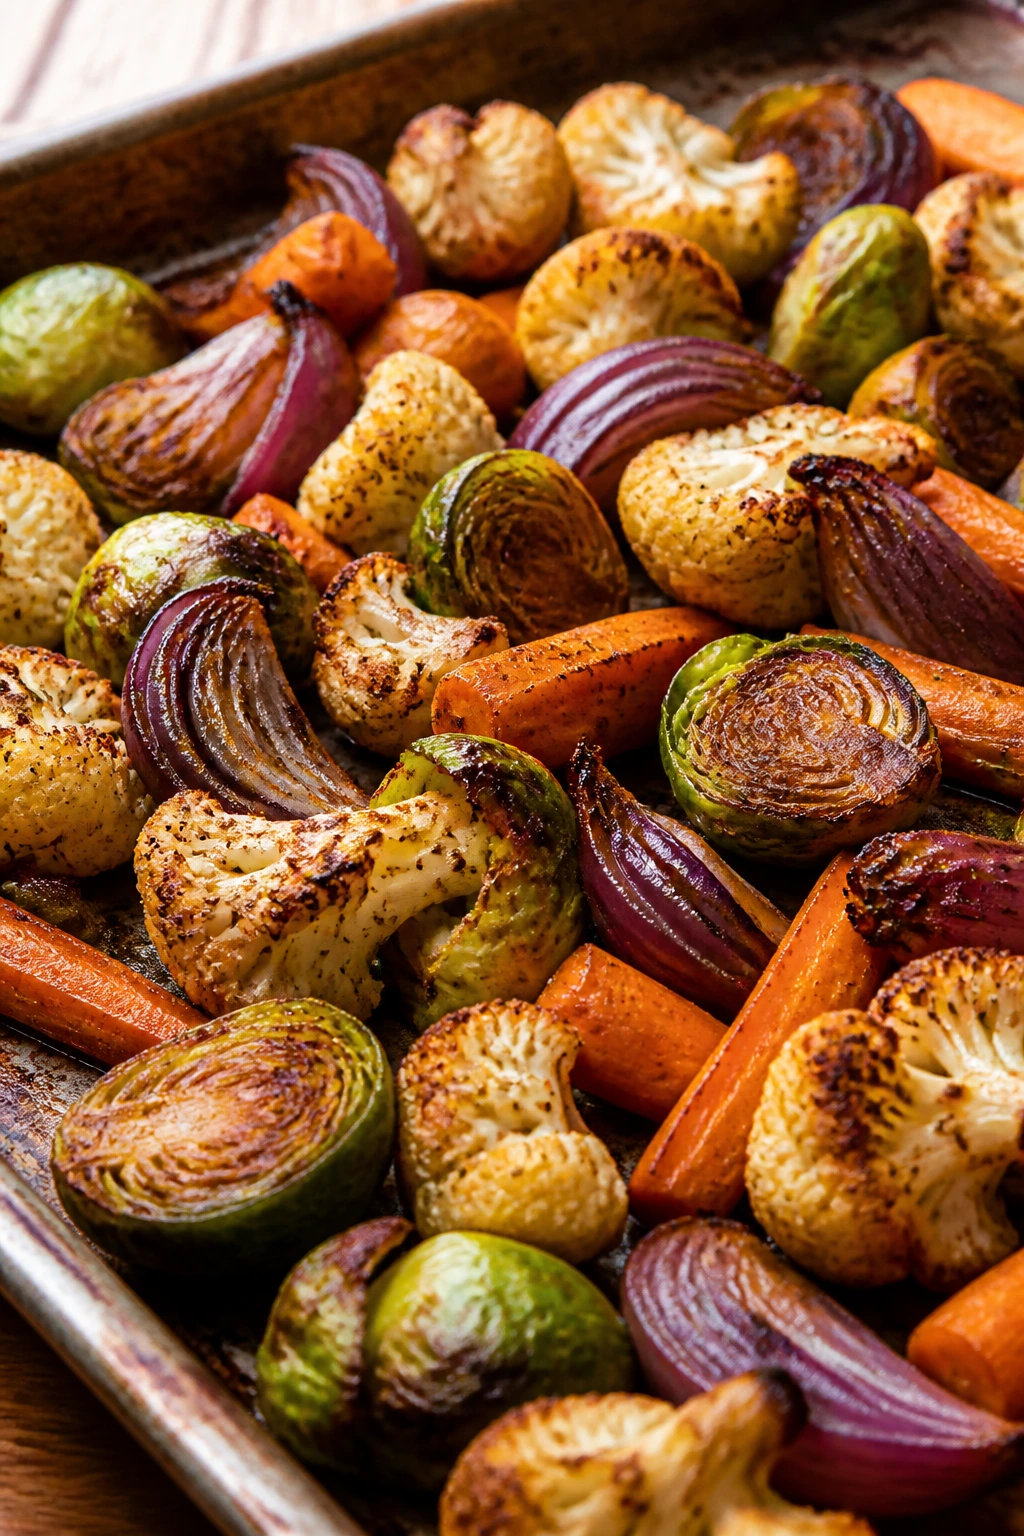
Roast for 15 minutes, then stir or flip the vegetables so new surfaces touch the hot metal. Return them to the oven for another 10 to 20 minutes, until the cauliflower edges are browned, the Brussels sprouts have deep cut-side color, the carrots are tender, and the onion tips look bronzed rather than pale.
-
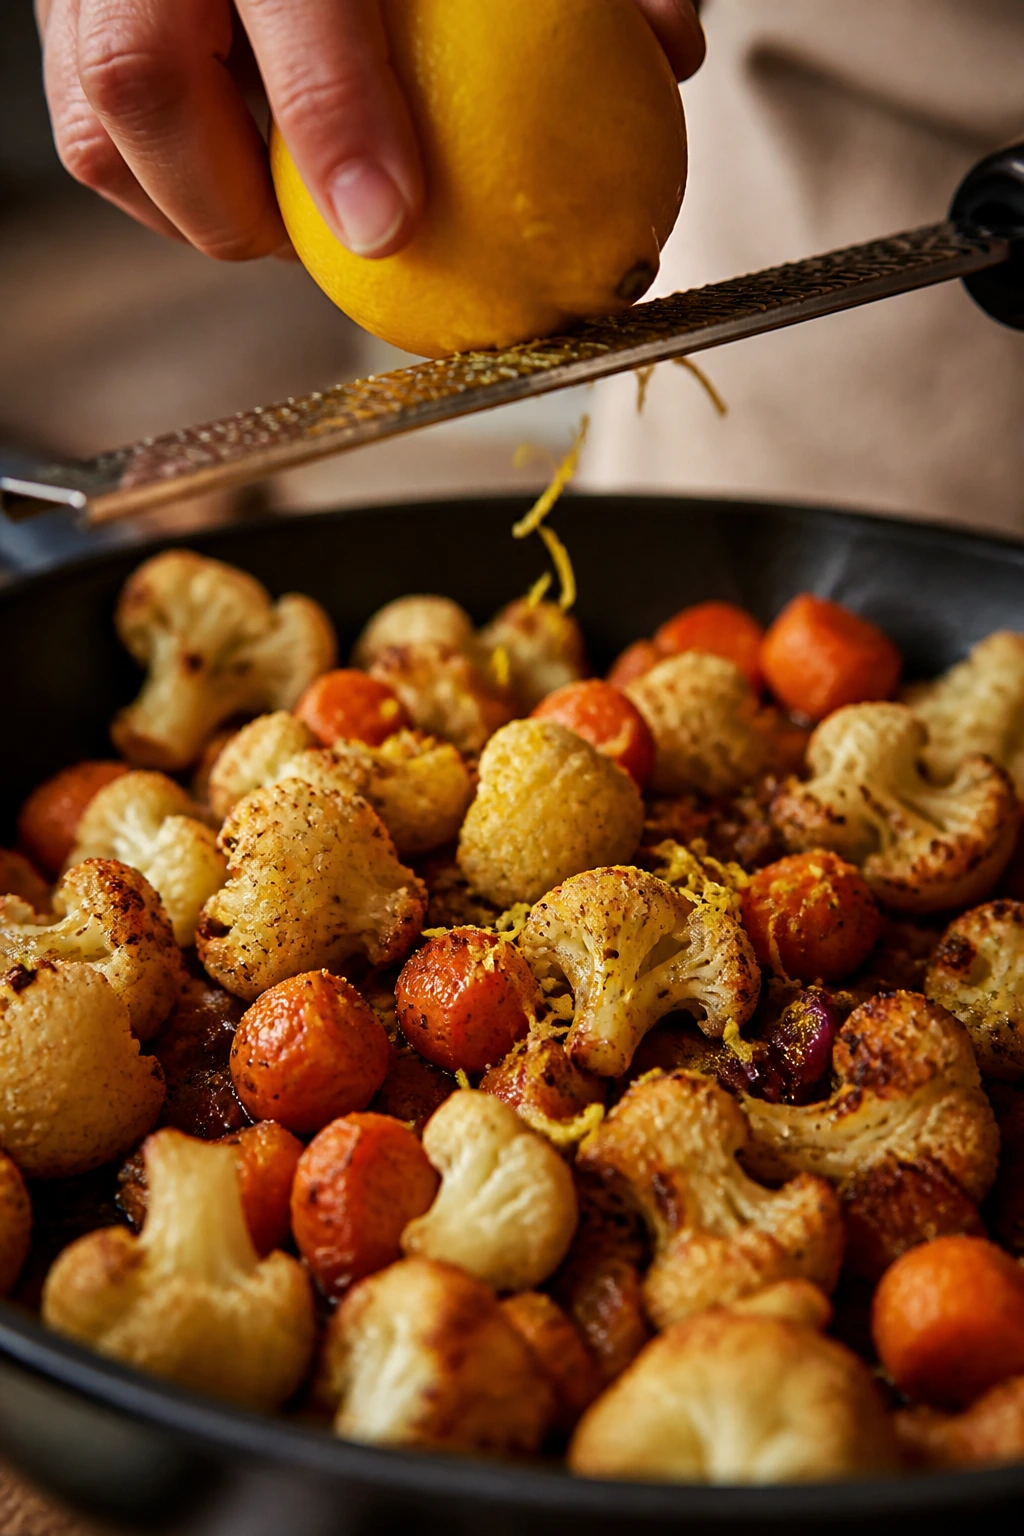
Pull the pan from the oven, taste a piece, and add a pinch more salt if needed. Finish with parsley or chives and a small squeeze of lemon if you want a brighter edge. Serve while the vegetables are still crisp at the edges.
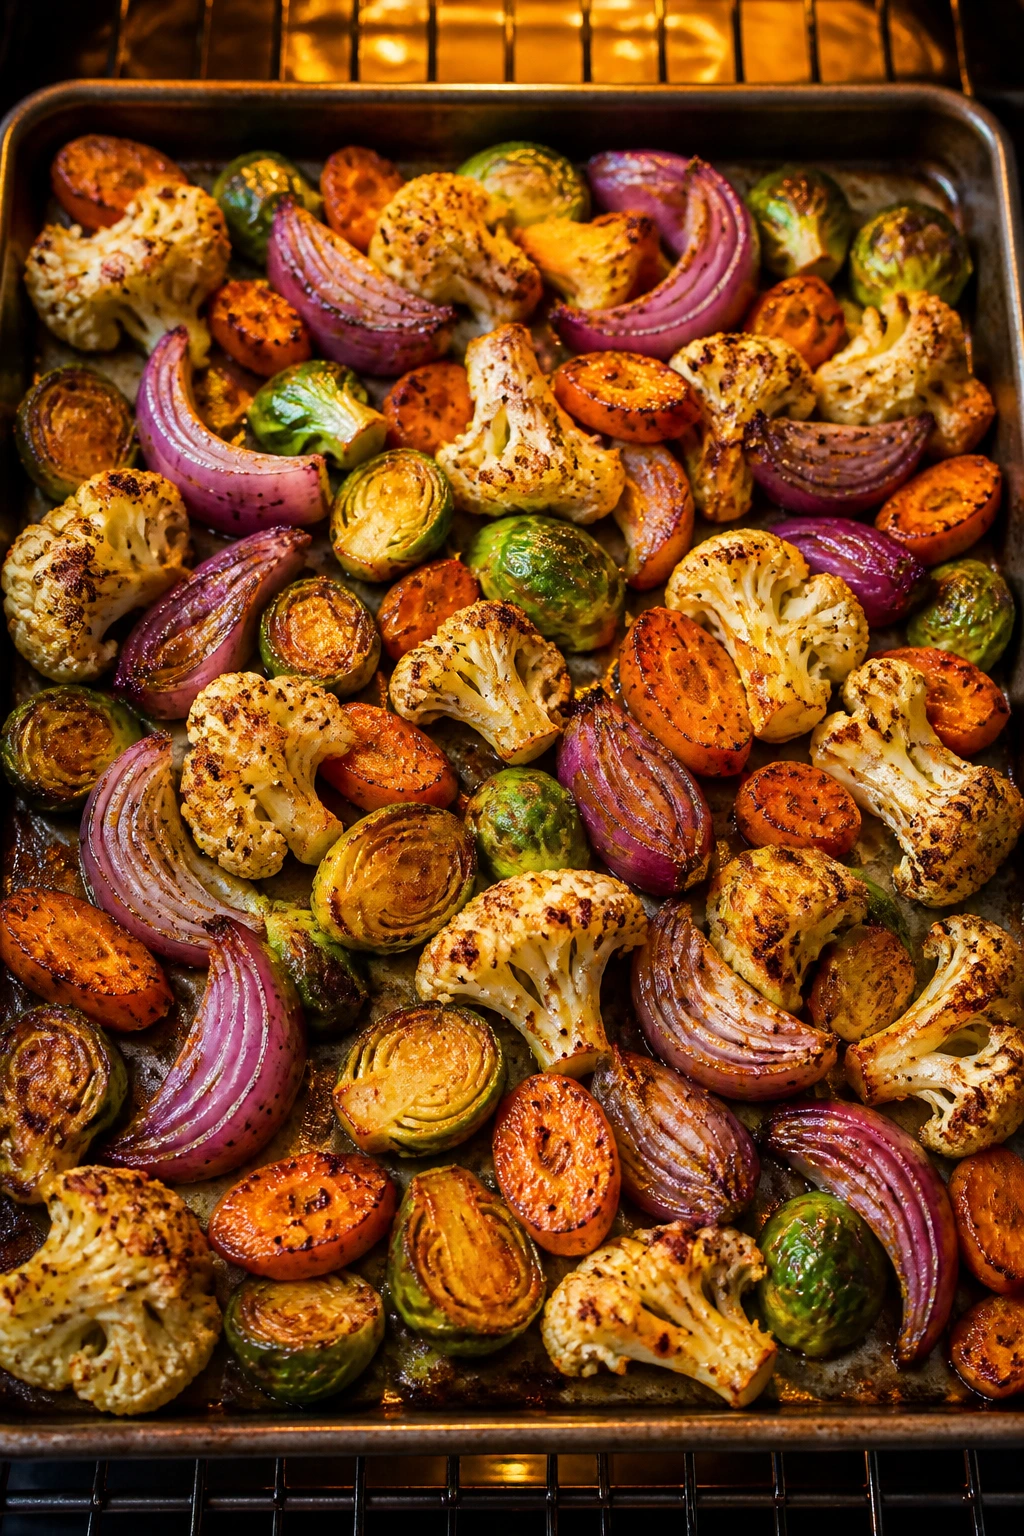
What Done Looks Like on a Sheet Pan
The biggest mistake people make is waiting for a perfect, all-over caramel color that never comes. Vegetables do not finish in a uniform shade. They finish with a mix of dark edges, tender centers, and a little variation from piece to piece, and that’s exactly what you want.
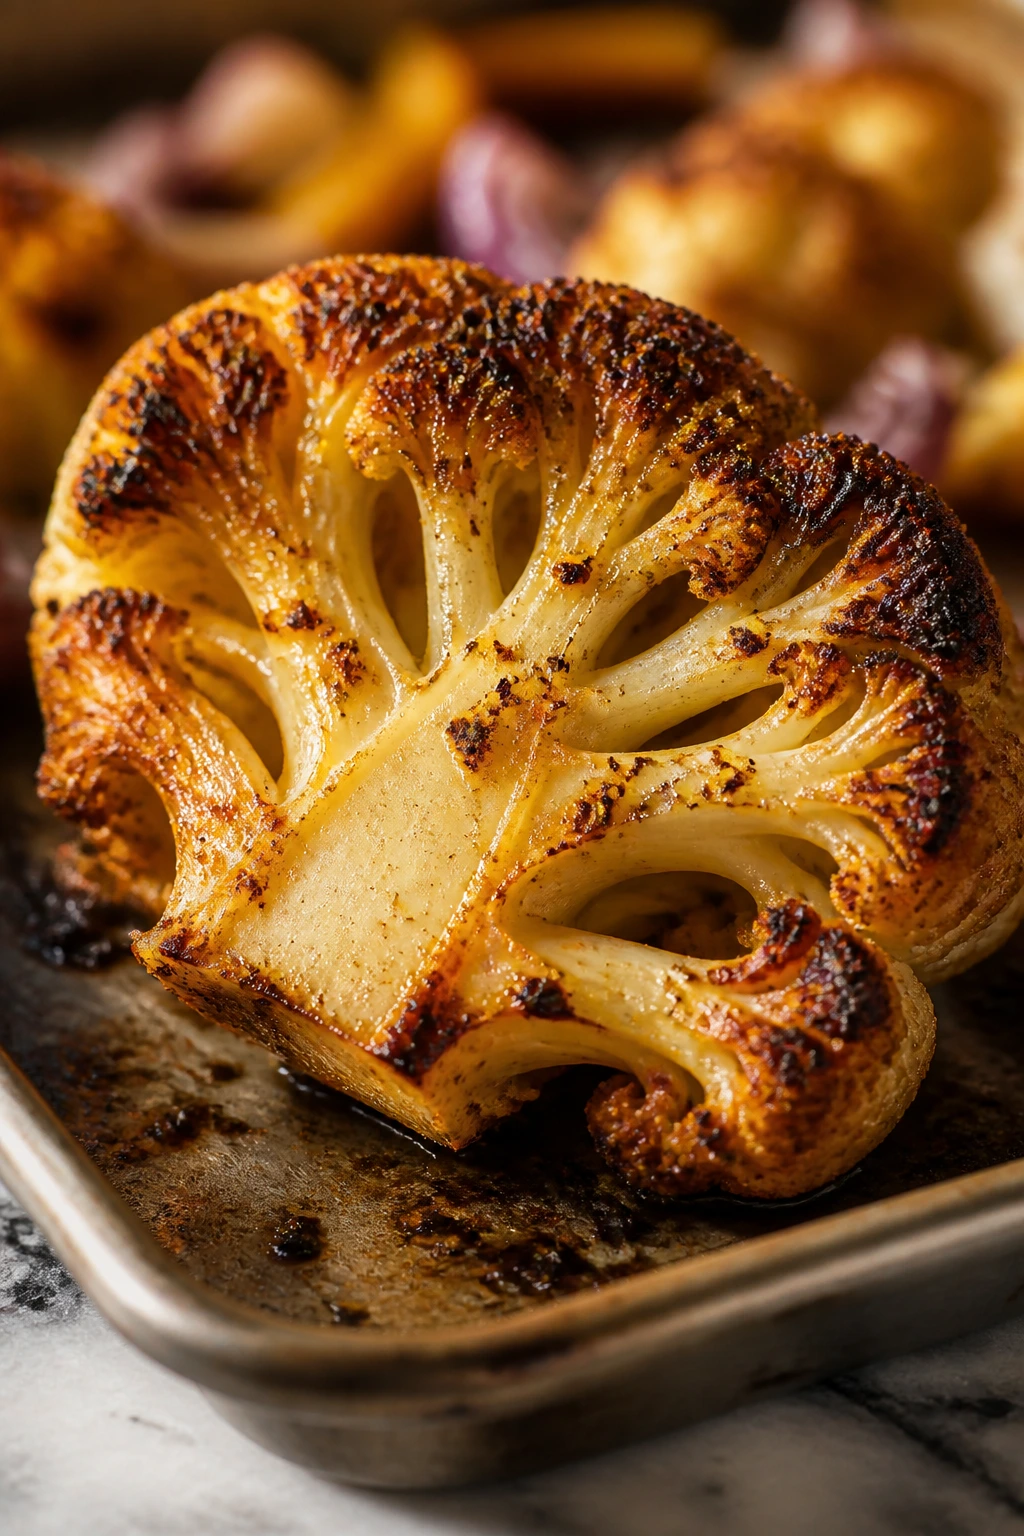
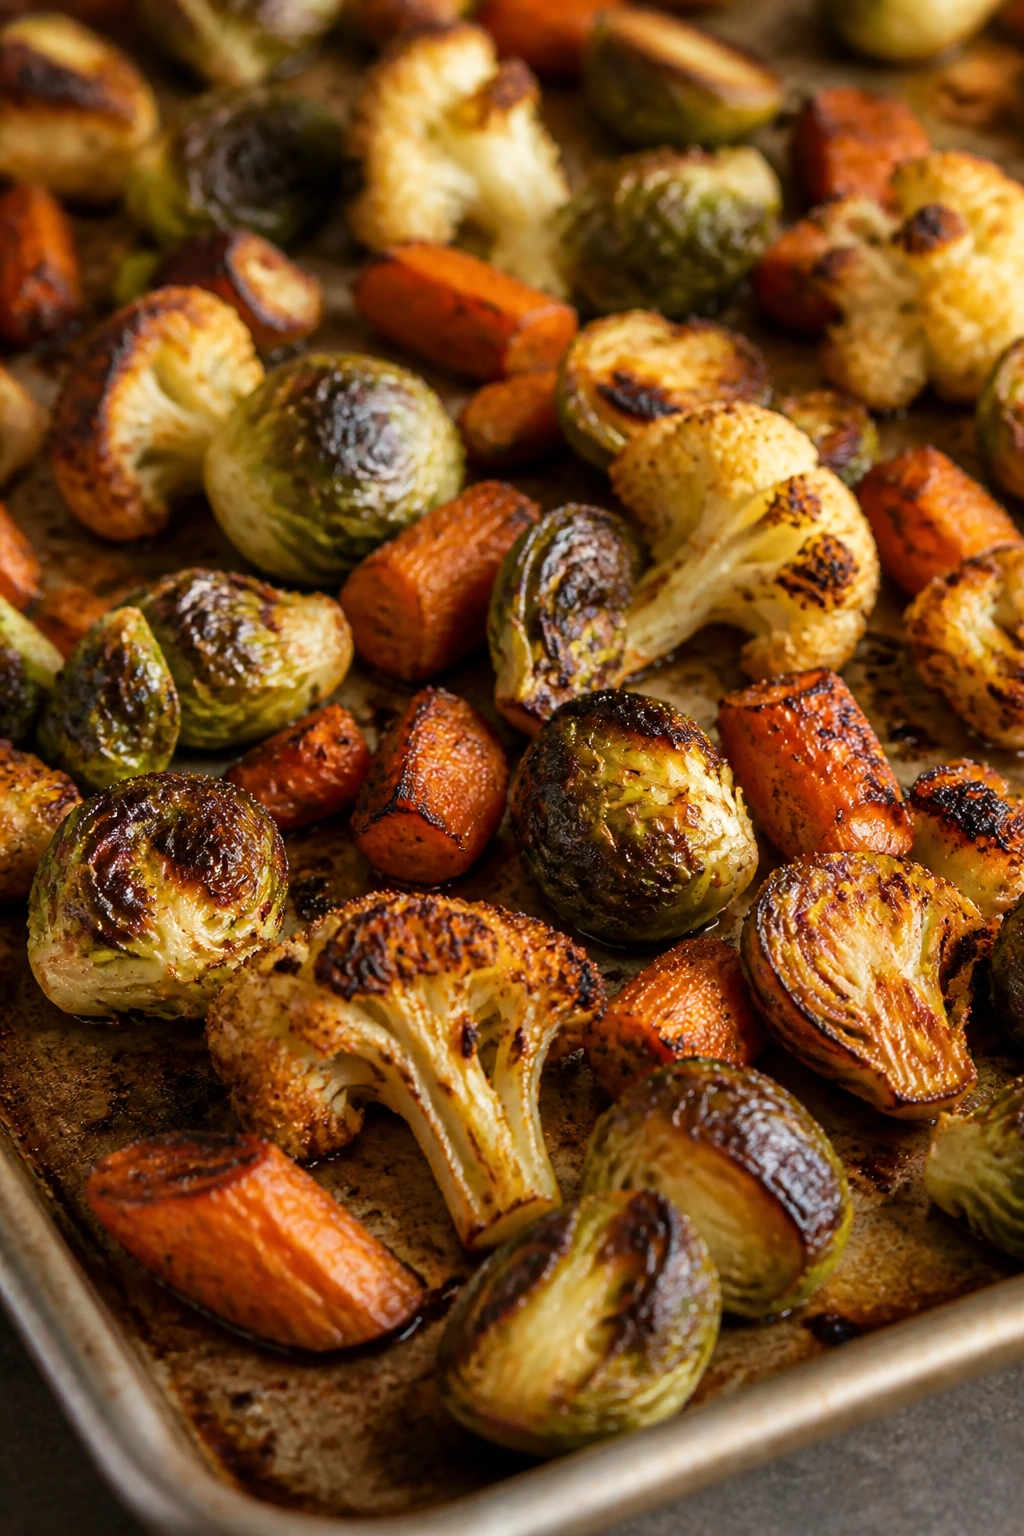
Color Is the First Clue
The cauliflower should have brown spots where the flat sides touched the pan. Brussels sprouts should show deep color on the cut face, not just on the loose outer leaves. The onion wedges should be soft enough to collapse with a fork, with a little dark striping on the edges. If everything looks the same pale beige color at the 20-minute mark, the oven is too cool or the pan is too crowded.
Texture Tells the Rest of the Story
A knife should slide through the carrots with only a little resistance. The Brussels sprouts should still have a little structure; they should not be mush. Cauliflower should feel tender but not waterlogged. If you pick up a piece and it bends before it browns, it needs more heat, not more patience.
The Smell Changes Near the Finish
At the beginning, the pan smells like raw spice and hot oil. Near the end, it starts smelling nutty, sweet, and savory all at once. That’s the moment I pay attention. A good roasted pan doesn’t just look done; it smells like dinner has crossed the finish line.
Turning Roasted Vegetables into Dinner
This is the part where a tray of vegetables stops being a side note and starts earning its place at the center of the plate. If you want a healthy dinner, not just a healthy side dish, give the vegetables something starchy or protein-rich to lean on.
As a Grain Bowl
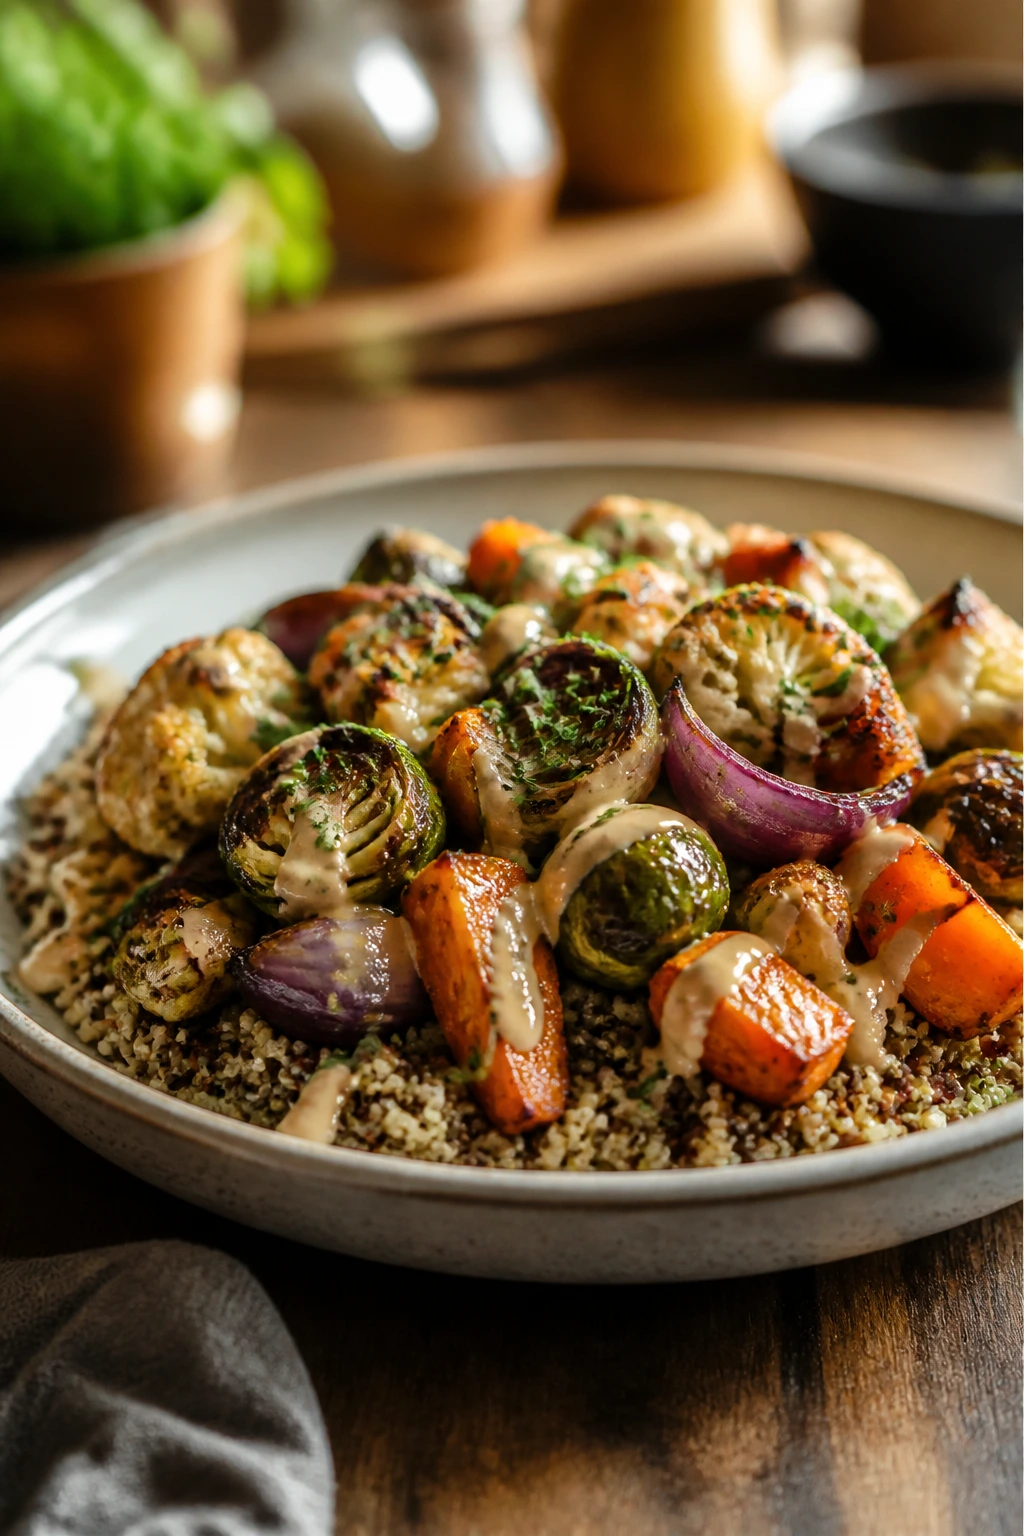
Spoon the vegetables over warm farro, quinoa, or brown rice and add a spoonful of tahini or plain yogurt if you want creaminess. A handful of chickpeas turns the whole thing into a real meal, and the browned bits from the pan make the grain bowl taste intentional instead of assembled from leftovers.
As a Main Plate
Pile the vegetables next to crispy tofu, a fried egg, or white beans tossed with olive oil and lemon. I like this route when I want dinner to feel simple but not bare. The vegetables carry the flavor, and the protein gives the plate enough structure to keep it from feeling like a snack.
As a Side Dish
If you’re serving these beside fish, chicken, or a bean loaf, keep the plating loose and let the browned edges show. I’d rather see a rough pile of bronzed cauliflower and onion than a neat scoop that hides the best parts. A little parsley, a lemon wedge, and the sticky bits from the pan are usually enough.
The Sauces That Fit
Tahini sauce, garlic yogurt, pesto, or a loose herb vinaigrette all work, but use them lightly. Too much sauce can flatten the crispness you just built. A tablespoon or two is plenty if the vegetables were roasted properly in the first place.
Small Moves That Change the Result
A recipe like this lives or dies on small choices. The ingredients matter, sure, but the quiet details matter more than people think, and those details are where a sheet pan goes from decent to genuinely worth repeating.
Flavor Enhancement: A little lemon zest in the seasoning adds brightness without making the vegetables taste citrusy. I especially like it with cauliflower and carrots, which can handle the lift.
Time-Saver: Cut the vegetables the night before and store them dry in airtight containers with a paper towel tucked inside. You still want to season them right before roasting, but the knife work is already done.
Cost-Saver: Use more carrots, onions, and cauliflower when broccoli prices are annoying or the produce bin looks rough. This seasoning doesn’t care whether the pan is built from fancy vegetables or the ones you can actually afford twice a week.
Pro Move: Warm the sheet pan in the oven before adding the vegetables. The first contact with hot metal helps the cut sides of the cauliflower and Brussels sprouts brown faster, which means better color before the centers soften too much.
Serving Suggestions: Toasted pumpkin seeds, chopped parsley, a few shavings of Parmesan, or a spoon of tahini can change the texture in a good way. Pick one finishing touch, not four. The point is to sharpen the vegetables, not bury them.
Make-It-Yours: For a vegan dinner bowl, keep the base recipe and add chickpeas or lentils. For a dairy-free finish, use tahini or an herby vinaigrette. For a richer plate, crumble a little feta over the top after roasting. The recipe already leans vegetarian, so the swaps are mostly about the final finish, not the core method.
Common Mistakes That Leave Vegetables Pale
If your vegetables come out soft and blond instead of browned and savory, the problem is usually one of a handful of things. Fortunately, all of them are fixable.
-
Crowding the pan: If the vegetables are piled on top of one another or touching in a thick layer, they steam. The fix is simple: spread them out or use two pans. If the vegetables look wet halfway through roasting, they probably needed more space from the start.
-
Skipping the drying step: Rinsed vegetables that go straight into the bowl carry water into the seasoning, which turns the spices patchy and the roast damp. Pat everything dry before you cut or after you cut, whichever is easier. The drier the surface, the better the browning.
-
Using too much sugar: More brown sugar does not mean more caramelization. It means faster scorching. Measure the teaspoon, don’t pour from the bag, and keep the oven at 425°F rather than cranking it higher and hoping for the best.
-
Mixing vegetables with very different cooking times: Carrots and sweet potatoes are not on the same schedule as zucchini or cherry tomatoes. If you throw everything together without thinking, some pieces will brown while others collapse. Cut denser vegetables smaller or add fast-cooking vegetables later.
-
Overloading the pan with oil: Shiny is not the goal. A light sheen is enough. If the vegetables swim, the seasoning slides around and the bottoms take on a greasy, soft texture instead of crisp edges.
-
Stopping before the finish: Roasted vegetables often taste decent at first glance and flat once they cool. That’s where the lemon juice, parsley, or a tiny splash of vinegar matters. The finish wakes everything up and makes the pan taste finished instead of merely cooked.
Variations for Smoky, Herby, or Spicy Pans
A good base seasoning should behave like a sturdy kitchen template, not a one-note rule. Once you’ve made the original version, the swaps get easy.
Smoky Market Roast
Replace the sweet paprika with smoked paprika and add ¼ teaspoon chipotle powder. This version leans deeper and a little darker, which I like with cauliflower, onion, and carrots. It’s the one to make when you want the pan to taste like it spent time near a fire, even though it absolutely did not.
Herb-Heavy Garden Pan
Swap the cumin for ½ teaspoon crushed rosemary and ½ teaspoon oregano. Add extra parsley at the end and finish with lemon zest. This variation tastes cleaner and a little greener, which suits broccoli and Brussels sprouts better than sweet potatoes. It’s a quieter pan, but not a weaker one.
Bright Lemon Bowl
Keep the base seasoning, but add 1 teaspoon finely grated lemon zest to the oil before tossing. Finish with a little more lemon juice after roasting. That small shift makes the vegetables taste sharper and fresher, which is useful when the rest of dinner is creamy, rich, or bean-heavy.
Warm Curry Roast
Replace the cumin and coriander with 1½ teaspoons curry powder and add ¼ teaspoon turmeric. The color turns more golden, and the flavor gets warmer and rounder. I reach for this when cauliflower and chickpeas are sharing a pan or when I want the vegetables to feel a little more substantial under rice.
Low-Sodium Dinner Pan
Cut the kosher salt to 1½ teaspoons and increase the black pepper and thyme slightly. Finish with lemon juice so the vegetables still taste lively. This version works well if you’re serving the pan with salty cheese, olives, or a sauce that already brings enough sodium to the table.
Storage, Reheating, and Make-Ahead
The dry seasoning mix keeps a long time, but the roasted vegetables have a shorter, more honest life. That’s normal. Roasting is about texture, and texture always starts fading the minute the vegetables cool.
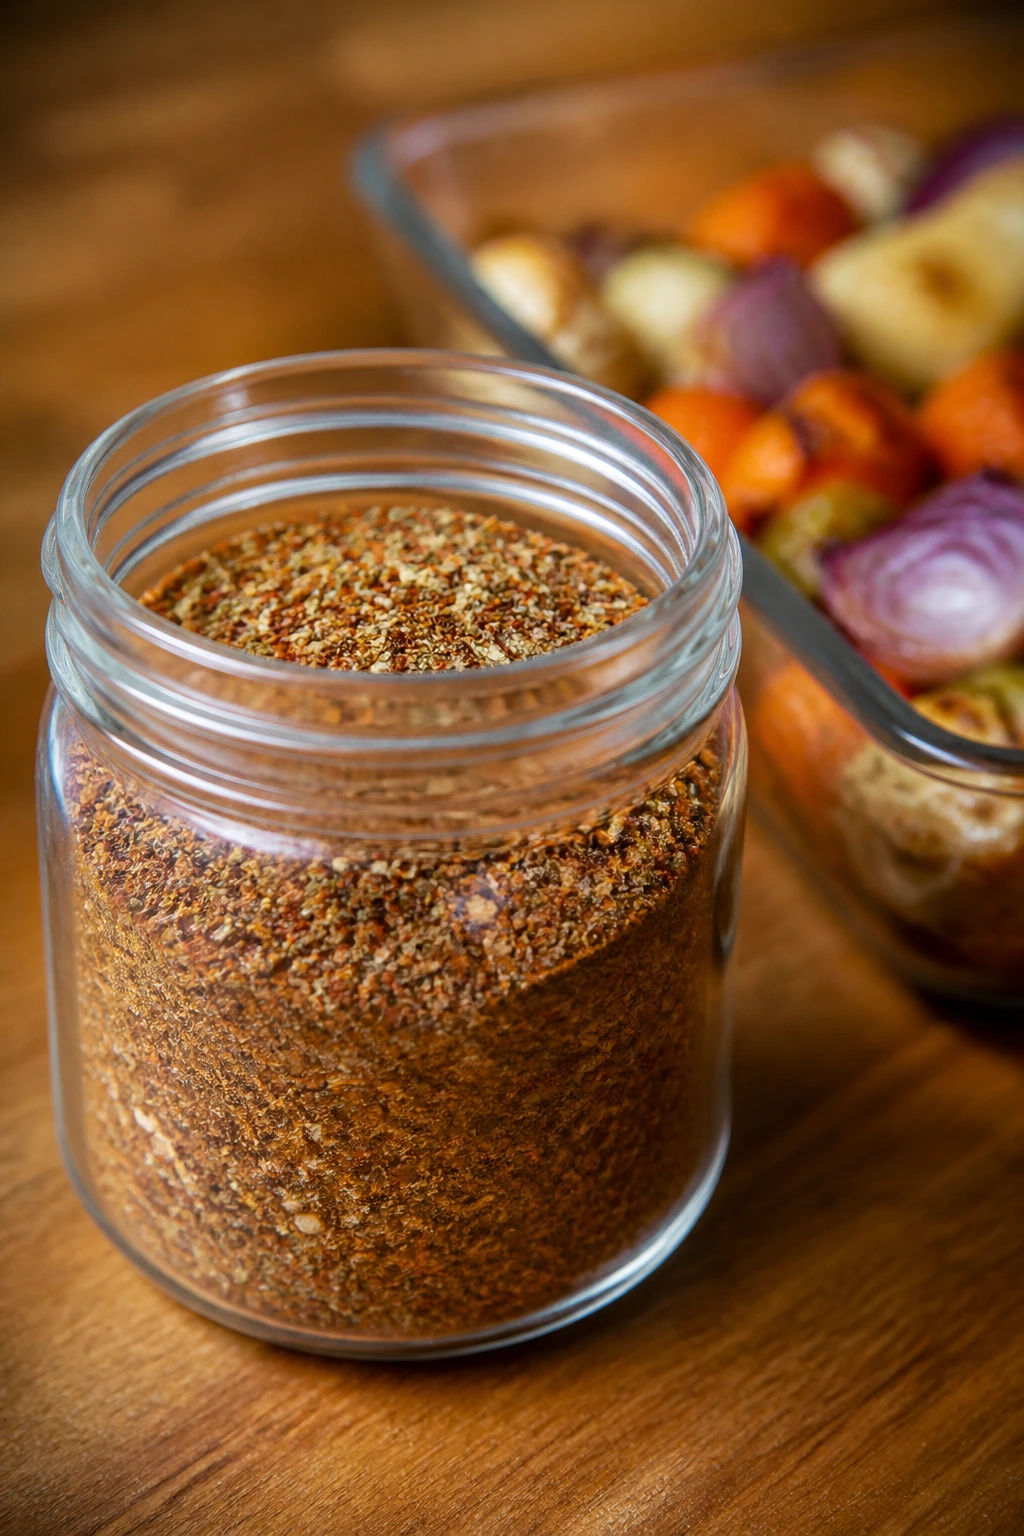
The dry seasoning blend keeps for about 6 months in an airtight jar if you store it away from steam and direct heat. Shake the jar before each use so the brown sugar and salt don’t settle at the bottom. If the mix clumps a little, break it up with a spoon and carry on.
The roasted vegetables keep for 3 to 4 days in the refrigerator in a shallow airtight container. Let them cool before sealing the container so you don’t trap steam and soften the edges completely. They’re fine cold in a grain bowl, but if you want them hot again, the oven is the better move.
For reheating, spread the vegetables on a sheet pan and warm them in a 425°F oven for 8 to 12 minutes until the edges wake back up. A skillet over medium-high heat works too; give them 4 to 6 minutes, stirring once or twice. The microwave will do in a pinch, but it takes the crunch out, and this recipe is built around crunch.
You can prep the vegetables up to 24 hours ahead if you keep them dry and chilled in separate containers. Toss with the oil, balsamic, and seasoning only right before roasting. If you season them too early, the salt pulls out moisture and the pan starts life wetter than it should.
For freezing, I wouldn’t freeze the roasted vegetables unless you’re fine with a softer texture later. They’ll keep for up to 2 months in a freezer-safe container, but I’d use them in soup, a casserole, or a blended sauce rather than expecting crisp edges after thawing. The seasoning blend itself does not need the freezer at all; a cabinet is enough.
Questions People Ask Before They Roast Vegetables
Can I use frozen vegetables?
Yes, but expect a softer result. Roast them straight from frozen on a very hot pan, keep the pieces in a single layer, and give them more time than fresh vegetables need. Broccoli and cauliflower handle this better than zucchini or mushrooms, which can turn watery fast.
How much seasoning should I use per pound of vegetables?
Roughly half of this recipe for 1 pound of vegetables works well, though the salt and oil should still be measured with some care. I usually think in terms of a light, even coat rather than a thick dusting. If the vegetables look dry after tossing, add a touch more oil, not another heavy handful of spice.
Can I make the seasoning mix ahead of time?
Absolutely. Mix the dry spices in a jar and keep it near the salt so you’ll actually use it. The flavor stays strong for months, and the convenience is half the point of having a blend like this.
What if my vegetables brown before they’re tender?
Lower the heat to 400°F next time and cut the dense vegetables a little smaller. If the outside is dark and the inside is still firm, the pieces are too large for the roast time you chose. In the moment, you can tent the pan loosely with foil and keep roasting until the centers give way.
Can I use parchment paper?
Yes, but know what you’re trading. Parchment makes cleanup easy, and it works fine if you’re mostly after tenderness, but a bare sheet pan gives deeper browning on the cut sides. If I’m making this for dinner and I want the best color, I usually skip parchment.
Can this become a full dinner without adding meat?
It can, and that’s where chickpeas, lentils, tofu, or a fried egg earn their keep. Put the roasted vegetables over a grain or beside beans, add a spoon of tahini or yogurt, and the plate has enough substance to stand on its own. The seasoning doesn’t need meat to feel complete.
What vegetables should I avoid with this seasoning?
Very watery vegetables like cucumber or lettuce do not belong here. Zucchini and mushrooms can work, but they need to be added late or cooked separately. If you want deep browning, choose vegetables that can sit in a hot oven without collapsing into a puddle.
Can I use this in an air fryer or on the grill?
Yes. For an air fryer, cook at 380°F in a single layer and shake the basket halfway through; most vegetables are done in 12 to 18 minutes depending on size. On the grill, use a perforated grill pan and watch the sugar carefully, because open heat browns faster than an oven and can move from caramelized to scorched in a blink.
A Pan Worth Repeating
The best thing about roasted vegetables is that they do not need to be dressed up into something else. Give them space, dry surfaces, a seasoning that knows when to step back, and a hot enough oven to do the browning work. That is often all dinner needs.
Once you’ve made a pan like this a few times, you stop thinking of vegetables as filler. They start acting like the center of the plate, and that shift changes the whole meal. A little color, a little salt, a little acid at the end. That’s a quiet kind of cooking, and I think it earns its place.
Caramelized Vegetable Seasoning for a Healthy Dinner — Recipe Card
Recipe Name: Caramelized Vegetable Seasoning for a Healthy Dinner
Description: A savory spice blend and roasting method that turns cauliflower, Brussels sprouts, carrots, and red onion into browned, tender vegetables with crisp edges and a bright finish.
Prep Time: 15 minutes
Cook Time: 25 to 35 minutes
Total Time: 40 to 50 minutes
Course: Side Dish, Main Course
Cuisine: American
Servings: 4 servings as a side, 2 servings as a main
Calories: About 125 kcal per side serving
Ingredients
For the Caramelized Vegetable Seasoning
- 2 teaspoons kosher salt
- 1½ teaspoons sweet paprika
- 1 teaspoon garlic powder
- 1 teaspoon onion powder
- 1 teaspoon packed light brown sugar
- ¾ teaspoon ground cumin
- ½ teaspoon dried thyme
- ½ teaspoon freshly ground black pepper
- ¼ teaspoon ground coriander
- ⅛ teaspoon cayenne pepper, optional
For the Vegetables
- 1 medium head cauliflower, cut into 1½-inch florets, about 6 cups
- 12 ounces Brussels sprouts, trimmed and halved
- 2 large carrots, peeled and cut on the bias into ½-inch pieces
- 1 large red onion, cut into 1-inch wedges
- 2½ tablespoons extra-virgin olive oil
- 1 tablespoon balsamic vinegar
- 1 tablespoon chopped fresh parsley or chives, for serving
- 1 teaspoon fresh lemon juice, optional
Instructions
-
Preheat the oven to 425°F (220°C) and position a rack in the middle. If you have two sheet pans, warm both in the oven.
-
Whisk together the salt, paprika, garlic powder, onion powder, brown sugar, cumin, thyme, black pepper, coriander, and cayenne in a small bowl.
-
Dry the cauliflower, Brussels sprouts, carrots, and red onion thoroughly, then cut them into even, bite-size pieces.
-
Toss the vegetables with the olive oil and balsamic vinegar in a large bowl until lightly coated.
-
Add the seasoning and toss again until the vegetables are evenly covered.
-
Spread the vegetables in a single layer on a hot rimmed sheet pan. Use two pans if needed.
-
Roast for 15 minutes, stir or flip, then roast for 10 to 20 minutes more until browned and tender.
-
Finish with parsley or chives and a squeeze of lemon if desired. Taste and add a pinch more salt if needed.
Notes: Bare metal browns more deeply than parchment; use parchment only if cleanup matters more than extra color. Add lemon after roasting, not before, so the pan stays bright. Keep the vegetables in a single layer for the best edges.