
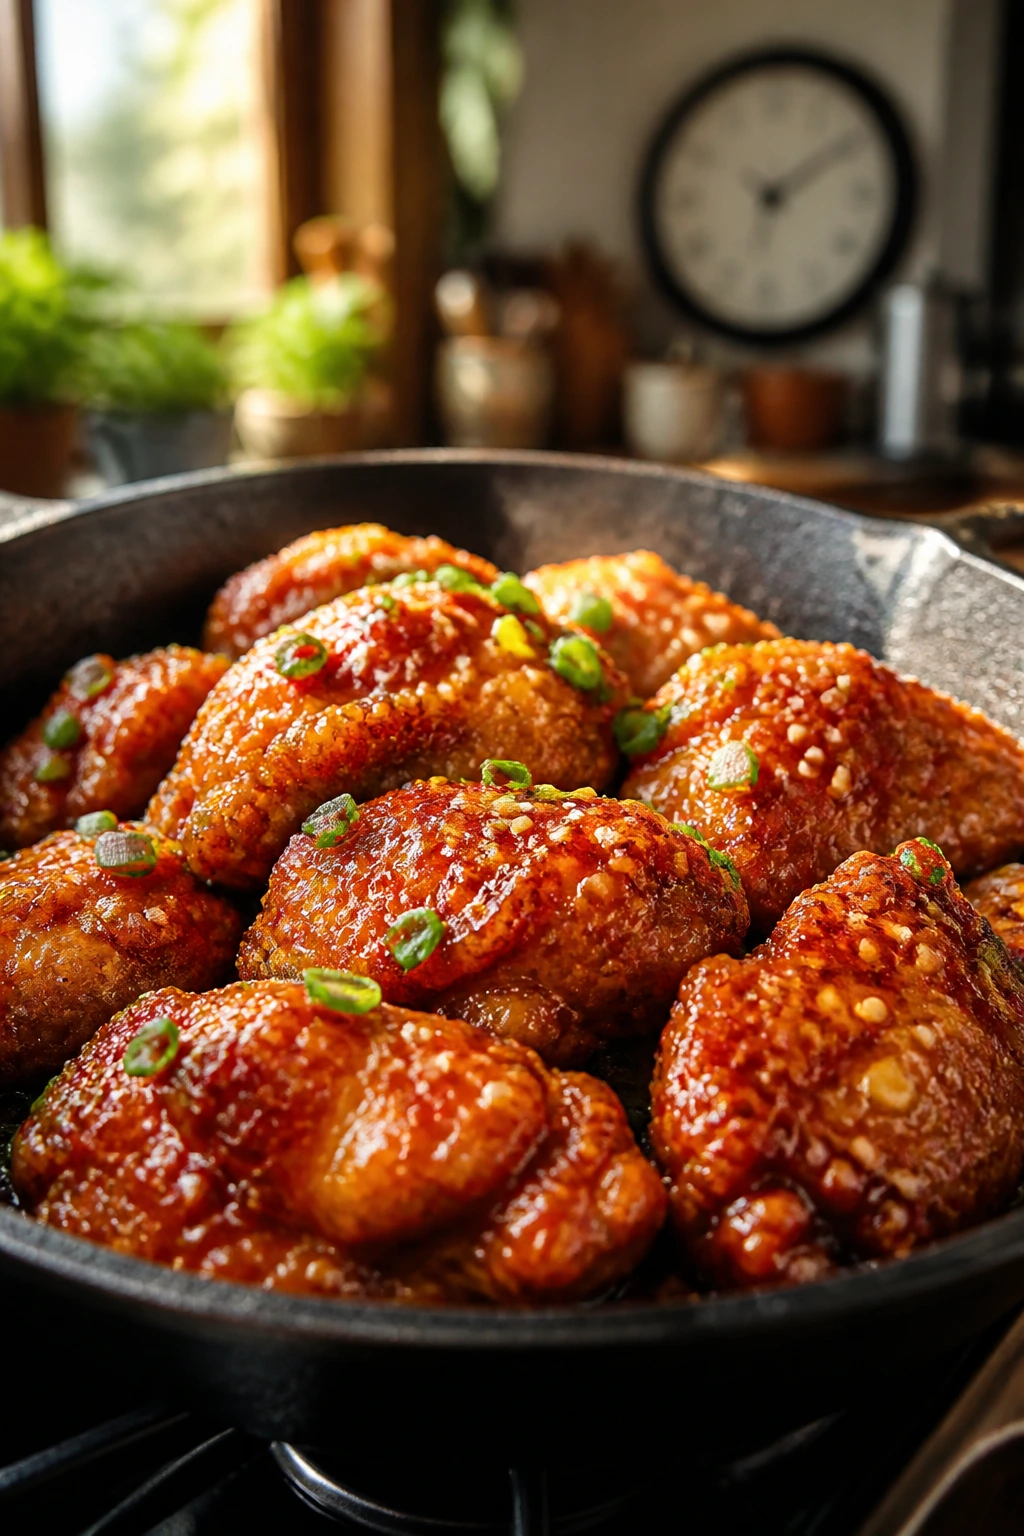
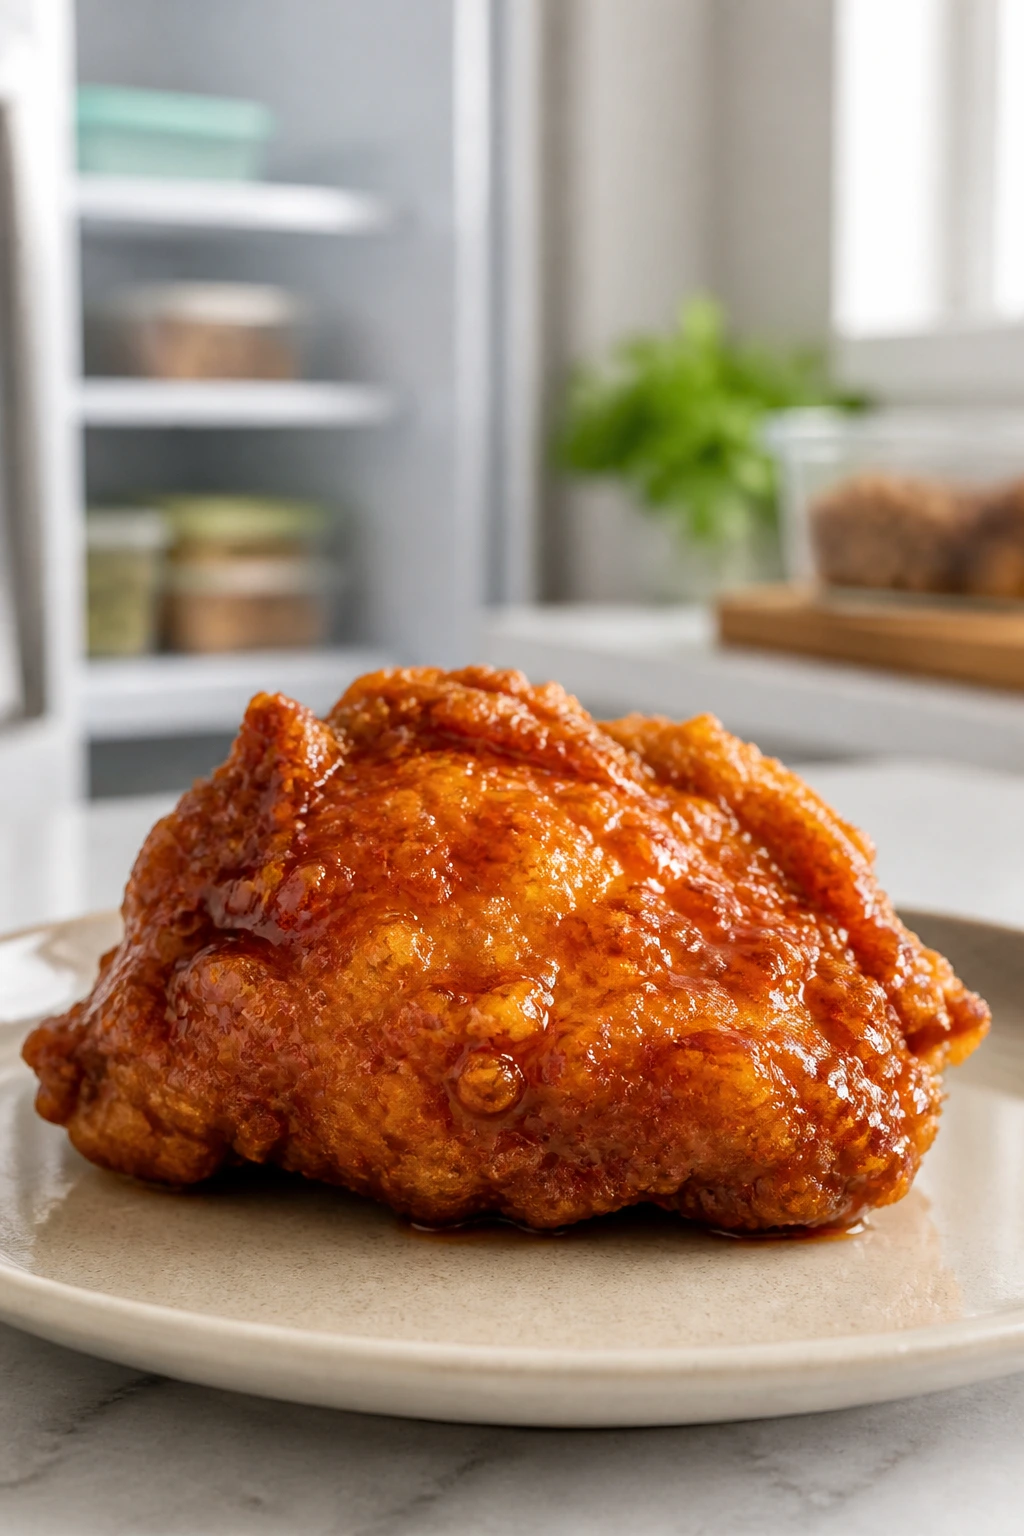
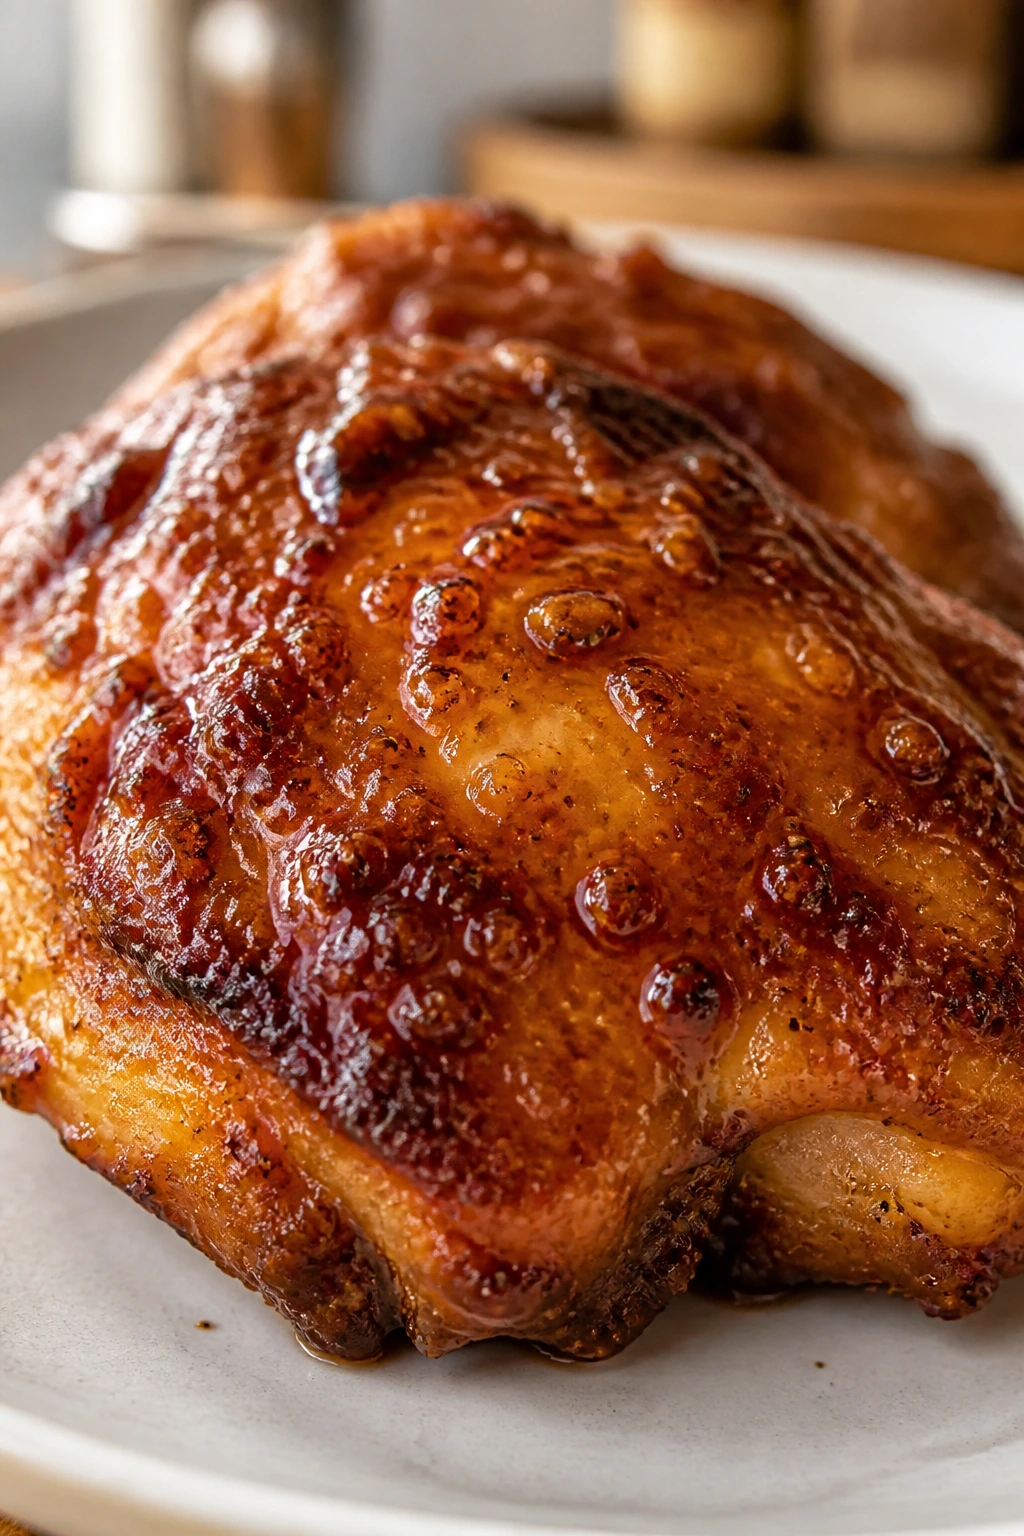
Crispy honey chicken on a weeknight sounds like something you’d order, not cook, and that’s part of why it works so well at home. The best version has a crust that still gives a little crackle when you bite in, then a glossy honey glaze that lands sweet first and salty a beat later, with garlic and vinegar cutting through so it never tastes heavy.
Most versions fall apart in the same two places. Either the chicken goes into oil that isn’t hot enough and comes out pale and greasy, or the sauce goes on too early and turns that crisp shell soft before it reaches the table. The fix is not mysterious. Dry chicken, hot oil, and sauce at the last possible second. That’s the whole game, and it’s a good one.
I like thighs here because they stay juicy even when the pieces are small enough to cook quickly. Breasts work too, but they demand a tighter eye and a thermometer. The glaze itself is short and sharp — honey, soy sauce, rice vinegar, garlic, ginger — which means every ingredient has a job and none of them can coast.
The nice thing about this dish is that it feels like a takeout-style dinner without actually behaving like one. You get the sticky glaze, the crisp edges, the fast stovetop timing, and a plate that can go from stove to table before the rice has even finished steaming. That balance is what makes it worth keeping in regular rotation.
Why Crispy Honey Chicken Works on a Busy Night
Fast Pan, Short Sauce: The chicken fries in batches in about 15 to 20 minutes, and the glaze takes only a few minutes on the stove, so the whole dinner stays inside a very manageable window.
Crisp Before Sweet: The coating gets fully cooked and browned before any sauce touches it, which is the difference between a crackly crust and a soggy one.
Pantry-Friendly Backbone: Flour, cornstarch, honey, soy sauce, vinegar, garlic, and ginger are all standard ingredients in a lot of kitchens, so this doesn’t ask for a specialty shopping trip.
Flexible Protein Choice: Thighs give you more margin for error, but breasts can step in if that’s what you have, as long as you cut them evenly and watch the cook time.
Sauce You Can Control: The glaze can lean more savory, more sweet, or a little spicier without changing the structure of the recipe, which makes it easy to adjust for the people at your table.
The Sweet-Salty Balance That Keeps Crispy Honey Chicken from Tasting Flat
Honey by itself is charming for about two bites. After that, it needs help. The soy sauce brings salt and depth, the rice vinegar keeps the sweetness from sticking to your tongue, and the garlic and ginger make the whole thing taste cooked rather than simply mixed.
That’s why this kind of chicken can go wrong in a very specific way. Too much honey and no acid, and the sauce reads like candy. Too much soy and not enough sweetness, and the glaze tastes dark and blunt. The sweet spot is a sauce that tastes a little too sharp in the pan, because once it hits the hot chicken, some of that edge softens.
The other thing people miss is texture contrast. The crust is not there just for looks. Cornstarch in the coating gives the edges a brittle, dry crunch, while baking powder creates tiny pockets that keep the shell from frying up dense. In other words, this is not a meat-and-sauce situation. It’s a texture decision.
I also like that the sauce is not cooked forever. A quick simmer is enough. If you boil it hard, honey can slide from glossy to sticky in a way that feels clumsy, almost grainy around the edges. Gentle heat keeps it clean.
What to Expect from the Clock and the Pan
A dish like this feels fancier than the clock says it should. That’s the appeal. You spend a little time on the coating and the frying, then the sauce comes together fast enough that the chicken doesn’t sit around getting damp.
If your stove heats evenly and you keep the batches modest, this is one of those dinners that can move in a clean line from prep to plate. If your burner runs hot or your skillet is thin, the pace changes a little — and so should your heat. That’s not a flaw. It’s kitchen reality.
Yield: Serves 4 to 6
Prep Time: 20 minutes
Cook Time: 20 minutes
Total Time: 45 minutes
Difficulty: Intermediate — the steps themselves are simple, but frying in batches and glazing at the right moment take a little attention.
Chill/Rest Time: 5 minutes for the coated chicken to settle before frying
Best Served: Right away, while the glaze is still glossy and the crust still has some edge
The Ingredients That Build the Crust and the Glaze

For the Chicken and Coating:
- 2 lbs boneless, skinless chicken thighs, cut into 1- to 1½-inch pieces
- 1 cup all-purpose flour
- 1/2 cup cornstarch
- 1 1/2 teaspoons baking powder
- 1 1/2 teaspoons kosher salt
- 1 teaspoon black pepper
- 1 teaspoon garlic powder
- 1 teaspoon onion powder
- 1/2 teaspoon paprika
- 2 large eggs
- 2 tablespoons water
- 3/4 cup neutral oil, plus a little more if needed for frying
For the Honey Glaze:
- 1/2 cup honey
- 1/4 cup low-sodium soy sauce
- 3 tablespoons rice vinegar
- 3 tablespoons water
- 3 cloves garlic, minced
- 1 teaspoon fresh ginger, grated
- 1 teaspoon sesame oil
- 1 tablespoon cornstarch
- 2 tablespoons cold water
For Serving:
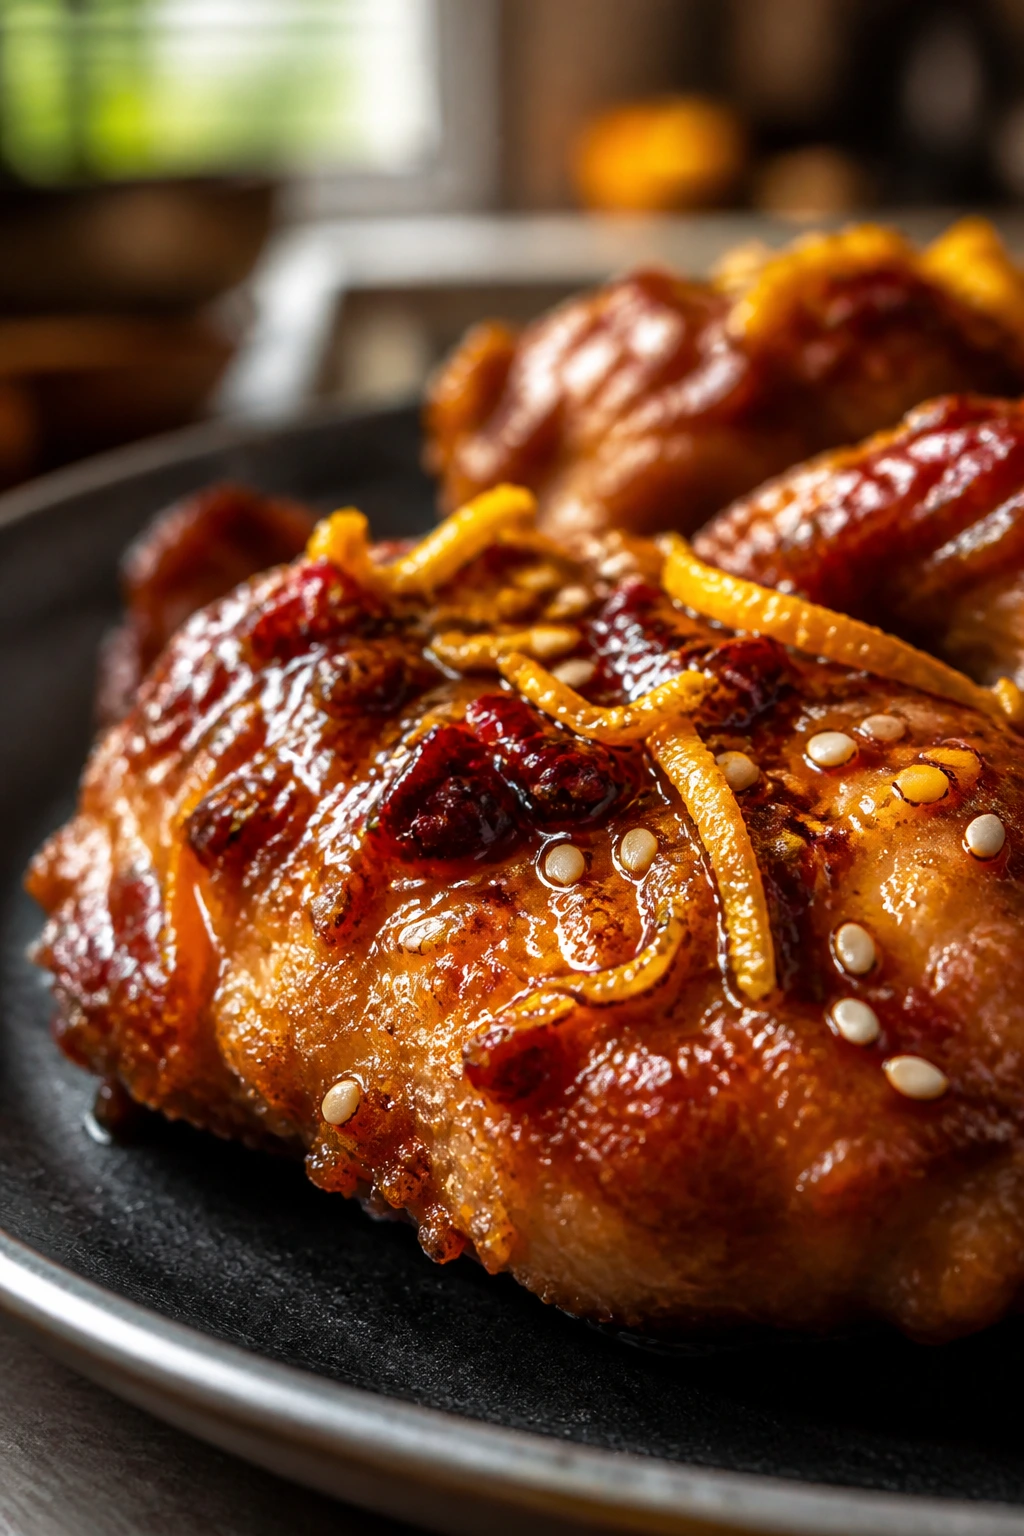
- 2 scallions, thinly sliced
- 1 tablespoon toasted sesame seeds
- Pinch of red pepper flakes, optional
What Each Ingredient Is Doing in the Bowl
Chicken
- What to use: 2 lbs boneless, skinless chicken thighs cut into even 1- to 1½-inch pieces. The size matters more than people think; even pieces finish at the same time and stay juicy.
- Preparation: Pat the chicken dry with paper towels before coating it. Wet chicken makes the flour clump in patches, and those bare spots fry up dull.
- Substitutions: Boneless chicken breasts work if you cut them into the same size pieces, but they need a little more watching because they dry faster. Chicken tenderloins also work, though they cook a minute sooner.
- Tips: Trim away big pockets of hard fat, but leave the smaller bits alone. A little fat in the thigh meat keeps the texture supple after frying.
Coating
- What to use: 1 cup all-purpose flour, 1/2 cup cornstarch, 1 1/2 teaspoons baking powder, and the dry seasonings. The cornstarch is the real crisp-maker here.
- Preparation: Whisk the dry mix until the salt and baking powder are fully spread through it. If one spoonful is saltier than another, the coating tastes uneven.
- Substitutions: Rice flour can replace half the all-purpose flour if you want a lighter gluten-free edge, and potato starch can stand in for the cornstarch in a pinch. If you use rice flour, keep the oil hot so it browns properly.
- Tips: Baking powder sounds odd in a frying coating, but it helps create tiny bubbles and a less heavy crust. The shell should feel crisp, not thick.
Glaze
- What to use: 1/2 cup honey, 1/4 cup low-sodium soy sauce, 3 tablespoons rice vinegar, 3 tablespoons water, 3 cloves garlic, 1 teaspoon ginger, and 1 teaspoon sesame oil. That mix gives you sweetness, salt, brightness, and aroma in one pan.
- Preparation: Mince the garlic finely and grate the ginger before the oil gets hot. Once the chicken is done, the sauce needs to move quickly.
- Substitutions: Apple cider vinegar can replace the rice vinegar, though it tastes a little sharper. Maple syrup can replace up to 2 tablespoons of the honey if you want the glaze less floral and a little rounder.
- Tips: Keep the simmer gentle. Honey can go from glossy to overly sticky fast, and once it starts tasting cooked down, the sauce loses some lift.
Finishing Touches
- What to use: Thinly sliced scallions, toasted sesame seeds, and a pinch of red pepper flakes if you like heat. These do more than garnish; they give the finished plate a last layer of texture.
- Preparation: Slice the scallions just before serving so they stay crisp and bright green. If they sit too long, they curl and soften.
- Substitutions: Toasted chopped peanuts add a nice crunch if sesame seeds aren’t your thing. A little lime zest can stand in for the scallions when you want the plate to taste sharper.
- Tips: Add the garnish after the sauce goes on, not before. Wet toppings disappear into sticky glaze faster than you’d expect.
Choosing and Prepping the Chicken So It Cooks Evenly
Thighs are the quiet hero here. They tolerate a little overcooking, keep their shape, and stay juicy after the fry. Breasts can work, but they need the kind of attention that’s annoying on a Tuesday night. You want pieces that cook through at the same pace, not a mix of tiny scraps and giant chunks.
Cut the chicken into pieces that are close in size, not perfect in shape. Perfect is overrated. A rough 1-inch cube or chunk is enough, and it cooks fast without drying out. If a piece looks especially thick, split it in half. If it looks thin and floppy, leave it alone and let it go crisp.
Dryness matters more than most people realize. I know that sounds obvious, but it’s the kind of step people rush because it looks small. Don’t. Moisture on the surface is the enemy of a clean coating, and a wet piece of chicken usually ends up with bald spots once it hits the oil.
A quick rest after coating helps too. Five minutes on a rack gives the flour and cornstarch a chance to hydrate and cling, which is the difference between a coating that stays put and one that drops off in the skillet like confetti.
The Tools That Make Frying Easier

- 12-inch heavy skillet or cast-iron skillet: A heavy base keeps the oil temperature steadier. Thin pans cool down too fast when the chicken goes in.
- Wire rack set over a sheet pan: This is where the fried chicken should drain. Paper towels trap steam underneath and soften the bottom.
- Instant-read thermometer: The easiest way to know when the chicken is done and when the oil has reached about 350°F.
- Two shallow bowls: One for the egg wash, one for the dry mix. Wide bowls make dredging less messy.
- Small saucepan: Best for the honey glaze if you want clean control over the heat.
- Tongs or a spider skimmer: Useful for turning the chicken and lifting it out without scraping the coating off.
- Microplane or fine grater: Handy for the garlic if you want a smoother sauce, though a sharp knife works too.
Frying, Glazing, and Keeping the Crunch
Prep the Coating Station:
-
Pat the chicken dry with paper towels and cut it into even 1- to 1½-inch pieces. Set the pieces on a tray while you mix the coating.
-
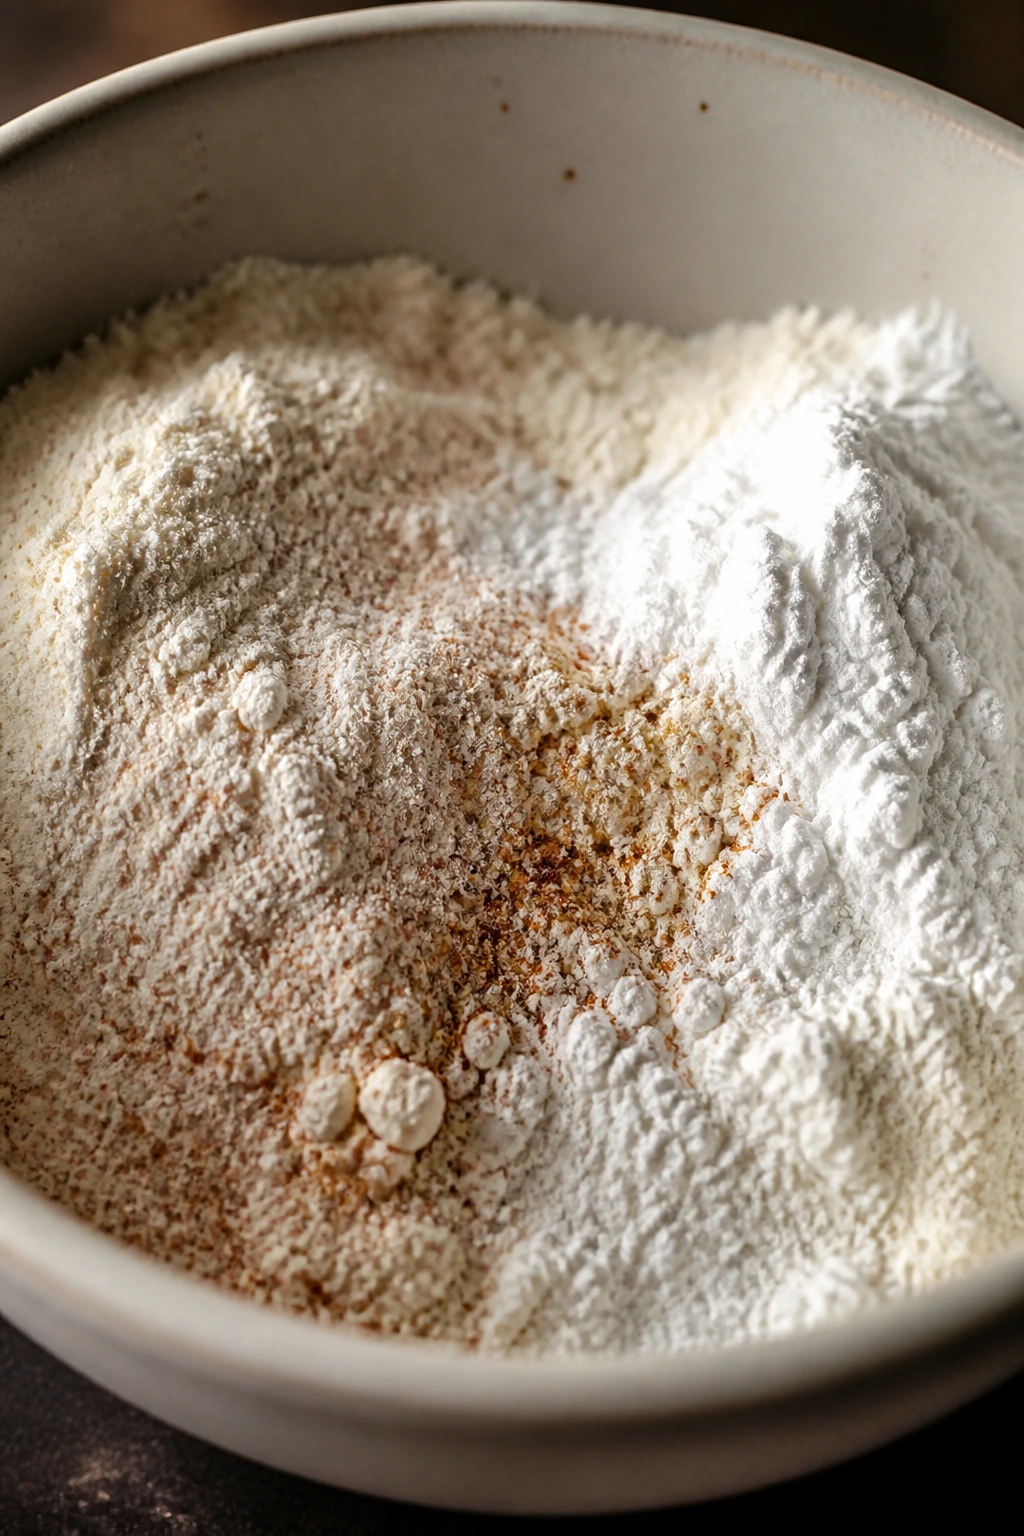
Whisk together the flour, cornstarch, baking powder, salt, black pepper, garlic powder, onion powder, and paprika in a wide shallow bowl. Keep whisking until the mix looks uniform and no pale streaks remain.
-
In a second bowl, whisk the eggs with 2 tablespoons of water until smooth. The mixture should look loose, not thick and ropey.
Coat the Chicken:
-
Toss the chicken pieces in the dry mix first, coating them lightly and shaking off the excess. This first pass helps the egg wash grab better.
-
Dip the floured chicken into the egg mixture, letting any excess drip off for a second or two. Too much egg turns into a gummy shell.
-
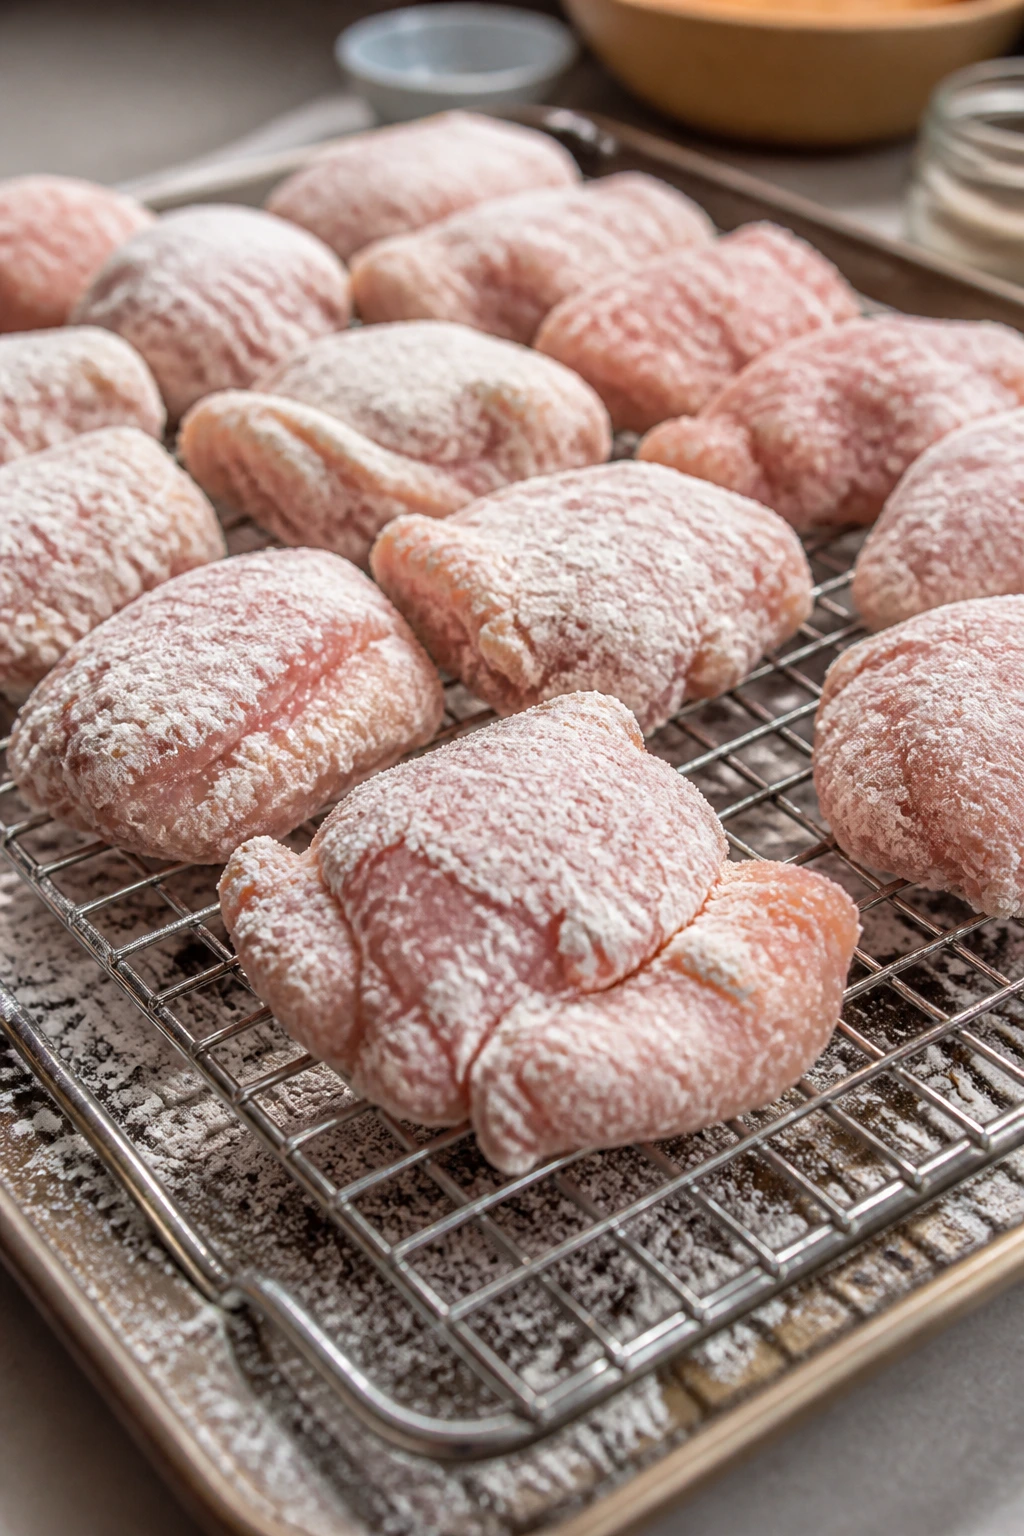
Return the chicken to the remaining dry mix and press it in gently so a thin, craggy coating sticks. Do not bury the pieces in a thick paste of flour; that gives you a heavy crust instead of a crisp one.
-
Set the coated chicken on a wire rack and let it rest for 5 minutes while you heat the oil. That pause helps the coating settle and cling.
Fry the Chicken:
-
Pour the oil into a 12-inch heavy skillet to a depth of about 1/4 inch and heat it over medium-high until it reaches about 350°F. If you do not have a thermometer, drop in a pinch of coating; it should sizzle right away and move around the pan.
-
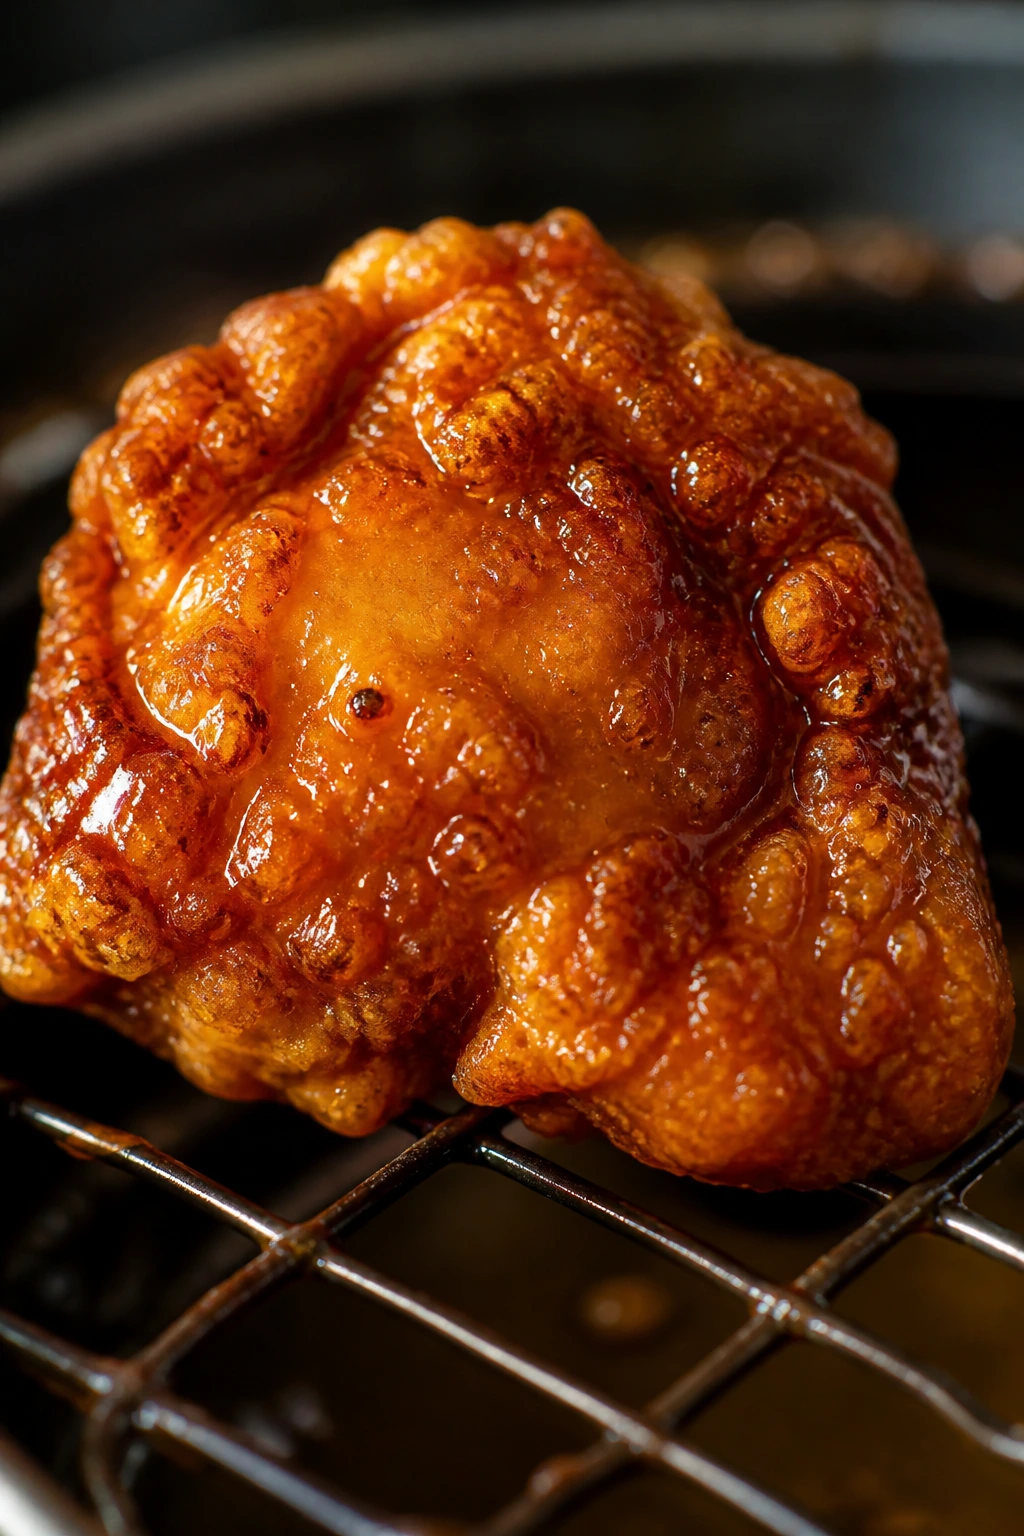
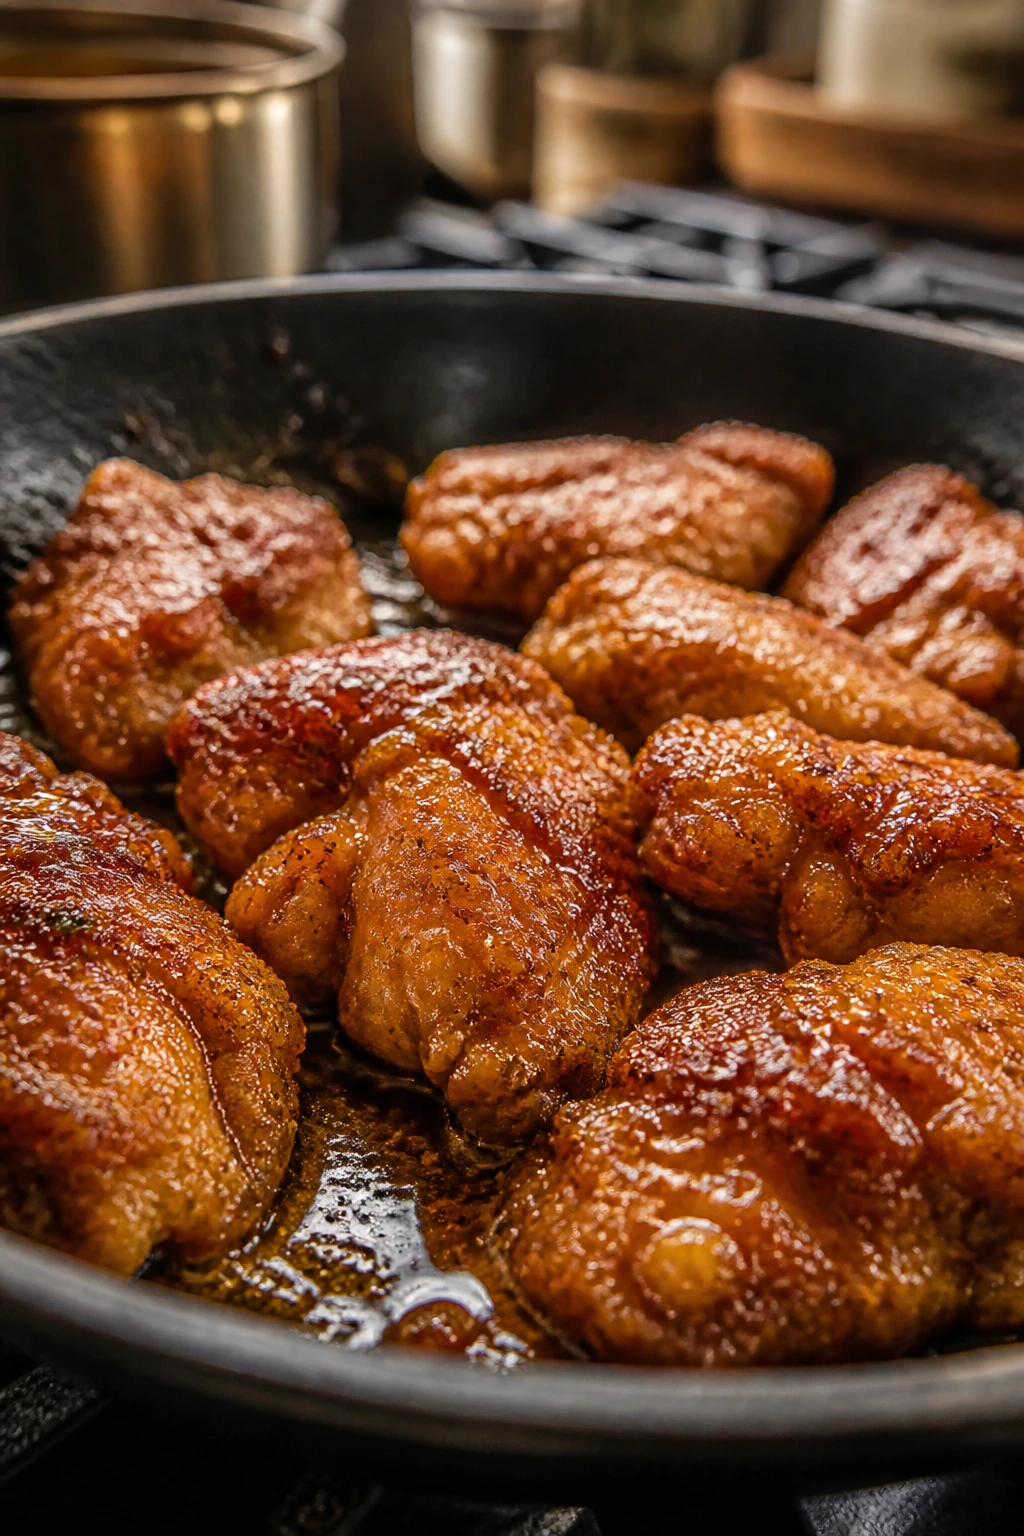
Fry the chicken in batches for 6 to 8 minutes total, turning once or twice, until the pieces are deep golden and the thickest one reads 165°F at the center. Do not crowd the pan — the oil temperature will crash, and the coating will soak up grease.
-
Transfer the chicken to the wire rack, not a plate. Let the pieces drain while you make the glaze. If you stack them, the bottom layer steams and goes soft.
Make the Glaze and Finish:
-
Whisk the honey, soy sauce, rice vinegar, water, minced garlic, ginger, and sesame oil together in a small saucepan. Bring it to a gentle simmer over medium heat.
-
Stir the cornstarch with 2 tablespoons of cold water in a small cup until smooth, then whisk it into the simmering sauce. Cook for 30 to 60 seconds, stirring, until the glaze turns glossy and thick enough to coat the back of a spoon.
-
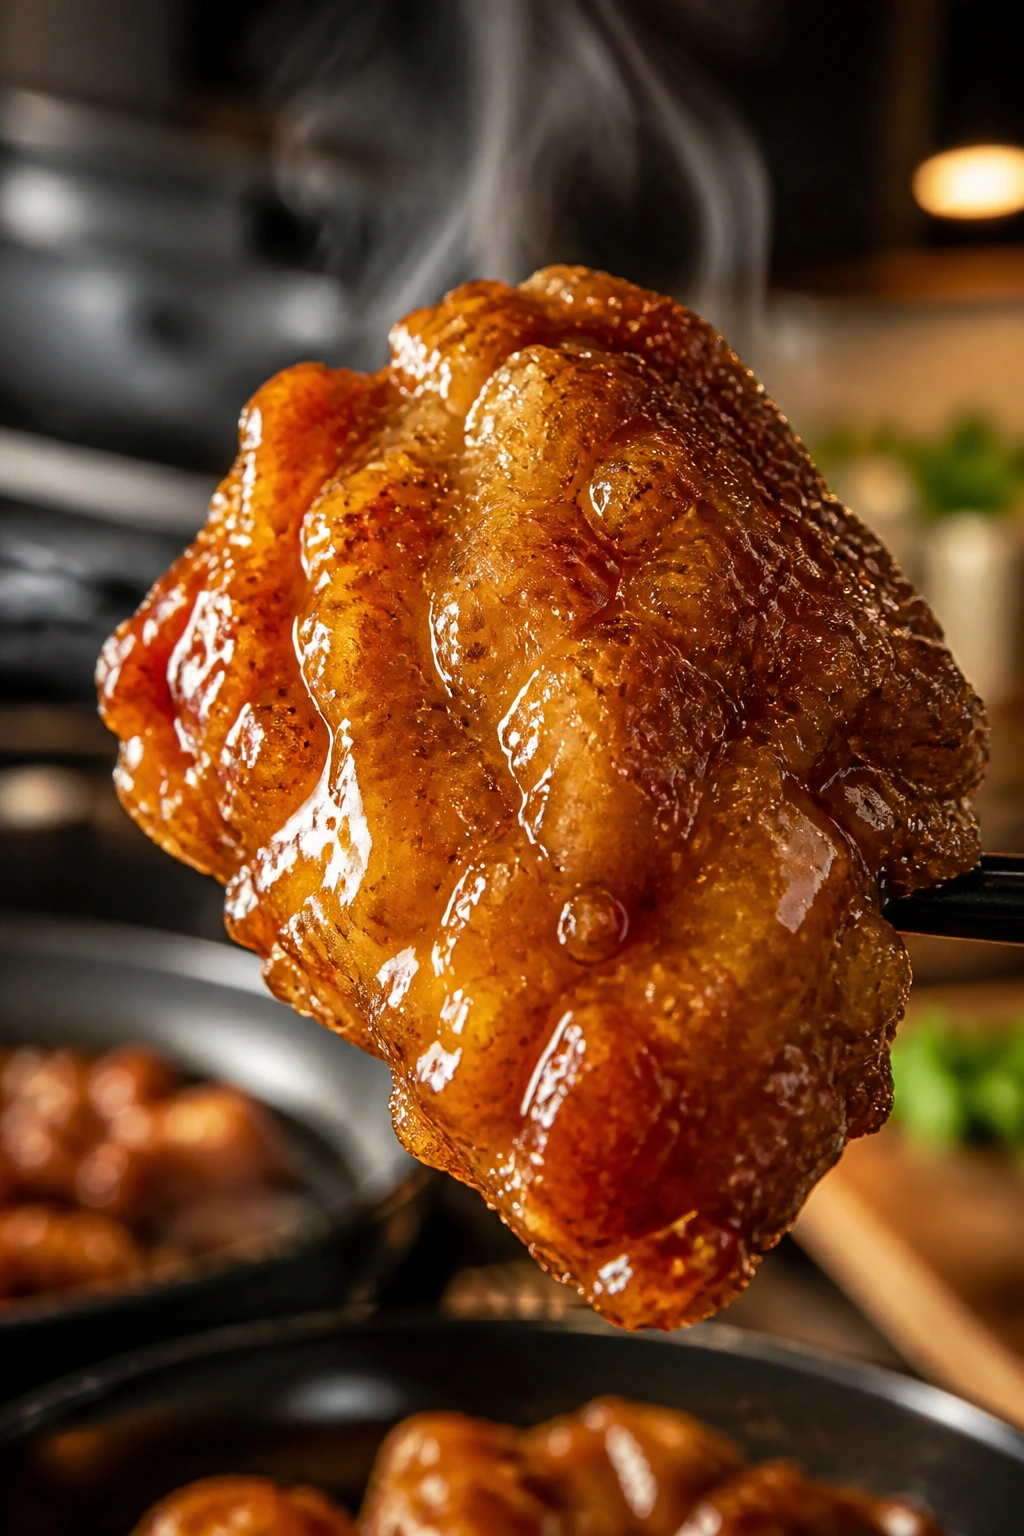
Turn off the heat and move the chicken to a large bowl. Pour about half the glaze over the chicken and toss quickly so every piece gets a thin coat. If you want maximum crunch, stop there and serve the extra glaze on the side.
-
Pile the chicken onto a serving platter, drizzle a little more glaze over the top, and finish with scallions, sesame seeds, and red pepper flakes if you want heat. Serve immediately.
How to Plate It with Rice, Greens, or Noodles
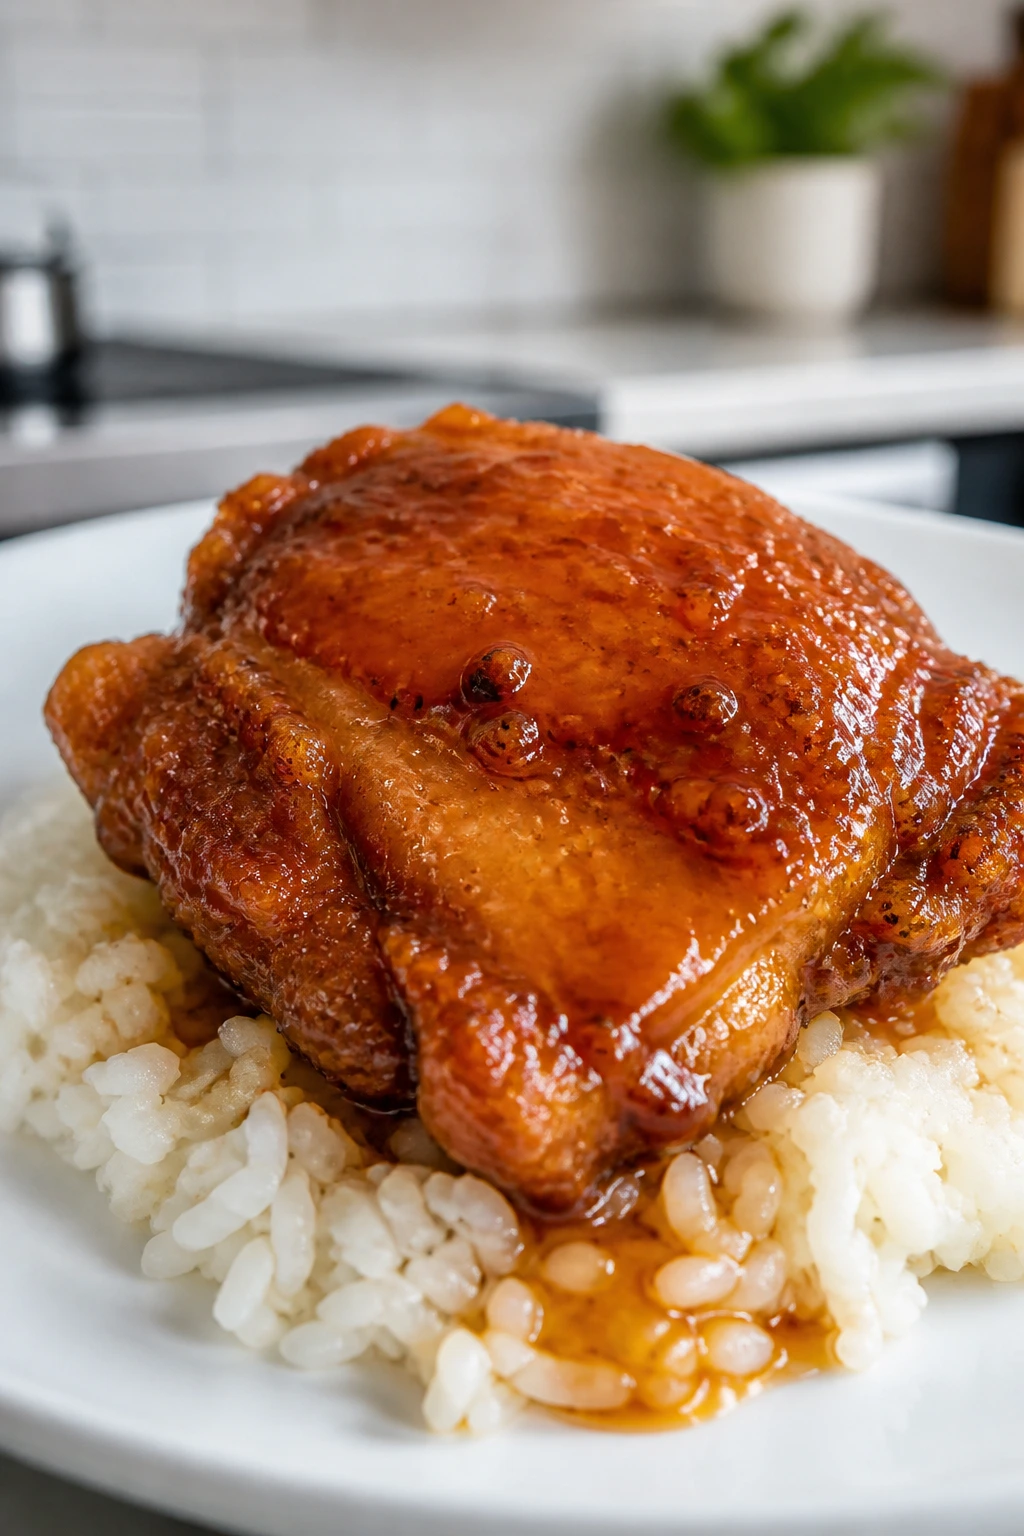
Presentation: Spoon the chicken over a shallow mound of jasmine rice or sticky rice and let the glaze run just a little onto the grains. A white plate or shallow bowl makes the amber sauce and green scallions pop without any fuss.
Accompaniments: Steamed broccoli, blistered snap peas, or garlicky green beans all work without fighting the sauce. If you want something with more body, serve it with plain lo mein noodles or a crisp cucumber salad dressed with rice vinegar and a pinch of salt.
Portions: Four hungry adults can clear this if it’s the main event with rice and vegetables. If you’re serving smaller portions or adding several sides, it stretches to 6. A good dinner plate usually holds about 3/4 cup rice, a generous scoop of chicken, and a handful of greens.
Beverage Pairing: Unsweetened iced green tea keeps the sweetness in check. A dry lager works too, especially if you’re serving the chicken with something salty on the side. If you want a non-alcoholic option with a little more edge, sparkling water with lime cuts through the glaze nicely.
Small Moves That Make the Flavor Taste Finished
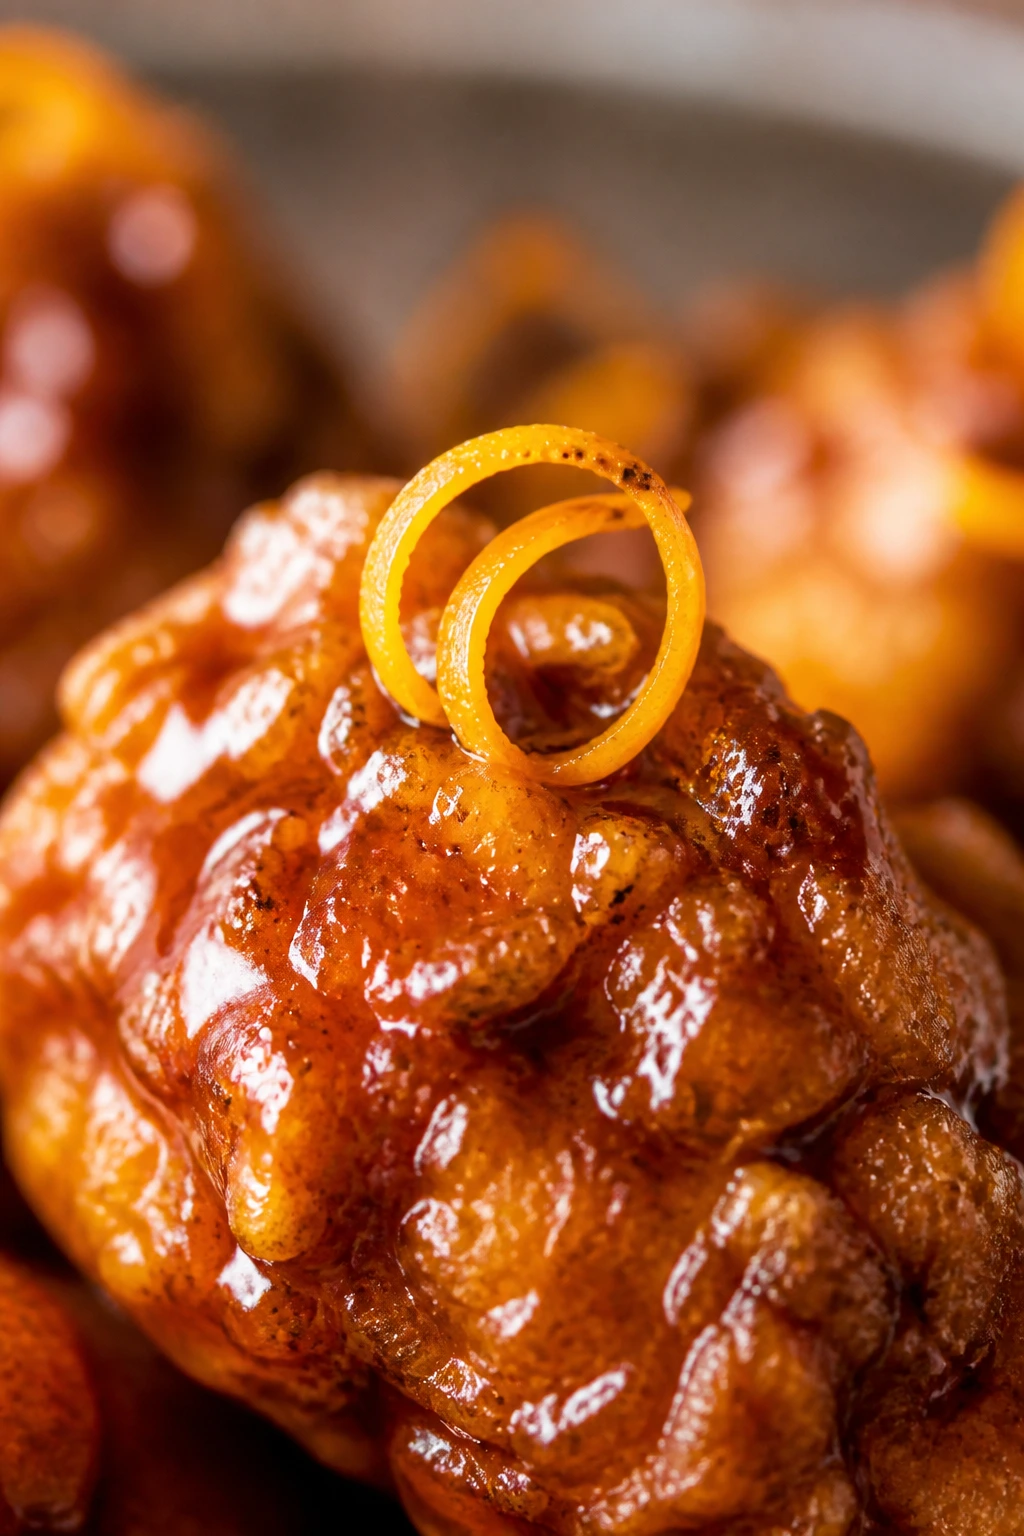
Flavor Enhancement: A teaspoon of orange zest in the glaze gives the honey a cleaner top note. It is a small change, but it keeps the sauce from leaning too dark.
Time-Saver: Mix the dry coating and whisk the glaze before you cut the chicken. Once the meat is ready, the rest moves fast, and you will not be standing there hunting for a microplane while the oil waits.
Pro Move: Rest the breaded chicken on the rack for those 5 minutes before frying. The coating hydrates a little, which helps it cling in the oil instead of flaking off.
Cost-Saver: Thighs often cost less than breasts and stay more forgiving in hot oil. Buy a larger pack, cut it into meal-size portions, and freeze the extras flat so they thaw quickly later.
Make-It-Yours: Add steamed broccoli, snow peas, or thin strips of bell pepper at the plating stage if you want vegetables in the same bowl. They stay bright if you keep them separate until the end, and they pick up just enough glaze to taste intentional.
Mistakes That Make the Crust Go Soft
-
Crowding the skillet. The chicken will look pale and greasy, not crisp and golden. Fry in smaller batches and let the oil come back to temperature between rounds.
-
Saucing too early. If the chicken sits in glaze while the pan is still hot, the crust softens fast. Move it to a bowl or platter first, then toss just before serving.
-
Skipping the rack. A plate traps steam under the chicken, and the bottom side loses its crackle. A wire rack is the easiest fix, and it matters more than people think.
-
Letting the glaze boil hard. Honey can go from glossy to sticky and blunt if the heat is too aggressive. Keep the simmer gentle and pull the sauce off once it coats a spoon.
-
Cutting uneven chicken pieces. Big chunks stay pale in the middle while small bits overcook. Take an extra minute to make the pieces match before you bread them.
-
Using too much sauce. A heavy pour can drown the crust. The best version is lacquered, not soupy; save some glaze for drizzling at the table.
Variations for Heat, Citrus, and Gluten-Free Cooking
-
Orange-Ginger Honey Chicken: Add 1 tablespoon orange zest and replace 1 tablespoon of the sauce water with orange juice. The result tastes brighter and a little fresher, which is useful if you’re serving it with broccoli or rice that needs a lift.
-
Chili Crisp Honey Chicken: Stir 1 to 2 teaspoons of chili crisp into the finished glaze, then top with a few extra red pepper flakes. The heat comes in after the sweetness, not before, which keeps the dish balanced.
-
Gluten-Free Crunch: Swap the all-purpose flour for rice flour and use tamari instead of soy sauce. Keep the cornstarch, because it’s one of the reasons the crust stays light rather than dense.
-
Air Fryer Version: Spray the coated chicken lightly with oil and air fry at 400°F for 10 to 12 minutes, turning once halfway through. The texture is a little drier than the skillet version, but it still gives you enough crunch to carry the glaze.
-
Sesame-Savory Finish: Add an extra 1/2 teaspoon of sesame oil and a bigger handful of sesame seeds. This pushes the dish a little less sweet and a little more savory, which is nice if you’re serving it with plain rice and greens.
Storage, Reheating, and Make-Ahead Timing
Room Temperature: Do not leave the finished chicken out for more than 2 hours. Once the glaze is on, the coating starts to soften, and food safety matters just as much as texture.
Fridge: Store leftovers in an airtight container for 3 to 4 days. If you know there will be leftovers, keep extra glaze separate so you can reheat the chicken without soaking it right away.
Freezer: Freeze the fried chicken without sauce for up to 2 months. The glaze can also be frozen in a small container for about 2 months, though it may need a quick whisk or a splash of water after thawing.
Reheating: The oven and air fryer are both better than the microwave. Reheat the chicken at 375°F in the oven for 8 to 10 minutes or in the air fryer at 350°F for 5 to 7 minutes, until the coating feels hot and crisp again. Warm the sauce separately in a small saucepan over low heat, then toss or drizzle it on after reheating.
Make-Ahead: The dry coating can be mixed up to 1 week ahead and kept in an airtight container. The sauce can be whisked together 3 days ahead and refrigerated. If you need to work ahead on the chicken itself, cut it in advance and refrigerate it for up to 24 hours, but bread it right before frying so the coating does not get patchy.
Crispy Honey Chicken Questions Home Cooks Ask

Can I use chicken breasts instead of thighs?
Yes, and plenty of people do. Cut the breasts into evenly sized pieces and watch them closely, because they dry out faster than thighs; once the center hits 165°F, pull them immediately.
Can I bake this instead of frying it?
You can, though the crust will be less crackly than the skillet version. Bake the coated pieces on a greased rack set over a sheet pan at 425°F, spray them lightly with oil, and turn once halfway through.
How do I keep the chicken crisp after I add the sauce?
Toss it lightly, not heavily, and do it right before serving. If you want the crispest result, drizzle some sauce over the plated chicken instead of coating every piece all the way through.
What if my glaze turns out too thin?
Let it simmer for another 30 to 60 seconds, or whisk together another teaspoon of cornstarch with 1 tablespoon of cold water and add it slowly. The sauce should look glossy and cling to the spoon, not run off in a watery sheet.
Can I make the sauce less sweet?
Cut the honey back to 1/3 cup and add another tablespoon of rice vinegar. A small pinch more salt also helps the sweetness taste less blunt.
What oil is best for frying the chicken?
Use a neutral oil with a high smoke point, like canola, vegetable, or peanut oil. Olive oil adds too much flavor here and can smoke before the chicken finishes crisping.
Can I make it ahead for dinner later?
You can fry the chicken ahead and reheat it in the oven or air fryer, but do not sauce it until the last minute. The coating survives much better that way, and the dinner still feels fresh when it hits the table.
A Sticky-Sweet Dinner Worth Repeating
A good weeknight dinner should not feel like a compromise. It should feel like you knew exactly where to spend your effort and where to save it, and this dish lands right in that lane. Hot oil, a short glaze, and a quick toss at the end give you enough texture and flavor to make a plain rice bowl taste like you tried harder than you did.
Keep the chicken dry. Keep the oil hot. Keep the sauce waiting until the last second. Those three habits do most of the work, and once you’ve made this once or twice, the whole process starts to feel almost automatic.
Crispy Honey Chicken — Recipe Card
Recipe Name: Crispy Honey Chicken
Description: Crispy chicken pieces tossed in a glossy honey-soy glaze with garlic, ginger, and a little vinegar for balance. The crust stays light and crackly when the sauce is added right before serving.
Prep Time: 20 minutes
Cook Time: 20 minutes
Total Time: 45 minutes
Course: Main Course
Cuisine: American-Chinese
Servings: 4 to 6 servings
Calories: About 520 kcal per serving
Ingredients
For the Chicken and Coating:
- 2 lbs boneless, skinless chicken thighs, cut into 1- to 1½-inch pieces
- 1 cup all-purpose flour
- 1/2 cup cornstarch
- 1 1/2 teaspoons baking powder
- 1 1/2 teaspoons kosher salt
- 1 teaspoon black pepper
- 1 teaspoon garlic powder
- 1 teaspoon onion powder
- 1/2 teaspoon paprika
- 2 large eggs
- 2 tablespoons water
- 3/4 cup neutral oil, plus more if needed for frying
For the Honey Glaze:
- 1/2 cup honey
- 1/4 cup low-sodium soy sauce
- 3 tablespoons rice vinegar
- 3 tablespoons water
- 3 cloves garlic, minced
- 1 teaspoon fresh ginger, grated
- 1 teaspoon sesame oil
- 1 tablespoon cornstarch
- 2 tablespoons cold water
For Serving:
- 2 scallions, thinly sliced
- 1 tablespoon toasted sesame seeds
- Pinch of red pepper flakes, optional
Instructions
-
Pat the chicken dry and cut it into even pieces. Whisk together the flour, cornstarch, baking powder, salt, pepper, garlic powder, onion powder, and paprika in one bowl.
-
Whisk the eggs with 2 tablespoons of water in a second bowl. Coat the chicken lightly in the dry mix, dip it in the egg wash, then return it to the remaining dry mix and press gently so a thin coating clings.
-
Set the coated chicken on a wire rack and rest for 5 minutes. Heat the oil in a 12-inch skillet over medium-high to about 350°F.
-
Fry the chicken in batches for 6 to 8 minutes total, turning as needed, until deep golden and cooked to 165°F in the center. Drain on a wire rack.
-
In a small saucepan, whisk together the honey, soy sauce, rice vinegar, water, garlic, ginger, and sesame oil. Bring to a gentle simmer.
-
Stir the cornstarch with 2 tablespoons of cold water, whisk it into the sauce, and cook for 30 to 60 seconds until glossy and thick enough to coat a spoon.
-
Toss the chicken with about half the glaze, then drizzle on more as needed. Top with scallions, sesame seeds, and red pepper flakes if using.
Notes: Keep the sauce separate until the very end for the best crunch. Thighs stay juicier than breasts, and the air fryer or oven versions will be a little less crisp than the skillet method.