
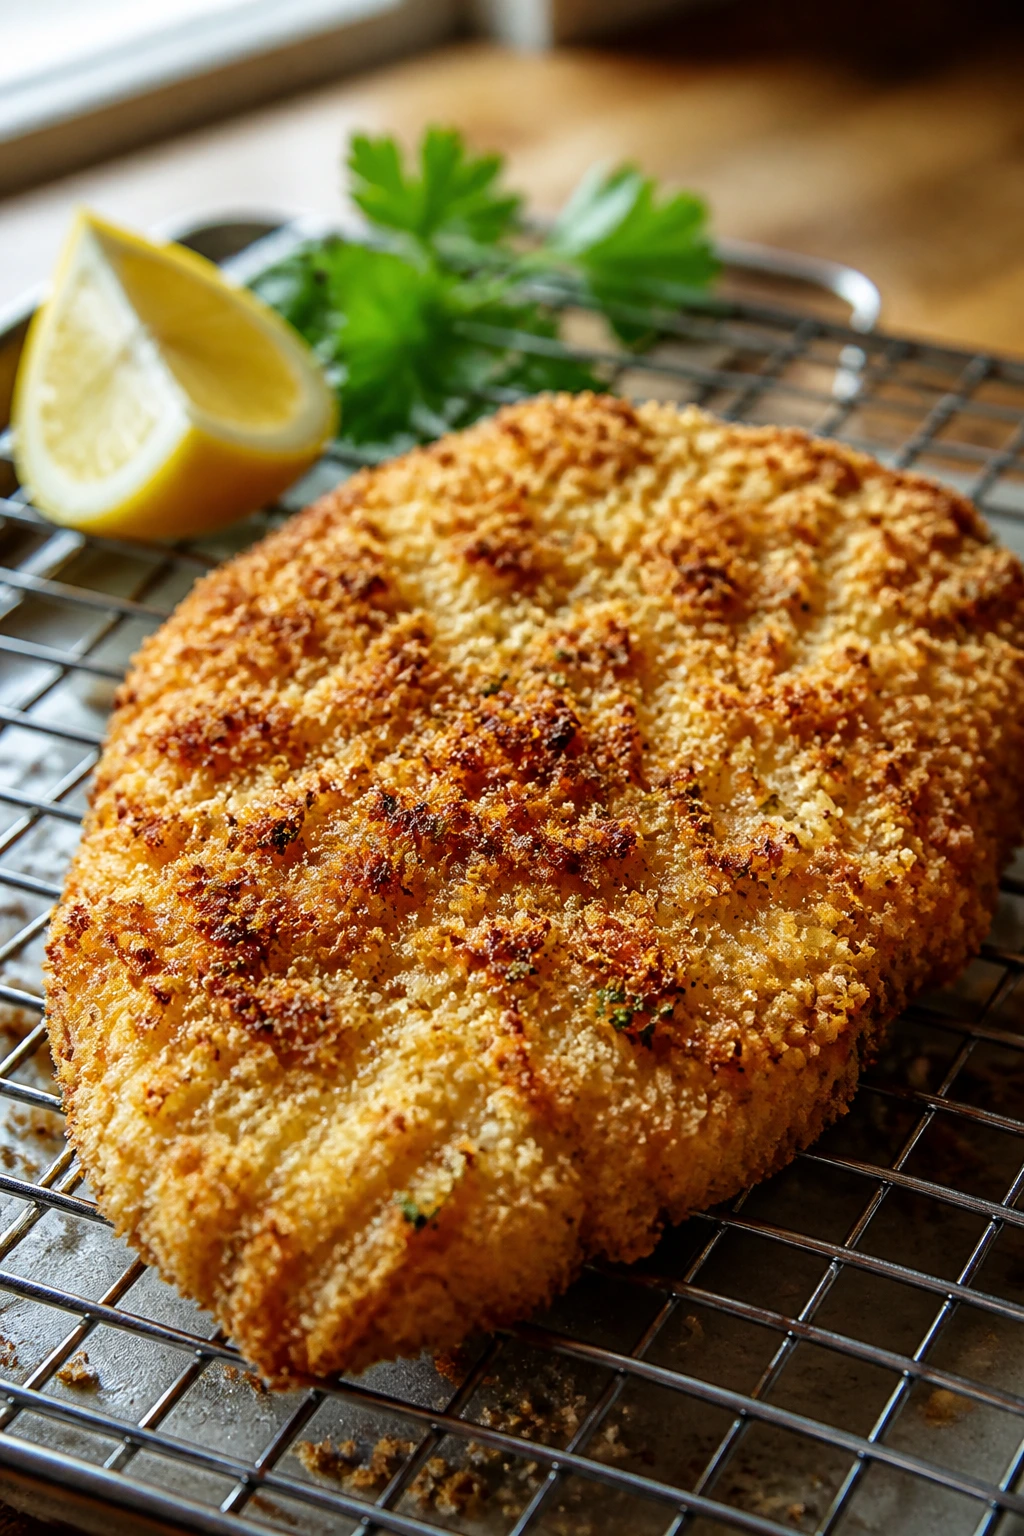
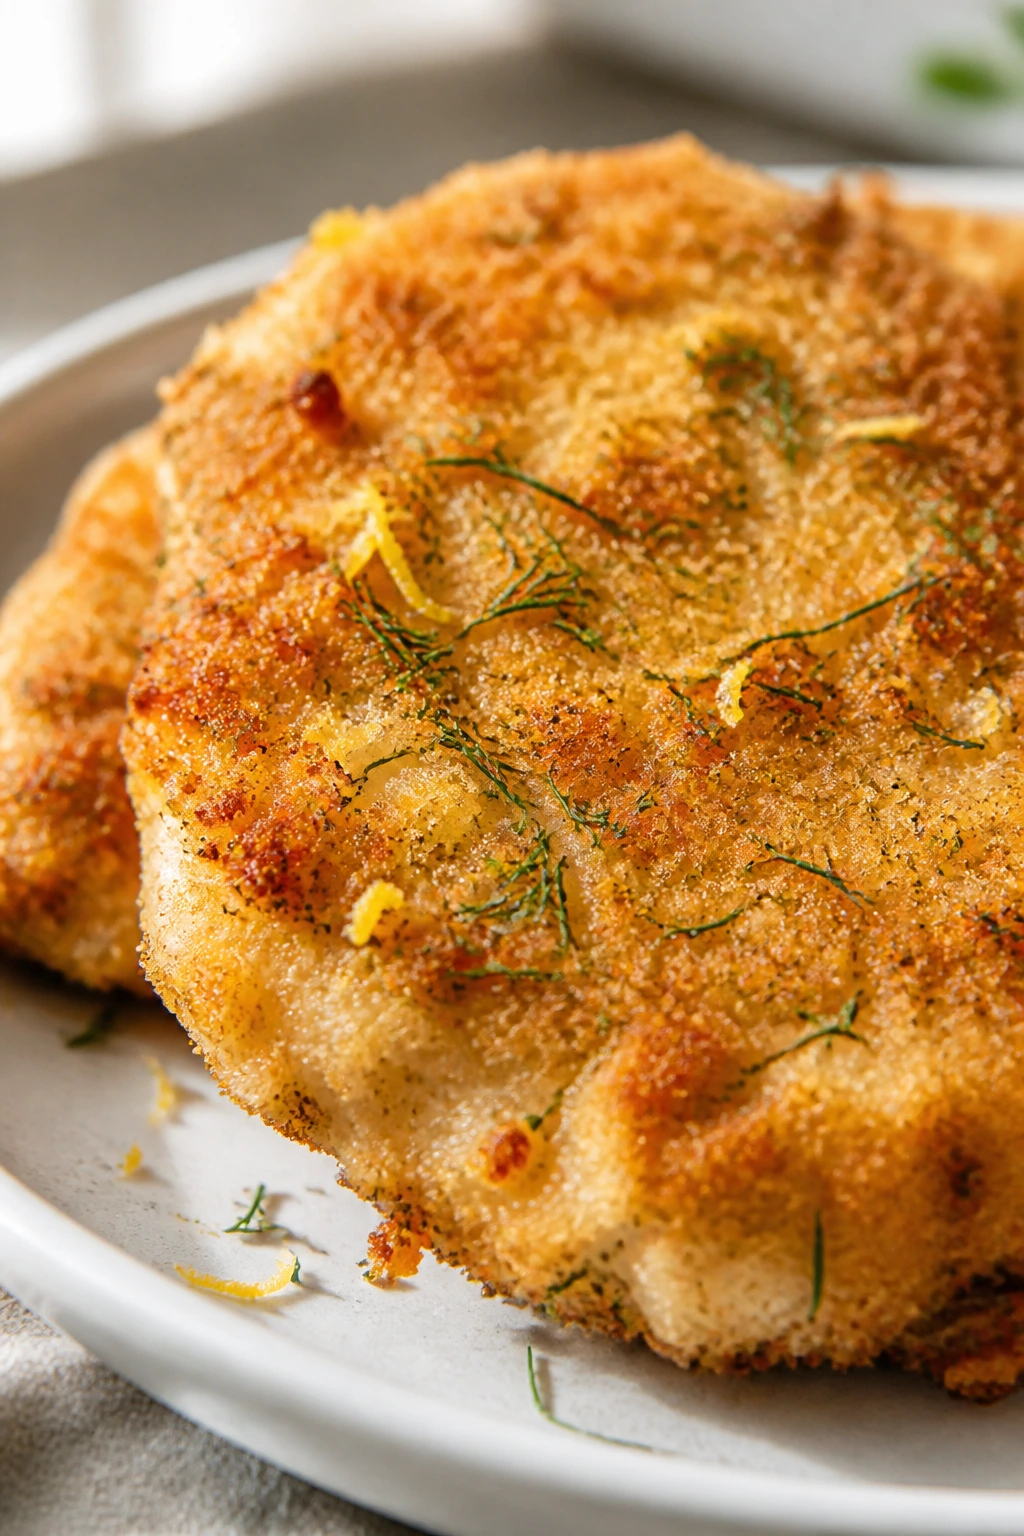
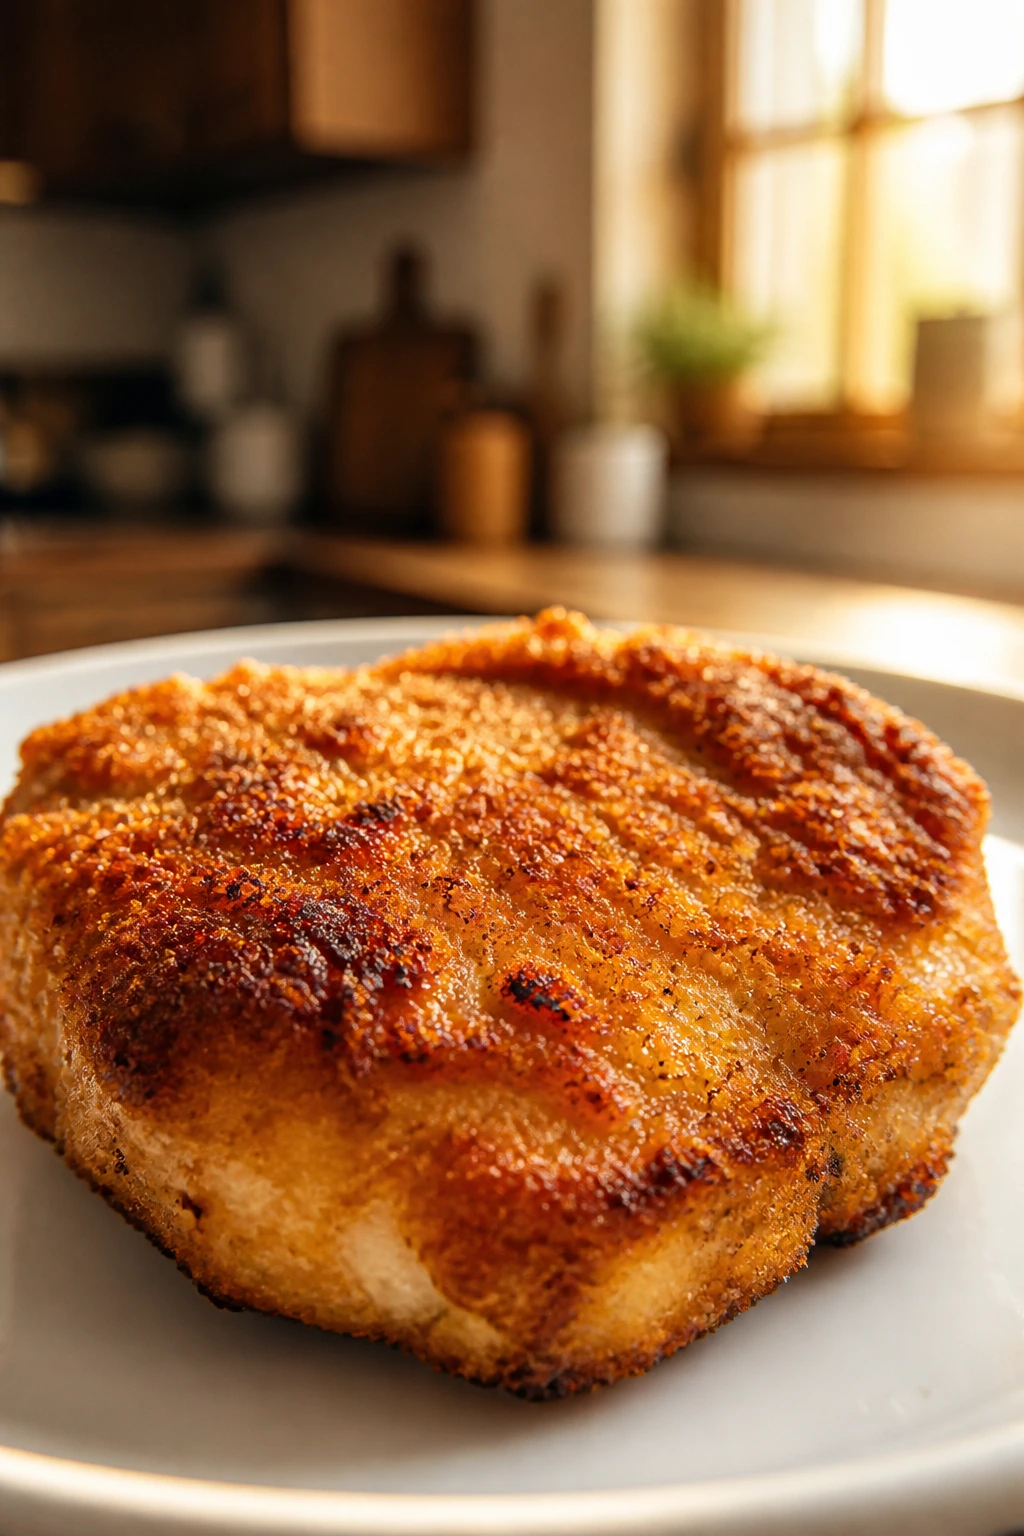
The first time you pull crispy yogurt chicken out of a hot oven, the crust smells nutty before it even looks brown. The yogurt has done the quiet work; the panko has gone blond at the edges; the chicken underneath stays juicy instead of drying out while you chase the side dishes.
Most breaded chicken recipes lean on eggs, flour, and a little luck. This one starts with plain Greek yogurt, which clings to the meat in a thicker, friendlier way than a thin marinade ever could. It seasons the chicken, gives the coating something to grab, and helps you get that shattery, golden surface without dragging out a skillet full of oil.
This is the kind of dinner I reach for when the evening is moving too fast for anything fussy. Slice the breasts, whisk a quick marinade, coat them in crumbs, and slide the tray into a hot oven. Dinner lands with a proper crunch. Not delicate. Not soggy. Proper.
That matters.
Why Crispy Yogurt Chicken Works on a Tuesday Night
The yogurt is doing two jobs at once: it tenderizes the chicken and leaves a tacky surface that helps the flour, egg, and panko stick instead of skating off in patches.
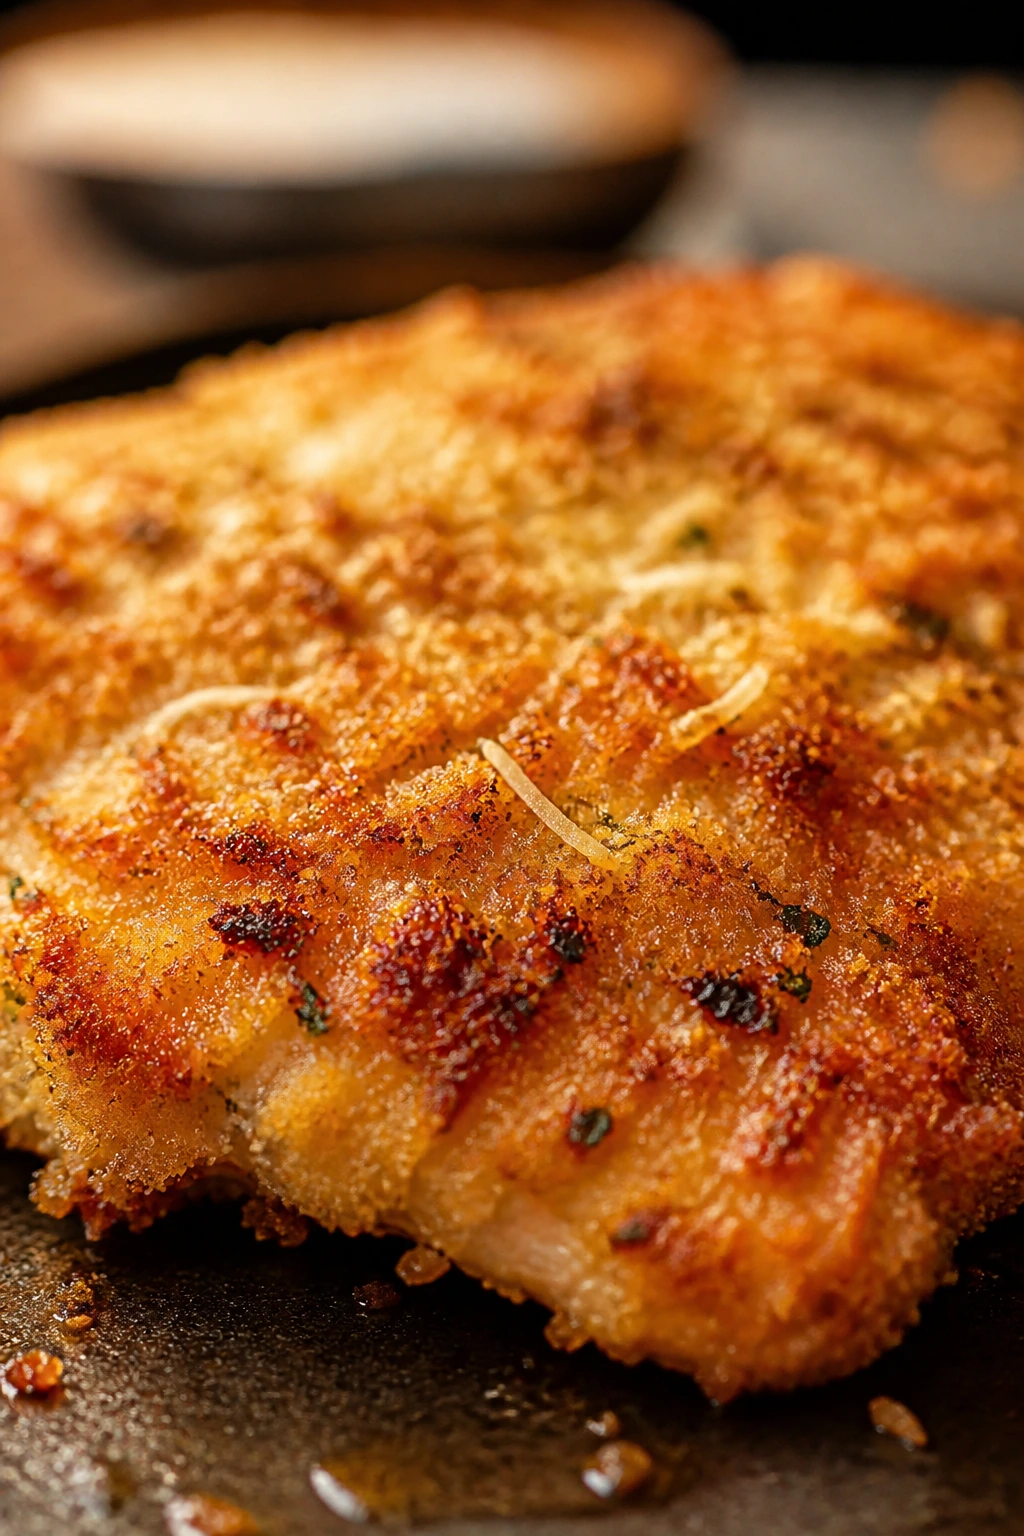
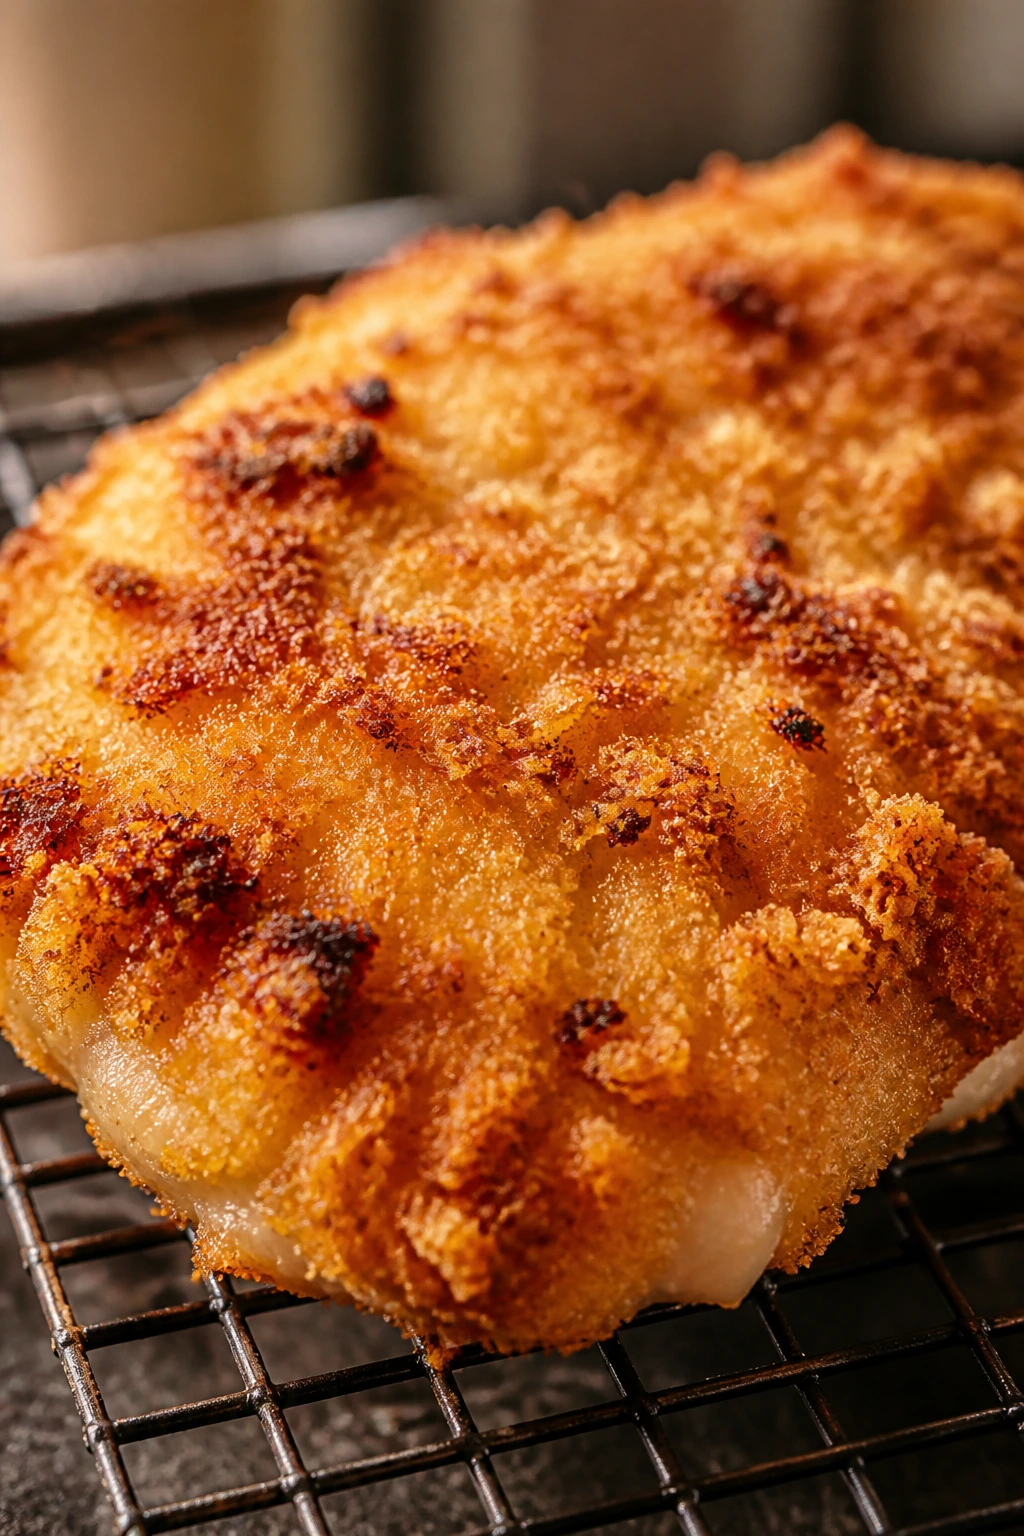
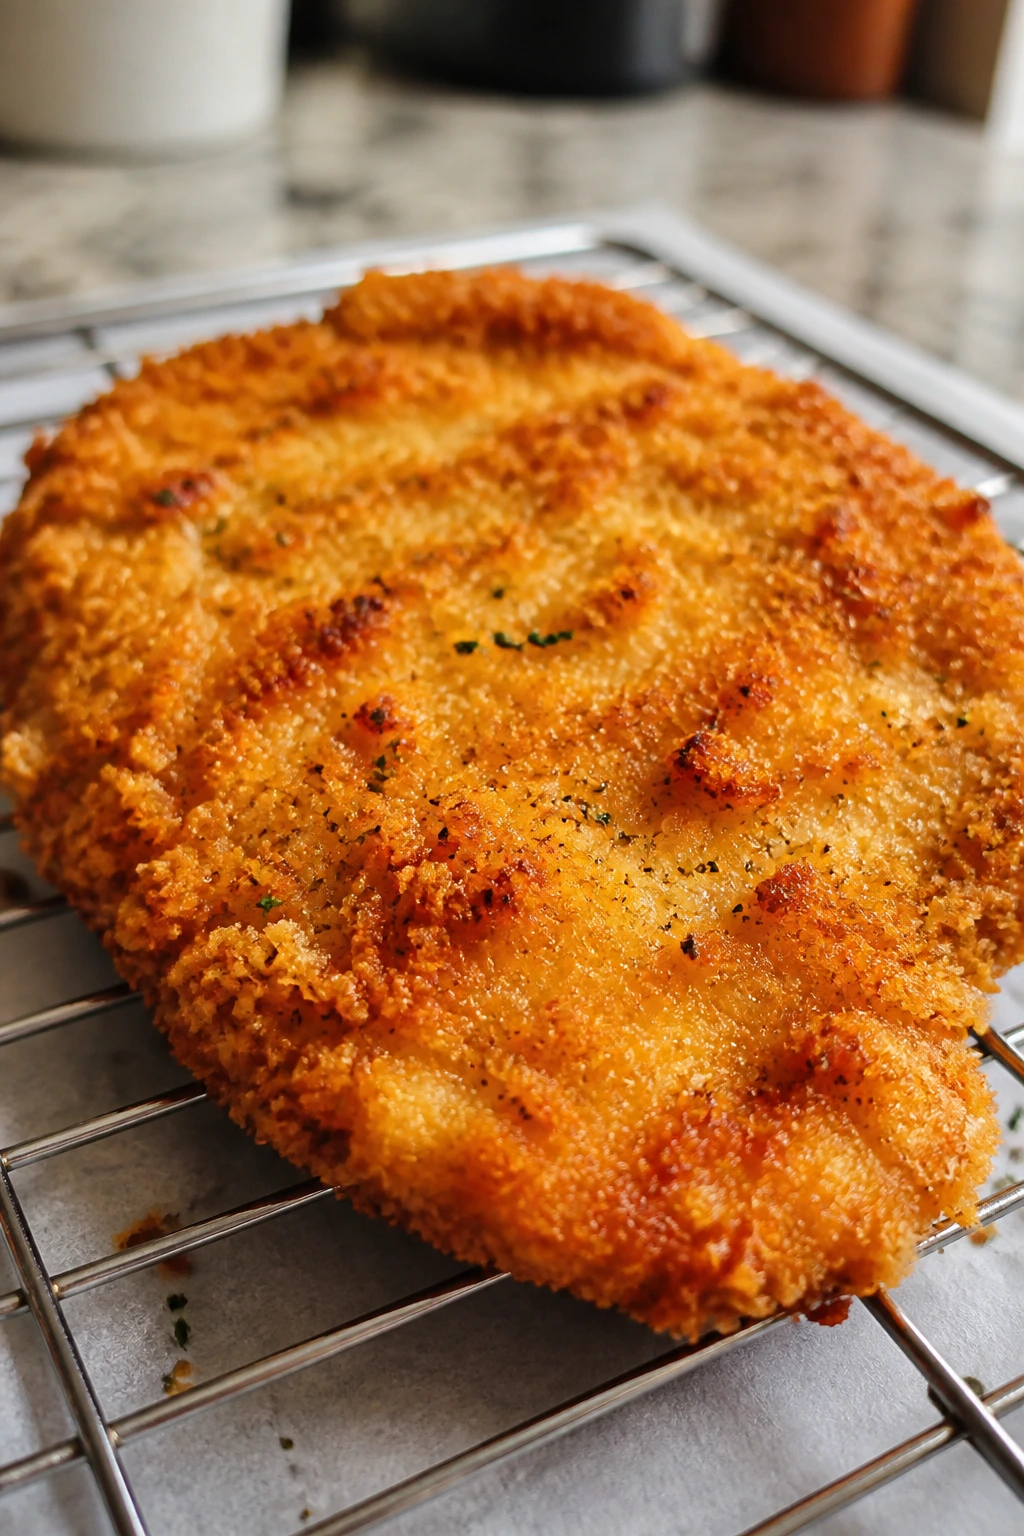
The crust actually stays crisp in the oven: panko has those jagged edges that brown better than fine breadcrumbs, and a wire rack keeps the underside from steaming against a flat pan.
The timing fits a real evening: thin cutlets cook in about 18 to 22 minutes, which leaves room for rice, salad, or roasted broccoli without turning dinner into a project.
The flavor is balanced from the start: Dijon, lemon, garlic, and smoked paprika keep the chicken savory and bright, so it tastes finished even before you add a sauce.
Leftovers do not feel like punishment: cold slices work in wraps, chopped salads, grain bowls, or a sandwich with crunchy lettuce and a swipe of mayo.
You do not need deep-frying discipline: the oven handles the crisping, which means less oil, less mess, and fewer reasons to stand at the stove guarding a pan.
The Timing and Yield That Make Dinner Feel Manageable
Yield: Serves 4
Prep Time: 20 minutes
Cook Time: 20 to 22 minutes
Total Time: 42 minutes active, plus marinating time
Chill/Rest Time: 30 minutes to 8 hours for marinating; 5 minutes resting after baking
Difficulty: Beginner — the method has a few steps, but none of them are tricky if you keep the breading station organized.
Best Served: Hot from the oven after a short rest, with lemon wedges and something green beside it
The Ingredients That Build the Crust
For the Chicken and Marinade:
- 2 pounds boneless, skinless chicken breasts, sliced horizontally into 4 cutlets and pounded to about 1/2 inch thick
- 1 cup plain whole-milk Greek yogurt
- 2 tablespoons Dijon mustard
- 2 tablespoons lemon juice
- 3 garlic cloves, finely grated or minced
- 1 teaspoon kosher salt
- 1 teaspoon smoked paprika
- 1 teaspoon dried oregano
- 1/2 teaspoon black pepper
- 1/4 teaspoon cayenne pepper, optional
For the Crunchy Coating:
- 1/2 cup all-purpose flour
- 1/4 cup cornstarch
- 2 large eggs
- 1 tablespoon water
- 1 1/2 cups panko breadcrumbs
- 3/4 cup finely grated Parmesan cheese
- 1 teaspoon garlic powder
- 1/2 teaspoon kosher salt
For the Pan and Finish:
- 2 tablespoons olive oil, for the rack or baking sheet
- 1 tablespoon olive oil or melted butter, to drizzle over the crust
- 2 tablespoons chopped fresh parsley
- 1 lemon, cut into wedges
What Each Ingredient Is Doing in Crispy Yogurt Chicken
Chicken Cutlets
What to use: 2 pounds boneless, skinless chicken breasts, sliced into 4 even cutlets and pounded to about 1/2 inch thick.
Preparation: Slice the breasts horizontally first, then pound from the thicker side toward the thinner side so each piece cooks at the same pace. You want even cutlets, not awkward slabs with one side dry before the middle is done.
Substitutions: Boneless thighs work if you want a richer, juicier result; turkey cutlets also handle this method well and cook in about the same window. If the breasts are giant, four cutlets may be enough for 4 hungry people. If they are smaller, you can stretch the batch a little farther.
Tips: Cold chicken is easier to slice cleanly, so keep it in the fridge until you are ready. If the pieces are uneven, the thin edges will overcook before the center reaches 165°F.
Greek Yogurt Marinade
What to use: 1 cup plain whole-milk Greek yogurt, 2 tablespoons Dijon mustard, 2 tablespoons lemon juice, 3 garlic cloves, and the salt, paprika, oregano, pepper, and cayenne listed above.
Preparation: Whisk the marinade until smooth before adding the chicken. The garlic should disappear into the yogurt instead of sitting in little sharp clumps on the surface, because those clumps can burn in the oven.
Substitutions: Plain regular yogurt can work if you strain it for 20 to 30 minutes first to thicken it. Sour cream gives a richer tang, and buttermilk gives a looser, thinner marinade that is fine for flavor but not as helpful for breading adhesion.
Tips: Whole-milk yogurt is worth choosing here. Low-fat yogurt can be watery, and watery marinade means more sliding, more mess, and a crust that wants to peel away in sheets.
Crispy Coating
What to use: 1/2 cup all-purpose flour, 1/4 cup cornstarch, 2 eggs, 1 tablespoon water, 1 1/2 cups panko breadcrumbs, 3/4 cup finely grated Parmesan, garlic powder, and a little salt.
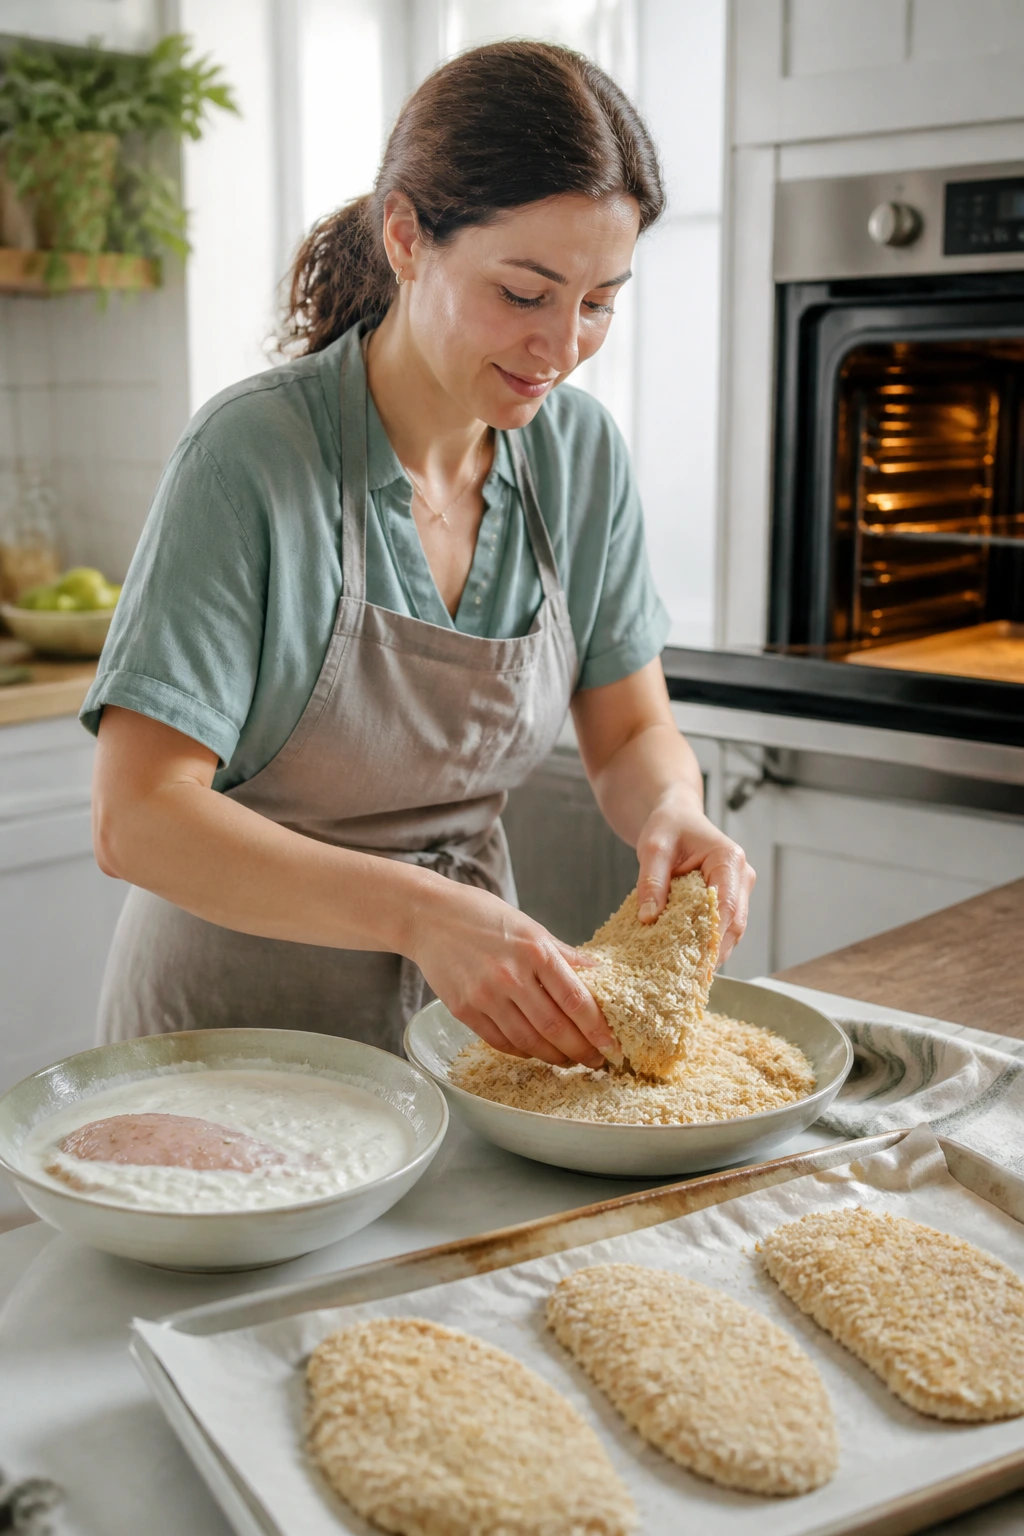
Preparation: Keep the flour mixture in one shallow dish, the eggs in another, and the panko-Parmesan mix in a third. When the crumbs are mixed with the cheese, the coating bakes with more color and a sharper edge.
Substitutions: Gluten-free flour and gluten-free panko both work. If you do not want Parmesan, use Pecorino Romano for a sharper bite or add another 1/4 cup panko plus a little extra salt.
Tips: Finely grated Parmesan browns better than big shreds. The fluffy stuff from a tube will not give the same crisp finish, and the texture can feel sandy instead of lacy.
Pan Finish and Garnish
What to use: 2 tablespoons olive oil for the rack or baking sheet, 1 tablespoon olive oil or melted butter for the top, parsley, and lemon wedges.
Preparation: Oil the rack lightly so the chicken releases cleanly after baking. Finish with parsley and lemon only after the cutlets come out of the oven, because both lose some punch when they sit under heat.
Substitutions: Avocado oil works in place of olive oil. Chives or dill can replace parsley if that is what is in the fridge.
Tips: The lemon at the end matters more than it looks like it should. A squeeze over the hot crust wakes up the yogurt, cheese, and paprika and keeps the chicken from tasting flat.
The Small Tools That Make Breading Less Messy
- Rimmed baking sheet: Catches any drips and gives the chicken a stable base in the oven.
- Wire rack: Keeps air moving around the cutlets so the bottoms stay crisp instead of damp.
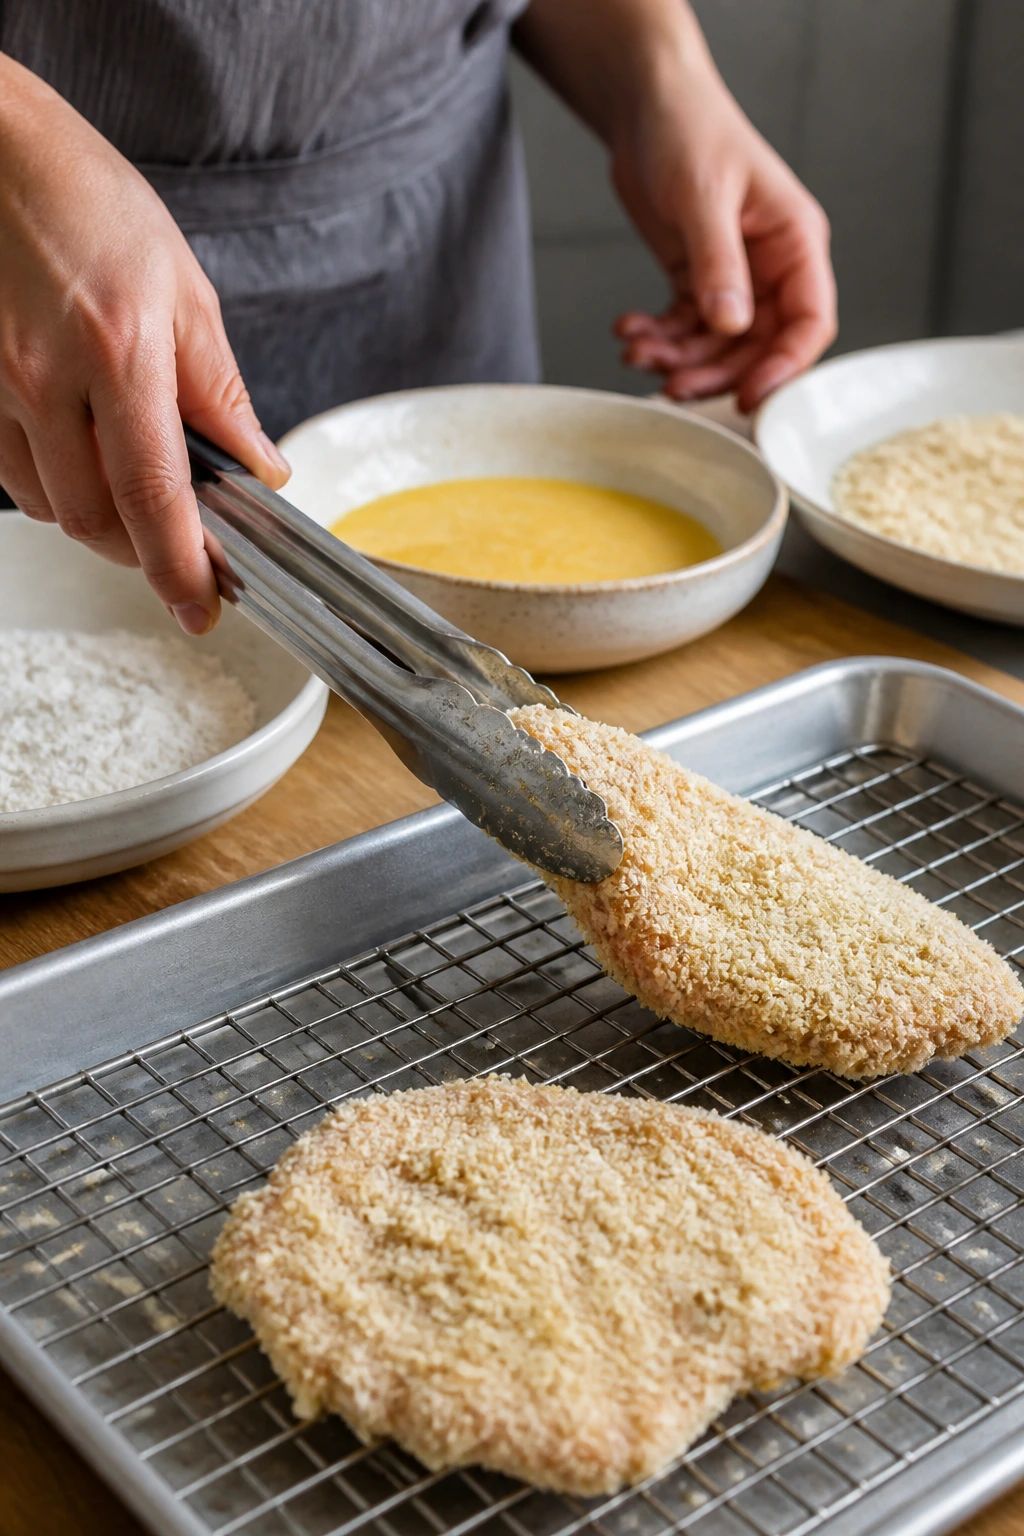
- 3 shallow bowls or pie plates: One for flour, one for eggs, one for breadcrumbs; this keeps the breading line sane.
- Meat mallet or rolling pin: Helps you pound the cutlets to an even thickness without tearing them.
- Tongs: Better than fingers when you are moving coated chicken from one station to the next.
- Instant-read thermometer: The easiest way to know when the thickest part of the chicken has hit 165°F.
- Microplane or fine grater: Useful for the garlic and Parmesan, which both behave better when they are finely textured.
- Pastry brush or oil mister: Makes it easier to coat the top of the breading lightly before baking.
How to Make the Chicken from Start to Finish
Prepare the Oven and Pan:
-
Preheat the oven to 425°F (220°C) and position a rack in the center. Line a rimmed baking sheet with foil or parchment, then set a wire rack on top and brush the rack lightly with 2 tablespoons olive oil.
-
If the chicken breasts are thick, slice each one horizontally into cutlets. Place them between two sheets of parchment or wax paper and pound to an even 1/2-inch thickness. The goal is flat pieces that cook at the same speed; if one end is twice as thick as the other, the thin side will go dry before the center is done.
Mix the Marinade and Coat the Chicken:
-
In a large bowl, whisk together the Greek yogurt, Dijon mustard, lemon juice, garlic, salt, smoked paprika, oregano, black pepper, and cayenne until smooth. Add the chicken and turn it until every surface is coated. Cover and refrigerate for 30 minutes to 8 hours.
-
Set up three shallow dishes. In the first, combine the flour and cornstarch. In the second, whisk the eggs and water until no streaks remain. In the third, mix the panko, Parmesan, garlic powder, and salt.
Bread the Cutlets and Bake:
-
Lift one piece of chicken from the marinade and let the excess drip off for a few seconds. Dredge it in the flour mixture, tapping off the loose dust, then dip it in the egg and let the extra egg run back into the dish. Press it into the panko mixture and coat both sides, but do not mash the crumbs down so hard that they turn into paste. Set the breaded cutlet on the prepared rack. Repeat with the remaining pieces.
-
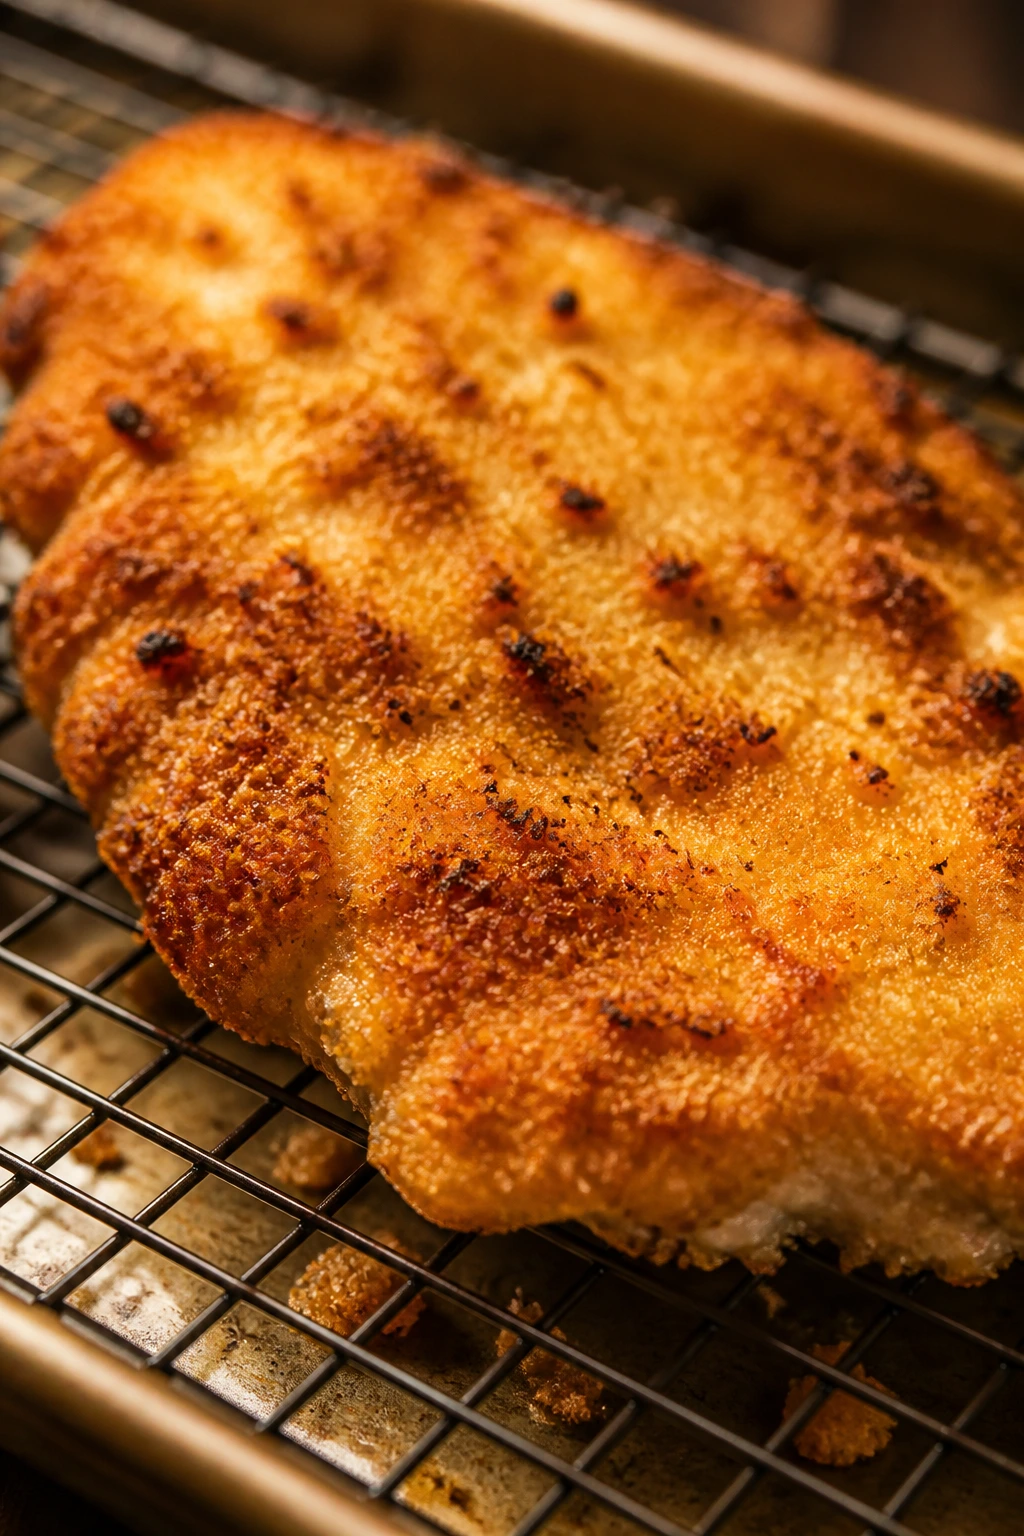
Drizzle or brush the top of each cutlet with the remaining 1 tablespoon olive oil or melted butter. This small bit of fat helps the panko color instead of drying out pale and brittle. Bake for 10 minutes, then carefully flip each cutlet with tongs and bake for 8 to 12 minutes more, until the coating is deep golden and the thickest part of the chicken reaches 165°F.
-
If you want a darker crust, turn the broiler on for 1 to 2 minutes at the end, watching constantly. Broilers move fast. The line between “nicely browned” and “why does this smell like toast?” is shorter than you want it to be.
-
Let the chicken rest on the rack for 5 minutes. Finish with chopped parsley and a squeeze of lemon, then serve while the crust still crackles when you cut into it.
What to Put on the Plate Beside It
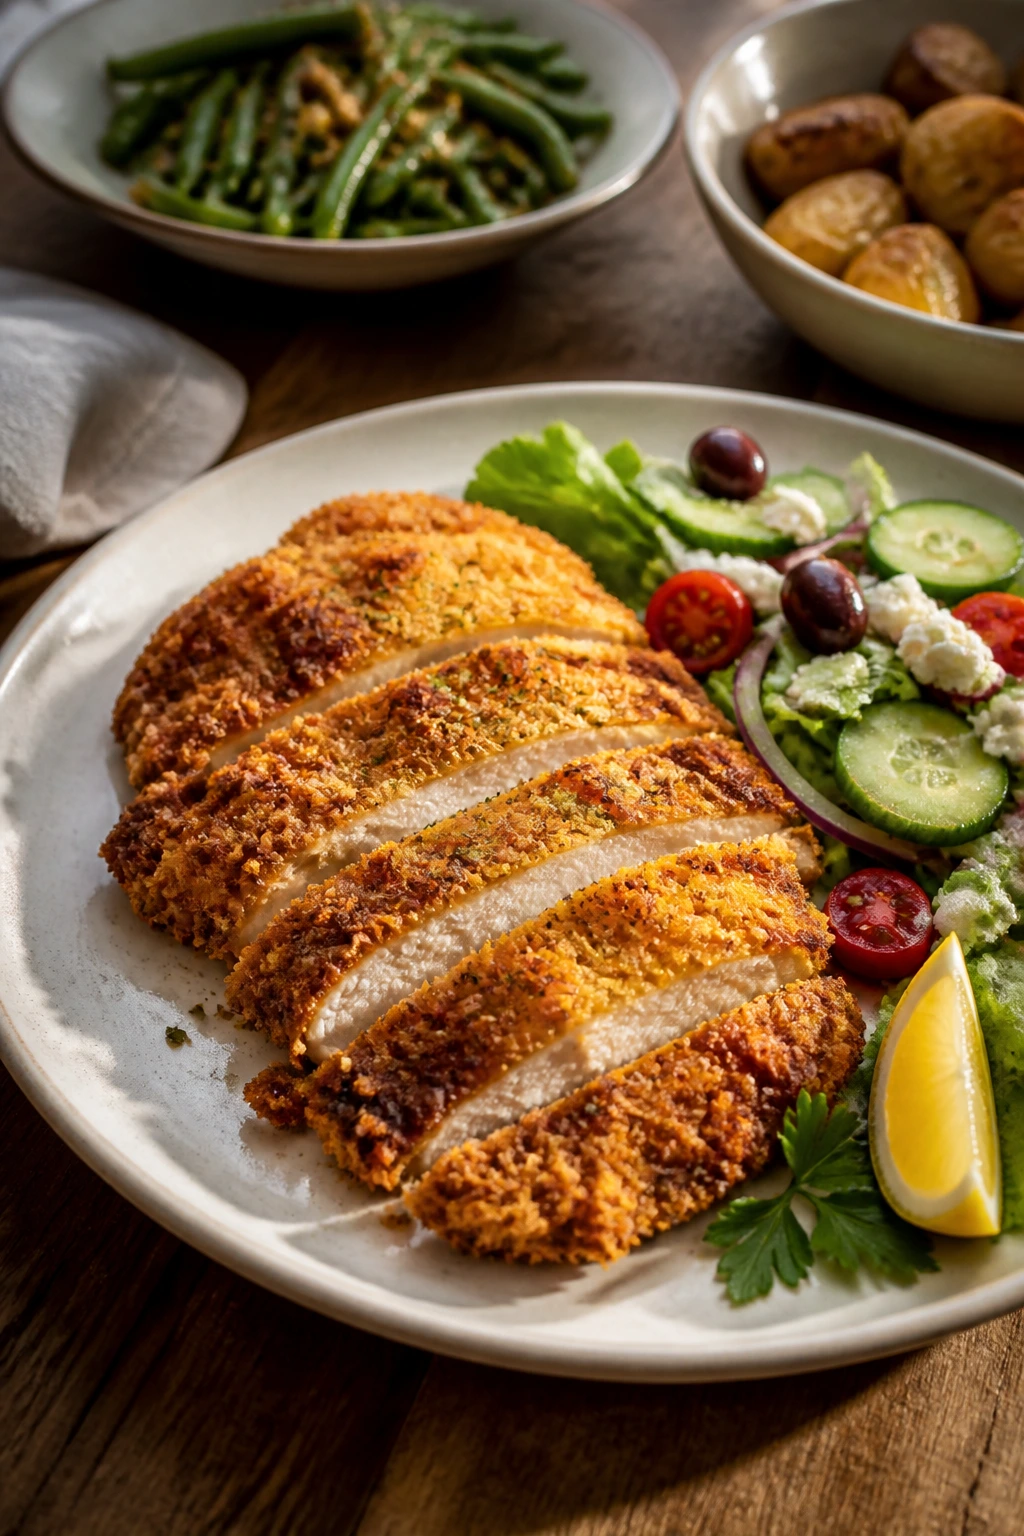
Presentation: Serve each cutlet whole on warm plates, then slice diagonally if you want the cross-section to show off the crunchy panko crust and the juicy center. A scatter of parsley and a few lemon wedges make the plate look finished without asking the chicken to share the spotlight with a heavy sauce.
Accompaniments: This chicken likes simple sides: buttered rice, roasted potatoes, garlicky green beans, a chopped cucumber salad, or a tray of broccoli roasted until the tips are dark. Anything with a little acid or a soft starch fits the tangy yogurt crust. If you want to keep the kitchen calm, choose one green thing and one starch, then stop there.
Portions: One cutlet per adult is a solid dinner when you have sides. If the breasts are large and the cutlets are hefty, 4 servings is realistic. If you slice the chicken into thinner pieces for smaller appetites, the same batch can stretch to 5 or 6 servings without feeling skimpy.
Beverage Pairing: Sparkling water with lemon keeps the meal bright. A dry riesling, pinot grigio, or even a cold lager works well because the bubbles and acidity cut through the Parmesan and yogurt without fighting the seasoning.
Small Upgrades and Useful Shortcuts
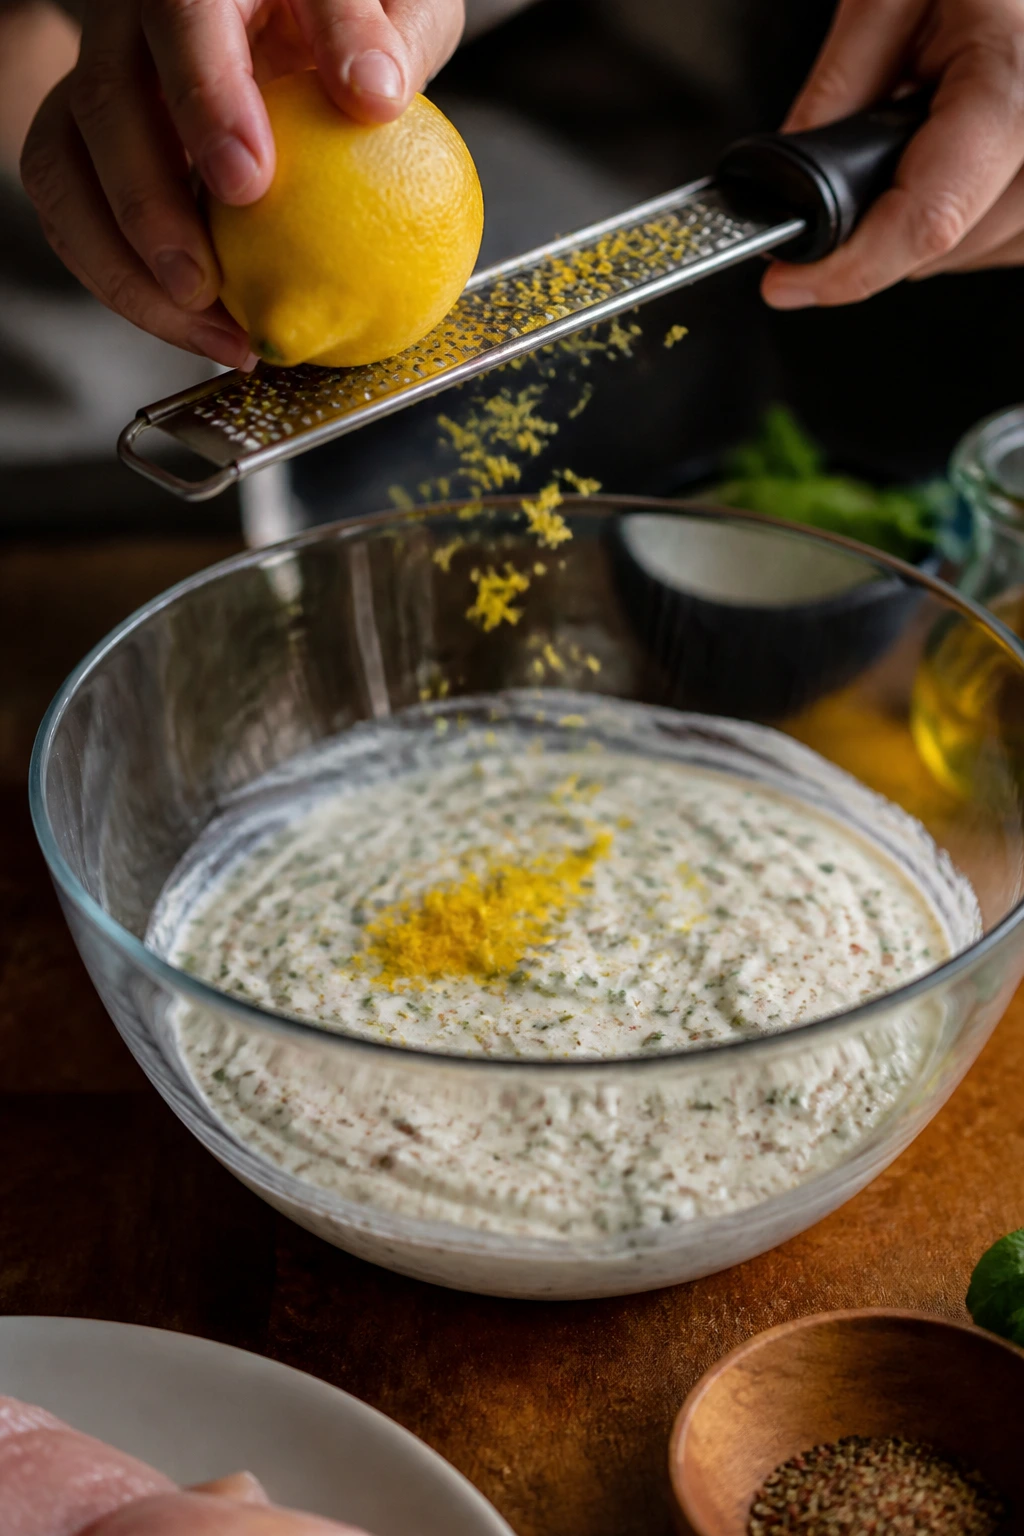
Flavor Enhancement: Grate 1 teaspoon of lemon zest into the yogurt marinade. It gives the chicken a cleaner citrus smell than juice alone, and it sharpens the whole dish without turning it sour.
Time-Saver: Buy chicken breasts that are already cut into cutlets, or ask the butcher to do it. You will save the annoying part of the prep and spend your time on the part that matters: getting the coating even.
Pro Move: Let the breaded cutlets sit on the rack for 5 to 10 minutes before they go into the oven. That brief rest helps the crumbs hydrate and latch onto the chicken instead of flaking off the second you move the tray.
Cost-Saver: Store-brand panko is fine here, and a small block of Parmesan goes farther than the pre-shredded tub. You are not building a cheese sauce; you just need enough fine salty cheese to brown with the crumbs.
If You Like It More Savory: Add 1/2 teaspoon onion powder to the crumb mix or a pinch of flaky salt right after baking. That tiny hit of salt on the crust makes the chicken taste fuller without needing sauce.
Mistakes That Turn the Cutlets Soft or Bland
-
Using yogurt that is too thin: If the marinade runs off the chicken like milk, the breading gets patchy and slippery. Use thick Greek yogurt, or strain regular yogurt first if that is what you have.
-
Skipping the rack: A flat baking sheet lets the bottom of the chicken sit in steam and crumbs. The underside softens, and by the time you eat it, the bottom feels more damp than crisp. A rack fixes that.
-
Pressing the crumbs too hard: You want the panko to adhere, not collapse into a paste. If you flatten it aggressively, the crust turns dense and loses the airy crunch that makes this recipe worth making.
-
Under-seasoning the coating: Yogurt and chicken both need help. If the crumb mix tastes bland before baking, the finished cutlet will taste bland after baking, only with a better texture. Salt the crumb mixture and do not be shy about the Parmesan.
-
Pulling it from the oven too early: Pale crumbs are not done just because the chicken is cooked. If the surface has not turned deep gold, give it another couple of minutes or a quick broil, then check the temperature again.
-
Cutting immediately after baking: Hot chicken leaks juice the second you slice it. Let it rest for 5 minutes so the crust stays on the meat instead of sliding around on the plate.
Flavor Variations That Still Feel Like the Same Dinner
Lemon-Dill Cutlets: Swap the oregano for 1 tablespoon chopped dill and add extra lemon zest to the marinade. This version is sharper and a little cooler in flavor, which works well with cucumbers or a simple potato salad.
Smoky Harissa Crunch: Stir 1 to 2 teaspoons harissa into the yogurt marinade and add a pinch of cumin to the crumb mix. The heat is not loud, but it lingers in a good way, especially if you serve the chicken with rice and yogurt on the side.
Gluten-Free Crunch: Use a gluten-free flour blend in place of the all-purpose flour and gluten-free panko or crushed rice cereal in place of regular breadcrumbs. The method stays the same, and the texture can still be sharply crisp if you do not overcrowd the tray.
Air-Fryer Cutlets: Bake the breaded chicken in an air fryer at 400°F for 10 to 12 minutes, flipping halfway and spraying lightly with oil. Work in batches so the pieces sit in one layer; crowded cutlets steam, and steamed crumbs are not what you came here for.
Thigh Swap: Use 2 pounds boneless, skinless chicken thighs instead of breasts if you want more richness. Pound them lightly, keep the same marinade, and add a couple of minutes to the cook time since thighs are usually thicker and less uniform.
Make-Ahead, Storage, and Reheating Without Losing the Crunch
Refrigerator: Cooked chicken keeps for 3 to 4 days in an airtight container in the fridge. I like to line the container with a paper towel so the bottom crust does not sit in moisture and soften as fast.
Freezer: Freeze cooked cutlets for up to 2 months. Let them cool completely, wrap each piece individually, and freeze them in a single layer first so the crust does not get smashed into one giant clump.
Reheating: The oven is the best fix. Reheat at 400°F for 10 to 12 minutes from the fridge, or use an air fryer at 375°F for 5 to 7 minutes, until the coating is hot and crisp again. The microwave will heat the chicken, but it also turns the crust soft and slightly rubbery, so I only use it when I am not pretending texture matters.
Make-Ahead: Marinate the chicken up to 8 hours ahead. You can also bread the cutlets and keep them on the rack in the fridge for up to 2 hours before baking, though I would not push that much farther because the coating starts to absorb moisture. For the cleanest finish, bread close to bake time.
Freezing Unbaked Cutlets: If you want to get ahead, freeze the breaded raw chicken on the rack or a tray until firm, then wrap and store for up to 1 month. Bake from frozen and add 8 to 10 minutes to the cook time, checking the internal temperature carefully. The crust will not be quite as delicate as a fresh batch, but it still gets the job done.
A small note: The yogurt marinade is the part that tolerates advance prep the best. The breading is the part that wants to stay close to the oven.
Questions People Ask Before Making Crispy Yogurt Chicken

Can I use regular yogurt instead of Greek yogurt?
Yes, but I would thicken it first. Regular yogurt is looser, so it tends to slide off the chicken and make the breading a little messy. If you strain it through a fine sieve or cheesecloth for 20 to 30 minutes, it behaves much more like Greek yogurt and gives you a better coating.
How long should the chicken marinate in yogurt?
Thirty minutes is enough to season the outside and help the breading stick. Eight hours is the practical ceiling here. Much longer than that, especially with lemon in the marinade, and the outer layer of the chicken can start to feel overly soft before it hits the oven.
Can I make this without breadcrumbs?
Not really if you want the same crisp finish. You can switch to gluten-free panko, crushed cornflakes, or crushed rice cereal, but the chicken still needs a dry, jagged coating to give you crunch. Without that outer layer, you end up with seasoned chicken, which is fine, but it is not the same recipe.
What if the coating keeps falling off?
That usually means the chicken was too wet or the breading line got rushed. Let excess marinade drip off before the flour step, press the crumbs on gently but firmly, and do not move the cutlets around too much once they are on the rack. The first 10 minutes of baking set the crust; after that, it holds together better.
Can I use chicken thighs?
Absolutely. Boneless thighs are forgiving and taste a little richer than breasts, which some people prefer on a night when the rest of dinner is simple. They may need a few extra minutes in the oven because they are often thicker and a bit more uneven.
Does the yogurt make the chicken taste sour?
Not in any loud way. Greek yogurt adds tang, but the mustard, garlic, Parmesan, and paprika round it out, and the heat of the oven smooths the sharper edge. What you taste most is savory chicken with a crisp crust and a little brightness at the end.
Can I make it in the air fryer?
Yes. The air fryer works well for smaller batches because the hot air keeps the coating moving and browning. Use 400°F, spray the cutlets lightly with oil, flip once halfway through, and do not crowd the basket or the crumbs will steam instead of crisp.
How do I know when it is done without drying it out?
Use an instant-read thermometer and check the thickest part of the largest cutlet. You are looking for 165°F. If the crust looks pale but the chicken is done, give it a short broil rather than leaving it in the oven long enough to dry out the meat.
Why This Recipe Earns Repeat Status
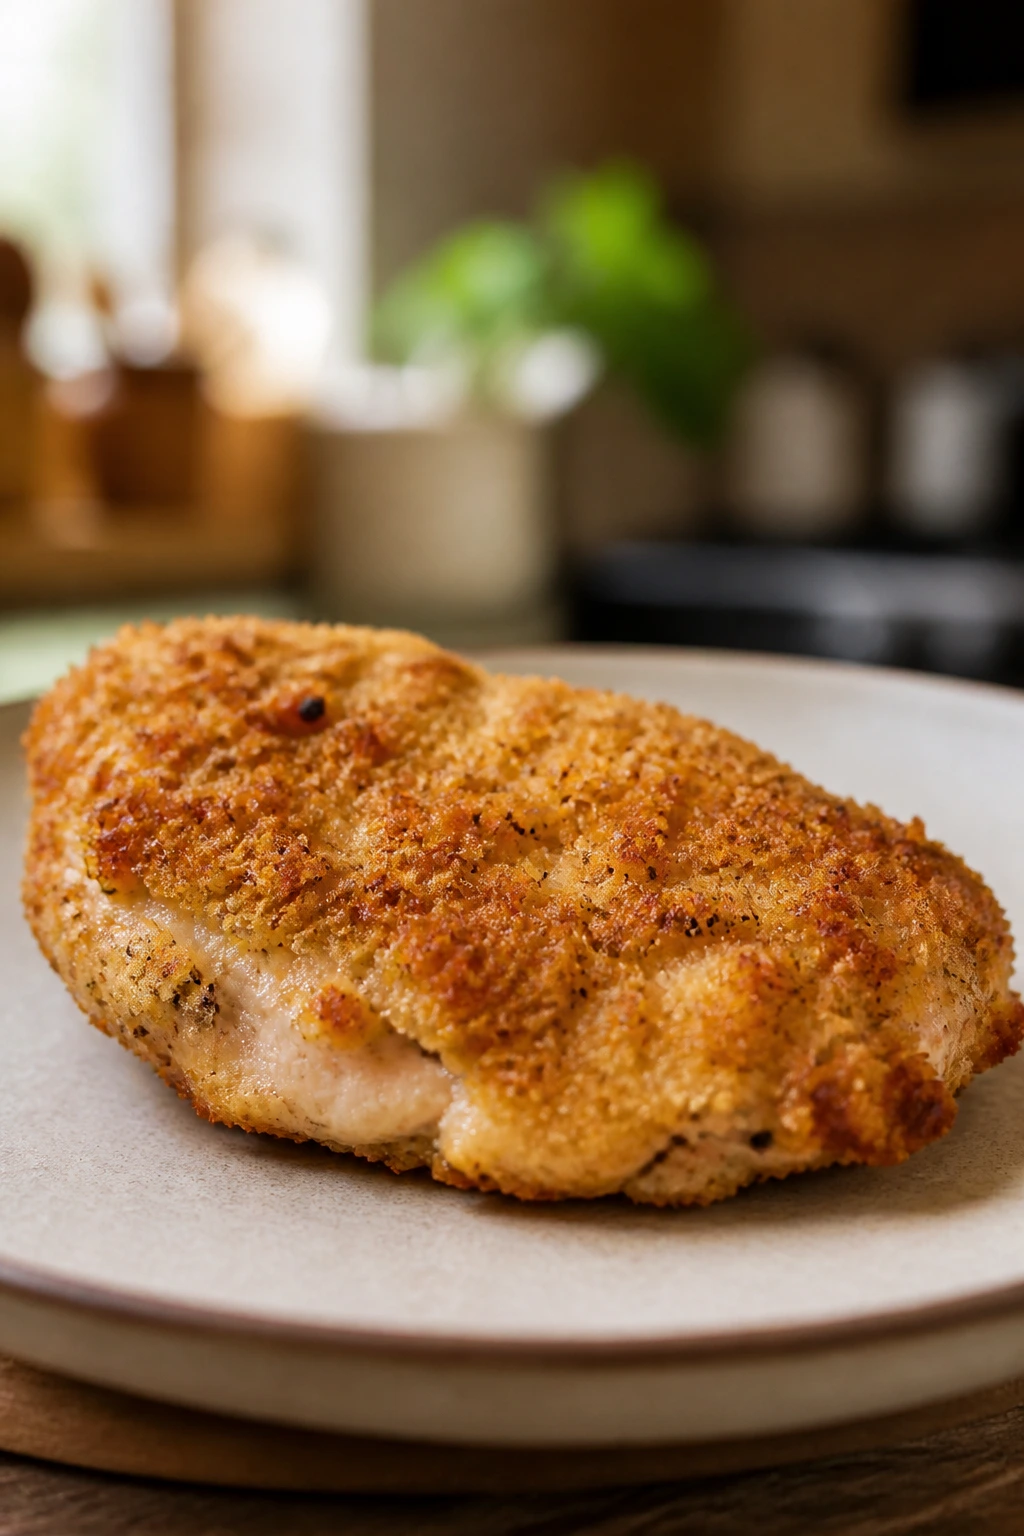
There are plenty of chicken cutlet recipes that look fine on paper and turn fussy in your kitchen. This one behaves. The yogurt keeps the meat tender, the panko gives you a real crunch, and the oven does the part of the job that people usually think belongs to a frying pan.
That is what makes it useful on busy nights. Not the novelty. Not the drama. Just a tray of crisp, browned cutlets that you can serve with rice, salad, potatoes, or whatever vegetable is sitting in the crisper drawer looking hopeful.
The more often you make it, the less like a recipe it feels and the more like a reliable habit. And honestly, that is the kind of chicken dinner I keep coming back to.
Crispy Yogurt Chicken for Weeknight Dinners — Recipe Card
Recipe Name: Crispy Yogurt Chicken for Weeknight Dinners
Description: Juicy chicken cutlets marinated in yogurt, mustard, lemon, and garlic, then coated in panko-Parmesan crumbs and baked until golden and crisp. It has the crackly crust people want from fried chicken with a cleaner, easier oven method.
Prep Time: 20 minutes
Cook Time: 20 to 22 minutes
Total Time: 42 minutes active, plus 30 minutes to 8 hours marinating
Course: Dinner, Main Course
Cuisine: American
Servings: 4 servings
Calories: About 650 kcal per serving
Ingredients
For the Chicken and Marinade:
- 2 pounds boneless, skinless chicken breasts, sliced horizontally into 4 cutlets and pounded to 1/2 inch thick
- 1 cup plain whole-milk Greek yogurt
- 2 tablespoons Dijon mustard
- 2 tablespoons lemon juice
- 3 garlic cloves, finely grated or minced
- 1 teaspoon kosher salt
- 1 teaspoon smoked paprika
- 1 teaspoon dried oregano
- 1/2 teaspoon black pepper
- 1/4 teaspoon cayenne pepper, optional
For the Crunchy Coating:
- 1/2 cup all-purpose flour
- 1/4 cup cornstarch
- 2 large eggs
- 1 tablespoon water
- 1 1/2 cups panko breadcrumbs
- 3/4 cup finely grated Parmesan cheese
- 1 teaspoon garlic powder
- 1/2 teaspoon kosher salt
For the Pan and Finish:
- 2 tablespoons olive oil, for the rack or baking sheet
- 1 tablespoon olive oil or melted butter, to drizzle over the crust
- 2 tablespoons chopped fresh parsley
- 1 lemon, cut into wedges
Instructions
-
Preheat the oven to 425°F (220°C) and line a rimmed baking sheet with a wire rack lightly brushed with olive oil.
-
Slice the chicken breasts into cutlets, pound them to an even 1/2-inch thickness, and whisk together the yogurt, Dijon, lemon juice, garlic, salt, paprika, oregano, pepper, and cayenne.
-
Coat the chicken in the yogurt marinade and refrigerate for 30 minutes to 8 hours.
-
Set up three shallow dishes: flour mixed with cornstarch, eggs whisked with water, and panko mixed with Parmesan, garlic powder, and salt.
-
Lift each cutlet from the marinade, dredge in flour, dip in egg, then press into the breadcrumb mixture.
-
Arrange on the rack, drizzle with olive oil or melted butter, and bake for 10 minutes. Flip and bake 8 to 12 minutes more, until golden and the thickest part reaches 165°F.
-
Rest for 5 minutes, then finish with parsley and lemon wedges.
Notes: Use thick Greek yogurt for the best coating; regular yogurt should be strained first. A wire rack keeps the crust crisp, and the chicken is best served hot from the oven.