
A dry chicken breast on a Tuesday night has a way of feeling personal. You start with a perfectly normal package from the fridge, give it a reasonable amount of seasoning, cook it “until done,” and then—somehow—you end up chewing a piece of polite cardboard. That’s exactly why juicy seasoned chicken breast for weeknight dinners deserves a better method than the sad, colorless one most people inherit from old dinner habits.
The fix is not complicated. It’s mostly about thickness, salt, heat, and timing—the four things that decide whether chicken breast stays plush or dries into strings. Once you learn how to treat the cut, you can get a browned, well-seasoned surface and a center that stays pale, tender, and actually worth slicing into. No sauce rescue mission required. No hiding it under cheese because the meat gave up first.
I like this style of chicken because it behaves like a dependable workhorse, not a fussy special occasion project. You can pair it with rice, tuck it into salad, slice it over roasted vegetables, or eat it with a fork and a pile of buttered noodles if the day has been long and nobody needs to hear any opinions about balance. The trick is making the chicken itself taste finished—savory, lightly smoky, garlicky, with a little lemon at the end so the whole thing tastes awake.
Why Chicken Breast Goes Dry So Fast
Chicken breast is lean, and lean cuts do not forgive sloppy heat. That’s the whole story in one sentence, really.
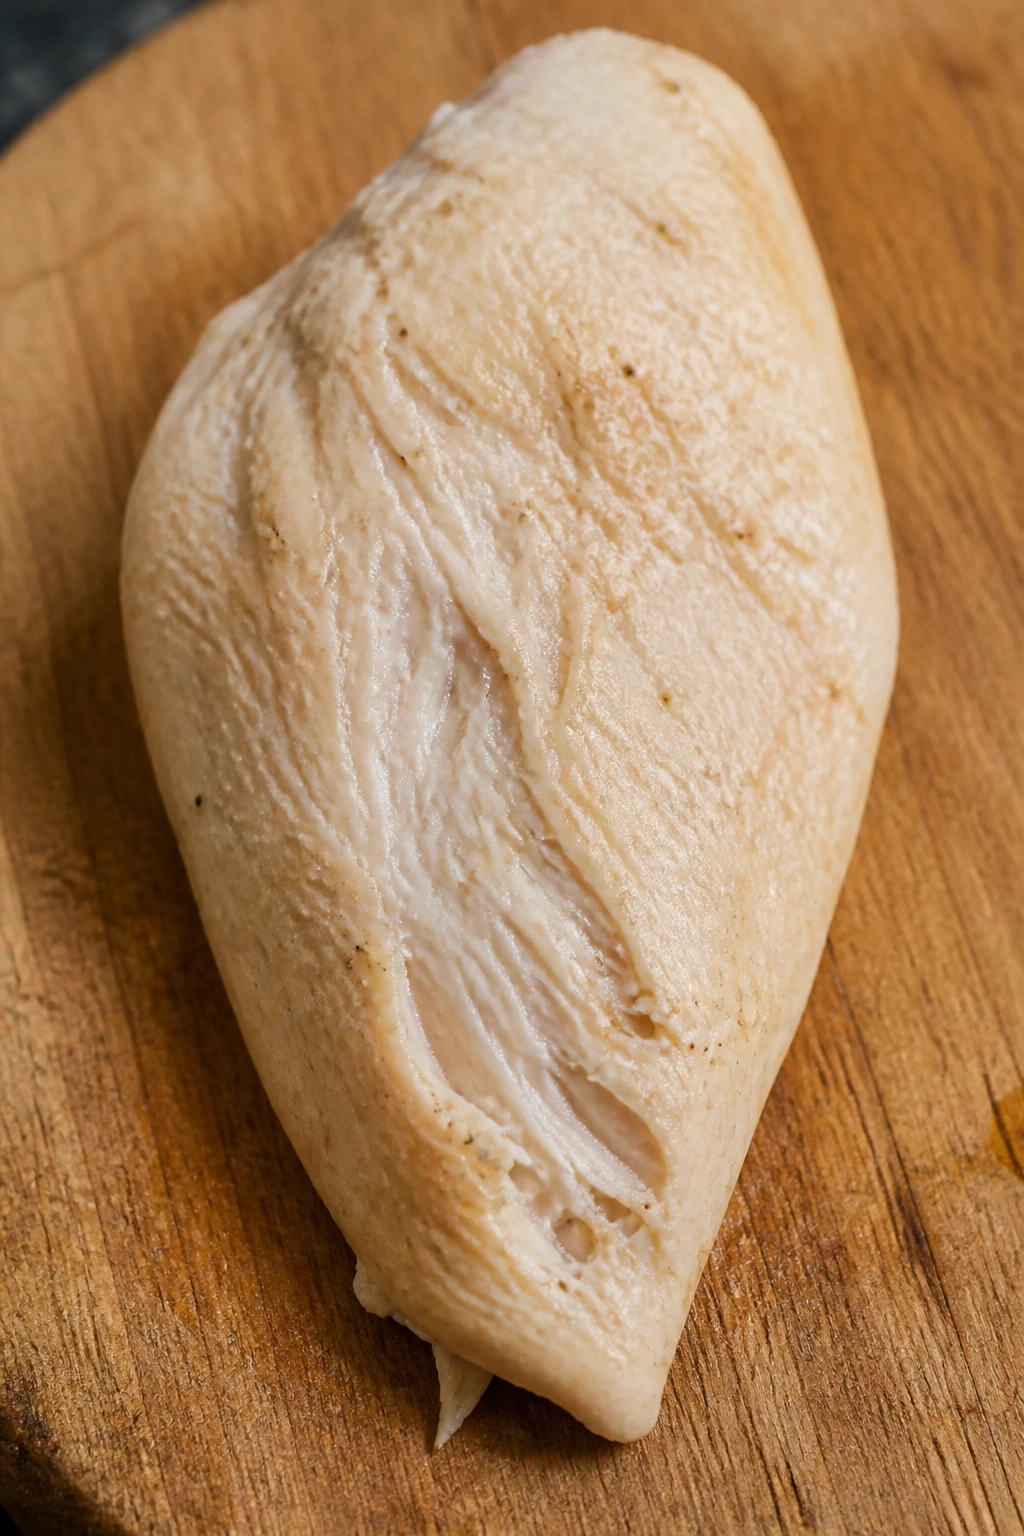
There’s very little fat in a boneless, skinless breast to buffer overcooking. Once the internal temperature keeps climbing past the safe line, moisture gets squeezed out of the muscle fibers and stays gone. You can see it in the cutting board: those dry white fibers that shred instead of slice cleanly.
Size makes the problem worse. Grocery-store chicken breasts are often uneven—thick in one end, thin in the other, sometimes with a strange bulb in the middle that cooks at a different pace. If you lay a lopsided breast in a hot pan without evening it out first, the skinny end finishes early while the thick end still needs time. That’s how people end up choosing between “undercooked” and “dry.” Neither is appealing.
Heat management matters more than drama. A screaming-hot oven or skillet is useful for browning the surface, but if you leave the chicken in there too long, you blow past the sweet spot fast. Chicken breast does best when you give it enough heat to build flavor, then stop at the right temperature instead of waiting for some mythical visual cue. Color lies. A thermometer does not.
Why This Juicy Seasoned Chicken Breast Works
The best part about this method is that it solves the dryness problem from three directions at once: even thickness, a measured seasoning mix, and a fast sear followed by a short finish in the oven.
Pounding the breast to a more even thickness sounds old-fashioned, but it saves dinner. Once the meat is mostly the same thickness from end to end, it cooks at the same pace. That means you are not waiting for one side of the breast to catch up while the thinner side turns stringy. Even a half-inch to three-quarters of an inch is enough to make the difference obvious.
The seasoning blend does more than make the chicken taste “seasoned.” Salt helps the meat hold onto moisture better, smoked paprika brings a little color and sweetness, garlic and onion powder build the savory base, and a small pinch of brown sugar encourages browning without turning the crust into barbecue candy. You get a deeper, rounder flavor than plain salt and pepper can manage on its own.
And then there’s the finish. I pull chicken breast at 160°F to 162°F and let it rest, because carryover heat usually brings it to the USDA’s safe 165°F without pushing the meat into the dry zone. That tiny gap matters. It’s the difference between meat that slices cleanly and meat that feels tired.
Why You’ll Keep Coming Back to This Chicken
Some recipes earn a permanent spot because they’re clever. This one earns it because it behaves.
-
Fast Cleanup: One skillet and one small bowl are enough if you season the chicken directly in the bowl and sear in an oven-safe pan.
-
Easy to Scale: Four breasts feed a family, but the same seasoning mix works for two cutlets or six thinner pieces without much thinking.
-
Leftovers That Hold Up: Sliced cold chicken breast keeps its shape in salads, grain bowls, and wraps, which is more than I can say for a lot of chicken recipes.
-
Flexible Flavor: The base seasoning is savory and mild enough for kids, but it takes well to extra heat, lemon, herbs, or a spoonful of pan sauce.
-
Reliable Texture: The method does not depend on guesswork. If you can read an instant-read thermometer, you can make this without crossing your fingers.
-
Weeknight-Friendly: The whole thing lands on the table fast enough that you do not need to plan the rest of your evening around dinner.
Timing, Yield, and the Little Numbers That Matter
Here’s the quick block I’d want on my own counter when I cook this.
Yield: Serves 4
Prep Time: 15 minutes
Cook Time: 15 minutes
Total Time: 30 minutes, plus 5 to 10 minutes resting
Difficulty: Beginner — the technique is simple, and the thermometer tells you exactly when to stop.
Best Served: Hot, after a short rest so the juices stay where they belong.
That resting time is not decoration. It gives the hot juices inside the chicken a second to settle, which means they stay in the meat instead of running onto the cutting board the second you slice in. If you skip it, the chicken can still taste fine, but the texture gets messier and the plate looks a little sad.
The Ingredient List for Juicy Seasoned Chicken Breast
For the Chicken
- 4 boneless, skinless chicken breasts, 6 to 8 ounces each
- 2 tablespoons olive oil, divided
- 1 1/2 teaspoons kosher salt
- 1 teaspoon packed light brown sugar
- 1 teaspoon smoked paprika
- 1 teaspoon garlic powder
- 1 teaspoon onion powder
- 1 teaspoon dried oregano
- 1/2 teaspoon freshly ground black pepper
- 1/4 teaspoon cayenne pepper, optional but useful if you like a little heat
- 1 tablespoon unsalted butter
- 1 tablespoon lemon juice
- 1 tablespoon chopped fresh parsley, plus more for serving
- Lemon wedges, for serving
A note on the salt: if you only have fine table salt, use 1 teaspoon instead of 1 1/2 teaspoons kosher salt. Table salt is denser, and a straight swap will push this too salty fast.
What Each Ingredient Is Doing in the Pan
Chicken Breast
What to use: 4 boneless, skinless chicken breasts, 6 to 8 ounces each, ideally close to the same size.
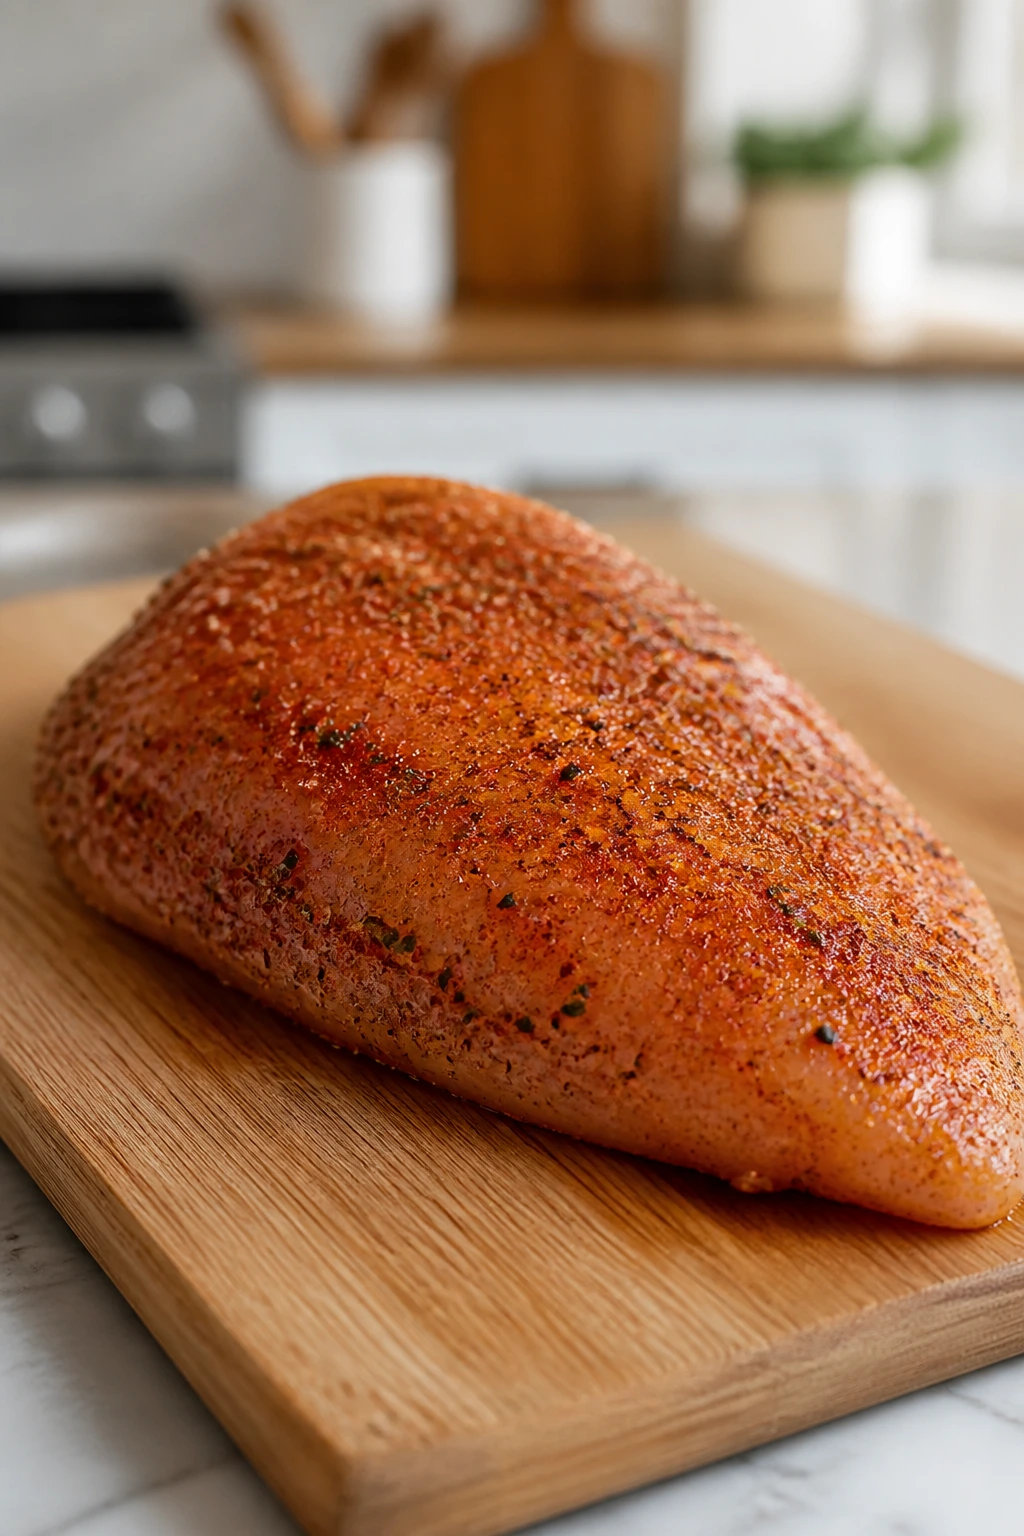
Preparation: Trim any loose fat, then pound the thicker end so each breast sits at about 1/2 to 3/4 inch thick. Pat it dry with paper towels before seasoning.
Substitutions: Boneless skinless chicken thighs work if you want a richer cut, and thin chicken cutlets can be used without pounding.
Tips: Buy the most even breasts you can find. The giant, oddly shaped ones look like a bargain, then cook like a small disaster unless you trim or split them.
Seasoning Blend
What to use: 1 1/2 teaspoons kosher salt, 1 teaspoon brown sugar, 1 teaspoon smoked paprika, 1 teaspoon garlic powder, 1 teaspoon onion powder, 1 teaspoon dried oregano, 1/2 teaspoon black pepper, and 1/4 teaspoon cayenne pepper.
Preparation: Mix the seasonings in a small bowl first so the rub lands evenly instead of clumping in one corner of the chicken.
Substitutions: Regular paprika can replace smoked paprika, thyme can replace oregano, and a mild chili powder can stand in for cayenne if you want less heat.
Tips: The salt is doing real work here, not just seasoning the surface. If you cut it too far, the chicken tastes flat even if the browning looks fine.
Oil, Butter, Lemon, and Herbs
What to use: 2 tablespoons olive oil, 1 tablespoon unsalted butter, 1 tablespoon lemon juice, and 1 tablespoon chopped parsley.
Preparation: Use one tablespoon of oil to coat the chicken and the other tablespoon for the skillet. Add the butter and lemon at the end, after the heat drops a bit.
Substitutions: Avocado oil works in place of olive oil, ghee can replace butter, and cilantro can step in for parsley if that’s the herb you have.
Tips: Butter burns fast in a hot pan, so it belongs at the finish. Lemon brightens the whole dish, but too much too early can mute the paprika and make the chicken taste sharp instead of full.
The Tools That Make It Easier
A good method still needs a few pieces of equipment that make the job cleaner and faster.
- 12-inch oven-safe skillet: Cast iron is my favorite here because it browns well and holds heat, but a stainless skillet that can go into the oven works too.
- Instant-read thermometer: Non-negotiable if you want juicy chicken breast instead of guesswork.
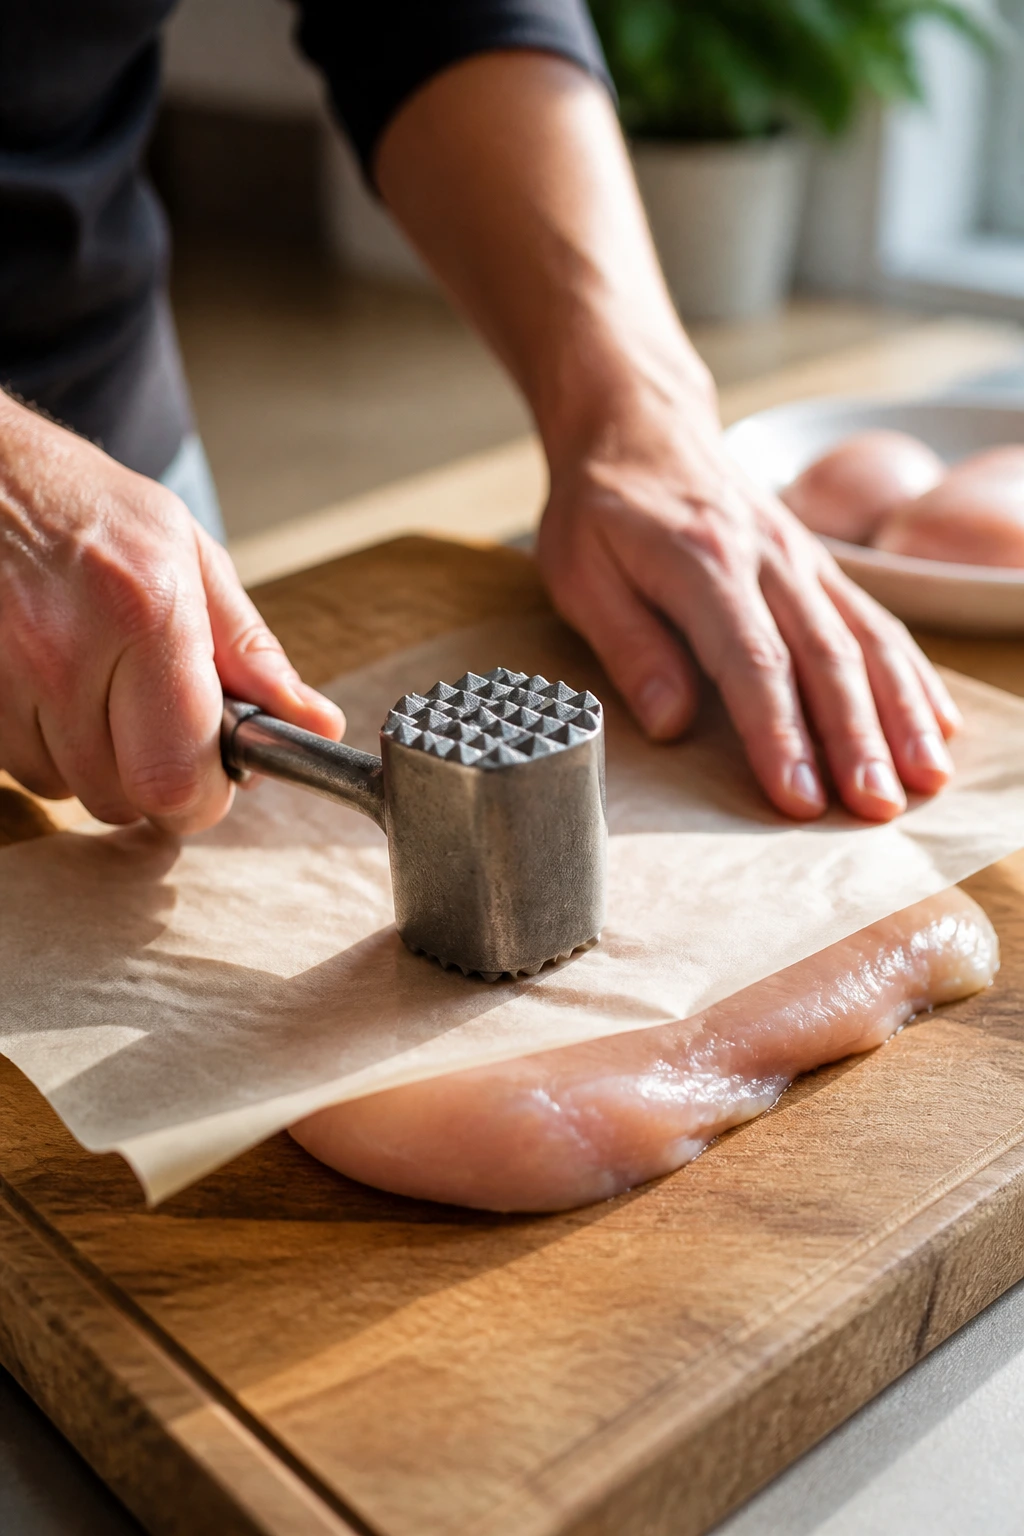
- Meat mallet or rolling pin: Useful for evening out the thickness without tearing the meat.
- Small mixing bowl: For the seasoning blend; it keeps the rub even and avoids seasoning clumps.
- Tongs: Better than a fork because they do not puncture the meat and leak juices.
- Paper towels: Dry chicken browns better. Wet chicken steams, and steaming is the enemy here.
- Cutting board with a groove, if you have one: Handy for resting and slicing without sending juices all over the counter.
The Method That Keeps the Chicken Tender
Prep the Chicken
-
Preheat the oven to 425°F (220°C) and move a rack to the center position.
-
Lay the chicken breasts on a cutting board and cover them with parchment or plastic wrap. Pound the thickest part of each breast until the piece is about 1/2 to 3/4 inch thick from end to end. Do not smash the meat flat—you want even thickness, not a chicken pancake.
-
Pat the chicken dry on both sides with paper towels. If the surface feels damp, keep blotting until it no longer shines.
Season and Sear
-
Stir together the salt, brown sugar, smoked paprika, garlic powder, onion powder, oregano, black pepper, and cayenne in a small bowl.
-
Rub the chicken with 1 tablespoon olive oil, then coat both sides with the seasoning mixture. Press it on lightly so it sticks. If a little falls off, that is fine; if the whole rub slides off, the chicken was still too wet.
-
Set a 12-inch oven-safe skillet over medium-high heat for about 2 minutes. Add the remaining 1 tablespoon olive oil and let it shimmer. The oil should move quickly when you tilt the pan, but it should not smoke hard.
-
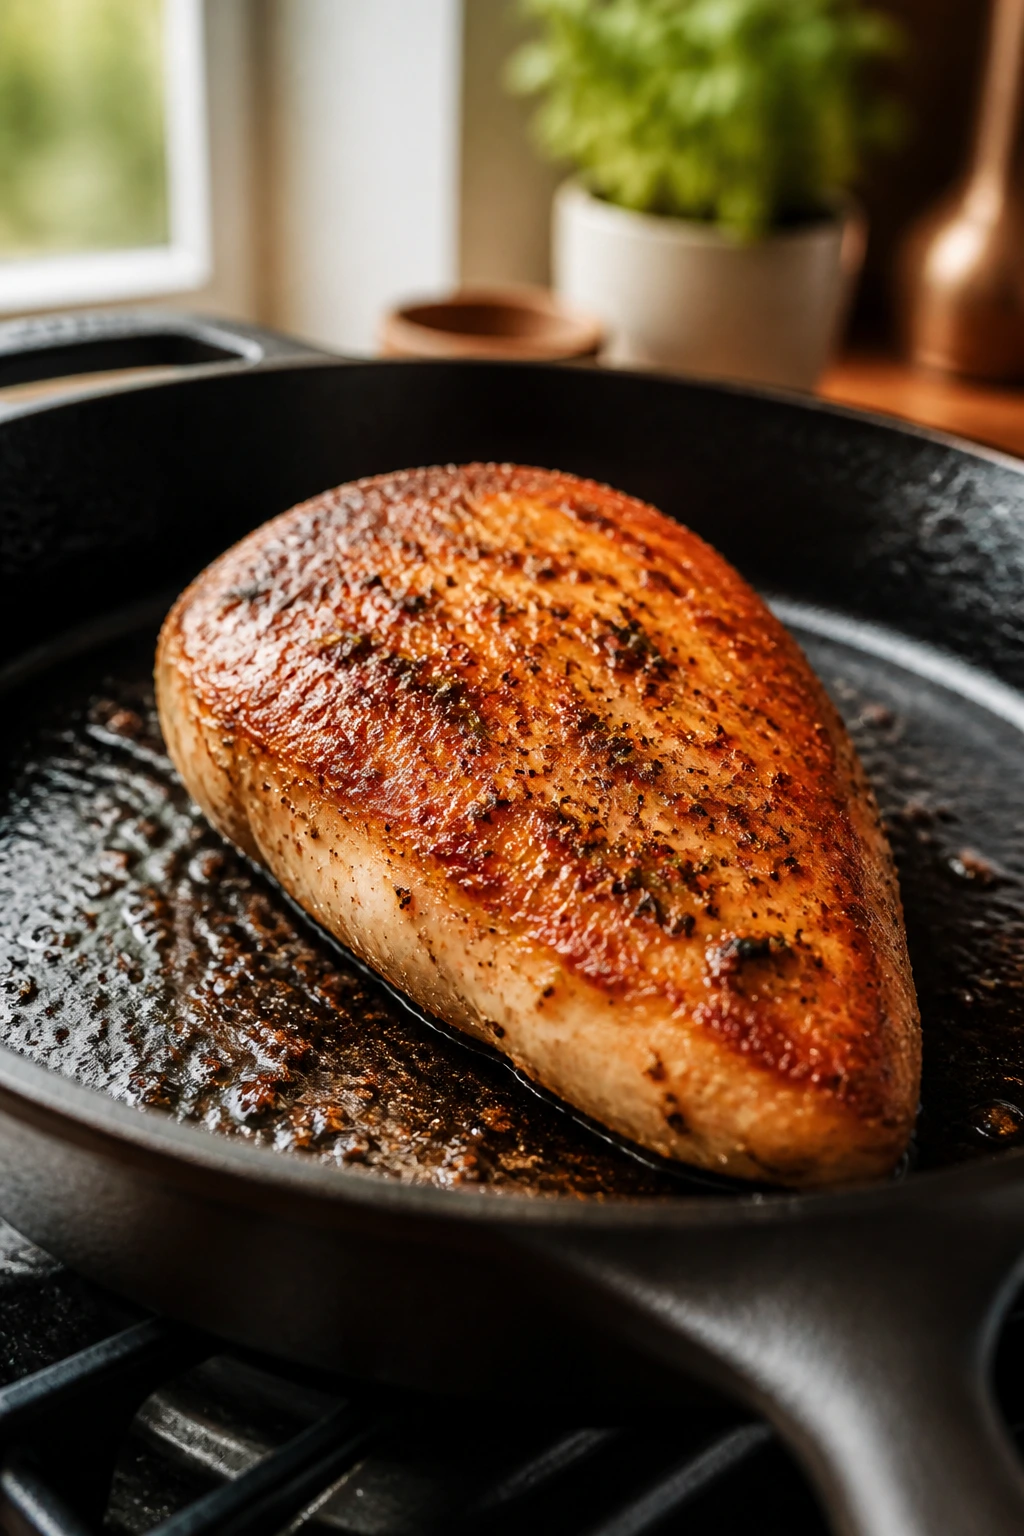
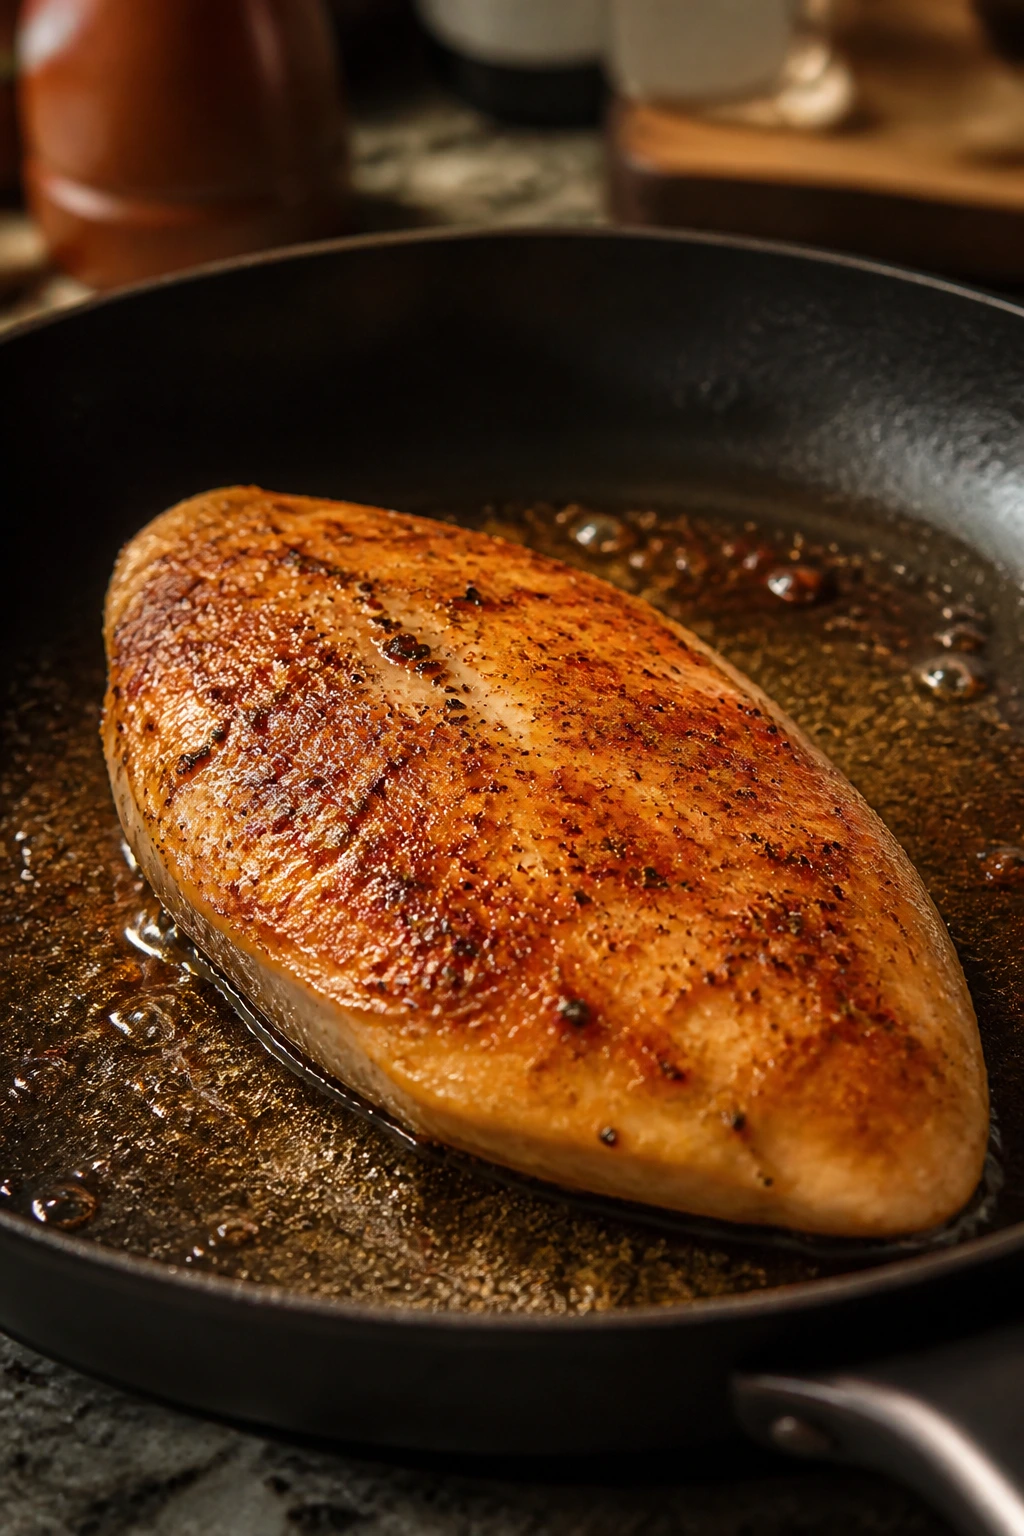
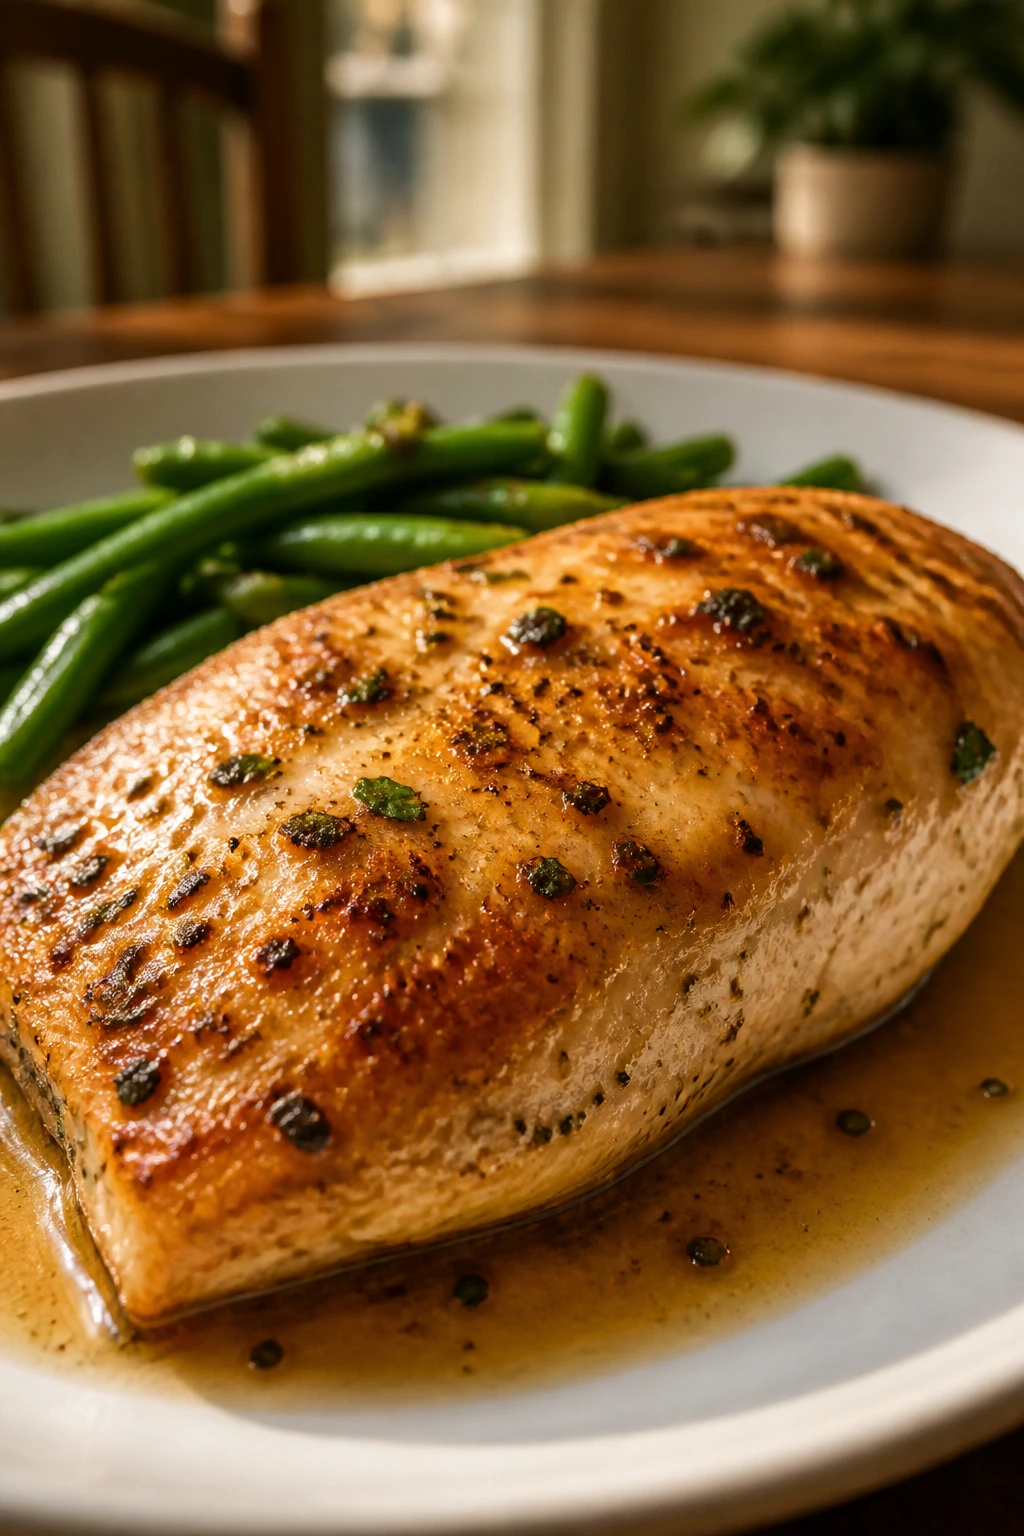
Place the chicken in the skillet and leave it alone for 3 to 4 minutes. You want a deep golden crust, not pale spots. Do not move the chicken during the first side or the crust will tear.
-
Flip the chicken and cook the second side for 2 minutes on the stove. Then move the skillet to the oven and roast for 6 to 8 minutes, until the thickest part of the chicken reads 160°F to 162°F on an instant-read thermometer.
Rest and Finish
-
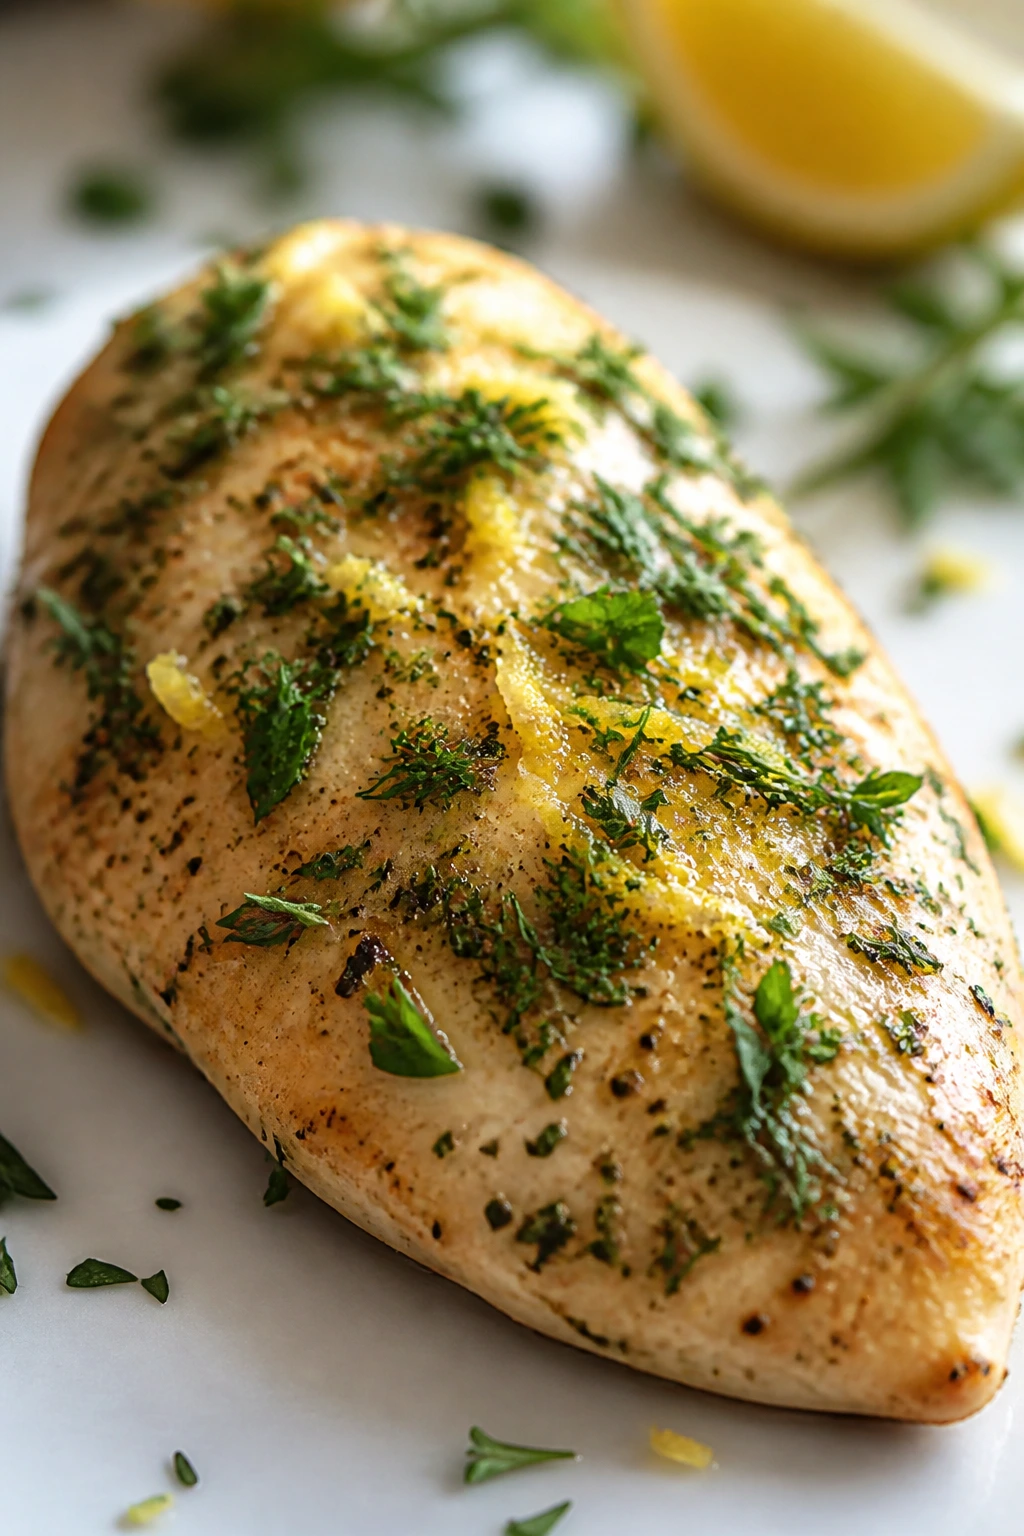
Remove the skillet from the oven and transfer the chicken to a plate. Add the butter and lemon juice to the hot skillet or spoon them over the chicken while it rests. Let the meat sit for 5 to 10 minutes before slicing.
-
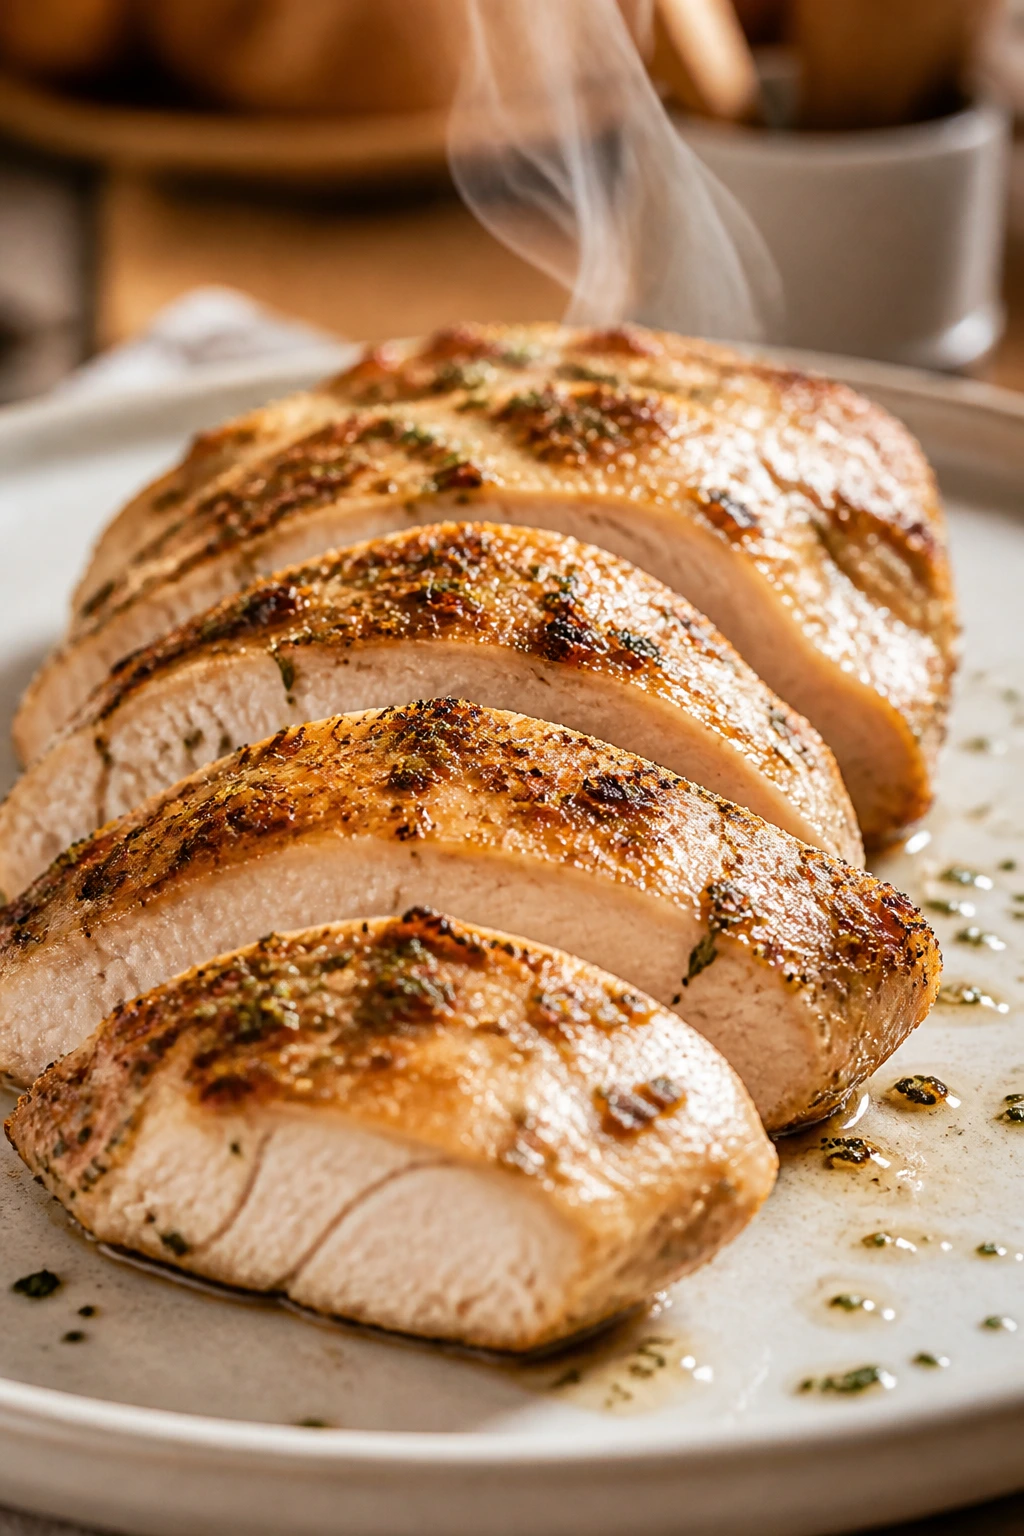
Sprinkle with parsley and serve with lemon wedges. If you cut into the chicken, the juices should be visible but not rushing out in a flood. That’s the spot.
If your skillet is not oven-safe, move the seared chicken to a lined sheet pan and finish it there. Same oven temperature, same temperature target. The only thing that changes is the pan.
How to Slice, Plate, and Serve It
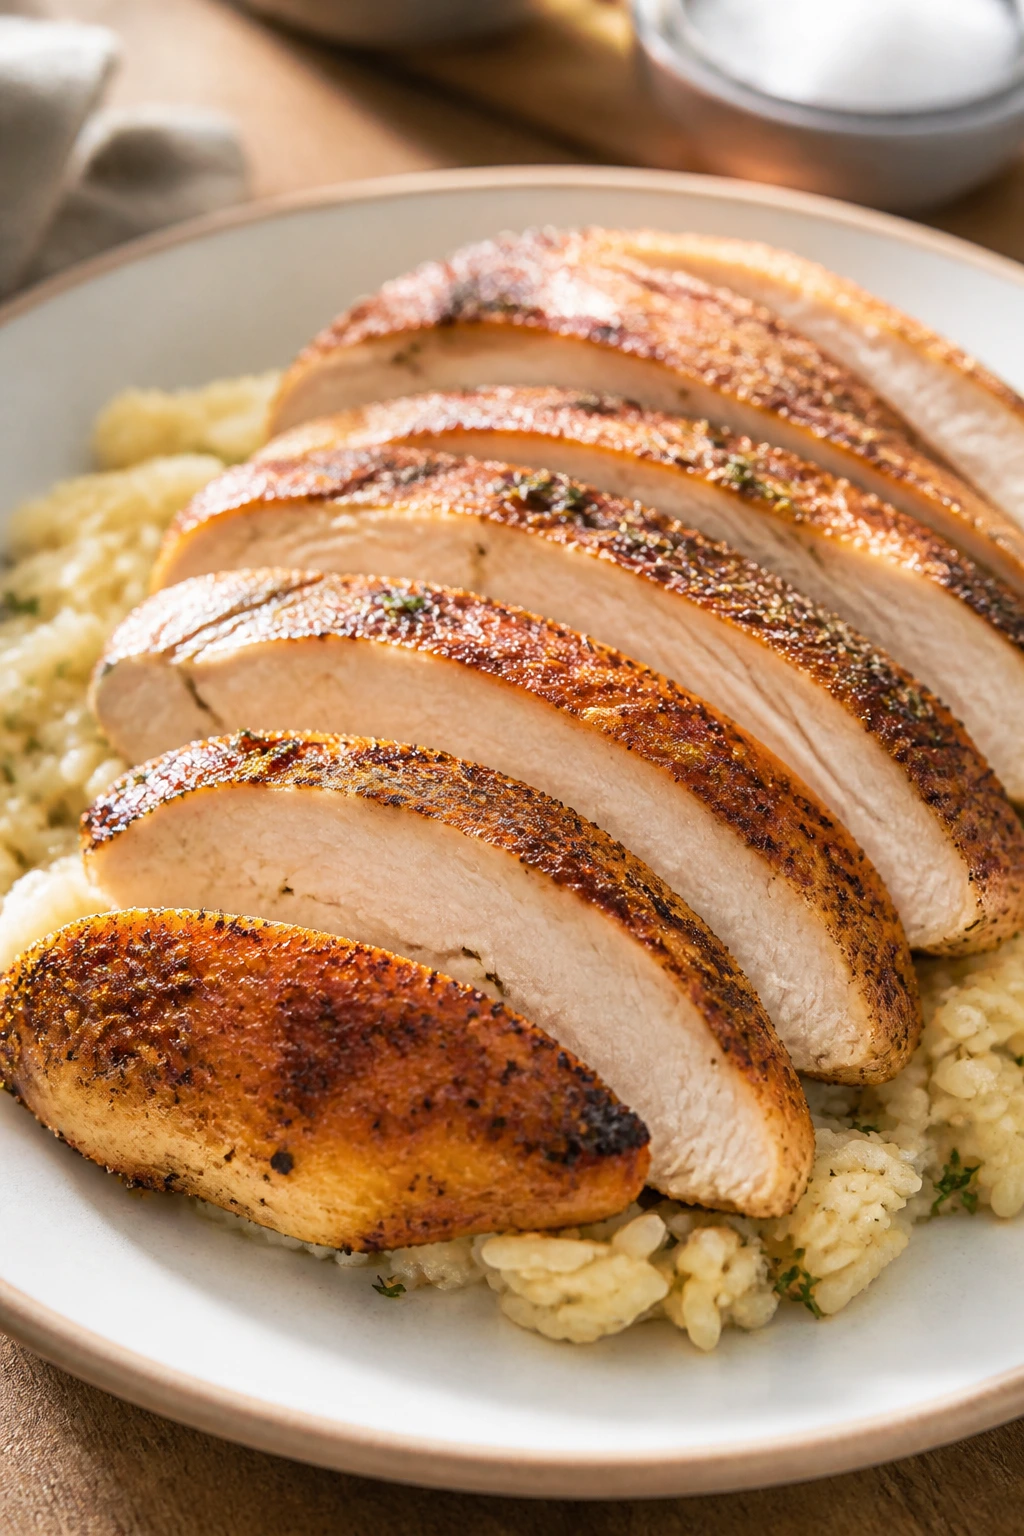
Presentation: Slice each breast on a slight bias, not straight across, so the pieces look tender instead of chopped. Fan them over the starch or vegetables rather than stacking them in a pile; it lets the browned seasoning show and keeps the plate from looking heavy.
Accompaniments: I like this with buttery rice, roasted potatoes, garlicky green beans, or a crisp salad with a sharp vinaigrette. It also lands well next to mashed potatoes or simple pasta tossed with olive oil and a little parmesan if you want dinner to lean more comforting than light.
Portions: One 6- to 8-ounce breast serves one adult well, especially if you’re adding sides. If the chicken is the main event on a salad or grain bowl, one breast can stretch into two smaller portions once it’s sliced.
Beverage Pairing: Sparkling water with lemon keeps the meal bright, and a dry white wine like Sauvignon Blanc handles the seasoning without fighting it. If you want something nonalcoholic with a little more body, unsweetened iced tea works better than juice.
Extra Tips for Better Flavor and Texture
Flavor Enhancement: Add 1 teaspoon lemon zest to the seasoning mix if you want the chicken to taste brighter before it ever hits the pan. Zest gives you the lemon aroma without the sharp acid that can make the surface taste harsh.
Time-Saver: Season the chicken up to 24 hours ahead and keep it covered in the fridge. The salt has time to work deeper into the meat, and dinner gets easier because the hardest part is already done.
Pro Move: Pull the chicken from the oven when the thickest part reads 160°F, then let it rest on a plate for 5 to 10 minutes. That resting window usually finishes the carryover cook without overdoing the center. This is the move that separates juicy chicken from “technically safe” chicken.
Cost-Saver: If chicken breasts are huge at the store, cut them horizontally into cutlets and cook them as thinner pieces. You’ll get more portions from the same package, and the thinner cutlets cook even faster.
Make-It-Yours: If you want a stronger herb flavor, swap the oregano for a mix of dried thyme and rosemary. If you want heat, add an extra 1/4 teaspoon cayenne or a pinch of crushed red pepper to the rub. If you want it milder for kids, leave out the cayenne and cut the black pepper in half.
Mistakes That Dry Out Chicken
-
Starting with uneven breasts: One side ends up dry while the other side still needs time. Fix it by pounding the thicker end until the whole breast cooks at the same pace.
-
Skipping the dry surface: Wet chicken steams before it browns, and the seasoning slides off. Pat the meat dry with paper towels until it feels tacky instead of slick.
-
Cooking by color alone: A deep golden crust is useful, but it does not tell you when the center is done. Use an instant-read thermometer and pull the chicken at 160°F to 162°F.
-
Slicing too soon: Juice runs onto the board instead of staying in the meat, so every slice looks dry even if the cooking was fine. Rest the chicken for 5 to 10 minutes before cutting.
-
Using a cold, weak skillet: If the pan is only lukewarm, the chicken releases moisture before the crust sets. Let the skillet heat for a couple of minutes and wait for the oil to shimmer before adding the meat.
-
Overcrowding the pan: Two chicken breasts crammed into a small skillet trap steam between them. Use a 12-inch pan for four breasts, or cook in batches if yours is smaller.
Variations and Swaps
Lemon-Herb Cutlets
Swap the smoked paprika for 1 tablespoon chopped fresh herbs—parsley, dill, and thyme are the trio I reach for most often—and add the lemon zest right into the seasoning mix. This version tastes lighter and cleaner, which is nice when you’re serving the chicken over salad or simple rice.
Smoky Cajun Skillet Chicken
Replace the oregano and cayenne with 2 teaspoons Cajun seasoning and add a pinch of extra garlic powder. The chicken gets a sharper, peppery edge and works well with rice, corn, or sautéed peppers.
Garlic-Parmesan Finish
Add 2 tablespoons finely grated parmesan to the seasoning blend and finish the chicken with a spoonful of melted butter mixed with parsley. The cheese browns on the surface and gives you a salty crust that reads a little richer than the base version.
Oven-Only Shortcut
If you do not want to stand at the stove, place the seasoned chicken on a lined sheet pan and bake at 425°F for 18 to 22 minutes, depending on thickness, until it reaches 160°F in the center. You lose a little crust, but the texture stays solid if you pound the breasts evenly first.
Dairy-Free Citrus Herb
Skip the butter and finish with a drizzle of olive oil plus lemon juice. It stays bright and clean, and the lack of butter is barely noticeable once the herbs and spice blend are in place.
Make-Ahead, Storage, and Reheating
Cooked chicken breast stores well if you handle it with a little care. Once it cools, get it into an airtight container within 2 hours; that’s the safe window for food on the counter. In the fridge, it keeps for 3 to 4 days. If you want to freeze it, wrap the breasts tightly or slice them first and store them in a freezer bag for up to 2 months.
Whole pieces stay juicier than slices during storage, so if you know you’ll be reheating later, leave the chicken whole until you’re ready to serve. Sliced leftovers are fine too, but they dry faster when they reheat. I usually store one or two breasts whole and slice the rest for lunches.
For reheating, the oven is the most forgiving. Put the chicken in a baking dish with 1 to 2 tablespoons of water or chicken broth, cover it loosely with foil, and warm it at 300°F until it reaches 165°F in the center. That usually takes 10 to 15 minutes for refrigerated breasts, a little longer if they’re thick.
The skillet method works too. Warm a small amount of oil or butter over medium-low heat, add the chicken, and cover the pan for a few minutes so the steam keeps the meat from drying out. Microwaving is the least charming option, but if that’s what you have, slice the chicken first, cover it with a damp paper towel, and reheat in short bursts so the edges do not turn leathery.
You can also season the raw chicken ahead of time and keep it covered in the fridge for up to 24 hours before cooking. That one small step makes weeknight cooking feel easier because you only have to sear and bake when dinner time shows up.
Questions Home Cooks Ask About Chicken Breast
Can I use thin-sliced chicken breasts instead of full breasts?
Yes, and they cook even faster. Thin-sliced breasts usually need only 2 to 3 minutes per side in the skillet and maybe 4 to 5 minutes in the oven, depending on thickness. Watch the thermometer closely because thin cutlets go from done to overdone in a hurry.
Do I really need to pound the chicken?
You do if the breasts are thick or uneven. Pounding is the simplest way to stop the skinny end from drying out while the thick end catches up, and it only takes a minute or two. If your chicken is already very even, you can skip it.
What if I do not have an oven-safe skillet?
Sear the chicken in any skillet, then move it to a lined sheet pan to finish in the oven. The pan switch is not a problem as long as you keep the same temperature and do not overcook the meat while moving it around.
Can I make this without the oven and cook it entirely on the stove?
Yes, though you need a lower flame after the sear. Cover the skillet and reduce the heat so the chicken cooks through gently; otherwise the crust burns before the center is ready. An instant-read thermometer matters even more in the stovetop-only version.
What internal temperature should I pull the chicken at?
For the juiciest result, pull it at 160°F to 162°F and rest it for several minutes. The USDA safe target for poultry is 165°F, and carryover heat usually closes that gap while the meat rests.
Can I use chicken thighs with this seasoning?
Absolutely. Boneless skinless thighs handle a little more heat and stay juicy even if you miss the timing by a minute or two. They also like the smoked paprika and garlic powder mix, so the seasoning does not need to change much.
How do I keep leftovers from tasting dry the next day?
Store them whole if possible, reheat gently, and do not blast them in the microwave for two straight minutes. A splash of broth, a covered dish, and a lower oven temperature keep the texture far better than aggressive heat.
The Chicken Dinner I’d Reach for First
There’s nothing flashy about a well-cooked chicken breast, and that is exactly why this one works so well. It shows up fast, tastes seasoned all the way through, and behaves like it wants dinner to go smoothly instead of turning into a little kitchen argument.
The next time you pull chicken from the fridge and need it to be dinner without a lot of drama, this is the move I’d trust first. Keep the thickness even, respect the thermometer, and let the chicken rest before you slice it. That’s the whole trick, and it pays off every single time.
Juicy Seasoned Chicken Breast for Weeknight Dinners — Recipe Card

Recipe Name: Juicy Seasoned Chicken Breast for Weeknight Dinners
Description: Boneless chicken breasts are pounded to an even thickness, coated in a smoky garlic-herb seasoning, seared, and finished in the oven for a tender center and browned crust. A short rest and a lemon-butter finish keep the meat juicy and bright.
Prep Time: 15 minutes
Cook Time: 15 minutes
Total Time: 30 minutes, plus 5 to 10 minutes resting
Course: Main Course
Cuisine: American
Servings: 4 servings
Calories: About 260 kcal per serving
Ingredients
For the Chicken
- 4 boneless, skinless chicken breasts, 6 to 8 ounces each
- 2 tablespoons olive oil, divided
- 1 1/2 teaspoons kosher salt
- 1 teaspoon packed light brown sugar
- 1 teaspoon smoked paprika
- 1 teaspoon garlic powder
- 1 teaspoon onion powder
- 1 teaspoon dried oregano
- 1/2 teaspoon freshly ground black pepper
- 1/4 teaspoon cayenne pepper, optional
- 1 tablespoon unsalted butter
- 1 tablespoon lemon juice
- 1 tablespoon chopped fresh parsley, plus more for serving
- Lemon wedges, for serving
Instructions
- Preheat the oven to 425°F (220°C) and position a rack in the center.
- Pound the chicken breasts to an even 1/2 to 3/4 inch thickness and pat them dry.
- Mix the salt, brown sugar, paprika, garlic powder, onion powder, oregano, black pepper, and cayenne in a small bowl.
- Rub the chicken with 1 tablespoon olive oil, then coat both sides with the seasoning.
- Heat the remaining 1 tablespoon olive oil in an oven-safe skillet over medium-high heat.
- Sear the chicken for 3 to 4 minutes on the first side, then 2 minutes on the second side.
- Transfer the skillet to the oven and roast for 6 to 8 minutes, until the thickest part reaches 160°F to 162°F.
- Remove the chicken, add the butter and lemon juice, and let it rest for 5 to 10 minutes.
- Sprinkle with parsley and serve with lemon wedges.
Notes: Pull the chicken a little before 165°F so carryover heat can finish the job. If your skillet is not oven-safe, move the chicken to a lined sheet pan to finish roasting.