
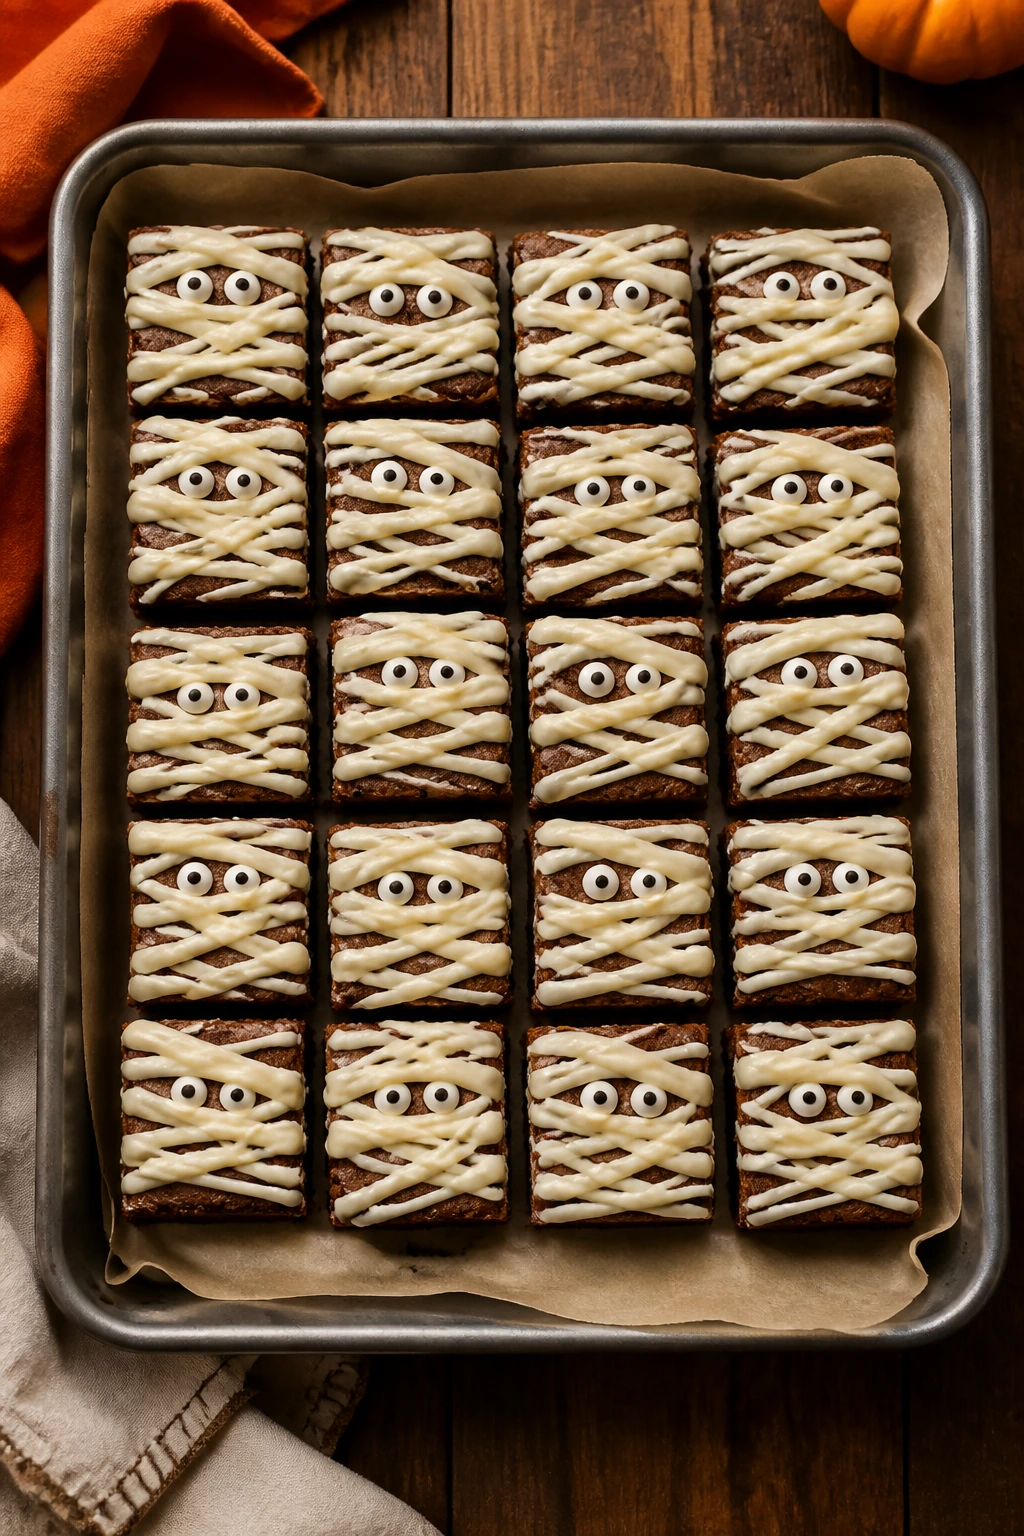
A good Halloween Brownie Mummies Recipe should look a little messy on purpose.
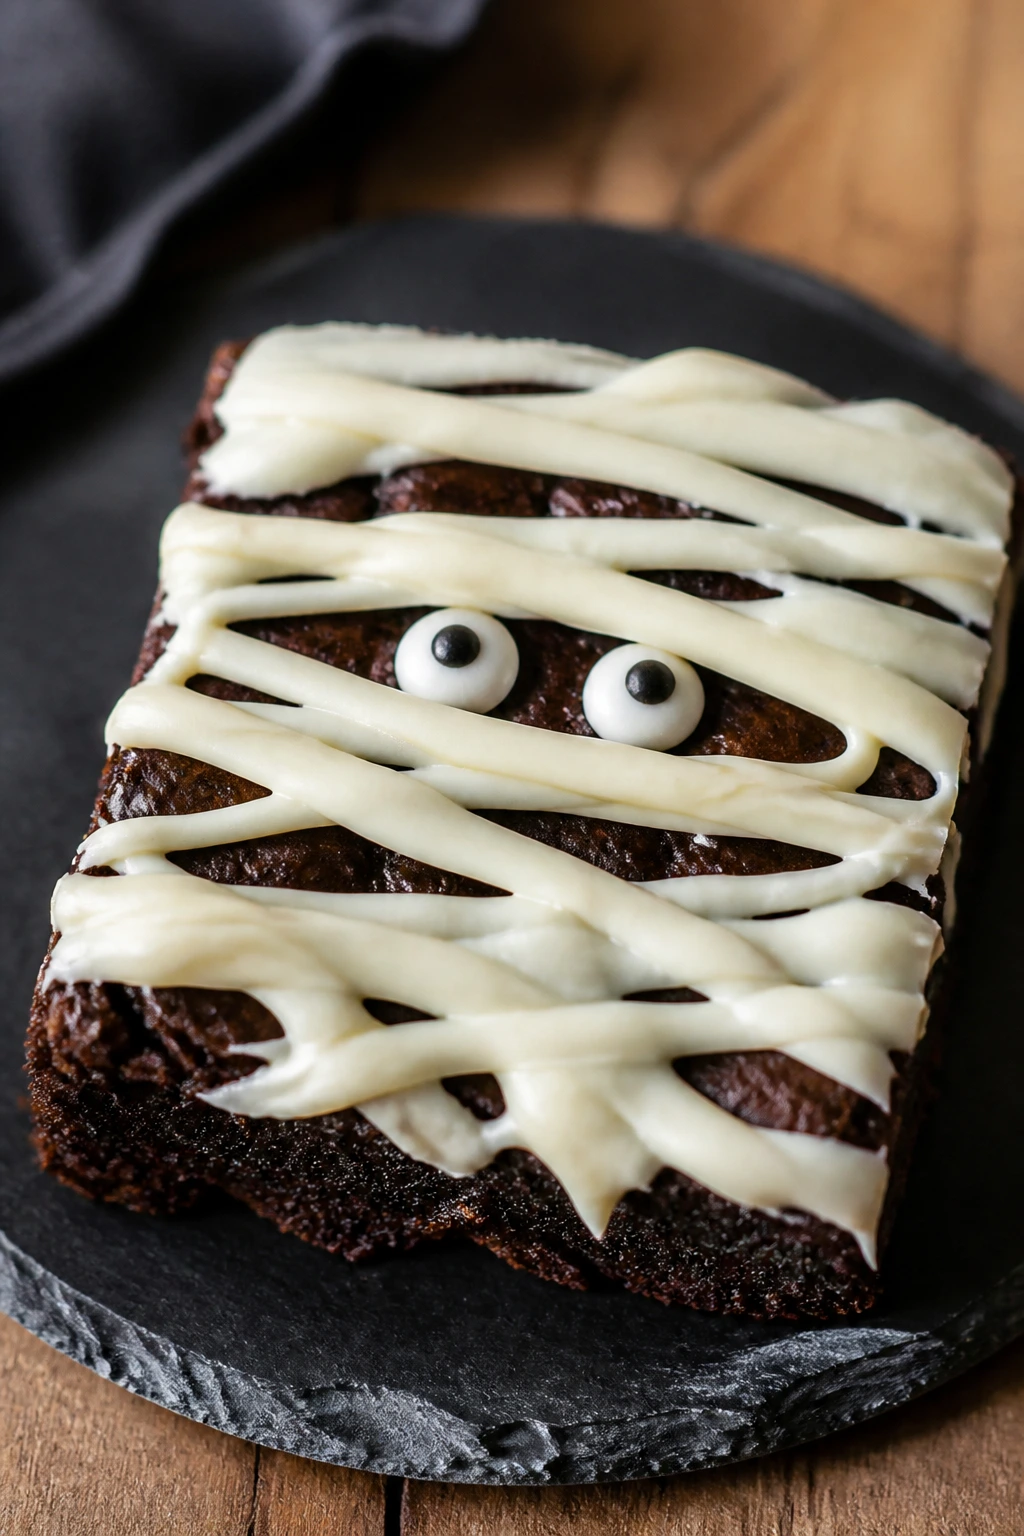
That’s the whole charm. The dark, fudgy brownie underneath gives you that deep cocoa flavor and a dense chew, then the white chocolate bandages swoop across the top in loose, uneven lines so the little candy eyes can peek through like they’re plotting something. If the drizzle looks too neat, it stops reading as a mummy and starts looking like a brownie wearing frosting. Different thing entirely.
What makes these worth making is the contrast. The brownie needs to be rich enough to stand up to the sweet coating, but not so cakey that it turns dry after baking. The white chocolate needs to be soft enough to pipe, but not so warm that it melts into a pale puddle and erases the face you just built. That balance sounds fussy. It isn’t, once you know the few places where the batter can go sideways.
And here’s the part I like most: these brownies still taste like real brownies after the Halloween costume comes off. No gimmicky filling, no candy overload, no sugar-bomb frosting mountain. Just a dark, glossy slab cut into tidy rectangles, dressed up for the table, and gone before the tray has time to warm up.
Why You’ll Keep Making These Brownie Mummies
-
Fudgy first, cute second: The brownie base is dense and chocolatey enough to matter on its own, so the decoration doesn’t feel like a mask hiding a mediocre dessert.
-
The decoration is forgiving: White chocolate bandages are supposed to look uneven, which is a relief if you’re not the sort of person who pipes roses for fun.
-
They slice into tidy party pieces: A 9×13-inch pan gives you clean rectangles that stack well, travel well, and fit on a buffet without crumbling into a sad corner.
-
The eyes do half the work: Candy eyes turn a simple drizzle into something people notice from across the room. Tiny detail, big payoff.
-
They hold up better than frosted cupcakes: Once the coating sets, the mummies stay put at room temperature instead of slumping into a soft frosting mess.
-
You can make the brownie slab ahead: Bake the base one day, decorate the next, and suddenly the whole thing feels calmer. Good desserts should give you that little mercy.
Timing, Yield, and the Best Moment to Decorate
Yield: 24 brownie mummies
Prep Time: 25 minutes
Cook Time: 30 minutes
Total Time: 1 hour 55 minutes, including cooling and decorating set time
Difficulty: Intermediate — the batter is straightforward, but clean slicing and neat drizzle lines take a bit of patience.
Chill/Rest Time: About 1 hour 10 minutes total for cooling before slicing and decorating
Best Served: Once the white chocolate has set, at room temperature
That cooling time is not fluff. It’s the difference between a brownie slab that cuts into neat mummy bars and one that drags, tears, and swallows the candy eyes before they’ve had a chance to show off. If your kitchen runs warm, give the slab a short stint in the fridge before slicing. Not forever. Just enough to firm the edges.
What Goes Into the Pan and the Bandages
For the Brownie Base:
- 1 cup (226 g) unsalted butter, cut into pieces
- 8 oz (226 g) semisweet chocolate, chopped
- 1 1/2 cups (300 g) granulated sugar
- 1/2 cup (100 g) packed light brown sugar
- 4 large eggs, room temperature
- 2 teaspoons pure vanilla extract
- 1 teaspoon espresso powder, optional
- 1 cup (125 g) all-purpose flour
- 3/4 cup (75 g) unsweetened cocoa powder
- 1 teaspoon fine sea salt
For the Mummy Finish:
- 12 oz (340 g) white chocolate melting wafers or white candy melts
- 1 to 2 teaspoons neutral oil, only if needed to thin the drizzle
- 48 candy eyes
That’s the whole cast. Short list, but each ingredient earns a job.
Why Each Ingredient Matters in This Brownie Mummies Recipe

Chocolate, Butter, and Cocoa: The Dark Backbone
What to use: 1 cup unsalted butter, 8 oz semisweet chocolate, and 3/4 cup unsweetened cocoa powder.
Preparation: Chop the chocolate so it melts evenly, and cut the butter into pieces so it softens in the pan without scorching the edges.
Substitutions: Bittersweet chocolate works if you want a darker, less sweet base. Dutch-process cocoa also works, though I prefer natural unsweetened cocoa here because it gives the brownies a slightly sharper chocolate bite.
Tips: Melt the butter and chocolate gently. A low flame or short microwave bursts is enough. If the mixture gets too hot, the brownies can taste a little flat, and you lose that glossy finish on top.
Sugar, Eggs, Vanilla, and Flour: The Structure Crew
What to use: 1 1/2 cups granulated sugar, 1/2 cup packed light brown sugar, 4 large eggs, 2 teaspoons vanilla, 1 cup flour, and 1 teaspoon fine sea salt.
Preparation: Let the eggs sit at room temperature if you can. They whisk into the sugar more smoothly and help the batter turn thick and shiny before the flour goes in.
Substitutions: Dark brown sugar makes the brownies a touch more molasses-rich. If you’re out of vanilla, skip it before you reach for imitation stuff that tastes like an old bakery shelf.
Tips: Brown sugar brings chew and a little moisture. The flour amount stays modest on purpose. You want the crumb to hold together for decorating, but you do not want a cake.
White Chocolate or Candy Melts: The Bandage Layer
What to use: 12 oz white chocolate melting wafers or white candy melts, plus 1 to 2 teaspoons neutral oil only if the mixture needs loosening.
Preparation: Melt in short bursts and stir often. White chocolate is fussy about heat, and candy melts can turn thick in a hurry if you rush them.
Substitutions: White candy melts are the easiest option for piping. White chocolate chips work too, but they usually need a little oil to become pipeable instead of clumpy.
Tips: You’re aiming for a drizzle that ribbons off a spoon, not a pour that runs across the brownie and buries the chocolate beneath it. Thick coating looks heavy. Thin lines look like bandages.
Candy Eyes and the Small Finishing Details
What to use: 48 candy eyes, which gives each brownie two eyes with a few spare pieces in case one goes rogue.
Preparation: Pull them out before you start decorating so you can place them while the white chocolate is still tacky.
Substitutions: If candy eyes are missing from the store shelf, tiny dots of melted dark chocolate or mini chocolate chips can stand in. They won’t look as playful, but they still read as a face.
Tips: Eyes stick best when the drizzle is still soft, usually within 30 to 60 seconds. If the coating has already set, dot on a tiny dab of melted chocolate as glue and press the eye into it.
The Tools That Make the Job Easier
- 9×13-inch metal baking pan — Metal heats evenly and gives the brownies crisp edges, which matters when you’re cutting neat mummy rectangles.
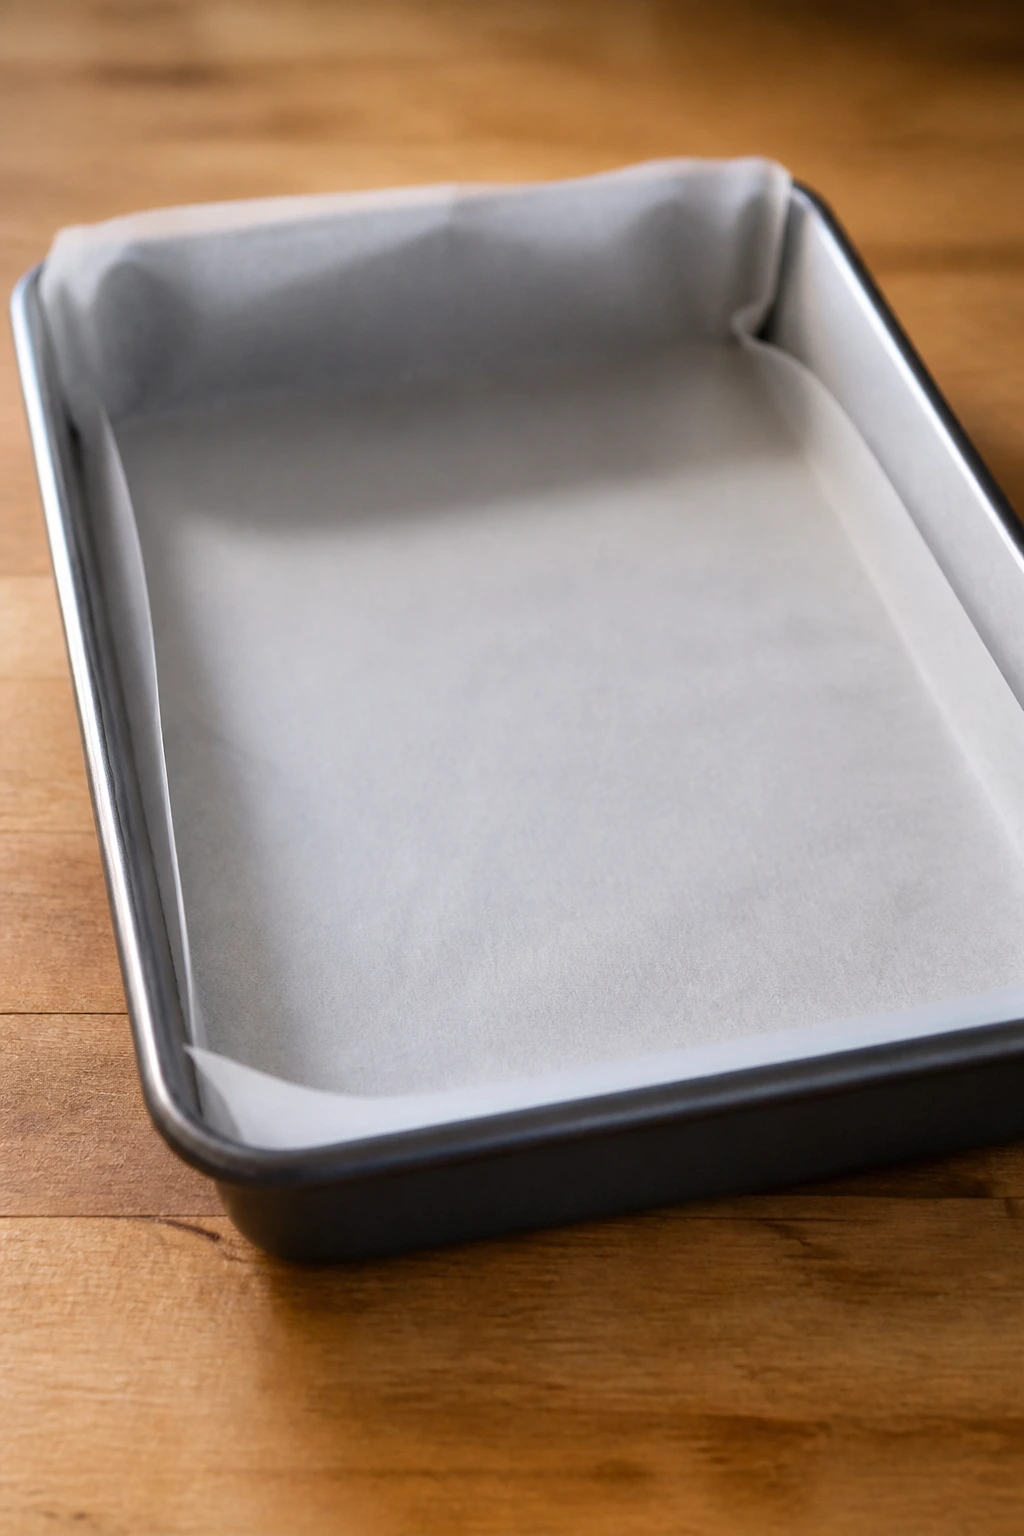
- Parchment paper — Leave overhang on the long sides so you can lift the brownie slab out cleanly.
- Medium saucepan or microwave-safe bowl — Either one works for melting butter and chocolate, as long as you keep the heat low.
- Large mixing bowl — You need room to whisk the eggs and sugar until the batter turns glossy.
- Whisk and rubber spatula — The whisk gives you that shiny top; the spatula keeps you from overmixing once the flour goes in.
- Offset spatula or small spoon — Useful for spreading the batter into the corners without jabbing the pan.
- Sharp chef’s knife or long serrated knife — A clean blade makes a cleaner cut, especially after the brownie slab chills.
- Cooling rack — Lets air move under the pan so the brownies cool instead of steaming themselves soft.
- Piping bag or zip-top bag — Either one works for the white chocolate bandages; snip the tiniest corner you can manage.
- Small microwave-safe bowl — Handy for melting the white chocolate in short bursts without risking the main batter bowl.
Mixing, Baking, and Cooling the Brownie Slab
Make the Brownie Batter
-
Preheat the oven and prepare the pan. Set the oven to 350°F (177°C) and line a 9×13-inch metal baking pan with parchment paper, leaving a 2-inch overhang on the long sides. Grease the exposed sides lightly. Do not skip the parchment sling if you want the slab to lift out in one piece.
-
Melt the butter and chocolate together. Combine the butter and chopped semisweet chocolate in a medium saucepan over low heat, stirring often, or melt them in the microwave in 20-second bursts at 50% power. Stop when the mixture is smooth and glossy, then let it sit for 5 minutes so it cools slightly.
-
Whisk the sugars, eggs, vanilla, and salt. In a large bowl, whisk together the granulated sugar, brown sugar, eggs, vanilla, espresso powder if you’re using it, and sea salt for 1 to 2 minutes, until the mixture thickens and looks pale brown and shiny. That shine matters. It’s the beginning of that crackly brownie top.
-
Stream in the chocolate mixture. Whisk the cooled chocolate-butter mixture into the egg mixture until the batter is dark, smooth, and fully combined. Scrape the bowl as you go so no sugar pockets hide at the bottom.
-
Fold in the dry ingredients. Sift or sprinkle the flour and cocoa powder over the bowl, then fold with a rubber spatula until no dry streaks remain. Stop as soon as the batter looks uniform. Overmixing here makes the brownies cakier and drier, and that’s the wrong texture for mummy bars.
-
Spread the batter into the pan. Scrape the batter into the prepared pan and nudge it into the corners with an offset spatula. The layer should look even, with a surface that’s thick and satiny rather than loose or wet.
Bake, Cool, and Slice
-
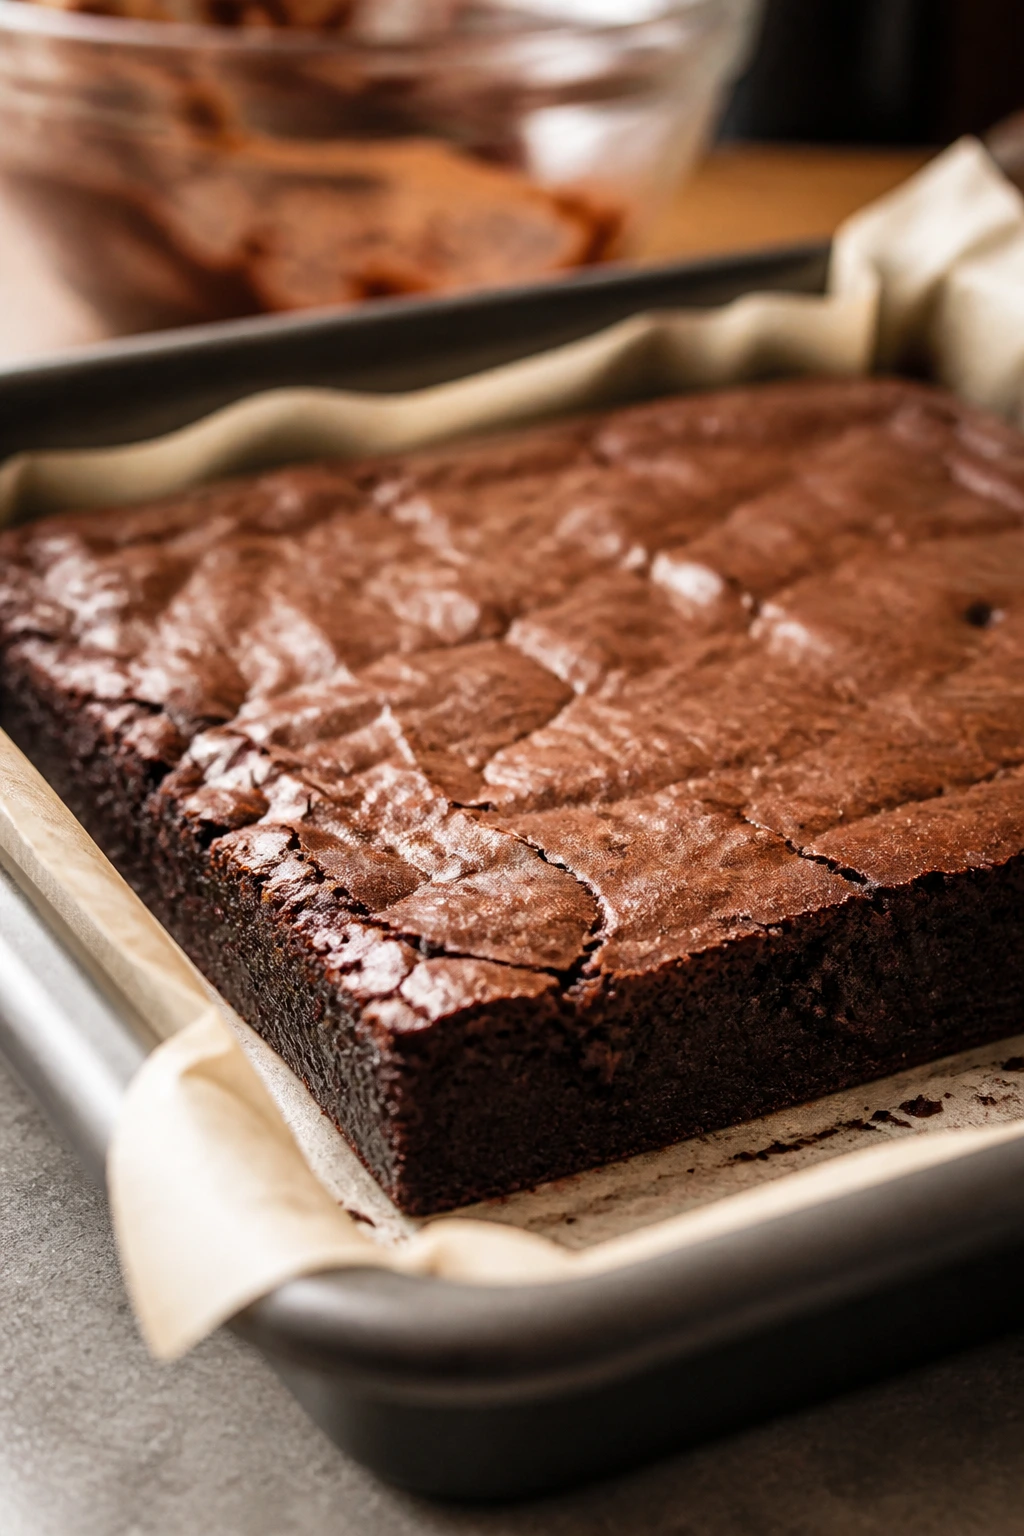
Bake until the center still has a little give. Bake for 28 to 32 minutes, rotating the pan once at the halfway mark. The edges should look set and slightly darker, while the center should still have a faint wobble. A toothpick inserted near the middle should come out with moist crumbs, not raw batter. If it comes out clean, you’ve probably gone too far.
-
Cool the brownies completely. Set the pan on a cooling rack and let the brownies cool for 1 hour in the pan. Use the parchment overhang to lift the slab onto a cutting board, then cool it another 20 to 30 minutes if the center still feels warm. If you want razor-clean cuts, chill the slab for 15 to 20 minutes before slicing.
-
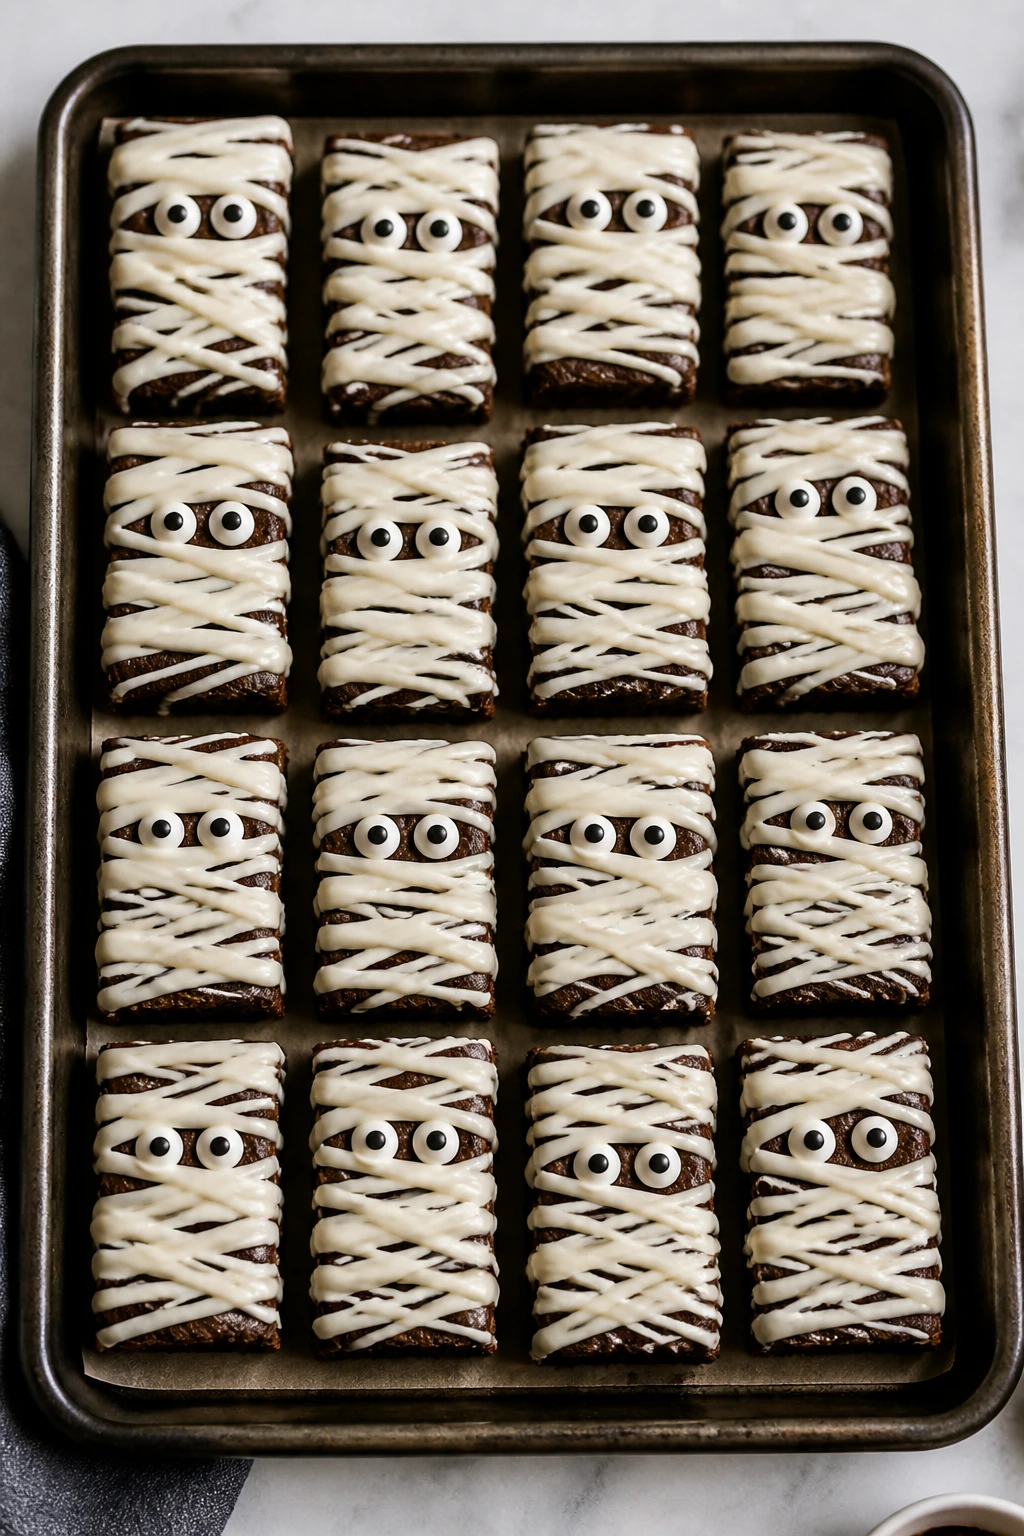
Cut into mummy bars. Slice the slab into 24 rectangles, about 4 rows by 6 rows. Wipe the knife clean between cuts if the edges start to smear. A warm knife can help, but dry it before each slice so it doesn’t leave water on the chocolate.
Wrap the Mummies
-
Melt the white chocolate or candy melts. Put the white chocolate in a small microwave-safe bowl and melt it in 15-second bursts, stirring between each round. If it feels too thick for piping, stir in 1 teaspoon neutral oil and test again. It should flow in thin ribbons.
-
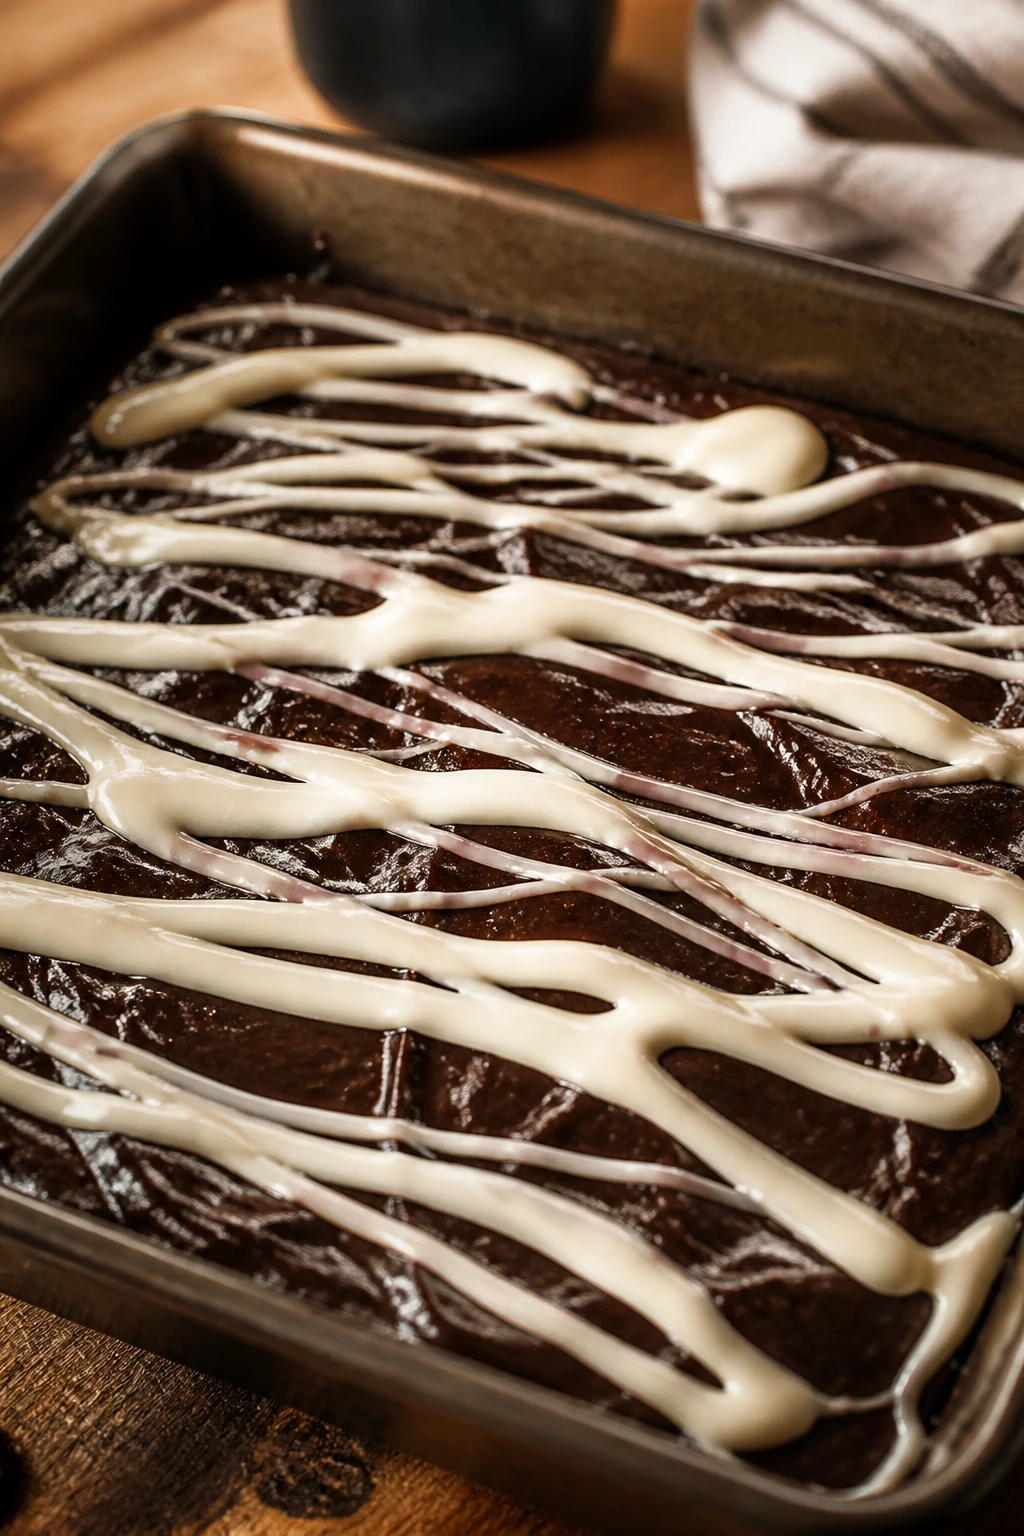
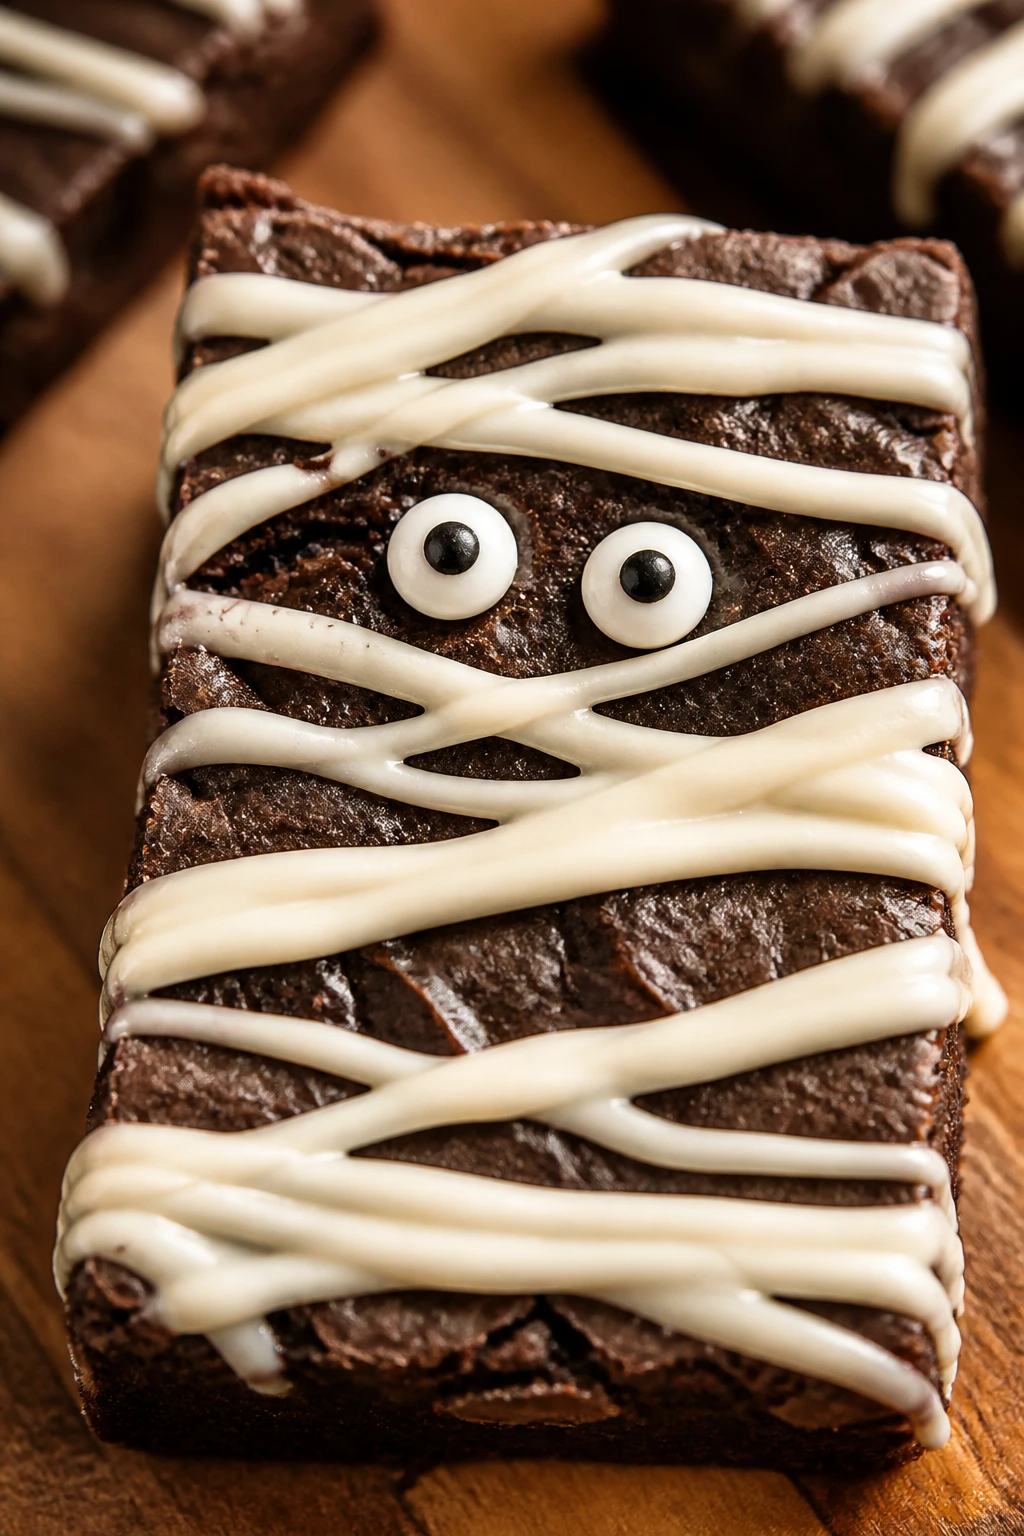
Pipe the bandages. Transfer the melted coating to a piping bag or zip-top bag, snip a tiny corner, and drizzle thin, uneven lines over each brownie rectangle. Leave dark brownie showing through on purpose. Real mummy bandages overlap and break apart; clean white stripes look too neat.
-
Add the candy eyes and let them set. Place two candy eyes on each brownie while the white chocolate is still tacky. Let the tray sit at room temperature for 15 minutes, or until the coating firms up enough that the eyes don’t slide. After that, they’re ready to serve or pack away.
How to Wrap the Brownies So They Actually Look Like Mummies
The decoration is where these brownies earn their name. If the white chocolate goes on as one thick stripe, you lose the mummy look and get a pale brownie with a face. Thin, broken lines do the job better. They leave the chocolate exposed in places, which is exactly what makes the eyes pop.
I like to pipe in short bursts, not long sweeping lines. Think bandages, not frosting ribbon. Hold the piping bag about an inch above the brownie surface and move your hand quickly enough that some lines taper and some cross over each other. That unevenness is the point. It reads as wrapped, not painted.
Cutting the brownies first makes the decorating easier than trying to carve shapes after the coating is on. A rectangle gives you a tiny canvas, which sounds less exciting than it is. Once the eyes go on, the whole thing changes shape in your head. Suddenly it’s not a brownie. It’s a character.
If the white chocolate starts to firm up in the piping bag, stop and warm it for 5 to 10 seconds. Don’t keep forcing it. Cold chocolate clogs the bag and gives you fat, clumsy lines. And fat lines are the fastest way to bury the face.
How I’d Put These on a Halloween Table
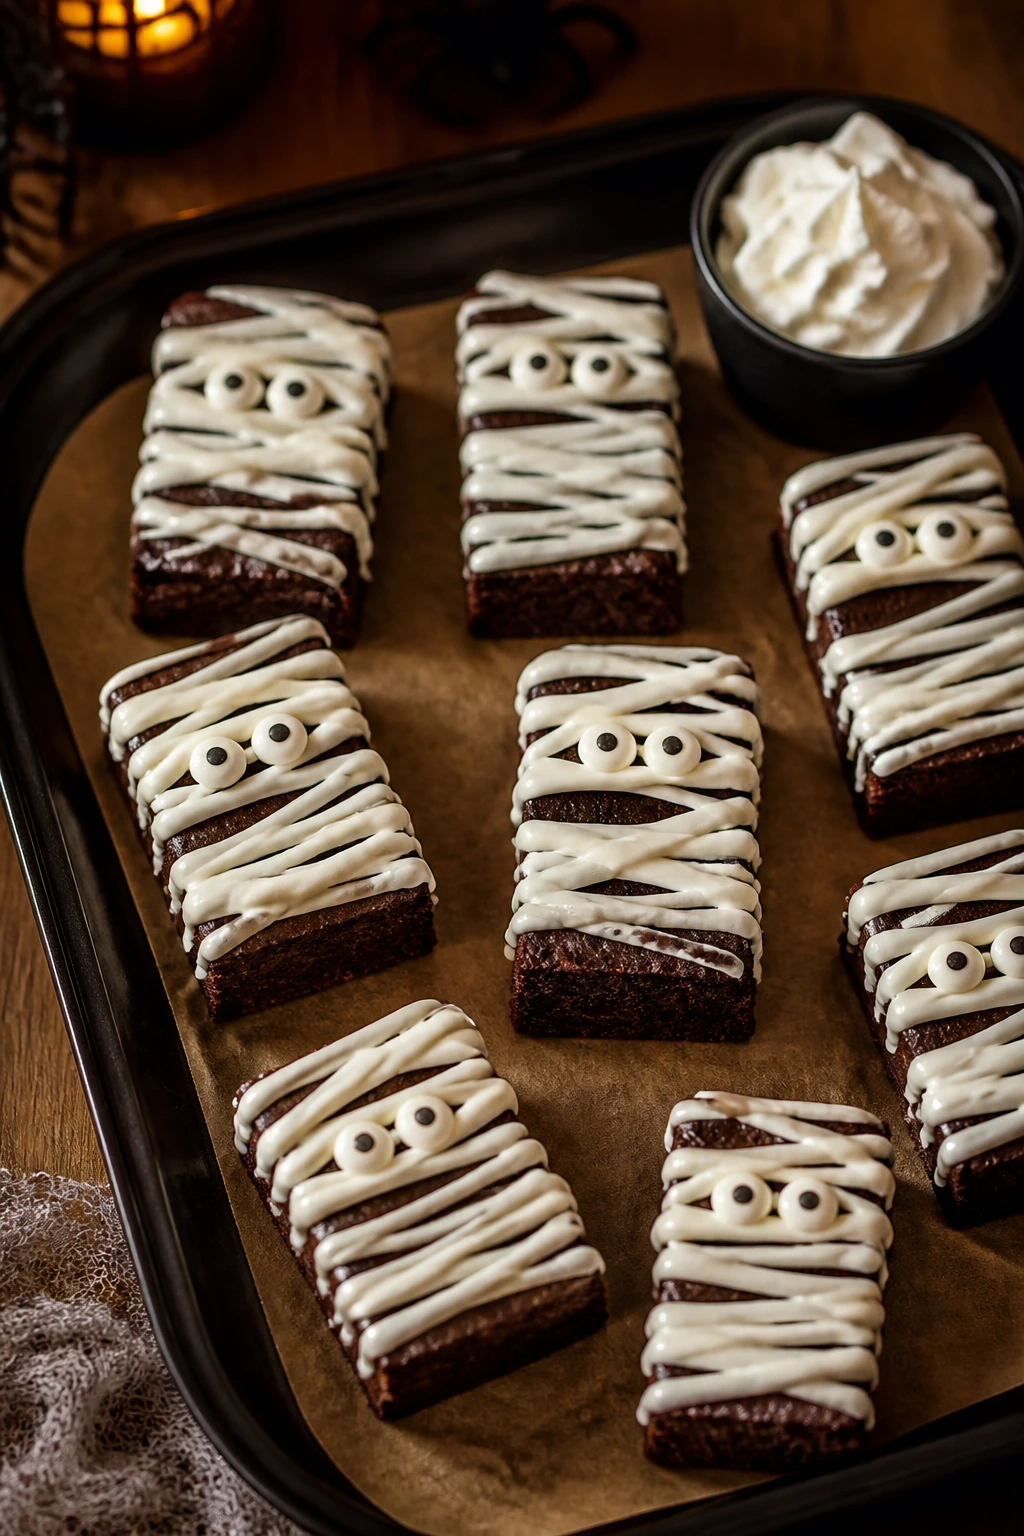
Presentation: Stack the brownie mummies on a dark platter, black slate, or parchment-lined tray so the white bandages stand out. Space them out a little. A crowded tray makes the faces harder to see, and these little guys deserve their own room.
Accompaniments: A bowl of whipped cream, a scoop of vanilla ice cream, or a small pitcher of warm chocolate sauce turns the brownies into a more dressed-up dessert. If you’re serving them at a party, set them next to salty snacks like pretzels or popcorn so the tray doesn’t read as pure sugar from edge to edge.
Portions: One rectangle is plenty after a dinner of soup, pizza, or pasta. If the mummies are part of a dessert spread, people will usually take two smaller pieces if they’re cut narrow, so you can scale the pan into 30 slimmer bars instead of 24 wider ones.
Beverage Pairing: Cold milk is the obvious partner, and it works for a reason. For adults, a bitter cup of coffee or espresso reins in the sweetness; for kids, apple cider gives the whole plate a warm fall note without fighting the chocolate.
These also sit well on a school-party tray because they don’t need forks. That is a bigger deal than it sounds. Desserts you can pick up with one hand survive real life better than desserts that need ceremony.
Small Fixes That Make a Big Difference

Flavor Enhancement: A teaspoon of espresso powder in the brownie batter deepens the chocolate without making the brownies taste like coffee. If you like a darker edge, a pinch of cinnamon works too, though I’d keep it subtle so the mummies still taste like brownies first.
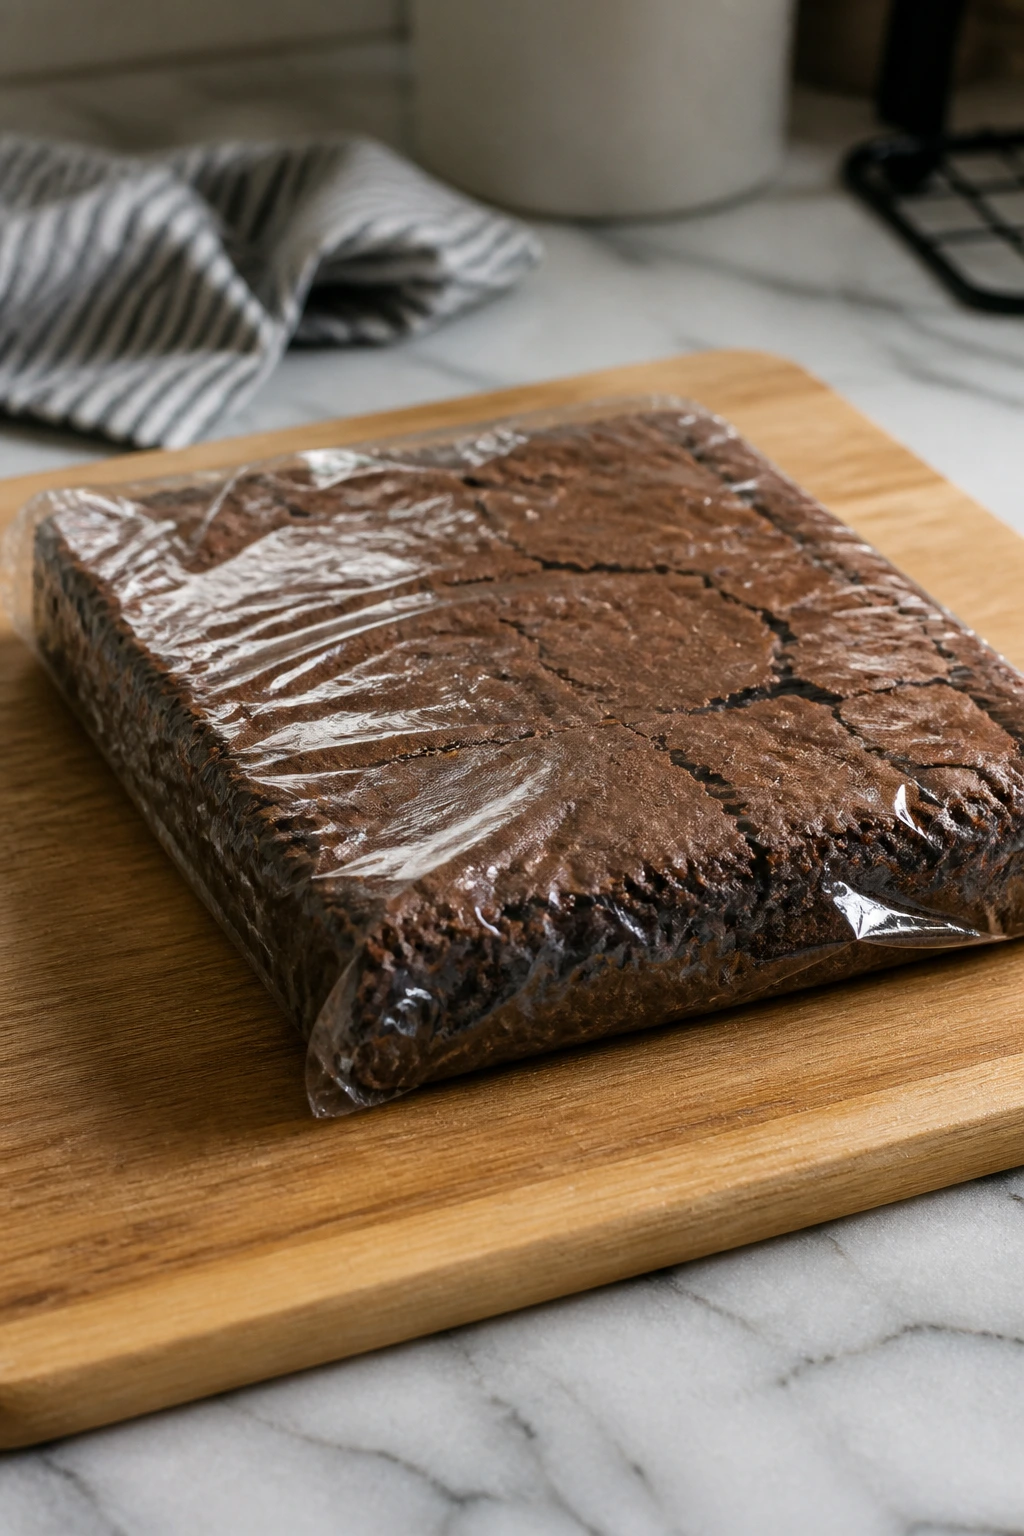
Time-Saver: Bake the brownie slab a day ahead, cool it completely, and wrap it tightly in the pan or on the cutting board. Decorate the next day when the crumb has settled. You’ll get cleaner cuts and less pressure when the tray needs to be ready by a certain hour.
Pro Move: Chill the slab for 15 to 20 minutes before slicing, then wipe the knife after every second cut. The brownies will cut into edges that look much sharper, and the mummy bandages will sit on top instead of sliding into crumbs.
Cost-Saver: White candy melts usually cost less than good white chocolate, and they pipe more cleanly. If you’re making several trays, that matters. Use the nicer chocolate where the flavor shows up most — in the brownie base — and let the coating do the visual work.
Look Boost: If you want the mummies to look a little more animated, place one eye slightly higher than the other on a few pieces. Tiny unevenness makes them look hand-made in the best possible way. Perfect symmetry feels a little stiff here.
The Mistakes That Make Brownie Mummies Look Sloppy
-
Cutting the brownies while they’re warm — The edges tear, the crumb smears, and the candy eyes never sit straight. Let the slab cool completely, and if you need extra clean cuts, chill it briefly before slicing.
-
Overbaking the pan — Dry brownies crack when you cut them and the centers lose that soft, fudgy middle. Pull the pan when the center still has moist crumbs on the toothpick and the edges look set.
-
Overheating the white chocolate — The drizzle turns grainy or stiff, then it clumps in the bag. Melt it slowly in short bursts and stir between each one; if needed, add a teaspoon of neutral oil to loosen it.
-
Piping thick white lines — The mummies lose their shape and start looking like snow-covered brownies. Keep the lines thin and broken, with dark chocolate showing through between them.
-
Adding the eyes too late — The candy eyes slide off or sit on top like they were glued on after the fact. Place them while the white chocolate is still tacky, usually right after piping.
-
Skipping the parchment sling — The brownie slab sticks in the corners and you end up prying at it with a spatula. Parchment is not a fussy extra here. It’s the reason the finished pieces come out in one piece.
Flavor Swaps and Costume Changes
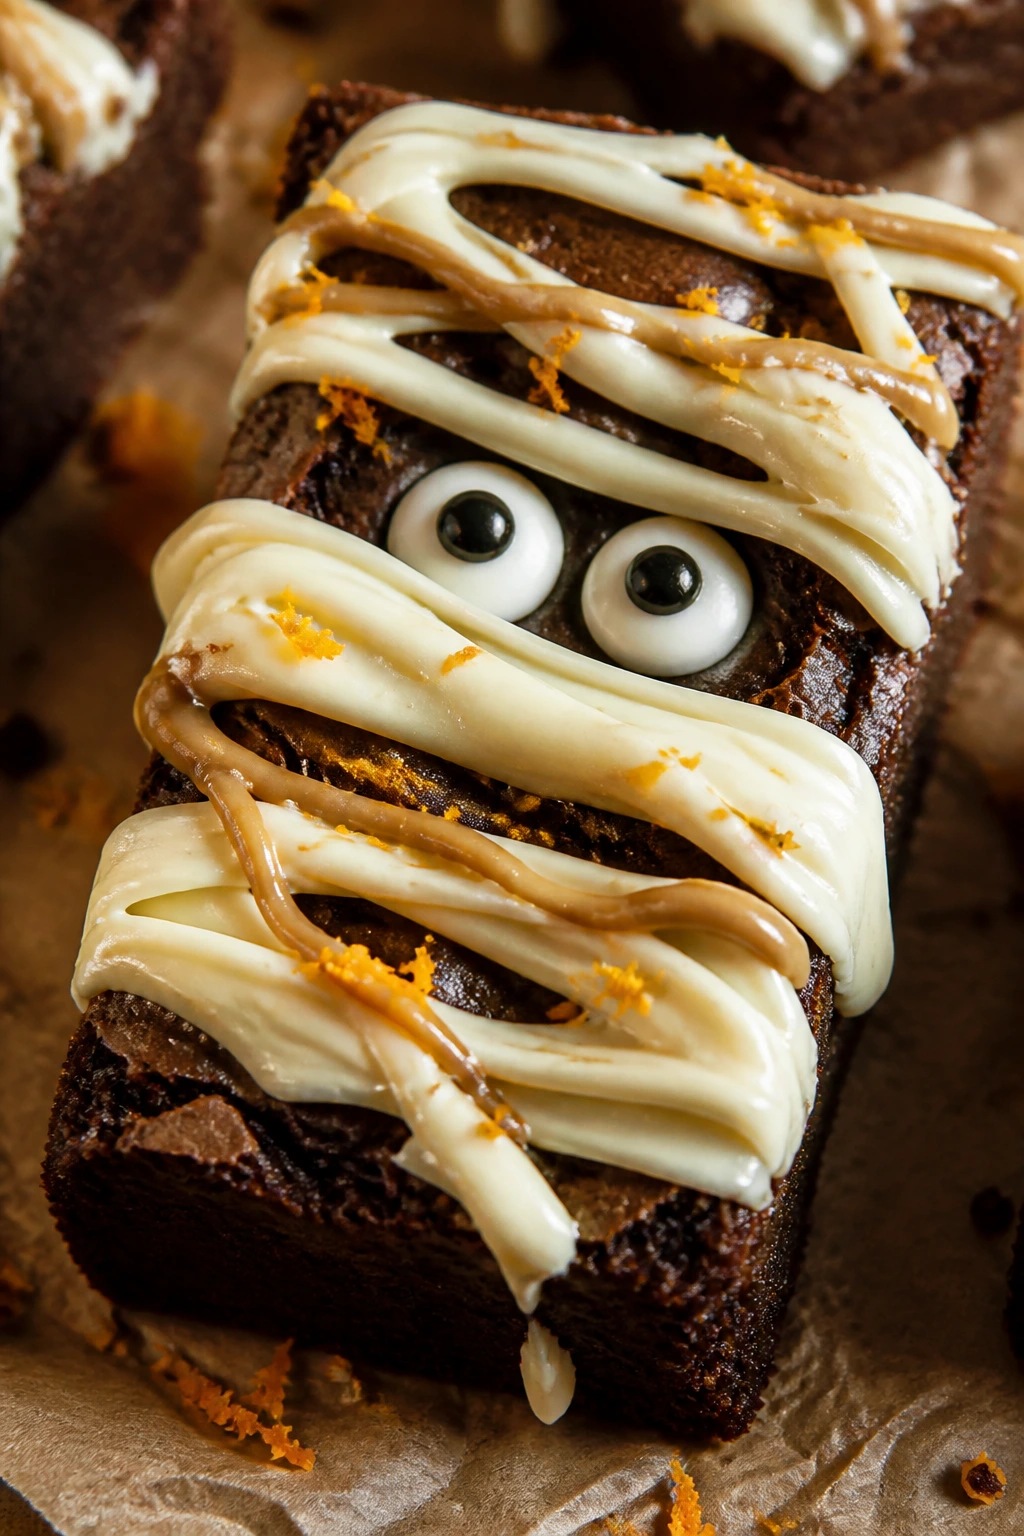
Peanut Butter Patch Mummies: Fold 3/4 cup peanut butter chips into the brownie batter before baking, or drizzle a few thin lines of warmed peanut butter under the white chocolate bandages. The salty, nutty note rounds off the sweetness and gives the brownies a thicker, more old-school candy-bar feel.
Orange-Zest Trick-or-Treat Mummies: Stir 2 teaspoons finely grated orange zest into the batter and use orange sprinkles sparingly around the tray. Orange and chocolate is a classic pairing for a reason, and the citrus cuts the richness in a way that feels bright rather than sharp.
Gluten-Free Graveyard Bars: Replace the all-purpose flour with 1 cup plus 2 tablespoons of a 1:1 gluten-free baking blend. Bake the pan and start checking a couple of minutes early, because some gluten-free blends set faster around the edges.
Dairy-Free Dark Night Mummies: Use dairy-free butter and dairy-free semisweet chocolate in the batter, then decorate with dairy-free white candy melts. The result still looks festive, and the chocolate flavor stays deep enough that nobody at the table feels shortchanged.
Mini Mummy Bites: Bake the batter in a greased mini muffin tin for 10 to 12 minutes instead of using a 9×13 pan. Pipe bandages across the domed tops and stick on tiny eyes. These are neat, bite-sized, and easier to serve when you want fewer crumbs on the floor.
Storing, Freezing, and Decorating Ahead of Time
The brownies keep best when the decoration is treated as a finishing step, not a built-in part of the bake. If you want the most flexibility, bake the slab plain, cool it completely, and store it wrapped well before you decorate. That way the brownie stays fudgy and the white chocolate stays bright.
Room temperature: Undecorated brownies keep for 2 days in an airtight container at room temperature. Decorated brownies keep for about 2 to 3 days if your kitchen is cool and dry. Put parchment between layers if you stack them, though one layer is cleaner and safer for the candy eyes.
Fridge: Decorated mummies can be refrigerated for up to 5 days, but the white chocolate may pick up a little condensation when you bring them back out. Seal them tightly, let them sit in the closed container until they lose the chill, and only then open the lid. That helps prevent sweaty bandages.
Freezer: Freeze the undecorated brownie slab or the cut brownie bars for up to 2 months. Wrap tightly in plastic, then foil, then slide into a freezer bag. Thaw overnight in the refrigerator before decorating. You can freeze decorated pieces, but the eyes and white coating are less pretty after thawing, so I only do that if I have no choice.
Make-ahead plan: Bake the brownie slab one day ahead and leave it undecorated. The next day, cut, pipe, and set the mummies in about 20 minutes. If you’re making these for a party, that two-stage plan keeps the actual decorating calm instead of rushed.
Halloween Brownie Mummies Questions
Can I use a boxed brownie mix instead of making the batter from scratch?
Yes. Use a fudgy brownie mix, bake it in the same 9×13-inch pan, and cool it fully before cutting. The decoration works the same way, though the flavor is less deep than the homemade version with melted chocolate and cocoa.
What kind of white chocolate works best for the bandages?
White candy melts are the easiest because they melt smoothly and pipe cleanly. Good white chocolate also tastes better, but it can be a little fussier and may need a teaspoon of neutral oil to get to the same drizzle consistency.
How do I keep the candy eyes from sliding off?
Add them while the white chocolate is still tacky, right after piping. If the drizzle has already set, use a tiny dab of melted chocolate as glue and press each eye into place for a second.
Can I make these the day before a party?
Yes, and that’s one of the nicer things about this recipe. Bake the brownies ahead, decorate them once they’re cool, and store them airtight at room temperature if the room is cool. If the space runs warm, refrigerate them and let them come back to room temperature before serving.
What if my brownies turn out too soft to cut cleanly?
Chill the slab for 15 to 20 minutes and use a long knife wiped clean between cuts. If they’re still too soft, they probably needed a couple more minutes in the oven, but a brief chill usually fixes the mess well enough for decorating.
Can I freeze brownie mummies after they’re decorated?
You can, but the candy eyes may dull or collect condensation after thawing. I prefer freezing the undecorated slab, then adding the bandages and eyes after it comes back to room temperature.
What if the white chocolate seizes or turns grainy?
It usually got too hot or a drop of water got into the bowl. Start over if it’s badly seized; if it’s only a little thick, stir in a tiny bit of neutral oil and keep the heat low. White chocolate punishes impatience faster than dark chocolate does.
A Tray Worth Repeating
There’s a reason brownie mummies keep showing up on Halloween dessert tables. They look playful, but they still taste like a proper brownie — dark, soft in the middle, and rich enough that one piece feels satisfying instead of decorative fluff. That matters. A cute dessert that doesn’t taste like much is a waste of oven space.
Bake the slab once, and you’ll probably find yourself reaching for the idea again with small changes: a different drizzle, a few different eyes, maybe a sharper chocolate base if you want less sweetness. The format is sturdy. The costume can change. That’s the kind of recipe worth keeping in the file.
Decadent Halloween Brownie Mummies — Recipe Card

Recipe Name: Decadent Halloween Brownie Mummies
Description: Fudgy chocolate brownies cut into neat rectangles, drizzled with white chocolate bandages, and finished with candy eyes for a spooky Halloween dessert.
Prep Time: 25 minutes
Cook Time: 30 minutes
Total Time: 1 hour 55 minutes, including cooling and decorating set time
Course: Dessert
Cuisine: American
Servings: 24 brownie mummies
Calories: About 230 per piece
Ingredients
For the Brownie Base:
- 1 cup (226 g) unsalted butter, cut into pieces
- 8 oz (226 g) semisweet chocolate, chopped
- 1 1/2 cups (300 g) granulated sugar
- 1/2 cup (100 g) packed light brown sugar
- 4 large eggs, room temperature
- 2 teaspoons pure vanilla extract
- 1 teaspoon espresso powder, optional
- 1 cup (125 g) all-purpose flour
- 3/4 cup (75 g) unsweetened cocoa powder
- 1 teaspoon fine sea salt
For the Mummy Finish:
- 12 oz (340 g) white chocolate melting wafers or white candy melts
- 1 to 2 teaspoons neutral oil, only if needed to thin the drizzle
- 48 candy eyes
Instructions
- Preheat the oven to 350°F (177°C) and line a 9×13-inch metal baking pan with parchment paper, leaving overhang on the long sides. Grease the exposed sides lightly.
- Melt the butter and chopped semisweet chocolate together over low heat or in the microwave in short bursts. Cool for 5 minutes.
- Whisk the granulated sugar, brown sugar, eggs, vanilla, espresso powder if using, and salt in a large bowl until thick and glossy.
- Whisk in the melted chocolate mixture until smooth.
- Fold in the flour and cocoa powder until no dry streaks remain. Spread the batter evenly in the pan.
- Bake for 28 to 32 minutes, until the edges are set and the center has moist crumbs on a toothpick. Cool completely, then cut into 24 rectangles.
- Melt the white chocolate or candy melts, thinning with neutral oil only if needed. Pipe thin bandages over each brownie and press on the candy eyes while the drizzle is still tacky.
- Let the brownies sit until the coating sets, about 15 minutes, then serve.
Notes: White candy melts are the easiest decorating option. For the cleanest cuts, chill the cooled brownie slab for 15 to 20 minutes before slicing.