
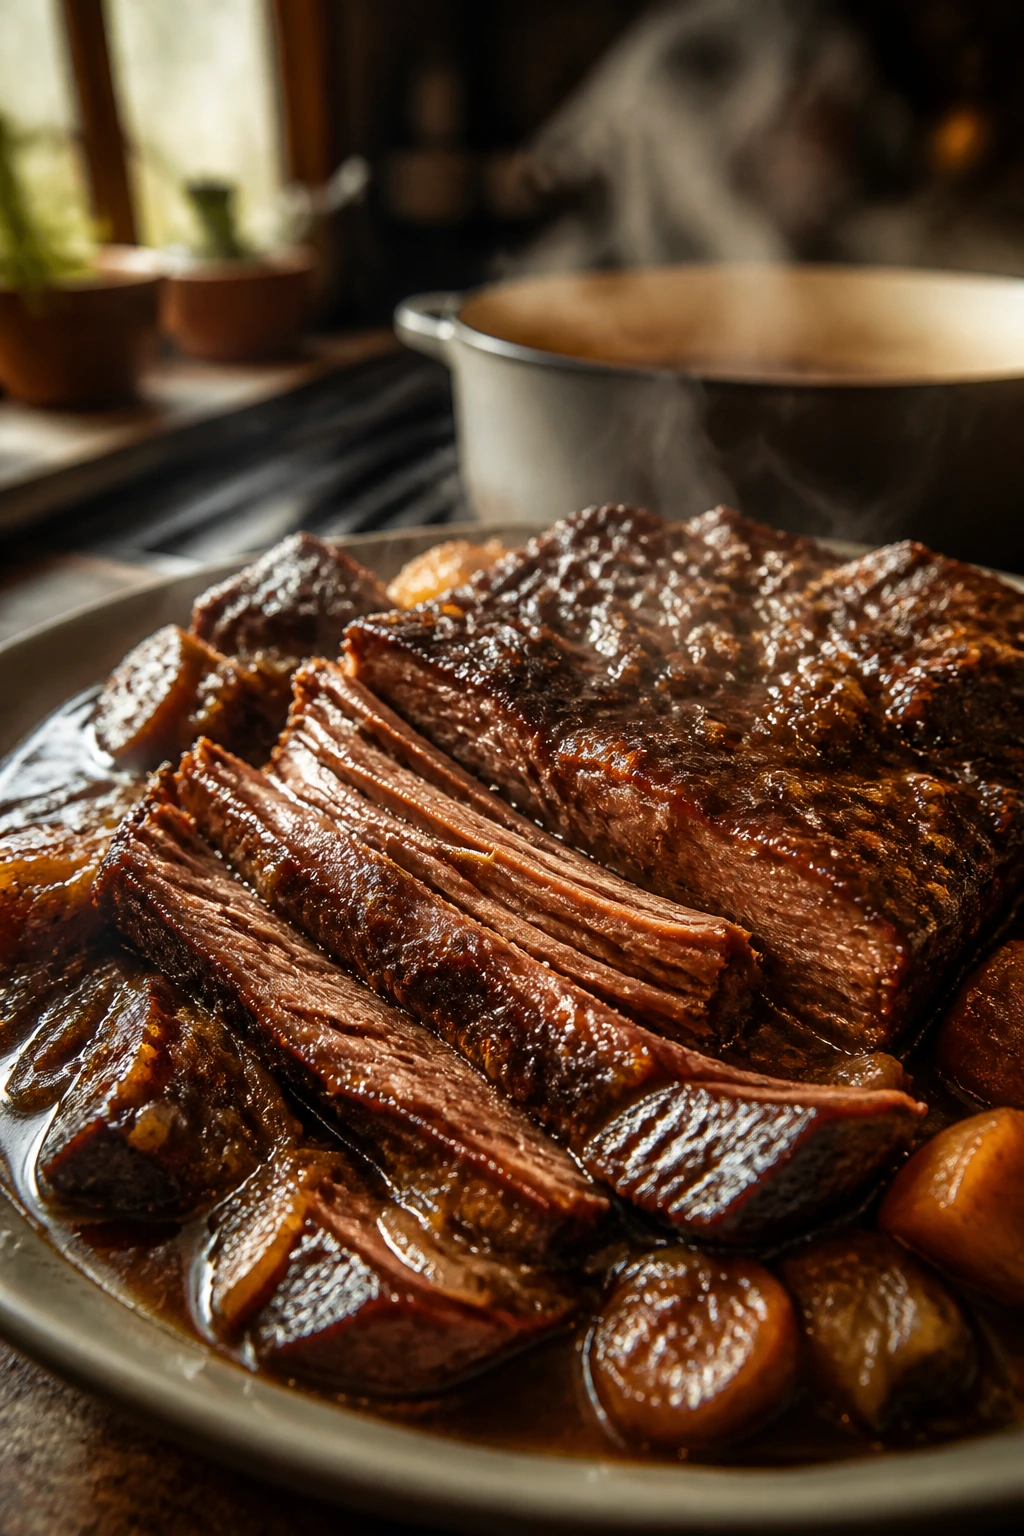
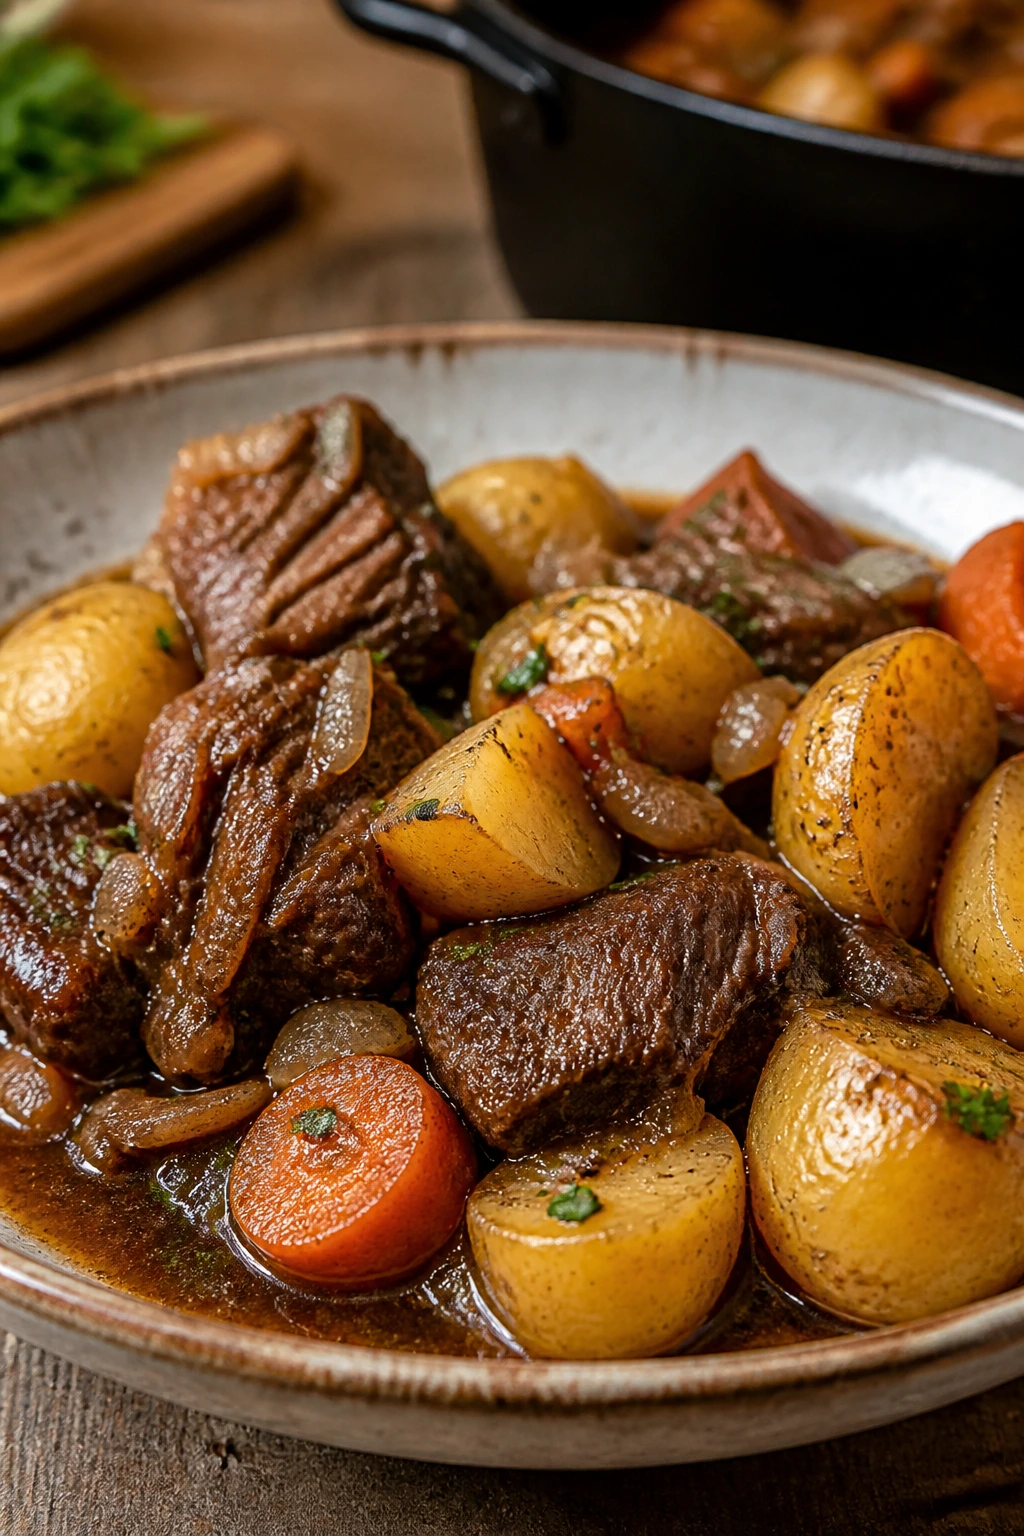
Tender beef and potatoes for a hearty dinner is one of those meals that smells like patience. The onions soften first, then the beef browns and leaves those dark little sticky bits in the pot, and by the time the broth starts to simmer around the edges, you already know you’re in good hands. This is the kind of dinner that doesn’t rush itself. It earns its tenderness.
The trick is not fancy. It’s a chuck roast, a Dutch oven, and enough time for collagen to relax into something silky instead of stubborn. Potatoes join later, which matters more than most people think. Add them too early and they go chalky or collapse; add them at the right moment and they soak up the beefy broth without turning to paste. Yukon Golds are my first pick here because they hold shape and still give you that soft, almost buttery bite.
There’s a lot of comfort in a pot like this, but comfort is the wrong word if it makes the dish sound lazy. It’s not lazy at all. It’s deliberate, and that’s why it works. The beef gets seared, the vegetables build depth, and the liquid spends a long, gentle afternoon turning into something you’ll want to swipe with bread. That’s the part worth paying attention to.
Why Tender Beef and Potatoes Deserve the Low-And-Slow Treatment
- Chuck roast beats lean beef here: the marbling and connective tissue in chuck turn into tenderness after a long braise, while lean cuts usually dry out or stay stringy.
- Potatoes added halfway stay intact: Yukon Gold chunks hold their shape better than russets, so you get soft edges and a clean bite instead of mashed potato soup.
- A Dutch oven does half the work: the heavy lid traps steam, keeps the heat even, and helps the beef cook through without the liquid boiling itself away.
- The sauce gets its own personality: browning the beef and cooking the tomato paste for a minute gives the broth a deeper, darker flavor that plain simmering never quite reaches.
- Leftovers taste even better: after a night in the fridge, the broth tightens and the seasoning settles in, which makes the next bowl taste more complete.
Timing, Yield, and the Sweet Spot for Serving
Yield: Serves 6
Prep Time: 25 minutes
Cook Time: 2 hours 45 minutes
Total Time: 3 hours 10 minutes
Difficulty: Intermediate — the steps are simple, but browning, timing, and heat control matter.
Best Served: Hot, after a 10-minute rest
Rest Time: 10 minutes before serving
A pot like this rewards a little patience. If your oven runs cool, give it an extra 10 to 15 minutes near the end and check the beef with a fork rather than the clock.
The Ingredient List for a Deep, Beefy Pot
For the Beef and Vegetables:
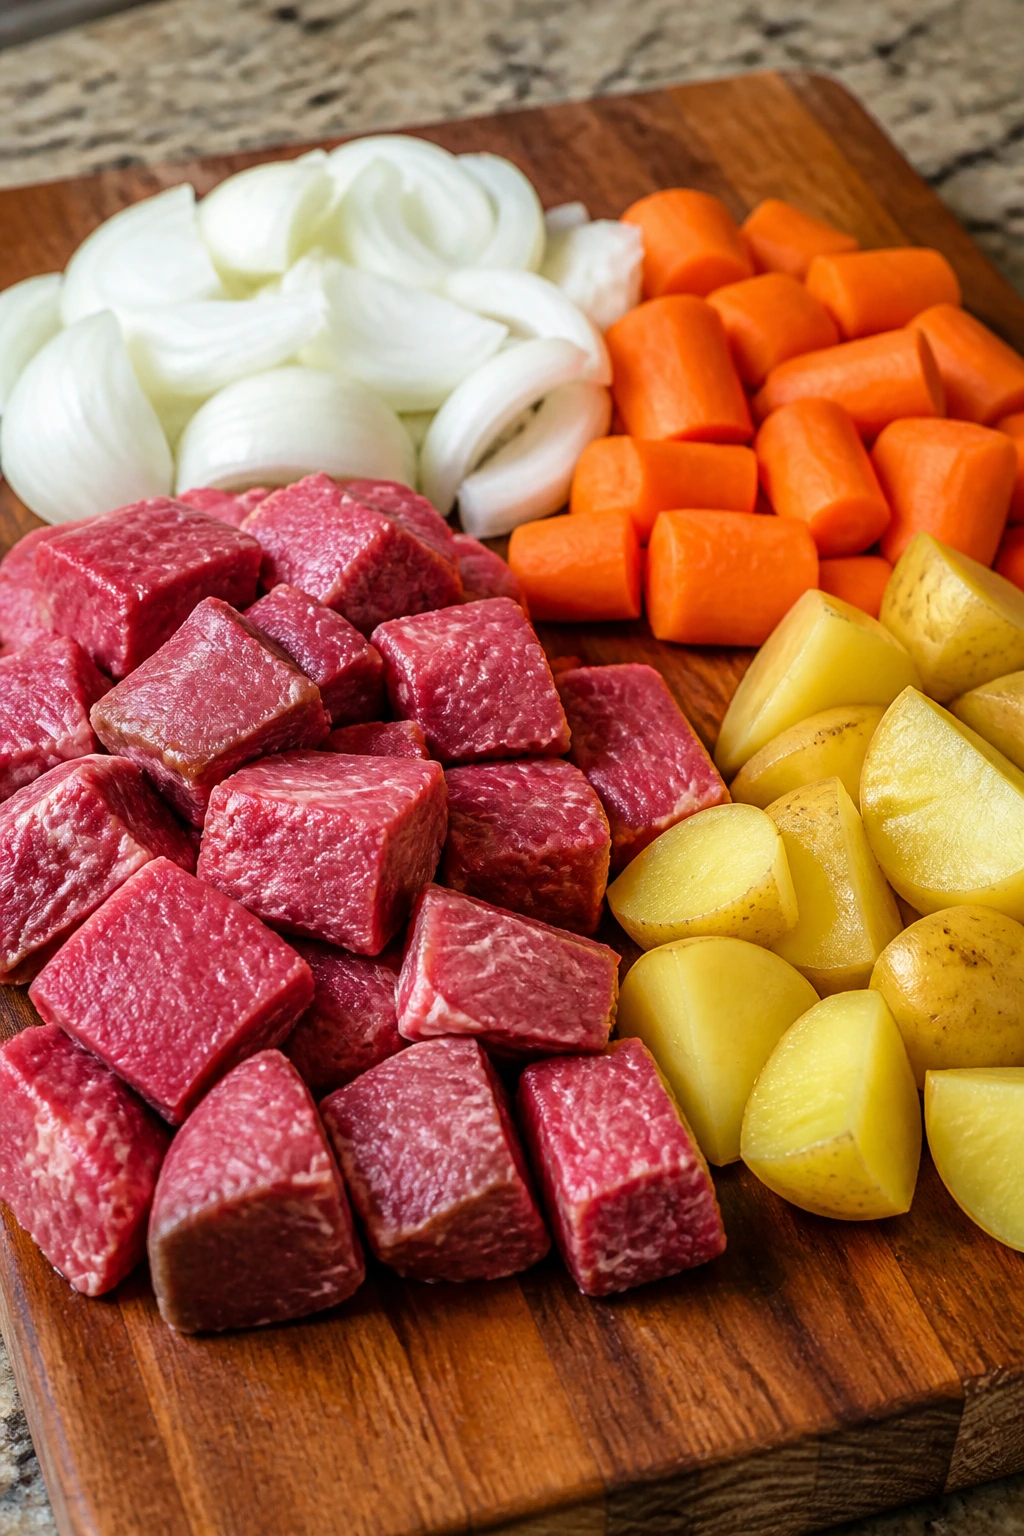
- 3 lb beef chuck roast, trimmed and cut into 1½-inch cubes
- 2 teaspoons kosher salt
- 1 teaspoon black pepper
- 3 tablespoons all-purpose flour, divided
- 2 tablespoons olive oil
- 1 large yellow onion, sliced into thick half-moons
- 3 medium carrots, cut into 1-inch chunks
- 4 cloves garlic, minced
For the Braising Liquid:
- 2 tablespoons tomato paste
- 3 cups low-sodium beef broth
- 1 tablespoon Worcestershire sauce
- 1 teaspoon dried thyme
- 2 bay leaves
For the Potatoes and Finish:
- 1½ lb Yukon Gold potatoes, cut into 1½-inch chunks
- 1 tablespoon unsalted butter
- 2 tablespoons chopped fresh parsley
Why Each Ingredient Matters in the Pot
Beef Chuck Roast
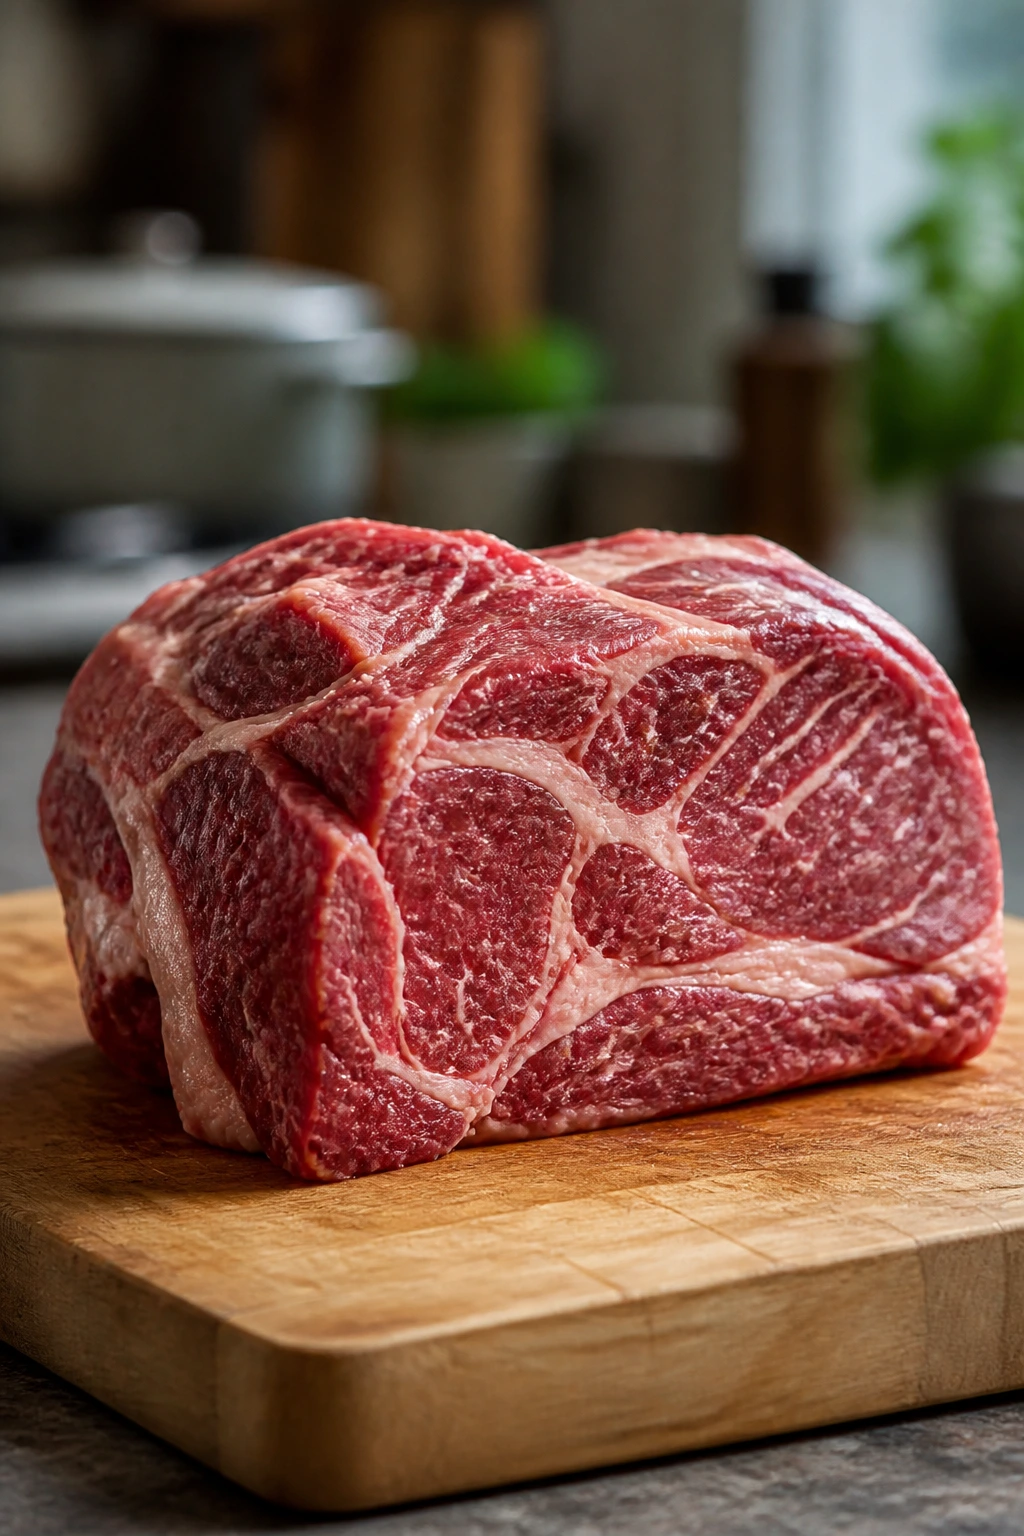
What to use: 3 pounds of beef chuck roast, cut into 1½-inch cubes, with some fat still attached.
Preparation: Pat it dry before seasoning; damp beef steams, and steamed beef refuses to brown properly.
Substitutions: Blade roast works well, and boneless short ribs give an even richer result if you don’t mind the cost.
Tips: Choose beef with visible marbling rather than the neatest-looking package in the case. The ugly-looking pieces often braise better.
Chuck is the right cut because it has enough connective tissue to soften instead of drying out. That’s the whole game. You’re not trying to keep it lean; you’re trying to make it surrender.
Yukon Gold Potatoes
What to use: 1½ pounds of Yukon Gold potatoes, cut into chunky 1½-inch pieces.
Preparation: Leave the skins on if they’re clean; the thin skin holds the cubes together and gives the pot a little texture.
Substitutions: Red potatoes are a fine backup if you want firmer pieces, while russets will break down more and thicken the broth.
Tips: Keep the potato chunks roughly the same size so they finish at the same time. If some are tiny and some are huge, the small ones will fall apart before the big ones are done.
Onion, Carrots, and Garlic
What to use: 1 large yellow onion, 3 medium carrots, and 4 cloves garlic.
Preparation: Slice the onion thick so it melts into the broth instead of disappearing; cut carrots into pieces that are big enough to survive the braise.
Substitutions: Shallots can replace part of the onion if you want a softer flavor, and parsnips are a nice swap for one carrot when you want a slightly sweeter edge.
Tips: Let the onion cook until the edges turn golden, not just translucent. That small color change matters more than people admit.
Broth, Tomato Paste, and Worcestershire
What to use: 3 cups low-sodium beef broth, 2 tablespoons tomato paste, and 1 tablespoon Worcestershire sauce.
Preparation: Stir the tomato paste into the vegetables and let it cook for a minute before adding liquid; that short step deepens the flavor.
Substitutions: If you’re out of Worcestershire, soy sauce can fill in the savory gap, though the flavor will tilt a little darker and saltier.
Tips: Use low-sodium broth so you can season at the end without boxing yourself in. A salty broth can make the whole pot taste blunt.
Thyme, Bay Leaves, Butter, and Parsley
What to use: 1 teaspoon dried thyme, 2 bay leaves, 1 tablespoon butter, and 2 tablespoons chopped parsley.
Preparation: Tie the bay leaves in only if you’re worried about fishing them out later; otherwise, just count them and remove them at the end.
Substitutions: Rosemary works if you like a piney note, but use less of it because it can take over.
Tips: Butter at the end smooths the broth and makes the sauce feel fuller. Parsley is not decoration here; it freshens the last bite.
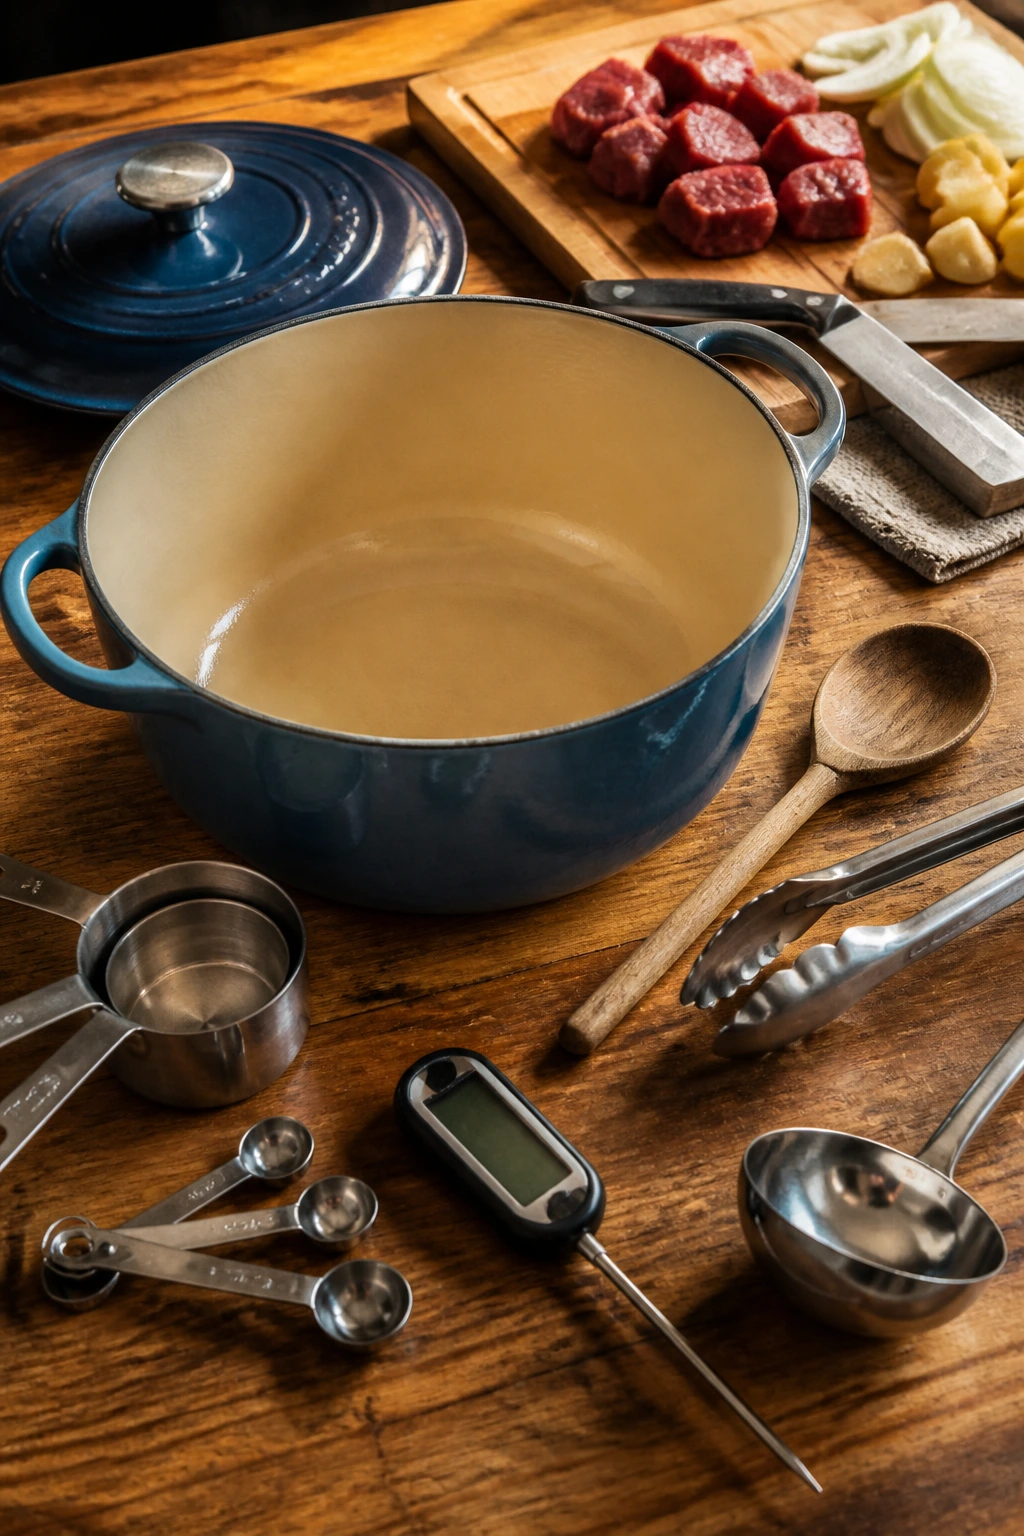
The Dutch Oven and Tools That Make the Job Easier
- 5½- to 7-quart Dutch oven with a tight lid: The heavy pot holds steady heat and gives you the best braise texture.
- Tongs: Useful for turning beef cubes without tearing them before they’ve browned.
- Wooden spoon or flat spatula: Better than a whisk for scraping up the fond on the bottom of the pot.
- Chef’s knife: You’ll use it for trimming the beef, slicing onions, and cutting potatoes cleanly.
- Cutting board with a damp towel underneath: Keeps the board from skittering when you’re working with raw beef and wet vegetables.
- Measuring spoons and cups: The liquid balance matters here, especially with broth and flour.
- Instant-read thermometer, optional but handy: Not required, but it can reassure you that the beef has gone past safe and into tender territory.
- Ladle or large serving spoon: Makes it easier to get beef, potatoes, and broth into bowls without digging.
Step-by-Step: Braising Beef Until It Slices with a Spoon
Prep and Brown the Beef
-
Preheat the oven to 325°F (165°C) and place a rack in the lower-middle position.
-
Pat the beef cubes dry with paper towels, then season them with the kosher salt, black pepper, and 2 tablespoons of the flour. Toss until each piece looks lightly dusted. Dry beef browns; wet beef steams.
-
Heat the olive oil in a large Dutch oven over medium-high heat until it shimmers. Add the beef in a single layer, working in 2 batches if needed. Sear each side for 3 to 4 minutes, until the surfaces are deeply browned. Transfer the beef to a plate.
Build the Braise
-
Reduce the heat to medium and add the onion and carrots to the same pot. Cook for 5 to 6 minutes, stirring often, until the onion softens and the edges start to turn golden.
-
Stir in the garlic and cook for 30 seconds until fragrant. Add the tomato paste and cook for 1 minute, stirring constantly, until it darkens slightly and coats the vegetables.
-
Sprinkle in the remaining 1 tablespoon flour and stir for 30 seconds. Pour in about ½ cup of the beef broth and scrape the bottom of the pot hard enough to loosen the browned bits. That dark paste on the bottom is where a lot of the flavor lives.
-
Add the remaining beef broth, Worcestershire sauce, thyme, and bay leaves. Return the beef and any juices to the pot. The liquid should come about halfway up the beef, not drown it.
Slow Braise and Finish
-
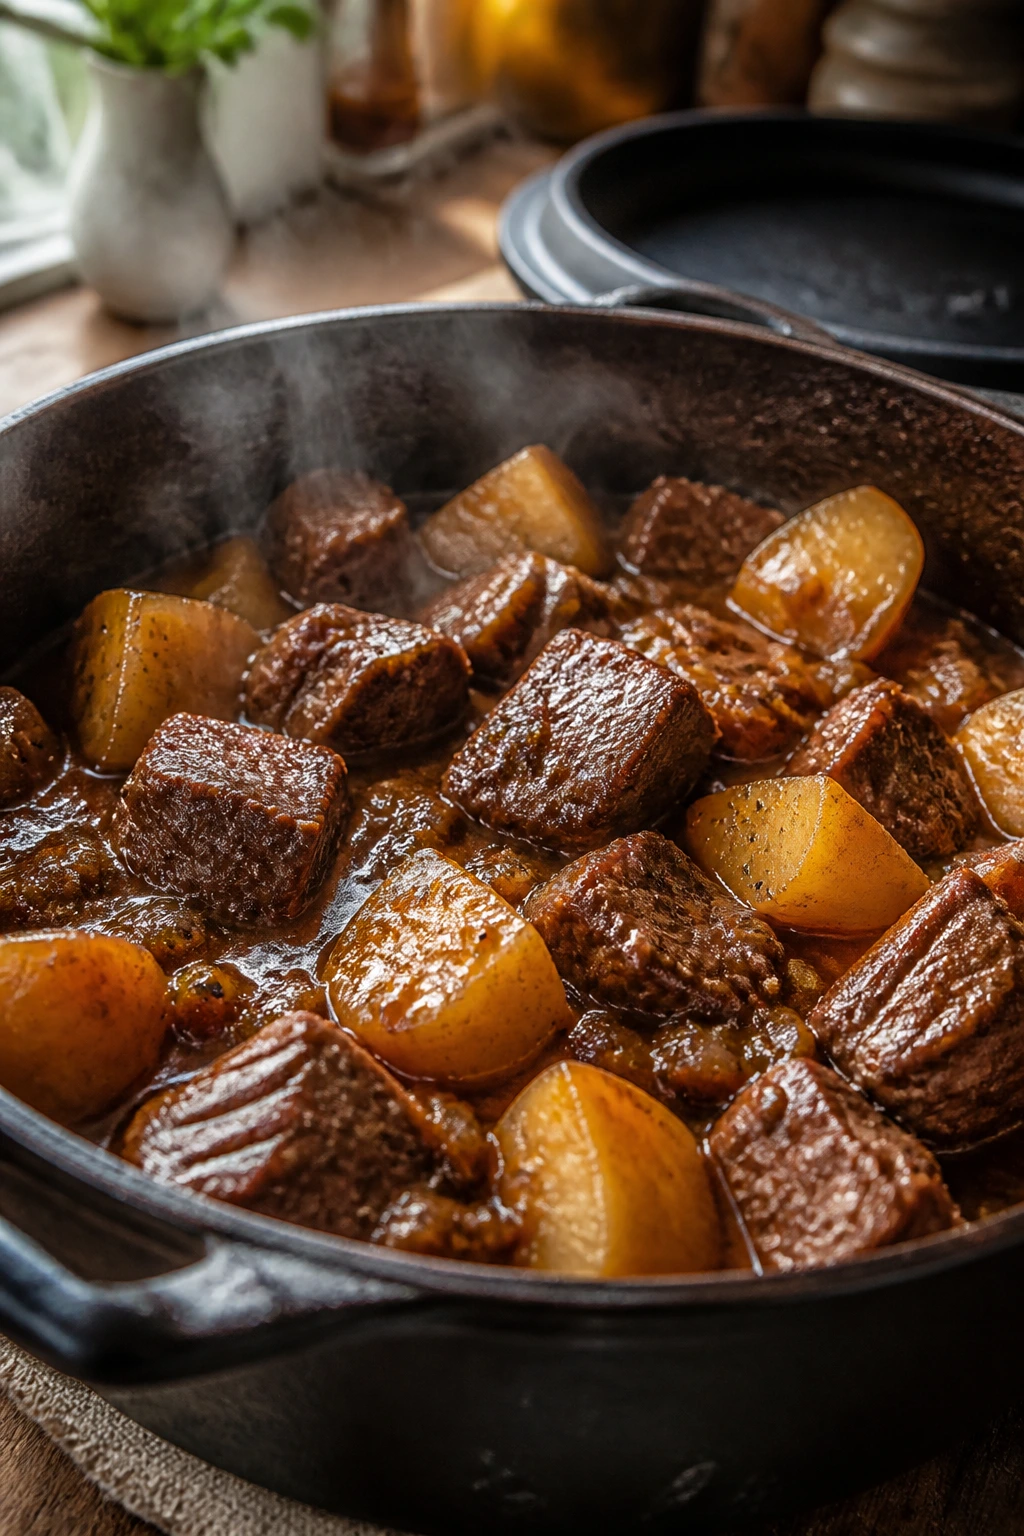
Bring the pot to a gentle simmer on the stovetop, then cover it and transfer it to the oven. Braise for 1 hour 45 minutes. The beef should look darker, the broth should be bubbling lazily around the edges, and the meat should be starting to give when nudged with a fork.
-
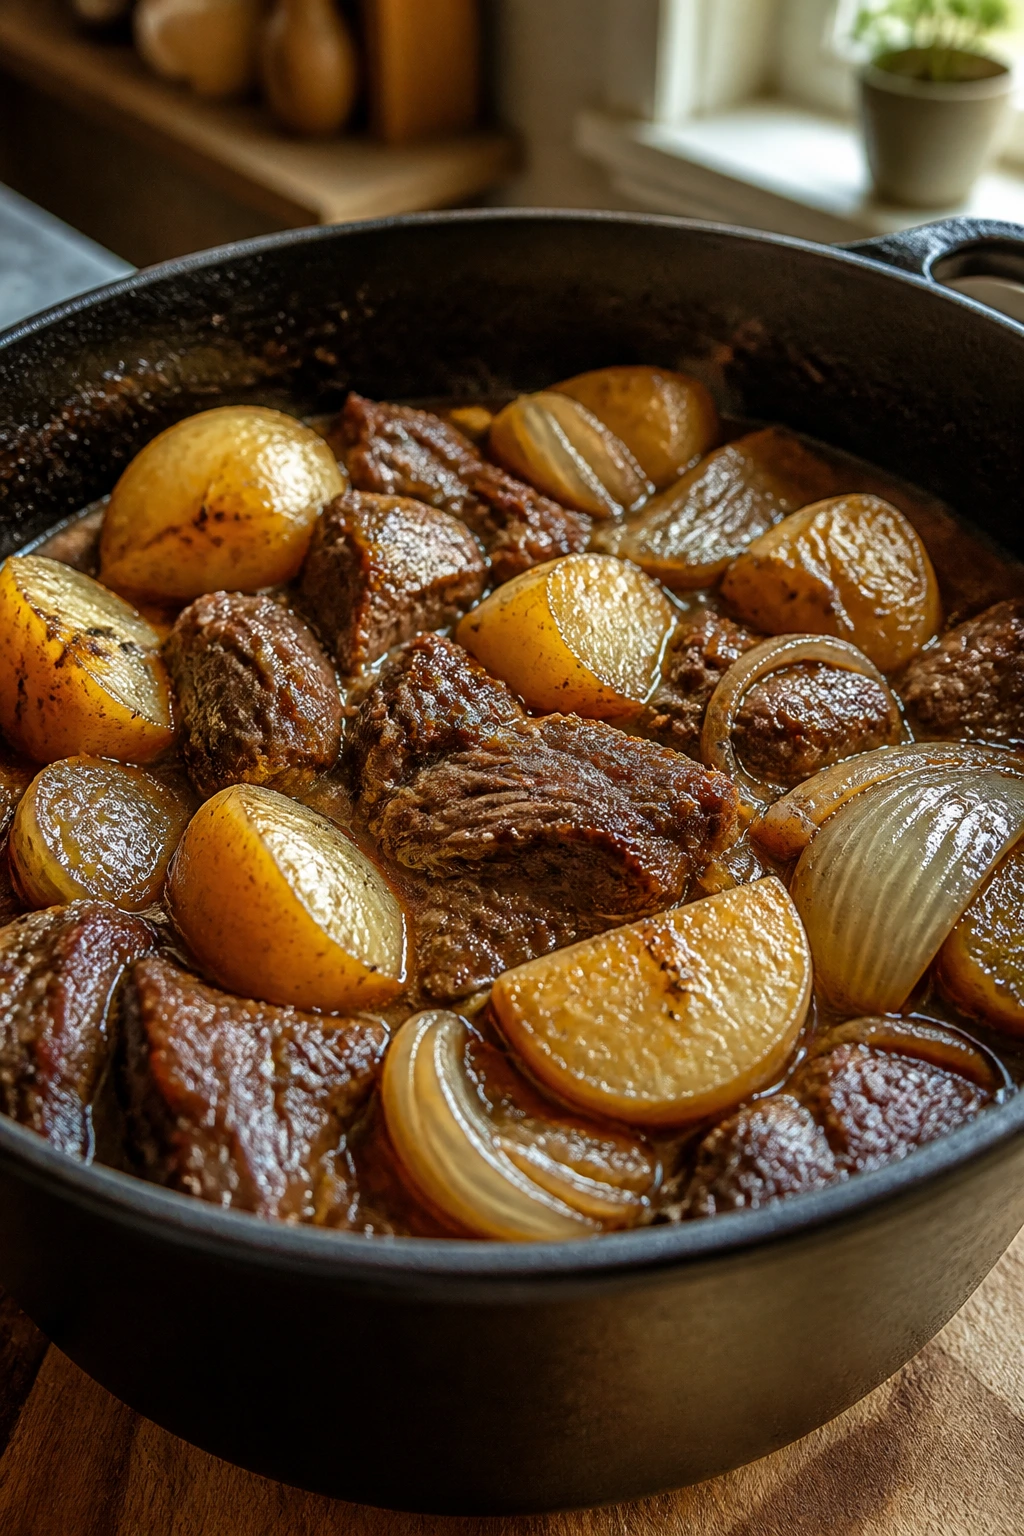
Remove the pot from the oven and stir in the potatoes. Re-cover the pot and return it to the oven for 45 to 60 minutes, until the potatoes are tender and the beef pulls apart easily with a fork. Do not rush this step by turning up the heat; the beef needs time, not force.
-
Remove the bay leaves. Stir in the butter and half of the parsley. Taste the broth and add a little more salt if it needs it. Let the pot rest for 10 minutes before serving so the broth settles and the potatoes stop breaking when you ladle them.
If the broth looks thinner than you want, set the uncovered pot over medium heat for 5 to 10 minutes and let it reduce a bit. You want a glossy spoon-coating sauce, not a soup you have to apologize for.
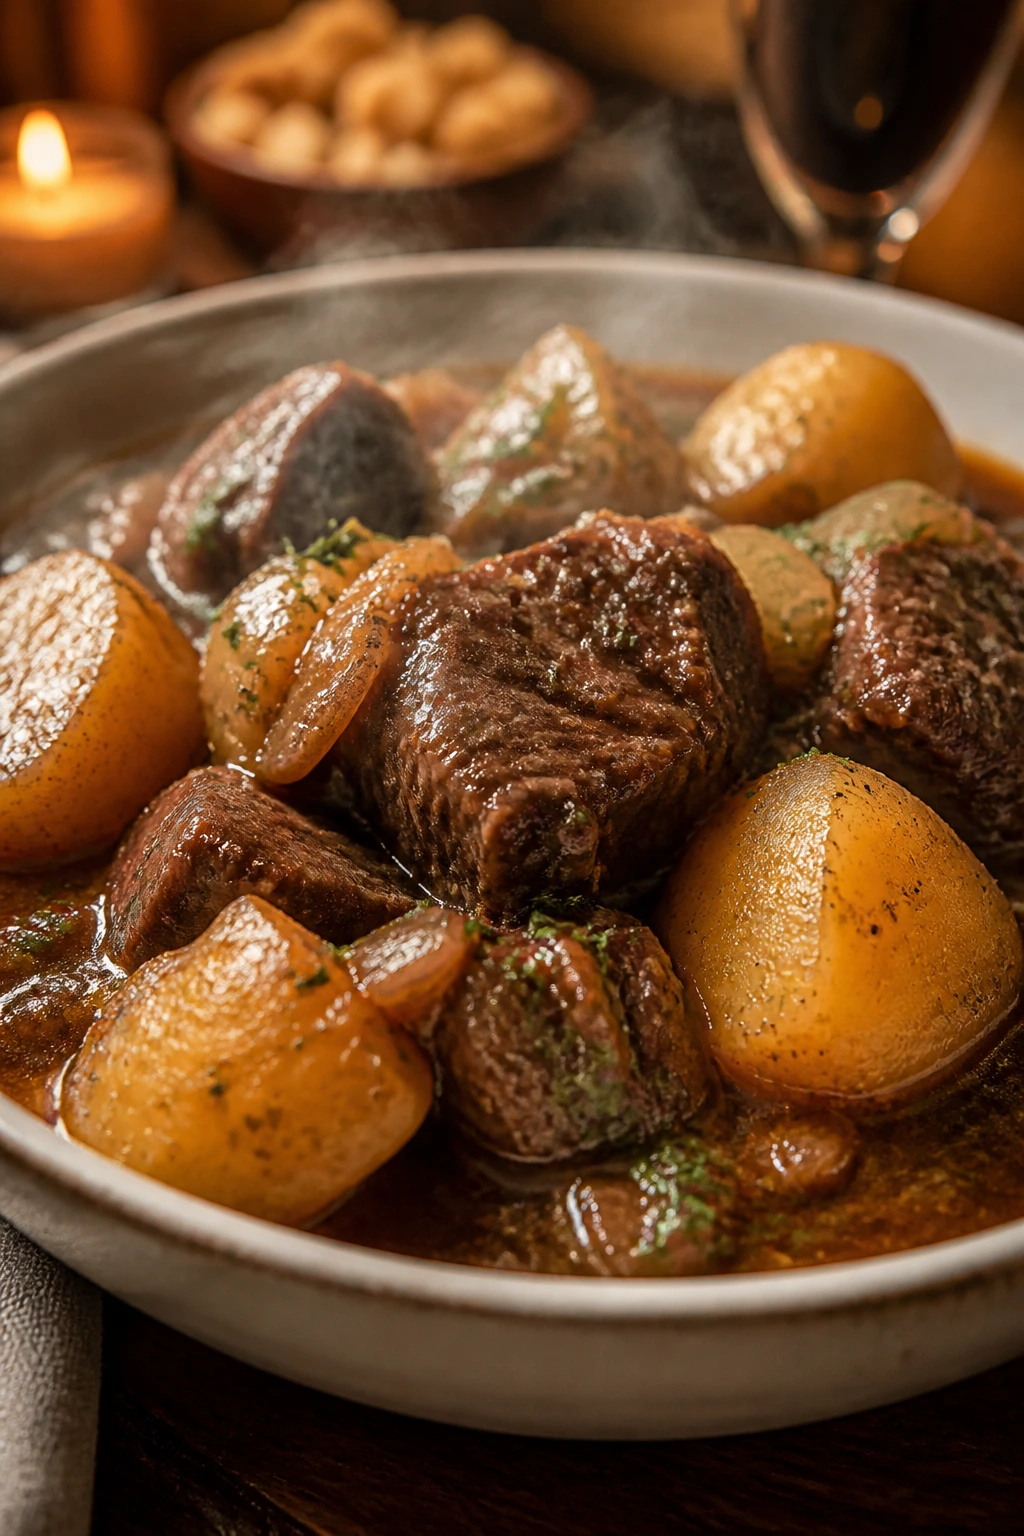
How to Serve It So the Bowl Feels Complete
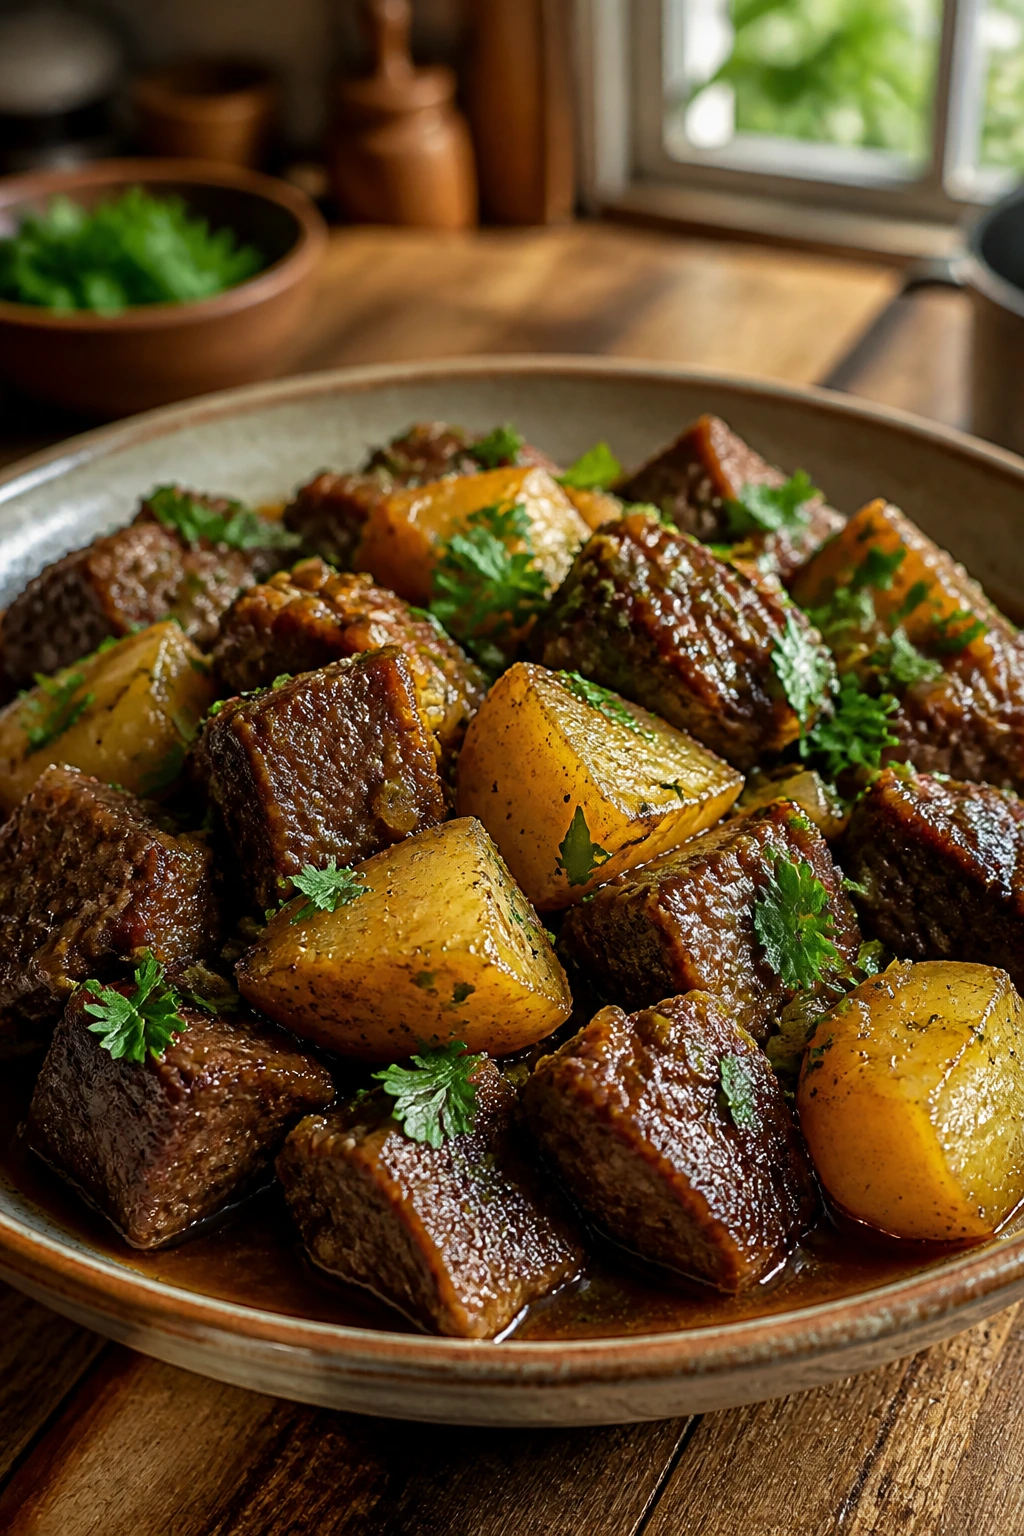
Presentation: Spoon the beef and potatoes into shallow bowls rather than deep soup bowls; you want people to see the chunks of beef and the golden edges of the potatoes. A final shower of chopped parsley gives the bowl a cleaner look and keeps the last few bites from feeling brown and heavy.
Accompaniments: A thick slice of crusty bread is the obvious move because the broth begs to be mopped up. If you want a vegetable beside it, keep the side simple: buttered green beans, steamed peas, or a sharp cabbage slaw all work without fighting the pot.
Portions: Plan on about 2 cups per serving for a normal dinner, a little more if the table is full of hungry eaters. If you’re stretching the pot, add a loaf of bread and a green salad rather than thinning the broth with extra liquid.
Beverage Pairing: A dry red wine like cabernet sauvignon or a malty amber lager handles the beef well. If you want something nonalcoholic, cold black tea with a squeeze of lemon or sparkling water with a wedge of lime keeps the meal from feeling too heavy.
Small Tweaks That Add More Flavor
Flavor Enhancement: Stir in 1 teaspoon of cider vinegar right before serving. It does not make the dish sour; it just brightens the broth enough that the beef tastes richer by contrast.
Customization: Add 8 ounces of cremini mushrooms when you cook the onions if you want a darker, more woodsy pot. They’ll shrink down and almost disappear into the broth, which is exactly the point.
Serving Suggestions: A spoonful of horseradish cream on the side is a nice move if you like a little heat with beef. Not enough to dominate. Just enough to wake up the potatoes.
Make-It-Yours: If you want a more herb-heavy finish, swap half the parsley for chopped dill or chives. Dill gives the broth a cooler, greener edge, while chives keep the flavor gentler.
A small pinch of smoked paprika also works if your pantry likes a little warmth. Use a light hand. Too much and the dish starts leaning away from the clean beef-and-potato character that makes it so satisfying.
Common Mistakes That Make the Beef Chewy
-
Using the wrong cut: Lean roast, round steak, or pre-trimmed stew meat can stay dry and tight even after a long cook. The fix is simple: buy chuck roast with visible marbling and cut it yourself if you can.
-
Crowding the pot during browning: If the beef cubes sit on top of each other, they steam and turn gray. Brown in batches, give each piece room, and wait for a deep brown crust before moving it.
-
Adding the potatoes too early: Potatoes dropped in at the beginning tend to collapse by the time the beef is tender. The fix is to hold them back until the last 45 to 60 minutes.
-
Letting the pot boil hard: A rolling boil turns the meat dry at the edges and makes the broth greasy. You want a lazy simmer with small bubbles around the rim, not a violent churn.
-
Forgetting to taste at the end: Broth and potatoes mute seasoning more than people expect. Taste after the butter goes in, then add salt a pinch at a time until the flavor wakes up.
-
Pulling it too soon: If the beef still resists a fork, it is not done. It needs more time, not more heat. That distinction matters.
Variations and Swaps for Different Kitchens
Red Wine Braise: Replace 1 cup of the beef broth with a dry red wine and let it reduce for a minute after the tomato paste step. The wine gives the sauce a deeper, darker edge and makes the whole pot taste more anchored.
Mushroom-Heavy Pot: Add 8 ounces of sliced cremini mushrooms with the onions and carrots. They soak up the browned fond and disappear into the broth in a good way, leaving the sauce fuller and a little earthier.
Smoky Paprika Version: Stir 1 teaspoon smoked paprika into the tomato paste before adding broth. If you like a faint heat, add ¼ teaspoon cayenne too. The potatoes still stay front and center, but the sauce gets a warmer finish.
Slow Cooker Route: Brown the beef and vegetables on the stove first, then move everything to a slow cooker and cook on low for 7 to 8 hours. Add the potatoes during the last 2 hours so they don’t turn grainy and overcooked.
Make-Ahead, Storage, and Reheating
This is a dish that holds up well, which is one reason I keep it in the cold-weather rotation. You can cook the beef and vegetable base a day ahead, cool it, and refrigerate it overnight. The next day, reheat it gently, add the potatoes, and finish the braise so the potatoes taste fresh instead of tired.
At room temperature, don’t leave the pot out for more than 2 hours. After that, the safe move is to get it into the fridge in shallow containers so it cools faster. In the refrigerator, the finished dish keeps for up to 4 days. The broth will thicken as it chills, and that’s normal.
Freezing works, but the potatoes soften a bit after thawing. If you know you want to freeze it, the cleaner option is to freeze the beef and broth without the potatoes, then cook fresh potatoes when you reheat it. If you freeze the whole pot, use it within 2 months for the best texture.
For reheating, the stovetop is the best tool. Put the beef and potatoes in a covered pot over medium-low heat with a splash of broth or water, and warm it slowly until it’s hot through. If you use the microwave, do short bursts of 60 to 90 seconds, stirring between rounds so the potatoes heat evenly and the beef doesn’t dry out at the edges.
Questions People Ask Before They Cook It
Can I use stew meat instead of chuck roast?
You can, but I wouldn’t choose it unless it’s well marbled and cut from chuck or blade roast. A lot of pre-cut stew meat is mixed from lean scraps, which means it can stay chewy even after long braising.
Do I have to sear the beef first?
No, but skipping the sear leaves flavor on the table. Browning the meat builds the dark bits that give the broth depth, and the dish tastes flatter without that step.
Why do the potatoes go in later?
Because potatoes are not beef. They soften much faster, and if they cook for the full braise they turn chalky or break apart. Adding them in the last 45 to 60 minutes keeps their shape and gives you better texture in the bowl.
What potatoes work best if I can’t find Yukon Golds?
Red potatoes are the next best choice if you want firm cubes. Russets are fine if you want the broth a little thicker and don’t mind some breakage, but they’re not my first pick for a clean-looking pot.
Can I make this in a slow cooker?
Yes. Brown the beef and vegetables first, then cook on low for 7 to 8 hours and add the potatoes in the last 2 hours. If you put the potatoes in too early, they lose their shape and get grainy.
How do I thicken the broth if it seems thin?
Let the pot simmer uncovered on the stovetop for 5 to 10 minutes after the meat is tender. You can also mash a few potato chunks against the side of the pot; that naturally thickens the sauce without adding more flour.
Why is my beef still tough after a long cook?
It usually needs more time, not higher heat. Chuck goes from firm to tender in a weird little window, and if you stop before the connective tissue has broken down, it will feel stubborn and chewy.
Can I freeze leftovers with the potatoes in them?
Yes, but the potato texture softens after thawing. If freezer texture matters to you, freeze the beef and broth on their own and add fresh potatoes when you reheat the pot.
A Steady Dinner Worth Making Again
Some dinners get attention because they’re flashy. This one earns it by being dependable. The beef goes tender, the potatoes soak up the broth, and the whole pot ends up tasting like it was planned by someone who actually wanted the meal to feel finished.
That’s what keeps me coming back to a braise like this. It doesn’t need a lot of decoration, and it doesn’t ask for a dozen side dishes to feel complete. Set out a bowl, tear off some bread, and let the spoon do the work. After one good pot, you’ll start keeping chuck roast and Yukon Golds in the rotation without even thinking about it.
Tender Beef and Potatoes — Recipe Card
Recipe Name: Tender Beef and Potatoes
Description: Beef chuck roast is braised with onions, carrots, broth, and herbs until fork-tender, then finished with Yukon Gold potatoes that soak up the savory sauce. It’s a straightforward, one-pot dinner with deep flavor and a spoonable gravy.
Prep Time: 25 minutes
Cook Time: 2 hours 45 minutes
Total Time: 3 hours 10 minutes
Course: Dinner, Main Course
Cuisine: American
Servings: 6 servings
Calories: About 430 kcal per serving
Ingredients
For the Beef and Vegetables:
- 3 lb beef chuck roast, trimmed and cut into 1½-inch cubes
- 2 teaspoons kosher salt
- 1 teaspoon black pepper
- 3 tablespoons all-purpose flour, divided
- 2 tablespoons olive oil
- 1 large yellow onion, sliced into thick half-moons
- 3 medium carrots, cut into 1-inch chunks
- 4 cloves garlic, minced
For the Braising Liquid:
- 2 tablespoons tomato paste
- 3 cups low-sodium beef broth
- 1 tablespoon Worcestershire sauce
- 1 teaspoon dried thyme
- 2 bay leaves
For the Potatoes and Finish:
- 1½ lb Yukon Gold potatoes, cut into 1½-inch chunks
- 1 tablespoon unsalted butter
- 2 tablespoons chopped fresh parsley
Instructions
-
Preheat the oven to 325°F (165°C). Pat the beef dry, then season with salt, pepper, and 2 tablespoons flour.
-
Heat the olive oil in a Dutch oven over medium-high heat. Brown the beef in batches, 3 to 4 minutes per side, then transfer it to a plate.
-
Reduce the heat to medium. Cook the onion and carrots for 5 to 6 minutes, then add the garlic and cook for 30 seconds.
-
Stir in the tomato paste and cook for 1 minute. Sprinkle in the remaining 1 tablespoon flour and stir for 30 seconds.
-
Add about ½ cup broth and scrape up the browned bits. Stir in the remaining broth, Worcestershire sauce, thyme, bay leaves, and beef.
-
Bring the pot to a gentle simmer, cover, and bake for 1 hour 45 minutes.
-
Stir in the potatoes, cover again, and bake for 45 to 60 minutes, until the beef is fork-tender and the potatoes are soft.
-
Remove the bay leaves. Stir in the butter and parsley, taste for salt, and rest for 10 minutes before serving.
Notes: Use chuck roast, not lean stew meat, if you want real tenderness. For a thicker sauce, simmer uncovered for 5 to 10 minutes at the end. The pot tastes even better the next day.