
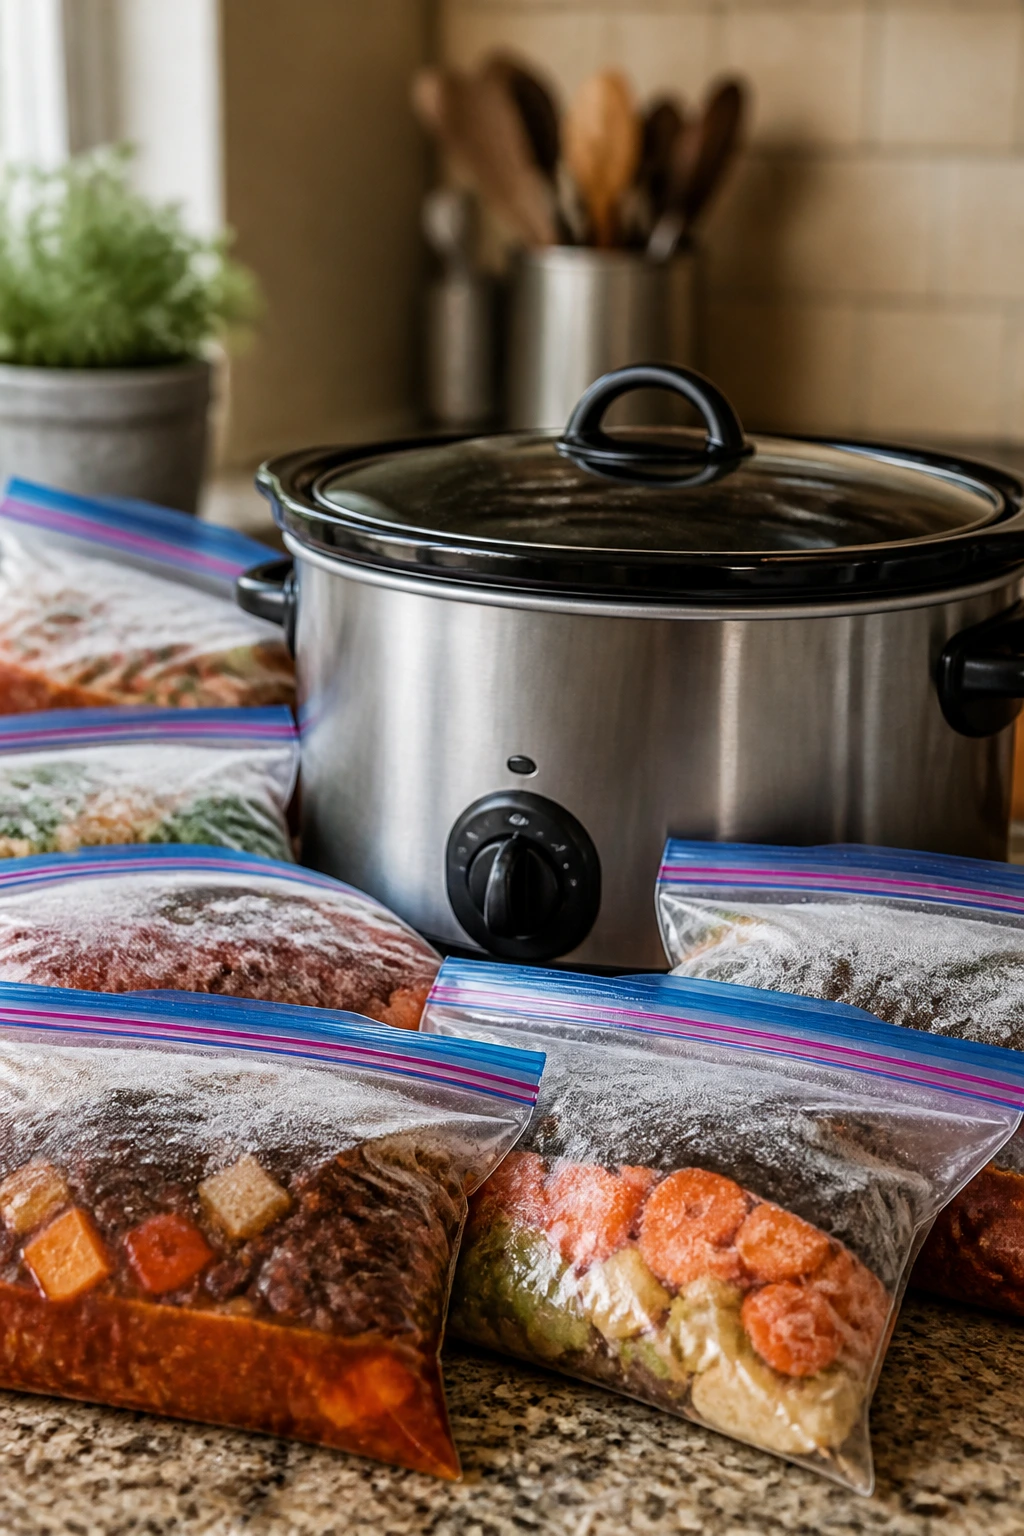
A freezer full of crockpot freezer meals changes a weeknight before it has a chance to turn messy. You stop staring into the fridge at 5:40 p.m. wondering what on earth can become dinner in under an hour. You stop making a second grocery run for one missing onion. And, maybe most useful of all, you stop paying the “I’ll figure it out later” tax that always shows up when everyone is hungry at the same time.
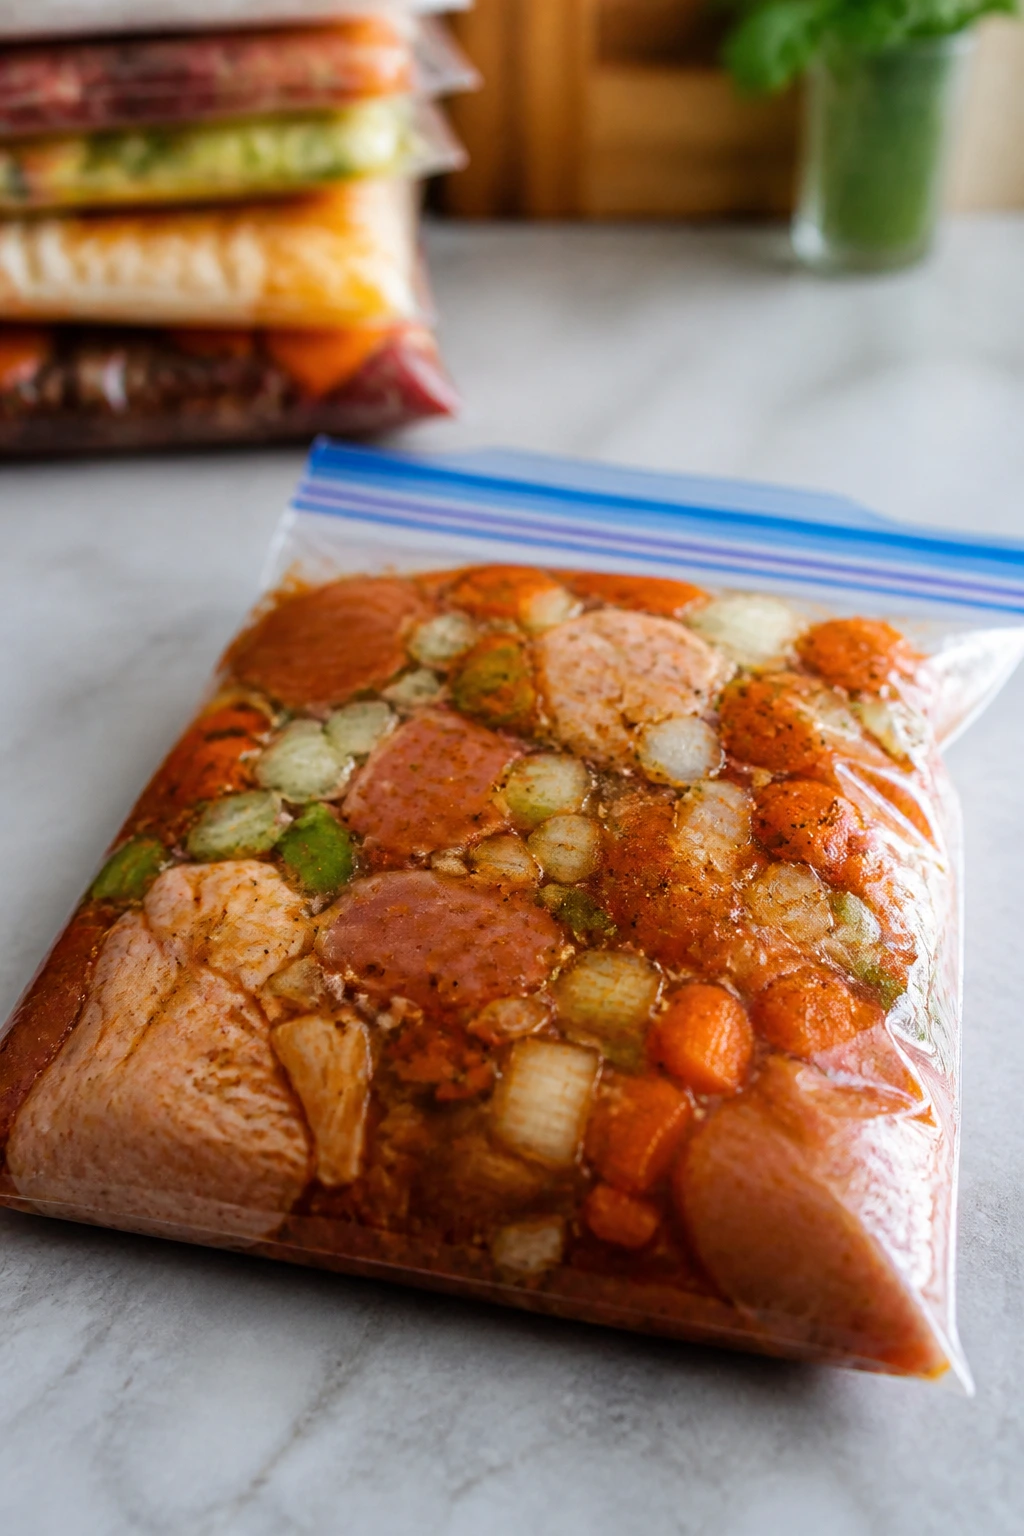
This kind of meal prep works because it respects the parts of cooking that are actually annoying. Chop the onion when you still have energy. Measure the spices once. Flatten the bag so it stacks neatly in the freezer and thaws faster later. Then let the slow cooker do the slow, steady work it was born to do. I’ve always liked freezer meals that lean on sturdy ingredients — chicken thighs, pork shoulder, beans, tomato sauces, broths with a little backbone — because they keep their shape and taste after the freeze-thaw cycle instead of turning limp and bland.
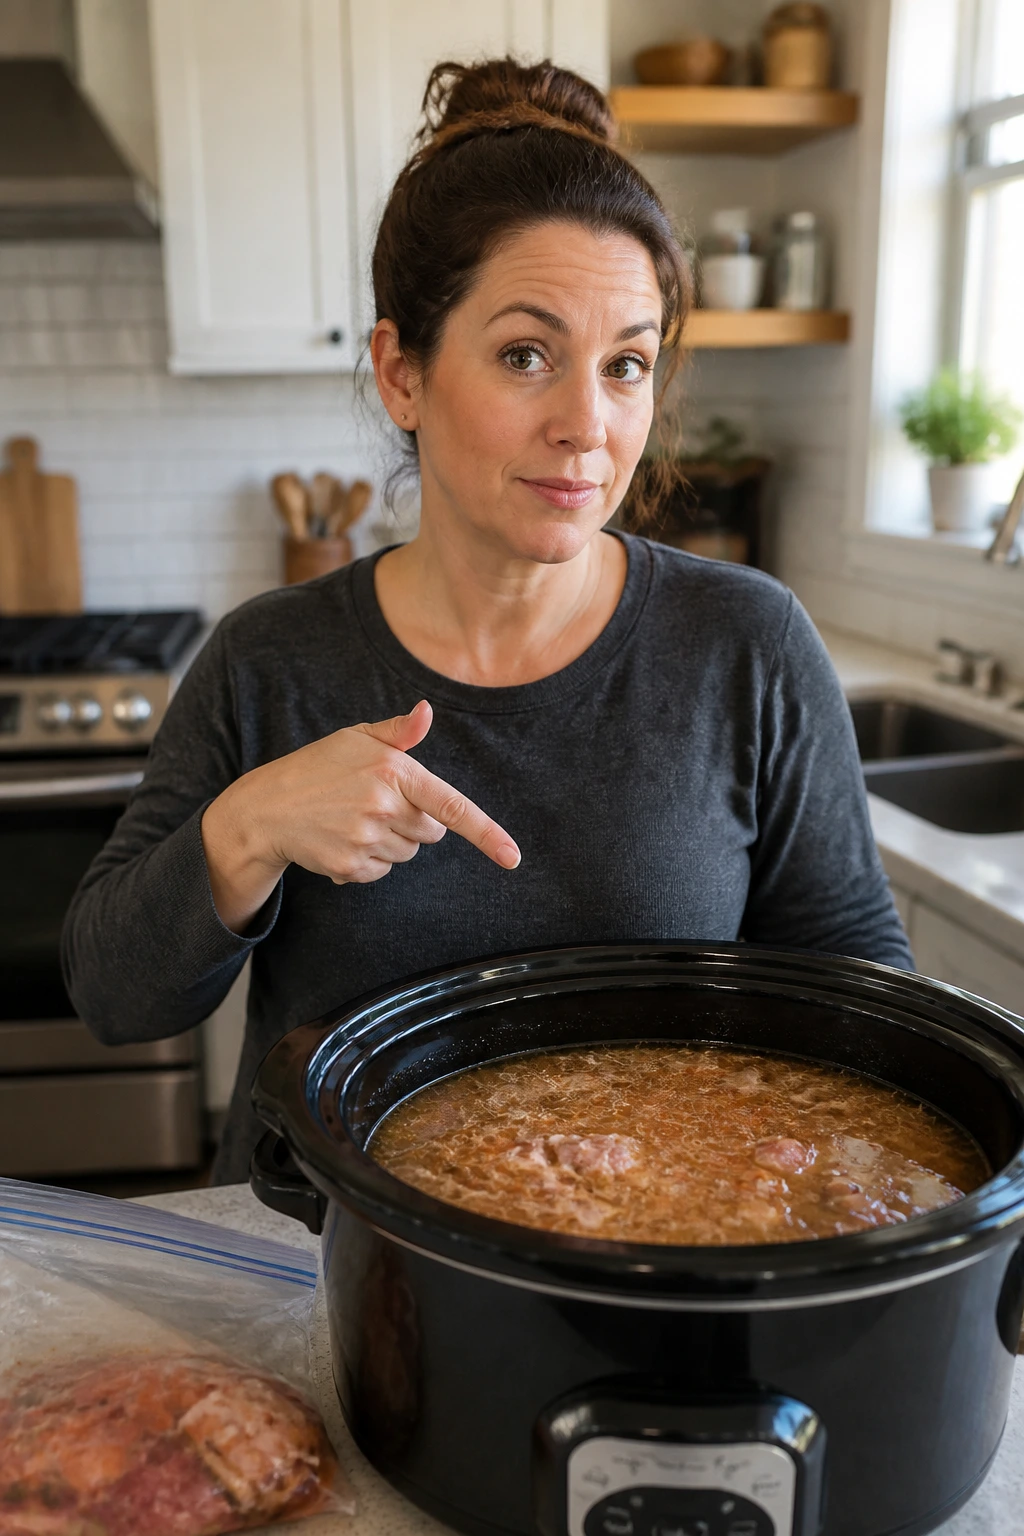
There’s one boring rule that matters more than people want to admit: thaw the bags in the refrigerator before they go into the slow cooker. Don’t set a block of frozen food on the counter and hope for the best. The whole system depends on safe, patient thawing and a cooker that stays in its lane. Once you accept that, the rest is easy. A labeled bag in the freezer becomes a real dinner plan, not just a vague intention.
The ten meals below are built for that kind of sanity. Some are brothy and spoonable. Some shred into sandwiches or tacos. A few are comfort-food bowls that taste like you spent all afternoon hovering over the stove, even though you didn’t. That’s the point.
1. Chicken Taco Soup
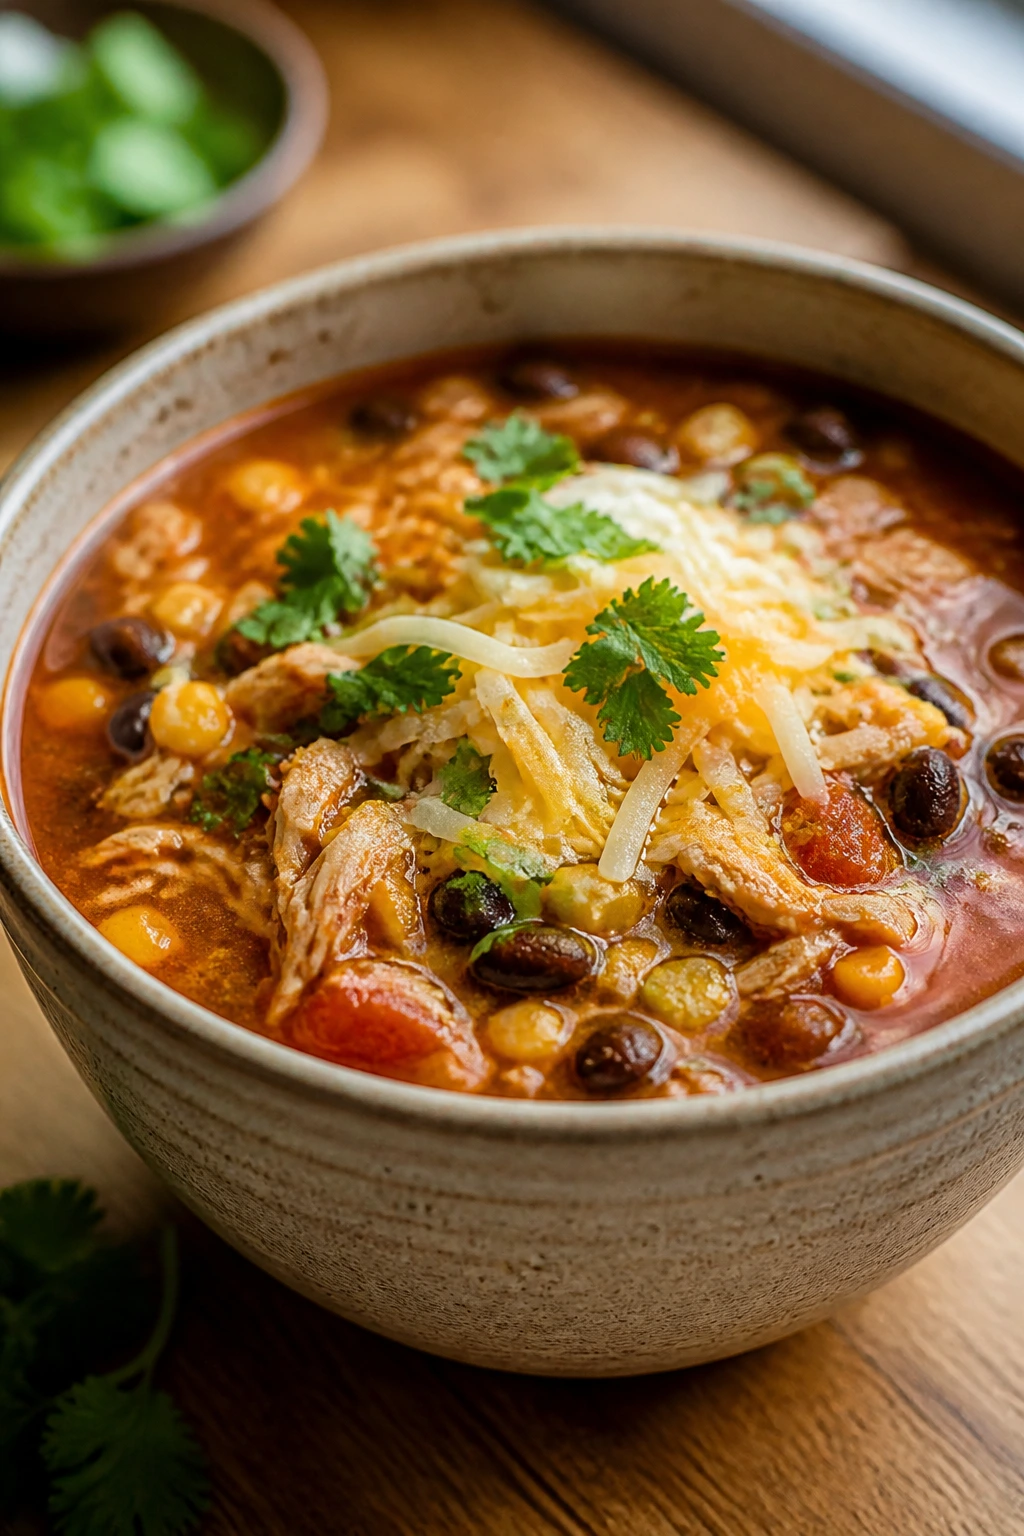
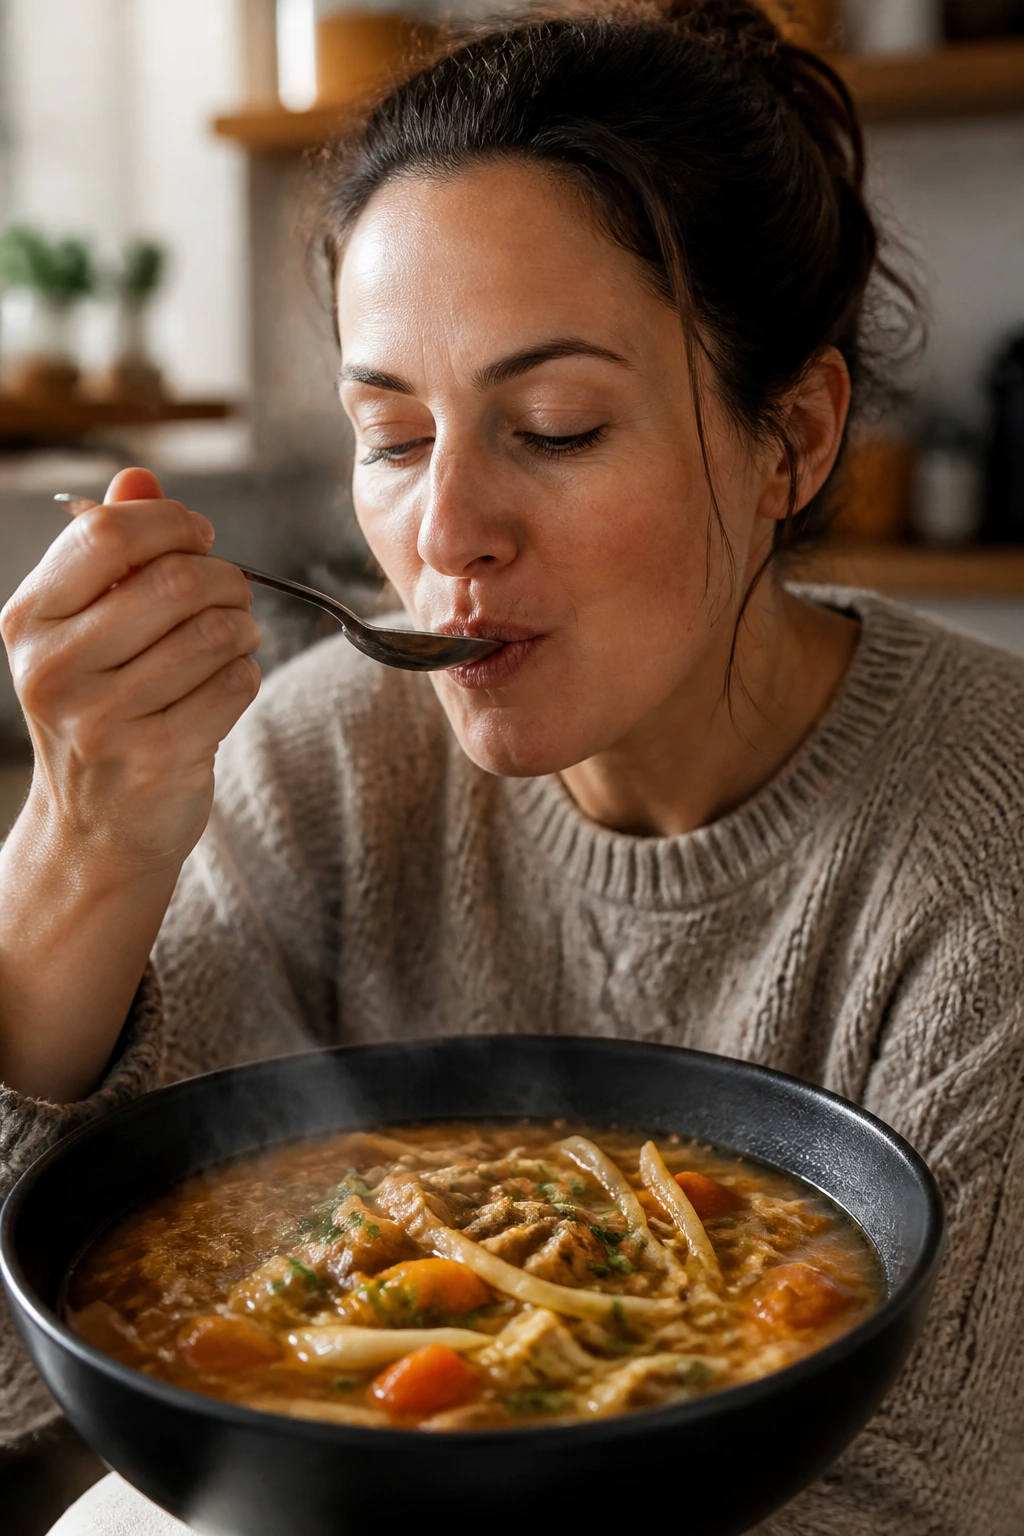
Chicken taco soup is the kind of freezer meal that disappears fast because it tastes like a fiesta without asking you to do much work. The broth comes out red-gold and savory, the beans make it hearty, and the salsa quietly does half the seasoning for you. I like this one because it feels lively instead of heavy, which matters when you want dinner to wake people up rather than put them to sleep.
The texture is the real win. Chicken thighs stay juicy in a long slow cook, black beans give little creamy pops, and the corn keeps things from going flat. Add a squeeze of lime at the end and the whole pot suddenly tastes brighter, almost as if you chopped fresh cilantro while nobody was looking.
Why It Works in the Freezer
Taco soup is forgiving in a way that cream-based soups are not. Tomato, beans, broth, and shredded chicken all handle freezing well, and the spice blend is strong enough to survive the cold without fading. This is also a rare slow cooker meal where a jarred ingredient — salsa — actually helps. A thick salsa brings seasoning, body, and a little acidity, so the soup tastes built, not assembled.
Key Ingredients
- 2 lbs boneless, skinless chicken thighs — They stay tender through a long cook and shred cleanly.
- 1 large yellow onion, diced — Adds sweetness and a little backbone.
- 3 cloves garlic, minced — Use fresh garlic; jarred works in a pinch, but it tastes flatter.
- 1 (15 oz) can black beans, drained and rinsed — Rinse them well so the broth stays clean.
- 1 (15 oz) can pinto beans, drained and rinsed — These soften the soup and make it feel fuller.
- 1 (14.5 oz) can diced tomatoes, undrained — They add body and enough juice to keep the soup from drying out.
- 1 (16 oz) jar salsa — Choose a thick salsa, not a watery one.
- 4 cups low-sodium chicken broth — Low-sodium keeps the seasoning from getting too salty after reducing.
- 1 cup frozen corn — Frozen corn is fine here; it holds texture better than canned.
- 2 tablespoons taco seasoning — A good shortcut if you want one seasoning packet’s worth of ease.
- 1 teaspoon ground cumin — Gives the broth that warm taco-shop smell.
- 4 oz cream cheese, softened, for finishing — Add after cooking if you want a creamy version.
- 1 lime, for serving — The acid sharpens everything.
- 1/4 cup chopped cilantro, for serving — Optional, but worth it if you like freshness.
Quick Steps
Assembly and Freeze:
- Put the chicken thighs, onion, garlic, beans, diced tomatoes, salsa, broth, corn, taco seasoning, cumin, salt, and pepper into a 1-gallon freezer bag.
- Press out as much air as possible, seal the bag, and flatten it on a sheet pan or cutting board. Freeze it flat so it stacks cleanly and thaws faster.
Cook and Finish: 3. Thaw the bag in the refrigerator until the center is no longer icy, usually overnight. 4. Pour the contents into a 5- to 6-quart slow cooker and cook on low for 6 to 7 hours or high for 3 to 4 hours, until the chicken reaches 165°F and shreds easily. 5. Shred the chicken with two forks, then stir in the cream cheese if you want a creamier soup. Cover and let it melt for 10 minutes. 6. Serve hot with lime wedges, cilantro, tortilla strips, or crushed chips.
Tips and Variations
- Spicier version: Swap in hot salsa and add 1 chopped jalapeño to the bag.
- Cream-free version: Skip the cream cheese and finish with avocado instead.
- Meal-prep trick: Pack the lime and cilantro separately so they stay fresh.
2. Smoky BBQ Pulled Pork
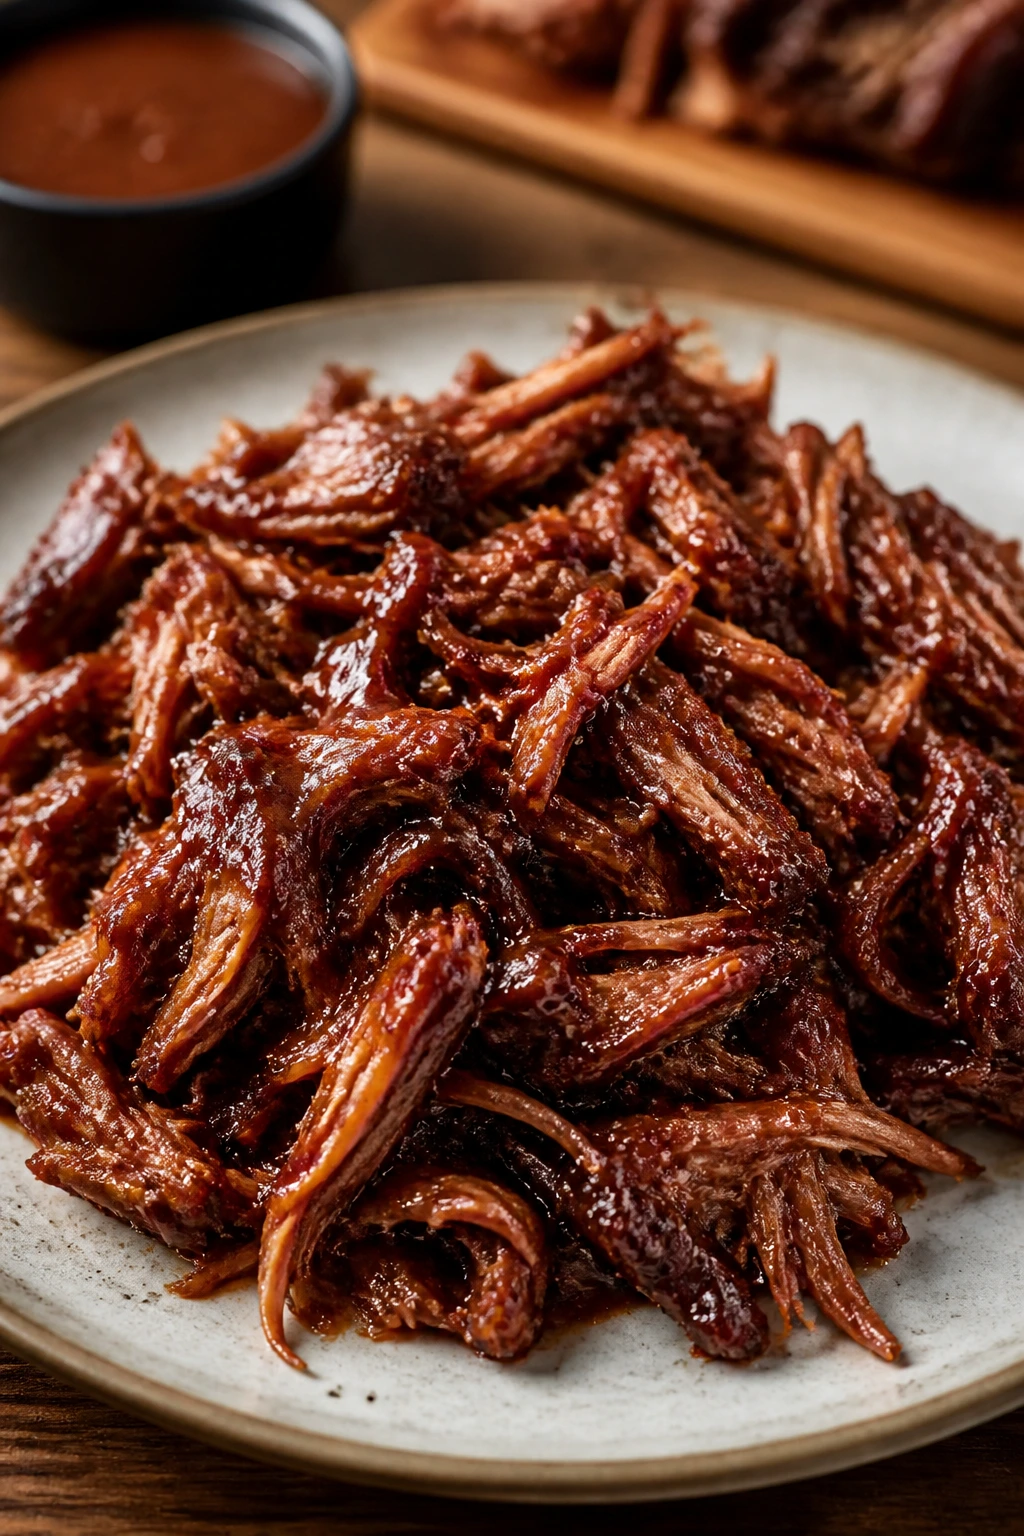
Pulled pork is the freezer meal that makes you look more organized than you feel. The smell alone is enough to make a kitchen seem intentional: smoky, sweet, a little tangy from the vinegar, with pork that breaks apart in long soft strands. Put it on a bun and it feels like you’ve done something impressive. Put it over rice or sweet potatoes and it turns into a weeknight bowl with real weight.
This one is built for people who want dinner that can stretch. Sandwiches one night, baked potatoes the next, maybe a quesadilla after that if you’re lucky enough to have leftovers. Pork shoulder is generous meat. It likes slow heat, and it likes being sauced.
What Makes It Work So Well
Pork shoulder has enough fat and connective tissue to handle a long cook without drying out. That marbling matters. The barbecue sauce brings sweetness, the vinegar keeps it from getting cloying, and the smoked paprika makes the whole pot smell like it has been working all afternoon. If you try this with a lean cut, you’ll feel the difference immediately. It’s not the same thing.
Ingredient List
- 3 lbs pork shoulder or pork butt — Trim only the thickest excess fat; some fat is your friend here.
- 1 large yellow onion, sliced — The onion melts into the sauce.
- 4 cloves garlic, minced — Fresh garlic gives the pork a deeper savory note.
- 1 cup barbecue sauce — Pick one you actually like eating from a spoon.
- 1/4 cup apple cider vinegar — Keeps the sauce bright and prevents heaviness.
- 1/2 cup low-sodium chicken broth — Helps the pork braise instead of just sitting in thick sauce.
- 2 tablespoons brown sugar — Useful if your barbecue sauce leans sharp.
- 1 tablespoon smoked paprika — This is the smoky backbone.
- 1 teaspoon kosher salt — Season the meat before freezing.
- 1 teaspoon black pepper — Gives the sauce some bite.
- 1 teaspoon chili powder — Optional, but it rounds out the sweetness.
- Hamburger buns or sandwich rolls, for serving — Toasted buns hold up best.
- Pickles or coleslaw, for serving — Sharp, crunchy toppings make the pork better.
Slow Cooker Directions
- Season the pork shoulder with salt, pepper, smoked paprika, chili powder, and brown sugar.
- Place the sliced onion, garlic, barbecue sauce, vinegar, and broth in a large freezer bag.
- Add the pork shoulder, press out the air, seal the bag, and freeze it flat.
- Thaw the bag in the refrigerator until flexible and cold but not icy in the center.
- Dump everything into the slow cooker and cook on low for 8 to 10 hours, or until the pork shreds with almost no resistance.
- Shred the pork, stir it back into the juices, and let it sit for 10 minutes so the meat drinks up the sauce.
- Serve on buns with pickles, slaw, or a spoonful of extra barbecue sauce.
Easy Swaps
- Sandwich night to bowl night: Serve the pork over roasted potatoes or rice instead of buns.
- Less sweet version: Cut the brown sugar in half and add an extra tablespoon of vinegar.
- Better leftovers: Store the pork with a little sauce so it stays moist in the fridge.
3. White Chicken Chili
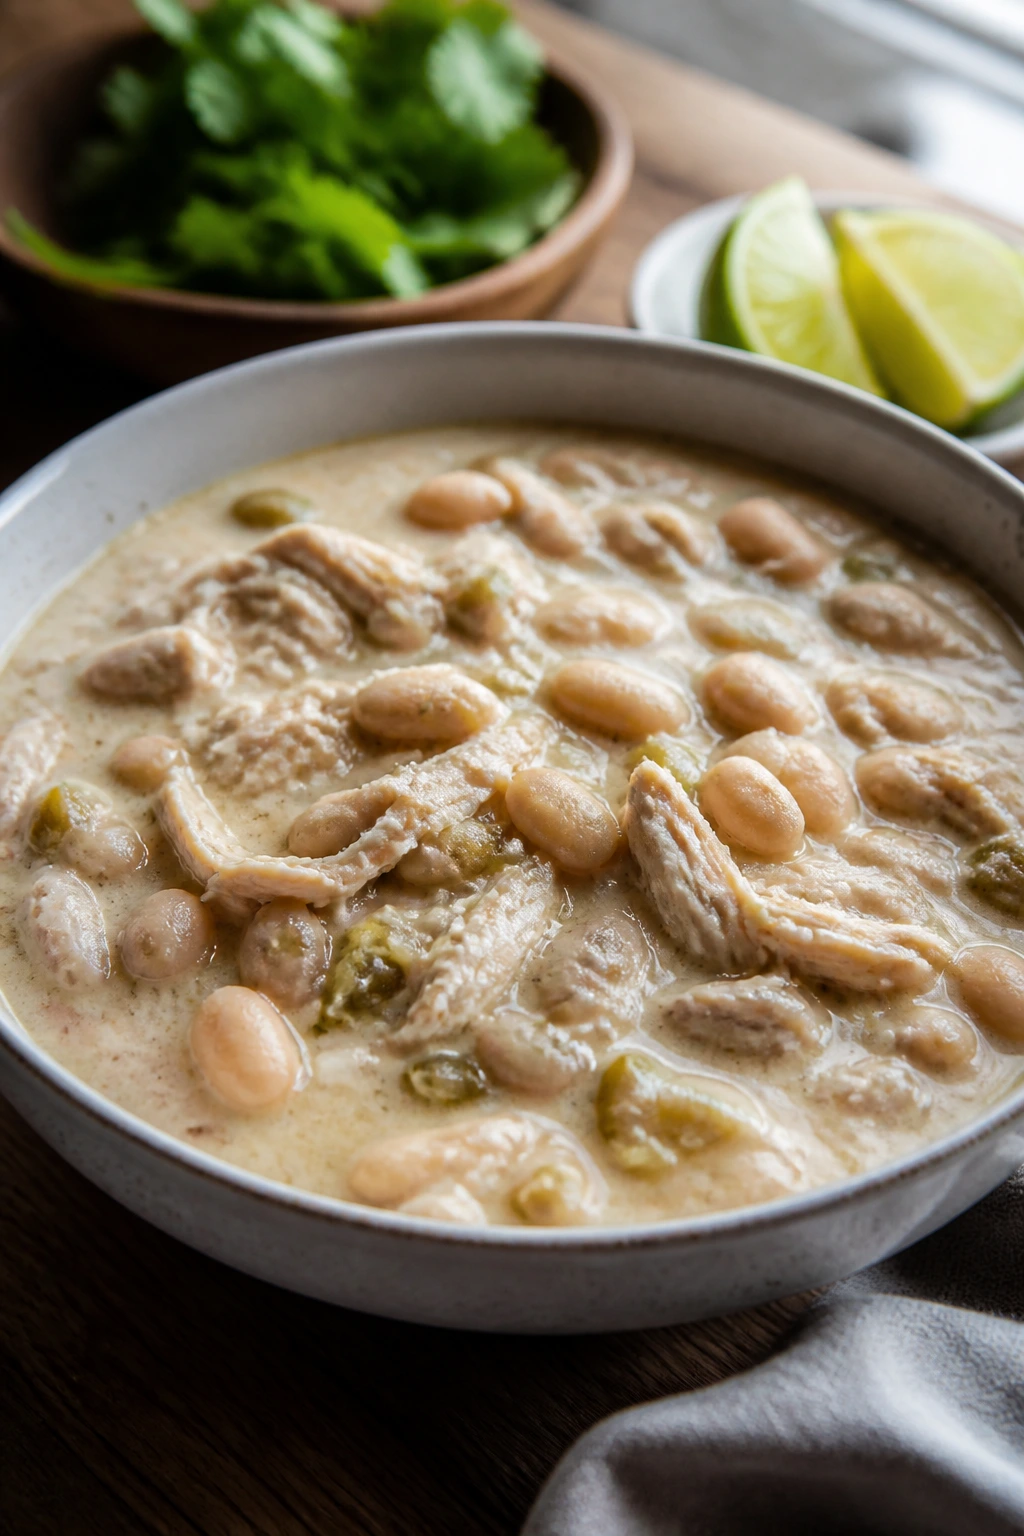
White chicken chili is proof that a freezer meal can feel light and filling at the same time. It comes out pale and creamy-looking, but the flavor is not shy: cumin, green chiles, beans, onion, and chicken all pull in the same direction. I reach for this one when I want something that eats like comfort food without the heavy tomato base of red chili.
It’s also one of the easier meals to keep from tasting tired after freezing. White beans soften into the broth and give the pot some natural body. Chicken thighs stay juicy. And because the flavor is built on cumin and chiles instead of a long ingredient list, it doesn’t lose much in the freezer.
What Keeps It Creamy and Clean
The trick here is simple: freeze the soup base without the dairy, then stir in cream cheese at the end. That keeps the texture smooth instead of grainy. Green chiles bring gentle heat rather than loud heat, which makes this a better family meal than a lot of chili recipes that depend on a big hit of spice. You can always put hot sauce on the table. I’d rather have control than regret.
Ingredient Notes
- 2 lbs boneless, skinless chicken thighs — Thighs hold up better than breasts in a long cook.
- 2 (15 oz) cans great northern beans, drained and rinsed — These give the chili its creamy body.
- 1 (4 oz) can diced green chiles — Mild heat, no drama.
- 1 large onion, diced — It should soften into the broth.
- 3 cloves garlic, minced — Keep it fresh and sharp.
- 4 cups low-sodium chicken broth — Enough liquid for a soupier chili.
- 1 cup frozen corn — Adds sweet bites and texture.
- 2 teaspoons ground cumin — The spice that makes the bowl smell right.
- 1 teaspoon dried oregano — A little herbal note keeps it from tasting flat.
- 1 teaspoon chili powder — Enough for warmth, not enough to scare anyone off.
- 4 oz cream cheese, cubed, for finishing — Add this after the chicken is cooked.
- 1 lime, for serving — Lime wakes up the beans and broth.
- 2 tablespoons chopped cilantro, for serving — Optional, but it does help.
Cooking Method
- Combine the chicken thighs, beans, green chiles, onion, garlic, broth, corn, cumin, oregano, chili powder, salt, and pepper in a freezer bag.
- Seal the bag tightly and freeze it flat.
- Thaw it in the refrigerator until the contents are loose and the center feels cold rather than icy.
- Pour into the slow cooker and cook on low for 6 to 7 hours or high for 3 to 4 hours, until the chicken reaches 165°F and breaks apart easily.
- Remove the chicken, shred it, and return it to the pot.
- Stir in the cream cheese and cover for 10 minutes, until the broth looks creamy and the cheese disappears into the soup.
- Finish with lime juice and cilantro.
Small Tweaks
- Thicker bowl: Mash a few of the beans against the side of the pot before serving.
- Milder bowl: Skip the chili powder and keep the green chiles mild.
- Freezer note: Keep the cream cheese out of the bag; it’s better added later.
4. Beef Stew with Root Vegetables
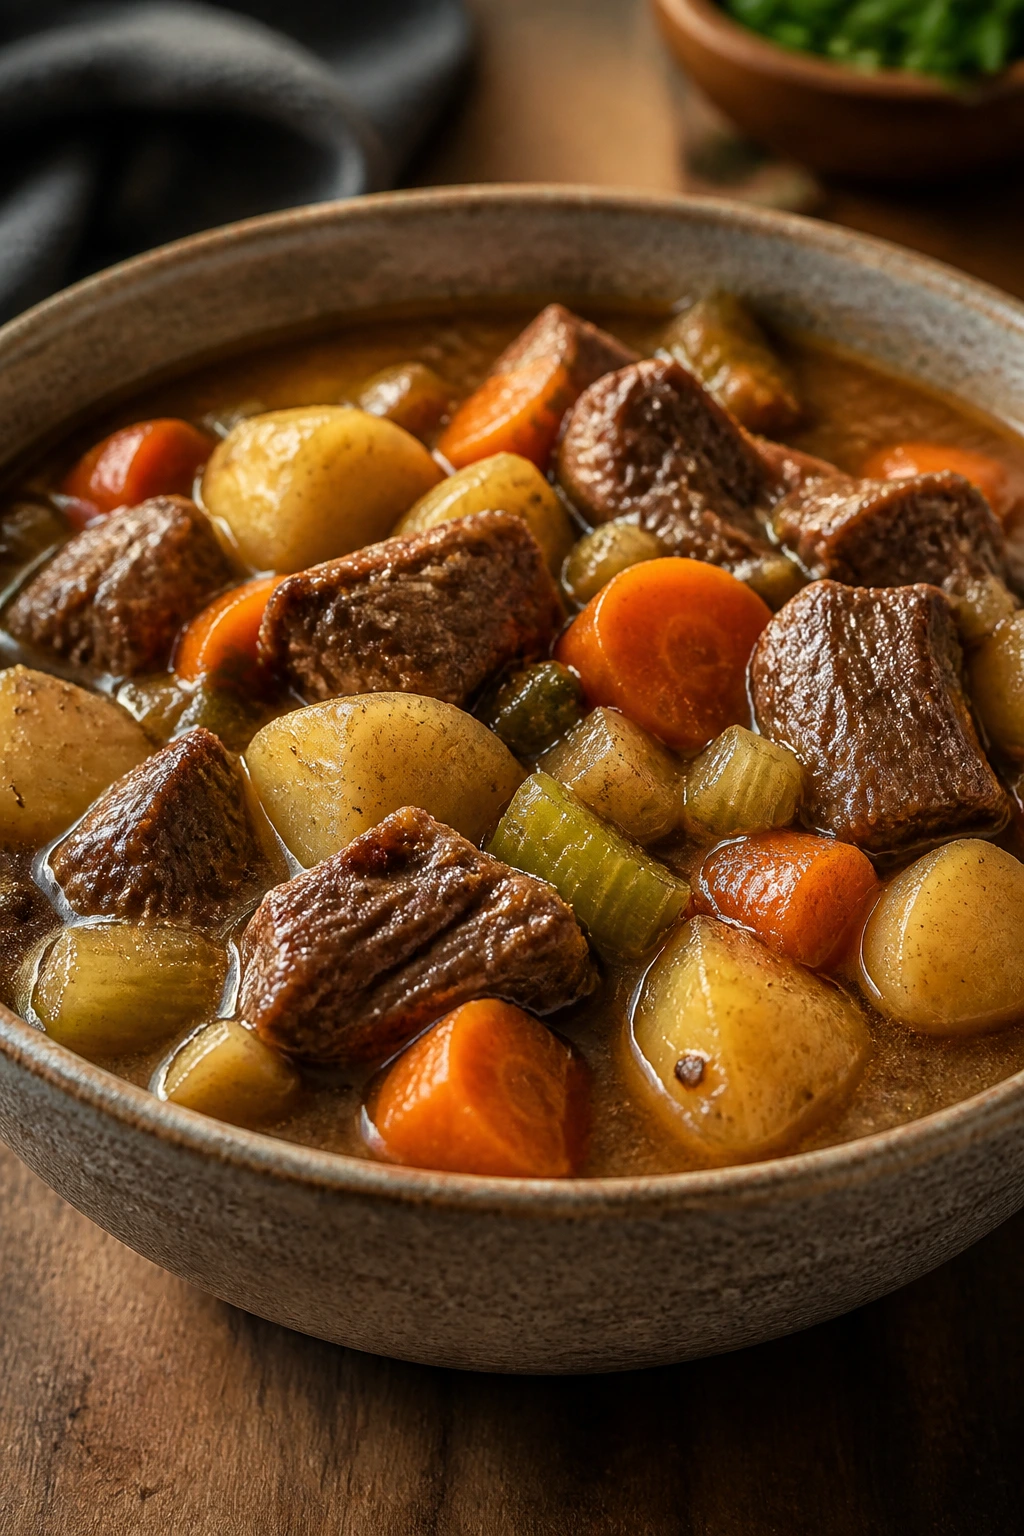
Beef stew smells like cold-weather food even if you make it on a plain ordinary afternoon. The first spoonful should be rich and a little glossy, with beef that falls apart at the edge of the spoon and potatoes that keep their shape instead of collapsing into mush. That balance matters. Nobody wants beef soup pretending to be stew.
I like this version because it leans on the right vegetables. Carrots bring sweetness. Celery gives the broth a faint savoriness that people notice without knowing why. Yukon Gold potatoes hold together better than floury russets, and they keep the stew from turning chalky after reheating.
Why This Version Holds Up
Beef chuck is built for long cooking. It starts a little tough and ends tender in a way leaner beef never will. Tomato paste, Worcestershire, and thyme give the broth more depth than plain broth alone. If you brown the meat first, the stew tastes more like something you planned than something you rushed, and that browned flavor survives freezing better than people expect.
Ingredient Notes
- 2 1/2 lbs beef chuck stew meat, cut into 1 1/2-inch pieces — Chuck gives you tender shreds after long cooking.
- 2 tablespoons olive oil — For browning the beef before it goes in the bag.
- 1 large yellow onion, diced — Adds sweetness and a little body.
- 3 carrots, cut into 1-inch chunks — Keep the pieces big so they don’t vanish.
- 3 celery stalks, sliced — Adds savoriness to the broth.
- 1 1/2 lbs Yukon Gold potatoes, cut into 1 1/2-inch chunks — They hold their shape well.
- 3 cups low-sodium beef broth — Enough liquid for braising, not drowning.
- 2 tablespoons tomato paste — Deepens the color and the flavor.
- 1 tablespoon Worcestershire sauce — Small amount, big payoff.
- 1 teaspoon dried thyme — Classic stew flavor.
- 1 bay leaf — Remove before serving.
- 1 cup frozen peas — Stir in at the end so they stay bright.
- Salt and black pepper — Season the meat before freezing and taste again at the end.
Step-by-Step
Brown and Build:
- Heat the olive oil in a large skillet over medium-high heat. Sear the beef in batches for 3 to 4 minutes per side, until the surfaces are dark brown but not burnt.
- Let the meat cool for a few minutes, then place it in a large freezer bag with the onion, carrots, celery, potatoes, broth, tomato paste, Worcestershire sauce, thyme, bay leaf, salt, and pepper.
- Press out the air, seal the bag, and freeze it flat.
Cook and Finish: 4. Thaw the bag in the refrigerator until it is fully flexible and the center is no longer frozen. 5. Pour the contents into the slow cooker and cook on low for 7 to 8 hours, or until the beef breaks apart easily and the potatoes are tender at the center. 6. Stir in the peas during the last 20 minutes. If you want a thicker stew, whisk 2 tablespoons cornstarch with 2 tablespoons cold water and stir it in during the final 10 minutes. 7. Remove the bay leaf and serve hot.
Variation Ideas
- Mushroom version: Add 8 oz sliced mushrooms on the cooking day if you like a deeper, earthier stew.
- Herbier version: Add 1 teaspoon chopped rosemary with the thyme.
- Leftover trick: The stew thickens overnight and tastes even better the next day.
5. Honey Garlic Chicken Thighs
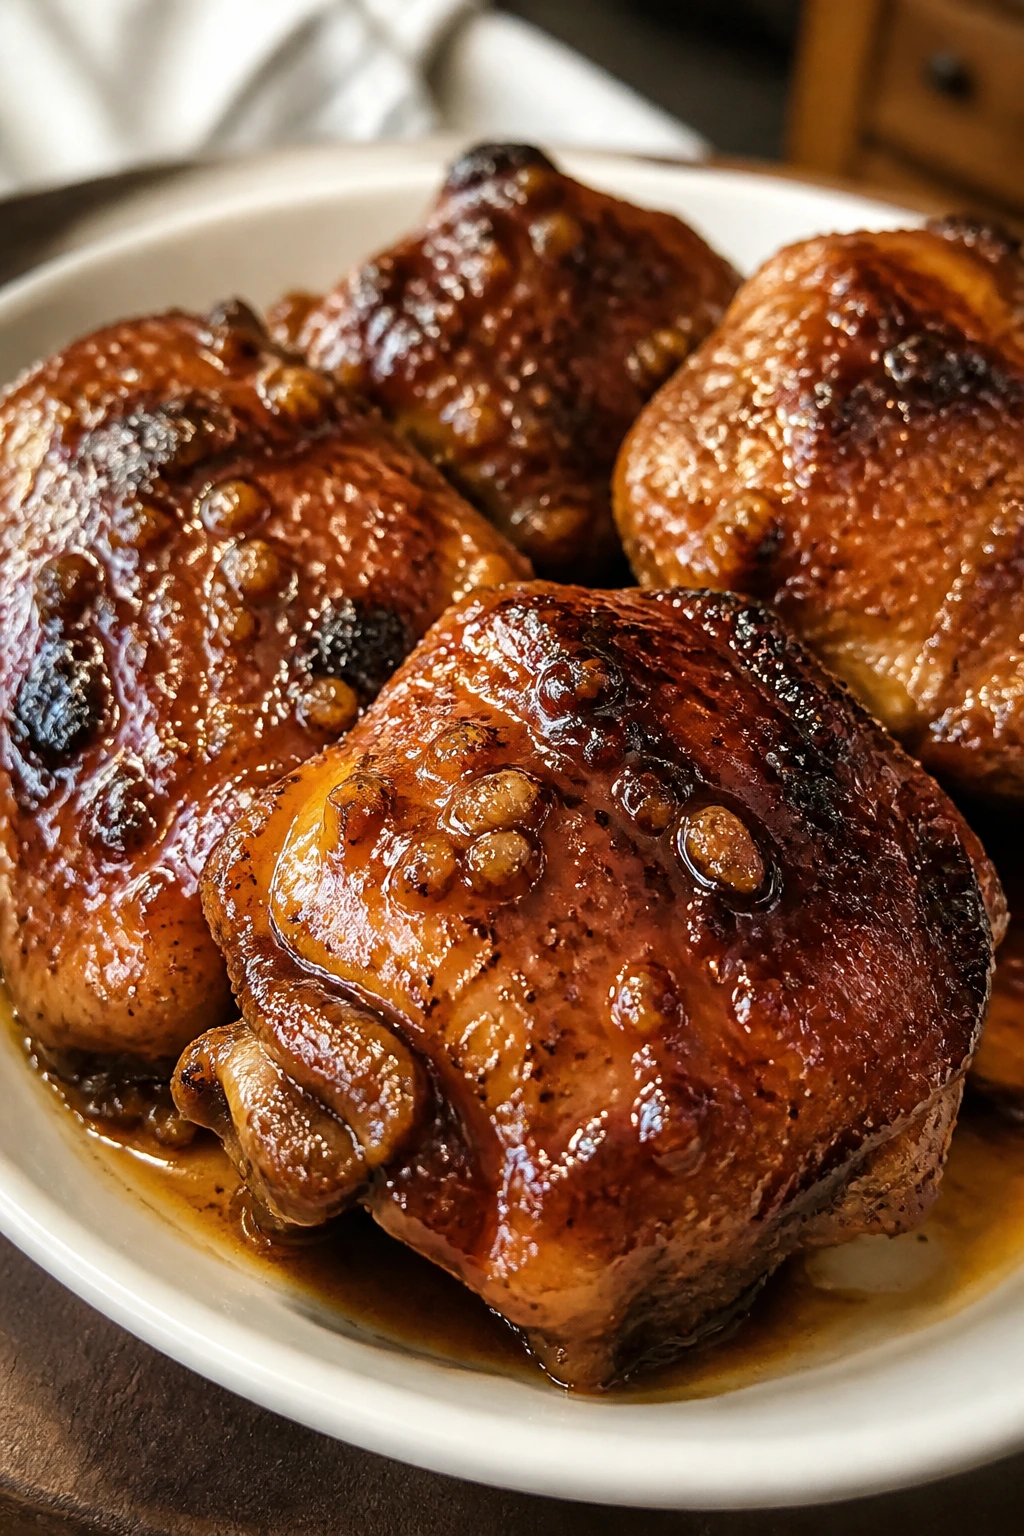
Honey garlic chicken is the freezer meal that tastes more cooked than assembled. The sauce turns glossy and sticky around the chicken, with enough garlic to smell like dinner from the hallway. There’s sweetness here, yes, but not dessert sweetness. The soy sauce and ginger keep the whole thing grounded.
Chicken thighs are the reason this recipe works. They stay juicy after a long slow cook and don’t mind sitting in a sweet-salty sauce for hours. If you’ve ever made a chicken breast recipe in a slow cooker and ended up with stringy meat, you already know why thighs are the better choice here.
The Sweet-Salty Balance Matters
Honey brings body and shine. Soy sauce brings salt and depth. Rice vinegar keeps the sauce from getting sticky in the wrong way, and fresh ginger sharpens the edges. I like to add carrots here because they catch the sauce and get a little sweet themselves. Serve this over rice and it behaves exactly the way you want a weeknight dinner to behave.
What Goes In
- 2 lbs boneless, skinless chicken thighs — The safest pick for a long cook.
- 1/3 cup honey — Enough to glaze the chicken without making it cloying.
- 1/3 cup low-sodium soy sauce or tamari — Tamari works well if you need gluten-free.
- 2 tablespoons rice vinegar — Keeps the sauce lively.
- 5 cloves garlic, minced — Garlic is not a place to be timid.
- 1 tablespoon fresh ginger, grated — Fresh ginger gives the sauce a clean bite.
- 1 large onion, sliced — Melts down and sweetens the base.
- 2 carrots, cut into thin coins or sticks — Add color and texture.
- 1/2 teaspoon red pepper flakes — Optional, but it keeps the sweetness in check.
- 1 tablespoon cornstarch — For thickening the sauce at the end.
- 2 tablespoons water — Mix with cornstarch before stirring it in.
- 2 green onions, sliced, for serving — Fresh and sharp at the end.
- 1 tablespoon sesame seeds, for serving — Nice texture, no fuss.
How to Cook It
- Place the chicken thighs, honey, soy sauce, rice vinegar, garlic, ginger, onion, carrots, and red pepper flakes in a freezer bag.
- Seal the bag tightly, massage it once so the sauce coats the chicken, and freeze it flat.
- Thaw the bag in the refrigerator until the contents are loose and cold.
- Pour into the slow cooker and cook on low for 5 to 6 hours or high for 3 to 4 hours, until the chicken reaches 165°F and feels tender when pressed with tongs.
- Move the chicken to a plate and whisk the cornstarch with the water in a small cup. Stir that mixture into the sauce.
- Cover and cook for 10 to 15 more minutes, until the sauce turns glossy and lightly thickened.
- Return the chicken to the slow cooker, coat it in the sauce, and serve with rice, green onions, and sesame seeds.
Easy Swaps
- Gluten-free version: Use tamari instead of soy sauce.
- Veggie add-on: Stir in snap peas during the last 15 minutes so they stay crisp.
- Rice bowl tip: Spoon extra sauce over the rice; it’s the best part.
6. Turkey Chili
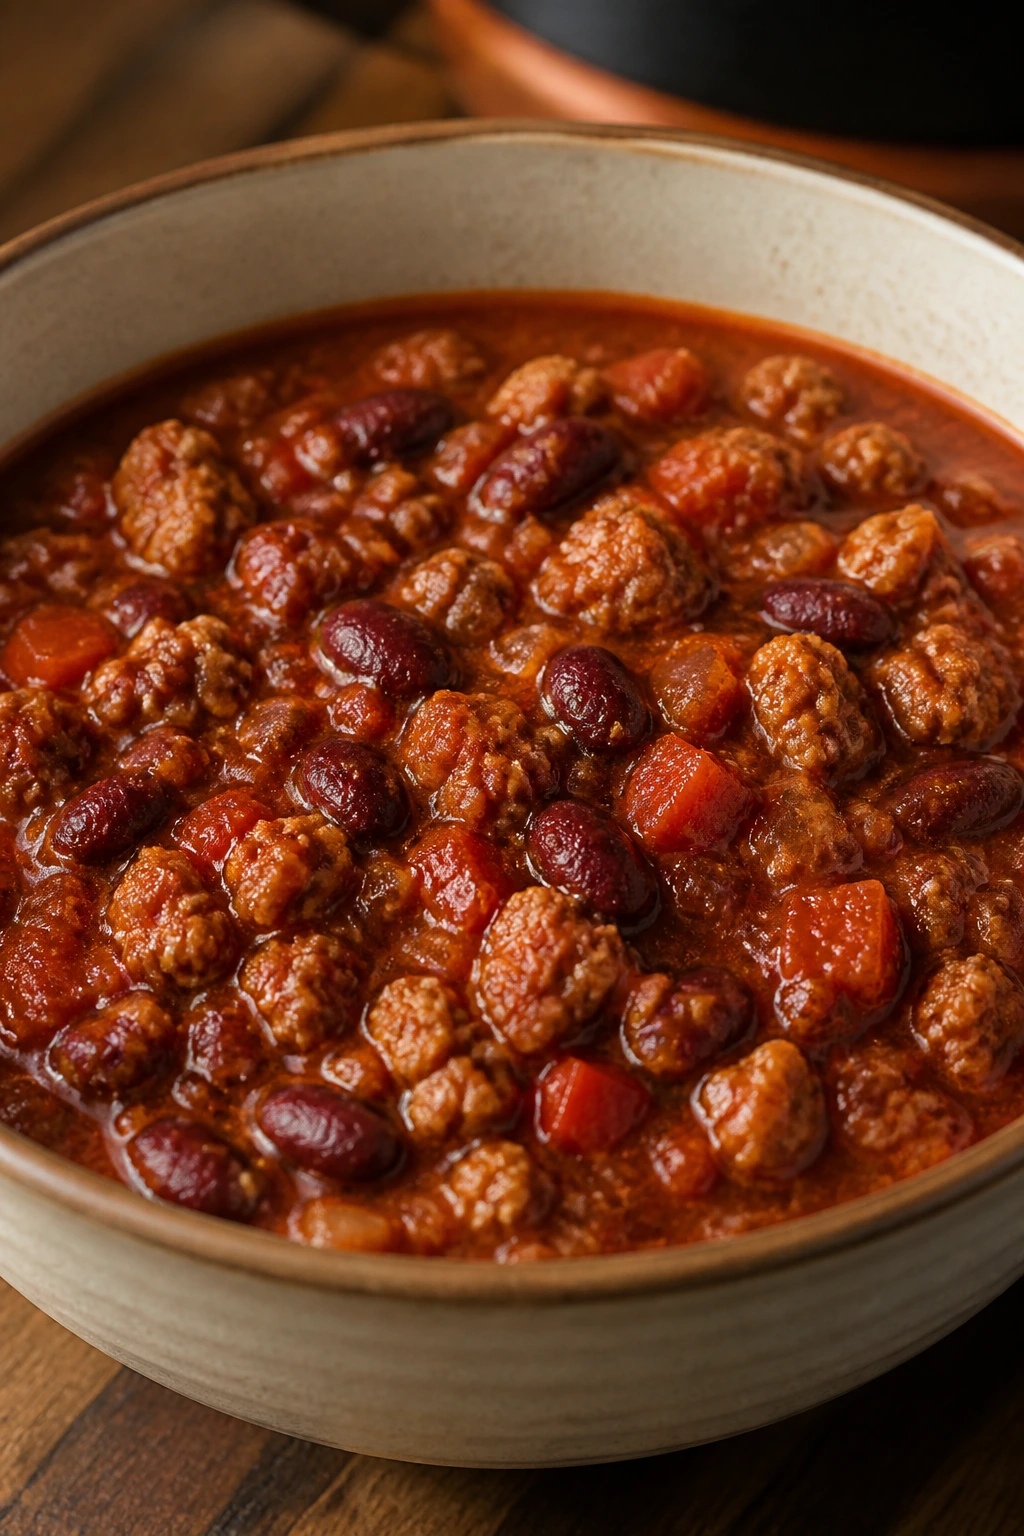
Ground turkey can be bland if you treat it like an afterthought. In a slow cooker, though, it becomes a solid, reliable chili when you build the base properly. You want onion, garlic, tomatoes, beans, and enough chili powder to give the pot a little heat and a lot of smell. That smell is half the appeal. It tells everyone dinner is on the way before they’ve even asked.
I prefer to brown the turkey before freezing. It adds a little edge to the flavor and keeps the texture from turning pasty. You don’t have to, but you’ll taste the difference. This is one of those places where ten extra minutes pays rent later.
Why It Stays Good After Freezing
Turkey has less fat than beef, so it needs help. Beans and tomatoes bring moisture back into the chili, and the spice mix keeps it tasting layered after a trip through the freezer. I like to use a red bell pepper here because it softens into the sauce and adds sweetness without shouting about it. The chili ends up sturdy enough for bowls but loose enough for a ladle.
Ingredient List
- 2 lbs lean ground turkey — Brown it before freezing for the best texture.
- 1 tablespoon olive oil — Helps the turkey brown instead of steam.
- 1 large onion, diced — The base flavor.
- 1 red bell pepper, diced — Adds color and a little sweetness.
- 3 cloves garlic, minced — Fresh garlic works best.
- 2 (15 oz) cans kidney beans, drained and rinsed — Classic chili body.
- 1 (15 oz) can black beans, drained and rinsed — Gives the chili a little more depth.
- 1 (28 oz) can diced tomatoes — Use the whole can, juice and all.
- 1 (15 oz) can tomato sauce — Helps the chili feel thicker.
- 2 cups low-sodium chicken broth or turkey broth — Enough to keep it spoonable.
- 2 tablespoons chili powder — Adjust to taste if your chili powder runs hot.
- 2 teaspoons ground cumin — Gives the chili its familiar warmth.
- 1 teaspoon smoked paprika — Adds a subtle smoky note.
- 1 teaspoon kosher salt — Season in layers.
- 1/2 teaspoon black pepper — Balances the tomatoes.
Slow Cooker Method
- Heat the olive oil in a skillet over medium heat. Add the ground turkey and cook for 5 to 6 minutes, breaking it up, until it is no longer pink and has a few browned bits.
- Stir in the onion, bell pepper, and garlic, and cook for 3 minutes more, until the onion starts to soften and the garlic smells sweet.
- Let the mixture cool, then transfer it to a freezer bag with the beans, tomatoes, tomato sauce, broth, chili powder, cumin, smoked paprika, salt, and pepper.
- Seal the bag, flatten it, and freeze it.
- Thaw the bag in the refrigerator until it is flexible and the center is cold rather than frozen.
- Pour into the slow cooker and cook on low for 6 to 7 hours or high for 3 to 4 hours, until the chili is hot and the flavors have settled together.
- Taste and adjust salt before serving. Add toppings like sour cream, shredded cheese, chopped onion, or tortilla chips.
Small Tweaks
- Thicker chili: Mash a few beans against the side of the pot near the end.
- Mild family version: Use mild chili powder and skip extra heat at the table.
- Freezer note: Frozen corn can go in the bag too, but don’t use too much or the chili gets sweet.
7. Swedish Meatballs in Gravy
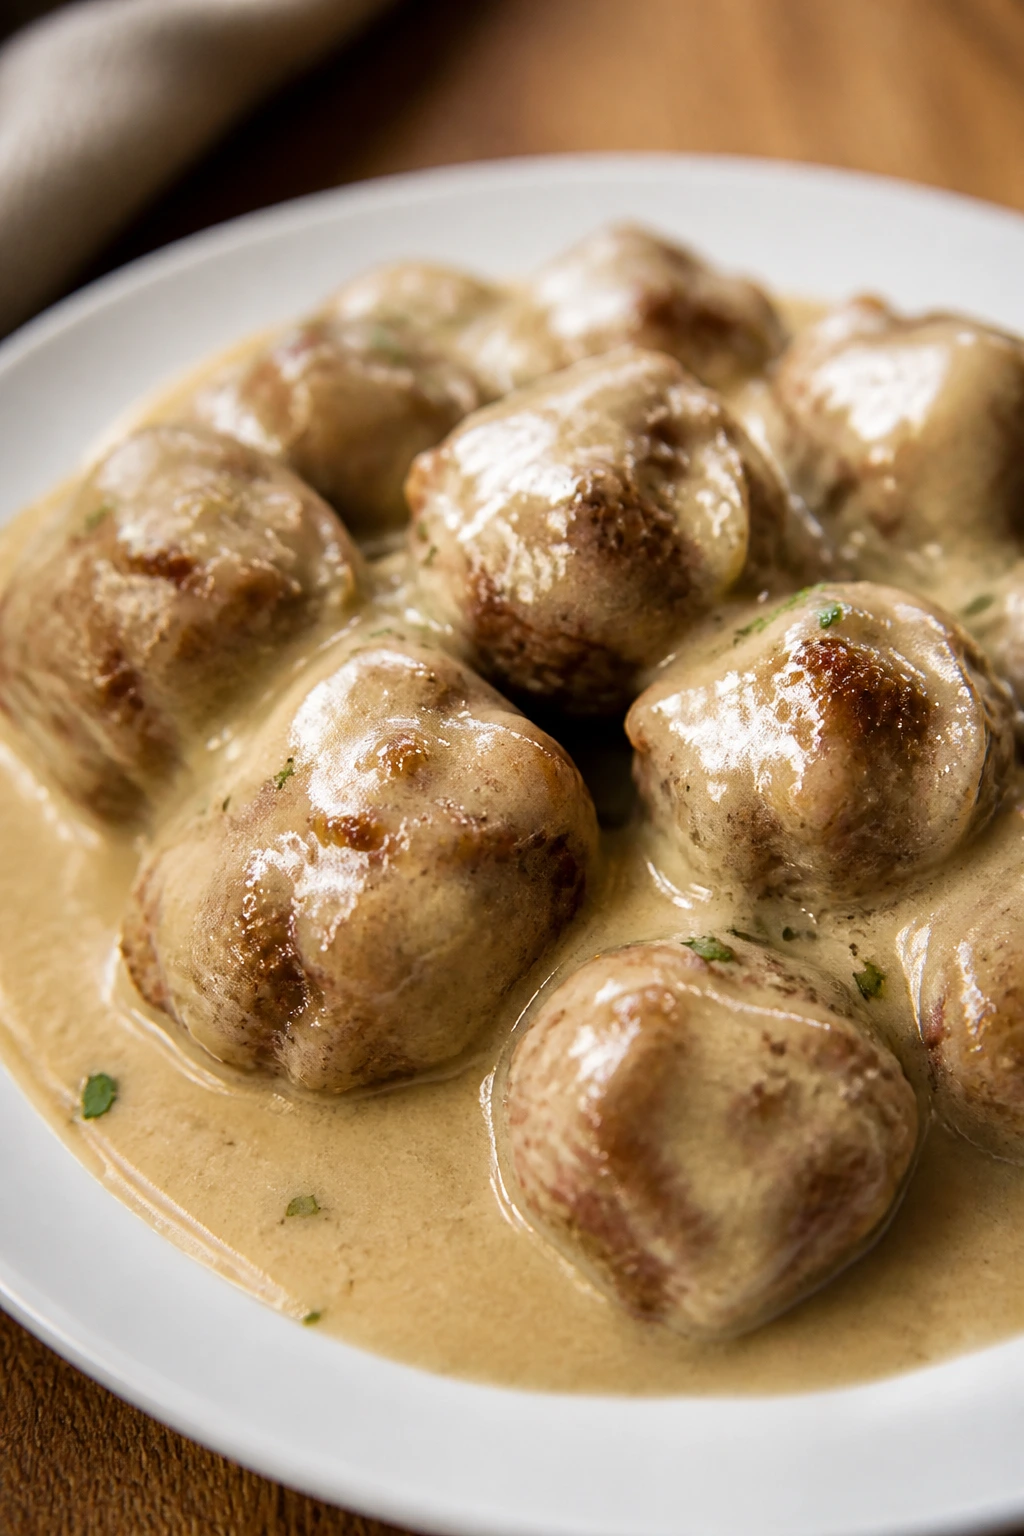
Some freezer meals lean hard into raw meat. Swedish meatballs are one of the few where I actually prefer starting with fully cooked ones. The texture stays firmer, the shape holds, and you get that soft, savory gravy without worrying about the meatballs breaking apart during a long slow cook. It’s a smart shortcut, not a lazy one.
The gravy has a different personality from a tomato-based sauce. It’s pale, silky, and deeply savory, with Worcestershire, Dijon, allspice, and a little nutmeg doing the heavy lifting. Serve it over egg noodles or mashed potatoes and it feels like comfort food with manners.
What Makes It Different
This recipe is all about restraint. You don’t want a heavy hand with the spices or the sauce will taste muddy. The meatballs need time to absorb the gravy, but not so much time that they lose their structure. Using pre-cooked frozen meatballs solves that problem neatly. They warm through, soak up flavor, and stay tender instead of turning grainy.
Ingredient Notes
- 2 lbs fully cooked frozen meatballs — Use plain or Swedish-style meatballs if you can find them.
- 1 large onion, finely diced — Small pieces blend into the gravy better.
- 3 cups low-sodium beef broth — The base of the sauce.
- 1 tablespoon Worcestershire sauce — Adds depth and a little tang.
- 1 tablespoon Dijon mustard — Keeps the gravy from tasting flat.
- 1/2 teaspoon ground allspice — The classic Swedish note.
- 1/4 teaspoon ground nutmeg — Use a light hand.
- 3 tablespoons cornstarch — For thickening the gravy at the end.
- 3 tablespoons water — Mix with the cornstarch before adding it.
- 1/2 cup sour cream — Stir in after cooking for a richer finish.
- 12 oz egg noodles or mashed potatoes, for serving — Either one works.
- Chopped parsley, for serving — Brightens the plate.
Step-by-Step
- Put the frozen meatballs, diced onion, beef broth, Worcestershire sauce, Dijon mustard, allspice, nutmeg, salt, and pepper into a large freezer bag.
- Seal the bag, press out the air, and freeze it flat.
- Thaw the bag in the refrigerator until the meatballs are no longer frozen in the center.
- Empty the contents into the slow cooker and cook on low for 4 to 5 hours or high for 2 to 3 hours, until the meatballs are hot all the way through and the onion is soft.
- Whisk the cornstarch with the water and stir it into the slow cooker. Cook for 10 to 15 minutes, until the gravy turns silky and lightly coats a spoon.
- Turn off the heat and stir in the sour cream.
- Serve over noodles or mashed potatoes with parsley on top.
Swap Ideas
- Lighter version: Use Greek yogurt instead of sour cream, but stir it in off heat.
- Extra-savory version: Add 1 teaspoon soy sauce to the gravy.
- Serving note: Egg noodles catch the sauce better than rice.
8. Teriyaki Chicken and Pineapple
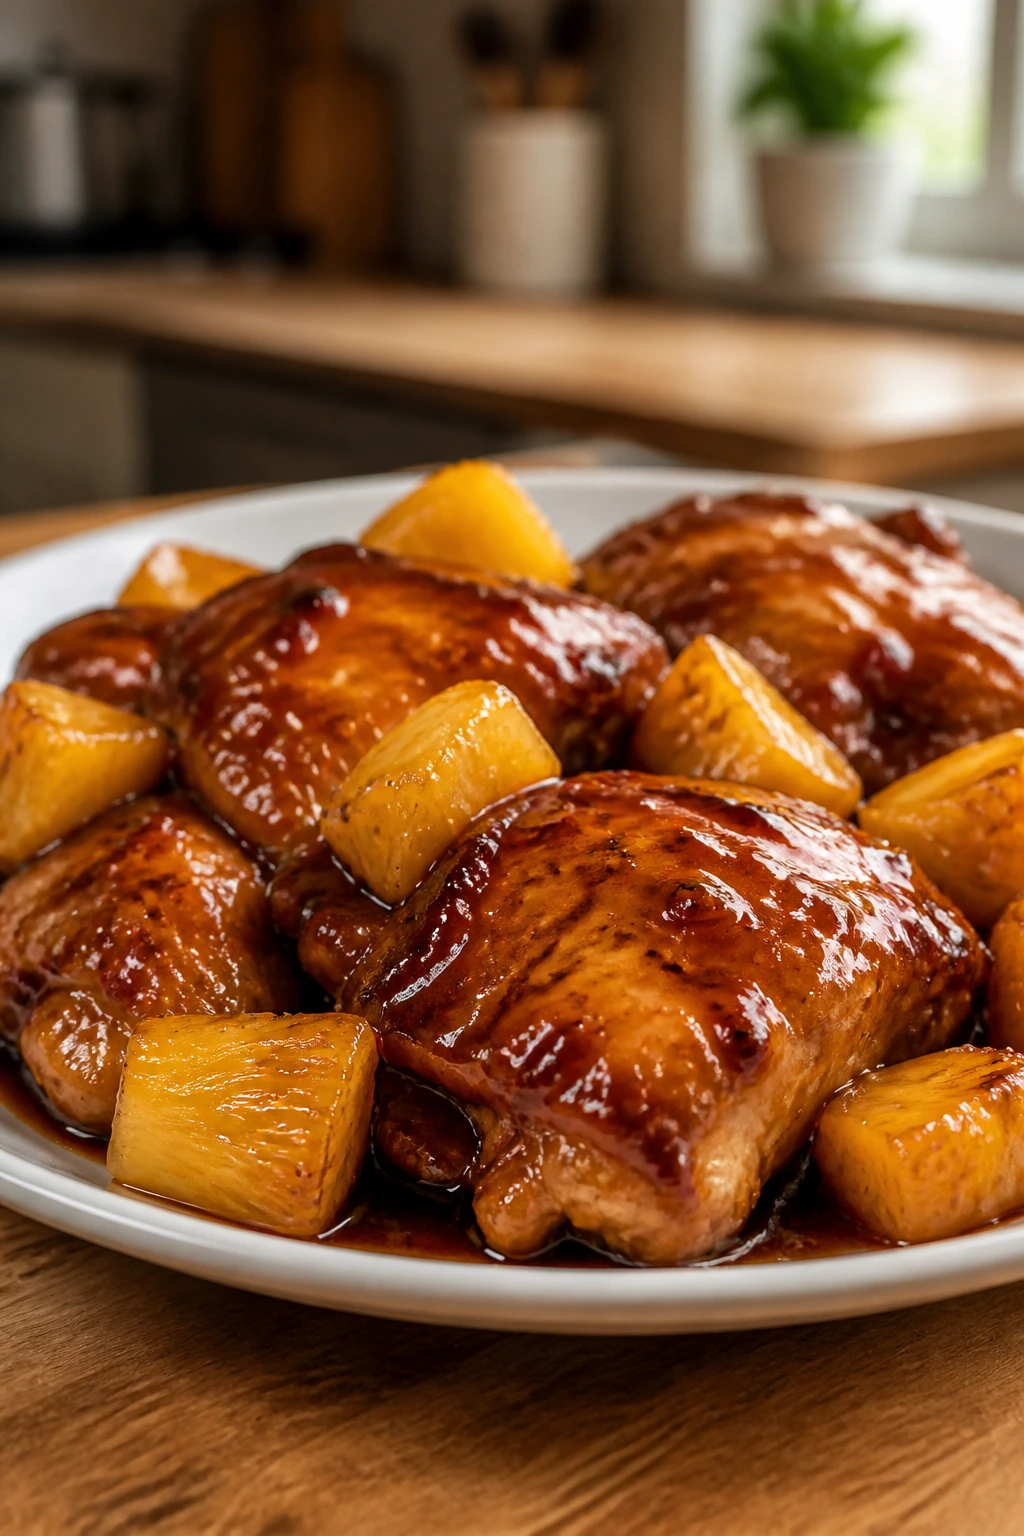
Teriyaki chicken sounds ordinary until the pineapple gets involved. Then the sauce turns sharper, brighter, and a little more alive. The sweet fruit rounds out the soy sauce, the ginger keeps everything from turning syrupy, and the chicken picks up that glossy, takeout-style finish people tend to like more than they admit.
This is a strong freezer meal because the sauce is built from ingredients that freeze well and cook down beautifully. It’s also easy to turn into bowls, lettuce wraps, or rice plates, which makes the leftovers do extra work without complaint. I’m in favor of any dinner that can become lunch with one scoop of rice.
Why the Pineapple Matters
Pineapple adds more than sweetness. It brings acidity, which keeps the sauce from tasting heavy, and its juice helps the chicken feel coated rather than buried. Use pineapple chunks, not a huge amount of syrup, and the sauce stays balanced. The bell pepper goes in late so it keeps a bit of bite. That small detail matters more than people expect.
Ingredient List
- 2 lbs boneless, skinless chicken thighs — Better than breasts for a long sauce cook.
- 1 cup pineapple chunks, drained if canned — Fresh or canned both work.
- 1/2 cup low-sodium soy sauce or tamari — Tamari if you want a gluten-free version.
- 1/4 cup honey or brown sugar — Choose the sweeter one if your soy sauce is strong.
- 2 tablespoons rice vinegar — Keeps the sauce bright.
- 4 cloves garlic, minced — A must.
- 1 tablespoon fresh ginger, grated — Fresh is worth the extra minute.
- 1 large onion, sliced — Softens into the sauce.
- 1 red bell pepper, sliced — Add near the end so it stays colorful.
- 1 tablespoon cornstarch — For thickening.
- 2 tablespoons water — Mix with the cornstarch.
- 2 green onions, sliced, for serving — Fresh finish.
- Sesame seeds, for serving — Optional but useful.
How to Make It
- Combine the chicken thighs, pineapple, soy sauce, honey, rice vinegar, garlic, ginger, onion, and salt and pepper in a freezer bag.
- Seal the bag tightly, turn it once or twice to coat the chicken, and freeze it flat.
- Thaw the bag in the refrigerator until the contents are fully loose.
- Pour into the slow cooker and cook on low for 5 to 6 hours or high for 3 to 4 hours, until the chicken reaches 165°F and shreds easily.
- Add the sliced red bell pepper during the last 30 minutes so it softens without losing all of its crunch.
- Mix the cornstarch with water, stir it into the sauce, and cook for 10 more minutes until glossy.
- Serve over rice with green onions and sesame seeds.
Small Tweaks
- Less sweet: Use brown sugar instead of honey and cut it back by a tablespoon.
- Bowl version: Add steamed broccoli on top when serving.
- Sauce tip: If the sauce tastes thin, let it sit with the lid off for a few minutes after thickening.
9. Salsa Verde Pork Carnitas
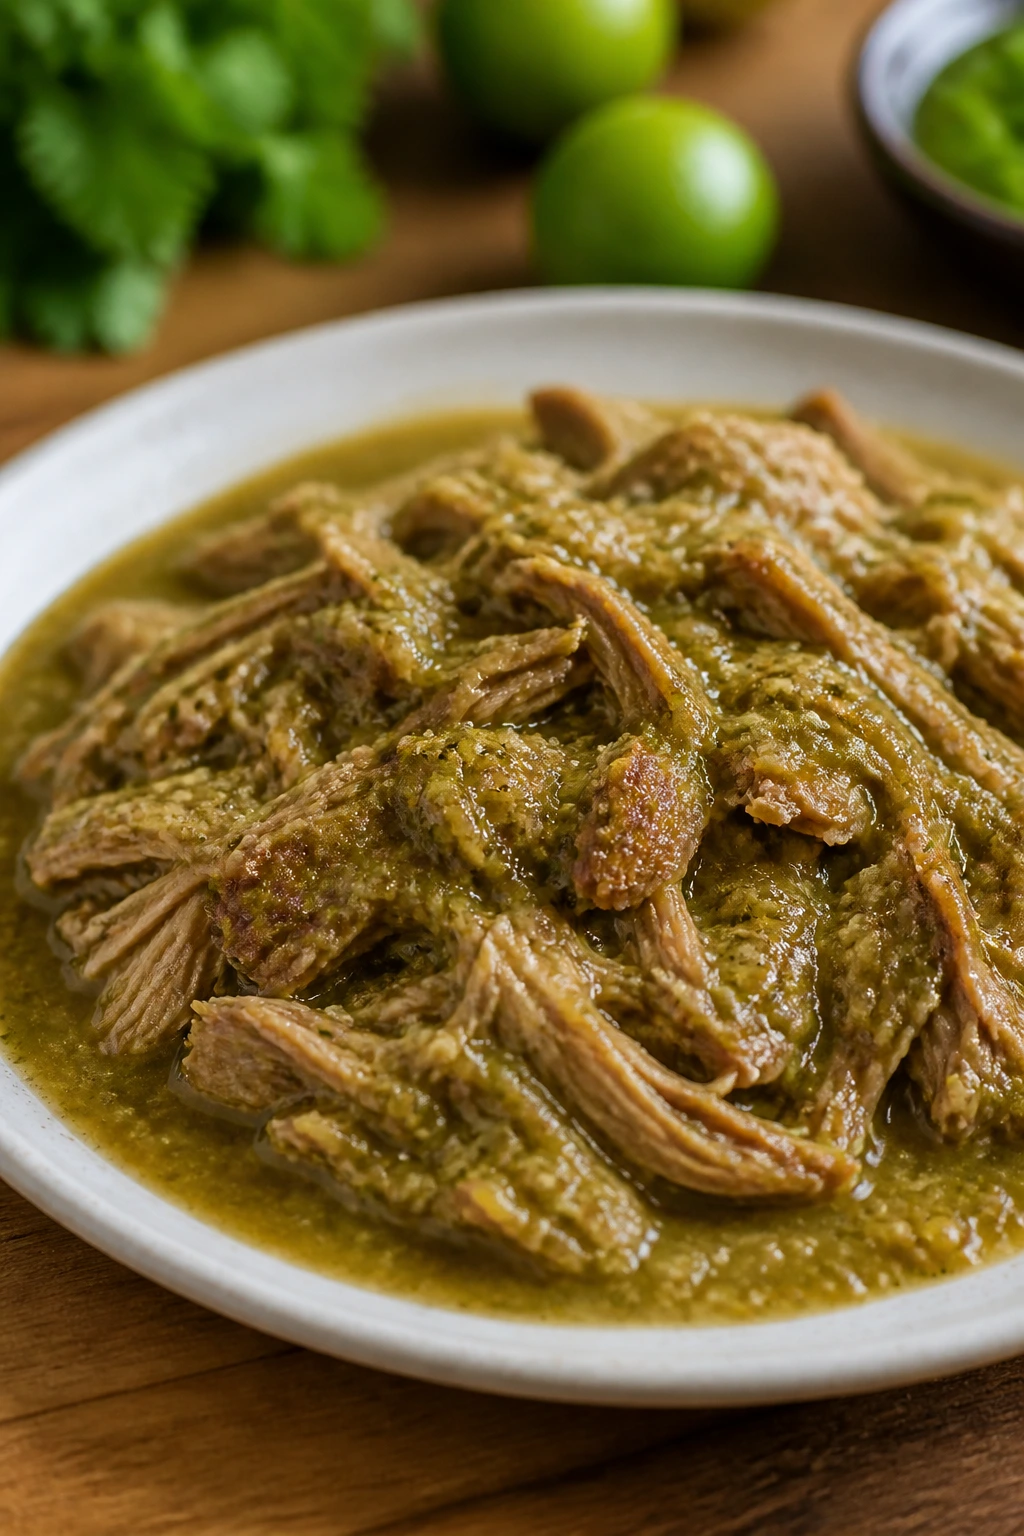
Pork shoulder is the quiet hero of freezer prep. It doesn’t demand much, it doesn’t dry out easily, and it tastes like you meant to make dinner with some care. Salsa verde gives the meat a tart, green brightness that red sauces don’t quite match. After a long slow cook, the pork turns soft enough to shred and rich enough to stand on its own in tacos or bowls.
This is the meal I make when I want something that can flex. Tortillas one night, rice bowls the next, nachos if things get playful. The leftovers hold up because the pork keeps soaking in flavor instead of losing it.
What Makes It Shred Cleanly
Salsa verde carries acidity, garlic, and chile in one bottle, which is useful when you want a freezer bag to taste like something more than “pork plus liquid.” The pork shoulder itself is the engine here. Slow heat turns the connective tissue soft, and a squeeze of lime at the end keeps the meat from tasting like it spent too long in the pot. It’s a simple meal with strong bones.
Key Ingredients
- 3 to 4 lbs pork shoulder, trimmed into large chunks — Leave some fat in place for tenderness.
- 1 large onion, sliced — It melts into the sauce.
- 4 cloves garlic, minced — Fresh garlic builds the flavor.
- 1 cup salsa verde — Choose one with a thick texture.
- 1 tablespoon ground cumin — Gives the pork a warm background note.
- 1 tablespoon dried oregano — A little herbal lift.
- 1 1/2 teaspoons kosher salt — Season the meat properly.
- 1 teaspoon black pepper — Balances the salsa.
- 1 lime, juiced — Add after cooking for a brighter finish.
- 1/2 cup low-sodium chicken broth — Keeps the sauce from getting too concentrated.
- Corn tortillas, for serving — Warm them before serving.
- Diced onion, cilantro, and avocado, for serving — The classic taco toppings.
Step-by-Step Method
- Put the pork shoulder, onion, garlic, salsa verde, cumin, oregano, salt, pepper, lime juice, and broth into a freezer bag.
- Seal it well, flatten the bag, and freeze it.
- Thaw the bag in the refrigerator until the contents are loose and no hard frozen center remains.
- Pour everything into the slow cooker and cook on low for 8 to 9 hours or high for 4 to 5 hours, until the pork shreds easily with forks.
- Remove the pork, shred it, and skim off any excess fat if needed.
- Return the pork to the slow cooker and let it sit in the sauce for 10 minutes.
- Serve in warm tortillas, over rice, or on nachos.
Variation Notes
- Crispy-edged version: Spread the shredded pork on a sheet pan and broil for 3 to 5 minutes after slow cooking.
- Milder taco night: Use a mild salsa verde and add hot sauce at the table.
- Meal-prep tip: Freeze lime wedges separately if you like a fresh squeeze at serving.
10. Lasagna Soup
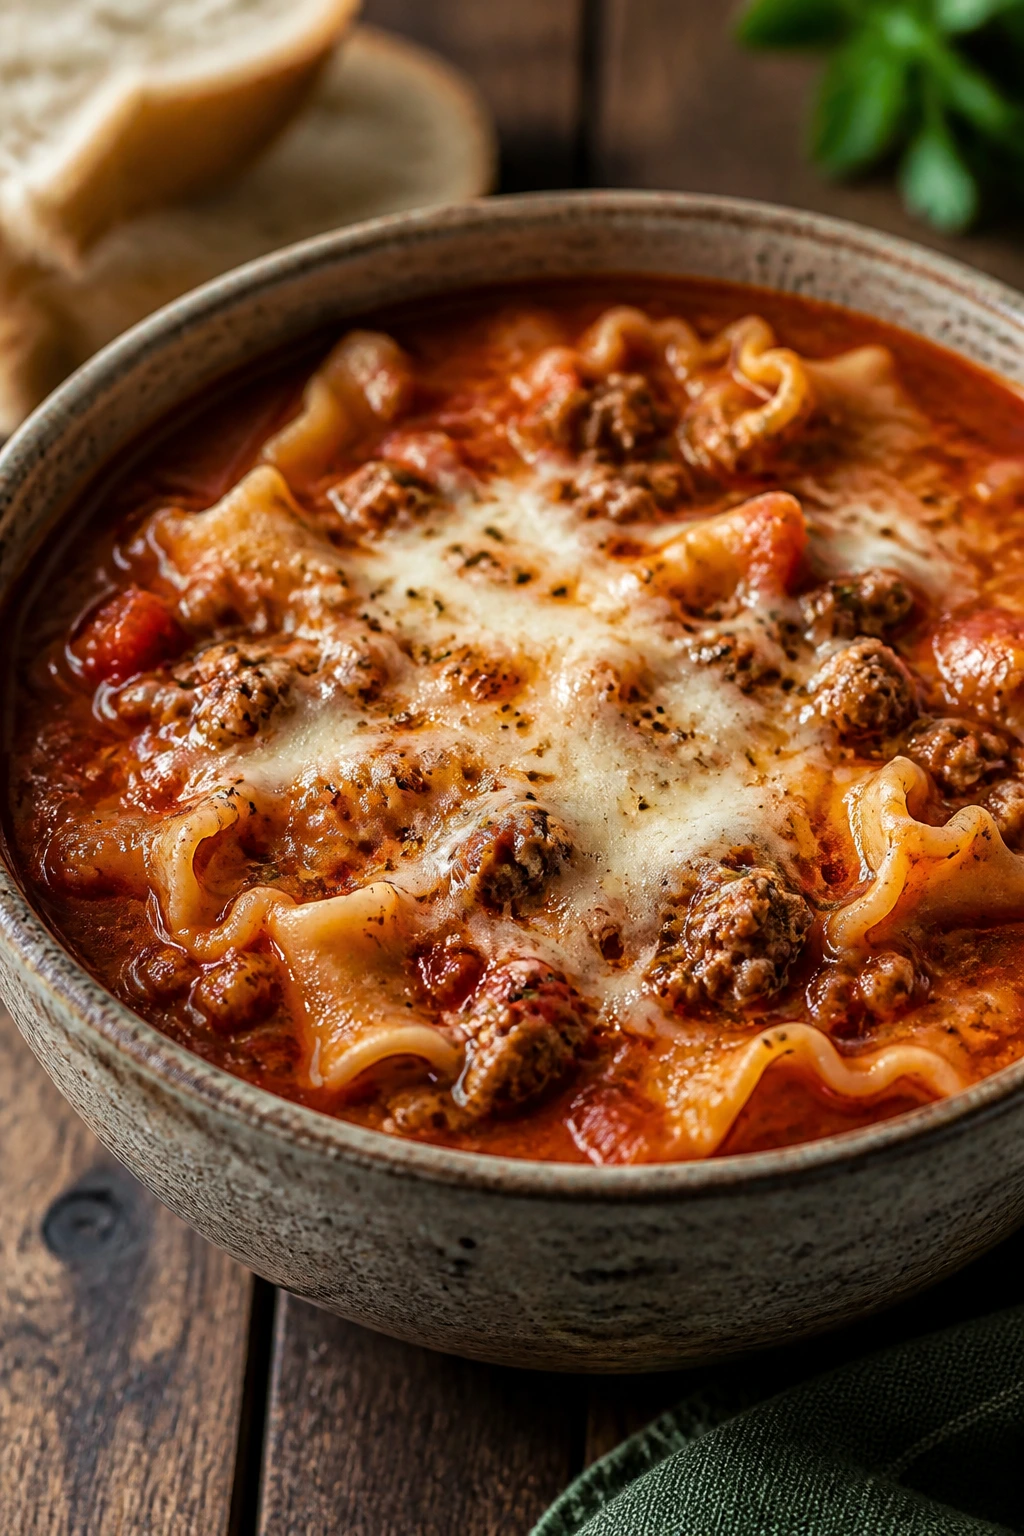
Lasagna soup is what happens when you want the flavor of lasagna without the layering ceremony. It tastes like a pot that has been simmering all day in a very good Italian grandmother’s kitchen, even if you made the base in a freezer bag a few days earlier. Tomato, garlic, herbs, beef, sausage, and cheese all show up, but in a way that feels easier than baking a pan of noodles and waiting for it to set.
I like this one because the parts that suffer in the freezer are the parts you hold back. The noodle goes in later. The ricotta and mozzarella go on at the end. That means the broth stays rich, the pasta keeps some bite, and the whole bowl lands with the right texture instead of getting muddy.
Why Keeping the Noodles Separate Helps
Pasta drinks liquid like it has a personal grudge. If you freeze it in the soup, it turns bloated and soft by the time you reheat the meal. Adding broken lasagna noodles near the end keeps them springy and lets the soup taste like soup, not pasta porridge. The meat base freezes well because it’s tomato-heavy, and tomato sauce is one of the safest bets in freezer meal prep.
Ingredient List
- 1 lb ground beef — Browned before freezing.
- 1 lb Italian sausage — Mild or hot, depending on your crowd.
- 1 large onion, diced — Gives the soup a sweet base.
- 4 cloves garlic, minced — Fresh is best.
- 2 tablespoons tomato paste — Deepens the tomato flavor.
- 1 (28 oz) can crushed tomatoes — Gives the soup body.
- 1 (15 oz) can tomato sauce — Helps the broth stay rich.
- 4 cups low-sodium beef broth — Enough to make it spoonable.
- 2 teaspoons Italian seasoning — The herb blend that ties it together.
- 1/2 teaspoon crushed red pepper flakes — Optional, but nice.
- 8 oz lasagna noodles, broken into pieces — Add on the cooking day.
- 1 cup ricotta cheese, for serving — Creamy and mild.
- 1 1/2 cups shredded mozzarella — Melts over the bowl.
- 1/4 cup grated Parmesan — Salty finish.
- Fresh basil, for serving — If you have it, use it.
Cooking Method
- Brown the ground beef and Italian sausage in a large skillet over medium heat, breaking it up until no pink remains and the meat is nicely browned.
- Add the onion and garlic and cook for 3 minutes, until the onion softens and the garlic smells sweet.
- Stir in the tomato paste, crushed tomatoes, tomato sauce, broth, Italian seasoning, red pepper flakes, salt, and pepper. Let the mixture cool.
- Transfer the cooled base to a freezer bag and freeze it flat. Keep the broken lasagna noodles separate.
- Thaw the soup base in the refrigerator until it is loose and cold through the middle.
- Pour the base into the slow cooker and cook on low for 6 to 7 hours or high for 3 to 4 hours.
- Stir in the broken noodles during the last 25 to 30 minutes, until they are tender but still have a little bite.
- Ladle into bowls and top with ricotta, mozzarella, Parmesan, and basil.
Small Tweaks
- Saucier version: Add an extra cup of broth if you like a looser soup.
- Vegetable add-in: Spinach or chopped zucchini can go in near the end.
- Leftover note: Store the noodles separately if you want the best texture the next day.
Why Crockpot Freezer Meals Save the Toughest Weeknights
The slow cooker is not magic. It will not rescue a bad cut of meat or fix an underseasoned sauce by sheer force of personality. What it does do, though, is give you a steady, low-effort heat source that rewards a little planning. That matters when the meal already lives in the freezer and the hard part is simply remembering to thaw it in time.
The best freezer meals share a few traits. They use ingredients that keep their shape under long heat. They lean on sauces that taste better after sitting for a few hours. They avoid delicate things that fall apart, like pasta or soft dairy, until the last stage. Once you start thinking that way, meal prep stops feeling like a list of chores and starts looking like a stack of easy choices. A flat freezer bag is a future dinner. That’s a nice thing to have in reserve.
Essential Equipment for These Recipes

- 6- to 8-quart slow cooker — Big enough for soups, pork shoulder, and chili without crowding.
- Gallon-size freezer bags — Best for flat-freezing and easy labeling.
- Sheet pans — Great for freezing bags flat and catching leaks.
- Sharp chef’s knife — Faster chopping, cleaner cuts, less frustration.
- Cutting board — Use a sturdy one; a second board for raw meat is helpful.
- Large skillet — Needed for browning beef, turkey, sausage, or chicken if you’re building extra flavor.
- Measuring cups and spoons — Keeps sauces and seasoning balanced.
- Wooden spoon or silicone spatula — For stirring, scraping, and shredding help.
- Instant-read thermometer — Handy for chicken and pork so you’re not guessing.
- Permanent marker and masking tape — Label each bag with the meal name, date, and cooking instructions.
- Tongs — Useful for moving hot meat in and out of the pot.
Smart Shopping for Crockpot Freezer Meals
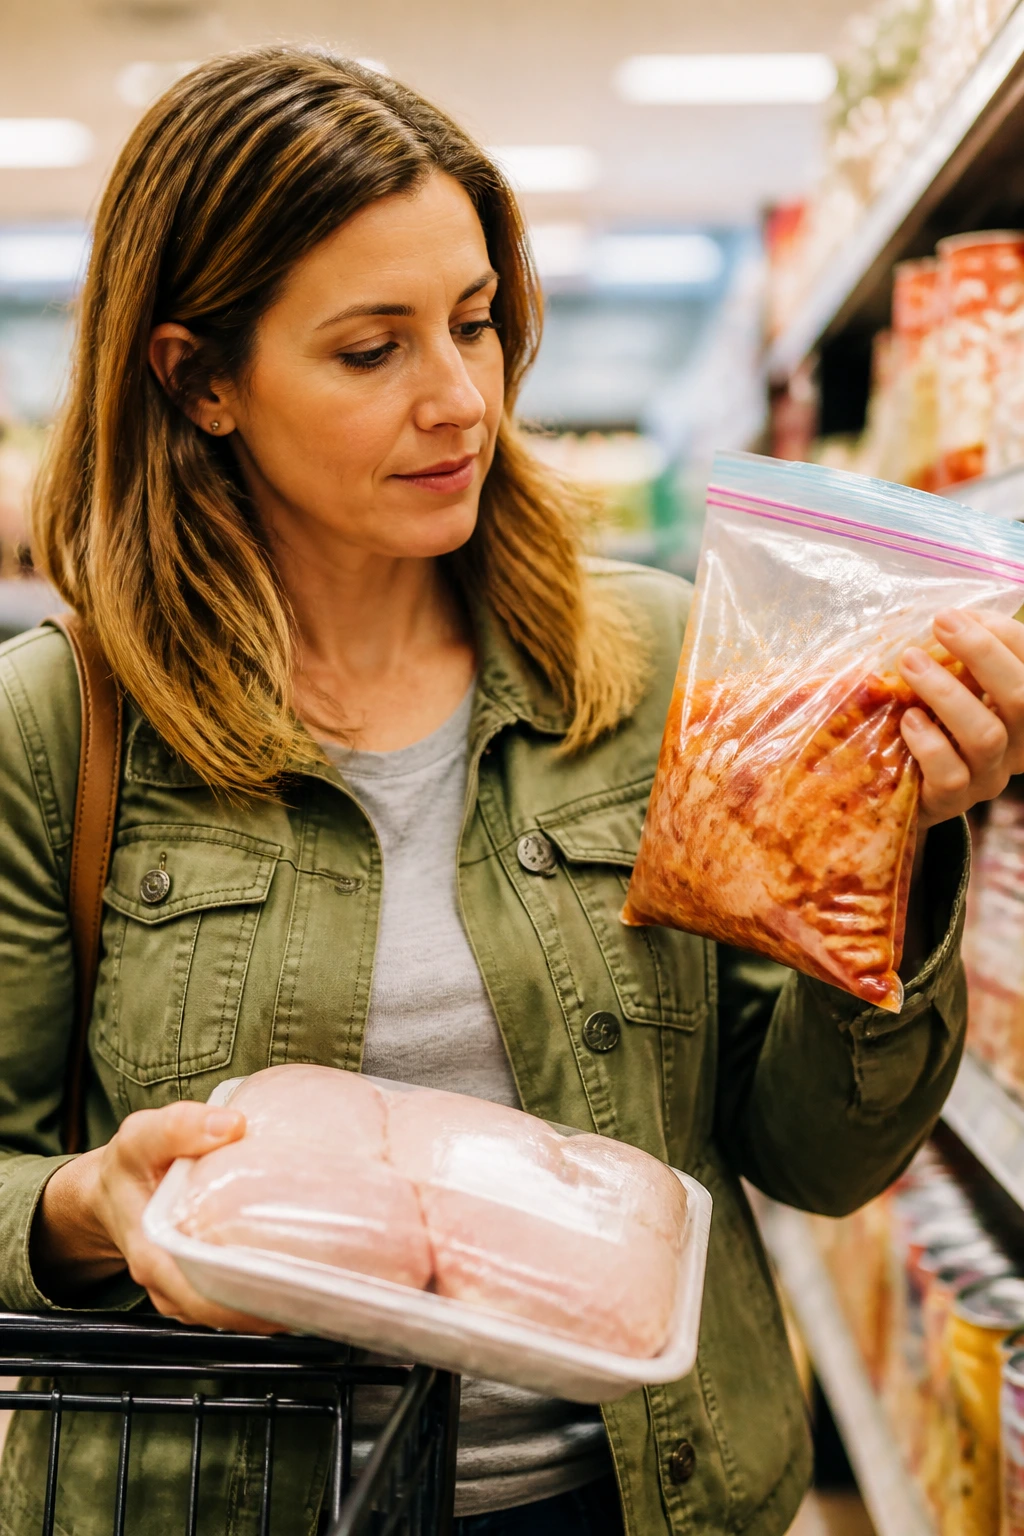
A good freezer meal starts in the store, long before the bag is sealed. Chicken thighs beat chicken breasts in a slow cooker because they stay juicy after a long cook. Pork shoulder is better than a lean roast for the same reason. Ground turkey needs help from browned edges, tomatoes, beans, or both, because it can turn dry if you treat it like beef and expect the same results.
Broth matters more than people think. Low-sodium broth gives you control, especially when soy sauce, salsa, barbecue sauce, or tomato products are already bringing salt to the party. Choose canned tomatoes with a clean ingredient list and a texture that matches the dish: crushed for soup, diced for chili, sauce for smooth body. Thick salsa and salsa verde hold up better than thin, watery jars.
Beans should be drained and rinsed unless the recipe says otherwise. Frozen corn is usually a better choice than canned because it keeps a fresher bite. Dairy is almost always better added after cooking, not frozen into the bag. And if you’re buying freezer bags, spend the extra few cents on sturdy ones. Thin bags split when you least want them to.
Make-Ahead, Storage, and Reheating Guidance

Uncooked freezer bags keep best for about 2 to 3 months when frozen flat and sealed well. Past that, they may still be safe, but the flavor and texture start to drift. Label every bag with the meal name, the date, the slow cooker setting, and any last-step ingredient that needs to be added later. That little note saves you from opening a bag and guessing what you meant six weeks earlier.
For thawing, the refrigerator is the place. Most bags need 12 to 24 hours to thaw fully if they’re flat; thicker bags can take a bit longer. The goal is a bag that bends easily and has no icy core. Do not start these meals from a frozen block in the slow cooker. That’s a food-safety problem and a texture problem all at once.
Once cooked, cool leftovers for about 20 to 30 minutes, then portion them into containers. Most finished meals keep 3 to 4 days in the refrigerator and up to 2 to 3 months in the freezer. Soups and chilies reheat best on the stovetop over low heat with a splash of broth. Shredded meats do well covered in a skillet or saucepan so they don’t dry out. If a meal contains noodles, rice, or pasta, store those separately when you can; they soak up liquid and turn soft fast. Microwave reheating works too — use medium power and short bursts so the edges don’t overcook before the center is hot.
Flavor Swaps That Work Across the Whole Batch
Gluten-Free Batch Prep: Use tamari instead of soy sauce, and check that your broth, salsa, and barbecue sauce are labeled gluten-free. It’s a simple swap, and it keeps meals like honey garlic chicken and teriyaki chicken easy to serve without extra fuss.
Dairy-Free Finish: Skip cream cheese, sour cream, and ricotta-based toppers, then finish bowls with avocado, olive oil, or a spoonful of dairy-free yogurt. White chicken chili and taco soup both taste good this way, especially if you add lime and herbs at the end.
Lower-Sodium Cook Bags: Choose low-sodium broth, rinse canned beans well, and cut back on added salt until the end. A slow cooker concentrates flavor without evaporating a ton of liquid, so you can always season more later. You can’t pull salt back out once it’s in.
Extra-Veggie Boost: Carrots, celery, bell peppers, zucchini, and spinach all fit naturally into these freezer meals. Add sturdier vegetables early and tender greens near the end so they keep some bite.
Kid-Friendly Mild Mode: Pull back on chili powder, red pepper flakes, and hot salsa. Put the heat on the table in the form of hot sauce, jalapeños, or pepper jack cheese so the base meal stays friendly.
Common Mistakes to Avoid With Crockpot Freezer Meals
The biggest mistake is overwatering the bag. Slow cookers don’t boil off liquid the way a stovetop pot does, so a bag that looks soupy before freezing often turns thin after cooking. Sauces should look a little concentrated going in. That feels counterintuitive until you’ve eaten one watery chili too many.
Another easy miss is freezing dairy into the bag. Cream cheese, sour cream, and yogurt can split or turn grainy after long slow heat. Keep them for the end. The same goes for pasta and rice. They belong near the finish, not buried in the freezer bag where they’ll soak up liquid and lose all sense of structure.
Lean meat is another trap. Chicken breasts can work, but they’re less forgiving than thighs. Ground turkey needs browning. Pork shoulder and beef chuck are better slow cooker bets than lean cuts that go stringy after hours of heat. And label the bags. Seriously. A freezer without labels is just a cold mystery pile.
Last, don’t skip thawing in the refrigerator. A slow cooker warms gently, which is useful when the food is already thawed and ready. It is not the place to defrost a frozen block safely. That rule is plain, and it saves a lot of trouble.
Frequently Asked Questions About Crockpot Freezer Meals

Can I put a frozen meal straight into the slow cooker?
No. Thaw the bag in the refrigerator first. Starting from frozen keeps the center in the temperature danger zone too long, and the texture usually suffers as well.
How far ahead can I make these freezer bags?
For best flavor and texture, aim for 2 to 3 months in the freezer. Most of these meals can sit longer, but the ingredients are at their best when you use them within that window.
Do chicken breasts work instead of thighs?
They can, but they dry out more easily. If you swap them in, check them earlier and keep an eye on the texture. Thighs give you more room for error, which is why I reach for them first.
Should I brown ground meat before freezing?
Yes, if you have the time. Browning ground beef, turkey, or sausage adds flavor and gives the finished meal a better texture. It also helps the meat break up more cleanly in the slow cooker.
Can I freeze pasta or rice in these meals?
You can, but I wouldn’t. Both get soft fast. Keep them separate and add them when serving or near the end of cooking if the recipe calls for it.
How do I keep the sauce from getting watery?
Use less broth than you think you need, choose thick salsa or tomato sauce, and thicken at the end with cornstarch if the pot looks thin. The slow cooker won’t evaporate much liquid, so a concentrated sauce is a smart starting point.
Can I double these recipes?
Yes, if your slow cooker is large enough and you do not overfill it. A 6-quart cooker can handle most of these recipes comfortably, but it still needs some space for the heat to move around.
A Better Back-Up Plan for Dinner
A freezer bag is not glamorous. It won’t impress anyone on the counter. But when the evening starts to wobble, it can save the whole thing without making a fuss. That’s what makes crockpot freezer meals so useful: they absorb the chaos before you get home to it.
The best part is how ordinary the process becomes after a few rounds. Chop, bag, label, flatten, freeze. Thaw, pour, cook, eat. Nothing fancy. Just a small stack of dinners waiting to be useful, which is honestly one of the nicest things you can keep in your freezer.
The next time your evening needs a backup plan, one of these bags will be ready.