
A pan of enchiladas has a habit of disappearing faster than almost any other family dinner, and that’s exactly why enchilada dinners for big families deserve a little respect. They have to do more than taste good. They need to stretch, stay saucy without turning soupy, and survive a second round in the oven without falling apart into a sad pile of torn tortillas and cheese slick.
The tricky part is never the idea. It’s the mechanics. You need fillings that hold together, tortillas that bend instead of crack, enough sauce to keep every bite soft at the edges, and enough flavor that the last square from the pan tastes as good as the first. That’s where enchiladas shine: they’re generous, forgiving, and built for a table that keeps asking for “just a little more.”
There’s also a quiet bonus here that people forget about until the end of a long evening. Enchiladas reheat well. Better than most casseroles, honestly. The sauce soaks into the tortillas, the fillings settle in, and leftovers the next day can taste almost more composed than the first serving. That matters when you’re feeding a house full of people with different schedules, different appetites, and very strong opinions about cheese.
Why This Collection Is Different
- Built for real pan size: Every recipe here is scaled for a crowd, with enough filling to make a 9×13-inch pan feel substantial instead of skimpy.
- Flexible on the protein front: Chicken, beef, pork, turkey, beans, and vegetables all get a turn, so you can cook from what you have instead of making one more grocery run.
- Leftovers aren’t an afterthought: These enchilada dinners hold their shape and flavor after chilling, which makes tomorrow’s lunch almost feel planned.
- Budget pressure stays low: Beans, rice, potatoes, tortillas, and canned sauces do a lot of heavy lifting without making dinner feel cheap.
- Sauce is part of the strategy: Red, green, creamy, and mole-style sauces each change the mood of the pan, so the collection never gets repetitive.
- Good for mixed eaters: Meat lovers, bean lovers, vegetable eaters, and the “please don’t make it spicy” crowd all have something here.
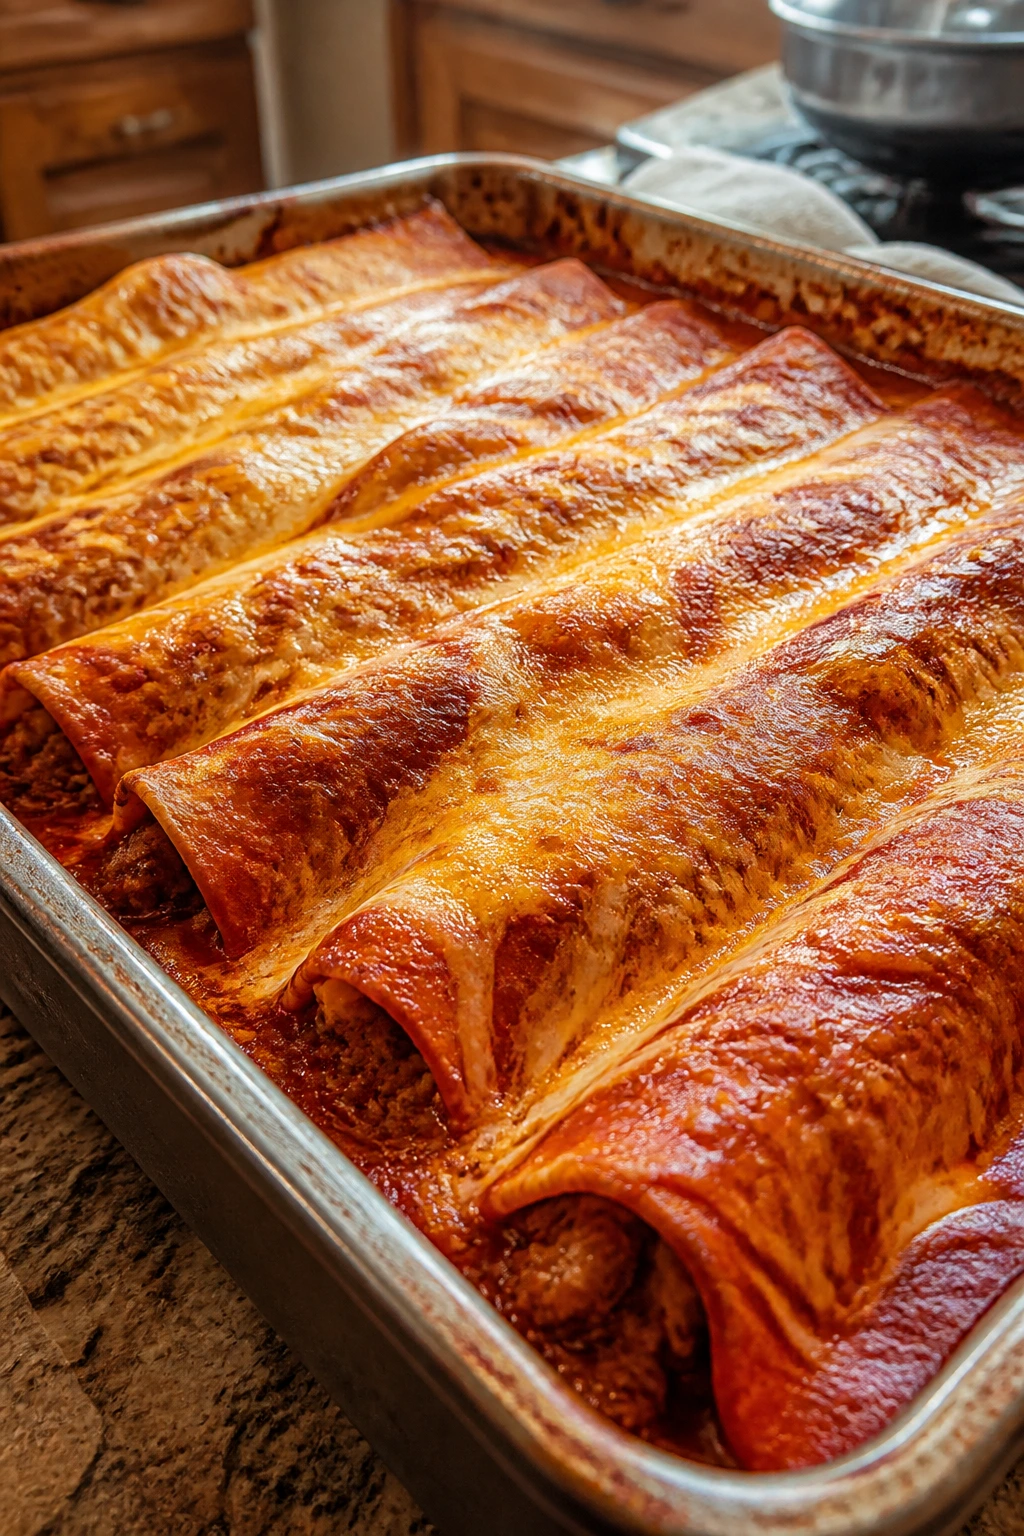
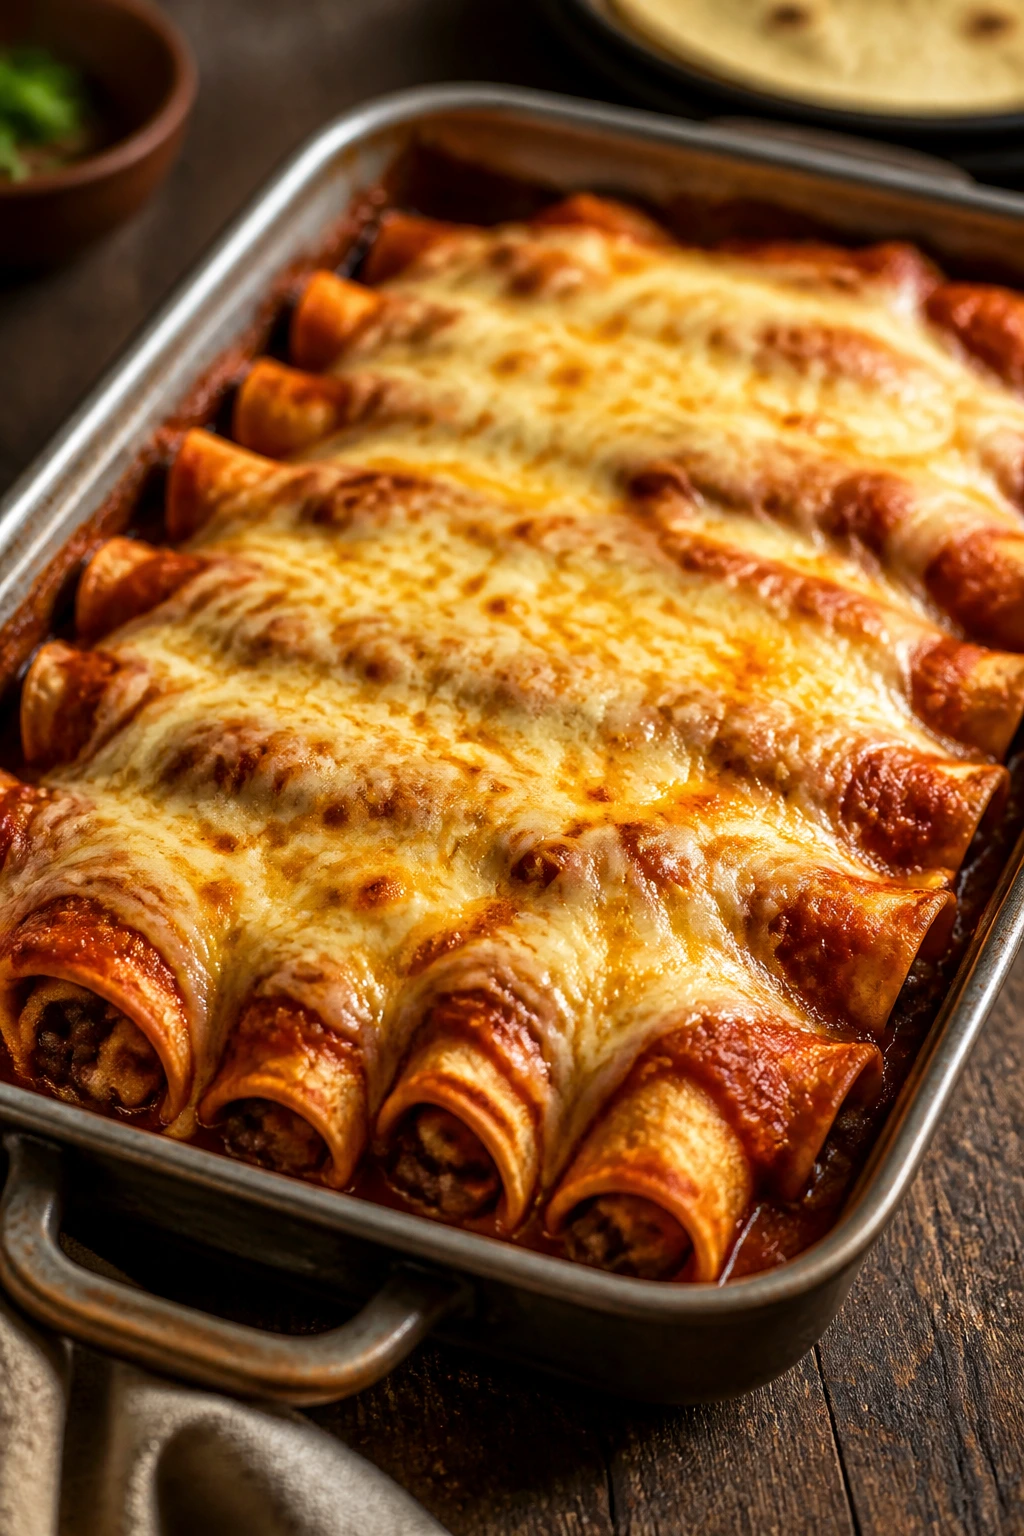
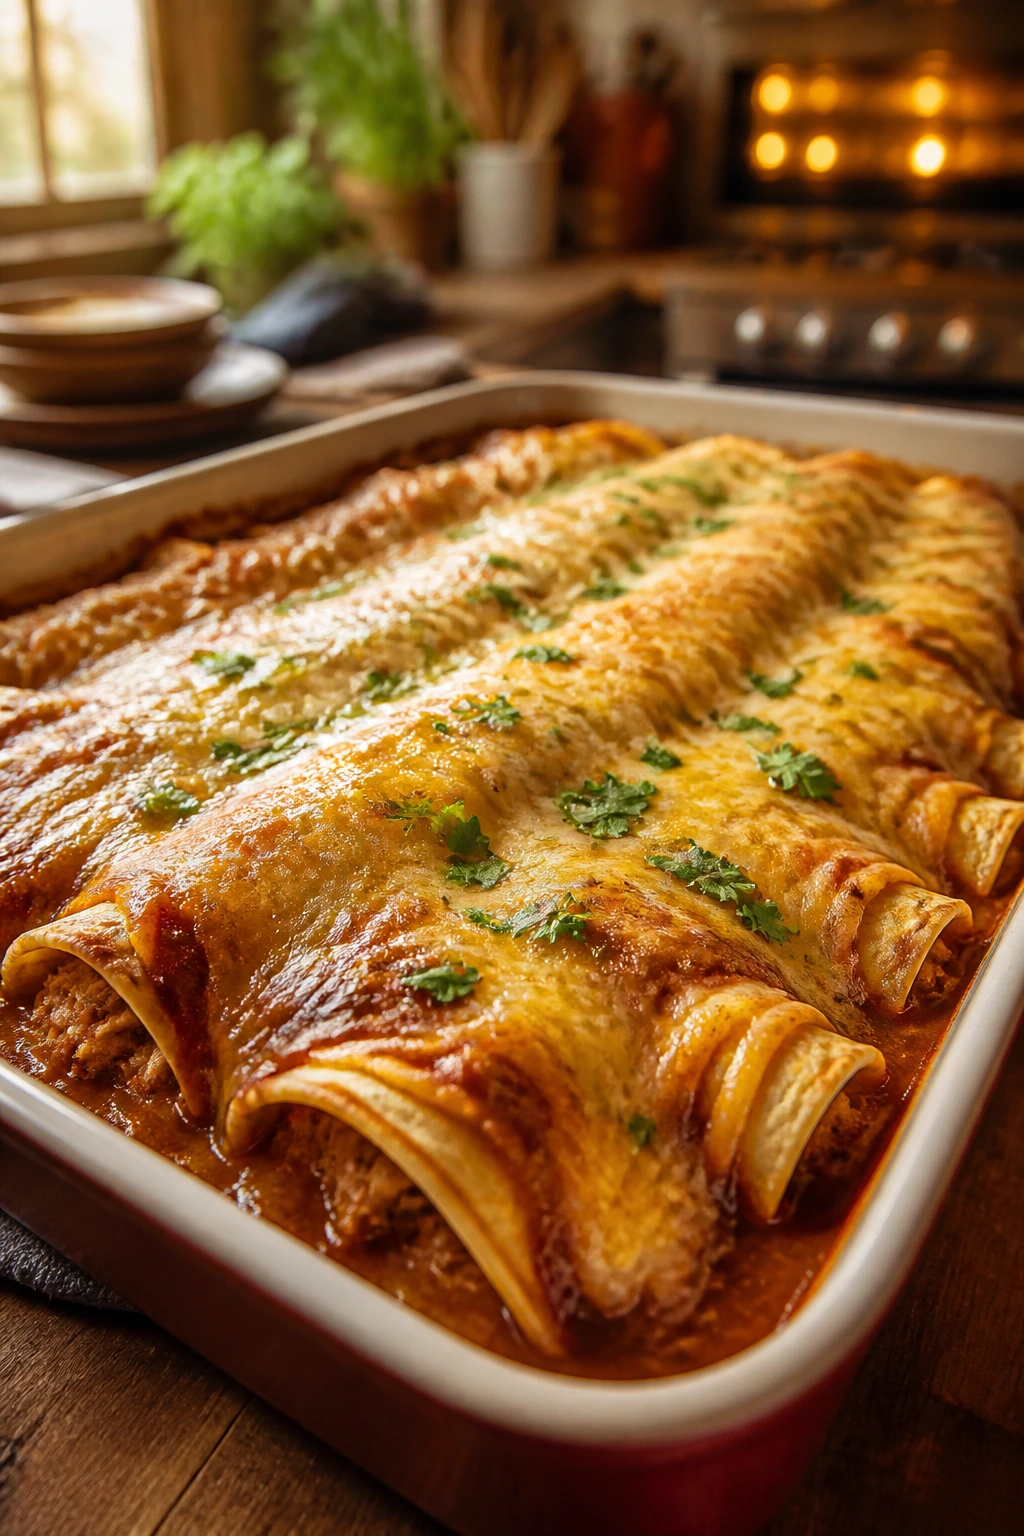
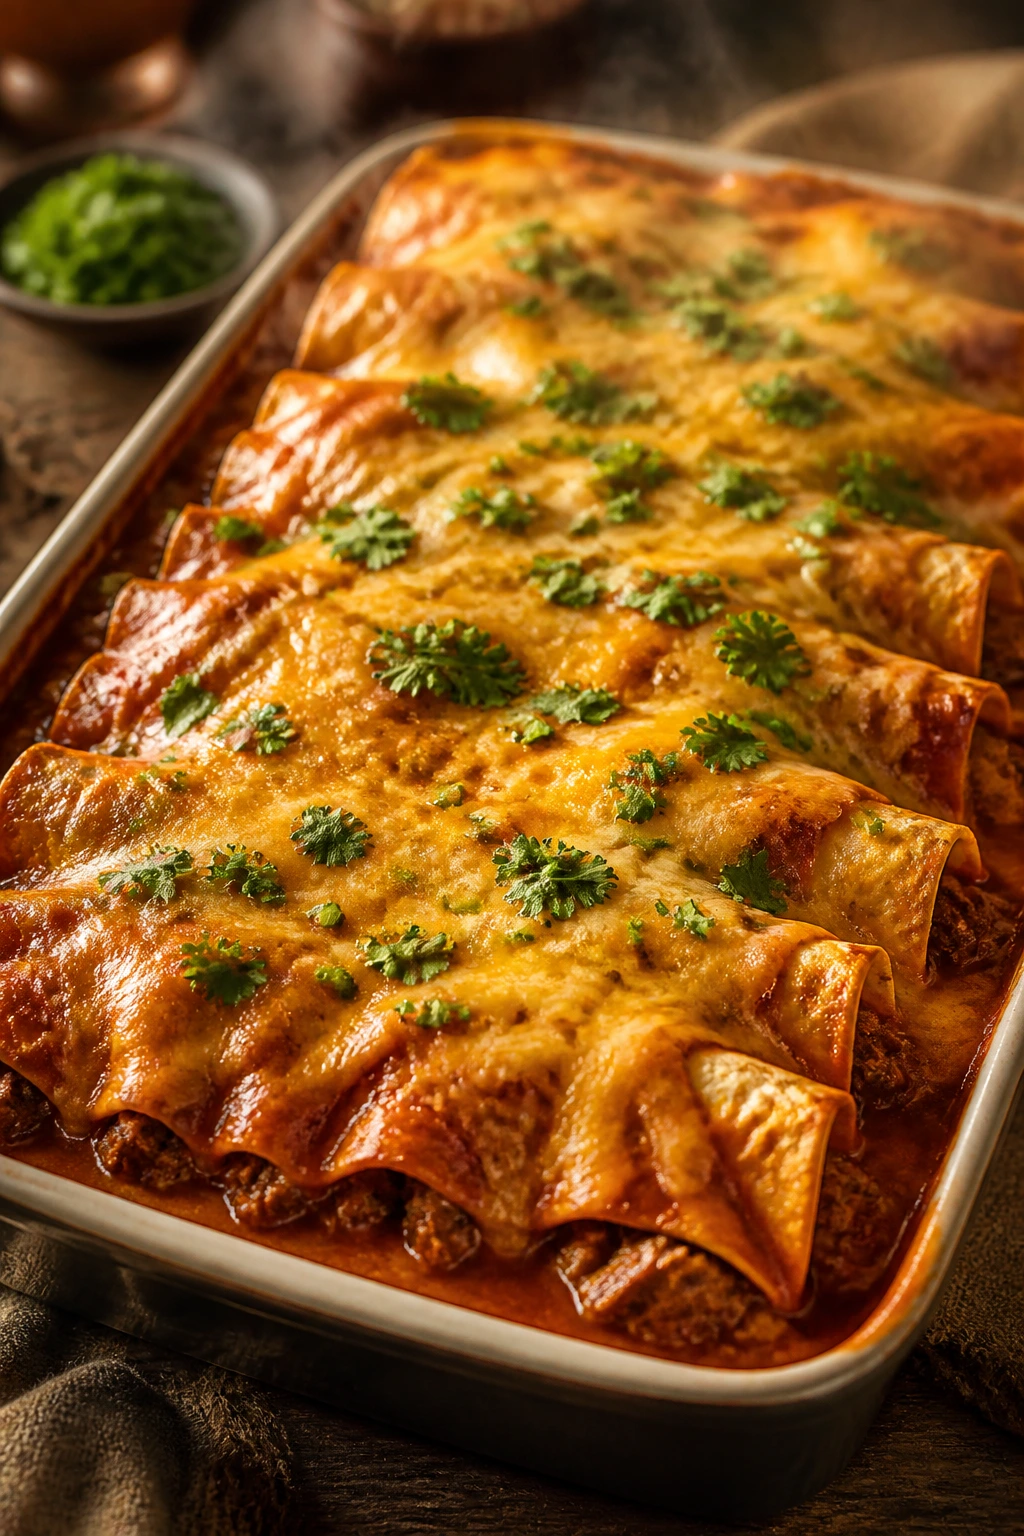
1. Big-Pan Beef and Cheese Enchiladas
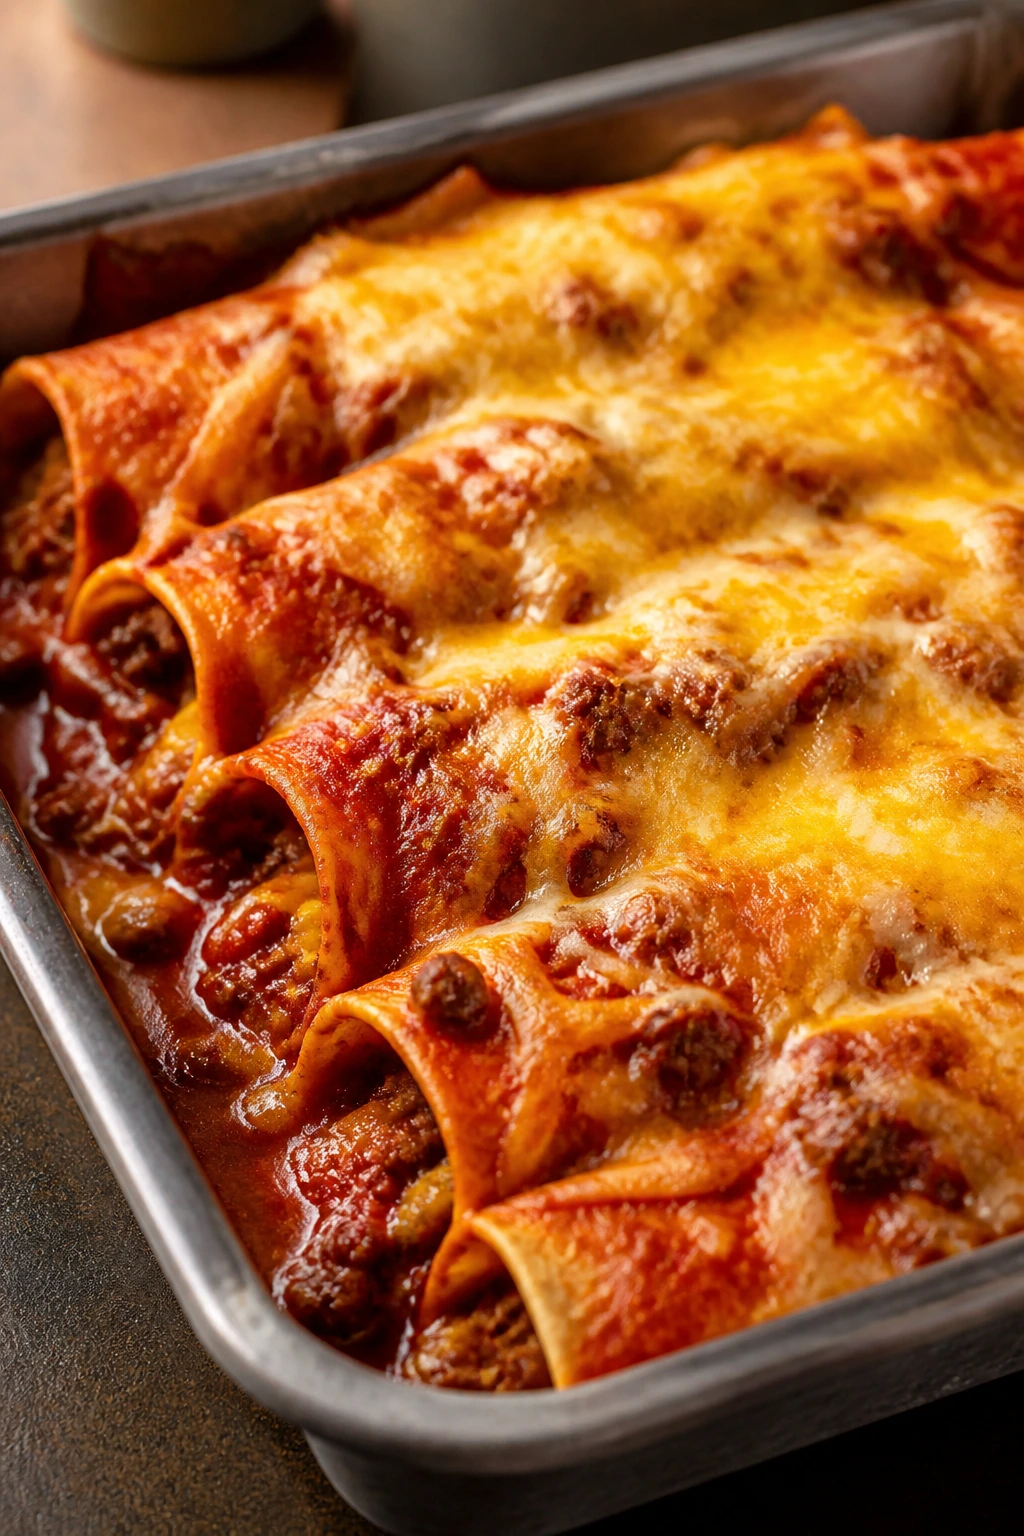
Beef enchiladas are the dependable, no-nonsense version of the dish. They smell like browned onion, chili powder, and melted cheese before they even come out of the oven, and that red sauce gives the whole pan a rich, deep color that looks like dinner meant business from the start.
This is the pan I reach for when I want something sturdy and familiar. The filling is thick enough to roll without leaking, the tortillas soften just enough in the oven, and the cheese melts into those little browned spots on top that people always fight over. If you’re feeding a crowd, beef is a safe bet because it holds flavor well even after the pan sits for 10 minutes on the counter.
Why It Works:
Ground beef gives you a filling that is rich but not greasy if you brown it properly and drain off the extra fat. Chili powder, cumin, and oregano build a sauce-friendly base, and a little green chile keeps the meat from tasting flat. The red enchilada sauce does the heavy lifting on moisture, so the tortillas stay tender instead of turning chewy. Bake it covered for most of the time, and you get melted cheese without a scorched top.
Key Ingredients:
- 2 tablespoons olive oil
- 2 pounds ground beef, 85/15 or 90/10
- 1 large yellow onion, diced small
- 3 garlic cloves, minced
- 2 tablespoons chili powder
- 1 teaspoon ground cumin
- 1 teaspoon dried oregano
- 1 teaspoon kosher salt
- 1/2 teaspoon black pepper
- 1 can (4 ounces) diced green chiles, drained
- 2 cups red enchilada sauce, divided
- 16 corn tortillas, 6-inch, warmed
- 3 cups shredded Mexican blend cheese
- 1/2 cup chopped cilantro
Quick Steps:
- Preheat the oven to 400°F and grease two 9×13-inch baking dishes or one very large casserole pan.
- Cook the onion in olive oil over medium heat for 4 to 5 minutes, until soft and translucent. Add the garlic and ground beef, then brown for 8 to 10 minutes, breaking the meat into small crumbles.
- Season the beef with chili powder, cumin, oregano, salt, pepper, and green chiles. Stir in 1 cup of the enchilada sauce and simmer for 3 minutes until the filling looks thick and glossy.
- Warm the tortillas in a dry skillet for about 15 seconds per side, or wrap them in a damp towel and microwave for 30 seconds. They should feel flexible, not stiff.
- Fill each tortilla with about 1/4 cup beef mixture and 1 to 2 tablespoons cheese, then roll snugly and place seam-side down in the pan.
- Pour the remaining enchilada sauce over the rolled tortillas, scatter the rest of the cheese on top, and cover loosely with foil.
- Bake for 15 minutes covered, then uncover and bake 8 to 10 minutes more, until the cheese is bubbling and lightly browned at the edges. Rest for 10 minutes before serving.
- Finish with cilantro so the top doesn’t taste heavy.
Tips and Variations:
- If your beef is on the fattier side, drain it well after browning or the pan will slide around under a layer of grease.
- Add 1 cup of cooked rice to the filling if you need the pan to go farther.
- A spoonful of sour cream or salsa on each serving wakes up the whole plate.
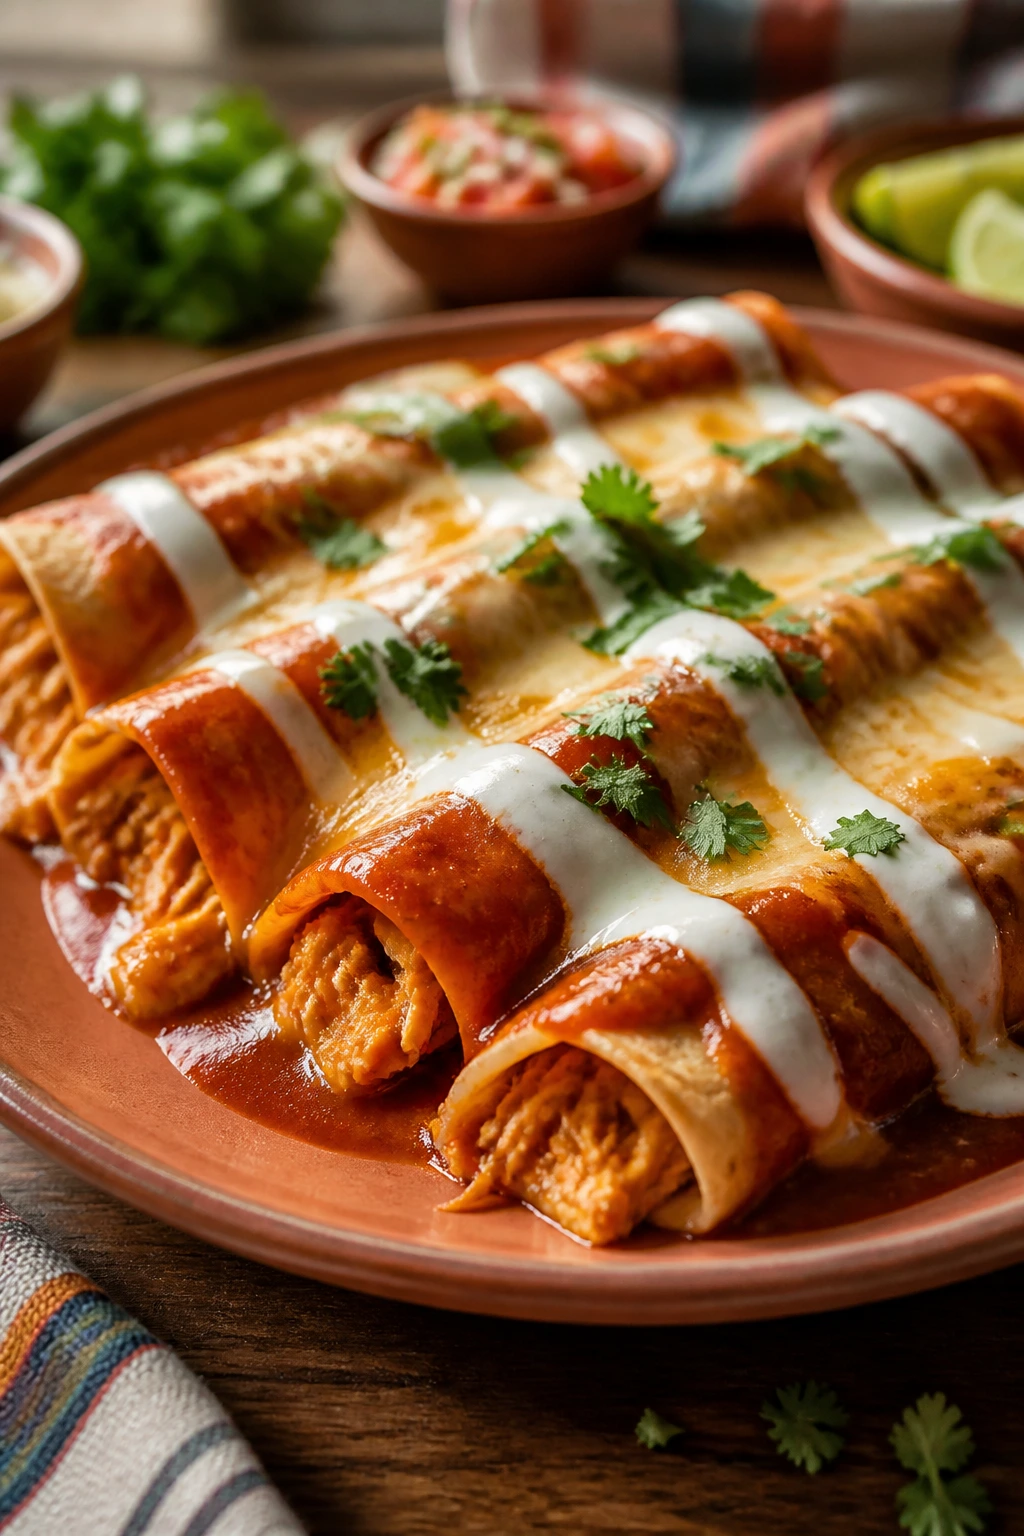
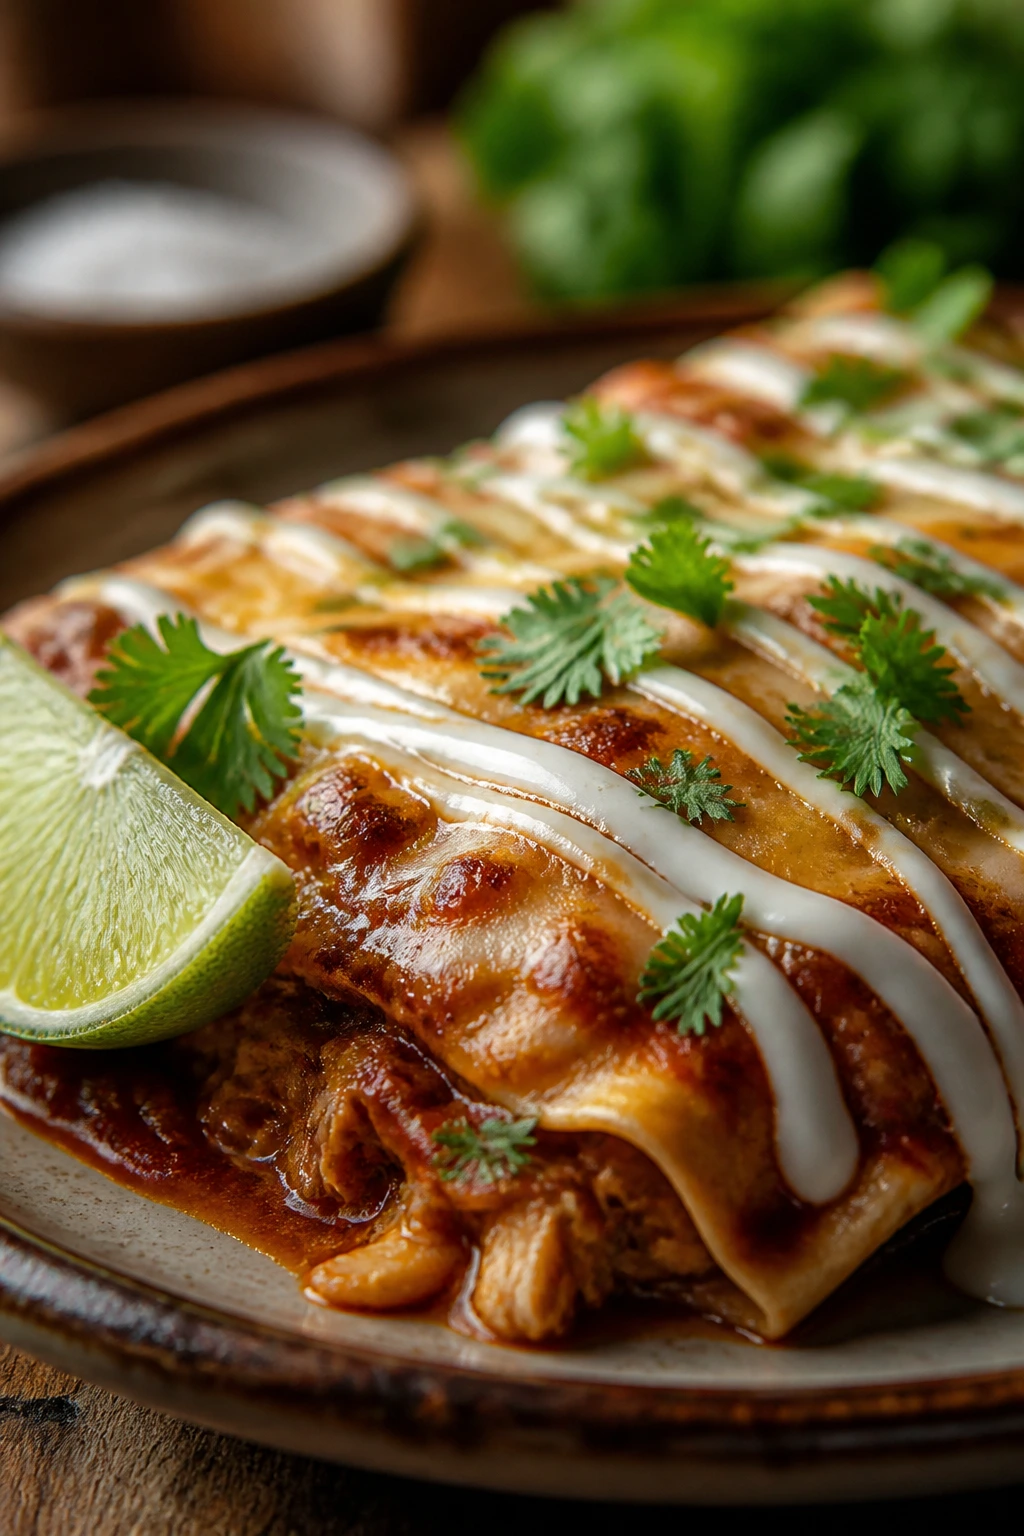
2. Slow-Simmer Chicken Enchiladas Verde
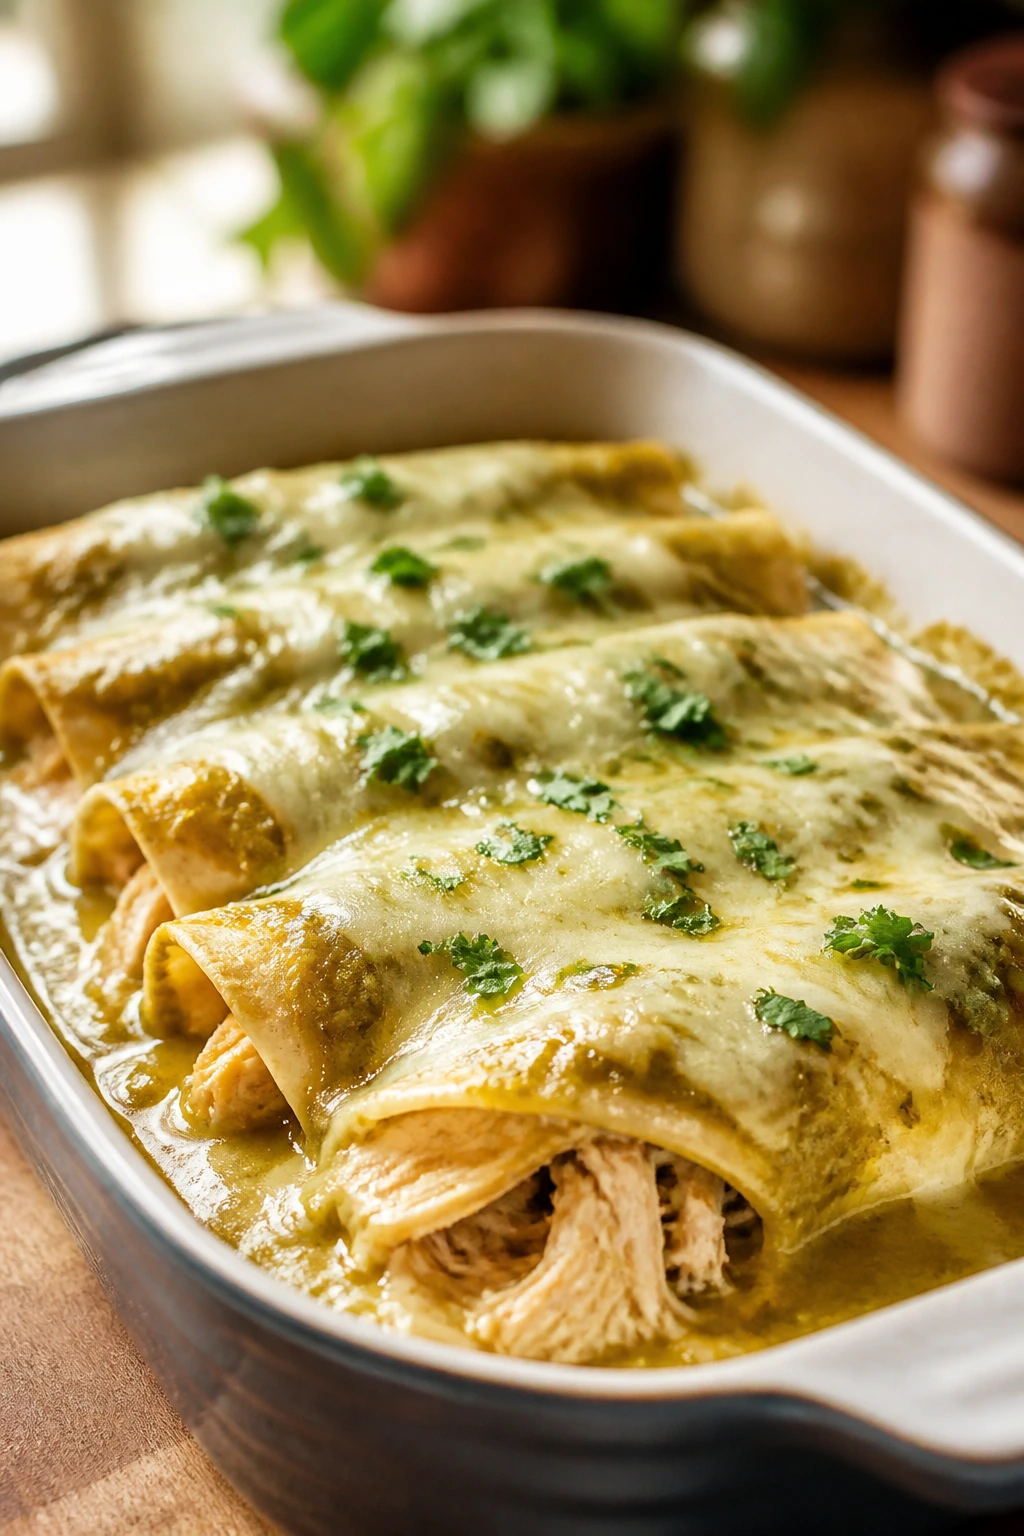
Green enchiladas have a brighter, cleaner bite than red-sauce pans, and that brightness keeps a large batch from feeling heavy. The salsa verde brings tang, the chicken stays juicy, and the smell that rises from the oven is all lime, onion, and melted jack cheese.
This is the pan that convinces people they “like chicken enchiladas better” even if they never say it out loud. Salsa verde does double duty here: it braises the chicken and later becomes the sauce on top. That means you build flavor at every step instead of hoping the cheese will cover for a bland filling.
Why It Works:
Chicken thighs are the smart pick because they stay tender after simmering and baking, even if the pan waits a few extra minutes before dinner. Salsa verde has enough acidity to keep the dish lively, and a final squeeze of lime keeps the whole thing from tasting dense. The filling also doesn’t need much flour or starch; it’s already sturdy from the shredded chicken and cheese. A little chopped cilantro at the end gives the pan a fresh edge that cuts through the richness.
Key Ingredients:
- 2 1/2 pounds boneless, skinless chicken thighs
- 1 small onion, sliced
- 3 cups salsa verde, divided
- 1 cup chicken broth
- 1 teaspoon kosher salt
- 1 teaspoon ground cumin
- 16 corn tortillas, warmed
- 3 cups shredded Monterey Jack cheese
- 1 cup sour cream
- 1/2 cup chopped cilantro
- 1 lime, cut into wedges
- 1 can (4 ounces) diced green chiles, drained
Quick Steps:
- Simmer the chicken thighs, onion, 2 cups salsa verde, broth, salt, cumin, and green chiles in a large skillet or Dutch oven over medium heat for 18 to 22 minutes, until the chicken reaches 165°F and pulls apart easily.
- Shred the chicken with two forks and stir it back into the pan so it absorbs the sauce. Cook 2 more minutes, until the mixture looks thick rather than soupy.
- Warm the tortillas until pliable, using a skillet or microwave as needed.
- Fill each tortilla with chicken and a handful of cheese, then roll and place seam-side down in a greased 9×13-inch dish.
- Spoon the remaining salsa verde over the top and sprinkle on the rest of the cheese.
- Bake at 375°F for 20 to 25 minutes, until the sauce bubbles around the edges and the cheese melts into soft white patches.
- Top with sour cream, cilantro, and lime juice right before serving.
Tips and Variations:
- If you’re using rotisserie chicken, skip the simmering step and toss the shredded meat with warm salsa verde for 5 minutes instead.
- Don’t drown the tortillas. A thin layer of sauce under and over the pan is enough.
- For a sharper finish, add sliced pickled jalapeños on top after baking.
3. Turkey, Corn, and Black Bean Enchiladas
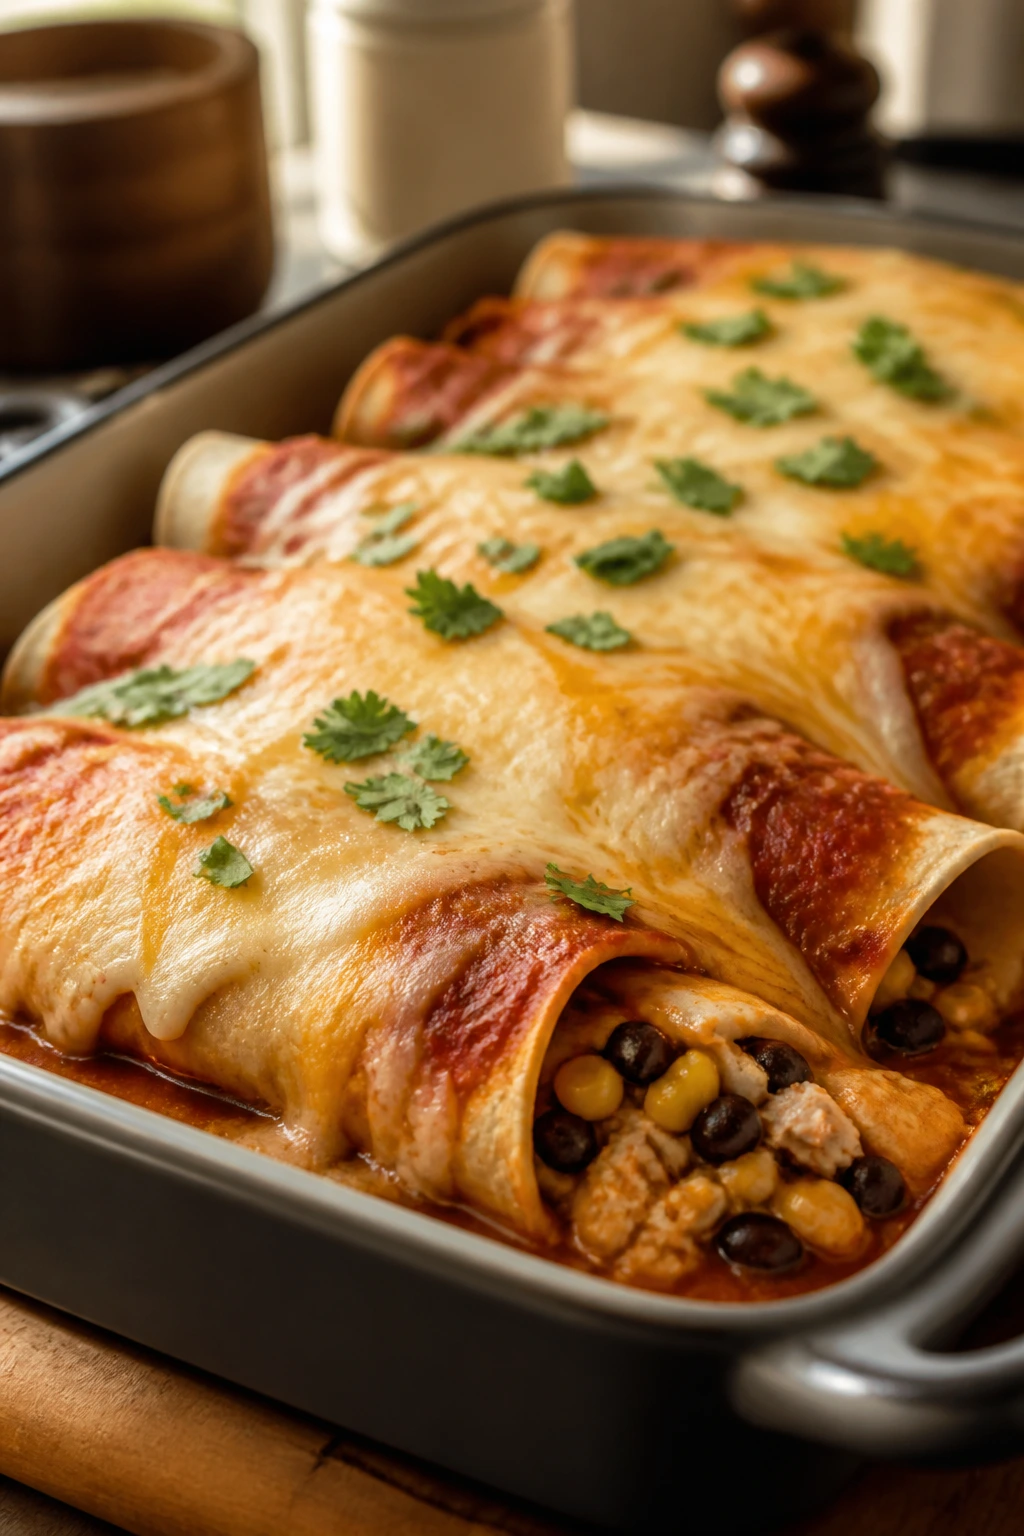
Turkey enchiladas can be bland if you let them be bland. These are not that. They get backbone from cumin, sweetness from corn, and enough bean-stretching power to feed a family without making the pan feel like a compromise.
I like this one because it eats like a weeknight meal but doesn’t look like one. The filling is colorful, and the black beans give the turkey something to cling to so every bite feels fuller than ground poultry usually does. If your family likes taco night, this is the cousin that shows up with manners and a bigger casserole dish.
Why It Works:
Ground turkey needs fat, spice, and moisture, which is why the onion, bell pepper, and enchilada sauce matter here. Black beans and cooked rice bulk up the filling so you can feed more people without piling on extra meat. Corn adds sweet pops that keep the pan from tasting one-note. Because the filling is already seasoned before it hits the tortillas, the whole bake tastes integrated instead of layered like separate parts pretending to be dinner.
Key Ingredients:
- 2 pounds ground turkey
- 1 tablespoon olive oil
- 1 large onion, diced
- 1 red bell pepper, diced
- 2 teaspoons ground cumin
- 2 tablespoons chili powder
- 1 teaspoon kosher salt
- 1 can (15 ounces) black beans, drained and rinsed
- 1 cup corn kernels, frozen or canned
- 2 cups cooked rice
- 2 cups red enchilada sauce, divided
- 12 corn tortillas, warmed
- 3 cups shredded cheddar or Mexican blend cheese
- 1/4 cup sliced green onions
Quick Steps:
- Heat the olive oil in a large skillet over medium-high heat. Add the onion and bell pepper, then cook for 5 minutes until softened.
- Brown the ground turkey, breaking it into small pieces, for 6 to 8 minutes until no pink remains.
- Season with cumin, chili powder, and salt. Stir in the beans, corn, rice, and 1 cup of the enchilada sauce, then cook for 2 to 3 minutes until everything is hot and the filling feels thick.
- Warm the tortillas until they bend without cracking.
- Assemble the enchiladas in a greased 9×13-inch dish, using about 1/3 cup filling per tortilla and a little cheese inside each roll.
- Top with the remaining enchilada sauce and all the cheese.
- Bake at 375°F for 20 to 25 minutes, until the cheese is melted and the sauce bubbles at the sides.
- Rest for 10 minutes, then finish with green onions so the pan tastes fresh, not heavy.
Tips and Variations:
- If you want a little heat, add 1 chopped chipotle pepper in adobo to the filling.
- Use brown rice if you like a firmer bite; white rice gives a softer, more blended texture.
- Leftover filling makes a solid burrito bowl the next day.
4. Simple Bean-and-Cheese Enchiladas
This is the pan I make when the fridge looks modest and the family still shows up hungry. Beans, rice, sauce, and cheese can feel humble on paper, but in the oven they turn into something deeply comforting and honestly kind of smart.
Bean enchiladas are the quiet workhorse of a big family dinner. They cost less than meat-heavy versions, they reheat without getting weird, and they make a lot of people full without sending you to the store for specialty ingredients. The real trick is to keep the filling thick, almost spreadable, so the tortillas don’t get soggy in the bake.
Why It Works:
Mashing part of the beans thickens the filling and gives it body, which keeps the enchiladas from splitting open when you roll them. Rice makes the dish feel like a complete meal, not just a side in a tortilla. The combination of pinto and black beans gives both creaminess and a little bite, and a good red sauce keeps the edges soft while the top gets lightly browned. You don’t need much fuss here; the recipe works because the textures play nice together.
Key Ingredients:
- 2 tablespoons olive oil
- 1 large onion, diced
- 2 cans (15 ounces each) pinto beans, drained and rinsed
- 1 can (15 ounces) black beans, drained and rinsed
- 2 cups cooked rice
- 1 cup salsa
- 2 teaspoons ground cumin
- 1 teaspoon garlic powder
- 16 corn tortillas, warmed
- 3 cups shredded Monterey Jack or cheddar
- 2 cups red enchilada sauce
- 1/2 cup chopped cilantro
Quick Steps:
- Cook the onion in olive oil over medium heat for 5 minutes, until soft and sweet-smelling.
- Stir in half of the beans, the salsa, cumin, and garlic powder. Mash the mixture lightly with a spoon so it thickens but still has texture.
- Fold in the remaining beans and cooked rice, then heat for 2 more minutes until the filling is steamy and thick enough to mound on a spoon.
- Warm the tortillas until they bend easily.
- Fill each tortilla with the bean mixture and a small handful of cheese, then roll and place seam-side down in a greased casserole dish.
- Pour the enchilada sauce over the top and scatter the remaining cheese evenly across the pan.
- Bake at 375°F for 20 to 25 minutes, until the cheese melts and the sauce bubbles at the edges.
- Finish with cilantro and let the pan rest before cutting, so the slices hold together.
Tips and Variations:
- Refried beans can replace one can of pinto beans if you want a smoother filling.
- Add diced green chiles for a little heat without changing the shape of the dish.
- A spoonful of sour cream on the side makes the beans taste richer.
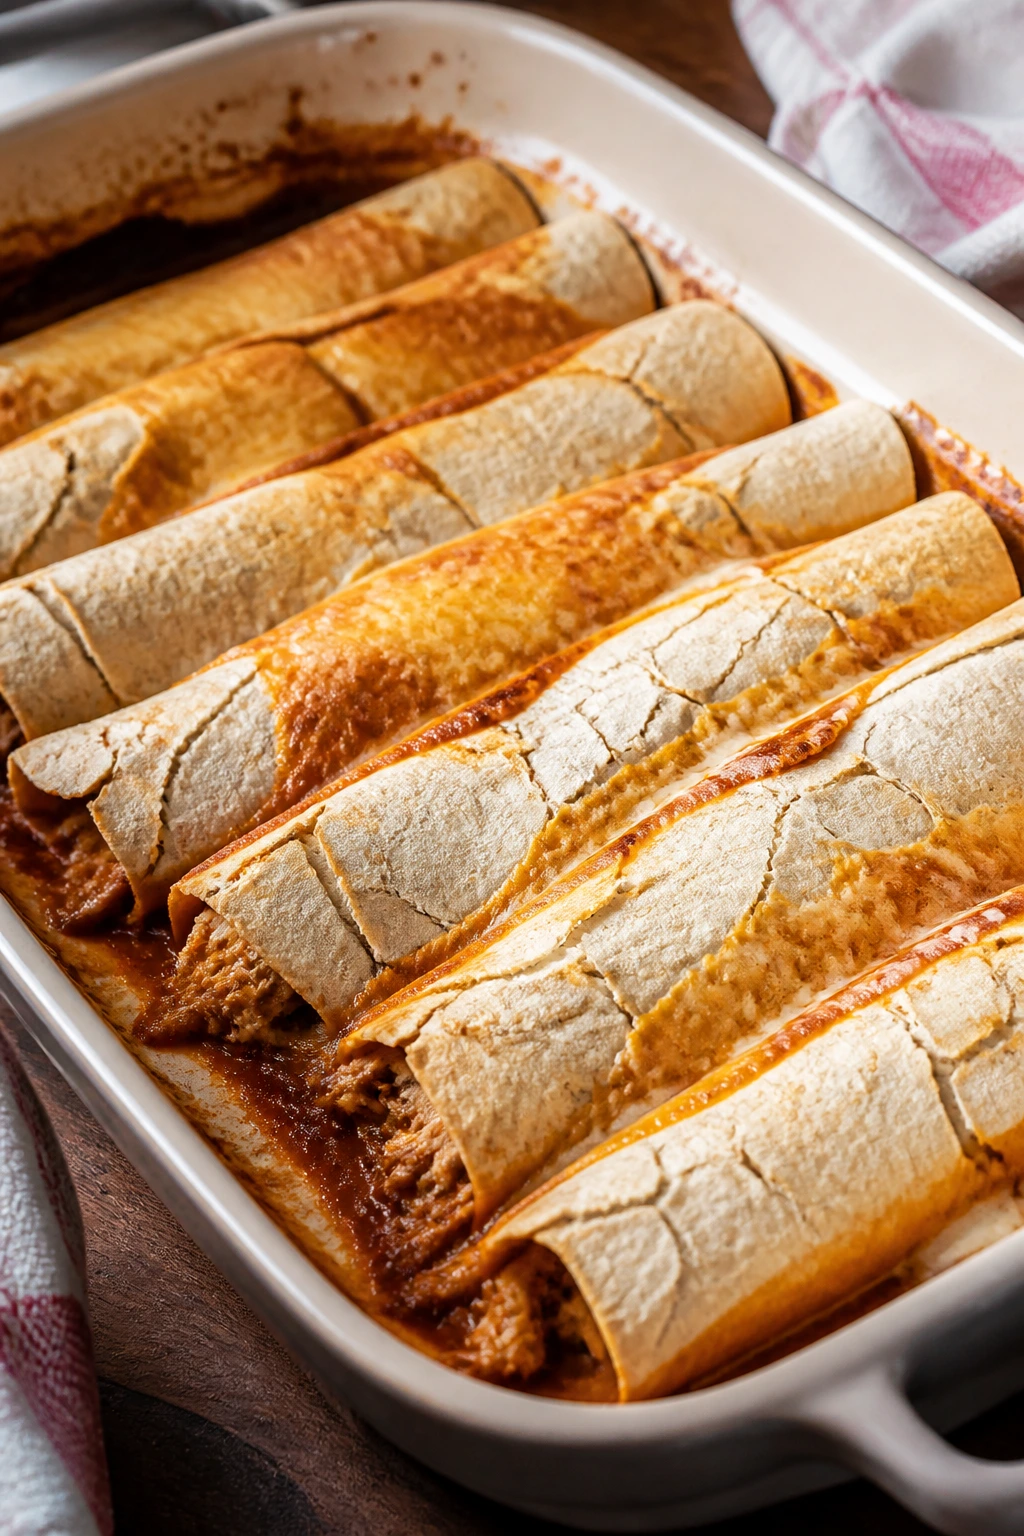
5. Pulled Pork Red Enchiladas
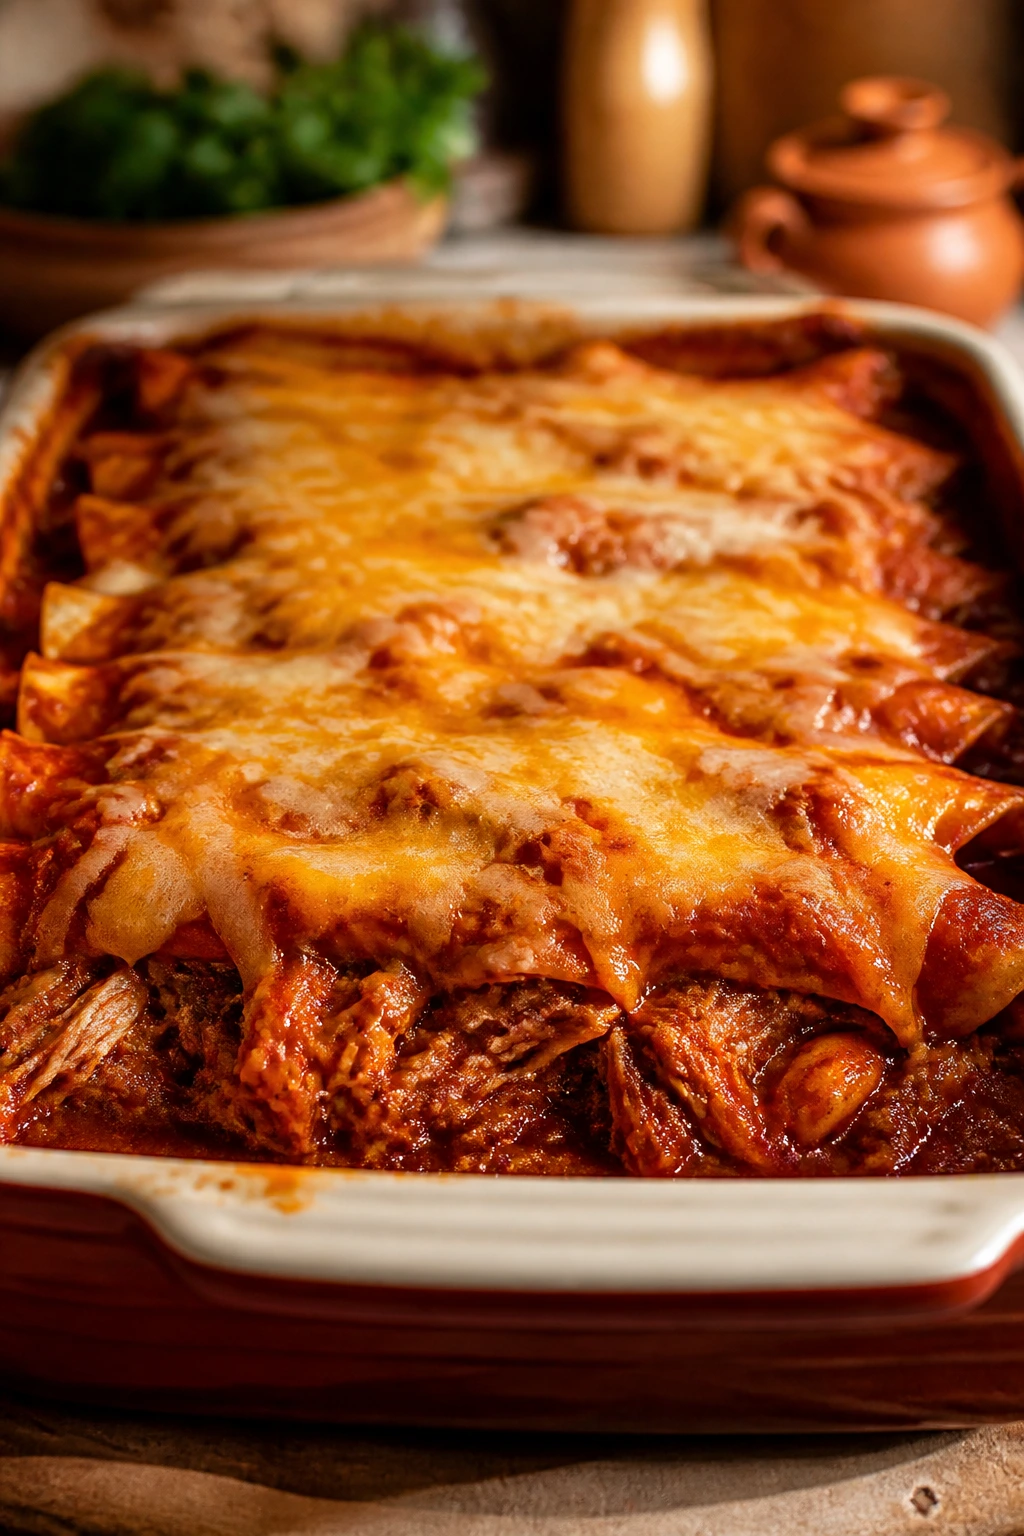
Pulled pork enchiladas are for the nights when you want dinner to feel a little abundant. The pork brings that slow-cooked, almost sweet depth, and red sauce settles into all the shredded edges in a way that makes each bite taste more deliberate than the effort it took to make it.
If you’ve got leftover pork shoulder, this is one of the best things you can do with it. The meat already has fat and flavor, which means the enchiladas come out juicy instead of dry. Red sauce gives the pork a familiar, slightly smoky backdrop, and pickled jalapeños on top keep the whole pan from leaning too rich.
Why It Works:
Pulled pork is naturally forgiving, so it stays moist through baking and reheating. The sauce inside the filling keeps the shredded meat from clumping, while the sauce on top protects the tortillas from drying out. A little onion and cumin sharpen the filling, and beans or corn can stretch the batch if you need more servings without changing the character of the dish. This is a “make it once, eat happily twice” kind of pan.
Key Ingredients:
- 3 cups cooked pulled pork, shredded finely
- 1 tablespoon olive oil
- 1 small onion, diced
- 1 teaspoon ground cumin
- 1 cup salsa
- 2 cups red enchilada sauce, divided
- 1 can (15 ounces) pinto beans, drained and rinsed
- 1 cup corn kernels
- 16 corn tortillas, warmed
- 3 cups shredded cheese
- 1/2 cup chopped cilantro
- 1/4 cup sliced pickled jalapeños, optional
Quick Steps:
- Sauté the onion in olive oil over medium heat for 4 to 5 minutes, until soft.
- Add the pulled pork, cumin, salsa, pinto beans, corn, and 1 cup of enchilada sauce. Stir and cook for 3 to 4 minutes until the mixture is thick and steaming.
- Warm the tortillas so they bend without splitting.
- Fill each tortilla with pork mixture and a little cheese, then roll tightly and place seam-side down in a greased 9×13-inch dish.
- Cover the enchiladas with the remaining sauce and all the cheese.
- Bake at 375°F for 20 to 25 minutes, until the cheese melts and the sauce is bubbling around the edges.
- Rest for 10 minutes, then finish with cilantro and jalapeños if you want a sharper bite.
Tips and Variations:
- If your pork is a little dry, warm it in extra sauce for 5 minutes before rolling.
- A spoonful of pickled onions on top makes the pork taste brighter.
- These are excellent with a side of slaw, because the cool crunch balances the richness.
6. Creamy Chicken Spinach Enchiladas
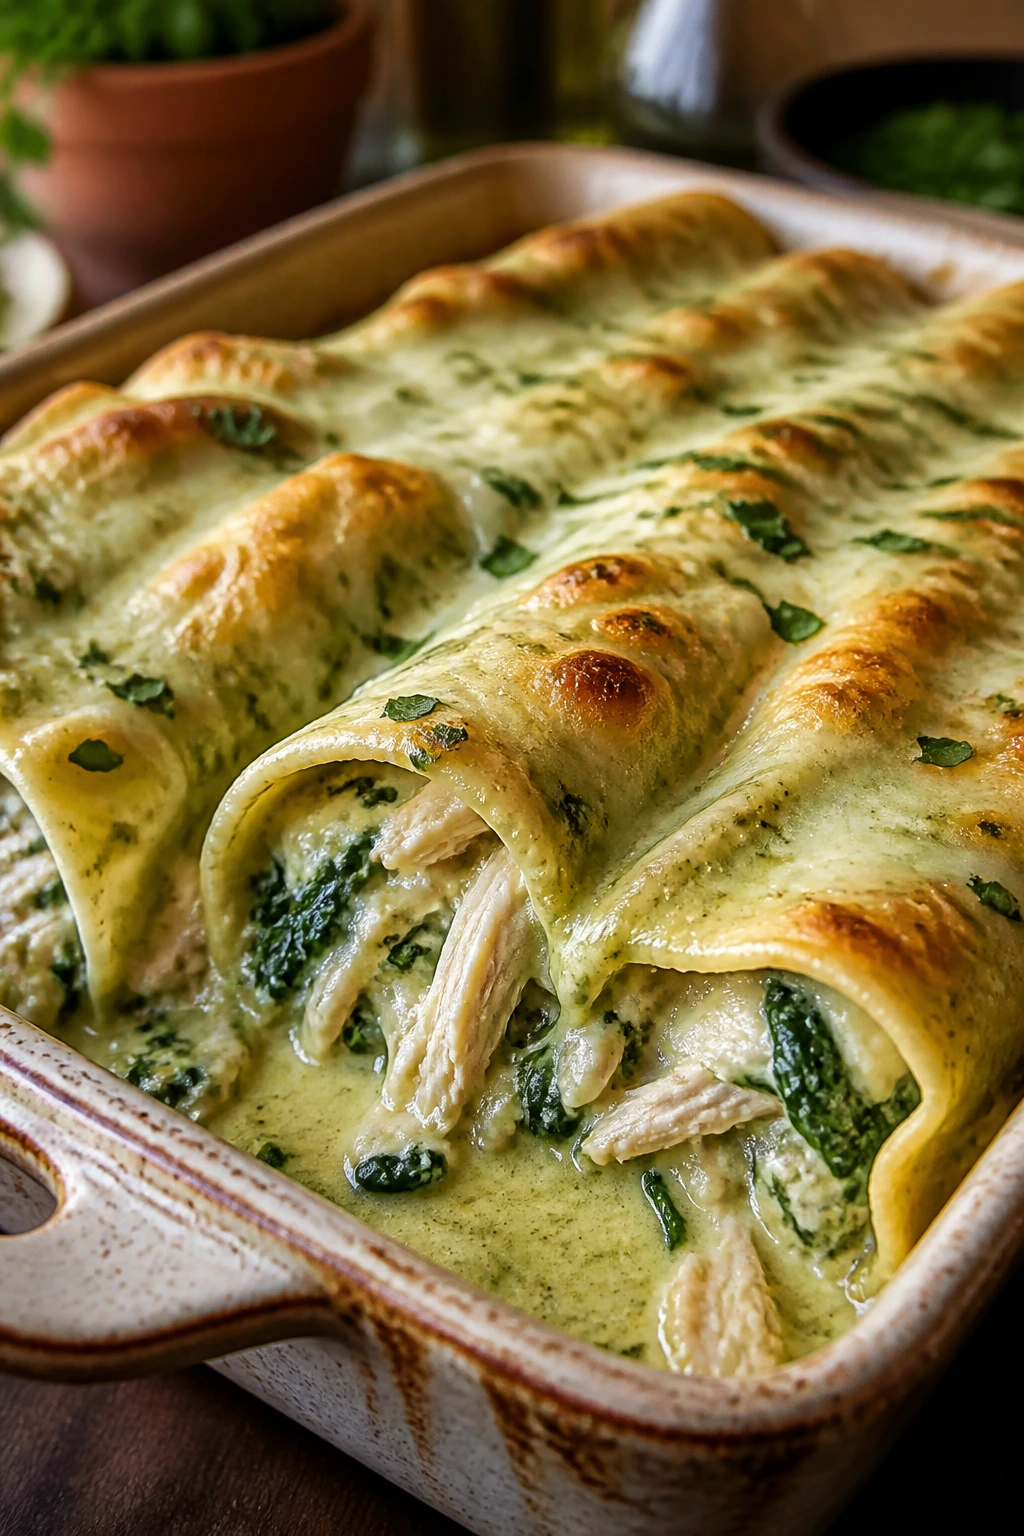
If red sauce feels too sharp some nights, this creamy pan is the answer. It’s lush without being clumsy, and the spinach folds into the chicken so neatly that even picky eaters usually stop asking questions after the first bite.
This recipe has a softer personality than the others, which is part of the charm. Cream cheese and sour cream give the filling a plush texture, while green chiles keep it from tasting flat or overly rich. I like this one for big families because it feels special enough for company but doesn’t require a separate side dish to seem complete.
Why It Works:
Cream cheese binds the filling so it stays inside the tortillas instead of spilling out in the pan. Spinach adds color and a bit of freshness, but more important, it breaks up the density of the dairy and chicken. Green enchilada sauce works here because its acidity cuts through the cream, which keeps the dish from feeling heavy. A gentle bake is the key; too hot, and the sauce can split around the edges.
Key Ingredients:
- 2 pounds cooked shredded chicken
- 1 tablespoon butter
- 10 ounces baby spinach
- 8 ounces cream cheese, softened
- 1 cup sour cream
- 1 can (4 ounces) diced green chiles, drained
- 2 cups green enchilada sauce
- 16 corn tortillas, warmed
- 3 cups shredded Monterey Jack cheese
- 1 teaspoon garlic powder
- 1/2 teaspoon kosher salt
- 1/2 teaspoon black pepper
Quick Steps:
- Wilt the spinach in butter over medium heat for 1 to 2 minutes, just until it collapses. Let it cool slightly, then chop it if the leaves are large.
- Mix the chicken, cream cheese, sour cream, green chiles, spinach, garlic powder, salt, and pepper in a large bowl until evenly coated.
- Warm the tortillas so they stay flexible.
- Fill each tortilla with the chicken mixture and a little Monterey Jack, then roll and set seam-side down in a greased baking dish.
- Pour the green enchilada sauce over the rolls and scatter the remaining cheese on top.
- Bake at 375°F for 20 to 25 minutes, until the sauce is bubbling and the cheese is melted.
- Rest for 10 minutes before serving so the creamy filling settles.
Tips and Variations:
- Use rotisserie chicken to cut the prep time down by nearly half.
- Chopped jalapeños can replace the green chiles if your family likes more heat.
- A squeeze of lime on the finished pan keeps the cream sauce from feeling too heavy.
7. Ground Beef Enchilada Bake
Rolling tortillas gets old fast when you’re feeding eight or ten people. This layered bake is the answer for nights when you want the flavor of enchiladas without standing over the counter filling and rolling each one like a tiny project.
The casserole form gives you a few advantages. Tortilla strips soak up sauce in the middle of the pan, the beef stays tucked into a neat layer, and the cheese melts down into every corner. It’s still clearly enchilada dinner, just with less fuss and fewer torn tortillas on the cutting board.
Why It Works:
Refried beans create a creamy layer that helps the casserole slice cleanly, and tortilla strips soak up the sauce without getting soggy if you don’t overdo it. Ground beef provides the familiar enchilada flavor people expect, while corn adds sweetness and a little texture. Because everything is layered, you get a different bite in each forkful: beef, beans, tortillas, cheese, sauce. That variety is what keeps a big family from getting bored halfway through the pan.
Key Ingredients:
- 2 pounds ground beef
- 1 large onion, diced
- 2 cups red enchilada sauce
- 1 can (16 ounces) refried beans
- 1 can (15 ounces) corn, drained
- 12 corn tortillas, cut into strips
- 3 cups shredded cheddar cheese
- 1 cup salsa
- 1/2 teaspoon black pepper
- 1 cup sour cream, for serving
- 2 tablespoons chopped cilantro, optional
Quick Steps:
- Brown the ground beef and onion in a large skillet over medium-high heat for 8 to 10 minutes, until the beef is no longer pink. Drain any excess fat.
- Stir in 1 cup of enchilada sauce and the black pepper, then simmer for 2 minutes.
- Layer half of the tortilla strips in a greased 9×13-inch baking dish, followed by half the refried beans, half the beef mixture, half the corn, and 1 cup of cheese.
- Repeat the layers with the remaining tortilla strips, beans, beef, corn, and another cup of cheese.
- Pour the salsa and remaining enchilada sauce evenly over the top, then finish with the last cup of cheese.
- Bake at 375°F for 25 to 30 minutes, until the center is hot and the cheese is browned in spots.
- Rest for 10 minutes so the layers firm up before slicing.
- Serve with sour cream and cilantro if you want a cooler, fresher finish.
Tips and Variations:
- If the pan looks dry before baking, spoon a little extra sauce over the edges.
- You can swap in ground turkey without changing the method.
- A chopped green onion garnish works better than raw onion if you want a milder bite.
8. Chocolate-Chile Chicken Mole Enchiladas
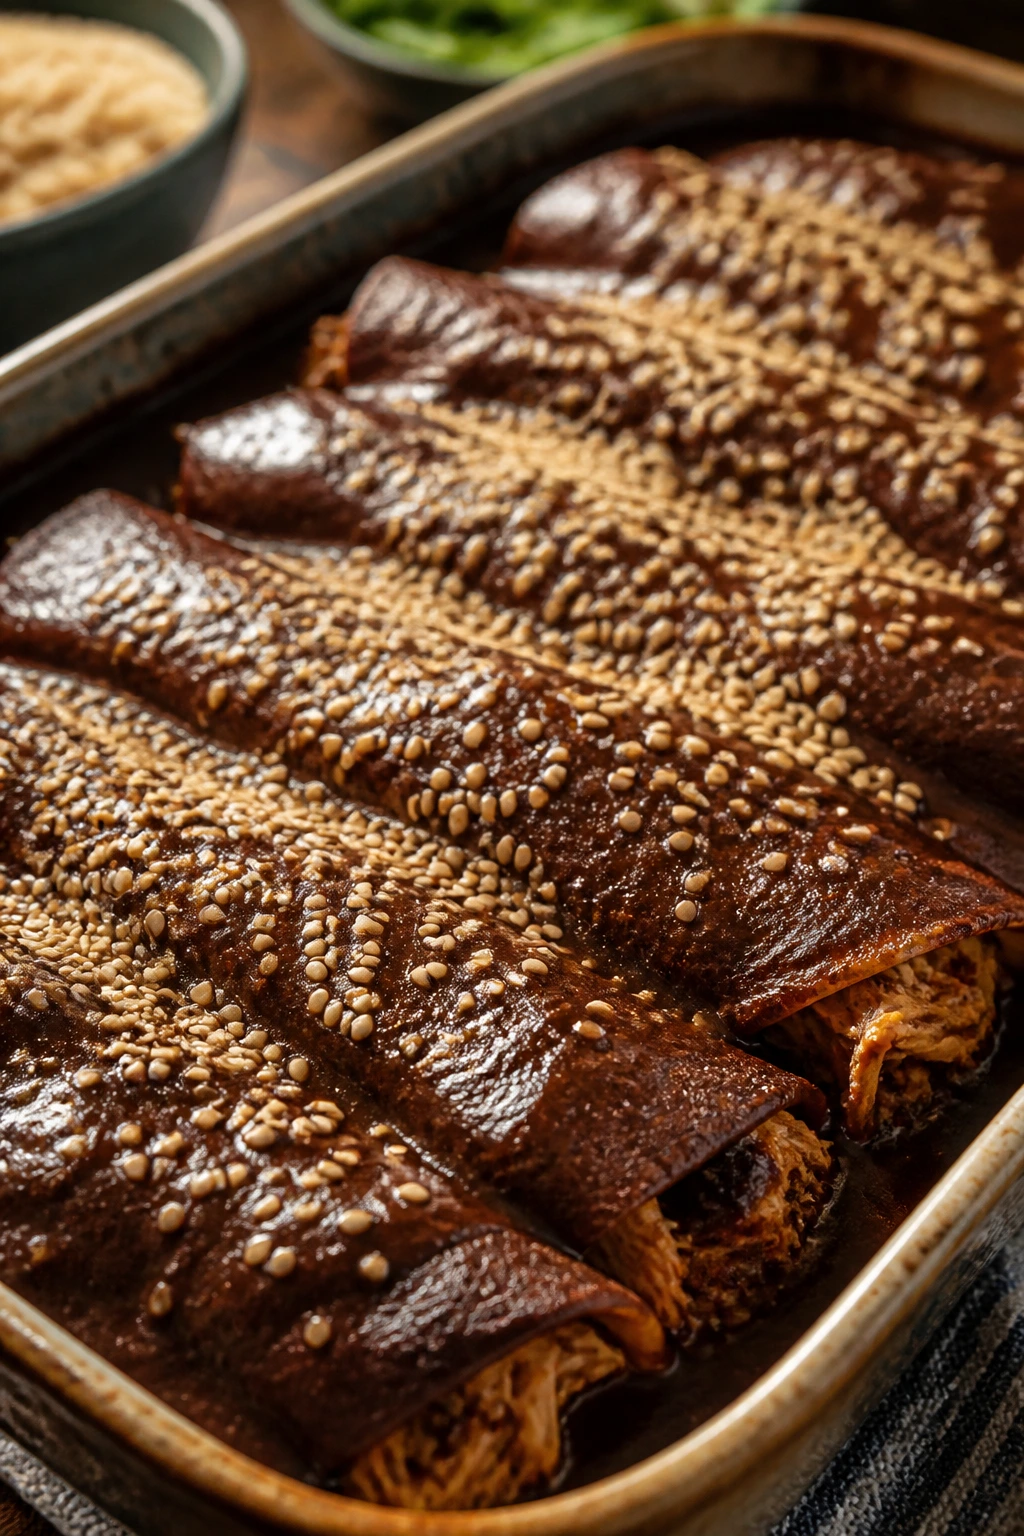
Mole brings a deep, earthy sweetness that makes dinner feel a little special without turning into a project. The sauce has a dark, almost velvet look in the pan, and once it hits the tortillas and cheese, the whole dish turns rich, warm, and slightly mysterious in the best way.
This is the enchilada dinner I pull out when I want the table to go quiet for a minute. The flavor is layered, not loud. You get chile, cocoa, toasted spice, and chicken in one bite, and then the sesame seeds on top give it that tiny nutty finish that keeps you reaching back for another piece.
Why It Works:
Mole sauce is thick by nature, so thinning it with broth gives you something that coats the tortillas instead of clumping on them. Chicken absorbs those flavors easily, which is why shredded meat works better than chunks here. The cheese softens the sauce’s bitterness just enough, and a handful of sesame seeds or cilantro at the end adds contrast. If mole has ever seemed intimidating, this is the version that makes it feel manageable.
Key Ingredients:
- 2 pounds cooked shredded chicken
- 1 tablespoon olive oil
- 1 small onion, diced
- 1 jar (16 ounces) mole sauce
- 1 cup chicken broth
- 16 corn tortillas, warmed
- 3 cups shredded Monterey Jack or Oaxaca cheese
- 1/4 cup toasted sesame seeds
- 1 avocado, sliced
- 1/2 cup chopped cilantro
- 1 teaspoon kosher salt, if needed
Quick Steps:
- Sauté the onion in olive oil over medium heat for 4 minutes, until soft.
- Add the mole sauce and chicken broth, then stir until the sauce loosens and turns glossy. Warm for 3 to 4 minutes over low heat.
- Fold in the shredded chicken and a pinch of salt if the sauce tastes flat. The filling should be thick enough to spoon, not run.
- Warm the tortillas until they bend easily.
- Fill each tortilla with chicken and a little cheese, then roll and place seam-side down in a greased baking dish.
- Spoon the remaining mole over the top and scatter the rest of the cheese across the pan.
- Bake at 375°F for 20 to 25 minutes, until the sauce bubbles and the cheese melts.
- Garnish with sesame seeds, avocado, and cilantro right before serving.
Tips and Variations:
- If your mole is very thick, add broth 1/4 cup at a time until it pours easily.
- A small squeeze of orange juice in the sauce brightens the flavor without making it sweet.
- Don’t skip the garnish. Mole needs a little contrast, or it can feel heavy.
9. White Chicken Enchiladas with Sour Cream Sauce
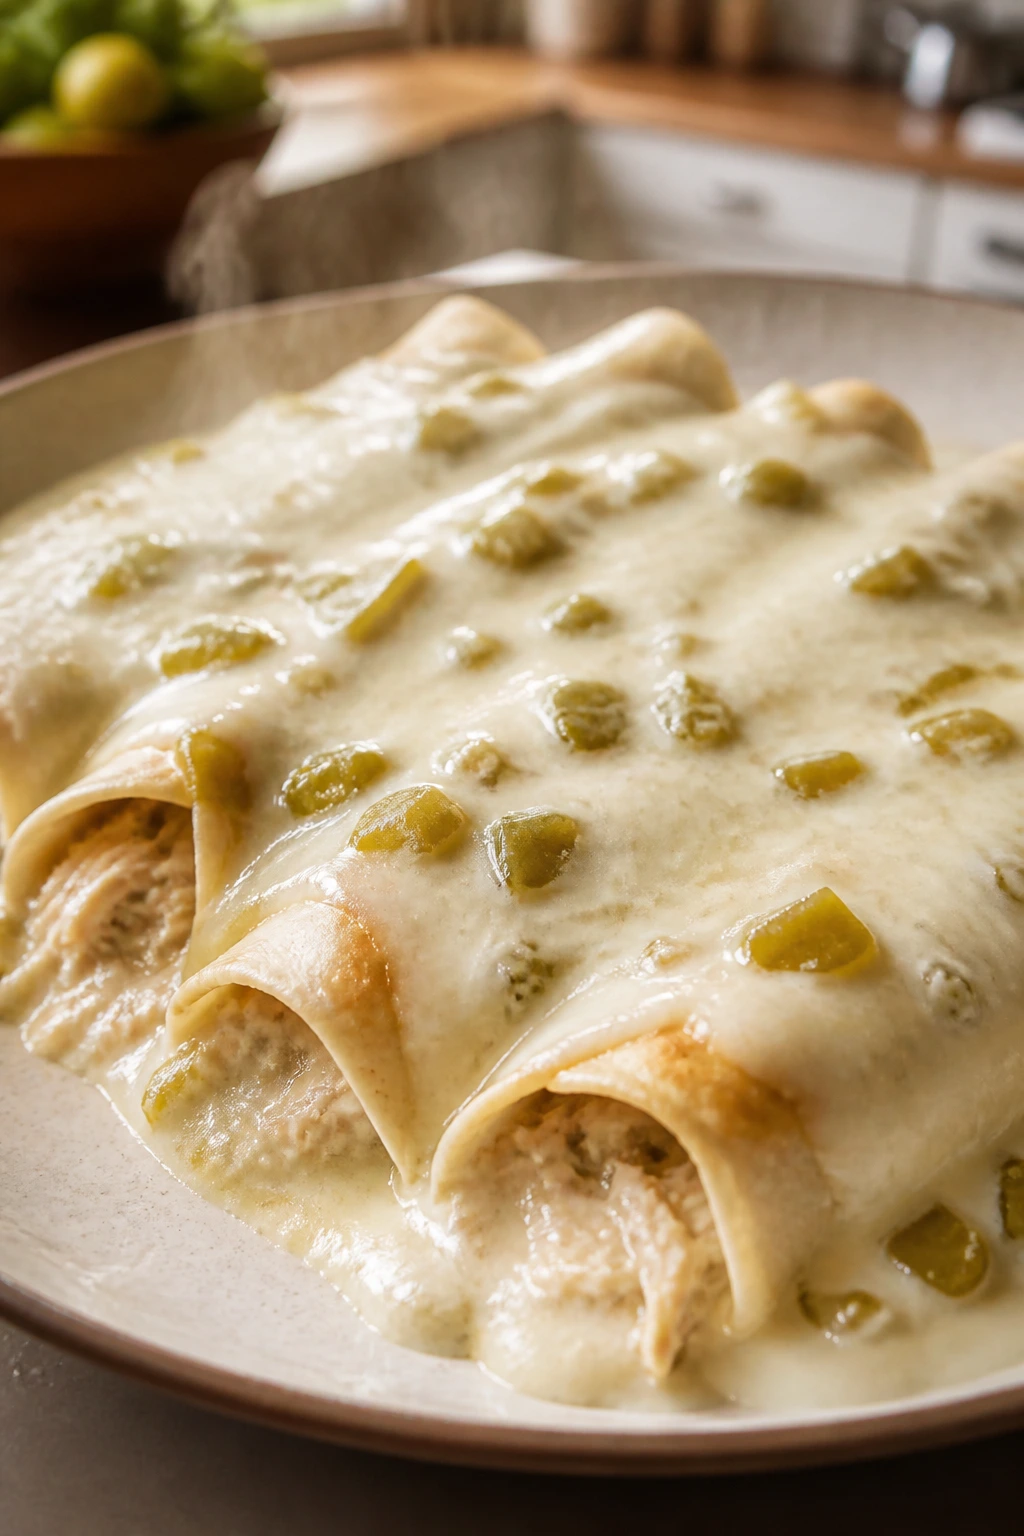
White enchiladas are the sneaky one in the group. They look soft and mild, then hit you with a creamy, savory sauce that tastes richer than it reads on the plate. The flour tortillas become tender and silky in the oven, almost like they’re wrapped in a blanket instead of baked.
This version leans into comfort without getting gluey. The sauce starts with a simple roux, which matters because a lot of creamy enchilada recipes break or separate when you rush them. Here, the sauce stays smooth, the green chiles keep it from tasting sleepy, and the chicken gives the pan enough heft to feed a full table.
Why It Works:
A butter-and-flour base gives the sour cream sauce structure, so it can go into the oven without splitting. Chicken broth adds savory depth, while the sour cream gets stirred in off the heat to keep the texture smooth. Flour tortillas are the right choice here because they stay soft under a creamy sauce and don’t crack the way corn tortillas sometimes do in this style. The green chiles and cumin are doing quiet work in the background, which is what creamy dishes need most.
Key Ingredients:
- 2 pounds cooked shredded chicken
- 16 flour tortillas, medium size
- 4 tablespoons butter
- 4 tablespoons all-purpose flour
- 2 cups chicken broth
- 1 cup sour cream
- 1 can (4 ounces) diced green chiles
- 1 teaspoon ground cumin
- 1/2 teaspoon garlic powder
- 1/2 teaspoon kosher salt
- 3 cups shredded Monterey Jack cheese
- 1/4 cup chopped cilantro
Quick Steps:
- Preheat the oven to 375°F and grease a 9×13-inch baking dish.
- Make the sauce by melting the butter in a saucepan over medium heat, whisking in the flour, and cooking for 1 minute until it smells a little nutty but not brown.
- Whisk in the chicken broth slowly, then cook for 3 to 4 minutes until the sauce thickens enough to coat a spoon. Remove from the heat and stir in the sour cream, green chiles, cumin, garlic powder, and salt.
- Fill each tortilla with shredded chicken and a handful of cheese, then roll and place seam-side down in the dish.
- Pour about two-thirds of the sauce over the enchiladas and sprinkle with the remaining cheese.
- Bake for 20 to 25 minutes, until the sauce is bubbling and the cheese is melted.
- Spoon the remaining sauce over the top before serving, then finish with cilantro.
Tips and Variations:
- If the sauce seems too thick, loosen it with 2 to 3 tablespoons more broth.
- Rotisserie chicken works well here, but season it lightly before rolling.
- A little diced jalapeño in the filling gives the creamy sauce more edge.
10. Veggie Fajita Enchiladas
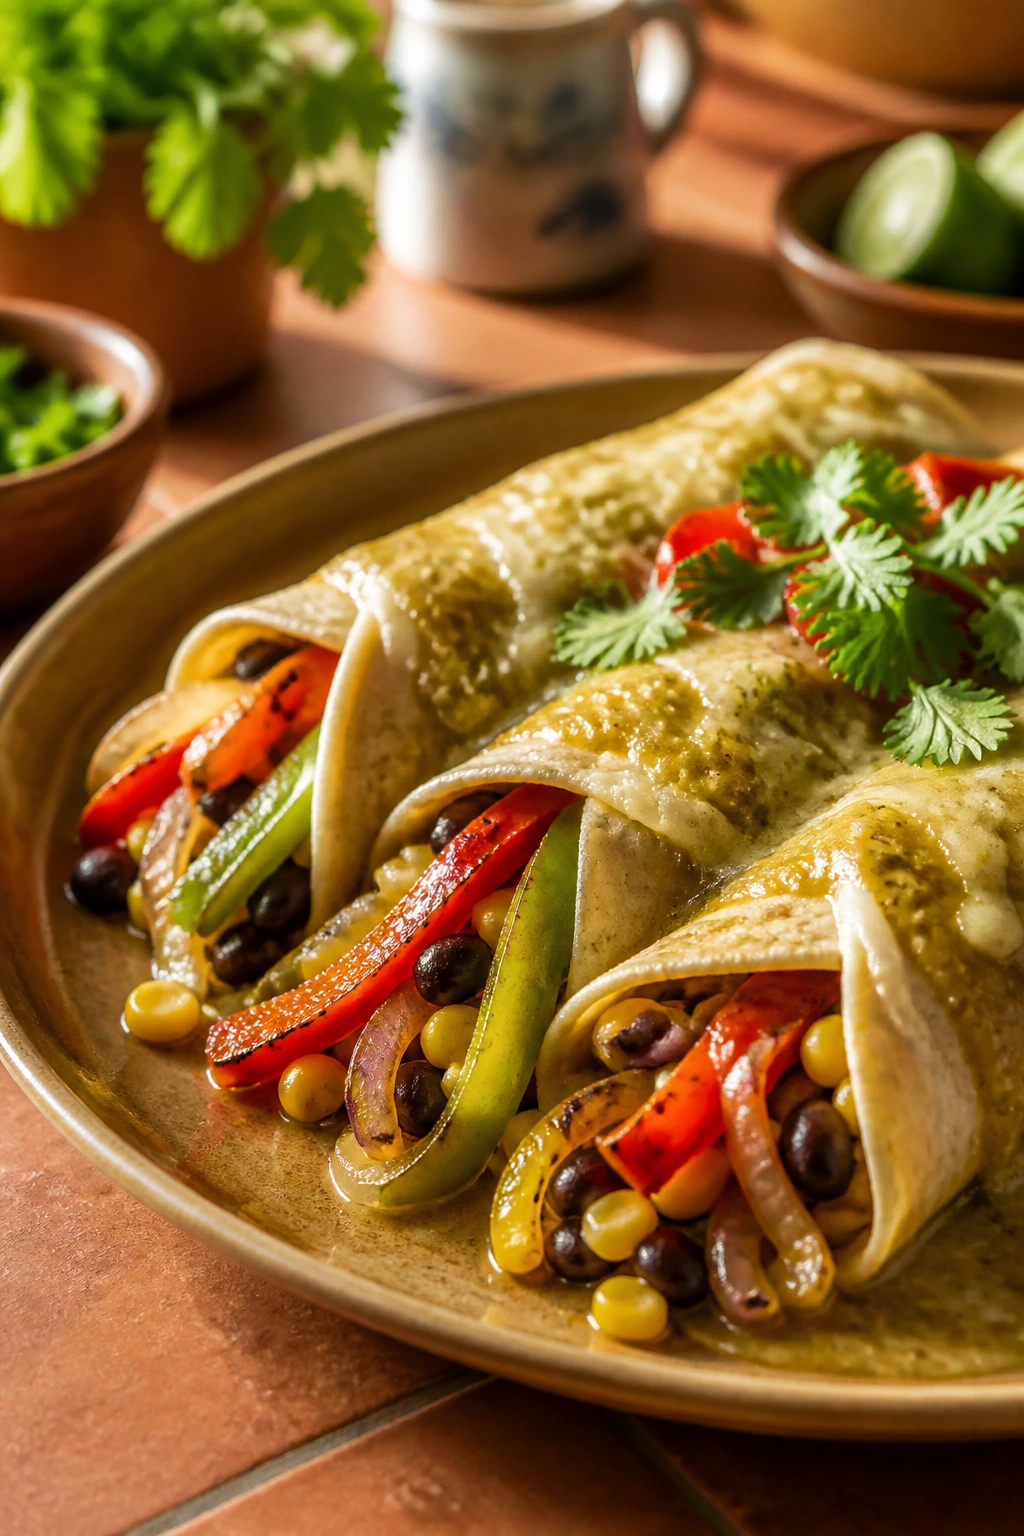
These enchiladas smell like the best part of fajita night: charred peppers, onions, and a little sweet corn hitting hot oil. They’re bright, colorful, and hearty enough to stand on their own, which matters when you’re feeding people who want vegetables to feel like dinner, not a side quest.
I like this pan because it doesn’t try to act like meat. The vegetables get cooked first so they don’t flood the casserole with water, the beans add body, and the sauce ties everything together in a way that feels full, not sparse. Even committed meat eaters tend to go back for seconds if the vegetables are cooked with enough color and seasoning.
Why It Works:
Fajita vegetables need to be cooked down before assembly, or they dump too much moisture into the pan. Black beans give the filling protein and make the enchiladas feel complete, while corn adds sweetness that balances the peppers. Green enchilada sauce makes the whole thing taste lively, but red sauce works too if you want a deeper flavor. Once the veggies pick up a little char, the dish stops tasting “vegetarian” in the dull way and starts tasting like dinner with a point of view.
Key Ingredients:
- 2 tablespoons olive oil
- 2 bell peppers, sliced
- 1 large onion, sliced
- 8 ounces mushrooms, sliced
- 2 medium zucchini, diced
- 2 teaspoons fajita seasoning
- 2 cans (15 ounces each) black beans, drained and rinsed
- 1 cup corn kernels
- 12 corn tortillas, warmed
- 2 cups green enchilada sauce
- 3 cups shredded cheese
- 1 lime, cut into wedges
- 1/4 cup chopped cilantro
Quick Steps:
- Cook the peppers, onion, mushrooms, and zucchini in olive oil over medium-high heat for 8 to 10 minutes, until the edges are browned and the vegetables have lost most of their moisture.
- Season with fajita seasoning, then stir in the beans and corn. Cook for 2 minutes more, just until hot.
- Warm the tortillas so they can roll cleanly.
- Fill each tortilla with the vegetable mixture and a little cheese, then roll and place seam-side down in a greased casserole dish.
- Pour the green enchilada sauce over the top and scatter the remaining cheese across the pan.
- Bake at 375°F for 20 to 25 minutes, until bubbling and lightly browned.
- Rest for 10 minutes, then finish with cilantro and a squeeze of lime.
Tips and Variations:
- Roasting the vegetables on a sheet pan instead of sautéing them gives you deeper browning.
- Add a diced jalapeño if your crowd likes more heat.
- A few slices of avocado on top make the pan feel richer without adding much work.
11. Green Chile Steak and Potato Enchiladas
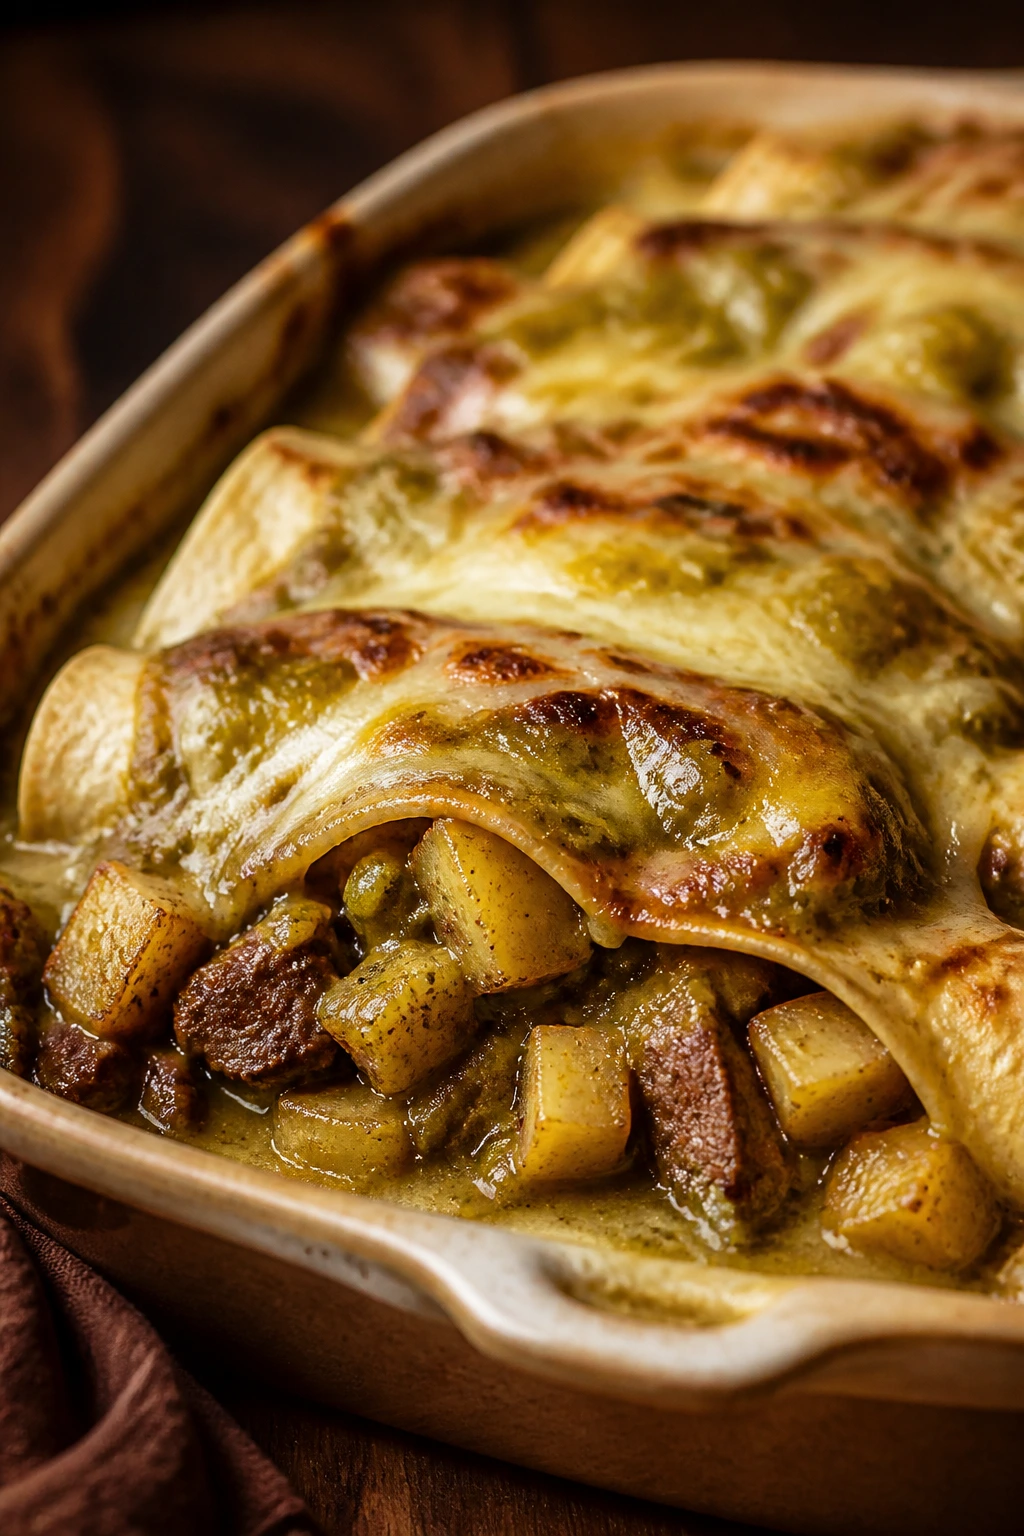
Steak and potatoes inside enchiladas sounds a little old-school, and that’s part of the appeal. This is the sturdy, deeply satisfying pan in the lineup, the one that feels like it can handle a long table, a hungry crowd, and one more person who “just came by.”
The potatoes are the clever part. They stretch the steak, soak up the sauce, and make the filling feel generous without turning it mushy. Green chiles keep the whole thing lively, and the roasted edges of the potatoes give the filling a little texture, which keeps the enchiladas from tasting soft all the way through.
Why It Works:
Steak can dry out if you overbake it, so pairing it with potatoes and green chile sauce protects the meat and keeps the filling juicy. Yukon gold potatoes are the right choice because they stay creamy after roasting and don’t fall apart in the pan. A little cumin and onion bridge the steak and potato flavors so the filling tastes deliberate rather than like leftovers wearing a costume. This recipe also slices neatly after resting, which matters when you’re serving a large crowd and don’t want filling sliding everywhere.
Key Ingredients:
- 1 1/2 pounds Yukon gold potatoes, diced into 1/2-inch cubes
- 1 tablespoon olive oil
- 1 1/2 pounds flank steak or sirloin
- 1 teaspoon kosher salt
- 1 teaspoon ground cumin
- 1 large onion, diced
- 2 cups green enchilada sauce
- 1 cup roasted green chiles
- 12 corn tortillas, warmed
- 3 cups shredded Monterey Jack cheese
- 1/2 cup chopped cilantro
Quick Steps:
- Roast the potatoes at 425°F with olive oil and half the salt for 20 minutes, until the edges are golden and the centers are tender.
- Sear the steak in a hot skillet for 3 to 4 minutes per side, depending on thickness, then rest it for 10 minutes before chopping it into small pieces.
- Cook the onion in the same skillet for 4 minutes, then stir in the cumin, chiles, chopped steak, and roasted potatoes. Add 1/2 cup enchilada sauce and heat for 2 minutes.
- Warm the tortillas so they roll cleanly.
- Fill each tortilla with the steak-potato mixture and a handful of cheese, then roll and place seam-side down in a greased dish.
- Spoon the remaining enchilada sauce over the top and finish with the rest of the cheese.
- Bake at 375°F for 20 to 25 minutes, until the cheese bubbles and the sauce edges thicken.
- Rest for 10 minutes, then finish with cilantro.
Tips and Variations:
- Leftover grilled steak works fine here; just chop it small and warm it gently.
- If you want a little more richness, add 1/2 cup of sour cream to the filling.
- A spoonful of salsa verde on each serving brightens the potato flavor.
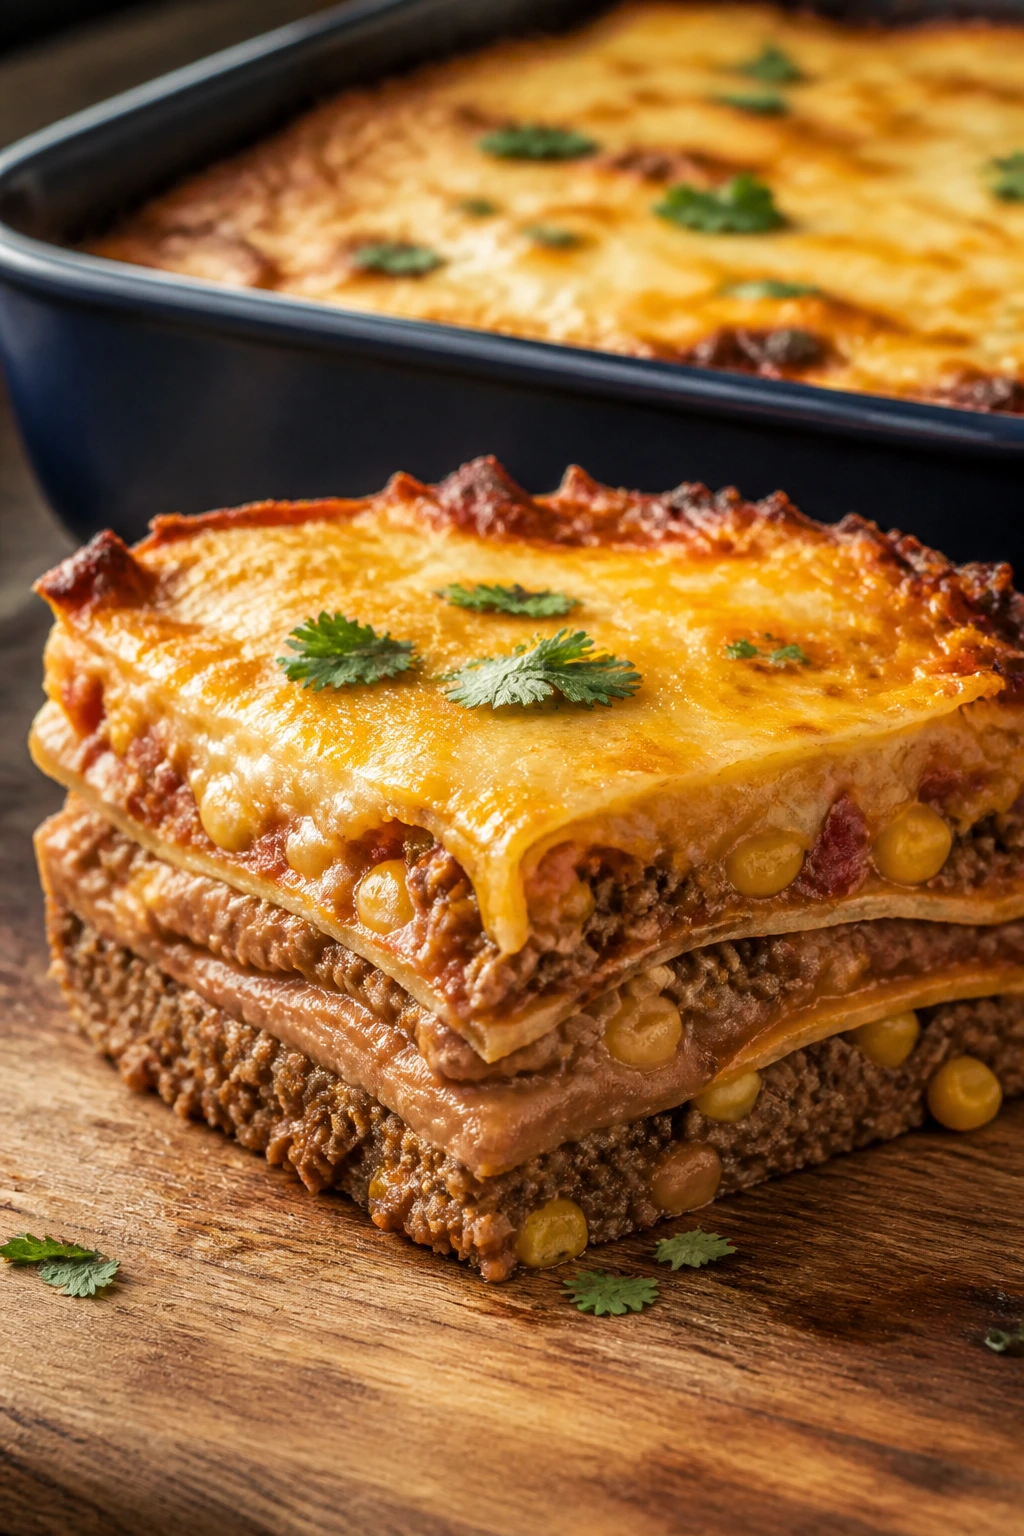
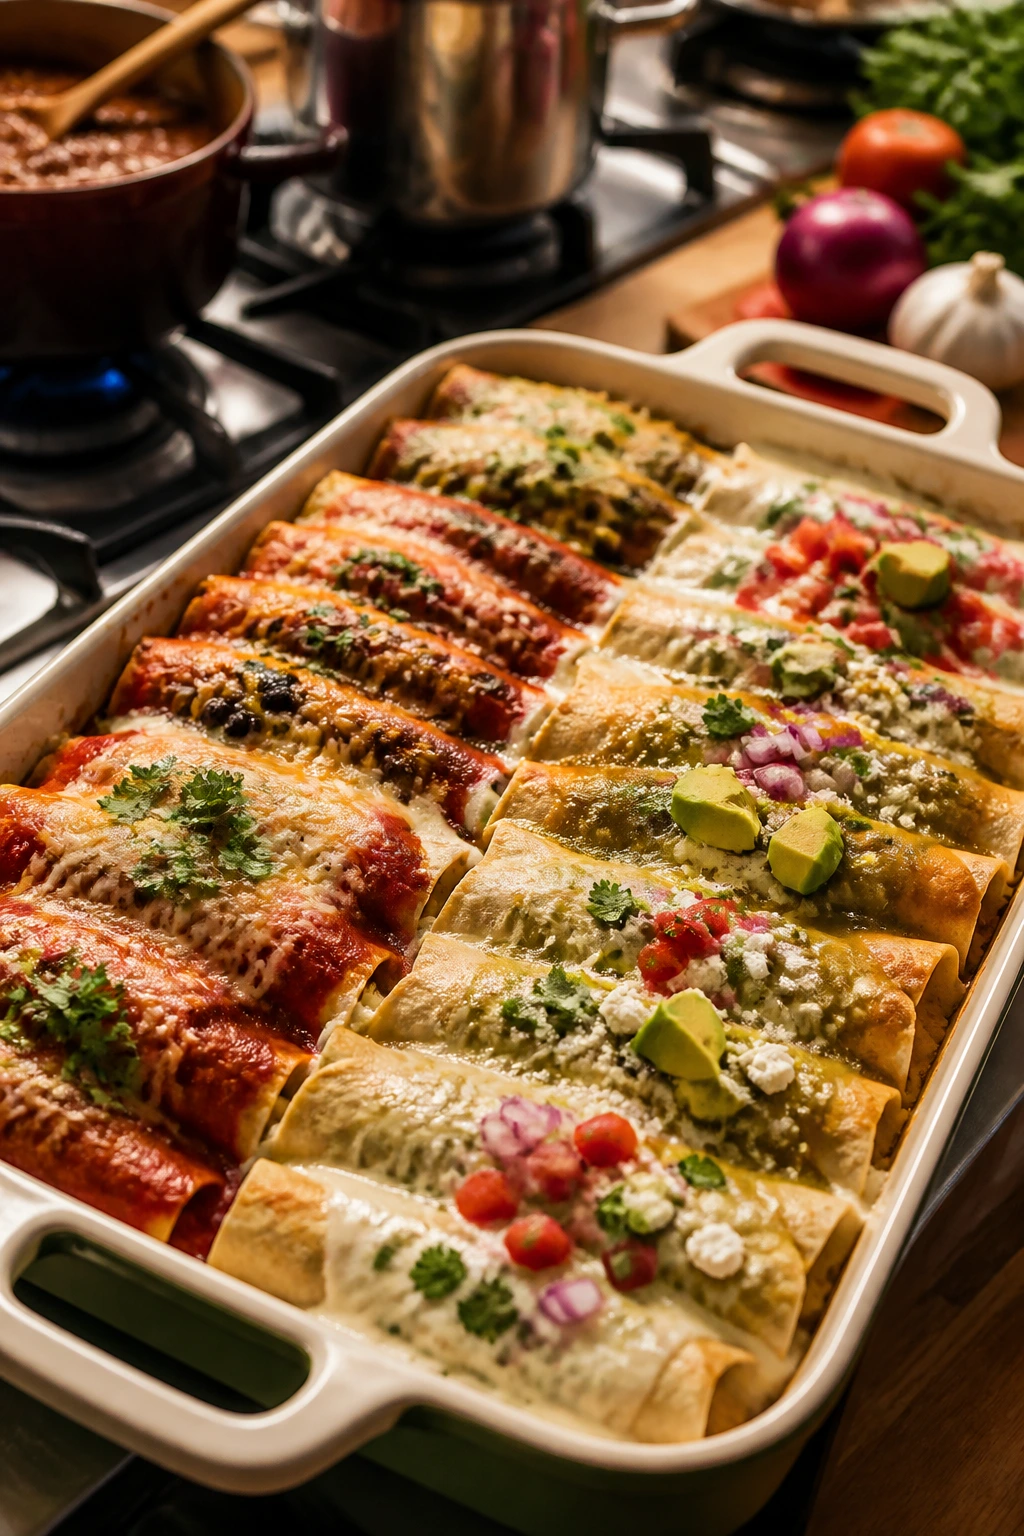
12. Enchilada Lasagna with Layers of Tortillas and Sauce
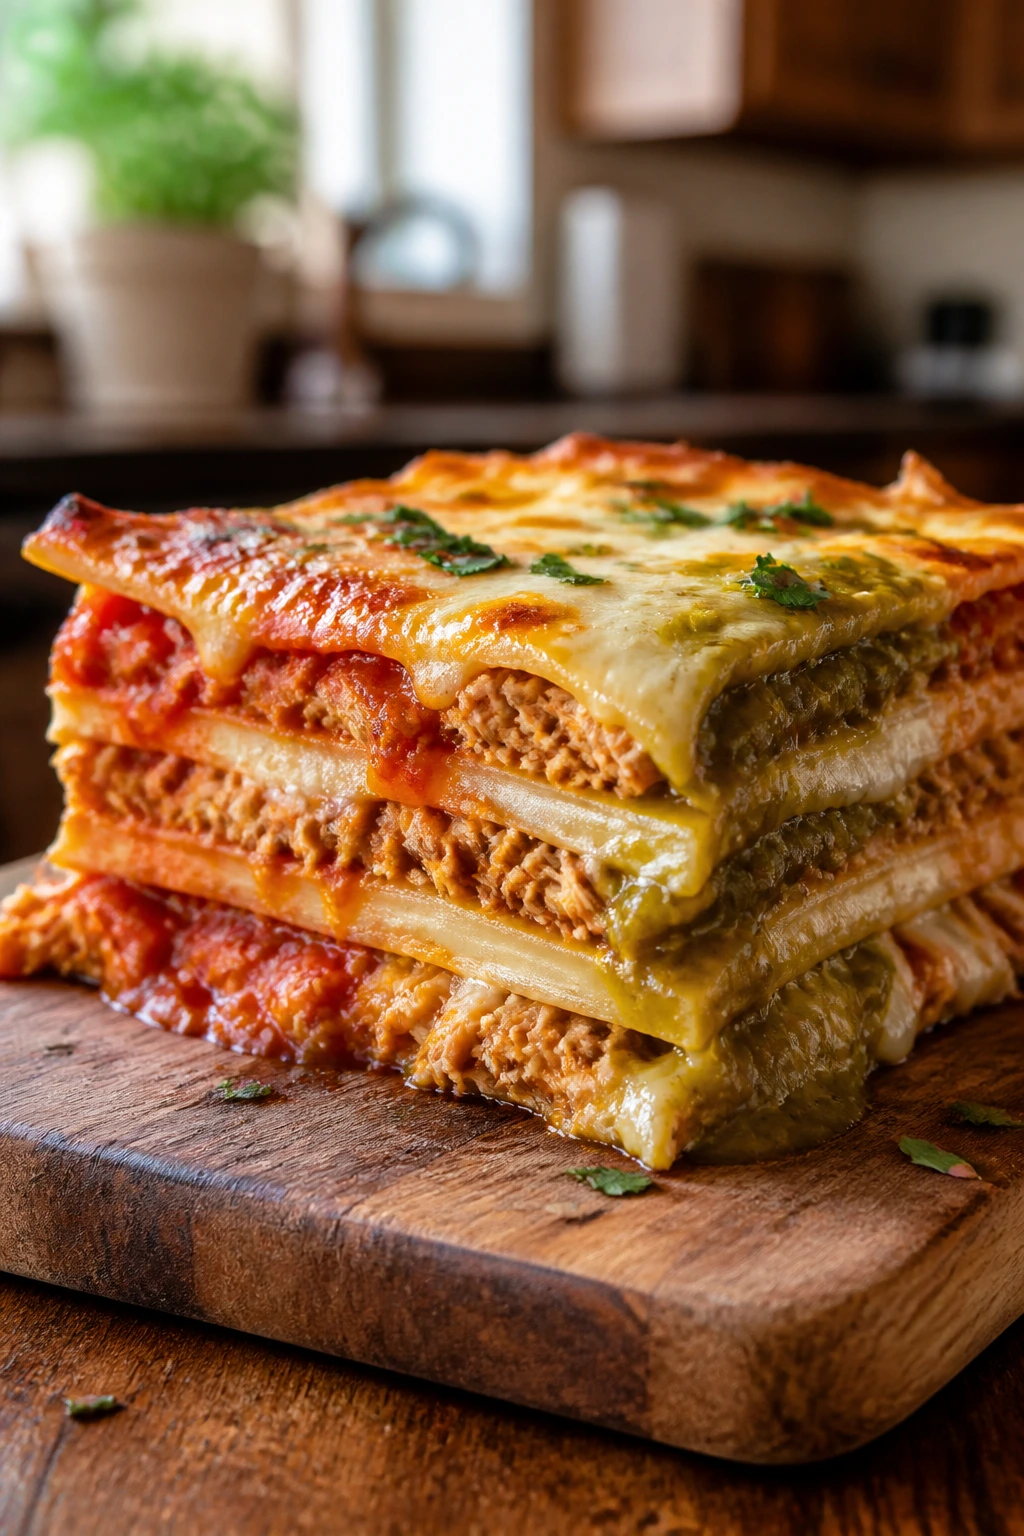
This is the casserole that eats like a cross between enchiladas and a layered pasta bake. You get clean slices, a lot of surface area for cheese, and enough structure that each serving looks tidy even when the family is reaching over one another to get to the pan first.
Layering tortillas instead of rolling them changes the whole feel of the dish. The sauces stay separate enough to taste their own personalities, the filling gets distributed evenly, and the top browns in patches that are honestly the best part. If you need a big-family dinner that looks generous and slices well, this is a strong final move.
Why It Works:
Lasagna-style layering makes assembly faster and more forgiving than rolling individual enchiladas. The tortillas soften as they bake, but they don’t lose shape because the filling and sauce are spread in thin, even layers. Using both red and green sauce gives the casserole more depth, and the cream cheese in the filling helps everything hold together when you cut into it. It’s the kind of pan that gives you neat squares without feeling fussy.
Key Ingredients:
- 2 pounds cooked shredded chicken
- 1 can (15 ounces) black beans, drained and rinsed
- 1 cup corn kernels
- 1 bell pepper, diced
- 8 ounces cream cheese, softened
- 1 jar (15 ounces) red enchilada sauce
- 1 jar (15 ounces) salsa verde
- 12 corn tortillas, cut in half
- 3 cups shredded cheese
- 1/2 cup sliced green onions
- 1/2 cup chopped cilantro
Quick Steps:
- Mix the chicken, black beans, corn, bell pepper, and cream cheese in a large bowl until the filling looks thick and evenly coated.
- Preheat the oven to 375°F and grease a 9×13-inch baking dish.
- Spread a thin layer of red enchilada sauce in the bottom of the dish, then lay down a layer of tortilla halves.
- Add half the chicken mixture, a drizzle of salsa verde, and a handful of cheese. Repeat with another tortilla layer, the remaining filling, more salsa verde, and more cheese.
- Top with the final tortillas, the rest of both sauces, and the remaining cheese.
- Bake for 30 to 35 minutes, until the center is hot and the top is bubbling and lightly browned.
- Rest for 15 minutes so the layers set.
- Garnish with green onions and cilantro before slicing into squares.
Tips and Variations:
- This is one of the best make-ahead pans in the group because the layers hold up well overnight.
- If you want a sharper flavor, swap the salsa verde for tomatillo salsa with a little extra lime.
- The leftovers cut cleaner the next day, which is either useful or mildly annoying depending on how much is left.
Why Enchiladas Stretch So Well for Big Crowds
Enchiladas are one of those meals that look like they were designed by someone who actually had to feed a room full of people. Tortillas form a built-in wrapper, sauce does the job of moisture and flavor at the same time, and cheese gives you the easy visual signal that dinner is done. No guesswork. No delicate plating.
They also scale in a way that most baked dinners do not. You can double a filling without changing the logic of the recipe, divide the pan across two casseroles, and keep both dishes warm until the table is ready. That matters for big families because dinner time is rarely a single, clean event. Somebody is late. Somebody is hungry early. Somebody wants seconds before the first serving has cooled enough to carry.
The other thing enchiladas do well is keep the food interesting from edge to center. The corners get a little browned and concentrated, the middle stays soft and saucy, and the filling brings enough texture that each bite feels slightly different. I like that. A lot. It keeps a big pan from tasting monotonous, which is a real risk when you’re feeding more than six people and hoping nobody notices the same forkful for the third time.
Essential Equipment for These Recipes
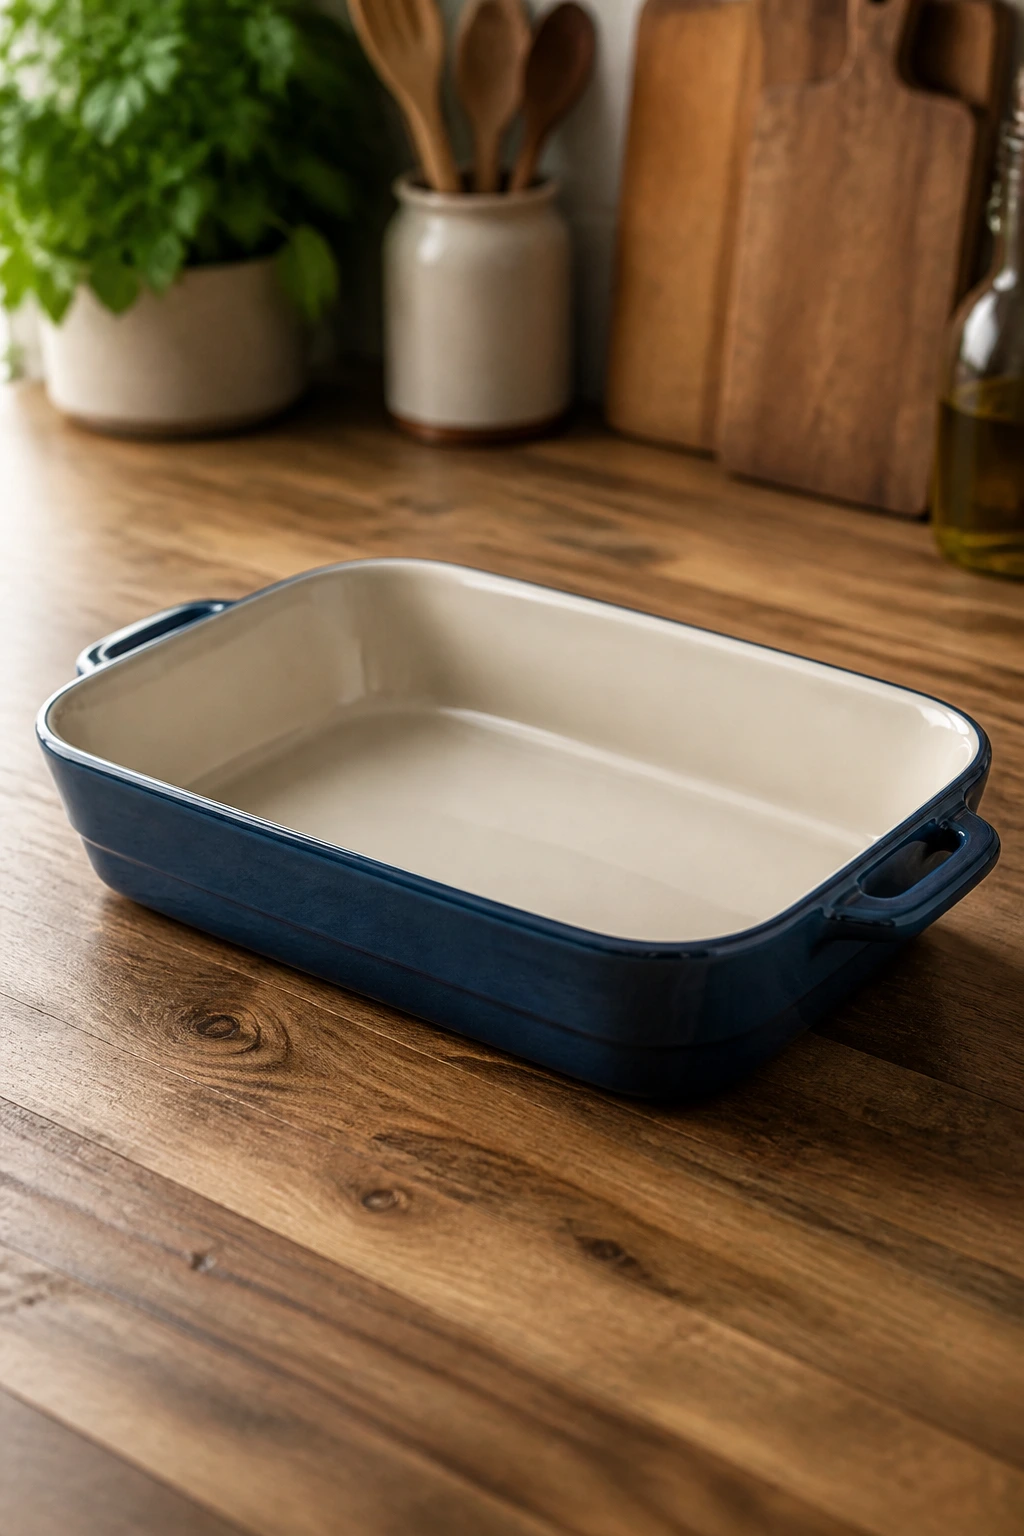
- 9×13-inch baking dishes: The standard size for most of these pans; keep two on hand if you plan to double a recipe.
- Large skillet or sauté pan: Needed for browning meat, softening vegetables, and thickening fillings before assembly.
- Dutch oven or deep saucepan: Handy for saucy fillings, chicken simmering, and any recipe that starts on the stovetop.
- Sheet pan: Useful for warming tortillas in batches or roasting vegetables for the veggie and potato versions.
- Mixing bowls: One large bowl for filling, one medium bowl for cheese and toppings, and another if you’re separating sauces.
- Tongs or a wide spatula: Makes it easier to turn tortillas and move hot fillings without tearing them.
- Measuring cups and spoons: The enchilada sauce balance matters more than people think, so don’t eyeball everything.
- Sharp knife and cutting board: For onions, peppers, herbs, and slicing the finished pan cleanly.
- Foil: Helps trap steam during the first part of baking and keeps cheese from overbrowning.
- Instant-read thermometer: Especially useful for chicken, pork, and steak so you know the filling is cooked through before it goes into the oven.
Smart Shopping and Ingredient Tips
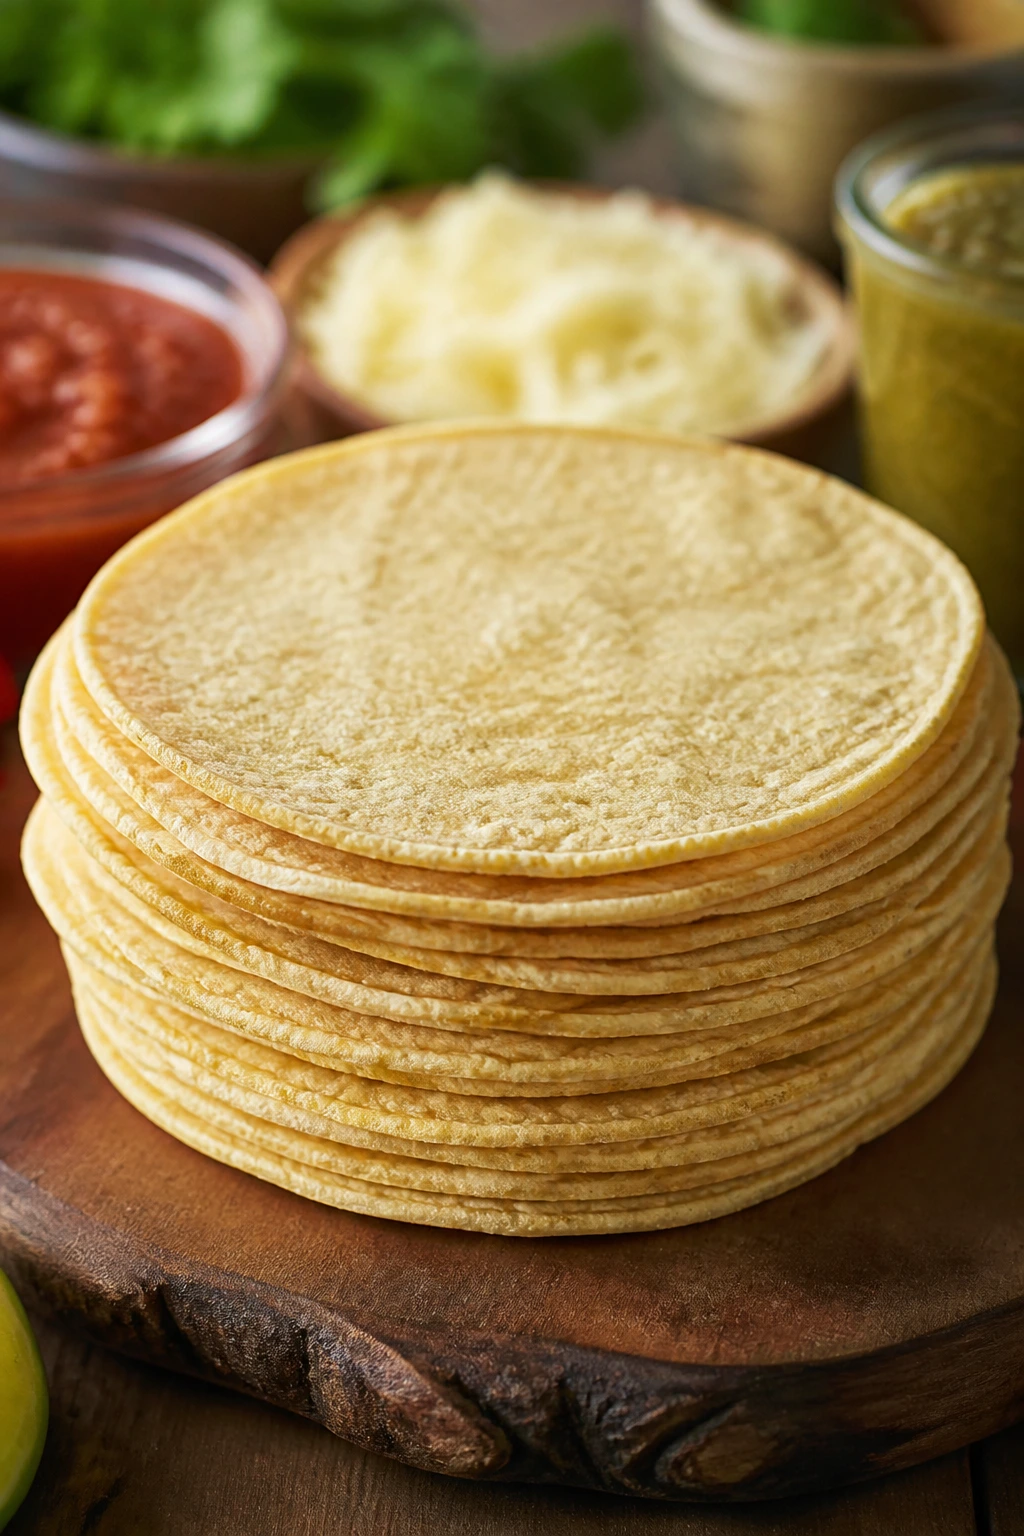
Tortillas make or break enchiladas, and the first decision is corn versus flour. Corn tortillas are the classic move for red and green sauces because they hold flavor well and give that familiar bite. Flour tortillas work better in creamy enchiladas because they stay soft and don’t crack as easily. If you’re using corn tortillas, warm them first in a dry skillet or wrapped in a damp towel; cold tortillas split the second you try to roll them.
Sauce deserves more attention than it usually gets. A thin, watery sauce will make the pan sloppy, while a very sweet one can flatten the whole dish. For store-bought sauce, look for one with chile or tomato near the top of the ingredient list and a texture that clings to a spoon instead of racing off it. If you’re making your own, taste it before assembling. It should seem a touch stronger than you want in a spoonful, because the tortillas and cheese will soften it.
Cheese is worth buying in block form if you can spare the minute to shred it yourself. Pre-shredded cheese has a coating that keeps it from clumping in the bag, but that same coating can keep it from melting smoothly on top of the pan. Monterey Jack melts cleanly. Cheddar brings sharper flavor. Mexican blend gives you both, which is why it shows up so often here.
Beans, vegetables, and sauces need draining discipline. Canned beans should be rinsed unless the recipe says otherwise. Mushrooms, zucchini, and peppers should be cooked down enough that they’re not leaking liquid into the casserole. And if you’re using rotisserie chicken or leftover pork, warm the meat gently with sauce before rolling so the filling doesn’t go into the dish cold and dry.
How to Serve a Pan of Enchiladas
Presentation: Spoon the enchiladas onto warm plates with a little extra sauce draped over the top, then finish with cilantro, sliced green onions, or a few pickled jalapeños. A small pile of shredded lettuce or thin radish slices on the side gives the plate a crisp look and a cool bite.
Accompaniments: Mexican rice, lime slaw, refried beans, roasted corn, and a simple tomato salad all make sense here. If you want something easier, chips and salsa or a bowl of avocado chunks with salt and lime can carry the table without much effort.
Portions: For adults, plan on 2 enchiladas if the filling is meat-heavy, or 2 to 3 if the pan is bean-based or layered with vegetables. For kids, 1 enchilada plus a side is usually enough. If you’re scaling up, assume one 9×13-inch pan serves about 6 hearty eaters or 8 lighter ones.
Beverage Pairing: Horchata is a lovely match with spicy or rich enchiladas, while a crisp lager works well with red sauce and beef. For a non-alcoholic option, sparkling lime water or agua fresca keeps the meal bright and cuts through the cheese.
Extra Tricks for Better Flavor
Flavor Enhancement: A squeeze of lime over the finished pan sounds small, but it wakes up red, green, and creamy enchiladas alike. If you want another layer, drizzle a little crema or thinned sour cream over the top in a zigzag, then add chopped cilantro and a pinch of flaky salt.
Customization: Add cooked rice, roasted potatoes, or beans to almost any of these fillings when you need the pan to stretch. If your family likes heat, stir chopped jalapeños or chipotle in adobo into the meat before assembling. For milder eaters, keep the filling plain and let the hot sauce live at the table.
Serving Suggestions: Pickled onions, avocado slices, cotija cheese, and toasted sesame seeds each give a different finish depending on the style of enchilada. I especially like pickled onions on pork and steak versions, because the acidity keeps the richness from piling up.
Make-It-Yours: For gluten-free dinners, stick with corn tortillas and check the sauce label carefully. For dairy-free pans, use a good melting plant-based cheese sparingly and lean harder on seasoned filling, salsa, and fresh herbs. For a lower-sodium version, rinse the beans, use low-salt broth, and season the meat yourself instead of relying on packaged spice mixes.
Make-Ahead, Storage, and Reheating Guidance
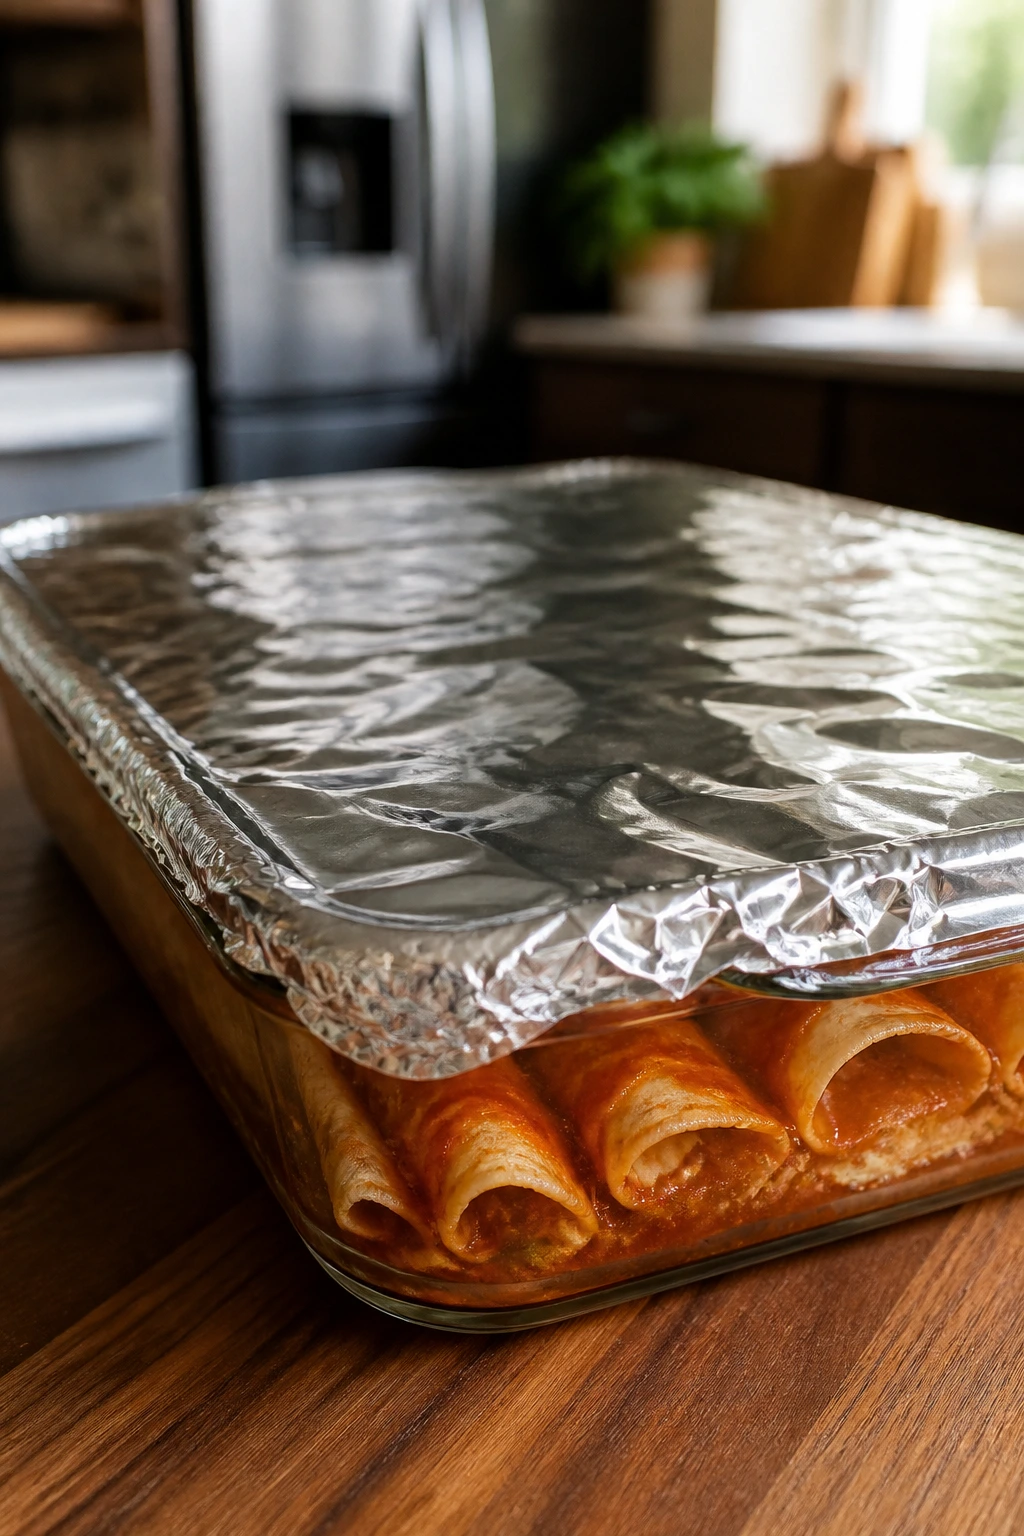
Most of these enchilada dinners can be assembled a day ahead and held in the refrigerator, covered tightly, for up to 24 hours before baking. That works especially well for the beef, bean, turkey, pork, and layered casserole versions. If you’re planning farther ahead, freeze the unbaked pan for up to 2 months, wrapped in foil and then in a freezer bag or a second layer of plastic wrap. Label it. Future you will be grateful.
For baked leftovers, the refrigerator is the safe home for 3 to 4 days. Creamy versions with sour cream or cream cheese are best eaten sooner rather than later, while red and green sauce pans tend to hold up the longest. Keep leftovers in an airtight container, or leave them in the original dish tightly covered if that’s easier.
Reheat whole pans in a 350°F oven, covered with foil, for 20 to 25 minutes or until hot in the center. Add a spoonful or two of extra sauce before reheating if the pan looks dry. Single portions can go in the microwave for 1 to 2 minutes, though a damp paper towel on top helps keep the tortilla from tightening up. For frozen unbaked pans, thaw overnight in the fridge first if you can. If you’re baking from frozen, expect a much longer bake and keep the dish covered for most of it so the top doesn’t overcook before the center warms through.
One practical note: creamy sauces can separate a little after freezing, while red and green sauce pans usually stay more stable. If freezing is part of your dinner routine, the bean, beef, turkey, and pulled pork recipes are the easiest bets.
Variations and Adaptations to Try
Tortilla Split: Use corn tortillas for red, green, and mole pans; use flour tortillas for creamy and white-sauce versions. That one change affects texture more than most people expect, and it’s often the difference between a neat slice and a pan that slumps.
Bean-Heavy Budget Tray: Replace half the meat in any beef, turkey, or pork recipe with extra beans or rice. The flavor stays familiar, the pan stretches farther, and the texture still feels full enough for a hungry group.
Heat-Seeker Upgrade: Add chipotle in adobo, chopped jalapeños, or a hotter salsa to the filling. Keep the cheese the same, though. Too much heat and too much cheese both flatten a dish in different ways, and the balance matters.
Mild Family Version: Use only a little chile powder, skip the jalapeños, and lean on mellow cheeses like Monterey Jack. Finish with sour cream or crema so the pan still tastes complete without waking up the whole house.
Vegetable-First Pan: Build the filling around roasted peppers, onions, mushrooms, corn, zucchini, beans, and a handful of rice. This works especially well with green sauce and a little cotija on top, because the vegetables get a clean, bright finish.
Freezer-Ready Batch Night: Assemble two pans at once, bake one, and freeze the other unbaked. The second pan becomes a ready-made dinner for a night when nobody wants to start from scratch and everybody wants to eat sooner than dinner would like.
Common Mistakes to Avoid
Dry tortillas: If the tortillas crack while rolling, the pan will leak filling and look rough before it even goes into the oven. Warm them first, either in a dry skillet or wrapped in a damp towel in the microwave.
Too much filling: Overstuffed tortillas split open during baking, then the filling ends up under the cheese instead of inside the enchiladas. Use a modest scoop and roll snugly; the pan should look full, not stuffed to the point of rebellion.
Watery filling: Vegetables that weren’t cooked down, beans that weren’t drained, or sauce that was too thin can turn the casserole loose and sloppy. Cook off excess moisture before assembly and use sauce that clings to a spoon.
Not enough sauce: Dry edges happen when the top and bottom of the pan don’t get coated well enough. Save a little sauce for the final pour, and don’t be stingy around the corners.
Skipping the rest time: Cutting the pan the second it leaves the oven causes the filling to slide out and the cheese to stretch into chaos. Give it 10 minutes for standard pans, 15 minutes for the lasagna-style version.
Overbaking the cheese: A dark cheese top is nice; a greasy, dried-out lid is not. Cover the pan for most of the bake, then uncover only at the end long enough to melt and lightly brown the top.
Questions Home Cooks Ask First

Can I use flour tortillas for all of these enchilada dinners?
You can, but the texture changes. Flour tortillas work best in creamy or white-sauce enchiladas; corn tortillas hold up better with red, green, mole, and layered casserole styles.
How do I keep enchiladas from getting soggy?
Use a filling that has been cooked down so it isn’t wet, warm the tortillas before rolling, and don’t drown the pan in sauce. A little sauce under the enchiladas and a little over the top is usually enough.
Can I make these ahead for a family gathering?
Yes. Assemble the pan, cover it tightly, and refrigerate for up to 24 hours before baking. If you need more time than that, freeze it unbaked instead.
What’s the best way to freeze a full pan?
Use a foil pan or a freezer-safe baking dish, wrap the unbaked enchiladas tightly, and freeze for up to 2 months. Thaw in the refrigerator before baking if possible, then add a little extra oven time if the center still feels cold.
Can I use rotisserie chicken in these recipes?
Absolutely. It works especially well in the verde, creamy spinach, white sauce, and lasagna-style versions. Toss the shredded chicken with a little warm sauce first so it doesn’t taste dry in the finished pan.
What if my sauce tastes too sharp?
A small pinch of sugar or a little more cheese can soften a very tangy red or green sauce. In creamy versions, a splash more broth or a spoon of sour cream usually smooths the edge.
How do I scale these up for a bigger crowd?
Double the filling and use two pans instead of trying to cram everything into one oversized dish. Enchiladas bake more evenly when they have room to breathe, and two pans are easier to serve anyway.
Can I make these less spicy for kids?
Yes. Use mild enchilada sauce, skip jalapeños and chipotle, and lean on cheese, beans, rice, or potatoes for body. You can always put hot sauce on the table for adults who want more kick.
A Dinner Worth Doubling
A good enchilada pan does something rare: it feels generous before anyone takes a bite. That’s the whole appeal here. You get a meal that can be mild or bold, frugal or rich, meat-heavy or fully vegetarian, and it still lands on the table with the same useful trait — it feeds people well and keeps going when they ask for seconds.
If you’ve ever needed one dinner that could satisfy a mixed crowd without turning your kitchen upside down, enchiladas are a strong place to stand. Pick a sauce, pick a filling, warm the tortillas, and build the pan with enough care that the last square tastes as good as the first. That’s the part worth repeating.