
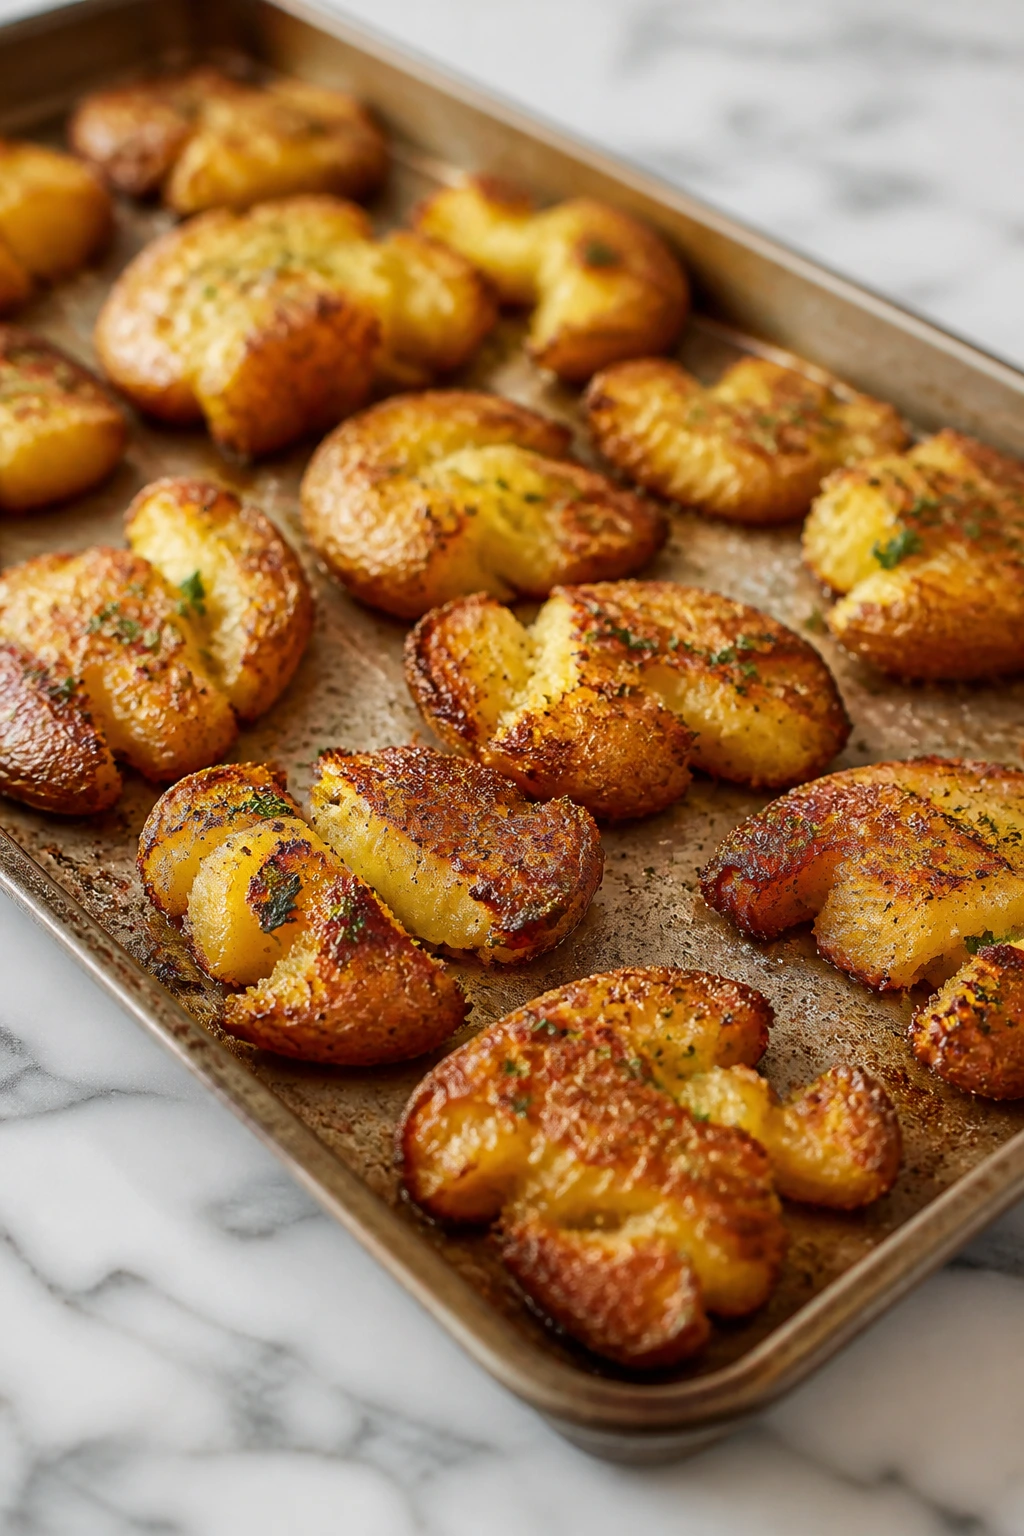
Smashed-potato dinners solve a very specific problem: you want a plate with crackly, browned potato edges, but you also want the rest of dinner to feel like dinner, not a side dish that wandered onto the wrong table. The first bite should give you that thin, salty crunch at the rim, then a soft, creamy center underneath. That contrast is the whole point.
A boiled potato is polite. A smashed potato is a little unruly. Once you flatten it, the surface area triples, the edges frill out, and the oven starts doing the part that mashed potatoes never can: browning those little ridges until they taste almost fried. I’m partial to Yukon Golds for this job because they hold together without turning gluey, though red potatoes can be excellent if you like a firmer bite.
What makes these smashed-potato dinners worth cooking is that they’re not built on decoration. They’re built on texture. Chicken juices run into the potato crags. Steak drips onto the tray. Salmon lands on a bed that can actually stand up to lemon and herbs instead of collapsing into a soggy mess. That’s the sort of dinner I keep coming back to. Not flashy. Just smart. And the first tray tells you everything.
Why You’ll Love This Collection
-
The crispy parts are not an accident: Each dinner uses boiled-and-smashed potatoes so the oven can brown the edges instead of just softening them again.
-
The plate feels like a full meal: Protein, vegetables, and potatoes share the same space, which means fewer side dishes to think about and fewer pans to wash.
-
The method works with meat, fish, and vegetarian toppings: Chicken thighs, salmon, shrimp, beans, and mushrooms all behave well when they’re paired with a sturdy potato base.
-
You get a lot of texture for very little fuss: The trick is simple—boil, smash, roast hard—but the result has those ragged, lacy edges that make people reach for the last piece.
-
Leftovers can still be good: The potatoes re-crisp in a hot oven or skillet, which matters more than people think when dinner is meant to carry into the next day.
-
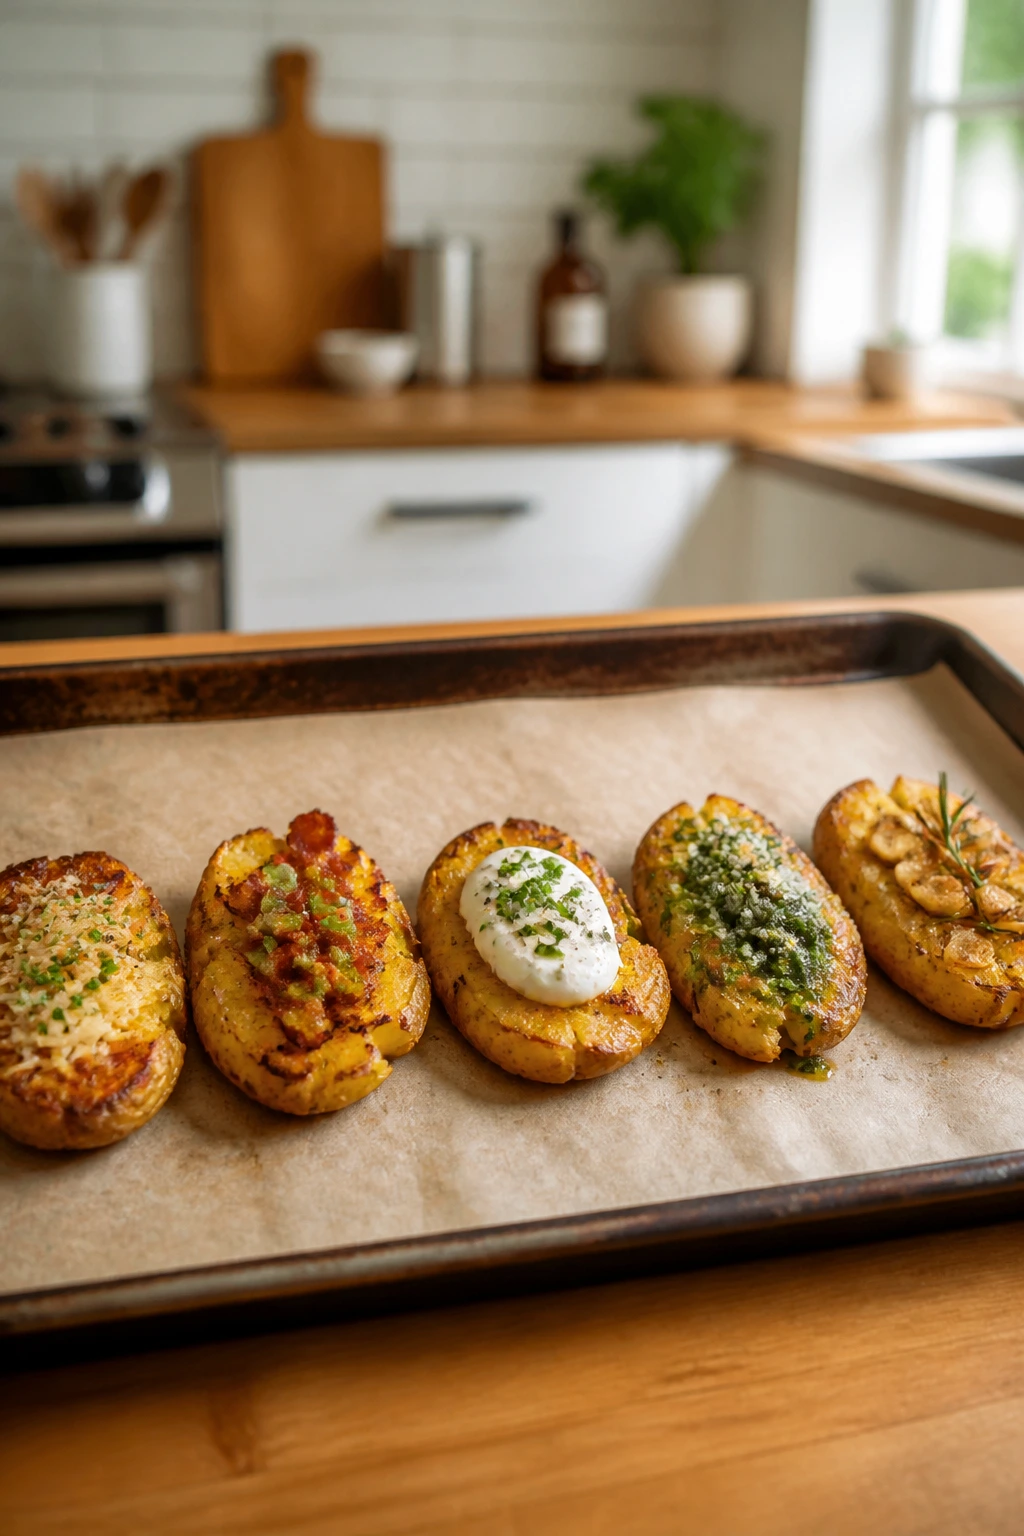
The dinners take seasoning well: Garlic butter, chimichurri, buffalo sauce, mustard pan sauce, feta, miso, and smoky spices all cling to smashed potatoes in a way plain roasted potatoes never quite manage.
1. Garlic-Parmesan Chicken Thighs with Broccoli on Crispy Smashed Potatoes
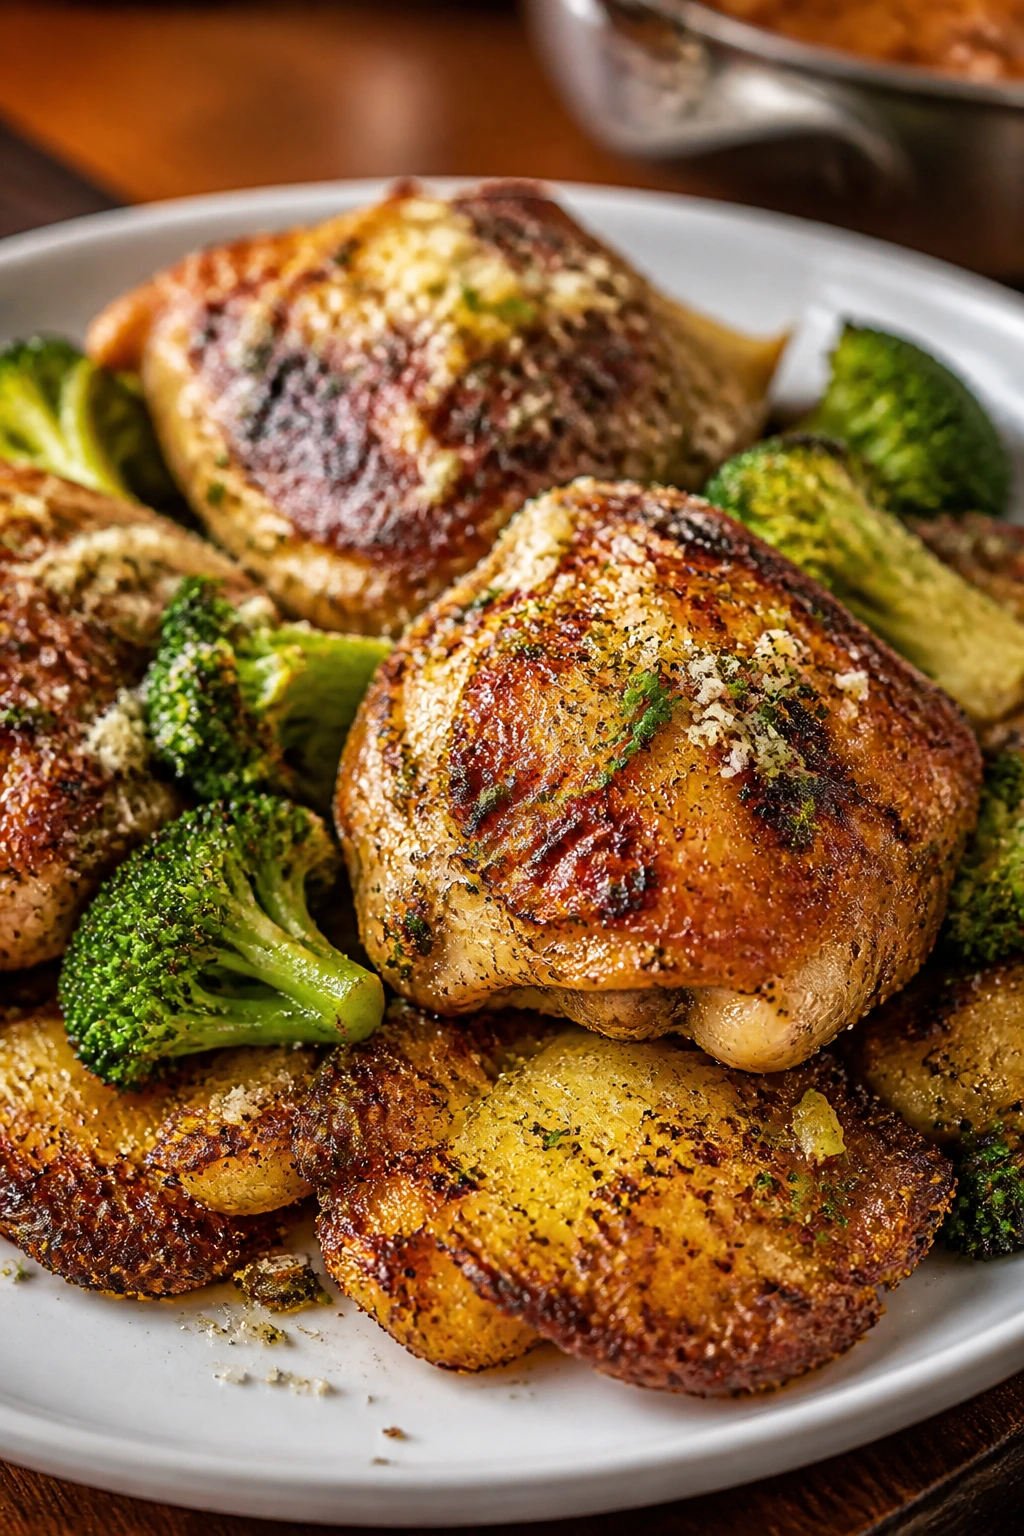
Garlic and Parmesan are doing a lot of work here, and I mean that in the best possible way. The potatoes get salty, browned, and a little jagged at the edges, the chicken thighs stay juicy, and the broccoli picks up those toasted bits that stick to the pan after the potato oil does its thing. It smells like an oven that’s been busy for an hour, which is always a good sign.
I like thighs here instead of breasts. Breasts can work, but they’re fussier, and this dinner doesn’t need fuss. The fat in the thighs keeps them forgiving while the potatoes finish crisping, and the broccoli gets just enough char without turning limp.
Why It Works:
The potatoes are boiled first, then smashed thin so the oven can dry out the surface and brown the ridges. Chicken thighs handle the same high heat better than most lean cuts, so the timing lines up without babysitting. Broccoli roasted on the same tray absorbs garlic, oil, and a little chicken drippings, which is exactly where its flavor should come from. Parmesan goes on at the end so it melts onto the potatoes instead of burning in the oven.
Key Ingredients:
- 2 pounds Yukon Gold potatoes, scrubbed and left whole if they’re small
- 1½ pounds boneless, skinless chicken thighs
- 3 cups broccoli florets, cut small enough to roast fast
- 2 tablespoons olive oil
- 4 cloves garlic, minced
- 1 teaspoon Italian seasoning
- ½ teaspoon smoked paprika
- ¼ cup finely grated Parmesan
- 1 teaspoon kosher salt
- ½ teaspoon black pepper
- 1 tablespoon butter, melted
- 1 lemon, cut into wedges
Quick Steps:
- Boil the potatoes: Cover the potatoes with cold salted water, bring to a boil, then simmer 15 to 18 minutes until a paring knife slides in easily.
- Preheat the oven: Set it to 450°F and line a rimmed sheet pan with parchment or lightly oil it.
- Smash and season: Drain the potatoes well, transfer them to the pan, smash each one to about ½ inch thick, then brush with olive oil, salt, and pepper.
- Start the potatoes: Roast the potatoes for 15 minutes until the edges look dry and pale gold.
- Add the chicken and broccoli: Toss the chicken with garlic, Italian seasoning, paprika, salt, and pepper. Toss the broccoli with a little oil. Nestle everything around the potatoes and roast 18 to 20 minutes, until the chicken hits 165°F.
- Finish hard: Brush the potatoes with melted butter, shower on Parmesan, and return to the oven for 2 minutes. Squeeze lemon over the tray before serving.
Equipment for This Recipe:
- Large pot for boiling the potatoes
- Rimmed sheet pan
- Parchment paper or a thin coat of oil
- Flat-bottomed cup or potato masher
- Instant-read thermometer
- Tongs
How to Serve This Dish:
Pile the potatoes on the plate first, then tuck the chicken over the top so the juices drip into the crags. Spoon the broccoli right alongside and finish with an extra pinch of Parmesan if you like things salty. A green salad with a sharp vinaigrette makes a nice reset between bites.
Pro Tips for This Recipe:
- Let the potatoes steam-dry for 2 minutes after draining; wet potatoes steam instead of crisping.
- Cut the broccoli small. Big florets take too long and the stalks go limp before the tops brown.
- If your chicken thighs are thick, give them a quick 5-minute head start in the oven before adding the broccoli.
- Use finely grated Parmesan, not chunky shreds. It melts into the potatoes instead of sliding off.
Variations on This Dish:
- Lemon-Herb Finish: Add lemon zest and chopped parsley with the Parmesan for a brighter, more herb-forward tray.
- Spicy Paprika Version: Swap the smoked paprika for a mix of smoked paprika and cayenne if you want heat on the edges.
- Rotisserie Shortcut: Use shredded rotisserie chicken tossed with garlic butter and add it after the potatoes roast.
Common Mistakes to Avoid with This Dish:
- Adding wet potatoes to the tray: They won’t brown well. Drain and steam-dry them before smashing.
- Overcrowding the broccoli: Packed florets trap steam and go drab. Give them space.
- Skipping the thermometer on chicken: Thighs are forgiving, but 165°F in the thickest part is still the target.
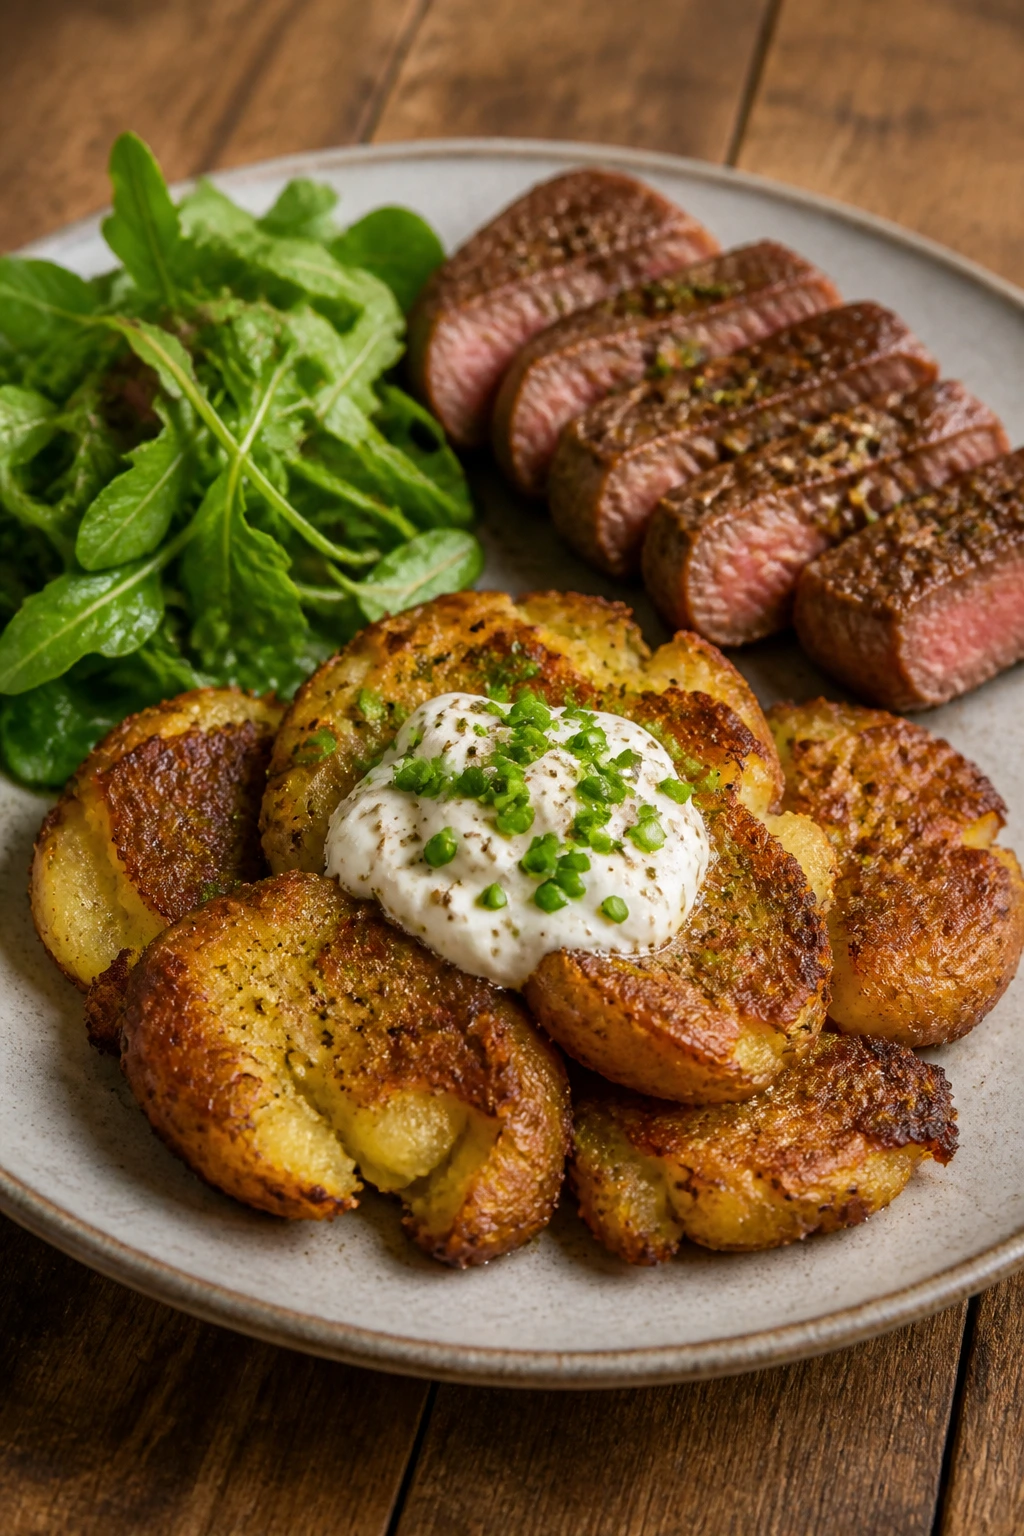
2. Cast-Iron Steak with Chimichurri and Craggy Smashed Potatoes
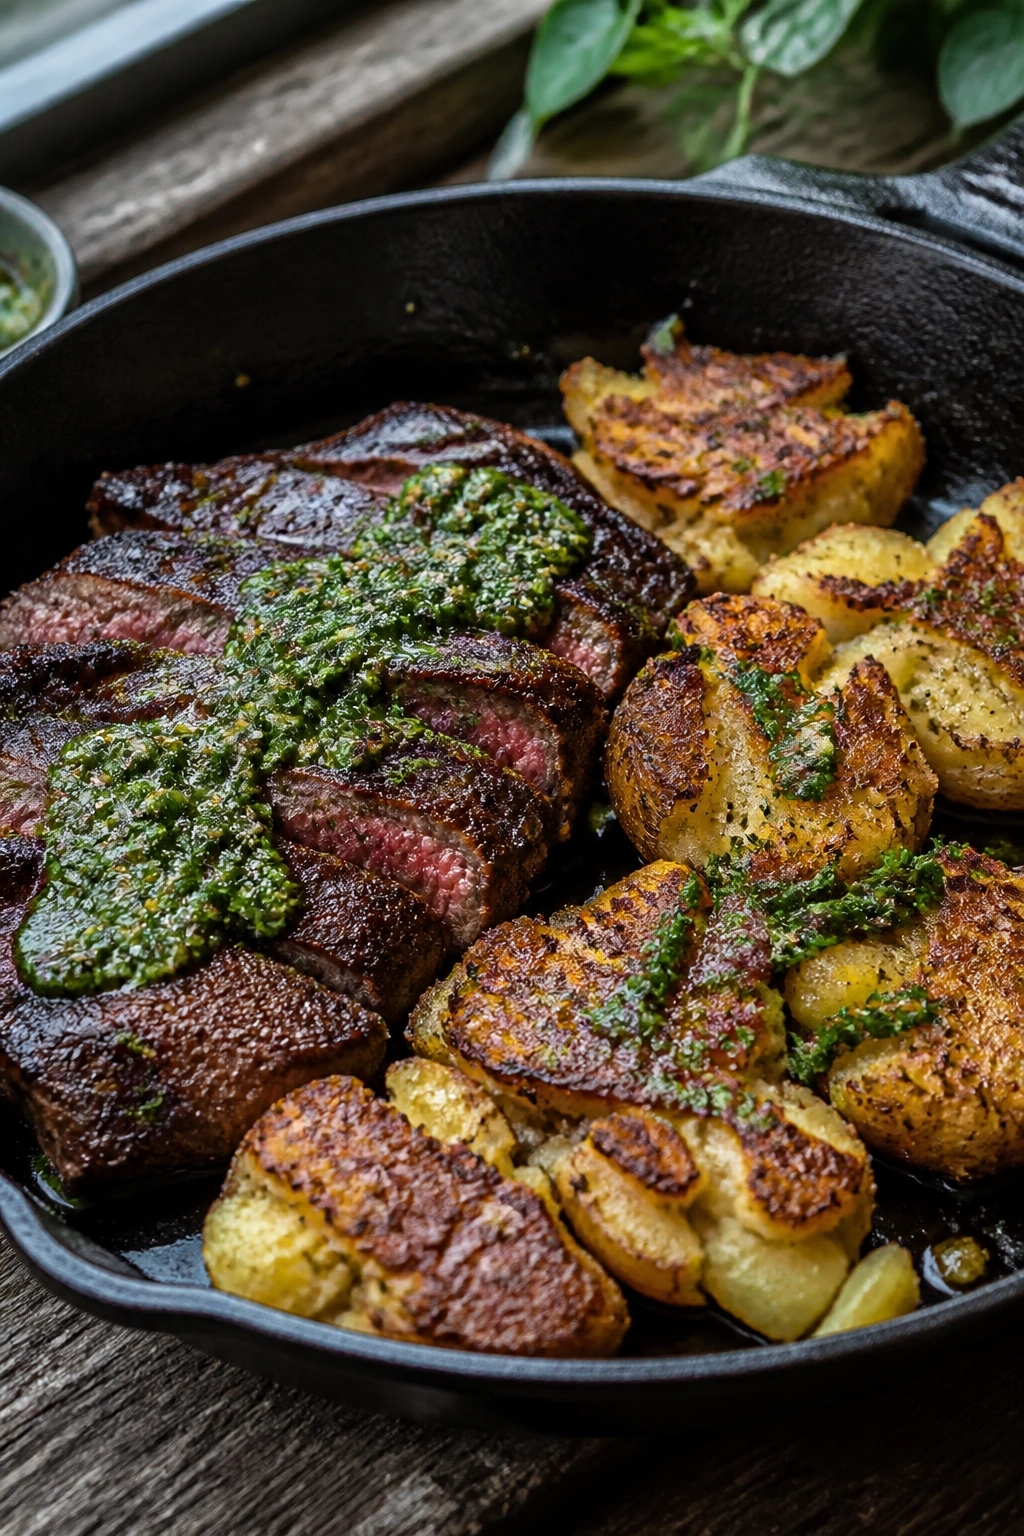
A good steak dinner can feel stiff. This one doesn’t. The potatoes crackle under the steak juices, the chimichurri cuts through the fat with raw parsley and vinegar, and the whole plate tastes like it came off a hot grill even if you cooked it inside on a rainy Tuesday.
The smashed potatoes matter here because they soak up steak drippings without getting mushy. That’s the bit people miss. They’re not just a side; they’re a drip-catcher with a crust.
Why It Works:
The potatoes roast at high heat first so their edges dry out before the steak goes into the skillet. A hot cast-iron pan gives you a proper sear without overcooking the middle, and the chimichurri brings acid, garlic, and herbs to keep the fat in check. The contrast is the whole game: hot, crisp potatoes; browned beef; cold herb sauce.
Key Ingredients:
- 2 pounds Yukon Gold potatoes
- 1½ pounds sirloin or strip steak, about 1 inch thick
- 2 tablespoons olive oil, plus more for the potatoes
- 1 teaspoon kosher salt
- 1 teaspoon black pepper
- 1 cup packed flat-leaf parsley leaves, finely chopped
- 2 tablespoons cilantro, chopped, optional
- 2 cloves garlic, minced
- 2 tablespoons red wine vinegar
- ½ cup olive oil for the chimichurri
- 1 tablespoon minced shallot
- ¼ teaspoon red pepper flakes
Quick Steps:
- Boil and dry the potatoes: Simmer the potatoes in salted water for 15 to 18 minutes, then drain and let the steam escape for a minute.
- Smash and roast: Smash the potatoes onto a greased sheet pan, brush with olive oil, salt, and pepper, then roast at 450°F for 20 minutes.
- Mix the chimichurri: Stir the parsley, cilantro, garlic, vinegar, olive oil, shallot, red pepper flakes, and a pinch of salt in a bowl.
- Season the steak: Pat the steak dry, rub with oil, salt, and pepper.
- Sear hard: Cook the steak in a hot cast-iron skillet 4 to 5 minutes per side for medium-rare, or until it reaches your preferred temperature.
- Rest and slice: Rest the steak 5 to 7 minutes, then slice against the grain and spoon chimichurri over the top.
Equipment for This Recipe:
- Large pot
- Rimmed sheet pan
- Cast-iron skillet
- Sharp knife
- Cutting board
- Instant-read thermometer
How to Serve This Dish:
Lay the potatoes down first, then fan the sliced steak across them so the juices hit the cracks. Spoon chimichurri generously; it should look bright and a little messy, not neat. A pile of arugula on the side with lemon dressing is all you need if you want greens.
Pro Tips for This Recipe:
- Pat the steak dry with paper towels before seasoning. Moisture is the enemy of a real sear.
- Don’t skip the rest. Slice too soon and the juices run straight onto the board.
- If the chimichurri tastes flat, add another tiny splash of vinegar and a pinch of salt.
- Use a flat-bottomed glass to smash the potatoes if you don’t own a masher; it works fine.
Variations on This Dish:
- Garlic Butter Steakhouse Style: Replace the chimichurri with garlic butter and chopped chives for a heavier, richer plate.
- Flank Steak Swap: Use flank steak sliced thin across the grain if that’s what you have, but cook it fast and rest it well.
- Herb-Free Red Sauce Version: Skip cilantro entirely and make the chimichurri with parsley, oregano, garlic, and vinegar.
Common Mistakes to Avoid with This Dish:
- Putting steak in a lukewarm skillet: You’ll get gray meat instead of a browned crust.
- Mashing the potatoes too flat: They burn before the centers stay creamy. Leave a little thickness.
- Using a sauce that’s too oily and not acidic enough: Chimichurri needs vinegar to cut the steak, not just herbs floating in oil.
3. Lemon-Dill Salmon with Asparagus and Silver-Edged Smashed Potatoes

Salmon likes a potato base more than people think. The fish brings richness, the lemon gives it a clean snap, and the asparagus starts to char just as the potato edges go bronzed and sharp. The plate looks spare, but it eats like a proper dinner.
I’m partial to this one because the sauce is light enough not to drown the potatoes. A quick dill yogurt spooned over the top keeps the whole thing from leaning heavy.
Why It Works:
Salmon cooks quickly, which makes it useful for a dinner built around potatoes that need a head start. Asparagus roasts in the same hot oven and picks up the oil from the tray, while the yogurt sauce gives you a cool, tangy finish. The potatoes hold the plate together, and the fish does not need much more than salt, lemon, and a little dill.
Key Ingredients:
- 2 pounds small Yukon Gold potatoes
- 4 salmon fillets, 6 ounces each, skin on or off
- 1 bunch asparagus, woody ends trimmed
- 2 tablespoons olive oil
- 1 teaspoon kosher salt
- ½ teaspoon black pepper
- 2 cloves garlic, thinly sliced or minced
- 1 teaspoon dried dill or 1 tablespoon chopped fresh dill
- ½ cup plain Greek yogurt
- 1 tablespoon lemon juice
- 1 teaspoon lemon zest
Quick Steps:
- Boil the potatoes: Cook the potatoes in salted water until fork-tender, about 15 minutes.
- Smash and roast: Drain, smash, oil, and roast on a sheet pan at 425°F for 20 minutes.
- Mix the yogurt sauce: Stir yogurt, lemon juice, lemon zest, dill, and a pinch of salt in a small bowl.
- Season the salmon and asparagus: Toss asparagus with oil, garlic, salt, and pepper. Season salmon with salt, pepper, and dill.
- Roast the fish: Add salmon and asparagus to the tray and roast 10 to 12 minutes, until the salmon flakes and the asparagus is tender at the stem.
- Finish with sauce: Spoon the dill yogurt over the salmon or serve it on the side.
Equipment for This Recipe:
- Large pot
- Rimmed sheet pan
- Small bowl for sauce
- Tongs or spatula
- Instant-read thermometer, optional but helpful
How to Serve This Dish:
Place the potatoes as the base, then tuck the asparagus along one side and the salmon on top or beside them. The yogurt sauce should be a cool stripe or a spoonful over the fish, not a flood. A cucumber salad fits well if you want a crisp, fresh contrast.
Pro Tips for This Recipe:
- Pick salmon fillets that are similar in size so they finish together.
- Cut the asparagus so the spears are close in thickness; thin ones cook fast, thick ones need more time.
- If your salmon has skin, roast it skin-side down so the flesh stays moist.
- Add the yogurt sauce after cooking, not during. Heat makes it loose and a little dull.
Variations on This Dish:
- Mustard-Dill Version: Stir 1 teaspoon Dijon into the yogurt sauce for a sharper finish.
- Herb Butter Salmon: Skip the yogurt and finish the fish with melted butter, dill, and lemon zest.
- Green Bean Swap: Use green beans instead of asparagus if the spears are huge or out of season.
Common Mistakes to Avoid with This Dish:
- Overcooking the salmon: It keeps cooking after it leaves the oven. Pull it when it flakes but still looks glossy.
- Crowding the asparagus under the fish: It steams instead of roasting. Give the spears their own space.
- Using watery yogurt straight from the tub without seasoning: It tastes thin until you add salt and lemon.
4. Smoky Chorizo, Peppers, and Onions on Deep-Browned Smashed Potatoes
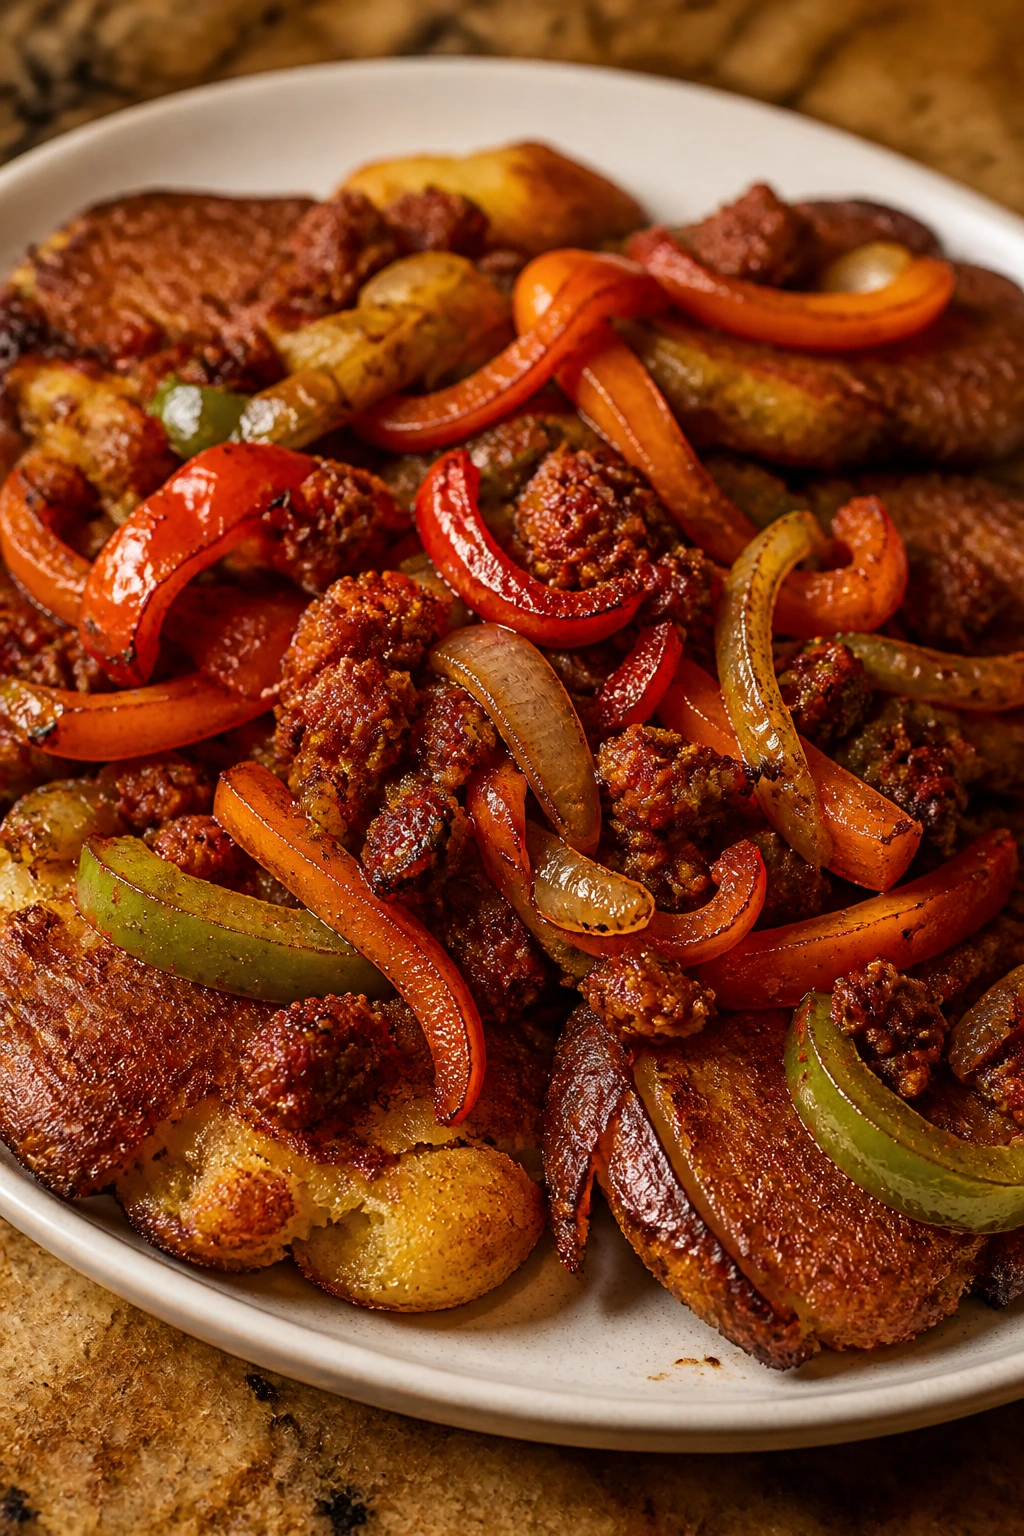
This is the loudest dinner in the lineup, and that’s not a criticism. Chorizo throws paprika and fat into the pan, the peppers soften at the edges, and the onions go sweet in the background while the potatoes catch all the drippings underneath. It’s the kind of plate that looks better a minute after you think it’s done.
Use fresh Mexican chorizo if you can find it. The casing gets in the way, and you want the meat loose enough to crumble into the peppers. Cured Spanish chorizo makes a different dish altogether.
Why It Works:
The potatoes need structure here because chorizo is greasy in the best possible sense. Their rough surfaces absorb some of the fat without going soft. Bell peppers and onions like a hot skillet, and the smoky paprika pushes the whole plate in one direction instead of tasting scattered. A squeeze of lime at the end keeps the richness from hanging around too long.
Key Ingredients:
- 2 pounds Yukon Gold potatoes
- 12 ounces fresh Mexican chorizo, casing removed
- 2 bell peppers, sliced into strips
- 1 yellow onion, sliced
- 2 tablespoons olive oil
- 2 cloves garlic, minced
- 1 teaspoon smoked paprika
- ½ teaspoon ground cumin
- 1 teaspoon kosher salt, divided
- ½ teaspoon black pepper
- 1 lime, cut into wedges
- 2 tablespoons chopped cilantro
Quick Steps:
- Boil and smash the potatoes: Cook the potatoes until tender, then smash onto an oiled sheet pan and season with salt, pepper, and oil.
- Roast the potatoes first: Bake at 450°F for 20 minutes until the edges are pale gold and crisping.
- Cook the chorizo: In a skillet over medium-high heat, cook the chorizo for 5 to 7 minutes, breaking it into crumbles.
- Add the vegetables: Stir in onions, peppers, garlic, paprika, cumin, and a pinch of salt. Cook 8 to 10 minutes until the peppers are softened and browned in spots.
- Combine and finish: Spoon the chorizo mixture over the potatoes and return the tray to the oven for 5 minutes.
- Serve with lime: Squeeze lime over the top and shower on cilantro.
Equipment for This Recipe:
- Large pot
- Sheet pan
- Large skillet
- Wooden spoon
- Citrus juicer, optional
How to Serve This Dish:
This wants a wide plate and a fork, not a tiny bowl. Spoon the chorizo mixture over the center so the edges of the potatoes stay visible and crisp. A spoonful of sour cream or plain yogurt cools the paprika if you like a softer finish.
Pro Tips for This Recipe:
- Don’t rinse the chorizo pan after cooking it; a little fat left behind helps the peppers brown.
- Slice the onions lengthwise so they keep some bite.
- If the chorizo releases a lot of fat, spoon off a little before adding the vegetables.
- Add the lime at the end. Cooking it dulls the sharp edge you want.
Variations on This Dish:
- Chorizo and Black Bean Bowl: Stir in a drained can of black beans for more bulk and a softer, stew-like feel.
- Poblano Upgrade: Swap one bell pepper for a sliced poblano if you want less sweetness and more green pepper flavor.
- Cured Chorizo Version: Use thinly sliced Spanish chorizo, but shorten the skillet time so it doesn’t dry out.
Common Mistakes to Avoid with This Dish:
- Using too much chorizo fat: The plate gets greasy fast. Spoon some off if the skillet looks slick.
- Overcooking the peppers: They should soften and blister, not collapse into mush.
- Forgetting the acid: Lime or vinegar is not optional here; it keeps the dish awake.
5. Buffalo Chicken with Blue Cheese and Celery on Smashed Potatoes
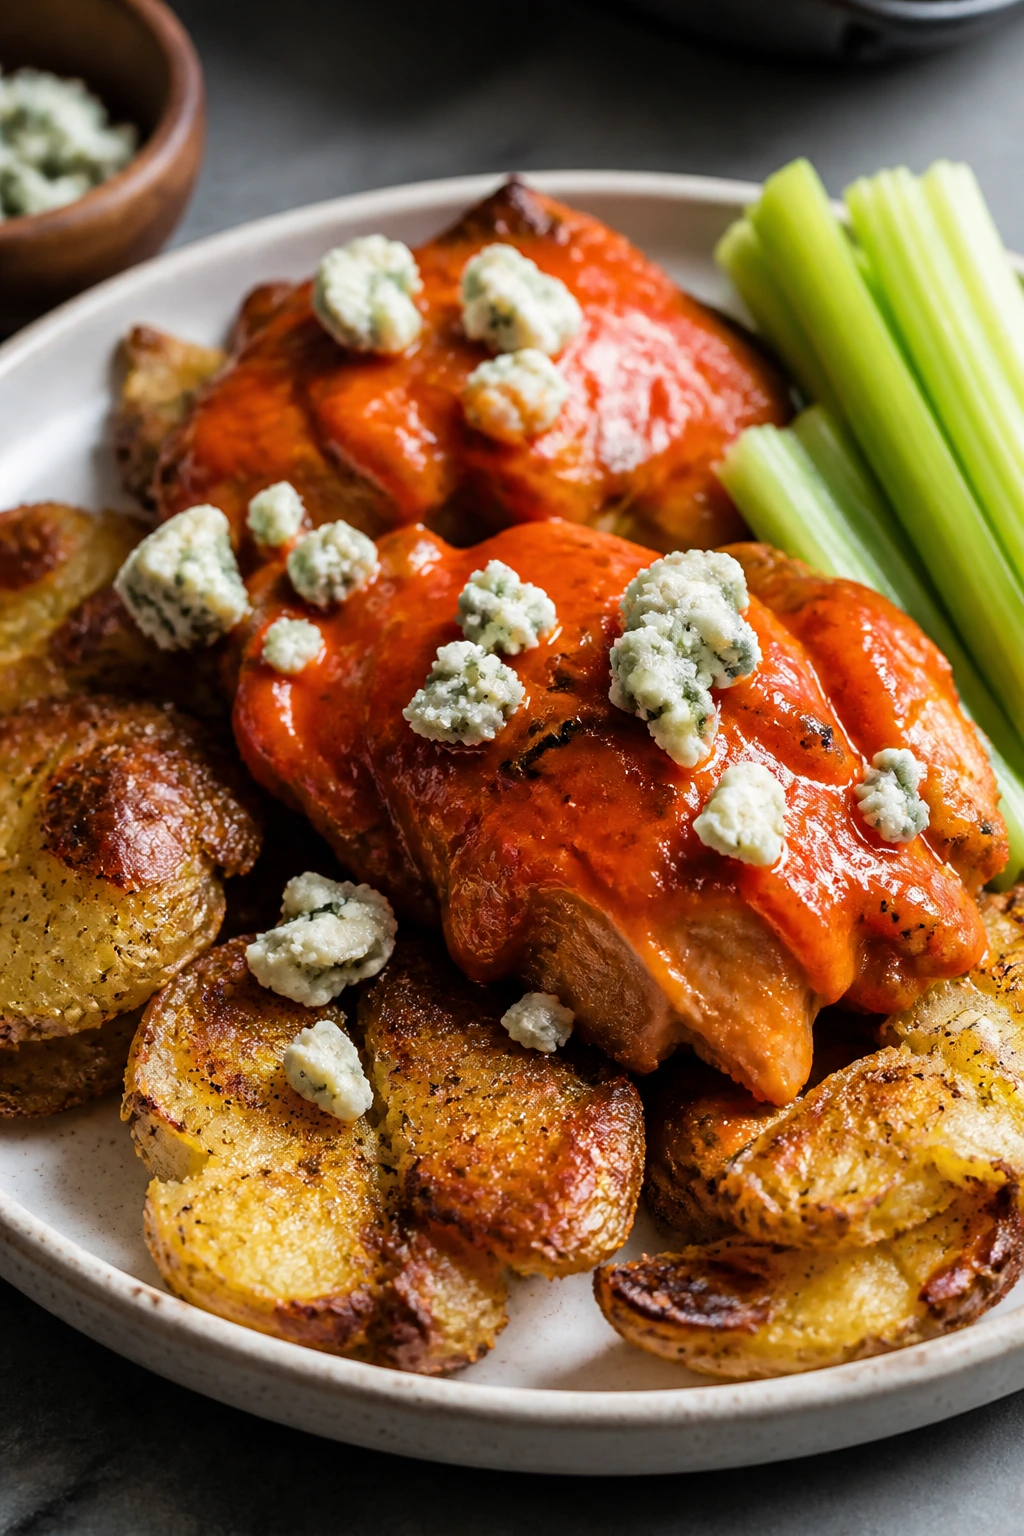
Buffalo sauce can go one of two ways: sharp and balanced, or sticky and one-note. Here it works because the smashed potatoes soak up the buttered heat, the blue cheese cools it down, and the celery gives you that cold, crunchy bite that makes the whole thing feel deliberate instead of improvised.
I like this dinner when I want something messy in a controlled way. It eats like wings and fries, only the fries are replaced by something with a little more backbone.
Why It Works:
Buffalo sauce needs a starchy base that can take heat without falling apart. Smashed potatoes do that job better than fries because the centers stay soft while the edges stay crisp. Chicken thighs hold moisture under the sauce, and blue cheese brings enough salt to make the whole plate feel finished. Celery is not garnish here. It’s a relief valve.
Key Ingredients:
- 2 pounds Yukon Gold potatoes
- 1½ pounds boneless, skinless chicken thighs
- ½ cup buffalo sauce
- 2 tablespoons butter
- 1 teaspoon garlic powder
- 1 teaspoon onion powder
- 1 teaspoon kosher salt
- ½ teaspoon black pepper
- 1 celery stalk, very thinly sliced
- ⅓ cup crumbled blue cheese
- 2 scallions, sliced
Quick Steps:
- Boil and smash the potatoes: Cook until tender, smash on a sheet pan, oil, and roast at 450°F for 20 minutes.
- Season the chicken: Toss the chicken with garlic powder, onion powder, salt, and pepper.
- Cook the chicken: Roast the chicken on a second tray or in a skillet at 425°F until it reaches 165°F, about 18 to 22 minutes.
- Toss with sauce: Warm the buffalo sauce with butter and toss the cooked chicken in it.
- Build the plate: Spoon the chicken over the potatoes.
- Finish cold and crunchy: Add celery, blue cheese, and scallions right before serving.
Equipment for This Recipe:
- Large pot
- Sheet pan or second baking tray
- Mixing bowl
- Instant-read thermometer
- Sharp knife for the celery
How to Serve This Dish:
This is best served hot, with the blue cheese still cool enough to resist the sauce a little. Put the potatoes on the plate first, then the chicken, then the celery and scallions so the texture stays obvious. A simple carrot salad or a few pickle spears fit the mood.
Pro Tips for This Recipe:
- Warm the buffalo sauce with the butter before tossing. Cold sauce clings badly.
- Slice the celery paper-thin so it reads as crisp, not bulky.
- If you want extra heat, add a pinch of cayenne to the chicken seasoning.
- Blue cheese should be cold and crumbly, not melted into the sauce.
Variations on This Dish:
- Ranch Drizzle Version: Use ranch instead of blue cheese if that’s your household’s house rule.
- Buffalo Cauliflower Swap: Replace the chicken with roasted cauliflower florets for a vegetarian plate.
- Extra-Crisp Tray Bake: Broil the chicken and potatoes for the last 2 minutes for darker edges.
Common Mistakes to Avoid with This Dish:
- Drowning the chicken in sauce too early: It softens the crust. Toss right before serving.
- Using thick celery chunks: They read as watery and awkward. Slice thin.
- Skipping the butter in the buffalo sauce: The sauce tastes harsh without it.
6. Mushroom, Spinach, and Gruyère on Shingled Smashed Potatoes
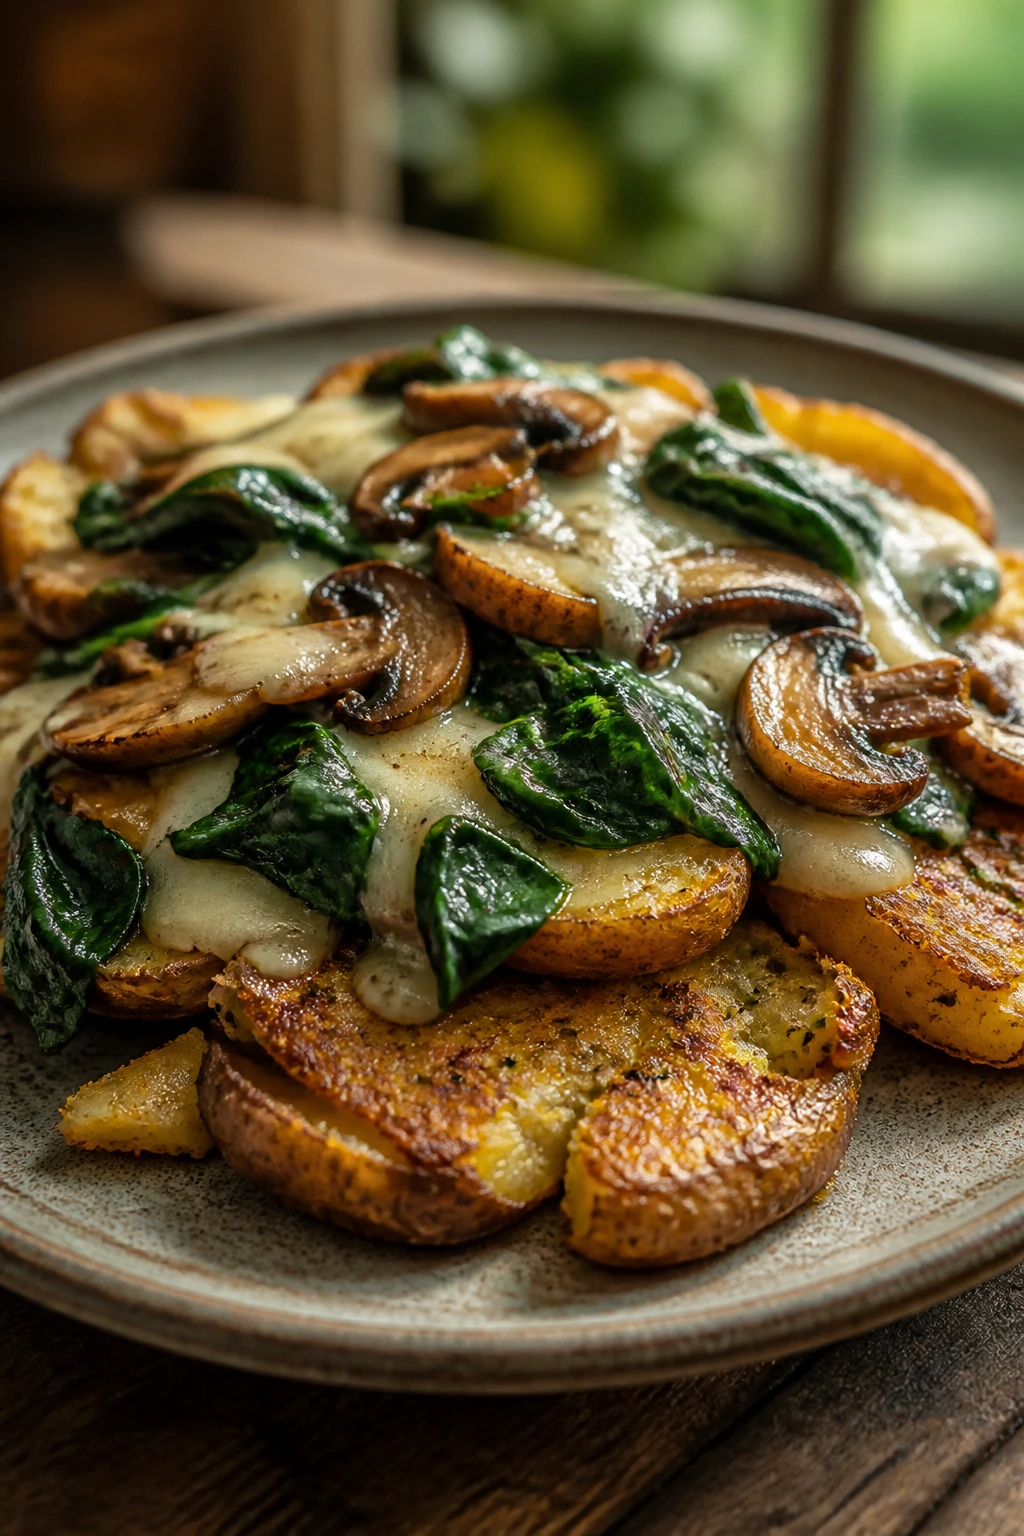
What if the best thing on the plate is the crackle under the cheese? That’s the move here. Mushrooms cook down until they’re glossy and browned, spinach wilts into the gaps, and Gruyère melts into the potatoes instead of sitting on top like a blanket. It’s rich without being heavy-handed.
I’m fond of this one on nights when meat feels unnecessary. The mushrooms bring enough savory depth that you don’t miss it.
Why It Works:
Mushrooms love a hot pan and a bit of room, which is why they’re perfect with smashed potatoes. The potatoes give you a crisp base, the mushrooms supply moisture and umami, and the Gruyère ties the whole thing together with a nutty melt. Spinach is there to break up the density, not dominate it.
Key Ingredients:
- 2 pounds Yukon Gold potatoes
- 12 ounces cremini mushrooms, sliced
- 4 cups baby spinach
- 1 small yellow onion, diced
- 3 cloves garlic, minced
- 1 teaspoon fresh thyme leaves or ½ teaspoon dried thyme
- 1 tablespoon butter
- 2 tablespoons olive oil
- 1 cup shredded Gruyère
- 1 tablespoon balsamic vinegar, optional
- 1 teaspoon kosher salt
- ½ teaspoon black pepper
Quick Steps:
- Boil, drain, and smash the potatoes: Cook until just tender, then smash and oil them on a sheet pan.
- Roast the potatoes: Bake at 450°F for 20 minutes until the edges begin to brown.
- Cook the mushrooms hard: In a skillet, sauté mushrooms in butter and oil until they give off moisture and then brown, about 8 minutes.
- Add onion, garlic, and thyme: Cook 3 more minutes until fragrant.
- Wilt the spinach: Stir it in just until it collapses, then splash in balsamic if using.
- Assemble and broil: Spoon the mushroom mixture over the potatoes, top with Gruyère, and broil 1 to 2 minutes until melted.
Equipment for This Recipe:
- Large pot
- Sheet pan
- Large skillet
- Wooden spoon
- Broiler-safe tray or pan
How to Serve This Dish:
Serve it straight from the pan if you like a rustic look, or slide the potatoes onto a platter and mound the mushrooms in the center. A tart green salad helps cut the cheese. If you want more substance, add a fried egg on top and call it dinner without apology.
Pro Tips for This Recipe:
- Don’t crowd the mushrooms. If they’re packed tight, they steam and go rubbery.
- Use Gruyère grated from a block if you want a clean melt.
- Add spinach at the end. Overcooked spinach turns slippery and dull.
- A tiny splash of balsamic makes the mushrooms taste deeper, not sweeter.
Variations on This Dish:
- Swiss and Shallot Version: Swap Gruyère for Swiss cheese and use shallots instead of onion.
- Creamy Skillet Finish: Stir 2 tablespoons of cream into the mushroom mixture before spooning it over the potatoes.
- Wild Mushroom Upgrade: Use shiitake or oyster mushrooms for a more earthy, less familiar flavor.
Common Mistakes to Avoid with This Dish:
- Adding cheese too early: It can grease out before it melts. Broil it at the end.
- Letting mushrooms sit undisturbed in a crowded skillet: They need heat and some contact to brown.
- Overloading the potatoes with sauce: Keep some crisp edges visible.
7. Cajun Shrimp with Corn and Scallion Smashed Potatoes
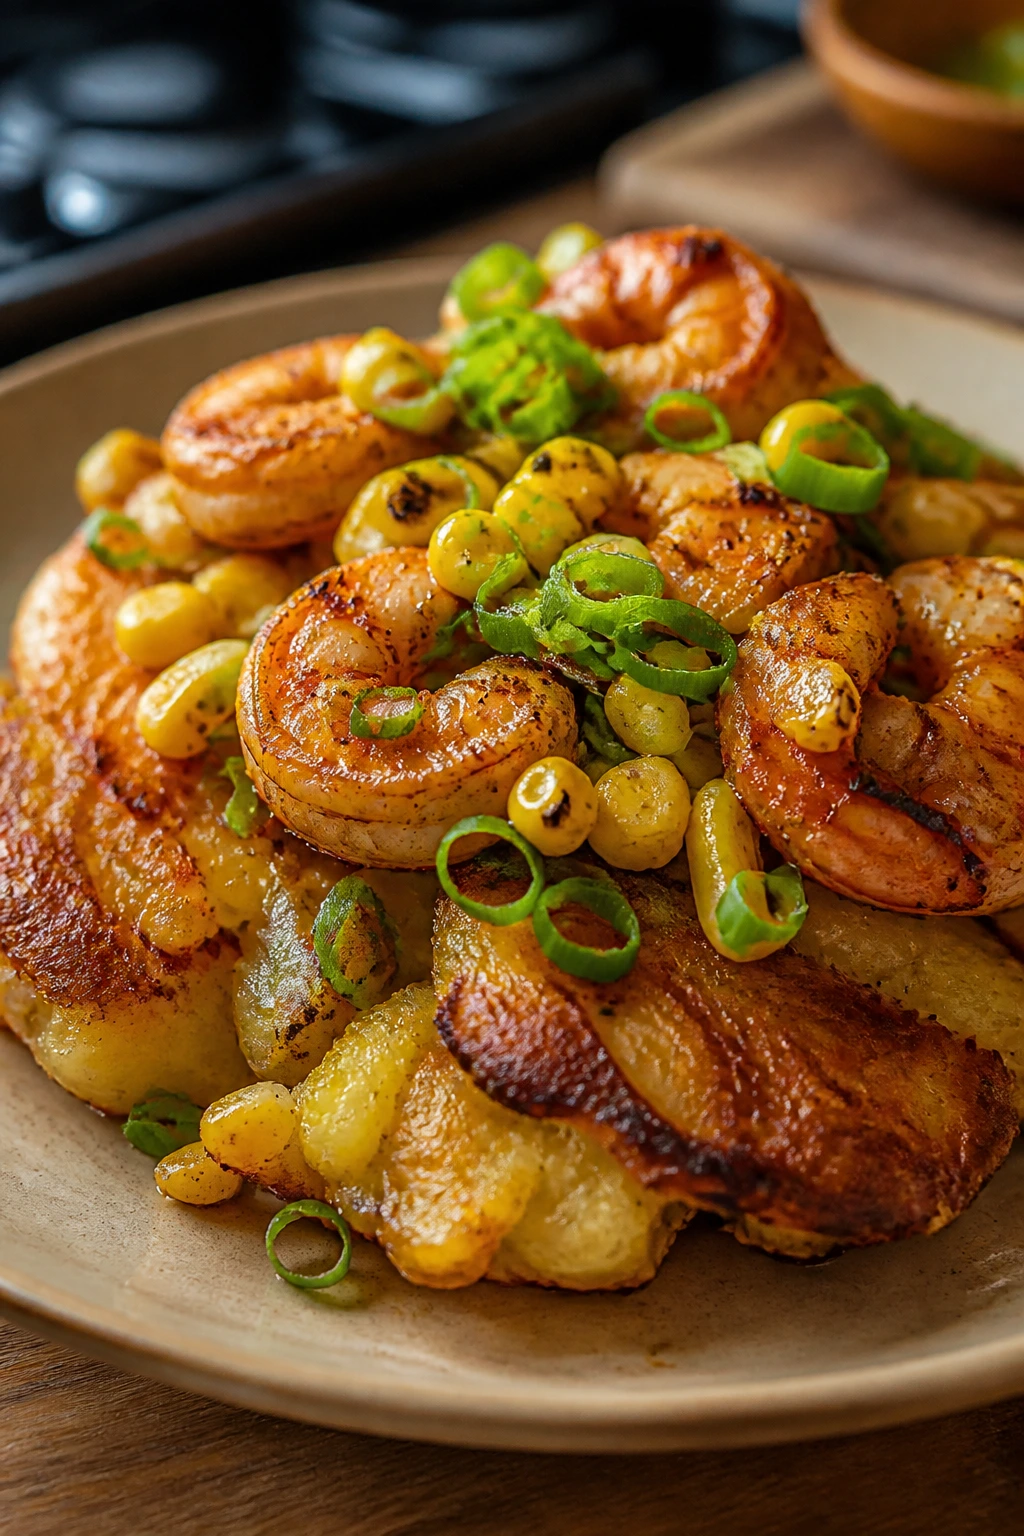
Shrimp cooks fast enough to keep up with smashed potatoes, which makes this one a small miracle on a busy night. The Cajun seasoning brings smoke and heat, the corn adds sweetness, and the scallions keep the plate from feeling heavy. It’s bright, salty, and just messy enough to be fun.
This is one of those dinners where the smell from the skillet gets people into the kitchen before the plate is ready. Good sign.
Why It Works:
Shrimp needs high heat and a short cook, which fits neatly around potatoes that have already been boiled and smashed. Corn gives you little bursts of sweetness against the spice, and scallions finish the plate with a sharp green note. The potatoes work as the landing pad for the shrimp juices and butter, which is where they become more than a side.
Key Ingredients:
- 2 pounds small Yukon Gold potatoes
- 1½ pounds large shrimp, peeled and deveined
- 1½ tablespoons Cajun seasoning
- 2 tablespoons butter
- 2 cups corn kernels, fresh or frozen and thawed
- 2 cloves garlic, minced
- 3 scallions, sliced
- 1 lemon
- 1 tablespoon olive oil
- ½ teaspoon kosher salt, plus more if needed
Quick Steps:
- Boil and smash the potatoes: Cook until tender, smash, season, and roast at 450°F for 20 minutes.
- Season the shrimp: Toss shrimp with Cajun seasoning and a little olive oil.
- Cook the corn: In a skillet, melt the butter and cook the corn with garlic for 3 to 4 minutes until it starts to brown.
- Sear the shrimp: Add shrimp to the skillet and cook 1 to 2 minutes per side until pink and curled.
- Finish with lemon and scallions: Squeeze lemon over the skillet and stir in scallions.
- Serve on the potatoes: Spoon the shrimp and corn over the hot smashed potatoes.
Equipment for This Recipe:
- Large pot
- Sheet pan
- Large skillet
- Tongs
- Lemon juicer, optional
How to Serve This Dish:
This looks best when the shrimp are piled on top of the potatoes instead of spread out. Let the corn and butter pool a little around the edges. A tomato salad or quick cucumber slices make the plate feel complete without competing with the spice.
Pro Tips for This Recipe:
- Thaw frozen shrimp completely and pat them dry. Wet shrimp steam.
- Taste the Cajun seasoning first. Some blends are much saltier than others.
- Add lemon at the end so the butter stays bright.
- Pull the shrimp the moment they curl into a loose C. Tight O-shapes usually mean they went too far.
Variations on This Dish:
- Blackened Shrimp Version: Add a pinch of paprika and extra black pepper for a darker crust.
- Creamy Corn Finish: Stir a tablespoon of cream into the corn if you want a softer sauce.
- Hot Sauce Drizzle: Finish with a few drops of hot sauce instead of extra salt.
Common Mistakes to Avoid with This Dish:
- Overcooking shrimp: They go rubbery fast. Keep the skillet time short.
- Using soggy thawed corn: Frozen corn needs to be thawed and dried before it hits the skillet.
- Skipping the lemon: Cajun spice without acid can taste blunt.
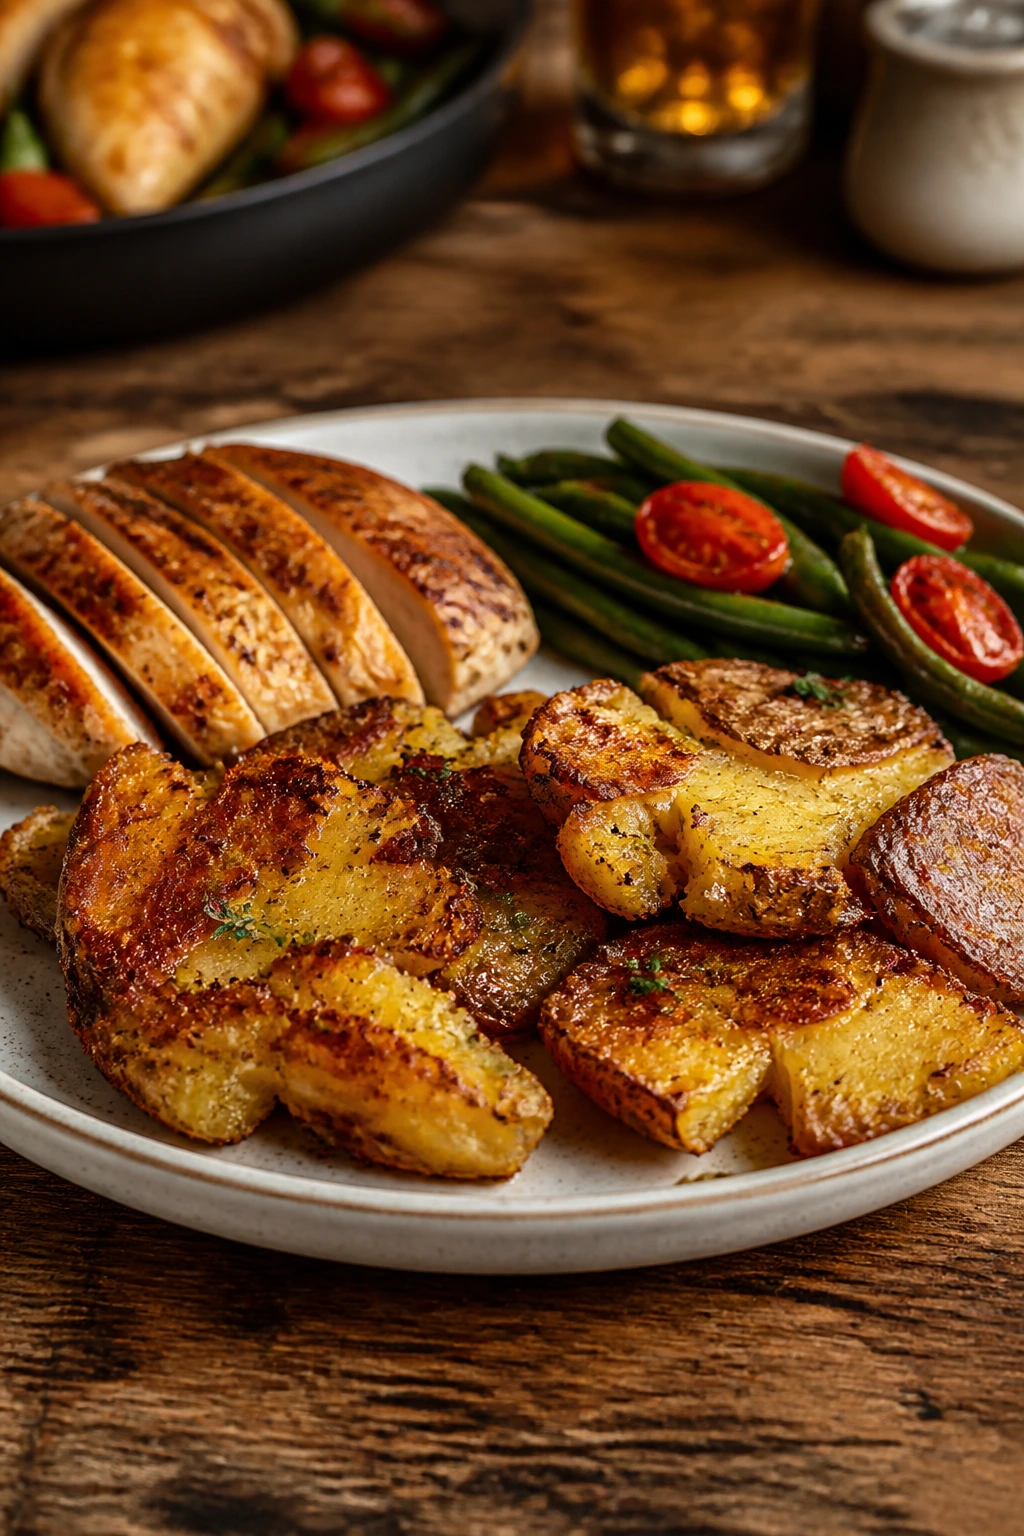
8. Pork Chops with Apple-Mustard Pan Sauce and Smashed Potatoes
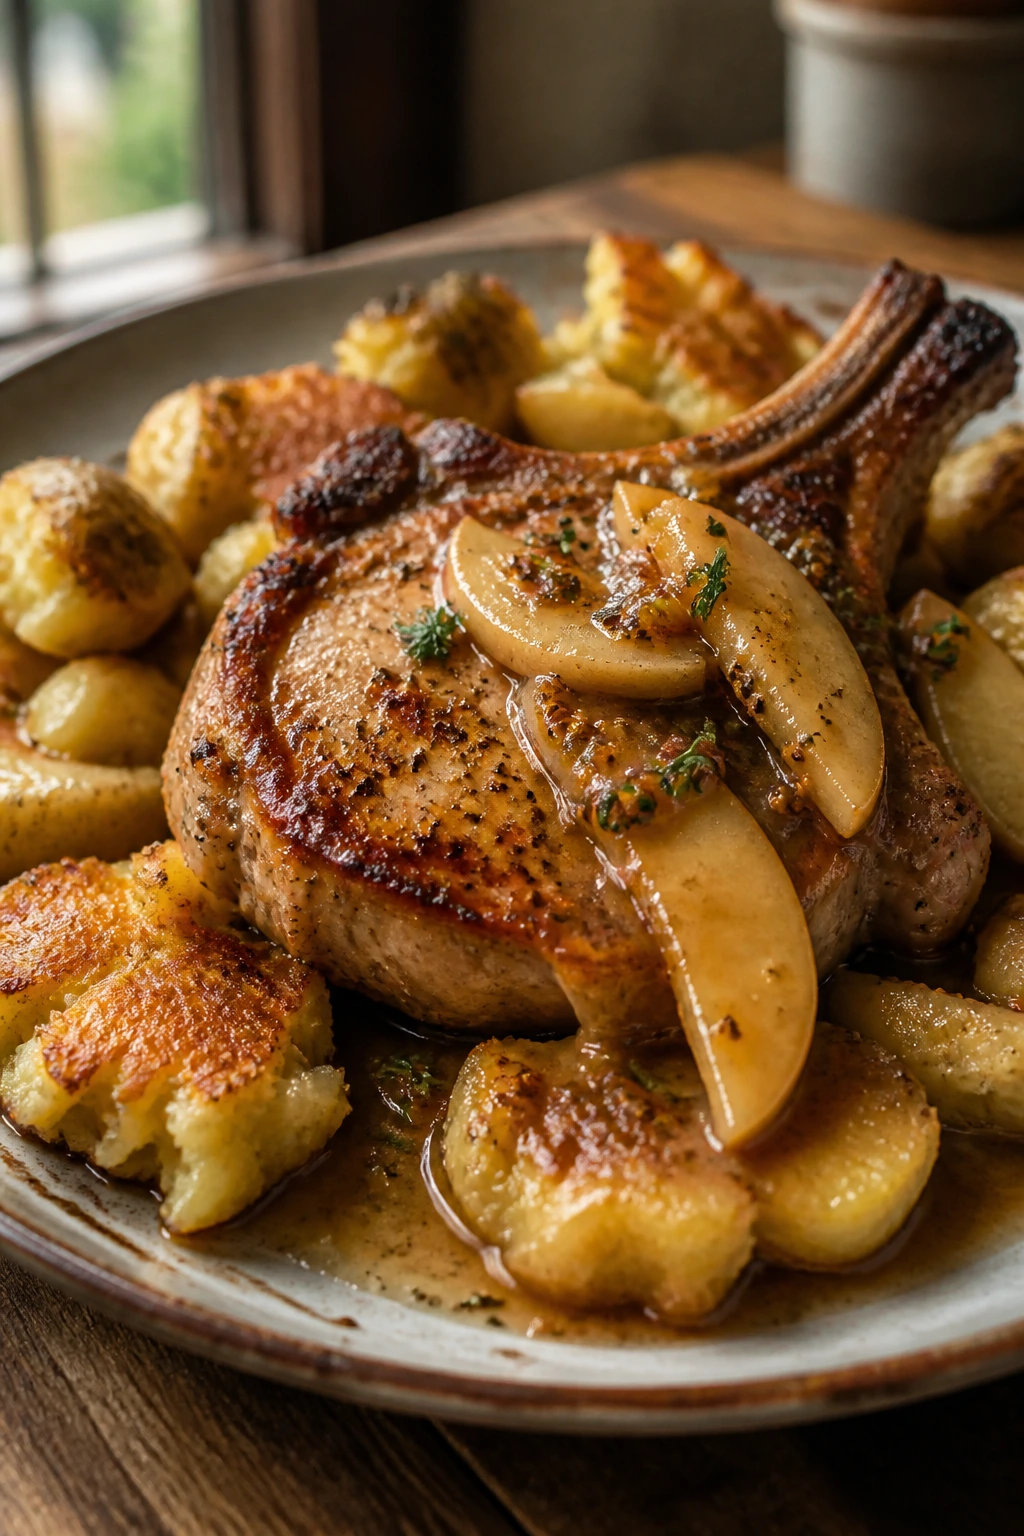
Pork and potatoes make sense together, but a pan sauce is what makes them feel finished. Here, the chops get a browned crust, the apples soften just enough to hold their shape, and the mustard sauce sneaks in a little sharpness so the potatoes don’t feel like a starch pile. It’s old-fashioned in the best way.
I like bone-in chops here because they stay juicier and look better on the plate. Boneless works, but the bone gives you a little insurance.
Why It Works:
Pork chops need a hot sear and a brief oven finish, which works neatly with potatoes already in motion. Apples and mustard are a reliable pair because one brings sweetness and the other brings bite. The sauce picks up browned bits from the skillet, which means none of the flavor gets wasted. That’s the part I never skip.
Key Ingredients:
- 2 pounds Yukon Gold potatoes
- 4 bone-in pork chops, about 1 inch thick
- 1 teaspoon kosher salt
- 1 teaspoon black pepper
- 1 tablespoon olive oil
- 1 shallot, minced
- 1 tart apple, sliced into thin wedges
- 1 cup apple cider
- 1 tablespoon Dijon mustard
- 1 teaspoon whole-grain mustard
- 1 teaspoon fresh thyme leaves or ½ teaspoon dried thyme
- 1 tablespoon butter
Quick Steps:
- Boil and smash the potatoes: Cook until fork-tender, then smash and roast at 450°F until crisp, about 20 to 25 minutes.
- Season and sear the pork: Pat the chops dry, season them well, and sear in oil over medium-high heat for 4 minutes per side.
- Finish in the oven: Move the skillet to a 400°F oven for 6 to 8 minutes, until the pork reaches 145°F.
- Build the sauce: Remove the chops, cook shallot and apple wedges for 2 to 3 minutes, then add cider, Dijon, mustard, and thyme. Reduce for 3 to 4 minutes.
- Mount with butter: Stir in butter off the heat.
- Serve: Spoon the sauce over the chops and potatoes.
Equipment for This Recipe:
- Large pot
- Sheet pan
- Heavy skillet, preferably cast iron
- Wooden spoon
- Instant-read thermometer
How to Serve This Dish:
Place the potatoes slightly off-center so the sauce can run between them and the pork. The apple wedges should stay visible, not buried. A simple cabbage slaw or wilted greens works well if you want a vegetable that stands up to the sauce.
Pro Tips for This Recipe:
- Dry the chops well before searing. Surface moisture ruins the crust.
- Use a tart apple, not a soft sweet one. You want shape, not applesauce.
- Don’t boil the sauce after adding butter or it can split.
- Pull the pork at 145°F, then rest it 5 minutes; that temperature is the sweet spot.
Variations on This Dish:
- Creamy Mustard Version: Add 2 tablespoons of cream to the sauce for a softer finish.
- Herb and Cider Swap: Use sage instead of thyme for a more autumnal flavor.
- Boneless Chop Shortcut: Use boneless chops, but shorten the oven time so they don’t dry out.
Common Mistakes to Avoid with This Dish:
- Overcooking pork chops: They dry out fast. Thermometer, not guesswork.
- Making the sauce too sweet: Use a tart apple and don’t add extra sugar.
- Skipping the browned bits in the pan: That’s where the sauce gets its depth.
9. Taco Beef and Cheddar Smashed-Potato Skillet
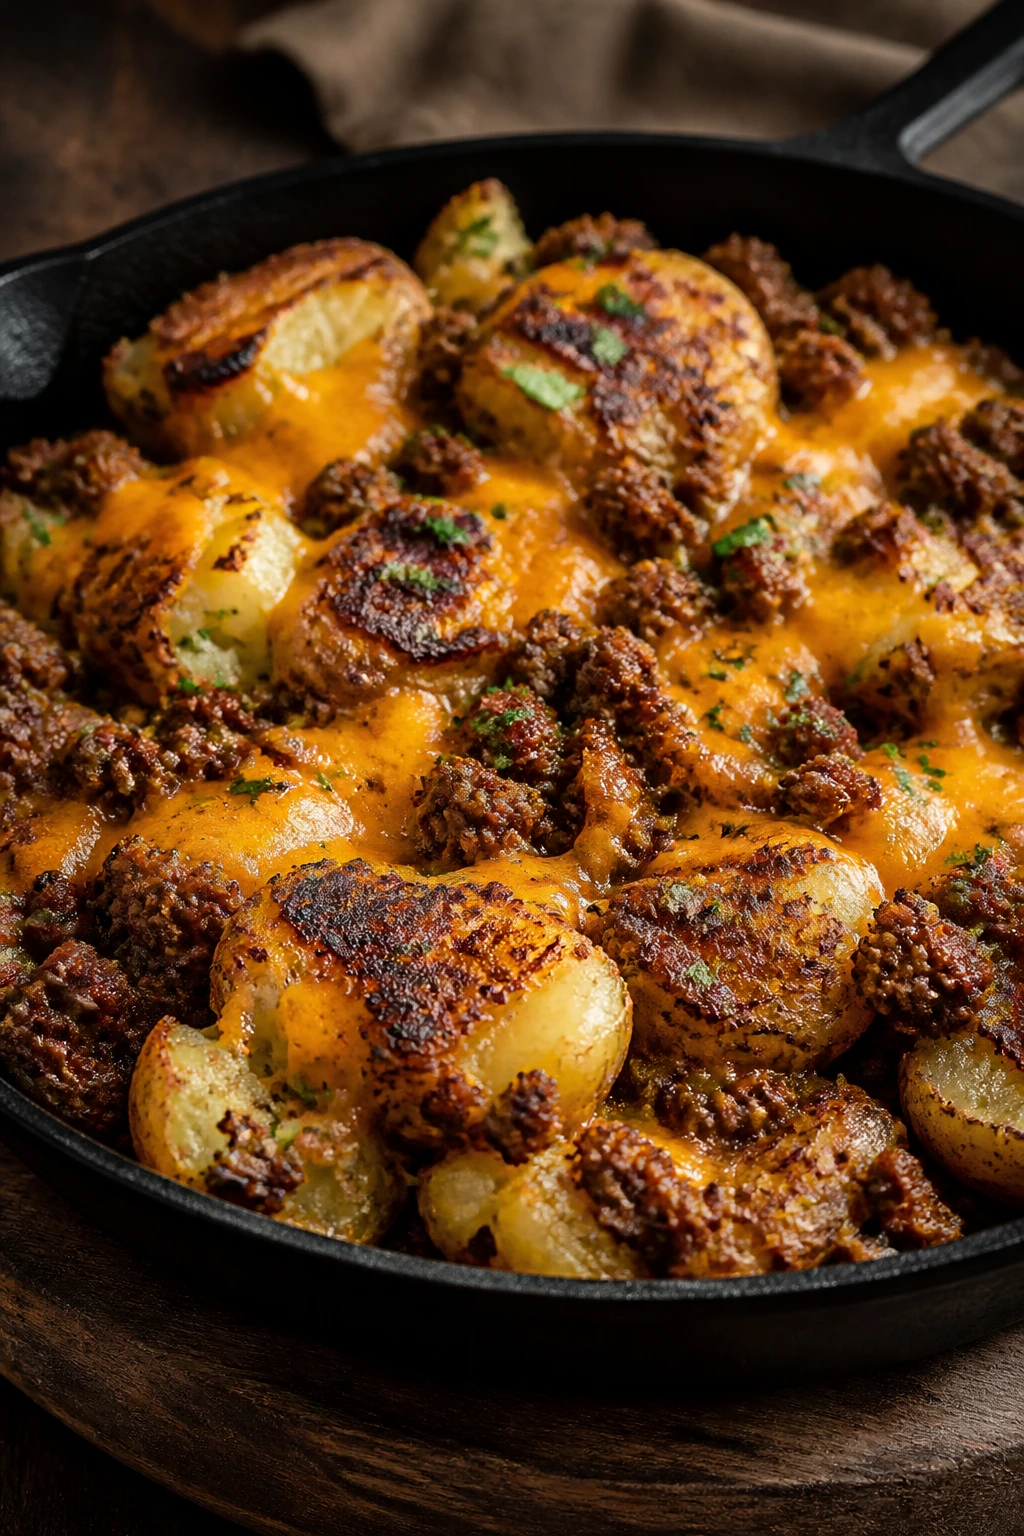
This tastes like the best part of taco night got separated from the tortilla and put where it belongs. The beef is savory and a little spiced, the cheddar melts into the potato crevices, and the salsa keeps everything from getting too dense. It’s loud food. Fine by me.
The smashed potatoes are the real reason this works. They catch the beef juices instead of letting them slide to the bottom of a bowl where nobody can reach them.
Why It Works:
Ground beef cooks quickly and seasons well, which makes it ideal for a dinner that depends on timing more than technique. The potatoes bring crunch and starch, black beans add another layer of substance, and salsa loosens the mix without turning it into soup. This is one of the few dinners where a broiler finish is not optional. You want the cheddar browned at the edges.
Key Ingredients:
- 2 pounds Yukon Gold potatoes
- 1 pound ground beef
- 1 small onion, diced
- 2 tablespoons taco seasoning
- ½ cup salsa
- 1 cup canned black beans, rinsed and drained
- 1 cup shredded cheddar
- 1 jalapeño, sliced thin
- 2 tablespoons chopped cilantro
- 1 tablespoon olive oil
- Salt, to taste
Quick Steps:
- Boil and smash the potatoes: Cook until tender, smash on a sheet pan, oil, and roast at 450°F for 20 minutes.
- Brown the beef: Cook onion and ground beef in a skillet over medium-high heat until the meat is no longer pink, about 6 to 8 minutes.
- Season the filling: Stir in taco seasoning, salsa, and beans. Let it simmer 2 minutes until thick.
- Assemble: Spoon the beef mixture over the potatoes and top with cheddar and jalapeño.
- Broil briefly: Broil 1 to 2 minutes until the cheese bubbles and browns in spots.
- Finish: Add cilantro and serve hot.
Equipment for This Recipe:
- Large pot
- Sheet pan
- Large skillet
- Broiler-safe tray if needed
- Wooden spoon
How to Serve This Dish:
Serve it with a spoon and let people crack through the top layer. A dollop of sour cream or a few avocado slices makes sense, but don’t bury the potatoes. A chopped romaine salad with lime dressing keeps the plate from leaning too heavy.
Pro Tips for This Recipe:
- Let the beef mixture cook down until it’s thick. Runny filling kills the crisp edges.
- Use a cheddar that melts well, not a pre-sauced cheese product.
- Broil close to the element for just a minute or two; watch it like a hawk.
- If you like heat, add pickled jalapeños after broiling.
Variations on This Dish:
- Turkey Taco Version: Swap in ground turkey and add an extra splash of oil for moisture.
- Street-Corn Twist: Add corn, cotija, and a little lime crema on top.
- Bean-Forward Vegetarian Swap: Replace the beef with mashed pinto beans and extra onions.
Common Mistakes to Avoid with This Dish:
- Putting watery salsa in too early: Cook it down so the filling stays spoonable.
- Using too much cheese at once: A thick blanket can hide the potatoes instead of finishing them.
- Skipping the broiler: The browned top is half the point.
10. Chickpea, Feta, and Tomato Smashed-Potato Dinner
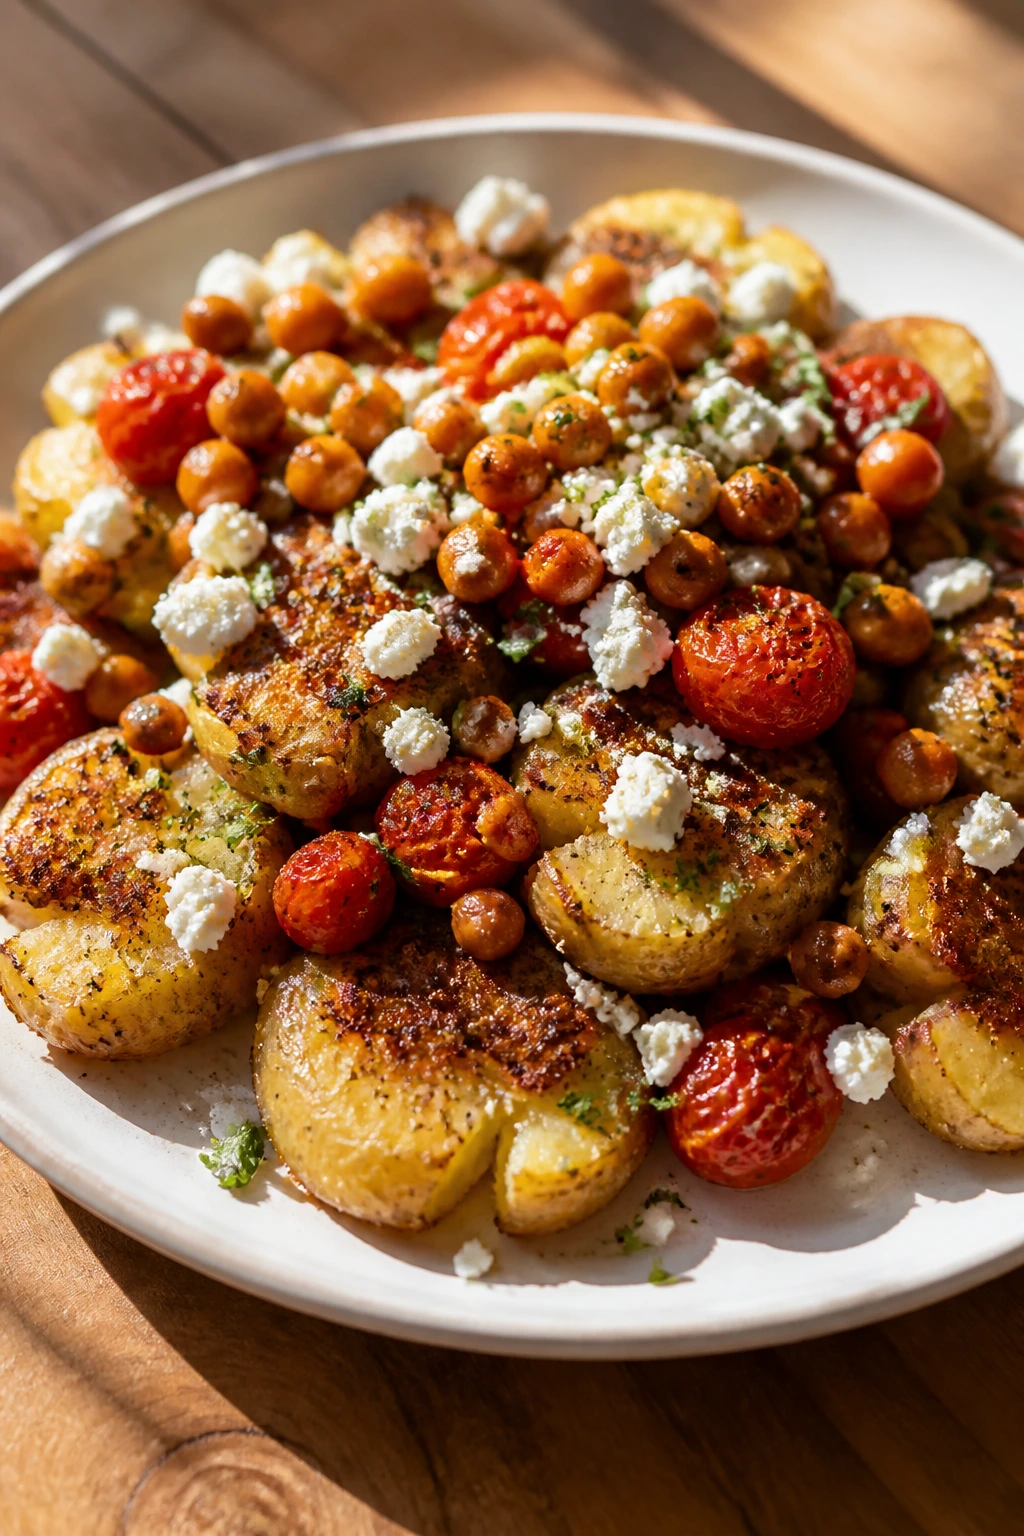
This is the bright, salty, herb-heavy version of the whole idea. Chickpeas bring a steady bite, tomatoes burst into the hot tray, and feta gives you little sharp pockets of salt. It tastes like something you’d make when the fridge is slightly unfriendly but still useful.
The potatoes give the dinner its weight. Without them, this would read as a warm salad. With them, it lands as a proper plate.
Why It Works:
Chickpeas roast well because their surfaces dry and tighten in the oven, which makes them feel more substantial than their can would suggest. Tomatoes collapse just enough to become saucy, and feta adds creamy salt without needing a separate sauce. A squeeze of lemon at the end wakes up the olive oil and oregano.
Key Ingredients:
- 2 pounds small Yukon Gold potatoes
- 1 can chickpeas, 15 ounces, drained and rinsed
- 2 cups cherry tomatoes
- 1 red onion, sliced
- 3 tablespoons olive oil
- 1 teaspoon dried oregano
- 1 garlic clove, minced
- 1 teaspoon kosher salt
- ½ teaspoon black pepper
- 4 cups baby spinach
- ½ cup feta, crumbled
- ½ lemon, juiced
Quick Steps:
- Boil and smash the potatoes: Cook the potatoes until tender, smash them, and roast at 450°F for 20 minutes.
- Season the chickpeas and tomatoes: Toss chickpeas, tomatoes, red onion, olive oil, oregano, garlic, salt, and pepper on a tray.
- Roast the topping: Roast 18 to 20 minutes until the tomatoes burst and the chickpeas darken at the edges.
- Add spinach: Toss the hot mixture with spinach so it wilts slightly.
- Assemble: Spoon over the potatoes.
- Finish with feta and lemon: Scatter feta and squeeze lemon over the top.
Equipment for This Recipe:
- Large pot
- Two sheet pans or one pan used in batches
- Mixing bowl
- Spatula
- Citrus juicer, optional
How to Serve This Dish:
Spread the potatoes on the plate, then pile the chickpea mixture over the center so the feta falls into the cracks. A little yogurt on the side is nice, but not necessary. This also pairs well with sliced cucumber or a tomato-cucumber salad if you want extra freshness.
Pro Tips for This Recipe:
- Dry the chickpeas well after rinsing. Wet chickpeas roast softly.
- Use small tomatoes; huge ones release too much liquid.
- Add the feta after roasting so it stays crumbly and bright.
- A small pinch of chili flakes gives the dish a little edge without changing its character.
Variations on This Dish:
- Olive and Caper Version: Add chopped olives and capers for a saltier, more Mediterranean feel.
- Tahini Drizzle Finish: Whisk tahini with lemon and water and drizzle it over the top.
- Halloumi Upgrade: Swap the feta for sliced halloumi if you want something more substantial.
Common Mistakes to Avoid with This Dish:
- Not drying the chickpeas: They need a dry surface to roast properly.
- Adding the spinach too early: It disappears. Fold it in at the end.
- Over-salting before the feta goes on: Feta brings plenty of salt on its own.
11. Italian Sausage, Kale, and White Beans on Herbed Smashed Potatoes
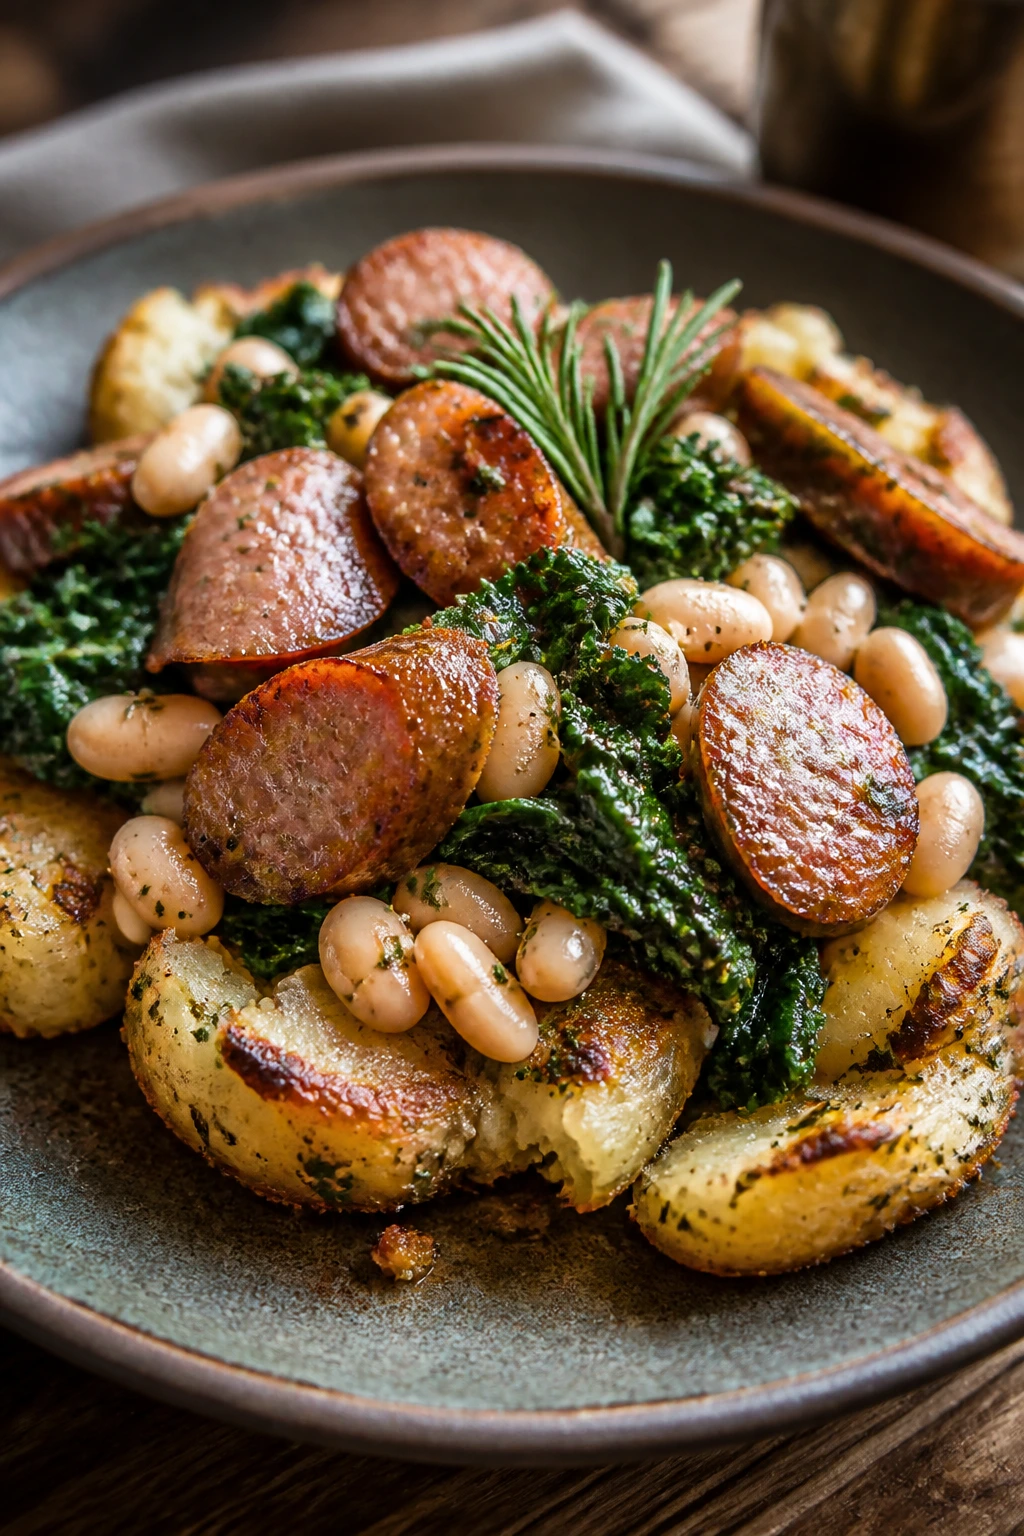
The smell alone sells this one. Sausage, garlic, and rosemary hit the pan first, then kale softens into the fat, and white beans turn the whole thing into something that feels sturdy enough for cold weather without needing a stew pot. The potatoes underneath keep the plate from turning into a pile of filling.
I prefer bulk sausage here because you can break it up properly. Links work, but they take a little more fiddling.
Why It Works:
Italian sausage brings built-in seasoning, which means you don’t need to overcomplicate the rest of the pan. Kale handles heat better than softer greens, and cannellini beans give the dish a creamy, mild base. Smashed potatoes catch the sausage oil and bean broth, which is where the dinner turns from decent to one you’d actually make again.
Key Ingredients:
- 2 pounds Yukon Gold potatoes
- 1 pound Italian sausage, sweet or hot, casings removed if needed
- 1 small onion, diced
- 3 cloves garlic, minced
- 1 bunch kale, stems removed and leaves chopped
- 1 can cannellini beans, drained and rinsed
- 1 teaspoon chopped rosemary or ½ teaspoon dried rosemary
- ½ cup chicken broth
- ¼ cup grated Parmesan
- 2 tablespoons olive oil
- ½ teaspoon black pepper
Quick Steps:
- Boil and smash the potatoes: Cook until fork-tender, smash, oil, and roast at 450°F for 20 minutes.
- Brown the sausage: Cook sausage in a skillet over medium-high heat until browned, 6 to 8 minutes.
- Add onion and garlic: Stir in onion and garlic and cook until soft and fragrant.
- Wilt the kale: Add the kale and broth, then cover for 2 minutes until the leaves collapse.
- Stir in beans and rosemary: Cook 2 more minutes until the beans are hot.
- Assemble and finish: Spoon the sausage mixture over the potatoes and top with Parmesan.
Equipment for This Recipe:
- Large pot
- Sheet pan
- Large skillet
- Wooden spoon
- Measuring cup
How to Serve This Dish:
Serve it in broad bowls or on large plates, because the saucy sausage mixture likes a little room. A spoonful of extra Parmesan at the table is not overkill. A simple bitter green salad gives the plate some lift.
Pro Tips for This Recipe:
- Break the sausage into small pieces so every bite carries seasoning.
- Remove kale stems; they stay chewy in a bad way.
- Let the broth reduce a little so the beans cling to the sausage instead of sliding around.
- Parmesan should go on at the end, while the pan is still hot.
Variations on This Dish:
- Sausage and Escarole Version: Swap kale for escarole if you want a gentler green.
- Tomato Braise Twist: Add ½ cup crushed tomatoes for a saucier, more stew-like feel.
- White Bean-Free Shortcut: If you don’t want beans, add more kale and another splash of broth.
Common Mistakes to Avoid with This Dish:
- Leaving the kale stems in: They stay woody and distract from the rest of the pan.
- Using too much broth: You want a glossy coating, not soup.
- Forgetting to season the potatoes: The topping is savory, but the potatoes still need salt.
12. Miso-Ginger Cod with Scallions and Sesame Smashed Potatoes

Cod needs a gentle hand, but it loves a strong glaze. Miso, ginger, and soy bring salt and depth, the scallions keep the finish fresh, and the sesame-edged potatoes underneath make the plate feel more deliberate than it has any right to be. This is the cleanest, brightest dinner in the batch.
I like cod here because it flakes into the potatoes instead of sitting on top in a heavy slab. It’s a good final recipe because it shows how flexible smashed potatoes really are.
Why It Works:
Cod cooks quickly, which means the potatoes get the long lead time and the fish gets a short roast with a glaze that clings. Miso adds savoriness without needing a long sauce, ginger sharpens the flavor, and sesame oil makes the potatoes taste a little more toasty. The whole dinner stays light on its feet.
Key Ingredients:
- 2 pounds small Yukon Gold potatoes
- 4 cod fillets, about 6 ounces each
- 2 tablespoons white miso
- 1 tablespoon soy sauce
- 1 tablespoon honey
- 1 tablespoon grated fresh ginger
- 1 tablespoon rice vinegar
- 1 tablespoon sesame oil, divided
- 2 scallions, thinly sliced
- 1 teaspoon sesame seeds
- 1 teaspoon kosher salt
- ½ teaspoon black pepper
Quick Steps:
- Boil and smash the potatoes: Cook until tender, then smash, season, drizzle with a little sesame oil, and roast at 450°F for 20 minutes.
- Make the glaze: Stir miso, soy sauce, honey, ginger, rice vinegar, and 1 teaspoon sesame oil until smooth.
- Prepare the cod: Pat the fillets dry and place them on a parchment-lined tray.
- Glaze and roast: Brush the cod with the miso mixture and roast 10 to 12 minutes, until the fish flakes easily.
- Finish the potatoes: Toss the hot potatoes with scallions and sesame seeds.
- Plate: Set the cod on or beside the potatoes and spoon any extra glaze over the top.
Equipment for This Recipe:
- Large pot
- Sheet pan
- Small bowl
- Pastry brush or spoon
- Fish spatula, helpful but not required
How to Serve This Dish:
Arrange the potatoes first, then the cod, then the scallions so the plate keeps its shape. A few cucumber slices or a quick cucumber salad are a smart side if you want something cold and sharp. This is one of those dinners that looks calm but tastes layered.
Pro Tips for This Recipe:
- Pat the cod dry before glazing so the miso sticks.
- Watch the fish closely near the end; cod can go from flaky to chalky fast.
- Use white miso if you can. It’s softer and less salty than darker miso.
- If the glaze feels too thick, loosen it with a teaspoon of warm water.
Variations on This Dish:
- Salmon Miso Version: Use salmon instead of cod and roast a minute or two longer.
- Maple-Ginger Swap: Replace honey with maple syrup for a deeper sweetness.
- Scallion-Cucumber Finish: Add thin cucumber ribbons dressed with rice vinegar on top for extra crunch.
Common Mistakes to Avoid with This Dish:
- Overbaking cod: It dries fast. Pull it when it flakes cleanly.
- Using dark miso without adjusting salt: It can overpower the fish.
- Skipping the sesame oil on the potatoes: That little note of nuttiness is part of what makes the plate feel complete.
Why Smashed-Potato Dinners Work So Well on a Hot Pan
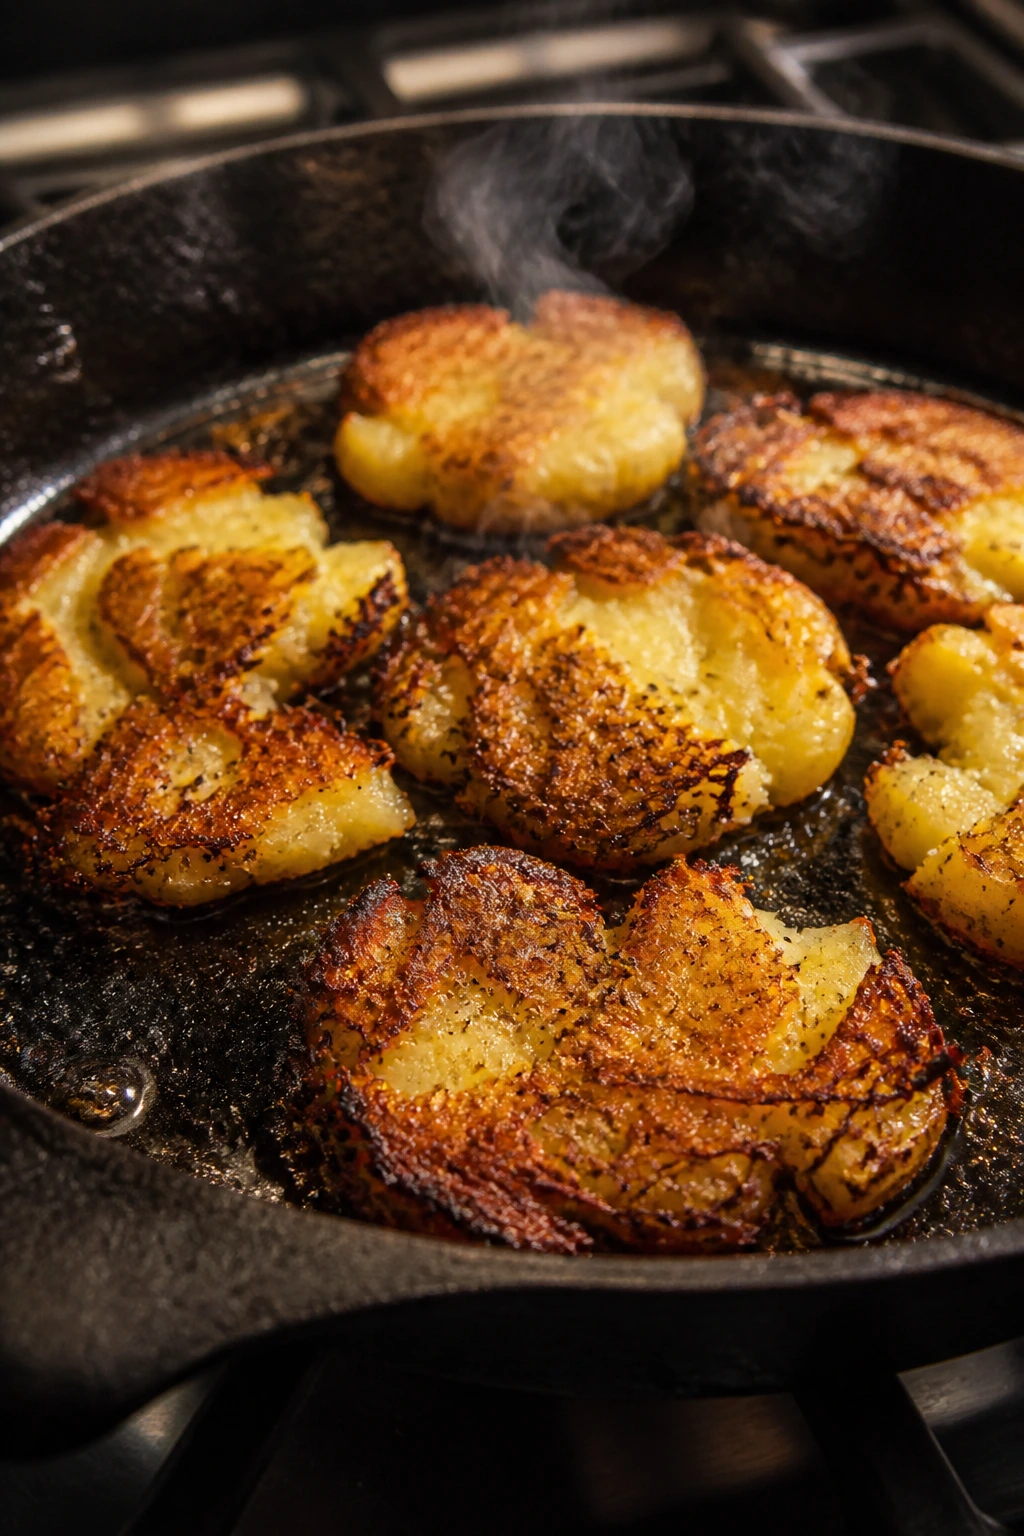
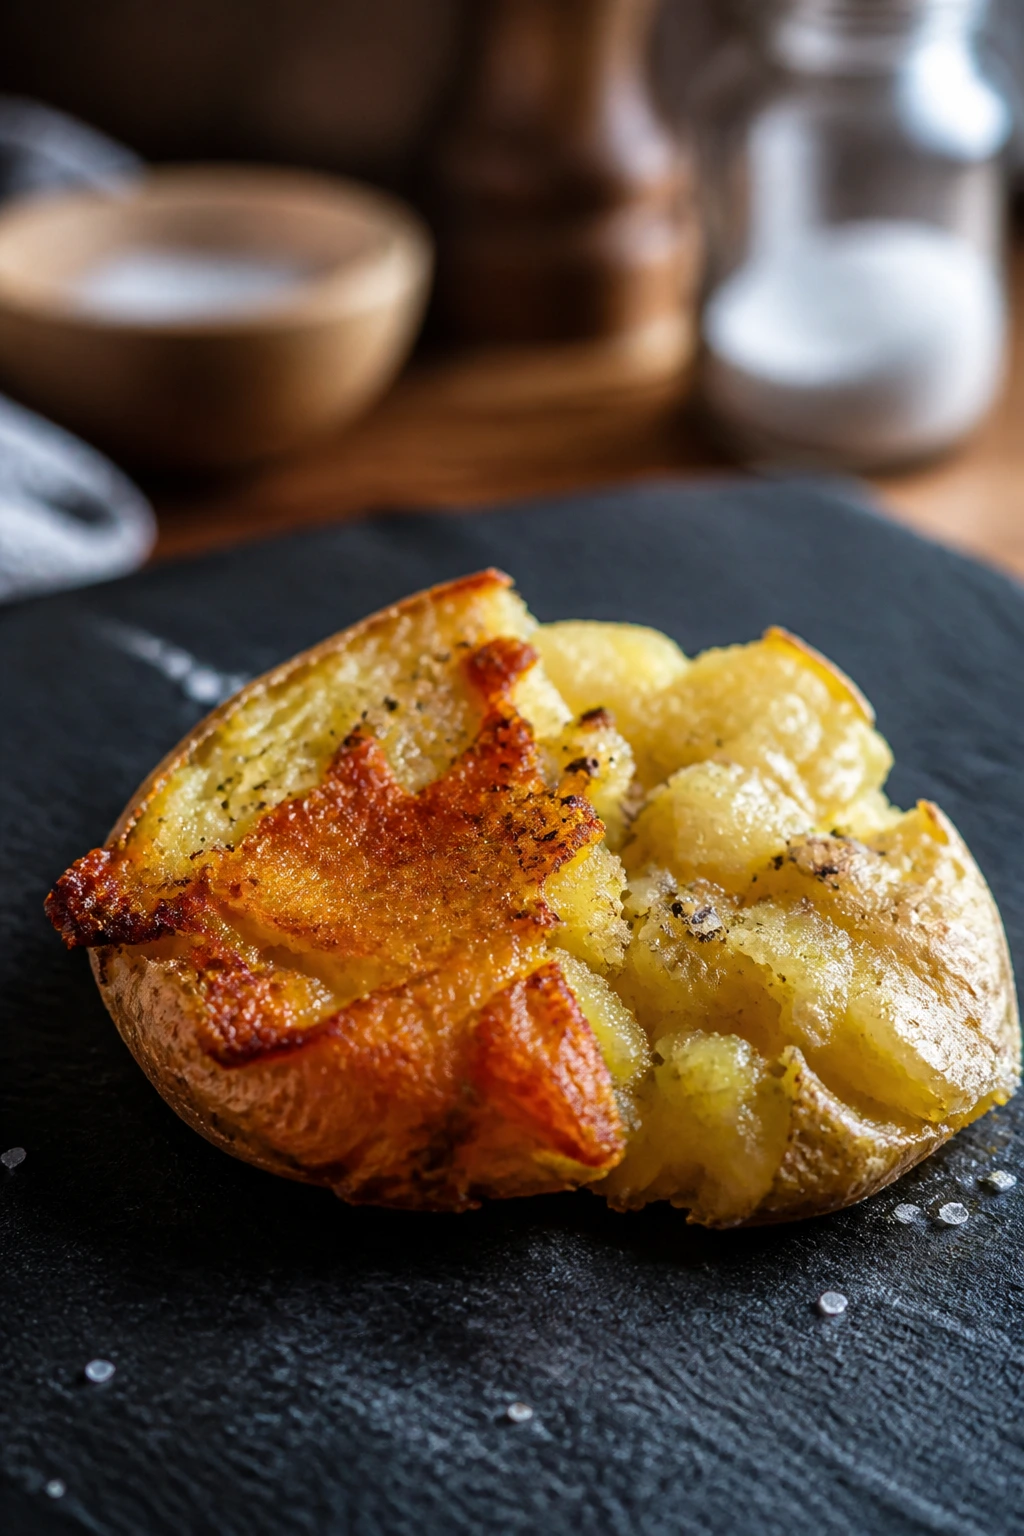
A smashed potato is basically a trick with a purpose. Boil the potatoes until the centers are tender, then flatten them so the oven can attack the surface from every angle. More surface area means more browning, and browning means flavor. That’s not a theory; it’s the reason the edges turn lacy and crisp while the middle stays soft.
The cut also changes how toppings behave. A smooth mashed potato turns sauces muddy. A smashed potato catches them. The cracks hold chicken juices, mustard pan sauce, miso glaze, and melted cheddar in different little pockets, so each bite tastes layered instead of blended into one beige note. That’s why these dinners feel sturdier than a tray of plain roasted potatoes with something dumped on top.
Potato choice matters more than people think. Waxy potatoes like Yukon Golds and red potatoes hold their shape, which gives you a cleaner smash and those useful ridges. Russets can work, but they’re drier and more delicate, so they need a gentler hand. If the potatoes are all the same size, they finish at the same time; if they’re wildly different, you’ll be fishing out overcooked little ones while the big ones are still stubborn in the center. Small annoyance. Big payoff when you get it right.
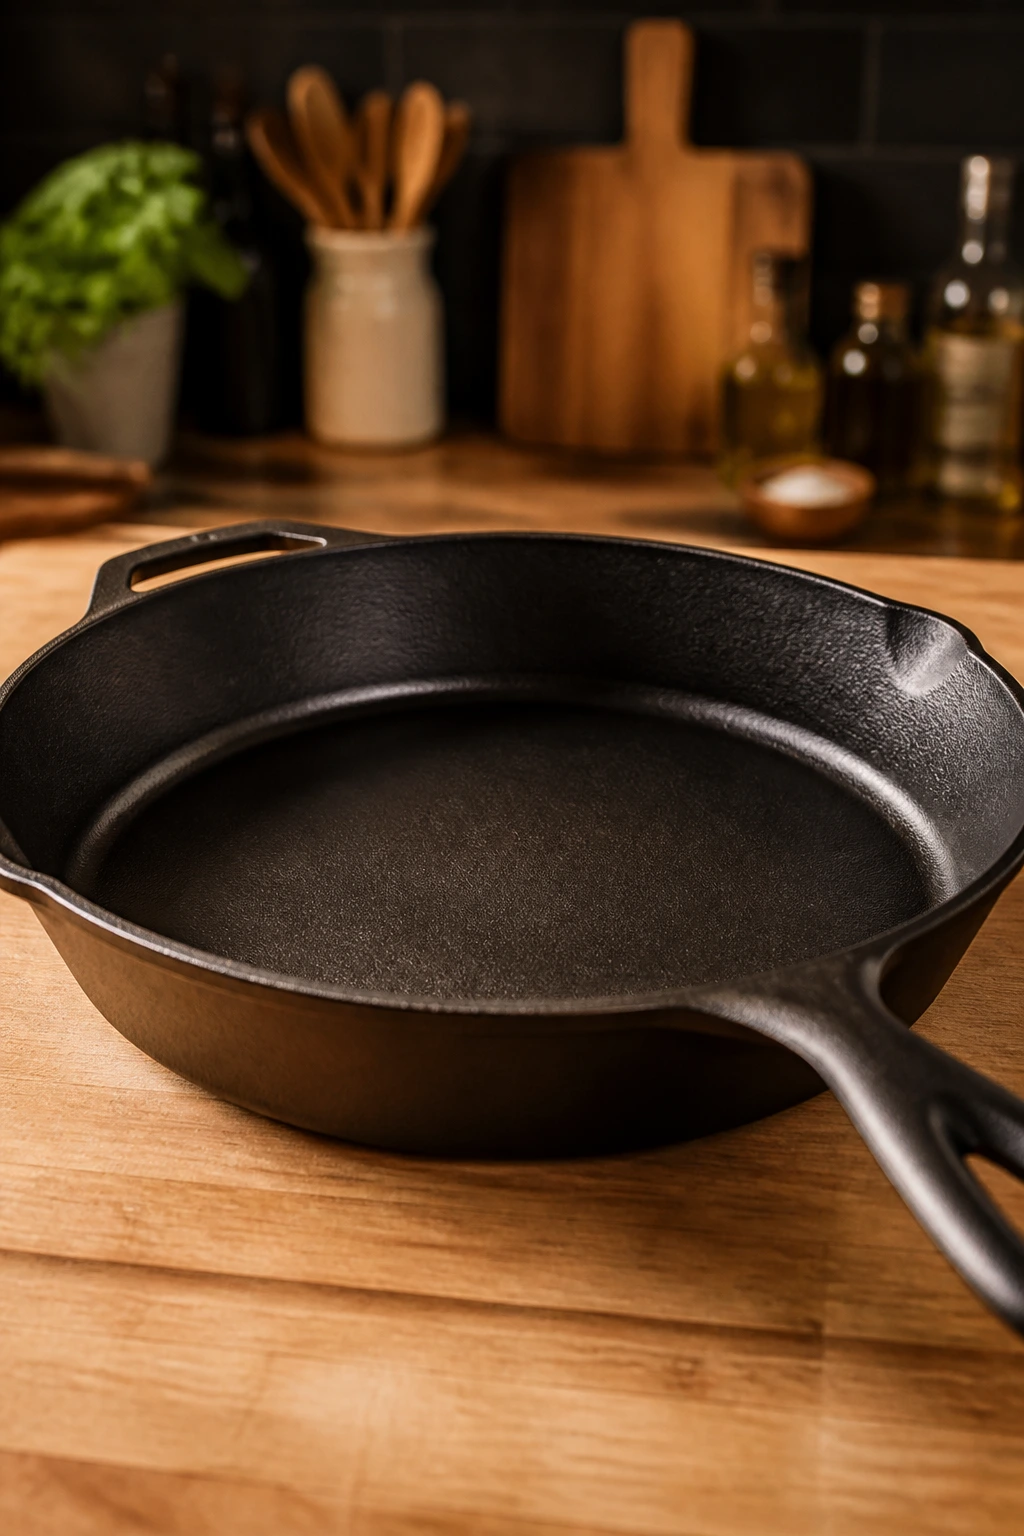
Essential Equipment for These Recipes
- Large pot: Needed for boiling the potatoes before they hit the oven.
- Rimmed sheet pans: The raised edge keeps oil and sauce from sliding off the tray.
- Cast-iron skillet: Best for steak, pork chops, chorizo, and any dinner that needs a serious sear.
- Flat-bottomed cup or potato masher: Used to smash the potatoes without turning them into paste.
- Instant-read thermometer: Especially useful for chicken, steak, pork, salmon, shrimp, and cod.
- Tongs: Handy for turning chicken, shrimp, and vegetables without tearing them.
- Sharp knife and cutting board: For trimming broccoli, slicing onions, and cutting herbs thin.
- Small mixing bowls: Good for sauces, glazes, and spice blends before the pan gets involved.
- Parchment paper or foil: Helps with cleanup, though a lightly oiled pan gives you a crisper bottom.
- Fish spatula: Optional, but useful for lifting delicate fillets without breaking them.
Smart Shopping and Ingredient Tips
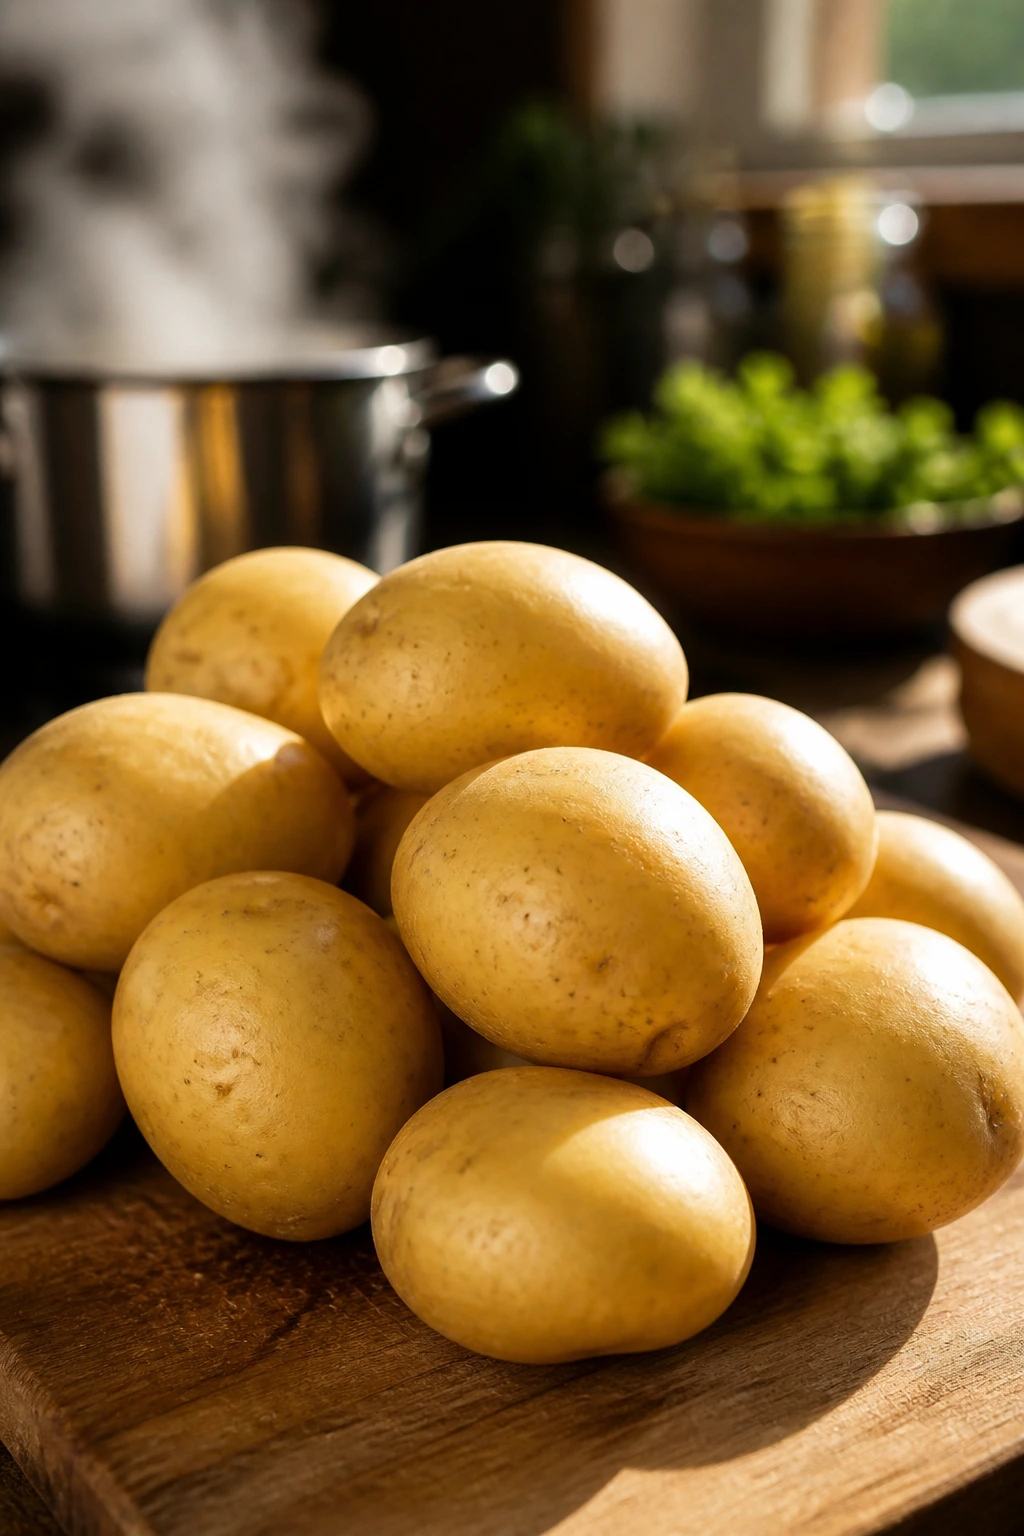
Buy potatoes with the same size in mind, not the same shape. The point is even cooking. Small Yukon Golds are my first choice because they boil fast, smash cleanly, and hold a creamy center under a crisp shell. Red potatoes work well too if you want a firmer, more rustic bite. Russets can be used, but they need gentler smashing or they can split into loose chunks that brown unevenly.
Pay attention to moisture on your proteins. Chicken thighs should look plump, not watery. Salmon should smell clean and sea-like, never sharp. Shrimp should be firm and dry when thawed, because wet shrimp steam before they sear. For pork chops and steak, thickness matters more than fancy packaging. A 1-inch chop or steak is easier to cook evenly than a skinny cut that races to done before the potatoes catch up.
Cheese is one of those ingredients where the cheap, convenient option isn’t always the best one. Pre-shredded cheese is fine in a pinch, but block cheese grated by hand melts smoother, especially Gruyère, cheddar, and Parmesan. If the recipe ends under the broiler, the fresher grating usually browns better too.
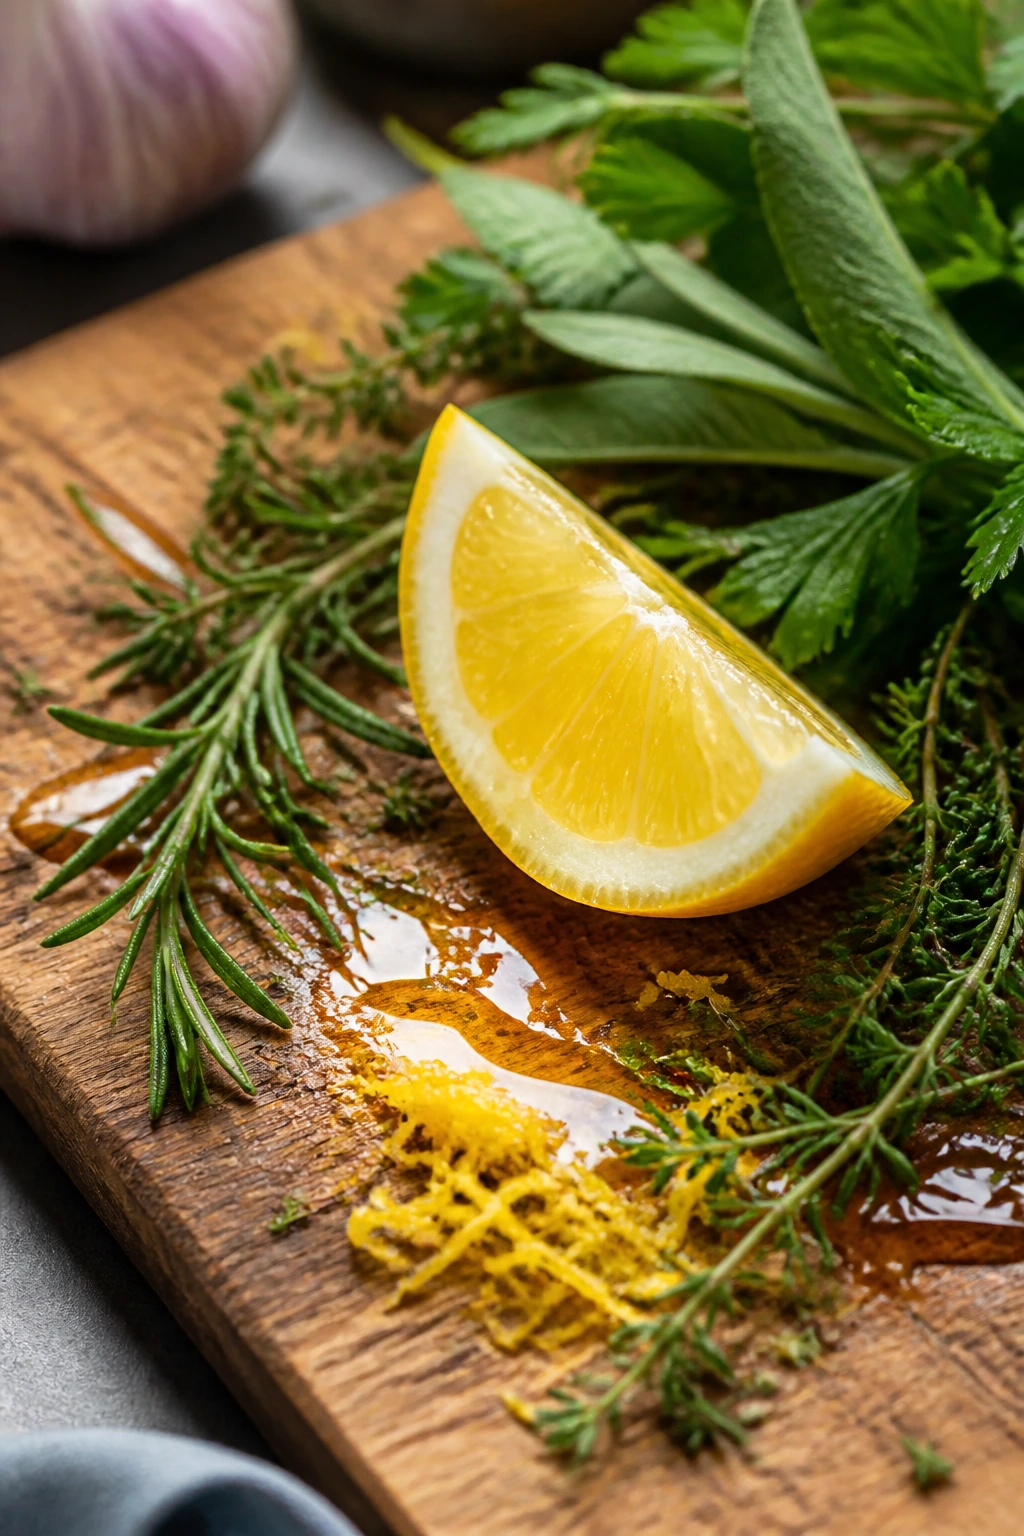
Herbs deserve the same attention. Parsley, dill, scallions, cilantro, and thyme each behave differently when heated. Soft herbs like dill and parsley are best added near the end. Woody herbs like rosemary and thyme can go in the pan earlier. If you keep one thing in your basket for these dinners, make it a good lemon. Acid at the end keeps fat from flattening the whole plate.
How to Serve These Recipes
Presentation:
Spread the potatoes in a loose layer first so their edges stay visible. Then spoon the topping in the center or slightly off to one side, not across the whole tray like wallpaper paste. A final scatter of herbs, scallions, feta, or Parmesan makes the plate look finished without hiding the texture that got you here in the first place.
Accompaniments:
Use crisp, bitter, or acidic sides that keep the meal from feeling heavy. A lemony salad, cucumber slices, vinegary slaw, roasted green beans, or a simple tomato salad all work across this collection. Bread is optional unless you’ve made one of the saucier versions; in that case, a rough piece of sourdough for swiping the pan is never a bad idea.
Portions:
For a dinner-sized plate, plan on 10 to 12 ounces of raw potatoes per person before boiling, plus 4 to 6 ounces of protein for lighter meals or 6 to 8 ounces for hungrier eaters. If you’re serving a family-style tray, use two sheet pans rather than cramming everything onto one. The potatoes need space or the edges stop crisping and start steaming.
Beverage Pairing:
A dry white wine like sauvignon blanc works with salmon, cod, shrimp, and chickpeas. For steak, pork, sausage, or chorizo, a lager or a medium-bodied red does the job without fighting the seasoning. Sparkling water with lemon is not a consolation prize here; it’s the right answer when the plate is rich and salty.
Additional Tips and Flavor Boosters
Flavor Enhancement:
A hit of acid at the end changes everything. Lemon juice, red wine vinegar, rice vinegar, or a spoon of mustard in a pan sauce wakes up the salt and fat that the potatoes carry. If the plate tastes a little flat, it usually needs brightness, not more cheese.
Customization:
You can swap herbs without breaking the recipe. Parsley and dill make things feel fresher, while rosemary and thyme lean woodsy. If you want more heat, use chili flakes, hot sauce, or a pinch of cayenne in the oil before the potatoes roast.
Serving Suggestions:
Finish the tray with something that looks raw or cool: scallions, chopped herbs, crumbled feta, thin celery, pickled onions, or a dollop of yogurt. That last little contrast keeps the whole plate from eating like one long note. Small detail. Huge difference.
Make-It-Yours:
For dairy-free dinners, use olive oil instead of butter and finish with tahini, pesto made without cheese, or a squeeze of lemon. For gluten-free plates, these recipes already do most of the work for you; just check sauces, sausages, and spice blends. If you want the meal lighter, lean on fish, chickpeas, or mushrooms and keep the potato layer crisp rather than heavy with sauce.
Make-Ahead, Storage, and Reheating Guidance
Smashed-potato dinners are best when the potatoes and toppings are treated like separate jobs. You can boil the potatoes up to 1 day ahead, smash them on a tray, cover them, and refrigerate them. Roast them straight from the fridge, but add 5 to 8 extra minutes so the cold centers catch up and the edges crisp again. If you’re making a tray for company, that trick saves a lot of panic.
Leftovers keep for 3 to 4 days in the refrigerator in airtight containers. Seafood-based versions are best within 2 days, while chicken, beef, pork, sausage, and vegetarian versions usually hold a bit longer. The potatoes lose some crispness in the fridge, which is normal. They’re still worth saving.
For reheating, the oven is the cleanest route. Spread the potatoes and toppings on a sheet pan and warm at 425°F for 10 to 15 minutes, uncovered, until the edges firm up again. A skillet over medium heat works well for smaller portions, especially if you want the bottoms to re-crisp fast. Microwaving is only useful if you’re warming a saucy center and do not care about crunch.
If you want to freeze the potatoes alone, do it after roasting, not before. They’ll keep for about 2 months, though the texture is never quite as sharp as fresh. Freeze saucy fish dishes with caution; cod and salmon can go dry after thawing. Chicken, beef, sausage, and bean-based versions handle freezing better, especially if the sauce is separate.
Food safety is straightforward: cooked chicken should hit 165°F, pork 145°F with a rest, fish should flake cleanly, and hot food left out for serving should not sit around long enough to drift below safe hot-holding temperatures. If you’re using the tray for a buffet, keep it warm rather than leaving it on the counter for hours. That’s not a potato problem. That’s a kitchen problem.
Variations and Adaptations to Try
Air-Fryer Crisp Route:
Boil and smash the potatoes first, then move them to the air fryer in a single layer at 390°F. A light spray of oil and 12 to 15 minutes of cooking usually gives you crisp edges fast. This works best when the topping is already cooked and you just want the potatoes re-crisped before serving.
Dairy-Free Finish:
Skip the butter, blue cheese, Gruyère, and Parmesan, then finish the potatoes with olive oil, lemon juice, herbs, and a spoon of tahini or cashew cream. You lose some richness, but the texture still holds. This is especially good with salmon, chickpeas, cod, and mushrooms.
Lower-Sodium Build:
Use unsalted potatoes at the boiling stage, then let acid, garlic, herbs, and spices do more of the work. Choose low-sodium broth, rinse canned beans well, and go easy on cheeses and cured meats. The plate still tastes full if you finish with lemon or vinegar.
Vegetarian Protein Swap:
For the meat-based dinners, try chickpeas, white beans, crispy tofu, or seared halloumi. The potatoes can carry all of them, but halloumi and tofu need a hot pan or oven to earn their place. Chickpeas are the safest swap when you want something that behaves like a pantry dinner.
Spice-Forward Version:
Add harissa, Calabrian chile paste, chipotle, cayenne, or hot honey depending on the dish. A teaspoon or two is enough in most of these dinners; you want a pulse of heat, not a burn that covers the potatoes. This adaptation works especially well with chicken, shrimp, chorizo, and taco beef.
Kid-Friendly Soft Landing:
Pull back on the herbs and heat, then keep the toppings familiar: cheddar, chicken, mild sausage, or steak with butter. Leave the sauces on the side so everyone can build their own plate. Kids tend to go after the potato edges first anyway, which tells you everything you need to know.
Common Mistakes to Avoid
-
Starting with wet potatoes: If the potatoes go from pot to tray without drying, they steam under their own moisture and the edges stay pale. Drain them well and let them sit for a minute before smashing.
-
Smashing too hard: You want crags and cracks, not crumbs. A potato flattened to a paper-thin sheet will burn before the center stays creamy. Aim for about ½ inch thick.
-
Crowding the pan: Too many potatoes or too much topping on one tray traps steam. Use two pans if needed. Space is not waste here; it is how crispness happens.
-
Adding wet toppings too early: Sauces, salsas, and buttery pan juices can soften the potato surface if they sit on it for too long before serving. Crisp first, sauce later.
-
Ignoring salt at the potato stage: If the potatoes are bland before the topping goes on, they stay bland underneath. Salt the boiling water and season the smashed potatoes before they roast.
-
Using the wrong potato shape for the recipe: Giant potatoes can make uneven layers, while very tiny ones can burn before the topping is ready. Choose similar sizes so the tray cooks in one rhythm.
Frequently Asked Questions

What potatoes work best for smashed-potato dinners?
Small Yukon Golds are my first choice because they’re creamy inside and hold together when smashed. Red potatoes also work well if you want a firmer bite. Russets can work, but they’re more fragile and need a gentler smash.
Do I have to boil the potatoes first?
Yes, if you want the soft center and crisp edges. Raw potatoes won’t flatten cleanly, and they usually dry out before the inside turns tender. Boiling first is what gives you that good contrast.
Can I make smashed potatoes ahead and still keep them crispy?
You can boil and smash them ahead, then roast them right before serving. If they’re already roasted, reheat them on a sheet pan at 425°F so the edges wake back up. The microwave won’t bring the crunch back.
What if the potatoes stick to the pan?
Usually it means the pan needed more oil, the potatoes were too wet, or you tried to lift them too early. Let them roast long enough to form a crust, then release them with a thin spatula. Parchment helps, though direct oil often gives a better bottom.
Can I use an air fryer instead of the oven?
Yes, especially for smaller batches. Boil and smash first, then air-fry at about 390°F until the edges are browned and crisp. You may need to work in batches so the potatoes aren’t piled on top of each other.
Should I peel the potatoes?
Usually no. The skins help the potatoes hold their shape, and they add texture once they crisp. If the skins are thick or damaged, trim those spots off and keep the rest on.
How do I keep the dinner from getting soggy?
Dry the potatoes well, don’t overcrowd the pan, and cook wet toppings down before they go on the tray. Sauces should finish the dish, not soak it from the start. That one habit changes the whole result.
Can I use sweet potatoes instead?
You can, but they behave differently. They caramelize faster, mash more loosely, and won’t give you the same shattery edge. If you swap them in, watch the heat closely and expect a softer finish.
A Plate Built for Crisp Edges
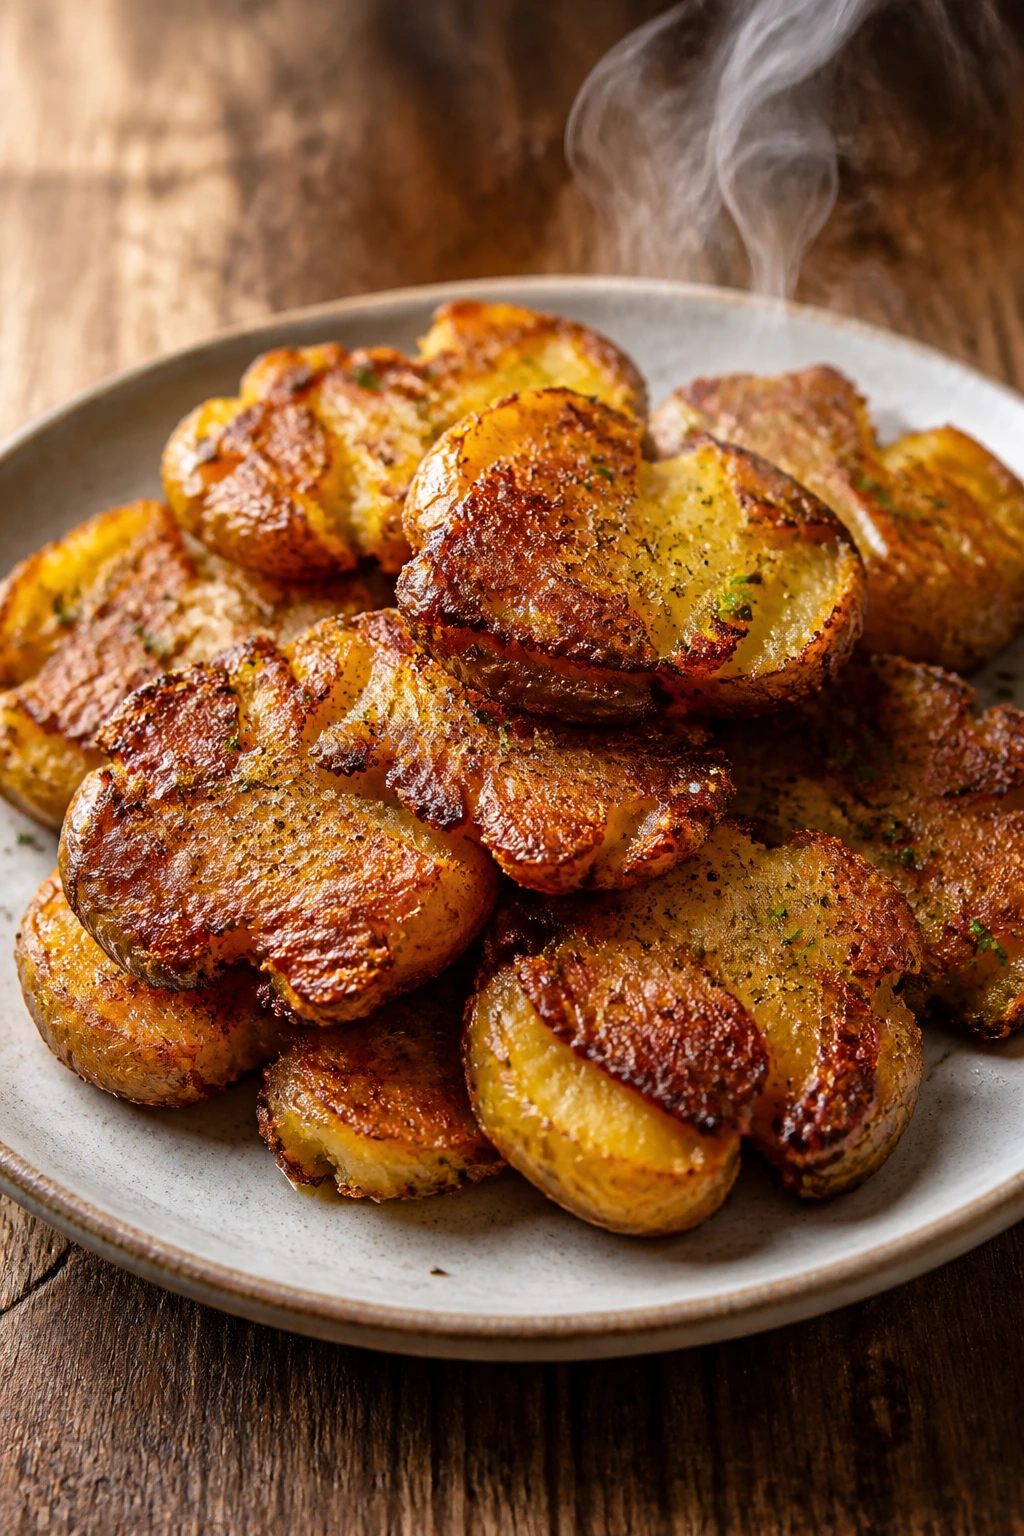
These dinners work because they respect texture. The potatoes stay the star, but they also behave like a landing pad for sauce, juices, cheese, herbs, and spice. That balance is what keeps a smashed-potato plate from sliding into sameness. Every recipe here has a different personality, but the shared trick is the same: boil, smash, roast hard, then top with something that knows how to behave.
Pick one that matches your mood and your pantry. If you want rich and salty, go steak or chorizo. If you want clean and bright, salmon or cod will do. If you want something that leans vegetarian without feeling like a compromise, the mushroom, chickpea, or sausage-and-bean versions have enough backbone to stand on their own. Keep the potatoes exposed, keep the pan hot, and let the edges speak first.