
Lazy Sunday nights have a smell: garlic warming in oil, something starchy softening in a shallow pan, and that little sigh of relief when you realize dinner will not involve six bowls and a sink full of dishes. A good five-ingredient skillet dinner lives right there, in the space between takeout and a full cooking project. You still get browned edges, a proper sauce, and a plate that feels like dinner, not a concession.
The best part is that five ingredients is not a gimmick. It forces the pan to do the heavy lifting. Orzo thickens broth as it cooks. Sausage seasons the vegetables around it. Pesto turns into sauce the moment it hits heat. You’re not making less dinner; you’re making smarter dinner.
These skillet meals lean on that idea in different ways. Some are brothy and spoonable, some are sticky and cheesy, and some are basically a shortcut to the kind of comfort food that usually asks for twice as much effort. Pick the one that matches the mood, keep the skillet hot, and let the evening stay easy.
Why These Five-Ingredient Skillet Dinners Earn a Spot on a Lazy Night
-
One-pan cleanup: Every recipe keeps the cooking inside a single skillet, which means the sink stays quiet and the counter doesn’t turn into a staging area.
-
Five main groceries, not fifteen: I’m counting olive oil, salt, and pepper as pantry basics, so the shopping list stays short without the food tasting stripped down.
-
The pan builds the flavor: Browning, deglazing, simmering, and melting all happen in the same vessel, which is why these dinners taste fuller than the ingredient count suggests.
-
Starches work harder here: Orzo, rice, gnocchi, and potatoes soak up broth and sauce instead of sitting off to the side like an afterthought.
-
Leftovers don’t feel punishing: The saucier skillets reheat well, and the rice or pasta-based ones usually hold together better than a loose, dry sauté.
-
Flexible by design: Most of these will forgive a different bean, a different green, or a different sausage if that’s what’s in the fridge.
1. Lemon Garlic Chicken and Orzo Skillet
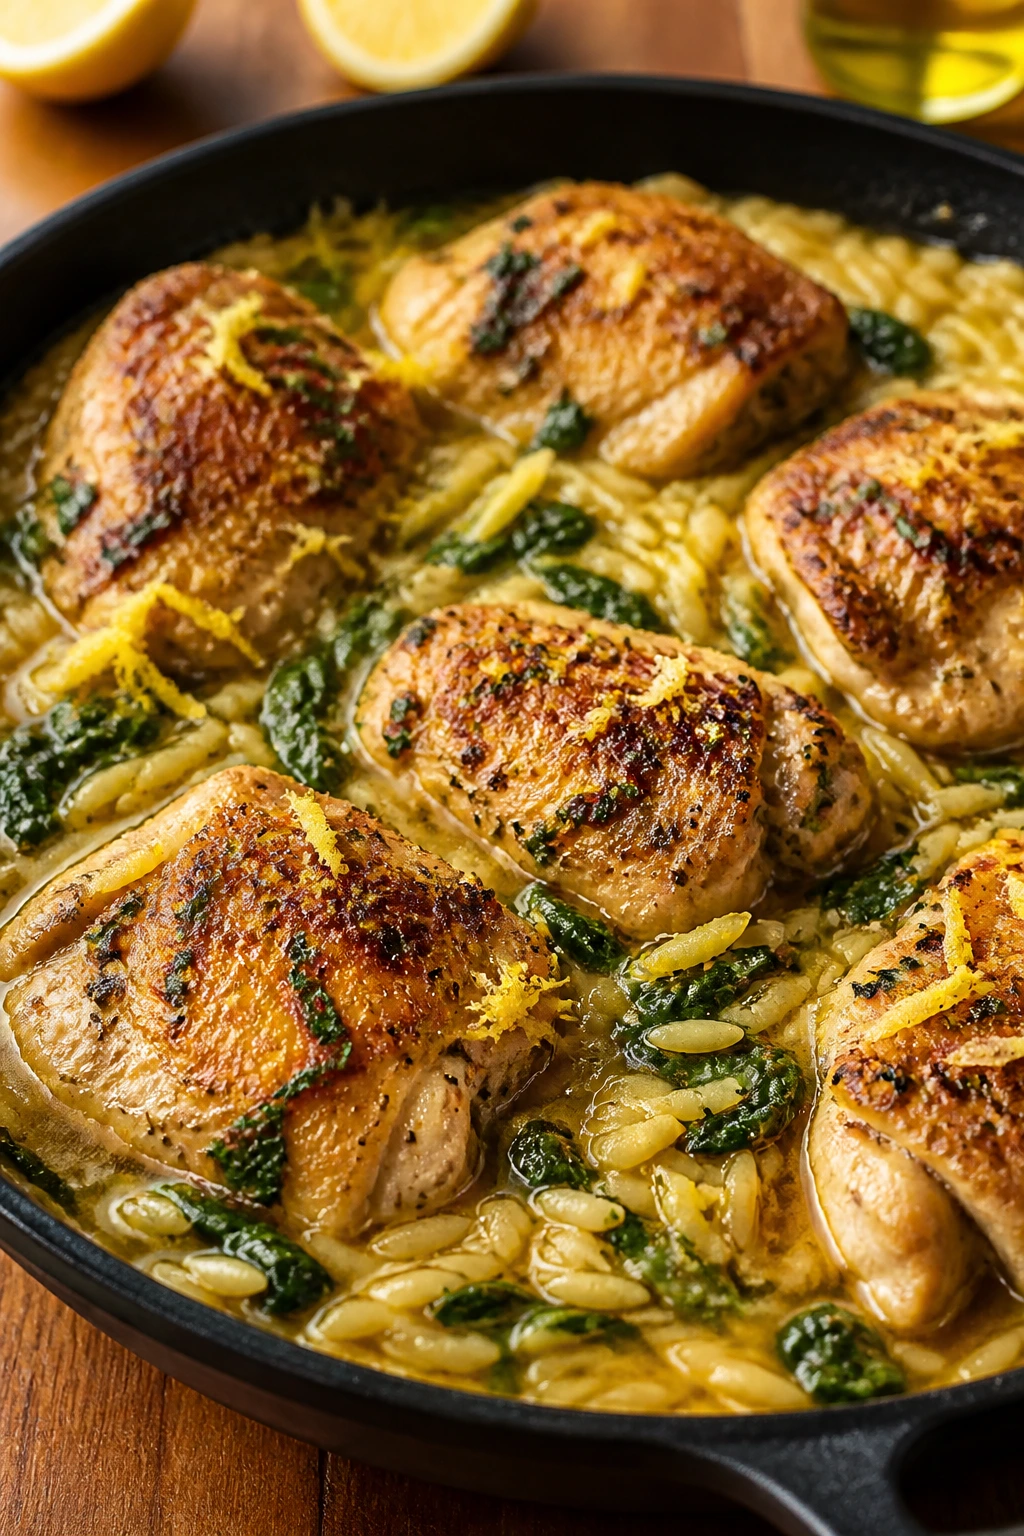
Garlic hits the oil first, then the chicken starts to brown in little copper patches, and the whole skillet smells like dinner is taking itself seriously without making a scene. The orzo cooks right in the broth, so it turns the pan into a glossy, spoonable meal instead of a chicken-and-pasta pile. Lemon at the end keeps it sharp and awake.
Orzo is the real trick here. It drinks broth, thickens the liquid, and gives you a sauce that clings instead of pooling. Chicken thighs stay tender through the simmer, which matters because this is not the place for dry, careful chicken breast.
Why It Works: Chicken thighs give the skillet enough fat to brown properly and enough cushion to stay juicy after the orzo goes in. Orzo cooks fast, so it absorbs broth while leaving just enough starch behind to make the pan look finished. Lemon zest and juice keep the flavor bright, and the spinach folds in so quickly that it feels like part of the sauce rather than a separate vegetable.
Key Ingredients: Chicken and Pasta
- 1½ lbs boneless, skinless chicken thighs, cut into 1-inch pieces — small pieces brown quickly and stay juicy.
- 1½ cups dry orzo — it thickens the broth as it cooks.
- 3 cups low-sodium chicken broth — enough liquid to soften the pasta without leaving the skillet soupy.
Fresh Finish
- 5 oz baby spinach — it melts down fast and keeps the pan from feeling heavy.
- 1 large lemon, zested and juiced — use both; the zest gives perfume, the juice gives bite.
Pantry Staples
- 1 tbsp olive oil — for browning the chicken.
- 1 tsp garlic powder, 1 tsp kosher salt, ½ tsp black pepper — simple seasoning that leaves room for the lemon.
Quick Steps:
- Pat the chicken dry and season it with the salt, pepper, and garlic powder.
- Heat the olive oil in a 12-inch skillet over medium-high heat. Add the chicken in a single layer and cook for 4 to 5 minutes, stirring once or twice, until the pieces are browned on the outside and nearly cooked through.
- Stir in the orzo and toast it for 1 minute, just until it looks glossy around the edges.
- Pour in the broth and half of the lemon zest. Bring the pan to a boil, then lower the heat to medium-low.
- Simmer uncovered for 10 to 12 minutes, stirring every couple of minutes, until the orzo is tender and the liquid has turned silky instead of brothy.
- Add the spinach and let it wilt for 30 to 60 seconds. Stir in 2 to 3 tablespoons lemon juice, taste, and add more salt or pepper if the pan needs it.
- Let the skillet rest off the heat for 2 minutes before serving. The sauce settles and thickens during that short pause.
Equipment for This Recipe
- 12-inch skillet with straight sides — the orzo needs space to move.
- Wooden spoon or spatula — for scraping up the browned bits.
- Measuring cups — the broth amount matters.
- Microplane or fine grater — for fine lemon zest.
How to Serve This Dish: Spoon it into shallow bowls while it’s still loose and glossy. A little extra lemon zest on top is worth the thirty seconds it takes. If you want a side, keep it plain: a green salad with a sharp vinaigrette or a slice of crusty bread is plenty.
Pro Tips for This Recipe
- Don’t rush the chicken browning. Pale chicken makes a pale pan, and this recipe depends on those browned bits.
- Stir the orzo every couple of minutes so it doesn’t catch on the bottom.
- Add the lemon juice at the end, not early. Early lemon gets muted while the broth simmers.
- If the orzo drinks up the broth before it’s tender, splash in ¼ cup hot water and keep cooking.
Variations on This Dish
- Creamy Lemon Finish: Stir in 2 tablespoons mascarpone or cream cheese at the end for a rounder sauce.
- Asparagus Swap: Replace the spinach with chopped asparagus tips and add them during the last 4 minutes of cooking.
- Dairy-Free Bright Bowl: Skip any creamy add-ins and finish with extra lemon zest and chopped parsley if you have it.
Common Mistakes to Avoid with This Dish
- Crowding the chicken: If the pieces sit on top of one another, they steam instead of browning. Use a wide skillet or cook in two batches.
- Boiling the orzo hard: A violent boil makes the pasta stick and the broth evaporate too fast. Keep it at a steady simmer.
- Adding the lemon too soon: Lemon loses some of its lift during a long simmer, so save the juice for the end.
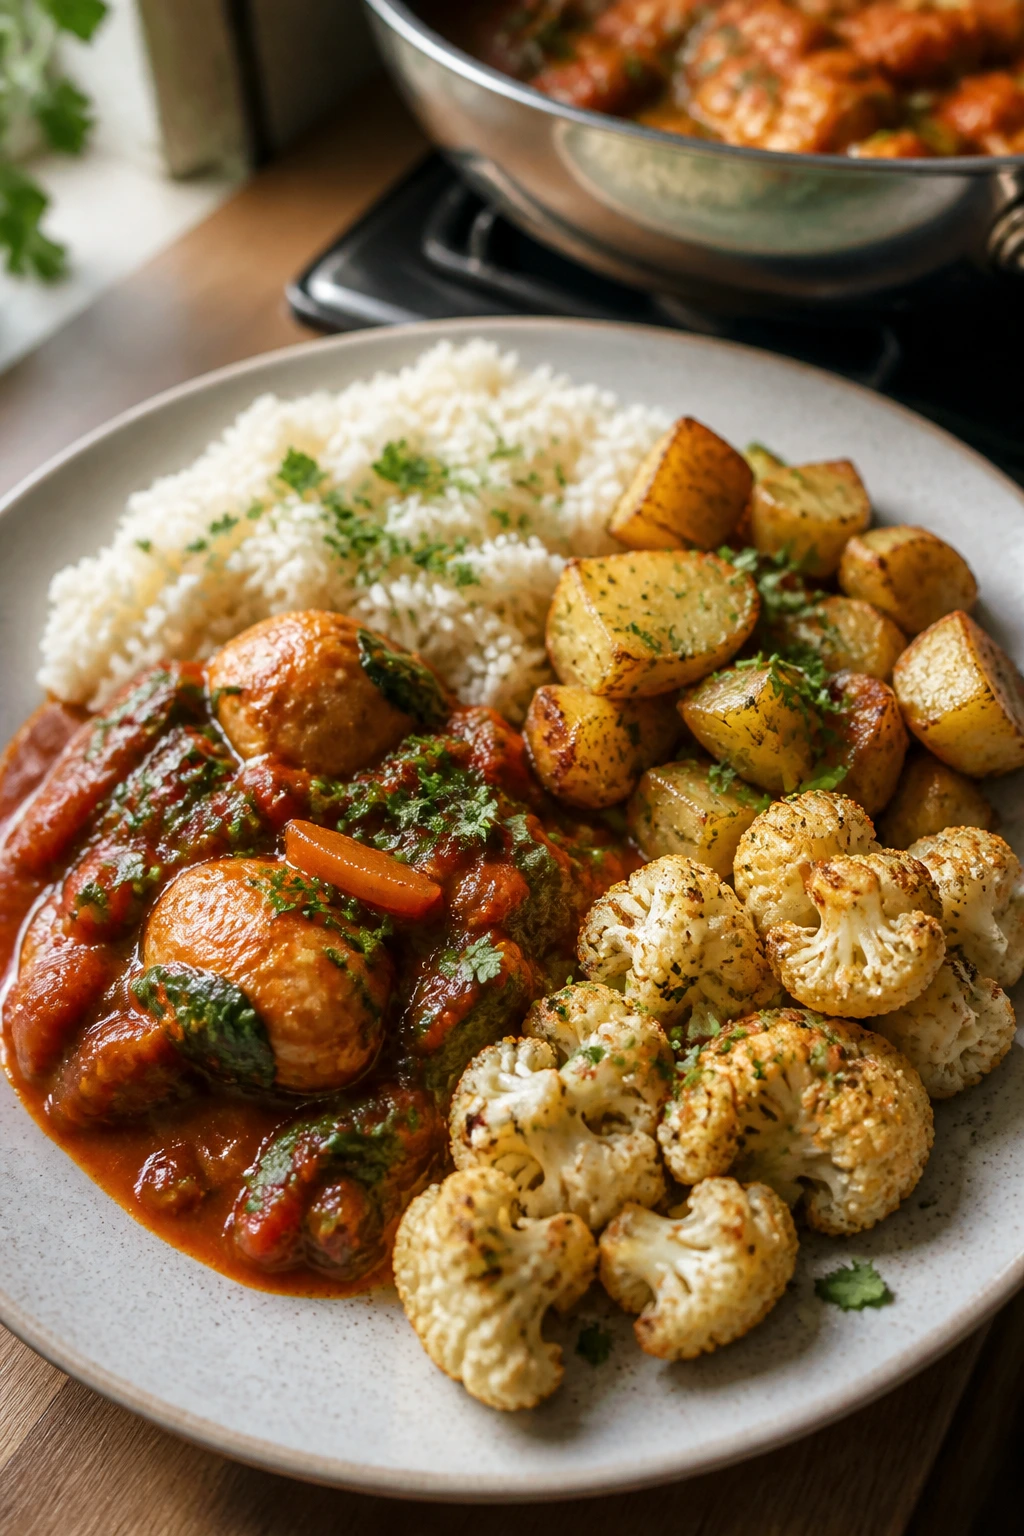
2. Italian Sausage, Peppers, and Potatoes Skillet
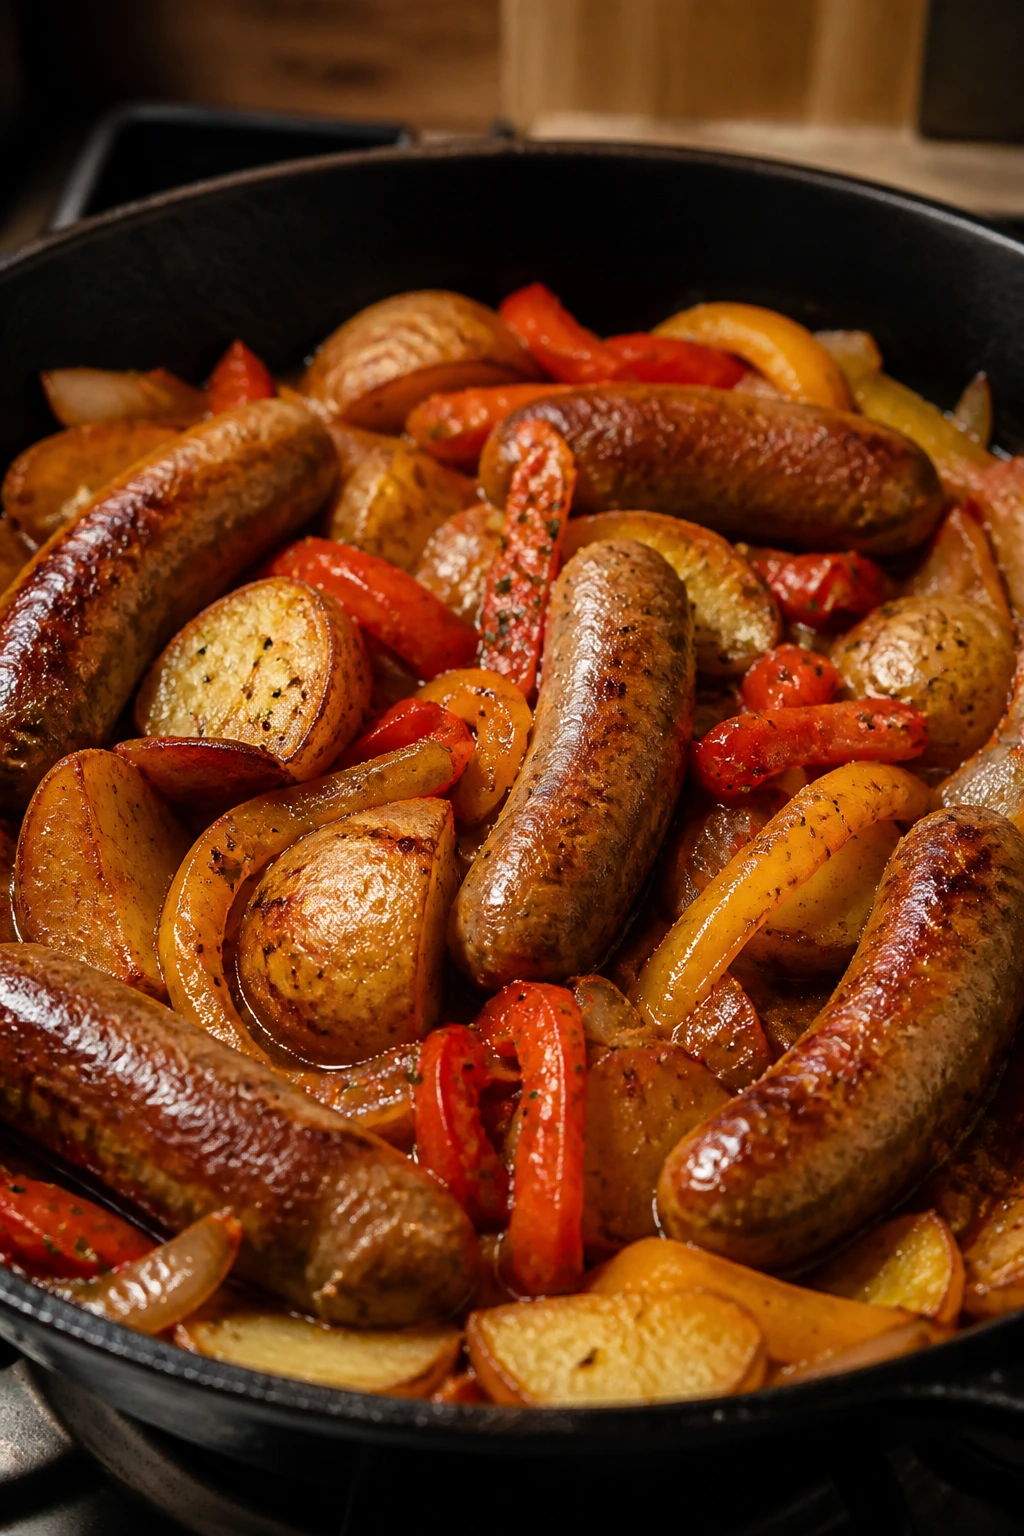
What do potatoes want from a skillet? Heat, salt, and a little patience. This version gives them all three, then throws in sausage fat and marinara so the whole pan turns sticky and savory instead of merely browned. It’s the kind of dinner that looks like it took more work than it did.
The potatoes soften first, the sausage seasons the pan, and the peppers bring just enough sweetness to keep the whole thing from feeling heavy. Marinara ties everything together without turning it into a pasta dish, which is exactly why I like it here.
Why It Works: Sausage brings fat and spice that coat the potatoes as they cook. The lid traps enough steam to soften the potatoes before the peppers go in, which keeps the skillet from turning into a half-raw, half-soggy mess. Marinara at the end gives you a glaze instead of a soup, and that’s the difference between “skillet dinner” and “things in sauce.”
Key Ingredients: Main Ingredients
- 1 lb Italian sausage links or bulk sausage — sweet or hot both work; just keep the flavor strong.
- 1½ lbs baby potatoes, halved — small potatoes cook more evenly than big chunks.
- 2 bell peppers, sliced — they soften but still keep a little snap.
- 1 small yellow onion, sliced — it sweetens as it cooks.
- 1½ cups marinara sauce — choose one you’d happily eat with a spoon.
Pantry Staples
- 1 tbsp olive oil — only if the sausage is very lean.
- 1 tsp Italian seasoning, 1 tsp kosher salt, ½ tsp black pepper — enough seasoning to carry the potatoes.
Quick Steps:
- Heat the olive oil in a large skillet over medium-high heat. Add the sausage and cook for 5 to 6 minutes, breaking it up if it’s bulk sausage or turning the links as they brown.
- Add the halved potatoes and a splash of water, then cover the skillet. Cook for 8 minutes over medium heat, shaking the pan once halfway through, until the potatoes are starting to turn tender around the edges.
- Stir in the onion and bell peppers. Cook uncovered for 5 minutes, stirring every minute or so, until the onion softens and the peppers lose their raw crunch.
- Pour in the marinara and sprinkle in the Italian seasoning. Stir well, then reduce the heat to medium-low.
- Simmer for 4 to 5 minutes, uncovered, until the sauce clings to the sausage and the potatoes are fork-tender.
- Taste for salt and pepper, then let the pan sit for 2 minutes before serving.
Equipment for This Recipe
- Large skillet with a lid — the lid helps the potatoes soften.
- Wooden spoon — good for turning the sausage and scraping the pan.
- Sharp knife — for slicing peppers and onion cleanly.
- Cutting board — preferably one with a damp towel underneath so it doesn’t slide.
How to Serve This Dish: Serve it straight from the skillet with a spoon and a little extra sauce spooned over the top. Garlic bread is the obvious move, but a simple polenta or a green salad works too. The best plate here is deep, not wide; you want the sauce to pool against the potatoes.
Pro Tips for This Recipe
- Start the potatoes before the peppers. If you add everything together, the peppers go soft before the potatoes catch up.
- Use small potatoes, not russets. Russets break down too fast and turn the sauce muddy.
- If your sausage gives off a lot of fat, spoon off some of it before adding the marinara.
- A quick splash of water under the lid is enough to steam the potatoes. You do not need broth here.
Variations on This Dish
- Spicy Arrabbiata Skillet: Use hot Italian sausage and add red pepper flakes with the marinara.
- Pizza Night Version: Stir in a handful of sliced pepperoni during the last 2 minutes so the skillet leans more savory and smoky.
- Herby White Sauce Swap: Replace the marinara with a jar of Alfredo-style sauce and finish with parsley for a softer, creamier pan.
Common Mistakes to Avoid with This Dish
- Skipping the covered potato stage: If you only brown the potatoes, they stay hard in the middle. The lid is doing real work here.
- Using watery marinara: Thin sauce slides off the potatoes instead of coating them. Pick a thicker jar or simmer a minute longer.
- Overcooking the peppers: They should stay soft, not collapse into strings. Add them after the potatoes have had their head start.
3. Creamy Tomato Tortellini Skillet
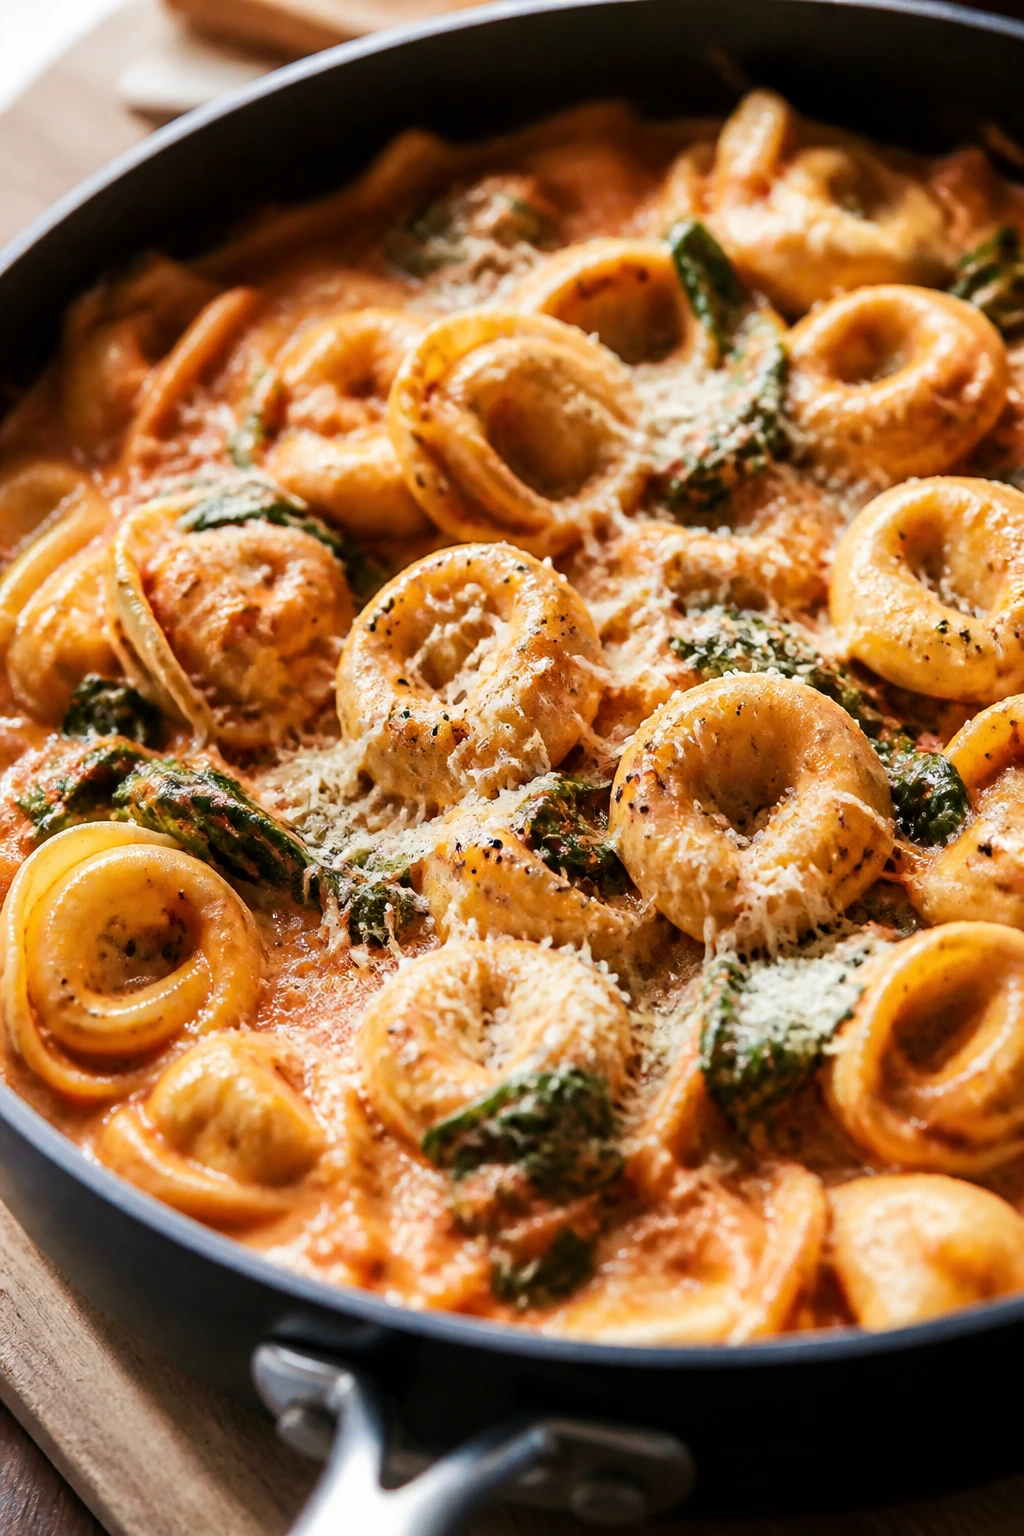
Creamy tomato tortellini sounds like a shortcut because it is, but it’s a smart one. The sauce comes together in the same pan that cooks the pasta, so the tortellini ends up wrapped in tomato cream instead of sitting beside it like a separate problem. It tastes like a dish with more moving parts than it actually has.
The stuffed pasta brings its own richness, which means you don’t need a long list of extras to make the skillet feel complete. Spinach softens into the sauce, parmesan gives it a salty edge, and the crushed tomatoes keep the whole thing from drifting into bland, beige comfort food.
Why It Works: Refrigerated tortellini cooks fast and already has flavor inside the pasta, so it doesn’t need much help. Crushed tomatoes give the sauce body, heavy cream smooths out the acid, and parmesan adds salt and depth at the end. A short simmer is enough here; if you cook it too long, the tortellini goes soft and the sauce loses its clean texture.
Key Ingredients: Pasta and Sauce
- 20 oz refrigerated cheese tortellini — fresh tortellini holds up best in a skillet.
- 1 (28 oz) can crushed tomatoes — gives the sauce texture and body.
- 1 cup heavy cream — softens the tomato sharpness.
Finish
- 4 oz baby spinach — it melts into the sauce in seconds.
- ¾ cup grated parmesan — adds salt and keeps the sauce from tasting flat.
Pantry Staples
- 1 tbsp olive oil — to start the sauce.
- 2 cloves garlic, minced or 1 tsp garlic powder, plus red pepper flakes, salt, and pepper — a small amount is enough because the tortellini and parmesan already bring flavor.
Quick Steps:
- Heat the olive oil in a large skillet over medium heat. Add the garlic and cook for 30 seconds, just until it smells sweet and not harsh.
- Pour in the crushed tomatoes, season with salt, pepper, and red pepper flakes if you want heat, and simmer for 5 minutes.
- Stir in the heavy cream and let the sauce turn a lighter, pinker color.
- Add the tortellini and ½ cup water. Cover the skillet and cook for 5 to 6 minutes over medium-low heat, stirring once or twice, until the pasta is tender and the sauce is thick enough to cling.
- Fold in the spinach and parmesan. Stir for 1 minute, until the spinach collapses and the cheese melts in.
- Taste the sauce and adjust the salt before serving.
Equipment for This Recipe
- Large skillet with a lid — the tortellini needs covered heat to cook evenly.
- Wooden spoon — for stirring the pasta without tearing it.
- Measuring cup — to add the water if the sauce gets too thick.
- Box grater or microplane — for parmesan if you’re not using pre-grated cheese.
How to Serve This Dish: Pile it into shallow bowls so the sauce sits around the pasta instead of disappearing under it. A green salad with a sharp vinaigrette is the cleanest companion. If you want bread, choose something plain and chewy that can mop up the sauce without stealing the show.
Pro Tips for This Recipe
- Keep the simmer gentle. Hard boiling makes tortellini split and the cream separate.
- Add the parmesan off the heat or at the very end so it melts smoothly.
- If the sauce tightens too much, stir in a splash of hot water before serving.
- Use a thick crushed tomato, not watery tomato sauce. The texture matters here.
Variations on This Dish
- Spicy Vodka-Style Shortcut: Add an extra pinch of red pepper flakes and a splash of pasta water for a sharper, warmer sauce.
- Pesto Swirl Finish: Stir in 2 tablespoons pesto at the end for a herbier, greener edge.
- Meaty Skillet Add-On: Brown ½ pound Italian sausage first, remove it, and return it after the tortellini cooks.
Common Mistakes to Avoid with This Dish
- Boiling the cream hard: That can make the sauce grainy. Keep the heat moderate.
- Overcooking the tortellini: It goes from tender to bloated quickly. Check it a minute early.
- Adding parmesan too early: Cheese can clump if it hits a sauce that’s too hot and too thin.
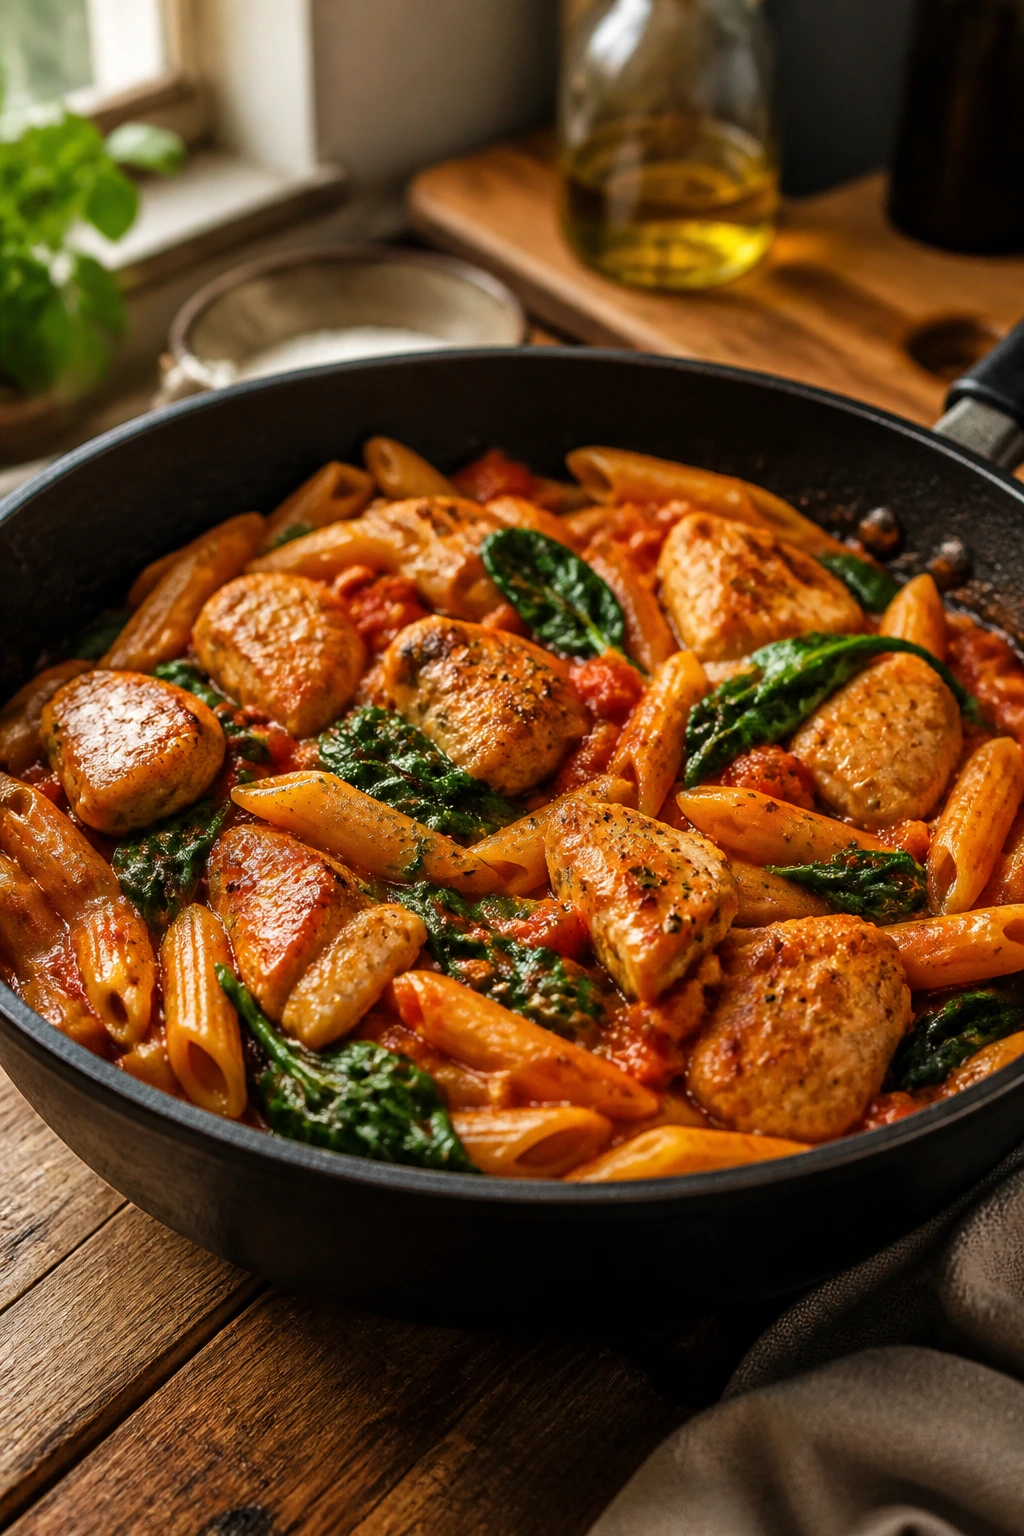
4. BBQ Chicken Corn and Black Bean Skillet
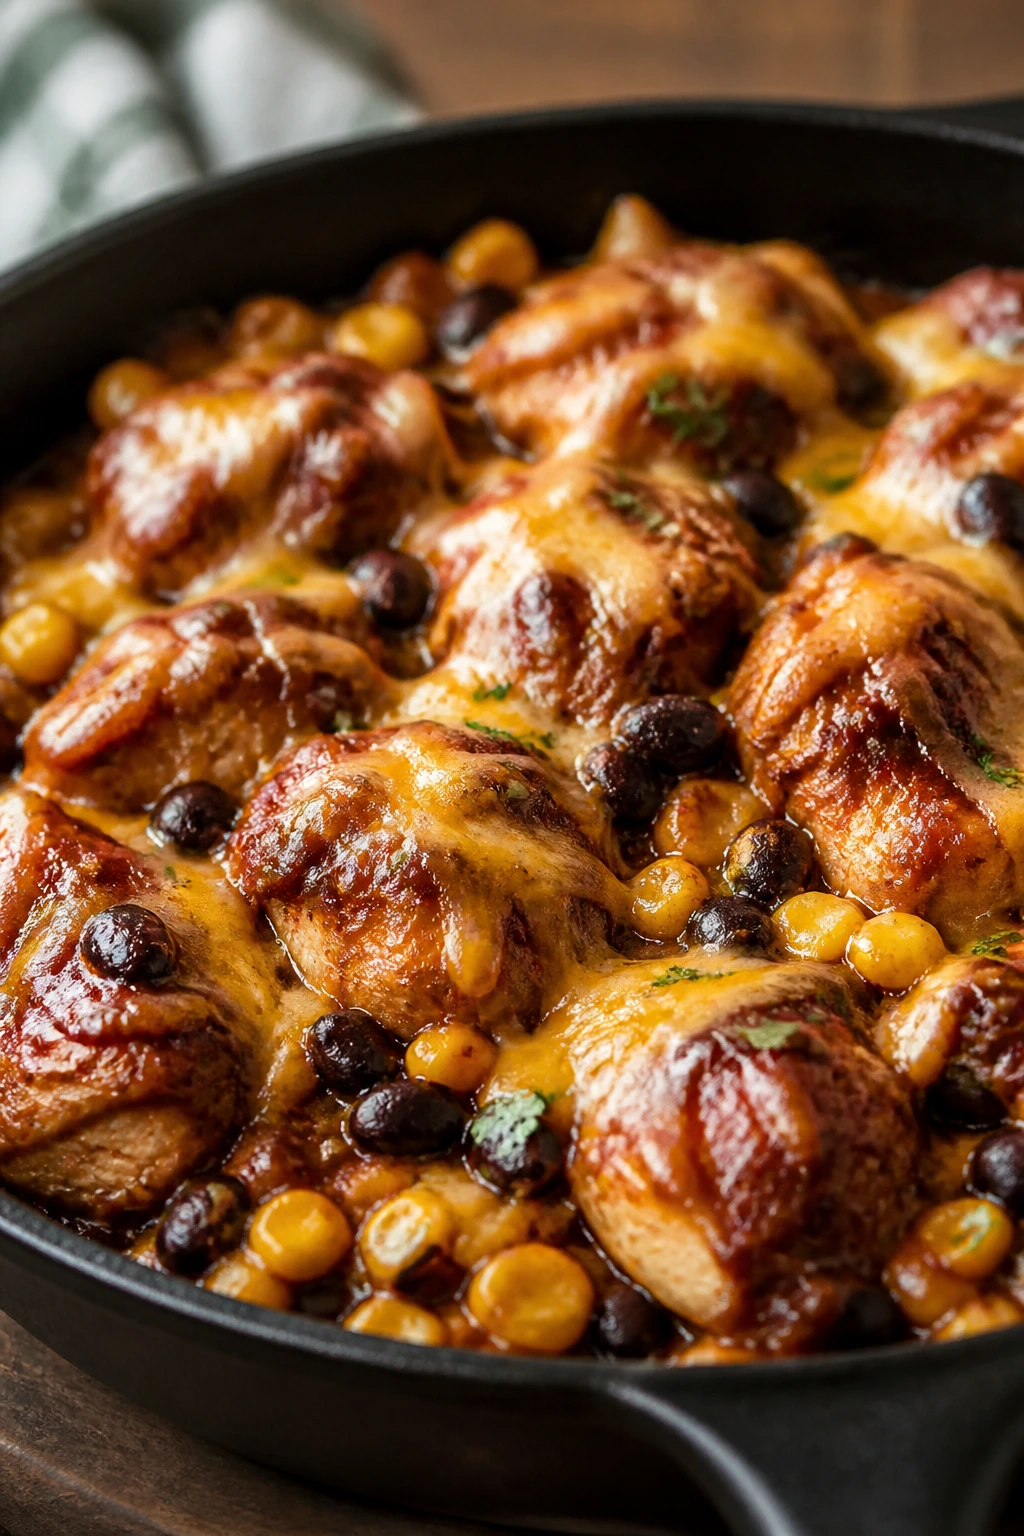
BBQ sauce earns its keep when it gets to glaze chicken in a hot pan instead of sitting on the side in a bottle. The corn brings sweetness, the black beans add body, and the cheddar melts into the top like a sticky blanket. This is the skillet equivalent of a backyard dinner with no backyard.
The beauty of this one is that it eats like a full meal without asking for much from you. Chicken gives the pan structure, and the beans and corn make enough texture that you don’t need rice unless you want it. That’s a useful kind of laziness.
Why It Works: BBQ sauce needs heat to taste deeper and less sugary, and searing the chicken first gives it that edge. Corn and black beans thicken the sauce while adding little bursts of sweetness and chew. Cheddar at the end seals the pan together, which is why this tastes more like a finished casserole than a quick stovetop toss.
Key Ingredients: Chicken and Sauce
- 1½ lbs boneless, skinless chicken thighs, cut into bite-size pieces — thighs stay juicy under a sticky sauce.
- 1 cup BBQ sauce — choose one with a smoky flavor, not a candy-sweet one.
Vegetable and Bean Base
- 2 cups frozen corn — no thawing needed.
- 1 (15 oz) can black beans, drained and rinsed — they bulk up the skillet and soak up sauce.
Finish
- 1½ cups shredded cheddar — melts over the top and pulls the dish together.
Pantry Staples
- 1 tbsp oil, 1 tsp smoked paprika, ½ tsp kosher salt, ½ tsp black pepper — enough to season the chicken before the sauce arrives.
Quick Steps:
- Heat the oil in a large skillet over medium-high heat. Season the chicken with the salt, pepper, and smoked paprika, then add it to the pan in a single layer.
- Cook for 5 to 6 minutes, stirring once or twice, until the chicken is browned on the outside and mostly cooked through.
- Add the corn and black beans. Stir for 1 minute so they warm through and catch some of the chicken drippings.
- Pour in the BBQ sauce and stir well. Reduce the heat to medium-low and simmer for 4 to 5 minutes, until the sauce looks glossy and the chicken is coated.
- Sprinkle the cheddar over the top, cover the skillet, and cook for 2 minutes, just until the cheese melts.
- Turn off the heat and let the pan rest for a minute before serving.
Equipment for This Recipe
- 12-inch skillet — you need room for the chicken to brown, not steam.
- Lid — to melt the cheese cleanly.
- Wooden spoon — for stirring the beans and sauce without smashing the corn.
- Tongs — handy if you prefer turning the chicken pieces individually.
How to Serve This Dish: Spoon it over rice if you want a more filling plate, or keep it in a bowl with tortilla chips on the side for scooping. A little chopped scallion or pickled jalapeño on top is a nice move if you have it. The pan itself is already doing a lot, so the plate can stay simple.
Pro Tips for This Recipe
- Use a BBQ sauce you like on its own. Once it reduces, any weird aftertaste gets louder.
- Don’t dump the cheese in too early. It melts best after the sauce has thickened a little.
- If the skillet looks dry before the sauce goes in, add a splash of water to loosen the browned bits.
- Frozen corn is fine here and often better than canned because it stays sweeter.
Variations on This Dish
- Chipotle Smoke Version: Stir in a spoonful of chipotle in adobo with the BBQ sauce for a deeper, hotter finish.
- Pulled-Chicken Shortcut: Use shredded cooked chicken and simmer it in the sauce for 3 minutes instead of browning raw pieces.
- Street-Corn Finish: Top each serving with a squeeze of lime and a spoonful of plain yogurt if you want a brighter, creamier edge.
Common Mistakes to Avoid with This Dish
- Using too much sauce too early: BBQ sauce can scorch if it sits on a dry, scorching pan for too long. Add it after the chicken is browned.
- Skipping the bean rinse: The can liquid makes the sauce cloudy and overly salty.
- Overcrowding the skillet: If the chicken pieces pile up, they steam and the sauce never gets a proper browned base.
5. Beef and Broccoli Rice Skillet
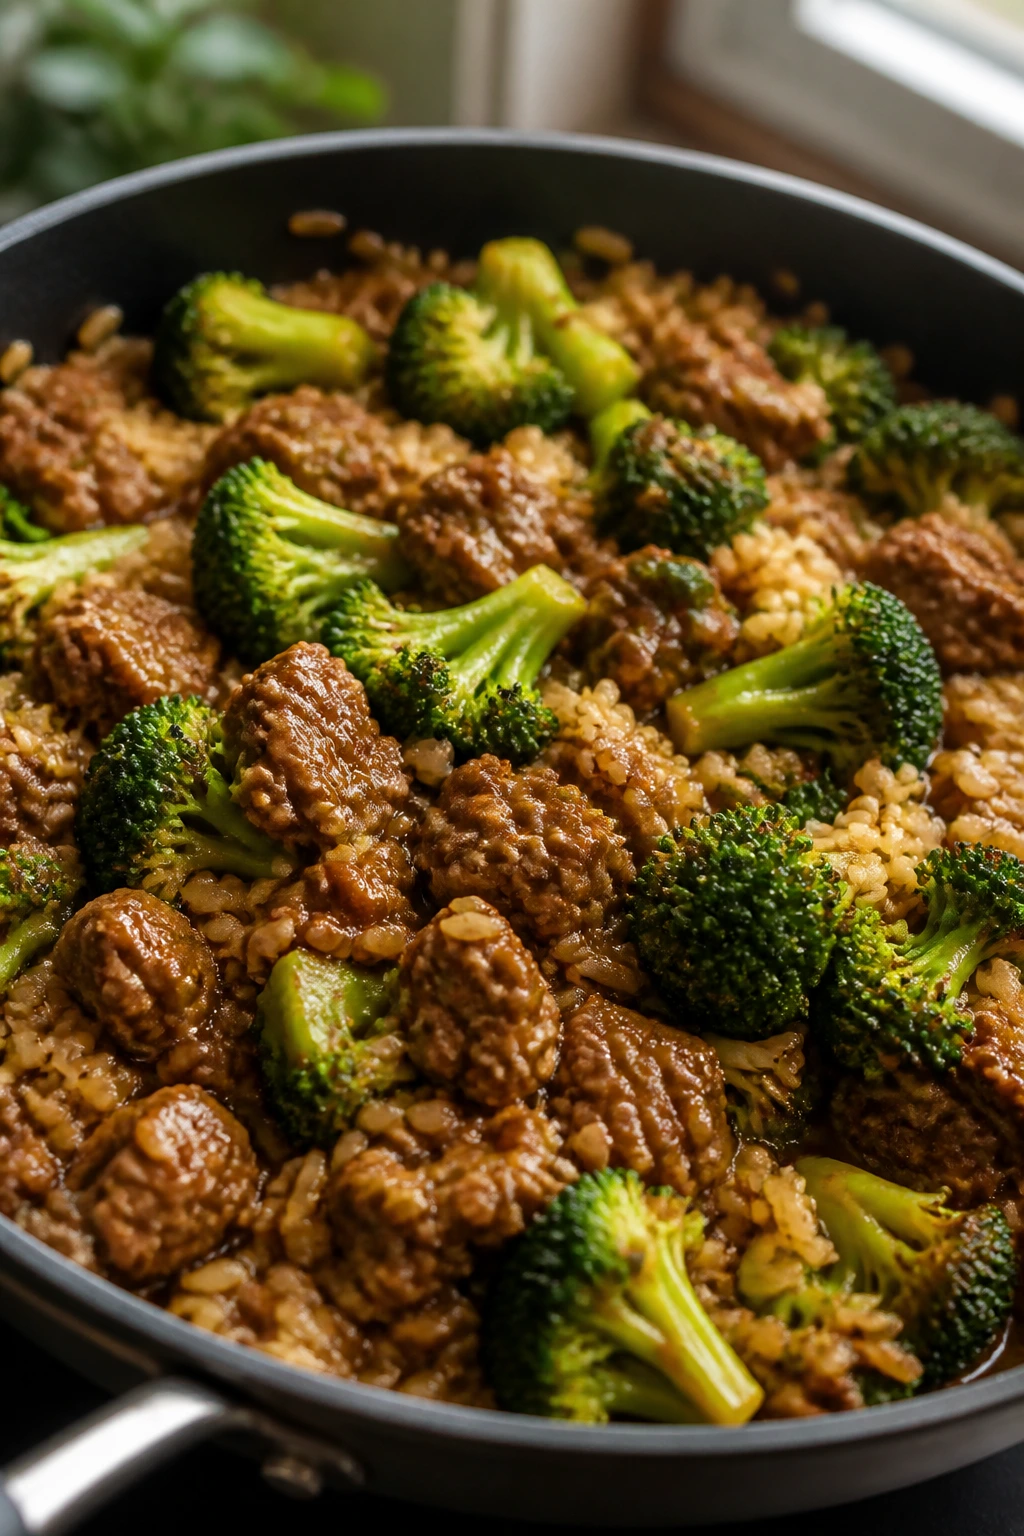
This one smells like a takeout order that decided to become more practical. The beef browns first, the broccoli steams in the same pan, and the rice soaks up the soy-broth mixture until it tastes like it was cooked that way on purpose. That’s the move: less fuss, same payoff.
If you use cold cooked rice, the whole thing comes together fast and stays separate enough to feel like a proper skillet dinner. The broccoli needs a little steam time, not a long simmer, and that’s why the lid matters. Keep the heat honest and the rice behaves.
Why It Works: Ground beef gives you quick browning and enough fat to season the pan. Broccoli softens just enough under a lid, which keeps it bright instead of mushy. Rice absorbs the broth and soy sauce, so the skillet ends up glazed rather than wet, and that’s the texture you want.
Key Ingredients: Beef and Rice
- 1 lb ground beef — choose one with enough fat to brown, not a super-lean blend.
- 3 cups cooked jasmine rice, cold or room temperature — chilled rice holds its shape better in the pan.
Vegetables and Sauce
- 4 cups broccoli florets, cut small — smaller pieces steam faster and more evenly.
- ⅓ cup low-sodium soy sauce — enough to season without making the pan overly salty.
- 1 cup beef broth — gives the rice something to absorb.
Pantry Staples
- 1 tbsp sesame oil or neutral oil, 2 garlic cloves minced, 1 tsp grated ginger, black pepper — the quick flavor base.
Quick Steps:
- Heat the oil in a large skillet over medium-high heat. Add the beef and cook for 5 to 6 minutes, breaking it up with a spoon until it’s browned and no longer pink.
- Stir in the garlic and ginger and cook for 30 seconds, just until fragrant.
- Add the broccoli and beef broth. Cover the skillet and cook for 4 to 5 minutes over medium heat, until the broccoli is bright green and slightly tender.
- Stir in the cooked rice and soy sauce. Break up any clumps and cook uncovered for 3 to 4 minutes, stirring often, until the rice is hot and the broth has mostly disappeared.
- Taste and add black pepper or a little more soy if needed. Let the skillet sit for 1 minute before serving.
Equipment for This Recipe
- Large skillet with a lid — the broccoli needs covered heat.
- Wooden spoon — good for breaking up the beef and rice.
- Measuring cups — the broth amount keeps the rice from drying out.
- Microplane — useful for the ginger if you want it finely grated.
How to Serve This Dish: Serve it in bowls with a few scallions if you’ve got them, but it does not need much else. I like this with a crisp cucumber salad on the side because the cold crunch cuts the soy-rich rice. A fried egg on top works too, though it pushes the dinner into brunch territory in the best way.
Pro Tips for This Recipe
- Use cold rice if you can. Warm rice tends to go soft fast and clump.
- Chop the broccoli small enough that it can steam in under 5 minutes.
- If the pan looks dry before the rice goes in, add 2 tablespoons of water rather than more broth.
- Don’t salt aggressively at the start; soy sauce is doing a lot of the work.
Variations on This Dish
- Teriyaki-leaning Version: Swap half the soy sauce for teriyaki sauce if you want a sweeter glaze.
- Chicken Shortcut: Ground chicken works if you prefer a milder pan, though it needs a little more oil.
- Sesame Finish: A small drizzle of sesame oil at the end gives the skillet a stronger nutty note.
Common Mistakes to Avoid with This Dish
- Using broccoli florets that are too big: They stay hard in the middle while everything else finishes.
- Adding the rice before the broccoli softens: The rice cools the pan and slows everything down.
- Overdoing the soy sauce: The dish can turn harsh and salty once it reduces.
6. Pesto Shrimp and Gnocchi Skillet
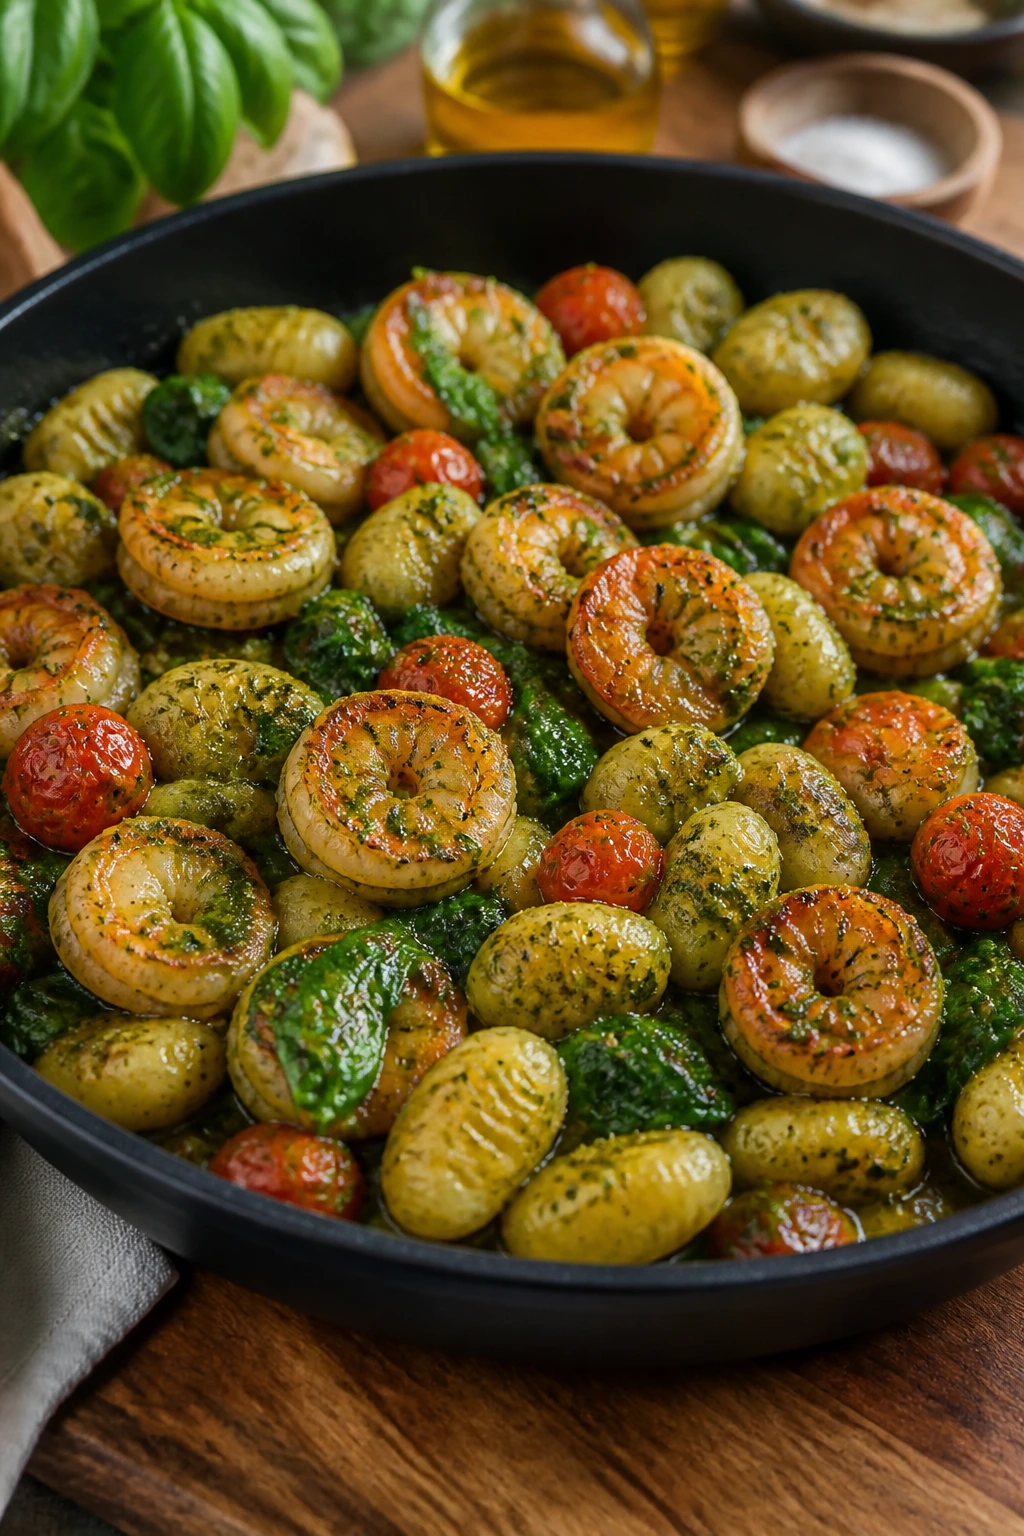
Shrimp and gnocchi share the same happy problem: both are done before you want them to be. That means the skillet has to move fast, but not frantic-fast. Crisp the gnocchi, sear the shrimp, and let the pesto coat everything at the end so the pan smells like basil and buttered starch.
The tomatoes burst just enough to loosen the pesto, and the spinach disappears almost instantly. You get a dish that feels light on effort and rich on the fork, which is a nice trade on a quiet night.
Why It Works: Shelf-stable or refrigerated gnocchi browns well in a skillet, so it gets a little crust before the sauce goes on. Shrimp cooks in minutes, which makes this one of the fastest dinners in the whole collection. Pesto carries the herb flavor, the tomatoes bring brightness, and the spinach gives the sauce enough body to cling.
Key Ingredients: Main Ingredients
- 1 lb raw shrimp, peeled and deveined — medium or large shrimp both work.
- 1 (16 oz) package gnocchi — shelf-stable or refrigerated.
- ½ cup basil pesto — use one that tastes fresh, not oily.
- 1 pint cherry tomatoes — they blister and burst in the pan.
- 4 oz baby spinach — it softens fast and balances the richness.
Pantry Staples
- 1 tbsp olive oil, salt, and black pepper — enough to season the shrimp and crisp the gnocchi.
Quick Steps:
- Pat the shrimp dry and season them lightly with salt and pepper.
- Heat the olive oil in a large skillet over medium-high heat. Add the shrimp and cook for 1 to 2 minutes per side, just until pink and curled. Remove them to a plate.
- Add the gnocchi to the same skillet and cook for 4 to 5 minutes, stirring occasionally, until the edges are golden and a little crisp.
- Add the cherry tomatoes and cook for 2 minutes, until they start to blister and split.
- Lower the heat to medium, stir in the pesto and spinach, and cook for 1 minute until the spinach collapses into the sauce.
- Return the shrimp to the pan and toss everything together for 30 seconds. Serve right away.
Equipment for This Recipe
- Large skillet — wide enough to crisp the gnocchi in one layer.
- Tongs — helpful for flipping shrimp quickly.
- Wooden spoon or spatula — for moving the gnocchi around without tearing it.
- Paper towels — dry shrimp brown better.
How to Serve This Dish: This is best in shallow bowls with a little more pesto drizzled over the top. A squeeze of lemon is a very good idea if you like a cleaner finish. Serve it with nothing more than a green salad or a piece of toasted bread; the skillet already has enough going on.
Pro Tips for This Recipe
- Dry the shrimp before it hits the pan. Wet shrimp steam instead of sear.
- Don’t over-stir the gnocchi at first; let it sit long enough to brown on one side.
- Add the pesto on lower heat so it stays green and fragrant.
- If the sauce looks tight, loosen it with 1 to 2 tablespoons of hot water.
Variations on This Dish
- Creamy Pesto Gnocchi: Stir in 2 tablespoons cream cheese or mascarpone with the pesto for a softer sauce.
- Broccolini Swap: Replace the spinach with thin broccolini spears and add them with the tomatoes.
- Dairy-Free Basil Bowl: Use a dairy-free pesto and skip any cheese garnish; the shrimp still carries the dish.
Common Mistakes to Avoid with This Dish
- Overcooking the shrimp: It turns rubbery fast. Pull it as soon as it’s pink.
- Crowding the gnocchi: If it overlaps too much, it steams and never gets crisp.
- Adding pesto over high heat: Basil can turn dull and bitter. Keep the heat moderate when it goes in.
7. Turkey Taco Skillet with Rice and Cheese

If taco night needs to happen on a couch-level effort scale, this is the move. The turkey gets seasoned in the pan, the rice soaks up salsa instead of plain water, and the beans and cheese make it feel like more than a shortcut. It’s the skillet version of a dinner that knows exactly what it’s doing.
Instant rice keeps the whole thing moving, which is half the point here. The sauce is thick enough to spoon, the cheese melts over the top, and the leftovers hold together better than most taco fillings do.
Why It Works: Ground turkey is mild enough to take on taco seasoning but sturdy enough to brown well in a skillet. Instant rice absorbs salsa quickly, so the pan comes together fast without requiring separate boiling. Black beans bulk up the mixture and keep it from tasting too lean, and cheddar melts into the top for a finish that feels complete.
Key Ingredients: Turkey and Grain Base
- 1 lb ground turkey — a 93% lean blend stays moist without getting greasy.
- 1 cup instant rice — cooks quickly and absorbs the sauce.
- 1½ cups salsa — use one with enough body to act like a cooking liquid.
Beans and Cheese
- 1 (15 oz) can black beans, drained and rinsed — they add chew and stretch the meal.
- 1 cup shredded cheddar — melts into the top and makes the skillet feel finished.
Pantry Staples
- 1 tbsp oil, 2 tsp taco seasoning, 1½ cups water or low-sodium broth — enough liquid to cook the rice and keep the pan from drying out.
Quick Steps:
- Heat the oil in a large skillet over medium-high heat. Add the turkey and cook for 5 to 6 minutes, breaking it apart until it’s no longer pink.
- Stir in the taco seasoning and cook for 30 seconds so it blooms in the heat.
- Add the instant rice, salsa, and water or broth. Stir well, bring the skillet to a simmer, then cover and cook over low heat for 5 minutes.
- Stir in the black beans and cook uncovered for 2 minutes, until everything is hot and the rice has absorbed the liquid.
- Sprinkle the cheddar over the top, cover the pan, and let it melt for 2 minutes.
- Rest the skillet off the heat for 1 minute before serving.
Equipment for This Recipe
- Large skillet with a lid — the rice needs covered heat.
- Wooden spoon — for breaking up the turkey and stirring the rice.
- Measuring cups — the liquid ratio matters.
- Cheese grater — if you want to shred cheddar yourself.
How to Serve This Dish: Spoon it into bowls and stop there, or tuck it into warm tortillas if you want dinner to become hand-held. A handful of shredded lettuce, diced tomato, or a dollop of sour cream on the side makes it feel more taco-like without complicating the pan. Chips work too, if you want a little crunch.
Pro Tips for This Recipe
- Use instant rice, not long-grain uncooked rice. The timing is completely different.
- Don’t skip the covered rest. That’s what finishes the rice without drying it out.
- If your salsa is very thick, use the full amount of water or broth.
- Taste before adding extra salt; taco seasoning and salsa can already be salty enough.
Variations on This Dish
- Enchilada-Style Skillet: Swap the salsa for enchilada sauce and use Monterey Jack instead of cheddar.
- Mild Kid Version: Use mild salsa and halve the taco seasoning if you want less heat and less spice bite.
- Cauliflower Rice Swap: Replace the instant rice with cauliflower rice and reduce the liquid to ½ cup for a lighter skillet.
Common Mistakes to Avoid with This Dish
- Using regular rice without changing the liquid and time: It won’t finish in the same window. Instant rice is the point here.
- Skipping the bean rinse: Extra can liquid makes the skillet muddy and too salty.
- Adding cheese while the pan is still aggressively boiling: It can turn stringy instead of melting smoothly.
8. Mushroom Spinach Feta White Bean Skillet

Earthy mushrooms, creamy beans, salty feta. That’s the whole mood, and it works because each ingredient pulls a different direction without fighting the others. This is the vegetarian skillet in the set that feels the least like a compromise.
The mushrooms need a hot pan so they can give off moisture and brown instead of going soft and gray. Once that part is handled, the beans and feta do the rest. A squeeze of lemon at the end makes the whole thing wake up.
Why It Works: Mushrooms bring umami and take on real color when they’re not crowded. Cannellini beans add a creamy, starchy base that makes the skillet filling without meat. Feta gives the whole pan a salty edge, while spinach and lemon keep it from tasting heavy or flat.
Key Ingredients: Vegetable Base
- 1 lb cremini mushrooms, sliced — they brown well and hold texture.
- 1 (15 oz) can cannellini beans, drained and rinsed — creamy without needing much help.
- 5 oz baby spinach — it shrinks fast and softens the pan.
- ½ cup sun-dried tomatoes, chopped — they bring a deep, tangy bite.
Finish
- 4 oz feta, crumbled — salty and sharp.
- 2 tbsp lemon juice — brightens the beans and mushrooms.
Pantry Staples
- 2 tbsp olive oil, 2 cloves garlic minced, salt, and black pepper — enough to build the base without burying the vegetables.
Quick Steps:
- Heat the olive oil in a large skillet over medium-high heat. Add the mushrooms in a single layer and cook for 6 to 8 minutes, stirring only occasionally, until they release their moisture and start turning brown.
- Stir in the garlic and chopped sun-dried tomatoes. Cook for 30 seconds.
- Add the cannellini beans, salt, and pepper. Stir and cook for 2 minutes, until the beans are warm and starting to pick up the mushroom flavor.
- Add the spinach and cook for 1 minute, just until it wilts.
- Turn off the heat, fold in the feta and lemon juice, and let the residual heat soften the cheese slightly.
- Taste and add more pepper if needed before serving.
Equipment for This Recipe
- Large skillet — mushrooms need room to brown.
- Wooden spoon — useful for turning the mushrooms without smashing them.
- Cutting board and knife — for the mushrooms and tomatoes.
- Citrus juicer or hand squeeze — the lemon juice matters at the end.
How to Serve This Dish: I like this over toasted bread, warm pita, or a scoop of rice if you want it more filling. It also works beside roasted potatoes, which is a little more carb-on-carb than people admit they want. A crisp cucumber salad on the side keeps the plate from feeling too soft.
Pro Tips for This Recipe
- Don’t crowd the mushrooms. If they pile up, they steam and go limp.
- Rinse the beans well so the skillet stays clean and the sauce doesn’t taste tinny.
- Add the feta off the heat so it softens instead of dissolving completely.
- A little lemon at the end does more here than another pinch of salt.
Variations on This Dish
- Greek-ish Version: Add dried oregano and a handful of chopped parsley if you want a stronger Mediterranean line.
- Creamier Bean Smash: Mash about a quarter of the beans with the spoon before adding the spinach for a thicker skillet.
- No-Feta Finish: Skip the feta and finish with a spoon of plain yogurt or nothing at all; the mushrooms still carry plenty of flavor.
Common Mistakes to Avoid with This Dish
- Salting too early and too hard: Feta is already salty, so taste at the end.
- Stirring mushrooms nonstop: They need a few quiet minutes to brown.
- Adding spinach before the beans are hot: The greens overcook while you wait for the center of the pan to catch up.
9. Teriyaki Salmon, Snap Pea, and Rice Skillet
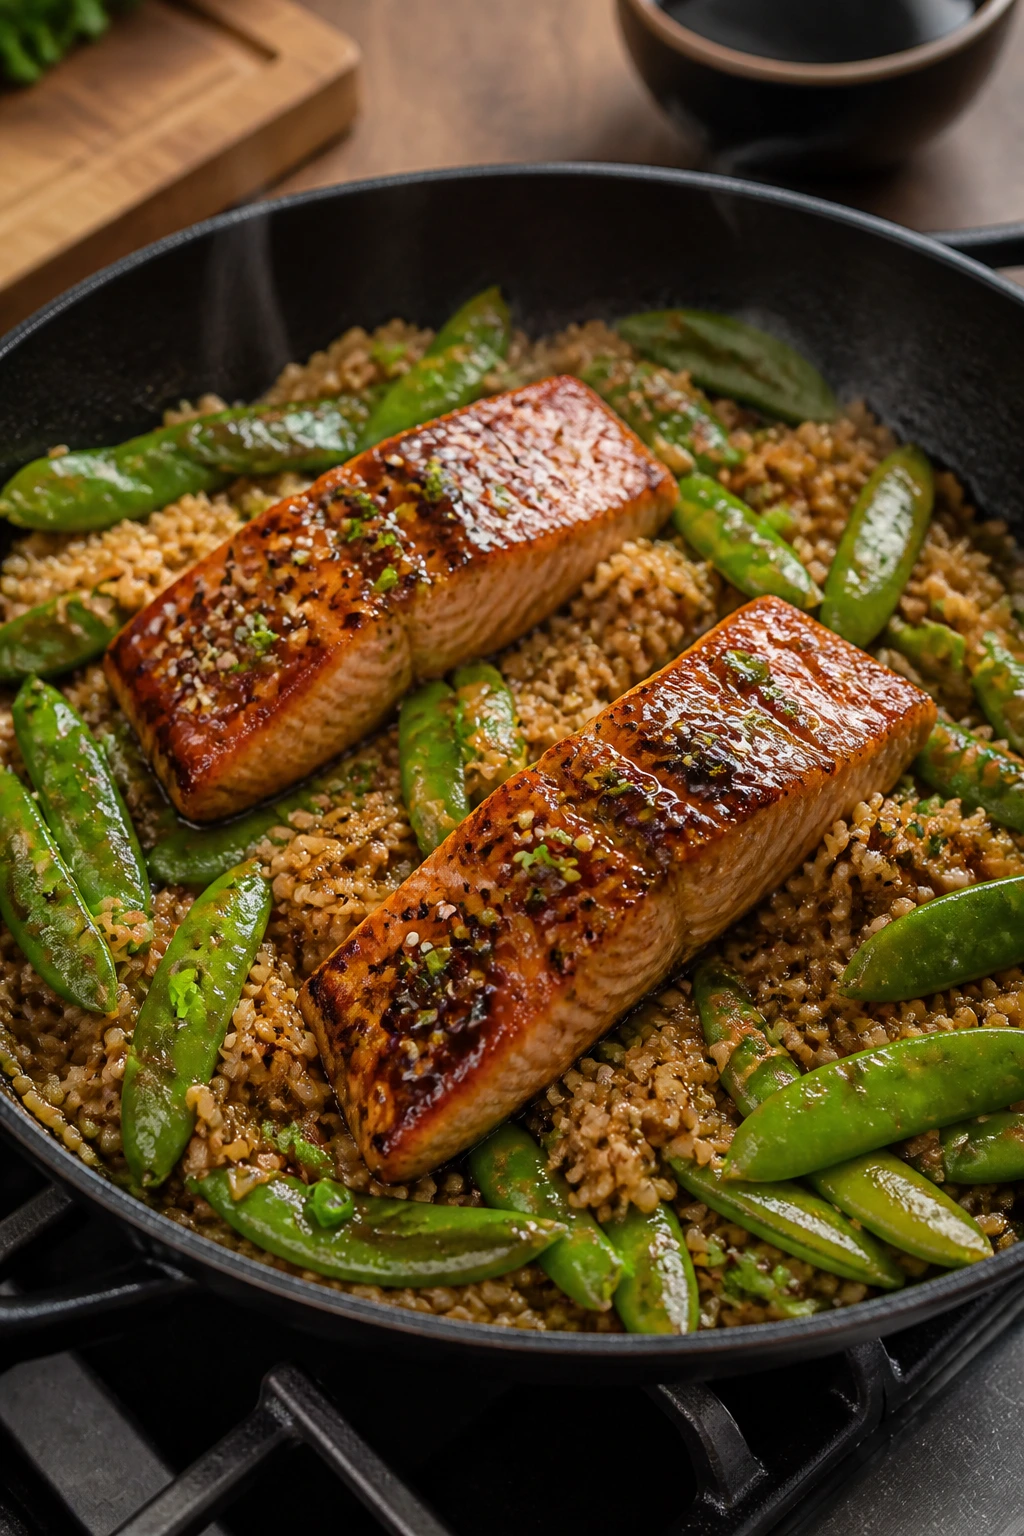
Some nights need a pan that feels composed, not busy. Salmon sears fast, snap peas stay bright, and teriyaki sauce ties the rice together without requiring a separate glaze or marinade. It’s a skillet dinner that looks organized even when the rest of the evening isn’t.
The rice matters here because it catches the sauce instead of letting it run to the bottom of the pan. Keep the salmon skin-side down if it has skin, and let the peas stay crisp. Nobody needs mushy salmon or limp vegetables.
Why It Works: Salmon needs only a few minutes per side, so it fits a fast skillet dinner better than most proteins. Snap peas cook quickly and stay crunchy, which gives the pan some lift. Teriyaki sauce coats the rice and salmon at the end, so the dish tastes glazed instead of wet.
Key Ingredients: Protein and Grain
- 4 salmon fillets, about 6 oz each — skin-on or skinless both work.
- 3 cups cooked jasmine rice — cold rice is easiest to work with.
Vegetables and Sauce
- 8 oz snap peas — trim the ends if they’re stringy.
- ½ cup teriyaki sauce — use one with a balanced sweet-salty flavor.
- 3 scallions, sliced — they brighten the finished pan.
Pantry Staples
- 1 tbsp oil, salt, black pepper, and sesame seeds — enough to sear the fish and finish the dish.
Quick Steps:
- Pat the salmon dry and season it lightly with salt and pepper.
- Heat the oil in a large skillet over medium-high heat. Add the salmon and cook for 3 to 4 minutes on the first side, then flip and cook for 1 to 2 minutes more, until the fish just flakes at the edges. Remove to a plate.
- Add the snap peas to the same skillet and cook for 2 minutes, stirring once, until they turn bright green.
- Add the rice and teriyaki sauce. Stir and cook for 2 to 3 minutes, until the rice is hot and the sauce coats the grains.
- Return the salmon to the skillet and warm it for 1 minute.
- Top with scallions and sesame seeds before serving.
Equipment for This Recipe
- Large skillet — wide enough to sear the salmon without crowding.
- Fish spatula or thin spatula — helpful for flipping salmon cleanly.
- Tongs — for the snap peas and rice.
- Small spoon — for drizzling teriyaki evenly.
How to Serve This Dish: Serve the salmon over the rice mixture so the sauce runs into the grains. A wedge of lime is a good add-on if your teriyaki runs sweet. If you want a side, keep it crisp and cold: sliced cucumbers or a cabbage slaw works well.
Pro Tips for This Recipe
- Dry the salmon well. Moisture on the surface slows browning.
- Don’t overcook the fish before the rice is ready; salmon only needs a short sear.
- Use cooked rice that’s a little chilled so it doesn’t collapse in the pan.
- If the teriyaki sauce is very sweet, add it after the rice is hot so it doesn’t scorch.
Variations on This Dish
- Spicy Gochujang Glaze: Stir a spoonful of gochujang into the teriyaki sauce for heat and depth.
- Cauliflower Rice Bowl: Use cauliflower rice instead of jasmine rice and cook it for only 2 minutes before adding the salmon back.
- Citrus Finish: A squeeze of lime at the table sharpens the sweet glaze nicely.
Common Mistakes to Avoid with This Dish
- Moving the salmon too soon: Let it form a crust before flipping or it can stick.
- Using wet rice: It clumps and steals the texture from the sauce.
- Letting the teriyaki cook too long before the fish goes back in: Sugary sauces can burn fast.
10. Cheesy Ground Beef and Cauliflower Skillet
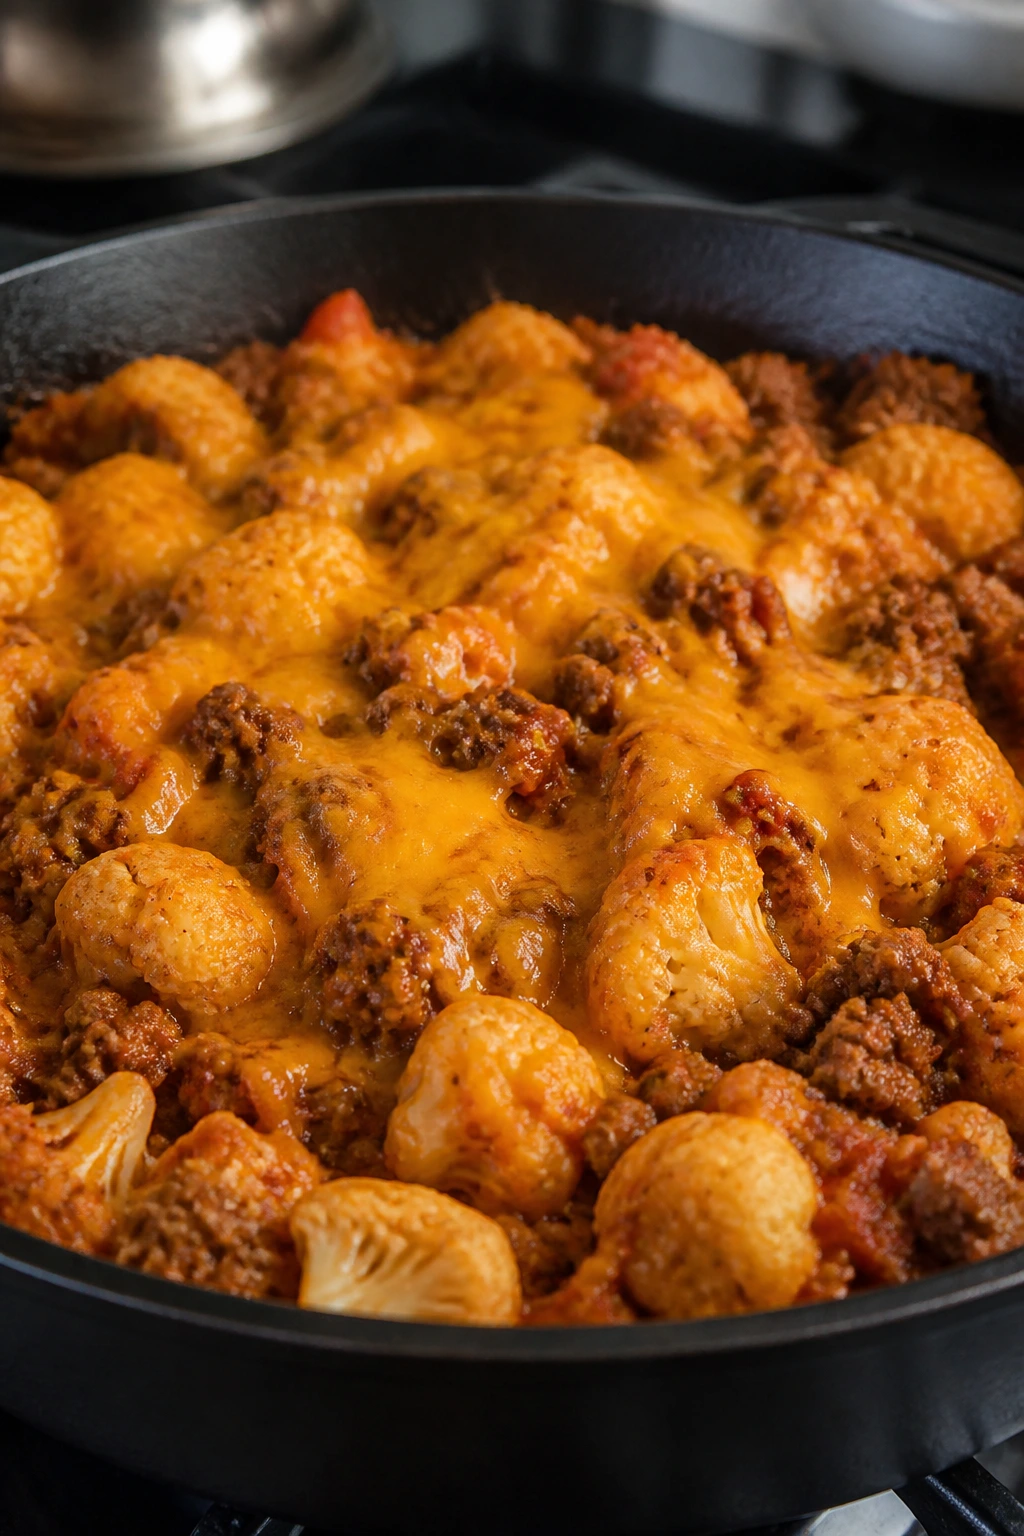
This one tastes like a skillet casserole without asking for a casserole dish. Cauliflower acts like a sturdy base, tomato paste gives the beef a deeper edge, and sour cream keeps the whole thing from reading as too lean or too austere. Cheddar on top is not optional in my house.
The cauliflower needs to get tender without falling apart, which is why a little steam time helps. Once the tomato paste and sour cream go in, the pan turns creamy and savory in a way that makes the low-carb label feel beside the point. It’s just dinner.
Why It Works: Ground beef browns quickly and leaves flavorful fat in the skillet. Cauliflower takes on seasoning well, especially when it gets a short covered cook. Tomato paste concentrates the beef flavor, and sour cream smooths the finish so the dish feels rich instead of skimpy.
Key Ingredients: Beef and Vegetables
- 1 lb ground beef — 85/15 or 90/10 both work.
- 1 large head cauliflower, cut into small florets, about 6 cups — smaller pieces cook faster.
- 1 small onion, diced — optional in the sense that it’s a pantry-style add-on, but worth using if you have it.
Sauce and Finish
- 2 tbsp tomato paste — gives the beef a deeper, darker flavor.
- ½ cup sour cream — softens the tomato and beef.
- 1½ cups shredded cheddar — melts over the top.
Pantry Staples
- 1 tbsp oil, ½ tsp smoked paprika, salt, and pepper — enough to season the pan and keep it from tasting plain.
Quick Steps:
- Heat the oil in a large skillet over medium-high heat. Add the beef and onion, if using, and cook for 5 to 6 minutes until the beef is browned and the onion is soft.
- Stir in the cauliflower florets, smoked paprika, salt, and pepper. Cook for 2 minutes so the cauliflower picks up some of the beef fat.
- Add ¼ cup water, cover the skillet, and cook over medium heat for 8 to 10 minutes, stirring once halfway through, until the cauliflower is tender.
- Stir in the tomato paste and sour cream until the pan turns creamy and evenly coated.
- Sprinkle the cheddar over the top, cover again, and cook for 1 to 2 minutes until the cheese melts.
- Turn off the heat and let it rest for a minute before serving.
Equipment for This Recipe
- Large skillet with a lid — the cauliflower needs that short steam.
- Wooden spoon — useful for breaking up the beef.
- Knife and cutting board — for small cauliflower florets.
- Measuring spoon — tomato paste is doing a lot here.
How to Serve This Dish: This is good straight from the pan, but a spoonful over rice or buttered noodles turns it into a bigger meal. A sharp pickle or a simple green salad gives the plate some edge. If you want to keep it low-carb, just serve it in a bowl and stop fussing.
Pro Tips for This Recipe
- Cut the cauliflower small. Big florets stay crunchy in the wrong way.
- Don’t add the sour cream while the skillet is boiling hard; it can break.
- Tomato paste tastes better after it cooks for a minute in the hot pan.
- If the skillet dries out before the cauliflower is tender, add another splash of water and cover again.
Variations on This Dish
- Taco-Style Skillet: Stir in taco seasoning instead of smoked paprika and top with salsa.
- Mushroom Stretch: Add a cup of sliced mushrooms with the onion if you want more volume.
- Extra Cozy Finish: Use half cheddar and half Monterey Jack for a softer melt.
Common Mistakes to Avoid with This Dish
- Leaving the cauliflower in big chunks: It takes too long to soften and throws off the texture.
- Adding too much tomato paste without moisture: The skillet can go dry and sharp.
- Boiling the sour cream: That’s the fastest path to grainy sauce.
11. Cajun Chicken and Rice Skillet
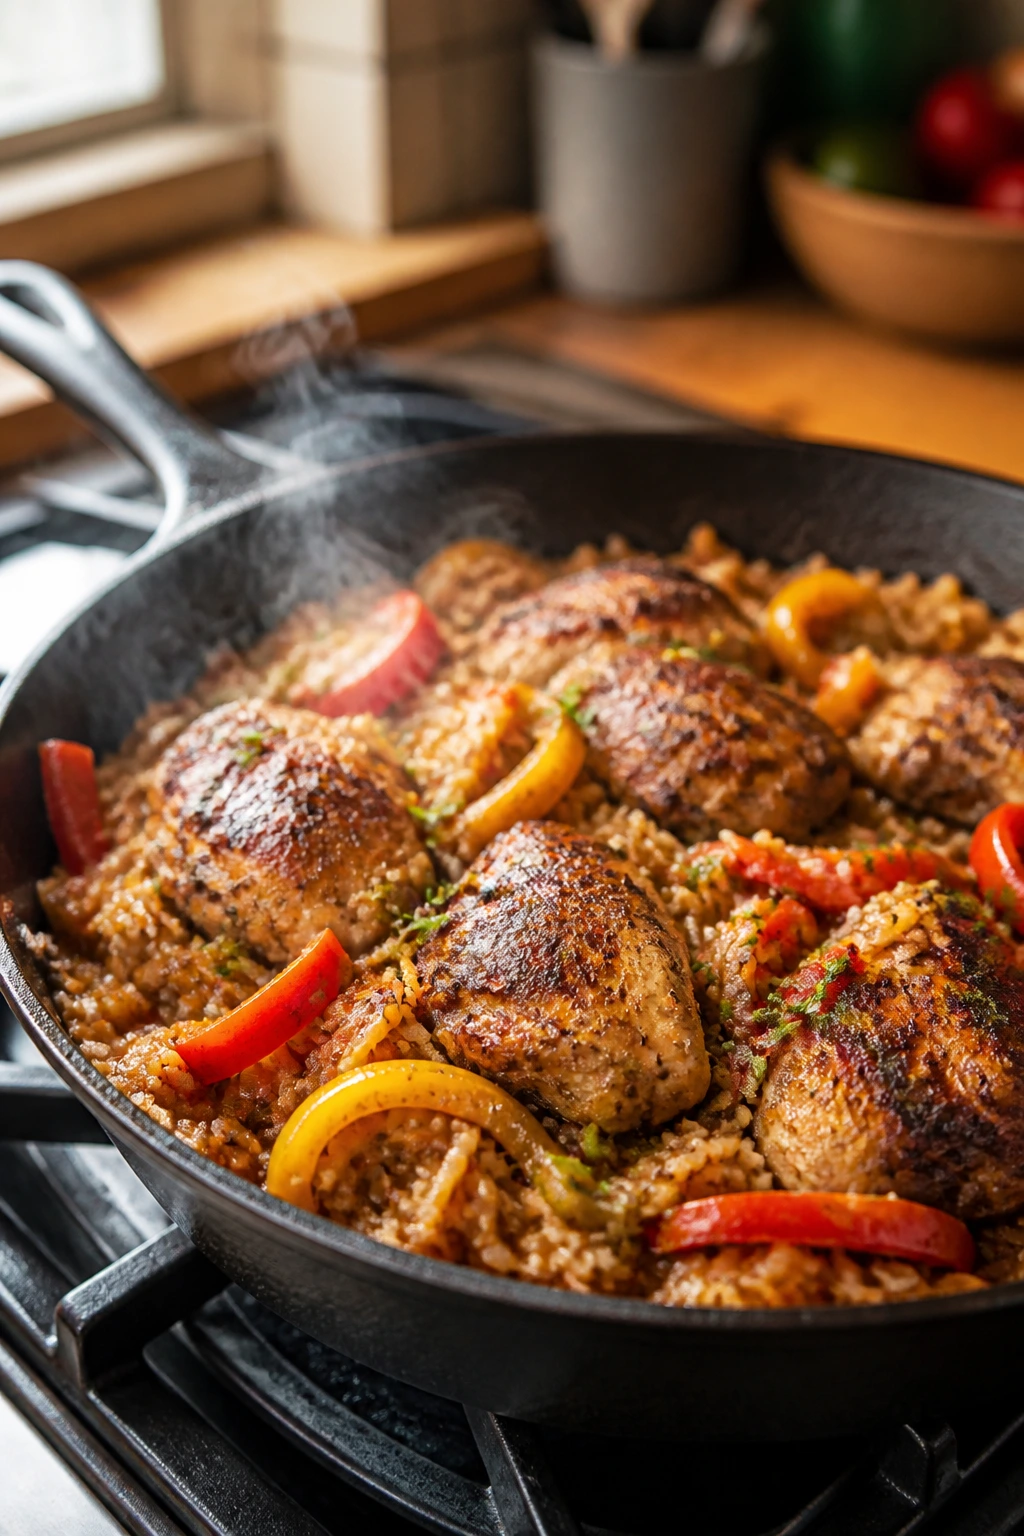
Bold, peppery, not fussy. That’s the lane here. Chicken gets a sear, bell peppers soften in the drippings, and rice cooks in broth colored by Cajun seasoning so every grain picks up a little heat. It’s the kind of dinner that tastes like you planned more than you did.
Use a skillet with a tight lid and don’t keep peeking. Rice wants a little privacy, and the chicken needs the gentle steam to finish without drying out. Once it rests, the whole thing comes together in one tidy pan.
Why It Works: Cajun seasoning gives the chicken and rice a shared flavor base, so the whole dish tastes coherent. Broth hydrates the rice while the covered cook finishes the chicken. Bell peppers soften into the pan and lend sweetness, which keeps the spice from turning harsh.
Key Ingredients: Chicken and Rice
- 1½ lbs chicken thighs, cut into bite-size pieces — they stay juicy through the simmer.
- 1½ cups long-grain white rice, rinsed — rinsing keeps it from clumping.
- 3 cups low-sodium chicken broth — enough to cook the rice properly.
Vegetables and Seasoning
- 2 bell peppers, sliced — red, yellow, or orange all work.
- 2 tbsp Cajun seasoning — use a blend you trust on its own.
Pantry Staples
- 1 tbsp oil, 1 tbsp butter, and a pinch of salt if needed — the butter helps the rice finish with a soft sheen.
Quick Steps:
- Heat the oil and butter in a large skillet over medium-high heat. Add the chicken and half of the Cajun seasoning, then cook for 5 to 6 minutes until the pieces are browned on the outside.
- Stir in the bell peppers and cook for 2 minutes, just until they start to soften.
- Add the rinsed rice, broth, and the remaining Cajun seasoning. Stir once so the rice is evenly distributed.
- Bring the skillet to a simmer, then cover and reduce the heat to low. Cook for 18 to 20 minutes, until the rice is tender and the liquid is absorbed.
- Turn off the heat and let the pan rest, covered, for 5 minutes.
- Fluff gently with a fork and taste before adding more salt.
Equipment for This Recipe
- Large skillet with a lid — the rice needs a sealed cook.
- Wooden spoon — for stirring without crushing the rice.
- Measuring cups — the broth ratio is what makes this work.
- Fork — for fluffing at the end.
How to Serve This Dish: Serve it in wide bowls with hot sauce on the table if you want more heat. A cool side like sliced tomatoes or a simple cucumber salad plays well against the seasoning. If you’re feeding people who like bread, warm biscuits or a plain roll work without competing.
Pro Tips for This Recipe
- Rinse the rice until the water runs clearer. It helps keep the grains separate.
- Keep the heat low once the lid goes on. Rice at a hard boil goes uneven fast.
- Use low-sodium broth if your Cajun seasoning is salty.
- Let it rest after cooking. The last bit of steam finishes the rice.
Variations on This Dish
- Shrimp Cajun Swap: Replace the chicken with shrimp and add them during the last 5 minutes so they stay tender.
- Milder Creole Version: Use less Cajun seasoning and finish with a little butter if you want the spice dialed back.
- Extra Peppery Finish: Add sliced scallions or a shake of black pepper right before serving.
Common Mistakes to Avoid with This Dish
- Lifting the lid too often: Every peek lets steam escape and leaves the rice uneven.
- Using too much seasoning blend: Cajun mixes can vary a lot in salt. Taste before adding more.
- Cutting the chicken too large: Big chunks need more time and can leave the rice overcooked by the time they’re done.
12. Honey Mustard Pork Chop and Apple Skillet
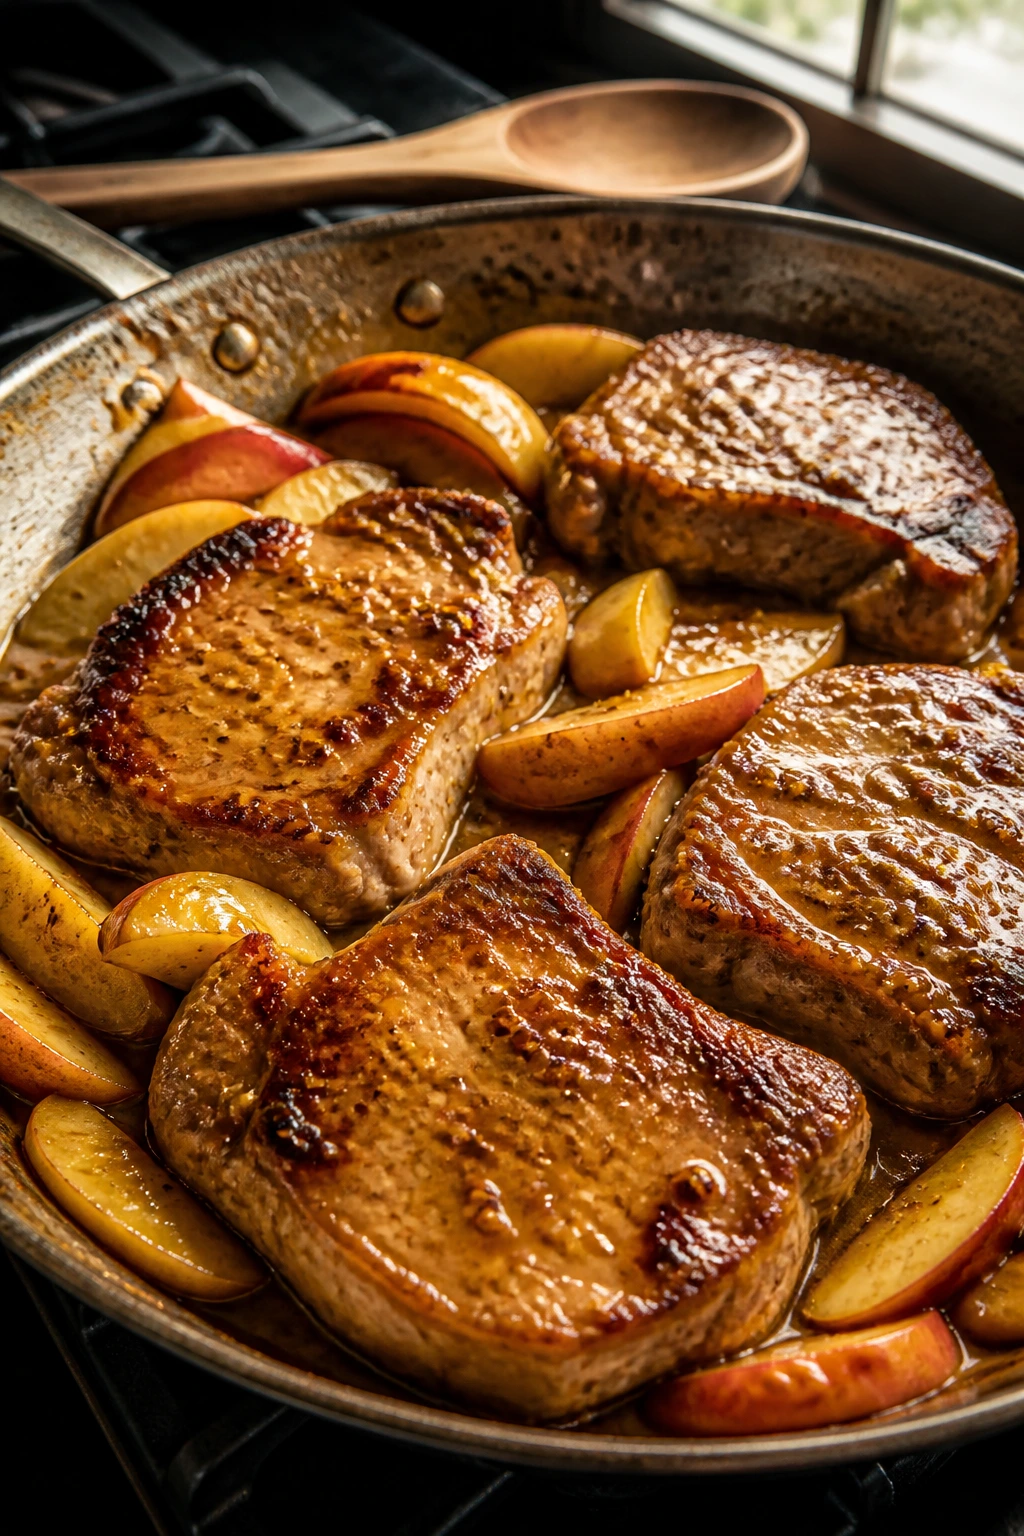
Pork chops and apples can sound a little polished, but in a skillet they turn rustic fast. The pork browns, the apples soften and pick up the drippings, and the honey mustard sauce pulls everything into one sweet-savory glaze. It’s calm food, not complicated food.
This works best with pork chops that are thick enough to sear without drying out. The apples should soften but keep some shape, which is why you want them in slices, not purée territory. The sauce comes together right in the pan, and that’s where the good stuff is.
Why It Works: Pork likes a sweet-sour partner, and apples plus Dijon do that without becoming syrupy. Broth loosens the sauce so it coats the chops instead of sticky-gluing itself to the pan. A short finish keeps the pork juicy and the apples intact.
Key Ingredients: Main Ingredients
- 4 boneless pork chops, about 1 inch thick — thick enough to sear and finish without drying out.
- 2 apples, cored and sliced — choose a firm apple that holds its shape.
- ⅓ cup Dijon mustard — gives the sauce its sharp edge.
- 3 tbsp honey — balances the mustard.
- ¾ cup chicken broth — helps the sauce coat the pan.
Pantry Staples
- 1 tbsp oil, salt, and black pepper — enough to season the chops and start the pan.
Quick Steps:
- Pat the pork chops dry and season both sides with salt and pepper.
- Heat the oil in a large skillet over medium-high heat. Add the pork chops and cook for 3 to 4 minutes per side, until browned. Remove them to a plate; they do not need to be fully cooked yet.
- Add the apple slices to the same skillet and cook for 2 to 3 minutes, stirring once, until they start to soften and pick up color.
- Whisk together the Dijon, honey, and chicken broth, then pour the mixture into the skillet.
- Return the pork chops to the pan, lower the heat to medium-low, and simmer for 4 to 6 minutes, until the pork reaches 145°F and the sauce looks glossy.
- Let the chops rest for 3 minutes before serving.
Equipment for This Recipe
- Large skillet — the chops need enough room to brown.
- Tongs — helpful for turning pork cleanly.
- Instant-read thermometer — this keeps the pork from drying out.
- Small whisk or fork — for blending the sauce.
How to Serve This Dish: This loves mashed potatoes, rice, or a hunk of bread that can collect the sauce. If you want to keep the plate simple, add a green vegetable on the side and call it done. The apples should sit right in the sauce, not off to one side like a garnish.
Pro Tips for This Recipe
- Pick firm apples, not mealy ones. You want slices that stay intact.
- Don’t overcook the pork in the browning stage; the sauce finishes it.
- If the sauce gets too thick, add another tablespoon or two of broth.
- Let the chops rest before slicing so the juices stay put.
Variations on This Dish
- Pear Swap: Use firm pears instead of apples for a softer sweetness.
- Mustard-Forward Version: Add an extra tablespoon of Dijon if you like the sauce sharper and less sweet.
- Bone-In Chop Upgrade: Bone-in chops work too, but give them a little extra time after the sauce goes in.
Common Mistakes to Avoid with This Dish
- Using thin pork chops: They can overcook before the sauce finishes.
- Choosing soft apples: They melt into mush and disappear.
- Adding honey over very high heat: It can scorch before the sauce has a chance to loosen.
13. Chickpea Coconut Curry Skillet

This is the skillet dinner I reach for when the fridge looks tired but dinner still needs to smell like it tried. Coconut milk makes the sauce lush, curry paste brings heat and depth, and chickpeas give the whole pan enough body that you do not miss meat. It’s simple in a good way, not in a stripped-down way.
The curry paste needs a minute in hot oil before the liquids go in. That tiny step matters more than people think. It turns the paste from raw and sharp into something rounder and more fragrant, and that’s what makes this dish taste like it came from a real pan instead of a shortcut.
Why It Works: Curry paste blooms in oil, which wakes up the spices before the liquid cools everything down. Coconut milk smooths out the heat and gives the sauce body. Chickpeas absorb flavor without falling apart, and spinach melts into the curry at the end so the pan looks fuller without becoming heavy.
Key Ingredients: Main Ingredients
- 2 cans chickpeas, drained and rinsed — they hold their shape and add bulk.
- 1 can full-fat coconut milk — the full-fat version gives the sauce enough body.
- 3 tbsp red curry paste — enough to season the whole skillet.
- 1 (14.5 oz) can diced tomatoes — adds acidity and a little texture.
- 5 oz baby spinach — folds into the sauce at the end.
Pantry Staples
- 1 tbsp oil, salt, and a squeeze of lime if you have it — all you need to brighten the finish.
Quick Steps:
- Heat the oil in a large skillet over medium heat. Add the curry paste and cook for 30 seconds to 1 minute, stirring constantly, until it smells fragrant and slightly darker.
- Pour in the diced tomatoes and coconut milk, stirring to combine.
- Add the chickpeas and bring the curry to a gentle simmer. Cook for 8 to 10 minutes, stirring occasionally, until the sauce thickens a little and the chickpeas absorb some of the flavor.
- Stir in the spinach and cook for 1 minute, just until it wilts.
- Taste and add salt if needed. Finish with lime if you have it, then serve warm.
Equipment for This Recipe
- Large skillet — gives the curry enough surface area to reduce.
- Wooden spoon — curry paste can stick if you let it sit.
- Measuring spoon — red curry paste needs a known amount.
- Ladle or large spoon — helpful for serving over rice.
How to Serve This Dish: Spoon it over rice if you want the safest, most useful plate. Naan or flatbread is good for scooping, too. If you like a little crunch, top it with chopped peanuts or scallions, but the curry does not depend on them.
Pro Tips for This Recipe
- Use full-fat coconut milk, not the thinner version, if you want a sauce that clings.
- Bloom the curry paste before the liquids go in; that’s where the depth comes from.
- If the curry tastes flat, it probably needs lime or salt more than more spice.
- Simmer gently. A hard boil can make the coconut sauce split.
Variations on This Dish
- Lime and Herb Finish: Add chopped cilantro or mint if you want a brighter top note.
- Sweet Potato Curry: Add small cubes of sweet potato with the tomatoes and give them extra simmer time.
- Heat-Heavy Version: Stir in extra curry paste or a little chili crisp right before serving.
Common Mistakes to Avoid with This Dish
- Skipping the curry paste bloom: The sauce tastes flatter and less aromatic.
- Using light coconut milk when you want body: It can leave the curry thin.
- Boiling too hard: Coconut milk behaves better at a gentle simmer.
14. Kielbasa and Cabbage Skillet with Mustard
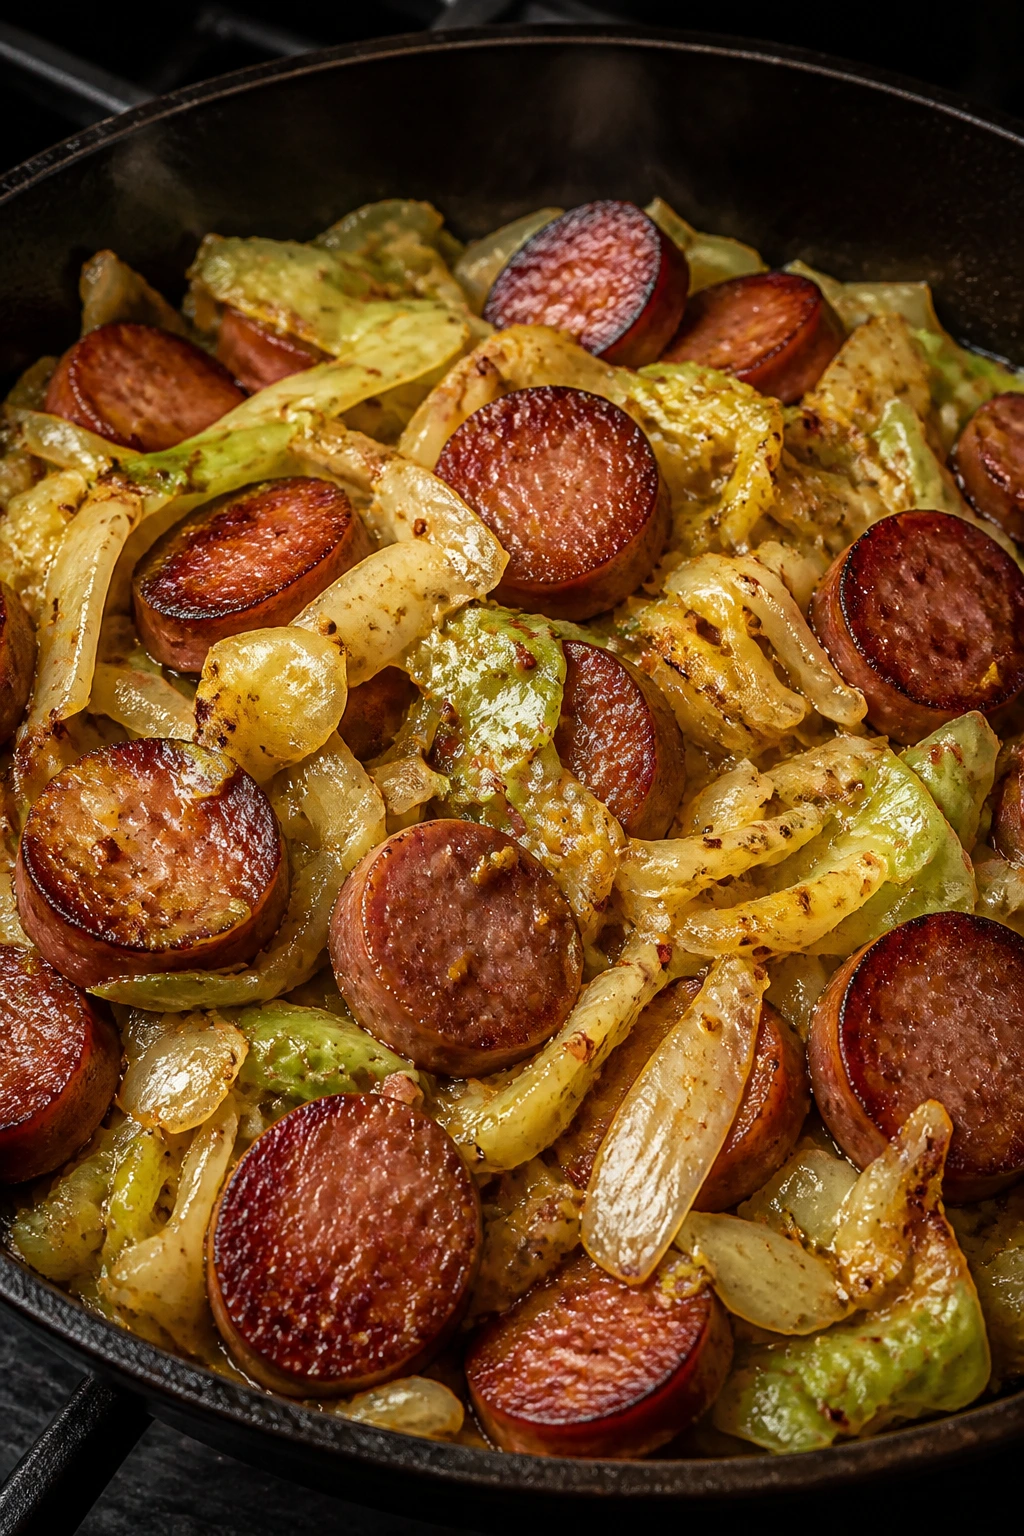
This is the rustic skillet in the bunch, the one that tastes like it came from a colder pantry and a warmer mood. Kielbasa brings salt and smoke, potatoes soak up the drippings, and cabbage softens into sweet ribbons that need very little help. Mustard and vinegar keep it from settling into heaviness.
The thing to watch is the potatoes. Start them first, then let the cabbage come in later so you get tender edges without turning the whole skillet to mush. This one likes a little browning and a little bite.
Why It Works: Kielbasa releases enough fat to season the potatoes and cabbage. The potatoes need that head start under a lid so they can soften before the cabbage goes in. Dijon mustard and apple cider vinegar add sharpness at the end, which keeps the skillet from tasting one-note.
Key Ingredients: Main Ingredients
- 14 oz kielbasa, sliced into coins — smoked sausage brings the flavor already.
- 1 small green cabbage, sliced, about 8 cups — it collapses as it cooks.
- 1 lb baby potatoes, halved — small potatoes are easier to finish in a skillet.
- 2 tbsp Dijon mustard — gives the sauce its tang.
- 1 tbsp apple cider vinegar — sharpens the finish.
Pantry Staples
- 1 tbsp oil, black pepper, and a pinch of caraway seeds if you like them — simple seasoning for a rustic pan.
Quick Steps:
- Heat the oil in a large skillet over medium-high heat. Add the kielbasa and cook for 4 to 5 minutes, until the slices are browned on both sides. Remove them to a plate.
- Add the potatoes to the skillet with a splash of water. Cover and cook for 10 minutes over medium heat, shaking the pan once halfway through.
- Add the cabbage and cook uncovered for 5 to 6 minutes, stirring often, until it softens and picks up a little color.
- Whisk the Dijon mustard and apple cider vinegar together, then stir them into the skillet with the kielbasa.
- Cook for 2 to 3 minutes, just until everything is hot and coated.
- Finish with black pepper and serve.
Equipment for This Recipe
- Large skillet with a lid — the potatoes need steam.
- Sharp knife — for slicing cabbage and kielbasa cleanly.
- Wooden spoon — helpful when the cabbage starts to collapse.
- Measuring spoon — Dijon and vinegar are doing the finishing work.
How to Serve This Dish: Serve it with rye bread, boiled egg noodles, or nothing at all if you want a straight-from-the-pan dinner. A spoonful of mustard on the side is a nice extra if you like more sharpness. The plate should look rustic and a little messy; that suits the food.
Pro Tips for This Recipe
- Brown the kielbasa well before removing it. Those browned edges flavor the potatoes.
- Don’t skip the covered potato stage. Raw centers are the main failure point here.
- Add cabbage after the potatoes are mostly tender so it doesn’t overcook.
- Taste before adding salt; kielbasa can be salty enough on its own.
Variations on This Dish
- Smoky Paprika Version: Add a pinch of smoked paprika with the cabbage for deeper color.
- Brussels Sprout Swap: Thinly sliced Brussels sprouts can replace some of the cabbage for a sharper, greener skillet.
- Sauerkraut Finish: A small spoonful of drained sauerkraut at the end gives the pan a more bratwurst-style edge.
Common Mistakes to Avoid with This Dish
- Using big potato chunks: They take too long and throw off the whole timeline.
- Letting the cabbage cook until it turns to strands: You want it soft, not dissolved.
- Adding mustard too early: It tastes cleaner and sharper when it goes in at the end.
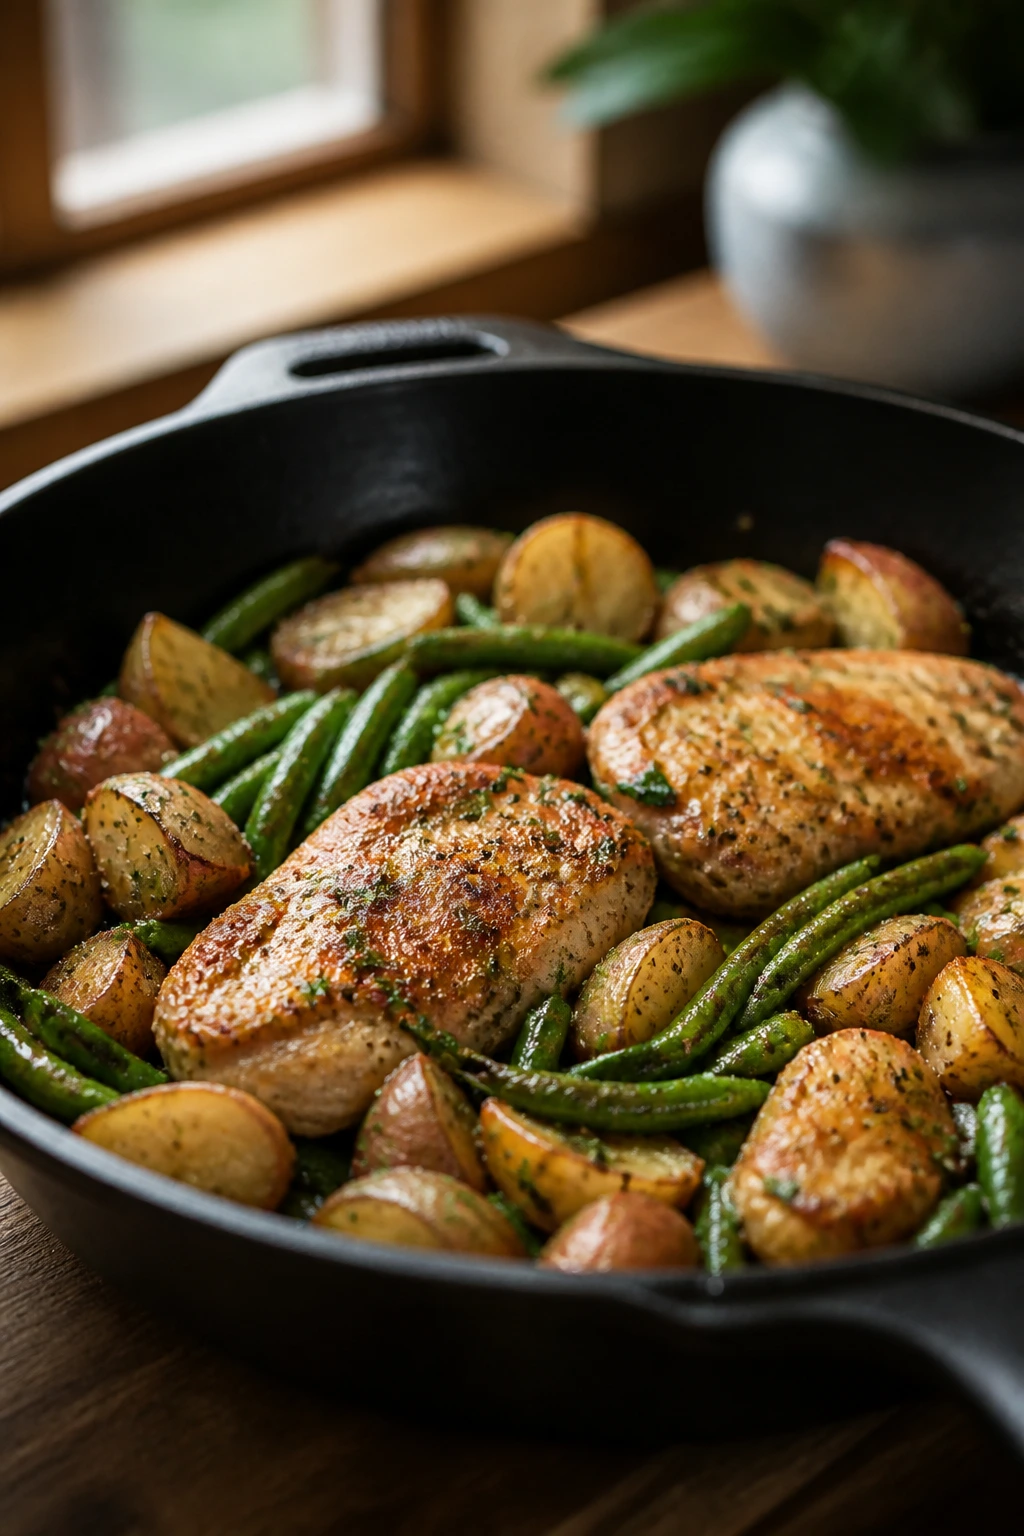
15. Spinach Artichoke Chicken Skillet
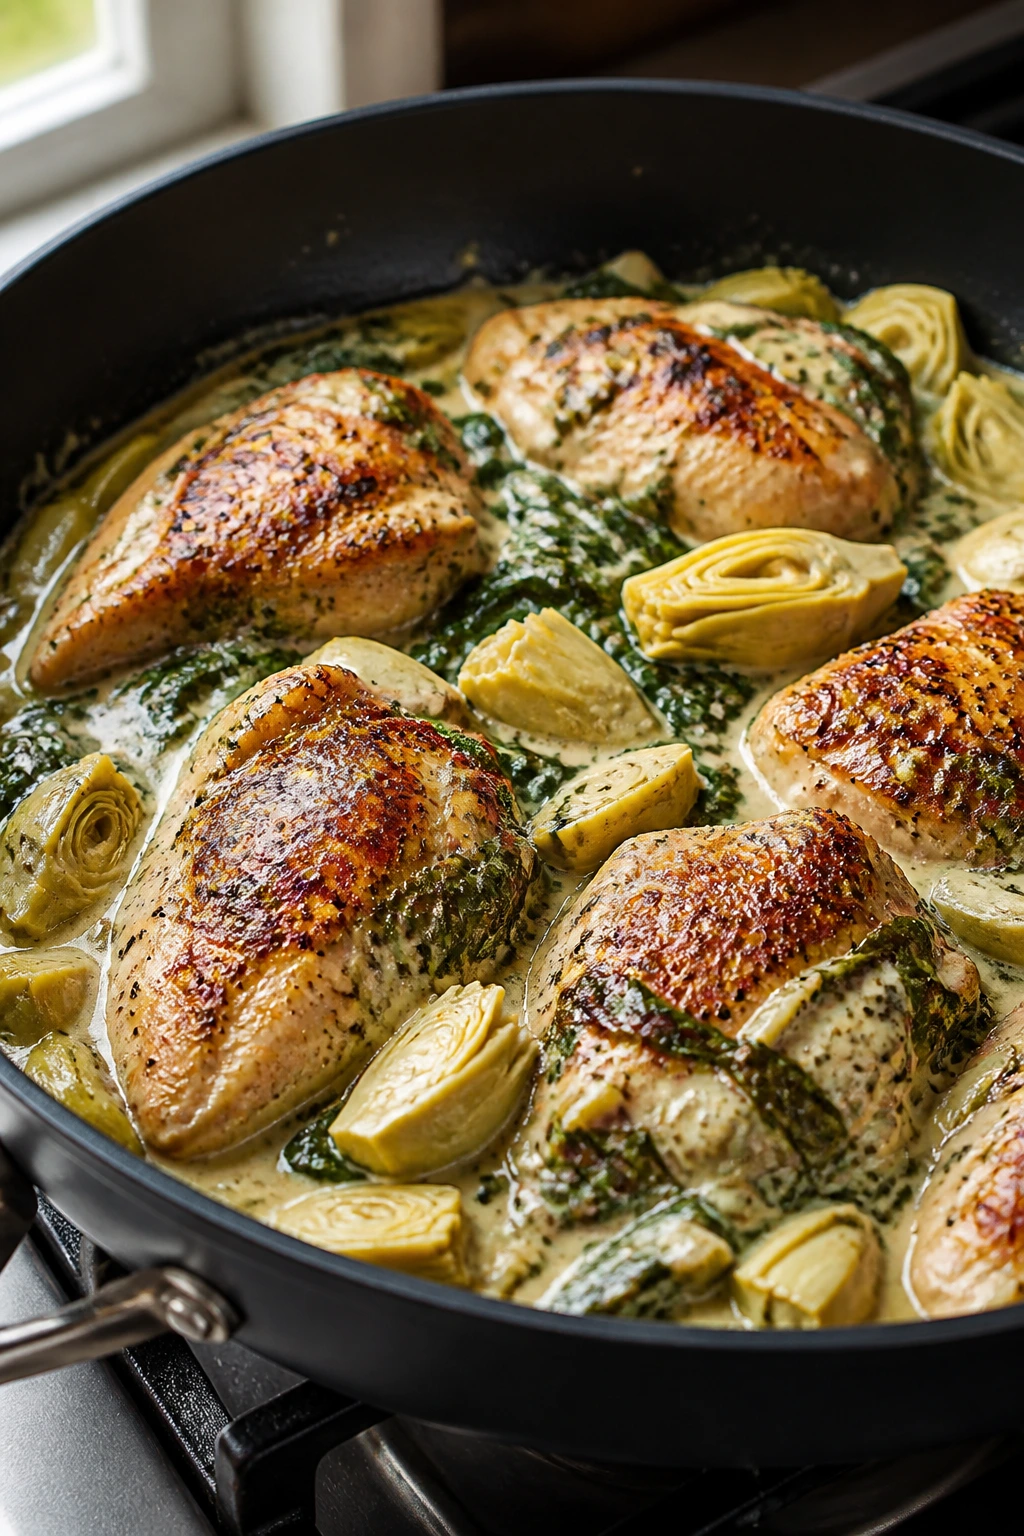
If spinach-artichoke dip met dinner and decided to behave itself, this would be the result. Chicken gets a proper sear, the cream cheese melts into broth, and the artichokes give the sauce a tang that keeps it from turning into plain cream. It’s rich, but not sleepy.
The key is to let the sauce come together before the spinach goes in, and to keep the heat low once the dairy shows up. That’s the difference between a smooth skillet and a broken one. Treat the cream cheese kindly and it pays you back.
Why It Works: Chicken gives the skillet something substantial to anchor the creamy sauce. Cream cheese melts into broth and creates a base that clings to artichokes and spinach. Parmesan sharpens the finish, and the artichokes bring enough tang that the sauce doesn’t taste flat or heavy.
Key Ingredients: Chicken and Vegetables
- 1½ lbs chicken breast cutlets or boneless, skinless thighs — cutlets cook quickly, thighs stay extra juicy.
- 1 (14 oz) can artichoke hearts, drained and chopped — quarter them so they’re easy to eat.
- 5 oz baby spinach — it wilts into the sauce fast.
Creamy Sauce
- 4 oz cream cheese, softened — soft cream cheese melts more smoothly.
- ½ cup grated parmesan — adds salt and depth.
- ½ cup chicken broth — loosens the sauce without thinning it too much.
Pantry Staples
- 1 tbsp olive oil, 2 cloves garlic minced, salt, and black pepper — the base flavor before the creamy part starts.
Quick Steps:
- Heat the olive oil in a large skillet over medium-high heat. Season the chicken with salt and pepper, then add it to the pan and cook for 4 to 5 minutes per side, until browned and nearly cooked through. Remove to a plate.
- Lower the heat to medium. Add the garlic and cook for 30 seconds, just until fragrant.
- Stir in the chicken broth and cream cheese. Cook, stirring, until the cream cheese melts into a smooth sauce.
- Add the chopped artichoke hearts and spinach. Stir for 1 to 2 minutes, until the spinach wilts and the artichokes are hot.
- Stir in the parmesan, then return the chicken to the skillet and simmer for 2 to 3 minutes, until the chicken reaches 165°F and the sauce clings to it.
- Rest for 1 minute before serving.
Equipment for This Recipe
- Large skillet — enough room for the chicken and sauce.
- Tongs — useful for flipping the chicken.
- Wooden spoon — for working the cream cheese into the broth.
- Measuring cup — for the broth and cream cheese timing.
How to Serve This Dish: Serve it over rice, buttered noodles, or with bread that can soak up the sauce. A simple side salad with a sharp dressing helps cut the richness. If you want it to feel a little more polished, add extra parmesan right at the table.
Pro Tips for This Recipe
- Soften the cream cheese before it goes into the pan. Cold blocks take longer and invite clumps.
- Keep the heat moderate once the dairy is in. Boiling can split the sauce.
- Chop the artichokes so every bite gets a little tang instead of a huge chunk.
- If the sauce seems too thick, add a tablespoon or two of broth and stir gently.
Variations on This Dish
- Baked-Dip Style Finish: Top the finished skillet with extra parmesan and serve it with toast points or pita.
- Lighter Greek-Yogurt Finish: Off the heat, stir in a spoonful of plain Greek yogurt if you want a tangier, lighter sauce.
- Mushroom Add-In: Add sliced mushrooms with the garlic if you want more earthiness and volume.
Common Mistakes to Avoid with This Dish
- Letting the sauce boil hard after the cream cheese goes in: That can make it grainy.
- Using artichokes that aren’t drained well: Extra liquid waters down the sauce fast.
- Overcooking the chicken in the first sear: It finishes in the sauce, so pull it before it goes dry.
Why the Skillet Wins on Lazy Sunday Nights
A skillet earns its keep by doing more than one job at once. It browns, it simmers, it reduces, and it holds the whole meal together while you keep your hands out of three other pans. That matters more on a quiet night than on a busy one, because the cooking itself should feel easy, not merely short.
The other reason these dinners work is texture. The skillet gives you contrast: crisp sausage against soft potatoes, glossy sauce around pasta, browned chicken under melted cheese. A baking dish can do comfort. A skillet gives you comfort with edges.
There’s also a small practical pleasure in keeping the heat on the stovetop. You can see when the broth disappears, smell when the garlic goes from sweet to sharp, and catch the exact second a sauce needs a splash of water or a squeeze of lemon. That kind of cooking feels calm because it stays visible.
Essential Equipment for These Recipes

-
12-inch skillet with straight sides: The best all-around size for browning, simmering, and fitting a full dinner without crowding.
-
Lid that fits the skillet: Essential for potatoes, rice, and any recipe that needs a little steam to finish.
-
Wooden spoon or heat-safe spatula: Good for scraping browned bits and moving ingredients without tearing them apart.
-
Tongs: Useful for chicken, sausage, pork chops, and salmon.
-
Instant-read thermometer: Especially useful for pork, chicken, and salmon so you do not guess at doneness.
-
Sharp chef’s knife: Makes quick work of peppers, onions, potatoes, and cabbage.
-
Cutting board: A bigger board keeps prep from getting chaotic.
-
Measuring cups and spoons: Broth, rice, orzo, and sauce ratios matter in skillet cooking.
-
Microplane or small grater: Handy for lemon zest, garlic, or parmesan.
Smart Shopping and Ingredient Tips
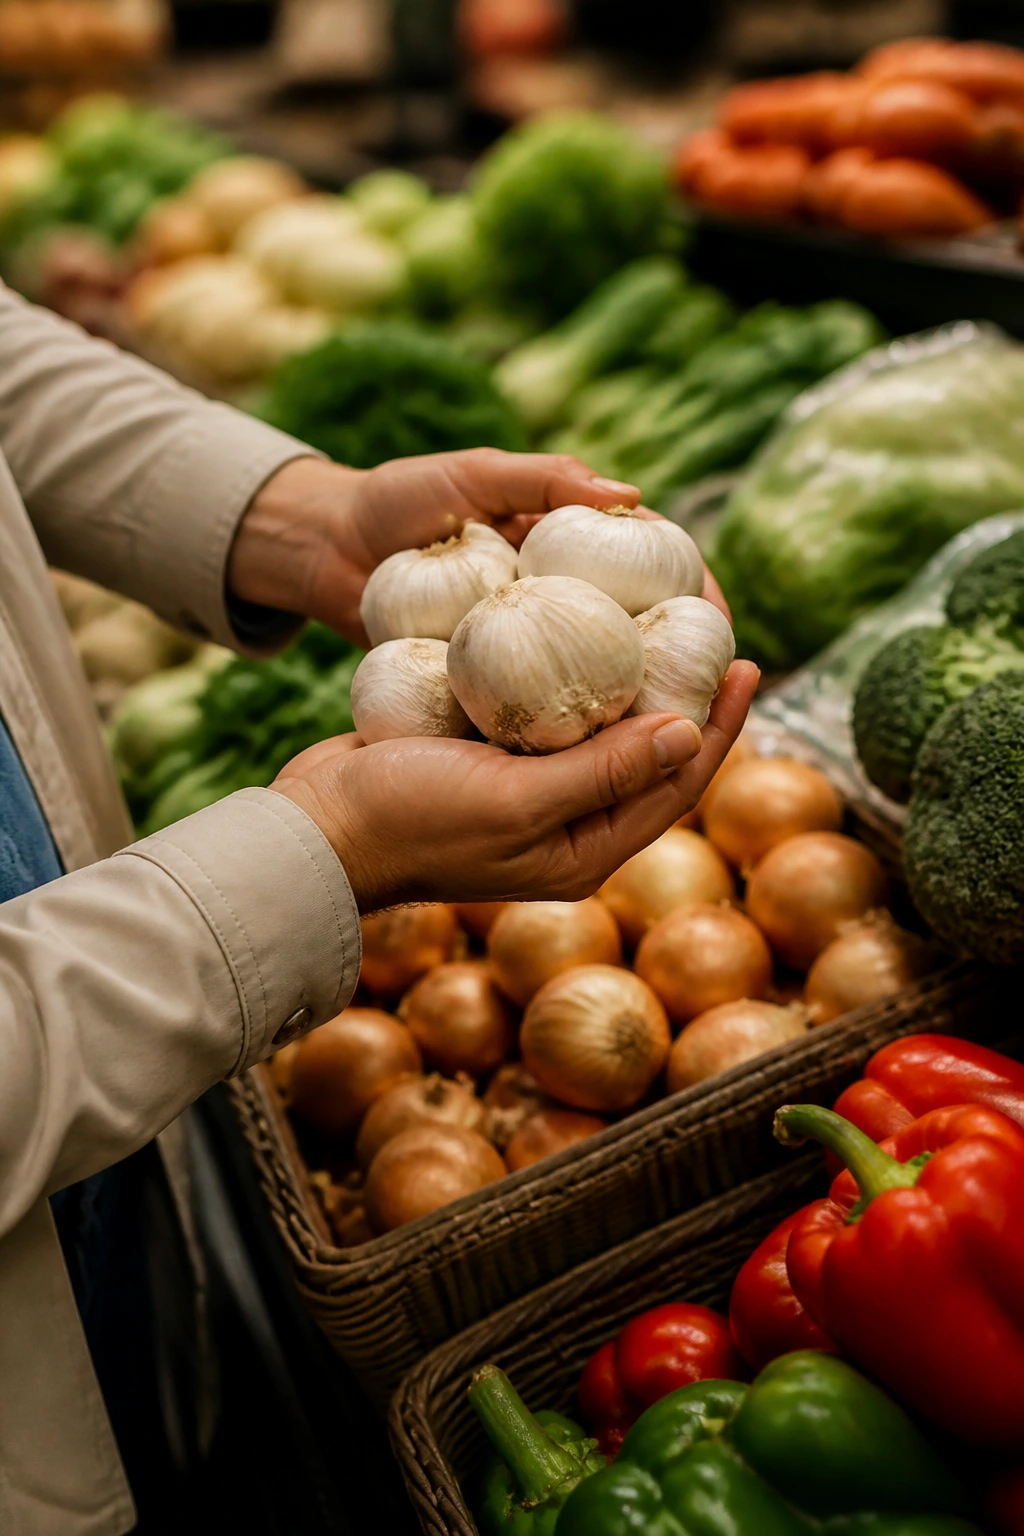
A short ingredient list exposes weak ingredients fast, so shopping well matters more here than in a crowded recipe. Choose chicken thighs if you can; they brown cleanly and forgive a longer simmer far better than breasts. For pork chops, look for pieces that are at least 1 inch thick. Thin chops dry out before the sauce gets a chance to finish.
For sausage, pick one with enough fat to leave a little sheen in the skillet. Ultra-lean sausage can taste dry and flat once the sauce hits. If you’re buying BBQ sauce, pesto, teriyaki, or marinara, taste them on a spoon before they ever reach the pan. A sauce that tastes thin in the jar usually tastes thinner after it’s reduced.
Vegetables need similar attention. Baby potatoes beat big russets for skillet cooking because they cook through at the same pace as the rest of the pan. Cremini mushrooms brown more reliably than white mushrooms. Frozen corn is a better buy than canned corn for most of these recipes because it stays sweet and crisp.
For rice-based dinners, cooked rice that has had a chance to cool is a real advantage. Freshly steamed rice gets sticky in a skillet. Slightly chilled rice holds its shape, so the soy or salsa or broth can coat it instead of turning it into paste. And on nights when you are tired, refrigerated tortellini and shelf-stable gnocchi are worth every penny. They behave well, and that is not a small thing.
How to Serve These Recipes

Presentation: Keep the saucy dinners in shallow bowls so the sauce pools around the starch instead of disappearing under it. For the sausage, pork chop, or chicken skillets, serving straight from the pan is fine; just wipe the rim first so it looks intentional, not hurried.
Accompaniments: A plain green salad with a sharp vinaigrette is the most useful side across this whole set. Garlic bread, crusty baguette, buttered noodles, or a simple cucumber salad all work depending on how heavy the skillet is. For the rice and pasta recipes, keep the side small and crisp so the main pan stays in charge.
Portions: Most of these make 4 servings without much trouble. The rice, pasta, and bean skillets can stretch to 5 if you serve them with bread or salad. Salmon and pork chop versions usually feel right at 4, while the bean-heavy vegetarian pans can feed 3 hungry adults or 4 lighter eaters.
Beverage Pairing: A crisp lager fits sausage and BBQ sauce well. Dry white wine works with lemon chicken, shrimp, and salmon. If you want to skip alcohol, sparkling water with lemon or unsweetened iced tea keeps the plate from feeling too heavy.
Additional Tips and Flavor Boosters
Flavor Enhancement: Finish saucy skillets with a small hit of acid: lemon juice, vinegar, or a squeeze of lime. That one move sharpens tomato, cream, and BBQ sauces without making them taste tart.
Customization: A handful of extra greens, a different bean, or a different starch can change the whole dinner without changing the method. Spinach can become kale. Cannellini beans can become chickpeas. Orzo can become rice if that’s what’s already in the cabinet.
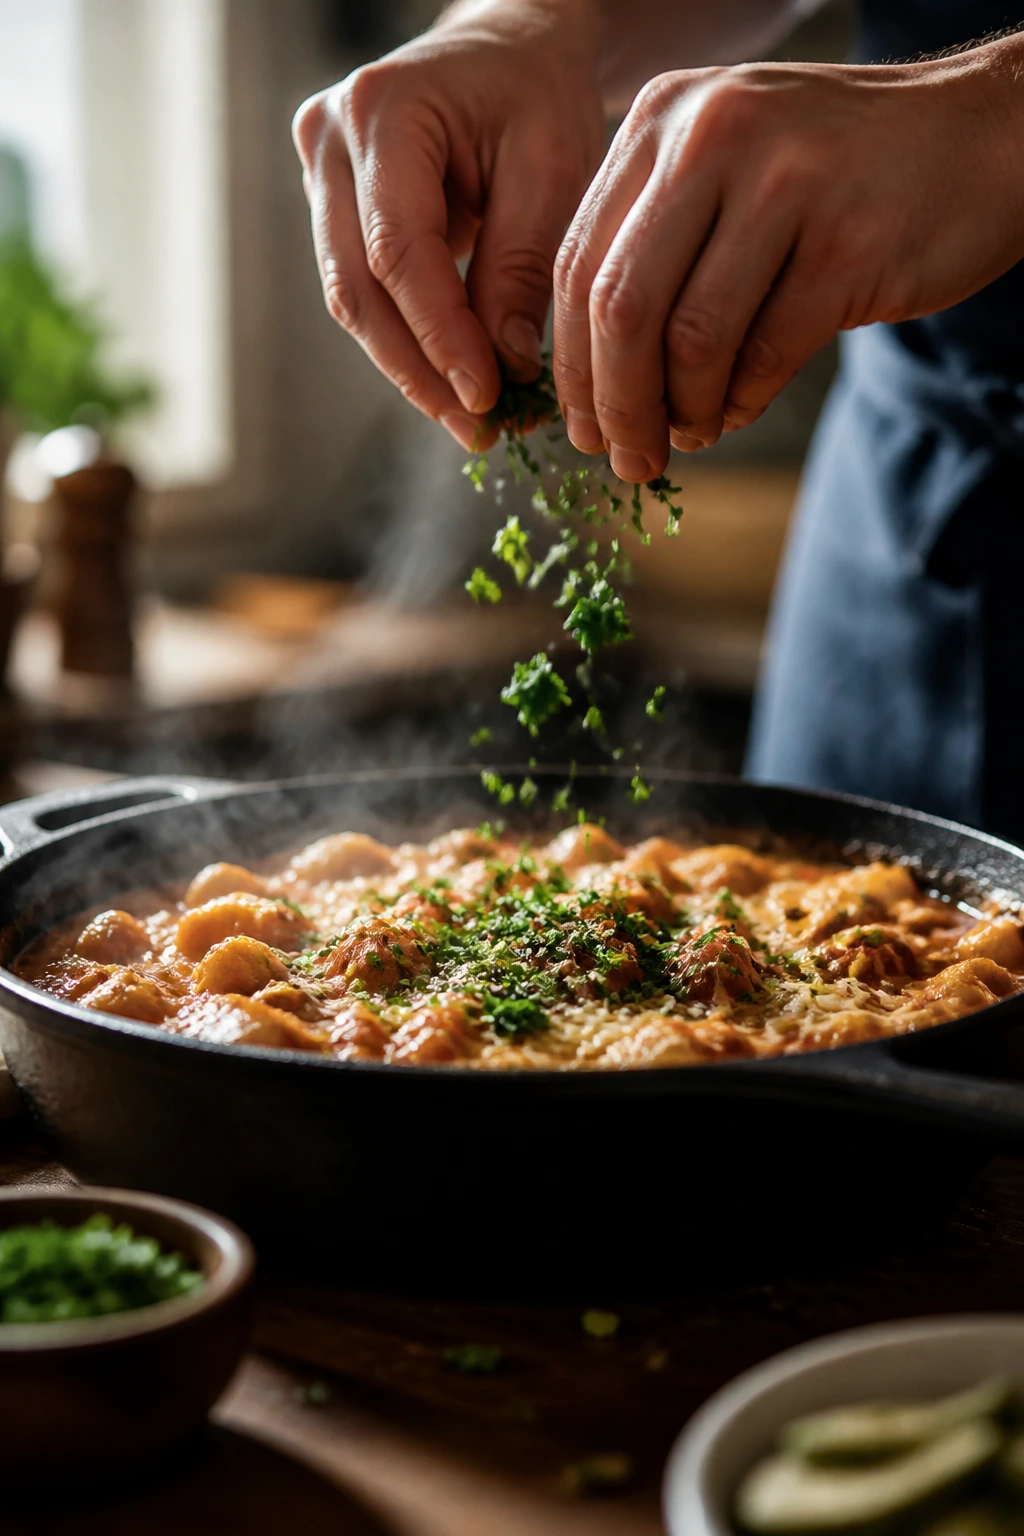
Serving Suggestions: Fresh herbs matter most at the end, not in the middle. Scallions, parsley, dill, or basil should go on after the heat is off so they stay green and smell fresh. Parmesan, feta, and sesame seeds also work better as a finish than as a buried ingredient.
Make-It-Yours: For dairy-free cooking, lean on coconut milk, pesto without cheese, or a final drizzle of good olive oil. For gluten-free plates, use rice, potatoes, cauliflower rice, or certified gluten-free pasta. If you like heat, keep hot sauce, chili crisp, or red pepper flakes on the table instead of building the whole skillet around them.
Make-Ahead, Storage, and Reheating Guidance
Most of these skillet dinners hold up well in the fridge for 3 to 4 days, though the seafood ones are best within 1 to 2 days. Rice, sausage, chicken, bean, and potato skillets freeze reasonably well for up to 2 months in airtight containers. Creamy tortellini and dairy-heavy chicken skillets can be frozen, but the sauce may separate a little; if you freeze them, keep the time closer to 1 month and expect a softer texture when reheated.
Let any skillet cool for no more than 2 hours before packing it away. Spread the food into shallow containers if you want it to chill faster. The faster it cools, the better the texture tends to be later, especially for rice and pasta.
To reheat, a skillet over medium-low heat is the best option. Add 1 to 2 tablespoons of water, broth, or milk depending on the dish, cover the pan, and stir every minute or two until hot. Rice and potato skillets usually need the lid so they don’t dry out. Pasta and gnocchi skillets do better with a gentle stir and a splash of liquid. Seafood should be reheated cautiously and only until warm, not steaming hard.
Some of these are better the next day, honestly. The sausage, tomato, bean, and curry skillets mellow a bit overnight, and the flavors settle in a useful way. Shrimp and salmon are the exceptions; they’re best fresh, and if you do reheat them, keep the heat low and the time short.
Variations and Adaptations to Try
Gluten-Free Pantry Swap: The easiest path is to keep the method and change the starch. Use rice, potatoes, cauliflower rice, or certified gluten-free pasta in place of orzo, tortellini, or standard gnocchi. Check sauces like teriyaki, BBQ, and marinara for hidden wheat if you need the pan to stay fully gluten-free.
Dairy-Free Cream Moves: Coconut milk works for curry and some tomato sauces, while pesto without cheese gives you a clean herb finish. Skip the cheddar, parmesan, and cream cheese, then finish with olive oil and extra seasoning so the pan still tastes complete. A squeeze of lemon or lime does more work here than people expect.
Lower-Sodium Without the Flat Taste: Use low-sodium broth, rinse canned beans well, and choose sauces that are not already heavily salted. Then lean on acid — lemon, vinegar, or a little mustard — to wake the food up at the end. Salt is easier to add than remove, so stay cautious early.
Veg-Forward Weeknight Version: Replace the meat in any of the skillet dinners with white beans, chickpeas, mushrooms, or extra vegetables. The mushroom, white bean, and curry skillets already prove the point: a pan can feel full without a big protein at the center. Add a grain or bread on the side if you want more heft.
Heat-It-Up Route: Red pepper flakes, chili crisp, Calabrian paste, or hot sauce can change the whole mood of the meal with almost no extra work. Add heat at the end for a sharper bite, or let it simmer in the sauce if you want something deeper and slower. Both work; they just land differently.
Common Mistakes to Avoid
The first mistake is crowding the skillet. When the pan is too full, vegetables steam instead of brown and meat goes gray before it gets a crust. If you only have a smaller skillet, cook in batches. It’s less annoying than rescuing a soggy dinner.
The second mistake is underestimating how much liquid starches need. Orzo, rice, and potatoes all need the right amount of broth or water and enough lid time to finish properly. If they’re hard in the center, don’t assume they’re done because the top looks cooked. The center is the part that tells the truth.
Another common one is adding dairy too early or over high heat. Cream cheese, sour cream, parmesan, and heavy cream all behave better when the pan has calmed down a little. If the sauce is boiling hard, turn it down before you stir them in. That small pause saves a lot of grainy texture.
People also under-season the skillet because the ingredients seem flavorful on their own. Then the sauce reduces and everything tastes flatter than it should. Taste at the end. Add salt, acid, or both.
The last mistake I see all the time is using the wrong size of cut. Big cauliflower florets, thick potato chunks, and oversized chicken pieces all need more time than the rest of the pan can spare. Keep the cuts small and even. That’s how the whole skillet finishes together instead of in layers of half-done and overdone.
Frequently Asked Questions

Can I use chicken breasts instead of thighs?
Yes, but cut them into smaller pieces and watch them closely. Breasts dry out faster, especially in skillet dinners that include a simmer or a covered finish. If you use them, pull them as soon as they hit 165°F.
Do I really need a 12-inch skillet?
It helps more than people think. A smaller pan crowds the ingredients and slows browning, which is how you end up with steamed chicken or soft vegetables. A 10-inch skillet can work for a couple of the recipes, but you’ll need to cook in batches more often.
Can I use leftover cooked rice?
Absolutely, and it’s often better than starting from scratch on a lazy night. Cold rice keeps its shape, heats fast, and absorbs sauce without turning mushy. Just break up any clumps before it goes into the pan.
Which of these skillet dinners freeze best?
The chicken, beef, sausage, bean, and curry skillets freeze the cleanest. Creamy tortellini, salmon, and shrimp are the least freezer-friendly because the texture changes more after thawing. If you want to freeze a dairy-based skillet, expect a softer sauce after reheating.
What if my sauce turns out too thin?
Let it simmer uncovered for a few more minutes so some of the liquid cooks off. If it still looks loose, stir in a little parmesan, mashed beans, or a spoonful of cream cheese depending on the recipe. More heat usually works better than more ingredients.
How do I keep gnocchi from turning mushy?
Give it space in the skillet and let it brown before you stir too much. The edges need direct contact with the pan, not a pile of sauce right away. Add the pesto or cream only after the gnocchi has picked up some color.
Can I use frozen vegetables instead of fresh?
Yes, with a little restraint. Frozen corn, peas, and some greens work very well; frozen broccoli or peppers can release more water, so you may need to cook a little longer. Add frozen vegetables where they can simmer down without flooding the pan.
What if I do not have a lid for my skillet?
A sheet pan or large baking tray can stand in. It does not need to seal perfectly; it just needs to trap enough steam to finish rice or potatoes. For pasta and cream sauces, you can usually skip the lid entirely.
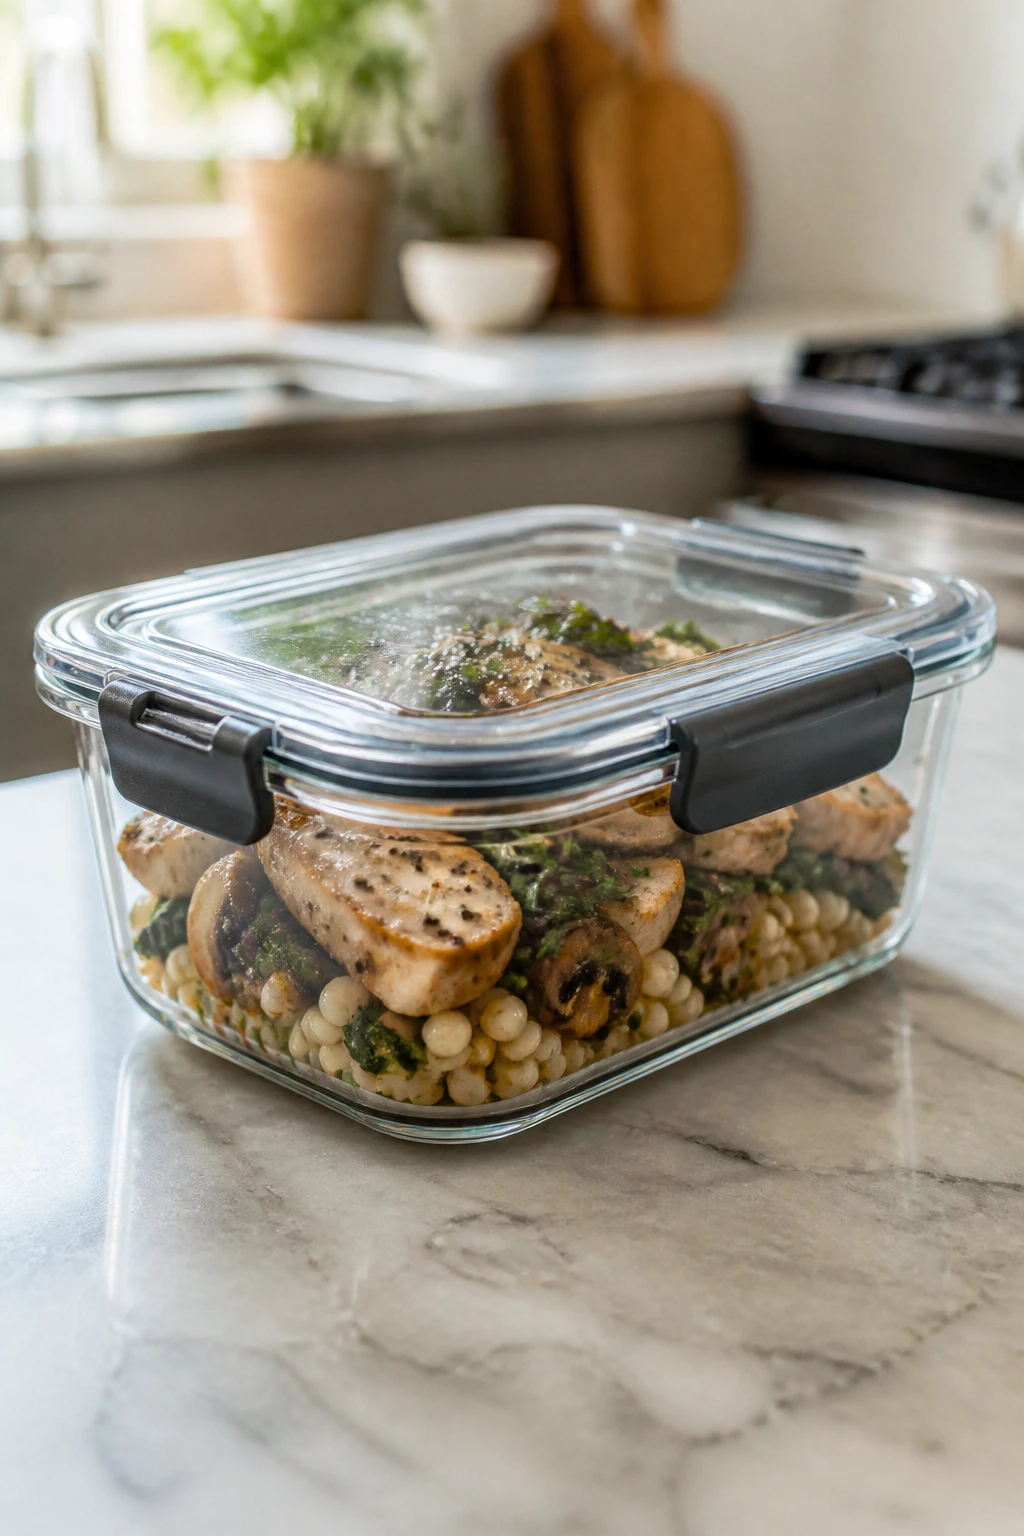
Are these good for meal prep?
Yes, especially the chicken, sausage, bean, and rice versions. Keep garnishes like herbs or cheese on the side and add them after reheating so the food doesn’t go flat in the fridge. The seafood recipes are the least useful for meal prep because they lose texture faster.
Sunday Night, Sorted
A five-ingredient skillet dinner is not about doing less for the sake of doing less. It’s about choosing ingredients that earn their place, then letting the pan combine them into something that tastes more composed than the shopping list looks. That is why these dinners work on a slow Sunday night: they ask for attention, but not much labor.
Pick one that matches what you already have, keep the heat steady, and let the skillet do the unglamorous work. The best kind of lazy dinner still feels like dinner when you sit down with it, and these do.