
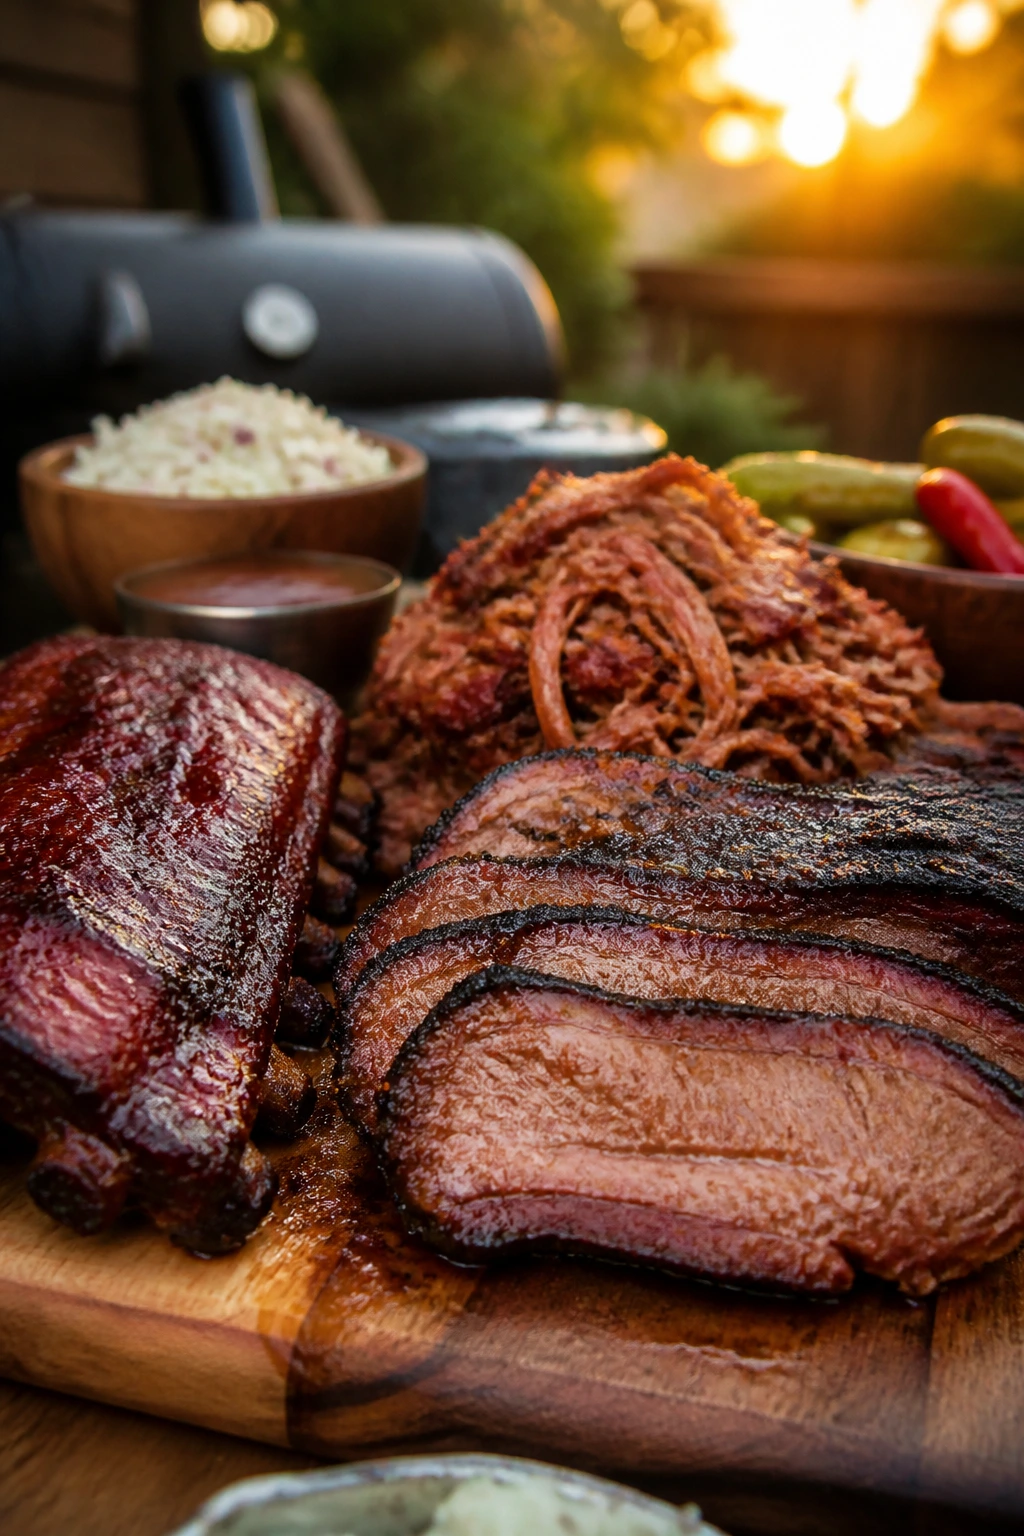
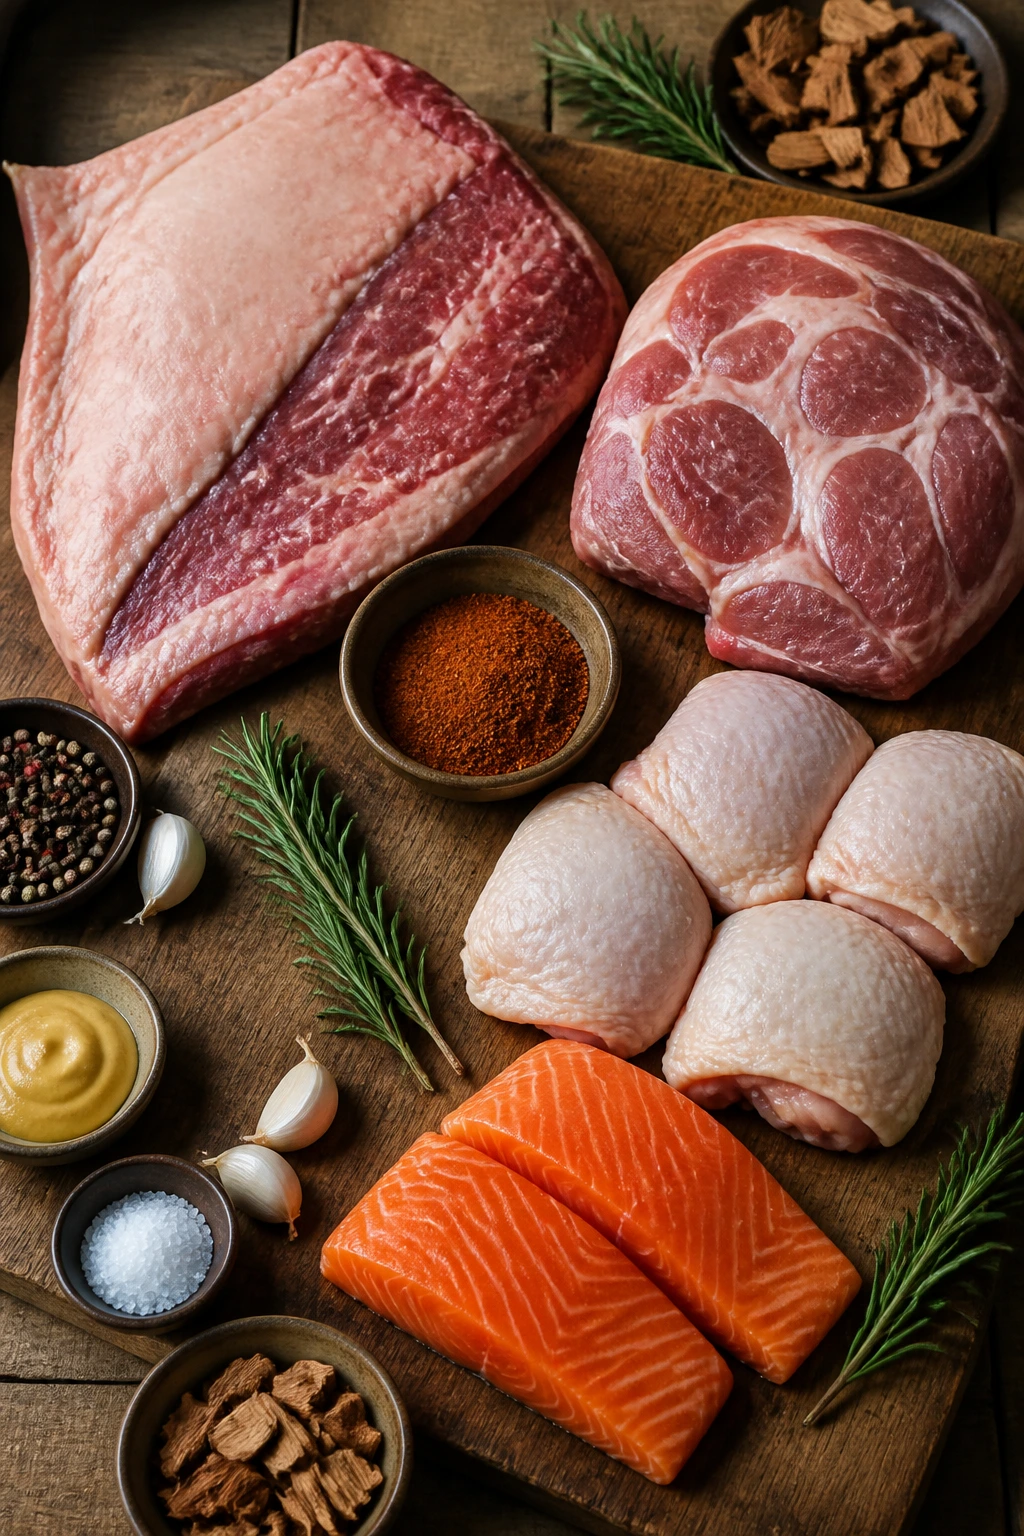
A good smoker changes dinner into something people remember. The meat comes off with a dark crust, a little shine on the surface, and that deep wood-fired smell that makes everyone drift toward the table before you call them. For smoker dinners for Father’s Day, that matters more than fancy plating. Smoke does half the work. Your job is to choose cuts that like slow heat, season them well, and know when to stop poking at them.
The best part is the range. You can go all day with a brisket or short ribs, or you can keep things brisk with salmon, chicken thighs, or pork tenderloin and still get the same low-key drama from the smoker. I’ve always liked a menu like this because it lets you match the meal to the crowd: one showpiece, one fast option, one thing that makes the leftovers disappear the next day. That’s a better use of a smoker than trying to force one recipe to do everything.
And yes, the details matter. A brisket wants clean smoke and a patient rest. Chicken skin needs a little extra heat. Salmon goes from silky to dry with almost no warning. Once you know those small differences, the whole meal gets easier. The wood, the rub, the resting time, the carve — that’s where the good dinners hide.
Why These Smoker Dinners Belong on the Table
-
Built for a hungry crowd: These recipes lean on beef, pork, chicken, and fish with enough heft to carry a full dinner, not just a snack before the main event.
-
Some are all-day, some are fast: Brisket and short ribs reward patience, while salmon, chicken thighs, and pork tenderloin give you smoke flavor without a long wait.
-
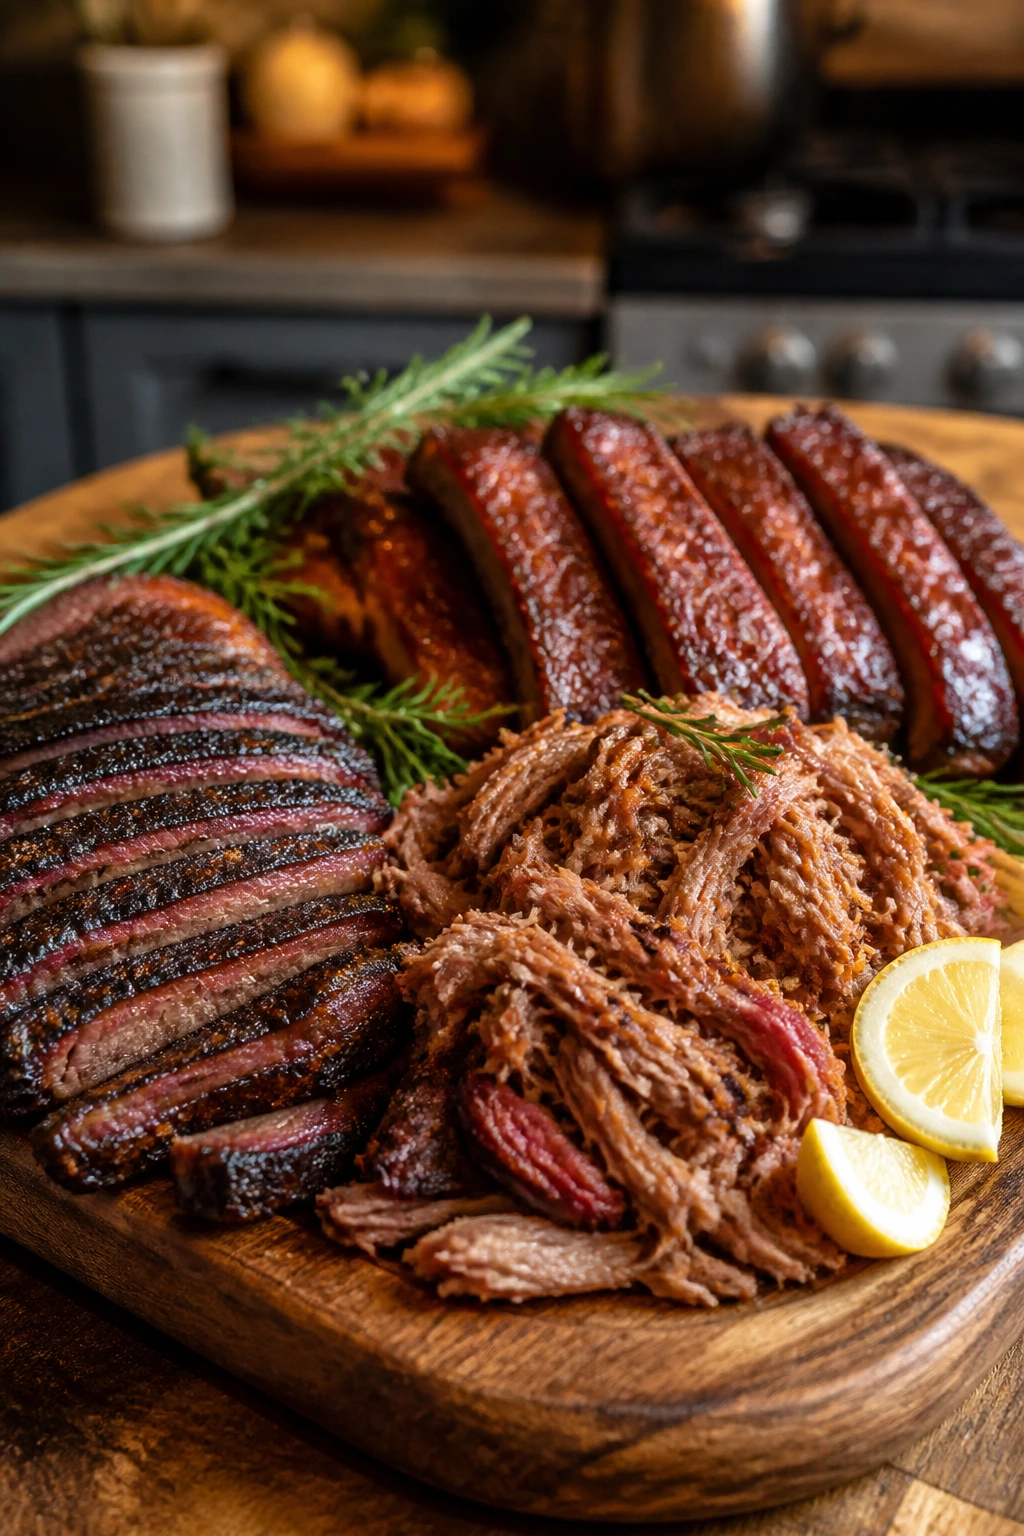
Leftovers actually matter: Pulled pork, brisket, meatloaf, and sausage make sharp, useful leftovers for sandwiches, bowls, tacos, and hash.
-
They pair with real side dishes: Each recipe works with slaw, beans, potato salad, cornbread, grilled vegetables, or a pile of sliced pickles.
-
The smoker does the heavy lifting: Once the fire is steady and the seasoning is on, you’re mostly managing temperature and rest time. That’s it.
-
The table looks generous without looking fussy: Smoky bark, glossy glaze, and clean slices do the visual work for you.
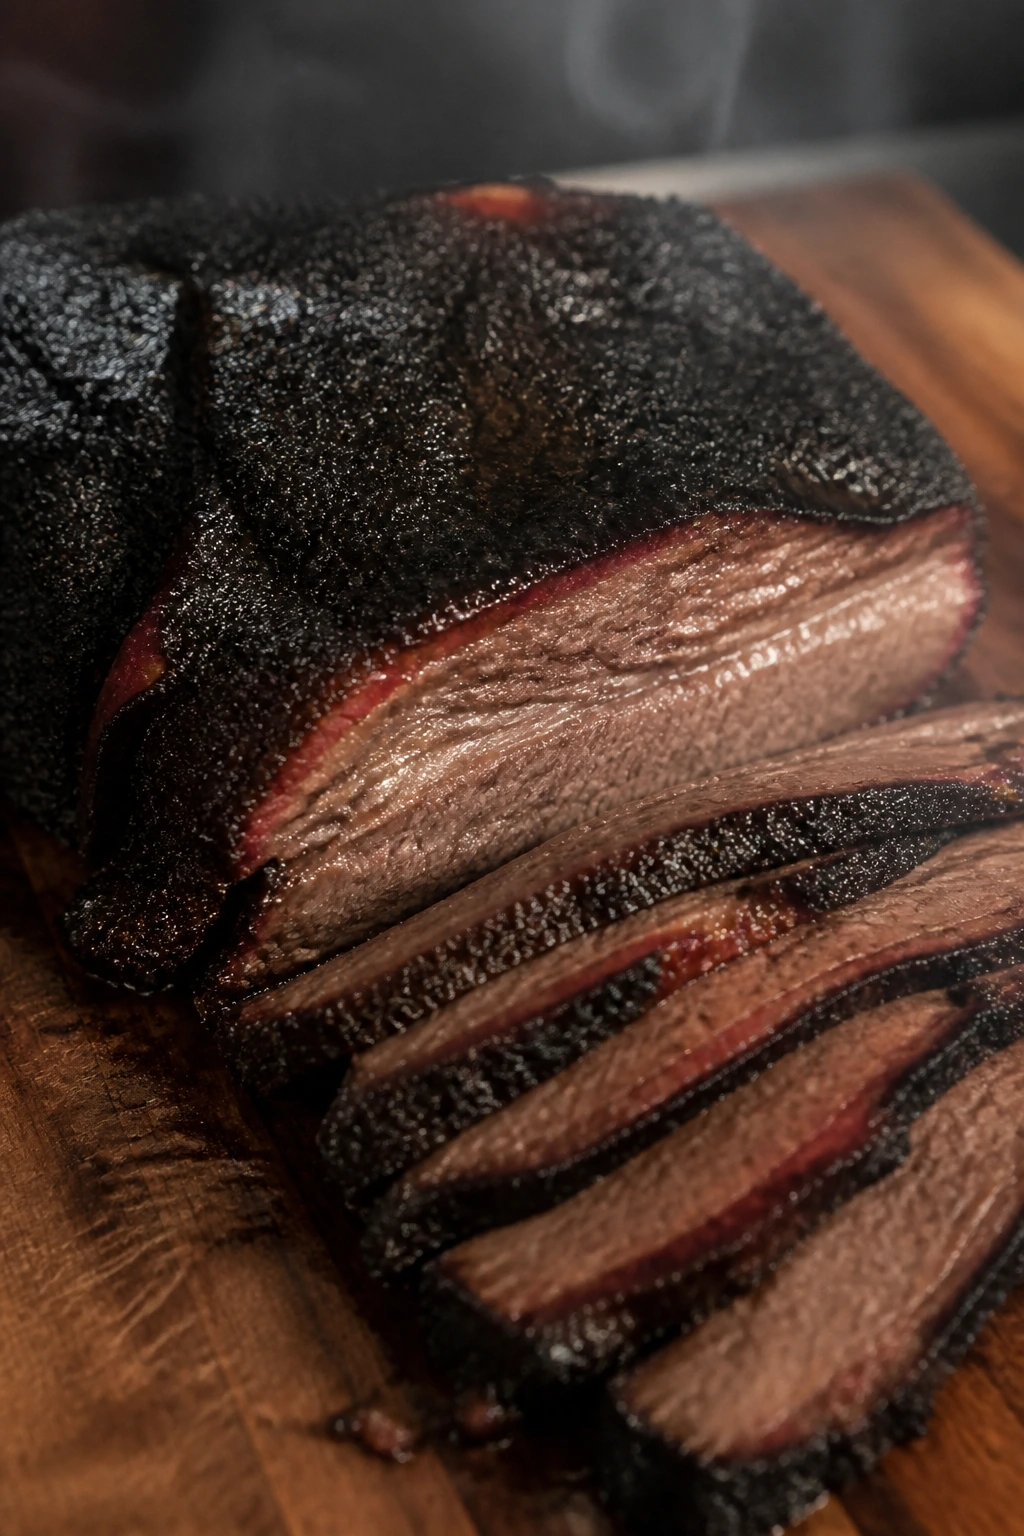
1. Smoked Beef Brisket
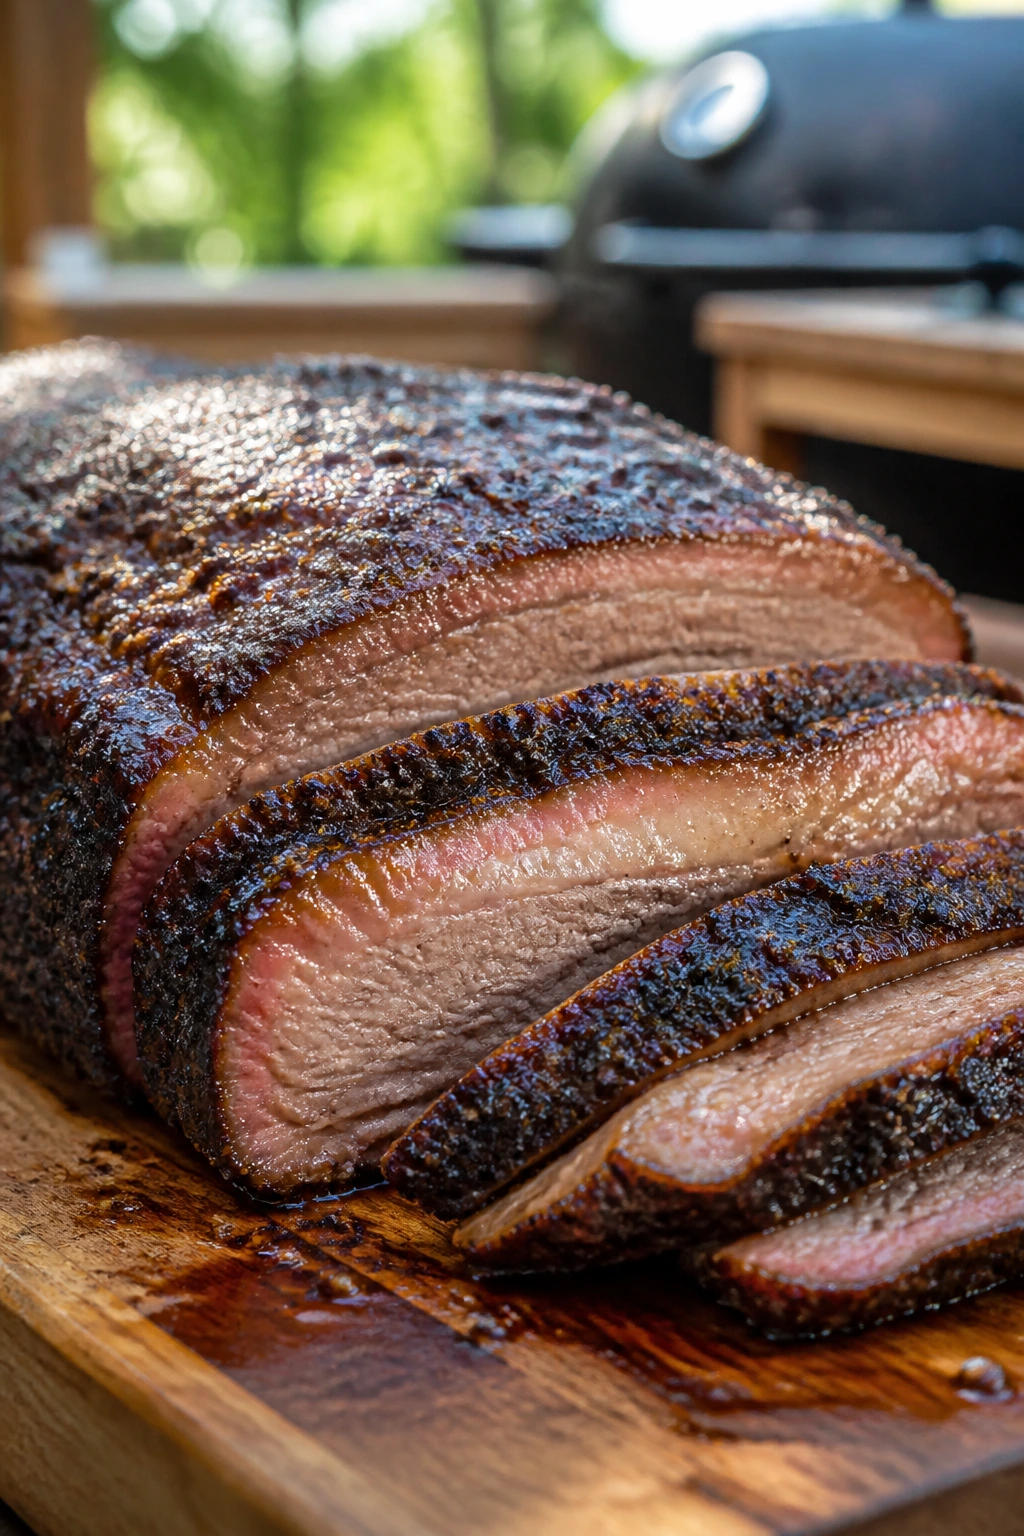
Brisket is the cut that makes everyone slow down. The bark gets dark and peppery, the fat softens into something almost spreadable, and the slices — when you get them right — hold together without feeling tight. It’s a big cut, yes, but that’s the whole point. A brisket says the meal matters.
Why It Works:
Brisket thrives on low, steady heat because it’s full of connective tissue that slowly turns tender instead of drying out. A 225°F smoker gives the fat time to render and the bark time to set, while butcher paper protects the surface once the color is right. The sweet spot is usually around 200-205°F internal, but the probe tells the real story: it should slide in with almost no resistance.
Key Ingredients:
- 1 whole packer brisket, 12 to 14 pounds
- 1/4 cup kosher salt
- 1/4 cup coarse black pepper
- 2 tablespoons garlic powder
- 2 tablespoons smoked paprika
- 2 tablespoons yellow mustard, as a binder
- 1 cup beef broth
- 1/2 cup apple cider vinegar, for spritzing
- 2 tablespoons beef tallow, optional for wrapping
Quick Steps:
- Trim the brisket so the fat cap sits at about 1/4 inch, and remove any hard, waxy fat that won’t render.
- Coat the brisket lightly with mustard, then season all sides with the salt, pepper, garlic powder, and paprika.
- Smoke at 225°F, fat side up if your heat comes from below, until the bark is dark and dry and the internal temperature reaches 165-170°F.
- Wrap tightly in butcher paper with a splash of beef broth or a little tallow, then return it to the smoker.
- Cook until the thickest part probes tender at 200-205°F, then rest it wrapped for at least 1 hour before slicing against the grain.
Tips and Variations:
- Coffee-Barked Brisket: Add 2 tablespoons finely ground coffee to the rub for a deeper crust.
- Point-End Burnt Ends: Cube the point, sauce it, and smoke it again until sticky and lacquered.
- Do Not Rush the Rest: Slicing hot brisket dumps the juices; let it sit.
2. Smoky Baby Back Ribs with Sticky Finish
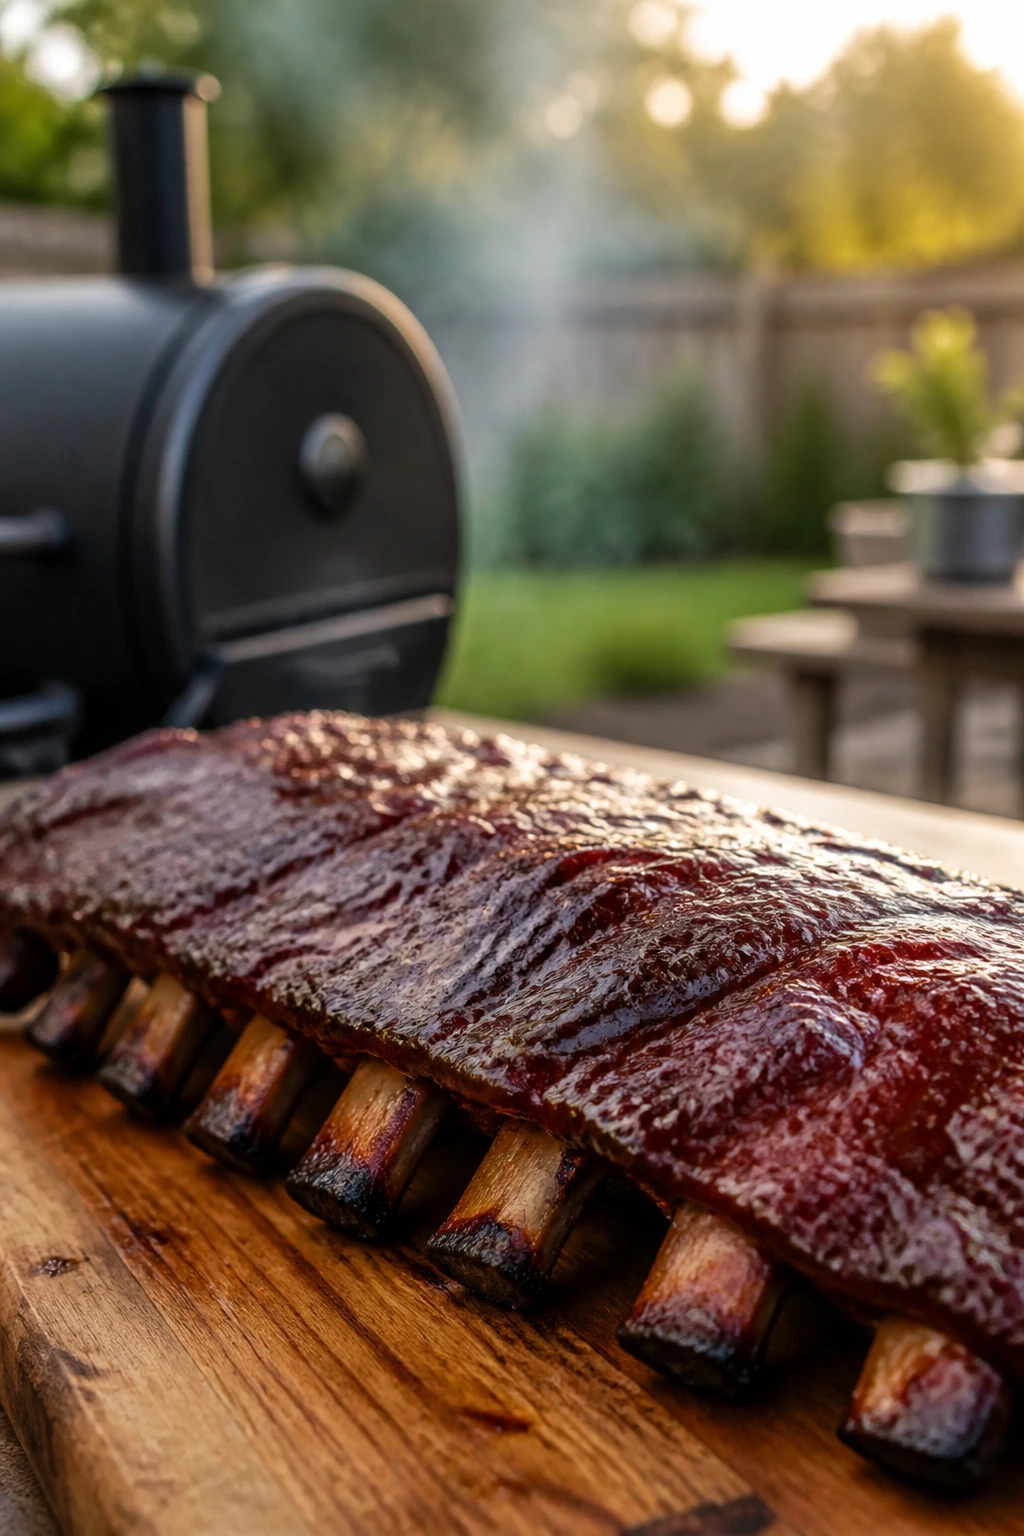
The smell of ribs on a smoker gets attention fast. Baby backs are leaner than spare ribs, which means they cook a little quicker and take sauce well without turning greasy. You get tender meat that pulls cleanly from the bone, but still keeps a bit of chew where it should.
Why It Works:
Baby back ribs are a sweet spot for Father’s Day because they feel special without demanding the full-day commitment of a brisket. Removing the membrane lets smoke and seasoning get into the meat instead of bouncing off the back. A wrapped phase helps the ribs steam-tenderize, and a final saucing period sets the glaze so it clings instead of slipping off in a sticky puddle.
Key Ingredients:
- 3 racks baby back ribs, about 7 to 8 pounds total
- 2 tablespoons yellow mustard
- 1/4 cup kosher salt
- 1/4 cup brown sugar
- 2 tablespoons paprika
- 1 tablespoon garlic powder
- 1 tablespoon onion powder
- 1 cup apple juice, for spritzing
- 1/2 cup unsalted butter, for wrapping
- 1 cup barbecue sauce
- 2 tablespoons apple cider vinegar
Quick Steps:
- Remove the thin membrane from the back of each rack, then pat the ribs dry.
- Brush lightly with mustard and coat all sides with the salt, brown sugar, paprika, garlic powder, and onion powder.
- Smoke at 250°F for about 2 hours, spritzing with apple juice every 45 minutes until the surface looks dry but not crusty.
- Wrap each rack in foil with butter and a splash of cider vinegar, then smoke for another 1 1/2 to 2 hours.
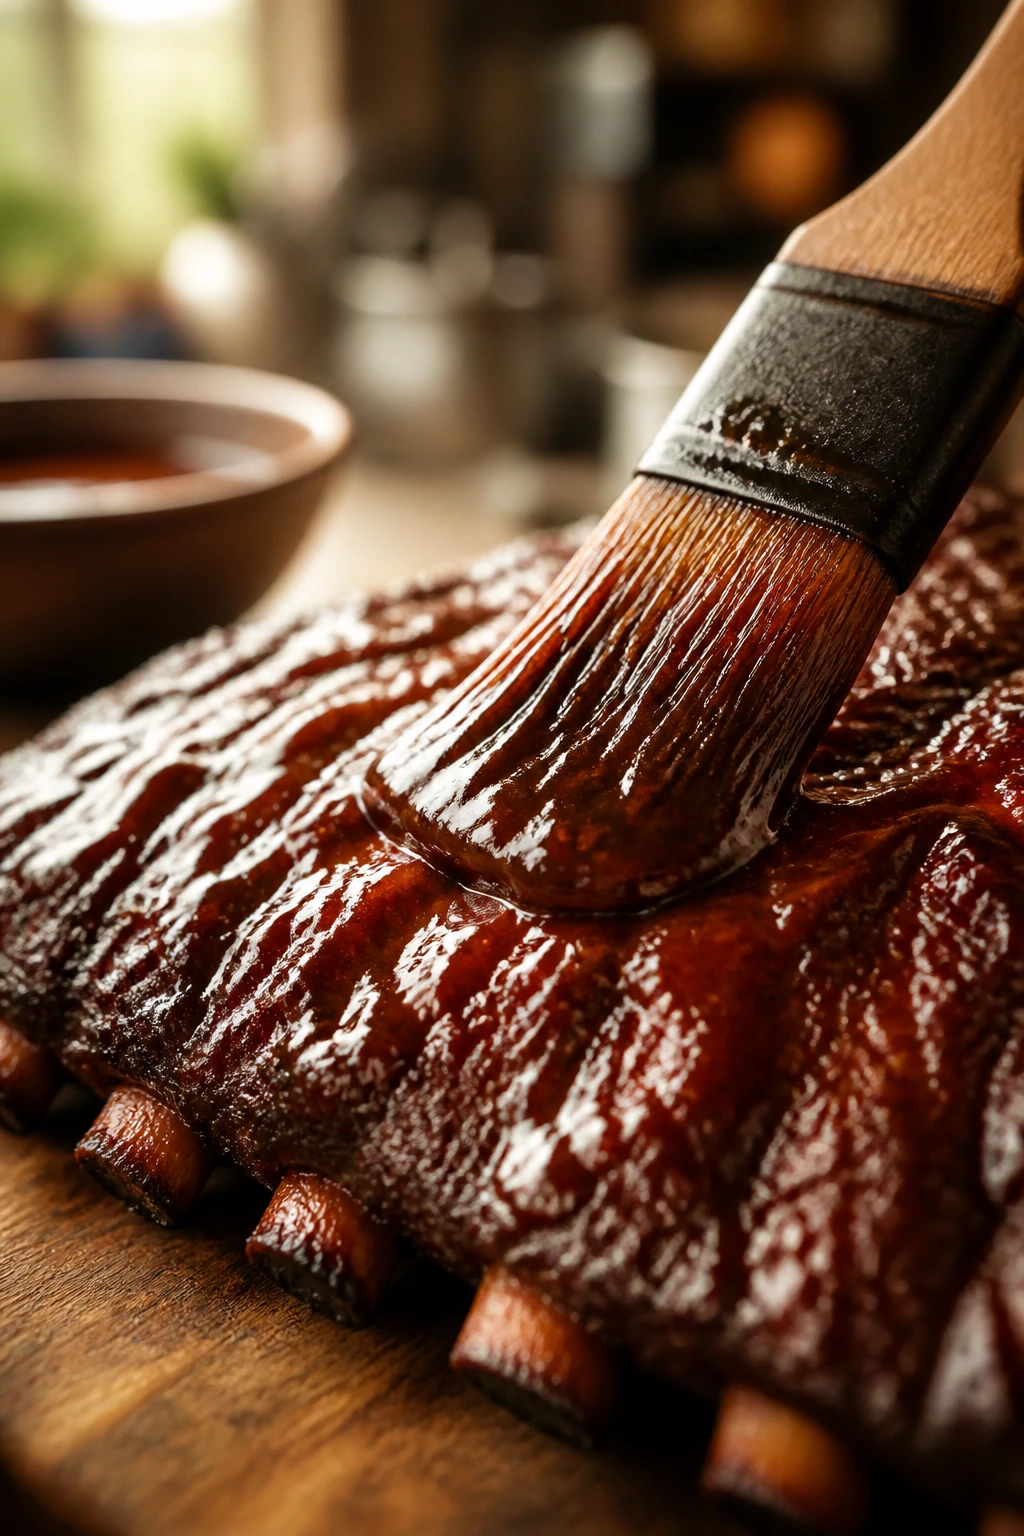
- Unwrap, brush with barbecue sauce, and smoke 20 to 30 minutes more until the sauce is glossy and the meat bends easily when lifted.
Tips and Variations:
- Dry Rib Style: Skip the sauce and finish with a little extra rub for a Memphis-style rack.
- Bend Test: A rack should bend sharply in the middle and start to crack on the surface.
- Sauce Late: Early sauce burns. Save it for the last stretch.
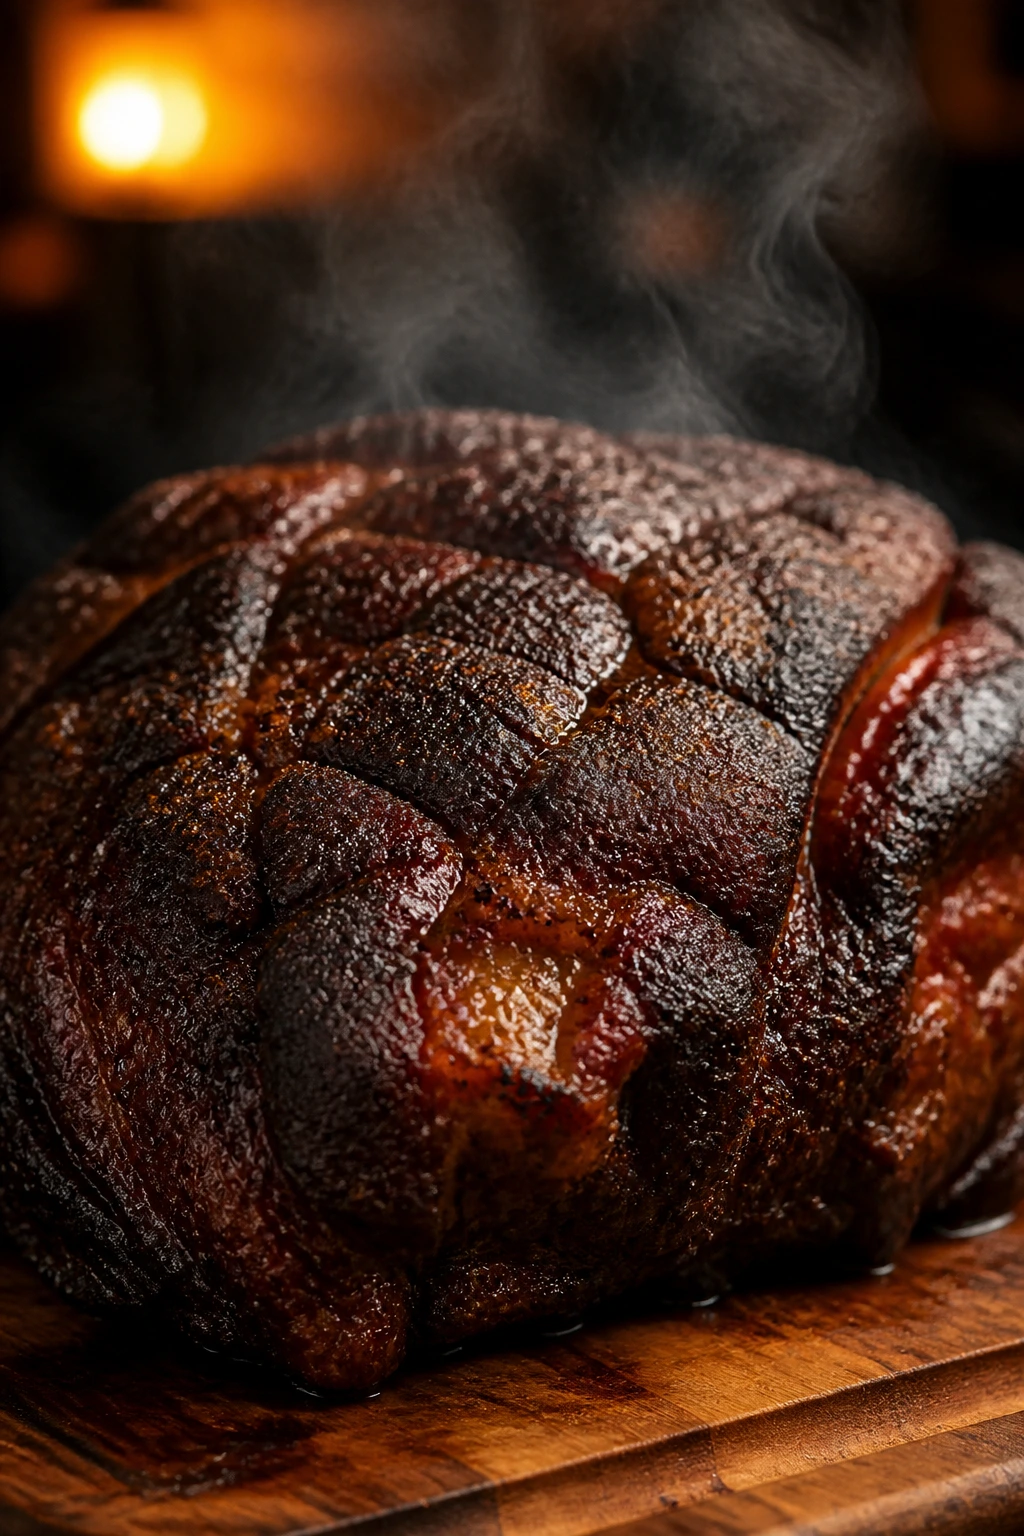
3. Pulled Pork Shoulder with Vinegar-BBQ Sauce
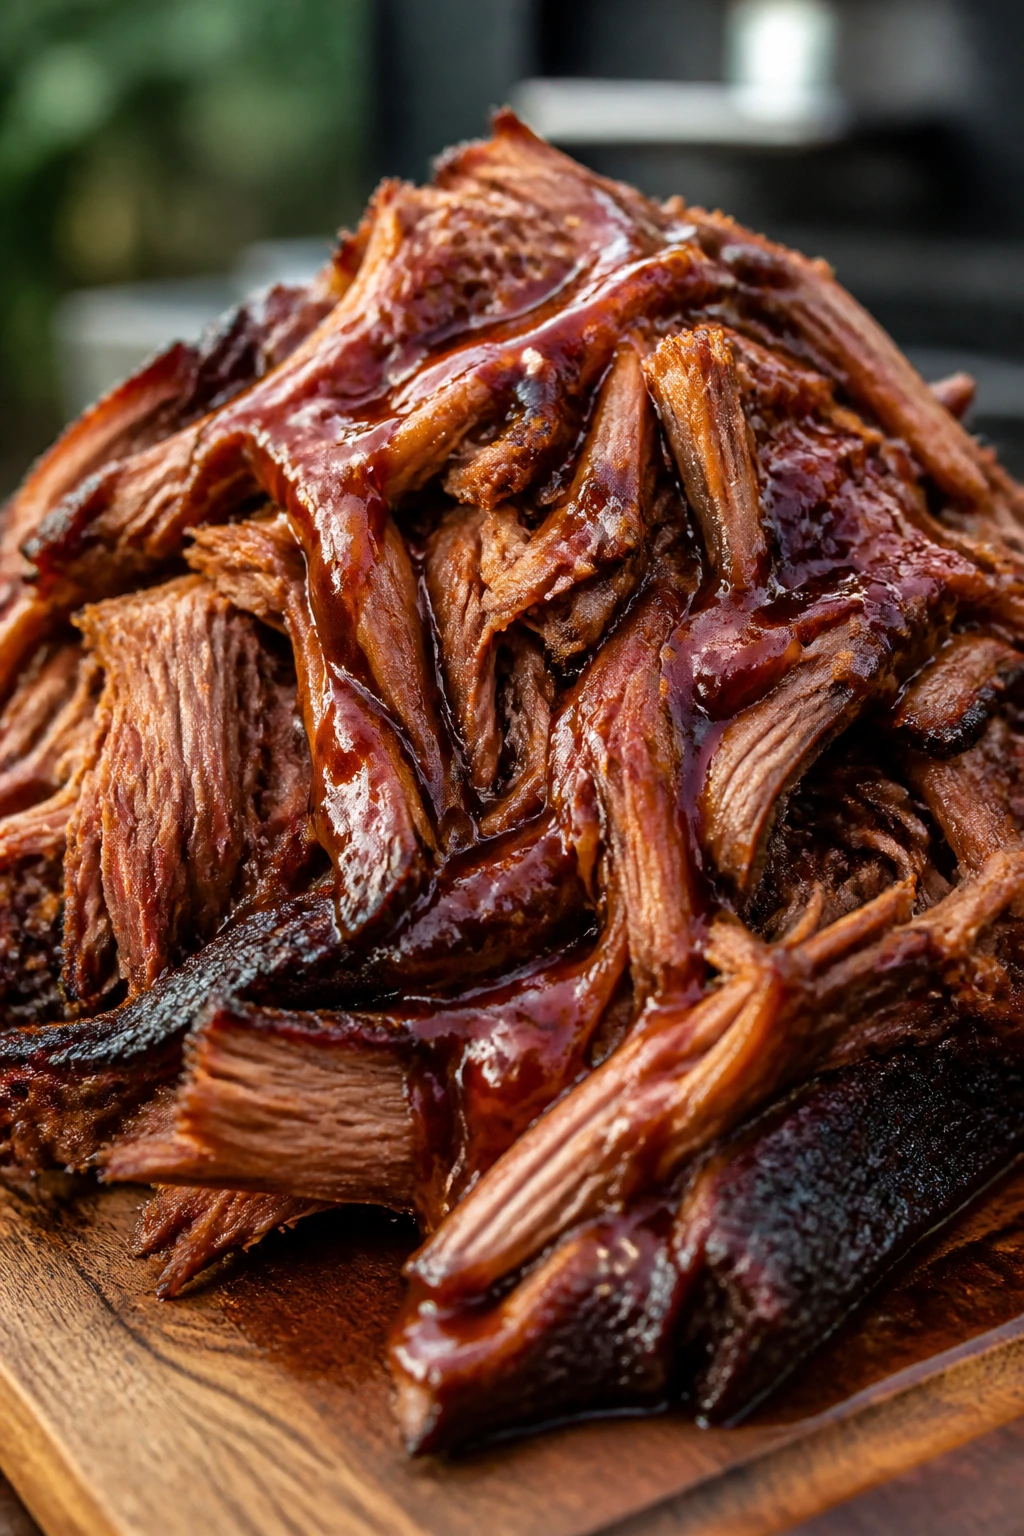
If you want one tray to feed a crowd and still have enough for sandwiches tomorrow, pork shoulder is the sensible choice. It’s forgiving, cheap compared with prime cuts, and loaded with enough fat and collagen to stay juicy through a long smoke. The pulled meat gets that stringy, succulent texture people keep going back for.
Why It Works:
Pork shoulder is built for long, slow cooking because the connective tissue breaks down over hours, not minutes. The outside gets barky, the inside turns tender, and the bone usually slides out with very little effort when it’s ready. Wrapping around the 165°F mark helps it power through the stall, and mixing the pulled meat with some of its own drippings keeps it from drying out once it’s shredded.
Key Ingredients:
- 1 bone-in pork shoulder, 8 to 10 pounds
- 2 tablespoons yellow mustard
- 1/4 cup kosher salt
- 1/4 cup brown sugar
- 2 tablespoons paprika
- 1 tablespoon black pepper
- 1 tablespoon garlic powder
- 1 cup apple juice
- 1/2 cup apple cider vinegar
- 2 tablespoons unsalted butter
- 8 to 10 brioche buns, for serving
- 2 cups coleslaw, optional but recommended
Quick Steps:
- Score the fat cap lightly, then coat the shoulder with mustard.
- Mix the salt, brown sugar, paprika, black pepper, and garlic powder, then season the pork on all sides.
- Smoke at 225°F until the bark is deep brown and the internal temperature reaches about 165°F, usually after several hours.
- Wrap the shoulder with apple juice and butter, then return it to the smoker and cook until it hits 200-205°F and feels loose when probed.
- Rest the pork for at least 45 minutes, then pull it apart, mixing in a little of the collected juices and a splash of vinegar sauce.
Tips and Variations:
- Carolina Lean: Increase the cider vinegar and cut back the sugar for a sharper finish.
- Sandwich Insurance: Toast the buns. Soft buns get soggy fast under pulled pork.
- Save the Drippings: Chill them briefly and skim the fat for a richer mix-in.
4. Honey-Glazed Smoked Chicken Thighs

Why do chicken thighs work so well on a smoker? Because they forgive mistakes that ruin leaner cuts. The dark meat stays juicy at higher temperatures, the skin can crisp if you give it enough heat, and the glaze turns tacky in the best possible way. This is the recipe for people who want smoke flavor without committing to an all-day project.
Why It Works:
Chicken thighs have enough fat to handle smoke at 275°F, which is hot enough to render the skin and move the cook along without drying the meat. The glaze goes on late, after the surface has already tightened, so the honey doesn’t burn before the chicken is done. Taking thighs to 175-185°F internal gives you meat that’s juicy and loose instead of stringy.
Key Ingredients:
- 3 pounds bone-in, skin-on chicken thighs
- 2 tablespoons olive oil
- 2 teaspoons kosher salt
- 1 teaspoon black pepper
- 2 teaspoons paprika
- 1 teaspoon garlic powder
- 1 teaspoon onion powder
- 1/2 cup barbecue sauce
- 3 tablespoons honey
- 1 tablespoon hot sauce
- 1 tablespoon lemon juice
Quick Steps:
- Pat the chicken thighs dry and set them on a rack in the fridge for 30 minutes if you want the skin drier.
- Rub the thighs with olive oil, then season with salt, pepper, paprika, garlic powder, and onion powder.
- Smoke at 275°F for about 45 minutes, skin side up, until the thighs are taking on color and the fat is beginning to render.
- Mix the barbecue sauce, honey, hot sauce, and lemon juice, then brush it on during the last 15 minutes of cooking.
- Continue smoking until the thickest thigh reaches 175-185°F and the skin is bronzed and slightly crisp.
Tips and Variations:
- Crisper Skin: Put the thighs on a wire rack and do not crowd them.
- Sweet Heat: Add 1 teaspoon cayenne to the rub if you like more bite.
- Serve with Pickles: The vinegar cuts through the glaze and keeps the plate from feeling heavy.
5. Cedar-Smoked Salmon with Herb Butter
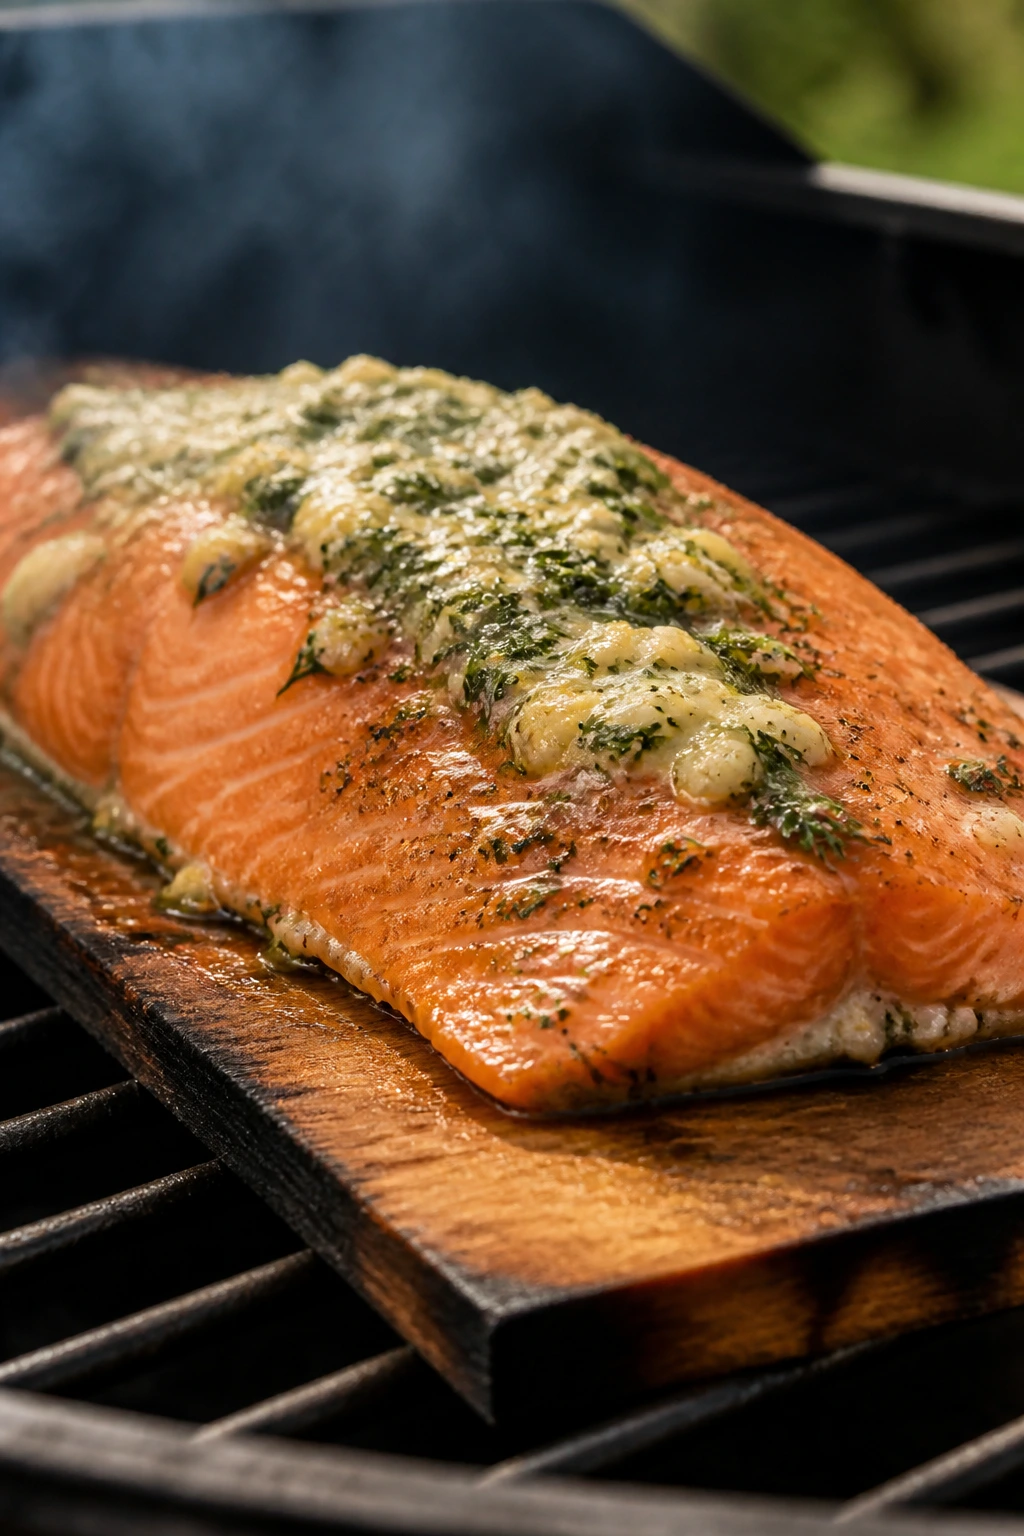
The first thing you notice is the smoke smell on the cedar plank — sweet, clean, and not heavy at all. Salmon gives you a different kind of smoker dinner, one that feels lighter but still earned. The flesh stays rich, the edges firm up just enough, and the herb butter melts into the top like it was always meant to be there.
Why It Works:
Salmon is delicate compared with brisket or pork, so the smoker has to be gentler. A cedar plank adds fragrance and helps buffer the heat, while a short sugar-salt cure firms the surface and gives the fish a better texture. The key is stopping early: salmon wants to be pulled while it’s still glossy and barely yielding, not after it flakes into dry little shards.
Key Ingredients:
- 2 pounds center-cut salmon fillet, skin on
- 2 tablespoons kosher salt
- 2 tablespoons brown sugar
- 1 tablespoon black pepper
- 1 cedar plank, soaked in water for 1 hour
- 4 tablespoons unsalted butter, melted
- 1 tablespoon fresh dill, chopped
- 1 tablespoon fresh parsley, chopped
- 1 teaspoon garlic, finely grated
- 1 tablespoon lemon juice
- 1 teaspoon maple syrup, optional
Quick Steps:
- Soak the cedar plank for at least 1 hour so it does not catch fire on the smoker.
- Mix the salt, brown sugar, and pepper, then lightly coat the salmon and let it sit for 20 to 30 minutes.
- Rinse off the cure very quickly, pat the fish dry, and place it skin-side down on the plank.
- Smoke at 225°F for 25 to 35 minutes, then brush with the melted butter mixed with dill, parsley, garlic, lemon juice, and maple syrup.
- Pull the salmon when the thickest part reaches 125-130°F for a silky texture, or closer to 145°F if you prefer a firmer finish.
Tips and Variations:
- Cedar Not Required: A foil tray works if you do not have a plank.
- Watch for Albumin: White protein beads mean it’s getting close; too many beads mean it went too far.
- Best the Same Day: Salmon is at its best when served soon after cooking.
6. Smoked Meatloaf with Tangy Tomato Glaze
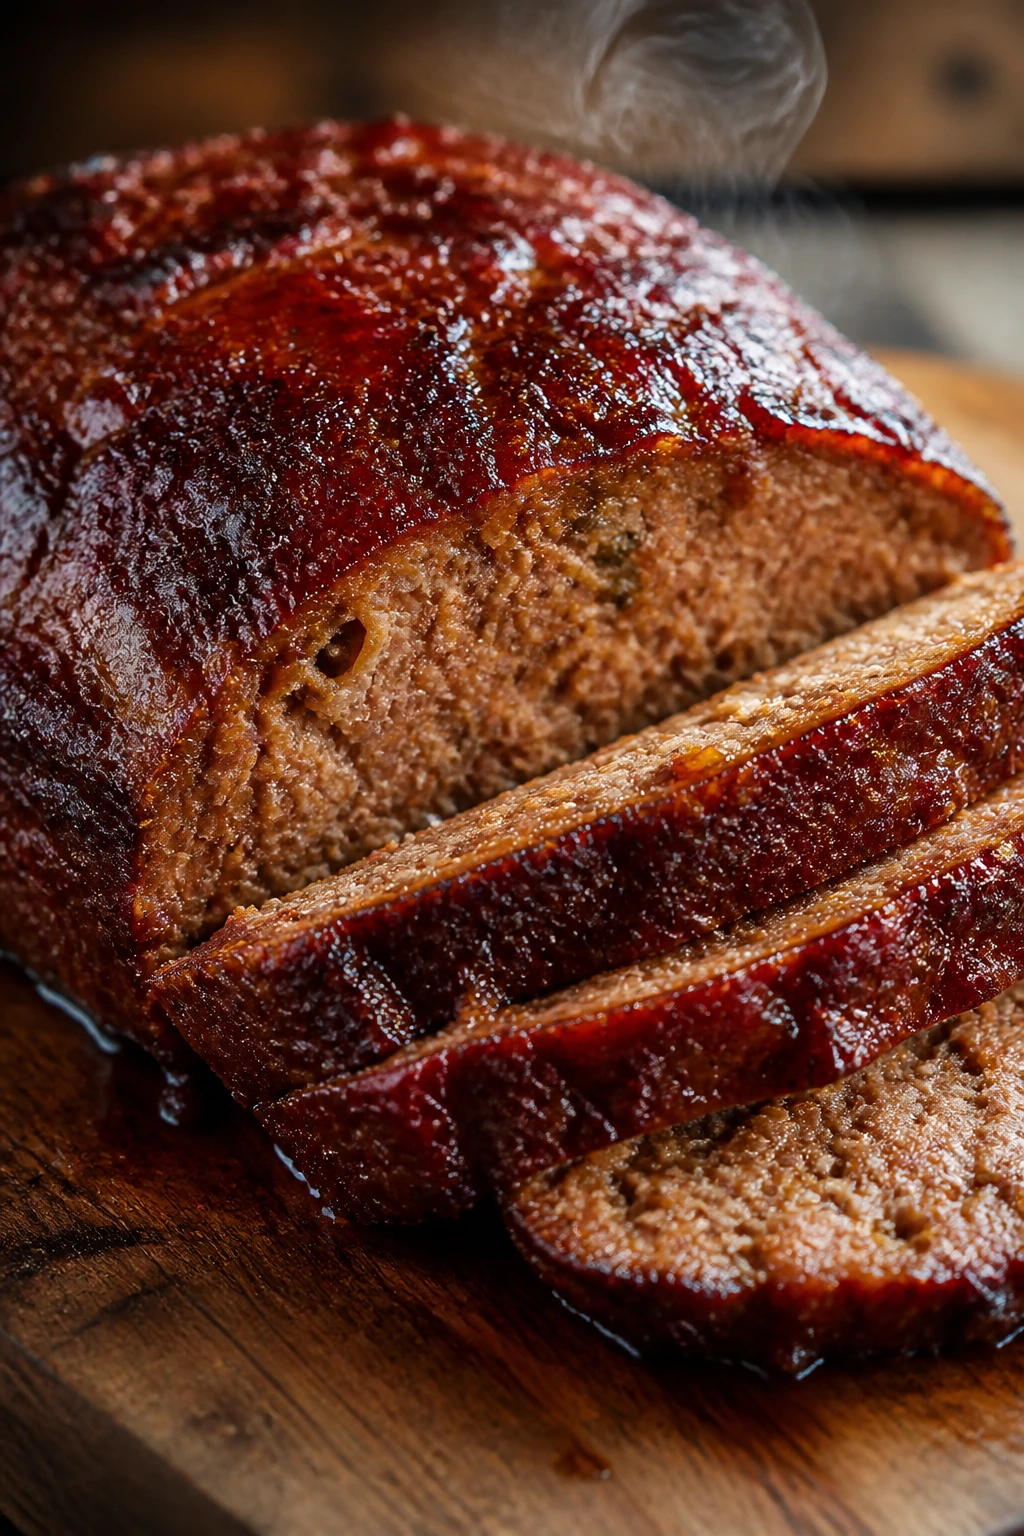
Smoked meatloaf is the kind of dish that surprises people in the best way. It’s familiar enough to feel comforting, but the smoker gives it a deeper edge and a better crust than the oven version ever manages. The glaze turns glossy and a little sticky, and the slices hold together without tasting dense.
Why It Works:
Meatloaf loves smoke because its shape gives the fire plenty of surface area to work on, and the fat from the beef and pork keeps the loaf from drying out. A loaf pan traps too much moisture, so a freeform shape on a rack gives you better bark and better texture. The glaze goes on near the end so the sugars can caramelize without burning into bitterness.
Key Ingredients:
- 1 1/2 pounds ground beef
- 1 pound ground pork
- 1 cup panko breadcrumbs
- 2 large eggs
- 1/2 cup whole milk
- 1 small onion, finely diced
- 3 cloves garlic, minced
- 1/4 cup ketchup
- 2 tablespoons Worcestershire sauce
- 1 tablespoon Dijon mustard
- 1 1/2 teaspoons kosher salt
- 1 teaspoon black pepper
- 1 teaspoon smoked paprika
- 1/2 cup ketchup, for the glaze
- 2 tablespoons brown sugar
- 1 tablespoon apple cider vinegar
Quick Steps:
- Mix the panko and milk in a large bowl and let it sit for 5 minutes so the breadcrumbs soften.
- Add the beef, pork, eggs, onion, garlic, ketchup, Worcestershire, mustard, salt, pepper, and paprika, then mix gently just until combined.
- Shape the meat into a freeform loaf about 9 inches long and place it on a wire rack over a foil-lined tray.
- Smoke at 250°F for 1 hour, then brush with the glaze made from ketchup, brown sugar, and vinegar.
- Continue smoking until the center reaches 155-160°F, then rest for 10 to 15 minutes before slicing.
Tips and Variations:
- Mini Loaves: Shape smaller loaves for faster cooking and more crust.
- Don’t Pack It Tight: Overmixing makes meatloaf heavy.
- Great Leftover Sandwiches: Cold slices with mustard and pickles are better than they should be.
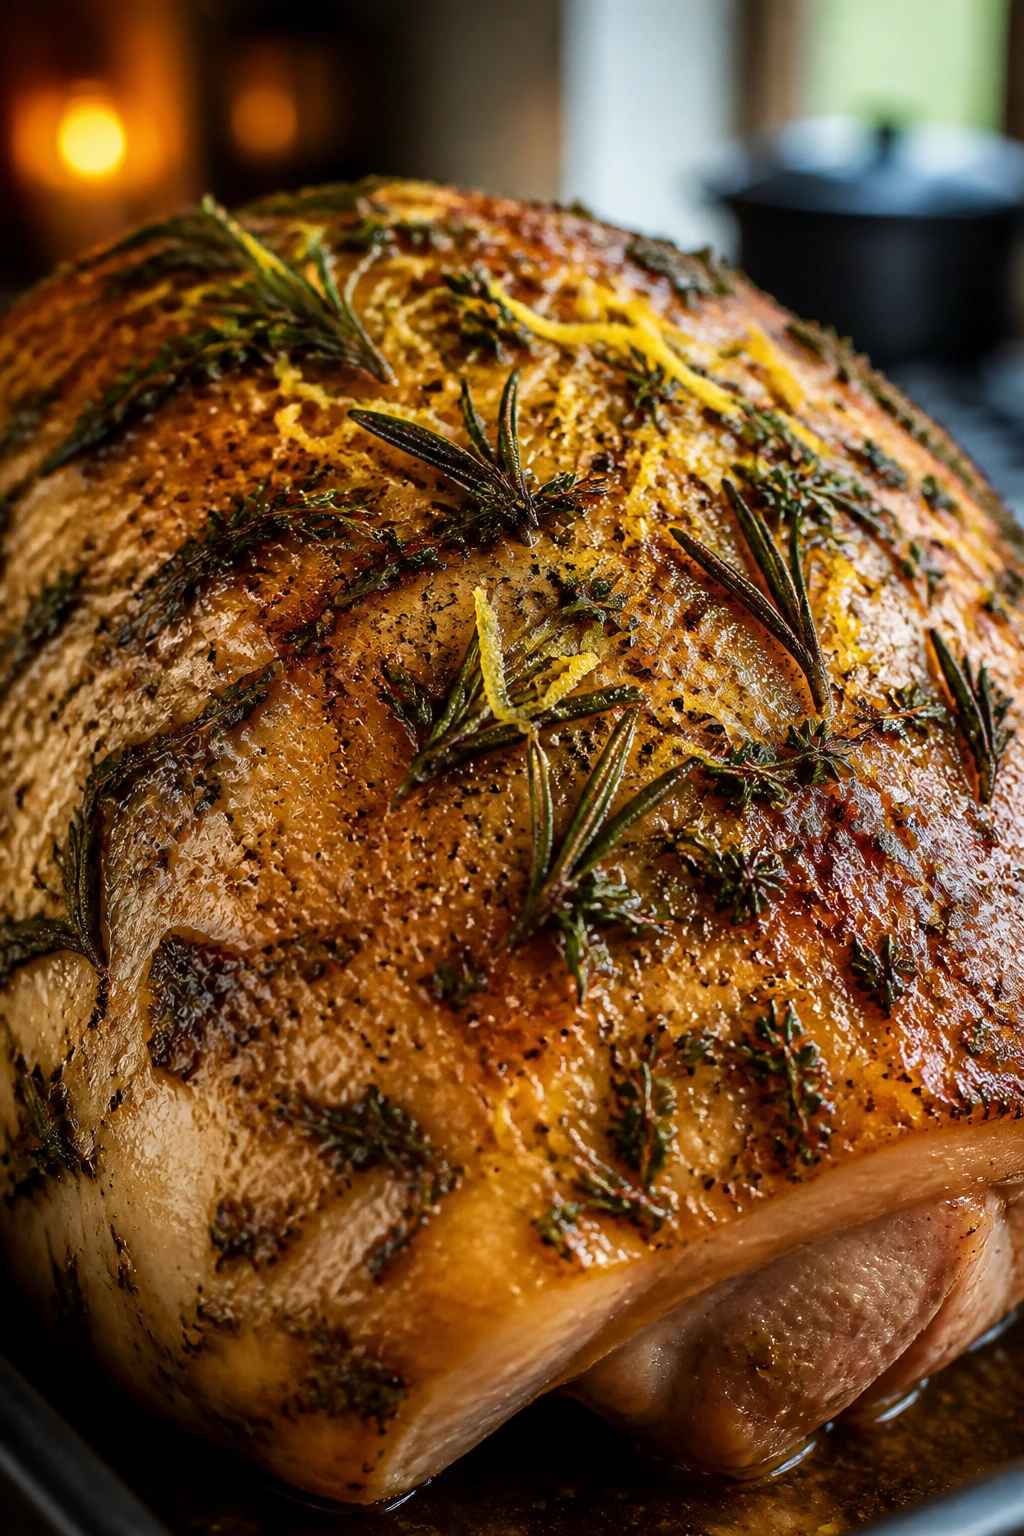
7. Smoked Turkey Breast with Garlic and Herbs
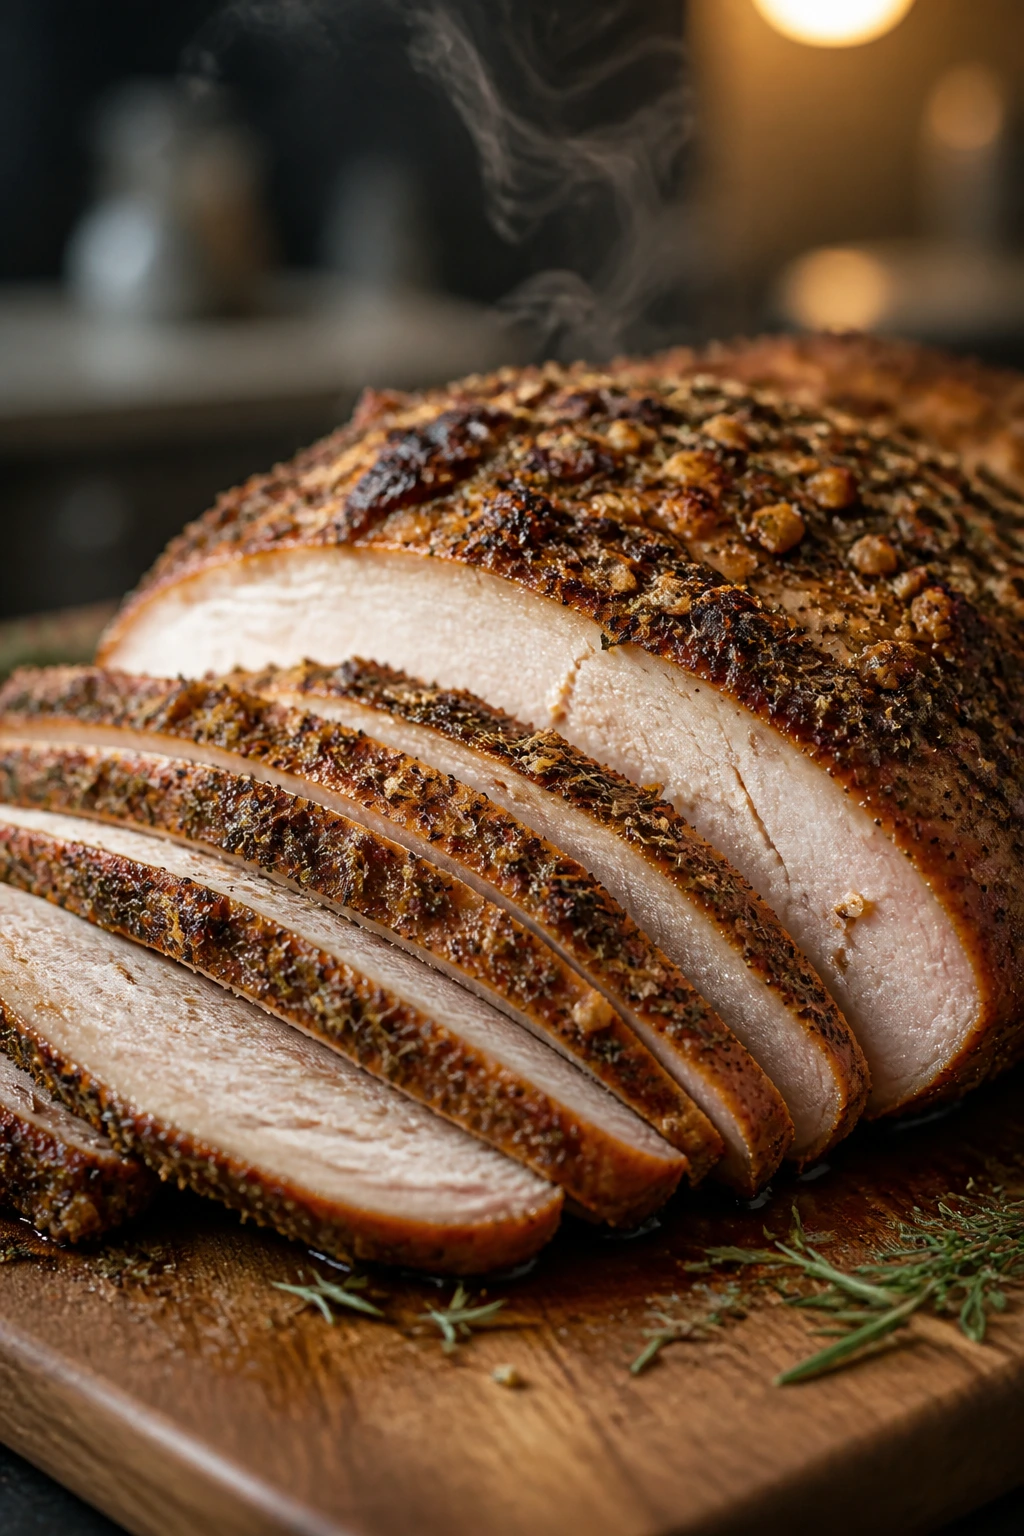
Lean meat and smoke can be a bad match if you rush it. Turkey breast needs a little protection, a little seasoning, and a thermometer you actually trust. Done right, it slices clean, stays moist, and feels like the kind of centerpiece people only expect from a holiday table.
Why It Works:
Turkey breast dries out fast if it’s cooked like chicken thighs or pork shoulder, so the strategy is all about moisture management. A simple dry brine seasons the meat all the way through, while butter and herbs keep the surface rich enough to handle smoke. Pulling it around 160°F and letting carryover take it the rest of the way is the difference between juicy and chalky.
Key Ingredients:
- 1 bone-in turkey breast, 4 to 6 pounds
- 3 tablespoons kosher salt
- 2 tablespoons unsalted butter, softened
- 1 tablespoon olive oil
- 2 teaspoons black pepper
- 2 teaspoons garlic powder
- 1 teaspoon paprika
- 1 tablespoon chopped rosemary
- 1 tablespoon chopped thyme
- 1 cup chicken broth
- 1 lemon, sliced
Quick Steps:
- Dry brine the turkey breast with the salt for at least 8 hours, uncovered in the fridge.
- Rub the breast with butter and olive oil, then season with pepper, garlic powder, paprika, rosemary, and thyme.
- Smoke at 250°F with the lemon slices and chicken broth in a drip pan beneath the turkey.
- Cook until the thickest part of the breast reaches 160°F and the skin is golden, usually around 2 to 3 hours depending on size.
- Rest for 20 minutes before slicing, and let the temperature climb to about 165°F during the rest.
Tips and Variations:
- Herb Butter Boost: Slide extra butter under the skin if you want a richer finish.
- Keep It Juicy: Slice only what you need; turkey dries faster once cut.
- Serve with Gravy: The drippings make a nice smoky base for pan gravy.
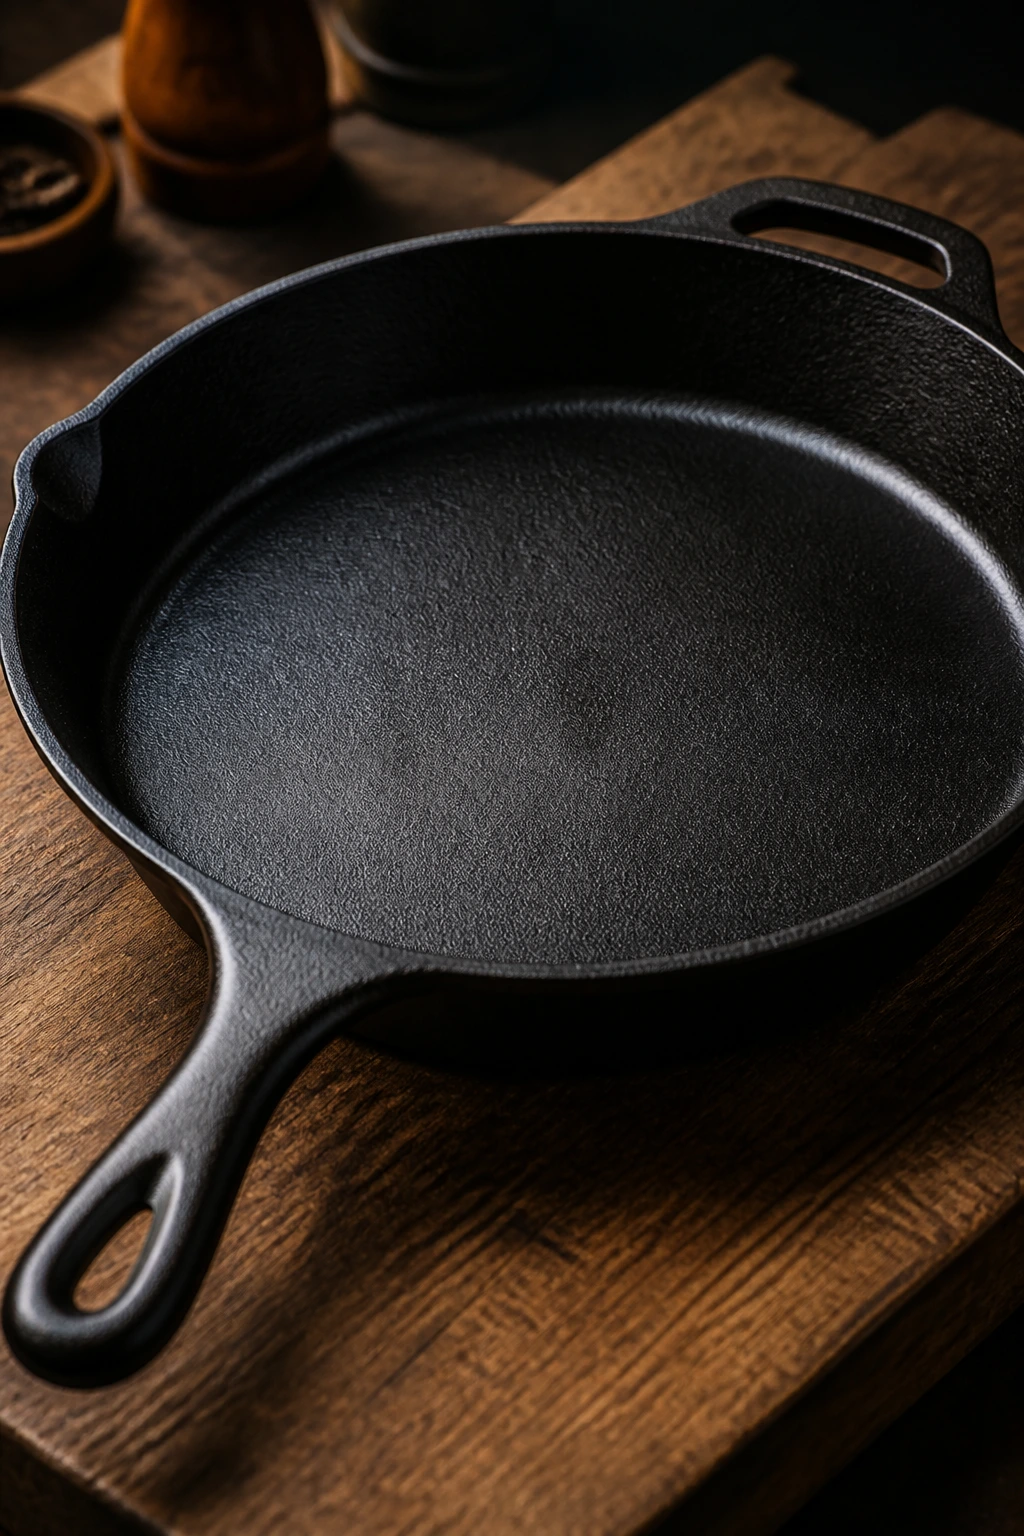
8. Sausage and Peppers on the Smoker
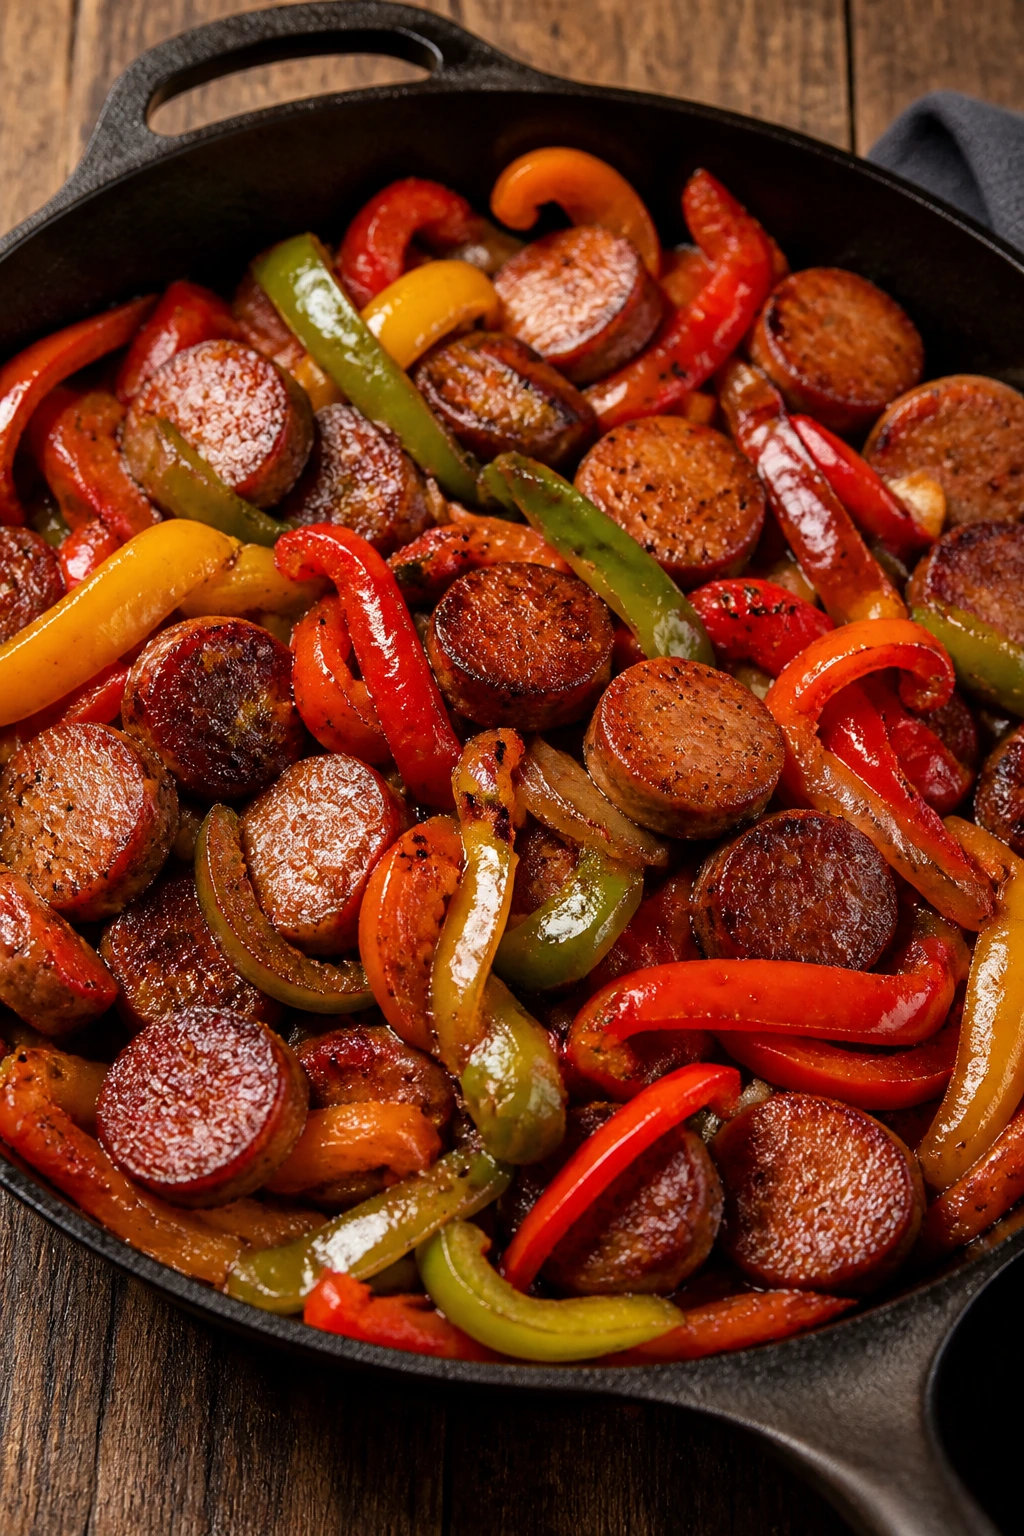
Need a smoker dinner that does not ask for a six-hour commitment? Sausage, peppers, and onions get the job done fast, and they still feel like a proper meal. The sausage picks up smoke while the peppers soften into something sweet and silky, and the whole thing works in a skillet, on rolls, or over rice.
Why It Works:
This dish is efficient because the sausage is already seasoned and often fully cooked, so the smoker’s job is mostly to deepen the flavor and warm everything through evenly. Cast iron holds heat well and lets the peppers and onions soften without turning mushy, while tomato paste adds a little body to the pan juices. It’s one of the few smoker dinners that feels casual and deliberate at the same time.
Key Ingredients:
- 2 pounds smoked sausage, sliced into 1-inch pieces
- 4 bell peppers, sliced
- 2 large onions, sliced
- 2 tablespoons olive oil
- 4 cloves garlic, minced
- 1 teaspoon Italian seasoning
- 1/2 teaspoon red pepper flakes
- 2 tablespoons tomato paste
- 1 cup crushed tomatoes
- 1/2 teaspoon kosher salt
- 1/4 teaspoon black pepper
- 6 hoagie rolls, or 3 cups cooked rice
- 8 slices provolone, optional
Quick Steps:
- Toss the peppers and onions with olive oil, garlic, Italian seasoning, red pepper flakes, salt, and pepper in a cast iron skillet.
- Add the sausage and tomato paste, then stir in the crushed tomatoes so the mixture looks coated but not soupy.
- Place the skillet in a 250°F smoker and cook for 35 to 45 minutes, stirring once halfway through.
- If you’re using rolls, lay provolone on top during the last 5 minutes so it softens.
- Serve hot over rice or tucked into buns while the peppers are still glossy and tender.
Tips and Variations:
- Use Good Sausage: A sausage with a firm casing and real fat beats dry links every time.
- Make It Hotter: Add sliced cherry peppers or a spoonful of Calabrian chile paste.
- One-Skillet Advantage: The skillet catches every drop of flavor, so do not skip it.
9. Mustard-Rubbed Smoked Pork Tenderloin
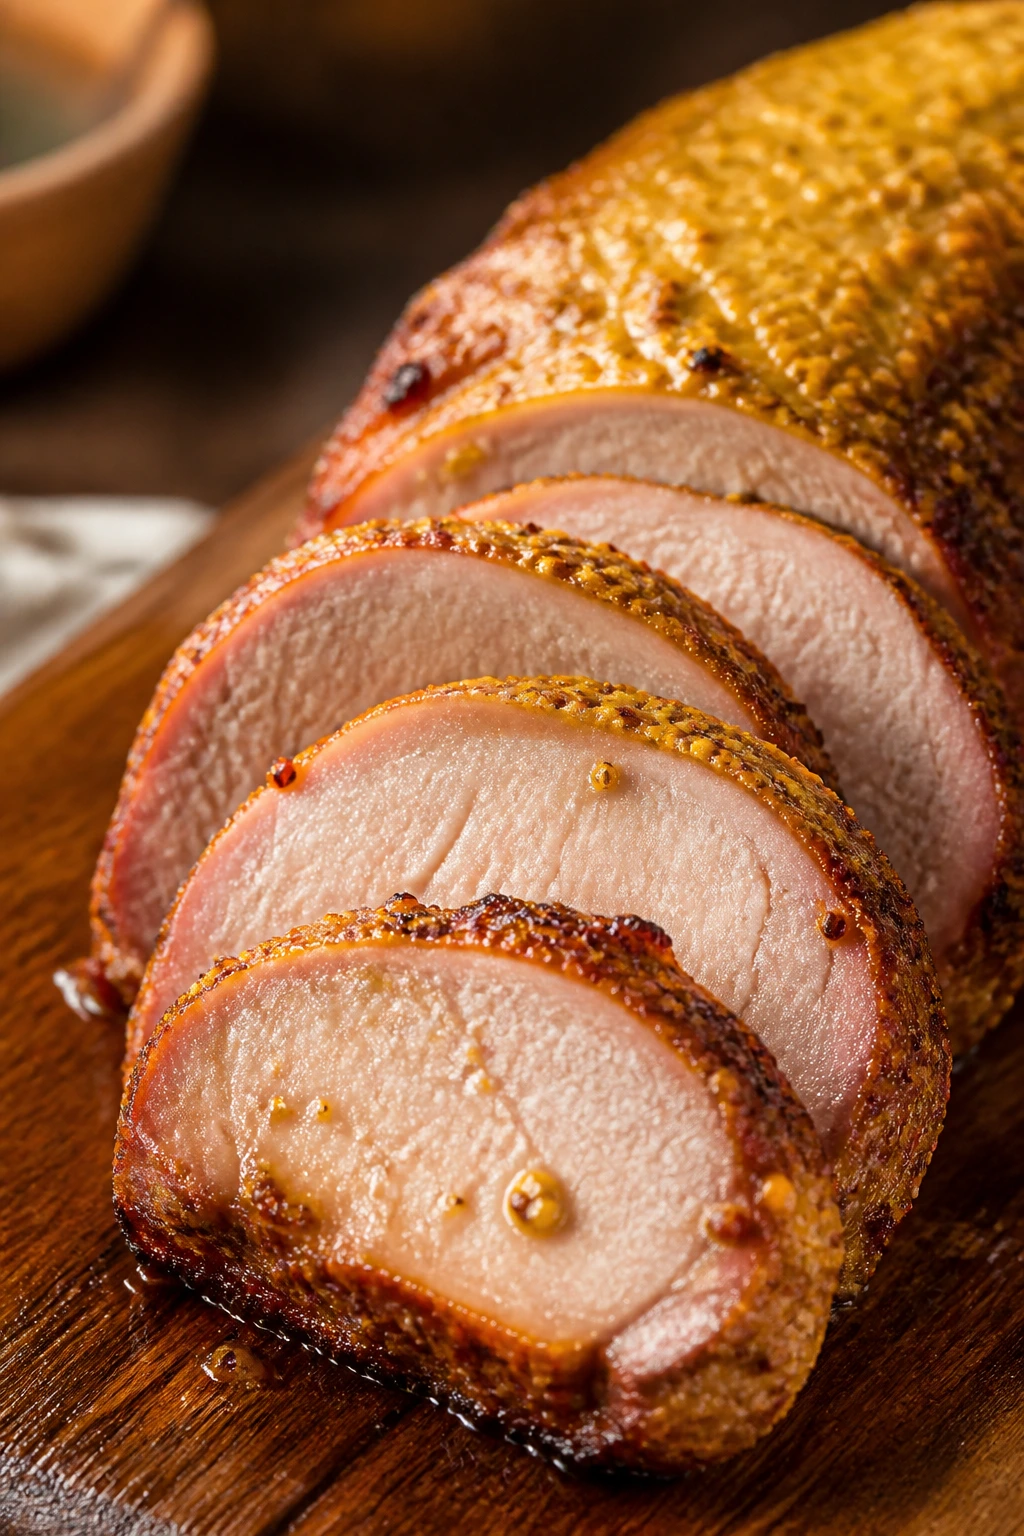
Pork tenderloin is not a cut to babysit. It’s a cut to respect and then get out of the way. The smoke gives it depth, the mustard rub builds a sharp crust, and the quick cook keeps the center juicy instead of stringy. If you want something polished without a lot of drama, this is the one.
Why It Works:
Tenderloin is naturally lean, so the trick is to keep the smoke gentle and the cook fast. A mustard-based rub helps seasoning cling to the surface, and a short rest after smoking keeps the juices from flooding out when you slice. Because this cut is small and tender already, you’re aiming for 145°F internal, not the slow collapse you want from shoulder or brisket.
Key Ingredients:
- 2 pork tenderloins, about 1 1/2 to 2 pounds total
- 2 tablespoons yellow mustard
- 1 tablespoon brown sugar
- 2 teaspoons kosher salt
- 1 teaspoon black pepper
- 1 teaspoon smoked paprika
- 1 teaspoon garlic powder
- 1/2 teaspoon onion powder
- 1/4 cup apple juice
- 2 tablespoons unsalted butter
- 1 tablespoon Dijon mustard, for serving
Quick Steps:
- Trim the silver skin from the tenderloins and pat them dry.
- Coat each tenderloin with yellow mustard, then season with brown sugar, salt, pepper, paprika, garlic powder, and onion powder.
- Smoke at 225°F to 250°F for about 45 to 60 minutes, turning once if one side colors faster than the other.
- Brush with apple juice and a little melted butter near the end so the surface stays glossy.
- Pull the tenderloins at 140-142°F, rest for 10 minutes, and slice at 145°F.
Tips and Variations:
- Reverse Sear Option: Give the tenderloins a quick hot sear after smoking if you want a darker crust.
- Do Not Overcook: Tenderloin goes from juicy to dry fast, so rely on a thermometer.
- Serve with Mustard Sauce: A spoonful of Dijon and butter makes a sharp, easy pan sauce.
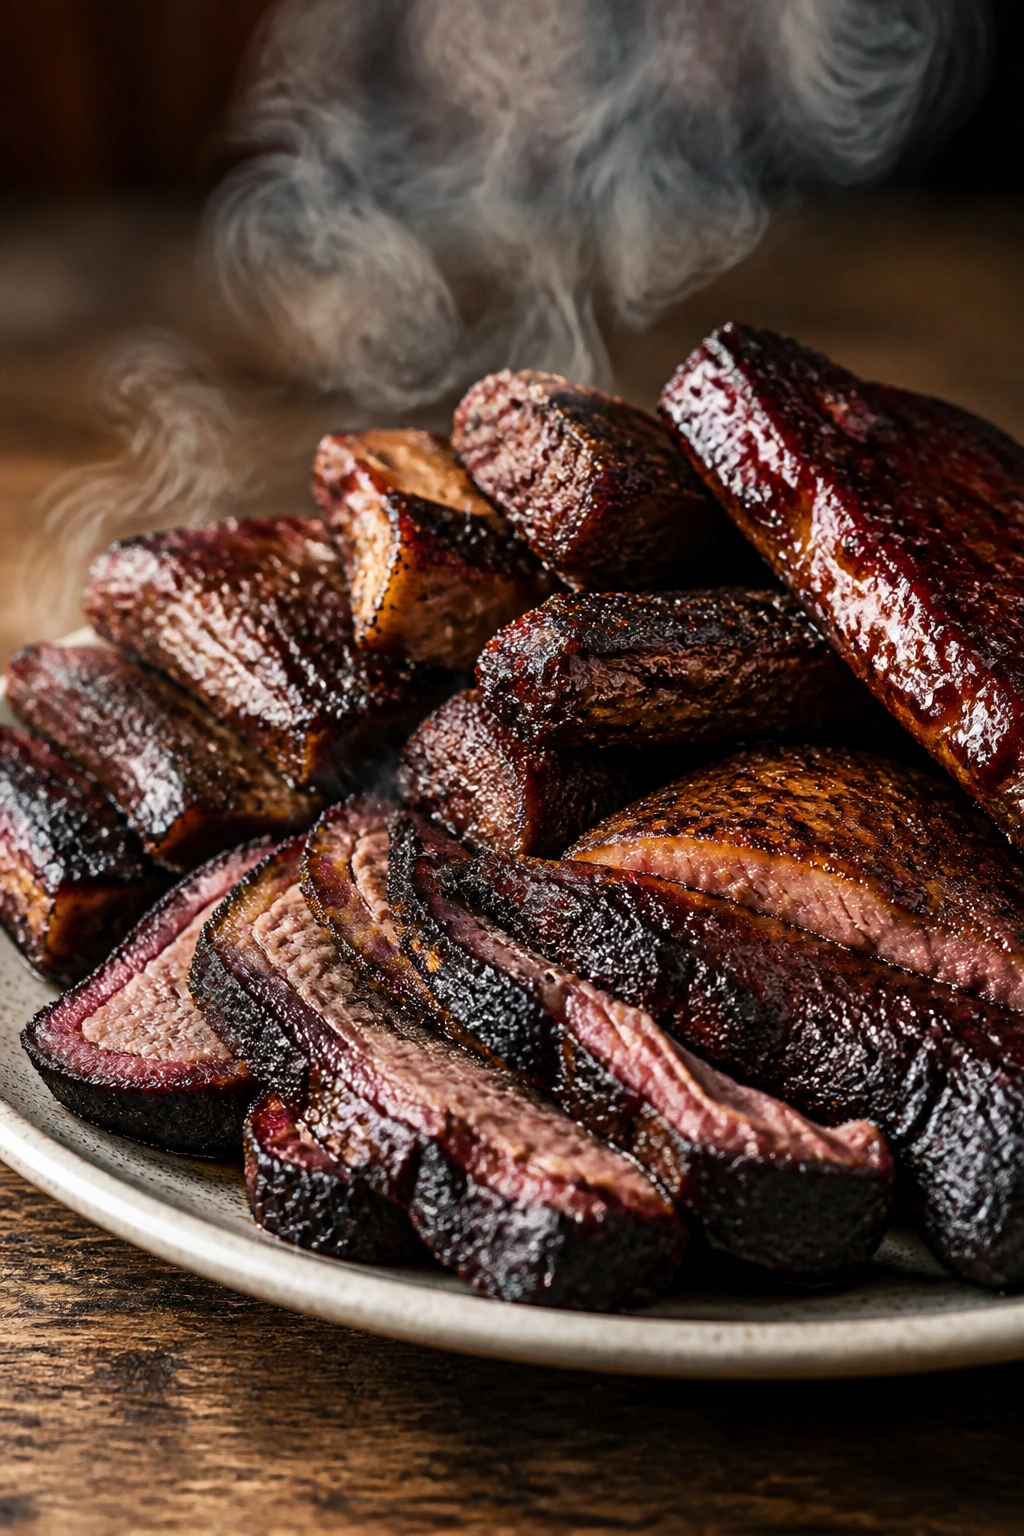
10. Chuck Roast Burnt Ends
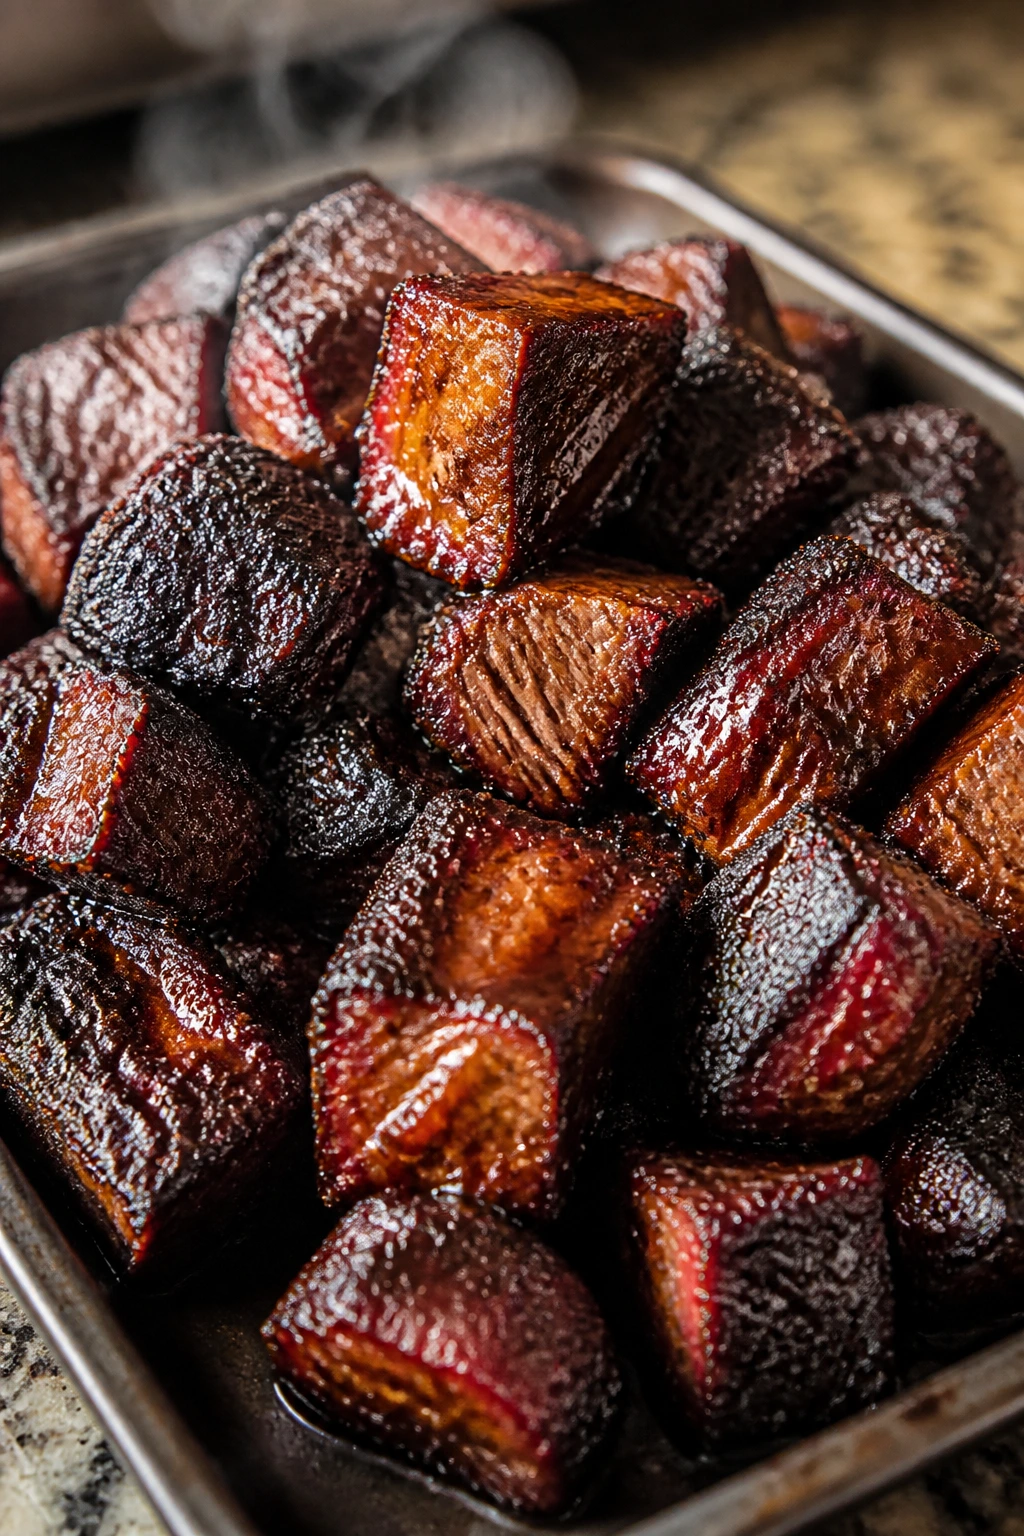
Chuck roast earns its keep twice: first as a roast, then as sticky cubes that disappear off the tray. It’s beefy, rich, and a little rough in the best possible way. After the second smoke, the edges get lacquered, the centers get tender, and the whole pan looks like it should be more expensive than it is.
Why It Works:
Chuck roast has enough marbling and connective tissue to behave like a poor man’s brisket without pretending to be one. The first stage builds bark and renders fat; the second stage, after cubing, lets each piece soak up sauce and turn glossy. It’s a forgiving recipe too — if brisket intimidates you, chuck roast gives you a similar payoff with less commitment.
Key Ingredients:
- 1 chuck roast, 4 to 5 pounds
- 2 tablespoons yellow mustard
- 1/4 cup kosher salt
- 1/4 cup coarse black pepper
- 2 tablespoons garlic powder
- 1 cup beef broth
- 1/2 cup barbecue sauce
- 2 tablespoons brown sugar
- 2 tablespoons unsalted butter
- 1 tablespoon Worcestershire sauce
- 1 tablespoon apple cider vinegar
Quick Steps:
- Coat the chuck roast lightly with mustard, then season all sides with salt, pepper, and garlic powder.
- Smoke at 250°F until the bark is set and the roast reaches about 165-170°F internal.
- Cut the roast into 1 1/2-inch cubes and place them in a foil pan with beef broth, barbecue sauce, brown sugar, butter, Worcestershire, and vinegar.
- Return the pan to the smoker and cook for another 45 to 60 minutes, stirring once or twice, until the cubes are dark, sticky, and tender.
- Serve hot, either piled on mashed potatoes or tucked into toasted rolls.
Tips and Variations:
- Use a Well-Marbled Roast: Lean chuck cooks up drier and less luxurious.
- Sauce in Layers: Add some sauce at the end, not all at the start.
- Fantastic Over Polenta: That soft, creamy base handles the rich beef nicely.
11. Whole Smoked Chicken with Crispy Skin
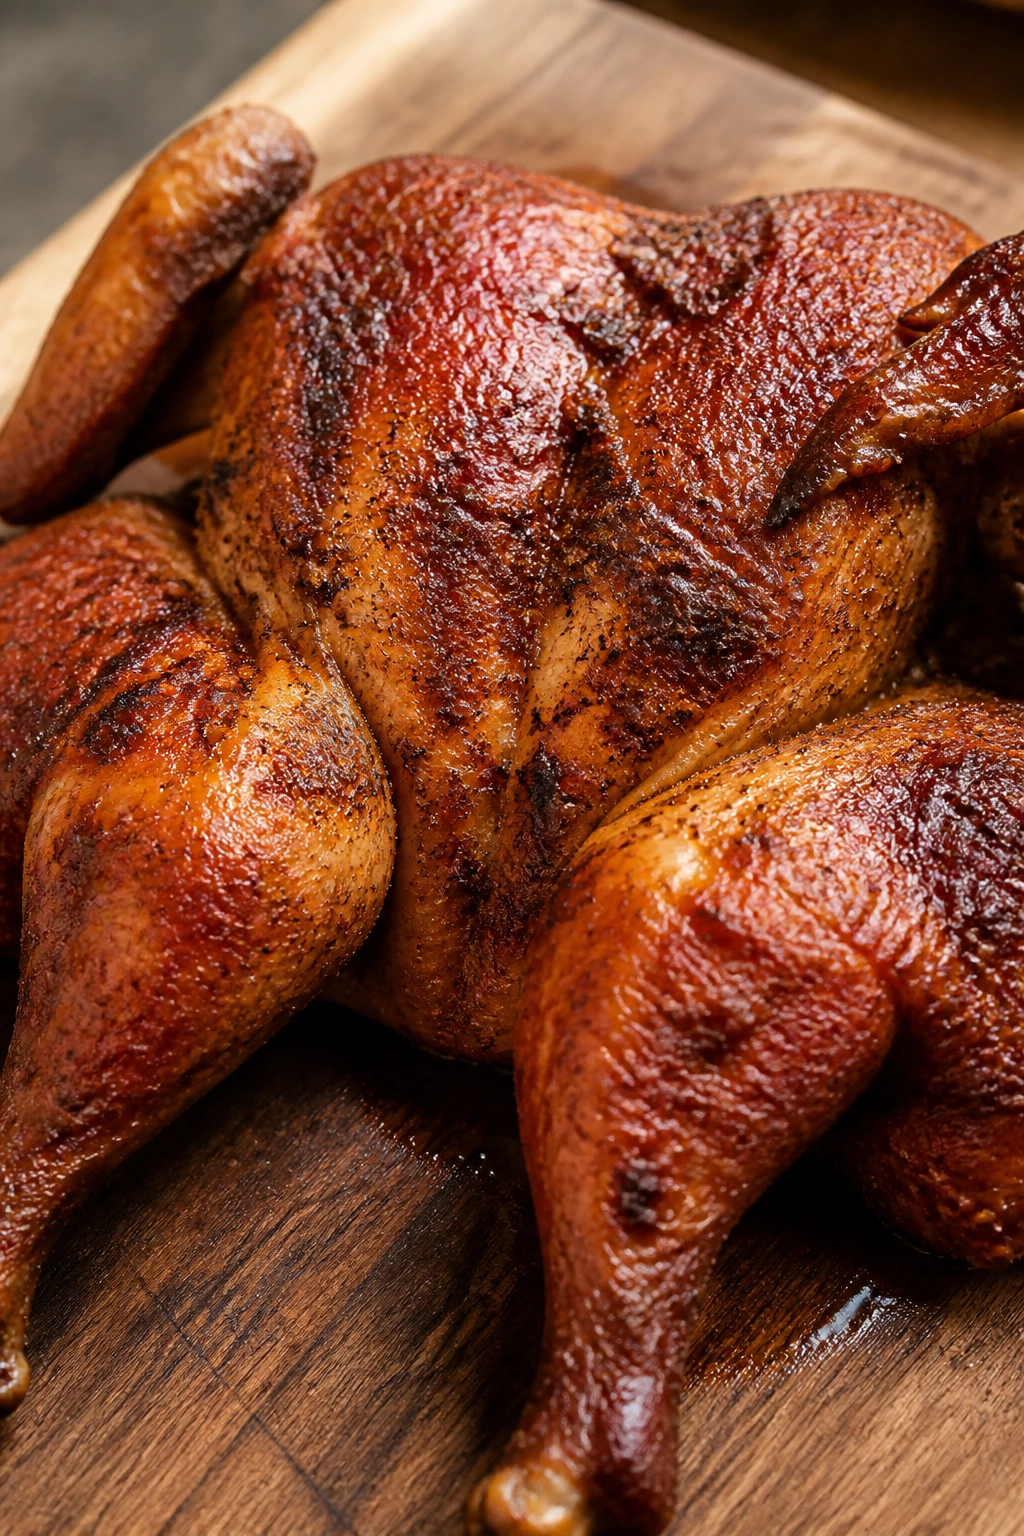
A spatchcocked whole chicken is the smartest low-drama move on a smoker. You get a full bird, crispier skin than you’d expect, and white and dark meat that finish closer together instead of waiting on each other. It’s simple enough for a weeknight and good enough for a table that matters.
Why It Works:
Spatchcocking flattens the bird so heat reaches the breasts and thighs more evenly, which keeps the breast from drying out while the legs finish. A dry brine pulls moisture to the surface, then draws it back in with seasoning, giving the skin a better chance to tighten. Smoking at 250-275°F hits the sweet spot: warm enough to crisp the skin, gentle enough to protect the meat.
Key Ingredients:
- 1 whole chicken, 4 to 5 pounds
- 2 tablespoons olive oil
- 2 tablespoons kosher salt
- 1 tablespoon black pepper
- 2 teaspoons garlic powder
- 2 teaspoons onion powder
- 2 teaspoons paprika
- 1 lemon, halved
- 4 sprigs fresh thyme
- 2 tablespoons unsalted butter, optional for finishing
- 1 cup chicken broth, for the drip pan
Quick Steps:
- Remove the backbone from the chicken and press it flat with your hands.
- Dry brine the bird with salt for at least 4 hours, or overnight if you have time.
- Rub the skin with olive oil, then season with pepper, garlic powder, onion powder, and paprika.
- Smoke at 250-275°F with lemon and thyme in the cavity area and broth in the drip pan, cooking until the breast reaches 165°F and the thighs hit 175°F.
- Rest for 15 minutes before carving, then finish with melted butter if you want extra shine.
Tips and Variations:
- Crispier Skin: Leave the chicken uncovered in the fridge for a few hours before cooking.
- Use the Drippings: They make a strong base for a quick gravy.
- Lemon Herb Version: Add rosemary and parsley if you want a brighter finish.
12. Reverse-Seared Smoked Prime Rib
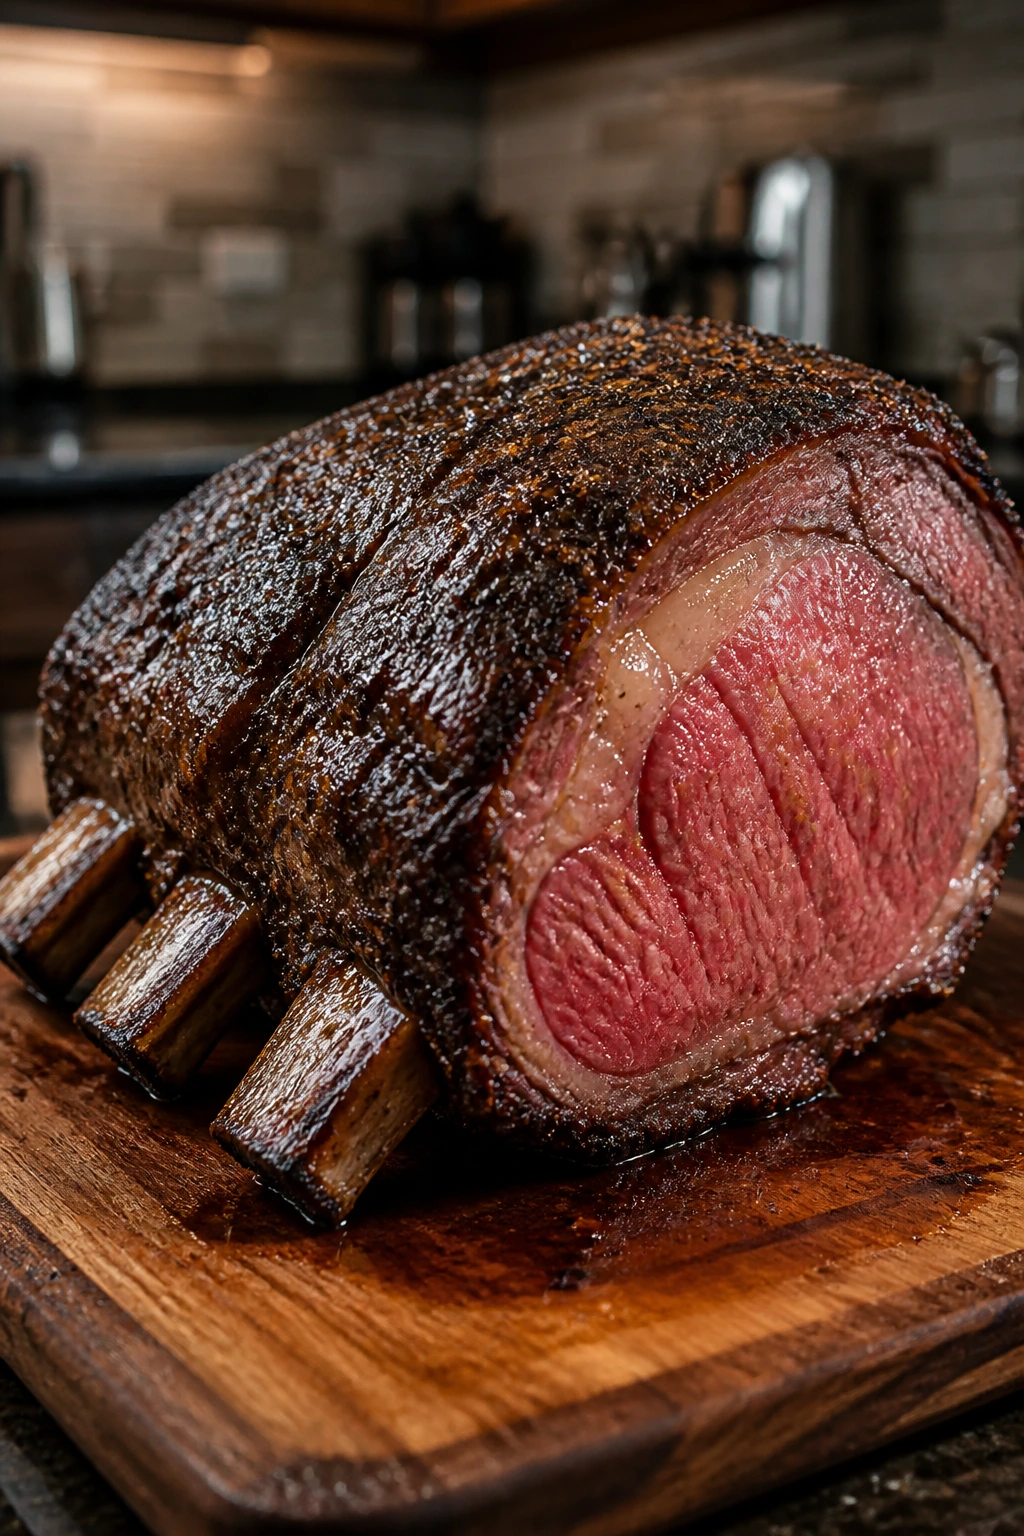
If you want one dish that looks expensive before anyone tastes it, prime rib is the showpiece. The smoke settles into the fat, the crust gets savory and dark, and the center stays rosy if you keep your nerve and trust the thermometer. This is the cut that makes people hover near the carving board.
Why It Works:
Prime rib already has the marbling to stay juicy, so the smoker’s job is gentle flavor and even warming, not aggression. Reverse searing gives you a clean edge-to-edge doneness profile: slow smoke first, hard heat last. That means less gray band around the outside and a more even slice from end to end, which is exactly what you want when the roast is the centerpiece.
Key Ingredients:
- 1 bone-in prime rib roast, 5 to 7 pounds
- 2 tablespoons kosher salt
- 1 tablespoon coarse black pepper
- 2 tablespoons garlic powder
- 1 tablespoon chopped rosemary
- 1 tablespoon chopped thyme
- 2 tablespoons olive oil
- 2 tablespoons softened butter
- 1 tablespoon horseradish, for serving
- 1/2 cup beef broth, optional for the pan
Quick Steps:
- Salt the roast at least 12 hours ahead and keep it uncovered in the fridge.
- Rub with olive oil, then season with pepper, garlic powder, rosemary, and thyme.
- Smoke at 225°F until the center reaches 118-120°F for medium rare.
- Rest the roast for 20 minutes, then hit it with a very hot oven or grill sear until the exterior darkens and the internal temperature settles around 125-130°F.
- Rest again briefly, then carve into thick slices and serve with horseradish.
Tips and Variations:
- Bone-In Makes Carving Easier: The bones help insulate the roast and add drama at the table.
- Do Not Skip the Rest: Reverse-seared meat still needs time to relax.
- Medium Preference: Pull a little later if you want 135°F and a more cooked center.
13. Smoky Beef Short Ribs
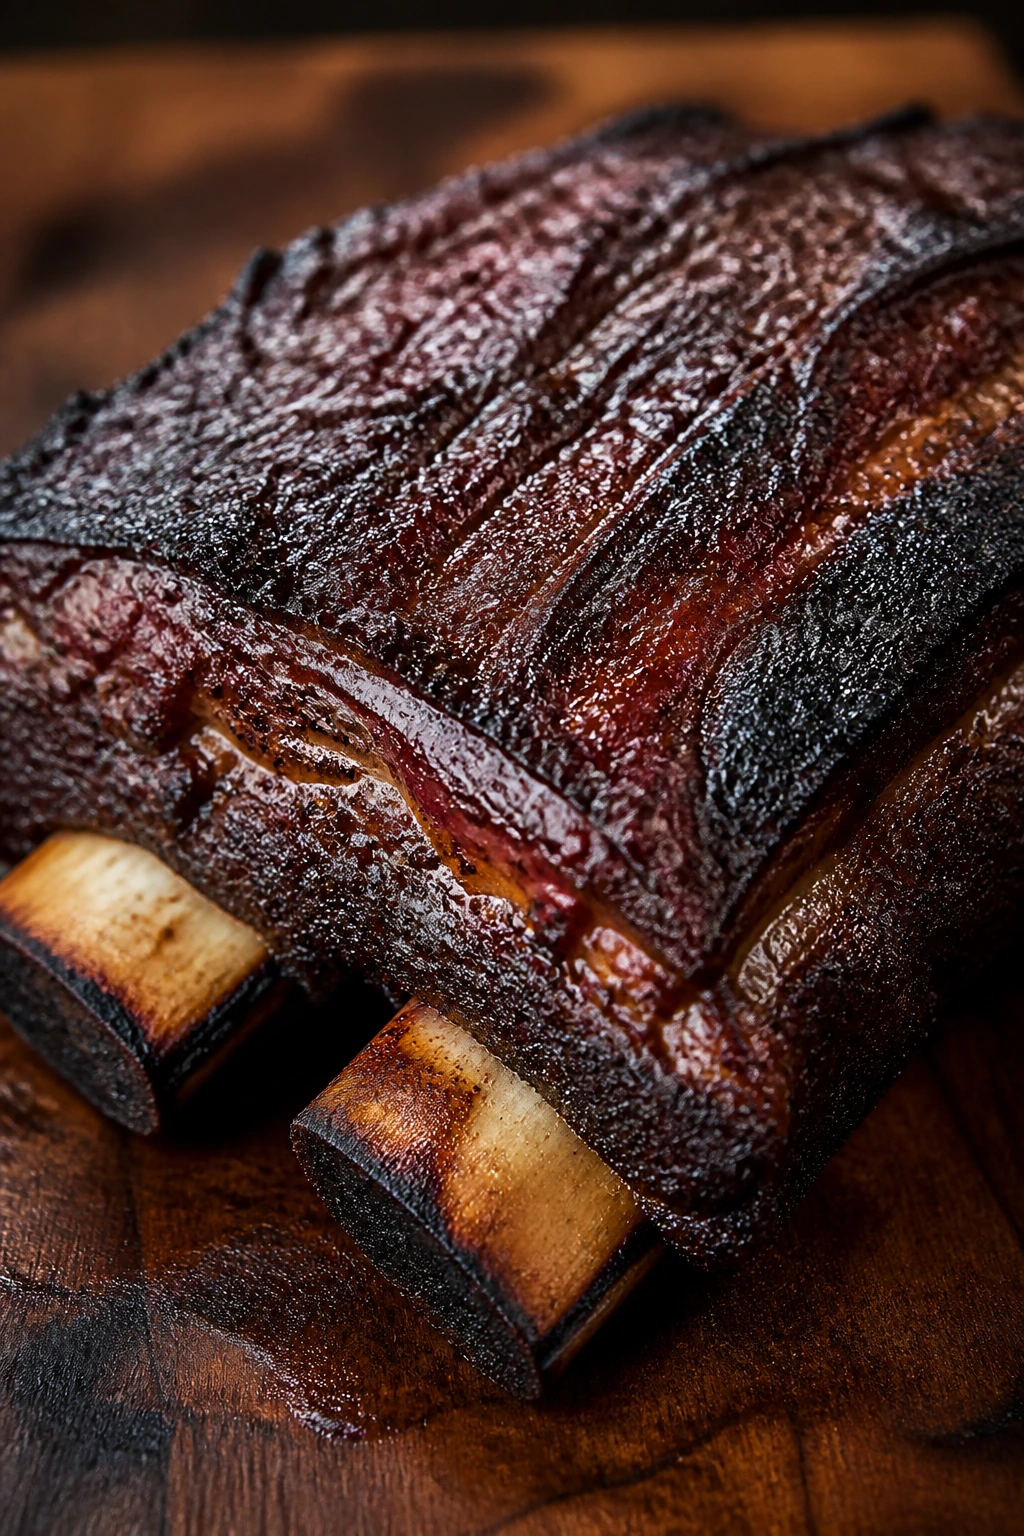
Why do beef short ribs taste like they were cooked by someone who knows exactly what they’re doing? Because they hold onto fat and gelatin like few other cuts. The meat gets dark on the outside, soft inside, and rich enough that you don’t need much else on the plate beyond something starchy and maybe a sharp pickle on the side.
Why It Works:
Short ribs have the collagen-heavy structure that makes long smoking worthwhile. They need enough heat to push through the stall and enough time for the connective tissue to loosen without drying the meat out. At around 203°F internal, the ribs should feel tender when probed, almost like warm butter under the bark.
Key Ingredients:
- 3 to 4 pounds beef short ribs
- 2 tablespoons yellow mustard
- 2 tablespoons kosher salt
- 1 tablespoon coarse black pepper
- 1 tablespoon smoked paprika
- 1 tablespoon garlic powder
- 1 teaspoon onion powder
- 1 cup beef broth
- 2 tablespoons Worcestershire sauce
- 2 tablespoons butter
- 1/2 cup barbecue sauce
Quick Steps:
- Trim any thick silverskin, then coat the ribs lightly with mustard.
- Season generously with salt, pepper, paprika, garlic powder, and onion powder.
- Smoke at 250°F until the bark is dark and set and the internal temperature reaches about 170°F.
- Wrap the ribs with beef broth, Worcestershire, butter, and barbecue sauce, then return them to the smoker.
- Cook until the meat probes tender at about 203°F, then rest for 30 minutes before serving.
Tips and Variations:
- Plate Ribs or Chuck Short Ribs: Both work, but thick plate ribs need more time.
- Serve with Polenta or Mash: The rich beef loves a soft base.
- Cut Careful Portions: They’re rich; smaller servings feel right.
14. Stuffed Bell Peppers with Sausage and Rice
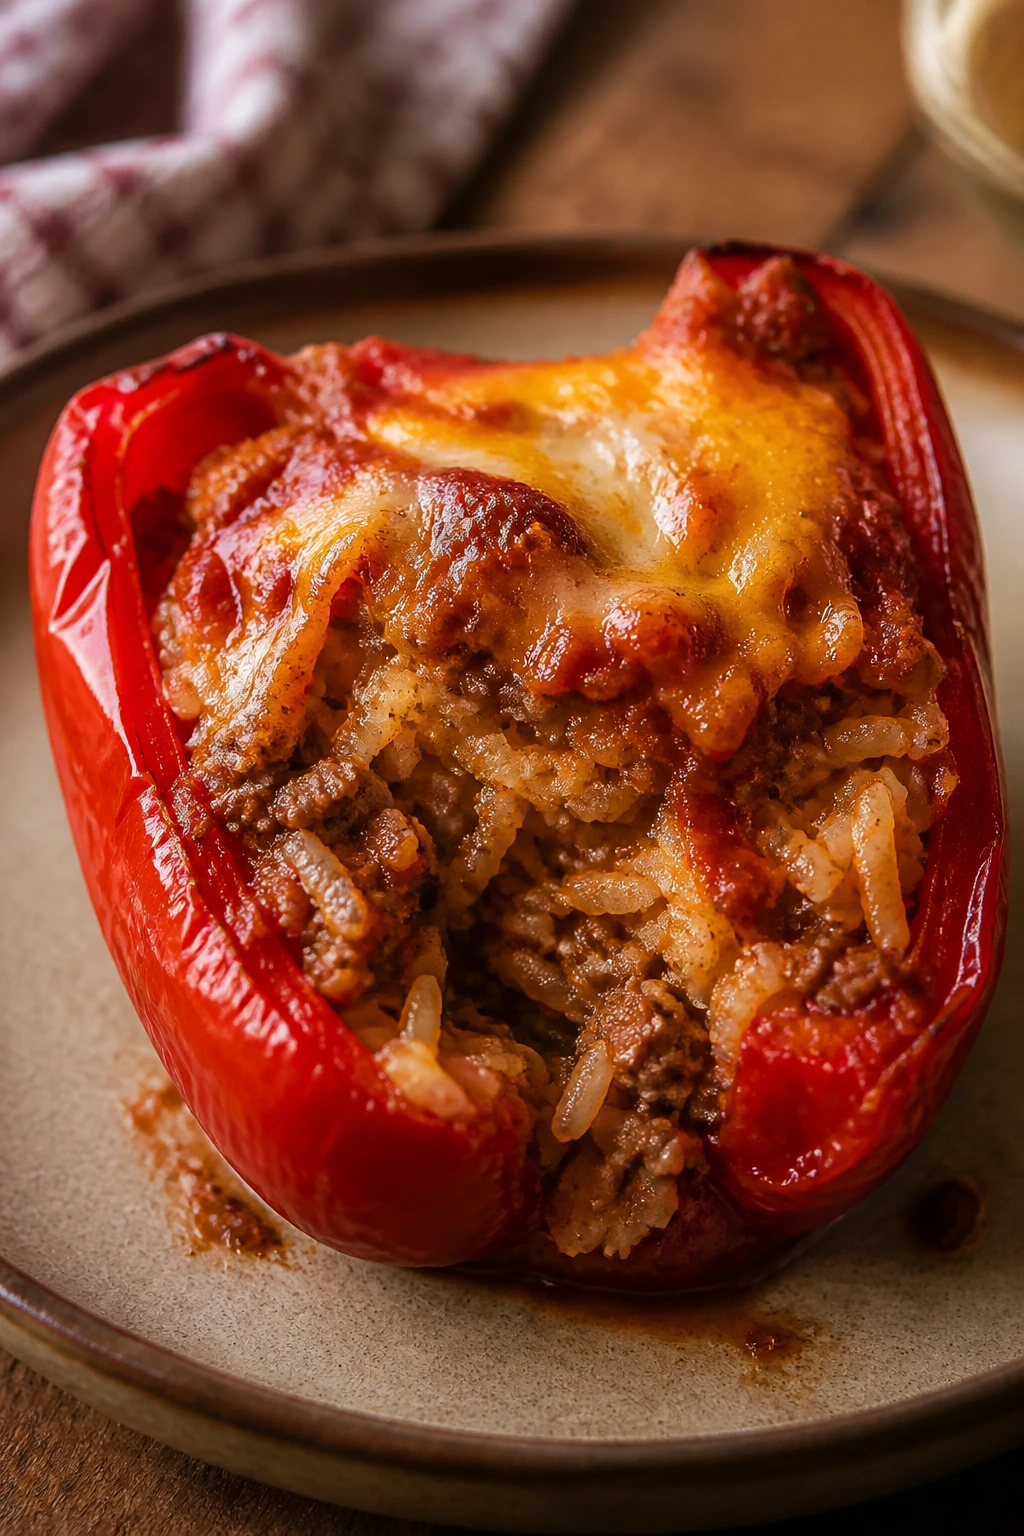
Not every smoker dinner has to be a giant hunk of meat. Stuffed peppers bring smoke, color, and enough comfort to hold their own beside the heavier cuts in this lineup. They’re also nice when you want one dish that looks tidy on the platter and still tastes like it came off a real fire.
Why It Works:
Bell peppers soften nicely in a smoker and pick up a sweet, wood-fired flavor that you do not get from the oven alone. The sausage and rice filling gives you enough body for dinner, while tomato sauce and cheese bring the whole thing together without making it soggy. Because the peppers act like little edible bowls, the juices stay where they belong.
Key Ingredients:
- 6 large bell peppers, tops cut off and seeds removed
- 1 pound Italian sausage
- 1 cup cooked rice
- 1 small onion, diced
- 3 cloves garlic, minced
- 1 1/2 cups tomato sauce
- 1 cup shredded mozzarella
- 1/4 cup grated Parmesan
- 2 tablespoons olive oil
- 1 teaspoon dried oregano
- 1 teaspoon kosher salt
- 1/2 teaspoon black pepper
Quick Steps:
- Cook the sausage with onion and garlic in a skillet until the sausage is browned and the onion is soft.
- Stir in the rice, 1 cup of the tomato sauce, oregano, salt, pepper, and half the mozzarella.
- Fill the peppers generously, then place them upright in a foil pan or baking dish.
- Smoke at 250°F for 45 to 60 minutes, until the peppers are tender but not collapsing.
- Spoon the remaining tomato sauce over the tops, add the rest of the cheese and Parmesan, and smoke for another 10 minutes until melted.
Tips and Variations:
- Color Matters: Red, yellow, and orange peppers taste sweeter than green ones.
- Add Mushrooms or Zucchini: If you want more vegetables in the filling, chop them small so they cook through.
- Make It Saucy: Extra tomato sauce on the plate helps if you’re serving with crusty bread.
Why the Smoker Makes a Dinner Feel Like a Celebration
Smoke changes the rhythm of a meal. It makes the cook plan a little farther ahead, which means the serving feels deliberate instead of rushed. That alone is enough to make a Father’s Day dinner feel different from an ordinary Sunday plate.
The other thing smoke does well is create contrast. A brisket needs a sharp slaw. Ribs want a cool potato salad. Salmon likes lemon and herbs. Even the richest cuts need something crisp or tangy next to them, because smoke by itself can get heavy if the rest of the plate is lazy.
I like this kind of menu because it lets you mix big gestures with practical choices. You can put brisket in the center and still tuck chicken thighs, sausage, or stuffed peppers around the edges. Nobody complains when the table is full.
Essential Equipment for These Smoker Dinners
- Smoker or pellet grill: Any steady smoker works; consistency matters more than brand.
- Instant-read thermometer: Essential for brisket, poultry, pork tenderloin, and prime rib.
- Leave-in probe thermometer: Helpful for long cooks so you aren’t opening the lid every 20 minutes.
- Butcher paper or heavy-duty foil: Paper is best for bark; foil is useful for ribs and saucy finishes.
- Wire rack: Great for chicken, meatloaf, and anything you want air to circulate under.
- Cast iron skillet or foil pan: Perfect for sausage and peppers, chuck roast cubes, or saucy rib finishes.
- Sharp carving knife: Clean slices make brisket, prime rib, and turkey look and eat better.
- Large cutting board with a groove: Keeps juices from running over the counter.
- Heat-resistant gloves: Useful when handling hot grates, pans, and wrapped meat.
- Long tongs: A small thing, but they save burned knuckles.
- Spritz bottle: Handy for apple juice, vinegar, or broth on brisket and ribs.
- Wood chunks or pellets: Oak, hickory, apple, cherry, and pecan cover most of these recipes well.
Smart Shopping and Ingredient Tips for Smoker Dinners
Buy the cut for the cook you actually want, not the one that looks cheapest per pound. Brisket should have flexible marbling and a flat that isn’t paper-thin. Pork shoulder wants a good fat cap and, if possible, the bone still in place. Chicken thighs should have intact skin and a decent layer of fat under it. Salmon should be center-cut and thick enough that the tail end won’t overcook while the center is still coming up to temp.
Wood choice matters more than people admit. Oak is the quiet workhorse for brisket, short ribs, and prime rib. Hickory has more bite and works well for pork and beef, but too much can get sharp fast. Apple and cherry are kinder to chicken, turkey, and salmon. Pecan sits in the middle — nutty, warm, and useful when you want smoke without a heavy hand. Mesquite can work, but it’s easy to overdo it, especially on poultry and fish.
For rubs and sauces, check the sugar level before you start. Sweet rubs help with bark on pork and chicken, but they burn sooner on thin cuts like salmon and tenderloin. If you’re buying barbecue sauce, look for one with enough acid to cut through the smoke — ketchup-only sweetness gets dull fast. And on the salt side, kosher salt is easier to control than fine table salt because it spreads more evenly over thick meat.
How to Serve These Recipes
Presentation:
Carve brisket and prime rib against the grain and fan the slices across a warm board or platter. Pulled pork looks best piled loosely rather than packed tight, and ribs should be cut into neat single bones before they hit the tray. Add fresh herbs, pickled onions, lemon wedges, or sliced jalapeños so the plate doesn’t go flat and brown.
Accompaniments:
Coleslaw, baked beans, potato salad, cornbread, grilled corn, roasted potatoes, and vinegar slaw are the obvious winners here because they cool the smoke and add texture. Salmon likes dill potatoes or a cucumber salad. Turkey breast is strong with gravy, greens, or roasted carrots. Stuffed peppers can sit beside garlic bread or a simple green salad if you want something lighter.
Portions:
Plan about 1/3 to 1/2 pound cooked meat per adult when the table has several sides. Ribs usually run 3 to 4 bones per person, chicken thighs 2 per person, salmon 6 ounces per person, and stuffed peppers 1 to 2 per guest depending on the rest of the menu. If the crowd is big and the appetite is bigger, scale the brisket or pulled pork first; they stretch the easiest.
Beverage Pairing:
Cold lager, amber ale, iced tea, bourbon lemonade, or sparkling water with lemon all work. Rich beef and pork can handle a darker beer. Chicken, turkey, and salmon tend to like something brighter and cleaner. A drink with some acidity keeps the meal from feeling heavy.
Additional Tips and Flavor Boosters
Flavor Enhancement:
A finishing sauce or glaze is worth the extra bowl on the counter. Brisket and short ribs like a warm vinegar sauce. Chicken thighs take well to honey and hot sauce. Prime rib needs very little, but a spoonful of horseradish cream on the side wakes the whole plate up.
Customization:
Keep one basic salt-pepper-garlic rub in your back pocket, then shift the character with one change. Add brown sugar for pork, paprika for chicken, rosemary for beef, or lemon zest for fish. That small move keeps the menu from tasting like it came from one bottle.
Serving Suggestions:
Pickles, pickled onions, sliced scallions, fresh dill, parsley, and a little flaky salt do more than garnish. They give the meal bite and lift. If you’re serving fattier cuts like brisket or chuck roast, a sharp pickle is not decoration. It’s balance.
Make-It-Yours:
For gluten-free plates, use gluten-free Worcestershire and check your sauce labels. For dairy-free cooking, swap butter for olive oil or beef tallow. For lower-sugar versions, skip the brown sugar in rubs and lean harder on pepper, paprika, mustard, and vinegar. The smoke is doing a lot already.
Make-Ahead, Storage, and Reheating Guidance
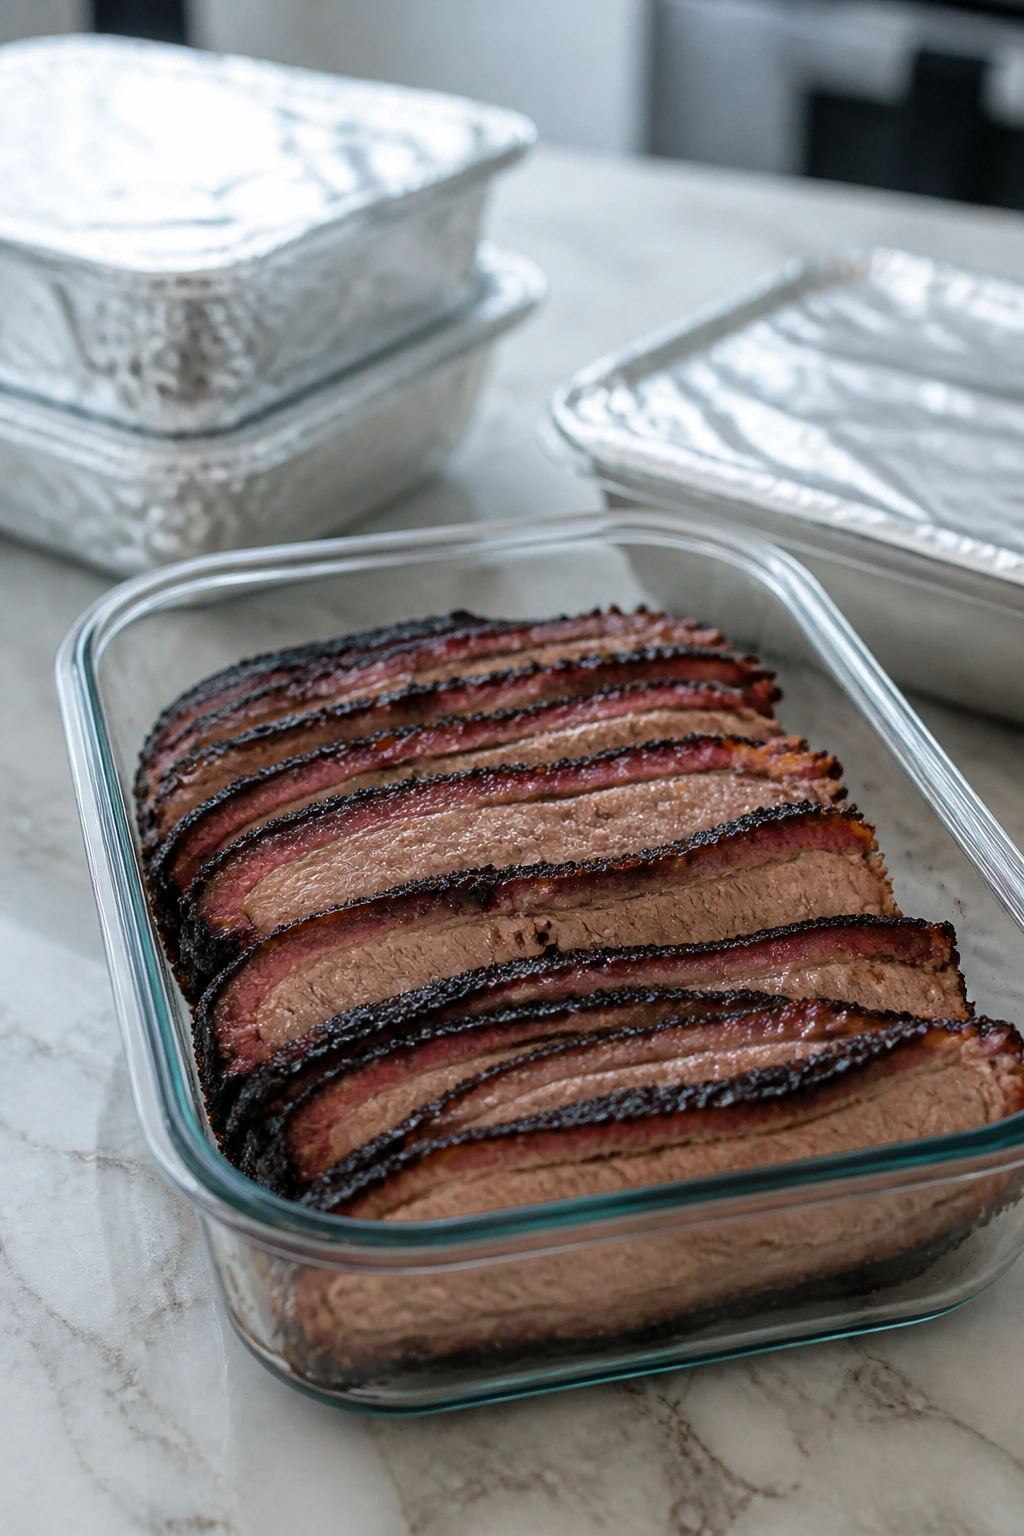
Most smoked meats keep well for 3 to 4 days in the refrigerator if they’re cooled quickly and wrapped tightly. Pulled pork, brisket, chuck roast, short ribs, turkey breast, and meatloaf also freeze well for up to 2 to 3 months when wrapped in foil, then sealed in a freezer bag or airtight container. Salmon is the exception: it’s best within 2 days and doesn’t love the freezer as much as the meat does.
Reheat beef and pork low and slow. A 250°F oven with a splash of broth in a covered pan keeps brisket, pulled pork, turkey, and short ribs from drying out. For sliced brisket or prime rib, reheat just until warm; if you push it too far, the meat gets loose and dusty. Pulled pork does well in a skillet with a spoonful of its drippings or barbecue sauce. Chicken thighs and whole chicken should be warmed to 165°F without overbaking the skin into leather.
Ribs need a little moisture and a short reheat, usually wrapped in foil at 275°F with a tablespoon or two of water or apple juice. Meatloaf reheats neatly in slices, either covered in the oven or in a skillet with a lid. Stuffed peppers are easy: add a spoonful of sauce on top and warm them until the center is hot. Fish is the pickiest one; salmon is often better served cold over salad or brought back gently in a low oven.
If you want to get ahead, season brisket, pork shoulder, turkey breast, and ribs the night before. Chicken thighs benefit from a short dry brine. Stuffed peppers can be assembled earlier in the day and smoked later. The one rule that matters most: get cooked food into the fridge within 2 hours.
Variations and Adaptations to Try
Texas-Style No-Sugar Smoke:
Skip the brown sugar in your rubs and go heavy on salt, black pepper, garlic, and paprika. This works especially well on brisket, prime rib, and short ribs. The bark comes out drier and more assertive, which is exactly what some people want with beef.
Sweet Heat Finish:
For ribs, chicken thighs, and pulled pork, swap part of the barbecue sauce for honey, maple syrup, or hot sauce. The sweet edge gives you shine; the heat keeps it from tasting flat. Use it late so the sugars do not scorch.
Herb-Forward Plate:
Lean on rosemary, thyme, dill, parsley, and lemon zest for turkey, salmon, and chicken. That lighter profile works when you want smoke without a heavy barbecue stamp on everything. It also keeps the meal from feeling repetitive if several smoked dishes share the same table.
Lower-Sodium Smokehouse:
Use a smaller amount of salt in the rub and rely more on garlic, onion powder, mustard, pepper, citrus, and wood choice. You can still get strong flavor without pushing the salt too hard. This is a good fit for salmon, chicken thighs, and stuffed peppers.
Gluten-Free Comfort Spread:
Choose gluten-free buns, check sauce labels, and serve more of the lineup with potatoes, rice, or corn-based sides. Pulled pork, brisket, chicken, and stuffed peppers all fit cleanly into that setup. No one misses the gluten when the smoke is good.
Faster Smoke Night:
If time is tight, center the menu around salmon, chicken thighs, sausage and peppers, pork tenderloin, or stuffed peppers. All five give you smoke flavor without asking for a whole day at the pit. That mix is handy when you want the smoker involved but not running your schedule.
Mistakes That Turn Good Smoke Bitter
Too much wood is the easiest way to wreck a good meal. Thick white smoke can make meat taste harsh and dirty, especially fish and chicken. You want clean, thin smoke and a steady burn, not a chimney that looks like it’s sending distress signals.
Pulling by the clock instead of the thermometer causes most dry meat. Brisket, pulled pork, short ribs, turkey breast, and prime rib all care more about internal temperature and probe feel than a stopwatch. If the meat feels tight, it isn’t ready, even if the estimate says it should be.
Skipping the rest is another common mess-up. The juices inside brisket, turkey, and prime rib need time to settle, and the same goes for ribs and pork shoulder. Slice too soon and the board fills with runoff instead of flavor.
Saucing too early burns sugar before the meat is done. That gives you dark spots that taste bitter rather than caramelized. Brush on sauce near the end, then let it set for just long enough to gloss over.
Cutting against the grain matters more than people think. Brisket, chuck roast, and prime rib all have direction to the muscle fibers, and the wrong cut turns slices chewy. Take 10 seconds to look before you carve. That tiny pause saves the whole tray.
Questions People Ask Before the Fire Goes On

What wood works best for smoker dinners for Father’s Day?
Oak is the safest single choice if you want one bag that handles brisket, pork, and beef well. Apple and cherry are better for chicken, turkey, and salmon, while hickory gives a stronger smoke that needs a lighter hand.
Can I make these recipes on a pellet smoker?
Yes, and many people do. Pellet smokers are steady, which helps with brisket, ribs, and turkey breast; just make sure you still watch internal temperature and don’t let the food sit in one note of smoke for too long.
Do I need to wrap everything in foil or butcher paper?
No. Wrapping helps with brisket, pork shoulder, ribs, and chuck roast because it speeds the cook and protects bark once it’s set. Chicken, salmon, sausage, and stuffed peppers usually do better unwrapped.
What if my brisket or pork shoulder stalls?
That stall is normal. The surface moisture evaporates and slows the temperature climb for a while, so stay patient and wrap when the bark is right. Fighting the stall by cranking the heat usually gives you dry edges and uneven texture.
Can I finish these dishes in the oven if the smoker is acting up?
Yes. Once the meat has absorbed enough smoke, the oven can carry it to the finish line. That works especially well for brisket, pork shoulder, ribs, turkey breast, and short ribs. Keep the oven low and covered when the meat needs tenderness, not crust.
Which recipes are best if I only have a few hours?
Chicken thighs, salmon, sausage and peppers, pork tenderloin, and stuffed peppers fit a shorter window. They still feel special, but they won’t chain you to the pit all day. Prime rib can also work if you want a shorter cook with a polished finish.
How do I keep smoked meat warm without drying it out?
Wrap it tightly and hold it in a warm oven, usually around 150-170°F, if your oven can do that safely. For larger cuts like brisket and pork shoulder, rest in a cooler wrapped in towels for an hour or two. That keeps the meat hot and relaxed without turning it tough.
Can I scale these recipes for a bigger crowd?
Absolutely, but scale the proteins first and the sides second. Pulled pork, brisket, and ribs stretch the easiest, while prime rib and salmon need a more careful count because they serve more like plated centerpieces. If the guest list is fuzzy, lean on pork shoulder or brisket and you’ll have insurance.
One Plate, A Lot of Smoke
The best smoked dinner isn’t the fanciest one. It’s the one that lands on the table with a little swagger, a little patience, and enough flavor to make the room go quiet for a moment.
That’s why this mix works. You’ve got the big cuts that feel like a celebration, the faster options that keep the day moving, and a few dishes that prove a smoker can do more than just feed a crowd. Pick one centerpiece or build a whole spread around two or three. Either way, the fire gets the credit, and the rest of us get the slice.