
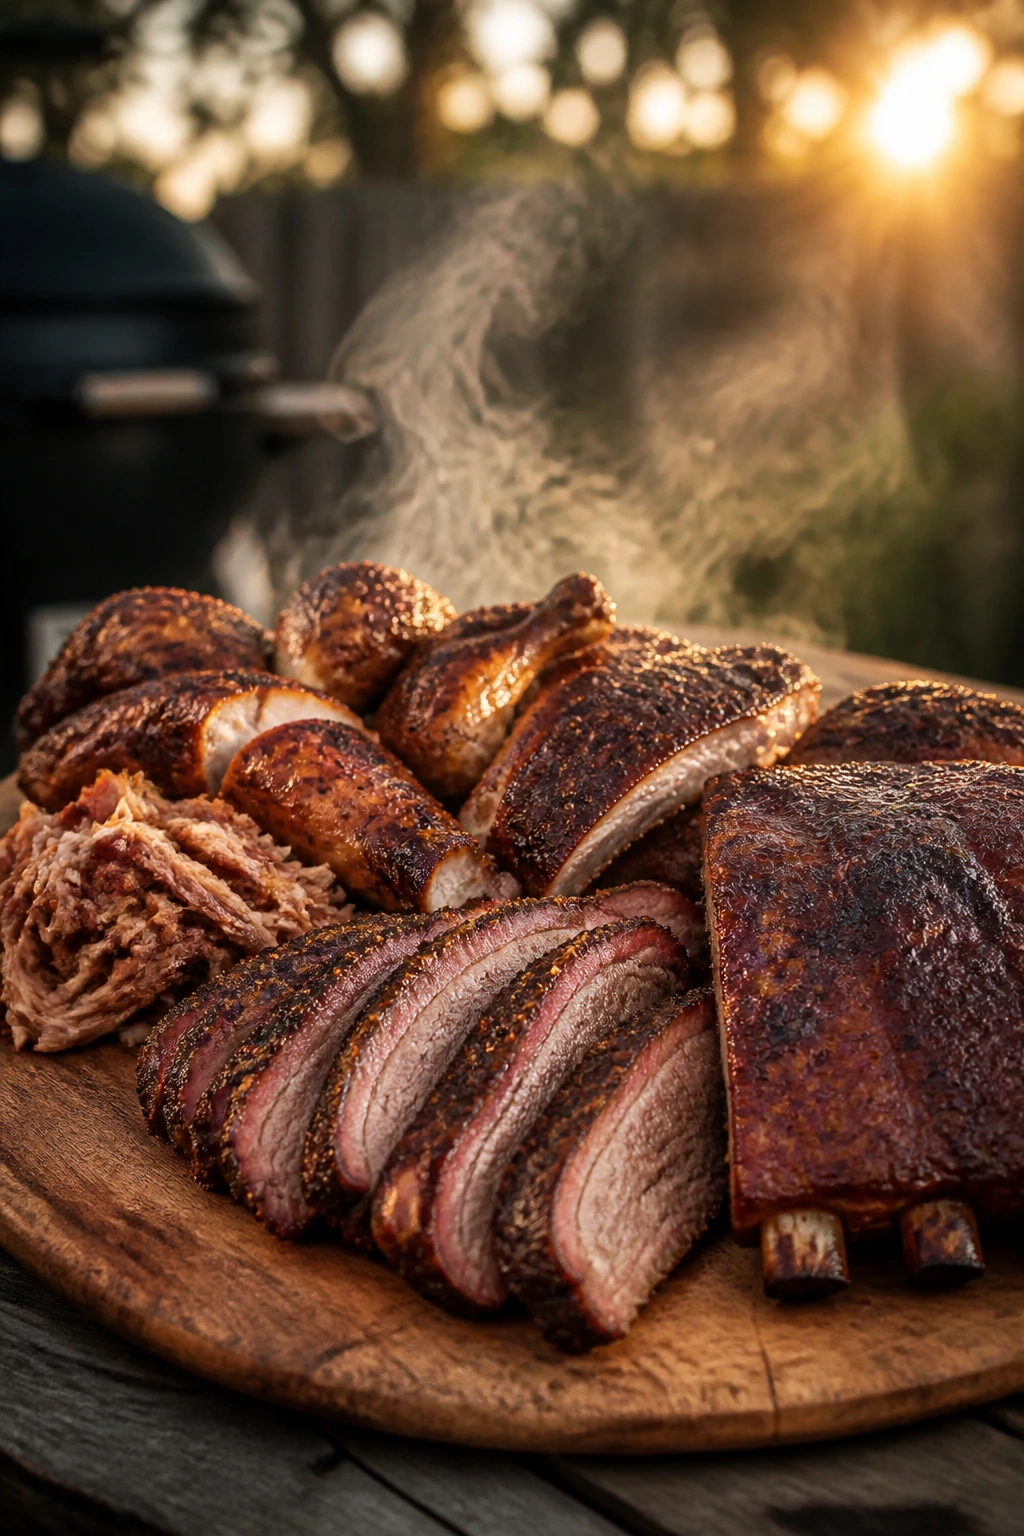
The best smoker dinners for weekend cookouts announce themselves before you even see the food. There’s the smell first: pepper, hardwood, a little sugar caramelizing at the edges, maybe a whiff of garlic if somebody knew what they were doing. Then the lid lifts, and suddenly the whole backyard feels like it has a center of gravity.
What makes smoker dinners for weekend cookouts so satisfying is that they can be grand or laid-back without changing gear. A brisket turns the day into an occasion. Chicken thighs, sausage, salmon, and stuffed peppers keep things moving when you want dinner on the table before the sun drops too far. The smoker is a slow machine, sure, but it’s also a flexible one, and that’s the part people miss when they treat it like a brisket-only tool.
I’ve always liked smoked meals that feel generous without being fussy. Give me bark, smoke, and a little sauce on the side. Give me a cut that gets better from patient heat, or a quick-cooking dinner that still picks up enough smoke to make the first bite memorable. That balance is what makes a cookout feel planned instead of improvised, and the recipes below lean hard into it.
Why You’ll Love This Collection
-
Built for real weekends: Some of these smoker dinners run all afternoon, while others are ready in about an hour, so you can match the recipe to the clock you actually have.
-
Big flavor, not complicated technique: Most of the heavy lifting comes from salt, pepper, fire management, and resting time. That’s the part that matters.
-
Crowd-sized without being boring: Brisket, pork shoulder, ribs, and short ribs feed a table; salmon, turkey breast, and pork tenderloin keep the menu from feeling one-note.
-
Flexible enough for mixed appetites: You can run one long smoke and one quicker dish together, which is a smart move when half the crowd wants rich meat and the other half wants something lighter.
-
Leftovers that do useful work: These dishes reheat into sandwiches, tacos, bowls, hash, and grilled cheese fillings instead of turning into sad fridge residents.
-
Smokehouse flavor from different angles: Dry rubs, glazes, mops, foil pans, and herb butter all show up here, so the food tastes varied instead of repeating the same sweet-bbq script.
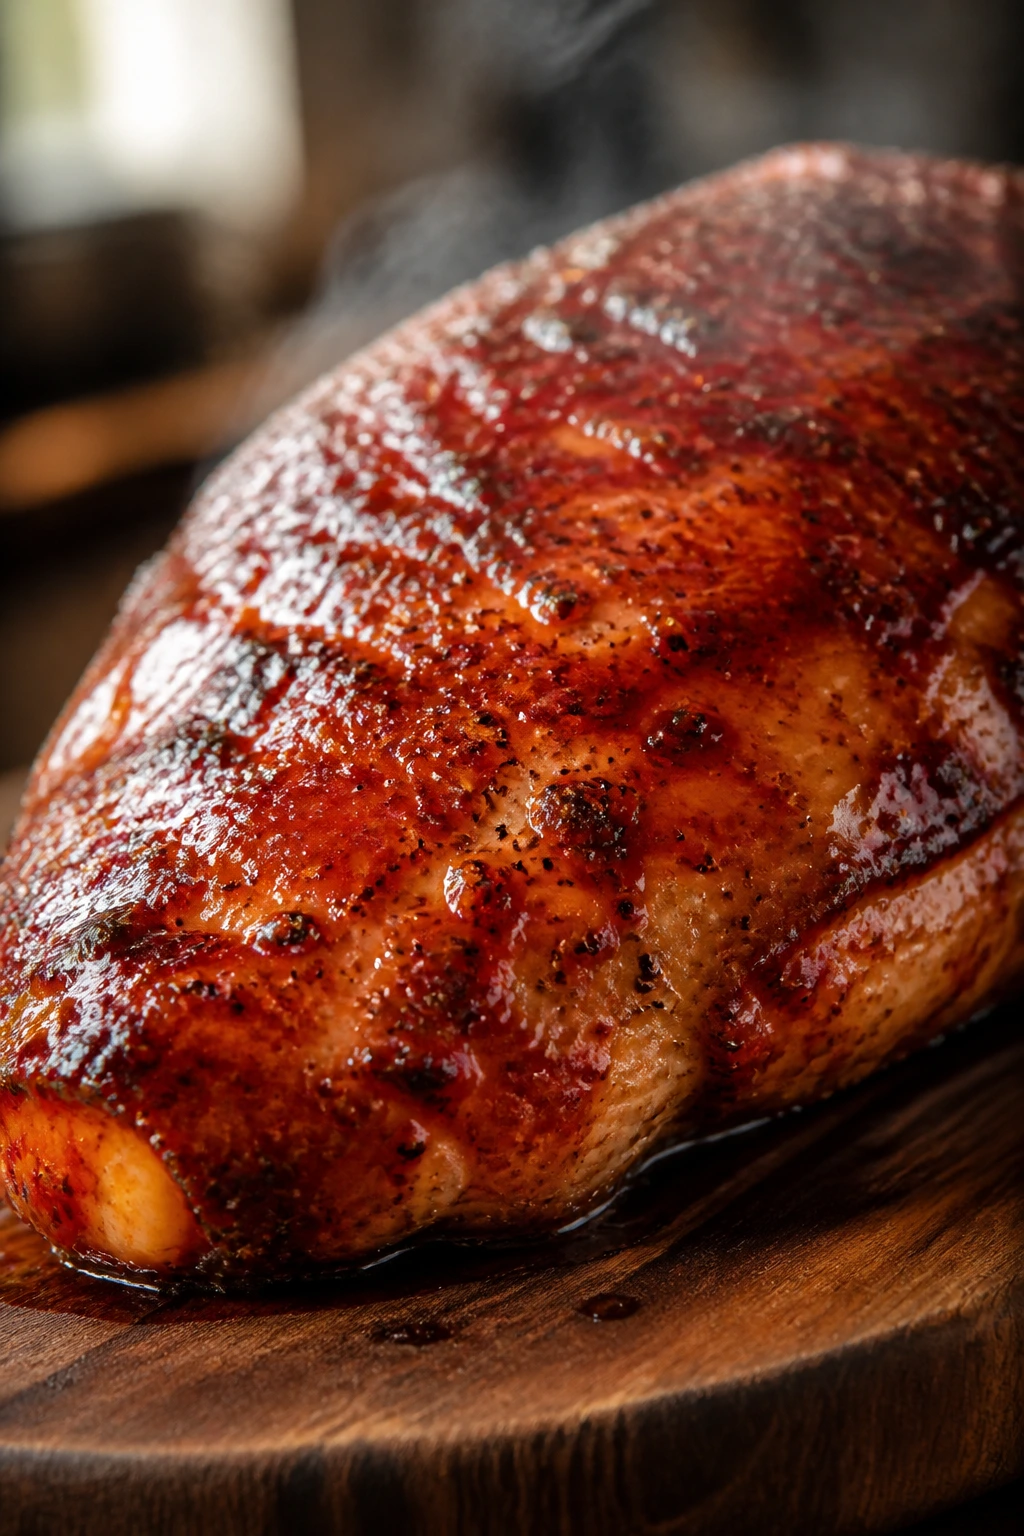
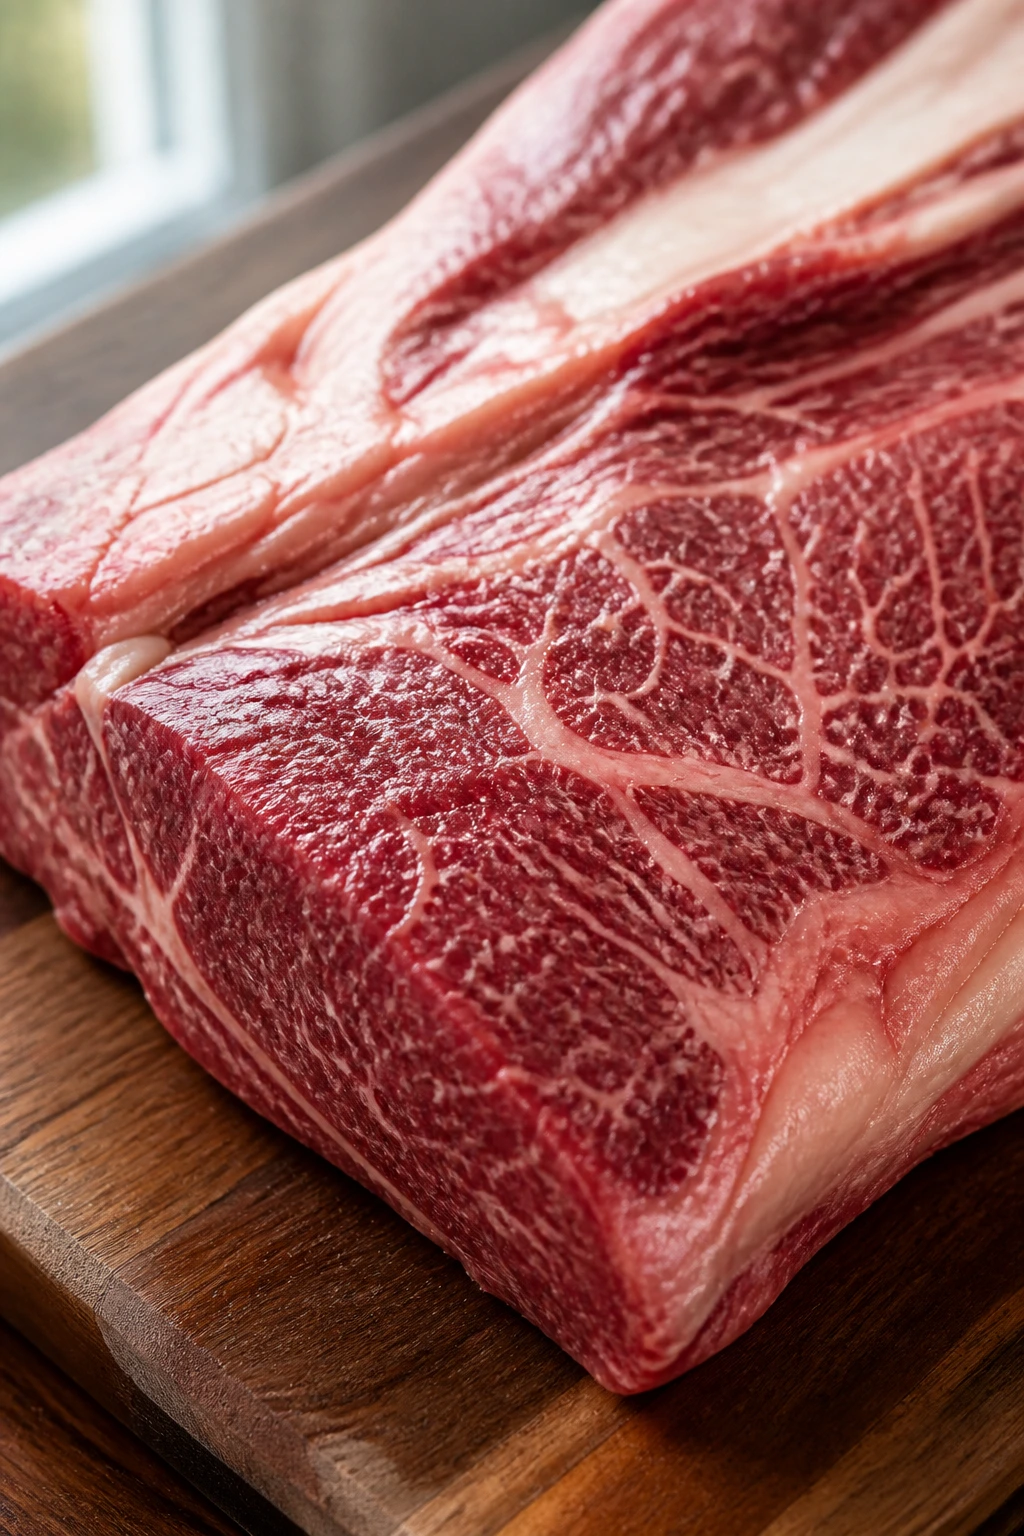
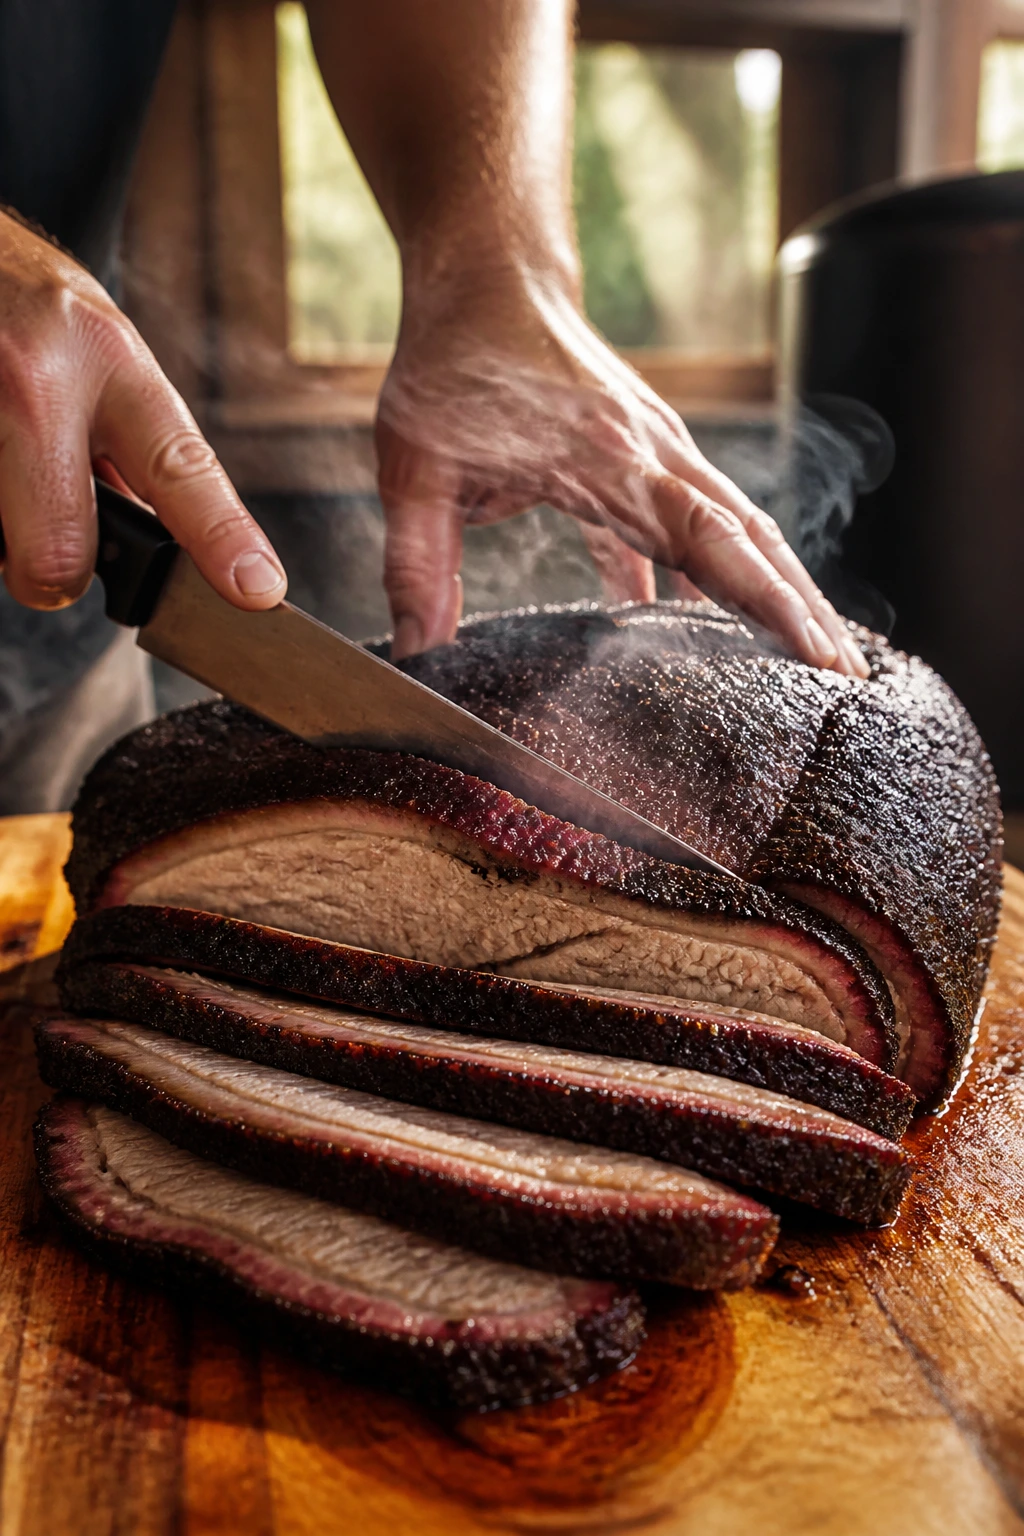
1. Texas-Style Smoked Beef Brisket
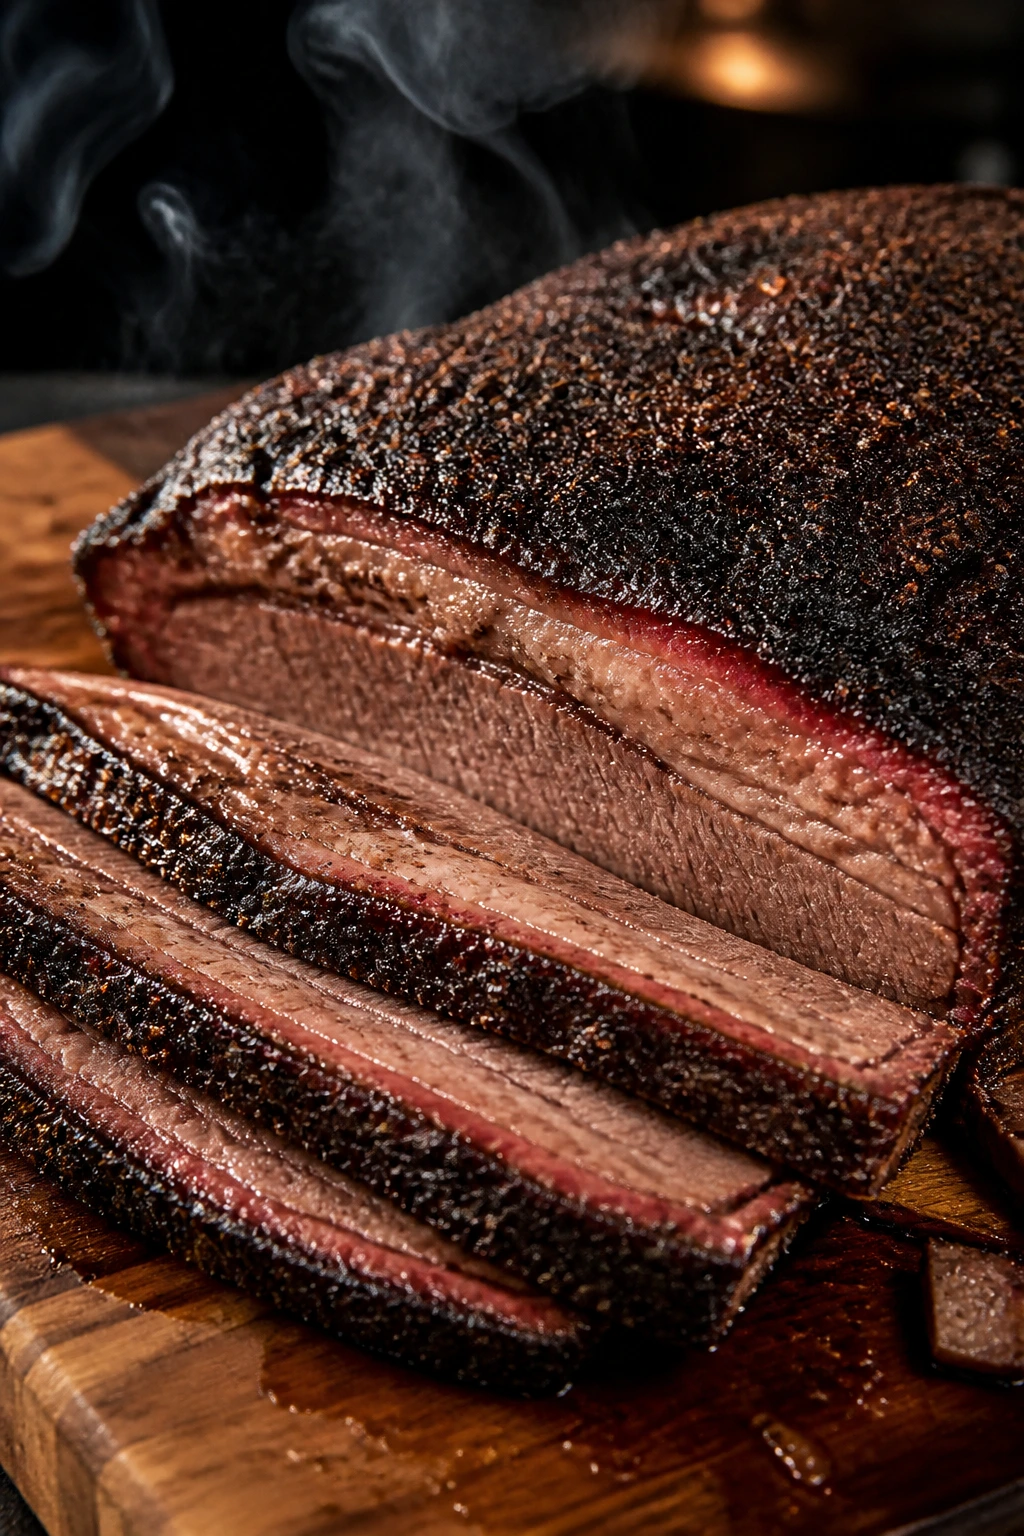
Brisket is the cut that turns a smoker into a serious piece of weekend equipment. You get that deep pepper crust, the lacquered bark, the fat that melts into the slices, and the kind of beefy flavor that makes a simple paper plate feel almost ceremonial. It’s not quick. It should not be.
Why It Works:
Brisket has enough connective tissue and fat to handle hours of low heat, which is exactly why it belongs in a smoker dinner lineup. A simple salt-and-pepper rub builds bark instead of burying the meat under sauce, and wrapping after the bark sets keeps the flat from drying out while the collagen finishes breaking down. The real target is tenderness, not a fixed clock; when a probe slides through the thickest part with almost no resistance, you’re close to the finish line.
Key Ingredients:
- 1 whole packer brisket, 12 to 14 pounds, trimmed with a 1/4-inch fat cap
- 1/4 cup kosher salt
- 1/4 cup coarse black pepper
- 2 tablespoons garlic powder
- 2 tablespoons paprika
- 2 tablespoons beef tallow or melted butter
- 1 cup beef broth
- 2 tablespoons hot sauce, optional, for the wrap
Quick Steps:
-
Trim and dry-brine: Trim the fat cap to about 1/4 inch and square off any thin edges. Salt the brisket lightly, set it on a rack, and refrigerate it uncovered for 8 to 24 hours if you have the time.
-
Season heavily: Mix the salt, pepper, garlic powder, and paprika. Coat every side evenly, pressing the rub into the surface so it sticks.
-
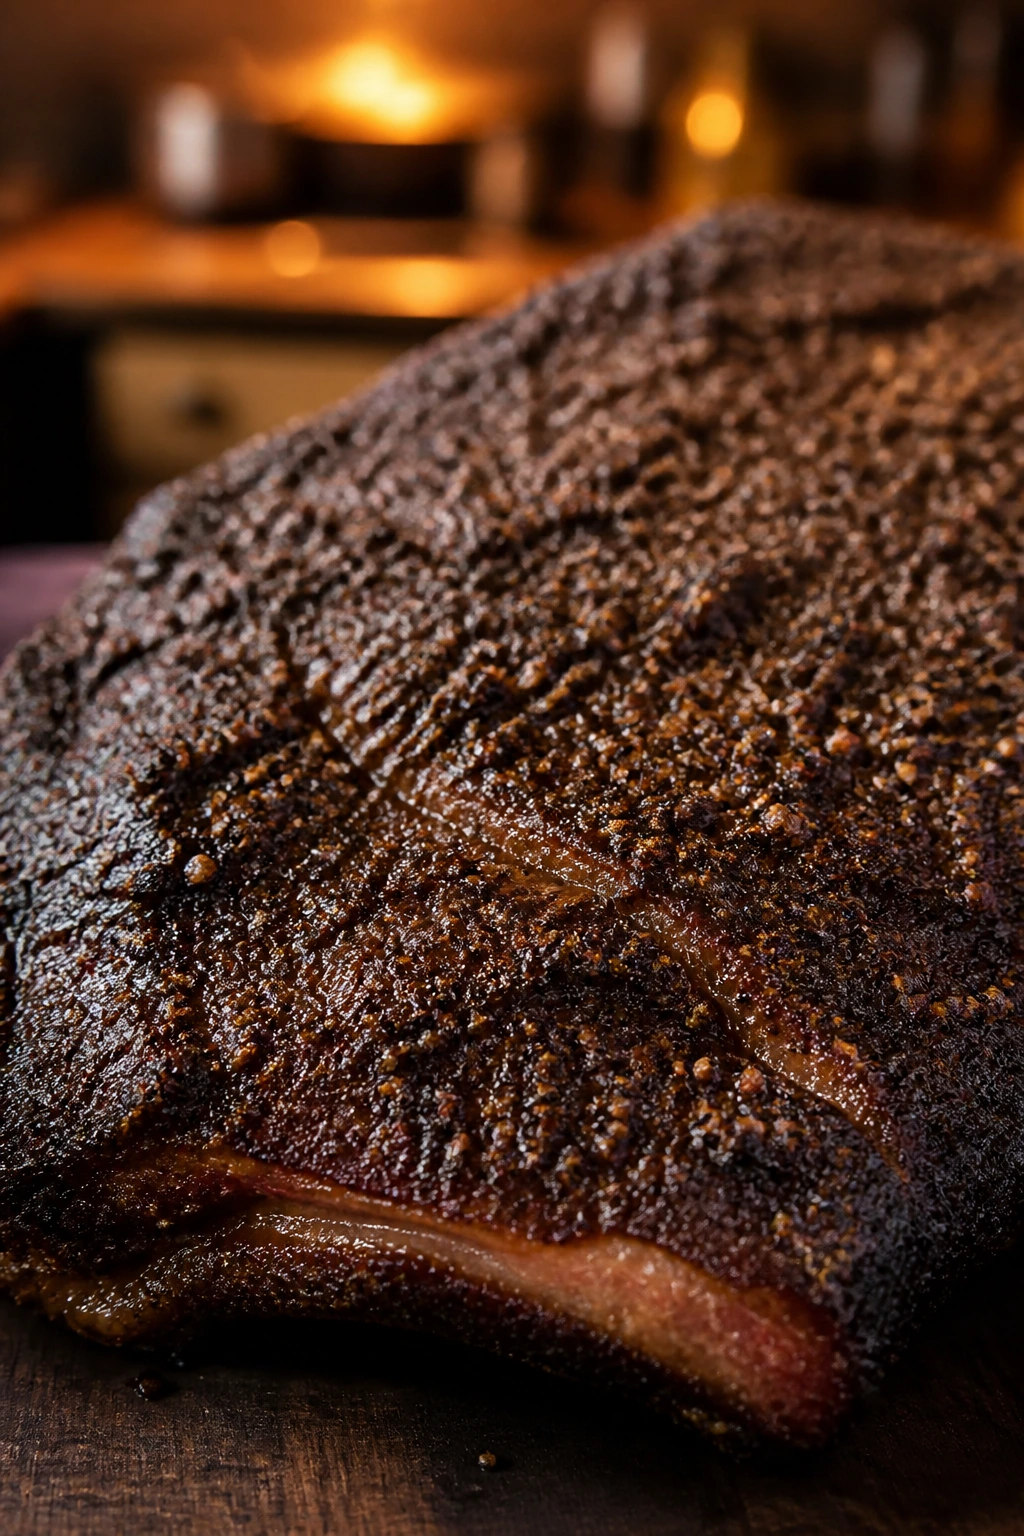
Smoke low and slow: Set the smoker to 225°F and place the brisket fat-side up. Smoke until the bark is set and the internal temperature reaches 160 to 170°F, usually 6 to 8 hours.
-
Wrap to finish: Lay the brisket on butcher paper, drizzle with beef tallow and a splash of broth, and wrap tightly. Return it to the smoker and cook until the probe slides in with very little push, usually around 200 to 205°F internal.
-
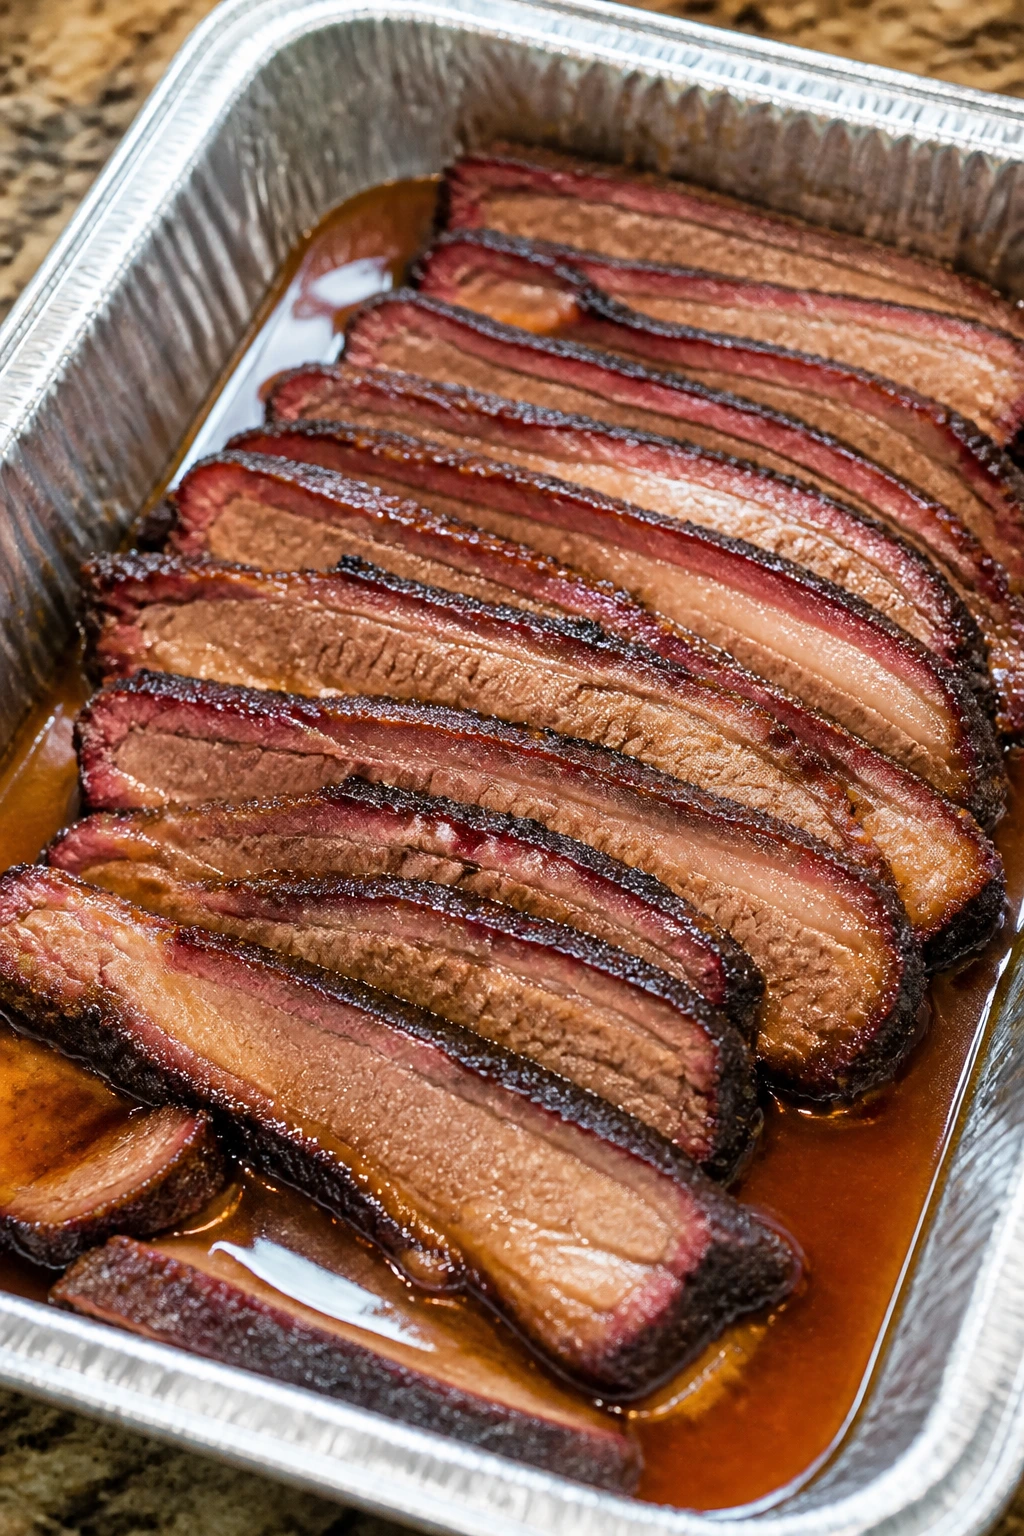
Rest before slicing: Rest the wrapped brisket in a cooler or warm oven for 1 to 2 hours. Slice against the grain, using the flat for neat slices and the point for chopped meat or burnt ends.
Tips and Variations:
- Pepper tip: If you like a sharper bark, push the black pepper to 3 tablespoons and keep the sugar out of the rub.
- Serving move: Save the drippings from the wrap and spoon a little over the sliced brisket.
- Leftover use: Thin slices make excellent sandwiches the next day, especially with pickles and mustard.
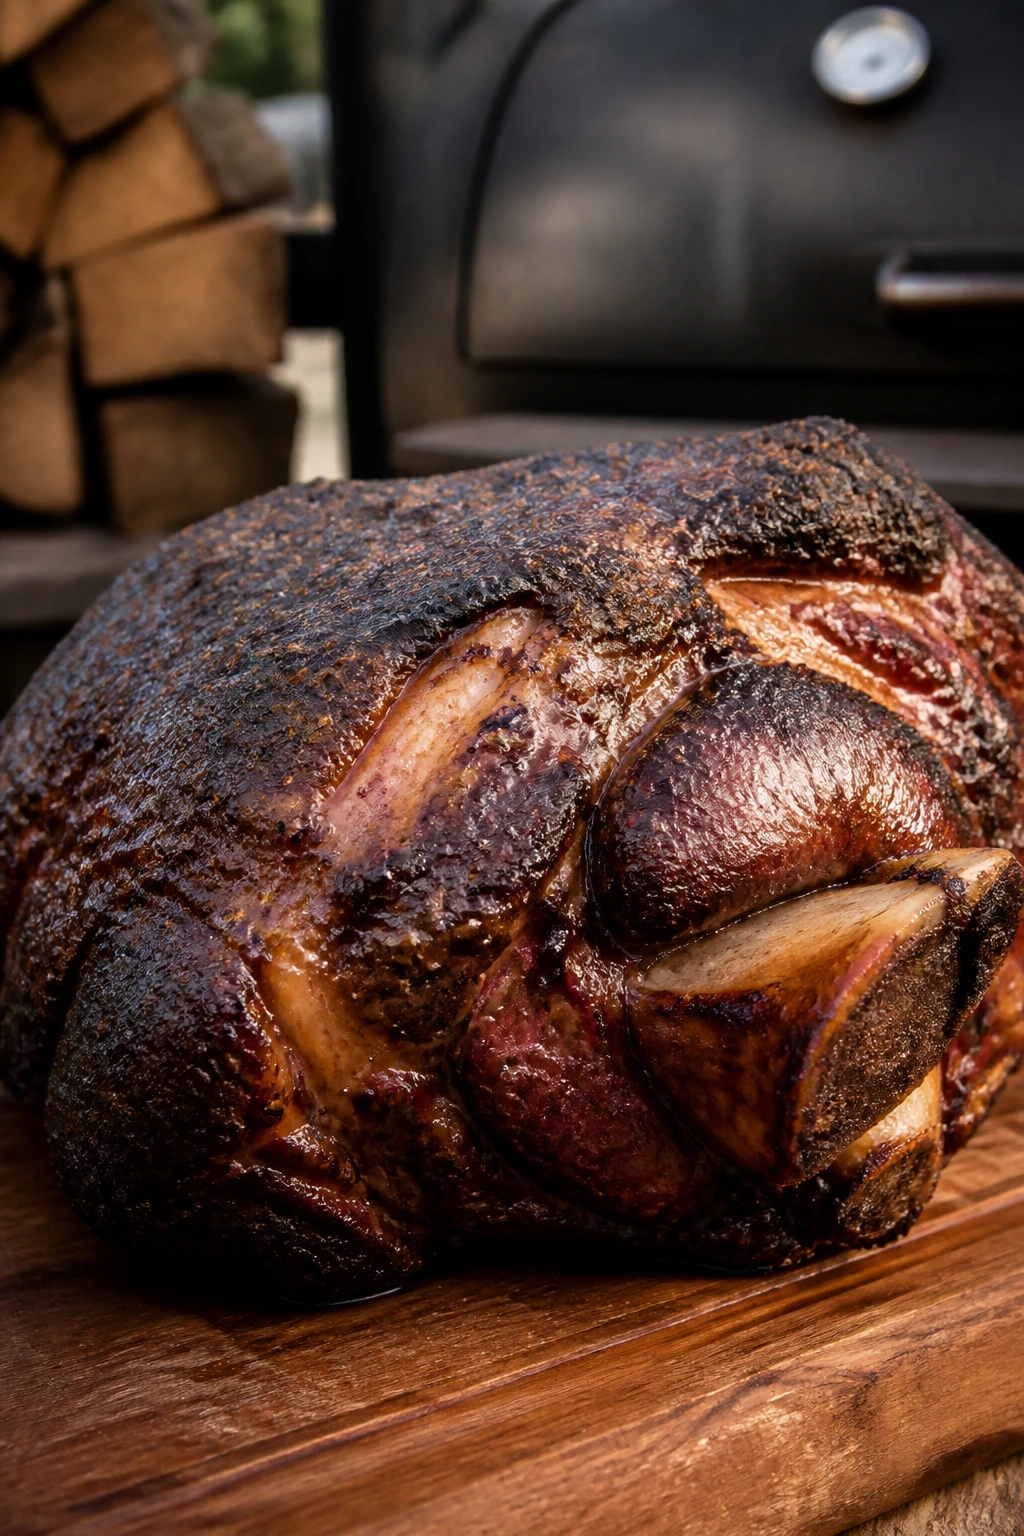
2. Smoked Pork Shoulder for Pulled Pork
Pork shoulder is the friendliest big cut on the smoker. It’s forgiving, deeply flavorful, and full of enough fat and connective tissue to turn into soft, shreddable meat without demanding perfect timing. When it’s done right, it smells sweet, smoky, and a little savory from the rendered fat.
Why It Works:
Shoulder has marbling in the places that matter, so it stays juicy through a long cook and still gives you those crisp little barky bits people fight over. A mustard binder helps the rub cling, but it doesn’t taste mustardy once the smoke and spice take over. Cook it until the bone twists cleanly or the probe slides into the shoulder with almost no resistance, usually around 200 to 205°F.
Key Ingredients:
- 1 bone-in pork shoulder, 8 to 10 pounds
- 2 tablespoons yellow mustard
- 1/4 cup kosher salt
- 1/4 cup brown sugar
- 2 tablespoons paprika
- 2 tablespoons chili powder
- 1 tablespoon garlic powder
- 1 cup apple cider
- 1 to 2 cups barbecue sauce, for serving
Quick Steps:
-
Prep the shoulder: Pat the pork dry and trim only the hard, waxy fat. Rub the surface with mustard so the seasoning has something to cling to.
-
Season generously: Mix the salt, brown sugar, paprika, chili powder, and garlic powder. Coat all sides in a thick, even layer.
-
Smoke at a steady heat: Set the smoker to 250°F. Place the shoulder on the grate and smoke until the exterior looks dark and dry in spots, and the internal temperature reaches roughly 165°F, about 5 to 6 hours.
-
Wrap and finish: Add the pork to a foil pan or butcher paper with a splash of apple cider. Cover tightly and cook until the internal temperature reaches 200 to 205°F and the bone pulls loose easily.
-
Rest and shred: Rest the pork for at least 45 minutes. Shred it by hand or with forks, mixing some bark and juices back into the meat.
Tips and Variations:
- Sauce choice: Serve barbecue sauce on the side so the meat stays the star.
- Heat control: A little cayenne in the rub gives you a sharper finish without turning the pork into chili.
- Reheat trick: A splash of apple juice in a covered skillet brings leftovers back to life fast.
3. Sticky Smoked Baby Back Ribs
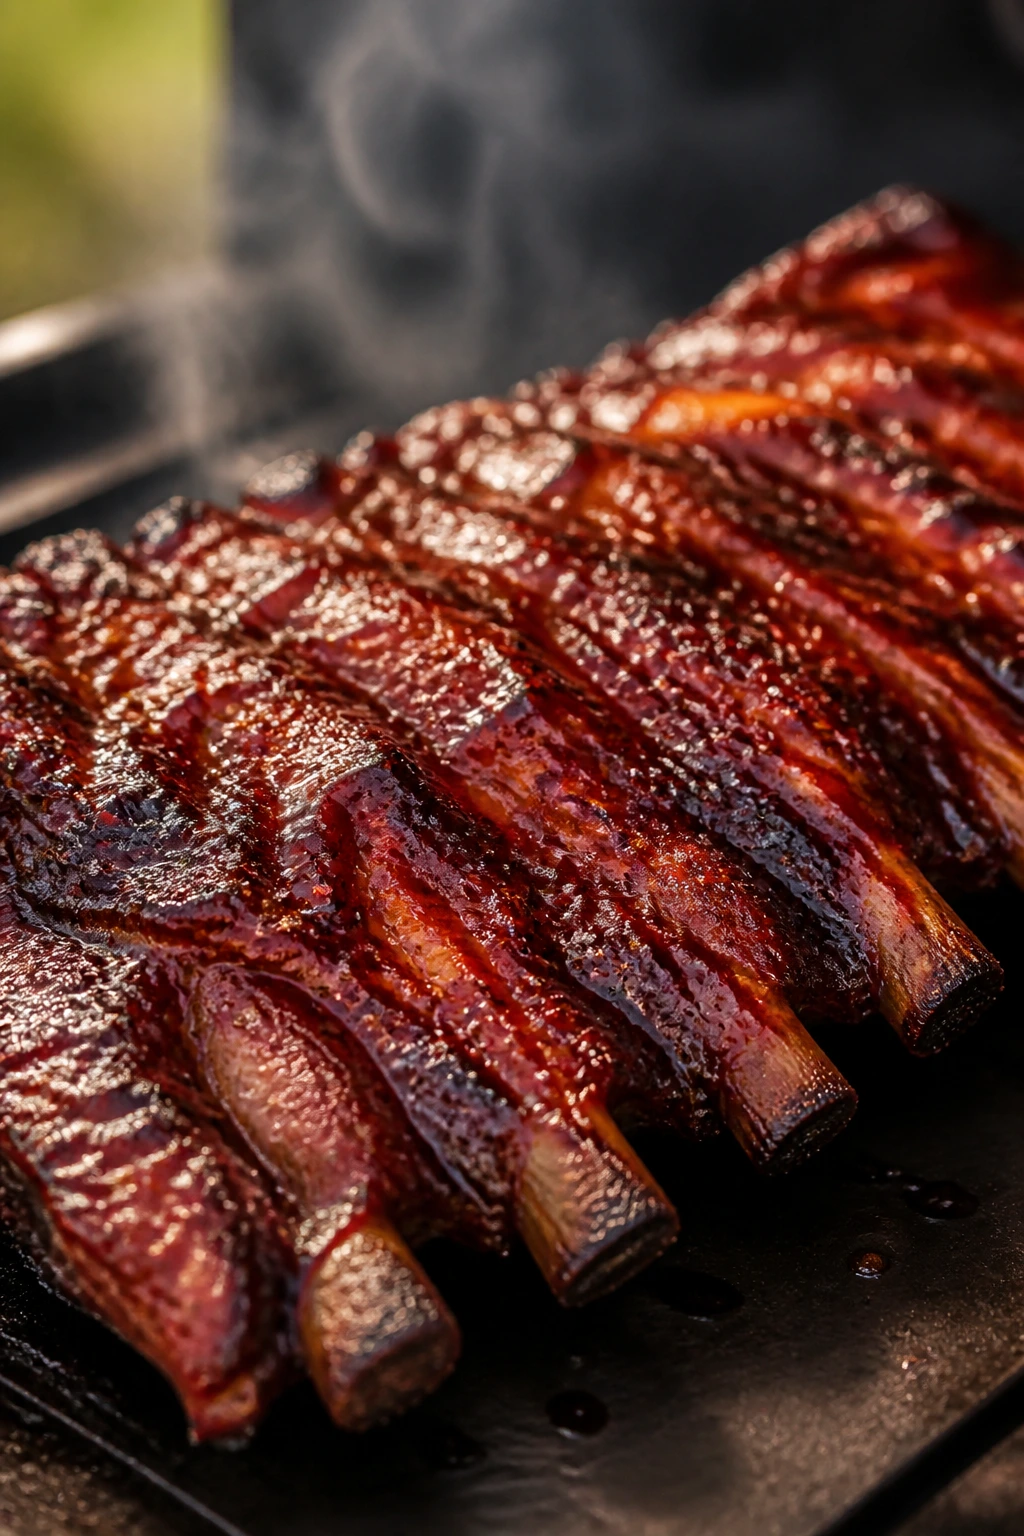
Ribs are the cookout cut that disappear fastest when you set them down right. Baby backs bring a neat, meaty bite, a tender rib meat texture, and a surface that takes on glaze beautifully once the smoke has done its part. You get finger-food drama without the seven-hour commitment of a giant roast.
Why It Works:
Baby back ribs have less fat than pork shoulder, so they need a little more control, but they reward you with a cleaner bite and a tighter texture. The membrane comes off, the rub builds the first layer, and the wrap phase helps the meat soften without turning mushy. The sweet glaze goes on near the end because sugar burns fast; that’s one of those small, boring details that makes the difference between lacquered and blackened.
Key Ingredients:
- 2 racks baby back ribs, about 4 to 5 pounds total
- 2 tablespoons yellow mustard
- 1/4 cup kosher salt
- 1/4 cup brown sugar
- 2 tablespoons paprika
- 1 tablespoon garlic powder
- 1 teaspoon black pepper
- 1/2 cup apple juice
- 2 tablespoons butter
- 1/2 cup barbecue sauce
- 2 tablespoons apple cider vinegar
Quick Steps:
-
Remove the membrane: Slide a knife under the thin membrane on the back of the ribs and peel it away. This gives you better texture and lets the rub get in.
-
Season the ribs: Rub the racks with mustard, then coat with the salt, brown sugar, paprika, garlic powder, and pepper.
-
Smoke until the bark sets: Set the smoker to 250°F. Smoke the ribs meat-side up for about 2 hours, until the surface looks dry and the color deepens to a rich mahogany.
-
Wrap with moisture: Lay each rack on foil with apple juice, butter, and a small splash of vinegar. Wrap tightly and cook for another 1 1/2 to 2 hours, until the meat pulls back from the bones.
-
Glaze and finish: Unwrap the ribs, brush with barbecue sauce, and return them to the smoker for 20 to 30 minutes until the glaze looks sticky and set.
Tips and Variations:
- Bite test: If the rack bends easily in the middle and the surface begins to crack, you’re close.
- Sauce warning: Keep the glaze for the last stretch or it can darken too fast.
- Flavor switch: A spoonful of honey in the sauce gives a softer, shinier finish.
4. Smoked Chicken Thighs with Crispy Skin
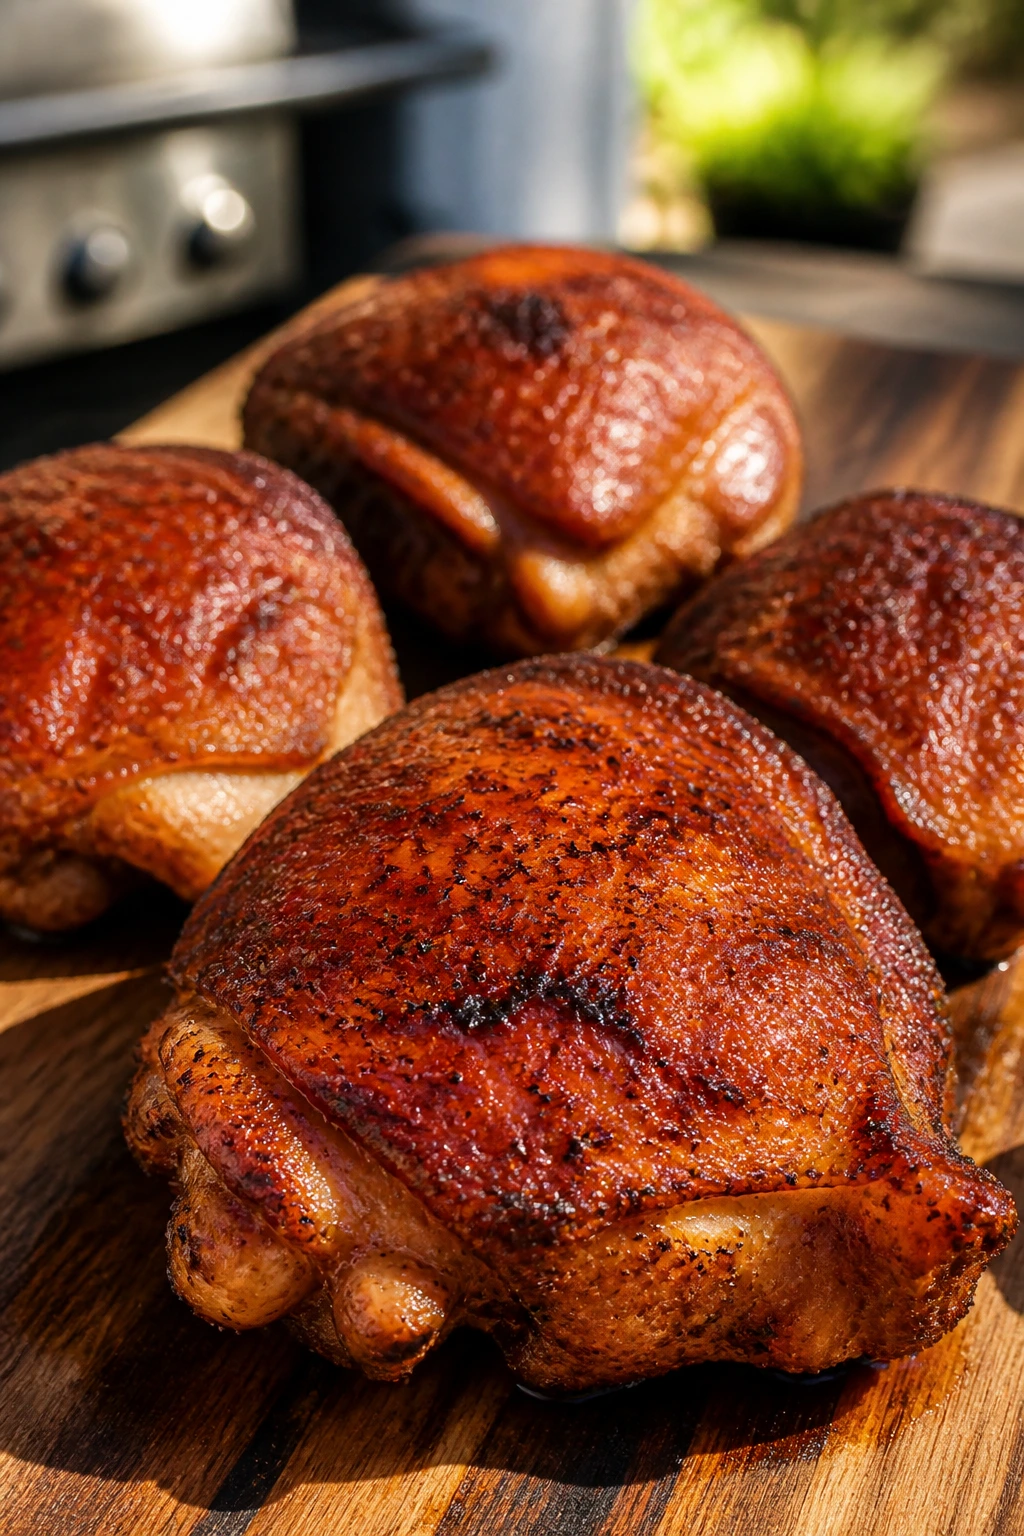
Chicken thighs might be the smartest smoker dinner on this list. They cook faster than the big cuts, stay juicy when the temperature climbs a little, and take on rub like they were built for it. If you want a dinner that feels casual but still tastes like you put in real effort, this is a strong place to start.
Why It Works:
Thighs have enough fat and connective tissue to stay tender through smoke, and they actually improve when the smoker runs a little hotter than brisket country. That higher heat helps the skin render instead of turning rubbery. Pull them at 175 to 185°F, not at the poultry textbook number, because dark meat gets better when it has a little more time to relax and soften.
Key Ingredients:
- 3 pounds bone-in, skin-on chicken thighs
- 1 tablespoon kosher salt
- 1 tablespoon black pepper
- 1 tablespoon paprika
- 2 teaspoons garlic powder
- 2 teaspoons onion powder
- 1 tablespoon brown sugar
- 2 tablespoons olive oil
- 2 tablespoons hot honey or barbecue sauce, optional
Quick Steps:
-
Dry the skin: Pat the thighs dry with paper towels and leave them uncovered in the fridge for 1 to 4 hours if possible. Dry skin renders better.
-
Season well: Toss the thighs with olive oil, then coat both sides with salt, pepper, paprika, garlic powder, onion powder, and brown sugar.
-
Smoke hot enough for the skin: Set the smoker to 275°F to 300°F. Place the thighs skin-side up and smoke for about 45 minutes.
-
Finish to the right temp: Keep cooking until the internal temperature reaches 175 to 185°F and the skin looks bronzed and a little taut. If you want glaze, brush it on during the last 10 minutes.
-
Rest briefly: Give the thighs 10 minutes before serving so the juices settle instead of running all over the board.
Tips and Variations:
- Crispier skin: A tiny dusting of baking powder in the rub helps the skin blister a little more, but use only 1/2 teaspoon for the whole batch.
- Sauce move: Serve hot honey on the side rather than painting it on early.
- Make it a platter: Add smoked corn and sliced cucumbers for a lighter cookout plate.
5. Smoked Whole Chicken with Herb Butter
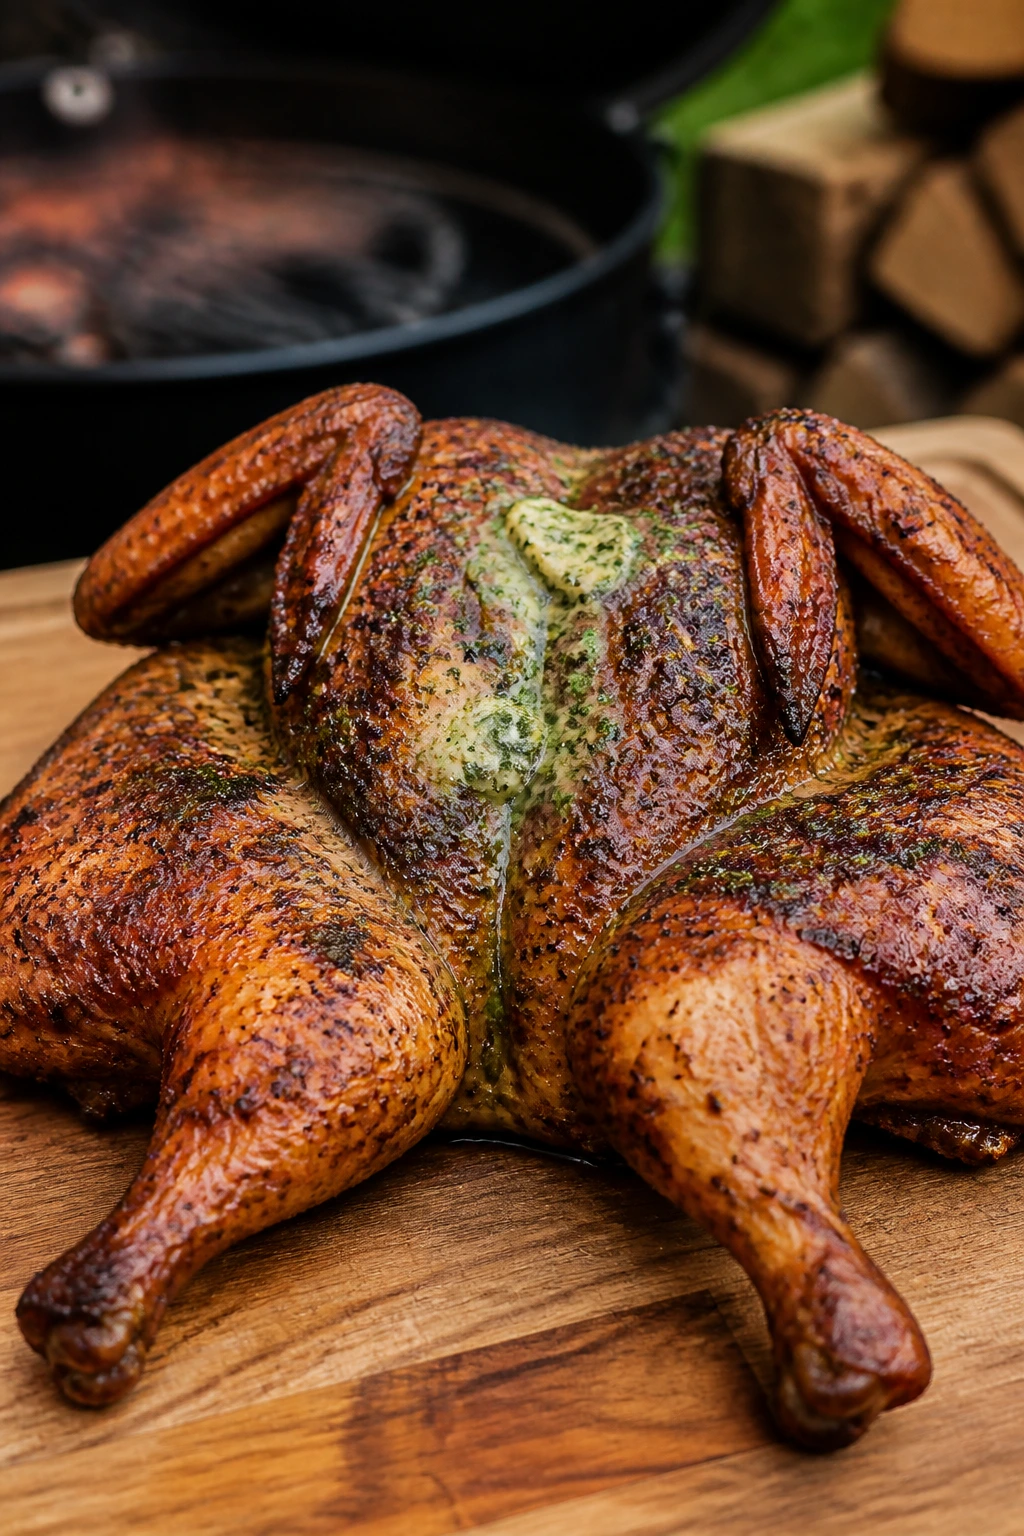
A whole chicken on the smoker has an old-school cookout feel that I never get tired of. It’s familiar enough to please a crowd, but the smoke, herbs, and butter under the skin give it a depth an oven roast can’t touch. The best ones carve cleanly and smell like lemon, thyme, and toasted skin.
Why It Works:
A whole bird gives you different textures in one dinner: breast meat for the folks who want lean slices, thighs and drumsticks for the people who like a richer bite. Spatchcocking flattens the chicken so it cooks more evenly, which means the breast won’t lag behind the legs. Herb butter under the skin bastes the meat from the inside as it cooks, and that is a better move than drowning the skin in sauce.
Key Ingredients:
- 1 whole chicken, 4 to 5 pounds, spatchcocked
- 4 tablespoons softened butter
- 1 tablespoon kosher salt
- 1 tablespoon black pepper
- 1 tablespoon chopped thyme
- 1 tablespoon chopped rosemary
- 2 cloves garlic, minced
- 1 lemon, zested and halved
- 1 tablespoon olive oil
Quick Steps:
-
Spatchcock the chicken: Remove the backbone with kitchen shears and press the bird flat. This helps the breast and legs cook at nearly the same speed.
-
Make the herb butter: Mix the butter, thyme, rosemary, garlic, lemon zest, salt, and pepper into a soft paste.
-
Season under and over the skin: Gently loosen the skin over the breast and thighs, then spread the herb butter underneath. Rub the outside with olive oil and a little extra salt.
-
Smoke until done: Set the smoker to 250°F to 275°F and cook the chicken skin-side up until the breast reaches 160 to 165°F and the thigh reads 175°F, usually 1 1/2 to 2 hours.
-
Rest and carve: Rest for 15 minutes, then carve along the breastbone and joints.
Tips and Variations:
- Flavor boost: A few lemon slices tucked under the bird add a fresh edge to the smoke.
- Skin tip: If the skin looks pale near the end, raise the heat for the last 10 minutes.
- Serving idea: Slice and serve with grilled potatoes or a sharp cabbage slaw.
6. Smoked Turkey Breast with Maple-Pepper Glaze
Turkey breast gets ignored too often because people assume it will be dry. On the smoker, with a good brine and a careful pull, it can be clean, juicy, and polished enough to feel a little special. The maple-pepper glaze gives it a lacquered finish that tastes more cookout than holiday boardroom.
Why It Works:
Turkey breast is lean, which means the difference between juicy and stringy is mostly about temperature control and moisture management. A short brine seasons the meat all the way through, and a glaze layered at the end keeps the exterior from drying out. Pull it at 160 to 165°F, then rest it; the carryover heat does the rest without pushing the meat into cotton territory.
Key Ingredients:
- 1 bone-in turkey breast, 4 to 5 pounds
- 1/4 cup kosher salt
- 2 tablespoons brown sugar
- 1 tablespoon black pepper
- 2 teaspoons garlic powder
- 2 tablespoons olive oil
- 2 tablespoons butter, melted
- 3 tablespoons maple syrup
- 1 tablespoon Dijon mustard
- 1 teaspoon chopped sage
Quick Steps:
-
Brine if you can: Mix the salt, brown sugar, and 4 cups water. Submerge the turkey breast for 4 to 8 hours, then pat it dry.
-
Season the bird: Rub with olive oil, black pepper, garlic powder, and chopped sage.
-
Smoke gently: Set the smoker to 250°F to 275°F and cook until the breast reaches 145°F, about 1 1/2 hours.
-
Glaze near the finish: Brush on a mix of maple syrup, Dijon, and melted butter. Continue smoking until the breast reaches 160 to 165°F.
-
Rest and slice thin: Rest for 15 to 20 minutes before carving against the grain.
Tips and Variations:
- Moisture note: Don’t skip the rest or the first slices will leak all over the board.
- Glaze control: Brush lightly twice instead of dumping on a thick coat.
- Leftover use: Thin slices make excellent sandwiches with cranberry relish or mustard.
7. Smoked Beef Short Ribs
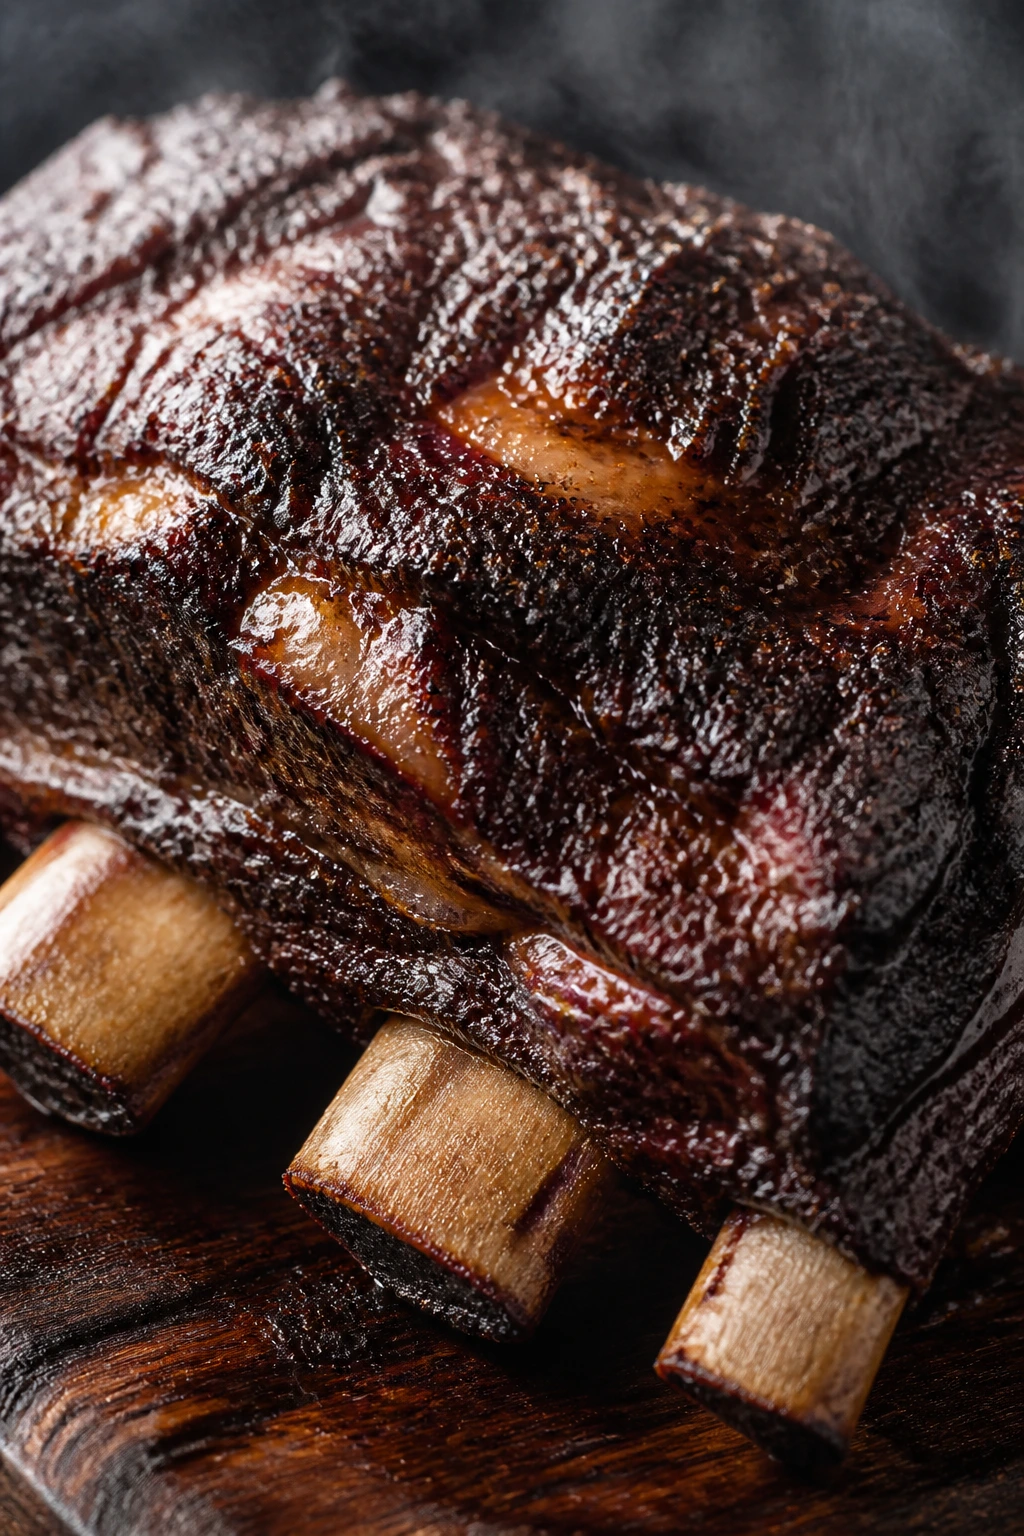
Beef short ribs are the deep-end version of a smoker dinner. They’re thick, rich, and almost absurdly satisfying when the fat turns silky and the meat gives up without a fight. If brisket is the classic, short ribs are the indulgent cousin.
Why It Works:
Plate short ribs have heavy marbling and connective tissue, which makes them perfect for low heat and long timing. They build a bark similar to brisket but often finish with a more concentrated beef flavor because the cut is so dense. Wrapping in butcher paper keeps the bark from getting soggy while the meat softens to that spoon-tender stage people remember.
Key Ingredients:
- 3 to 4 pounds beef short ribs, cut English-style
- 2 tablespoons kosher salt
- 2 tablespoons coarse black pepper
- 1 tablespoon garlic powder
- 1 tablespoon onion powder
- 1 tablespoon smoked paprika
- 2 tablespoons beef tallow or melted butter
- 1 cup beef broth
- 1 tablespoon Worcestershire sauce
Quick Steps:
-
Trim and season: Trim excess hard fat from the ribs, then coat them with salt, pepper, garlic powder, onion powder, and smoked paprika.
-
Smoke low and steady: Set the smoker to 250°F. Place the ribs bone-side down and smoke for about 4 hours until the bark is dark and the surface feels firm.
-
Wrap for tenderness: Lay the ribs on butcher paper with beef tallow, broth, and Worcestershire. Wrap tightly and return them to the smoker.
-
Cook until probe tender: Continue until the internal temperature lands around 203°F and a probe slides in with almost no resistance, usually another 2 to 3 hours.
-
Rest before slicing: Rest for at least 30 minutes. Slice between the bones and serve with any juices trapped in the wrap.
Tips and Variations:
- Wood choice: Oak or hickory gives the ribs a strong beef-forward smoke.
- Sauce note: These are rich enough that sauce is optional.
- Board trick: Serve over sliced onions or mashed potatoes so the beef juices have somewhere to go.
8. Bacon-Wrapped Smoked Meatloaf
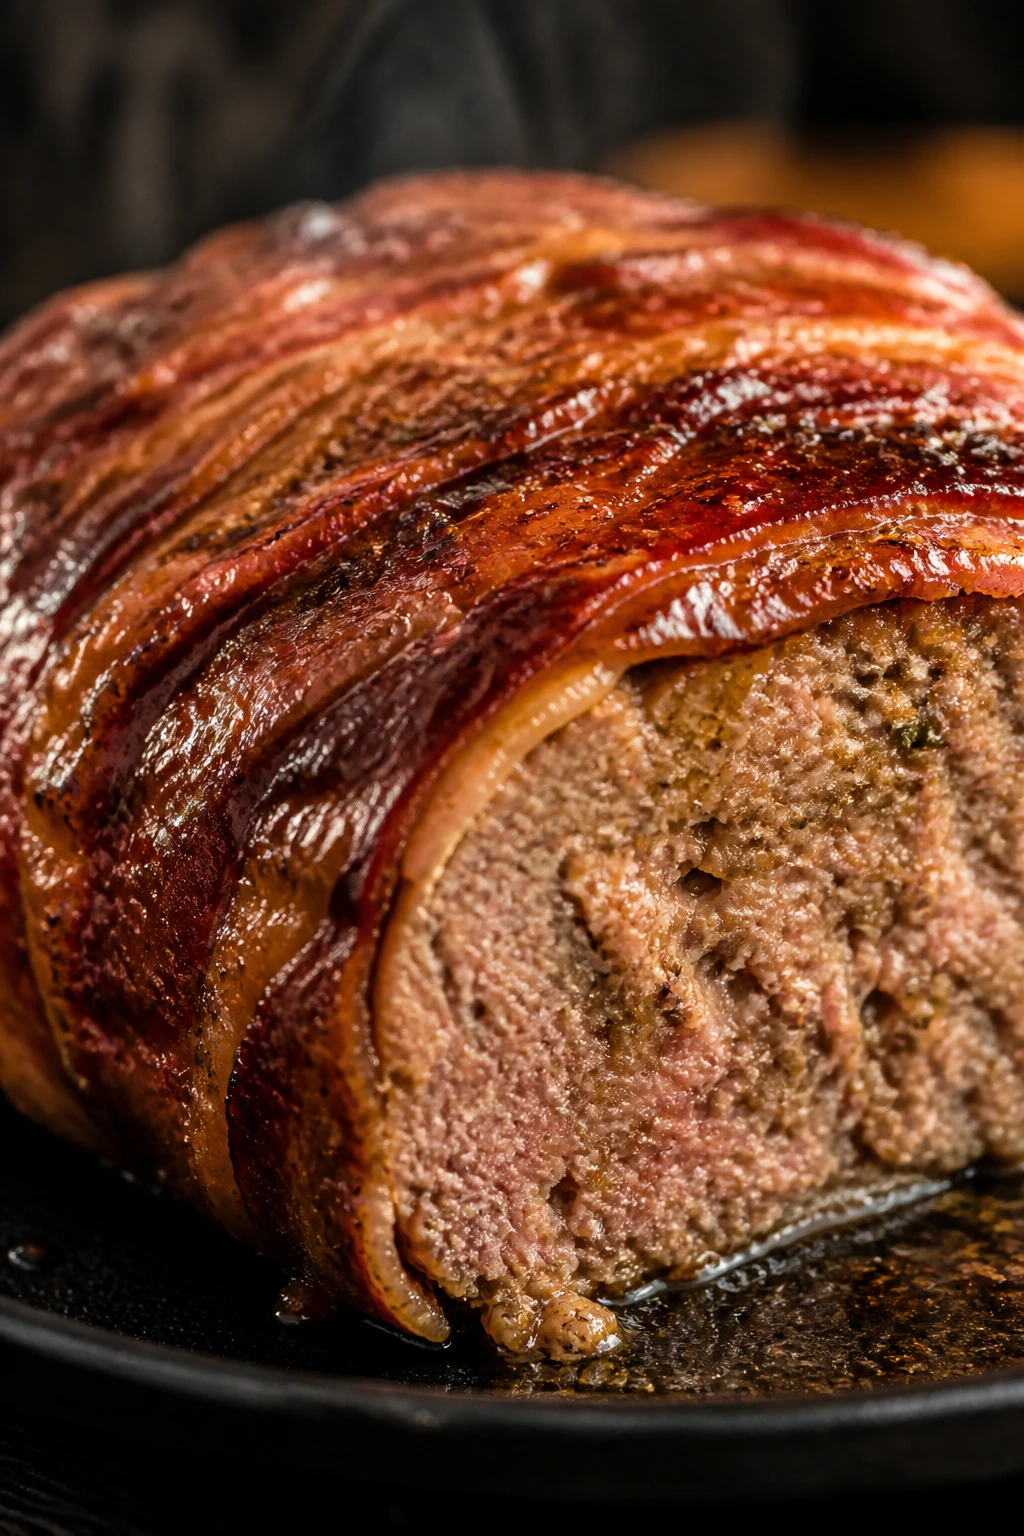
Meatloaf on a smoker has the charm of a diner classic and the flavor of backyard barbecue. Bacon wrapped around the loaf keeps the outside from drying, the glaze gets sticky at the end, and the slices hold together far better than a lot of oven-baked versions. It’s one of those dishes people underestimate until they try it.
Why It Works:
A mix of ground beef and pork gives you flavor and fat without turning the loaf greasy. Breadcrumbs and eggs keep the texture tender, while the smoker adds a faint wood-fired note that suits ketchup glaze better than a standard oven ever will. Cooking it on a rack or flat pan lets the bacon crisp and the fat drip away instead of pooling under the loaf.
Key Ingredients:
- 2 pounds ground beef, preferably 80/20
- 1/2 pound ground pork
- 1 cup breadcrumbs
- 2 large eggs
- 1 small onion, finely diced
- 2 cloves garlic, minced
- 2 tablespoons Worcestershire sauce
- 8 to 10 bacon slices
- 1/2 cup ketchup
- 2 tablespoons brown sugar
- 1 tablespoon yellow mustard
Quick Steps:
-
Mix gently: Combine the beef, pork, breadcrumbs, eggs, onion, garlic, Worcestershire, salt, and pepper in a large bowl. Mix until just combined; overworking makes the loaf dense.
-
Shape and wrap: Form the mixture into a loaf shape on a foil-lined tray or a rack set over a pan. Lay bacon slices over the top, tucking the ends under the loaf.
-
Smoke the loaf: Set the smoker to 250°F to 275°F and cook for about 2 hours.
-
Glaze and finish: Stir ketchup, brown sugar, and mustard together, brush it over the loaf, and smoke until the internal temperature reaches 160°F, about 45 minutes more.
-
Rest and slice: Rest for 10 to 15 minutes so the slices hold together cleanly.
Tips and Variations:
- Texture tip: A loose loaf shape cooks more evenly than one packed into a pan.
- Flavor move: Add a teaspoon of smoked paprika to the mix if you want a deeper barbecue note.
- Sandwich idea: Cold slices on white bread with pickles are dangerously good.
9. Smoked Salmon with Brown Sugar-Dill Cure
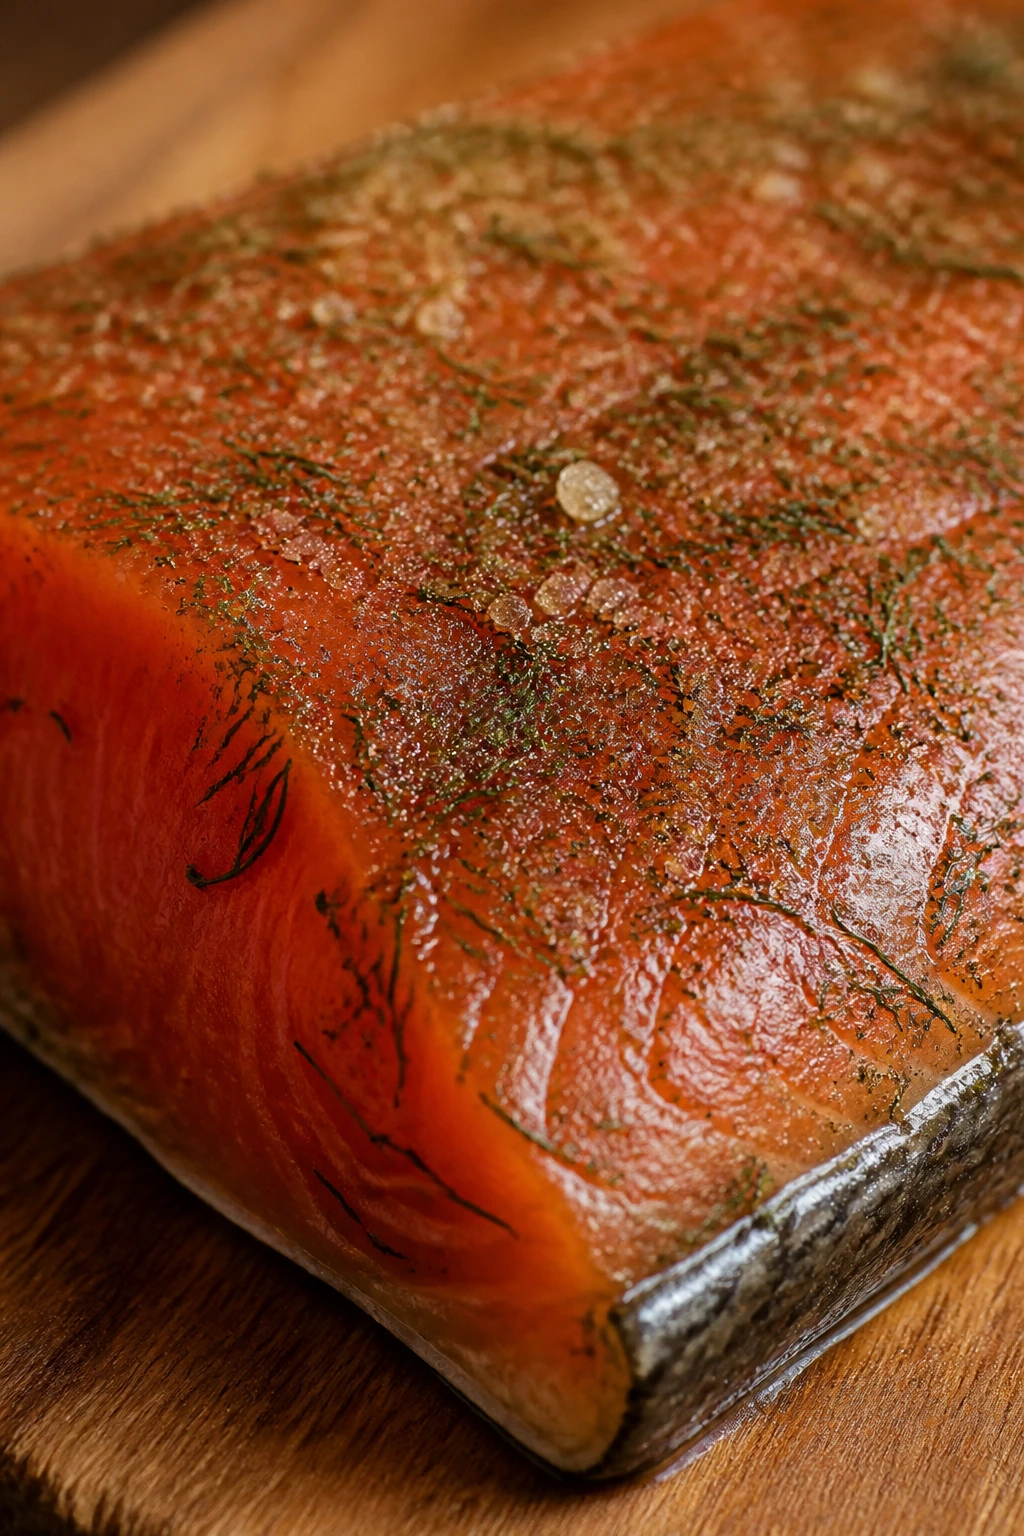
Salmon brings a lighter, cleaner feel to a smoker spread, and that matters when the rest of the menu leans heavy. The fish takes smoke fast, so it tastes polished and silky instead of harsh or overworked. A little sugar and dill turn it into something that feels like a cookout appetizer and a proper dinner at the same time.
Why It Works:
Salmon cooks fast, which is both the charm and the trap. A short cure seasons the flesh and firms it slightly so it won’t fall apart on the grate, and smoking at a lower temperature keeps the oils intact instead of pushing them out. The target is a tender center around 125 to 130°F, not a dry flake-fest.
Key Ingredients:
- 1 salmon side, about 2 pounds, skin on
- 2 tablespoons brown sugar
- 1 tablespoon kosher salt
- 1 tablespoon chopped dill
- 1 teaspoon lemon zest
- 1 teaspoon black pepper
- 1 tablespoon olive oil
- Lemon wedges, for serving
Quick Steps:
-
Cure the fish lightly: Mix the brown sugar, salt, dill, lemon zest, and pepper. Rub it over the salmon and let it sit in the fridge for 30 to 60 minutes.
-
Rinse and dry: Rinse off the cure, pat the salmon dry, and brush the flesh with olive oil.
-
Smoke gently: Set the smoker to 225°F. Place the salmon skin-side down and smoke for 45 to 75 minutes, depending on thickness.
-
Watch the texture: Pull the fish when it reaches 125 to 130°F in the thickest part and the surface looks satin-like, not dry.
-
Serve right away: Finish with lemon wedges and a little extra dill.
Tips and Variations:
- Wood choice: Alder or fruit wood keeps the fish delicate.
- Serving move: Flake leftovers into crackers, salad, or cold pasta.
- Sauce option: A spoonful of yogurt-dill sauce works if you want a creamier finish.
10. Smoked Pork Tenderloin with Mustard Mop
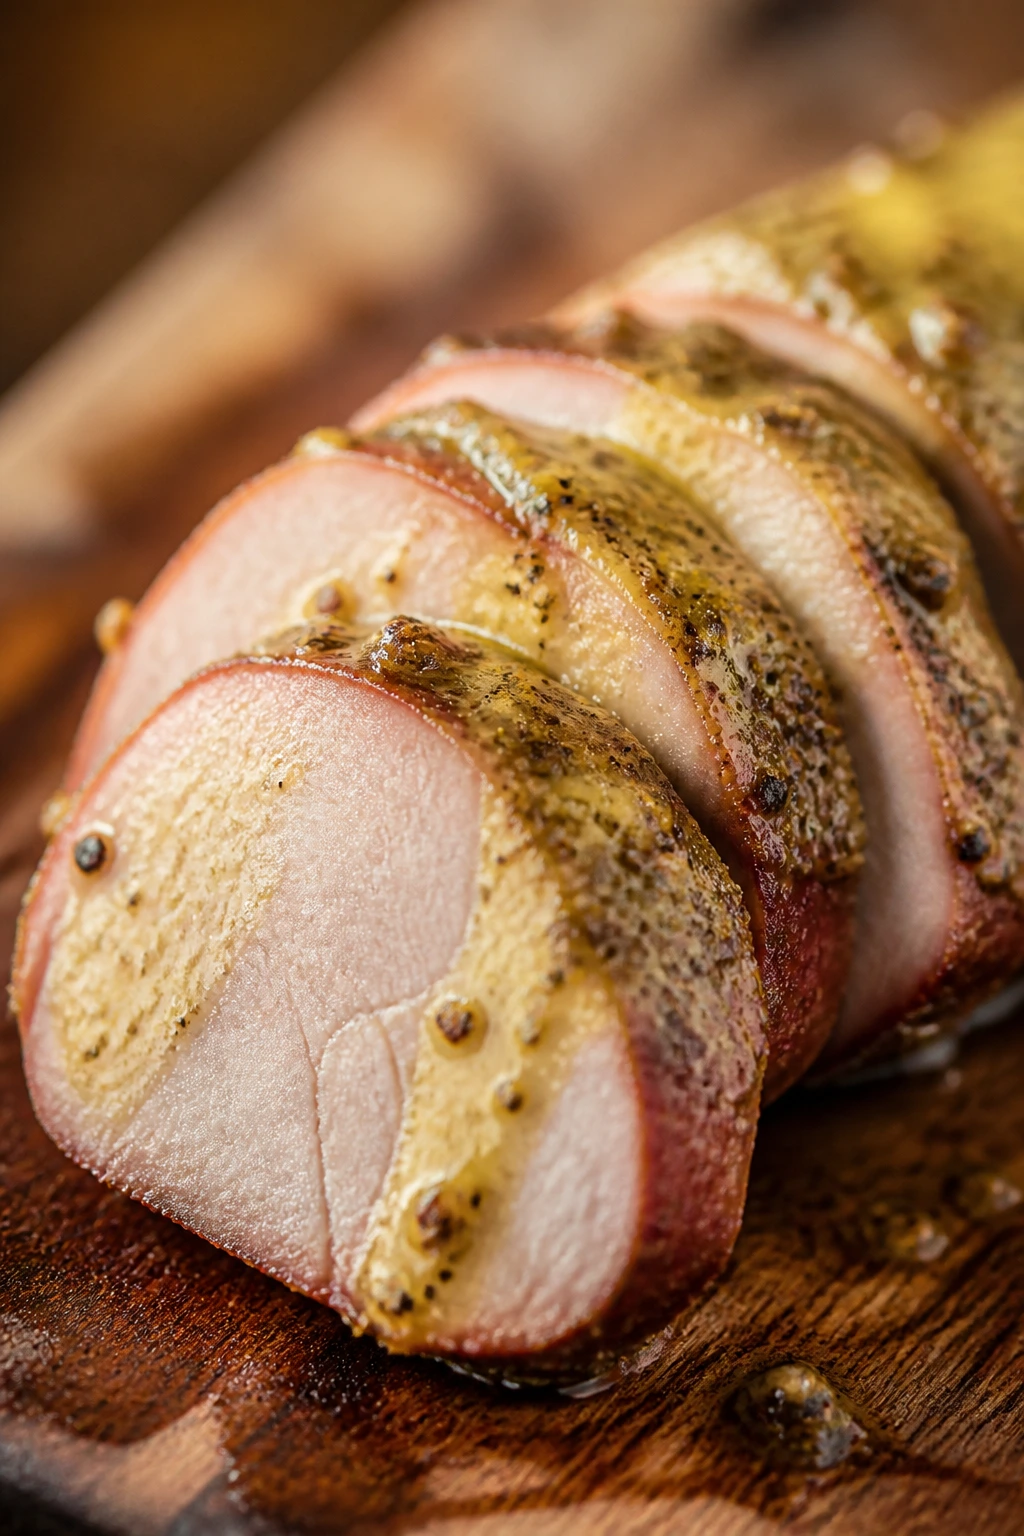
Pork tenderloin is the sleeper hit here. It cooks quickly, takes smoke well, and slices into neat medallions that look a lot more polished than the amount of work involved would suggest. The mustard mop keeps the outside tangy and prevents the lean meat from tasting flat.
Why It Works:
Tenderloin is leaner than shoulder, so the trick is to smoke it fast enough to preserve juiciness but long enough to get actual smoke flavor on the surface. A mustard-and-vinegar mop adds sharpness and moisture, and a short rest keeps the juices in the meat rather than on the cutting board. If you pull it around 140 to 145°F, the slices stay pink and tender after resting.
Key Ingredients:
- 2 pork tenderloins, about 1 1/2 pounds each
- 2 tablespoons yellow mustard
- 2 tablespoons olive oil
- 1 tablespoon kosher salt
- 1 tablespoon black pepper
- 2 teaspoons garlic powder
- 1 teaspoon chopped rosemary
- 2 tablespoons apple cider vinegar
- 1 tablespoon honey, optional
Quick Steps:
-
Trim and season: Remove the silvery membrane from the tenderloins and pat them dry. Rub with olive oil, mustard, salt, pepper, garlic powder, and rosemary.
-
Start the smoke: Set the smoker to 250°F to 275°F and place the tenderloins on the grate.
-
Mop once or twice: Mix apple cider vinegar with honey if using, then brush it on after the first 30 minutes.
-
Cook to temp: Smoke until the internal temperature reaches 140 to 145°F, usually 60 to 90 minutes.
-
Rest and slice: Rest for 10 minutes, then slice into thick medallions.
Tips and Variations:
- Don’t overcook it: Tenderloin goes from juicy to dry fast, so use a probe thermometer.
- Flavor swap: A little Dijon in the mop gives the meat a sharper edge.
- Serving idea: This is good with grilled peaches or a mustardy potato salad.
11. Smoked Sausage and Peppers Foil Pan Dinner
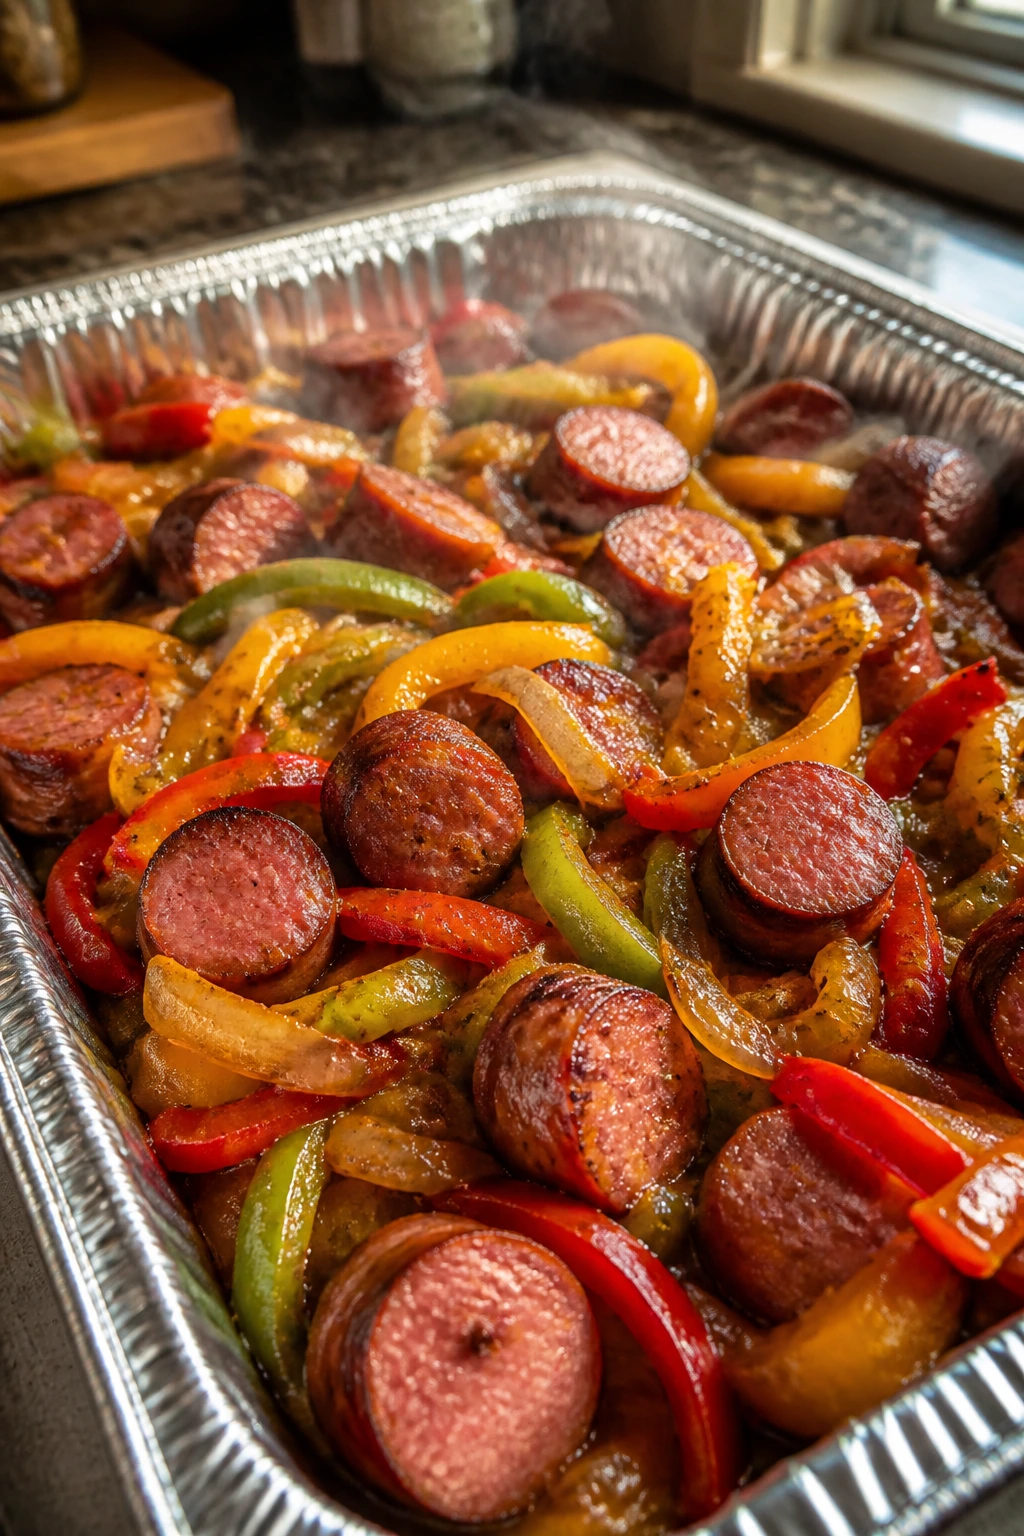
Not every smoker dinner needs a dramatic long haul. Sausage and peppers give you a one-pan, low-fuss meal that still tastes like it came from a cookout worth remembering. The peppers soften, the onions sweeten, and the sausage picks up smoke in a way that makes the whole pan smell better than it has any right to.
Why It Works:
This is the kind of dinner that uses the smoker like a flavor engine instead of a whole-day project. The foil pan catches juices, which means the vegetables braise a little while they smoke. Italian sausage brings fat and seasoning, so you don’t need much more than onions, peppers, garlic, and tomatoes to make the pan feel complete.
Key Ingredients:
- 2 pounds Italian sausage links, mild or hot
- 4 bell peppers, sliced
- 2 large onions, sliced
- 3 cloves garlic, minced
- 1 can diced tomatoes, 14.5 ounces
- 2 tablespoons olive oil
- 1 teaspoon dried oregano
- 1 teaspoon black pepper
- 1/2 cup shredded mozzarella, optional
- Crusty rolls or rice, for serving
Quick Steps:
-
Build the pan: Toss the peppers and onions with olive oil, garlic, oregano, black pepper, and a little salt. Spread them in a large foil pan.
-
Add the sausage: Nestle the sausage links over the vegetables and pour the diced tomatoes around them.
-
Smoke until tender: Set the smoker to 275°F and cook for about 1 1/2 hours, stirring the vegetables once halfway through.
-
Finish the sausage: If you want browned edges, move the sausages directly to the grate for 5 to 10 minutes at the end.
-
Serve hot: Spoon everything into rolls or over rice and top with mozzarella if you like a melted finish.
Tips and Variations:
- Sheet pan option: If you want more browning, transfer the pan to a hot grill for the last few minutes.
- Flavor tip: A splash of red wine vinegar keeps the vegetables from tasting flat.
- Leftover use: Chop everything up for pasta or eggs the next morning.
12. Chuck Roast Burnt Ends
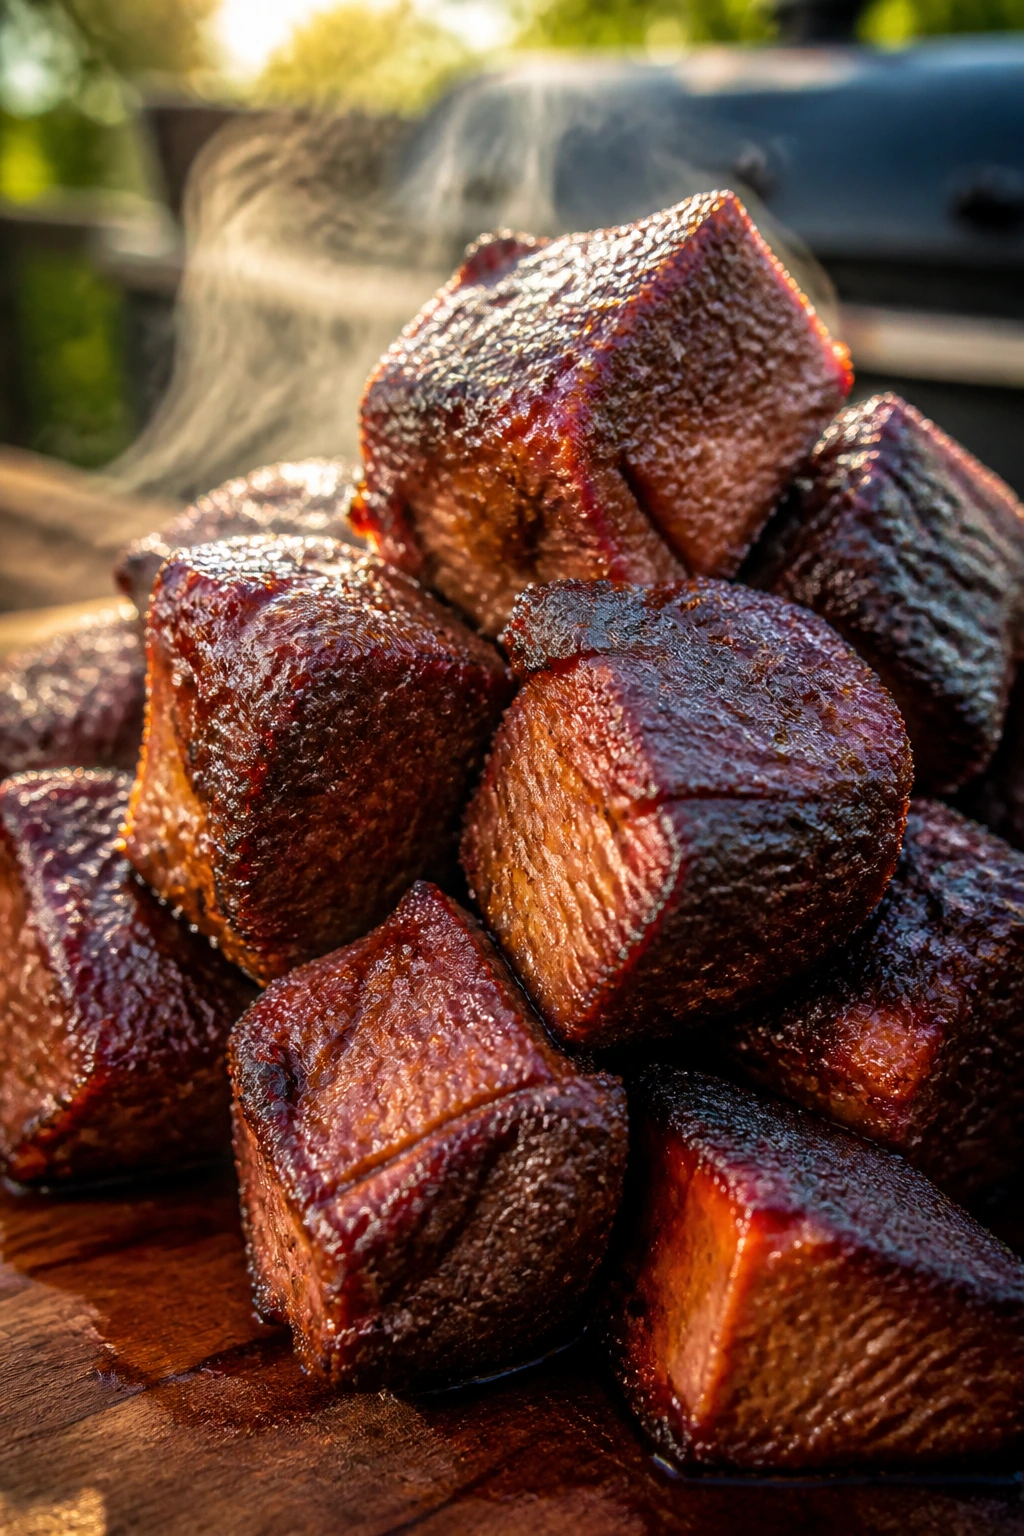
Chuck roast burnt ends are the practical person’s answer to brisket burnt ends. You get sticky beef cubes with bark, sauce, and just enough tenderness to feel decadent, but the cut is cheaper and far more forgiving. It’s one of the best smoker dinners for a crowd that likes rich flavor without a full brisket commitment.
Why It Works:
Chuck roast has enough marbling to handle a long smoke, and cubing it after the first stretch of cooking gives more surface area for bark and glaze. The first phase dries the outside and builds flavor; the second phase, with butter, sauce, and broth, turns the cubes into soft little beef bombs. You’re aiming for a balance of sticky and tender, not dry edges with sauce painted on top.
Key Ingredients:
- 1 chuck roast, 4 to 5 pounds
- 2 tablespoons kosher salt
- 2 tablespoons coarse black pepper
- 1 tablespoon garlic powder
- 1 tablespoon paprika
- 2 tablespoons beef tallow or melted butter
- 1/2 cup beef broth
- 1/2 cup barbecue sauce
- 2 tablespoons brown sugar
- 1 tablespoon Worcestershire sauce
Quick Steps:
-
Season the roast: Coat the chuck roast with salt, pepper, garlic powder, and paprika.
-
Smoke until barky: Set the smoker to 250°F and smoke for about 4 hours, until the outside is dark and the internal temperature is around 165°F.
-
Cube it up: Cut the roast into 1 1/2-inch cubes and place them in a foil pan.
-
Glaze and braise: Add tallow, broth, barbecue sauce, brown sugar, and Worcestershire. Toss to coat, cover tightly, and return to the smoker for 1 to 2 hours.
-
Set the glaze: Uncover for the last 20 to 30 minutes so the sauce thickens and clings to the cubes.
Tips and Variations:
- Heat tip: A little cayenne in the glaze gives the cubes a darker, sharper finish.
- Serving move: Toothpicks are not a joke here; people eat these like appetizers.
- Sauce warning: Too much liquid makes the glaze thin, so measure it instead of guessing.
13. Cajun Smoked Turkey Legs
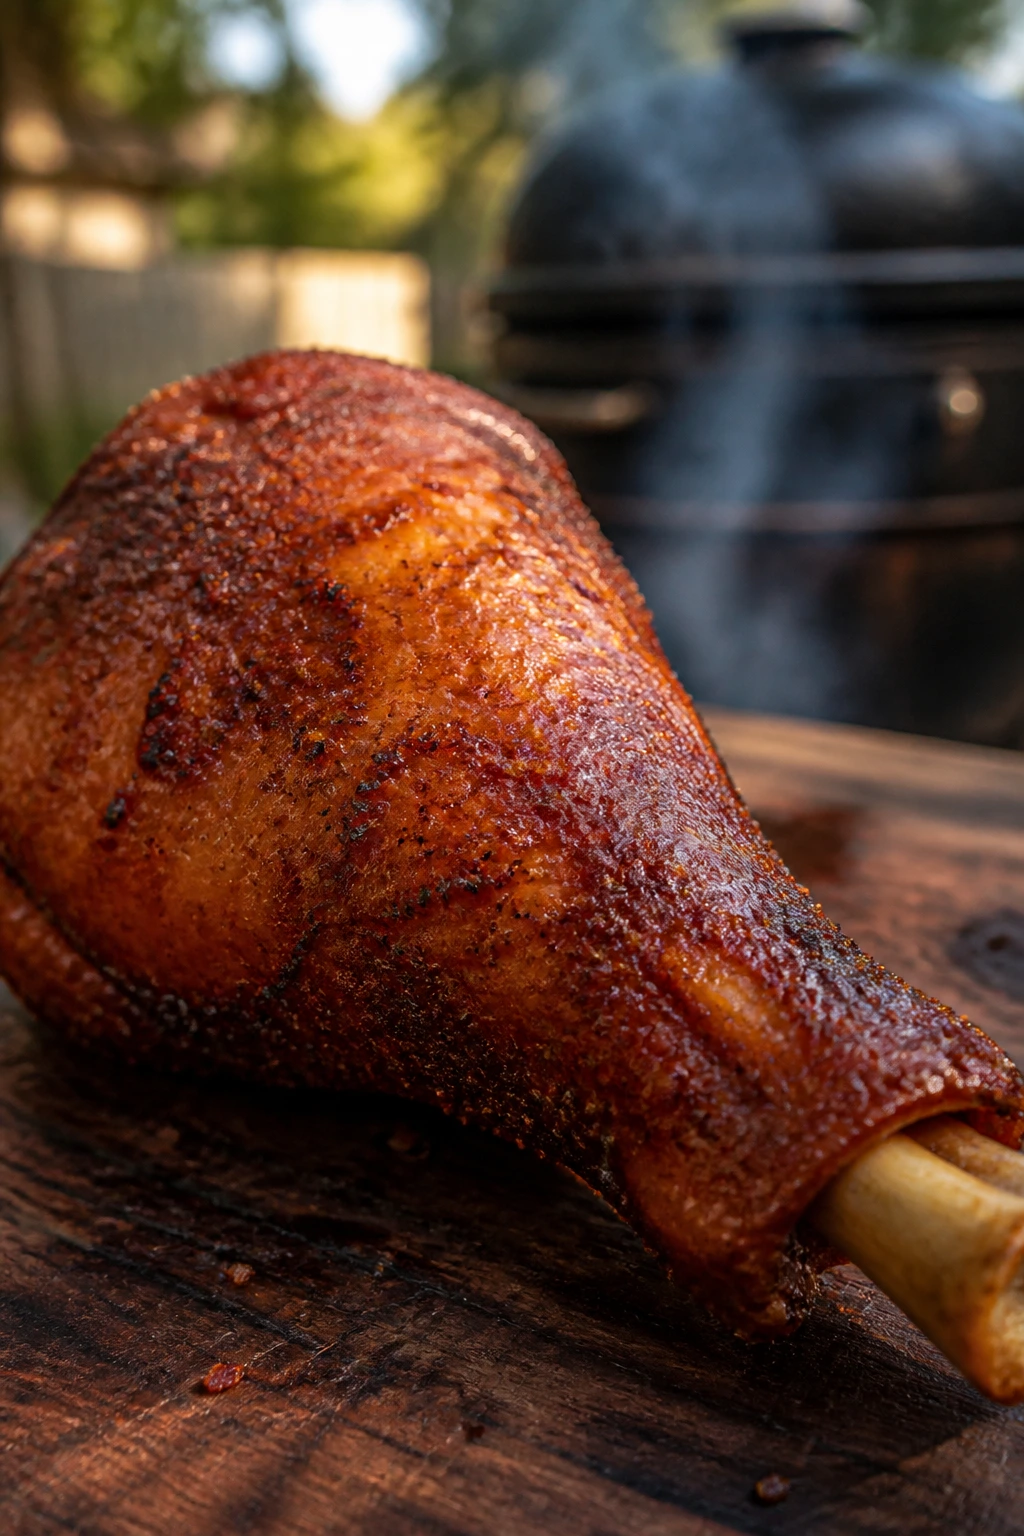
Turkey legs belong at a cookout. They’re dark, meaty, and a little theatrical in the best possible way, especially when the skin bronzes and the Cajun butter seeps into the meat. This is the dish that makes people grin before they even pick it up.
Why It Works:
Turkey legs have enough connective tissue to benefit from slower cooking, and they hold up well to bold seasoning. A dry brine seasons the meat all the way through, while the Cajun butter adds fat and spice near the finish so the skin doesn’t burn before the legs are done. Because legs are darker meat, you want them around 175 to 180°F for the best texture.
Key Ingredients:
- 6 turkey legs
- 2 tablespoons kosher salt
- 1 tablespoon brown sugar
- 2 tablespoons Cajun seasoning
- 1 tablespoon paprika
- 2 tablespoons butter, melted
- 2 teaspoons garlic powder
- 1 teaspoon hot sauce
- 1 tablespoon olive oil
Quick Steps:
-
Dry-brine first: Salt the turkey legs and refrigerate them uncovered for 4 to 12 hours if you can.
-
Season the legs: Brush with olive oil, then coat with Cajun seasoning, paprika, garlic powder, and brown sugar.
-
Smoke the legs: Set the smoker to 275°F and cook for about 2 hours.
-
Brush with Cajun butter: Mix melted butter and hot sauce, then brush it on during the last 30 minutes.
-
Cook to tender: Pull the legs when the internal temperature reaches 175 to 180°F and the skin looks deep golden.
Tips and Variations:
- Skin tip: Higher heat near the end helps the skin tighten.
- Flavor move: Add a little smoked paprika to the butter if you want a deeper color.
- Serving idea: These go well with pickles and cornbread, which sounds simple because it is simple.
14. Smoked Stuffed Bell Peppers
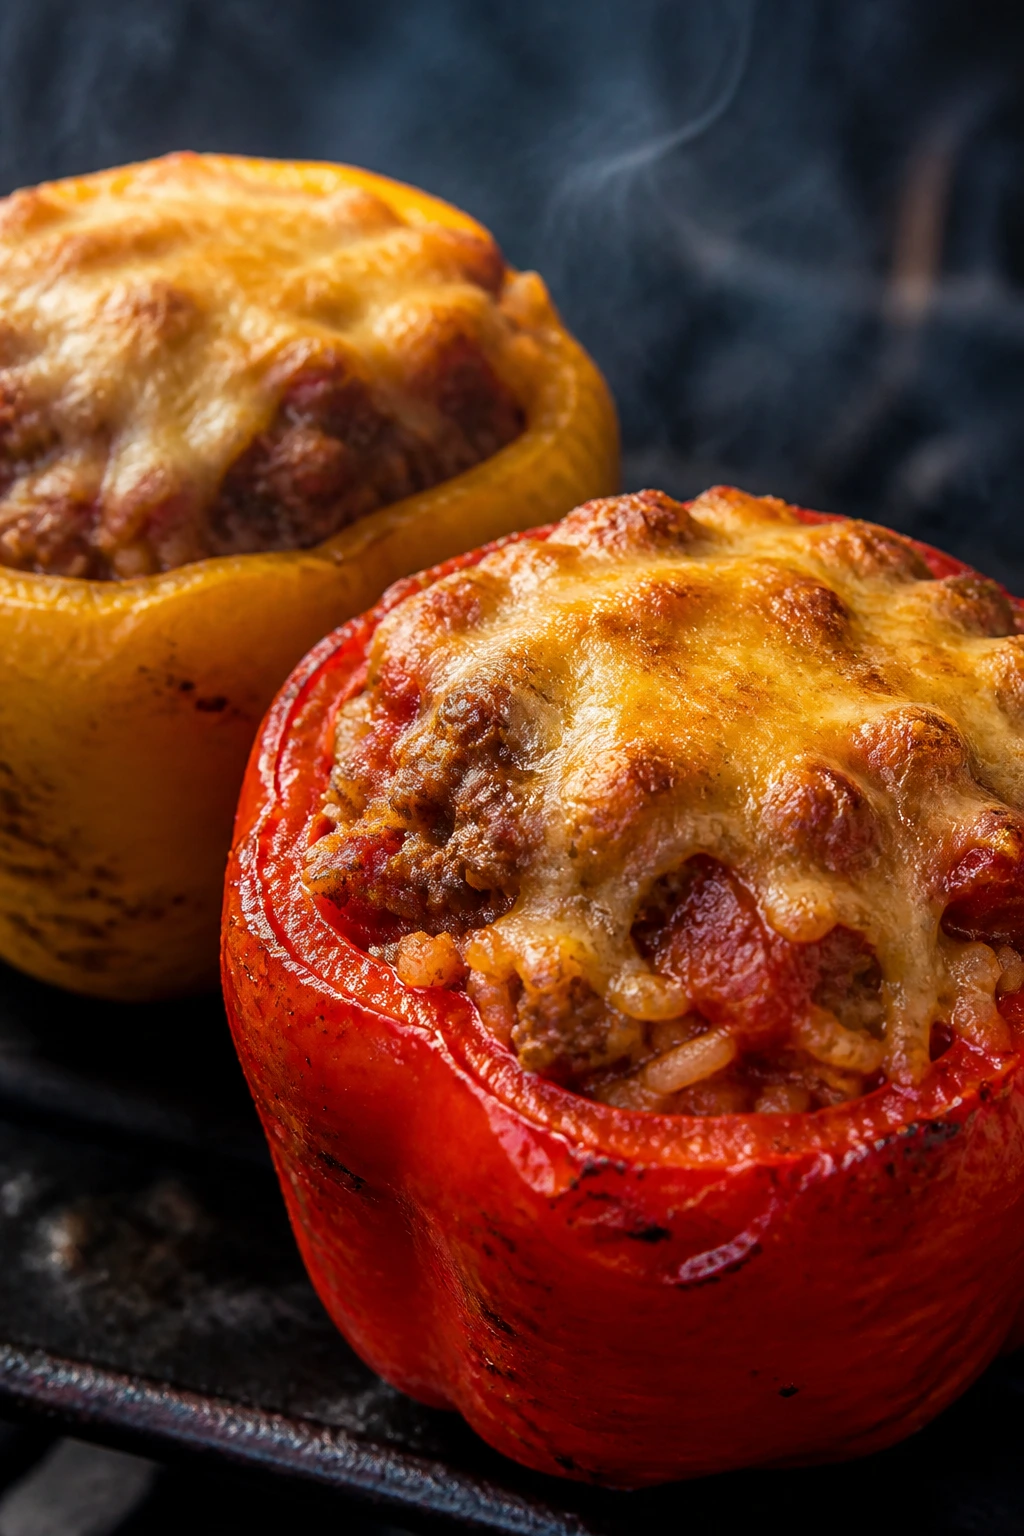
Stuffed peppers bring color to a smoker spread that can otherwise lean brown, red, and more brown. They’re tidy, filling, and easy to portion, which makes them a nice reset between heavier barbecue cuts. The peppers soften just enough to stay upright while the filling gets smoky and rich.
Why It Works:
The smoker doesn’t just cook the filling; it perfumes the whole pepper shell. Ground beef, rice, tomato sauce, and cheese give you the classic stuffed-pepper comfort profile, while the smoke adds a savory edge that makes the dish feel less like weeknight casserole and more like cookout food. You want the peppers tender with a little bite, not collapsed into mush.
Key Ingredients:
- 6 large bell peppers, tops removed and seeded
- 1 1/2 pounds ground beef
- 1 cup cooked rice
- 1 small onion, diced
- 2 cloves garlic, minced
- 1 cup tomato sauce
- 1 tablespoon Worcestershire sauce
- 1 teaspoon Italian seasoning
- 1 cup shredded cheddar or Monterey Jack
- 2 tablespoons chopped parsley
Quick Steps:
-
Prep the peppers: Slice off the tops and remove seeds and ribs. If they wobble, trim a sliver from the bottom so they stand upright.
-
Cook the filling: Brown the beef with onion and garlic in a skillet. Stir in rice, tomato sauce, Worcestershire, seasoning, salt, and pepper.
-
Stuff the peppers: Pack the filling into each pepper and place them upright in a foil pan or cast-iron skillet.
-
Smoke until tender: Set the smoker to 250°F to 275°F and cook for about 1 1/2 hours.
-
Add cheese at the end: Top with shredded cheese during the last 10 to 15 minutes until melted and bubbly.
Tips and Variations:
- Stability tip: A little foil crumpled under each pepper helps keep them upright.
- Swap option: Use ground turkey or sausage instead of beef.
- Serving idea: A spoonful of hot sauce or salsa on top keeps the filling lively.
15. Smoked Mac and Cheese with Bacon and Jalapeños
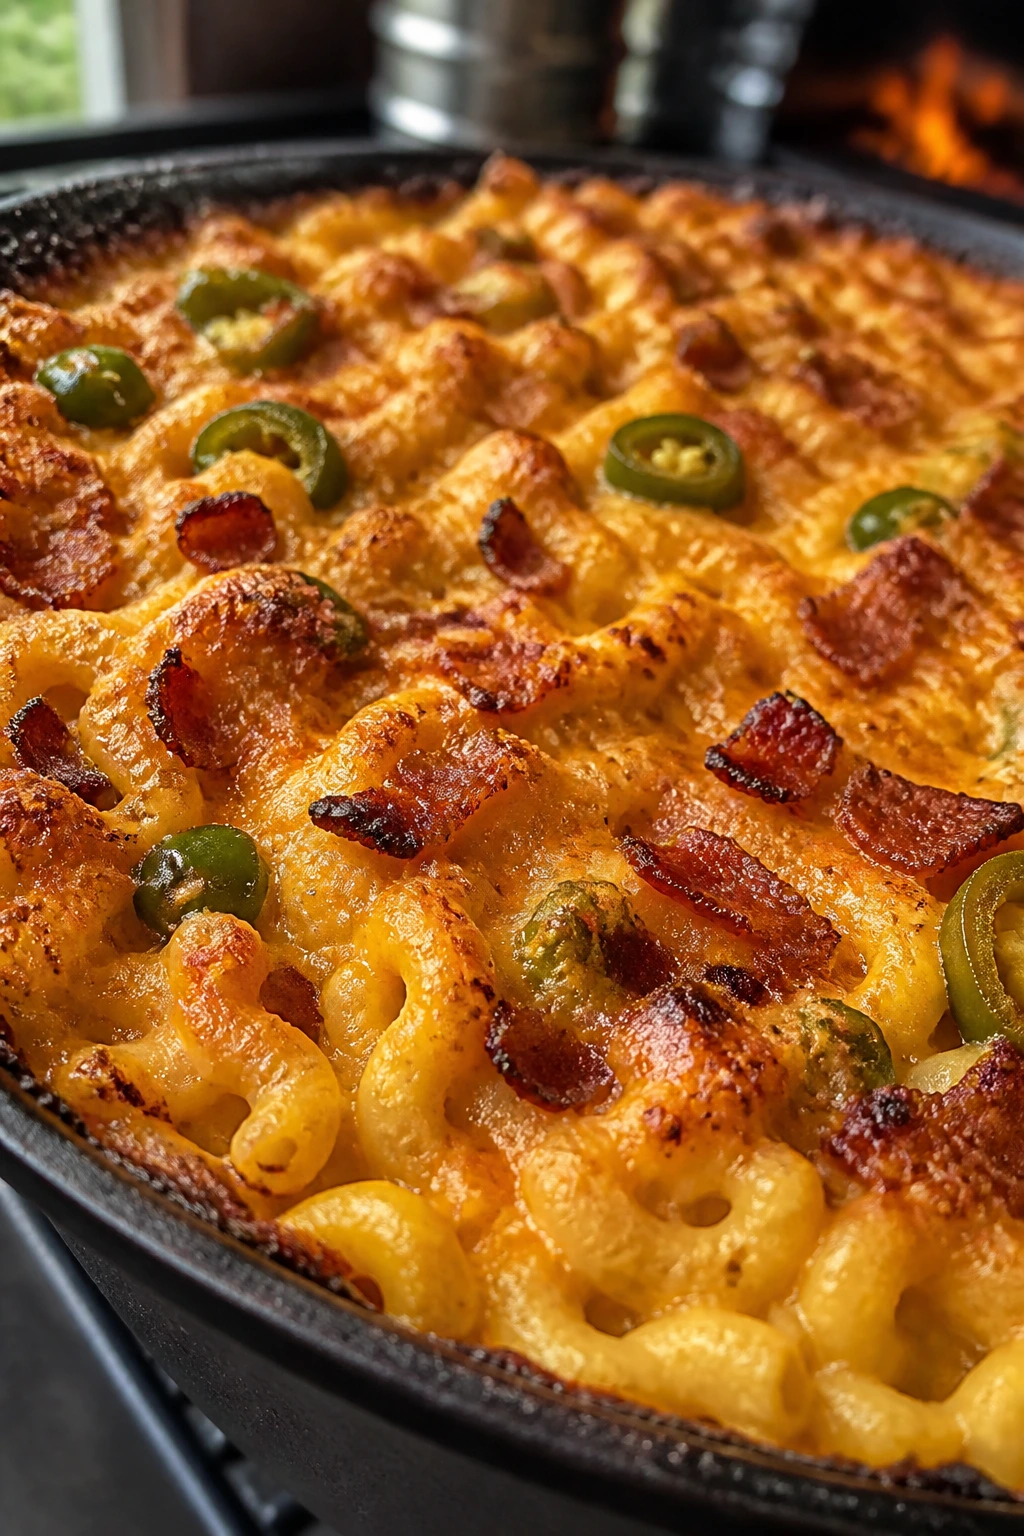
Smoked mac and cheese is the kind of dish that makes a crowd go quiet for a second. The top gets bronzed and crusty, the center stays creamy, and the smoke turns a familiar comfort food into something that can stand next to ribs without blushing. Add bacon and jalapeños, and you’ve got a dinner that does more than sit on the side of the plate.
Why It Works:
Pasta, cheese sauce, and smoke are a better match than they sound on paper. The smoker gives the top layer a savory edge, and the pan captures enough heat to bubble the sauce without breaking it. A mix of cheeses keeps the sauce from turning dull; one sharp cheese for bite, one melty cheese for body, and a little cream cheese to keep things smooth.
Key Ingredients:
- 1 pound elbow macaroni
- 4 tablespoons butter
- 1/4 cup all-purpose flour
- 3 cups whole milk
- 2 cups shredded sharp cheddar
- 1 cup shredded smoked gouda
- 4 ounces cream cheese
- 6 slices bacon, cooked and chopped
- 2 jalapeños, seeded and diced
- 1 cup breadcrumbs, optional
Quick Steps:
-
Cook the pasta: Boil the macaroni in salted water until just shy of al dente, then drain.
-
Make the cheese sauce: Melt butter, whisk in flour, and cook for 1 minute. Slowly add milk, then stir in cheddar, gouda, and cream cheese until smooth.
-
Combine and load the pan: Fold in pasta, bacon, and jalapeños. Pour into a buttered cast-iron skillet or foil pan. Top with breadcrumbs if you want a crust.
-
Smoke until set: Set the smoker to 225°F to 250°F and cook for 45 to 60 minutes, until the edges bubble and the top picks up color.
-
Rest briefly: Let it sit for 10 minutes so the sauce thickens.
Tips and Variations:
- Heat control: Remove jalapeño seeds if you want the flavor without the burn.
- Texture tip: Don’t overcook the pasta before it hits the smoker.
- Serving idea: A spoonful of pickled onions on top cuts through the richness fast.
16. Pork Belly Burnt Ends
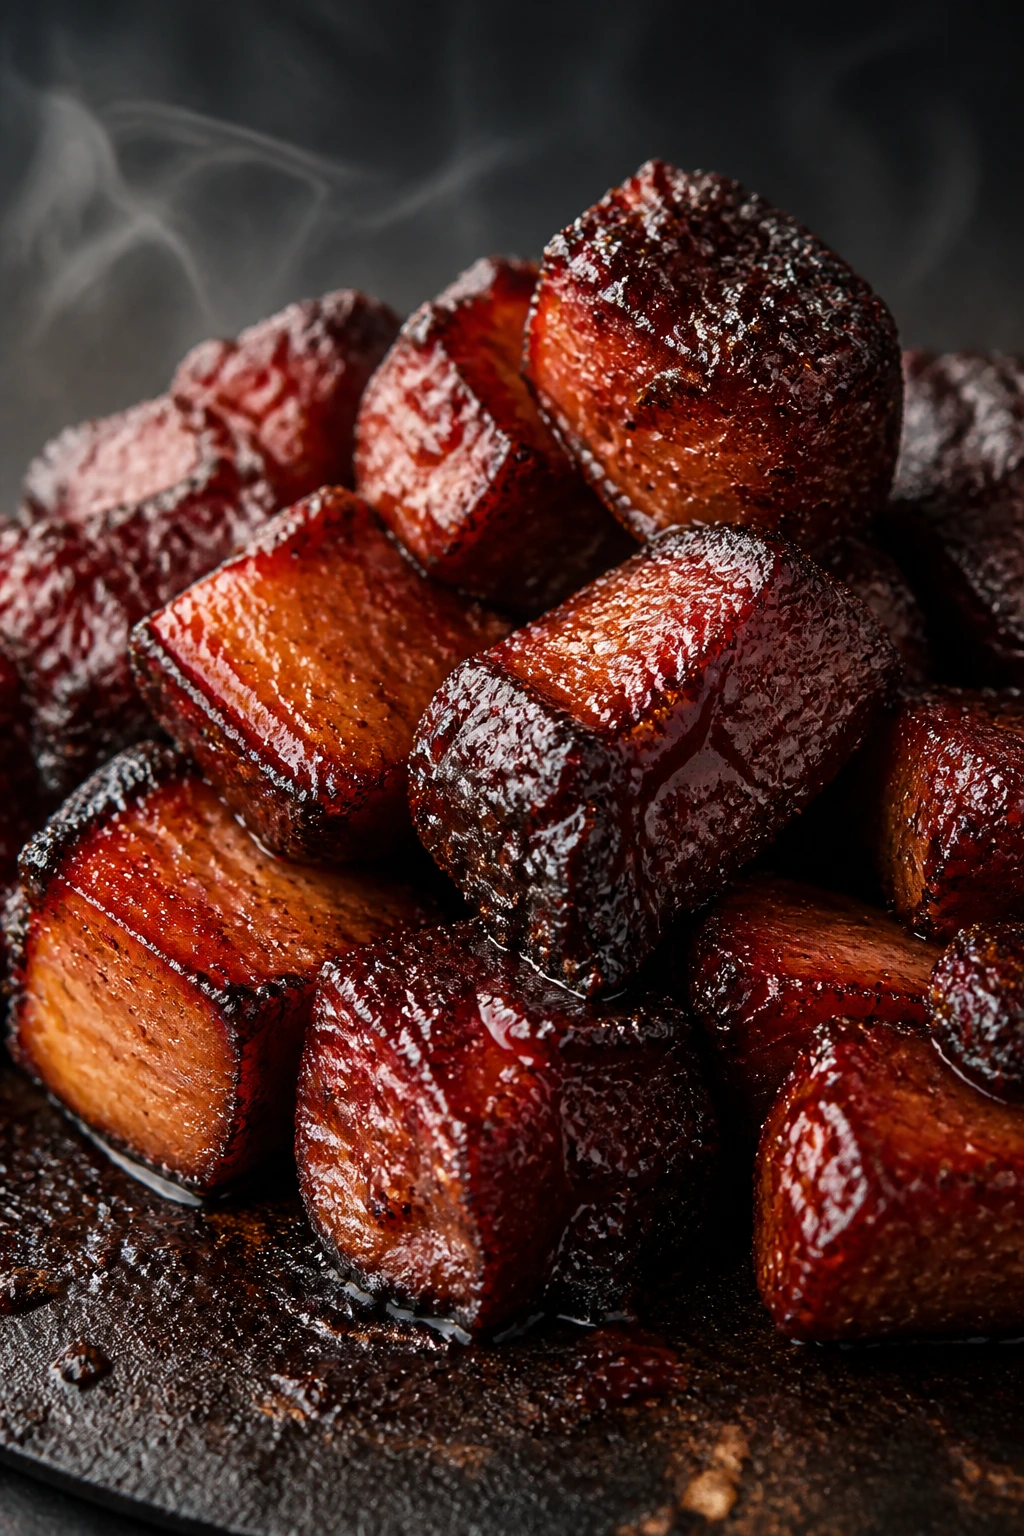
Pork belly burnt ends are the loudest dish on this list. Sweet, salty, rich, sticky, and a little over the top — in the best possible way. They’re the kind of thing people hover around the pan for, pretending they’re “just tasting one more” and then somehow the pan is empty.
Why It Works:
Pork belly has fat in all the places you want fat, which means it turns soft and glossy instead of dry when it’s cooked in stages. The first smoke builds bark, the middle braise softens the cubes, and the final glaze turns them sticky and burnished. This is not a lean dinner. It is a reward dinner.
Key Ingredients:
- 4 pounds pork belly, skin removed and cut into 1 1/2-inch cubes
- 2 tablespoons kosher salt
- 2 tablespoons coarse black pepper
- 1 tablespoon garlic powder
- 1 tablespoon paprika
- 2 tablespoons brown sugar
- 2 tablespoons butter
- 1/2 cup barbecue sauce
- 1/4 cup maple syrup
- 1/2 cup apple juice
Quick Steps:
-
Season the cubes: Toss the pork belly with salt, pepper, garlic powder, paprika, and brown sugar.
-
Smoke to build bark: Set the smoker to 250°F and cook the cubes for about 3 hours until the edges darken and the fat starts to render.
-
Braise in a pan: Move the cubes to a foil pan with butter, barbecue sauce, maple syrup, and apple juice. Cover tightly and cook for 1 hour.
-
Glaze and tighten: Uncover, toss the cubes, and cook for another 30 to 45 minutes until the sauce thickens and clings.
-
Serve hot: Spoon them onto a tray or straight from the pan while the glaze is still tacky.
Tips and Variations:
- Balance tip: A splash of vinegar in the glaze keeps the sweetness from taking over.
- Serving idea: These are good with cornbread and sliced cucumbers, which is a better idea than it sounds.
- Warning: Let them rest only a few minutes; they’re best when the glaze is still warm and sticky.
Why the Smoker Wins on Weekend Cookouts

A smoker gives you two things that grills and ovens can’t quite fake: time and layer. Time lets fat render, connective tissue soften, and rub turn into bark. Layer comes from the way smoke, heat, fat, and resting all build on each other instead of happening at once. That’s why a brisket tastes different from smoked chicken thighs even when both started with the same salt, pepper, and wood.
The weekend is the right setting for this because it gives the food room to breathe. You’re not racing the clock between school pickup and a 6:30 dinner. You can let a shoulder run long, pull a salmon side fast, or slide a foil pan of sausage and peppers into a corner of the smoker while something bigger finishes. That flexibility is the whole point. A smoker dinner doesn’t have to mean one giant cut and a whole afternoon of anxiety.
Wood choice matters, but people make it sound fancier than it is. Oak and hickory are sturdy and good with beef and pork. Fruit woods like apple and cherry are softer, nicer with chicken, turkey, and salmon. If you use clean-burning fuel and keep the smoke thin instead of billowy, most of these dinners will taste balanced rather than harsh. Thick white smoke? Nope. That flavor gets bitter fast.
The best smoker menus mix long-cook anchors with quicker wins. One brisket or pork shoulder can hold the center of the table, while chicken thighs, stuffed peppers, or mac and cheese keep everyone fed while the big meat rests. That’s the move I trust most. It keeps the whole cookout from becoming a waiting game.
Essential Equipment for These Recipes
-
Smoker: Pellet, offset, charcoal, or electric all work if you can hold a steady temperature.
-
Instant-read thermometer: The one tool that prevents dry chicken, overcooked salmon, and brisket guesswork.
-
Probe thermometer: Handy for long cooks so you do not keep opening the lid every 20 minutes.
-
Butcher paper: Best for brisket, beef ribs, and chuck roast when you want bark without steaming the meat too much.
-
Heavy-duty foil: Useful for ribs, pork shoulder, sausage pans, mac and cheese, and quick braise-style finishes.
-
Tongs with long handles: Short tongs are a bad idea near hot grates. Simple as that.
-
Drip pan or foil pan: Catches fat, holds glazes, and makes cleanup far less annoying.
-
Sharp boning knife: Brisket trimming, membrane removal, and spatchcocking all go easier with a real sharp blade.
-
Kitchen shears: Better than a knife for cutting chicken backs and trimming meatloaf bacon.
-
Heat-resistant gloves: Good for handling big roasts, hot pans, and slippery wrapped meat.
-
Spray bottle or mop brush: Optional, but useful for apple cider, vinegar mops, or butter mixtures on faster cooks.
-
Cutting board with a juice groove: Saves your counter from becoming a swamp when the meat rests.
Smart Shopping and Ingredient Tips
Buy the cut for the cook you actually want to do, not the one that looks cheapest on the shelf. For brisket and beef short ribs, look for good marbling and even thickness; a flat that gets paper-thin at one end dries out faster than you want. For pork shoulder, a bone-in piece gives you better flavor and a built-in doneness clue when the bone starts moving freely.
Chicken thighs and turkey legs are far more forgiving than breast meat, which is why they’re such strong smoker choices. If you buy chicken thighs, pick skin-on pieces with skin that covers the meat cleanly instead of hanging in torn bits. For turkey breast, bone-in usually stays juicier than boneless because it cooks more gently. Salmon should be thick enough to stay intact on the grate — a center-cut side is easier to manage than skinny tail pieces.
Sauces and rubs are worth shopping for carefully. A barbecue sauce that’s too sweet can burn early, so I like something with acid and pepper built in. Same story with rubs: if the label reads like dessert, it can turn sticky in the wrong way. Salt, black pepper, paprika, garlic powder, onion powder, and a touch of brown sugar will handle more of this menu than any flashy bottle.
Don’t forget the small things that make smoke food taste better. Apple cider vinegar, Dijon mustard, beef broth, butter, and plain yellow mustard all show up across the recipes because they work. They help hold seasoning, create moisture, and balance the smoke without making the food taste crowded. And if you’re buying wood chunks or pellets, choose one main wood and one backup wood instead of a cabinet full of bags you’ll never finish.
How to Serve These Recipes

Presentation:
Stack sliced brisket or pork shoulder on butcher paper with pickles and onions so it feels casual and generous. Put ribs on a long board, not a tiny platter. Chicken thighs, stuffed peppers, and turkey legs look best when you give them room and a few bright things around them — herbs, lemon wedges, slaw, sliced chilies, that sort of thing.
Accompaniments:
I’d keep a cool, crisp side on every smoker table: vinegar slaw, potato salad, grilled corn, cucumber salad, or pickles with some bite. For the richer dishes, cornbread and baked beans make sense. For salmon and turkey breast, a green salad or a peppery slaw stops the meal from feeling heavy.
Portions:
Plan 6 to 8 ounces of cooked meat per adult for brisket, pork shoulder, short ribs, and pork belly burnt ends. Ribs usually work out to 2 to 3 bones per person when you’ve got sides. Chicken thighs, turkey legs, and pork tenderloin should be portioned with the rest of the menu in mind, since people tend to go back for seconds once the smoke smell hits them.
Beverage Pairing:
Ice-cold lager, pale ale, or a dry cider works with almost all of this. For nonalcoholic drinks, unsweetened iced tea, lemonade with extra lemon, or sparkling water with a lime wedge keeps the table from getting too syrupy. Rich beef cuts like brisket and short ribs can also handle a stout, if that’s your lane.
Additional Tips and Flavor Boosters

Flavor Enhancement:
A finishing pinch of flaky salt on sliced brisket, chicken thighs, or pork tenderloin makes the smoke pop. Tiny detail. Big payoff. For salmon, a little lemon zest or dill right before serving keeps the fish from tasting flat after the smoker has done its work.
Customization:
If your crowd likes heat, add chipotle powder to the rub on ribs, pork shoulder, or chuck roast. For a sweeter profile, use maple syrup in the glaze for turkey breast, pork belly, or meatloaf. I’d keep the sugar light on the long cooks and save the sticky stuff for the final stretch.
Serving Suggestions:
Pickled onions, dill pickles, fresh herbs, and a sharp vinegar slaw are the best friends these dishes have. They cut through fat and make rich meats easier to eat. A spoonful of mustard sauce on pork tenderloin or turkey legs also works better than a heavy blanket of barbecue sauce.
Make-It-Yours:
For gluten-free plates, skip bread crumbs in meatloaf or use certified gluten-free crumbs, and choose a sauce without wheat-based thickeners. For dairy-free versions, lean on oil, broth, and mustard mops instead of butter-based finishes. For lower-sugar cooks, trim the brown sugar in glazes and let acid and spice do more of the work. For kid-friendly tables, keep the rubs mild and put hot sauce on the side where it belongs.
Make-Ahead, Storage, and Reheating Guidance
Most smoked meats keep well in the refrigerator for 3 to 4 days when wrapped tightly or packed into airtight containers. Brisket, pork shoulder, ribs, and chuck roast all freeze well for up to 2 to 3 months if you slice or portion them first and cover them with a little of their own juices. Turkey breast and chicken are best eaten sooner, but they still hold up for several days if you don’t dry them out in the fridge.
Salmon is the exception. It’s best within 1 to 2 days and should be reheated gently, if at all. Cold smoked salmon leftovers are usually more useful than hot leftovers because reheating fish too hard turns the texture chalky. Pork belly burnt ends and smoked mac and cheese can both be reheated, but they need a little attention because the sauce and fat tighten up in the fridge.
For reheating meat, low and slow wins again. Set the oven to 250°F, put the meat in a covered pan with a splash of broth, cider, or water, and heat until warm through. Brisket and pork shoulder do well wrapped in foil. Ribs should be covered loosely so the sauce doesn’t scorch. Chicken and turkey should be reheated until they reach 165°F at the center, and then pulled immediately.
If you want to make parts ahead, do the rubs, sauces, and glazes a day or two in advance. Sausage-and-pepper pans can be assembled early and smoked later. Meatloaf can be shaped and wrapped in bacon, then chilled until smoking time. The one thing I would not do is leave fully cooked smoked meat sitting out to “keep warm” for hours. A cooler or a low oven is fine. A countertop is not.
Variations and Adaptations to Try
Pepper-Heavy Texas Lean:
Push the black pepper and salt forward on brisket, short ribs, and chuck roast, then leave the sweet sauce on the side. This style gives you a sharper bark and keeps the meat tasting beef-first. It’s the cleanest way to smoke if you want smoke flavor without a sticky finish.
Sweet-Heat Cookout Glaze:
Use honey, maple syrup, or brown sugar in the final glaze for ribs, pork belly, meatloaf, and turkey legs, then add cayenne or chipotle for heat. The trick is to add sweetness late, not early, so the surface can still brown properly. That gives you shine without a burnt crust.
Lighter Plate Swap:
Lean harder on chicken thighs, turkey breast, salmon, and stuffed peppers when you want the smoker to feel less heavy. Use olive oil, mustard, lemon, and herbs instead of butter-heavy finishes. The food still tastes like a cookout, just with a little more breathing room.
Gluten-Free Smokehouse:
Skip breadcrumbs or use gluten-free crumbs in the meatloaf and stuffed peppers, and choose sauces with clean labels. Most rubs are already gluten-free if you build them from salt, pepper, paprika, and garlic powder. Foil pan dinners and smoked fish are easy wins here.
Dairy-Free Finish:
Use broth, cider, mustard, and olive oil instead of butter in wraps and glazes. Pork shoulder, brisket, ribs, and sausage pans barely notice the difference. Even mac and cheese can be rebuilt with dairy-free cheese, though I’d be honest and say the texture changes.
Kid-Friendly Smoke:
Keep the rubs mild, use less black pepper and fewer chilies, and put the spicy sauces on the side. Chicken thighs, pulled pork, sausage and peppers, and meatloaf are the easiest crowd-pleasers for mixed ages. Kids usually go for the sticky finishes, not the smoke bomb versions.
Common Mistakes to Avoid
Chasing thick white smoke:
If the smoker is belching clouds, the meat will taste harsh and bitter. The fix is to let the fire burn cleaner and wait for thin smoke before adding food. You want a faint blue ribbon, not a chimney fire.
Cooking by the clock instead of the meat:
A brisket or pork shoulder can run longer than planned, and chicken thighs or tenderloin can finish faster than expected. Internal temperature and tenderness are the real markers. A thermometer saves you from both overcooking and guessing wrong.
Saucing too early:
Sugar burns, glaze burns, and barbecue sauce burns. If you paint it on too soon, you’ll get dark, bitter patches instead of a sticky finish. Hold the sauce for the final stretch unless you want a blackened crust for a very specific reason.
Skipping the rest:
Sliced meat that’s cut the minute it comes off the smoker leaks juice everywhere. That’s the symptom. The fix is time: brisket, pork shoulder, and short ribs need a real rest, and even chicken and turkey benefit from 10 to 20 minutes before carving.
Choosing the wrong cut for the cook time:
Lean cuts like tenderloin, salmon, and turkey breast need faster, gentler smoking. Dense cuts like brisket, shoulder, and short ribs need patience. Mixing those up is how people end up with dry pork or rubbery fish.
Under-seasoning the surface:
Smoke gives flavor, but it is not seasoning by itself. If the rub is timid, the finished meat tastes flat, especially on big cuts. Salt first, then build the rest of the rub with enough backbone to stand up to the fire.
Frequently Asked Questions
Can I run more than one of these smoker dinners at the same time?
Yes, and that’s one of the best parts of cooking this way. Pair a long cook like brisket or pork shoulder with quicker items like chicken thighs, sausage and peppers, or stuffed peppers, and you can serve dinner in waves instead of waiting for one big finish.
What wood works best for most of these recipes?
Oak and hickory are the safest all-around choices for beef and pork. Apple and cherry are friendlier on chicken, turkey, and salmon. If you only want one bag in the shed, oak is the most flexible, but fruit wood makes the lighter dishes taste cleaner.
Do I have to wrap brisket or pork shoulder?
No, but wrapping helps protect the bark and keeps the meat from drying out once the surface has taken enough smoke. If you like a firmer bark, wait until the bark is set before wrapping. If you want a softer exterior and faster finish, wrap earlier.
How do I keep chicken skin from turning rubbery?
Dry the skin well, smoke at a higher temperature than you would for brisket, and leave a little space between the pieces so the skin can render. Chicken thighs and whole chicken both do better around 275°F than in a low 225°F crawl. Moist heat is the enemy of crisp skin.
What if my smoker temperature swings a lot?
Small swings are normal, especially with charcoal or offset smokers. Big swings usually mean the fire needs better airflow or the fuel is burning unevenly. Use a thermometer at grate level, adjust the vents slowly, and stop opening the lid every few minutes.
Can I reheat smoked meat without ruining it?
Yes, if you keep the heat low and add a little moisture. Cover brisket, pork shoulder, ribs, or chuck roast with broth or their own juices and warm them at 250°F. Fish needs a gentler hand, so cold leftovers are often better than overcooked reheated salmon.
How much meat should I plan per person for a cookout?
For big cuts like brisket, pork shoulder, and short ribs, 6 to 8 ounces cooked per adult is a good starting point. For ribs, count 2 to 3 bones per person when sides are on the table. If the menu includes several dishes, scale down each meat a little and let the spread do the work.
Can I make any of these ahead of time?
Absolutely. Rubs, glazes, and sauces can be made ahead, and meatloaf or stuffed peppers can be assembled the day before. Brisket and pork shoulder often reheat well enough that some people prefer them after a night in the fridge.
Smoke, Slice, Serve
The best smoker dinners have a certain confidence about them. They don’t rush. They don’t need much decoration. They show up with bark, smoke, and the kind of flavor that makes people drift back to the table for a second look and then a third bite.
That’s what makes this kind of cookout food worth keeping in rotation: the menu can swing from a long brisket to a quick salmon side, or from sticky ribs to a foil pan of sausage and peppers, and still feel like one meal. That range matters. It keeps the smoker useful instead of ceremonial.
Quick Reference Table
| Recipe | Prep Time | Cook Time | Total Time | Servings | Standout Detail |
|---|---|---|---|---|---|
| Texas-Style Smoked Beef Brisket | 30 min | 12 hr | 14 hr 30 min | 10-12 | peppery bark and buttery slices |
| Smoked Pork Shoulder for Pulled Pork | 20 min | 8 hr | 10 hr | 10-12 | juicy shreds with crisp bark bits |
| Sticky Smoked Baby Back Ribs | 20 min | 5 hr | 5 hr 20 min | 4-6 | sticky glaze and clean bite |
| Smoked Chicken Thighs with Crispy Skin | 15 min | 1 hr 20 min | 1 hr 35 min | 4-6 | crispy skin without drying out |
| Smoked Whole Chicken with Herb Butter | 20 min | 1 hr 45 min | 2 hr 5 min | 4-6 | herb butter under the skin |
| Smoked Turkey Breast with Maple-Pepper Glaze | 20 min | 2 hr 15 min | 2 hr 35 min | 6-8 | maple-pepper glaze |
| Smoked Beef Short Ribs | 20 min | 7 hr | 7 hr 20 min | 4-6 | rich, spoon-tender beef |
| Bacon-Wrapped Smoked Meatloaf | 20 min | 3 hr 15 min | 3 hr 35 min | 6-8 | bacon wrap and tangy glaze |
| Smoked Salmon with Brown Sugar-Dill Cure | 15 min | 1 hr | 1 hr 15 min | 4-6 | sweet dill cure and silky center |
| Smoked Pork Tenderloin with Mustard Mop | 15 min | 1 hr 10 min | 1 hr 25 min | 4-6 | fast smoke and sharp mustard mop |
| Smoked Sausage and Peppers Foil Pan Dinner | 15 min | 1 hr 30 min | 1 hr 45 min | 6-8 | all-in-one foil pan |
| Chuck Roast Burnt Ends | 25 min | 6 hr 30 min | 6 hr 55 min | 6-8 | sticky cubes with brisket-like bark |
| Cajun Smoked Turkey Legs | 15 min | 3 hr | 3 hr 15 min | 4-6 | Cajun butter and dark meat |
| Smoked Stuffed Bell Peppers | 25 min | 1 hr 45 min | 2 hr 10 min | 6 | colorful, complete dinner in one pan |
| Smoked Mac and Cheese with Bacon and Jalapeños | 20 min | 1 hr | 1 hr 20 min | 8-10 | smoke-kissed cheese crust |
| Pork Belly Burnt Ends | 20 min | 4 hr 15 min | 4 hr 35 min | 6-8 | sticky, rich cubes that vanish fast |