
Vegetable side dishes can rescue a weeknight dinner faster than any clever main course. A hot sheet pan, a good skillet, and a handful of vegetables with enough salt and fat to wake them up — that’s usually all it takes to turn “What else is for dinner?” into a plate that feels finished.
I’ve always liked sides that do real work. Not the tired bowl of steamed something that sits there looking polite and forgotten. I mean the broccoli with browned edges, the green beans that still snap when you bite them, the carrots glazed until they shine like lacquer. A side dish earns its place when it brings texture, color, and a little contrast to whatever else is on the table.
That matters most on ordinary nights. You don’t need a complicated vegetable project when the chicken is already in the oven or the pasta water is already boiling. You need something that can move fast, taste like the vegetable it came from, and not act needy. These 22 vegetable side dishes are built for exactly that kind of cooking.
Why These Vegetable Side Dishes Make Weeknights Easier
-
Fast payoff: Most of these recipes finish in 20 to 35 minutes, so they fit beside a simple main without turning dinner into a production.
-
Flexible timing: Several can roast at the same oven temperature, which means you can slide in a second tray or swap vegetables based on what’s in the crisper drawer.
-
Real flavor, not filler: A spoonful of butter, a hit of lemon, a little garlic, or a hard roast in a hot oven does the heavy lifting. You won’t need a pantry raid.
-
Vegetables that actually get eaten: Crisp edges, browned spots, and a touch of salt change the game. Plain steamed vegetables are easy to ignore; these are harder to pass by.
-
Easy to pair: Each dish plays well with roasted chicken, baked fish, pasta, tofu, grains, or a simple omelet when dinner needs to be even more stripped down.
-
Built for repeat cooking: None of these depends on a fancy garnish or a hard-to-find ingredient. If you cook on autopilot some nights, that’s a feature, not a flaw.
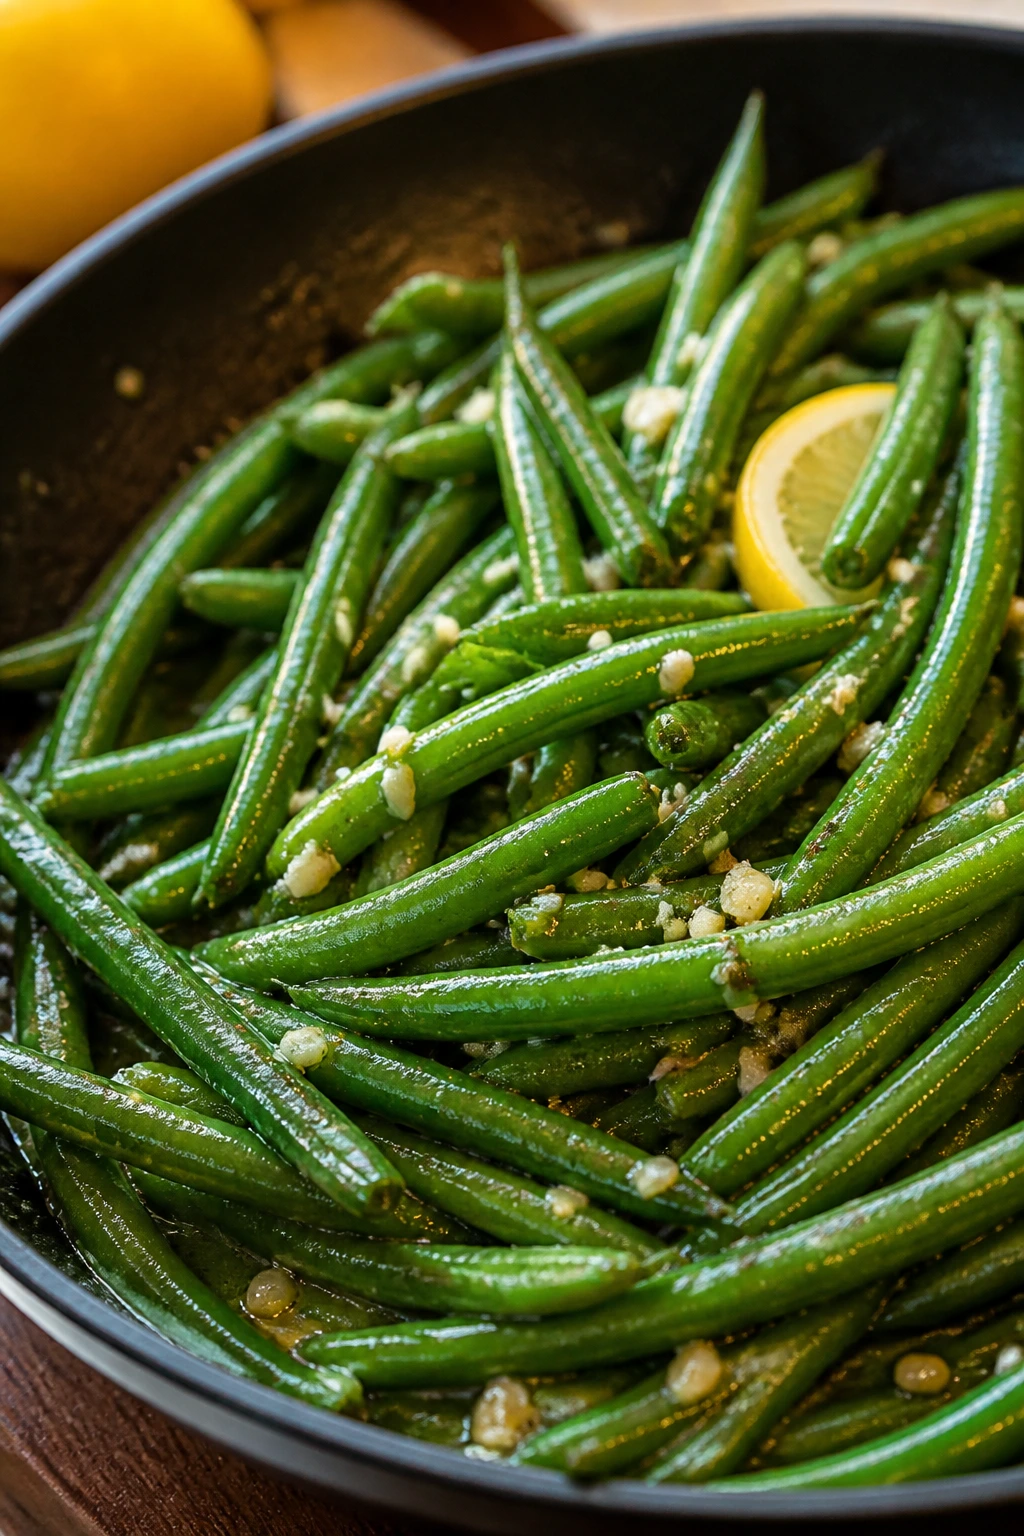
1. Garlic Butter Green Beans
Fresh green beans are one of those vegetables that wake up the minute they hit heat and salt. Done right, they stay bright, a little snappy, and just rich enough from butter that people stop treating them like a side note.
Why It Works:
Blanching the beans for a couple of minutes keeps their color vivid, then a quick toss in garlic butter finishes them without turning them soft. The method is fast, but it still gives you that fresh green-bean bite that microwave steaming never quite reaches.
Key Ingredients:
- 1 lb fresh green beans, trimmed
- 2 tbsp unsalted butter
- 1 tbsp olive oil
- 3 garlic cloves, minced
- 1/2 tsp kosher salt
- 1/4 tsp black pepper
- 1 tsp lemon juice
- 1 tbsp sliced almonds, toasted, optional
Quick Steps:
- Bring a large pot of salted water to a boil and set a bowl of ice water nearby.
- Blanch the green beans for 2 minutes, until bright green and just tender.
- Drain and plunge them into the ice water for 1 minute, then pat dry.
- Warm the butter and olive oil in a large skillet over medium heat.
- Add the garlic and cook for 30 seconds, just until fragrant, then add the beans, salt, and pepper.
- Toss for 2 to 3 minutes until glossy and hot, then finish with lemon juice and almonds if using.
Equipment for This Recipe:
- Large pot
- Large skillet
- Slotted spoon or spider
- Colander
How to Serve This Dish:
Pile them beside roasted chicken, salmon, or a bowl of rice. The green beans should look glossy, not saucy, with a few browned garlic flecks clinging to the edges.
Pro Tips for This Recipe:
- Dry the beans well after blanching; water in the skillet makes the butter spit and thin out.
- Use fresh garlic, not jarred, because the whole point here is that sweet, sharp garlic aroma.
- If your beans are thin, shave 30 seconds off the blanch time.
Variations on This Dish:
- Lemony Almond Crunch: Add extra lemon zest and a heavier pinch of toasted almonds for a brighter finish.
- Chili Garlic Beans: Stir in 1/4 tsp red pepper flakes with the garlic for a little heat.
- Brown Butter Beans: Let the butter turn nutty and golden before adding the garlic for a deeper, toastier flavor.
Common Mistakes to Avoid with This Dish:
- Skipping the ice bath: The beans keep cooking in their own heat and go drab fast. The fix is simple — shock them briefly and dry them.
- Burning the garlic: Garlic goes bitter in a hurry. Keep the heat at medium and move fast.
- Overcrowding the skillet: If the beans pile up too thick, they steam instead of glossing. Use a wide pan.
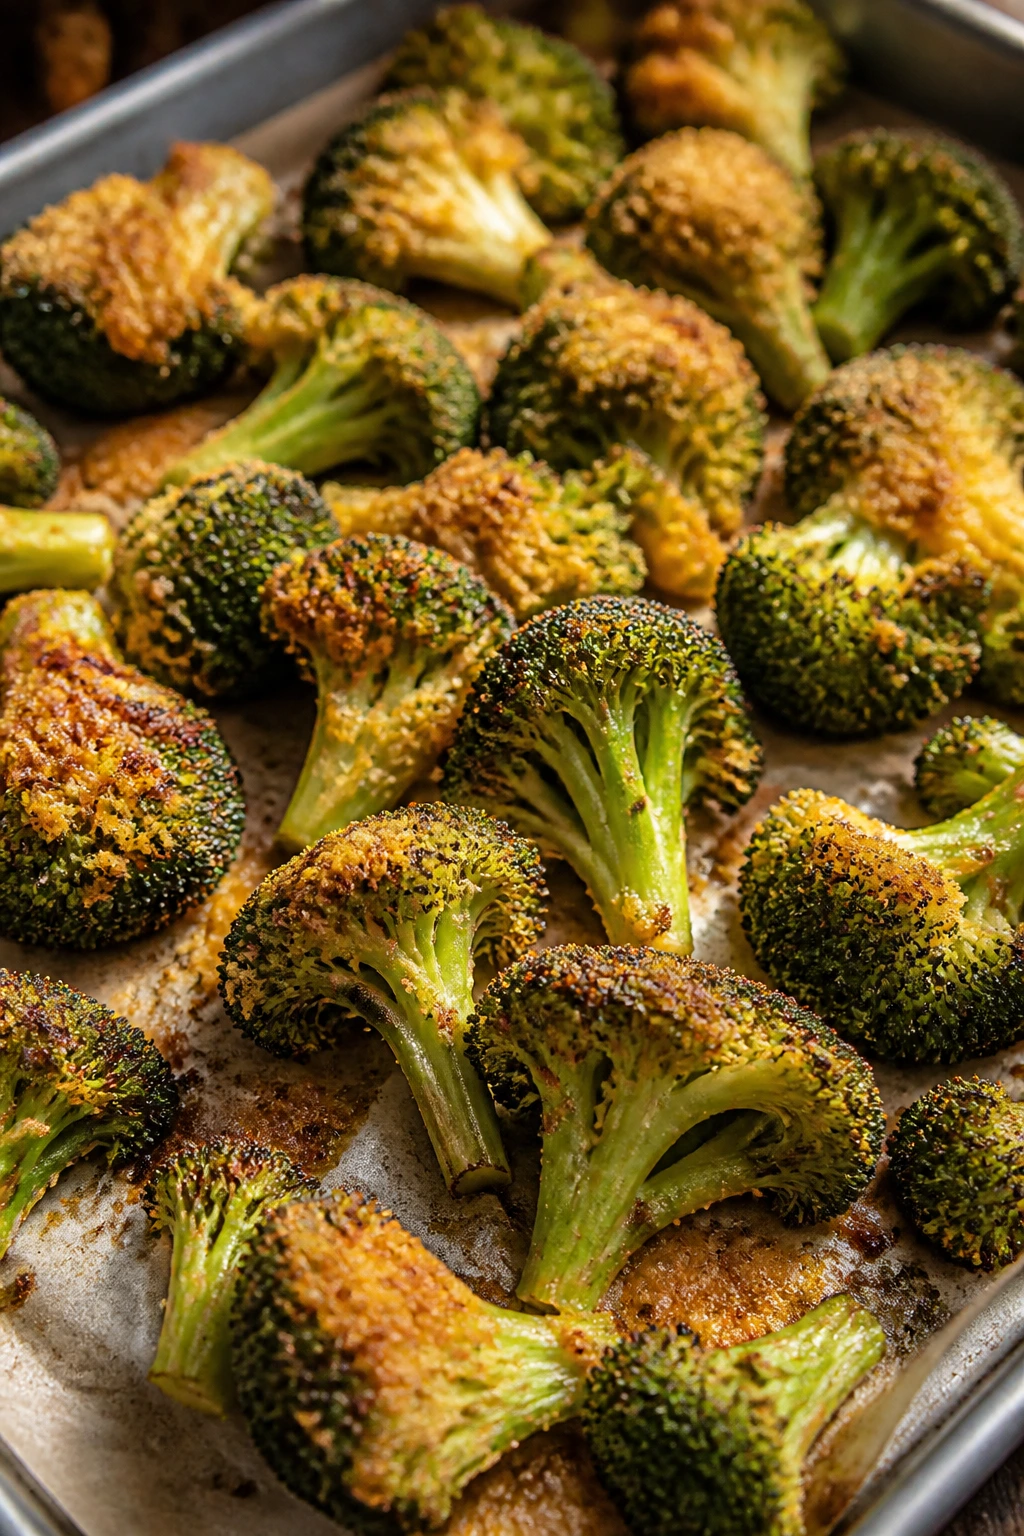
2. Crispy Parmesan Roasted Broccoli
Broccoli is at its best when the florets get dark around the tips and the stems stay just tender. That balance — browned, salty, a little nutty — is why roasted broccoli disappears faster than most vegetables on the table.
Why It Works:
A hot oven around 425°F pushes moisture out of the florets and encourages those crisp edges that make roasted broccoli taste deeper than boiled or steamed. Parmesan adds salt and a brittle, savory crust where it melts against the hot pan.
Key Ingredients:
- 1 1/2 lbs broccoli florets, cut into even pieces
- 2 1/2 tbsp olive oil
- 1/2 tsp kosher salt
- 1/4 tsp black pepper
- 1/2 tsp garlic powder
- 1/3 cup finely grated Parmesan
- 1 tbsp lemon juice, optional
- Pinch of red pepper flakes, optional
Quick Steps:
- Preheat the oven to 425°F and line a rimmed sheet pan with parchment.
- Toss the broccoli with olive oil, salt, pepper, and garlic powder until lightly coated.
- Spread it out in a single layer, cut sides down where possible.
- Roast for 16 to 20 minutes, until the edges are browned and the stems are tender when pierced with a fork.
- Sprinkle on the Parmesan during the last 3 minutes so it melts and clings.
- Finish with lemon juice or red pepper flakes if you want a sharper edge.
Equipment for This Recipe:
- Rimmed sheet pan
- Mixing bowl
- Parchment paper
- Box grater or fine grater
How to Serve This Dish:
Serve it hot, right off the tray, with the browned edges facing up. It works beside pasta, grilled meat, or a baked potato, and it’s sturdy enough to hold up for a few minutes while the rest of dinner comes together.
Pro Tips for This Recipe:
- Cut the florets into similar sizes so the small bits don’t scorch before the thick stems soften.
- Use finely grated Parmesan, not thick shreds; it melts into the broccoli instead of sliding off.
- If the pan looks crowded, split it between two trays. Crowding is the enemy here.
Variations on This Dish:
- Garlic Lemon Broccoli: Add a teaspoon of lemon zest after roasting for a brighter finish.
- Extra-Crisp Broccoli: Roast plain for 10 minutes first, then add Parmesan near the end.
- Spicy Parmesan Broccoli: Add a pinch of cayenne with the oil for a warm, steady heat.
Common Mistakes to Avoid with This Dish:
- Using wet broccoli: Water on the florets turns roasting into steaming. Dry them well after washing.
- Dumping Parmesan in too early: Cheese can burn before the broccoli browns. Add it near the end.
- Using too low a temperature: Broccoli needs heat to brown. A lukewarm oven gives you gray florets.
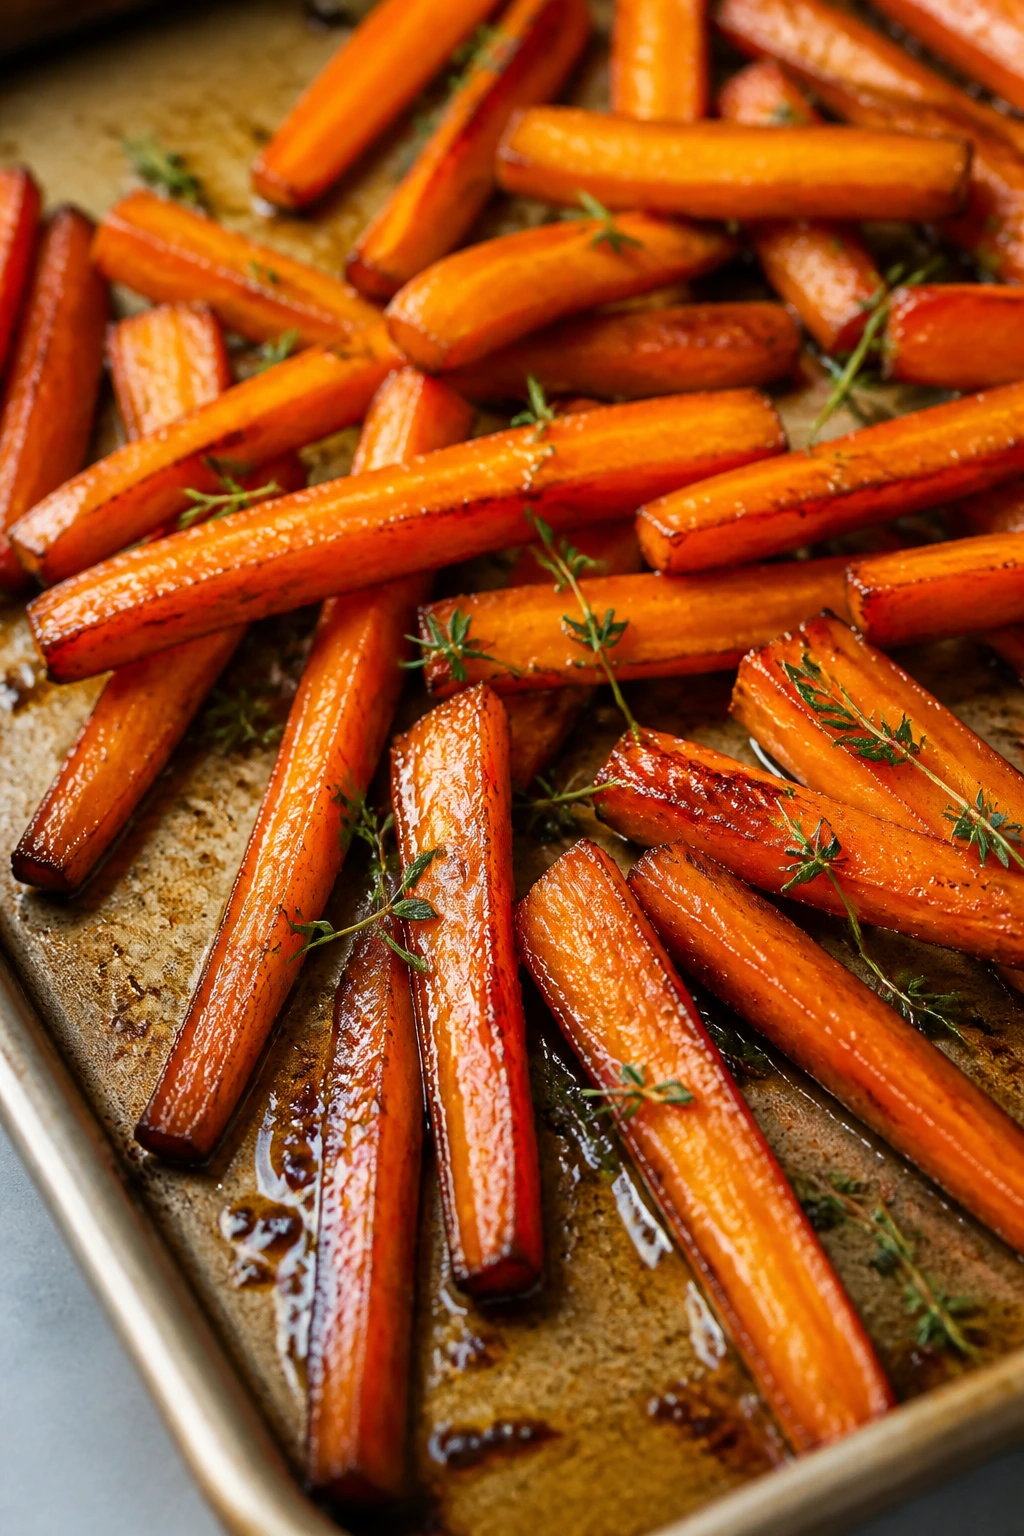
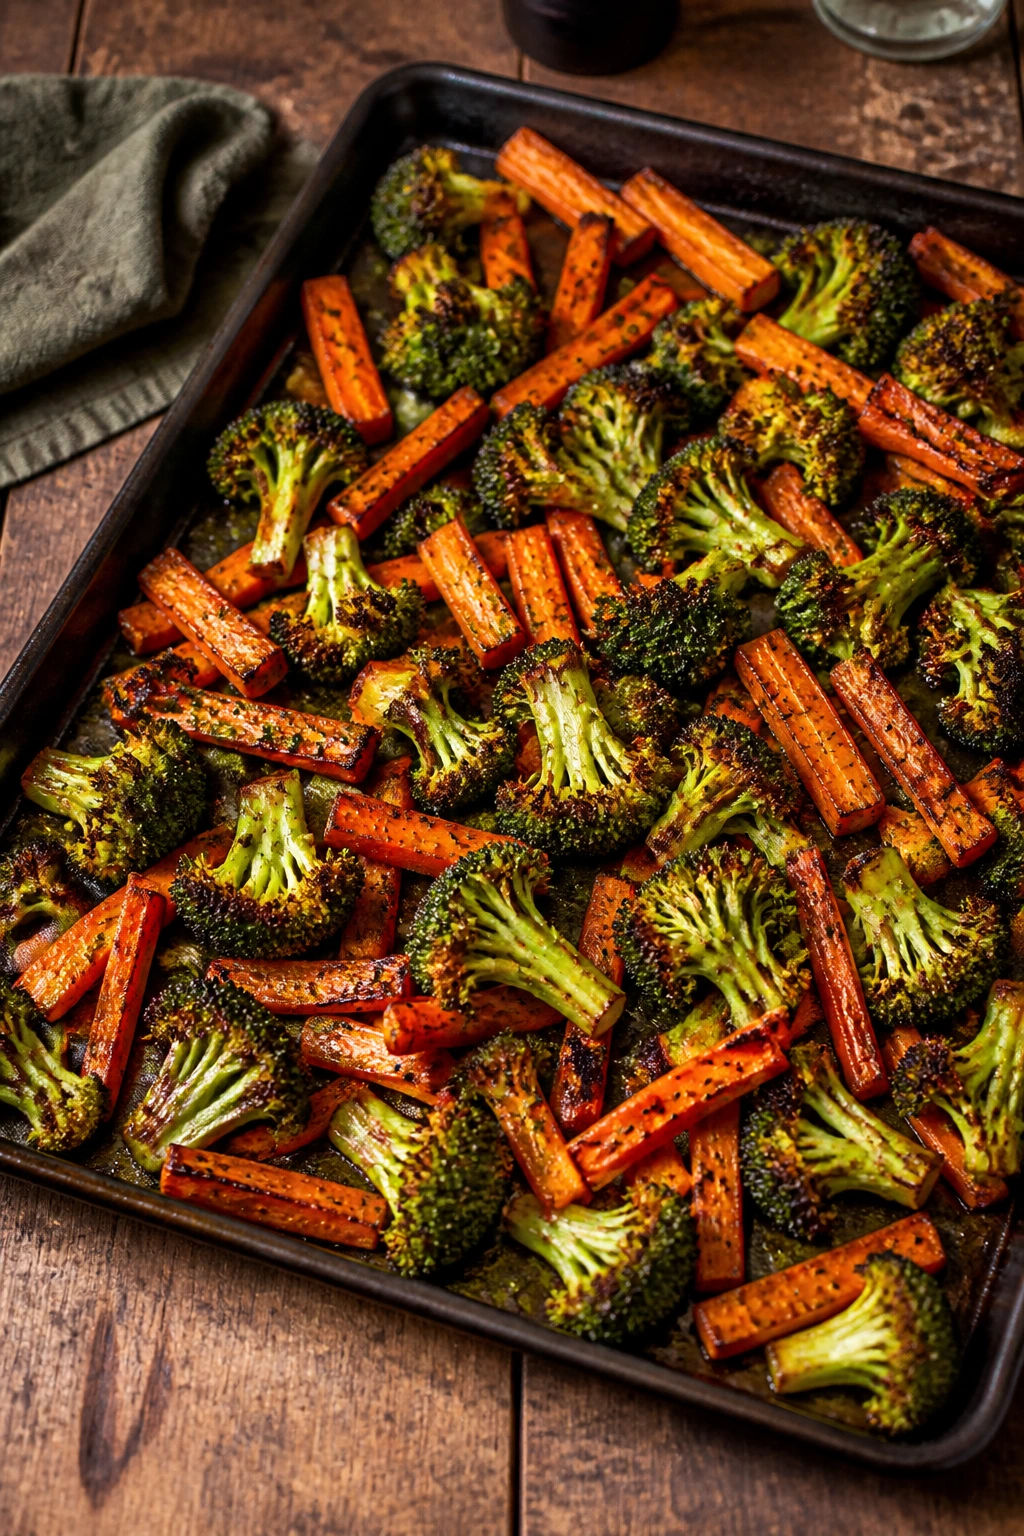
3. Honey-Glazed Carrots with Thyme
Carrots cooked this way come out tender at the center with edges that look almost candied. The honey doesn’t make them cloying; it just nudges their natural sweetness forward and gives them that glossy finish people always reach for first.
Why It Works:
A quick roast at 400°F softens the carrots without collapsing them, and a small amount of honey is enough to glaze the surface without turning the pan into syrup. Thyme cuts the sweetness and keeps the dish from tasting one-note.
Key Ingredients:
- 2 lbs carrots, peeled and cut into 2-inch batons
- 2 tbsp olive oil
- 2 tbsp honey
- 1 tsp fresh thyme leaves or 1/2 tsp dried thyme
- 1/2 tsp kosher salt
- 1/4 tsp black pepper
- 1 tbsp butter, optional
- 1 tsp lemon juice, optional
Quick Steps:
- Preheat the oven to 400°F and line a sheet pan with parchment.
- Toss the carrots with olive oil, honey, thyme, salt, and pepper until coated.
- Spread them out in one layer and roast for 22 to 28 minutes.
- Flip once halfway through so the bottoms caramelize instead of sticking.
- Pull them when they’re fork-tender and the edges are lightly browned.
- Toss with butter or lemon juice at the end if you want a richer or brighter finish.
Equipment for This Recipe:
- Rimmed baking sheet
- Vegetable peeler
- Mixing bowl
- Spatula
How to Serve This Dish:
These belong next to roast chicken, meatloaf, or lentils. They bring a warm orange color to the plate, and the glaze should look shiny, not wet.
Pro Tips for This Recipe:
- Cut the carrots evenly or the thin ones will shrivel before the thick ones soften.
- Don’t drown them in honey; a light coat gives better caramelization.
- Fresh thyme beats dried if you have it, but use the dried version sparingly because it concentrates as it roasts.
Variations on This Dish:
- Maple Thyme Carrots: Swap the honey for maple syrup for a deeper, woodier sweetness.
- Orange Glazed Carrots: Add 1 tablespoon orange juice and a little zest for a brighter citrus note.
- Spiced Carrots: Stir in 1/4 teaspoon cumin for a warmer flavor that leans savory.
Common Mistakes to Avoid with This Dish:
- Cutting uneven batons: Thin pieces overcook before thick pieces soften. Keep the size close.
- Using too much glaze: Carrots can slip from glossy to sticky fast. A light coat is enough.
- Skipping the flip: The underside is where the browning happens. Turn them once.
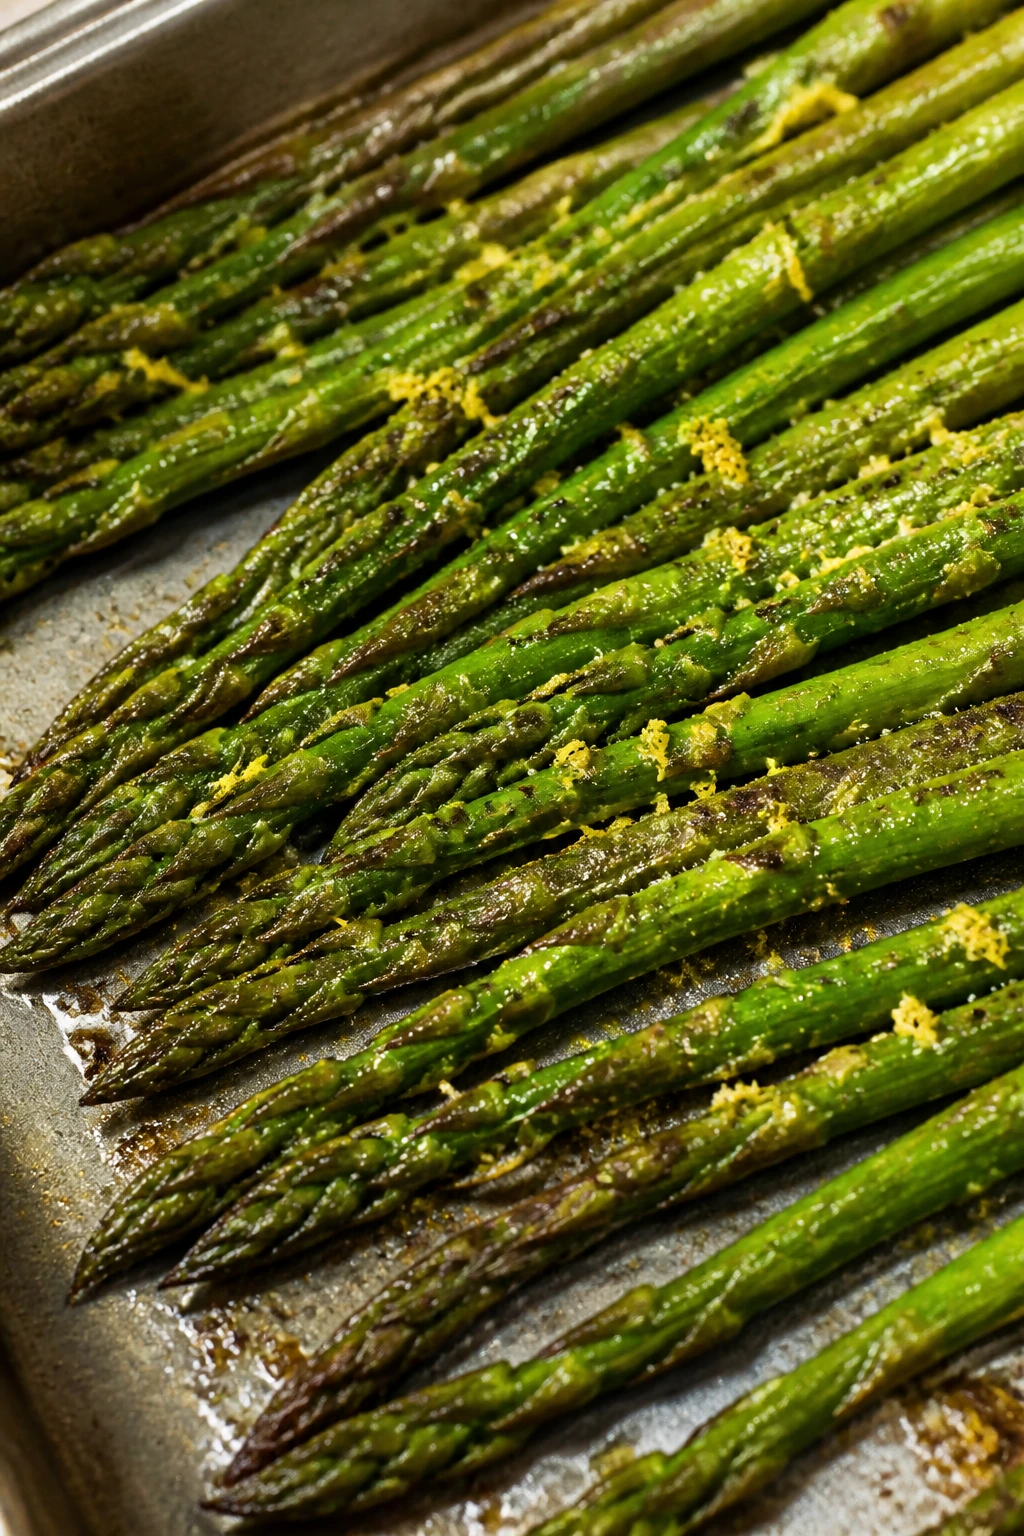
4. Lemon Pepper Asparagus
Asparagus doesn’t need much help, which is exactly why overworking it is such a waste. A quick roast, a hit of lemon, and a scatter of black pepper keep the stalks crisp-tender and clean-tasting.
Why It Works:
Asparagus cooks fast because the stalks are mostly water, so a short roast at 425°F gives you a little color without turning the tips stringy. Lemon at the end keeps the flavor sharp and fresh instead of flat.
Key Ingredients:
- 1 1/2 lbs asparagus, woody ends trimmed
- 2 tbsp olive oil
- 1/2 tsp kosher salt
- 1/2 tsp black pepper
- 1 tsp lemon zest
- 1 tbsp lemon juice
- 2 tbsp shaved Parmesan, optional
Quick Steps:
- Heat the oven to 425°F and line a baking sheet.
- Toss the asparagus with olive oil, salt, pepper, and lemon zest.
- Spread in a single layer and roast for 8 to 12 minutes, depending on thickness.
- Pull them when the stalks are tender but still spring back slightly when nudged.
- Finish with lemon juice and Parmesan, if using.
Equipment for This Recipe:
- Sheet pan
- Sharp knife
- Microplane or zester
- Tongs
How to Serve This Dish:
Serve it with eggs, salmon, or a simple grain bowl. The finished stalks should stay long and neat, which makes the plate look cleaner than most sides.
Pro Tips for This Recipe:
- Thin asparagus needs less time than thick spears; check early rather than guessing.
- Zest the lemon before juicing it, while the peel is still easy to handle.
- If the stalks are very thick, peel the lower third so they don’t taste woody.
Variations on This Dish:
- Garlic Parmesan Asparagus: Toss in 1 minced garlic clove and extra Parmesan during the last 2 minutes.
- Balsamic Asparagus: Drizzle with 1 teaspoon balsamic reduction after roasting.
- Chili Lemon Asparagus: Add red pepper flakes and a little extra lemon juice for a sharper bite.
Common Mistakes to Avoid with This Dish:
- Overcooking the tips: They go limp long before the stems are done. Check at 8 minutes.
- Using too much oil: Asparagus wants a light coat, not a slick one.
- Leaving the woody ends on: The bottom inch or two can be unpleasantly fibrous.
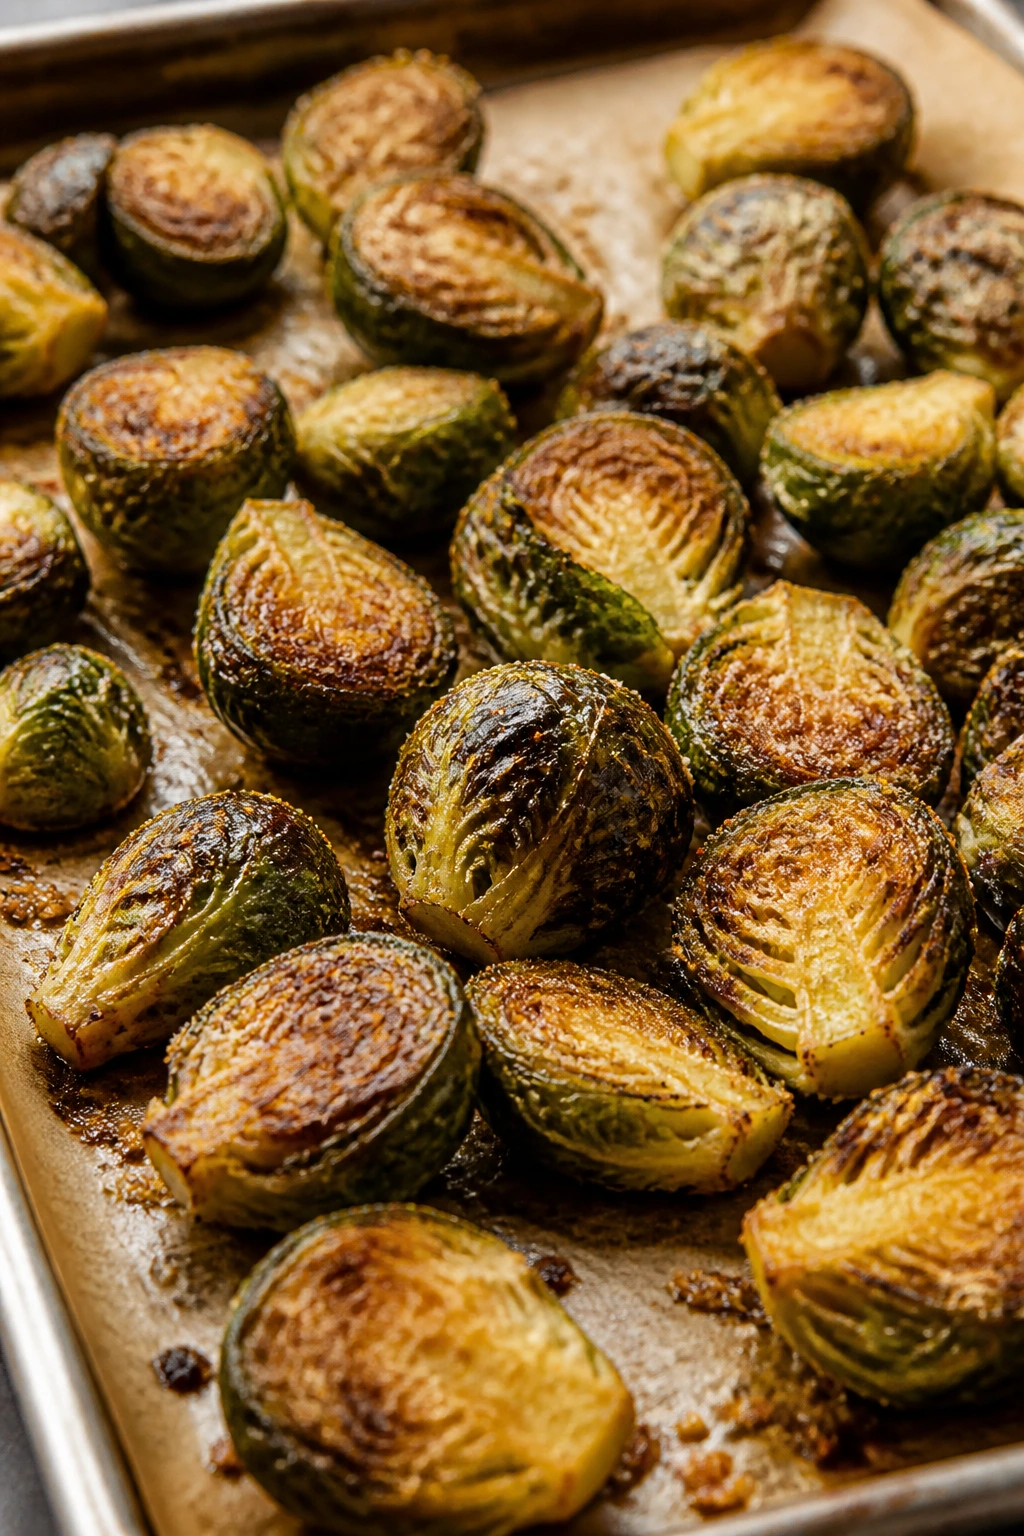
5. Crispy Parmesan Brussels Sprouts
Brussels sprouts earn their reputation back when they’re browned hard enough to get nutty at the edges. The trick is to roast them cut-side down so the flat surface does the caramelizing work for you.
Why It Works:
Brussels sprouts love hot, dry heat. A 425°F oven gives the cut faces time to sear before the leaves scorch, and Parmesan clings to the sprouts in all the little folds where salt belongs.
Key Ingredients:
- 1 1/2 lbs Brussels sprouts, trimmed and halved
- 2 1/2 tbsp olive oil
- 1/2 tsp kosher salt
- 1/4 tsp black pepper
- 1/2 tsp garlic powder
- 1/3 cup finely grated Parmesan
- 1 tsp lemon juice
- 1 tbsp balsamic glaze, optional
Quick Steps:
- Preheat the oven to 425°F and line a large sheet pan.
- Toss the halved sprouts with olive oil, salt, pepper, and garlic powder.
- Arrange them cut-side down in one layer.
- Roast for 18 to 24 minutes, until the cut sides are deeply browned and the centers are tender.
- Sprinkle with Parmesan during the last 3 minutes.
- Finish with lemon juice or balsamic glaze.
Equipment for This Recipe:
- Sheet pan
- Mixing bowl
- Parchment paper
- Tongs or spatula
How to Serve This Dish:
They’re excellent with roasted pork, mushrooms, or creamy polenta. A little balsamic glaze gives them a dark, glossy finish that looks more complicated than it is.
Pro Tips for This Recipe:
- Trim off only the dry stem end; too much trimming makes the leaves fall apart.
- Don’t peel off every loose outer leaf — those crisp up into the best bits.
- If you want extra crunch, leave the Parmesan off until the very end so it stays patchy and crisp.
Variations on This Dish:
- Hot Honey Brussels: Drizzle with 1 teaspoon hot honey after roasting.
- Lemon Garlic Brussels: Add minced garlic halfway through roasting for a softer garlic flavor.
- Maple Mustard Brussels: Toss with 1 teaspoon Dijon and 1 teaspoon maple syrup after baking.
Common Mistakes to Avoid with This Dish:
- Crowding the pan: Brussels sprouts need room or they steam and soften. Use two trays if needed.
- Using a mild oven: The browned face is the point. Heat matters.
- Stirring too often: Let them sit cut-side down long enough to color.
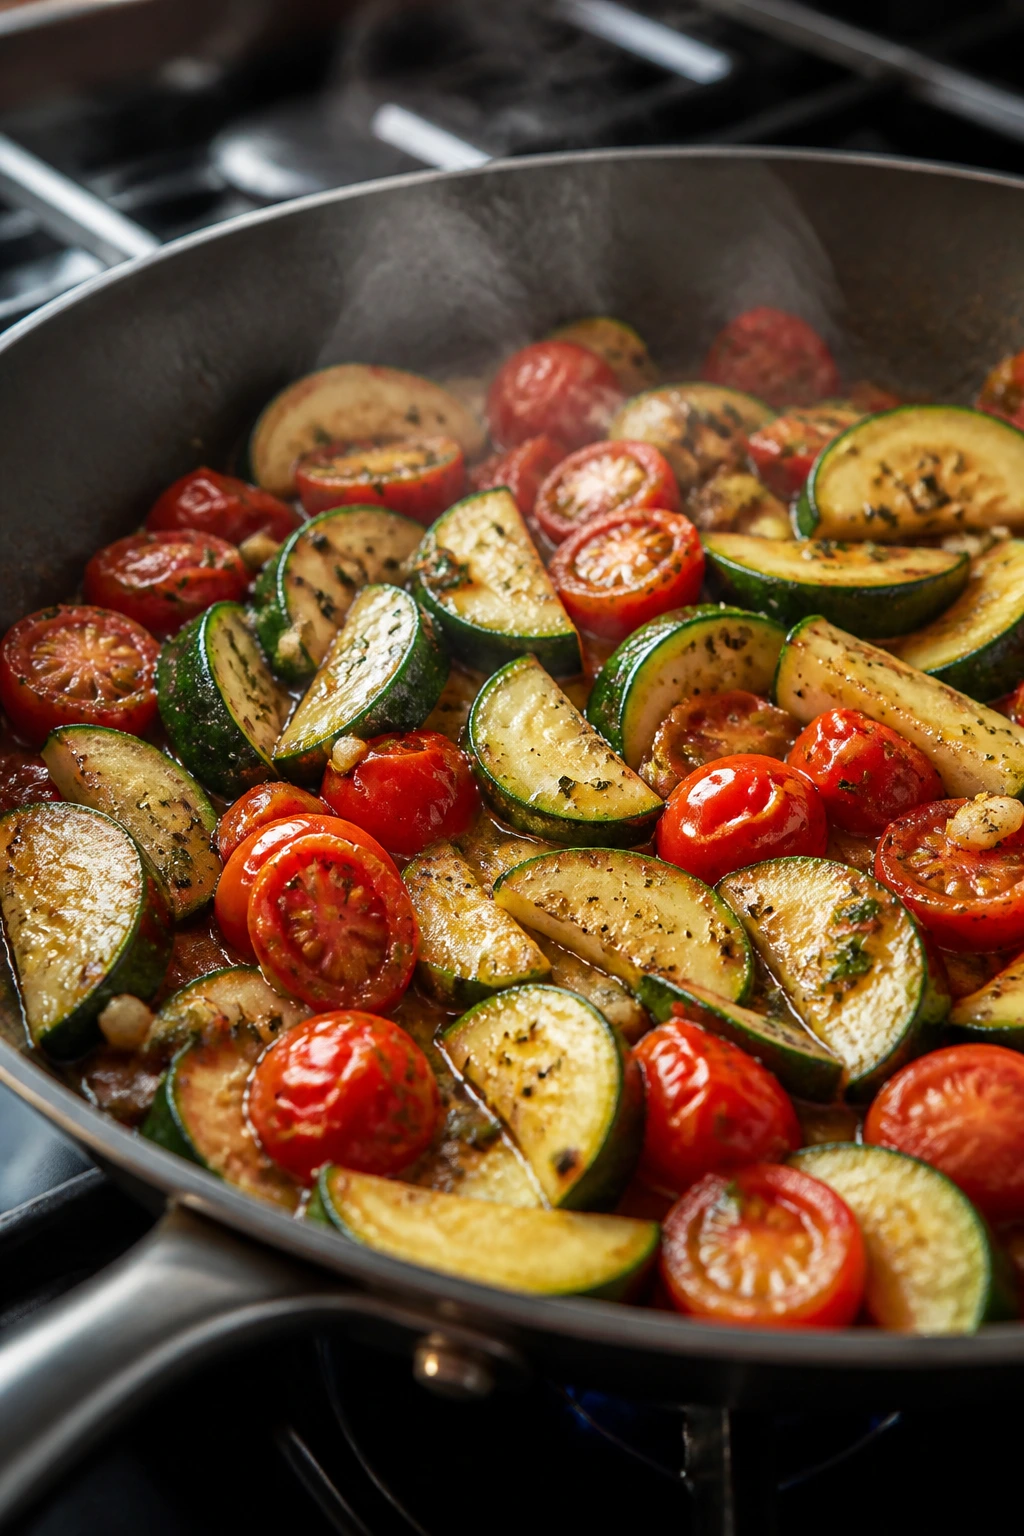
6. Sautéed Zucchini and Cherry Tomatoes
This is the dish you make when the zucchini is threatening to get away from you. The tomatoes burst, the zucchini softens just enough, and the whole pan tastes like it was built in five quiet minutes.
Why It Works:
Zucchini goes watery if you cook it too long, so the skillet method keeps it tender without collapsing it. Cherry tomatoes add their own juice, which becomes a quick pan sauce around the garlic and herbs.
Key Ingredients:
- 2 medium zucchini, sliced into 1/2-inch half-moons
- 1 pint cherry tomatoes
- 2 tbsp olive oil
- 2 garlic cloves, minced
- 1/2 tsp kosher salt
- 1/4 tsp black pepper
- 1 tsp chopped basil or parsley
- 1 tbsp grated Parmesan, optional
Quick Steps:
- Heat the olive oil in a large skillet over medium-high heat.
- Add the zucchini in a single layer and cook for 3 to 4 minutes, until lightly browned.
- Stir in the garlic and cherry tomatoes and cook for 3 to 5 minutes, until the tomatoes begin to burst.
- Season with salt and pepper, then toss in the herbs.
- Serve immediately while the zucchini still has a little shape.
Equipment for This Recipe:
- Large skillet
- Wooden spoon
- Sharp knife
- Cutting board
How to Serve This Dish:
Serve it with pasta, grilled fish, or spooned over toast with a fried egg. It should look loose and glossy, not soupy.
Pro Tips for This Recipe:
- Don’t salt the zucchini at the start or it releases too much water.
- Use a hot skillet so the slices brown before they soften.
- If your tomatoes are large, cut them in half so they burst faster.
Variations on This Dish:
- Mediterranean Zucchini: Add olives and a pinch of oregano.
- Creamy Finish: Stir in 2 tablespoons ricotta at the end.
- Chili Zucchini Tomatoes: Add red pepper flakes with the garlic.
Common Mistakes to Avoid with This Dish:
- Overcooking the zucchini: It should still have some bite. Mushy zucchini is a fast road to disappointment.
- Using a crowded pan: Too many slices trap steam.
- Adding herbs too early: Basil and parsley lose their brightness if they cook too long.
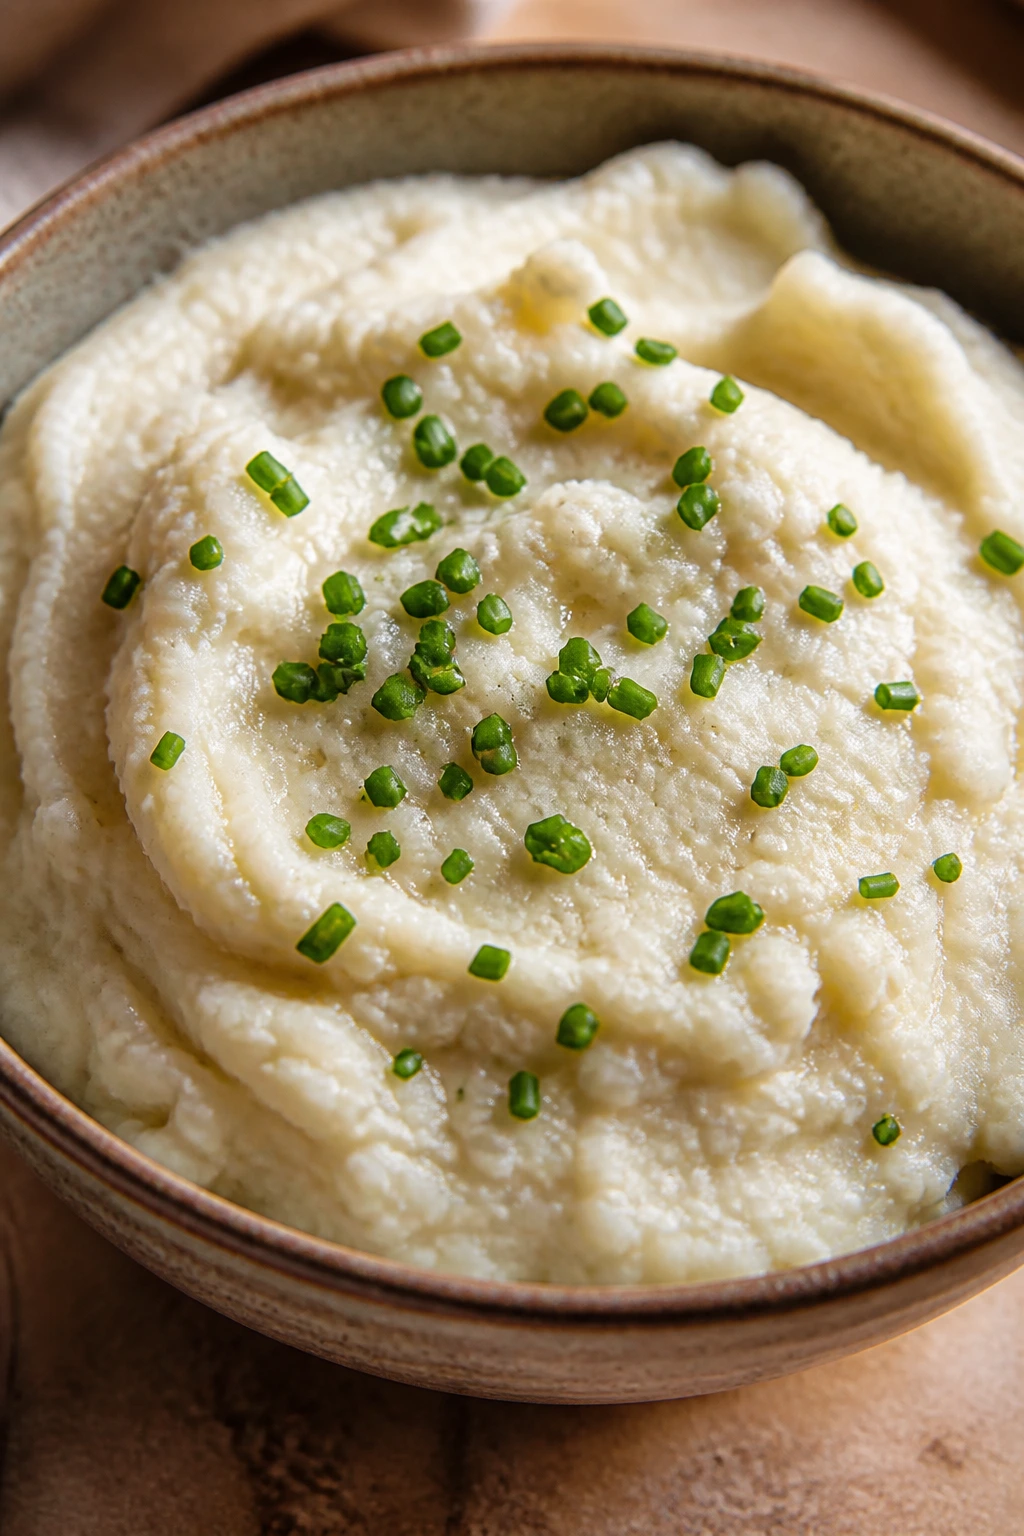
7. Mashed Cauliflower with Chives
Mashed cauliflower is at its best when it’s smooth, not watery, and carries enough butter and salt to feel like a real side. If you’ve had bland versions before, the issue usually wasn’t the cauliflower — it was the moisture left in it.
Why It Works:
Steaming or boiling the florets until just tender keeps the texture soft, while a quick dry-out in the pan or colander prevents a thin mash. Butter, cream cheese, or sour cream give the finished bowl body without making it heavy.
Key Ingredients:
- 2 large heads cauliflower, cut into florets
- 3 tbsp unsalted butter
- 2 oz cream cheese, softened
- 2 tbsp milk or half-and-half
- 1/2 tsp kosher salt
- 1/4 tsp black pepper
- 2 tbsp chopped chives
Quick Steps:
- Steam the cauliflower florets for 10 to 12 minutes, until very tender.
- Drain well and let them sit for 2 minutes so steam escapes.
- Add the cauliflower to a food processor or bowl.
- Blend or mash with butter, cream cheese, milk, salt, and pepper until smooth.
- Stir in chives and serve hot.
Equipment for This Recipe:
- Large pot with steamer basket or colander
- Food processor or potato masher
- Mixing bowl
- Spoon or spatula
How to Serve This Dish:
Spoon it under braised mushrooms, roast chicken, or anything with gravy. It should hold a soft mound and not puddle on the plate.
Pro Tips for This Recipe:
- Let the cauliflower drain thoroughly; extra water is the enemy.
- Use a food processor for the smoothest result, but don’t overblend into glue.
- Taste after blending and adjust salt at the end — cauliflower needs more seasoning than people expect.
Variations on This Dish:
- Garlic Cauliflower Mash: Roast 4 garlic cloves and blend them in.
- Cheddar Cauliflower: Add 1/2 cup shredded cheddar for a sharper, richer version.
- Dairy-Light Mash: Use olive oil and a splash of broth instead of butter and cream cheese.
Common Mistakes to Avoid with This Dish:
- Leaving too much water in the cauliflower: It makes the mash loose and dull. Drain, steam off, then mash.
- Overprocessing: It can turn pasty fast. Blend only until smooth.
- Underseasoning: Cauliflower tastes flat without enough salt and fat.
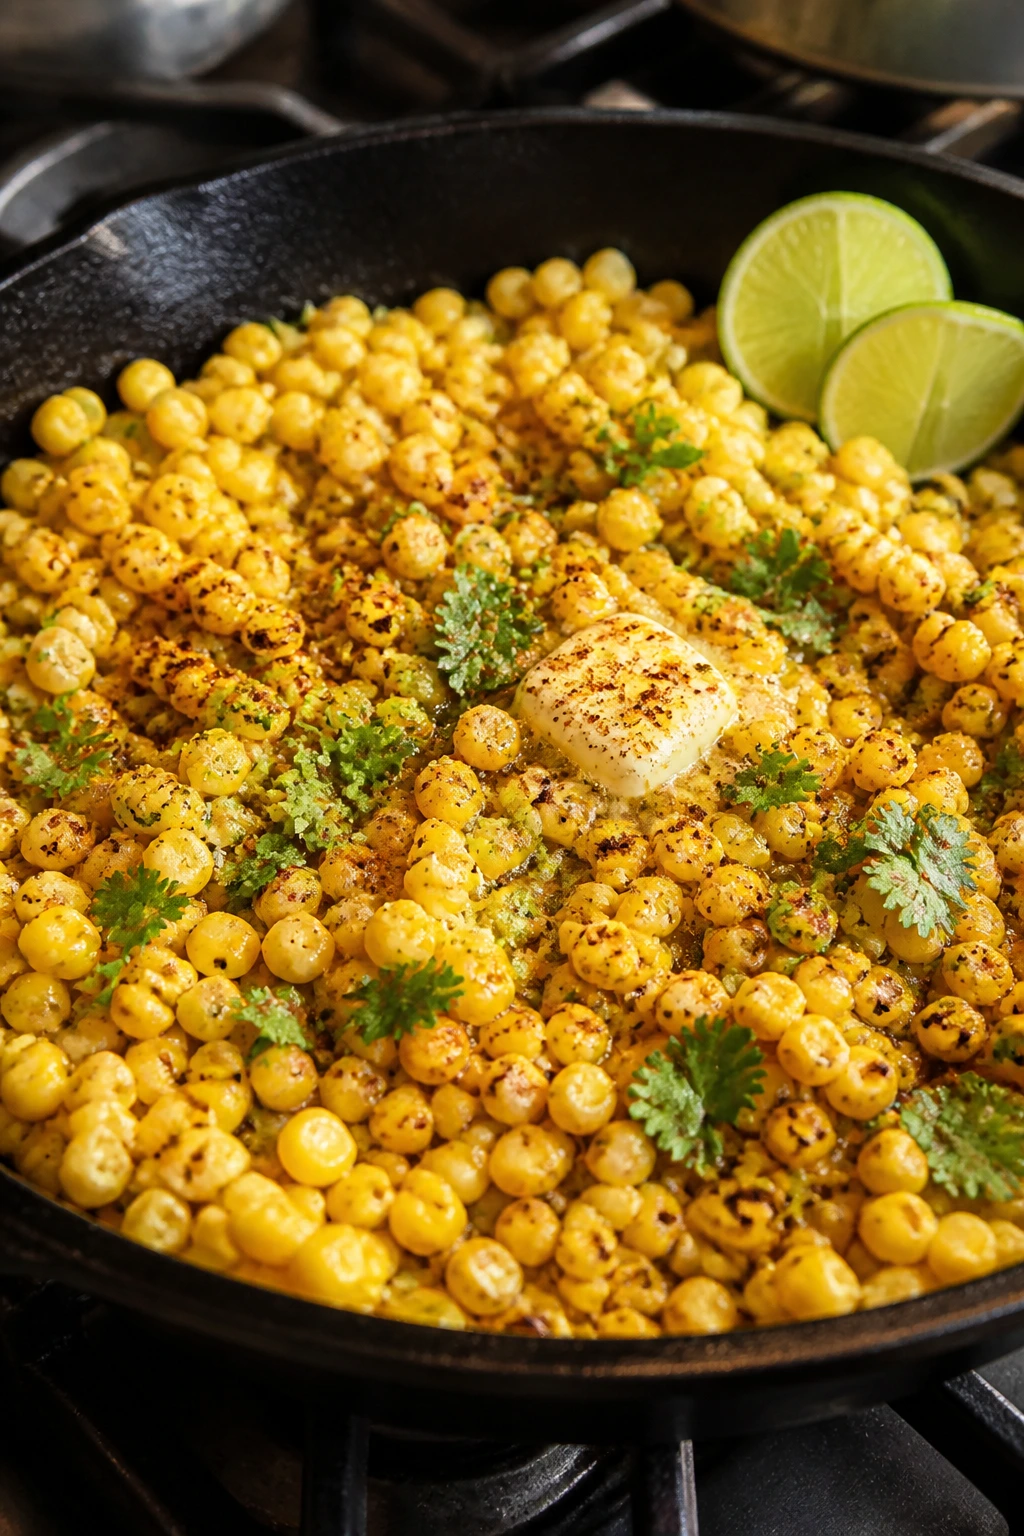
8. Skillet Corn with Chili Lime Butter
Corn in a skillet sounds simple because it is simple. But a hot pan, a little butter, and a squeeze of lime turn those kernels into something bright enough to pull attention away from the main dish for a minute.
Why It Works:
High heat gives corn a few browned spots, which deepens the sweetness. Chili, lime, and butter keep the flavor moving between sweet, salty, tangy, and a little smoky.
Key Ingredients:
- 4 cups corn kernels, fresh or frozen and thawed
- 2 tbsp butter
- 1 tbsp olive oil
- 1/2 tsp chili powder
- 1/2 tsp kosher salt
- 1 lime, juiced and zested
- 2 tbsp chopped cilantro
- 2 tbsp crumbled queso fresco, optional
Quick Steps:
- Heat butter and oil in a large skillet over medium-high heat.
- Add corn and cook for 6 to 8 minutes, stirring only now and then, until browned in spots.
- Stir in chili powder and salt.
- Add lime zest and juice, then toss to coat.
- Finish with cilantro and queso fresco if using.
Equipment for This Recipe:
- Large skillet
- Zester
- Cutting board
- Measuring spoons
How to Serve This Dish:
Serve it with tacos, grilled meat, or black beans and rice. It should look loose and golden, not creamy or heavy.
Pro Tips for This Recipe:
- If using frozen corn, thaw it first and pat it dry so it browns instead of steaming.
- Let the corn sit untouched for short bursts to pick up color.
- Fresh lime juice matters here; bottled juice tastes flat against the sweet corn.
Variations on This Dish:
- Mexican Street Corn Style: Add mayo and extra queso fresco for a richer bowl-style side.
- Smoky Corn: Swap chili powder for smoked paprika.
- Herb Corn: Replace cilantro with basil for a softer, sweeter finish.
Common Mistakes to Avoid with This Dish:
- Stirring too much: You’ll stop the browning. Let the kernels sit.
- Using wet corn: It steams and stays pale. Dry it well.
- Adding lime too early: The flavor is brighter when it goes in at the end.
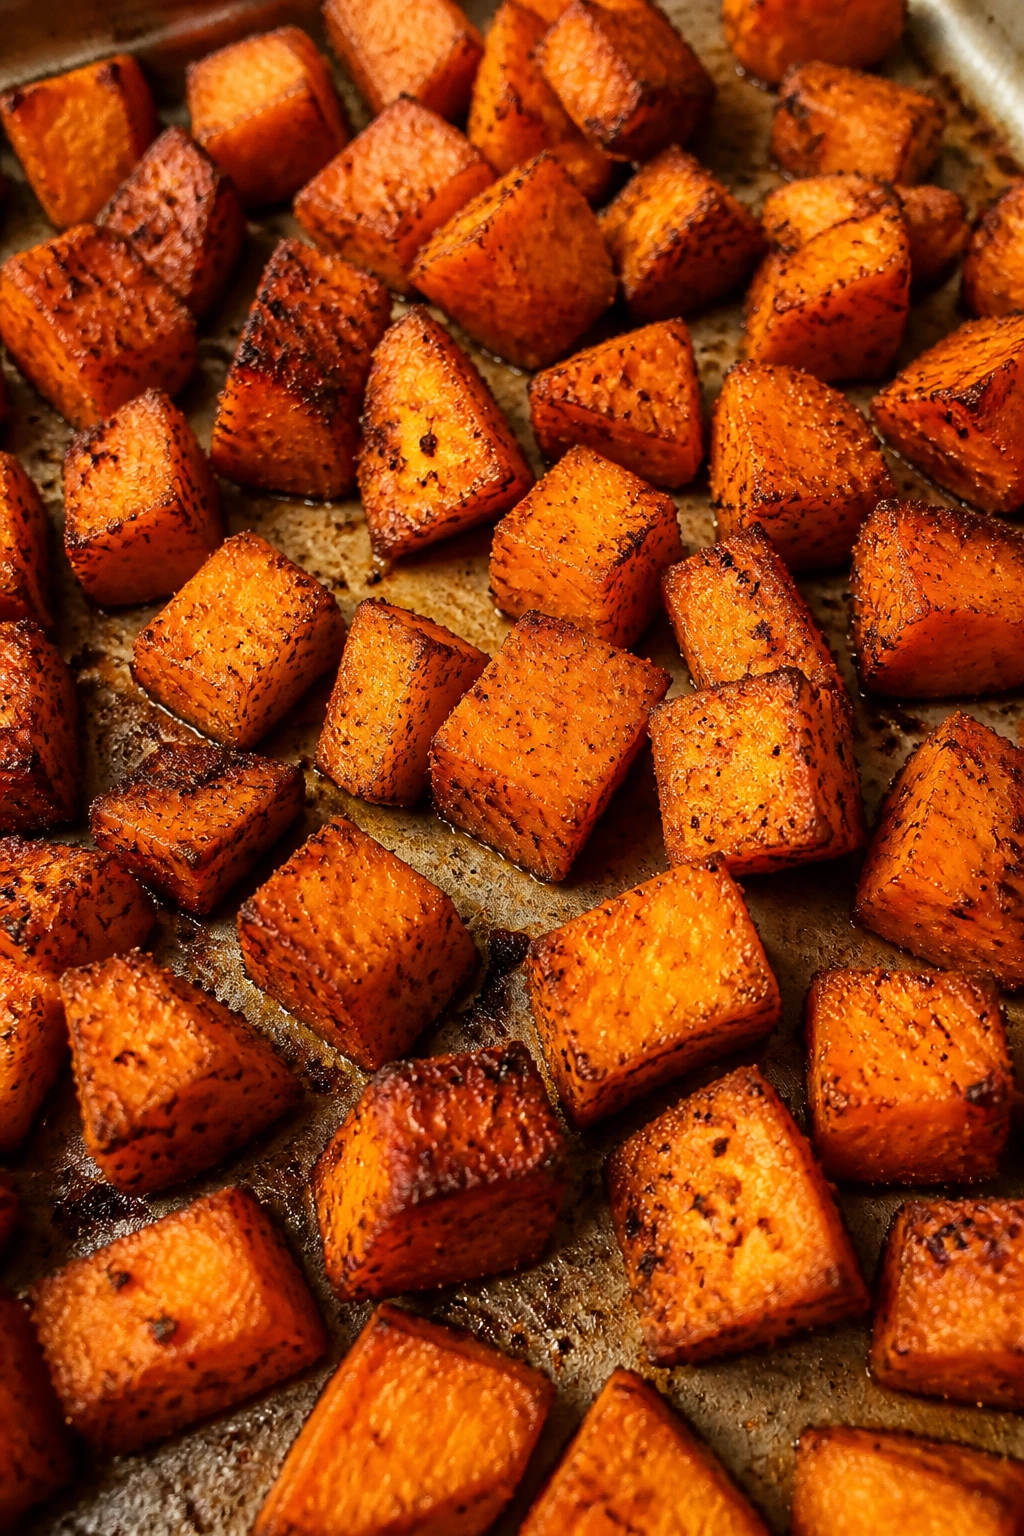
9. Roasted Sweet Potatoes with Smoked Paprika
Sweet potatoes can go mushy fast if they’re crowded or under-roasted. Give them room, heat, and a little smoked paprika, and they turn into caramel-edged cubes with a deep, savory smell that makes sense of the whole plate.
Why It Works:
High heat builds a crust on the outside before the centers collapse, which is the whole trick with diced sweet potatoes. Smoked paprika adds depth so they taste less like dessert and more like an actual side dish.
Key Ingredients:
- 2 lbs sweet potatoes, peeled and cut into 3/4-inch cubes
- 2 1/2 tbsp olive oil
- 1 tsp smoked paprika
- 1/2 tsp kosher salt
- 1/4 tsp black pepper
- 1/2 tsp ground cumin, optional
- 1 tbsp maple syrup, optional
- 1 tbsp chopped parsley
Quick Steps:
- Preheat the oven to 425°F and line a sheet pan.
- Toss the sweet potatoes with oil, paprika, salt, pepper, and cumin if using.
- Spread them in a single layer with space between the cubes.
- Roast for 25 to 30 minutes, flipping once halfway through.
- Finish with maple syrup and parsley if you want a sweeter gloss.
Equipment for This Recipe:
- Sheet pan
- Large bowl
- Spatula
- Sharp knife
How to Serve This Dish:
These are good beside pork, tofu, or a fried egg. The edges should be bronzed, not blackened, and the centers soft enough to yield cleanly to a fork.
Pro Tips for This Recipe:
- Keep the cubes close in size so the tray cooks evenly.
- Don’t peel if the skins are in good shape and you want a little extra texture.
- If you like more browning, preheat the empty sheet pan for 5 minutes before adding the potatoes.
Variations on This Dish:
- Garlic Herb Sweet Potatoes: Add minced garlic in the last 8 minutes so it doesn’t burn.
- Cinnamon Savory Sweet Potatoes: Add a tiny pinch of cinnamon with the paprika.
- Maple Pecan Version: Toss with toasted pecans after roasting.
Common Mistakes to Avoid with This Dish:
- Overcrowding the tray: The cubes need space to brown.
- Cutting pieces too small: They dry out before the inside turns tender.
- Using too much syrup early: Sugar burns before the potatoes finish.
10. Garlicky Mushrooms with Thyme
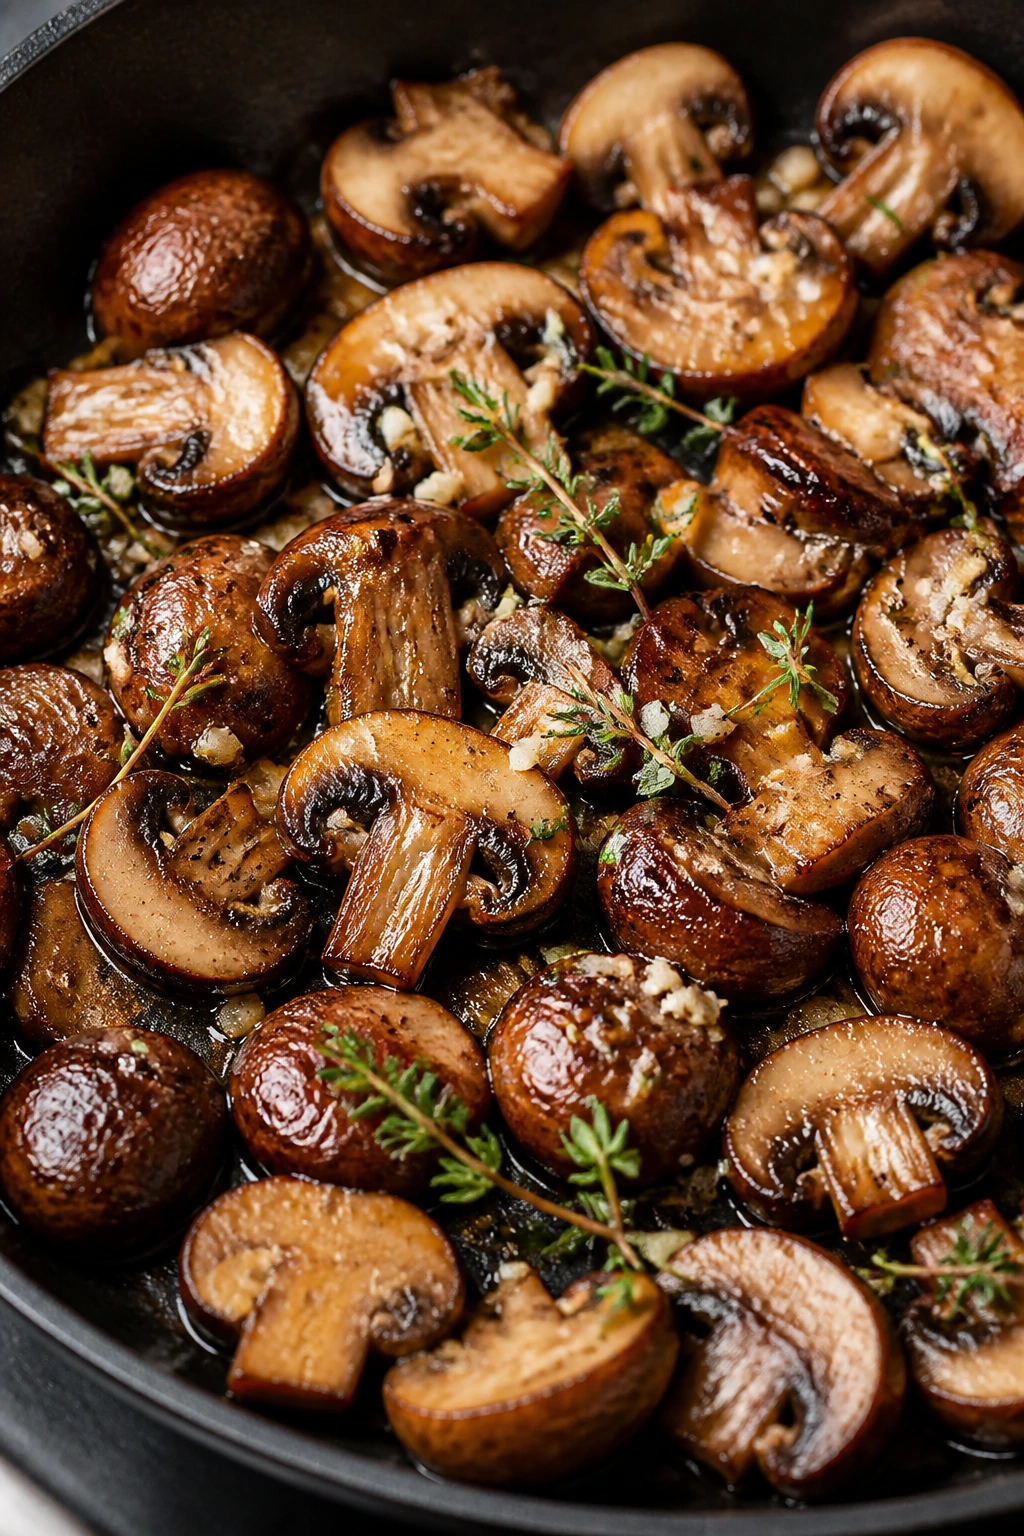
Mushrooms are one of the few vegetables that can taste meaty without pretending to be meat. Sauté them hard enough and they go from wet and spongy to deeply browned, with a smell that says dinner is getting serious.
Why It Works:
Mushrooms release a lot of water first, then start browning once that moisture cooks off. A wide skillet and enough heat give them room to sear instead of simmer.
Key Ingredients:
- 1 lb cremini or button mushrooms, cleaned and halved
- 2 tbsp olive oil
- 2 tbsp butter
- 3 garlic cloves, minced
- 1 tsp fresh thyme leaves
- 1/2 tsp kosher salt
- 1/4 tsp black pepper
- 1 tbsp soy sauce or tamari
- 1 tsp lemon juice
Quick Steps:
- Heat the oil in a large skillet over medium-high heat.
- Add the mushrooms and cook for 6 to 8 minutes, letting the moisture cook off.
- Add the butter, garlic, thyme, salt, and pepper.
- Cook for 2 to 3 minutes more, until the mushrooms are browned and glossy.
- Stir in soy sauce and lemon juice, then serve.
Equipment for This Recipe:
- Large skillet
- Wooden spoon
- Knife
- Cutting board
How to Serve This Dish:
These are excellent over mashed potatoes, toast, polenta, or steak if you’re not keeping the whole meal vegetarian. The mushrooms should look glossy and browned, not soupy.
Pro Tips for This Recipe:
- Clean mushrooms with a damp towel instead of soaking them.
- Don’t salt too early or the mushrooms dump water faster.
- Give them room in the pan; a crowded skillet makes them pale.
Variations on This Dish:
- Creamy Mushroom Pan: Stir in 2 tablespoons crème fraîche at the end.
- Balsamic Mushrooms: Add 1 teaspoon balsamic vinegar for a darker, sharper flavor.
- Spicy Mushrooms: Add a pinch of chili flakes with the garlic.
Common Mistakes to Avoid with This Dish:
- Starting with low heat: You’ll steam the mushrooms instead of browning them.
- Adding too much liquid at once: Soy sauce and lemon should be finishing touches, not a bath.
- Using too small a skillet: Browning needs surface area.
11. Charred Cabbage Wedges with Tahini Drizzle
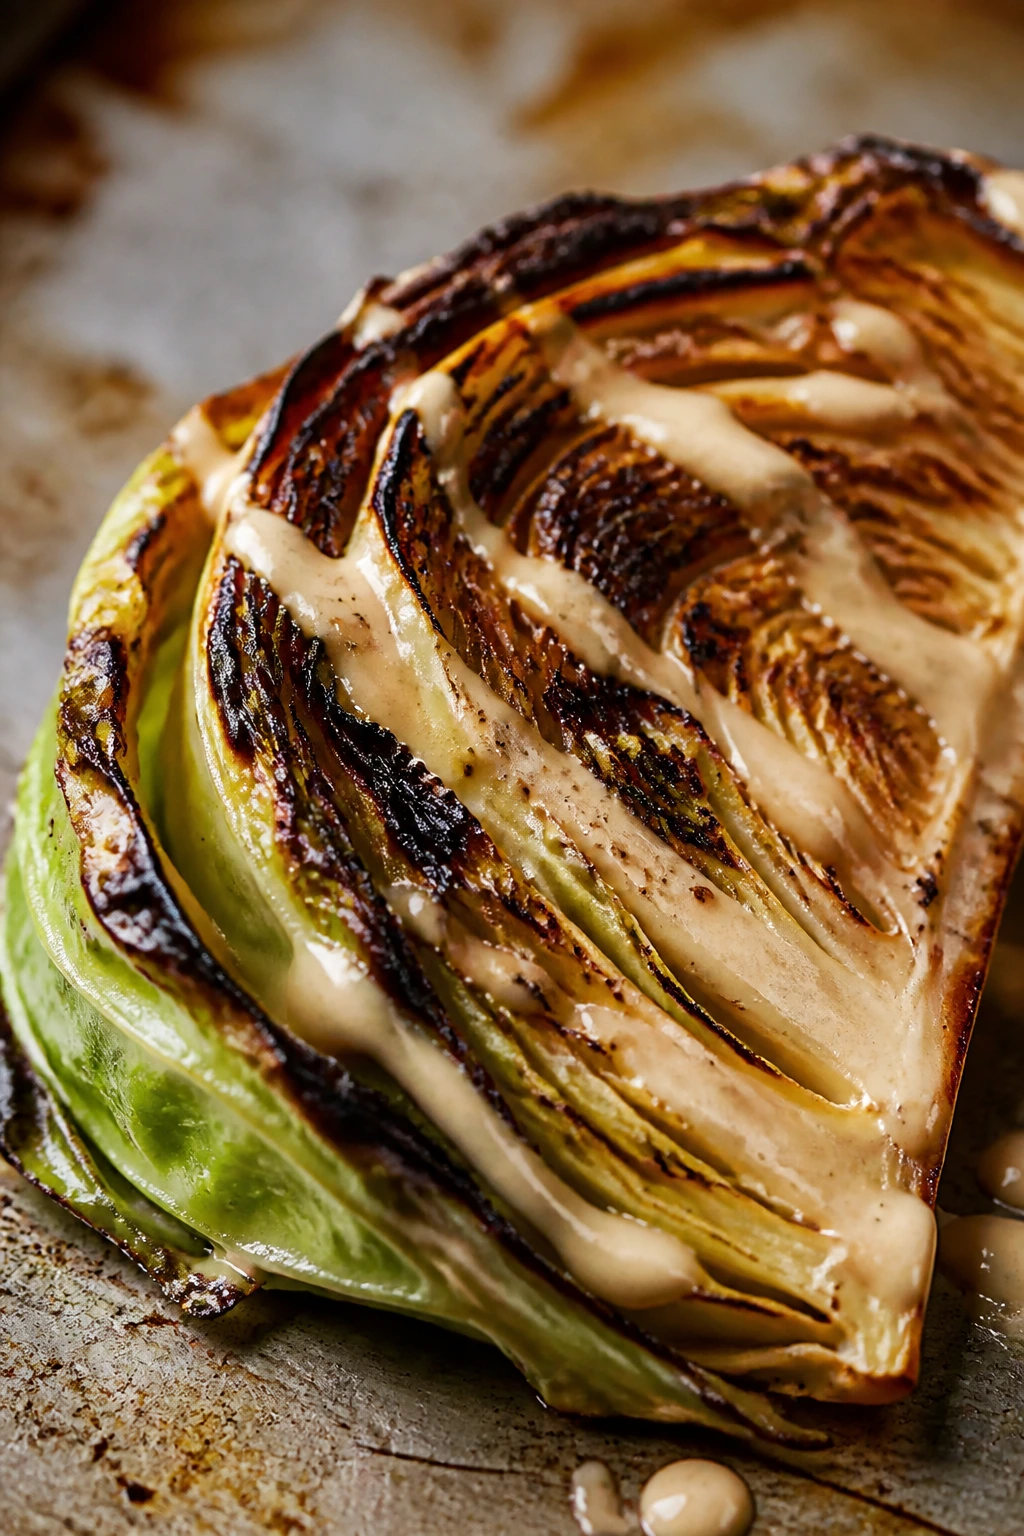
Cabbage gets unfairly treated like a filler vegetable, which is wild because a hot roast transforms it. The outer leaves crisp up, the center turns sweet, and the whole wedge picks up a gentle smokiness from the oven.
Why It Works:
Cut cabbage into wedges and it keeps enough structure to hold up under high heat. A tahini drizzle brings creaminess without dairy and gives the dish a nutty finish that lands well with the charred edges.
Key Ingredients:
- 1 large green cabbage, cut into 6 wedges
- 3 tbsp olive oil
- 1 tsp kosher salt
- 1/2 tsp black pepper
- 3 tbsp tahini
- 1 tbsp lemon juice
- 1 small garlic clove, grated
- 2 to 4 tbsp warm water
Quick Steps:
- Heat the oven to 425°F and line a sheet pan.
- Rub the cabbage wedges with olive oil, salt, and pepper.
- Roast for 20 minutes, then flip carefully and roast 10 to 15 minutes more.
- Whisk tahini, lemon juice, garlic, and warm water until pourable.
- Drizzle over the hot wedges and serve.
Equipment for This Recipe:
- Sharp chef’s knife
- Sheet pan
- Small bowl
- Whisk
How to Serve This Dish:
Serve the wedges whole with the drizzle pooled in the creases. They work well with grains, beans, or roasted tofu, and they look especially good when the outer leaves are browned and frilly.
Pro Tips for This Recipe:
- Leave the core in place so the wedges stay together.
- Make the tahini sauce loose enough to drizzle; thick paste won’t spread well.
- A pinch of cumin in the drizzle is a nice move if you want more warmth.
Variations on This Dish:
- Sesame Cabbage: Swap tahini for sesame oil and toasted sesame seeds.
- Harissa Cabbage: Stir 1 teaspoon harissa into the drizzle for heat.
- Garlic Herb Cabbage: Finish with chopped parsley instead of a sauce.
Common Mistakes to Avoid with This Dish:
- Cutting wedges too thin: They fall apart and burn.
- Using a dry drizzle: Tahini needs enough water to loosen.
- Serving before roasting long enough: Cabbage should have browned edges and a tender center.
12. Green Bean Almondine
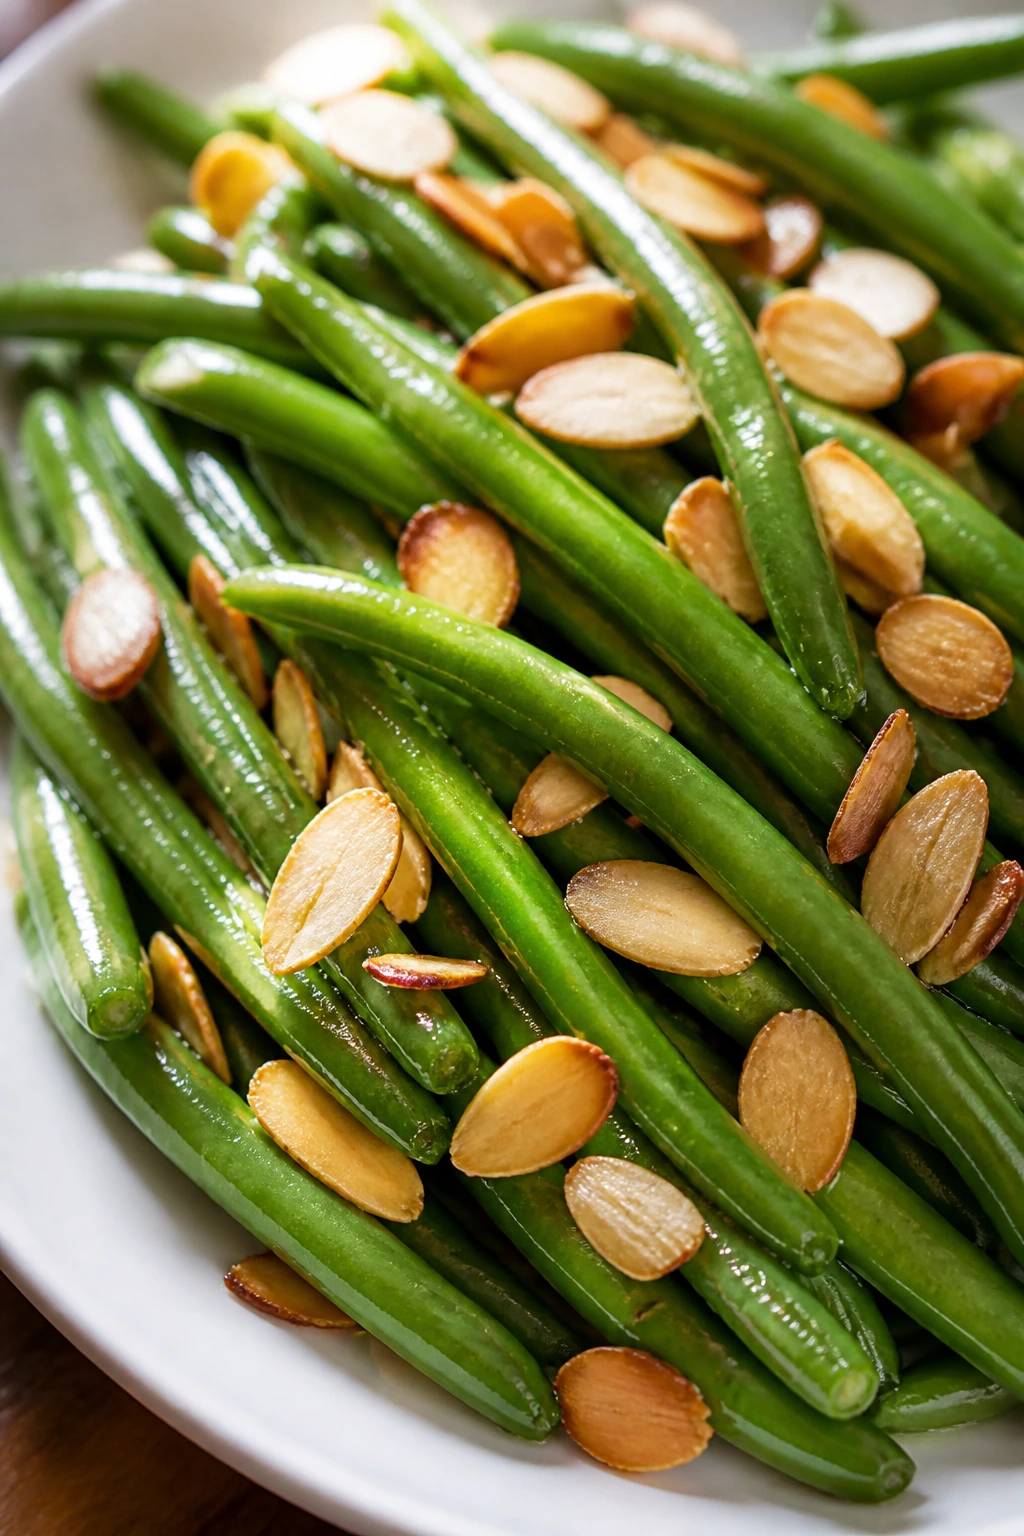
There’s a reason this dish has stayed around so long. The beans stay crisp, the butter picks up a little nuttiness, and the almonds bring a toasty crunch that makes the whole bowl feel finished.
Why It Works:
Blanching keeps the beans bright green, while quickly toasting the almonds in butter adds flavor before the beans go in. It’s a simple sequence, but the order matters.
Key Ingredients:
- 1 lb green beans, trimmed
- 2 tbsp unsalted butter
- 1 tbsp sliced almonds
- 1 garlic clove, minced
- 1/2 tsp kosher salt
- 1/4 tsp black pepper
- 1 tsp lemon juice
- Pinch of lemon zest, optional
Quick Steps:
- Blanch the green beans in salted water for 2 minutes, then drain and dry.
- Melt the butter in a skillet over medium heat.
- Add the almonds and cook for 1 to 2 minutes until golden.
- Stir in garlic for 30 seconds.
- Add the beans, salt, and pepper; toss for 2 minutes.
- Finish with lemon juice and zest.
Equipment for This Recipe:
- Pot and colander
- Skillet
- Slotted spoon
- Small knife
How to Serve This Dish:
It fits beside roast chicken, fish, or a holiday-style plate, but it’s plain enough for a Tuesday too. The finished beans should look glossy with little almond flecks scattered through them.
Pro Tips for This Recipe:
- Toast the almonds first, not last. That butter-to-almond step is where the flavor builds.
- Keep the beans bright by draining them fast and not overcooking during the sauté.
- Lemon at the end keeps the butter from tasting heavy.
Variations on This Dish:
- Brown Butter Almondine: Let the butter brown before adding the almonds.
- Shallot Almondine: Add 1 minced shallot with the garlic for a sweeter base.
- Herbed Almondine: Finish with tarragon or parsley for a softer herbal note.
Common Mistakes to Avoid with This Dish:
- Overcooking the beans: They should still have snap.
- Burning the almonds: They go from gold to bitter in a blink.
- Skipping the lemon: The acid keeps the butter from flattening the flavor.
13. Balsamic Roasted Root Vegetables
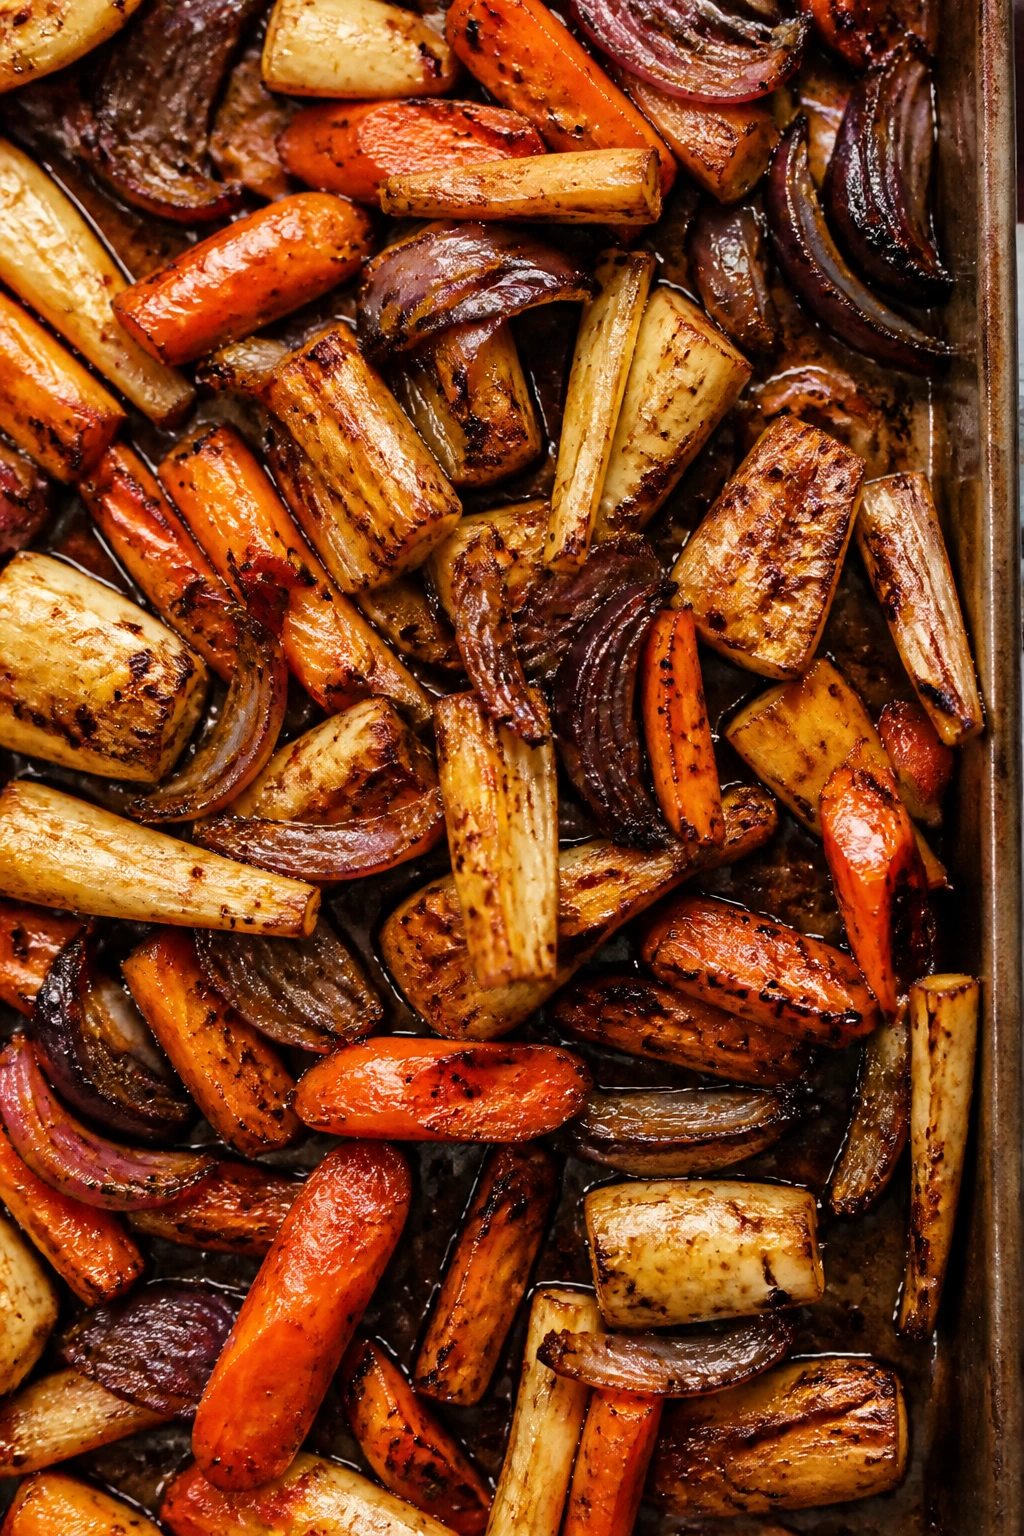
This is the tray you make when the crisper drawer has gone a little chaotic. Carrots, parsnips, and onions roast into something sweet, dark, and a bit sticky around the edges.
Why It Works:
Root vegetables love a hot oven because the dry heat drives off excess moisture and pulls their sugars forward. A small pour of balsamic near the end turns the tray glossy without making it soggy.
Key Ingredients:
- 1 lb carrots, cut into chunks
- 1 lb parsnips, peeled and cut into chunks
- 1 red onion, cut into wedges
- 3 tbsp olive oil
- 1 tsp kosher salt
- 1/2 tsp black pepper
- 1 tsp fresh rosemary, chopped
- 1 1/2 tbsp balsamic vinegar
Quick Steps:
- Preheat the oven to 425°F and line a sheet pan.
- Toss the vegetables with oil, salt, pepper, and rosemary.
- Spread them out in a single layer.
- Roast for 30 to 35 minutes, stirring once.
- Drizzle with balsamic vinegar during the last 5 minutes and return to the oven.
Equipment for This Recipe:
- Sheet pan
- Large mixing bowl
- Spatula
- Peeler
How to Serve This Dish:
Serve it with lentils, roast meat, or a simple baked fish. The onions should collapse a little, and the carrots should have browned corners rather than soft white edges.
Pro Tips for This Recipe:
- Keep the vegetable pieces similar in size so the tray finishes together.
- Add the balsamic late; early vinegar can burn before the vegetables are tender.
- If you want more caramelization, let the pan rest untouched for the last 10 minutes.
Variations on This Dish:
- Herbes de Provence Roots: Swap rosemary for herbes de Provence.
- Honey Balsamic Roots: Add 1 teaspoon honey with the vinegar.
- Garlic Root Medley: Add smashed garlic cloves to the tray for a milder garlic flavor.
Common Mistakes to Avoid with This Dish:
- Using too many wet vegetables: They steam instead of roast.
- Cutting onions too thin: They disappear before the roots finish.
- Adding vinegar too early: It should glaze, not burn.
14. Garlicky Spinach with Lemon
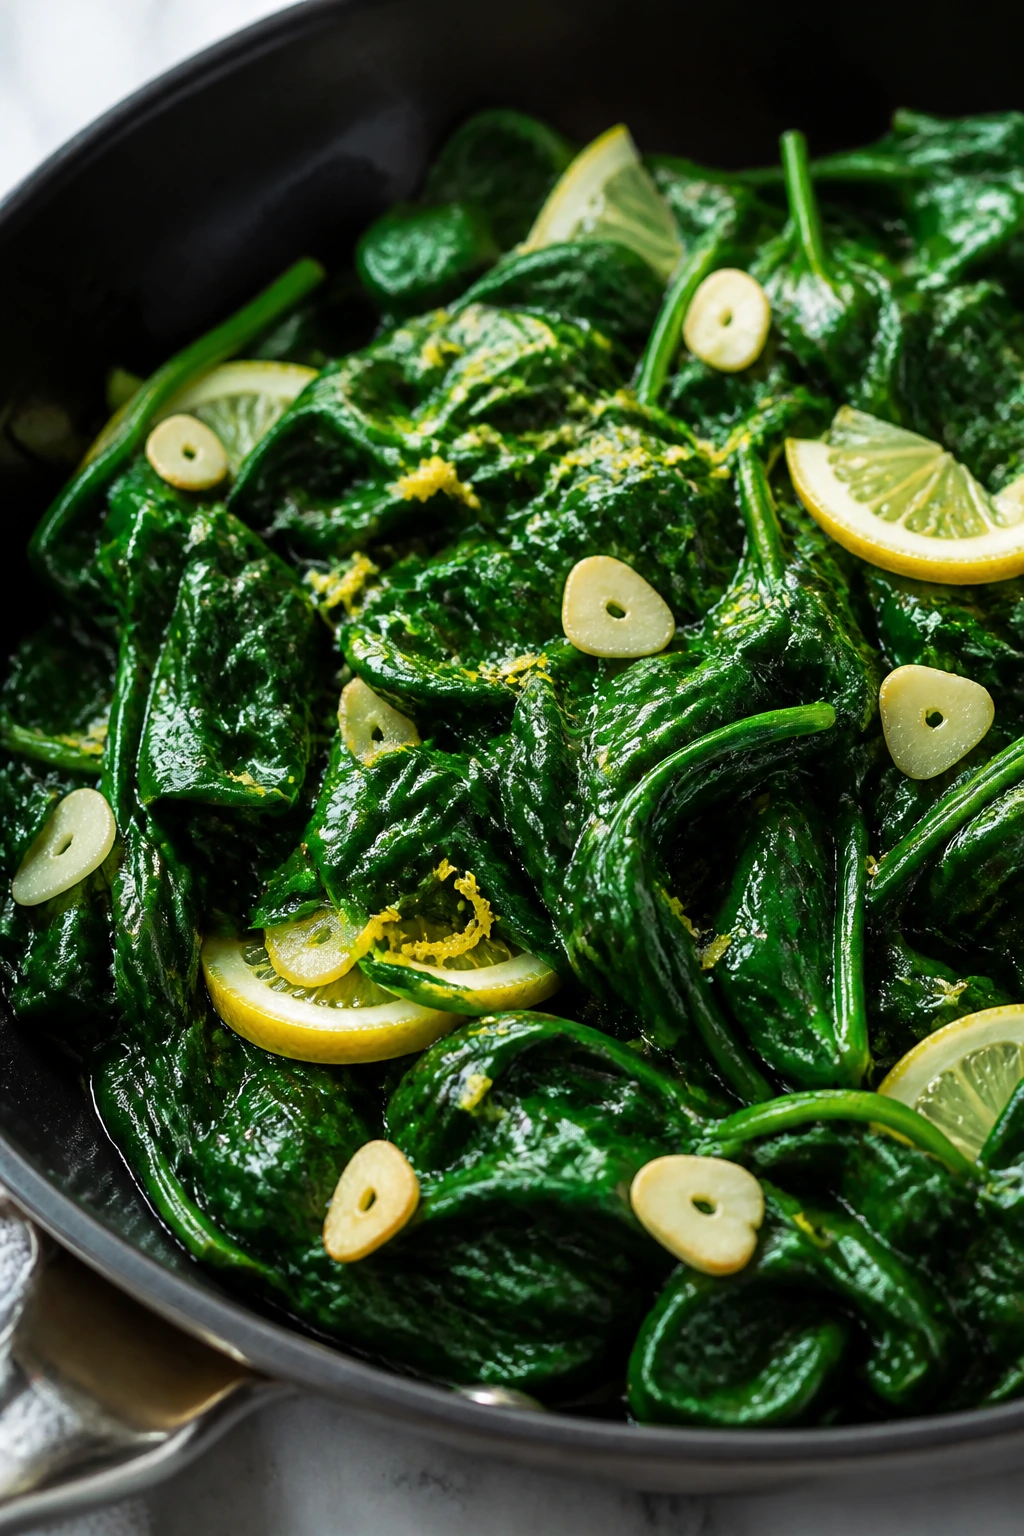
Spinach is fast, yes, but speed alone doesn’t make it worth serving. What makes it worth serving is that moment when the leaves collapse into a silky pile and still taste green instead of muddy.
Why It Works:
Spinach cooks in minutes, which means garlic and lemon stay bright instead of dulled by long heat. A quick sauté is enough to make it tender without wringing all the life out of it.
Key Ingredients:
- 10 oz fresh spinach
- 1 1/2 tbsp olive oil
- 2 garlic cloves, thinly sliced
- 1/4 tsp kosher salt
- 1/4 tsp black pepper
- 1 tsp lemon juice
- Pinch of nutmeg, optional
- 1 tbsp grated Parmesan, optional
Quick Steps:
- Heat the olive oil in a large skillet over medium heat.
- Add the garlic and cook for 30 seconds, just until fragrant.
- Add the spinach in batches and toss until wilted, about 2 minutes.
- Season with salt, pepper, and lemon juice.
- Finish with nutmeg or Parmesan if you want a little extra depth.
Equipment for This Recipe:
- Large skillet
- Tongs
- Garlic slicer or knife
- Citrus juicer, optional
How to Serve This Dish:
Spoon it next to eggs, pasta, or roasted potatoes. It should look soft and glossy, with the stems barely visible.
Pro Tips for This Recipe:
- Add the spinach in batches if your skillet is not huge.
- Use baby spinach for a softer texture; mature leaves take a little longer.
- Lemon goes in at the end or the greens taste flat.
Variations on This Dish:
- Creamed Spinach Lite: Stir in 2 tablespoons ricotta or cream cheese.
- Garlic Chili Spinach: Add red pepper flakes with the garlic.
- Sesame Spinach: Finish with a few drops of sesame oil instead of Parmesan.
Common Mistakes to Avoid with This Dish:
- Overcooking: Spinach goes from perfect to dull in a minute.
- Using too much oil: It should coat, not pool.
- Waiting to season until the end: Salt helps the spinach collapse evenly.
15. Sesame Broccolini
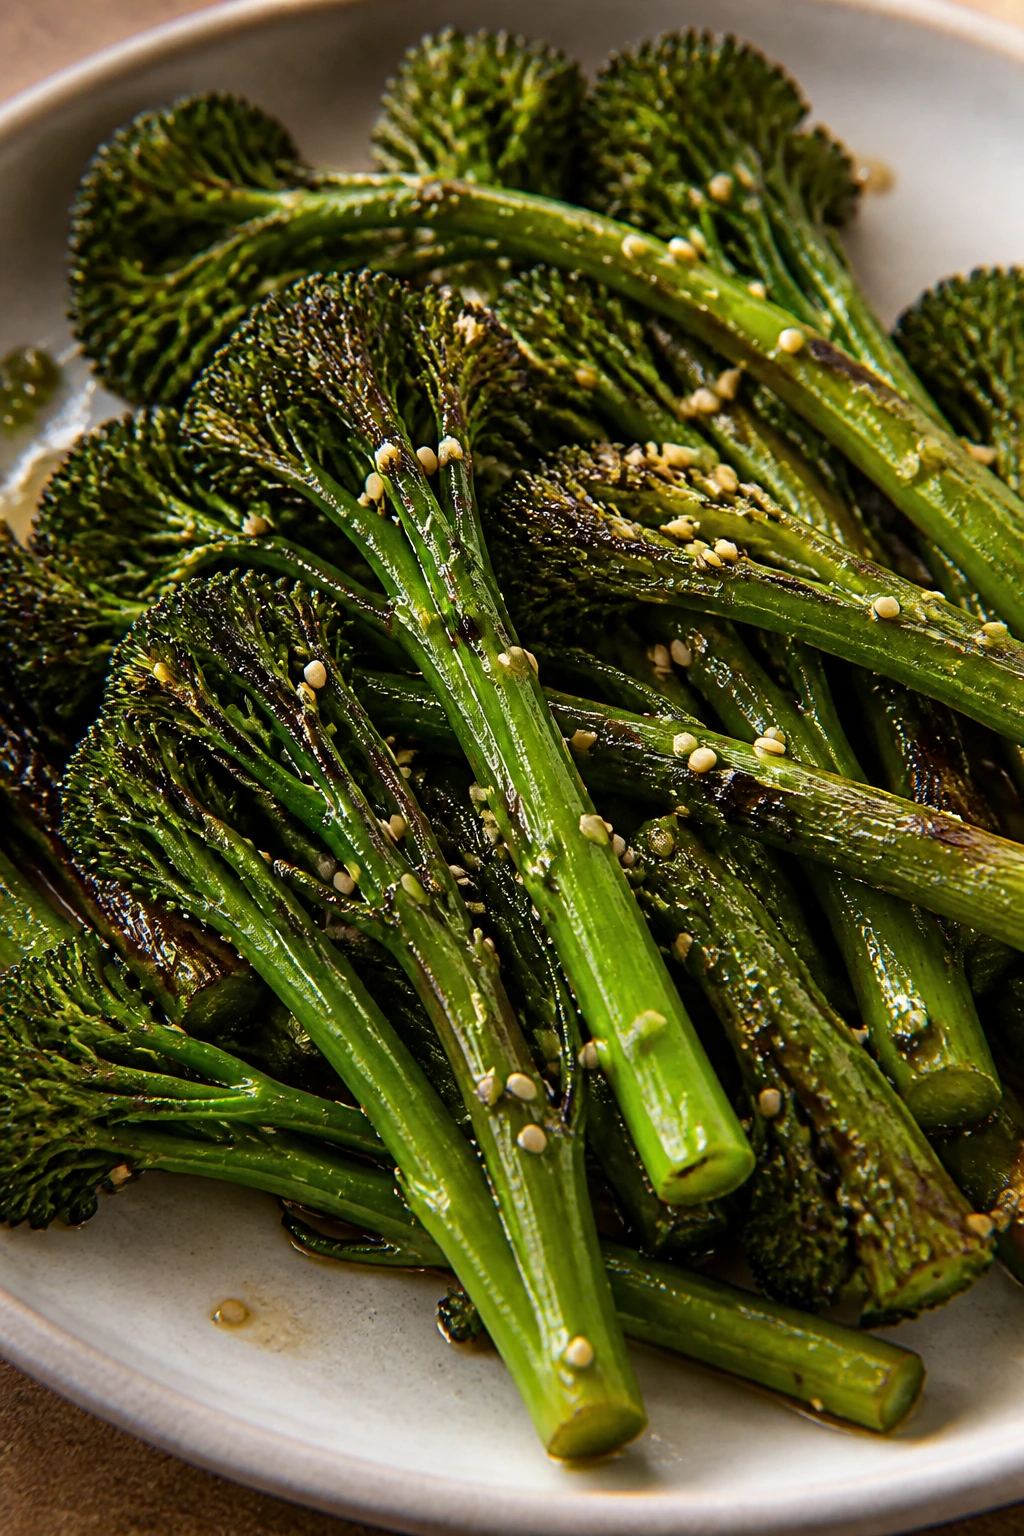
Broccolini cooks faster than broccoli and has a sweeter stem, which makes it a nice change when you want something green but not fussy. Sesame oil and a little soy sauce give it an easy, savory finish that works with almost anything.
Why It Works:
Broccolini is thin enough to blister quickly in a hot skillet or under a broiler. Soy sauce adds salt and depth, while sesame seeds bring a nutty crunch that sticks to the stalks.
Key Ingredients:
- 1 lb broccolini, trimmed
- 1 1/2 tbsp olive oil
- 1 tbsp soy sauce or tamari
- 1 tsp toasted sesame oil
- 1 garlic clove, minced
- 1 tbsp sesame seeds
- 1/2 tsp kosher salt, if needed
- 1 tsp rice vinegar, optional
Quick Steps:
- Heat the olive oil in a large skillet over medium-high heat.
- Add the broccolini and cook for 4 to 5 minutes, turning occasionally.
- Stir in garlic, soy sauce, sesame oil, and sesame seeds.
- Cook for 1 to 2 minutes more until the stalks are tender and lightly blistered.
- Finish with rice vinegar if you want a sharper edge.
Equipment for This Recipe:
- Large skillet
- Tongs
- Measuring spoons
- Knife
How to Serve This Dish:
It fits beautifully with rice, noodles, salmon, or tofu. The stems should stay bright and the tops should have a few browned spots, not a wilted look.
Pro Tips for This Recipe:
- Dry the broccolini after washing so it blisters instead of steaming.
- Use toasted sesame oil sparingly; too much takes over.
- If the stems are thick, add a tablespoon of water and cover the pan for 1 minute.
Variations on This Dish:
- Ginger Sesame Broccolini: Add grated ginger with the garlic.
- Chili Crisp Broccolini: Spoon over chili crisp at the end.
- Lemon Sesame Broccolini: Swap rice vinegar for lemon juice.
Common Mistakes to Avoid with This Dish:
- Cooking on low heat: Broccolini needs a little edge to taste right.
- Overusing soy sauce: It should season, not drown the stalks.
- Ignoring stem thickness: Thick stems need a short covered finish.
16. Cauliflower Gratin
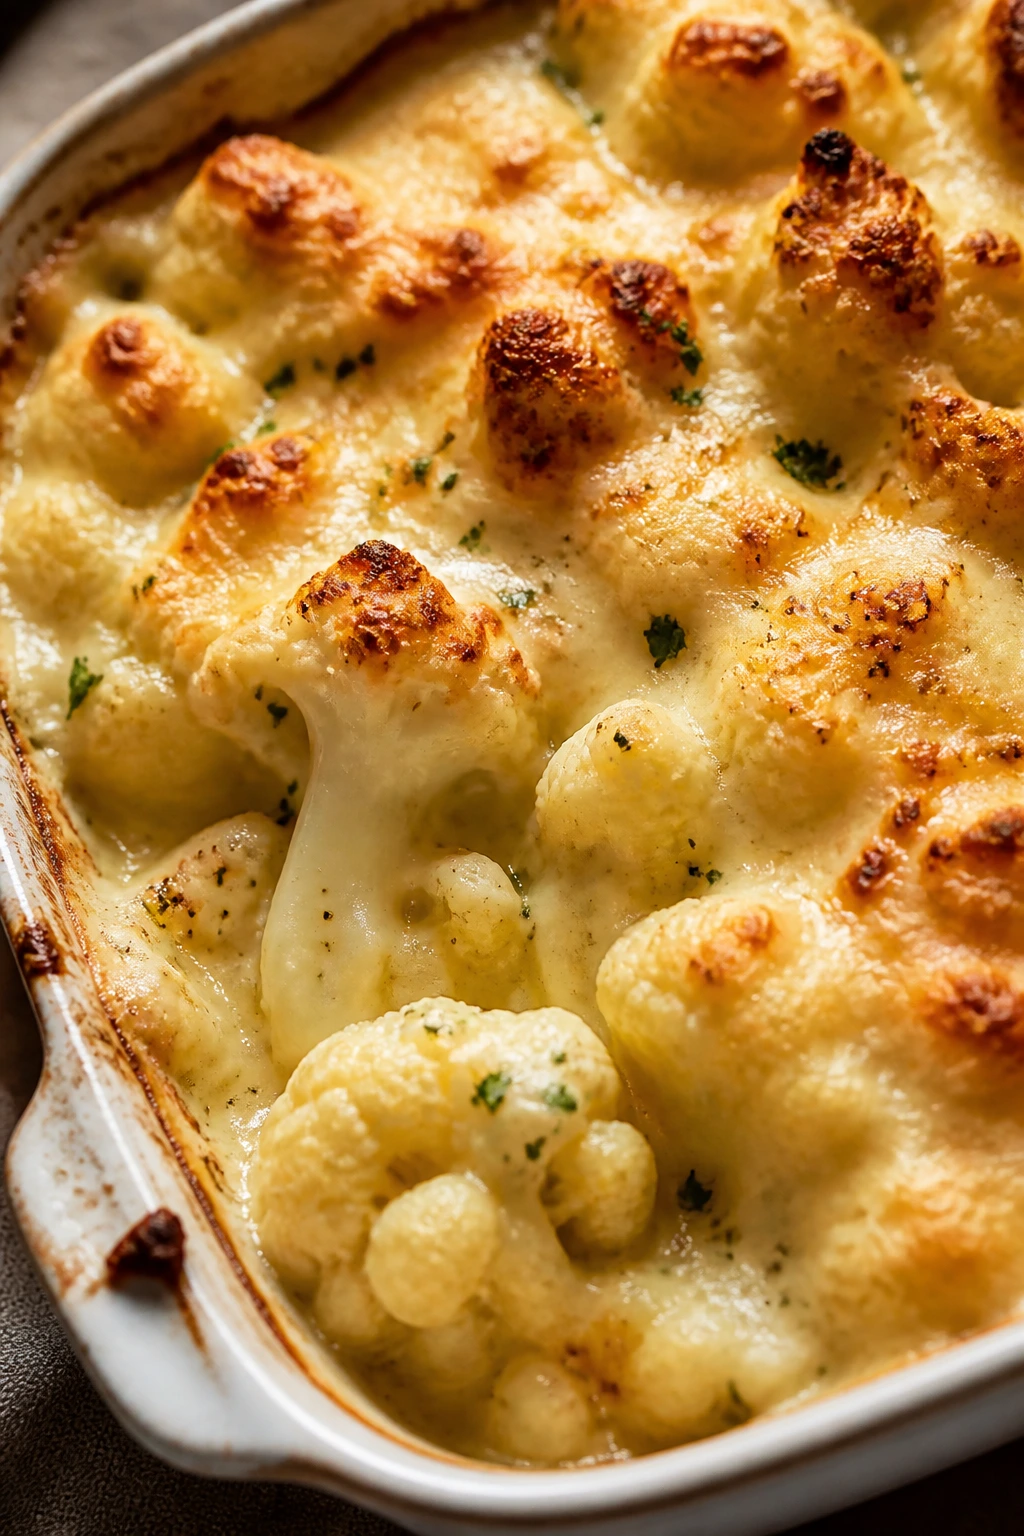
A good cauliflower gratin doesn’t hide the vegetable under cheese; it uses cheese to make cauliflower taste richer and more complete. You want tender florets, a creamy sauce, and a browned top that crackles when a spoon breaks through.
Why It Works:
Parboiling the cauliflower keeps the florets from staying hard in the center, and a simple béchamel coats them without turning the dish heavy. Baking gives the top a browned crust, which is half the pleasure.
Key Ingredients:
- 1 large head cauliflower, cut into florets
- 2 tbsp butter
- 2 tbsp flour
- 1 1/2 cups milk
- 1 cup shredded cheddar or Gruyère
- 1/2 tsp kosher salt
- 1/4 tsp black pepper
- 1/4 tsp nutmeg
- 1/4 cup breadcrumbs, optional
Quick Steps:
- Preheat the oven to 400°F and butter a baking dish.
- Boil or steam the cauliflower for 5 to 6 minutes, until just tender.
- Make a quick sauce: melt butter, whisk in flour, then add milk and cook until thickened.
- Stir in cheese, salt, pepper, and nutmeg.
- Fold in the cauliflower, top with breadcrumbs if using, and bake for 20 to 25 minutes until browned.
Equipment for This Recipe:
- Baking dish
- Saucepan
- Whisk
- Steamer basket or pot
How to Serve This Dish:
Serve it as a richer side beside roast chicken, mushrooms, or a simple salad with sharp vinaigrette. The top should be golden and the sauce should still look creamy underneath.
Pro Tips for This Recipe:
- Don’t fully cook the cauliflower before baking or it turns mushy.
- Whisk the sauce until smooth before adding cheese.
- A handful of breadcrumbs on top gives a more aggressive crust.
Variations on This Dish:
- Mustard Cauliflower Gratin: Add 1 teaspoon Dijon to the sauce.
- Smoked Cheese Gratin: Use smoked cheddar for a deeper flavor.
- Herb Gratin: Add thyme or chives to the sauce.
Common Mistakes to Avoid with This Dish:
- Watery cauliflower: Drain it well before saucing.
- Boiling the sauce too hard: It can turn grainy.
- Skipping the browning step: The top needs color or the dish tastes flat.
17. Pan-Roasted Okra with Cornmeal
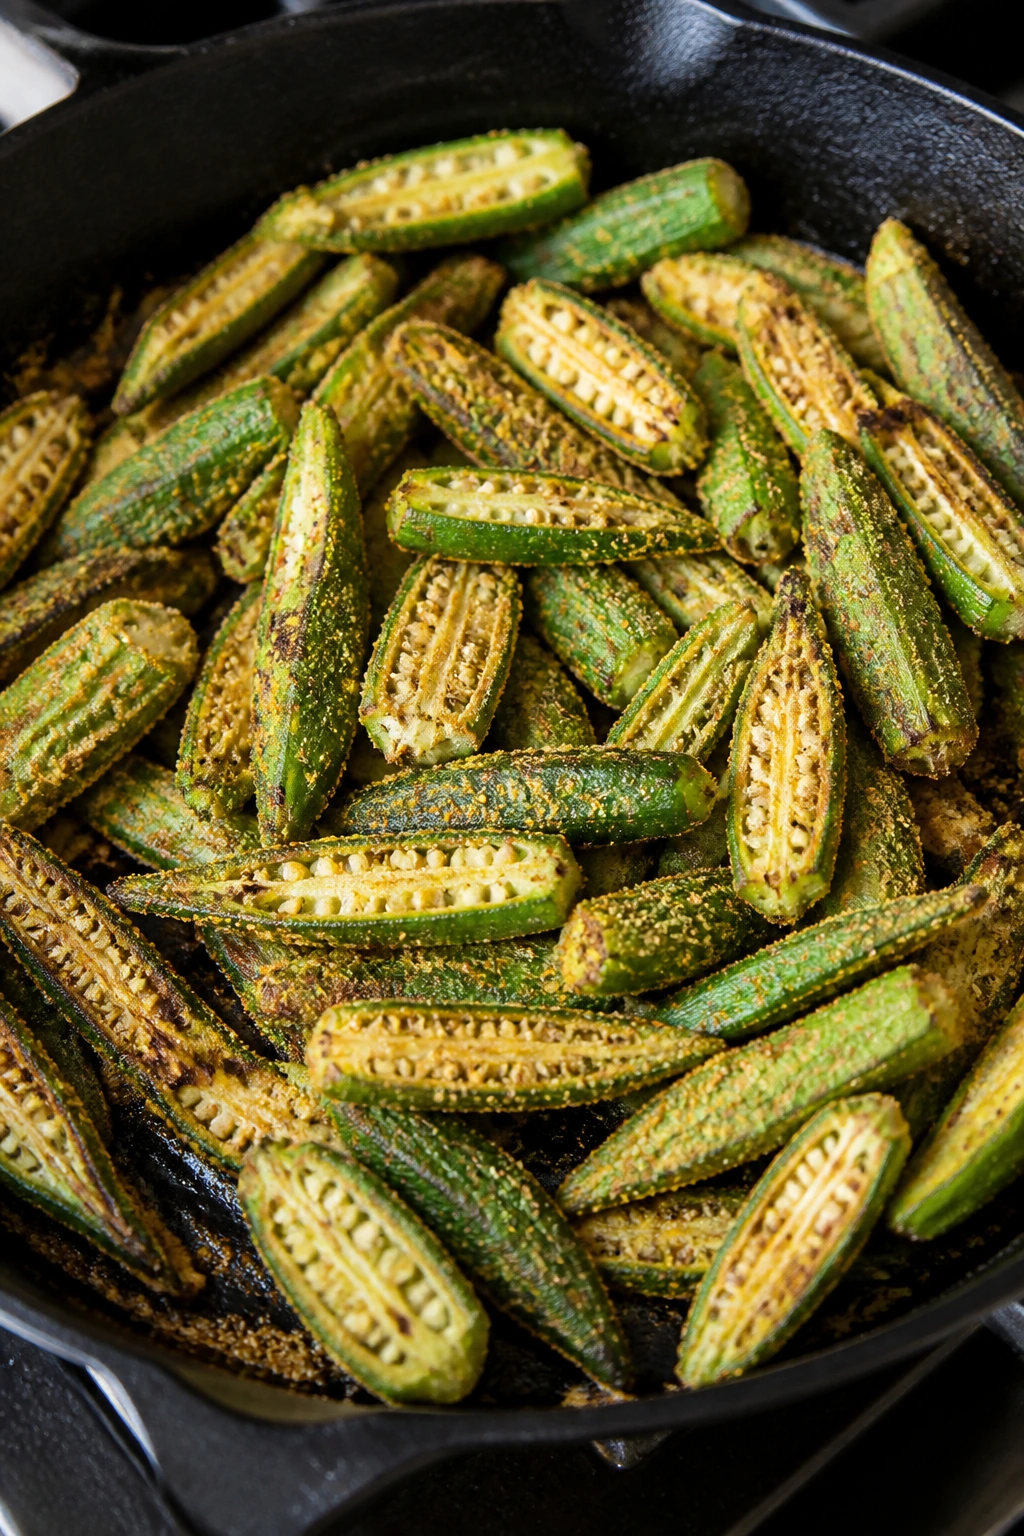
Okra can be slippery if you treat it like a delicate vegetable. Pan-roasting with a dusting of cornmeal changes the texture completely, giving you little crisp edges and a cleaner bite.
Why It Works:
A hot skillet and a dry coating tame the okra’s surface moisture. Cornmeal adds crunch, while a little acid at the end keeps the flavor from leaning dull.
Key Ingredients:
- 1 lb fresh okra, trimmed and halved lengthwise
- 2 tbsp olive oil
- 3 tbsp fine cornmeal
- 1/2 tsp kosher salt
- 1/4 tsp black pepper
- 1/4 tsp smoked paprika
- 1 tsp lemon juice
- 1 tbsp chopped parsley
Quick Steps:
- Pat the okra dry and toss with olive oil.
- Sprinkle with cornmeal, salt, pepper, and smoked paprika.
- Heat a skillet over medium-high heat and add the okra cut-side down.
- Cook for 4 to 5 minutes without moving much, then toss and cook 3 minutes more.
- Finish with lemon juice and parsley.
Equipment for This Recipe:
- Large skillet
- Paper towels
- Mixing bowl
- Spatula
How to Serve This Dish:
Serve it with rice, grilled tomatoes, or any dish that could use a crisp, grassy side. The coating should cling in spots, not form a thick crust.
Pro Tips for This Recipe:
- Dry okra well before coating; moisture causes the slippery texture everyone complains about.
- Use fine cornmeal rather than coarse meal so it sticks better.
- Don’t stir constantly; the cut face needs time on the pan.
Variations on This Dish:
- Spicy Okra: Add cayenne to the cornmeal.
- Garlic Okra: Toss in a minced garlic clove during the last minute.
- Tomato Okra: Serve with halved cherry tomatoes warmed in the same pan.
Common Mistakes to Avoid with This Dish:
- Cooking wet okra: It gets slimy and steams.
- Using too much cornmeal: The flavor gets dusty instead of crisp.
- Overcrowding: The pan needs space to sear the cut sides.
18. Cucumber Dill Salad
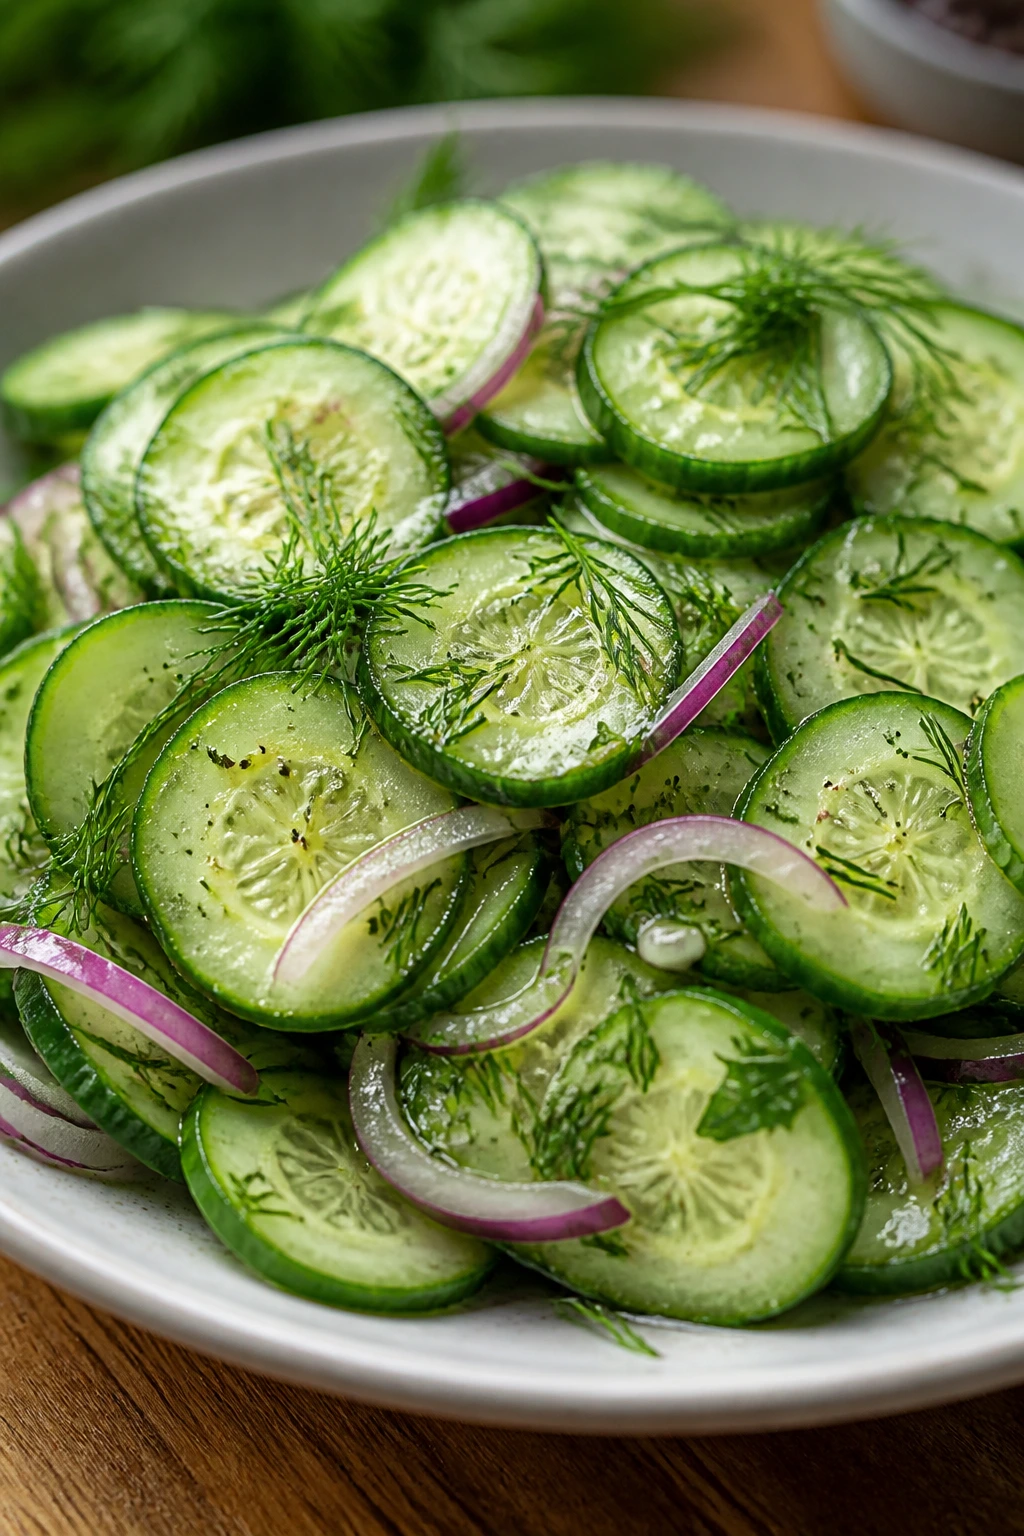
Not every vegetable side needs heat. A cold cucumber salad gives a dinner plate a sharp, crunchy reset, especially when everything else on the table is roasted or rich.
Why It Works:
Salting the cucumbers briefly draws out excess water so the dressing stays crisp instead of watered down. Dill and vinegar bring a clean, bright edge that cuts through heavier mains.
Key Ingredients:
- 2 large cucumbers, thinly sliced
- 1/2 small red onion, thinly sliced
- 1/2 tsp kosher salt
- 2 tbsp sour cream or Greek yogurt
- 1 tbsp white wine vinegar
- 1 tbsp chopped dill
- 1/4 tsp black pepper
- 1 tsp sugar, optional
Quick Steps:
- Toss the cucumber slices with salt and let them sit for 10 minutes.
- Pat them dry with paper towels.
- Mix sour cream, vinegar, dill, pepper, and sugar if using.
- Fold in cucumbers and red onion.
- Chill for 10 minutes before serving if you want a colder, tighter salad.
Equipment for This Recipe:
- Sharp knife or mandoline
- Mixing bowl
- Paper towels
- Spoon
How to Serve This Dish:
Serve it with grilled foods, potatoes, or a sandwich-heavy dinner. It should look cool and crisp, with just enough dressing to coat the slices.
Pro Tips for This Recipe:
- Seed cucumbers if they’re especially watery.
- Slice the onion very thin or it will dominate the bowl.
- Make it close to serving time if you want maximum crunch.
Variations on This Dish:
- Vinegar Dill Salad: Skip the sour cream and use a lighter vinegar dressing.
- German-Style Cucumber Salad: Add a little more sugar and dill.
- Herbed Yogurt Salad: Mix in mint or chives.
Common Mistakes to Avoid with This Dish:
- Not salting the cucumbers: The salad turns watery fast.
- Using thick slices: Thin slices absorb the dressing better.
- Overdressing: Cucumber should stay crisp, not swim.
19. Ratatouille-Style Eggplant and Zucchini
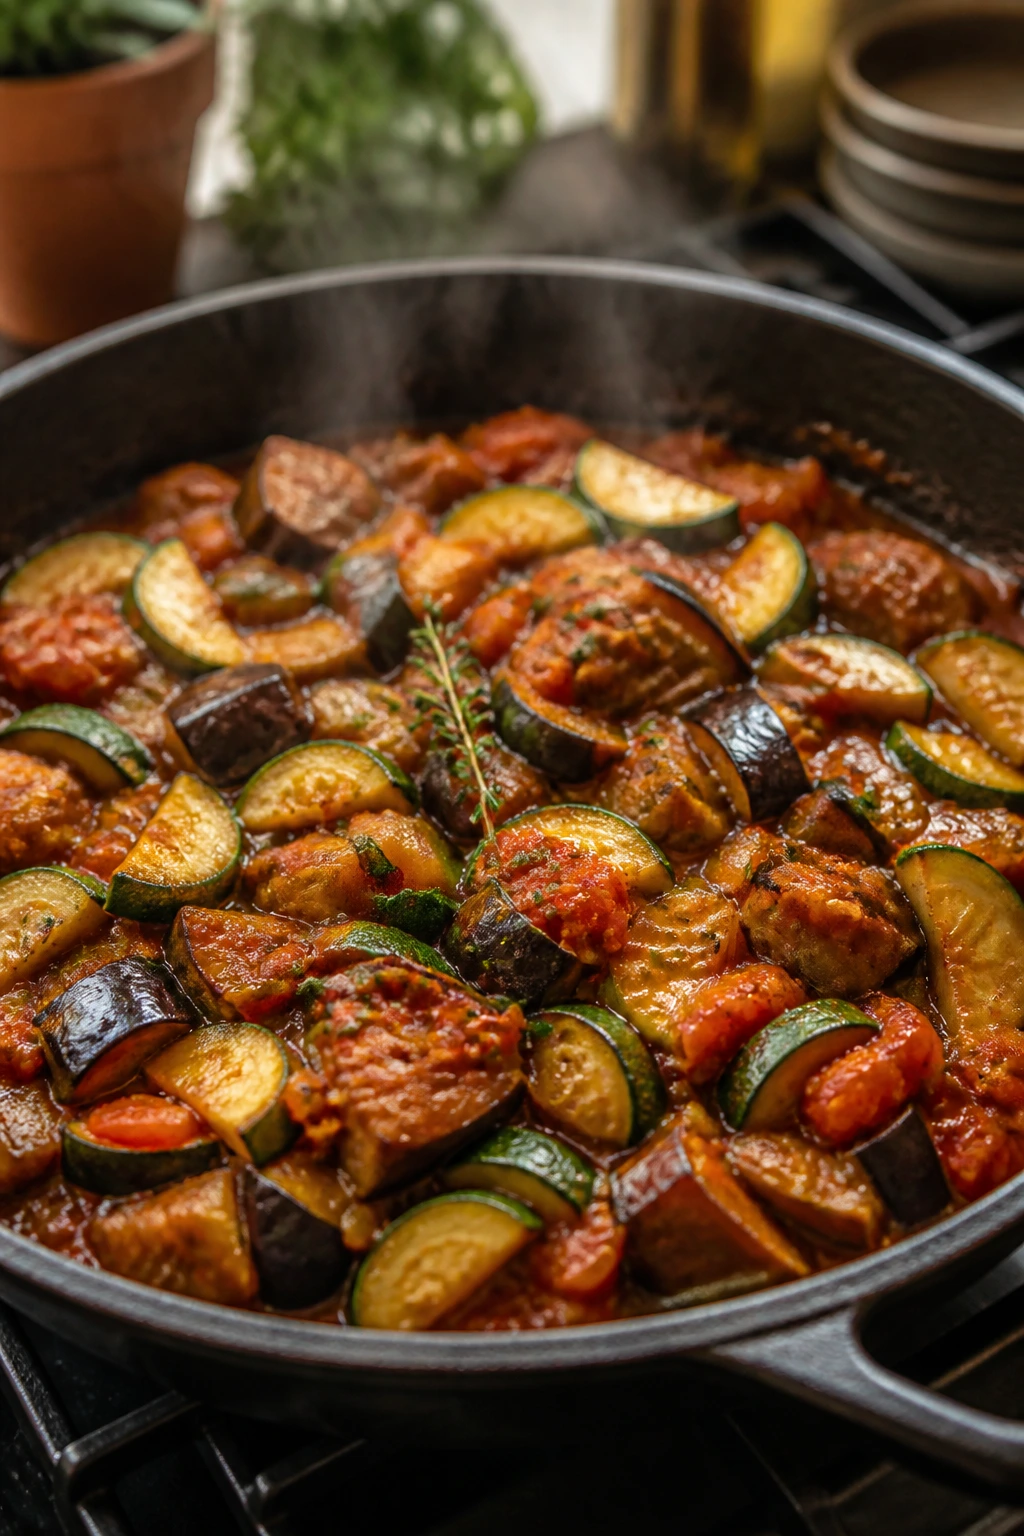
This is the kind of vegetable side that feels like it took more effort than it did. Eggplant, zucchini, tomato, and onion collapse together into a soft, savory tangle that tastes far deeper than the ingredient list suggests.
Why It Works:
Ratatouille-style cooking builds flavor by layering vegetables that each need different timing. Eggplant softens, zucchini stays intact long enough to keep shape, and tomatoes melt into the gaps.
Key Ingredients:
- 1 medium eggplant, cut into 1-inch cubes
- 2 zucchini, cut into thick half-moons
- 1 yellow onion, sliced
- 2 cups chopped tomatoes or 1 can diced tomatoes, drained
- 3 tbsp olive oil
- 3 garlic cloves, minced
- 1 tsp kosher salt
- 1/2 tsp black pepper
- 1 tsp thyme or oregano
Quick Steps:
- Heat 2 tablespoons of oil in a large skillet or Dutch oven over medium heat.
- Cook the onion for 4 to 5 minutes, then add eggplant and cook 6 minutes more.
- Stir in zucchini, garlic, tomatoes, salt, pepper, and thyme.
- Cover and cook 12 to 15 minutes, stirring once or twice, until the vegetables are soft but not collapsed into mush.
- Finish with the remaining oil if the pan looks dry.
Equipment for This Recipe:
- Large skillet or Dutch oven
- Wooden spoon
- Knife
- Cutting board
How to Serve This Dish:
Serve it with crusty bread, rice, or grilled fish. It should be saucy but not watery, with the vegetables still visible in the mix.
Pro Tips for This Recipe:
- Salt the eggplant lightly first if it’s very spongy, then blot after 10 minutes.
- Use ripe tomatoes or well-drained canned tomatoes so the dish doesn’t get thin.
- Stir gently to keep the zucchini from falling apart.
Variations on This Dish:
- Herbed Ratatouille: Add basil at the end.
- Spicy Ratatouille: Use a pinch of red pepper flakes.
- Cheesy Ratatouille: Top with grated Parmesan before serving.
Common Mistakes to Avoid with This Dish:
- Starting with too much heat: The onion and eggplant can scorch before they soften.
- Using watery tomatoes: They dilute the sauce. Drain canned tomatoes if needed.
- Overstirring: The vegetables should stay recognizable.
20. Buttered Peas with Mint

Peas are one of the easiest vegetables to wreck by overcooking them into dull little bullets. Keep them brief, add butter, and finish with mint, and they turn sweet, vivid, and almost springlike even when the rest of dinner is plain.
Why It Works:
Peas need only enough heat to warm through, which keeps their color bright and their flavor fresh. Butter and mint give them polish without drowning out the natural sweetness.
Key Ingredients:
- 3 cups frozen peas
- 2 tbsp butter
- 1 tbsp water
- 1/2 tsp kosher salt
- 1/4 tsp black pepper
- 1 tbsp chopped mint
- 1 tsp lemon juice, optional
Quick Steps:
- Melt the butter in a skillet over medium heat.
- Add the peas and water, then cover for 2 minutes.
- Uncover and cook 1 to 2 minutes more, just until hot.
- Season with salt and pepper.
- Stir in mint and lemon juice right before serving.
Equipment for This Recipe:
- Skillet or small saucepan
- Spoon
- Measuring spoons
- Small knife
How to Serve This Dish:
Serve it with roasted salmon, chicken, or rice. The peas should look glossy and bright, not pale or wrinkled.
Pro Tips for This Recipe:
- Frozen peas are better than old fresh peas most of the time; they’re picked and frozen quickly.
- Keep the cook time short or the peas lose their color.
- Mint belongs at the end or it tastes bruised.
Variations on This Dish:
- Garlic Peas: Add a small minced garlic clove with the butter.
- Creamy Peas: Stir in a spoonful of crème fraîche.
- Lemon Peas: Add zest for a cleaner, sharper taste.
Common Mistakes to Avoid with This Dish:
- Overcooking: Peas get starchy fast.
- Skipping the water splash: It helps steam them quickly.
- Adding mint too early: It loses its fresh bite.
21. Smashed Baby Potatoes with Herbs
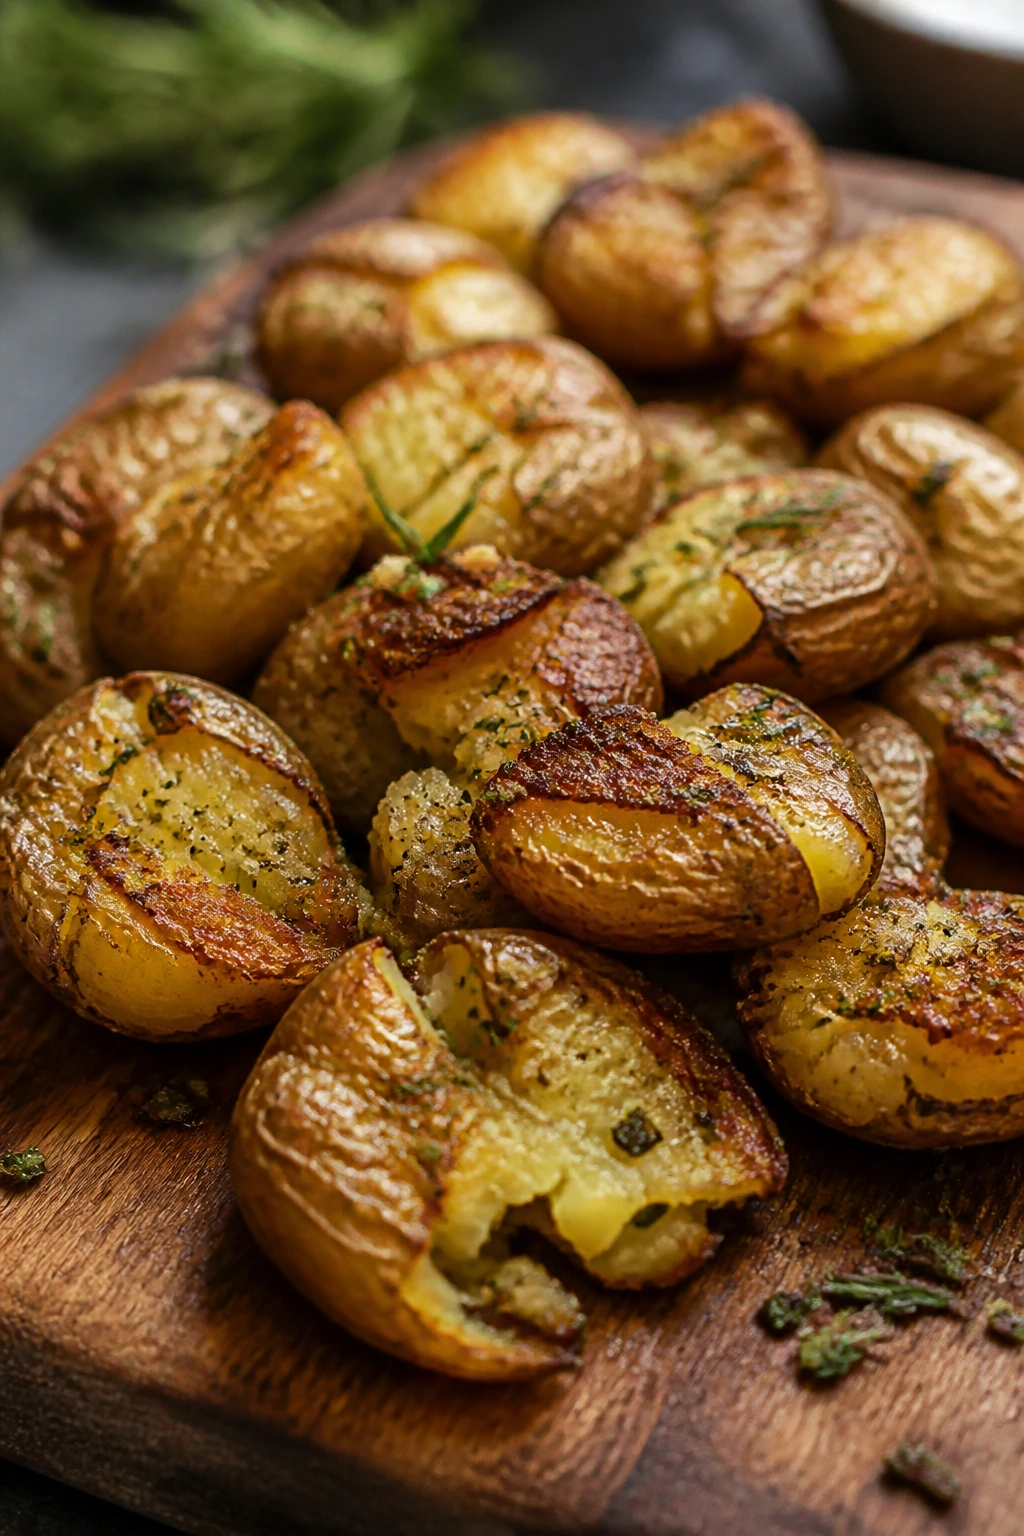
These potatoes are what happen when crisp edges meet creamy centers. You boil them, smash them, and roast them until the edges go golden and craggy enough to catch every bit of herb oil you drizzle over them.
Why It Works:
Boiling makes the centers tender, and smashing creates more surface area for browning. That extra surface is where the texture lives, and texture is what makes potatoes worth repeating.
Key Ingredients:
- 2 lbs baby potatoes
- 3 tbsp olive oil
- 1 tsp kosher salt
- 1/2 tsp black pepper
- 1 tsp chopped rosemary or thyme
- 2 garlic cloves, minced
- 1 tbsp chopped parsley
- 1 tbsp grated Parmesan, optional
Quick Steps:
- Boil the potatoes in salted water for 15 to 18 minutes, until fork-tender.
- Drain and let them steam dry for 5 minutes.
- Arrange on a sheet pan and smash each one gently with the bottom of a glass.
- Drizzle with oil, salt, pepper, rosemary, and garlic.
- Roast at 425°F for 20 to 25 minutes, until deeply browned.
- Finish with parsley and Parmesan.
Equipment for This Recipe:
- Pot
- Sheet pan
- Bottom of a glass or measuring cup
- Spatula
How to Serve This Dish:
Serve them with anything that needs a crunchy, salty side. They look best piled loosely so the crisp edges stay visible.
Pro Tips for This Recipe:
- Choose potatoes of similar size so they boil evenly.
- Let them dry after boiling or they’ll steam on the tray.
- Smash gently; you want broken skins, not mashed potatoes.
Variations on This Dish:
- Sour Cream Potato Smash: Serve with a dollop of sour cream and chives.
- Cajun Potatoes: Swap the herbs for Cajun seasoning.
- Lemon Herb Potatoes: Add lemon zest after roasting.
Common Mistakes to Avoid with This Dish:
- Smashing too hard: The potatoes fall apart and lose their structure.
- Skipping the dry steam time: Wet potatoes don’t crisp well.
- Using too little salt: Potatoes need more seasoning than they look like they do.
22. Charred Shishito Peppers with Sea Salt
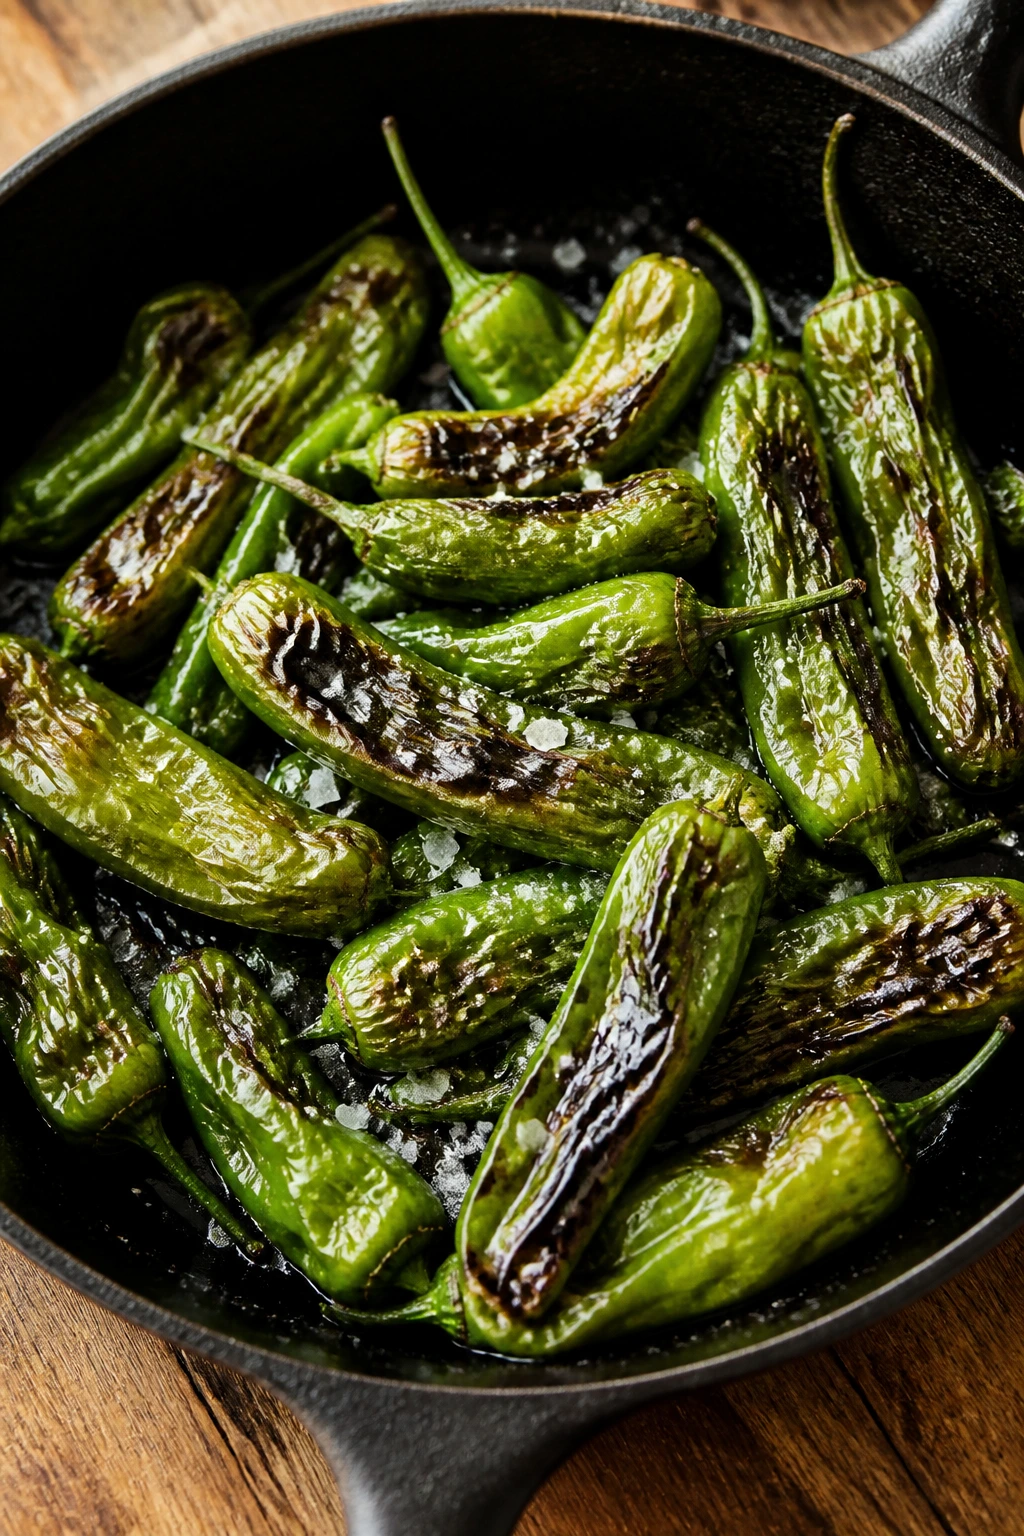
Shishito peppers are one of the easiest vegetables to cook when you want a little drama and almost no work. They blister in the pan, turn smoky around the edges, and deliver one surprise-hot pepper now and then, which keeps everyone paying attention.
Why It Works:
High heat creates blisters fast, and that char gives the peppers a sweet, almost grassy flavor underneath the salt. They’re done in minutes, which is why they’re such a useful last-minute side.
Key Ingredients:
- 8 oz shishito peppers
- 1 tbsp olive oil
- 1/2 tsp flaky sea salt
- 1 tsp lemon juice
- 1 pinch smoked paprika, optional
Quick Steps:
- Heat the oil in a large skillet over medium-high heat until shimmering.
- Add the peppers in a single layer.
- Cook for 6 to 8 minutes, turning occasionally, until blistered and lightly charred.
- Transfer to a plate and sprinkle with flaky salt.
- Finish with lemon juice or smoked paprika if you want a little extra lift.
Equipment for This Recipe:
- Large skillet
- Tongs
- Plate
- Measuring spoon
How to Serve This Dish:
Serve them with cold drinks, grilled food, or a bowl of noodles. They should look wrinkled and blistered in spots, not blackened all over.
Pro Tips for This Recipe:
- Keep the pan hot enough that the peppers blister quickly.
- Dry the peppers before cooking so they char instead of sputter.
- Don’t obsess over every pepper being evenly cooked; the uneven char is part of the appeal.
Variations on This Dish:
- Soy Shishitos: Add a tiny splash of soy sauce after cooking.
- Sesame Shishitos: Finish with sesame oil and sesame seeds.
- Spicy Salt Shishitos: Use chile salt instead of plain flaky salt.
Common Mistakes to Avoid with This Dish:
- Using low heat: The peppers turn limp before they blister.
- Overcrowding the skillet: They steam and soften.
- Salting too early: Salt can pull out water before the char forms.
Why a Hot Pan and a Hot Oven Do Most of the Work
The common thread in these vegetable side dishes is heat, not trickery. A hot sheet pan gives you browned broccoli, crisp Brussels sprouts, and sweet sweet potatoes. A hot skillet does the same for mushrooms, corn, and peas, just with a different pace and a different kind of surface.
That matters because vegetables fail in very predictable ways. They get watery when the pan is crowded. They go soft when the heat is timid. They taste flat when the salt is too timid or the acid shows up too early. Most of the time, the fix is not a complicated sauce. It’s better contact with the pan, a little more seasoning than feels safe, and enough restraint to pull the food off the heat while it still has some shape.
You can also think in terms of moisture management. Dry the vegetables after washing. Don’t add too much oil. Give roasting vegetables space. Let sautéed vegetables sit still for a minute so the pan can do its job. Those little habits are the difference between “I made a vegetable” and “we should make that again.”
And yes, some vegetables want gentler handling. Spinach, peas, asparagus, and zucchini all cook fast enough that you can ruin them by being too proud of your stove. The trick is knowing which side belongs in the hot zone and which one needs a shorter, lighter touch. Once you get that rhythm, weeknight cooking stops feeling random.
Essential Equipment for These Recipes
-
Rimmed sheet pans: The workhorse for broccoli, Brussels sprouts, carrots, sweet potatoes, cabbage, and potatoes; the rim keeps juices from sliding everywhere.
-
Large skillet: A wide skillet matters for mushrooms, corn, spinach, green beans, peas, and broccolini because surface area drives browning.
-
Large pot with colander or steamer basket: Useful for blanching green beans and cooking cauliflower or baby potatoes without turning them to mush.
-
Sharp chef’s knife: A clean cut makes even pieces, which is the difference between a tray that cooks together and one that burns in patches.
-
Cutting board that doesn’t skate around: Put a damp towel under it if needed. Sliding boards are how fingers get nicked.
-
Mixing bowls in two sizes: One for tossing vegetables with oil and seasoning, one smaller bowl for quick drizzles and sauces.
-
Tongs and a thin spatula: Tongs are better for turning broccolini and asparagus; a spatula helps with roasted vegetables that want to stay glued to the pan.
-
Microplane or fine grater: Handy for Parmesan, lemon zest, garlic, and nutmeg. The fine texture distributes flavor without clumps.
-
Whisk: Needed for gratin sauce, tahini drizzle, and any dressing that needs to come together smoothly.
-
Paper towels or clean kitchen towels: Dry vegetables before they hit heat. That step is boring. It also matters more than people want to admit.
Smart Shopping and Ingredient Tips
Choose vegetables that feel heavy for their size and look dry on the outside. Broccoli should have tight florets, not yellowing edges. Brussels sprouts should feel dense, not loose and airy. For asparagus, the spears should snap cleanly near the bottom, and the tips should still be closed.
Frozen vegetables are not a compromise in every case. Frozen peas are often better than fresh peas that have spent days sitting around. Frozen corn is perfectly useful if you thaw and dry it first. Cauliflower, broccoli, and green beans can work from frozen too, but they need more attention to moisture, and they will not roast the same way fresh ones do.
Butter, olive oil, and Parmesan are doing a lot of the flavor work in this collection, so buy the versions you actually like to taste. A bland olive oil will show up. Parmesan from the green can is not the move if you want a clean melt; finely grated cheese from a block gives a better texture. On the other hand, if all you have is the pre-grated stuff, it can still be useful in a pinch, especially for roast vegetables.
A final note on herbs: fresh thyme, dill, chives, parsley, basil, and mint each behave differently. Harder herbs like thyme and rosemary can go into the pan early. Softer herbs like basil and mint should wait until the end, or they lose their clean edge. That one habit saves more dishes than people think.
How to Serve These Recipes
Presentation:
Put roasted vegetables on warm platters instead of crowding them in bowls. Let browned sides face up whenever you can, because that’s the part people eat first with their eyes. For sauced vegetables like cauliflower gratin or ratatouille, use a shallow dish so the surface stays visible.
Accompaniments:
These sides pair with roasted chicken, seared fish, baked tofu, meatloaf, rice bowls, pasta, or a simple egg dinner. A loaf of crusty bread works especially well with the saucier dishes — ratatouille, gratin, mushrooms, and the cucumber salad if you like dipping into the dressing.
Portions:
For most weeknight dinners, plan on about 3/4 cup of roasted or sautéed vegetables per person, or a full cup if the side is the main vegetable on the plate. Heavier dishes like gratin or mashed cauliflower can sit closer to 1/2 cup per person because they’re richer.
Beverage Pairing:
A dry white wine like Sauvignon Blanc matches lemony or green vegetables nicely. For a nonalcoholic option, sparkling water with lime or unsweetened iced tea handles the salt, butter, and acid without getting in the way.
Additional Tips and Flavor Boosters
Flavor Enhancement:
A finishing acid is often what makes a side dish feel complete. Lemon juice, balsamic vinegar, rice vinegar, or a little hot honey can wake up roasted vegetables that look done but taste sleepy.
Customization:
Keep a few texture boosters around: toasted almonds, sesame seeds, breadcrumbs, or crumbled cheese. They turn soft vegetables into something with contrast, and contrast is what people remember.
Serving Suggestions:
Garnish with chopped herbs at the end, not the start. Parsley, chives, dill, and mint each read brighter when they sit on top of hot vegetables instead of getting cooked into them.
Make-It-Yours:
For dairy-free dinners, use olive oil, tahini, or a spoon of miso where butter or cheese would normally show up. For lower-sodium versions, lean harder on lemon zest, herbs, garlic, and a bit of heat so the vegetables still taste alive.
Make-Ahead, Storage, and Reheating Guidance
Roasted vegetables are best the day they’re made, especially anything with crisp edges like broccoli, Brussels sprouts, sweet potatoes, cabbage, and potatoes. They’ll keep in the refrigerator for 3 to 4 days in a covered container, but the texture softens a little after the first night.
Sautéed vegetables like mushrooms, green beans, corn, broccolini, spinach, and zucchini keep about 2 to 3 days chilled. Reheat them in a skillet over medium heat with a teaspoon of oil or butter so the surface wakes back up. A microwave works, but it tends to make the vegetables limp, especially the delicate ones.
Mashed cauliflower, cauliflower gratin, and ratatouille-style vegetables are the best candidates for make-ahead cooking. Mashed cauliflower keeps for 3 days in the fridge and can be reheated gently in a saucepan or microwave with a splash of milk. Cauliflower gratin can be baked ahead, chilled, and reheated covered at 350°F until hot, then uncovered for a few minutes to bring back the top. Ratatouille often tastes better after resting overnight because the flavors settle into each other.
Frozen storage is a mixed bag. Mashed cauliflower freezes fairly well for up to 2 months, though it may need a little extra stirring when reheated. Roasted vegetables usually lose too much texture in the freezer, so I would skip freezing those unless you plan to use them in a soup, omelet, or grain bowl later.
Cold salads like the cucumber dill salad should be made the same day if you want crisp slices. They can sit for a few hours in the fridge, but after that the cucumbers start leaking water and the dressing thins out.
Variations and Adaptations to Try
Sheet-Pan Supper Shortcut:
Pick two vegetables that roast well at the same temperature — broccoli and carrots, Brussels sprouts and sweet potatoes, cabbage and cauliflower — and keep the cuts close in size. Start the denser vegetable first, then add the quicker one partway through. That lets you build a full dinner side without watching three pans at once.
Dairy-Free Version:
Use olive oil, tahini, or a little coconut yogurt where butter, cream, or cheese would normally go. Garlic, lemon, herbs, and toasted seeds do a lot of heavy lifting here, so the dish still feels complete instead of stripped down.
Low-Sodium, Big-Flavor Version:
Cut the salt back and lean on acidity, black pepper, smoked paprika, garlic, and fresh herbs. Roasted vegetables in particular do not need much help if the browning is good; the surface caramelization carries a lot of flavor on its own.
Air Fryer Route:
Broccoli, Brussels sprouts, shishito peppers, sweet potato cubes, and asparagus all do well in the air fryer if you want faster browning. Shake the basket once or twice so the vegetables don’t stick together, and keep an eye on the last few minutes because air fryers brown aggressively.
Spice-Smart Version:
A pinch of red pepper flakes, cayenne, chili powder, or harissa can change the whole mood of the plate. Use heat where the vegetable can support it — corn, carrots, sweet potatoes, cabbage, and mushrooms all take spice well without losing their own flavor.
Cold-Weather, Warm-Weather Swap:
When you want something heavier, lean toward gratins, mashed cauliflower, roasted roots, and smashed potatoes. When the meal needs to feel lighter, choose asparagus, spinach, cucumber salad, broccolini, or shishitos and keep the finish sharp and herb-heavy.
Common Mistakes to Avoid
Crowding is the big one. If vegetables are piled on top of one another, they steam in their own moisture and go soft before they brown. Use two pans when you need to. It is not fussy. It is the difference between caramelized and sad.
Another common problem is underseasoning. Vegetables can take more salt than people expect, especially potatoes, broccoli, cauliflower, and cabbage. Season before cooking, then taste again at the end. A final pinch of salt often makes the whole dish taste more awake.
Wet vegetables are trouble. If you wash broccoli, zucchini, spinach, or green beans and toss them straight into the pan, they release water and flatten the texture. Dry them well with towels. That step is not glamorous, but it pays.
Heat timing also trips people up. Delicate vegetables like asparagus, spinach, peas, cucumber, and zucchini need short cooking windows or no heat at all. Denser vegetables like carrots, potatoes, Brussels sprouts, and cabbage need more heat and more patience. Treating them all the same is how you end up with a tray where half the food is raw and half is tired.
Finally, don’t forget that acid is a finishing move in many of these recipes. Lemon juice, vinegar, and balsamic taste brightest at the end. If you add them too early, they fade; if you leave them out entirely, the dish can taste one-dimensional.
Frequently Asked Questions
Can I mix different vegetables on one sheet pan?
Yes, but choose vegetables with similar cooking times or stagger them. Broccoli and Brussels sprouts can share a pan; asparagus and zucchini usually need their own because they finish much faster.
What vegetables are best for roasting on busy nights?
Broccoli, Brussels sprouts, carrots, sweet potatoes, cabbage, and cauliflower are the easiest bets. They hold up well at high heat and can take a little extra time without falling apart.
Can I use frozen vegetables for these recipes?
Frozen peas and corn work especially well, and frozen cauliflower or broccoli can work if you dry them thoroughly. Frozen vegetables are less reliable for high-heat roasting unless you’re fine with a softer texture.
How do I keep roasted vegetables from getting soggy?
Use a hot oven, don’t crowd the pan, and dry the vegetables after washing. If the pan is watery in the middle of cooking, the oven temperature is probably too low or the tray is too full.
Which of these sides can I make ahead?
Mashed cauliflower, cauliflower gratin, ratatouille, and cucumber salad are the best make-ahead options. Roasted vegetables are still fine the next day, but they lose some of their crisp edges.
How do I scale these recipes for a bigger dinner?
Double the ingredients, but use two sheet pans instead of one crowded pan. For skillet recipes, cook in batches so the vegetables brown instead of steaming.
What if my vegetables brown too fast before they soften?
Your oven or skillet is probably running hot, or the pieces are cut too small. Lower the heat by 25°F for roasting, or add a splash of water and briefly cover the skillet for stovetop dishes that need a little more tenderizing.
Can I make these without dairy?
Absolutely. Olive oil, tahini, lemon, herbs, and toasted nuts can stand in for butter and cheese in most of the collection. The only thing you need to watch is seasoning, because dairy often carries some of the salt and richness that you’ll need to replace.
Why do some vegetables need blanching first?
Green beans and certain sturdy greens benefit from a quick blanch because it locks in color and shortens the final cooking time. It’s a small step, but it keeps the vegetables bright and crisp instead of dull and leathery.
A Better Weeknight Habit
A good vegetable side dish does more than fill the empty corner of a plate. It gives a dinner some shape, some color, and a reason to look forward to the vegetables instead of tolerating them. That’s what these recipes do when they’re handled with enough heat, salt, and timing to let the vegetables taste like themselves.
The nice part is that none of this requires a special shopping run. A pan of broccoli, a skillet of mushrooms, or a tray of carrots can come together while the rest of dinner is already happening. Once that rhythm settles in, weeknight cooking feels less like damage control and more like a routine you can actually trust.