
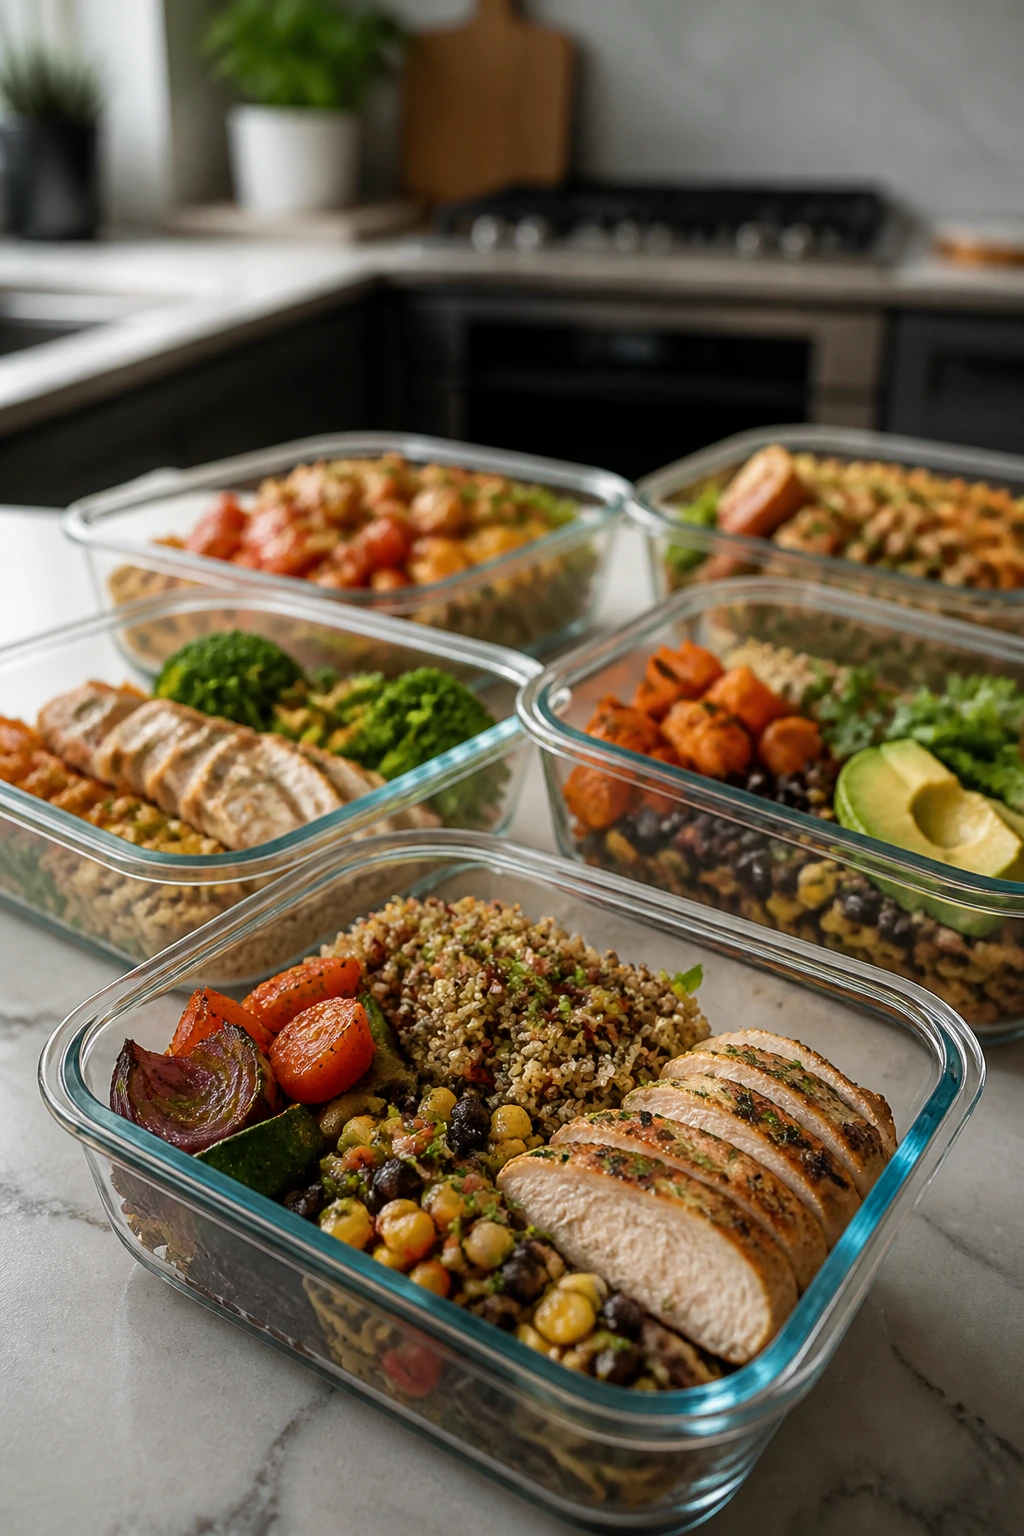
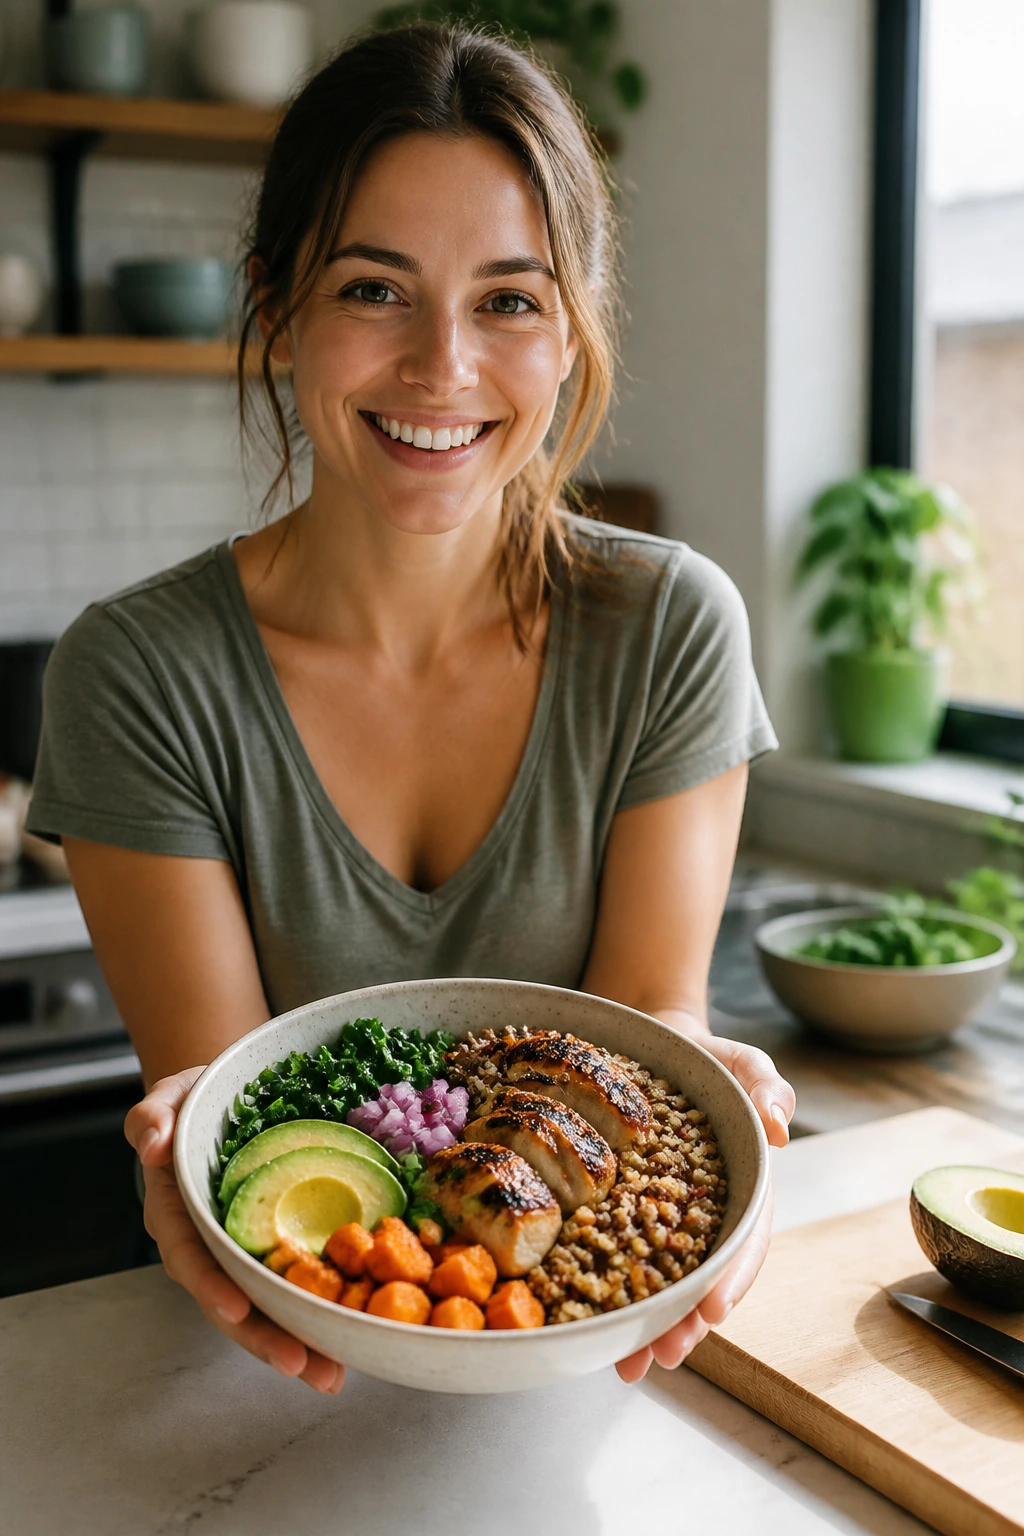
By Sunday afternoon, the fridge can look like a tiny line cook has moved in: sheet pans cooling on the counter, rice steaming in one pot, a cutting board covered with lemon zest and carrot peels, and a row of containers waiting to earn their keep. That’s the real appeal of meal prep Sundays. Not perfection. Not a color-coded fridge photo. Just enough solid food to make Tuesday feel less chaotic and Thursday night less like a rescue mission.
Healthy family meal ideas work best when they hold their shape after chilling, reheating, and getting nudged around by real life. A good prep meal needs to survive a second day in the fridge without turning limp, dry, or weirdly watery. It should also give you some wiggle room — a sauce on the side for one person, extra rice for another, a handful of herbs or cheese for whoever wants more flavor.
That’s the filter I used here. These are meals that batch-cook well, portion cleanly, and still taste like someone cared. Some are bowls. Some are soups. Some are tray bakes and skillet dinners and one breakfast idea that earns its spot because Monday mornings are not gentle. The point is simple: cook once, eat well more than once, and keep the food interesting enough that nobody starts hovering around the takeout menus.
Why These Meal Prep Sundays Keep Working After the Weekend
-
They hold texture in the fridge: These meals use grains, beans, roasted vegetables, and sturdy proteins that stay pleasant after 3 to 4 days, not mushy by lunchtime on Tuesday.
-
They leave room for picky eaters: Sauce on the side, toppings at the end, and mild seasoning first make it easier to serve the same base to adults and kids without cooking two separate dinners.
-
They reheat without drama: Rice bowls, soups, chili, meatballs, and baked casseroles all come back to life with a splash of water or a short oven reheat.
-
They make smart use of overlapping ingredients: A bunch of parsley, a bag of brown rice, a carton of Greek yogurt, and a few bell peppers can carry several meals across the week.
-
They keep lunch from feeling like leftovers punishment: These are actual meals with texture, color, and enough salt and acid to taste finished after they’ve been stored.
-
They work for real schedules: Some recipes can be portioned into lunches, some can become dinner, and a few can do both without getting awkward.
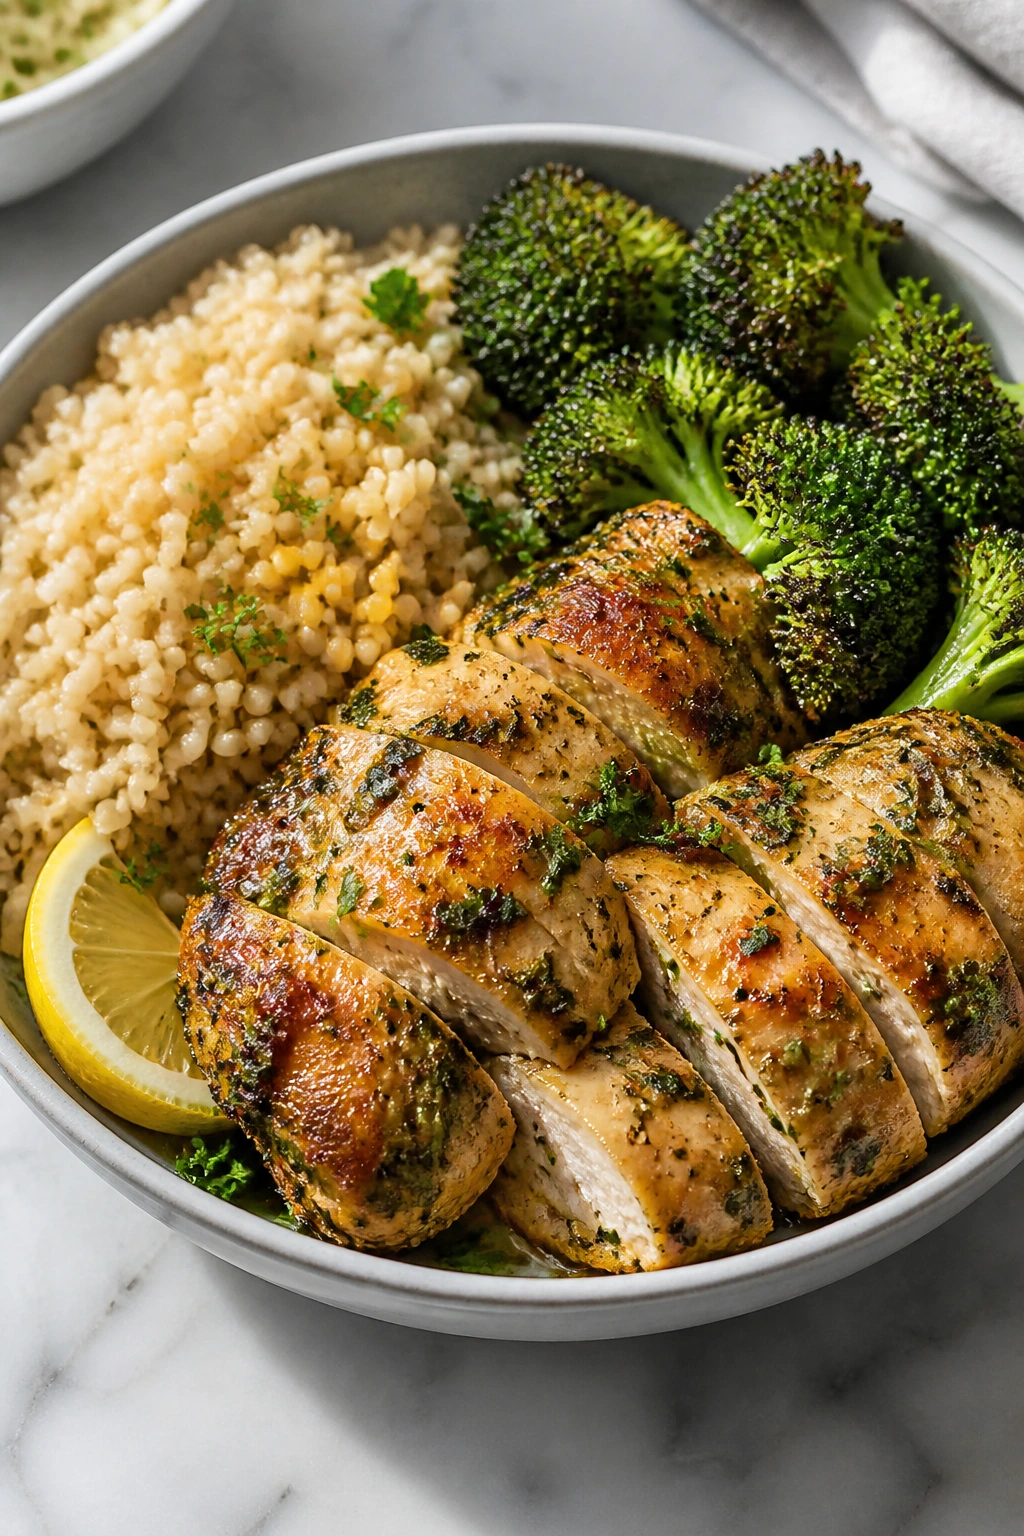
1. Lemon-Herb Chicken and Brown Rice Bowls
Intro: Bright lemon, garlicky chicken, and roasted broccoli give this bowl the kind of clean, savory flavor that still tastes good on day three. I like it with chicken thighs because they stay juicy after reheating; breasts can work, but they need a little more attention or they dry out fast.
Why It Works: This is one of those meal prep meals that improves when the parts stay separate until serving. Brown rice gives you a sturdy base, broccoli brings bite, and the lemon-herb chicken carries enough flavor to stand up after chilling. Roasting everything at 425°F keeps the broccoli from going soft and lets the chicken pick up a little color around the edges.
Key Ingredients:
- 2 lbs boneless, skinless chicken thighs
- 2 cups uncooked brown rice
- 1 large head broccoli, cut into florets
- 2 lemons, zested and juiced
- 3 tbsp olive oil
- 4 garlic cloves, minced
- 2 tsp dried oregano
- 1 tsp kosher salt
- 1/2 tsp black pepper
- 1/2 cup plain Greek yogurt, optional for a sauce
Quick Steps:
- Cook the rice: Rinse 2 cups brown rice, then simmer with 4 cups water and a pinch of salt until tender, about 35 to 40 minutes.
- Season the chicken: Toss the chicken thighs with lemon zest, lemon juice, olive oil, garlic, oregano, salt, and pepper.
- Roast the broccoli: Spread the florets on a lined sheet pan, toss with a little olive oil and salt, and roast at 425°F for 18 to 22 minutes until the edges are browned.
- Cook the chicken: Roast the chicken on a separate pan for 20 to 25 minutes, until the thickest piece reaches 165°F and the juices run clear.
- Make the sauce: Stir Greek yogurt with a squeeze of lemon juice, a pinch of salt, and a tablespoon of water if you want it looser.
- Portion and chill: Divide rice, chicken, and broccoli into containers, then keep the sauce in a small cup so the rice stays dry.
Equipment for This Recipe:
- Rimmed sheet pan
- Medium saucepan with lid
- Instant-read thermometer
- Mixing bowl and tongs
How to Serve This Dish: Spoon the bowls warm and finish with lemon wedges and chopped parsley. A few cucumber slices or a quick tomato salad on the side make the plate feel fresher without adding much work.
Pro Tips for This Recipe:
- Use thighs if you can; they reheat with fewer dry spots.
- Let the rice cool for 10 minutes before sealing the containers so condensation doesn’t build up.
- Roast the broccoli in a single layer or it steams instead of browning.
- If your lemons are small, keep one extra on hand for the sauce.
Variations on This Dish:
- Mediterranean Feta Finish: Add crumbled feta and sliced olives after reheating.
- Dairy-Free Lemon Drizzle: Skip the yogurt and finish with more lemon juice and olive oil.
- Garlic-Paprika Version: Add 1 teaspoon smoked paprika to the chicken for a deeper, warmer flavor.
Common Mistakes to Avoid with This Dish:
- Packing everything wet: Sauce on the rice makes the bowl soggy by day two. Keep it separate.
- Overcrowding the pan: Too many broccoli florets at once means pale, soft vegetables instead of browned edges.
- Skipping the thermometer: Chicken thighs feel forgiving, but a quick check keeps them juicy and safe.
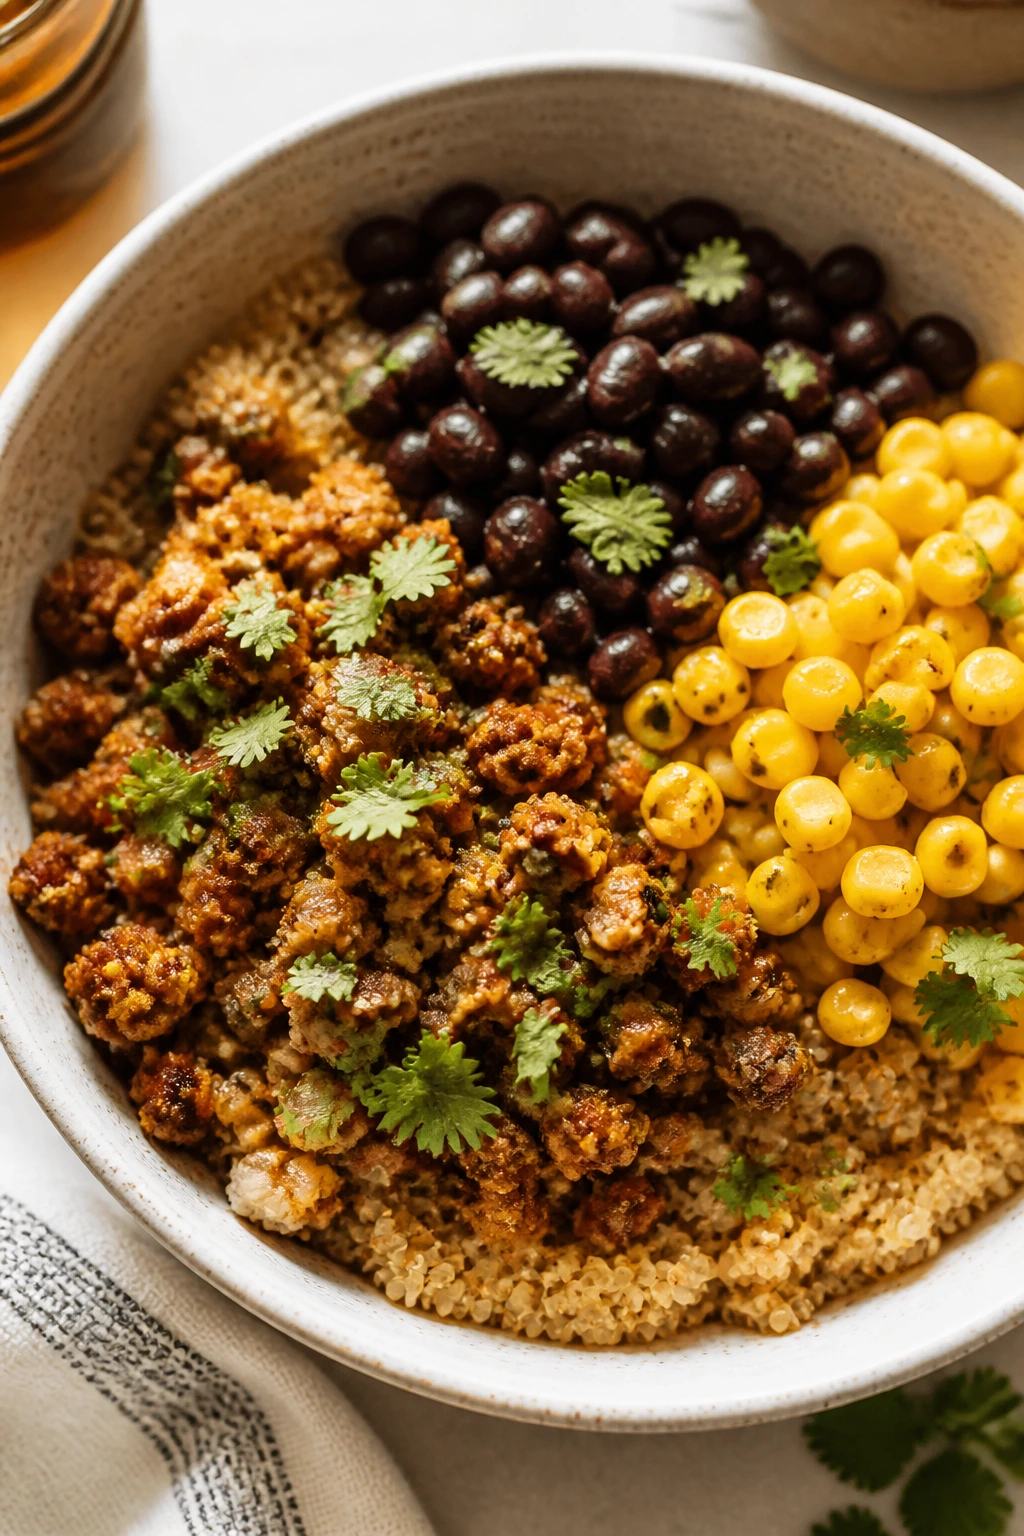
2. Turkey Taco Quinoa Bowls with Black Beans and Corn
Intro: These bowls are all about warm spice, a little sweetness from corn, and the sort of savory turkey filling that makes a lunch container look more interesting than it has any right to. Quinoa keeps the base light but still filling, and the black beans give the bowl some real staying power.
Why It Works: Ground turkey cooks fast, so you can batch it in under 15 minutes and still get a ton of flavor with cumin, chili powder, and tomato paste. Quinoa handles the fridge better than most grains because it stays fluffy instead of gluey. Add avocado or salsa only when serving, and you avoid the gray, sad-lunch effect.
Key Ingredients:
- 2 lbs lean ground turkey
- 1 1/2 cups uncooked quinoa, rinsed
- 1 can black beans, drained and rinsed
- 1 1/2 cups frozen corn
- 1 small onion, diced
- 3 cloves garlic, minced
- 2 tbsp tomato paste
- 2 tsp chili powder
- 1 tsp ground cumin
- 1 tsp kosher salt
- 1 lime, juiced
- 1 avocado, sliced, optional
Quick Steps:
- Cook the quinoa: Simmer quinoa with 3 cups water until the grains open and the water is absorbed, about 15 minutes.
- Brown the turkey: Cook the turkey and onion in a skillet over medium-high heat until no pink remains and the edges start to brown, about 8 to 10 minutes.
- Build the filling: Stir in garlic, tomato paste, chili powder, cumin, salt, black beans, corn, and 1/4 cup water. Cook 3 to 4 minutes until the mixture looks glossy and thick.
- Finish with lime: Turn off the heat and add lime juice so the filling tastes brighter after chilling.
- Assemble containers: Divide quinoa, turkey filling, and any extra corn evenly.
- Add toppings later: Pack avocado, salsa, or yogurt separately so they don’t turn the bowl watery.
Equipment for This Recipe:
- Large skillet
- Fine-mesh sieve for rinsing quinoa
- Medium saucepan
- Meal prep containers
How to Serve This Dish: Top each bowl with chopped cilantro, shredded lettuce, or a spoonful of salsa. If you want it more dinner-like, add warm tortillas on the side and let everyone build their own.
Pro Tips for This Recipe:
- Rinse quinoa well or it can taste faintly bitter.
- Let the turkey mixture cook until the tomato paste darkens a shade; that’s where the flavor gets fuller.
- A pinch of smoked paprika makes the filling taste like it cooked longer than it did.
- If you like heat, keep hot sauce separate and add it after reheating.
Variations on This Dish:
- Southwest Sweet Potato Bowls: Add roasted sweet potato cubes for more texture and a little sweetness.
- Creamy Chipotle Version: Stir chipotle yogurt into the finished bowl instead of plain salsa.
- Vegetarian Bean Swap: Replace turkey with an extra can of black beans plus 1 cup chopped mushrooms.
Common Mistakes to Avoid with This Dish:
- Overcooking the quinoa: Mushy quinoa turns the whole bowl heavy. Pull it when the water is absorbed and the grains show those little tails.
- Adding avocado too early: It browns and softens. Always pack it separately.
- Underseasoning the turkey: Plain ground turkey needs salt and spices in the pan, not just a dump of salsa later.
3. Sheet-Pan Salmon with Sweet Potatoes and Green Beans
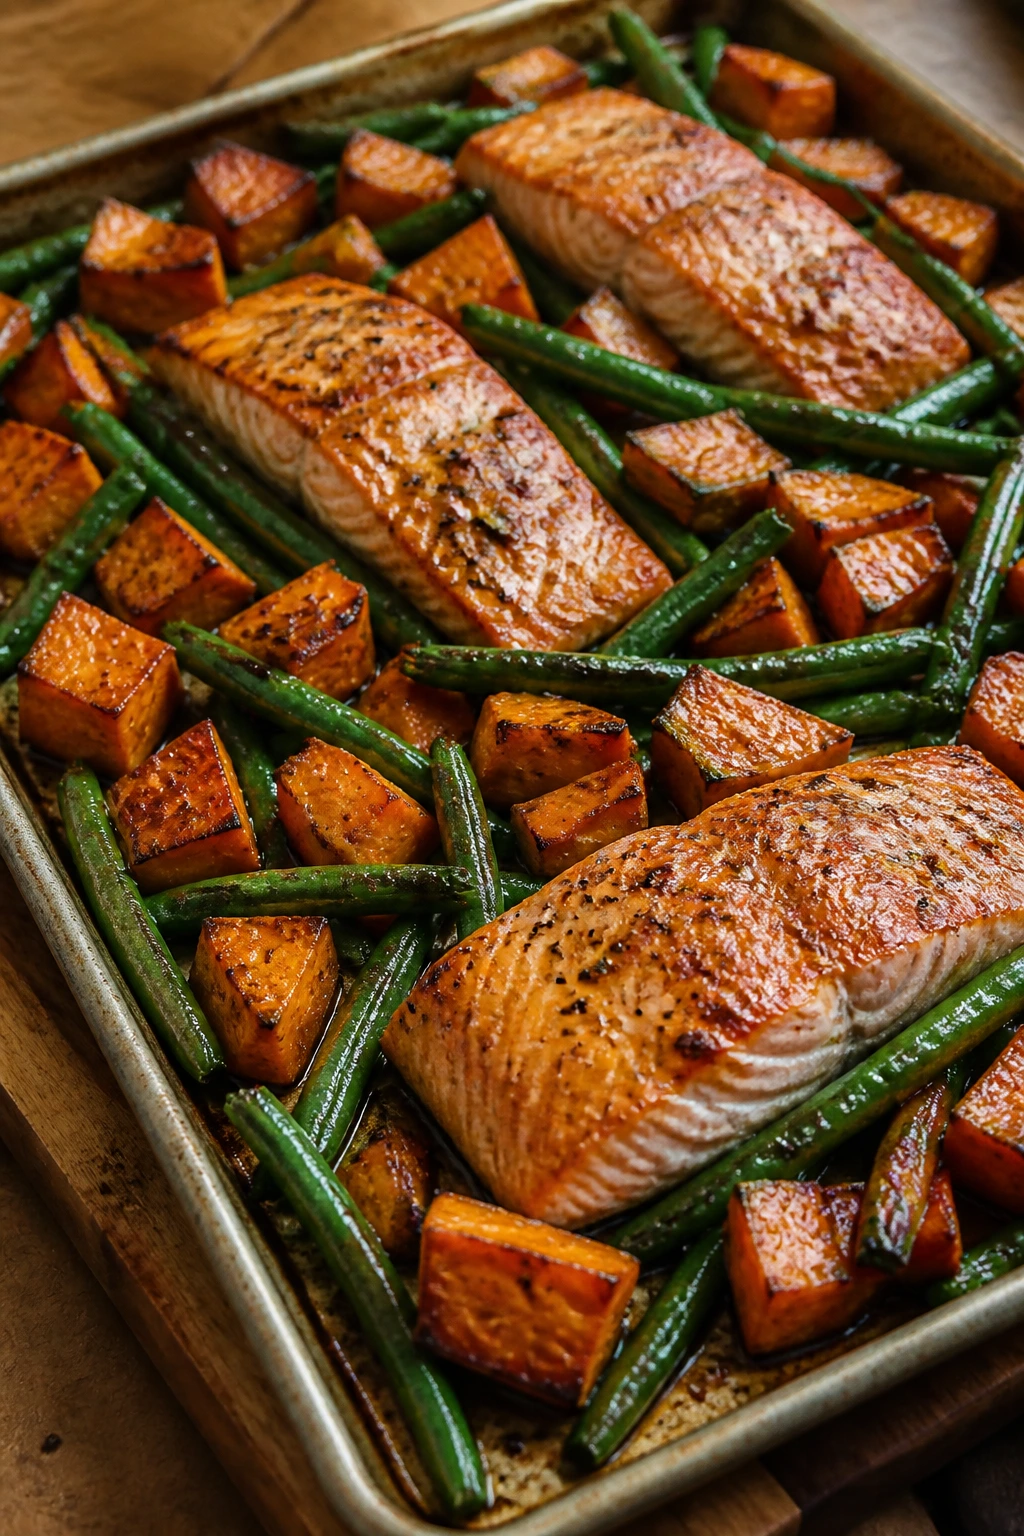
Intro: Salmon is the meal prep wildcard that can either feel elegant or feel like a fridge chore. This version stays on the right side of that line because sweet potatoes roast into caramelized edges, green beans keep a bit of snap, and the salmon gets a quick honey-mustard glaze that tastes polished without being fussy.
Why It Works: The sweet potatoes start first because they need a head start, and that’s the trick that keeps the whole pan on the same timeline. Salmon cooks fast at 400°F, so it stays moist if you pull it the moment it flakes in thick, glossy pieces. The glaze also helps because acid and honey make reheated salmon taste less flat.
Key Ingredients:
- 4 salmon fillets, about 6 oz each
- 2 medium sweet potatoes, peeled and cubed
- 12 oz green beans, trimmed
- 2 tbsp olive oil
- 1 tbsp Dijon mustard
- 1 tbsp honey
- 1 lemon, sliced and juiced
- 2 cloves garlic, minced
- 1 tsp kosher salt
- 1/2 tsp black pepper
- 1/2 tsp dried thyme
Quick Steps:
- Roast the sweet potatoes: Toss the cubes with olive oil, half the salt, and thyme, then roast at 400°F for 15 minutes.
- Make the glaze: Stir Dijon, honey, lemon juice, garlic, and black pepper together.
- Add the salmon and beans: Push the potatoes to one side, add the salmon and green beans, and brush the glaze over the fish.
- Finish roasting: Cook 10 to 12 minutes more, until the salmon flakes and the beans are bright green with a little blistering.
- Cool before boxing: Let the fish rest 5 minutes so it doesn’t steam itself apart in the container.
- Pack carefully: Place the salmon on top of the vegetables or in a separate section so the glaze doesn’t soak the beans.
Equipment for This Recipe:
- Large rimmed sheet pan
- Small bowl for the glaze
- Fish spatula
- Parchment paper
How to Serve This Dish: I like this with a lemon wedge and a spoonful of plain yogurt mixed with dill. A little quinoa or couscous works if you want a bigger dinner, but the pan is complete on its own.
Pro Tips for This Recipe:
- Cut sweet potatoes into even cubes, or the tiny pieces burn before the big ones soften.
- Use skin-on salmon if you can; it holds together better after reheating.
- Don’t drown the fish in glaze. A thin coat is enough.
- Green beans need space on the pan or they go leathery at the tips.
Variations on This Dish:
- Dill-Yogurt Finish: Add a cold dill yogurt sauce after reheating for extra moisture.
- Maple-Mustard Version: Swap honey for maple syrup if that’s what’s in the cupboard.
- Asparagus Swap: Use asparagus instead of green beans, but add it in the last 8 minutes so it doesn’t overcook.
Common Mistakes to Avoid with This Dish:
- Cooking salmon too long: It keeps cooking after it leaves the oven. Pull it while the center is still barely translucent.
- Packing hot fish: The trapped steam softens the vegetables and makes the salmon smell stronger than it should.
- Using a crowded pan: Overlap ruins the roast on both the potatoes and the beans.
4. Chickpea Coconut Curry with Spinach and Jasmine Rice
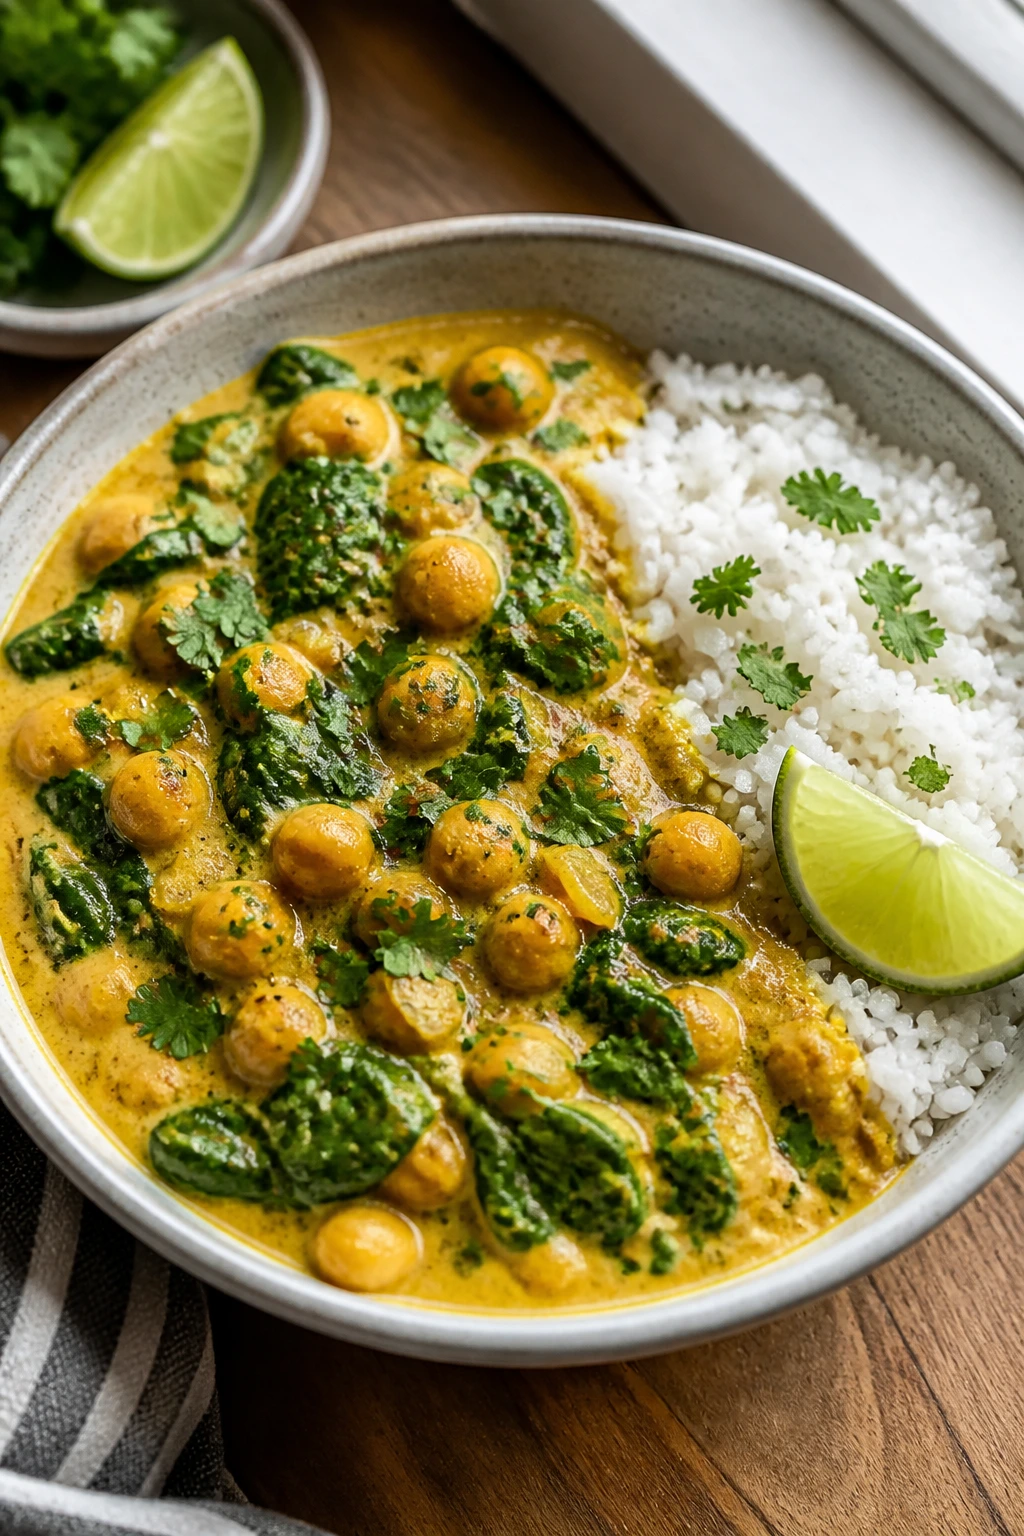
Intro: This is the kind of meatless meal that doesn’t act like a compromise. The curry is silky, the chickpeas stay intact, and the spinach disappears into the sauce in the best way, leaving behind color and a little iron-rich heft without turning stringy or bitter.
Why It Works: Coconut milk gives the sauce enough body to reheat cleanly, while chickpeas and rice create a steady, filling base. Curry paste or curry powder brings the depth, but the real trick is a small splash of lime at the end — that keeps the flavor from flattening in the fridge. It’s one of the few vegetarian prep meals that still feels good after a second microwave round.
Key Ingredients:
- 2 cans chickpeas, drained and rinsed
- 1 can full-fat coconut milk
- 1 1/2 cups uncooked jasmine rice
- 1 medium onion, sliced
- 3 cloves garlic, minced
- 1 tbsp grated fresh ginger
- 2 tbsp red curry paste
- 2 cups baby spinach
- 1 tbsp olive oil
- 1 tsp kosher salt
- 1 lime, juiced
- 1 cup low-sodium vegetable broth
Quick Steps:
- Cook the rice: Simmer jasmine rice according to package directions until fluffy, then spread it on a tray for a few minutes so it doesn’t clump.
- Build the base: Cook onion in olive oil over medium heat until soft and lightly golden, about 6 to 8 minutes.
- Toast the aromatics: Stir in garlic, ginger, and curry paste for 30 seconds until fragrant.
- Simmer the curry: Add coconut milk, broth, chickpeas, and salt. Simmer 10 to 12 minutes until slightly thickened.
- Wilt the spinach: Stir in spinach and lime juice just until it collapses.
- Portion with rice: Spoon curry over rice and cool before sealing the containers.
Equipment for This Recipe:
- Large saucepan or deep skillet
- Wooden spoon
- Measuring cups
- Airtight containers
How to Serve This Dish: Top with cilantro, sliced scallions, or a spoonful of plain yogurt if you want it milder. A handful of chopped cucumber on the side gives the meal some crunch, which this bowl appreciates.
Pro Tips for This Recipe:
- Full-fat coconut milk reheats more smoothly than light coconut milk.
- Let the curry simmer long enough to lose the raw edge of the paste.
- If you want more vegetable bulk, add diced carrots with the onions.
- Keep the rice and curry separate for the best texture.
Variations on This Dish:
- Peanut-Lime Twist: Stir in 1 tablespoon peanut butter and extra lime juice for a richer sauce.
- Cauliflower Add-In: Roast cauliflower florets first, then fold them in near the end.
- Mild Family Version: Use half the curry paste and add more coconut milk for a gentler flavor.
Common Mistakes to Avoid with This Dish:
- Boiling the coconut milk hard: It can separate. Keep the simmer gentle.
- Skipping the acid: Lime juice wakes the curry up after chilling.
- Overfilling the containers while hot: The steam weakens the spinach and makes the rice wet.
5. Beef and Broccoli Stir-Fry with Brown Rice
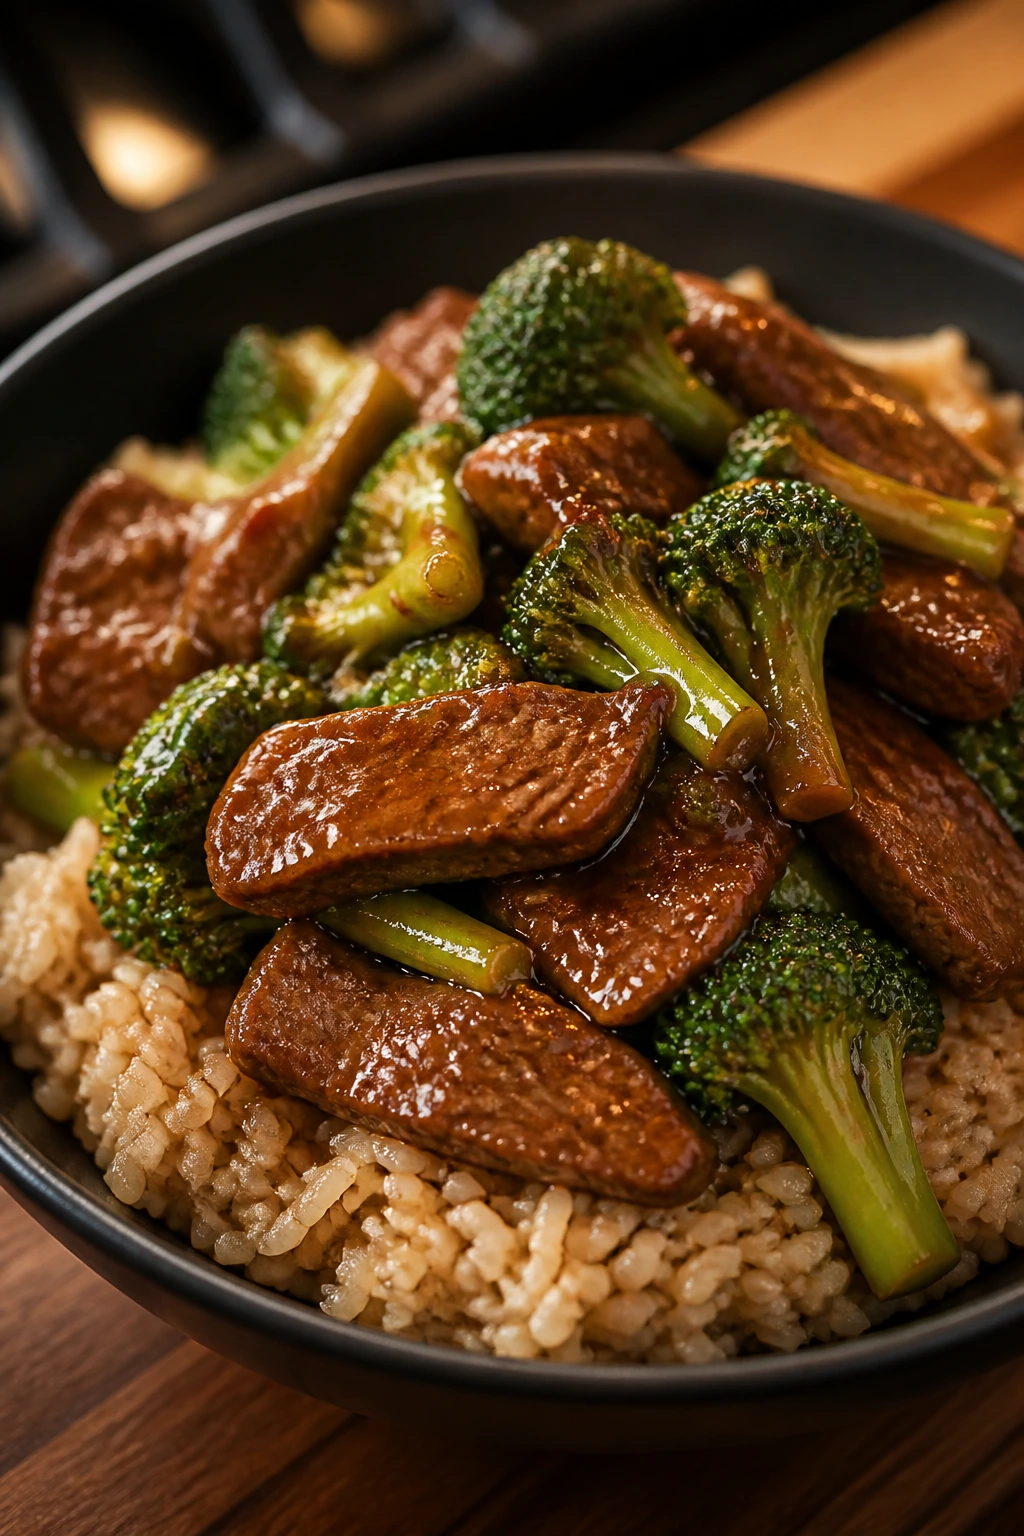
Intro: Beef and broccoli sounds like takeout, but the home version can be cleaner, less salty, and better suited to meal prep if you slice the beef thin enough. I like flank steak here because it sears fast and stays tender when you reheat it with sauce.
Why It Works: The sauce is balanced — soy sauce, ginger, garlic, and a little cornstarch for body — so it clings to the beef instead of puddling at the bottom of the container. Broccoli holds its shape nicely if you blanch or stir-fry it briefly before mixing everything together. Brown rice gives the whole thing a sturdier, more fiber-friendly base than white rice.
Key Ingredients:
- 1 1/2 lbs flank steak, thinly sliced against the grain
- 1 large head broccoli, cut into florets
- 2 cups uncooked brown rice
- 1/4 cup low-sodium soy sauce
- 2 tbsp oyster sauce
- 1 tbsp cornstarch
- 1 tbsp sesame oil
- 3 cloves garlic, minced
- 1 tbsp grated ginger
- 1 tbsp olive oil
- 1 tsp honey
- 1/4 cup water
Quick Steps:
- Cook the rice: Prepare brown rice and keep it warm.
- Mix the sauce: Whisk soy sauce, oyster sauce, cornstarch, honey, and water until smooth.
- Sear the beef: Cook the sliced steak in a hot skillet with olive oil for 1 to 2 minutes per side until browned but still tender; remove it.
- Cook the broccoli: Stir-fry the broccoli with a splash of water for 3 to 4 minutes until bright green and just tender.
- Finish the stir-fry: Add garlic, ginger, beef, and sauce to the pan. Cook 1 to 2 minutes until the sauce turns glossy and coats the meat.
- Pack with rice: Divide the rice and stir-fry into containers, then cool before sealing.
Equipment for This Recipe:
- Large skillet or wok
- Sharp knife for thin slicing
- Small whisking bowl
- Rice cooker or saucepan
How to Serve This Dish: Finish with sesame seeds and sliced scallions. If your family likes heat, add chili crisp at the table instead of mixing it in early.
Pro Tips for This Recipe:
- Freeze the beef for 15 minutes before slicing; it’s easier to cut thin.
- Don’t crowd the pan, or the beef steams instead of browning.
- Keep the broccoli a little firm; it softens during reheating.
- Use low-sodium soy sauce or the sauce can taste harsh after a day in the fridge.
Variations on This Dish:
- Honey-Garlic Version: Add a little more honey and extra garlic for a sweeter glaze.
- Snow Pea Swap: Use snow peas in place of broccoli for a faster cook time.
- Ginger-Lime Twist: Add lime juice at the end for a brighter, fresher finish.
Common Mistakes to Avoid with This Dish:
- Slicing with the grain: That gives you chewy strips. Cut across the grain.
- Cooking the beef too long: Thin steak only needs a quick sear.
- Pouring in the sauce too early: The cornstarch can clump if the pan isn’t hot enough.
6. Greek Chicken Pasta Salad with Cucumbers, Tomatoes, and Feta
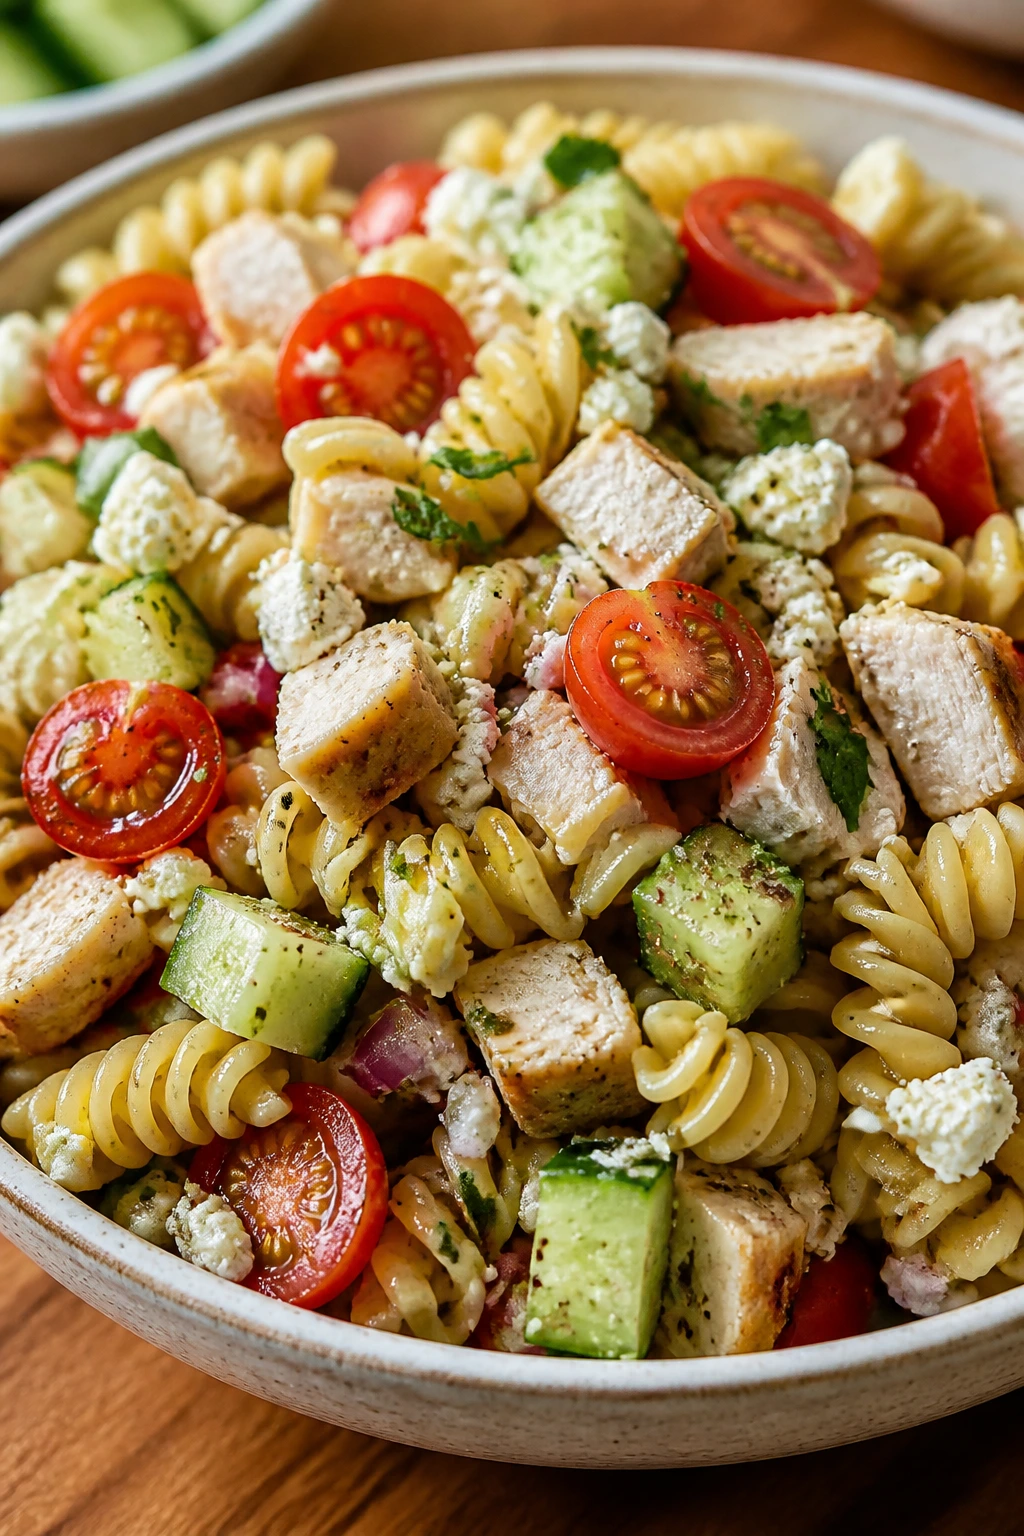
Intro: This is the lunchbox meal that actually tastes lively cold. There’s briny feta, crunchy cucumber, tomatoes that still have some snap, and chicken that gets better after a night in the dressing rather than worse, which is rare and lovely.
Why It Works: Pasta salad is one of the best meal prep moves because it can be eaten straight from the fridge with no reheating at all. The trick is using a shape that holds dressing — rotini, fusilli, or bow ties — and tossing it with enough acid so the flavors don’t dull after chilling. The cucumbers and tomatoes need to be seeded or patted dry a bit, or the bowl gets watery.
Key Ingredients:
- 12 oz rotini pasta
- 2 cups cooked chicken breast or thighs, chopped
- 1 cucumber, diced
- 1 pint cherry tomatoes, halved
- 1/2 red onion, thinly sliced
- 3/4 cup feta, crumbled
- 1/4 cup extra-virgin olive oil
- 3 tbsp red wine vinegar
- 1 tbsp lemon juice
- 1 tsp dried oregano
- 1 tsp kosher salt
- 1/2 tsp black pepper
Quick Steps:
- Cook the pasta: Boil until just tender, then drain and rinse briefly under cool water.
- Mix the dressing: Whisk olive oil, vinegar, lemon juice, oregano, salt, and pepper.
- Combine the base: Toss pasta with chicken, cucumber, tomatoes, and red onion in a large bowl.
- Add the feta: Fold in feta gently so it doesn’t disappear into crumbs.
- Dress and chill: Pour the dressing over the salad and mix well. Chill for at least 30 minutes.
- Refresh before serving: Add a small drizzle of olive oil or lemon juice if the pasta has absorbed most of the dressing.
Equipment for This Recipe:
- Large pot
- Colander
- Large mixing bowl
- Sharp knife and cutting board
How to Serve This Dish: Serve it cold with extra feta and a few olives scattered on top. A piece of pita or a handful of chopped romaine turns it into a fuller lunch without much effort.
Pro Tips for This Recipe:
- Salt the pasta water well; the salad tastes flat if the noodles are underseasoned.
- Chop the chicken into bite-size pieces so every forkful feels balanced.
- If you have time, marinate the red onion in vinegar for 10 minutes to soften the bite.
- Keep tomatoes and cucumbers as dry as possible before mixing.
Variations on This Dish:
- Tuna-Spin Version: Swap chicken for drained tuna and add baby spinach just before eating.
- Orzo Shortcut: Use orzo if that’s what’s in the pantry, but cool it fully so it doesn’t clump.
- Dairy-Light Version: Leave out the feta and add chopped olives for saltiness instead.
Common Mistakes to Avoid with This Dish:
- Overcooking the pasta: Soft pasta gets gummy after chilling.
- Dressing too early with warm noodles: They soak up too much dressing and turn heavy.
- Using wet cucumbers: That’s how you get a puddle at the bottom of the container.
7. Turkey Meatballs with Marinara, Zucchini, and Whole-Wheat Spaghetti
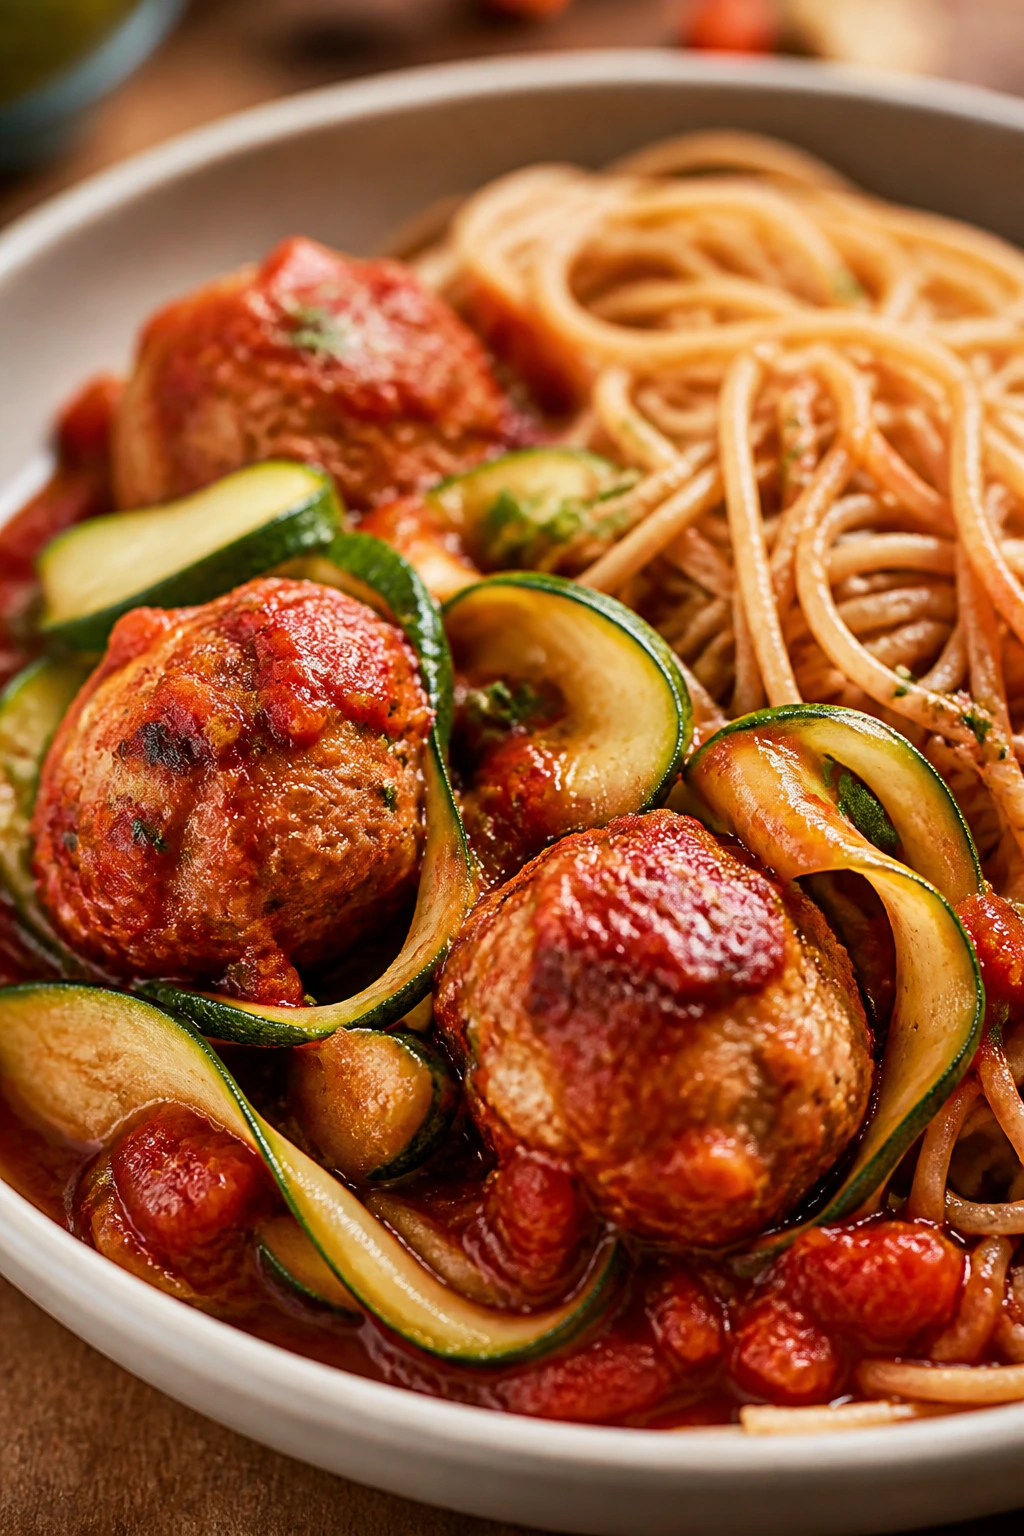
Intro: Meatballs are one of those family meals that still feels like dinner, even after you’ve portioned it into five lunch containers. Turkey keeps them lighter than beef, zucchini sneaks in extra vegetables without making a scene, and whole-wheat spaghetti gives the whole plate enough body for reheating.
Why It Works: Turkey meatballs are sturdy enough to bake in batches and hold their shape in sauce. Baking instead of frying keeps the prep cleaner and makes a bigger batch manageable on a Sunday. The marinara does the heavy lifting for flavor, while the zucchini adds moisture and softens into the sauce without taking over.
Key Ingredients:
- 2 lbs ground turkey
- 1 cup breadcrumbs
- 1 egg
- 1/4 cup grated Parmesan
- 2 cloves garlic, minced
- 2 tsp Italian seasoning
- 1 tsp kosher salt
- 1/2 tsp black pepper
- 2 medium zucchini, diced
- 4 cups marinara sauce
- 12 oz whole-wheat spaghetti
Quick Steps:
- Form the meatballs: Mix turkey, breadcrumbs, egg, Parmesan, garlic, seasoning, salt, and pepper until just combined. Roll into 1 1/2-inch balls.
- Bake the meatballs: Arrange on a lined baking sheet and bake at 400°F for 15 to 18 minutes, until they reach 165°F.
- Cook the pasta: Boil spaghetti until al dente, then drain.
- Warm the sauce: Simmer marinara with diced zucchini for 5 to 7 minutes until the zucchini softens.
- Coat the meatballs: Add baked meatballs to the sauce and simmer 3 to 5 minutes.
- Pack smartly: Portion pasta, meatballs, and extra sauce together so the noodles don’t dry out.
Equipment for This Recipe:
- Rimmed baking sheet
- Large saucepan
- Mixing bowl
- Measuring spoons
How to Serve This Dish: A little extra Parmesan and chopped parsley finish the bowl nicely. Garlic bread is optional, but a crisp green salad next to the pasta makes the meal feel less heavy.
Pro Tips for This Recipe:
- Don’t overmix the turkey or the meatballs get dense.
- Wet your hands slightly when rolling so the mixture doesn’t stick.
- Slightly undercook the pasta if you know it’ll be reheated later.
- If the sauce seems thin, simmer it a few more minutes before packing.
Variations on This Dish:
- Spinach-Stuffed Version: Fold chopped spinach into the meatball mix for more greens.
- Spicy Arrabbiata Twist: Use a peppery marinara and add chili flakes.
- Gluten-Free Swap: Use gluten-free breadcrumbs and pasta; the texture stays close if you don’t overcook either one.
Common Mistakes to Avoid with This Dish:
- Packing dry pasta alone: It turns firm and bland fast. Always add sauce.
- Skipping the bake check: Underdone meatballs can look browned outside and still be raw inside.
- Using watery zucchini slices too large: Dice them small so they melt into the sauce instead of floating around.
8. Hearty Lentil and Vegetable Soup
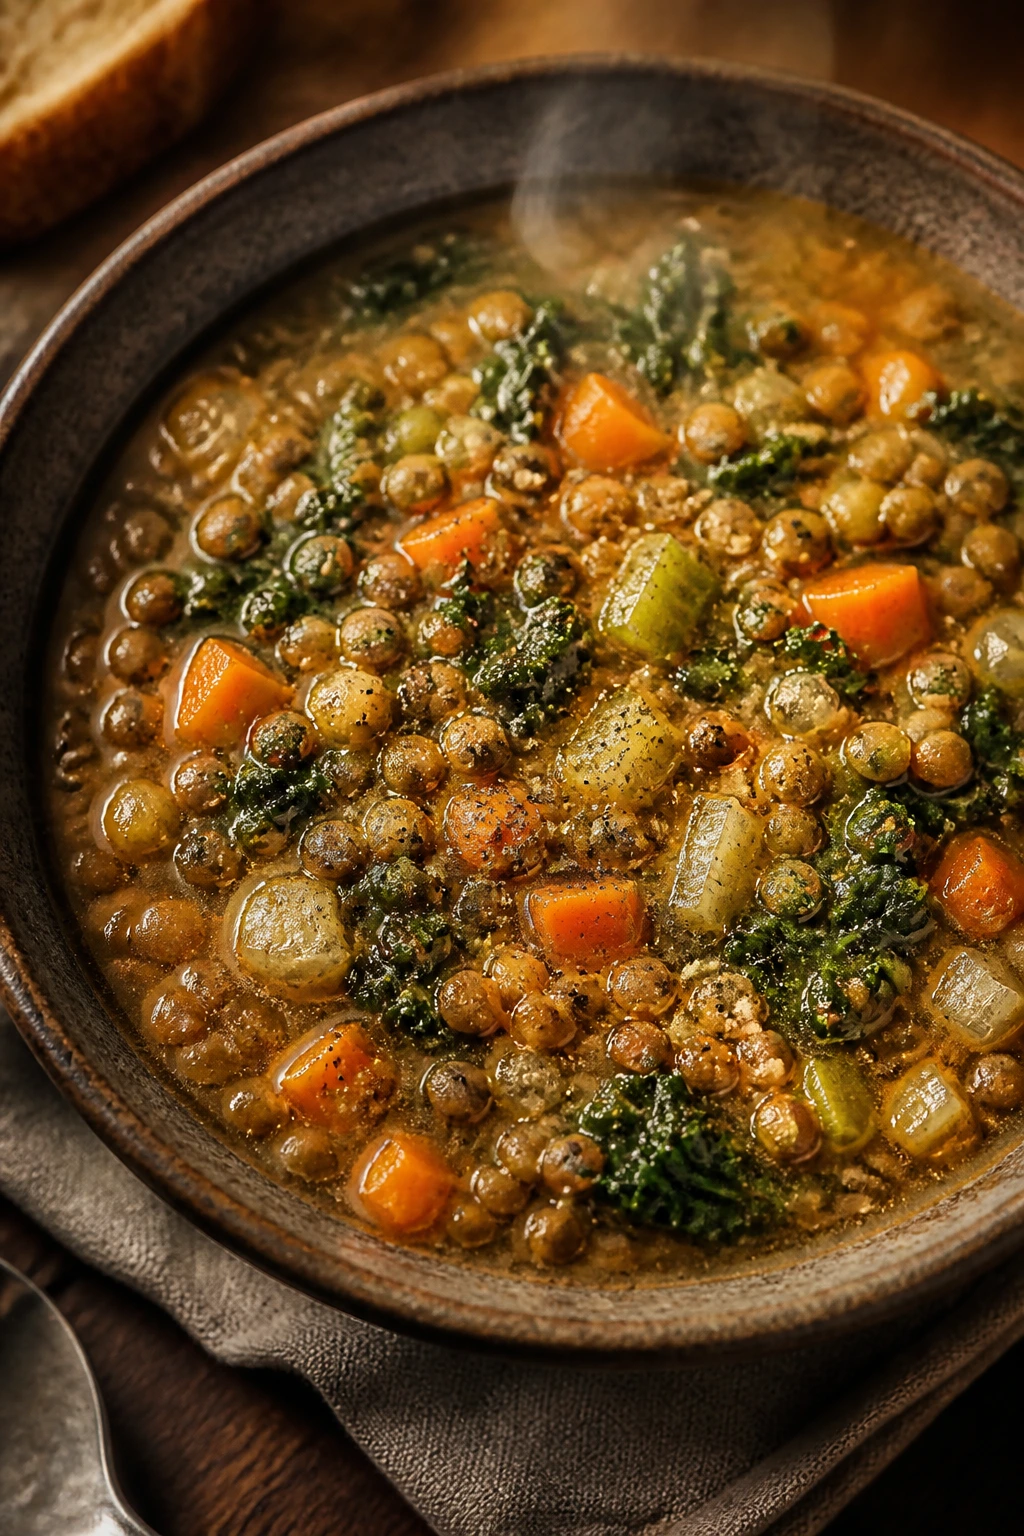
Intro: Lentil soup is the quiet workhorse of meal prep. It thickens as it sits, which is exactly what you want, and it gives you a pot of food that can become lunch, dinner, or a late bowl with a slice of toast if somebody gets home hungry and impatient.
Why It Works: Lentils cook faster than beans, don’t need soaking, and hold their shape better than people expect. The soup base — onion, carrot, celery, garlic, tomatoes, broth — tastes deeper after a day in the fridge because the lentils carry the seasonings through the liquid. Kale or spinach can go in at the end without turning the soup murky.
Key Ingredients:
- 2 cups brown or green lentils, rinsed
- 1 onion, diced
- 2 carrots, diced
- 2 celery stalks, diced
- 3 cloves garlic, minced
- 1 can diced tomatoes
- 8 cups low-sodium vegetable or chicken broth
- 2 cups chopped kale
- 2 tbsp olive oil
- 1 tsp kosher salt
- 1/2 tsp black pepper
- 1 tsp dried thyme
Quick Steps:
- Sauté the vegetables: Cook onion, carrots, and celery in olive oil over medium heat for 7 to 8 minutes until softened.
- Add garlic and thyme: Stir in garlic and thyme for 30 seconds.
- Build the soup: Add lentils, diced tomatoes, broth, salt, and pepper.
- Simmer gently: Cook uncovered for 25 to 30 minutes until the lentils are tender but not falling apart.
- Finish with greens: Stir in kale for the last 3 to 5 minutes until it softens.
- Cool and portion: Ladle into containers and leave a little room at the top for expansion if freezing.
Equipment for This Recipe:
- Large soup pot
- Wooden spoon
- Ladle
- Airtight containers
How to Serve This Dish: A spoonful of yogurt or a squeeze of lemon makes the bowl taste brighter. Toasted sourdough or whole-grain crackers beside it is usually enough.
Pro Tips for This Recipe:
- Rinse lentils well to remove grit.
- Add extra broth if you like a looser soup, because it thickens in the fridge.
- Keep the salt moderate until the end; broth brands vary a lot.
- A parmesan rind simmered in the pot adds a deep savory note, if you have one.
Variations on This Dish:
- Curried Lentil Bowl: Add curry powder and a splash of coconut milk near the end.
- Tomato-Basil Version: Stir in fresh basil just before serving.
- Smoky Sausage Add-In: Brown sliced chicken sausage and add it after the lentils soften.
Common Mistakes to Avoid with This Dish:
- Boiling too hard: Lentils split and the soup turns muddy.
- Adding all the greens too early: Kale gets dull and overcooked.
- Under-seasoning the base: Lentil soup needs enough salt to keep the broth from tasting flat after chilling.
9. Stuffed Bell Peppers with Turkey, Rice, and Tomato Sauce
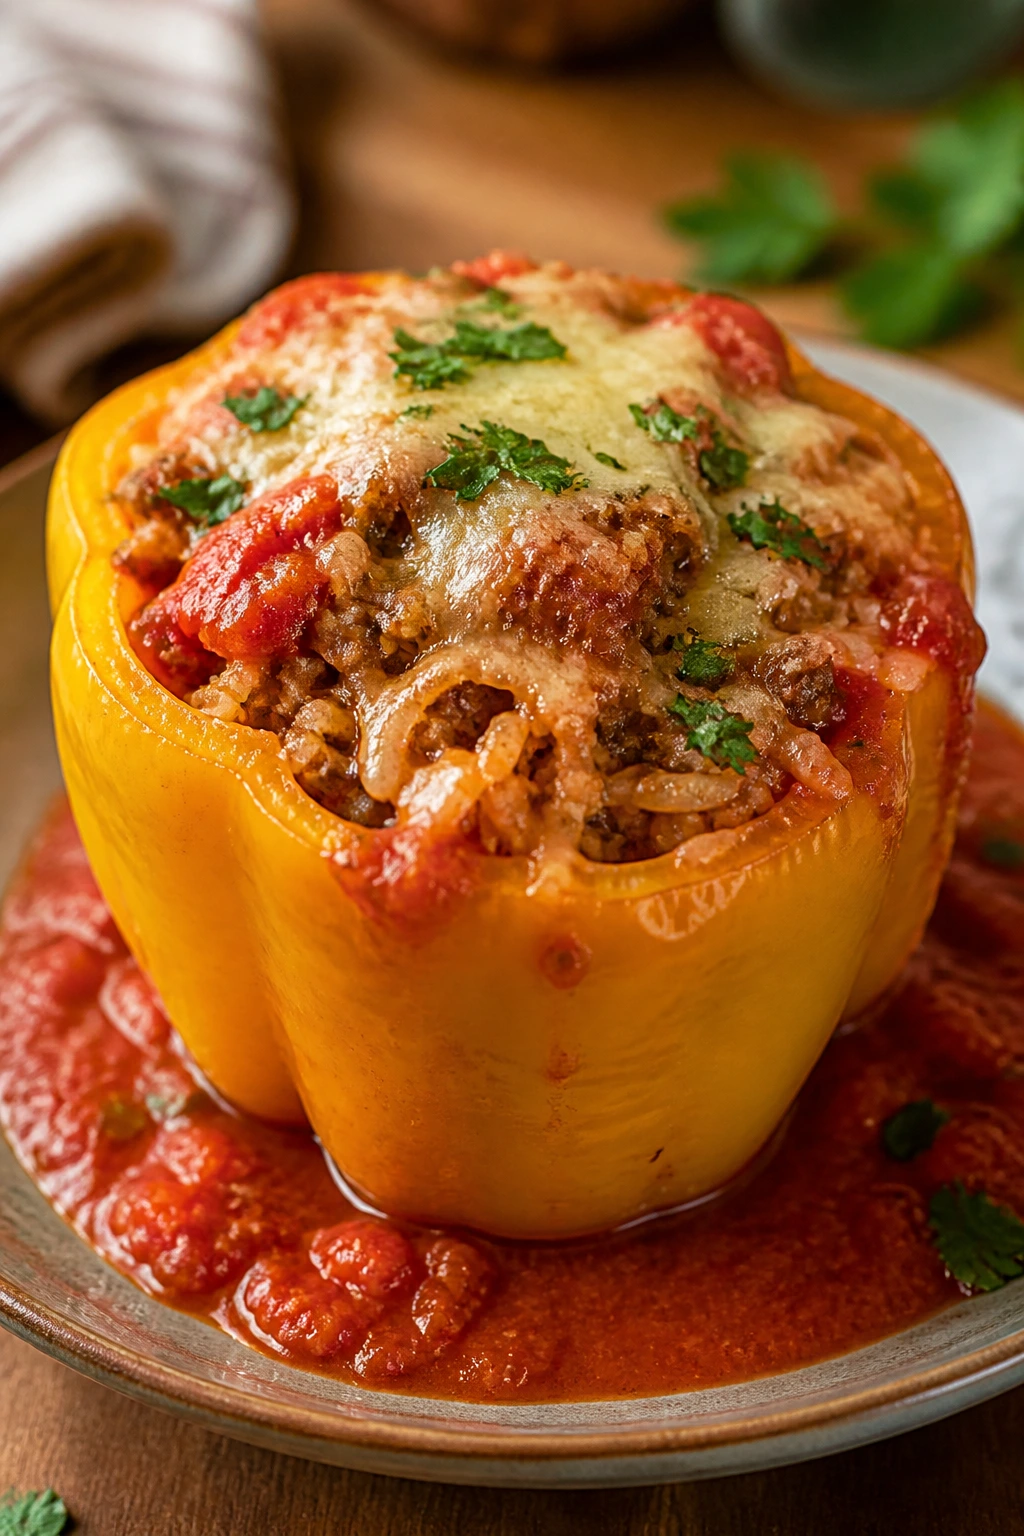
Intro: Stuffed peppers are the kind of meal prep that feels a little old-school in the best way. You get a built-in container, a tidy portion, and enough color in the pan to make the fridge look more cheerful than it has any right to.
Why It Works: Bell peppers act like edible bowls, which means the filling stays moist while the outside softens just enough in the oven. Ground turkey, rice, and tomato sauce make a balanced filling that reheats well without separating. The trick is par-cooking the peppers so they don’t stay harsh and raw in the center.
Key Ingredients:
- 6 large bell peppers, tops removed and seeds discarded
- 1 1/2 lbs ground turkey
- 1 1/2 cups cooked rice
- 1 small onion, diced
- 2 cloves garlic, minced
- 2 cups tomato sauce
- 1 cup shredded mozzarella or part-skim cheese
- 1 tsp Italian seasoning
- 1 tsp kosher salt
- 1/2 tsp black pepper
- 1 tbsp olive oil
Quick Steps:
- Soften the peppers: Bake the hollowed peppers at 375°F for 10 minutes with a little water in the pan.
- Cook the filling: Sauté onion in olive oil, add turkey, and cook until no pink remains.
- Season it well: Stir in garlic, cooked rice, tomato sauce, Italian seasoning, salt, and pepper.
- Stuff the peppers: Spoon filling into each pepper and place them upright in a baking dish.
- Top with cheese: Sprinkle mozzarella over each one.
- Bake until tender: Cook 20 to 25 minutes until the peppers are softened and the cheese is melted and lightly browned.
Equipment for This Recipe:
- Baking dish
- Large skillet
- Sharp knife
- Measuring cups
How to Serve This Dish: Serve with a spoon of extra tomato sauce on the plate if you like things saucy. A simple cucumber salad or steamed green beans balances the sweetness of the peppers.
Pro Tips for This Recipe:
- Choose peppers that can sit flat so they don’t tip over.
- If your rice is very dry, add a splash of sauce to the filling.
- Let them cool before lifting; the filling sets a bit and holds together better.
- Red and yellow peppers taste sweeter than green ones, which some kids prefer.
Variations on This Dish:
- Mexican-Style Peppers: Use taco seasoning and black beans instead of Italian seasoning.
- Vegetarian Grain Swap: Replace turkey with lentils and chopped mushrooms.
- Cheesy Broccoli Version: Fold finely chopped steamed broccoli into the filling.
Common Mistakes to Avoid with This Dish:
- Skipping the pepper pre-bake: Raw peppers stay too firm.
- Overstuffing the shells: The filling expands and spills into the pan.
- Using dry filling: A little sauce keeps the inside from tasting like a rice brick.
10. Teriyaki Tofu and Broccoli Rice Bowls
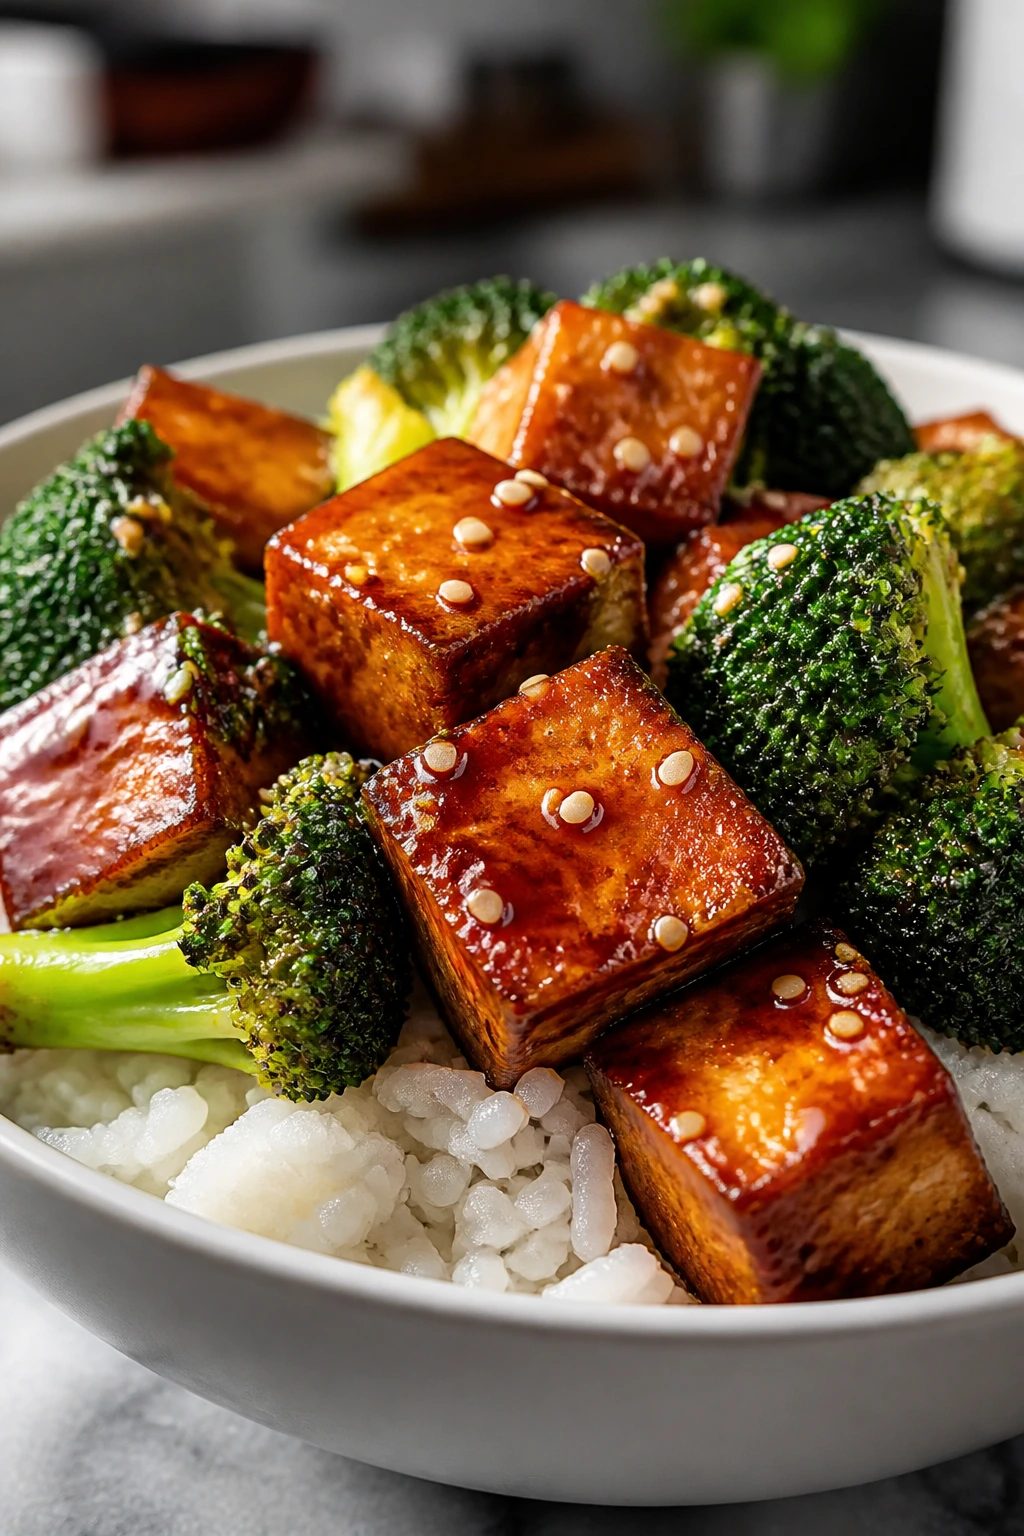
Intro: If tofu has ever disappointed you, it was probably treated like an afterthought. Pressed, crisped, and glazed properly, it gets a deep savory edge that works beautifully with broccoli and rice. This is one of the best meal prep bowls for anyone who wants a meatless option that still feels substantial.
Why It Works: Pressing the tofu matters because excess water is the enemy of browning. A quick cornstarch dusting creates a thin crust that catches the teriyaki sauce, and broccoli brings crunch that stays pleasant after reheating. The sauce is salty-sweet with enough ginger to keep the whole bowl from tasting one-note.
Key Ingredients:
- 2 blocks extra-firm tofu, about 14 oz each
- 2 cups uncooked jasmine or brown rice
- 1 large head broccoli, cut into florets
- 1/4 cup soy sauce
- 2 tbsp maple syrup or honey
- 1 tbsp rice vinegar
- 2 cloves garlic, minced
- 1 tbsp grated ginger
- 2 tbsp cornstarch
- 2 tbsp neutral oil
- 1 tbsp sesame seeds
- 2 scallions, sliced
Quick Steps:
- Press the tofu: Wrap tofu in towels and press for 15 to 20 minutes, then cut into cubes.
- Cook the rice: Prepare rice and let it cool slightly.
- Brown the tofu: Toss tofu with cornstarch and cook in oil over medium-high heat until golden on most sides.
- Steam-sauté the broccoli: Cook broccoli with a splash of water until bright green and just tender.
- Make the sauce: Simmer soy sauce, maple syrup, vinegar, garlic, and ginger for 1 to 2 minutes.
- Toss and pack: Coat the tofu and broccoli with sauce, then portion with rice and sesame seeds.
Equipment for This Recipe:
- Tofu press or heavy cutting board with towels
- Large skillet
- Small saucepan
- Containers with compartments
How to Serve This Dish: Top with extra scallions and a squeeze of lime if you want a brighter finish. A few sliced cucumbers on the side bring a cold crunch that helps with the warm rice.
Pro Tips for This Recipe:
- Extra-firm tofu works far better than soft or silken tofu here.
- Don’t skip the cornstarch; it makes the edges crisp enough to stand up to sauce.
- Let the sauce thicken for a minute before tossing so it clings instead of sliding off.
- Add chili flakes at the table if some eaters like more heat than others.
Variations on This Dish:
- Sesame-Garlic Version: Add more sesame oil and a little grated garlic to the sauce.
- Peanut Teriyaki Twist: Stir in 1 tablespoon peanut butter for a richer bowl.
- Veggie-Heavy Swap: Replace half the rice with shredded cabbage for extra crunch.
Common Mistakes to Avoid with This Dish:
-
Using wet tofu: It won’t brown well. Press it first.
-
Saucing before crisping: The tofu softens instead of forming
-
Using wet tofu: It won’t brown well. Press it first, even if you only have 15 minutes, because the outside needs to dry out before it can crisp.
-
Crowding the pan: The cubes steam instead of forming a crust. Cook in two batches if your skillet looks full.
-
Saucing too soon: If the tofu goes into the sauce before it’s golden, the coating turns soft and the whole thing gets heavy.
11. Chicken Shawarma Bowls with Roasted Cauliflower and Herby Yogurt
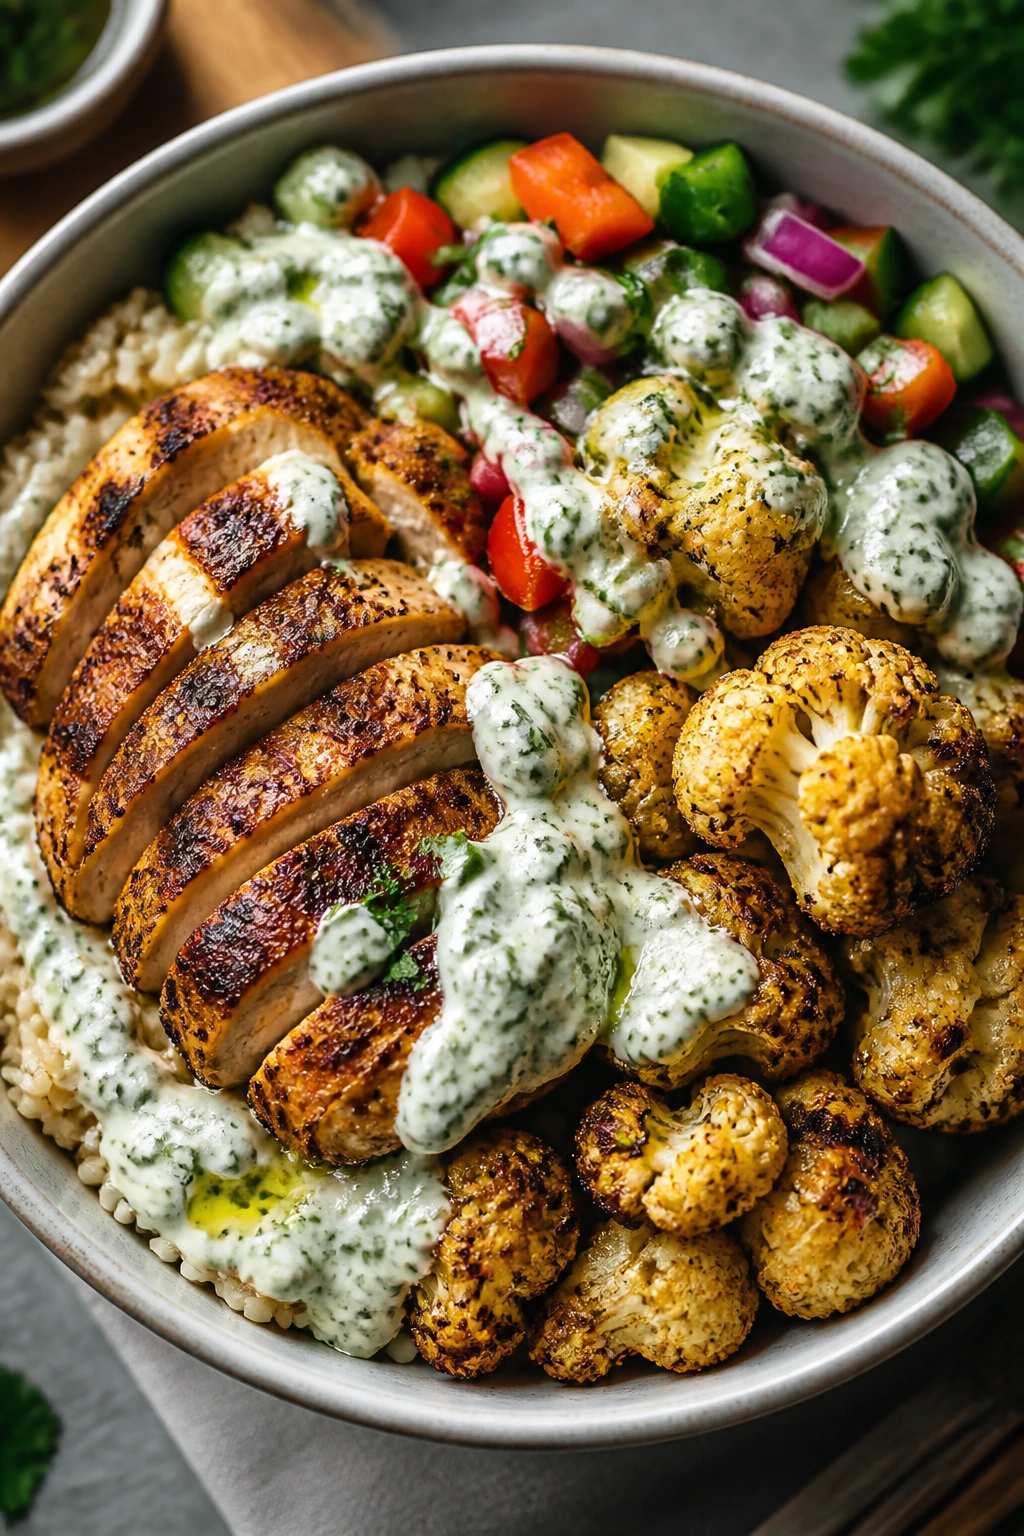
Intro: Shawarma spice is one of those blends that wakes up a batch-cooked meal fast — warm cumin, paprika, garlic, coriander, and a little cinnamon, all of it clinging to chicken thighs and cauliflower in a way that tastes far more layered than the prep time suggests. I like this bowl because it stays interesting after reheating, which is where a lot of bowl meals fall apart.
The cauliflower matters here. It isn’t filler. Roasted until the edges brown and the florets turn nutty, it gives the bowls a second texture so you’re not eating soft chicken and soft rice and soft sauce all in one bite.
Why It Works: Chicken thighs take the spice rub well and stay juicy after a day or two in the fridge. Cauliflower roasts in the same hot oven, which means you get caramelization without a separate pan, and the yogurt sauce brings the cool, sharp contrast the bowl needs. A meal prep bowl lives or dies by balance, and this one gets it right because every part has a job.
Key Ingredients:
- 2 lbs boneless, skinless chicken thighs
- 1 large head cauliflower, cut into florets
- 2 cups cooked brown rice or quinoa
- 1 cup plain Greek yogurt
- 2 tbsp olive oil
- 2 lemons, one juiced and one cut into wedges
- 3 cloves garlic, minced
- 2 tsp ground cumin
- 2 tsp paprika
- 1 tsp ground coriander
- 1/2 tsp cinnamon
- 1 tsp kosher salt
- 1/2 tsp black pepper
- 1 cucumber, diced
- 2 tbsp chopped parsley or dill
Quick Steps:
- Heat the oven: Preheat to 425°F and line two sheet pans.
- Season the chicken: Toss the thighs with olive oil, garlic, cumin, paprika, coriander, cinnamon, salt, pepper, and lemon juice.
- Roast the cauliflower: Toss florets with a little oil and salt, then roast 20 to 25 minutes until browned at the edges.
- Cook the chicken: Roast the thighs 20 to 25 minutes until they reach 165°F in the thickest part and the juices run clear.
- Mix the yogurt sauce: Stir yogurt with lemon juice, parsley, a pinch of salt, and a spoonful of water if you want it looser.
- Assemble the bowls: Divide rice, chicken, cauliflower, cucumber, and sauce into containers.
Equipment for This Recipe:
- Two rimmed sheet pans
- Mixing bowl
- Instant-read thermometer
- Small bowl for the sauce
How to Serve This Dish: Spoon the yogurt over the top right before eating, then finish with cucumber, parsley, and a squeeze of lemon. If you want extra crunch, chopped romaine or shredded cabbage works well under the rice.
Pro Tips for This Recipe:
- Cut the cauliflower into similar-size florets so the smaller bits do not burn before the big ones brown.
- If you’re short on time, marinate the chicken for just 20 minutes while the oven heats.
- The yogurt sauce tastes better after 30 minutes in the fridge.
- Warm rice helps the bowl feel finished, but let it cool a bit before sealing the container.
Variations on This Dish:
- Pita Wrap Version: Stuff the chicken and cauliflower into warm pita with cucumbers and sauce.
- Harissa Heat Swap: Add 1 tablespoon harissa paste to the seasoning mix for more bite.
- Dairy-Free Bowl: Use tahini thinned with lemon and water instead of yogurt.
Common Mistakes to Avoid with This Dish:
- Using too little seasoning: Shawarma needs a firm hand. If the spice mix looks timid, the bowl tastes flat.
- Roasting cauliflower in a wet heap: Spread it out or it turns soft and pale.
- Packing sauce on top too early: The yogurt softens the rice, so keep it separate until serving.
12. Turkey and White Bean Chili with Peppers and Corn
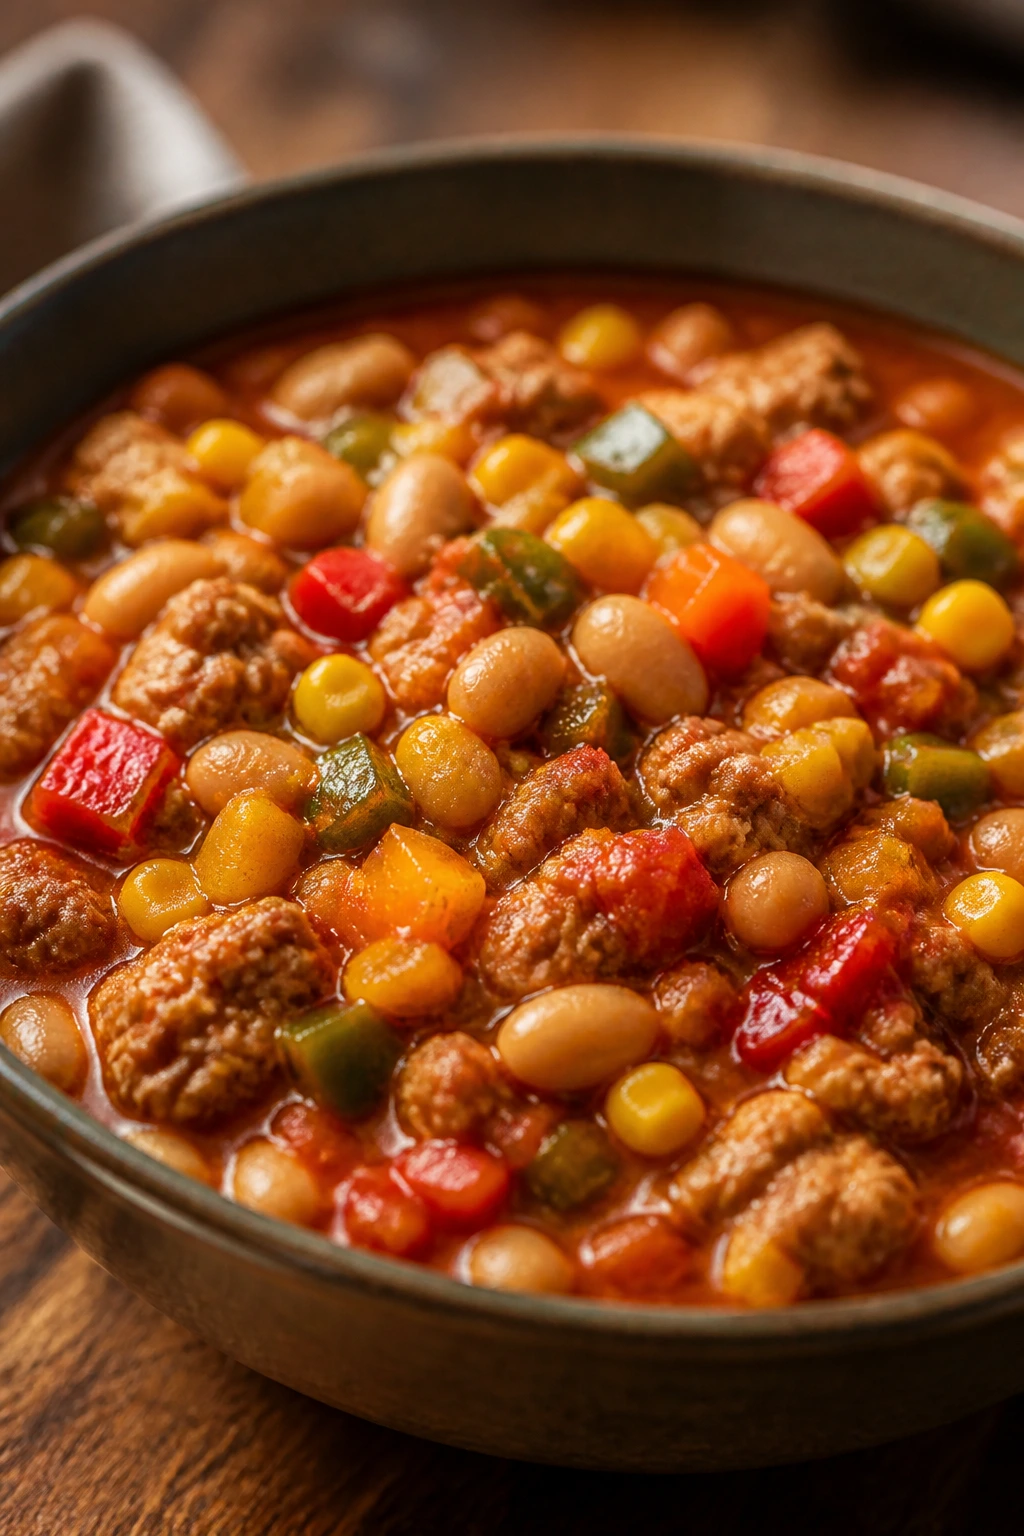
Intro: Chili is the meal prep king for a reason. It reheats like it was built to do exactly that, and turkey plus white beans gives you a lighter bowl that still tastes hearty enough for a family dinner. The peppers and corn keep it from becoming one-note.
Why It Works: Lean ground turkey cooks quickly, but the beans and tomatoes bring enough body that the chili still feels substantial after a night in the fridge. White beans stay intact better than some softer legumes, and they soak up the broth without collapsing. A little lime at the end keeps the whole pot from tasting dull.
Key Ingredients:
- 2 lbs ground turkey
- 2 cans white beans, drained and rinsed
- 1 onion, diced
- 2 bell peppers, diced
- 1 1/2 cups frozen corn
- 1 can diced tomatoes
- 4 cups low-sodium chicken broth
- 2 tbsp chili powder
- 1 tsp ground cumin
- 1 tsp smoked paprika
- 1 tsp kosher salt
- 1/2 tsp black pepper
- 1 lime, juiced
- 1 tbsp olive oil
Quick Steps:
- Start the base: Cook onion and peppers in olive oil over medium heat until soft, about 6 to 8 minutes.
- Brown the turkey: Add turkey and cook until no pink remains, breaking it up with a spoon.
- Toast the spices: Stir in chili powder, cumin, smoked paprika, salt, and pepper for 30 seconds.
- Simmer the chili: Add tomatoes, broth, beans, and corn. Simmer 20 to 25 minutes until thickened.
- Brighten the pot: Stir in lime juice at the end.
- Portion for the week: Cool before packing, then divide into containers with toppings separate.
Equipment for This Recipe:
- Large soup pot or Dutch oven
- Wooden spoon
- Ladle
- Airtight containers
How to Serve This Dish: A spoonful of Greek yogurt, sliced scallions, and diced avocado work well on top. You can also serve it over baked potatoes, which sounds old-fashioned and still works.
Pro Tips for This Recipe:
- Let the onions and peppers soften before adding the turkey or the chili tastes sharp.
- If you want it thicker, simmer uncovered for the last 5 minutes.
- Use low-sodium broth so the beans don’t push the salt level too high.
- Chili usually tastes better after a night in the fridge, so this is one of the easiest meals to prep ahead.
Variations on This Dish:
- Smoky Chipotle Version: Add minced chipotle in adobo for a deeper, hotter chili.
- Green Chili Bowl: Swap diced tomatoes for green chiles and tomatillo salsa.
- Extra Veg Version: Add diced zucchini or chopped spinach in the last 5 minutes.
Common Mistakes to Avoid with This Dish:
- Boiling the chili hard: It can make the turkey grainy and the beans break down too much.
- Not tasting before packing: Beans and broth vary a lot, so adjust salt and lime at the end.
- Using frozen corn straight from the bag without simmering long enough: It needs a few minutes to heat through and sweeten the pot.
13. Apple Cinnamon Baked Oatmeal Squares
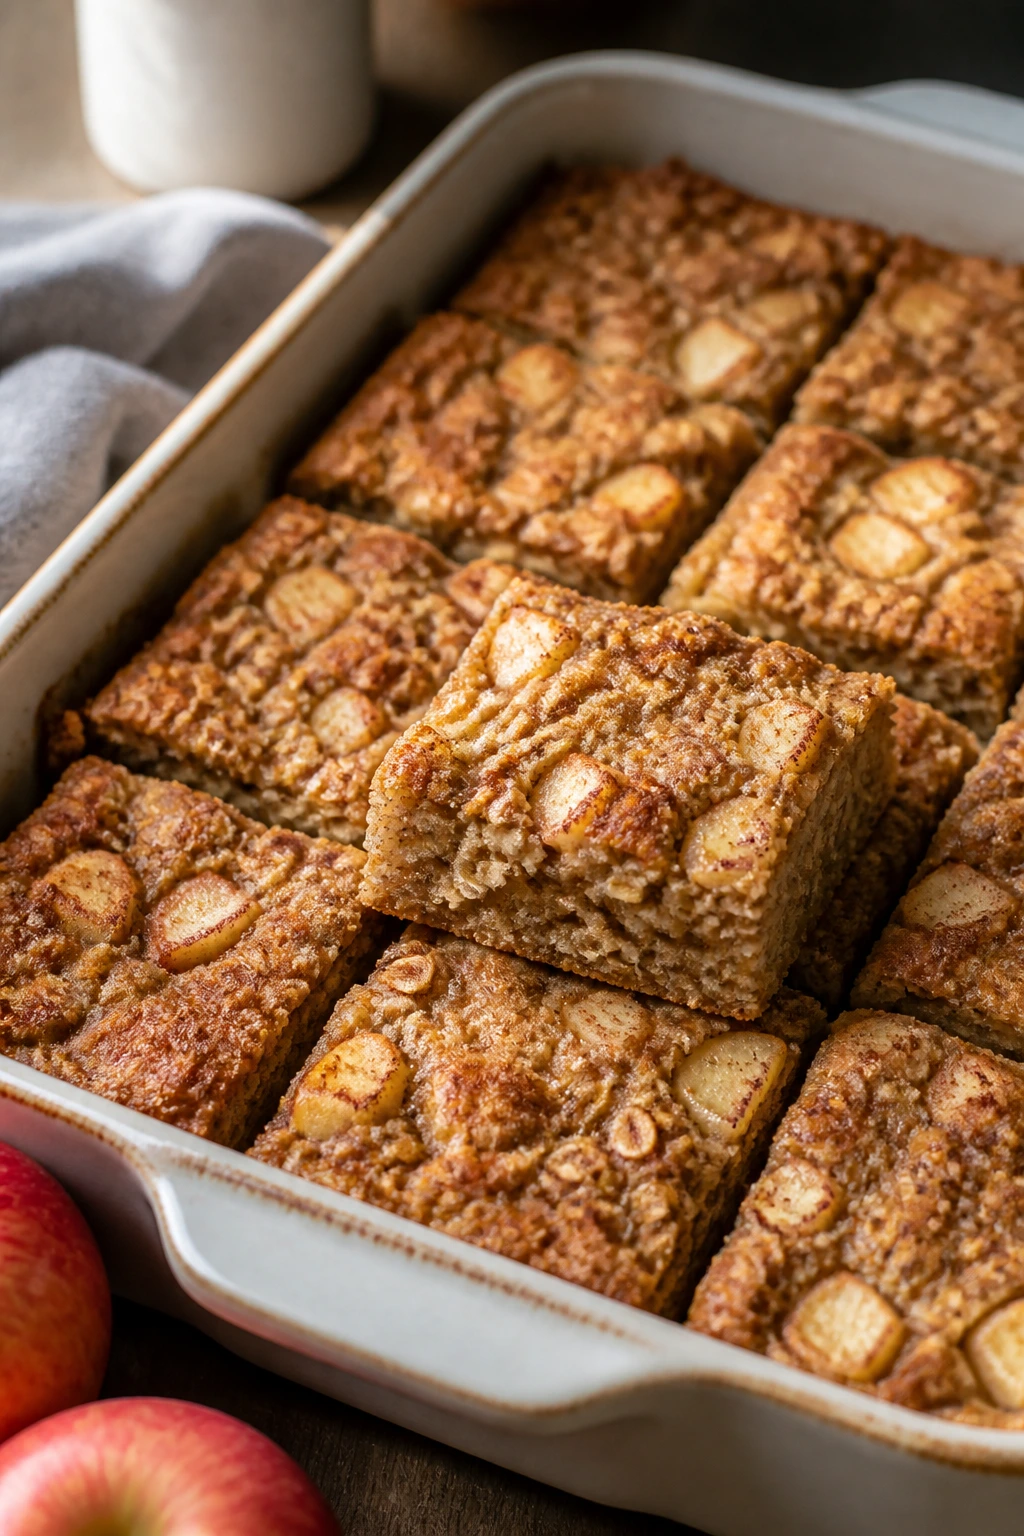
Intro: Breakfast meal prep gets ignored until somebody is standing in the kitchen with one sock on, late for school, and asking for something that isn’t a granola bar. These oatmeal squares fix that. They’re soft in the center, lightly crisp at the corners, and sturdy enough to eat with one hand if that’s the morning you’re having.
Why It Works: Oats, eggs, and milk bake into a sliceable base that survives refrigeration better than most quick breakfasts. Apples add moisture and a little chew, while cinnamon and vanilla give the pan a warm smell that feels domestic in the best way. You can cut the whole pan into squares and hand them out cold, warm, or with yogurt.
Key Ingredients:
- 3 cups old-fashioned rolled oats
- 2 apples, peeled and diced
- 2 large eggs
- 2 cups milk or unsweetened milk alternative
- 1/3 cup maple syrup
- 1/4 cup plain Greek yogurt
- 2 tsp cinnamon
- 1 tsp vanilla extract
- 1 1/2 tsp baking powder
- 1/2 tsp kosher salt
- 2 tbsp melted butter or coconut oil
- 1/4 cup chopped walnuts, optional
Quick Steps:
- Preheat the oven: Set it to 350°F and grease an 8×8-inch or 9×9-inch baking dish.
- Mix the wet ingredients: Whisk eggs, milk, maple syrup, yogurt, vanilla, and melted butter until smooth.
- Add the dry ingredients: Stir in oats, baking powder, cinnamon, and salt.
- Fold in apples: Mix in diced apples and walnuts if using.
- Bake: Pour into the dish and bake 35 to 40 minutes until the center is set and the top looks lightly golden.
- Cool and cut: Let it cool at least 20 minutes before slicing into squares.
Equipment for This Recipe:
- Baking dish
- Mixing bowl
- Whisk and spatula
- Sharp knife for cutting apples
How to Serve This Dish: Serve the squares with extra yogurt and a few berries. If you want them to feel more breakfast-y, drizzle on a little maple syrup and a pinch of flaky salt.
Pro Tips for This Recipe:
- Use old-fashioned oats, not instant oats, or the texture gets too soft.
- Dice the apples small so they soften evenly and don’t sink into one corner.
- If the top browns too quickly, tent loosely with foil for the last 10 minutes.
- These taste good cold, but a quick microwave warm-up gives them a more cake-like feel.
Variations on This Dish:
- Berry Almond Version: Swap apples for blueberries and add sliced almonds.
- Pumpkin Spice Squares: Replace 1 cup of milk with pumpkin purée and add pumpkin spice.
- Dairy-Free Morning Bake: Use almond milk and coconut yogurt.
Common Mistakes to Avoid with This Dish:
- Using quick oats: They break down too much and make the squares gummy.
- Cutting too soon: The pan needs time to set or the slices fall apart.
- Skipping the salt: Sweet breakfasts need salt, or they taste flat after a day in the fridge.
14. Sheet-Pan Chicken Fajita Bowls with Black Beans and Brown Rice
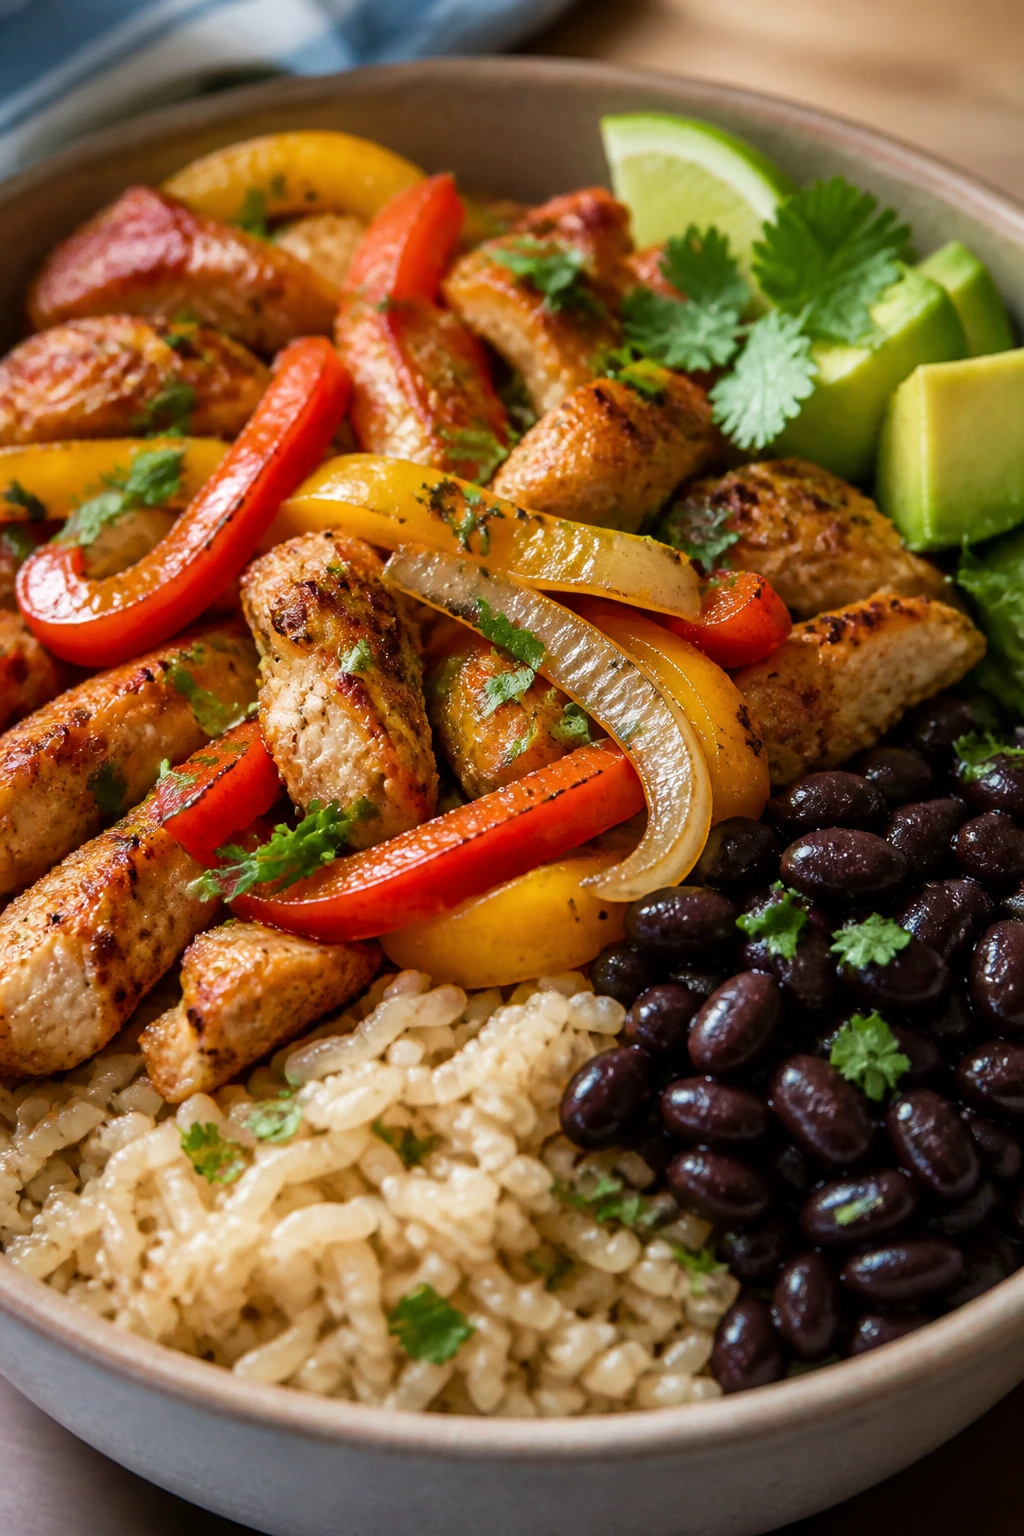
Intro: Fajita bowls are the kind of dinner that looks more complicated than it is. Slice the chicken and peppers, toss everything with spice, and let the oven do the part that usually requires standing over a skillet in clouds of onion steam. The result tastes bold, but the prep is tidy.
Why It Works: Chicken, peppers, onions, and black beans all fit the same flavor lane, so you don’t have to build separate components from scratch. The sheet pan gives you browned edges without constant stirring, and brown rice makes the bowl sturdy enough to handle meal prep for a few days. Lime at the end matters here — it keeps the spices from tasting dusty after chilling.
Key Ingredients:
- 2 lbs boneless, skinless chicken breasts or thighs
- 3 bell peppers, sliced
- 1 large onion, sliced
- 1 can black beans, drained and rinsed
- 2 cups cooked brown rice
- 2 tbsp olive oil
- 2 tsp chili powder
- 1 tsp ground cumin
- 1 tsp smoked paprika
- 1 tsp garlic powder
- 1 tsp kosher salt
- 1/2 tsp black pepper
- 1 lime, juiced
- 1 avocado, sliced, optional
Quick Steps:
- Heat the oven: Preheat to 425°F.
- Season the chicken and vegetables: Toss chicken, peppers, onions, olive oil, spices, salt, and pepper together.
- Roast everything: Spread on a sheet pan and bake 18 to 22 minutes, until the chicken reaches 165°F and the vegetables are soft with browned edges.
- Add the beans: Warm the black beans briefly in a skillet or microwave with a pinch of salt.
- Finish with lime: Toss the roasted mixture with lime juice.
- Build the bowls: Divide rice, fajita filling, and beans into containers.
Equipment for This Recipe:
- Large sheet pan
- Sharp knife
- Mixing bowl
- Instant-read thermometer
How to Serve This Dish: Add salsa, chopped cilantro, or a spoon of Greek yogurt at serving time. Tortillas on the side turn the bowl into taco night if the family wants a less formal dinner.
Pro Tips for This Recipe:
- Slice the peppers and onions fairly thick so they roast instead of collapsing.
- Don’t pile everything into a heap on the pan.
- Thighs hold up better than breasts if you know the bowls will be reheated twice.
- Add avocado at the table, not in the container.
Variations on This Dish:
- Cauliflower Rice Version: Swap some or all of the rice for cauliflower rice if you want a lighter bowl.
- Steak Fajita Swap: Use flank steak and shorten the roasting time.
- Mild Kid-Friendly Bowl: Cut the chili powder in half and serve salsa on the side.
Common Mistakes to Avoid with This Dish:
- Overcooking the chicken: Thin pieces can dry out fast at high heat, so check early.
- Using watery salsa as a meal prep base: It makes the rice soggy. Keep it separate.
- Forgetting the lime: The lime is what makes the reheated bowl taste fresh instead of tired.
15. Lentil Bolognese with Whole-Wheat Pasta and Mushrooms
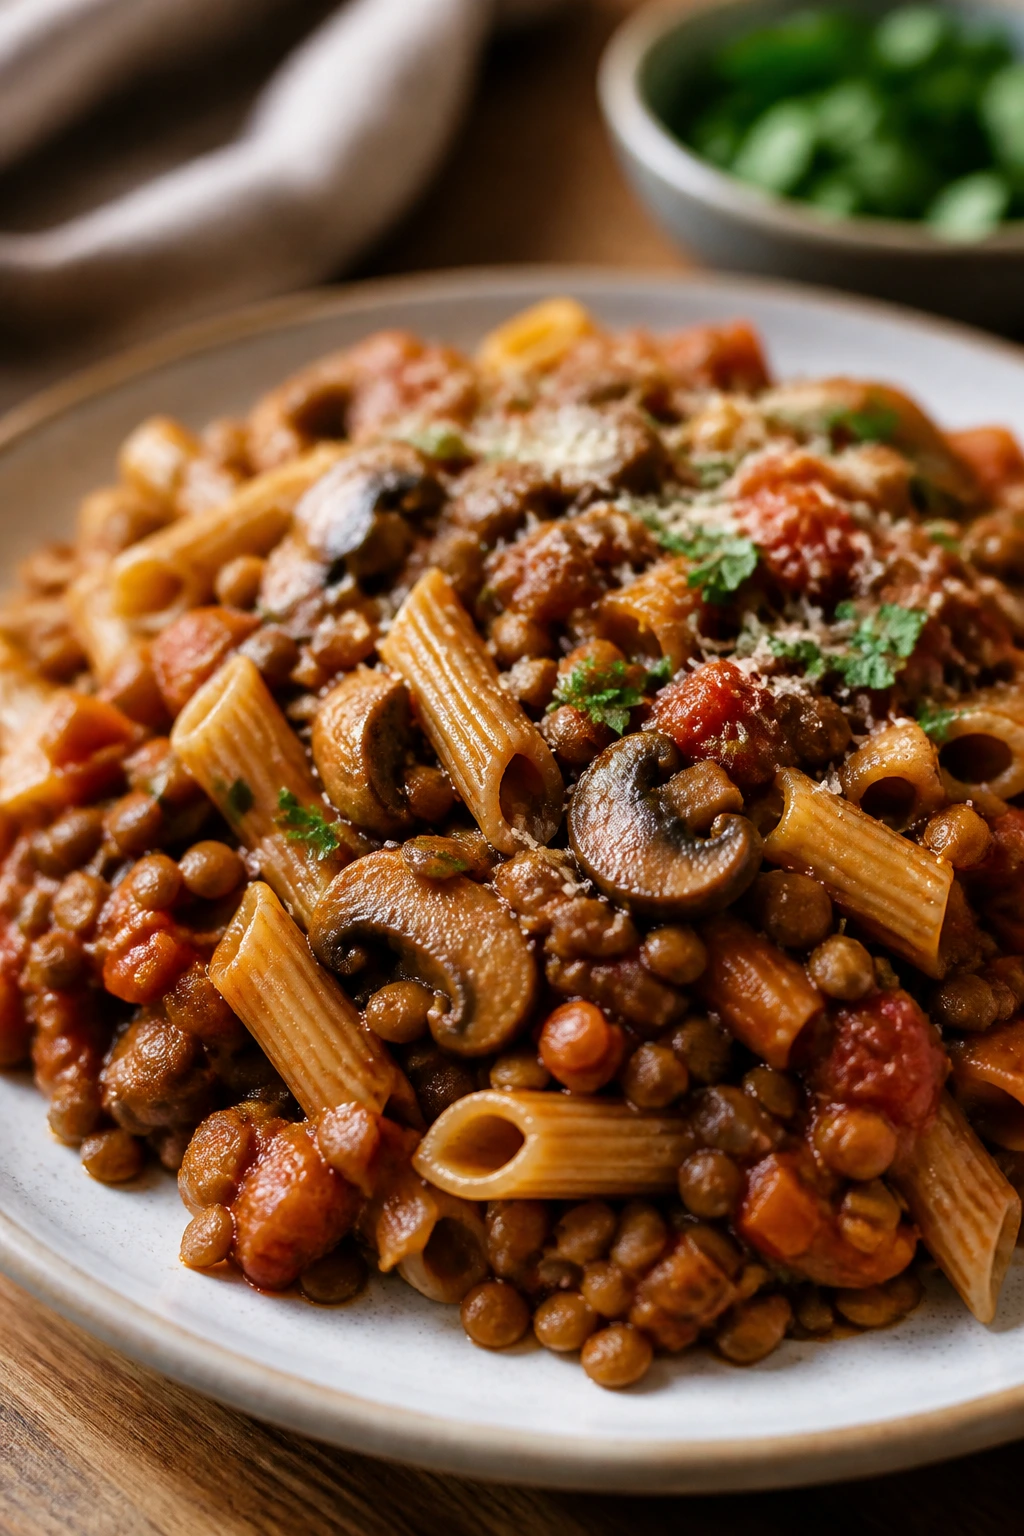
Intro: If you want a meatless family dinner that still feels like a proper bowl of pasta, lentil bolognese is the move. The mushrooms bring a savory base, the lentils give the sauce body, and the tomatoes cook down into something rich enough to coat every strand of whole-wheat pasta.
Why It Works: Lentils and mushrooms make a sauce that holds texture after chilling, which matters because some vegetarian pasta sauces turn mushy by day two. Whole-wheat pasta brings a nutty note and stands up better than delicate noodles in the fridge. This is the kind of meal that tastes better with a little time, which is exactly what you want from a Sunday prep dish.
Key Ingredients:
- 2 cups cooked brown or green lentils
- 12 oz whole-wheat pasta
- 12 oz mushrooms, finely chopped
- 1 onion, diced
- 2 carrots, diced
- 3 cloves garlic, minced
- 1 can crushed tomatoes
- 2 tbsp tomato paste
- 2 tbsp olive oil
- 1 tsp dried oregano
- 1 tsp dried basil
- 1 tsp kosher salt
- 1/2 tsp black pepper
- 1/4 cup grated Parmesan, optional
Quick Steps:
- Cook the pasta: Boil until just al dente, then drain.
- Build the sauce base: Cook onion, carrots, and mushrooms in olive oil over medium heat until the mushrooms give off their liquid and it mostly cooks away, about 8 to 10 minutes.
- Add garlic and tomato paste: Stir for 1 minute until the paste darkens a shade.
- Simmer the lentil sauce: Add lentils, crushed tomatoes, oregano, basil, salt, and pepper. Simmer 15 to 20 minutes until thick.
- Toss with pasta: Combine the sauce and pasta, adding a splash of water if it needs loosening.
- Portion for storage: Pack with a little extra sauce over the top so the pasta doesn’t dry out.
Equipment for This Recipe:
- Large skillet or Dutch oven
- Pot for pasta
- Colander
- Wooden spoon
How to Serve This Dish: Finish with Parmesan and chopped parsley, then serve with a simple salad if you want something crisp beside the pasta. A slice of garlic bread is optional, but a green salad is the better everyday move.
Pro Tips for This Recipe:
- Chop the mushrooms finely so they melt into the sauce.
- Let the tomato paste cook until it darkens; raw paste tastes sharp and tinny.
- Reserve a cup of pasta water before draining.
- Lentil bolognese freezes well, but only if you keep the sauce a little looser than you think you need.
Variations on This Dish:
- Turkey-Lentil Blend: Add browned turkey if you want a half-meat, half-lentil version.
- Creamy Ricotta Finish: Spoon ricotta on top just before serving.
- Red Pepper Twist: Add roasted red peppers for a sweeter, deeper sauce.
Common Mistakes to Avoid with This Dish:
- Letting the mushrooms stay wet: They need enough time to lose their liquid or the sauce turns thin.
- Cooking the pasta too soft: It will keep softening in the container.
- Using too little salt in the sauce: Lentils need seasoning or they taste like a shrug.
Why Sunday Batch Cooking Wins the Week
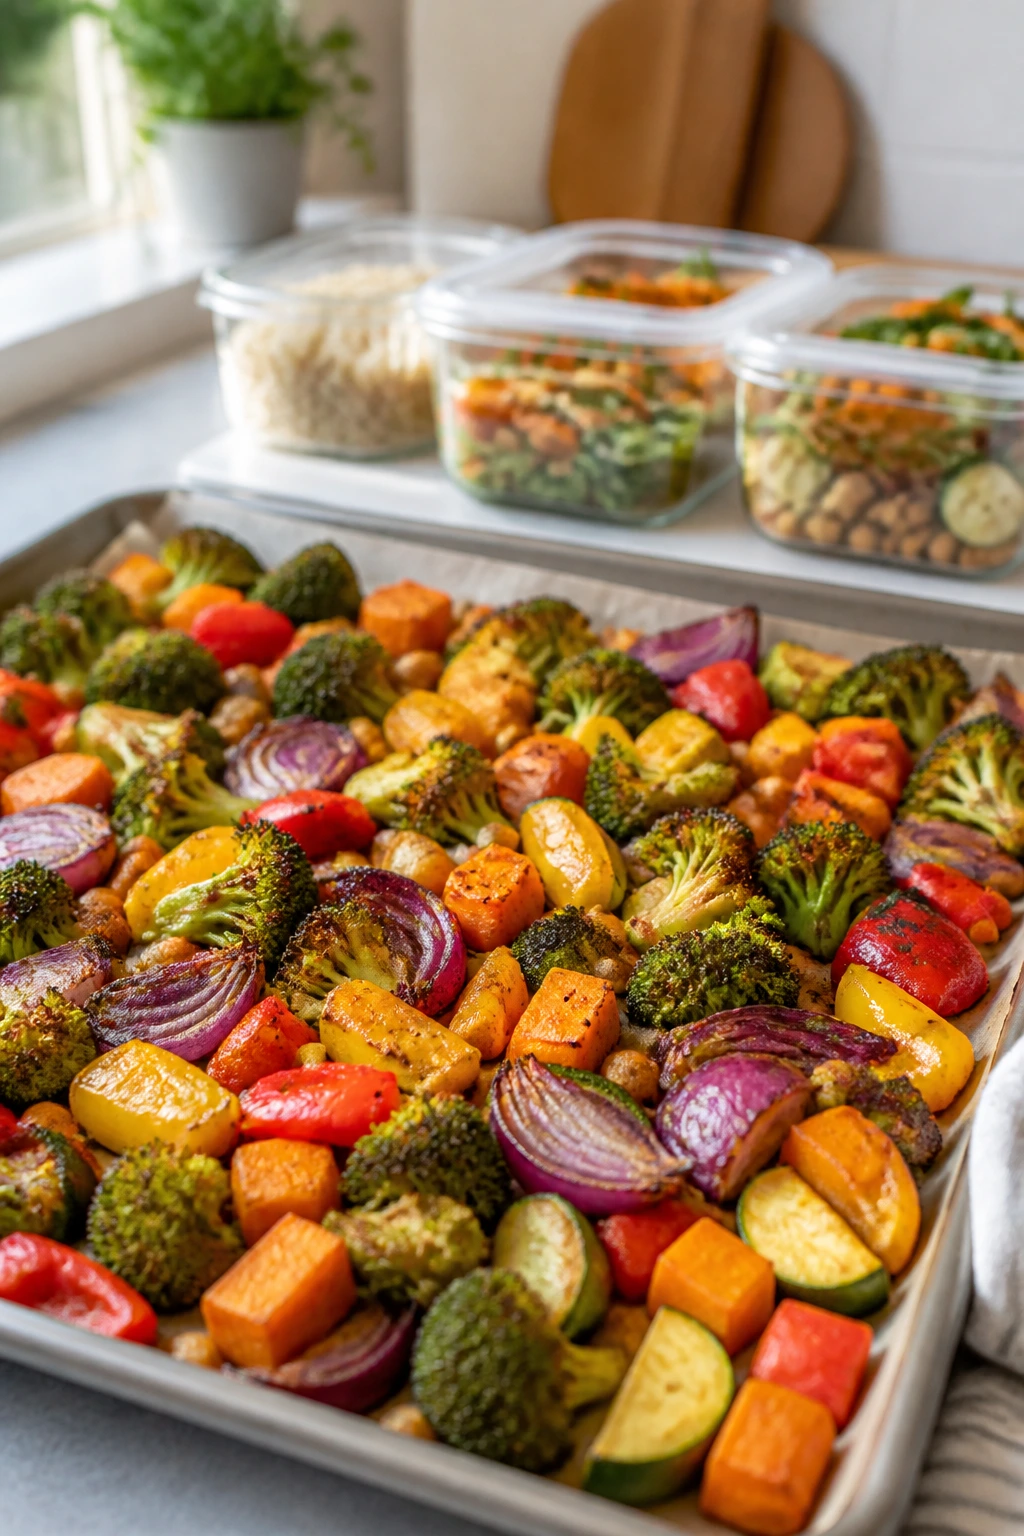
Meal prep works when it behaves like a kitchen habit instead of a performance. That means choosing recipes that share ingredients, tolerate chilling, and don’t collapse into sludge when you reheat them. Rice, quinoa, lentils, roasted vegetables, shredded chicken, and sturdy sauces are all doing the same quiet job here: making the next few days easier without making the food boring.
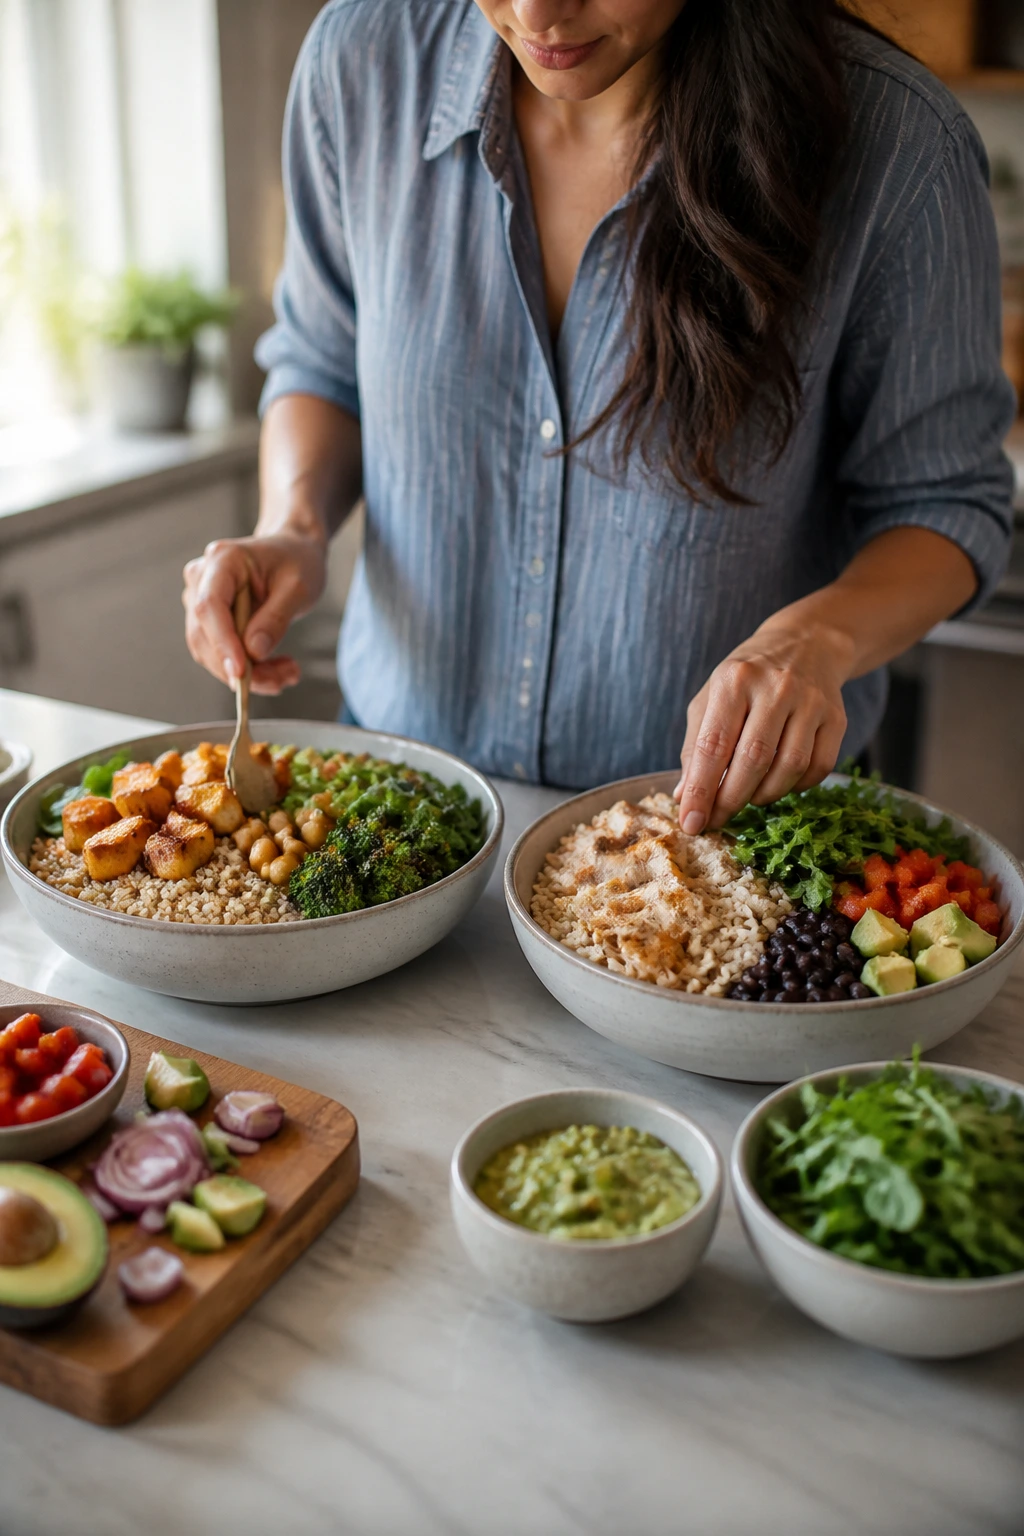
The best Sunday prep session usually has a rhythm. One hot oven. One pot of grains. One pan for protein. Maybe a second tray for vegetables if the first one is crowded. That’s enough. You do not need six complicated recipes to fill the fridge; you need three or four solid components that can be mixed, spooned, or packed in a way that keeps dinner from becoming a nightly negotiation.
I also think it helps to keep the bright things separate. Citrus, yogurt sauces, herbs, crunchy toppings, pickled onions, avocado — those are the pieces that keep a prep meal from going stale by Wednesday. Add them at the end and the whole week tastes fresher than it actually is. Tiny trick. Big payoff.
Essential Equipment for These Recipes
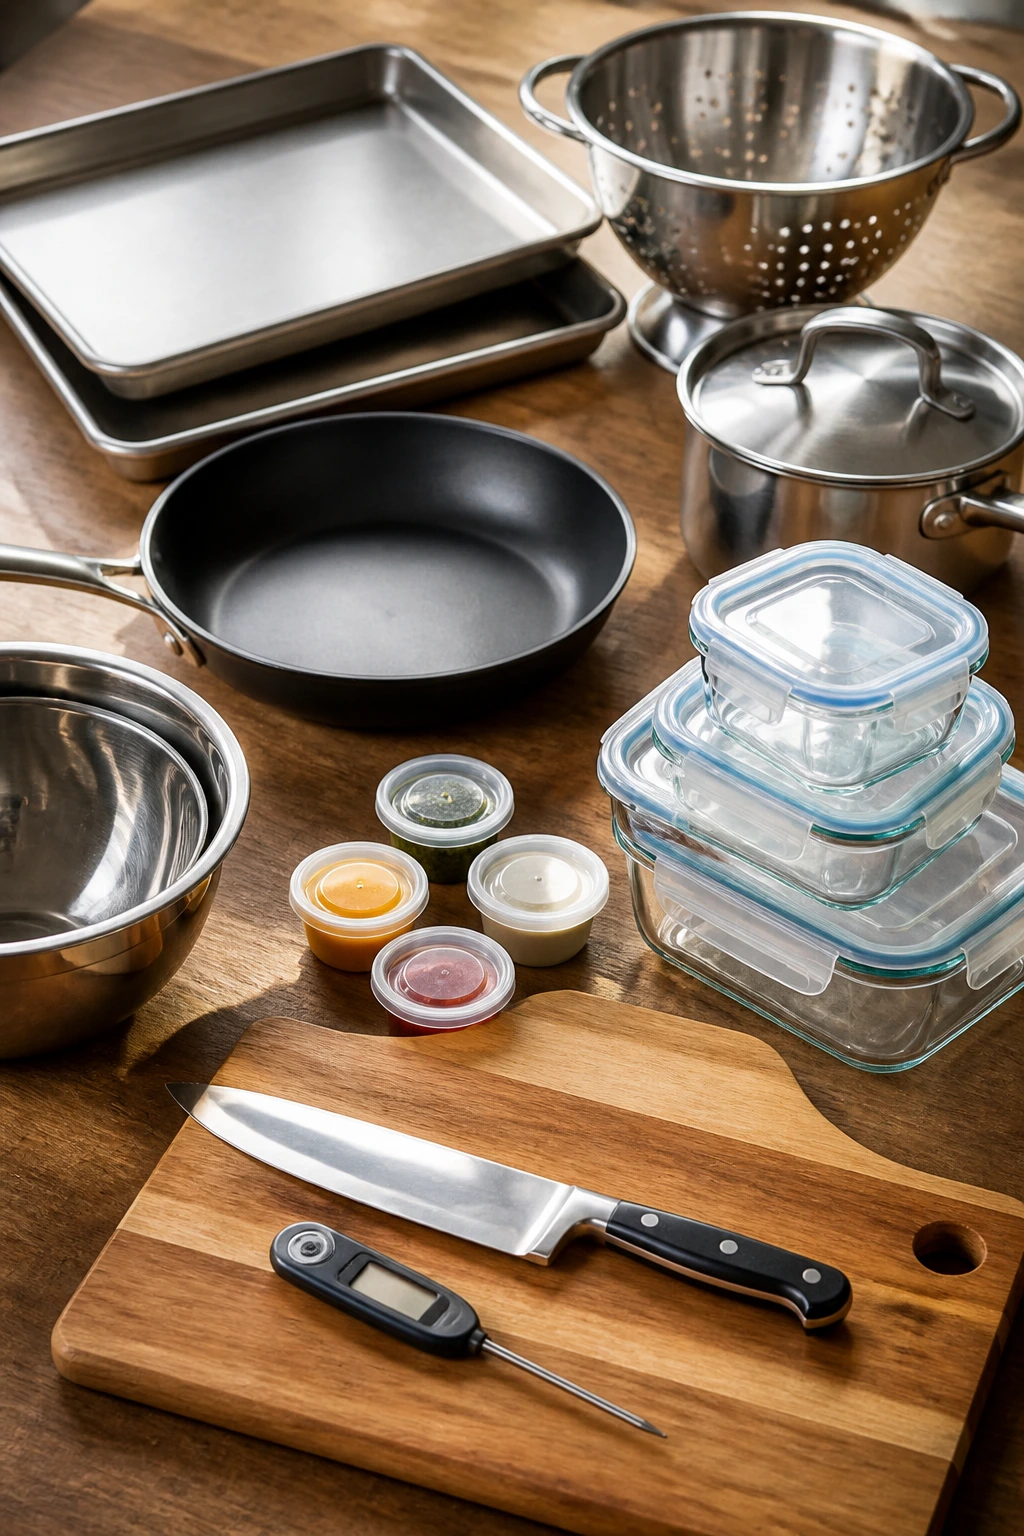
- Two rimmed sheet pans: Roasting vegetables and proteins separately keeps them from steaming each other.
- Large skillet or Dutch oven: Useful for chili, bolognese, stir-fries, and any filling that needs room to move.
- Medium saucepan with lid: Brown rice, quinoa, oats, and pasta all need a proper pot.
- Instant-read thermometer: Chicken, turkey, and salmon are much easier to get right when you check them once.
- Sharp chef’s knife: Thin slicing matters for peppers, onions, mushrooms, chicken, and steak.
- Cutting board with a damp towel underneath: Keeps the board from skidding when you’re chopping a lot of vegetables.
- Mixing bowls in 2 sizes: One for sauces and seasoning, one for tossing the bigger components.
- Meal prep containers: Compartmented ones help when you want dry rice, vegetables, and sauce kept apart.
- Small sauce cups or jars: Perfect for yogurt sauces, dressings, salsa, and anything that makes the base soggy.
- Colander or fine-mesh strainer: Needed for pasta, beans, quinoa, and lentils.
Smart Shopping and Ingredient Tips

The smartest meal prep shopping happens before you ever touch the stove. Start with proteins that stay good after reheating: chicken thighs, ground turkey, salmon if you’re using it quickly, tofu if you press it well, and beans or lentils for the meals that lean plant-based. Lean chicken breast can work, but it needs a little more care because it dries faster once it’s cooked and chilled.
For produce, choose vegetables that can take heat without falling apart. Bell peppers, broccoli, cauliflower, carrots, onions, green beans, zucchini, mushrooms, and cabbage are the ones I reach for because they still taste like vegetables after a few days. Tomatoes and cucumbers are better cold and fresh, so use them as accents rather than the whole foundation unless you’re making a pasta salad or a bowl that gets eaten the same day.
Grains matter more than people think. Brown rice has more chew and tends to reheat better than very soft white rice if you’re making bowls. Quinoa is faster and lighter, but it can turn bitter if it isn’t rinsed. Whole-wheat pasta holds up in sauces with more structure, while delicate noodles get tired fast. Buy the grain that matches the meal’s texture, not the one that just sounds healthy on the box.
A good meal prep fridge also needs acid and fat. Lemons, limes, yogurt, tahini, mustard, olive oil, vinegar, and a jar of salsa can rescue a container that would otherwise taste like leftovers. I’d rather see one extra lemon on the shopping list than another dry, overseasoned pan of chicken.
How to Serve These Recipes
Presentation: Serve bowl meals in shallow containers or wide plates rather than deep tubs when you can. You see the colors better, and the food feels more deliberate. A spoonful of sauce, a few herbs, and one bright topping — scallions, parsley, feta, lemon zest, chopped cucumber — go a long way.
Accompaniments: Keep a few flexible sides around: pita, whole-grain crackers, extra greens, fruit, yogurt, or a simple salad. Chili works with baked potatoes, fajita bowls work with tortillas, pasta salad can stand alone, and breakfast oatmeal needs almost nothing besides fruit or yogurt. Don’t overcomplicate the plate.
Portions: For adults, most of these meals land well at about 1 1/2 to 2 cups of food per container, depending on how dense the base is. Kids usually need less grain and more of the familiar part — chicken, pasta, meatballs, or the eggy breakfast squares. If you’re scaling up, double the sauce before you double the starch; that’s usually the part that runs short first.
Beverage Pairing: Sparkling water with lemon works across almost everything here, which is boring but true. Unsweetened iced tea, cucumber water, or a simple mineral water with lime also fits the bowls and chili nicely. For breakfast, coffee or a milky tea beside the oatmeal squares makes sense. Keep the drinks plain. The meals already have enough going on.
Additional Tips and Flavor Boosters
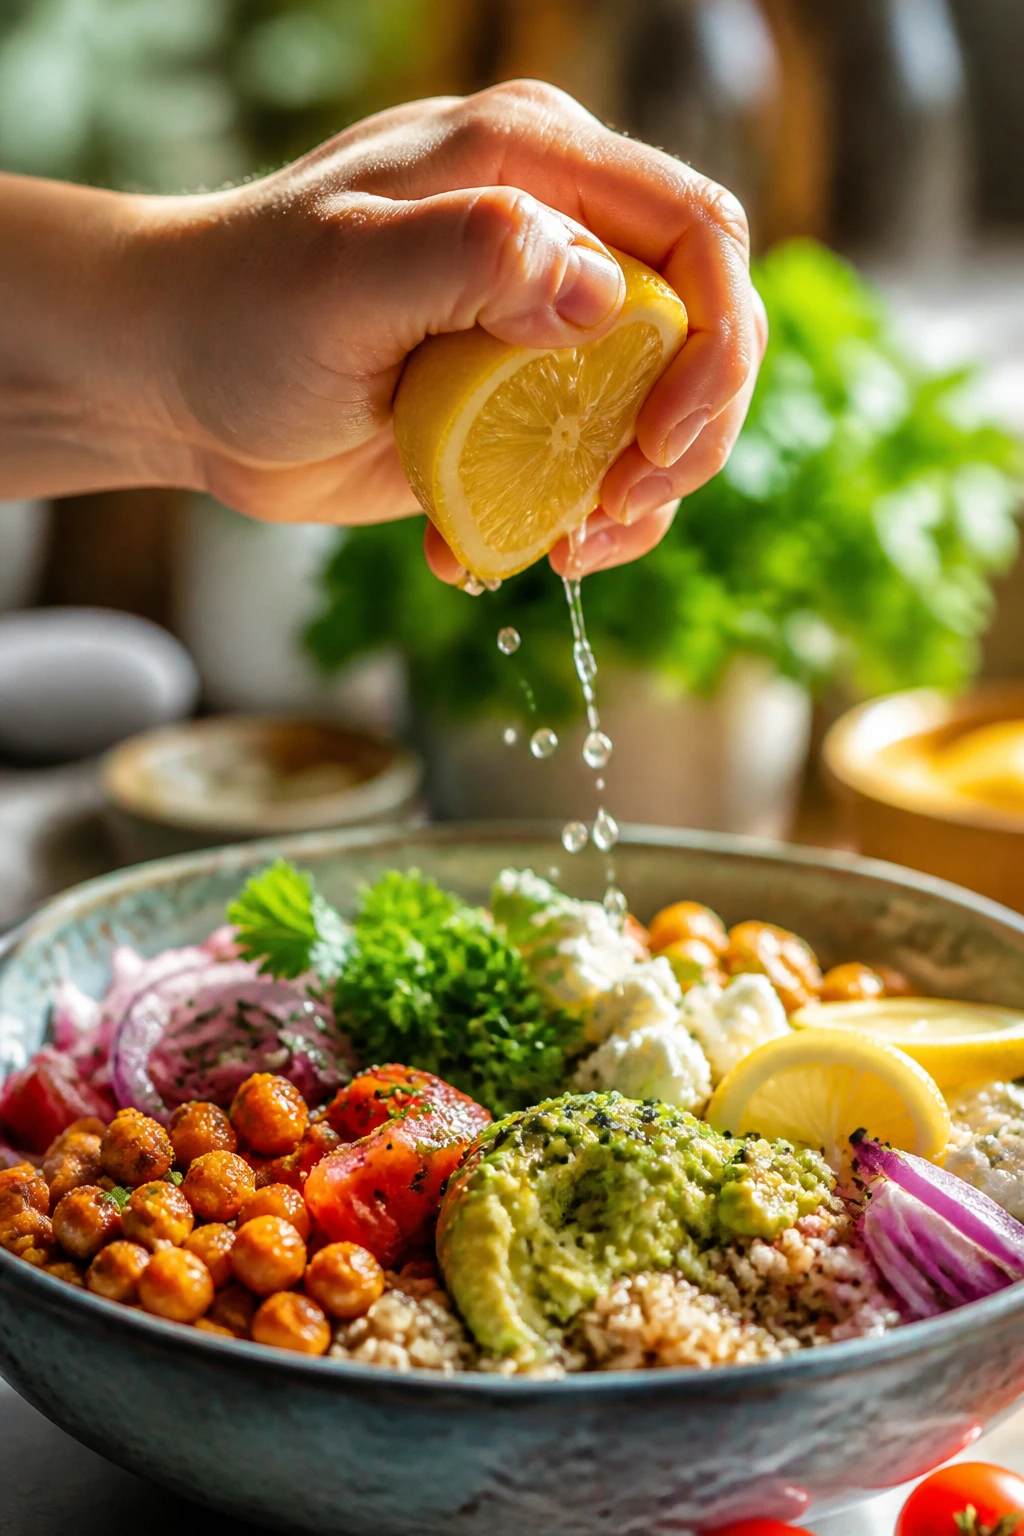
Flavor Enhancement: Add one finishing hit of acid at the end of every savory meal. Lemon juice, lime juice, red wine vinegar, or a splash of pickle brine can wake up a chilled container in a way salt alone can’t.
Customization: Keep the base mild and put the heat at the table. Chili crisp, hot sauce, red pepper flakes, harissa, and sliced jalapeños let different family members season their own portion without turning the whole pan fiery.
Serving Suggestions: Fresh herbs matter more in meal prep than in a just-cooked dinner. Parsley on chicken bowls, dill on salmon, cilantro on fajita bowls, basil on pasta, or scallions on chili give the food a clean top note right before it hits the plate.
Make-It-Yours: For gluten-free eaters, use rice, quinoa, or potatoes instead of pasta and choose tamari over soy sauce. For dairy-free meals, tahini, olive oil, or avocado usually step in well where yogurt or cheese would go. For kids, keep sauces on the side and cut vegetables smaller so the pieces feel less suspicious.
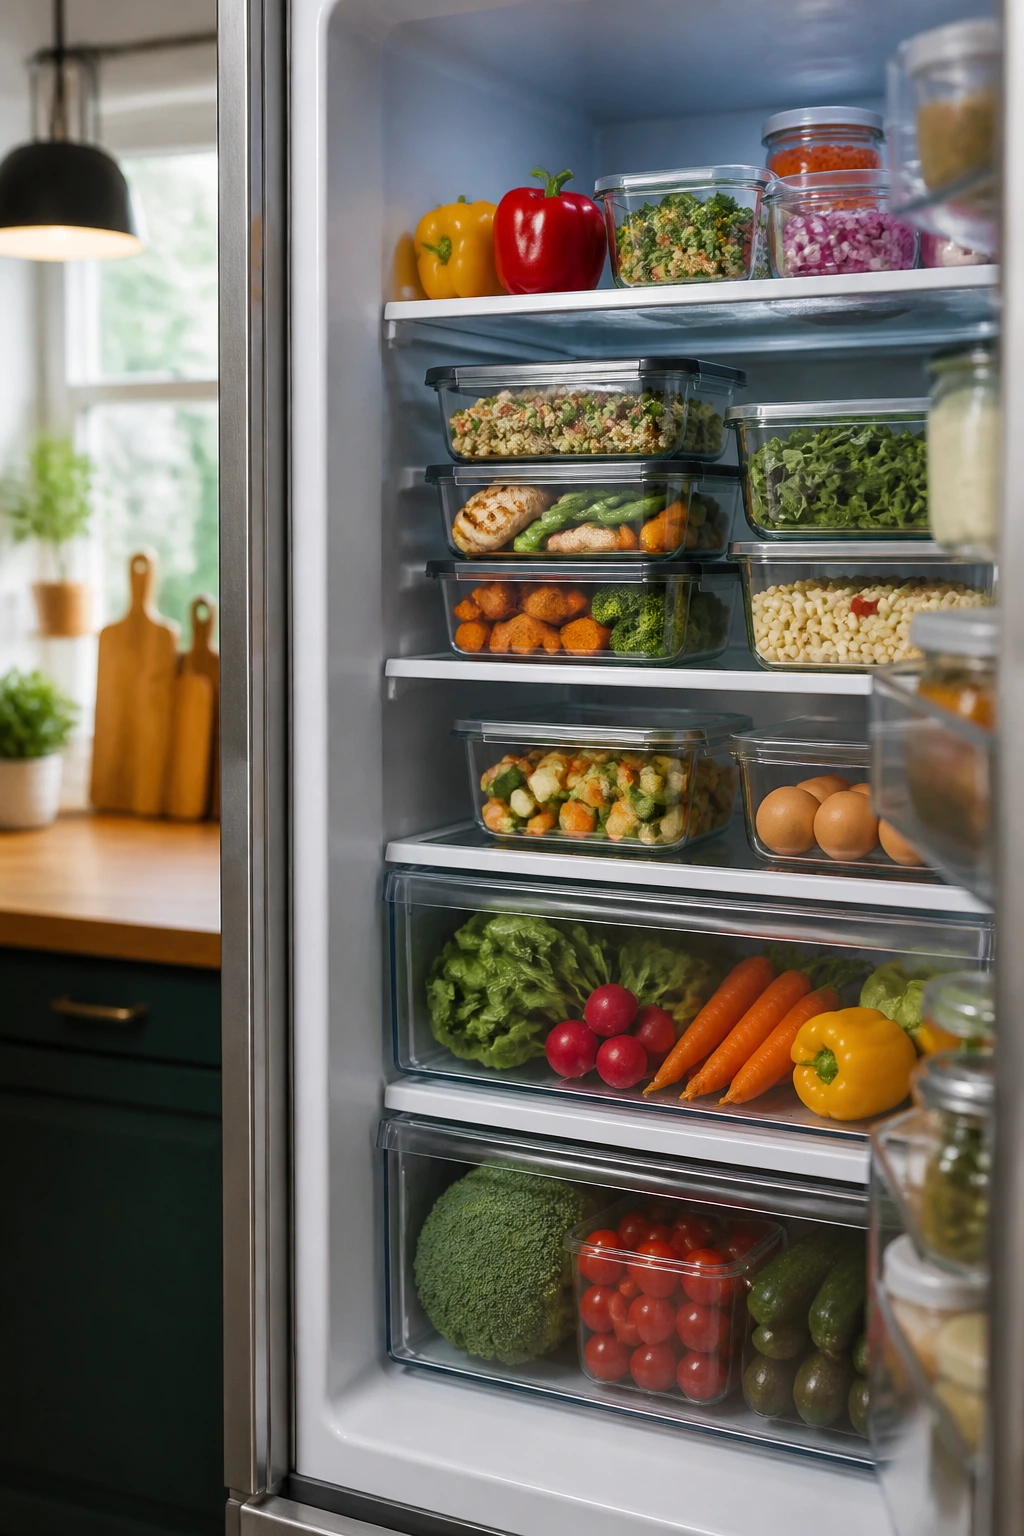
Make-Ahead, Storage, and Reheating Guidance
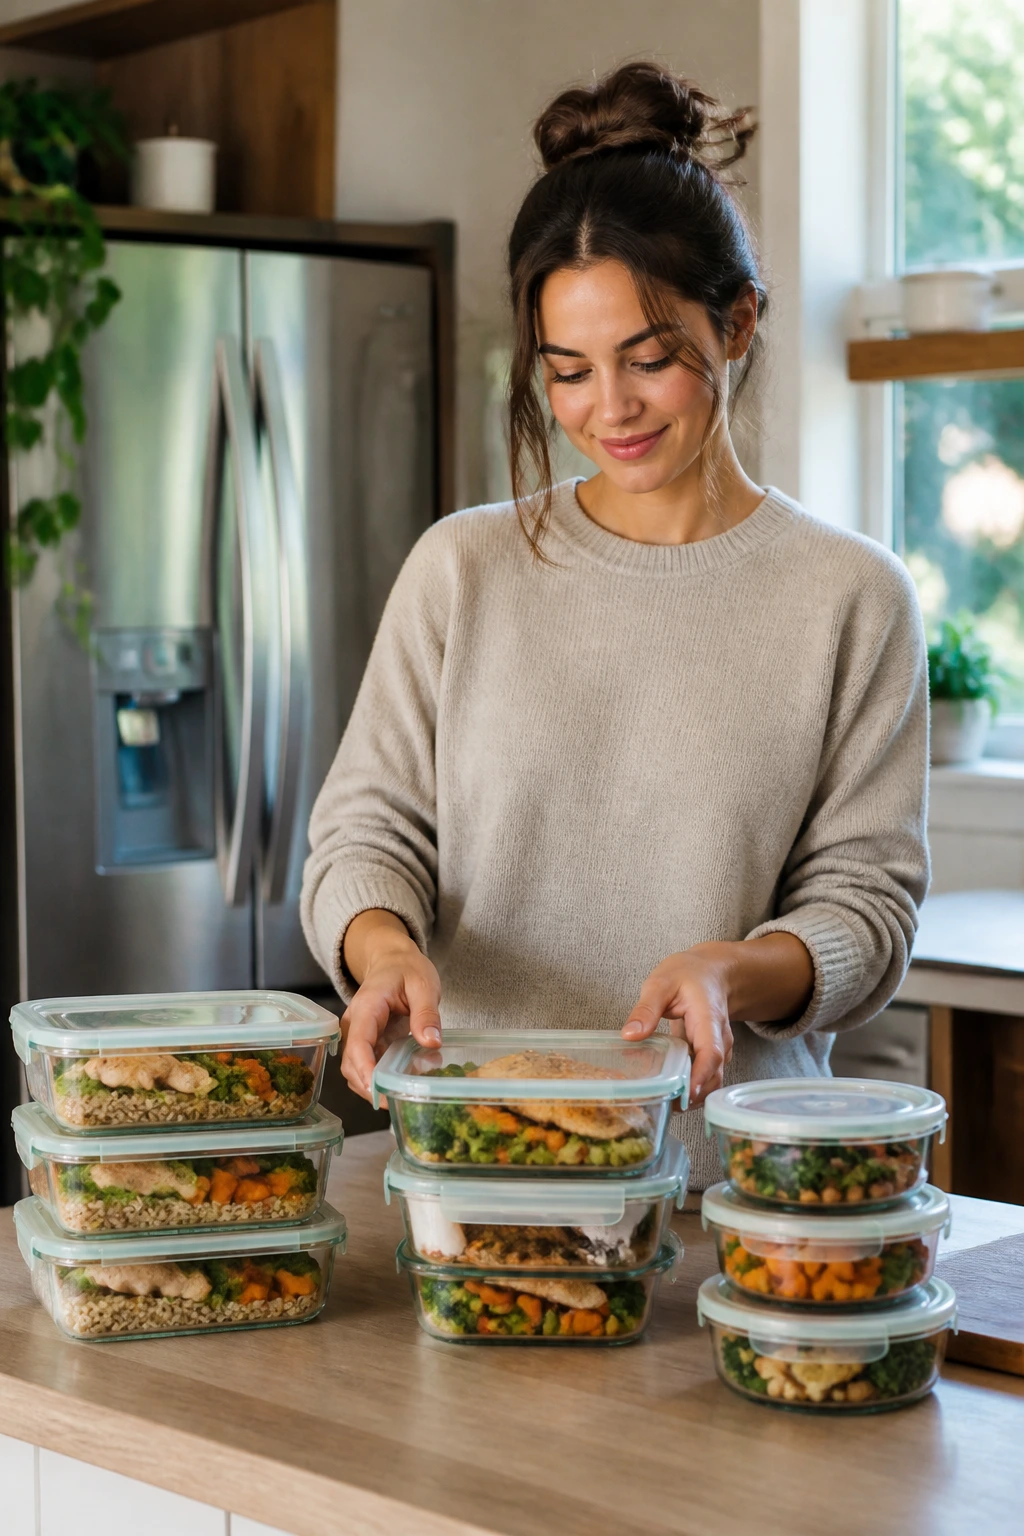
Most of these meals keep well for 3 to 4 days in the fridge if they’re cooled before sealing. Soups, chili, and lentil sauces can stretch to 4 to 5 days because they’re wetter and heat through evenly. Rice bowls, pasta salads, and roasted vegetable meals taste best in that first 72-hour window, when the textures still feel lively and the herbs haven’t gone dull.
Freezing works for several of them, though not all. Chili, lentil bolognese, turkey meatballs in sauce, curry, and some chicken bowls freeze well for up to 2 to 3 months. Pasta salads, cucumber-heavy dishes, avocado-based meals, and yogurt sauces are poor freezer candidates. They don’t come back the same, and there’s no point pretending otherwise.
Reheating should match the meal. Soups and chili do best on the stovetop over medium-low heat with a splash of broth or water. Rice bowls and fajita bowls can go in the microwave covered with a damp paper towel for 1 to 2 minutes, stirred, then heated again in short bursts. Roasted chicken and vegetables warm better in a 350°F oven for about 10 to 15 minutes if you want to keep a little texture. Salmon is the fussiest; reheat it gently and stop early, or eat it cold over greens.
Breakfast oatmeal squares are easy. A microwave gives them a soft, cake-like texture in 20 to 30 seconds, while a toaster oven brings back a little edge. If you’re reheating something with sauce, add the sauce after the first heat, not before. It sounds small. It isn’t.
Variations and Adaptations to Try
Vegetarian Protein Switch: Swap chicken or turkey for beans, lentils, tofu, or chickpeas in the bowls and chili recipes. The key is seasoning the meatless protein a little more aggressively, since it won’t bring its own savory flavor the way browned meat does.
Dairy-Light Fridge Prep: Use tahini, olive oil, or avocado instead of yogurt, sour cream, or cheese when you want the meals to travel better. Dairy can be fine, but it’s often the first thing that gets watery or dull after a few days.
Lower-Carb Plate: Replace part of the rice or pasta with cauliflower rice, extra greens, or roasted vegetables. I would not strip the starch out entirely unless you want the meals to feel thin; a little rice or pasta is what makes them feel like dinner.
Kid-Friendly Mild Batch: Keep the spice in the pan light and let adults add heat later. This works especially well for shawarma bowls, fajita bowls, chili, and curry, where one hot sauce bottle at the table solves the whole family argument.
Freezer-First Prep: Pick meals that freeze cleanly — chili, bolognese, curry, meatballs in sauce, and some chicken bowls — and portion them flat in freezer bags or small containers. They thaw faster and take up less space than giant bricks.
Mediterranean Swap: Use lemon, oregano, dill, cucumber, tomato, feta, and olive oil to shift several of these recipes into a brighter, herbier lane. It works especially well for chicken bowls, pasta salad, and salmon.
Common Mistakes to Avoid
Packing wet and dry foods together too early: Rice, pasta, and roasted vegetables soak up sauce fast. If you know the meal needs a little life later, keep the dressing, yogurt, salsa, or lemon wedge separate until serving.
Using one seasoning profile for everything: Meal prep gets boring when every container tastes like the same garlic powder. Switch between cumin, oregano, curry, dill, paprika, and ginger so the fridge doesn’t start to feel repetitive by Wednesday.
Overcooking because the food will be reheated: This is the big one. Chicken, salmon, pasta, rice, broccoli, and even oatmeal keep cooking a little after they leave the heat, and they get softer in storage. Pull them early enough that they still have some structure left.
Choosing delicate vegetables for long storage: Lettuce, cucumbers, raw tomatoes, and herbs are better as toppings than foundations. They can be part of the meal, but they should not carry the whole thing if you want it to last.
Forgetting salt in the base: Tomatoes, beans, rice, lentils, and grains all need enough salt to taste finished after chilling. Underseasoned food gets worse in the fridge, not better.
Ignoring how the meal will be eaten: A family meal prep plan fails when lunch needs a fork, a spoon, and a prayer. Keep the format simple. Bowls, soups, bakes, salads, and squares beat fiddly meals that need extra assembly on a busy morning.
Frequently Asked Questions
Can I prep all 15 meals on one Sunday?
You can, but I wouldn’t unless you have a large kitchen and a very strong dislike of rest. Most people do better batching 3 to 5 recipes at a time so the fridge doesn’t overflow and the food still tastes fresh by midweek.
Which of these meals hold up best for lunch at school or work?
Chili, lentil bolognese, turkey taco quinoa bowls, chicken bowls, pasta salad, and oatmeal squares all travel well. Meals with sauce on the side or a sturdy base usually survive a lunch bag better than anything too delicate or wet.
What’s the best protein if I want the least dry leftovers?
Chicken thighs, ground turkey in sauce, salmon eaten within a couple of days, tofu that’s been pressed, and lentils all do better than plain chicken breast. Moisture and sauce matter more than people like to admit.
Can I freeze rice bowls and pasta dishes?
Rice bowls freeze well if you keep the sauce separate. Pasta is trickier; sauces freeze better than the finished pasta. If you can, freeze the sauce and cook the noodles fresh or undercook them a bit before freezing.
How do I keep vegetables from getting soggy?
Roast them hot, don’t crowd the pan, and cool them before sealing the container. For raw vegetables like cucumber or tomato, keep them as a fresh topping instead of mixing them into the main batch.
Do these meals work for picky eaters?
Yes, if you keep the base mild and build in toppings at the end. A child who refuses cilantro can still eat the same chicken, rice, and beans as everyone else if the herbs and sauces stay optional.
What if the food tastes bland after reheating?
Add acid first, then salt, then a little fat. A squeeze of lemon or lime, a spoonful of yogurt, or a splash of vinegar usually fixes the flatness faster than piling on more spice.
How far ahead can I cook the grains and proteins?
Rice, quinoa, lentils, chicken, turkey, and chili base can be cooked 1 to 3 days ahead and held in the fridge, but the texture is best if you portion everything into containers within a few hours of cooking. The longer hot food sits in a big pot, the less fresh it tastes later.
Which recipes are best for freezing and thawing in single portions?
Chili, curry, lentil bolognese, meatballs in sauce, and soup are the easiest. They thaw evenly in a microwave or overnight in the fridge, and you’re not forced to defrost a whole family-sized pan just to get through one lunch.
A Fridge That Works Harder
Meal prep Sundays do not need to look glamorous to work. They need to be steady, repeatable, and honest about what gets eaten after three days in a container. That usually means strong seasoning, sturdy ingredients, and a few bright things added at the end when the food lands on the table.
The best part is that once you build a small rotation — a bowl, a soup, a pasta, a breakfast bake, maybe one sheet-pan dinner — the whole week stops feeling like a series of separate emergencies. The fridge starts doing some of the work for you. That’s the point, really. Keep the food solid, keep the prep simple, and let Sunday carry a little more of Monday than it used to.