
Picky eaters usually aren’t rejecting nutrition. They’re rejecting surprise.
A bowl that looks too wet, a sauce that tastes sharp, a piece of chicken that turns stringy by day three — any one of those can send a carefully packed lunch straight into the trash. That’s why healthy meal prep for picky eaters has to be built around familiar flavors, steady textures, and protein that still tastes like food after a couple of days in the fridge.
The sweet spot is narrower than most people think. You want meals that feel calm on the plate: chicken, turkey, eggs, beef, rice, potatoes, pasta, mild cheese, and sauces that stay on the side until the last minute. You also want enough protein to keep the meal from turning into a snack three hours later. That part matters more than people admit.
The good news is, this style of prep does not need fancy ingredients or a giant Sunday marathon. It needs a few solid recipes that reheat well, stay recognizable, and don’t get weird when they sit overnight. A fridge full of food people actually eat is a beautiful thing. So let’s start there.
Why These Meal Prep Boxes Get Eaten
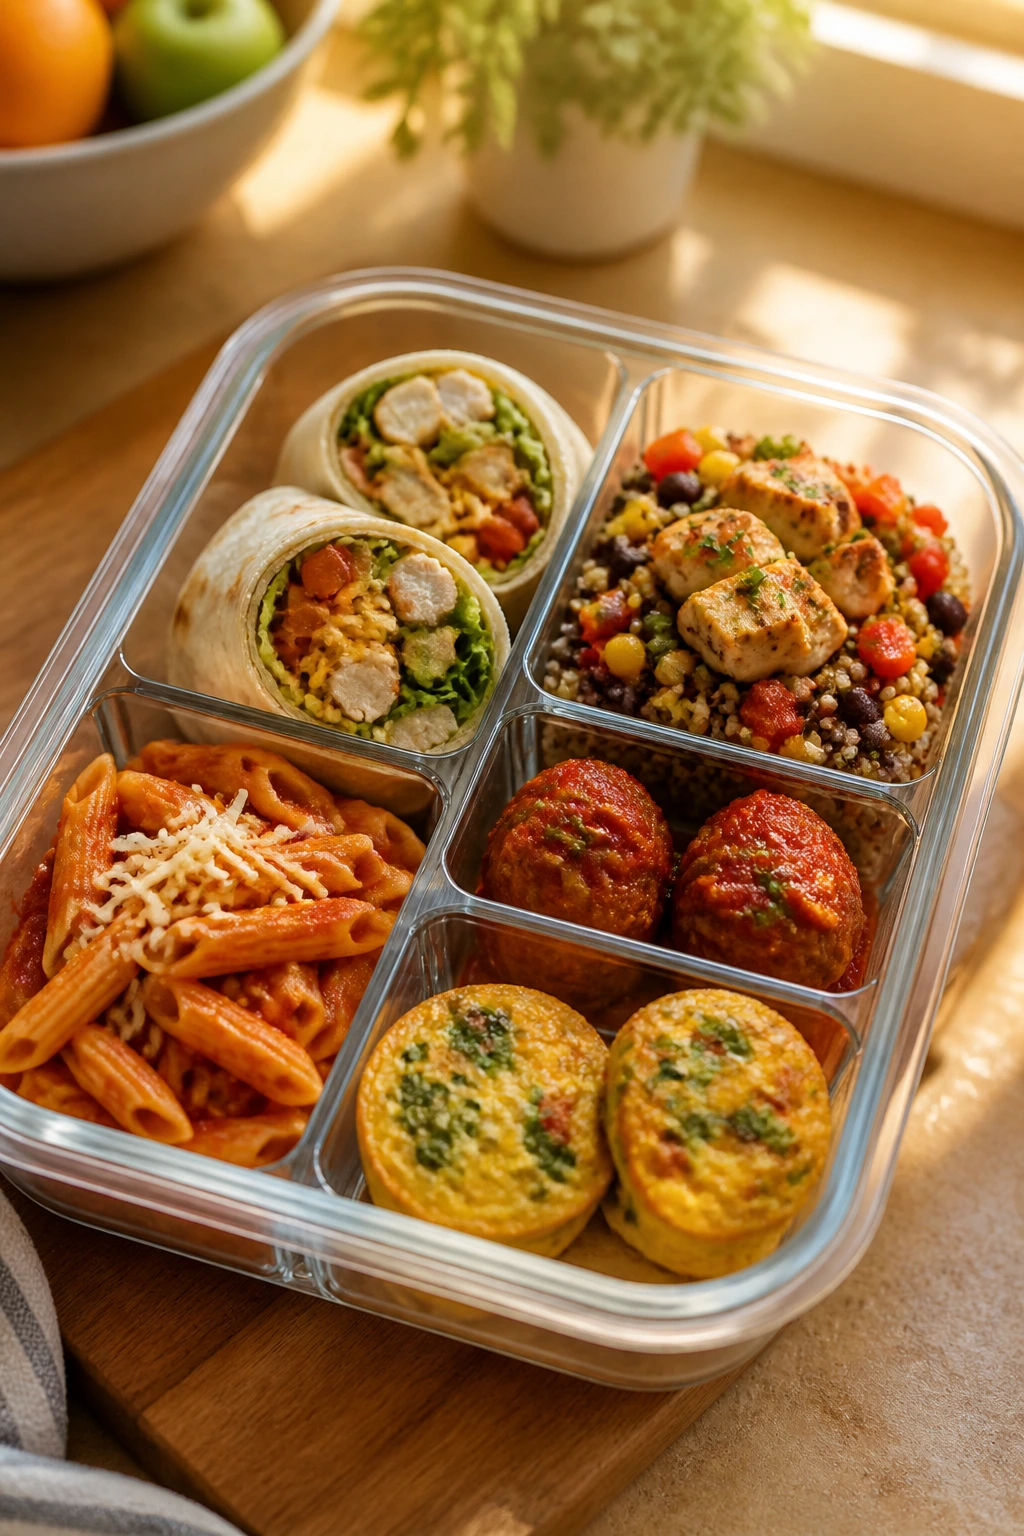
- Familiar shapes win: Burritos, bowls, pasta, meatballs, and egg muffins feel recognizable before the first bite, which makes them easier to accept than a random “clean eating” mash-up.
- Protein does the heavy lifting: Most of these recipes land around 20 to 35 grams of protein per serving, so lunch keeps people full instead of sending them hunting for crackers an hour later.
- Texture stays under control: These dishes are chosen because they still behave after chilling — roasted potatoes stay firm, rice stays fluffy if packed right, and baked pasta doesn’t turn to paste.
- Sauces are flexible: Several recipes let you keep dressing, salsa, or glaze on the side, which is a small thing with a huge payoff for picky eaters.
- The flavors stay mild on purpose: Garlic, cheddar, honey, ranch, taco seasoning, Parmesan, and soy-based glazes show up again and again because they read as safe, not suspicious.
- Batch cooking feels manageable: A lot of the ingredients overlap, so you can roast potatoes, cook rice, brown meat, and still feel like you’ve only had one decent cooking session.
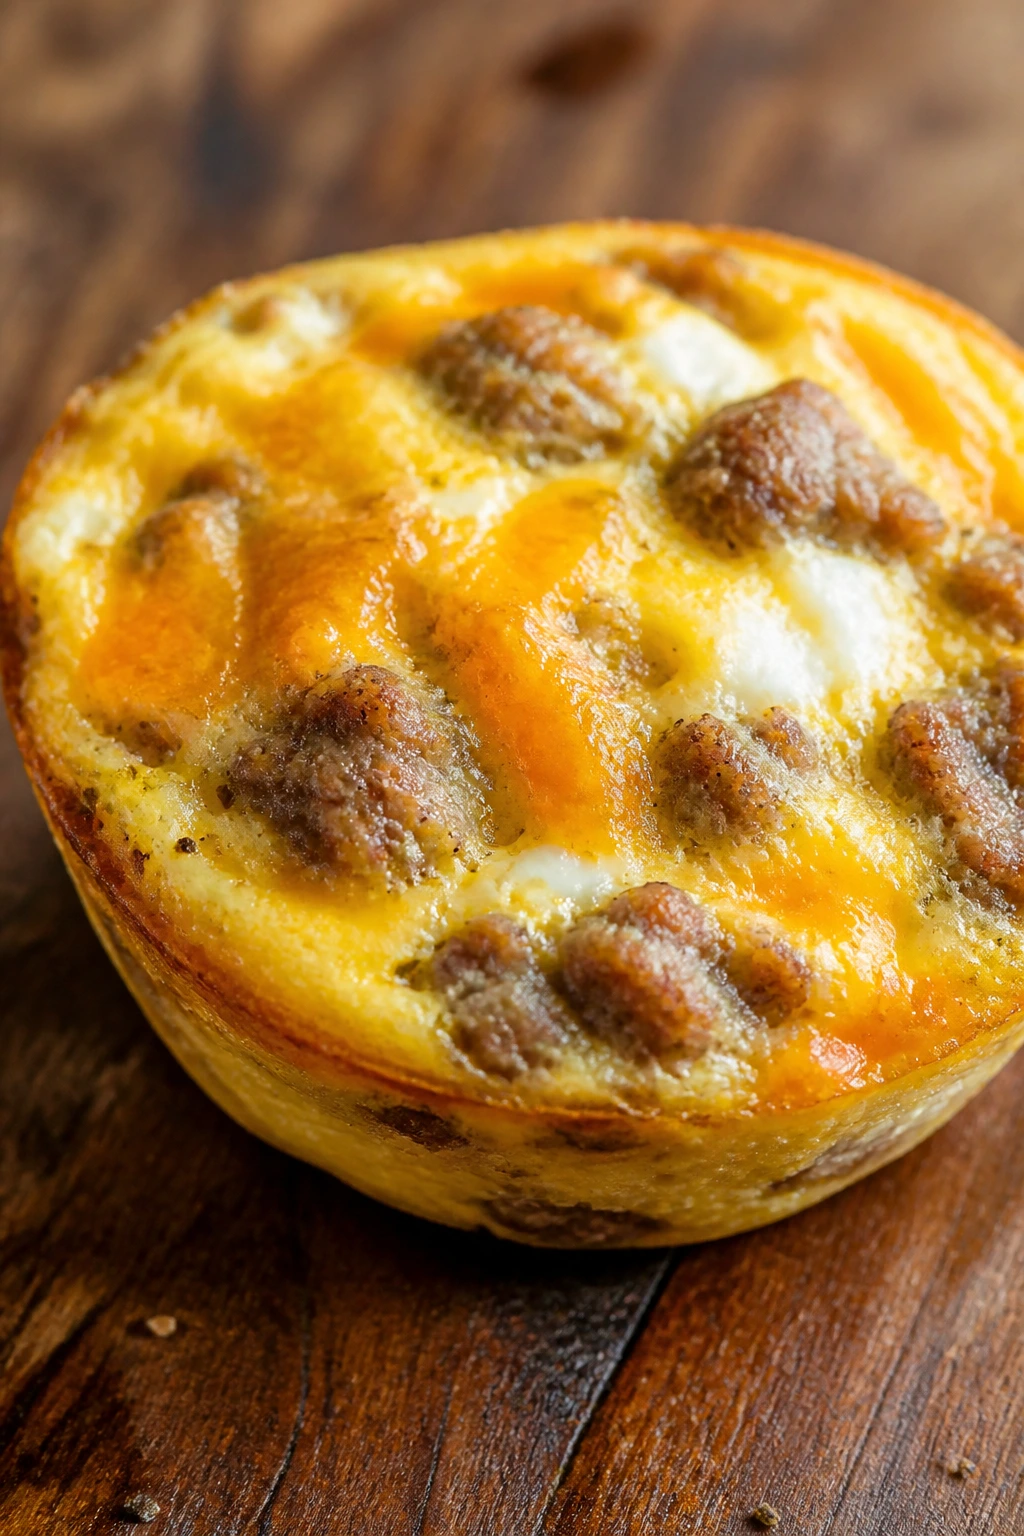
1. Turkey Sausage Egg Muffins
These little egg cups are one of the few breakfast meal prep foods that still feel decent on day three. The edges get a little golden, the centers stay tender, and the cheddar gives each bite a familiar, salty finish. If you’ve ever opened a container of scrambled eggs and found a rubbery brick inside, this is the fix.
Why It Works:
Turkey sausage, eggs, and cottage cheese make a high-protein base without tasting like a health-food project. The cottage cheese melts into the eggs and keeps the texture soft instead of dry, which matters a lot after reheating. Each muffin lands around 12 to 14 grams of protein, and the bite-size shape makes them easy to pack with fruit, toast, or a handful of cherry tomatoes. They’re also the rare breakfast that can be eaten cold if the morning gets messy.
Key Ingredients:
- 8 large eggs
- 1/2 cup cottage cheese
- 8 oz turkey breakfast sausage
- 1 cup shredded cheddar cheese
- 1/2 cup diced red bell pepper
- 1/4 cup finely chopped green onion
- 1/2 teaspoon kosher salt
- 1/4 teaspoon black pepper
- 1 teaspoon butter or oil for greasing the pan
Quick Steps:
- Preheat the oven to 375°F and grease a 12-cup muffin tin very well with butter or oil.
- Cook the turkey sausage in a skillet over medium heat for 5 to 7 minutes, breaking it into small crumbles until it is no longer pink.
- Stir in the bell pepper and cook for 2 minutes, just until it softens slightly.
- Whisk the eggs, cottage cheese, salt, and pepper in a large bowl until the mixture looks mostly smooth.
- Divide the sausage mixture and cheddar among the muffin cups, then pour the egg mixture over the top, filling each cup about three-quarters full.
- Bake for 18 to 22 minutes, until the centers are set and the tops no longer wobble when the pan is nudged.
- Cool in the pan for 10 minutes before loosening the edges with a butter knife.
Equipment for This Recipe:
- 12-cup muffin tin
- Large skillet
- Mixing bowl and whisk
- Measuring cups and spoons
- Rubber spatula or spoon
How to Serve This Dish:
I like these with apple slices and a piece of toast, or tucked into a lunchbox with grapes and cucumber sticks. Two muffins make a solid breakfast; three is the better number if the morning is long and nobody is stopping for a snack until noon. Warm them until the cheese just softens, not until the eggs dry out.
Pro Tips for This Recipe:
- Grease the muffin tin like you mean it. Egg muffins cling to bare metal with an almost personal grudge.
- If cottage cheese texture bothers your crowd, blend it with the eggs first. The curds disappear.
- Let the muffins cool before storing them. If you seal them hot, steam softens the tops.
- Freeze them in a single layer first, then bag them. That keeps them from sticking together into one sad block.
Variations on This Dish:
- Ham and Cheddar Swap: Replace the turkey sausage with 1 cup diced ham for a sweeter, saltier flavor that tastes more like a deli breakfast.
- Spinach Sneak Version: Fold in 1 cup very finely chopped spinach. It disappears better than bigger greens and won’t change the taste much.
- Mini Burrito Cups: Add 1/2 cup diced potato or hash browns for a more filling, diner-style version.
Common Mistakes to Avoid with This Dish:
- Skipping the cooling time: The muffins will stick and tear if you try to remove them too soon. Give them 10 minutes in the pan.
- Overfilling the cups: Egg rises a little. Fill too high and you’ll get overflowed, jagged tops instead of neat little rounds.
- Baking until the tops look dry: That’s too far. Pull them when the centers are just set; they finish firming as they cool.
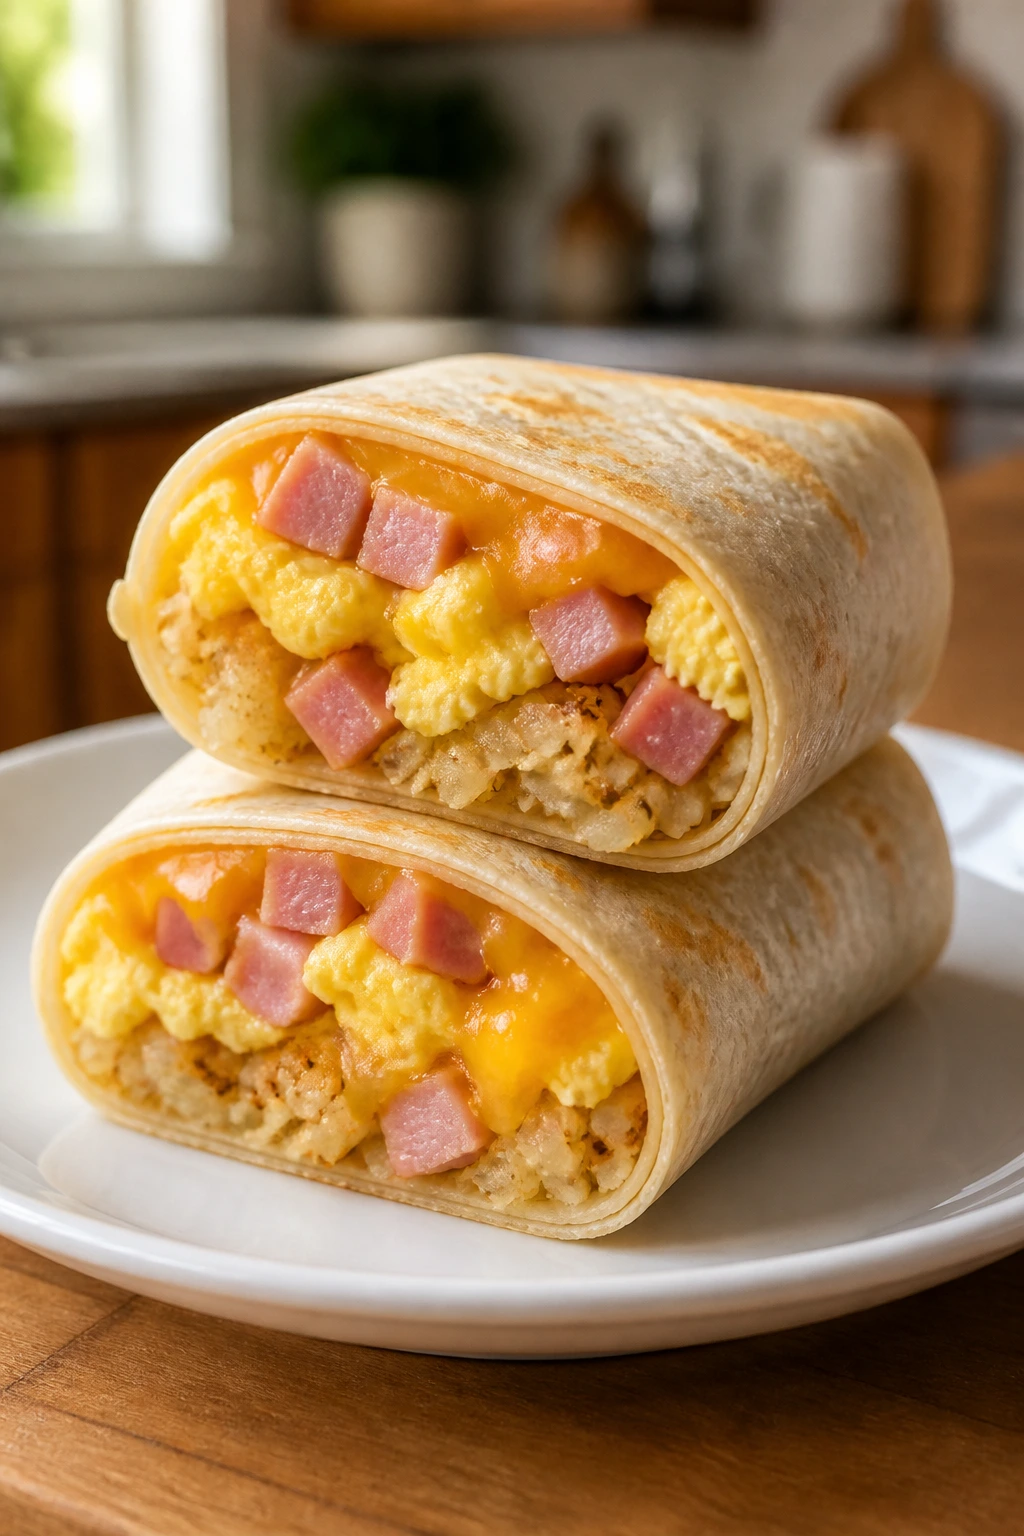
2. Ham and Cheese Breakfast Burrito Wraps
A good breakfast burrito should survive the fridge without falling apart the second someone lifts it with one hand. These do. The tortilla stays soft, the eggs stay fluffy, and the ham gives each bite enough salt to make the cheese taste richer.
Why It Works:
This is the kind of meal prep that behaves well because every piece has a job. Eggs bring the protein, ham brings the familiar lunch-meat flavor, and the hash browns give the filling enough body that it doesn’t slide around inside the tortilla. One burrito can carry roughly 24 to 28 grams of protein, depending on the ham and cheese you use. That’s plenty for a breakfast that needs to last.
Key Ingredients:
- 8 large eggs
- 1 tablespoon butter
- 1 1/2 cups diced ham
- 2 cups frozen shredded hash browns
- 1 cup shredded cheddar cheese
- 6 large flour tortillas
- 2 tablespoons milk
- 1/2 teaspoon kosher salt
- 1/4 teaspoon black pepper
- 1 tablespoon chopped chives, optional
Quick Steps:
- Cook the hash browns in a skillet over medium heat with a little oil, pressing them into the pan and leaving them alone until the bottom turns crisp and golden, about 4 to 5 minutes per side.
- Scramble the eggs with the milk, salt, and pepper in butter over medium-low heat until they are soft and just barely set.
- Warm the diced ham in the same skillet for 1 minute, just to take the chill off and sharpen the flavor.
- Lay the tortillas flat and divide the hash browns, eggs, ham, cheddar, and chives down the center of each one.
- Fold the sides in, roll tightly, and place seam-side down in a dry skillet for 1 to 2 minutes per side so the tortilla seals.
- Cool completely, then wrap each burrito in foil or parchment before refrigerating or freezing.
Equipment for This Recipe:
- Large nonstick skillet
- Spatula
- Mixing bowl and fork or whisk
- Foil or parchment paper
- Sheet pan for cooling
How to Serve This Dish:
These work well on their own, but a little fruit on the side makes breakfast feel less rushed. If you’re packing them for school or work, cut each burrito in half so the filling stays centered and the lunchbox looks less like a brick. Ketchup or hot sauce should go in a separate cup, not inside the wrap.
Pro Tips for This Recipe:
- Let the filling cool before rolling. Hot eggs turn the tortilla gummy.
- Use medium tortillas if your family hates giant burritos; they’re easier to seal and reheat.
- Don’t overload the center. A modest burrito wraps cleanly. A stuffed burrito bursts at the seam.
- Freeze them individually, then stack them in a bag. That saves a lot of morning arguing.
Variations on This Dish:
- Turkey Bacon Version: Swap the ham for cooked turkey bacon and keep the rest the same. The flavor gets smokier and a little less salty.
- Mild Southwest Burrito: Add 2 tablespoons diced green chiles and a spoonful of salsa on the side. Keep the spice low and the flavor familiar.
- Extra-Egg Protein Wrap: Add 4 egg whites to the scramble for a leaner, higher-protein filling without changing the texture much.
Common Mistakes to Avoid with This Dish:
- Rolling while the filling is hot: Steam makes the tortilla soft and slippery. Cool the filling first.
- Using wet hash browns: Soggy potatoes make the burrito split and reheat badly. Cook them until crisp.
- Forgetting to toast the seam: That quick skillet step keeps the burrito closed and gives it a better bite.
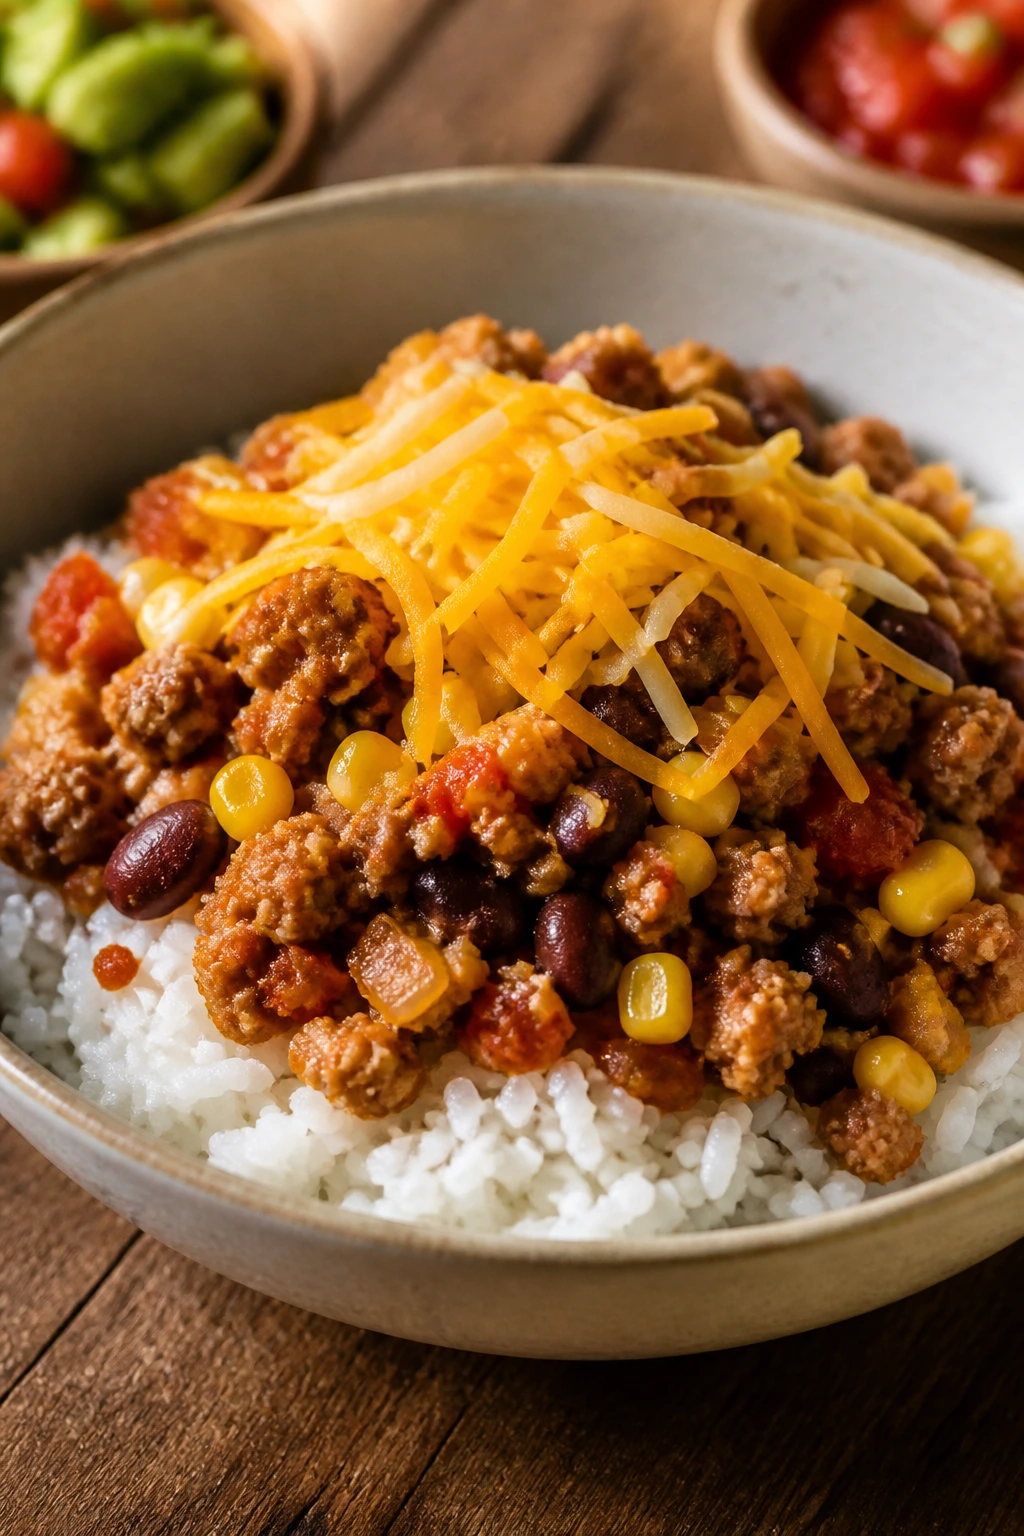
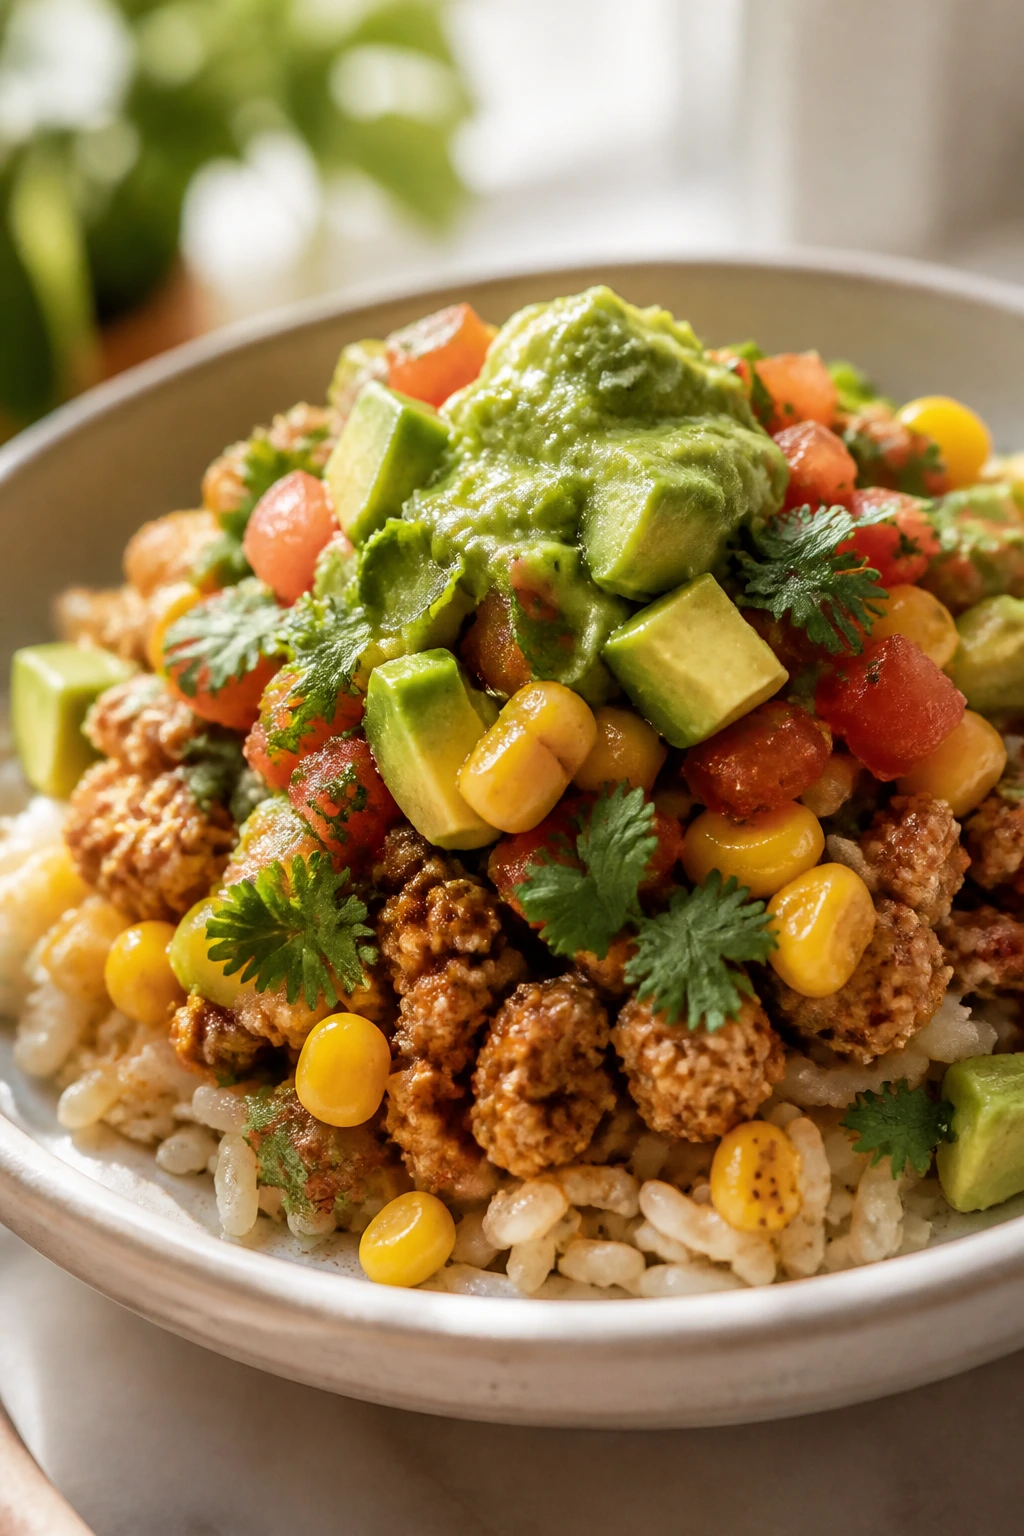
3. Mild Turkey Taco Rice Bowls
This is taco night stripped down to the parts picky eaters usually trust: rice, seasoned meat, cheese, and a little salsa if they want it. Nothing weird. Nothing fussy. Just a bowl that tastes like lunch, not a challenge.
Why It Works:
Ground turkey is a smart meal-prep protein because it reheats cleanly and takes on seasoning fast. The rice gives the bowl a soft base, while beans and corn add enough texture to keep it from feeling flat. One serving usually lands around 30 grams of protein, and the whole thing can be packed with salsa, avocado, or lettuce kept apart until lunch. That separate-parts trick matters more than people think.
Key Ingredients:
- 1 1/2 pounds ground turkey
- 1 tablespoon olive oil
- 2 tablespoons mild taco seasoning
- 1/2 cup low-sodium chicken broth
- 3 cups cooked white rice
- 1 can black beans, drained and rinsed
- 1 cup frozen or canned corn, drained
- 1 cup shredded cheddar cheese
- 1 cup salsa
- 1 avocado, sliced, optional
Quick Steps:
- Cook the rice and let it cool slightly so it doesn’t steam itself soggy in the container.
- Heat the olive oil in a large skillet over medium-high heat, then add the ground turkey and cook for 6 to 8 minutes, breaking it up until no pink remains.
- Stir in the taco seasoning and chicken broth, then simmer for 2 to 3 minutes until the mixture looks glossy and lightly saucy rather than watery.
- Warm the black beans and corn in a small pan or microwave-safe bowl until just hot.
- Divide the rice among meal prep containers, top with turkey, beans, corn, and cheddar, and keep salsa and avocado separate if you’re packing ahead.
Equipment for This Recipe:
- Large skillet
- Saucepan or rice cooker
- Wooden spoon or spatula
- Meal prep containers with lids
- Knife and cutting board
How to Serve This Dish:
These bowls are better with a little fresh crunch on the side, so I like adding lettuce or cucumber after reheating. A few tortilla chips make the lunch feel more like taco night, and a small cup of salsa lets picky eaters decide how much flavor they want. If someone dislikes mixed food, pack the rice, turkey, and toppings in separate sections.
Pro Tips for This Recipe:
- Use 93/7 turkey if you want the bowl to stay moist without getting greasy.
- Don’t drown the meat in broth. You want it lightly coated, not soupy.
- Add avocado at the last minute. It browns fast and looks worse than it tastes.
- If your eater likes plain food, keep the salsa on the side and season the rice lightly with salt.
Variations on This Dish:
- No-Bean Taco Bowl: Skip the beans and add extra corn or more rice if beans are a dealbreaker.
- Cheesy Queso Style: Replace salsa with a few spoonfuls of warm queso on serving day.
- Lettuce Bowl Swap: Use shredded lettuce as the base for a colder, crunchier bowl.
Common Mistakes to Avoid with This Dish:
- Overcooking the turkey until it’s chalky: Stop once the pink is gone, then let the seasoning finish the job.
- Adding salsa before storage: It leaks into the rice and turns everything soft.
- Packing the avocado too early: It turns brown and mushy. Slice it fresh.
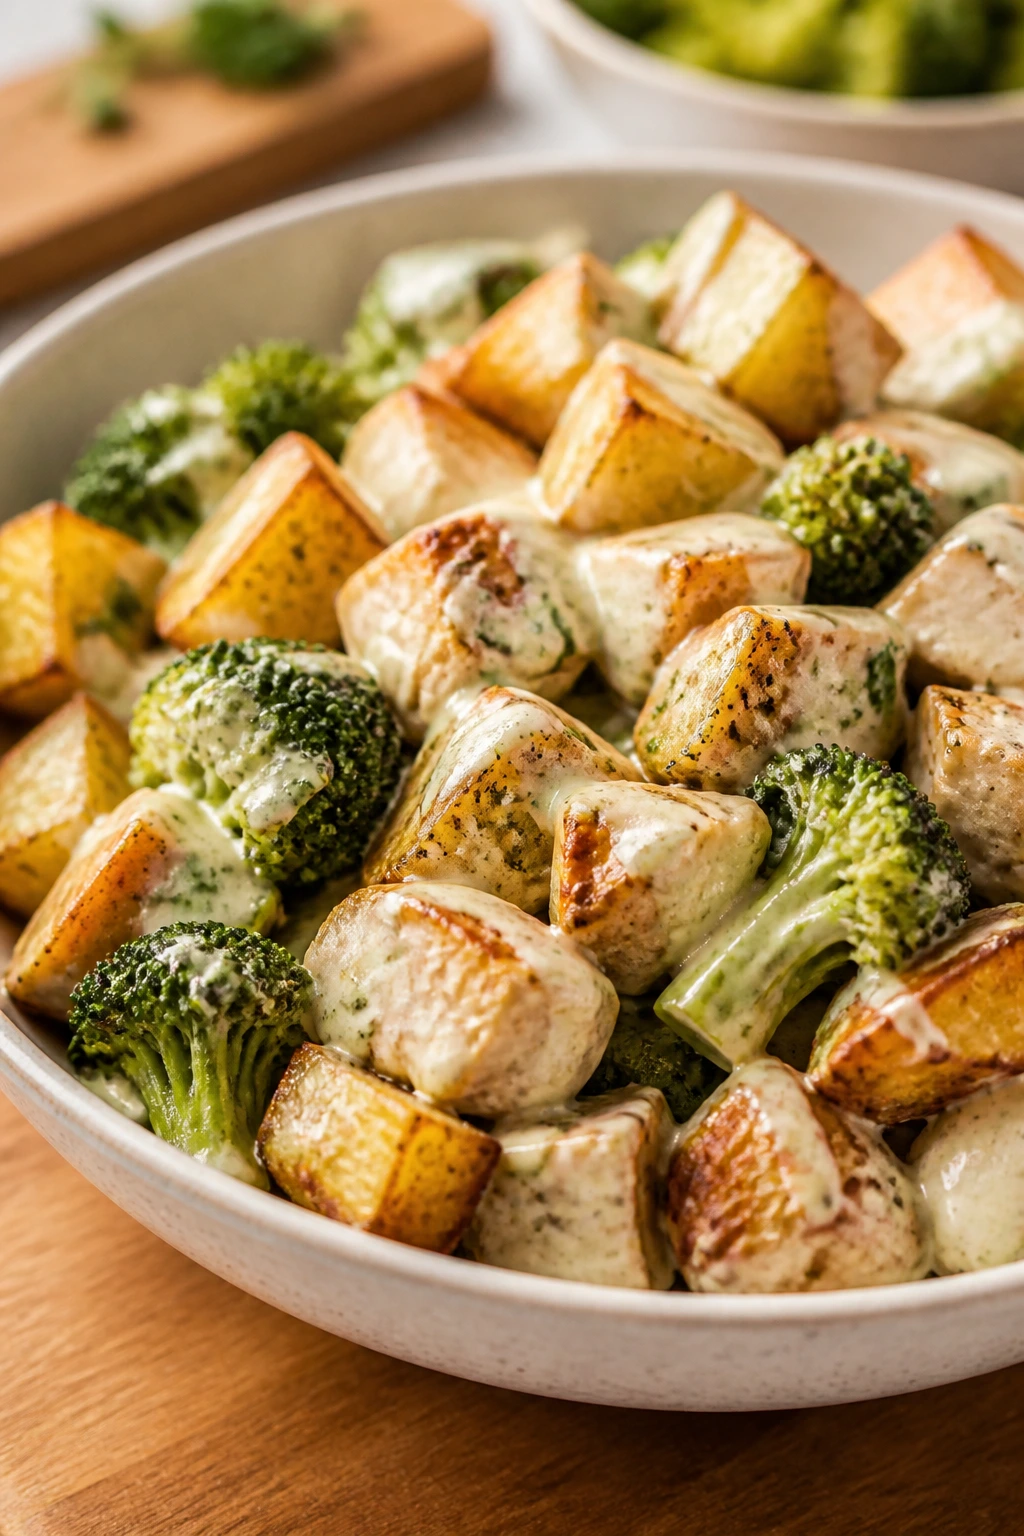
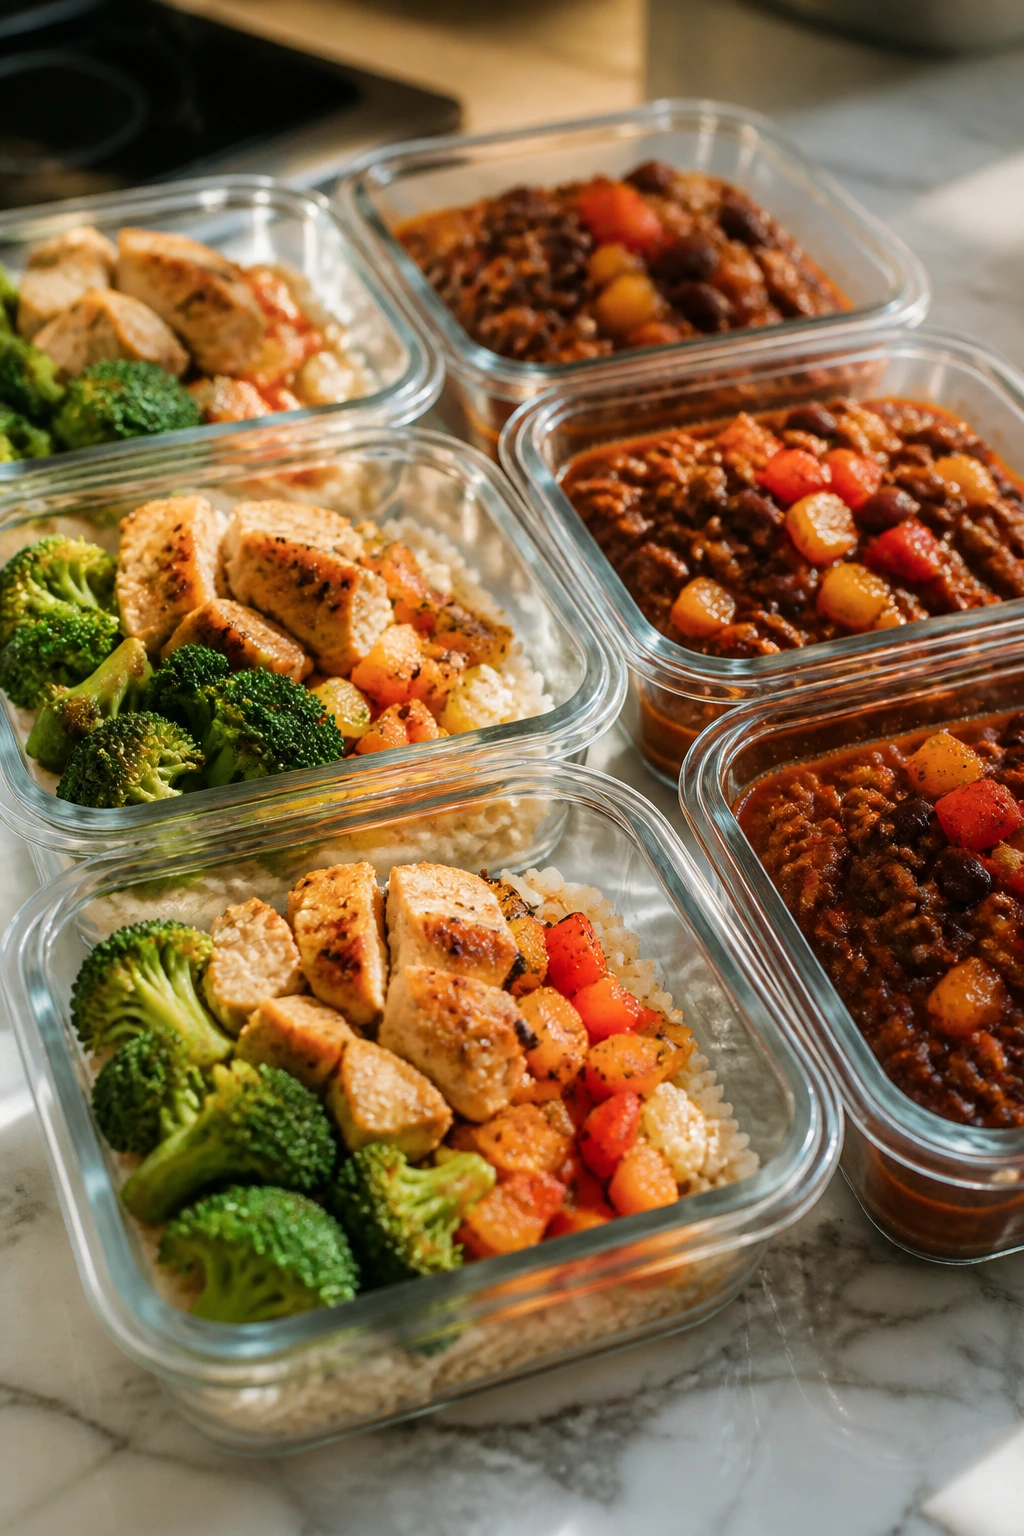
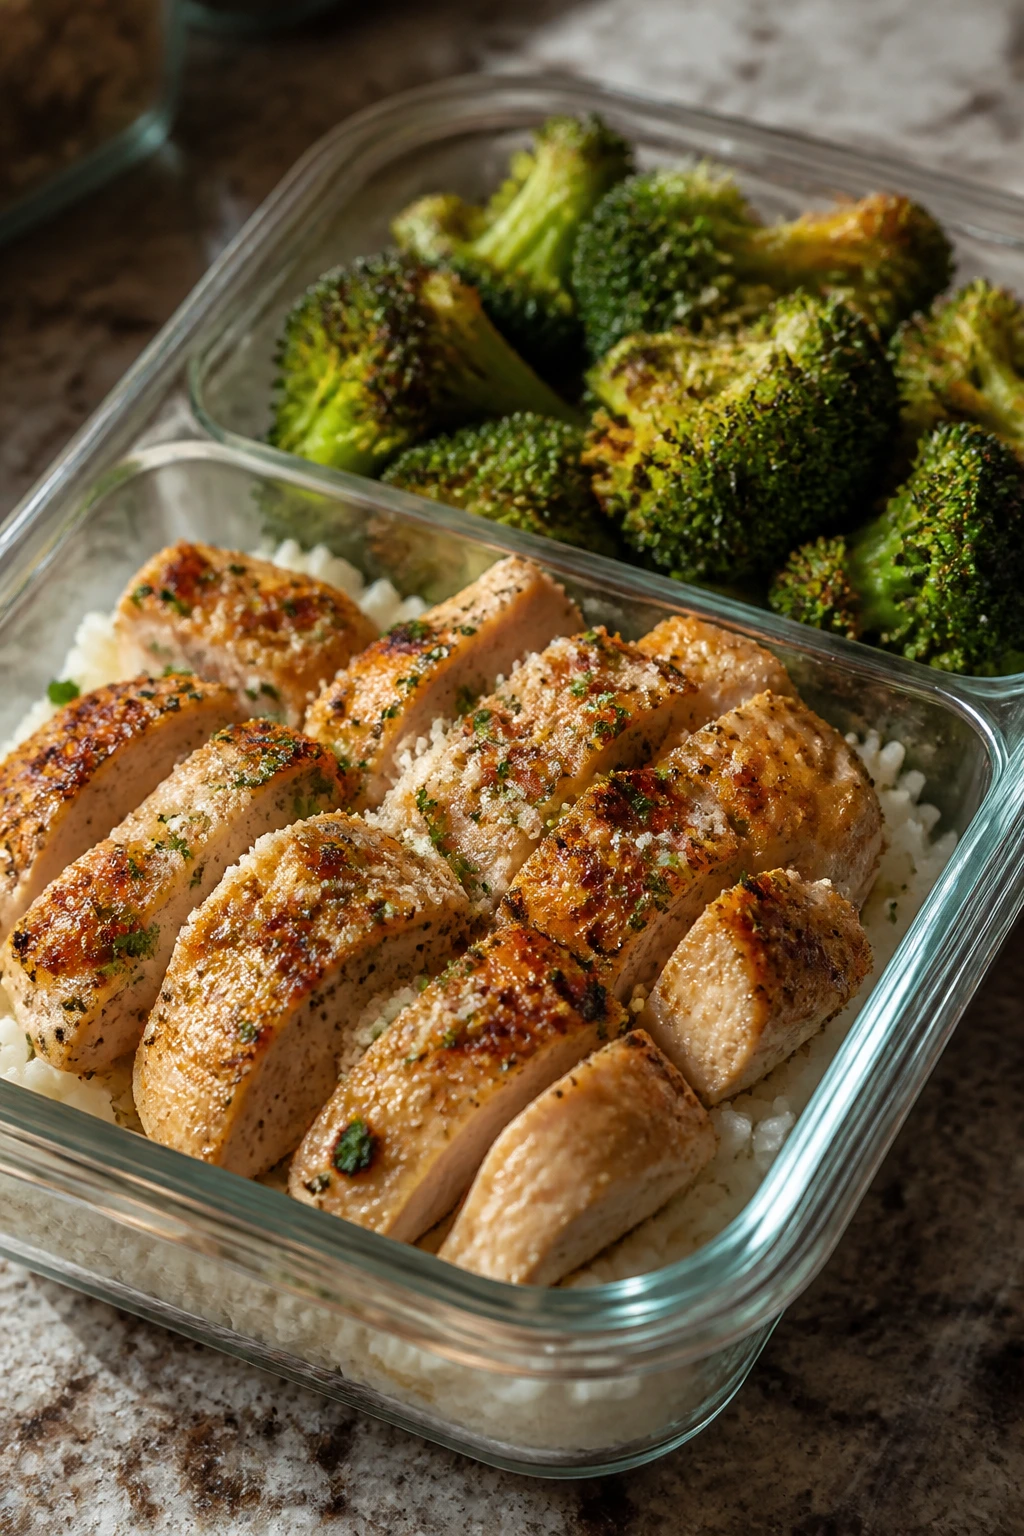
4. Garlic Parmesan Chicken and Broccoli Boxes
This one feels close to a classic takeout plate, only cleaner and a lot more predictable. The chicken gets savory and golden, the broccoli turns crisp at the edges, and the Parmesan sticks to everything in the best possible way. It’s the sort of lunch that makes a plastic container look more serious than it has any right to.
Why It Works:
Chicken thighs stay juicier than breasts during meal prep, which is one reason this box reheats so well. The broccoli roasts instead of steaming, so it keeps a little bite instead of going limp. Parmesan gives the whole thing a salty finish that reads familiar even to picky eaters, and the rice underneath catches the garlic butter so nothing tastes dry. That balance is the whole trick.
Key Ingredients:
- 2 pounds boneless, skinless chicken thighs
- 4 cups broccoli florets
- 2 tablespoons olive oil
- 4 cloves garlic, minced
- 1/2 cup finely grated Parmesan cheese
- 1 teaspoon Italian seasoning
- 1/2 teaspoon kosher salt
- 1/4 teaspoon black pepper
- 4 cups cooked rice
- 1 lemon, cut into wedges
Quick Steps:
- Preheat the oven to 425°F and line a rimmed sheet pan with parchment.
- Toss the broccoli with 1 tablespoon olive oil, half the salt, and half the pepper, then spread it out on one side of the pan.
- Rub the chicken thighs with the remaining oil, garlic, Italian seasoning, salt, and pepper, then place them on the other side of the pan.
- Roast for 20 to 25 minutes, until the chicken reaches 165°F at the thickest point and the broccoli has browned edges.
- Sprinkle the Parmesan over the chicken and broccoli while they’re hot, then portion everything over rice and add lemon at the table.
Equipment for This Recipe:
- Rimmed sheet pan
- Parchment paper
- Instant-read thermometer
- Mixing bowl
- Sharp knife
How to Serve This Dish:
This is good with plain rice, but it also works over mashed potatoes if you want a softer meal. The lemon wedge matters more than it looks; a small squeeze wakes up the garlic and keeps the Parmesan from tasting heavy. If you’re feeding a picky eater, keep the broccoli on the side and let them move it around the plate like they’re negotiating.
Pro Tips for This Recipe:
- Grate the Parmesan finely so it melts into the hot chicken instead of sitting in flakes.
- Don’t crowd the broccoli. If it piles up, it steams and loses the roasted edges.
- Chicken thighs forgive a few extra minutes; breasts do not. Check with a thermometer.
- A little lemon at the end makes the whole box taste fresher after reheating.
Variations on This Dish:
- Lemon-Herb Version: Add 1 teaspoon lemon zest and a little parsley for a brighter, less buttery finish.
- Cauliflower Rice Box: Swap the rice for cauliflower rice if you want a lower-carb lunch.
- Extra-Cheese Bake: Add a few tablespoons of mozzarella before the final minute of roasting for a thicker, gooier top.
Common Mistakes to Avoid with This Dish:
- Roasting chicken and broccoli together without spacing them out: The broccoli goes soft. Give it room.
- Using pre-shredded Parmesan only: It works in a pinch, but finely grated block cheese melts better here.
- Skipping the thermometer: Chicken that looks done but isn’t still needs a few minutes. Guessing is how dry chicken happens.
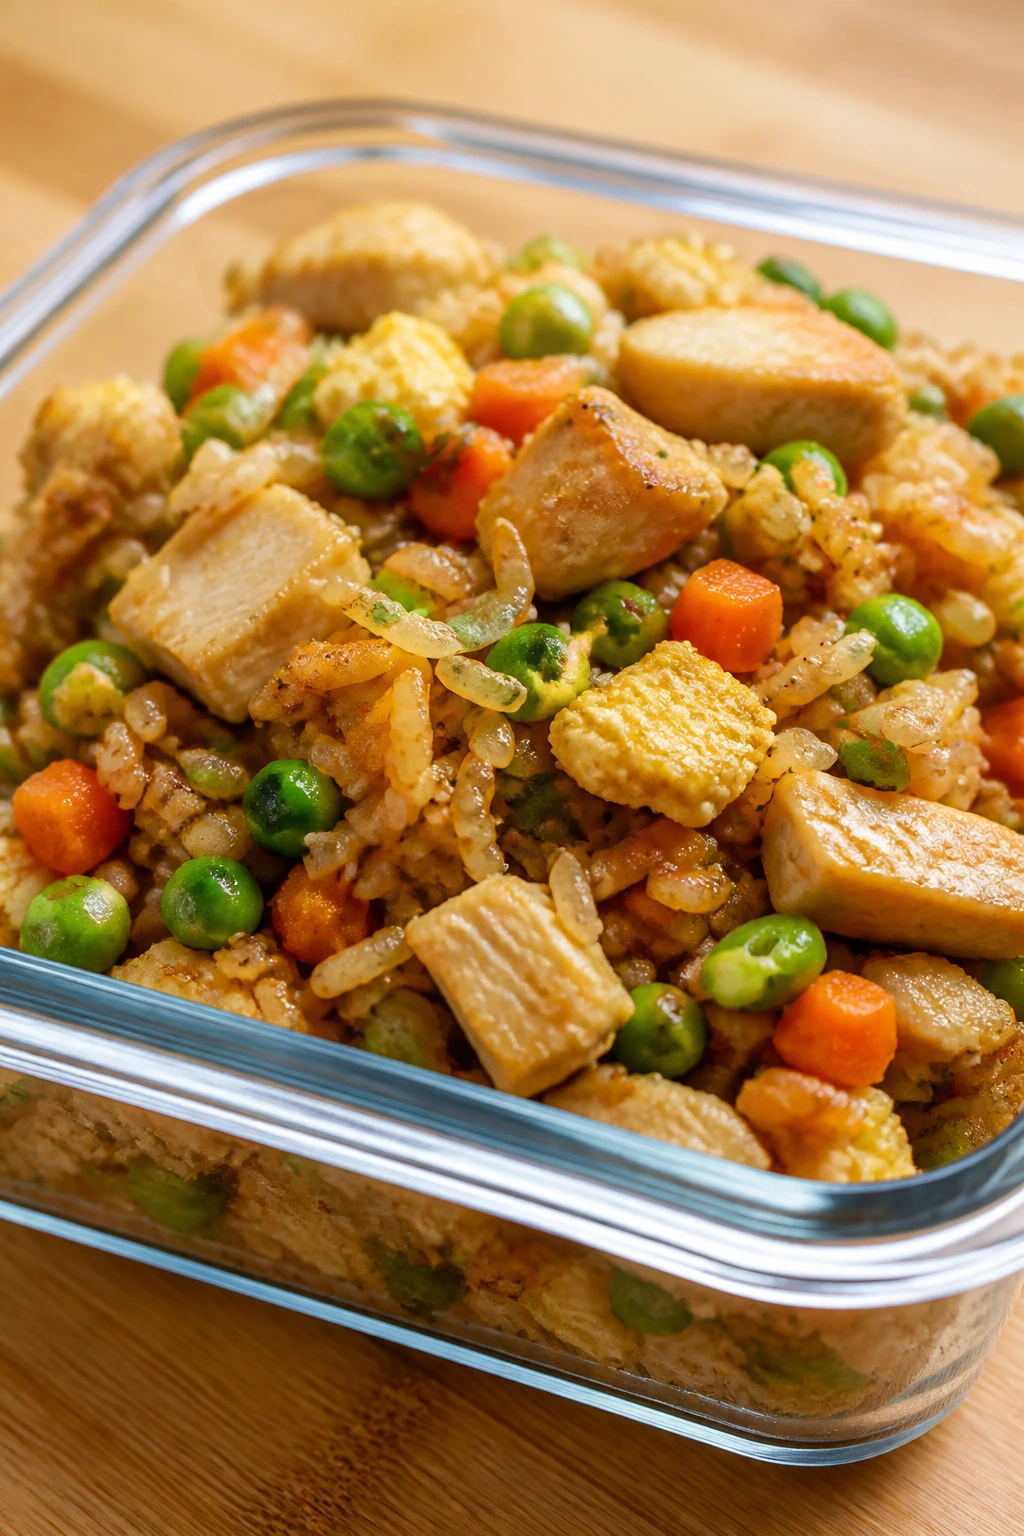
5. Chicken Fried Rice Meal Prep
If you want one container that feels familiar and doesn’t ask much of the eater, fried rice is a quiet hero. The rice stays separate enough to look tidy, the chicken gives it substance, and the peas and carrots blend in instead of announcing themselves from across the room. That is useful.
Why It Works:
Cold rice is the real secret here. It fries instead of turning mushy, which gives you those separate grains that make fried rice feel right. Eggs add more protein, chicken keeps the meal filling, and the soy-sesame sauce clings without flooding the pan. A serving can reach 30 grams of protein if you’re generous with the chicken. It also reheats well because nothing in it depends on delicate texture.
Key Ingredients:
- 3 cups cold cooked white rice
- 1 1/2 pounds cooked chicken breast, diced
- 3 large eggs
- 2 cups frozen peas and carrots
- 3 scallions, sliced
- 3 tablespoons low-sodium soy sauce
- 1 tablespoon sesame oil
- 2 tablespoons neutral oil
- 2 cloves garlic, minced
Quick Steps:
- Heat 1 tablespoon neutral oil in a large skillet or wok over medium-high heat.
- Scramble the eggs until just set, then transfer them to a plate.
- Add the remaining oil, garlic, peas, and carrots, and cook for 2 to 3 minutes until the vegetables are hot and no longer icy.
- Stir in the chicken and rice, breaking up any clumps with the spatula as you go.
- Add soy sauce and sesame oil, cook for another 3 to 4 minutes until the rice is hot and lightly toasted, then fold the eggs and scallions back in.
Equipment for This Recipe:
- Large skillet or wok
- Spatula
- Cutting board and knife
- Measuring spoons
- Airtight containers
How to Serve This Dish:
This one works by itself, though a few cucumber slices or a clementine on the side make the lunch feel less heavy. If you’re packing it for someone picky about mixed food, let the rice and chicken cool into a neat layer before sealing the container; it looks less chaotic that way. I’d keep extra soy sauce out of the box unless you know they want more salt.
Pro Tips for This Recipe:
- Use day-old rice. Fresh rice clumps and steams instead of frying.
- Don’t overload the pan. Work in batches if the skillet looks crowded.
- Dice the chicken fairly small so it mixes evenly through the rice.
- Sesame oil should finish the dish, not cook it from the start. Too much heat can make it taste harsh.
Variations on This Dish:
- Mild Sesame Version: Skip the garlic and add a little extra soy if you want a softer flavor.
- Veggie-Heavy Bowl: Add chopped zucchini or bell pepper, but cook off the moisture first.
- Brown Rice Swap: Use brown rice if you want more chew; just make sure it’s fully chilled before frying.
Common Mistakes to Avoid with This Dish:
- Using hot rice: The pan turns steamy and the rice gets sticky.
- Adding too much soy sauce at once: The rice gets wet and dark instead of savory.
- Forgetting to pre-cook the eggs separately: They scramble into tiny dry bits if you stir them in too early.
6. Cheeseburger Bowls with Roasted Potatoes
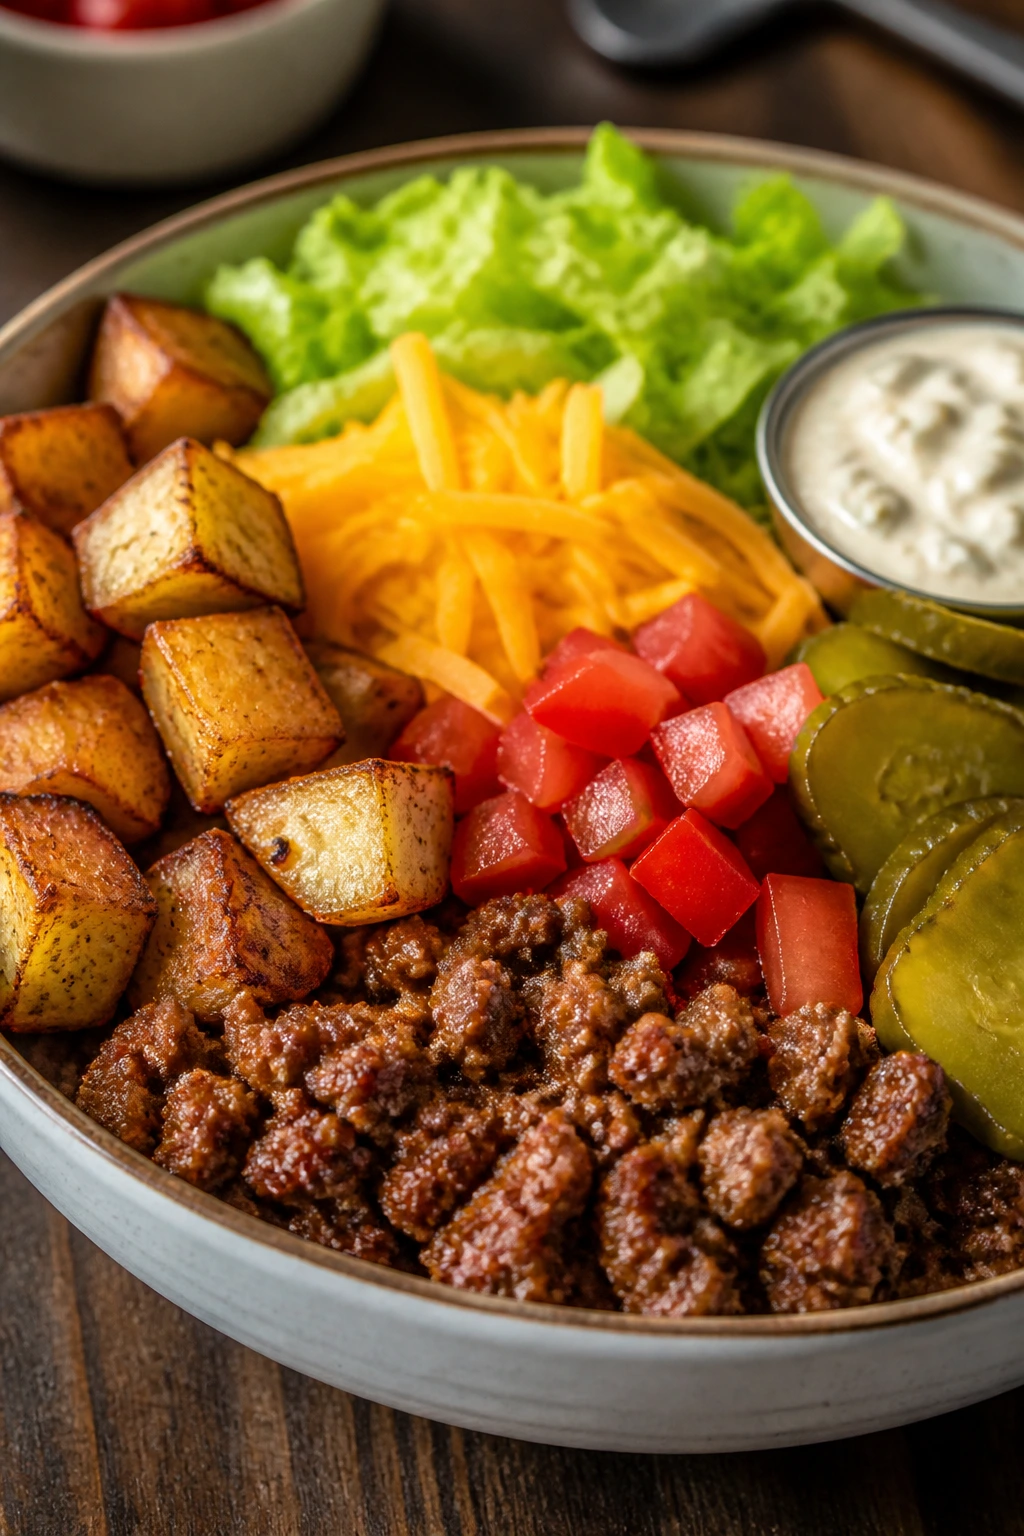
This is the meal for anyone who wants burger flavor without a soggy bun or a drive-thru aftertaste. The potatoes give you the comfort-food part, the beef gives you the protein, and the pickle-y burger sauce hits those familiar notes without taking over the whole bowl. It’s plain in a good way.
Why It Works:
A cheeseburger bowl feels appealing because the parts stay honest. Roasted potatoes are sturdier than fries in meal prep, ground beef stays flavorful after chilling, and the toppings can be added in whatever order a picky eater prefers. One bowl usually lands around 30 grams of protein, and the Greek yogurt sauce keeps the burger flavor creamy without going heavy. The pickles are optional, which is how you know this recipe understands its audience.
Key Ingredients:
- 1 1/2 pounds lean ground beef
- 2 pounds baby potatoes, halved
- 2 tablespoons olive oil
- 1 teaspoon garlic powder
- 1 teaspoon kosher salt
- 1/2 teaspoon black pepper
- 1 cup shredded cheddar cheese
- 1 cup shredded lettuce
- 1 cup diced tomato
- 1/2 cup chopped pickles
- 1/2 cup plain Greek yogurt
- 2 tablespoons ketchup
- 1 teaspoon yellow mustard
Quick Steps:
- Preheat the oven to 425°F and toss the potatoes with olive oil, garlic powder, salt, and pepper.
- Roast the potatoes on a sheet pan for 25 to 30 minutes, flipping once, until they are browned and tender.
- Brown the ground beef in a skillet over medium-high heat for 7 to 8 minutes, breaking it into small crumbles and seasoning lightly with salt and pepper.
- Stir together the Greek yogurt, ketchup, and mustard in a small bowl to make the burger sauce.
- Portion the potatoes and beef into containers, then add cheddar, lettuce, tomato, and pickles on top or pack them separately.
Equipment for This Recipe:
- Rimmed sheet pan
- Large skillet
- Small mixing bowl
- Spatula
- Meal prep containers
How to Serve This Dish:
Keep the lettuce and sauce separate until serving if you want the bowl to stay crisp. A pickle spear on the side gives the lunch a straight burger-shop feel. If someone hates mixed toppings, arrange the beef and potatoes in two neat zones and call it done.
Pro Tips for This Recipe:
- Use lean beef so the potatoes don’t soak up too much grease.
- Roast the potatoes cut-side down for better browning.
- Add lettuce after reheating, not before.
- If the sauce tastes too sharp, add 1 teaspoon more Greek yogurt before serving.
Variations on This Dish:
- Double-Cheese Bowl: Add a second handful of cheddar and skip the tomatoes if you want a more classic burger profile.
- Wrap It Up: Spoon the filling into tortillas for a burger-wrap lunch.
- No-Pickle Version: Leave out the pickles and use a little extra mustard in the sauce.
Common Mistakes to Avoid with This Dish:
- Adding lettuce too early: It wilts and turns limp overnight.
- Using greasy beef: The whole bowl becomes slick. Leaner beef makes a cleaner meal.
- Underseasoning the potatoes: They need more salt than people expect, or they taste flat next to the beef.
7. Honey Garlic Chicken, Rice, and Green Beans

This one tastes a little like takeout, only without the sticky cardboard box and mystery oil. The honey glaze gives the chicken a glossy finish, the green beans stay snappy, and the rice soaks up the extra sauce without turning the container into soup. It’s mild enough for cautious eaters and still interesting enough for everyone else.
Why It Works:
Honey and garlic are one of those combinations that feel sweet before they feel strong. That makes them easier for picky eaters than a sharp, tangy sauce. Chicken thighs stay tender through reheating, green beans hold their shape better than softer vegetables, and the rice underneath catches the glaze in the right way. You get a full meal with roughly 30 grams of protein and a flavor profile that doesn’t need explaining.
Key Ingredients:
- 2 pounds boneless chicken thighs
- 3 cups green beans, trimmed
- 1/4 cup honey
- 3 tablespoons low-sodium soy sauce
- 3 cloves garlic, minced
- 1 tablespoon ketchup
- 1 tablespoon rice vinegar
- 1 tablespoon cornstarch mixed with 2 tablespoons water
- 4 cups cooked rice
- 1 tablespoon neutral oil
Quick Steps:
- Whisk the honey, soy sauce, garlic, ketchup, and rice vinegar together in a small bowl.
- Heat the neutral oil in a skillet over medium-high heat, then cook the chicken thighs for 5 to 6 minutes per side until browned and cooked through.
- Remove the chicken, add the green beans to the pan, and cook for 3 to 4 minutes until they turn bright green and start to blister.
- Pour the honey-garlic sauce into the skillet and simmer for 1 minute, then stir in the cornstarch slurry and cook until the sauce thickens and looks shiny.
- Slice the chicken, return it to the pan, and toss everything in the glaze before portioning over rice.
Equipment for This Recipe:
- Large skillet with a lid
- Small bowl and whisk
- Measuring cups and spoons
- Knife and cutting board
- Storage containers
How to Serve This Dish:
I like this one with the sauce spooned over the chicken, not the rice, so the grains keep some definition. A few sesame seeds are optional, not required. If the eater likes things plain, keep the glaze light and let the green beans sit to the side of the container instead of mixing everything together.
Pro Tips for This Recipe:
- Add the cornstarch slurry only after the sauce is bubbling. That’s when it thickens cleanly.
- Slice the chicken after it rests for a few minutes. The juices stay where they belong.
- Trim the green beans evenly so they cook at the same pace.
- If the sauce tastes too sweet, add another teaspoon of vinegar.
Variations on This Dish:
- Pineapple Note: Stir in a few tablespoons of pineapple juice for a softer, sweeter glaze.
- Breast Meat Version: Use chicken breasts if you prefer them, but pull them as soon as they hit 165°F.
- Mild Garlic-Butter Swap: Leave out the honey and finish with garlic butter for a less sweet lunch.
Common Mistakes to Avoid with This Dish:
- Burning the honey: Keep the heat at medium-high, not screaming hot.
- Cooking the green beans until they shrivel: They should still have a little bite.
- Pouring the sauce over rice too early: The rice turns soggy fast. Keep it on top of the chicken if you can.
8. Italian Turkey Meatball Pasta
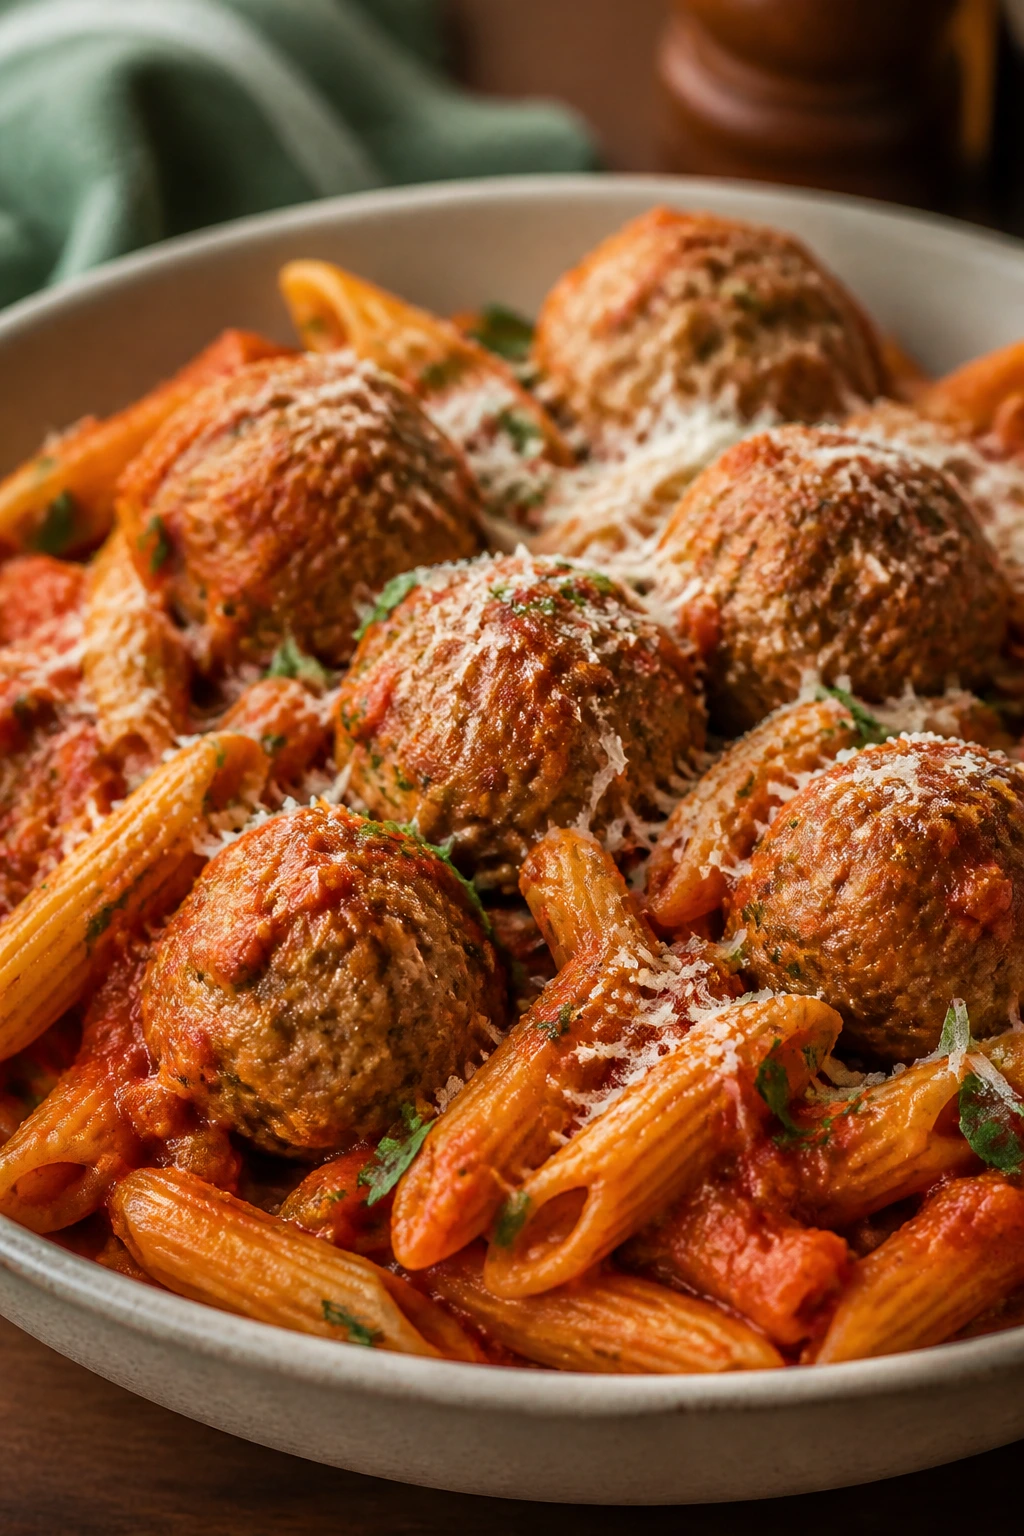
If picky eaters trust one thing, it’s meatballs with pasta. The turkey keeps the meal lighter than beef versions, but the Parmesan and marinara make it taste familiar enough that nobody needs a speech about balanced lunches. Good meatballs also hold up in the fridge better than most people expect.
Why It Works:
Turkey meatballs give you the same comfort as a classic red-sauce dinner with a little less heaviness. Baking them keeps the texture tidy, and the sauce protects the pasta from drying out. A serving usually gives you around 32 grams of protein, especially if you use a sturdy pasta shape and a good handful of Parmesan. It reheats well because the sauce and meatballs carry the moisture, not the pasta alone.
Key Ingredients:
- 1 1/2 pounds ground turkey
- 1/2 cup plain breadcrumbs
- 1 large egg
- 1/4 cup grated Parmesan cheese
- 1 teaspoon Italian seasoning
- 2 cloves garlic, minced
- 24 ounces marinara sauce
- 12 ounces short pasta, such as penne or rotini
- 2 cups baby spinach, optional
- 1 tablespoon olive oil
Quick Steps:
- Preheat the oven to 400°F and line a baking sheet with parchment.
- Mix the turkey, breadcrumbs, egg, Parmesan, Italian seasoning, and garlic until just combined, then form into 16 to 18 meatballs.
- Bake the meatballs for 15 to 18 minutes until they are cooked through and lightly browned.
- Boil the pasta in salted water until just al dente, then drain and toss it with olive oil so it doesn’t stick.
- Warm the marinara in a skillet, add the meatballs and spinach if using, then fold in the pasta or keep the pasta separate for meal prep containers.
Equipment for This Recipe:
- Rimmed baking sheet
- Large pot
- Large skillet
- Mixing bowl
- Wooden spoon
How to Serve This Dish:
This is good with extra Parmesan and a slice of garlic bread if you want the meal to feel more like dinner than lunch. Keep the sauce modest so the pasta doesn’t collapse into a red blur. If your eater hates spinach, skip it; nobody needs a lecture at lunchtime.
Pro Tips for This Recipe:
- Mix the meatball mixture just until combined. Overmixing makes them dense.
- Undercook the pasta by a minute if you plan to reheat it later.
- Warm the sauce before adding the spinach so it wilts quickly.
- Freeze meatballs and sauce separately if you want the best texture.
Variations on This Dish:
- Baked Ziti Shortcut: Swap the pasta for ziti, top with mozzarella, and bake in a dish for a casserole-style version.
- Meatball Sub Filling: Spoon the meatballs into rolls on serving day for a sandwich-style lunch.
- Gluten-Free Pasta Swap: Use a sturdy gluten-free pasta and keep it just shy of soft.
Common Mistakes to Avoid with This Dish:
- Packing the pasta while it’s still steaming: It gets sticky and mushy fast.
- Overbaking the meatballs: They dry out. Pull them as soon as they’re cooked through.
- Using a thin sauce: The pasta will absorb it and end up bland. A fuller sauce works better for meal prep.
9. BBQ Chicken Sweet Potato Meal Prep
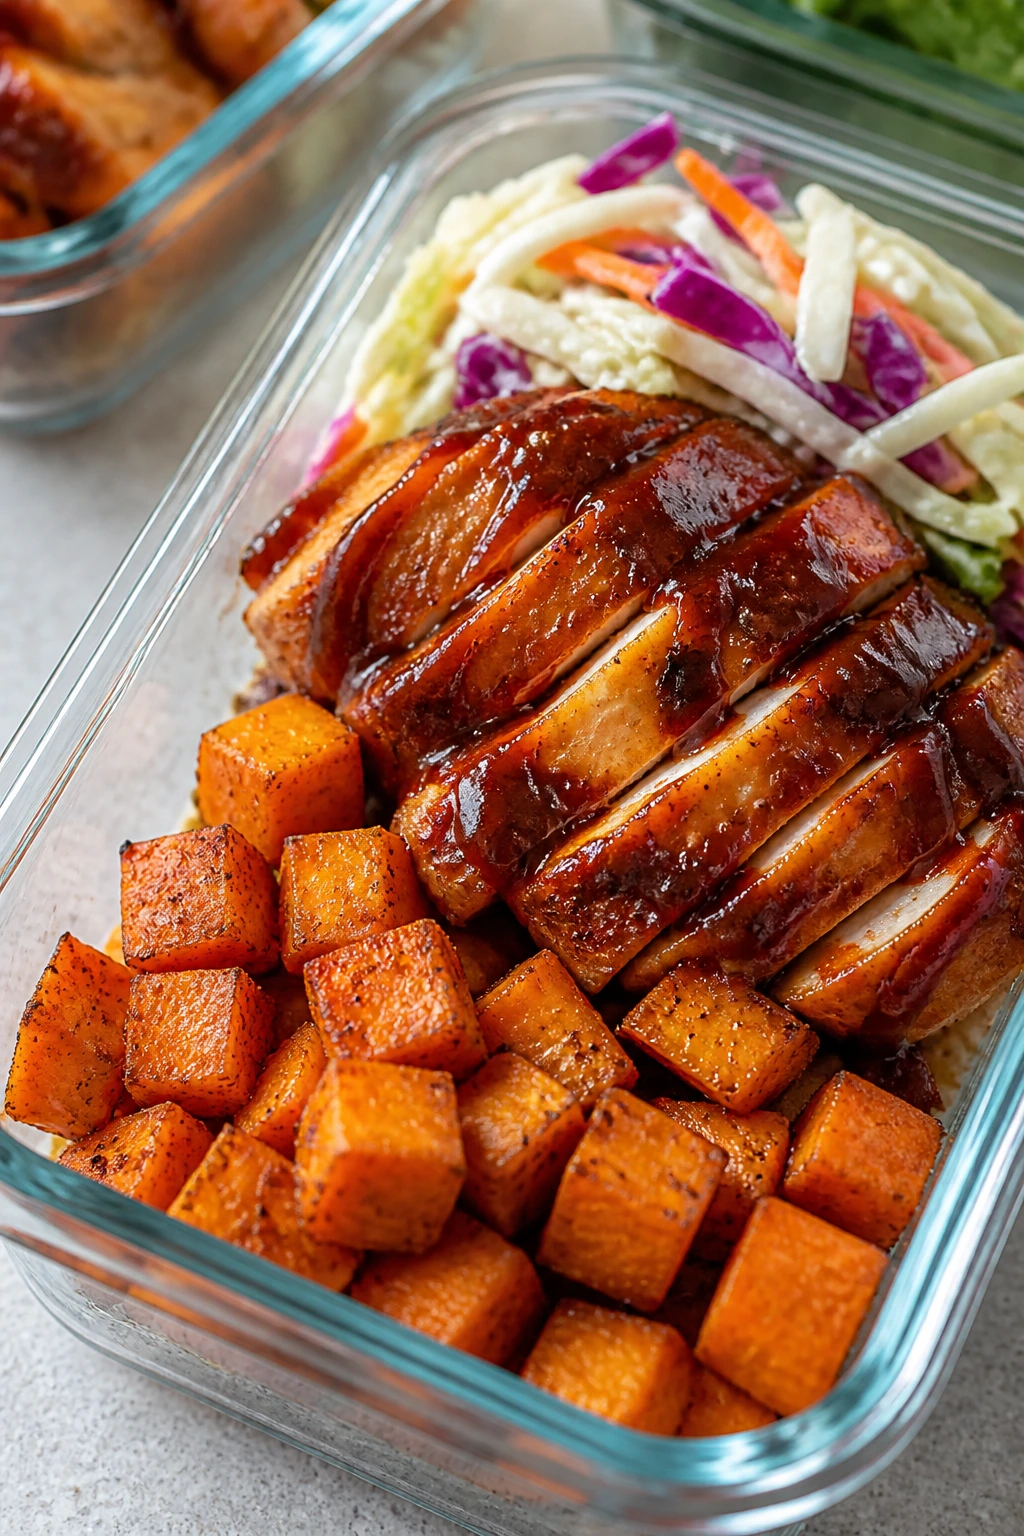
Sweet potatoes give this one a natural sweetness that helps the BBQ sauce feel more grounded. Add tender chicken and a little crisp coleslaw on the side, and you’ve got a lunch that tastes like backyard food without needing a grill. It’s the sort of container that disappears faster than it should.
Why It Works:
BBQ sauce is already familiar, which means the flavor does not need a lot of explaining. Sweet potatoes hold up well when roasted, chicken breast stays lean and filling, and the slaw adds a fresh crunch if you keep it separate until eating time. You can get roughly 30 grams of protein per serving, and the plate looks bright even after it’s been in the fridge. That helps more than people admit.
Key Ingredients:
- 2 pounds boneless, skinless chicken breasts
- 4 medium sweet potatoes
- 2 tablespoons olive oil
- 1/2 cup BBQ sauce
- 1 teaspoon smoked paprika
- 1/2 teaspoon kosher salt
- 1/4 teaspoon black pepper
- 2 cups coleslaw mix
- 1/2 cup plain Greek yogurt
- 1 tablespoon apple cider vinegar
Quick Steps:
- Preheat the oven to 425°F and line a sheet pan with parchment.
- Peel or scrub the sweet potatoes, cube them, and toss them with 1 tablespoon olive oil, salt, pepper, and smoked paprika.
- Roast the sweet potatoes for 15 minutes, then add the chicken breasts brushed with the remaining oil and a little salt.
- Continue roasting for 18 to 22 minutes, until the chicken reaches 165°F and the potatoes are tender at the center.
- Toss the chicken with BBQ sauce after roasting, then serve with the sweet potatoes and a quick slaw made from coleslaw mix, Greek yogurt, and vinegar.
Equipment for This Recipe:
- Rimmed sheet pan
- Large mixing bowl
- Cutting board and knife
- Basting brush or spoon
- Instant-read thermometer
How to Serve This Dish:
The slaw belongs on the side unless you enjoy wilted cabbage. I like this one in a three-part container: potatoes in one section, chicken in another, slaw tucked away until lunch. It feels a little more like a plate and less like leftovers, which is the whole point.
Pro Tips for This Recipe:
- Cut the sweet potatoes evenly so they roast at the same pace.
- Brush the BBQ sauce on after cooking so it stays glossy, not burned.
- Use a thick sauce; watery BBQ sauce slides off and disappears.
- If the chicken breasts are thick, pound them lightly so they cook evenly.
Variations on This Dish:
- Pulled Chicken Skillet: Shred the chicken after roasting and mix it with the sauce for a softer texture.
- Lower-Carb Swap: Replace the sweet potatoes with roasted cauliflower or broccoli.
- Smoky Chipotle Version: Add a tiny bit of chipotle powder if the eater wants a little heat.
Common Mistakes to Avoid with This Dish:
- Saucing the chicken before it roasts: BBQ sauce burns before the meat finishes.
- Skipping the slaw vinegar: The yogurt alone can taste flat.
- Cutting the potatoes too small: They dry out before they get tender.
10. Baked Ziti with Lean Turkey
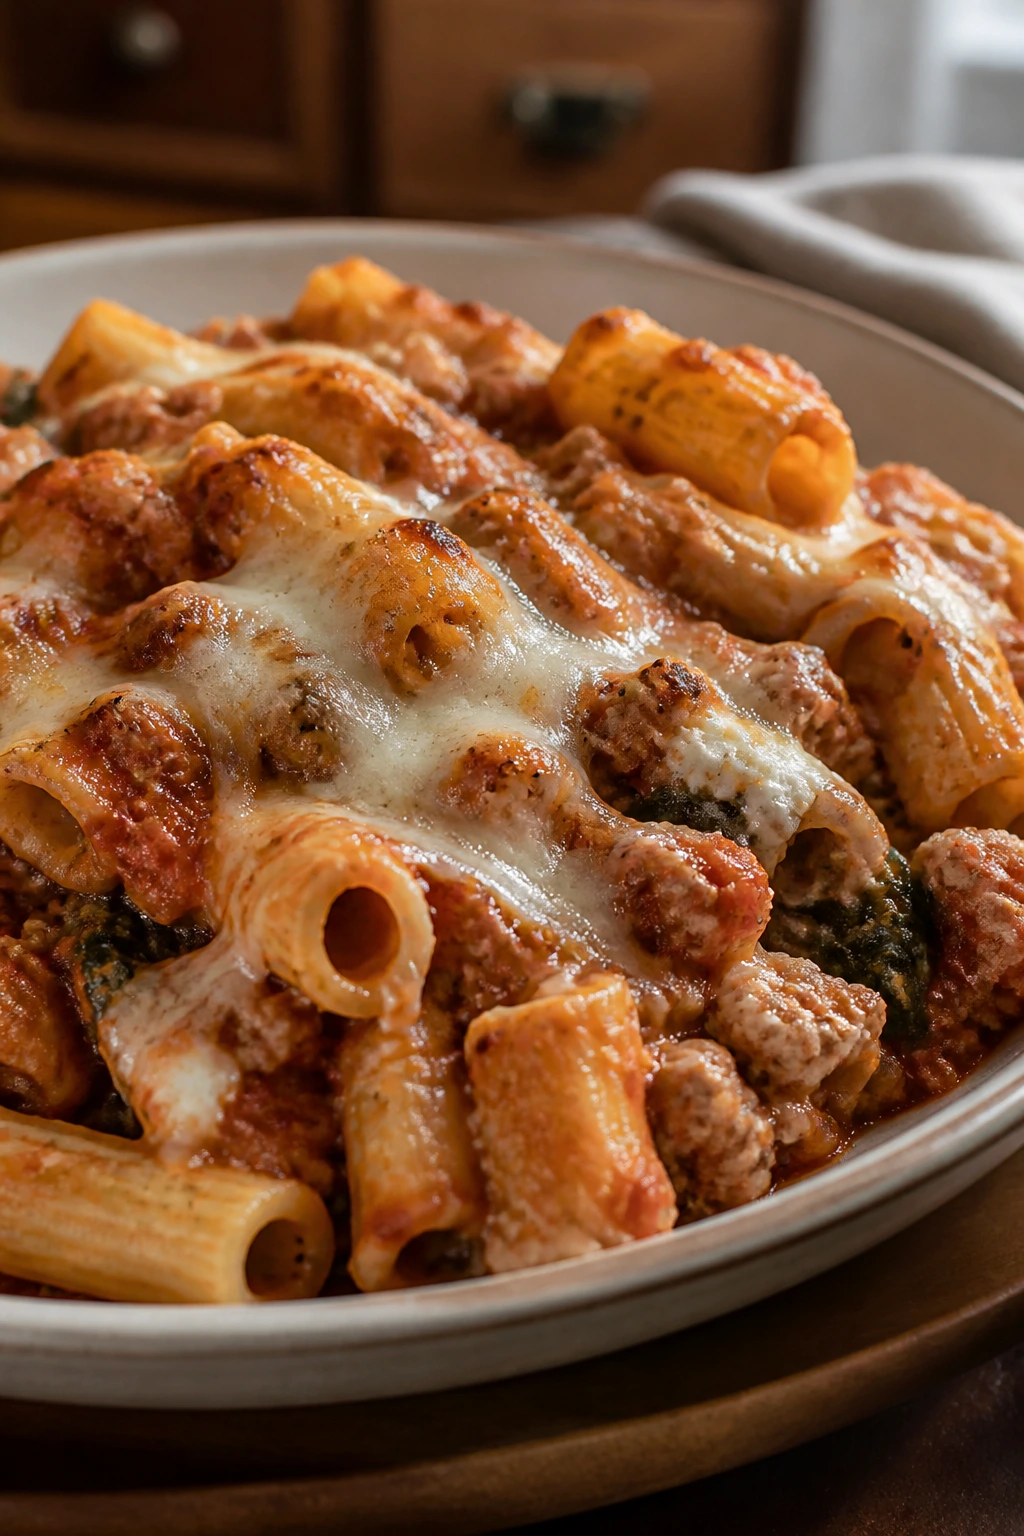
This is one of those casseroles that tastes like it took more effort than it did. The pasta stays coated, the cheese melts into the sauce, and the turkey disappears into the tomato layer enough that picky eaters usually just register “baked pasta.” That is a compliment.
Why It Works:
Baked ziti is forgiving in a way a lot of meal prep food is not. The ricotta keeps the filling creamy, the mozzarella melts into those stretchy pockets people expect, and the turkey adds protein without changing the flavor profile much. One square can easily carry 30 grams of protein if you portion it generously. It also freezes well, which makes it useful when the week starts off louder than planned.
Key Ingredients:
- 1 1/2 pounds ground turkey
- 12 ounces ziti or penne
- 24 ounces marinara sauce
- 1 1/2 cups ricotta cheese
- 2 cups shredded mozzarella cheese
- 1 large egg
- 1/4 cup grated Parmesan cheese
- 2 cups baby spinach, optional
- 1 teaspoon Italian seasoning
- 1 tablespoon olive oil
Quick Steps:
- Preheat the oven to 375°F and grease a 9×13-inch baking dish.
- Cook the pasta until just shy of al dente, then drain and set aside.
- Brown the turkey in olive oil over medium heat, season with Italian seasoning, and stir in the marinara.
- Mix the ricotta, egg, and Parmesan in a bowl until smooth, then fold in spinach if using.
- Layer half the pasta, half the turkey sauce, and all the ricotta mixture in the baking dish, then repeat with the rest of the pasta and sauce. Top with mozzarella and bake for 20 to 25 minutes until bubbling.
- Rest for 10 minutes before cutting so the casserole holds together.
Equipment for This Recipe:
- 9×13-inch baking dish
- Large pot
- Large skillet
- Mixing bowl
- Foil
How to Serve This Dish:
This is good with a simple green salad or roasted broccoli if you want some freshness beside it. A square of baked ziti is filling enough for lunch, but bigger eaters may want a second piece and a piece of garlic bread. If someone is picky about greens, leave the spinach out. The casserole does not need it to work.
Pro Tips for This Recipe:
- Undercook the pasta a little. The oven keeps softening it.
- Let the ricotta mixture sit at room temperature for a few minutes so it spreads more easily.
- Use a thicker marinara, not a watery one.
- Resting matters here. Cut too soon and the layers slide apart.
Variations on This Dish:
- Spaghetti Bake: Swap ziti for spaghetti and twirl it into the pan for a looser casserole.
- Dairy-Light Version: Use part-skim ricotta and less mozzarella if you want a lighter top.
- No-Spinach Classic: Skip the greens and keep it purely pasta, sauce, and cheese.
Common Mistakes to Avoid with This Dish:
- Cooking the pasta all the way through first: It softens too much in the oven.
- Using a thin sauce: The casserole turns watery.
- Skipping the rest time: The layers need a few minutes to settle before slicing.
11. Teriyaki Beef and Broccoli Bowls
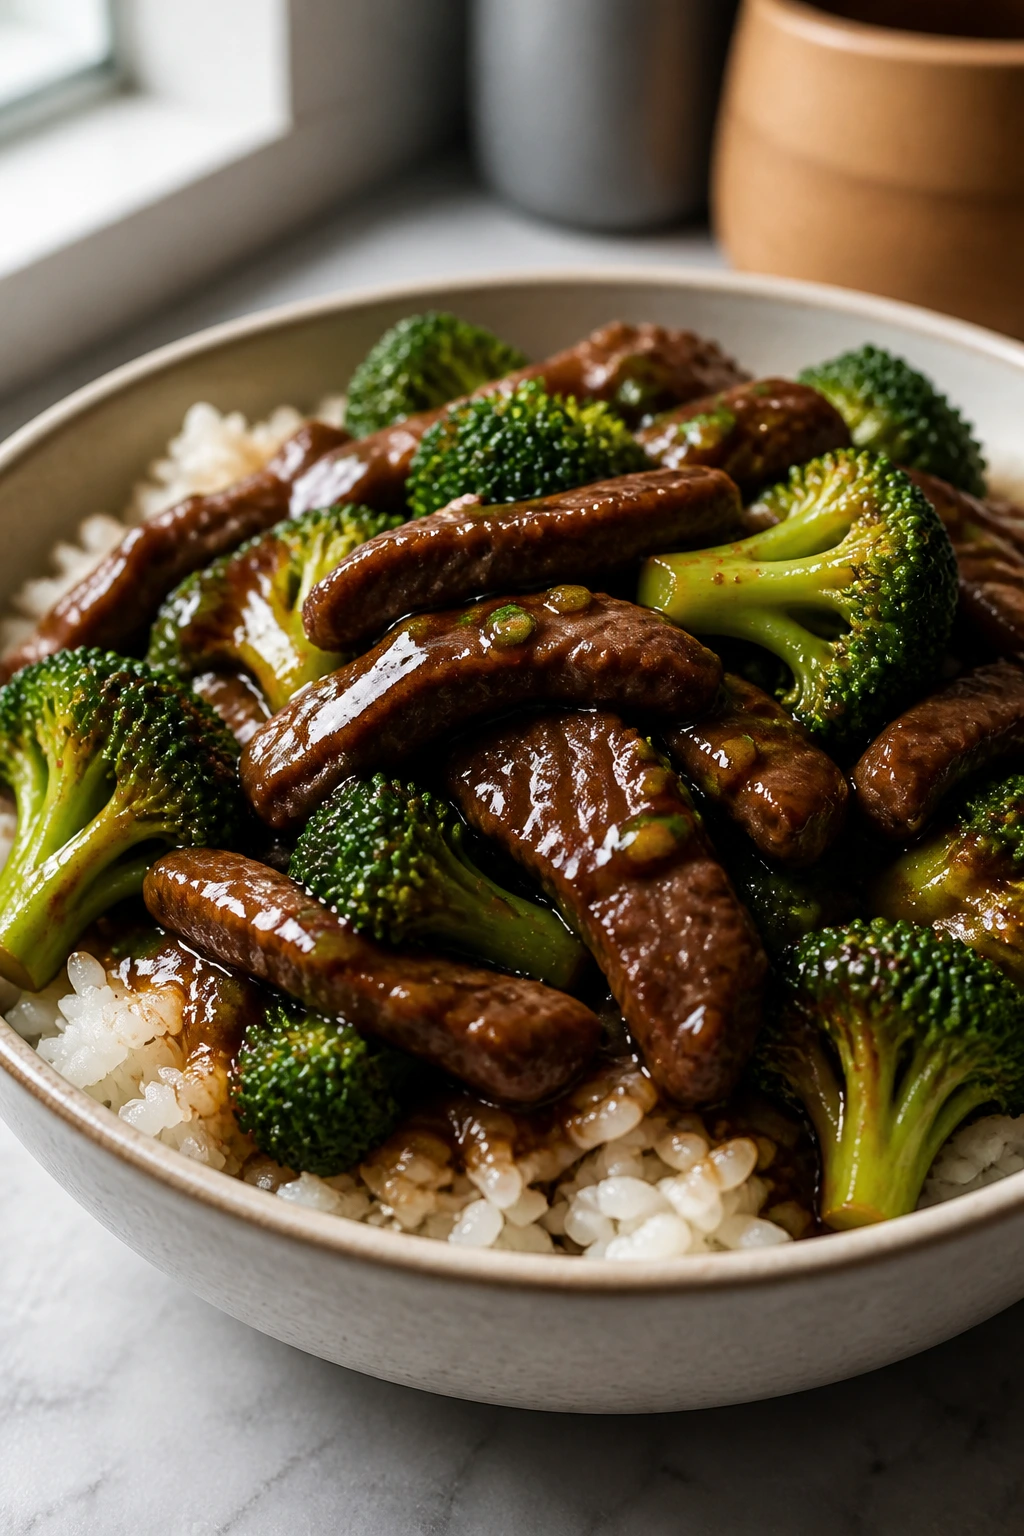
This bowl has the kind of takeout flavor that makes people forget they are eating reheated food. The beef stays savory, the broccoli gives you something green without going loud, and the sauce clings to rice in a way that feels comforting rather than messy. Picky eaters usually accept this one because it looks straightforward at a glance.
Why It Works:
Thin-sliced beef cooks fast and stays tender when you don’t overdo it. Broccoli roasts or steams just enough to keep its shape, and the teriyaki sauce brings a sweet-salty gloss that pairs well with rice. The bowl usually hits around 28 to 32 grams of protein, and it’s easy to pack with sauce on the side if the eater likes more control. That control is often the difference between “ate it” and “left it.”
Key Ingredients:
- 1 1/2 pounds flank steak or lean sirloin
- 4 cups broccoli florets
- 3 cups cooked jasmine rice
- 1/3 cup low-sodium teriyaki sauce
- 2 tablespoons low-sodium soy sauce
- 1 tablespoon cornstarch
- 2 cloves garlic, minced
- 1 teaspoon grated fresh ginger
- 1 tablespoon neutral oil
- 2 scallions, sliced
Quick Steps:
- Slice the beef thinly against the grain and toss it with soy sauce, garlic, and ginger.
- Heat the oil in a large skillet over medium-high heat and sear the beef for 2 to 3 minutes per side until browned but still tender.
- Add the broccoli with a splash of water, cover for 2 minutes, then uncover so the moisture cooks off.
- Whisk the teriyaki sauce with the cornstarch and a little water, then pour it into the skillet and stir until it thickens and coats the beef.
- Divide over rice and finish with scallions if you want them.
Equipment for This Recipe:
- Large skillet or wok
- Sharp knife
- Cutting board
- Small bowl for sauce
- Meal prep containers
How to Serve This Dish:
Keep the sauce modest if you know the eater likes things less glossy and more plain. A few sesame seeds or sliced scallions can help, but they’re optional. I’d pack this over rice in a shallow container so the beef stays on top and the broccoli doesn’t get buried.
Pro Tips for This Recipe:
- Slice the beef while it is cold or just slightly chilled. Thin cuts are easier that way.
- Do not cook the beef past browned. It can get chewy fast.
- If the sauce is too thin, let it bubble for another minute before serving.
- Use broccoli florets that are close in size so they cook evenly.
Variations on This Dish:
- Chicken Teriyaki Swap: Use chicken breast or thigh strips instead of beef.
- Cauliflower Rice Bowl: Swap the rice for cauliflower rice and cook off the moisture first.
- Mild Ginger-Free Version: Leave out the ginger if that flavor tends to turn people off.
Common Mistakes to Avoid with This Dish:
- Cutting the beef with the grain: That makes every bite tougher.
- Overcrowding the skillet: The meat steams instead of searing.
- Letting broccoli sit too long in sauce: It loses its bite and turns soft.
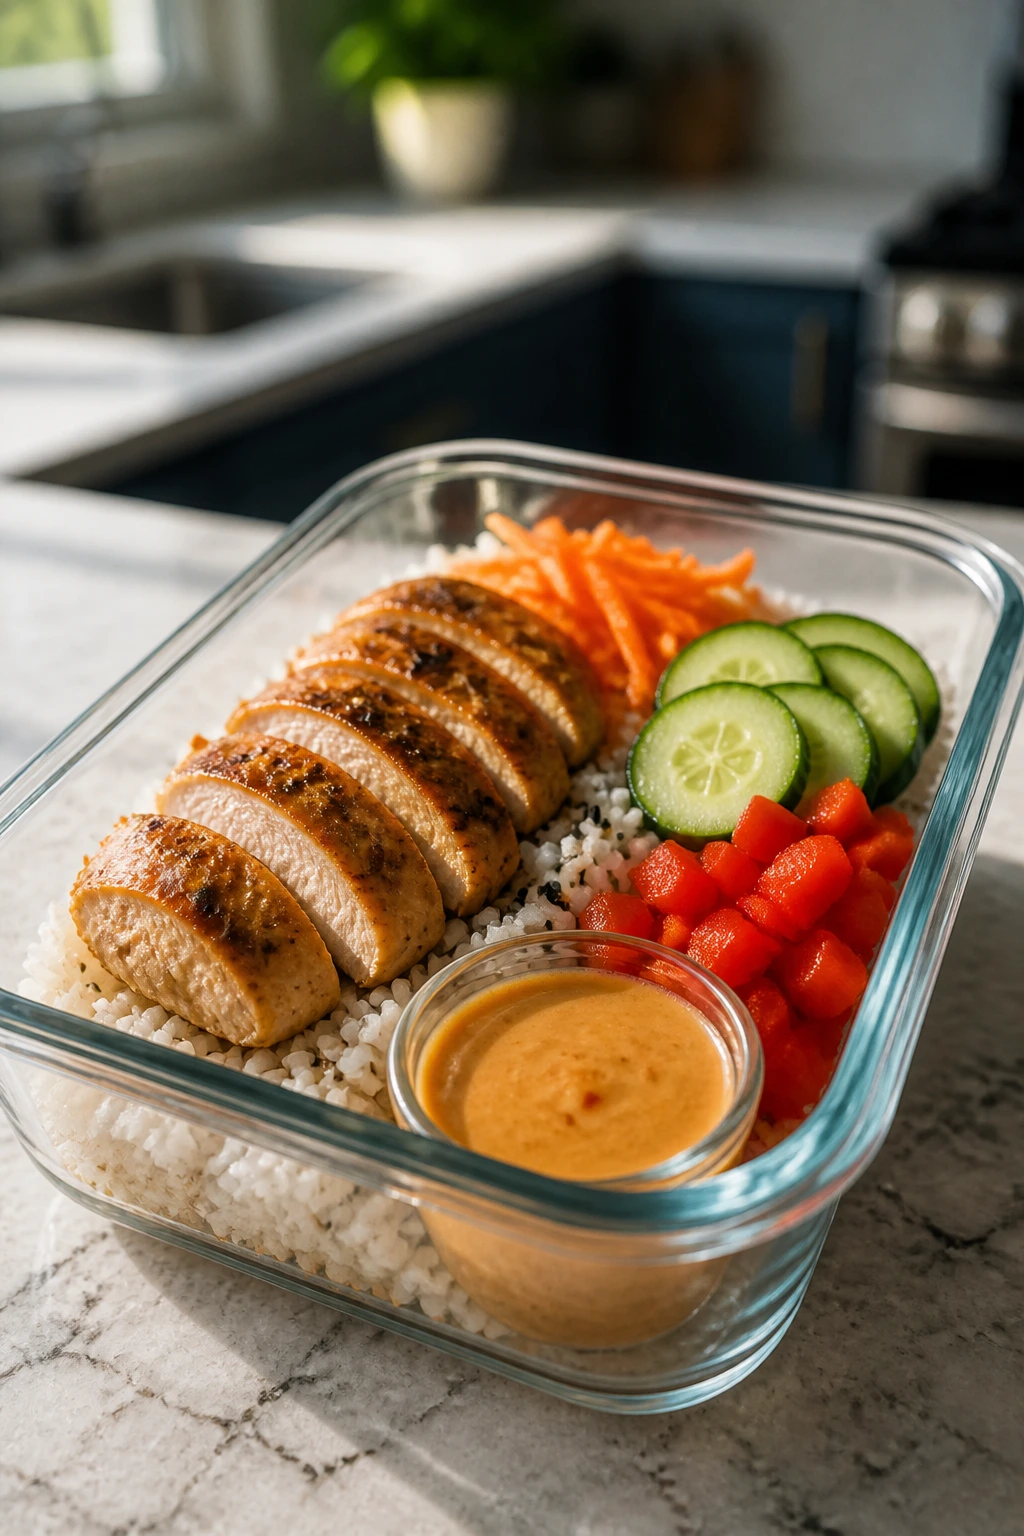
12. Chicken Caesar Pasta Salad Jars
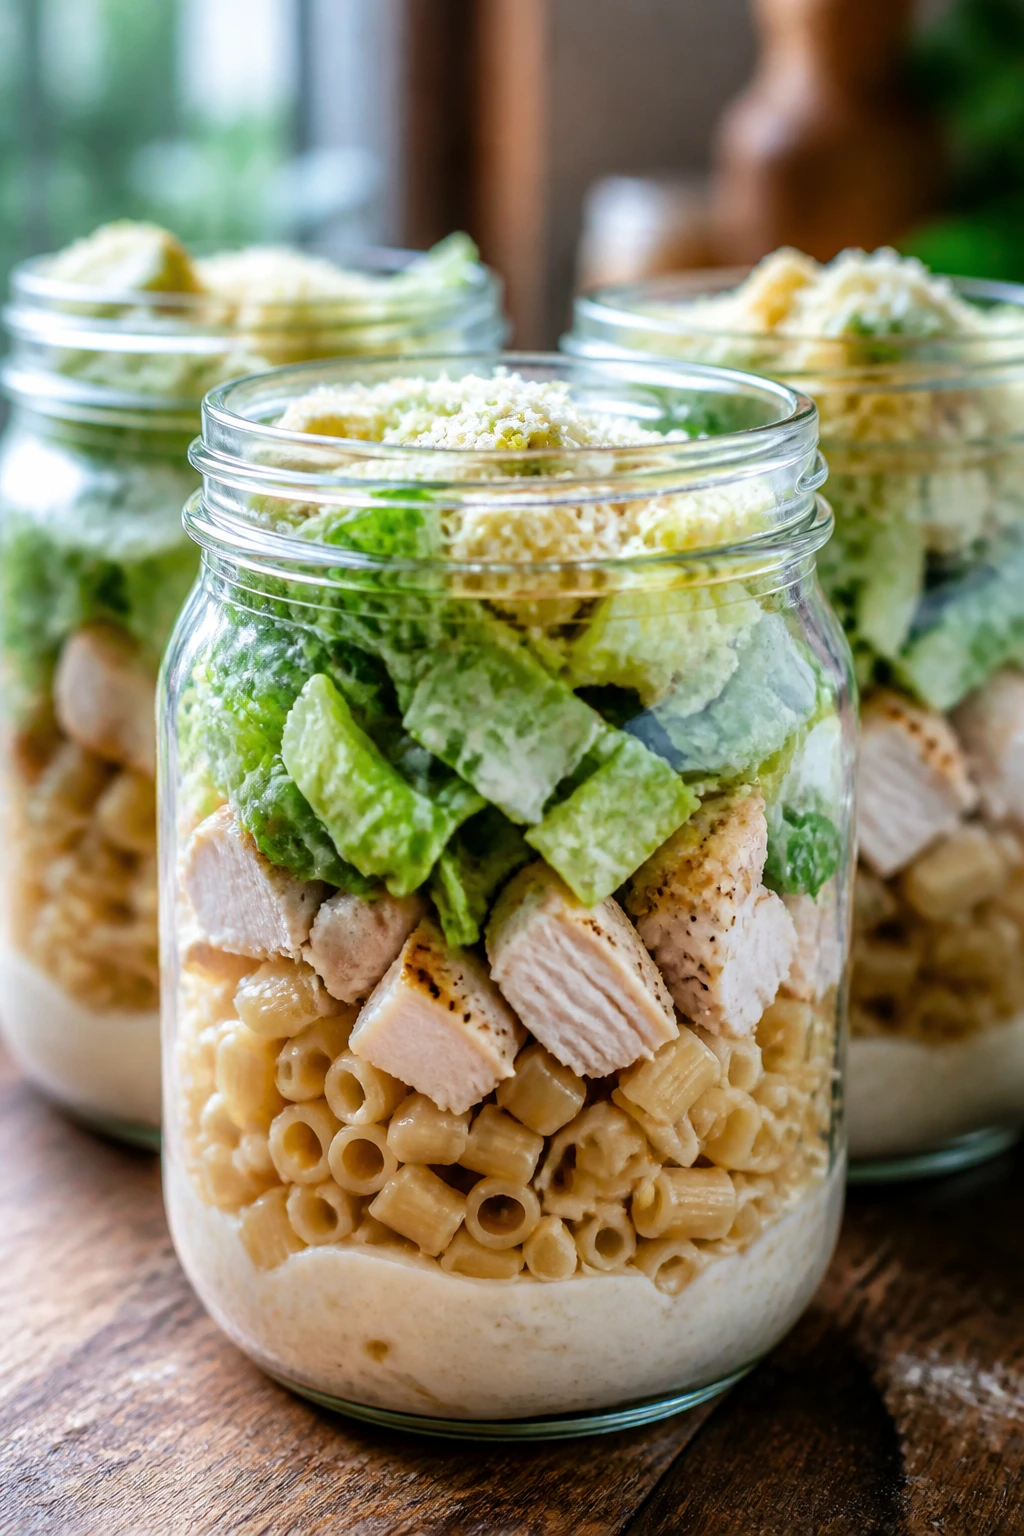
This is the cold lunch that still feels like a real meal. The chicken gives it backbone, the pasta makes it filling, and the Caesar dressing does enough work that you do not need a pile of extra ingredients to make it interesting. It’s also a nice choice for picky eaters because the flavor is recognizable from the first forkful.
Why It Works:
Caesar is one of those flavors people either already like or can at least name without hesitation. Chickpea pasta adds extra protein, chicken makes the salad a true lunch instead of a side, and layering the jar keeps the romaine crisp until the last second. Each jar can land around 30 grams of protein, and the cold format is handy for anyone who doesn’t want to microwave lunch at all. That’s a real perk.
Key Ingredients:
- 1 pound boneless chicken breast
- 12 ounces chickpea pasta or another sturdy short pasta
- 1 romaine heart, chopped
- 1/2 cup grated Parmesan cheese
- 3/4 cup Caesar dressing
- 1 cup croutons, packed separately
- 1 tablespoon olive oil
- 1 teaspoon kosher salt
- 1/2 teaspoon black pepper
- 1 lemon, optional
Quick Steps:
- Season the chicken with salt, pepper, and olive oil, then cook it in a skillet over medium heat or bake it at 400°F until it reaches 165°F.
- Boil the pasta until just tender, drain it, and cool it under cold water so it stops cooking.
- Chop the romaine and dry it thoroughly with paper towels or a salad spinner.
- Layer the dressing in the bottom of each jar, then add pasta, chicken, Parmesan, and romaine on top.
- Pack croutons separately and shake the jar into a bowl before eating so the lettuce doesn’t wilt.
Equipment for This Recipe:
- Large skillet or baking sheet
- Pot for pasta
- Salad spinner or paper towels
- Wide-mouth jars or meal prep containers
- Tongs or a spoon
How to Serve This Dish:
Pour the jar into a bowl before eating if you want the Caesar flavor distributed evenly. A few extra shavings of Parmesan on top make it feel fresher. If the person eating it dislikes romaine, switch to chopped kale and massage it with a teaspoon of dressing first so it softens.
Pro Tips for This Recipe:
- Dry the lettuce well. Water at the bottom of a jar ruins the whole point.
- Don’t overcook the pasta. It should still have some bite after chilling.
- Keep the croutons away from the dressing until the last minute.
- Cut the chicken into pieces no bigger than a bite or two; that makes the jar easier to eat cold.
Variations on This Dish:
- Turkey Caesar Jar: Swap in sliced turkey breast or leftover turkey cutlets.
- Ranch Pasta Salad: Use ranch dressing instead of Caesar for a softer flavor.
- Gluten-Free Version: Use a gluten-free short pasta that stays firm when chilled.
Common Mistakes to Avoid with This Dish:
- Packing wet lettuce: It turns limp and sad by lunch.
- Using delicate pasta shapes: They break down in the fridge.
- Adding croutons too soon: They lose their crunch completely.
13. Lemon Herb Salmon and Potatoes
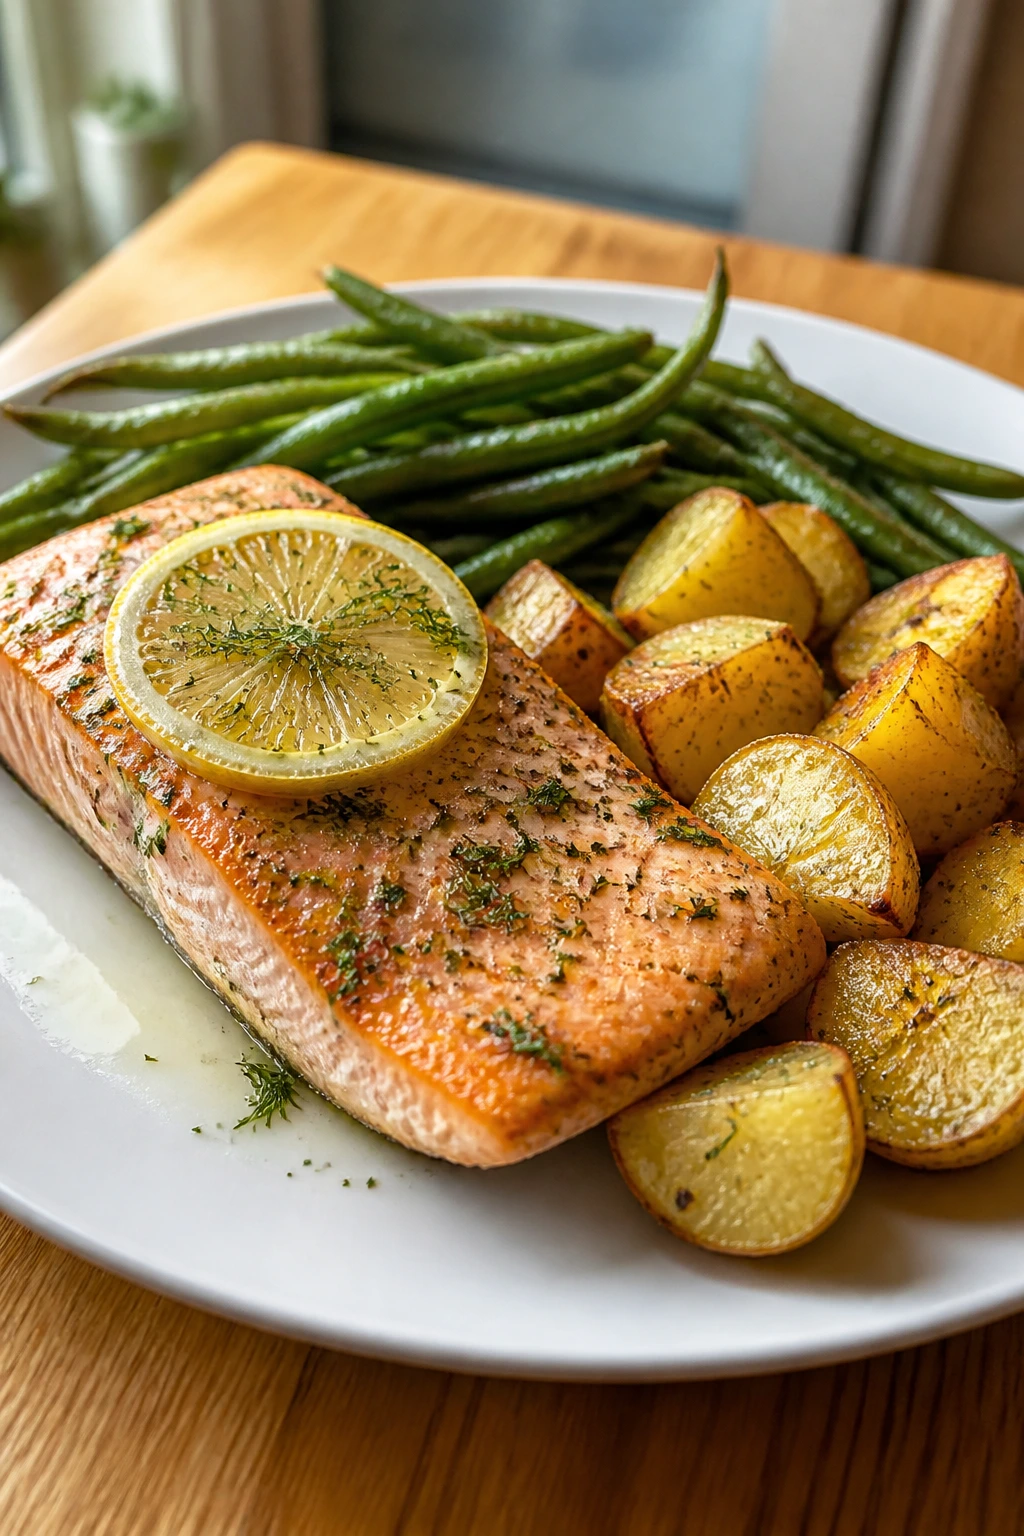
Salmon can be a tricky sell for picky eaters, which is why this version stays mild and clean. The potatoes are familiar, the lemon is gentle, and the salmon gets just enough dill and garlic to taste like dinner without tasting strong. If fish usually gets side-eye at your table, this is the one worth trying.
Why It Works:
The flavor here is restrained on purpose. Lemon keeps the salmon bright, dill makes it taste fresh rather than fishy, and roasted potatoes give the meal a soft, starchy base that feels safe. A serving delivers a hefty protein hit, usually around 28 to 32 grams, depending on the salmon portion. It’s also a one-pan meal if you manage the timing well, which makes the cleanup easier than a separate fish-and-sides setup.
Key Ingredients:
- 1 1/2 pounds salmon fillets
- 1 1/2 pounds baby potatoes
- 1 pound green beans or asparagus
- 2 tablespoons olive oil
- 1 lemon, sliced and juiced
- 2 teaspoons dried dill or 1 tablespoon fresh dill
- 2 cloves garlic, minced
- 1 teaspoon kosher salt
- 1/2 teaspoon black pepper
Quick Steps:
- Preheat the oven to 425°F and line a sheet pan with parchment.
- Toss the potatoes with half the oil, salt, pepper, and half the garlic, then roast for 20 minutes.
- Add the green beans or asparagus to the pan and nestle the salmon fillets beside them.
- Brush the salmon with the remaining oil, lemon juice, dill, and garlic, then roast for 10 to 12 minutes until the fish flakes easily and the potatoes are tender.
- Finish with extra lemon if you want the flavor a little brighter.
Equipment for This Recipe:
- Rimmed sheet pan
- Parchment paper
- Small bowl for the lemon mixture
- Knife and cutting board
- Instant-read thermometer, optional but useful
How to Serve This Dish:
Serve the salmon with the potatoes underneath or beside it, not buried under sauce. A little extra lemon on the side helps each person decide how bright they want the plate to be. If the eater is fish-cautious, cut a smaller piece and keep the vegetables separate.
Pro Tips for This Recipe:
- Start the potatoes first. Salmon cooks quickly and needs its own timing.
- Don’t overdo the dill. A little goes a long way.
- Pull the salmon as soon as it flakes; dry fish is the fast way to lose trust.
- Use thinner fillets if your family dislikes a thicker center.
Variations on This Dish:
- Honey-Dill Salmon: Brush the fish with 1 tablespoon honey before roasting for a softer glaze.
- Chicken Swap: Use thin chicken cutlets if salmon is a no-go.
- Rice Bowl Version: Flake the salmon over rice with the potatoes chopped small.
Common Mistakes to Avoid with This Dish:
- Overbaking the salmon: It gets dry and firm fast.
- Adding lemon too early: The flavor can get sharp instead of fresh.
- Crowding the potatoes and fish: Steam is the enemy of a crisp roast.
14. Ranch Chicken and Potato Bowls
Ranch does a lot of heavy lifting for picky eaters. It’s familiar, mild, and somehow makes chicken and potatoes feel less like a health project and more like an actual lunch people might ask for again. That alone earns it a place in the rotation.
Why It Works:
The ranch seasoning gives the chicken and potatoes a shared flavor, which makes the bowl taste cohesive without needing a bold sauce. Roasted potatoes stay satisfying after reheating, and chicken thighs or breasts both work depending on how lean you want the meal. The yogurt ranch on top adds creaminess and protein, which helps the bowl land around 30 grams per serving. A lot of meals promise comfort. This one actually behaves like comfort food.
Key Ingredients:
- 2 pounds boneless chicken thighs or breasts
- 2 pounds Yukon Gold potatoes, cubed
- 2 tablespoons olive oil
- 2 tablespoons ranch seasoning
- 2 cups broccoli florets
- 1/2 cup plain Greek yogurt
- 2 tablespoons milk
- 1 tablespoon lemon juice
- 1/2 teaspoon salt
- 1/4 teaspoon black pepper
Quick Steps:
- Preheat the oven to 425°F and line two sheet pans or one very large pan with parchment.
- Toss the potatoes with olive oil, half the ranch seasoning, salt, and pepper, then roast for 15 minutes.
- Coat the chicken with the remaining ranch seasoning and place it on the pan with the broccoli.
- Roast for 18 to 22 minutes until the chicken reaches 165°F and the potatoes are tender with crisp edges.
- Stir together the Greek yogurt, milk, and lemon juice to make a quick ranch sauce, then drizzle over the bowls when serving.
Equipment for This Recipe:
- Two sheet pans or one large pan
- Mixing bowl
- Measuring spoons
- Knife and cutting board
- Meat thermometer
How to Serve This Dish:
The sauce tastes best spooned on at the last second, not before storage. A few carrot sticks on the side fit the ranch theme and keep the lunchbox simple. If the eater doesn’t love broccoli, switch it for green beans or leave the vegetables on a separate side of the container.
Pro Tips for This Recipe:
- Toss the potatoes thoroughly so every piece gets some seasoning.
- Don’t cut the potatoes too small or they’ll dry out.
- If using chicken breasts, pound them to an even thickness.
- The yogurt sauce thickens in the fridge, so loosen it with a splash of milk before serving if needed.
Variations on This Dish:
- Loaded Ranch Bowl: Add a little shredded cheddar and chopped bacon.
- Dairy-Free Herb Drizzle: Replace the yogurt sauce with olive oil, lemon, and extra herbs.
- Wrap Version: Spoon everything into a tortilla for a handheld lunch.
Common Mistakes to Avoid with This Dish:
- Underseasoning the potatoes: They need more than a light dusting.
- Adding sauce too early: It softens the roast edges.
- Using a pan that’s too crowded: The vegetables steam instead of browning.
15. Mild Turkey Chili with Rice
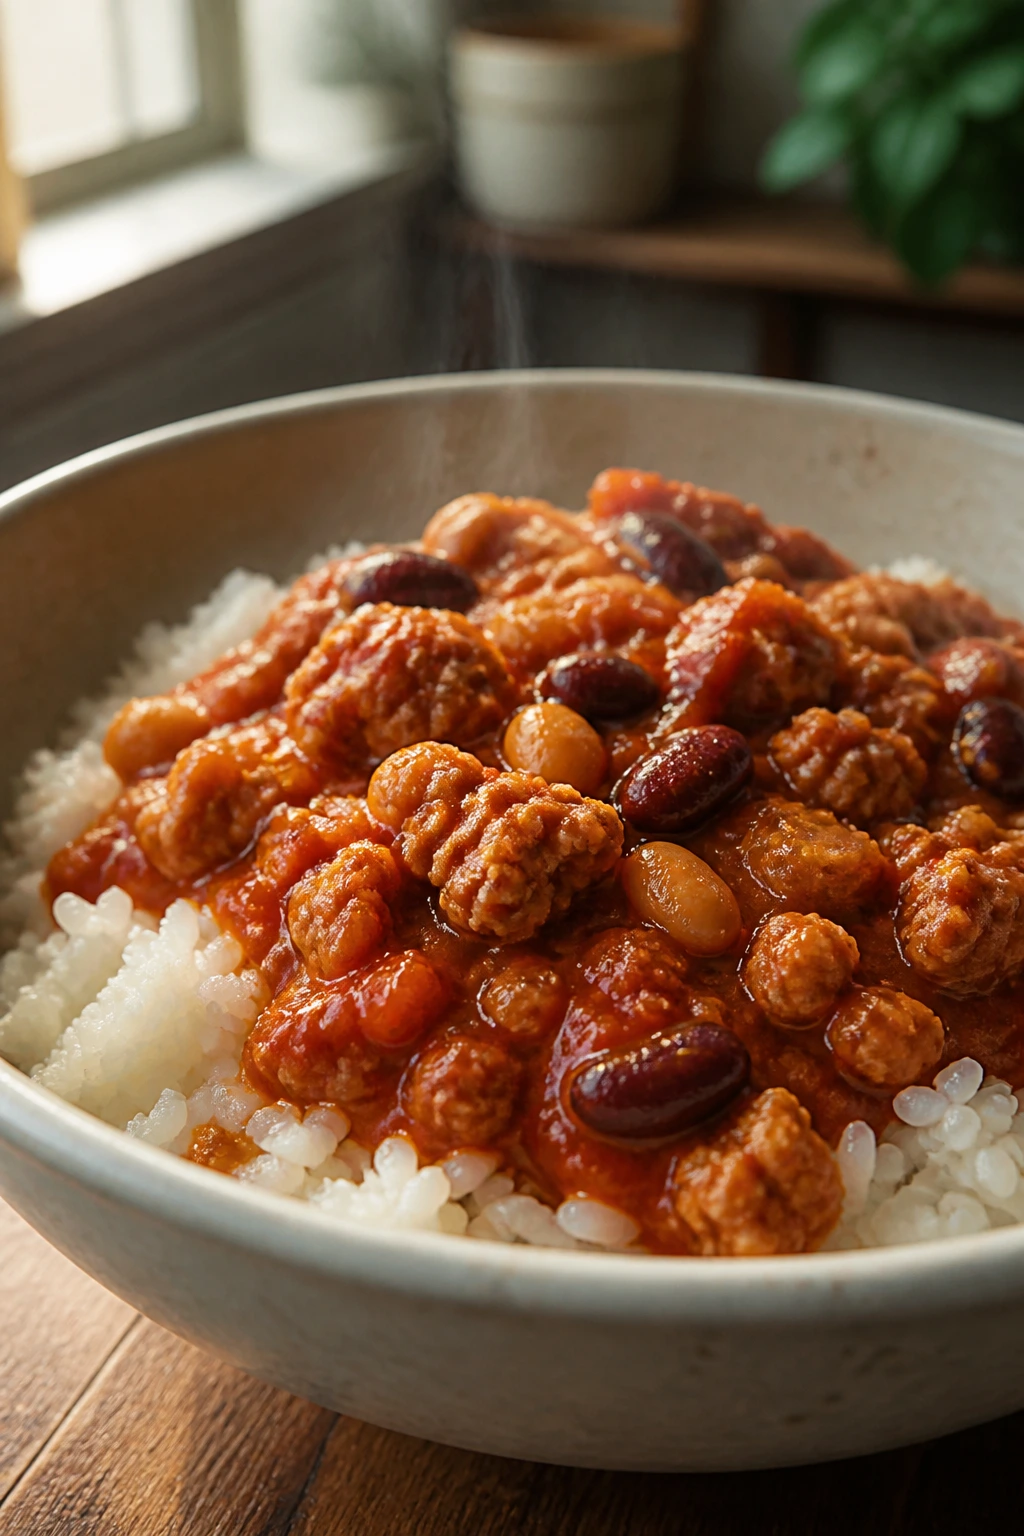
This is the freezer-friendly one that pulls its weight when the week gets unpredictable. The chili stays gentle, the turkey keeps it lean and filling, and the rice turns it into a proper meal instead of a bowl that leaves people searching for crackers afterward. It also happens to be one of the easiest recipes to batch.
Why It Works:
Turkey chili works for picky eaters when the spice stays low and the bean-to-meat ratio stays sensible. The broth and tomatoes create a soft, spoonable texture, while the rice underneath gives the bowl structure. A serving can carry 30 grams of protein, and the leftovers freeze cleanly in single portions. The best part is that it tastes even better after a night in the fridge, when the seasoning has had a chance to settle in.
Key Ingredients:
- 1 1/2 pounds ground turkey
- 1 tablespoon olive oil
- 1 small onion, finely diced
- 2 cloves garlic, minced
- 1 can diced tomatoes, 14.5 oz
- 1 can tomato sauce, 15 oz
- 1 can kidney beans, drained and rinsed
- 1 can black beans, drained and rinsed
- 1 cup chicken broth
- 2 tablespoons mild chili powder
- 1 teaspoon ground cumin
- 3 cups cooked rice
- Shredded cheese or sour cream for serving, optional
Quick Steps:
- Heat the oil in a large pot over medium heat, then cook the onion for 4 to 5 minutes until it softens.
- Add the ground turkey and garlic, cooking for 6 to 8 minutes until the turkey is no longer pink.
- Stir in the chili powder and cumin, then add the diced tomatoes, tomato sauce, beans, and broth.
- Bring the pot to a gentle simmer and cook for 20 to 25 minutes, stirring now and then, until the chili thickens slightly.
- Spoon over rice and top with a little cheese or sour cream if you want a softer finish.
Equipment for This Recipe:
- Large Dutch oven or stockpot
- Wooden spoon
- Cutting board and knife
- Measuring cups and spoons
- Storage containers or freezer bags
How to Serve This Dish:
I like this one with a small handful of shredded cheddar on top and maybe a few crushed tortilla chips if the eater wants crunch. Rice keeps it from feeling too “soupy,” which picky eaters often appreciate. If beans are a hard no, pack a bean-light version or blend one can into the sauce so the texture disappears.
Pro Tips for This Recipe:
- Keep the chili powder mild unless you know everyone likes heat.
- Let the chili simmer uncovered for the last few minutes if it needs to thicken.
- Rice on the side freezes better than rice stirred in.
- If the flavor tastes flat, a tiny splash of vinegar or a pinch more salt usually fixes it.
Variations on This Dish:
- Bean-Light Chili: Use one can of beans instead of two and add more turkey.
- Taco Chili Bowls: Serve it over rice with cheese and lettuce for a more taco-like plate.
- No-Rice Version: Eat it as a thicker soup with cornbread or crackers on the side.
Common Mistakes to Avoid with This Dish:
- Making it too spicy by accident: Mild chili powder is enough for this audience.
- Skipping the simmer: The flavors need time to settle.
- Using too much broth: The chili should be spoonable, not watery.
Why Mild, High-Protein Meal Prep Gets Finished
Picky eaters do not usually need more variety. They need less chaos.
That sounds blunt, but it’s true. A lunch with three sauces, two strong vegetables, and a protein that dries out in six hours is asking for trouble. The recipes above stay useful because they do the opposite: they keep the flavors familiar, the textures readable, and the protein high enough that the meal actually holds someone over. That combination matters whether you’re packing food for yourself, a kid, or a very opinionated adult who believes pickles should remain a theory rather than a topping.
The other piece people miss is shape. Burritos, bowls, muffins, pasta bakes, meatballs, and rice boxes are easy to portion and easy to recognize. When food looks predictable, it gets eaten more often. I’d rather make one container that disappears than three clever ones that come home untouched.
Essential Equipment for These Recipes
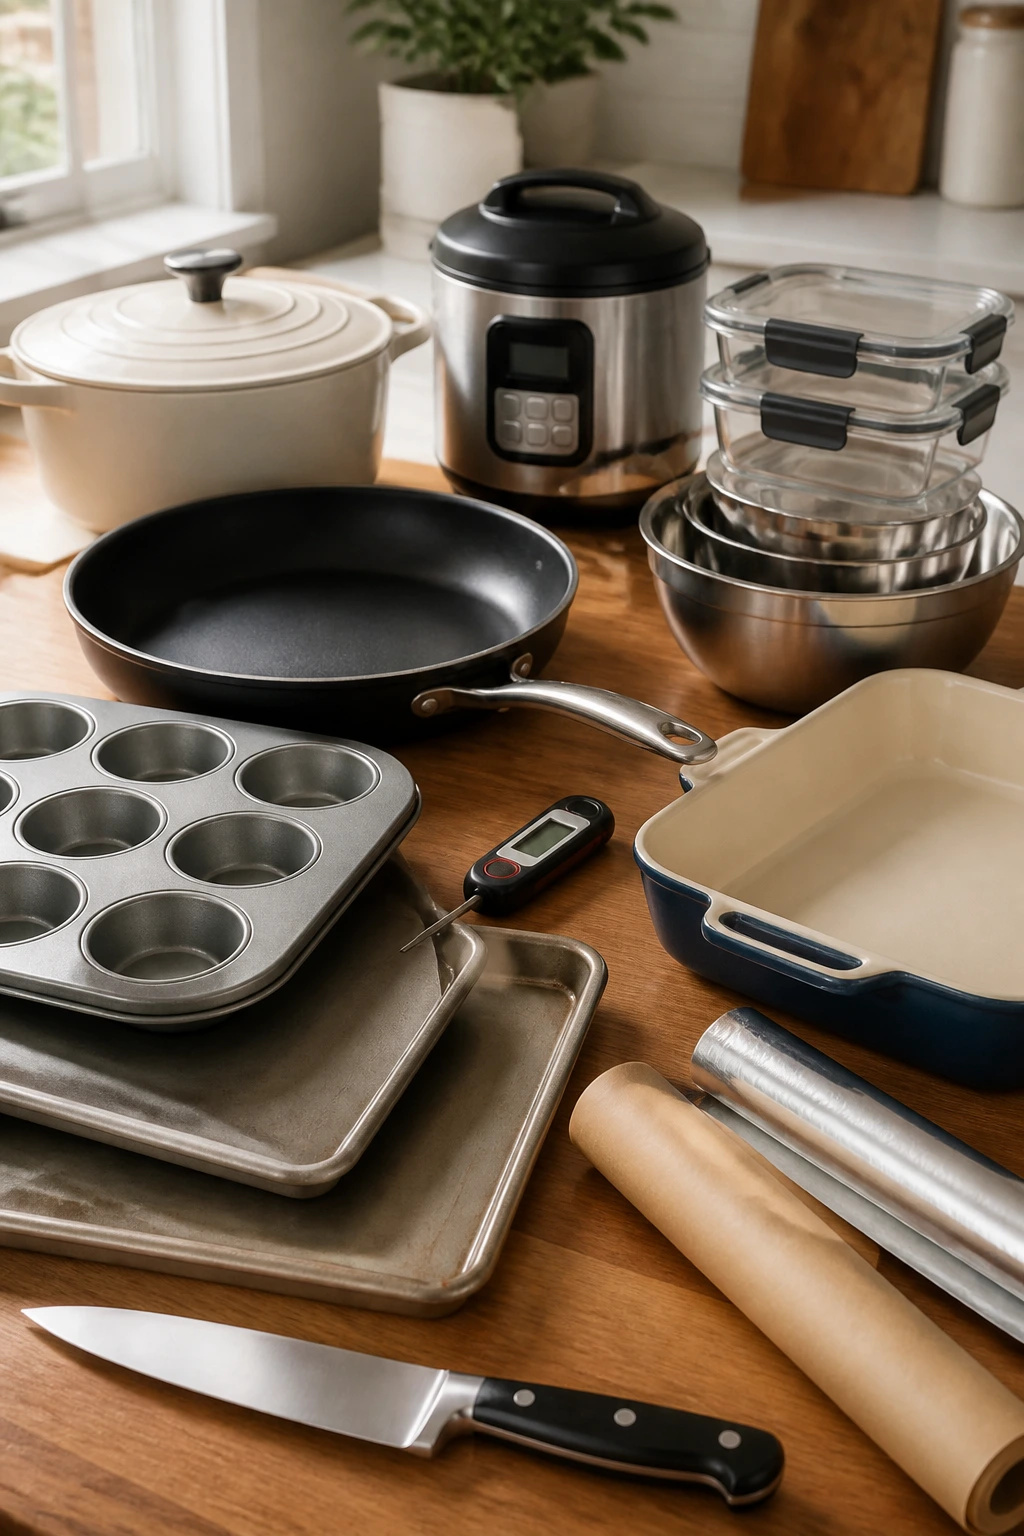
- 12-cup muffin tin: Needed for breakfast egg muffins and useful for portioning other baked bites.
- Two rimmed sheet pans: A lot of these recipes rely on roasting, and crowded pans make soggy vegetables.
- Large nonstick skillet or sauté pan: Good for ground turkey, fried rice, taco bowls, and quick sauces.
- Dutch oven or deep stockpot: Best for chili, pasta sauce, and anything that needs a long simmer.
- 9×13-inch baking dish: Needed for baked ziti and handy for any casserole-style meal prep.
- Instant-read thermometer: The easiest way to stop guessing on chicken, salmon, and turkey.
- Rice cooker or medium saucepan with a tight lid: Rice is a core part of this collection, and consistent rice matters.
- Mixing bowls in two sizes: You’ll want one for sauces and one for meat or egg mixtures.
- Meal prep containers with snug lids: Shallow boxes work best for bowls, while divided containers help picky eaters separate textures.
- Foil and parchment paper: Parchment keeps roasted foods from sticking, and foil helps with burritos and reheating.
- Sharp chef’s knife: Thin slices of chicken, beef, and salmon are easier when the knife actually cuts cleanly.
- Colander or salad spinner: Especially useful for pasta salad jars and any recipe with lettuce or greens.
Smart Shopping and Ingredient Tips
The best shopping habit here is simple: buy ingredients that stay themselves after they’ve been cooked and chilled. That means chicken thighs instead of only breasts for some dishes, 93/7 ground turkey instead of ultra-lean turkey that turns dusty, and sturdy pasta shapes instead of delicate ones that collapse in the fridge.
Rice deserves more attention than it gets. Jasmine rice and medium-grain white rice keep a soft, familiar texture that picky eaters usually accept. Brown rice works too, but it needs a little more moisture and a little more patience. If you like meal prep to feel easy, cook a big pot once and let it cool before sealing it into containers. Warm rice trapped under a lid gets sticky fast.
Frozen vegetables are worth buying here. Peas, carrots, and corn are useful in fried rice, taco bowls, and chili because they stay consistent and don’t need much knife work. Broccoli and green beans can be fresh or frozen, though fresh usually roasts better and frozen usually wins on speed. That tradeoff is practical, not moral.
For cheese, block cheese usually melts better than pre-shredded because the anti-caking powder on bagged cheese can make it less smooth. That matters in baked ziti, egg muffins, and anything you want to reheat without a gritty top. Still, if the goal is speed, bagged cheese is fine. Meal prep does not need to become a personality.
Sauces deserve the same honesty. Low-sodium soy sauce, a thick BBQ sauce, plain Greek yogurt, and a mild taco seasoning packet all make life easier, but they should be chosen with reheating in mind. Thin sauces disappear into rice. Sharp sauces taste sharper after a night in the fridge. A little more thickness and a little less salt usually work better than the opposite.
How to Serve These Recipes
Presentation:
Meal prep looks better when the food has edges. Use shallow containers for rice bowls and pasta so the protein sits on top instead of sinking into the bottom. Divide wet toppings — salsa, ranch, burger sauce, Caesar dressing, slaw — into tiny cups or a separate corner of the container so they stay fresh until lunch.
Accompaniments:
Fruit works across almost everything here: grapes with egg muffins, apple slices with burritos, orange segments beside chicken bowls, or berries with breakfast wraps. Simple sides like cucumber sticks, carrot sticks, and crackers help picky eaters feel like they have options without turning lunch into a buffet. Garlic bread, tortilla chips, or a dinner roll can help pasta and chili feel more complete.
Portions:
For most adults, a meal prep box should land around 1 1/2 to 2 cups of food with 25 to 35 grams of protein. Kids usually need less volume but still benefit from the same ratios, just in smaller containers or half portions. If someone gets hungry fast, add extra protein first, not extra sauce.
Beverage Pairing:
Water is fine, but cold milk, sparkling water, or unsweetened iced tea fits these meals better than sugary drinks. For breakfast items, coffee or milk makes sense. For pasta, bowls, and chili, plain water with lemon keeps the meal from feeling too heavy.
Additional Tips and Flavor Boosters
Flavor Enhancement:
A small hit of acid makes leftovers taste alive again. A squeeze of lemon over chicken, a splash of vinegar in chili, or a spoon of salsa on taco bowls can wake up flavors that went a little quiet in the fridge. Don’t drown the food. Just give it a nudge.
Customization:
Keep add-ins separate if you’re feeding a mixed crowd. One person can pile on pickles, another can skip them, and the base recipe stays the same. Corn, shredded carrots, cucumbers, extra cheese, and chopped herbs all work as optional extras without changing the core dish.
Serving Suggestions:
Crispy toppings deserve a place in meal prep too, but not inside the main container. Toasted breadcrumbs on baked pasta, sesame seeds on rice bowls, crushed tortilla chips on chili, or a handful of chow mein noodles on fried rice can turn a soft lunch into something with real bite.
Make-It-Yours:
For dairy-free meals, lean on olive oil, salsa, BBQ sauce, and herbs instead of cheese-heavy toppings. For gluten-free versions, use rice, potatoes, corn tortillas, certified gluten-free pasta, and tamari instead of soy sauce. For lower-carb plates, shift the ratio toward vegetables and protein, but keep the textures familiar so the meal still feels like lunch, not penance.
Make-Ahead, Storage, and Reheating Guidance
Most of these meals keep best for 3 to 4 days in the fridge when stored in shallow, airtight containers. That covers turkey bowls, chicken rice boxes, chili, baked pasta, roasted chicken, and fried rice. If you’re making a weekly prep, I’d build the containers on the day the food cools, then label the lids with a marker so nobody has to guess what’s inside.
The freezer is useful for the higher-stability dishes: egg muffins, breakfast burritos, meatballs, chili, baked ziti, and saucy chicken bowls all freeze well for up to 2 months, and sometimes a little longer if the wrapping is tight. Pasta salad jars and lettuce-heavy meals are the exceptions. Those belong in the fridge only, and they’re best eaten within 3 days. Once greens are wet or dressing has sat too long, no amount of optimism fixes them.
Reheating is where most meal prep goes sideways, so keep it simple. Rice bowls and chicken dishes should be microwaved covered with 1 to 2 tablespoons of water or broth to bring back a little steam, usually for 1 1/2 to 3 minutes, stirring once halfway through. Pasta bakes do better in the oven at 325°F for 15 to 20 minutes, covered loosely with foil so the top does not dry out. Egg muffins reheat fast — usually 20 to 30 seconds in the microwave. Burritos do best wrapped in a paper towel, then heated in short bursts so the tortilla stays soft instead of tough.
Let hot food cool before sealing it. That sounds basic, but it is where a lot of meal prep fails. Steam trapped in a container turns rice gummy and vegetables soft. A 15 to 20 minute cool-down on the counter is enough for most dishes, as long as the room is not warm enough to make you suspicious.
Variations and Adaptations to Try
No-Onion, No-Drama Plates:
Leave onions out of the base recipes and lean harder on garlic powder, Italian seasoning, or ranch seasoning. This works especially well in egg muffins, chicken bowls, and chili. If onion texture is the problem rather than the flavor, cook it until it disappears into the pan.
Gluten-Free Lunch Box Fix:
Use rice, potatoes, corn tortillas, gluten-free pasta, and tamari to keep the whole collection easy to eat without wheat. The biggest texture wins are fried rice, taco bowls, chili, and roasted chicken boxes. Gluten-free pasta can work too, but only if you keep it a touch firmer than you would for a baked casserole.
Dairy-Light Switches:
Skip the cheddar, ricotta, and yogurt sauces when needed, then replace the creaminess with avocado, olive oil, or a spoon of hummus on the side. Turkey taco bowls, salmon boxes, and chicken rice bowls handle this swap without much fuss. You lose a little richness, but the meals stay solid.
Lower-Sodium Setup:
Choose low-sodium soy sauce, broth, and tomatoes, then bring flavor back with lemon, garlic, herbs, and a little vinegar. That approach works well on fried rice, honey garlic chicken, and chili. It’s a better trade than letting the whole meal taste flat from the start.
Soft-Texture Backup Plan:
If crunchy vegetables are a dealbreaker, roast them a little longer or swap them for softer sides like rice, mashed potatoes, or pasta. Meatballs, baked ziti, egg muffins, and chili are especially good for this style. The goal is to make the food feel gentle, not bland.
Common Mistakes to Avoid
Mixing wet and dry parts too early:
This is how meals turn soggy before they even hit the fridge. Keep salsa, slaw, Caesar dressing, yogurt sauce, and burger sauce separate until serving time.
Cooking protein all the way through during prep:
Chicken breasts, salmon, and turkey go a little farther when reheated. If you cook them past the point of “done” on prep day, they dry out by day two. Pull them at the right temperature, not the right mood.
Choosing vegetables that collapse under heat:
Zucchini, raw tomatoes, and delicate greens can go limp fast. Better choices are broccoli, green beans, carrots, corn, and cabbage, which hold their shape and still taste like themselves after chilling.
Underseasoning for leftovers:
Food tastes duller after refrigeration. A container that seems seasoned enough on the stove may taste flat by lunch, so season the base a little more boldly than you would for a fresh dinner.
Freezing everything in one big slab:
That’s a quick way to create a meal you can’t portion. Freeze burritos individually, freeze meatballs in a single layer first, and use flat freezer bags for chili or sauced chicken so each portion thaws evenly.
Ignoring texture preferences:
A picky eater is usually reacting to one specific thing: soft onions, slimy lettuce, sauce on everything, or a mix of foods they can’t separate. Fix the texture problem and the meal often gets eaten without further drama.
Frequently Asked Questions
Can I make all 15 recipes in one prep session?
You can, but I wouldn’t try to cook every single one in a single day unless you’re feeding a very large household. A smarter move is to pick 3 to 4 recipes that share ingredients — like rice bowls, a pasta dish, and one breakfast item — then freeze extras.
Which recipes hold up best for picky eaters who hate soggy food?
Turkey taco bowls, garlic Parmesan chicken boxes, fried rice, cheeseburger bowls, and baked ziti are strong choices because their textures stay familiar. Anything with lettuce or slaw should be packed with the wet parts on the side.
What’s the best protein if I want the easiest leftovers?
Chicken thighs, ground turkey, lean beef, and turkey meatballs are the most forgiving. Salmon tastes best fresh or within a couple of days, while egg muffins and chili are great for freezer storage.
Can I freeze rice bowls without ruining the rice?
Yes, if the rice is cooled first and the container is sealed well. Reheat with a tablespoon or two of water and cover the box so the rice steams back to life instead of drying out.
How do I keep a picky eater from refusing a mixed bowl?
Pack the bowl in parts. Put rice, protein, and vegetables in separate corners or separate containers, and keep sauces in tiny cups. A meal that looks controlled is easier to accept than a bowl that looks stirred.
Can I use store-bought sauce and still keep these meals healthy?
Absolutely. Just pick thicker sauces with lower sodium when you can, and use enough protein and vegetables that the sauce acts like seasoning, not the whole meal. Store-bought does not ruin meal prep; too much of it does.
What if I don’t have meal prep containers with compartments?
Use any shallow airtight container and separate the wet items with silicone cups, parchment, or small reusable sauce cups. The goal is to keep the crunchy or leafy parts from touching moisture until serving.
Can I swap chicken, turkey, and beef across these recipes?
Most of the time, yes. Chicken swaps well with turkey in bowls and pasta bakes, while beef can step into cheeseburger bowls or teriyaki bowls if you keep the sauce mild. Just pay attention to cooking times, since lean turkey and beef do not behave exactly the same way.
Which breakfast recipe is best if mornings are chaotic?
The egg muffins win that race. They reheat in seconds, they can be eaten with one hand, and they do not fall apart in a bag the way a loaded burrito sometimes can.
A Fridge Full of Meals People Will Actually Eat
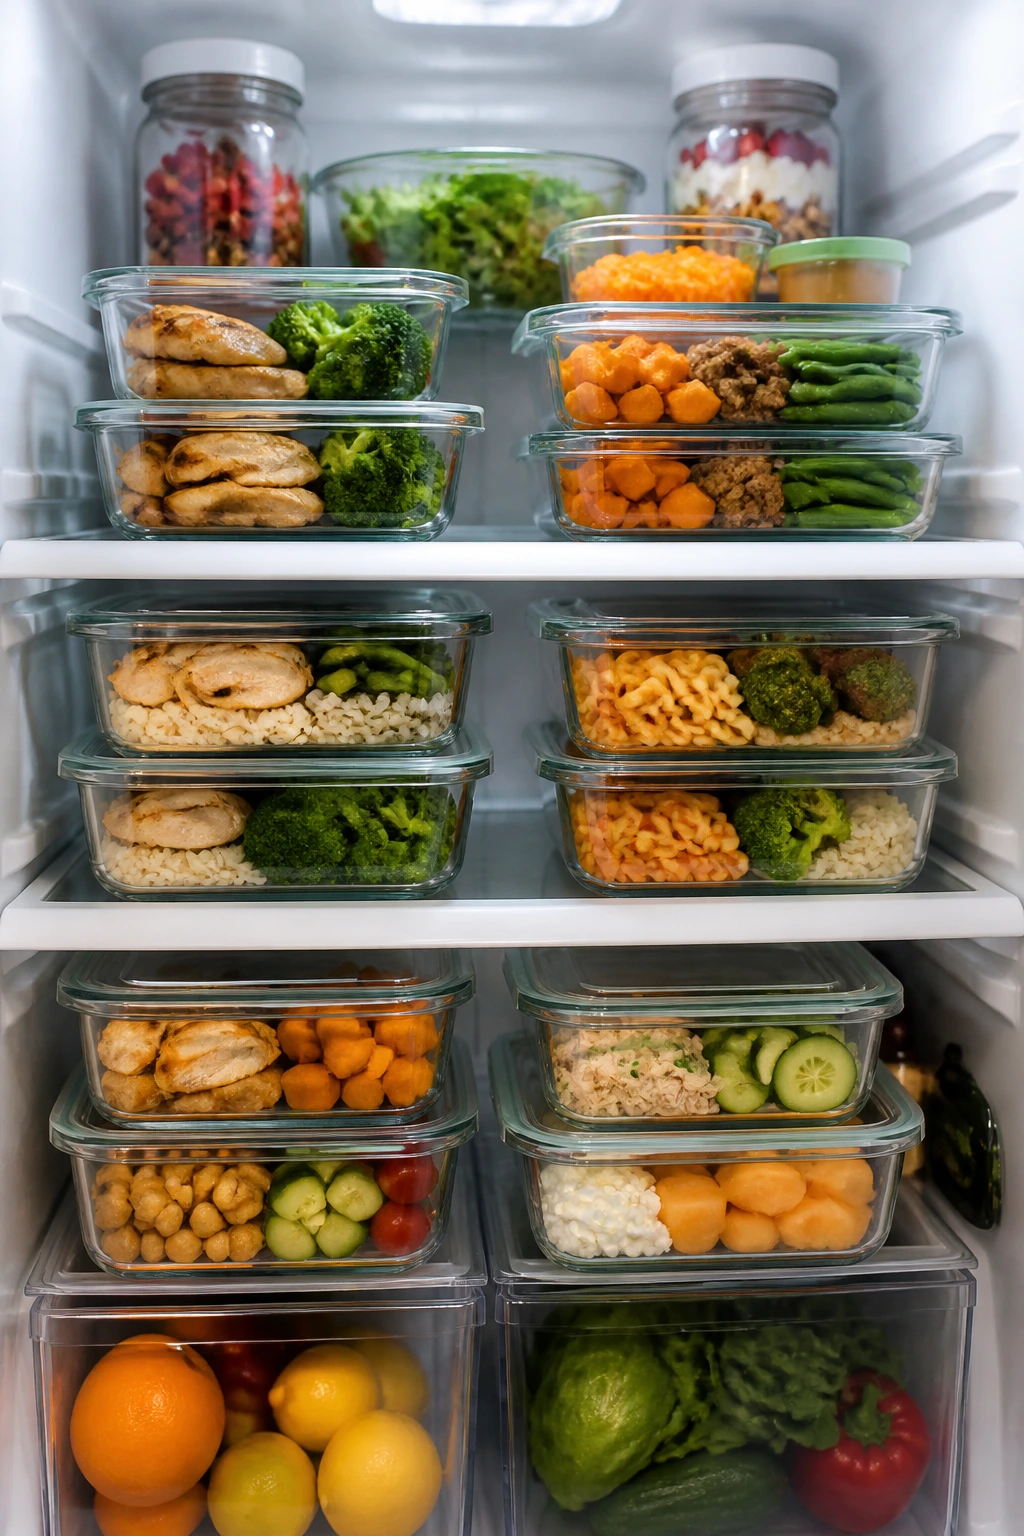
A good meal prep plan doesn’t need to be clever. It needs to be dependable.
That’s the real value of these recipes: they keep the food recognizable, the protein high, and the texture steady enough that a picky eater doesn’t immediately recoil at the sight of leftovers. A burrito that seals, a bowl that reheats cleanly, a casserole that slices neatly — those little wins matter a lot more than anyone likes to admit.
Pick two or three recipes from this list and make them side by side. Once you’ve got a couple of lunches and breakfasts that disappear on schedule, the whole week starts to feel less like negotiation and more like dinner is already halfway done.