
Healthy quick weeknight dinners have a bad reputation they don’t deserve. People hear “healthy” and picture dry chicken, sad steamed vegetables, and a sauce that tastes like it was measured by committee. But the dinners that actually get cooked on a Tuesday night look different: a hot skillet, a little browning on the pan, a squeeze of lemon, a handful of herbs, a can of beans, a piece of fish that’s done before you’ve finished washing the cutting board.
That’s the lane I like best. Fast enough that you’re not bargaining with your own energy. Nutritious enough that you don’t feel flattened afterward. And specific enough — the right cut of chicken, the right shortcut grain, the right pan temperature — that dinner tastes deliberate instead of improvised. A good weeknight recipe doesn’t need drama. It needs timing, good seasoning, and a few smart moves that keep cleanup sane.
So here’s the real trick: build dinners around lean protein, vegetables that cook quickly, and sauces that wake everything up in the last minute or two. That’s where the magic sits. Not in some heroic amount of effort. In good habits repeated 50 times.
Why These Healthy Quick Weeknight Dinners Earn a Spot in the Rotation
- Short ingredient lists: Most of these recipes lean on 6 to 8 core items, which keeps the shopping list from turning into a second job.
- Fast cooking methods: Skillet sears, sheet pans, stir-fries, and no-cook assembly keep most dinners in the 15- to 30-minute range.
- Balanced plates: Protein, vegetables, and a sensible starch show up together, so you do not end up with a meal that looks healthy but leaves you hungry an hour later.
- Flexible pantry swaps: Canned beans, frozen vegetables, rotisserie chicken, and pre-cooked grains slide into plenty of these recipes without making the food feel like a compromise.
- Cleanup stays light: A lot of these dinners use one pan, one bowl, or one pot, which matters more than people admit when it’s dark and the sink is already half full.
- Easy to scale: Most of them double cleanly for bigger households or meal prep, and several can be turned into lunch the next day without drying out.
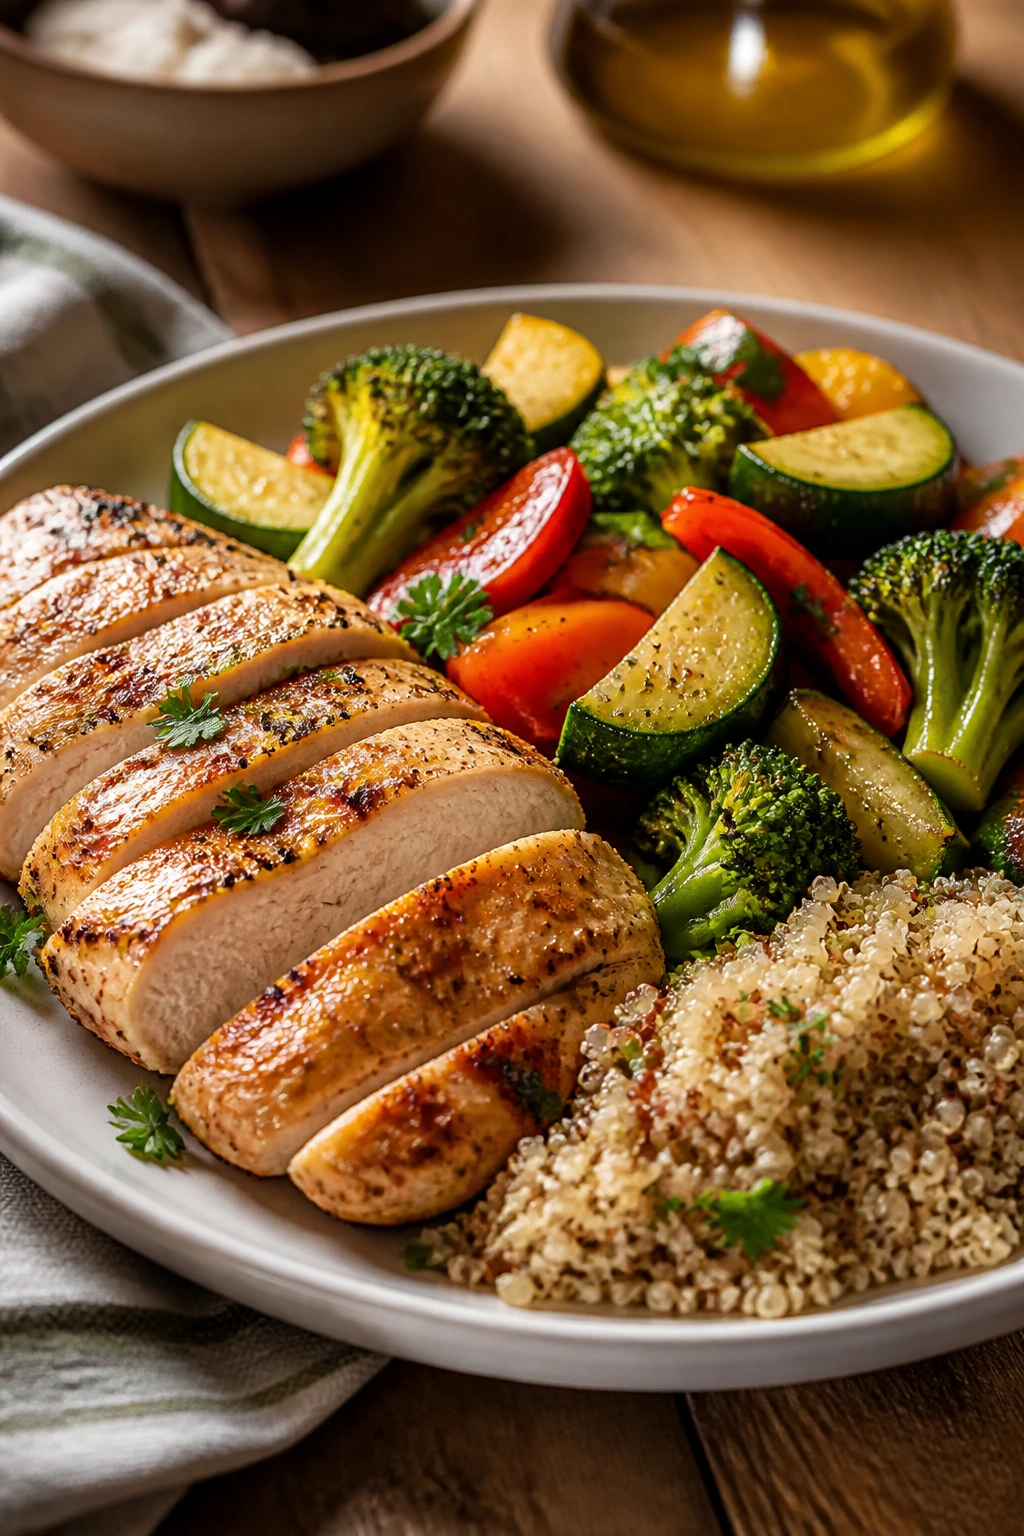
1. Lemon-Garlic Chicken and Broccoli Skillet
A hot skillet gives this dinner its backbone. The chicken gets a little golden color, the broccoli softens at the edges, and the lemon wakes everything up at the end so it tastes bright instead of heavy. I like this one because it feels like actual dinner, not a pile of “good-for-you” ingredients arranged on a plate.
Why It Works: Thin chicken cutlets cook in about 3 to 4 minutes per side, which keeps the whole meal moving. Broccoli florets cook fast enough to stay green and a little crisp. The garlic goes in late so it smells sweet, not bitter, and the lemon juice cuts through the olive oil with almost no effort.
Key Ingredients:
- 1 lb chicken cutlets; thin pieces cook quickly and stay juicy
- 3 cups broccoli florets; cut small so they tenderize fast
- 2 tablespoons olive oil; enough for browning without pooling
- 3 garlic cloves, minced; adds sharpness at the end
- 1 lemon, zested and juiced; gives the pan sauce its lift
- 1/2 teaspoon kosher salt and 1/4 teaspoon black pepper; the basic seasoning matters here
- 2 tablespoons low-sodium chicken broth; helps loosen the browned bits
Quick Steps:
- Season the chicken with salt, pepper, and half the lemon zest.
- Heat the olive oil in a large skillet over medium-high heat and sear the chicken for 3 to 4 minutes per side until golden and cooked through.
- Transfer the chicken to a plate. Add the broccoli and broth to the pan, then cover for 2 minutes.
- Stir in the garlic and lemon juice, cook 30 seconds, and return the chicken to coat in the pan juices.
Equipment for This Recipe:
- Large skillet; 12-inch works best
- Tongs; makes flipping the cutlets easier
- Microplane or fine grater; useful for the lemon zest
- Cutting board and sharp knife; for trimming the broccoli and chicken
How to Serve This Dish: Spoon the broccoli and lemony pan juices over the chicken and serve with brown rice, quinoa, or a small roasted potato. A simple cucumber salad works well beside it.
Pro Tips for This Recipe:
- Cut the broccoli into small florets; big ones lag behind and go soft before the chicken finishes.
- If the pan looks dry, add the broth before the garlic so the garlic doesn’t scorch.
- Let the chicken rest for 2 minutes before slicing so the juices stay put.
Variations on This Dish:
- Parmesan Finish: Add 2 tablespoons grated parmesan at the end for a salty edge.
- Herby Version: Stir in chopped parsley or dill just before serving.
- Spicy Lemon Chicken: Add 1/4 teaspoon red pepper flakes with the garlic.
Common Mistakes to Avoid with This Dish:
- Don’t crowd the skillet; the chicken steams instead of browns.
- Don’t add the garlic too early; it can turn harsh in a hot dry pan.
- Don’t skip the broth or lemon juice; the pan needs a little liquid to turn the browned bits into sauce.
2. Miso-Sesame Salmon with Green Beans
The glaze is the point here. Miso, soy, honey, and sesame oil make a sticky, salty-sweet coating that clings to the salmon and glosses the green beans without making them soggy. It tastes like a dinner that took longer than it did.
Why It Works: Salmon fillets roast cleanly at 425°F, usually in 12 to 14 minutes depending on thickness. Green beans cook on the same tray and pick up flavor from the glaze as it drips down. Miso gives you depth without needing a long sauce simmer.
Key Ingredients:
- 4 salmon fillets, about 5 oz each; similar size helps them finish together
- 1 lb green beans, trimmed; choose thin beans if you can
- 2 tablespoons white miso; gives the glaze its savory base
- 1 tablespoon low-sodium soy sauce; adds salt and color
- 1 tablespoon honey; balances the miso’s edge
- 1 tablespoon sesame oil; use a light hand, it’s strong
- 1 tablespoon rice vinegar; keeps the glaze from tasting sticky
- 2 teaspoons grated ginger; fresh is sharper than powder
- 1 teaspoon sesame seeds; for a little crunch at the end
Quick Steps:
- Heat the oven to 425°F and line a sheet pan with parchment.
- Whisk the miso, soy sauce, honey, sesame oil, rice vinegar, and ginger until smooth.
- Arrange the green beans on the pan, place the salmon beside them, and brush everything with the glaze.
- Roast for 12 to 14 minutes until the salmon flakes and the beans are tender with a little bite.
Equipment for This Recipe:
- Rimmed sheet pan; catches the glaze
- Parchment paper; makes cleanup easy
- Small bowl and whisk; for the sauce
- Pastry brush or spoon; to coat the fish evenly
How to Serve This Dish: Serve it over steamed rice or cauliflower rice with extra sesame seeds on top. A few sliced scallions and a wedge of lime give the plate more snap.
Pro Tips for This Recipe:
- Dry the salmon with paper towels before glazing so it roasts instead of steams.
- If your salmon is thin, start checking at 10 minutes.
- Put the green beans under the salmon if you want more glaze on them.
Variations on This Dish:
- Ginger-Chili Salmon: Add 1 teaspoon chili crisp to the glaze.
- Maple Miso Salmon: Swap honey for maple syrup if you want a rounder sweetness.
- Broccoli Swap: Use broccoli florets in place of green beans; give them 2 extra minutes.
Common Mistakes to Avoid with This Dish:
- Don’t overbake salmon; it dries fast once it passes opaque and flaky.
- Don’t drown the fish in sauce; too much liquid keeps the glaze from setting.
- Don’t use thick green beans without trimming the stems; they stay stringy.
3. Turkey Taco Lettuce Cups
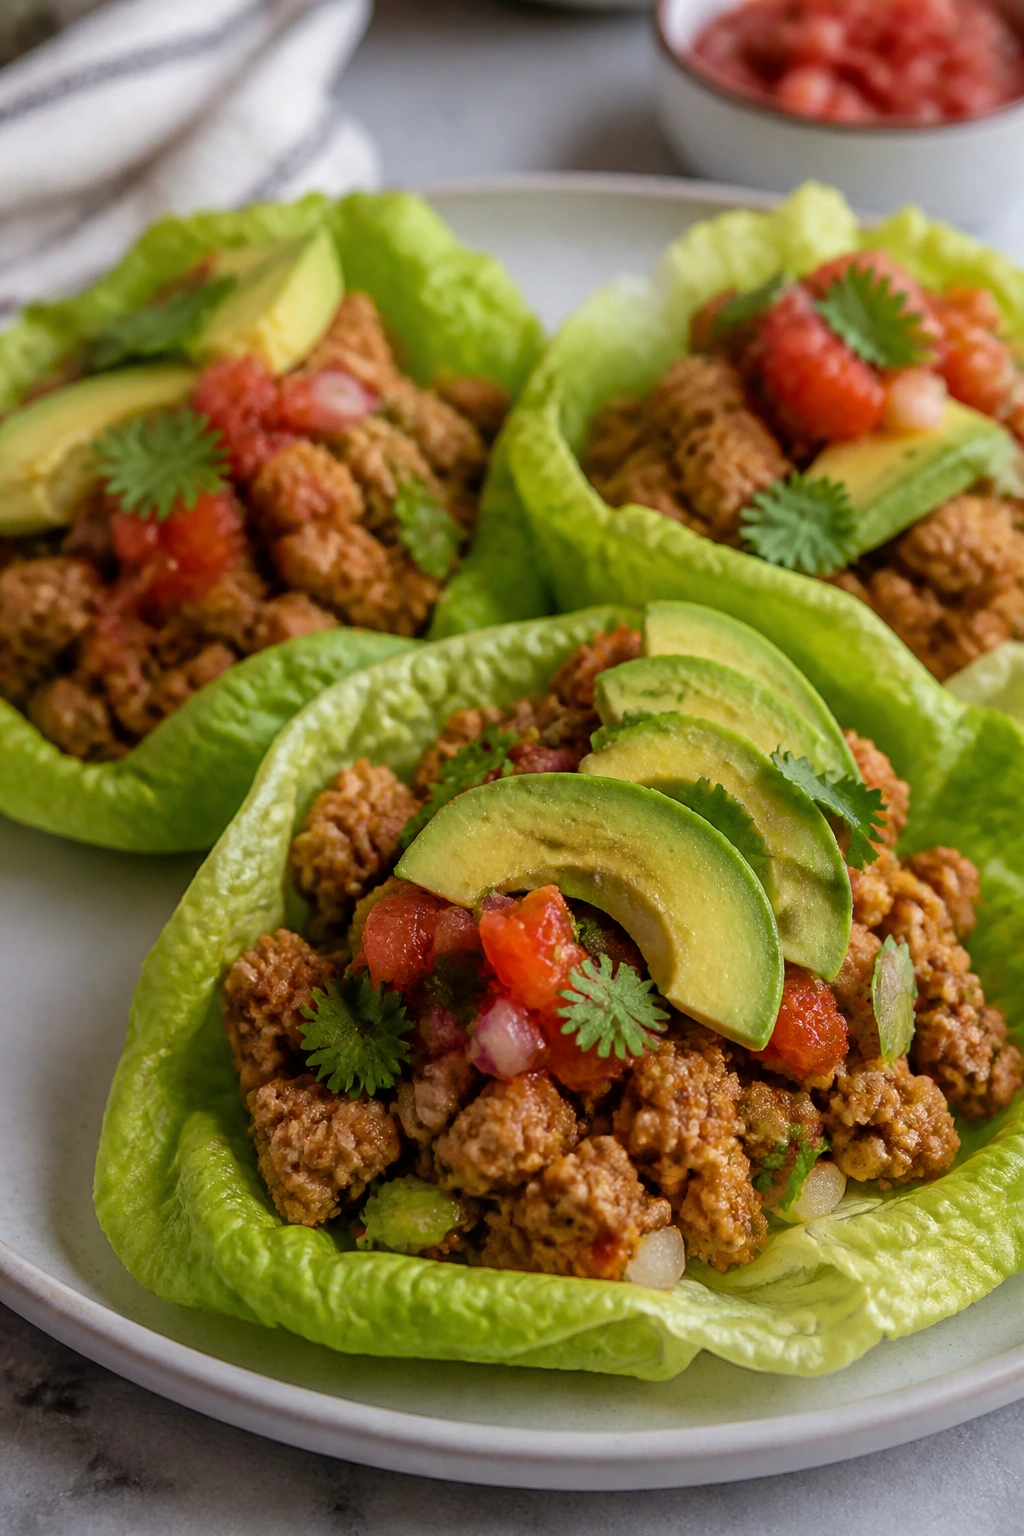
These are the kind of tacos that stay light but still feel like dinner. The turkey gets browned with onion and seasoning, then tucked into cool lettuce leaves with salsa and avocado. Crisp, salty, and a little messy. Good messy.
Why It Works: Lean ground turkey cooks quickly and soaks up taco seasoning without getting greasy. Lettuce cups replace tortillas, which keeps the plate lighter without making it feel like diet food. Black beans add fiber and stretch the filling.
Key Ingredients:
- 1 lb lean ground turkey; 93% lean works well
- 1 tablespoon olive oil; helps the turkey brown
- 1 small yellow onion, finely diced; builds the base flavor
- 2 tablespoons taco seasoning; use a low-sodium blend if possible
- 1/2 cup salsa; adds moisture and spice
- 1 can black beans, rinsed and drained; for fiber and heft
- 1 head butter lettuce; the soft leaves fold best
- 1 avocado, sliced; cools the heat
- 1 lime, cut into wedges; for finishing
Quick Steps:
- Heat the olive oil in a skillet over medium heat and cook the onion for 3 minutes.
- Add the turkey and break it up with a spoon; cook until no pink remains.
- Stir in the taco seasoning, salsa, and black beans, then simmer for 2 to 3 minutes until thick.
- Spoon the filling into lettuce leaves and top with avocado and lime.
Equipment for This Recipe:
- Large skillet; for browning the turkey
- Wooden spoon or spatula; breaks up the meat well
- Measuring spoons; taco seasoning gets salty fast
- Serving platter; makes the lettuce cups easier to build
How to Serve This Dish: Set the filling in a bowl and the lettuce leaves around it so everyone can build their own. Add a spoonful of plain Greek yogurt if you want a creamy note.
Pro Tips for This Recipe:
- Wash and dry the lettuce leaves well or the filling will slide.
- If the turkey seems dry, add 1 to 2 tablespoons water with the salsa.
- Warm the black beans before adding them; cold beans cool the skillet too much.
Variations on This Dish:
- Chipotle Turkey Cups: Stir in 1 teaspoon chopped chipotle in adobo.
- Tex-Mex Bowl: Serve the filling over rice instead of lettuce.
- Vegetarian Swap: Use lentils and extra black beans in place of turkey.
Common Mistakes to Avoid with This Dish:
- Don’t overstuff the lettuce leaves; they tear fast.
- Don’t skip draining the salsa if it’s very loose.
- Don’t cook the turkey on high heat the whole time; it can dry out before the onion softens.
4. Chickpea Spinach Coconut Curry
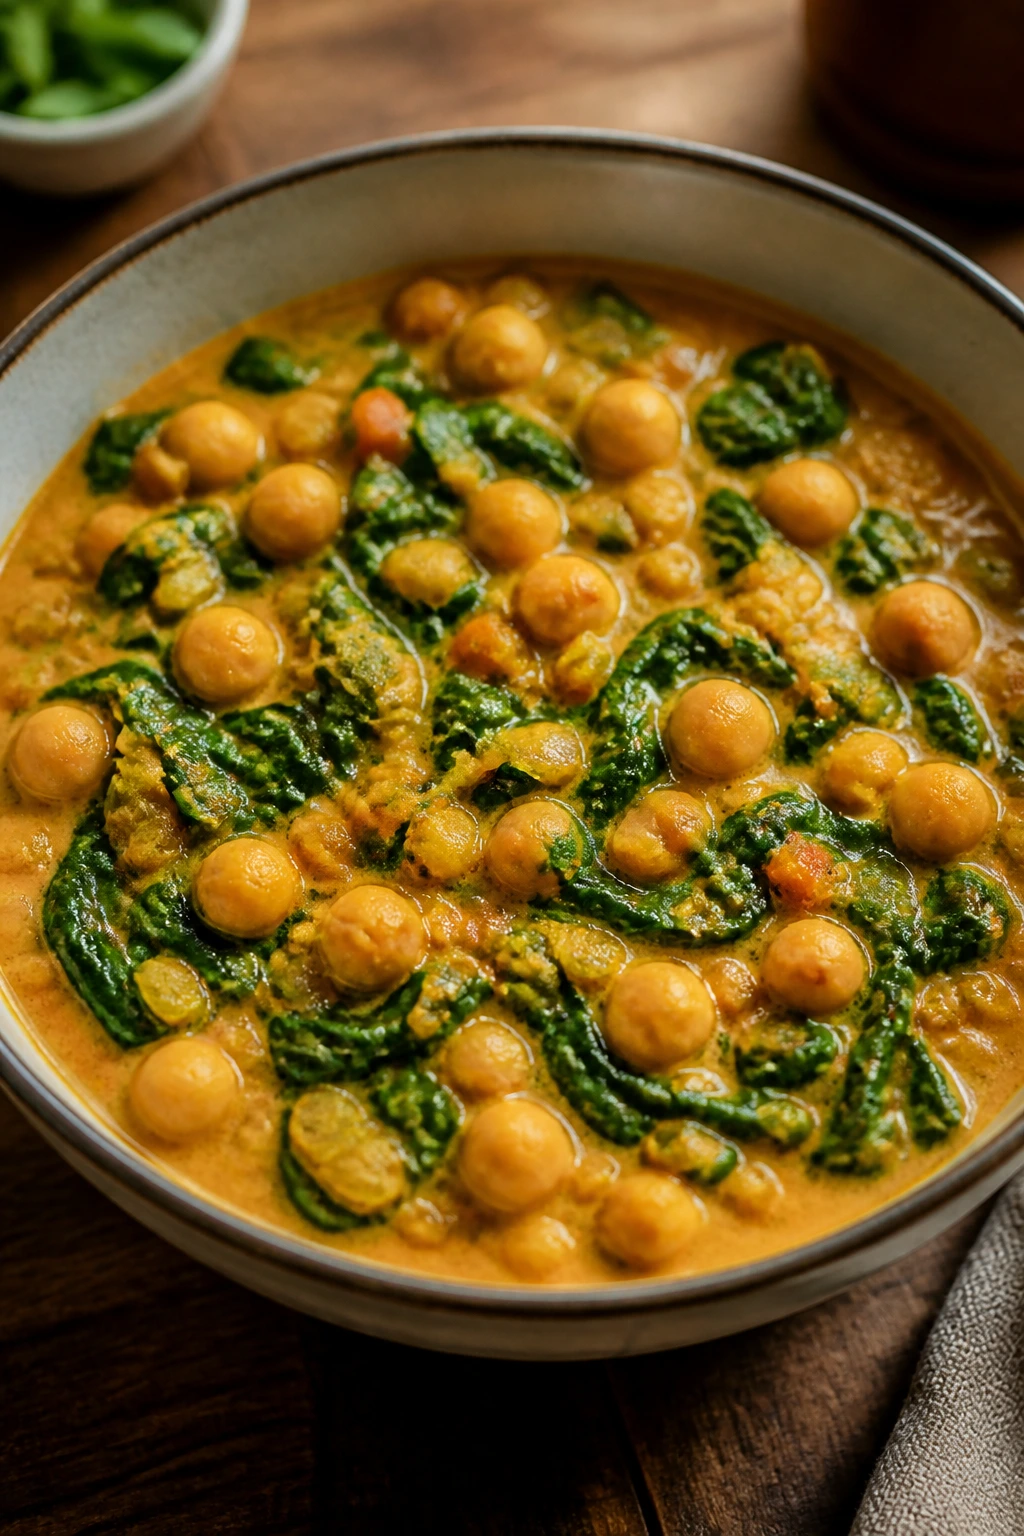
This curry smells like dinner before it even hits the bowl. Curry powder and garlic bloom in the pan, then chickpeas and tomatoes simmer in light coconut milk until the sauce turns warm and silky. Spinach goes in at the end and melts down almost instantly.
Why It Works: Canned chickpeas need no pre-cooking, so the curry can be built in one pot in under 25 minutes. Light coconut milk keeps the sauce creamy without feeling heavy. Red or white rice on the side catches the sauce without stealing the spotlight.
Key Ingredients:
- 1 tablespoon coconut oil or olive oil; either one works
- 1 small yellow onion, diced; the base flavor
- 2 garlic cloves, minced; stirred in after the onion softens
- 1 tablespoon curry powder; choose one you actually like the smell of
- 1 can chickpeas, rinsed and drained; the protein anchor
- 1 can diced tomatoes, 14.5 oz; adds acidity and body
- 1 can light coconut milk, 13.5 oz; makes the sauce silky
- 3 cups baby spinach; wilts in the last minute
- 1 lime, juiced; brightens the finished curry
Quick Steps:
- Heat the oil in a saucepan over medium heat and cook the onion for 4 minutes.
- Stir in the garlic and curry powder for 30 seconds until fragrant.
- Add the chickpeas, tomatoes, and coconut milk, then simmer for 10 minutes.
- Stir in the spinach and lime juice and cook until the leaves wilt.
Equipment for This Recipe:
- Medium saucepan or Dutch oven; one pot is enough
- Wooden spoon; for stirring the curry
- Can opener; obviously, but worth saying
- Citrus juicer; handy for the lime
How to Serve This Dish: Spoon it over brown rice or spoon it next to warm naan if you want something to mop with. A spoon of yogurt on top cools the spice well.
Pro Tips for This Recipe:
- Let the curry simmer uncovered for a few minutes if the sauce looks thin.
- If your curry powder is mild, add 1/4 teaspoon cayenne.
- Stir the spinach in right before serving so it stays bright green.
Variations on This Dish:
- Sweet Potato Curry: Add 1 cup diced sweet potato with the tomatoes and simmer until tender.
- Green Curry Shortcut: Swap curry powder for 1 tablespoon green curry paste.
- Dairy-Free Comfort Bowl: Top with toasted cashews instead of yogurt.
Common Mistakes to Avoid with This Dish:
- Don’t boil the coconut milk hard; it can separate.
- Don’t add spinach too early or it turns muddy.
- Don’t forget salt at the end; chickpeas and coconut milk need a final nudge.
5. Shrimp Snap Pea Stir-Fry
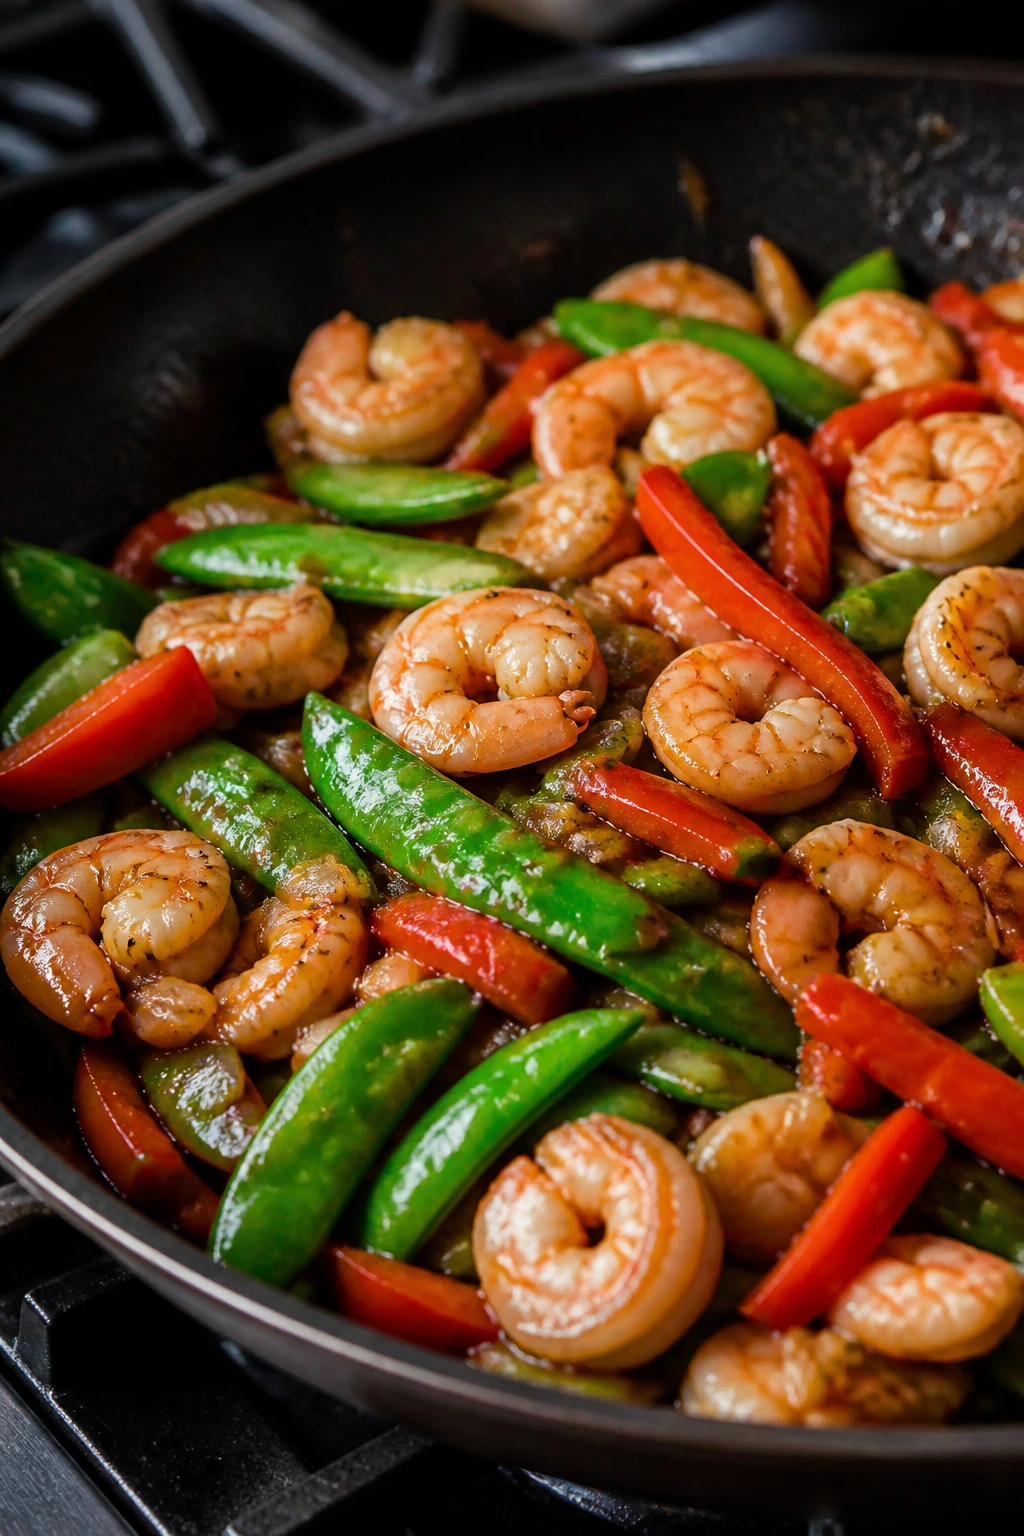
Shrimp cooks so fast that you almost have to be ready before you start. That’s the charm. The snap peas stay loud and crisp, the shrimp turns pink and plump in a minute or two, and the sauce clings in a thin glossy coat rather than pooling at the bottom of the pan.
Why It Works: Shrimp is one of the best fast proteins on the table because it cooks in about 2 minutes per side. Snap peas and bell pepper bring crunch without a long sauté. A simple soy-ginger sauce keeps the pan lively without demanding a long simmer.
Key Ingredients:
- 1 lb large shrimp, peeled and deveined; thaw fully if frozen
- 2 cups snap peas; trim the ends if they’re tough
- 1 red bell pepper, sliced; adds color and sweetness
- 2 tablespoons low-sodium soy sauce; the salty base
- 1 tablespoon honey; balances the soy
- 2 teaspoons grated ginger; fresh gives the best snap
- 2 garlic cloves, minced; added near the end
- 1 tablespoon neutral oil; for high-heat cooking
- 2 cups cooked brown rice; for serving
Quick Steps:
- Mix the soy sauce, honey, ginger, and garlic in a small bowl.
- Heat the oil in a large skillet or wok over medium-high heat.
- Cook the shrimp for 1 to 2 minutes per side, then remove them from the pan.
- Stir-fry the snap peas and bell pepper for 3 minutes, add the sauce, then return the shrimp and toss until coated.
Equipment for This Recipe:
- Large skillet or wok; the extra surface area helps
- Tongs; useful for turning shrimp
- Small mixing bowl; for the sauce
- Rice cooker or saucepan; if you’re making rice from scratch
How to Serve This Dish: Serve the stir-fry over brown rice or cauliflower rice and finish with sesame seeds or sliced scallions. It’s good with a few cucumber slices on the side.
Pro Tips for This Recipe:
- Pat the shrimp dry first or they’ll steam.
- Keep the heat up; stir-frying wants a hot pan.
- Cook the vegetables just until bright and crisp-tender, not soft.
Variations on This Dish:
- Spicy Chili Version: Add 1 teaspoon chili garlic sauce to the sauce bowl.
- Veggie-Heavy Bowl: Add mushrooms or shredded cabbage for extra volume.
- Rice Noodle Swap: Toss it with cooked rice noodles instead of rice.
Common Mistakes to Avoid with This Dish:
- Don’t overcook the shrimp; rubbery shrimp can’t be fixed.
- Don’t let the pan cool between steps.
- Don’t overload the skillet with vegetables or they’ll release too much water.
6. Chicken Fajita Bowls
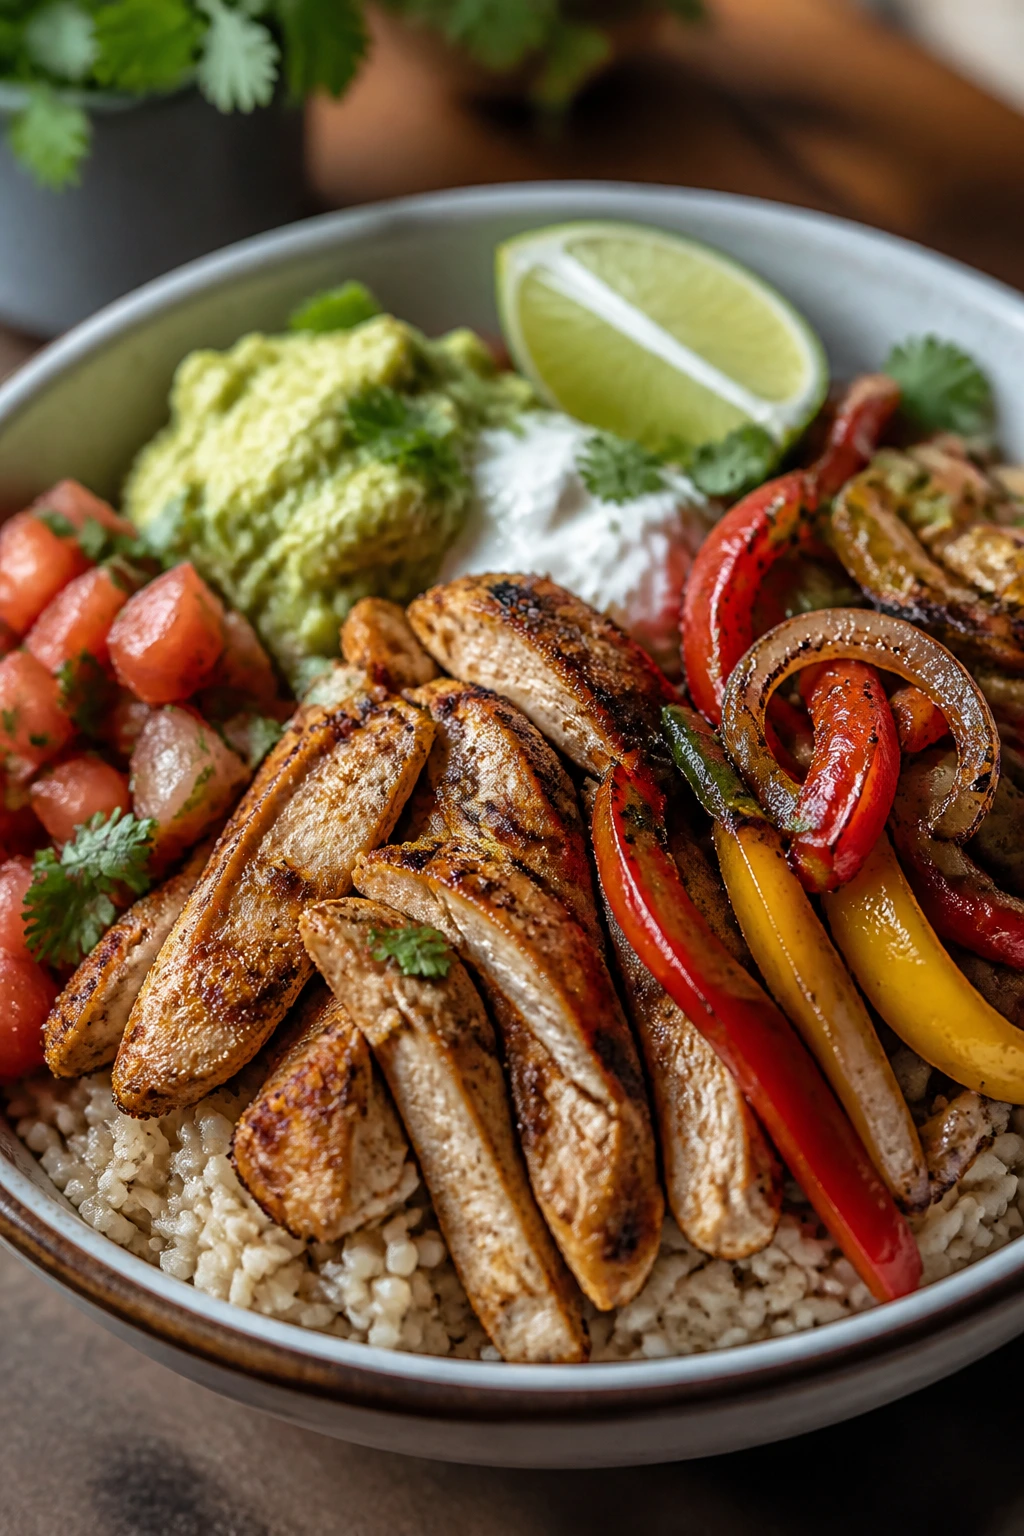
This is a weeknight dinner that knows how to show up. The chicken gets seasoned with cumin and chili powder, the peppers and onions go soft at the edges, and the lime at the end keeps the whole bowl from feeling weighed down. It’s the kind of meal that gets better as you add toppings.
Why It Works: Thin-sliced chicken breast cooks fast and stays tender if you don’t chase it past done. Bell peppers and onions cook in the same skillet, which means the pan picks up all the seasoning. Rice underneath gives the bowl enough structure to feel complete.
Key Ingredients:
- 1 lb chicken breast, thinly sliced; thinner pieces cook faster
- 2 bell peppers, sliced; use different colors if you want
- 1 medium onion, sliced; the sweetness matters
- 1 tablespoon olive oil; for the skillet
- 1 teaspoon cumin; gives the fajita flavor its depth
- 1 teaspoon chili powder; adds warmth without much heat
- 1 lime, juiced; bright finish
- 2 cups cooked brown rice; for the bowl base
- 1/2 cup salsa and 1/4 cup plain Greek yogurt; for topping
Quick Steps:
- Toss the chicken with cumin, chili powder, salt, and half the lime juice.
- Heat the oil in a skillet over medium-high heat and cook the chicken for 5 to 6 minutes.
- Add the peppers and onion and cook for 4 more minutes until softened and a little browned.
- Spoon over rice and finish with salsa and Greek yogurt.
Equipment for This Recipe:
- Large skillet; room for the chicken and vegetables
- Sharp knife; thin slices cook more evenly
- Measuring spoons; spices are easy to overdo
- Serving bowls; the toppings look better in a bowl than on a plate
How to Serve This Dish: Build the bowl with rice first, then fajita filling, then toppings. A handful of cilantro or sliced jalapeño works if you want more edge.
Pro Tips for This Recipe:
- Slice the chicken across the grain so it stays tender.
- Let the peppers keep a little bite; mushy fajitas are a drag.
- Warm the rice before assembling so the bowl feels cohesive.
Variations on This Dish:
- Cauliflower Rice Bowl: Swap the brown rice for cauliflower rice.
- Chicken and Black Bean Version: Add 1/2 cup black beans to stretch the skillet.
- Tortilla Wrap Night: Roll everything into whole-wheat tortillas.
Common Mistakes to Avoid with This Dish:
- Don’t crowd the chicken or it will steam.
- Don’t cook the onions until they collapse completely; a little shape is better.
- Don’t skip the lime at the end; it makes the whole bowl taste fresher.
7. Pesto Chicken Zucchini Noodles
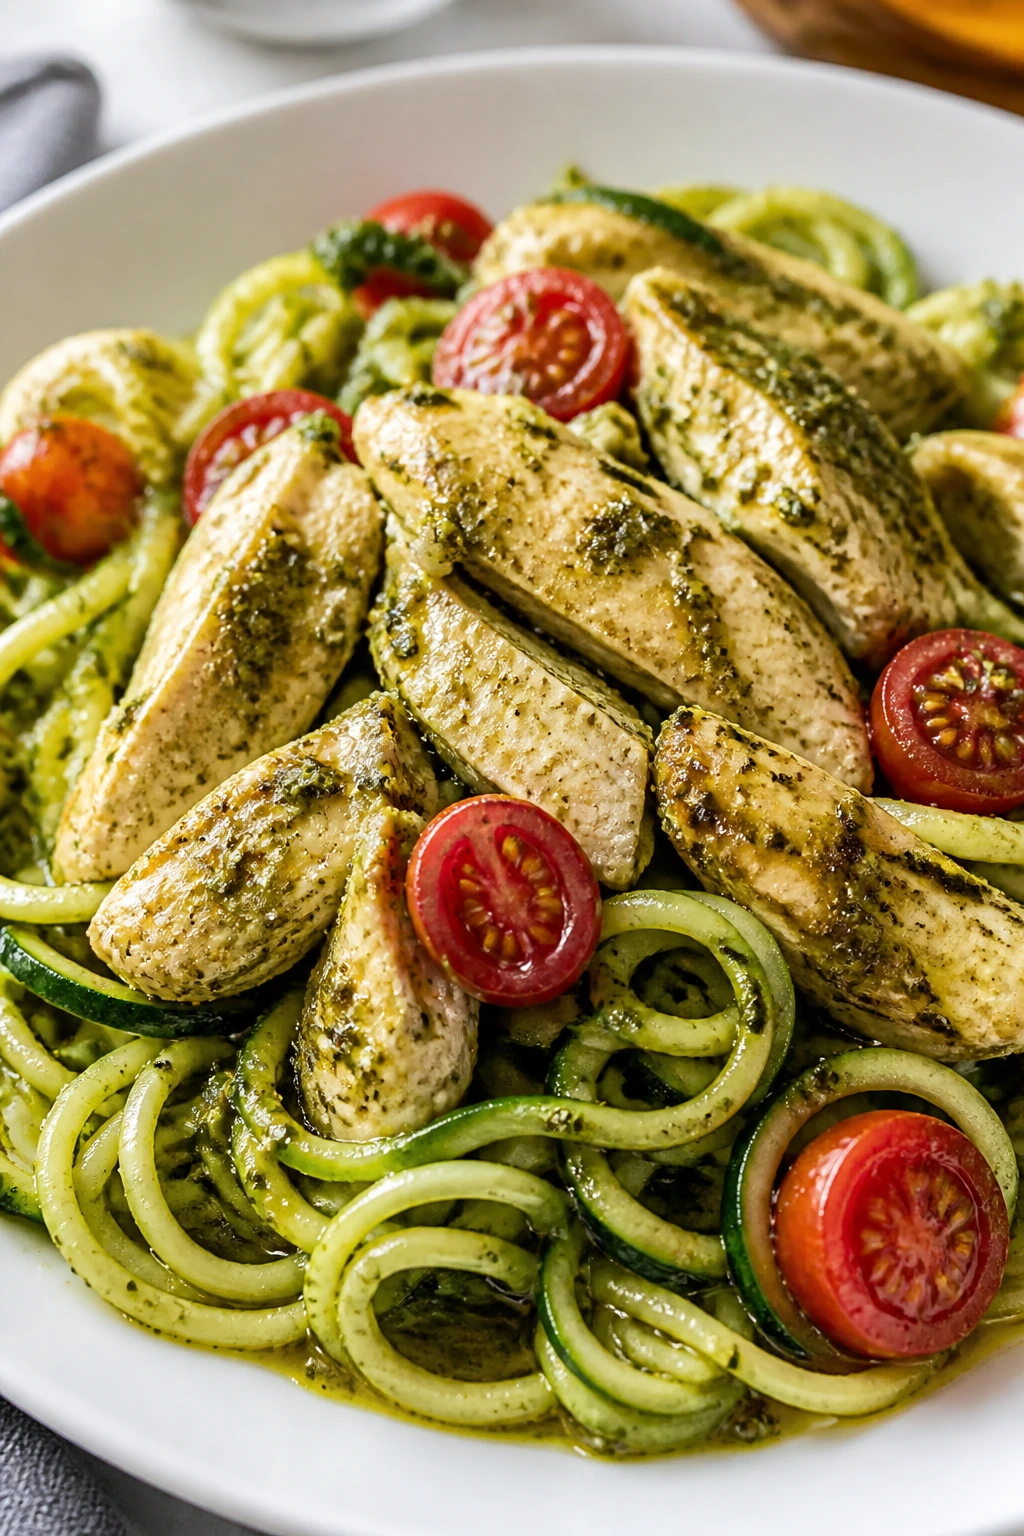
This one tastes a little like summer even if the kitchen is busy and the sink is already full. The chicken brings the protein, the pesto brings the basil and garlic, and the zucchini noodles stay tender-crisp if you don’t fuss with them too long. The key is to keep the pan moving.
Why It Works: Chicken cutlets cook in minutes, and zucchini noodles only need a quick toss so they don’t turn watery. Pesto acts like a built-in sauce, which keeps the ingredient list short. Cherry tomatoes burst in the pan and make their own little pan sauce.
Key Ingredients:
- 1 lb chicken cutlets; or slice breasts in half horizontally
- 4 medium zucchini, spiralized; pat them dry first
- 1/3 cup basil pesto; store-bought is fine here
- 1 pint cherry tomatoes, halved; they soften and burst
- 1 tablespoon olive oil; for the skillet
- 2 garlic cloves, minced; for the tomatoes
- 2 tablespoons grated parmesan; optional but nice
Quick Steps:
- Season the chicken with salt and pepper.
- Sear it in olive oil over medium-high heat for 3 to 4 minutes per side, then set aside.
- In the same pan, cook the tomatoes and garlic for 2 minutes, then add the zucchini noodles.
- Toss in the pesto and sliced chicken just long enough to warm through.
Equipment for This Recipe:
- Large skillet; wide enough for the zoodles
- Spiralizer or julienne peeler; for the zucchini
- Tongs; helps turn the chicken cleanly
- Paper towels; for drying the zucchini noodles
How to Serve This Dish: Pile it into shallow bowls and finish with parmesan and black pepper. Garlic toast is not mandatory, but I won’t argue if it appears.
Pro Tips for This Recipe:
- Salt the zucchini lightly and blot it dry if it seems very wet.
- Don’t leave the zucchini in the pan for more than a minute or two.
- Keep extra pesto on the side if you want a stronger basil hit.
Variations on This Dish:
- Pesto Shrimp Swap: Use shrimp instead of chicken and shorten the cook time.
- Sun-Dried Tomato Version: Add chopped sun-dried tomatoes for more depth.
- Dairy-Free Bowl: Use a dairy-free pesto and skip the parmesan.
Common Mistakes to Avoid with This Dish:
- Don’t overcook the zoodles; they’ll leak liquid and get limp.
- Don’t add pesto too early or it can dull in the hot pan.
- Don’t use thick chicken pieces; they take too long and the zucchini suffers.
8. Sweet Potato Black Bean Quesadillas
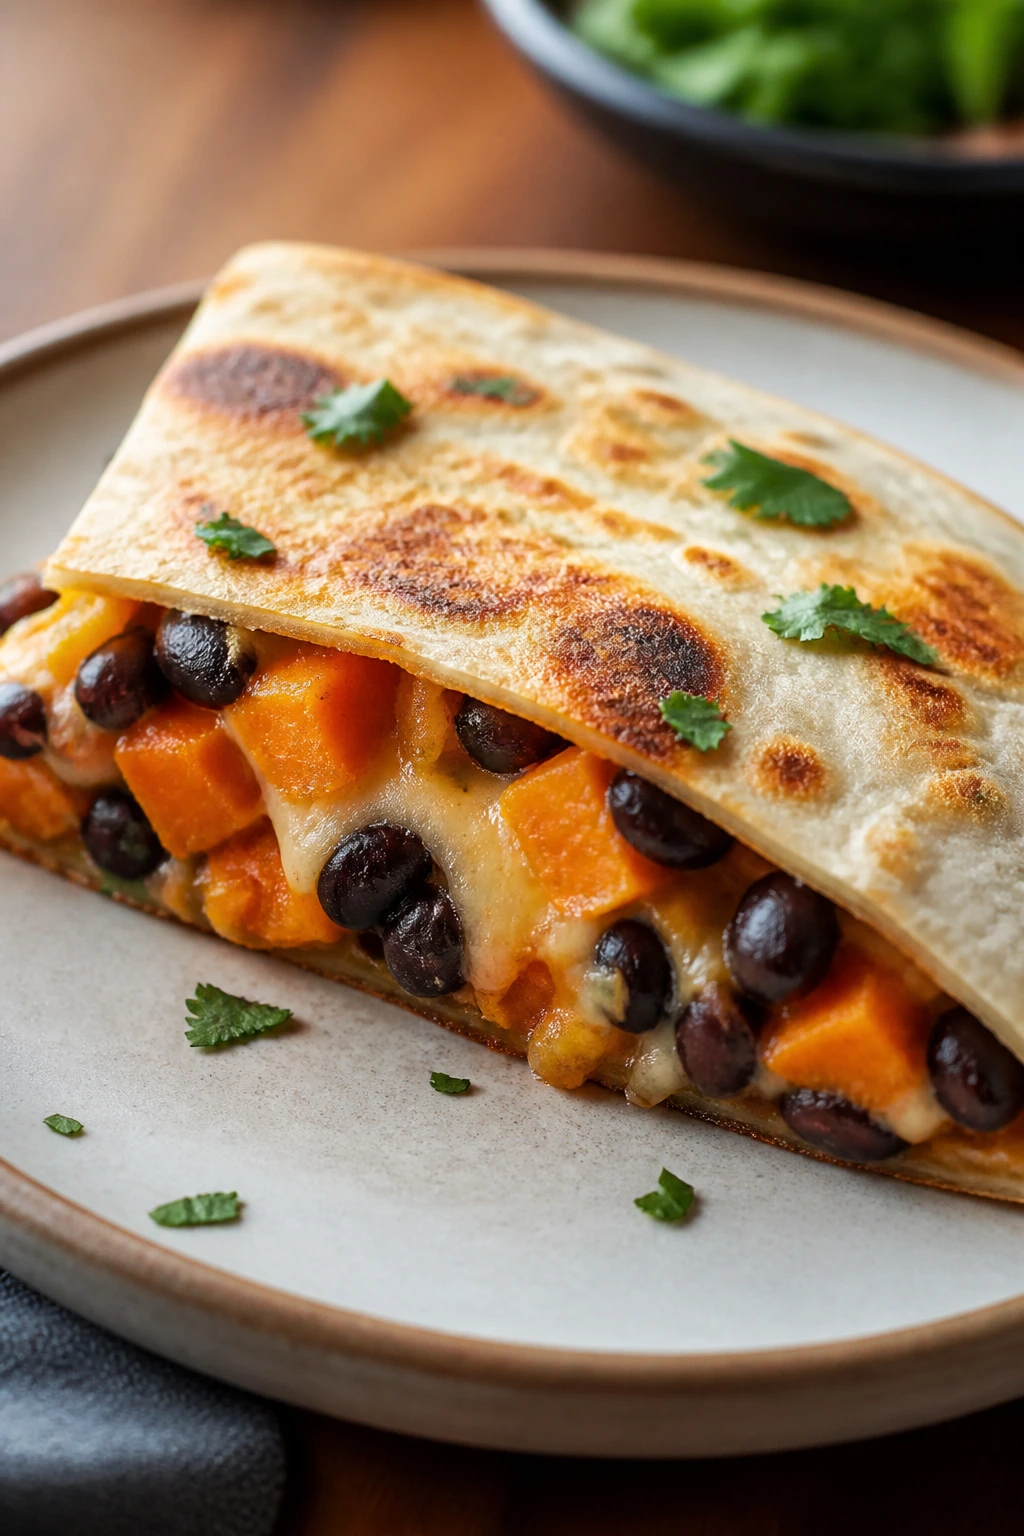
These are crisp on the outside, soft in the middle, and surprisingly filling for something that cooks this fast. Sweet potato brings the sweetness, black beans bring substance, and a little cheese holds the whole thing together. You get the comfort of a quesadilla without the usual nap.
Why It Works: Microwaving the sweet potato first knocks down the cook time. Black beans add protein and fiber, and whole-wheat tortillas make the meal sturdier. A hot skillet gives the tortilla a crisp shell without needing much oil.
Key Ingredients:
- 1 medium sweet potato, peeled and diced small; microwave it first
- 1 can black beans, rinsed and drained; the main filling
- 4 whole-wheat tortillas; medium size is easiest to flip
- 1 cup shredded cheddar or pepper jack; use less if you want it lighter
- 1 teaspoon ground cumin; gives the filling shape
- 1 cup baby spinach; wilts into the filling
- 1 tablespoon olive oil; for the skillet
- Salsa for serving; brightens the plate
Quick Steps:
- Microwave the diced sweet potato with a splash of water for 4 to 5 minutes until tender.
- Mash it lightly with the black beans, cumin, and spinach.
- Spread the filling on half each tortilla, add cheese, fold, and cook in a skillet over medium heat for 2 to 3 minutes per side.
- Slice into wedges and serve with salsa.
Equipment for This Recipe:
- Microwave-safe bowl; for the sweet potato
- Large skillet; for crisping the quesadillas
- Fork or potato masher; for the filling
- Spatula; for flipping without tearing
How to Serve This Dish: Cut the quesadillas into triangles and stack them with salsa and sliced avocado. A crunchy cabbage slaw makes the meal feel more complete.
Pro Tips for This Recipe:
- Dice the sweet potato small or it won’t soften fast enough.
- Don’t overfill the tortillas; that’s how they split.
- Let the first side get properly golden before flipping.
Variations on This Dish:
- Chipotle Sweet Potato: Add a spoonful of chopped chipotle in adobo.
- Breakfast-for-Dinner: Add scrambled eggs to the filling.
- Dairy-Free Version: Use plant-based cheese or skip it and add avocado.
Common Mistakes to Avoid with This Dish:
- Don’t use huge sweet potato chunks; they stay hard.
- Don’t cook on high heat or the tortilla burns before the cheese melts.
- Don’t skip the beans; without them the filling feels thin.
9. Teriyaki Tofu Rice Bowls
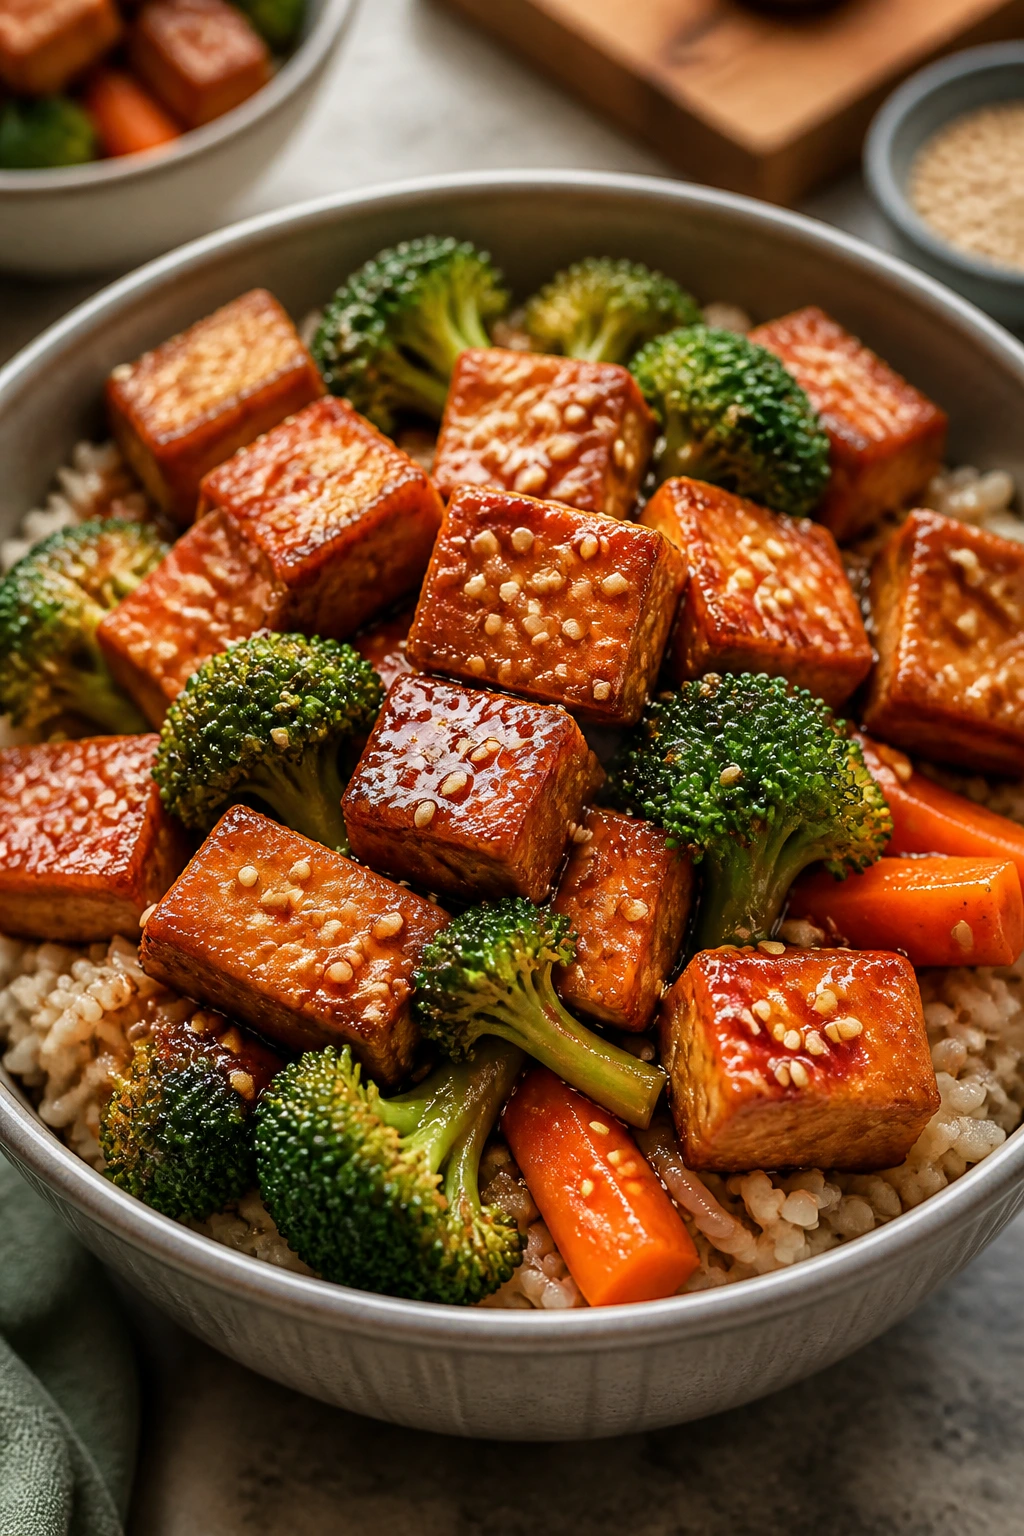
Tofu gets a bad rap from people who’ve only eaten it when it was treated like a punishment. Crisp it in a hot pan, coat it with teriyaki, and put it over rice with broccoli and carrots, and the story changes fast. The edges get chewy, the sauce gets glossy, and dinner starts to make sense.
Why It Works: Extra-firm tofu holds its shape if you press it first and give it some heat. A quick teriyaki glaze clings better to crisp tofu than to soft tofu. Broccoli and carrots add color and crunch without slowing the clock down much.
Key Ingredients:
- 14 oz extra-firm tofu; press out excess liquid
- 1 tablespoon cornstarch; helps the tofu crisp
- 1 tablespoon neutral oil; for the skillet
- 2 cups broccoli florets; cut small
- 1 carrot, thinly sliced; cooks quickly
- 1/4 cup teriyaki sauce; use one you’d actually eat straight
- 2 cups cooked brown rice; for the bowl
- 2 scallions, sliced; for a fresh finish
Quick Steps:
- Press the tofu for 10 minutes, then cube it and toss it with cornstarch.
- Pan-fry the tofu in oil over medium-high heat until golden on two or three sides.
- Add the broccoli and carrot with a splash of water and cook until crisp-tender.
- Pour in the teriyaki sauce, toss to coat, and serve over rice with scallions.
Equipment for This Recipe:
- Heavy skillet; helps tofu brown
- Tofu press or clean towel; to dry the block
- Spatula; for flipping the cubes
- Small bowl; for the cornstarch coating
How to Serve This Dish: Put the tofu and vegetables over rice and add sesame seeds or a drizzle of sriracha if you want more punch. A few cucumber slices help cool the sweetness.
Pro Tips for This Recipe:
- Press the tofu longer if it feels soft; moisture is the enemy of browning.
- Don’t stir the cubes constantly; let them sit and develop color.
- If your teriyaki is very sweet, add 1 teaspoon rice vinegar to sharpen it.
Variations on This Dish:
- Peanut Teriyaki Bowl: Add 1 tablespoon peanut butter to the sauce.
- Edamame Upgrade: Stir in 1 cup shelled edamame with the vegetables.
- Cauliflower Rice Swap: Use cauliflower rice for a lighter base.
Common Mistakes to Avoid with This Dish:
- Don’t skip pressing the tofu; it won’t crisp.
- Don’t drown the pan in sauce or the tofu goes soft.
- Don’t cook the vegetables until limp; the crunch is part of the point.
10. Turkey Meatballs with Marinara and Spinach

These meatballs are lean, tender, and fast enough for a night when you want pasta but not a heavy hand. The turkey stays light, the marinara does the work of a simmered sauce, and the spinach wilts right into the pan at the end so you get a little green with every bite.
Why It Works: Ground turkey cooks quickly, and small meatballs brown fast in a skillet or oven. Marinara adds moisture so the turkey doesn’t dry out. Spinach needs barely any time, which makes it a clean way to add vegetables without another pan.
Key Ingredients:
- 1 lb ground turkey; not too lean if you can avoid it
- 1 egg; binds the meatballs
- 1/4 cup breadcrumbs; helps hold moisture
- 2 tablespoons grated parmesan; adds savory depth
- 1 teaspoon garlic powder; keeps the seasoning even
- 2 cups marinara sauce; choose one with simple ingredients
- 4 cups baby spinach; wilts fast
- 2 cups cooked whole-wheat pasta or zucchini noodles; for serving
Quick Steps:
- Mix the turkey, egg, breadcrumbs, parmesan, and garlic powder gently.
- Roll into 12 meatballs and brown them in a skillet or bake at 400°F for 12 minutes.
- Pour marinara over the meatballs and simmer for 5 minutes.
- Stir in the spinach until wilted, then serve over pasta or zoodles.
Equipment for This Recipe:
- Mixing bowl; for the meatball mixture
- Sheet pan or skillet; either one works
- Measuring scoop or spoon; helps make even meatballs
- Saucepan if you bake the meatballs first; for the marinara
How to Serve This Dish: Serve in shallow bowls over pasta with extra parmesan on top. A side salad with lemon dressing keeps the plate from feeling too saucy.
Pro Tips for This Recipe:
- Mix the meatball mixture lightly; packing it makes dense meatballs.
- If the mixture feels sticky, wet your hands before rolling.
- Use a simmer, not a boil, once the meatballs hit the sauce.
Variations on This Dish:
- Spicy Arrabbiata Version: Use a hot marinara and add red pepper flakes.
- Turkey Meatball Subs: Pile the meatballs into whole-grain rolls.
- Gluten-Free Version: Use almond flour or GF breadcrumbs.
Common Mistakes to Avoid with This Dish:
- Don’t overwork the turkey or the meatballs turn bouncy.
- Don’t simmer too hard in the sauce; the meatballs can break.
- Don’t forget to salt the mixture; turkey needs it.
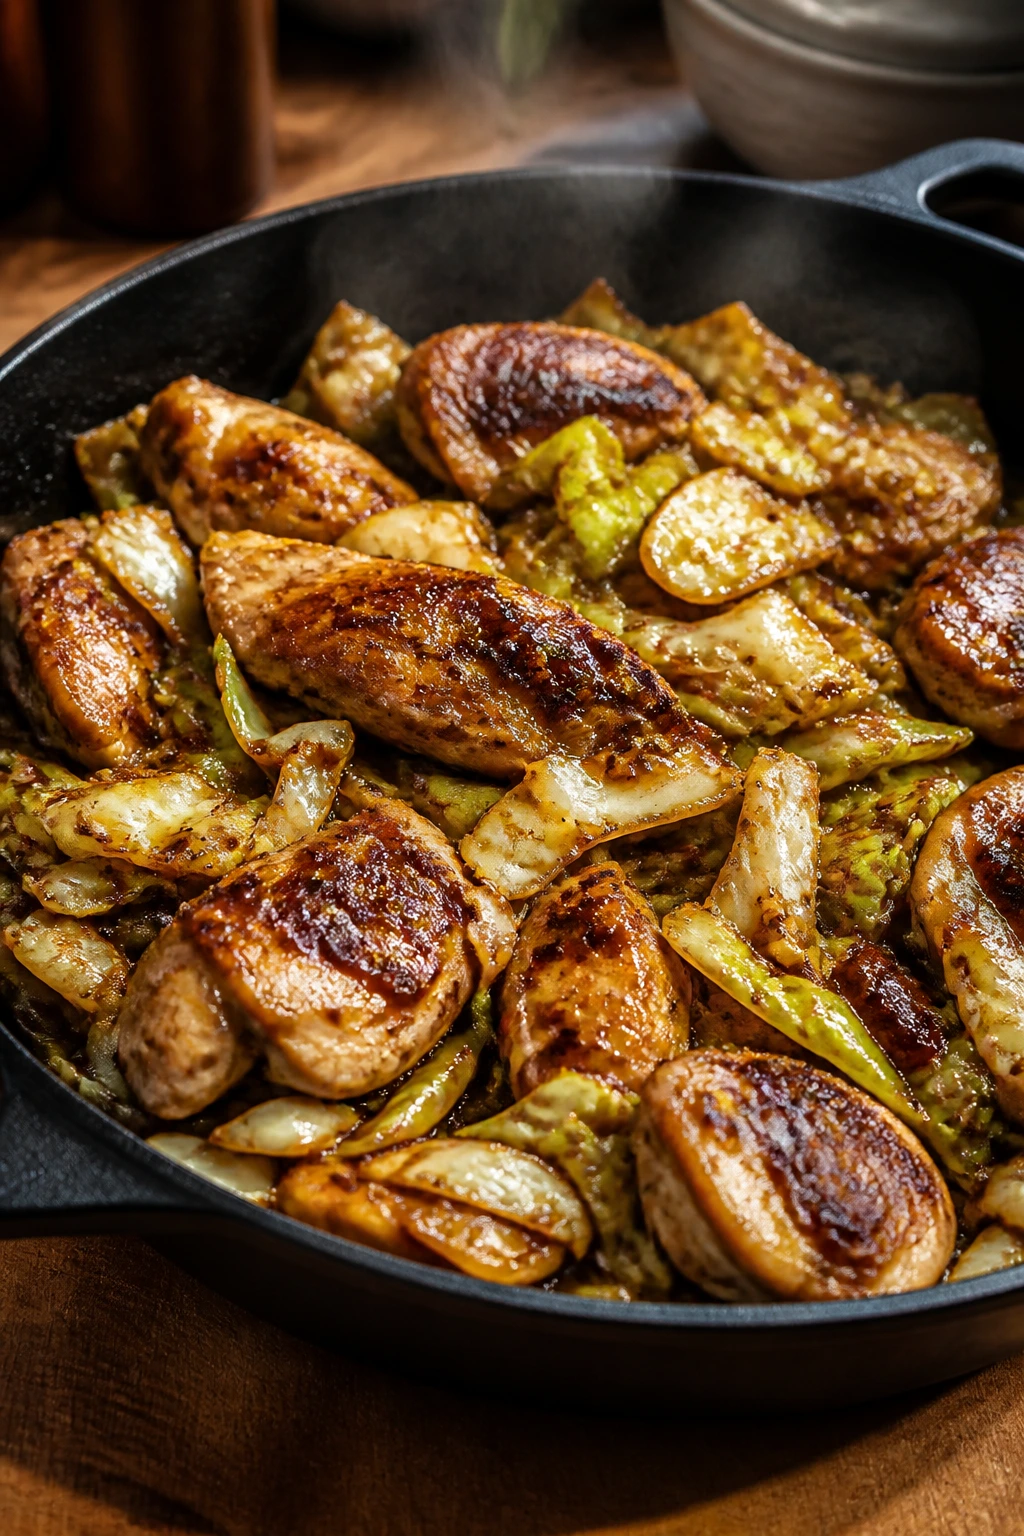
11. Chicken Sausage Sheet Pan with Peppers and Potatoes
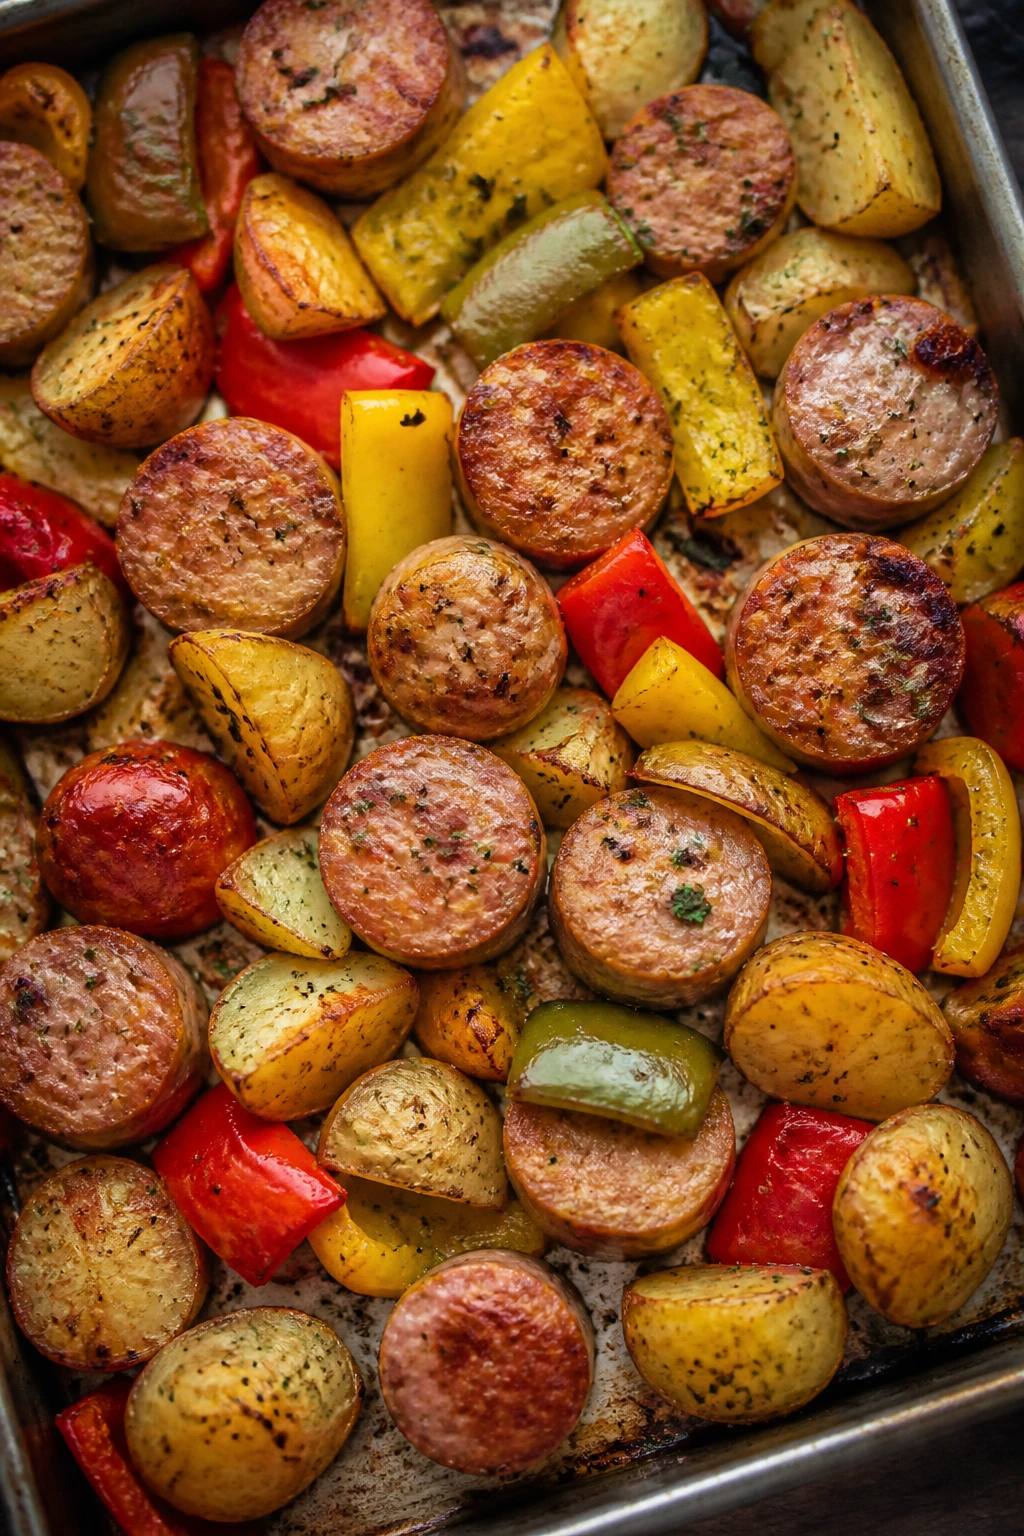
This is the kind of sheet-pan dinner that takes care of itself once it’s in the oven. The chicken sausage browns, the peppers soften, and the potatoes get crispy edges if you cut them small enough. It’s practical food, and I mean that as praise.
Why It Works: Chicken sausage is already cooked, so it only needs heat and color. Small potato pieces roast quickly, and peppers turn sweet at 425°F. Everything shares the same pan, which means dinner happens with one timer and one piece of cleanup.
Key Ingredients:
- 12 oz chicken sausage, sliced into coins; choose a lower-sodium version if possible
- 1 lb baby potatoes, halved; cut larger ones smaller
- 2 bell peppers, sliced; color is up to you
- 1 red onion, sliced; adds sweetness
- 2 tablespoons olive oil; coats everything
- 1 teaspoon Italian seasoning; keeps the flavor easy
- 1/2 teaspoon kosher salt and 1/4 teaspoon pepper; adjust to the sausage
Quick Steps:
- Heat the oven to 425°F and line a sheet pan.
- Toss the potatoes with half the oil, salt, and seasoning, then roast for 10 minutes.
- Add the sausage, peppers, onion, and the rest of the oil; toss and roast 15 more minutes.
- Stir once halfway through so the edges brown evenly.
Equipment for This Recipe:
- Rimmed sheet pan; the bigger the better
- Mixing bowl; for tossing the vegetables
- Cutting board and knife; for the potatoes and peppers
- Spatula; for turning the tray halfway through
How to Serve This Dish: Spoon it into bowls with a dollop of mustard or Greek yogurt on the side. A simple green salad makes the meal feel less one-note.
Pro Tips for This Recipe:
- Cut the potatoes small enough that they’re nearly the same size as the pepper strips.
- Give the pan space; crowded potatoes turn soft.
- If the sausage is very salty, hold back on the seasoning at first.
Variations on This Dish:
- Mustard Herb Version: Toss with whole-grain mustard after roasting.
- Sweet Potato Swap: Use cubed sweet potatoes instead of baby potatoes.
- Smoky Version: Add smoked paprika for a deeper edge.
Common Mistakes to Avoid with This Dish:
- Don’t skip pre-roasting the potatoes; they need the head start.
- Don’t cut the vegetables too large or the sheet pan timing falls apart.
- Don’t use parchment that curls up; it can block browning.
12. Greek Chicken Pita Pockets
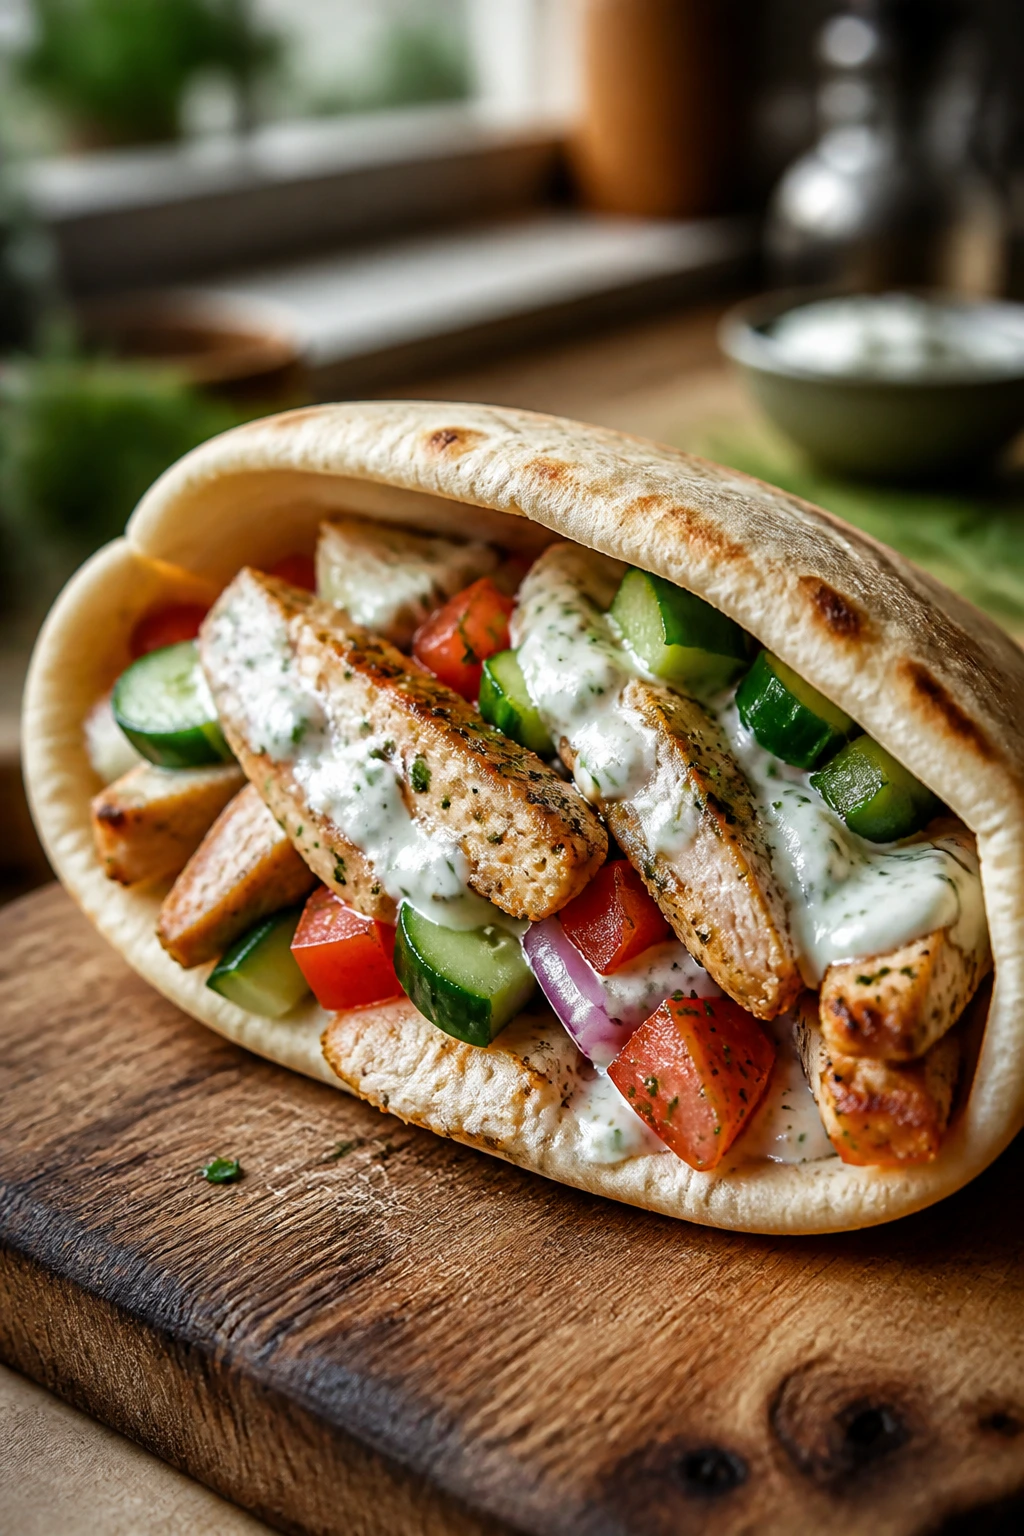
Cold cucumber, tangy yogurt, warm chicken, soft pita. That’s the whole story, and it works because the textures stay separate until you bite through them. The chicken gets oregano and lemon, the vegetables stay crisp, and the yogurt sauce ties it together without making the pocket soggy.
Why It Works: Thin chicken strips cook fast and pick up Greek seasoning in minutes. A yogurt-lemon sauce gives you creaminess with more protein than a mayo-heavy spread. Cucumber and tomato add freshness that keeps the pita from feeling heavy.
Key Ingredients:
- 1 lb chicken breast, sliced into strips; thin strips cook faster
- 1 teaspoon dried oregano; the key seasoning
- 1 tablespoon olive oil; for the pan
- 1 cucumber, diced; keep the peel on if you like crunch
- 1 tomato, diced; drain it a little if it’s very juicy
- 1/2 red onion, thinly sliced; sharpens the filling
- 1 cup plain Greek yogurt; for the sauce
- 2 tablespoons lemon juice; brightens the yogurt
- 4 whole-wheat pitas; warmed before stuffing
Quick Steps:
- Toss the chicken with oregano, salt, pepper, and olive oil.
- Cook the chicken in a skillet over medium-high heat for 5 to 6 minutes until browned.
- Stir the yogurt with lemon juice and a pinch of salt.
- Stuff the pitas with chicken, cucumber, tomato, onion, and yogurt sauce.
Equipment for This Recipe:
- Skillet; for the chicken
- Small bowl; for the yogurt sauce
- Knife and cutting board; for the vegetables
- Tongs; for moving the chicken around
How to Serve This Dish: Serve the pita pockets with a handful of olives or a quick green salad. If you want less mess, make them open-faced and fold them at the table.
Pro Tips for This Recipe:
- Warm the pita briefly so it doesn’t crack when folded.
- Drain juicy tomatoes so the pockets hold together.
- Add a little dill if you want the sauce to taste sharper.
Variations on This Dish:
- Chicken Gyro Bowl: Skip the pita and serve everything over rice.
- Feta Version: Add crumbled feta for salt and richness.
- Chickpea Add-In: Toss in a handful of chickpeas for more substance.
Common Mistakes to Avoid with This Dish:
- Don’t overfill the pita or it tears.
- Don’t skip warming the bread; cold pita breaks fast.
- Don’t slice the onion too thick; it should disappear into the bite a little.
13. Lentil Tomato Kale Soup
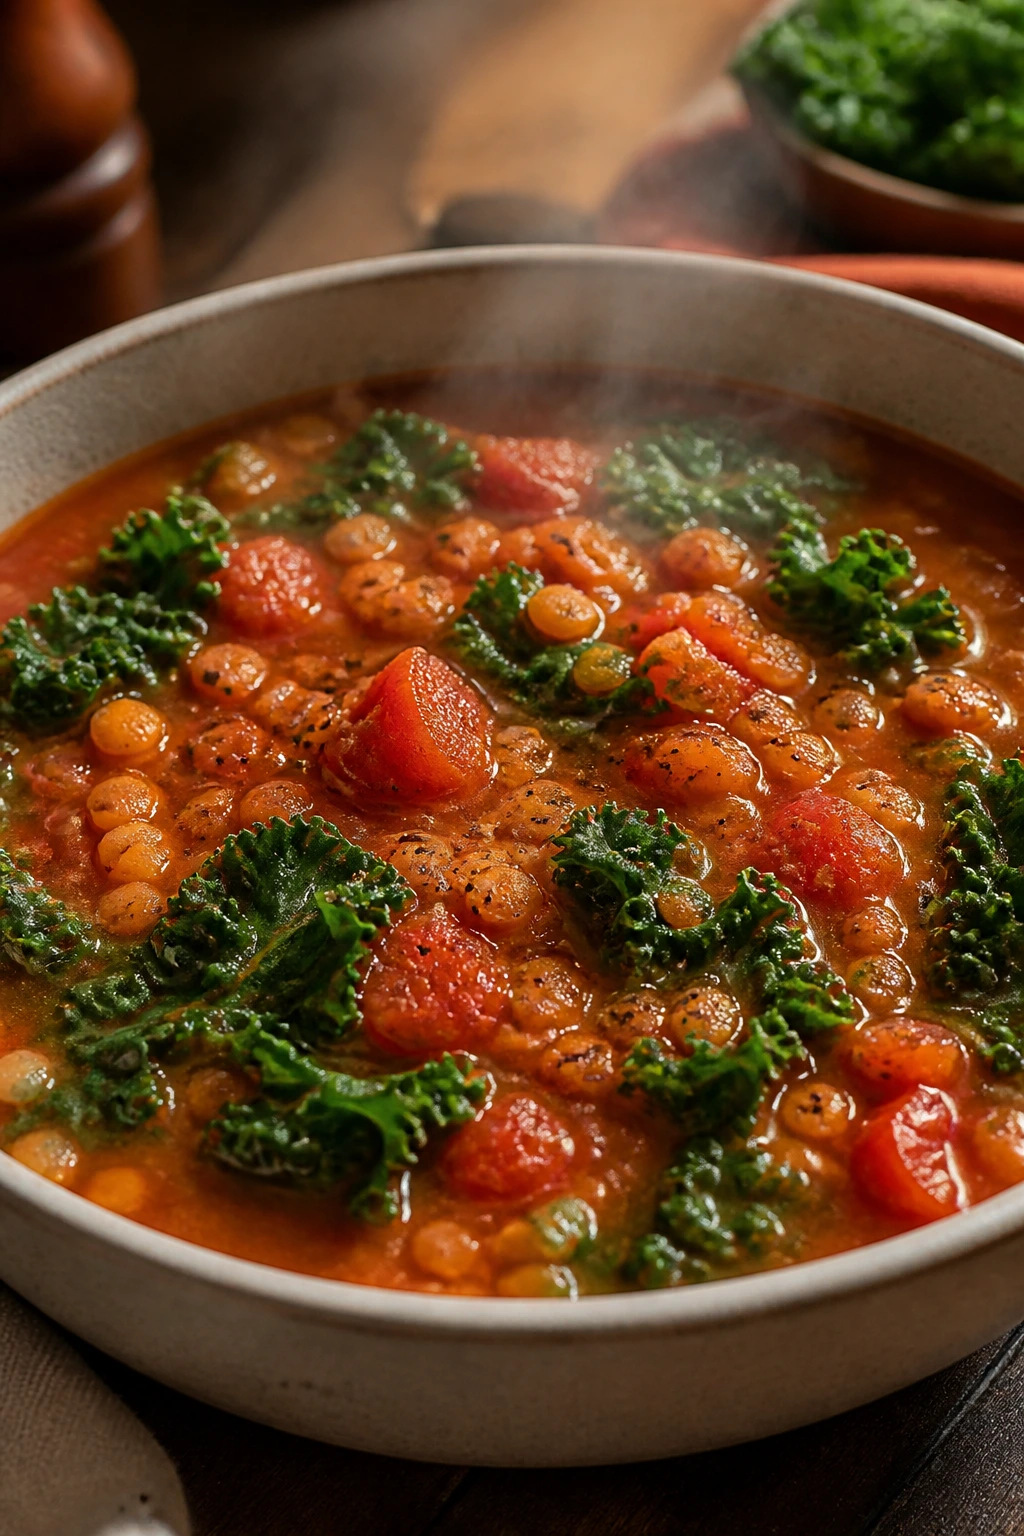
Red lentils are one of the few pantry ingredients that reward you immediately. They soften fast, thicken the broth, and make soup feel filling without a long simmer. Kale goes in late so it stays green and a little chewy, which matters more than people think.
Why It Works: Red lentils cook in about 15 to 18 minutes, which makes them ideal for a weeknight soup. Tomatoes and broth create a quick base, and kale gives the pot some texture right at the end. It tastes like it took longer because the flavors build in layers.
Key Ingredients:
- 1 cup red lentils, rinsed; they cook faster than brown lentils
- 1 tablespoon olive oil; for the pot
- 1 small onion, diced; the soup base
- 2 carrots, diced small; helps the soup feel fuller
- 2 garlic cloves, minced; add after the onion softens
- 1 can diced tomatoes, 14.5 oz; gives body and acidity
- 4 cups low-sodium vegetable broth; the liquid base
- 3 cups chopped kale; stems removed
- 1 teaspoon ground cumin; adds warmth
Quick Steps:
- Heat the oil in a pot and cook the onion and carrots for 4 minutes.
- Add the garlic and cumin for 30 seconds.
- Stir in the lentils, tomatoes, and broth; simmer 15 minutes.
- Add the kale and cook 3 minutes until tender, then season and serve.
Equipment for This Recipe:
- Medium pot or Dutch oven; a wide one helps
- Wooden spoon; for stirring the lentils
- Knife and cutting board; for the carrots and kale
- Ladle; for serving cleanly
How to Serve This Dish: Ladle into bowls with a splash of olive oil or yogurt on top. Toasted whole-grain bread works well for dunking.
Pro Tips for This Recipe:
- Rinse the lentils until the water runs mostly clear.
- If the soup gets too thick, add more broth a splash at a time.
- Chop the kale small so it softens fast and doesn’t feel stringy.
Variations on This Dish:
- Smoked Paprika Version: Add 1/2 teaspoon smoked paprika with the cumin.
- Spinach Swap: Use spinach instead of kale if that’s what you have.
- Tomato-Free Lentil Soup: Skip the tomatoes and use extra broth plus lemon juice.
Common Mistakes to Avoid with This Dish:
- Don’t cook red lentils too long or they collapse into paste.
- Don’t add kale at the start; it gets dull and tired.
- Don’t forget salt at the end; lentils drink it up.
14. Cod with Tomatoes, Olives, and Capers
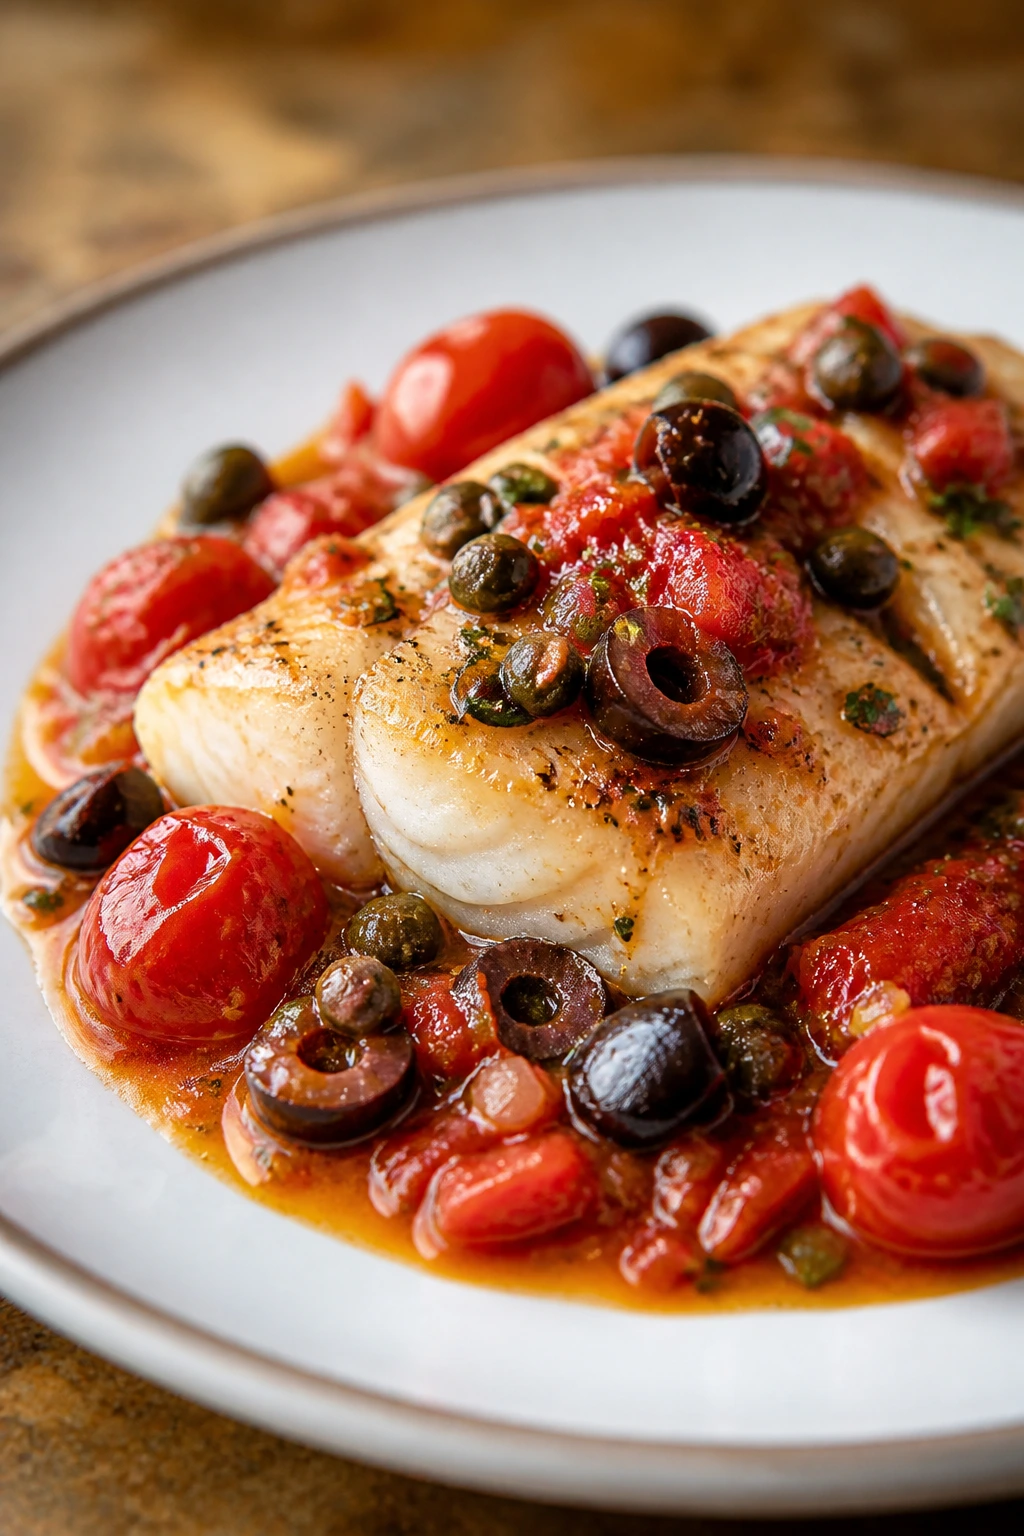
Cod is mild, which is why it loves bold company. Tomatoes burst into sauce, olives bring salt, capers bring bite, and the fish stays tender if you stop cooking it at the right moment. This is one of those dinners that feels Mediterranean without making a whole project out of it.
Why It Works: Cod is lean and cooks quickly, usually in 10 to 12 minutes in a hot oven. The tomatoes soften just enough to make a light pan sauce. Capers and olives do the seasoning work, so you don’t need much else.
Key Ingredients:
- 4 cod fillets, about 5 oz each; similar thickness helps
- 1 pint cherry tomatoes; halved if they’re large
- 1/3 cup pitted olives, sliced; Castelvetrano or Kalamata both work
- 1 tablespoon capers, drained; rinse if they’re very salty
- 2 tablespoons olive oil; for the pan
- 2 garlic cloves, minced; stirred into the tomato mix
- 1 lemon, sliced and juiced; brightens the fish
- 2 tablespoons chopped parsley; for the finish
Quick Steps:
- Heat the oven to 400°F.
- Toss the tomatoes, olives, capers, garlic, olive oil, and half the lemon juice in a baking dish.
- Nestle the cod into the tomato mixture and season lightly.
- Bake for 10 to 12 minutes until the fish flakes and the tomatoes have burst.
Equipment for This Recipe:
- Baking dish; 9×13-inch or similar
- Small bowl; for the tomato mix
- Spoon; for basting the fish
- Citrus juicer; optional but handy
How to Serve This Dish: Serve with couscous, rice, or crusty bread to catch the tomato juices. A simple arugula salad makes a sharp side.
Pro Tips for This Recipe:
- Don’t over-season early; olives and capers bring a lot of salt.
- If your cod pieces are thin, check them at 8 minutes.
- Use ripe tomatoes if you can; they break down better.
Variations on This Dish:
- Herb Lemon Cod: Add dill or basil at the end.
- Chickpea Addition: Stir in 1 cup chickpeas for more heft.
- Tomato-Free White Fish Bake: Use fennel, lemon, and olives instead.
Common Mistakes to Avoid with This Dish:
- Don’t bake cod past flaking; it dries quickly.
- Don’t use a tiny baking dish or the fish steams.
- Don’t skip the acid at the end; the dish needs the lemon.
15. Beef and Cabbage Stir-Fry
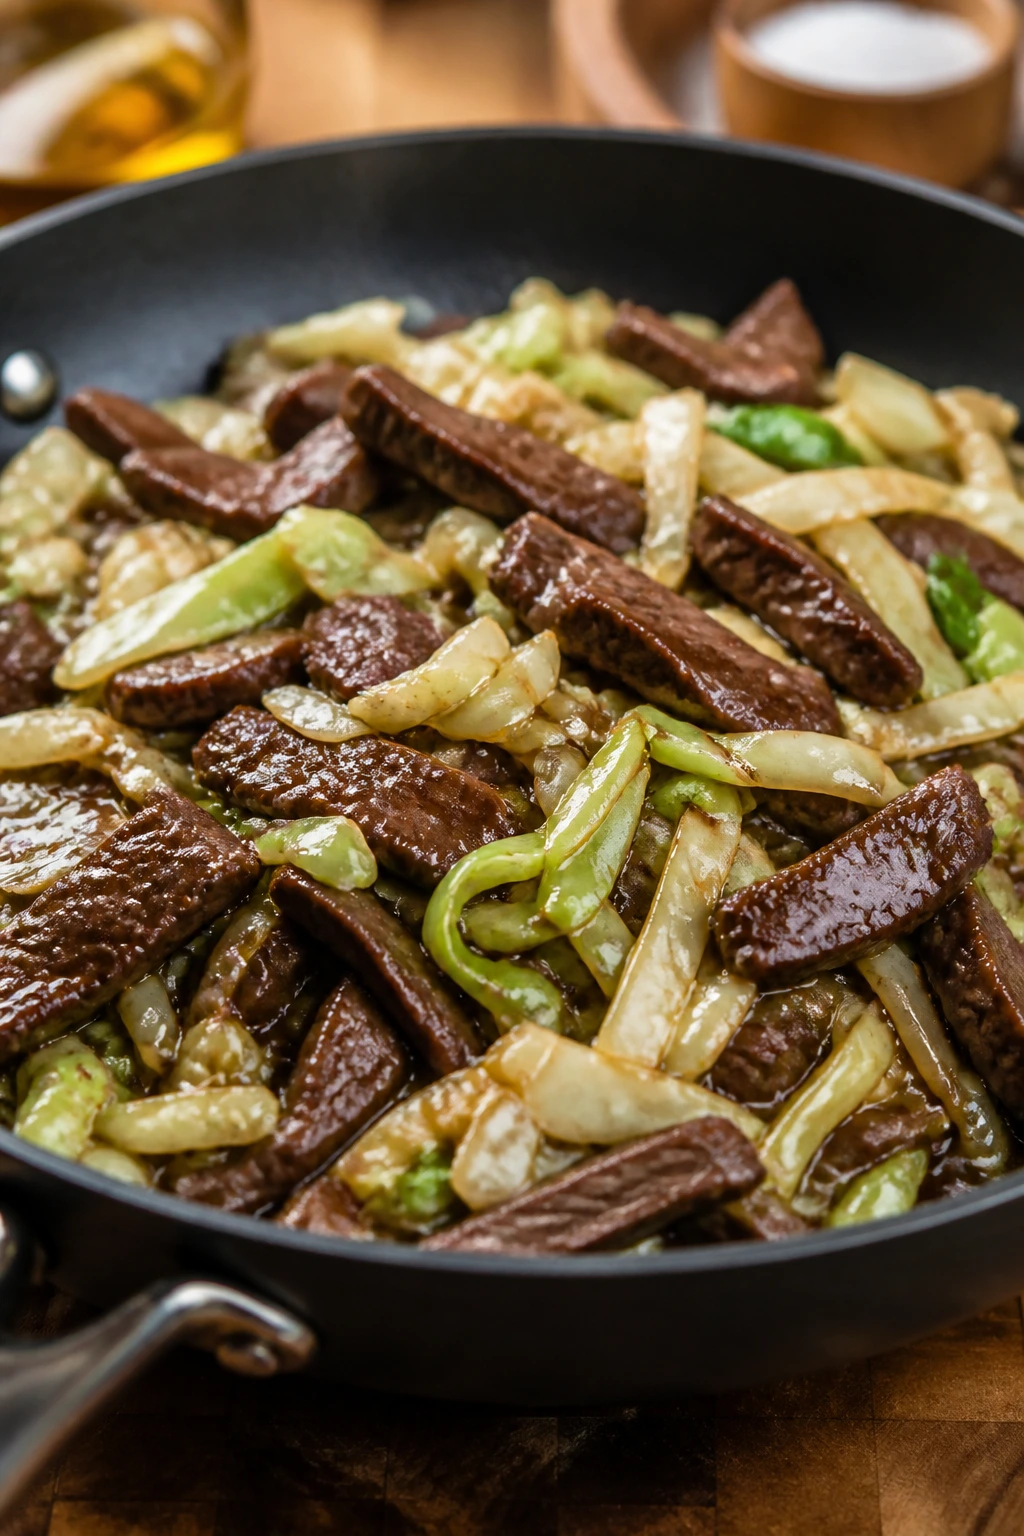
Cabbage is one of the best weeknight vegetables because it takes heat without collapsing. Pair it with lean beef, a little soy sauce, and ginger, and you get a skillet that tastes fuller than it looks. It’s fast, cheap, and oddly satisfying.
Why It Works: Thin beef or lean ground beef cooks in minutes. Cabbage shrinks as it cooks, so a big pile turns into a generous dinner without much effort. The soy-ginger sauce gives the pan a savory edge that doesn’t need sugar to work.
Key Ingredients:
- 1 lb lean ground beef or thin-sliced flank steak; both cook quickly
- 4 cups shredded cabbage; green, purple, or a mix
- 1 carrot, julienned; adds color and crunch
- 2 garlic cloves, minced; the flavor base
- 1 tablespoon grated ginger; fresh is best
- 2 tablespoons low-sodium soy sauce; the main seasoning
- 1 tablespoon rice vinegar; cuts the richness
- 1 teaspoon sesame oil; for finishing
- 2 cups cooked brown rice; optional but useful
Quick Steps:
- Brown the beef in a large skillet over medium-high heat.
- Add the garlic and ginger and cook for 30 seconds.
- Stir in the cabbage, carrot, soy sauce, and rice vinegar, then cook 4 to 5 minutes until the cabbage softens but keeps some crunch.
- Finish with sesame oil and serve over rice if you want.
Equipment for This Recipe:
- Large skillet or wok; cabbage needs room
- Spatula; for breaking up ground beef
- Grater; for the ginger
- Sharp knife; for shredding the cabbage
How to Serve This Dish: Bowl it up with rice or eat it as-is if you want something lighter. A squeeze of lime or sprinkle of scallions works well.
Pro Tips for This Recipe:
- Don’t overcook the cabbage; it should still have some snap.
- If using flank steak, slice it thin against the grain.
- Drain excess fat if your beef gives off more than a tablespoon or two.
Variations on This Dish:
- Korean-Style Version: Add gochujang and a little sesame seed.
- Ground Turkey Swap: Use turkey for a lighter skillet.
- Noodle Bowl: Toss with soba or rice noodles instead of rice.
Common Mistakes to Avoid with This Dish:
- Don’t use too much sauce or the cabbage turns watery.
- Don’t cook the beef on low heat; you want some browning.
- Don’t shred the cabbage too finely or it disappears.
16. Veggie Egg Fried Rice with Edamame
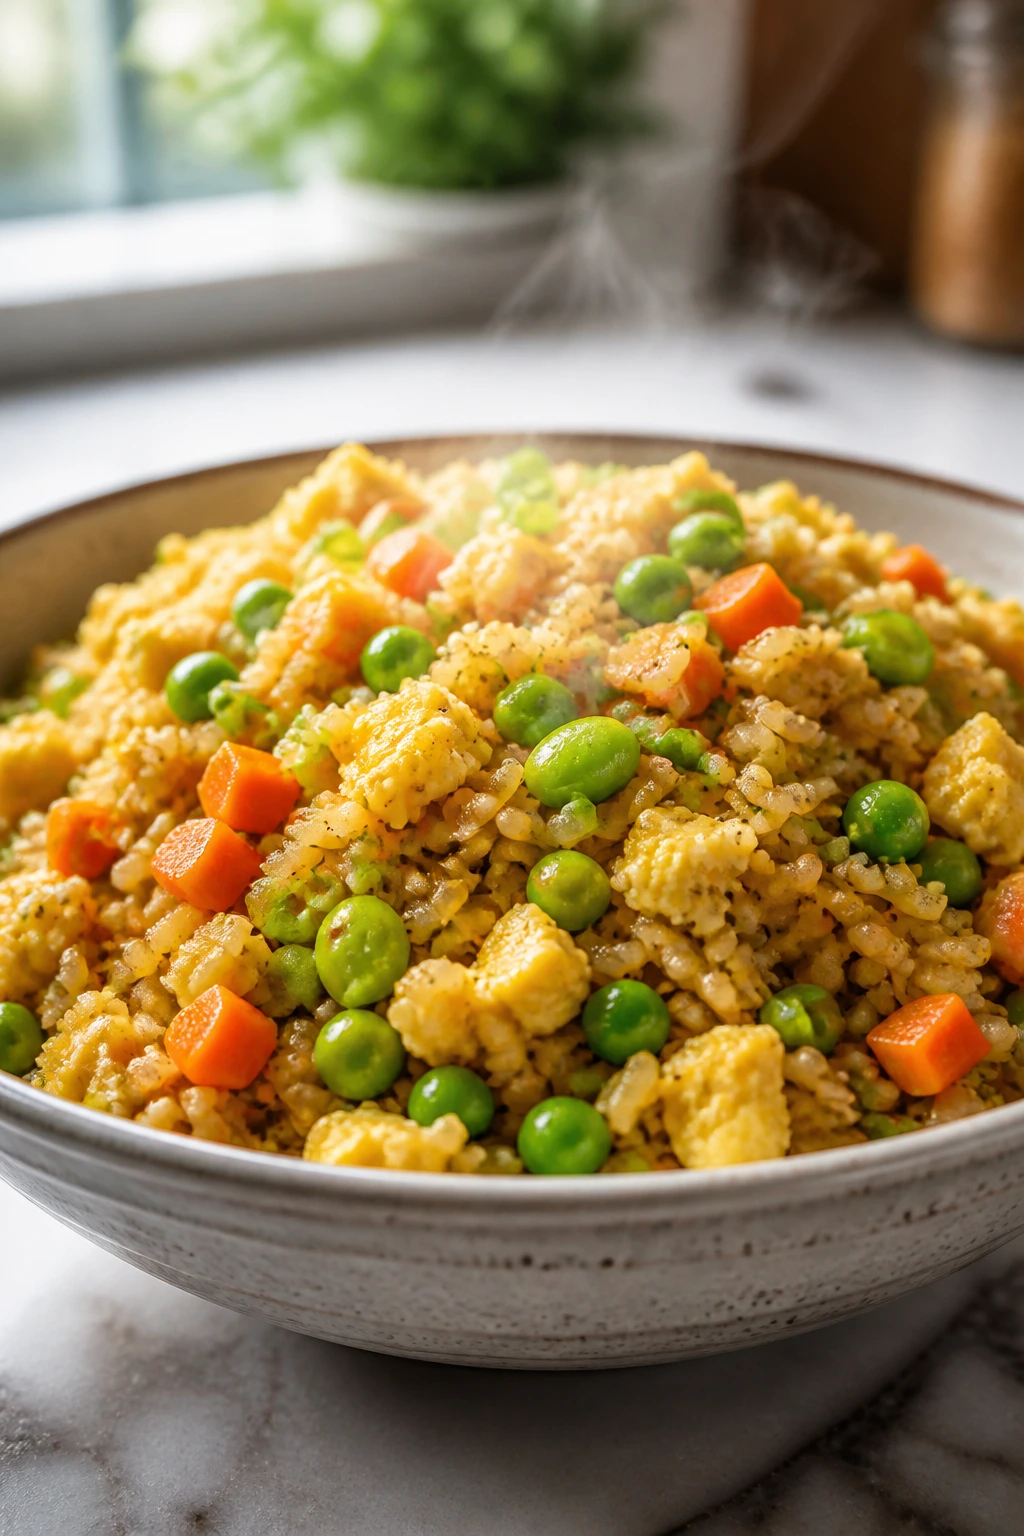
This is what fried rice should be on a school-night: quick, hot, and packed with enough vegetables that it feels like a meal rather than a side dish. The trick is cold rice. Fresh rice is sticky; leftover rice fries up with actual texture.
Why It Works: Cooked, chilled rice separates in the pan instead of clumping. Eggs and edamame add protein without slowing anything down. Frozen peas and carrots make the vegetable part easy, which is the whole point.
Key Ingredients:
- 3 cups cooked brown rice, chilled; day-old rice works best
- 3 eggs, beaten; adds richness and protein
- 1 cup frozen peas and carrots; no chopping required
- 1 cup shelled edamame; for extra protein
- 2 scallions, sliced; saves a little freshness for the end
- 2 tablespoons low-sodium soy sauce; for seasoning
- 1 tablespoon sesame oil; the finish
- 1 tablespoon neutral oil; for cooking the eggs and rice
Quick Steps:
- Heat the neutral oil in a large skillet or wok over medium-high heat.
- Scramble the eggs, remove them, and set aside.
- Add the rice, peas and carrots, and edamame; fry for 4 to 5 minutes until hot.
- Stir in the soy sauce, sesame oil, eggs, and scallions.
Equipment for This Recipe:
- Large skillet or wok; keeps the rice moving
- Spatula; for breaking up clumps
- Bowl; for the eggs
- Measuring spoons; soy sauce and sesame oil are easy to overdo
How to Serve This Dish: Serve as a bowl on its own or with sliced cucumber and chili crisp. A fried egg on top is not mandatory, but it’s a nice extra.
Pro Tips for This Recipe:
- Break up cold rice with your hands before it hits the skillet.
- Keep the heat fairly high so the rice fries, not steams.
- Add the soy sauce around the edge of the pan so it hits heat first.
Variations on This Dish:
- Chicken Fried Rice: Add diced cooked chicken or rotisserie chicken.
- Cauliflower Rice Swap: Use half cauliflower rice, half brown rice.
- Kimchi Version: Stir in chopped kimchi for tang and heat.
Common Mistakes to Avoid with This Dish:
- Don’t use freshly cooked rice; it gets gummy.
- Don’t dump in too much soy sauce at once.
- Don’t overcrowd the pan or the rice softens instead of frying.
17. Stuffed Bell Peppers with Turkey and Rice
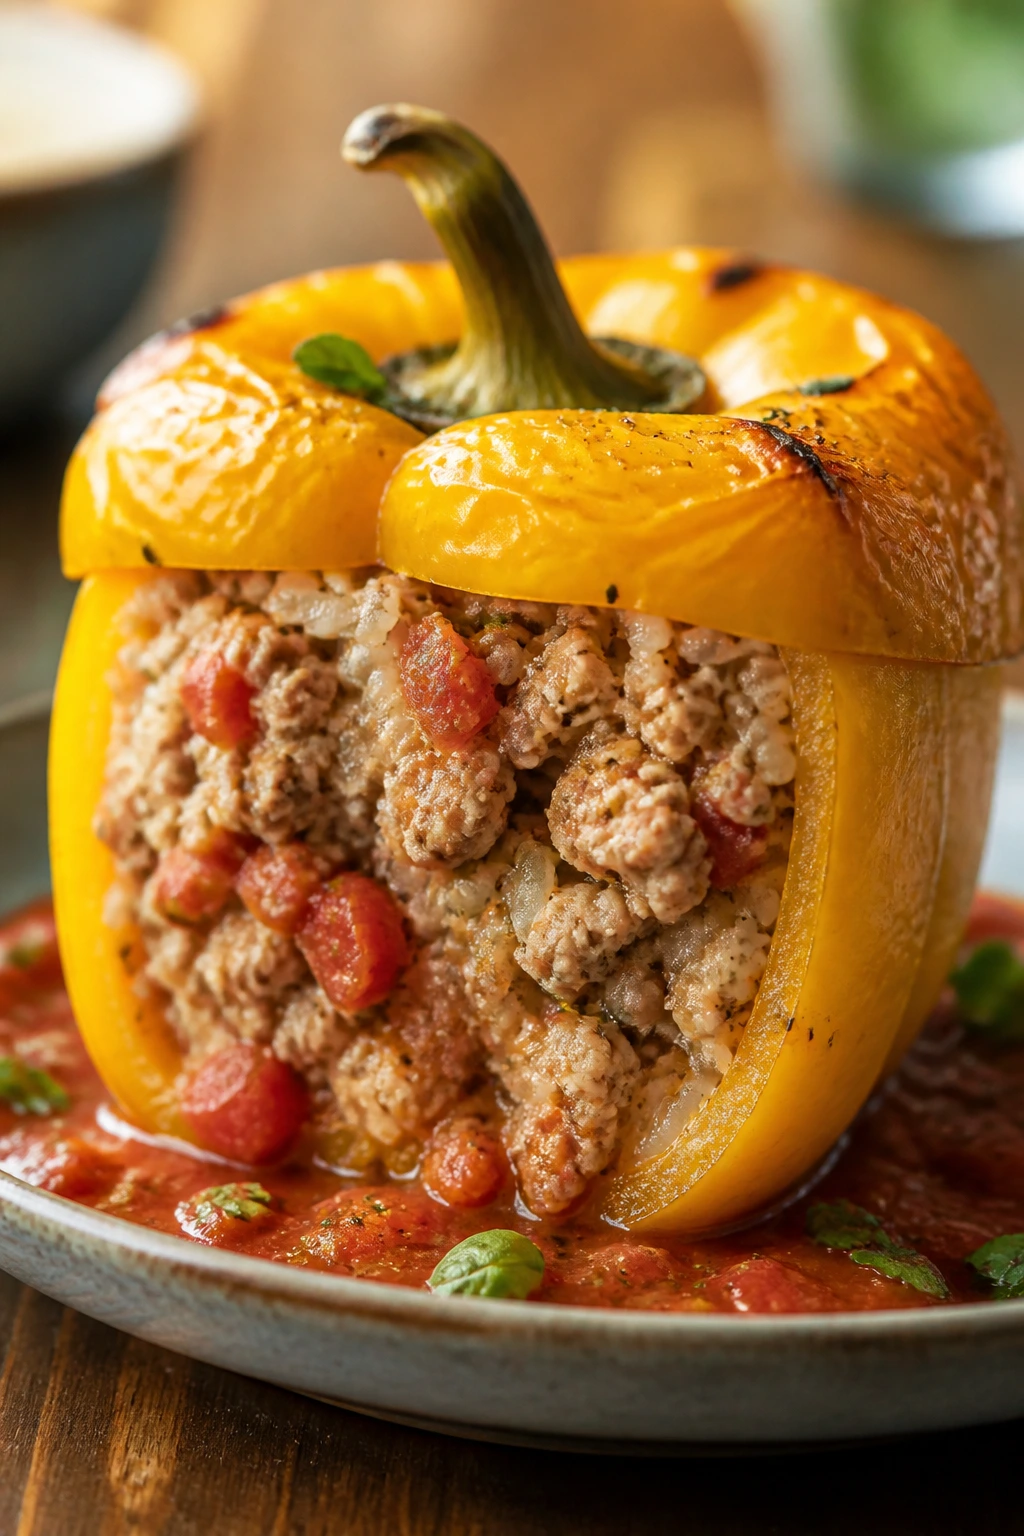
Stuffed peppers can feel fussy, but they don’t have to be. If the rice is already cooked and the filling is seasoned properly, the peppers become little edible bowls that hold a savory turkey mixture without making dinner heavy. The cheese on top is optional, though I rarely skip it.
Why It Works: Pre-cooked rice shortens the filling time, and ground turkey keeps the stuffing lean. Peppers soften in the oven while holding their shape. Tomato sauce keeps the filling moist so it doesn’t turn crumbly.
Key Ingredients:
- 4 large bell peppers; tops cut off and seeds removed
- 1 lb ground turkey; the main filling
- 1 cup cooked brown rice; or white rice if that’s what you have
- 1 small onion, diced; starts the filling
- 1 cup tomato sauce; binds everything together
- 1 teaspoon Italian seasoning; easy and reliable
- 1/2 cup shredded mozzarella; optional topping
- 1 tablespoon olive oil; for the skillet
Quick Steps:
- Heat the oven to 400°F and set the peppers in a baking dish.
- Cook the onion and turkey in olive oil until browned, then stir in the rice, tomato sauce, and seasoning.
- Fill the peppers with the turkey mixture and top with cheese if using.
- Bake for 20 to 25 minutes until the peppers are tender and the tops are browned.
Equipment for This Recipe:
- Baking dish; to hold the peppers upright
- Skillet; for the filling
- Spoon; for stuffing the peppers
- Foil; helpful if the tops brown too fast
How to Serve This Dish: Serve one pepper per person with a green salad or roasted green beans. If you want extra sauce, spoon a little marinara in the baking dish first.
Pro Tips for This Recipe:
- If the peppers wobble, slice a thin piece off the bottom to flatten them.
- Don’t overstuff; the filling expands slightly.
- Use cooked rice that isn’t wet or the filling gets loose.
Variations on This Dish:
- Tex-Mex Peppers: Add corn, black beans, and taco seasoning.
- Mediterranean Peppers: Use feta, olives, and oregano instead of mozzarella.
- Cauliflower Rice Version: Swap half or all of the rice for cauliflower rice.
Common Mistakes to Avoid with This Dish:
- Don’t undercook the peppers; they should be tender enough to cut.
- Don’t skip pre-cooking the filling or the turkey stays bland.
- Don’t use too much sauce or the peppers turn soupy.
18. Sesame Ginger Soba with Shrimp
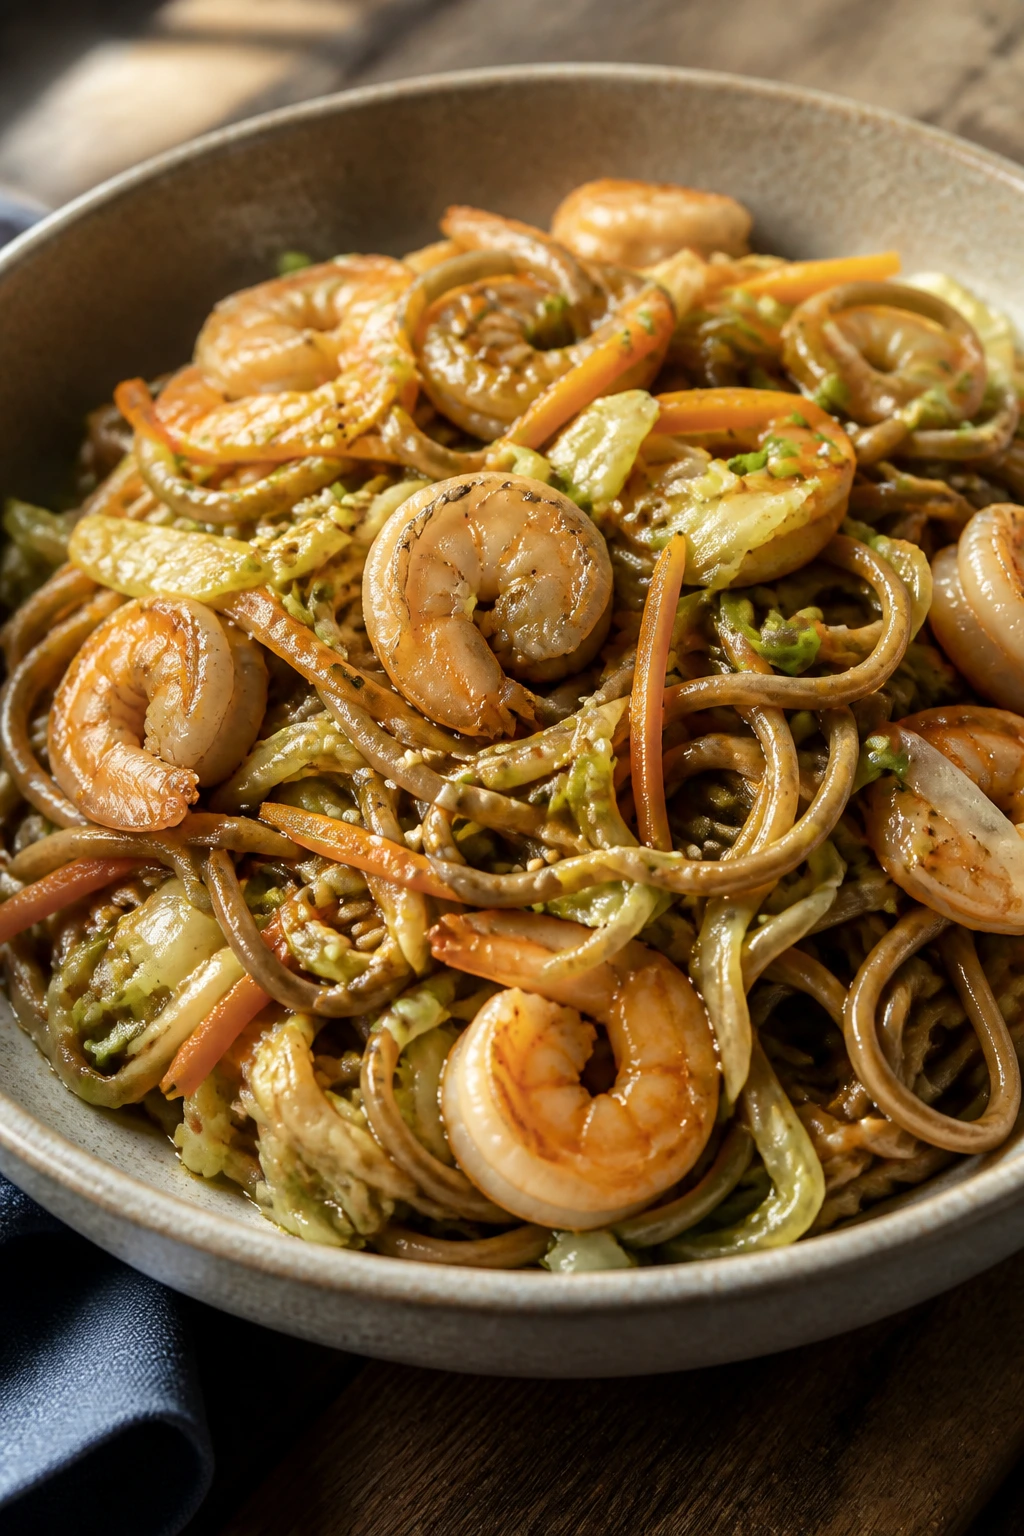
Soba noodles make a weeknight dinner feel a little more intentional, even when you’ve got twenty minutes and a half-empty fridge. The noodles are nutty, the shrimp stays light, and the sesame-ginger sauce coats everything without feeling heavy.
Why It Works: Soba cooks quickly and holds up well with vegetables. Shrimp cooks in minutes and doesn’t need a long marinade. Shredded cabbage and carrots give the bowl crunch so the noodles don’t become mushy.
Key Ingredients:
- 8 oz soba noodles; rinse after cooking
- 1 lb shrimp, peeled and deveined; thaw first if frozen
- 2 cups shredded cabbage; a slaw mix works too
- 1 carrot, julienned; for color and crunch
- 2 tablespoons low-sodium soy sauce; the main seasoning
- 1 tablespoon sesame oil; gives the noodles their flavor
- 1 tablespoon rice vinegar; keeps the sauce lively
- 1 teaspoon grated ginger; fresh if possible
- 1 tablespoon neutral oil; for cooking the shrimp
Quick Steps:
- Cook the soba according to the package and rinse under cold water.
- Whisk the soy sauce, sesame oil, rice vinegar, and ginger.
- Sauté the shrimp in neutral oil for 2 to 3 minutes until pink, then remove.
- Toss the noodles with cabbage, carrot, shrimp, and sauce.
Equipment for This Recipe:
- Medium pot; for the noodles
- Colander; to rinse soba
- Large skillet; for the shrimp
- Tongs; for tossing the noodles
How to Serve This Dish: Serve in bowls with sesame seeds and scallions. A few cucumber slices or a side of edamame fits the whole vibe.
Pro Tips for This Recipe:
- Rinse soba well so the noodles don’t clump.
- Don’t overcook the shrimp; pull it while it’s just opaque.
- Add a spoonful of peanut butter if you want a thicker sauce.
Variations on This Dish:
- Peanut Soba Bowl: Stir 1 tablespoon peanut butter into the sauce.
- Vegetarian Noodle Bowl: Use tofu instead of shrimp.
- Spicy Version: Add chili oil or chili crisp at serving.
Common Mistakes to Avoid with This Dish:
- Don’t let the noodles sit in the pot after draining; they stick.
- Don’t under-season the sauce; soba needs a strong hand.
- Don’t skip the cold rinse or the noodles can get gummy.
19. Tuna and White Bean Salad Wraps
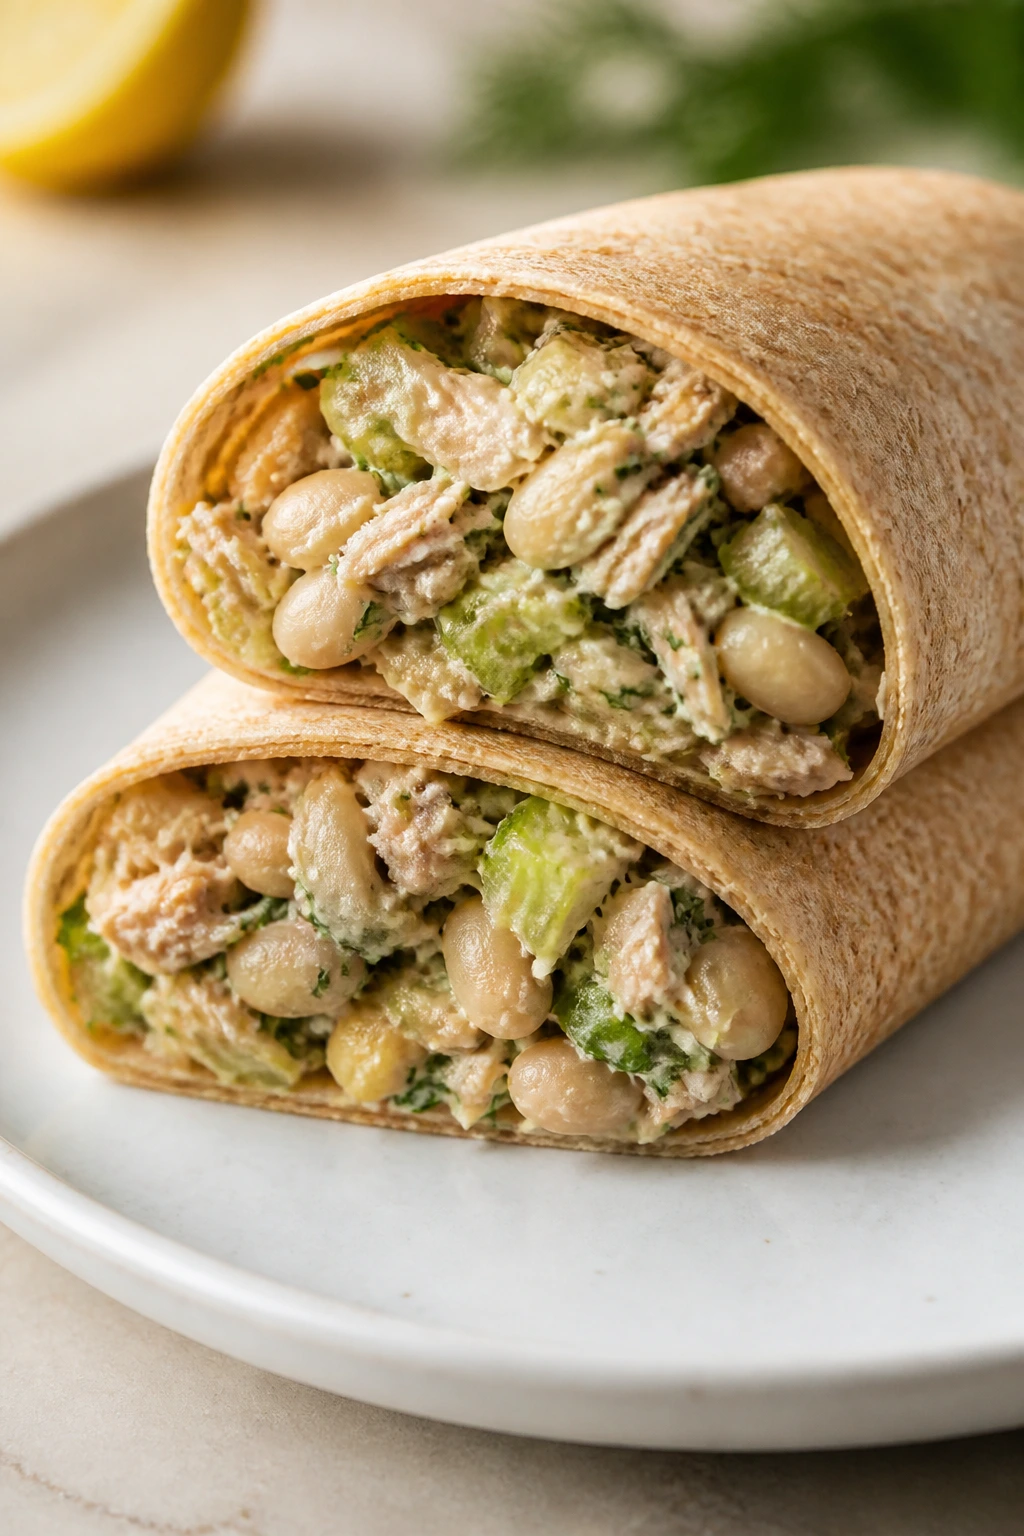
No-cook dinners need to earn their keep, and this one does. Tuna, white beans, lemon, and dill turn into a filling that tastes brighter than canned pantry food has any right to. Wrapped in whole-wheat tortillas or spooned into lettuce, it lands somewhere between lunch and dinner in the best way.
Why It Works: Tuna gives you lean protein without any cooking. White beans add creaminess and fiber, which makes the filling feel more complete than tuna alone. Lemon and dill keep the whole thing from tasting flat.
Key Ingredients:
- 2 cans tuna in water, drained; chunk light or albacore both work
- 1 can cannellini beans, rinsed and drained; the creamy bulk
- 2 celery stalks, finely chopped; for crunch
- 1/4 cup plain Greek yogurt; or mayo if you prefer
- 1 tablespoon lemon juice; fresh makes a difference
- 1 tablespoon chopped dill; or parsley if that’s easier
- 4 whole-wheat wraps or large lettuce leaves; for serving
- Salt and pepper to taste; tuna needs both
Quick Steps:
- Mash half the beans lightly with a fork.
- Mix the tuna, beans, celery, yogurt, lemon juice, dill, salt, and pepper.
- Spoon the mixture into wraps or lettuce leaves.
- Roll and serve with extra lemon wedges.
Equipment for This Recipe:
- Mixing bowl; for the filling
- Fork; for mashing the beans
- Cutting board and knife; for the celery
- Spoon; for stuffing the wraps
How to Serve This Dish: Add sliced cucumber or cherry tomatoes alongside the wrap. If you want more crunch, tuck in shredded lettuce or sprouts.
Pro Tips for This Recipe:
- Drain the tuna well or the filling gets watery.
- Mash some beans but not all; texture matters here.
- Taste before you salt, because canned tuna can vary.
Variations on This Dish:
- Mediterranean Tuna Wrap: Add chopped olives and a little feta.
- Spicy Tuna Version: Stir in a spoonful of hot sauce.
- Open-Faced Toast: Skip the wrap and pile it onto toast.
Common Mistakes to Avoid with This Dish:
- Don’t overmix the tuna or it turns pasty.
- Don’t skip the acid; lemon keeps the filling awake.
- Don’t use soggy wraps or the whole thing falls apart.
20. Mediterranean Couscous Chickpea Bowls
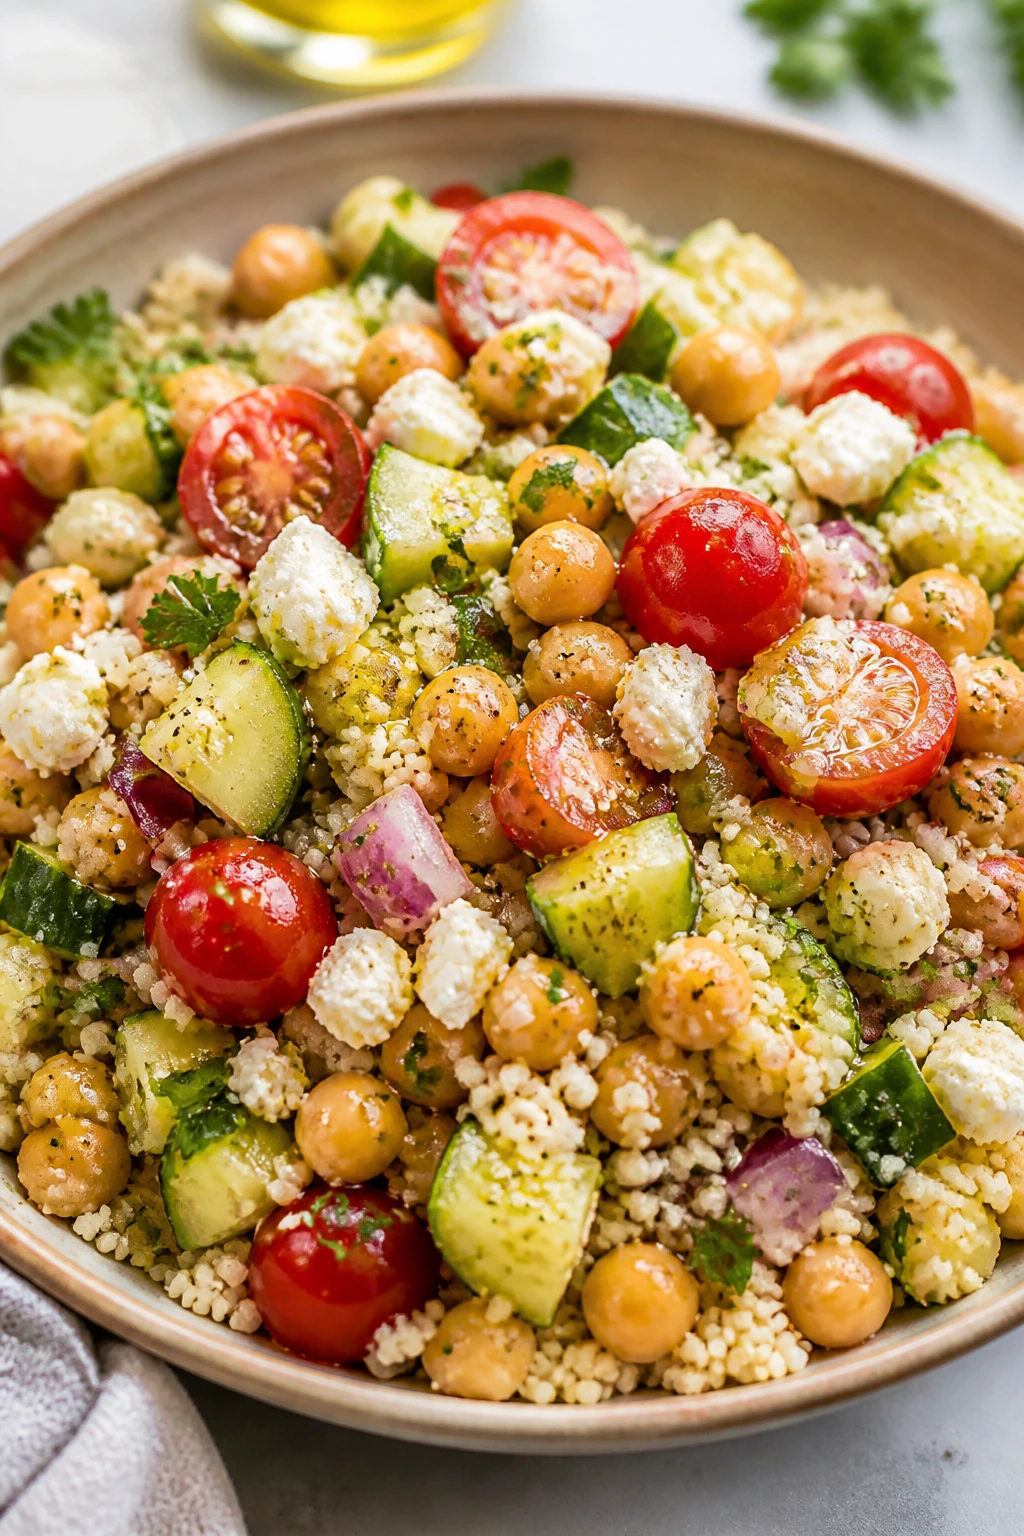
Couscous is one of those ingredients that feels almost suspiciously quick. Pour boiling water over it, wait a few minutes, fluff it, and dinner has a base. Add chickpeas, cucumber, tomato, feta, and lemon, and you get a bowl that tastes clean and sharp.
Why It Works: Couscous cooks in the time it takes to chop the vegetables. Chickpeas add staying power, and feta gives the bowl just enough salt. The lemon-olive oil dressing keeps everything separate instead of muddy.
Key Ingredients:
- 1 cup couscous; plain or whole-wheat
- 1 can chickpeas, rinsed and drained; for protein
- 1 cucumber, diced; for crunch
- 1 cup cherry tomatoes, halved; sweet and juicy
- 1/2 cup crumbled feta; adds salt
- 2 tablespoons olive oil; for the dressing
- 1 lemon, juiced; the key acid
- 2 tablespoons chopped parsley; for freshness
Quick Steps:
- Pour 1 cup boiling water over the couscous, cover, and let it sit for 5 minutes.
- Fluff with a fork and stir in the olive oil and lemon juice.
- Add the chickpeas, cucumber, tomatoes, feta, and parsley.
- Toss gently and season with salt and pepper.
Equipment for This Recipe:
- Medium bowl; for the couscous and salad
- Fork; for fluffing
- Knife and cutting board; for the vegetables
- Measuring cup; for the water and couscous
How to Serve This Dish: Serve warm or at room temperature in wide bowls. A spoon of hummus on the side gives it a little more body.
Pro Tips for This Recipe:
- Let the couscous sit covered so the grains steam evenly.
- Salt the tomato and cucumber lightly if they taste flat.
- Use a fork, not a spoon, to fluff the couscous.
Variations on This Dish:
- Tzatziki Bowl: Add a spoon of tzatziki over the top.
- Roasted Veg Version: Add roasted zucchini or eggplant.
- No-Feta Swap: Use avocado for creaminess instead.
Common Mistakes to Avoid with This Dish:
- Don’t drown the couscous in dressing.
- Don’t skip fluffing or the grains clump.
- Don’t mix the vegetables too aggressively or the tomatoes break down.
21. Chicken and Cabbage Skillet
Cabbage loves a hot pan, and chicken thighs love a little time without being fussed over. Put them together with soy sauce and garlic, and the skillet turns sweet, savory, and just a little caramelized around the edges. It’s simple, but not boring.
Why It Works: Chicken thighs stay juicy even when they sit in a hot skillet for a few extra minutes. Cabbage collapses down fast, so a giant pile becomes dinner without much prep. A little soy sauce gives the whole pan a deeper color and taste.
Key Ingredients:
- 1 lb boneless skinless chicken thighs, sliced; thighs stay tender
- 4 cups shredded cabbage; bagged slaw mix works
- 2 garlic cloves, minced; adds bite
- 1 tablespoon olive oil; for browning
- 2 tablespoons low-sodium soy sauce; seasoning and color
- 1 tablespoon rice vinegar; brightens the skillet
- 1 teaspoon sesame oil; finish only
- 2 scallions, sliced; for garnish
Quick Steps:
- Brown the chicken thighs in olive oil over medium-high heat for 5 to 6 minutes.
- Add the garlic and cabbage and cook for 4 minutes until the cabbage softens.
- Stir in soy sauce and rice vinegar and cook 1 more minute.
- Finish with sesame oil and scallions.
Equipment for This Recipe:
- Large skillet; cabbage needs room
- Spatula; for stirring the skillet
- Knife and cutting board; for slicing the chicken
- Tongs; helpful for turning the thighs
How to Serve This Dish: Serve over rice or scoop into bowls as-is. A sprinkle of sesame seeds or a side of pickled vegetables works well.
Pro Tips for This Recipe:
- Slice the chicken into even pieces so it cooks at the same pace.
- Don’t add sesame oil early; it loses its edge.
- If the cabbage releases a lot of water, keep the heat up to let it evaporate.
Variations on This Dish:
- Ginger Version: Add 1 teaspoon grated ginger with the garlic.
- Ground Chicken Swap: Use ground chicken if that’s what you have.
- Spicy Cabbage Bowl: Add chili flakes or sriracha.
Common Mistakes to Avoid with This Dish:
- Don’t cook the cabbage down until it’s limp.
- Don’t skip browning the chicken; that color matters.
- Don’t use low heat or the skillet turns watery.
22. Zucchini Feta Frittata

A good frittata is mostly about restraint. You want the eggs set, the zucchini tender, and the feta salty enough that you don’t have to chase the flavor around the plate. This one is soft in the center, golden on top, and perfect with a salad.
Why It Works: Eggs bake quickly in a skillet or oven-safe pan, and zucchini adds moisture without making the dish heavy. Feta supplies enough salt that you don’t need much else. It’s one of the rare dinners that works hot, warm, or at room temperature.
Key Ingredients:
- 8 large eggs; the structure
- 1 medium zucchini, grated and squeezed dry; keep the frittata from getting wet
- 1/2 cup crumbled feta; salt and tang
- 1/4 cup milk; helps the eggs stay tender
- 1 tablespoon olive oil; for the pan
- 2 tablespoons chopped dill or parsley; for freshness
- Salt and pepper to taste
Quick Steps:
- Heat the oven to 375°F.
- Sauté the zucchini in olive oil for 2 minutes to drive off extra moisture.
- Whisk the eggs, milk, herbs, salt, and pepper, then stir in the feta.
- Pour into the skillet and bake 15 to 18 minutes until just set.
Equipment for This Recipe:
- Oven-safe skillet; 10-inch is ideal
- Whisk; for the eggs
- Box grater; for the zucchini
- Oven mitts; the handle gets hot
How to Serve This Dish: Cut into wedges and serve with a tomato salad or sliced avocado. A little hot sauce on the side isn’t a bad idea either.
Pro Tips for This Recipe:
- Squeeze the zucchini hard in a towel or the eggs won’t set cleanly.
- Pull the frittata when the center still has a slight wobble.
- Let it sit for 5 minutes before slicing so it finishes gently.
Variations on This Dish:
- Spinach Frittata: Swap half the zucchini for chopped spinach.
- Cheddar Herb Version: Use cheddar instead of feta and add chives.
- Crustless Dinner Pie: Add leftover roasted vegetables to the egg mix.
Common Mistakes to Avoid with This Dish:
- Don’t skip removing zucchini water.
- Don’t overbake; eggs turn rubbery fast.
- Don’t use a pan that isn’t oven-safe unless you want a mess.
23. Salmon Cucumber Rice Bowls
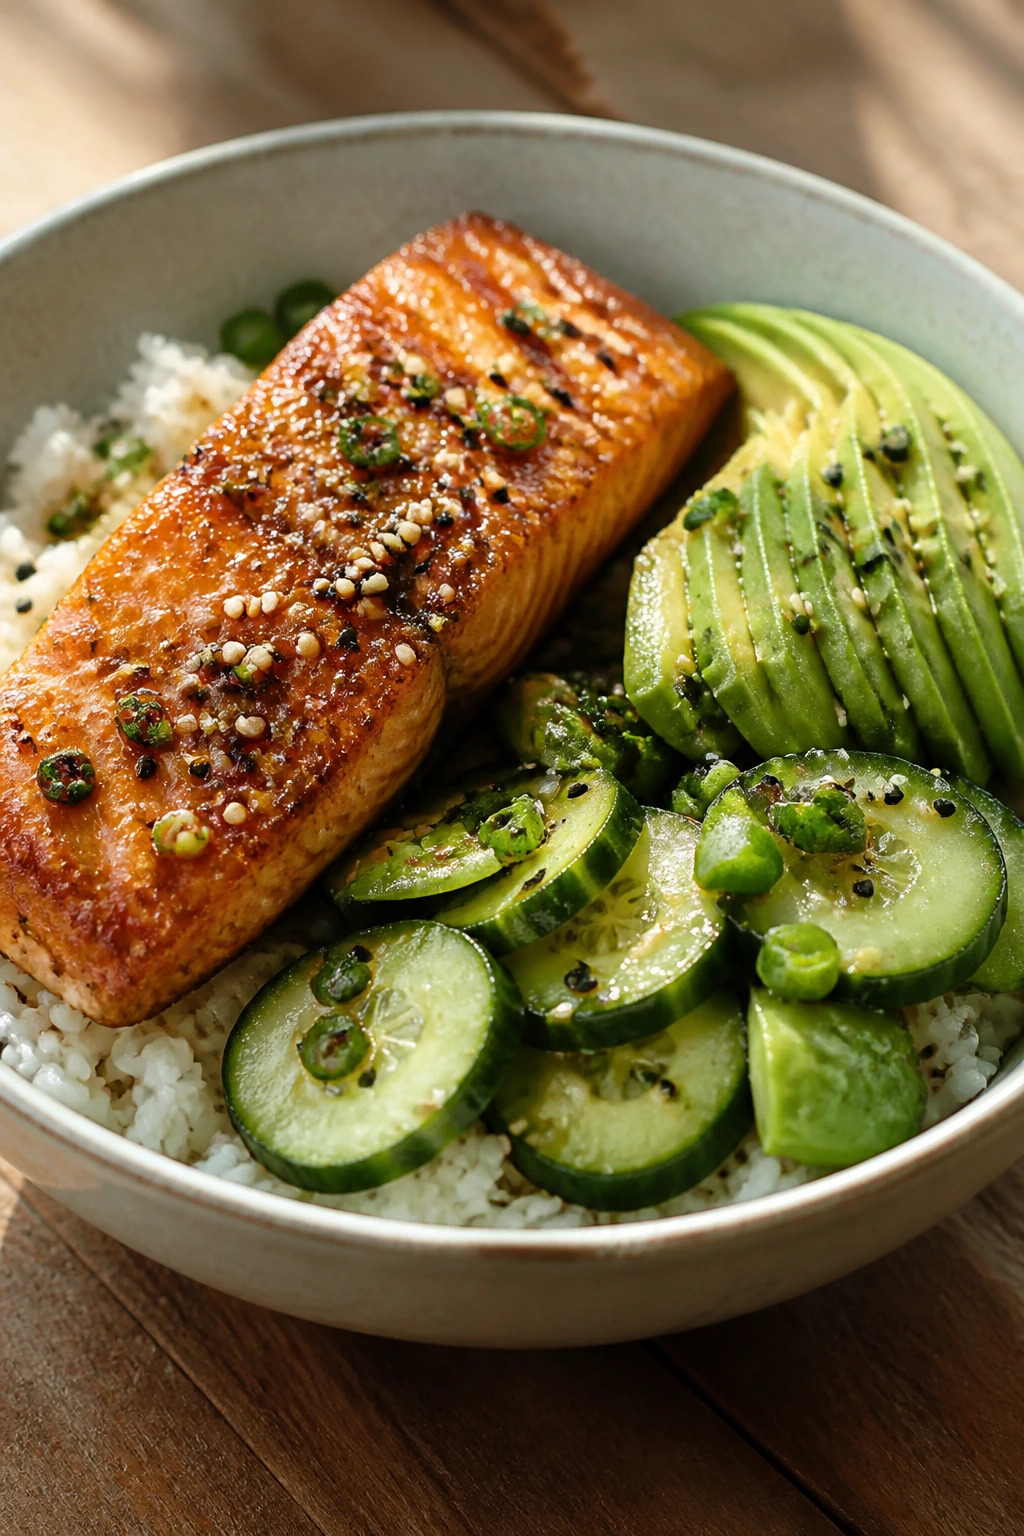
This bowl is cool, clean, and a little glossy from the sesame dressing. Salmon gives it weight, cucumber keeps it fresh, and rice makes it a real dinner instead of a snack pretending to be one. It’s the kind of meal you can assemble quickly and still feel good about.
Why It Works: Salmon cooks fast in a skillet or air fryer, and rice gives the bowl a sturdy base. Cucumber and avocado add soft, cool contrast. A soy-rice vinegar dressing keeps the whole thing from feeling rich in the wrong way.
Key Ingredients:
- 4 salmon fillets, about 5 oz each; or 1 lb total
- 2 cups cooked brown rice; warm is best
- 1 cucumber, thinly sliced; chill it if you want more crunch
- 1 avocado, sliced; adds creaminess
- 2 tablespoons low-sodium soy sauce; dressing base
- 1 tablespoon rice vinegar; brightens the bowl
- 1 teaspoon sesame oil; a little goes far
- 1/2 cup shelled edamame; optional but useful
- 1 teaspoon sesame seeds; for garnish
Quick Steps:
- Cook the salmon in a skillet over medium heat or bake at 400°F for 10 to 12 minutes.
- Whisk the soy sauce, rice vinegar, and sesame oil.
- Divide the rice into bowls and add cucumber, avocado, and edamame.
- Top with salmon, drizzle with dressing, and finish with sesame seeds.
Equipment for This Recipe:
- Skillet or baking sheet; either method works
- Small bowl; for the dressing
- Knife; for the cucumber and avocado
- Rice cooker or saucepan; if the rice isn’t already made
How to Serve This Dish: Serve the bowls with chopsticks or a fork, whichever feels easier. Extra cucumbers or pickled ginger make the bowl pop.
Pro Tips for This Recipe:
- Pat the salmon dry so the skin or surface browns.
- Warm the rice before assembling or the bowl feels flat.
- Slice the avocado right before serving so it stays green.
Variations on This Dish:
- Spicy Mayo Bowl: Add a spoonful of sriracha mixed with Greek yogurt.
- Cabbage Crunch Version: Add shredded cabbage for texture.
- Cauliflower Rice Swap: Use cauliflower rice if you want a lighter base.
Common Mistakes to Avoid with This Dish:
- Don’t overcook the salmon; it should flake, not dry out.
- Don’t use icy-cold rice straight from the fridge without reheating.
- Don’t skip seasoning the rice lightly if it tastes flat.
24. Turkey Bean Chili
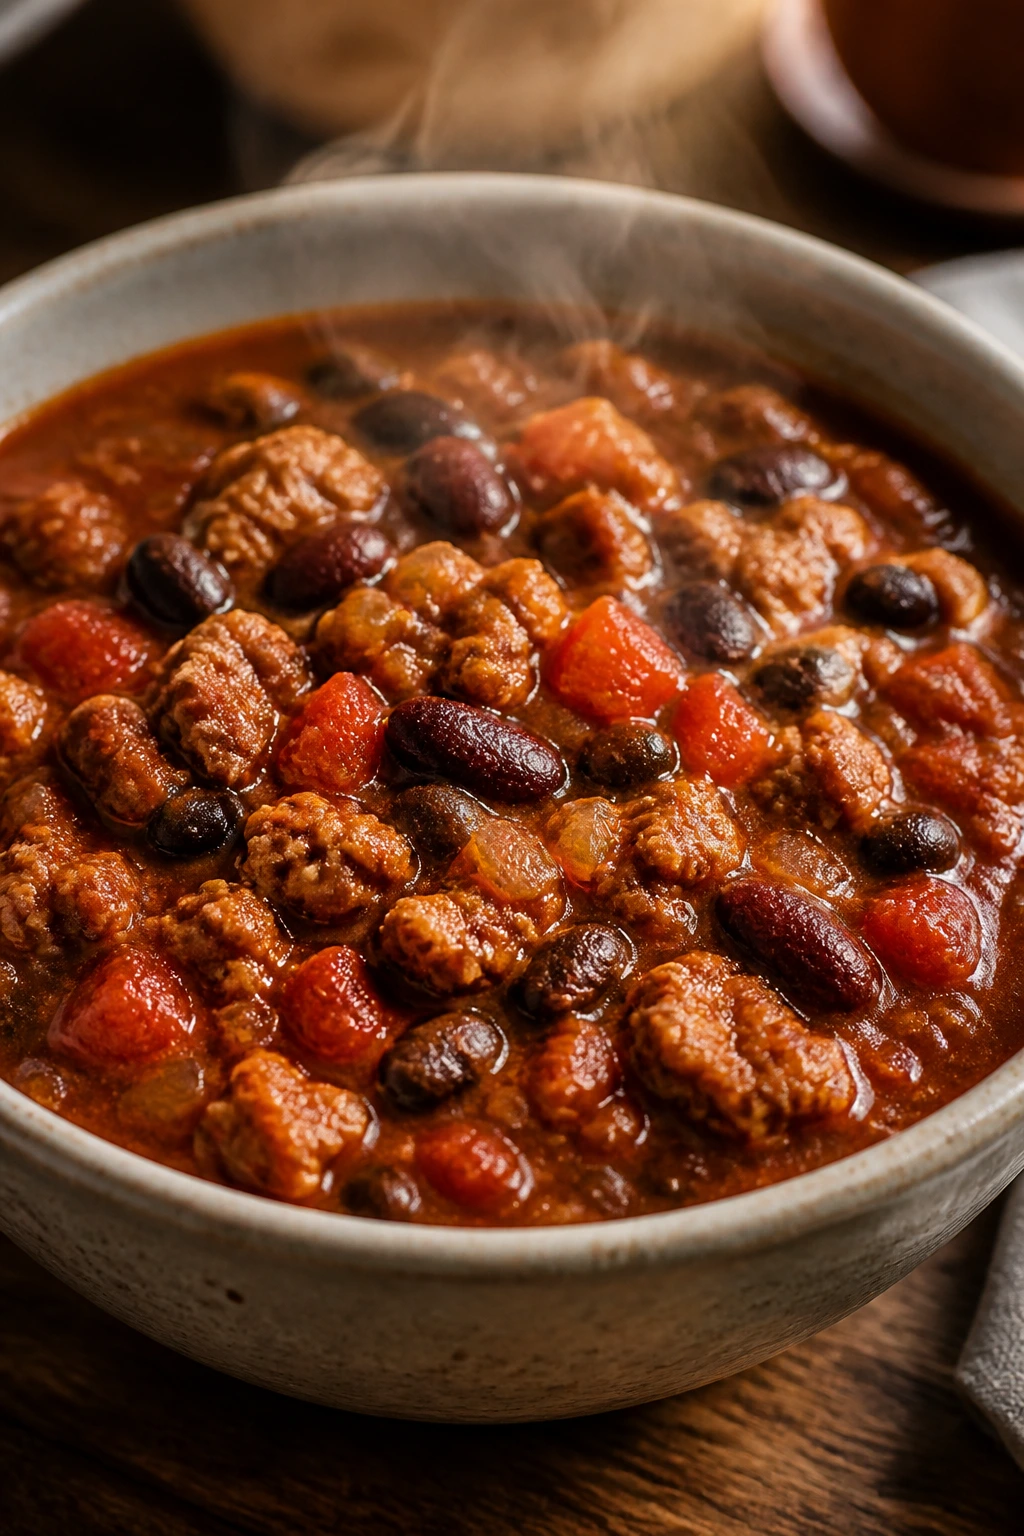
Chili is one of the easiest places to make a healthy dinner that still feels like a real meal. Lean turkey, beans, tomatoes, and spices simmer together into something thick enough to eat with a spoon and sturdy enough to keep you full. It’s better on night two, which is one of the reasons I trust it.
Why It Works: Ground turkey browns fast and stays lean. Beans make the pot hearty without much work, and canned tomatoes give you enough liquid for a proper chili texture. A short simmer lets the flavors come together without tying up the stove all evening.
Key Ingredients:
- 1 lb ground turkey; 93% lean is a good middle ground
- 1 tablespoon olive oil; for browning
- 1 onion, diced; the flavor base
- 2 cans beans, drained and rinsed; black beans and kidney beans are a nice mix
- 1 can diced tomatoes, 14.5 oz; the body of the chili
- 1 cup low-sodium broth; keeps it from getting too thick
- 2 tablespoons chili powder; the main spice
- 1 teaspoon cumin; adds warmth
- 1/2 teaspoon salt; adjust after simmering
Quick Steps:
- Brown the turkey and onion in oil in a pot.
- Stir in chili powder and cumin for 30 seconds.
- Add beans, tomatoes, and broth; simmer 15 to 20 minutes.
- Taste, salt as needed, and serve.
Equipment for This Recipe:
- Large pot or Dutch oven; for simmering
- Wooden spoon; for breaking up turkey
- Can opener; absolutely necessary
- Ladle; for serving
How to Serve This Dish: Top with chopped onion, Greek yogurt, or shredded cheddar if you want it richer. Cornbread is optional; a simple salad is enough.
Pro Tips for This Recipe:
- Let the turkey brown a little before stirring too much.
- Simmer uncovered if you want a thicker chili.
- Add a splash of vinegar or lime at the end if the flavor feels muted.
Variations on This Dish:
- Smoky Chipotle Chili: Add chopped chipotle in adobo.
- White Turkey Chili: Use white beans, green chiles, and cumin.
- Vegetarian Version: Replace the turkey with extra beans and lentils.
Common Mistakes to Avoid with This Dish:
- Don’t under-season; chili needs a confident hand.
- Don’t boil it hard or the beans break apart.
- Don’t stop after 5 minutes of simmering; the flavor needs time.
25. Smoky Chickpea Toasts with Soft Eggs
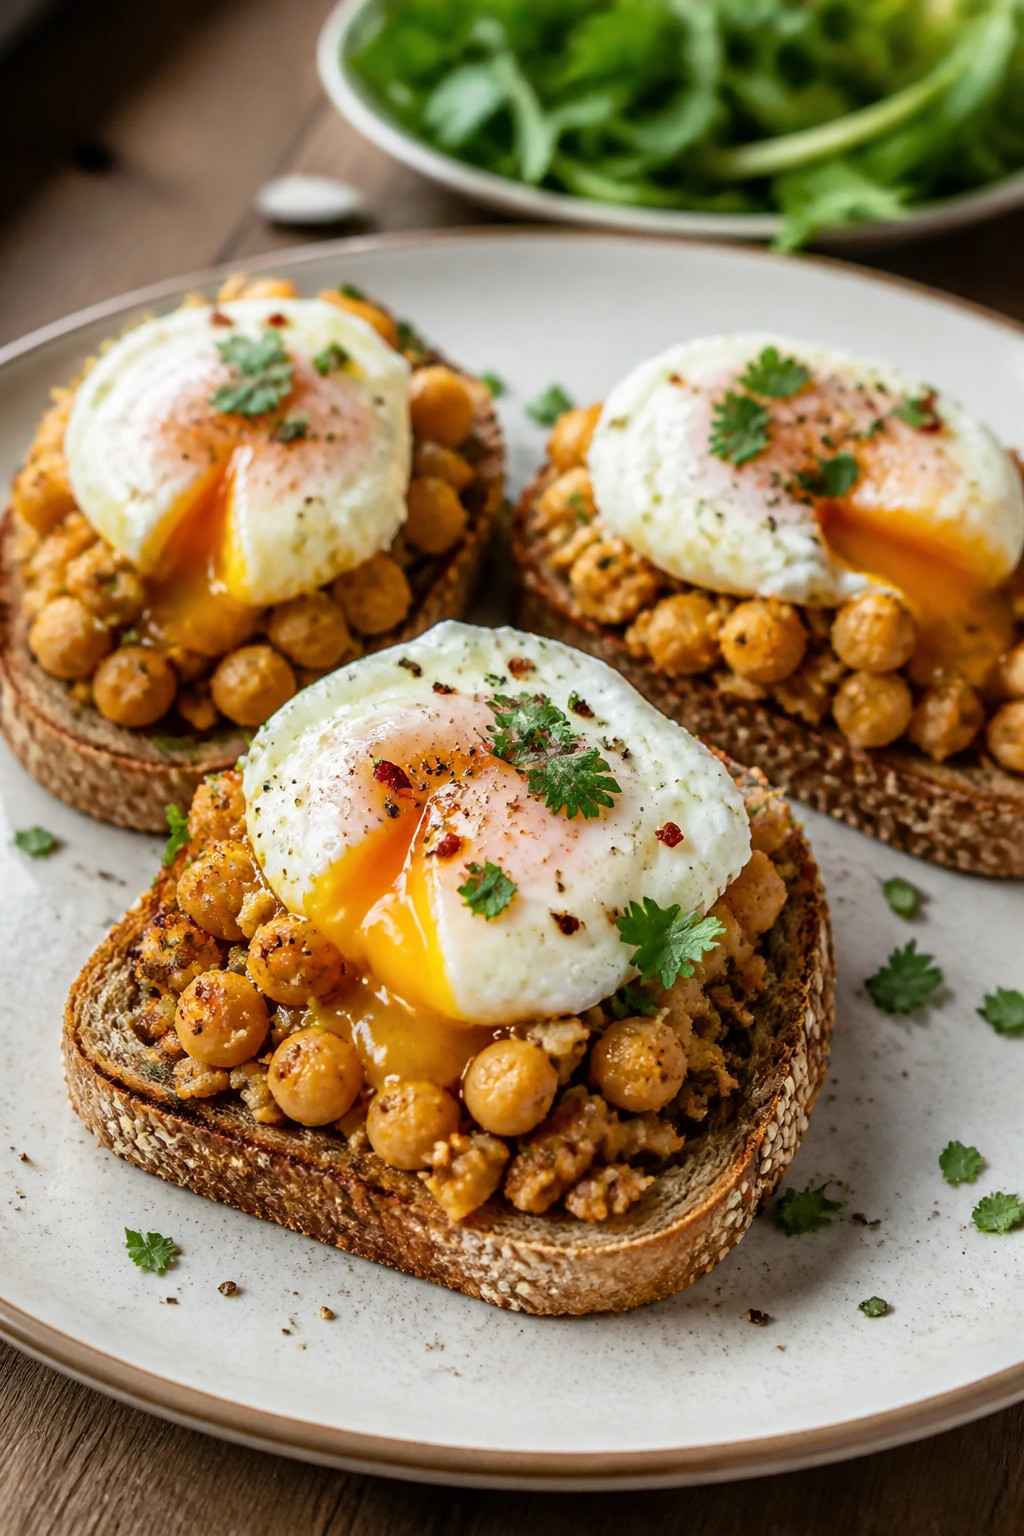
This is the kind of dinner that looks casual but lands with more substance than you expect. Crisp toast, smoky chickpeas, garlicky greens, and a runny egg on top. It’s fast, cheap, and built from ingredients that usually live in the pantry or crisper drawer.
Why It Works: Chickpeas mash well and absorb smoked paprika without needing long cooking. Eggs add protein and make the plate feel finished. Greens bring a bitter note that keeps the toast from tasting one-dimensional.
Key Ingredients:
- 1 can chickpeas, rinsed and drained; mash some, leave some whole
- 4 slices whole-grain bread; sturdy slices hold the topping
- 1 bunch kale or spinach; chopped
- 1 tablespoon olive oil; for the pan
- 1 teaspoon smoked paprika; the main flavor
- 1 tablespoon tahini; adds creaminess
- 1 lemon, juiced; for brightness
- 4 eggs; fried or soft-boiled
Quick Steps:
- Toast the bread.
- Sauté the greens in olive oil until wilted, then set aside.
- Warm the chickpeas with smoked paprika, tahini, and lemon juice, mashing lightly.
- Top the toast with greens, chickpeas, and eggs.
Equipment for This Recipe:
- Skillet; for the greens and chickpeas
- Toaster or broiler; for the bread
- Fork; for mashing chickpeas
- Small pan or pot; if soft-boiling eggs
How to Serve This Dish: Serve two toasts per person with sliced tomato or cucumber on the side. A few flakes of chili make the eggs taste better.
Pro Tips for This Recipe:
- Use sturdy bread or the topping will slide off.
- Don’t overcook the eggs if you want the yolk to run.
- Mash only part of the chickpeas so the topping still has texture.
Variations on This Dish:
- Avocado Version: Add sliced avocado under the chickpeas.
- Feta Finish: Crumble feta over the eggs.
- Hummus Shortcut: Spread hummus on the toast first if you want more creaminess.
Common Mistakes to Avoid with This Dish:
- Don’t use flimsy bread.
- Don’t skip the lemon; smoky food needs acidity.
- Don’t cook the greens to death; they should still taste green.
26. Cherry Tomato Ricotta Pasta with Arugula
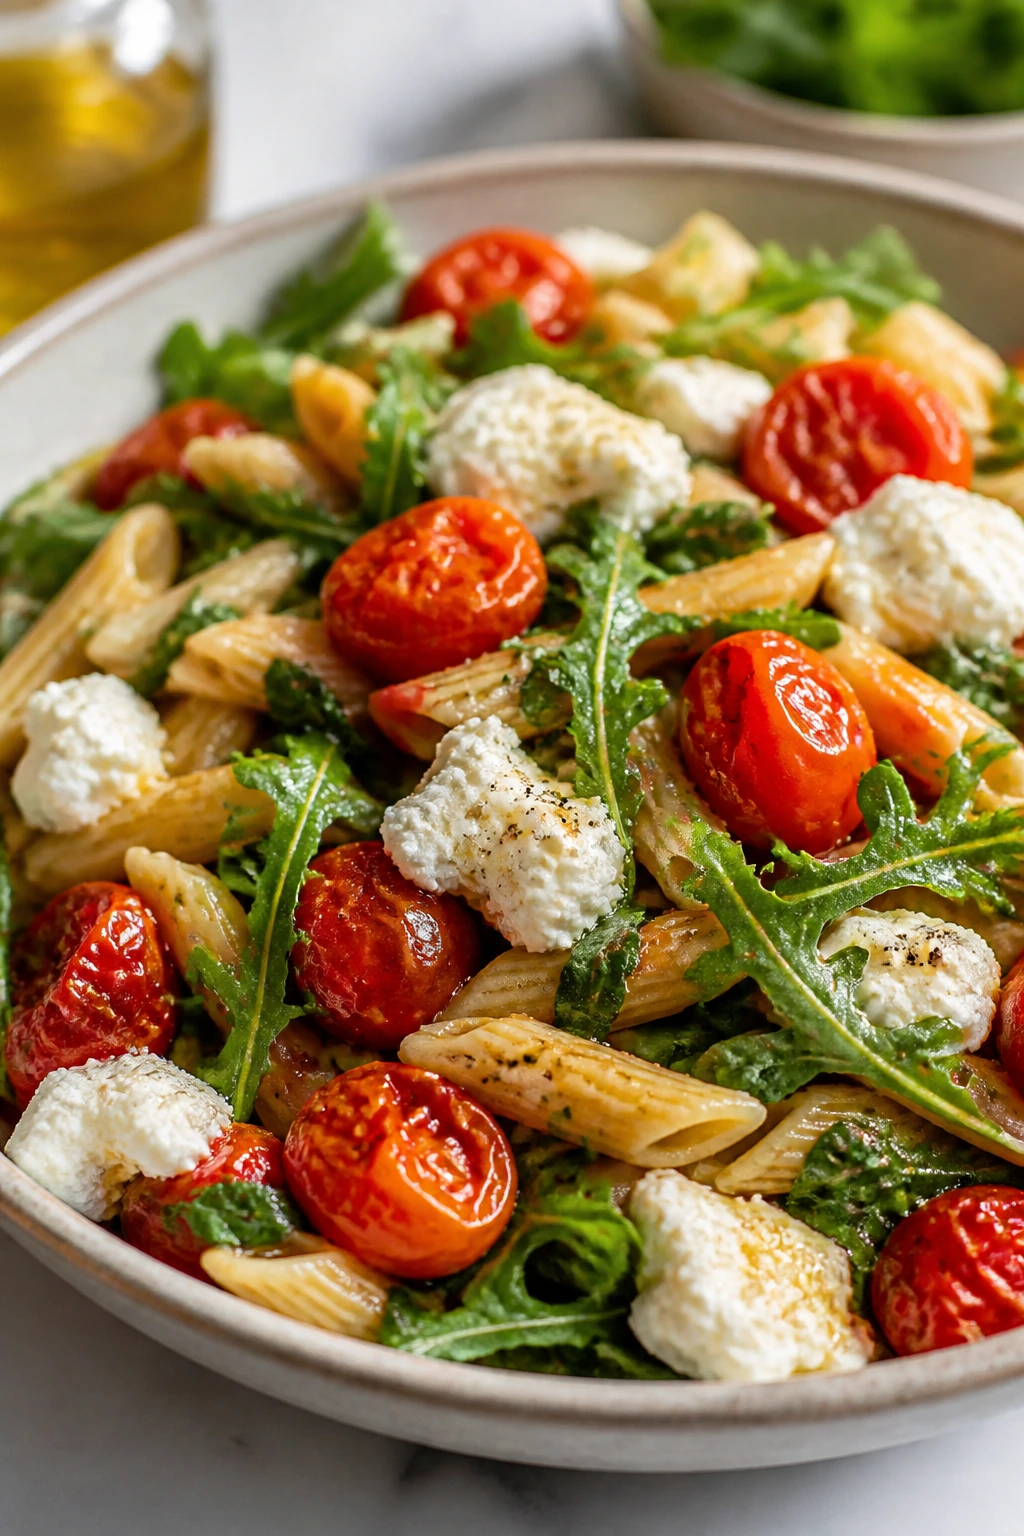
A bowl of pasta doesn’t have to be heavy to feel satisfying. Cherry tomatoes blister in olive oil, ricotta gives the sauce body without a long simmer, and arugula cuts through the creaminess with a peppery edge. It’s quick, but it doesn’t taste rushed.
Why It Works: Whole-wheat pasta adds fiber and cooks on schedule. Cherry tomatoes break down fast and create a fresh sauce in the same pan. Ricotta gives you creaminess with less fuss than a traditional cream sauce.
Key Ingredients:
- 8 oz whole-wheat pasta; penne or fusilli both work
- 2 cups cherry tomatoes; halved if large
- 1 cup ricotta; the creamy element
- 2 cups arugula; added at the end
- 2 garlic cloves, sliced; cooked gently
- 1 tablespoon olive oil; for the pan
- 1 teaspoon lemon zest; lifts the sauce
- 2 tablespoons pasta water; to loosen everything
Quick Steps:
- Cook the pasta until al dente and reserve 1/2 cup pasta water.
- Sauté the garlic and tomatoes in olive oil until blistered and juicy.
- Stir in ricotta, lemon zest, and a splash of pasta water.
- Toss with pasta and arugula until the greens wilt.
Equipment for This Recipe:
- Pot for pasta; salt the water well
- Large skillet; for the sauce
- Colander; for draining
- Wooden spoon; for tossing
How to Serve This Dish: Finish with black pepper and parmesan if you like. A simple side salad is enough beside it.
Pro Tips for This Recipe:
- Don’t overcook the tomatoes; you want them broken, not collapsed into nothing.
- Save pasta water before draining.
- Add arugula at the very end so it stays sharp.
Variations on This Dish:
- Spinach Swap: Use spinach instead of arugula for a softer finish.
- Lemon-Herb Version: Add basil or parsley.
- Protein Add-In: Stir in white beans or grilled chicken.
Common Mistakes to Avoid with This Dish:
- Don’t drown the pasta in ricotta without loosening it with pasta water.
- Don’t cook the garlic too hard.
- Don’t skip salting the pasta water; the sauce needs it.
27. Miso Mushroom Ramen with Soft Egg
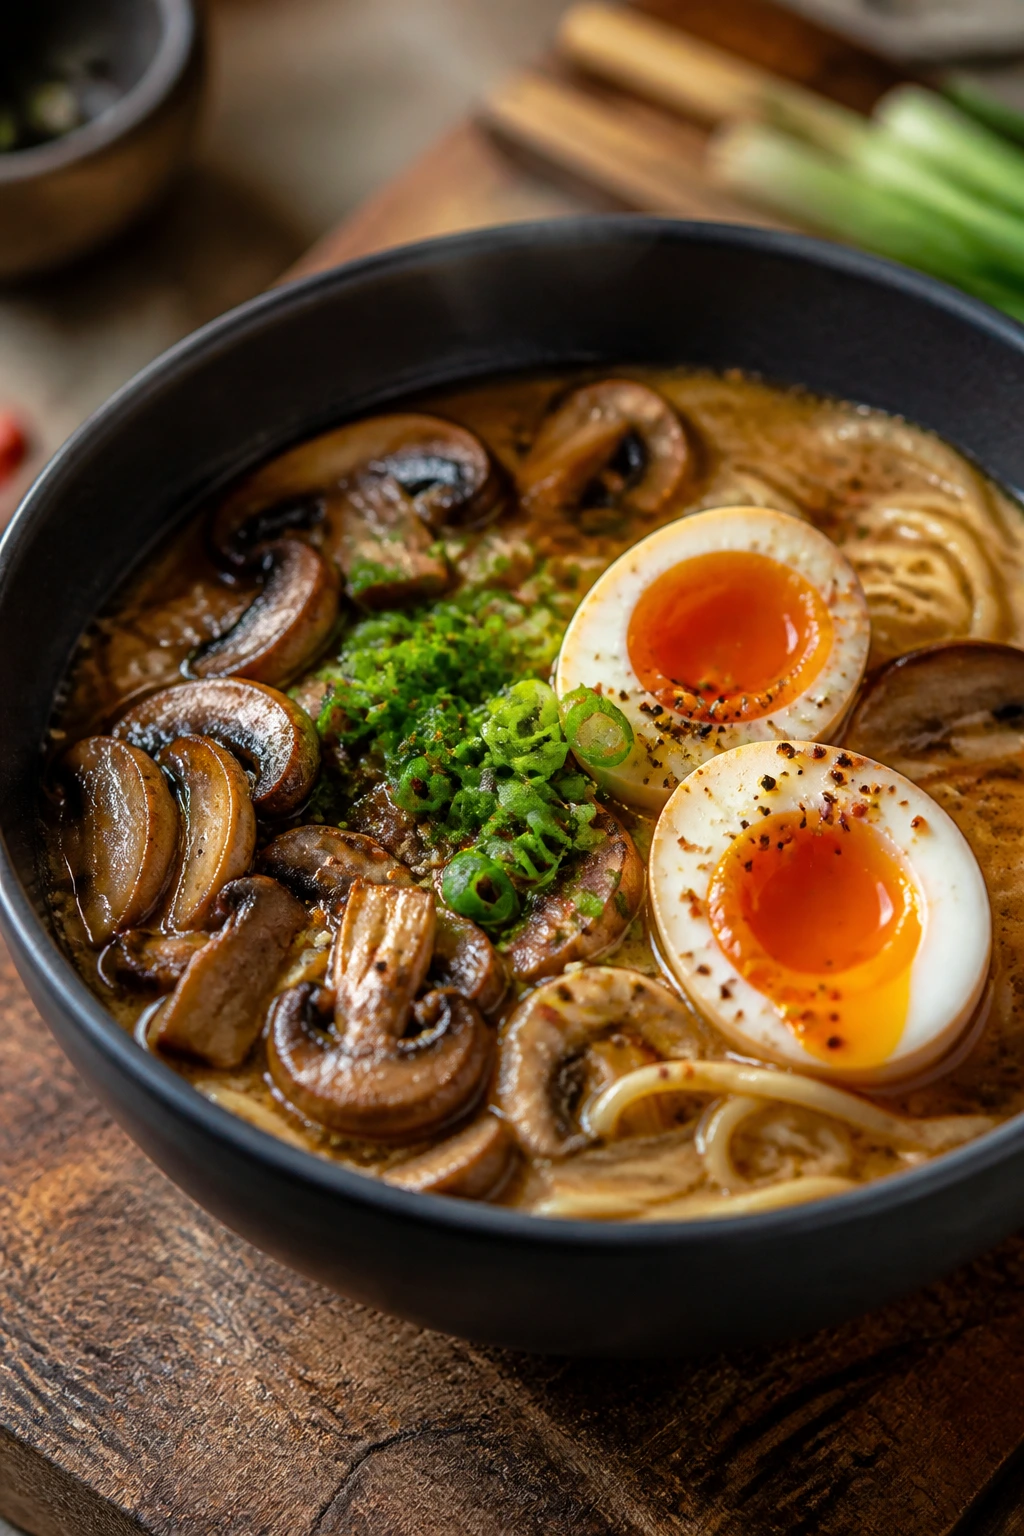
Instant ramen gets a lot of attention, but homemade-fast ramen can be a better deal. Mushrooms bring chew, miso brings depth, and the egg gives the broth some richness. It’s warm, fast, and a little restorative without pretending to be anything fancy.
Why It Works: Mushrooms brown quickly and create savory flavor in the broth. Miso dissolves into hot liquid and gives the soup a deeper backbone than plain bouillon. Soft eggs turn it into dinner instead of a snack.
Key Ingredients:
- 6 oz ramen noodles or soba; choose your preferred noodle
- 8 oz mushrooms, sliced; cremini or shiitake work well
- 2 tablespoons white miso; whisked into the broth
- 4 cups low-sodium broth; chicken or vegetable
- 2 eggs; soft-boiled
- 2 cups baby spinach; for the last minute
- 2 scallions, sliced; for garnish
- 1 teaspoon sesame oil; finish only
Quick Steps:
- Soft-boil the eggs for 7 minutes, then peel and halve them.
- Sauté the mushrooms in a pot until browned.
- Add the broth and miso, then simmer 3 minutes.
- Cook the noodles in the broth or separately, then add spinach and top with eggs.
Equipment for This Recipe:
- Medium pot; the whole soup can happen there
- Small pot; if you want to boil eggs separately
- Slotted spoon; for lifting noodles
- Whisk; to dissolve the miso
How to Serve This Dish: Serve in deep bowls with sesame seeds and chili oil on the side. The broth should be hot enough that the spinach softens as you eat.
Pro Tips for This Recipe:
- Dissolve the miso in a ladle of hot broth before adding it.
- Don’t boil miso hard or the flavor flattens.
- Keep the eggs a little jammy; they make the bowl feel richer.
Variations on This Dish:
- Chicken Ramen Version: Add shredded chicken or rotisserie chicken.
- Spicy Miso Bowl: Stir in chili paste or chili crisp.
- Veggie-Heavy Bowl: Add bok choy or shredded cabbage.
Common Mistakes to Avoid with This Dish:
- Don’t let the noodles sit too long in the broth or they swell.
- Don’t skip browning the mushrooms.
- Don’t use too much miso at once; taste as you go.
28. Sheet Pan Tilapia with Asparagus and Lemon
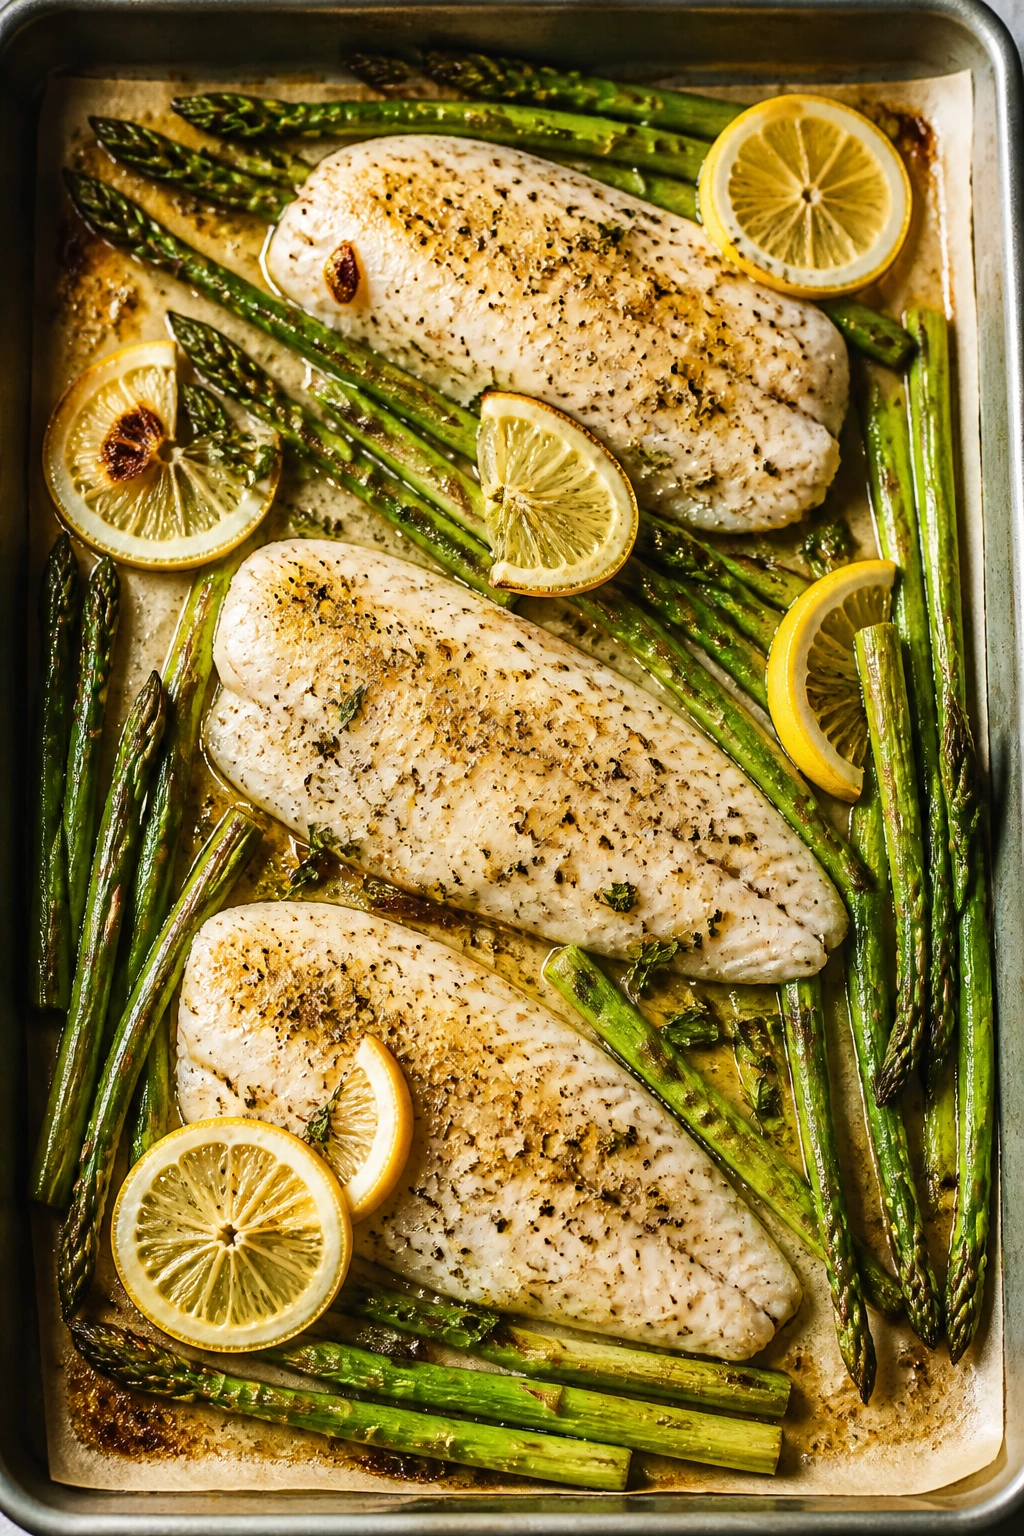
Tilapia is a quick fish, and asparagus is one of the few vegetables that keeps pace with it. Together they make a sheet pan dinner that is light, bright, and almost annoyingly simple in the best possible way. The lemon does the heavy lifting.
Why It Works: Tilapia cooks in about 10 minutes, which makes it one of the fastest proteins you can roast. Asparagus spears roast quickly and stay crisp-tender when they’re not overloaded with oil. Lemon and garlic keep the fish from tasting too plain.
Key Ingredients:
- 1 lb tilapia fillets; similar thickness helps
- 1 lb asparagus, trimmed; thinner spears roast faster
- 2 tablespoons olive oil; for coating
- 1 lemon, sliced and juiced; the finish
- 1 teaspoon garlic powder; easy and even
- 1/2 teaspoon paprika; for color
- Salt and black pepper to taste
Quick Steps:
- Heat the oven to 400°F and line a sheet pan.
- Toss the asparagus with half the oil, salt, pepper, and garlic powder.
- Nestle the tilapia on the pan, brush with the rest of the oil, and season.
- Roast for 10 to 12 minutes, then finish with lemon juice and slices.
Equipment for This Recipe:
- Sheet pan; rimmed is best
- Parchment paper; helps the fish release cleanly
- Small bowl; for the oil and seasoning
- Tongs; for moving the asparagus
How to Serve This Dish: Serve with rice, quinoa, or a small potato. A spoon of dill yogurt sauce is nice if you want extra creaminess.
Pro Tips for This Recipe:
- Pat the fish dry so it roasts instead of steaming.
- If the asparagus is very thick, give it a 2-minute head start.
- Pull the fish when it flakes easily at the thickest point.
Variations on This Dish:
- Herb-Crusted Version: Add chopped dill or parsley before baking.
- Panko Topping: Sprinkle a little whole-wheat panko on the fish for crunch.
- Lemon Pepper Swap: Use lemon pepper seasoning instead of paprika.
Common Mistakes to Avoid with This Dish:
- Don’t overcook tilapia; it dries fast.
- Don’t put wet asparagus on the pan or it steams.
- Don’t forget to trim the woody ends of the spears.
29. Ground Chicken Lettuce Wraps
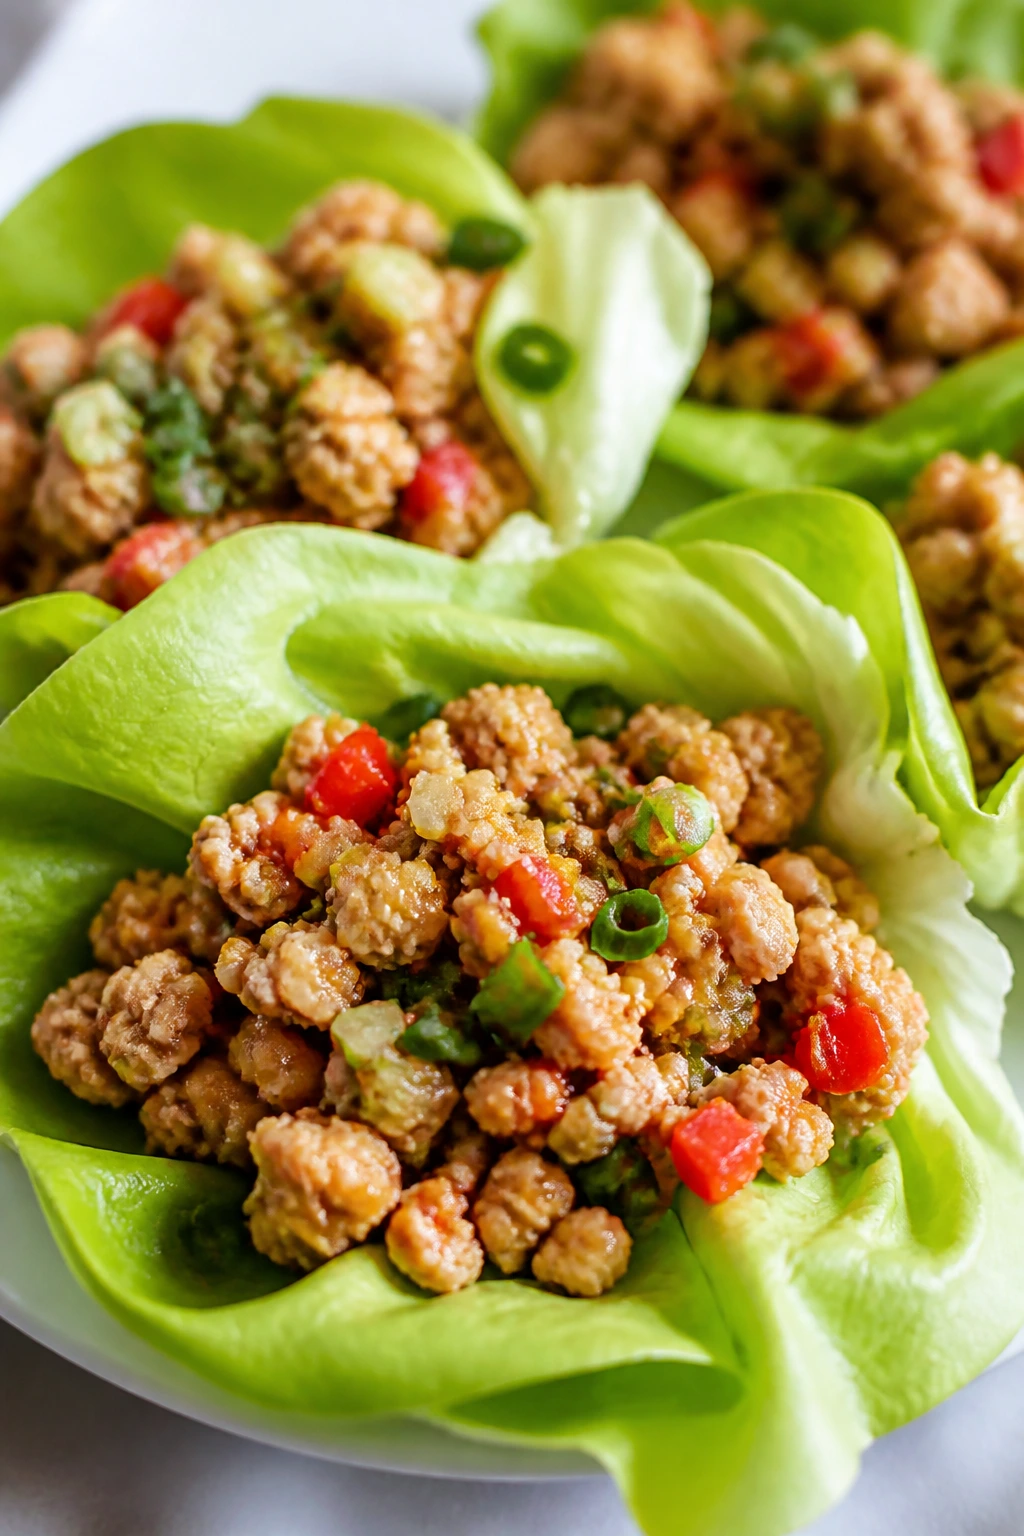
There’s a reason lettuce wraps show up on weeknight menus so often: they’re fast, hands-on, and easy to keep light without losing flavor. Ground chicken soaks up garlic, ginger, and a little soy sauce, then gets tucked into crisp lettuce cups that crack when you bite them.
Why It Works: Ground chicken cooks in one skillet in under 10 minutes. Mushrooms or water chestnuts add texture without adding much weight. Lettuce keeps the whole thing fresh and cool.
Key Ingredients:
- 1 lb ground chicken; lean and quick
- 1 tablespoon neutral oil; for the pan
- 1 small onion, diced; flavor base
- 1 cup mushrooms, finely chopped; adds body
- 2 garlic cloves, minced; for savory depth
- 1 tablespoon grated ginger; fresh is better here
- 2 tablespoons low-sodium soy sauce; seasoning
- 1 tablespoon hoisin sauce; gives a little sweetness
- 1 head butter lettuce; for cups
Quick Steps:
- Cook the onion and mushrooms in oil for 3 minutes.
- Add the chicken and cook, breaking it up, until no pink remains.
- Stir in garlic, ginger, soy sauce, and hoisin; cook 1 minute.
- Spoon into lettuce cups and serve.
Equipment for This Recipe:
- Large skillet; for the filling
- Spoon; for stuffing the cups
- Knife and cutting board; for the vegetables
- Serving platter; helpful for assembly
How to Serve This Dish: Set out the filling with lettuce leaves, sliced scallions, and chopped peanuts. A bowl of rice on the side makes it more substantial.
Pro Tips for This Recipe:
- Chop the mushrooms very fine so they blend into the filling.
- Don’t let the lettuce sit wet or it slips in your hand.
- Taste the filling before serving; soy sauces vary a lot.
Variations on This Dish:
- Thai-Style Version: Add lime juice and chopped basil.
- Spicy Wraps: Mix in chili garlic sauce.
- Rice Bowl Swap: Serve over rice if you want more starch.
Common Mistakes to Avoid with This Dish:
- Don’t overcook the chicken; it gets dry fast.
- Don’t use loose, watery lettuce if you can avoid it.
- Don’t skip the ginger; it gives the filling its lift.
30. Kale Caesar Chicken Salad
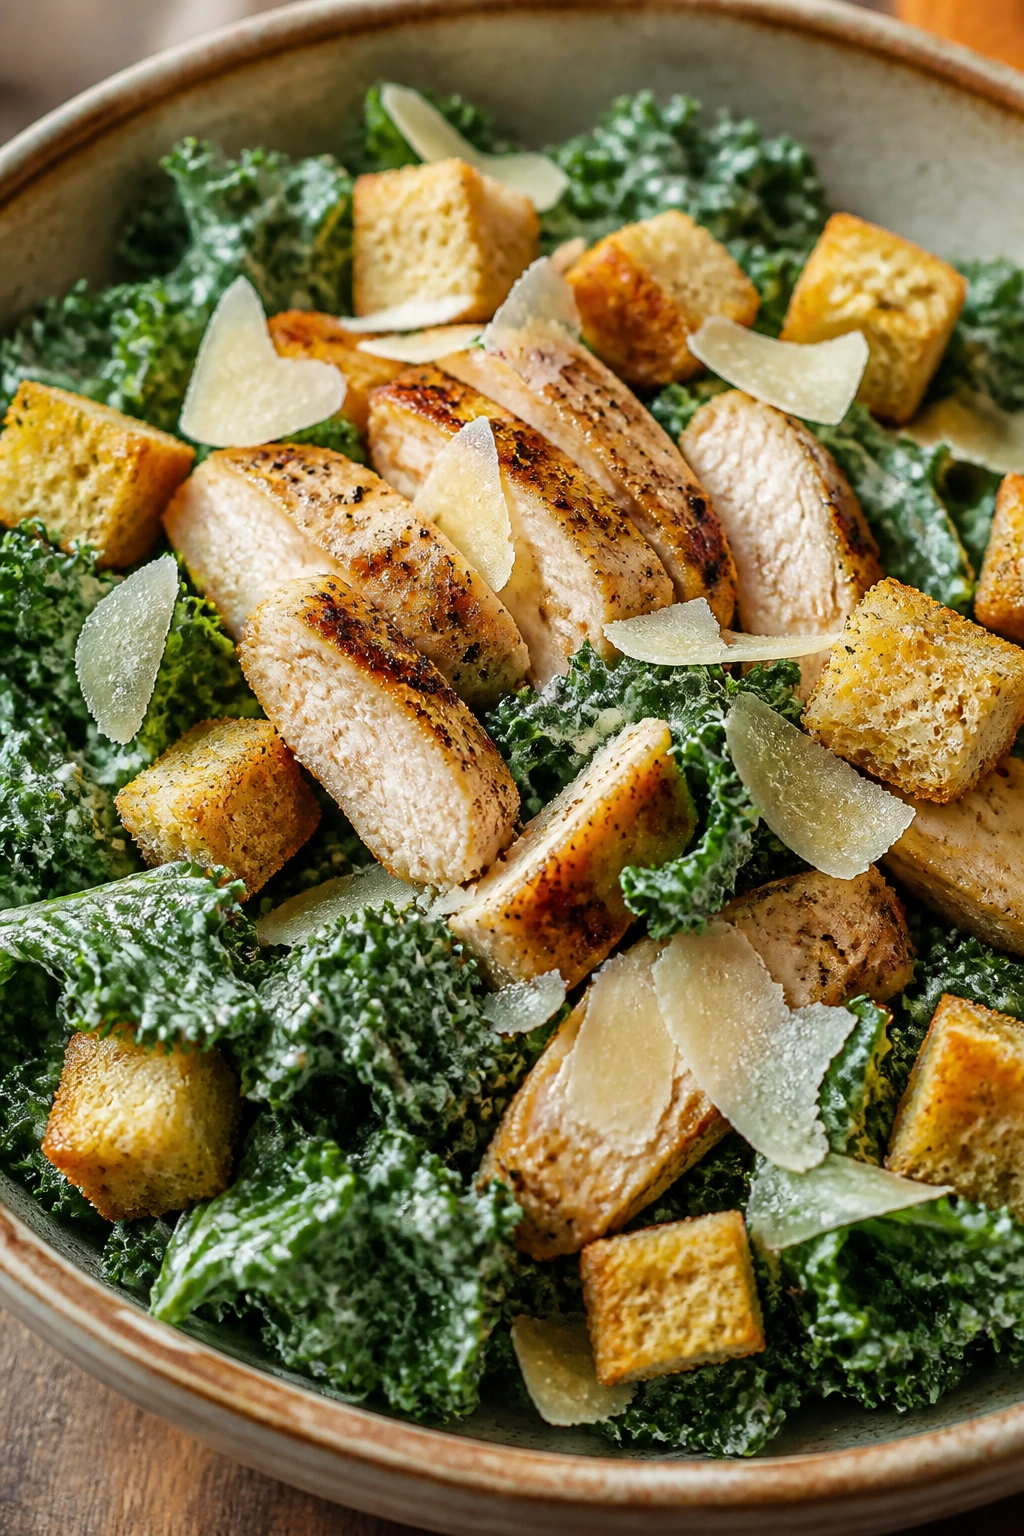
A Caesar salad can absolutely work as dinner if you give it enough protein and enough crunch to keep it interesting. Kale holds up better than romaine, which means the dressing can sit on it for a few minutes without turning the leaves limp. Add chicken, and the whole thing stops acting like a side dish.
Why It Works: Kale is sturdier than lettuce, so it can handle a thicker dressing. Grilled or pan-seared chicken makes the salad filling enough for dinner. A yogurt-based Caesar dressing keeps the richness but cuts some of the heaviness.
Key Ingredients:
- 2 chicken breasts; cooked and sliced
- 1 bunch kale, stems removed and chopped; massage it lightly
- 1/4 cup plain Greek yogurt; for the dressing
- 1 tablespoon lemon juice; sharpens the dressing
- 1 garlic clove, finely grated; use a light hand
- 2 tablespoons grated parmesan; for the dressing and topping
- 1 tablespoon olive oil; for the chicken or dressing
- 1 cup croutons; optional, but they do add crunch
Quick Steps:
- Cook the chicken in a skillet or grill pan until done, then slice it.
- Whisk the yogurt, lemon juice, garlic, parmesan, and olive oil into a dressing.
- Massage the dressing into the kale for 1 minute.
- Top with chicken and croutons.
Equipment for This Recipe:
- Skillet or grill pan; for the chicken
- Mixing bowl; for the salad
- Whisk; for the dressing
- Knife and cutting board; for slicing
How to Serve This Dish: Serve in big bowls so the chicken sits on top and the kale stays under the dressing. Shaved parmesan on top makes it feel finished.
Pro Tips for This Recipe:
- Massage kale for 30 seconds so it softens.
- Don’t overdo the garlic in the dressing; raw garlic gets loud fast.
- Let the chicken rest before slicing so it stays juicy.
Variations on This Dish:
- Salmon Caesar: Swap chicken for salmon.
- Anchovy Version: Add anchovy paste to the dressing if you like a stronger Caesar.
- Vegetarian Bowl: Use chickpeas instead of chicken.
Common Mistakes to Avoid with This Dish:
- Don’t use watery dressing; it makes the kale floppy.
- Don’t slice the chicken too early or the juices run out.
- Don’t skip salt in the dressing; kale needs it.
31. Black Bean Corn Skillet Enchiladas

This is the easier cousin of full enchiladas. You layer the tortillas, beans, corn, and sauce right in the skillet, then let the cheese melt into everything. It tastes like a more relaxed version of a classic, which is exactly what weeknights need.
Why It Works: Corn tortillas soften quickly in sauce, which means you don’t need to roll each one. Black beans make the filling hearty, and corn adds sweetness. The whole skillet bakes fast because everything is already partially cooked.
Key Ingredients:
- 6 corn tortillas, cut into strips; they soften better than whole tortillas
- 1 can black beans, rinsed and drained; main protein
- 1 cup corn kernels; frozen or canned
- 1 cup enchilada sauce; red or green
- 1 cup shredded Monterey Jack or cheddar; for melting
- 1 small onion, diced; for the base
- 1 cup baby spinach; tucks into the layers
- 1 tablespoon olive oil; for the onion
Quick Steps:
- Sauté the onion in oil until soft.
- Stir in the beans, corn, and spinach.
- Layer tortilla strips, filling, sauce, and cheese in a skillet or baking dish.
- Bake at 400°F for 15 minutes until bubbling.
Equipment for This Recipe:
- Oven-safe skillet or baking dish; 10-inch skillet works well
- Knife; for the tortillas and onion
- Spoon; for layering
- Foil; if the top browns too fast
How to Serve This Dish: Serve with salsa, avocado, or plain yogurt on top. A crunchy cabbage slaw on the side cuts the richness.
Pro Tips for This Recipe:
- Use enough sauce so the tortillas soften properly.
- Keep the tortilla strips fairly even.
- Let the skillet rest for 5 minutes before scooping.
Variations on This Dish:
- Chicken Enchilada Skillet: Add shredded rotisserie chicken.
- Veggie-Packed Version: Add zucchini or bell peppers.
- Spicy Green Sauce Swap: Use green enchilada sauce instead of red.
Common Mistakes to Avoid with This Dish:
- Don’t skimp on sauce or the tortillas stay tough.
- Don’t overload the skillet with cheese.
- Don’t serve it immediately out of the oven or it falls apart.
32. Pork Tenderloin Medallions with Apples and Brussels
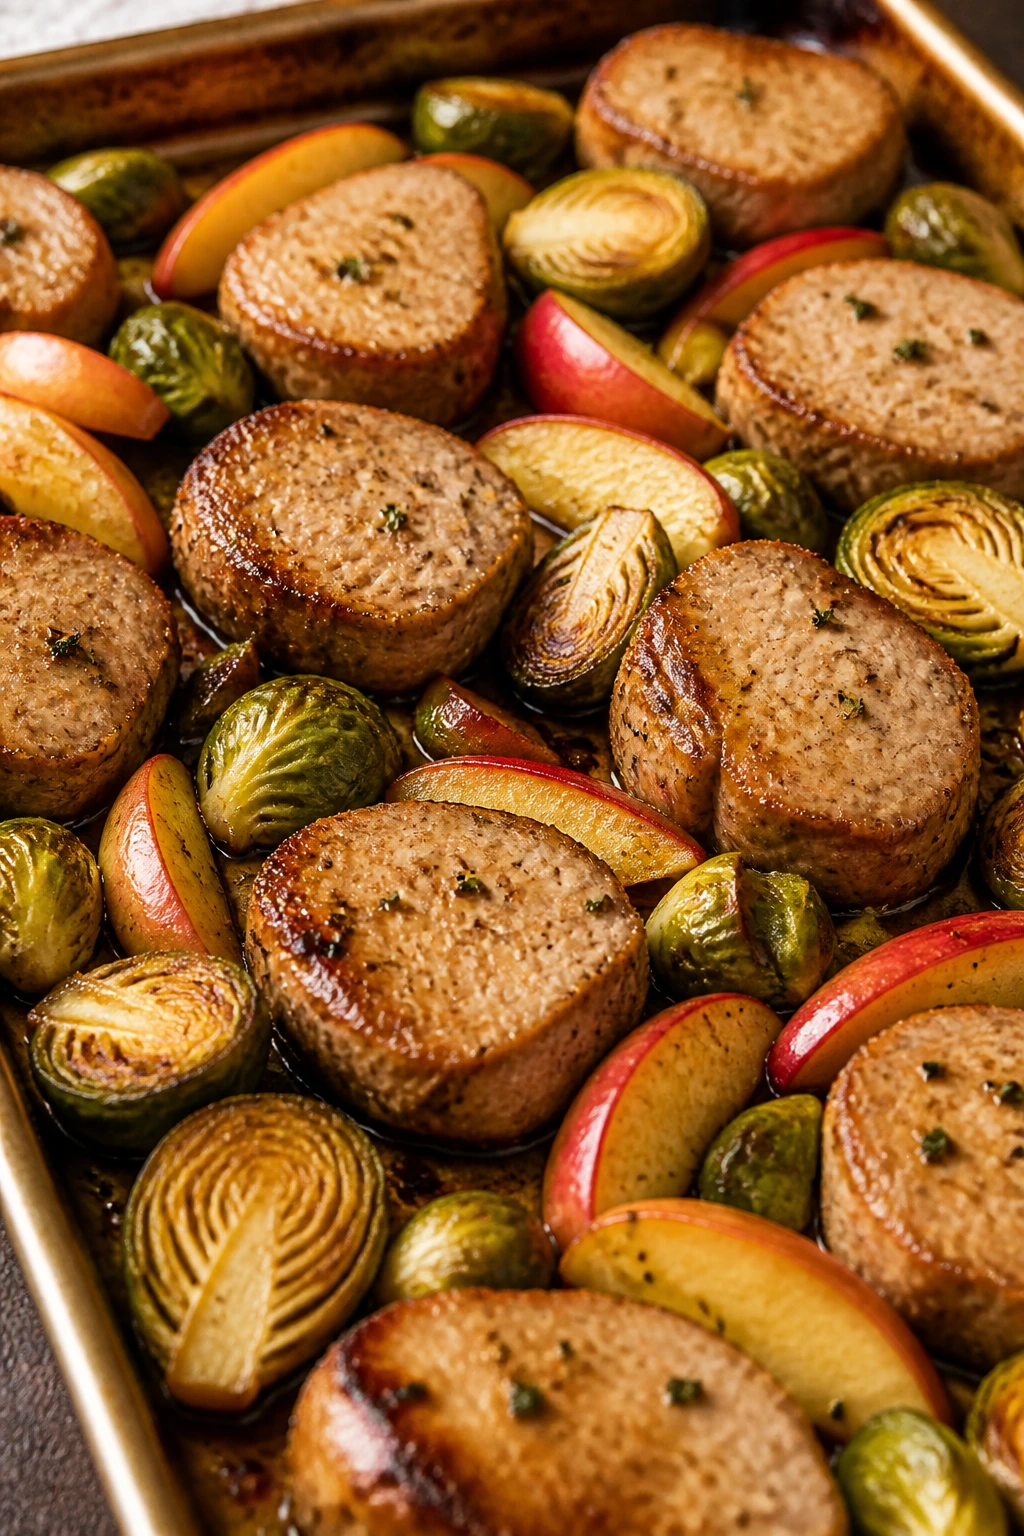
Pork tenderloin is one of the quickest lean cuts you can cook, and it plays well with sweet apples and roasted Brussels sprouts. The apples soften just enough to make a little pan glaze, while the pork stays tender if you don’t overcook it. It tastes like fall without being tied to a season.
Why It Works: Pork tenderloin cooks quickly when sliced into medallions. Brussels sprouts roast fast when halved, and apples add a fresh sweetness that balances the savory meat. A little mustard or thyme gives the pan something to hold onto.
Key Ingredients:
- 1 lb pork tenderloin, sliced into medallions; fast and lean
- 1 lb Brussels sprouts, halved; trim the stems
- 2 apples, cored and sliced; Honeycrisp or Gala work well
- 1 tablespoon olive oil; for the pan
- 1 teaspoon dried thyme; the herb note
- 1 tablespoon Dijon mustard; optional but useful
- Salt and black pepper to taste
Quick Steps:
- Heat the oven to 425°F.
- Roast the Brussels sprouts with olive oil, salt, and pepper for 10 minutes.
- Add the pork medallions and apples, season again, and roast 10 to 12 minutes more.
- Stir in Dijon or thyme if using and serve.
Equipment for This Recipe:
- Sheet pan; rimmed helps with juices
- Knife; for the pork and apples
- Cutting board; keep one for meat and one for produce if you can
- Tongs; for moving the medallions
How to Serve This Dish: Serve with farro or mashed cauliflower if you want a base. A little mustard on the side is a good move.
Pro Tips for This Recipe:
- Cut the pork into even medallions so it finishes together.
- Don’t let the apples overcook; they should hold some shape.
- Use a meat thermometer if you have one; pork is best when it just hits done.
Variations on This Dish:
- Mustard-Maple Version: Add a teaspoon of maple syrup to the mustard.
- Sweet Potato Swap: Use sweet potatoes instead of Brussels sprouts.
- Sage Version: Add fresh sage leaves for a deeper savory note.
Common Mistakes to Avoid with This Dish:
- Don’t overcook pork tenderloin; it dries out fast.
- Don’t cut the sprouts too small or they burn.
- Don’t skip the seasoning on the vegetables.
33. Thai Basil Beef and Rice
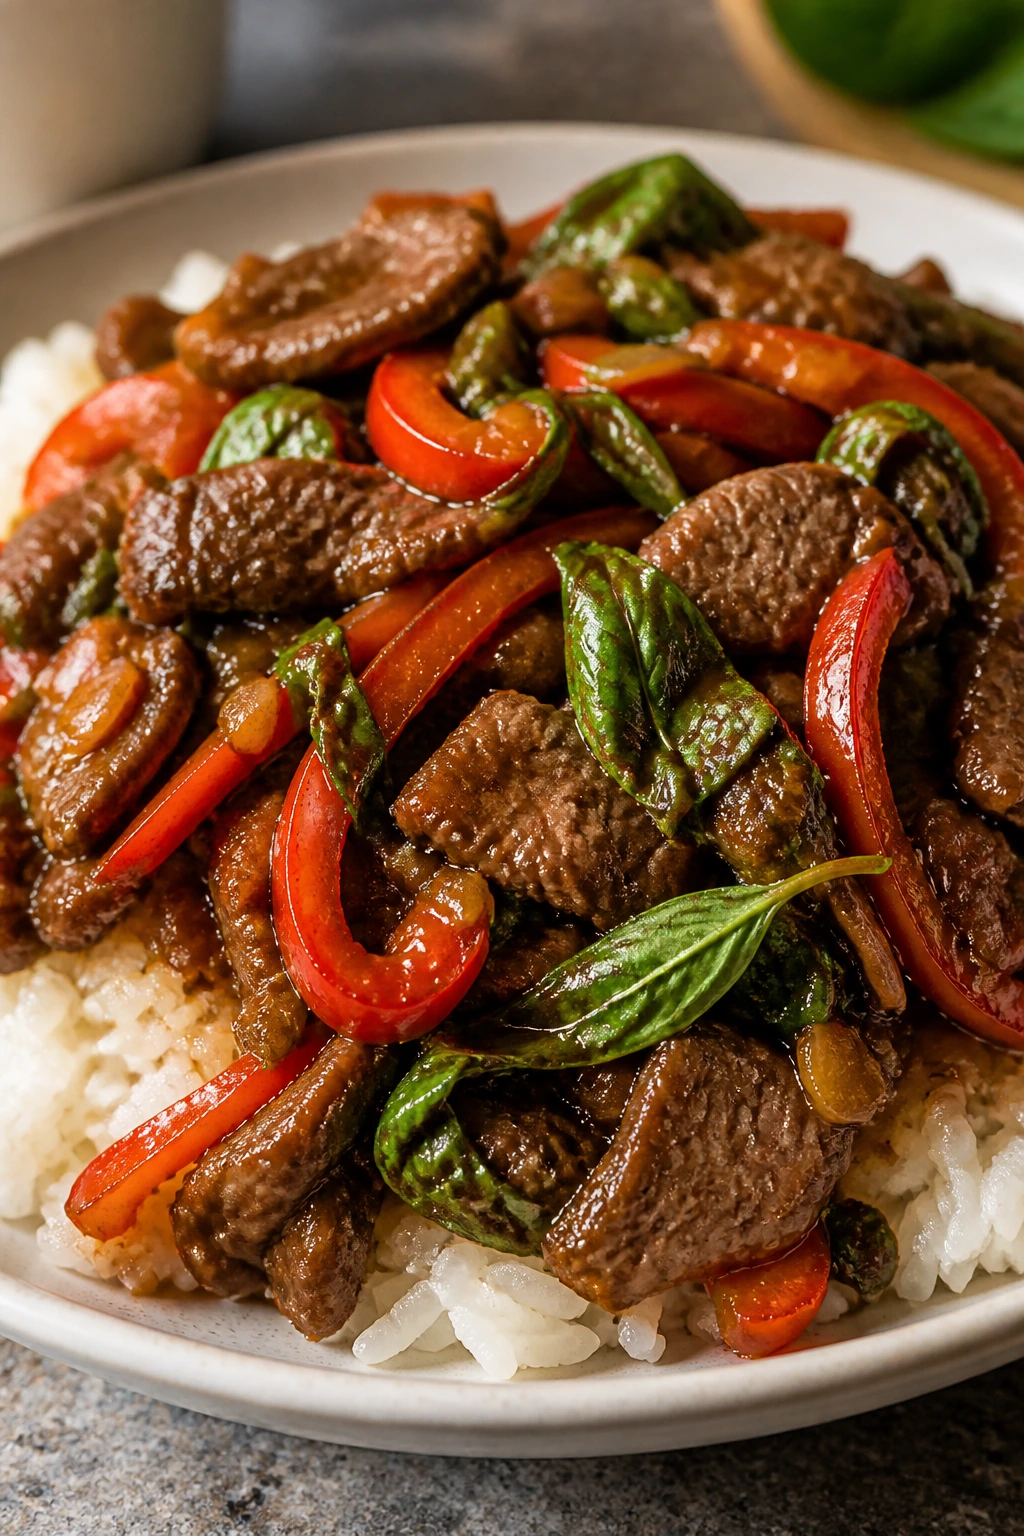
Thai basil beef is what happens when you want something fast, savory, and a little loud. The beef browns hard, the basil goes in late so it keeps its perfume, and the sauce is salty with just enough heat to keep you paying attention. It’s one of my favorite “I want real dinner now” recipes.
Why It Works: Lean ground beef cooks quickly and takes on sauce well. Basil added at the end keeps its flavor fresh instead of cooked-flat. Rice underneath soaks up the juices and turns the skillet into an actual meal.
Key Ingredients:
- 1 lb lean ground beef; 90% lean is a good choice
- 1 bell pepper, sliced; for crunch and color
- 2 garlic cloves, minced; important
- 2 tablespoons low-sodium soy sauce; salty base
- 1 tablespoon fish sauce; optional but adds depth
- 1 teaspoon chili paste or flakes; for heat
- 2 cups fresh basil leaves; added at the end
- 2 cups cooked rice; white or brown
Quick Steps:
- Brown the beef in a hot skillet, breaking it up as it cooks.
- Add the garlic and bell pepper and cook 2 minutes.
- Stir in soy sauce, fish sauce, and chili paste.
- Turn off the heat, fold in basil, and serve over rice.
Equipment for This Recipe:
- Large skillet; for browning
- Spatula; for breaking up the beef
- Knife and cutting board; for the pepper
- Measuring spoons; the sauces are potent
How to Serve This Dish: Serve over rice with a fried egg if you want it richer. A cucumber side salad helps cool the heat.
Pro Tips for This Recipe:
- Add the basil off the heat so it stays bright.
- Don’t overdo the fish sauce; it’s strong.
- Let the beef get some real color before you stir too much.
Variations on This Dish:
- Turkey Basil Bowl: Use ground turkey instead of beef.
- Veggie Version: Swap beef for chopped mushrooms and crumbled tofu.
- Rice Noodle Swap: Serve it over rice noodles instead of rice.
Common Mistakes to Avoid with This Dish:
- Don’t use basil early or it turns dull.
- Don’t let the skillet get crowded.
- Don’t skip the chili element entirely; it helps the dish taste like itself.
34. Chicken Sausage Gnocchi with Spinach
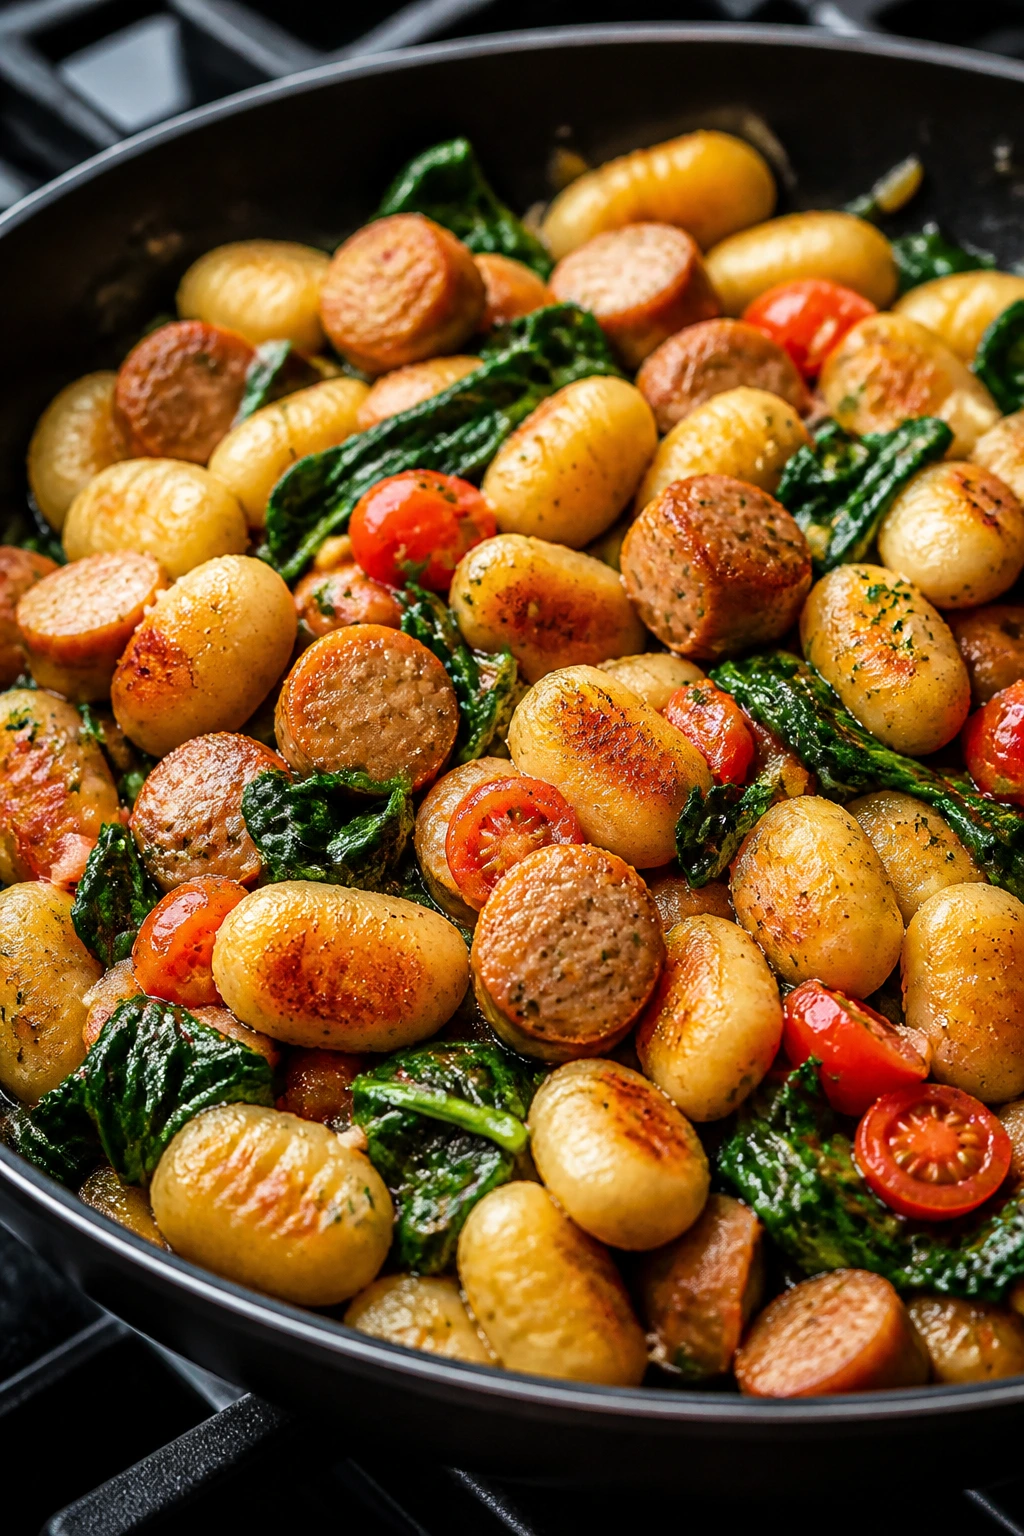
This is one of those skillet meals that tastes like comfort but doesn’t ask for much. The gnocchi gets golden in the pan, chicken sausage brings seasoning, and spinach melts into the sauce without a lot of ceremony. It’s cozy, but still quick enough to count as weeknight food.
Why It Works: Shelf-stable gnocchi can go straight into the skillet and brown on the outside. Chicken sausage is already cooked, which keeps the time low. Spinach and cherry tomatoes round out the pan so it doesn’t feel too dense.
Key Ingredients:
- 12 oz chicken sausage, sliced; fully cooked sausage is fastest
- 1 lb shelf-stable gnocchi; no boiling needed if you pan-crisp it
- 3 cups baby spinach; wilts quickly
- 1 pint cherry tomatoes, halved; adds acidity
- 2 tablespoons olive oil; for browning
- 2 garlic cloves, minced; for the sauce
- 1/4 cup water or broth; helps the pan steam
Quick Steps:
- Brown the gnocchi in olive oil in a skillet for 5 minutes.
- Add the sausage and tomatoes and cook 3 minutes.
- Stir in garlic, water or broth, and spinach.
- Cook until the spinach wilts and the gnocchi is tender.
Equipment for This Recipe:
- Large skillet; enough room for the gnocchi to brown
- Spatula; for turning the gnocchi
- Knife; for slicing the sausage
- Cutting board; for the tomatoes
How to Serve This Dish: Serve in bowls with parmesan or black pepper on top. A lemony green salad balances the richness nicely.
Pro Tips for This Recipe:
- Don’t stir the gnocchi constantly; let it brown.
- Add the spinach at the very end so it doesn’t disappear.
- If the pan dries out, add a splash more broth.
Variations on This Dish:
- Creamy Version: Add 2 tablespoons ricotta at the end.
- Broccoli Swap: Use broccoli florets instead of spinach.
- Spicy Sausage Bowl: Choose a hot chicken sausage.
Common Mistakes to Avoid with This Dish:
- Don’t boil the gnocchi unless the package specifically asks for it.
- Don’t overcook the tomatoes into sauce too early.
- Don’t skip browning; pale gnocchi tastes flat.
35. Cauliflower Fried Rice with Chicken
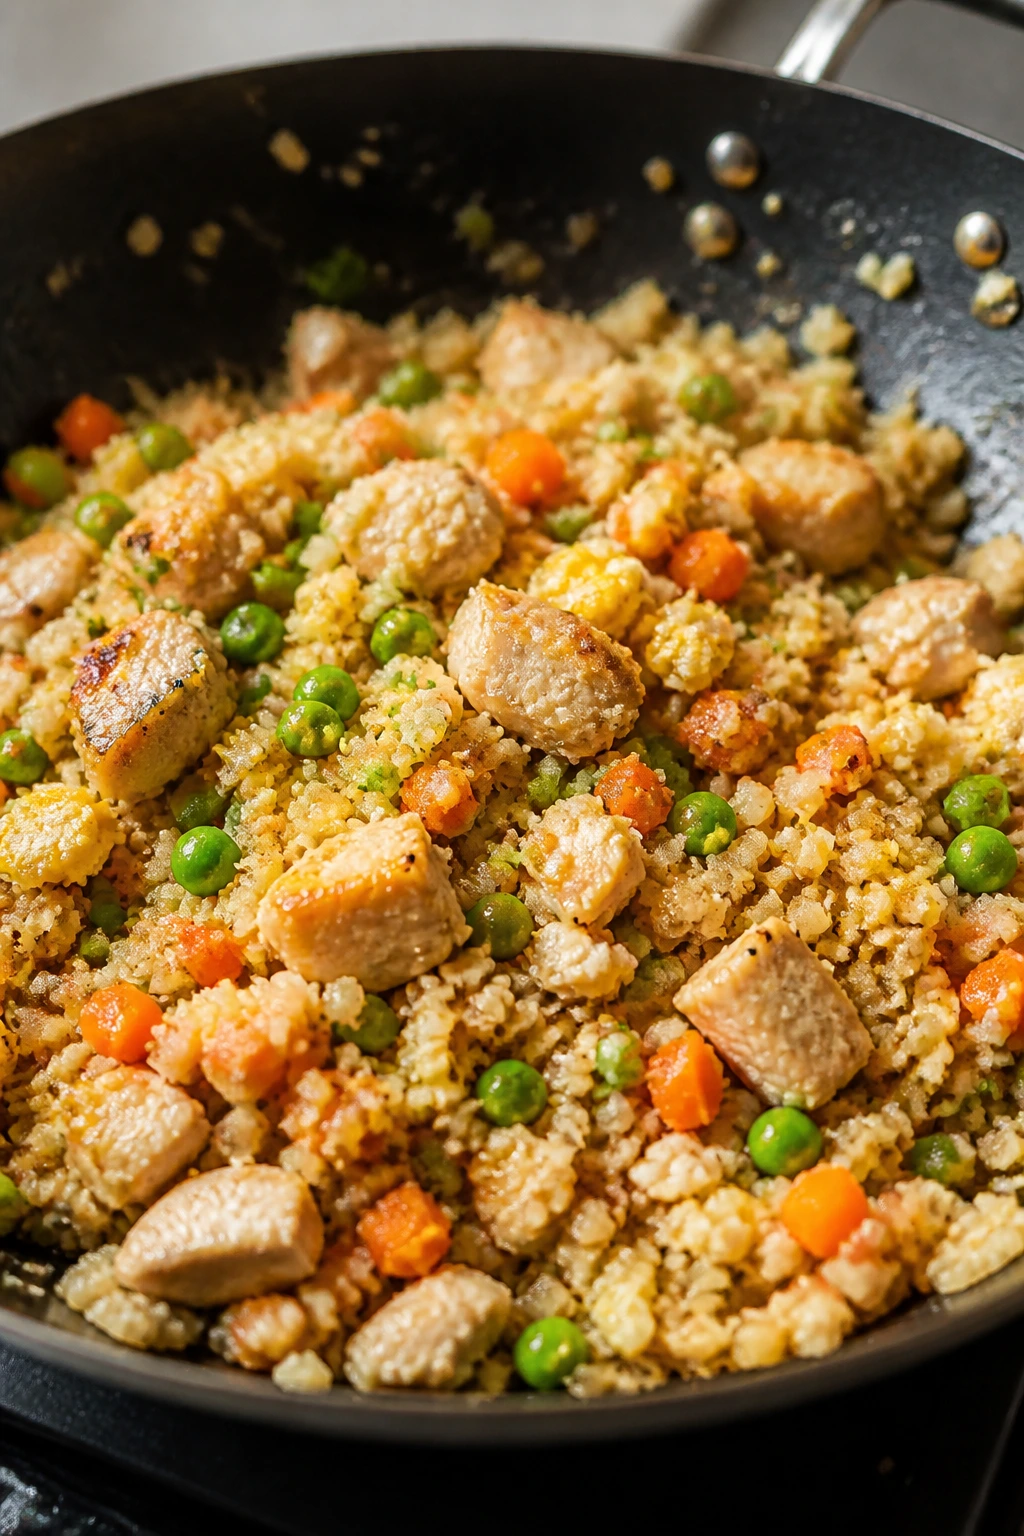
Cauliflower rice has a lot of dull versions in the wild. This isn’t one of them. Fry it hard, keep the pan hot, and add chicken, eggs, and sesame oil, and it turns into a genuinely satisfying dinner that happens to be lighter than the usual takeout version.
Why It Works: Cauliflower rice cooks fast and absorbs seasoning well when the pan is hot. Chicken and eggs add protein, which keeps the bowl from feeling empty. Frozen mixed vegetables make the whole thing easy to assemble.
Key Ingredients:
- 4 cups cauliflower rice; fresh or frozen
- 1 lb chicken breast, diced small; tiny pieces cook quickly
- 2 eggs, beaten; add richness
- 1 cup frozen peas and carrots; no prep needed
- 2 tablespoons low-sodium soy sauce; the seasoning
- 1 tablespoon sesame oil; finish flavor
- 1 tablespoon neutral oil; for the skillet
- 2 scallions, sliced; for garnish
Quick Steps:
- Cook the chicken in neutral oil until browned and done.
- Scramble the eggs in the same pan and set aside.
- Add cauliflower rice and vegetables and stir-fry for 4 to 5 minutes.
- Return the chicken and eggs, then add soy sauce and sesame oil.
Equipment for This Recipe:
- Large skillet or wok; needed for good heat
- Spatula; for breaking up the eggs and rice
- Bowl; for the eggs
- Knife; for the chicken
How to Serve This Dish: Serve in bowls with extra scallions or a spoonful of chili crisp. A side of cucumber salad works well.
Pro Tips for This Recipe:
- Keep frozen cauliflower rice frozen until you’re ready to cook it.
- Cook over fairly high heat so the rice doesn’t steam.
- Salt carefully; soy sauce can cover a lot.
Variations on This Dish:
- Shrimp Version: Swap chicken for shrimp.
- Pineapple Bowl: Add a small handful of pineapple for sweetness.
- Vegetarian Fried Rice: Replace the chicken with tofu or more eggs.
Common Mistakes to Avoid with This Dish:
- Don’t use a wet cauliflower rice bag without squeezing it out.
- Don’t crowd the pan.
- Don’t skip the sesame oil; it makes the dish taste finished.
36. Tuna Pasta with Peas and Lemon
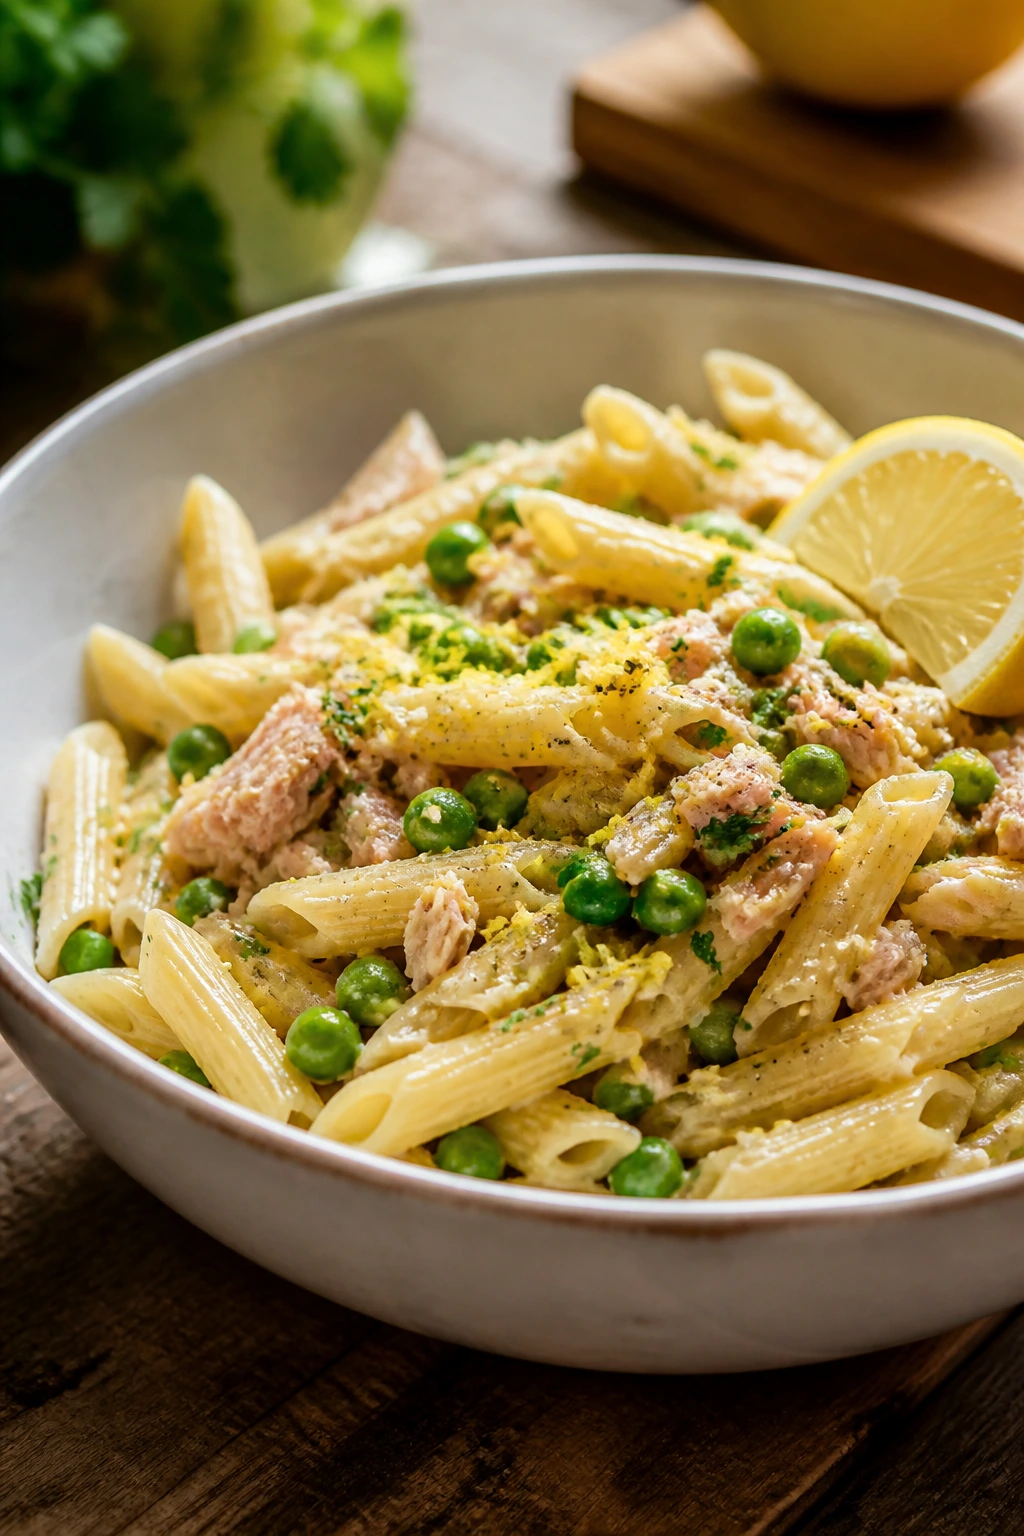
Tuna pasta works because it doesn’t try too hard. Pasta, peas, lemon, olive oil, tuna, done. But if you salt the water well and finish it with a little pasta water, it tastes cleaner and brighter than the boxed version people remember from childhood.
Why It Works: Tuna gives you protein with almost no prep. Peas add sweetness and color, and lemon keeps the sauce from tasting heavy. The pasta water helps everything cling together without cream.
Key Ingredients:
- 8 oz pasta; penne, fusilli, or spaghetti all work
- 2 cans tuna, drained; packed in water is fine
- 1 cup peas; frozen is easiest
- 2 tablespoons olive oil; for the sauce
- 1 lemon, zested and juiced; key to the flavor
- 2 tablespoons chopped parsley; for freshness
- 1 tablespoon capers; optional, but they fit well
Quick Steps:
- Cook the pasta and peas together until al dente, then reserve some pasta water.
- Warm the tuna gently with olive oil, lemon zest, and capers.
- Toss in the pasta, peas, and a splash of pasta water.
- Finish with lemon juice and parsley.
Equipment for This Recipe:
- Pot for pasta; large enough to move around
- Colander; for draining
- Large skillet; for the tuna and sauce
- Microplane; for the lemon zest
How to Serve This Dish: Serve with black pepper and extra lemon on the table. A simple green salad is enough on the side.
Pro Tips for This Recipe:
- Don’t break up the tuna into paste; leave some texture.
- Add lemon juice off the heat for a fresher taste.
- Save more pasta water than you think you need.
Variations on This Dish:
- Creamy Tuna Pasta: Stir in a spoonful of Greek yogurt.
- Mediterranean Version: Add olives and cherry tomatoes.
- Whole-Wheat Upgrade: Use whole-wheat pasta for more fiber.
Common Mistakes to Avoid with This Dish:
- Don’t overcook the pasta.
- Don’t dump the tuna in too early or it dries out.
- Don’t skip the lemon; it’s what makes the dish wake up.
37. Shakshuka with Feta and Chickpeas
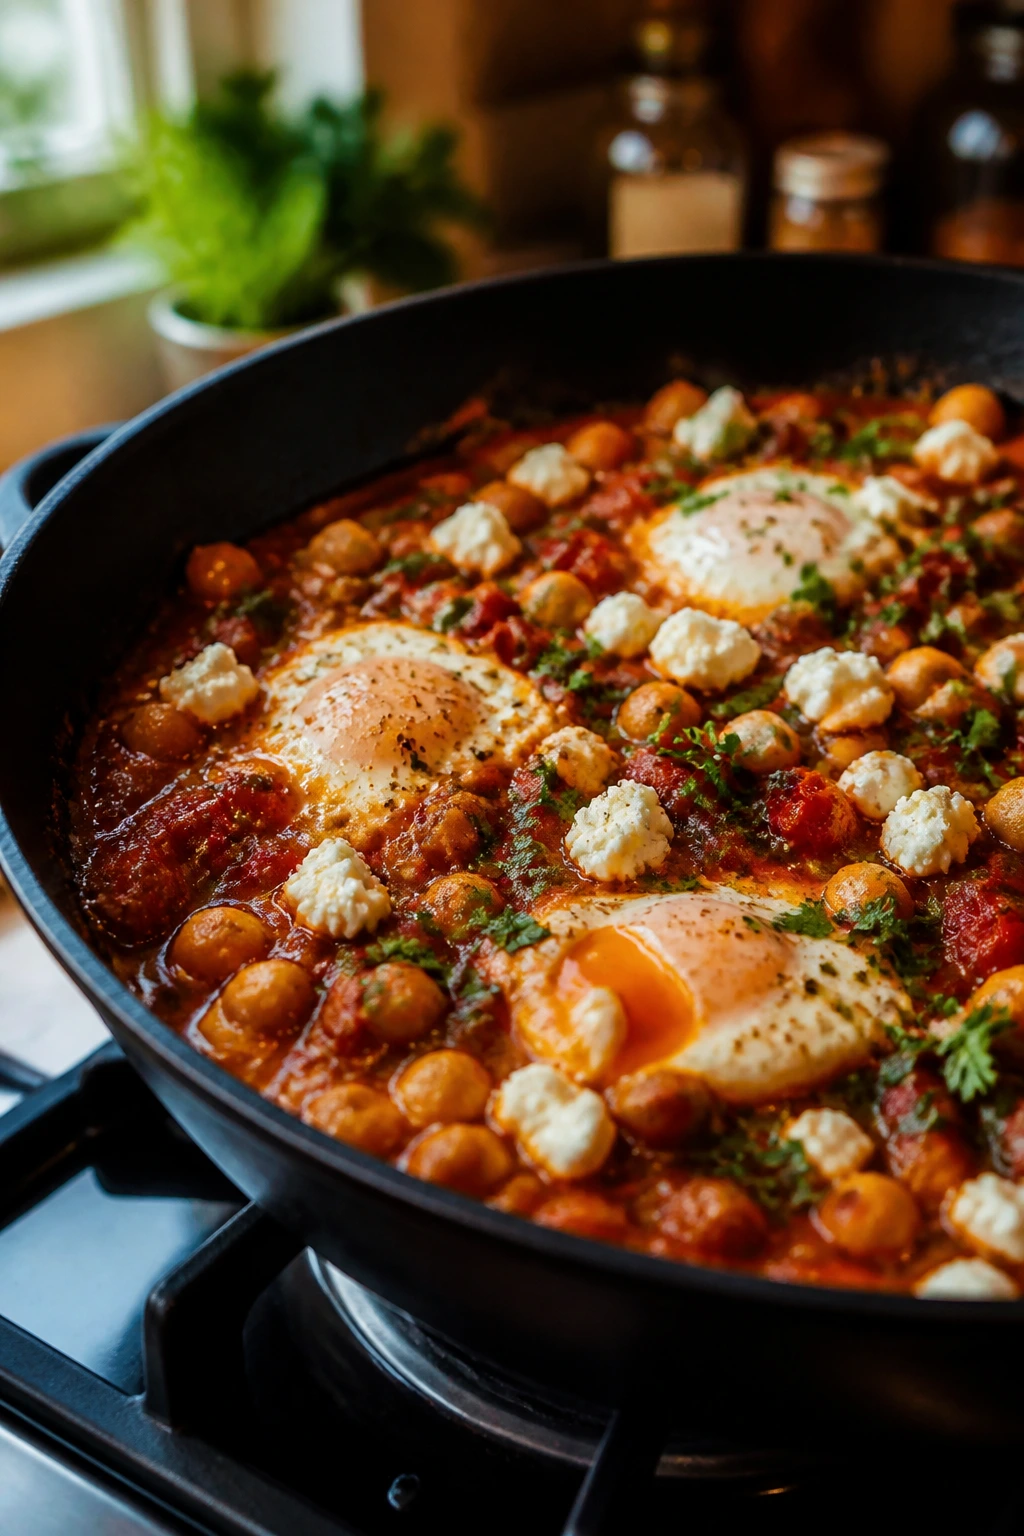
Shakshuka is one of those dinners that looks more dramatic than the work it asks for. Eggs poach in a spiced tomato sauce, chickpeas make it sturdy, and feta softens over the top in little salty pockets. It’s a skillet meal with personality.
Why It Works: Canned tomatoes make a quick sauce base, and chickpeas turn it into a proper dinner. The eggs cook directly in the sauce, which means fewer dishes and less fuss. Feta adds salt and creaminess without needing a separate sauce.
Key Ingredients:
- 1 tablespoon olive oil; for the skillet
- 1 onion, diced; the base
- 1 bell pepper, diced; adds sweetness
- 2 garlic cloves, minced; stir in after the onion softens
- 1 can crushed tomatoes, 28 oz; the sauce
- 1 can chickpeas, rinsed and drained; for substance
- 1 teaspoon cumin; important here
- 6 eggs; poached in the sauce
- 1/2 cup crumbled feta; finish
- Salt and pepper to taste
Quick Steps:
- Cook the onion and bell pepper in oil until soft.
- Add garlic, cumin, tomatoes, and chickpeas; simmer 10 minutes.
- Make little wells, crack in the eggs, cover, and cook 5 to 7 minutes.
- Scatter feta on top and serve right away.
Equipment for This Recipe:
- Large skillet with lid; essential for poaching the eggs
- Wooden spoon; for the sauce
- Knife and cutting board; for the vegetables
- Spoon; for making wells in the sauce
How to Serve This Dish: Serve with crusty bread, pita, or rice for scooping. A chopped cucumber salad keeps the plate lighter.
Pro Tips for This Recipe:
- Simmer the sauce until it thickens or the eggs disappear into soup.
- Cover the pan so the egg whites set properly.
- Add feta after the eggs are nearly done so it doesn’t dry out.
Variations on This Dish:
- Green Shakshuka: Use greens and herbs instead of tomatoes.
- Spicy Version: Add harissa or chili flakes.
- No-Chickpea Version: Leave out chickpeas and serve with more bread.
Common Mistakes to Avoid with This Dish:
- Don’t let the sauce stay watery.
- Don’t overcook the eggs; a soft yolk is part of the charm.
- Don’t use a pan without a lid unless you’re ready to improvise with foil.
38. Turkey Burger Bowls with Sriracha Lime Sauce
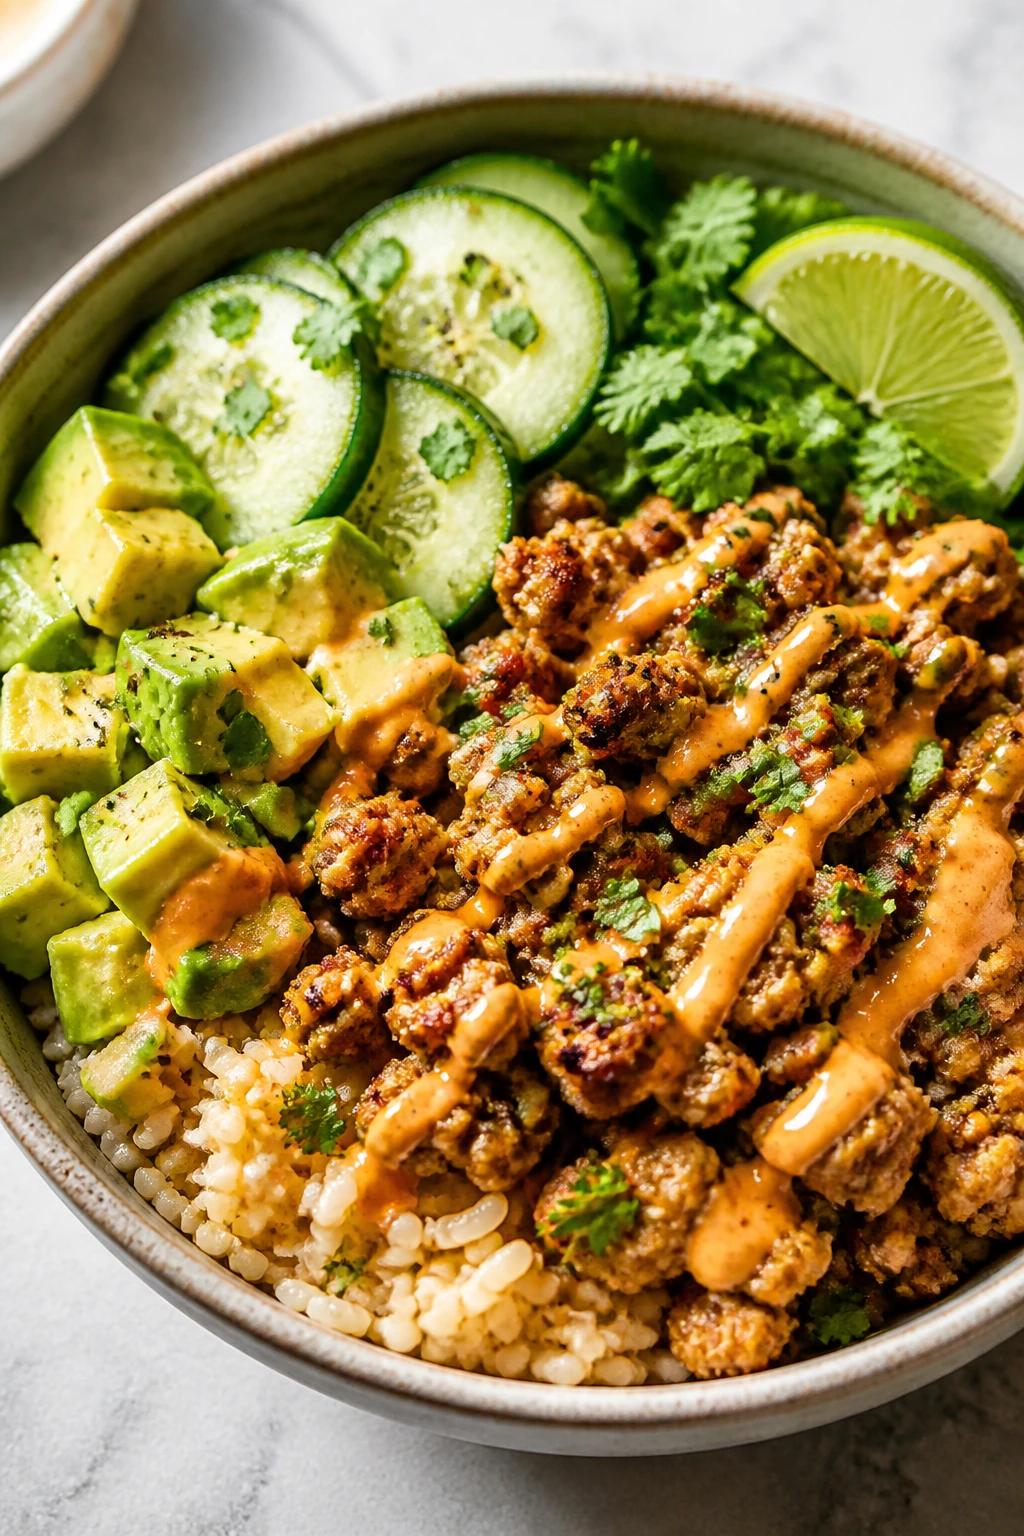
These bowls skip the bun and keep all the good parts: savory turkey, cool vegetables, rice or quinoa, and a sauce with enough heat to keep you interested. It’s the kind of dinner that feels tailored to a Tuesday, not built for a photo.
Why It Works: Ground turkey cooks quickly and can be seasoned like a burger without the bread. Rice or quinoa gives the bowl enough base to hold together. The sriracha-lime sauce cuts through the turkey’s mild flavor and wakes up the vegetables.
Key Ingredients:
- 1 lb ground turkey; the main protein
- 1 teaspoon garlic powder; easy burger-style seasoning
- 1 teaspoon onion powder; keeps the flavor round
- 2 cups cooked brown rice or quinoa; for the bowl
- 1 cucumber, sliced; cool and crisp
- 1 avocado, sliced; adds richness
- 1/4 cup plain Greek yogurt; sauce base
- 1 teaspoon sriracha; adjust to taste
- 1 lime, juiced; for the sauce and bowl
Quick Steps:
- Season and cook the turkey in a skillet until browned and done.
- Stir the yogurt, sriracha, and lime juice into a sauce.
- Build bowls with rice, cucumber, avocado, and turkey.
- Drizzle the sauce over the top.
Equipment for This Recipe:
- Skillet; for the turkey
- Small bowl; for the sauce
- Knife; for the vegetables
- Serving bowls; wide ones work best
How to Serve This Dish: Add shredded lettuce or pickled onions if you want more crunch. A handful of sesame seeds gives the bowl a little polish.
Pro Tips for This Recipe:
- Don’t overpack the turkey into the pan.
- Taste the sauce before adding more sriracha; it builds fast.
- Warm the rice so the bowl tastes cohesive.
Variations on This Dish:
- Asian-Inspired Bowl: Add shredded carrots and cucumber ribbons.
- Tex-Mex Bowl: Use salsa and avocado instead of sriracha sauce.
- Lettuce Bowl: Serve over chopped romaine for a lighter version.
Common Mistakes to Avoid with This Dish:
- Don’t cook the turkey until it’s dry and crumbly.
- Don’t skip an acid in the sauce; lime matters.
- Don’t let the avocado brown before serving.
39. Coconut Lime Lentil Soup
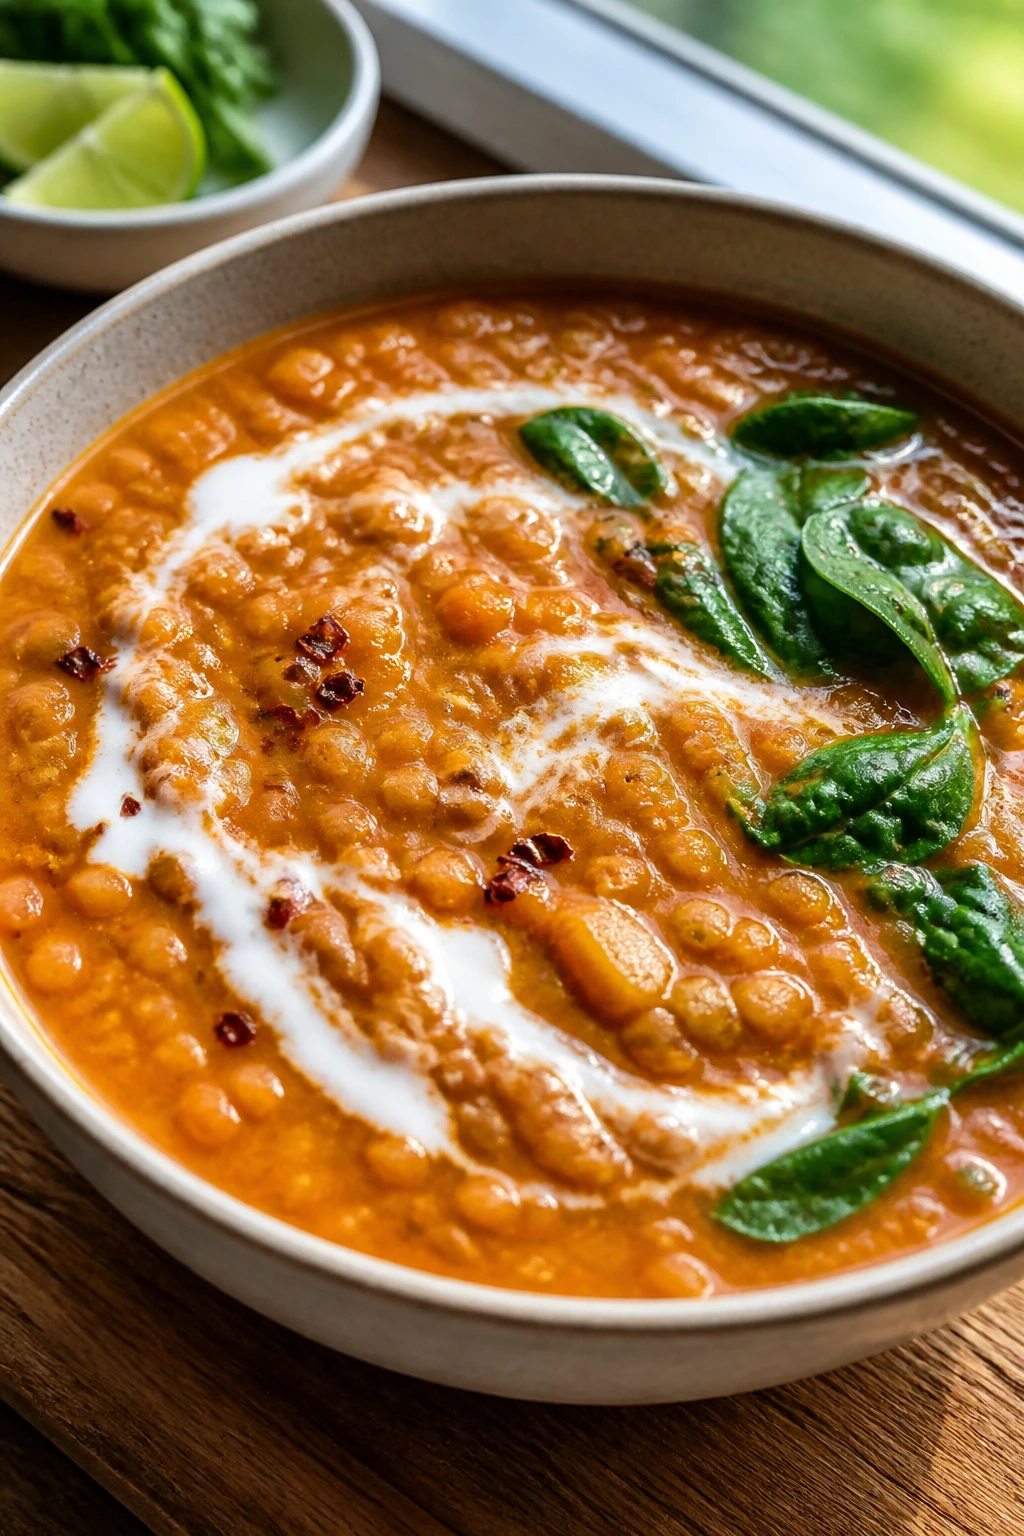
This soup is smooth, bright, and more filling than people expect from lentils. Coconut milk rounds out the edges, lime keeps it lively, and spinach at the end gives the bowl some color. It tastes rich without getting heavy.
Why It Works: Red lentils cook fast and thicken the soup naturally. Light coconut milk adds creaminess without a long simmer. Lime at the end sharpens the whole pot so it doesn’t taste soft or flat.
Key Ingredients:
- 1 cup red lentils, rinsed; they cook quickly
- 1 tablespoon olive oil; for the base
- 1 onion, diced; the start of the soup
- 2 garlic cloves, minced; for depth
- 1 teaspoon curry powder; or a mild curry blend
- 4 cups low-sodium broth; the liquid base
- 1 can light coconut milk, 13.5 oz; for creaminess
- 2 cups baby spinach; stirred in at the end
- 1 lime, juiced; the finishing acid
Quick Steps:
- Sauté the onion in oil until soft.
- Add garlic and curry powder and cook 30 seconds.
- Stir in lentils, broth, and coconut milk; simmer 15 minutes.
- Add spinach and lime juice, then serve.
Equipment for This Recipe:
- Medium pot; enough for simmering
- Wooden spoon; for stirring
- Ladle; for serving
- Citrus juicer; optional but useful
How to Serve This Dish: Serve with naan, pita, or a slice of toasted bread. A spoonful of yogurt on top works if you want it creamier.
Pro Tips for This Recipe:
- Rinse the lentils to remove dust and keep the broth clean.
- Stir often near the end because lentils can stick.
- If the soup thickens too much, add broth, not water, for better flavor.
Variations on This Dish:
- Tomato-Lime Version: Add a small can of diced tomatoes.
- Carrot Version: Add diced carrots with the onion.
- Spicy Coconut Soup: Stir in red pepper flakes or chili paste.
Common Mistakes to Avoid with This Dish:
- Don’t boil hard or the coconut milk can separate.
- Don’t forget the lime; it keeps the soup from tasting soft.
- Don’t under-salt; lentils need seasoning.
40. Broccoli Stuffed Sweet Potatoes with Chickpeas
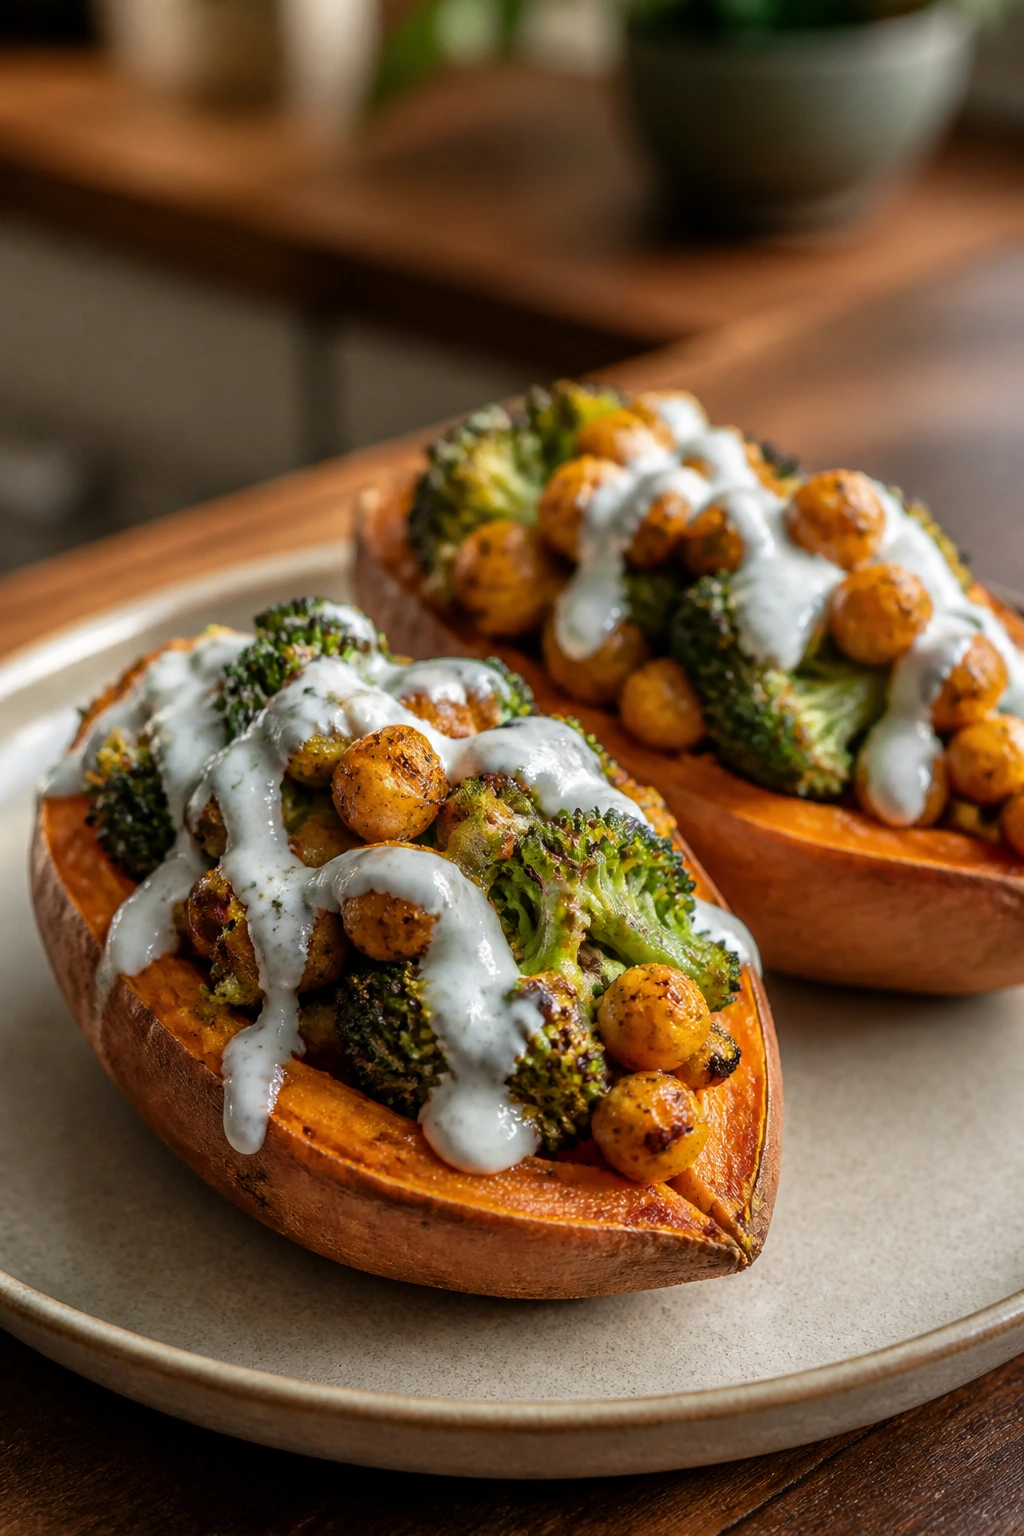
Sweet potatoes are a built-in bowl, which is already a good start. Add roasted broccoli, seasoned chickpeas, and a lemony sauce, and you’ve got a dinner that eats like a full plate without needing a lot of parts. It’s straightforward food, and that’s why it works.
Why It Works: Sweet potatoes can be microwaved or roasted ahead, which makes the clock friendly. Chickpeas add protein and texture. Broccoli gives you a little bite so the filling doesn’t all blur together.
Key Ingredients:
- 4 medium sweet potatoes; scrubbed clean
- 1 can chickpeas, rinsed and drained; for the stuffing
- 3 cups broccoli florets; cut small
- 1 tablespoon olive oil; for roasting
- 1/2 teaspoon paprika; for the chickpeas
- 1/4 cup Greek yogurt or tahini; for the sauce
- 1 lemon, juiced; brightens the topping
- Salt and pepper to taste
Quick Steps:
- Microwave the sweet potatoes for 8 to 10 minutes or roast them until soft.
- Roast the broccoli and chickpeas with olive oil, paprika, salt, and pepper at 425°F for 15 minutes.
- Split the potatoes and fluff the insides with a fork.
- Top with broccoli, chickpeas, and yogurt or tahini mixed with lemon juice.
Equipment for This Recipe:
- Microwave or oven; either way works
- Sheet pan; for roasting the filling
- Knife; for splitting the potatoes
- Bowl; for the sauce
How to Serve This Dish: Serve one stuffed potato per person with extra lemon on the side. A green salad helps the meal feel more finished.
Pro Tips for This Recipe:
- Pierce the sweet potatoes before microwaving or they can burst.
- Roast the chickpeas long enough for some edges to crisp.
- Mix the sauce thin enough to drizzle.
Variations on This Dish:
- Curry Chickpea Version: Add curry powder instead of paprika.
- Hummus Topping: Swap the yogurt sauce for hummus.
- Feta Finish: Crumble feta over the top if you want salt.
Common Mistakes to Avoid with This Dish:
- Don’t undercook the sweet potatoes; they should be soft enough to split easily.
- Don’t skip seasoning the broccoli.
- Don’t make the sauce too thick or it sits in a lump.
41. Pesto Salmon and Tomatoes
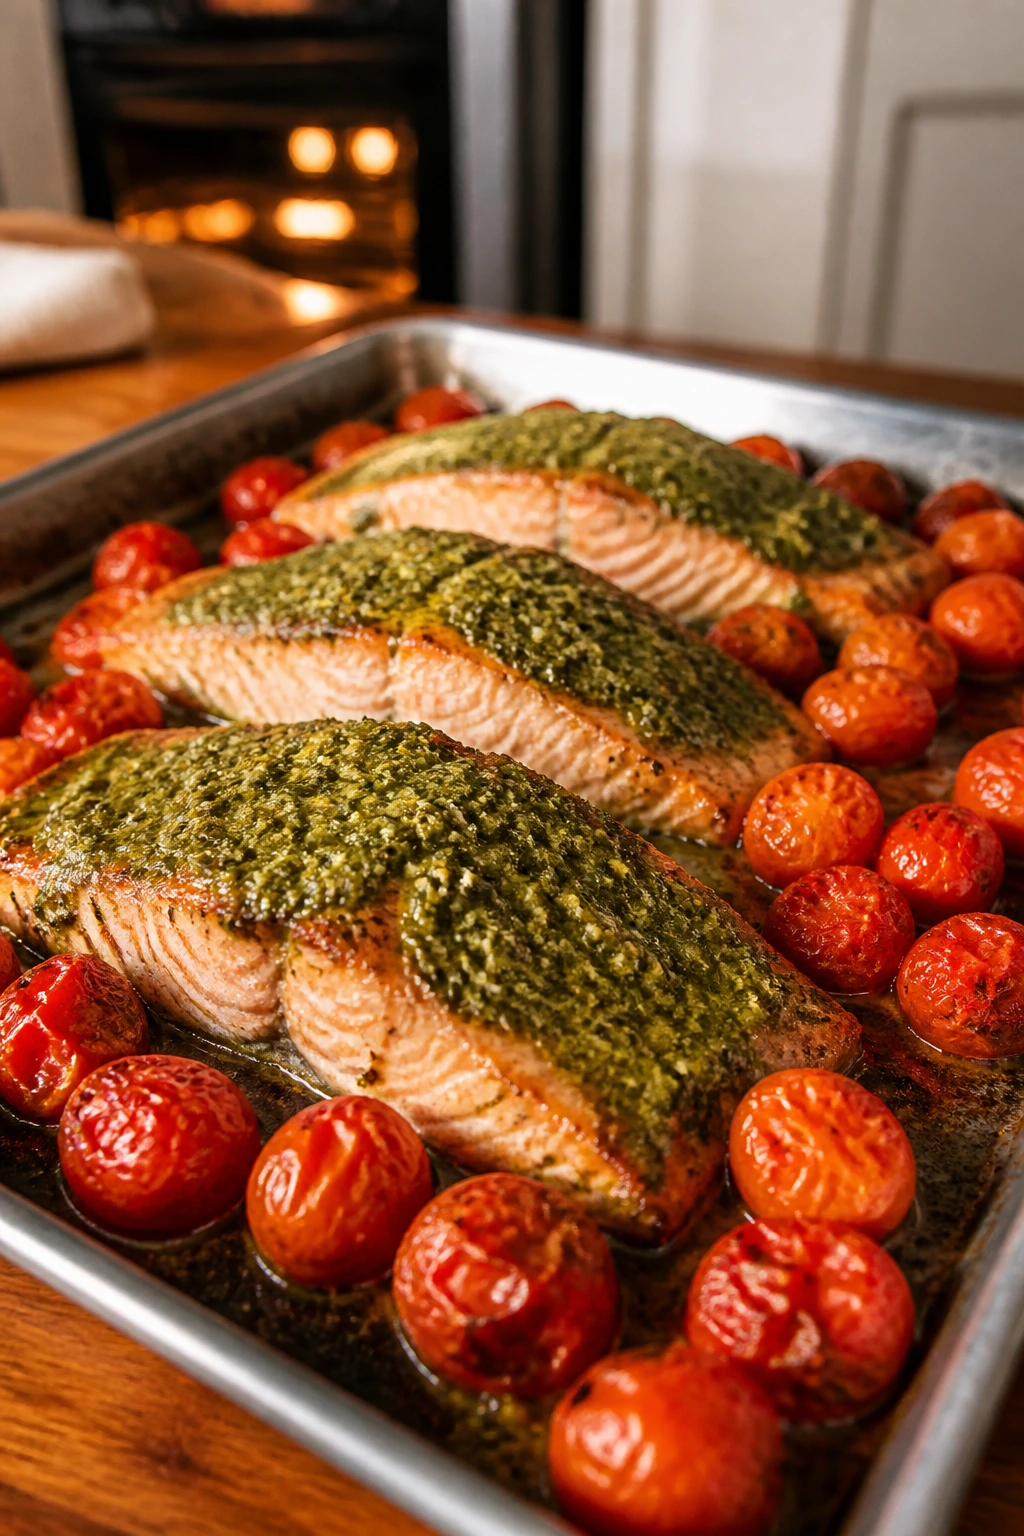
Pesto and salmon get along almost too well. The pesto drapes over the fish, the tomatoes burst around it, and the whole tray smells like basil and garlic by the time it comes out of the oven. It’s a low-effort dinner with a polished finish.
Why It Works: Salmon roasts quickly and stays tender if you stop at the right time. Pesto acts as both seasoning and fat, which keeps the fish moist. Cherry tomatoes roast beside it and turn into a built-in sauce.
Key Ingredients:
- 4 salmon fillets, about 5 oz each; similar size matters
- 1/3 cup basil pesto; store-bought works well
- 1 pint cherry tomatoes; whole or halved
- 1 tablespoon olive oil; for the tomatoes
- 1 lemon, cut into wedges; for serving
- 1 teaspoon black pepper; salmon likes it
- 1 lb green beans or asparagus; optional side on the same pan
Quick Steps:
- Heat the oven to 400°F.
- Toss the tomatoes and vegetables with olive oil, salt, and pepper on a sheet pan.
- Nestle the salmon onto the pan and spread pesto over the top.
- Roast 12 to 15 minutes until the fish flakes and the tomatoes burst.
Equipment for This Recipe:
- Sheet pan; a rimmed one
- Parchment paper; makes cleanup easy
- Spoon; for spreading pesto
- Knife; for halving tomatoes if needed
How to Serve This Dish: Serve with rice, quinoa, or a crusty loaf to mop up the juices. A few basil leaves on top make the tray look finished.
Pro Tips for This Recipe:
- Choose salmon fillets of similar thickness.
- Don’t use too much pesto or it can overwhelm the fish.
- Pull the salmon when the center still looks just a touch translucent.
Variations on This Dish:
- Lemon Pesto Version: Stir lemon zest into the pesto.
- Vegetable Tray Add-On: Roast zucchini or broccoli beside the salmon.
- Dairy-Free Pesto: Use a dairy-free pesto if needed.
Common Mistakes to Avoid with This Dish:
- Don’t overbake salmon.
- Don’t crowd the tomatoes under too much fish.
- Don’t forget salt on the vegetables.
42. Chicken Shawarma Bowls

Shawarma seasoning does a lot of work with very little time. The chicken gets smoky and fragrant, the rice or cauliflower rice keeps the bowl grounded, and the yogurt sauce cools everything down. It tastes layered, even though the method is direct.
Why It Works: Chicken thighs or breasts take on spice quickly in a hot skillet. Yogurt sauce adds creaminess and keeps the bowl from feeling dry. Cucumber, tomato, and hummus turn a basic bowl into something with enough contrast to stay interesting.
Key Ingredients:
- 1 lb chicken thighs or breasts, sliced; thighs stay juicier
- 1 tablespoon olive oil; for the pan
- 1 tablespoon shawarma spice blend; or cumin, paprika, garlic, and cinnamon
- 2 cups cooked rice or cauliflower rice; base
- 1 cucumber, diced; for crunch
- 1 tomato, diced; for freshness
- 1/2 cup plain Greek yogurt; for sauce
- 1 tablespoon lemon juice; for the sauce
- 1/4 cup hummus; optional but useful
Quick Steps:
- Toss the chicken with shawarma spice and olive oil.
- Cook in a hot skillet until browned and cooked through.
- Stir yogurt with lemon juice and a pinch of salt.
- Build bowls with rice, chicken, cucumber, tomato, hummus, and sauce.
Equipment for This Recipe:
- Skillet; for the chicken
- Small bowl; for the yogurt sauce
- Knife and cutting board; for the vegetables
- Rice cooker or saucepan; if using rice
How to Serve This Dish: Serve with warm pita or extra cucumber on the side. Pickled onions make the bowl even better if you have them.
Pro Tips for This Recipe:
- Don’t be shy with the spice blend; chicken can handle it.
- If using breasts, cut them evenly so they don’t overcook.
- A little char on the chicken improves the whole bowl.
Variations on This Dish:
- Falafel Bowl: Swap the chicken for falafel.
- Tahini Sauce Version: Use tahini and lemon instead of yogurt.
- Cauliflower Rice Bowl: Go lighter with cauliflower rice.
Common Mistakes to Avoid with This Dish:
- Don’t under-season the chicken.
- Don’t use watery tomatoes without draining them a bit.
- Don’t skip the sauce; the bowl needs a cool counterpoint.
43. Mushroom Spinach Frittata
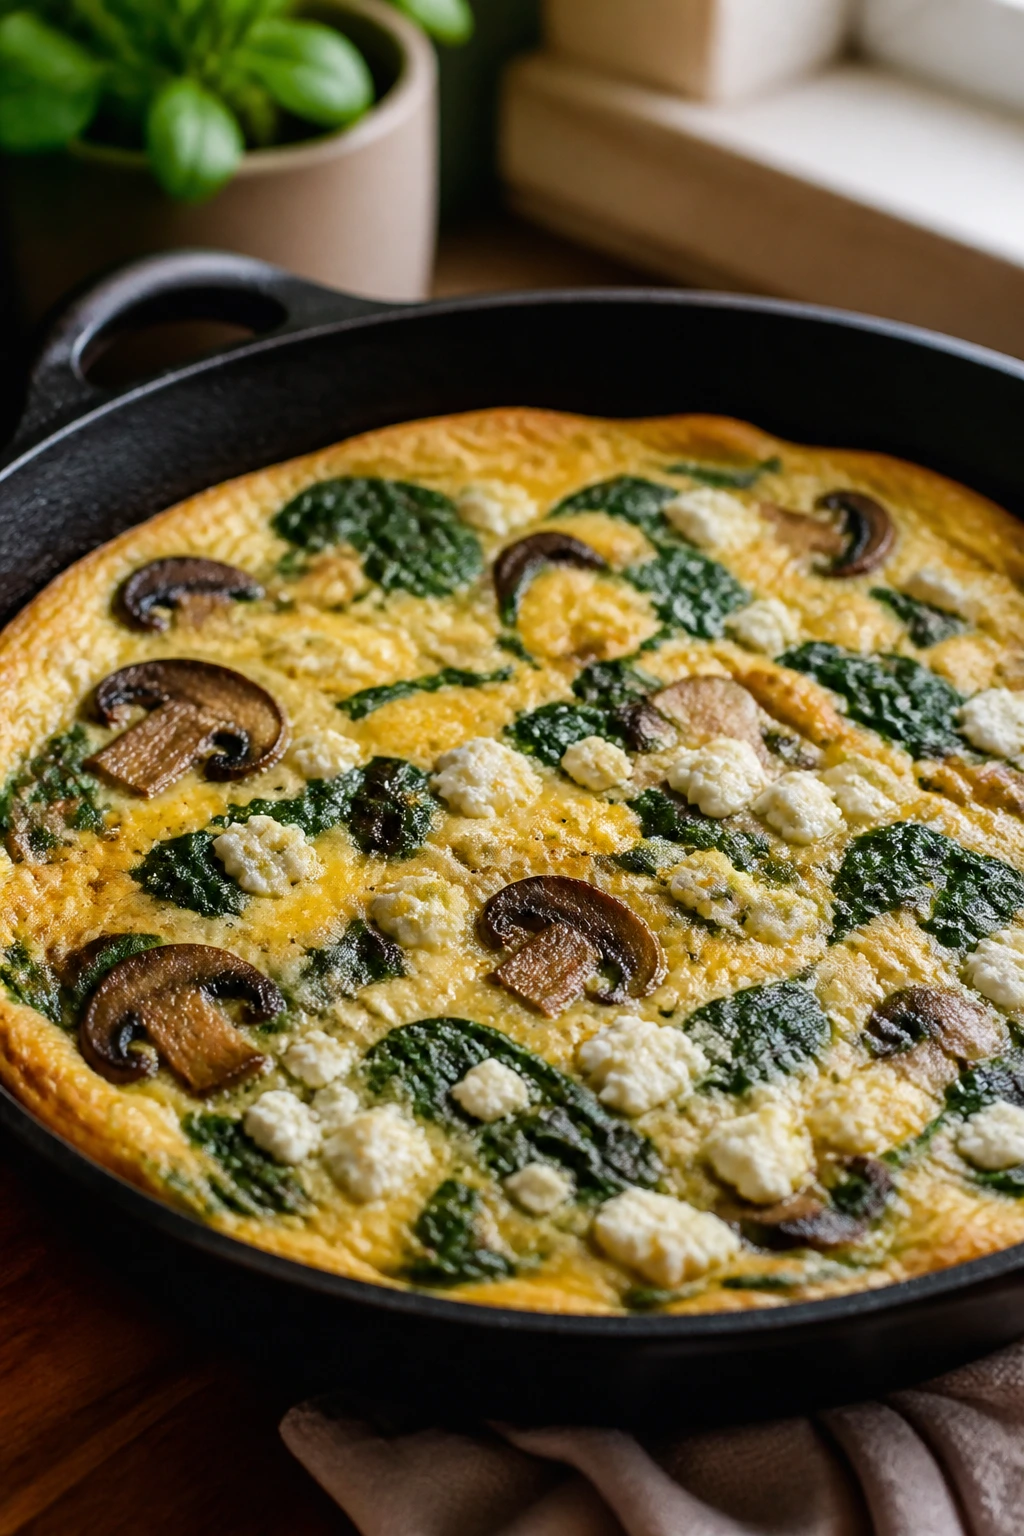
Mushrooms bring that browned, savory flavor that eggs are always happy to sit beside. Spinach folds in softly, feta or parmesan sharpens the edges, and the whole thing can go from stovetop to oven without turning into a project. It’s easy, but it doesn’t taste lazy.
Why It Works: Mushrooms release moisture first, then brown if you keep the heat up. Eggs set quickly in the oven, which keeps the center tender. Spinach disappears into the eggs in a good way, and the result is sturdy enough for dinner.
Key Ingredients:
- 8 large eggs; the base
- 8 oz mushrooms, sliced; cremini are dependable
- 3 cups baby spinach; added near the end
- 1/4 cup milk; keeps the eggs soft
- 1/2 cup feta or parmesan; for salt and bite
- 1 tablespoon olive oil; for the skillet
- Salt and black pepper to taste
Quick Steps:
- Heat the oven to 375°F.
- Cook the mushrooms in olive oil until browned and their liquid is gone.
- Stir in the spinach until wilted.
- Whisk the eggs, milk, salt, pepper, and cheese, pour into the skillet, and bake 15 to 18 minutes.
Equipment for This Recipe:
- Oven-safe skillet; 10-inch is ideal
- Whisk; for the eggs
- Knife and cutting board; for the mushrooms
- Oven mitts; the skillet handle gets hot fast
How to Serve This Dish: Cut into wedges and serve with a tomato salad or sliced avocado. Hot sauce on the side is not a bad idea.
Pro Tips for This Recipe:
- Cook the mushrooms until their pan liquid evaporates.
- Pull the frittata before the center is fully firm; it keeps setting as it rests.
- Use enough salt in the eggs so the flavor carries.
Variations on This Dish:
- Herb Frittata: Add dill, parsley, or chives.
- Cheddar Version: Swap the cheese for sharp cheddar.
- Veggie Mix-In: Add a handful of roasted peppers.
Common Mistakes to Avoid with This Dish:
- Don’t leave mushroom water in the pan.
- Don’t overbake the eggs.
- Don’t use a nonstick pan that cannot go in the oven.
44. Baked Falafel Pitas
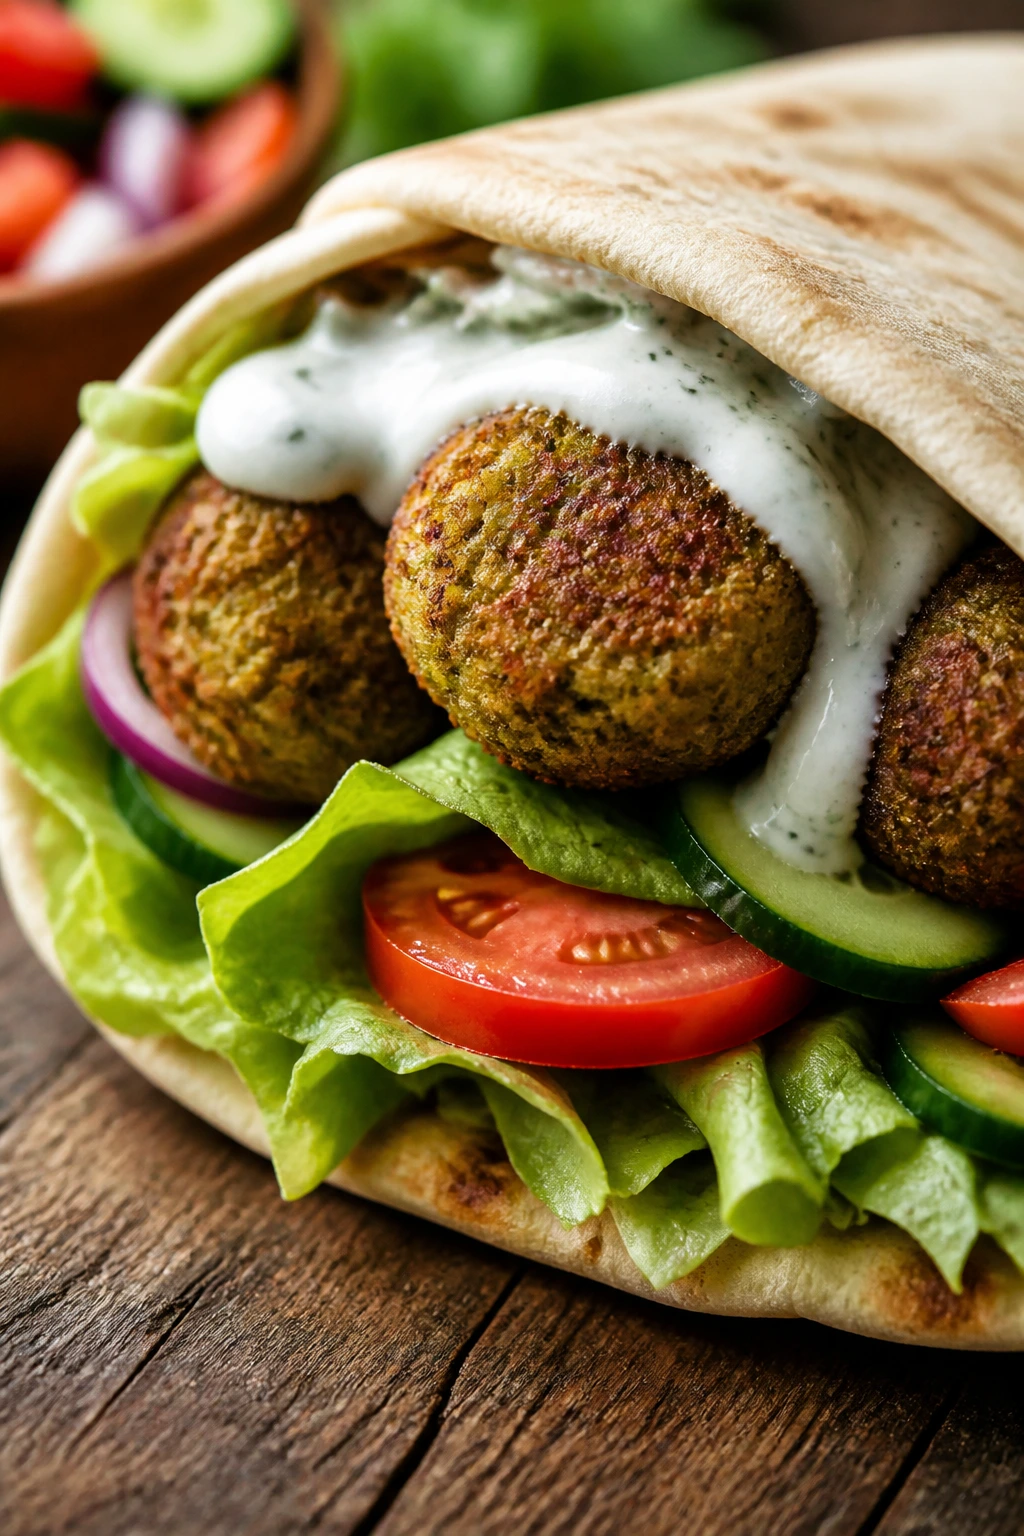
If you keep frozen or mix-made falafel around, dinner can happen without much planning. Warm pitas, chopped vegetables, yogurt sauce, and crisp falafel turn into something that tastes far more assembled than it actually is. It’s a shortcut, but a smart one.
Why It Works: Falafel bakes or reheats fast, so the active time stays low. Yogurt sauce and vegetables make the meal feel fresh. Pitas hold the filling well if you warm them first.
Key Ingredients:
- 12 falafel balls or one package prepared falafel mix; baked rather than fried if possible
- 4 whole-wheat pitas; warmed
- 1 cucumber, diced; for crunch
- 1 tomato, diced; for freshness
- 1 cup shredded lettuce; for the base
- 1/2 cup plain Greek yogurt; for sauce
- 1 tablespoon lemon juice; for the sauce
- 1 tablespoon chopped parsley; optional but good
Quick Steps:
- Bake or heat the falafel according to the package or recipe instructions.
- Stir the yogurt with lemon juice, salt, and parsley.
- Warm the pitas and fill them with lettuce, cucumber, tomato, and falafel.
- Drizzle with yogurt sauce.
Equipment for This Recipe:
- Oven or air fryer; for the falafel
- Small bowl; for the sauce
- Knife and cutting board; for the vegetables
- Sheet pan; if baking falafel
How to Serve This Dish: Serve with pickles or a simple chickpea salad. If the pita splits, just turn it into a bowl and carry on.
Pro Tips for This Recipe:
- Warm the pita or it tears.
- Don’t overload the bread; falafel is bulky.
- Add a spoonful of hummus if you want more richness.
Variations on This Dish:
- Falafel Bowl: Skip the pita and serve over greens.
- Tahini Sauce Version: Use tahini and lemon instead of yogurt.
- Spicy Pickle Version: Add pickled turnips or jalapeños.
Common Mistakes to Avoid with This Dish:
- Don’t use cold falafel straight from the fridge.
- Don’t forget to dry the chopped vegetables a bit.
- Don’t stuff the pita before you’re ready to eat.
45. Kung Pao Chicken with Green Beans
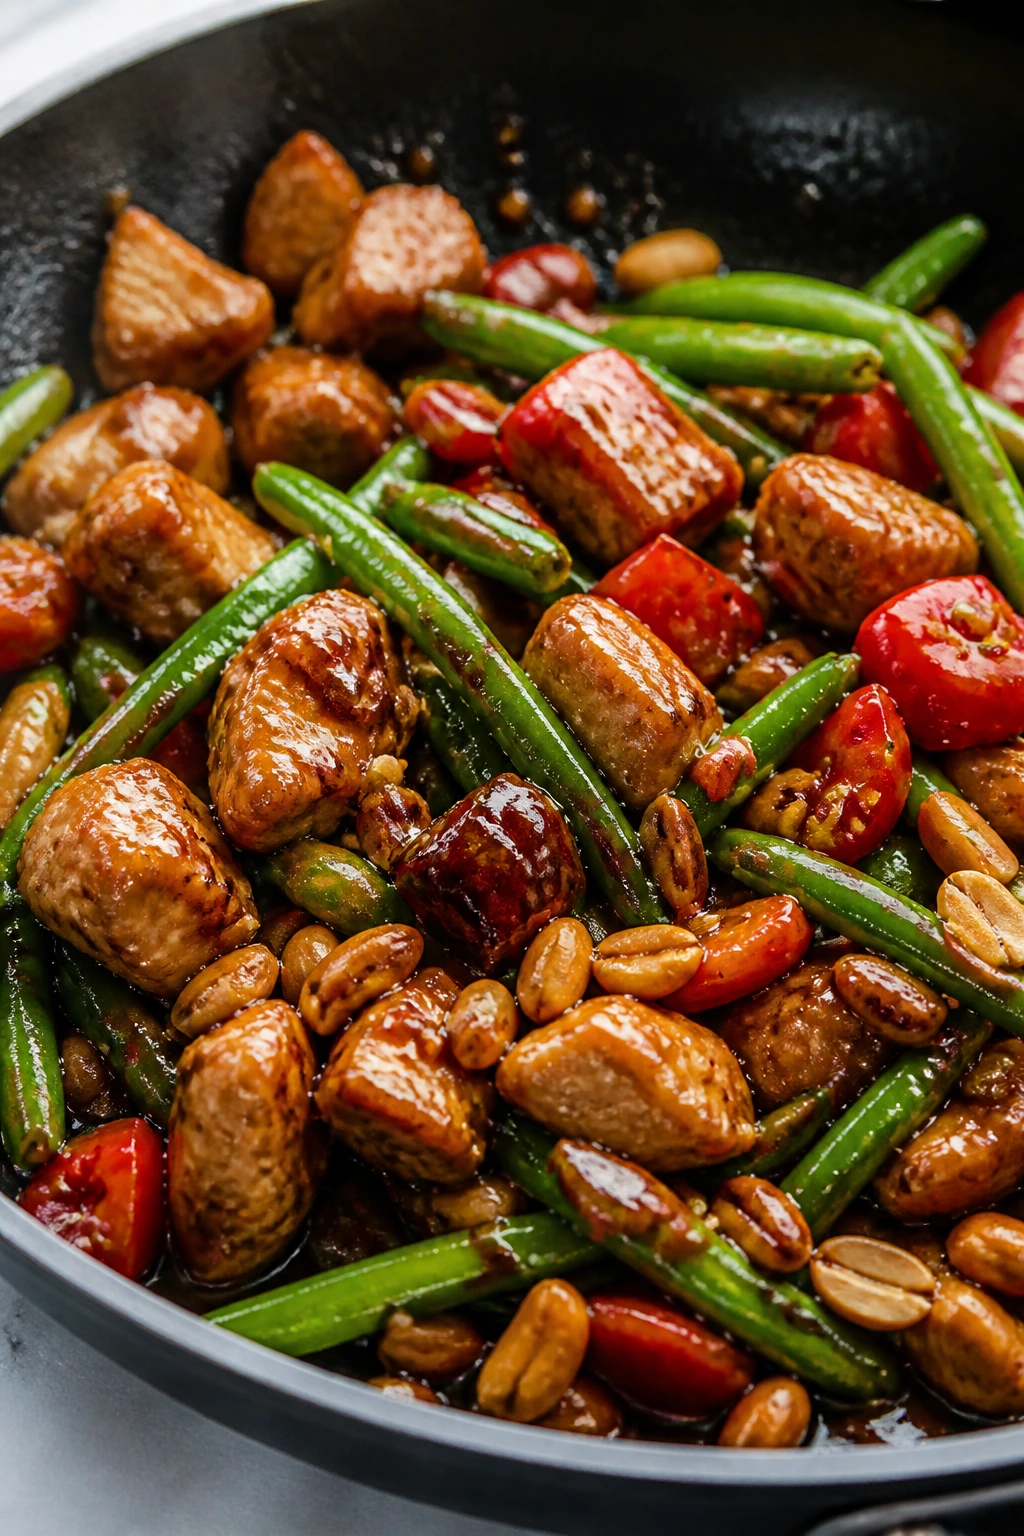
Kung pao doesn’t need a restaurant wok to work. A hot skillet, chicken cut into small pieces, green beans, and a sauce with soy, vinegar, and a little heat get you most of the way there. The peanuts are what make it feel finished.
Why It Works: Small chicken pieces cook fast and brown well. Green beans stay crisp if you don’t overcook them. The sauce clings better when it hits a hot pan and reduces for a minute.
Key Ingredients:
- 1 lb chicken breast, diced small; cooks quickly
- 2 cups green beans, trimmed; crisp and bright
- 1 bell pepper, sliced; for sweetness
- 2 tablespoons low-sodium soy sauce; the base
- 1 tablespoon rice vinegar; for balance
- 1 teaspoon chili garlic sauce; adjust to heat preference
- 1 tablespoon peanut butter; optional, for body
- 2 tablespoons roasted peanuts; for crunch
- 1 tablespoon neutral oil; for cooking
Quick Steps:
- Brown the chicken in oil in a hot skillet.
- Add the green beans and bell pepper and cook 3 minutes.
- Stir in the soy sauce, vinegar, chili sauce, and peanut butter.
- Cook until glossy, then top with peanuts.
Equipment for This Recipe:
- Large skillet or wok; extra heat is helpful
- Spatula; for stirring
- Small bowl; for the sauce
- Knife and cutting board; for the vegetables
How to Serve This Dish: Serve over rice with extra scallions if you like them. A few cucumber slices on the side cool the heat nicely.
Pro Tips for This Recipe:
- Cut the chicken small so it cooks before the vegetables soften too much.
- Keep the heat lively during the sauce step.
- Add the peanuts at the end so they stay crisp.
Variations on This Dish:
- Cashew Version: Swap peanuts for cashews.
- Tofu Kung Pao: Use tofu cubes instead of chicken.
- Mild Version: Cut the chili sauce in half and add more vinegar.
Common Mistakes to Avoid with This Dish:
- Don’t overcrowd the skillet.
- Don’t let the beans turn soft and drab.
- Don’t add the peanuts too early or they lose their crunch.
46. Turkey Bolognese with Zucchini
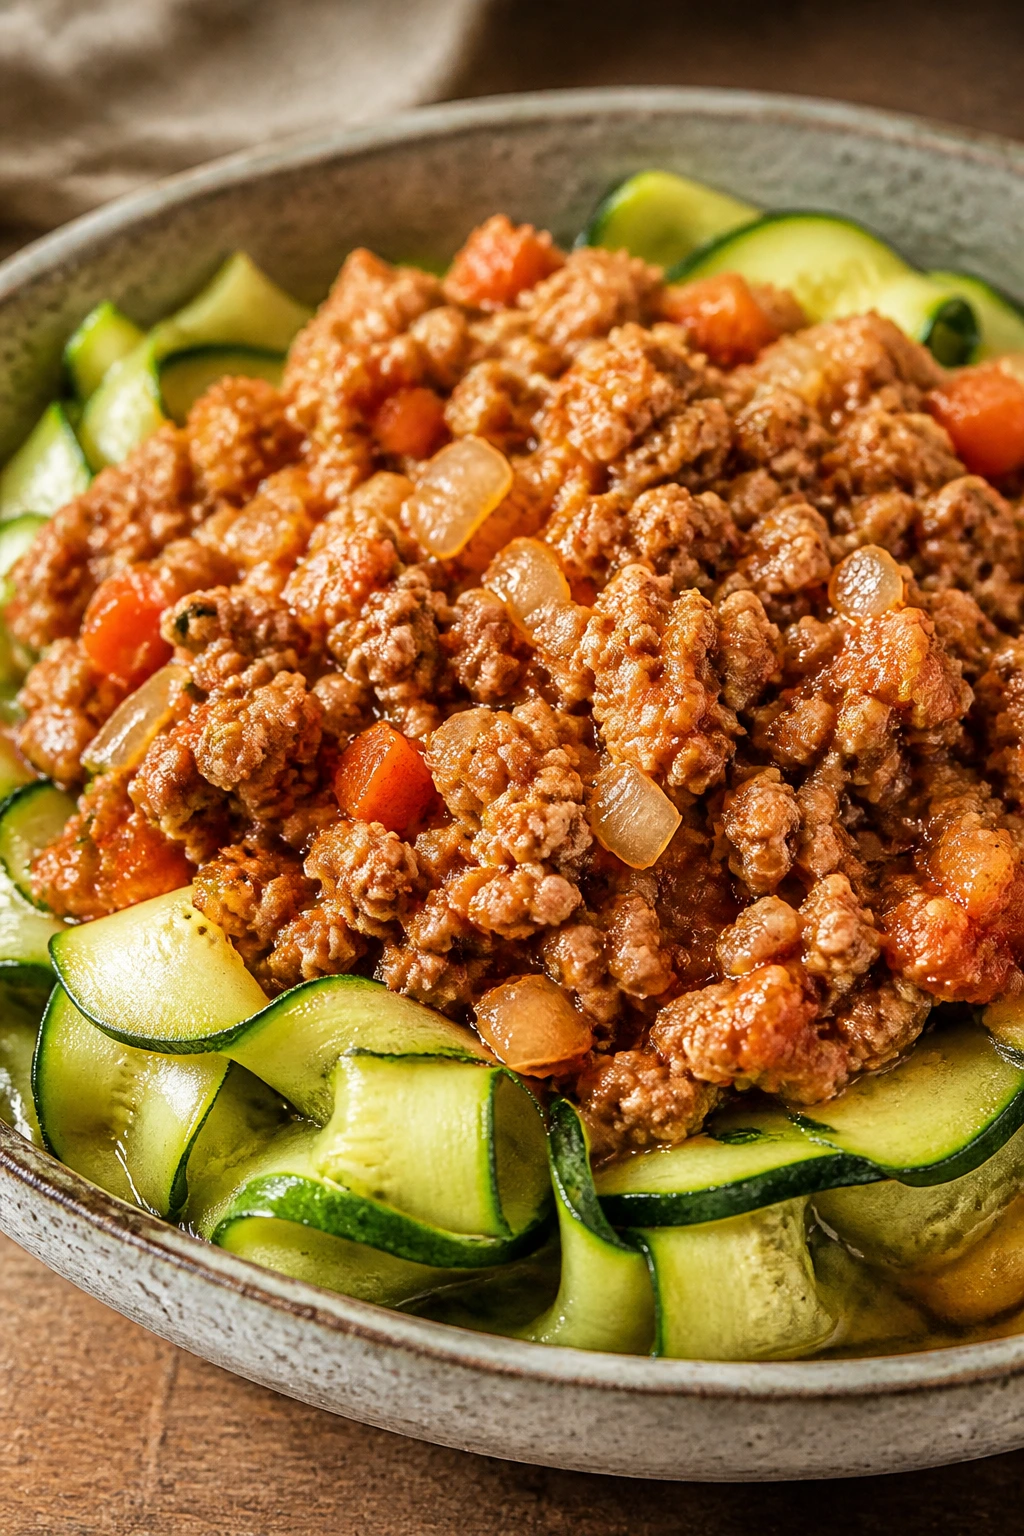
This is how you make a lighter pasta night without making it sad. Turkey simmers with tomato sauce and vegetables, while zucchini can stand in for some or all of the pasta if you want to keep the plate lighter. The sauce tastes like it took longer than it did, which is useful on a Tuesday.
Why It Works: Ground turkey browns quickly and likes tomato sauce. Carrots and onion build a more layered sauce without much extra work. Zucchini noodles or ribbons make the plate fresher without completely replacing the comfort of pasta.
Key Ingredients:
- 1 lb ground turkey; the sauce base
- 1 onion, diced; for sweetness
- 2 carrots, finely diced; add body
- 2 garlic cloves, minced; important in any bolognese
- 1 jar marinara or 1 can crushed tomatoes, 24 to 28 oz; the sauce
- 4 medium zucchini, spiralized or ribboned; for serving
- 1 tablespoon olive oil; for the pan
- 1 teaspoon Italian seasoning; easy flavor
- 2 tablespoons parmesan; for serving
Quick Steps:
- Brown the turkey with onion and carrots in olive oil.
- Add garlic and Italian seasoning and cook 30 seconds.
- Stir in the marinara and simmer 10 to 15 minutes.
- Serve over zucchini noodles or a mix of zucchini and pasta.
Equipment for This Recipe:
- Large skillet or saucepan; for the sauce
- Spiralizer or peeler; for the zucchini
- Wooden spoon; for stirring
- Knife and cutting board; for the vegetables
How to Serve This Dish: Spoon the sauce over zucchini ribbons and sprinkle parmesan on top. If you want a more filling meal, serve it over half pasta, half zucchini.
Pro Tips for This Recipe:
- Let the onion and carrot soften before adding the sauce.
- Don’t overcook the zucchini; it should stay a little firm.
- If the sauce tastes flat, add a splash of vinegar or a pinch of salt.
Variations on This Dish:
- Spaghetti Version: Serve it over whole-wheat spaghetti.
- Pork-Turkey Blend: Mix turkey with a little lean pork if you want more richness.
- Vegetable Bolognese: Add chopped mushrooms for more body.
Common Mistakes to Avoid with This Dish:
- Don’t skip browning the turkey.
- Don’t let the zucchini sit in hot sauce too long.
- Don’t use too much marinara without reducing it.
47. Greek Shrimp and Orzo

Orzo is one of the easiest ways to make a quick dinner feel a bit more composed. Cook the shrimp, toss in tomatoes and spinach, and finish with feta and lemon, and you get a pan that tastes bright and Mediterranean without much effort. It’s fast, but it doesn’t feel bare.
Why It Works: Shrimp and orzo both cook quickly, which keeps the whole skillet moving. Feta and lemon add the tangy edge that keeps seafood dinners from tasting dull. Spinach folds in at the end and makes the bowl feel complete.
Key Ingredients:
- 1 lb shrimp, peeled and deveined; size medium or large
- 1 cup orzo; cooks fast in broth
- 1 cup cherry tomatoes; for sweetness
- 2 cups baby spinach; for the finish
- 1/2 cup crumbled feta; the salty topper
- 2 tablespoons olive oil; for the skillet
- 1 lemon, juiced and zested; for brightness
- 2 cups low-sodium broth; for cooking the orzo
- 2 garlic cloves, minced; for flavor
Quick Steps:
- Cook the orzo in broth until tender and most of the liquid is absorbed.
- Sauté the garlic and shrimp in olive oil until pink.
- Add tomatoes and spinach and cook briefly.
- Fold in the orzo, lemon, and feta, then serve.
Equipment for This Recipe:
- Large skillet or sauté pan; wide enough for orzo
- Wooden spoon; for stirring
- Knife; for the tomatoes and lemon
- Citrus juicer; optional
How to Serve This Dish: Serve in shallow bowls with extra feta on top. A simple cucumber salad works well beside it.
Pro Tips for This Recipe:
- Don’t overcook the shrimp; pull them when they just turn pink.
- Add a little extra broth if the orzo drinks up too much liquid.
- Stir in lemon zest at the end for a brighter scent.
Variations on This Dish:
- Lemon Herb Version: Add dill or parsley.
- Chicken Orzo Swap: Use diced chicken instead of shrimp.
- No-Feta Version: Add olives and more lemon if you want a dairy-free bowl.
Common Mistakes to Avoid with This Dish:
- Don’t let the orzo turn mushy.
- Don’t keep the shrimp in the pan too long.
- Don’t skip the lemon; the dish needs it.
48. Chili Crisp Tofu and Mushrooms
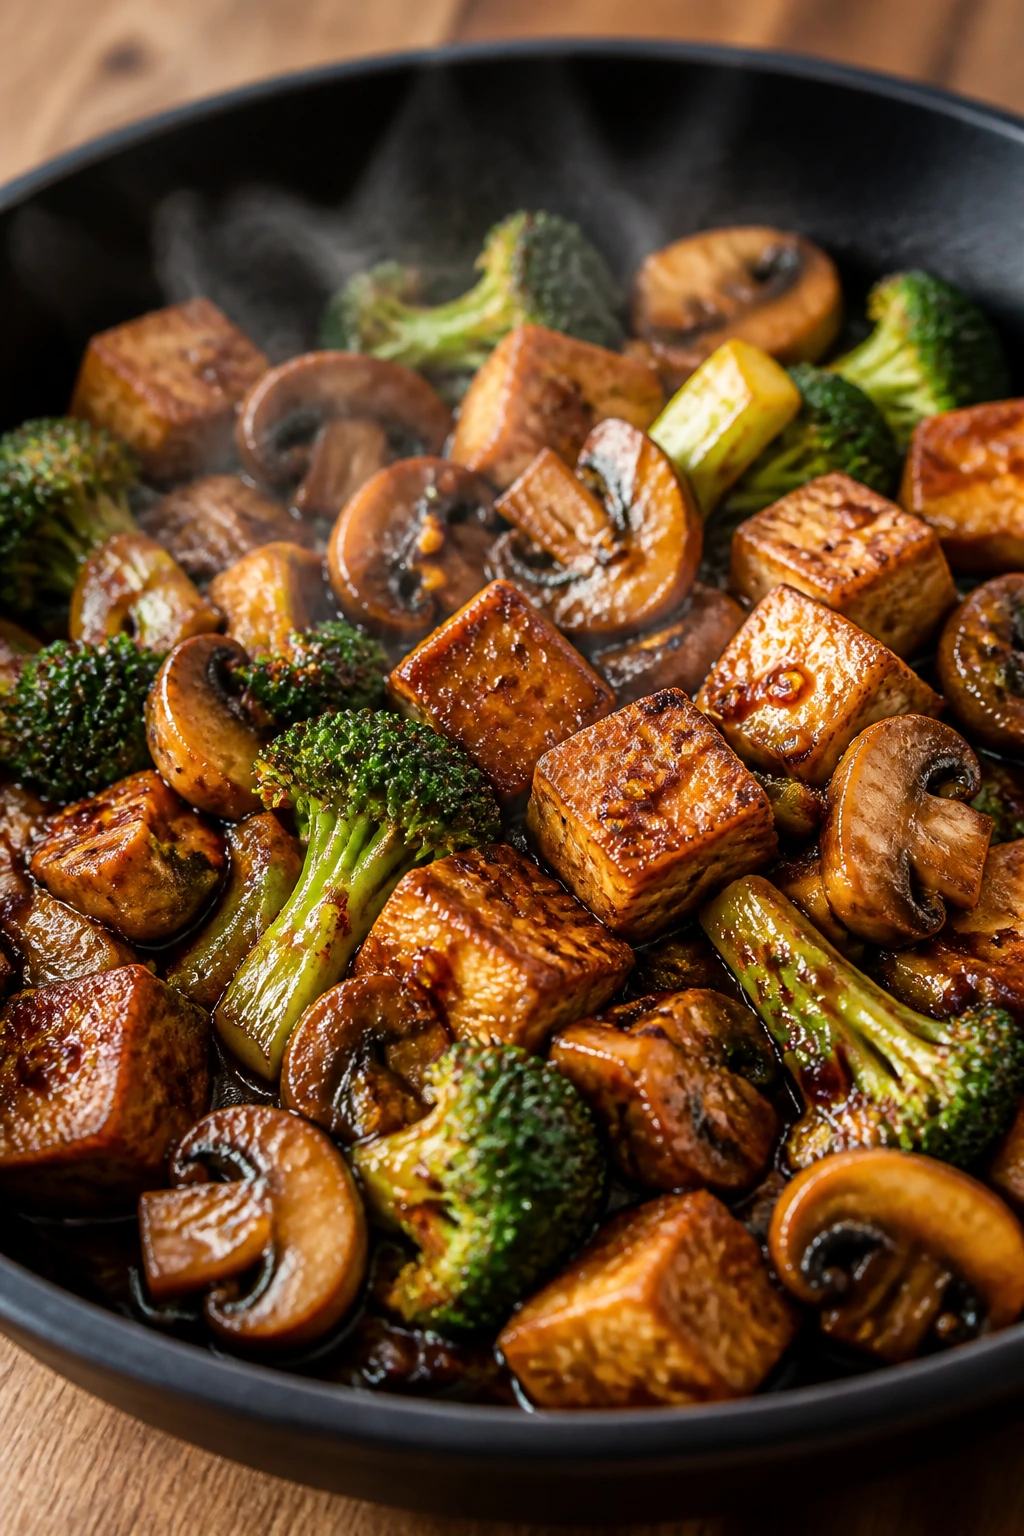
Chili crisp is a cheat code if you use it properly. A little goes a long way, and once it hits crisp tofu and browned mushrooms, it creates a dinner with heat, crunch, and a glossy finish that feels far more deliberate than the ingredient list suggests.
Why It Works: Pressed tofu browns well and holds sauce on its surface. Mushrooms bring savoriness, and broccoli adds a vegetable that can take the same heat. Chili crisp finishes the dish with texture, not just spice.
Key Ingredients:
- 14 oz extra-firm tofu, pressed and cubed; moisture needs to come out
- 8 oz mushrooms, sliced; cremini are solid
- 1 broccoli crown, cut into florets; smaller pieces cook faster
- 1 tablespoon neutral oil; for browning
- 1 to 2 tablespoons chili crisp; adjust to heat preference
- 1 tablespoon low-sodium soy sauce; for salt
- 2 cups cooked rice; for serving
- 1 teaspoon sesame seeds; optional garnish
Quick Steps:
- Press and cube the tofu, then brown it in oil until crisp.
- Add mushrooms and broccoli and cook until the mushrooms release and reabsorb their moisture.
- Stir in soy sauce and chili crisp.
- Serve over rice with sesame seeds.
Equipment for This Recipe:
- Large skillet; for crisping tofu
- Tofu press or towel; to dry it
- Spatula; for turning cubes
- Bowl; for the rice
How to Serve This Dish: Serve over rice with sliced scallions or cucumber. A squeeze of lime is useful if you want more lift.
Pro Tips for This Recipe:
- Press tofu longer if it still feels wet.
- Don’t stir too soon; let the tofu get color first.
- Add chili crisp at the end so the crunchy bits stay crunchy.
Variations on This Dish:
- Peanut Chili Version: Add a spoonful of peanut butter to the sauce.
- Cauliflower Rice Bowl: Swap in cauliflower rice for a lighter base.
- Eggplant Swap: Use diced eggplant instead of mushrooms if you want softer texture.
Common Mistakes to Avoid with This Recipe:
- Don’t skip pressing the tofu.
- Don’t crowd the pan or the tofu softens.
- Don’t add too much chili crisp all at once; it’s louder than it looks.
49. Taco Salad with Salsa Vinaigrette
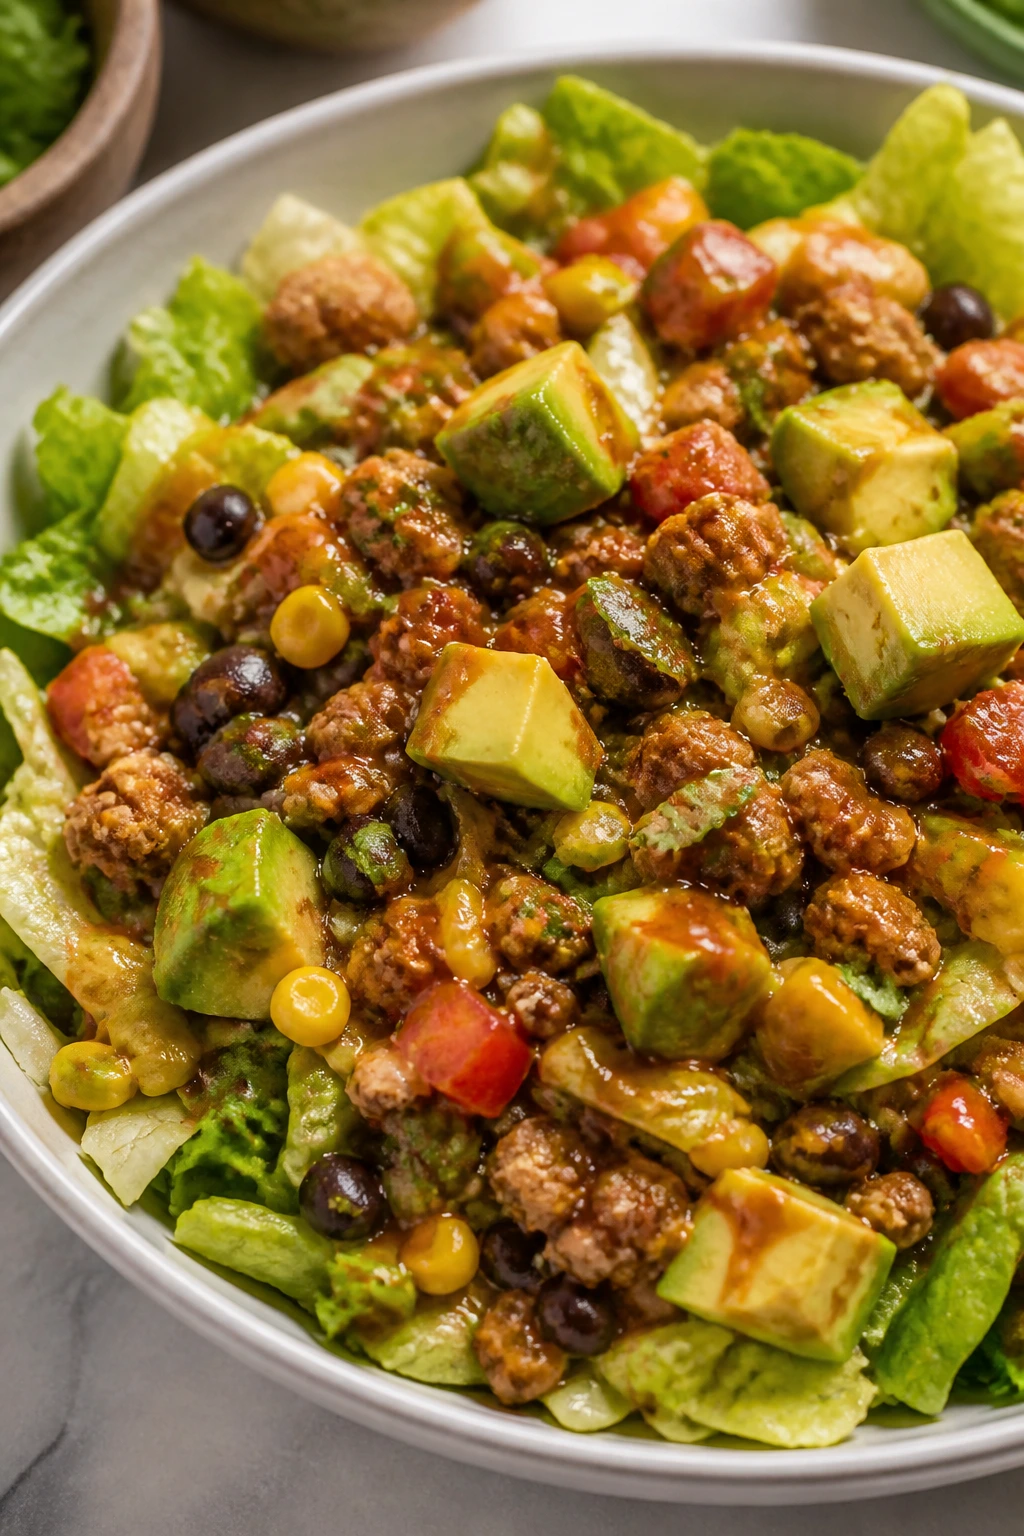
This is what happens when taco night needs to be lighter but still feel like dinner. Crisp lettuce, seasoned turkey, black beans, corn, avocado, and a sharp salsa dressing all land in one bowl. It’s casual food, but the flavors are organized.
Why It Works: Ground turkey cooks fast and carries taco seasoning well. Beans and corn give the salad enough substance to count as dinner. Salsa mixed with a little olive oil or yogurt turns into a dressing without a blender.
Key Ingredients:
- 1 lb ground turkey; lean and fast
- 1 tablespoon taco seasoning; or a homemade blend
- 1 large head romaine or chopped lettuce; the base
- 1 can black beans, rinsed and drained; for fiber
- 1 cup corn; fresh, canned, or thawed frozen
- 1 avocado, diced; for richness
- 1/2 cup salsa; for the dressing
- 1 tablespoon olive oil; to smooth the dressing
- 1/4 cup crushed tortilla chips; optional crunch
Quick Steps:
- Brown the turkey with taco seasoning.
- Mix the salsa with olive oil to make a quick dressing.
- Build bowls with lettuce, beans, corn, avocado, and turkey.
- Drizzle the dressing and top with chips if using.
Equipment for This Recipe:
- Skillet; for the turkey
- Large salad bowl; for assembling
- Small bowl; for the dressing
- Knife and cutting board; for the avocado and lettuce
How to Serve This Dish: Serve the salad right after dressing it so the lettuce stays crisp. A spoonful of Greek yogurt or a squeeze of lime works well.
Pro Tips for This Recipe:
- Drain the beans and corn well.
- Season the turkey assertively; salad can hide bland meat.
- Add the avocado just before serving.
Variations on This Dish:
- Chicken Taco Salad: Use shredded chicken instead of turkey.
- Southwest Version: Add pepitas and extra corn.
- Vegetarian Bowl: Skip the turkey and double the beans.
Common Mistakes to Avoid with This Dish:
- Don’t dress the whole bowl too early.
- Don’t use wet lettuce.
- Don’t make the turkey too mild; it needs to carry the salad.
50. Rotisserie Chicken Minestrone
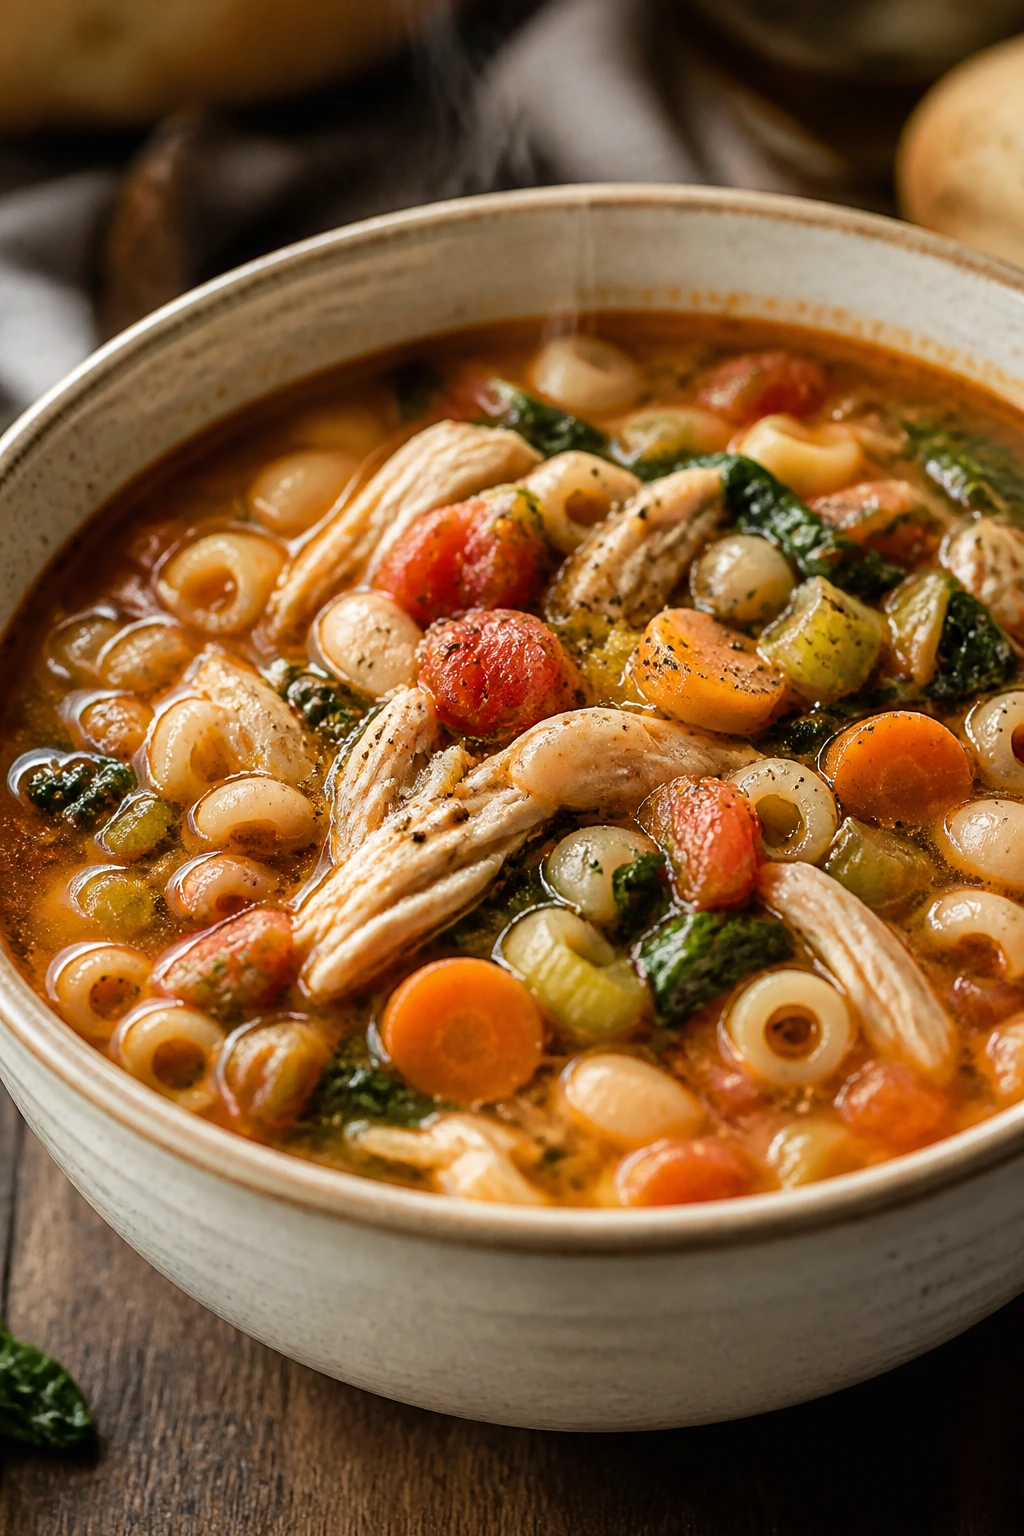
This is what I make when the day has gone long and dinner needs to be efficient without being thin. Rotisserie chicken saves the browning step, beans and pasta make the soup substantial, and the vegetables turn it into something warm and homey without much active work.
Why It Works: Rotisserie chicken cuts the cook time down to almost nothing. Beans, pasta, and vegetables turn broth into an actual meal. The soup tastes better if you let it sit for a few minutes before serving, which is a small gift on a busy night.
Key Ingredients:
- 3 cups shredded rotisserie chicken; skin removed if you want it lighter
- 1 can white beans, rinsed and drained; adds body
- 1 can diced tomatoes, 14.5 oz; for the broth
- 2 carrots, diced; classic minestrone base
- 2 celery stalks, diced; for flavor
- 2 cups spinach; stirred in at the end
- 1 cup small pasta; ditalini or elbow work well
- 6 cups low-sodium broth; the soup base
- 1 teaspoon Italian seasoning; simple and reliable
Quick Steps:
- Sauté the carrots and celery in a little oil until softened.
- Add broth, tomatoes, beans, Italian seasoning, and pasta; simmer until the pasta is tender.
- Stir in the chicken and spinach and warm through.
- Taste and adjust seasoning before serving.
Equipment for This Recipe:
- Large pot or Dutch oven; for the soup
- Ladle; for serving
- Knife and cutting board; for the vegetables
- Wooden spoon; for stirring
How to Serve This Dish: Serve with toasted bread or a little parmesan on top. The soup is thick enough to stand alone, which is part of its charm.
Pro Tips for This Recipe:
- Add the chicken near the end so it stays tender.
- Cook the pasta separately if you want leftovers to keep better.
- If the soup is too thick, add more broth before serving.
Variations on This Dish:
- Pesto Minestrone: Stir in a spoonful of pesto at the end.
- Bean-Heavy Version: Add a second can of beans and skip the pasta.
- Whole-Grain Pasta Swap: Use whole-grain small pasta for extra fiber.
Common Mistakes to Avoid with This Recipe:
- Don’t overcook the pasta in the soup if you plan to store leftovers.
- Don’t use too much salt before tasting; rotisserie chicken can be salty.
- Don’t add spinach too early or it fades into the broth.
Why These Dinners Work on Real Evenings

The best quick dinner formula is rarely a secret. It’s usually some version of a good protein, a fast vegetable, and a sauce or seasoning that gives the whole pan a reason to exist. That’s why these healthy quick weeknight dinners stay useful across a wide range of grocery budgets and appetites. They lean on ingredients that cook fast and don’t need babysitting.
I also like how forgiving most of them are. A little more broccoli. A slightly smaller salmon fillet. Leftover rice instead of freshly cooked rice. These recipes can absorb small changes without collapsing, which matters when you’re cooking from the real world instead of a tidy test kitchen.
Essential Equipment for These Recipes
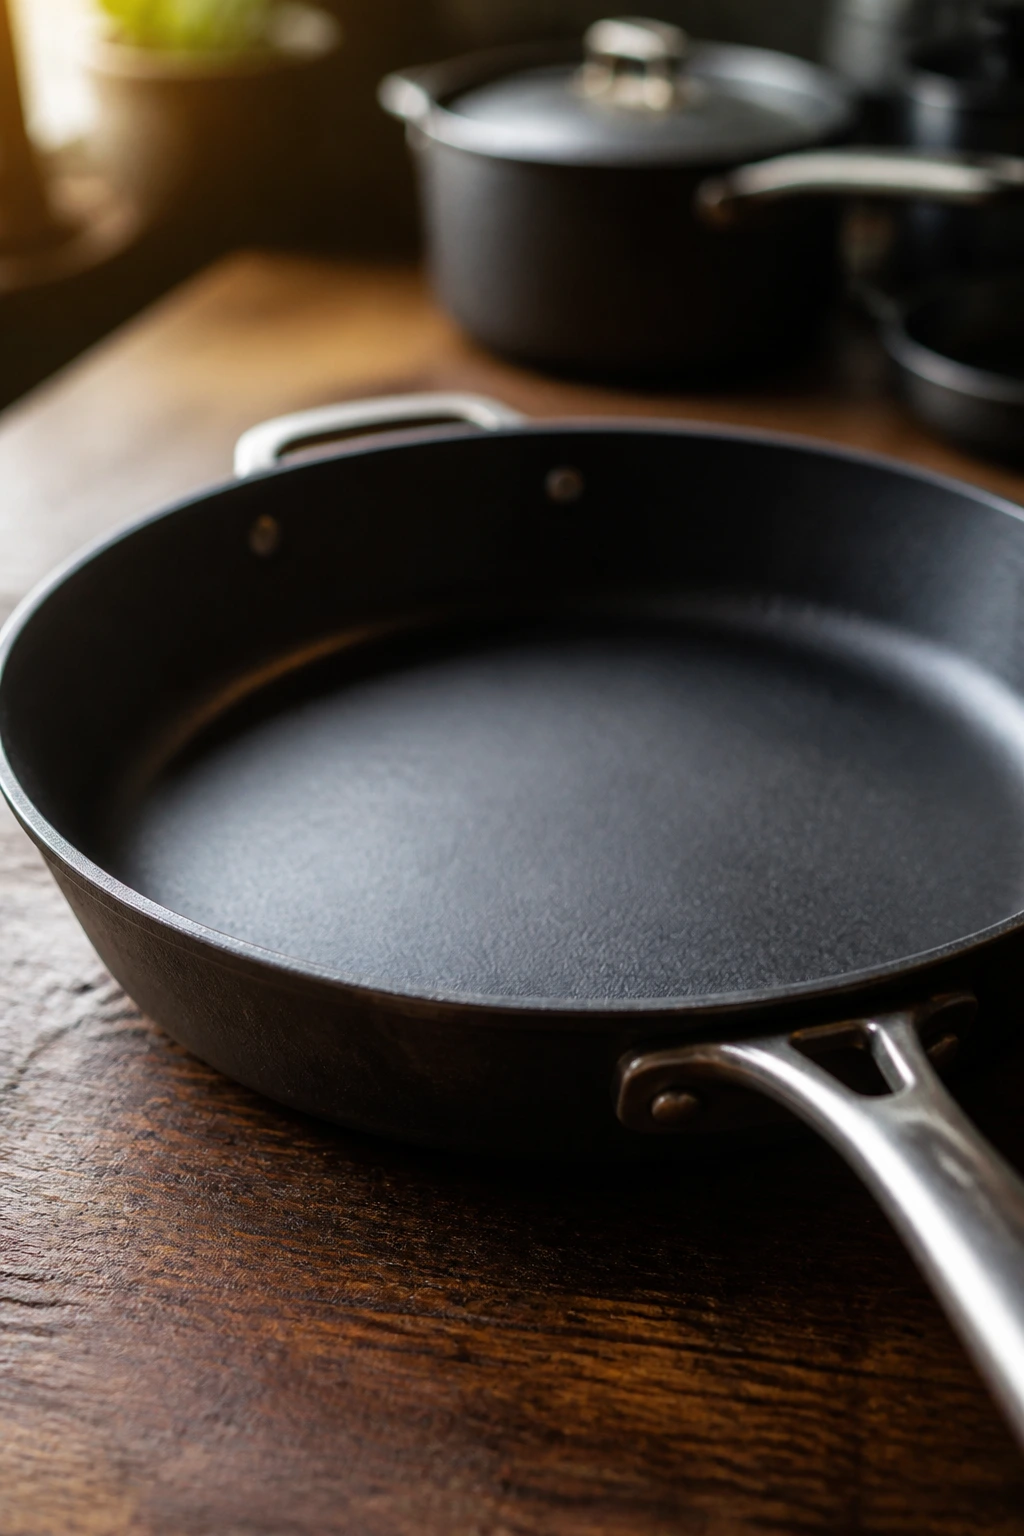
- Large skillet or sauté pan: The workhorse for stir-fries, skillet pastas, chicken cutlets, and fast sauces.
- Rimmed sheet pan: Essential for salmon, tilapia, sausage, and any dinner that needs roasting without splatter.
- Medium pot or Dutch oven: Best for soups, chili, and saucy one-pot meals.
- Sharp chef’s knife: Saves time on peppers, onions, cabbage, chicken, and herbs.
- Cutting board: A sturdy board makes the prep calmer and safer.
- Measuring cups and spoons: Helpful for sauces and seasoning blends that can turn salty fast.
- Tongs: Useful for flipping chicken, shrimp, fish, and sausage without tearing them.
- Box grater or microplane: Handy for lemon zest, ginger, and zucchini.
- Mixing bowls: One small bowl for sauces and one medium bowl for tossing ingredients is usually enough.
- Airtight containers: Make leftovers easier to store and reheat without drying out.
Smart Shopping for Healthy Quick Weeknight Dinners
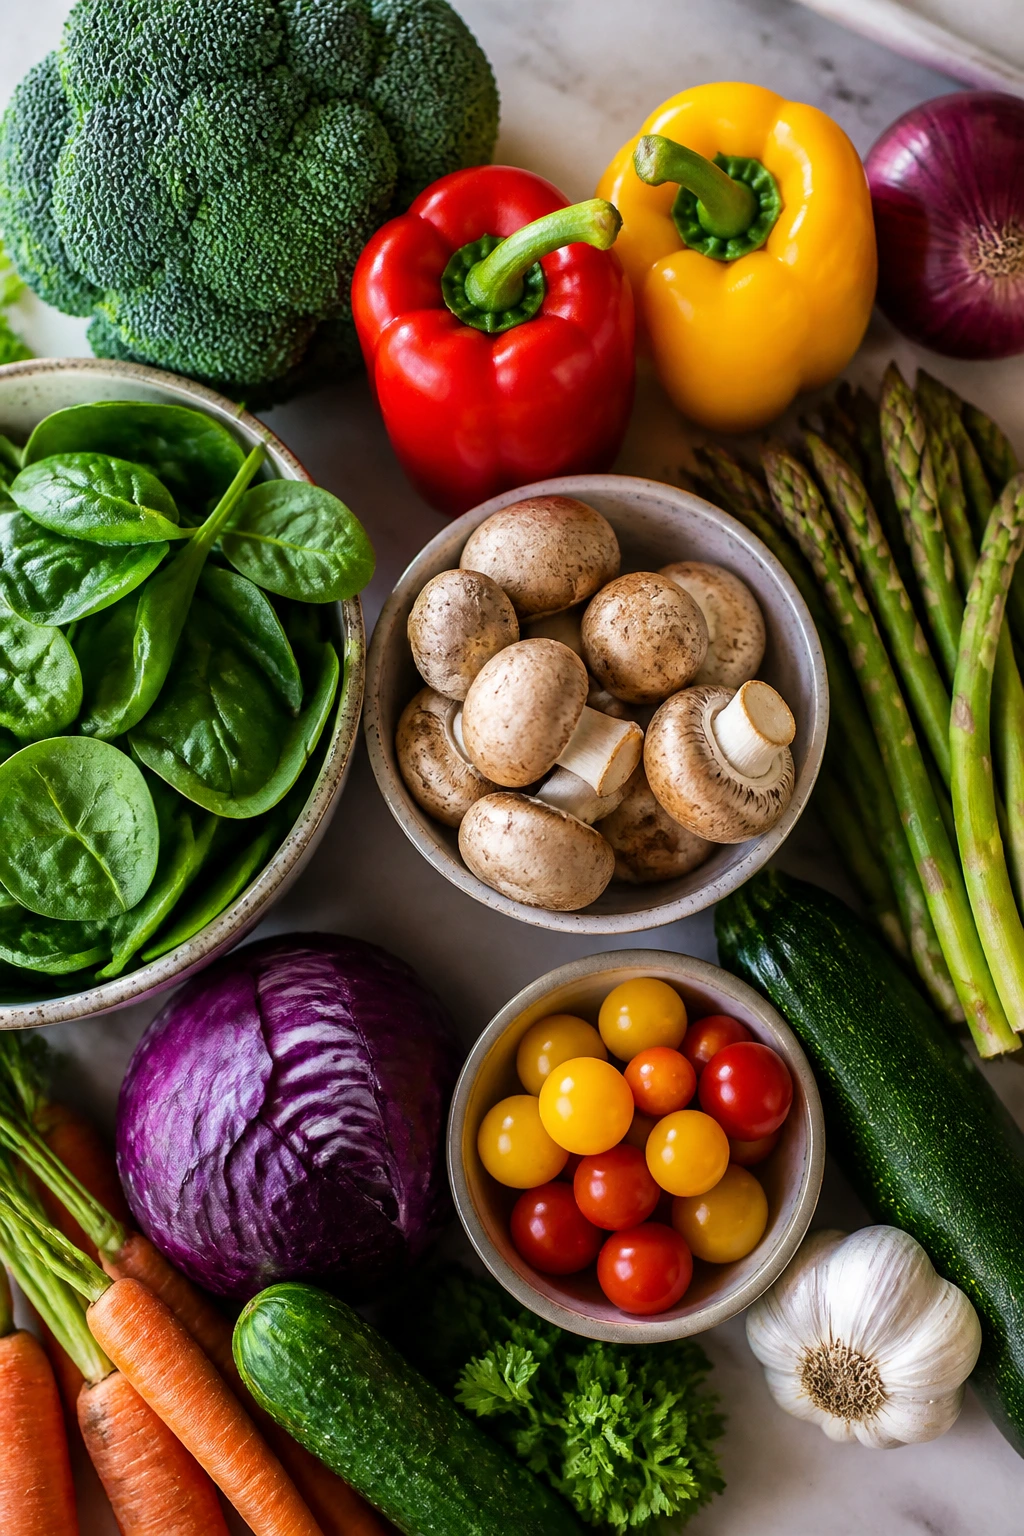
The smartest grocery trip for this kind of cooking is not glamorous. It’s practical. Pick proteins that cook fast — chicken cutlets, shrimp, salmon, ground turkey, tofu, rotisserie chicken — and buy vegetables that don’t need a long bath in the oven to become edible. Broccoli, green beans, asparagus, zucchini, peppers, spinach, cabbage, and mushrooms all earn their place because they move quickly.
Canned beans and canned tomatoes are your quiet helpers. They cut prep time, add fiber, and turn a sparse fridge into a full dinner plan. If you buy low-sodium versions, you get more control over the final seasoning, which matters a lot in one-pan cooking where flavors concentrate fast.
Frozen vegetables are worth keeping around too. Peas, corn, edamame, and mixed carrots are fine here, and I’d argue they’re often better than limp fresh produce that has been hanging around the crisper for a week. Same story with grains: cooked rice, couscous, or orzo can be made ahead and used in several meals without feeling repetitive.
For pantry sauces, choose a few good ones and use them carefully: soy sauce, miso, pesto, salsa, marinara, curry powder, tahini, and chili crisp can cover a lot of ground. The mistake is buying ten condiments and using none of them well. Two tablespoons can change a dinner. Half a bottle is usually too much.
How to Serve These Recipes

Presentation: Keep the plate simple and let texture do the work. Bowls are useful for saucy dinners like chili, curries, and rice bowls, while sheet-pan meals look better spread out on a platter so the browning is visible. A final squeeze of lemon, a spoon of yogurt, or a scatter of herbs makes these meals look finished without extra effort.
Accompaniments: Brown rice, quinoa, couscous, farro, whole-wheat pita, crusty bread, or a quick green salad all fit the theme. For lighter dinners like salads or lettuce wraps, I like adding a small starch on the side so the meal doesn’t feel too thin. For heavier skillet dinners, something crisp and acidic — cucumber salad, slaw, pickles — keeps the plate from getting tired.
Portions: Most of these recipes serve 4 with reasonable portions, though soup and chili can stretch farther. For lighter meals like lettuce cups or salads, plan on a bigger volume of vegetables per person. For richer bowls or pasta dishes, 1 to 1½ cups per serving usually feels right, especially if you’re adding bread or rice alongside.
Beverage Pairing: Sparkling water with lime is the safest universal choice, and it works better than people give it credit for. Unsweetened iced tea fits the salty, savory recipes well. For something a little more intentional, a light white wine or dry rosé pairs nicely with salmon, shrimp, and herb-heavy dishes.
Additional Tips and Flavor Boosters
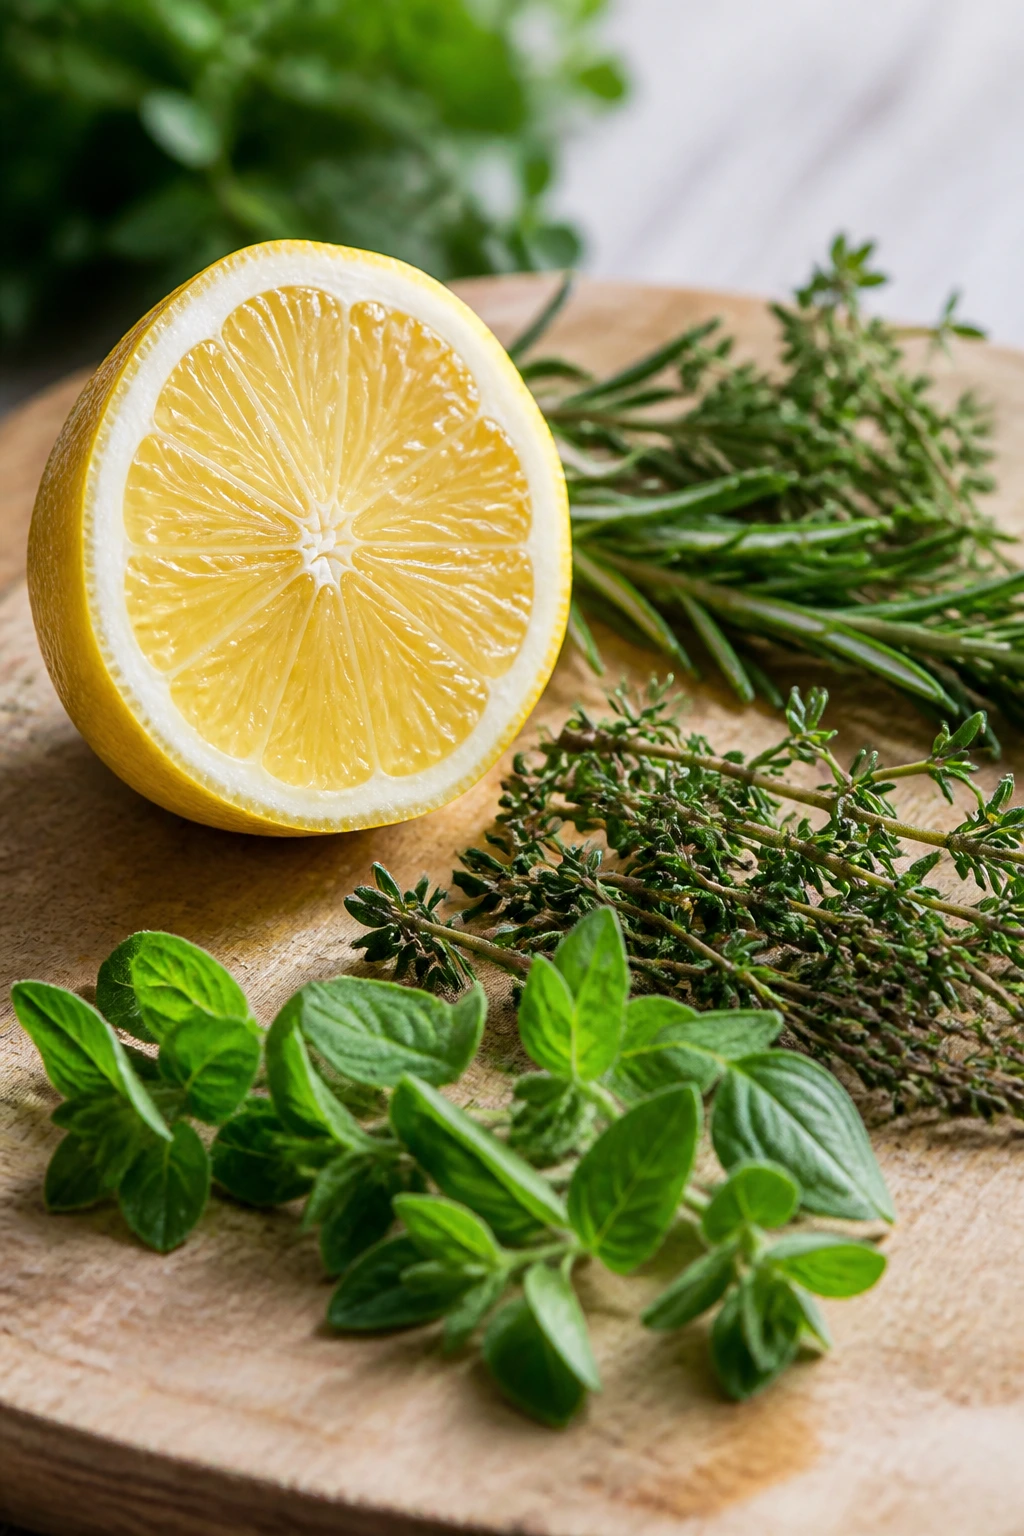
Flavor Enhancement: Keep a lemon on the counter and use it often. Acid is the difference between a dinner that tastes merely cooked and one that tastes awake. A final squeeze over salmon, chicken, soup, or beans can make a dish feel more focused without changing the structure.
Customization: If a recipe feels too light, add a grain or bean. If it feels too heavy, add crunch: cucumber, cabbage, radish, celery, or even a few pickles. That little contrast does more than another spoonful of sauce ever will.
Serving Suggestions: Fresh herbs are the easiest finish in the kitchen. Parsley, dill, cilantro, basil, and scallions can make the same dinner taste more specific. Toasted sesame seeds, crushed peanuts, or parmesan also help when a dish needs a small lift at the end.
Make-It-Yours: For lower-carb meals, swap rice for cauliflower rice or extra greens. For dairy-free versions, lean on tahini, olive oil, or avocado instead of yogurt and cheese. For extra protein, add eggs, chickpeas, edamame, or an extra half-pound of lean meat rather than piling on more sauce.
Make-Ahead, Storage, and Reheating Guidance
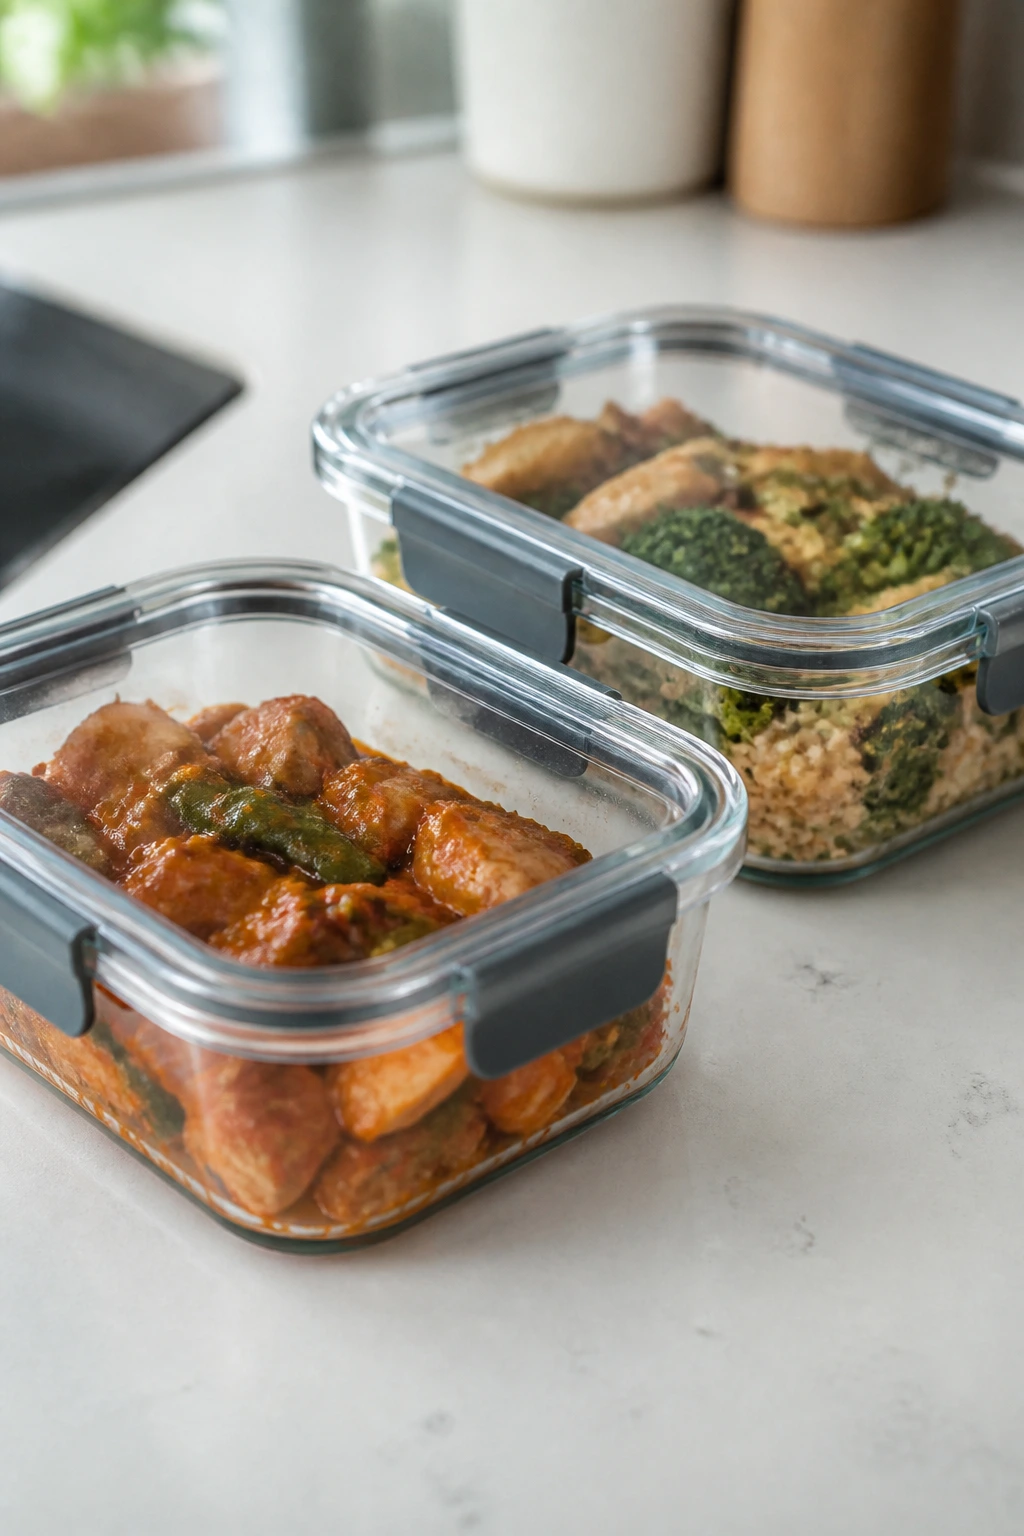
A few of these dinners are best made fresh, but a lot of them hold up well if you think ahead by even one step. Chili, soup, turkey bolognese, lentil curry, and minestrone usually keep well in the refrigerator for 3 to 4 days. In the freezer, most of the soup-based dishes and saucy ground-meat meals will keep for up to 2 months if you cool them quickly and pack them in airtight containers.
Rice bowls, stir-fries, and skillet meals are fine for leftovers, but texture matters. Store sauces separately when you can, especially for lettuce wraps, pita pockets, and bowls with crisp vegetables. Reheat rice-based dishes in a skillet with a splash of water over medium heat, or in the microwave covered loosely so the grains steam instead of drying out.
Fish and shrimp are the most fragile leftovers in the group. Salmon and cod can be eaten cold the next day in bowls or salads, but reheating them too hard can wreck the texture. If you do warm them, use low heat and stop as soon as they’re barely hot. Shrimp is even fussier; I usually prefer to eat leftover shrimp cold over greens or tucked into a wrap.
Meal prep works best when you split the work. Chop vegetables ahead, cook rice or quinoa once, mix a sauce, and keep the protein separate until dinner. That gives you the speed without forcing everything to sit together and go soft. Some of these recipes, especially chili, curry, soup, and pasta sauce, taste better on day two. Others, like zucchini noodles and lettuce cups, are happiest the day they’re made.
Variations and Adaptations to Try
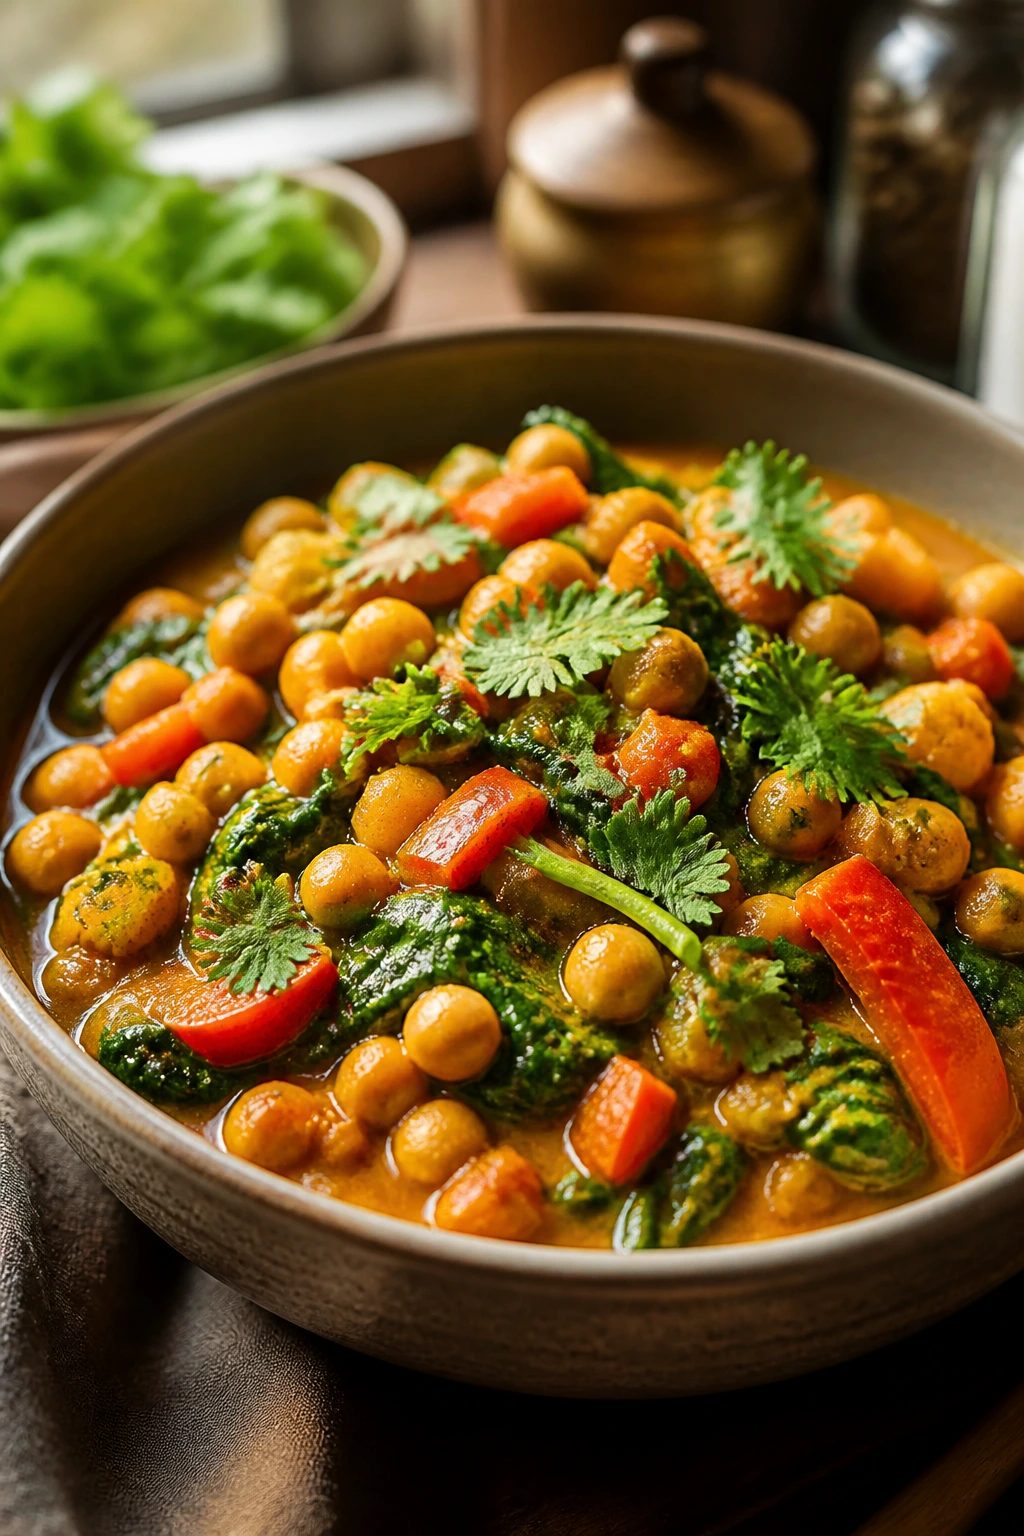
Gluten-Free Rotation: Swap soy sauce for tamari, use corn tortillas instead of wheat wraps, and serve bowls over rice or cauliflower rice. Most of the recipes here adapt cleanly because the structure is already simple.
Dairy-Free Path: Skip yogurt, feta, parmesan, and ricotta, then lean on tahini, avocado, pesto without cheese, or a bit more lemon and olive oil. The key is replacing creaminess with something that still carries the flavor, not just removing the dairy and hoping for the best.
Vegetarian Night Shift: Chickpeas, lentils, tofu, eggs, and beans can stand in for chicken, turkey, or fish in a lot of these dinners. I’d especially trust the curry, fried rice, lettuce wraps, bowls, and soups to convert well without much redesign.
Extra-Quick Pantry Edition: Keep frozen shrimp, canned beans, jarred marinara, couscous, instant brown rice, and prewashed greens on hand. That gives you a dinner plan even when the fridge looks bare.
Kid-Friendly Mild Version: Pull back on chili flakes, chili crisp, and extra black pepper, then serve sauces on the side instead of mixed in. Kids often like the same flavors when they can control the heat themselves.
Low-Sodium Reset: Choose no-salt-added tomatoes and broth, rinse canned beans, and season in layers instead of pouring salt at the start. You’ll get more control, and the food won’t taste flat if you finish with lemon, herbs, or vinegar.
Common Mistakes to Avoid
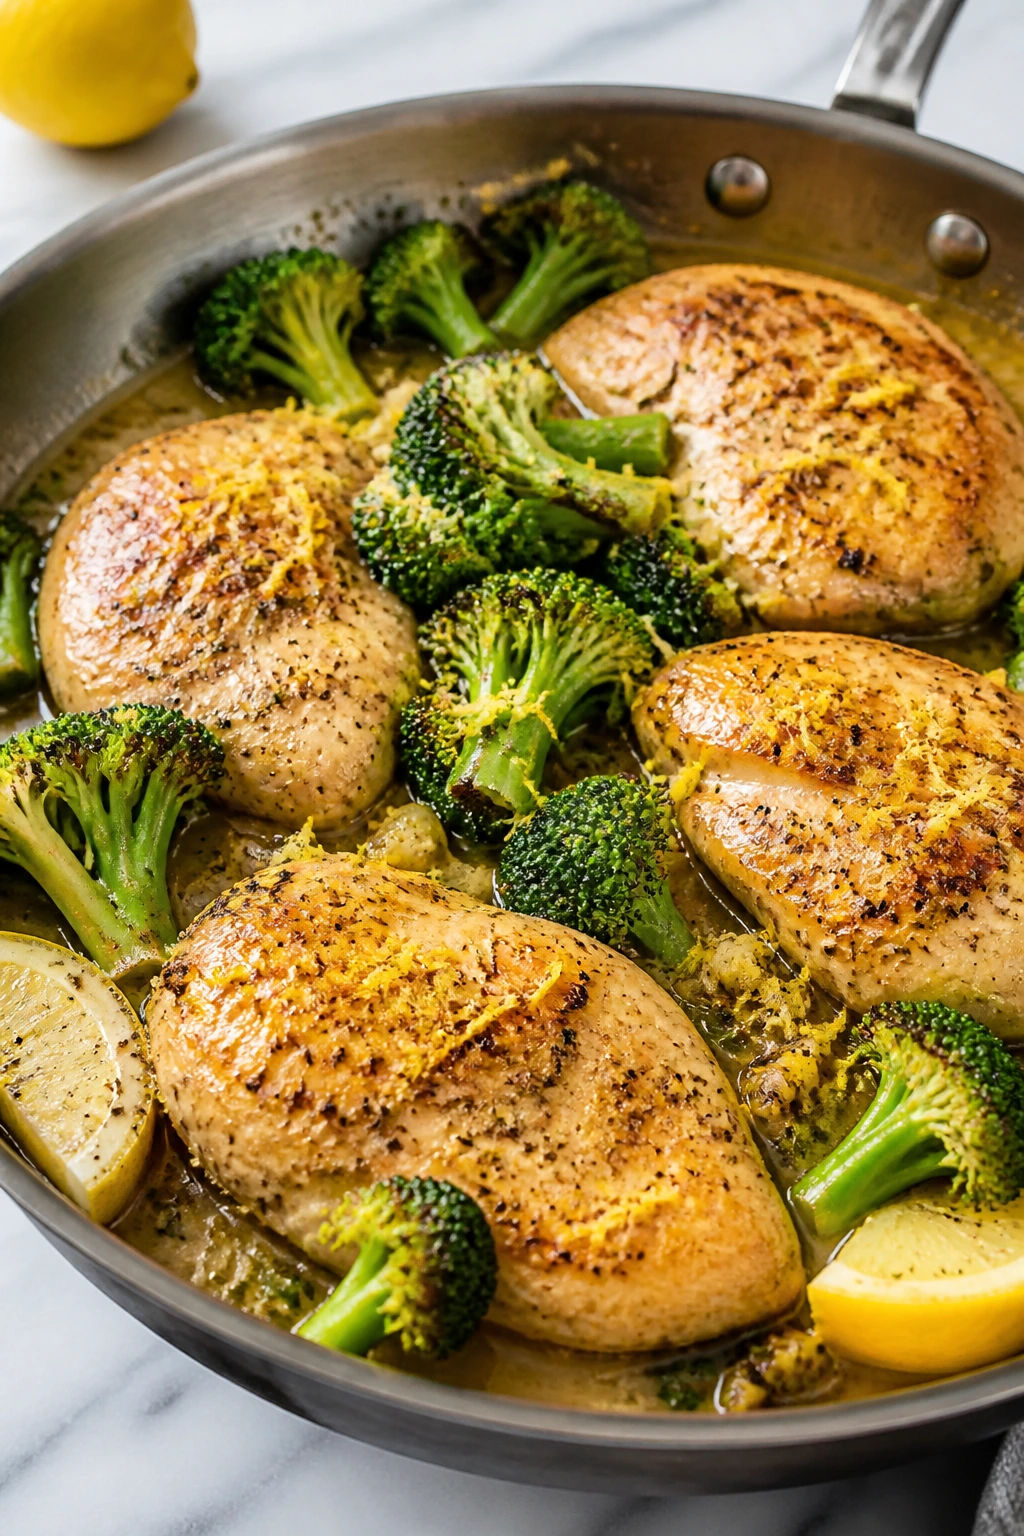
The first mistake is overcooking the protein because you’re waiting for some imaginary extra browning. Chicken cutlets, shrimp, salmon, and cod all move fast. If you leave them in the pan or oven “just a little longer,” you can lose the texture that made the recipe worth cooking in the first place. A thermometer helps. So does paying attention to color and flake.
The second mistake is using wet vegetables. Frozen vegetables need a little care, and fresh produce can carry more water than you expect. If your cabbage, zucchini, spinach, or mushrooms go into the pan soaking wet, they steam instead of brown. Pat things dry. Salt zucchini lightly and blot it. Let mushrooms finish releasing their moisture before you call them done.
The third mistake is underseasoning early and then panicking at the end. A lot of these recipes rely on layers: a little salt on the protein, a little acid in the sauce, a little finish at the end. If you wait until the bowl is plated and then dump everything into it, the flavors don’t integrate. Season the parts, then taste the whole.
Another easy trap is making every dinner “healthy” by stripping out the things that give it structure. No fat, no starch, no crunch, no acid. That’s not balance; that’s boredom. Use olive oil, rice, beans, avocado, cheese, or yogurt where they make sense. You want a meal, not a checkbox.
Frequently Asked Questions
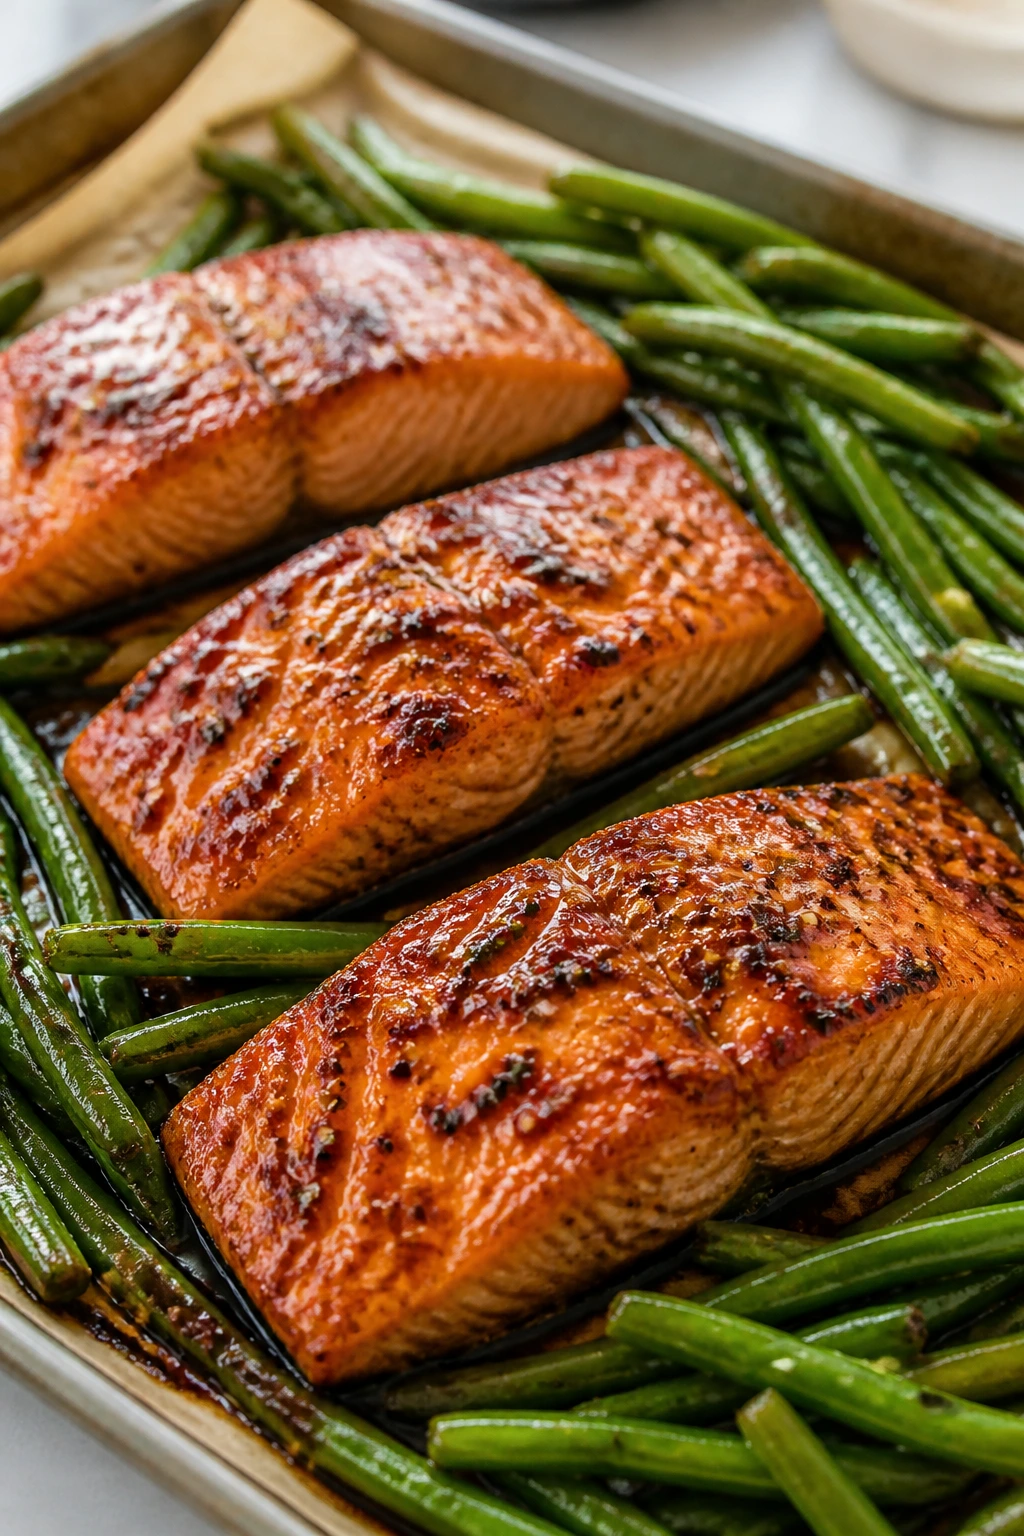
Can I prep these dinners ahead of time?
Yes, but prep the parts, not the finished meal, when you can. Chop vegetables, mix sauces, cook rice, and season proteins ahead of time, then cook quickly at dinner so the textures stay right.
Which recipes are best for meal prep lunches too?
Soup, chili, turkey bolognese, curry, fried rice, and grain bowls hold up well. Lettuce cups, zucchini noodles, and fish dishes are better eaten fresh or used cold the next day.
What’s the best protein to keep on hand for fast dinners?
I’d keep chicken cutlets, ground turkey, eggs, canned tuna, tofu, and frozen shrimp in regular rotation. They’re versatile, cook fast, and fit a lot of different flavor directions.
Can I swap brown rice for white rice in these meals?
Absolutely. White rice cooks faster and feels softer; brown rice adds more chew and fiber. Use whichever one fits your pantry and your timing.
How do I keep stir-fries from turning soggy?
Use a hot pan, cook in batches if needed, and add sauces late. Vegetables should still have some crunch when the pan comes off the heat.
What if I don’t have fresh herbs?
Use dried herbs earlier in the cook, or lean on citrus, scallions, sesame seeds, and good pantry sauces. Fresh herbs are nice, but they’re not the only way to make dinner taste finished.
Are these recipes okay for picky eaters?
A lot of them are easier to tailor than people think. Keep the sauce on the side, serve the components separately, and hold back the spicy ingredients until everyone’s plated.
Can I use frozen vegetables instead of fresh?
Yes, and in some cases I prefer them. Frozen peas, corn, edamame, spinach, and mixed vegetables are a real advantage on busy nights because they’re already trimmed, chopped, and ready to cook.
The Dinners That Stick
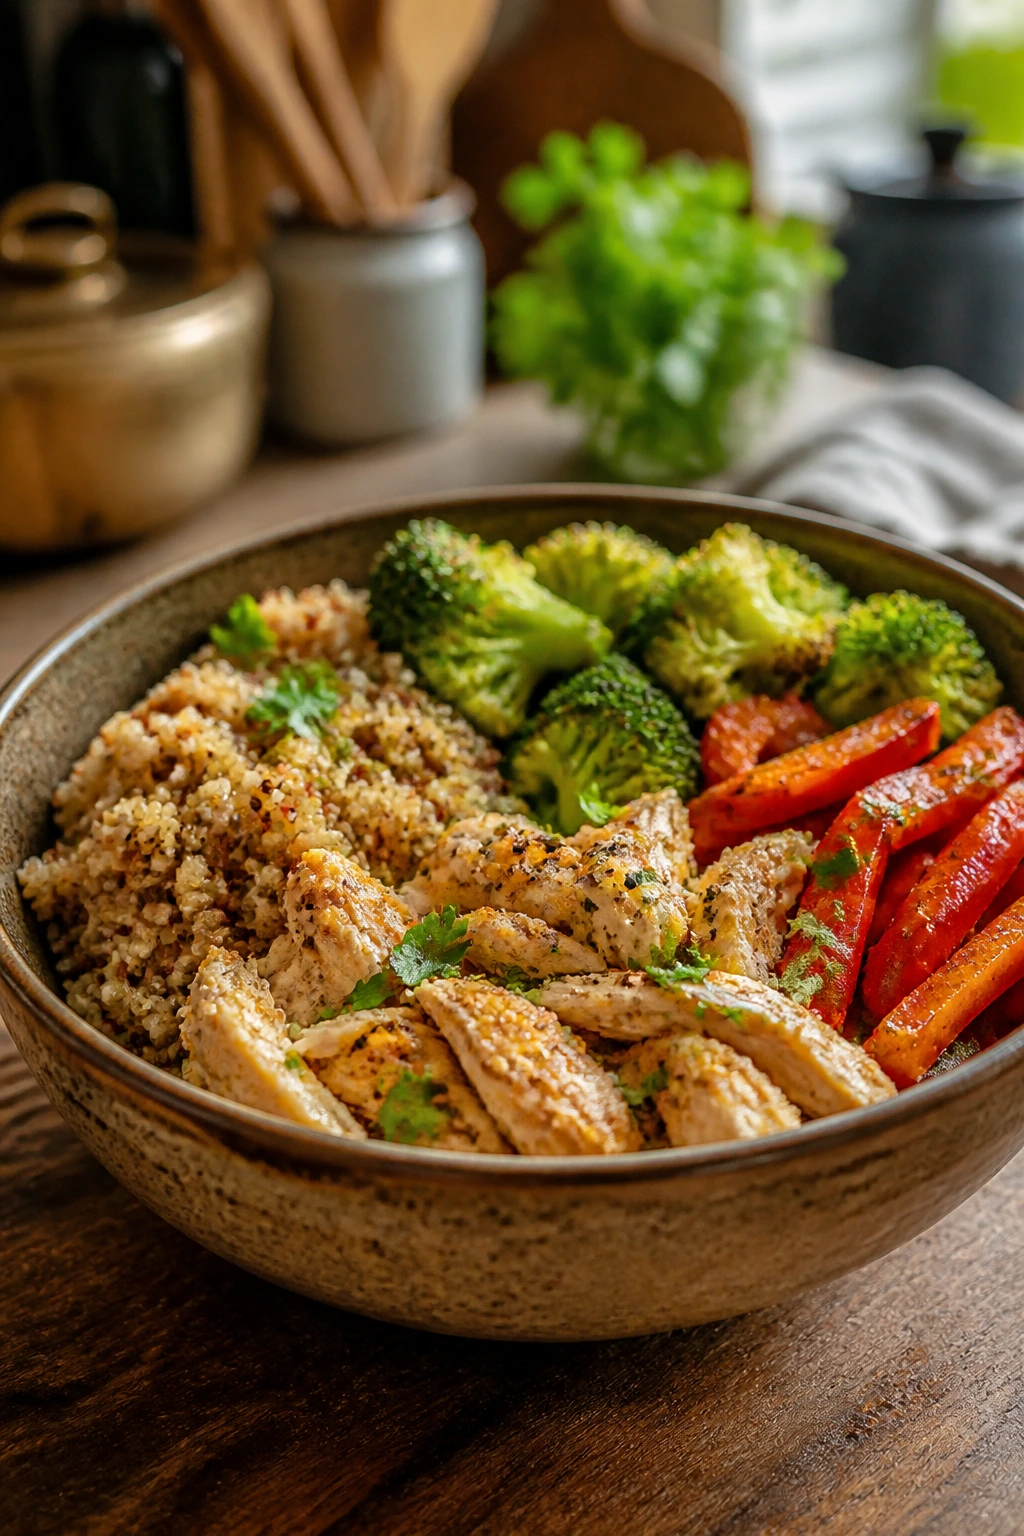
A useful weeknight dinner doesn’t need to win awards. It needs to be repeatable. That’s why the best recipes here lean on fast proteins, vegetables that hold their shape, and sauces that carry the flavor without turning the meal into a project.
What I like most about this group is how easily it bends. Fish turns into bowls, beans turn into soup, chicken becomes lettuce cups, and a sheet pan can carry half the grocery list if you cut the vegetables to the right size. That flexibility is the difference between “I should cook more” and actually cooking more.
Keep a few of these in your pocket, and dinner stops feeling like a nightly rescue mission. It becomes a set of moves you already know well — and that’s usually the point where healthy food starts to feel practical enough to repeat.