
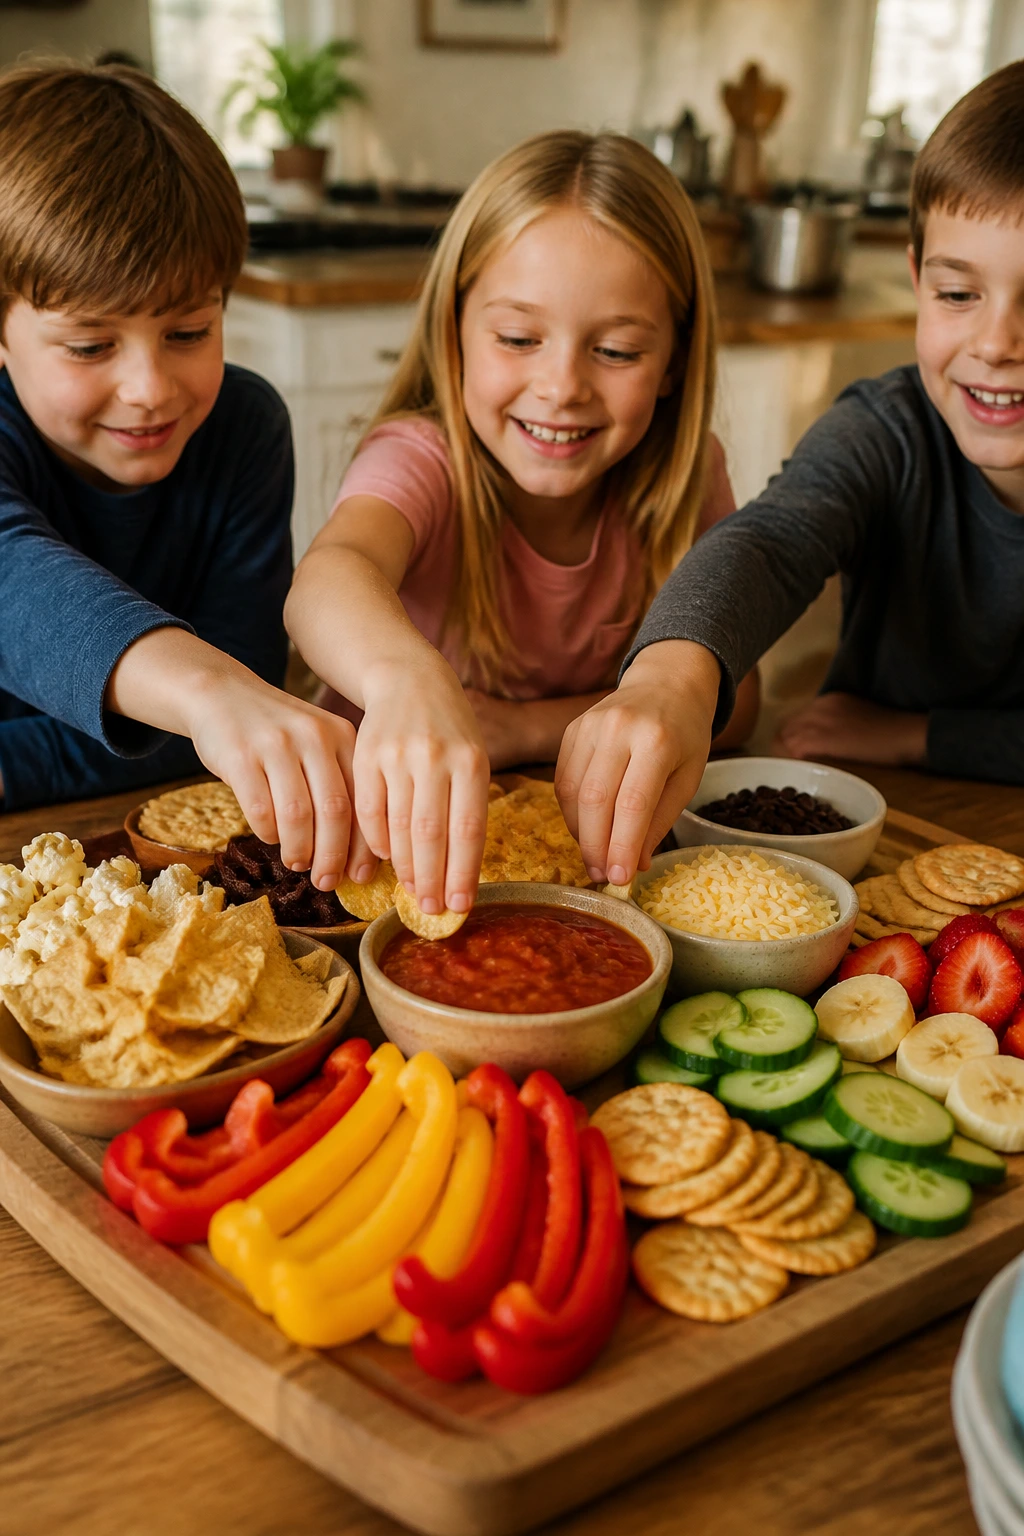
Recipes kids can make for family movie night work best when the kitchen is more assembly line than test kitchen. You want foods that forgive a crooked sprinkle of cheese, a heavy hand with the salsa, or a banana slice that lands slightly off-center and still tastes right.
I like movie-night food that gives kids a real job. Not pretend work. The good stuff happens when someone can spread sauce on a pita round, thread grapes onto a skewer, or press a cereal bar into the pan with the heel of a clean hand while the credits are still far away.
These 15 recipes lean into that sweet spot: salty, sweet, crunchy, melty, no-fuss, and built for a table full of small helpers. Some are dinner disguised as snacks. Some are pure snack food. A couple are the kind of things that vanish so fast you’ll wish you had started a second tray before anyone hit play.
Why This Collection Works So Well for Movie Night
-
Real kid jobs: Every recipe has at least one task little hands can handle, from sprinkling cheese to lining up banana slices, so kids feel useful instead of sidelined.
-
Low-stress ingredients: These recipes rely on pitas, tortillas, cereal, fruit, cheese, and pantry staples that are easy to find and easy to swap.
-
Mix of sweet and savory: A movie-night spread gets boring fast if everything tastes the same, so this collection gives you salty snacks, fruity bites, and a proper dessert dip.
-
Fast cleanup: Most of these can be made with one bowl, one sheet pan, or one muffin tin, which matters when the kitchen starts looking like a popcorn storm.
-
Flexible for mixed ages: Younger kids can stir, top, dip, and skewer; older kids can handle measuring, assembling, and baking with a quick check-in from an adult.
-
Works as snack board food: Several of these recipes can sit side by side on one big tray, which makes the table feel generous without making you cook three separate meals.
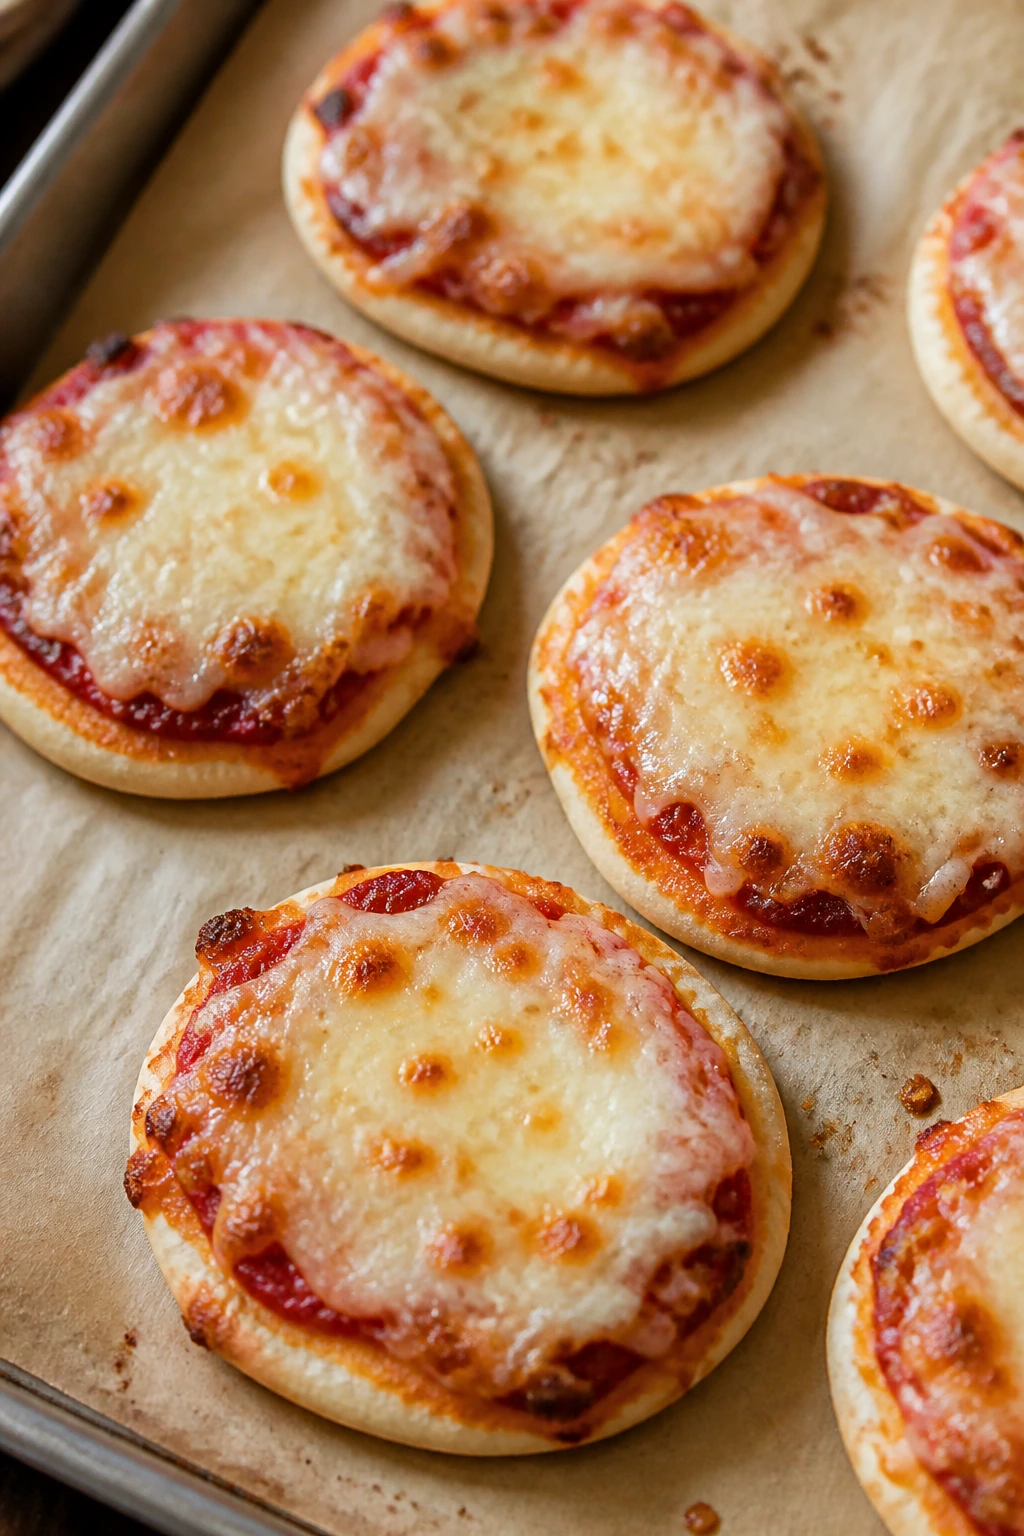
1. Mini Pizza Pita Rounds
Mini pizza pita rounds are the kind of movie-night food that disappears before the opening credits settle down. They’re crisp at the edges, chewy in the center, and small enough for kids to grab without dragging a whole slice across the couch.
Why It Works:
Pita bread gives you a fast, sturdy base that bakes in about 8 to 10 minutes at 425°F, so you get pizza flavor without waiting on dough. Kids can spoon sauce, scatter cheese, and add toppings without wrecking the structure. The thin base also means the cheese bubbles fast instead of turning the whole snack into a soggy sheet.
Key Ingredients:
- 4 whole wheat pita breads, split if thick
- 1 cup pizza sauce
- 2 cups shredded mozzarella
- 1/2 cup mini pepperoni
- 1/2 cup diced bell pepper
- 1 teaspoon Italian seasoning
- 1 tablespoon olive oil, for brushing
- 2 tablespoons grated Parmesan, optional
Quick Steps:
- Preheat the oven to 425°F and line a sheet pan with parchment.
- Brush each pita lightly with olive oil and place it flat on the pan.
- Spread about 2 tablespoons of pizza sauce on each pita, leaving a small edge bare.
- Sprinkle mozzarella evenly, then add pepperoni and bell pepper.
- Finish with Italian seasoning and Parmesan, if using.
- Bake for 8 to 10 minutes, until the cheese is melted and the pita edges are crisp and lightly browned.
- Cool for 2 minutes, then cut into wedges with a pizza cutter or sharp knife.
Equipment for This Recipe:
- Rimmed sheet pan
- Parchment paper
- Pastry brush or spoon
- Pizza cutter or sharp knife
How to Serve This Dish:
Serve the rounds on a big wooden board with napkins stacked nearby. They’re good as a first snack or as the “real food” part of the evening, especially with carrot sticks or a simple salad on the side.
Pro Tips for This Recipe:
- Use less sauce than you think; too much makes the pita limp.
- Pre-shredded mozzarella works fine here and melts evenly enough for this kind of snack.
- If the pitas are thick, toast them plain for 2 minutes first so the bottoms stay crisp.
Variations on This Dish:
- Margherita Pita Rounds: Skip the pepperoni and add sliced cherry tomatoes plus torn basil after baking.
- BBQ Chicken Rounds: Swap the pizza sauce for barbecue sauce and use chopped cooked chicken.
- Veggie Patch Version: Load on mushrooms, olives, and spinach, but keep the topping layer light.
Common Mistakes to Avoid with This Dish:
- Too much sauce: The pita softens fast and goes floppy. Keep the sauce thin.
- Overloading toppings: A heavy pile slides off when you cut it. Less is better.
- Skipping the rest time: Cutting immediately sends hot cheese everywhere. Give it 2 minutes.
2. Soft Pretzel Bites with Cheddar Dip
Are soft pretzel bites ever not a hit? Warm, salty, and meant for dipping, they feel a little more special than chips but still stay firmly in snack territory.
Why It Works:
Refrigerated pizza dough or biscuit dough turns into chewy pretzel bites with almost no drama, and a quick baking-soda bath gives them that classic pretzel taste. Kids can roll ropes, cut pieces, and sprinkle salt, which makes the process feel hands-on without becoming messy chaos. The cheddar dip adds a warm, movie-theater-style finish that makes the tray disappear fast.
Key Ingredients:
- 1 pound refrigerated pizza dough
- 8 cups water
- 1/4 cup baking soda
- 1 egg, beaten
- 1 tablespoon coarse salt
- 1 tablespoon melted butter
- 1 1/2 cups shredded cheddar
- 1 cup milk
- 1 tablespoon flour
Quick Steps:
- Preheat the oven to 425°F and line two sheet pans with parchment.
- Cut the dough into 4 sections, roll each into a rope, then cut into 1-inch bites.
- Bring the water and baking soda to a gentle boil. Drop the bites in batches for 20 to 30 seconds, then lift them out with a slotted spoon.
- Place on the sheet pans, brush with egg, and sprinkle with coarse salt.
- Bake for 12 to 14 minutes, until deep golden brown.
- For the dip, whisk flour into melted butter, add milk, and cook until slightly thickened. Stir in cheddar until smooth.
- Serve warm with the dip in a small bowl in the center.
Equipment for This Recipe:
- Sheet pans
- Parchment paper
- Large pot
- Slotted spoon
How to Serve This Dish:
Pile the bites in a bowl lined with a tea towel so they stay warm a little longer. The cheddar dip should be thick enough to cling, not pour like soup.
Pro Tips for This Recipe:
- Keep the dough covered while kids work so it doesn’t dry out.
- Don’t leave the pretzels in the baking-soda bath too long or they get slippery instead of chewy.
- Shred the cheese yourself if you want a smoother dip, though bagged cheddar still works.
Variations on This Dish:
- Garlic Parm Pretzels: Brush with garlic butter after baking and shower with Parmesan.
- Cinnamon Sugar Pretzel Bites: Skip the salt and toss warm bites in cinnamon sugar, then serve with vanilla yogurt.
- Jalapeño Cheese Dip: Stir chopped pickled jalapeños into the cheddar dip for older kids and adults.
Common Mistakes to Avoid with This Dish:
- Skipping the bath: The bites bake up pale and bread-like. The baking soda step matters.
- Overbaking: They get hard fast. Pull them when they’re deep golden.
- Serving the dip too cold: It thickens into a clump. Warm it gently and stir well.
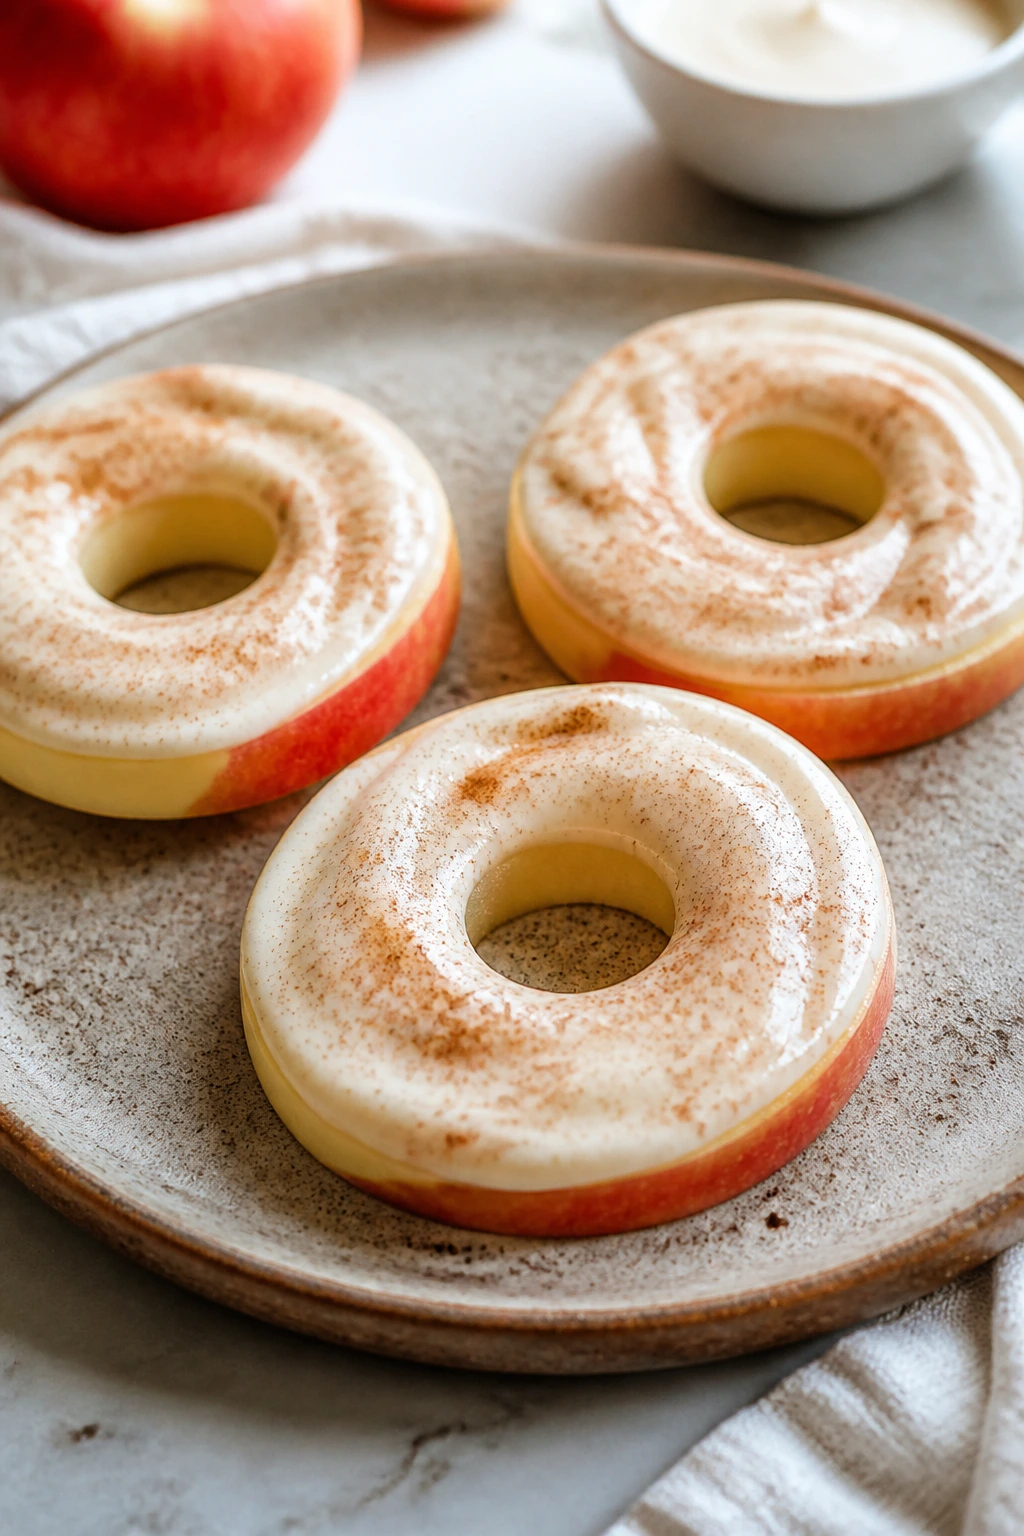
3. Apple “Donut” Rings with Cinnamon Yogurt
These are the snack version of an apple candy store window. Crisp apple rings, creamy yogurt, and a little cinnamon make them feel playful without needing an oven at all.
Why It Works:
Core a few apples, slice them into rings, and you’ve got built-in circles that look like mini donuts when topped with yogurt and sprinkles. Kids can handle the whole thing with a butter knife or spoon, which keeps the task safe and satisfying. A sprinkle of granola or crushed cereal gives the soft yogurt a crunch that keeps it from feeling too sweet.
Key Ingredients:
- 2 large apples, cored and sliced into rings
- 1 cup plain or vanilla Greek yogurt
- 1 tablespoon honey
- 1 teaspoon ground cinnamon
- 1/3 cup granola
- 2 tablespoons mini chocolate chips
- 1 tablespoon peanut butter or sunflower seed butter, optional
Quick Steps:
- Mix the yogurt, honey, and cinnamon in a small bowl.
- Lay the apple rings flat on a platter.
- Spoon or spread the cinnamon yogurt onto each ring.
- Sprinkle with granola and chocolate chips.
- Drizzle with peanut butter or sunflower seed butter if using.
- Serve right away so the apples stay crisp.
Equipment for This Recipe:
- Cutting board
- Paring knife or apple corer
- Small bowl
- Spoon or butter knife
How to Serve This Dish:
Spread the rings across a tray in a single layer; stacked apples turn slippery. They work best as a first snack while everyone is still settling in and the floor still isn’t sticky.
Pro Tips for This Recipe:
- Choose firm apples like Honeycrisp, Pink Lady, or Fuji so the rings hold their shape.
- Pat the apple slices dry before topping them; wet surfaces make the yogurt slide.
- If you need to pack them ahead, keep the yogurt separate and assemble just before serving.
Variations on This Dish:
- Caramel Apple Rings: Swap the honey for a drizzle of caramel sauce.
- Berry Crunch Rings: Add chopped strawberries and crushed graham crackers.
- Nut-Free Lunchbox Style: Use sunflower seed butter and skip the chocolate chips if needed.
Common Mistakes to Avoid with This Dish:
- Soft apples: They bend under the topping. Use crisp apples only.
- Too much yogurt: The rings get slippery and hard to eat. A thin spread is enough.
- Making them too far ahead: Apples brown and lose their snap. Assemble close to serving.
4. No-Bake Peanut Butter Cereal Bars
If you need one recipe that behaves well when the timer is already running, this is it. No oven, no special tools, and enough peanut butter chew to hold together without turning into a brick.
Why It Works:
Warm peanut butter and honey bind cereal and oats into bars that hold together after a short chill in the fridge. Kids can stir the mixture once the wet ingredients are combined, then press it into the pan with lightly greased hands or a spatula. The chocolate chips go in at the end so they stay whole instead of melting into the mix.
Key Ingredients:
- 3 cups crispy rice cereal
- 1 cup old-fashioned oats
- 1 cup creamy peanut butter
- 1/2 cup honey
- 1 teaspoon vanilla extract
- 1/4 teaspoon fine salt
- 1/2 cup mini chocolate chips
- 2 tablespoons sunflower seeds, optional
Quick Steps:
- Line an 8-inch square pan with parchment.
- Warm the peanut butter and honey in a saucepan over low heat just until smooth.
- Stir in vanilla and salt.
- Add the cereal and oats, then mix until everything is coated.
- Fold in the chocolate chips and seeds, if using.
- Press the mixture firmly into the pan.
- Chill for 30 to 45 minutes, then cut into bars.
Equipment for This Recipe:
- 8-inch square pan
- Parchment paper
- Saucepan
- Spatula or wooden spoon
How to Serve This Dish:
Cut the bars small if you’re serving them among several snacks. They’re rich enough that one bar often goes farther than you think, especially if the rest of the table is already loaded.
Pro Tips for This Recipe:
- Press hard. Loose packing means crumbly bars.
- Let the mixture cool for a minute before adding chips so they don’t melt.
- If your kitchen is warm, chill the bars a little longer before cutting.
Variations on This Dish:
- Chocolate Crunch Bars: Stir in 2 tablespoons cocoa powder and use chocolate chips.
- Sunbutter Swap: Replace peanut butter with sunflower seed butter for a nut-free version.
- Birthday Sprinkle Bars: Add 2 tablespoons rainbow sprinkles right before pressing into the pan.
Common Mistakes to Avoid with This Dish:
- Too much heat: Boiling the peanut butter mixture can make the bars dry. Warm it gently.
- Not pressing firmly enough: The bars fall apart later. Compact them well.
- Cutting too soon: Warm bars smear instead of slice. Chill first.
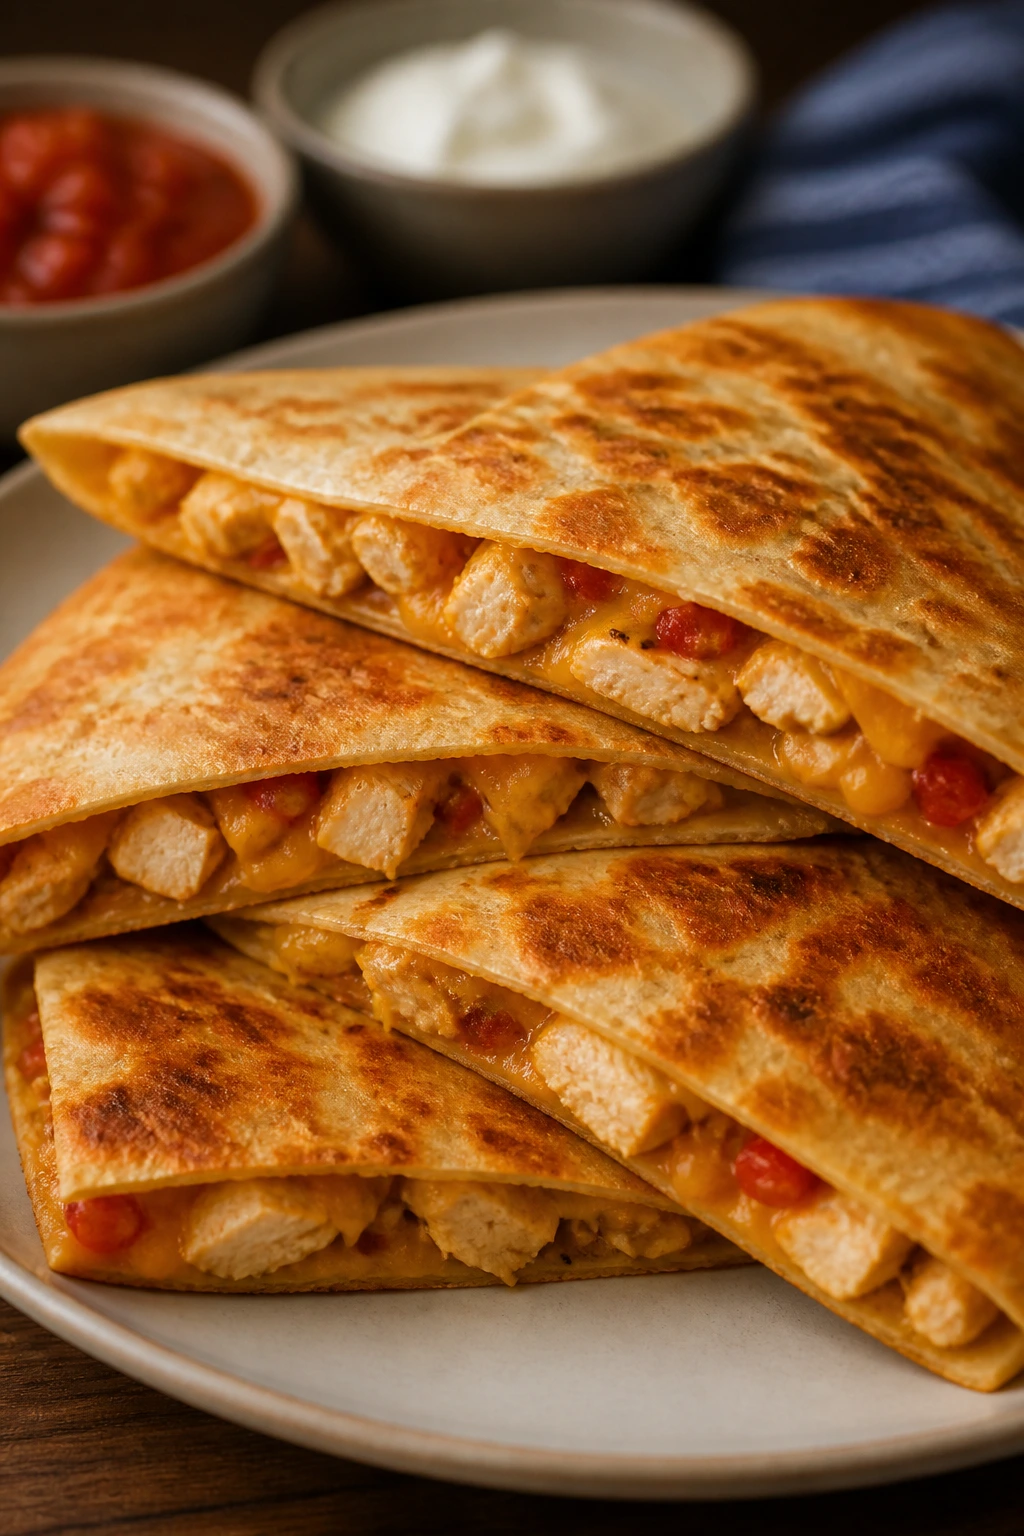
5. Chicken Quesadilla Triangles
Quesadillas are movie-night gold because they feel like dinner without asking for a fork. When you cut them into small triangles, they become easy hand food that still tastes like a real meal.
Why It Works:
Cooked chicken, cheese, and tortillas create a fast, pan-crisped snack that older kids can help assemble while younger kids sprinkle the cheese. The cheese melts around the chicken and locks everything together, which means the wedges don’t spill the second they leave the skillet. A little salsa on the side keeps the filling from tasting flat.
Key Ingredients:
- 2 cups cooked shredded chicken
- 2 cups shredded cheddar or Monterey Jack
- 4 large flour tortillas
- 1/2 cup salsa
- 1 teaspoon taco seasoning
- 1 tablespoon butter or oil
- 2 tablespoons chopped green onion, optional
Quick Steps:
- Mix the chicken with taco seasoning and a spoonful of salsa.
- Heat a skillet over medium heat and melt the butter.
- Lay one tortilla in the skillet, then scatter cheese over half the tortilla.
- Spoon chicken on top, add a little green onion, and fold the tortilla closed.
- Cook for 2 to 3 minutes per side, until golden and the cheese melts.
- Repeat with the remaining tortillas.
- Cut into triangles and serve warm.
Equipment for This Recipe:
- Large skillet
- Spatula
- Cutting board
- Sharp knife or pizza cutter
How to Serve This Dish:
Serve the triangles stacked like little wedges on a platter with salsa and sour cream in separate bowls. They sit nicely next to carrot sticks or cucumber rounds if you want to stretch the snack into a lighter dinner.
Pro Tips for This Recipe:
- Keep the heat at medium, not high. High heat burns the tortilla before the cheese melts.
- Don’t overfill. A thin, even layer makes cleaner wedges.
- Let the quesadillas rest for 1 minute before cutting so the cheese settles.
Variations on This Dish:
- Bean-and-Corn Quesadillas: Skip the chicken and use black beans plus corn.
- Spicy Salsa Verde Version: Use salsa verde and a pinch of cumin for a brighter flavor.
- Breakfast Quesadillas: Swap chicken for scrambled eggs and diced ham.
Common Mistakes to Avoid with This Dish:
- Cold filling: It keeps the cheese from melting on time. Warm the chicken first.
- Too much salsa inside: The tortilla turns wet. Serve extra salsa on the side instead.
- Cutting too early: The filling spills out. Give it a minute to settle.
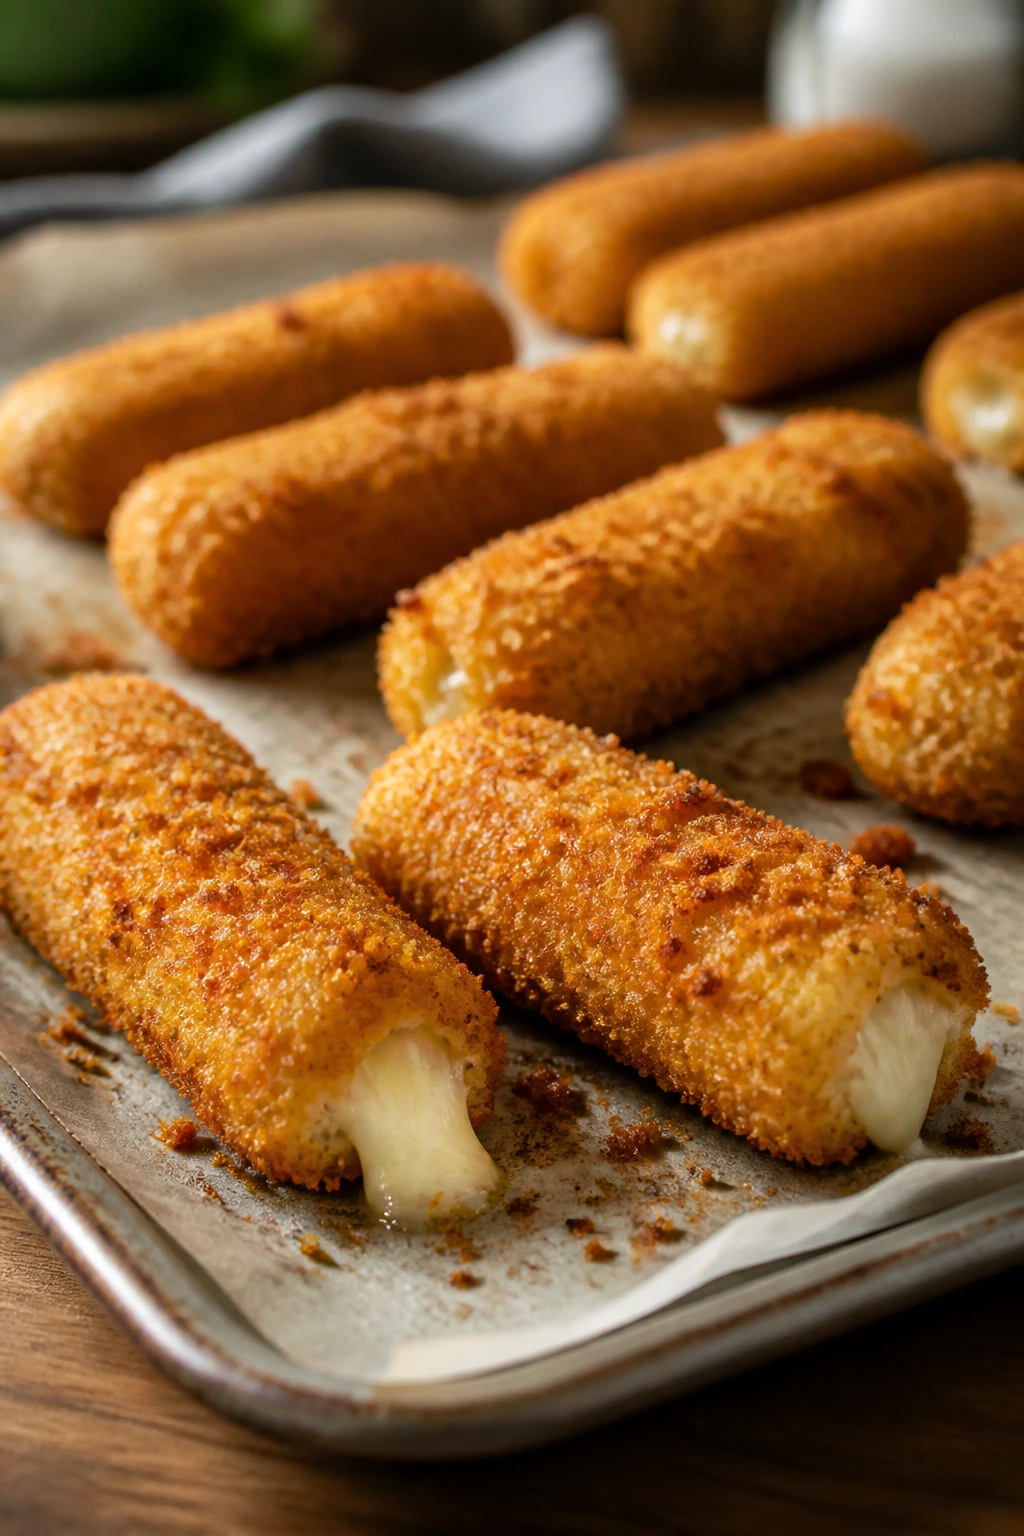
6. Oven-Baked Mozzarella Sticks
These are for the kids who want the “movie theater snack” experience at home, but without the fryer and the grease splatter. Crunchy outside, stretchy inside, and much easier to manage than they look.
Why It Works:
Freezing the breaded cheese sticks before baking keeps the coating in place and gives you a better cheese pull later. Kids can do almost all of the breading station work: flour, egg, crumbs, repeat. The oven does the rest, and a hot marinara cup turns the whole plate into something people hover over.
Key Ingredients:
- 12 string cheese sticks
- 1/2 cup all-purpose flour
- 2 large eggs
- 1 cup panko breadcrumbs
- 1 cup Italian-seasoned breadcrumbs
- 1 teaspoon garlic powder
- 1 teaspoon Italian seasoning
- 1/2 teaspoon fine salt
- 1 cup marinara sauce, for serving
Quick Steps:
- Freeze the cheese sticks for 30 minutes.
- Set up three bowls: flour in one, beaten eggs in one, and breadcrumbs mixed with seasonings in one.
- Coat each cheese stick in flour, then egg, then crumbs, then repeat the egg and crumb step for a thicker shell.
- Freeze the coated sticks for another 20 minutes.
- Bake at 425°F on a parchment-lined sheet pan for 8 to 10 minutes, until golden.
- Serve immediately with warm marinara.
Equipment for This Recipe:
- Sheet pan
- Parchment paper
- Three shallow bowls
- Freezer space
How to Serve This Dish:
Set them out in a line with the marinara right in the middle. They are best eaten hot, while the center is molten and the coating still has a little crunch.
Pro Tips for This Recipe:
- Don’t skip the freezer steps. Warm cheese leaks.
- Use panko for the crispest shell; it gives you more crunch than fine crumbs.
- Work fast once the sticks are breaded so the coating doesn’t soften before baking.
Variations on This Dish:
- Herby Mozzarella Sticks: Add dried basil and oregano to the crumb mix.
- Spicy Version for Older Kids: Stir a pinch of red pepper flakes into the breadcrumbs.
- Gluten-Free Swap: Use gluten-free flour and breadcrumbs, then freeze a little longer before baking.
Common Mistakes to Avoid with This Dish:
- Skipping the second breading layer: The cheese can break through. Double coat them.
- Baking too long: The cheese escapes. Pull them when the crumbs are golden.
- Serving after they cool: They lose the pull and the crunch. Eat them right away.
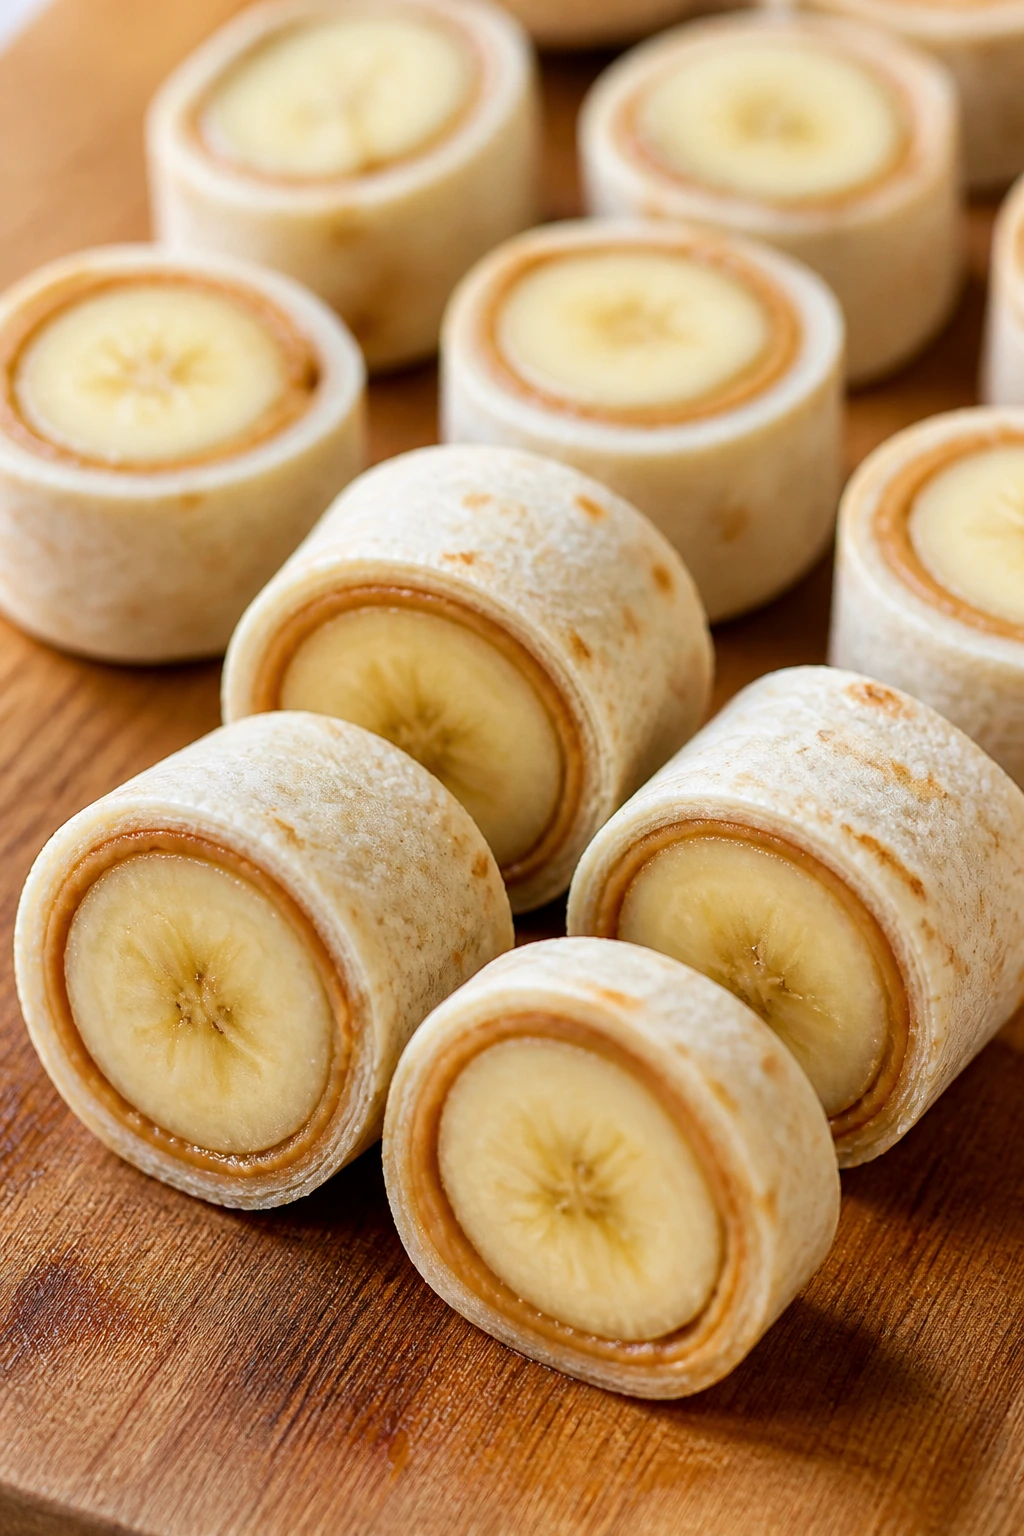
7. Banana Sushi Roll-Ups
Banana sushi is one of those silly, clever snacks that kids grin at before they even taste it. It’s soft, sweet, and easy to cut into little coin-shaped bites that look fancier than they are.
Why It Works:
A tortilla gives the banana a neat wrap, and nut butter acts like edible glue. Once you roll it up and slice it, the snack becomes a tray of tidy rounds that are easy for little hands to pick up. A sprinkle of granola or crushed cereal adds a little crackle so the texture doesn’t go completely soft.
Key Ingredients:
- 2 large flour tortillas
- 2 bananas
- 1/2 cup peanut butter or sunflower seed butter
- 1/4 cup granola, crushed slightly
- 2 tablespoons mini chocolate chips
- 1 tablespoon shredded coconut, optional
- 1 teaspoon honey, optional
Quick Steps:
- Lay the tortillas flat.
- Spread a thin layer of nut butter over each tortilla, leaving the edges clean.
- Place one banana near the edge of each tortilla.
- Sprinkle granola and chocolate chips over the banana.
- Roll the tortilla snugly around the banana.
- Slice into 1-inch rounds with a sharp knife.
- Serve right away or chill briefly for cleaner cuts.
Equipment for This Recipe:
- Cutting board
- Sharp knife
- Spoon or butter knife
- Small bowl for mix-ins
How to Serve This Dish:
Arrange the rounds cut-side up so the swirl shows. They make a nice sweet snack between savory bites, and they’re easy to tuck into a bento-style movie tray.
Pro Tips for This Recipe:
- Use bananas that are ripe but still firm.
- Don’t overfill the tortilla or the roll pops open.
- Chilling for 10 minutes before slicing gives neater rounds.
Variations on This Dish:
- PB&J Sushi: Spread a thin layer of jam under the nut butter.
- Chocolate Lover’s Roll-Up: Add cocoa powder to the nut butter and use crushed pretzels.
- Nut-Free Version: Use sunflower seed butter and skip the coconut if needed.
Common Mistakes to Avoid with This Dish:
- Overripe bananas: They squish and smear. Choose firm fruit.
- Thick nut butter layer: It squeezes out during rolling. Keep it thin.
- Cutting with a dull knife: The tortilla tears. Use a sharp blade.
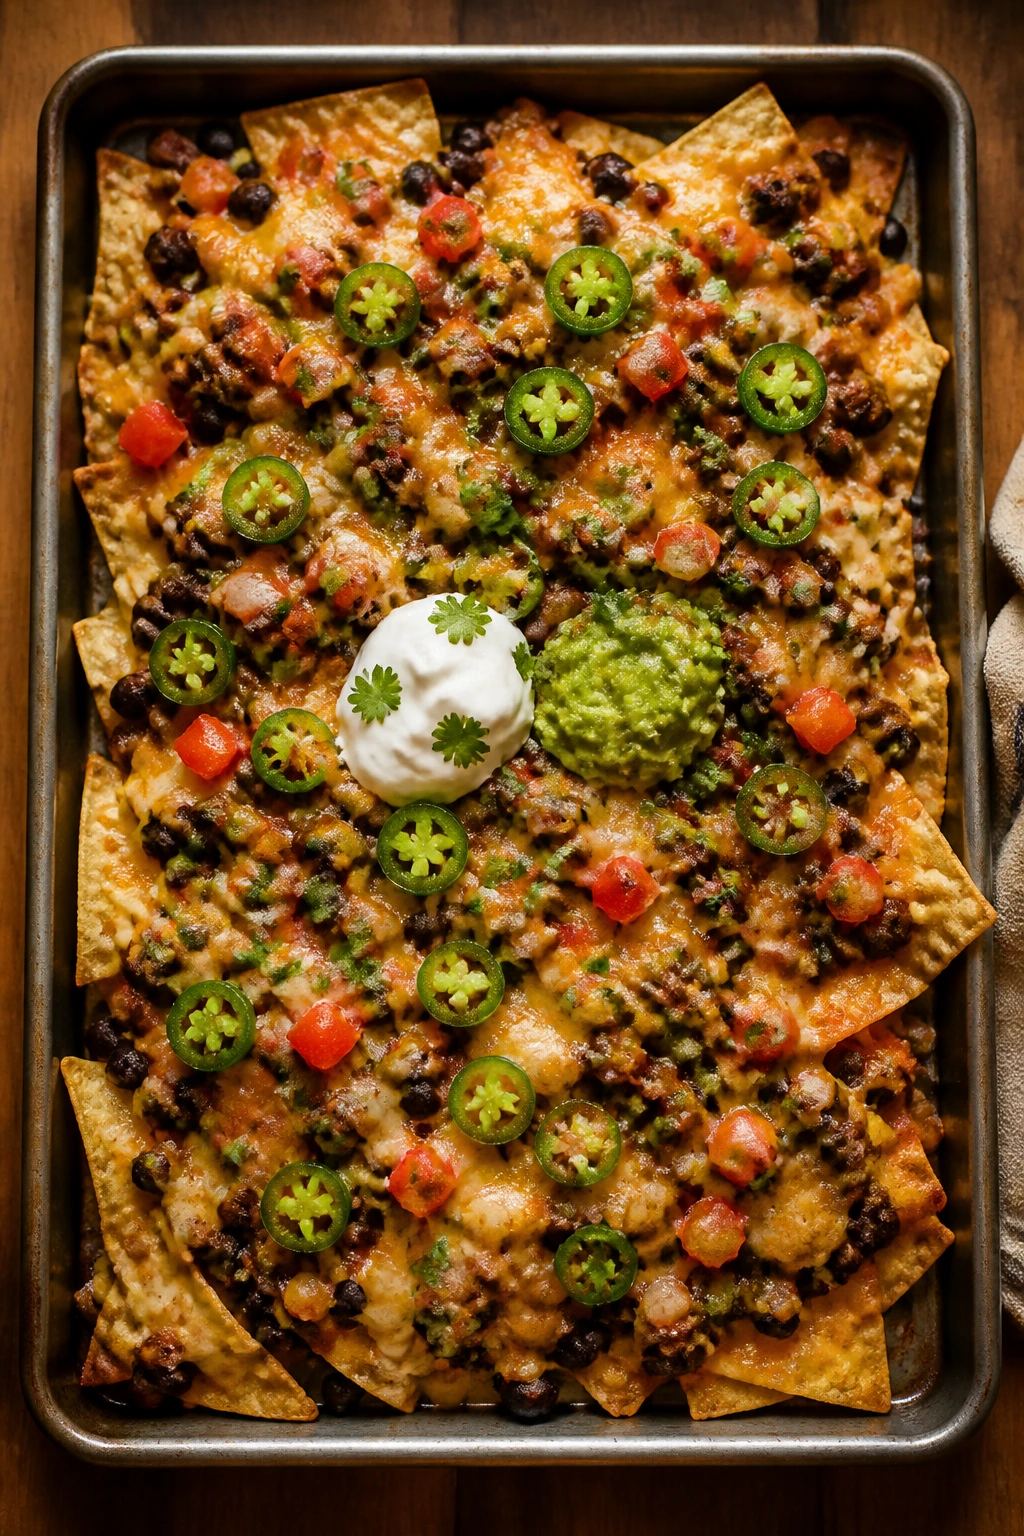
8. Sheet-Pan Nachos
Sheet-pan nachos are the closest thing to a guaranteed vanishing act on this list. The trick is simple: hot chips, plenty of cheese, and toppings that can handle a blast in the oven without turning to mush.
Why It Works:
A large sheet pan gives you enough surface area to layer chips in a single-ish layer, so every handful gets cheese instead of a dry bare chip. Kids can scatter beans, corn, and shredded cheese with almost no precision required, which is exactly how nachos should be made. The oven melts everything in about 8 minutes, and you can finish with cold toppings after baking.
Key Ingredients:
- 10 cups tortilla chips
- 2 cups shredded cheddar
- 1 cup shredded Monterey Jack
- 1 cup black beans, drained and rinsed
- 1 cup corn kernels
- 1/2 cup salsa
- 1/2 teaspoon chili powder
- 1 avocado, diced, optional
- 2 tablespoons chopped cilantro, optional
Quick Steps:
- Preheat the oven to 400°F.
- Spread half the chips on a sheet pan, then add half the cheese, beans, and corn.
- Repeat with the remaining chips and toppings.
- Bake for 7 to 9 minutes, until the cheese is melted and the edges of the chips are toasted.
- Spoon salsa over the top and add avocado and cilantro.
- Serve straight from the pan while the cheese is still soft.
Equipment for This Recipe:
- Large rimmed sheet pan
- Parchment paper
- Spoon
- Small knife for avocado
How to Serve This Dish:
Serve the nachos right on the pan for the low-effort win, or slide them onto a big platter if you want to make the table look a little more polished. Either way, extra napkins are not optional.
Pro Tips for This Recipe:
- Keep wet toppings like salsa and avocado for after baking.
- Use sturdy chips; thin ones collapse under the cheese.
- If you want more structure, add the beans and cheese in smaller pockets instead of one giant layer.
Variations on This Dish:
- BBQ Chicken Nachos: Use shredded chicken, barbecue sauce, and cheddar.
- Breakfast Nachos: Add scrambled eggs and crumbled bacon.
- Mild Kid Version: Skip chili powder and serve hot sauce on the side for adults.
Common Mistakes to Avoid with This Dish:
- Loading the pan too heavily: The chips steam and get soft. Use two layers at most.
- Baking too long: Cheese dries out and chips burn at the edges. Pull them as soon as they melt.
- Adding salsa before baking: The whole tray turns soggy. Finish with cold toppings after.
9. Mini Sloppy Joe Sliders
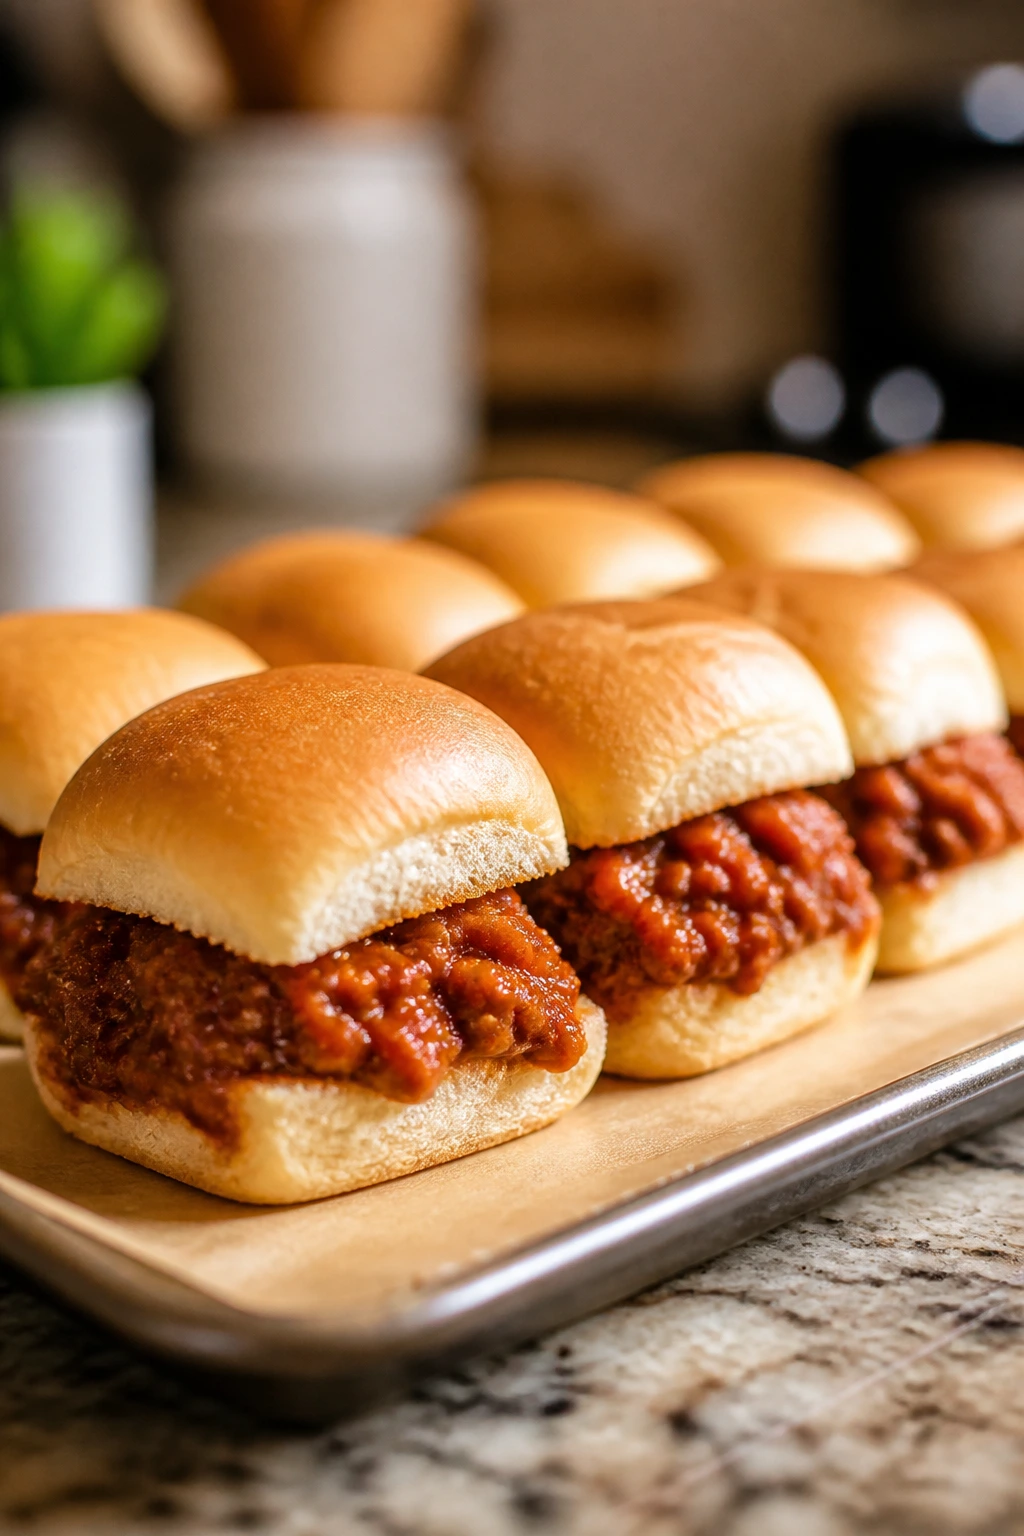
Mini sloppy joe sliders bring dinner energy to a movie-night spread without needing knives, forks, or a formal seat at the table. They’re saucy, soft, and ideal for bigger kids who want something filling between scenes.
Why It Works:
Ground beef or turkey cooks quickly with onion, ketchup, and a few pantry seasonings, which means the filling is done before anyone starts asking for dessert. Slider buns turn the mixture into something portable, and the smaller size keeps the filling from spilling everywhere. If you keep the sauce thick, the sandwiches hold together better than the messy full-size version.
Key Ingredients:
- 1 pound ground beef or turkey
- 1/2 cup finely diced onion
- 3/4 cup ketchup
- 2 tablespoons tomato paste
- 1 tablespoon Worcestershire sauce
- 1 teaspoon yellow mustard
- 1 teaspoon brown sugar
- 12 slider buns
Quick Steps:
- Cook the onion and ground meat in a skillet over medium heat until the meat is browned.
- Drain excess grease if needed.
- Stir in ketchup, tomato paste, Worcestershire sauce, mustard, and brown sugar.
- Simmer for 5 to 7 minutes, until thick and glossy.
- Spoon the filling onto the slider buns.
- Serve warm, with a pick through each slider if you want them to stay closed.
Equipment for This Recipe:
- Large skillet
- Wooden spoon
- Measuring cups and spoons
- Serving platter
How to Serve This Dish:
These are easiest to eat with a napkin in one hand and the remote nowhere near the other. Add pickle chips on the side if your crowd likes a sharper bite.
Pro Tips for This Recipe:
- Keep the filling thick; runny sauce leaks out of the buns.
- Toast the buns lightly if you want them to hold up longer.
- If kids are helping, let them spoon the filling after the meat is cooked and cooled for a minute.
Variations on This Dish:
- Turkey-and-Cheddar Sliders: Use ground turkey and top with a little cheddar.
- Sweet Onion Version: Add more onion and a splash of barbecue sauce.
- Meatless Sloppy Joes: Swap in lentils or crumbled plant-based meat.
Common Mistakes to Avoid with This Dish:
- Too much sauce: The buns collapse. Cook the filling down.
- Skipping the browning step: The meat tastes flat. Let it get some color.
- Serving cold buns: They turn gummy. Warm them briefly before filling.
10. Sweet and Salty Popcorn Mix
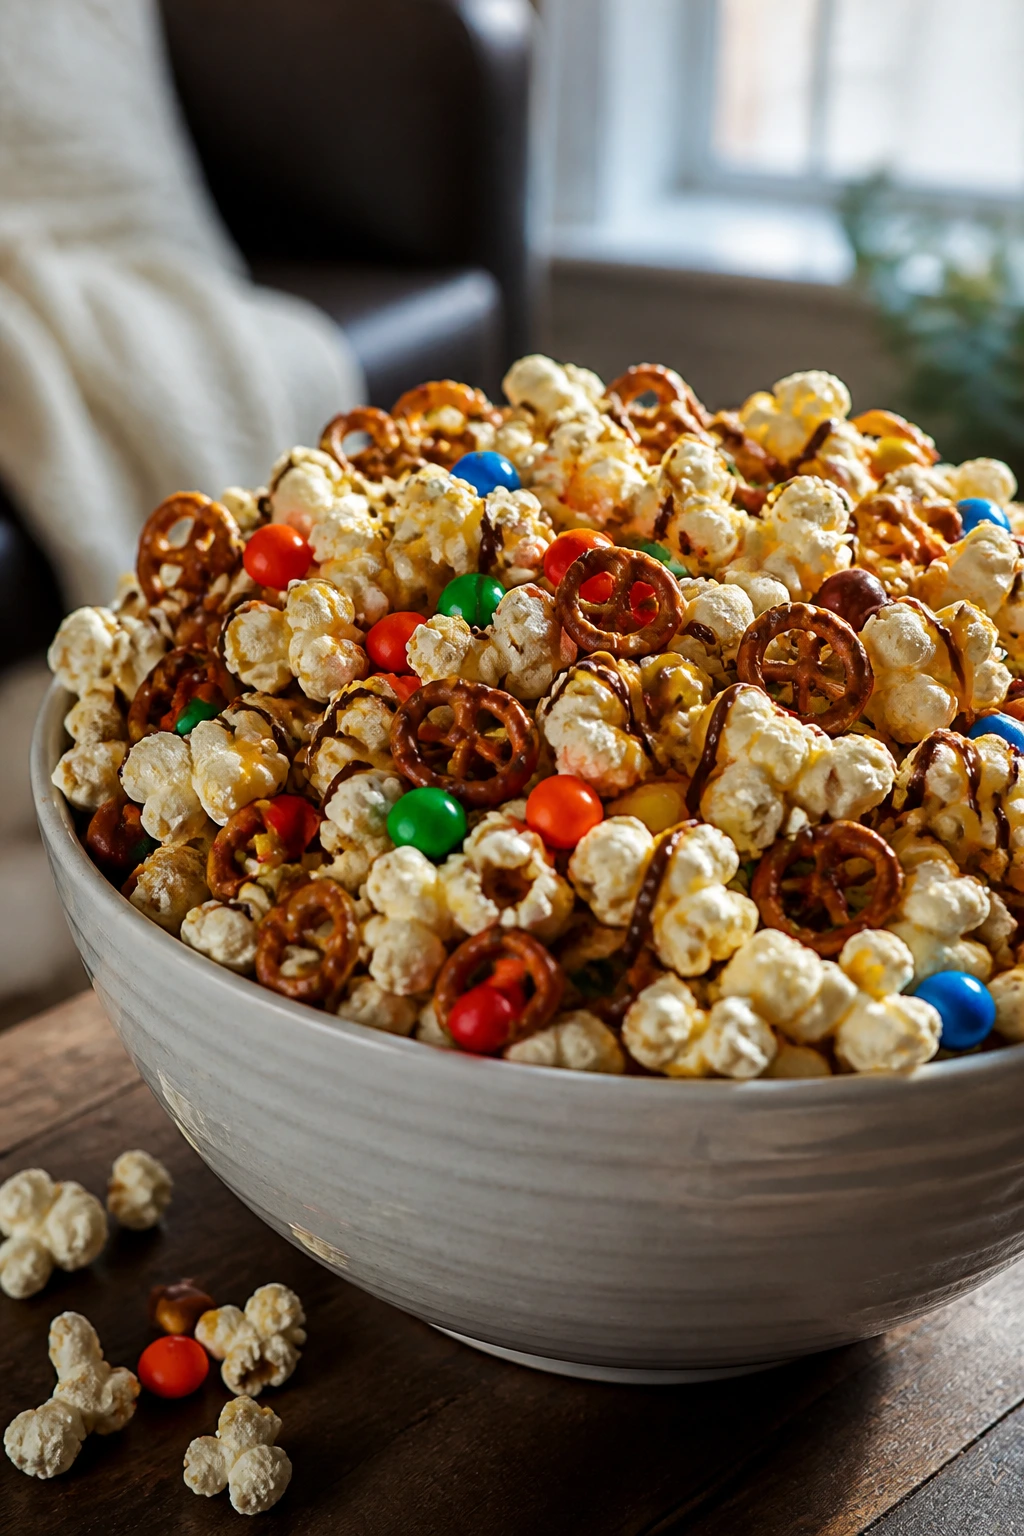
Popcorn mix is the snack version of a good coat pocket: it holds everything you want in one place. A little sweet, a little salty, and very hard to stop eating once the bowl hits the coffee table.
Why It Works:
Fresh popcorn has the light crunch you want, and a mix of pretzels, cereal, or chocolate pieces gives you contrast in every handful. Kids can measure, pour, and toss the ingredients in a big bowl, which makes this one feel especially hands-on. A quick drizzle of melted butter or white chocolate helps the seasoning cling instead of sinking to the bottom.
Key Ingredients:
- 8 cups plain popped popcorn
- 2 cups mini pretzels
- 1 1/2 cups cereal squares or oat cereal
- 1/2 cup chocolate chips or candy-coated chocolates
- 3 tablespoons melted butter
- 2 tablespoons powdered sugar
- 1/2 teaspoon cinnamon
- 1/4 teaspoon fine salt
Quick Steps:
- Place the popcorn, pretzels, cereal, and chocolate in a large bowl.
- Whisk the melted butter with powdered sugar, cinnamon, and salt.
- Drizzle the mixture over the snack bowl.
- Toss gently with clean hands or a large spoon until lightly coated.
- Spread on a tray for 10 minutes if you want the coating to set a little.
- Serve in smaller bowls so the big one doesn’t vanish immediately.
Equipment for This Recipe:
- Large mixing bowl
- Measuring cups
- Spoon or clean hands
- Sheet pan, optional for setting
How to Serve This Dish:
This belongs in one wide bowl on the snack table, with a second empty bowl nearby for shells, wrappers, or stray candy pieces. It’s the easiest thing in the collection to portion into small cups for younger kids.
Pro Tips for This Recipe:
- Use freshly popped popcorn, not stale bagged popcorn.
- Let the popcorn cool slightly before adding chocolate, or the chips soften too much.
- If you want a stronger coating, mix twice: once with butter, then once with the dry seasoning.
Variations on This Dish:
- Caramel Crunch Mix: Swap the butter mixture for a thin caramel drizzle.
- Chocolate Pretzel Mix: Add melted chocolate in a zigzag and use only pretzels and popcorn.
- Nutty Trail Mix Style: Stir in roasted peanuts or sunflower seeds for extra crunch.
Common Mistakes to Avoid with This Dish:
- Too much liquid seasoning: The popcorn gets soggy. Use a light drizzle.
- Adding hot butter to warm chocolate: The candy melts into clumps. Cool the popcorn first.
- Skipping the toss: Uneven coating leaves some bites bland. Mix thoroughly.
11. Baked Mac and Cheese Cups
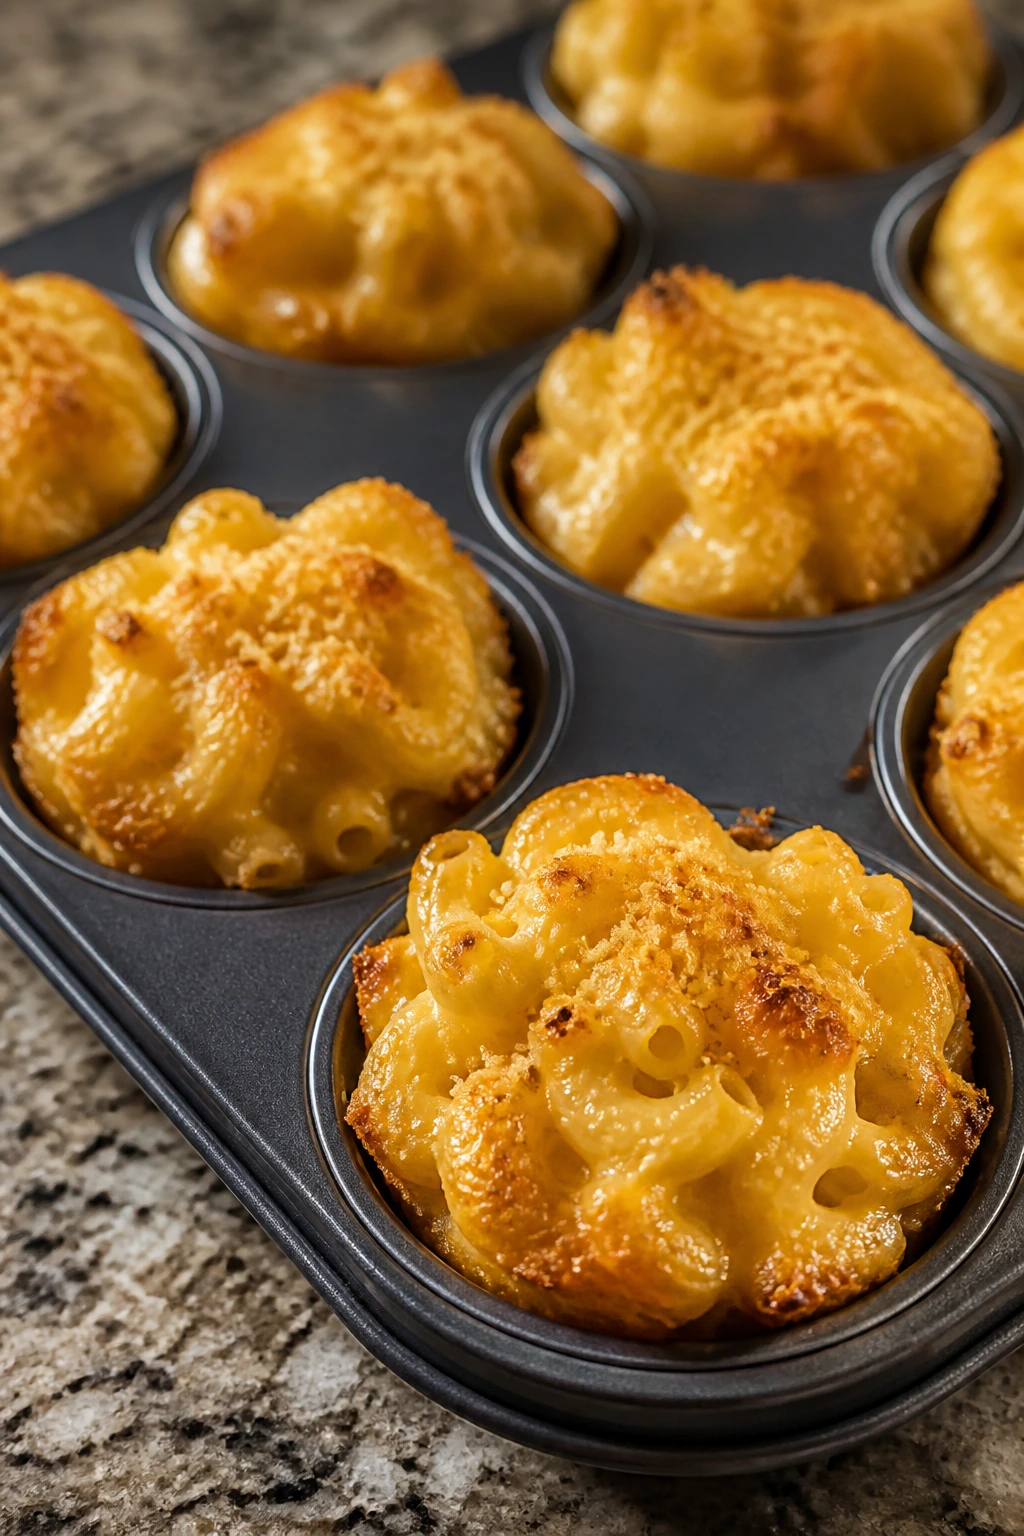
Mac and cheese cups are the sort of thing kids talk about like they invented them. They’re creamy in the middle, browned on top, and easy to eat with fingers if you’re in full movie mode.
Why It Works:
Baking the macaroni in a muffin tin gives you portions that hold together instead of slumping into a casserole scoop. Eggs help the cheese sauce set, so the cups stay neat enough to pick up after a short rest. Kids can stir the pasta, cheese, and milk mixture before it goes into the tin, which is one of those rare cooking jobs that feels substantial.
Key Ingredients:
- 3 cups cooked elbow macaroni
- 2 cups shredded cheddar
- 1 cup milk
- 2 large eggs
- 1/2 cup grated Parmesan
- 1/2 cup breadcrumbs
- 2 tablespoons melted butter
- 1/2 teaspoon garlic powder
- 1/2 teaspoon salt
Quick Steps:
- Preheat the oven to 375°F and grease a 12-cup muffin tin.
- Whisk the milk, eggs, garlic powder, and salt together in a large bowl.
- Stir in the cooked macaroni, cheddar, and Parmesan.
- Divide the mixture among the muffin cups and top with breadcrumbs mixed with melted butter.
- Bake for 20 to 25 minutes, until the tops are golden and the centers are set.
- Cool for 5 minutes before lifting the cups out.
Equipment for This Recipe:
- Muffin tin
- Large bowl
- Whisk
- Measuring cups
How to Serve This Dish:
Serve these warm on a tray with a little bowl of ketchup or hot sauce for the grown-ups. They’re sturdy enough to hold during a commercial break and rich enough that two cups may be enough for younger kids.
Pro Tips for This Recipe:
- Slightly undercook the pasta so it doesn’t go mushy in the oven.
- Grease the muffin tin well or the cups stick.
- Let them cool a few minutes before removing; the shape firms up as they rest.
Variations on This Dish:
- Bacon Mac Cups: Add crumbled cooked bacon to the mix.
- Broccoli Cheddar Cups: Stir in very small steamed broccoli florets.
- Three-Cheese Version: Use cheddar, mozzarella, and Parmesan for a softer melt.
Common Mistakes to Avoid with This Dish:
- Using too much milk: The cups won’t set. Stick to the measured amount.
- Packing the cups too loosely: They fall apart. Press the mixture in gently.
- Skipping the rest time: The cups need a few minutes to firm up before serving.
12. Fruit and Cheese Skewers with Honey Dip
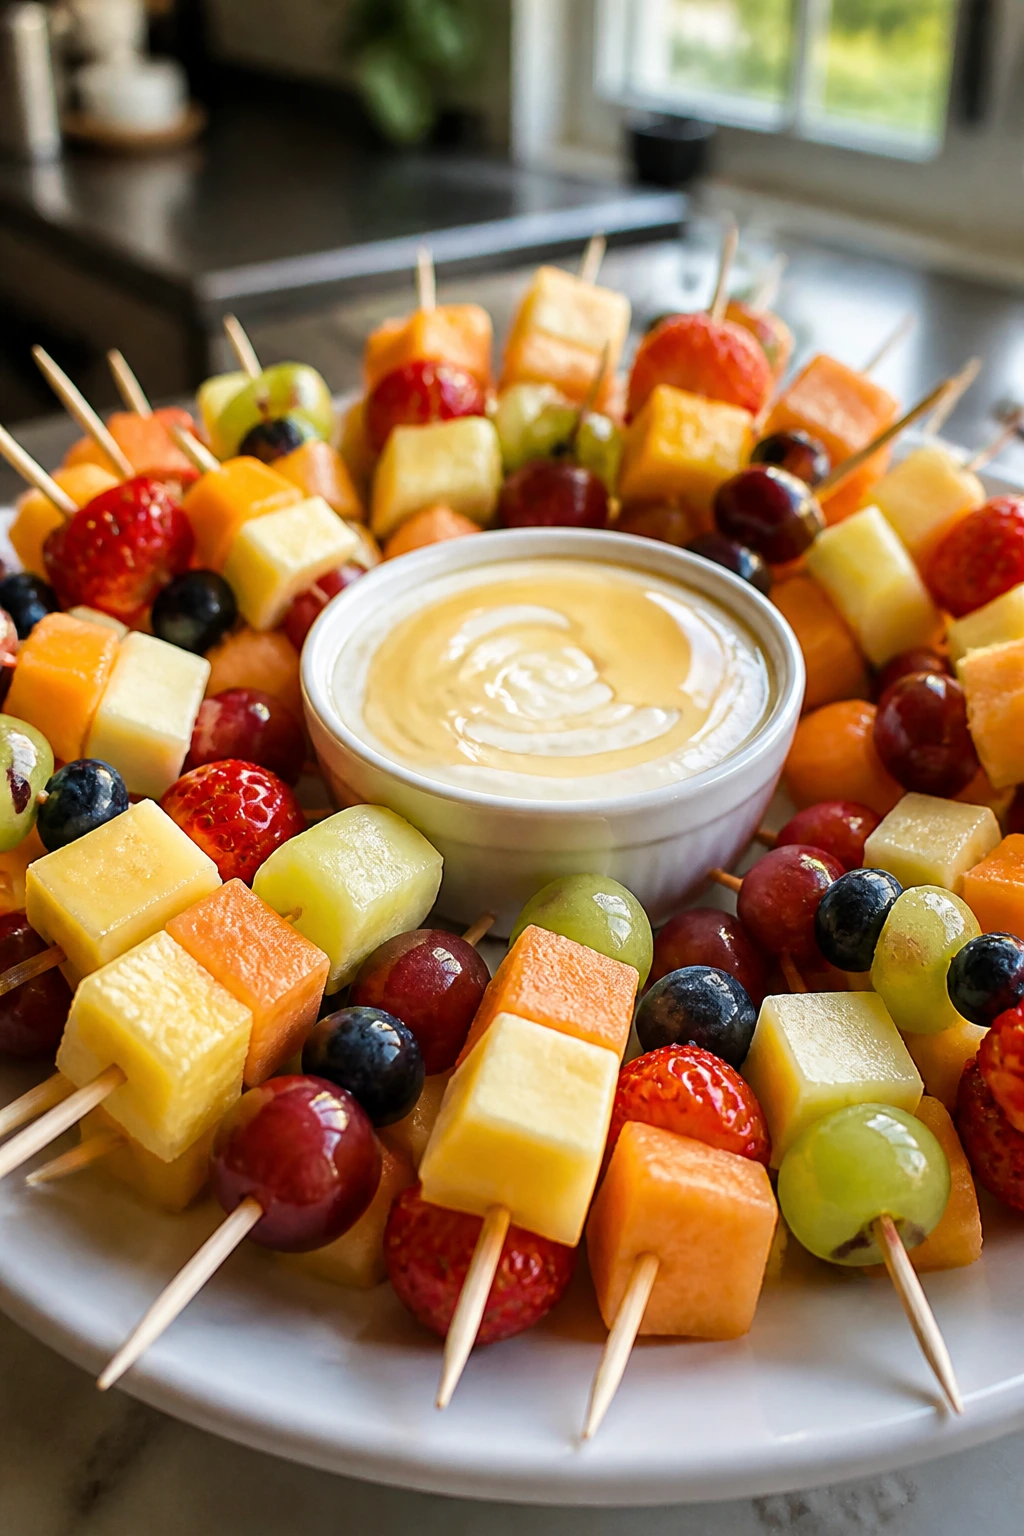
This is the snack tray’s clean-cut cousin. It looks bright, it travels well from counter to couch, and it gives you a nice break from all the melted cheese and sugar.
Why It Works:
Threading fruit and cheese onto skewers turns simple ingredients into something that feels finished and deliberate. Kids can choose the color pattern, which keeps them interested while you’re dealing with the rest of the spread. The honey yogurt dip adds a little creaminess and lets the skewers read as a snack, not a salad that wandered into the wrong room.
Key Ingredients:
- 1 cup seedless grapes
- 1 cup strawberries, hulled
- 1 cup cubed cheddar cheese
- 1 cup cubed mozzarella cheese
- 1 cup melon cubes
- 12 small wooden skewers
- 1 cup vanilla yogurt
- 1 tablespoon honey
Quick Steps:
- Wash and dry the fruit thoroughly.
- Cut the cheese into bite-size cubes.
- Thread fruit and cheese onto the skewers in alternating patterns.
- Stir the yogurt and honey together for the dip.
- Arrange the skewers on a platter and place the dip in the center.
- Chill until serving if you want them extra cold.
Equipment for This Recipe:
- Cutting board
- Paring knife
- Small wooden skewers
- Small bowl for dip
How to Serve This Dish:
Line the skewers up like little color sticks across the platter. They’re useful as a palate reset between rich bites, and they keep kids reaching for something fresh without making the spread feel too serious.
Pro Tips for This Recipe:
- Pat the fruit dry so the skewers don’t slide around.
- Use firm cheese cubes, not shredded cheese, or the whole thing becomes awkward.
- For younger kids, make shorter skewers or use toothpicks with the tips trimmed.
Variations on This Dish:
- Tropical Skewers: Use pineapple, mango, and mozzarella.
- Berry-Heavy Version: Alternate strawberries, blueberries, and cheddar.
- Nut-Free Dip Boost: Add a little vanilla and cinnamon to the yogurt dip.
Common Mistakes to Avoid with This Dish:
- Wet fruit: It makes the platter slippery. Dry everything well.
- Oversized cubes: They fall off the sticks. Keep the pieces bite-sized.
- Leaving them out too long: Fruit softens and sweats. Chill until serving.
13. Crispy Pita Chips with Fresh Salsa
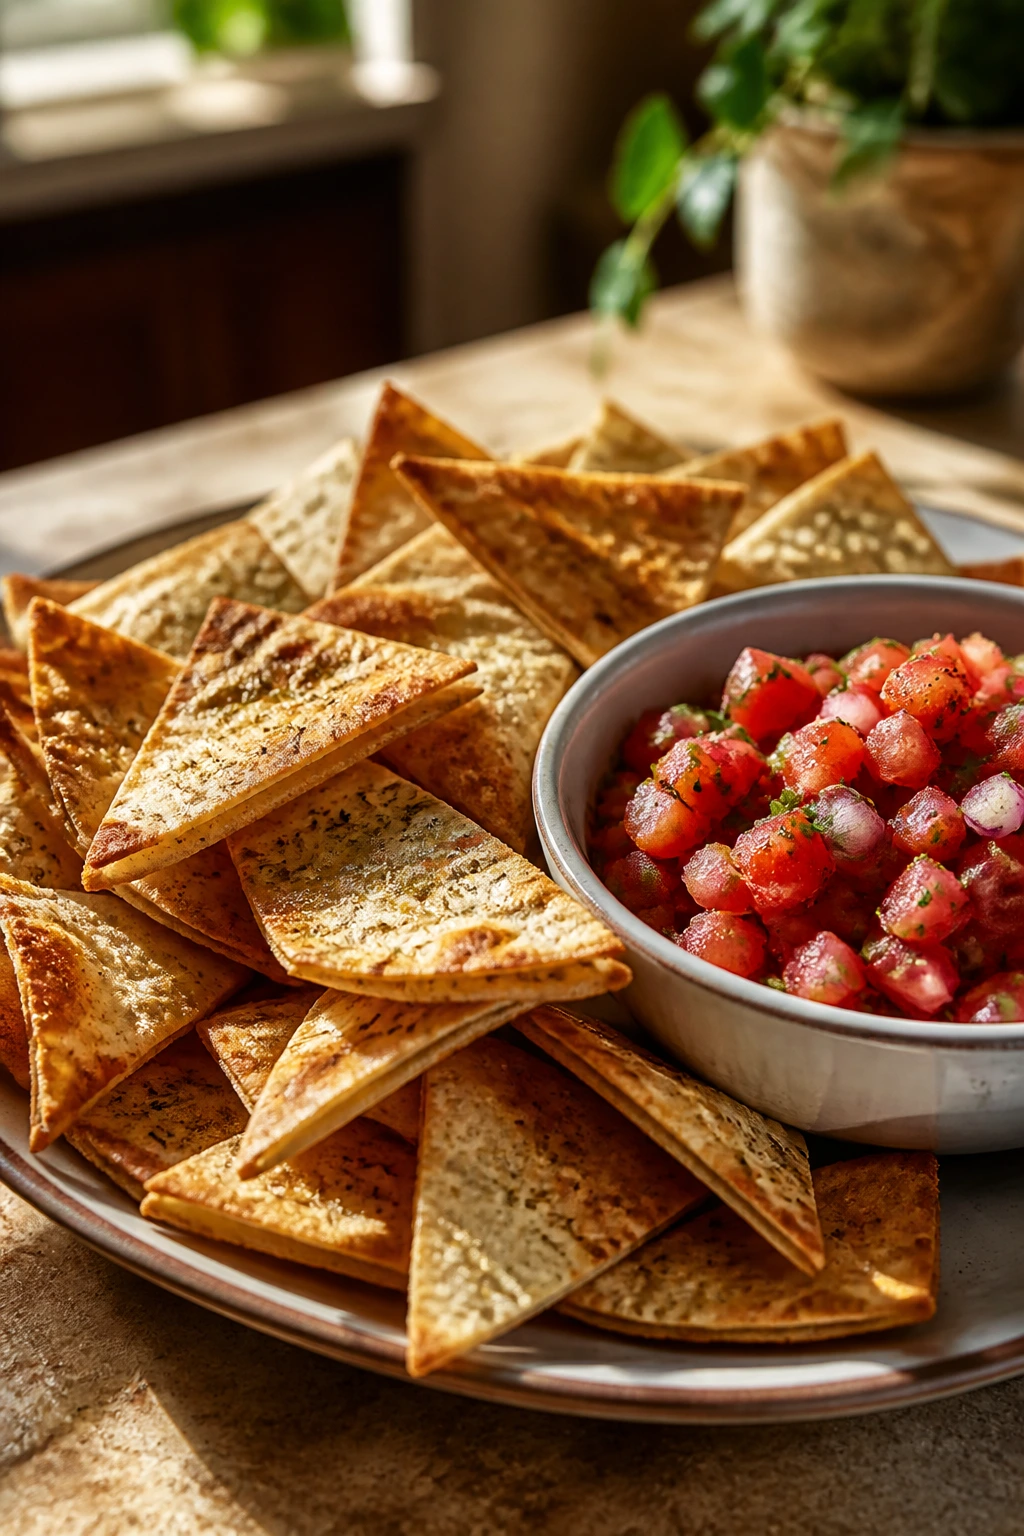
When you want something crunchy that can sit next to everything else on the table, pita chips are a solid move. Homemade salsa gives them a sharp, bright finish that cuts through all the cheese and chocolate on movie night.
Why It Works:
Cutting pita bread into wedges and baking them with oil makes a sturdy chip that holds up to dip without snapping in the salsa bowl. Kids can brush, sprinkle, and toss the chips in a bowl before they go into the oven. The salsa uses simple chopped vegetables, so even if the knife work is uneven, the flavor still lands where it should.
Key Ingredients:
- 4 pita breads
- 2 tablespoons olive oil
- 1/2 teaspoon salt
- 1/2 teaspoon garlic powder
- 4 ripe tomatoes, diced
- 1/4 cup finely diced red onion
- 1 tablespoon lime juice
- 2 tablespoons chopped cilantro
- 1 small jalapeño, seeded and minced, optional
Quick Steps:
- Preheat the oven to 400°F.
- Cut the pitas into triangles and place them in a bowl.
- Toss with olive oil, salt, and garlic powder.
- Spread on a sheet pan and bake for 8 to 10 minutes, turning once, until crisp.
- Mix the tomatoes, onion, lime juice, cilantro, and jalapeño for the salsa.
- Serve the chips warm with the salsa in a separate bowl.
Equipment for This Recipe:
- Sheet pan
- Sharp knife or kitchen scissors
- Mixing bowl
- Spoon
How to Serve This Dish:
Set the chips beside the heavier snacks so people can rotate between crunchy and rich. They’re especially good when you want one thing on the table that doesn’t need cheese to feel complete.
Pro Tips for This Recipe:
- Keep an eye on the chips in the last minute; they go from crisp to too dark fast.
- Dice the tomatoes small so the salsa doesn’t turn watery.
- If your tomatoes are bland, a tiny pinch of sugar helps.
Variations on This Dish:
- Roasted Tomato Salsa: Use roasted tomatoes for a deeper flavor.
- Corn Salsa: Add thawed corn kernels for sweetness.
- Everything Bagel Chips: Swap garlic powder for everything bagel seasoning.
Common Mistakes to Avoid with This Dish:
- Too much oil: The chips turn greasy. A light coat is enough.
- Hot salsa on hot chips: The texture softens fast. Keep them separate until serving.
- Using juicy tomatoes without draining: The salsa gets soupy. Remove some seeds if needed.
14. Skillet S’mores Dip
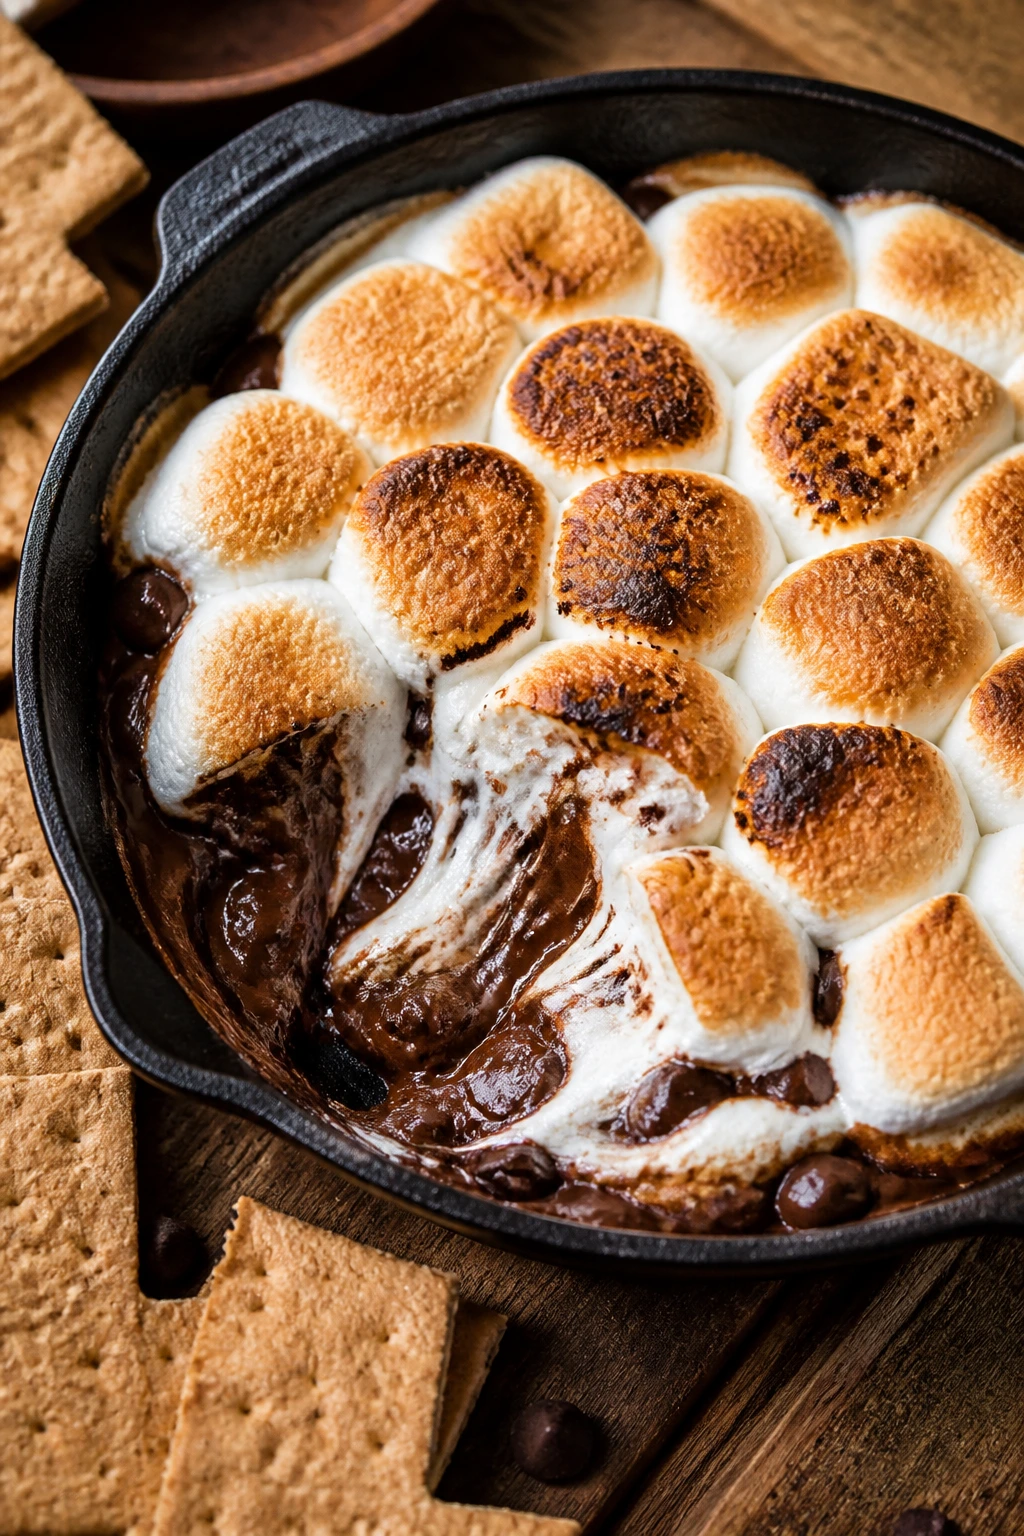
This one is pure movie-night theater in a skillet. Melty chocolate on the bottom, toasted marshmallows on top, and graham crackers waiting nearby like they know exactly what’s coming.
Why It Works:
A small oven-safe skillet or baking dish turns into a self-serve dessert that tastes like a campfire without requiring one. Kids can pour the chocolate chips and arrange the marshmallows, which makes the prep feel almost ceremonial. A short bake gives you softened chocolate and bronzed marshmallows without burning the edges.
Key Ingredients:
- 2 cups semi-sweet chocolate chips
- 1 tablespoon heavy cream or milk
- 2 cups mini marshmallows
- 1 tablespoon butter, for the skillet
- 12 graham crackers, broken into pieces
- 1/4 cup chopped strawberries or banana slices, optional
Quick Steps:
- Preheat the oven to 400°F.
- Butter a small oven-safe skillet or baking dish.
- Spread the chocolate chips in the bottom and drizzle with cream or milk.
- Top with marshmallows in a single layer.
- Bake for 6 to 8 minutes, until the marshmallows are puffed and golden.
- Serve right away with graham crackers for dipping.
Equipment for This Recipe:
- Small cast-iron or oven-safe skillet
- Oven mitts
- Spoon
- Graham crackers for dipping
How to Serve This Dish:
Set the skillet on a trivet in the middle of the table and let everyone scoop from the edges inward. If you add fruit, keep it on the side so the dip stays rich and classic.
Pro Tips for This Recipe:
- Use a skillet that holds heat but isn’t too huge; a small one keeps the chocolate thick.
- Watch the marshmallows closely in the last minute.
- Let the dip cool for 30 seconds before serving so it doesn’t scorch mouths.
Variations on This Dish:
- Peanut Butter S’mores Dip: Swirl a few tablespoons of peanut butter into the chocolate.
- Mint Chocolate Version: Add a drop or two of peppermint extract.
- White Chocolate Dip: Swap in white chocolate chips and top with crushed cookies.
Common Mistakes to Avoid with This Dish:
- Overbaking: The marshmallows go from toasted to black fast. Pull it early.
- Skipping the cream: Chocolate can seize a little if it’s too dry. A splash helps.
- Waiting too long to serve: The chocolate firms up. Eat it while it’s warm.
15. Mini Taco Cups
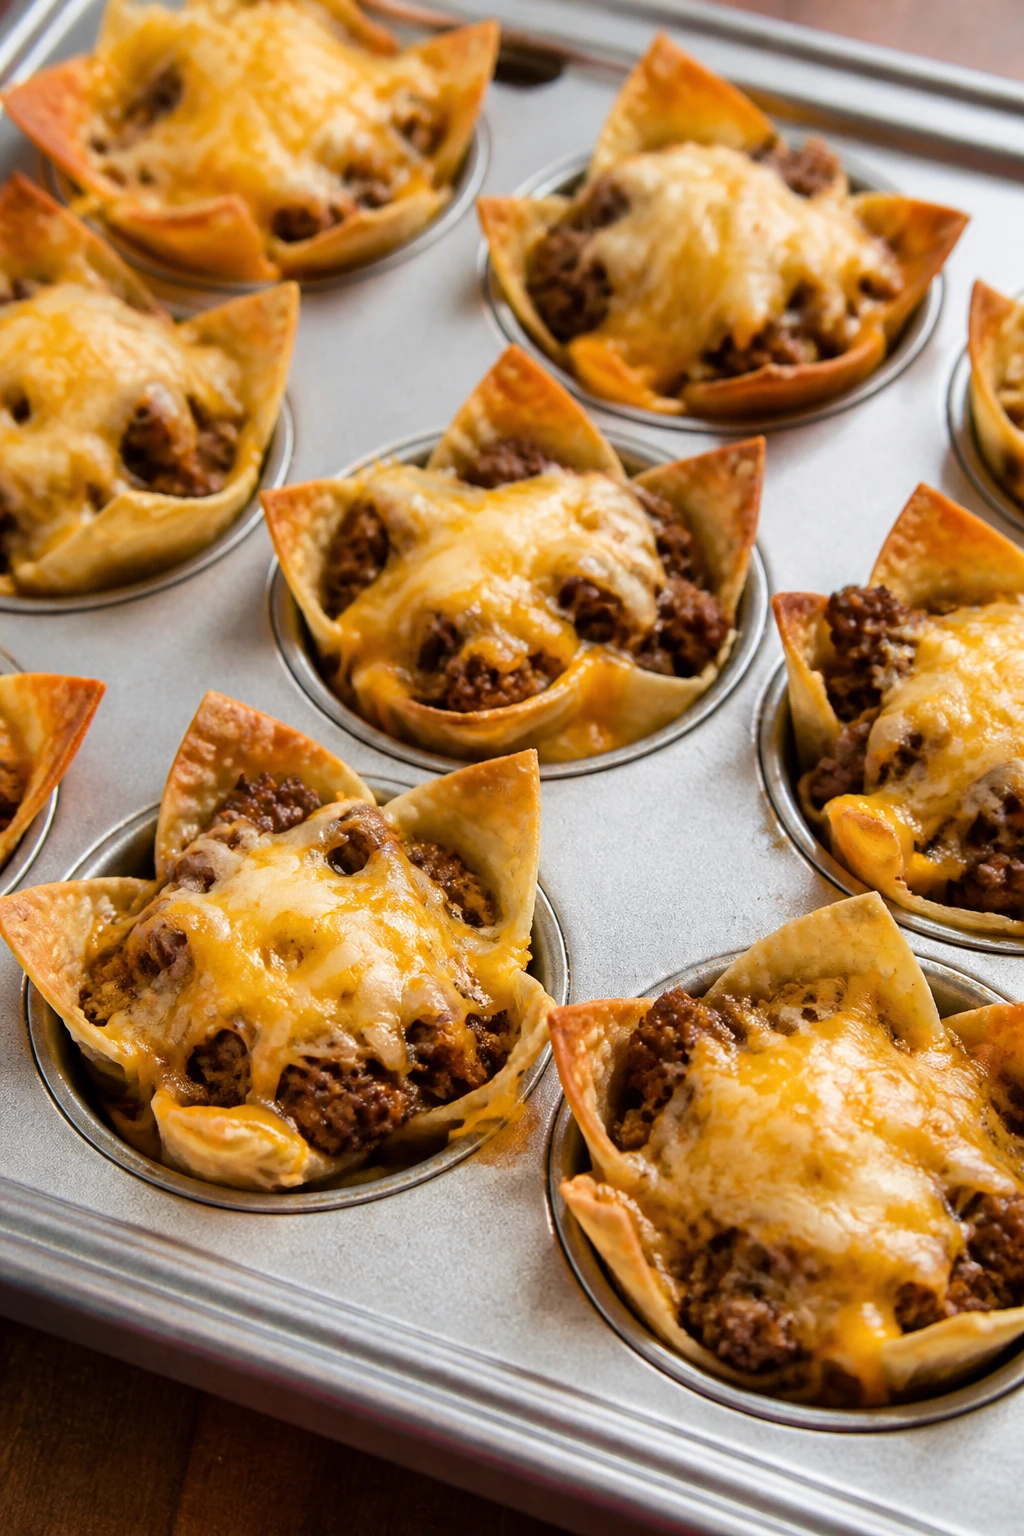
Mini taco cups are what happen when tacos put on their movie-night shoes. They’re crisp, handheld, and tidy enough that you won’t be hunting for stray lettuce under the couch cushions.
Why It Works:
Wonton wrappers bake into little cups that hold seasoned taco filling without collapsing, which is the whole point here. Kids can press the wrappers into the muffin tin, sprinkle cheese, and spoon in the filling with enough independence to feel proud of the result. You get the flavor of tacos in a portion that’s easier to eat in the dark.
Key Ingredients:
- 24 wonton wrappers
- 1 pound ground beef or turkey
- 1 tablespoon taco seasoning
- 1/2 cup water
- 1 cup shredded cheddar
- 1/2 cup salsa
- 1/2 cup shredded lettuce
- 1/4 cup sour cream
- 2 tablespoons diced tomato, optional
Quick Steps:
- Preheat the oven to 375°F and grease a 12-cup muffin tin.
- Press 2 wonton wrappers into each muffin cup, offsetting them so the edges make a cup shape.
- Brown the meat in a skillet, stir in taco seasoning and water, and simmer for 3 to 4 minutes.
- Spoon the filling into the wrappers and top with cheese.
- Bake for 10 to 12 minutes, until the edges are golden and crisp.
- Top with salsa, lettuce, sour cream, and tomato after baking.
Equipment for This Recipe:
- Muffin tin
- Skillet
- Spoon
- Small bowl for toppings
How to Serve This Dish:
These are the savory snack I’d put near the center of the table, because they eat like one-bite tacos and hold up better than a pile of loose chips. Keep the cold toppings off to the side so every cup stays crisp.
Pro Tips for This Recipe:
- Press the wrappers into the tin firmly so they form a real cup.
- Drain the meat well if it’s greasy, or the bottoms soften.
- Add lettuce and sour cream after baking, not before.
Variations on This Dish:
- Bean-and-Cheese Cups: Use black beans instead of meat for a vegetarian version.
- Mild Taco Cups: Skip the spicy salsa and use plain tomato salsa.
- Nacho-Style Cups: Add a few crushed tortilla chips on top before baking for extra crunch.
Common Mistakes to Avoid with This Dish:
- Overfilling the cups: They spill over and stick. Fill just below the rim.
- Adding wet toppings early: The wrappers soften. Keep toppings for after baking.
- Not greasing the tin: The cups cling to the pan. A light coat of oil matters.
Why Movie Night Food Works Best When Kids Help Make It

The best part of a family movie night spread isn’t only the eating. It’s the feeling that the table got built by the same people who are going to sit around it.
When kids help make the food, the whole evening slows down in a good way. They’re more likely to eat the apple rings they helped assemble, or the quesadilla wedges they cut into triangles, or the popcorn mix they shook in a giant bowl until the chocolate chips looked evenly scattered. That ownership matters more than people admit.
There’s also a practical side. Kids who can dump, stir, sprinkle, press, and skewer are saving you time while learning how to work in a kitchen without needing a lecture every 30 seconds. That’s worth something. A lot, actually.
Essential Equipment for These Recipes
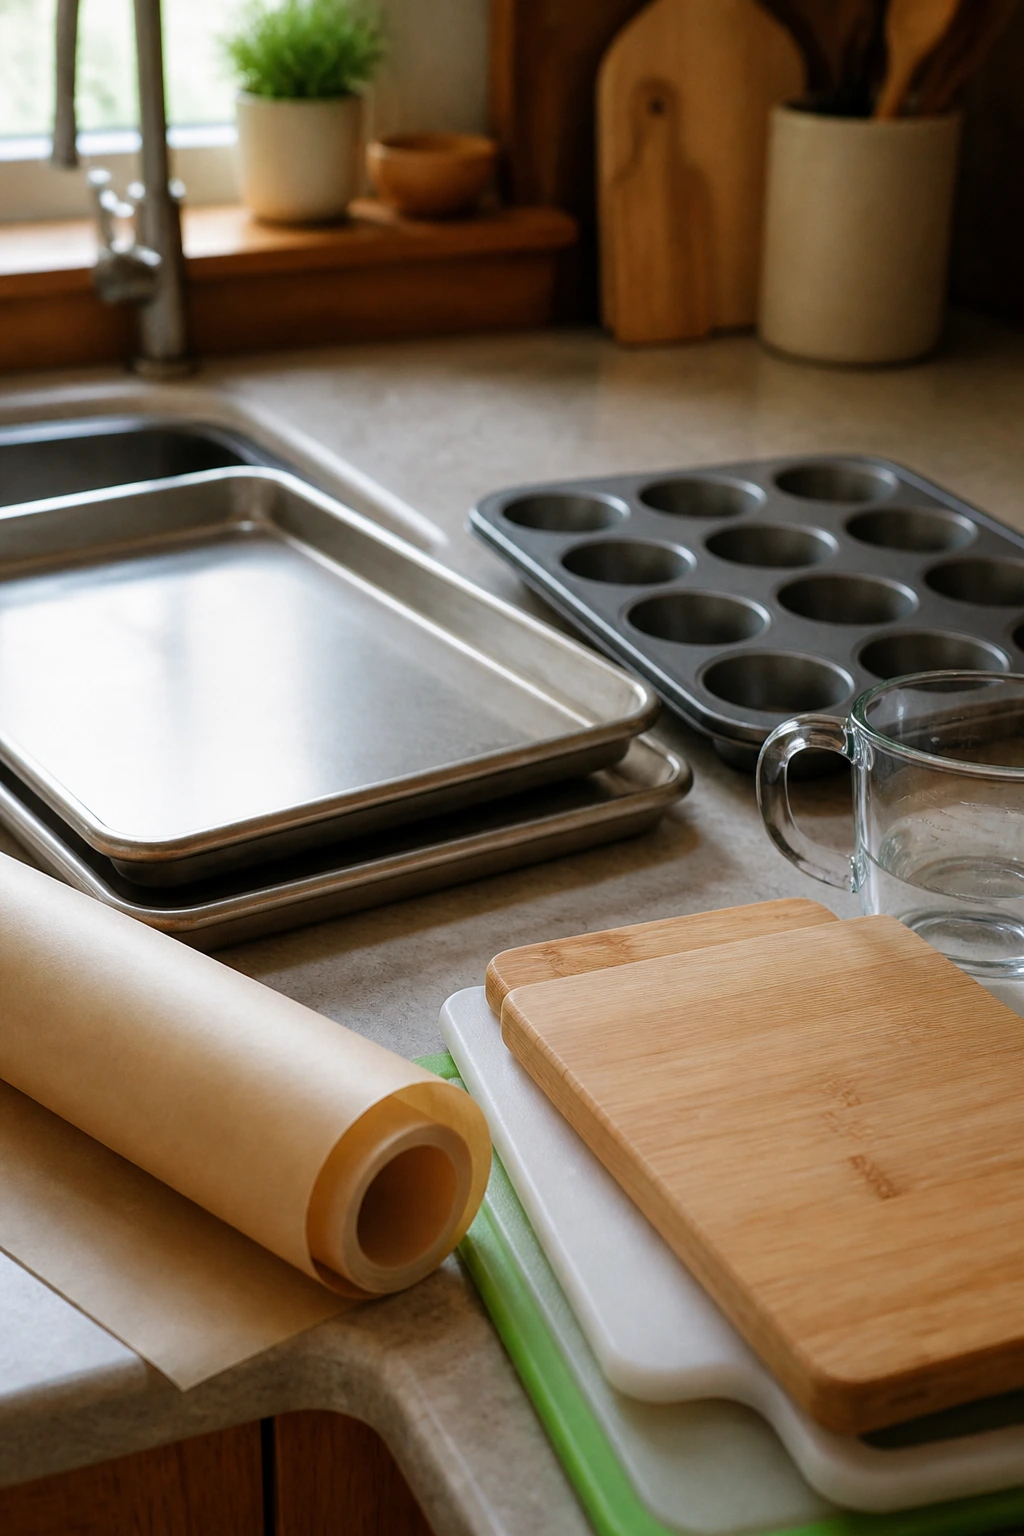
- Sheet pans: You’ll use them for pizza rounds, nachos, chips, and mozzarella sticks, so having two lined up makes life easier.
- Parchment paper: It keeps cheese from welding itself to the pan and makes cleanup painless.
- Muffin tin: Needed for mac and cheese cups and mini taco cups; a nonstick one works best.
- Large mixing bowls: Popcorn mix, cereal bars, and taco fillings all need room to toss without landing on the counter.
- Sharp knife or pizza cutter: Clean cuts matter for quesadillas, pita rounds, and banana sushi.
- Small skillet or oven-safe skillet: Handy for s’mores dip and quick fillings.
- Measuring cups and spoons: Helpful when you want kids to be part of the process without guessing.
- Slotted spoon: Useful for pretzel bites if you make the baking-soda bath.
- Cutting board: A sturdy one keeps slicing tasks safer and less messy.
- Airtight storage containers: Necessary if you’re making cereal bars, chips, or leftover snack portions ahead of time.
Smart Shopping and Ingredient Tips
A movie-night snack lineup lives or dies on a few workhorse ingredients, so shop with the texture in mind. For the cheesy recipes, choose cheeses that melt well and shred cleanly: mozzarella, Monterey Jack, cheddar, and string cheese all earn their place here. Pre-shredded cheese is fine for speed, but if you want the smoothest melt for dips and quesadillas, a block shredded at home behaves a little better.
Tortillas and pitas matter more than people think. Pick tortillas that bend without cracking and pitas that are sturdy enough to hold toppings. Thin tortillas tear when you fold them; thick, soft ones usually hold up better for quesadillas and roll-ups. For pitas, look for ones without huge air pockets if you want a flatter pizza base.
Fruit should be firm. Apples with a crisp bite, bananas that are ripe but not collapsing, grapes that are dry on the outside, and strawberries with bright color all make the snack table look fresher and last longer. If you’re building skewers or apple rings, shop the fruit last so it doesn’t sit bruised in the car.
For pantry items, keep an eye on popcorn kernels, crispy cereal, breadcrumbs, and salsa. Plain popcorn tastes cleaner than heavily buttered bagged popcorn when you’re mixing it with chocolate or sugar. Salsa with a lower water content works better for nachos and taco cups because it doesn’t flood the chips or wrappers.
How to Serve These Recipes

Presentation:
Put savory snacks on one side of the table and sweet snacks on the other. That sounds fussy, but it keeps chocolate away from salsa and helps kids aim their hands instead of digging blindly through everything at once.
Accompaniments:
A movie-night spread likes a few simple sidekicks: carrot sticks, cucumber rounds, extra napkins, and maybe a small bowl of pickles or fruit. For the sweeter recipes, keep milk, sparkling water, or lemonade nearby. For the savory ones, salsa, ranch, sour cream, and marinara cover most of the bases without overcomplicating the table.
Portions:
Plan on 2 to 4 small savory bites per child if you’re serving several recipes, or 1 to 2 more filling items like sliders, mac cups, or quesadilla triangles. Adults usually take a little more, especially if the snacks are replacing dinner. If you’re feeding a bigger crowd, double the chips, cheese, and fruit first; those go fastest.
Beverage Pairing:
Cold milk fits the sweeter snacks and s’mores dip. Lemonade, sparkling apple cider, or plain seltzer with lime works across the savory trays and keeps the meal feeling bright instead of heavy.
Additional Tips and Flavor Boosters
Flavor Enhancement: A pinch of flaky salt on the sweet snacks changes everything. Sprinkle it lightly over the s’mores dip, apple rings, or cereal bars, and the sweetness tastes sharper and cleaner.
Customization: Build one snack tray as the “plain” version and one as the “bonus” version. Keep one pizza round or quesadilla tray mild, then add jalapeños, hot sauce, or extra herbs to the adult side so nobody has to negotiate toppings at the table.
Serving Suggestions: Use small bowls for dips instead of one giant communal pool. Marinara, salsa, cheddar dip, and yogurt all behave better when they’re separated, and the table looks less chaotic too.
Make-It-Yours: For dairy-free eaters, use plant-based cheese where it melts decently and rely more on salsa, fruit, nut butter, or chocolate for flavor. For nut-free homes, sunflower seed butter steps in nicely for the apple rings, banana sushi, and cereal bars, and it doesn’t turn the room into an allergy gamble.
Make-Ahead, Storage, and Reheating Guidance

A few of these recipes are best made right before the movie starts, but plenty can be prepped earlier if you’re willing to split the work. The no-bake cereal bars keep well in the fridge for 5 days, wrapped or sealed in an airtight container. The popcorn mix stays crisp for about 3 days at room temperature if you keep moisture away from it. Fruit skewers and apple rings are best the same day, though the dip can be mixed a day ahead and stored separately.
Quesadilla triangles, mini taco cups, mac and cheese cups, and sloppy joe sliders all hold up in the fridge for 3 to 4 days. Reheat quesadillas and sliders in a skillet or 350°F oven until warmed through, which keeps them from going soggy. Mac cups warm well in a 325°F oven for about 10 minutes, or in the microwave in short bursts if you’re not worried about a slightly softer top.
Mozzarella sticks are a little more fragile after baking. They’re best fresh, but leftovers can be reheated in an air fryer or oven for a few minutes until the coating crisps again. Don’t microwave them unless you like molten cheese and a soft shell. The s’mores dip doesn’t store well after baking, so that one should be treated as a finish-the-pan dessert. If you want to save time, you can measure the chocolate and marshmallows into the skillet earlier and keep it covered until the oven’s ready.
Variations and Adaptations to Try
Nut-Free Snack Tray:
Swap peanut butter for sunflower seed butter in the apple rings, banana sushi, and cereal bars. Use a quick check on the labels for cereal, chocolate, and crackers, because hidden nuts show up in the least convenient places. This version is the easiest way to keep the whole table inclusive without giving up the sweet snacks.
Gluten-Free Movie Spread:
Use certified gluten-free tortillas, gluten-free breadcrumbs, GF cereal, and rice-based crackers. The pizza rounds, popcorn mix, nachos, fruit skewers, and s’mores dip all adapt cleanly, which means nobody has to feel like they got the “special diet” tray. Keep the texture strong by choosing sturdy chips and breads, not the flimsy stuff.
Dinner-First Version:
If the movie starts after a long day, lean into the filling recipes: mini taco cups, sloppy joe sliders, quesadilla triangles, and mac and cheese cups. Serve them with fruit skewers and popcorn mix so the table still feels like snack night, just with more staying power. This is the version I’d make when everyone shows up hungry enough to eat the remote.
Lower-Sugar Mix:
Cut the honey in the cereal bars and fruit dip by a tablespoon or two, skip the chocolate chips on the banana sushi, and keep the sweet drizzle for just one or two dishes. Apples, popcorn, pretzels, and cheese hold the table together when the sugar is dialed back a little. It still feels fun. Just less sticky.
Spice-Up-for-Adults Tray:
Keep one tray plain for kids, then add pickled jalapeños, hot sauce, pepper jack, or chili flakes to a second tray for the grown-ups. The nachos, taco cups, quesadillas, and sliders all welcome a sharper edge without needing a totally separate recipe. That split keeps everyone happy and saves you from over-seasoning the whole batch.
Common Mistakes to Avoid
The biggest mistake is making everything too complicated. Movie night food should not require three knife techniques, a reduction sauce, and a last-minute panic over whether the cheese is browning too fast. The more assembly you can hand to kids, the better the evening usually goes.
Another trap is overfilling. Nachos get soggy, quesadillas split, pretzel bites dry out, and taco cups overflow when you try to pile on one more spoonful. A lighter hand gives you cleaner food, and cleaner food gets eaten faster because people aren’t fighting with it.
Heat management trips people up too. Mozzarella sticks need the freezer, s’mores dip needs a close eye, and pizza rounds and chips can go from crisp to scorched in the blink of an oven light. If your oven runs hot, check the tray a minute early. That one habit saves more snacks than any fancy trick.
Skipping a resting period is another classic mistake. Quesadillas need a minute before cutting, mac cups need a few minutes in the tin, and cereal bars need chilling before slicing. Rush the cooling, and the shape falls apart.
Finally, don’t mix wet toppings with crisp bases too soon. Salsa, avocado, yogurt, and fruit juices all want to soften chips, pitas, and crackers if they sit together too long. Keep the wet pieces separate until the very end, and the whole spread holds its texture longer.
Frequently Asked Questions
Which of these recipes are easiest for younger kids to help with?
The easiest jobs are stirring, sprinkling, pressing, and skewer-building. Apple rings, popcorn mix, fruit skewers, banana sushi, and cereal bars give younger kids real participation without asking them to handle hot pans or sharp tools.
What can I make ahead of time for movie night?
Cereal bars, popcorn mix, salsa, cheese dip, and the taco or sloppy joe fillings can all be prepped earlier in the day. Keep crunchy parts separate and assemble close to showtime so the texture stays right.
How do I keep snacks warm during the movie?
Use a low oven, around 200°F, for items that need to stay hot for a short stretch, like sliders or quesadillas. For dips and s’mores, treat them as serve-immediately recipes and bring them out once everyone is settled.
How can I make this whole spread nut-free?
Swap sunflower seed butter for peanut butter and check labels on cereal, chocolate, and crackers. The rest of the collection is easy to adapt because the snacks rely more on cheese, fruit, tortillas, and popcorn than on nuts themselves.
Can I turn these into a dinner instead of just snacks?
Yes, and that’s one of the nicest things about the list. Quesadillas, sliders, taco cups, and mac cups can absolutely carry the meal, while the fruit, chips, and popcorn act as the movie-night extras.
What if my kids are picky about texture?
Build the table in layers. Put out crisp things, soft things, and dip things separately so nobody gets stuck with a mixed texture they hate. A picky kid can make a tray out of just apple rings, pretzels, and pizza wedges without feeling left out.
Do I need special equipment for any of these?
Nothing wild. A sheet pan, muffin tin, skillet, mixing bowls, parchment paper, and a sharp knife cover most of the collection. The only item that really benefits from a specific pan is the s’mores dip, which works best in a small oven-safe skillet.
How do I keep fruit from browning?
Use firm fruit, cut it close to serving time, and pat it dry before arranging it. For apple rings, a light brush of lemon juice helps, but don’t soak them or they start tasting sharp in a bad way.
Can I double the recipes for a bigger crowd?
Yes, and several of them scale very well. Pizza rounds, popcorn mix, nachos, and cereal bars double cleanly; just use two pans if the batch gets crowded. The only recipes that need more care are the baked cheese ones, because overcrowding the pan changes how they melt and crisp.
Lights, Snacks, Action
Movie night food gets better when it looks like the people in the room had a hand in making it. That’s really the heart of these recipes. They’re not fussy, they’re not fragile, and they give kids something meaningful to do before the first scene starts.
A tray of pizza rounds, fruit skewers, popcorn mix, and a skillet of s’mores dip feels generous without turning your kitchen into a catering job. And if one child only wants the pretzel bites while another camps out by the quesadilla tray, fine. That’s the whole point.
Pick a few savory things, add one sweet thing, leave the wrappers where people can reach them, and let the snack table carry the evening. The right movie-night spread doesn’t need perfection; it just needs enough good bites to make everyone stay put for one more scene.