
A picnic dinner lives or dies on one blunt test: does it still taste good after an hour in a cooler and a little jostling in the car? The food that looks pretty on the kitchen counter can fall apart fast once you’re eating off a paper plate, balancing a drink in one hand, and trying not to drop a cherry tomato into the grass. The winners are the dishes that stay sturdy, hold their flavor at room temperature, and don’t punish you for packing them a little early.
That’s why easy picnic dinners have their own rules. You want salt, acid, and texture. You want foods that travel without sulking. And you want enough variety that the spread feels like dinner, not a snack tray someone forgot to finish.
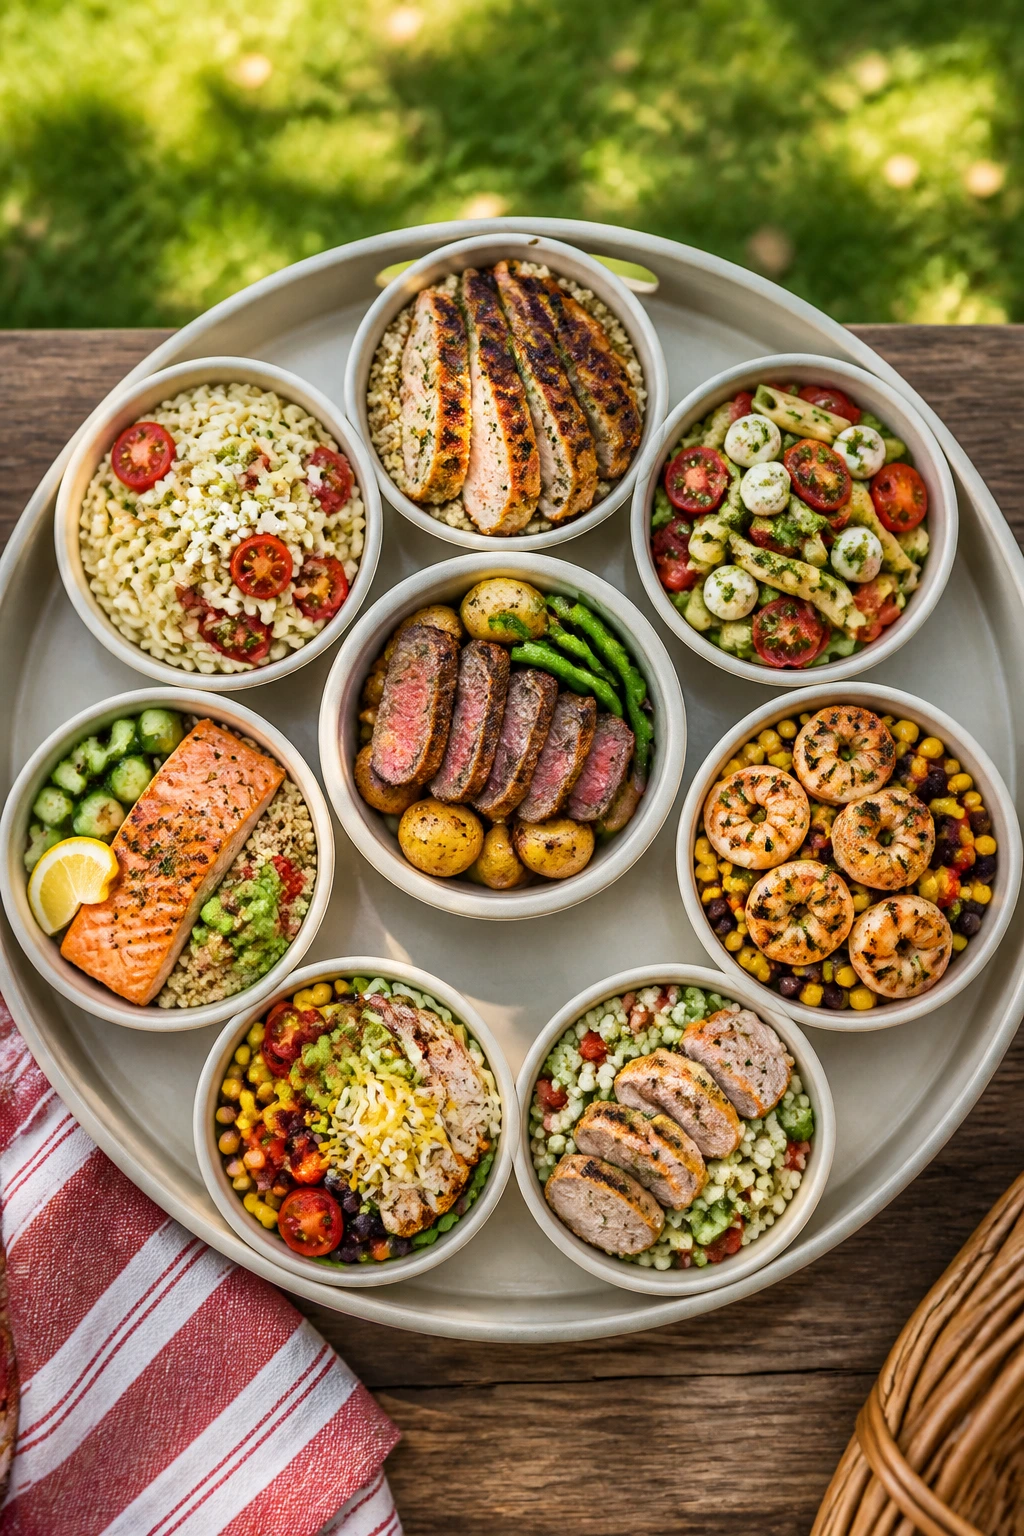
These 35 summer easy dinners for a summer picnic lean hard into that sweet spot. Some are wraps and sandwiches that don’t collapse into a mess. Some are pasta salads and grain bowls that taste even better after a short chill. A few are grilled mains that can be eaten warm or cold without losing their charm. The common thread is practical: no fussy plating, no sauce explosions, no wilted greens doing the sad little flop they do after ten minutes in heat.
Why You’ll Love This Collection
- Built for travel: Every recipe here survives a cooler ride, a picnic blanket, and a few minutes out of refrigeration without turning into soup.
- Dinner-sized, not snack-sized: These are full meals with enough protein, starch, and vegetables to work as supper.
- Good hot, cold, or room temp: That flexibility matters when the grill is far away, the ice packs are melting, or people arrive at different times.
- Short ingredient lists: Most of these rely on familiar pantry items, rotisserie chicken, canned beans, sturdy bread, or leftover grains.
- Easy to pack and serve: Wraps, bowls, skewers, and cut-and-serve slabs keep utensils to a minimum.
- Easy to scale up: Most can feed a small family or a bigger crowd without changing the method.
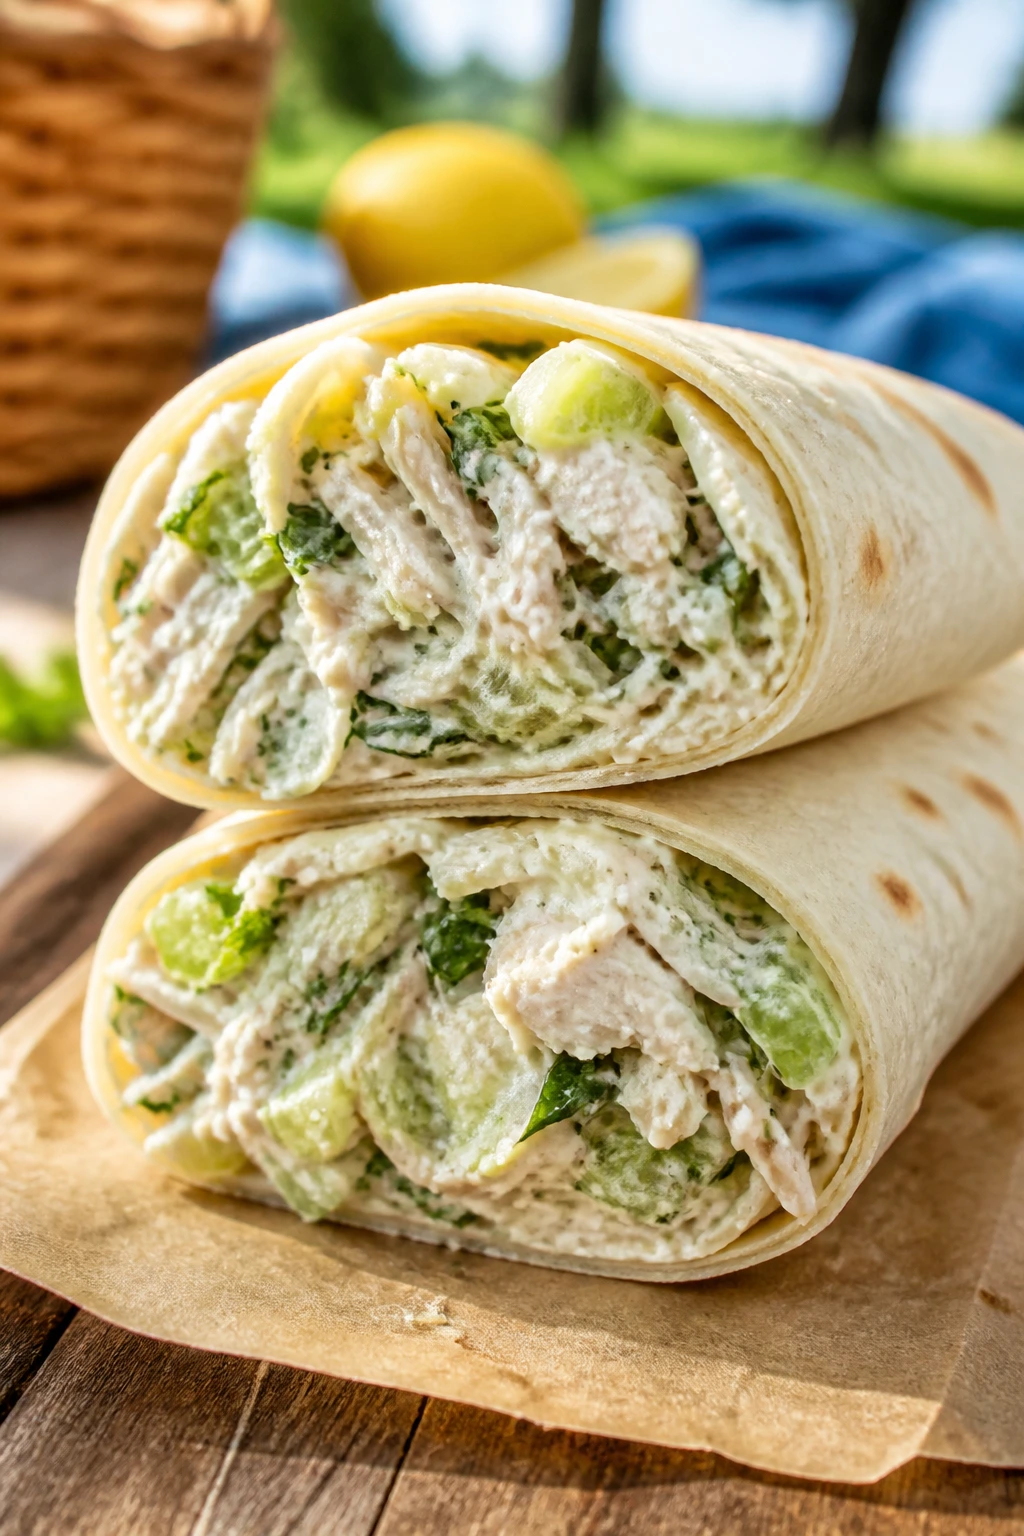
1. Lemon Herb Chicken Salad Wraps
The filling here tastes bright and cool, with enough crunch from celery to keep the chicken from feeling heavy. I like these when the weather is sticky and nobody wants a hot meal. They eat cleanly, which matters more than people admit.
Why It Works:
Rotisserie chicken makes this fast, and Greek yogurt keeps the filling creamy without drowning it. Lemon juice and dill wake everything up after chilling, so the wrap still tastes fresh an hour later.
Key Ingredients:
- 2 cups shredded rotisserie chicken
- 1/3 cup plain Greek yogurt
- 2 tablespoons mayonnaise
- 1 tablespoon lemon juice
- 1 tablespoon chopped dill
- 1 celery stalk, finely diced
- 2 scallions, thinly sliced
- 4 large flour tortillas
- 1 cup torn romaine
- Salt and black pepper, to taste
Quick Steps:
- Stir the yogurt, mayonnaise, lemon juice, dill, salt, and pepper in a bowl.
- Fold in the chicken, celery, and scallions until coated.
- Warm the tortillas for 10 seconds so they roll without cracking.
- Layer romaine and chicken salad down the center of each tortilla.
- Roll tightly, wrap in parchment, and chill for 15 minutes before slicing.
Equipment for This Recipe:
- Medium mixing bowl
- Rubber spatula or spoon
- Cutting board
- Sharp knife
How to Serve This Dish:
Cut each wrap on a slight diagonal and tuck the halves into parchment. Add kettle chips, grapes, or a handful of snap peas on the side. Two halves make a solid lunch-to-dinner portion.
Pro Tips for This Recipe:
- Drain the celery after chopping if it looks watery.
- Use tortillas that are at least 10 inches wide.
- Pack the lettuce separately if you’re making these more than a few hours ahead.
Variations on This Dish:
- Curry Chicken Wraps: Add 1 teaspoon curry powder and a spoonful of chopped apple.
- Avocado Crunch Wraps: Swap half the mayo for mashed avocado.
- Deli-Style Version: Use sliced turkey instead of chicken and add a little Dijon mustard.
Common Mistakes to Avoid with This Dish:
- Don’t overfill the wrap. It tears during the first bite.
- Don’t skip the chill time. The filling sets up and slices cleaner.
- Don’t use dry, brittle tortillas unless you enjoy cracks and leaks.
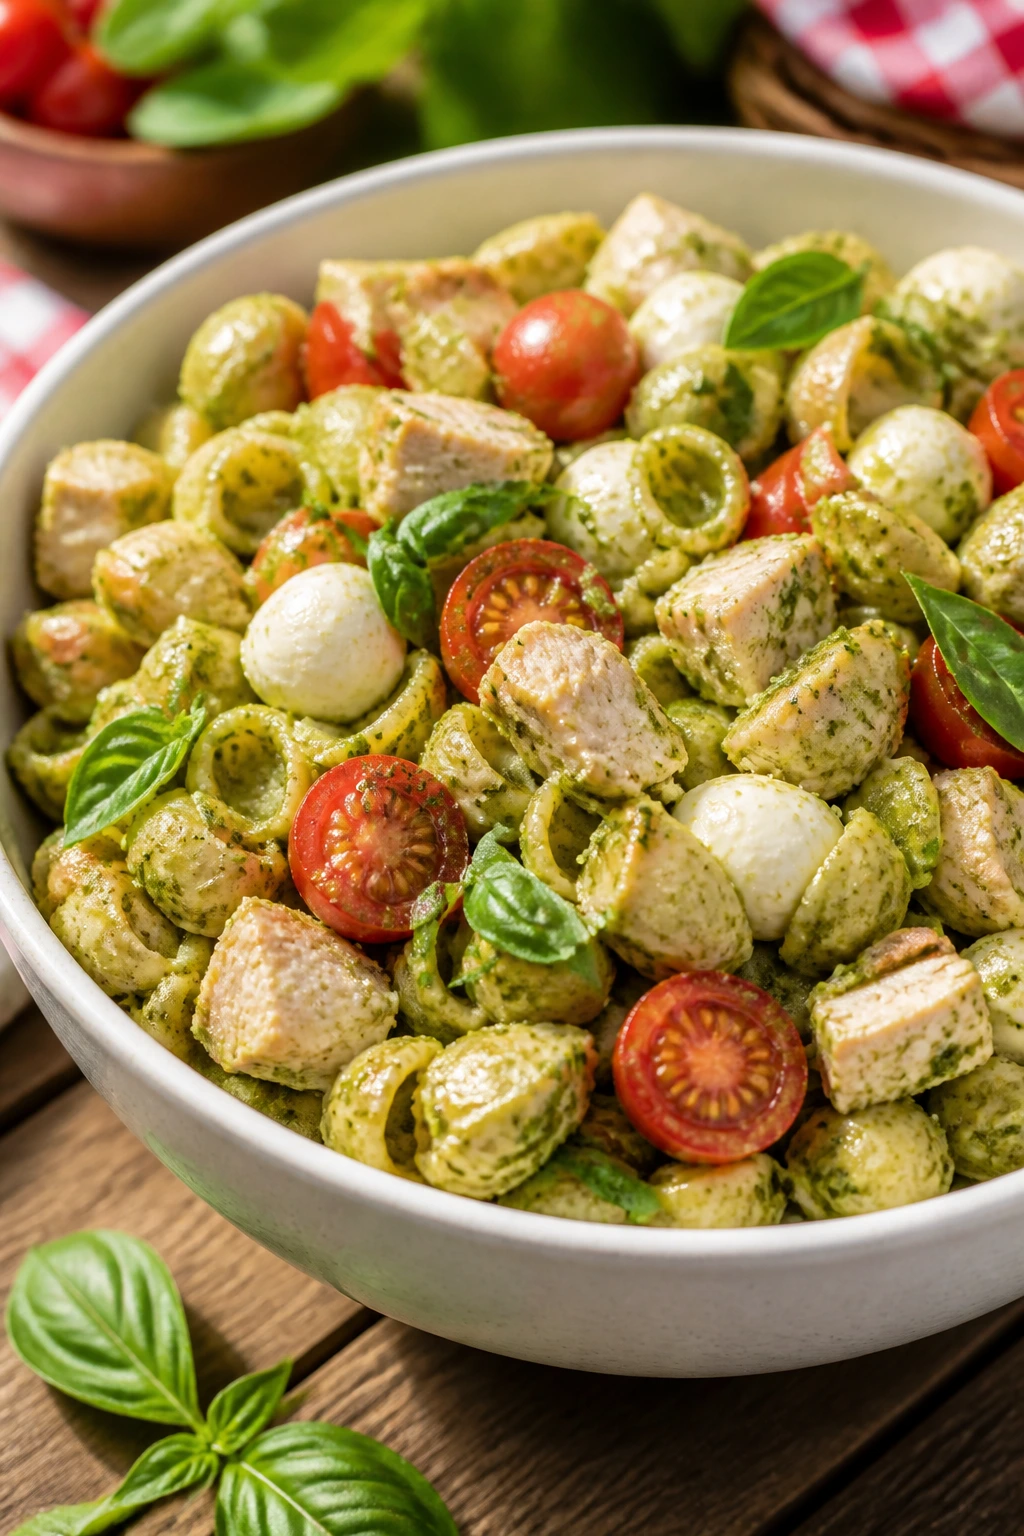
2. Pesto Chicken Caprese Pasta Salad
This one has the color people always hope picnic food will have: green pesto, red tomatoes, white mozzarella. The pasta carries the sauce, and the chicken gives it enough heft to count as dinner instead of side dish territory.
Why It Works:
Short pasta grabs pesto better than long strands, and the lemon in the dressing keeps the basil from tasting flat. Mozzarella pearls hold their shape well in a cooler, which is half the battle.
Key Ingredients:
- 12 ounces short pasta, such as rotini or fusilli
- 2 cups cooked chicken, chopped
- 1/2 cup basil pesto
- 1 cup cherry tomatoes, halved
- 8 ounces mozzarella pearls
- 1/4 cup thinly sliced red onion
- 1 tablespoon lemon juice
- 2 tablespoons olive oil
- 1/4 cup torn basil
- Salt and black pepper, to taste
Quick Steps:
- Cook the pasta in salted water until just al dente, then drain and cool under cold water.
- Whisk pesto, lemon juice, olive oil, salt, and pepper in a large bowl.
- Add pasta, chicken, tomatoes, mozzarella, and onion.
- Toss gently until coated, then fold in the basil.
- Chill for 20 to 30 minutes so the flavors settle.
Equipment for This Recipe:
- Large pot
- Colander
- Large mixing bowl
- Wooden spoon or rubber spatula
How to Serve This Dish:
Pile it into a shallow bowl and scatter extra basil over the top. It’s good with sliced sourdough or a chunk of focaccia. I like serving it cold, straight from the cooler, when the tomatoes are still firm.
Pro Tips for This Recipe:
- Undercook the pasta by 1 minute if the salad will sit.
- Add a splash of olive oil if the pesto tightens up after chilling.
- Halve the tomatoes only if they’re ripe but still firm.
Variations on This Dish:
- Sun-Dried Tomato Version: Swap half the pesto for chopped sun-dried tomatoes.
- Vegetarian Bowl: Replace the chicken with chickpeas.
- Spicy Basil Salad: Stir in a spoonful of calabrian chile paste.
Common Mistakes to Avoid with This Dish:
- Don’t overcook the pasta. Soft pasta turns gluey in the cooler.
- Don’t drown it in pesto. You want coating, not paste.
- Don’t add delicate basil too early if you’re packing it overnight.
3. Chili-Lime Shrimp and Corn Skewers
These skewers smell like summer the second they hit the grill. The shrimp gets a quick kiss of smoke, the corn brings sweetness, and the lime keeps the whole thing lively instead of heavy.
Why It Works:
Shrimp cooks fast and tastes good warm or cold, which makes it ideal for picnic dinner duty. Corn char adds texture, and the chili-lime marinade gives you enough punch that you don’t need a complicated sauce.
Key Ingredients:
- 1 1/2 pounds large shrimp, peeled and deveined
- 2 ears corn, cut into 1-inch rounds
- 1 zucchini, sliced into thick half-moons
- 2 tablespoons olive oil
- 1 tablespoon lime juice
- 2 cloves garlic, minced
- 1 teaspoon smoked paprika
- 1/2 teaspoon chili powder
- Salt and black pepper, to taste
Quick Steps:
- Toss the shrimp with olive oil, lime juice, garlic, paprika, chili powder, salt, and pepper.
- Thread shrimp, corn rounds, and zucchini onto skewers.
- Grill over medium-high heat for 2 to 3 minutes per side, until the shrimp turns pink and opaque.
- Cook the corn until lightly charred in spots.
- Cool slightly before packing, or serve warm with lime wedges.
Equipment for This Recipe:
- Grill or grill pan
- Skewers
- Mixing bowl
- Tongs
How to Serve This Dish:
Serve the skewers over rice salad or with a tomato-cucumber salad. If you’re eating at the park, pull the shrimp off the skewers before serving to make things easier. A little extra lime at the table helps.
Pro Tips for This Recipe:
- Use large shrimp so they don’t overcook while you’re finishing the corn.
- Soak wooden skewers for 20 minutes if you’re grilling over open flame.
- Don’t pack the skewers in a tight stack; let them cool in a single layer.
Variations on This Dish:
- Garlic Butter Shrimp: Swap the chili powder for melted butter and parsley.
- Tropical Version: Add pineapple chunks to the skewers.
- Spicy Cajun Style: Use Cajun seasoning instead of paprika and chili powder.
Common Mistakes to Avoid with This Dish:
- Don’t overcook the shrimp. Rubbery shrimp is a picnic buzzkill.
- Don’t cut the zucchini too thin or it will fall apart.
- Don’t forget the acid. Lime keeps the whole thing from tasting flat.
4. Turkey Provolone Pinwheels
These pinwheels are the lunchbox trick that still works when you need dinner on the grass. They’re tidy, salty, and built around deli ingredients that don’t need much babysitting.
Why It Works:
Cream cheese acts like edible glue, so the rolls stay tight. Turkey and provolone give enough substance to feel like a real meal, and roasted red peppers bring sweetness without making the wrap soggy.
Key Ingredients:
- 4 large flour tortillas
- 8 ounces cream cheese, softened
- 2 teaspoons Dijon mustard
- 12 slices deli turkey
- 8 slices provolone
- 1 cup baby spinach
- 1/2 cup roasted red peppers, patted dry
- Black pepper, to taste
Quick Steps:
- Stir the cream cheese and Dijon until smooth.
- Spread the mixture over each tortilla, leaving a small border.
- Layer turkey, provolone, spinach, and roasted peppers.
- Roll the tortillas tightly and wrap in plastic or parchment.
- Chill for 30 minutes, then slice into 1-inch pinwheels.
Equipment for This Recipe:
- Cutting board
- Sharp knife
- Mixing bowl
- Plastic wrap or parchment
How to Serve This Dish:
Stack the pinwheels around a bowl of pickles or olives. They’re good on a platter with potato chips and cherry tomatoes. I like them as a main when the rest of the picnic leans light.
Pro Tips for This Recipe:
- Pat the peppers dry or they’ll loosen the wrap.
- Roll as tightly as you can without tearing the tortilla.
- Chill before slicing; that single step makes the cut edges neat instead of squashed.
Variations on This Dish:
- Italian Sub Pinwheels: Add salami and a little shredded lettuce.
- Turkey Pesto Version: Replace the mustard with basil pesto.
- Vegetarian Roll-Ups: Use hummus, cucumber, and shredded carrots.
Common Mistakes to Avoid with This Dish:
- Don’t overload the filling. Thin layers roll better.
- Don’t slice too soon, or the spirals spring open.
- Don’t use super-soft tortillas straight from a warm package; they tear easily.
5. Caprese Focaccia Sandwiches
Focaccia makes a picnic sandwich feel a little more generous than standard sliced bread. The crumb is oily enough to stay pleasant, and the crust keeps its shape even after a bit of handling.
Why It Works:
Focaccia doesn’t collapse under juicy tomatoes the way flimsy bread does. Pesto, mozzarella, and basil give you all the Caprese flavors, and balsamic glaze adds a sharp finish that wakes up every bite.
Key Ingredients:
- 1 large focaccia loaf, split horizontally
- 1/3 cup basil pesto
- 8 ounces fresh mozzarella, sliced
- 2 large tomatoes, sliced
- 1 packed cup arugula
- 1/4 cup basil leaves
- 1 to 2 tablespoons balsamic glaze
- Flaky salt and black pepper, to taste
Quick Steps:
- Slice the focaccia in half horizontally.
- Spread pesto on both cut sides.
- Layer mozzarella, tomatoes, arugula, and basil.
- Drizzle with balsamic glaze and season with salt and pepper.
- Press gently, cut into squares, and pack in parchment.
Equipment for This Recipe:
- Serrated knife
- Cutting board
- Spoon or offset spatula
- Parchment paper
How to Serve This Dish:
Cut into chunky squares so nobody has to wrestle a giant wedge. Add grapes, chips, or marinated olives alongside. This one is best the same day, while the bread still has a little chew.
Pro Tips for This Recipe:
- Salt the tomato slices lightly and blot them after 5 minutes.
- Use a sturdier focaccia, not the airy kind that opens like a sponge.
- Add arugula right before serving if you want it extra crisp.
Variations on This Dish:
- Peach Caprese: Swap half the tomatoes for ripe peach slices.
- Prosciutto Version: Add thin prosciutto for a saltier, meatier sandwich.
- Grilled Zucchini Caprese: Replace tomatoes with grilled zucchini ribbons.
Common Mistakes to Avoid with This Dish:
- Don’t build it too far ahead if the tomatoes are very juicy.
- Don’t use watery mozzarella; drain it first.
- Don’t press so hard that the bread turns dense and oily.
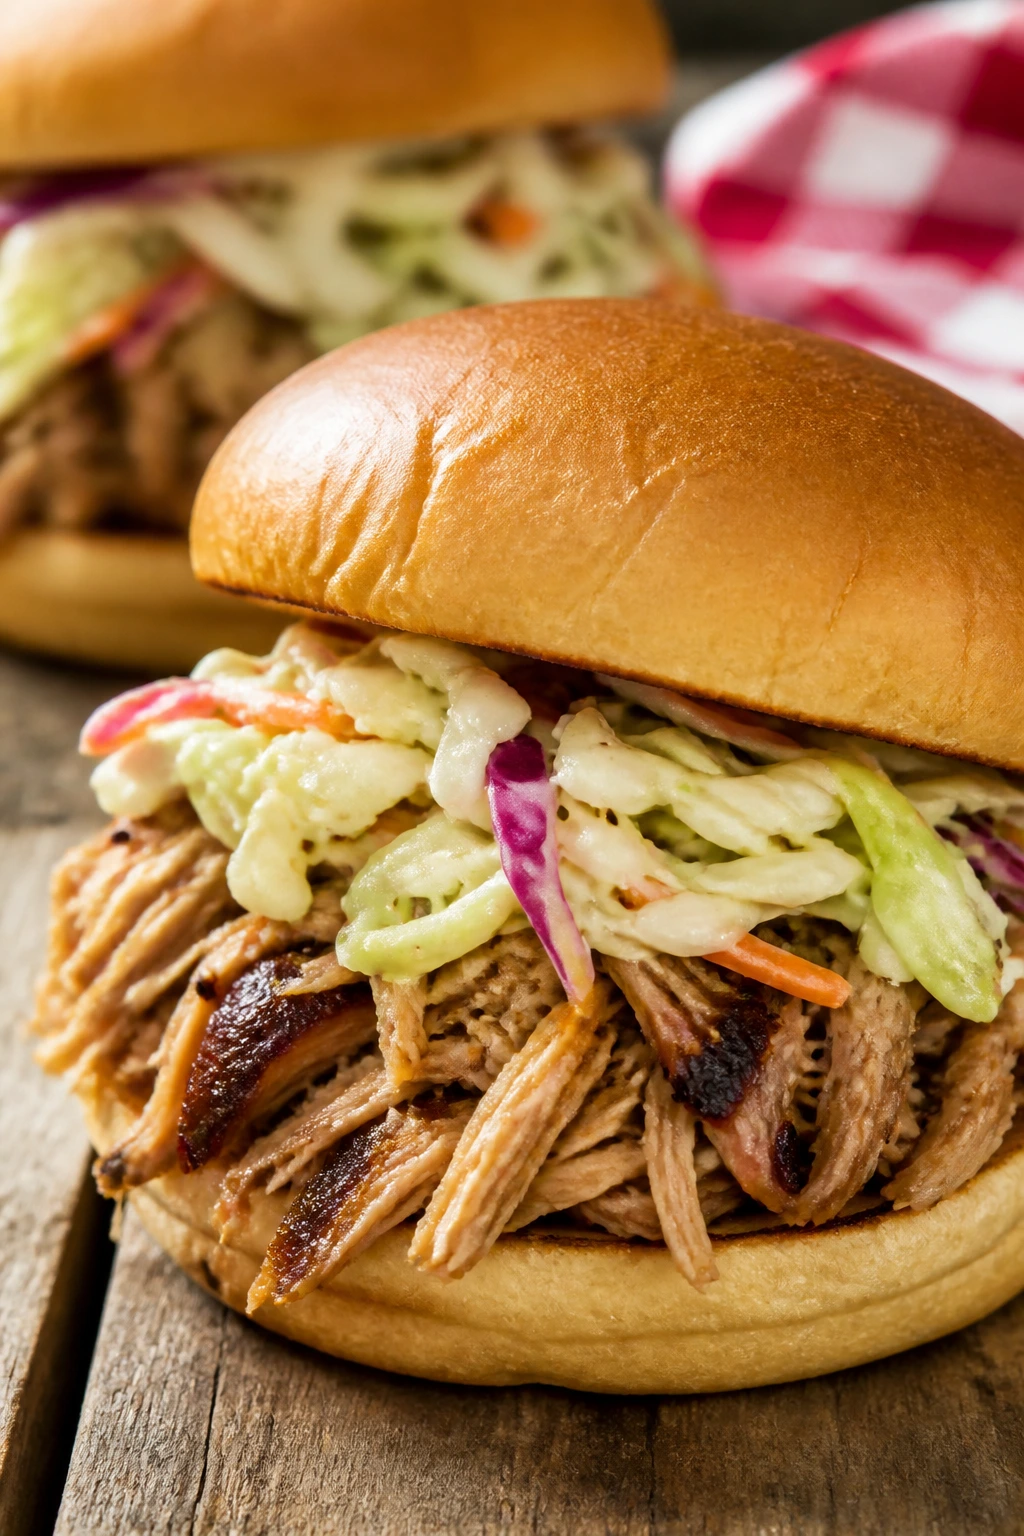
6. BBQ Chicken Sliders with Tangy Slaw
These are the kind of sliders people hover around first. Sweet sauce, soft buns, and a slaw with enough vinegar to cut through the richness. They feel casual, which is exactly the point.
Why It Works:
Shredded chicken soaks up barbecue sauce without getting dry. The slaw gives crunch and a little bite, and the sliders are small enough to pack neatly but filling enough to work as dinner.
Key Ingredients:
- 3 cups shredded cooked chicken
- 1 cup barbecue sauce
- 2 cups shredded cabbage or coleslaw mix
- 2 tablespoons mayonnaise
- 1 tablespoon apple cider vinegar
- 1 teaspoon sugar
- 6 slider buns
- 1/2 cup dill pickle chips
- Salt and black pepper, to taste
Quick Steps:
- Toss the cabbage, mayonnaise, vinegar, sugar, salt, and pepper in a bowl.
- Warm the chicken with barbecue sauce in a skillet over low heat for 3 to 4 minutes.
- Split the slider buns and add a layer of chicken.
- Top with slaw and pickle chips.
- Wrap loosely in foil if you’re traveling, or serve right away.
Equipment for This Recipe:
- Skillet
- Mixing bowl
- Spoon
- Knife
How to Serve This Dish:
Pile them on a tray with extra pickles and a bowl of chips. Two sliders plus a side salad makes a proper picnic dinner. If you’re feeding a group, keep the chicken warm and the slaw cold.
Pro Tips for This Recipe:
- Keep the slaw separate until the last minute if you want maximum crunch.
- Use a sauce that’s thick, not watery.
- Toast the buns lightly if they’re very soft.
Variations on This Dish:
- Buffalo Slider Version: Swap barbecue sauce for buffalo sauce and add ranch.
- Pulled Pork Swap: Use leftover pulled pork instead of chicken.
- Vegetarian Jackfruit Sliders: Replace the chicken with shredded jackfruit.
Common Mistakes to Avoid with This Dish:
- Don’t drown the buns. Too much sauce makes them fall apart.
- Don’t pack hot chicken directly over the slaw; it wilts fast.
- Don’t skip the pickles. They cut the sweetness and keep the flavor lively.
7. Chickpea Cucumber Feta Bowls
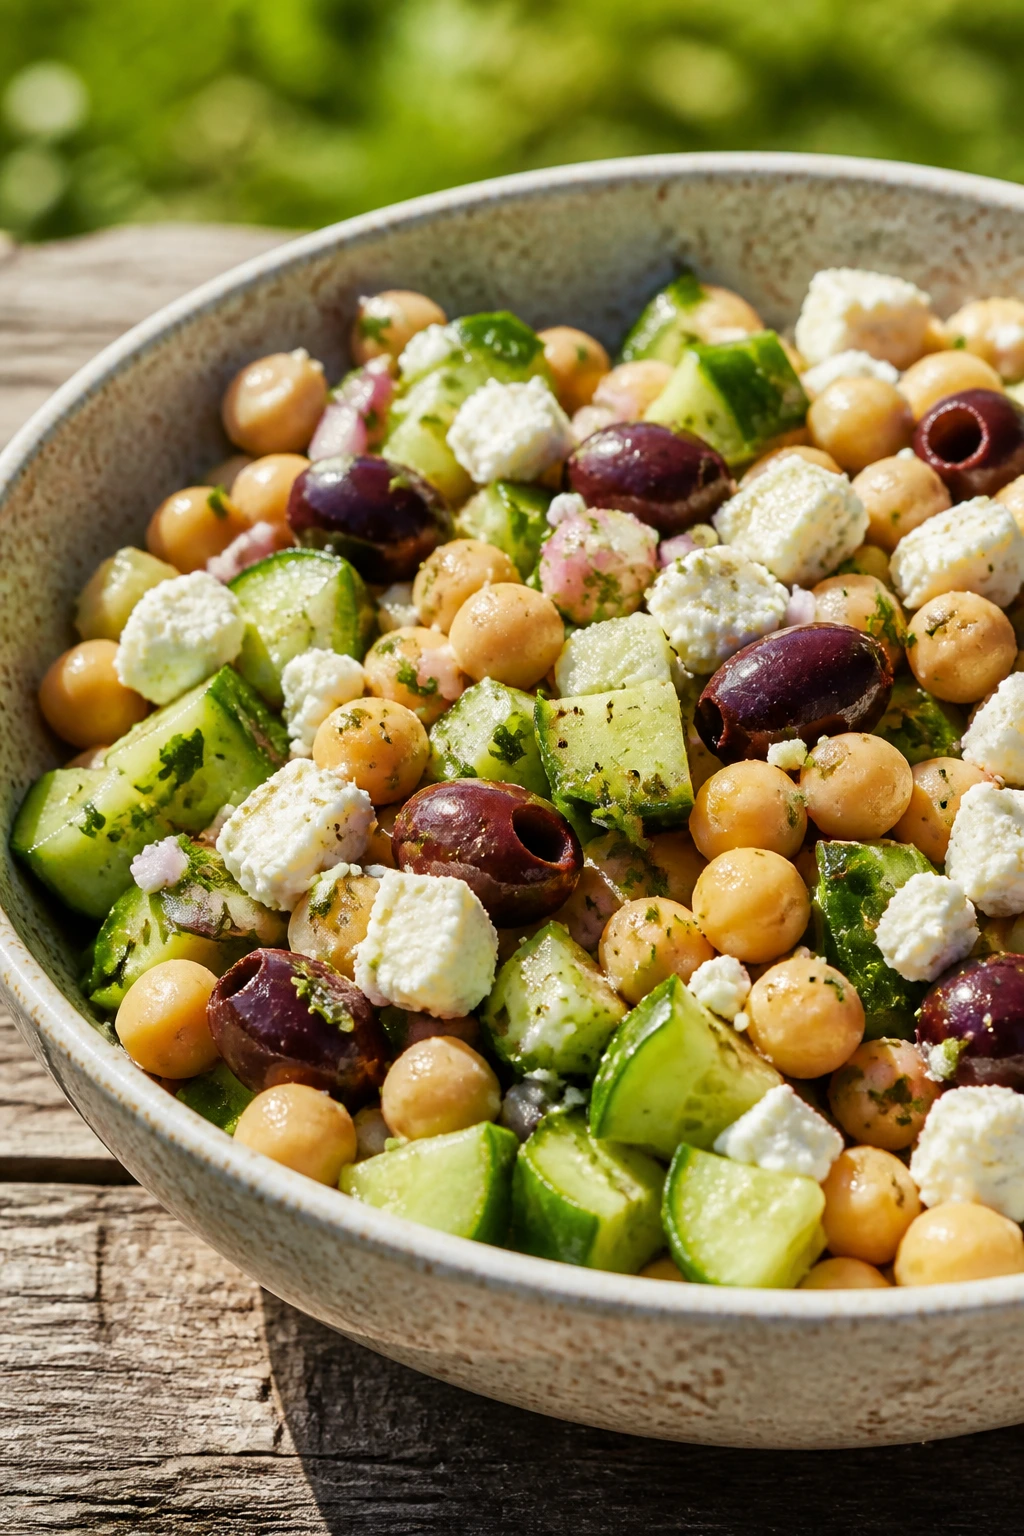
This is the cold bowl I reach for when I want dinner that tastes crisp instead of heavy. The chickpeas bring substance, the cucumber brings crunch, and feta adds the salty little hits that make you keep going back.
Why It Works:
Chickpeas hold up in a cooler better than many proteins. Lemon and olive oil make a dressing that doesn’t get weird after chilling, and the whole bowl can be eaten straight from a container.
Key Ingredients:
- 2 cans chickpeas, drained and rinsed
- 1 large cucumber, diced
- 1 cup cherry tomatoes, halved
- 1/2 red onion, thinly sliced
- 3/4 cup crumbled feta
- 1/3 cup kalamata olives
- 2 tablespoons olive oil
- 1 tablespoon lemon juice
- 1 teaspoon dried oregano
- Salt and black pepper, to taste
Quick Steps:
- Pat the chickpeas dry so the dressing clings better.
- Combine chickpeas, cucumber, tomatoes, onion, feta, and olives in a bowl.
- Whisk olive oil, lemon juice, oregano, salt, and pepper.
- Toss gently and chill for 15 to 20 minutes.
- Pack into bowls or containers for the picnic.
Equipment for This Recipe:
- Colander
- Large bowl
- Knife
- Measuring spoon
How to Serve This Dish:
Spoon the salad into shallow bowls and add pita triangles on the side. It also works inside lettuce cups if you want something lighter. A few torn herbs on top make it look and taste fresher.
Pro Tips for This Recipe:
- Salt the cucumber lightly if it’s extra watery, then blot it dry.
- Thin onion slices keep the bite sharp without taking over.
- Add feta last if you want clean cubes instead of crumbles.
Variations on This Dish:
- Quinoa Bowl: Add 1 cup cooked quinoa for extra heft.
- Avocado Version: Fold in diced avocado just before serving.
- Vegan Bowl: Skip the feta and add toasted sunflower seeds.
Common Mistakes to Avoid with This Dish:
- Don’t skip drying the chickpeas.
- Don’t drown the salad in dressing; chickpeas need coating, not soaking.
- Don’t chop the cucumber too small or it turns watery fast.
8. Steak Arugula Sandwiches with Pickled Onions
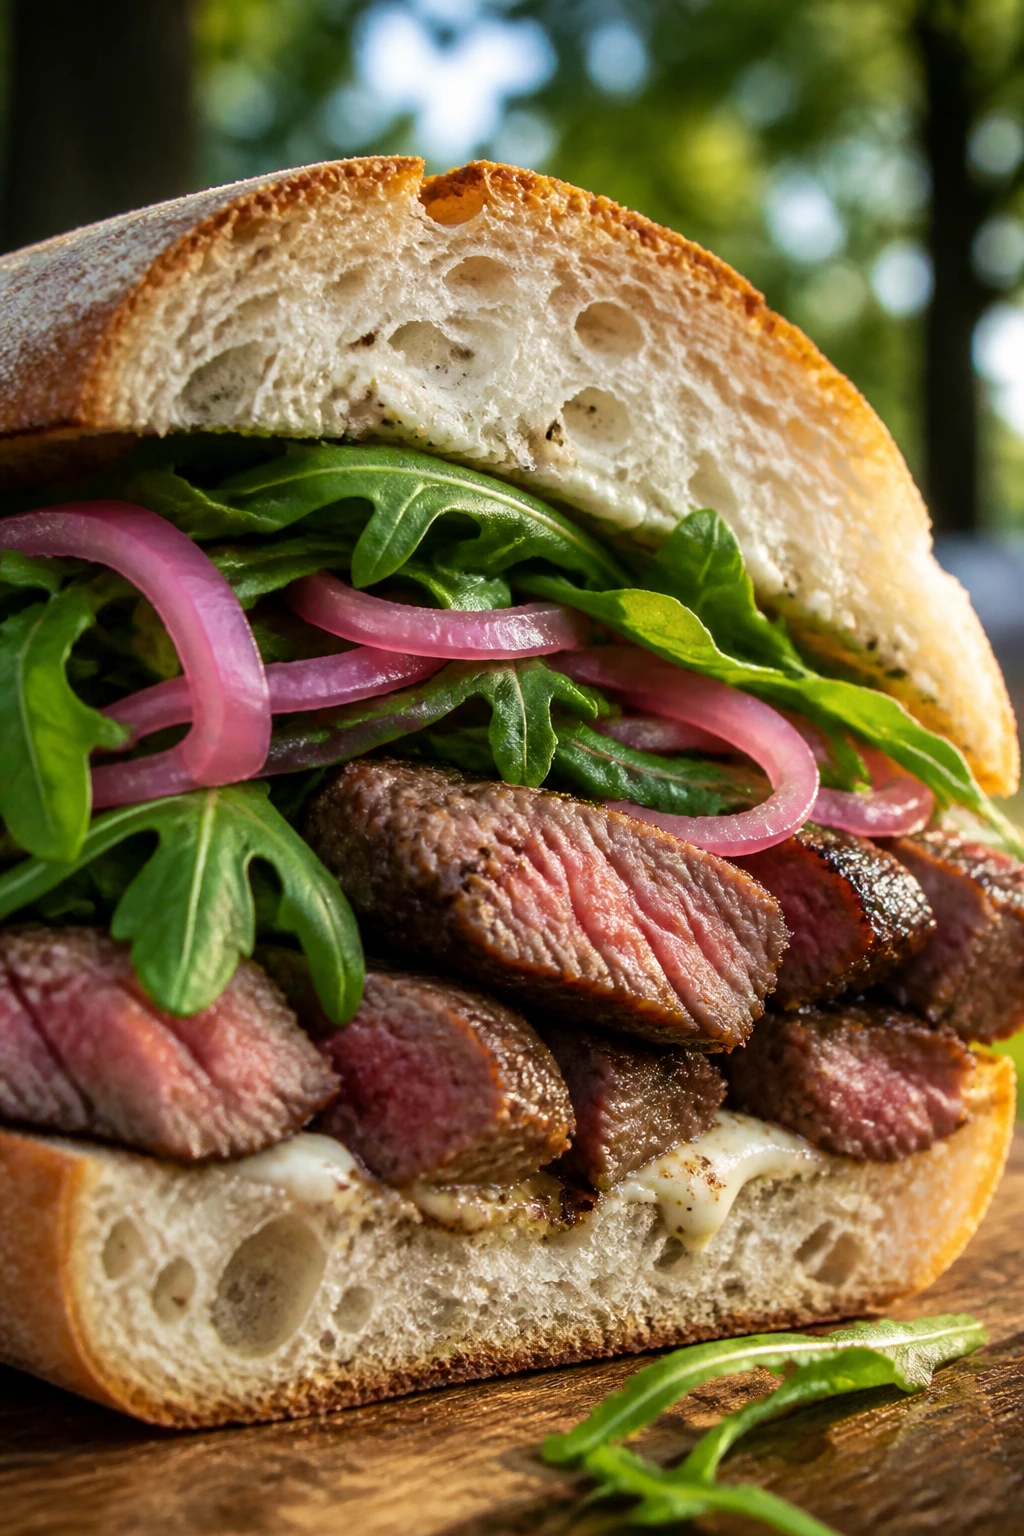
These sandwiches feel a little more grown-up without getting fussy. Thinly sliced steak, peppery arugula, and sharp onions give you the kind of bite that still tastes good after it’s been packed and hauled across a park.
Why It Works:
Steak loves acid and salt, so pickled onions and a horseradish spread make sense here. Ciabatta or a crusty roll keeps the filling contained, and arugula adds a green bite that does not wilt into mush right away.
Key Ingredients:
- 1 pound flank steak
- 1 tablespoon olive oil
- Salt and black pepper, to taste
- 1/3 cup mayonnaise
- 1 tablespoon prepared horseradish
- 1 cup arugula
- 1 large ciabatta loaf or 4 rolls
- 1/2 cup quick pickled onions
- 1 tomato, sliced
Quick Steps:
- Season the steak with olive oil, salt, and pepper.
- Sear over medium-high heat for 4 to 5 minutes per side, then rest for 10 minutes.
- Mix the mayonnaise and horseradish.
- Slice the steak thinly against the grain.
- Spread the sauce on the bread, then layer arugula, steak, onions, and tomato.
Equipment for This Recipe:
- Skillet or grill
- Cutting board
- Sharp slicing knife
- Small bowl
How to Serve This Dish:
Wrap each sandwich in parchment and cut in half. Serve with chips, olives, or a cucumber salad. A little extra horseradish on the side is a good idea if you like a sharper bite.
Pro Tips for This Recipe:
- Rest the steak before slicing or the juices will run out.
- Slice against the grain, thin enough to bite cleanly.
- Use rolls with a firm crust so the bread doesn’t cave.
Variations on This Dish:
- Chimichurri Steak: Replace the horseradish spread with chimichurri.
- Roast Beef Shortcut: Use deli roast beef and warm it slightly.
- Mushroom Version: Swap steak for roasted portobellos.
Common Mistakes to Avoid with This Dish:
- Don’t slice steak with the grain. It turns chewy.
- Don’t build the sandwich while the meat is still steaming.
- Don’t use soft sandwich bread unless you want the filling to squash out.
9. Tuna Pasta Salad with Celery and Dill
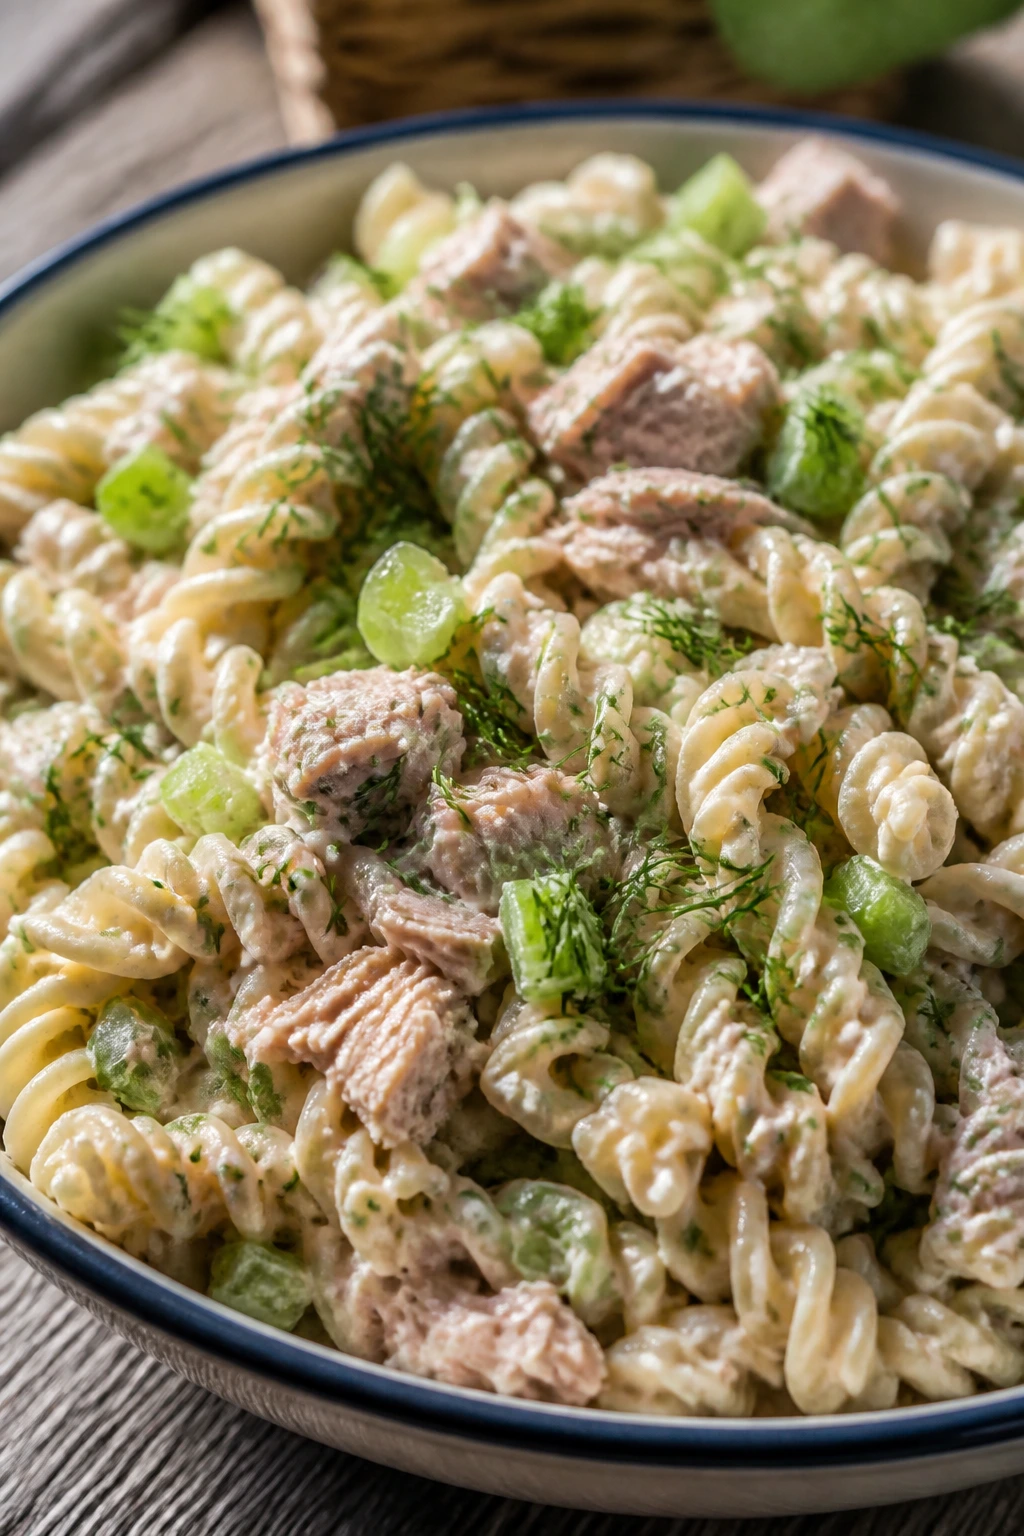
This is old-school in the best way. The tuna gives it backbone, the celery keeps it crisp, and dill pickle brine makes the whole thing taste cleaner than the heavy, mayo-soaked versions people remember from bad potlucks.
Why It Works:
Pasta makes the salad dinner-sized, and tuna brings protein without needing a stove at the picnic. A little Greek yogurt lightens the dressing so it stays creamy even after chilling.
Key Ingredients:
- 12 ounces elbow pasta or small shells
- 2 cans tuna, drained
- 1/3 cup mayonnaise
- 1/4 cup plain Greek yogurt
- 2 celery stalks, diced
- 1/4 cup chopped dill pickles
- 2 tablespoons chopped red onion
- 1 tablespoon pickle brine
- 1 tablespoon chopped dill
- Salt and black pepper, to taste
Quick Steps:
- Cook the pasta until al dente, then rinse cool and drain well.
- Stir the mayonnaise, yogurt, pickle brine, dill, salt, and pepper in a bowl.
- Fold in the tuna, celery, pickles, and onion.
- Add the pasta and toss gently.
- Chill for at least 20 minutes before packing.
Equipment for This Recipe:
- Pot
- Colander
- Large bowl
- Spoon
How to Serve This Dish:
Serve it cold with crackers, sliced cucumbers, or a pile of cherry tomatoes. It makes a full dinner on its own if you add fruit on the side. I like a few extra dill sprigs on top.
Pro Tips for This Recipe:
- Use tuna packed in olive oil if you want a richer flavor.
- Drain the pasta well or the dressing loosens up too much.
- Keep the dill pickle pieces small so every bite has the same balance.
Variations on This Dish:
- Mediterranean Tuna Salad: Add olives and chopped roasted peppers.
- Spicy Version: Stir in a little hot sauce or diced jalapeño.
- Gluten-Free Swap: Use rice-based pasta.
Common Mistakes to Avoid with This Dish:
- Don’t mix while the pasta is hot, or the mayo can turn greasy.
- Don’t skimp on salt. Tuna pasta salad needs it.
- Don’t leave it out in the sun too long; the mayo wants the cooler.
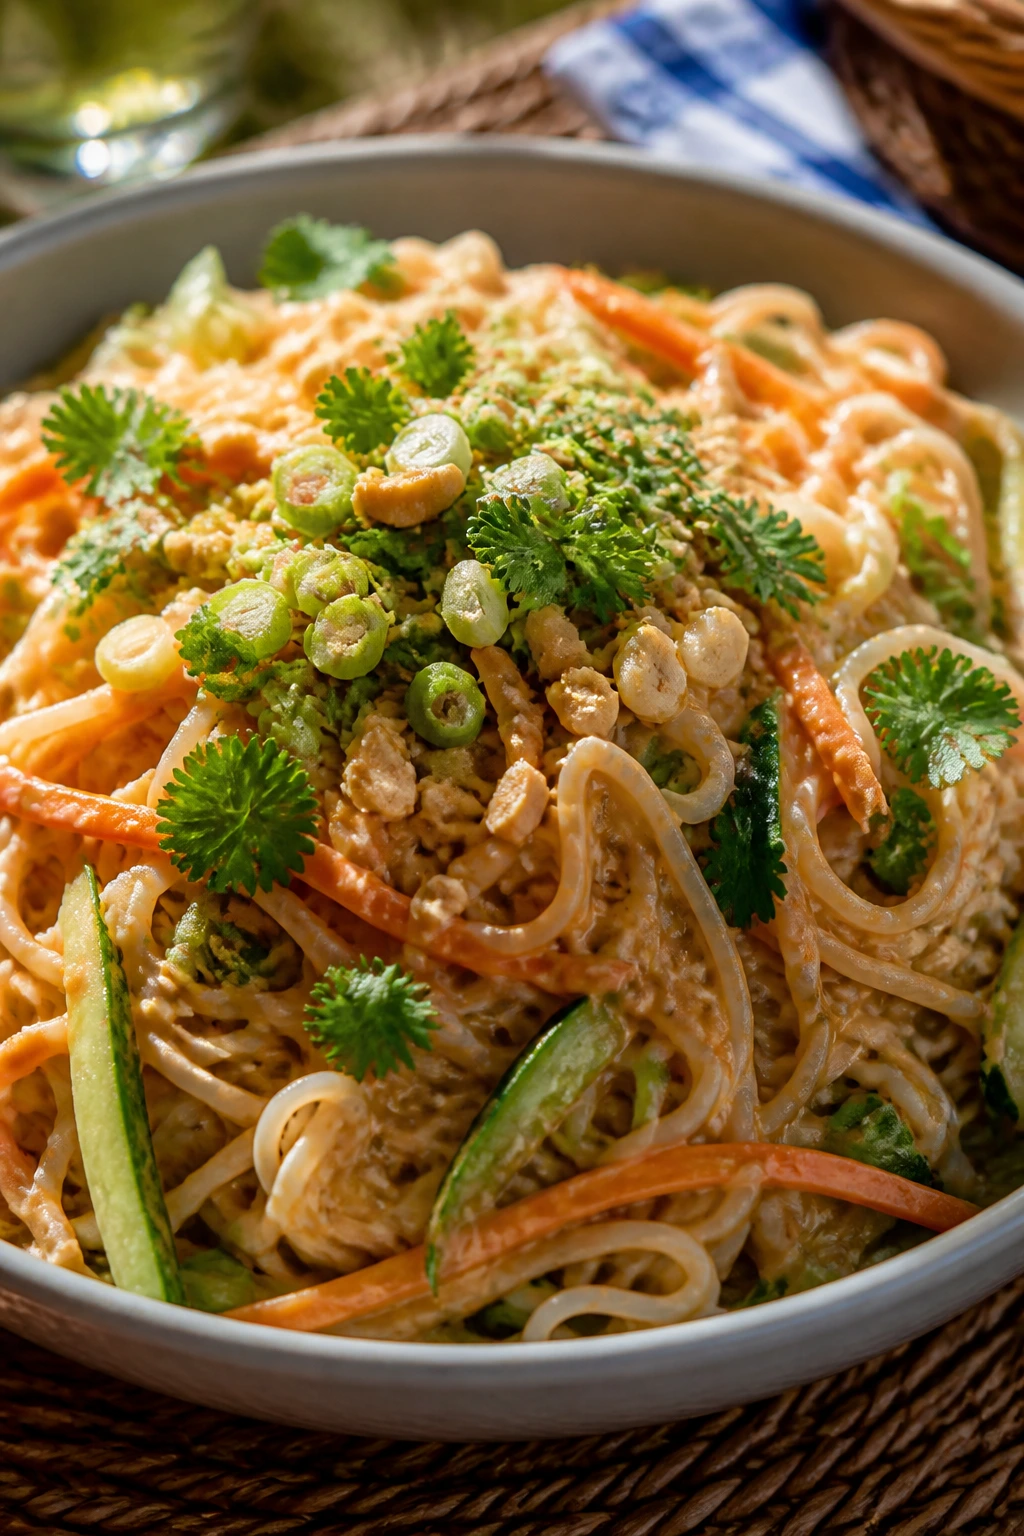
10. Cold Soba Noodle Salad with Edamame
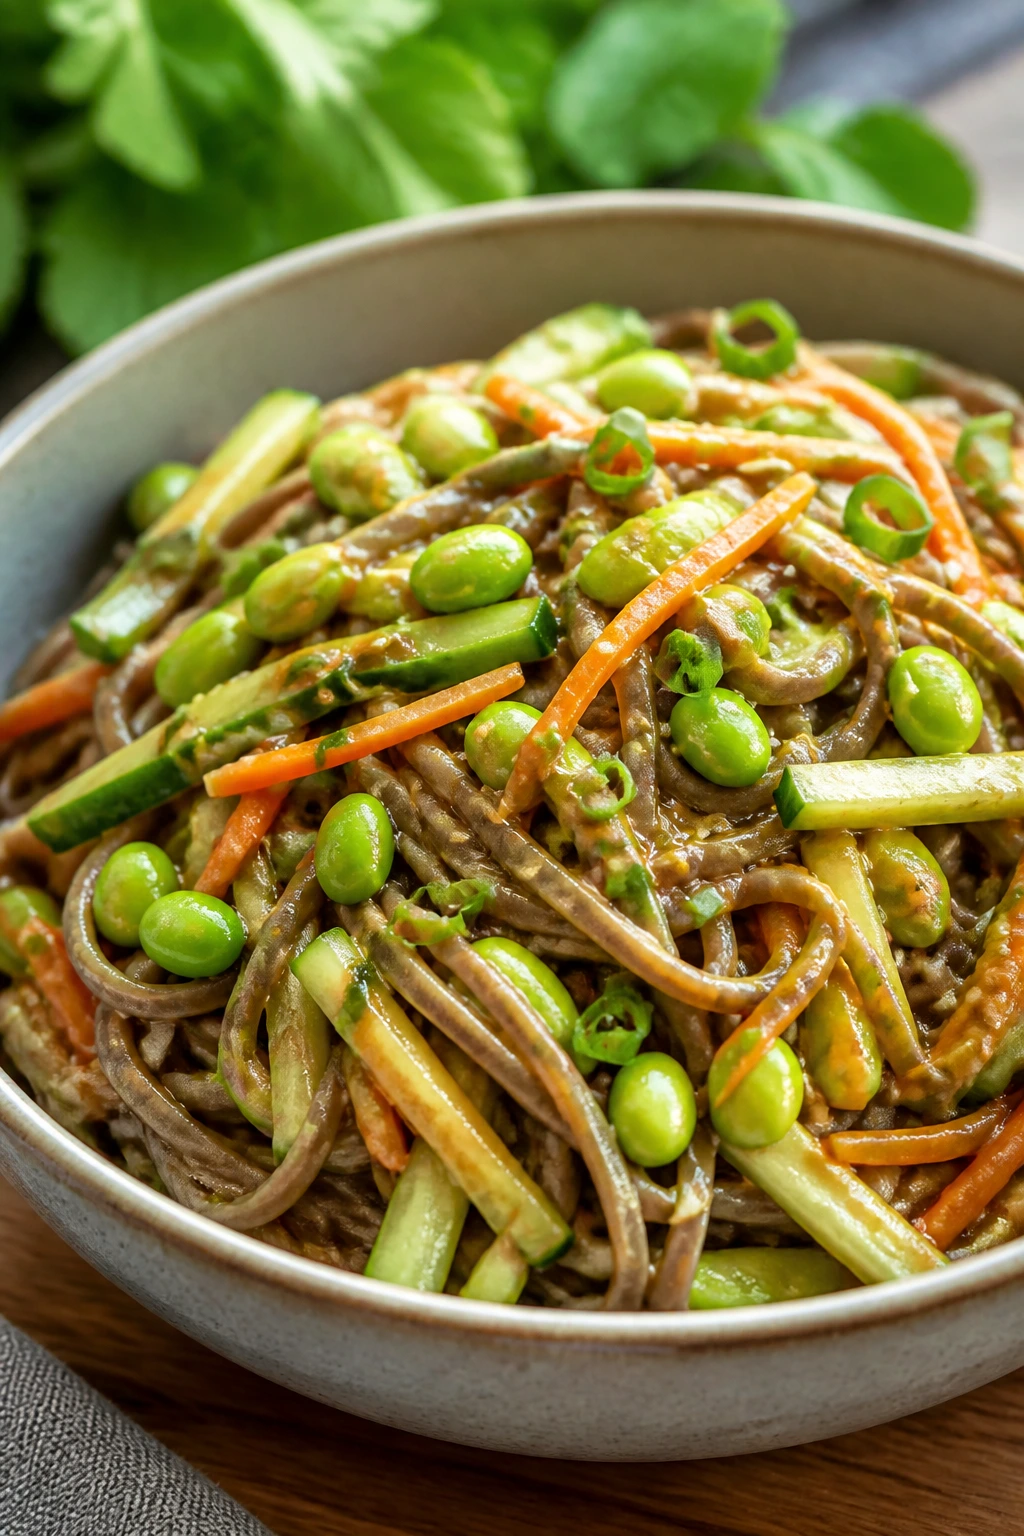
Soba has a nutty flavor that makes cold noodles taste intentional instead of like leftovers. The sesame-peanut dressing clings to every strand, and the edamame gives enough protein to make this count as dinner.
Why It Works:
Soba noodles love a cold rinse, which keeps them from sticking together. The dressing is punchy enough to survive chilling, and the vegetables keep the bowl from feeling soft or one-note.
Key Ingredients:
- 8 ounces soba noodles
- 1 cup shelled edamame, thawed
- 1 cup shredded carrots
- 1 cucumber, julienned
- 2 scallions, sliced
- 1/3 cup peanut butter
- 2 tablespoons soy sauce
- 1 tablespoon rice vinegar
- 1 tablespoon sesame oil
- 1 teaspoon honey
- Sesame seeds, for topping
Quick Steps:
- Cook the soba noodles according to the package, then rinse under cold water until fully cool.
- Whisk peanut butter, soy sauce, rice vinegar, sesame oil, and honey with a splash of warm water.
- Toss noodles with the dressing.
- Fold in edamame, carrots, cucumber, and scallions.
- Sprinkle with sesame seeds and chill before serving.
Equipment for This Recipe:
- Pot
- Colander
- Large mixing bowl
- Whisk
How to Serve This Dish:
Pack it in shallow containers so the noodles don’t clump at the bottom. A little extra scallion on top helps the whole bowl look fresh. This is one of the best make-ahead picnic dinners on the list.
Pro Tips for This Recipe:
- Rinse the noodles thoroughly; soba gets sticky fast.
- Thin the dressing with warm water until it coats but still looks glossy.
- Add cucumber near the end if you want more crunch.
Variations on This Dish:
- Chicken Soba Bowl: Add shredded chicken.
- Tahini Version: Swap peanut butter for tahini.
- Spicy Sesame Noodles: Stir in chili crisp.
Common Mistakes to Avoid with This Dish:
- Don’t let the noodles sit un-rinsed; they clump into one mass.
- Don’t use too much dressing at once. You can always add more.
- Don’t chop the vegetables so finely they disappear.
11. Thai Peanut Chicken Lettuce Cups
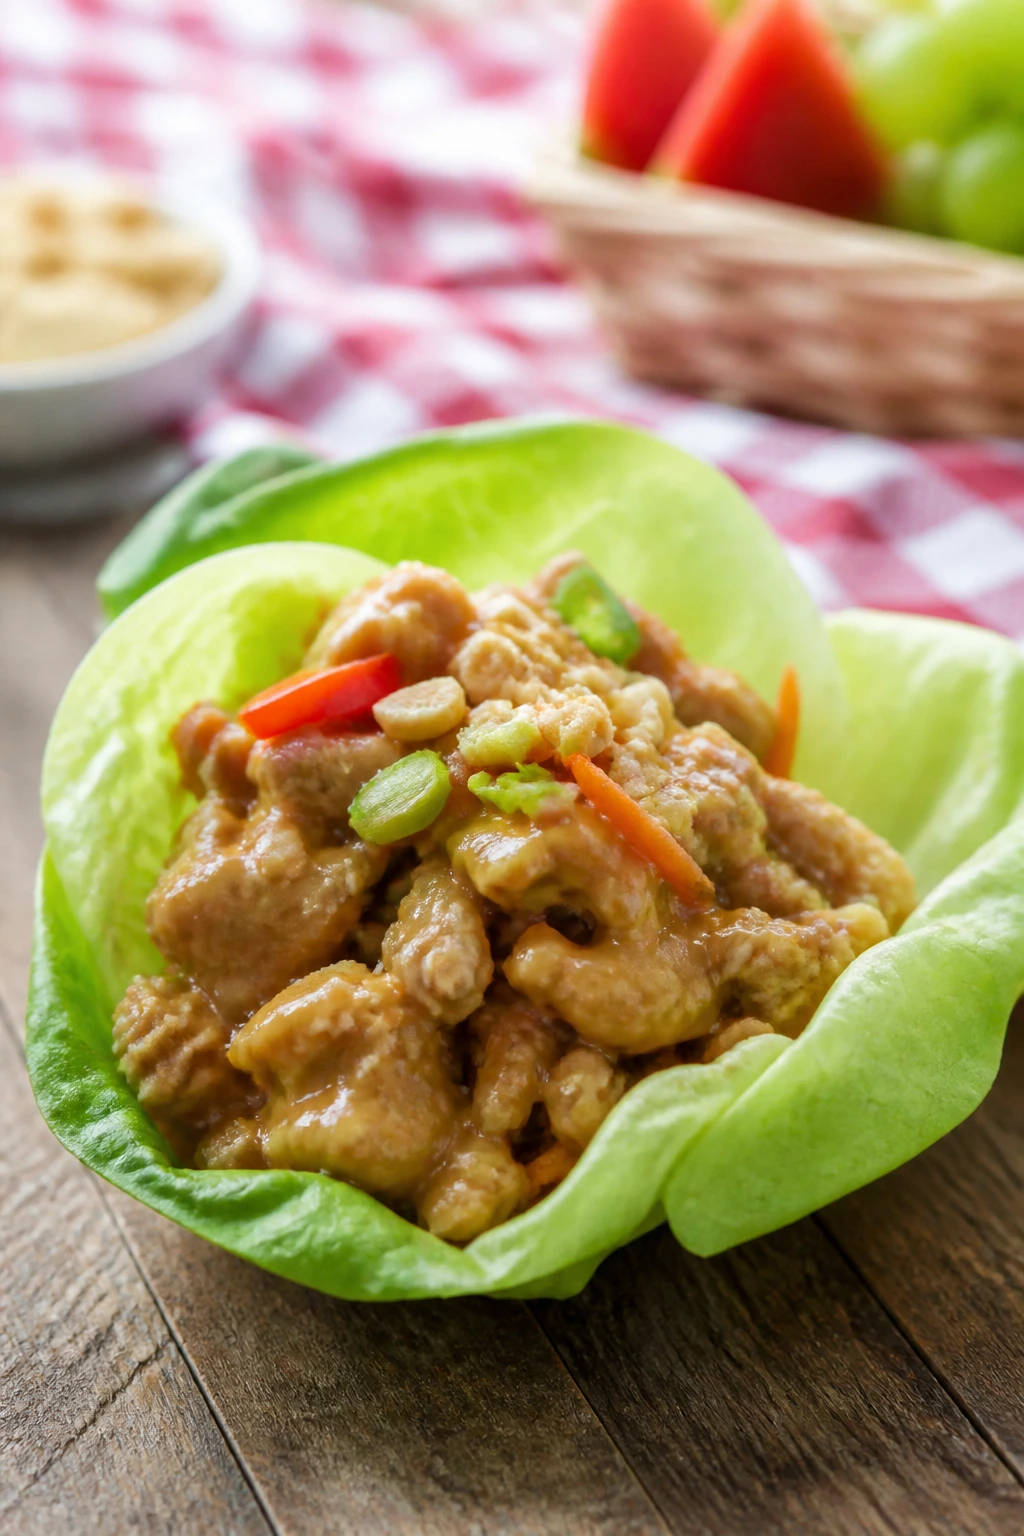
These lettuce cups are crisp, savory, and a little sticky from the peanut sauce in the best possible way. You get crunch from the lettuce and carrots, plus enough sauce to make it feel complete.
Why It Works:
Ground chicken cooks fast and grabs flavor quickly. Butter lettuce or romaine leaves work like edible bowls, which means the food stays tidy and easy to handle.
Key Ingredients:
- 1 pound ground chicken
- 2 tablespoons peanut butter
- 2 tablespoons soy sauce
- 1 tablespoon lime juice
- 1 teaspoon grated ginger
- 2 cloves garlic, minced
- 1 carrot, shredded
- 1/2 cup chopped cilantro
- 1 head butter lettuce or romaine hearts
- 1/4 cup chopped peanuts
Quick Steps:
- Cook the chicken in a skillet over medium heat until no longer pink, about 6 to 8 minutes.
- Stir in peanut butter, soy sauce, lime juice, ginger, and garlic.
- Cook for 1 minute more until glossy.
- Cool slightly, then spoon into lettuce leaves.
- Top with carrot, cilantro, and peanuts before packing.
Equipment for This Recipe:
- Skillet
- Spatula
- Knife
- Serving bowl
How to Serve This Dish:
Arrange the lettuce leaves on a platter and keep the filling in a separate container if you’re traveling far. Rice on the side turns this into a bigger meal. A squeeze of lime at the table sharpens the flavor.
Pro Tips for This Recipe:
- Don’t cook the sauce until dry; it should stay a little glossy.
- Use lettuce leaves with firm ribs so they don’t fold inward.
- Chop the peanuts last so they stay crunchy.
Variations on This Dish:
- Turkey Swap: Use ground turkey instead of chicken.
- Tofu Version: Crumble and sauté firm tofu.
- Heat-Lover’s Version: Add sriracha or sliced chile.
Common Mistakes to Avoid with This Dish:
- Don’t pack the cups assembled if you can avoid it.
- Don’t let the filling cool in the skillet for too long or it thickens too much.
- Don’t use flimsy lettuce; it leaks.
12. BLT Pasta Salad
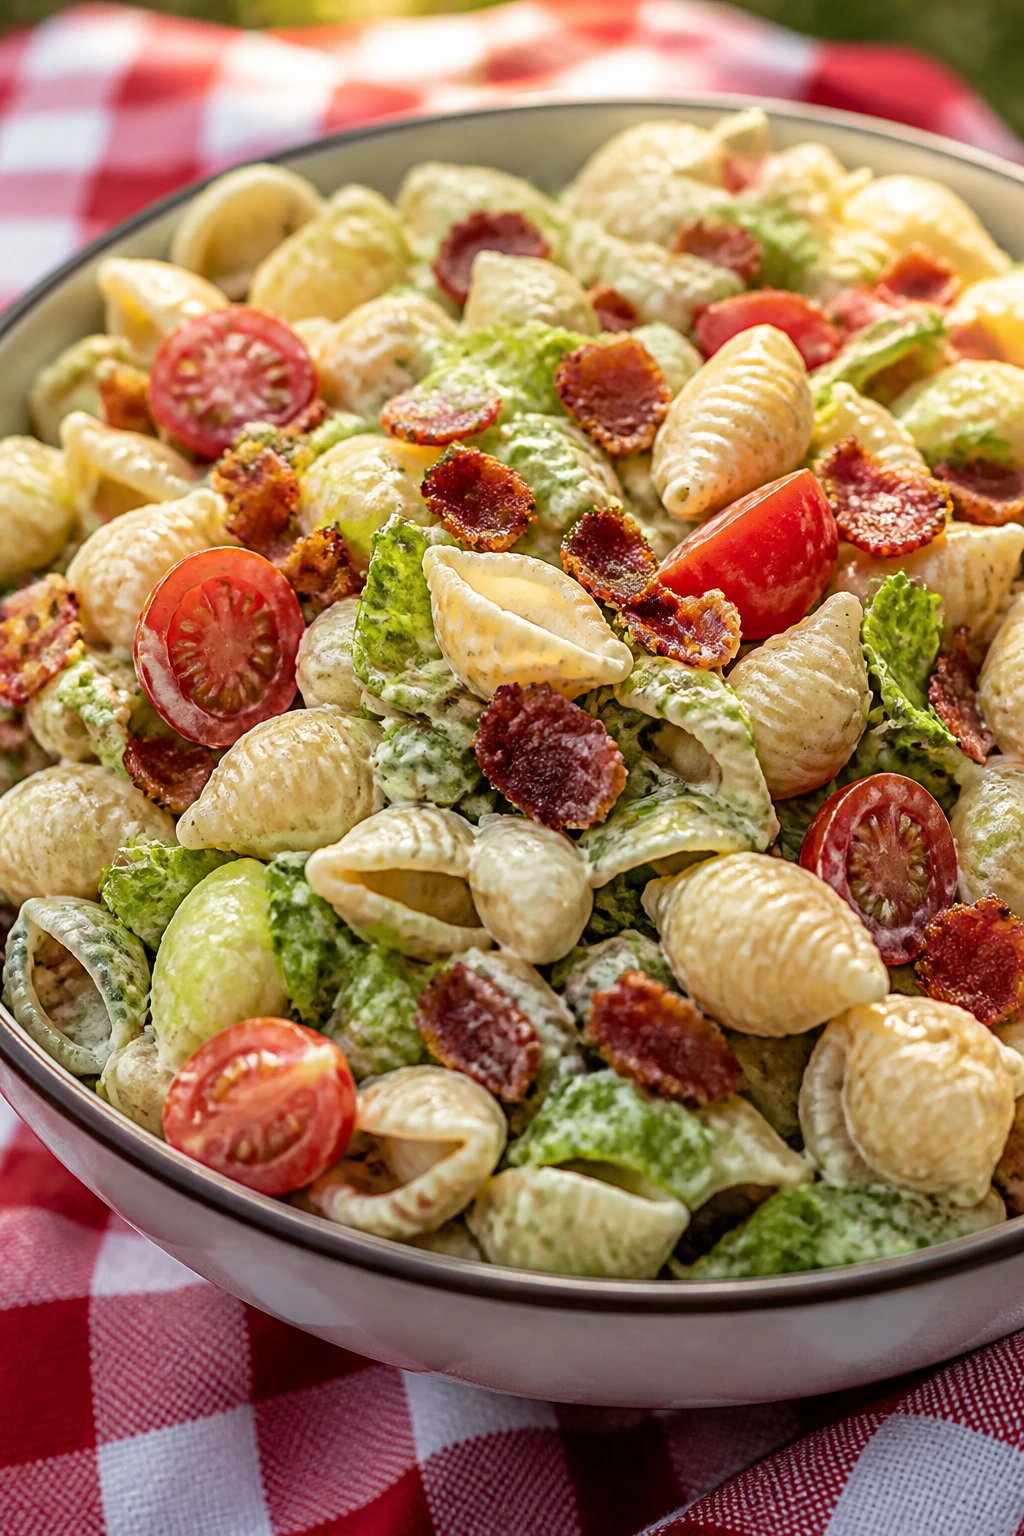
This tastes like a BLT that wandered into a picnic cooler and decided to become dinner. Bacon brings the salt, tomatoes bring the juice, and romaine keeps the whole thing from feeling soft.
Why It Works:
Pasta gives the sandwich flavors a more dinner-like scale, and the dressing coats the shells without getting heavy. Add the lettuce at the end and it stays crisp instead of turning limp.
Key Ingredients:
- 12 ounces small pasta
- 8 slices bacon, cooked crisp and chopped
- 1 1/2 cups cherry tomatoes, halved
- 3 cups romaine, chopped
- 1/3 cup mayonnaise
- 1/4 cup sour cream
- 1 tablespoon apple cider vinegar
- 1/2 teaspoon garlic powder
- Salt and black pepper, to taste
Quick Steps:
- Cook pasta until al dente, drain, and cool.
- Stir mayonnaise, sour cream, vinegar, garlic powder, salt, and pepper.
- Toss pasta with dressing, bacon, and tomatoes.
- Fold in romaine just before packing.
- Chill briefly and serve cold.
Equipment for This Recipe:
- Pot
- Colander
- Mixing bowl
- Spoon
How to Serve This Dish:
Serve in a wide bowl with extra bacon scattered on top. Corn on the cob or watermelon makes a fitting side. If you want cleaner bites, pack the lettuce separately and mix at the blanket.
Pro Tips for This Recipe:
- Keep the bacon truly crisp or it softens in the dressing.
- Dry the tomatoes after halving if they’re very juicy.
- Use sturdy pasta shapes like rotini or shells.
Variations on This Dish:
- Turkey BLT: Add chopped turkey for more protein.
- Ranch Version: Swap the sour cream mixture for ranch dressing.
- Vegetarian Version: Use smoky tempeh instead of bacon.
Common Mistakes to Avoid with This Dish:
- Don’t add romaine too early.
- Don’t use warm bacon straight from the pan.
- Don’t overdo the mayo; the salad should look coated, not wet.
13. Greek Orzo Salad with Feta and Olives
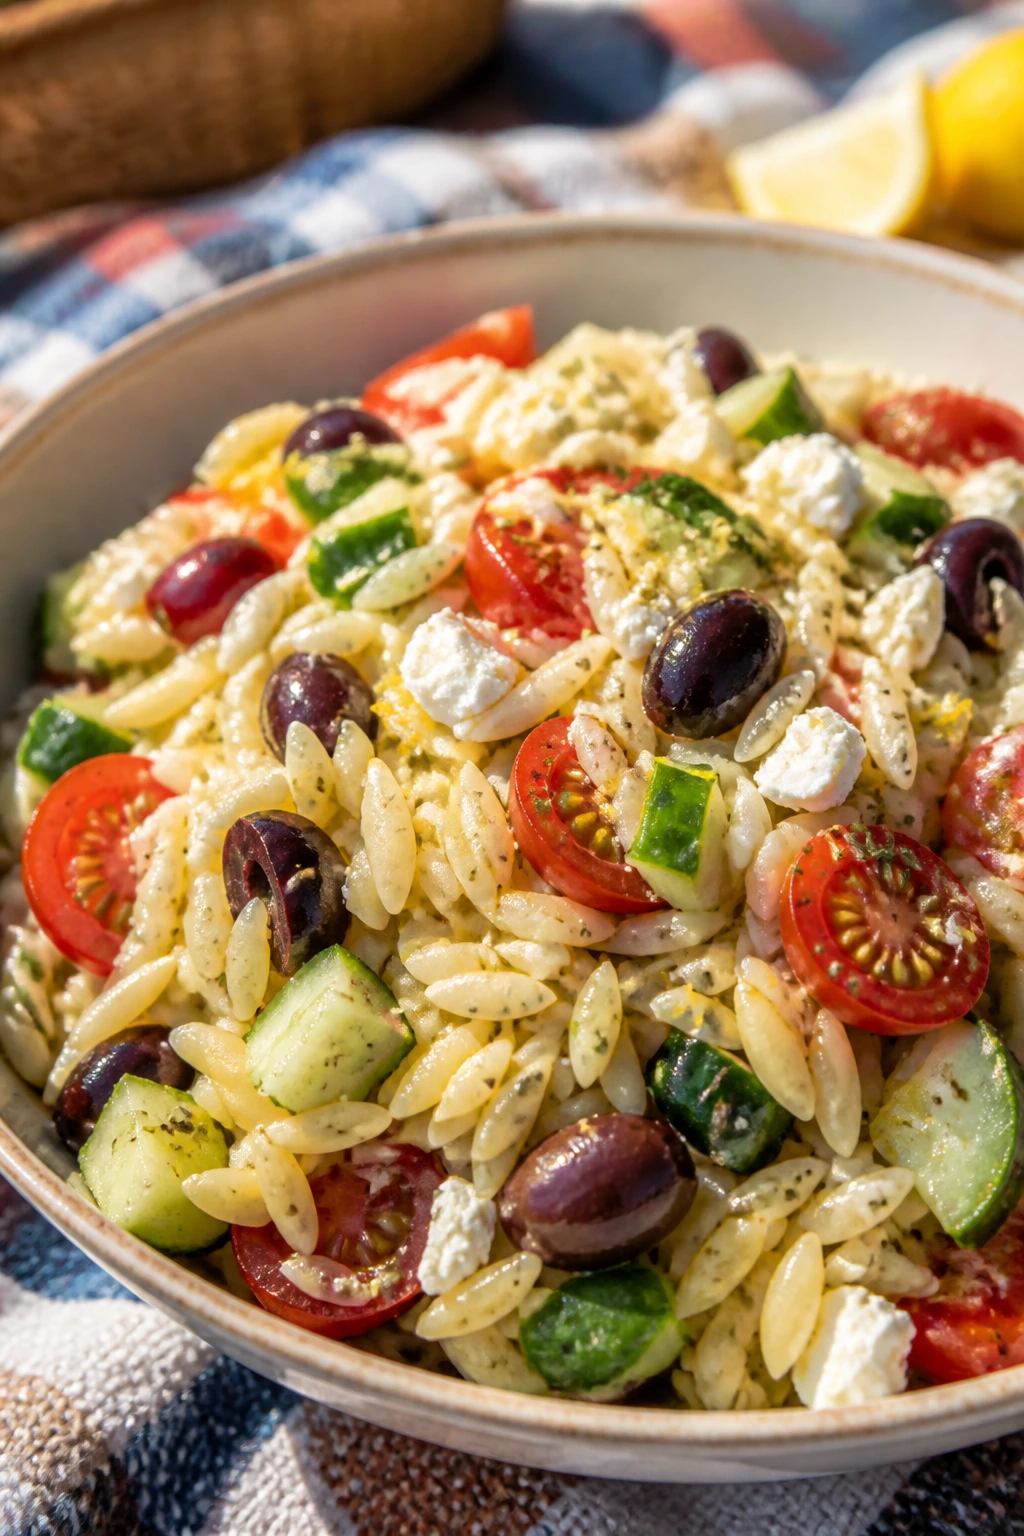
Orzo is tiny enough to feel delicate, but it still makes a proper meal when you load it with cucumber, feta, and olives. The lemon and oregano give it that unmistakable Greek-salad edge.
Why It Works:
Orzo soaks up dressing without turning dense. The mix of briny olives, salty feta, and crisp cucumber gives enough contrast that you don’t need much more.
Key Ingredients:
- 12 ounces orzo
- 1 cucumber, diced
- 1 cup cherry tomatoes, halved
- 1/2 red onion, thinly sliced
- 3/4 cup feta, crumbled
- 1/2 cup kalamata olives, halved
- 2 tablespoons olive oil
- 1 tablespoon lemon juice
- 1 teaspoon dried oregano
- 2 tablespoons chopped parsley
Quick Steps:
- Cook the orzo in salted water until tender, then drain and cool.
- Whisk olive oil, lemon juice, oregano, salt, and pepper.
- Toss orzo with cucumber, tomatoes, onion, olives, and parsley.
- Fold in feta gently.
- Chill for 20 minutes before serving.
Equipment for This Recipe:
- Pot
- Colander
- Large bowl
- Spoon
How to Serve This Dish:
Serve it with grilled chicken or pita on the side if you want a bigger spread. It also works as a stand-alone dinner in a container with fruit. A handful of parsley right before serving makes the colors pop.
Pro Tips for This Recipe:
- Cool the orzo fully before adding feta.
- Use good olives; briny flavor matters here.
- If the salad sits long, brighten it with another squeeze of lemon.
Variations on This Dish:
- Chickpea Orzo: Add one can of chickpeas.
- Farro Swap: Use farro for a nuttier chew.
- Pepperoncini Version: Add sliced pepperoncini for more bite.
Common Mistakes to Avoid with This Dish:
- Don’t overcook the orzo or the salad gets soft.
- Don’t add all the feta at once if you want some pieces intact.
- Don’t skip the lemon; olive oil alone makes it dull.
14. Teriyaki Salmon Rice Balls
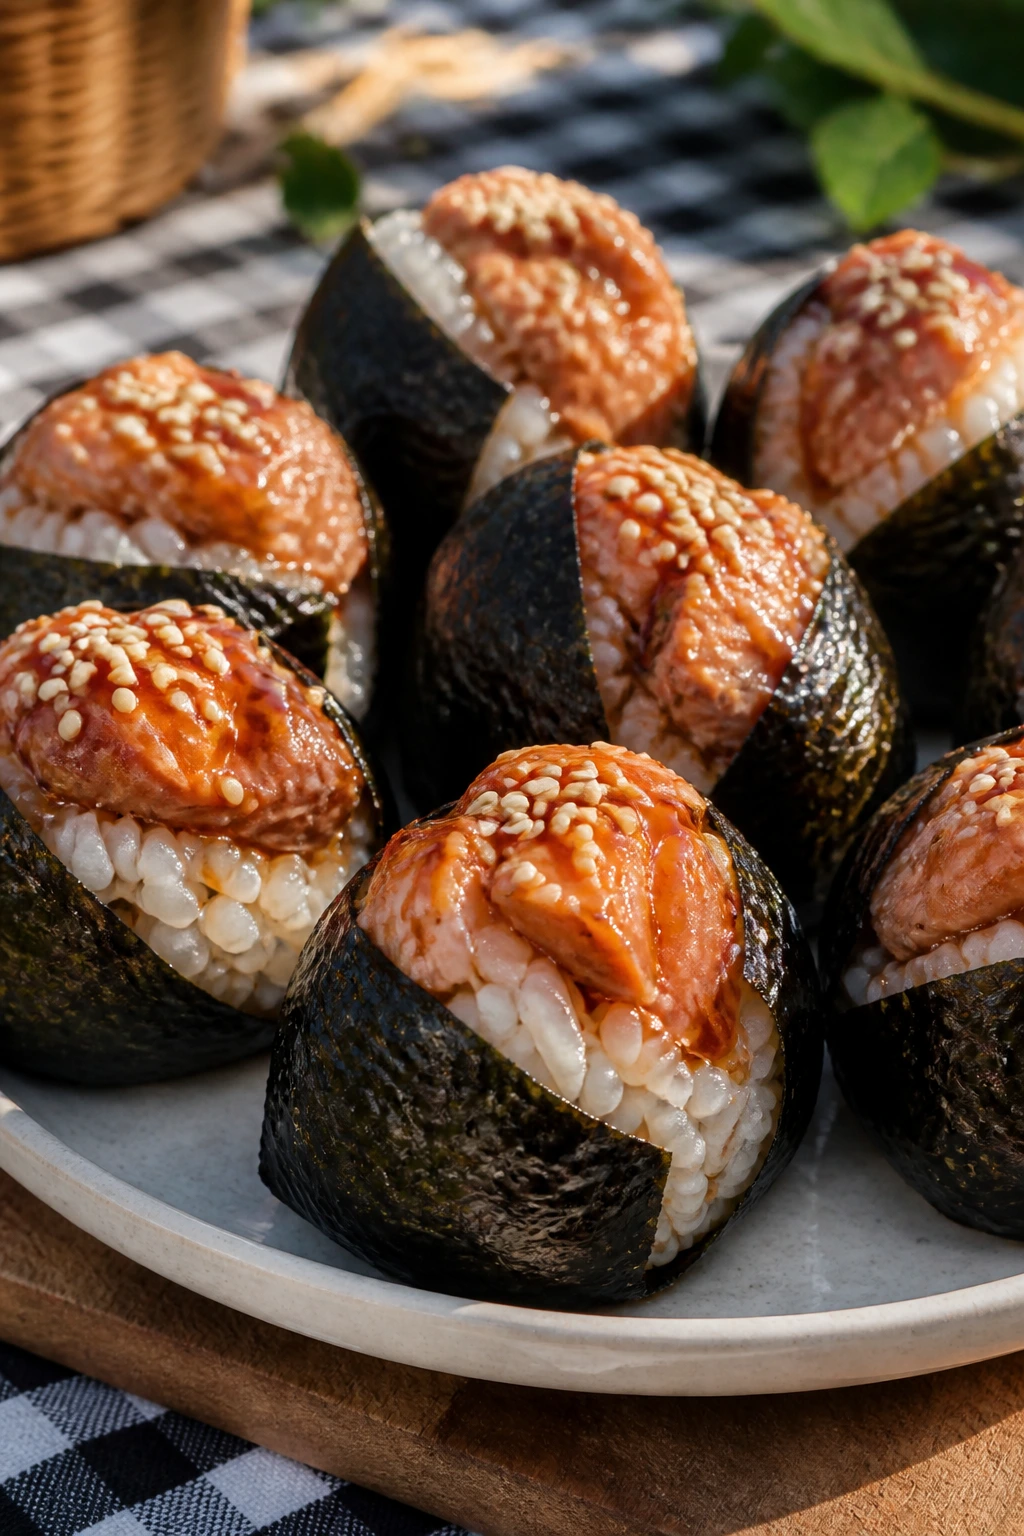
These are neat, hand-held, and a little more fun than a standard rice bowl. Salmon, rice, and nori give you a compact dinner that feels good cold or room temp.
Why It Works:
Rice balls pack tightly and travel well if the rice is seasoned properly. Teriyaki salmon adds sweet-salty flavor, and nori gives you a dry wrapper that helps keep hands clean.
Key Ingredients:
- 2 cups uncooked sushi rice
- 1 pound salmon fillet
- 1/3 cup teriyaki sauce
- 1 tablespoon rice vinegar
- 1 teaspoon sugar
- 1 tablespoon sesame seeds
- 2 sheets nori, cut into strips
- 1/2 cucumber, thinly sliced
- Salt, to taste
Quick Steps:
- Cook the sushi rice and season it with rice vinegar, sugar, and salt.
- Bake the salmon at 400°F for 12 to 14 minutes, then flake it.
- Mix the salmon with a spoonful of teriyaki sauce.
- Shape rice into balls, tuck salmon inside, and wrap with nori strips.
- Pack with cucumber slices and extra teriyaki if you want dipping.
Equipment for This Recipe:
- Rice cooker or pot
- Baking sheet
- Mixing bowl
- Small bowl of water for shaping
How to Serve This Dish:
Serve these chilled or at room temperature with cucumber and a few sesame seeds. They’re tidy enough to eat with your hands, which is a relief at a picnic. A tiny container of soy sauce is useful, though not required.
Pro Tips for This Recipe:
- Wet your hands lightly so the rice doesn’t stick.
- Use salmon that flakes cleanly, not mushy leftovers.
- Don’t overfill the centers; the rice should hold together.
Variations on This Dish:
- Tuna Onigiri: Swap salmon for flaked tuna.
- Tofu Filling: Use diced teriyaki tofu for a vegetarian version.
- Spicy Mayo Version: Add a little mayonnaise and sriracha inside.
Common Mistakes to Avoid with This Dish:
- Don’t use hot rice; it makes the nori soggy fast.
- Don’t shape the balls too loosely.
- Don’t skip seasoning the rice itself.
15. Rotisserie Chicken Caesar Wraps
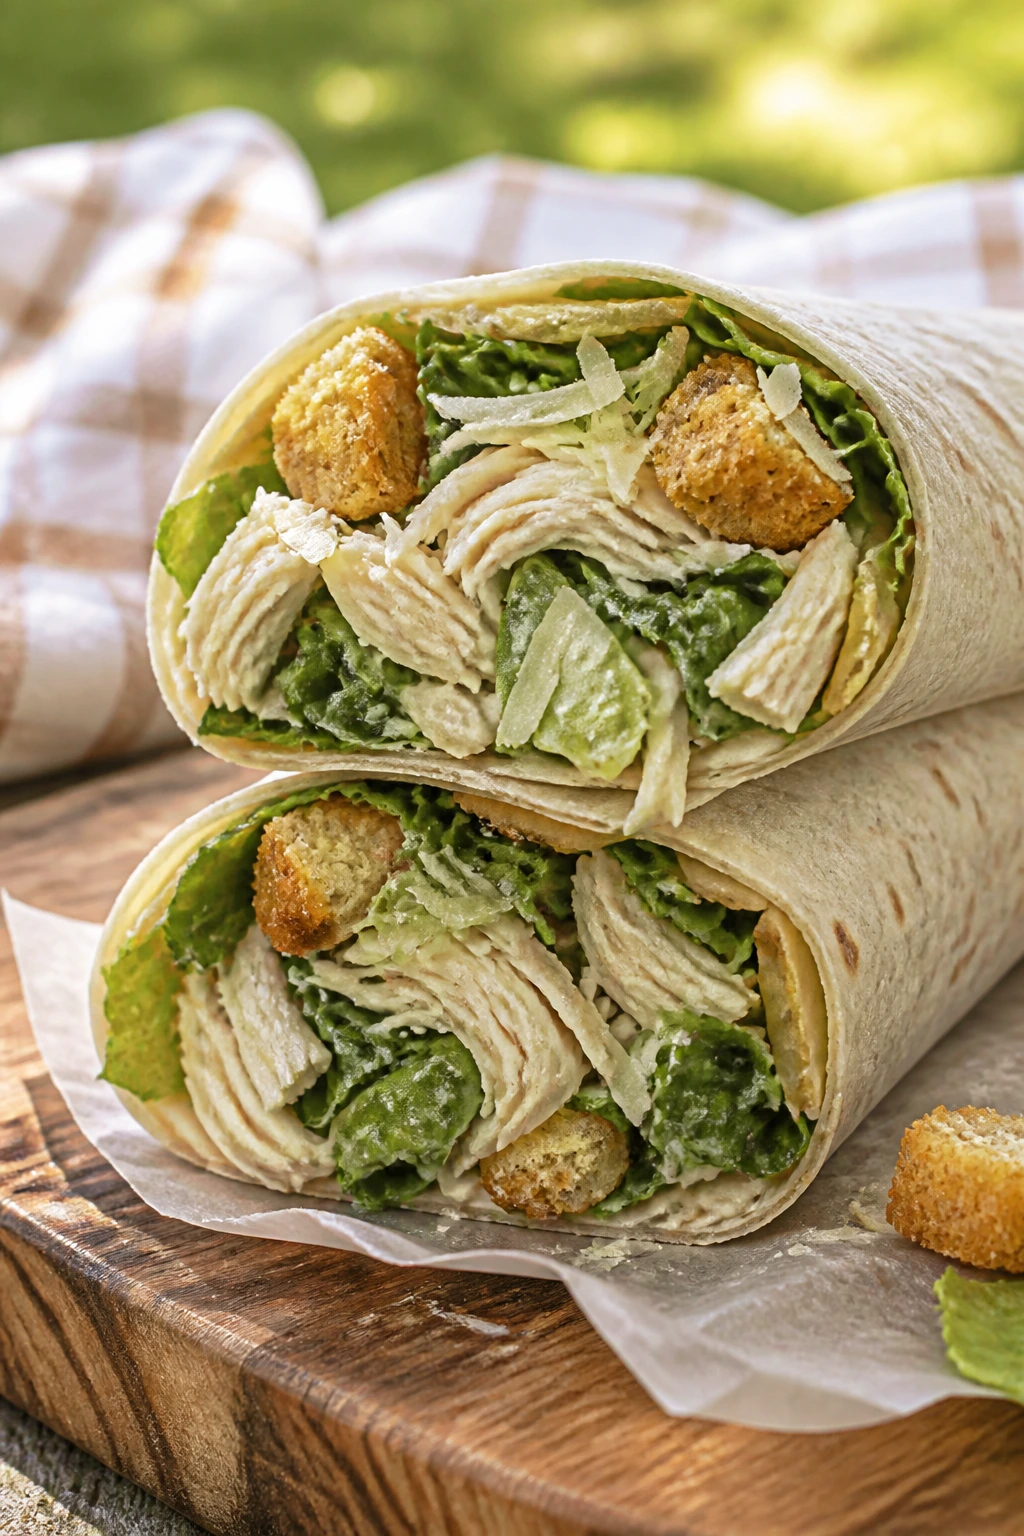
Caesar wraps are one of those blunt, useful picnic dinners that never try too hard. They taste familiar, they pack fast, and they keep the crunchy-creamy balance people want from a Caesar salad without requiring a fork.
Why It Works:
Rotisserie chicken saves time and already has enough flavor to stand up to Caesar dressing. Crushed croutons add crunch, and romaine stays firm longer than softer greens.
Key Ingredients:
- 3 cups chopped rotisserie chicken
- 4 cups chopped romaine
- 1/2 cup Caesar dressing
- 1/3 cup grated Parmesan
- 1 cup croutons, lightly crushed
- 4 large tortillas
- 1 tablespoon lemon juice
- Black pepper, to taste
Quick Steps:
- Toss chicken, romaine, Caesar dressing, Parmesan, lemon juice, and pepper in a bowl.
- Fold in crushed croutons right before assembling.
- Divide the filling among the tortillas.
- Roll tightly and wrap in parchment.
- Slice in half just before serving.
Equipment for This Recipe:
- Mixing bowl
- Spoon
- Knife
- Cutting board
How to Serve This Dish:
Serve with watermelon wedges or a few grapes to cut the saltiness. These wraps are best assembled close to eating time, but the filling can be made ahead. A sprinkle of extra Parmesan on the cut edge looks good and tastes sharper.
Pro Tips for This Recipe:
- Pack croutons separately if you need more than an hour of crunch.
- Dry the romaine after washing; wet lettuce makes a slippery filling.
- Use a thick Caesar dressing so the wrap doesn’t leak.
Variations on This Dish:
- Shrimp Caesar Wraps: Replace chicken with chilled shrimp.
- Kale Caesar: Use finely chopped kale for a sturdier green.
- Bacon Caesar: Add chopped bacon for extra salt and crunch.
Common Mistakes to Avoid with This Dish:
- Don’t overfill the tortillas.
- Don’t dress the lettuce too far ahead if you like crunch.
- Don’t slice the wrap before it’s packed tight.
16. Black Bean and Corn Quesadillas
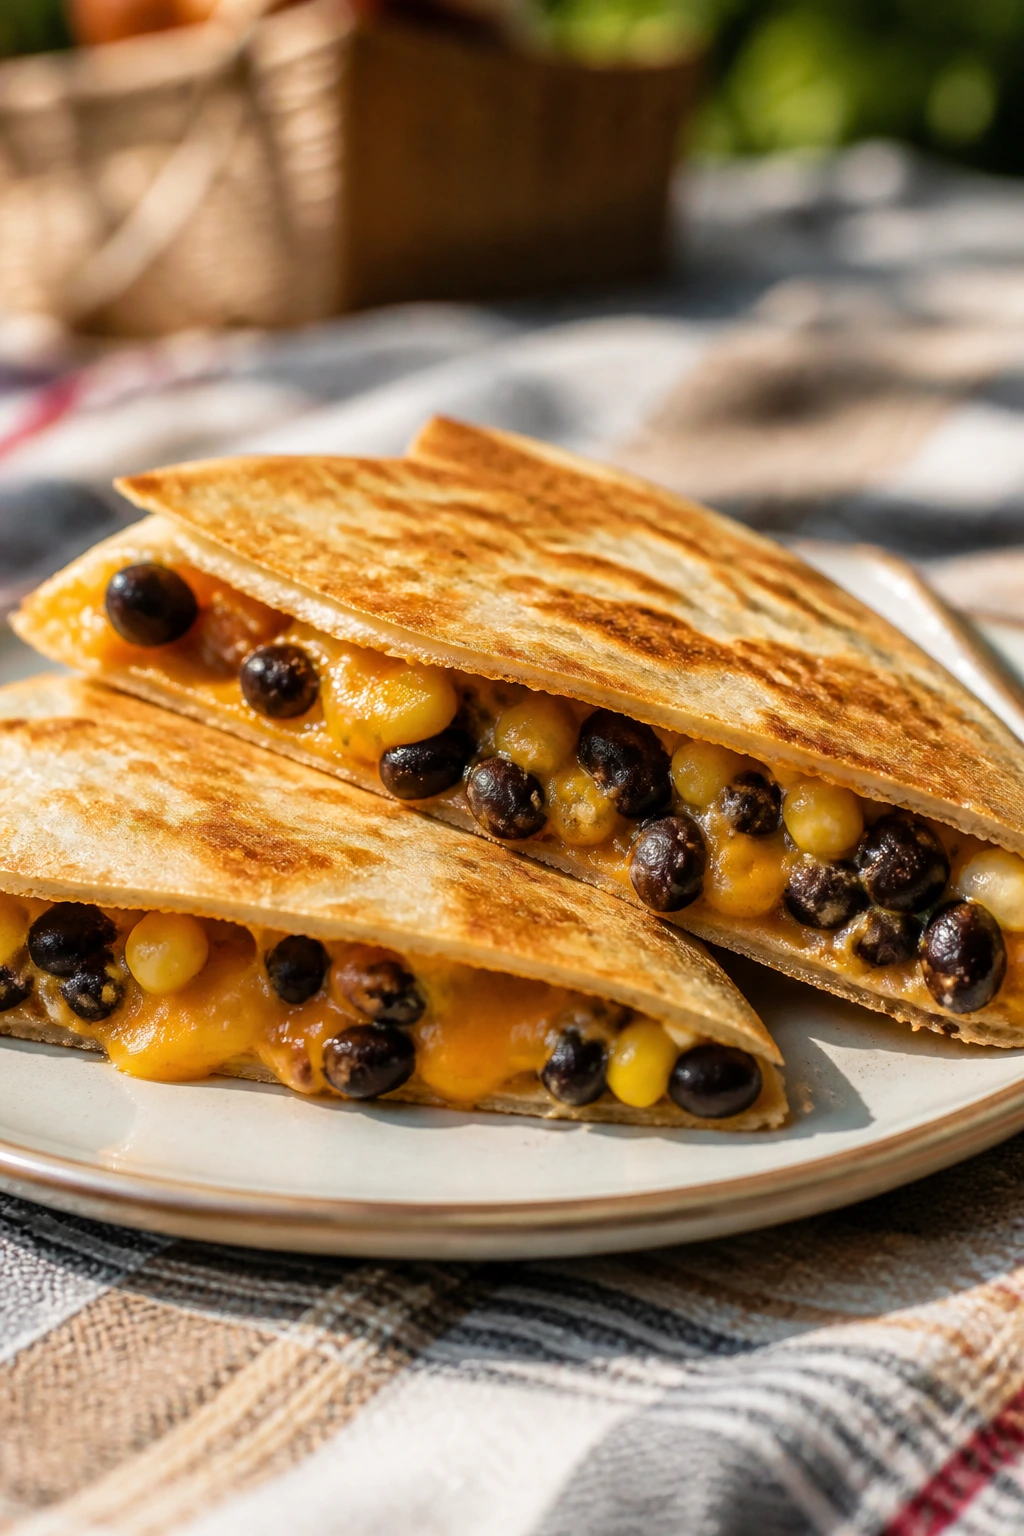
These quesadillas are the kind of dinner that holds together in a foil packet and still tastes good without a plate. The black beans make them filling, the corn gives sweetness, and the cheese does the glue work.
Why It Works:
A crisp tortilla handles transport far better than a soft one. Black beans bring protein, and the sweet corn plus sharp cheddar keeps the filling from tasting flat after it cools.
Key Ingredients:
- 8 flour tortillas
- 1 can black beans, rinsed and drained
- 1 cup corn kernels
- 2 cups shredded cheddar
- 2 scallions, sliced
- 1 teaspoon cumin
- 1/2 teaspoon chili powder
- 1 tablespoon olive oil
- Salsa, for serving
Quick Steps:
- Mash half the beans lightly with cumin and chili powder.
- Spread the bean mixture over 4 tortillas.
- Add corn, scallions, and cheddar, then top with the remaining tortillas.
- Cook in a skillet with olive oil over medium heat for 2 to 3 minutes per side.
- Cool slightly, then cut into wedges.
Equipment for This Recipe:
- Skillet
- Spatula
- Knife
- Cutting board
How to Serve This Dish:
Serve the wedges with salsa or a simple avocado dip. They’re good warm, room temp, or wrapped in foil for later. A side of sliced melon keeps the meal light enough for hot weather.
Pro Tips for This Recipe:
- Use medium heat so the cheese melts before the tortilla burns.
- Don’t overstuff; thin layers crisp better.
- Let them cool for a few minutes before slicing so the filling settles.
Variations on This Dish:
- Pepper Jack Version: Swap cheddar for pepper jack.
- Veggie Loaded: Add chopped spinach or peppers.
- Breakfast Quesadilla: Add scrambled eggs and leave out the chili powder.
Common Mistakes to Avoid with This Dish:
- Don’t cook on high heat or the outside browns too fast.
- Don’t use wet salsa inside the quesadilla.
- Don’t cut immediately after cooking if you want tidy wedges.
17. Antipasto Skewers with Bread
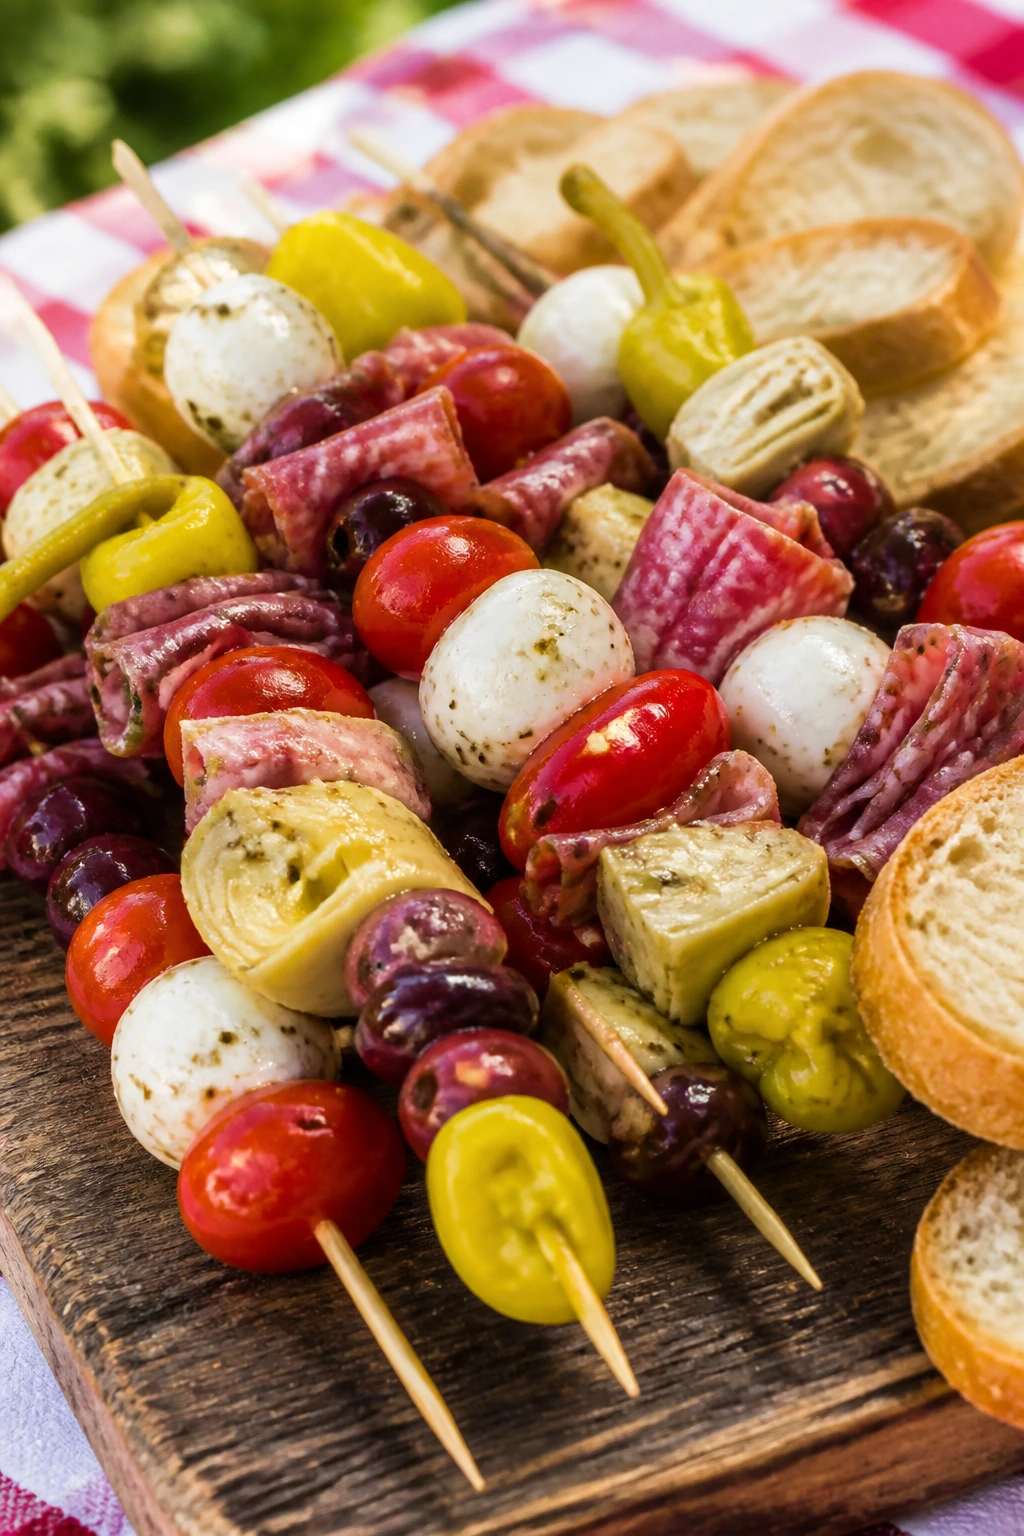
These skewers are basically a picnic board on a stick, which is useful when nobody wants to stand around with a knife. Salami, cheese, olives, and tomatoes keep the bites savory and varied.
Why It Works:
The ingredients are already designed to be eaten cold. Threading them onto skewers makes the platter easy to grab, and a loaf of bread turns it into dinner instead of a starter.
Key Ingredients:
- 8 ounces salami, folded
- 8 ounces mozzarella balls
- 1 cup cherry tomatoes
- 1/2 cup olives
- 1 cup marinated artichoke hearts, drained
- 1/2 cup pepperoncini, drained
- 1 baguette, sliced
- 2 tablespoons olive oil
- Balsamic glaze, for drizzling
Quick Steps:
- Drain all marinated ingredients well.
- Thread salami, mozzarella, tomatoes, olives, artichokes, and pepperoncini onto skewers.
- Brush baguette slices lightly with olive oil.
- Pack skewers and bread separately.
- Drizzle with balsamic glaze right before serving.
Equipment for This Recipe:
- Skewers
- Cutting board
- Knife
- Small brush or spoon
How to Serve This Dish:
Lay the skewers across a platter with the bread tucked beside them. Add grapes or a simple green salad if you want a fuller meal. These are excellent for people who eat in shifts.
Pro Tips for This Recipe:
- Drain the wet ingredients or the skewers get slippery.
- Fold salami slices in half so the skewers look fuller.
- Use sturdy baguette slices, not soft sandwich bread.
Variations on This Dish:
- Turkey Antipasto: Swap salami for turkey salami.
- Vegetarian Skewers: Add more artichokes and roasted peppers.
- Spicy Version: Use hot capicola and extra pepperoncini.
Common Mistakes to Avoid with This Dish:
- Don’t skewer ingredients too tightly or they split.
- Don’t pack bread against moist ingredients for hours.
- Don’t forget a knife for the baguette unless you slice it first.
18. Cucumber Dill Egg Salad Sandwiches
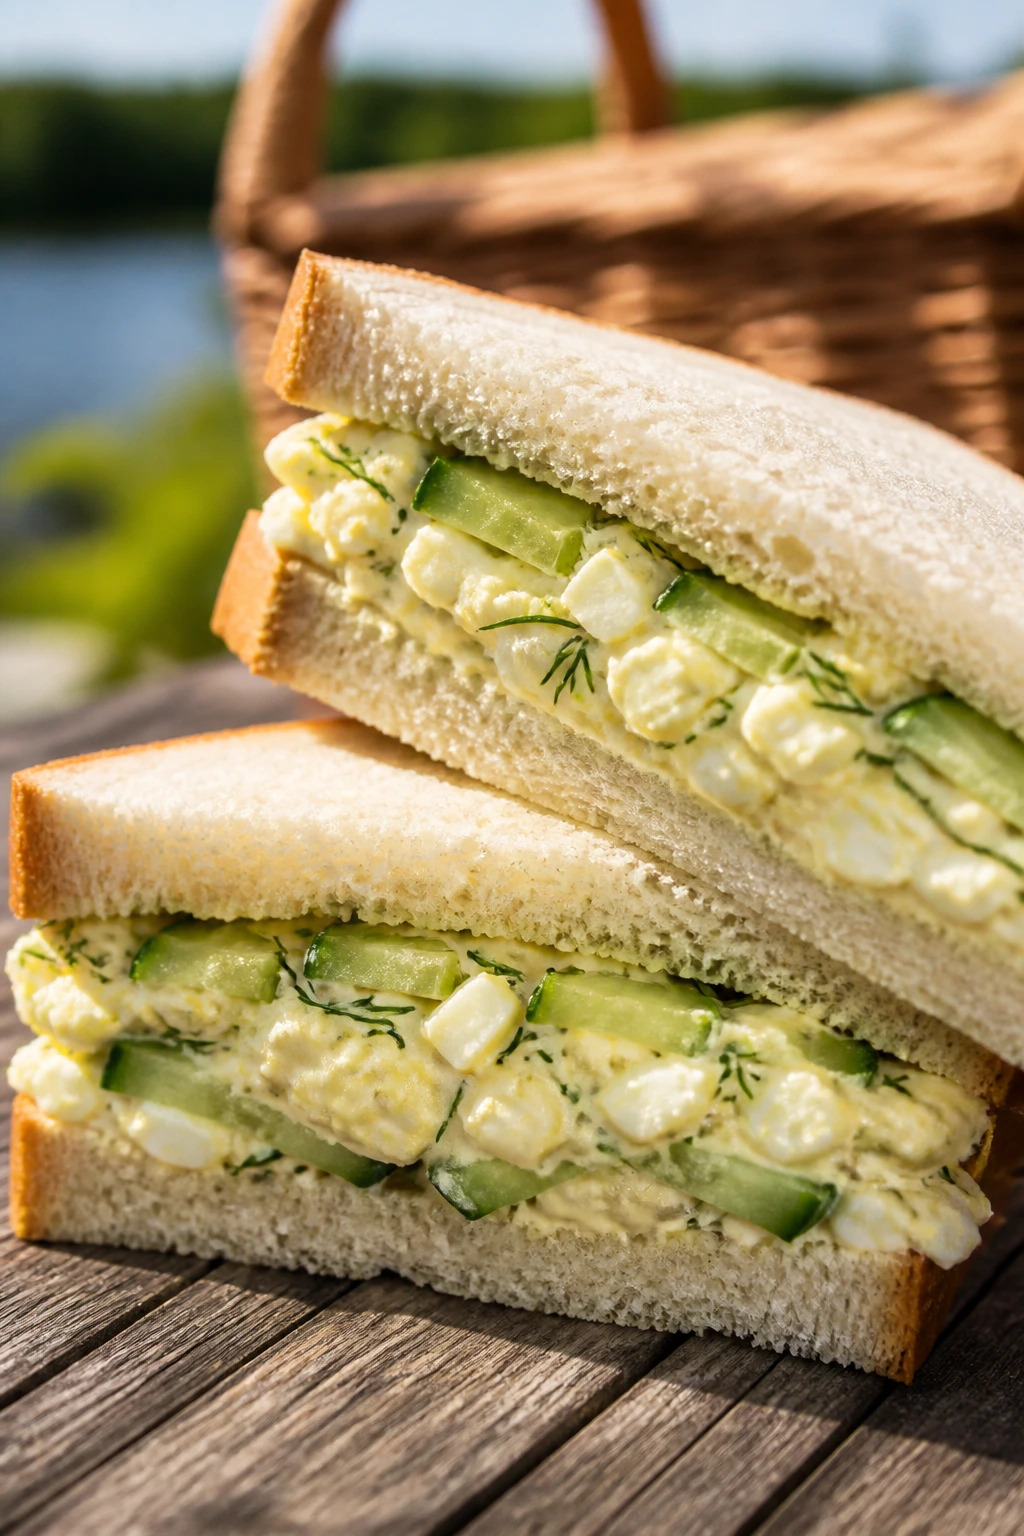
Egg salad can be heavy if you let it, but cucumber and dill keep this version cool and fresh. Soft bread makes sense here, because the filling is creamy and needs a little cushion.
Why It Works:
Eggs hold well when chilled, and the cucumber adds water plus crunch without making the filling muddy if you handle it right. Dill and mustard give the salad enough edge that it doesn’t taste flat.
Key Ingredients:
- 6 large eggs
- 1/4 cup mayonnaise
- 2 tablespoons Greek yogurt
- 1 teaspoon Dijon mustard
- 1 cup cucumber, finely diced
- 1 tablespoon chopped dill
- 8 slices soft sandwich bread
- Salt and black pepper, to taste
Quick Steps:
- Hard-boil the eggs, cool them completely, and peel.
- Chop the eggs and mix them with mayo, yogurt, mustard, dill, salt, and pepper.
- Fold in the cucumber.
- Spread on bread just before serving or pack filling separately.
- Cut the sandwiches in halves or quarters.
Equipment for This Recipe:
- Saucepan
- Bowl
- Fork or spoon
- Knife
How to Serve This Dish:
Serve with kettle chips, radishes, or a few dill pickles on the side. The sandwiches are best cold, straight from the cooler. Keep the edges neat by trimming crusts if you want them to look tidy on a platter.
Pro Tips for This Recipe:
- Salt the cucumber lightly, then blot it dry.
- Chill the eggs before mixing so the filling stays compact.
- Use bread that’s soft but not flimsy.
Variations on This Dish:
- Avocado Egg Salad: Swap part of the mayo for mashed avocado.
- Rye Sandwiches: Use rye bread for a sharper flavor.
- Open-Face Version: Spoon the salad on toasted bread instead.
Common Mistakes to Avoid with This Dish:
- Don’t use warm eggs; the filling gets loose.
- Don’t chop the cucumber too large.
- Don’t assemble too early unless you like soggy bread.
19. Sesame Ginger Tofu Lettuce Wraps
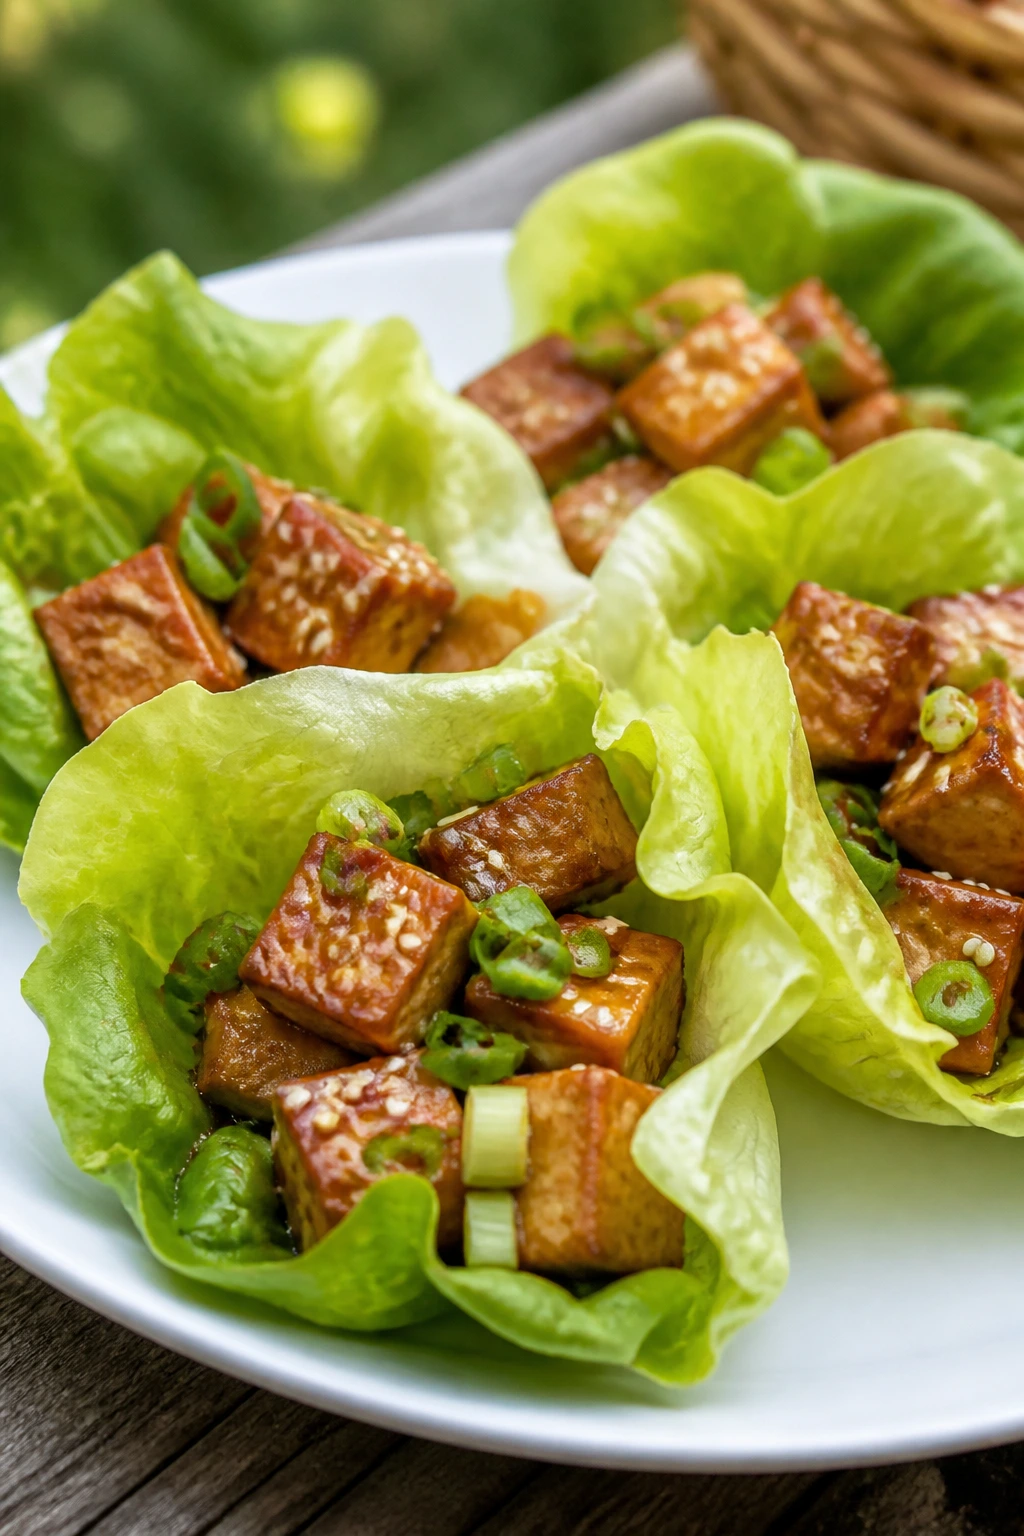
These wraps are clean, savory, and a little glossy from the sauce. The tofu gets crisp edges in the skillet, which matters more than most people expect when they think they don’t like tofu.
Why It Works:
Pressing the tofu removes excess water, so it browns instead of steaming. Ginger, soy, and sesame give it enough flavor to stand on its own, and lettuce keeps the wrap cool and crisp.
Key Ingredients:
- 1 block extra-firm tofu, about 14 ounces
- 2 tablespoons soy sauce
- 1 tablespoon sesame oil
- 1 teaspoon grated ginger
- 2 cloves garlic, minced
- 1 tablespoon honey or maple syrup
- 1 carrot, shredded
- 1/2 cucumber, julienned
- 1 head butter lettuce
- 1 tablespoon sesame seeds
Quick Steps:
- Press the tofu for 15 minutes, then cut it into cubes.
- Sauté the tofu in sesame oil over medium-high heat until golden, about 8 minutes.
- Stir in soy sauce, ginger, garlic, and honey.
- Cook until the tofu looks glossy and the sauce clings.
- Spoon into lettuce leaves and top with carrot, cucumber, and sesame seeds.
Equipment for This Recipe:
- Skillet
- Spatula
- Knife
- Tofu press or clean towel
How to Serve This Dish:
Serve with rice if you want a larger meal, or keep it as handheld wraps. A tiny bowl of extra sauce helps if you like things more savory. The lettuce cups look best with the filling added right before eating.
Pro Tips for This Recipe:
- Press the tofu well; wet tofu won’t brown.
- Don’t crowd the pan or the cubes steam.
- Use butter lettuce leaves with intact bases.
Variations on This Dish:
- Chicken Version: Use diced cooked chicken.
- Tempeh Swap: Tempeh gives a firmer bite.
- Spicy Ginger Wraps: Add chili flakes or sriracha.
Common Mistakes to Avoid with This Dish:
- Don’t skip the press.
- Don’t cook the sauce until it burns dry.
- Don’t use thin lettuce leaves that split in your hand.
20. Zucchini Feta Fritters with Yogurt Dip
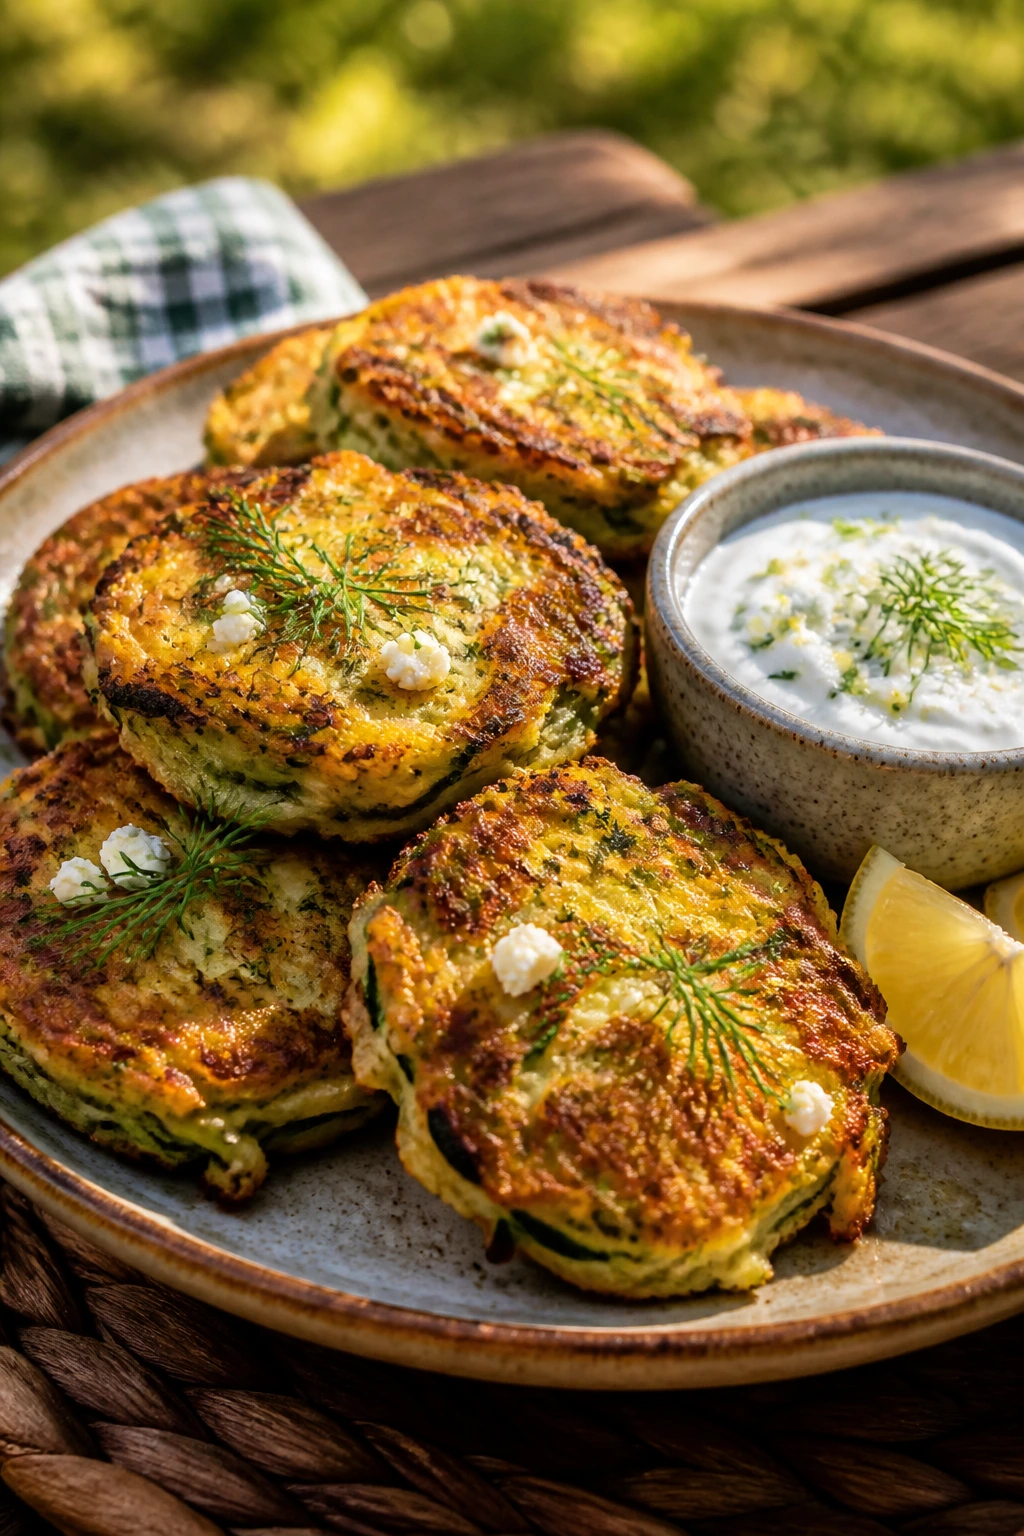
These fritters are crisp on the outside and soft inside, which is a nice break from all the sandwiches and bowls. They’re especially useful when zucchini starts piling up and you want something that feels like dinner, not a side dish.
Why It Works:
Squeezing the zucchini dry keeps the fritters from turning soggy. Feta seasons the batter from the inside, and the yogurt dip gives you a cool, tangy finish once they’ve cooled a little.
Key Ingredients:
- 3 medium zucchini, grated
- 2 large eggs
- 1/3 cup all-purpose flour
- 1/2 cup crumbled feta
- 2 tablespoons chopped dill
- 1 clove garlic, grated
- 2 tablespoons olive oil
- 1/2 cup plain yogurt
- 1 tablespoon lemon juice
- Salt and black pepper, to taste
Quick Steps:
- Grate the zucchini and squeeze out as much water as you can.
- Mix zucchini, eggs, flour, feta, dill, garlic, salt, and pepper.
- Heat olive oil in a skillet over medium heat.
- Drop spoonfuls of batter into the pan and cook 3 to 4 minutes per side.
- Stir yogurt and lemon juice together for the dip.
Equipment for This Recipe:
- Box grater
- Skillet
- Mixing bowl
- Clean kitchen towel
How to Serve This Dish:
Serve the fritters warm or room temp with the yogurt dip on the side. They fit well beside tomato salad or grilled chicken. A little chopped dill on top makes them look finished.
Pro Tips for This Recipe:
- Squeeze the zucchini harder than feels necessary.
- Keep the skillet at medium heat so the centers cook through.
- Let them rest on a rack, not paper towels, if you want them crisper.
Variations on This Dish:
- Corn Fritters: Add 1 cup corn kernels.
- Gluten-Free Version: Use chickpea flour instead of regular flour.
- Herb Version: Add mint and parsley with the dill.
Common Mistakes to Avoid with This Dish:
- Don’t skip squeezing the zucchini.
- Don’t fry on high heat or the outsides burn before the centers set.
- Don’t stack them hot or they soften.
21. Niçoise Salad Jars
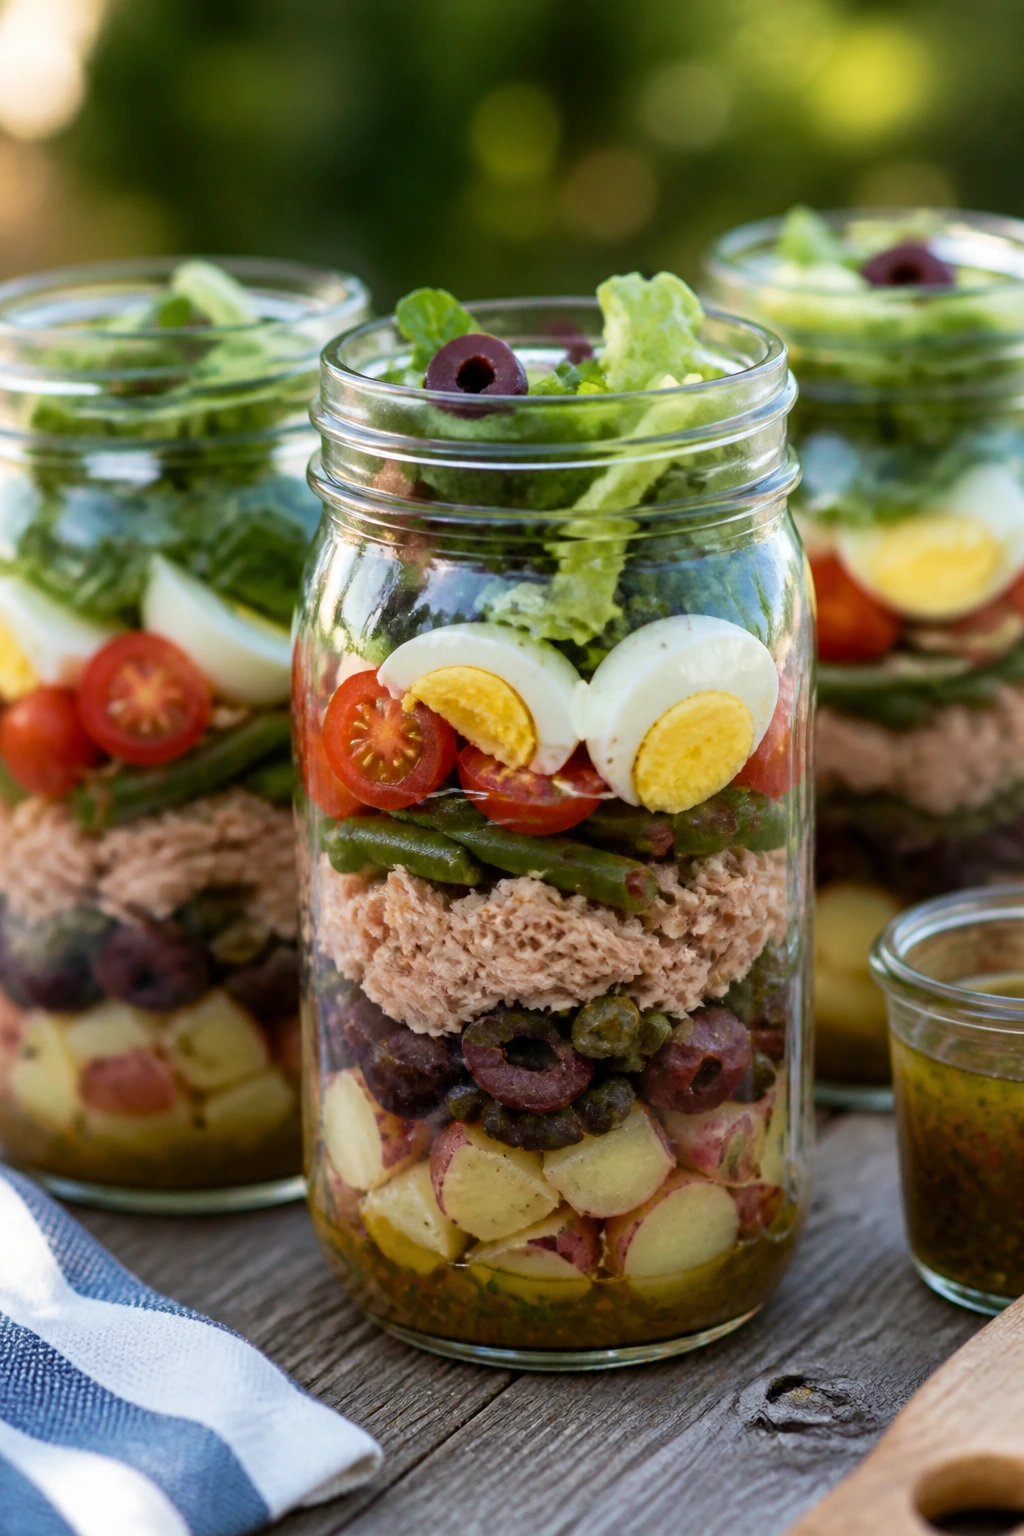
Niçoise salad feels built for picnic packing. The components stay separate in the jar, and when you shake or tip them into a bowl, the dressing runs through everything without turning it soggy.
Why It Works:
The hard-boiled eggs, potatoes, tuna, and green beans all hold up well in the fridge. Layering the dressing first and the greens last keeps the jar tidy until you’re ready to eat.
Key Ingredients:
- 1 pound baby potatoes
- 8 ounces green beans, trimmed
- 4 large eggs
- 2 cans tuna, drained
- 1 cup cherry tomatoes, halved
- 1/2 cup olives
- 1/3 cup vinaigrette
- 1 cup lettuce or baby spinach
Quick Steps:
- Boil the potatoes until tender, then cool.
- Cook the green beans until bright green and just tender, then chill.
- Hard-boil the eggs and slice them.
- Layer vinaigrette, potatoes, beans, tuna, tomatoes, olives, eggs, and greens in jars.
- Chill until picnic time.
Equipment for This Recipe:
- Saucepan
- Slotted spoon
- Mason jars or lidded containers
- Knife
How to Serve This Dish:
Shake the jar into a bowl or eat from the jar with a fork. Add bread if you want more carbs. These are tidy, which is useful when the picnic table is crowded.
Pro Tips for This Recipe:
- Dry each component well before layering.
- Keep the lettuce on top so it doesn’t get saturated.
- Use wide-mouth jars if you want easier eating.
Variations on This Dish:
- Salmon Niçoise: Swap tuna for cooked salmon.
- Vegetarian Version: Use chickpeas instead of tuna.
- Potato-Free Bowl: Add extra greens and cucumbers.
Common Mistakes to Avoid with This Dish:
- Don’t layer delicate greens near the dressing.
- Don’t overcook the eggs.
- Don’t skip cooling the potatoes before packing.
22. Grilled Veggie Hummus Wraps
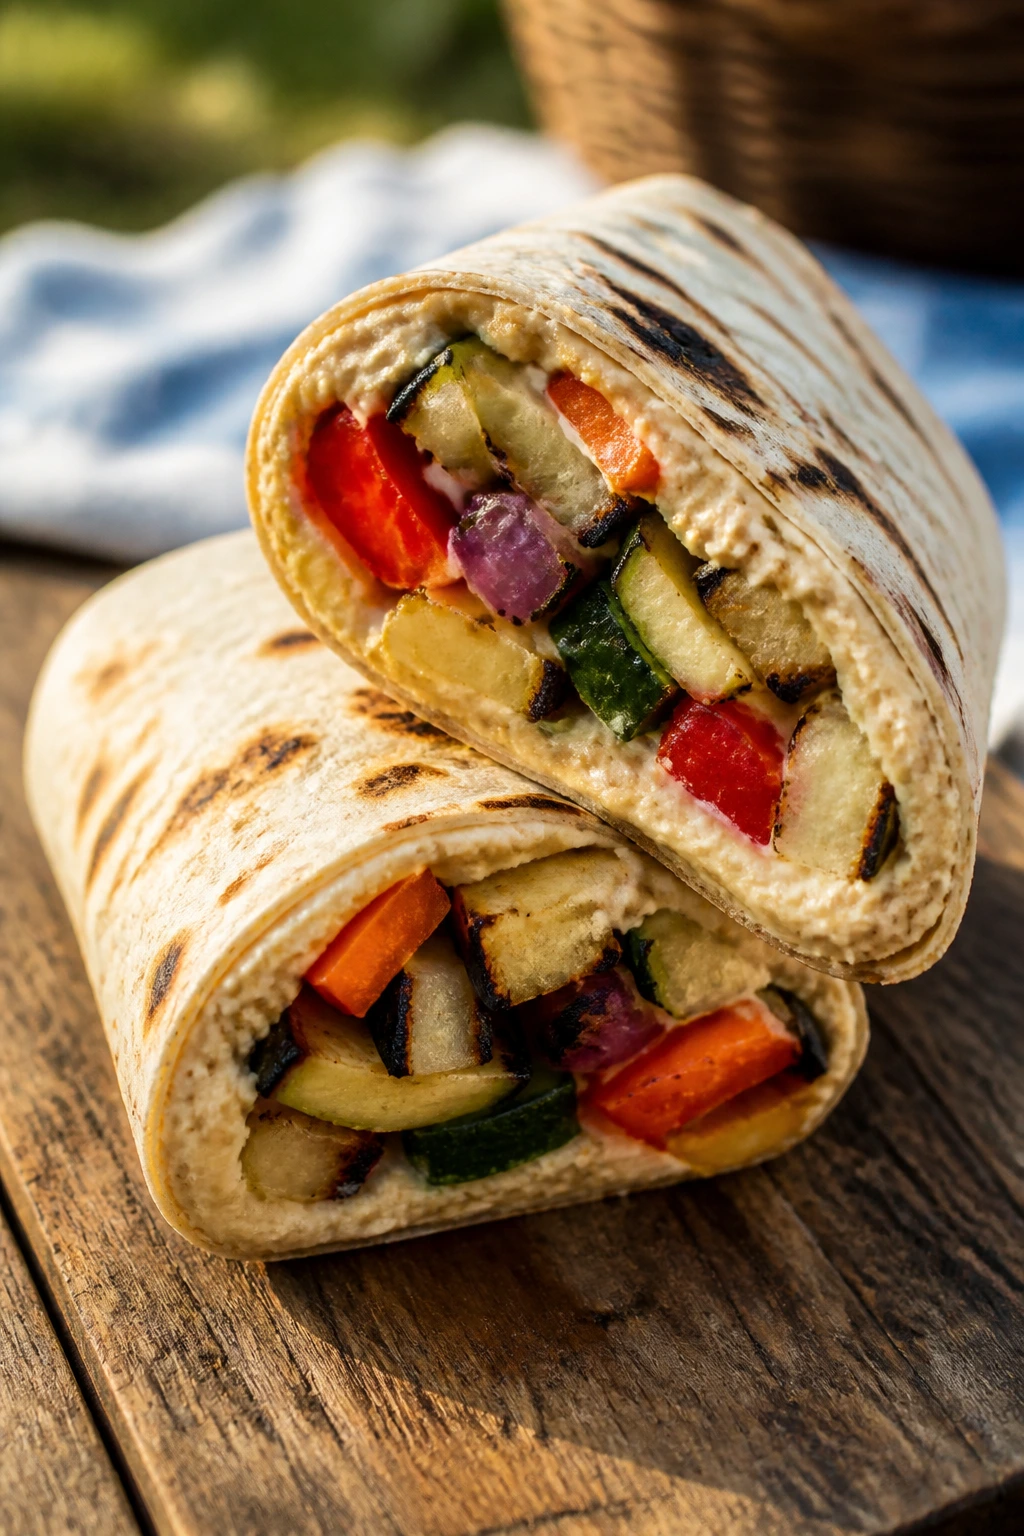
These wraps taste like a farmer’s market lunch that decided to become dinner. Grilled zucchini, peppers, and onions bring smoke and sweetness, while hummus keeps the filling creamy and stable.
Why It Works:
Hummus acts as both spread and moisture barrier, so the tortilla doesn’t go soggy as fast. Grilled vegetables hold their shape well, and you can make the filling ahead without much trouble.
Key Ingredients:
- 2 zucchini, sliced lengthwise
- 2 bell peppers, sliced
- 1 red onion, sliced into rounds
- 2 tablespoons olive oil
- 1 teaspoon salt
- 1 teaspoon black pepper
- 1 cup hummus
- 4 large tortillas
- 2 cups baby spinach
- 1/2 cup crumbled feta, optional
Quick Steps:
- Toss the vegetables with olive oil, salt, and pepper.
- Grill or grill-pan them over medium-high heat until softened and lightly charred.
- Spread hummus over each tortilla.
- Layer spinach, grilled vegetables, and feta.
- Roll tightly and wrap for transport.
Equipment for This Recipe:
- Grill or grill pan
- Tongs
- Knife
- Cutting board
How to Serve This Dish:
Cut each wrap in half and serve with cucumber sticks or a tomato salad. These do well cold, which makes them a low-stress picnic dinner. A little extra hummus on the side is never a bad idea.
Pro Tips for This Recipe:
- Cool the vegetables before wrapping.
- Use hummus thick enough to spread without dripping.
- Don’t overfill with peppers; they slide around.
Variations on This Dish:
- Roasted Veggie Wraps: Roast the vegetables instead of grilling.
- Spicy Hummus Version: Use harissa hummus.
- Gluten-Free Wraps: Use sturdy gluten-free tortillas or lettuce leaves.
Common Mistakes to Avoid with This Dish:
- Don’t wrap hot vegetables.
- Don’t use thin tortillas that tear when rolled.
- Don’t forget to blot extra moisture from the vegetables.
23. Bacon Ranch Chicken Pasta Salad
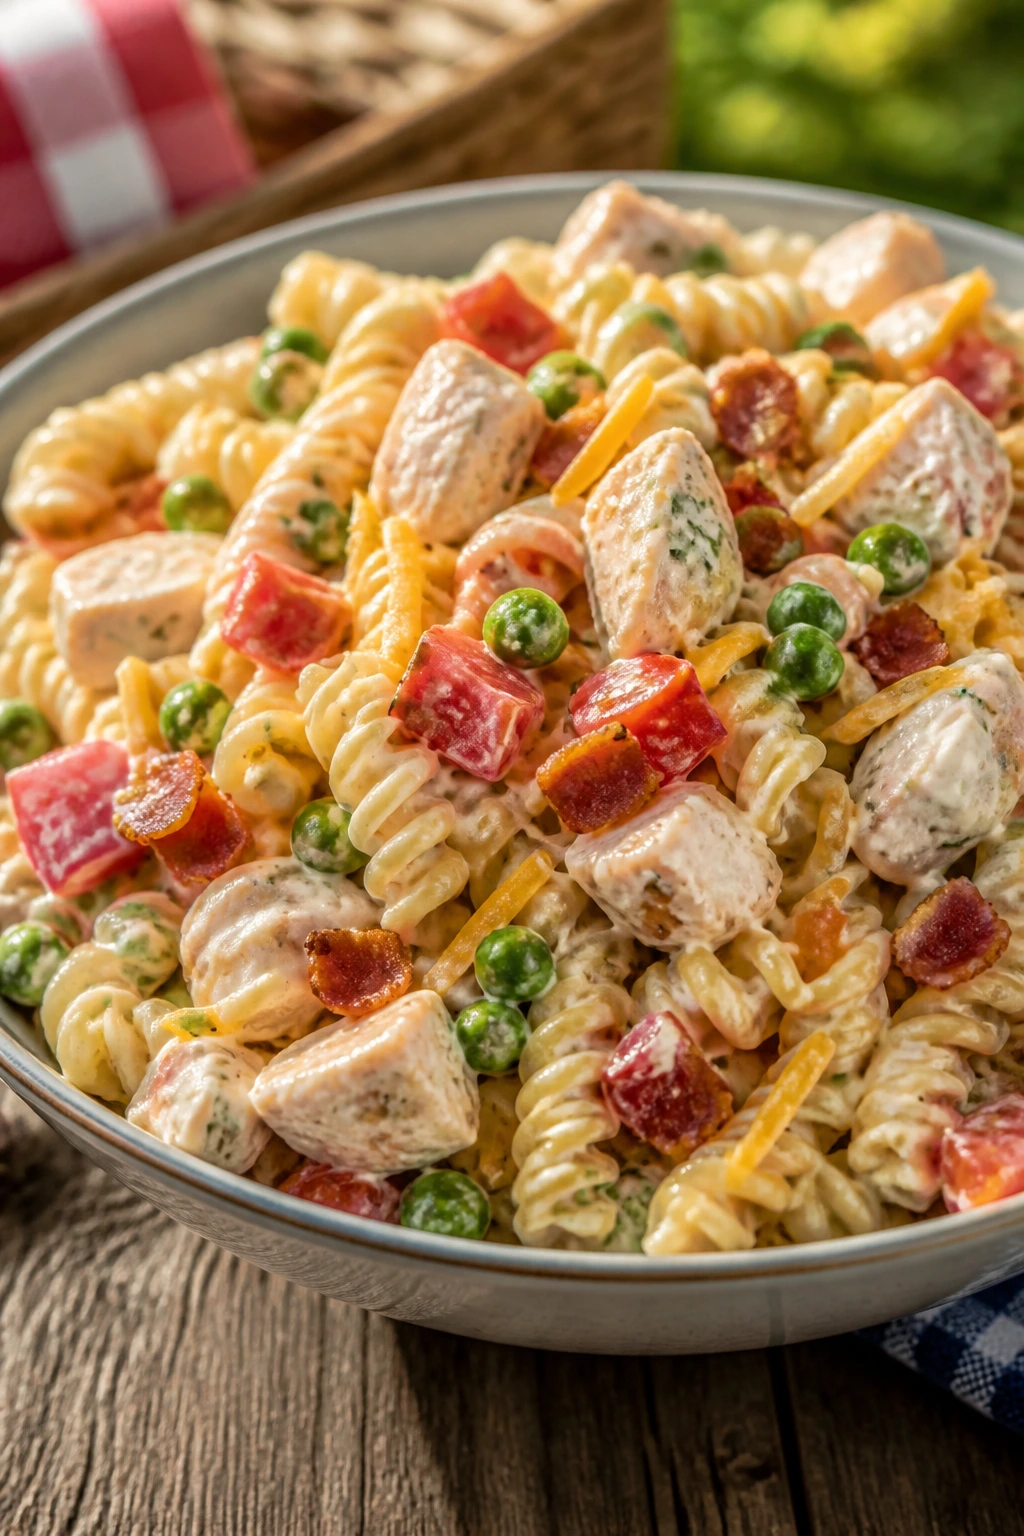
This is the picnic pasta salad people make once and then keep making because it vanishes first. Bacon and ranch bring the familiar flavor, while peas and tomatoes keep it from feeling too heavy.
Why It Works:
The ranch coating clings to short pasta, and the chicken keeps it meal-sized. Crisp bacon adds salt and texture, which is the part that saves this from blandness.
Key Ingredients:
- 12 ounces short pasta
- 2 cups cooked chicken, chopped
- 6 slices bacon, cooked crisp and chopped
- 1/2 cup ranch dressing
- 1/2 cup plain Greek yogurt
- 1 cup frozen peas, thawed
- 1 cup cherry tomatoes, halved
- 1/2 cup shredded cheddar
- Salt and black pepper, to taste
Quick Steps:
- Cook pasta until al dente, then cool completely.
- Stir ranch, Greek yogurt, salt, and pepper in a large bowl.
- Toss pasta with chicken, bacon, peas, tomatoes, and cheddar.
- Fold in the dressing until evenly coated.
- Chill for 20 minutes before packing.
Equipment for This Recipe:
- Pot
- Colander
- Mixing bowl
- Spoon
How to Serve This Dish:
Serve cold with extra tomato wedges or a pile of celery sticks. It’s filling enough to stand on its own, though fruit works well beside it. I like this in a shallow container so the bacon stays visible.
Pro Tips for This Recipe:
- Let the bacon cool before chopping so it stays crisp.
- Thaw and dry the peas so they don’t water down the dressing.
- Add the cheese near the end so it doesn’t disappear.
Variations on This Dish:
- Buffalo Ranch Version: Add a spoonful of buffalo sauce.
- Turkey Bacon Swap: Use turkey bacon if you want a leaner version.
- Vegetarian Bowl: Replace chicken with chickpeas.
Common Mistakes to Avoid with This Dish:
- Don’t use too much dressing. Ranch should coat, not pool.
- Don’t add warm bacon; it softens fast.
- Don’t pack it before the pasta cools.
24. Pineapple Chicken Skewers with Rice Salad
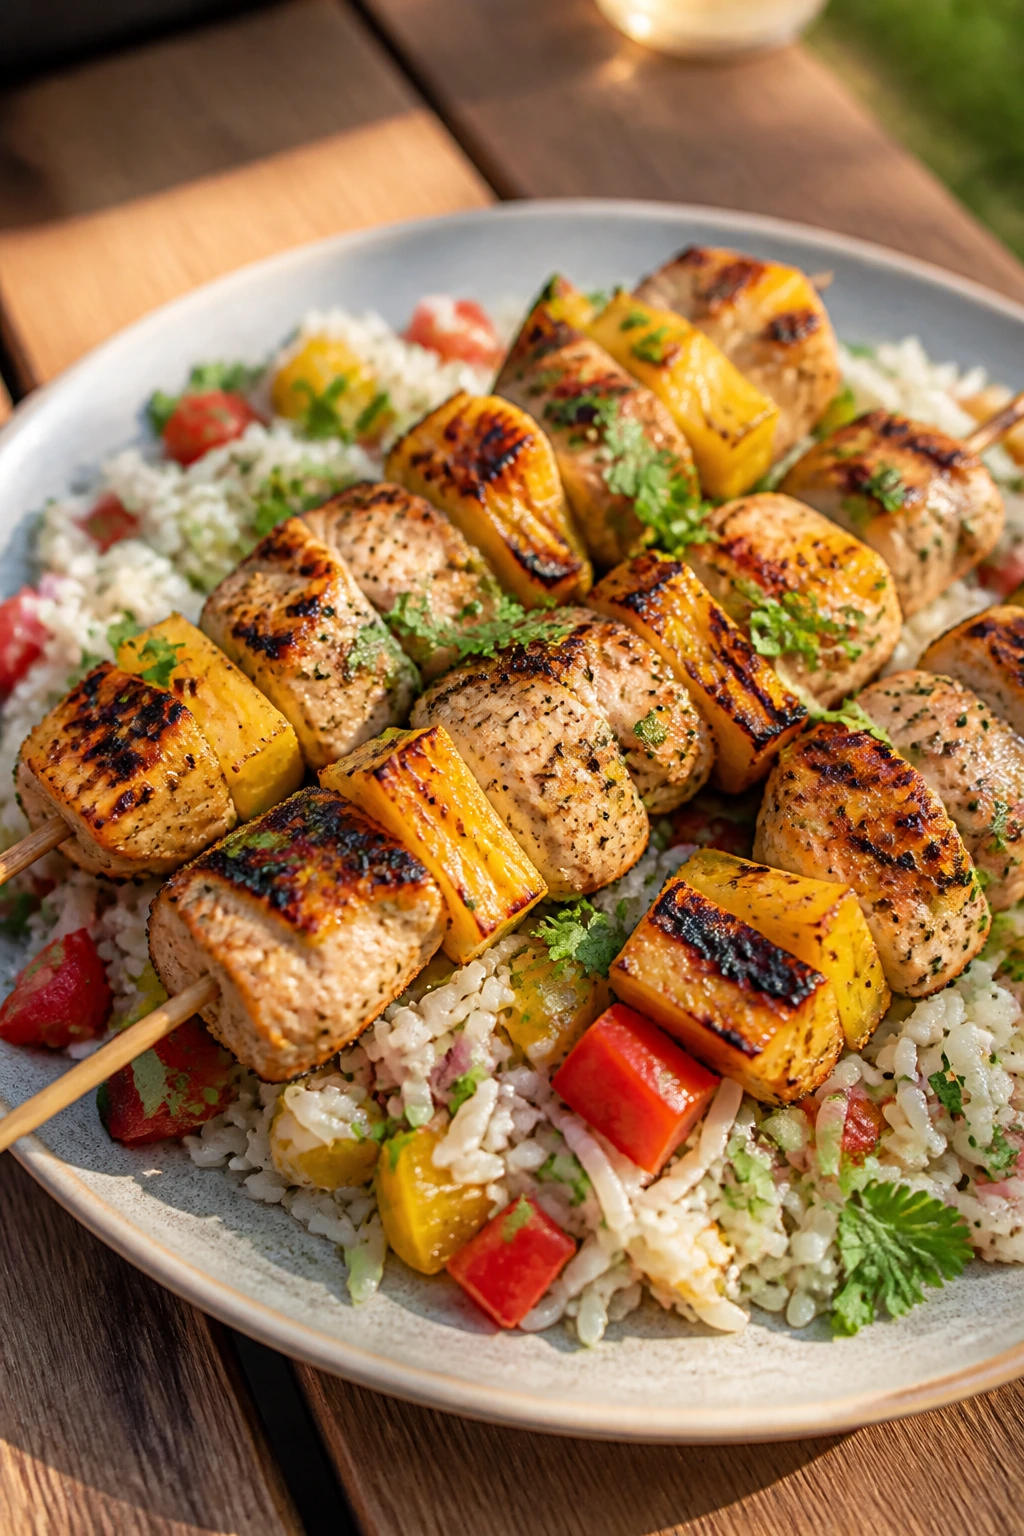
These skewers bring a bright, sweet edge that feels right when the air is heavy and the grill is already hot. Pineapple caramelizes fast, so you get little browned spots that taste like the best part of summer.
Why It Works:
Chicken thighs stay juicy on the grill, which matters when you’re cooking ahead. The rice salad underneath catches the drips and turns the whole thing into a complete dinner.
Key Ingredients:
- 1 1/2 pounds boneless chicken thighs, cut into chunks
- 2 cups pineapple chunks
- 2 tablespoons soy sauce
- 1 tablespoon honey
- 1 clove garlic, minced
- 2 cups cooked rice
- 1 cucumber, diced
- 2 tablespoons chopped cilantro
- 1 tablespoon lime juice
- Salt and black pepper, to taste
Quick Steps:
- Marinate chicken with soy sauce, honey, garlic, salt, and pepper for 15 minutes.
- Thread chicken and pineapple onto skewers.
- Grill over medium-high heat for 10 to 12 minutes, turning once.
- Toss rice with cucumber, cilantro, lime juice, and a pinch of salt.
- Serve the skewers over the rice salad or pack them separately.
Equipment for This Recipe:
- Grill
- Skewers
- Bowl
- Tongs
How to Serve This Dish:
This works warm or at room temp. Spoon the rice salad into a container and lay the skewers on top, or slide everything into one bowl once you arrive. Extra lime wedges help keep it sharp.
Pro Tips for This Recipe:
- Use thighs, not breasts, if you want forgiving grill time.
- Cut pineapple into pieces that match the chicken chunks.
- Don’t crowd the skewers or the chicken steams.
Variations on This Dish:
- Jerk Chicken Version: Add jerk seasoning to the marinade.
- Shrimp Swap: Use large shrimp and grill for a much shorter time.
- Tofu Skewers: Use extra-firm tofu and grill carefully.
Common Mistakes to Avoid with This Dish:
- Don’t use pineapple pieces so small they fall apart.
- Don’t overcook the chicken.
- Don’t pack the rice without cooling it first.
25. Sausage Pepper Hoagies

This is the loud, satisfying picnic dinner in the group. Sausage, peppers, and onions are messy in the best way, and hoagie rolls give you enough structure to actually eat them.
Why It Works:
The peppers and onions soften into a sweet base, and the sausage brings enough fat and seasoning that you don’t need much else. Wrapped in foil, these hold heat better than you’d expect.
Key Ingredients:
- 1 1/2 pounds Italian sausage links
- 3 bell peppers, sliced
- 1 large onion, sliced
- 2 tablespoons olive oil
- 6 hoagie rolls
- 6 slices provolone
- 1/2 teaspoon dried oregano
- Salt and black pepper, to taste
Quick Steps:
- Cook the sausage in a skillet or grill until browned and cooked through.
- Sauté peppers and onion in olive oil until soft and lightly caramelized.
- Slice the sausage if you want easier packing.
- Fill the rolls with sausage, peppers, onion, and provolone.
- Wrap in foil for travel or serve immediately.
Equipment for This Recipe:
- Skillet or grill
- Tongs
- Knife
- Foil
How to Serve This Dish:
Serve with chips, pickles, or a chopped salad. These are best warm, but they still work at room temp once wrapped. If you’re feeding a crowd, keep the filling in a pan and let people build their own.
Pro Tips for This Recipe:
- Brown the sausage well for better flavor.
- Slice the peppers thick enough that they don’t turn mushy.
- Warm the rolls lightly before filling if you’re eating right away.
Variations on This Dish:
- Chicken Sausage Version: Use chicken sausage for a lighter option.
- Marinara Style: Add a spoonful of marinara sauce.
- Spicy Version: Use hot Italian sausage and extra peppers.
Common Mistakes to Avoid with This Dish:
- Don’t slice the sausage before it rests or the juices run out.
- Don’t overload the rolls with filling.
- Don’t cook the peppers until they collapse completely.
26. Corn Tomato Farro Salad with Basil
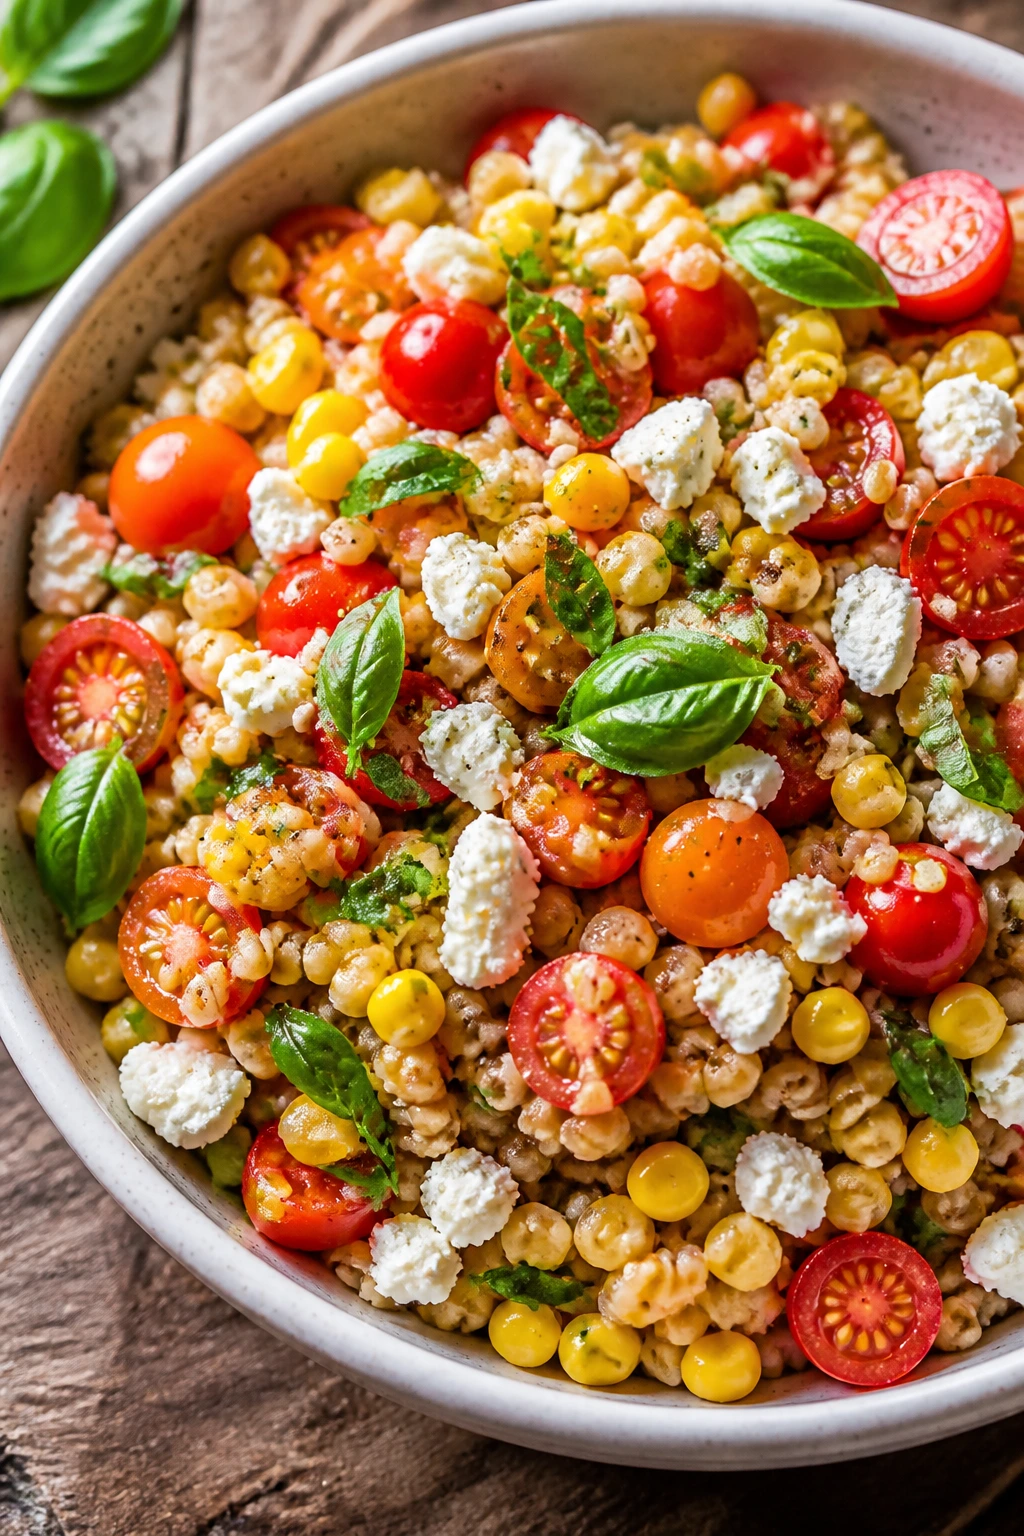
Farro brings a chewy, nutty backbone that works well when you want something more substantial than pasta. Corn and tomato keep it bright, and basil makes the whole bowl smell like a garden.
Why It Works:
Farro holds dressing without getting mushy. The corn can be grilled or charred in a skillet, and the tomatoes add juiciness that makes the grain feel less dry.
Key Ingredients:
- 1 1/2 cups farro
- 2 ears corn, kernels cut off
- 1 1/2 cups cherry tomatoes, halved
- 1/2 cup crumbled feta
- 1/3 cup chopped basil
- 2 tablespoons olive oil
- 1 tablespoon lemon juice
- 1 small garlic clove, grated
- Salt and black pepper, to taste
Quick Steps:
- Cook farro until tender but chewy, then cool.
- Char the corn in a skillet or grill until lightly browned.
- Whisk olive oil, lemon juice, garlic, salt, and pepper.
- Toss farro with corn, tomatoes, feta, and basil.
- Chill for 15 minutes before serving.
Equipment for This Recipe:
- Pot
- Skillet or grill
- Large bowl
- Spoon
How to Serve This Dish:
Spoon it into a broad bowl and finish with extra basil. It pairs nicely with grilled chicken or can stand alone if you add a few olives. I like it slightly cool, not ice-cold.
Pro Tips for This Recipe:
- Salt the farro water well or the grain tastes dull.
- Let the corn brown a little; that char matters.
- Add basil at the end so it stays green.
Variations on This Dish:
- Quinoa Swap: Use quinoa instead of farro.
- Avocado Version: Fold in avocado right before serving.
- Chicken Farro Salad: Add grilled chicken strips.
Common Mistakes to Avoid with This Dish:
- Don’t underseason the grain.
- Don’t overcook farro until it splits apart.
- Don’t add basil too early or it darkens.
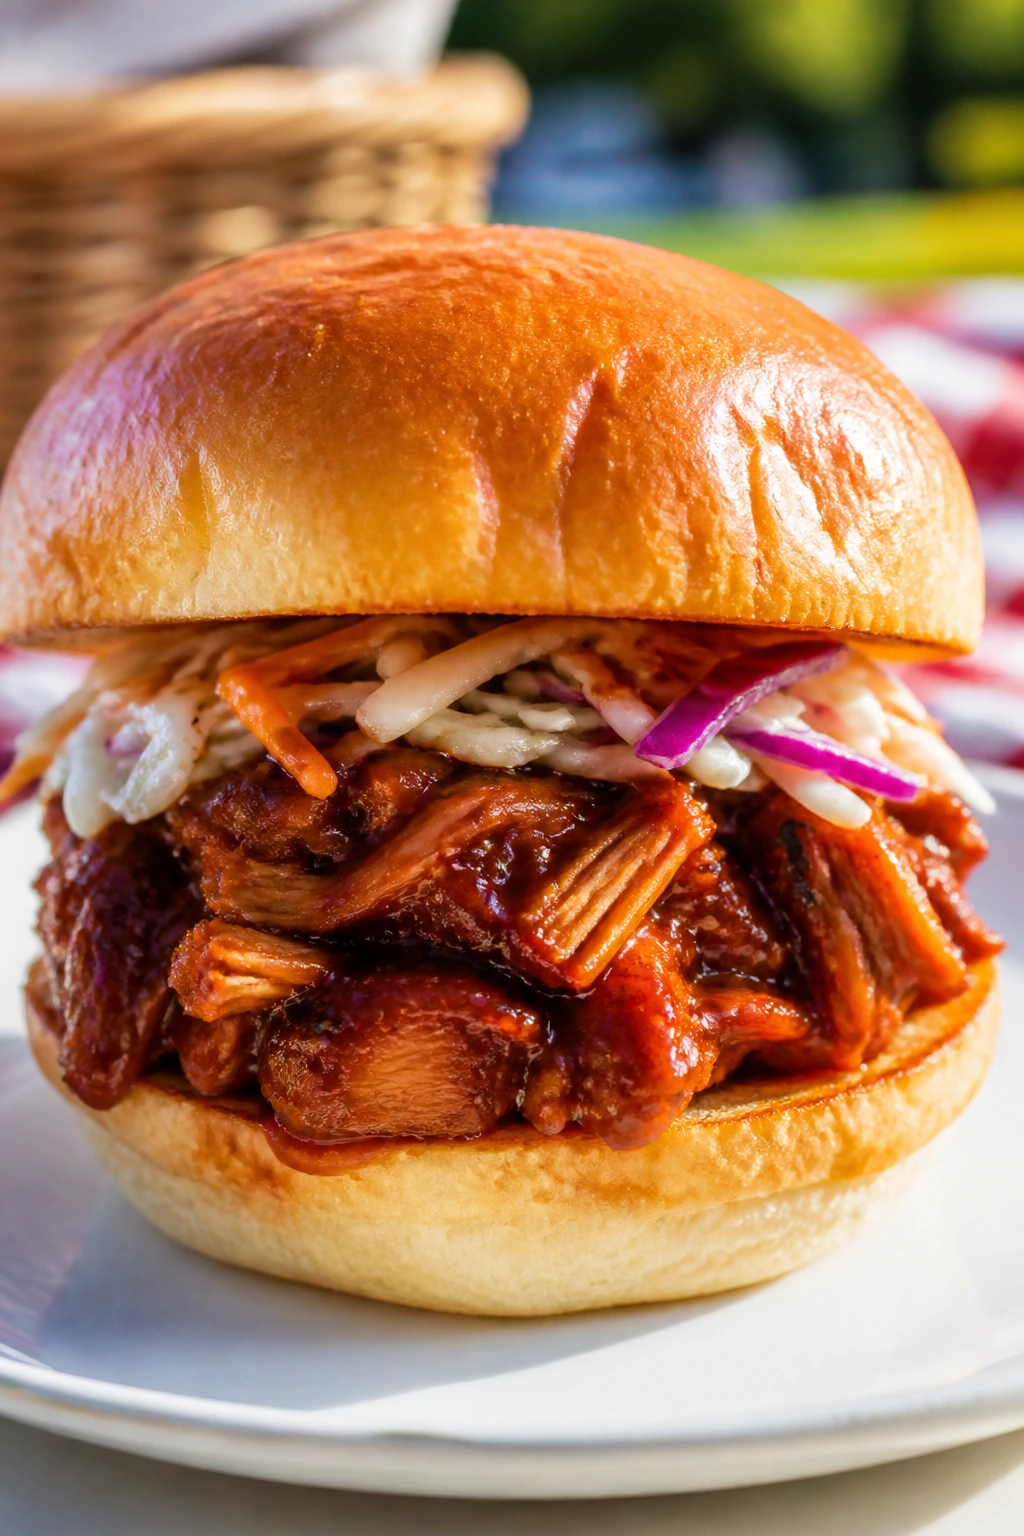
27. Pulled Pork Sandwiches with Vinegar Slaw
These sandwiches taste like a picnic that knows exactly what it’s doing. Pulled pork brings the richness, and vinegar slaw cuts through it so the whole thing doesn’t feel heavy.
Why It Works:
Pulled pork is one of the rare picnic meats that still tastes good after reheating or holding warm. The slaw stays crisp if you keep it lightly dressed, and the buns soak up flavor without going soggy immediately.
Key Ingredients:
- 3 cups pulled pork
- 1/2 cup barbecue sauce
- 4 cups shredded cabbage
- 2 tablespoons apple cider vinegar
- 1 teaspoon sugar
- 1 tablespoon olive oil
- 6 sandwich buns
- Pickles, for serving
- Salt and black pepper, to taste
Quick Steps:
- Toss cabbage, vinegar, sugar, olive oil, salt, and pepper.
- Warm the pulled pork with barbecue sauce over low heat.
- Split the buns and, if you like, toast them lightly.
- Pile pork onto the buns and top with slaw and pickles.
- Wrap in foil for the picnic.
Equipment for This Recipe:
- Skillet or saucepan
- Bowl
- Spoon
- Foil
How to Serve This Dish:
Serve with potato salad or chips and keep extra slaw on the side. These are best warm, but they still hold up well in a cooler. A sharp pickle on the side is doing important work here.
Pro Tips for This Recipe:
- Make the slaw lightly dressed so it stays crunchy.
- Use buns that can handle sauce without collapsing.
- Warm the pork slowly so it doesn’t dry out.
Variations on This Dish:
- Carolina Style: Add more vinegar and less barbecue sauce.
- Pulled Chicken: Swap in shredded chicken.
- Spicy Pork: Stir hot sauce into the pork.
Common Mistakes to Avoid with This Dish:
- Don’t over-sauce the pork.
- Don’t pack hot pork directly into the buns unless you want steam-soft bread.
- Don’t let the slaw sit too long after dressing.
28. Sushi-Inspired Salmon Cucumber Bowls
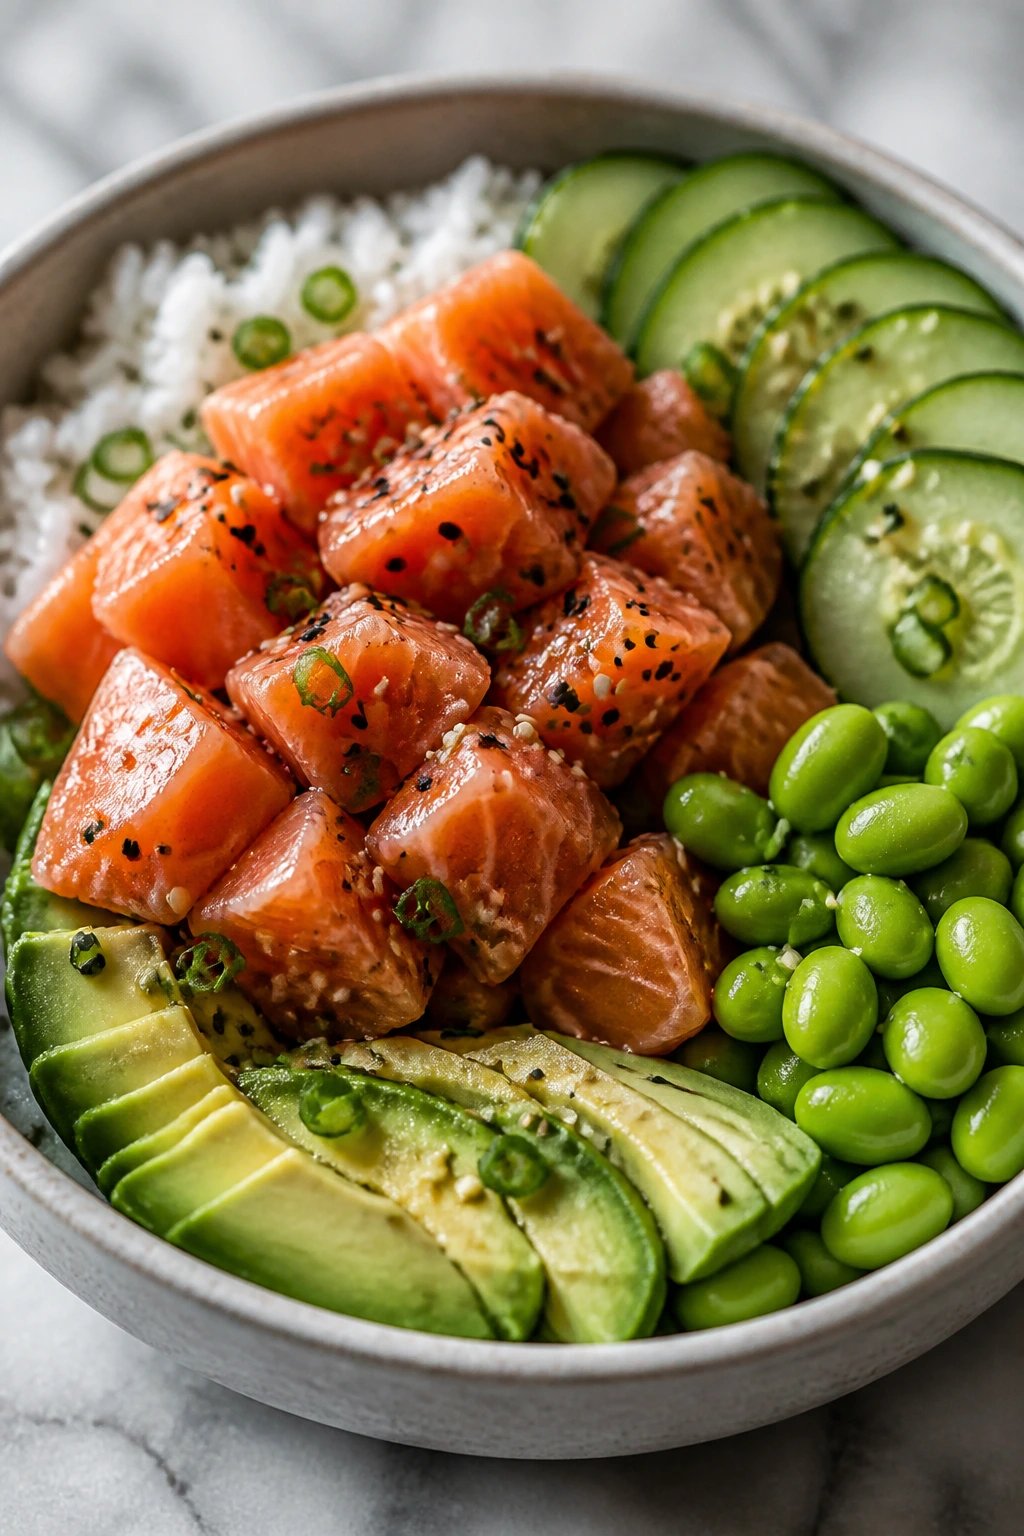
These bowls borrow the clean, cool feeling of sushi without asking anyone to roll anything. Salmon, rice, cucumber, and avocado make a compact meal that still feels picnic-friendly.
Why It Works:
Rice gives you substance, while cucumber and avocado keep the bowl fresh. A light soy-vinegar dressing ties everything together, and salmon can be packed chilled without losing much appeal.
Key Ingredients:
- 3 cups cooked rice
- 1 pound cooked salmon, flaked
- 1 cucumber, thinly sliced
- 1 avocado, sliced
- 1 cup shelled edamame
- 2 tablespoons soy sauce
- 1 tablespoon rice vinegar
- 1 teaspoon sesame oil
- 1 tablespoon sesame seeds
- Nori strips, optional
Quick Steps:
- Cool the rice and season it lightly with salt if needed.
- Whisk soy sauce, rice vinegar, and sesame oil.
- Divide rice among bowls or containers.
- Top with salmon, cucumber, avocado, edamame, and sesame seeds.
- Pack dressing separately if you’re traveling far.
Equipment for This Recipe:
- Bowl
- Knife
- Spoon
- Storage containers
How to Serve This Dish:
Serve chilled with nori strips on the side for a little crunch. It looks best in shallow containers where the toppings stay visible. A small drizzle of sauce right before eating keeps the rice from drying out.
Pro Tips for This Recipe:
- Use rice that has cooled fully before packing.
- Add avocado last so it stays neat.
- Keep the dressing separate until serving if possible.
Variations on This Dish:
- Tuna Poke-Style: Use canned or cooked tuna instead of salmon.
- Tofu Bowl: Swap in marinated tofu cubes.
- Spicy Mayo Bowl: Add a little mayo and sriracha.
Common Mistakes to Avoid with This Dish:
- Don’t pack the bowl while the rice is still warm.
- Don’t slice the avocado too early.
- Don’t drown the rice in soy sauce.
29. Cobb Salad Cups
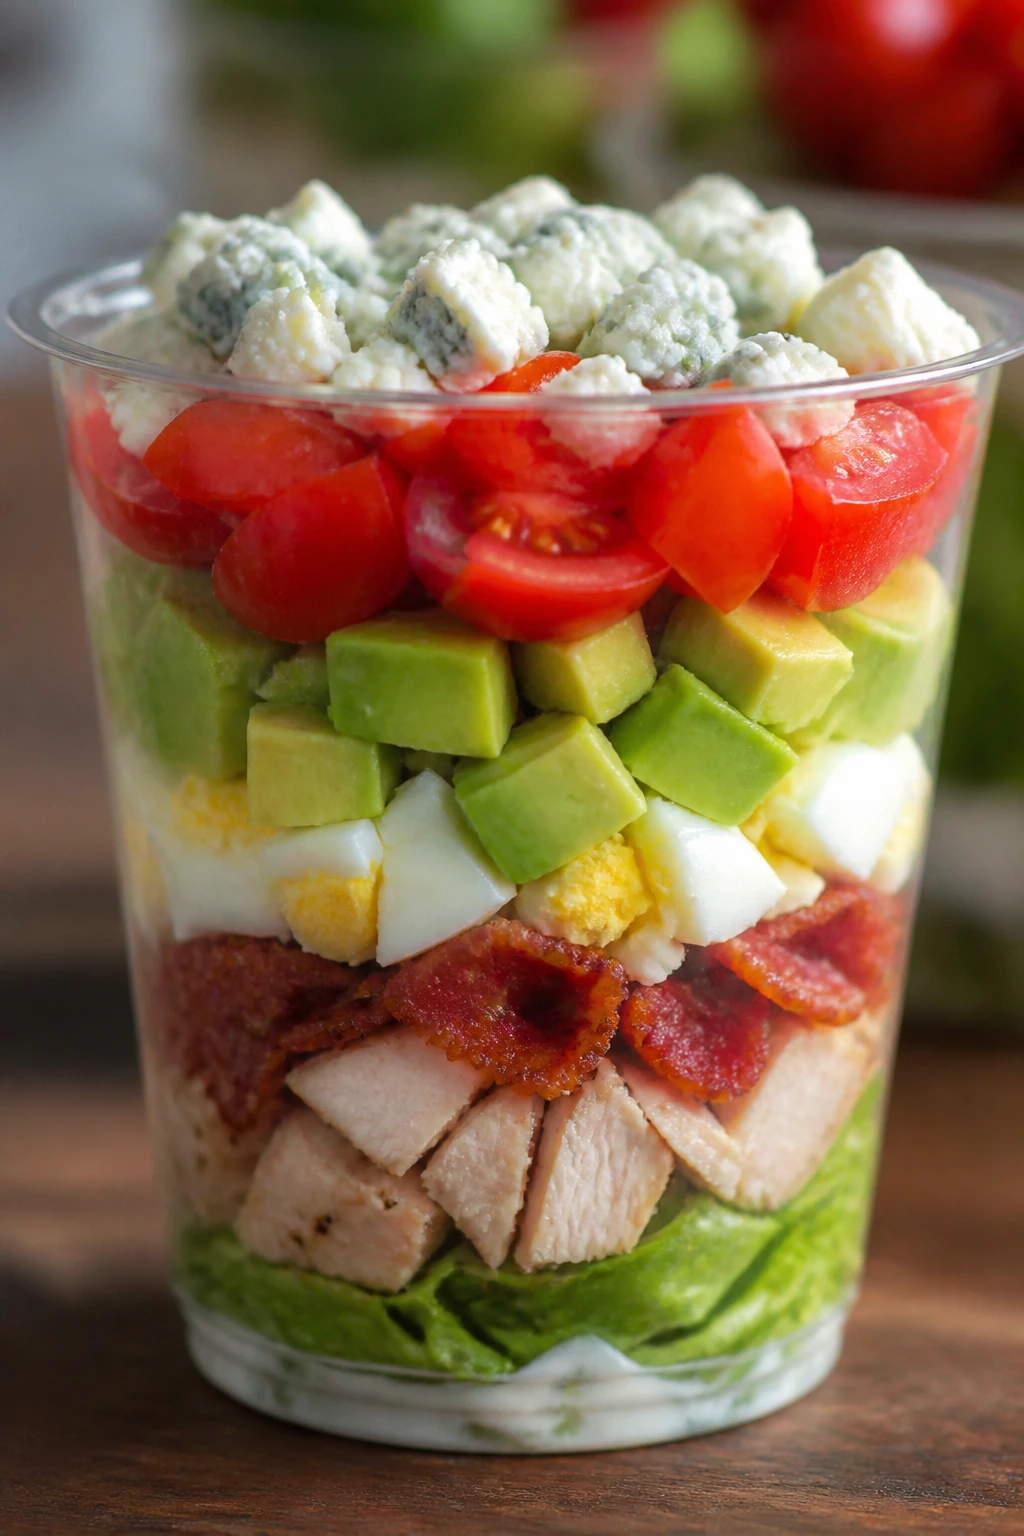
Cobb salad makes a better picnic meal than people expect because every ingredient likes being cold. Pack it in cups, and you get tidy layers instead of one giant chopped mess.
Why It Works:
The classic mix of chicken, bacon, egg, avocado, and blue cheese gives you protein, fat, and crunch in a small package. Portioning it into individual cups keeps the greens from getting crushed.
Key Ingredients:
- 4 cups chopped romaine
- 2 cups cooked chicken, chopped
- 6 slices bacon, cooked and crumbled
- 4 hard-boiled eggs, chopped
- 1 avocado, diced
- 1 cup cherry tomatoes, halved
- 1/2 cup blue cheese
- 1/2 cup ranch or vinaigrette
Quick Steps:
- Prep all ingredients and chill them separately.
- Divide romaine into cups or containers.
- Arrange chicken, bacon, eggs, avocado, tomatoes, and blue cheese in sections.
- Pack dressing separately.
- Toss or drizzle right before eating.
Equipment for This Recipe:
- Knife
- Cutting board
- Small containers or cups
- Spoon
How to Serve This Dish:
Serve in clear cups if you want the layers to show. Add bread or crackers if the crowd wants more carbs. This is one of the easiest ways to make salad feel like dinner.
Pro Tips for This Recipe:
- Add avocado as close to serving as possible.
- Keep the dressing separate or the greens flatten out.
- Use sturdy cups or jars with lids if you’re transporting them.
Variations on This Dish:
- Turkey Cobb: Swap chicken for turkey.
- Vegetarian Cobb: Use chickpeas and extra egg.
- Greek Cobb: Replace blue cheese with feta.
Common Mistakes to Avoid with This Dish:
- Don’t chop the greens too small.
- Don’t dress it early.
- Don’t use overripe avocado unless you’re serving immediately.
30. Sheet Pan Pizza Slices with Arugula

Pizza is a picnic dinner if you make it in slices that travel well. Sheet pan pizza gives you thick, sturdy pieces that don’t go limp the way thin slices can.
Why It Works:
The crust bakes all the way through on a sheet pan, which helps it hold toppings once cooled. Arugula goes on after baking, so it stays fresh and peppery instead of wilted.
Key Ingredients:
- 1 pound pizza dough
- 1 tablespoon olive oil
- 2 cups shredded mozzarella
- 1 cup cherry tomatoes, halved
- 2 cups arugula
- 2 tablespoons grated Parmesan
- 1 teaspoon dried oregano
- Salt and black pepper, to taste
Quick Steps:
- Heat the oven to 475°F and oil a sheet pan.
- Stretch the dough into the pan and let it rest 10 minutes if it keeps shrinking.
- Top with mozzarella, tomatoes, oregano, salt, and pepper.
- Bake for 12 to 15 minutes until the crust is golden and the cheese bubbles.
- Scatter arugula and Parmesan over the pizza after baking, then cut into squares.
Equipment for This Recipe:
- Sheet pan
- Oven
- Knife or pizza cutter
- Spoon
How to Serve This Dish:
Cut into squares and pack between sheets of parchment. It’s good warm, but it also holds up well at room temp. Add a green salad or fruit if you want the meal to feel more rounded.
Pro Tips for This Recipe:
- Don’t overload the top with tomatoes or the crust softens.
- Let the pizza cool a few minutes before cutting.
- Use the arugula as a finishing topping, not a baked one.
Variations on This Dish:
- Pepperoni Version: Add sliced pepperoni before baking.
- White Pizza: Use ricotta and garlic instead of tomato.
- Veggie Version: Add mushrooms and peppers.
Common Mistakes to Avoid with This Dish:
- Don’t pull it from the oven too early.
- Don’t top with arugula before baking.
- Don’t cut it while the cheese is still lava-hot if you want neat slices.
31. Greek Chicken Pita Pockets
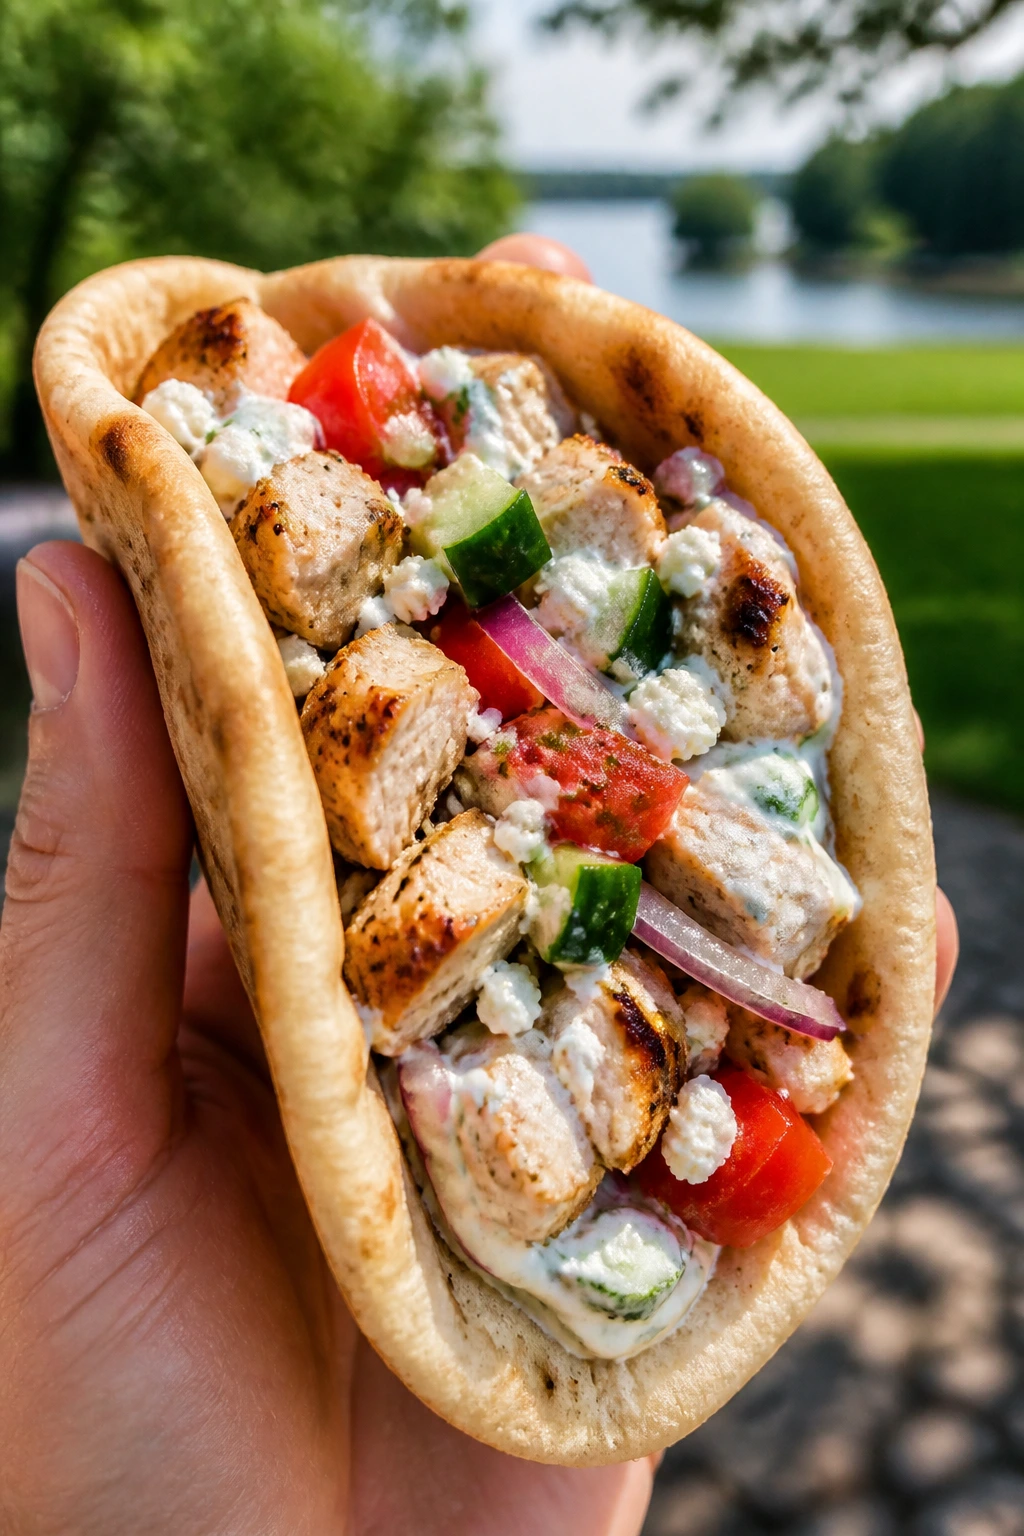
These pita pockets are compact, bright, and easy to eat without a fork. Tzatziki, cucumber, tomato, and feta give the chicken that cool Greek-salad feel.
Why It Works:
Pita pockets hold fillings better than wraps when the filling is chunky. Tzatziki adds moisture without making the bread soggy right away, and the cucumber keeps each bite crisp.
Key Ingredients:
- 6 pita pockets
- 2 cups cooked chicken, chopped
- 1 cup tzatziki
- 1 cucumber, diced
- 1 tomato, diced
- 1/4 red onion, thinly sliced
- 1/2 cup feta
- 1 cup chopped romaine
Quick Steps:
- Chop all the vegetables and chill them.
- Mix chicken with a spoonful of tzatziki if you want it extra moist.
- Open the pita pockets gently.
- Fill with romaine, chicken, cucumber, tomato, onion, feta, and tzatziki.
- Wrap in parchment and pack snugly.
Equipment for This Recipe:
- Knife
- Cutting board
- Spoon
- Parchment paper
How to Serve This Dish:
Serve the pita pockets with olives and extra tzatziki in a small container. They’re best assembled close to serving, but the fillings can all be prepped ahead. If the pita is very dry, warm it for a few seconds before filling.
Pro Tips for This Recipe:
- Don’t overfill the pita or the pocket splits.
- Salt the tomatoes lightly and blot them if they’re juicy.
- Keep the tzatziki separate until the last moment if you want cleaner bread.
Variations on This Dish:
- Lamb Pita Pockets: Use leftover lamb instead of chicken.
- Chickpea Version: Swap in smashed chickpeas.
- Spicy Pita: Add sliced banana peppers or hot sauce.
Common Mistakes to Avoid with This Dish:
- Don’t stuff with hot filling.
- Don’t use crumbly pita that cracks open.
- Don’t let watery cucumbers sit in the sandwich too long.
32. Cold Sesame Peanut Rice Noodle Salad
Rice noodles bring a soft, slippery texture that feels perfect when the weather is hot and no one wants much effort. The peanut dressing gives it body, and the vegetables keep the bowl from sliding into monotony.
Why It Works:
Rice noodles are fast, cheap, and ideal cold. The sauce clings well once the noodles are rinsed and cooled, and the whole thing keeps its shape better than many pasta salads.
Key Ingredients:
- 8 ounces rice noodles
- 1/3 cup peanut butter
- 2 tablespoons soy sauce
- 2 tablespoons rice vinegar
- Juice of 1 lime
- 1 cup shredded carrots
- 1 cucumber, julienned
- 2 scallions, sliced
- 1/4 cup chopped peanuts
- Cilantro, for garnish
Quick Steps:
- Cook the rice noodles according to the package and rinse them under cold water.
- Whisk peanut butter, soy sauce, rice vinegar, and lime juice with a little warm water.
- Toss the noodles with the dressing.
- Fold in carrots, cucumber, and scallions.
- Top with peanuts and cilantro, then chill.
Equipment for This Recipe:
- Pot
- Colander
- Mixing bowl
- Whisk
How to Serve This Dish:
Serve in a wide bowl so the noodles don’t clump. A wedge of lime on the side sharpens the flavor after chilling. Add grilled chicken if you want the salad to feel even more like dinner.
Pro Tips for This Recipe:
- Rinse the noodles until they feel cool and loose.
- Thin the peanut dressing slowly so it stays creamy.
- Add peanuts right before serving for crunch.
Variations on This Dish:
- Tahini Noodles: Swap peanut butter for tahini.
- Chicken Noodle Salad: Add shredded chicken.
- Spicy Chili Version: Stir in chili crisp.
Common Mistakes to Avoid with This Dish:
- Don’t leave noodles stuck together in the colander.
- Don’t make the sauce too thick.
- Don’t forget salt; peanut sauces need it.
33. BBQ Jackfruit Sliders
Jackfruit is one of those ingredients that works best when you stop trying to make it pretend to be something else. Here, it’s the soft, saucy filling in a slider that tastes smoky, sweet, and sturdy enough for a picnic.
Why It Works:
Canned young jackfruit shreds like pulled meat once it simmers long enough. Barbecue sauce gives it the flavor anchor it needs, and slider buns keep the whole thing compact.
Key Ingredients:
- 2 cans young green jackfruit in brine, drained and rinsed
- 1/2 onion, sliced
- 1 tablespoon olive oil
- 1 cup barbecue sauce
- 6 slider buns
- 2 cups coleslaw
- 1 tablespoon apple cider vinegar
- Salt and black pepper, to taste
Quick Steps:
- Sauté the onion in olive oil until soft.
- Add jackfruit and cook for 5 minutes, breaking it apart with a spoon.
- Stir in barbecue sauce and simmer until the jackfruit looks shredded and coated.
- Toss the slaw with vinegar, salt, and pepper.
- Fill the buns with jackfruit and top with slaw.
Equipment for This Recipe:
- Skillet
- Spoon or fork
- Bowl
- Knife
How to Serve This Dish:
Serve the sliders with chips or pickles. They’re best warm, but they also work at room temperature once the sauce settles into the bread. Keep the slaw separate if you want extra crunch.
Pro Tips for This Recipe:
- Cook the jackfruit long enough to soften the core pieces.
- Shred it with a spoon so it looks more like pulled filling.
- Choose barbecue sauce with enough thickness to cling.
Variations on This Dish:
- Spicy BBQ Jackfruit: Add hot sauce to the pan.
- Pulled Mushroom Sliders: Use shredded mushrooms instead.
- Chicken Shortcut: Swap in shredded chicken if you want a non-vegetarian version.
Common Mistakes to Avoid with This Dish:
- Don’t serve jackfruit too soon; it needs time to soften.
- Don’t skip the slaw or the sliders taste one-note.
- Don’t drown the buns in sauce.
34. Taco Salad Cups with Lime Crema
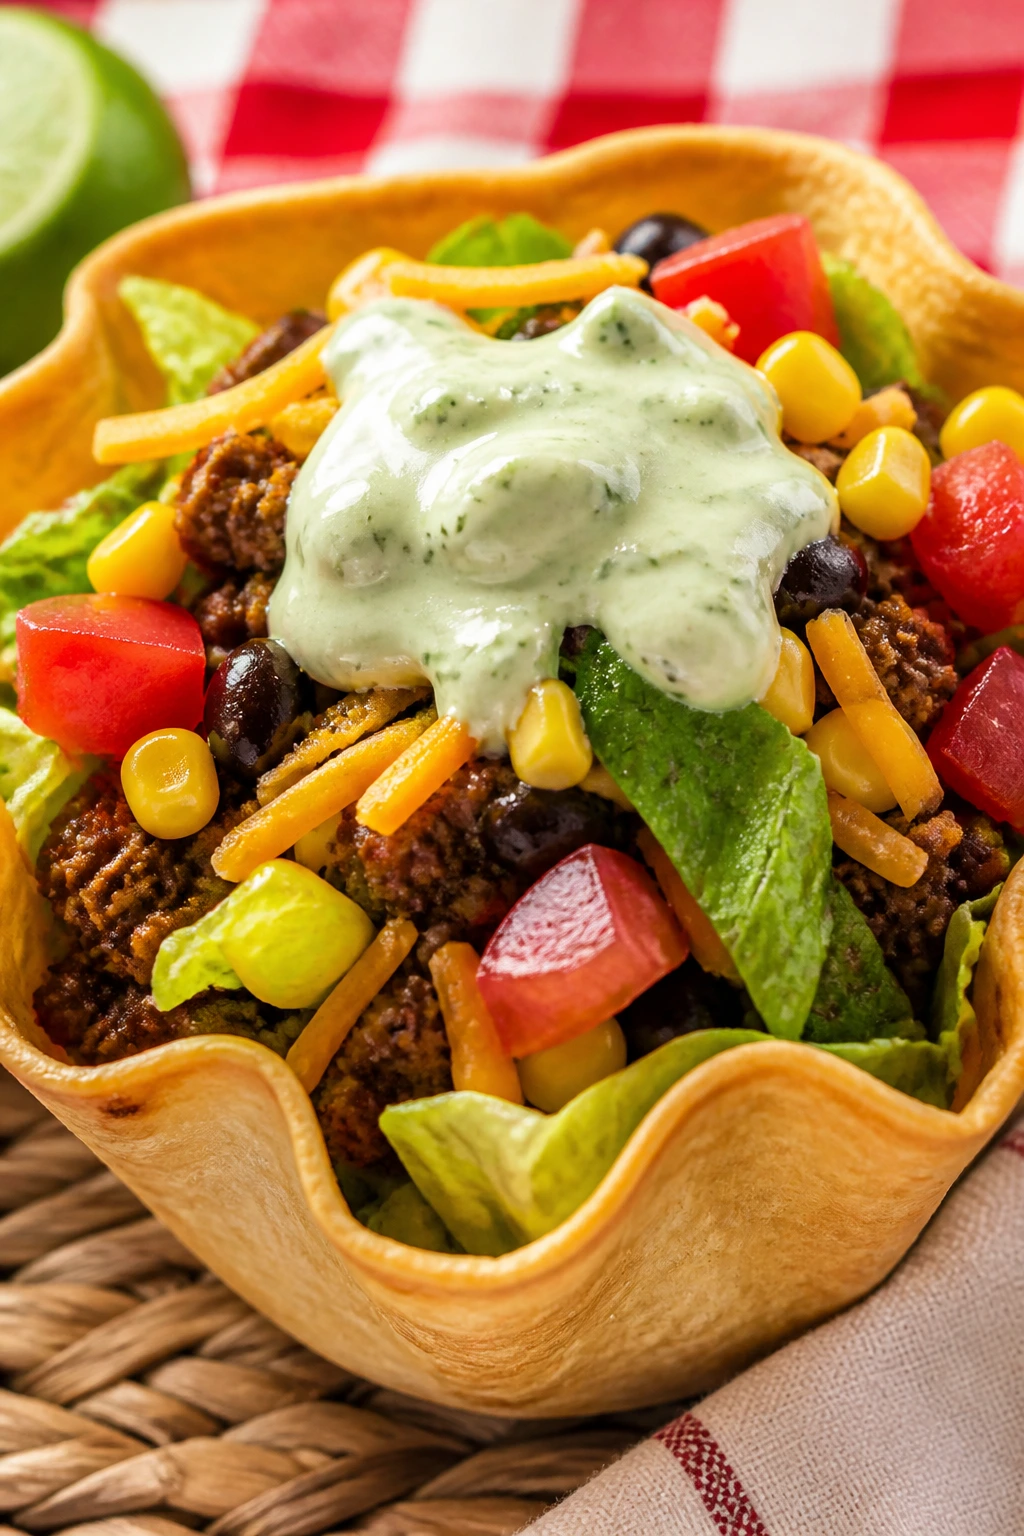
These cups bring all the good parts of taco night without the shell cracking in your lap. Each one has enough crunch, spice, and lime to feel like a real meal, not a sad salad pretending to be dinner.
Why It Works:
Portioning the salad into cups keeps the lettuce crisp. The warm taco meat can be cooled a bit before packing, and the lime crema gives the whole thing the sharp finish tacos need.
Key Ingredients:
- 1 pound ground turkey or beef
- 2 tablespoons taco seasoning
- 4 cups chopped romaine
- 1 cup black beans
- 1 cup corn kernels
- 1 cup diced tomatoes
- 1 cup shredded cheddar
- 1/2 cup sour cream
- 1 tablespoon lime juice
- 8 small cups or bowls
Quick Steps:
- Cook the meat with taco seasoning until browned and seasoned.
- Stir sour cream and lime juice together for the crema.
- Divide romaine among cups.
- Top with meat, beans, corn, tomatoes, and cheddar.
- Add crema right before serving.
Equipment for This Recipe:
- Skillet
- Spoon
- Knife
- Small cups or containers
How to Serve This Dish:
Serve with tortilla chips tucked on the side or crushed over the top. It’s a neat picnic dinner because each cup holds its own. A few cilantro leaves make the top look brighter if you want to dress them up.
Pro Tips for This Recipe:
- Cool the meat before layering if you’re packing them early.
- Keep the crema in a separate container until eating.
- Use thick cups so they don’t tip over.
Variations on This Dish:
- Vegetarian Taco Cups: Use extra beans and crumbled tofu.
- Shrimp Taco Cups: Swap in chopped cooked shrimp.
- Buffalo Taco Cups: Replace taco seasoning with buffalo sauce and ranch.
Common Mistakes to Avoid with This Dish:
- Don’t fill the cups too early if you want crisp lettuce.
- Don’t use greasy meat without draining it.
- Don’t forget acid; lime keeps the flavor awake.
35. Watermelon Prosciutto Burrata Focaccia

This one walks the line between dinner and a very smart snack, and I mean that as praise. Sweet watermelon, salty prosciutto, creamy burrata, and chewy focaccia make an odd mix that works because every bite has contrast.
Why It Works:
Focaccia gives the base enough structure for juicy fruit. Burrata adds richness without making the whole thing heavy, and the prosciutto keeps the sweetness from turning cloying.
Key Ingredients:
- 1 large focaccia loaf, split or sliced
- 8 ounces burrata
- 3 cups watermelon, sliced into bite-size pieces
- 4 ounces prosciutto
- 1 cup basil leaves
- 1 tablespoon olive oil
- Flaky salt, to taste
- Balsamic glaze, optional
Quick Steps:
- Slice the focaccia into picnic-friendly pieces.
- Tear the burrata and spread it over the bread.
- Layer watermelon, prosciutto, and basil.
- Drizzle with olive oil and sprinkle lightly with flaky salt.
- Add balsamic glaze if you want a sweeter finish, then serve immediately.
Equipment for This Recipe:
- Serrated knife
- Cutting board
- Spoon
- Serving platter
How to Serve This Dish:
Serve it in squares or rough rectangles so people can grab pieces with their hands. This works well with a green salad or grilled vegetables if you want the meal to feel more balanced. It tastes best when everything is cool but not icy.
Pro Tips for This Recipe:
- Pat the watermelon dry so it doesn’t soak the bread.
- Assemble close to serving time.
- Use burrata at cool room temperature so it spreads easily.
Variations on This Dish:
- Peach Prosciutto Focaccia: Swap watermelon for sliced peaches.
- Tomato Burrata Version: Use ripe tomatoes instead of fruit.
- Vegetarian Option: Leave out the prosciutto and add marinated cucumbers.
Common Mistakes to Avoid with This Dish:
- Don’t salt the watermelon too early or it leaks.
- Don’t make this hours in advance unless you enjoy soggy focaccia.
- Don’t use bread that’s too airy and delicate.
Why Picnic Dinners Work Best When They Stay Simple

The best picnic dinners don’t try to behave like plated restaurant meals. They’re built with a little more salt, a little more acid, and a little more structure than your average weekday dinner, because they have to survive travel, heat, and the odd lapse in timing. A wrap that holds. A salad that doesn’t drown. A sandwich that still tastes like something after ten minutes on a blanket. That’s the real goal.
I also like how forgiving this style of cooking can be. Leftover chicken becomes a wrap. Beans become a bowl. Pasta gets a second life when you add lemon, herbs, and something briny. Once you start thinking in those terms, dinner for a picnic stops feeling like a special project and starts feeling like a useful habit.
Essential Equipment for These Recipes
- Large mixing bowls: You’ll use them for pasta salads, slaws, dressings, and fillings.
- Sharp chef’s knife: Clean cuts matter when you’re packing wraps, sandwiches, and vegetables.
- Cutting board: A big one gives you room for assembly without losing half your fillings to the counter.
- Colander: Pasta, grains, beans, and blanched vegetables need to drain well.
- Skillet or grill pan: Handy for sausage, quesadillas, fritters, and quick sears.
- Outdoor grill or sheet pan: Useful for skewers, pizza, and anything you want charred or baked in batches.
- Tongs: A small thing, but they keep grilled food from tearing apart.
- Storage containers with tight lids: Picnic food needs lids that don’t pop open in the car.
- Parchment paper or foil: Great for wrapping sandwiches, sliders, and pizza slices so they stay neat.
- Skewers: Wooden or metal, depending on the recipe, for anything you want to serve as finger food.
- Salad spinner: Not required, but it saves you from wet greens and soggy wraps.
- Instant-read thermometer: Especially useful for chicken, sausage, and salmon when you’re cooking ahead.
Smart Shopping and Ingredient Tips
The easiest picnic dinners start with ingredients that already know how to behave. Buy bread that has a little structure, not the soft, squishy kind that compresses under a tomato slice. Focaccia, ciabatta, pita, hoagie rolls, and sturdy tortillas hold up better than very airy sandwich bread. If you want wraps to stay tight, choose tortillas that are large enough to roll without tearing.
For produce, pick ripe but firm tomatoes, cucumbers with tight skin, and herbs that look perky instead of limp. Basil bruises fast, so it’s better to buy it the day before you need it if possible. Watermelon, peaches, and corn should smell sweet and fresh; if they don’t, they’ll taste watery and flat in the finished dish.
Protein can be practical here. Rotisserie chicken, canned tuna, canned chickpeas, cooked shrimp, and leftover pulled pork all save time and travel well. Deli meat should smell clean and feel cold, not slick. For cheese, feta, provolone, mozzarella pearls, cheddar, and Parmesan are all easy to portion and pack.
Frozen ingredients are not a cheat. Frozen peas, edamame, and corn are often better than tired fresh versions, especially in salads where texture matters more than nostalgia. Just thaw them fully and dry them before mixing so you don’t water down the dressing.
How to Serve These Recipes
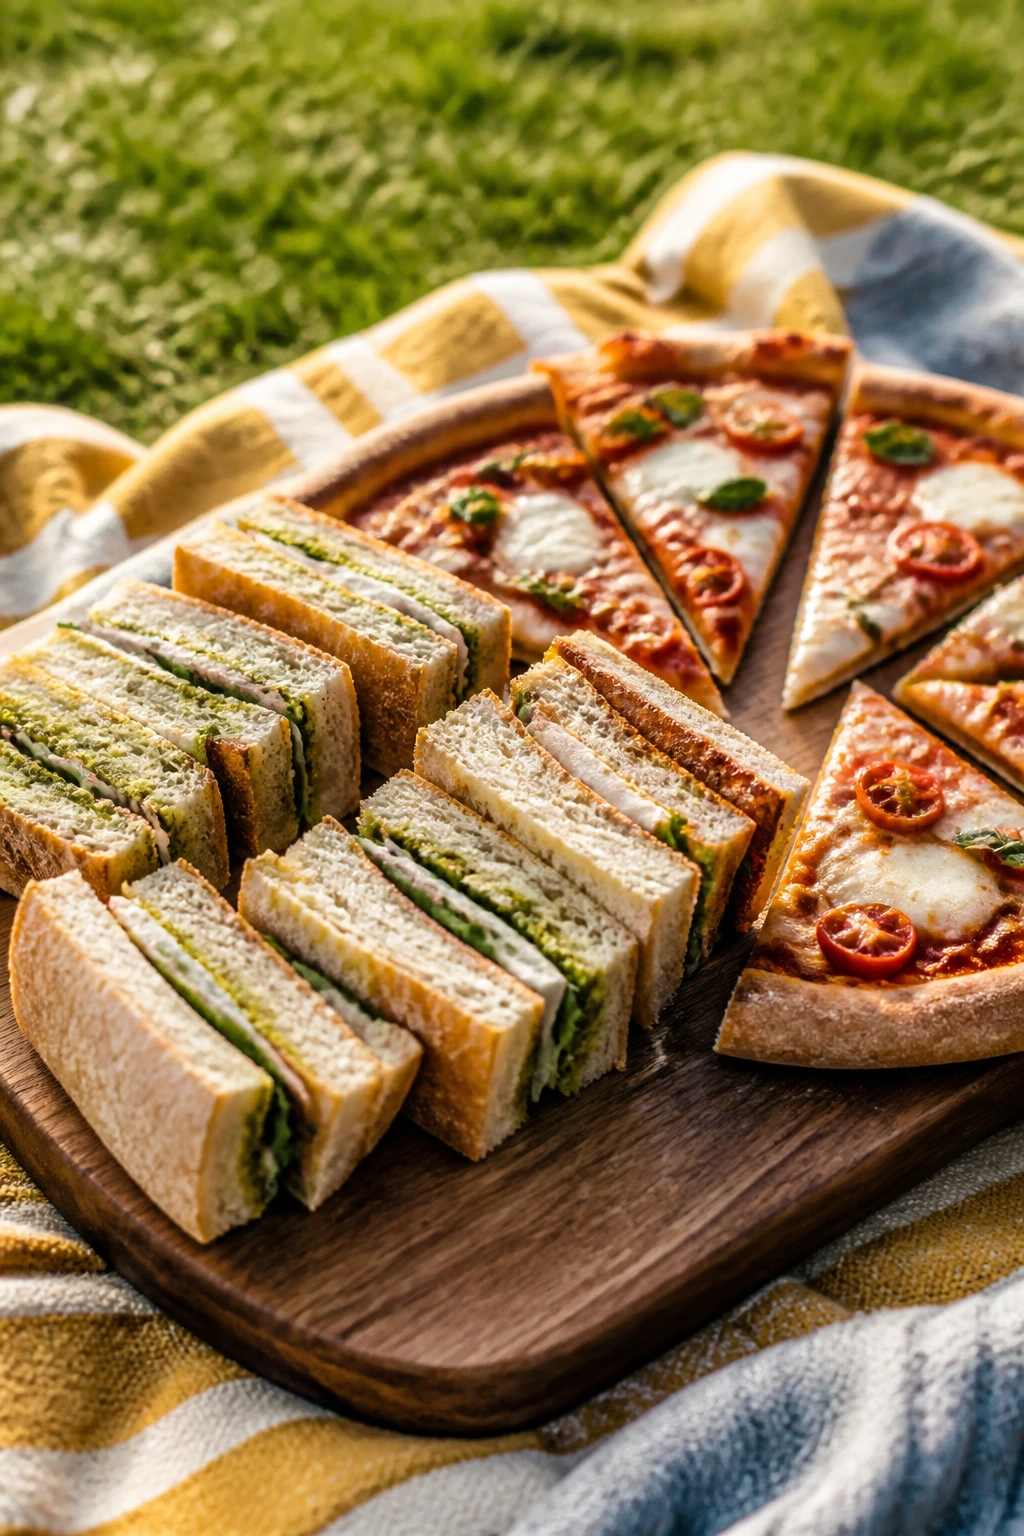
Presentation:
Picnic food looks best when it’s packed in layers that make sense. Keep greens on top, wet dressings in separate containers, and sliced items wrapped tightly in parchment so they don’t slide. For platters at the park, cut sandwiches and pizza into smaller pieces than you would at home; that one choice makes everything feel easier and more generous.
Accompaniments:
A good picnic dinner usually wants one crisp thing and one cold fruit thing beside it. Chips, cucumbers, pickles, melon, grapes, or a simple green salad work across almost the whole collection. Bread is the obvious add-on for grain bowls and salads; fruit helps cut through richer items like sliders, pasta salads, and sausage hoagies.
Portions:
Most of these recipes feed 4 to 6 adults, though a few of the more substantial ones — sliders, hoagies, and pizza — can stretch farther. If you’re serving mixed ages, assume people will take smaller portions of the richer foods and bigger portions of the cold salads. For a picnic with several dishes, plan on 1 main and 2 sides per person instead of trying to make every item the size of a full entrée.
Beverage Pairing:
I like sparkling water with citrus for almost everything here because it doesn’t fight the food. Iced tea, lemonade, or a dry rosé work well when the menu runs salty or smoky. For kid-heavy picnics, cold apple cider or plain water with sliced cucumber keeps things easy.
Additional Tips and Flavor Boosters
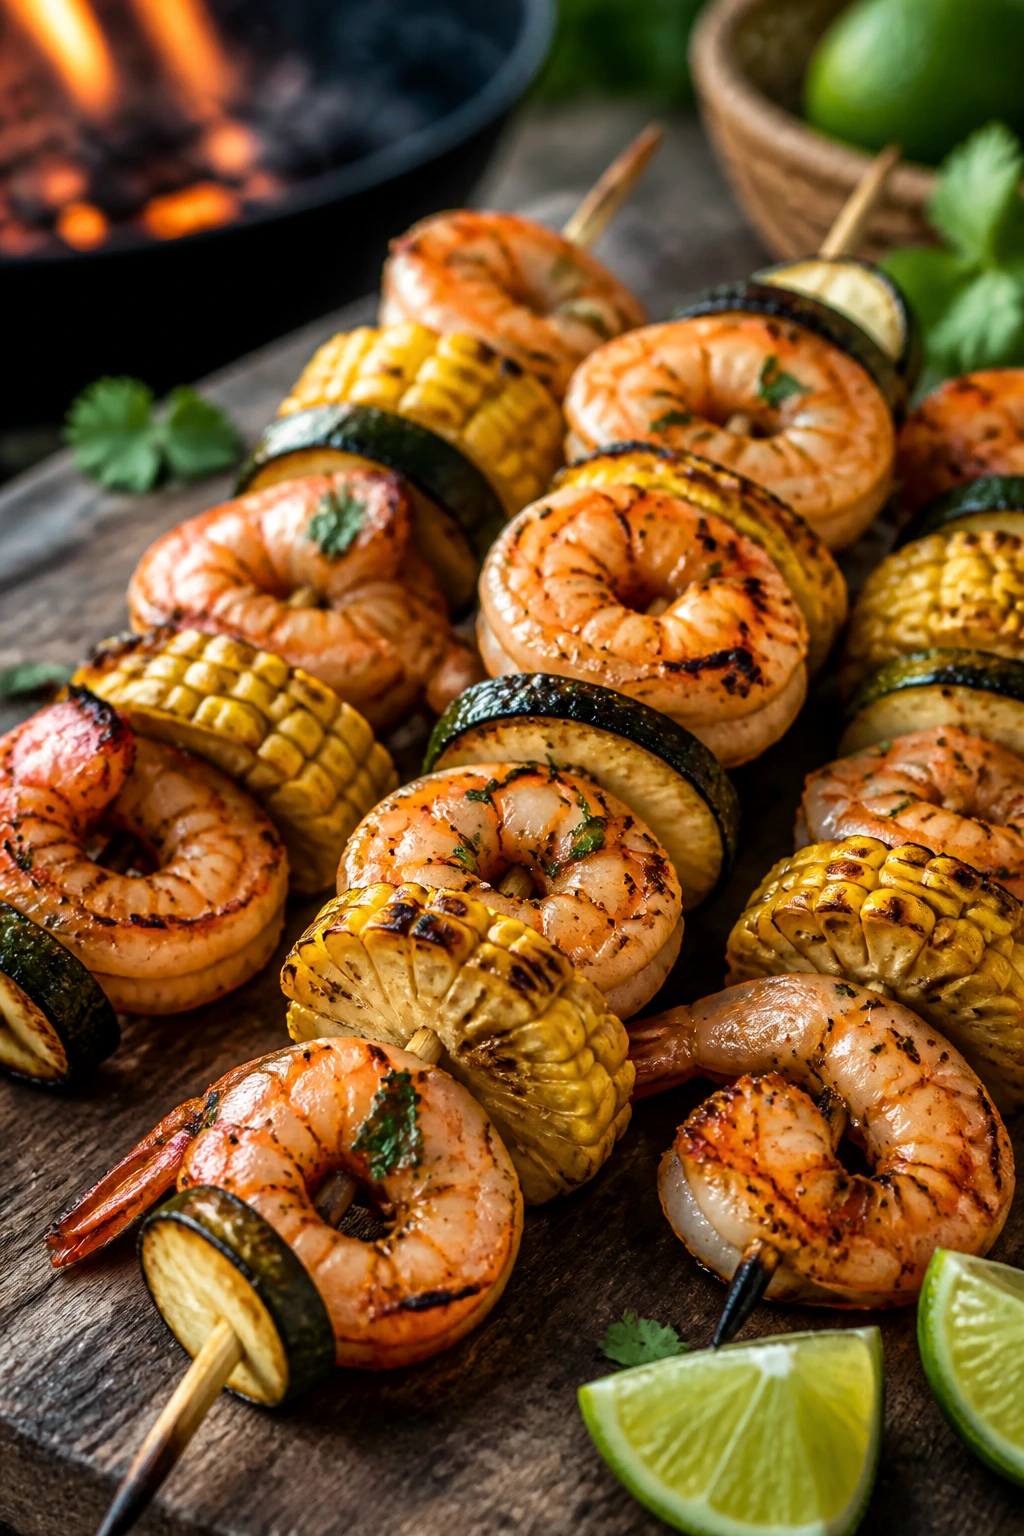
Flavor Enhancement: Keep a jar of quick pickled onions in the fridge. A spoonful of sharp onion can rescue chicken salad, grain bowls, sandwiches, and even pizza slices that need a little lift after chilling.
Customization: If you want a picnic spread that works for different eaters, build one or two recipes around a neutral base and let people add toppings. Grain salads, pasta salads, bowls, and wraps all take well to this kind of choose-your-own-assembly approach.
Serving Suggestions: Finish cold dishes with something crunchy right before serving — toasted seeds, crushed croutons, chopped peanuts, or sesame seeds. A handful on top changes the texture fast, and that matters when a dish has been sitting in a cooler for a while.
Make-It-Yours: For dairy-free eaters, use olive oil dressings, hummus, or avocado in place of creamy sauces. For gluten-free plates, lean on rice, quinoa, corn tortillas, lettuce cups, and rice noodles. For extra heat, add sliced chiles, chili crisp, or hot sauce at the table instead of mixing it into every portion.
Make-Ahead, Storage, and Reheating Guidance
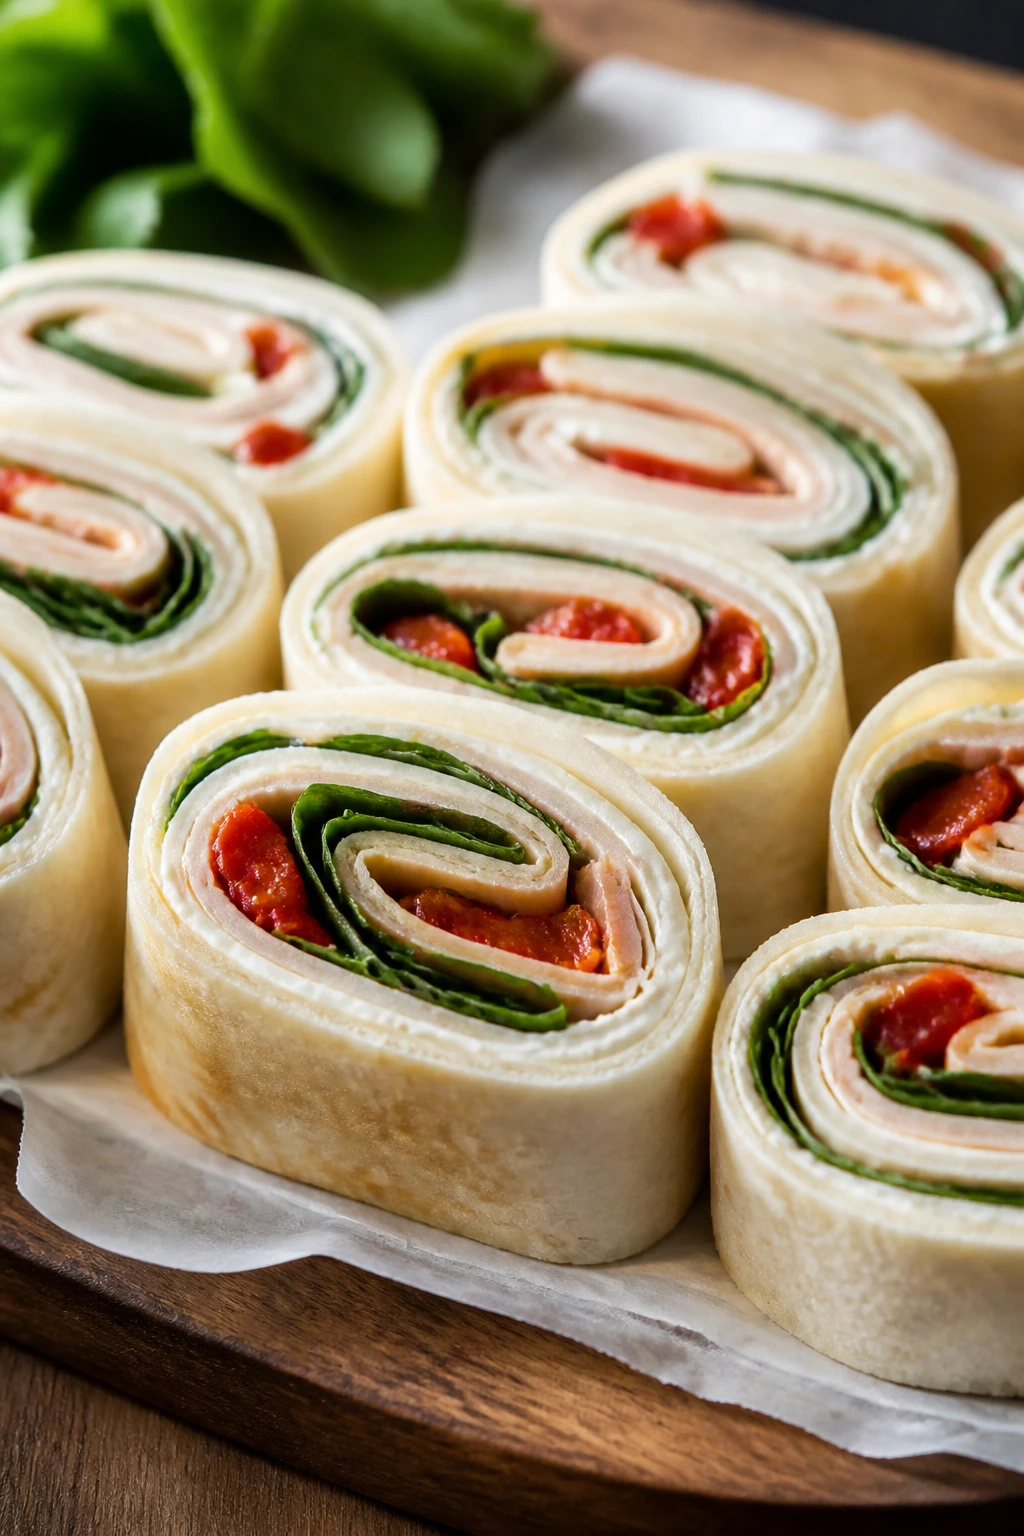
Most of these picnic dinners keep best when you separate wet and dry components until serving. Wraps and sandwiches are at their peak the day they’re assembled, though fillings can often be made 1 to 2 days ahead and held in the fridge. Pasta salads, grain salads, and bean salads usually keep 3 to 4 days refrigerated in airtight containers. If they contain avocado, lettuce, or very juicy tomatoes, they’re better within 24 hours.
Cooked chicken, pork, sausage, and steak hold for 3 to 4 days in the refrigerator if cooled within 2 hours of cooking. Pulled pork freezes well for up to 2 to 3 months, and shredded chicken can be frozen for about the same length of time. Seafood is fussier: shrimp, salmon, and tuna salads are best eaten within 1 to 2 days and are usually better chilled than frozen.
For reheating, use the method that respects the texture. Sliders, hoagies, and sausage sandwiches do well wrapped in foil in a 325°F oven for 10 to 15 minutes. Quesadillas and fritters re-crisp nicely in a skillet over medium heat or in a 375°F oven for 8 to 10 minutes. Pasta salads and grain bowls usually do not need reheating; if they seem dry after chilling, add a spoonful of dressing, a squeeze of lemon, or a drizzle of olive oil and toss again.
Cool all cooked components before packing. Warm food dumped into a sealed container creates condensation, and condensation turns crisp edges and good bread into a damp mess. If you want something warm at the picnic, transport it in an insulated container and keep cold items in a separate cooler with ice packs or frozen water bottles.
Variations and Adaptations to Try
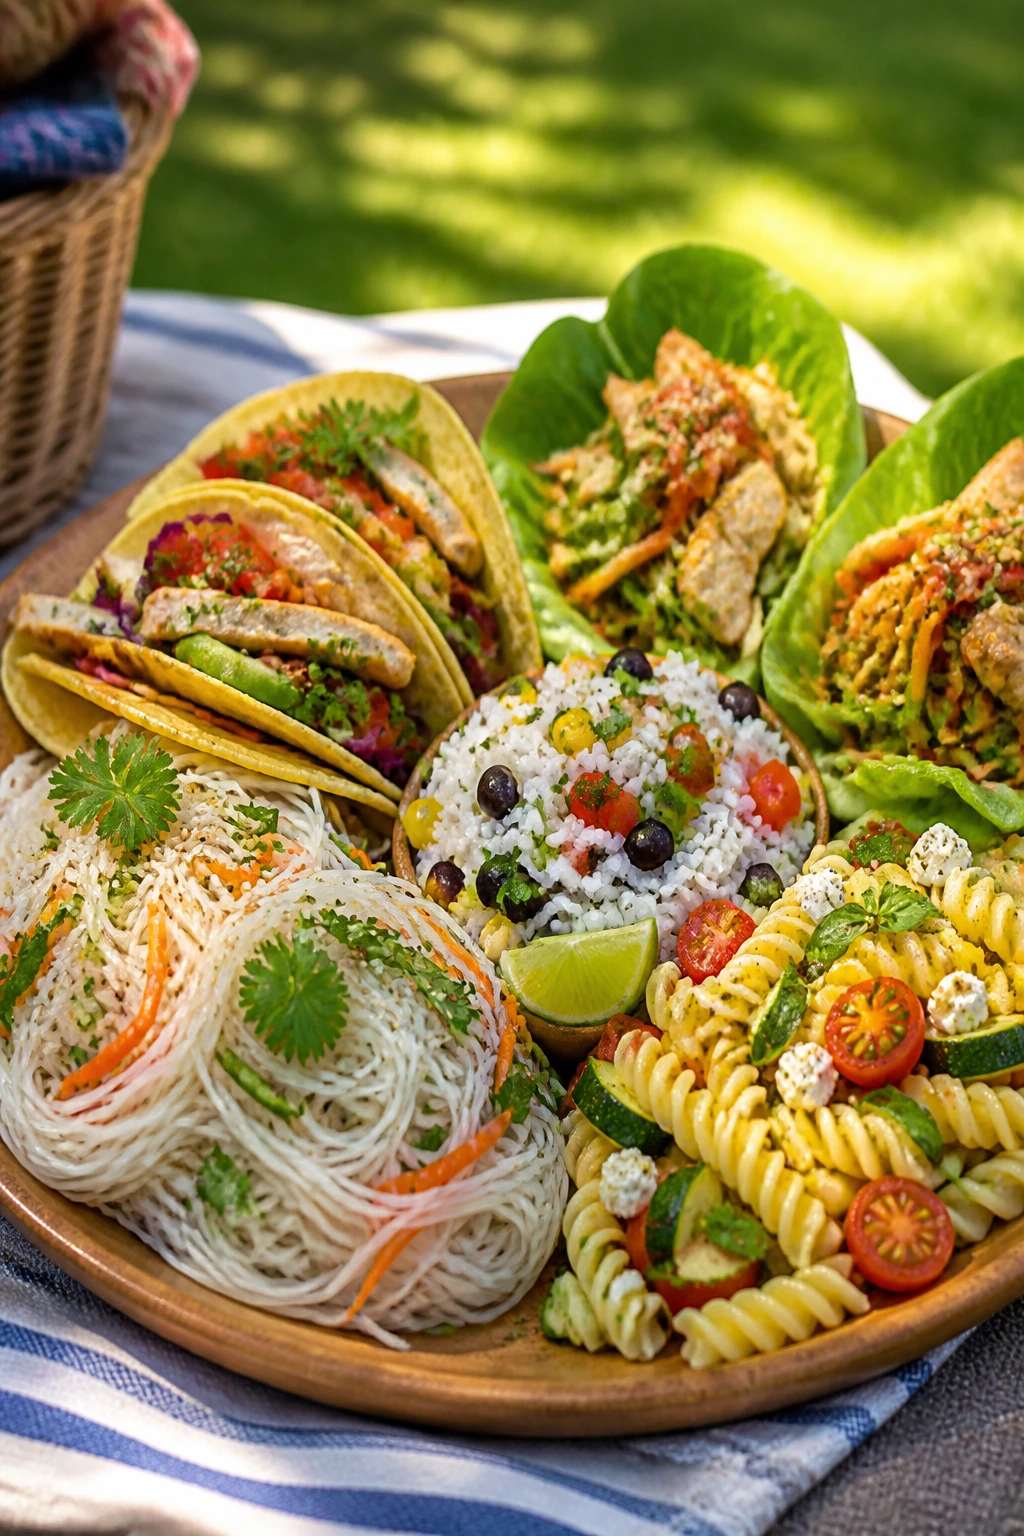
Gluten-Free Picnic Lineup:
Use rice noodles, corn tortillas, lettuce cups, rice bowls, and gluten-free pasta for the dishes that need a starch. The best part is that most of the fillings in this collection already work without bread if you swap the carrier.
Dairy-Free Picnic Basket:
Skip the cheese-heavy finishes and lean on hummus, olive oil, pesto without Parmesan, avocado, or tahini dressings. The flavor won’t feel missing if you keep acid and herbs in the picture.
Vegetarian and Vegan Switches:
Chickpeas, tofu, jackfruit, black beans, and extra vegetables can stand in for meat in a lot of these recipes without much fuss. The trick is to season them well enough that they don’t taste like a compromise.
Lower-Cook-Time Version:
Choose recipes built on rotisserie chicken, canned beans, deli turkey, or leftover grains when you need the fastest path to the blanket. That’s where picnic dinners get practical instead of precious.
Heat-Friendly Packing:
For the hottest days, pack dressings, sliced avocado, and bread separately. Bring frozen water bottles to double as ice packs, and keep the cooler shaded once you arrive so the food doesn’t warm up while you’re unpacking.
Kid-Approved Plate:
Go lighter on onion, chili, horseradish, and strong cheese. Small wraps, sliders, pinwheels, and pasta salads with familiar flavors usually disappear first when you keep the seasoning simple.
Common Mistakes to Avoid with Picnic Dinners
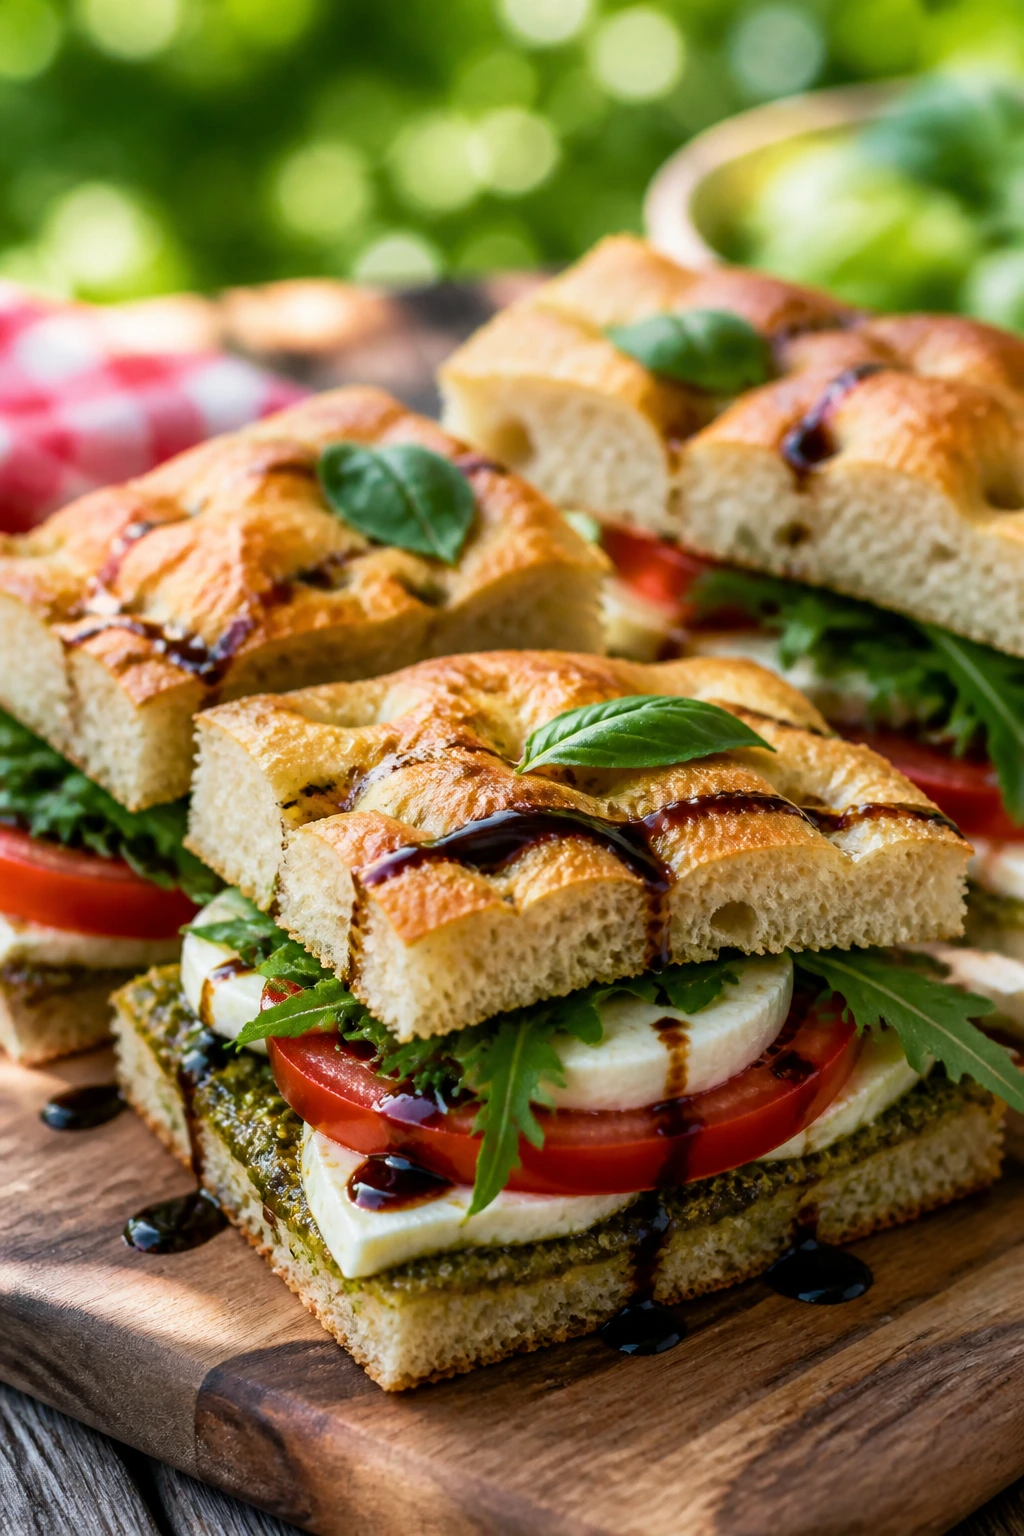
The first mistake is packing everything dressed too early. Wet greens, sauced bread, and soft herbs can go limp fast, and once that happens there isn’t a fix. Keep dressings, tomatoes, and crunchy toppings separate when you can, then mix at the last minute.
Another common slip is choosing bread that can’t take a little moisture. Super-soft sandwich bread, flimsy rolls, and ultra-thin tortillas collapse after a short ride. Use sturdier bread, toast if needed, and wrap sandwiches tightly so they hold their shape.
Food that’s still warm when it gets sealed into a container causes its own trouble. Steam condenses, bread softens, and crisp toppings lose their edge. Let grilled meats, fritters, pizza, and roasted vegetables cool before packing them unless you’re using a proper insulated container for hot food.
People also under-season cold food. Once pasta, grains, and proteins get chilled, they taste a little quieter than they do in the pan. The answer is not more salt at random; it’s acid, herbs, a sharp dressing, pickles, lemon juice, or a briny ingredient like olives or feta.
The last mistake is pretending all picnic food can sit out forever. Cold salads and seafood still need real food-safety handling. Keep things cold, keep them covered, and don’t leave creamy dishes or cooked proteins in the sun longer than you’d trust them on a hot counter.
Picnic Dinner FAQ
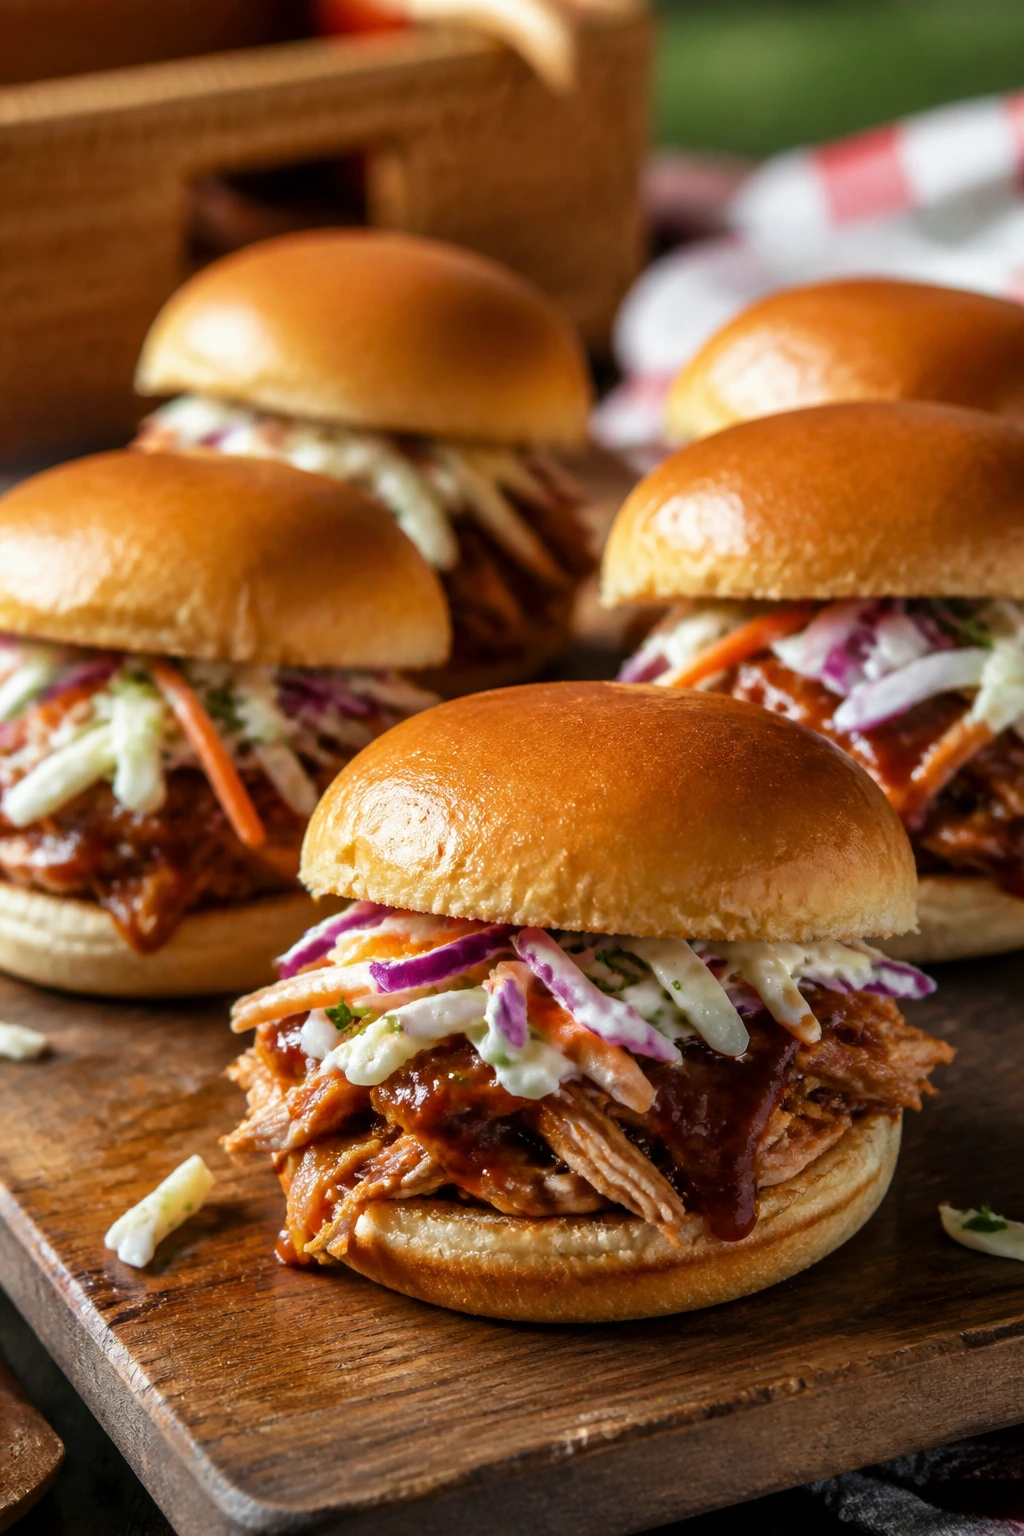
How far ahead can I make picnic dinners?
Pasta salads, grain salads, and bean salads are usually best made 1 day ahead and can hold for 3 to 4 days in the fridge. Wrap fillings, slaws, and sandwich components can also be prepped ahead, but build the bread or tortilla part closer to serving time.
What picnic foods are safest in hot weather?
The safest bets are foods that stay cold in a cooler and don’t depend on a creamy sauce for flavor: grain salads, chickpea salads, wraps with sturdy fillings, grilled meats chilled properly, and fruit. Seafood and mayonnaise-heavy dishes need especially careful chilling and shouldn’t sit out long.
Can I pack warm food for a picnic?
Yes, if you use an insulated container and keep it separate from cold items. Sausage hoagies, pulled pork, and some grilled dishes travel well warm, but they should still be hot enough on arrival to stay appealing and safe.
How do I keep sandwiches from getting soggy?
Use a moisture barrier like hummus, cream cheese, or pesto on the bread, and keep tomatoes or dressed greens in separate layers. Wrap sandwiches tightly in parchment and then foil if you need extra structure.
What if I don’t have a cooler?
Choose recipes that are comfortable at room temperature for a short window: pinwheels, antipasto skewers, focaccia squares, rice balls, some pasta salads, and sturdy grain bowls. Even then, keep the food shaded and serve it soon after arrival.
Can I use store-bought shortcuts without ruining the recipe?
Absolutely. Rotisserie chicken, bottled pesto, packaged slaw mix, and prewashed greens make these dinners easier without changing the whole point. The food still tastes homemade if you season it well and keep the textures sharp.
What’s the best way to keep avocado from browning?
Add it as close to serving as you can. If you need a little delay, brush cut avocado with lemon or lime juice and pack it in a tight container with plastic touching the surface.
How do I scale these recipes for a bigger group?
Most of them scale cleanly by multiplying the main components and tasting the dressing or seasoning before you mix everything together. The only things that don’t scale perfectly are very salty add-ins like olives, feta, pickles, and bacon; those should be increased more slowly.
What should I do if a salad tastes flat after chilling?
Wake it up with acid, not more bulk. Lemon juice, vinegar, pickle brine, or a pinch of salt usually brings the flavor back faster than adding another spoonful of dressing.
Cooler-Ready Dinners That Still Feel Like Dinner
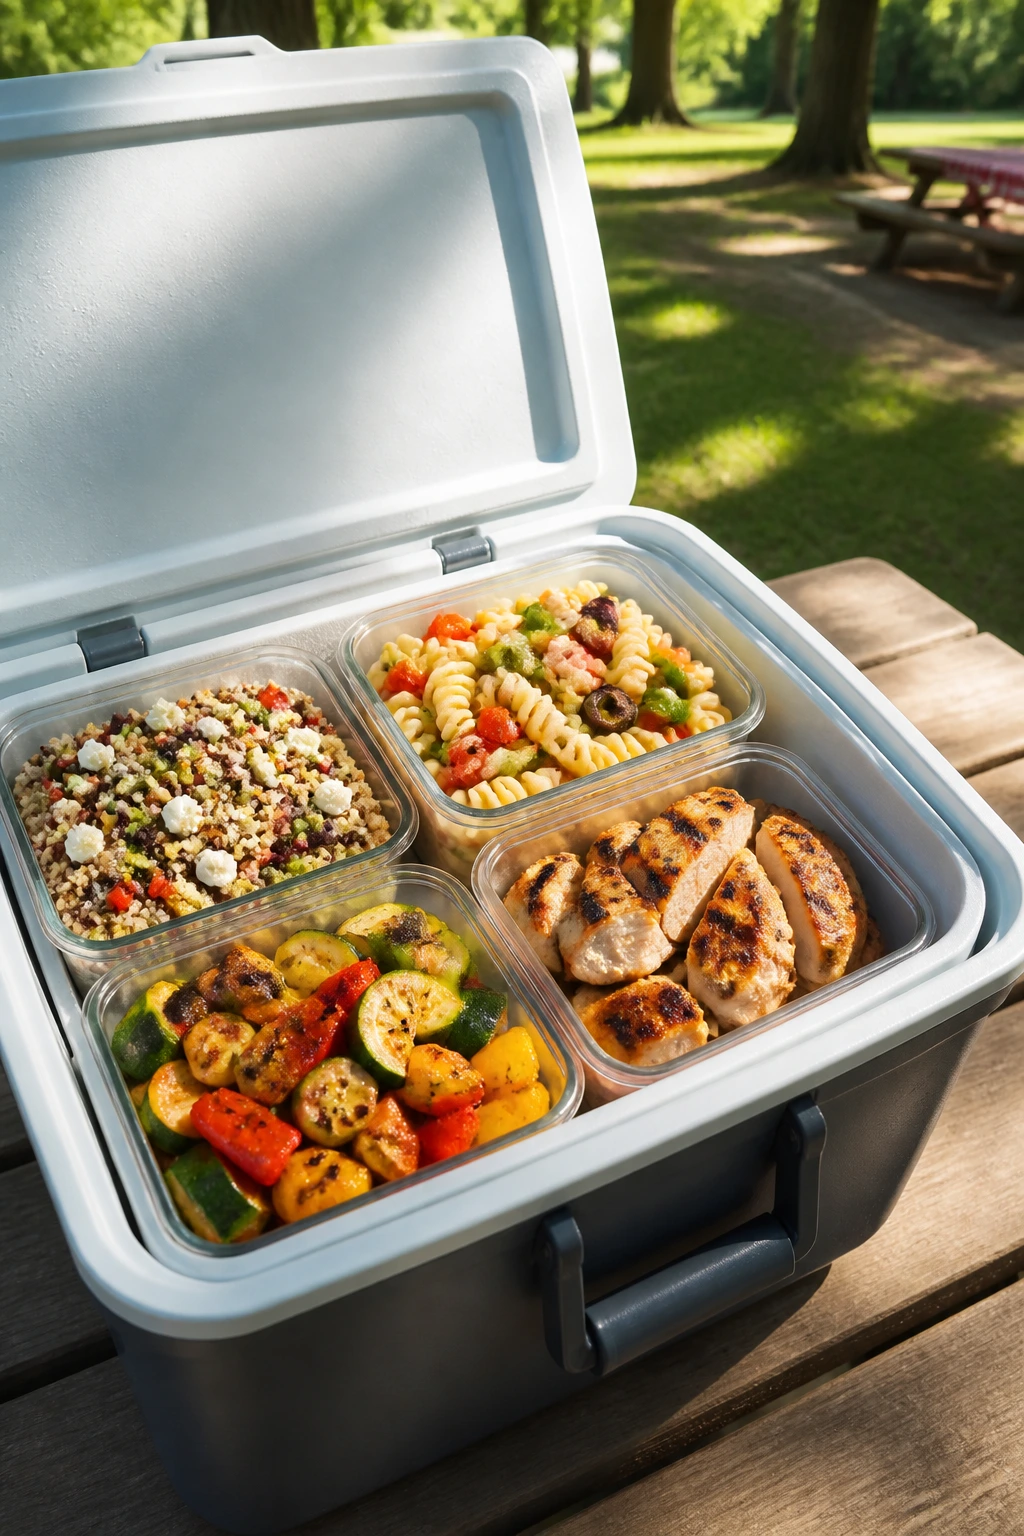
A good picnic dinner doesn’t need to be fancy. It needs to travel cleanly, eat well at a table, blanket, or tailgate, and still taste like someone cared when you open the lid. That’s the real filter here, and every recipe above passes it in a different way.
Some of these are built for crunch. Some lean on grains and noodles. A few are the kind of sandwich that gets better once the flavors settle for twenty minutes. Keep two or three in rotation, and packing dinner for a picnic stops feeling like a scramble.