
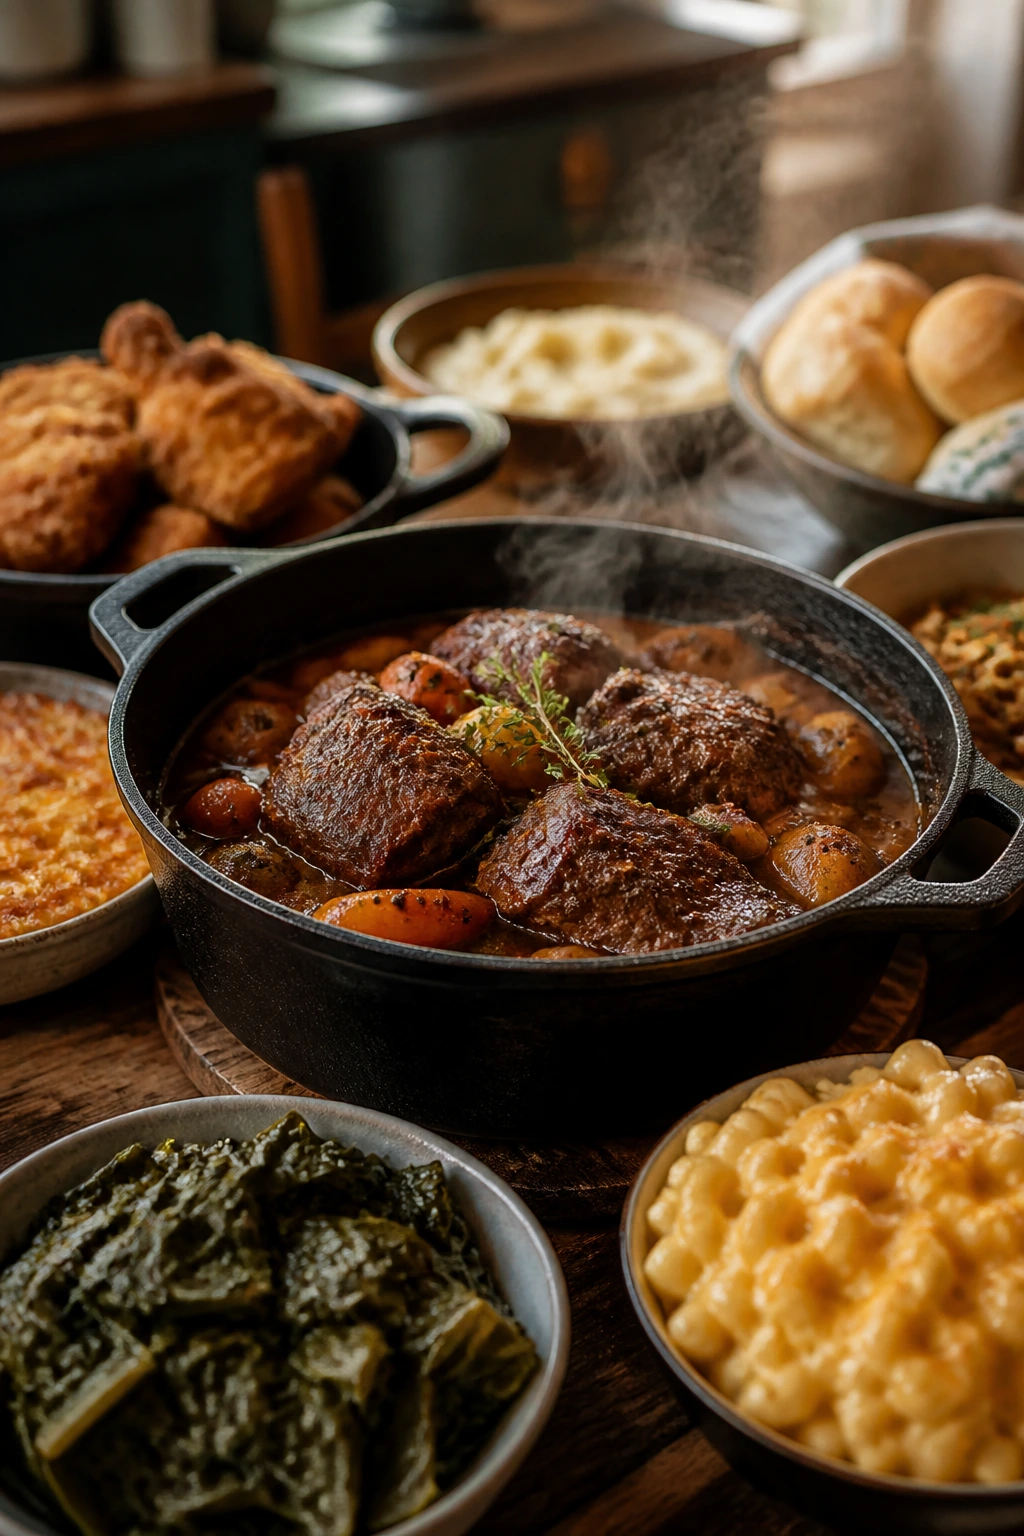
The best Sunday supper food doesn’t rush. It starts with onions sizzling in fat, ends with gravy that clings to rice, and spends the middle of its life getting more tender by the minute. That slow, steady rhythm is exactly why soul food dinners for Sunday suppers feel so comforting: they’re built on patience, seasoning, and the kind of cooking that makes the kitchen smell like somebody cared.
These are the meals that grew out of thrift and skill. Bone-in chicken, smoked turkey, pork chops, beans, collards, mac and cheese, catfish, oxtails — none of it is flashy on paper. On the plate, though, it becomes a different story. The meat falls apart, the gravy turns glossy, the greens soften into silk, and the rice underneath catches every bit of flavor that drops from the spoon.
A proper Sunday table can hold all of that at once. Some dishes here are braises. Some are fried. A few are baked until the edges go a little dark and the center stays soft. All of them reward a little attention, and none of them need fancy treatment to taste like home.
Why These Sunday Supper Recipes Earn Their Spot
- Slow flavor wins here: Bone-in meats, long simmering, and pan gravies give these dishes a deeper taste than fast-cooked weeknight food can usually manage.
- Budget cuts do the heavy lifting: Chicken thighs, turkey wings, beans, pork chops, and oxtails all bring big flavor without demanding delicate handling.
- The table feels full fast: A single braise, casserole, or pot of beans can feed a crowd and still leave leftovers that taste even better the next day.
- Gravy matters more than garnish: These recipes are built around sauce, pot liquor, drippings, or pan juices, which means every bite lands with more flavor.
- They play well together: You can set out rice, cornbread, biscuits, greens, and a casserole without making the meal feel scattered.
- Sunday supper energy is the point: These dishes ask for a little time, but they pay it back in comfort, and that exchange is the whole charm.
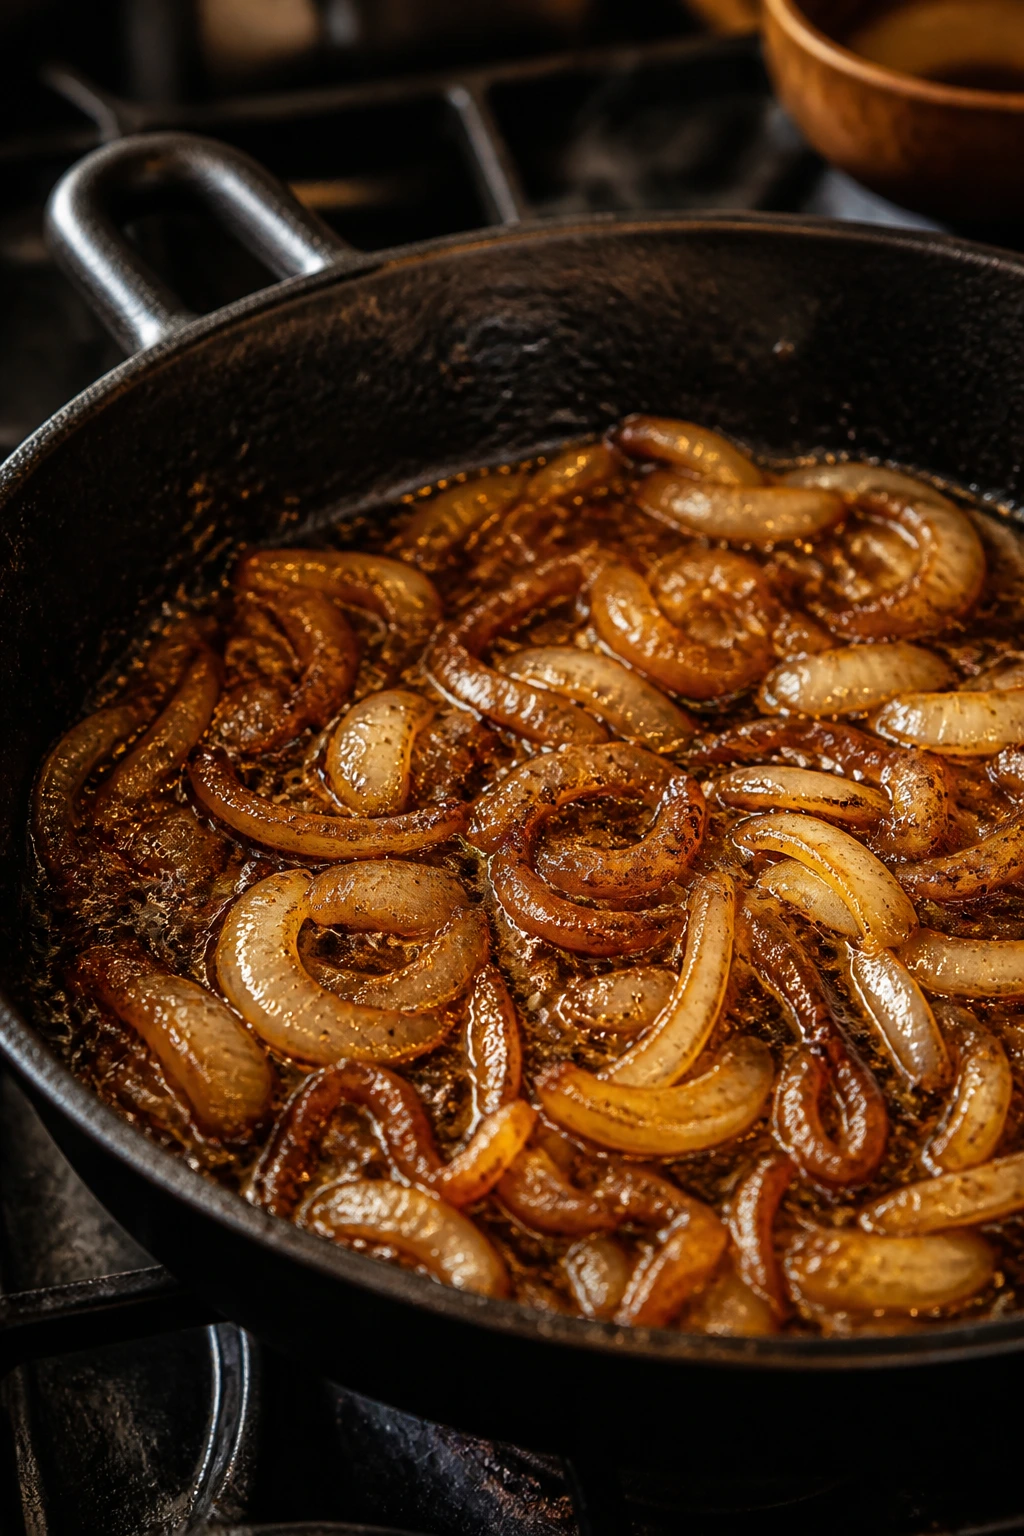
1. Smothered Chicken with Onion Gravy
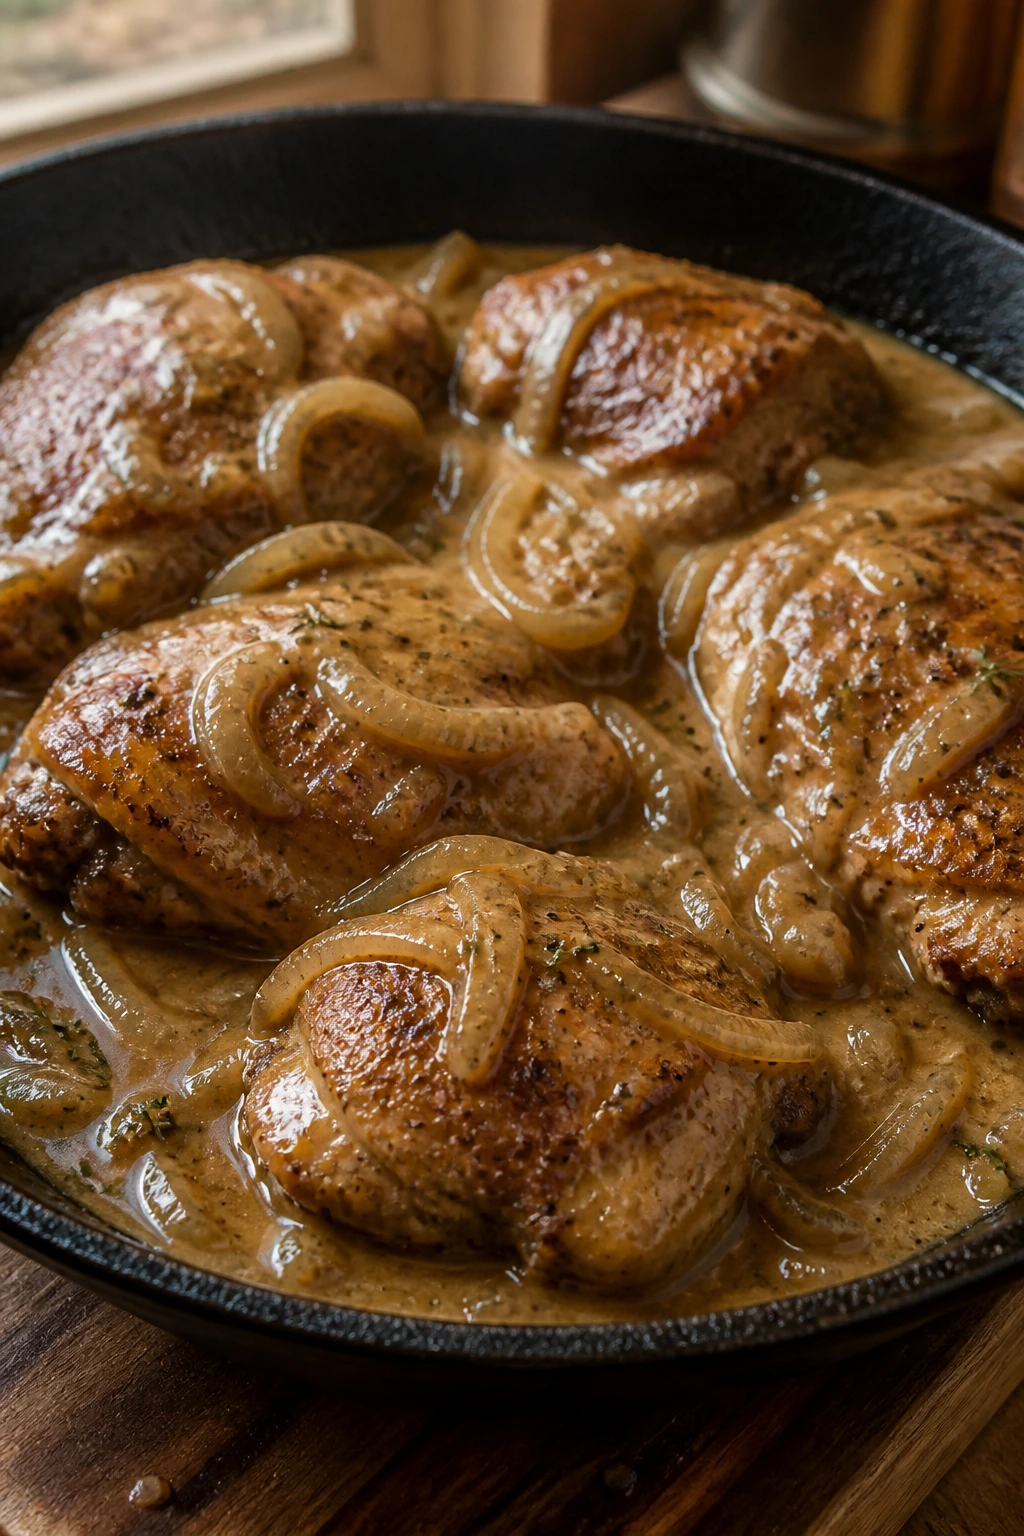
Smothered chicken is the kind of dish that turns a quiet kitchen into a place people drift toward. The chicken gets seasoned, browned, and tucked into a pan of onions that melt down into a savory gravy, so every piece ends up glossy, savory, and deeply chicken-y. It’s the dinner I want when I need something warm, not fussy.
Why It Works: Bone-in chicken thighs and drumsticks stay juicy through a long simmer, and that matters because the gravy needs time to pick up all the browned bits from the pan. Searing the chicken first builds flavor you can taste in the sauce, not just see on the surface. By the time the onions go soft and the stock thickens, the whole skillet smells sweet, peppery, and a little smoky from the paprika.
Key Ingredients:
- 3 pounds bone-in, skin-on chicken thighs and drumsticks — dark meat stays tender under gravy.
- 2 teaspoons kosher salt — season the chicken all the way through, not just the skin.
- 1 teaspoon black pepper — gives the gravy a warm bite.
- 2 teaspoons paprika — adds color and a soft smoky edge.
- 1 teaspoon garlic powder — helps the seasoning cling to the chicken.
- 1 cup all-purpose flour, divided — some for dredging, some for thickening.
- 3 tablespoons vegetable oil — enough to brown without burning.
- 2 large yellow onions, thinly sliced — they melt into the sauce.
- 3 cloves garlic, minced — stir in near the end so it stays sweet.
- 3 cups chicken stock — the base of the gravy.
- 2 tablespoons butter — finishes the sauce with a silkier texture.
- 1 teaspoon dried thyme — one of those quiet herbs that makes gravy taste finished.
- 1 bay leaf — optional, but useful if you like a deeper savory note.
Quick Steps:
- Season and dredge: Pat the chicken dry, season it with salt, pepper, paprika, and garlic powder, then coat lightly in flour.
- Brown the chicken: Heat the oil in a large skillet over medium-high heat and sear the pieces for 4 to 5 minutes per side until golden brown. Don’t crowd the pan or the chicken will steam.
- Cook the onions: Lower the heat, add the onions, and cook for 8 to 10 minutes until they soften and pick up the browned bits from the bottom.
- Build the gravy: Stir in the garlic and the remaining flour, cook for 1 minute, then slowly whisk in the stock until smooth.
- Simmer gently: Return the chicken to the pan, add thyme and the bay leaf, cover, and cook on low for 35 to 40 minutes until the chicken reaches 165°F and pulls tender from the bone.
- Finish and serve: Stir in the butter, taste for salt, and spoon the gravy over rice or mashed potatoes.
Tips and Variations:
- Make-Ahead: The gravy tastes even richer after a night in the fridge; reheat it slowly with a splash of stock.
- Flavor Boost: A teaspoon of Worcestershire gives the sauce more depth without making it taste sharp.
- Serving Idea: Spoon it over white rice so the gravy has somewhere to go.
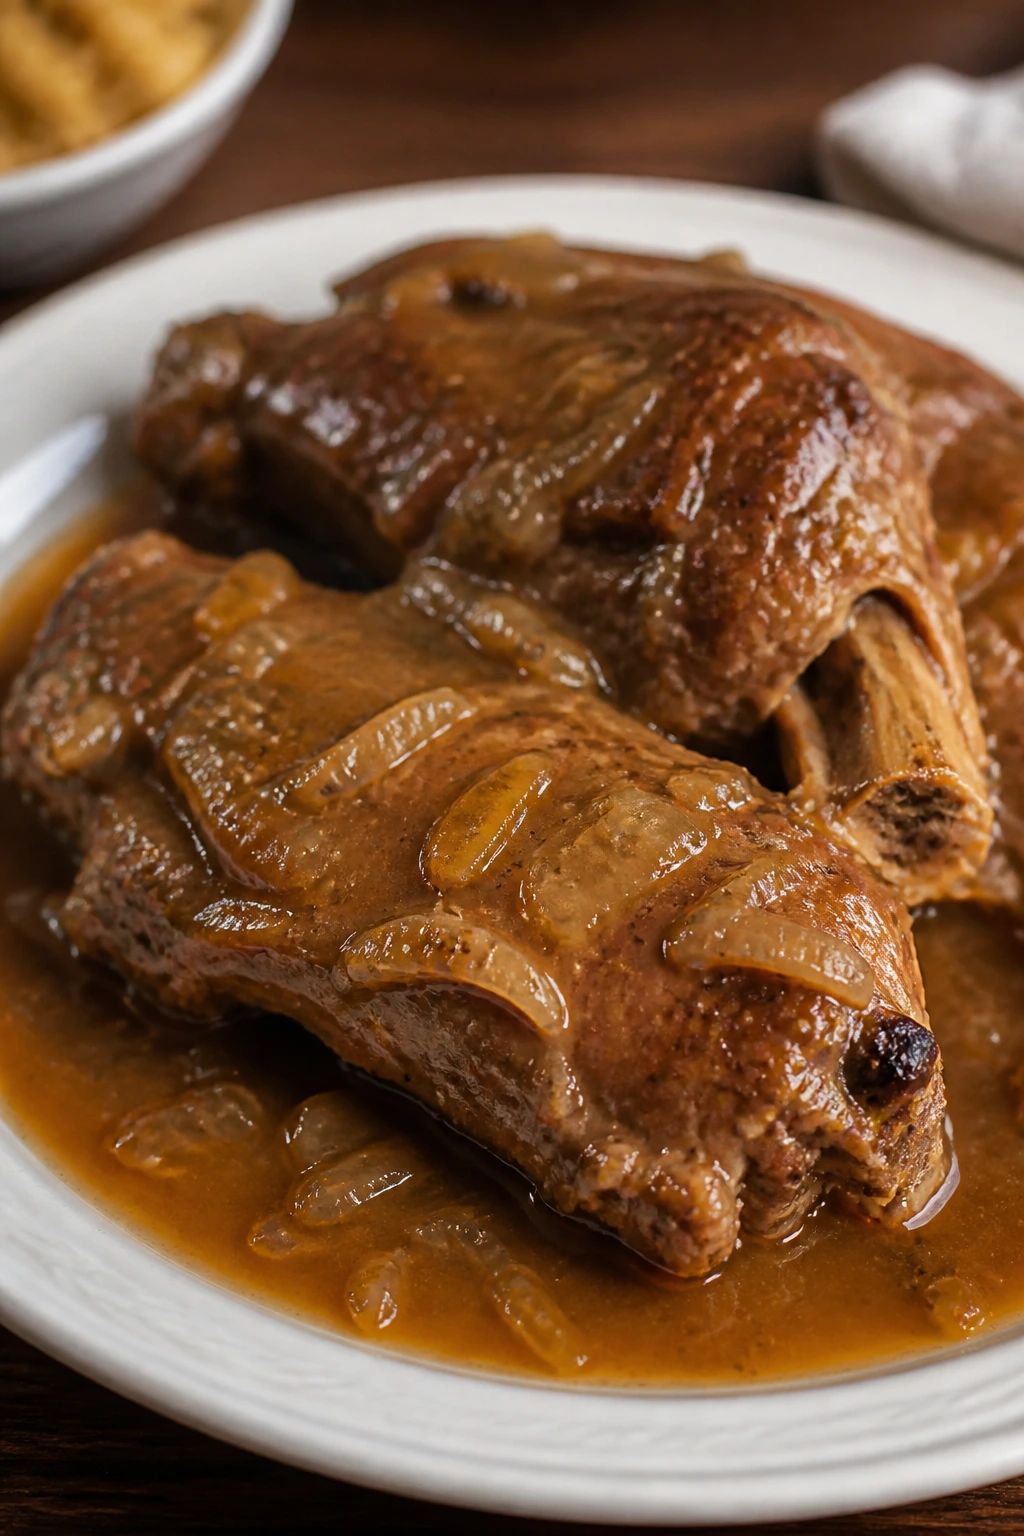
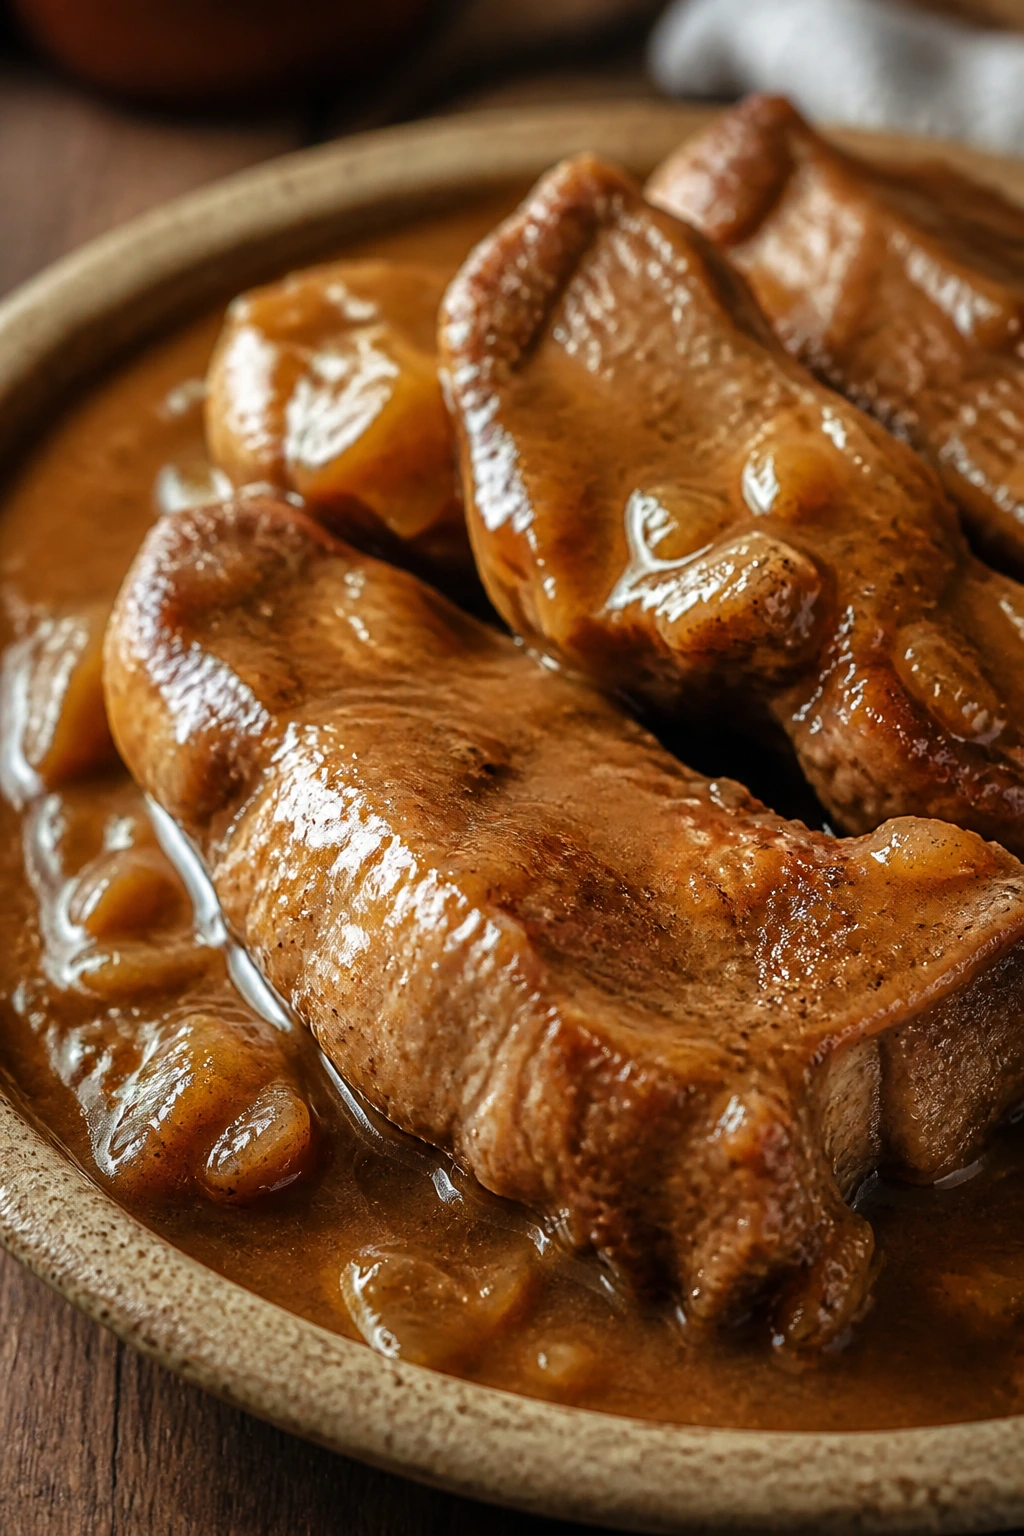
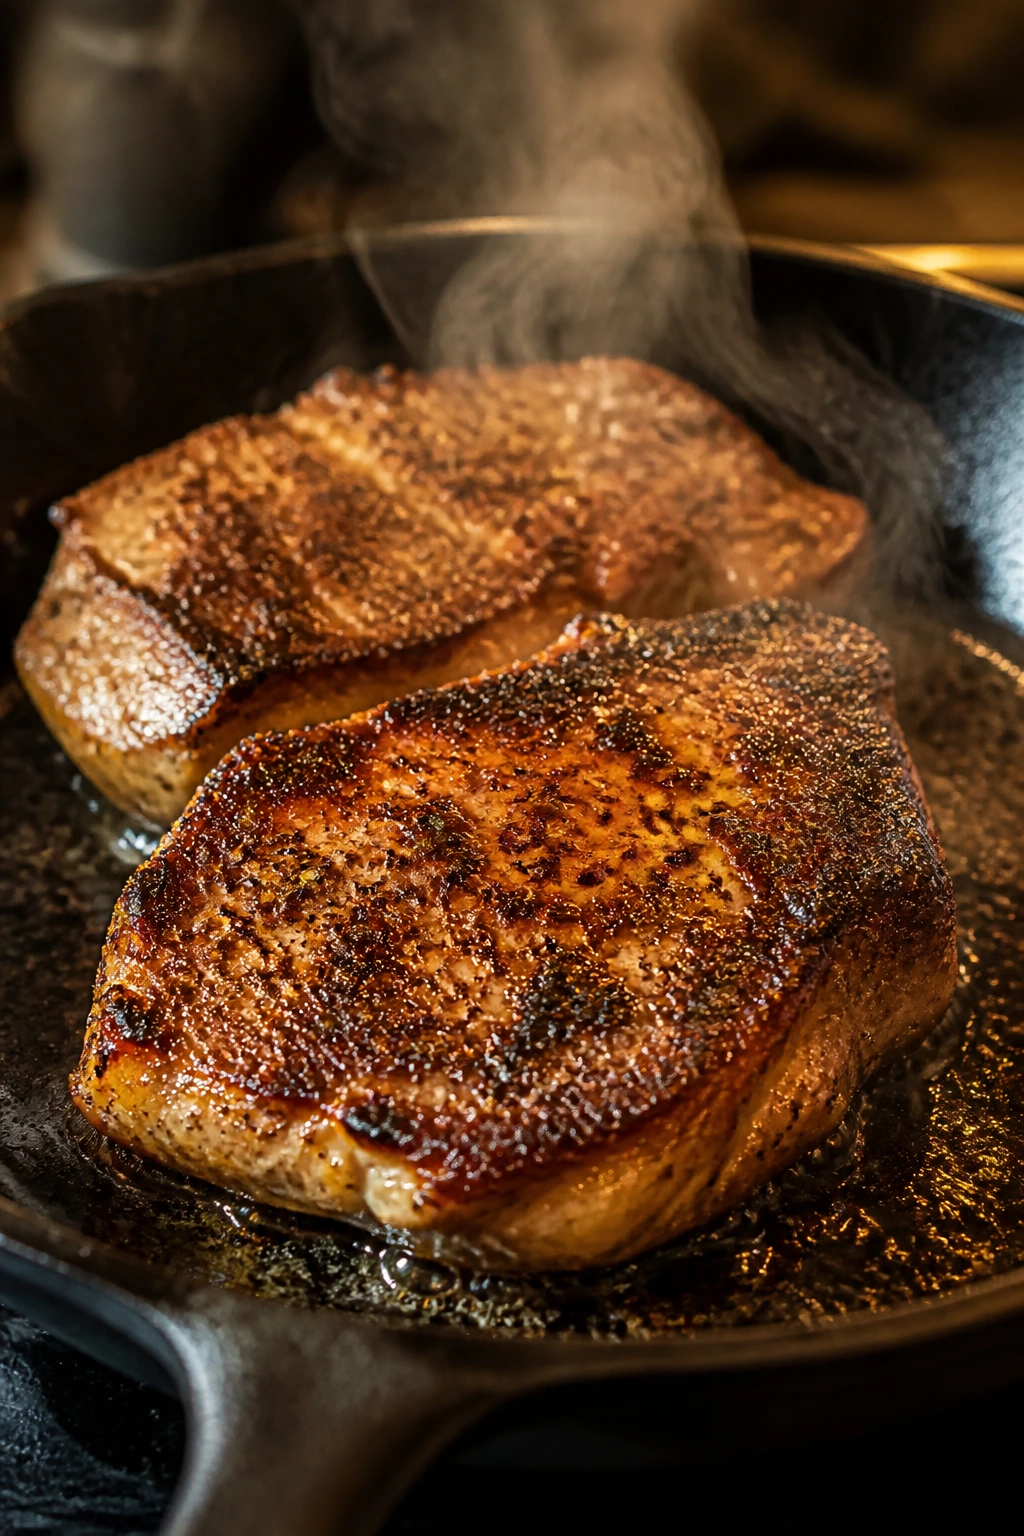
2. Smothered Pork Chops with Brown Gravy
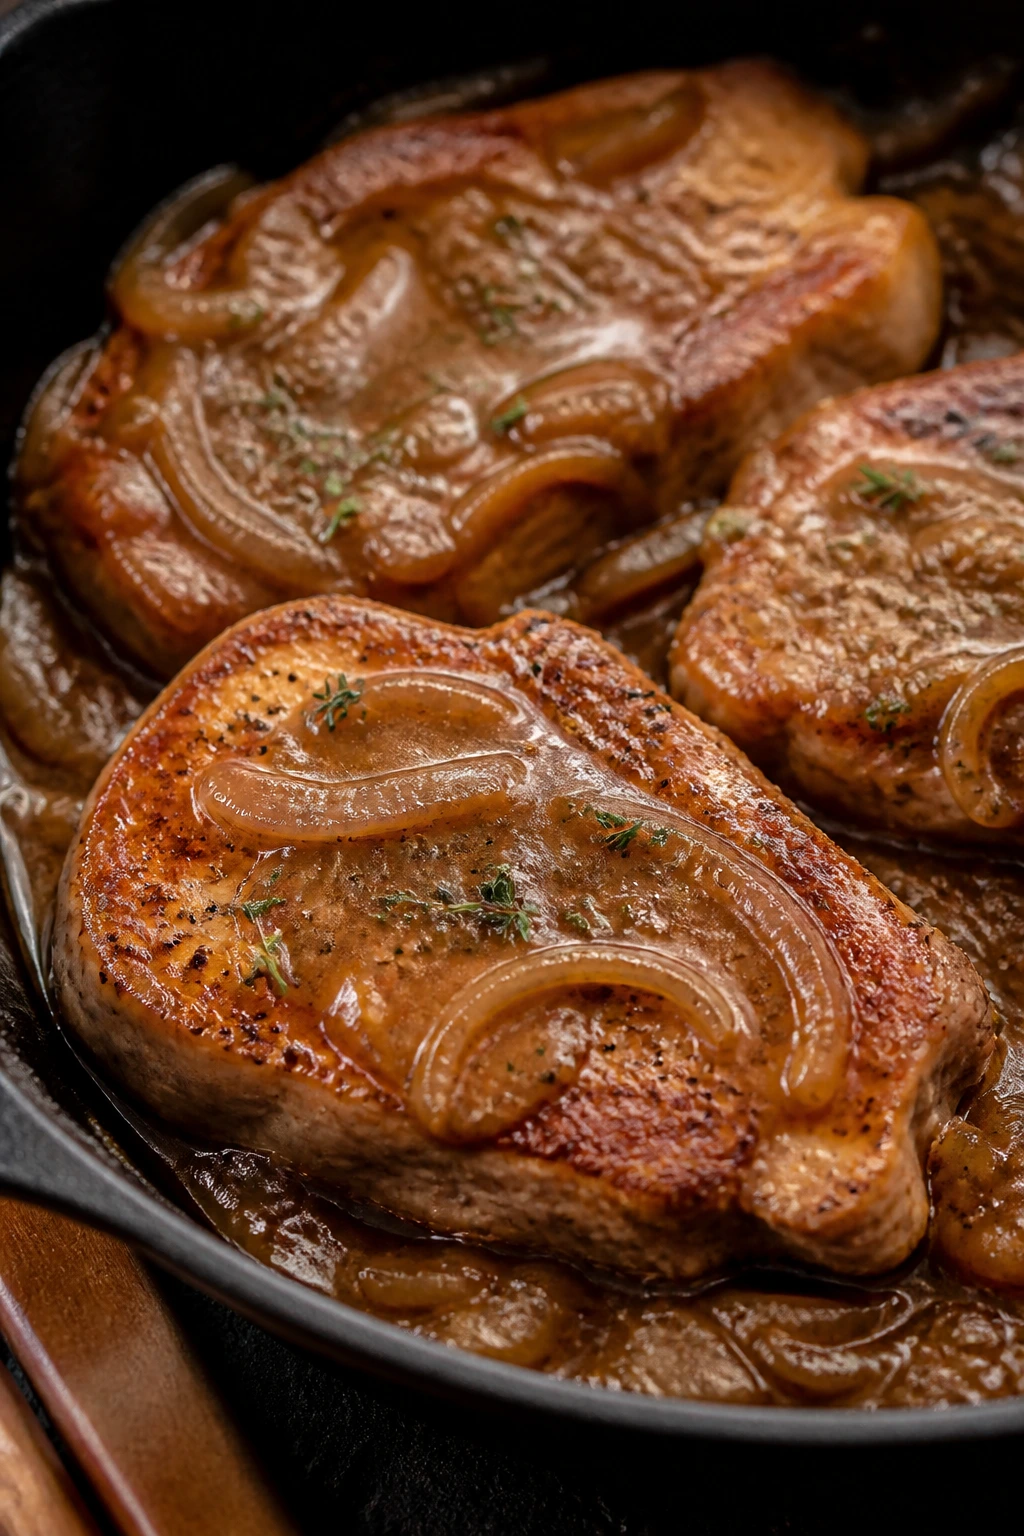
What does a proper pork chop gravy need? Time, onion, and a little restraint. Thick-cut chops sear well, hold up in the oven, and give you enough meat to stand up to the sauce without turning dry or stringy. This is the kind of supper that looks simple until you taste it.
Why It Works: Pork chops are lean enough to dry out if you blast them with heat, but a quick sear followed by a covered braise keeps them juicy. The onion gravy picks up the browned fond from the skillet, which is where most of the flavor lives anyway. A touch of Worcestershire and thyme gives the sauce a round, old-fashioned taste that feels right at home with mashed potatoes.
Key Ingredients:
- 4 bone-in pork chops, about 1 inch thick — thick chops survive the braise better.
- 1 teaspoon kosher salt — season both sides before dredging.
- 1 teaspoon black pepper — sharp enough to cut through the richness.
- 1 teaspoon onion powder — adds a little background sweetness.
- 1 cup all-purpose flour — for coating and thickening.
- 2 tablespoons vegetable oil — for the first brown crust.
- 1 large yellow onion, sliced — softens into the gravy.
- 2 cloves garlic, minced — a small amount goes a long way here.
- 2 cups chicken broth or beef broth — beef broth makes the gravy darker.
- 1 tablespoon Worcestershire sauce — deepens the savory note.
- 1 teaspoon dried thyme — keeps the gravy from tasting flat.
- 1 tablespoon butter — for a smoother finish.
- 8 ounces sliced mushrooms, optional — good if you want more body in the pan sauce.
Quick Steps:
- Season and flour the chops: Pat the pork dry, season it well, and dredge lightly in flour.
- Sear them fast: Brown the chops in oil over medium-high heat for 3 to 4 minutes per side, then move them to a plate.
- Soften the onions: Add the sliced onion to the skillet and cook for 6 to 8 minutes until soft and caramel-colored at the edges.
- Make the gravy: Stir in garlic and a tablespoon of flour if the pan looks dry, then whisk in the broth, Worcestershire, and thyme.
- Braise covered: Return the pork chops, cover the pan, and bake at 350°F for 25 to 30 minutes until the chops reach 145°F and feel tender.
- Rest and finish: Stir in butter, let the chops rest for 5 minutes, and spoon the gravy over the top.
Tips and Variations:
- Do Not Overcook: Pork chops go dry fast; pull them as soon as they hit temperature.
- Extra Richness: A spoonful of pan drippings from another roast can deepen the gravy.
- Best Side: Creamy mashed potatoes or buttered rice both catch the sauce well.
3. Southern Fried Chicken

The first crackle of chicken hitting hot oil tells you everything. If the heat is right, the crust turns crisp and rugged, the meat stays juicy, and the whole kitchen smells like church supper and Sunday afternoon at the same time. Fried chicken has a reputation for being tricky. It isn’t impossible. It just asks you to pay attention.
Why It Works: Buttermilk tenderizes the chicken while helping the flour cling in craggy little bits, and those rough edges fry into the best part. A little cornstarch in the coating gives the crust more crunch without making it heavy. Keeping the oil at 325°F gives the skin time to brown before the meat dries out.
Key Ingredients:
- 3 pounds mixed chicken pieces — thighs, drumsticks, and wings all fry well.
- 2 cups buttermilk — tenderizes and helps the coating stick.
- 2 tablespoons hot sauce — adds seasoning without making the chicken taste spicy-hot.
- 2 teaspoons kosher salt — seasons the meat beneath the crust.
- 1 teaspoon black pepper — keeps the flavor lively.
- 2 cups all-purpose flour — the main coating.
- 1/2 cup cornstarch — makes the crust crisper.
- 2 teaspoons paprika — gives a warm color.
- 1 teaspoon garlic powder — rounds out the seasoning.
- 1 teaspoon onion powder — keeps the crust from tasting one-note.
- 2 quarts peanut oil or vegetable oil — enough for steady frying.
Quick Steps:
- Marinate the chicken: Combine the chicken, buttermilk, hot sauce, salt, and pepper, then chill for at least 1 hour or overnight.
- Mix the coating: Stir the flour, cornstarch, paprika, garlic powder, onion powder, and a little more salt in a wide bowl.
- Dredge carefully: Lift each piece from the buttermilk, let the excess drip off, then press it into the flour mixture so the coating looks shaggy.
- Rest the coating: Set the dredged chicken on a rack for 15 minutes so the crust hydrates and stays put.
- Fry at 325°F: Cook in batches, turning once, until the crust is deep golden and the thickest pieces reach 165°F — usually 12 to 15 minutes for dark meat.
- Drain well: Move the chicken to a wire rack, not paper towels, so the crust stays crisp.
Tips and Variations:
- Oven Finish: If your pieces brown too fast, finish them in a 375°F oven for 10 minutes.
- Seasoning Shift: Add a pinch of cayenne if you want more heat.
- Make It Easier: Fry only thighs and drumsticks if you want fewer pieces to monitor.
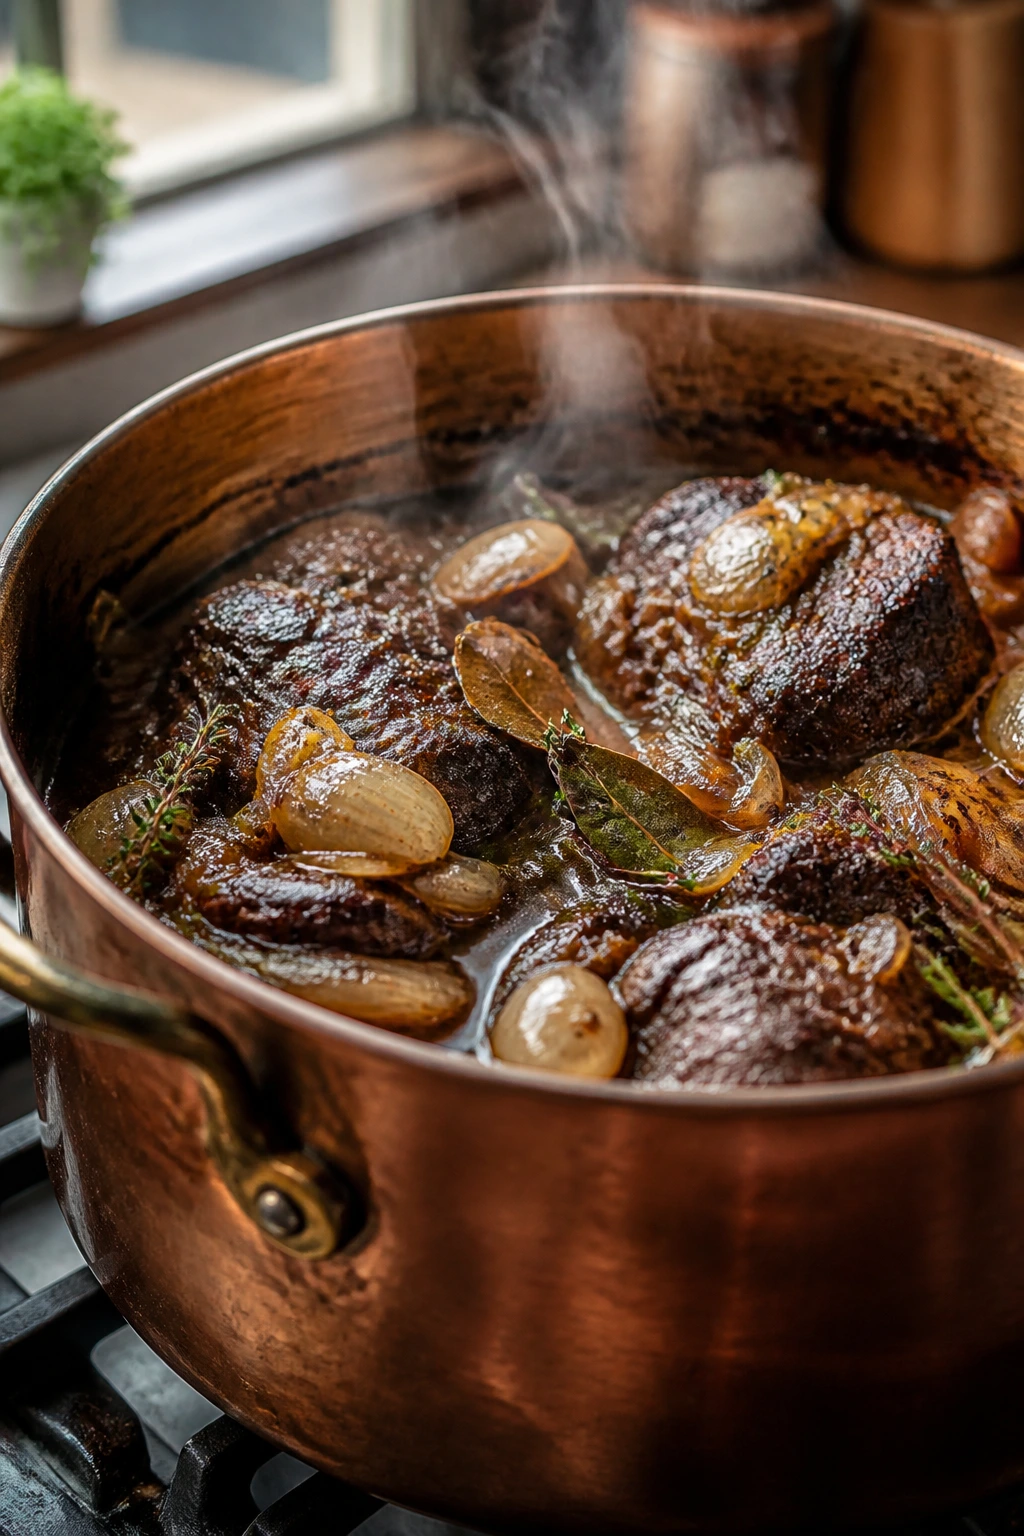
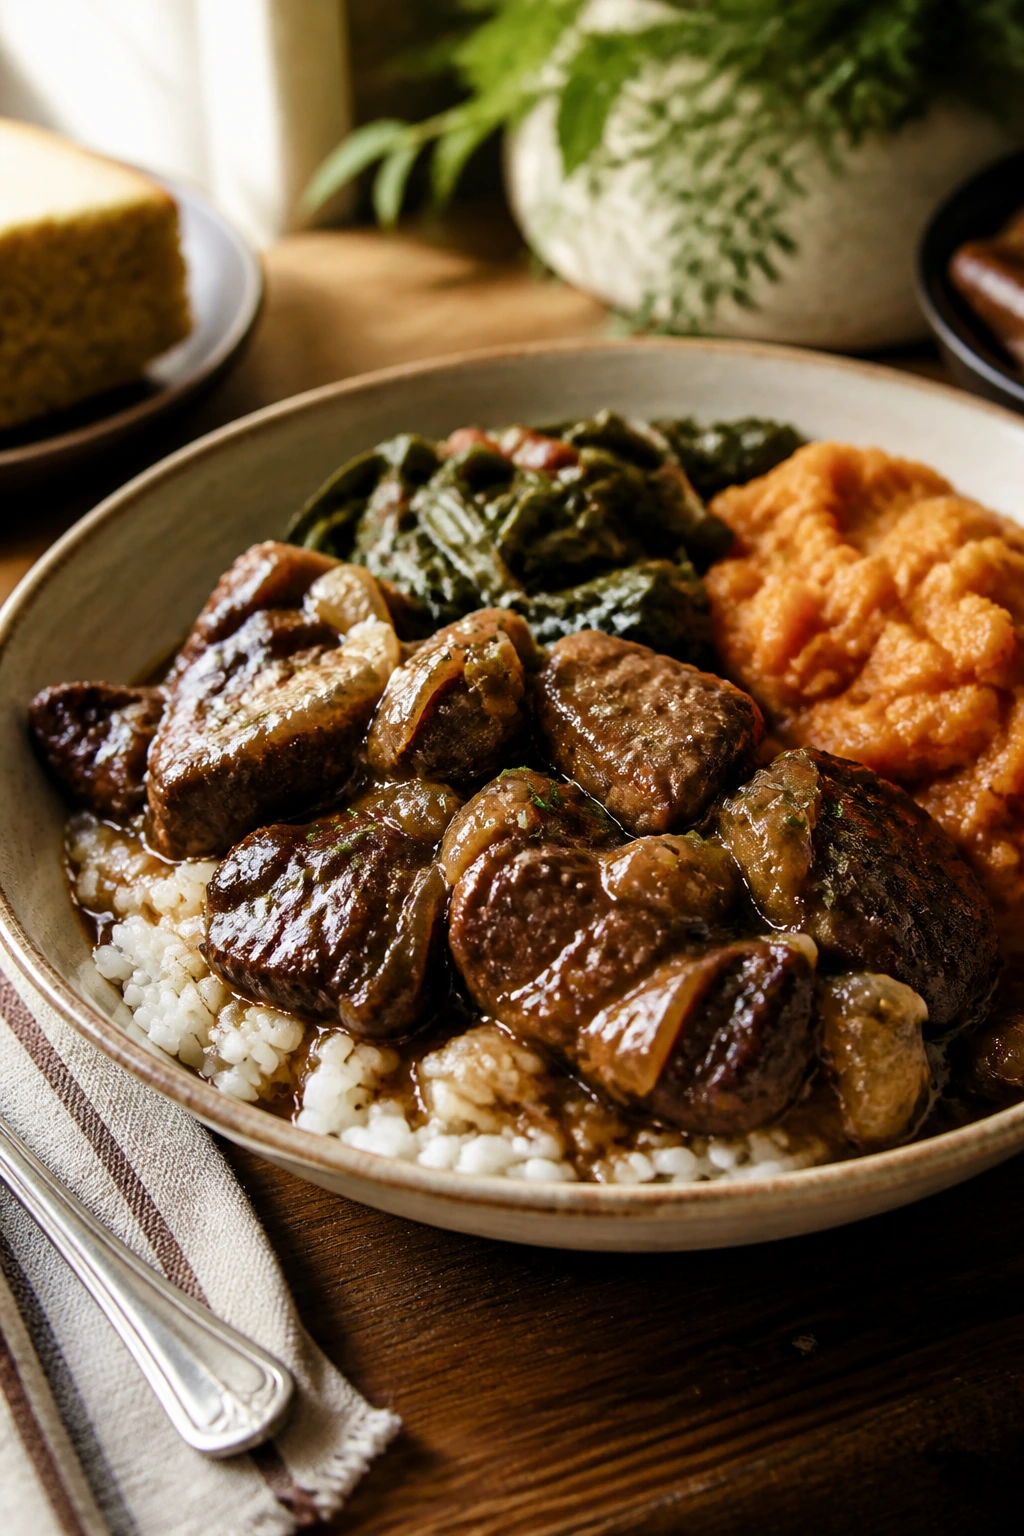
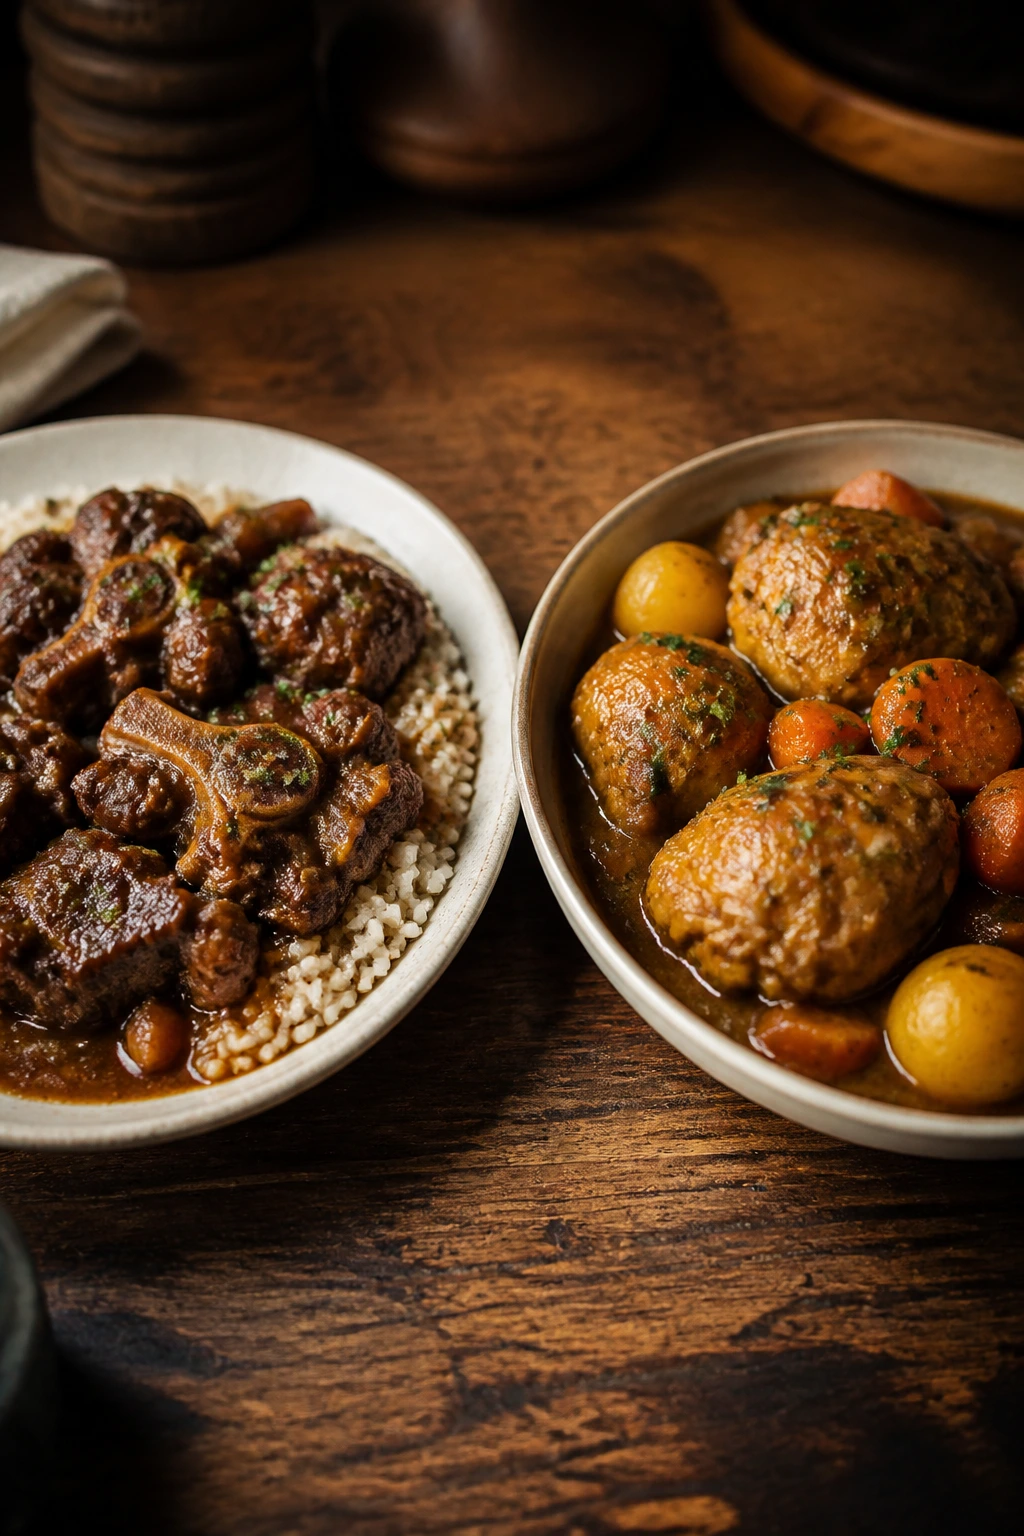
4. Oxtails Braised Low and Slow
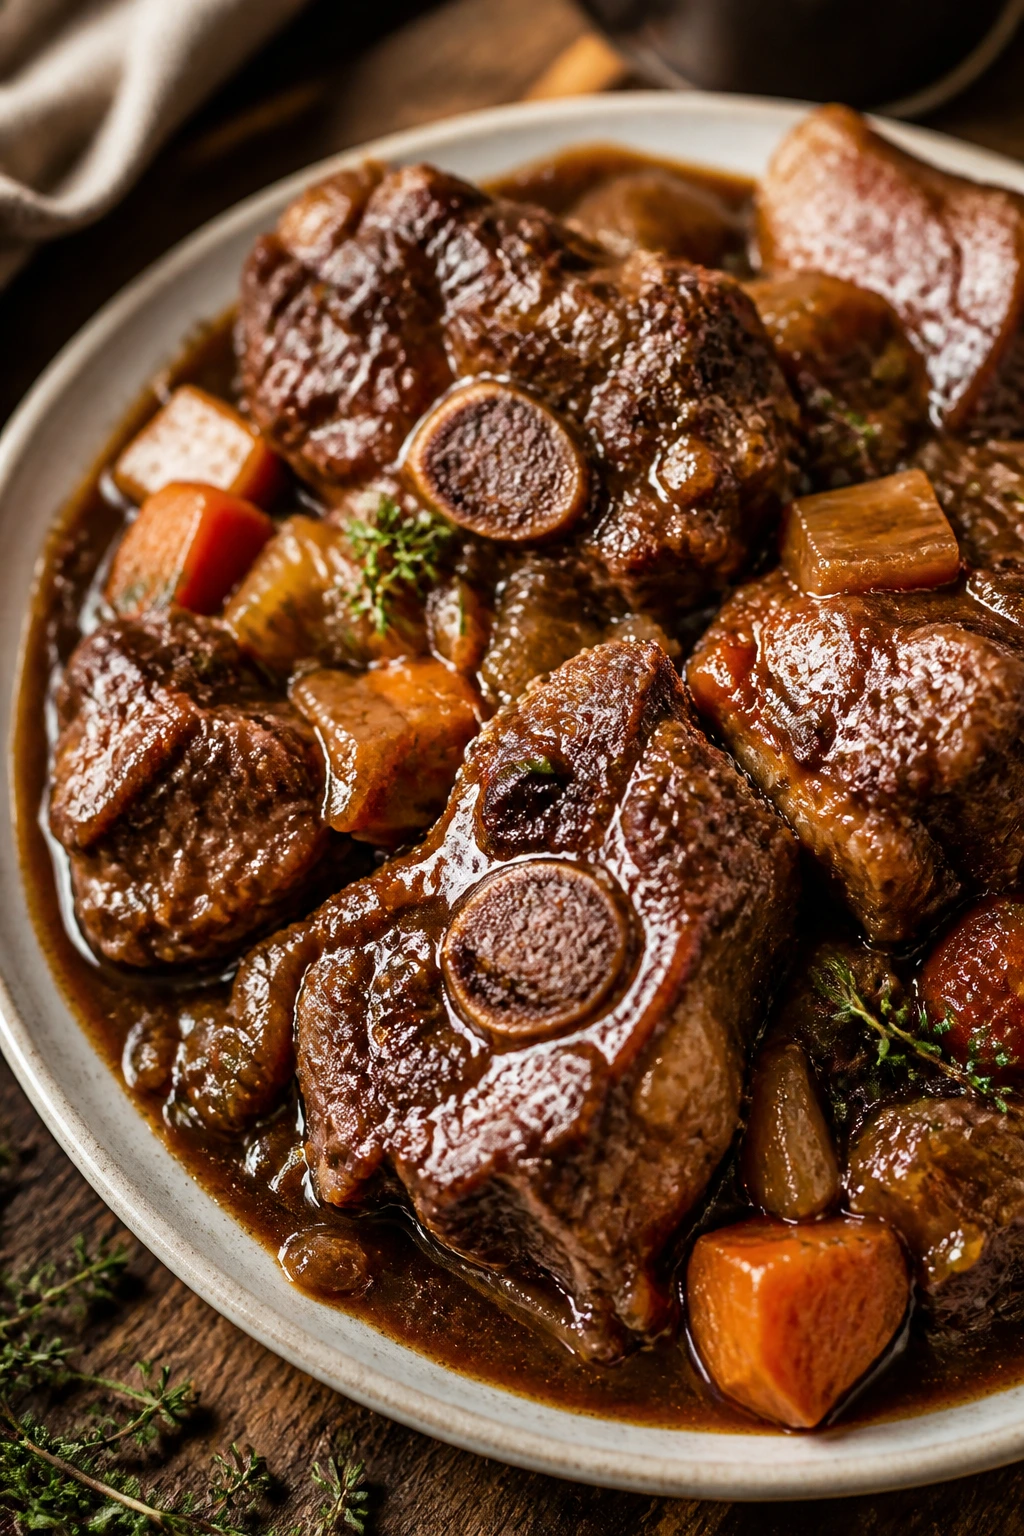
Oxtails are not hard to cook. They just refuse to be rushed. Once they brown, braise, and spend a long stretch in the oven, the meat softens into that rich, spoonable texture that makes people go quiet at the table. The broth turns glossy. The bones do half the work. That’s part of the charm.
Why It Works: Oxtails are full of connective tissue, which means they need time and moisture to turn tender. A dry, high-heat method would be a waste of a good cut. Braising them with onion, carrot, celery, and tomato paste gives the sauce sweetness, body, and a deep brown color that feels far more expensive than the ingredient list suggests.
Key Ingredients:
- 4 pounds oxtails — look for pieces with meat attached and some marbling.
- 2 teaspoons kosher salt — season generously before browning.
- 1 teaspoon black pepper — important for balance.
- 1/2 cup all-purpose flour — for a light dredge and thickened sauce.
- 2 tablespoons vegetable oil — for browning.
- 1 large onion, chopped — the sweet base of the braise.
- 2 carrots, chopped — adds body to the sauce.
- 2 celery ribs, chopped — classic stew flavor.
- 3 cloves garlic, minced — stir in after the vegetables soften.
- 2 tablespoons tomato paste — deepens the color and taste.
- 4 cups beef stock — the main braising liquid.
- 1 cup red wine or more stock — wine adds depth; stock keeps it simple.
- 2 bay leaves — help the sauce taste layered.
- 1 teaspoon dried thyme — a small herb with a big payoff.
- 1 tablespoon Worcestershire sauce — boosts the beefiness.
Quick Steps:
- Season and dredge lightly: Pat the oxtails dry, season them, and dust them in flour so they brown better.
- Brown in batches: Sear the oxtails in hot oil until deeply browned on all sides, about 3 to 4 minutes per side.
- Cook the vegetables: Add onion, carrot, and celery to the pot and cook until softened, scraping up the browned bits.
- Stir in tomato paste: Cook it for 1 minute so it darkens a shade and loses the raw edge.
- Braise covered: Add stock, wine, bay leaves, thyme, and Worcestershire, bring to a simmer, cover, and bake at 325°F for 3 1/2 to 4 hours until the meat nearly slips from the bone.
- Skim and serve: Skim any extra fat from the surface and serve the oxtails over rice, mashed potatoes, or creamy grits.
Tips and Variations:
- Flavor Boost: A spoonful of browning sauce deepens the color if you like your gravy darker.
- Short on Time? Use a pressure cooker, but finish uncovered so the sauce thickens.
- Best Leftover Move: Chill the braise overnight; the sauce gets better as the flavors settle.
5. Turkey Wings in Brown Gravy
Turkey wings have that old-school Sunday supper feel the minute they go into the oven. They’re big, meaty, and a little rustic, which is exactly why they work so well with gravy. Once they’ve had time to braise, the meat pulls back from the bone and the sauce takes on a rich, peppery edge.
Why It Works: Turkey wings have enough collagen to benefit from long, moist heat, and they bring a stronger flavor than boneless poultry ever could. Browning them first gives the gravy more depth, while a simple mix of stock, onion, and sage keeps the dish rooted in familiar territory. The wings also give you a lot of serving mileage for the price, which is useful when the table keeps growing by the minute.
Key Ingredients:
- 3 pounds turkey wings — split at the joints if they come whole.
- 2 teaspoons kosher salt — turkey needs enough salt to carry the gravy.
- 1 teaspoon black pepper — keeps the flavor from going flat.
- 1 teaspoon paprika — for color and a mild smoky note.
- 1 teaspoon onion powder — helps the seasoning stick.
- 1/2 cup all-purpose flour — for dredging and thickening.
- 2 tablespoons oil — for browning.
- 1 large onion, sliced — melts into the gravy.
- 1 green bell pepper, sliced — optional, but common in Southern gravy.
- 3 cloves garlic, minced — adds warmth near the end.
- 3 cups chicken stock or turkey stock — the braising liquid.
- 2 tablespoons butter — finishes the sauce.
- 1 teaspoon dried sage — gives the gravy that holiday-table smell.
- 1 bay leaf — optional, but useful.
Quick Steps:
- Season the wings well: Pat dry, season with salt, pepper, paprika, and onion powder, and dust lightly with flour.
- Brown them first: Sear in oil over medium heat until golden on both sides, about 4 minutes per side.
- Cook the vegetables: Add onion and bell pepper to the same pan and cook until softened and slightly browned.
- Build the gravy: Stir in garlic and a spoonful of flour if needed, then whisk in the stock and sage until smooth.
- Braise until tender: Nestle the wings back in, cover, and bake at 325°F for 1 1/2 to 2 hours until the meat is soft and the gravy is thick.
- Finish and spoon over rice: Stir in butter, taste for salt, and serve with white rice or mashed potatoes.
Tips and Variations:
- Texture Tip: If the gravy looks thin, uncover the pan for the last 15 minutes.
- Mild or Savory: Leave out the bell pepper if you want a cleaner gravy taste.
- Great With: Butter beans and cornbread turn this into a full plate.
6. Chicken and Dumplings
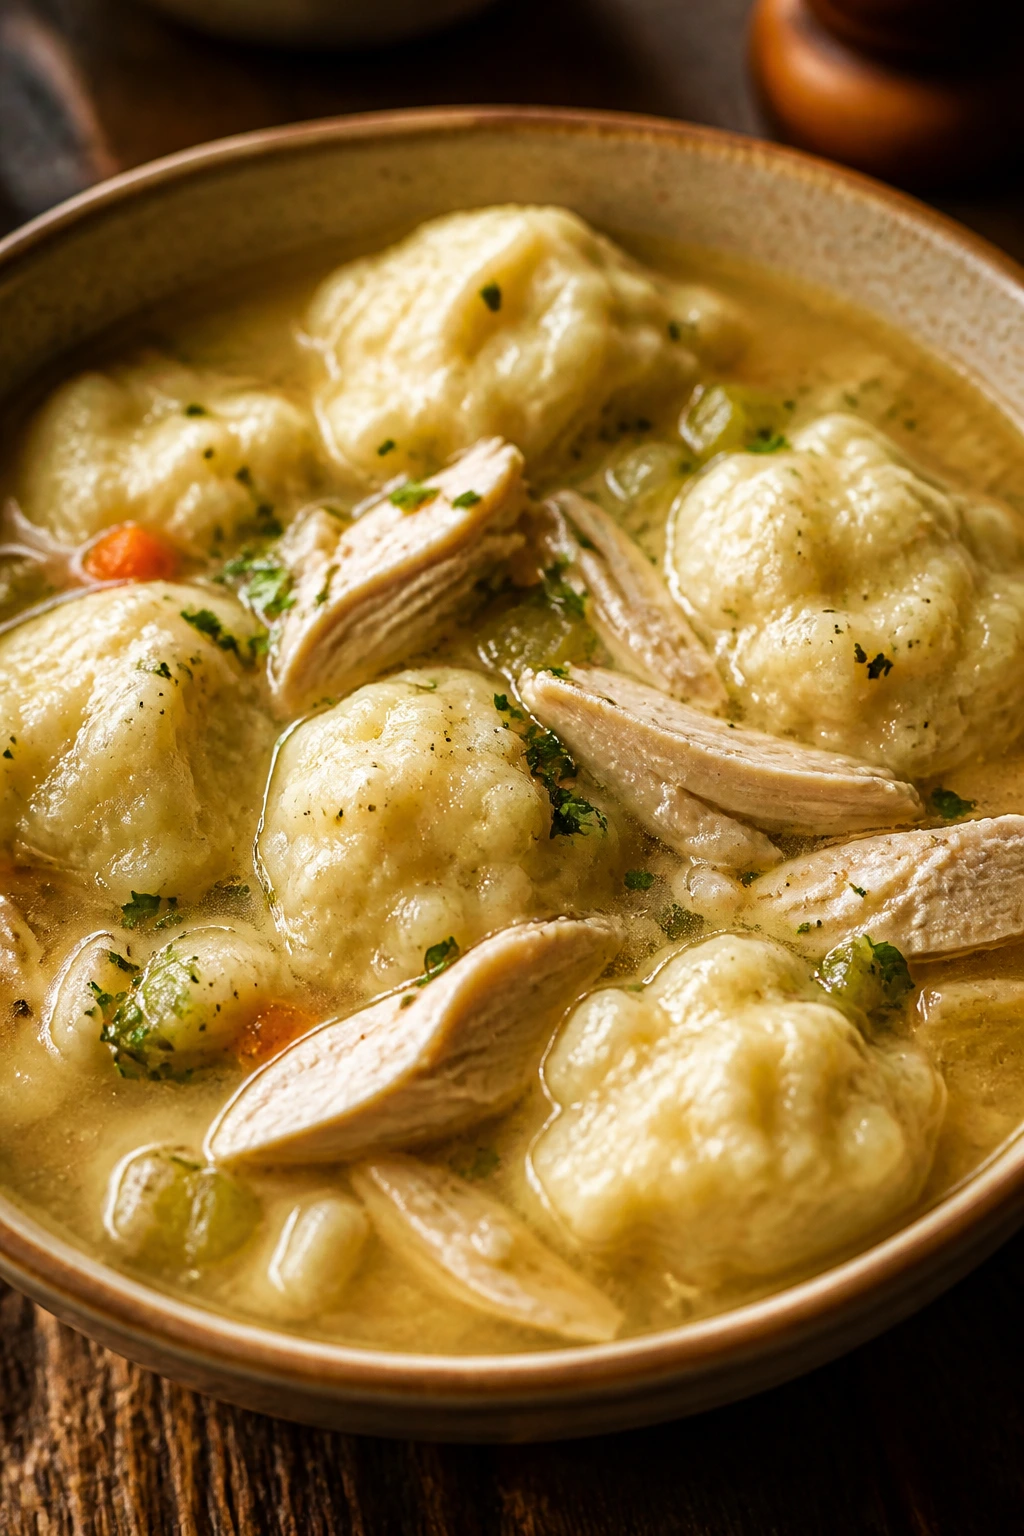
Chicken and dumplings is what happens when a stew decides to wear a blanket. The broth gets rich, the chicken turns tender, and the dumplings steam on top until they’re soft in the middle and a little chewy at the edges. It’s not a showy dish. It is a comforting one, and there’s a difference.
Why It Works: The chicken simmers first so the broth picks up flavor from the bones and vegetables, which means the whole pot tastes like it cooked longer than it did. Drop dumplings made with baking powder rise gently under the lid instead of turning dense. Keep the heat low and steady, and the dumplings stay fluffy instead of soggy.
Key Ingredients:
- 2 pounds bone-in chicken thighs — the meat stays tender and the broth tastes fuller.
- 1 large onion, chopped — the base flavor for the stew.
- 2 carrots, sliced — adds sweetness and texture.
- 2 celery ribs, sliced — keeps the broth savory.
- 6 cups chicken stock — use a good one here.
- 2 tablespoons butter — for richness.
- 1 teaspoon dried thyme — classic and restrained.
- 1 teaspoon kosher salt — adjust after the broth reduces.
- 2 cups all-purpose flour — for the dumplings.
- 1 tablespoon baking powder — gives the dumplings lift.
- 1 teaspoon black pepper — enough to show through the dough.
- 1 cup whole milk — brings the dumpling dough together.
- 2 tablespoons chopped parsley, optional — freshens the finish.
Quick Steps:
- Simmer the chicken: Put the chicken, onion, carrots, celery, stock, butter, thyme, salt, and pepper in a pot and simmer until the chicken is cooked through, about 25 minutes.
- Shred and season: Remove the chicken, shred or chop it, and return it to the pot. Taste the broth and adjust the salt now.
- Mix the dumpling dough: Stir the flour, baking powder, a pinch of salt, and the milk just until combined. Do not overmix or the dumplings will turn tough.
- Drop onto simmering stew: Use a spoon to dollop the dough over the surface of the broth in small mounds.
- Cover and cook gently: Put the lid on, lower the heat, and cook for 15 minutes without lifting the lid. The dumplings need that steam.
- Finish with parsley: Check one dumpling for doneness; it should be set and fluffy, not raw in the middle. Add parsley if you like a fresh note.
Tips and Variations:
- Thicker Stew: Mash a few potato chunks into the broth if you want a denser base.
- Shortcut: Use rotisserie chicken and good stock when time is tight.
- Serving Idea: A shallow bowl is better than a plate; the broth deserves room.
7. Red Beans and Rice with Smoked Sausage
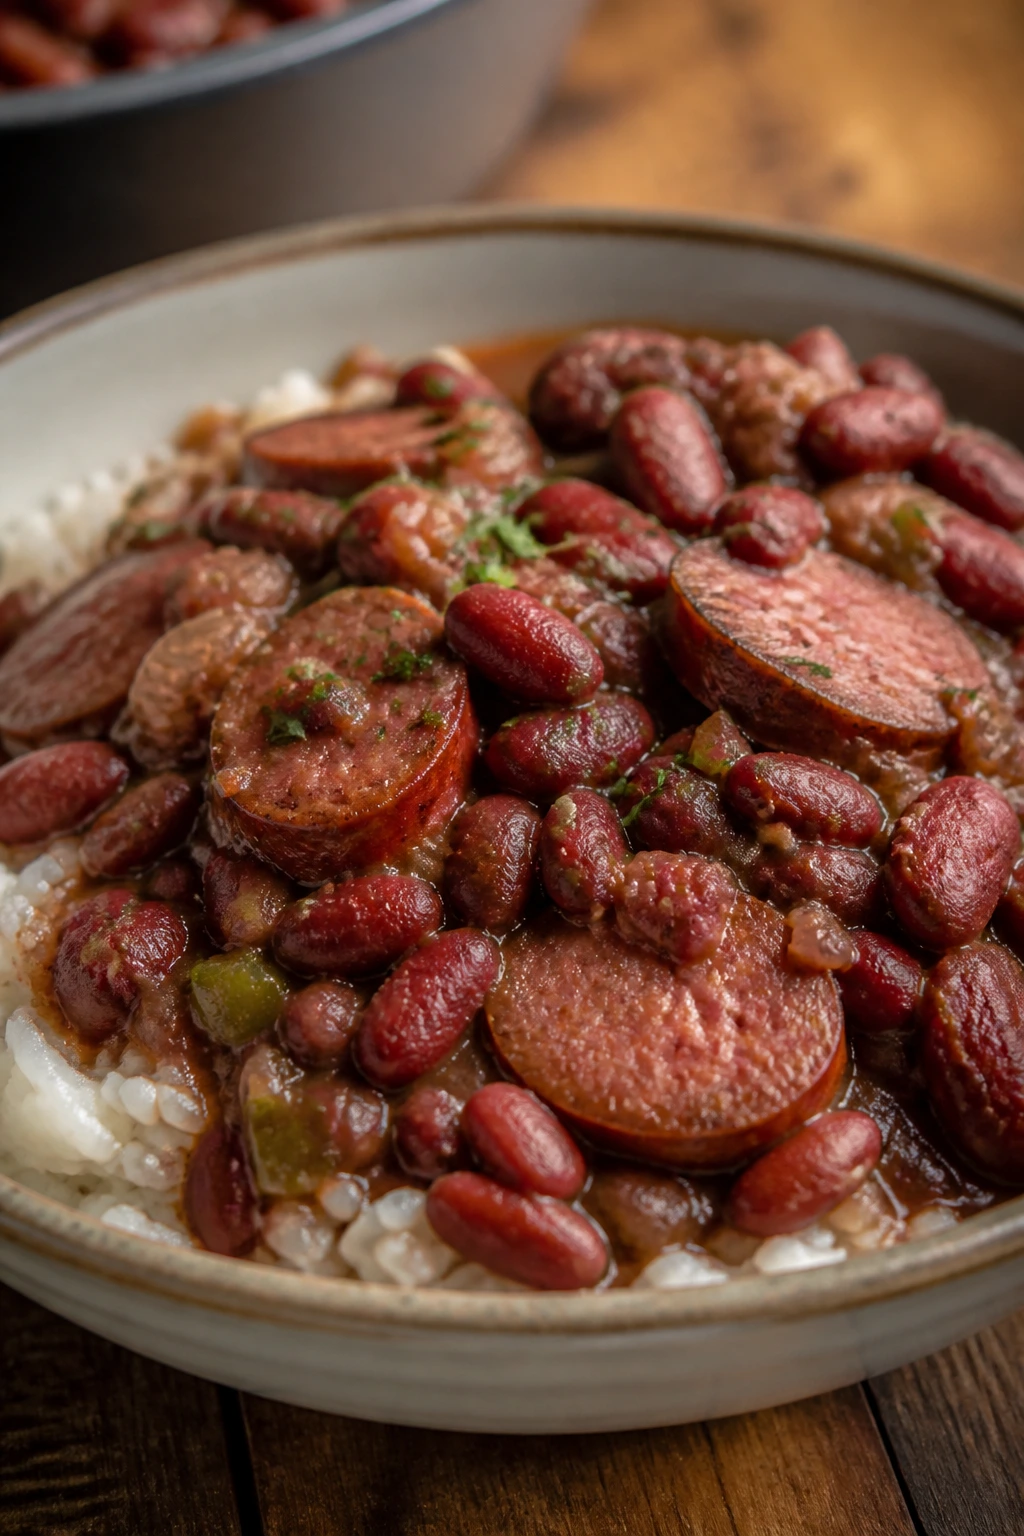
Red beans and rice has a thrift-store honesty to it that I love. It’s humble, filling, and far more satisfying than its ingredients suggest. The beans cook down until creamy, the sausage lends smoke, and the rice underneath soaks up all the seasoned broth without turning mushy.
Why It Works: Dried red beans release starch as they simmer, which thickens the pot naturally without needing cream or extra flour. Smoked sausage and, if you want it, a ham hock, bring the kind of savory depth that canned beans can’t match. A little vinegar at the end wakes the whole pot up and keeps it from tasting dull.
Key Ingredients:
- 1 pound dried red beans — rinse them well and pick out any broken pieces.
- 12 ounces smoked sausage, sliced — andouille or smoked beef sausage both work.
- 1 onion, diced — the first layer of flavor.
- 2 celery ribs, diced — adds that old-school Southern base.
- 1 green bell pepper, diced — gives sweetness and color.
- 3 cloves garlic, minced — stir in after the vegetables soften.
- 1 ham hock, optional — useful if you want a deeper smoky broth.
- 2 bay leaves — help the beans taste fuller.
- 1 teaspoon dried thyme — a small amount is enough.
- 6 cups water or stock — start with enough for a loose simmer.
- 1 tablespoon hot sauce — add more later if you want.
- 2 to 3 cups cooked white rice — for serving.
Quick Steps:
- Soak the beans: Quick-soak them in hot water for 1 hour or soak overnight, then drain.
- Brown the sausage: Cook the sausage in a large pot until it gets some color and releases its fat.
- Cook the vegetables: Add onion, celery, and bell pepper and cook until softened, then stir in garlic.
- Simmer the beans: Add beans, ham hock if using, bay leaves, thyme, water or stock, and hot sauce. Bring to a simmer and cook 1 1/2 to 2 hours until the beans are creamy.
- Mash a few beans: Use the back of a spoon to mash some beans against the pot wall. That’s how you get the creamy texture without turning the whole pot to paste.
- Serve over rice: Pull out the bay leaves, taste for salt, and spoon over hot rice.
Tips and Variations:
- Less Meat: Skip the ham hock and use vegetable stock if you want a lighter pot.
- Better Beans: Old beans stay tough longer; buy a fresh bag if possible.
- Extra Finish: A splash of red wine vinegar at the end brightens the whole dish.
8. Black-Eyed Peas with Ham Hock
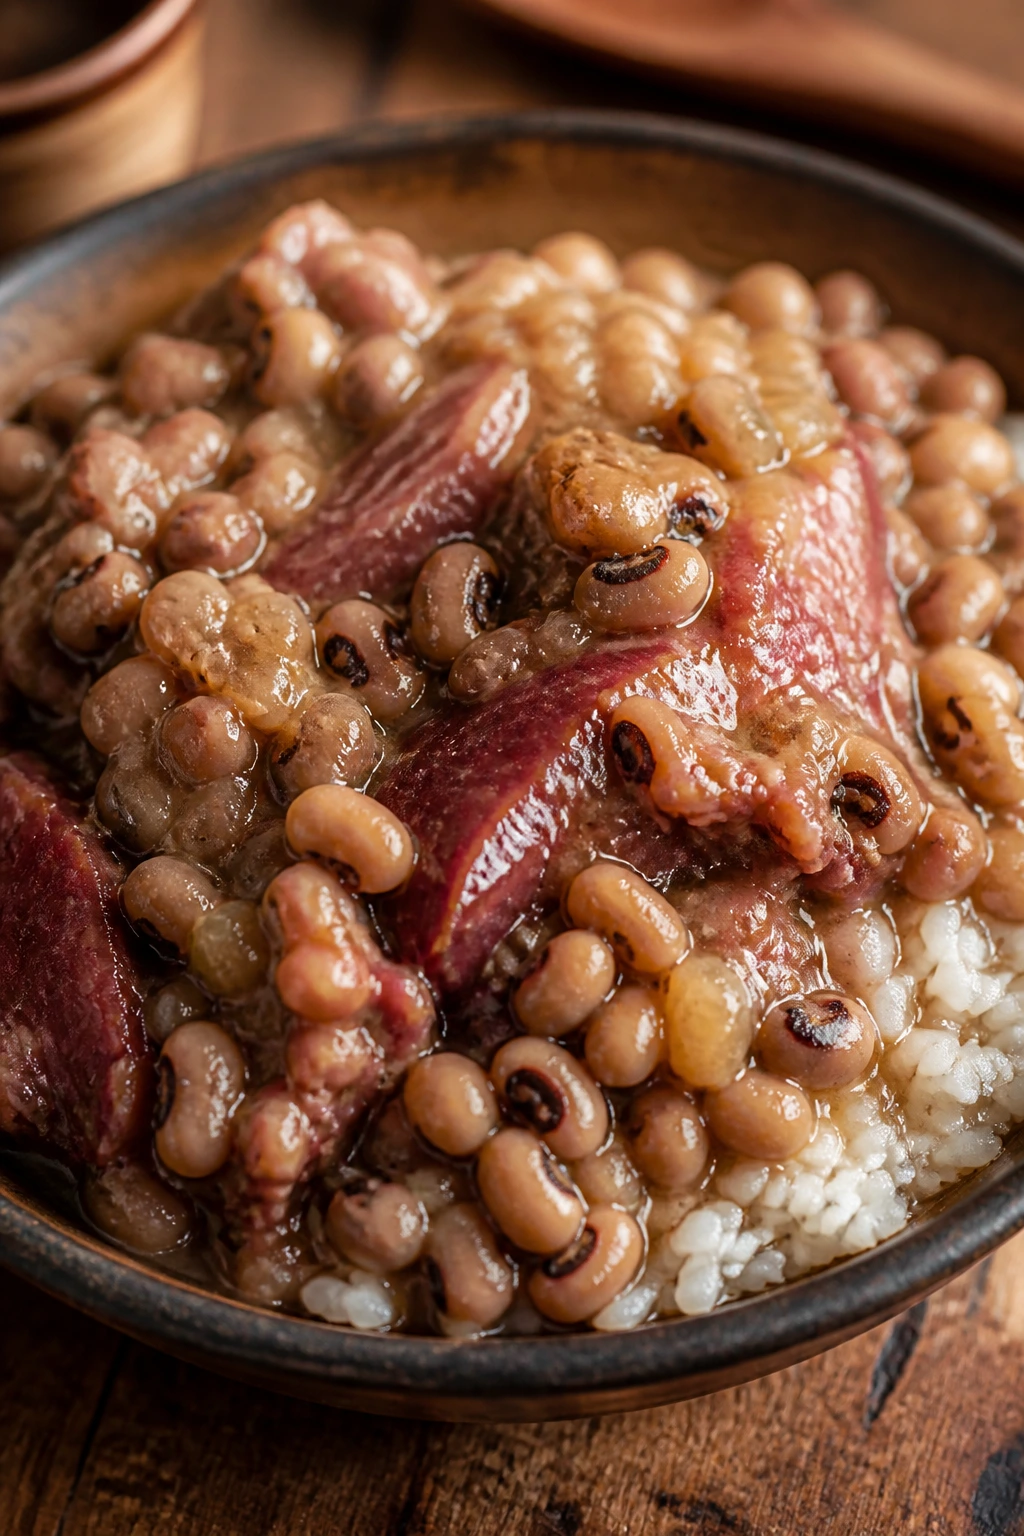
Black-eyed peas deserve more respect than they usually get. They’re creamy, a little earthy, and excellent at carrying smoked meat without turning heavy. With a ham hock in the pot, they become soft enough to spoon over rice but still keep their shape, which is the sweet spot.
Why It Works: The ham hock slowly gives up salt, smoke, and gelatin, and those three things make the peas taste like they cooked longer than the clock says. Black-eyed peas cook faster than many dried beans, so you can get a deep, comforting pot without babysitting it all afternoon. A splash of vinegar at the end keeps the flavor bright and cuts through the richness.
Key Ingredients:
- 1 pound dried black-eyed peas — rinse before cooking.
- 1 ham hock — or smoked turkey if you want less pork.
- 1 onion, chopped — the starting point for the pot.
- 3 cloves garlic, minced — add after the onion softens.
- 2 celery ribs, chopped — adds a quiet savory note.
- 1 teaspoon smoked paprika — gives the broth a warm color.
- 1 bay leaf — small, but worth using.
- 6 cups water or chicken stock — enough to cover the peas well.
- 1 teaspoon kosher salt — hold back a little until the end if your ham hock is salty.
- 1 tablespoon apple cider vinegar — stirs in right before serving.
- 2 cups cooked rice, optional — nice if you want to stretch the dish.
Quick Steps:
- Rinse and sort the peas: Pick out any gravel or damaged peas, then rinse under cool water.
- Build the base: Put the ham hock, onion, celery, garlic, paprika, bay leaf, and water or stock in a pot and bring it to a gentle simmer.
- Add the peas: Stir in the black-eyed peas and cook uncovered for 45 to 60 minutes until tender.
- Watch the liquid: Add a splash of water if the pot starts looking dry before the peas are soft.
- Season late: Taste for salt near the end; ham hocks can do a lot of the seasoning themselves.
- Finish with vinegar: Stir in the vinegar and serve hot, plain or over rice.
Tips and Variations:
- Greens on the Side: Collards or mustard greens make an easy companion.
- Creamier Pot: Mash a small portion of peas with a spoon for a thicker broth.
- No Ham Hock? Smoked turkey wings bring a cleaner smoke and still taste right.
9. Baked Chicken and Rice
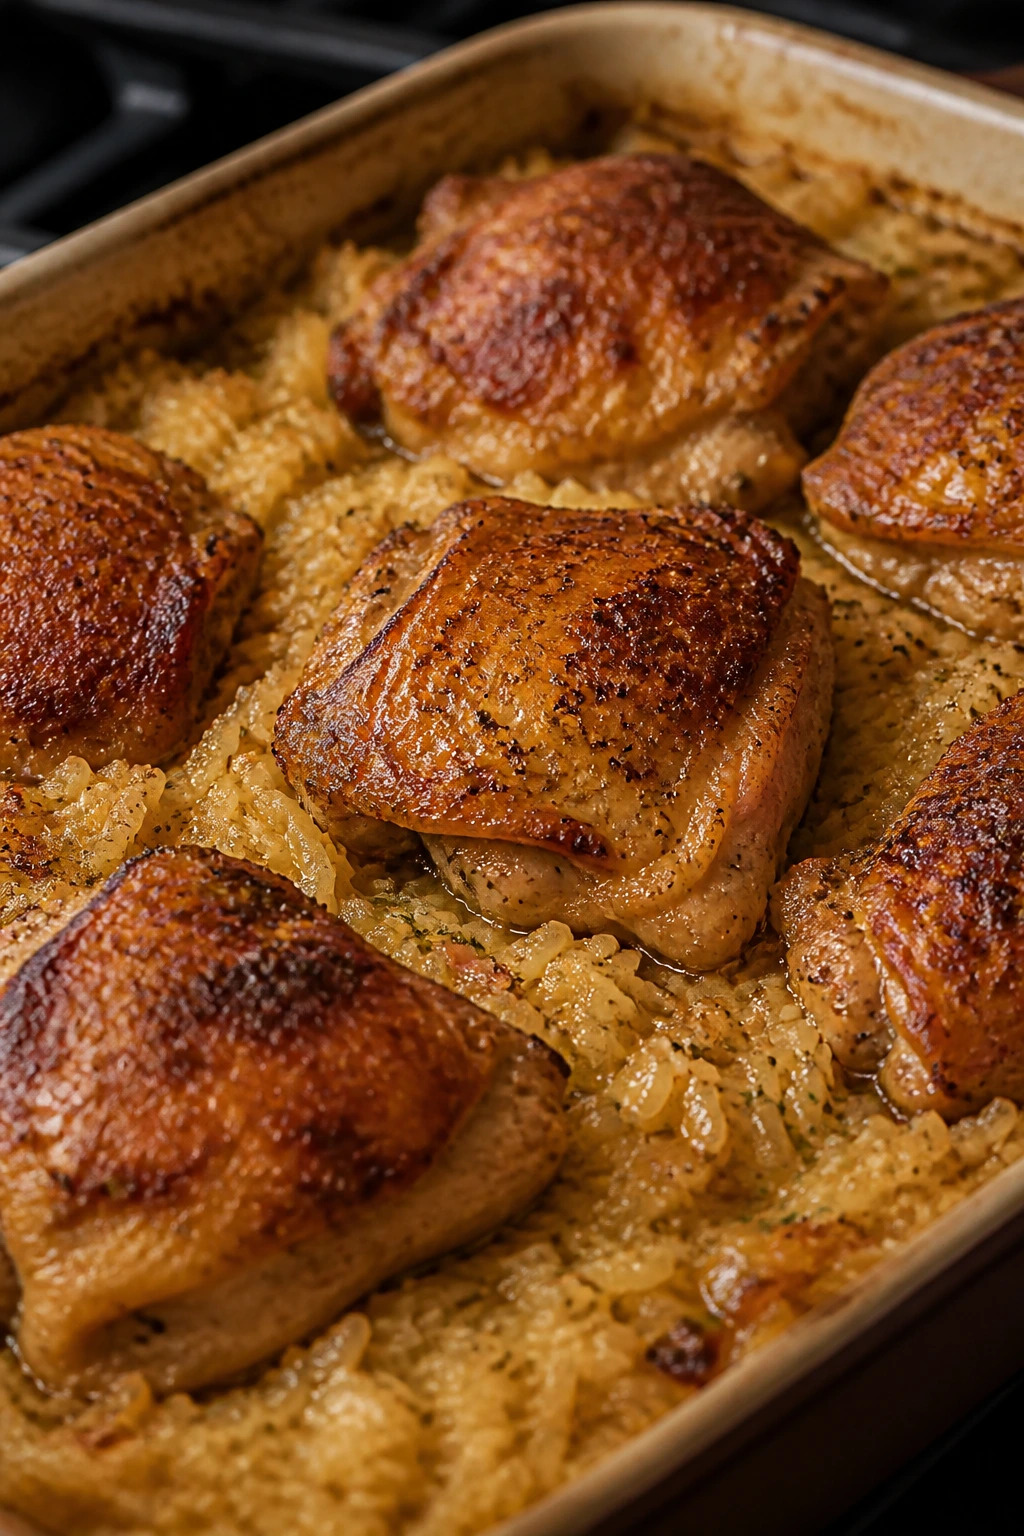
Baked chicken and rice is the dinner I make when I want the oven to do the heavy lifting. The rice absorbs broth and drippings as it cooks, the chicken browns on top, and the bottom layer turns tender without collapsing into mush. It’s a one-pan supper with enough character to sit at the Sunday table.
Why It Works: Bone-in chicken thighs release fat and flavor into the rice below, which is why this dish tastes better than plain chicken plus plain rice. Starting with a quick sear gives the skin more color, and baking the pan covered keeps the rice from drying out. Uncovering it near the end lets the top get a little crisp, which is the part people usually fight over.
Key Ingredients:
- 2 pounds bone-in, skin-on chicken thighs — the best cut for this style.
- 1 1/2 cups long-grain white rice — rinse it so it stays separate.
- 1 large onion, diced — softens into the rice.
- 3 cloves garlic, minced — stir into the onion.
- 3 cups chicken broth — the rice needs enough liquid to cook through.
- 2 tablespoons butter — adds body and taste.
- 1 teaspoon paprika — gives the chicken a little color.
- 1 teaspoon dried thyme — a steady, familiar herb.
- 1 teaspoon kosher salt — season the rice base.
- 1/2 teaspoon black pepper — keeps the dish from going flat.
- 1 cup frozen peas, optional — good if you want a little green in the pan.
Quick Steps:
- Sear the chicken: Brown the thighs skin-side down in a skillet for 4 to 5 minutes until the skin starts to crisp.
- Cook the onion and garlic: In the same pan or a baking dish, soften the onion in butter and stir in the garlic.
- Add the rice: Stir in the rinsed rice, thyme, paprika, salt, and pepper so the grains get coated in the fat.
- Pour in the broth: Add the broth and peas if using, then nestle the chicken on top, skin-side up.
- Bake covered: Cover tightly and bake at 375°F for 35 minutes.
- Uncover and finish: Remove the lid and bake 10 to 15 minutes more until the chicken reaches 165°F and the rice is tender but not wet.
Tips and Variations:
- Rinse the Rice: This keeps the final texture fluffy instead of sticky.
- Extra Flavor: A few strips of bell pepper cook nicely with the onion.
- Good Leftover Dish: The rice reheats well with a spoonful of broth.
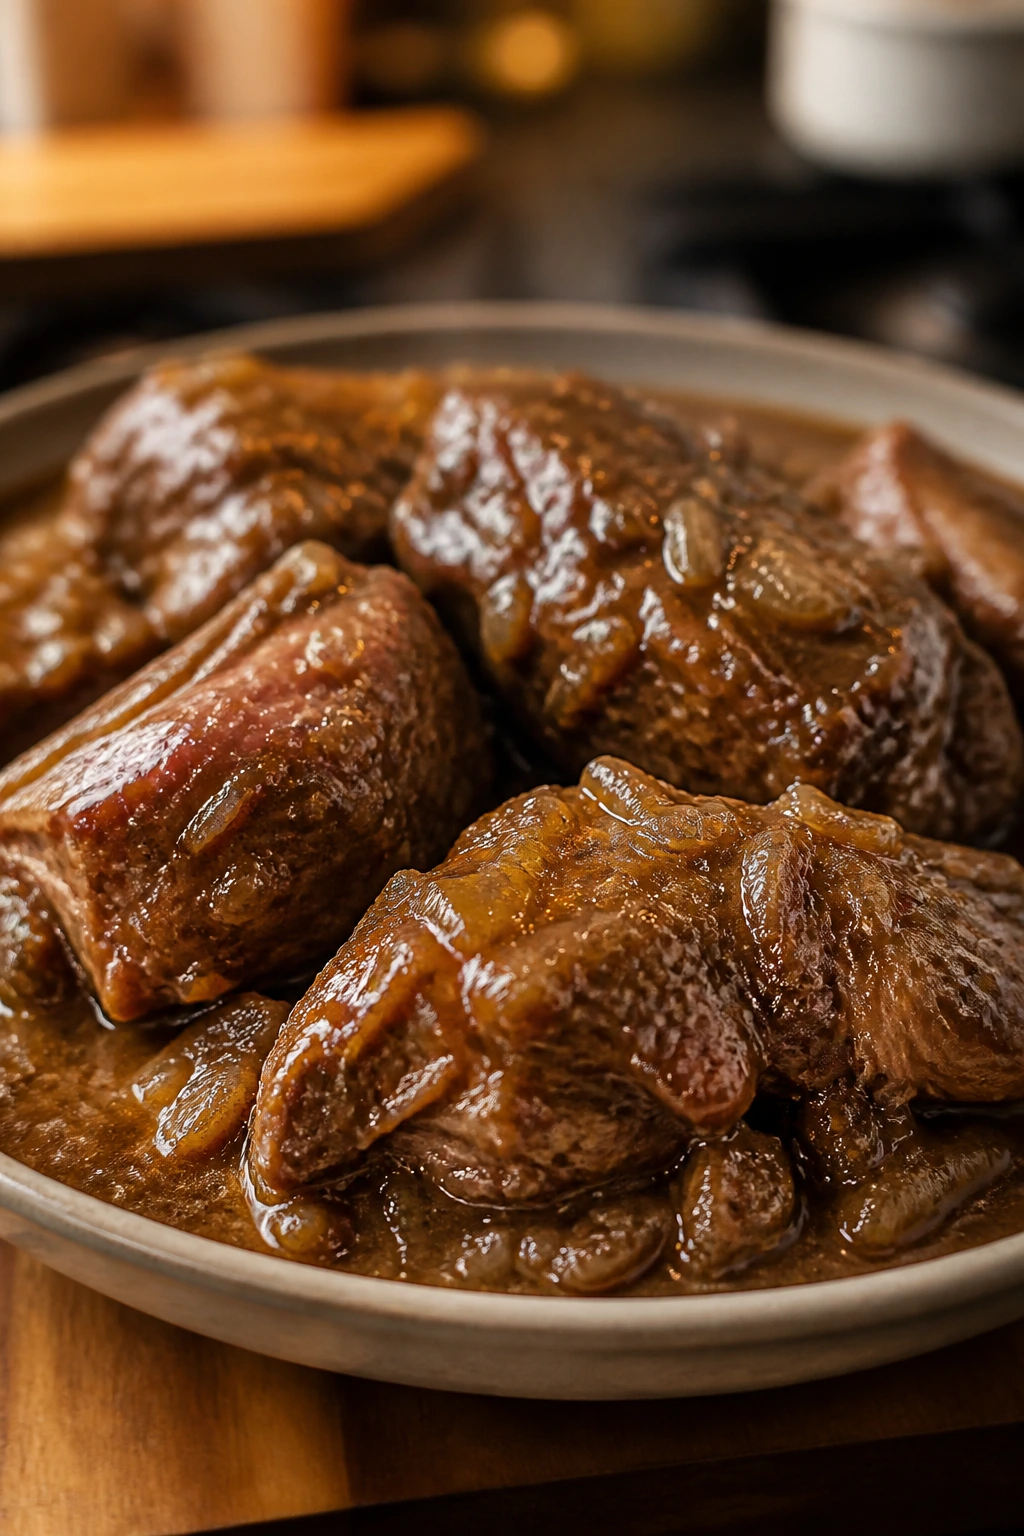
10. Country-Style Ribs with Pan Gravy
Country-style ribs are one of those cuts that feel more expensive after they’ve spent two hours in the oven. They’re meaty, forgiving, and made for brown gravy. Once the onions soften and the drippings loosen up, you get a sauce that wants mashed potatoes nearby.
Why It Works: These ribs have enough fat and connective tissue to stay juicy during a long braise, which makes them better suited to Sunday cooking than a quick sear. Browning first builds flavor on the surface, then the covered oven time turns the meat tender without drying it out. A little vinegar in the gravy keeps the richness from feeling heavy.
Key Ingredients:
- 3 pounds country-style pork ribs — bone-in if you can get them.
- 2 teaspoons kosher salt — season before browning.
- 1 teaspoon black pepper — keeps the sauce lively.
- 1 teaspoon garlic powder — a strong base note.
- 1 teaspoon onion powder — helps the seasoning blend.
- 2 tablespoons all-purpose flour — for the gravy.
- 2 tablespoons oil — for searing.
- 1 large onion, sliced — the sauce’s backbone.
- 3 cups chicken broth — enough liquid for a braise.
- 1 tablespoon Worcestershire sauce — adds a dark, savory note.
- 1 teaspoon apple cider vinegar — cuts the richness.
- 1 tablespoon butter — to finish the gravy.
Quick Steps:
- Season the ribs: Pat them dry and coat them with salt, pepper, garlic powder, and onion powder.
- Brown well: Sear the ribs in hot oil until the outside is deeply colored, about 3 to 4 minutes per side.
- Soften the onion: Add the sliced onion and cook until translucent and lightly browned.
- Make the gravy: Sprinkle in flour, cook for 1 minute, then whisk in the broth, Worcestershire, and vinegar.
- Braise slowly: Return the ribs to the pan, cover, and bake at 300°F for 2 1/2 hours until the meat is pull-apart tender.
- Finish with butter: Stir in butter at the end and spoon the gravy over potatoes or rice.
Tips and Variations:
- If the sauce breaks: Whisk in a splash of broth and keep the heat low.
- Spice It Up: A pinch of cayenne works if you want a little heat.
- Best Pairing: Mac and cheese or collard greens round this out fast.
11. Southern Meatloaf with Brown Sugar Glaze
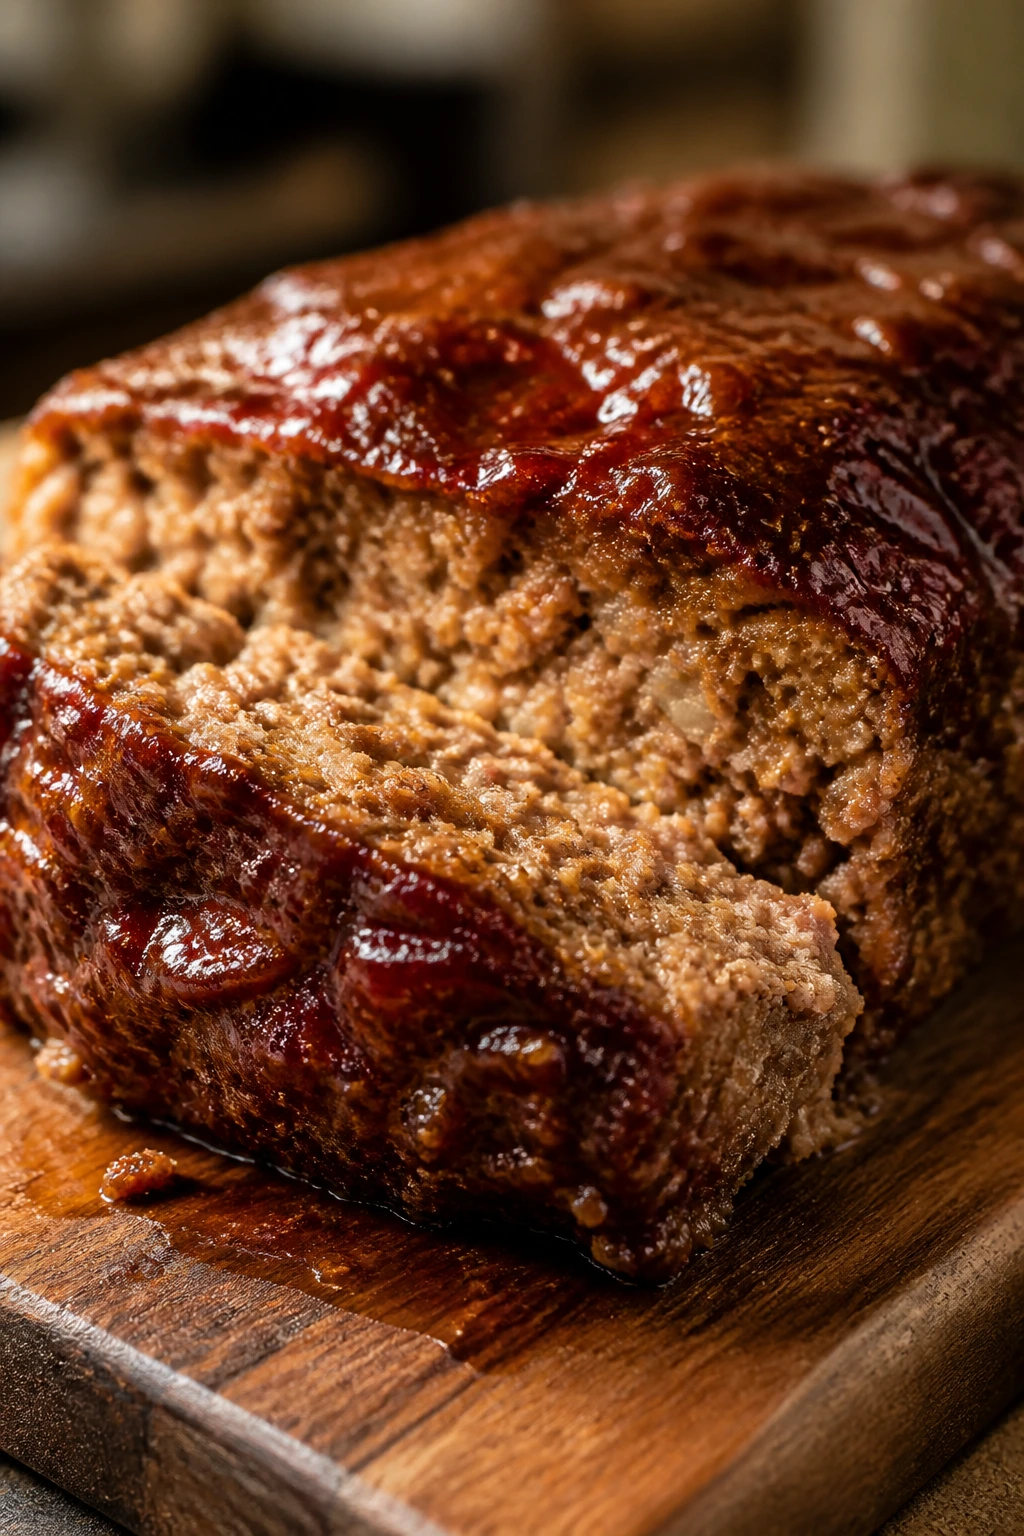
Meatloaf gets dismissed too easily. A good one is tender, seasoned all the way through, and glazed so the top turns sticky and dark around the edges. This version leans Southern: onion, Worcestershire, a soft crumb, and a sweet-savory glaze that makes each slice hold together cleanly.
Why It Works: Meatloaf needs fat and restraint. Too lean, and it turns dry; too much handling, and it turns dense. Using a mix of ground beef and a little pork gives you flavor and moisture, while the glaze caramelizes in the oven and helps the top stay soft instead of crusty.
Key Ingredients:
- 2 pounds ground beef, preferably 80/20 — you need some fat for tenderness.
- 1/2 pound ground pork, optional — adds richness if you have it.
- 1 cup breadcrumbs or crushed saltine crackers — helps the loaf hold shape.
- 1 small onion, finely diced — cooks into the meat.
- 2 eggs — bind the mixture.
- 1/2 cup milk — keeps the loaf from drying out.
- 2 tablespoons Worcestershire sauce — gives the meat a deeper taste.
- 1 tablespoon yellow mustard — quiet tang in the background.
- 1 teaspoon kosher salt — season the loaf fully.
- 1 teaspoon black pepper — enough to balance the glaze.
- 1 cup ketchup — the base of the glaze.
- 2 tablespoons brown sugar — helps the top caramelize.
- 1 teaspoon apple cider vinegar — keeps the glaze from tasting flat.
Quick Steps:
- Mix gently: Combine the beef, pork if using, breadcrumbs, onion, eggs, milk, Worcestershire, mustard, salt, and pepper until just mixed. Stop as soon as it looks combined.
- Shape the loaf: Put it in a loaf pan or form it freehand on a lined sheet pan.
- Stir the glaze: Mix ketchup, brown sugar, and vinegar in a bowl.
- Bake partway: Cook at 350°F for 35 minutes.
- Glaze and finish: Spread the glaze over the top and bake 20 to 25 minutes more until the center reaches 160°F.
- Rest before slicing: Let it sit for 10 minutes so the juices settle.
Tips and Variations:
- Better Texture: Crushed saltines make a softer loaf than plain dry breadcrumbs.
- Extra Southern Note: A tablespoon of finely minced celery adds a classic flavor.
- Serving Idea: Mashed potatoes and green beans make the plate feel complete.
12. Catfish with Hush Puppies
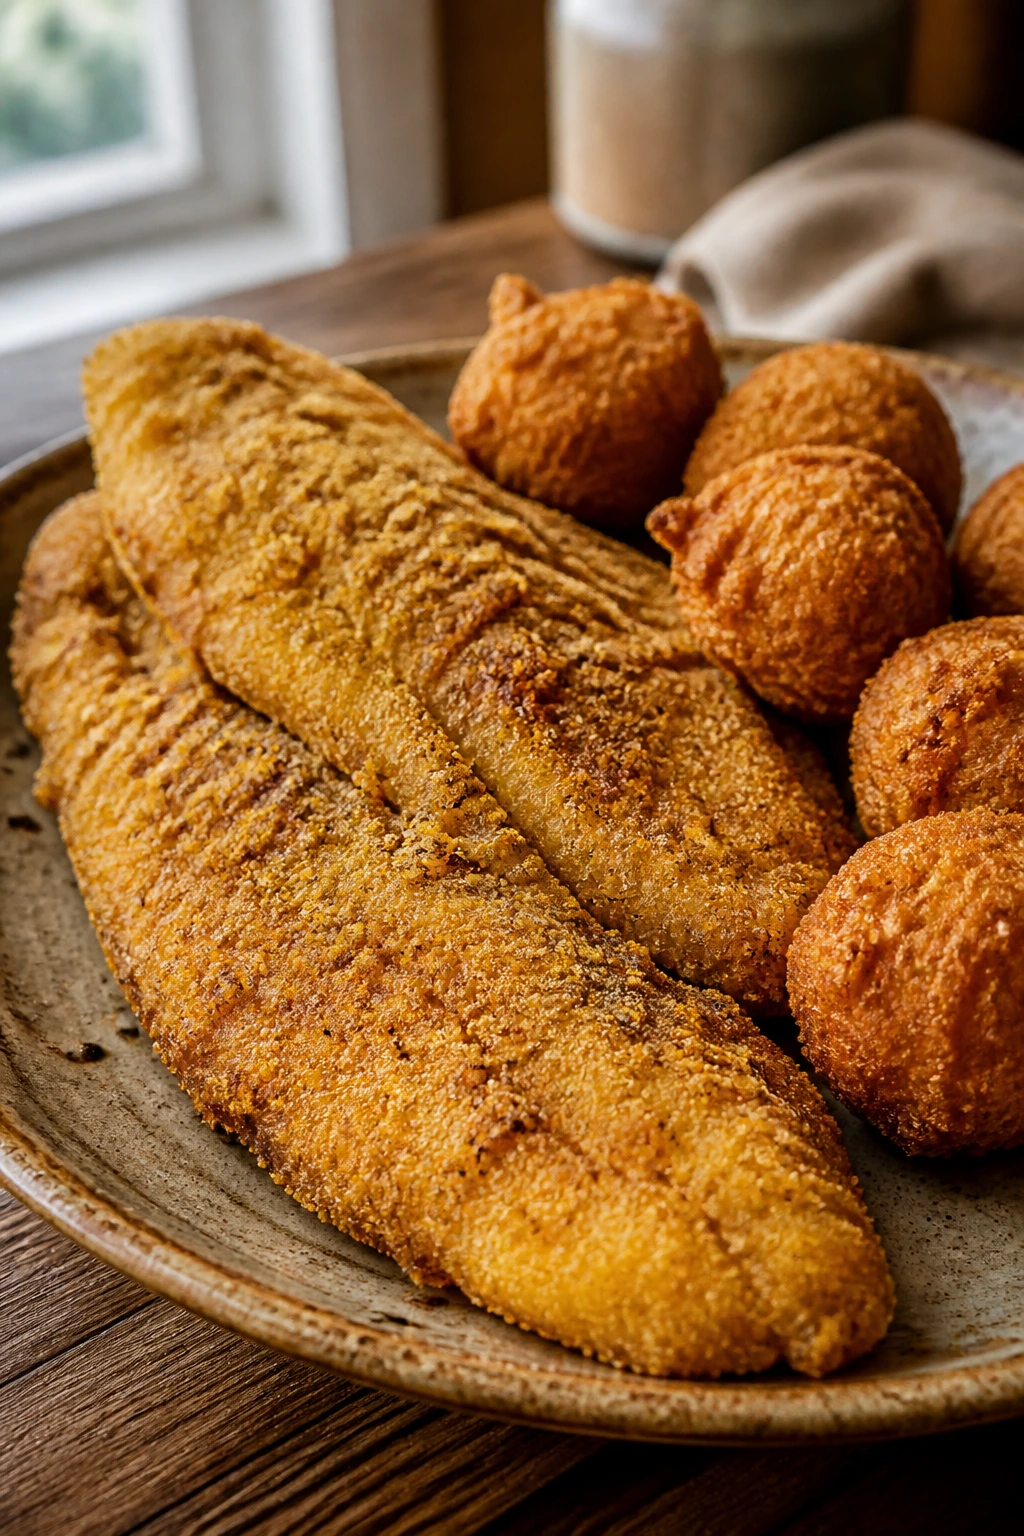
Catfish fry night has a sound all its own. The oil hisses, the coating turns sandy-golden, and the hush puppies come out with crisp shells and tender centers that beg for butter. Catfish is one of those dinners that feels casual and special at once, which is a rare trick.
Why It Works: Catfish has a mild flavor and a soft texture, so it takes seasoning beautifully without needing a long marinade. A cornmeal-heavy coating gives the fish the right crunch, and frying at 350°F keeps the crust crisp before the fish overcooks. Hush puppies use the same flavor family, which is why they belong on the same plate.
Key Ingredients:
- 2 pounds catfish fillets — pat them dry before breading.
- 1 teaspoon kosher salt — season the fish well.
- 1/2 teaspoon black pepper — enough to sharpen the flavor.
- 1 cup cornmeal — the main crust for the fish.
- 1/2 cup all-purpose flour — helps the coating stick.
- 1/2 teaspoon cayenne, optional — for a little heat.
- 1 cup buttermilk — helps the coating cling.
- 1 tablespoon hot sauce — optional, but nice.
- 2 quarts vegetable oil — for frying.
- 1 cup cornmeal, for the hush puppies — gives them texture.
- 1/2 cup flour, for the hush puppies — keeps the batter light enough.
- 1 small onion, finely minced — gives the hush puppies bite.
- 1 egg — binds the hush puppy batter.
- 1/2 cup buttermilk — enough to make a thick batter.
- 1 teaspoon baking powder — gives the hush puppies lift.
Quick Steps:
- Mix the fish coating: Stir cornmeal, flour, salt, pepper, and cayenne in a shallow bowl.
- Dip the fillets: Coat the fish in buttermilk, then press into the cornmeal mixture.
- Make the hush puppy batter: Combine cornmeal, flour, onion, egg, buttermilk, baking powder, and a little salt until thick.
- Fry the fish: Cook the fillets in 350°F oil for 3 to 4 minutes per side until golden and flaky.
- Fry the hush puppies: Drop spoonfuls of batter into the same oil and fry until deep golden, about 2 to 3 minutes.
- Drain and serve: Move everything to a rack and serve with lemon wedges and hot sauce.
Tips and Variations:
- Use a Thermometer: Fish is done at 145°F, and guessing usually means overcooking.
- Crisper Crust: Let the coated fish rest 10 minutes before frying.
- Best Side: Coleslaw cuts the richness nicely.
13. Smothered Turkey Necks
Smothered turkey necks are proof that a tough cut can turn into something luxurious if you give it enough time. The meat gets soft, the gravy goes dark and rich, and the bones lend the sauce a depth you don’t get from boneless cuts. This is the kind of recipe people remember after the plates are cleared.
Why It Works: Turkey necks have connective tissue that breaks down into tenderness during a long simmer, and they carry gravy beautifully because there’s so much shape and surface area. Browning them before the braise adds a roasted flavor that keeps the pot from tasting flat. The onion, garlic, and bell pepper trio gives the gravy its Southern backbone.
Key Ingredients:
- 3 pounds turkey necks — split pieces cook more evenly.
- 2 teaspoons kosher salt — season before browning.
- 1 teaspoon black pepper — gives the gravy a sharp edge.
- 1 teaspoon onion powder — helps the seasoning settle in.
- 1/2 cup all-purpose flour — for the gravy and a light dredge.
- 2 tablespoons oil — for browning.
- 1 large onion, sliced — softens into the sauce.
- 1 green bell pepper, sliced — optional, but classic.
- 3 cloves garlic, minced — add after the vegetables soften.
- 3 cups chicken stock — the braising liquid.
- 1 tablespoon Worcestershire sauce — deepens the taste.
- 1 teaspoon dried thyme — brings the gravy together.
- 1 tablespoon butter — for the finish.
Quick Steps:
- Season and dredge: Pat the necks dry, season them, and dust lightly with flour.
- Brown the necks: Sear them in hot oil until golden on the outside.
- Cook the vegetables: Add onion and bell pepper to the pan and cook until soft.
- Make the gravy: Stir in garlic and a little flour if needed, then whisk in the stock, Worcestershire, and thyme.
- Braise low and slow: Return the necks to the pan, cover, and bake at 325°F for 2 to 2 1/2 hours until tender.
- Finish with butter: Stir in butter and serve the necks with rice or mashed potatoes.
Tips and Variations:
- Thin Gravy Fix: Uncover for the last 20 minutes if the sauce needs to tighten.
- Heat Option: A pinch of red pepper flakes gives the gravy more lift.
- Serving Move: White rice catches the sauce better than anything else.
14. Collard Greens with Smoked Turkey
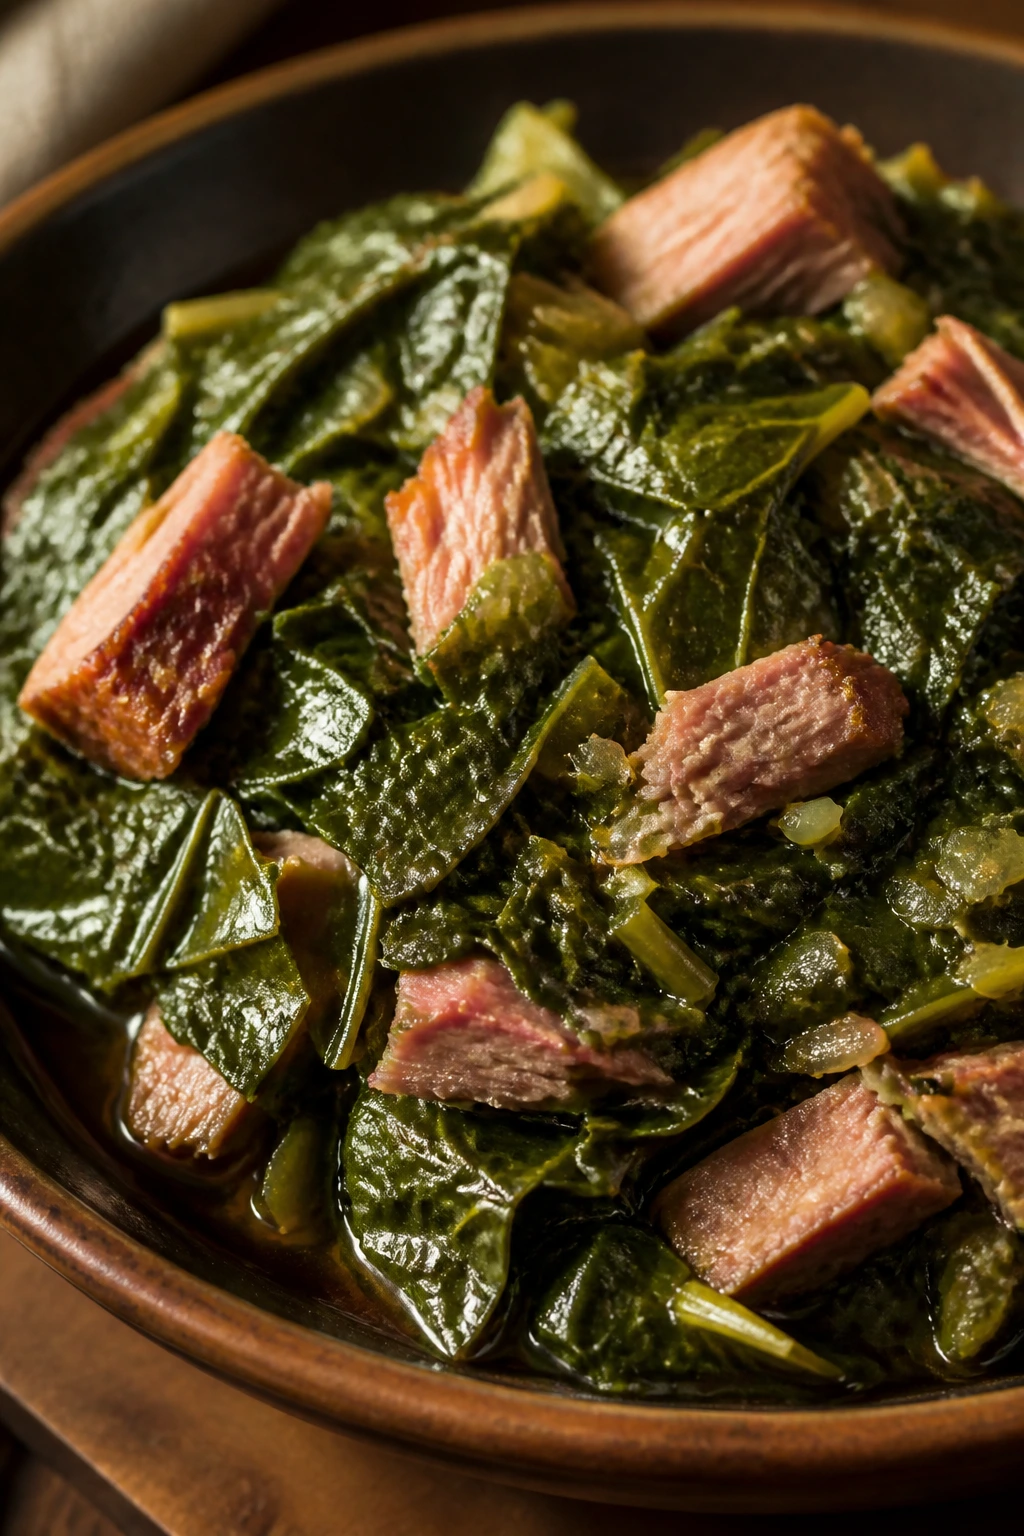
Collard greens are about patience, not speed. They start out tough, a little bitter, and very unexciting. Then the smoked turkey goes in, the pot liquor turns silky, and the greens turn into something worth putting at the center of the plate with cornbread on the side.
Why It Works: Collards need long, moist heat to soften, and smoked turkey adds enough salt and smoke to make the liquid taste like a proper broth. A splash of vinegar at the end does more than brighten the greens — it keeps them from tasting murky or overcooked. I also like a little hot sauce in the pot or at the table, because greens like a little edge.
Key Ingredients:
- 2 bunches collard greens — washed well and chopped.
- 2 smoked turkey wings or 1 pound turkey drumsticks — the main seasoning meat.
- 1 large onion, chopped — starts the pot.
- 4 cloves garlic, minced — add after the onion softens.
- 6 cups water or chicken stock — enough to simmer the greens.
- 1 teaspoon red pepper flakes — optional heat.
- 1 teaspoon kosher salt — add cautiously if the turkey is salty.
- 1/2 teaspoon black pepper — helps the broth feel finished.
- 2 tablespoons apple cider vinegar — balances the bitterness.
- Hot sauce, optional — for serving.
Quick Steps:
- Wash the greens well: Swish them in several changes of cold water to get rid of grit.
- Start the stock: Put the turkey, onion, garlic, water or stock, red pepper flakes, salt, and pepper in a pot and simmer for 45 minutes.
- Add the greens in batches: Stir in the collards a handful at a time, letting each batch wilt before adding more.
- Cook until tender: Keep the pot at a low simmer for 1 to 1 1/2 hours until the greens are soft and silky.
- Adjust the seasoning: Taste the broth, add vinegar, and add more salt only if it needs it.
- Serve with pot liquor: Ladle some of the cooking liquid into each bowl. That’s part of the dish.
Tips and Variations:
- Less Bitter: A small pinch of sugar can soften the edge if your greens are especially strong.
- Swap the Meat: Smoked ham hocks or neck bones work too.
- Best Pairing: Cornbread is non-negotiable in my kitchen.
15. Baked Macaroni and Cheese

A real baked mac and cheese should cut in thick squares, not ooze across the plate like soup. The top gets browned and a little firm, the inside stays creamy, and the cheese tastes sharp enough to stand up to everything else on the table. On a Sunday spread, this is the dish people refill before they finish the first serving.
Why It Works: A quick roux-based sauce gives you control over the texture, and a mix of cheddar plus a milder melting cheese keeps the casserole from turning greasy. Eggs help the custard set so the bake slices cleanly. Baking it uncovered near the end builds the browned top people argue over.
Key Ingredients:
- 1 pound elbow macaroni — classic shape, reliable texture.
- 4 tablespoons butter — for the roux.
- 4 tablespoons all-purpose flour — thickens the sauce.
- 3 cups whole milk — the main liquid.
- 1 can evaporated milk, 12 ounces — adds body.
- 2 large eggs, lightly beaten — helps the casserole set.
- 4 cups sharp cheddar, shredded — the main cheese flavor.
- 2 cups Colby Jack or Monterey Jack, shredded — helps the sauce melt smoothly.
- 1 teaspoon dry mustard — brings the cheese flavor forward.
- 1 teaspoon paprika — adds color.
- 1 teaspoon kosher salt — taste carefully because cheese already brings salt.
- 1/2 teaspoon black pepper — balances the richness.
Quick Steps:
- Cook the pasta: Boil the macaroni in salted water until just shy of al dente, then drain.
- Make the sauce: Melt butter, whisk in flour, and cook for 1 minute before slowly whisking in the milk and evaporated milk.
- Add the cheese: Lower the heat, stir in the cheddar and Jack until smooth, then whisk in the mustard, paprika, salt, and pepper.
- Temper the eggs: Stir a little of the hot sauce into the beaten eggs, then return that mixture to the pot so it doesn’t scramble.
- Combine and bake: Fold the pasta into the cheese sauce, pour into a buttered baking dish, and bake at 350°F for 25 to 30 minutes until bubbling.
- Rest before serving: Let it stand for 10 minutes so it slices neatly.
Tips and Variations:
- Use Block Cheese: Pre-shredded cheese can make the sauce grainy.
- Extra Crunch: A buttered cracker topping is fine if you like a little contrast.
- Reheat Well: Add a splash of milk before warming leftovers.
Why Slow, Steady Cooking Makes Sunday Supper Taste Better
Soul food dinners for Sunday suppers lean on one simple idea: heat changes humble ingredients into something bigger than they were before. That usually means browning first, then braising, simmering, baking, or frying with enough control that the food has time to settle into itself. A cast-iron skillet, Dutch oven, and sturdy roasting pan can carry a lot of the work here.
A rushed pot of gravy tastes thin. A rushed pan of greens tastes sharp and underdeveloped. A rushed chicken breast tastes like regret. That sounds harsh, but it’s true. The recipes in this collection do their best work when the cook stays near the stove, listens for the sizzle, and pays attention to the little changes: onions turning translucent, stock going glossy, edges darkening at the right speed.
Frying needs its own kind of discipline. Oil that’s too cool gives you greasy crust. Oil that’s too hot burns the outside before the inside catches up. Between those two extremes is the sweet spot where chicken, fish, and hush puppies come out crisp instead of heavy. A thermometer helps, and so does a little patience between batches.
Essential Equipment for These Recipes

- Cast-iron skillet: Ideal for smothered chicken, pork chops, and any recipe that starts with a hard sear.
- Dutch oven or heavy pot: Best for beans, collards, oxtails, and braises that need long, even heat.
- Large baking dish or roasting pan: Useful for baked chicken, mac and cheese, and any casserole with a browned top.
- Instant-read thermometer: The easiest way to keep fried chicken and pork chops juicy without guessing.
- Wire rack: Helps fried chicken, fish, and hush puppies stay crisp after cooking.
- Tongs: Makes turning chicken, ribs, and fish easier without tearing the crust.
- Whisk: Handy for smooth gravies and cheese sauces.
- Colander: Useful for rinsing greens, beans, and pasta.
- Ladle: Makes serving gravy-heavy dishes less messy.
- Sharp knife and cutting board: Onion, celery, bell pepper, and greens all move faster when the knife is in shape.
Smart Shopping and Ingredient Tips
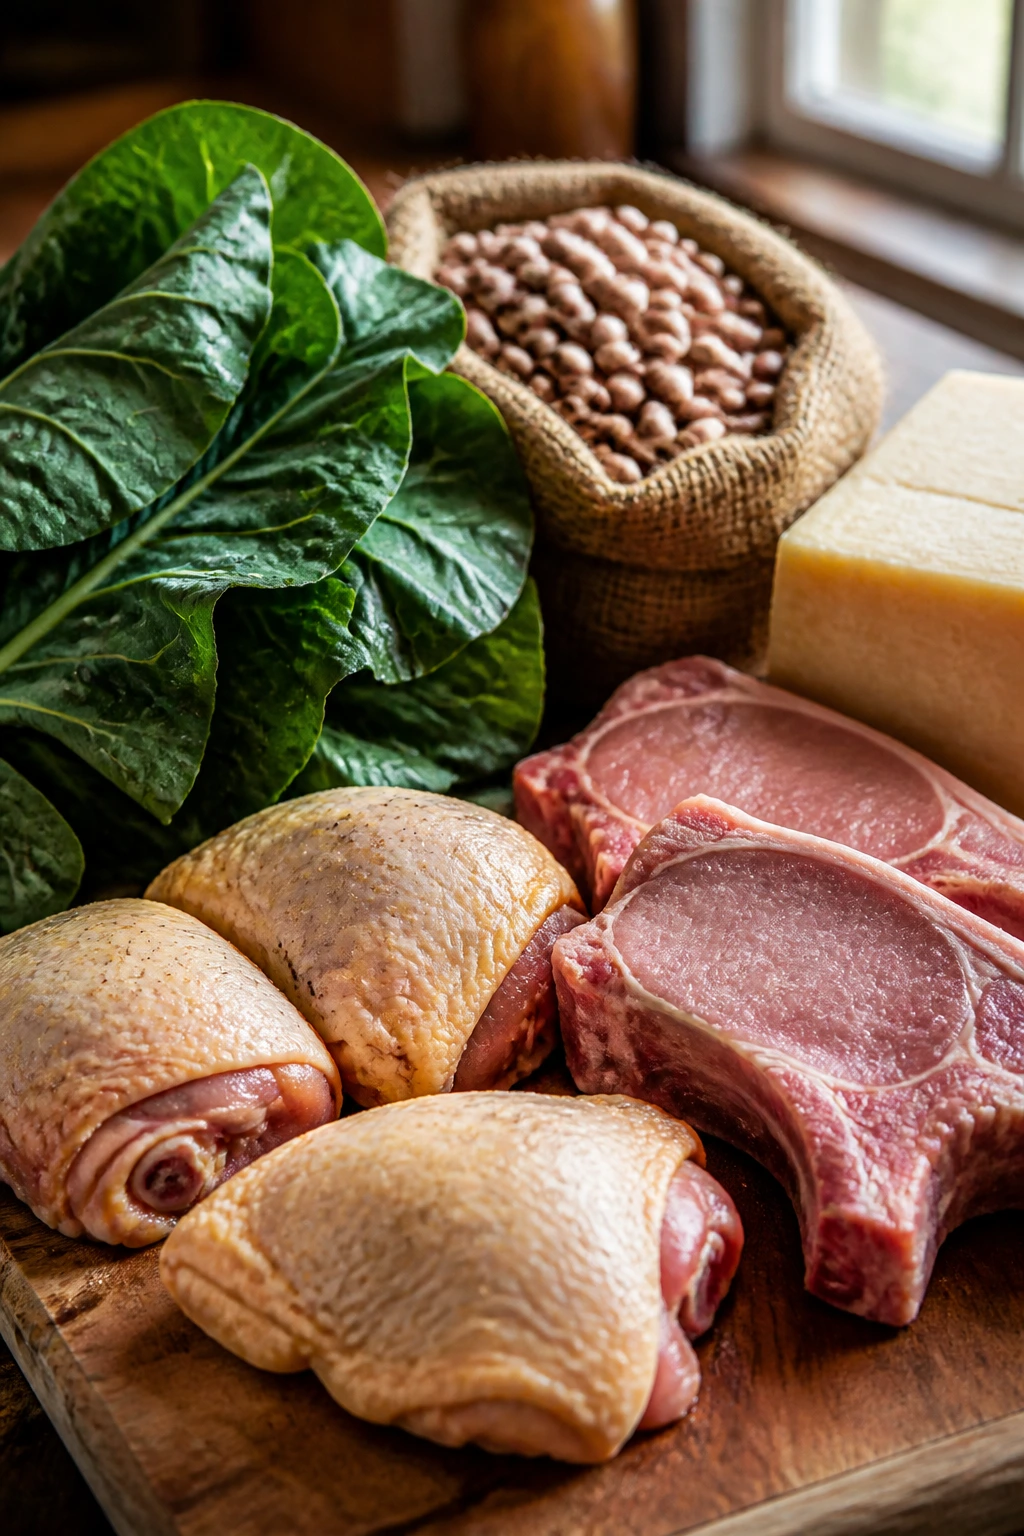
Bone-in meat is usually the better buy for this kind of cooking. Chicken thighs, turkey wings, pork chops with the bone in, and oxtails all bring more flavor to the pot than boneless cuts, and they stay tender through long cooking. If you see chicken breast in a braise recipe, pause. It can work, but it rarely gives the same payoff.
For greens and beans, freshness matters more than brand names. Buy collards with firm stems and deep green leaves, not limp bunches with yellow edges. Dried beans should look clean and intact, not chalky or split. If a bag has a lot of broken pieces, the beans will cook unevenly and turn mushy before the center gets tender.
Cheese is worth a little extra attention. For mac and cheese, buy blocks and grate them yourself. Pre-shredded cheese often carries anti-caking powder, which can make the sauce grainy. The same goes for broth: a decent stock makes gravy taste fuller, while weak stock leaves you trying to fix flavor with more salt. That never helps much.
How to Serve These Recipes
Presentation: Spoon gravy-heavy dishes into shallow bowls so the sauce spreads instead of pooling awkwardly. Fried chicken and fish look best on a platter with a little space between pieces, while mac and cheese, beans, and collards do well in wide serving dishes that show the texture on top.
Accompaniments: Buttermilk biscuits, cornbread, white rice, mashed potatoes, sweet tea slaw, and simple green beans fit almost everything here. If you want one no-fuss plate, pair a braise with rice, a green vegetable, and a piece of cornbread. That’s the classic move for a reason.
Portions: Most of these recipes serve 4 to 6 people generously, though bean pots and casseroles can stretch farther if you add rice or bread. For a Sunday table with lots of sides, plan smaller portions and let people go back for seconds. They will.
Beverage Pairing: Sweet tea is the obvious answer, and it still works. I also like iced lemonade, unsweet iced tea with lemon, or ginger beer for richer dishes like oxtails and ribs. Greasy food and something cold with a little bite always make a better pair than people expect.
Flavor Boosters That Fit the Whole Spread
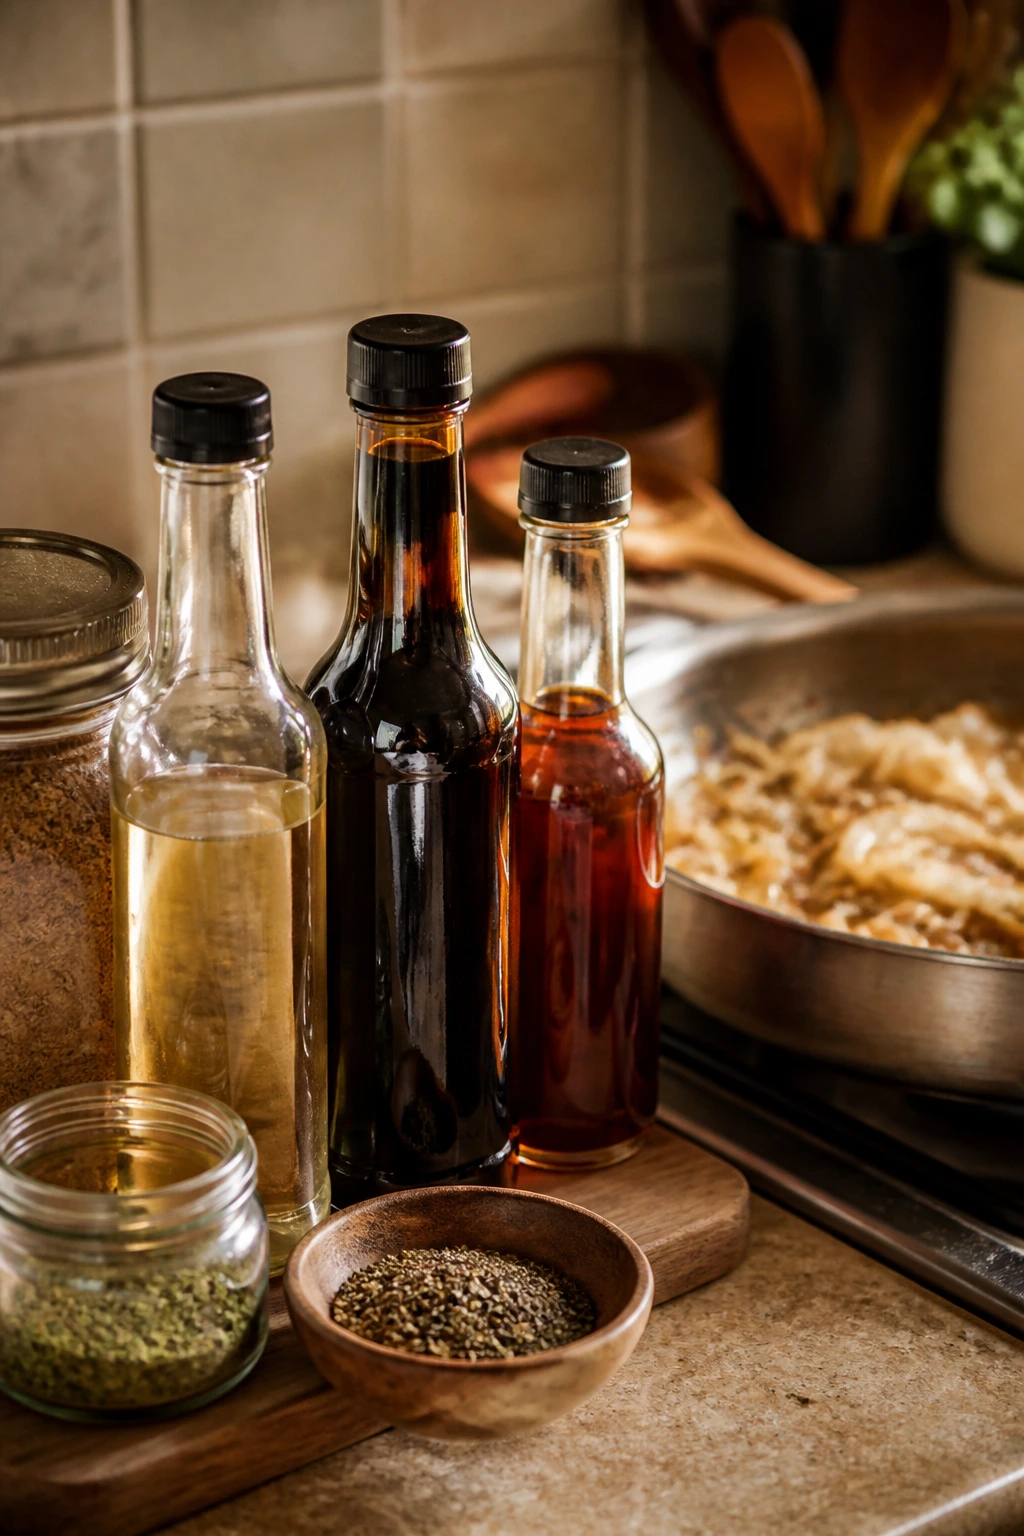
Flavor Enhancement: A small splash of apple cider vinegar at the end of greens, beans, or braises wakes up the pot without making it sour. For gravies, a teaspoon of Worcestershire or browning sauce adds depth fast.
Customization: If your table likes more heat, keep hot sauce nearby and add cayenne to the flour for fried chicken or fish. If you want a gentler version, lean on black pepper, thyme, and paprika instead of chili heat.
Serving Suggestions: Fresh parsley, sliced scallions, or a few thin onion rings on top of smothered dishes can make the plate look cared for. A spoon of pan gravy over rice or mashed potatoes does more for the dish than any garnish ever will.
Make-It-Yours: For lighter eating, use smoked turkey instead of ham in greens and peas. For a richer table, add a spoonful of bacon fat to the skillet before the onions go in. For a dairy-free path, use stock, oil, and a good non-dairy butter in the gravy-based recipes.
Make-Ahead, Storage, and Reheating Guidance
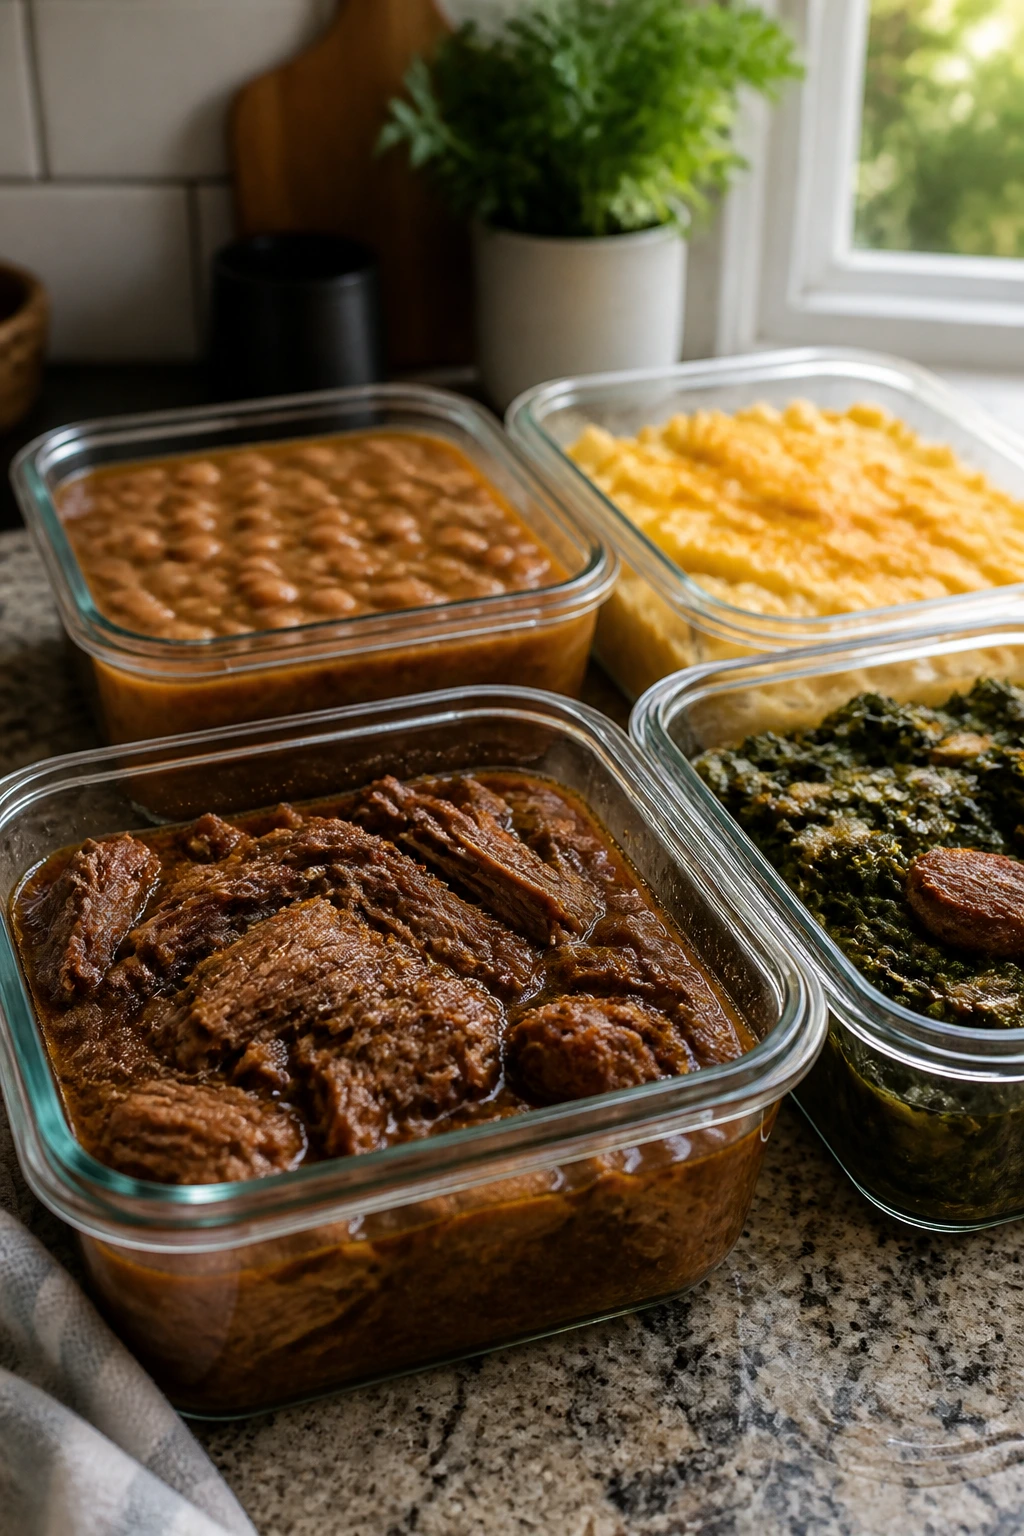
Braised dishes like smothered chicken, pork chops, oxtails, turkey wings, ribs, beans, and collards usually hold 3 to 4 days in the refrigerator in airtight containers. They freeze well too, often for up to 2 to 3 months, though beans and greens usually keep their texture better than potato-heavy or dairy-heavy dishes. Cool them fast, get them into shallow containers, and refrigerate within 2 hours of cooking.
Fried chicken and fish are a different story. They’re best the day they’re made, and leftovers are fine for about 3 days in the fridge, but the crust softens. Reheat them on a wire rack in a 375°F oven for 10 to 15 minutes, or use an air fryer if you have one. The microwave will make the coating limp. It just will.
Baked mac and cheese keeps for 3 to 4 days refrigerated and freezes for about 2 months, though the texture is best if you reheat it covered with a splash of milk at 325°F until warm through. Rice dishes like baked chicken and rice, red beans and rice, and black-eyed peas reheat nicely with a spoon or two of broth stirred in before warming. For anything with gravy, reheat slowly on the stovetop over low heat and stir often so it doesn’t scorch on the bottom.
A small note on make-ahead cooking: collards, beans, and braises often taste better the next day. Fried food does not. If you’re planning Sunday supper on a schedule, make the stews and greens first, then cook the fish or chicken close to serving time.
Variations and Adaptations to Try
Smoke Without the Pork: Use smoked turkey wings, turkey necks, or a little smoked paprika in place of ham hocks and bacon. You still get that deep, savory note, just without pork in the pot.
Oven-Only Sunday: If you don’t want to stand over a skillet, lean into braises and casseroles. Smothered chicken, pork chops, ribs, baked chicken and rice, and mac and cheese all move easily from stovetop to oven.
Gentler Heat, Same Flavor: Leave out cayenne and hot sauce, then build flavor with onion, thyme, black pepper, and paprika. The dishes won’t taste flat; they’ll just lean more savory than spicy.
Extra-Comfort Table: Serve every braise with rice or mashed potatoes, add cornbread on the side, and bring one green vegetable to balance the heavier plates. It sounds obvious. It also works every single time.
Bean-and-Green Meatless Corner: Red beans, black-eyed peas, collards, and mac and cheese can anchor a Sunday spread without meat if you lean on stock, butter, onion, garlic, and enough seasoning. Use smoked salt or smoked paprika if you want a little depth where pork usually shows up.
Common Mistakes to Avoid
Skipping the brown on meats: If you put chicken, pork chops, or ribs straight into liquid, the flavor stays thin. Brown the surface first, even if it takes 10 extra minutes.
Turning the heat too high: A hard boil ruins greens, beans, and braises by breaking the meat down too quickly or making the liquid cloudy and bitter. Keep it at a steady simmer and let time do the work.
Underseasoning early: A lot of cooks wait until the end, then dump in salt and hope for the best. Season the meat, the cooking liquid, and the finish in layers so the dish tastes rounded, not salty on the surface and flat underneath.
Crowding the fryer: Too many pieces in the oil drop the temperature fast, which gives you greasy crusts and pale chicken. Fry in batches and give the oil a minute to recover between them.
Using weak cheese or pre-shredded cheese for mac and cheese: The sauce can turn grainy or dull. Buy blocks and grate them fresh. It’s a small extra step and the texture is worth it.
Rushing the rest time: Pork chops, meatloaf, fried chicken, and mac and cheese all improve when they sit a few minutes before serving. Cut too soon and the juices or sauce spread everywhere.
Questions Readers Ask Before Cooking

Can I make these Sunday supper recipes ahead of time?
Yes, especially the braises, beans, greens, and mac and cheese. Most of those dishes taste even better after a night in the fridge because the seasoning settles and the sauce thickens slightly.
What’s the best cut of chicken for soul food dinners?
Bone-in thighs and drumsticks are the safest choice for braises and fried chicken. They stay juicy, take seasoning well, and forgive a little extra cooking time in a way chicken breast does not.
Can I use canned beans instead of dried beans?
You can, but the texture changes a lot. Canned beans need far less cooking and can turn mushy if you simmer them like dried beans, so add them near the end and keep the liquid gentler.
How do I keep gravy from getting lumpy?
Whisk the flour into fat first, cook it briefly, then add stock slowly while whisking. If lumps still form, keep whisking over low heat or strain the gravy before serving.
What if my collard greens taste bitter?
Give them more time, a little salt, and a splash of vinegar. A spoonful of pot liquor tastes better when the greens have softened fully, and the vinegar brightens the edges without masking the flavor.
How do I reheat fried chicken without ruining the crust?
Use a 375°F oven on a wire rack, not a plate. The rack lets air move under the chicken so the bottom stays crisp instead of steaming itself soft.
Can I make these recipes in a slow cooker?
Some of them, yes. Oxtails, ribs, turkey necks, beans, and some smothered dishes adapt well, though you’ll still want to brown the meat first if you care about flavor. Fried chicken, fish, and mac and cheese are better handled by oven or stovetop.
How do I scale these dishes for a bigger Sunday table?
Double braises, beans, and collards fairly easily if your pot is large enough. Fried food needs more time and oil management, so scale that one by frying in batches rather than trying to make every piece at once.
A Sunday Table Worth Repeating
A good Sunday supper doesn’t need a dozen fancy moves. It needs enough heat to build flavor, enough salt to season the middle of the food, and enough patience to let the best parts happen at their own pace. That’s the heart of these soul food dinners: they’re sturdy, generous, and built to feed people who plan to sit a while.
Pick one braise, one fried dish, one casserole, and one pot of greens or beans, and you’ve got a table that feels complete without becoming complicated. That combination has carried families through a lot of Sundays, and for good reason. It’s practical food with a real sense of occasion.