
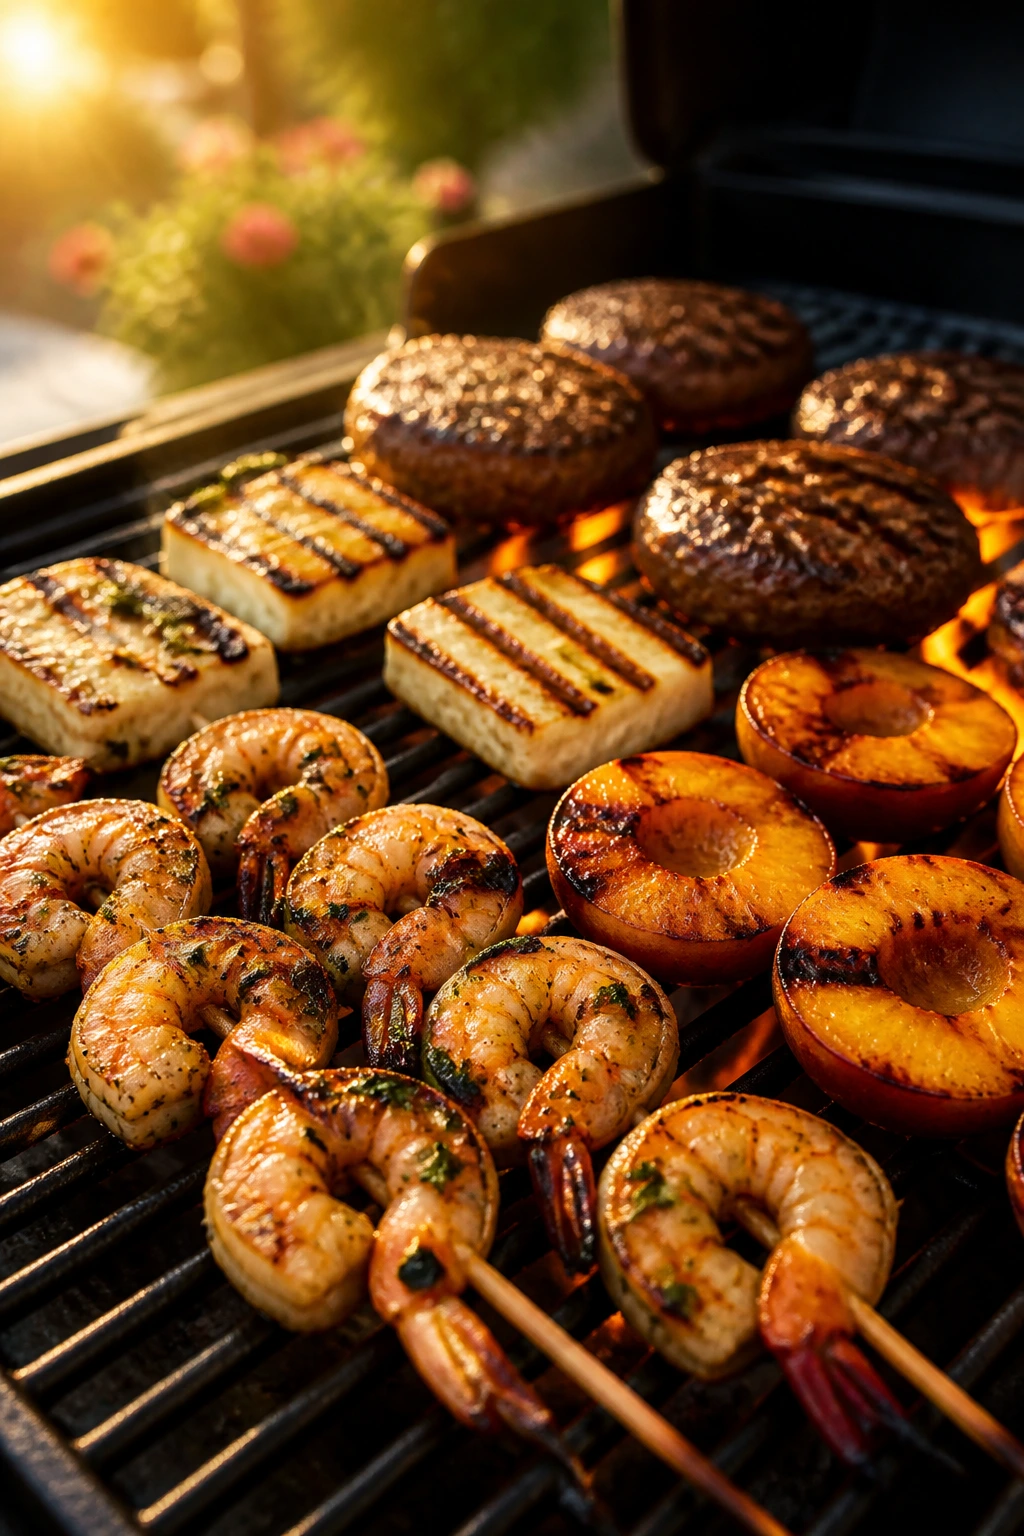
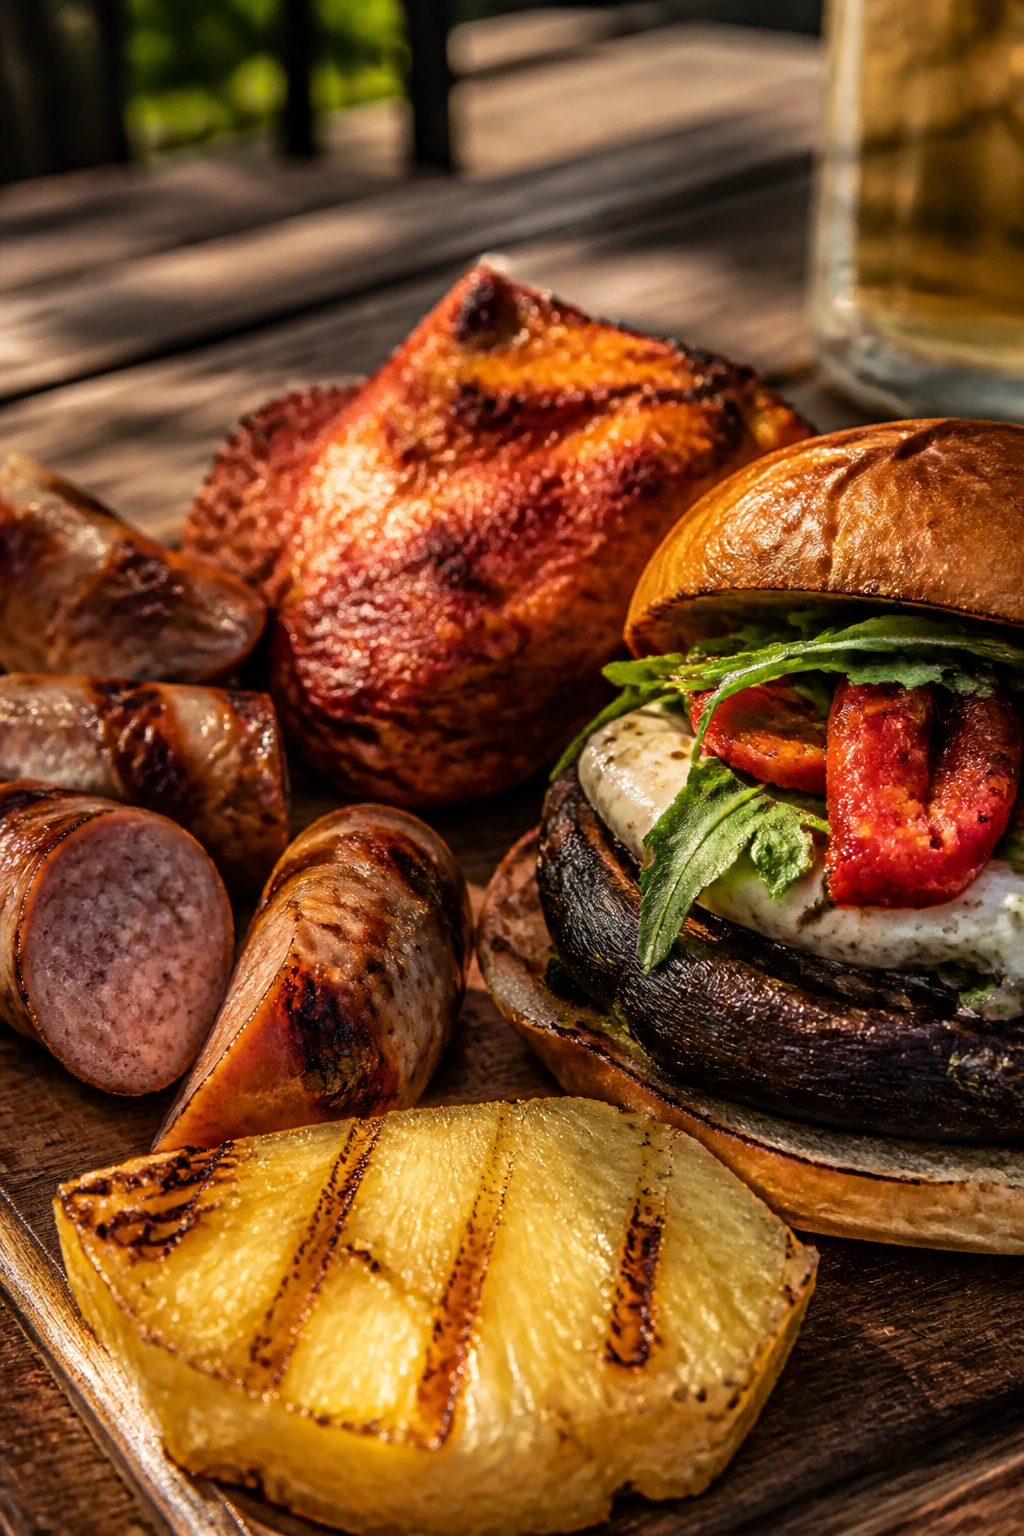
A grill has a way of making a weekend feel more put together. The first hiss of fat on hot grates, the smell of lemon and smoke, the little black stripes that show up on corn or chicken after a minute too long over the fire — that’s the kind of cooking that turns a plain evening into a small event. These summer dishes for the grill work because they don’t fight heat. They lean into it.
The smartest grill food in warm weather is usually the food that likes a little char, a little smoke, and not much fuss. Chicken thighs stay juicy where breasts can dry out. Halloumi holds its shape where softer cheeses would melt into the grates. Peaches go soft and syrupy in two minutes flat. Salmon, pork tenderloin, burgers, wings, fruit — all of them behave better when you know exactly how hot the fire should be and when to move them.
There’s no need to make grilling complicated. A clean grate, a hot fire, and a few well-chosen ingredients can carry a whole spread. Start with one main dish, add one vegetable, then finish with something sweet on the grate. That’s usually enough to make the whole table quiet for a minute.
Why This Collection Earns Its Spot on the Grill
-
Fast-fire cooking: Most of these dishes are on the table in under an hour, and several — shrimp, peaches, halloumi, burgers — take even less once the grill is hot.
-
Different heat zones matter: A few recipes need direct flame, a few need indirect heat, and that mix keeps salmon, pork, and wings from turning dry or bitter.
-
Char works in more places than people think: Fruit, cheese, flatbread, peppers, and mushrooms all pick up better flavor with a little dark edge.
-
These recipes share ingredients well: Lemon, garlic, herbs, olive oil, yogurt, and basic spices show up across the list, so the shopping is easier than it looks.
-
They travel well from main to side to dessert: You can build a full meal from this list without repeating yourself — a burger, a salad, and grilled pineapple feel like they belong to the same cookout but never taste tired.
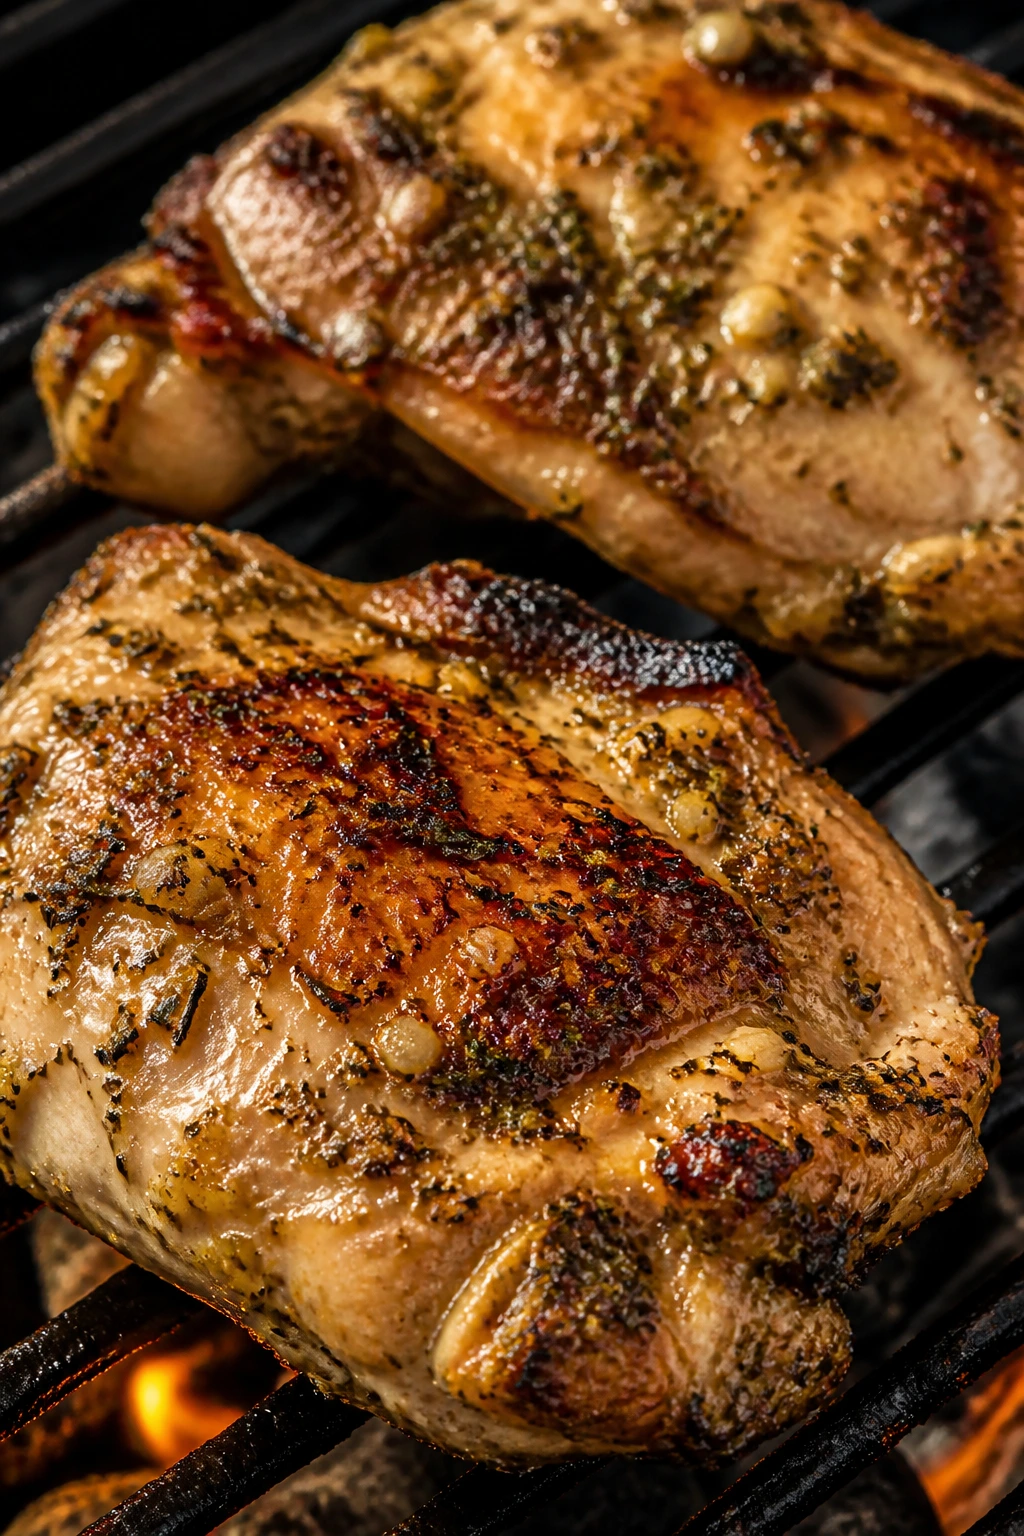
1. Lemon-Herb Grilled Chicken Thighs
Juicy chicken thighs were made for a hot grate. They take on lemon, garlic, rosemary, and thyme without turning fragile, and the skinless version here gets those crisp, browned edges that taste like summer evening food should taste. I reach for thighs when I want the grill to do the heavy lifting and not make me babysit the meat every thirty seconds.
Why It Works:
Chicken thighs have enough fat to stay moist over medium-high heat, which gives you a lot more breathing room than chicken breasts. Lemon zest adds perfume without flooding the marinade with too much acid, and the olive oil helps the herbs cling to the meat. Grill them at 425°F to 450°F and the outside picks up color fast while the inside stays tender. That’s the whole point.
Key Ingredients:
- 2 pounds boneless, skinless chicken thighs
Use thighs of similar size so they cook at the same speed. - 3 tablespoons olive oil
Helps the marinade coat the meat and keeps it from sticking. - Zest and juice of 2 lemons
The zest gives you brightness without making the chicken chalky. - 4 garlic cloves, minced
Enough to perfume the meat without burning on the grates. - 1 tablespoon chopped fresh rosemary
Use fresh if you can; dried rosemary can get prickly. - 1 tablespoon chopped fresh thyme
Adds a soft, woodsy note under the lemon. - 1 teaspoon kosher salt
Salts the meat all the way through. - 1/2 teaspoon black pepper
Keeps the flavor sharp and clean. - 1/2 teaspoon paprika
Gives the chicken a warmer color and a faint smoky edge.
Quick Steps:
- Whisk the olive oil, lemon zest, lemon juice, garlic, rosemary, thyme, salt, pepper, and paprika in a bowl.
- Add the chicken thighs and toss until every surface is coated. Cover and refrigerate for 30 minutes to 4 hours.
- Preheat the grill to medium-high, about 425°F to 450°F, then oil the grates.
- Grill the chicken for 5 to 7 minutes per side, until the outside is browned and the thickest part reaches 165°F.
- Move any pieces that brown too fast to a cooler spot on the grill, then rest the chicken for 5 minutes before serving.
Equipment for This Recipe:
- Outdoor grill or grill pan
Direct heat gives the best char. - Large mixing bowl
Big enough to coat the thighs evenly. - Long tongs
Safer than a fork, which leaks juices. - Instant-read thermometer
The only sane way to know when thighs are done.
How to Serve This Dish:
Pile the chicken on a platter with lemon wedges and a few torn herbs over the top. It goes especially well with grilled potatoes, corn, or a sharp cucumber salad. If you want a heavier meal, tuck the thighs into warm pita with yogurt sauce and sliced tomatoes.
Pro Tips for This Recipe:
- Dry the thighs before marinating if they’re wet from packaging; a dry surface grabs flavor better.
- Don’t push the lemon beyond 4 hours or the meat can get a little mealy around the edges.
- Oil the grates, not the chicken alone. Both help, but clean grates are what stop tearing.
- Let it rest. Five minutes sounds boring. It matters.
Variations on This Dish:
- Greek Street Style: Add oregano, a little red wine vinegar, and serve with tzatziki.
- Chili-Lime Version: Swap the lemon for lime and add 1 teaspoon chili flakes.
- Bone-In Swap: Use bone-in thighs and add 8 to 10 minutes of cook time, moving them to indirect heat if needed.
Common Mistakes to Avoid with This Dish:
- Grilling straight from the fridge: Cold thighs brown unevenly. Let them sit out 15 minutes first.
- Lifting too soon: If the meat sticks, it is not ready. Give it another minute.
- Skipping the thermometer: Thighs are forgiving, but guessing still leads to dry chicken.
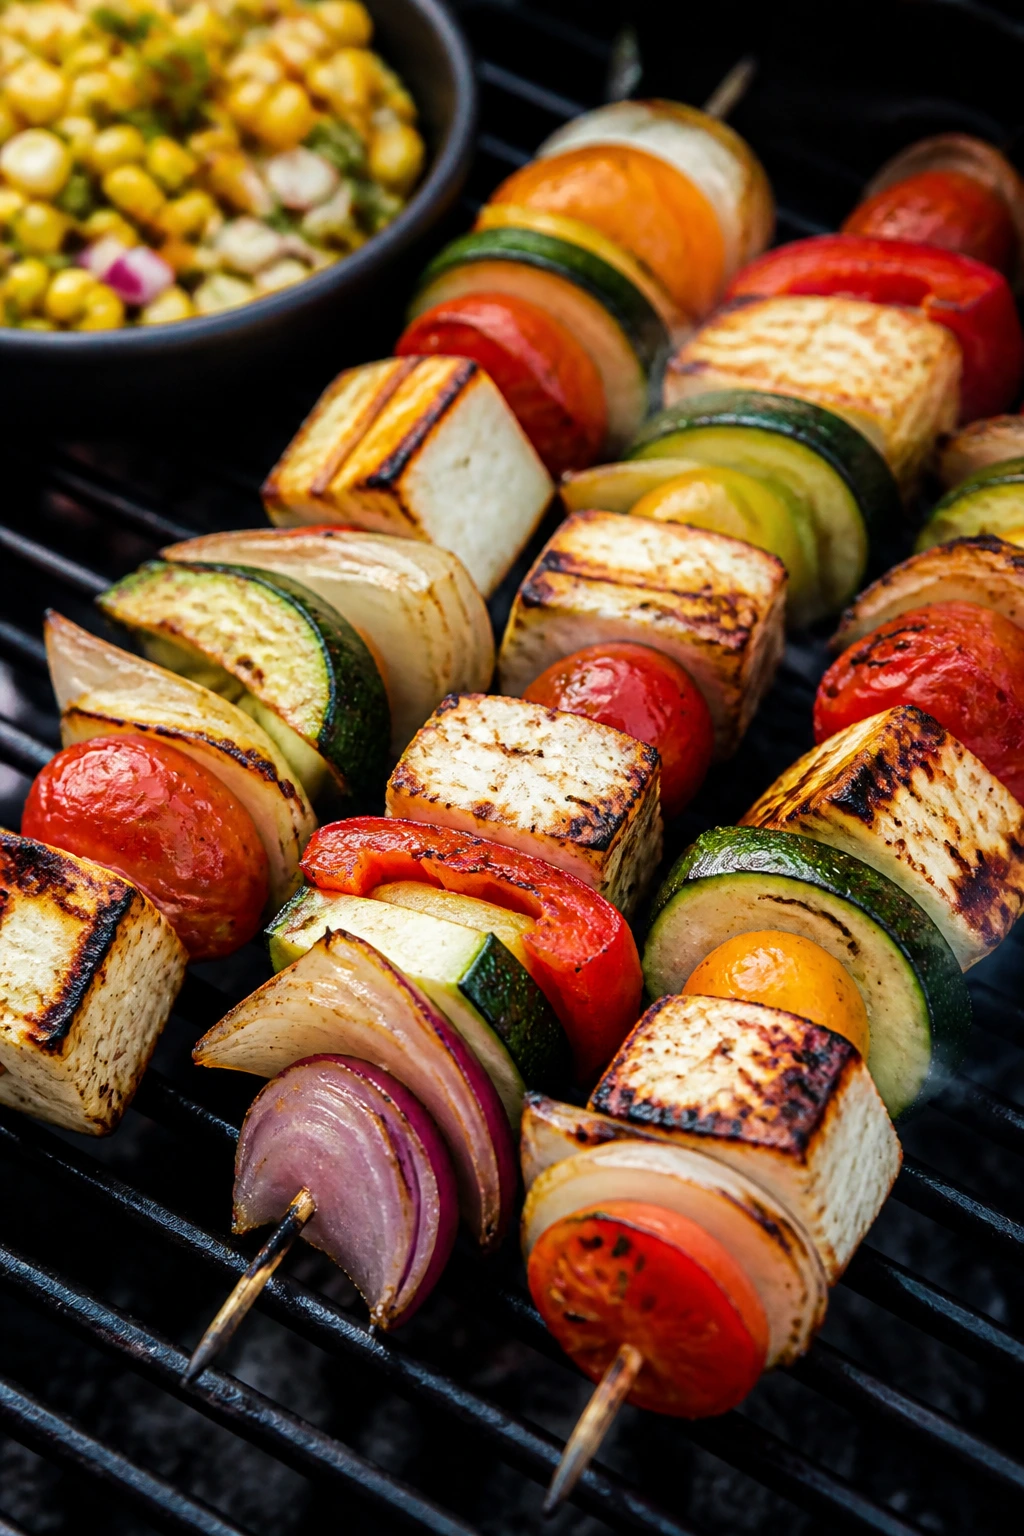
2. Halloumi and Garden Veg Skewers with Charred Corn Salsa
What happens when salty cheese meets fire? Halloumi does exactly what you want it to do: it gets browned at the edges, soft inside, and never collapses through the grates. Add zucchini, bell pepper, onion, tomatoes, and sweet corn, and you’ve got a skewer that tastes like a vegetable stand got invited to a cookout.
Why It Works:
Halloumi’s high melting point makes it one of the best grilling cheeses out there. It browns instead of disappearing. The vegetables give you soft spots and blistered edges in the same bite, and the charred corn salsa adds sweetness that cuts through the salt. Grill this over medium-high heat and you get clean grill marks, not mush.
Key Ingredients:
- 8 ounces halloumi, cut into 1-inch cubes
Keep the cubes large enough so they don’t split. - 1 zucchini, cut into 1/2-inch half-moons
Thin enough to soften, thick enough to stay on the skewer. - 1 red bell pepper, cut into 1-inch chunks
Sweet peppers char beautifully. - 1 red onion, cut into wedges
The layers loosen and turn sweet on the grill. - 1 pint cherry tomatoes
Use firm tomatoes so they hold on the skewer. - 2 ears corn, husked
Grilled separately, then cut off the cob for salsa. - 2 tablespoons olive oil
Helps everything brown instead of steam. - 1 tablespoon lemon juice
Brings the cheese and vegetables into focus. - 1 teaspoon dried oregano
Fits the salty cheese and summer vegetables well. - 2 tablespoons chopped basil
For the finishing salsa. - Salt and black pepper
Go light on the salt; halloumi brings plenty.
Quick Steps:
- Soak wooden skewers in water for 20 to 30 minutes if you’re using them.
- Toss the zucchini, pepper, onion, and cherry tomatoes with olive oil, oregano, pepper, and a small pinch of salt.
- Thread the halloumi and vegetables onto skewers, keeping the pieces snug but not jammed.
- Grill the corn and skewers over medium-high heat for 8 to 10 minutes, turning every couple of minutes until the halloumi is browned and the vegetables are tender with dark spots.
- Slice the kernels from the corn, toss them with lemon juice and basil, then spoon the salsa over the skewers.
Equipment for This Recipe:
- Grill or grill basket
A basket helps with the corn and smaller tomatoes if needed. - Wooden or metal skewers
Metal saves soaking time. - Tongs
Halloumi is easier to turn with a gentle grip. - Sharp knife
Needed for clean, even vegetable cuts.
How to Serve This Dish:
Set the skewers over a smear of yogurt or hummus, then spoon the corn salsa on top. They work as a main with rice, or as a side next to chicken or steak. I like them with a squeeze of extra lemon and a few torn basil leaves while the cheese is still warm.
Pro Tips for This Recipe:
- Pat the halloumi dry before skewering or it can steam instead of brown.
- Cut the vegetables to the same thickness so nothing burns while something else stays raw.
- Keep the heat moderate. Halloumi wants color, not an inferno.
- Use the tomatoes as cushions between firmer pieces if you’re threading long skewers.
Variations on This Dish:
- Mediterranean Brine: Add olives and a little chopped mint to the salsa.
- Spicy Pepper Version: Toss the vegetables with smoked paprika and a pinch of cayenne.
- No-Skewer Shortcut: Grill the vegetables in a basket and sear the halloumi in large planks.
Common Mistakes to Avoid with This Dish:
- Using cheese that is too soft: Halloumi should feel springy, not creamy.
- Overcrowding the skewers: Packed pieces cook unevenly and are harder to turn.
- Forgetting the salsa: The charred corn makes the whole dish taste fresher and sweeter.
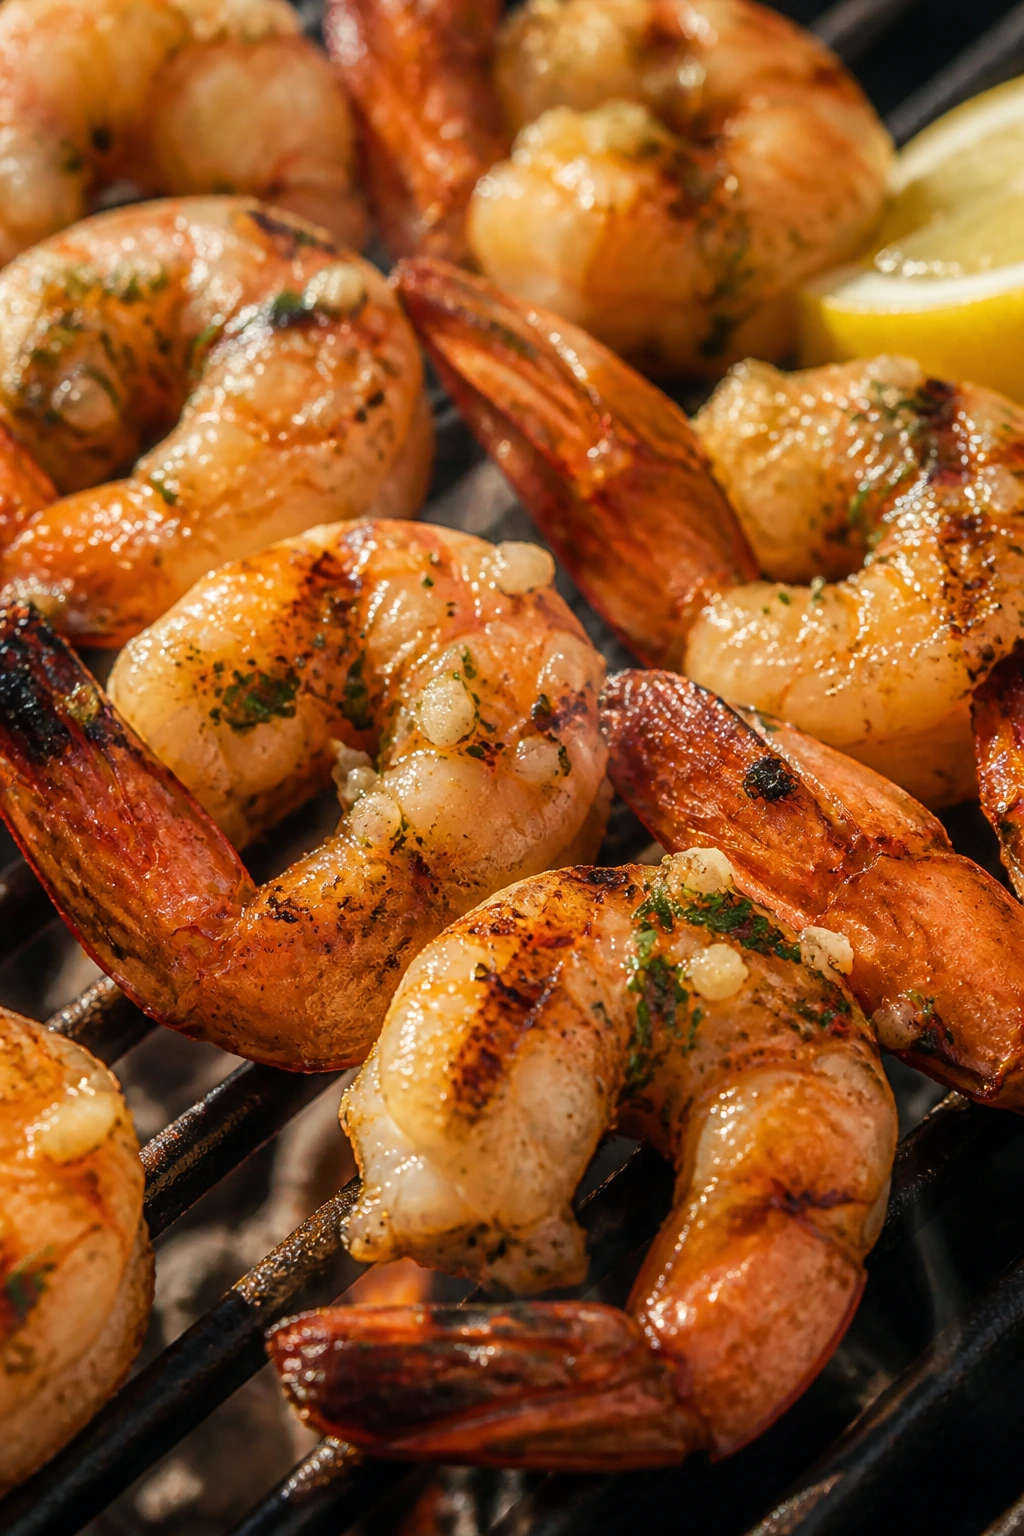
3. Garlic Butter Grilled Shrimp
Shrimp might be the fastest thing on this list, which is exactly why it belongs here. A minute too long and they turn bouncy in the wrong way. Hit them with garlic, lemon, smoked paprika, and a little butter after grilling, and you get that glossy, salty finish that tastes like something far fancier than it is.
Why It Works:
Shrimp cook fast because they’re small and lean, but that also means they overcook fast. A short marinade gives flavor without turning the flesh soft or watery. Grilling over direct heat for 2 to 3 minutes total keeps the shrimp tender, and the butter goes on after they leave the fire so the garlic doesn’t scorch. That last move matters.
Key Ingredients:
- 1 1/2 pounds large shrimp, peeled and deveined
Large shrimp hold up better on the grill than small ones. - 2 tablespoons olive oil
Keeps the shrimp from sticking and helps the spices cling. - 3 tablespoons unsalted butter, melted
Finishes the shrimp with gloss and richness. - 4 garlic cloves, minced
Strong enough to show up, not so much that it burns. - 1 tablespoon lemon juice
Brightens the butter and cuts the richness. - 1 teaspoon smoked paprika
Gives the shrimp a light campfire note. - 1/2 teaspoon kosher salt
Seasons the shrimp inside and out. - 1/4 teaspoon black pepper
Keeps the flavor from falling flat. - Pinch of red pepper flakes
Optional, but welcome if you like a little heat. - 1 tablespoon chopped parsley
For the final scatter of green.
Quick Steps:
- Whisk the olive oil, garlic, lemon juice, paprika, salt, pepper, and red pepper flakes in a bowl.
- Add the shrimp and toss gently. Let them sit for 15 to 20 minutes while you heat the grill.
- Preheat the grill to medium-high and oil the grates well.
- Thread the shrimp onto skewers or set them in a grill basket.
- Grill for 1 1/2 to 2 minutes per side, until opaque and curled into a loose C shape. If they form a tight O, they’ve gone too far.
- Brush with the melted butter, shower with parsley, and serve hot.
Equipment for This Recipe:
- Grill basket or skewers
Skewers make turning easier; a basket is easier for loose shrimp. - Small bowl
For the quick marinade. - Pastry brush
Handy for the butter finish. - Tongs
Better than picking up shrimp one by one.
How to Serve This Dish:
Serve the shrimp over rice, folded into tacos, or piled beside grilled corn and a green salad. They’re at their best straight off the grill, when the butter is still shiny on the surface. A squeeze of lemon over the plate wakes everything up.
Pro Tips for This Recipe:
- Use thawed shrimp that are dry on the surface. Wet shrimp steam before they sear.
- Skip tiny shrimp. They overcook before you can turn around.
- Don’t marinate forever. Acid and seafood do not want a long visit.
- Keep the butter for the end. Put garlic butter on hot shrimp, not on the grill flames.
Variations on This Dish:
- Cajun Smoke: Swap the paprika for Cajun seasoning and add chopped scallion.
- Citrus Herb: Use orange and lime zest with dill instead of parsley.
- No-Butter Version: Finish with extra olive oil and a spoonful of salsa verde.
Common Mistakes to Avoid with This Dish:
- Overcooking by feel alone: Shrimp should be just opaque, not rubbery.
- Using too much garlic in the marinade: Garlic can burn fast over direct heat.
- Crowding the skewer: Leave a little space so the heat reaches every side.
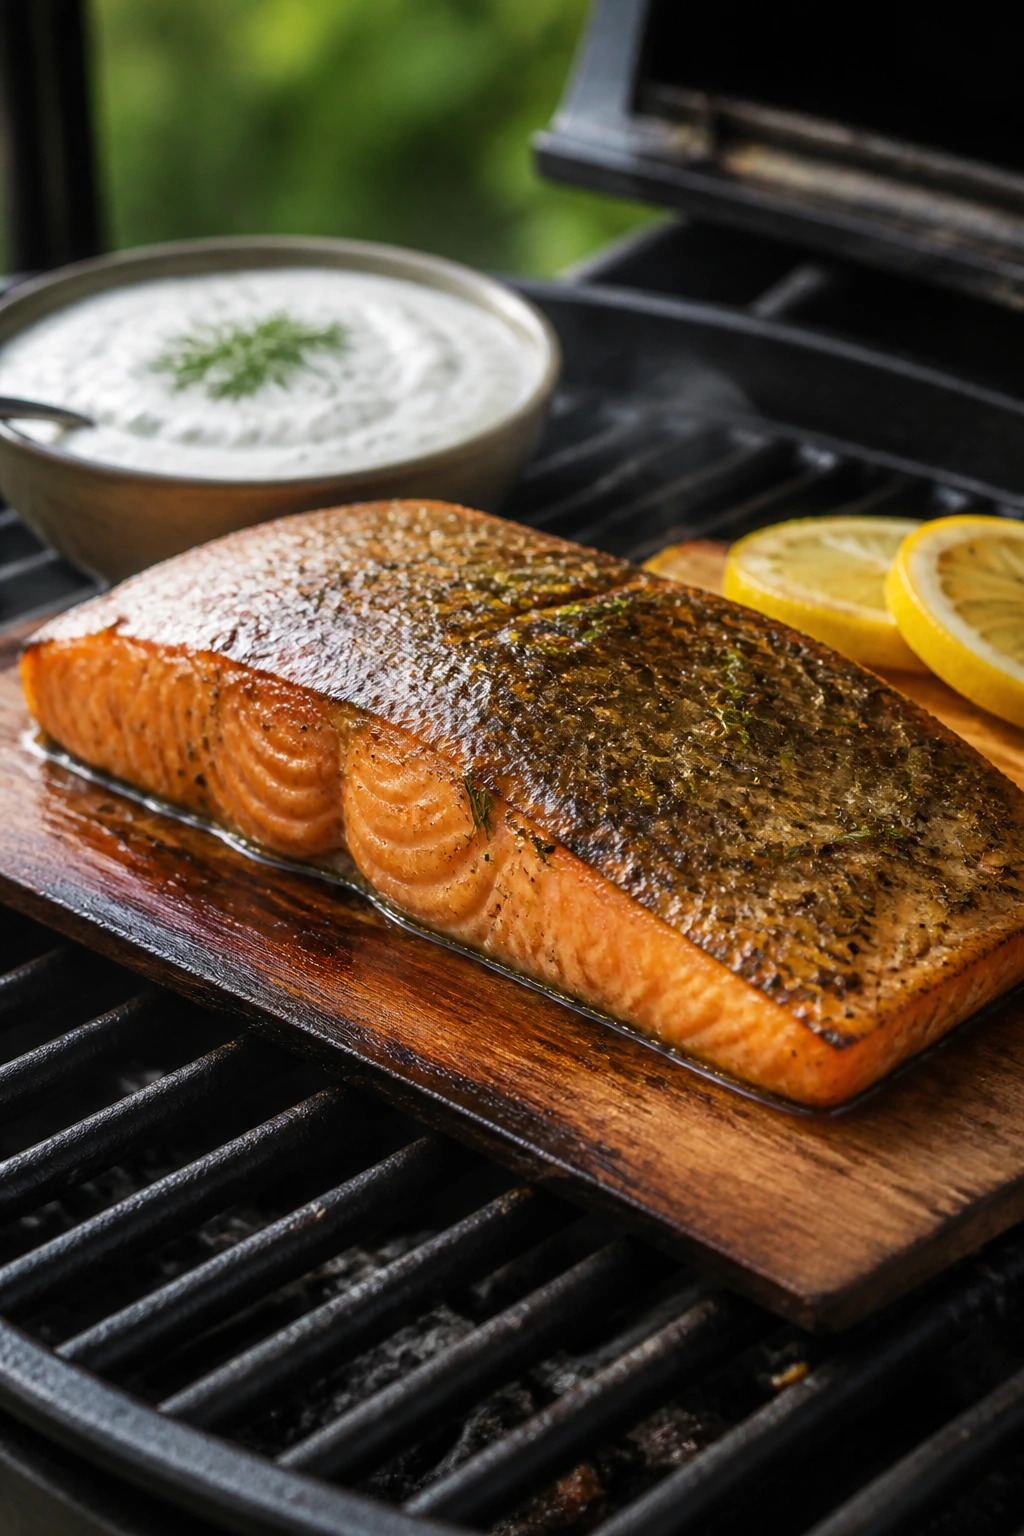
4. Cedar Plank Salmon with Dill Yogurt
Salmon on a cedar plank has a different kind of drama. The smoke is softer, the flesh stays moist, and the whole thing looks like it belongs on a long wooden board in the middle of a summer table. A dill yogurt sauce on the side keeps the fish cool and sharp instead of heavy.
Why It Works:
A soaked cedar plank turns the grill into a gentle roaster with smoke. That’s why this method works so well for salmon: you get heat, perfume, and a bit of insulation from the flames. The fish cooks over indirect medium heat instead of direct fire, which keeps the fat from breaking too fast and the edges from drying out. Dill yogurt brings cold, creamy contrast.
Key Ingredients:
- 1 cedar plank, soaked in water for at least 1 hour
Soak it long enough that it does not ignite right away. - 1 1/2 to 2 pounds salmon fillet, skin-on
A center-cut fillet cooks the most evenly. - 1 tablespoon olive oil
Helps the seasoning cling to the fish. - 1 teaspoon kosher salt
The salmon needs enough salt to stand up to the smoke. - 1/2 teaspoon black pepper
Keeps the flavor clean. - 1 lemon, sliced
The slices can sit beside or under the salmon. - 1/2 cup Greek yogurt
Thick enough to spoon, not run. - 2 tablespoons chopped dill
The obvious herb choice here, and for good reason. - 1 tablespoon lemon juice
Sharpens the sauce. - 1 teaspoon Dijon mustard
Gives the yogurt some backbone.
Quick Steps:
- Soak the cedar plank in water for 1 hour, then drain it.
- Stir the yogurt, dill, lemon juice, and Dijon in a small bowl.
- Rub the salmon with olive oil, salt, and pepper.
- Preheat the grill to 375°F to 400°F for indirect cooking. Place the plank over the heat until it starts to smoke lightly, then move the salmon onto the plank.
- Close the lid and cook for 12 to 15 minutes, until the salmon flakes and reaches 125°F to 130°F in the thickest part.
- Rest for 5 minutes, then serve with the dill yogurt and lemon slices.
Equipment for This Recipe:
- Cedar plank
The smoke is the point. - Grill with a lid
You need trapped heat for this method. - Instant-read thermometer
Salmon is too expensive to guess with. - Small bowl and spoon
For the yogurt sauce.
How to Serve This Dish:
Serve the salmon right on the plank if you like a rustic look, or slide it onto a platter with cucumber salad and roasted potatoes. The dill yogurt belongs on the side so each person can spoon on as much as they want. Cold sauce against hot fish is one of those small, satisfying things that never gets old.
Pro Tips for This Recipe:
- Use skin-on salmon so the fish has a little protection from the heat.
- Keep the plank soaked. Dry wood burns instead of smokes.
- Do not drown the fish in sauce before grilling. Save the yogurt for the table.
- Watch the edges first. Salmon is done when the center still looks a touch glossy.
Variations on This Dish:
- Maple-Dijon Salmon: Brush the top with a thin maple-Dijon glaze in the last 2 minutes.
- Herb-Crusted Version: Add chopped parsley and chives to the oil before grilling.
- Foil Packet Backup: If you do not have a plank, use a foil tray with lemon and dill.
Common Mistakes to Avoid with This Dish:
- Putting salmon on a dry plank: It can scorch fast and taste smoky in the wrong way.
- Grilling over direct flame: You want smoke and gentle heat, not charred edges.
- Pulling it too late: Overdone salmon flakes into dry little pieces.
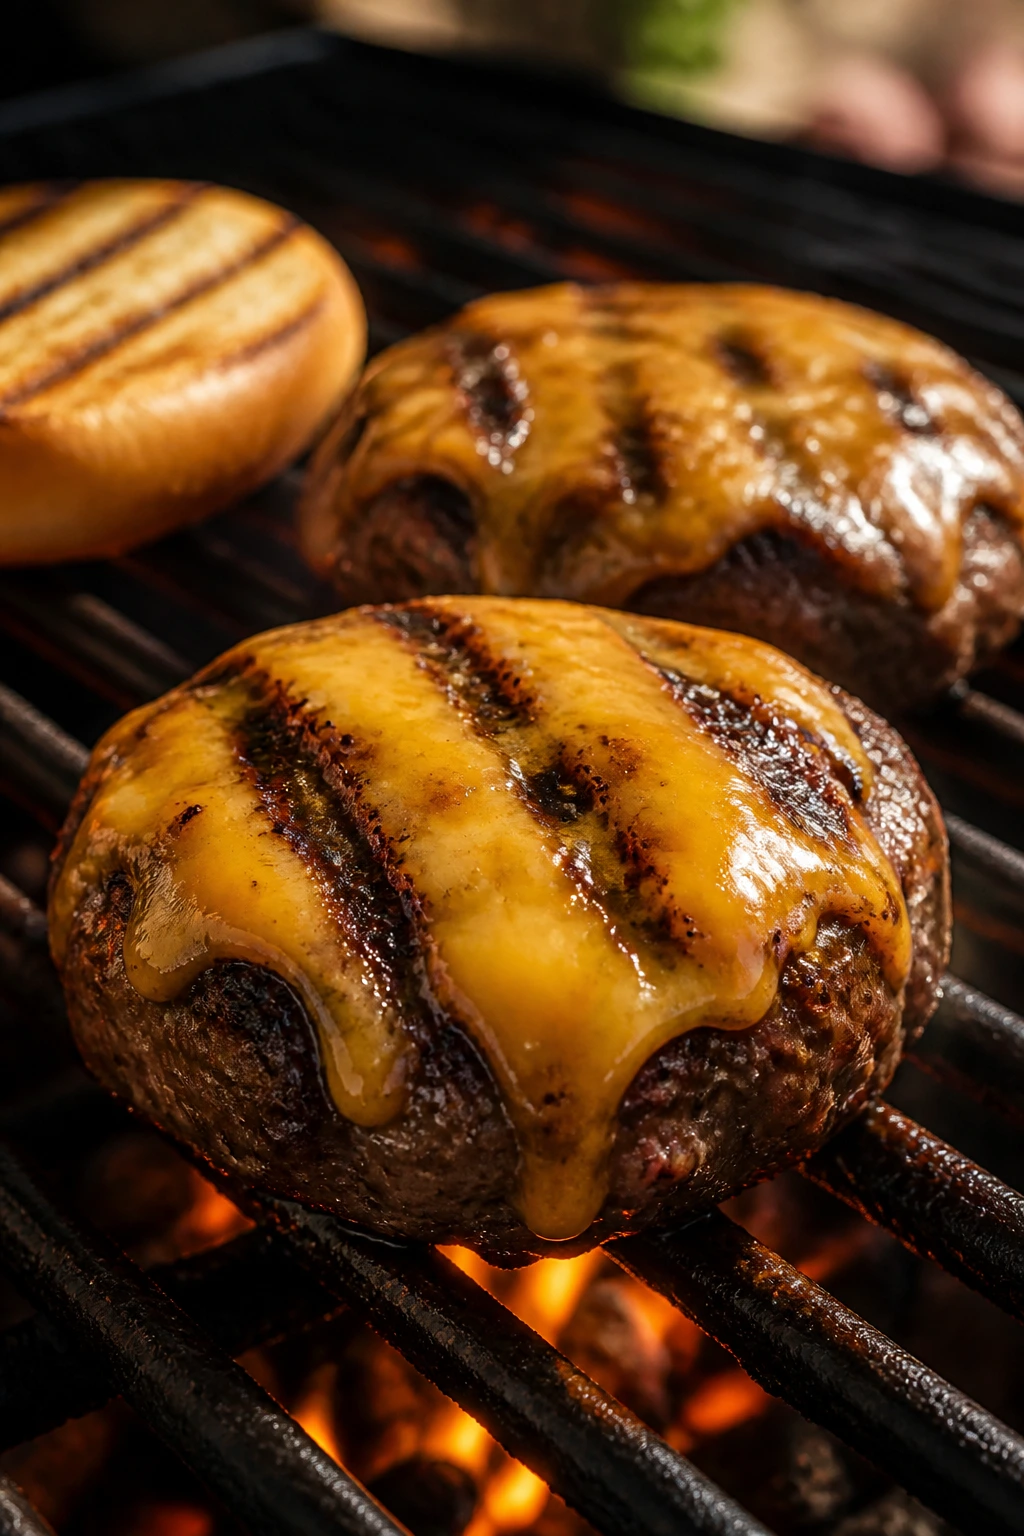
5. Smoky Cheddar Burgers
A proper burger on the grill should look a little rough around the edges. Not sloppy. Just honest. The beef needs enough fat to stay juicy, the cheese needs to melt into the grooves, and the bun needs a quick kiss from the grates so it does not go limp the second the juices hit it.
Why It Works:
An 80/20 ground beef blend gives you enough fat for flavor without turning the burger greasy. Worcestershire sauce and smoked paprika deepen the meat without making it taste like a spice cabinet dumped over the bowl. A hot grill at medium-high heat sears the outside fast, and the last minute of cheese melts into the top of the patty while the bun warms. That’s the sweet spot.
Key Ingredients:
- 2 pounds ground beef, 80/20
Leaner meat dries out faster on the grill. - 1 1/2 teaspoons kosher salt
Seasons the beef all the way through. - 1 teaspoon black pepper
Sharpens the flavor. - 1 teaspoon Worcestershire sauce
A little umami goes a long way. - 1 teaspoon smoked paprika
Adds a subtle grilled note before the burgers even hit the grate. - 8 slices cheddar cheese
Sharp cheddar melts well and tastes bold. - 4 burger buns
Brioche, sesame, or potato buns all work. - 1 red onion, sliced
Grill the onion alongside the patties. - 1 tomato, sliced
Use a firm tomato so it does not collapse. - Lettuce and pickles
For crunch and acid.
Quick Steps:
- Gently mix the beef with salt, pepper, Worcestershire, and paprika. Divide into 4 patties and press a shallow dimple in the center of each.
- Preheat the grill to medium-high and oil the grates.
- Grill the onion slices for 4 to 5 minutes, turning once, until softened and marked.
- Grill the burgers for 3 to 5 minutes per side, depending on thickness and doneness preference.
- Add cheddar during the last minute and close the lid so it melts.
- Toast the buns, then build the burgers with lettuce, tomato, onion, and pickles.
Equipment for This Recipe:
- Grill
Hot and clean is the whole game. - Wide spatula
Makes flipping easier. - Mixing bowl
For the beef mixture. - Instant-read thermometer
Useful if you want exact doneness.
How to Serve This Dish:
Serve the burgers with grilled onions stacked high and a handful of salted chips or potato wedges on the side. If you’re feeding a crowd, set out the toppings separately and let people build their own. A good burger gets messy in the best possible way.
Pro Tips for This Recipe:
- Handle the meat lightly. Dense patties turn chewy.
- Press the dimple in the center. It helps the burger stay flat instead of doming.
- Do not smash the patty once it’s on the grill. That juice belongs inside.
- Toast the buns cut-side down. Barely a minute. That’s enough.
Variations on This Dish:
- Blue Cheese Burger: Swap cheddar for blue cheese and add caramelized onions.
- Jalapeño Burger: Mix chopped jalapeño into the beef and use pepper jack.
- Turkey Burger Route: Use ground turkey, but add 1 tablespoon olive oil to keep it from drying out.
Common Mistakes to Avoid with This Dish:
- Overmixing the beef: The texture goes tight and rubbery.
- Flipping too often: One clean flip is easier on the patty.
- Skipping the bun toast: A soft bun turns soggy fast.
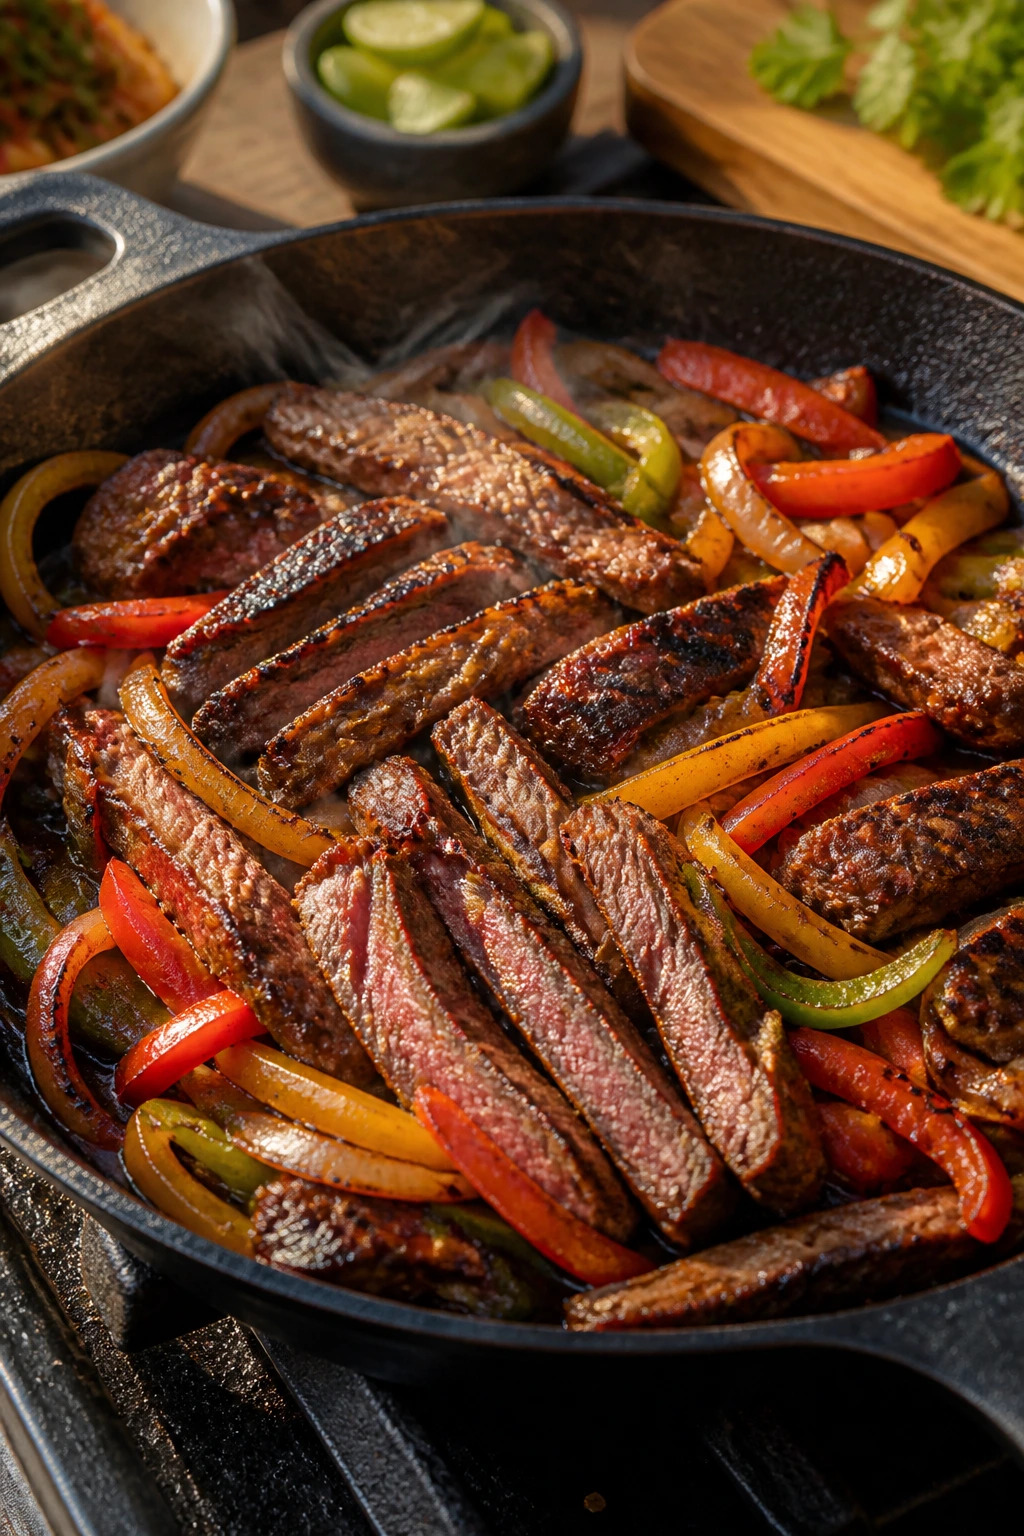
6. Grilled Steak Fajitas
Steak fajitas belong on the grill the way rain belongs on pavement. The meat gets charred edges, the peppers go sweet and smoky, and the onions soften into ribbons that taste like they’ve been hanging around the fire all night. Slice everything against the grain and the whole thing turns into a dinner that feels more playful than it has any right to be.
Why It Works:
Flank and skirt steak like high heat and short cook times. They’re built for fast searing, then a rest on the cutting board before slicing. The lime, garlic, cumin, and chili powder marinade gives the meat surface flavor without drowning it. Meanwhile, the vegetables get their own heat and a little char, which keeps the fajitas from tasting like meat with side vegetables attached.
Key Ingredients:
- 1 1/2 pounds flank steak or skirt steak
Choose a cut that slices cleanly across the grain. - 3 bell peppers, sliced into strips
Use a mix of colors if you want more sweetness. - 1 large onion, sliced
Thick slices hold up better than thin ones. - 3 tablespoons olive oil
Helps the marinade coat the steak and vegetables. - Juice of 2 limes
Bright, sharp, and right at home with grilled beef. - 2 garlic cloves, minced
Enough to sharpen the marinade. - 1 teaspoon ground cumin
Gives the steak a warm, earthy base. - 1 teaspoon chili powder
Adds color and mild heat. - 1/2 teaspoon dried oregano
Brings a little herbal lift. - 1 teaspoon kosher salt
Helps the meat season all the way through. - 1/2 teaspoon black pepper
For the final edge. - Flour or corn tortillas
Warm them on the grill at the end.
Quick Steps:
- Whisk the olive oil, lime juice, garlic, cumin, chili powder, oregano, salt, and pepper in a bowl.
- Coat the steak with the marinade and refrigerate for 30 minutes to 2 hours.
- Toss the peppers and onion with a little olive oil, salt, and pepper.
- Grill the vegetables over medium-high heat for 8 to 10 minutes, turning until softened and marked.
- Grill the steak for 3 to 5 minutes per side for medium-rare, or until it reaches 130°F to 135°F.
- Rest the steak for 10 minutes, slice thinly against the grain, and serve with the vegetables and warm tortillas.
Equipment for This Recipe:
- Grill
Hot enough to sear fast. - Tongs
Better for flipping vegetables than a fork. - Cutting board with a groove
Catches the steak juices. - Sharp knife
Necessary for clean, thin slices.
How to Serve This Dish:
Put the steak and vegetables on a warm platter and let people build their own tacos. Salsa, sour cream, pickled onions, and sliced avocado all fit the mood. A side of grilled lime halves looks simple and tastes sharper than bottled lime ever does.
Pro Tips for This Recipe:
- Slice the steak across the grain. That’s the difference between tender and chewy.
- Use a hotter zone for the meat if your grill has one; steak likes a real sear.
- Resting is non-negotiable. Ten minutes gives the juices time to settle.
- Warm the tortillas last. Stack them in a clean towel so they stay soft.
Variations on This Dish:
- Chipotle Steak Fajitas: Add adobo sauce or chipotle powder to the marinade.
- Chicken Fajitas: Swap in boneless thighs and cook a minute or two longer.
- Portobello Fajitas: Use thick mushroom caps and add a splash of soy sauce to the marinade.
Common Mistakes to Avoid with This Dish:
- Cutting the steak too soon: The juices spill out on the board.
- Using thinly sliced peppers: They shrivel before they char.
- Packing the grill too tightly: The vegetables steam instead of browning.
7. BBQ Pork Tenderloin with Peach Glaze
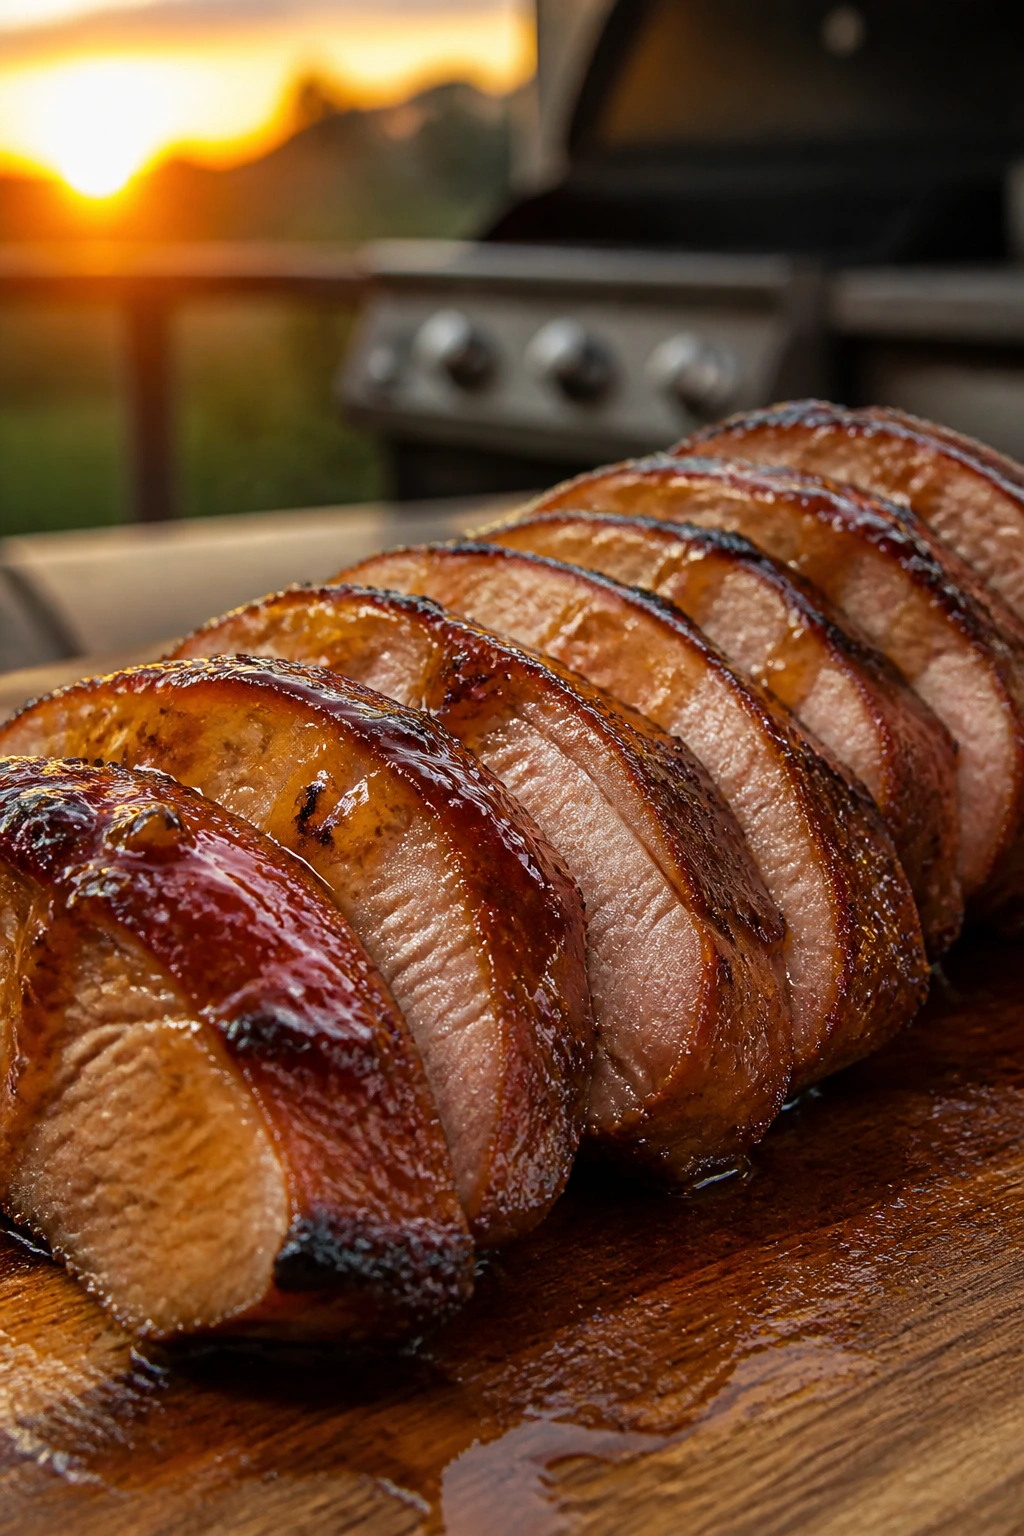
Pork tenderloin deserves more love on the grill than it gets. It cooks fast, it takes on spice well, and it pairs with peaches in a way that feels almost too natural. The glaze here is sweet, tangy, and sticky enough to shine on the meat without turning into burnt sugar.
Why It Works:
Tenderloin is lean, so it benefits from a seasoning rub and a quick glaze at the end rather than a long, sugary marinade. Peach preserves give you body and fruit flavor, while vinegar and Dijon keep the glaze from getting cloying. Grill the pork over a combination of direct and indirect heat, and pull it at 140°F to 145°F so it stays juicy after resting. Overcooked tenderloin turns dry in a hurry.
Key Ingredients:
- 2 pork tenderloins, about 2 pounds total
Trim off any silvery membrane if needed. - 1 tablespoon brown sugar
Helps the rub brown on the grill. - 1 teaspoon smoked paprika
Gives the pork a warm, smoky color. - 1 teaspoon kosher salt
Seasons the meat through the center. - 1/2 teaspoon black pepper
Keeps the flavor clean. - 1 tablespoon olive oil
Helps the rub stick. - 1/2 cup peach preserves
Makes the glaze thick and glossy. - 1/4 cup barbecue sauce
Adds smoke and depth. - 1 tablespoon apple cider vinegar
Cuts the sweetness. - 1 teaspoon Dijon mustard
Keeps the glaze sharp. - Pinch of red pepper flakes
Optional, for a little heat.
Quick Steps:
- Mix the brown sugar, paprika, salt, pepper, and olive oil, then rub it over the pork.
- Combine the peach preserves, barbecue sauce, vinegar, Dijon, and red pepper flakes in a small saucepan or bowl.
- Preheat the grill to medium-high, then set up one cooler side for indirect cooking.
- Grill the tenderloins for 12 to 15 minutes, turning every few minutes, until browned on all sides.
- Move them to indirect heat and brush with glaze during the last 5 minutes of cooking.
- Pull the pork at 140°F to 145°F, rest for 10 minutes, then slice into medallions and spoon more glaze over the top.
Equipment for This Recipe:
- Grill with a cooler side
Needed for gentle finishing. - Small saucepan or bowl
For the glaze. - Basting brush
Makes the glaze easy to apply. - Instant-read thermometer
Pork tenderloin is too lean to guess.
How to Serve This Dish:
Slice the pork and fan it on a platter with extra glaze spooned over the top. Grilled peaches, coleslaw, or corn on the cob fit without trying too hard. A few thyme sprigs or parsley leaves make the plate look finished without clutter.
Pro Tips for This Recipe:
- Know the cut. Pork tenderloin is not the same as pork loin.
- Glaze late. Sugar burns fast if you start too early.
- Rest before slicing. That ten-minute pause keeps the juices where they belong.
- Keep an eye on flare-ups. Fruit glaze can drip and scorch if you forget it.
Variations on This Dish:
- Apricot Glaze: Swap the peach preserves for apricot and keep the vinegar.
- Spicy Bourbon Version: Add 1 tablespoon bourbon and a bit more chili flake to the glaze.
- Herb-Crusted Pork: Add chopped rosemary to the rub and finish with lemon zest.
Common Mistakes to Avoid with This Dish:
- Cooking it like a thick roast: Tenderloin needs speed, not a long slow roast.
- Adding glaze too early: Burnt sugar is bitter, not caramel.
- Slicing before resting: The meat will look juicy, then turn dry on the board.
8. Grilled Vegetable and Mozzarella Flatbread
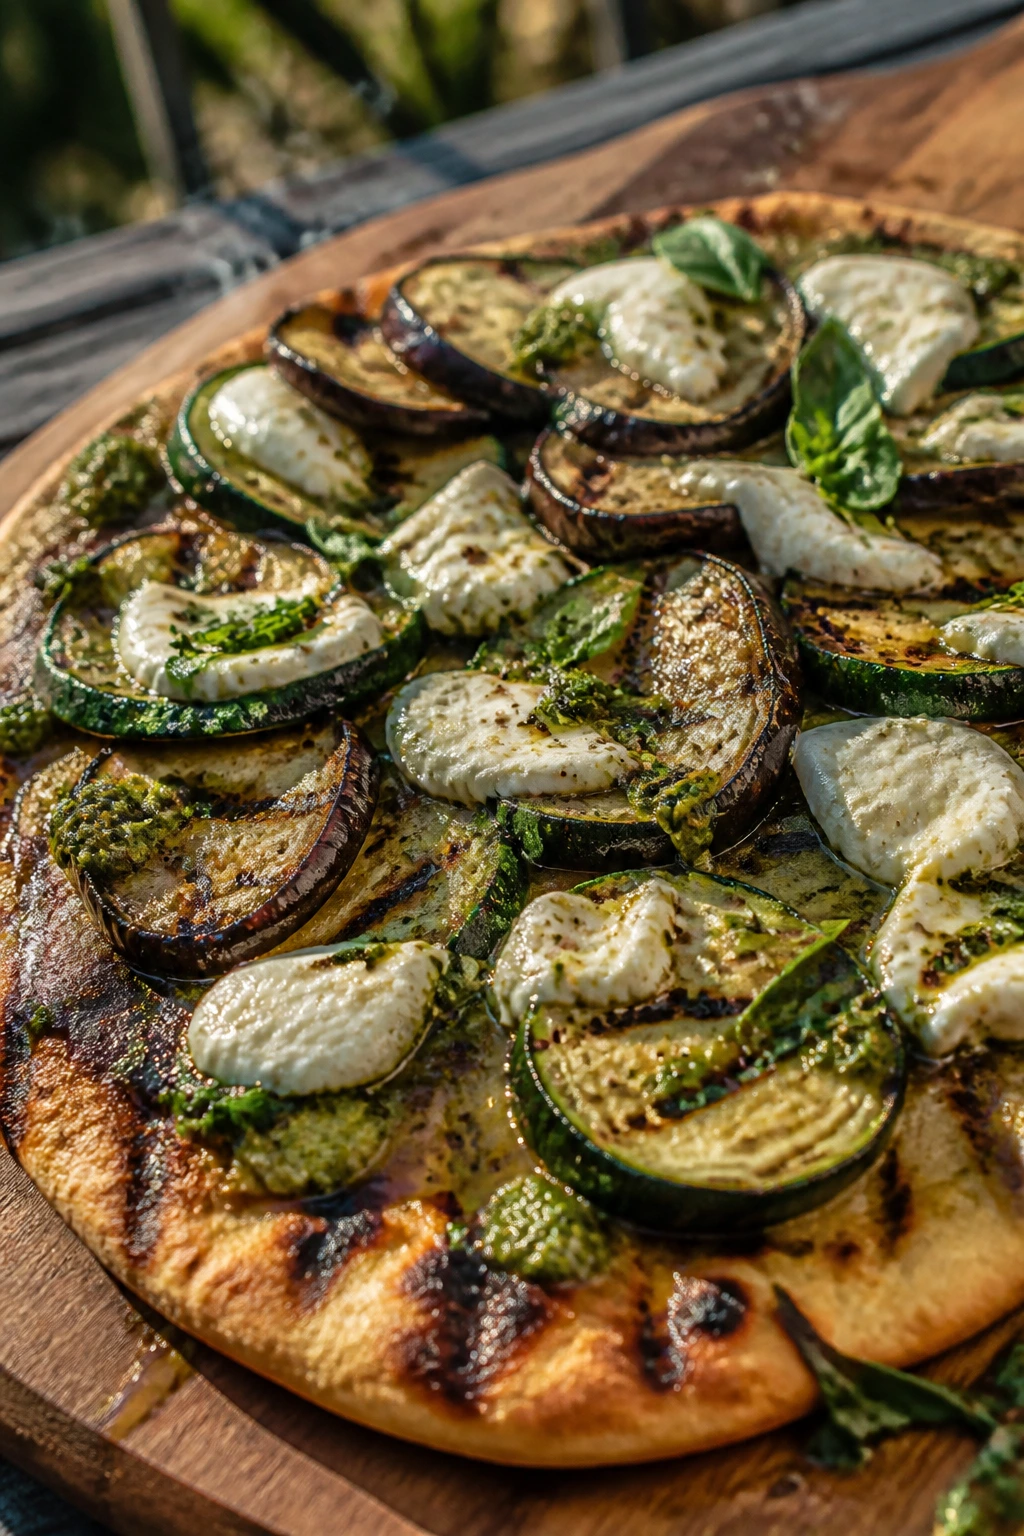
Flatbread is one of those grill recipes that feels casual until the first bite. The crust gets blistered, the zucchini and eggplant pick up char, and the mozzarella melts into little pools that drip into the pesto. It’s the dish I make when I want the grill to act like an oven, but with better smoke.
Why It Works:
Pizza dough takes to a hot grill if you give it one side of direct heat and a quick flip. That first side puffs, blisters, and gets enough structure to hold toppings. Grilled vegetables are already cooked a bit before they hit the dough, which keeps the flatbread from getting waterlogged. Pesto gives you fat and herb flavor without needing a heavy sauce.
Key Ingredients:
- 1 pound pizza dough
Store-bought or homemade both work. - 1 zucchini, thinly sliced
Thin slices grill quickly and lay flat. - 1 small eggplant, thinly sliced
The slices should be no thicker than 1/4 inch. - 1 red onion, sliced
Grillable and sweet. - 8 ounces fresh mozzarella, torn into pieces
Tear it, don’t grate it. - 2 tablespoons olive oil
Keeps the vegetables and dough from sticking. - 1/2 cup pesto
Acts as the sauce. - 1 teaspoon kosher salt
Seasons the vegetables. - 1/2 teaspoon black pepper
Sharpens the flavor. - Fresh basil leaves
For the finish.
Quick Steps:
- Toss the zucchini, eggplant, and onion with olive oil, salt, and pepper.
- Grill the vegetables over medium-high heat for 3 to 5 minutes per side until tender and marked, then set them aside.
- Stretch the dough into a rough oval and brush both sides lightly with olive oil.
- Grill one side of the dough for 2 to 3 minutes, until it puffs and the bottom has grill marks.
- Flip the dough, spread on pesto, scatter the mozzarella and grilled vegetables over the top, then close the lid for 2 to 3 minutes until the cheese melts.
- Finish with basil, slice, and serve right away.
Equipment for This Recipe:
- Grill with a clean grate
Dough sticks easily if the grate is dirty. - Tongs and a spatula
Helpful for flipping the dough. - Pizza peel or sheet pan
Useful for carrying stretched dough to the grill. - Pastry brush
For the oil.
How to Serve This Dish:
Cut the flatbread into thick strips and serve it as a starter or a light dinner with a bitter green salad. It also holds up well beside grilled chicken or sausage. I like a drizzle of olive oil and a few flakes of salt right before serving.
Pro Tips for This Recipe:
- Let dough rest if it fights back. Ten minutes on the counter makes stretching easier.
- Use a light hand with toppings. Too much and the center goes soggy.
- Pre-grill the vegetables. Raw eggplant on flatbread is a bad idea.
- Close the lid briefly after topping. The trapped heat melts cheese fast.
Variations on This Dish:
- Tomato-Basil Flatbread: Use sliced tomatoes and a little ricotta instead of eggplant.
- White Pizza Version: Skip pesto and use garlic oil, mozzarella, and rosemary.
- Gluten-Free Route: Use a gluten-free dough that can handle direct heat.
Common Mistakes to Avoid with This Dish:
- Trying to load it like a pizza delivery pie: The grill wants fewer toppings.
- Letting the dough tear on the grate: Oil and a clean surface matter here.
- Walking away for too long: Flatbread can go from blistered to burned fast.
9. Grilled Peach, Burrata, and Prosciutto Salad
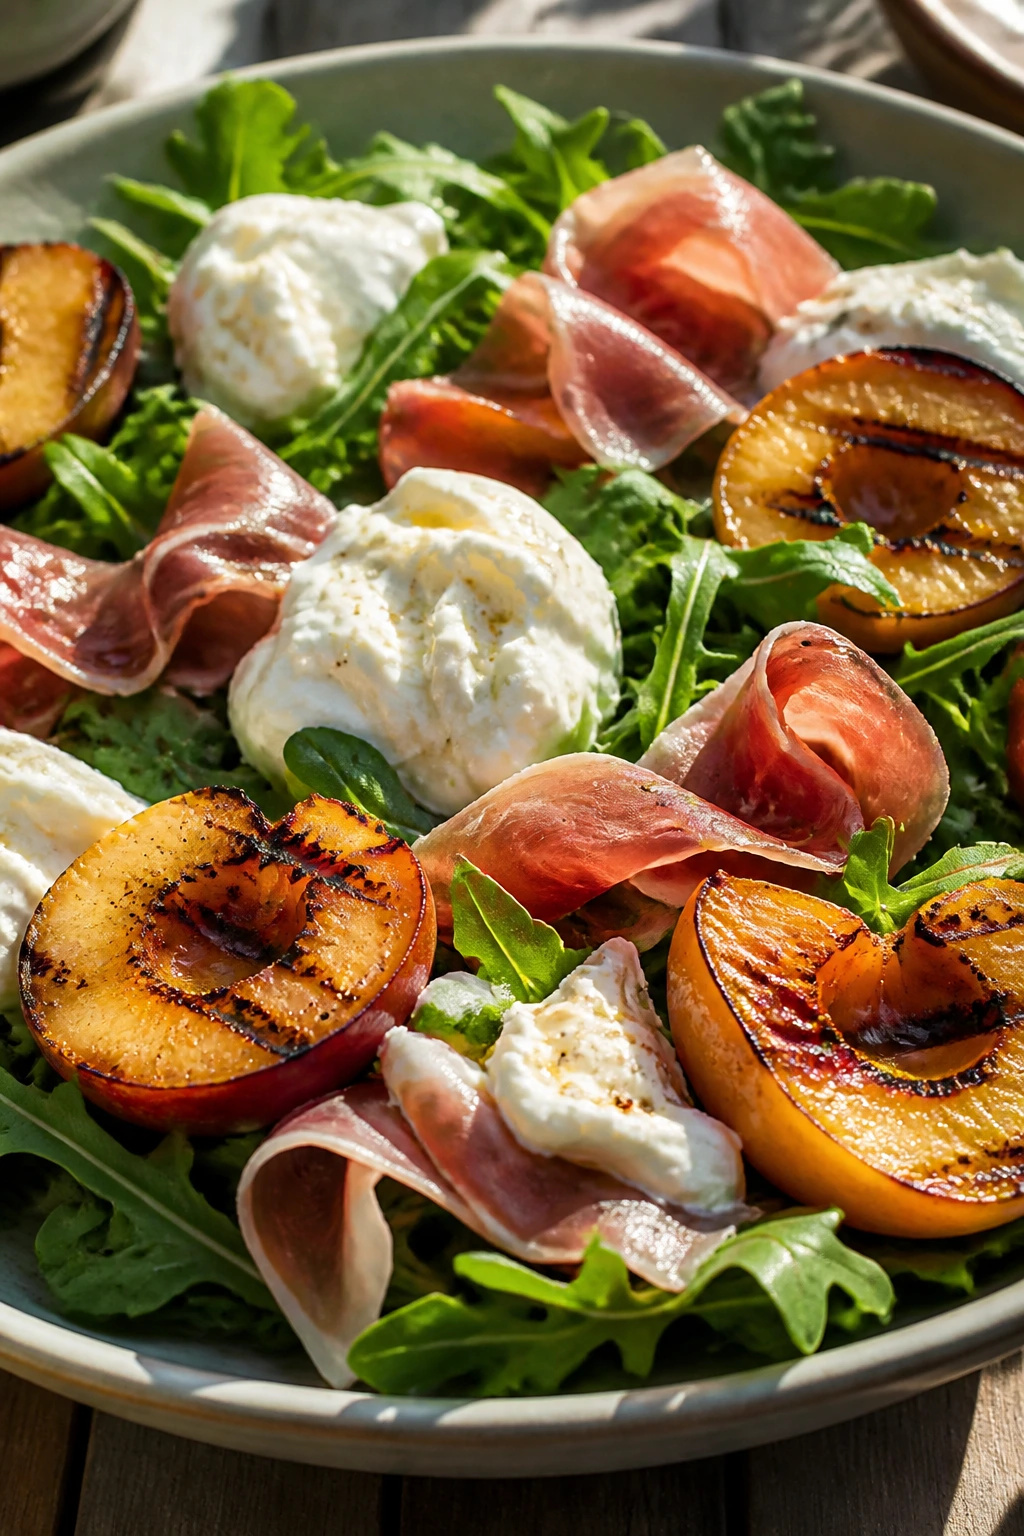
There are salads, and then there are salads that make everyone stop talking for a second. Grilled peaches do that. The fruit softens at the edges, the burrata spills creamy curds onto the plate, and the prosciutto brings salt and chew. It’s a starter, a lunch, or a side if you want the meal to feel lighter but still worth sitting down for.
Why It Works:
Peaches become sweeter and more fragrant after a short stint on the grill. Burrata gives you cool creaminess against the warm fruit, and prosciutto adds the savory punch that keeps the dish from drifting into dessert territory. Arugula brings peppery bitterness, so the whole plate keeps moving instead of sitting still. A little balsamic glaze finishes the job with acidity and shine.
Key Ingredients:
- 4 ripe peaches, halved and pitted
Ripe but still firm enough to hold shape. - 2 tablespoons olive oil
Helps the peaches caramelize. - 5 ounces baby arugula
Bitter greens balance the richness. - 8 ounces burrata
Cold from the fridge until the moment you plate it. - 4 ounces prosciutto
Torn into ribbons or folded into loose strips. - 2 tablespoons balsamic glaze
Enough to drizzle, not drown. - 1/4 cup basil leaves
Fresh basil makes the whole plate smell better. - 1/4 cup toasted pistachios
For crunch. - Pinch of flaky salt
Optional, but worth it.
Quick Steps:
- Brush the peach halves with olive oil.
- Grill them cut-side down over medium heat for 1 to 2 minutes, until marked and just starting to soften.
- Arrange the arugula on a platter and tear the burrata over the top.
- Add the peaches and tuck the prosciutto around them.
- Drizzle with balsamic glaze, scatter basil and pistachios, then finish with a small pinch of salt.
Equipment for This Recipe:
- Grill or grill pan
Either gives you the char. - Tongs
For moving the peaches gently. - Sharp knife
To halve and pit the fruit. - Platter
Best for a composed salad.
How to Serve This Dish:
Serve it immediately while the peaches are still warm and the burrata is cool. A hunk of crusty bread turns it into a real meal, and a chilled glass of sparkling water with lemon fits the plate well. Do not hold this salad for later; the contrast is the whole trick.
Pro Tips for This Recipe:
- Choose peaches that give a little when pressed but are not collapsing.
- Dry the burrata briefly after opening if it’s very wet; excess liquid can pool on the plate.
- Add the prosciutto at the end so it keeps some texture.
- Toast the pistachios ahead of time in a dry skillet for deeper flavor.
Variations on This Dish:
- Goat Cheese Swap: Use soft goat cheese if burrata is not handy.
- Vegetarian Version: Leave out the prosciutto and add more pistachios or avocado.
- Honey-Balsamic Finish: Drizzle a little honey with the glaze for extra sweetness.
Common Mistakes to Avoid with This Dish:
- Using overripe peaches: They fall apart before they mark.
- Drowning the salad in glaze: Burrata needs room to show up.
- Assembling too early: The greens wilt and the prosciutto loses its edge.
10. Grilled Stuffed Bell Peppers with Couscous and Feta

Stuffed peppers are usually thought of as oven food, but the grill gives them a better personality. The skins blister, the edges soften, and the filling picks up a little smoke. Couscous, chickpeas, feta, lemon, and herbs make a meal that eats cleanly and doesn’t need much beside it.
Why It Works:
Bell peppers are built with thick walls, which makes them a good vessel for direct and indirect heat. Grilling them cut-side down first softens the flesh and gives you a little char before the filling goes in. Couscous is fast-cooking and light, so it doesn’t weigh the peppers down the way rice sometimes does. Feta and lemon keep the filling bright enough to cut through the smoke.
Key Ingredients:
- 4 large bell peppers, halved and seeded
Look for peppers with flat bottoms so they sit steadily. - 1 cup couscous
Fluffs up fast and catches the lemon well. - 1 cup boiling water or broth
For the couscous. - 1 can chickpeas, drained and rinsed
Adds body and protein. - 1/2 cup crumbled feta
Salty and sharp. - 1/4 cup chopped parsley
Freshens the filling. - 2 tablespoons olive oil
Keeps the filling moist. - 2 scallions, thinly sliced
A little bite. - Juice of 1 lemon
Wakes everything up. - 1 teaspoon ground cumin
Adds warmth. - Salt and black pepper
Season to taste.
Quick Steps:
- Stir the couscous with the boiling water or broth, cover, and let it sit for 5 minutes. Fluff with a fork.
- Mix the couscous, chickpeas, feta, parsley, olive oil, scallions, lemon juice, cumin, salt, and pepper in a bowl.
- Preheat the grill to medium heat and oil the grates.
- Grill the pepper halves cut-side down for 4 to 5 minutes, then flip them over.
- Spoon in the filling and grill, covered, for another 6 to 8 minutes until the peppers are tender and the filling is warmed through.
- Serve hot, with extra lemon on the side.
Equipment for This Recipe:
- Grill with a lid
Needed for softening the peppers after filling. - Mixing bowl
For the couscous mixture. - Spoon
For filling the peppers neatly. - Tongs
For moving pepper halves carefully.
How to Serve This Dish:
Serve two pepper halves per person as a light main, or one half as a side next to grilled fish or chicken. A spoonful of yogurt on the plate makes the dish feel rounder without making it heavy. These also work well at room temperature, which is handy if the rest of dinner is still coming off the grill.
Pro Tips for This Recipe:
- Choose thick peppers. Thin walls tear and collapse.
- Do not pack the filling too tightly. Leave space for the heat to move through.
- Couscous should be fluffy, not wet. If it’s sticky, let it cool a bit before stuffing.
- Add feta last. It keeps its shape better that way.
Variations on This Dish:
- Mediterranean Chickpea Version: Add chopped olives and sun-dried tomatoes.
- Harissa Heat: Stir a spoonful of harissa into the couscous for more spice.
- Vegan Swap: Skip the feta and use toasted pine nuts and a spoonful of tahini.
Common Mistakes to Avoid with This Dish:
- Undercooking the peppers: They should give when pierced, not stay raw and crunchy.
- Overfilling the halves: The stuffing falls out before the peppers soften.
- Using cold filling from the fridge: Let it lose its chill so it warms evenly.
11. Honey-Soy Grilled Chicken Wings
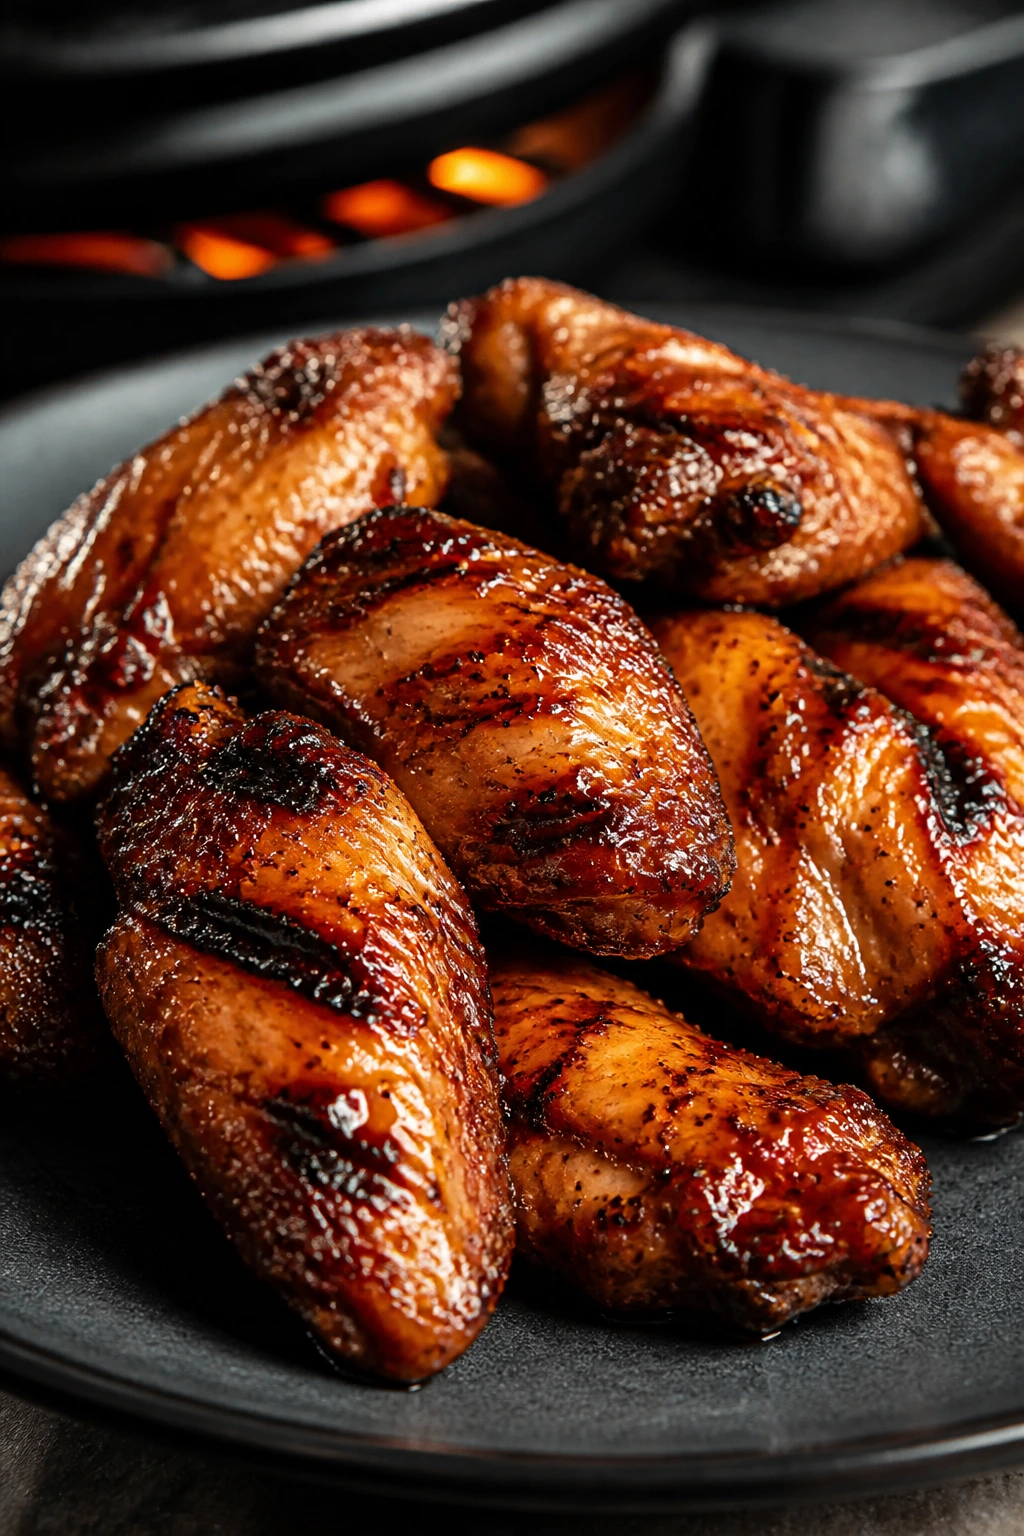
Wings deserve better than the same old sticky sauce dumped on after the fact. On the grill, they pick up char before the glaze goes on, which makes every bite taste deeper and less sugary. Honey, soy, ginger, and garlic give you a shiny finish that clings without turning the skin limp.
Why It Works:
Chicken wings need a two-stage approach. They want enough indirect heat to render the fat and cook through, then a final blast of direct heat to crisp and glaze. Soy sauce adds salt and umami, honey brings shine, and ginger cuts through the sweetness. Cook wings to 175°F to 185°F if you want the meat tender enough to pull cleanly from the bone.
Key Ingredients:
- 3 pounds chicken wings, split at the joints
Split wings cook more evenly. - 1/4 cup soy sauce
Salts the meat and deepens the flavor. - 3 tablespoons honey
Gives the glaze body. - 2 tablespoons rice vinegar
Keeps the glaze from tasting heavy. - 2 garlic cloves, minced
Strong but not overwhelming. - 1 tablespoon grated fresh ginger
Brings heat and freshness. - 1 tablespoon sesame oil
A little goes a long way. - 1 teaspoon black pepper
Sharpens the marinade. - 1 teaspoon crushed red pepper flakes
Optional, for extra kick. - Sesame seeds and sliced scallions
For finishing.
Quick Steps:
- Pat the wings dry with paper towels.
- Stir the soy sauce, honey, vinegar, garlic, ginger, sesame oil, pepper, and red pepper flakes in a bowl, then toss the wings in the marinade. Chill for 30 minutes to 4 hours.
- Preheat the grill to medium heat and set up an indirect zone.
- Grill the wings over indirect heat for 35 to 45 minutes, turning every 10 minutes, until they’re cooked through and the skin looks rendered.
- Move them over direct heat for the final 2 to 4 minutes, brushing on a little extra glaze until the outside is sticky and lightly charred.
- Finish with sesame seeds and scallions.
Equipment for This Recipe:
- Grill with two heat zones
This matters more than almost anything else here. - Tongs
For turning without piercing the skin. - Basting brush
Makes glazing easy. - Foil drip tray
Helps keep flare-ups under control.
How to Serve This Dish:
Pile the wings on a platter with cucumber salad or grilled corn on the side. They’re good enough to eat with your hands, but napkins should be close by because the glaze likes to cling. A little lime wedge on the side sharpens the sweet-savory finish.
Pro Tips for This Recipe:
- Dry the wings before marinating. Damp skin gets sluggish on the grill.
- Use indirect heat first. That’s how you cook them through without burning the glaze.
- Brush the glaze late. Sugar and direct fire are a risky pair.
- Cook wings by temperature, not by color alone. Color can fool you.
Variations on This Dish:
- Korean Heat: Add gochujang to the glaze for more depth.
- Lemon-Soy Wings: Swap ginger for lemon zest and a little garlic powder.
- Dry-Rub Style: Skip the glaze and use a paprika-cumin rub with a squeeze of lime at the end.
Common Mistakes to Avoid with This Dish:
- Saucing too early: The honey burns before the wings finish cooking.
- Leaving the grill too hot: The outside chars while the center stays underdone.
- Stopping at 165°F: Wings get better a little higher, where the connective tissue softens.
12. Grilled Sausage and Pepper Hoagies

There’s nothing delicate about this sandwich, and that’s part of the charm. Sausage, peppers, and onions on a toasted roll give you smoke, fat, sweetness, and crunch in one bite. It tastes like a cookout handed itself a better lunch hour.
Why It Works:
Italian sausage brings fat and seasoning, which means the grill only has to add char and a little crispness. Peppers and onions soften over moderate heat and turn sweet at the edges. Toasting the rolls after the filling is ready keeps them from going limp under the juices. Simple, direct, done.
Key Ingredients:
- 1 1/2 pounds Italian sausage links
Sweet or hot, depending on your crowd. - 3 bell peppers, sliced into strips
Use mixed colors if you want more sweetness. - 1 large onion, sliced
Thick slices hold together on the grill. - 2 tablespoons olive oil
Helps the vegetables brown. - 1 teaspoon dried oregano
Fits the sausage flavor. - 1/2 teaspoon kosher salt
Keep it light since the sausage is already seasoned. - 1/2 teaspoon black pepper
Adds bite. - 4 hoagie rolls
Sturdy rolls handle the filling best. - 4 slices provolone or 1 cup shredded provolone
Melts over the hot sausage. - Optional yellow mustard or spicy brown mustard
Good if you like a sharper sandwich.
Quick Steps:
- Toss the peppers and onion with olive oil, oregano, salt, and pepper.
- Preheat the grill to medium heat.
- Grill the sausages for 12 to 15 minutes, turning often until browned and cooked to 160°F.
- Grill the peppers and onions until soft and lightly charred, about 8 to 10 minutes.
- Slice the sausages lengthwise if you want more surface area, then tuck them into the rolls with peppers, onions, and provolone.
- Return the assembled hoagies to the grill for 1 to 2 minutes to melt the cheese and toast the bread.
Equipment for This Recipe:
- Grill
Medium heat keeps the sausage from bursting. - Tongs
Essential for turning links cleanly. - Grill basket or sheet pan
Helpful for the vegetables if you have a lot. - Knife and cutting board
For slicing the vegetables and sandwich.
How to Serve This Dish:
Serve the hoagies with a sharp pickle spear or a cabbage slaw if you want some crunch on the side. They’re filling enough to stand alone, which is useful when the grill is busy and nobody wants a complicated plate. A little mustard on the roll before the sausage goes in is the move I keep coming back to.
Pro Tips for This Recipe:
- Do not pierce the sausage. The fat should stay inside.
- Cook the links over medium heat, not a roaring fire. Slow enough to cook through, hot enough to brown.
- Toast the rolls last. Bread burns quickly once it’s sliced.
- Cut the peppers thick. Thin strips disappear before the sausage finishes.
Variations on This Dish:
- Chicken Sausage Version: Use chicken or turkey sausage for a lighter sandwich.
- Spicy Arrabbiata Style: Add crushed red pepper and a spoonful of marinara.
- Plant-Based Option: Swap in good grilled vegan sausage and keep the peppers and onions.
Common Mistakes to Avoid with This Dish:
- Bursting the sausage by high heat: A blown casing is messy and dry.
- Using weak rolls: Soft sandwich bread turns to mush.
- Skipping the cheese melt: The heat from the sausage helps the provolone cling.
13. Tandoori Chicken Skewers
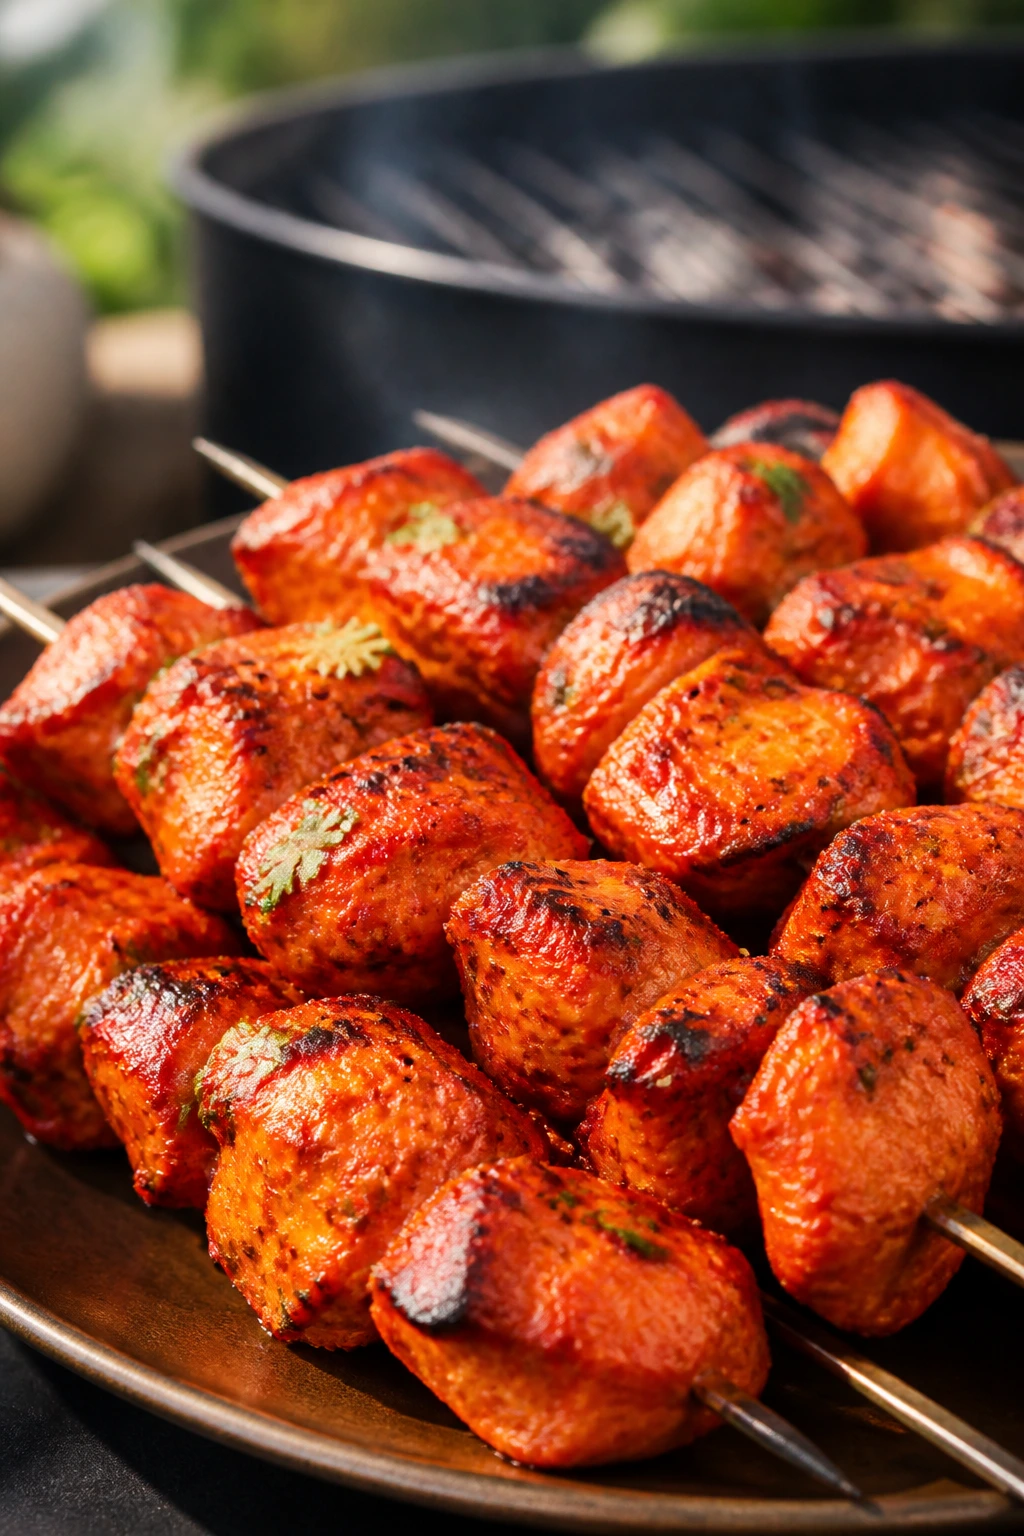
Tandoori chicken on a grill gives you the bright spice of a clay oven without having to own one. The yogurt marinade tenderizes the meat, the spices stain it a deep red-orange, and the edges get little blackened spots that taste like they were meant to be there. I like this recipe because it looks dramatic and is not actually difficult.
Why It Works:
Yogurt coats the chicken and holds the spice mixture in place. The mild tang helps the chicken stay tender while the salt seasons it through the center. Boneless thighs take the heat better than breasts, and skewers make it easy to turn the pieces without losing them to the grates. Grill over medium-high heat and you get char outside, juicy meat inside.
Key Ingredients:
- 2 pounds boneless chicken thighs, cut into 1 1/2-inch pieces
Thighs stay moist and handle the spice well. - 1 cup plain yogurt
Thick yogurt clings better than thin. - 2 tablespoons lemon juice
Cuts through the richness. - 3 garlic cloves, minced
Gives the marinade backbone. - 1 tablespoon grated fresh ginger
Sharp and warm. - 2 teaspoons garam masala
The main spice note. - 1 teaspoon ground cumin
Earthy and steady. - 1 teaspoon paprika
For color. - 1/2 teaspoon turmeric
Adds the classic yellow glow. - 1 teaspoon kosher salt
Necessary here; do not underseason. - 1/2 teaspoon cayenne, optional
Use if you want heat. - Chopped cilantro
For the finish.
Quick Steps:
- Mix the yogurt, lemon juice, garlic, ginger, garam masala, cumin, paprika, turmeric, salt, and cayenne in a bowl.
- Add the chicken pieces and coat them well. Refrigerate for 2 to 12 hours.
- Thread the chicken onto skewers.
- Preheat the grill to medium-high heat and oil the grates.
- Grill the skewers for 5 to 6 minutes per side, turning until the chicken is charred in spots and reaches 165°F.
- Rest for 3 to 5 minutes, then finish with cilantro and serve.
Equipment for This Recipe:
- Skewers
Metal is easiest; wooden ones need soaking. - Mixing bowl
Big enough for the marinade. - Tongs
For turning the skewers. - Instant-read thermometer
Needed for safe, juicy chicken.
How to Serve This Dish:
Serve the skewers with naan, cucumber salad, or basmati rice. A small bowl of yogurt mixed with lemon and salt makes a good dipping sauce. The chicken also works well tucked into wraps with sliced onion and tomatoes.
Pro Tips for This Recipe:
- Use thighs, not breasts. Breasts dry out before the spice can shine.
- Wipe off excess marinade if it’s thick and clumpy; too much yogurt can drip and flare.
- Soak wooden skewers long enough that they don’t scorch.
- Give the chicken room on the skewer. Tight packing slows even cooking.
Variations on This Dish:
- Paneer Skewers: Swap chicken for paneer cubes and shorten the grill time.
- Mild Family Version: Reduce the cayenne and add a little more paprika.
- Curry-Lime Style: Add lime zest and a spoonful of curry powder for a different direction.
Common Mistakes to Avoid with This Dish:
- Using watery yogurt: Thin marinade slides off the chicken.
- Overcrowding the skewers: The centers stay undercooked.
- Cooking over blazing flame: The outside blacks before the meat is done.
14. Portobello Mushroom Burgers with Herby Mayo
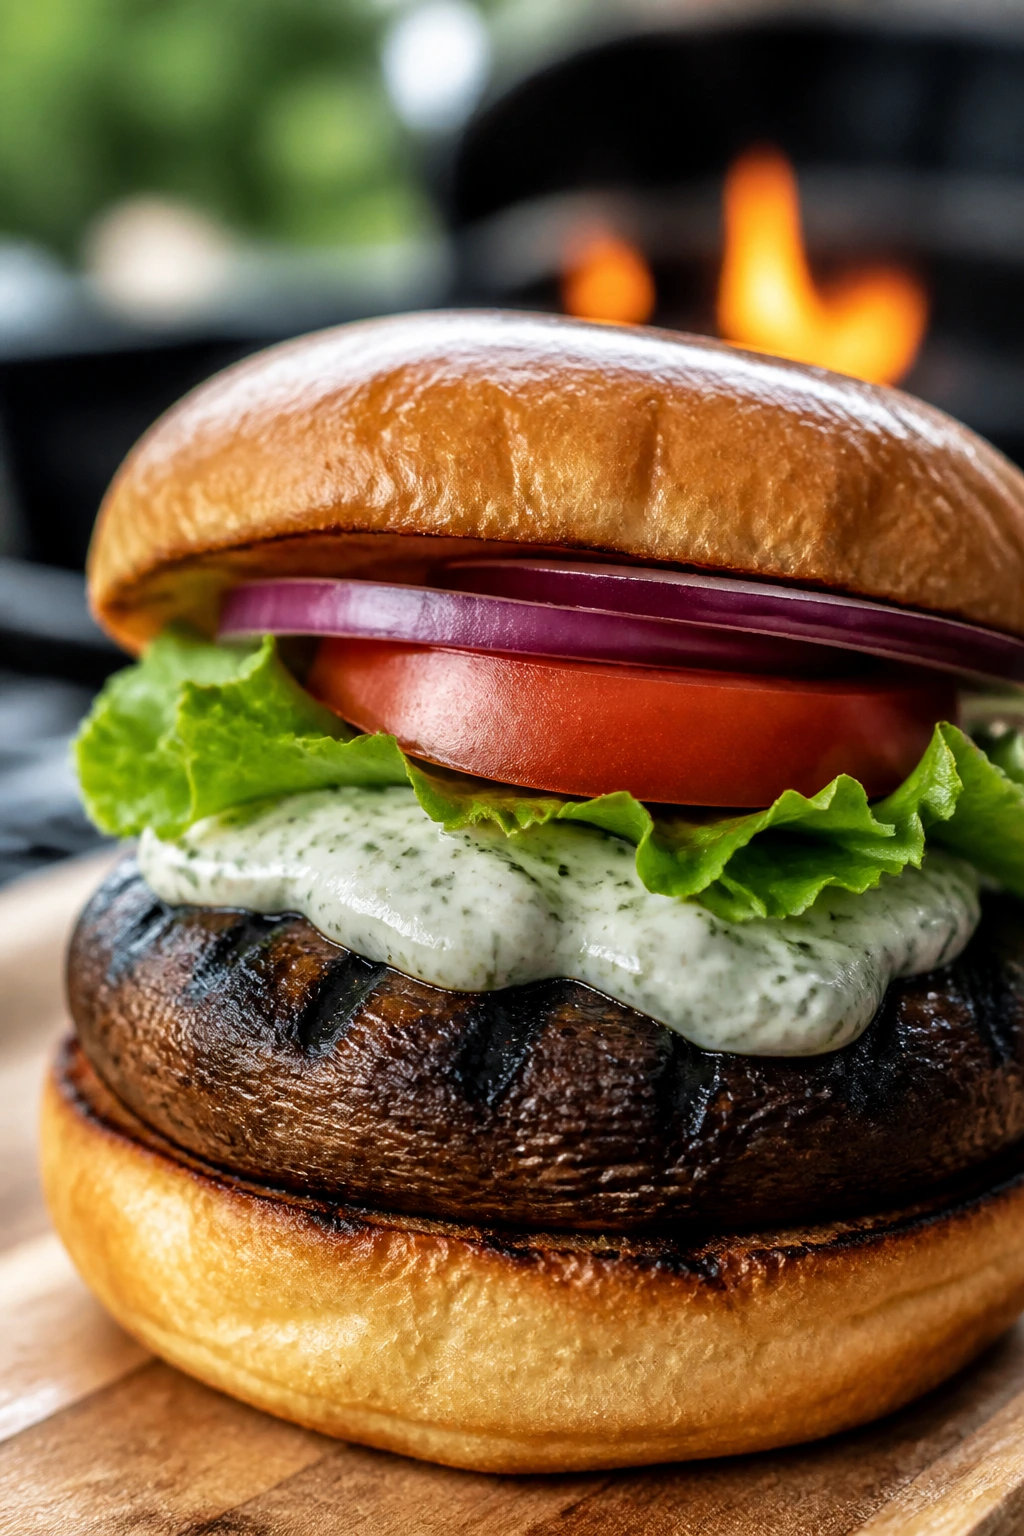
A grilled portobello cap has a meaty feel without pretending to be meat. It absorbs balsamic, garlic, and olive oil, then turns tender enough to sit neatly in a bun with lettuce and tomato. If you want a vegetarian grill option that still feels like a proper sandwich, this is the one I’d make first.
Why It Works:
Portobello mushrooms have enough surface area to pick up marinade and enough structure to stay intact over the grill. The gills hold seasoning, the cap softens without falling apart, and the bun gets to play an important role instead of just being a delivery system. Herby mayo gives the burger richness, while the tomato and lettuce keep it from feeling heavy.
Key Ingredients:
- 4 large portobello mushroom caps
Remove the stems and wipe the caps clean. - 3 tablespoons olive oil
Helps the mushrooms brown. - 2 tablespoons balsamic vinegar
Adds tang and depth. - 2 garlic cloves, minced
Sharpens the marinade. - 1 teaspoon soy sauce
Brings out the mushroom flavor. - 1/2 teaspoon kosher salt
Season lightly; soy sauce already brings salt. - 1/2 teaspoon black pepper
For the edge. - 4 burger buns
Brioche, potato, or sesame all work. - Lettuce, tomato, and red onion
Keep the burger crisp. - 4 slices Swiss or pepper jack, optional
If you want a melted finish. - 1/4 cup mayonnaise mixed with chopped parsley and chives
The herby spread.
Quick Steps:
- Mix the olive oil, balsamic vinegar, garlic, soy sauce, salt, and pepper in a bowl.
- Brush the mushroom caps with the marinade and let them sit for 15 to 30 minutes.
- Preheat the grill to medium-high heat and oil the grates.
- Grill the mushrooms gill-side down for 4 to 5 minutes, then flip and cook for another 3 to 4 minutes until tender.
- Add cheese during the last minute if using.
- Toast the buns, spread with herby mayo, and build the burgers with lettuce, tomato, and onion.
Equipment for This Recipe:
- Grill
Medium-high heat gives the best browning. - Pastry brush
Great for the marinade. - Tongs
Mushrooms are easier to turn gently. - Small bowl
For the mayo and marinade.
How to Serve This Dish:
Serve with fries, a tomato salad, or grilled corn if you want a full plate. These burgers hold up well if people want to add avocado or pickles too. I’d keep the sauce simple; the mushroom already brings a deep, savory flavor.
Pro Tips for This Recipe:
- Dry the caps after wiping. Water blocks browning.
- Do not marinate them for hours. Mushrooms can turn mushy if they sit too long.
- Cook gill-side down first. That side holds the juices and gets the best color.
- Choose buns that can take moisture. Thin, airy buns collapse fast.
Variations on This Dish:
- Caprese Mushroom Burger: Add mozzarella, tomato, and basil instead of the herby mayo.
- Teriyaki Version: Use a teriyaki glaze in place of balsamic.
- Vegan Build: Swap the mayonnaise for a tahini-garlic sauce and skip the cheese.
Common Mistakes to Avoid with This Dish:
- Using tiny mushrooms: They dry out before they feel satisfying.
- Leaving the caps wet: Steam is the enemy of browning.
- Skipping the seasoning: Portobellos need salt and acid or they taste flat.
15. Grilled Pineapple with Chili-Lime and Coconut Sugar
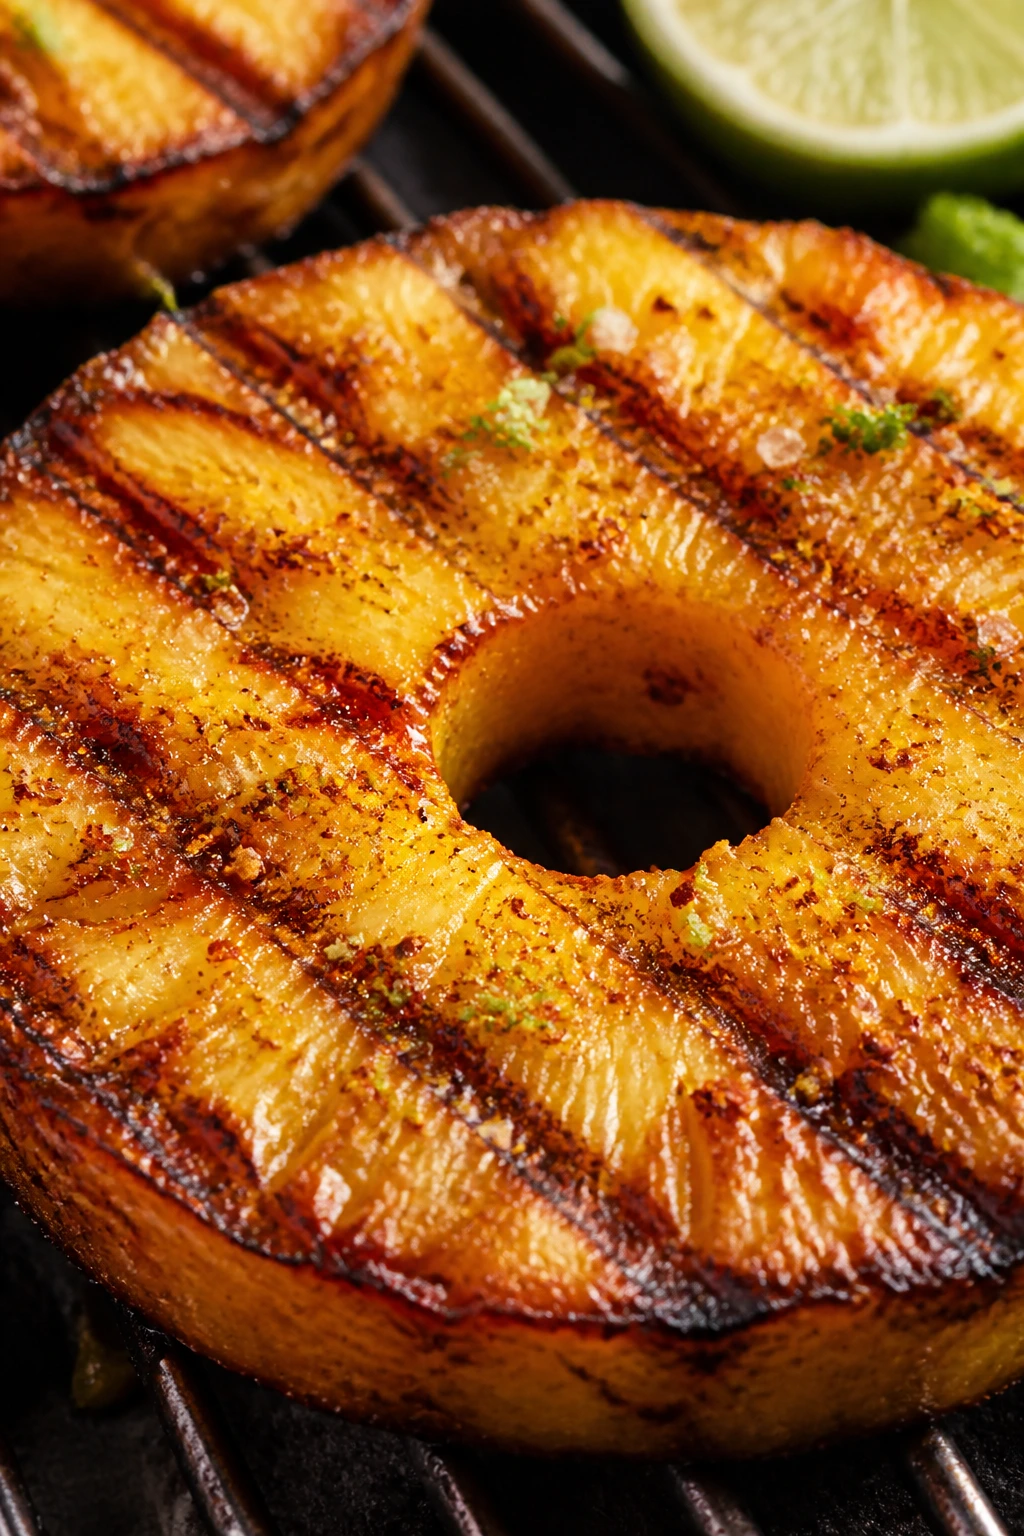
Pineapple on the grill is a small trick that pays off fast. The sugars caramelize, the edges darken, and the fruit turns more fragrant without losing its snap. Add chili, lime, and a pinch of salt, and you get a dessert or side that tastes like the grill had a better idea than you did.
Why It Works:
Pineapple already carries sugar and acid, which makes it one of the easiest fruits to grill well. A little coconut sugar deepens the caramel notes, while lime and chili keep the flavor bright and sharp instead of syrupy. Grilling for just a few minutes gives you color on the surface and juicy fruit underneath. Leave it on too long and you get pineapple jam in the wrong shape.
Key Ingredients:
- 1 ripe pineapple, peeled, cored, and cut into rings or spears
Ripe fruit should smell sweet at the base. - 2 tablespoons coconut sugar or brown sugar
Helps with caramelization. - 1 teaspoon chili powder or Tajín
Gives the fruit a gentle kick. - Zest and juice of 1 lime
Adds acid after grilling. - Pinch of salt
Makes the sweetness taste fuller. - 1 tablespoon melted butter or neutral oil
Helps the sugar stick. - Fresh mint, optional
Good if you want a cleaner finish. - Vanilla ice cream or plain yogurt, optional
If you want to turn it into dessert.
Quick Steps:
- Toss the pineapple with melted butter or oil, coconut sugar, chili powder, and a pinch of salt.
- Preheat the grill to medium-high and oil the grates.
- Grill the pineapple for 2 to 3 minutes per side, until dark grill marks form and the fruit is hot through.
- Remove from the grill and squeeze lime juice over the top.
- Finish with lime zest and mint, then serve warm.
Equipment for This Recipe:
- Grill or grill pan
Either gives the caramelized surface. - Tongs
For turning spears or rings. - Small bowl
For tossing the fruit. - Zester or fine grater
For the lime zest.
How to Serve This Dish:
Serve it warm on its own, or with ice cream if you want dessert to lean creamy. It also works beside grilled pork or chicken, which is why I keep putting fruit on the grate near the end of dinner. A little mint looks nice, but more importantly, it smells fresh against the smoke.
Pro Tips for This Recipe:
- Choose ripe but not mushy pineapple. It should feel firm with a little give.
- Cut the pieces thick enough that they do not collapse.
- Serve immediately. Pineapple is best while the surface is still warm and glossy.
- Salt matters here. A tiny pinch makes the sweetness sharper.
Variations on This Dish:
- Rum-Caramel Finish: Brush with a little rum and brown sugar near the end.
- Tajín Pineapple: Use Tajín instead of chili powder for a saltier kick.
- Coconut Dessert Plate: Add toasted coconut and a scoop of coconut yogurt.
Common Mistakes to Avoid with This Dish:
- Using fruit that is too ripe: It turns soft before it caramelizes.
- Adding too much sugar: The surface burns before the middle warms.
- Leaving it on the grill for too long: You want char marks, not collapsed fruit.
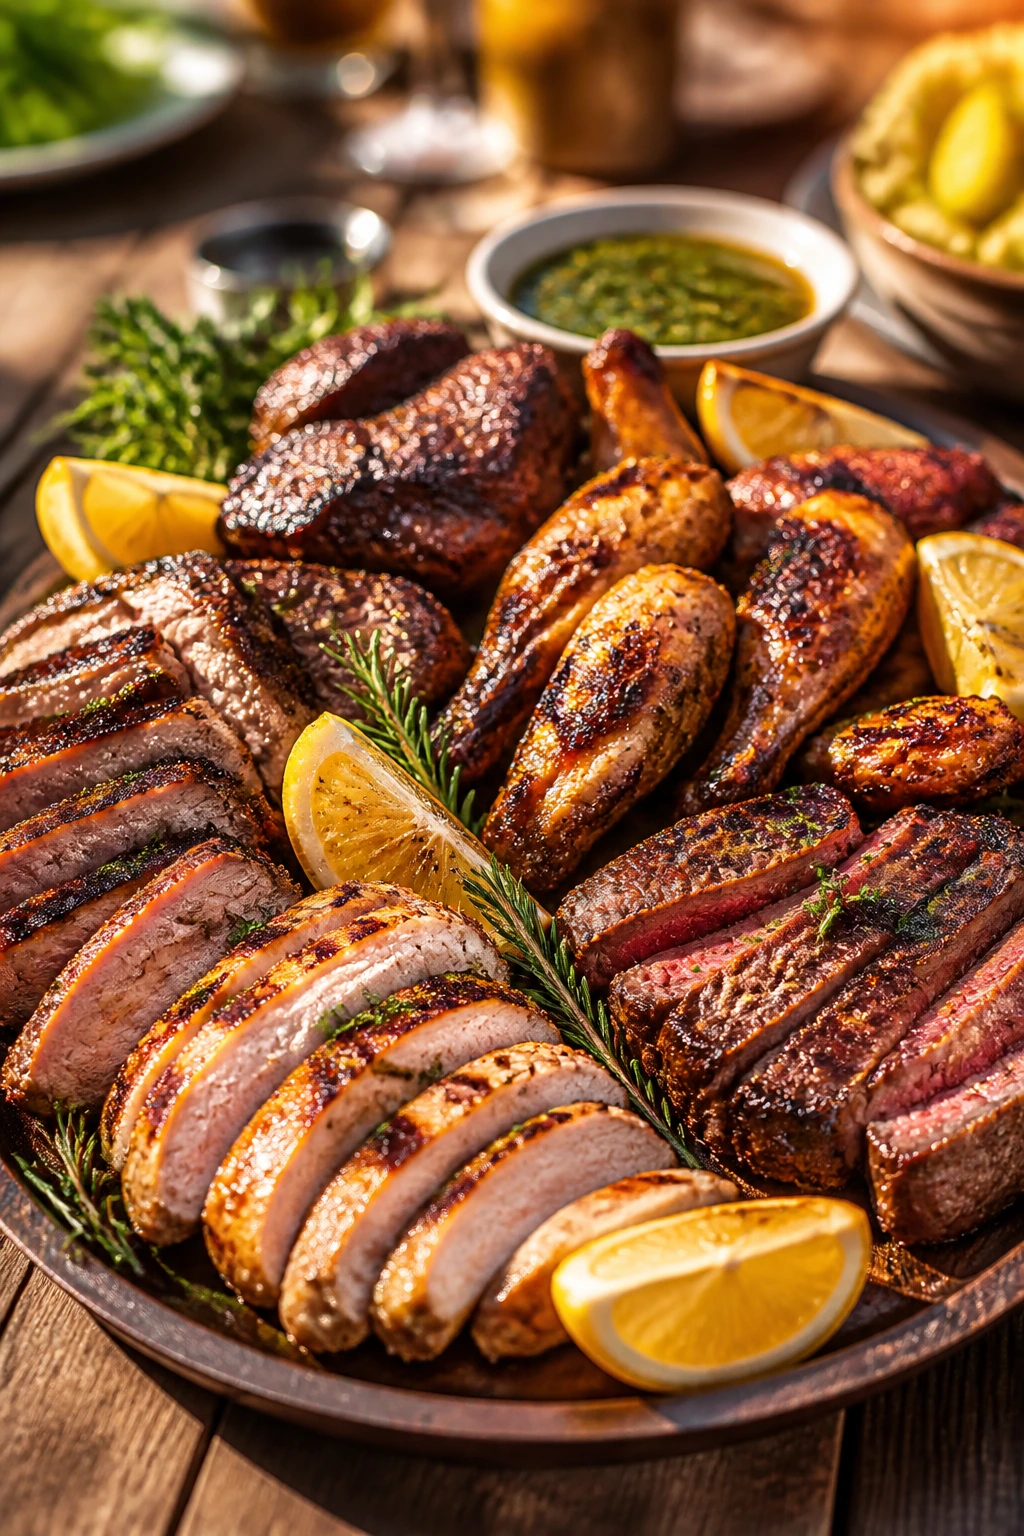
Why These Grilled Dishes Work So Well Together
The grill does not treat every ingredient the same way, and that is a gift. It can sear chicken thighs hard enough to crisp the outside, smoke salmon gently on a cedar plank, blister peaches in two minutes, and coax sweetness out of onions without making them taste cooked to death. That range is why this collection works as a set instead of a random pile of recipes. You get the same fire, but not the same result.
A good grilled menu usually balances three things: something rich, something bright, and something with crunch or chill. Chicken thighs and pork tenderloin bring the rich part. Salads, herb sauces, yogurt, lemon, and lime keep the plate awake. Corn, peppers, flatbread, and toasted buns add texture that makes the meal feel complete instead of smoky for the sake of smoke. The best cookouts I’ve been to had that balance without announcing it.
There’s also a practical reason to love this spread. You can cook many of these dishes in overlapping waves. The chicken marinates while you prep the peppers. The salmon cooks while the flatbread dough rests. The pineapple grills after the heat has come down a bit. That kind of rhythm keeps the work simple, and the table feels full without requiring every pan in the kitchen.
Essential Equipment for These Recipes
-
A grill with a lid
Direct heat handles burgers, shrimp, and fruit; indirect heat matters for salmon, wings, and pork tenderloin. -
Long tongs
You’ll use them constantly for flipping, moving, and rescuing food from hot spots. -
Instant-read thermometer
Chicken should hit 165°F, pork tenderloin 145°F, shrimp should be opaque, and wings cook best higher than you think. -
Two mixing bowls
One for marinades, one for sauces or salad toppings. -
Sharp chef’s knife
Needed for clean slices on peppers, onions, steak, fruit, and herbs. -
Cutting board with a groove
Keeps juices from running across the counter when you slice meats. -
Skewers, wooden or metal
Handy for shrimp, halloumi, and tandoori chicken. -
Grill basket
Useful for vegetables, onions, or smaller pieces that would otherwise fall through the grates. -
Pastry or basting brush
Great for glaze, oil, and butter. -
Cedar plank
Optional, but worth using for salmon if you like a softer smoke. -
Sheet pan
Good for carrying raw ingredients to the grill and resting cooked food. -
Airtight containers
For leftovers that need to be cooled and stored without drying out.
Smart Shopping and Ingredient Tips
Buy chicken thighs that are close in size. A tray with one huge piece and three small ones turns dinner into a timing puzzle, and nobody needs that. For burgers, choose beef that is not too lean. 80/20 gives you enough fat for grill flavor and a juicier bite. If you go leaner, add the risk of dry edges and a flat center.
For shrimp, size matters more than people admit. Large shrimp — think 16/20 or 21/25 count — handle grill heat better than tiny ones and are easier to thread. Buy them already peeled and deveined if that saves your sanity. For salmon, look for a center-cut fillet with even thickness and skin attached. The skin is not decorative; it helps the fish stay together on the plank or grates.
Fruit should be ripe but not collapsing. Peaches and pineapple need enough sugar to caramelize, but not so much softness that they fall apart when you turn them. Press the fruit lightly near the stem end. A little give is good. Mushy fruit is a mess. Halloumi should feel springy and firm in its brine, not dry or cracked. If it looks chalky on the edges, pass.
For vegetables, heavier is often better. Bell peppers with thick walls, onions with tight layers, zucchini that feels solid in the hand — those are the pieces that hold up to the fire. Flatbread and burger buns should be sturdy enough to stand up to moisture. Soft bread can still work, but it needs a quick toast on the grill so it does not collapse into the sauce.
How to Serve These Recipes
Presentation:
A grill dinner looks best when the food has room to breathe. Use a big platter for chicken, steak, wings, or pork, then scatter herbs, lemon wedges, or lime halves around the edges. Salads and fruit dishes should be spread out rather than piled high; you want to see the peaches, burrata, or greens instead of hiding them under a mountain of garnish.
Accompaniments:
Grilled potatoes, cucumber salad, coleslaw, corn on the cob, buttered rice, warm tortillas, and crusty bread all work across this collection. Burgers and sausage hoagies need something sharp on the side. Salmon and shrimp like something cool and acidic. Flatbread, stuffed peppers, and halloumi skewers can stand alone, but a simple green salad keeps the meal from feeling lopsided.
Portions:
Plan on one chicken thigh per person if the rest of the table is busy with sides, or two if the chicken is the centerpiece. Shrimp works best at about 5 to 6 large shrimp per serving as an appetizer, more as a main. Burgers, pork tenderloin medallions, steak fajitas, and sausage hoagies should be sized by appetite, not by appearance — if the grill is the whole meal, people eat more than you think.
Beverage Pairing:
Cold lager, sparkling water with lime, iced tea with lemon, or a dry rosé all fit neatly beside these dishes. For the sweeter plates — peach salad and pineapple — a crisp white wine or tart citrus spritz keeps things bright. Heavy drinks can flatten grilled food. A clean, cold drink keeps the smoke from feeling dense.
Additional Tips and Flavor Boosters
Flavor Enhancement: A finishing hit of acid matters more than a lot of people think. Lemon juice on chicken, lime on pineapple, balsamic on peaches, or a spoonful of yogurt on wings will make the grilled flavor feel sharper and more finished. If a plate tastes flat at the end, it usually needs acid, not more salt.
Customization: Build your own spice path without changing the whole recipe. Add chili flakes to chicken, smoked paprika to vegetables, ginger to shrimp, or cumin to peppers. The basic structure of grilled food is sturdy. You can push it in different directions without breaking it.
Serving Suggestions: Keep fresh herbs close to the platter — basil for peaches, dill for salmon, parsley for shrimp, cilantro for tandoori chicken, scallions for wings. Herbs do not just look nice. They add a green, sharp smell that makes the smoke seem cleaner.
Make-It-Yours: Dairy-free eaters can lean on olive oil, citrus, and herb sauces instead of butter or yogurt. Gluten-free diners can use corn tortillas, grilled potatoes, rice, or lettuce wraps with almost all of these recipes. If you want lower spice, keep the chili flakes and cayenne on the side. That way the grill stays friendly to the whole table instead of one corner of it.
Make-Ahead, Storage, and Reheating Guidance
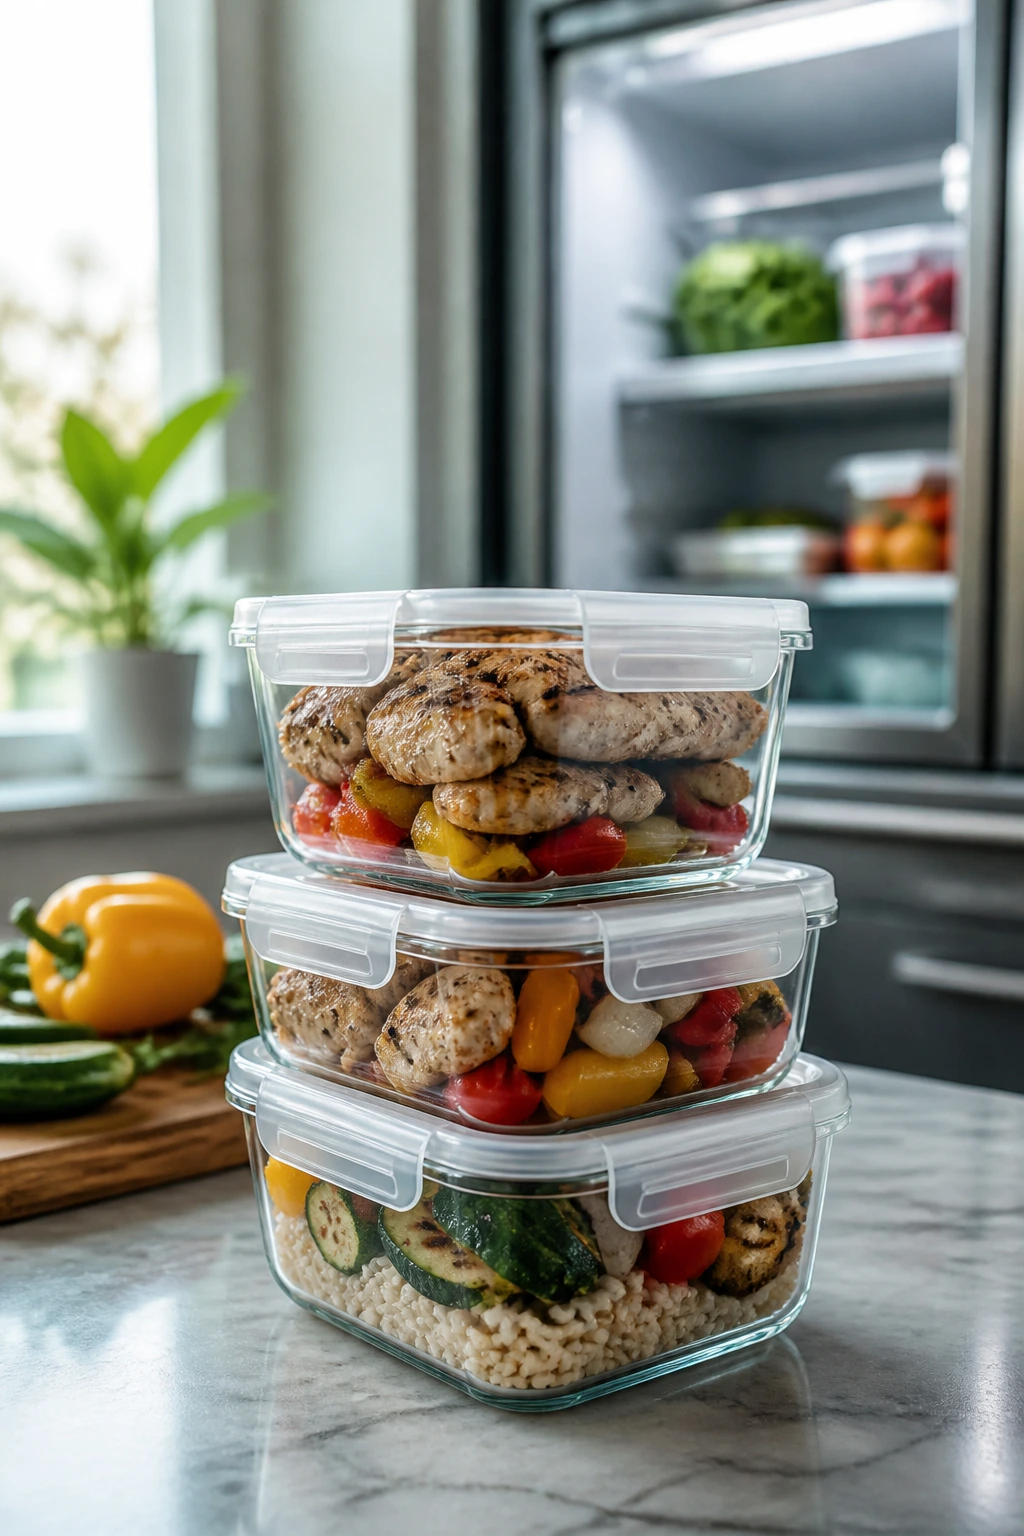
Most of these dishes hold up better than people expect, but the textures change depending on what you’re storing. Grilled chicken thighs, pork tenderloin, burgers, stuffed peppers, and sausage hoagies will keep 3 to 4 days in the refrigerator if they’re cooled quickly and packed in airtight containers. Shrimp and salmon are better within 1 to 2 days. Flatbread is best on day one, though it can be kept for 2 days and reheated carefully. Fruit dishes — peaches, pineapple, and salad with burrata — are most useful the day they’re made.
Freezing works for some of the savory dishes. Cooked chicken thighs and pork tenderloin freeze well for up to 2 months. Burgers can be frozen too, though the buns should be stored separately. Shrimp and salmon freeze for about 1 month, but the texture gets softer after thawing, so I usually leave those for the fridge rather than the freezer. Flatbread can be frozen, but the crust loses some of its grit. Vegetables and stuffed peppers freeze poorly once they’re grilled, because the water in the vegetables turns the texture muddy after thawing.
Reheat chicken, pork, wings, and stuffed peppers in a 325°F oven, covered loosely with foil, until warmed through. Add a spoonful of water or broth to the pan if the meat looks dry. Shrimp should be reheated gently in a skillet over low heat or served cold if you cooked it just right the first time. Salmon likes a short stay in a low oven, then a sauce on top to hide any dryness. Flatbread reheats best on a dry skillet or directly on a grill rack for a minute or two. Microwaves work in a pinch, but they make bread limp and seafood rubbery, so I avoid them when I can.
Marinades can often be made a day ahead. You can also slice vegetables, mix spice blends, and stir together sauces the morning of the cookout. Just keep acid-heavy marinades away from seafood for too long. Shrimp and fish do not want to sit around in lemon juice until dinner. That’s how you end up with mush that looks cooked before it ever touches the fire.
Variations and Adaptations to Try
Dairy-Free Grill Night:
Build the spread around chicken thighs, shrimp, steak fajitas, pork tenderloin, and pineapple, then skip the butter, yogurt, burrata, and cheese. Olive oil, lemon, lime, herbs, and salsa do the same job without dairy. The food gets brighter, not thinner.
Gluten-Free Plate:
Swap in corn tortillas for the fajitas, lettuce cups for burgers, rice for chicken or pork, and potatoes for the sausage or salmon. Flatbread can be replaced with grilled corn salad or stuffed peppers. The grill doesn’t care about gluten; the sides need the adjustment.
Lower-Salt Approach:
Use more citrus, garlic, herbs, and vinegars, and let the grill marks do some of the work. Halloumi, soy sauce, sausage, and feta already bring salt, so balance them with unsalted sides and fresh greens. This style tastes cleaner when the food is hot off the grill and less dependent on sauces.
Mild Kid-Friendly Spread:
Keep the shrimp, chicken, burgers, flatbread, and pineapple, but set spicy sauces aside. Use paprika instead of cayenne and let people add heat at the table. Kids often handle grilled food better when the char is there but the spice is not trying to prove anything.
Smoke-Lover’s Menu:
Lean into cedar planks, smoked paprika, indirect wings, grilled onions, charred corn, and blistered peaches. A charcoal grill will deepen the flavor, but gas works too if you give the food enough time and do not rush the browning. Smoke should add depth, not take over.
Vegetarian Cookout Build:
Halloumi skewers, vegetable flatbread, stuffed peppers, portobello burgers, grilled peaches, and pineapple can carry a whole meal. Pair them with grains, yogurt sauces, and crunchy salad. You do not need meat to make the grill feel busy.
Common Mistakes to Avoid
-
Starting with a dirty or sticky grate
Food tears when it sticks, and sticking usually starts with a crusty grate. Clean and oil the grill before the first batch goes on. -
Using one heat level for everything
Shrimp, salmon, and fruit need a different touch from burgers, wings, and steak. Set up direct and indirect zones so you can move food where it needs to go. -
Saucing too soon
Honey glazes, BBQ sauces, and fruit syrups burn fast. Put them on near the end unless you enjoy the taste of scorched sugar. -
Cutting meat too early
Steak, pork tenderloin, and chicken need a short rest after grilling. Slice too fast and the juices run out onto the board. -
Crowding the grill
When food sits too close together, it steams instead of browning. Leave gaps between the pieces and cook in batches if you need to. -
Ignoring carryover cooking
Salmon, pork, and chicken keep cooking after they leave the heat. Pull them a little early and let the resting time do part of the work.
Frequently Asked Questions
Can I use a gas grill instead of charcoal for these recipes?
Yes. Gas grills are excellent for the chicken thighs, shrimp, burgers, pork tenderloin, wings, and flatbread. Charcoal brings more smoke, but heat control on gas is easier, which matters more than people admit.
Which recipes are best if I’m cooking for a crowd?
Chicken thighs, sausage hoagies, stuffed peppers, wings, and burgers scale up easily. Shrimp and salmon can be made for a crowd too, but they need a little more timing discipline because they go from done to overdone fast.
What’s the safest way to know when the meat is done?
Use an instant-read thermometer. Chicken should reach 165°F, pork tenderloin 145°F with a rest, wings are better a little higher, and steak fajitas can be pulled earlier if you want medium-rare. Color alone is not enough.
Can I prep these recipes the night before?
Yes. Marinades, chopped vegetables, sauces, and spice rubs can all be done ahead. Keep seafood marinating only briefly, and hold fruit and burrata dishes for the day you plan to serve them so the texture stays right.
How do I keep vegetables from falling through the grates?
Use larger cuts, a grill basket, or skewers. Zucchini rounds, onion wedges, pepper strips, and eggplant slices all behave better when they’re wide enough to rest on the bars.
What if my grill has hot spots?
Use the hot spots for burgers, steak, and fruit if you want extra char. Move salmon, chicken, and wings to the cooler zone when the edges start browning too fast. Hot spots are annoying until you start using them on purpose.
Can I make these indoors on a grill pan?
A grill pan works for shrimp, chicken, halloumi, peaches, mushrooms, and flatbread. It will not give you the exact same smoke, but it will give you good marks and a lot of the same charred flavor if you preheat it well.
Do I need to marinate everything?
No. Some foods want a marinade, and some only need oil and salt. Shrimp, salmon, peaches, pineapple, and halloumi often need less than people think. Overmarinating can damage texture more than it helps flavor.
How can I make the meal feel complete without adding a lot of extra work?
Pick one protein, one vegetable, and one bright finish. Chicken thighs with grilled corn salsa, salmon with cucumber salad, or burgers with grilled peaches on the side all land well without asking for a second stovetop session.
One Hot Grate
A good grill weekend does not need six sauces, three marinades, and a spreadsheet. It needs food that likes heat, food that can take a little char, and enough balance on the plate that the smoke stays interesting instead of heavy. That’s why these dishes work so well together: they’re sturdy where they should be, bright where they need to be, and uncomplicated in the best possible way.
If you pick one savory main and one sweet finish, you already have the bones of a strong meal. Add a salad, warm bread, or grilled potatoes if you want to stretch it. Then leave yourself a minute at the end to stand by the grill while the last bits of sugar and smoke settle down. That’s the part I never rush.
Fire up the grate, choose the food that likes the flame, and let dinner do what summer dinner does best.