
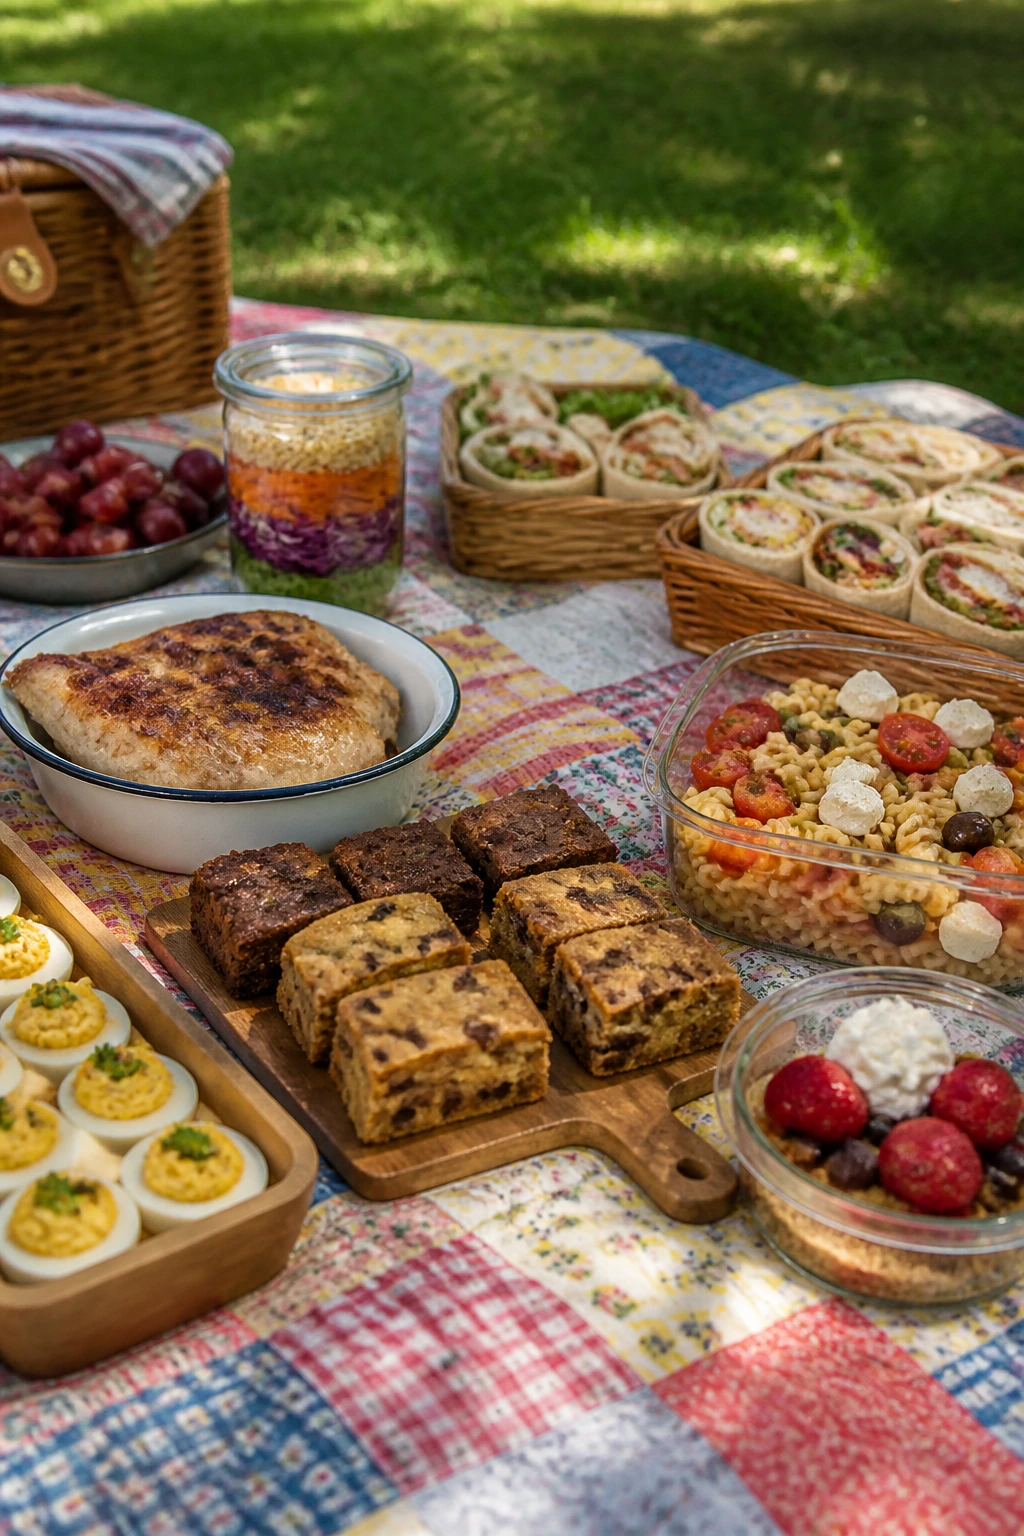
The best summer picnic recipes are the ones that still taste like themselves after a ride in the back seat, a few hours under a tree, and one too many people opening the container “just to take a look.” They don’t slump. They don’t leak. They don’t turn into sad, oily puddles the moment the sun hits the tablecloth.
That’s the whole trick, really. Picnic food has to do two jobs at once: taste good and behave itself. You want bright tomatoes that don’t flood the bread, pasta salads that stay loose instead of gluey, chicken that still feels juicy at room temperature, and desserts that can sit out long enough for everyone to wander back for a second square. Cold food has its own rules. So does food that gets packed into a cooler with ice packs, bottled drinks, paper napkins, and somebody’s overconfident idea of “we probably don’t need another container.”
I’ve always liked picnic food better when it leans on smart texture instead of fuss. Crunchy cucumbers. Toasty bread. Salted cheese. Herb-heavy dressings. Fruit that’s ripe but not collapsing in your hands. The recipes below are built around that kind of practical summer cooking — the kind that travels well, still tastes fresh at noon, and doesn’t ask you to babysit it once the basket is packed.
Why This Collection Works on a Picnic Blanket
- Everything here travels well: These recipes hold up in a cooler, in a tote, or on a folding table without turning watery or floppy.
- Cold or room-temp friendly: A picnic doesn’t need food that’s piping hot, and these dishes taste right when they’re not.
- Built for real-life packing: Several of the recipes use sturdy bread, thick dressings, or moisture barriers so you don’t end up with soggy sandwiches.
- Balanced spread: You get mains, sides, snacks, sweets, and drinks, which matters when a picnic needs to function as lunch and dessert.
- Simple ingredients, big payoff: Most of these recipes rely on eggs, chicken, beans, herbs, fruit, and pantry staples you can buy without hunting through three specialty stores.
- Easy to scale up: A lot of picnic food needs to feed one extra cousin, one extra neighbor, and one extra appetite. These recipes stretch cleanly.
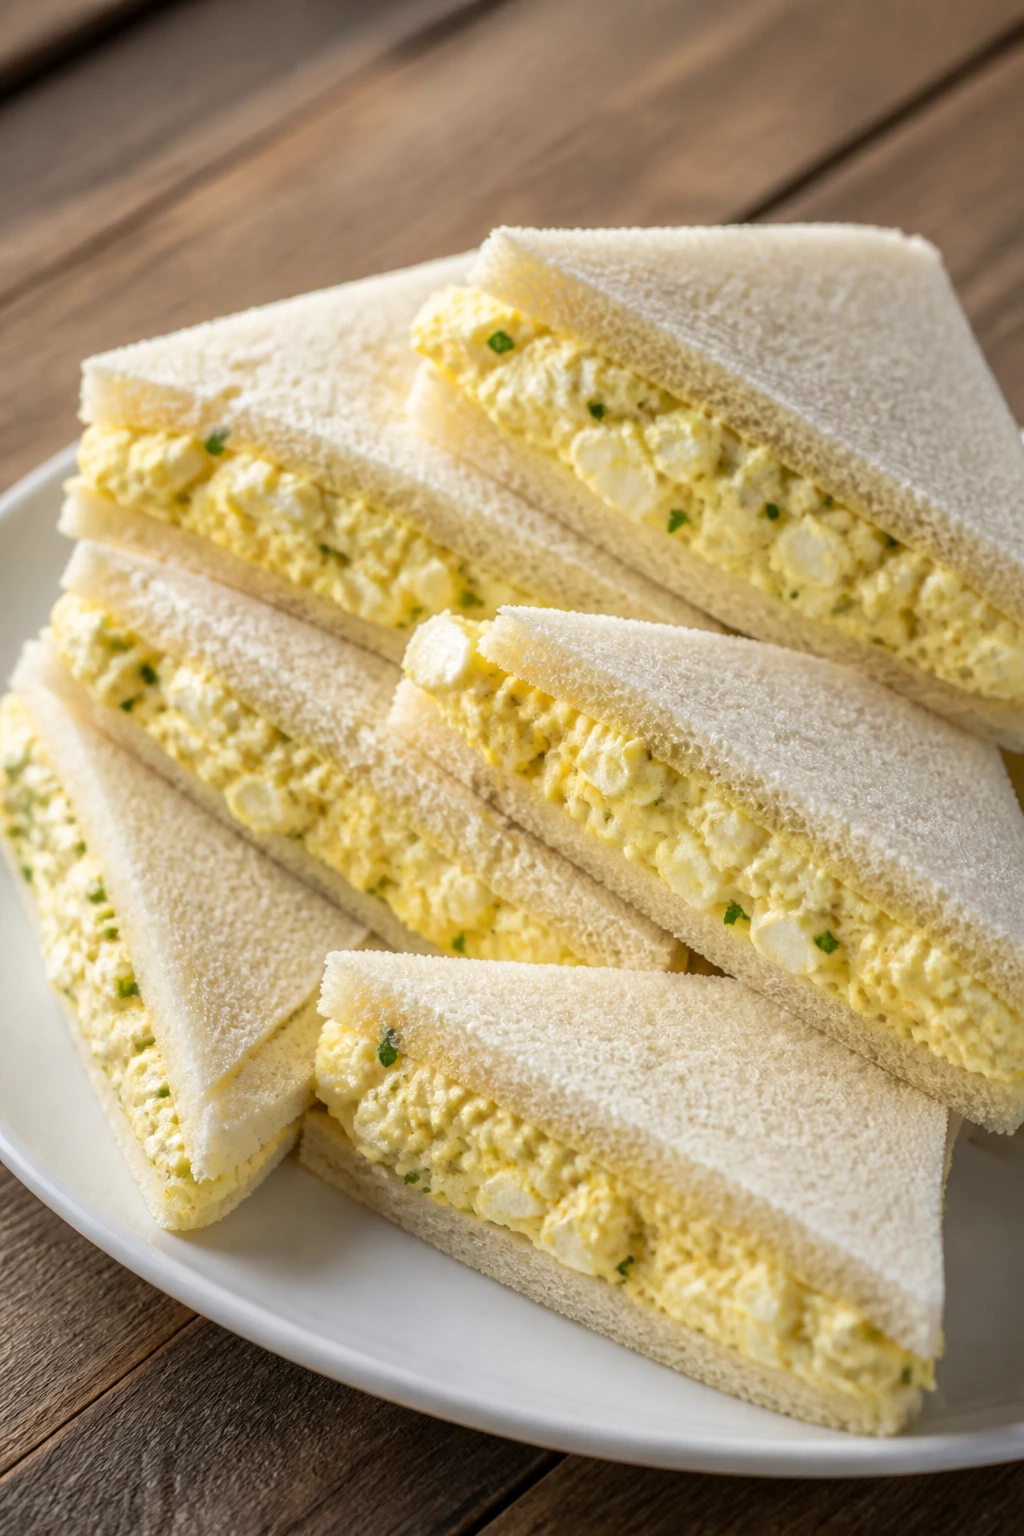
1. Classic Egg Salad Tea Sandwiches
Intro: Egg salad can be dull, or it can be the thing people quietly finish first. These little sandwiches hit the sweet spot: creamy, peppery, a little tangy, with soft bread that keeps the filling front and center.
Why It Works: The filling is sturdy enough to chill for an hour and still spread cleanly. A little Dijon and chopped chives keep the eggs from tasting flat, and the crusts-off bread makes each bite tidy. Picnic food needs that kind of restraint.
Key Ingredients:
- 6 large eggs
- 1/3 cup mayonnaise
- 1 teaspoon Dijon mustard
- 1 tablespoon finely chopped chives
- 1 teaspoon lemon juice
- 1/4 teaspoon kosher salt
- 1/4 teaspoon black pepper
- 8 slices soft white or wheat sandwich bread
- 1 tablespoon softened butter, optional for the bread
Quick Steps:
- Hard-boil the eggs for 10 minutes, then move them to ice water.
- Peel and chop the eggs finely.
- Stir together mayo, Dijon, chives, lemon juice, salt, and pepper.
- Fold in the eggs until coated but not mashed to paste.
- Spread a thin layer on bread, add the second slice, trim crusts, and cut into fingers or triangles.
Equipment for This Recipe:
- Medium saucepan
- Mixing bowl
- Fork or pastry cutter
- Sharp knife
- Cutting board
How to Serve This Dish: Stack the sandwiches on a chilled plate with cucumber spears and a handful of salt-and-vinegar chips. They’re best cut small, because one big square of egg salad feels clunky at a picnic table.
Pro Tips for This Recipe:
- Chill the filling for 20 minutes before assembly; it slices cleaner.
- Use day-old bread if you can. Fresh bread tears when trimmed.
- A pinch of celery salt gives it a deli-style edge.
Variations on This Dish:
- Herb Garden Version: Add dill and parsley for a greener, sharper flavor.
- Pickle-Lover’s Version: Stir in 2 tablespoons finely chopped dill pickles.
- Avocado Swap: Replace half the mayonnaise with mashed avocado and eat the sandwiches the same day.
Common Mistakes to Avoid with This Dish:
- Don’t over-mash the eggs; the filling turns gluey instead of creamy.
- Don’t soak the bread with too much filling. A thin layer keeps the sandwich neat and portable.
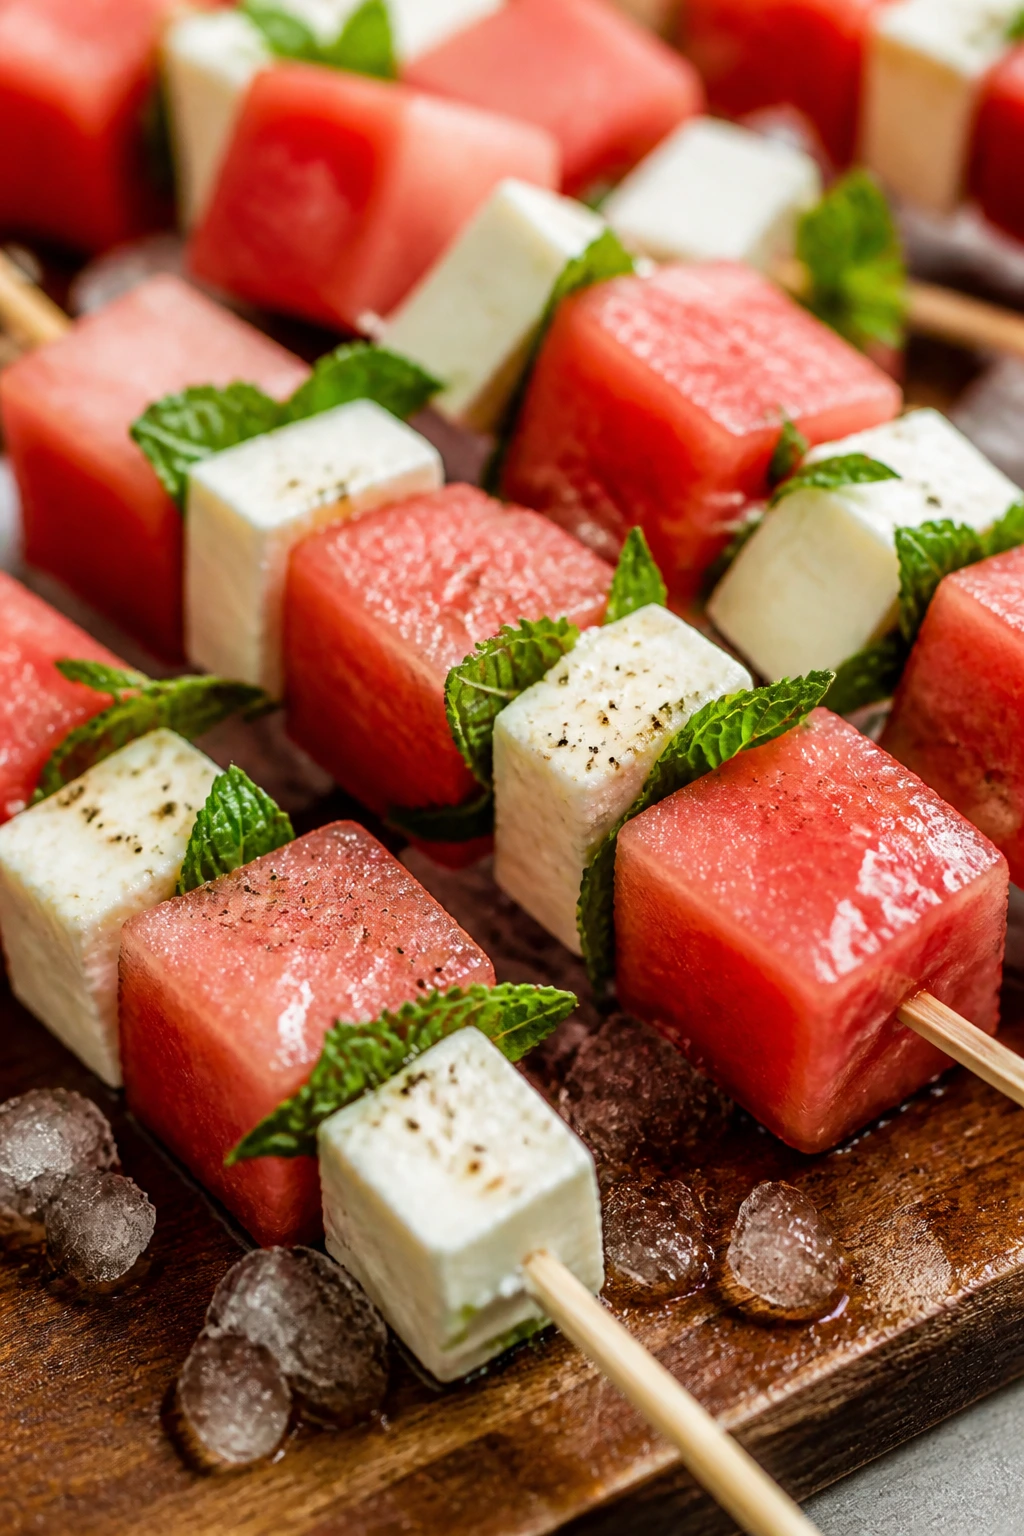
2. Watermelon, Feta, and Mint Skewers
Intro: This is the recipe that disappears in the first five minutes because people keep “just trying one.” The salt of the feta, the cold snap of watermelon, and the mint make each bite taste colder than it really is.
Why It Works: Watermelon carries a lot of juice, so it’s smart to use firm cubes and a salty cheese that can stand beside it. The skewers keep everything clean in a picnic setting, and they don’t need a fork.
Key Ingredients:
- 4 cups watermelon, cut into 1-inch cubes
- 8 ounces feta cheese, cut into cubes
- 24 fresh mint leaves
- 1 tablespoon lime juice
- 1 teaspoon honey
- 1/4 teaspoon flaky salt
- 12 small skewers or toothpicks
Quick Steps:
- Cut the watermelon and feta into similar-sized cubes.
- Whisk lime juice, honey, and a tiny pinch of salt.
- Thread watermelon, mint, and feta onto skewers.
- Drizzle lightly with the lime-honey mixture right before serving.
Equipment for This Recipe:
- Cutting board
- Sharp knife
- Small bowl
- Small skewers or toothpicks
- Serving platter
How to Serve This Dish: Serve them in a shallow tray lined with chilled greens or crushed ice underneath a second tray. They work best as a first bite while everyone is still settling in.
Pro Tips for This Recipe:
- Pat the watermelon dry so the feta doesn’t slide.
- Use block feta, not crumbles. The cubes hold their shape.
- Add the honey dressing at the last minute.
Variations on This Dish:
- Basil Swap: Use basil instead of mint for a softer herbal note.
- Chili-Lime Version: Add a pinch of chili flakes to the drizzle.
- Balsamic Finish: A few drops of thick balsamic glaze make it taste more dessert-like.
Common Mistakes to Avoid with This Dish:
- Don’t salt heavily before serving; watermelon already carries enough sweetness.
- Don’t cut the cubes too small or they’ll split on the skewer.
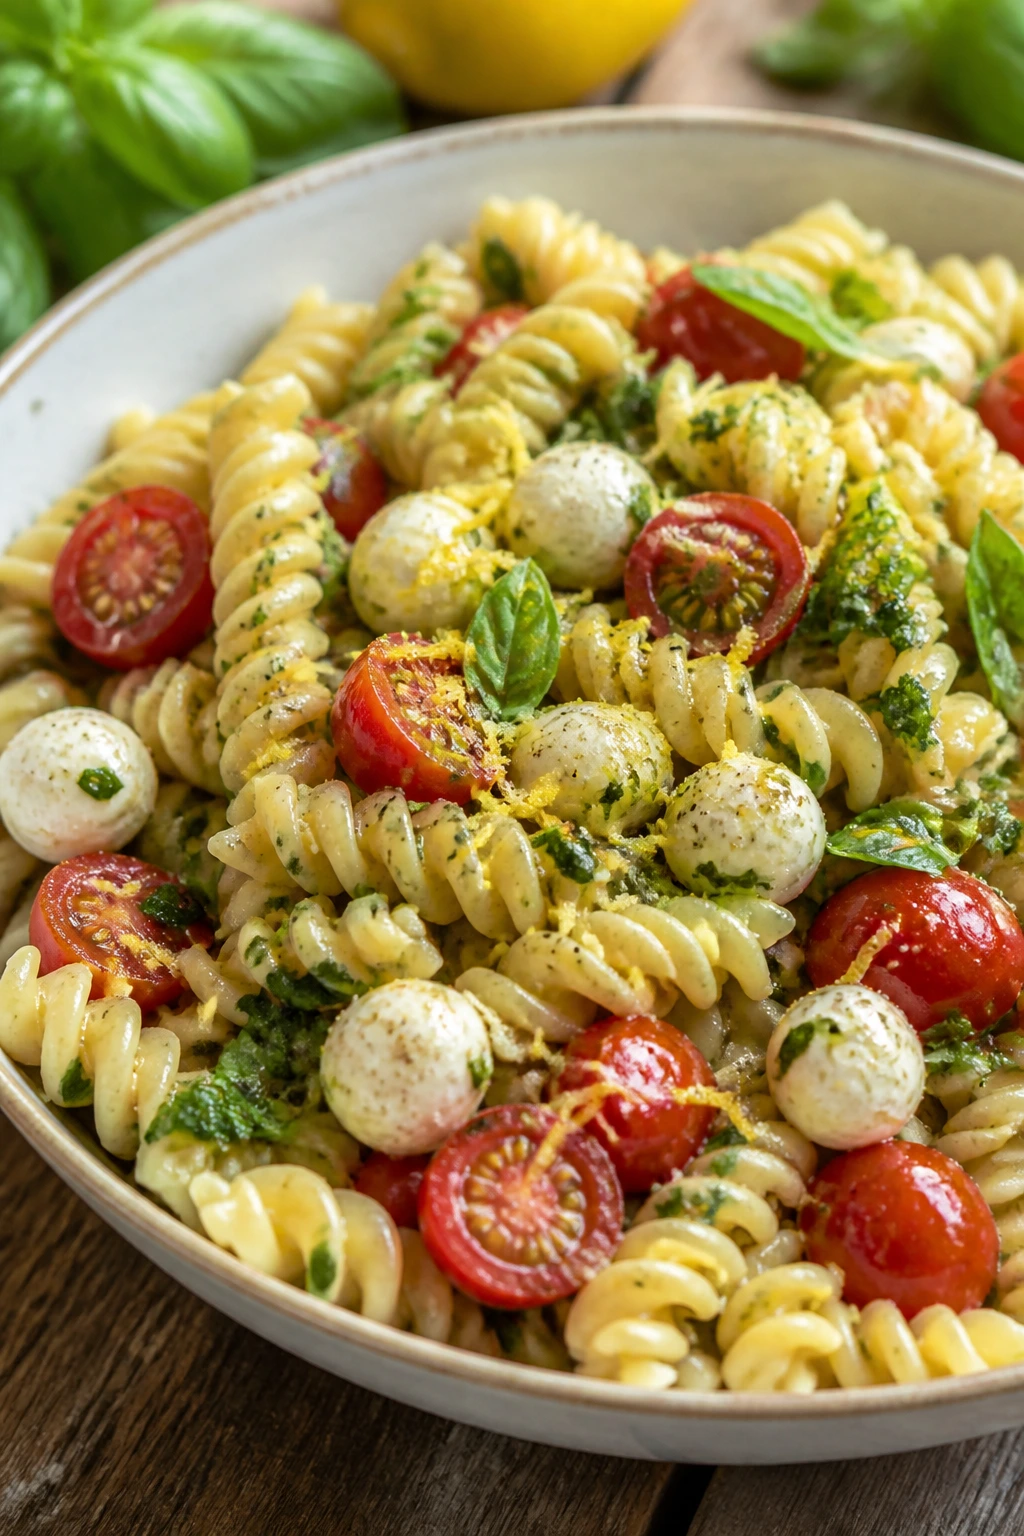
3. Lemon Basil Pasta Salad
Intro: Pasta salad gets a bad name when it’s buried under too much mayo. This version stays bright because lemon, olive oil, and basil do the heavy lifting. It tastes like a picnic table should taste.
Why It Works: Short pasta catches the dressing in all the right places, and the basil stays fragrant if you fold it in after the pasta cools a little. Cherry tomatoes and mozzarella bring enough richness to make it feel like a full side dish.
Key Ingredients:
- 1 pound rotini or fusilli
- 1 1/2 cups cherry tomatoes, halved
- 8 ounces mozzarella pearls
- 1/2 cup fresh basil leaves, torn
- 1/3 cup olive oil
- 3 tablespoons lemon juice
- 1 teaspoon lemon zest
- 1 teaspoon Dijon mustard
- 1 teaspoon kosher salt
- 1/2 teaspoon black pepper
Quick Steps:
- Boil the pasta in salted water until al dente, about 9 to 11 minutes.
- Drain and cool it under cold water, then shake it dry.
- Whisk olive oil, lemon juice, zest, Dijon, salt, and pepper.
- Toss pasta with tomatoes and mozzarella, then add basil.
- Chill for 30 minutes before packing.
Equipment for This Recipe:
- Large pot
- Colander
- Big mixing bowl
- Whisk
- Serving container with lid
How to Serve This Dish: Pile it into a wide bowl and top with a few extra basil leaves. It sits nicely beside grilled chicken, cold sandwiches, or sliced peaches.
Pro Tips for This Recipe:
- Salt the pasta water well; bland pasta won’t recover.
- Toss the pasta with a spoonful of dressing while it’s still warm.
- Add the basil after cooling so it doesn’t darken fast.
Variations on This Dish:
- Pesto Shortcut: Replace half the dressing with pesto.
- Vegetable-Heavy Version: Add chopped cucumbers and zucchini ribbons.
- Protein Boost: Fold in chickpeas or diced salami.
Common Mistakes to Avoid with This Dish:
- Don’t drown it in dressing; the pasta keeps absorbing liquid.
- Don’t serve it straight from the fridge without a quick stir. The oil tightens up.
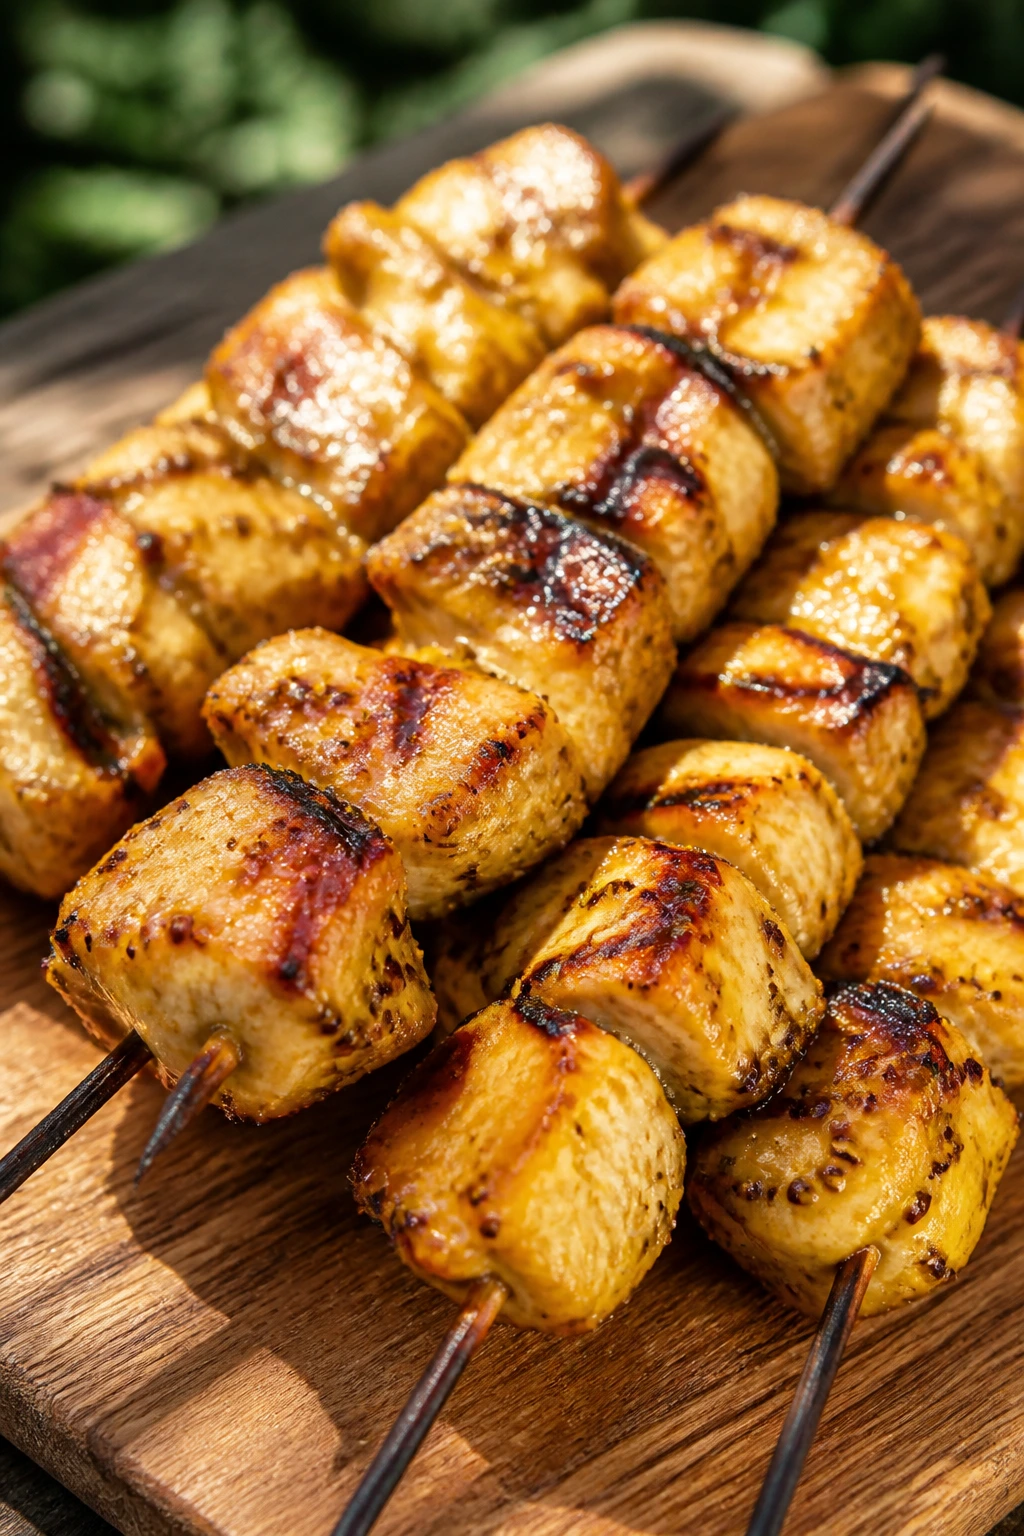
4. Honey Mustard Chicken Skewers
Intro: These are the skewers I reach for when I want something picnic-friendly that still feels like an actual main dish. The glaze gets sticky at the edges, and that sweet-salty hit does a lot of work.
Why It Works: Chicken thighs stay juicier than breasts if the picnic table sits in the shade for a while. The honey-mustard mixture doubles as marinade and finish, which means the flavor clings even after cooling a bit.
Key Ingredients:
- 2 pounds boneless chicken thighs, cut into 1 1/2-inch pieces
- 1/4 cup Dijon mustard
- 1/4 cup honey
- 2 tablespoons olive oil
- 2 tablespoons apple cider vinegar
- 2 garlic cloves, minced
- 1 teaspoon kosher salt
- 1/2 teaspoon black pepper
- 1 teaspoon smoked paprika
- 8 skewers
Quick Steps:
- Whisk Dijon, honey, oil, vinegar, garlic, salt, pepper, and paprika.
- Toss chicken in half the mixture and marinate for 30 minutes.
- Thread chicken onto skewers.
- Grill over medium-high heat for 4 to 5 minutes per side, until 165°F in the center.
- Brush with the remaining glaze and rest 5 minutes.
Equipment for This Recipe:
- Mixing bowl
- Grill or grill pan
- Metal or soaked wooden skewers
- Tongs
- Instant-read thermometer
How to Serve This Dish: Pack them with a crisp slaw or cucumber salad. They’re good warm or at room temperature, which matters when the picnic spread gets delayed.
Pro Tips for This Recipe:
- Cut the chicken pieces evenly so they finish together.
- Save some glaze before the raw chicken touches it.
- Resting the skewers keeps the juices in the meat.
Variations on This Dish:
- Spicy Version: Add 1 teaspoon hot sauce or chili flakes.
- Lemon Herb Version: Swap paprika for thyme and lemon zest.
- Pan-Fried Version: Cook in a hot skillet if a grill isn’t available.
Common Mistakes to Avoid with This Dish:
- Don’t use breasts cut too thin; they dry out fast.
- Don’t baste with raw marinade after cooking.
5. Tomato, Cucumber, and Red Onion Panzanella
Intro: Panzanella is one of those rare recipes that gets better when the bread drinks in the juices. Done right, it tastes like tomato season in a bowl, with enough crunch left to keep each bite interesting.
Why It Works: Sturdy bread cubes hold shape long enough to soak up the dressing without collapsing. The vinegar and tomato juices do what mayonnaise can’t: they keep the salad lively instead of heavy.
Key Ingredients:
- 6 cups stale country bread, torn into 1-inch pieces
- 4 ripe tomatoes, cut into chunks
- 1 English cucumber, sliced
- 1/2 red onion, thinly sliced
- 1/4 cup olive oil
- 2 tablespoons red wine vinegar
- 1 teaspoon kosher salt
- 1/2 teaspoon black pepper
- 1/2 cup basil leaves
Quick Steps:
- Toast the bread at 375°F for 8 to 10 minutes.
- Toss tomatoes, cucumber, and onion with salt and vinegar.
- Add bread and olive oil, then toss again.
- Let sit 15 to 20 minutes so the bread softens at the edges.
- Fold in basil just before serving.
Equipment for This Recipe:
- Sheet pan
- Large bowl
- Knife and cutting board
- Wooden spoon
- Serving bowl
How to Serve This Dish: Spoon it into a wide bowl and finish with extra olive oil. It works as a side for grilled meat or as the main event with mozzarella on the side.
Pro Tips for This Recipe:
- Use bread with a firm crust.
- Salt the tomatoes first; they release better flavor.
- Don’t add basil early or it bruises.
Variations on This Dish:
- Peach Panzanella: Add sliced peaches for sweetness.
- Caper Version: Toss in capers for extra bite.
- Grilled Bread Version: Char the bread cubes on a grill for smoke.
Common Mistakes to Avoid with This Dish:
- Don’t use fresh sandwich bread; it turns mushy too fast.
- Don’t serve it immediately after mixing. The soak time matters.
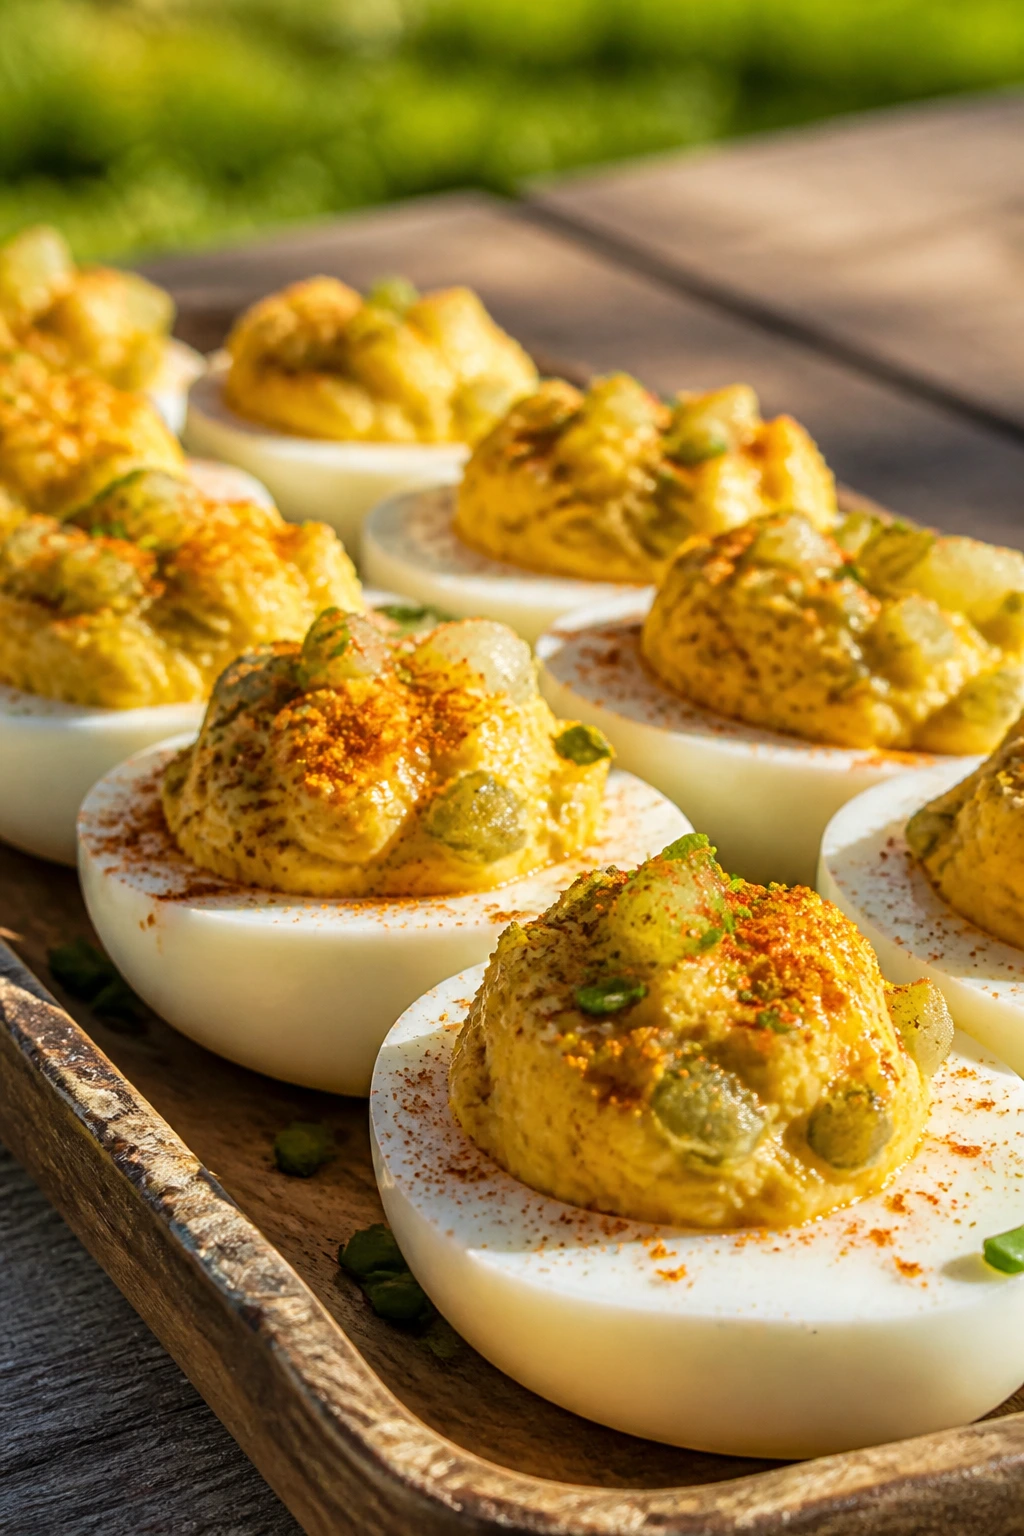
6. Deviled Eggs with Dill Pickle Relish
Intro: Plain deviled eggs are fine. These are better. The pickle relish gives the yolk filling a snap, and the paprika on top makes the tray look finished even before people start grabbing.
Why It Works: The filling stays stable because the yolks are mashed with enough mayonnaise to hold shape, not enough to slide. Pickle relish adds acidity and crunch, which cuts through the richness of the egg.
Key Ingredients:
- 12 large eggs
- 1/3 cup mayonnaise
- 2 tablespoons dill pickle relish
- 1 teaspoon Dijon mustard
- 1 teaspoon white vinegar
- 1/4 teaspoon salt
- 1/4 teaspoon black pepper
- 1/2 teaspoon paprika
- 1 tablespoon chopped chives
Quick Steps:
- Hard-boil the eggs for 10 to 11 minutes, then chill in ice water.
- Peel, halve, and remove the yolks.
- Mash yolks with mayo, relish, mustard, vinegar, salt, and pepper.
- Spoon or pipe filling back into the whites.
- Dust with paprika and chives.
Equipment for This Recipe:
- Saucepan
- Mixing bowl
- Fork or hand mixer
- Piping bag or spoon
- Egg platter
How to Serve This Dish: Serve them on a deviled-egg tray or on a bed of lettuce so they don’t skid around. Keep them cold until the last minute.
Pro Tips for This Recipe:
- Start eggs in already-boiling water if you want cleaner peeling.
- Pipe the filling for a neater tray.
- Use fine relish, not huge chunks.
Variations on This Dish:
- Bacon Version: Add 2 tablespoons crumbled bacon.
- Dill Version: Increase fresh dill and skip the paprika.
- Curried Version: Add 1/4 teaspoon curry powder.
Common Mistakes to Avoid with This Dish:
- Don’t overfill the whites; the tops smear when carried.
- Don’t let them sit warm too long. Eggs need cool storage.
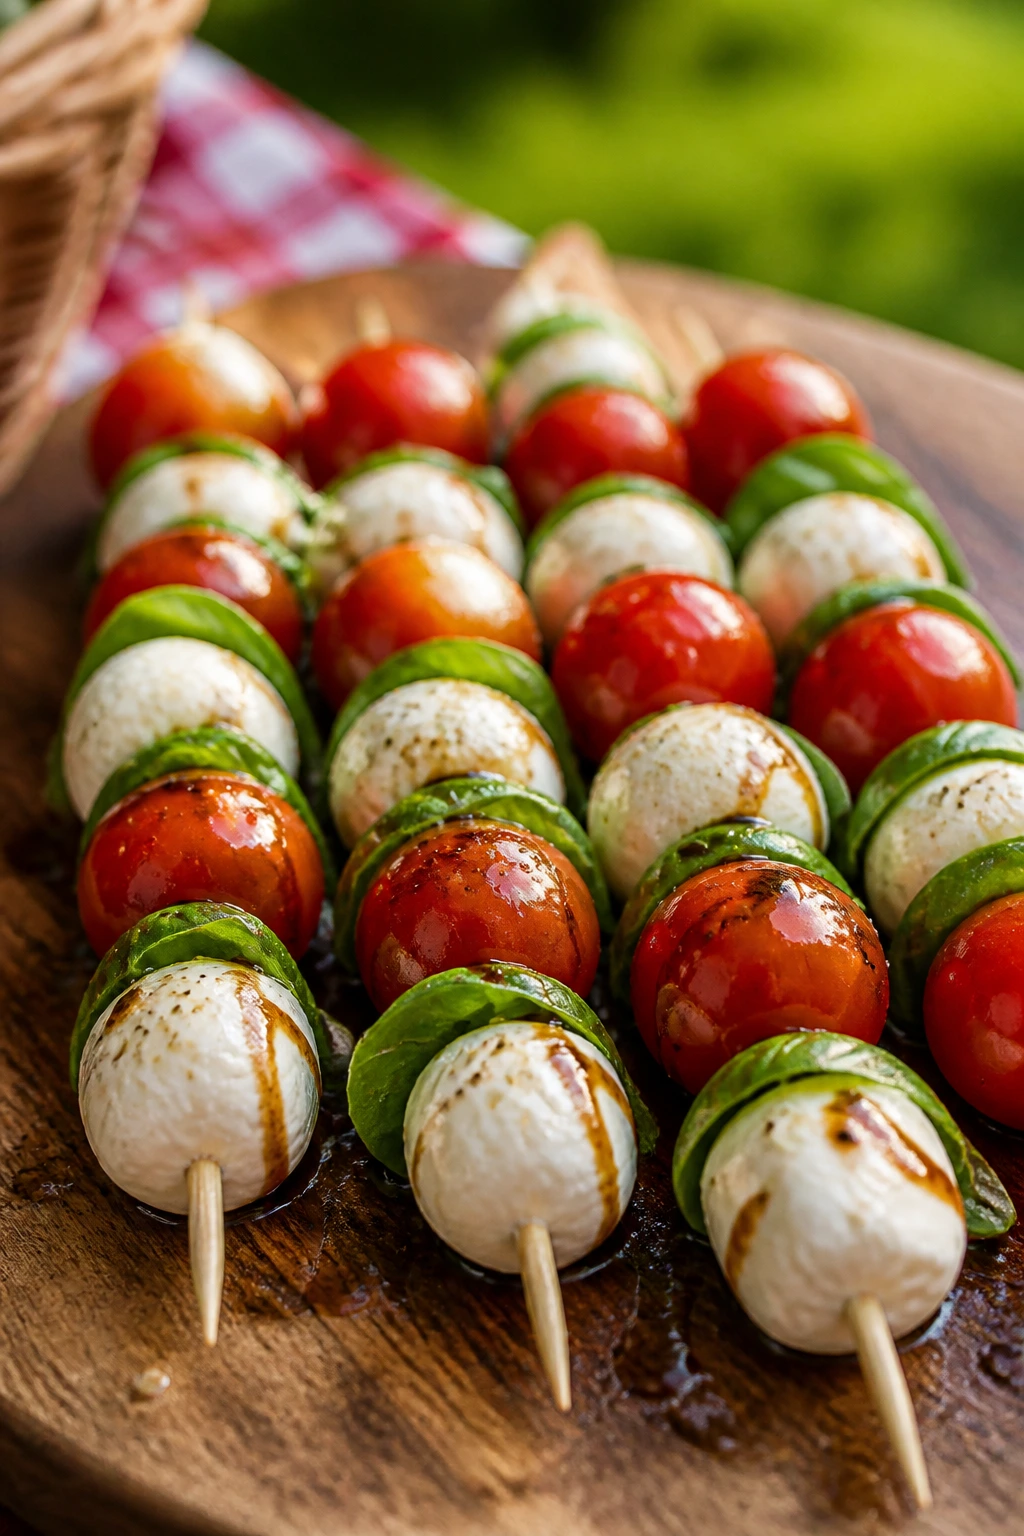
7. Caprese Skewers
Intro: Caprese skewers look polished, but they’re really just tomatoes, cheese, and basil arranged with some discipline. That’s part of why they work so well on a picnic blanket.
Why It Works: Cherry tomatoes and mozzarella pearls are the same size, so the bites stay balanced. A tiny drizzle of olive oil and balsamic glaze gives the whole tray a glossy finish without making it soggy.
Key Ingredients:
- 2 cups cherry tomatoes
- 2 cups mozzarella pearls
- 1 cup fresh basil leaves
- 2 tablespoons olive oil
- 1 tablespoon balsamic glaze
- 1/2 teaspoon kosher salt
- 1/4 teaspoon black pepper
- 20 small skewers or toothpicks
Quick Steps:
- Thread tomato, basil, and mozzarella onto skewers.
- Arrange them on a platter.
- Drizzle with olive oil and balsamic glaze.
- Sprinkle with salt and pepper just before serving.
Equipment for This Recipe:
- Toothpicks or skewers
- Platter
- Small bowl
- Cutting board
How to Serve This Dish: Serve chilled but not icy cold. They’re good alongside grilled bread, prosciutto, or a simple green salad.
Pro Tips for This Recipe:
- Tear large basil leaves so they don’t fold awkwardly.
- Use firm tomatoes, not the soft ones that split.
- Add the glaze right before serving.
Variations on This Dish:
- Peach Caprese: Add a peach slice between the tomato and cheese.
- Pesto Drizzle: Replace balsamic with thinned pesto.
- Prosciutto Upgrade: Add a folded strip of prosciutto to each skewer.
Common Mistakes to Avoid with This Dish:
- Don’t drown them in glaze.
- Don’t skewer overripe tomatoes; they leak everywhere.
8. No-Mayo Potato Salad
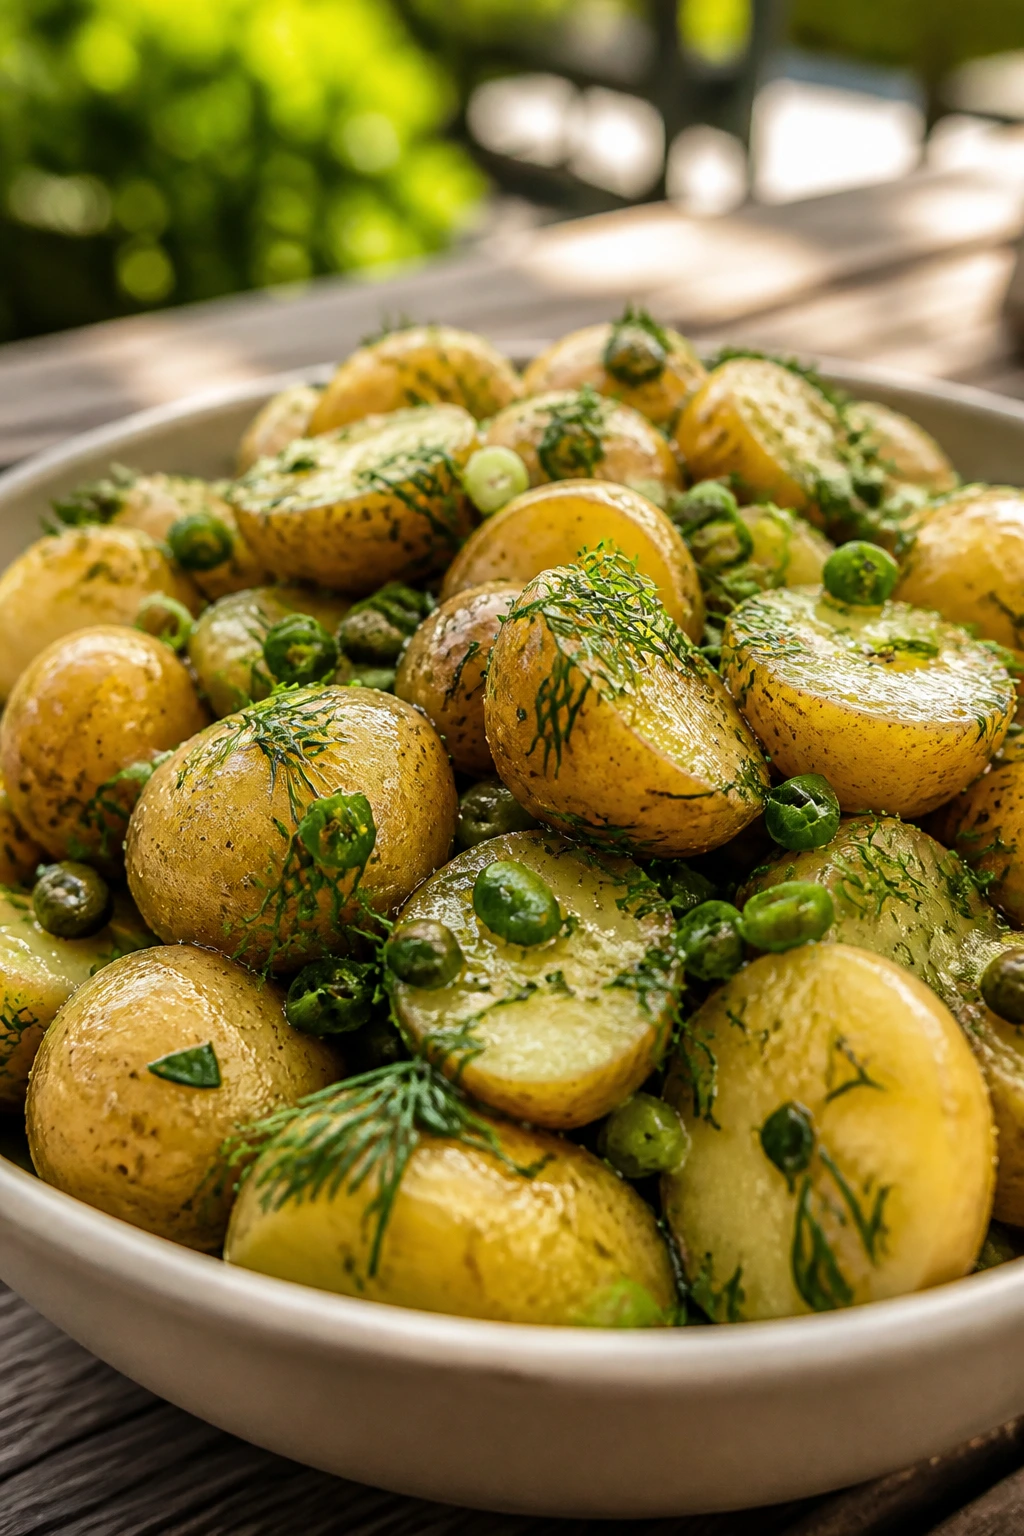
Intro: This is the potato salad I trust when the picnic is going to last longer than the conversation about where everyone parked. No mayonnaise, no collapse, no greasy slick on top.
Why It Works: Warm potatoes soak up the vinaigrette better than cold ones, and the mustard, vinegar, and herbs keep the salad sharp even after it chills. It tastes cleaner than the creamier version and holds up longer in a cooler.
Key Ingredients:
- 2 pounds baby potatoes
- 1/4 cup olive oil
- 3 tablespoons white wine vinegar
- 1 tablespoon Dijon mustard
- 2 teaspoons kosher salt
- 1/2 teaspoon black pepper
- 1/2 cup chopped dill
- 1/4 cup sliced scallions
- 2 tablespoons capers, optional
Quick Steps:
- Boil the potatoes in salted water until tender, 12 to 15 minutes.
- Drain and halve them while still warm.
- Whisk oil, vinegar, Dijon, salt, and pepper.
- Toss potatoes with dressing, dill, scallions, and capers.
- Chill at least 30 minutes.
Equipment for This Recipe:
- Large pot
- Colander
- Mixing bowl
- Whisk
- Container with lid
How to Serve This Dish: Spoon it into a shallow dish and finish with extra dill. It sits well beside chicken, sausages, or anything smoky from the grill.
Pro Tips for This Recipe:
- Dress the potatoes warm so they absorb flavor.
- Don’t overcook them, or the edges slough off.
- Add herbs after the first toss so they stay bright.
Variations on This Dish:
- German-Style Version: Add chopped bacon and a little more vinegar.
- Mustard-Herb Version: Use grainy mustard for texture.
- Green Bean Version: Toss in blanched green beans.
Common Mistakes to Avoid with This Dish:
- Don’t use waxy potatoes that stay hard in the middle.
- Don’t chill before dressing; the flavor doesn’t sink in the same way.
9. Turkey, Havarti, and Pesto Pinwheels
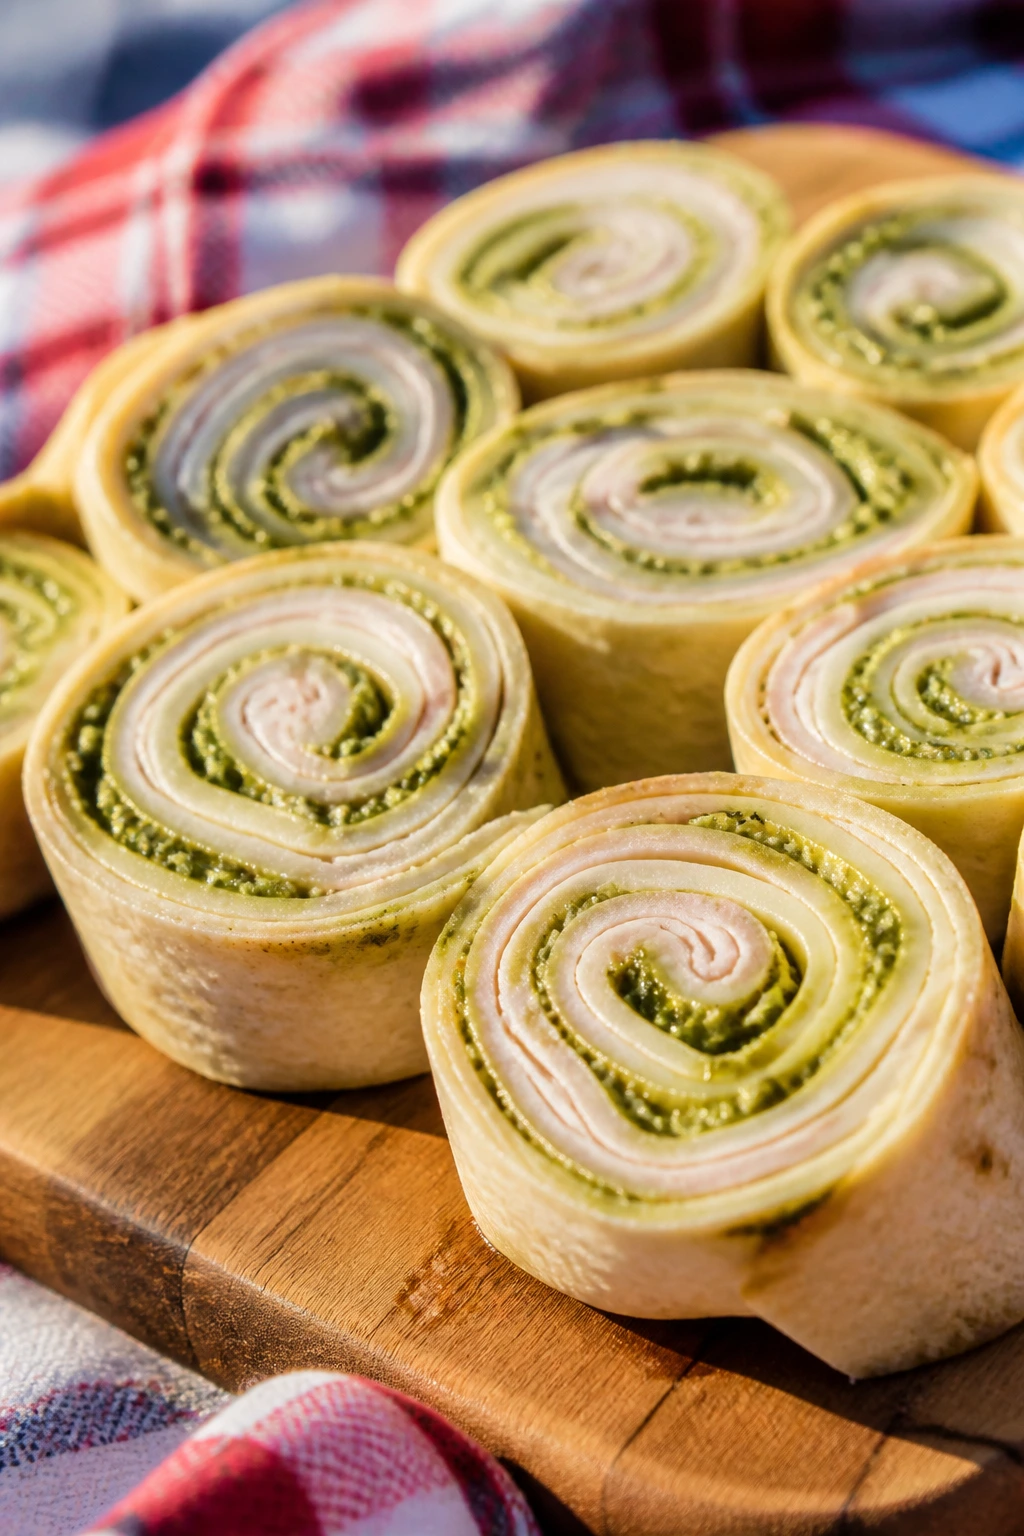
Intro: Pinwheels feel slightly old-school, which is part of the charm. The trick is keeping them tight and cold so the spiral doesn’t unravel before lunch.
Why It Works: Tortillas are flexible enough to roll tightly, and pesto gives the filling enough moisture and flavor to keep the turkey from tasting dry. Havarti melts in the mouth without turning greasy at room temp.
Key Ingredients:
- 4 large flour tortillas
- 8 ounces sliced turkey
- 8 ounces sliced Havarti
- 1/3 cup basil pesto
- 1 cup baby spinach
- 1/2 cup shredded carrots
- 1 tablespoon cream cheese, softened
Quick Steps:
- Spread cream cheese thinly over each tortilla.
- Add pesto, turkey, Havarti, spinach, and carrots.
- Roll tightly, wrap in plastic, and chill 30 minutes.
- Slice into 1-inch pinwheels with a sharp knife.
Equipment for This Recipe:
- Cutting board
- Sharp knife
- Plastic wrap or parchment
- Spoon or offset spatula
How to Serve This Dish: Arrange them cut-side up on a tray so the spirals show. They work as a lunch anchor with fruit and chips on the side.
Pro Tips for This Recipe:
- Chill before slicing or they squash.
- Don’t overfill the tortillas.
- Use a thin layer of pesto so the wrap doesn’t slide apart.
Variations on This Dish:
- Chicken Swap: Use sliced chicken instead of turkey.
- Roasted Pepper Version: Add thin strips of roasted red pepper.
- Vegetarian Version: Skip the turkey and add cucumbers plus extra spinach.
Common Mistakes to Avoid with This Dish:
- Don’t cut too soon after rolling.
- Don’t use wet greens without drying them first.
10. Greek Chickpea Salad Pita Pockets
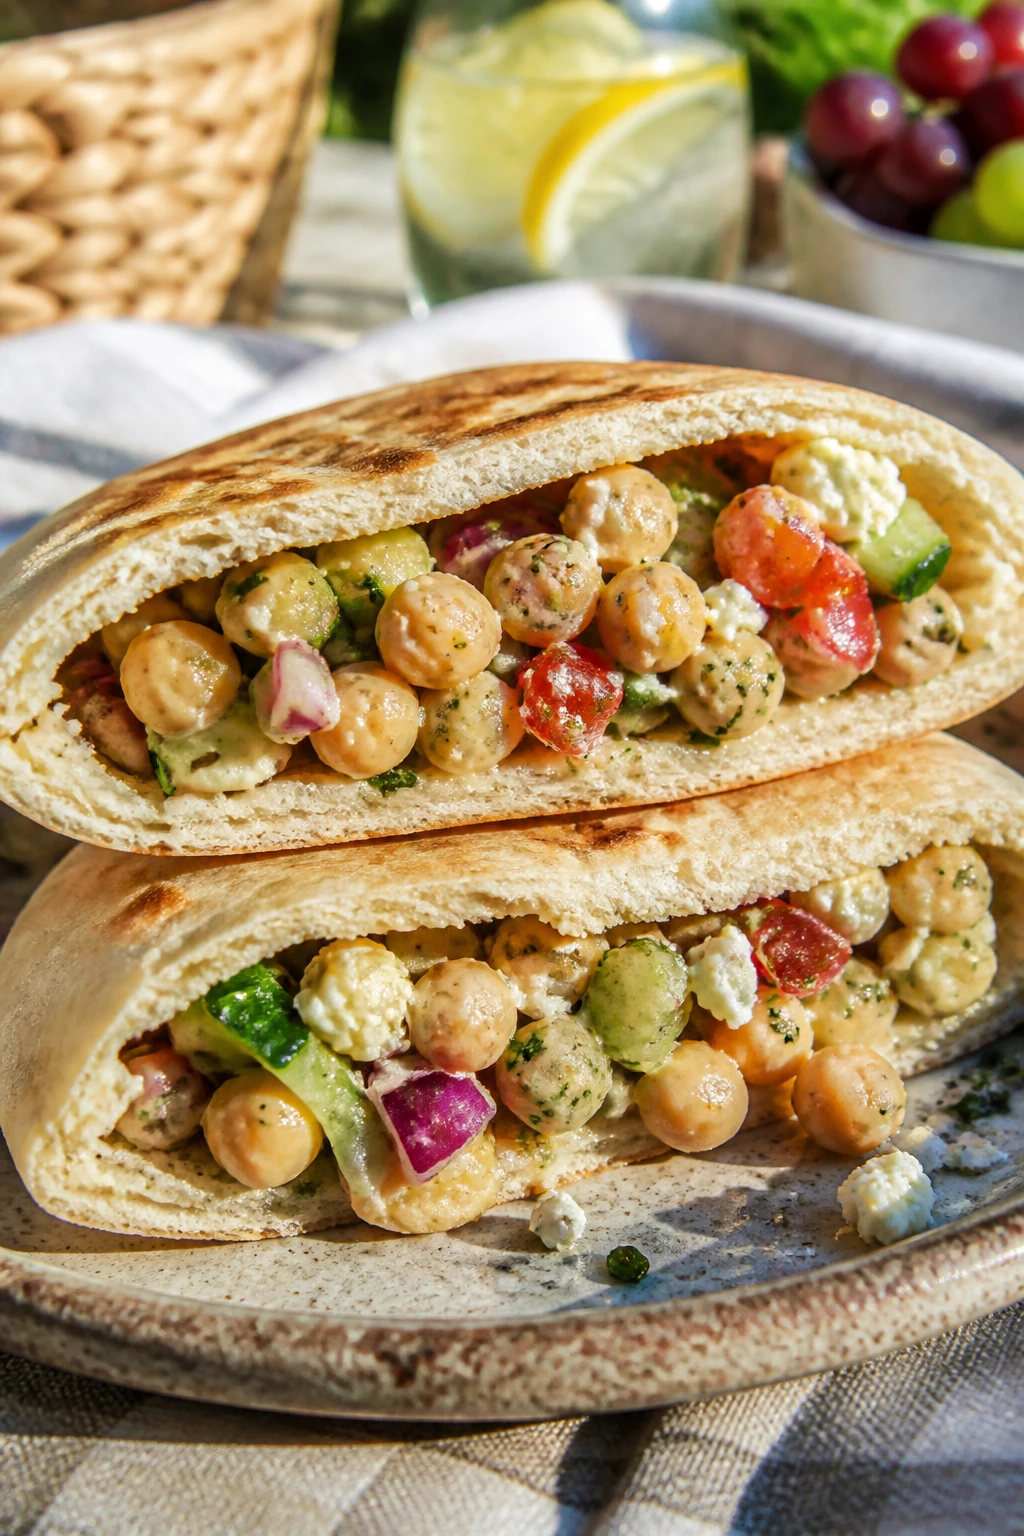
Intro: Chickpeas do a lot of useful work in picnic food. They hold their shape, take on dressing fast, and turn a simple pita into something with enough heft to count as lunch.
Why It Works: The salad is built on sturdy ingredients — beans, cucumbers, tomatoes, and feta — so it stays crisp instead of collapsing. A lemon-oregano dressing keeps the filling bright and sharp.
Key Ingredients:
- 2 cans chickpeas, drained and rinsed
- 1 cucumber, diced
- 1 cup cherry tomatoes, halved
- 1/2 cup crumbled feta
- 1/4 cup red onion, minced
- 3 tablespoons olive oil
- 2 tablespoons lemon juice
- 1 teaspoon dried oregano
- 1/2 teaspoon salt
- 4 pita pockets
Quick Steps:
- Toss chickpeas, cucumber, tomatoes, feta, and onion in a bowl.
- Whisk oil, lemon juice, oregano, salt, and pepper.
- Pour dressing over salad and toss.
- Spoon into pita pockets right before serving.
Equipment for This Recipe:
- Mixing bowl
- Knife and cutting board
- Spoon
- Measuring spoons
How to Serve This Dish: Pack the salad separately from the pita if you want maximum crunch. A side of olives or hummus fits the same plate nicely.
Pro Tips for This Recipe:
- Drain the chickpeas well so the pita stays dry.
- Add the feta last if you want bigger crumbles.
- Stuff the pitas just before eating.
Variations on This Dish:
- Tzatziki Version: Add a spoonful of tzatziki to each pocket.
- Avocado Version: Fold in diced avocado for creaminess.
- Farro Version: Mix in cooked farro for more chew.
Common Mistakes to Avoid with This Dish:
- Don’t overstuff the pitas or they split.
- Don’t dress the salad too early if it will sit for hours.
11. Strawberry Spinach Salad with Poppy Seed Dressing
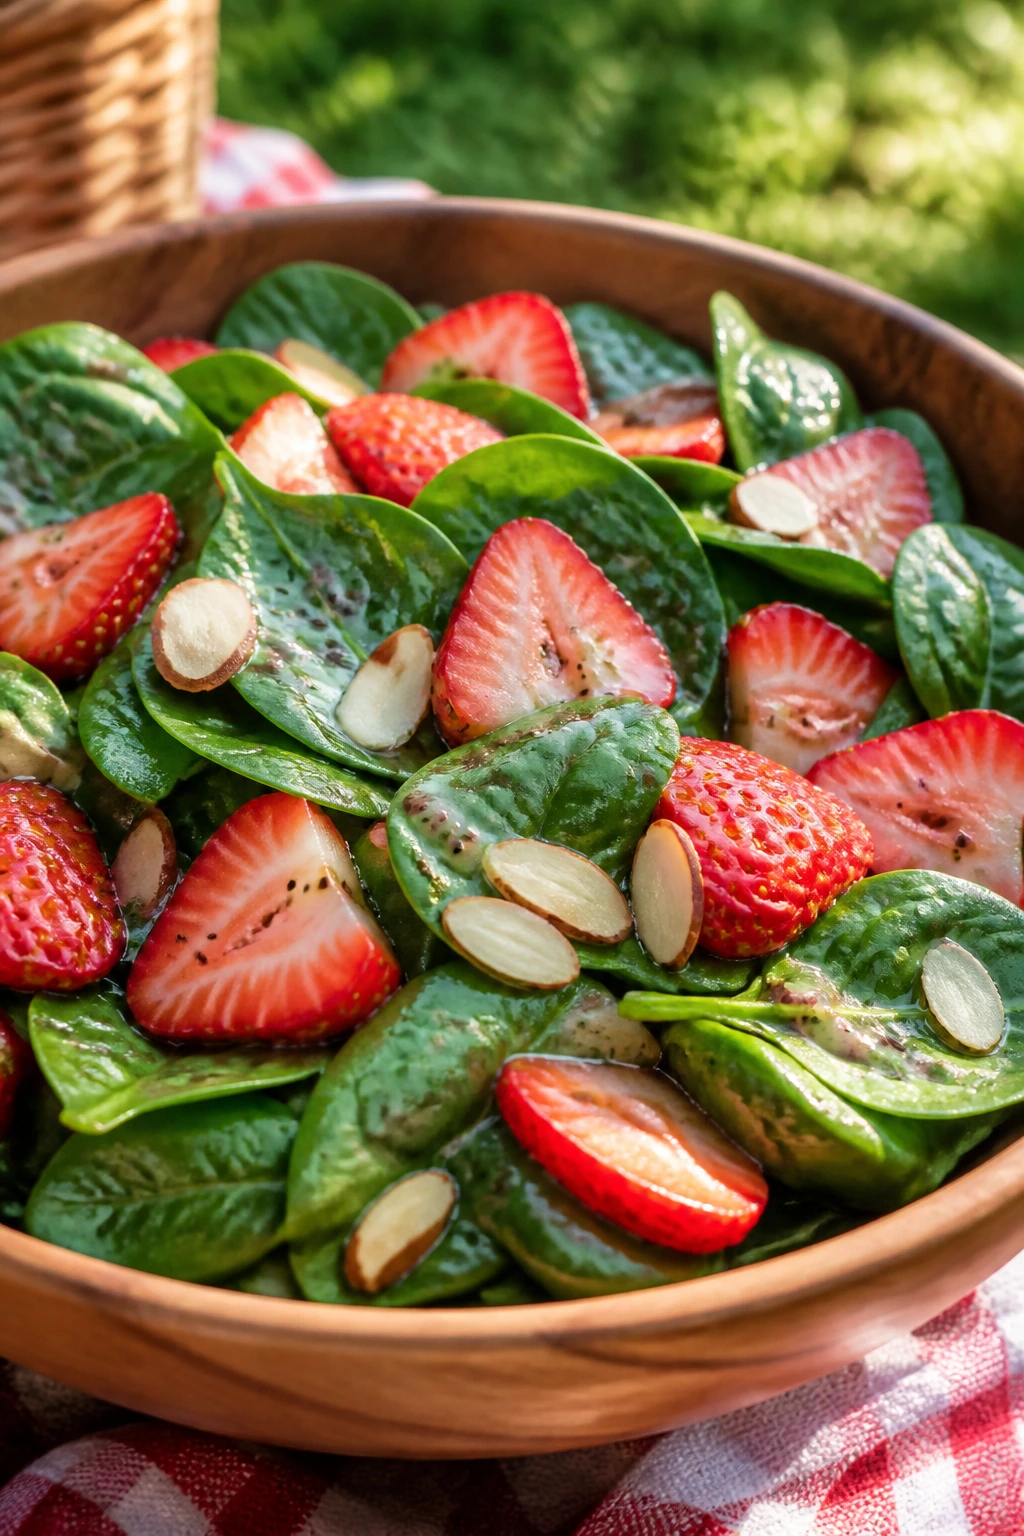
Intro: This salad is built on contrast: sweet strawberries, tender spinach, a little crunch, a little tang. It’s the one people think of as “light,” then still go back for more because the dressing actually tastes like something.
Why It Works: Baby spinach doesn’t wilt as quickly as delicate lettuces, and strawberries pair well with a sweet-tart dressing that clings instead of pooling. Almonds or pecans give the salad enough texture to feel complete.
Key Ingredients:
- 6 cups baby spinach
- 2 cups strawberries, sliced
- 1/2 cup sliced almonds
- 1/4 cup red onion, thinly sliced
- 2 tablespoons poppy seeds
- 3 tablespoons apple cider vinegar
- 2 tablespoons honey
- 1/4 cup olive oil
- 1/4 teaspoon salt
Quick Steps:
- Whisk vinegar, honey, oil, poppy seeds, and salt.
- Toss spinach, strawberries, almonds, and onion in a bowl.
- Drizzle with dressing right before serving.
- Toss gently so the berries stay intact.
Equipment for This Recipe:
- Large bowl
- Small bowl
- Whisk
- Salad tongs
How to Serve This Dish: Serve it in a chilled bowl and bring extra dressing on the side. It pairs with quiche, sandwiches, or grilled chicken.
Pro Tips for This Recipe:
- Slice the strawberries right before packing.
- Toast the almonds for a deeper flavor.
- Dress only what you plan to eat soon.
Variations on This Dish:
- Goat Cheese Version: Add crumbled goat cheese.
- Blueberry Version: Swap half the strawberries for blueberries.
- Chicken Version: Add sliced grilled chicken for a fuller meal.
Common Mistakes to Avoid with This Dish:
- Don’t overdress the spinach.
- Don’t use limp berries; they make the salad look tired fast.
12. Cold Sesame Noodle Salad
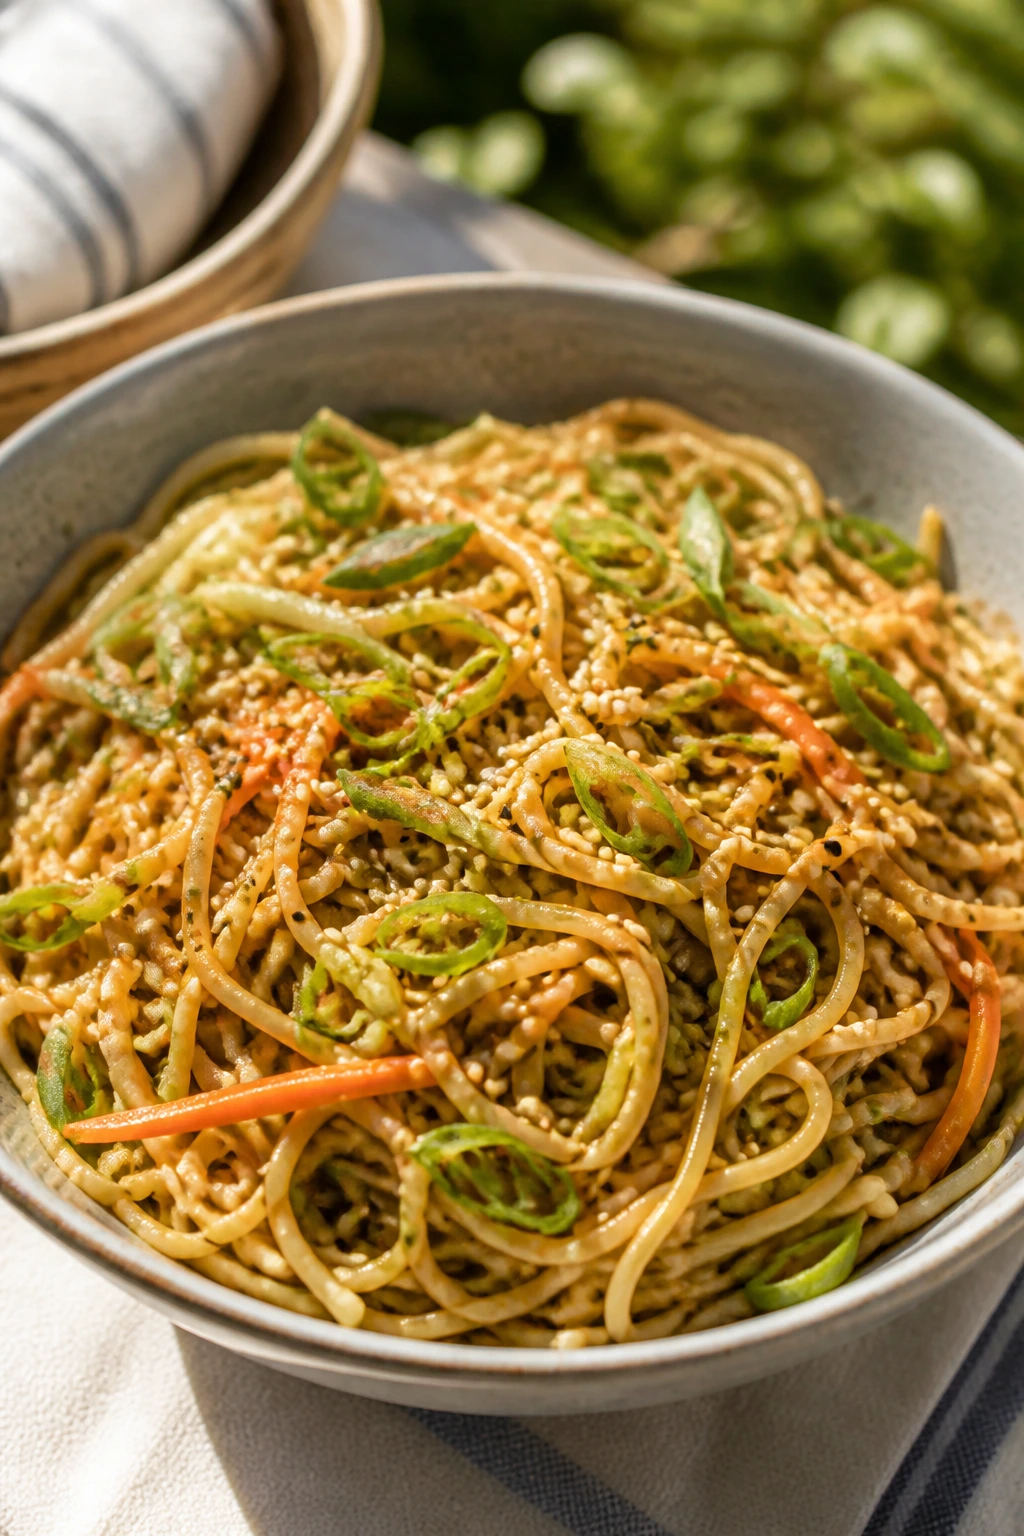
Intro: Cold noodles are one of the smartest picnic moves because they taste good after they’ve had time to sit. Sesame, soy, and a little ginger make the bowl feel savory enough to carry lunch.
Why It Works: The sauce coats noodles best when they’re rinsed and fully cooled, and a crunchy vegetable or two keeps the texture from going soft. It’s also one of the few picnic recipes that improves after a little rest.
Key Ingredients:
- 12 ounces spaghetti or soba noodles
- 1/4 cup soy sauce
- 2 tablespoons sesame oil
- 2 tablespoons rice vinegar
- 1 tablespoon peanut butter
- 1 tablespoon honey
- 1 teaspoon grated ginger
- 1 cup shredded carrots
- 2 scallions, sliced
- 1 tablespoon sesame seeds
Quick Steps:
- Cook noodles until just tender, then rinse cold.
- Whisk soy sauce, sesame oil, vinegar, peanut butter, honey, and ginger.
- Toss noodles with carrots and scallions.
- Chill 20 minutes, then top with sesame seeds.
Equipment for This Recipe:
- Pot
- Colander
- Mixing bowl
- Whisk
- Tongs
How to Serve This Dish: Pack it in a lidded container and serve with chopsticks or forks. Add sliced cucumber or edamame if you want more crunch.
Pro Tips for This Recipe:
- Rinse thoroughly or the noodles clump.
- Thin the sauce with a spoonful of warm water if it feels tight.
- Save the sesame seeds for the top.
Variations on This Dish:
- Spicy Version: Add chili crisp or sriracha.
- Nut-Free Version: Skip peanut butter and use sunflower seed butter.
- Protein Version: Add shredded chicken or tofu.
Common Mistakes to Avoid with This Dish:
- Don’t let the noodles sit sticky and warm before dressing.
- Don’t overload with sauce; a glossy coat is enough.
13. Pimento Cheese and Crackers
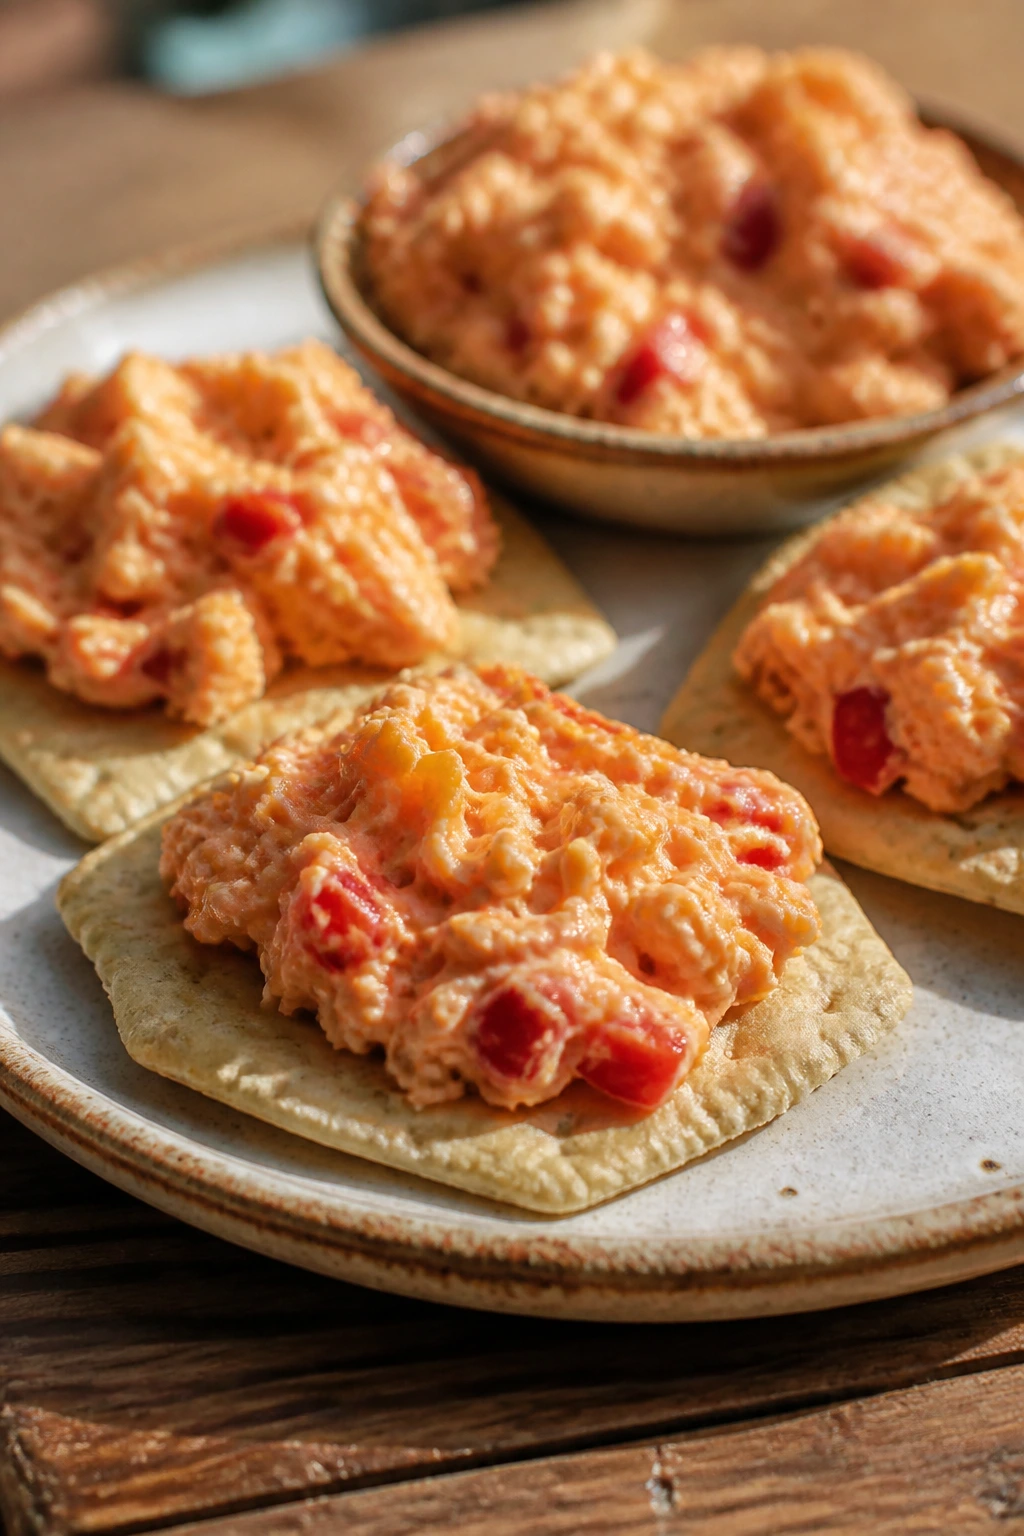
Intro: Pimento cheese is one of those Southern staples that knows exactly what it is. Sharp, creamy, a little smoky, and made for spreading onto crackers without apology.
Why It Works: The shredded cheese base gives it structure, while the cream cheese and mayo keep it spreadable even after chilling. Pimentos add color and sweetness, which keeps the whole thing from tasting heavy.
Key Ingredients:
- 2 cups shredded sharp cheddar
- 4 ounces cream cheese, softened
- 1/4 cup mayonnaise
- 1/4 cup diced pimentos, drained
- 1 teaspoon hot sauce
- 1/4 teaspoon garlic powder
- 1/4 teaspoon black pepper
- Crackers, for serving
Quick Steps:
- Stir cream cheese and mayo until smooth.
- Fold in cheddar, pimentos, hot sauce, garlic powder, and pepper.
- Chill 30 minutes.
- Spoon onto crackers when ready to eat.
Equipment for This Recipe:
- Mixing bowl
- Spoon or spatula
- Airtight container
- Serving bowl
How to Serve This Dish: Serve with sturdy crackers, celery sticks, and sliced radishes. It’s also good inside a sandwich if you have leftover spread.
Pro Tips for This Recipe:
- Shred the cheese yourself for the best texture.
- Let it sit 15 minutes after chilling so it loosens slightly.
- Taste before adding extra salt; cheddar can be salty enough.
Variations on This Dish:
- Bacon Version: Add crisp bacon bits.
- Jalapeño Version: Fold in minced pickled jalapeños.
- Smoked Version: Use smoked cheddar for a deeper note.
Common Mistakes to Avoid with This Dish:
- Don’t use pre-shredded cheese if you want a smoother spread.
- Don’t skip chilling; the flavor gets better after a rest.
14. BLT Sliders
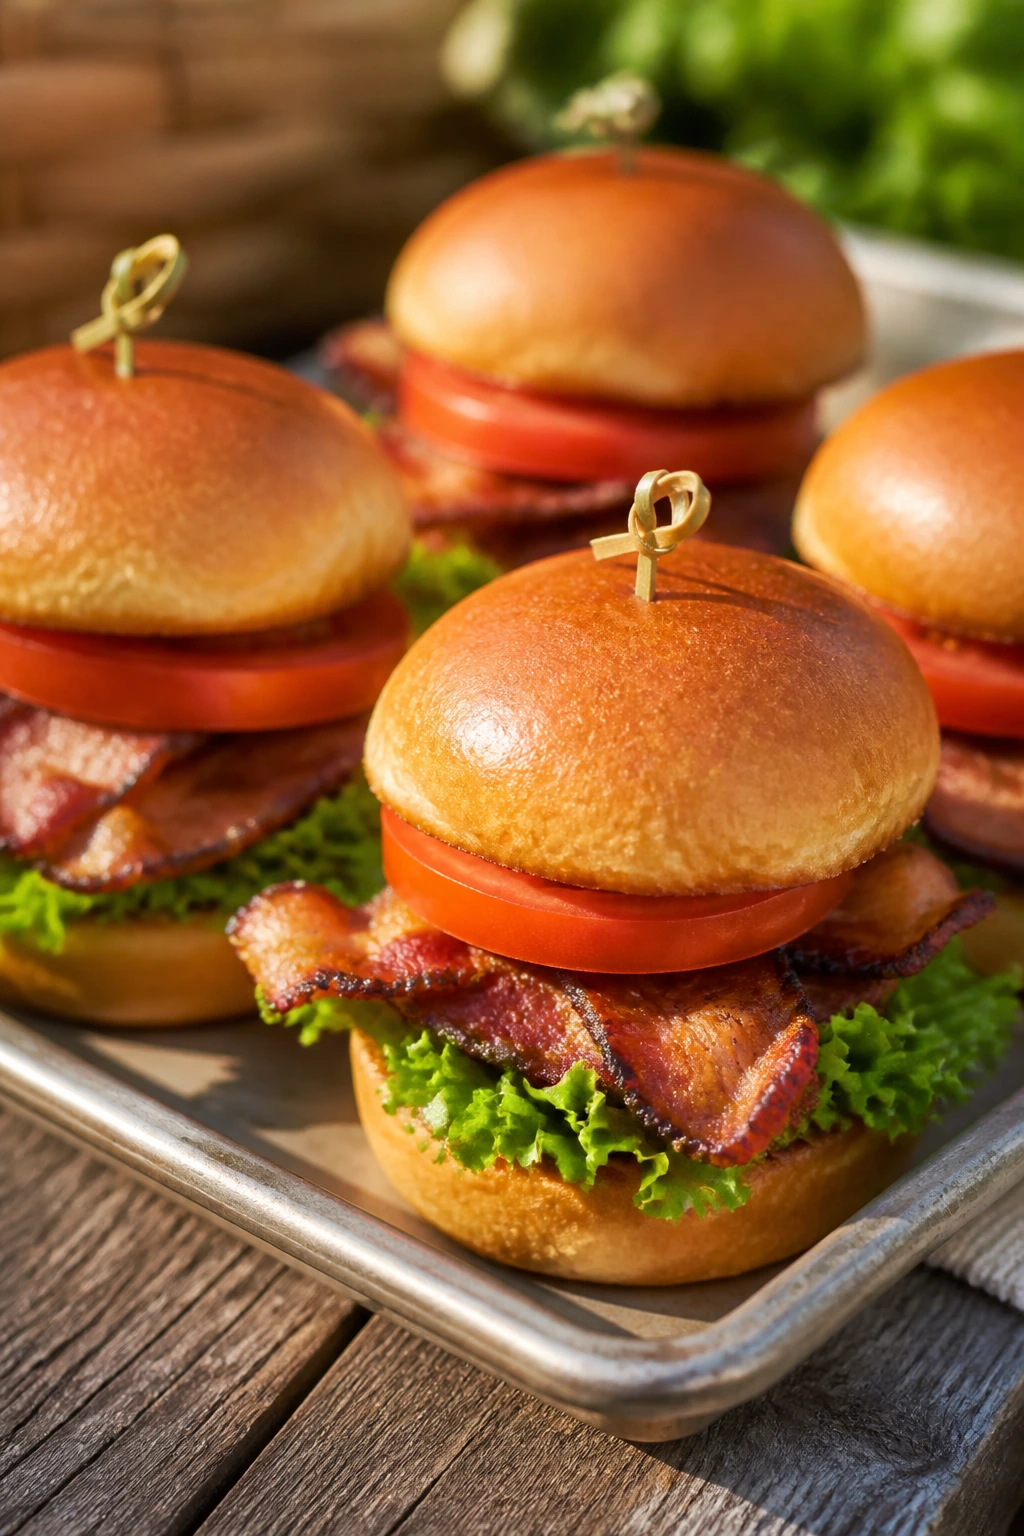
Intro: A BLT has no business being fancy, and that’s exactly why it works. Sliders make it easier to pack, easier to serve, and easier to keep the lettuce from getting lost in the bread.
Why It Works: Soft slider buns hold the fillings without getting bulky, and the bacon gives the sandwich enough salt to balance the tomatoes. A thin layer of mayo protects the bread from tomato juice.
Key Ingredients:
- 12 slider buns
- 12 slices bacon
- 2 tomatoes, sliced
- 2 cups shredded lettuce
- 1/3 cup mayonnaise
- 1 tablespoon butter, softened
- 1/4 teaspoon black pepper
Quick Steps:
- Cook bacon until crisp, then drain.
- Split buns and spread the insides with mayonnaise.
- Layer bacon, tomato, lettuce, and pepper.
- Close sliders and wrap tightly until serving.
Equipment for This Recipe:
- Skillet or sheet pan
- Knife
- Cutting board
- Paper towels
- Serving tray
How to Serve This Dish: Keep them wrapped in halves and stack them cut-side out. They pair well with potato chips, pickles, and a cold drink.
Pro Tips for This Recipe:
- Dry the tomatoes before assembly.
- Use sturdy buns, not ultra-soft ones that crush.
- Assemble close to serving time.
Variations on This Dish:
- Turkey BLT: Swap in sliced turkey.
- Avocado BLT: Add a few slices of avocado.
- Peppered BLT: Add extra black pepper to the mayo.
Common Mistakes to Avoid with This Dish:
- Don’t assemble too early or the buns go soggy.
- Don’t crowd the bacon while cooking; it needs space to crisp.
15. Cucumber-Dill Sandwiches
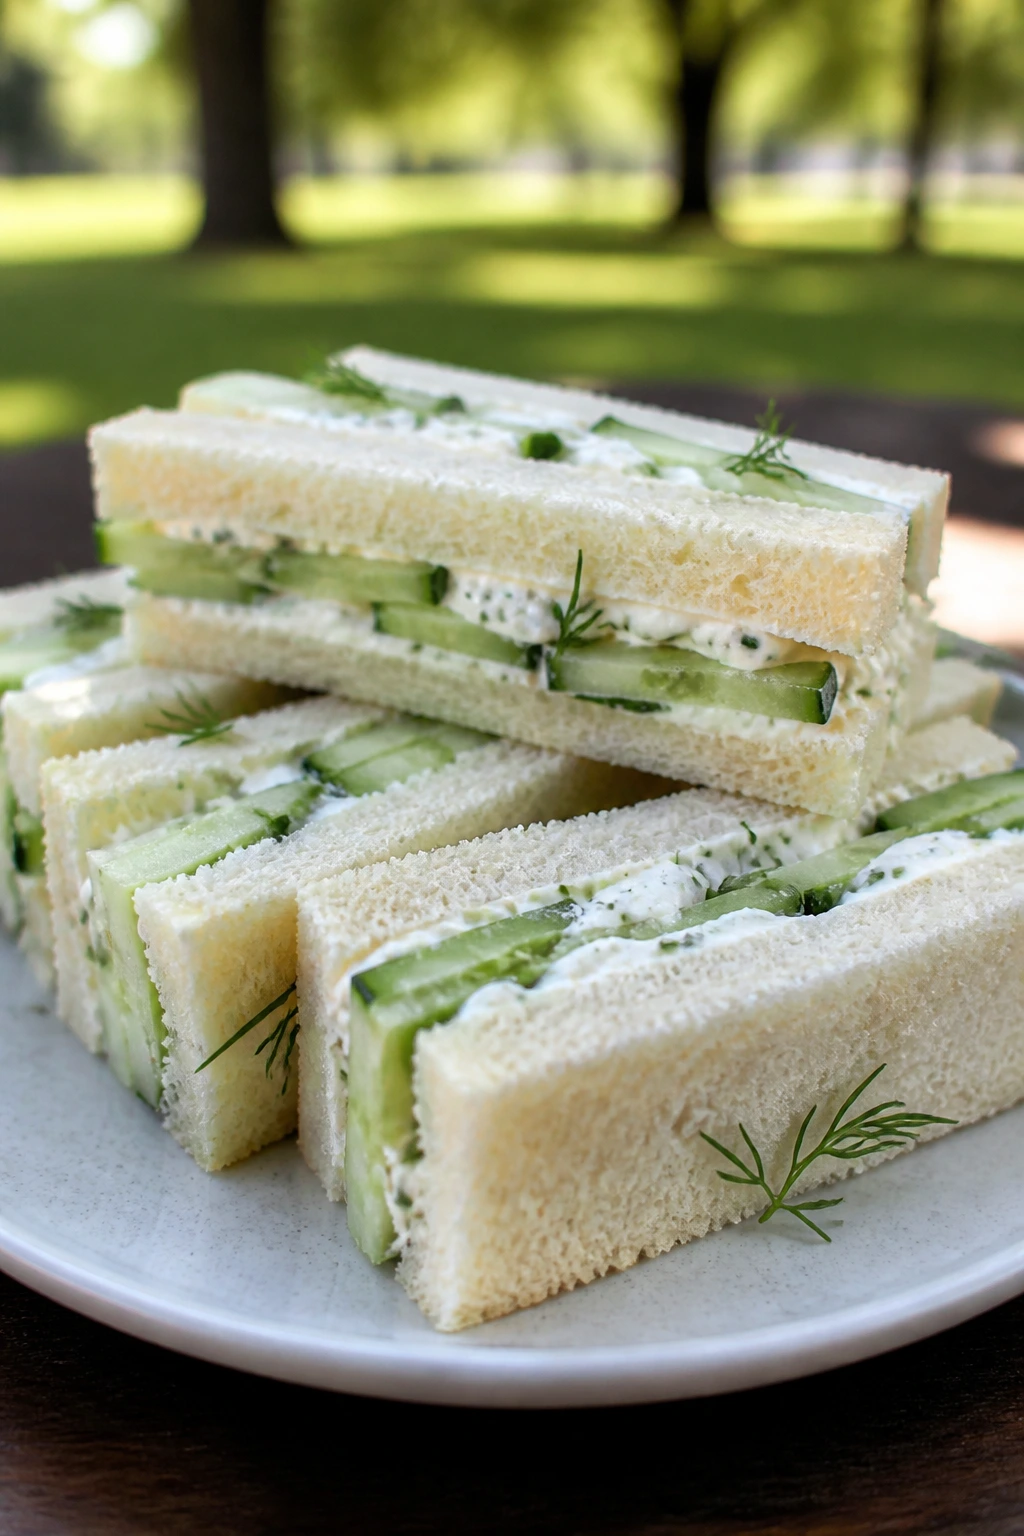
Intro: These sandwiches taste like the cool part of summer. Cream cheese, dill, and thin cucumber slices create a clean, almost crisp bite that feels right beside a thermos and a patch of shade.
Why It Works: The cucumber has enough water to feel refreshing, but the cream cheese layer acts as a barrier so the bread stays intact. Dill sharpens the filling without making it heavy.
Key Ingredients:
- 8 slices soft sandwich bread
- 6 ounces cream cheese, softened
- 1 tablespoon mayonnaise
- 1 tablespoon chopped fresh dill
- 1 teaspoon lemon zest
- 1/2 teaspoon salt
- 1/4 teaspoon black pepper
- 1 large cucumber, thinly sliced
Quick Steps:
- Mix cream cheese, mayo, dill, lemon zest, salt, and pepper.
- Spread mixture on bread slices.
- Layer cucumber slices evenly.
- Top, trim crusts, and cut into squares or fingers.
Equipment for This Recipe:
- Mixing bowl
- Knife
- Cutting board
- Spoon or spatula
How to Serve This Dish: Serve them chilled and cut small. They work well as a light lunch with fruit, chips, or chilled soup.
Pro Tips for This Recipe:
- Pat cucumbers dry before layering.
- Thin slices matter; thick slices make the sandwich slippery.
- Chill before cutting for cleaner edges.
Variations on This Dish:
- Mint Version: Add chopped mint with the dill.
- Smoked Salmon Version: Add a thin layer of smoked salmon.
- Everything Bagel Version: Sprinkle seasoning on the cream cheese.
Common Mistakes to Avoid with This Dish:
- Don’t skip drying the cucumber.
- Don’t use crusty bread; it fights the filling.
16. Grilled Corn and Black Bean Salad
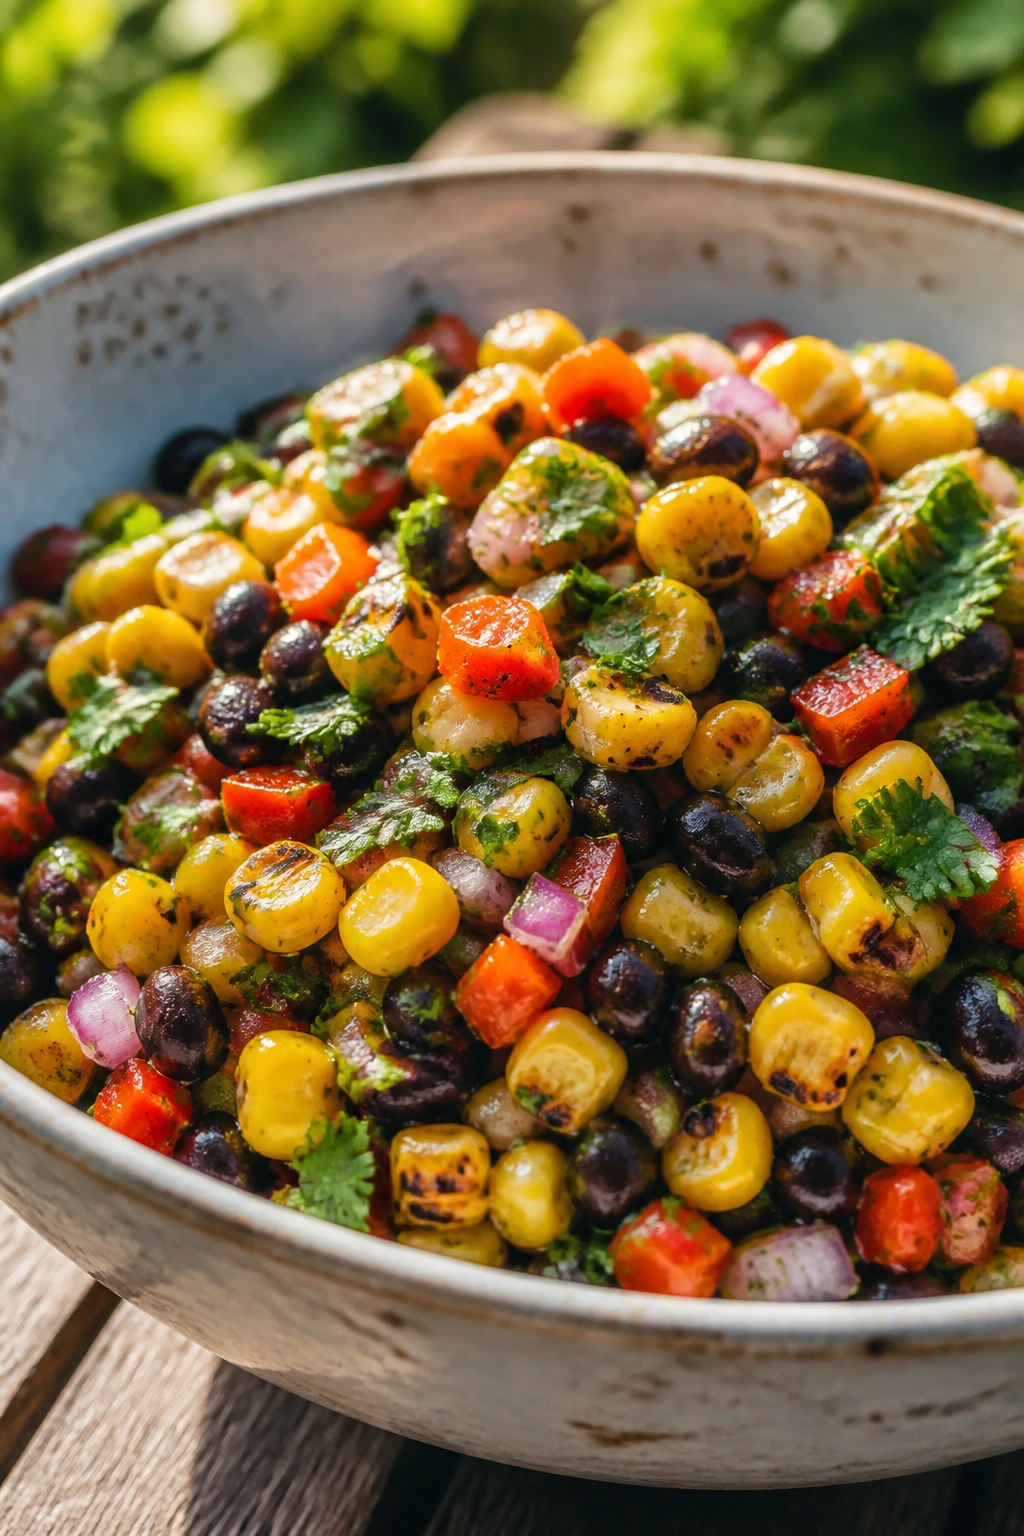
Intro: Corn and black beans are a natural pair, but grilling the corn first changes the whole thing. The kernels get browned spots, the salad picks up a smoky note, and suddenly it feels like it belongs on a summer table.
Why It Works: Black beans hold up well in a vinaigrette, and the corn brings sweetness and texture. Lime, cilantro, and red onion keep the bowl bright enough that it doesn’t taste like a heavy bean salad.
Key Ingredients:
- 4 ears corn, grilled and kernels cut off
- 2 cans black beans, rinsed and drained
- 1 red bell pepper, diced
- 1/4 cup red onion, minced
- 1/4 cup chopped cilantro
- 3 tablespoons lime juice
- 1/4 cup olive oil
- 1 teaspoon cumin
- 1 teaspoon salt
Quick Steps:
- Grill corn over medium-high heat until charred in spots, 8 to 10 minutes.
- Cut kernels from the cobs.
- Whisk lime juice, oil, cumin, and salt.
- Toss corn, beans, pepper, onion, and cilantro with dressing.
- Chill before serving.
Equipment for This Recipe:
- Grill or grill pan
- Large bowl
- Knife
- Whisk
How to Serve This Dish: Spoon it into cups or serve it as a side with tortilla chips. It also works spooned over greens if you want to stretch it into a lunch.
Pro Tips for This Recipe:
- Let the corn cool before cutting so it doesn’t scatter.
- Rinse the beans well or the salad tastes muddy.
- Add cilantro at the end for a fresher look.
Variations on This Dish:
- Avocado Version: Add diced avocado at serving.
- Feta Version: Crumble feta over the top.
- Spicy Version: Add minced jalapeño.
Common Mistakes to Avoid with This Dish:
- Don’t skip the acid; beans need it.
- Don’t overchar the corn into bitterness.
17. Lemon Herb Chicken Salad Lettuce Cups
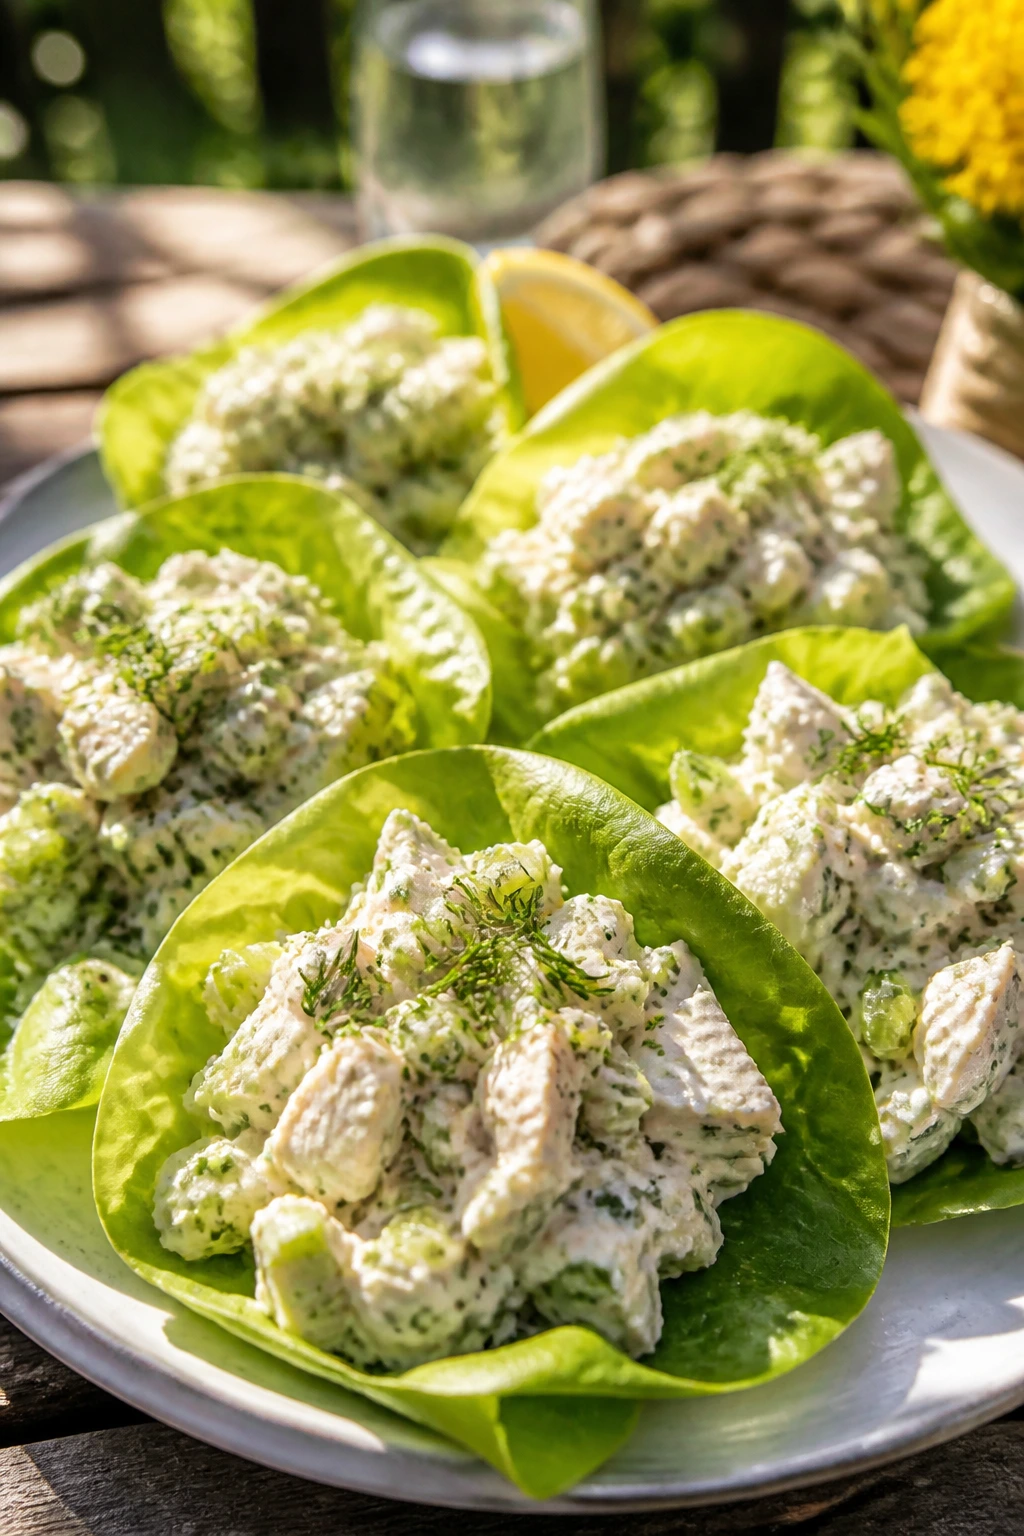
Intro: Chicken salad gets a cleaner, brighter profile when you swap the usual heavy hand for lemon and herbs. In lettuce cups, it feels lighter, but still enough to hold its own at lunch.
Why It Works: Shredded chicken soaks up the dressing fast, and lettuce cups solve the soggy-bread problem completely. Celery and herbs keep the filling crisp and aromatic.
Key Ingredients:
- 3 cups cooked shredded chicken
- 1/3 cup mayonnaise
- 1 tablespoon lemon juice
- 1 teaspoon Dijon mustard
- 1/2 cup diced celery
- 2 tablespoons chopped parsley
- 1 tablespoon chopped dill
- 1/4 teaspoon salt
- 1/4 teaspoon black pepper
- Butter lettuce leaves
Quick Steps:
- Stir mayo, lemon juice, Dijon, salt, and pepper together.
- Fold in chicken, celery, parsley, and dill.
- Chill 20 minutes.
- Spoon into lettuce leaves right before serving.
Equipment for This Recipe:
- Mixing bowl
- Spoon
- Knife
- Salad spinner or towels
How to Serve This Dish: Set the cups on a platter and pack extra filling separately. Add grapes or sliced cucumbers for an easy side.
Pro Tips for This Recipe:
- Use cold chicken so the dressing stays thick.
- Dry the lettuce carefully or the cups slip.
- A few chopped almonds add good crunch.
Variations on This Dish:
- Grapes and Almonds Version: Add chopped grapes and toasted almonds.
- Curry Version: Stir in curry powder and raisins.
- Avocado Version: Replace part of the mayo with mashed avocado.
Common Mistakes to Avoid with This Dish:
- Don’t overfill lettuce cups or they tear.
- Don’t use wet chicken; it loosens the dressing.
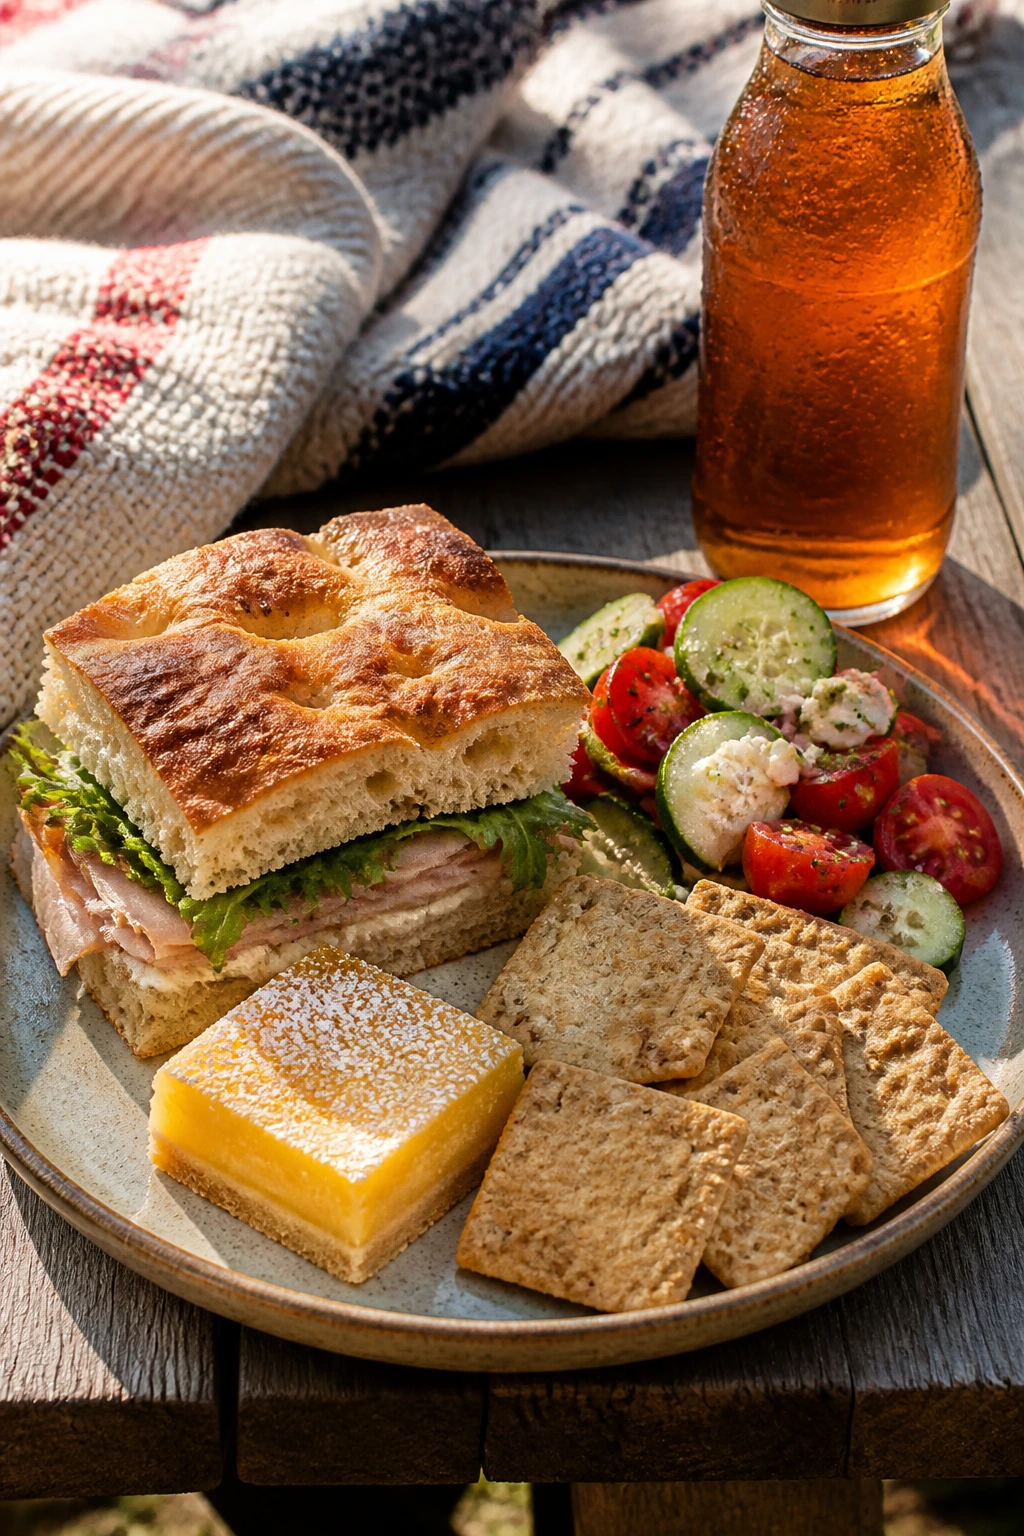
18. Roasted Vegetable Focaccia Sandwich
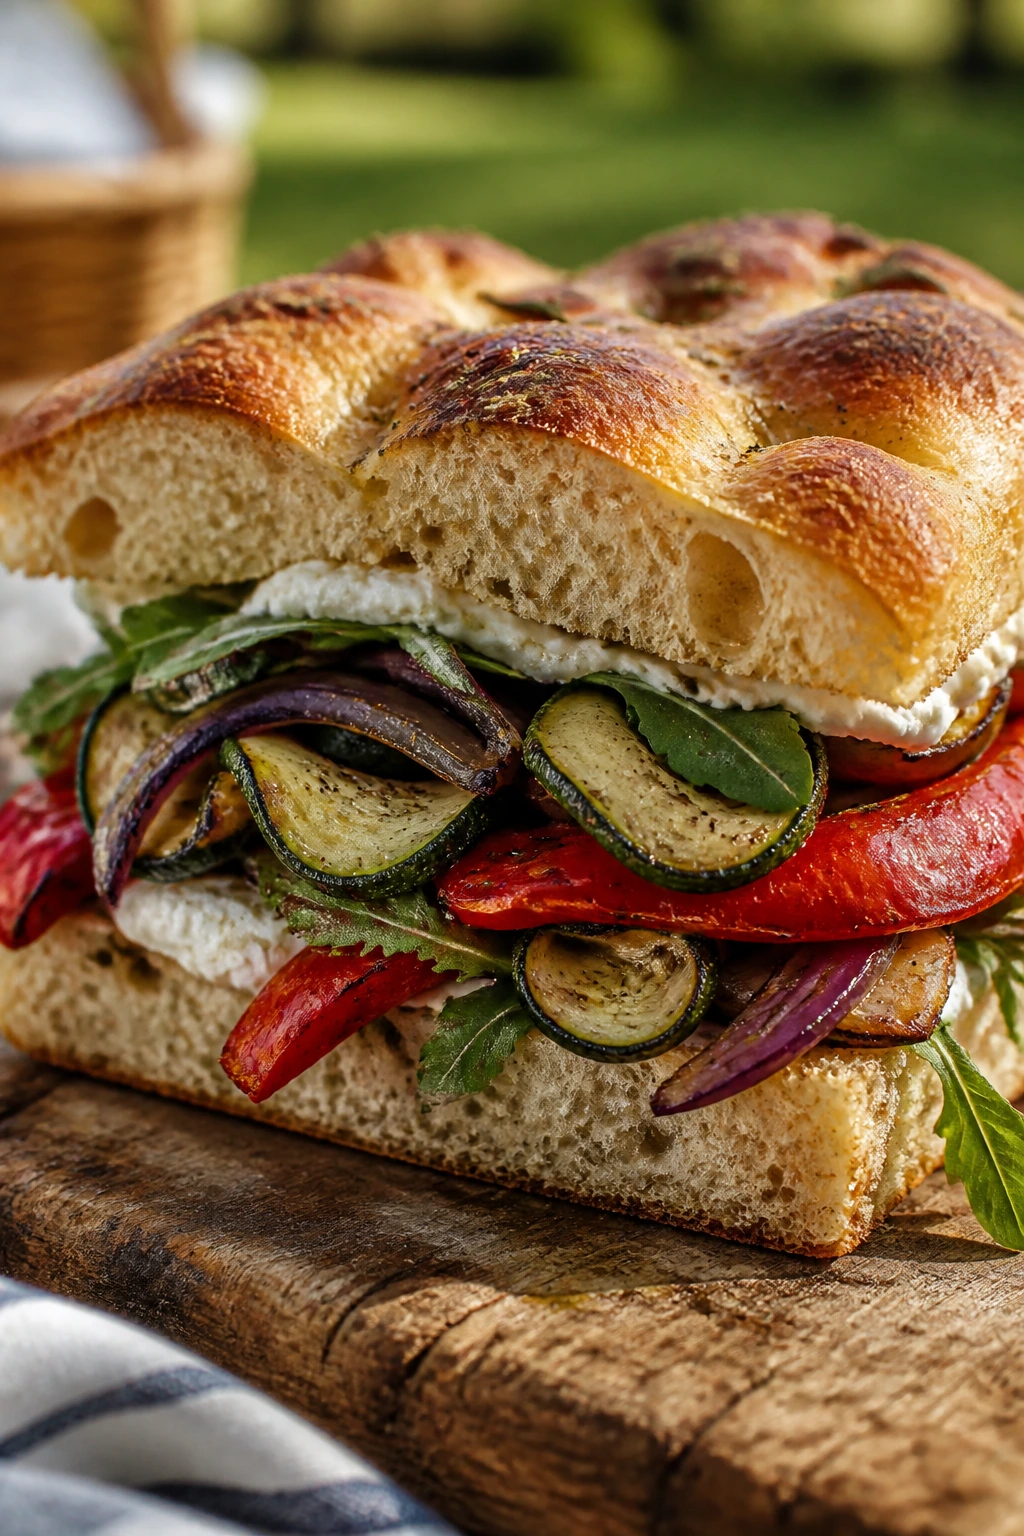
Intro: A good vegetable sandwich needs weight, not just salad stuff trapped between bread. Roasted zucchini, peppers, and onions give this focaccia enough depth to stand up on its own.
Why It Works: Focaccia is sturdy and oily in the best way, so it resists moisture better than many sandwich breads. Roasting the vegetables concentrates their flavor, which matters when the sandwich is served cold.
Key Ingredients:
- 1 large focaccia loaf, split horizontally
- 1 zucchini, sliced lengthwise
- 1 red bell pepper, sliced
- 1 small red onion, sliced
- 2 tablespoons olive oil
- 1/2 teaspoon salt
- 1/4 teaspoon black pepper
- 4 ounces goat cheese or hummus
- 1 cup arugula
Quick Steps:
- Roast vegetables at 425°F for 20 minutes with oil, salt, and pepper.
- Cool them slightly.
- Spread cheese or hummus on the focaccia.
- Layer vegetables and arugula, then close and press gently.
- Slice into picnic-sized portions.
Equipment for This Recipe:
- Sheet pan
- Knife
- Cutting board
- Serrated knife
- Parchment paper
How to Serve This Dish: Wrap the loaf tightly and slice after chilling 15 minutes. It makes a strong main for a vegetarian picnic plate.
Pro Tips for This Recipe:
- Let the vegetables cool before assembly.
- Use a dense loaf, not airy bread that tears.
- Arugula adds peppery bite, so don’t skip it.
Variations on This Dish:
- Mozzarella Version: Swap goat cheese for sliced mozzarella.
- Pesto Version: Use pesto instead of hummus.
- Eggplant Version: Add roasted eggplant slices.
Common Mistakes to Avoid with This Dish:
- Don’t pile on too many vegetables.
- Don’t assemble while the vegetables are hot.
19. Shrimp Avocado Salad Cups
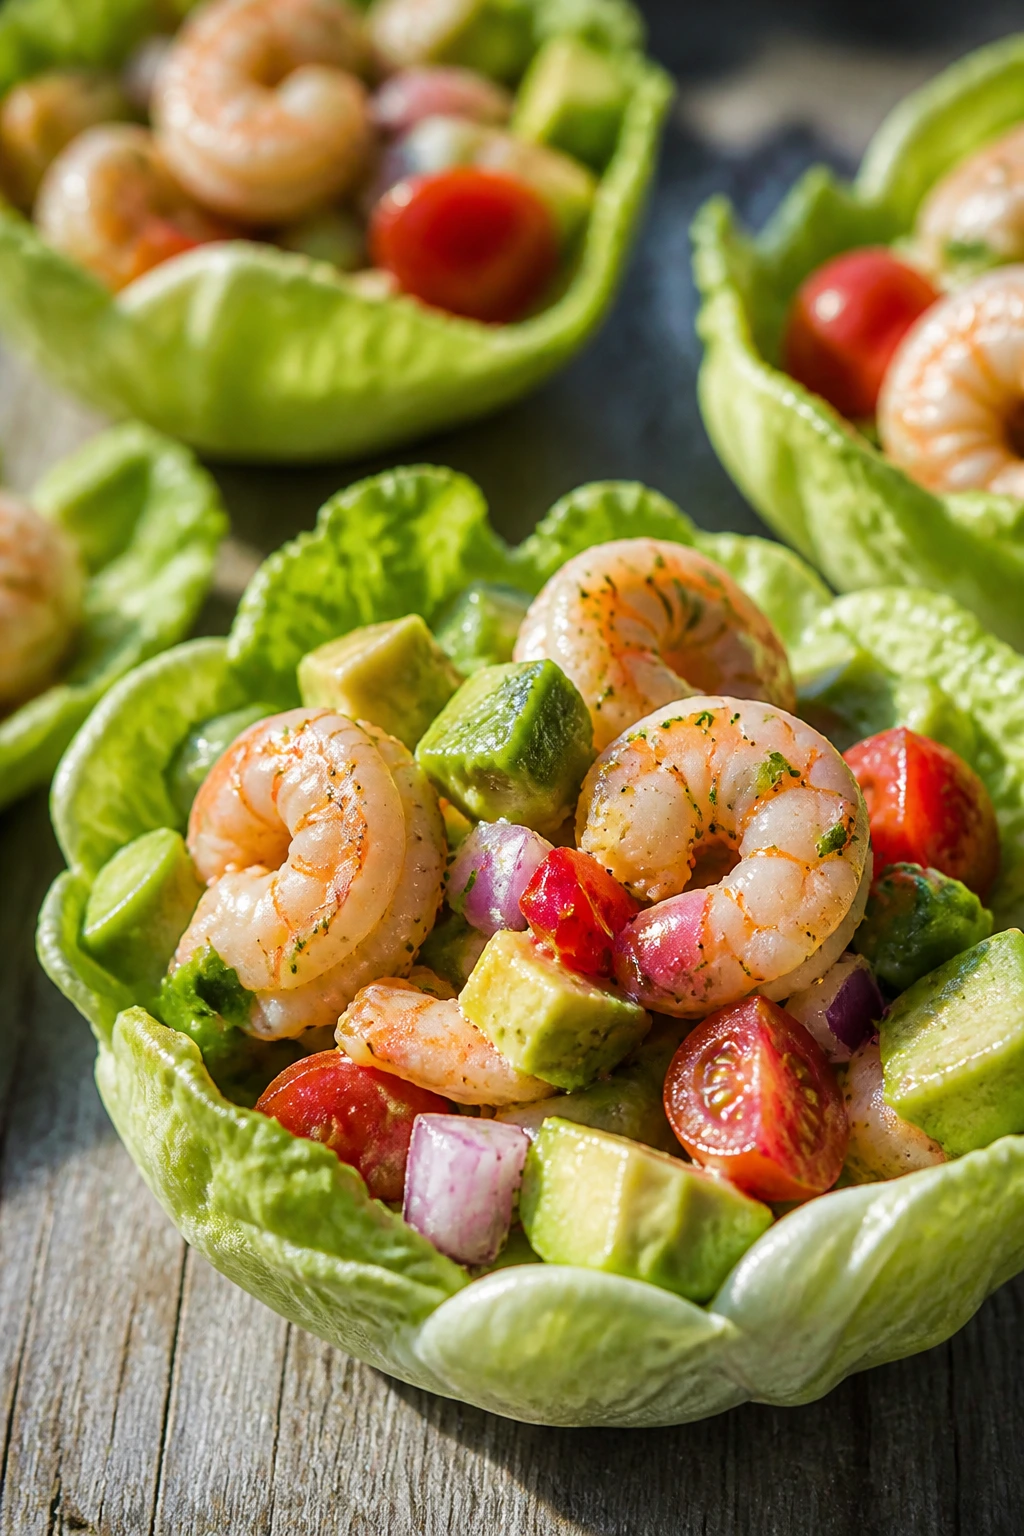
Intro: Shrimp and avocado make a tidy little picnic pairing, as long as you treat the avocado with respect. In individual cups, the salad feels fresh instead of fussy.
Why It Works: Shrimp bring briny flavor and protein, while avocado gives creaminess without needing mayo overload. Lime juice keeps the avocado from browning too quickly and gives the whole cup a sharper finish.
Key Ingredients:
- 1 pound cooked shrimp, chopped
- 2 avocados, diced
- 1/2 cup cherry tomatoes, diced
- 1/4 cup red onion, minced
- 2 tablespoons lime juice
- 1 tablespoon olive oil
- 1 tablespoon chopped cilantro
- 1/2 teaspoon salt
- 1/4 teaspoon black pepper
- Lettuce cups or small jars
Quick Steps:
- Toss shrimp, avocado, tomatoes, and onion in a bowl.
- Whisk lime juice, oil, salt, and pepper.
- Fold dressing gently into the salad.
- Spoon into lettuce cups or jars right before serving.
Equipment for This Recipe:
- Mixing bowl
- Knife
- Spoon
- Small containers or cups
How to Serve This Dish: Keep the salad cold until serving and add tortilla chips on the side. A few jalapeño slices are not out of place if you want heat.
Pro Tips for This Recipe:
- Use fully cooked shrimp that are chilled.
- Add avocado at the last minute.
- Don’t stir too hard or the avocado smears.
Variations on This Dish:
- Mango Version: Add diced mango for sweetness.
- Spicy Version: Add minced jalapeño and chili powder.
- Mayo Version: Stir in a spoonful of mayonnaise for more body.
Common Mistakes to Avoid with This Dish:
- Don’t leave it in the sun; avocado softens fast.
- Don’t use rubbery shrimp. Chill them after cooking.
20. Mini Sausage Rolls

Intro: Mini sausage rolls are the kind of picnic food that vanishes before the napkins are gone. They’re flaky, salty, and easy to grab with one hand while the other hand protects your drink from the wind.
Why It Works: Puff pastry bakes into crisp layers that stay surprisingly pleasant at room temperature. The sausage filling is seasoned enough to taste good cold, which is the whole point here.
Key Ingredients:
- 1 sheet puff pastry, thawed
- 1 pound bulk pork sausage
- 1 small onion, finely grated
- 1 teaspoon dried sage
- 1/2 teaspoon salt
- 1/2 teaspoon black pepper
- 1 egg, beaten
- 1 tablespoon Dijon mustard
Quick Steps:
- Mix sausage, onion, sage, salt, and pepper.
- Roll pastry into a rectangle and spread with Dijon.
- Shape sausage into a log along one edge.
- Roll up, seal, brush with egg, and cut into 2-inch pieces.
- Bake at 400°F for 20 to 25 minutes until browned.
Equipment for This Recipe:
- Sheet pan
- Parchment paper
- Knife
- Pastry brush
- Mixing bowl
How to Serve This Dish: Serve them slightly warm or fully cool with mustard on the side. They go well with slaw, pickles, or a simple green salad.
Pro Tips for This Recipe:
- Keep the pastry cold while working.
- Seal the seam well or the filling peeks out.
- Rest 5 minutes after baking so the fat settles.
Variations on This Dish:
- Apple Version: Add finely grated apple to the sausage mix.
- Spicy Version: Add chili flakes and a pinch of fennel.
- Vegetarian Version: Use a plant-based sausage filling.
Common Mistakes to Avoid with This Dish:
- Don’t overfill the pastry.
- Don’t bake from a warm tray; the pastry needs cold fat to puff.
21. BBQ Chicken Drumsticks
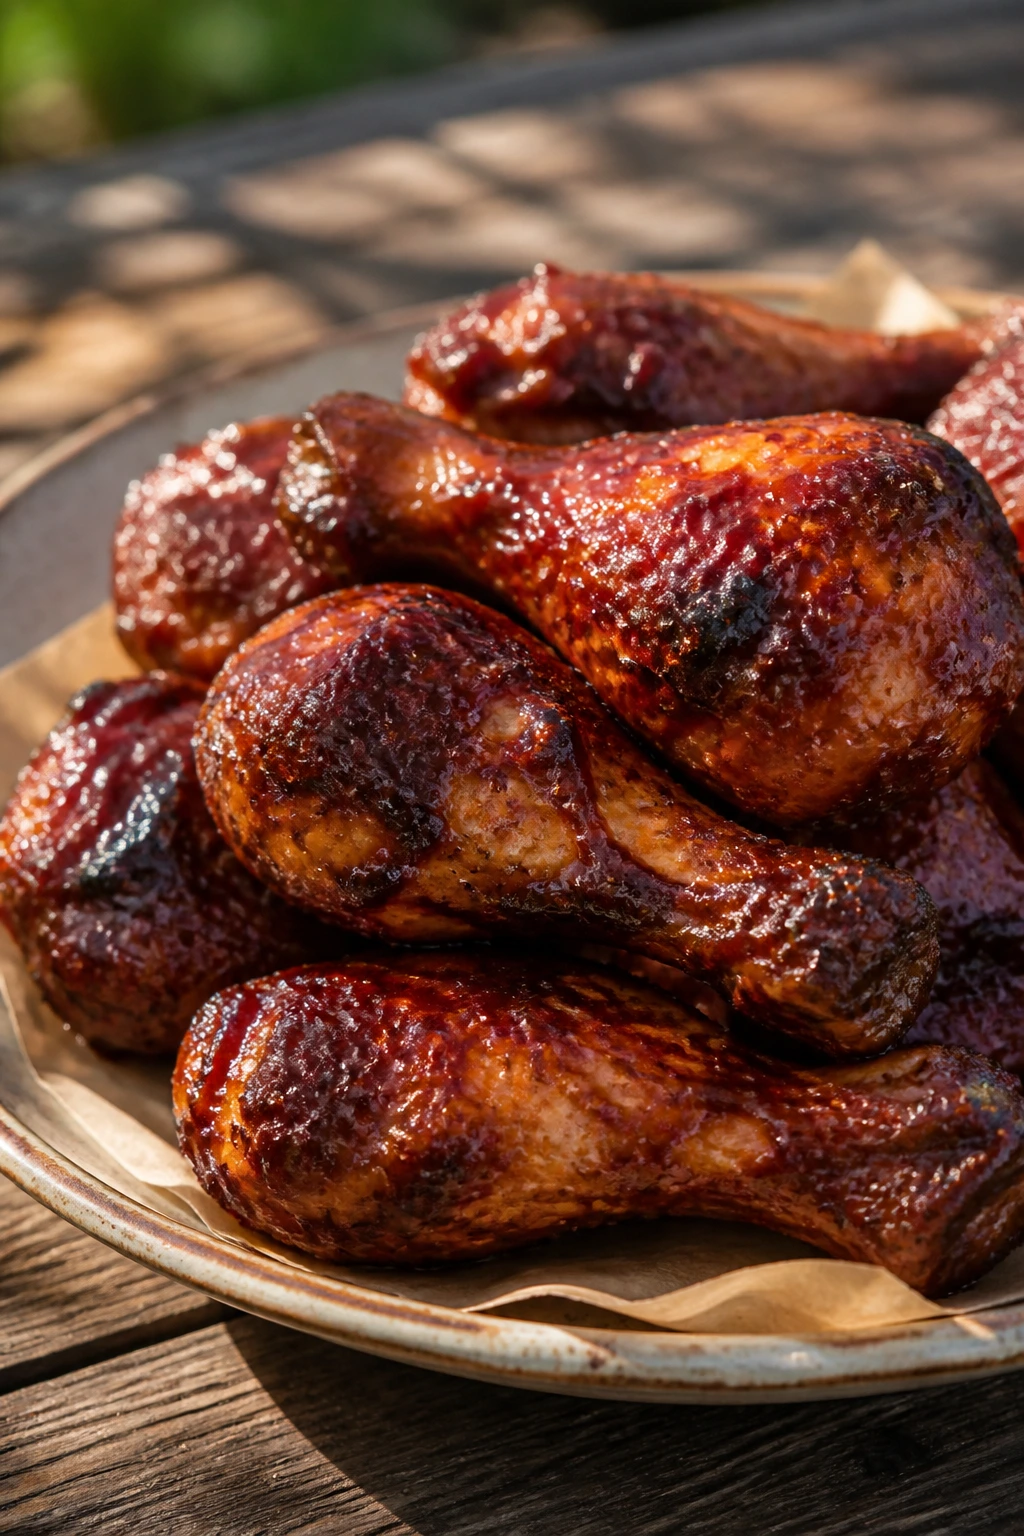
Intro: Drumsticks are picnic-friendly because they’re cheap, sturdy, and easy to eat without a knife. A sticky barbecue glaze gives them that charred-sweet finish people tend to remember.
Why It Works: Dark meat stays juicy longer than breast meat, which matters when food sits out a little. The sauce caramelizes at the edges, so even room-temp bites have good flavor.
Key Ingredients:
- 3 pounds chicken drumsticks
- 1 cup barbecue sauce
- 2 tablespoons apple cider vinegar
- 1 tablespoon brown sugar
- 1 teaspoon smoked paprika
- 1 teaspoon kosher salt
- 1/2 teaspoon black pepper
- 1 tablespoon oil
Quick Steps:
- Toss drumsticks with oil, salt, pepper, and paprika.
- Bake at 425°F for 35 to 40 minutes, turning once.
- Mix barbecue sauce, vinegar, and brown sugar.
- Brush onto drumsticks during the last 10 minutes.
- Bake until the internal temperature reaches 165°F.
Equipment for This Recipe:
- Sheet pan
- Tongs
- Pastry brush
- Instant-read thermometer
How to Serve This Dish: Pack with cornbread, slaw, or potato salad. They’re messy in the best way, so bring plenty of napkins.
Pro Tips for This Recipe:
- Don’t sauce too early or it burns.
- Use parchment for easier cleanup.
- Let them cool before packing so steam doesn’t soften the skin.
Variations on This Dish:
- Honey Heat Version: Add honey and hot sauce to the glaze.
- Dry-Rub Version: Skip sauce and use a spice rub.
- Grilled Version: Finish over live heat for more char.
Common Mistakes to Avoid with This Dish:
- Don’t undercook near the bone.
- Don’t pack them tightly while still hot; the skin softens.
22. Couscous Salad with Apricots and Almonds
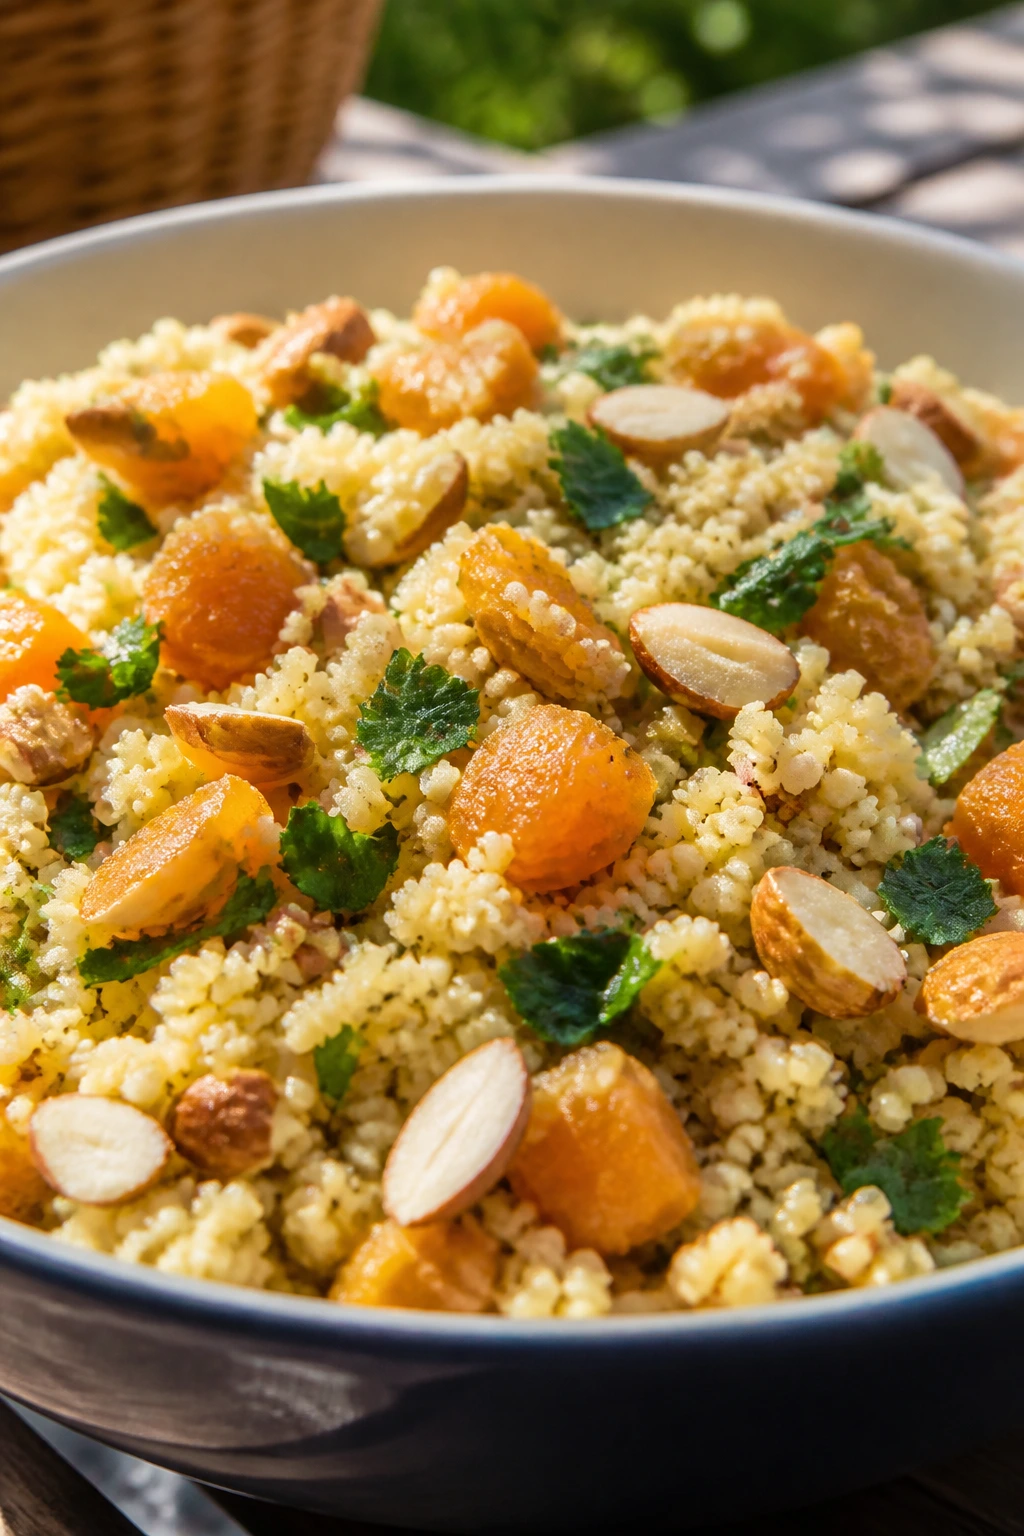
Intro: Couscous is a picnic cheat code because it cooks fast and soaks up flavor like a sponge. With dried apricots and almonds, the salad lands somewhere between savory side and sweet lunch bowl.
Why It Works: The tiny grains take on lemon and olive oil quickly, and the apricots give little bursts of sweetness that keep each bite moving. Toasted almonds bring the crunch that most grain salads need.
Key Ingredients:
- 1 1/2 cups couscous
- 1 1/2 cups boiling water
- 1/4 cup olive oil
- 2 tablespoons lemon juice
- 1/2 cup chopped dried apricots
- 1/2 cup sliced almonds, toasted
- 1/4 cup chopped parsley
- 1/4 cup chopped scallions
- 1/2 teaspoon salt
- 1/4 teaspoon black pepper
Quick Steps:
- Pour boiling water over couscous, cover, and rest 5 minutes.
- Fluff with a fork.
- Whisk oil, lemon juice, salt, and pepper.
- Toss with apricots, almonds, parsley, and scallions.
- Chill or serve at room temperature.
Equipment for This Recipe:
- Heatproof bowl
- Fork
- Small whisk
- Knife
How to Serve This Dish: Serve in a shallow bowl with grilled chicken or roasted vegetables. It travels well in a container and does not mind being eaten outdoors.
Pro Tips for This Recipe:
- Toast the almonds until they smell nutty.
- Fluff couscous before dressing so it doesn’t clump.
- Add herbs after cooling slightly.
Variations on This Dish:
- Mediterranean Version: Add cucumber and feta.
- Orange Version: Use orange juice instead of lemon.
- Herbed Version: Add mint and dill for a greener profile.
Common Mistakes to Avoid with This Dish:
- Don’t let couscous sit as a solid block.
- Don’t skip toasting the nuts; raw almonds taste flat here.
23. Tuna Salad Stuffed Tomatoes
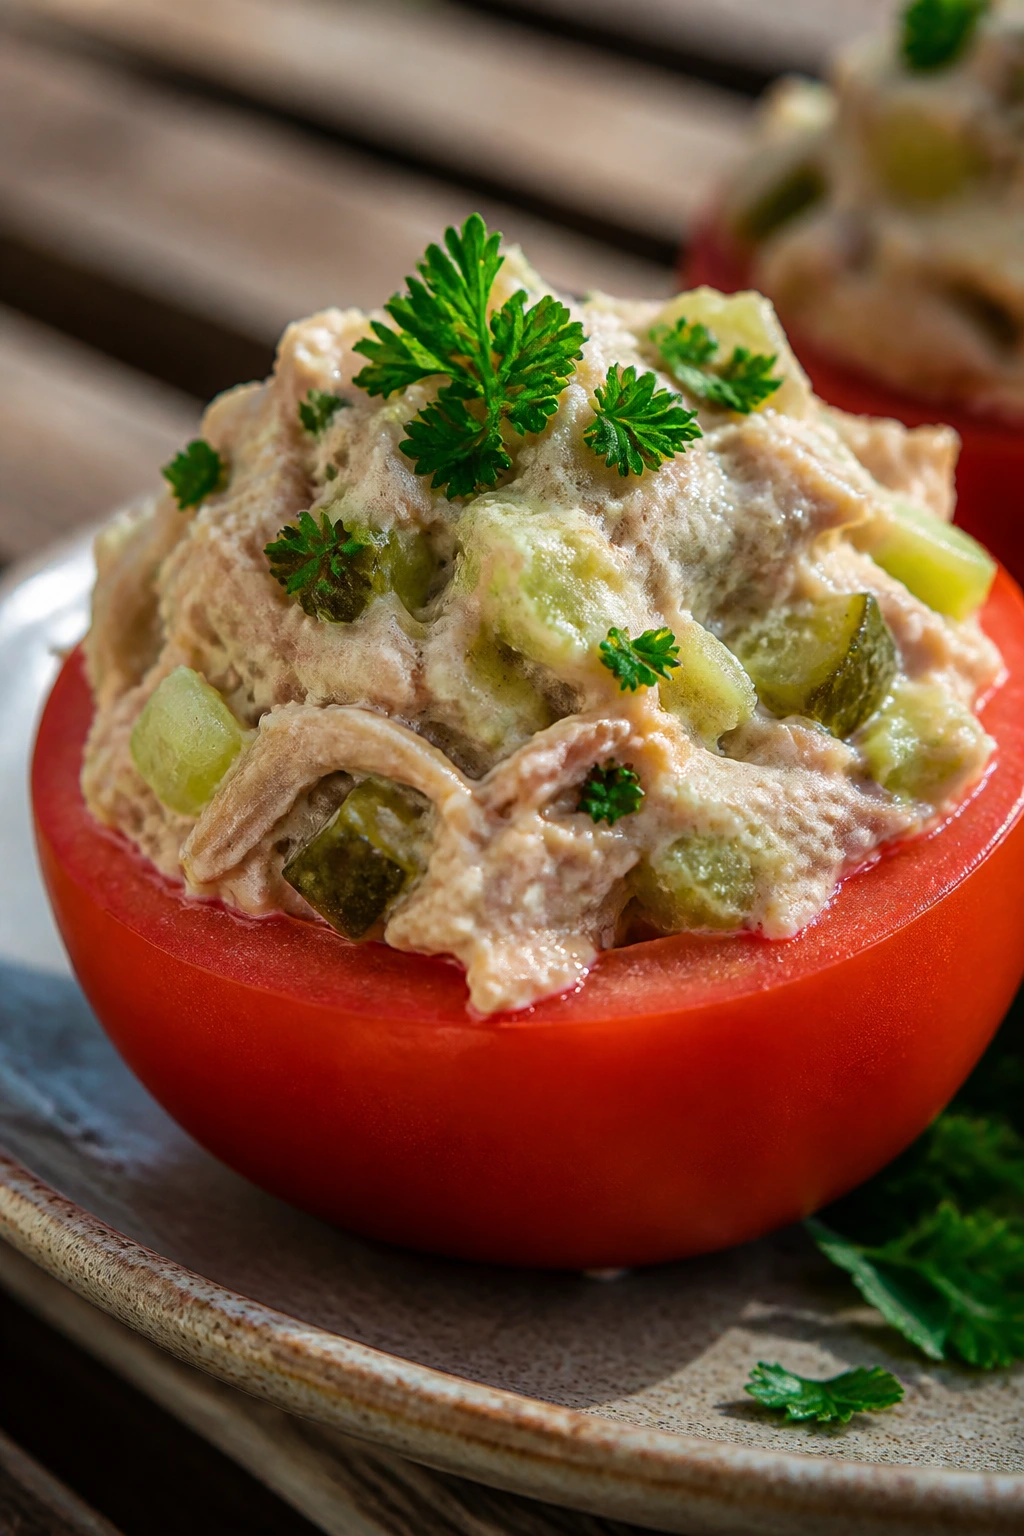
Intro: Stuffed tomatoes solve two problems at once: they keep tuna salad tidy, and they bring their own serving dish. That makes them weirdly perfect for a picnic.
Why It Works: The tomato shell holds the filling without needing bread, and the tuna salad gets some brightness from celery and lemon so it doesn’t feel heavy. It’s cold, simple, and neat.
Key Ingredients:
- 4 large tomatoes
- 2 cans tuna, drained
- 1/4 cup mayonnaise
- 1 tablespoon lemon juice
- 1/4 cup diced celery
- 2 tablespoons chopped dill pickle
- 1 tablespoon chopped parsley
- 1/4 teaspoon salt
- 1/4 teaspoon black pepper
Quick Steps:
- Cut the tops off tomatoes and scoop out the centers.
- Mix tuna, mayo, lemon juice, celery, pickle, parsley, salt, and pepper.
- Spoon filling into tomatoes.
- Chill briefly before serving.
Equipment for This Recipe:
- Sharp knife
- Spoon
- Mixing bowl
- Tray or plate
How to Serve This Dish: Serve them on a bed of lettuce so they don’t roll. They’re good with crackers or a handful of corn chips.
Pro Tips for This Recipe:
- Salt the tomato shells lightly and let them drain.
- Use firm tomatoes with thick walls.
- Chill the tuna salad before stuffing.
Variations on This Dish:
- Avocado Version: Replace some mayo with mashed avocado.
- Curried Version: Add curry powder and raisins.
- Crunch Version: Add chopped apple instead of pickle.
Common Mistakes to Avoid with This Dish:
- Don’t use overly ripe tomatoes; they collapse.
- Don’t skip draining the tuna well.
24. Fruit Salad with Honey Lime
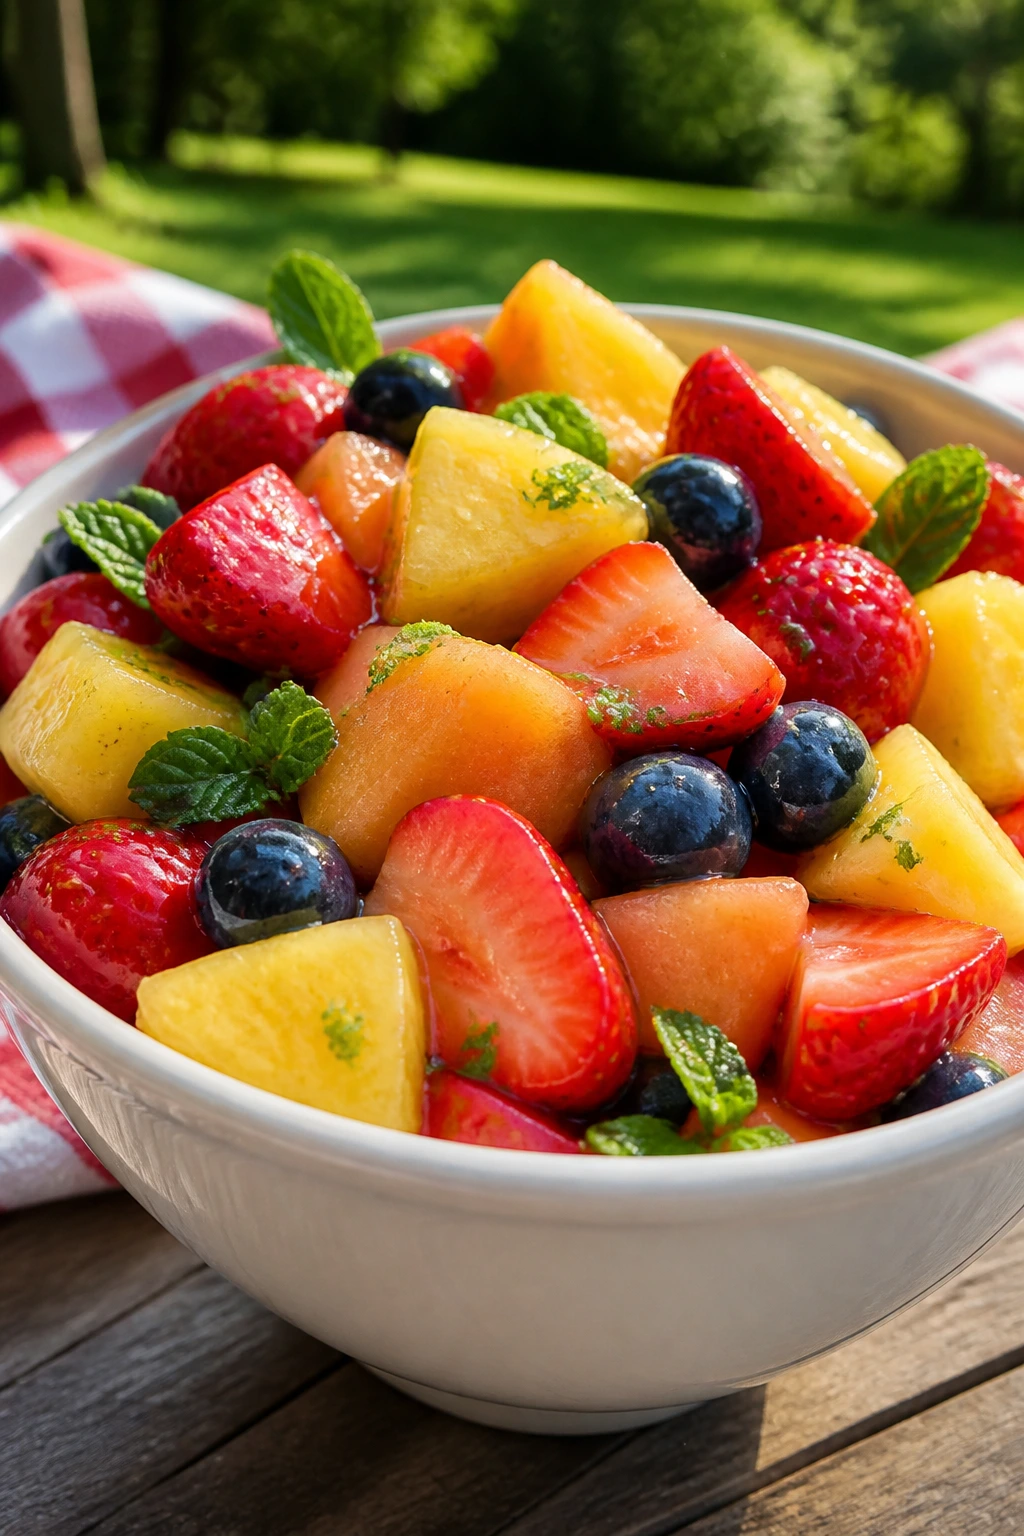
Intro: A good fruit salad should taste like the fruit, not syrup. Honey, lime, and a little mint pull the pieces together without smothering them.
Why It Works: Different fruits need different levels of handling, and this version keeps the cut pieces large enough to stay juicy. Lime stops browning on apples or pears if you add them, and mint keeps the bowl fresh.
Key Ingredients:
- 2 cups strawberries, halved
- 2 cups pineapple chunks
- 2 cups melon cubes
- 1 cup blueberries
- 2 tablespoons honey
- 1 tablespoon lime juice
- 1 teaspoon lime zest
- 1 tablespoon chopped mint
- Pinch of salt
Quick Steps:
- Combine all fruit in a big bowl.
- Whisk honey, lime juice, zest, and salt.
- Drizzle over fruit and toss gently.
- Add mint right before serving.
Equipment for This Recipe:
- Large bowl
- Small bowl
- Whisk
- Sharp knife
How to Serve This Dish: Serve it cold in cups or a big chilled bowl. It works between savory dishes because it resets the palate.
Pro Tips for This Recipe:
- Cut everything to a similar size.
- Add bananas only if you’re serving immediately.
- Keep the dressing light.
Variations on This Dish:
- Berry-Only Version: Use strawberries, raspberries, and blackberries.
- Citrus Version: Add orange segments.
- Stone Fruit Version: Add peaches or nectarines.
Common Mistakes to Avoid with This Dish:
- Don’t overmix or the softer fruit breaks down.
- Don’t dress it hours in advance if the fruit is very ripe.
25. Savory Cheese and Herb Scones

Intro: Scones aren’t just for tea. These cheesy, herb-loaded ones travel well, hold their shape, and pair with almost any picnic spread.
Why It Works: The dough is sturdy enough to bake into tall wedges that don’t crumble apart in the basket. Cheddar and chives give enough salt and aroma that you don’t need much else.
Key Ingredients:
- 2 cups all-purpose flour
- 1 tablespoon baking powder
- 1/2 teaspoon salt
- 1/2 cup cold butter, cubed
- 1 cup shredded cheddar
- 2 tablespoons chopped chives
- 3/4 cup cold milk or buttermilk
- 1 egg, beaten, for brushing
Quick Steps:
- Mix flour, baking powder, and salt.
- Cut in butter until the mix looks like coarse crumbs.
- Stir in cheddar and chives.
- Add milk and mix just until combined.
- Shape, cut, brush with egg, and bake at 400°F for 18 to 20 minutes.
Equipment for This Recipe:
- Mixing bowl
- Pastry cutter or fork
- Baking sheet
- Parchment paper
- Sharp knife
How to Serve This Dish: Serve warm or at room temperature with butter, jam, or sliced ham. They make a strong side when the rest of the basket is light.
Pro Tips for This Recipe:
- Keep butter cold for the best rise.
- Don’t knead the dough much.
- Brush the tops for color and shine.
Variations on This Dish:
- Jalapeño Cheddar Version: Add minced jalapeño.
- Rosemary Version: Swap chives for rosemary.
- Dairy-Free Version: Use plant butter and dairy-free cheese.
Common Mistakes to Avoid with This Dish:
- Don’t overwork the dough or they go tough.
- Don’t use warm butter; it ruins the texture.
26. Hummus and Veggie Wraps
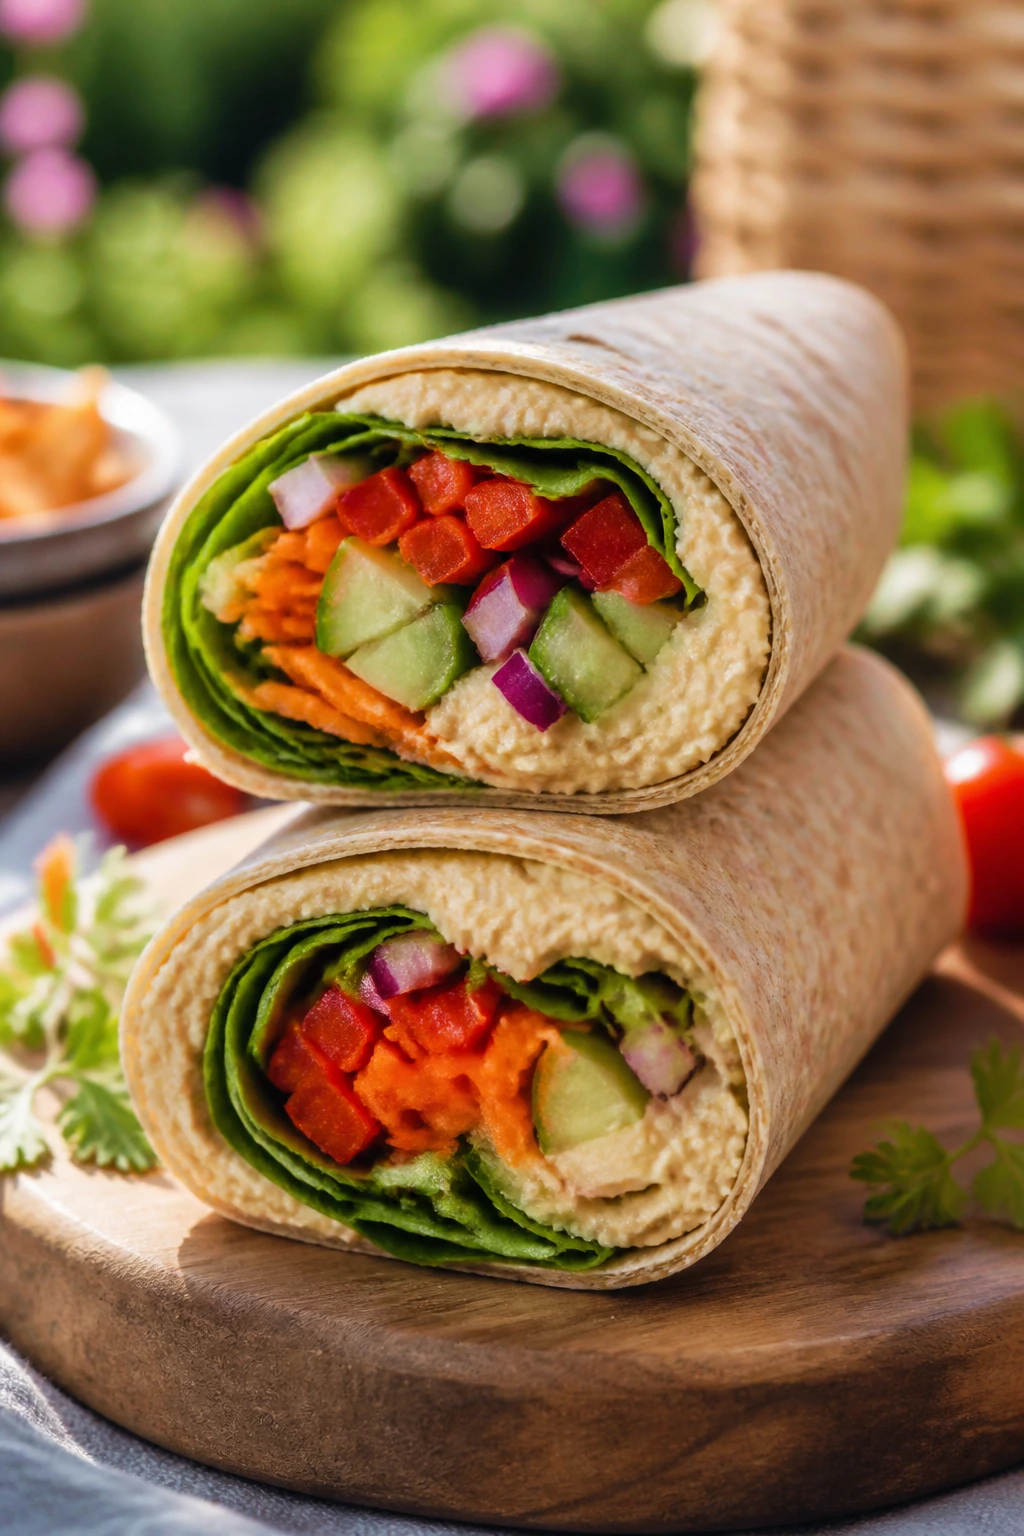
Intro: These wraps are the answer when you want something colorful that doesn’t need a stove. They stay tidy if you keep the filling dry and the hummus thick.
Why It Works: Hummus acts as glue and flavor, while crunchy vegetables keep the wrap from feeling mushy. Whole-wheat tortillas hold up better than very soft ones, which matters when the wrap sits for a while.
Key Ingredients:
- 4 large whole-wheat tortillas
- 1 cup hummus
- 1 cucumber, julienned
- 1 red bell pepper, sliced thin
- 1 carrot, shredded
- 1 cup baby spinach
- 1/4 cup crumbled feta, optional
- 1 tablespoon lemon juice
Quick Steps:
- Spread hummus over each tortilla.
- Add vegetables and feta.
- Drizzle with lemon juice.
- Roll tightly, tuck the sides, and slice in half.
Equipment for This Recipe:
- Cutting board
- Knife
- Spoon
- Parchment wrap, optional
How to Serve This Dish: Pack them cut-side up or wrap them in parchment to keep the ends neat. They’re easy to hand out next to fruit or chips.
Pro Tips for This Recipe:
- Dry the vegetables well.
- Don’t overload the wrap.
- Chill for 10 minutes before slicing.
Variations on This Dish:
- Roasted Pepper Version: Add jarred roasted peppers.
- Avocado Version: Add thin avocado slices.
- Olive Version: Add chopped olives for briny flavor.
Common Mistakes to Avoid with This Dish:
- Don’t use wet cucumbers without draining them.
- Don’t skip the tight roll or they unravel.
27. Chicken Tenders with Parmesan Crust
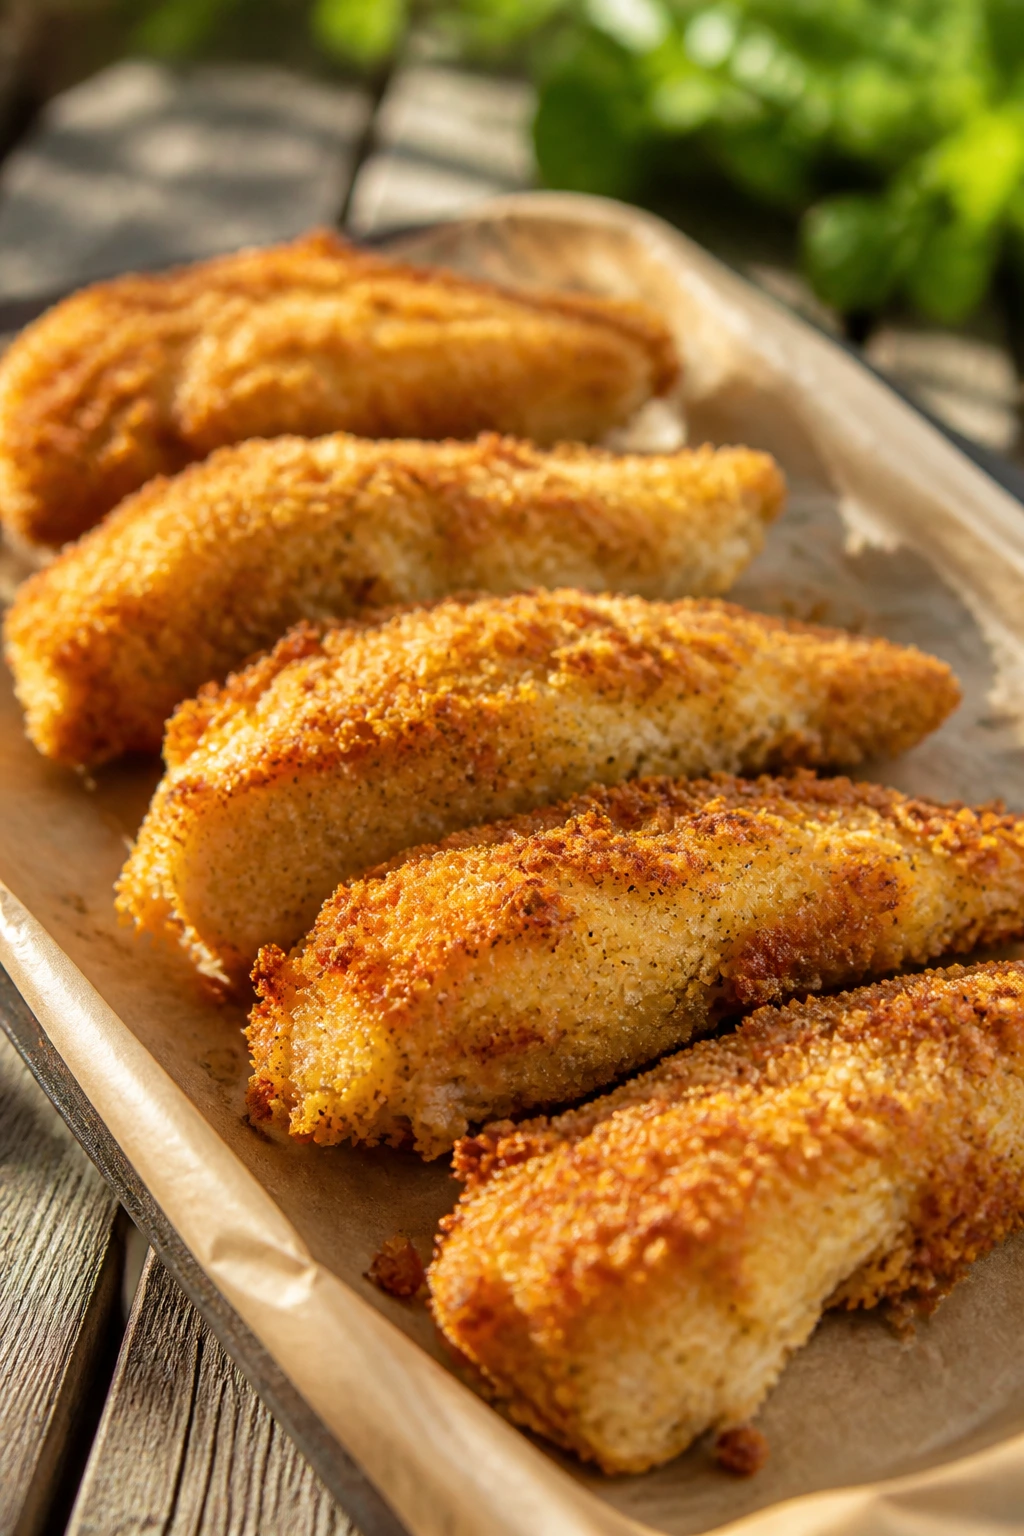
Intro: Not every picnic food has to be cold. These chicken tenders work because the crust stays crisp enough to be good warm or room temperature, and kids usually go for them without a debate.
Why It Works: Parmesan and breadcrumbs brown into a savory shell that keeps the chicken juicy inside. Baking instead of frying makes them easier to pack, and they still taste satisfying after they cool.
Key Ingredients:
- 2 pounds chicken tenders
- 1 cup panko breadcrumbs
- 1/2 cup grated Parmesan
- 1 teaspoon garlic powder
- 1 teaspoon paprika
- 1/2 teaspoon salt
- 2 eggs, beaten
- 2 tablespoons olive oil
Quick Steps:
- Mix panko, Parmesan, garlic powder, paprika, and salt.
- Dip tenders in egg, then coat with the crumb mixture.
- Arrange on a sheet pan, drizzle with oil.
- Bake at 425°F for 18 to 20 minutes until golden and 165°F inside.
Equipment for This Recipe:
- Sheet pan
- Parchment paper
- Two shallow bowls
- Tongs
- Thermometer
How to Serve This Dish: Pack with ranch, honey mustard, or marinara. They’re solid picnic protein and also good tucked into rolls.
Pro Tips for This Recipe:
- Use panko for a crisper crust.
- Don’t crowd the pan.
- Rest before packing so the coating firms up.
Variations on This Dish:
- Spicy Version: Add cayenne to the crumb mix.
- Herb Version: Add dried parsley and oregano.
- Gluten-Free Version: Use gluten-free crumbs.
Common Mistakes to Avoid with This Dish:
- Don’t underseason the crumbs.
- Don’t pack while steaming or the crust softens.
28. Marinated Mozzarella and Olives
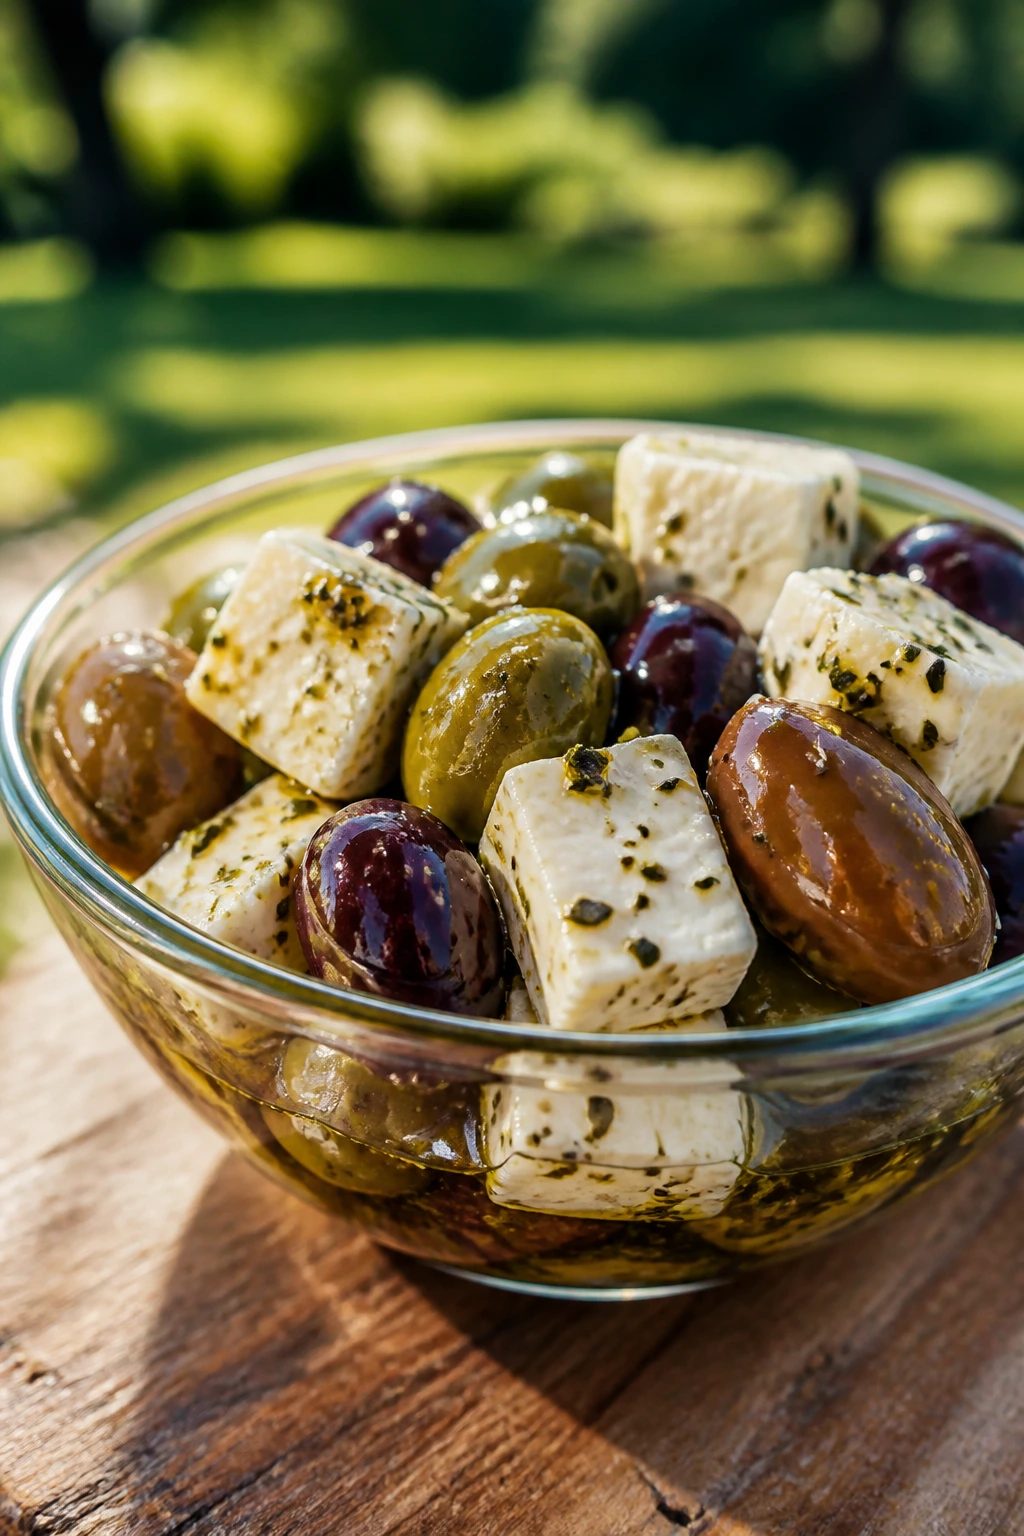
Intro: This is the kind of snack people hover around while pretending they’re waiting for the “real food.” Briny olives, soft mozzarella, and herbs give you a small, salty bite that keeps the picnic moving.
Why It Works: Cheese cubes absorb marinade better than whole balls, and the olive oil carries garlic and herbs across every piece. It’s built to taste good cold, which makes it easy.
Key Ingredients:
- 8 ounces mozzarella balls or cubes
- 1 cup mixed olives
- 1/4 cup olive oil
- 1 tablespoon red wine vinegar
- 1 garlic clove, minced
- 1 teaspoon dried oregano
- 1 teaspoon chopped parsley
- 1/4 teaspoon red pepper flakes
- Black pepper to taste
Quick Steps:
- Mix oil, vinegar, garlic, oregano, parsley, pepper flakes, and black pepper.
- Add mozzarella and olives.
- Toss and chill for at least 30 minutes.
- Serve with toothpicks or small forks.
Equipment for This Recipe:
- Small bowl
- Spoon
- Storage container
- Serving dish
How to Serve This Dish: Serve beside crackers, salami, or sliced bread. A few cherry tomatoes make it look fuller without much work.
Pro Tips for This Recipe:
- Let it marinate long enough for the garlic to soften.
- Use a mix of olive types for better flavor.
- Bring it to the picnic already chilled.
Variations on This Dish:
- Lemon Version: Swap vinegar for lemon juice.
- Herb Garden Version: Add basil and thyme.
- Pepperoncini Version: Add sliced pepperoncini for heat.
Common Mistakes to Avoid with This Dish:
- Don’t use tiny amounts of oil; the marinade needs to coat.
- Don’t forget to drain overly wet mozzarella.
29. Cherry Tomato Galette Bites

Intro: These are a little more effort, yes, but the payoff is a tray of flaky, hand-held tomato bites that feel special without becoming precious. They hold together better than a full pie at a picnic.
Why It Works: Puff or pie dough gives a sturdy base, and cherry tomatoes roast into concentrated sweetness. A thin layer of cheese keeps the crust from getting soggy, which is the main battle here.
Key Ingredients:
- 1 sheet pie dough or puff pastry
- 2 cups cherry tomatoes, halved
- 1/2 cup ricotta
- 1/4 cup grated Parmesan
- 1 tablespoon olive oil
- 1 teaspoon thyme leaves
- 1/2 teaspoon salt
- 1/4 teaspoon black pepper
- 1 egg, beaten
Quick Steps:
- Roll dough and cut into 3-inch rounds.
- Mix ricotta and Parmesan, then spread on each round.
- Top with tomatoes, thyme, salt, and pepper.
- Fold edges slightly, brush with egg, and bake at 400°F for 18 to 22 minutes.
Equipment for This Recipe:
- Sheet pan
- Parchment paper
- Knife or cutter
- Mixing bowl
- Pastry brush
How to Serve This Dish: Serve warm or room temperature with basil scattered over the top. They work as a picnic appetizer that feels more finished than crackers and dip.
Pro Tips for This Recipe:
- Drain juicy tomatoes on paper towels first.
- Keep the filling layer thin.
- Let them cool before stacking.
Variations on This Dish:
- Goat Cheese Version: Swap ricotta for goat cheese.
- Pesto Version: Add a thin layer of pesto under the cheese.
- Onion Version: Add caramelized onion for sweetness.
Common Mistakes to Avoid with This Dish:
- Don’t overfill the rounds.
- Don’t skip docking the dough if it puffs too much.
30. Macaroni Salad with Peas and Cheddar
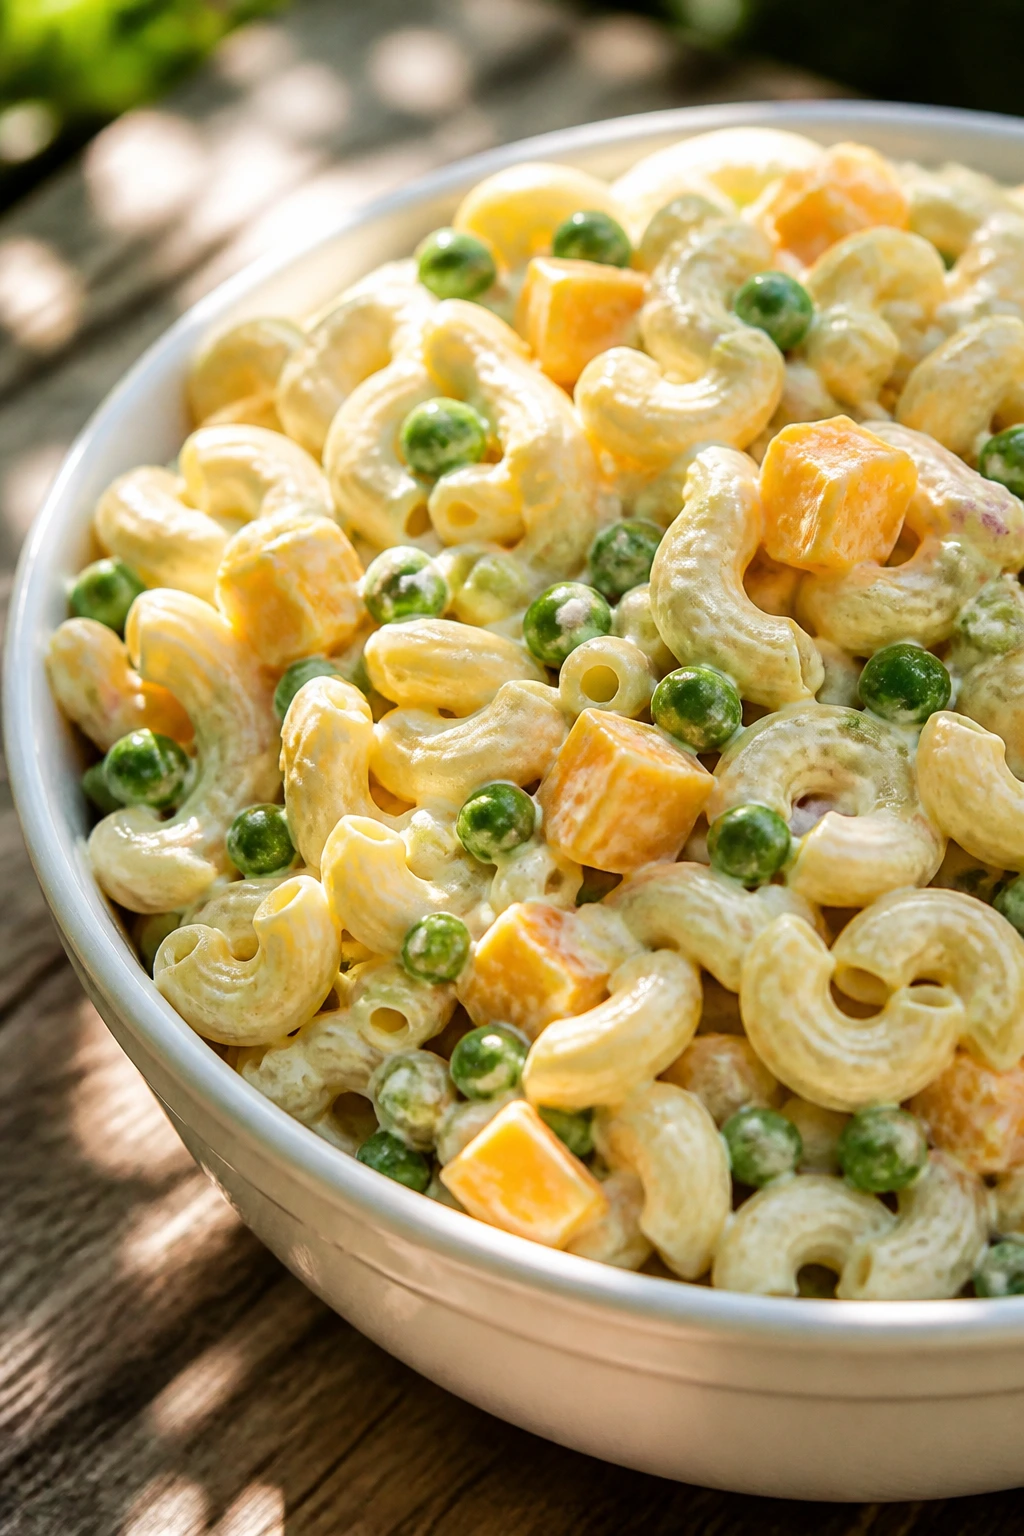
Intro: Macaroni salad can go sideways fast, but when it’s balanced, it’s the kind of side people expect at a summer picnic. Peas and cheddar give it a sweet-salty mix that feels nostalgic without being flat.
Why It Works: Small pasta shapes cling to the dressing, and the peas pop through with little bursts of sweetness. Cheddar adds enough depth to keep the salad from tasting like plain mayo and noodles.
Key Ingredients:
- 1 pound elbow macaroni
- 1 cup frozen peas, thawed
- 1 cup shredded cheddar
- 1/2 cup mayonnaise
- 2 tablespoons sour cream
- 1 tablespoon apple cider vinegar
- 1 teaspoon Dijon mustard
- 1/2 teaspoon salt
- 1/4 teaspoon black pepper
Quick Steps:
- Cook macaroni until just tender, then cool it.
- Whisk mayo, sour cream, vinegar, Dijon, salt, and pepper.
- Toss pasta with peas and cheddar.
- Fold in dressing.
- Chill at least 30 minutes.
Equipment for This Recipe:
- Pot
- Colander
- Mixing bowl
- Spoon
How to Serve This Dish: Serve cold in a big bowl with extra pepper on top. It’s the picnic side that sits comfortably next to burgers, chicken, or sandwiches.
Pro Tips for This Recipe:
- Cool the pasta before dressing or it gets greasy.
- Add a spoonful of dressing after chilling if it tightens up.
- Keep the peas small and tender.
Variations on This Dish:
- Ham Version: Add diced ham.
- Pickle Version: Fold in chopped pickles.
- Mustard Version: Increase Dijon for more bite.
Common Mistakes to Avoid with This Dish:
- Don’t overcook the macaroni.
- Don’t serve it without enough salt; cold pasta dulls flavor.
31. No-Bake Lemon Bars
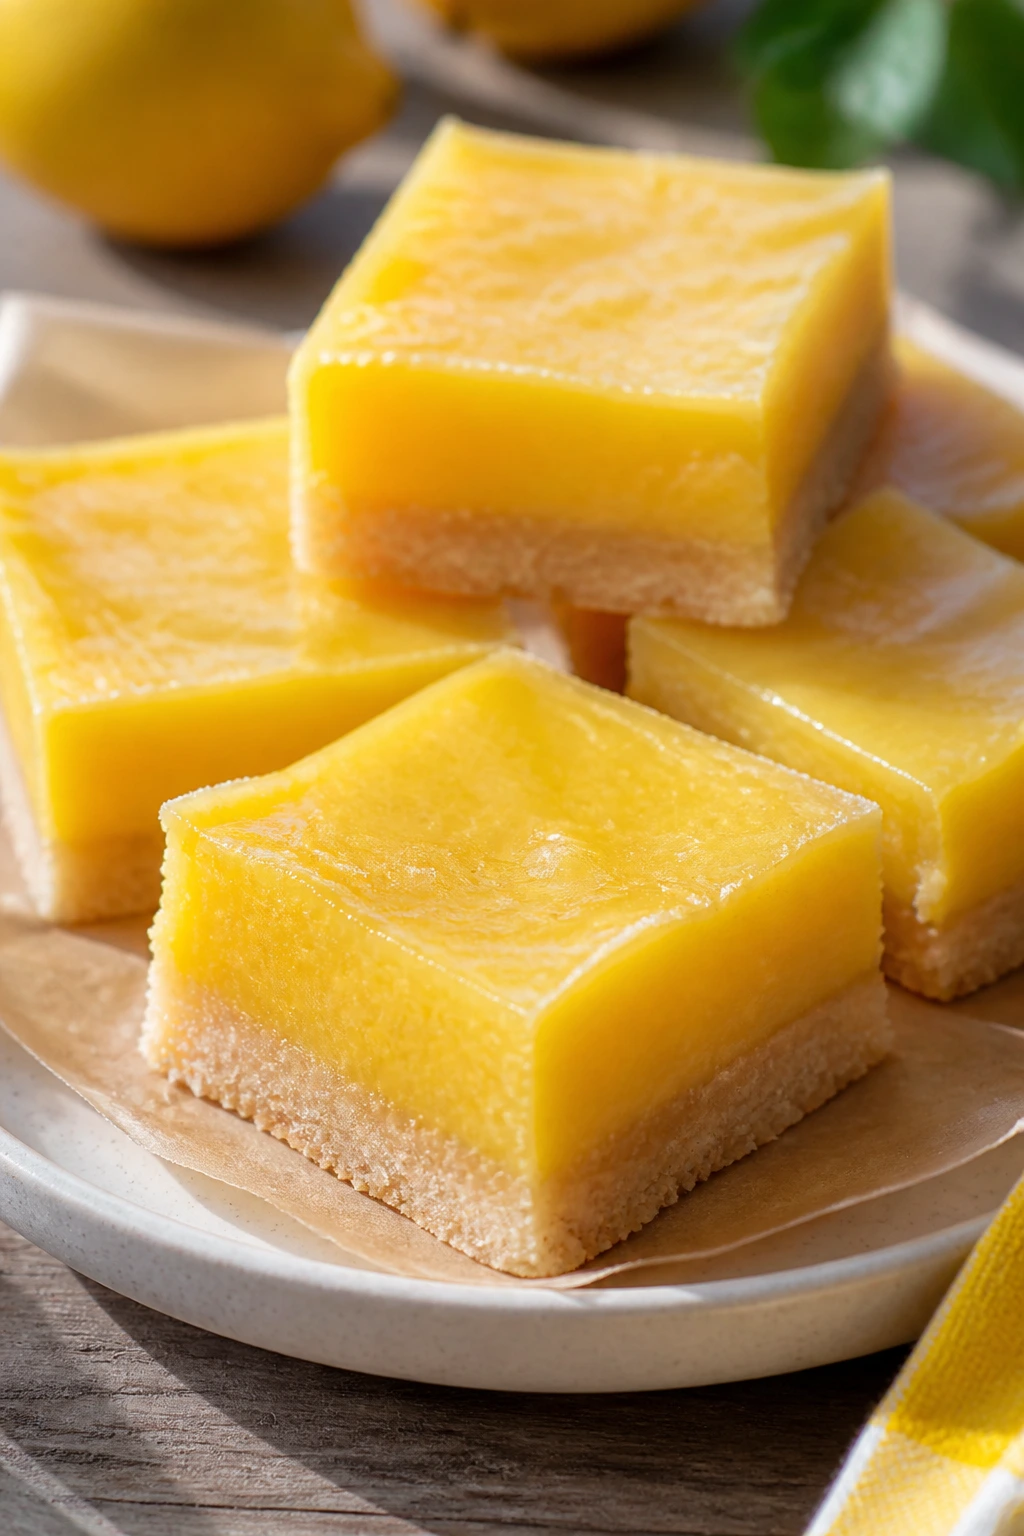
Intro: Lemon bars are picnic gold because they taste bright even after a long sit in the cooler. No baking means less fuss, and the cold, firm texture is exactly what you want after savory food.
Why It Works: A cookie crumb crust holds together without needing a hot oven, and the lemon filling sets in the fridge with a clean, cool slice. Powdered sugar on top gives it the familiar finish people expect.
Key Ingredients:
- 2 cups graham cracker crumbs
- 1/2 cup melted butter
- 2 tablespoons sugar
- 1 can sweetened condensed milk
- 1/2 cup lemon juice
- 1 tablespoon lemon zest
- 1 cup whipped topping or whipped cream
- Powdered sugar for dusting
Quick Steps:
- Mix crumbs, butter, and sugar.
- Press into a lined pan and chill 15 minutes.
- Whisk condensed milk, lemon juice, zest, and whipped topping.
- Spread over crust and chill 4 hours.
- Dust with powdered sugar and slice.
Equipment for This Recipe:
- 8×8-inch pan
- Mixing bowls
- Whisk
- Parchment paper
- Offset spatula
How to Serve This Dish: Serve cold, cut small, and keep them shaded. They’re the dessert people reach for after something salty and grilled.
Pro Tips for This Recipe:
- Line the pan for easy lifting.
- Chill fully before cutting or the squares slump.
- Use fresh lemon juice, not bottled.
Variations on This Recipe:
- Lime Version: Swap lemon for lime.
- Berry Version: Add a thin layer of berry jam under the filling.
- Graham-Free Version: Use vanilla wafer crumbs.
Common Mistakes to Avoid with This Recipe:
- Don’t cut early.
- Don’t overdo the crust butter or it turns greasy.
32. Blueberry Hand Pies

Intro: Hand pies are the right kind of dessert for outdoor eating because they don’t need utensils and they don’t melt into a mess in the sun. Blueberries burst into a jammy filling that stays neat inside the crust.
Why It Works: Small sealed pies trap the fruit inside, which means fewer drips than a full tart. A little lemon zest keeps the filling from tasting flat, and the baked crust travels well once cooled.
Key Ingredients:
- 2 sheets pie dough
- 2 cups blueberries
- 1/4 cup sugar
- 1 tablespoon cornstarch
- 1 teaspoon lemon zest
- 1 tablespoon lemon juice
- 1 egg, beaten
- 1 tablespoon coarse sugar
Quick Steps:
- Mix blueberries, sugar, cornstarch, zest, and lemon juice.
- Cut dough into rounds.
- Fill, fold, and seal with a fork.
- Brush with egg, sprinkle with coarse sugar, and bake at 400°F for 20 minutes.
Equipment for This Recipe:
- Baking sheet
- Parchment paper
- Mixing bowl
- Fork
- Pastry brush
How to Serve This Dish: Serve them once cooled so the filling sets. They’re easy to stack in a container with parchment between layers.
Pro Tips for This Recipe:
- Don’t overfill or they burst.
- Cut steam vents if your dough is thick.
- Cool fully before packing.
Variations on This Recipe:
- Peach Version: Swap in diced peaches.
- Mixed Berry Version: Use raspberries and blackberries.
- Glaze Version: Drizzle with lemon icing after cooling.
Common Mistakes to Avoid with This Recipe:
- Don’t forget to seal the edges well.
- Don’t bake from too-warm dough; the crust gets limp.
33. Peach Cobbler Bars
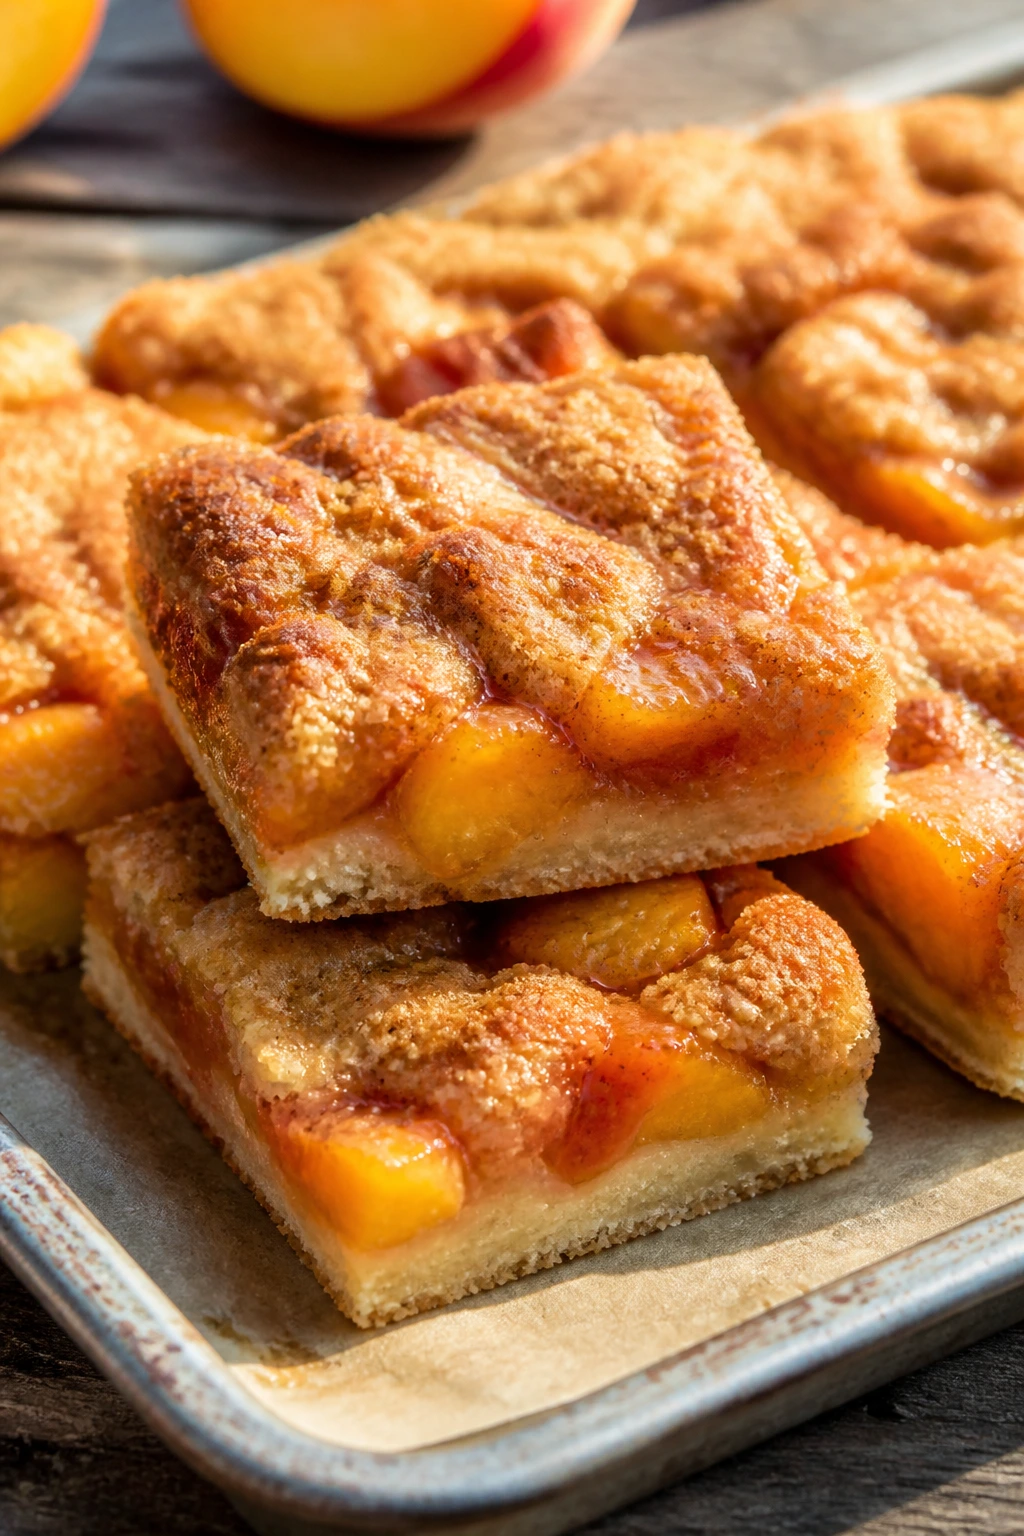
Intro: Peach cobbler is lovely, but bars are easier to carry. You get buttery crust, soft fruit, and a sliceable square that behaves like it’s been invited to the picnic on purpose.
Why It Works: The crust and topping sandwich the peaches, so the fruit doesn’t spill everywhere. A little cinnamon supports the peach flavor without making the dessert feel too heavy.
Key Ingredients:
- 2 cups all-purpose flour
- 1 cup sugar, divided
- 1 teaspoon baking powder
- 1/2 teaspoon salt
- 1 cup cold butter, cubed
- 3 cups sliced peaches
- 1 tablespoon cornstarch
- 1 teaspoon cinnamon
- 1 teaspoon vanilla extract
Quick Steps:
- Mix flour, 1/2 cup sugar, baking powder, and salt.
- Cut in butter until crumbly.
- Press half into a pan and bake 10 minutes at 350°F.
- Toss peaches with remaining sugar, cornstarch, cinnamon, and vanilla.
- Spread peaches over crust, crumble the rest on top, and bake 30 to 35 minutes.
Equipment for This Recipe:
- 9×13-inch pan
- Mixing bowls
- Pastry cutter or fork
- Spoon
- Parchment paper
How to Serve This Dish: Serve cooled, cut into clean squares, maybe with whipped cream if you’re keeping a cooler handy. They hold together better than pie and feel easier outdoors.
Pro Tips for This Recipe:
- Use ripe but still firm peaches.
- Let the bars cool completely before cutting.
- Bake until the top is golden, not pale.
Variations on This Recipe:
- Berry Cobbler Version: Add blueberries or blackberries.
- Brown Sugar Version: Use brown sugar for a deeper flavor.
- Almond Version: Add sliced almonds to the crumble.
Common Mistakes to Avoid with This Recipe:
- Don’t skip the pre-bake on the crust.
- Don’t cut while hot or the filling runs.
34. Iced Tea Lemonade

Intro: A picnic without a cold drink feels unfinished, and this one hits the sweet-tart middle that makes people refill their cups. The tea keeps it grounded; the lemonade keeps it bright.
Why It Works: Strong tea stands up to ice and citrus without tasting watered down. Mixing the tea and lemonade while both are chilled keeps the flavor clean, not muddy or flat.
Key Ingredients:
- 4 black tea bags
- 4 cups boiling water
- 2 cups cold water
- 1 cup lemon juice
- 1/2 cup sugar or honey
- Lemon slices
- Ice
- Fresh mint, optional
Quick Steps:
- Steep tea bags in boiling water for 5 minutes.
- Remove bags and stir in sugar until dissolved.
- Add cold water and lemon juice.
- Chill, then serve over ice with lemon slices.
Equipment for This Recipe:
- Pitcher
- Kettle or pot
- Spoon
- Measuring cups
How to Serve This Dish: Pour it into a chilled pitcher and bring extra ice in a separate bag or cooler compartment. Mint makes it look more finished without much effort.
Pro Tips for This Recipe:
- Brew tea strong; ice will dilute it.
- Sweeten while the tea is still warm.
- Add lemon after cooling so the flavor stays sharper.
Variations on This Dish:
- Peach Tea Version: Add peach slices or puree.
- Herbal Version: Use half mint tea.
- Sparkling Version: Top each glass with club soda.
Common Mistakes to Avoid with This Recipe:
- Don’t underbrew the tea.
- Don’t add ice too early or the drink waters down fast.
35. Ginger-Mint Limeade

Intro: Limeade gets a sharper personality when ginger and mint are in the picture. It tastes like the kind of drink you want between salty bites, especially once the ice starts floating at the top.
Why It Works: Ginger gives warmth without heat, mint cools the finish, and lime keeps the sweetness in check. It’s a strong picnic choice because it tastes lively even after dilution.
Key Ingredients:
- 1 cup lime juice
- 1/2 cup sugar
- 4 cups cold water
- 1 tablespoon grated fresh ginger
- 1/4 cup mint leaves
- Lime slices
- Ice
Quick Steps:
- Stir sugar into 1 cup warm water until dissolved.
- Add lime juice, remaining water, ginger, and mint.
- Chill for 30 minutes.
- Strain if you want a smoother drink.
- Serve over ice with lime slices.
Equipment for This Recipe:
- Pitcher
- Fine-mesh strainer, optional
- Spoon
- Measuring cups
How to Serve This Dish: Serve cold in tall glasses or reusable cups. It’s sharp enough to stand beside salty snacks, and the mint makes it feel especially clean on a hot day.
Pro Tips for This Recipe:
- Smash the mint lightly before adding it.
- Grate ginger finely so the flavor spreads.
- Sweeten gradually; lime can hide sugar fast.
Variations on This Recipe:
- Sparkling Limeade: Replace half the water with soda water.
- Honey Version: Use honey instead of sugar.
- Berry Version: Muddle in raspberries.
Common Mistakes to Avoid with This Recipe:
- Don’t oversteep the mint or it turns grassy.
- Don’t serve without enough ice if the day is warm.
Picnic Food That Still Tastes Good at Noon
The more I make picnic food, the more I respect recipes that know their job. Some dishes need to be served the minute they leave the stove. Picnic recipes need a little more backbone. They need structure, acidity, salt, and a way to survive a few hours without becoming a mess.
That’s why the best basket usually mixes a few cold salads, one sturdy sandwich, one crisp snack, something sweet, and a drink that can take ice well. If you pack from that angle, the whole meal feels calm instead of improvised. Nobody ends up eating a warm, sad tomato slice off a paper plate and pretending it was fine.
Essential Equipment for These Recipes
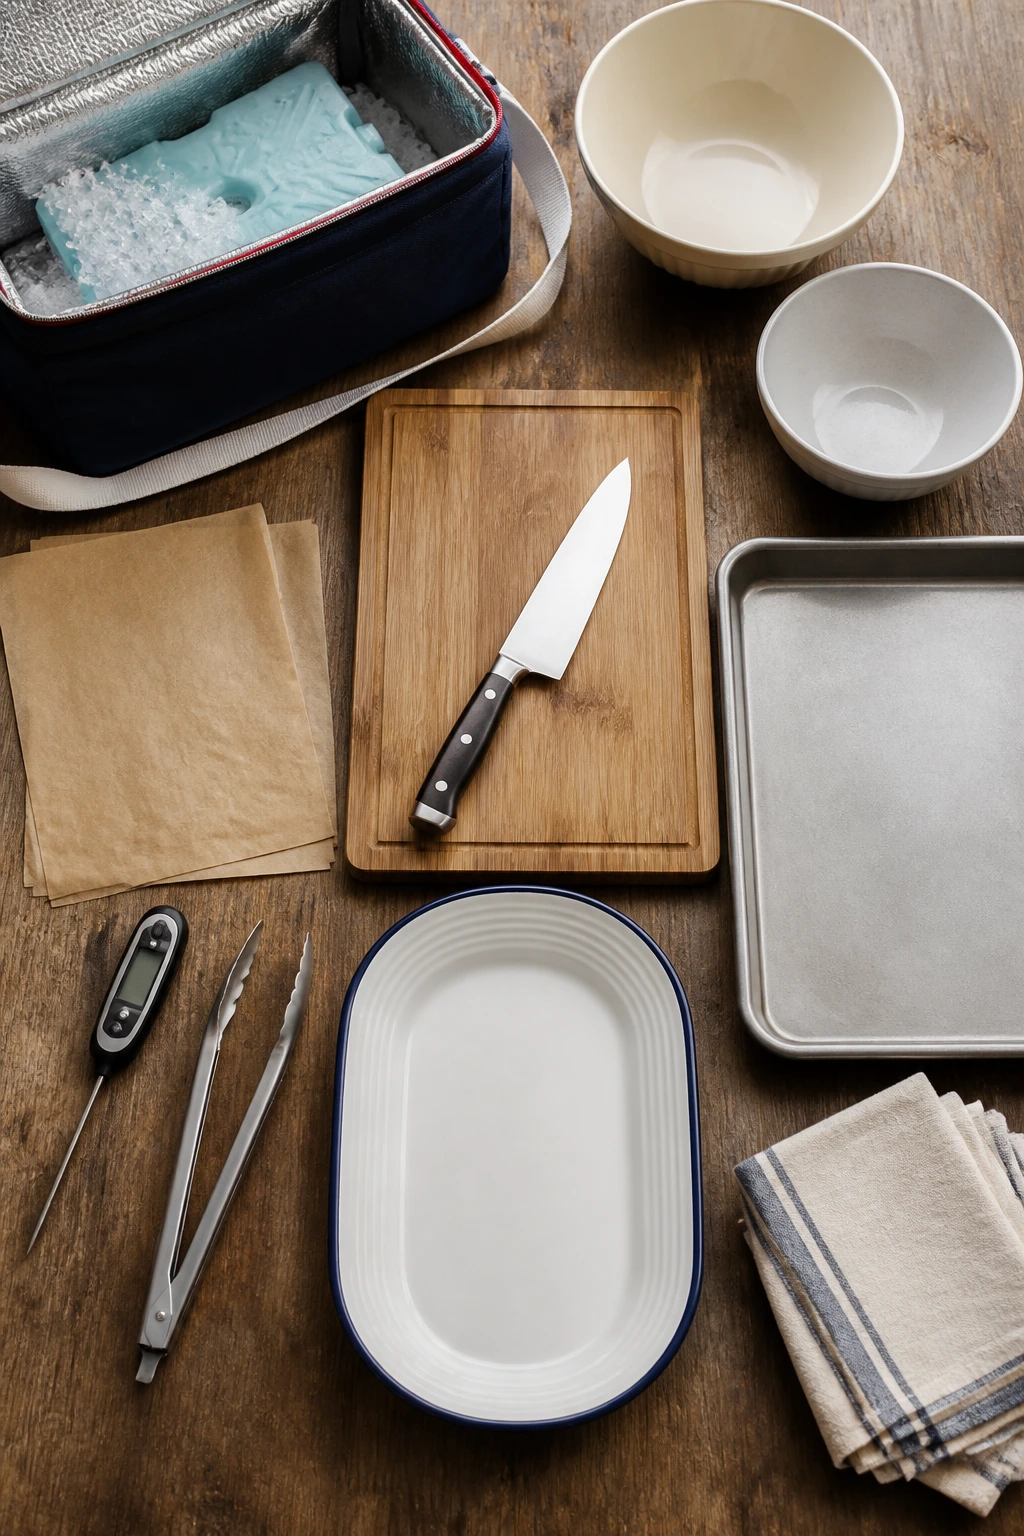
- Insulated cooler: Keeps eggs, chicken, shrimp, dairy, and drinks cold until serving.
- Reusable ice packs: Better than loose ice for sandwiches and containers that need to stay dry.
- A few shallow containers: Wide containers cool faster and keep salads from getting crushed.
- Parchment paper: Handy for wrapping sandwiches, bars, and hand pies without sticking.
- Sharp knife: Clean cuts matter for tea sandwiches, pinwheels, and bars.
- Cutting board: A large, stable board makes prep faster and safer.
- Mixing bowls in two or three sizes: You’ll need one for dressings, one for fillings, and one for tossing.
- Sheet pans: Useful for roasting vegetables, baking chicken, and cooling items quickly.
- Instant-read thermometer: Especially helpful for chicken, drumsticks, and anything cooked outdoors.
- Small tongs or toothpicks: Useful for skewers, cheese bites, and tray-style serving.
- Serving platters with rims: Keep juicy items from sliding off the edge.
- Reusable napkins or paper towels: Picnic food is neat only in theory.
Smart Shopping and Ingredient Tips
Picnic recipes live or die on ingredient choice. Buy bread with enough structure to survive a knife and a little moisture — focaccia, slider buns, country loaf, and tortillas usually behave better than soft sandwich bread that tears when you look at it too hard. For salads, choose produce that feels firm and smells fresh: tomatoes should give a little under pressure, cucumbers should be crisp, berries should be dry, and herbs should look perky instead of limp at the stems.
For protein, dark chicken meat gives you more forgiveness than breast meat. Shrimp should smell clean, never fishy. Eggs are easier to peel if they’re not the very freshest ones, which is one of those slightly annoying kitchen truths that keeps showing up because it works. If you’re shopping for cheese, buy blocks or balls when the recipe depends on texture; pre-shredded cheese is fine in some places, but block cheese usually tastes cleaner and melts or spreads more predictably.
Canned beans, jarred roasted peppers, and good pantry condiments are not cheating. They’re practical. A picnic basket is often better when you lean on a few reliable store-bought items and spend your energy on the part that needs hands-on care: the dressing, the roasting, the slicing, the final seasoning. That’s where the food starts to feel yours.
How to Serve These Recipes
Presentation: Build the picnic in layers, not chaos. Put wet salads in shallow bowls, line sandwich trays with parchment, and keep fruit and sweets in separate containers so they don’t pick up savory smells.
Accompaniments: Pair the richer items — egg salad, pimento cheese, sausage rolls, chicken drumsticks — with crisp sides like cucumber spears, chips, or a green salad. The lighter recipes, like watermelon skewers or fruit salad, work better as resets between heavier bites.
Portions: For a picnic lunch, plan on 2 to 3 savory items per person if you’re serving a mix, or 1 main plus 2 sides and 1 dessert. Cut sandwiches, bars, and hand pies smaller than you would indoors; people always graze more outdoors.
Beverage Pairing: Iced tea lemonade and ginger-mint limeade fit the whole collection, but sparkling water with lime also plays nicely with salty foods and cheese-heavy bites. If you want one drink to carry the cooler, make it the cold one that keeps its flavor after the ice melts a little.
Additional Tips and Flavor Boosters
Flavor Enhancement: Keep a tiny finishing salt in your bag. A pinch of flaky salt on tomatoes, melon, or deviled eggs wakes everything up, especially after the food has sat chilled.
Customization: Build a “choose your own” picnic by serving dressings and crunchy toppings separately — toasted nuts, herbs, pickles, hot sauce, and extra citrus let people tune their own plate without turning the main dish into mush.
Serving Suggestions: Bright garnishes matter more outdoors than they do at a formal table. A few extra basil leaves, dill sprigs, lemon wedges, or sliced scallions make the spread look alive, which is half the pleasure of a picnic.
Make-It-Yours: If you’re feeding vegetarians, lean harder on chickpeas, hummus, cheese, and grain salads. For a dairy-free basket, the lemony, vinaigrette-based recipes do most of the work without asking for swaps. For kids, keep the spicy condiments off to the side and cut everything into smaller, easy-grip shapes.
Make-Ahead, Storage, and Reheating Guidance
A lot of these recipes can be made ahead, which is part of their charm. Egg salad, chicken salad, pasta salad, potato salad, deviled eggs, grain salads, and dressings all hold well for 3 to 4 days refrigerated in airtight containers. Fruit salad is best within 24 hours once it’s dressed, and avocado-based items are best the day they’re made unless you’re packing them with plenty of lime and keeping them cold.
For room temperature, use the old picnic rule and stay conservative: perishable food should not sit out more than 2 hours, and 1 hour is the safer limit when it’s hot enough that the ice in your cooler is fading fast. Keep cold items nestled against ice packs and leave the lid closed as much as you can. Every peek warms the box faster than people think.
Warm recipes like chicken drumsticks, sausage rolls, chicken tenders, and hand pies are usually better reheated gently in a 325°F to 350°F oven for 8 to 15 minutes, depending on size. That keeps the crust from going soggy. Avoid the microwave for anything breaded or flaky unless you enjoy soft edges and a little regret. Sandwiches and wraps should be assembled the day of, though the fillings can often be mixed a day ahead. Dressings and sauces can usually be made 2 to 3 days in advance and stored separately, which makes picnic morning a lot less frantic.
Variations and Adaptations to Try

Gluten-Free Basket: Swap sandwich bread for lettuce cups, tortillas for gluten-free wraps, and pasta for gluten-free shapes where needed. The potato salad, fruit salad, skewers, and most egg dishes already fit naturally.
Dairy-Free Spread: Use olive-oil dressings, hummus, avocado, and vinaigrettes instead of cream cheese, feta, Havarti, and ricotta. The chicken skewers, black bean salad, couscous salad, and limeade all fit this route without feeling like replacements.
Kid-Friendly Picnic: Keep the flavors straightforward: sliders, chicken tenders, fruit salad, hand pies, and mild pasta salad. Leave spicy sauces and strong onions on the side so the tray doesn’t turn into a negotiation.
Protein-Forward Lunch: Add chicken, tuna, shrimp, or chickpeas to the salads, and pack more of the savory items in place of dessert-heavy choices. A picnic can be light without being flimsy.
Heat-Friendly Menu: Favor vinegary salads, sturdy cheeses, pickles, and baked items over mayonnaise-heavy dishes if the basket will sit out for a while. This is where panzanella, couscous salad, pimento cheese, and fruit-forward desserts earn their keep.
Regional Picnic Remix: Push the basket one direction at a time — Southern with pimento cheese, deviled eggs, and BBQ drumsticks; Mediterranean with chickpea salad, caprese skewers, and marinated olives; deli-style with egg salad, tuna tomatoes, and cucumber sandwiches.
Common Mistakes to Avoid
The first mistake is packing too many soft foods together. A juicy tomato, creamy salad, and soft bread in the same container is how you get a soggy lunch by the time the blanket is spread. Keep wet ingredients separate until the last possible moment, or give them a barrier like mayo, cheese, or a sturdy leaf.
Another one: forgetting that cold food tastes muted. A chilled pasta salad needs more salt than you think, and a vinaigrette should lean bright enough that it still tastes alive after cooling. If a recipe seems underseasoned in the kitchen, it will feel flatter outdoors.
Overdressing salads is another classic picnic problem. Pasta, beans, and potatoes all keep soaking up dressing after they’re mixed, so a salad that looks perfect at first can turn greasy or wet later. Start with a little less dressing, chill it, then add more if needed before packing.
A lot of people also slice bread too early. Once the cut surface is exposed, it dries out and stales faster. For sandwiches, assemble late, wrap tightly, and cut only when you’re ready to serve if you want neat edges.
Then there’s ignoring the cooler. A picnic basket looks charming, but it is not magic. If you’re carrying eggs, chicken, shrimp, or dairy, keep them cold with ice packs and don’t bury the cold items under warm ones. That one change saves more food than any cute serving tray ever will.
Finally, trying to make everything the morning of turns a calm picnic into a kitchen scramble. The smart move is to make dressings, roast vegetables, boil eggs, bake bars, and chill drinks ahead of time, then assemble only the items that need to stay crisp. Picnic food rewards planning. It always has.
Picnic Questions People Actually Ask
How far ahead can I make picnic food?
Most salads, dressings, bars, and baked items can be made 1 to 2 days ahead, and some, like potato salad or pasta salad, taste better after a night in the fridge. Build sandwiches, wraps, and cucumber-heavy items as close to serving as you reasonably can.
What foods are safest for a picnic in warm weather?
Choose foods that stay good cold or room temperature: grain salads, fruit, roasted vegetables, baked items, and sturdy sandwiches with moisture barriers. Anything with mayonnaise, eggs, chicken, or shrimp should stay chilled in a cooler until serving.
How do I keep sandwiches from getting soggy?
Use a thin layer of mayo, cream cheese, hummus, or pesto as a barrier between bread and wet fillings. Put tomatoes, pickles, and cucumbers in the middle, not right against the bread, and wrap the sandwiches tightly until serving.
Can I make these recipes vegetarian?
Absolutely. Chickpea salads, hummus wraps, panzanella, caprese skewers, roasted vegetable sandwiches, grain salads, and fruit desserts already do most of the work. For protein swaps, beans and cheese usually step in cleanly.
What’s the best picnic food if I only have one cooler?
Pick items that are forgiving: pasta salad, potato salad, chicken salad lettuce cups, fruit salad, bars, and a cold drink. Those recipes keep well without needing constant fuss, which matters when cooler space is limited.
How do I transport deviled eggs without a mess?
Use a deviled-egg tray with a lid, or nest the halved whites in a container lined with lettuce. Chill them well first, keep the filling firm, and carry them flat. Warm eggs are the problem; cold ones behave.
What if my pasta salad gets dry before serving?
Save a few tablespoons of dressing and stir it in right before serving. Pasta drinks a lot of liquid as it sits, and a fresh splash of oil or lemon wakes it back up fast.
Can I use store-bought items without ruining the picnic?
Yes, and I’d argue you should use them where they help. Store-bought pesto, hummus, barbecue sauce, pie dough, and crackers are smart shortcuts; the part that matters is how you combine them and what you finish them with.
What’s the easiest picnic dessert to carry?
Bars and hand pies. They cut cleanly, stack well, and don’t melt into a puddle. Lemon bars, peach cobbler bars, and blueberry hand pies are all easier outdoors than anything frosted.
How do I keep fruit salad from turning watery?
Cut the fruit into even pieces, use firm ripe fruit, and add the honey-lime dressing right before serving. If you’re using very juicy fruit like peaches or melons, keep the dressing light and chill the salad before you pack it.
A Basket Worth Packing Again
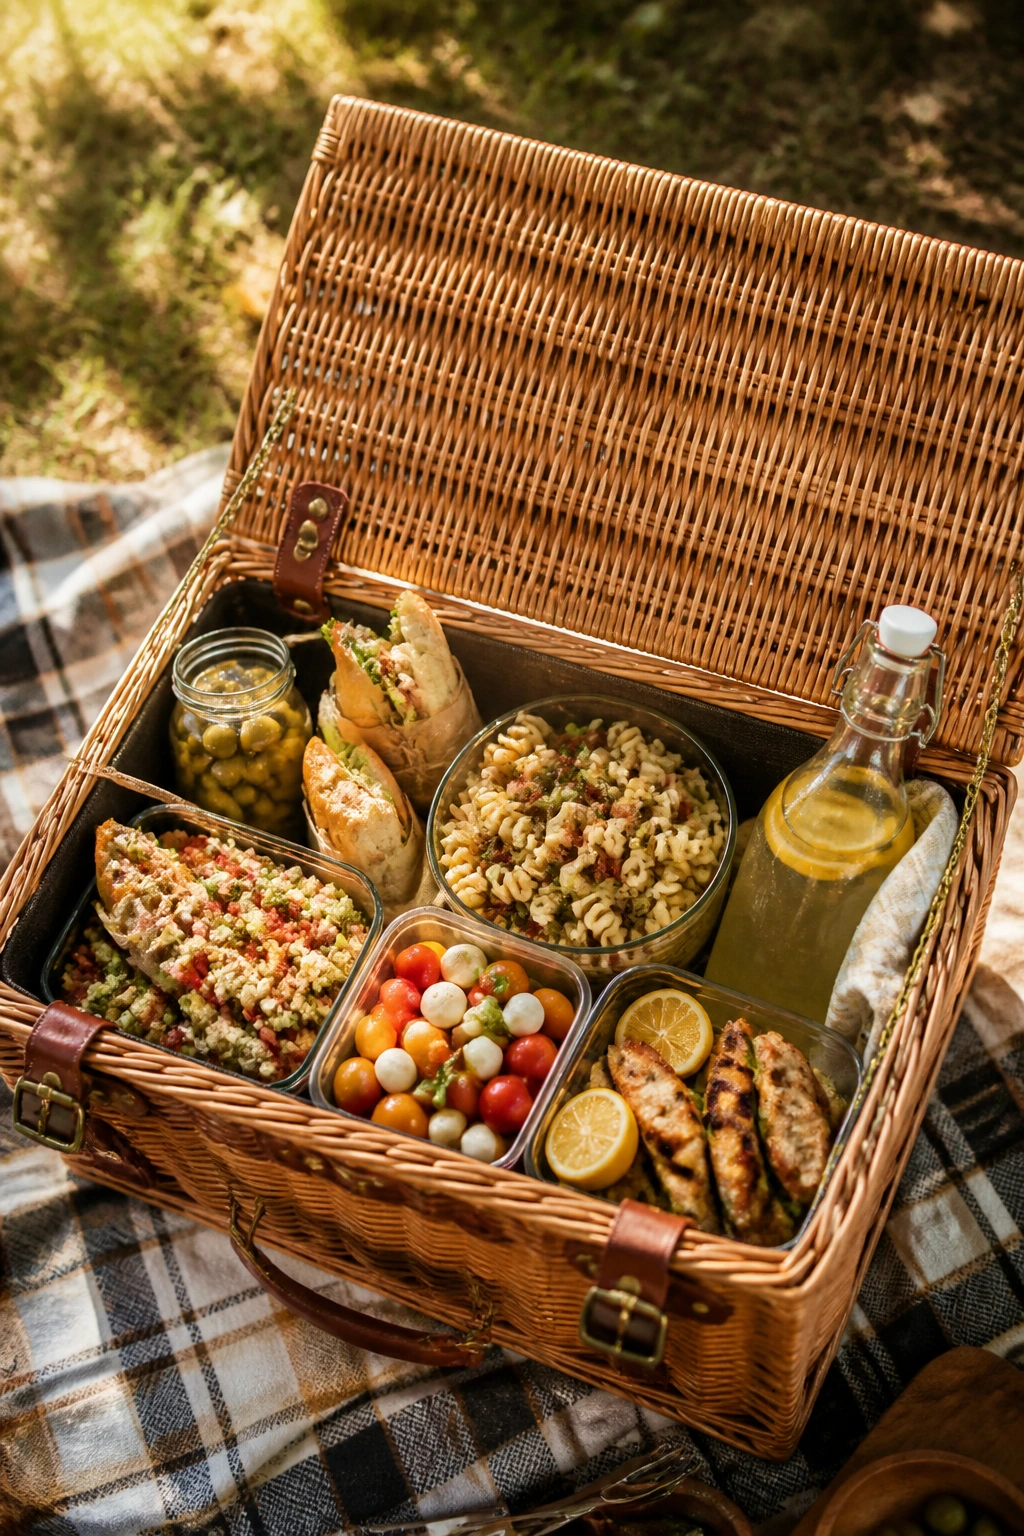
The best picnic spread isn’t the fanciest one. It’s the one that still looks appealing after the napkins have blown around, the cooler has been opened six times, and someone has wandered off with the serving spoon. These summer picnic recipes are built for that real-life test: they hold their shape, taste good cold, and don’t punish you for serving outdoors.
Mix a few sturdy mains, one or two bright salads, something salty, something sweet, and a cold drink that can take ice. That’s the sweet spot. Not fussy. Not flimsy. Just food that knows how to behave on a blanket, and still tastes like summer when you get around to the second helping.