
Light summer meals have a way of exposing bad habits in the kitchen. Heavy sauces, long braises, and oven-on-high dinners feel wrong when the air is warm and the windows are open. What you want instead is dinner that tastes complete but doesn’t sit in your stomach like a brick — food with crisp edges, cool herbs, juicy tomatoes, bright citrus, and enough substance to keep you from poking around the pantry an hour later.
The best easy summer nights usually start with a short list: one good protein, one or two vegetables that taste like they were picked an hour ago, and a dressing or sauce that wakes everything up. A grilled chicken salad can be done in the time it takes to clear the table. A shrimp taco can stay cool on the plate and still feel like a meal. Even a pasta dish can be light if the ratio leans hard toward herbs, lemon, beans, and vegetables instead of cream.
What follows is the kind of collection I keep returning to when I want dinner to feel quick without feeling flimsy. Some dishes are no-cook. Some lean on the grill. Some use a sheet pan, which is my personal favorite path on a night when I’d like to eat and not stage a kitchen cleanup marathon. All of them are built for warm weather, hungry people, and the stubborn fact that nobody wants to spend forty-five minutes standing over a stove when the light is still out.
Why These Light Summer Meals Earn a Spot on the Table
-
Fast Cook Times: Most of these dinners are done in 30 minutes or less, and several rely on 10-minute proteins like shrimp, scallops, fish fillets, or grilled chicken cutlets.
-
Cool, Crisp Textures: Cucumbers, lettuces, herbs, tomatoes, cabbage, and stone fruit do the heavy lifting here, so the food tastes fresh instead of heavy.
-
Flexible Proteins: Chicken, shrimp, salmon, tuna, beans, tofu, and eggs all show up, which makes it easy to cook from what’s in the fridge.
-
Low-Fuss Cleanup: A lot of these meals use one pan, one bowl, or one grill grate, and that matters when the evening already feels full.
-
Meal-Size Without the Slump: The recipes lean on high-volume vegetables, beans, and grain bowls, so they feel substantial without turning into a nap.
-
Easy to Mix and Match: You can swap one salad for another, tuck fillings into lettuce cups or tortillas, or turn leftovers into lunch the next day without much effort.
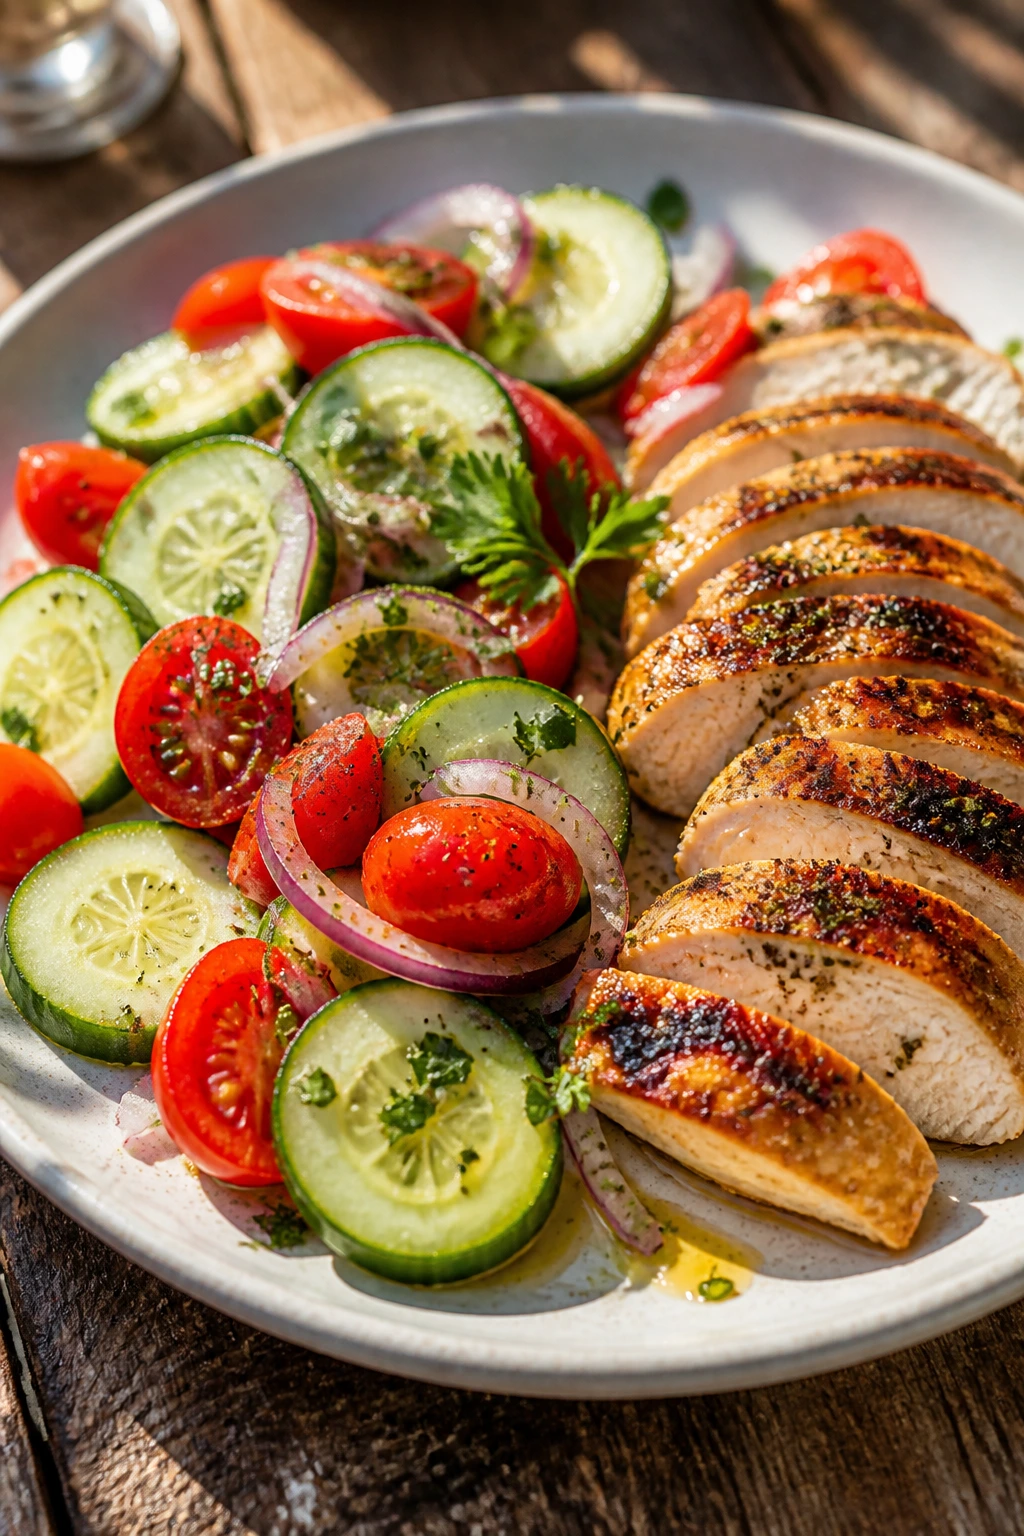
1. Lemon-Herb Grilled Chicken Salad
A good grilled chicken salad should taste like something you’d happily eat twice in one week, and this one does. The chicken picks up lemon, garlic, and herbs, then lands on a pile of greens, cucumbers, tomatoes, and feta. Nothing here is fussy. The payoff is that clean, salty, bright bite that works so well on a warm evening.
Why It Works:
The chicken cooks fast because it’s sliced into cutlets, which means you get juicy meat and browned edges in about 10 minutes. The dressing doubles as a marinade, so the flavor doesn’t sit only on the surface. That little blast of lemon keeps the whole plate from feeling flat.
Key Ingredients:
- 1 lb boneless, skinless chicken thighs, or 2 large breasts sliced into cutlets
- 2 tbsp olive oil
- 1 lemon, zested and juiced
- 2 garlic cloves, finely grated
- 6 cups baby greens
- 1 cup cherry tomatoes, halved
- 1 cucumber, sliced
- ½ cup crumbled feta
- 2 tbsp chopped dill or parsley
Quick Steps:
- Whisk the olive oil, lemon juice, zest, garlic, salt, and pepper in a bowl.
- Toss the chicken in half the mixture and let it sit for 10 to 15 minutes.
- Grill or sear the chicken over medium-high heat for 4 to 5 minutes per side, until the center reaches 165°F.
- Rest the chicken for 5 minutes, then slice it.
- Toss the greens, tomatoes, cucumber, feta, and remaining dressing, then top with the chicken.
Equipment for This Recipe:
- Grill pan or outdoor grill
- Medium mixing bowl
- Sharp knife and cutting board
- Tongs
How to Serve This Dish:
Pile it into wide bowls so the juices stay where they belong. A slice of toasted sourdough or a few warm pita wedges on the side make it feel more complete without weighing it down.
Pro Tips for This Recipe:
- Use chicken cutlets if you can; they cook more evenly than thick breasts.
- Add the feta after tossing the salad so it stays in chunks.
- If your lemons are small, use both the juice and the zest; the zest carries the scent.
- A spoonful of yogurt in the marinade makes the chicken even softer.
Variations on This Dish:
- Greek-Style Version: Add olives and sliced red onion, then swap dill for oregano.
- Grain Bowl Swap: Spoon the salad over farro or quinoa if you want a sturdier dinner.
- Dairy-Free Finish: Skip the feta and add avocado for creaminess.
Common Mistakes to Avoid with This Dish:
- Don’t grill the chicken straight from a cold marinade; let it sit briefly so it cooks more evenly.
- Don’t drown the greens in dressing. They should glisten, not collapse.
- Don’t slice the chicken right off the grill. A short rest keeps the juices inside.
2. Shrimp Tacos with Cabbage Slaw
Shrimp tacos are the kind of dinner that make a Tuesday feel lightly celebratory. The shrimp sear in minutes, the slaw stays crunchy, and the lime crema ties everything together with a cool, tangy finish. You get heat, acid, crunch, and a little smoke. That’s the whole trick.
Why It Works:
Shrimp is a perfect weeknight protein because it goes from raw to done in a flash, which keeps the tacos lively instead of overcooked. The cabbage slaw can sit while you handle the shrimp, and it gets better as it rests for 10 minutes. Warm tortillas are the final piece; cold tortillas turn taco night into a chore.
Key Ingredients:
- 1 lb large shrimp, peeled and deveined
- 1 tbsp olive oil
- 1 tsp chili powder
- ½ tsp cumin
- 4 cups shredded cabbage
- 2 tbsp lime juice
- ¼ cup Greek yogurt
- 8 small corn tortillas
- 1 avocado, sliced
- 2 tbsp chopped cilantro
Quick Steps:
- Toss the cabbage with lime juice, salt, and a pinch of cilantro.
- Stir the shrimp with olive oil, chili powder, cumin, garlic powder, salt, and pepper.
- Cook the shrimp in a hot skillet for 2 minutes per side, until pink and curled.
- Warm the tortillas in a dry skillet for 20 to 30 seconds per side.
- Fill with slaw, shrimp, avocado, and yogurt or crema.
Equipment for This Recipe:
- Large skillet
- Small bowl
- Tongs
- Microplane or citrus juicer
How to Serve This Dish:
Serve them immediately while the shrimp are still warm and the tortillas are soft. I like two tacos per person with extra slaw on the plate so every bite has some crunch.
Pro Tips for This Recipe:
- Pat the shrimp dry before seasoning; wet shrimp steam instead of sear.
- Don’t overcook them. The moment they curl into a loose C, they’re done.
- Warm tortillas one batch at a time so they stay flexible.
- A few pickled onions can wake up the whole taco.
Variations on This Dish:
- Chipotle Shrimp Tacos: Add chipotle powder or adobo sauce for more smoke.
- Mango Slaw Version: Fold diced mango into the cabbage for a sweeter finish.
- Lettuce Cup Swap: Use butter lettuce instead of tortillas for a lighter plate.
Common Mistakes to Avoid with This Dish:
- Don’t leave the shrimp on the heat too long. Rubbery shrimp are the fastest way to ruin tacos.
- Don’t skip salt in the slaw; bland cabbage tastes like a missed opportunity.
- Don’t overload the tortilla. Two or three shrimp per taco is enough.
3. Tomato-Basil Burrata Toast with White Beans
This is the kind of meal that feels almost too easy, and that’s part of its charm. Toasted bread, smashed white beans, juicy tomatoes, burrata, basil, and olive oil can stand in for a more complicated dinner without pretending to be anything else. It’s creamy, crunchy, salty, and cold where it should be cold.
Why It Works:
White beans give the toast actual staying power, so it’s not just an appetizer in disguise. Burrata adds richness without needing a sauce, and ripe tomatoes do the heavy lifting on flavor. If your tomatoes are excellent, this dish barely needs anything else.
Key Ingredients:
- 4 thick slices sourdough or country bread
- 1 can white beans, drained and rinsed
- 1 ball burrata, about 4 oz
- 2 cups chopped ripe tomatoes
- 1 small garlic clove, halved
- 2 tbsp olive oil
- 1 tbsp balsamic glaze
- ¼ cup basil leaves
- Salt and black pepper
Quick Steps:
- Toast the bread until the edges are deep golden.
- Rub each slice with the cut side of garlic while it’s still warm.
- Mash the white beans with olive oil, salt, and pepper, then spread them on the toast.
- Top with tomatoes, burrata, basil, and a drizzle of balsamic glaze.
- Finish with flaky salt and more olive oil if the tomatoes need it.
Equipment for This Recipe:
- Toaster or skillet
- Fork
- Small bowl
- Cutting board
How to Serve This Dish:
Serve it open-faced and eat it with a knife and fork if the burrata gets messy. A simple green salad or a cup of chilled cucumber soup turns it into dinner without any drama.
Pro Tips for This Recipe:
- Use bread that can handle toppings; flimsy sandwich bread goes soggy fast.
- Salt the tomatoes separately for 5 minutes if they taste flat.
- If burrata isn’t available, torn mozzarella works, but add more olive oil.
- The garlic rub matters more than it sounds. Don’t skip it.
Variations on This Dish:
- Heirloom Tomato Version: Use sliced heirloom tomatoes instead of chopped cherry tomatoes.
- Avocado Bean Toast: Add smashed avocado under the beans for extra creaminess.
- Caper Finish: Scatter capers on top for a sharper, briny bite.
Common Mistakes to Avoid with This Dish:
- Don’t build the toast too early. Bread gets damp if it sits under toppings.
- Don’t use underripe tomatoes; they make the whole plate taste like cardboard.
- Don’t forget salt on the beans. They need it.
4. Salmon with Cucumber Dill Yogurt and Green Beans
Salmon and yogurt may sound like a strange pairing until you taste them together. The fish brings richness, the cucumber dill sauce cools everything off, and the green beans keep the plate bright and snappy. It feels composed but still very easy. That’s the sweet spot.
Why It Works:
Roasting salmon on a sheet pan keeps the fish moist and reduces cleanup to one tray. The yogurt sauce can be mixed while the salmon cooks, which means no waiting around. Green beans roast quickly enough to stay crisp at the tips and tender in the middle.
Key Ingredients:
- 4 salmon fillets, about 5 oz each
- 1 lb green beans, trimmed
- 2 tbsp olive oil
- 1 cup plain Greek yogurt
- ½ cucumber, finely chopped
- 2 tbsp chopped dill
- 1 lemon, juiced
- 1 tsp Dijon mustard
Quick Steps:
- Heat the oven to 425°F and line a sheet pan.
- Toss the green beans with olive oil, salt, and pepper, then spread them on the pan.
- Place the salmon on the pan, season well, and roast for 10 to 12 minutes.
- Mix the yogurt, cucumber, dill, lemon, Dijon, salt, and pepper.
- Plate the salmon with green beans and a spoonful of sauce.
Equipment for This Recipe:
- Sheet pan
- Parchment paper
- Small bowl
- Fish spatula or thin spatula
How to Serve This Dish:
Serve it with lemon wedges and a small spoonful of yogurt sauce on the side, not over the top. A few boiled new potatoes are fine if you want a little more starch.
Pro Tips for This Recipe:
- Choose fillets that are the same thickness so they finish together.
- Pull the salmon when it flakes but still looks slightly glossy in the center.
- Drain the cucumber a bit if it’s very watery.
- A pinch of dill in the sauce and a pinch on the fish make it taste more finished.
Variations on This Dish:
- Caper-Dill Version: Add chopped capers to the yogurt sauce.
- Herb Swap: Use mint and parsley if dill isn’t your favorite.
- Broiled Finish: Broil the salmon for the last minute if you want a little more color.
Common Mistakes to Avoid with This Dish:
- Don’t roast the fish until it looks dry. Salmon keeps cooking after it leaves the oven.
- Don’t skip seasoning on the green beans. They need more than oil.
- Don’t make the yogurt sauce too far ahead if your cucumber is extra juicy.
5. Chicken Lettuce Cups with Ginger Soy
These are the kind of lettuce cups that disappear fast because they’re crisp, savory, and a little glossy from the sauce. Ground chicken cooks into tiny bits that hold onto ginger, garlic, and soy, and the lettuce gives every bite a cold crunch. No fork required, which is a bonus on hot nights.
Why It Works:
Ground chicken picks up flavor quickly, so you don’t need a long marinade or a big ingredient list. Water chestnuts give the filling a clean snap that keeps the texture lively. Lettuce cups feel lighter than rice bowls, but they still count as dinner.
Key Ingredients:
- 1 lb ground chicken
- 1 tbsp sesame oil
- 2 garlic cloves, minced
- 1 tbsp fresh ginger, grated
- 2 tbsp soy sauce
- 1 tbsp rice vinegar
- 1 can water chestnuts, chopped
- 2 scallions, sliced
- 1 head butter lettuce, leaves separated
Quick Steps:
- Heat sesame oil in a skillet over medium-high heat.
- Cook the chicken, breaking it up, until no pink remains, about 5 to 6 minutes.
- Add garlic and ginger, then stir for 30 seconds until fragrant.
- Stir in soy sauce, rice vinegar, water chestnuts, and scallions.
- Spoon into lettuce leaves and serve right away.
Equipment for This Recipe:
- Large skillet
- Wooden spoon
- Knife
- Small bowl
How to Serve This Dish:
Stack the filling in the center of a platter and set the lettuce leaves around it. Let people build their own cups so the leaves stay crisp until the last bite.
Pro Tips for This Recipe:
- Use butter lettuce, not iceberg, unless you want the cups to crack.
- Let the pan get hot before the chicken goes in.
- If the filling looks dry, add 1 or 2 tablespoons of water.
- A little chili crisp on top is never a bad idea.
Variations on This Dish:
- Thai Basil Version: Stir in basil and a little lime juice at the end.
- Mushroom Blend: Replace half the chicken with minced mushrooms for a softer filling.
- Rice Bowl Swap: Serve the same filling over rice if you need more heft.
Common Mistakes to Avoid with This Dish:
- Don’t overload the lettuce leaves. They tear fast.
- Don’t cook the garlic too long; it turns bitter in a hurry.
- Don’t skip the vinegar. The filling needs a little sharpness to stay lively.
6. Greek Chickpea Pita Pockets
Greek chickpea pita pockets are the kind of meal that requires almost no heat and still feels finished. Creamy chickpeas, cucumber, tomato, feta, lemon, and herbs tuck neatly into pita bread. The texture does the work here: soft, crisp, salty, and fresh all in the same bite.
Why It Works:
Chickpeas bring enough protein and fiber to make this a real dinner, not a sad snack. A quick lemon-olive oil dressing coats everything and keeps the pita from tasting dry. If you want something you can make in one bowl and eat with one hand, this is the move.
Key Ingredients:
- 1 can chickpeas, drained and rinsed
- 1 cucumber, diced
- 1 cup cherry tomatoes, halved
- ½ red onion, thinly sliced
- ½ cup crumbled feta
- 2 tbsp olive oil
- 1 lemon, juiced
- 2 tbsp chopped parsley or dill
- 4 pita breads
Quick Steps:
- Mix the chickpeas, cucumber, tomatoes, onion, feta, olive oil, lemon juice, herbs, salt, and pepper.
- Let the salad sit for 5 minutes so the flavors settle.
- Warm the pita briefly in a dry skillet or toaster.
- Split the pita and stuff it with the chickpea mixture.
- Serve with extra lemon on the side.
Equipment for This Recipe:
- Mixing bowl
- Knife and cutting board
- Skillet or toaster
- Spoon
How to Serve This Dish:
Serve the filling and pita separately if you’re feeding a crowd. The pitas stay softer that way, and people can build their own pockets without the filling spilling everywhere.
Pro Tips for This Recipe:
- Drain the chickpeas well or the filling gets watery.
- A little chopped mint makes the whole thing taste fresher.
- Warm pita is worth the extra minute. Cold pita tears.
- If feta is very salty, back off on the added salt.
Variations on This Dish:
- Hummus Layer: Spread hummus inside the pita before the chickpeas.
- Avocado Version: Add diced avocado for a creamier pocket.
- Spicy Swap: Stir in sliced pepperoncini or a pinch of red pepper flakes.
Common Mistakes to Avoid with This Dish:
- Don’t cut the vegetables too large; the pita can’t hold them.
- Don’t skip the resting time for the salad. It helps the lemon spread through the chickpeas.
- Don’t use stale pita unless you plan to grill it first.
7. Zucchini Noodle Pesto Bowl with Mozzarella
This bowl has that warm-weather energy people keep trying to talk about, but here it’s earned. Zucchini noodles give you volume without heaviness, pesto adds the punch, and mozzarella pearls keep it creamy. Add tomatoes and basil, and the bowl tastes like a cooler, lighter cousin of pasta dinner.
Why It Works:
Zucchini noodles take on flavor fast, which means you can keep the sauce simple and still get a complete dish. Pesto coats the ribbons in a thin layer instead of burying them. A handful of nuts or beans turns it from side dish into dinner.
Key Ingredients:
- 3 large zucchini, spiralized
- ½ cup pesto
- 1 cup mozzarella pearls
- 1 cup cherry tomatoes, halved
- 2 tbsp toasted pine nuts or almonds
- 1 tbsp lemon juice
- ¼ cup basil leaves
- Salt and pepper
Quick Steps:
- Pat the zucchini noodles dry with paper towels.
- Toss them with pesto and lemon juice in a large bowl.
- Add tomatoes, mozzarella, basil, salt, and pepper.
- Sprinkle on the nuts just before serving.
- Eat right away so the noodles stay crisp.
Equipment for This Recipe:
- Spiralizer or vegetable peeler
- Large bowl
- Paper towels
- Tongs
How to Serve This Dish:
Serve it in shallow bowls so the pesto spreads evenly. A piece of grilled chicken or a fried egg on top makes it more filling without changing the mood.
Pro Tips for This Recipe:
- Salt the zucchini lightly, then blot it dry if it seems watery.
- Don’t drown the noodles in pesto; a light coating is enough.
- Toast the nuts in a dry skillet for a minute or two.
- If your pesto is thick, loosen it with a teaspoon of olive oil.
Variations on This Dish:
- White Bean Boost: Add rinsed white beans for extra staying power.
- Sun-Dried Tomato Version: Mix in chopped sun-dried tomatoes for a deeper flavor.
- Dairy-Free Swap: Use a vegan pesto and skip the mozzarella.
Common Mistakes to Avoid with This Dish:
- Don’t let spiralized zucchini sit in a bowl for long before dressing it.
- Don’t skip drying the noodles or the bowl gets puddly.
- Don’t forget salt; zucchini needs it more than people think.
8. Soba Noodle Salad with Sesame Edamame
Cold soba noodle salad is one of those dishes that makes a heat wave feel manageable. The noodles are nutty and springy, the edamame gives protein, and the sesame dressing lands somewhere between savory and bright. It eats like lunch and dinner at the same time, which is useful.
Why It Works:
Soba noodles are fast-cooking and taste good chilled, so they make an easy base for summer meals. Edamame and cucumbers add bulk without heaviness. The dressing is strong enough to season the whole bowl, which matters when food is served cold.
Key Ingredients:
- 8 oz soba noodles
- 1 cup shelled edamame
- 1 cucumber, julienned
- 1 carrot, shredded
- 3 tbsp soy sauce
- 2 tbsp rice vinegar
- 1 tbsp sesame oil
- 1 tbsp tahini or peanut butter
- 2 scallions, sliced
Quick Steps:
- Cook the soba noodles, then rinse them under cold water.
- Whisk soy sauce, rice vinegar, sesame oil, tahini, and a splash of water.
- Toss noodles with edamame, cucumber, carrot, and dressing.
- Finish with scallions and sesame seeds.
- Chill for 10 minutes or serve immediately.
Equipment for This Recipe:
- Medium pot
- Colander
- Mixing bowl
- Whisk
How to Serve This Dish:
Serve it cold or barely cool. If you want a more complete meal, add sliced chicken, tofu, or a soft-boiled egg on top.
Pro Tips for This Recipe:
- Rinse soba well or the noodles clump.
- Keep the dressing a little bold because cold food tastes quieter.
- Add cucumber at the end if you want maximum crunch.
- A squeeze of lime can brighten the sesame base fast.
Variations on This Dish:
- Peanut Soba Swap: Use peanut butter in the dressing for a rounder flavor.
- Spicy Chili Oil Version: Add chili crisp before serving.
- Herb-Laced Bowl: Toss in mint and cilantro for a greener finish.
Common Mistakes to Avoid with This Dish:
- Don’t overcook soba; it turns soft fast.
- Don’t use all the dressing at once if the noodles are still warm.
- Don’t forget to rinse the edamame if it was frozen and salty.
9. Turkey Burger with Avocado and Radish Slaw
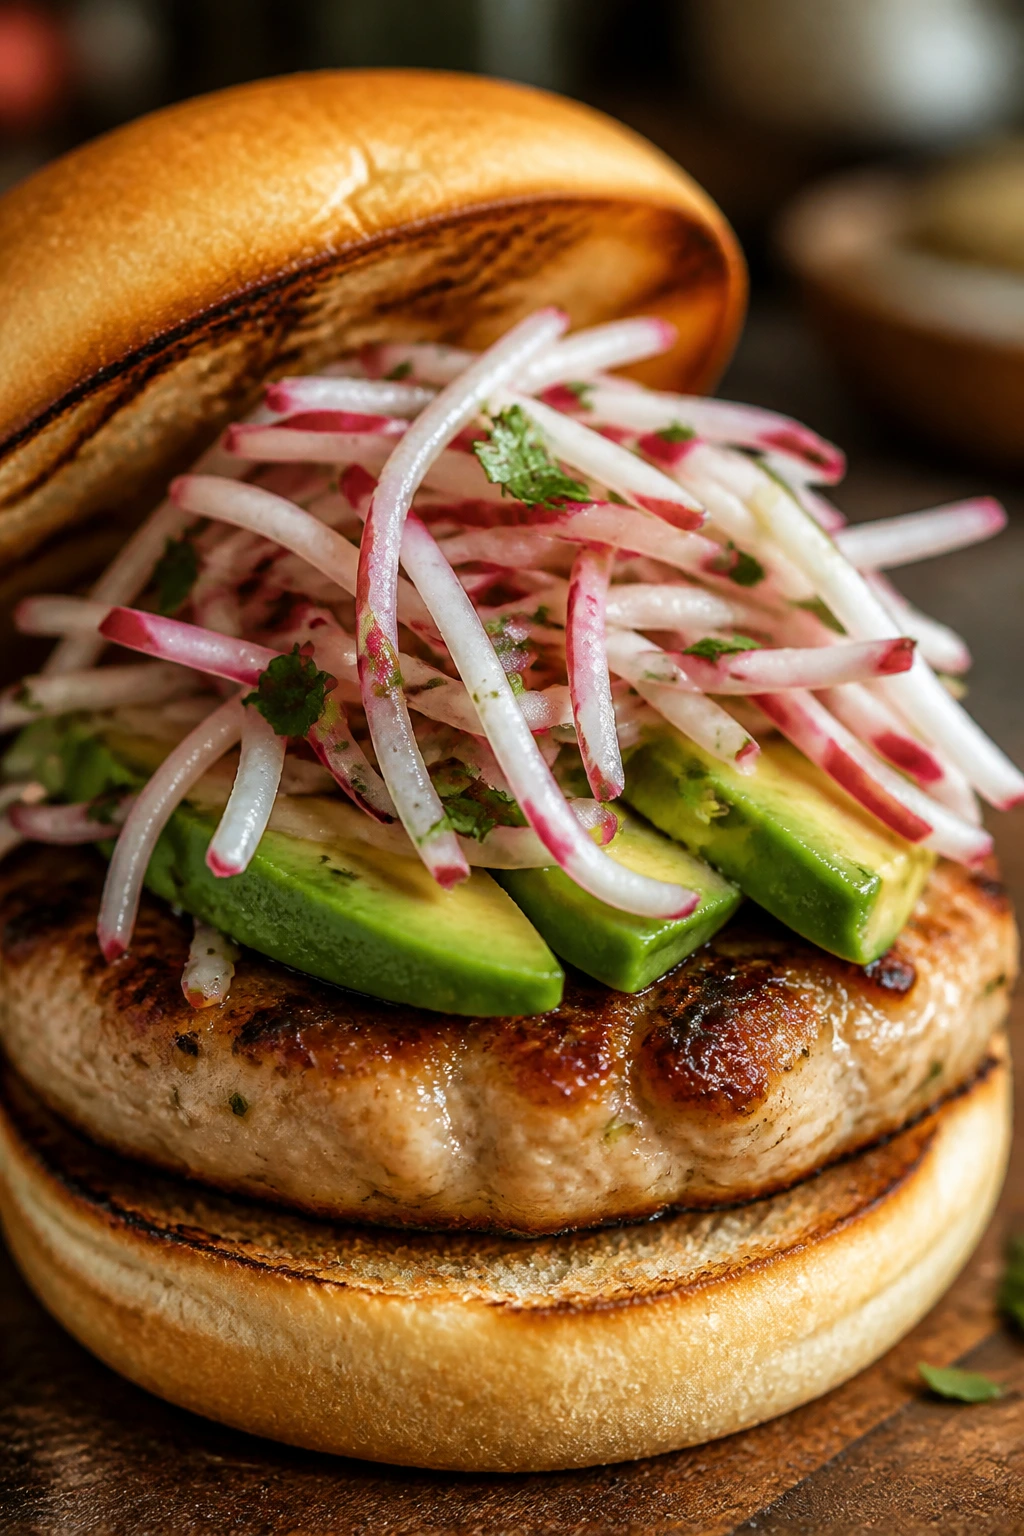
Turkey burgers get a bad reputation when they’re dry and timid. This version avoids that problem by using enough seasoning and enough fat from avocado and slaw to keep every bite juicy. It’s still a burger, just a lighter one that doesn’t sit like a brick.
Why It Works:
Ground turkey loves seasoning, so a little onion powder, garlic, and Worcestershire make a big difference. Radish slaw brings sharpness and crunch, which is exactly what a turkey patty needs. Serving it on a bun or lettuce wrap changes the mood without changing the effort.
Key Ingredients:
- 1 lb ground turkey
- 1 tbsp Worcestershire sauce
- 1 tsp garlic powder
- 1 tsp onion powder
- 1 avocado, sliced
- 1 cup shredded cabbage
- 4 radishes, thinly sliced
- 1 tbsp lime juice
- 4 burger buns or lettuce leaves
Quick Steps:
- Mix turkey with Worcestershire, garlic powder, onion powder, salt, and pepper.
- Shape into 4 patties and press a small dip in the center.
- Cook in a skillet or on the grill for 4 to 5 minutes per side, until 165°F.
- Toss cabbage, radishes, lime juice, and a pinch of salt.
- Build the burgers with avocado and slaw.
Equipment for This Recipe:
- Skillet or grill
- Mixing bowl
- Spatula
- Small bowl for slaw
How to Serve This Dish:
Serve with sliced tomatoes and a handful of chips or cucumber salad on the side. A lettuce wrap keeps it lighter; a toasted bun gives you the full burger experience.
Pro Tips for This Recipe:
- Don’t overwork the turkey or the patties get dense.
- Make the patties thinner than beef burgers; turkey benefits from a shorter cook.
- The slaw tastes better after 5 minutes in lime juice.
- Toasting the bun helps it hold up under the avocado.
Variations on This Dish:
- Feta Turkey Burger: Crumble feta into the patties for a salty finish.
- Spicy Mayo Version: Add hot sauce to mayo for the spread.
- Lettuce Wrap Swap: Skip the bun and pile on extra slaw.
Common Mistakes to Avoid with This Dish:
- Don’t cook turkey burgers until they dry out. Pull them at 165°F, not later.
- Don’t skip the seasoning; turkey needs help.
- Don’t mash the avocado too far ahead or it browns fast.
10. Tuna Niçoise-ish Salad
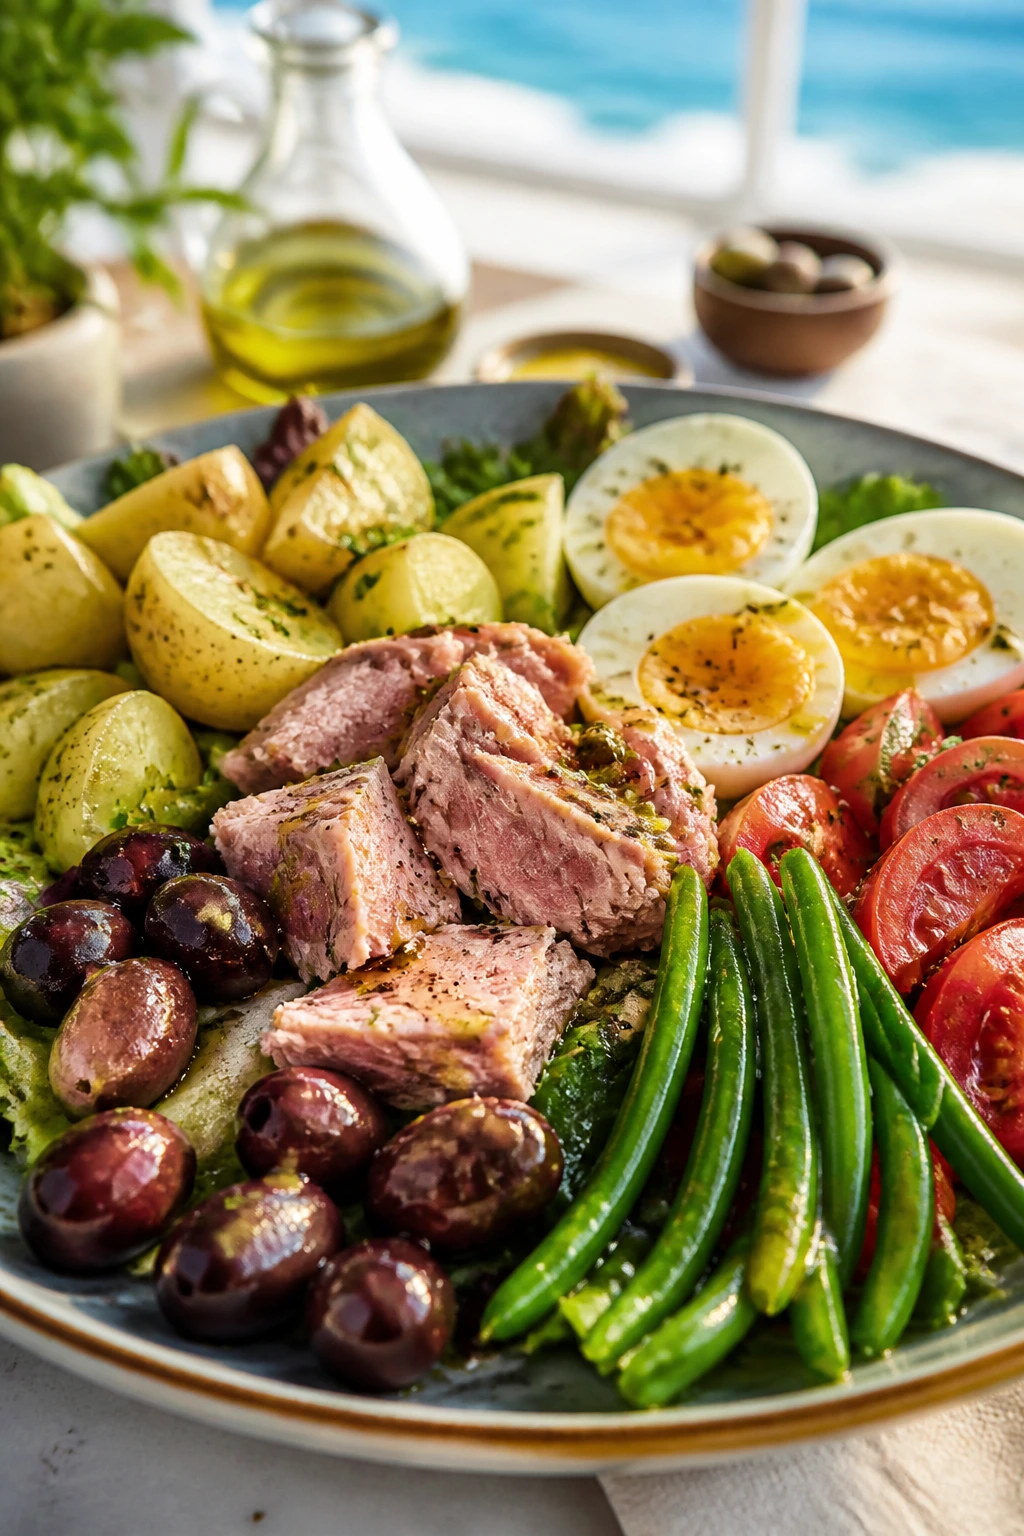
A Niçoise-style salad is one of those dinners that looks more complicated than it is. Eggs, tuna, green beans, tomatoes, olives, and potatoes make a plate that feels composed and cold in the best way. This version keeps the spirit of the original but trims the work.
Why It Works:
Canned tuna saves time, though canned tuna in olive oil tastes richer than the watery stuff. Green beans and eggs add structure, while potatoes give just enough starch to make it dinner. The vinaigrette is sharp on purpose; it keeps every component from tasting sleepy.
Key Ingredients:
- 2 cans tuna in olive oil, drained
- 8 oz baby potatoes
- 8 oz green beans, trimmed
- 4 hard-boiled eggs
- 1 cup cherry tomatoes
- ½ cup olives
- 4 cups mixed greens
- 3 tbsp olive oil
- 1 tbsp red wine vinegar
Quick Steps:
- Boil the potatoes until tender, then cool and halve them.
- Blanch the green beans for 2 to 3 minutes and chill them.
- Whisk olive oil, vinegar, Dijon, salt, and pepper.
- Arrange the greens, potatoes, beans, eggs, tomatoes, olives, and tuna on a platter.
- Drizzle with dressing and serve.
Equipment for This Recipe:
- Pot
- Slotted spoon
- Large platter
- Small bowl
How to Serve This Dish:
Serve it family-style on one big platter so the colors stay visible. A hunk of crusty bread is enough on the side; the salad already carries the meal.
Pro Tips for This Recipe:
- Salt the potato water so the potatoes taste like something.
- Cool the beans fast to keep them bright green.
- If you want more punch, add capers.
- Use a firm-boiled egg with a slightly creamy yolk, not a crumbly one.
Variations on This Dish:
- Salmon Swap: Use leftover salmon instead of tuna.
- Anchovy Dressing: Mash one anchovy into the vinaigrette for more depth.
- No Potato Version: Replace potatoes with extra beans if you want it lighter.
Common Mistakes to Avoid with This Dish:
- Don’t overcook the eggs; chalky yolks drag the whole salad down.
- Don’t build the salad while the potatoes are hot or the greens wilt.
- Don’t forget salt in the vinaigrette. Cold salads need stronger seasoning.
11. Halloumi and Peach Skewers with Arugula
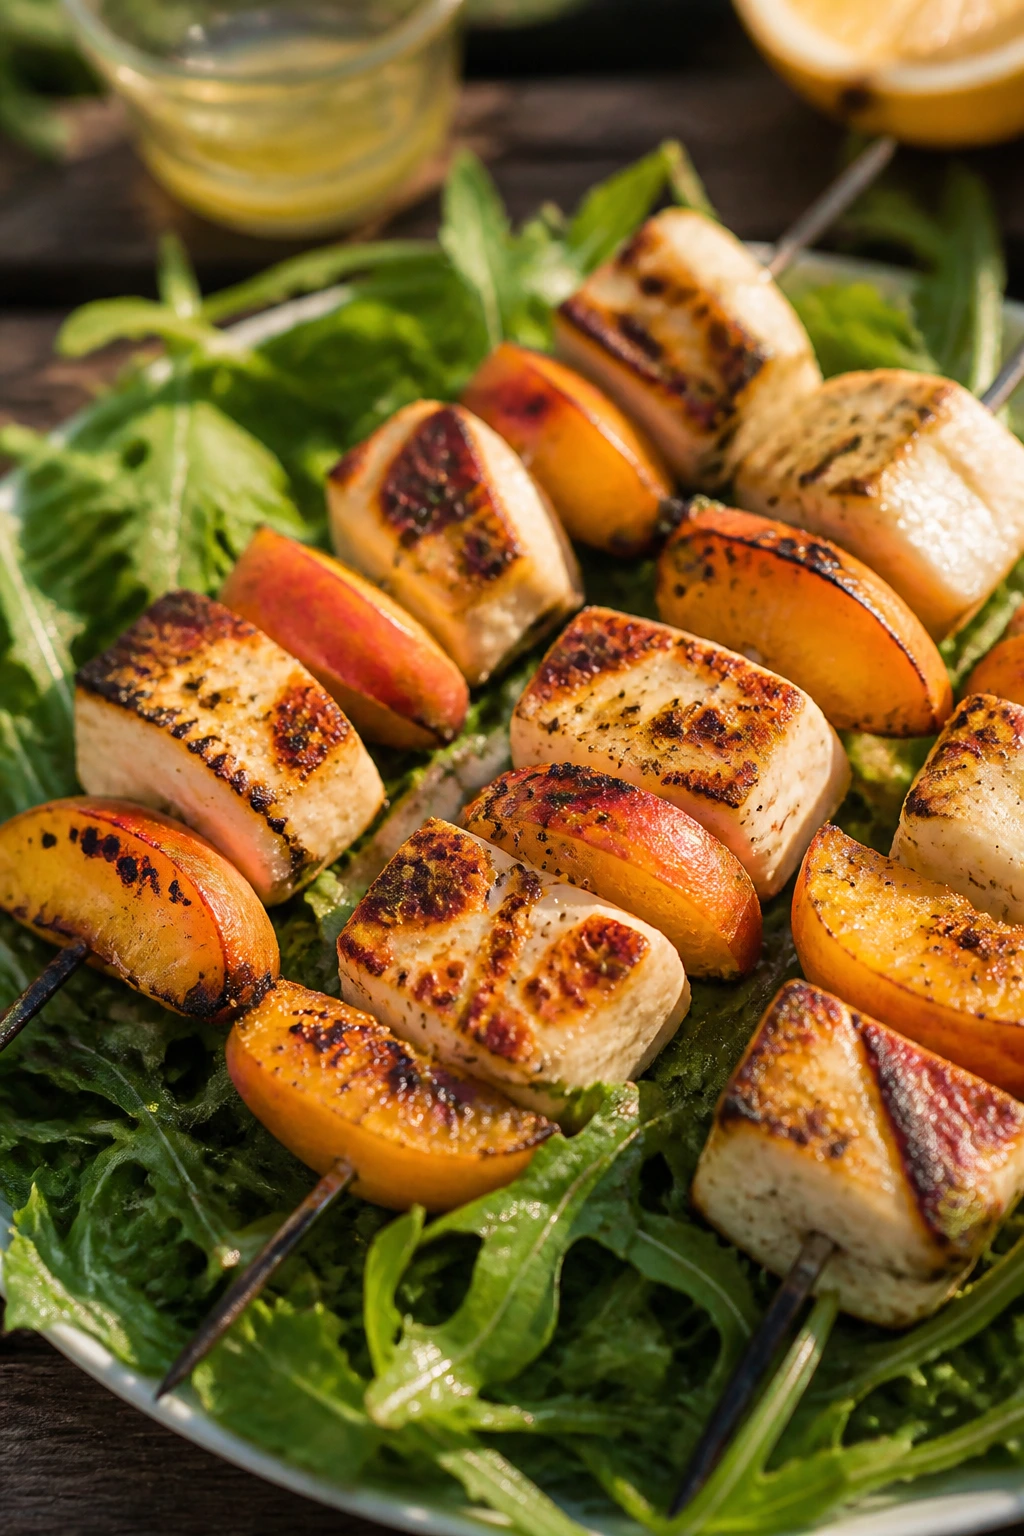
Halloumi and peaches belong together in a way that makes perfect sense once you bite into them. The cheese browns at the edges, the peaches soften and release juice, and the arugula gives the whole plate a peppery finish. It’s the kind of dinner that feels a little playful.
Why It Works:
Halloumi holds its shape on the grill, so it gives you real texture instead of melting away. Peaches caramelize quickly, which makes their sweetness taste deeper. The arugula underneath catches the salty juices and turns into a built-in dressing.
Key Ingredients:
- 8 oz halloumi, cut into cubes
- 2 peaches, pitted and sliced
- 2 tbsp olive oil
- 4 cups arugula
- 1 lemon, juiced
- 1 tsp honey
- 2 tbsp chopped basil
- Black pepper
Quick Steps:
- Thread halloumi and peaches onto skewers.
- Brush with olive oil and grill over medium heat for 2 to 3 minutes per side.
- Whisk lemon juice, honey, olive oil, salt, and pepper.
- Toss arugula with half the dressing.
- Serve the skewers over the arugula with basil on top.
Equipment for This Recipe:
- Grill or grill pan
- Skewers
- Whisk
- Salad bowl
How to Serve This Dish:
Serve 2 skewers per person over a bed of arugula. A piece of grilled flatbread or a spoonful of couscous turns it into a fuller meal if you need one.
Pro Tips for This Recipe:
- Soak wooden skewers if you’re grilling over direct flame.
- Use peaches that are ripe but not collapsing.
- Don’t crowd the skewers; space helps the edges brown.
- A few torn mint leaves work nicely with the basil.
Variations on This Dish:
- Nectarine Swap: Use nectarines when peaches are firmer.
- Herbed Yogurt Plate: Add a dollop of yogurt under the arugula.
- Prosciutto Version: Wrap a strip of prosciutto around the halloumi if you want more salt.
Common Mistakes to Avoid with This Dish:
- Don’t grill peaches too long or they fall apart.
- Don’t skip the acid in the dressing; halloumi needs it.
- Don’t use young, squeaky halloumi straight from the package without blotting it dry.
12. Cold Sesame Peanut Rice Noodles with Cucumber
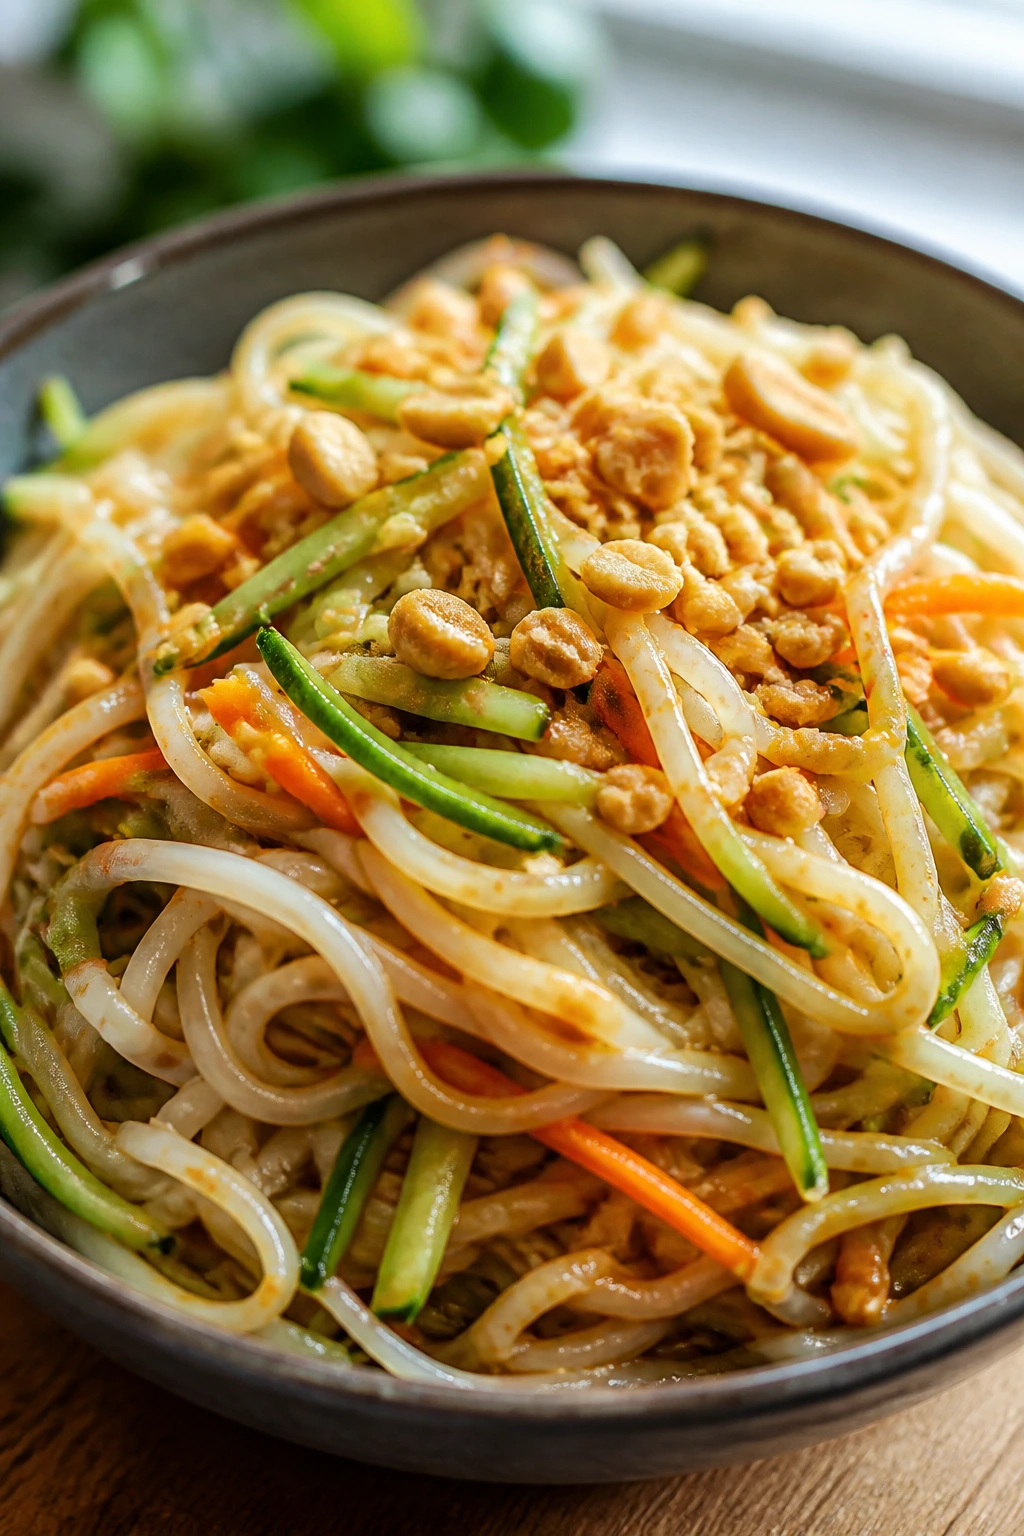
Cold rice noodles are a relief on hot nights because they never ask the oven for help. Add cucumber, shredded carrot, and a peanut-sesame dressing, and you get a bowl that tastes rich but still feels light enough for a late dinner. It’s the kind of meal that gets better after a short chill.
Why It Works:
Rice noodles absorb dressing quickly, so the bowl tastes cohesive instead of like separate parts. Peanut butter gives body, while lime and soy keep the sauce sharp. Crunchy vegetables are what keep the texture lively.
Key Ingredients:
- 8 oz rice noodles
- 1 cucumber, julienned
- 1 carrot, shredded
- 2 scallions, sliced
- ¼ cup peanut butter
- 2 tbsp soy sauce
- 1 tbsp lime juice
- 1 tsp sesame oil
- 2 tbsp chopped peanuts
Quick Steps:
- Cook the rice noodles, then rinse in cold water.
- Whisk peanut butter, soy sauce, lime juice, sesame oil, and a splash of warm water until smooth.
- Toss noodles with cucumber, carrot, and scallions.
- Coat with dressing and top with peanuts.
- Chill briefly or serve right away.
Equipment for This Recipe:
- Pot
- Colander
- Whisk
- Large bowl
How to Serve This Dish:
Serve it cold in shallow bowls. If you want a protein add-in, shredded chicken or tofu slides in cleanly without changing the flavor.
Pro Tips for This Recipe:
- Use warm water to loosen the dressing, not more lime juice.
- Rinse the noodles thoroughly or they get gummy.
- Add peanuts at the end so they stay crunchy.
- A spoonful of chili crisp works if you like heat.
Variations on This Dish:
- Miso Peanut Version: Add 1 teaspoon of white miso to the dressing.
- Herb Version: Toss in mint and cilantro for a fresher bowl.
- Sesame Chicken Add-On: Fold in leftover chicken for a fuller meal.
Common Mistakes to Avoid with This Dish:
- Don’t let the noodles sit wet after draining.
- Don’t make the dressing too thick; it should coat, not glue.
- Don’t skip the cucumber. Without it, the bowl loses its cool crunch.
13. Sheet-Pan Fajita Fish Tacos
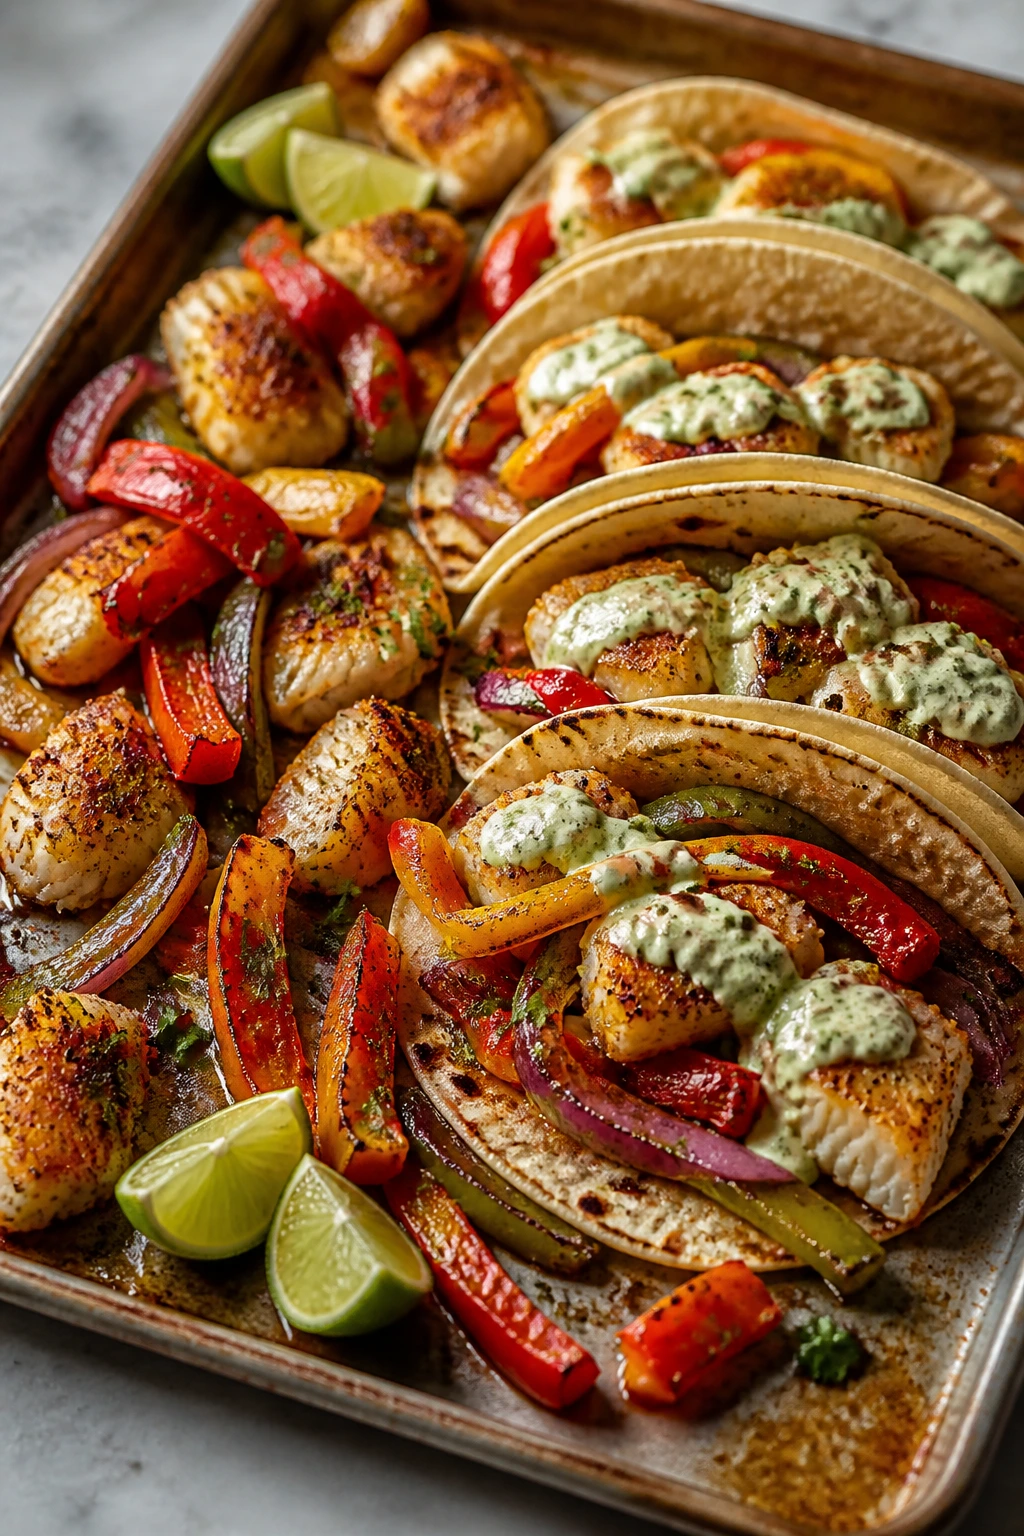
Fish tacos become easy the moment you move the vegetables and fish onto one sheet pan. Bell peppers, onions, and flaky white fish roast together until the edges char a little, and then you tuck everything into tortillas with lime crema. It’s fast, bright, and not at all heavy.
Why It Works:
A sheet pan keeps the cooking even and trims down the mess. White fish cooks in the same window as the peppers when the pieces are cut right, which is the part that makes this practical. Lime crema gives the tacos enough richness to feel complete.
Key Ingredients:
- 1½ lb white fish fillets, like cod or tilapia
- 2 bell peppers, sliced
- 1 onion, sliced
- 2 tbsp olive oil
- 1 tbsp fajita seasoning
- 8 corn tortillas
- ¼ cup sour cream or yogurt
- 1 lime, juiced
- 2 cups shredded cabbage
Quick Steps:
- Heat the oven to 425°F.
- Toss peppers and onion with oil and half the seasoning, then spread on a sheet pan.
- Add the fish, season well, and roast for 10 to 12 minutes.
- Mix sour cream with lime juice and a pinch of salt.
- Flake the fish into tortillas with cabbage, roasted vegetables, and crema.
Equipment for This Recipe:
- Sheet pan
- Spatula
- Small bowl
- Foil or parchment
How to Serve This Dish:
Serve with extra lime wedges and a few slices of avocado if you have them. Two tacos per person usually feels right unless you’re cooking for teenagers, in which case, make more.
Pro Tips for This Recipe:
- Cut the peppers fairly thin so they soften on time.
- Don’t roast the fish past the point where it flakes.
- Warm the tortillas before serving or they split.
- A quick cabbage slaw under the fish helps catch the juices.
Variations on This Dish:
- Spicy Version: Add chipotle to the crema.
- Mango Salsa Swap: Top with chopped mango and red onion.
- Grilled Version: Cook the fish and vegetables on a grill basket instead.
Common Mistakes to Avoid with This Dish:
- Don’t use fish that’s too thick or it will lag behind the vegetables.
- Don’t skip oil on the peppers; they need help browning.
- Don’t overload the taco or the fish disappears under the filling.
14. Caprese Orzo with Grilled Shrimp
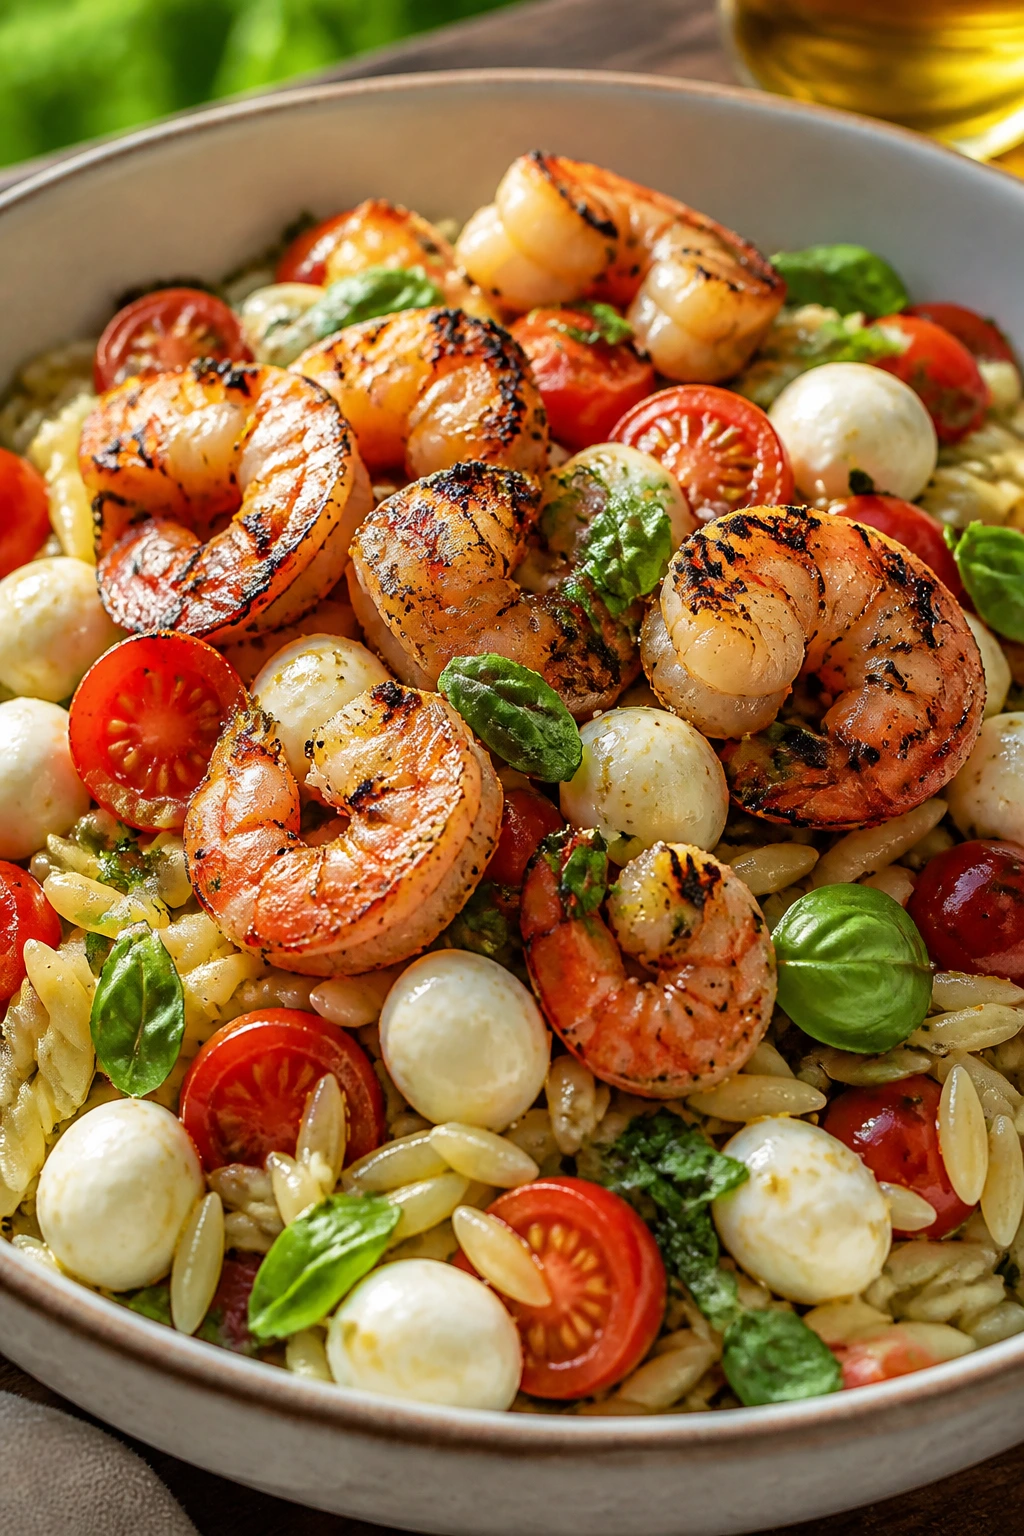
Orzo makes a nice bridge between salad and pasta, and that’s why it works so well here. Tossed with tomatoes, mozzarella, basil, and lemon, it stays light even after the shrimp go on top. The plate looks busy in the right way. Nothing falls flat.
Why It Works:
Orzo cooks quickly and takes on dressing easily, which makes it an efficient base for a warm-weather meal. Grilled shrimp bring a little char and enough protein to make the bowl feel finished. The lemon keeps the mozzarella from turning too rich.
Key Ingredients:
- 8 oz orzo
- 1 lb shrimp, peeled and deveined
- 1 tbsp olive oil
- 1 cup cherry tomatoes
- 1 cup mozzarella pearls
- ¼ cup basil leaves
- 1 lemon, juiced
- Salt and black pepper
Quick Steps:
- Cook the orzo until tender, then drain and cool slightly.
- Season the shrimp with oil, salt, and pepper.
- Grill or sear shrimp for 2 minutes per side.
- Toss orzo with tomatoes, mozzarella, basil, lemon juice, and olive oil.
- Top with shrimp and serve.
Equipment for This Recipe:
- Pot
- Skillet or grill
- Mixing bowl
- Colander
How to Serve This Dish:
Serve it warm or at room temperature. A simple arugula salad on the side is enough if you want to stretch the meal without making it feel bigger.
Pro Tips for This Recipe:
- Salt the pasta water well; bland orzo is a missed chance.
- Toss the orzo while it’s still a little warm so it drinks in the dressing.
- Don’t overcook the shrimp. They should curl and turn opaque.
- Use small mozzarella pearls so every bite gets cheese.
Variations on This Dish:
- Pesto Orzo: Swap lemon dressing for pesto.
- Grilled Zucchini Add-In: Add charred zucchini slices.
- Chicken Version: Use sliced grilled chicken instead of shrimp.
Common Mistakes to Avoid with This Dish:
- Don’t rinse the orzo cold unless it’s getting very sticky.
- Don’t add basil too early or it bruises and darkens.
- Don’t bury the shrimp under the pasta; keep them visible and juicy.
15. BBQ Chicken Flatbread with Corn
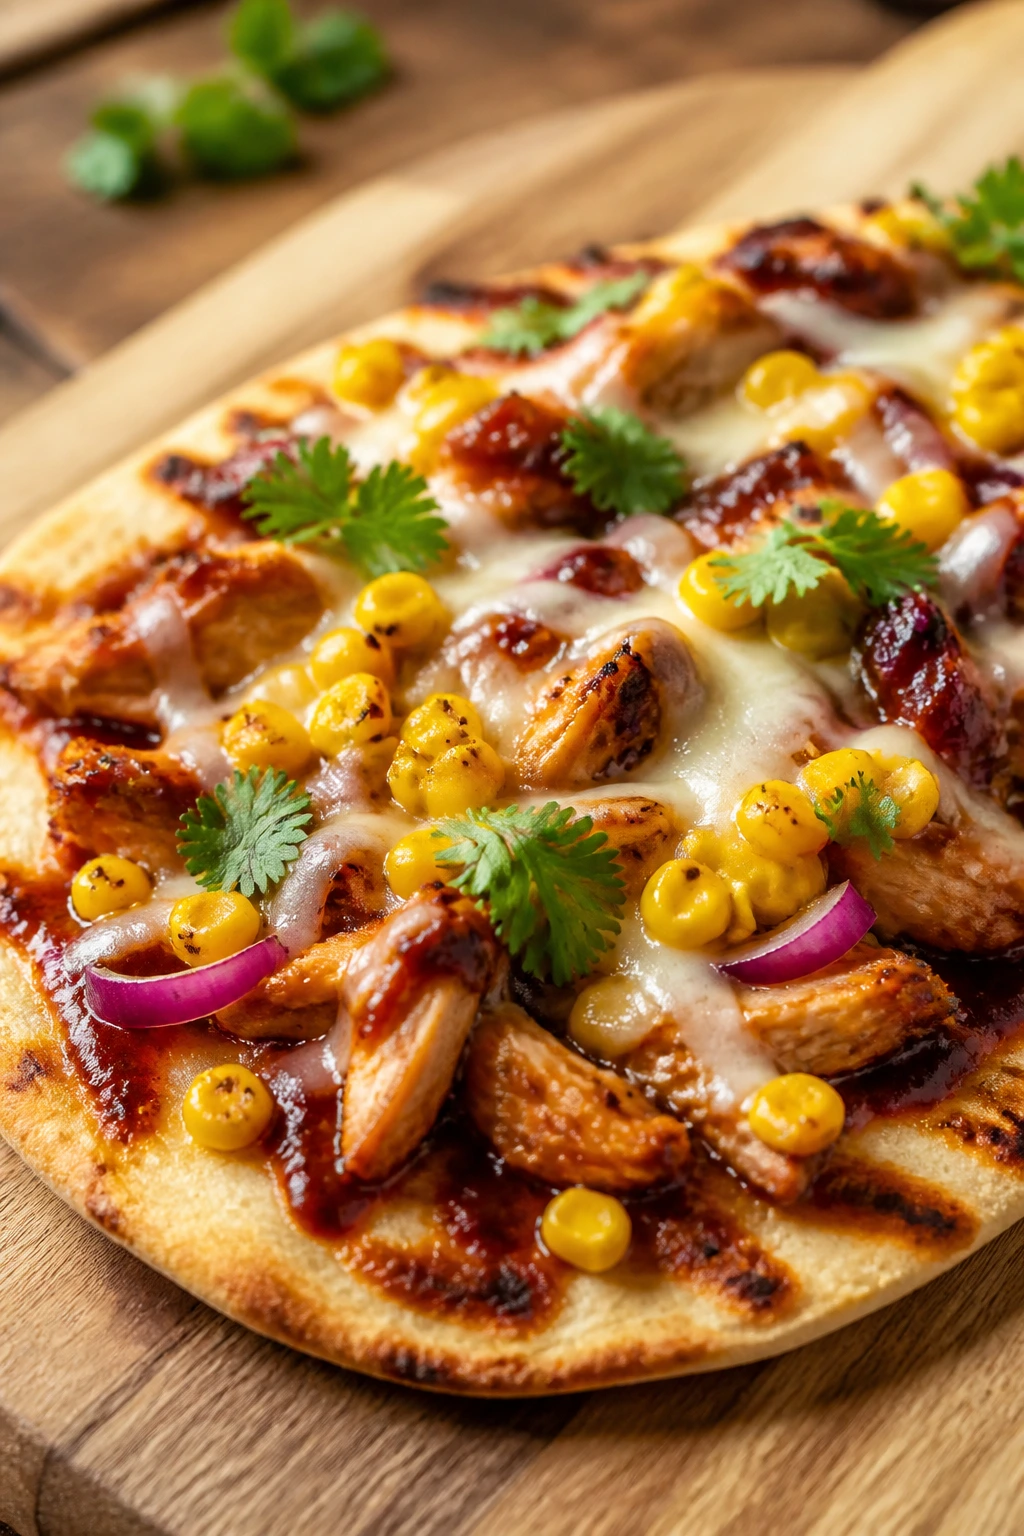
This is the kind of dinner that scratches the pizza itch without turning into a full pizza project. Flatbread gives you a crisp base, BBQ chicken brings smoky sweetness, and corn adds the sweet pop that makes the whole thing taste like warm weather. It’s quick. It’s informal. That’s the appeal.
Why It Works:
Using cooked chicken keeps the bake short, which stops the flatbread from drying out. Corn gives texture and freshness, while a little red onion sharpens the sweetness of the sauce. A quick finish of cilantro or scallions keeps it from feeling heavy.
Key Ingredients:
- 2 flatbreads or naan
- 1½ cups shredded cooked chicken
- ⅓ cup BBQ sauce
- 1 cup corn kernels, fresh or thawed
- ½ red onion, thinly sliced
- 1 cup shredded mozzarella
- 2 tbsp chopped cilantro
- Olive oil
Quick Steps:
- Heat the oven to 450°F.
- Toss chicken with BBQ sauce.
- Brush the flatbreads lightly with olive oil.
- Top with mozzarella, chicken, corn, and onion.
- Bake for 8 to 10 minutes, then finish with cilantro.
Equipment for This Recipe:
- Sheet pan
- Mixing bowl
- Knife
- Oven mitts
How to Serve This Dish:
Cut it into rectangles and serve with a green salad or sliced cucumbers. It’s good hot, but it also holds up for a quick second round later.
Pro Tips for This Recipe:
- Preheat the pan if you want a crisper bottom.
- Use less sauce than you think; too much makes the flatbread soggy.
- Thawed frozen corn works fine here.
- A little pickled jalapeño can wake up the sauce.
Variations on This Dish:
- Chipotle Version: Mix chipotle into the BBQ sauce.
- Peach BBQ Swap: Add sliced peach if you like sweet and smoky.
- Vegetarian Version: Use pulled jackfruit or chickpeas instead of chicken.
Common Mistakes to Avoid with This Dish:
- Don’t overload the toppings or the bread softens.
- Don’t bake too long or the flatbread turns dry and brittle.
- Don’t forget a little oil on the base; it helps the crust brown.
16. Mediterranean Lentil Salad with Feta
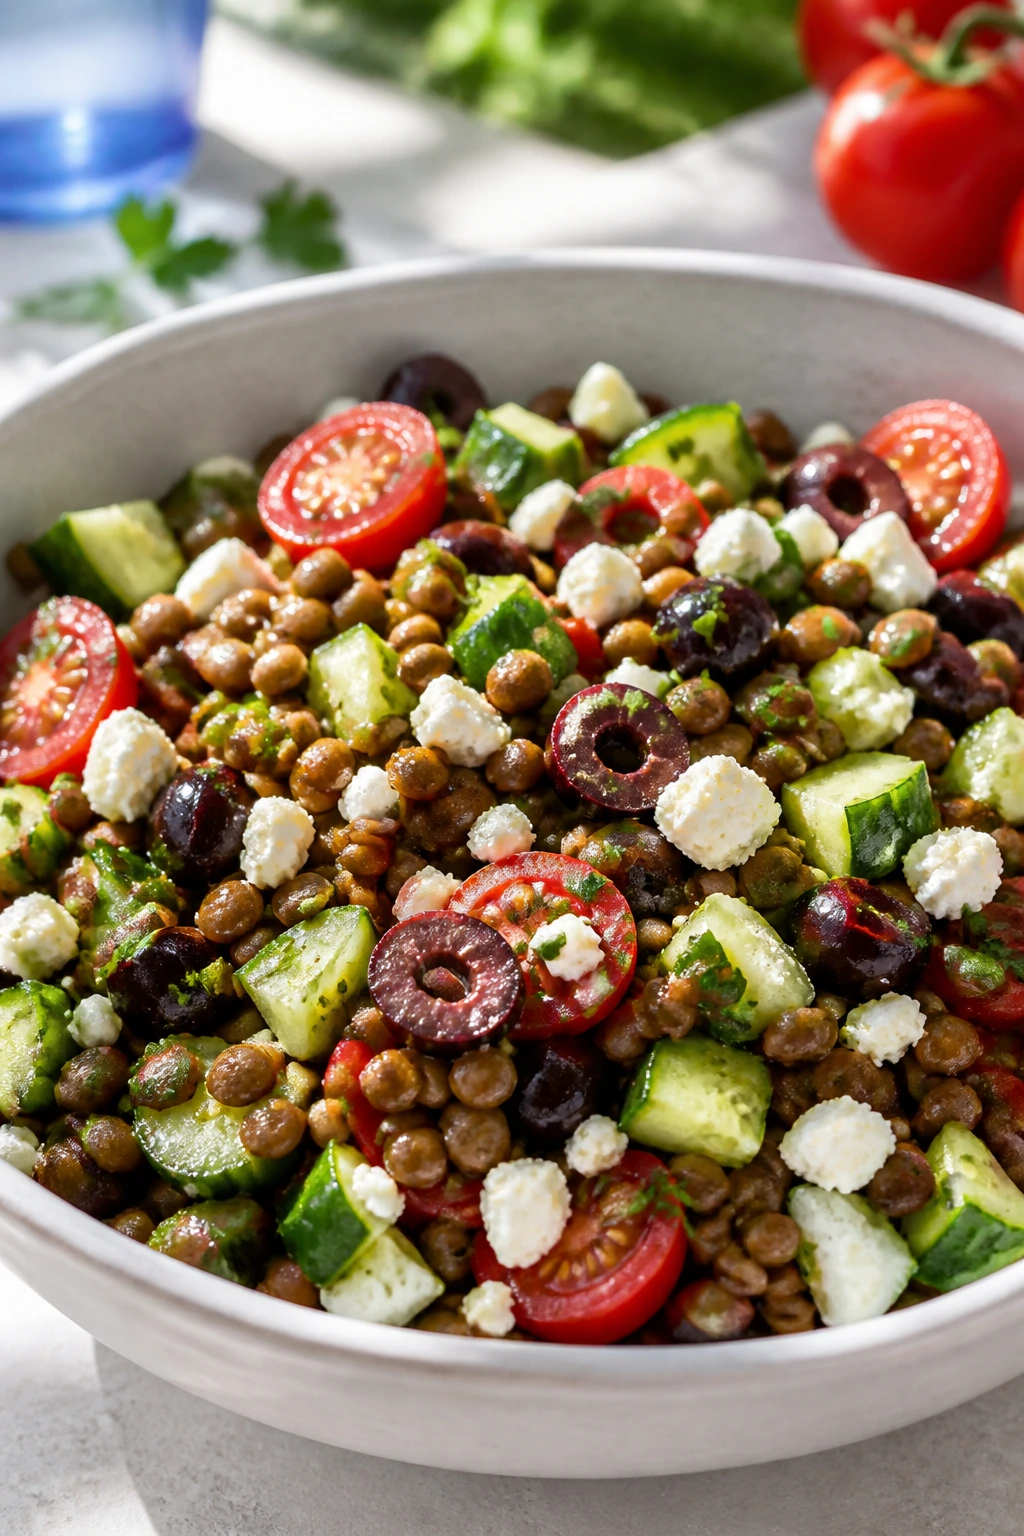
Lentils are underrated on hot nights because they stay firm, take on dressing well, and taste better after a short rest. Add cucumber, tomatoes, parsley, olives, and feta, and you’ve got a salad that can carry dinner without any drama. It’s sturdy, cool, and sharper than it looks.
Why It Works:
Lentils hold their shape better than a lot of beans, so the salad stays textured even after dressing. The mix of lemon, olive oil, and herbs gives the whole bowl a clean finish. Feta and olives supply the salt, which means you don’t need much else.
Key Ingredients:
- 1½ cups cooked green or brown lentils
- 1 cucumber, diced
- 1 cup cherry tomatoes, halved
- ½ cup crumbled feta
- ¼ cup chopped parsley
- ¼ cup sliced olives
- 3 tbsp olive oil
- 1 lemon, juiced
Quick Steps:
- Cool the lentils if they’re freshly cooked.
- Toss with cucumber, tomatoes, feta, parsley, olives, oil, lemon, salt, and pepper.
- Let the salad sit for 10 minutes.
- Taste and adjust with more lemon or olive oil.
- Serve chilled or room temperature.
Equipment for This Recipe:
- Mixing bowl
- Colander if using canned lentils
- Spoon
- Knife
How to Serve This Dish:
Serve it on a platter with pita or toasted flatbread. It also works as a side beside grilled chicken or fish if you want to stretch the meal.
Pro Tips for This Recipe:
- Don’t overcook the lentils; mushy lentils make the salad dull.
- Add feta last if you want the cubes to stay intact.
- Fresh parsley makes a bigger difference than dried ever will.
- A spoonful of Dijon in the dressing is worth trying.
Variations on This Dish:
- Mint Version: Add chopped mint for a cooler flavor.
- Roasted Pepper Swap: Stir in chopped roasted red peppers.
- No-Feta Version: Use avocado instead for creaminess.
Common Mistakes to Avoid with This Dish:
- Don’t dress the salad while the lentils are hot enough to collapse.
- Don’t skip salt in the cooking water if you’re making lentils from dry.
- Don’t drown it in lemon; you want balance, not acid burn.
17. Grilled Steak and Romaine Salad
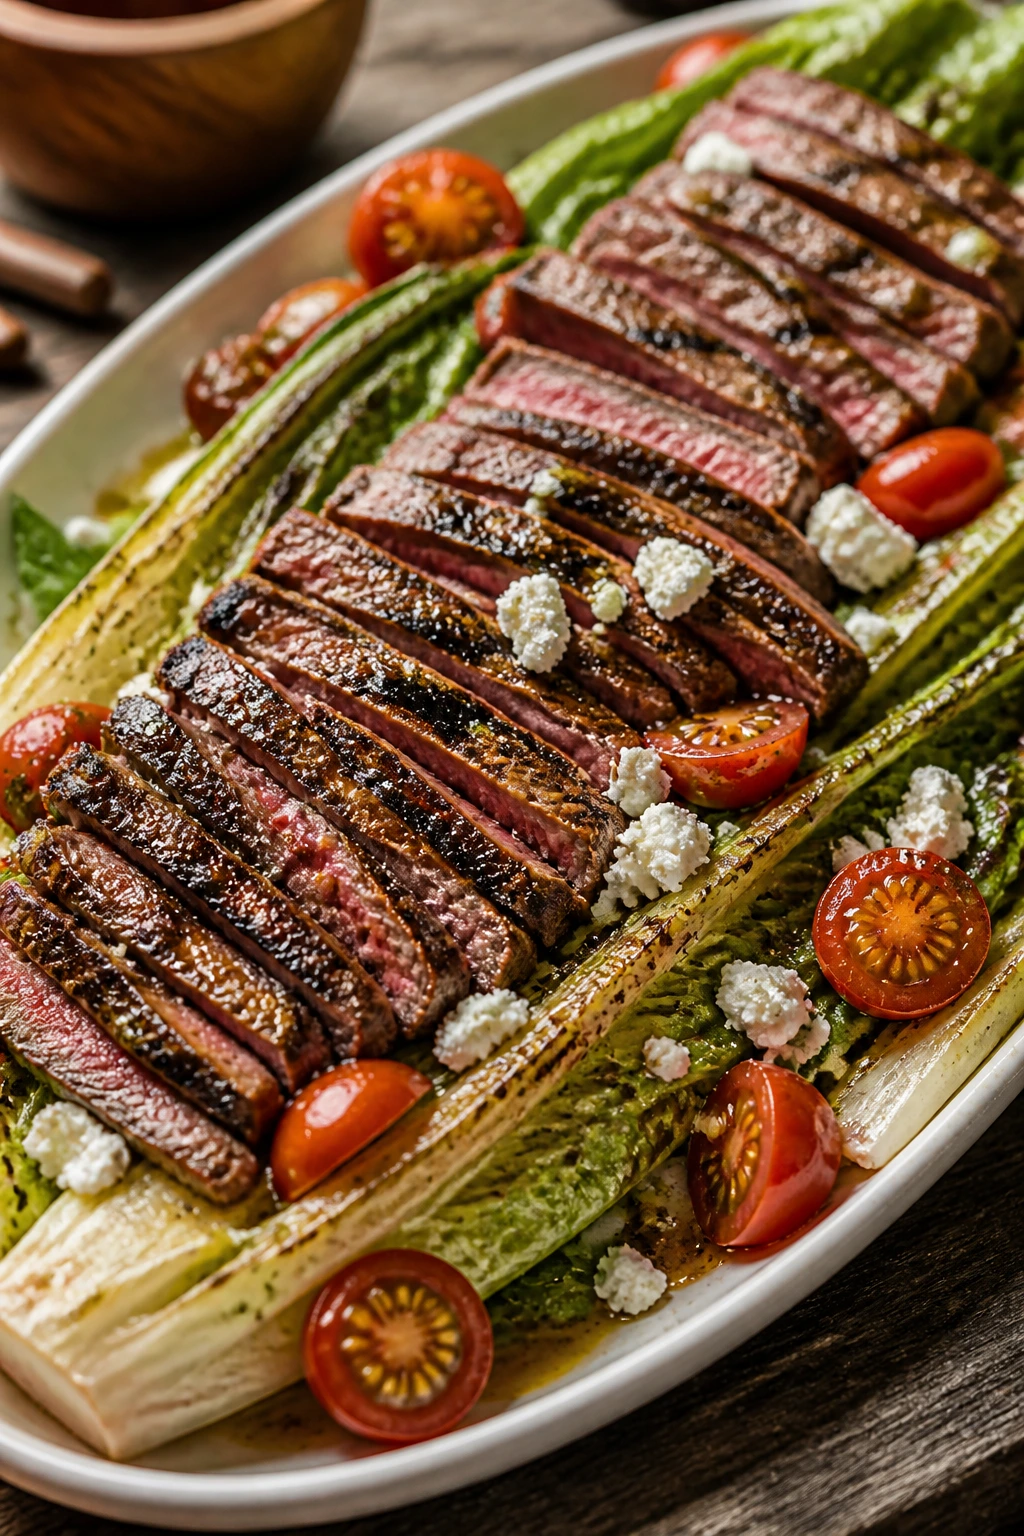
Steak salads can be heavy, but this one stays nimble because the steak is sliced thin and the romaine gets a little char. A sharp vinaigrette, tomatoes, cucumbers, and a bit of cheese do the rest. It’s a steak dinner that knows when to stop.
Why It Works:
Romaine on the grill gets a smoky edge without turning limp. Thinly sliced steak stretches across the salad so a small amount goes farther. The vinaigrette adds enough punch to keep the whole bowl interesting.
Key Ingredients:
- 1 lb flank steak
- 2 romaine hearts, halved
- 1 cucumber, sliced
- 1 cup cherry tomatoes
- ¼ cup crumbled blue cheese or feta
- 3 tbsp olive oil
- 1 tbsp red wine vinegar
- 1 tsp Dijon mustard
Quick Steps:
- Season the steak with salt and pepper.
- Grill or sear for 3 to 5 minutes per side, then rest.
- Grill the romaine cut-side down for about 1 minute.
- Whisk the vinaigrette.
- Slice the steak thinly and serve over romaine with the vegetables and cheese.
Equipment for This Recipe:
- Grill or heavy skillet
- Sharp knife
- Cutting board
- Small bowl
How to Serve This Dish:
Serve it on a long platter so the steak slices sit on top of the lettuce instead of disappearing into it. A piece of toasted bread can handle the extra dressing.
Pro Tips for This Recipe:
- Slice the steak against the grain or it stays chewy.
- Don’t over-grill the romaine; one minute is enough.
- Let the steak rest so the juices stay in the meat.
- A few croutons are welcome if you want more crunch.
Variations on This Dish:
- Herb Steak Version: Add chopped parsley and chives to the vinaigrette.
- Avocado Swap: Replace the cheese with avocado slices.
- Balsamic Finish: Use balsamic instead of red wine vinegar.
Common Mistakes to Avoid with This Dish:
- Don’t slice the steak too early. Resting matters.
- Don’t use a bland vinaigrette; the lettuce needs help.
- Don’t pile the salad into a deep bowl where the romaine steams.
18. Sesame Salmon Rice Bowl with Snap Peas
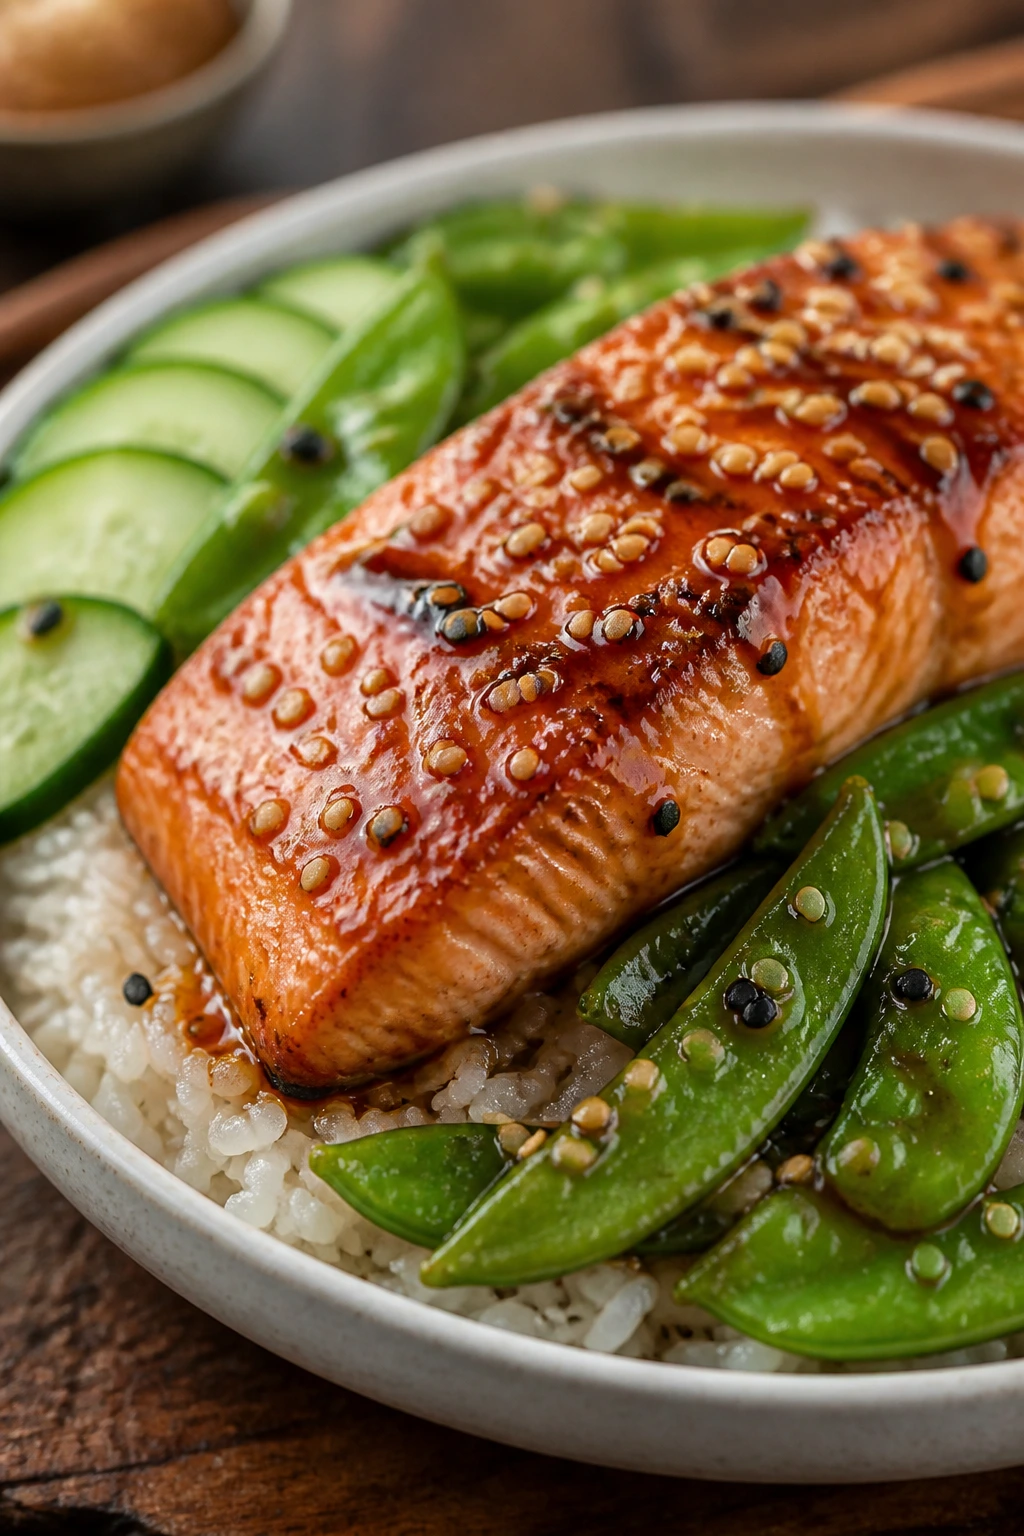
Rice bowls are useful because they let you keep dinner simple without making it boring. Here, salmon brings richness, snap peas add crunch, and a sesame-soy glaze ties everything together. It’s balanced in the way a good bowl should be: a little hot, a little cool, and never mushy.
Why It Works:
Salmon can be roasted or pan-seared, and both methods work well here. Snap peas cook fast enough to stay bright, which matters when the rest of the bowl leans soft. A small amount of rice gives the dish structure without taking over.
Key Ingredients:
- 4 salmon fillets, about 5 oz each
- 2 cups cooked rice
- 2 cups snap peas
- 1 cucumber, sliced
- 2 tbsp soy sauce
- 1 tbsp sesame oil
- 1 tbsp rice vinegar
- 1 tsp honey
- Sesame seeds
Quick Steps:
- Roast or sear the salmon until just cooked through.
- Blanch the snap peas for 1 minute, then cool.
- Whisk soy sauce, sesame oil, vinegar, and honey.
- Build bowls with rice, cucumber, snap peas, and salmon.
- Drizzle with sauce and finish with sesame seeds.
Equipment for This Recipe:
- Skillet or sheet pan
- Small bowl
- Pot for rice
- Tongs
How to Serve This Dish:
Serve it in wide bowls with the sauce drizzled around the edges. A little shredded carrot or avocado on top fits naturally if you have it.
Pro Tips for This Recipe:
- Keep the rice portion modest so the bowl stays light.
- Blanch the peas fast; they should still snap.
- Don’t over-reduce the sauce. Thin is fine.
- A little grated ginger in the glaze is a good move.
Variations on This Dish:
- Teriyaki Twist: Add more honey and a touch of garlic.
- Brown Rice Bowl: Use brown rice if you want a chewier base.
- Tofu Version: Swap salmon for crispy tofu cubes.
Common Mistakes to Avoid with This Dish:
- Don’t overcook the salmon. Dry fish ruins the whole bowl.
- Don’t use cold, clumpy rice straight from the fridge unless you loosen it first.
- Don’t skip the cucumber; it keeps the bowl fresh.
19. Avocado Crab Salad Stuffed Tomatoes
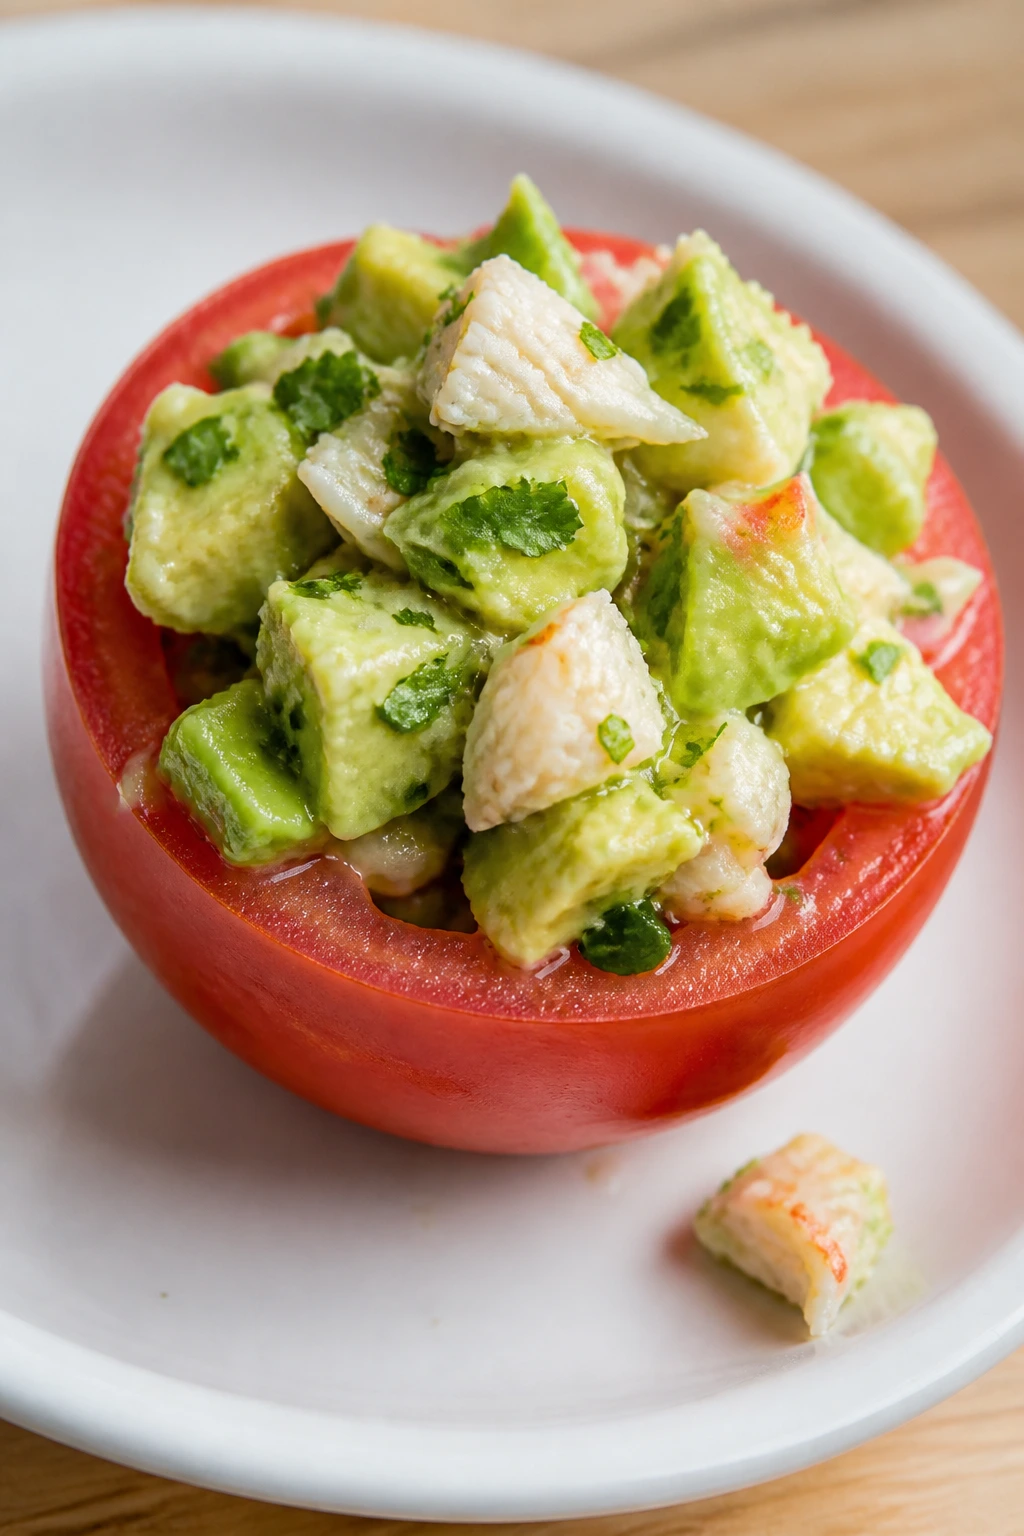
Stuffed tomatoes are one of those old-school ideas that still work because they make sense. Hollowed tomatoes hold a cool crab and avocado salad that tastes briny, creamy, and sharp all at once. It’s a light dinner that feels fancy without acting fancy.
Why It Works:
Tomatoes act like edible bowls, so you don’t need bread or a separate starch unless you want one. Crab stays delicate when you keep the dressing light. Avocado brings body, and celery adds the crunch that makes the filling feel complete.
Key Ingredients:
- 4 large tomatoes
- 8 oz lump crab meat
- 1 avocado, diced
- 1 celery stalk, finely diced
- 1 tbsp mayonnaise or Greek yogurt
- 1 tbsp lemon juice
- 1 tbsp chopped dill
- Salt and pepper
Quick Steps:
- Cut the tops off the tomatoes and scoop out the centers.
- Mix crab, avocado, celery, mayo, lemon juice, dill, salt, and pepper gently.
- Spoon the filling into the tomatoes.
- Chill for 10 minutes if you want them colder.
- Serve with extra herbs on top.
Equipment for This Recipe:
- Small bowl
- Spoon
- Sharp knife
- Cutting board
How to Serve This Dish:
Serve two stuffed tomatoes per person with a handful of crackers or a simple salad on the side. They look nicest on a chilled plate, especially if the tomatoes are very ripe.
Pro Tips for This Recipe:
- Handle the crab gently so it stays in flakes.
- Use tomatoes that stand upright without tipping over.
- Add avocado at the last minute to keep it green.
- A pinch of Old Bay works if you want more seafood flavor.
Variations on This Dish:
- Shrimp Swap: Use chopped cooked shrimp instead of crab.
- Cucumber Crunch: Add finely diced cucumber to the filling.
- Spicy Version: Stir in a little hot sauce or diced jalapeño.
Common Mistakes to Avoid with This Dish:
- Don’t overmix the crab or it turns pasty.
- Don’t use tomatoes that are too soft to hold their shape.
- Don’t make the filling too wet or the tomatoes leak.
20. Veggie-Packed Egg Roll Bowls
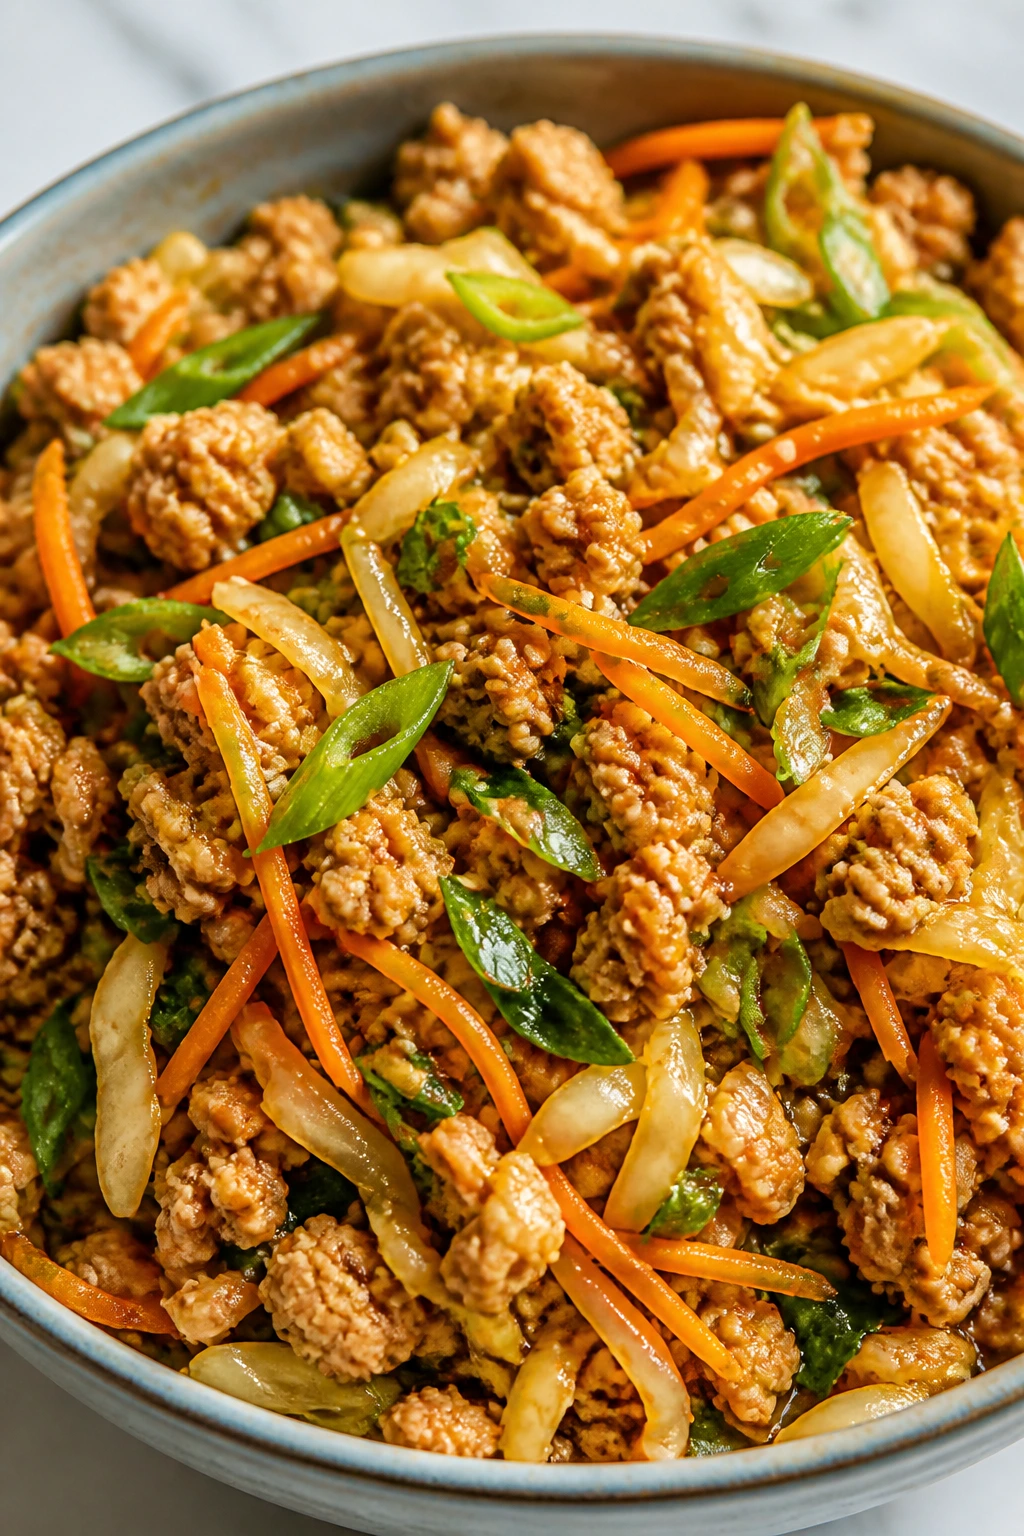
Egg roll bowls are what you cook when you want the flavor of takeout without the wrapper. Ground meat, cabbage, carrots, ginger, and soy sauce all come together in one skillet, and the result is savory, crunchy, and fast. It’s not trying to be delicate. That’s part of the charm.
Why It Works:
Shredded cabbage cooks down just enough to soften while keeping a bit of bite. Ginger and garlic make the whole skillet smell like dinner in five seconds flat. Using a bowl instead of a wrapper keeps the meal lighter and easier to assemble.
Key Ingredients:
- 1 lb ground turkey
- 1 tbsp sesame oil
- 4 cups shredded cabbage
- 1 cup shredded carrots
- 2 garlic cloves, minced
- 1 tbsp grated ginger
- 3 tbsp soy sauce
- 2 scallions, sliced
Quick Steps:
- Brown the turkey in sesame oil over medium-high heat.
- Add garlic and ginger and cook for 30 seconds.
- Stir in cabbage, carrots, and soy sauce.
- Cook until the cabbage softens but still has crunch, about 4 minutes.
- Finish with scallions and sesame seeds.
Equipment for This Recipe:
- Large skillet
- Wooden spoon
- Knife
- Cutting board
How to Serve This Dish:
Serve it as-is in bowls, or spoon it over rice if you want more starch. A fried egg on top is a good idea if you have one.
Pro Tips for This Recipe:
- Don’t overcrowd the skillet or the cabbage steams instead of softening.
- Add the soy sauce toward the end so the vegetables don’t get soggy.
- A splash of rice vinegar at the finish sharpens everything.
- Use coleslaw mix if you want to skip the shredding.
Variations on This Dish:
- Pork Version: Use ground pork for a richer skillet.
- Spicy Garlic Swap: Add chili garlic sauce.
- Tofu Version: Use crumbled tofu and cook it until lightly crisp.
Common Mistakes to Avoid with This Dish:
- Don’t cook the cabbage until it turns limp and wet.
- Don’t forget the sesame oil; it gives the bowl its takeout flavor.
- Don’t overdo the soy sauce or the whole thing tastes flat-salty.
21. BBQ Tofu Lettuce Wraps
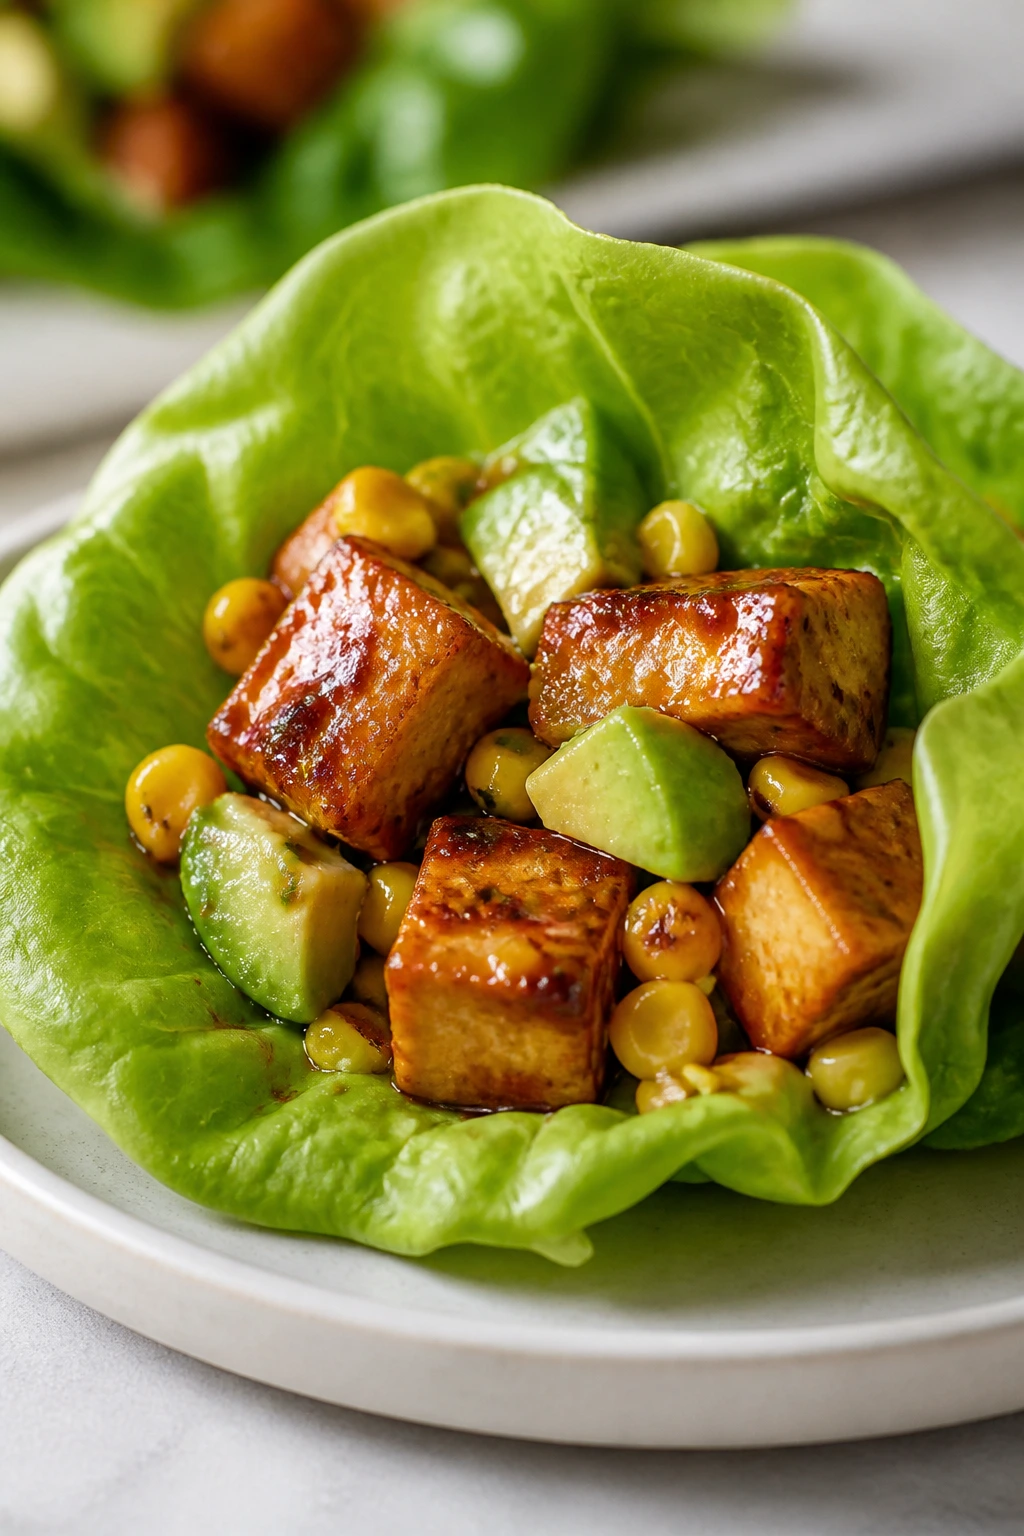
Tofu lettuce wraps make sense in summer because they’re cool, quick, and surprisingly satisfying when you crisp the tofu first. The barbecue sauce brings smoke and sweetness, the lettuce brings crunch, and the toppings do the rest. This is a meal that does not need a long explanation.
Why It Works:
Pressing the tofu first helps it brown instead of steaming. BBQ sauce clings to the crisp edges and gives the filling a sticky finish. Lettuce keeps the wraps light enough that you don’t need to think about side dishes too hard.
Key Ingredients:
- 14 oz extra-firm tofu, pressed and cubed
- 2 tbsp cornstarch
- 1 tbsp oil
- ⅓ cup BBQ sauce
- 8 butter lettuce leaves
- 1 avocado, diced
- ½ cup corn kernels
- 2 tbsp chopped cilantro
Quick Steps:
- Toss tofu cubes with cornstarch, salt, and pepper.
- Pan-fry in oil until crisp on multiple sides.
- Add BBQ sauce and stir until glossy.
- Spoon into lettuce leaves with avocado, corn, and cilantro.
- Serve immediately.
Equipment for This Recipe:
- Skillet
- Towel or tofu press
- Bowl
- Spatula
How to Serve This Dish:
Set up the wraps on a tray and let people fill them themselves. A quick cucumber salad on the side keeps the plate cool and bright.
Pro Tips for This Recipe:
- Press the tofu long enough that it feels noticeably drier.
- Don’t add the sauce too early or you lose the crispy edges.
- Use broad lettuce leaves that fold without cracking.
- A squeeze of lime keeps the BBQ flavor from getting sticky-heavy.
Variations on This Dish:
- Spicy BBQ: Use a hotter sauce or add chili flakes.
- Pineapple Version: Add diced pineapple for extra sweetness.
- Gluten-Free Finish: Check the BBQ sauce label and you’re set.
Common Mistakes to Avoid with This Dish:
- Don’t skip pressing the tofu. That step matters.
- Don’t crowd the pan or the tofu softens.
- Don’t drown the wraps in sauce; you want crisp, not soggy.
22. Herbed Ricotta Stuffed Zucchini Boats
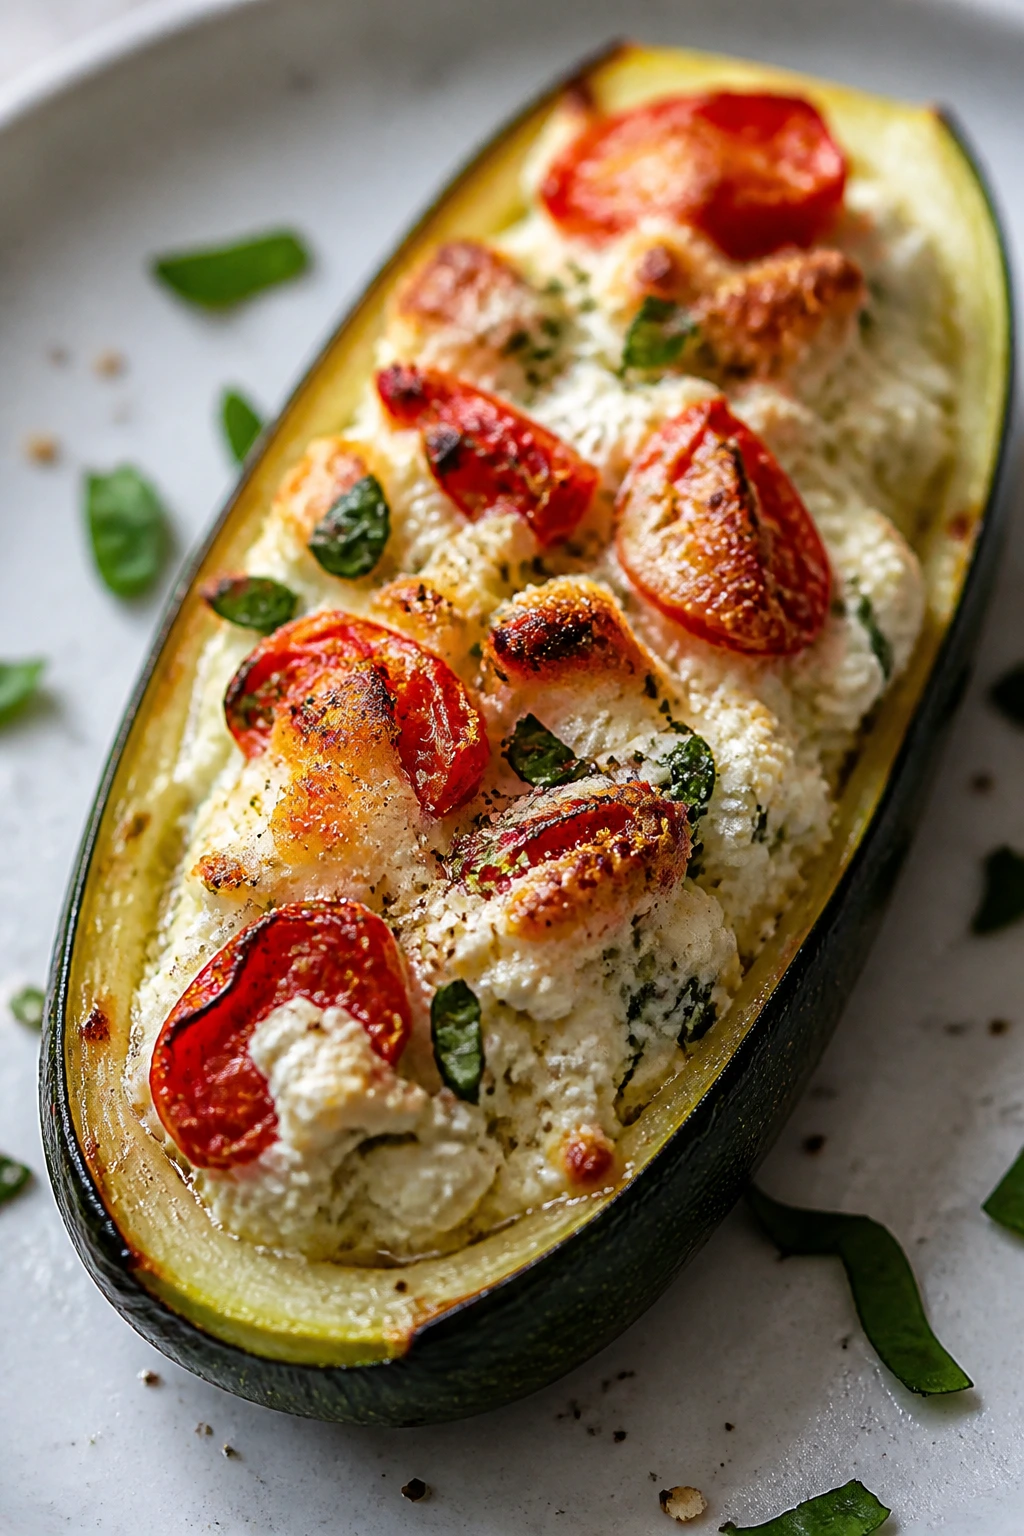
Zucchini boats are one of the easiest ways to make vegetables feel like dinner. Ricotta, herbs, tomatoes, and a little Parmesan turn the center into something creamy and savory, while the zucchini edges soften in the oven. It’s a light plate, but not a skimpy one.
Why It Works:
Zucchini has a mild flavor that takes on whatever you put with it. Ricotta gives the filling body without making it dense, and a small amount of breadcrumbs adds just enough texture. Baking everything together lets the tomato juices seep into the filling.
Key Ingredients:
- 4 medium zucchini
- 1 cup ricotta
- ¼ cup Parmesan
- ¼ cup breadcrumbs
- 1 cup chopped tomatoes
- 2 tbsp chopped basil
- 1 garlic clove, minced
- 1 tbsp olive oil
Quick Steps:
- Heat the oven to 400°F.
- Halve the zucchini and scoop out the centers.
- Mix ricotta, Parmesan, breadcrumbs, tomatoes, basil, garlic, salt, and pepper.
- Fill the zucchini halves and drizzle with olive oil.
- Bake for 20 to 25 minutes, until the zucchini is tender and the tops are golden.
Equipment for This Recipe:
- Baking dish
- Mixing bowl
- Spoon
- Knife
How to Serve This Dish:
Serve two zucchini halves per person with a green salad or grilled chicken alongside. They’re good straight from the oven, though they hold together better after a 5-minute rest.
Pro Tips for This Recipe:
- Don’t scoop the zucchini too thin or the boats collapse.
- If the filling seems loose, add a bit more breadcrumbs.
- A little lemon zest in the ricotta wakes it up.
- Use a baking dish that fits snugly so the boats don’t tip.
Variations on This Dish:
- Sausage Version: Add cooked Italian sausage to the filling.
- Dairy-Light Swap: Use part-skim ricotta and less Parmesan.
- Pesto Finish: Spoon pesto over the top after baking.
Common Mistakes to Avoid with This Dish:
- Don’t under-season the filling; zucchini is mild.
- Don’t bake until the boats turn mushy.
- Don’t skip salting the tomatoes if they’re bland.
23. Lemon Garlic Scallop Couscous
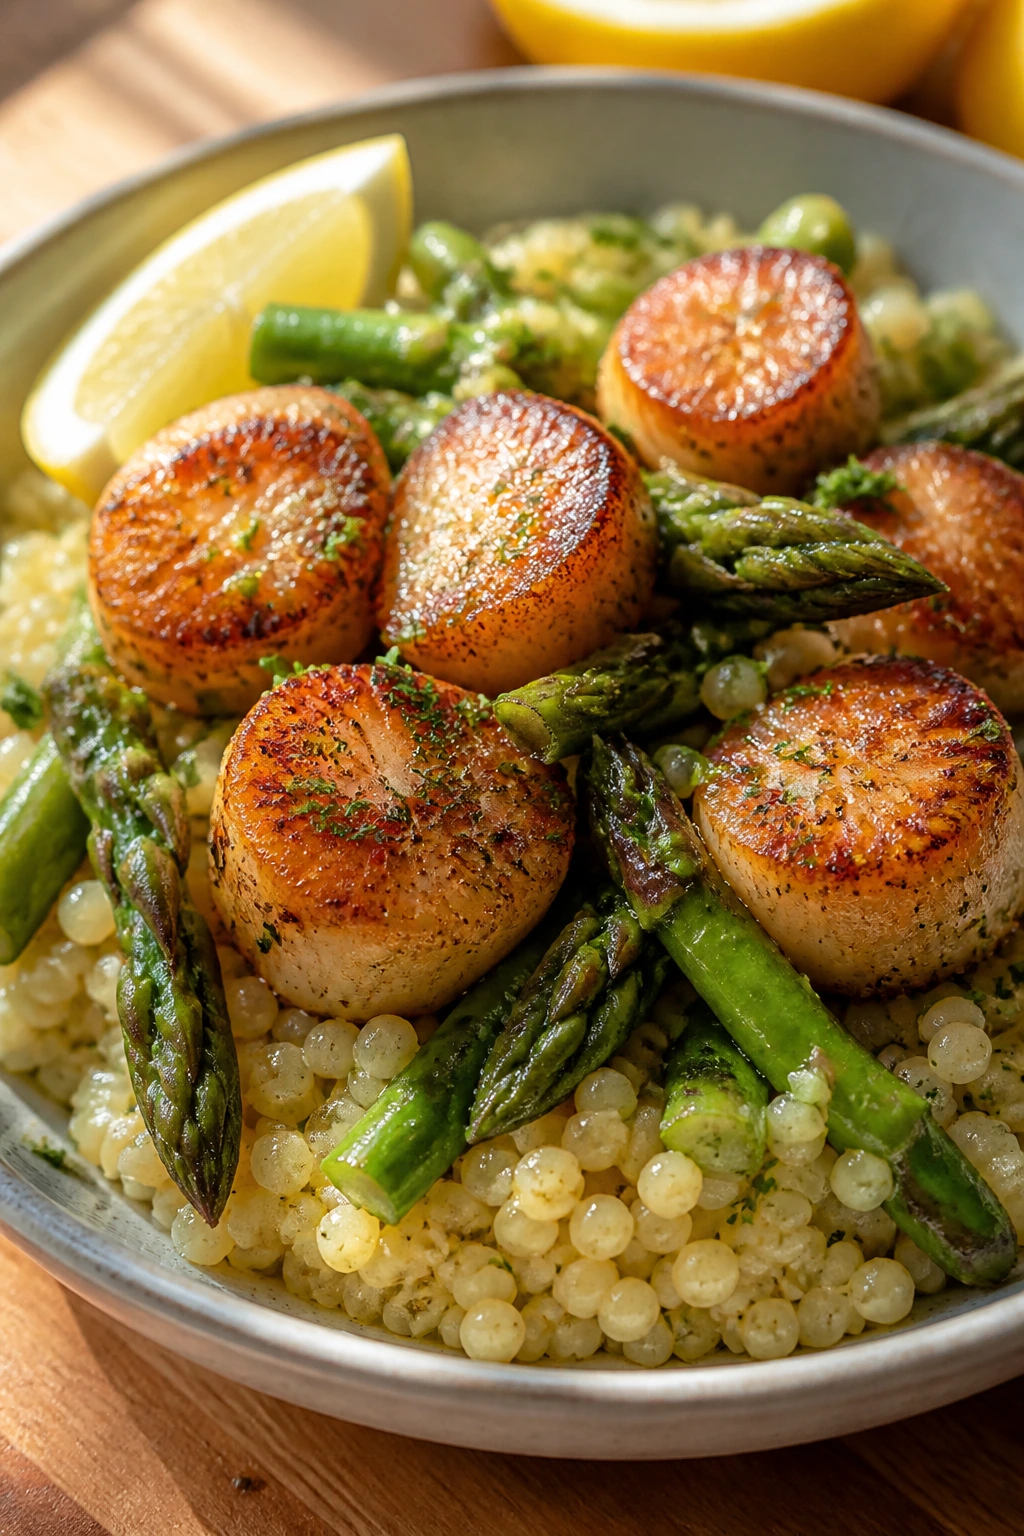
Scallops bring a little luxury to a weeknight without demanding much time. Paired with couscous, asparagus, lemon, and garlic, they make a dinner that feels elegant but still light on the plate. The whole thing cooks fast enough that the scallops stay sweet instead of tough.
Why It Works:
Couscous cooks in minutes, which keeps pace with the scallops. Asparagus gives the bowl some structure and a fresh green note. Lemon and garlic sharpen the scallops without hiding their flavor, which is the part that matters.
Key Ingredients:
- 1 lb sea scallops, patted dry
- 1 cup couscous
- 1 bunch asparagus, cut into pieces
- 2 tbsp olive oil
- 2 garlic cloves, minced
- 1 lemon, juiced
- 2 tbsp chopped parsley
- Salt and pepper
Quick Steps:
- Cook the couscous according to the package and fluff it.
- Sauté asparagus in olive oil until just tender, about 3 to 4 minutes.
- Sear the scallops in a hot skillet for 1½ to 2 minutes per side.
- Stir garlic, lemon juice, and parsley into the couscous.
- Serve the scallops over the couscous with asparagus.
Equipment for This Recipe:
- Skillet
- Saucepan or kettle for couscous
- Tongs
- Paper towels
How to Serve This Dish:
Serve it on warm plates so the scallops stay tender and the couscous doesn’t cool too fast. A few cherry tomatoes on the side are enough if you want more color.
Pro Tips for This Recipe:
- Dry scallops sear better. Moisture is the enemy here.
- Don’t move them once they hit the pan. Let the crust form.
- Couscous tastes better with a little olive oil stirred through it.
- If the garlic is burning, lower the heat fast.
Variations on This Dish:
- Herb Couscous: Add mint and dill.
- Tomato Version: Stir in halved cherry tomatoes at the end.
- Shrimp Swap: Use shrimp if scallops are out of reach.
Common Mistakes to Avoid with This Dish:
- Don’t overcook scallops; they go rubbery fast.
- Don’t use a crowded pan or they steam.
- Don’t serve couscous dry; it needs olive oil or butter.
24. Chicken Caesar Wraps
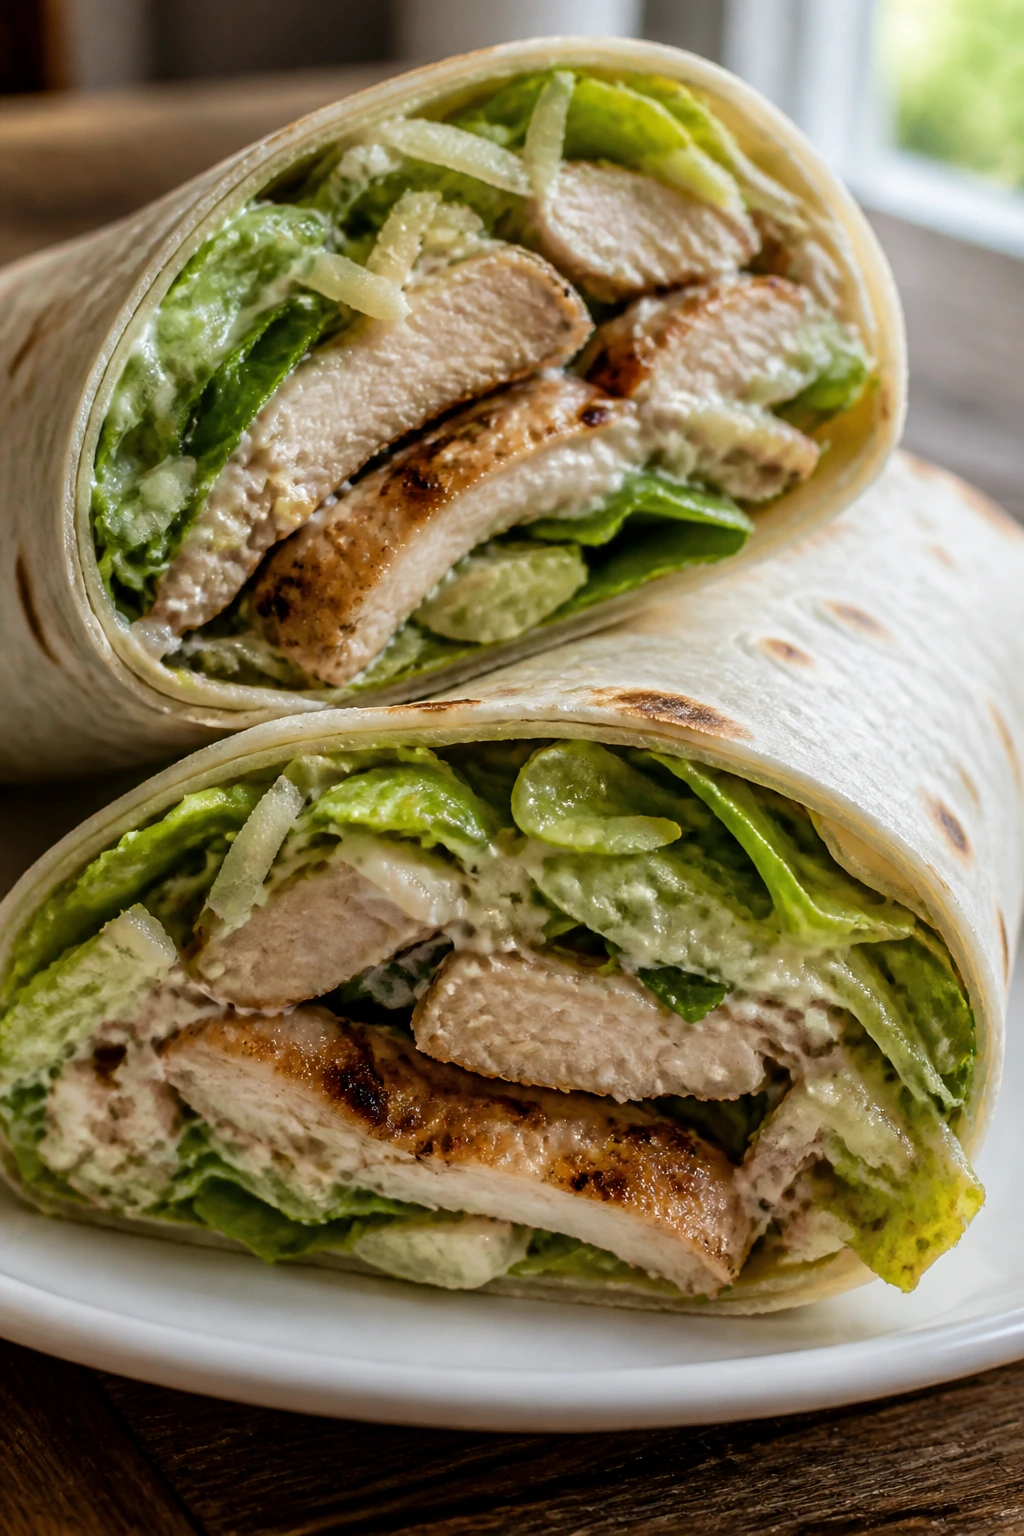
Chicken Caesar wraps are practical, which is not the same thing as boring. Crisp romaine, sliced chicken, Parmesan, and a creamy dressing wrapped in a tortilla gives you a cold, crunchy dinner that travels well from kitchen to patio. It’s familiar in the best way.
Why It Works:
The wrap format keeps Caesar salad from feeling like a side dish. Chicken gives the wrap enough substance, and a little crushed crouton inside adds a crackly texture. If you keep the dressing measured, the wrap stays tidy instead of soggy.
Key Ingredients:
- 2 cups cooked chicken, sliced
- 4 cups chopped romaine
- ¼ cup Caesar dressing
- ¼ cup grated Parmesan
- 4 flour tortillas
- ½ cup croutons, lightly crushed
- Black pepper
- Lemon wedges
Quick Steps:
- Toss romaine with Caesar dressing, Parmesan, and pepper.
- Lay chicken and crushed croutons down the center of each tortilla.
- Add the dressed romaine.
- Roll tightly, tucking the sides in.
- Slice and serve with lemon.
Equipment for This Recipe:
- Mixing bowl
- Knife
- Cutting board
- Skillet if warming tortillas
How to Serve This Dish:
Cut each wrap in half so the filling shows. A few sliced cucumbers or grapes on the side keep the meal feeling fresh and low-key.
Pro Tips for This Recipe:
- Dry the romaine well before dressing it.
- Use small tortillas; oversized ones are harder to roll neatly.
- Add the croutons right before wrapping so they stay crunchy.
- Rotisserie chicken works fine if you shred it yourself.
Variations on This Dish:
- Spicy Caesar: Add hot sauce to the dressing.
- Bacon Version: Add a little crisp bacon for more salt.
- Lettuce Wrap Swap: Use romaine leaves instead of tortillas.
Common Mistakes to Avoid with This Dish:
- Don’t overfill the tortilla or it tears.
- Don’t dress the lettuce too heavily.
- Don’t let the wrap sit too long before eating.
25. Watermelon Feta Mint Salad with Chicken
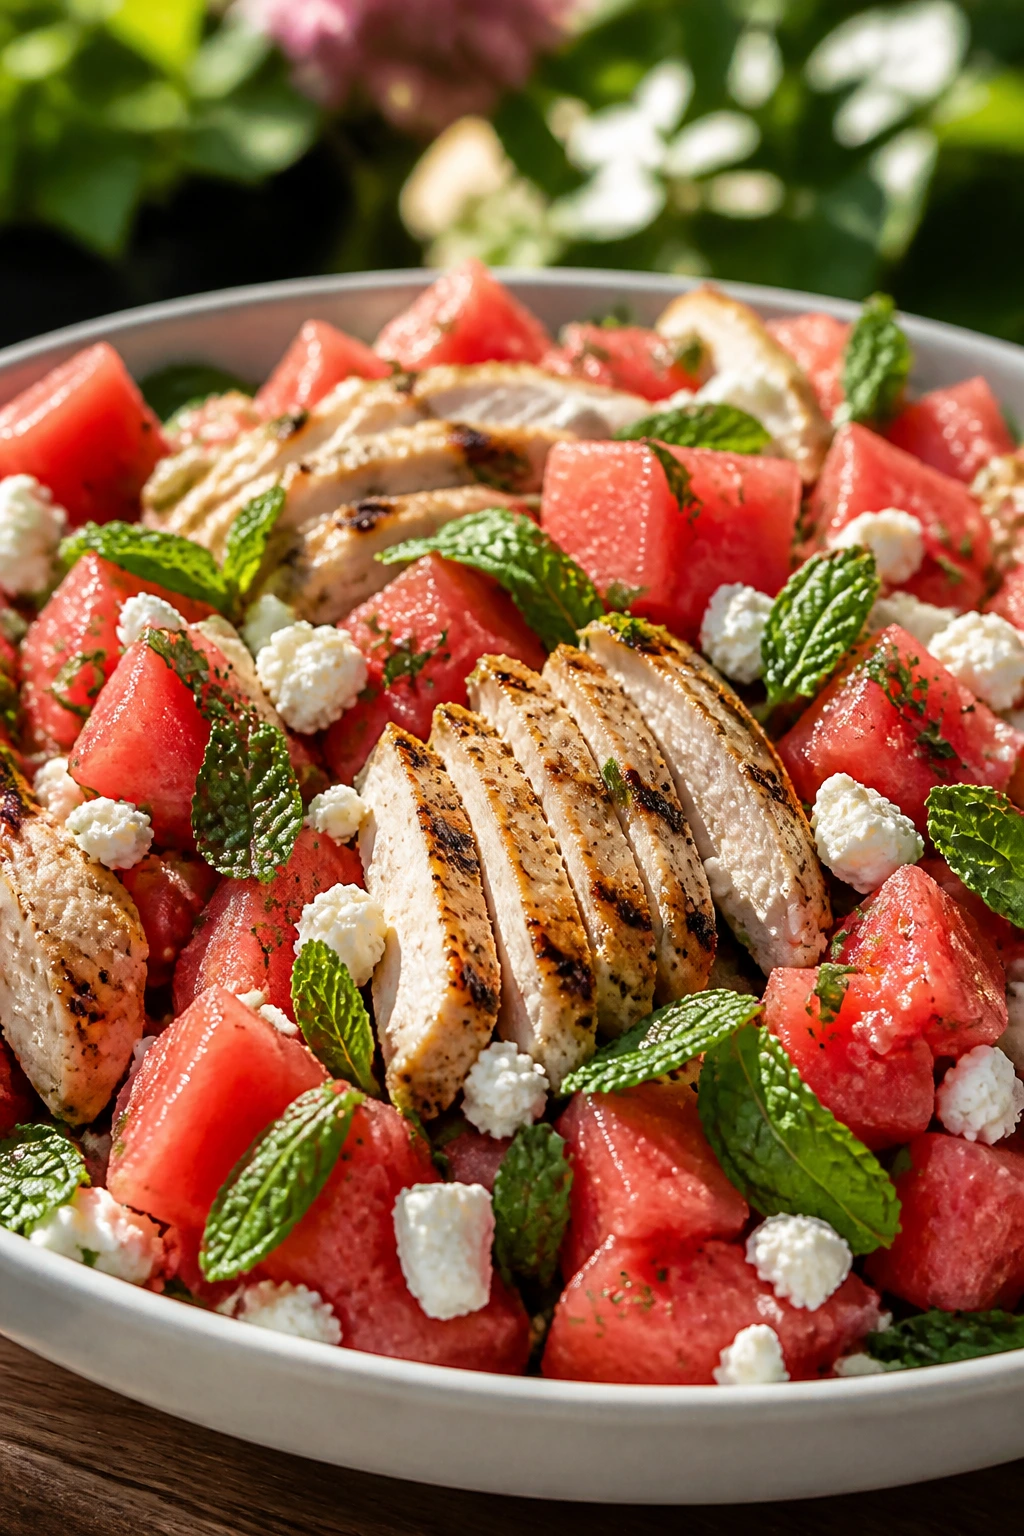
Watermelon salad can sound like a side dish until you add chicken and make it dinner. The watermelon brings cold sweetness, feta brings salt, mint gives perfume, and grilled chicken makes the whole thing feel balanced. It’s a plate that tastes like a deep breath.
Why It Works:
Watermelon and feta are a classic pairing because the sweet-salty contrast is immediate. Chicken keeps the salad from being all brightness and no anchor. Cucumber adds another cool layer, which helps on very warm nights.
Key Ingredients:
- 2 cups cooked or grilled chicken, sliced
- 4 cups watermelon cubes
- 1 cucumber, sliced
- ½ cup crumbled feta
- ¼ cup mint leaves
- 1 lime, juiced
- 1 tbsp olive oil
- Black pepper
Quick Steps:
- Arrange watermelon, cucumber, and chicken on a platter.
- Scatter feta and mint over the top.
- Whisk lime juice, olive oil, salt, and pepper.
- Drizzle the dressing over everything.
- Serve chilled.
Equipment for This Recipe:
- Large platter or bowl
- Knife
- Small whisk bowl
- Cutting board
How to Serve This Dish:
Serve it in a shallow bowl or on a wide platter so the watermelon doesn’t crush itself. A little crusty bread on the side is enough if you want a bit more to eat.
Pro Tips for This Recipe:
- Use cold watermelon straight from the fridge.
- Add mint right before serving so it stays bright.
- Slice the chicken thinly so it mixes easily with the fruit.
- A few olives fit surprisingly well if you want more salt.
Variations on This Dish:
- Grilled Peach Version: Swap watermelon for sliced peaches.
- Herb Swap: Use basil instead of mint.
- Dairy-Free Finish: Skip the feta and add toasted almonds.
Common Mistakes to Avoid with This Dish:
- Don’t dress the salad too early or the watermelon leaks.
- Don’t use feta that’s too dry and crumbly unless you want it scattered everywhere.
- Don’t cut the chicken into large chunks; it breaks the balance.
26. Peanut Chicken Crunch Salad
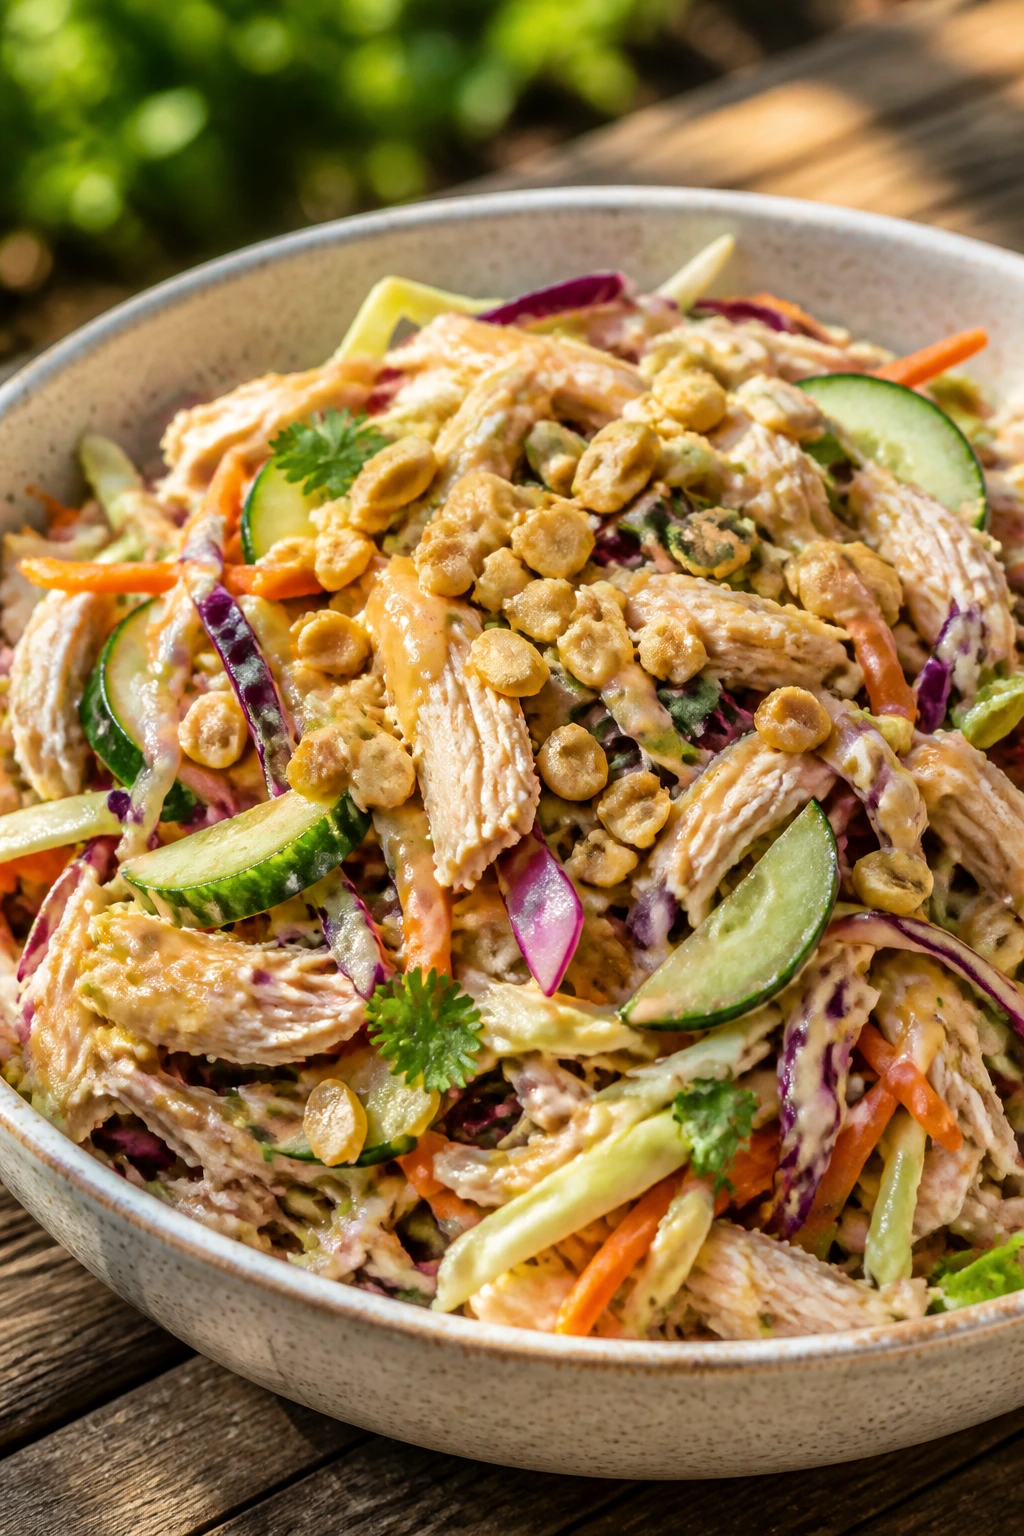
This is the salad I make when I want crunch to do the heavy lifting. Shredded chicken, cabbage, carrots, cucumbers, peanuts, and a peanut-lime dressing create a bowl that stays crisp for a long time. It’s lively enough to feel like a full dinner, which is the point.
Why It Works:
Cabbage holds up under dressing much better than delicate greens. Chicken soaks up the peanut sauce without getting soggy. The peanuts at the end give you the crunch that makes the bowl feel complete.
Key Ingredients:
- 2 cups shredded cooked chicken
- 4 cups shredded cabbage
- 1 cucumber, sliced
- 1 carrot, shredded
- ¼ cup chopped peanuts
- 3 tbsp peanut butter
- 1 tbsp soy sauce
- 1 tbsp lime juice
- 1 tsp honey
Quick Steps:
- Whisk peanut butter, soy sauce, lime juice, honey, and warm water until smooth.
- Toss cabbage, cucumber, carrot, and chicken in a large bowl.
- Add the dressing and toss again.
- Top with peanuts and cilantro if you like.
- Serve chilled or at room temperature.
Equipment for This Recipe:
- Large bowl
- Whisk
- Knife
- Box grater or shredder
How to Serve This Dish:
Serve it in big bowls with lime wedges on the side. If you want more heft, a small pile of rice noodles underneath works well.
Pro Tips for This Recipe:
- Use warm water to loosen the dressing gradually.
- Shred the chicken finely so it blends into the salad.
- Toss the peanuts in at the very end.
- A little grated ginger in the dressing is a strong move.
Variations on This Dish:
- Sesame Swap: Add sesame oil for more depth.
- Tofu Version: Replace chicken with baked tofu.
- Mango Crunch: Add diced mango for sweetness.
Common Mistakes to Avoid with This Dish:
- Don’t use watery cucumber without draining it first.
- Don’t make the dressing too thick.
- Don’t skip acid. Peanut dressing needs lime to stay bright.
27. Pesto White Bean Pasta Salad
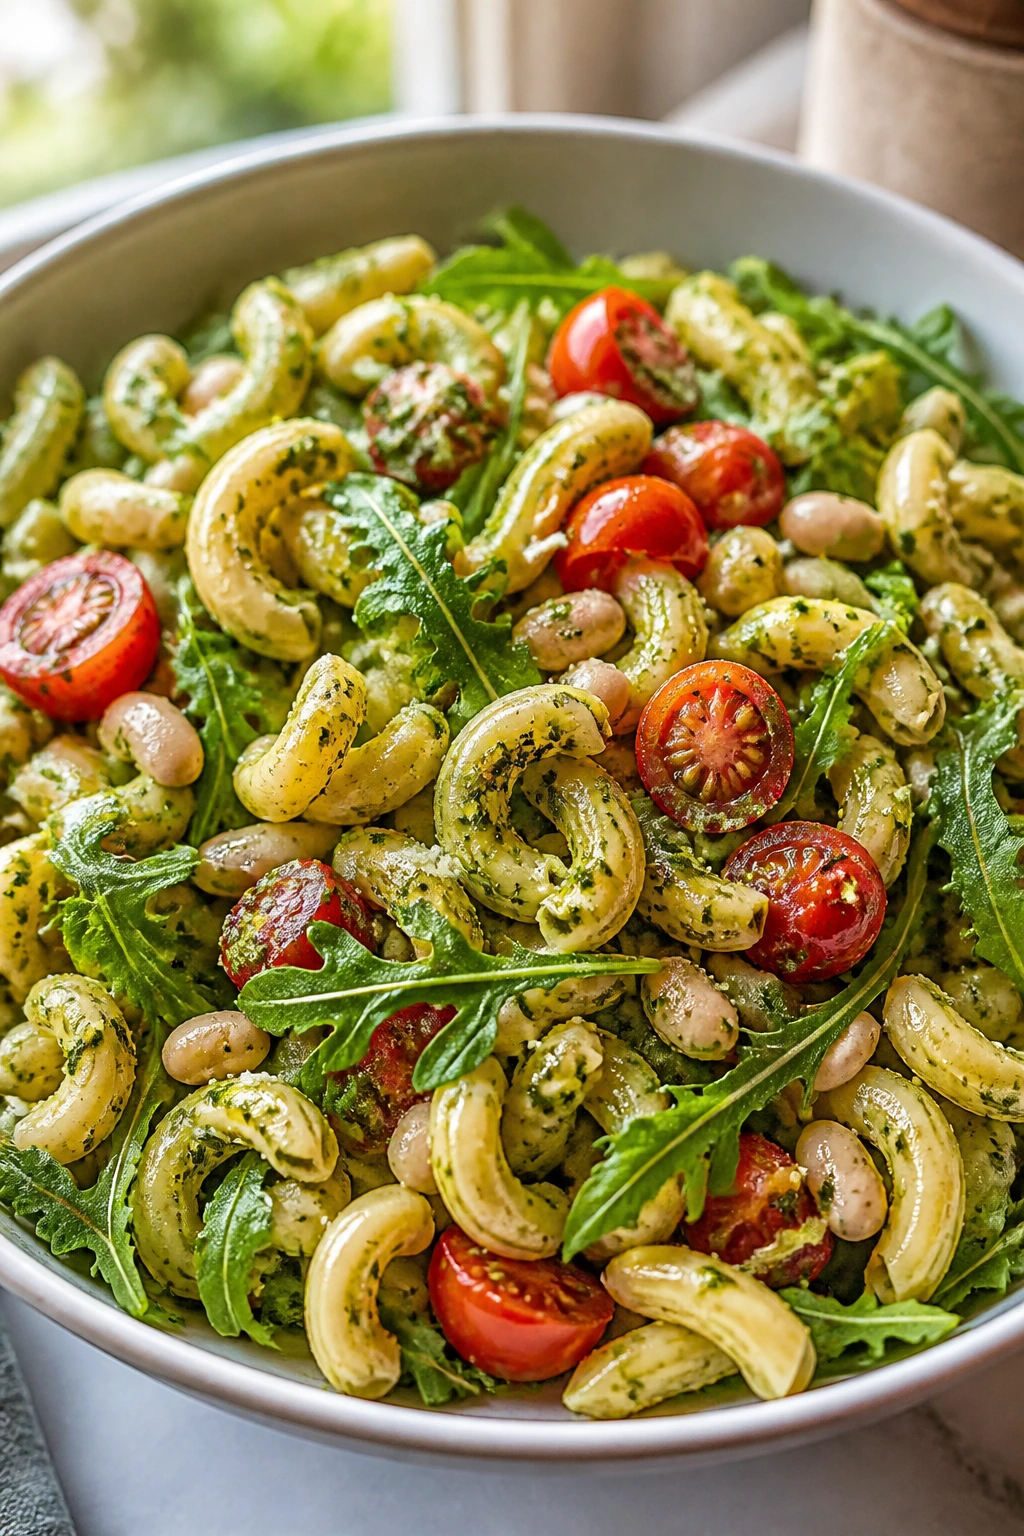
Pasta salad can get weighed down by too much dressing or too many extras. This one stays light because white beans, tomatoes, arugula, and pesto keep the flavor sharp and the texture clean. It tastes like something you’d want after a long, hot day.
Why It Works:
White beans add protein and creaminess without a heavy sauce. Pesto clings to short pasta better than long noodles do, and arugula brings a peppery edge that keeps the bowl from going flat. The lemon helps the whole thing taste fresher.
Key Ingredients:
- 8 oz short pasta
- 1 can white beans, drained and rinsed
- 1 cup cherry tomatoes, halved
- 2 cups arugula
- ⅓ cup pesto
- 1 lemon, juiced
- ¼ cup grated Parmesan
- Black pepper
Quick Steps:
- Cook the pasta, then cool it slightly.
- Toss with pesto and lemon juice while still a little warm.
- Fold in beans, tomatoes, arugula, and Parmesan.
- Season with pepper and taste for salt.
- Serve at room temperature.
Equipment for This Recipe:
- Pot
- Colander
- Large bowl
- Spoon
How to Serve This Dish:
Serve it as a main with extra arugula on top or as a side next to grilled chicken. It travels well, which makes it useful for picnics and last-minute dinners.
Pro Tips for This Recipe:
- Toss the pasta while it’s warm so it catches the pesto.
- Add arugula last so it doesn’t wilt too much.
- Use a sturdy short pasta like rotini or shells.
- A spoonful of pasta water can loosen thick pesto if needed.
Variations on This Dish:
- Mozzarella Version: Add torn mozzarella for more creaminess.
- Sun-Dried Tomato Swap: Stir in chopped sun-dried tomatoes.
- Herb Version: Mix in basil and parsley if the pesto needs a lift.
Common Mistakes to Avoid with This Dish:
- Don’t rinse the pasta cold unless it’s clumping badly.
- Don’t overdo the pesto or the salad turns sticky.
- Don’t skip lemon; pesto alone can feel heavy.
28. Grilled Portobello and Goat Cheese Sandwich

Portobello sandwiches work because the mushroom turns meaty on the grill without becoming heavy. Add goat cheese, arugula, tomato, and a little balsamic, and you get a sandwich that tastes like dinner, not just a meatless alternative. It has enough bite to stand on its own.
Why It Works:
Portobellos soak up marinade and grill into something juicy and savory. Goat cheese adds tang, which keeps the sandwich from feeling flat. Arugula and tomato provide the cool, crisp contrast that grilled mushrooms need.
Key Ingredients:
- 4 large portobello caps, stems removed
- 2 tbsp olive oil
- 1 tbsp balsamic vinegar
- 4 sandwich rolls or slices of bread
- 4 oz goat cheese
- 2 cups arugula
- 1 tomato, sliced
- Salt and pepper
Quick Steps:
- Brush the mushrooms with olive oil, balsamic, salt, and pepper.
- Grill for 4 to 5 minutes per side until tender.
- Toast the bread lightly.
- Spread goat cheese on the bread and layer with arugula, tomato, and mushrooms.
- Close and serve warm.
Equipment for This Recipe:
- Grill or grill pan
- Brush
- Knife
- Spatula
How to Serve This Dish:
Serve it with a cucumber salad or a handful of chips. If the mushrooms are huge, cut the sandwich in half so it doesn’t slide around.
Pro Tips for This Recipe:
- Scrape out the dark gills if you want a cleaner look.
- Don’t over-marinate or the mushrooms get waterlogged.
- Toast the bread so it can hold the juices.
- A little garlic rubbed on the toast helps.
Variations on This Dish:
- Mozzarella Version: Swap goat cheese for fresh mozzarella.
- Pesto Spread: Use pesto instead of plain cheese.
- Open-Face Swap: Serve it open-faced for a lighter plate.
Common Mistakes to Avoid with This Dish:
- Don’t grill the mushrooms until they collapse.
- Don’t use soggy bread.
- Don’t skip seasoning; mushrooms need salt.
29. Spaghetti with Clams and Parsley
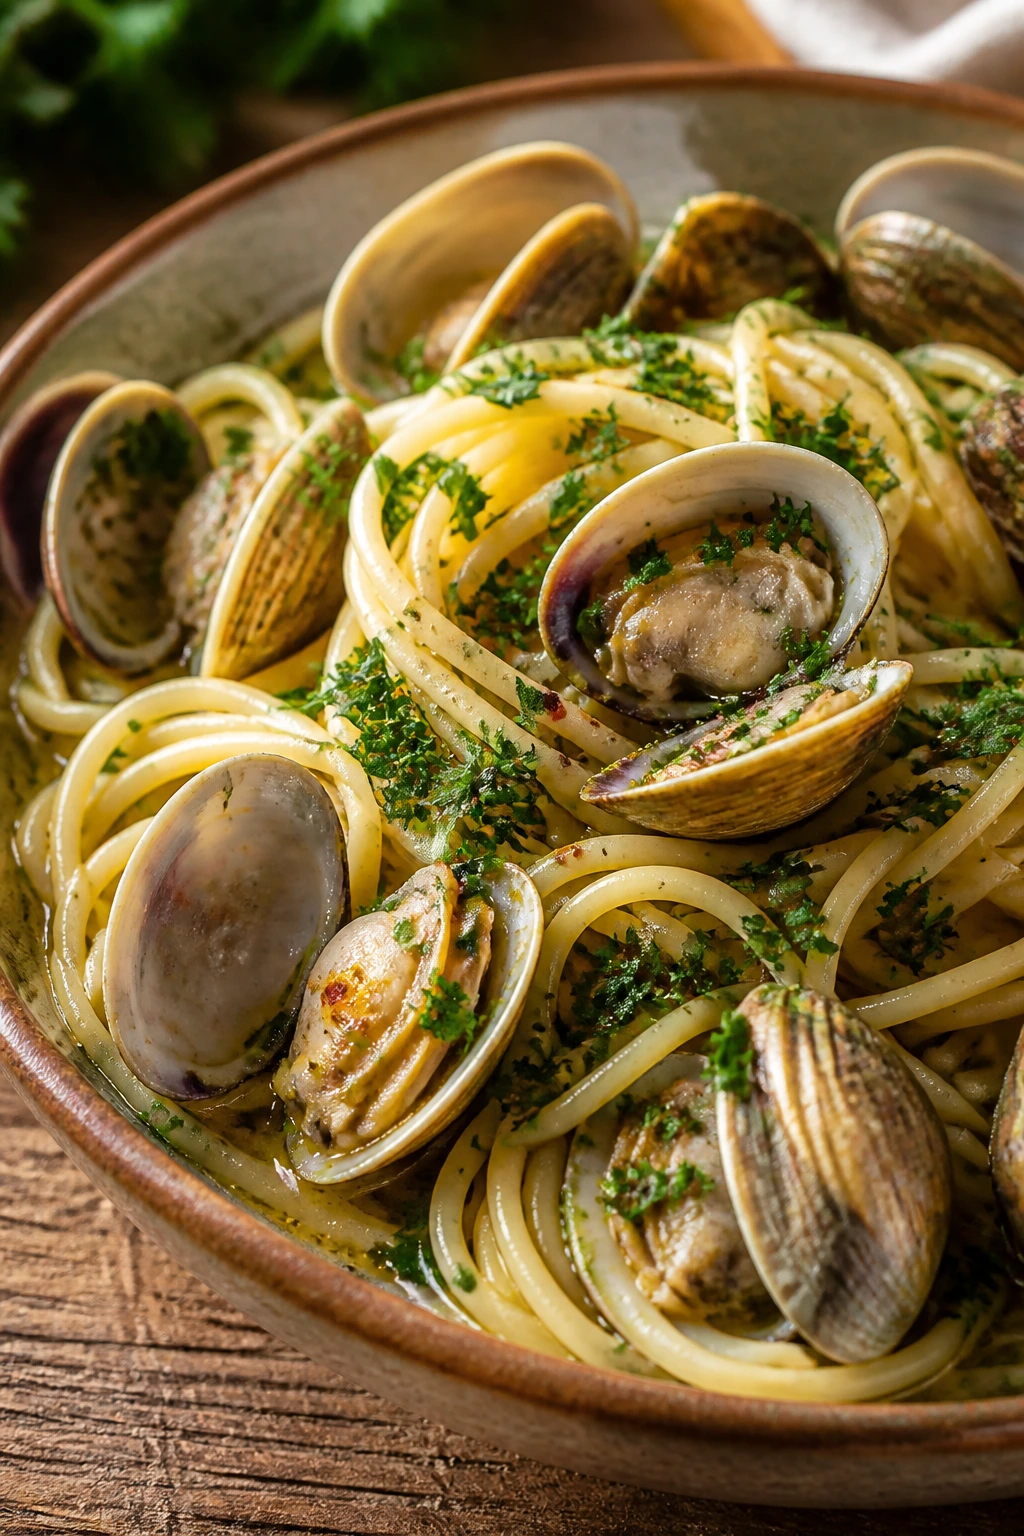
Clam spaghetti brings a coastal feel to dinner without asking for a heavy sauce. Garlic, olive oil, white wine, clams, and parsley make a broth that clings to the pasta just enough. It’s light, briny, and more satisfying than it sounds.
Why It Works:
The clams create their own sauce as they open, which is why this dish tastes richer than the ingredient list suggests. Olive oil and pasta water turn the broth silky. Parsley keeps the flavor clean and prevents the garlic from taking over.
Key Ingredients:
- 12 oz spaghetti
- 2 lbs littleneck clams, scrubbed
- 3 tbsp olive oil
- 4 garlic cloves, sliced
- ½ cup dry white wine
- ¼ tsp red pepper flakes
- ¼ cup chopped parsley
- Lemon wedges
Quick Steps:
- Cook the spaghetti until just shy of done.
- Sauté garlic and red pepper flakes in olive oil.
- Add wine and clams, then cover and cook until the clams open, about 6 to 8 minutes.
- Toss in spaghetti and a splash of pasta water.
- Finish with parsley and lemon.
Equipment for This Recipe:
- Large pot
- Deep skillet with lid
- Tongs
- Colander
How to Serve This Dish:
Serve it in shallow bowls with a little broth spooned over the top. A green salad is enough on the side; the pasta is already carrying a lot of flavor.
Pro Tips for This Recipe:
- Discard any clams that stay shut after cooking.
- Keep the pasta a little firm so it finishes in the pan.
- Use a dry white wine you’d actually drink.
- A final drizzle of good olive oil matters here.
Variations on This Dish:
- Cherry Tomato Version: Add tomatoes with the garlic.
- Herb Swap: Use basil and parsley together.
- Linguine Swap: Linguine works if that’s what you have.
Common Mistakes to Avoid with This Dish:
- Don’t boil the clams too long or they toughen.
- Don’t use too much wine; you want broth, not soup.
- Don’t skip the pasta water. It helps the sauce cling.
30. Charred Corn and Black Bean Quesadillas
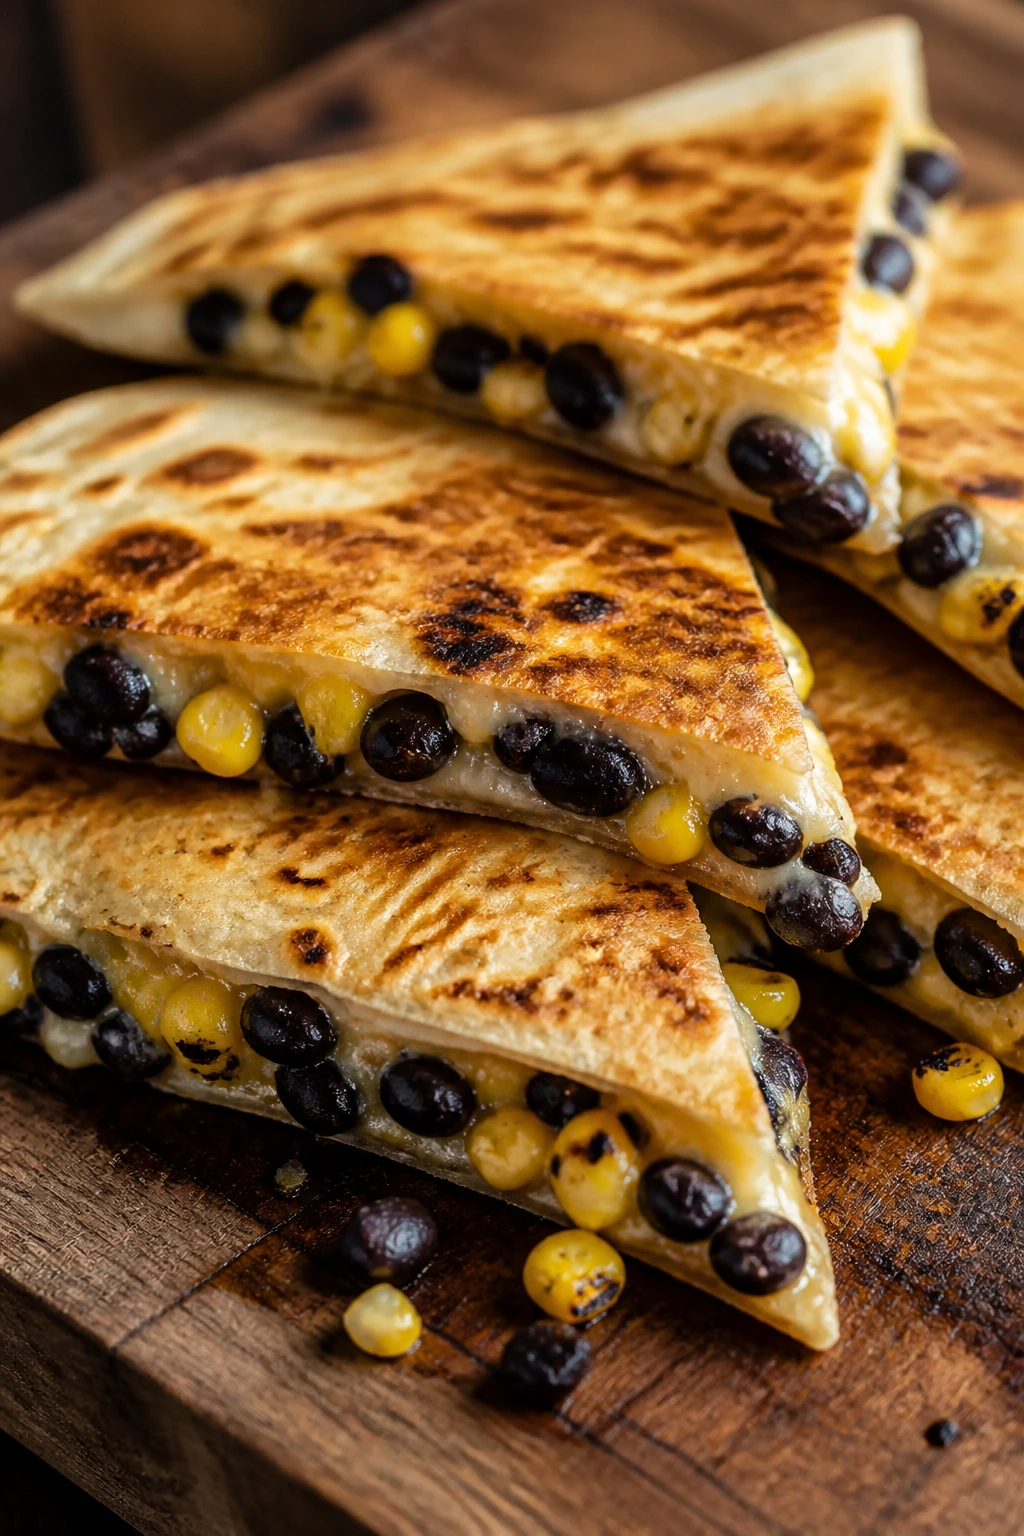
Quesadillas are one of the easiest ways to build a fast summer meal that still has texture. Charred corn, black beans, cheese, and a little lime make them taste sunny and filling without being heavy. They’re also easy to cut, share, and eat with one hand if needed.
Why It Works:
Black beans provide substance, while corn keeps the filling sweet and fresh. Browning the tortilla in a skillet gives you crisp edges and a soft center. A little lime after cooking keeps the cheese from tasting too dense.
Key Ingredients:
- 4 flour tortillas
- 1 can black beans, drained and rinsed
- 1 cup corn kernels
- 1½ cups shredded cheese
- 2 tbsp chopped cilantro
- 1 lime, juiced
- 1 tsp cumin
- 1 tbsp oil
Quick Steps:
- Sauté corn in a dry skillet until lightly charred.
- Mix corn with beans, cumin, cilantro, lime juice, salt, and pepper.
- Sprinkle cheese on half of each tortilla, add filling, then more cheese.
- Fold and cook in oil over medium heat until crisp and melty.
- Slice into wedges and serve.
Equipment for This Recipe:
- Large skillet
- Spatula
- Bowl
- Knife
How to Serve This Dish:
Serve with salsa, sliced avocado, or a quick tomato salad. Two wedges make a light meal; four make a proper dinner.
Pro Tips for This Recipe:
- Don’t overload the filling or the tortilla splits.
- Char the corn a little; raw corn tastes flatter.
- Let the quesadilla rest for a minute before slicing.
- Use a cheese that melts well, like Monterey Jack or Oaxaca.
Variations on This Dish:
- Chicken Add-In: Fold in shredded chicken.
- Spicy Pepper Version: Add diced jalapeño.
- Corn Salsa Swap: Use leftover corn salsa instead of plain corn.
Common Mistakes to Avoid with This Dish:
- Don’t cook on high heat or the tortilla burns before the cheese melts.
- Don’t skip the rest time after cooking.
- Don’t use too little cheese; it helps glue the quesadilla together.
31. Niçoise Salmon Rice Bowl
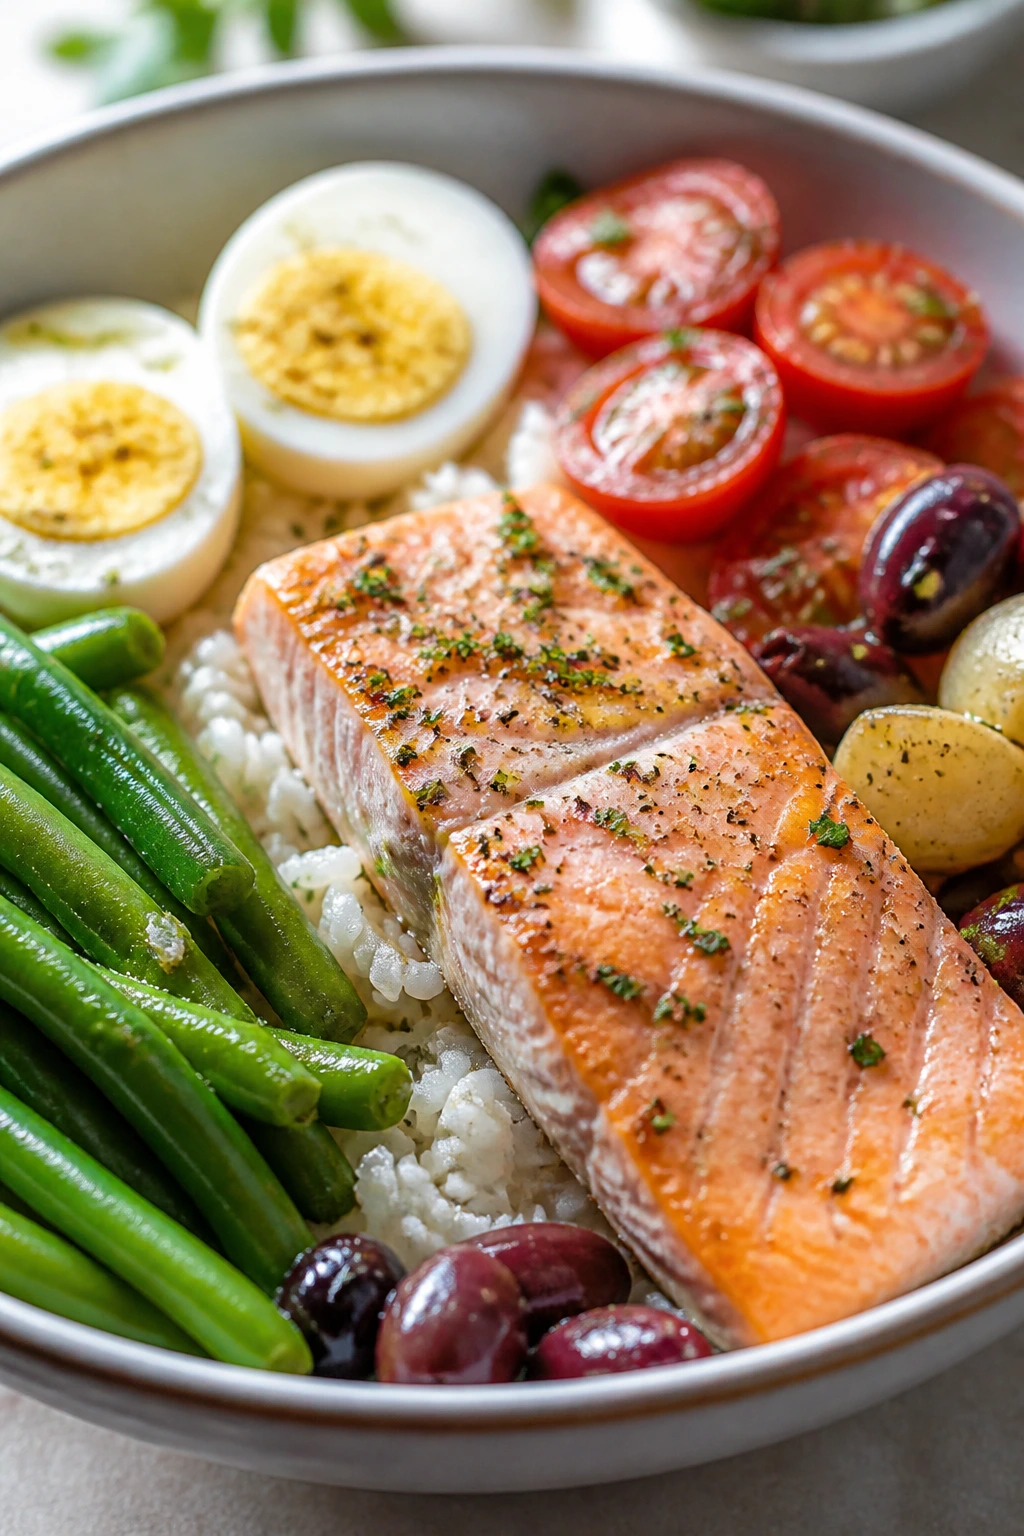
This bowl takes the bones of a Niçoise salad and turns them into something a little more relaxed. Salmon, rice, green beans, eggs, tomatoes, and olives give you enough contrast to keep each bite interesting. It’s tidy, colorful, and complete.
Why It Works:
Rice makes the bowl feel grounded, while the other ingredients keep it bright. Salmon is rich enough to carry the dish without sauce overload. The eggs and beans bring structure, which is why the bowl feels like dinner instead of a side salad with ambition.
Key Ingredients:
- 2 cups cooked rice
- 2 salmon fillets
- 4 hard-boiled eggs, halved
- 1 cup green beans
- 1 cup cherry tomatoes
- ½ cup olives
- 2 tbsp olive oil
- 1 tbsp Dijon mustard
- 1 tbsp lemon juice
Quick Steps:
- Cook or roast the salmon until just done.
- Blanch the green beans and cool them.
- Whisk olive oil, Dijon, lemon juice, salt, and pepper.
- Build bowls with rice, beans, tomatoes, olives, eggs, and salmon.
- Drizzle with dressing and serve.
Equipment for This Recipe:
- Saucepan
- Skillet or sheet pan
- Small bowl
- Bowl for assembling
How to Serve This Dish:
Serve it warm or room temperature. A few cucumber slices or a handful of herbs on top help the bowl feel fresher without complicating it.
Pro Tips for This Recipe:
- Season each component lightly so the bowl tastes layered, not salted at the end.
- Keep the rice portion small if you want it lighter.
- Don’t overcook the beans; snap matters.
- A little caper in the dressing is a nice touch.
Variations on This Dish:
- Tuna Swap: Use tuna if you don’t want to cook fish.
- Potato Version: Replace rice with boiled potatoes.
- Herb Dressing: Add parsley and chives to the vinaigrette.
Common Mistakes to Avoid with This Dish:
- Don’t overcook the salmon into flakes before assembling.
- Don’t let the rice clump; fluff it first.
- Don’t forget acid in the dressing, or the bowl feels too rich.
32. Cucumber Avocado Gazpacho with Shrimp
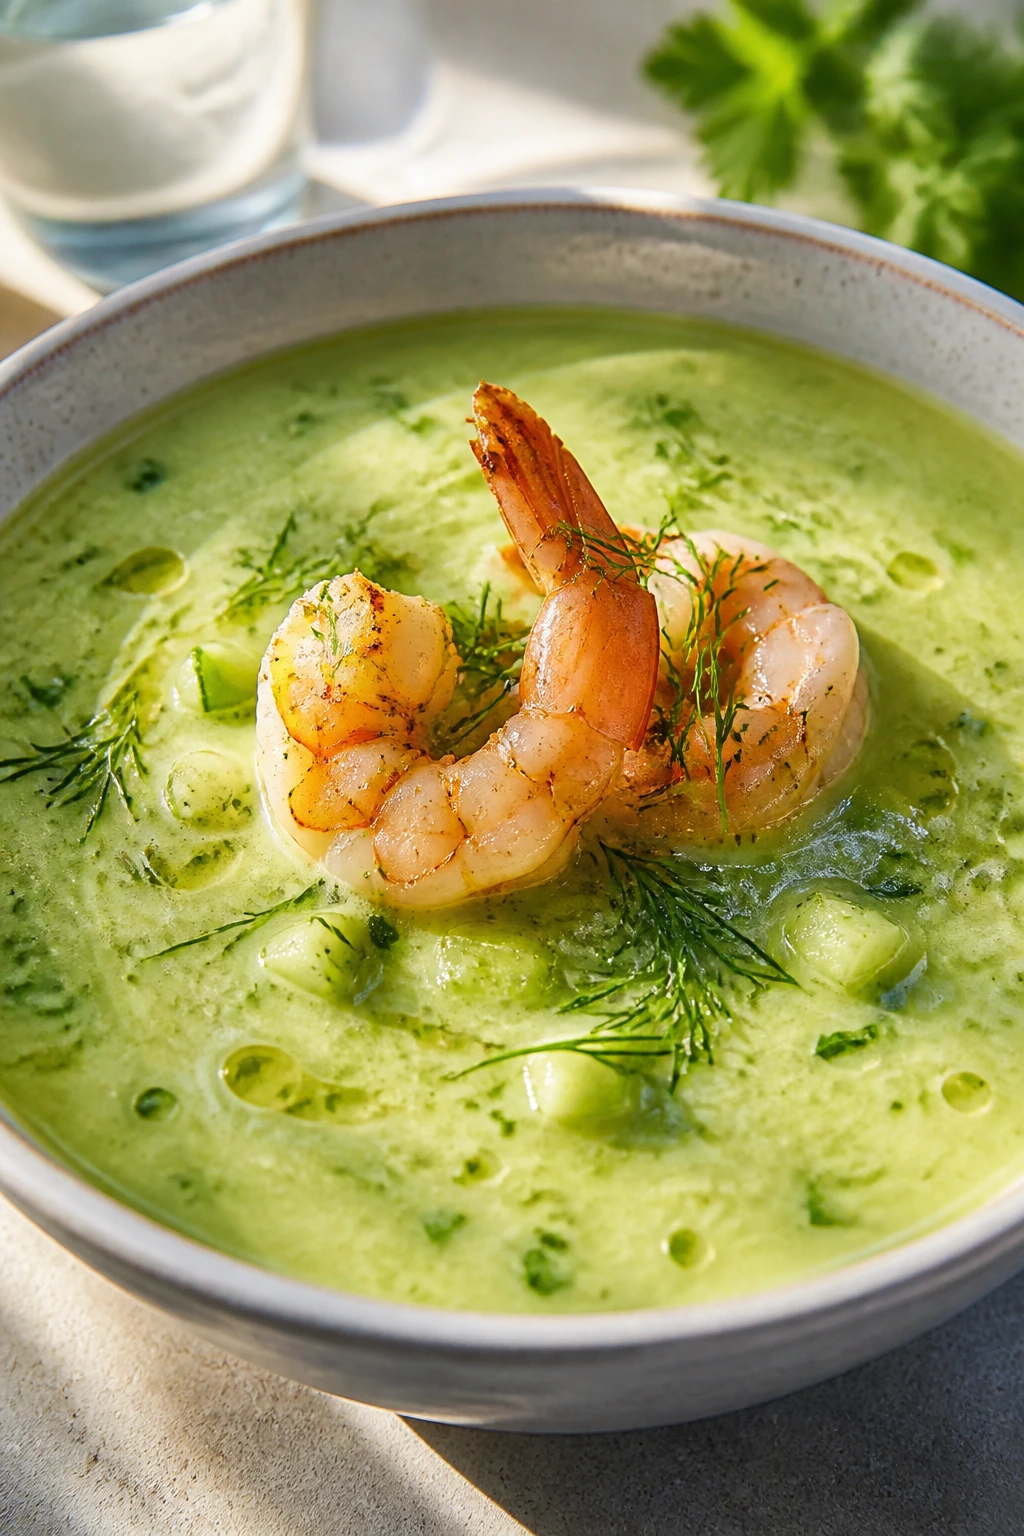
Cold soup can sound too minimal until you’ve had the right one. Cucumber, avocado, yogurt, lime, and herbs blend into a smooth, cool bowl, then shrimp on top give it enough protein to count as dinner. It’s the sort of meal that actually makes a hot night feel manageable.
Why It Works:
The soup stays fresh because the ingredients are all naturally cool and high in water. Avocado adds body without cream, while yogurt gives a gentle tang. Shrimp on top turns the bowl into a meal instead of an appetizer.
Key Ingredients:
- 2 cucumbers, peeled and chopped
- 1 avocado
- 1 cup plain Greek yogurt
- 1 lime, juiced
- 1 garlic clove
- 1 cup ice water
- 1 lb cooked or quickly sautéed shrimp
- 2 tbsp chopped dill or mint
Quick Steps:
- Blend cucumbers, avocado, yogurt, lime juice, garlic, ice water, salt, and pepper until smooth.
- Chill for 10 to 15 minutes if you have time.
- Season the shrimp lightly and sauté if needed.
- Pour the soup into bowls.
- Top with shrimp and herbs.
Equipment for This Recipe:
- Blender
- Knife
- Bowl
- Skillet if cooking shrimp
How to Serve This Dish:
Serve it cold in shallow bowls with a few cucumber dice or herbs on top. A piece of toast or a small handful of crackers is enough on the side.
Pro Tips for This Recipe:
- Use cold ingredients so the soup tastes crisp right away.
- Taste for salt after blending; cold soup needs more than you think.
- Don’t over-blend once it’s smooth or it can go thin.
- A dash of hot sauce is nice if you want contrast.
Variations on This Dish:
- Green Herb Version: Add basil and parsley.
- Spicy Shrimp Swap: Season the shrimp with chili powder.
- No-Yogurt Version: Use cold water and a little olive oil instead.
Common Mistakes to Avoid with This Dish:
- Don’t use watery cucumbers without tasting them first.
- Don’t let the avocado brown before blending.
- Don’t serve the soup warm; the whole point is the chill.
33. Chicken Skewers with Tzatziki and Tomato Salad
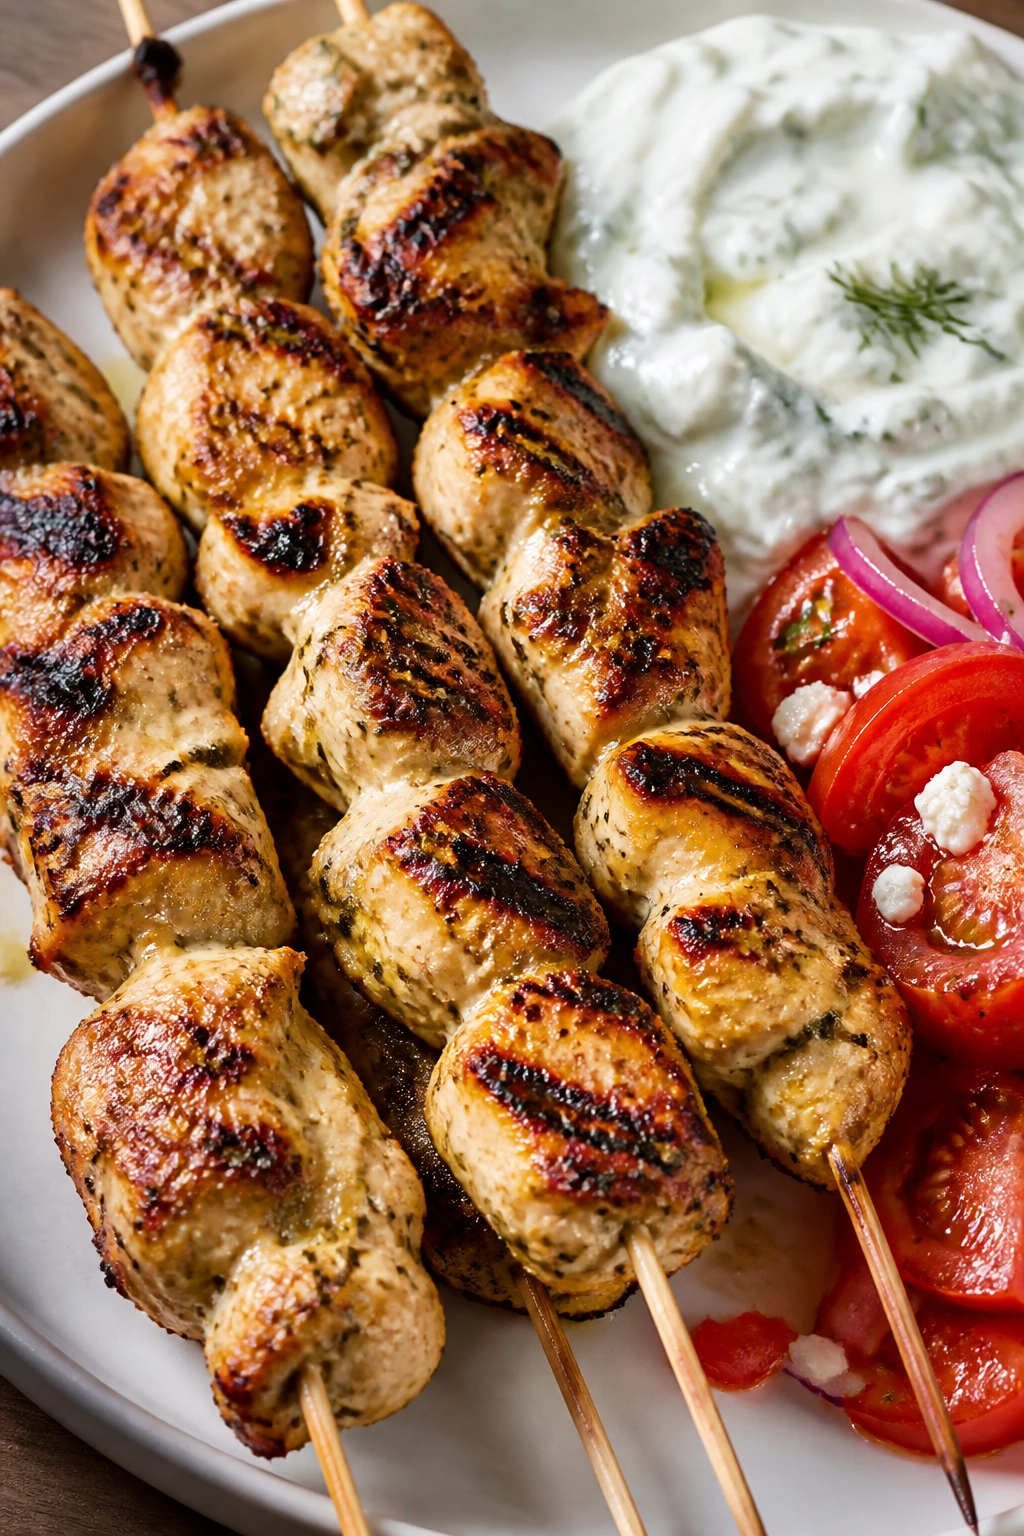
Chicken skewers are one of the easiest ways to get grill flavor without making dinner feel like a project. The yogurt marinade keeps the meat tender, the tzatziki cools things down, and the tomato salad brings a juicy, acidic finish. It’s balanced in the way good summer food should be.
Why It Works:
Yogurt tenderizes the chicken and helps the spices cling. Skewers cook fast because the pieces are bite-size, which reduces the chance of dryness. The tomato salad adds freshness so the plate doesn’t rely on sauce alone.
Key Ingredients:
- 1½ lb chicken thighs, cut into chunks
- ½ cup Greek yogurt
- 2 garlic cloves, minced
- 1 tsp paprika
- 1 cucumber, grated
- 1 cup Greek yogurt for tzatziki
- 2 cups cherry tomatoes
- 1 tbsp lemon juice
- 4 pita breads
Quick Steps:
- Marinate the chicken in yogurt, garlic, paprika, salt, and pepper for 15 minutes.
- Thread onto skewers.
- Grill or broil until cooked through, about 10 to 12 minutes total.
- Mix cucumber, yogurt, lemon, salt, and dill for tzatziki.
- Toss tomatoes with olive oil and serve with warm pita.
Equipment for This Recipe:
- Skewers
- Grill or broiler
- Bowl
- Box grater
How to Serve This Dish:
Serve the skewers with tzatziki on the side so people can dip as they go. A pile of tomato salad and warm pita makes the whole thing feel like a complete plate.
Pro Tips for This Recipe:
- Cut the chicken into similar-size pieces so it cooks evenly.
- If using wooden skewers, soak them first.
- Let the meat rest after grilling or the juices run out.
- Drain the cucumber for tzatziki so it stays thick.
Variations on This Dish:
- Lemon-Oregano Version: Add oregano to the marinade.
- Beef Swap: Use sirloin chunks if you want a richer skewer.
- Lettuce Plate: Skip pita and serve over lettuce.
Common Mistakes to Avoid with This Dish:
- Don’t pack the chicken too tightly on the skewer.
- Don’t skip the resting time after grilling.
- Don’t make tzatziki too thin; it should cling.
34. Summer Vegetable Frittata
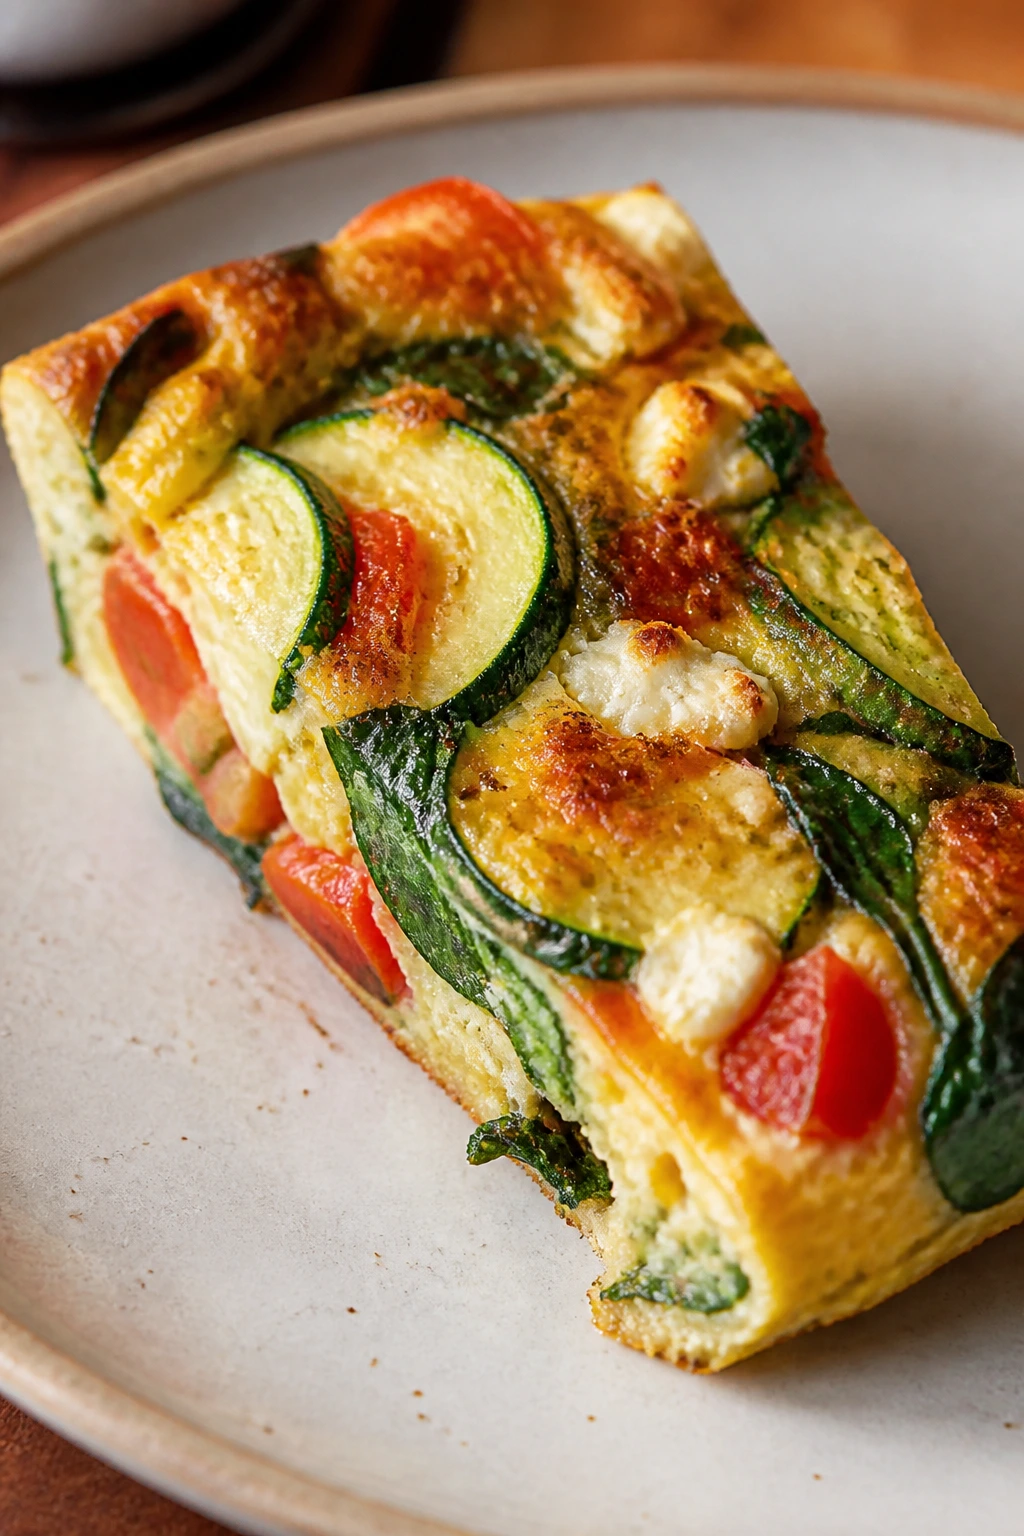
A frittata works for dinner when you have vegetables that need using and not much patience. Zucchini, tomatoes, spinach, and goat cheese baked with eggs make a dish that’s light but still satisfying. It’s also one of the few warm-weather meals that tastes good hot or room temperature.
Why It Works:
Eggs hold together a lot of vegetables without turning the meal heavy. The vegetables soften first in a skillet, which keeps the frittata from releasing too much water in the oven. Goat cheese adds pockets of tang that keep each slice interesting.
Key Ingredients:
- 8 large eggs
- 1 zucchini, diced
- 1 cup cherry tomatoes
- 2 cups spinach
- ¼ cup milk or cream
- 4 oz goat cheese
- 1 small onion, diced
- 1 tbsp olive oil
Quick Steps:
- Sauté onion and zucchini in oil until tender.
- Add spinach and tomatoes and cook briefly.
- Whisk eggs with milk, salt, and pepper.
- Pour over the vegetables and scatter goat cheese on top.
- Bake at 375°F for 15 to 20 minutes, until set in the center.
Equipment for This Recipe:
- Oven-safe skillet
- Whisk
- Bowl
- Spatula
How to Serve This Dish:
Cut it into wedges and serve with a simple salad. A slice of frittata can handle lunch or dinner on its own, though toast never hurts.
Pro Tips for This Recipe:
- Use a skillet that goes from stove to oven.
- Don’t add raw watery vegetables straight into the eggs.
- Pull the frittata when the center still has a slight wobble.
- Let it rest for a few minutes before slicing.
Variations on This Dish:
- Herb Version: Add basil, chives, or dill.
- Cheddar Swap: Use cheddar instead of goat cheese.
- Potato Add-In: Add thinly sliced cooked potato for more body.
Common Mistakes to Avoid with This Dish:
- Don’t overbake or the eggs turn rubbery.
- Don’t forget to season the vegetables.
- Don’t slice too soon or the frittata falls apart.
35. Canned Sardine Toasts with Lemon and Herbs
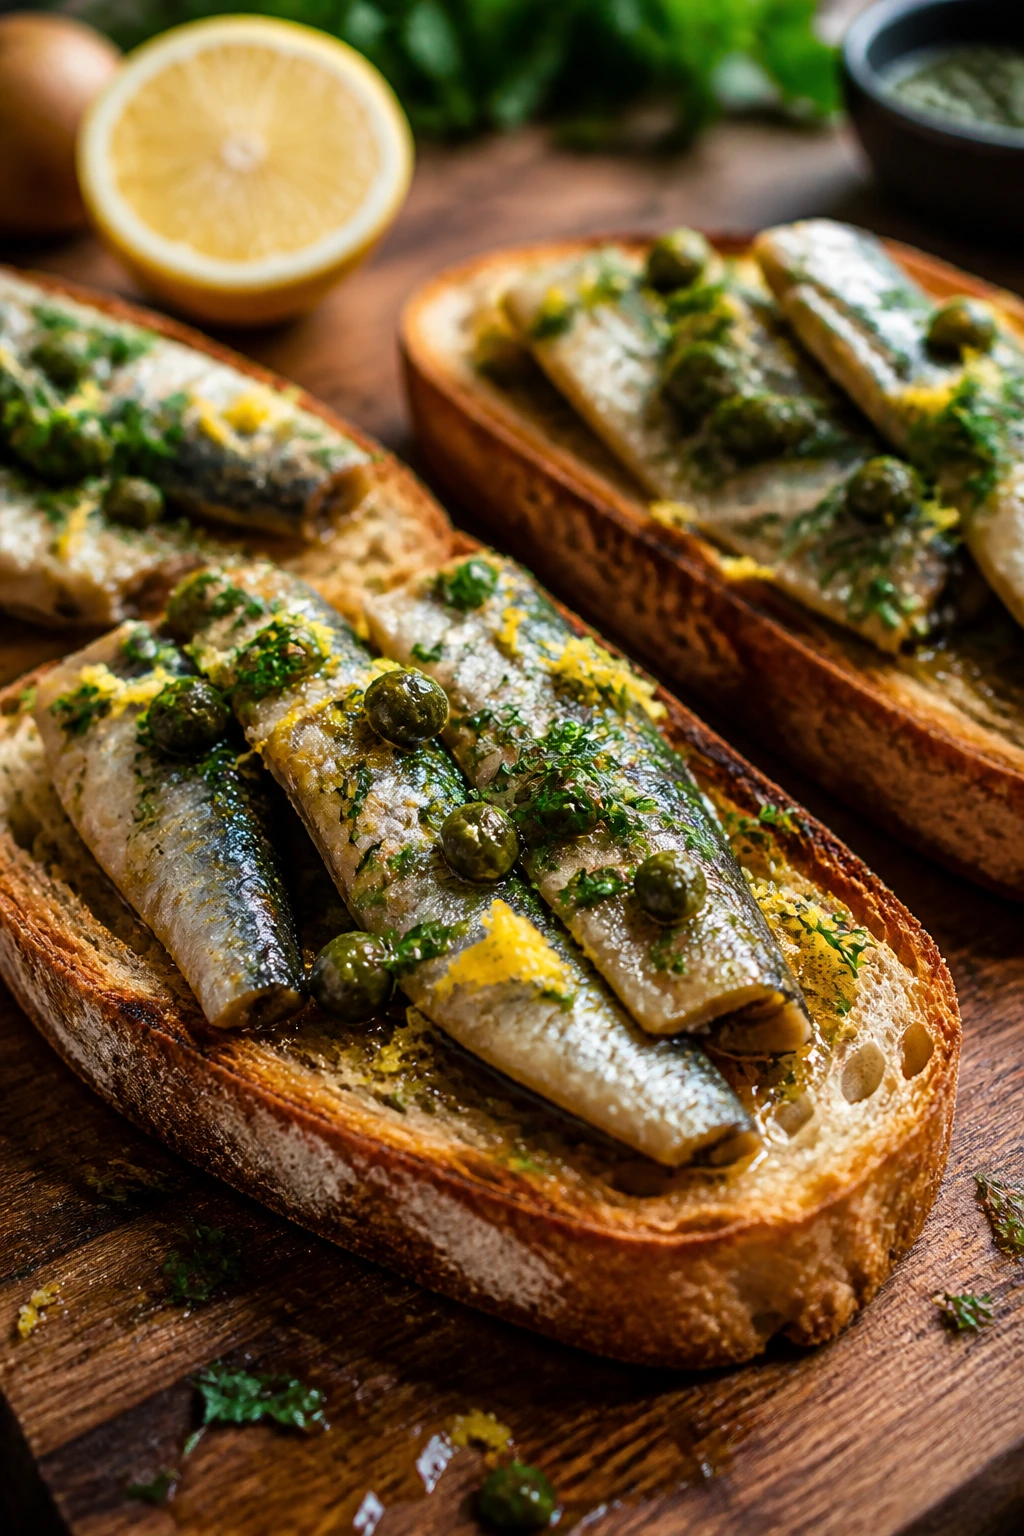
Sardines on toast are having a deserved moment because they’re cheap, fast, and much better than people expect when you treat them well. Lemon, herbs, capers, and crisp toast turn the tin into dinner. It’s salty, bright, and a little old-fashioned in a good way.
Why It Works:
Sardines already bring oil and umami, so you only need a few sharp toppings to finish the plate. Toast gives the necessary crunch, and lemon cuts through the richness. This is a pantry meal that tastes deliberate, not improvised.
Key Ingredients:
- 1 can sardines in olive oil
- 4 slices sourdough or rye bread
- 1 lemon, zested and juiced
- 2 tbsp chopped parsley or dill
- 1 tbsp capers
- 1 small cucumber, sliced
- Olive oil
- Black pepper
Quick Steps:
- Toast the bread until crisp.
- Drain the sardines lightly if they’re very oily.
- Mash or lay the sardines on toast.
- Top with lemon zest, capers, herbs, cucumber, and pepper.
- Finish with a squeeze of lemon and serve.
Equipment for This Recipe:
- Toaster or skillet
- Knife
- Small bowl if mashing
- Cutting board
How to Serve This Dish:
Serve one or two toasts per person with a simple cucumber salad or tomatoes on the side. If you want it to feel more like dinner, add sliced avocado or a soft-boiled egg.
Pro Tips for This Recipe:
- Use good bread; this dish lives or dies on the toast.
- Don’t drown the sardines in toppings.
- A tiny bit of chili flakes works well here.
- If you dislike strong fish flavor, add more lemon and herbs, not more oil.
Variations on This Dish:
- Avocado Sardine Toast: Add mashed avocado underneath.
- Tomato Version: Layer thin tomato slices on the toast first.
- Mustard Swap: Spread a little Dijon on the bread for extra punch.
Common Mistakes to Avoid with This Dish:
- Don’t use soft bread that collapses under the fish.
- Don’t serve sardines ice-cold from the fridge if they taste muted; let them sit 5 minutes.
- Don’t skip acid. Lemon is what keeps this from feeling heavy.
Why These Light Dinners Work Better on Warm Nights
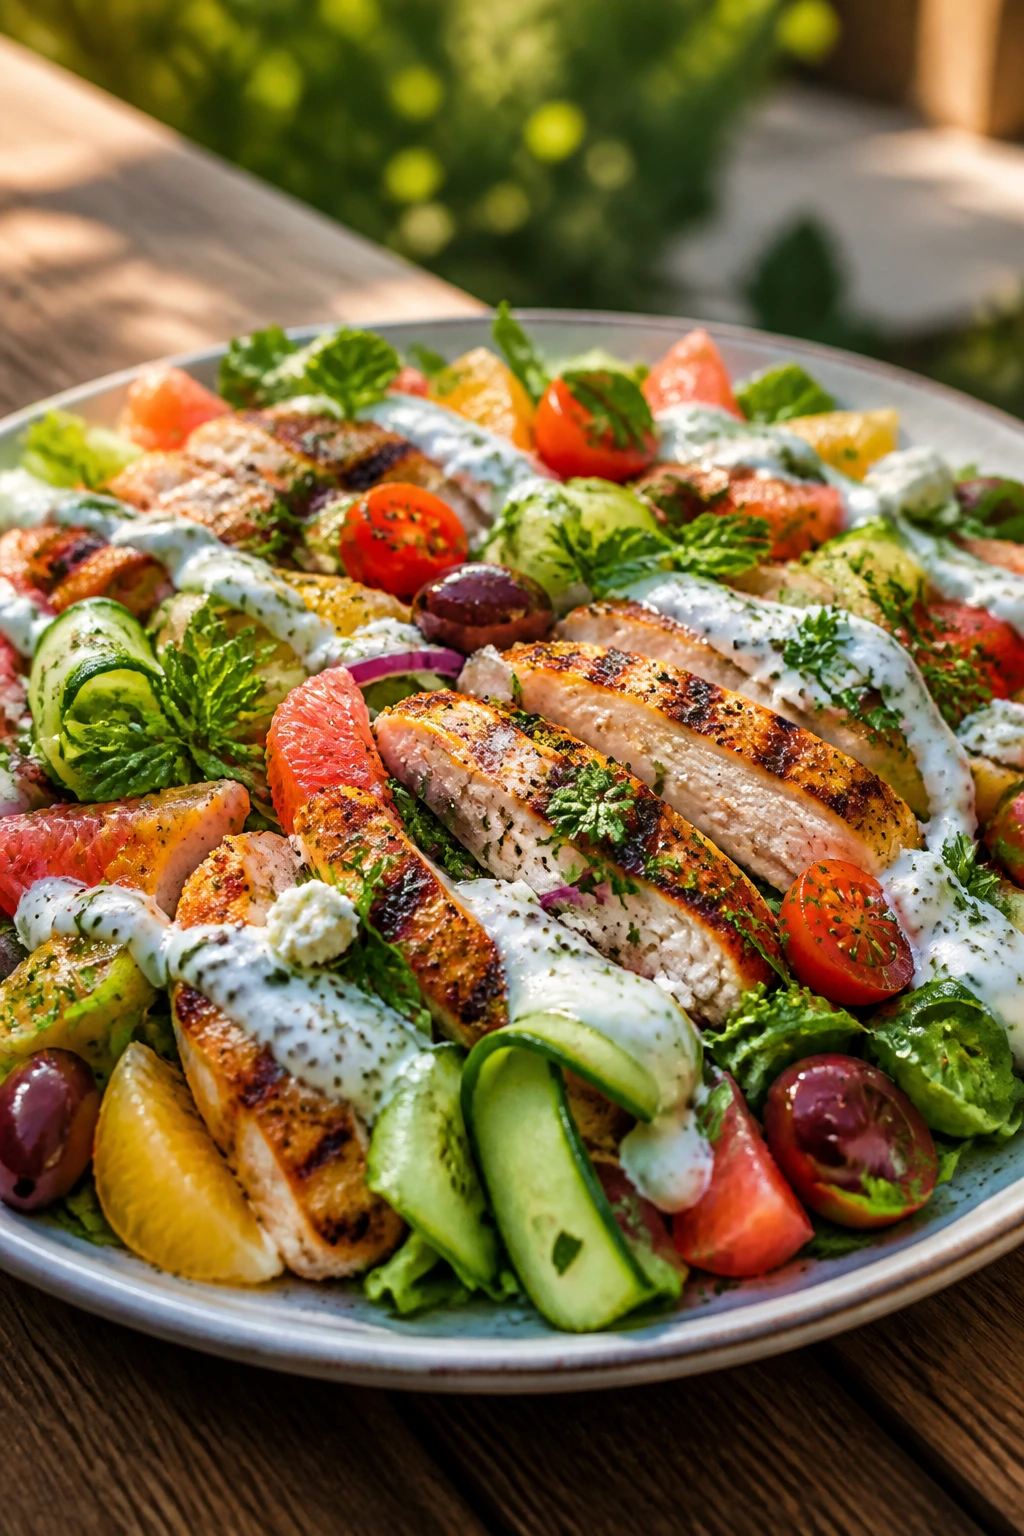
The reason these light summer meals feel easier is not magic. It’s structure. You’re using ingredients that cook fast, ingredients that taste good cold, and ingredients that already carry their own brightness — tomatoes, herbs, citrus, cucumbers, cabbage, stone fruit, yogurt, olives, and fish that doesn’t need a long simmer to become edible.
I also think the best summer dinners know when to stop. They don’t keep building layers for the sake of it. A good grilled chicken salad doesn’t need cream. A shrimp taco doesn’t need ten toppings. A cold noodle bowl doesn’t need to pretend it’s ramen. The food works because each piece has a job, and none of them have to work too hard.
That’s the nice part. You can cook with the windows open, keep the sink from filling with dishes, and still put food on the table that feels thought through. That’s a win in my book.
Essential Equipment for These Recipes

-
Large skillet: Useful for shrimp, chicken, burgers, tofu, and quick vegetable sautés.
-
Sheet pan: The workhorse for salmon, fish tacos, flatbreads, and anything you want to roast with minimal cleanup.
-
Grill or grill pan: Handy for chicken, steak, halloumi, mushrooms, and skewers; a grill basket helps with delicate vegetables.
-
Mixing bowls in 2 sizes: One for sauces and one for the finished salad or grain bowl saves a lot of back-and-forth.
-
Sharp chef’s knife: Summer recipes lean on fresh produce, and clean cuts matter for tomatoes, herbs, cucumbers, and stone fruit.
-
Cutting board: Use one that stays put; a damp towel underneath helps if your counter is slick.
-
Tongs: Better than a fork for turning shrimp, chicken, salmon, or mushrooms without tearing them.
-
Whisk or fork: Good enough for most vinaigrettes, dressings, and yogurt sauces.
-
Colander: Needed for pasta, noodles, beans, and quick-blanched vegetables.
-
Blender: Only for the cold soup and a few sauces; optional elsewhere.
Smart Shopping and Ingredient Tips
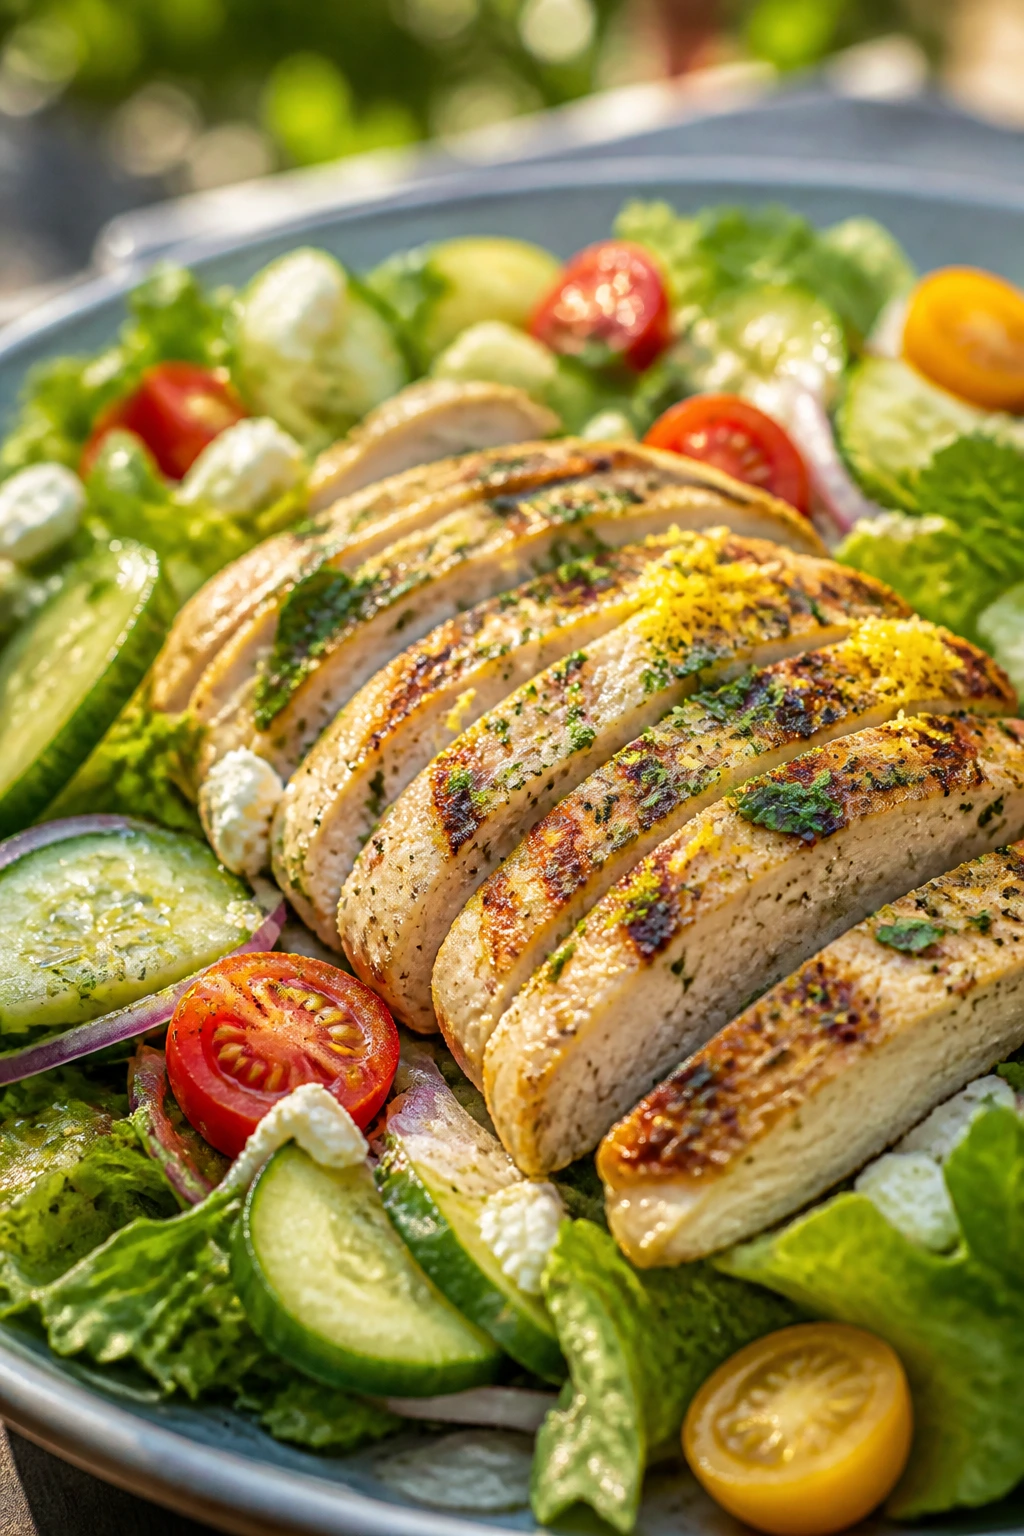
Buy the best tomatoes you can find, and I mean that literally. Summer dinners rise or fall on tomato flavor more often than people want to admit. If the tomatoes smell like little green stems or the cut side looks pale and mealy, keep walking. Same with cucumbers: look for firm, straight ones with thin skins if possible, because thick, waxy cucumbers tend to taste sleepy.
For proteins, choose fast-cooking cuts. Chicken thighs are more forgiving than breasts, especially on the grill. Shrimp should be firm and not smell fishy. Salmon fillets with even thickness finish more predictably than skinny tail pieces. When a recipe says canned tuna or sardines, buying the version packed in olive oil is worth the extra attention.
Beans and grains deserve a note too. Canned chickpeas, white beans, and lentils are fine here if you drain them well. Dry beans can be lovely, but they’re not helping on an easy night. For pasta and noodles, short shapes and rice noodles hold dressings better than long strands that knot themselves into trouble.
Herbs matter more in warm-weather cooking than in heavy winter food. Buy small bunches and use them fast. Basil goes black if you abuse it, dill goes limp, and parsley is the reliable friend that shows up when you need it. If your produce drawer is full of herbs and half of them look sad, turn them into a quick chopped salad or dressing before they give up entirely.
How to Serve These Recipes
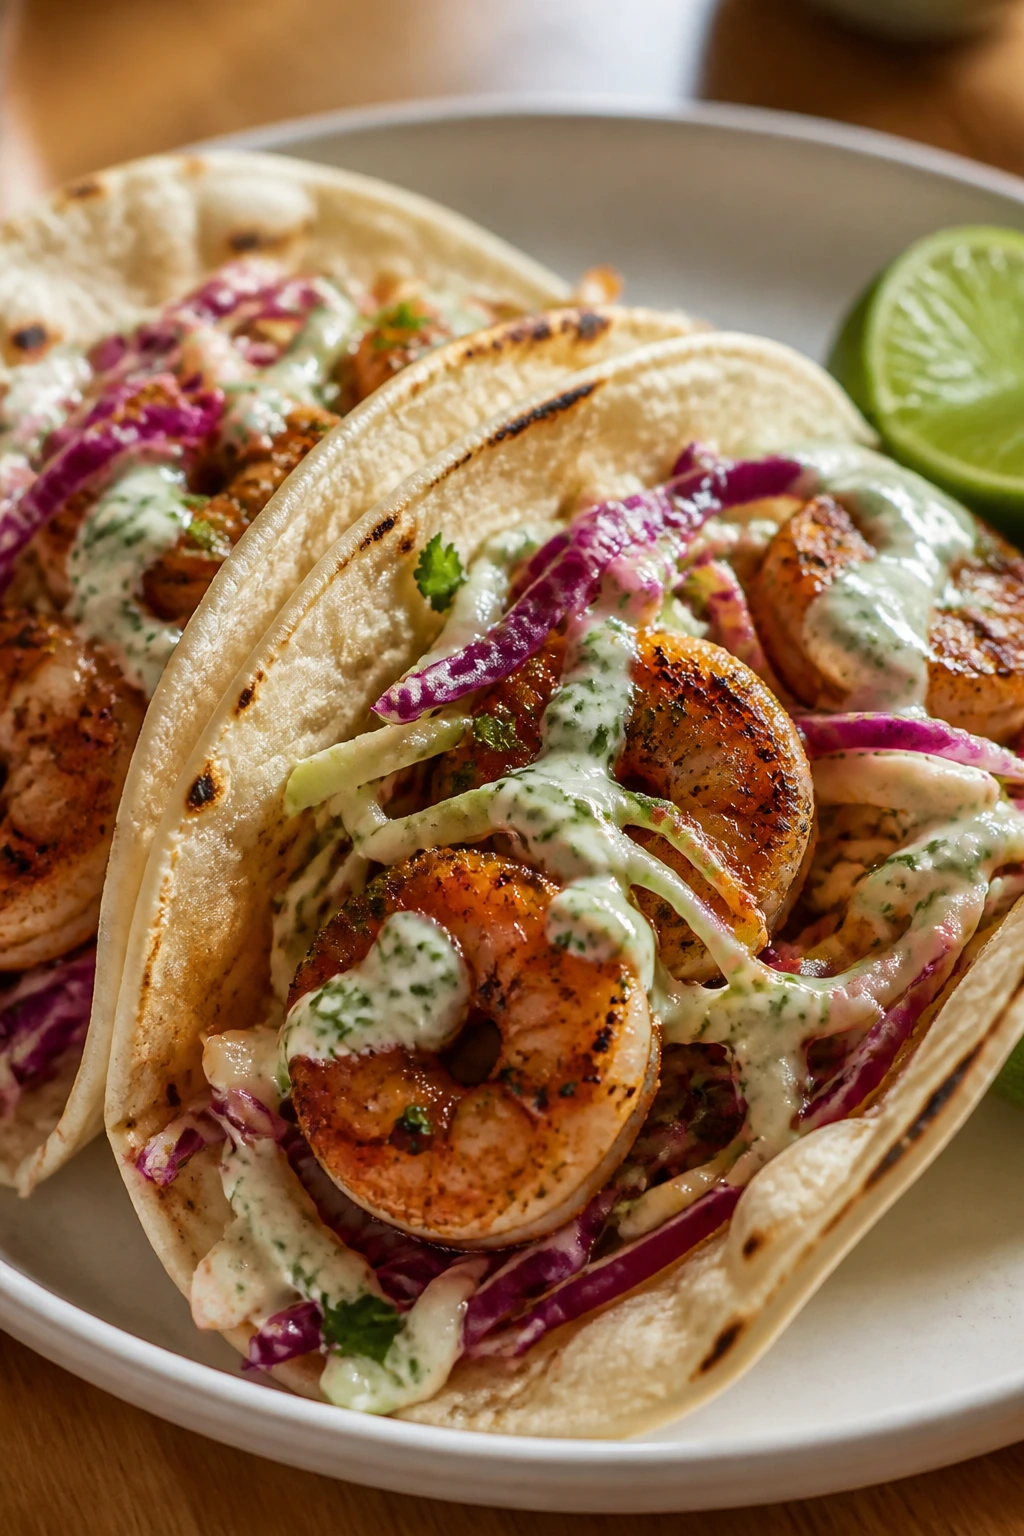
Presentation:
Use shallow bowls, wide platters, or boards when you can. These dishes look better when the ingredients stay visible — salmon over rice, shrimp on tacos, tomatoes and burrata spread across toast, or salad arranged in sections instead of dumped into a deep bowl.
Accompaniments:
A simple green salad, sliced cucumbers, grilled bread, pita, or a small pile of potatoes can round things out without making dinner feel heavy. For the heartier bowls and tacos, I’d go with something crisp and acidic on the side rather than another starch.
Portions:
Most of these recipes comfortably feed 2 to 4 people as written. If you’re feeding bigger appetites, add bread, rice, or an extra vegetable rather than doubling the protein immediately; that keeps the meal balanced and keeps your grocery bill from creeping up.
Beverage Pairing:
Sparkling water with lime works for almost everything here. If you want something with a little more character, a dry white wine, a light rosé, or iced black tea with lemon sits nicely beside the herbs, citrus, and salty ingredients.
Additional Tips and Flavor Boosters
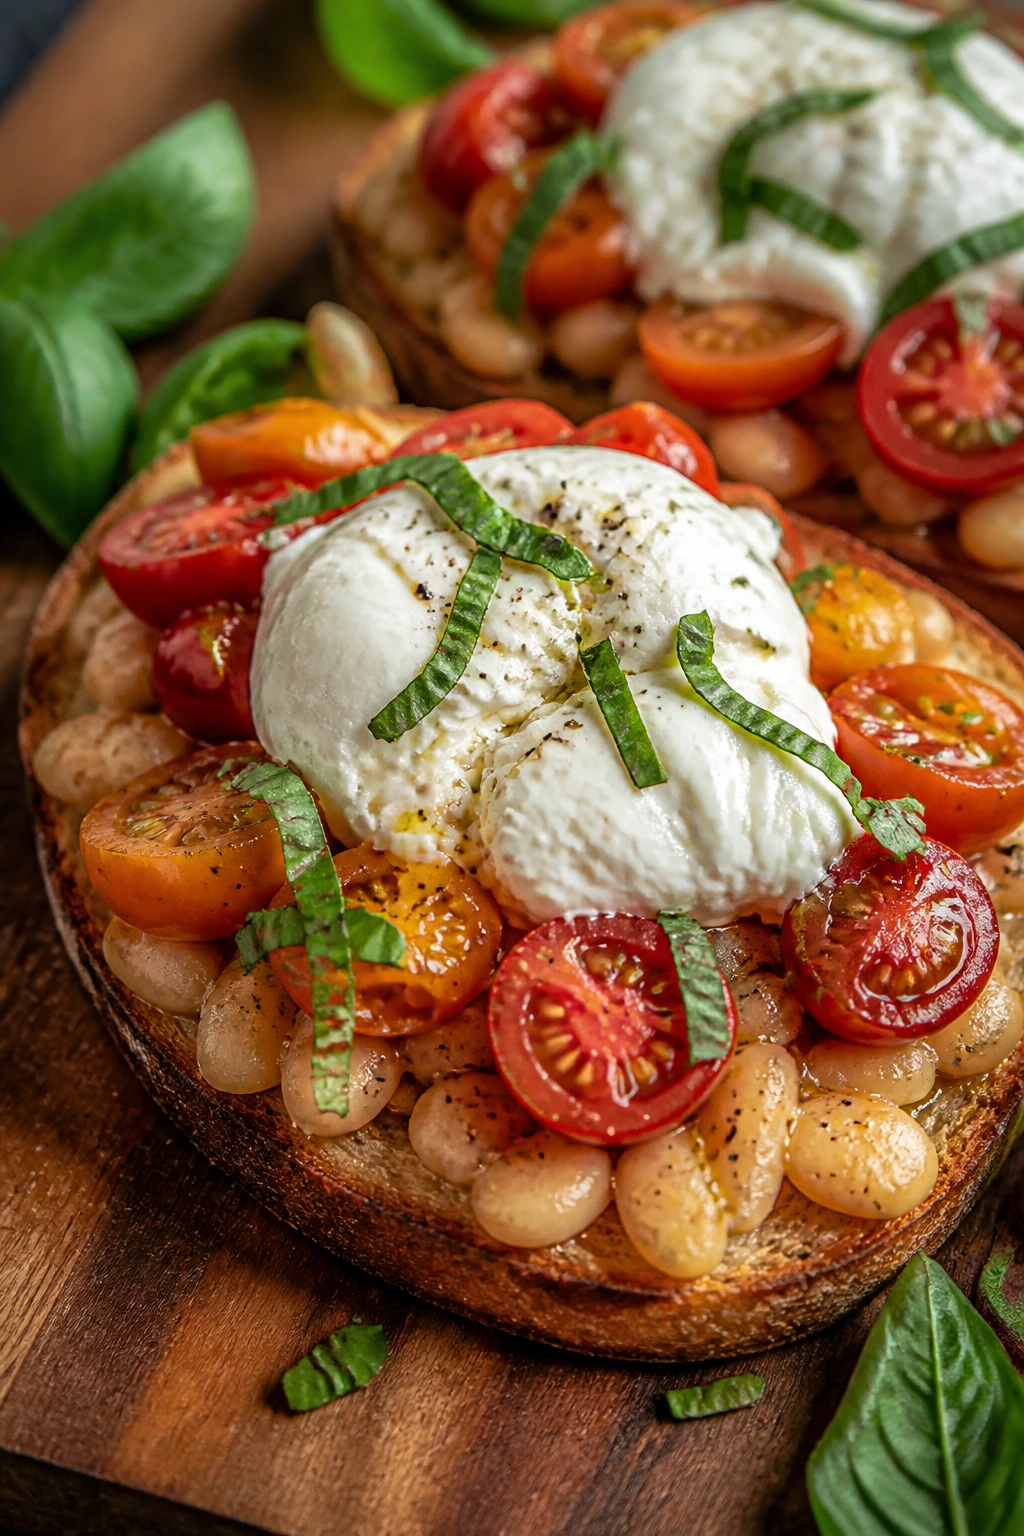
Flavor Enhancement: A small finishing acid — lemon juice, lime juice, red wine vinegar, or a splash of balsamic — does more work in summer cooking than another spoonful of sauce. It sharpens tomatoes, wakes up greens, and keeps grilled food from tasting flat.
Customization: If you want more heft, add beans, eggs, or a small portion of grains. If you want less, skip the starch and lean harder on cucumbers, cabbage, lettuce, and herbs. That’s the easiest way to make these meals fit your appetite without changing the recipe.
Serving Suggestions: Keep a jar of pickled onions, capers, chili crisp, and flaky salt around. Any one of them can rescue a plate that tastes a little too polite. A small garnish sounds optional until you eat the dish before and after.
Make-It-Yours: For dairy-free meals, use avocado, tahini, or a little olive oil instead of yogurt, feta, or burrata. For gluten-free plates, use corn tortillas, rice, lettuce cups, or gluten-free bread where needed. For extra spice, add chili flakes or hot sauce at the end rather than burying the heat in the cooking.
Make-Ahead, Storage, and Reheating Guidance
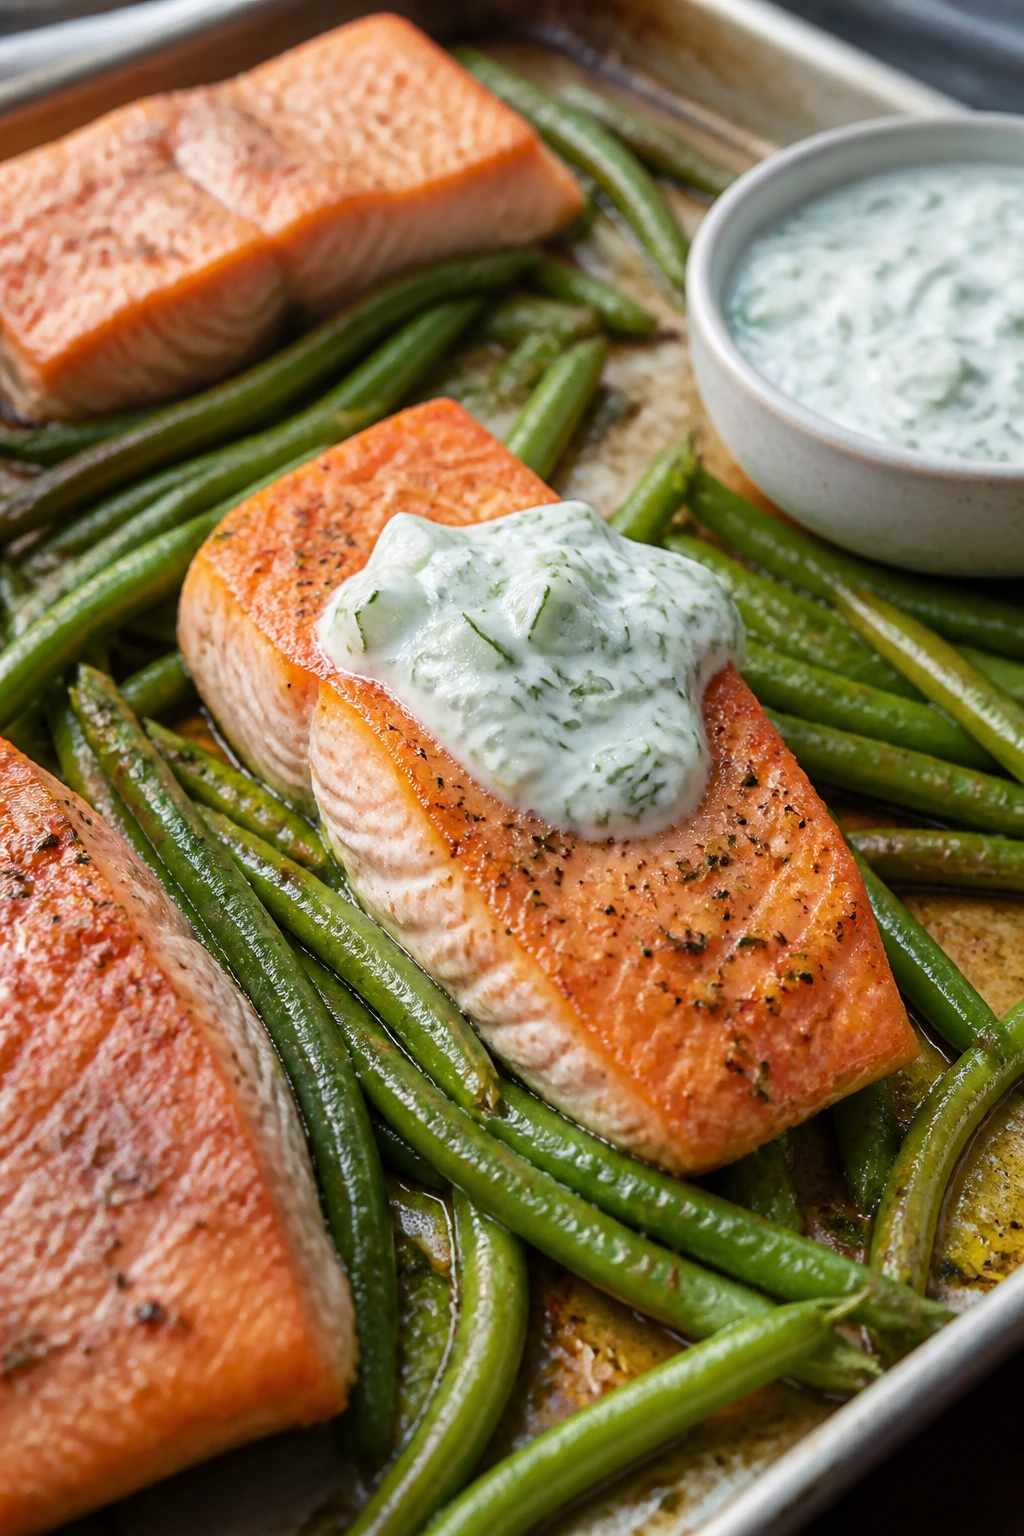
A few of these dishes are best eaten the moment they’re assembled, and I would not pretend otherwise. Shrimp tacos, stuffed tomatoes, lettuce cups, and zucchini noodle bowls lose some charm if they sit around too long. That said, the components can often be prepped ahead: chop vegetables, mix dressings, make slaws, cook grains, and marinate proteins a few hours in advance.
Cooked chicken, salmon, steak, and turkey fillings keep well in the fridge for 3 to 4 days in airtight containers. Pasta salads and bean salads usually hold for 3 days, sometimes 4 if the vegetables are sturdy and the dressing isn’t too watery. Cold noodle bowls and slaws are best within 1 to 2 days, when the crunch is still present and the herbs haven’t faded.
For reheating, use low heat and keep an eye on texture. Chicken, turkey, and grain bowls can be warmed in a skillet with a teaspoon of water or oil. Salmon and fish are better reheated gently in a low oven, around 300°F, for just a few minutes. Shrimp is touchy; if you have to reheat it, do it briefly in a skillet and stop as soon as it’s warm. Microwaving works in a pinch, but it can soften vegetables and make seafood rubbery.
A few dishes actually improve after a short rest. Lentil salad, chickpea pita filling, peanut chicken salad, and pasta salad often taste better after 20 to 30 minutes because the dressing spreads more evenly. On the other hand, anything with toast, lettuce, or cucumber is best assembled at the last minute. That contrast matters.
Freezing is useful for some cooked proteins and fillings, but not for the delicate, watery stuff. Ground turkey fillings, cooked chicken, and some bean-based mixtures freeze for up to 2 months if packed tightly. Lettuce, tomatoes, cucumbers, and yogurt sauces do not freeze well. They come back strange, and there is no heroism in forcing it.
Variations and Adaptations to Try
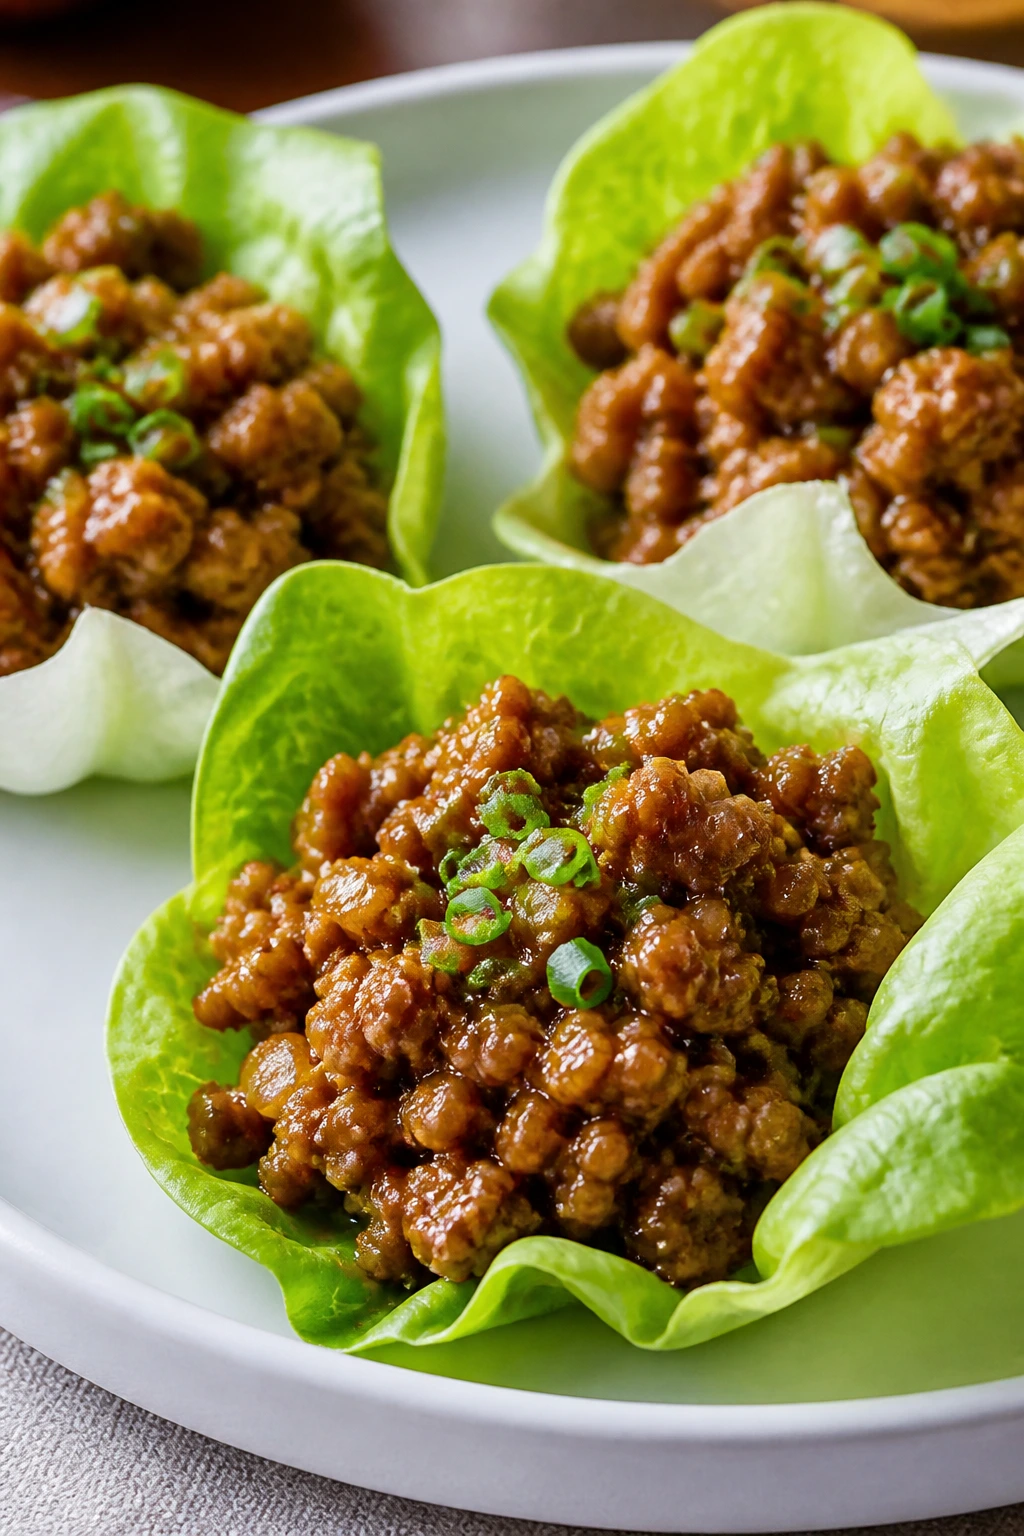
Gluten-Free Summer Plate: Use rice bowls, corn tortillas, lettuce cups, or gluten-free bread across the recipes that normally call for wraps or toast. The flavor stays the same; only the carrier changes.
Dairy-Free Swap: Replace yogurt sauces with tahini dressing, use avocado instead of feta or burrata, and choose olive oil for richness. The result is still creamy enough if you’re not stingy with acid and seasoning.
High-Protein Version: Add eggs, beans, tofu, shrimp, or extra chicken to the salad and bowl recipes. I like this route when dinner needs to hold me until morning, not just get me to 9 p.m.
Vegetarian Night: The chickpea pockets, lentil salad, zucchini boats, tofu wraps, and halloumi skewers already fit nicely. For the fish or chicken dishes, portobello mushrooms, white beans, or tofu can step in without making the plate feel empty.
Kid-Friendly Mild Version: Pull back on chili flakes, skip the capers, and use softer herbs like parsley or basil. Keep sauces on the side. Kids tend to do better when they can build their own plate instead of being handed a fully dressed one.
Mediterranean Twist: Lean on lemon, olive oil, cucumber, tomatoes, olives, oregano, and feta. This works especially well with chicken, salmon, chickpeas, lentils, and grilled vegetables.
Common Mistakes to Avoid
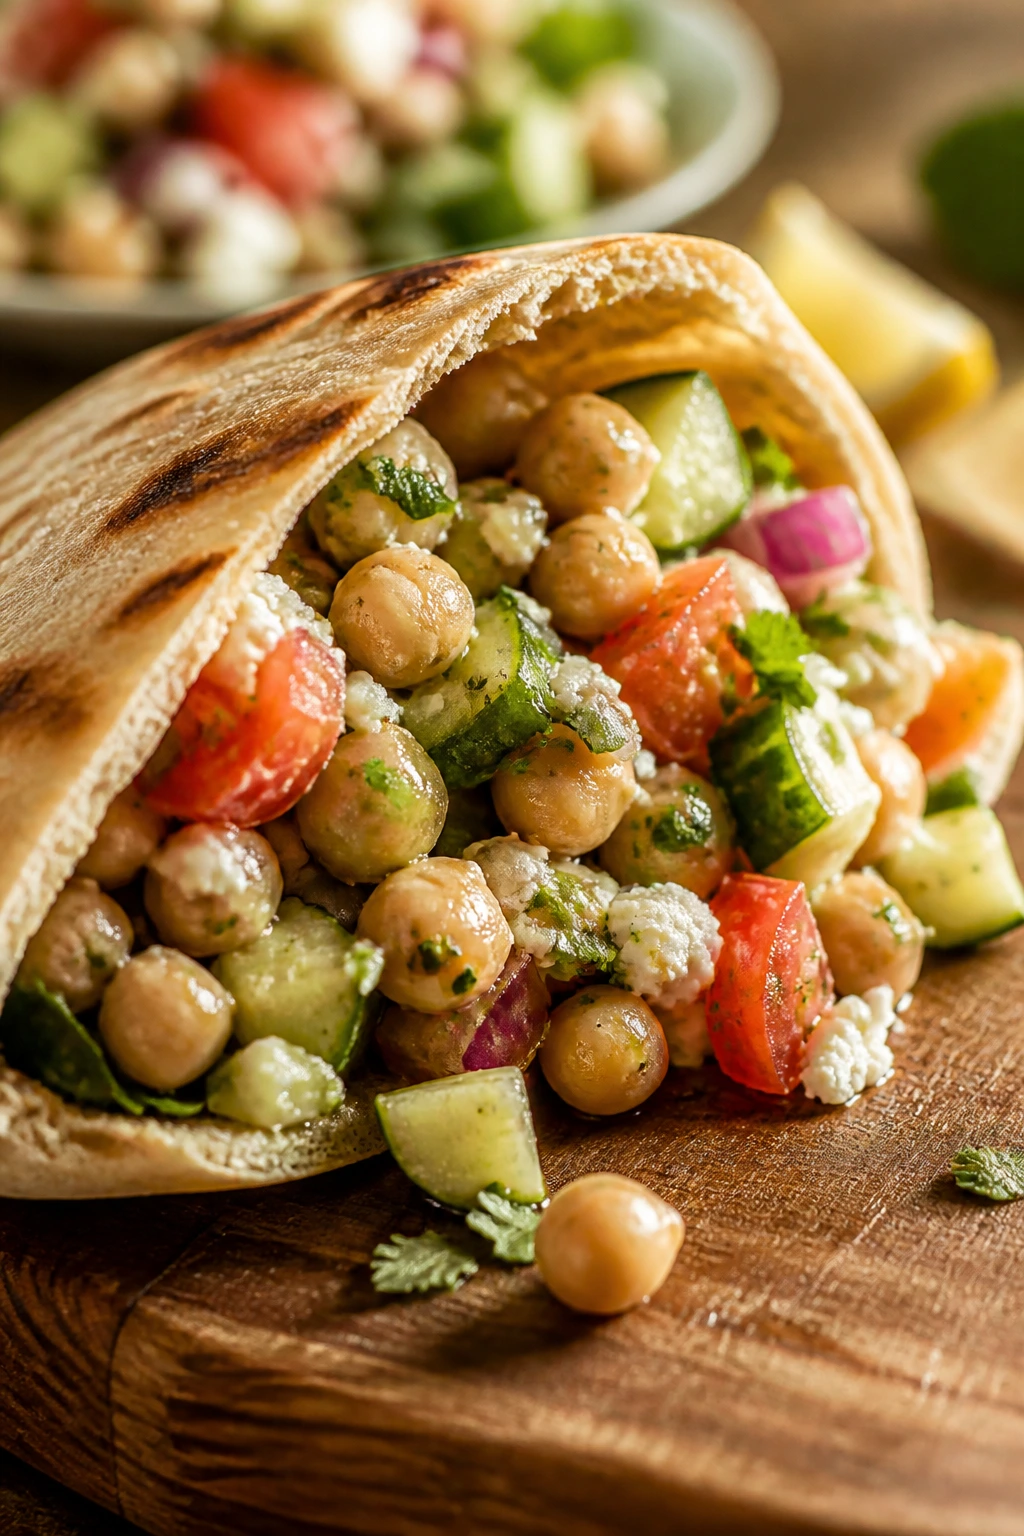
The biggest mistake is overcooking delicate proteins because you’re trying to multitask. Shrimp, scallops, salmon, and fish all go from excellent to dry faster than people expect. Pull them early, let carryover heat do the last bit, and stop assuming “a minute more” is harmless. It usually isn’t.
Another common problem is watery vegetables. Zucchini, cucumbers, tomatoes, and mushrooms can flood a bowl if they’re not handled with some care. Salt and blot when needed, drain what you can, and keep creamy dressings separate until the last minute. A soggy salad is not a tragic mistake, but it is annoying.
People also underseason cold food. A chilled salad tastes flatter than the same salad warm, which means you often need more salt, more acid, or a stronger dressing than feels natural while you’re mixing it. Taste after chilling if you can. Cold food lies to you a little.
Then there’s the habit of adding too many ingredients because summer produce is pretty and tempting. Pretty does not always mean better. If you already have tomatoes, cucumbers, herbs, and a sharp dressing, you may not need five extra toppings competing for attention.
Last, don’t forget temperature contrast. A warm protein on cool greens, cold soup with hot shrimp, charred vegetables with bright herbs — these little shifts are what make the plate feel finished. If everything is the same temperature and texture, dinner can taste strangely flat even when the ingredients are fine.
Frequently Asked Questions
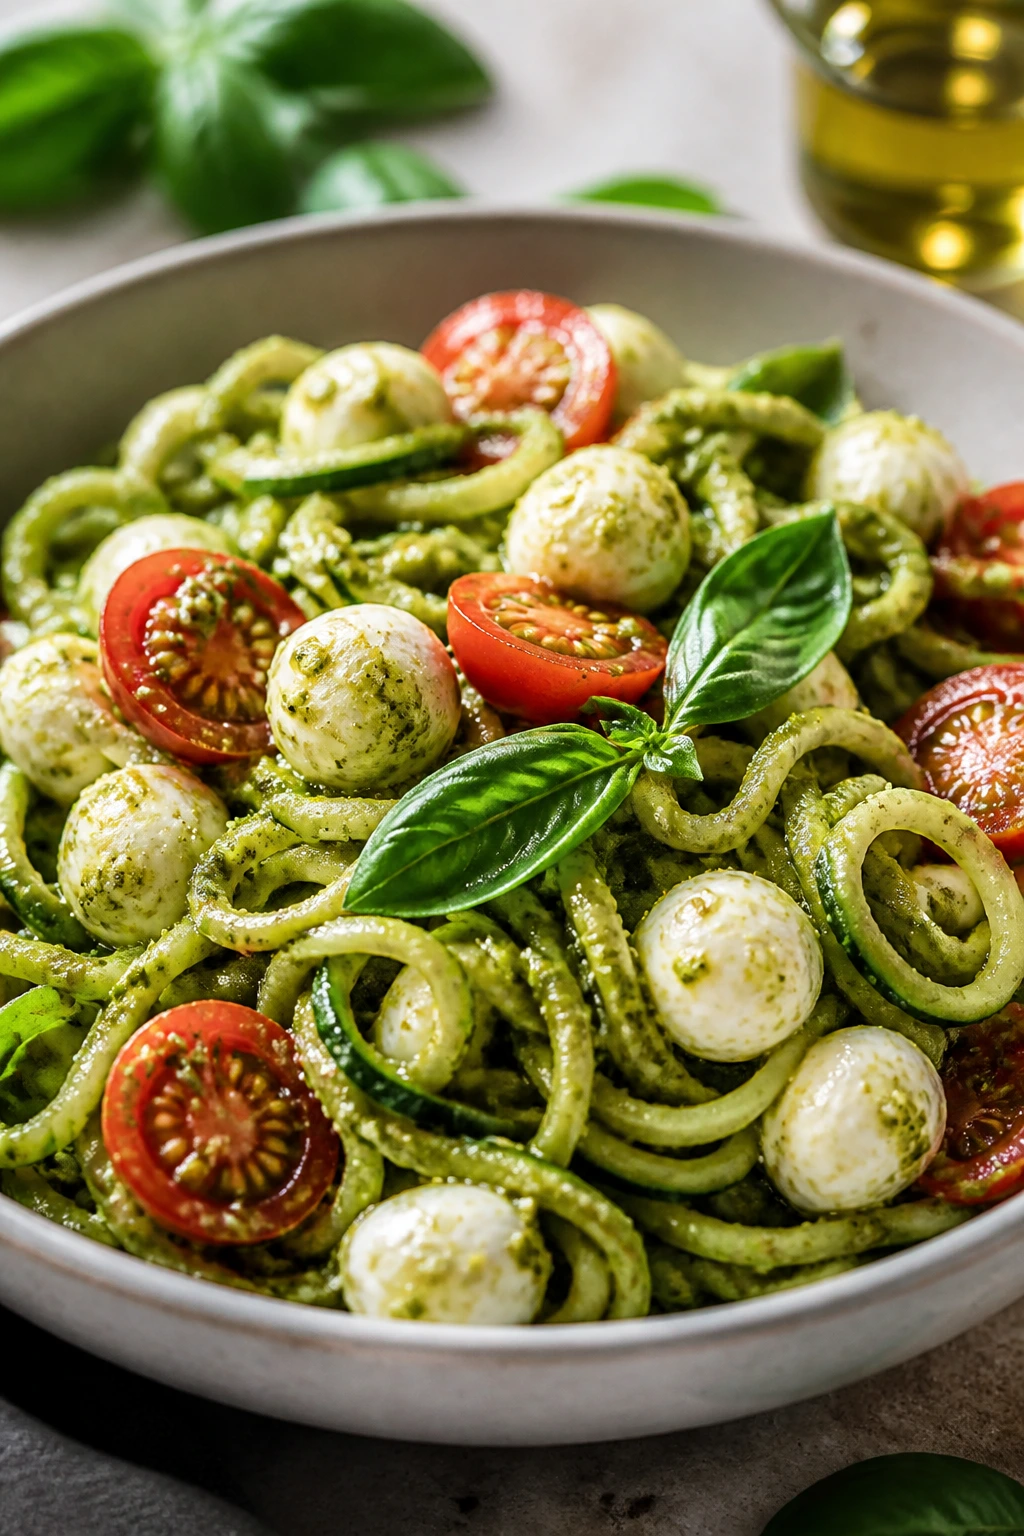
Can I make these meals ahead for the next day?
Yes, but choose wisely. Grain bowls, bean salads, lentil salads, and pasta salads hold up well, while lettuce-based dishes, toast, and cucumber-heavy plates are best assembled right before eating.
What proteins are easiest for light summer dinners?
Shrimp, salmon, chicken cutlets, tuna, tofu, eggs, and canned beans are the most practical. They cook quickly, don’t demand heavy sauces, and work well with cold or warm vegetables.
How do I keep salads from feeling too small to count as dinner?
Add a protein, a bean, or a grain, then make sure the dressing is assertive enough to season the whole bowl. A salad with three good textures — crisp, creamy, and chewy — usually eats like a meal.
What should I do if my grilled chicken or fish tastes bland?
Add acid and salt at the end. A squeeze of lemon, a pinch of flaky salt, or a spoonful of vinaigrette often fixes the problem faster than more cooking ever will.
Can I swap fresh herbs for dried ones?
You can, but use dried herbs in marinades, dressings, or cooked fillings rather than as a final garnish. Fresh herbs give a brighter finish, which matters a lot in light summer meals.
What’s the easiest way to scale these recipes for a crowd?
Choose dishes that can be served from a platter or bowl — salads, rice bowls, tacos, skewers, pasta salads, and flatbreads. Double the dressing first, then adjust the rest, because underdressed crowd food is a letdown.
How do I stop vegetables from going soggy?
Dry them after washing, salt them when appropriate, and keep wet ingredients separate until serving. If a recipe uses tomatoes, cucumbers, or zucchini, the final few minutes are where the texture lives or dies.
What if I don’t have a grill?
A heavy skillet, grill pan, broiler, or sheet pan can stand in for most grilled recipes. The food doesn’t care where the browning comes from as long as you get some heat and don’t crowd the pan.
Easy Nights, Better Plates

The nice part about cooking this way is that it doesn’t ask for much ceremony. A few good ingredients, a quick sear, a cold bowl, a warm tortilla, a sharp dressing — that’s enough. The food feels light because the structure is light, not because it’s missing something.
That’s really the whole point of these dinners. They let you eat well when the evening is warm, the kitchen is not the place you want to be for long, and a heavy meal would feel like too much. Keep the tomatoes ripe, the herbs fresh, and the sauces bright, and the rest takes care of itself.