
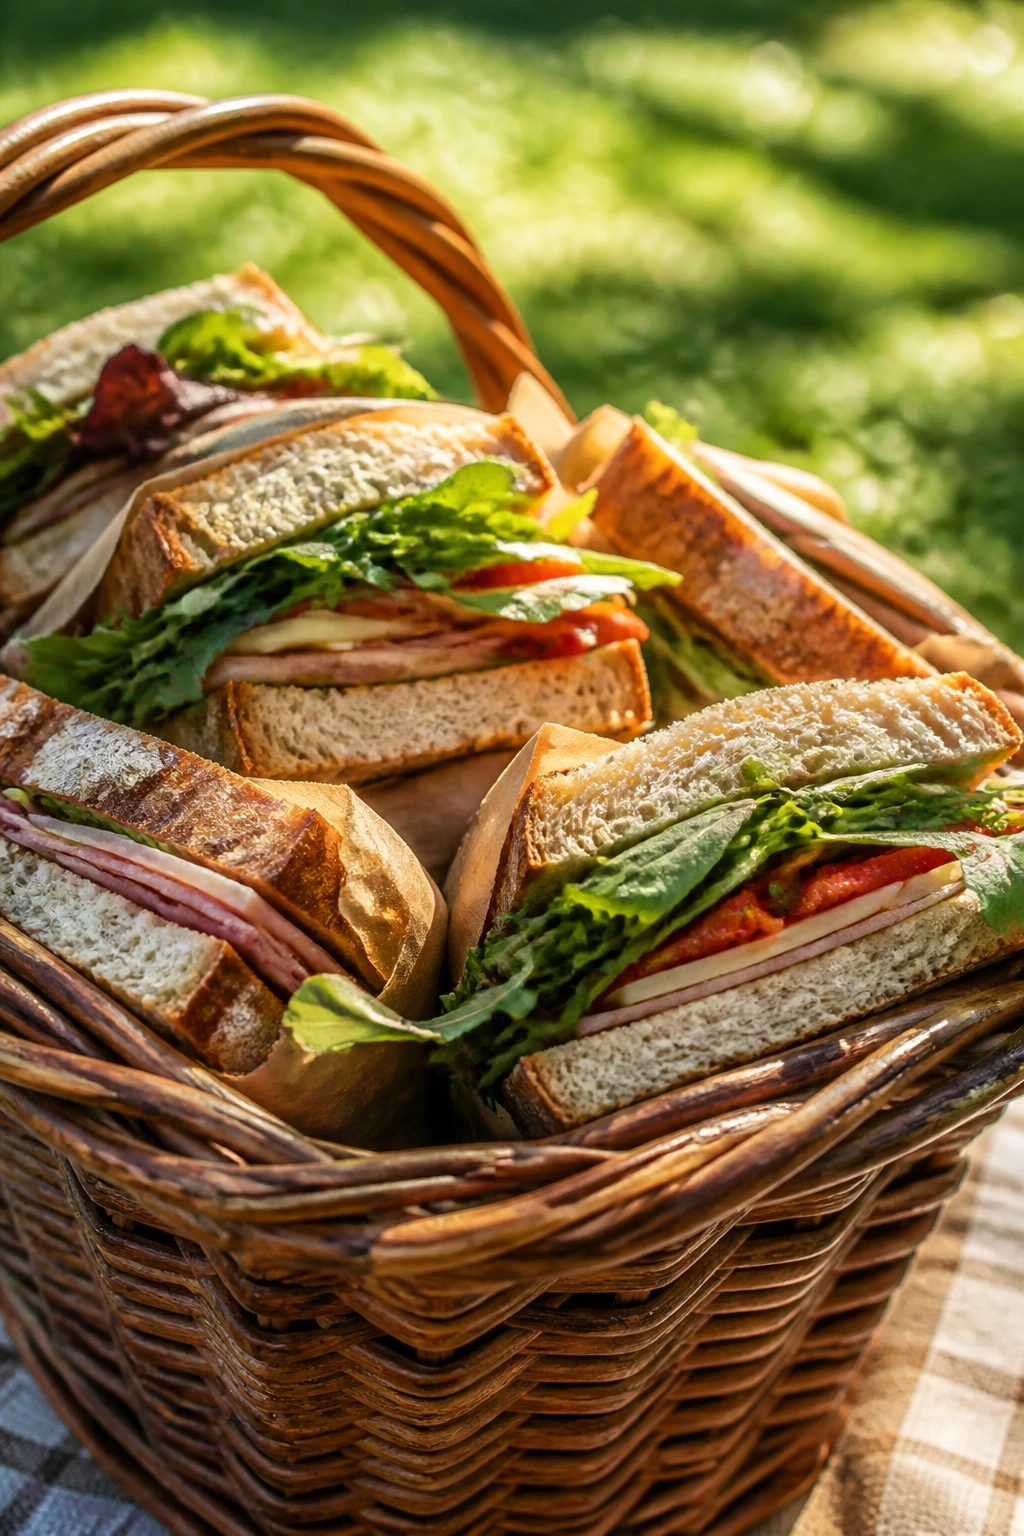
A summer picnic punishes sloppy sandwiches. One leak of tomato juice, one overfilled roll, one soft loaf packed before it’s ready, and lunch goes from crisp to soggy in about ten minutes flat. These summer sandwich ideas are built around that problem, not around wishful thinking: sturdy bread, smart layering, sharp condiments, and fillings that still taste like themselves after a ride in a cooler.
I’ve packed enough picnic lunches to know the difference between a sandwich that looks pretty on a cutting board and one that actually survives a blanket on the ground. The winners are never the ones with the most ingredients. They’re the ones with the right ingredients in the right order — dry against the bread, juicy in the center, crunchy somewhere in the middle, and no ingredient left to do a job it can’t handle.
Some of these are cold and clean. Some want a quick toast, grill, or press before they hit the basket. A few lean sweet enough to work as a late picnic snack. The common thread is simple: these sandwiches eat neatly, travel well, and don’t fall apart the minute you look away.
Why These Summer Sandwich Ideas Belong in the Basket
- Sturdy bread matters more than fancy fillings: A crusty baguette, ciabatta, roll, or wrap keeps tomato juice and dressing from soaking straight through the crumb.
- They’re built for make-ahead packing: Most of these fillings can be mixed an hour ahead, and several get better after a short chill in the fridge.
- Cold and warm options are both covered: Some sandwiches are best served straight from the cooler, while others are worth a quick press in a skillet before wrapping.
- The flavor balance stays sharp outdoors: Salt, acid, herbs, pickles, and mustard keep the sandwiches from tasting flat once they’ve sat in the sun for a bit.
- There’s room for pantry swaps: Chicken, tuna, chickpeas, leftover roast beef, grilled vegetables, and deli meat all show up here, which makes the whole lineup easy to adapt.
1. Caprese Baguette with Burrata
Creamy burrata and ripe tomatoes make a sandwich that wants to run wild, so the crusty baguette earns its keep here. Basil and balsamic give it that sharp, sweet edge that keeps the whole thing from tasting like soft cheese on bread.
Why It Works: The toasted cut sides act like armor against tomato juice, and burrata spreads into the crumb without needing a heavy mayo. A little salt on the tomatoes wakes up the whole sandwich.
Key Ingredients:
- 1 small baguette, about 12 inches, split lengthwise
- 8 oz burrata, drained
- 2 medium ripe tomatoes, sliced 1/4 inch thick
- 1 tbsp olive oil
- 1 tsp kosher salt
- 1/2 cup basil leaves
- 1 tbsp balsamic glaze
Quick Steps:
- Toast the baguette cut sides at 400°F for 4 to 5 minutes until lightly crisp.
- Slice the tomatoes and salt them for 5 minutes, then blot off extra moisture.
- Spoon the burrata over the bottom half of the bread.
- Layer on tomatoes and basil leaves, then drizzle with olive oil and balsamic glaze.
- Close, cut, and wrap in parchment before packing.
Equipment for This Recipe:
- Serrated bread knife
- Baking sheet
- Parchment paper
How to Serve This Dish: Serve it with kettle chips and a bowl of chilled watermelon. A diagonal cut shows off the burrata and keeps the sandwich easy to share.
Pro Tips for This Recipe:
- Use tomatoes that feel firm but give slightly at the stem.
- Drain the burrata for 10 minutes so the filling doesn’t slide.
- Pack basil between cheese and tomato so it stays greener.
Variations on This Dish:
- Prosciutto Caprese: Add 4 oz thin-sliced prosciutto for a saltier, meatier build.
- Pesto Caprese: Swap the balsamic for 2 tbsp pesto spread on the bread.
Common Mistakes to Avoid with This Dish:
- Don’t skip the toast; soft bread turns heavy fast.
- Don’t add wet tomatoes straight from the cutting board; blot them first.
2. Lemon-Dill Chicken Salad Croissants
Chicken salad on a croissant is one of those picnic staples that only works if the filling stays tight and the herbs taste fresh. Lemon and dill keep the dressing bright, while celery adds the kind of crunch you notice on the second bite.
Why It Works: The croissant gives buttery softness without needing extra spread, and the lemon cuts through the mayo so the filling stays lively. Chilling the salad for 20 minutes helps it hold together.
Key Ingredients:
- 2 cups cooked chicken, chopped
- 1/3 cup mayonnaise
- 1 tbsp Greek yogurt
- 1 tbsp lemon juice
- 1 celery stalk, finely diced
- 1 tbsp chopped dill
- 4 mini croissants
- 1 cup butter lettuce leaves
Quick Steps:
- Stir the chicken, mayo, yogurt, lemon juice, celery, and dill in a bowl.
- Season with salt and pepper, then chill for 20 minutes.
- Split the croissants and line them with lettuce.
- Spoon the chicken salad into the croissants.
- Wrap each sandwich in parchment and pack cold.
Equipment for This Recipe:
- Mixing bowl
- Rubber spatula
- Serrated knife
How to Serve This Dish: Pair it with potato chips and grapes. Half a croissant sandwich is enough for a light lunch; two make a fuller picnic plate.
Pro Tips for This Recipe:
- Use chicken breast or thigh, but chop it small so the filling sits neatly.
- A little Greek yogurt keeps the salad from tasting heavy.
- Add dill at the end so it smells fresh instead of dull.
Variations on This Dish:
- Curry Chicken Salad: Add 1 tsp curry powder and 2 tbsp golden raisins.
- Herb-Garden Version: Swap dill for tarragon and chives.
Common Mistakes to Avoid with This Dish:
- Don’t add too much mayo; the filling should mound, not slump.
- Don’t fill the croissants too early if they’re delicate and flaky.
3. Turkey, Swiss, and Pickle Crunch
Turkey and Swiss can taste sleepy if you don’t give them some edge. Pickles, mustard, and a crackly roll turn the whole thing into a picnic sandwich with some bite.
Why It Works: Swiss melts just enough from the warmth of the bread, while pickles and mustard keep the flavor sharp. A toasted roll gives the sandwich enough backbone to carry the deli meat.
Key Ingredients:
- 8 slices deli turkey
- 4 slices Swiss cheese
- 2 sandwich rolls, split
- 2 tbsp Dijon mustard
- 1 dill pickle spear, thinly sliced
- 1 cup shredded lettuce
- 1 tbsp softened butter
Quick Steps:
- Toast the split rolls with butter at 375°F for 4 minutes.
- Spread Dijon on both cut sides.
- Layer turkey, Swiss, lettuce, and pickle slices.
- Press gently, then cut in half.
- Wrap tightly for transport.
Equipment for This Recipe:
- Baking sheet
- Butter knife
- Serrated knife
How to Serve This Dish: Serve with pickle chips and cherry tomatoes. It’s a clean lunch that holds up well next to fruit or a simple pasta salad.
Pro Tips for This Recipe:
- Ask for turkey sliced thin so the sandwich doesn’t feel bulky.
- Pat pickle slices dry if you want less drip.
- Butter the roll before toasting; dry rolls tear.
Variations on This Dish:
- Peppery Club Style: Add bacon and a few arugula leaves.
- Honey Mustard Version: Swap Dijon for honey mustard and skip the pickle.
Common Mistakes to Avoid with This Dish:
- Don’t overload the meat; turkey should be layered, not stacked like a brick.
- Don’t skip the lettuce barrier if the pickles are juicy.
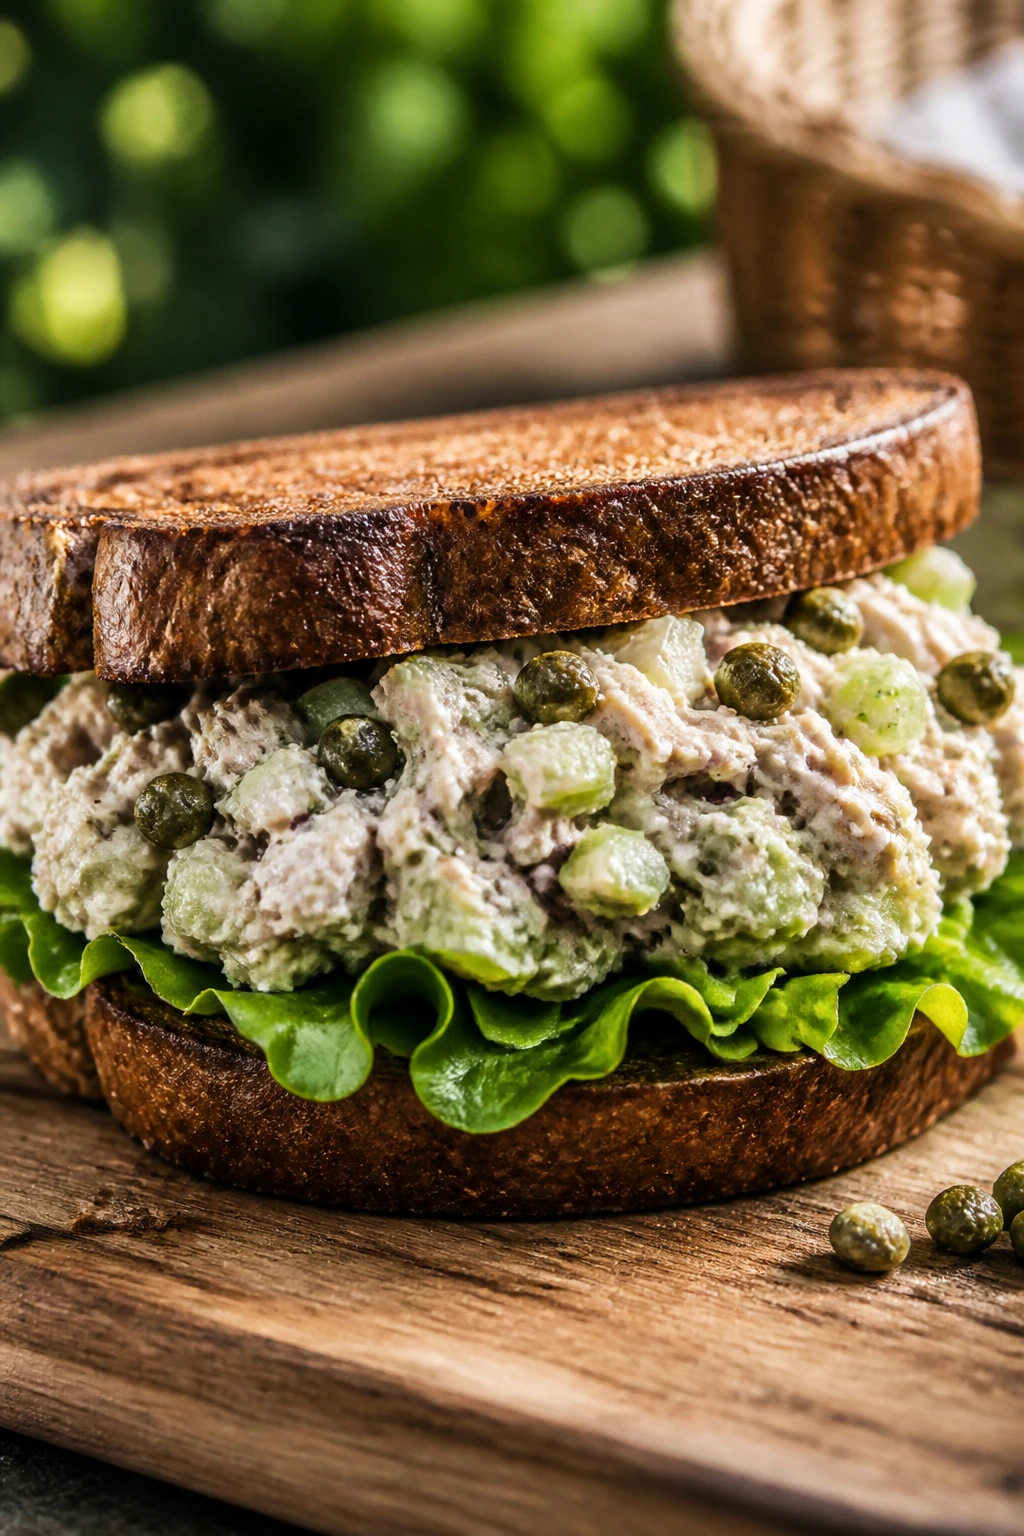
4. Tuna Salad on Toasted Sourdough
Tuna salad tastes flat when it’s boxed up without enough acid or texture. Toasted sourdough, celery, and capers give it a cleaner, sharper finish that behaves better in a picnic basket.
Why It Works: Sourdough’s chewy crust stands up to the tuna salad, and the toast keeps the bread from soaking immediately. Capers add tiny bursts of salt that keep each bite from going soft.
Key Ingredients:
- 1 can tuna, drained well
- 1/4 cup mayonnaise
- 1 tsp Dijon mustard
- 1 celery stalk, minced
- 1 tbsp capers, chopped
- 4 slices sourdough bread
- 1 cup arugula
Quick Steps:
- Mix tuna, mayo, mustard, celery, and capers in a bowl.
- Toast the sourdough at 400°F for 3 to 4 minutes.
- Pile arugula on two slices, then spoon on the tuna salad.
- Top with the remaining toast and press lightly.
- Cut diagonally and wrap.
Equipment for This Recipe:
- Mixing bowl
- Toaster or oven
- Serrated knife
How to Serve This Dish: A handful of kettle chips or a dill pickle spear fits right beside it. If you want it to feel more like lunch-lunch, add sliced cucumbers on the side.
Pro Tips for This Recipe:
- Drain the tuna very well; water is the enemy here.
- Chop the celery fine so the texture stays even.
- A squeeze of lemon wakes the whole filling up.
Variations on This Dish:
- Mediterranean Tuna: Add olives and a little chopped parsley.
- Creamier Tuna Melt: Add cheddar and grill it until the edges brown.
Common Mistakes to Avoid with This Dish:
- Don’t leave the tuna wet in the bowl.
- Don’t build it on soft bread unless you plan to eat it immediately.
5. Egg Salad with Chives and Lettuce
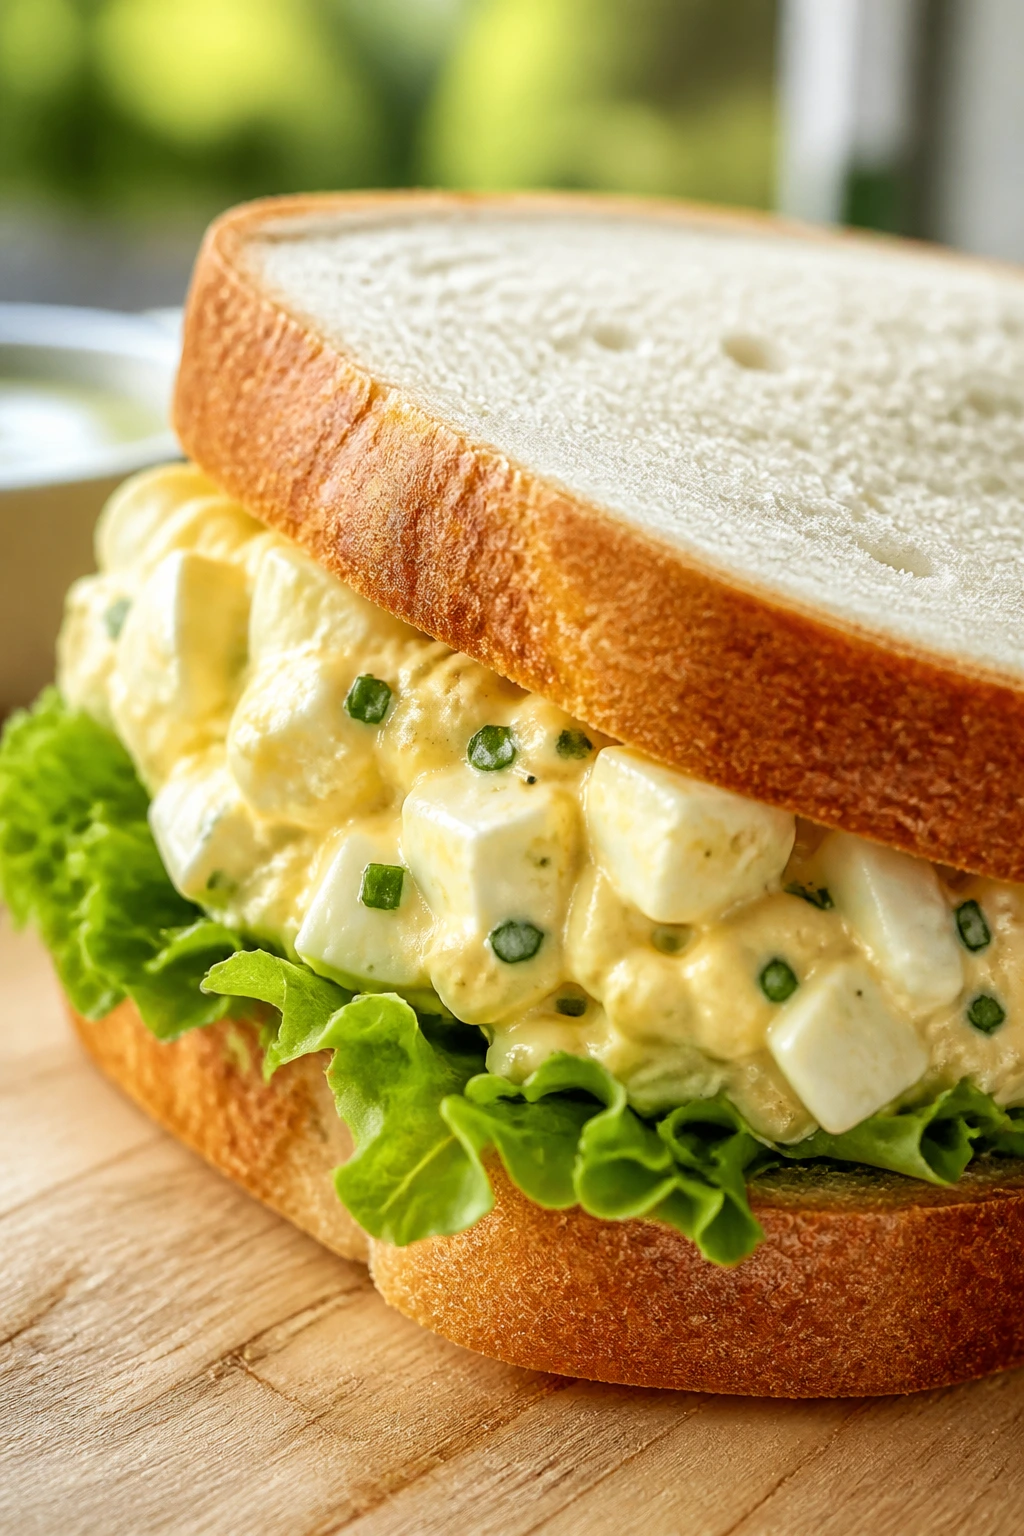
Egg salad can go heavy fast, which is why chives and mustard matter so much. Crisp lettuce and soft white bread keep it tidy enough for a blanket lunch instead of a fork-only situation.
Why It Works: The eggs get mashed just enough to hold, but not so much that the filling turns paste-like. Chives and mustard cut through the richness and keep the flavor from flattening out.
Key Ingredients:
- 6 large eggs, hard-boiled and cooled
- 1/4 cup mayonnaise
- 1 tsp yellow mustard
- 2 tbsp chopped chives
- 1 tsp vinegar
- 4 slices soft sandwich bread
- 4 butter lettuce leaves
Quick Steps:
- Peel the cooled eggs and chop them coarsely.
- Fold in mayo, mustard, chives, vinegar, salt, and pepper.
- Chill the mixture for 15 minutes.
- Layer lettuce on the bread, then spoon on the egg salad.
- Close, trim, and wrap for the basket.
Equipment for This Recipe:
- Saucepan
- Mixing bowl
- Fork or potato masher
How to Serve This Dish: Cut the sandwiches into fingers and serve with salted chips. They also work well with sliced radishes or a crisp dill pickle.
Pro Tips for This Recipe:
- Cool the eggs completely before mixing, or the mayo gets loose.
- Mash only half the eggs if you want a chunkier texture.
- A little vinegar sharpens the filling more than extra mustard does.
Variations on This Dish:
- Avocado Egg Salad: Replace half the mayo with mashed avocado.
- Dill Pickle Egg Salad: Fold in 2 tbsp chopped pickles for extra bite.
Common Mistakes to Avoid with This Dish:
- Don’t overmash the eggs; the filling needs some texture.
- Don’t pack it warm, or the bread will soften too fast.
6. Hummus, Cucumber, and Roasted Pepper Wrap
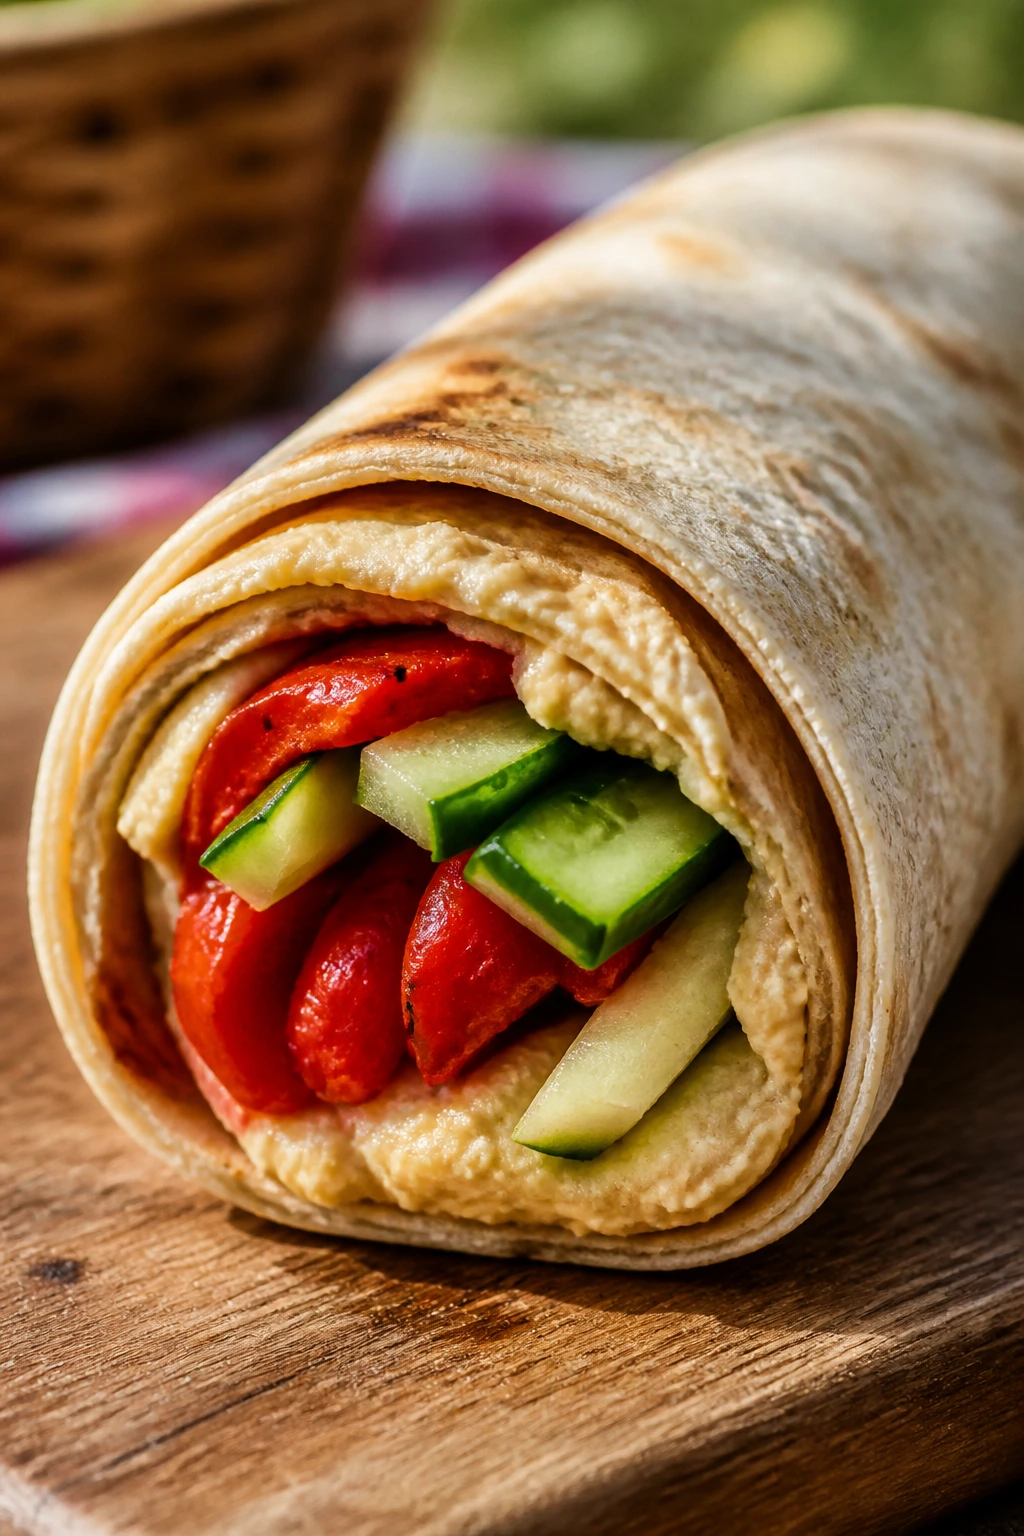
This wrap is the calm one in the lineup: cool cucumbers, sweet peppers, and a thick swipe of hummus. It travels better than most vegetable sandwiches because the filling is dry enough to stay neat.
Why It Works: Hummus acts like both spread and glue, and the cucumber stays crisp if you seed it first. Roasted peppers bring sweetness without dumping extra water into the wrap.
Key Ingredients:
- 2 large flour tortillas
- 1 cup hummus
- 1 cucumber, seeded and sliced into matchsticks
- 1 cup roasted red peppers, patted dry
- 1 cup baby spinach
- 1/4 cup crumbled feta
- 1 tsp lemon juice
Quick Steps:
- Spread hummus across each tortilla, leaving a 1-inch border.
- Layer spinach, cucumber, peppers, feta, and lemon juice.
- Roll tightly, tucking in the sides as you go.
- Chill for 10 minutes, then slice on the diagonal.
- Wrap the halves snugly.
Equipment for This Recipe:
- Cutting board
- Sharp knife
- Parchment paper
How to Serve This Dish: Serve with olives and a small bowl of hummus for dipping. A wedge of melon on the side makes the wrap feel more like a picnic plate.
Pro Tips for This Recipe:
- Seed the cucumber so the wrap doesn’t weep.
- Pat the peppers dry with paper towels.
- Chill before slicing so the roll stays tight.
Variations on This Dish:
- Sun-Dried Tomato Wrap: Swap roasted peppers for chopped sun-dried tomatoes.
- Tahini Version: Use tahini mixed with lemon and garlic instead of hummus.
Common Mistakes to Avoid with This Dish:
- Don’t overfill the tortilla; rolling gets messy fast.
- Don’t use wet cucumber slices straight from the cutting board.
7. Grilled Halloumi and Zucchini Pita
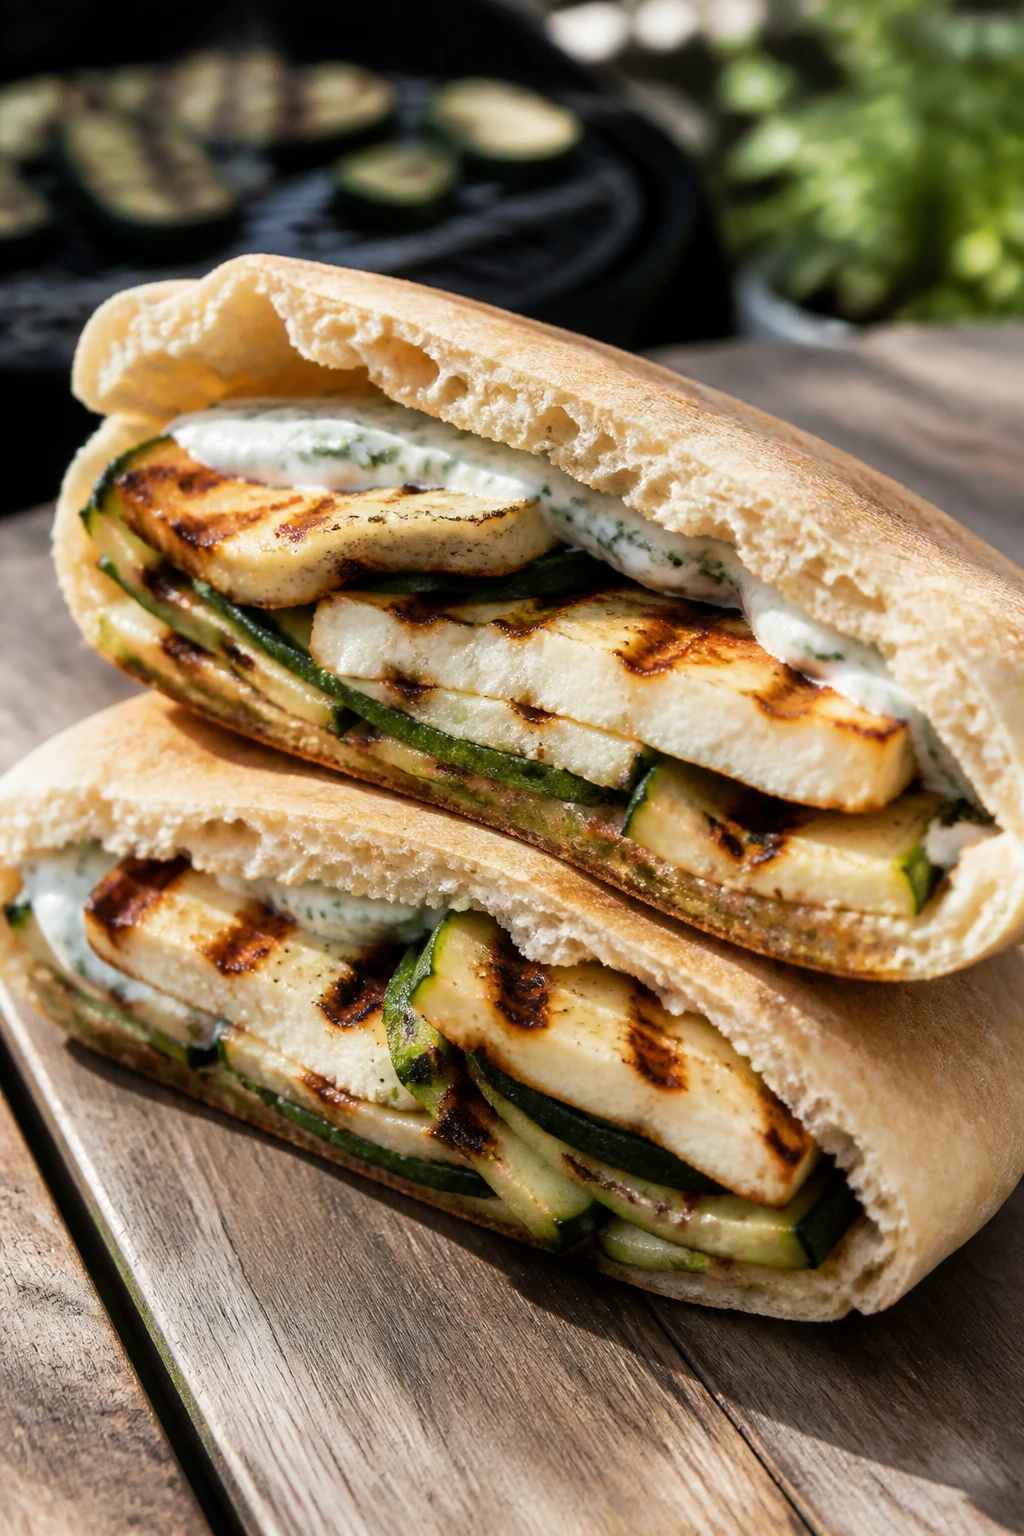
Halloumi has the kind of salty chew that makes vegetables feel like a meal, not a side note. Grilled zucchini and warm pita keep the sandwich sturdy enough to hold its own outdoors.
Why It Works: Halloumi browns fast and keeps its shape, which is exactly what you want in a picnic sandwich. A little tzatziki or yogurt sauce gives the whole thing a cool finish.
Key Ingredients:
- 8 oz halloumi, sliced
- 1 medium zucchini, sliced lengthwise
- 2 tbsp olive oil
- 2 pita breads
- 1/3 cup tzatziki
- 1/4 cup sliced red onion
- 1 tbsp chopped mint
Quick Steps:
- Brush the zucchini and halloumi with olive oil.
- Grill over medium-high heat for 2 to 3 minutes per side until browned.
- Warm the pita for 1 minute in a dry skillet.
- Spread tzatziki inside, then add zucchini, halloumi, onion, and mint.
- Fold and wrap while still warm.
Equipment for This Recipe:
- Grill pan or skillet
- Tongs
- Knife
How to Serve This Dish: Serve it with cucumber salad or a handful of olives. If you’re packing for a long picnic, keep the tzatziki on the side and spoon it in right before eating.
Pro Tips for This Recipe:
- Dry the halloumi well before grilling so it browns instead of steaming.
- Slice zucchini long so it lays flat inside the pita.
- Warm pita briefly; brittle pita cracks.
Variations on This Dish:
- Herb-Lemon Pita: Add parsley and a squeeze of lemon.
- Spicy Version: Brush the zucchini with chili oil before grilling.
Common Mistakes to Avoid with This Dish:
- Don’t overcook halloumi; it gets rubbery.
- Don’t fill the pita while the vegetables are dripping hot oil.
8. Peanut Butter, Strawberry, and Honey Sandwich
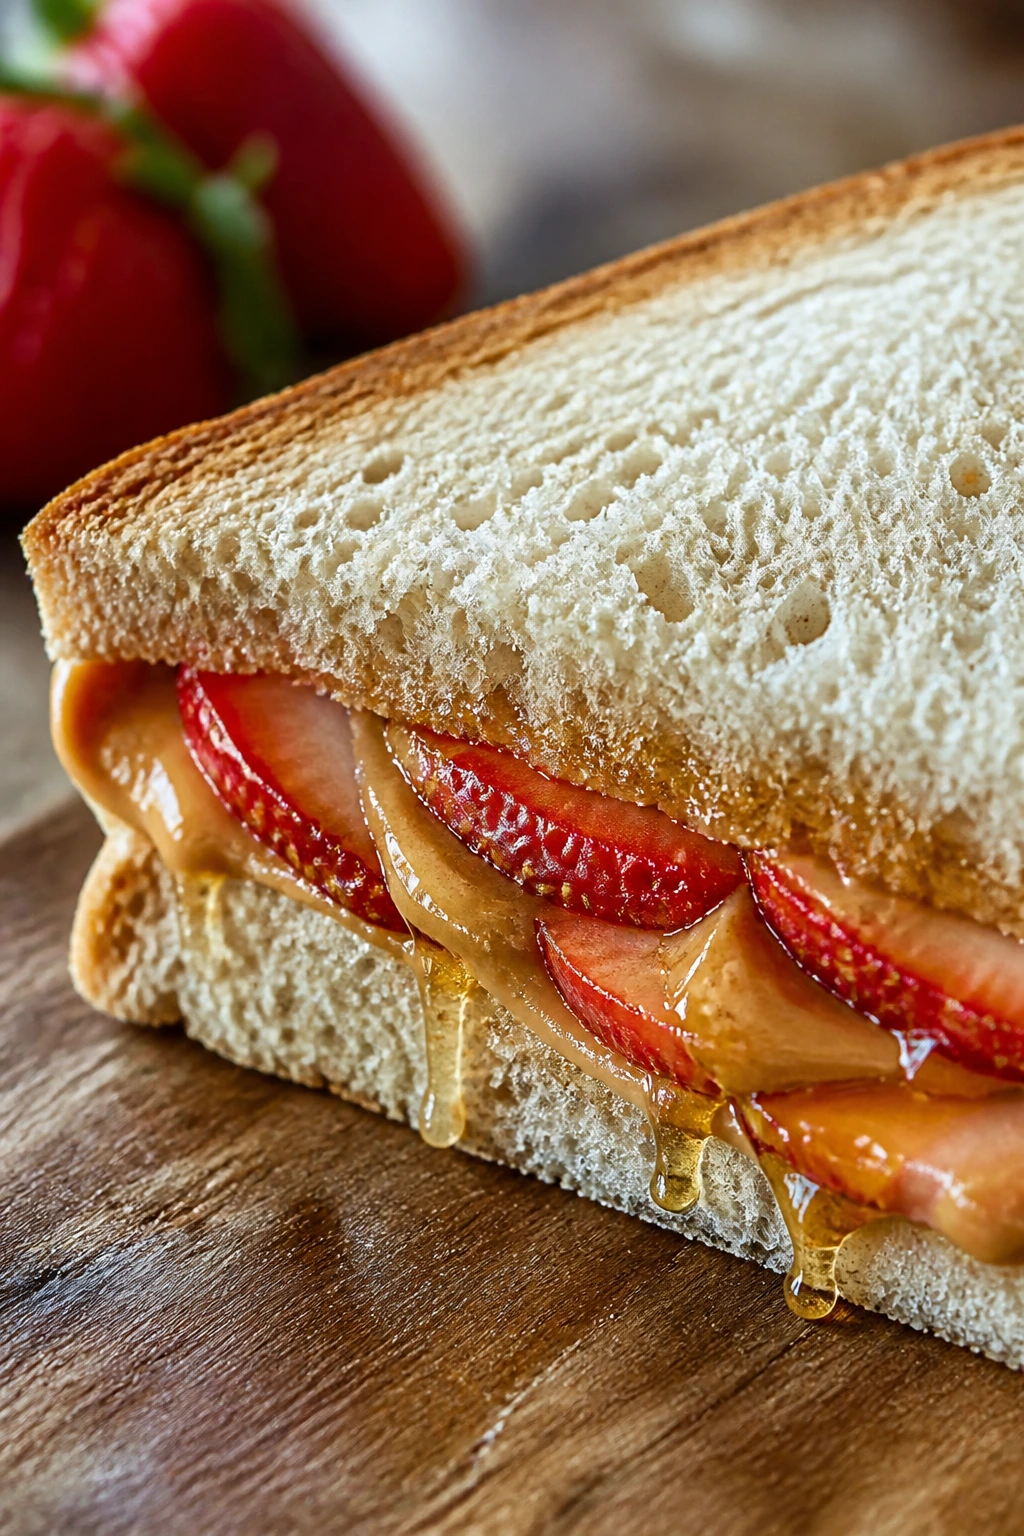
This is the sweet one that still belongs in a picnic basket. Strawberries, peanut butter, and honey hit the right mix of salty, creamy, and bright, and the whole thing takes almost no time to build.
Why It Works: Peanut butter seals the bread against strawberry juice, while honey gives you enough sweetness that you don’t need jam. A pinch of salt makes the strawberries taste sharper.
Key Ingredients:
- 4 slices soft sandwich bread
- 1/2 cup creamy peanut butter
- 1 cup strawberries, thinly sliced
- 1 tbsp honey
- Pinch of flaky salt
- 1 tbsp chopped roasted peanuts, optional
Quick Steps:
- Spread peanut butter on all four bread slices.
- Layer strawberries over two slices and drizzle with honey.
- Add a pinch of salt and peanuts if using.
- Close the sandwiches and press lightly.
- Cut into triangles and wrap.
Equipment for This Recipe:
- Paring knife
- Cutting board
- Butter knife
How to Serve This Dish: It goes well with apple slices and cold milk or lemonade. Kids tend to love this one, but so do the adults who secretly want dessert before noon.
Pro Tips for This Recipe:
- Slice the strawberries thin so they don’t slide out.
- Use soft bread with some structure, not the flimsy kind.
- Keep the honey light; too much makes the bread slippery.
Variations on This Dish:
- Banana-Peanut Version: Swap strawberries for banana slices.
- Almond Butter Upgrade: Use almond butter and a few blueberries.
Common Mistakes to Avoid with This Dish:
- Don’t pile the berries high; the sandwich should close cleanly.
- Don’t pack it cut-side down if the fruit is very juicy.
9. BLT with Basil Mayo
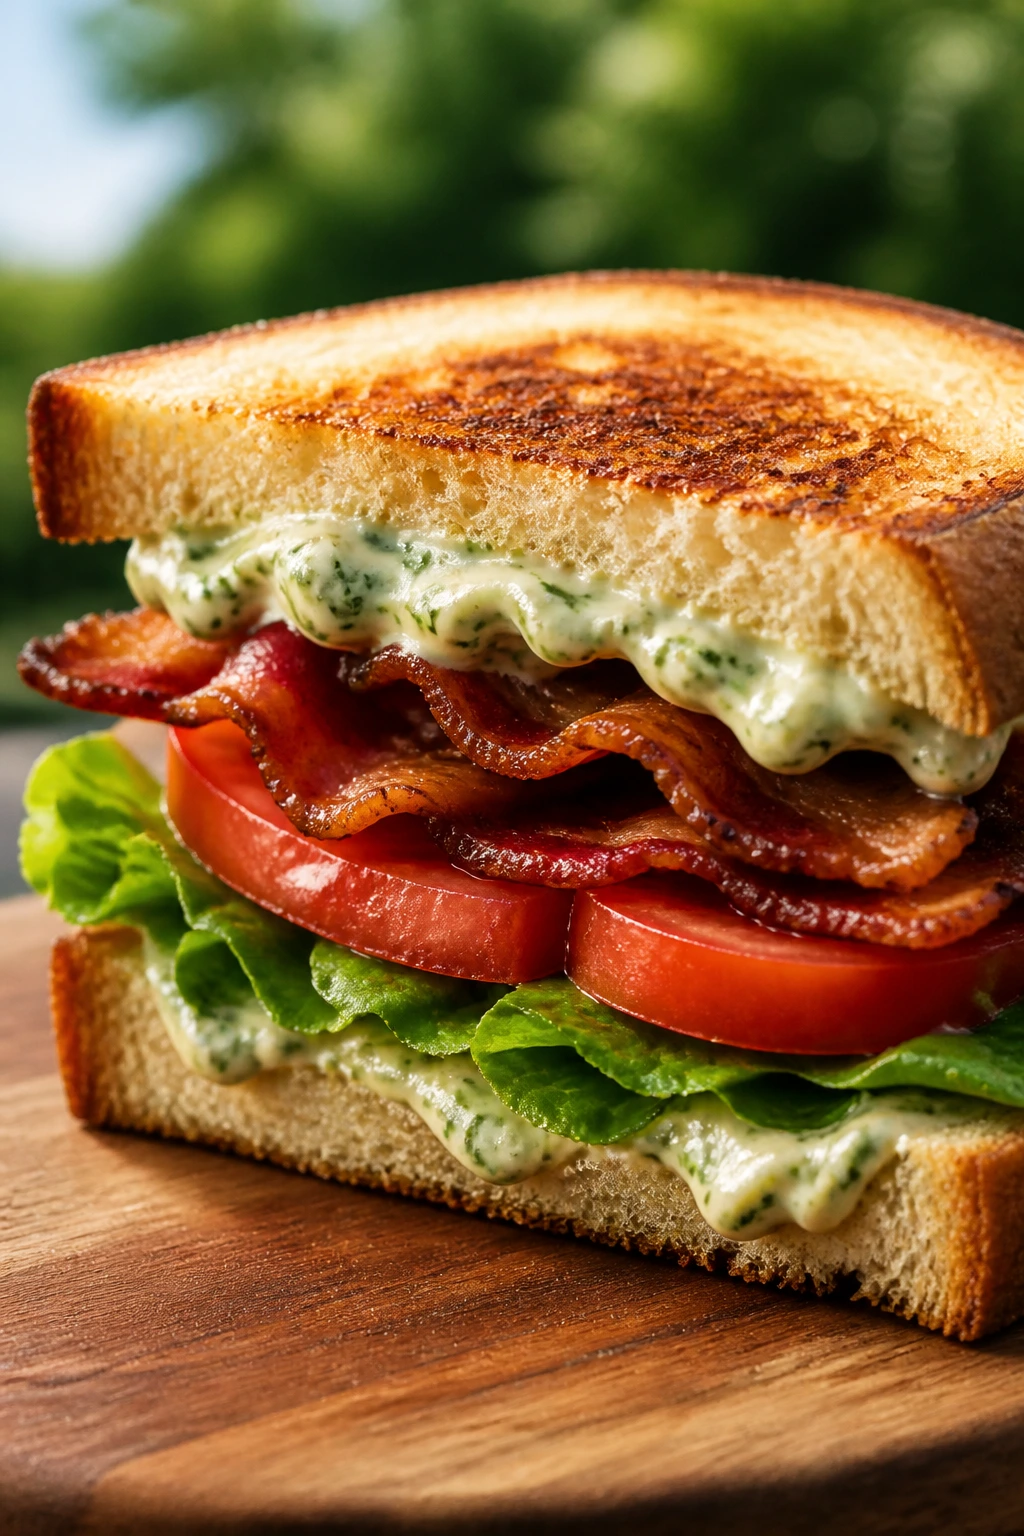
A BLT is already a summer sandwich, but basil mayo makes it taste greener and a little more alive. Crisp bacon and ripe tomato do the heavy lifting, and the toast keeps everything from sinking into itself.
Why It Works: Basil adds enough herbal lift to keep the mayonnaise from tasting flat, and the lettuce gives each bite some cold snap. Toasted bread is non-negotiable here.
Key Ingredients:
- 6 slices bacon
- 4 slices sandwich bread
- 2 tbsp mayonnaise
- 1 tbsp chopped basil
- 2 medium tomatoes, sliced
- 4 leaves romaine or iceberg lettuce
- Pinch of salt and pepper
Quick Steps:
- Cook the bacon until crisp, then drain on paper towels.
- Mix the mayo with basil.
- Toast the bread until golden.
- Spread basil mayo on each slice, then layer lettuce, tomato, and bacon.
- Close, cut diagonally, and wrap.
Equipment for This Recipe:
- Skillet
- Paper towels
- Serrated knife
How to Serve This Dish: It wants kettle chips, a dill pickle, and maybe a cold peach on the side. Eat it soon after assembly; BLTs are not built for long waiting.
Pro Tips for This Recipe:
- Salt the tomatoes lightly and blot them after 5 minutes.
- Let the bacon cool a minute so it stays crisp.
- Romaine holds better than floppy leafy lettuce.
Variations on This Dish:
- Avocado BLT: Add sliced avocado for a creamier bite.
- Spicy BLT: Stir a little hot sauce into the basil mayo.
Common Mistakes to Avoid with This Dish:
- Don’t skip the toast.
- Don’t stack the tomato against naked bread.
10. Pesto, Mozzarella, and Roasted Pepper Ciabatta
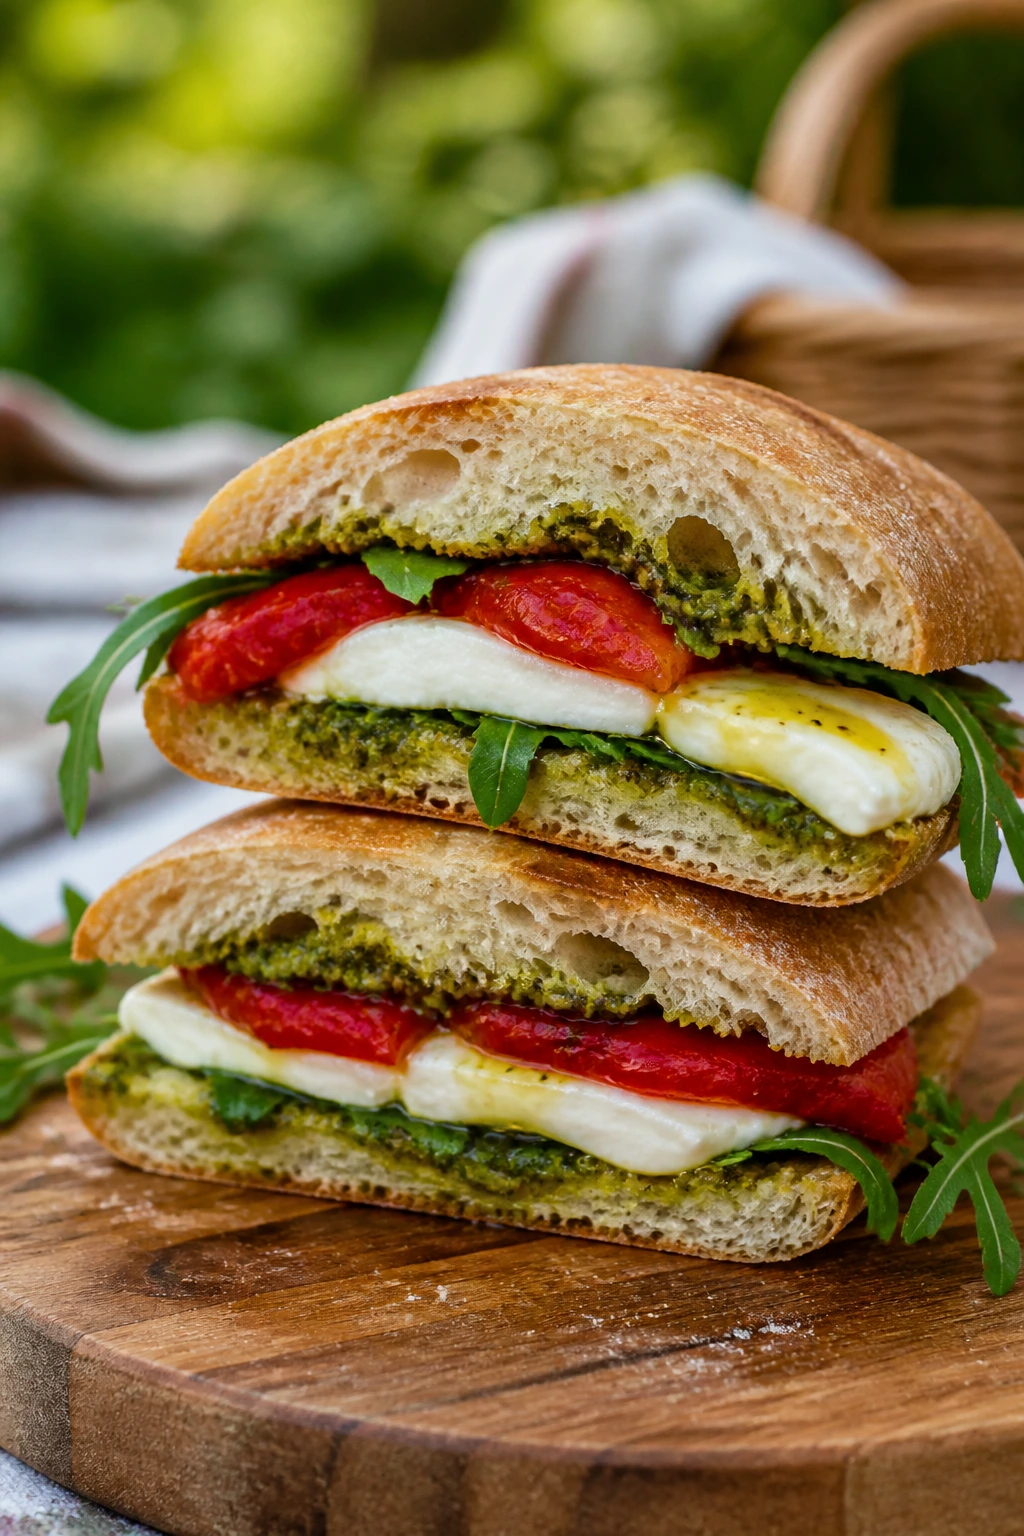
This one tastes like a picnic that snuck through an Italian café kitchen. Pesto, mozzarella, and roasted peppers are bold enough to stand up to ciabatta’s chew without turning mushy.
Why It Works: Ciabatta has the structure to handle oil, pesto, and cheese, and the roasted peppers bring sweet depth without extra wetness. A short press makes the filling settle into the bread instead of sliding out.
Key Ingredients:
- 1 ciabatta loaf, split
- 3 tbsp pesto
- 8 oz fresh mozzarella, sliced and patted dry
- 1 cup roasted red peppers, drained
- 1 cup arugula
- 1 tbsp olive oil
Quick Steps:
- Spread pesto on both cut sides of the ciabatta.
- Layer mozzarella, peppers, and arugula.
- Drizzle lightly with olive oil.
- Press the sandwich in a skillet or panini press for 2 to 3 minutes.
- Slice and wrap warm or at room temperature.
Equipment for This Recipe:
- Grill pan or panini press
- Serrated knife
- Parchment paper
How to Serve This Dish: Serve it with marinated olives or a simple tomato salad. It’s good warm, but it also holds up once it cools a little.
Pro Tips for This Recipe:
- Pat mozzarella dry before slicing.
- Use thick pesto, not watery pesto from the bottom of the jar.
- A short press gives the ciabatta better grip.
Variations on This Dish:
- Prosciutto Pesto Ciabatta: Add 4 oz prosciutto.
- Sun-Dried Tomato Version: Swap roasted peppers for chopped sun-dried tomatoes.
Common Mistakes to Avoid with This Dish:
- Don’t overload the pesto; too much oil softens the bread.
- Don’t press it too long or the mozzarella will spill out.
11. Ham, Peach, and Dijon Sandwich
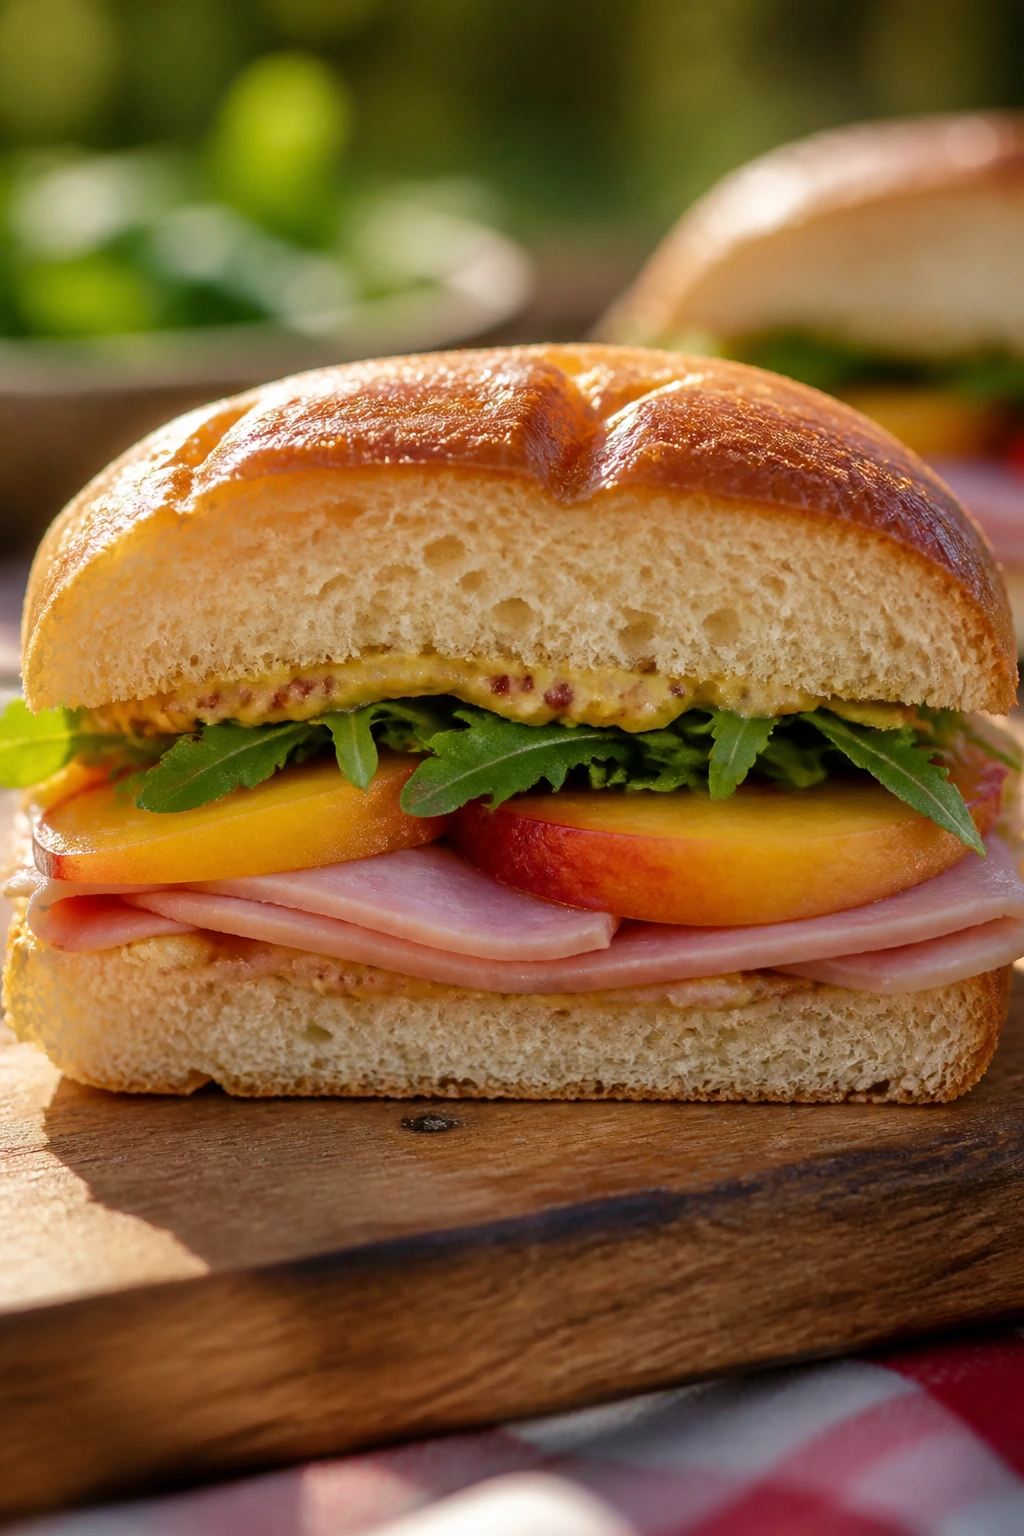
Ham and peaches sound like a strange pair until you bite into one with mustard and good bread. The sweet fruit lifts the salty ham, and Dijon keeps the whole thing from drifting into dessert territory.
Why It Works: Firm peaches give you juice without collapsing, and the mustard adds a sharp line through the richness. A sturdy roll or brioche bun gives you just enough softness without falling apart.
Key Ingredients:
- 6 slices ham
- 1 ripe but firm peach, thinly sliced
- 2 tbsp Dijon mustard
- 2 brioche buns or sandwich rolls
- 1 cup arugula
- 1 tbsp butter
Quick Steps:
- Split and lightly toast the buns with butter.
- Spread Dijon on both sides.
- Add arugula, ham, and peach slices.
- Close the sandwich and press gently.
- Wrap and chill briefly before packing.
Equipment for This Recipe:
- Knife
- Skillet or toaster
- Cutting board
How to Serve This Dish: This one likes potato chips and a few grapes on the side. If the peaches are very juicy, eat it the same day you build it.
Pro Tips for This Recipe:
- Choose peaches that yield a little but don’t feel mushy.
- Arugula gives a peppery edge that keeps the sandwich grounded.
- Toasting the bun keeps the peach juice in check.
Variations on This Dish:
- Brie and Ham Version: Add a few thin slices of brie.
- Prosciutto Peach Sandwich: Swap ham for prosciutto and use less mustard.
Common Mistakes to Avoid with This Dish:
- Don’t use overripe peaches; they slip everywhere.
- Don’t skip the greens, or the sandwich tastes too soft.
12. Chicken Caesar Wrap
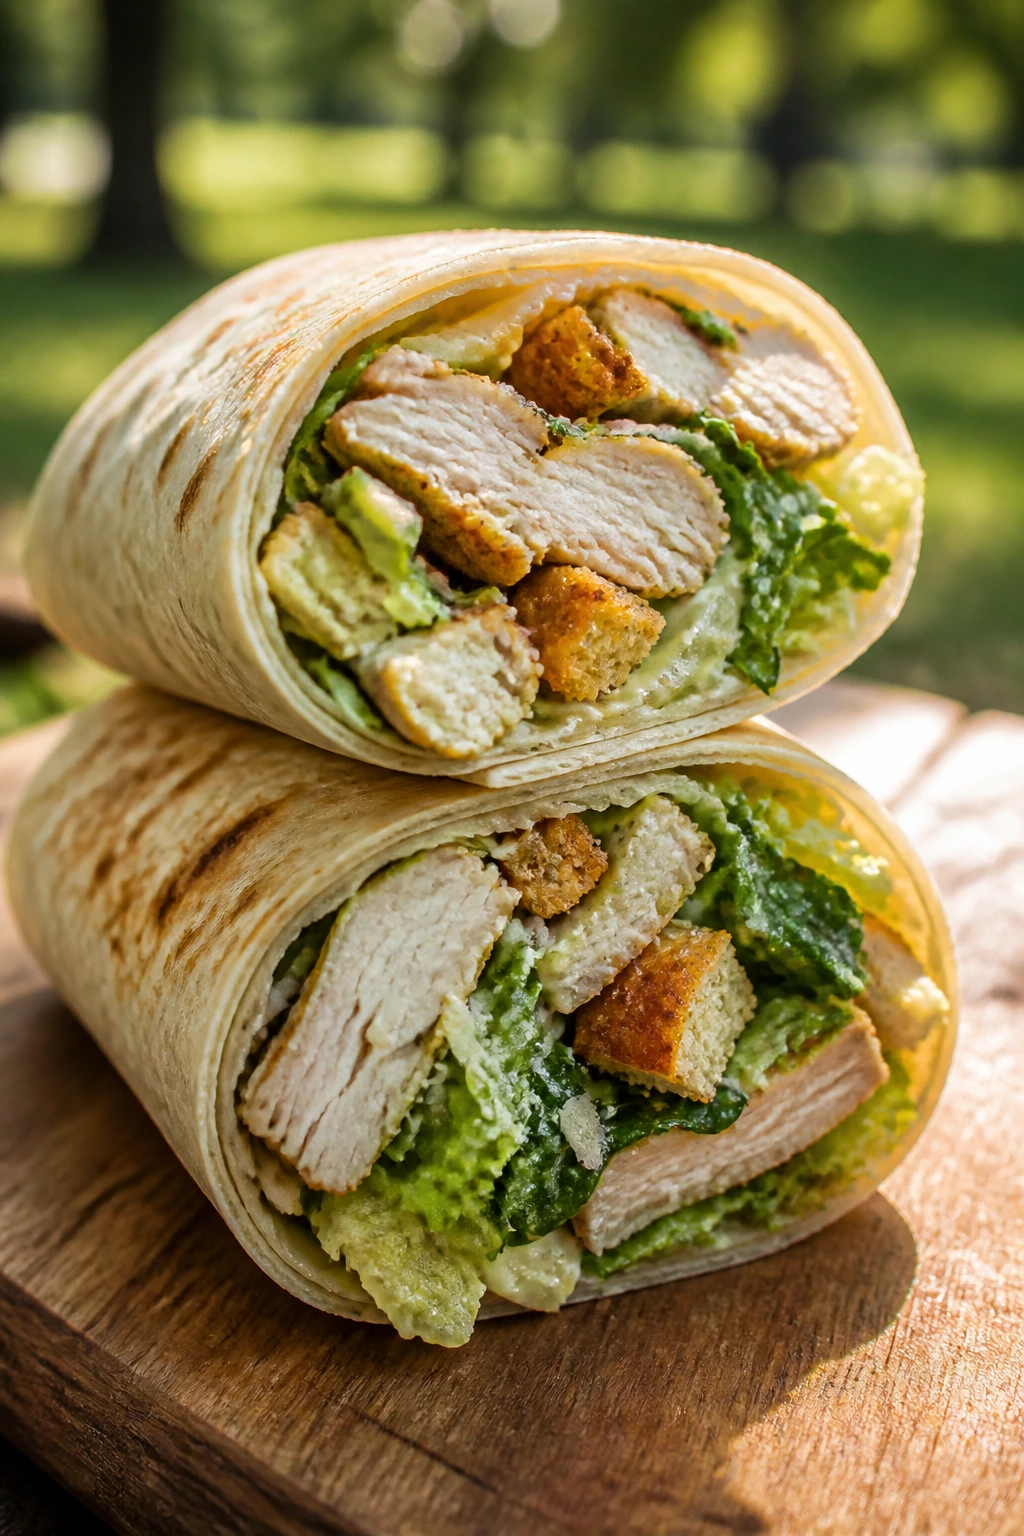
A Caesar wrap can get heavy if the dressing takes over, so the trick is restraint. Romaine, parmesan, and croutons give you the classic flavor without making the tortilla soggy.
Why It Works: Chicken gives the wrap substance, while romaine keeps the bite cold and crisp. Crushed croutons add a dry crunch that survives better than soft breadcrumbs.
Key Ingredients:
- 2 cups cooked chicken, sliced
- 2 large flour tortillas
- 1 cup romaine, chopped
- 1/4 cup Caesar dressing
- 1/4 cup grated parmesan
- 1/2 cup croutons, lightly crushed
Quick Steps:
- Toss the chicken with Caesar dressing.
- Lay romaine, chicken, parmesan, and crushed croutons down the center of each tortilla.
- Roll tightly, tucking in the sides.
- Chill for 10 minutes.
- Slice and wrap.
Equipment for This Recipe:
- Large bowl
- Cutting board
- Sharp knife
How to Serve This Dish: It fits well with carrot sticks and a handful of cherry tomatoes. If you’re packing for heat, keep extra dressing separate and add it only at the last minute.
Pro Tips for This Recipe:
- Use romaine hearts; they stay crisper than loose leaves.
- Don’t drown the chicken in dressing.
- Crush the croutons lightly so they don’t tear the tortilla.
Variations on This Dish:
- Bacon Caesar Wrap: Add 4 slices crumbled bacon.
- Anchovy Caesar: Add a tiny spoon of anchovy paste to the dressing.
Common Mistakes to Avoid with This Dish:
- Don’t overfill the tortilla; it won’t roll cleanly.
- Don’t let it sit dressed for hours before serving.
13. Smoked Salmon Bagel Sandwich
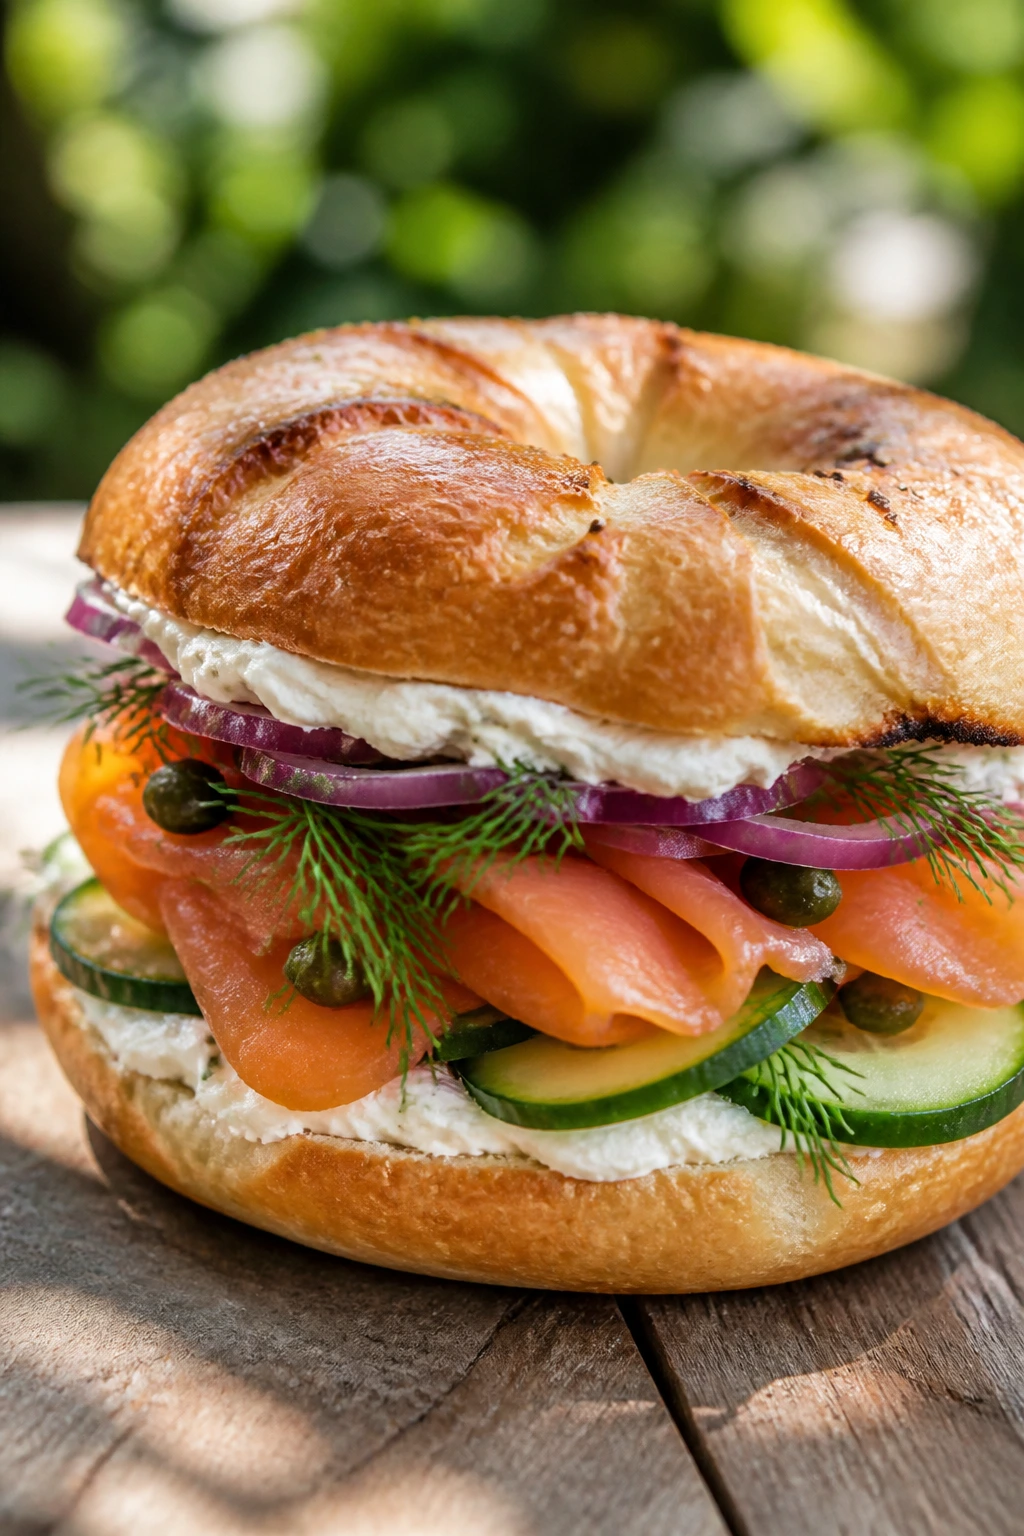
Smoked salmon belongs in a cool sandwich that tastes clean and a little luxurious. Cream cheese, capers, cucumber, and dill give it the familiar bagel-shop flavor without needing much work.
Why It Works: Cream cheese forms a moisture barrier, and cucumber gives a cold snap that keeps the smoked salmon from feeling too dense. A bagel or soft roll stands up to the filling better than thin sliced bread.
Key Ingredients:
- 2 bagels, split and lightly toasted
- 4 oz cream cheese
- 4 oz smoked salmon
- 1/2 cucumber, thinly sliced
- 1 tbsp capers
- 1 tbsp chopped dill
- 2 thin slices red onion
Quick Steps:
- Toast the bagels lightly so they don’t go gummy.
- Spread cream cheese on both halves.
- Layer salmon, cucumber, onion, capers, and dill.
- Close the sandwiches and press gently.
- Wrap and keep chilled.
Equipment for This Recipe:
- Toaster or skillet
- Butter knife
- Serrated knife
How to Serve This Dish: Serve it with sliced melon or a small potato salad. This one is best cold and should be packed with an ice pack if the picnic stretches on.
Pro Tips for This Recipe:
- Pat the cucumber dry before slicing it in.
- Use a bagel with some chew, not a spongy one.
- Keep the onion slices thin so they don’t overpower the salmon.
Variations on This Dish:
- Lox and Avocado: Add a few avocado slices.
- Everything Bagel Version: Use everything bagels for extra seasoning.
Common Mistakes to Avoid with This Dish:
- Don’t assemble it too far ahead; the bagel can get dense.
- Don’t use too much cream cheese or the salmon gets buried.
14. Curried Chickpea Salad Sandwich
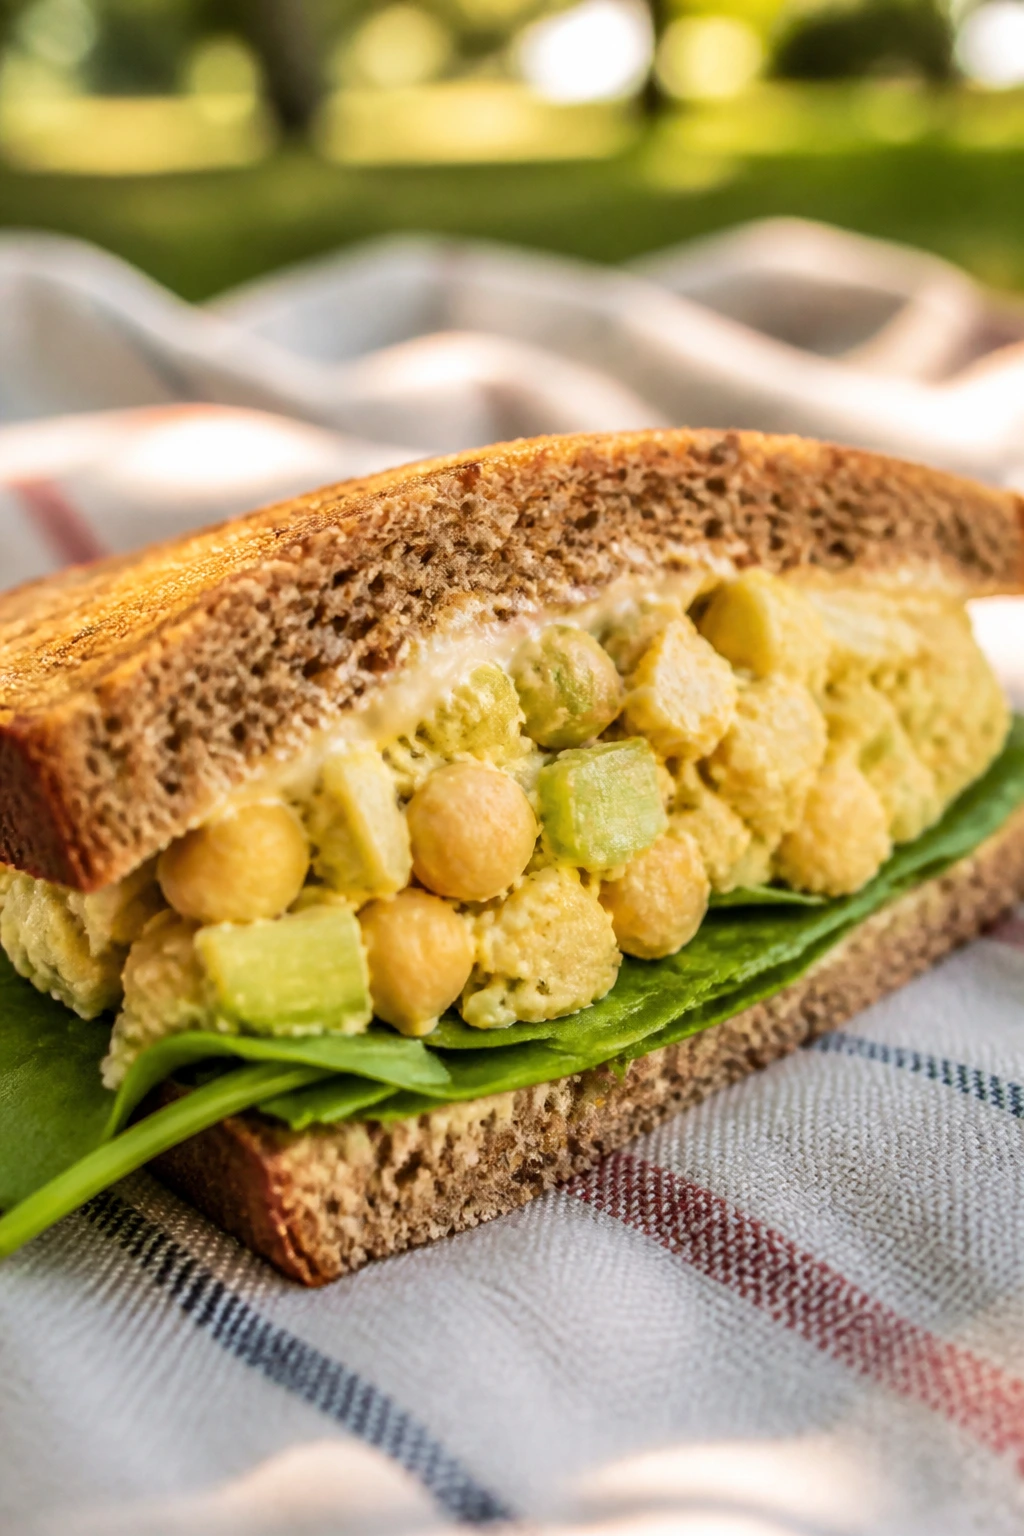
Chickpea salad has a nice habit of tasting better after a short chill. Curry powder, celery, and a little lemon turn the mash into something that feels hearty without relying on meat.
Why It Works: Chickpeas hold texture when you mash only part of them, and the curry powder gives warmth without heat overload. Lettuce or spinach keeps the bread from getting damp.
Key Ingredients:
- 1 can chickpeas, drained and rinsed
- 1/4 cup mayonnaise
- 1 tsp curry powder
- 1 celery stalk, diced
- 1 tbsp lemon juice
- 4 slices whole-grain bread
- 1 cup spinach
Quick Steps:
- Mash half the chickpeas with a fork.
- Stir in mayo, curry powder, celery, lemon juice, salt, and pepper.
- Chill the mixture for 15 minutes.
- Spoon it onto bread lined with spinach.
- Cut and wrap.
Equipment for This Recipe:
- Fork
- Mixing bowl
- Knife
How to Serve This Dish: Serve it with cucumber spears and a handful of raisins or grapes. It’s good for picnics where you want something filling that doesn’t need a stove.
Pro Tips for This Recipe:
- Leave some chickpeas whole for texture.
- A tiny pinch of sugar can round out the curry.
- Use sturdy bread; soft sandwich bread flattens under mash.
Variations on This Dish:
- Raisin Curry Chickpea: Add 2 tbsp raisins for sweetness.
- Spicy Version: Stir in chopped jalapeño or chili flakes.
Common Mistakes to Avoid with This Dish:
- Don’t overmash the chickpeas into paste.
- Don’t skip the lemon; it keeps the salad from tasting dusty.
15. Cucumber and Cream Cheese Tea Sandwiches
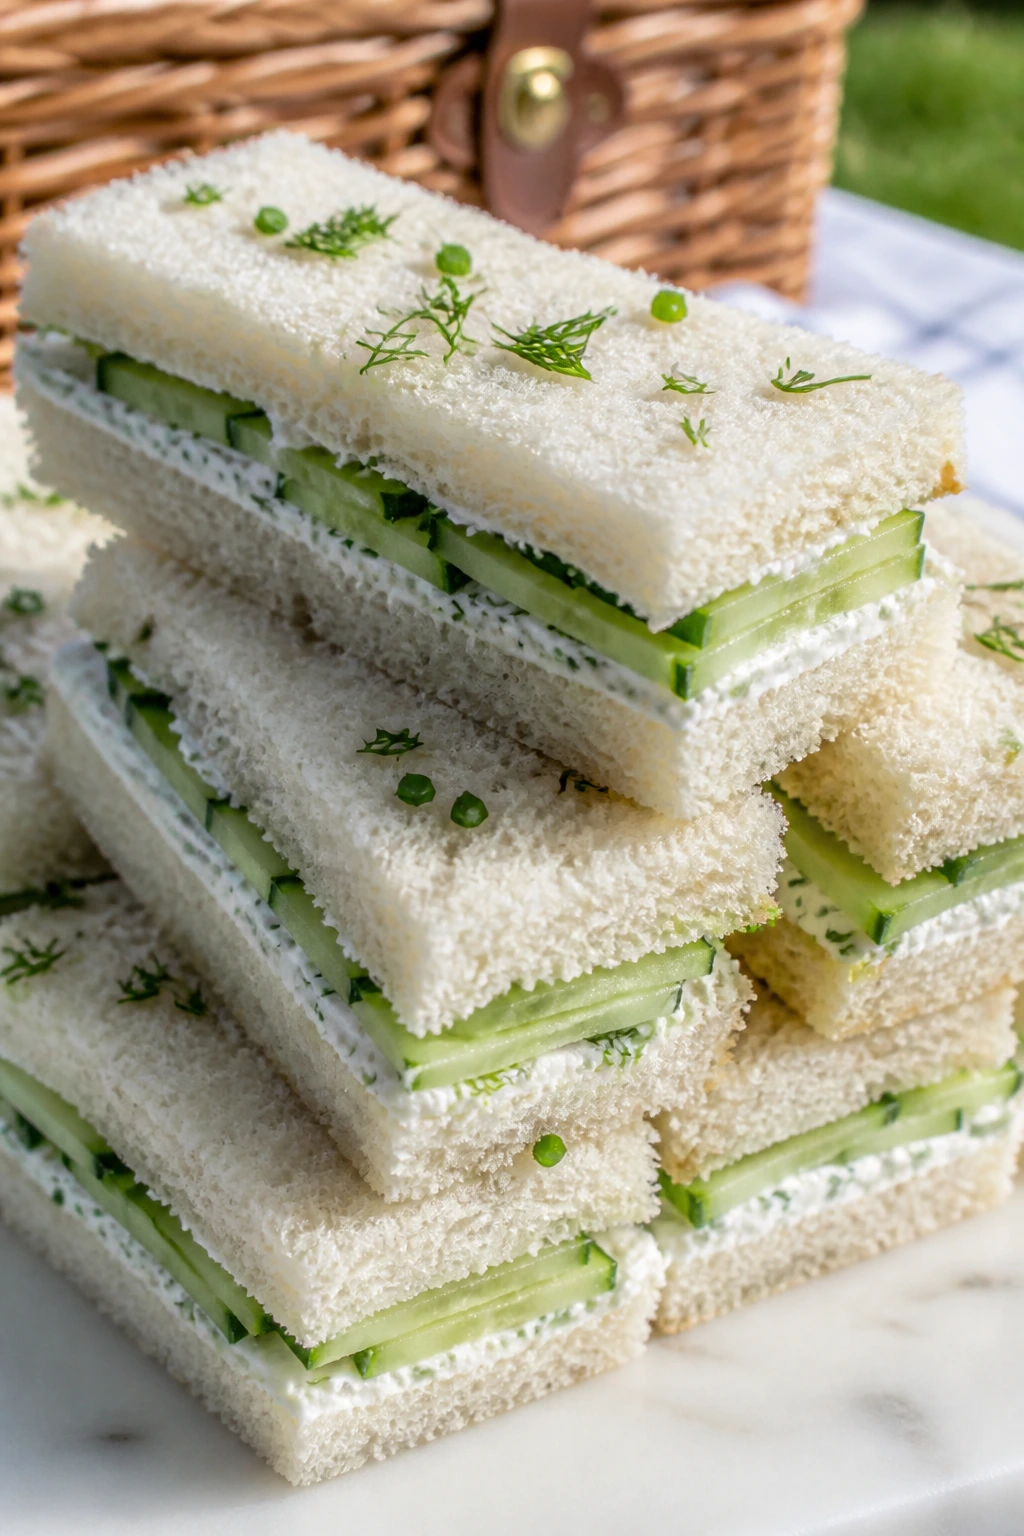
These are the neat little squares that make a picnic feel organized. Thin cucumber slices, cream cheese, and soft bread are simple, but the trick is drying the cucumber well so the bread stays intact.
Why It Works: Cream cheese seals the bread, and the cucumber gives a cool, clean crunch. Dill and chives add enough flavor that the sandwich doesn’t taste bland once it’s chilled.
Key Ingredients:
- 8 slices soft white bread, crusts removed
- 6 oz cream cheese, softened
- 1/2 cucumber, very thinly sliced
- 1 tbsp chopped dill
- 1 tbsp chopped chives
- 1 tsp lemon juice
Quick Steps:
- Mix cream cheese with dill, chives, lemon juice, salt, and pepper.
- Pat the cucumber slices dry.
- Spread the cream cheese on the bread.
- Layer cucumbers, top with another slice, and press gently.
- Trim the crusts and cut into small rectangles.
Equipment for This Recipe:
- Sharp knife
- Cutting board
- Small bowl
How to Serve This Dish: Stack them on a chilled tray with radishes and olives. They work best as part of a larger spread, not as the only sandwich on the table.
Pro Tips for This Recipe:
- Use the thinnest cucumber slices you can manage.
- Chill briefly before cutting for cleaner edges.
- Bread with a little structure holds shape better than ultra-soft slices.
Variations on This Dish:
- Mint Cucumber Tea Sandwiches: Swap dill for mint.
- Smoked Salmon Tea Sandwiches: Add a thin layer of smoked salmon under the cucumber.
Common Mistakes to Avoid with This Dish:
- Don’t leave the cucumber wet.
- Don’t make them too far ahead unless the bread is very fresh.
16. Pulled Pork Slider Sandwiches
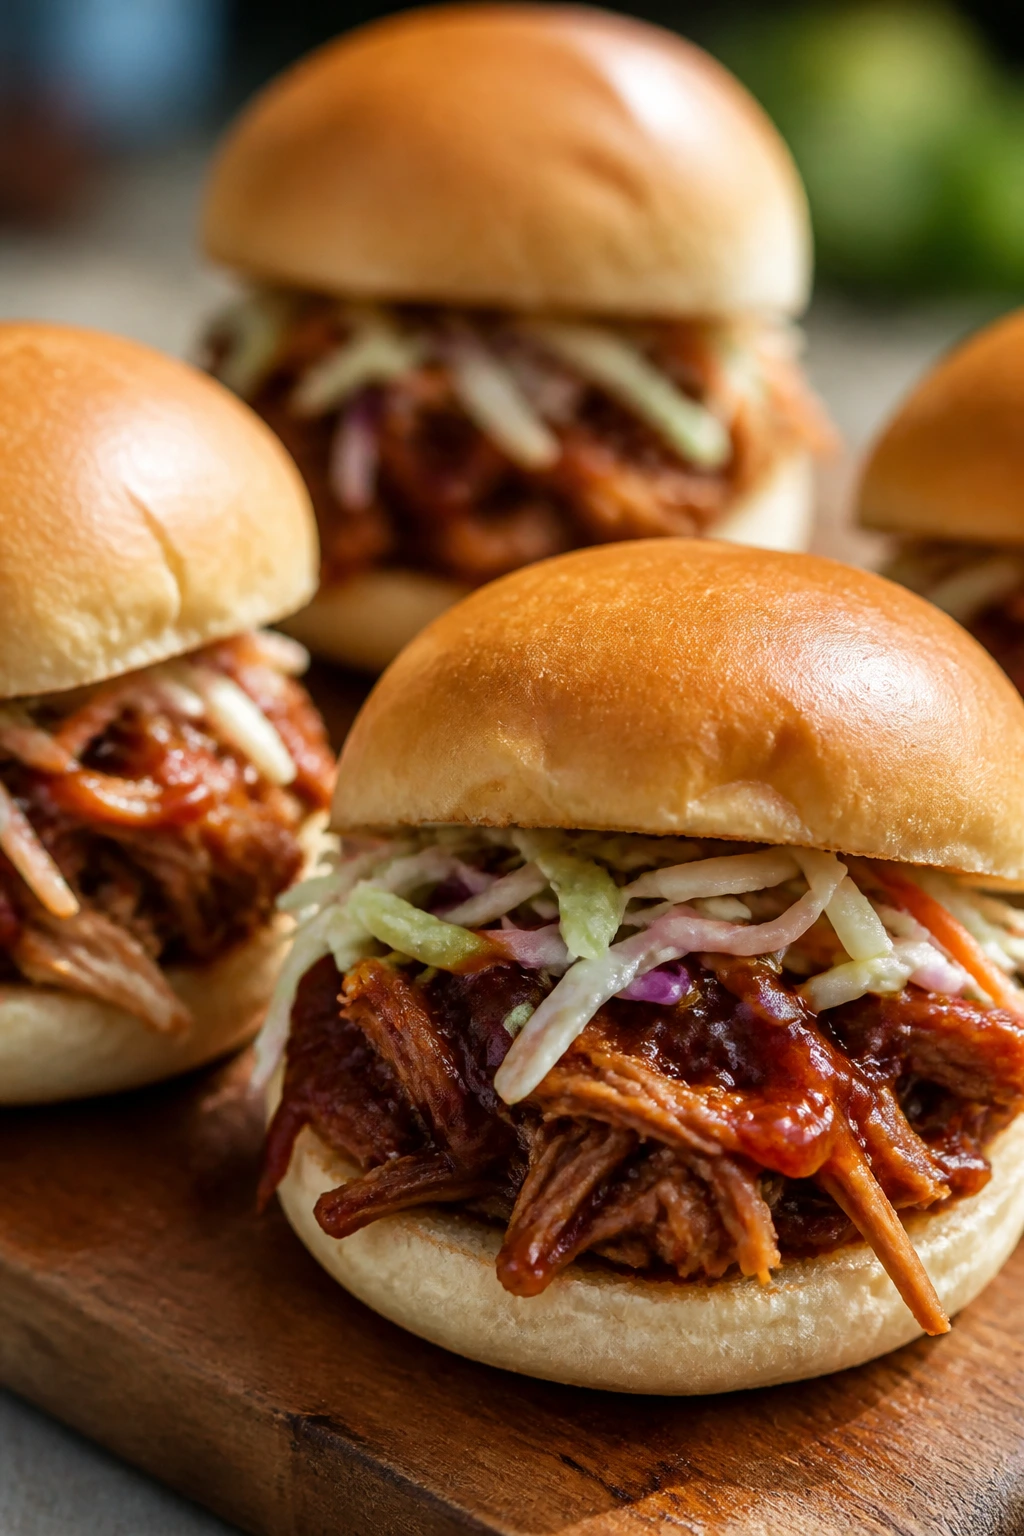
Pulled pork sliders bring a little smoke and a little mess, but in the best way. Coleslaw and pickles keep the sweetness of the barbecue sauce in check, and the tiny rolls make them easier to hand out.
Why It Works: Soft slider buns soak up sauce without collapsing if you toast them first. Slaw adds crunch and cuts through the richness.
Key Ingredients:
- 2 cups pulled pork
- 1/3 cup barbecue sauce
- 6 slider buns
- 1 cup coleslaw
- 1/4 cup pickle slices
- 1 tbsp melted butter
Quick Steps:
- Warm the pulled pork with barbecue sauce over low heat.
- Toast the slider buns lightly with butter.
- Spoon pork onto the bottom buns.
- Top with coleslaw and pickles.
- Close and wrap in foil or parchment.
Equipment for This Recipe:
- Skillet
- Baking sheet
- Tongs
How to Serve This Dish: Serve them with corn salad or baked beans if you’re leaning into the barbecue mood. Two or three sliders make a solid picnic serving.
Pro Tips for This Recipe:
- Keep the pork just saucy enough to cling.
- Toast the buns so they don’t go wet.
- Pack slaw separately if you want the buns extra firm.
Variations on This Dish:
- Carolina Style: Swap barbecue sauce for vinegar-based sauce.
- Spicy Sliders: Add sliced jalapeños and hot sauce.
Common Mistakes to Avoid with This Dish:
- Don’t drown the pork in sauce.
- Don’t skip the toasting step or the buns soften fast.
17. Italian Sub with Shaved Veggies

An Italian sub needs contrast, not just more meat. Shaved lettuce, tomatoes, pepperoncini, and a splash of vinegar keep the whole thing bright enough to taste fresh after a few hours in the basket.
Why It Works: Thinly sliced meats and shaved vegetables stack neatly, which means the sandwich stays tight when you cut it. A roll with a firm crust handles the oil and vinegar better than soft bread.
Key Ingredients:
- 1 large sub roll, split
- 3 oz salami
- 3 oz ham
- 3 oz provolone
- 1 cup shredded lettuce
- 1 tomato, sliced
- 2 tbsp pepperoncini slices
- 1 tbsp olive oil
- 1 tbsp red wine vinegar
Quick Steps:
- Split and lightly toast the sub roll.
- Layer provolone, ham, salami, lettuce, tomato, and pepperoncini.
- Drizzle with olive oil and vinegar.
- Season with salt and pepper.
- Press, cut, and wrap tightly.
Equipment for This Recipe:
- Serrated knife
- Cutting board
- Small bowl
How to Serve This Dish: It wants potato chips and maybe a handful of grapes or a crisp cucumber salad. Half a sub is usually enough if there are other picnic dishes on the blanket.
Pro Tips for This Recipe:
- Keep the oil and vinegar light; a little goes a long way.
- Use cold meats, but let the roll toast warm.
- Shredded lettuce packs better than big leaves.
Variations on This Dish:
- Turkey Sub Swap: Replace the salami and ham with turkey.
- Hot Pepper Version: Add sliced banana peppers or crushed red pepper.
Common Mistakes to Avoid with This Dish:
- Don’t overdo the oil or the roll gets soggy.
- Don’t use thick tomato slices; they slide around.
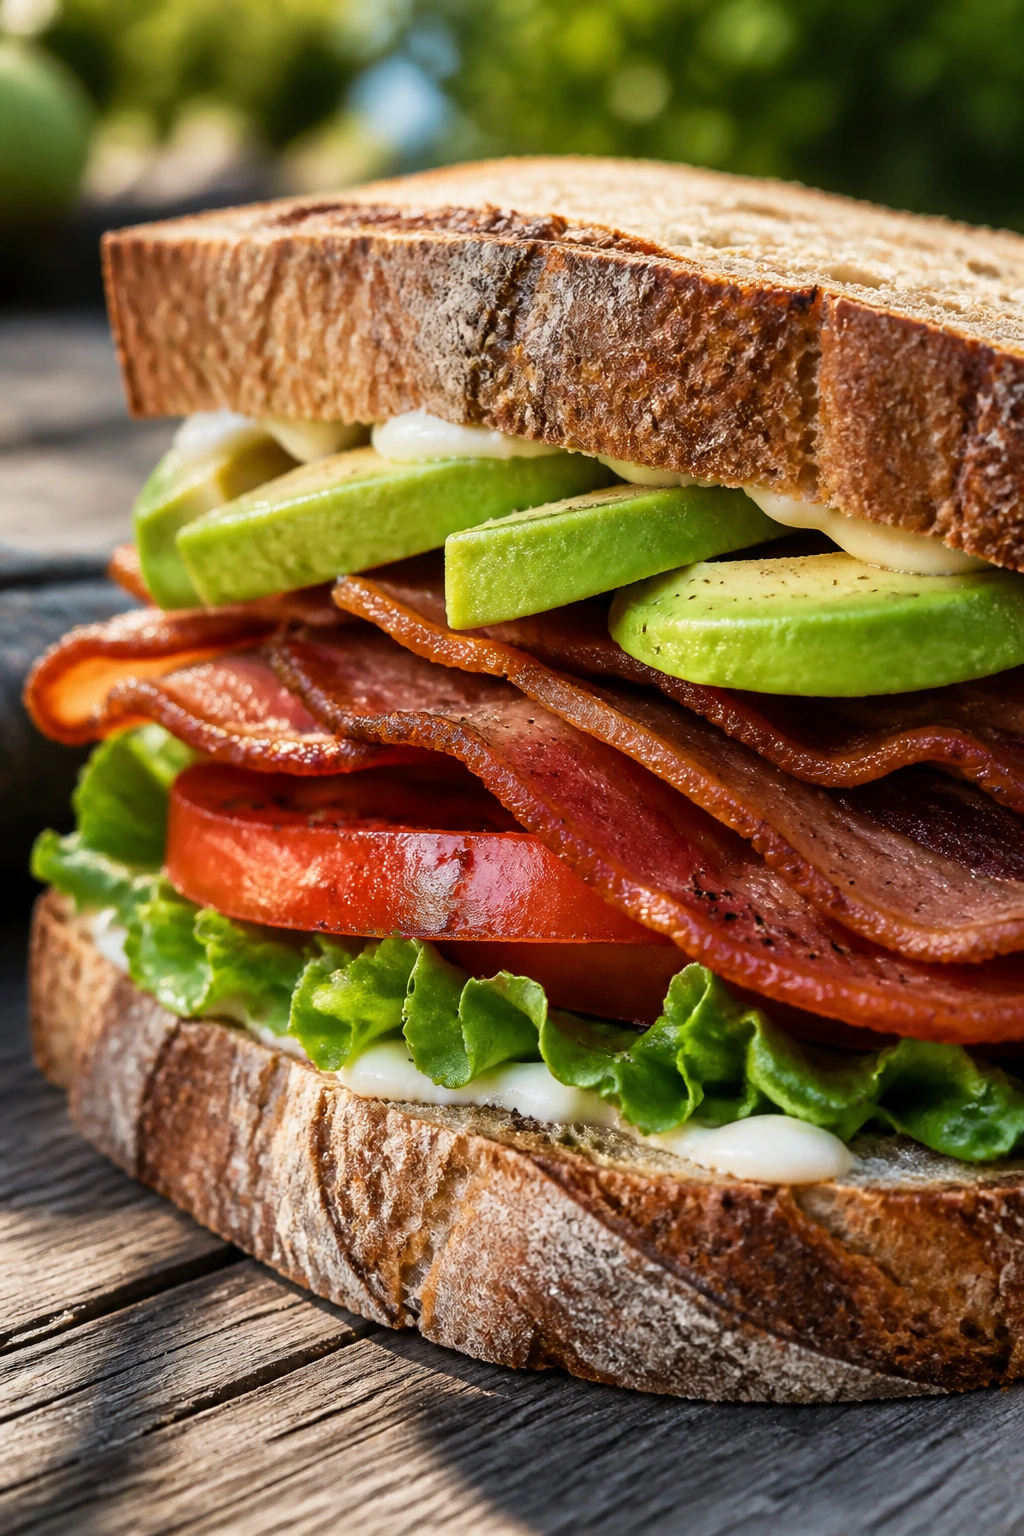
18. Turkey Club with Avocado
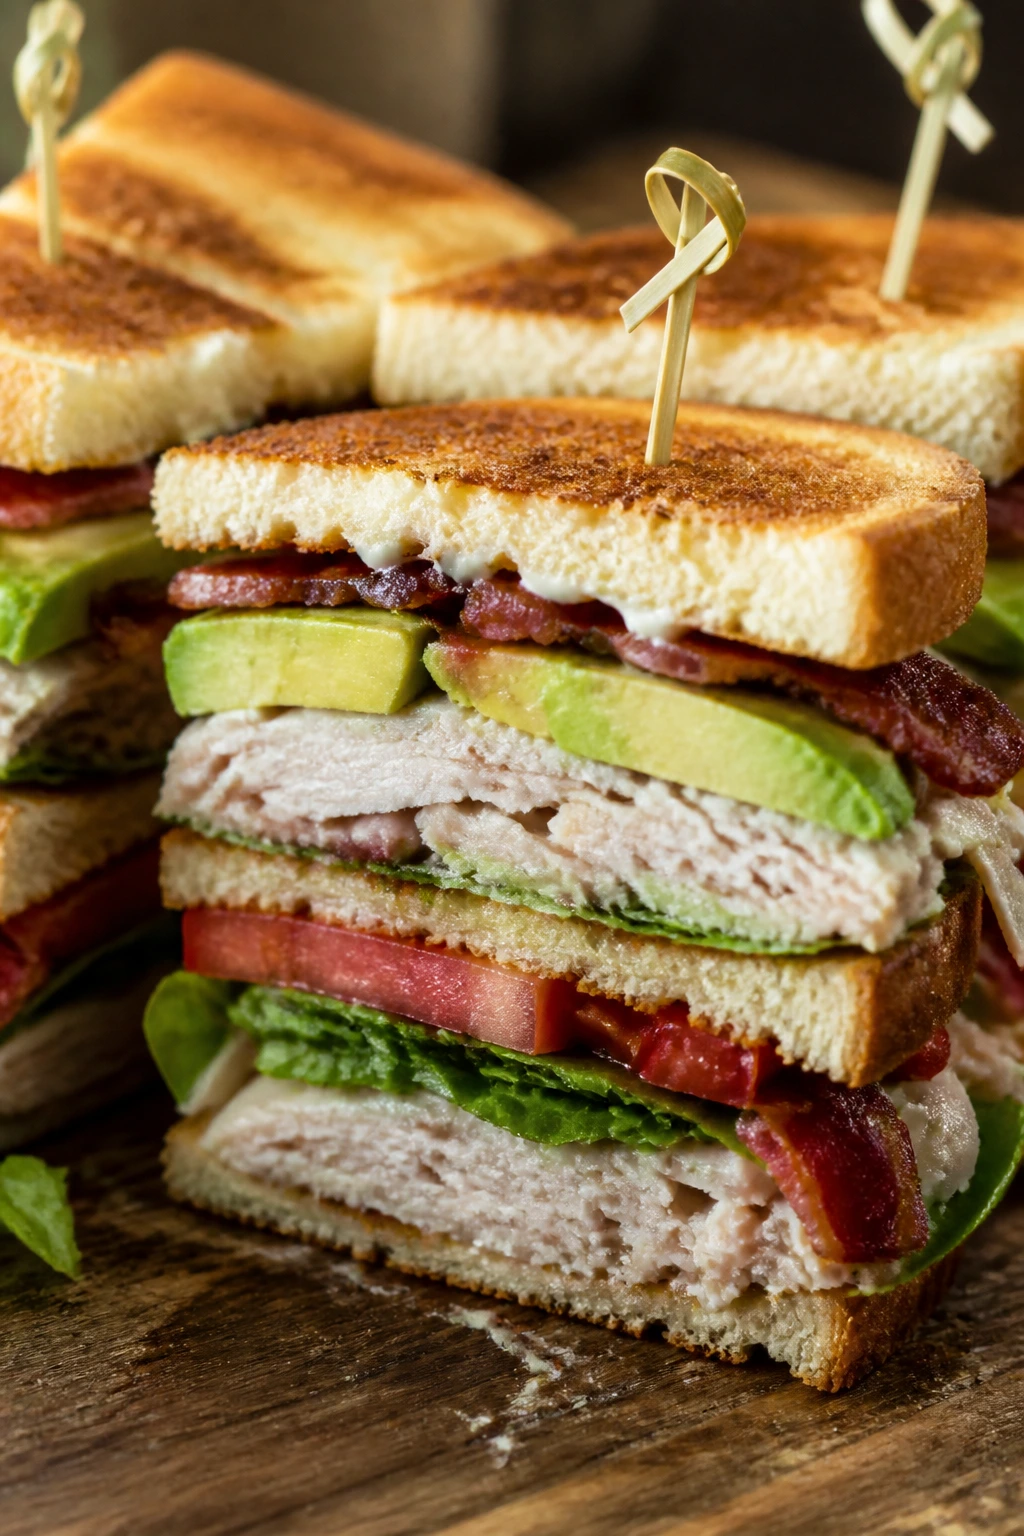
A turkey club can feel like a lot, which is why avocado helps. It softens the edges of the bacon and gives the sandwich a creamier middle without needing extra mayo.
Why It Works: Toasted bread keeps the club from collapsing under its own layers, and avocado bridges the dry turkey and salty bacon. Stack it carefully, and the whole thing cuts cleanly.
Key Ingredients:
- 6 slices sandwich bread
- 8 slices turkey
- 4 slices bacon, cooked crisp
- 1 avocado, sliced
- 4 tomato slices
- 4 lettuce leaves
- 2 tbsp mayonnaise
Quick Steps:
- Toast the bread until golden.
- Spread mayo on each slice.
- Build the first layer with turkey, lettuce, and tomato.
- Add another slice of toast, then bacon and avocado.
- Top, cut into quarters, and secure with picks if needed.
Equipment for This Recipe:
- Skillet
- Serrated knife
- Toothpicks
How to Serve This Dish: Serve it with chips and a few cornichons. Because it’s a taller sandwich, I like wrapping it in parchment before cutting so the stack stays tight.
Pro Tips for This Recipe:
- Use ripe but firm avocado so it doesn’t smear.
- Cut the club after a short rest so the layers settle.
- Keep tomato slices thin and dry.
Variations on This Dish:
- BLT Club: Swap turkey for extra bacon.
- Herb Mayo Club: Stir chopped chives into the mayo.
Common Mistakes to Avoid with This Dish:
- Don’t build it on soft bread.
- Don’t stack wet tomato against the bread.
19. Avocado Egg Salad Sandwich
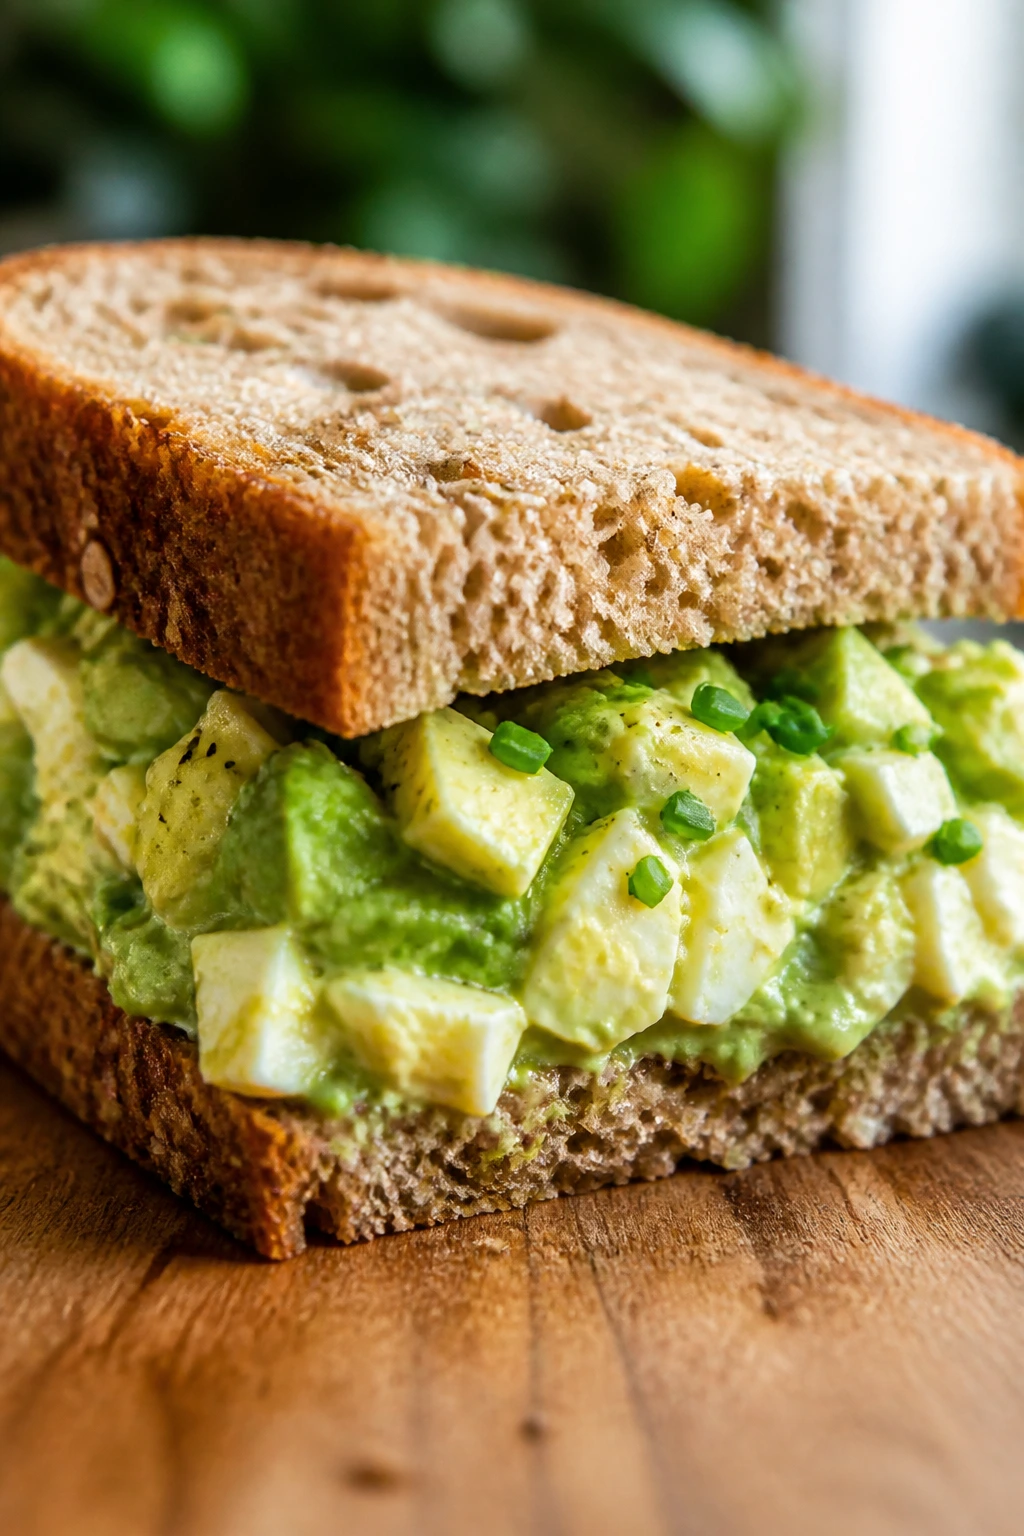
This sandwich takes egg salad and gives it a fresher, softer edge. Avocado makes the filling creamy enough to need less mayo, and lime keeps the whole thing from tasting heavy.
Why It Works: Egg and avocado make a smooth base, but chives and lime stop it from going bland. The bread needs to be hearty enough to hold the filling without tearing.
Key Ingredients:
- 4 hard-boiled eggs, chopped
- 1 ripe avocado, mashed
- 2 tbsp mayonnaise
- 1 tsp lime juice
- 1 tbsp chopped chives
- 4 slices whole-grain bread
- 1 cup lettuce
Quick Steps:
- Mash the avocado in a bowl.
- Fold in the eggs, mayo, lime juice, chives, salt, and pepper.
- Chill for 10 minutes.
- Line the bread with lettuce and spoon on the filling.
- Close, cut, and wrap.
Equipment for This Recipe:
- Bowl
- Fork
- Knife
How to Serve This Dish: It tastes good with sliced cucumbers and a few salted crackers on the side. Eat it the same day, because avocado darkens and softens as it sits.
Pro Tips for This Recipe:
- Use lemon or lime juice right away to slow browning.
- Chop the eggs while they’re fully cool.
- Keep the filling slightly chunky.
Variations on This Dish:
- Dijon Avocado Egg: Add 1 tsp Dijon.
- Herby Version: Add parsley and dill.
Common Mistakes to Avoid with This Dish:
- Don’t leave the avocado exposed too long.
- Don’t overmix until the filling turns mushy.
20. Meatball Sub on Mini Rolls

Meatball subs are a little chaotic, so mini rolls make them picnic-friendly. Marinara, melted cheese, and a bite-sized format keep the mess under control while still giving you the full comfort-food effect.
Why It Works: Small rolls let you portion the sauce instead of flooding the bread, and provolone melts into the meatballs without turning the sandwich into soup. A short bake sets the cheese.
Key Ingredients:
- 12 small meatballs, cooked
- 1 cup marinara sauce
- 4 mini rolls
- 4 slices provolone
- 1 tbsp grated parmesan
- 1 tbsp chopped basil
Quick Steps:
- Warm the meatballs in marinara over medium-low heat.
- Split the rolls and spoon in a little sauce.
- Add 3 meatballs per roll and top with provolone.
- Bake at 375°F for 5 minutes until the cheese melts.
- Finish with parmesan and basil.
Equipment for This Recipe:
- Saucepan
- Baking sheet
- Spoon
How to Serve This Dish: Serve with a simple green salad or roasted peppers. They’re best eaten warm, so pack them close to the heat source if you’re traveling a short distance.
Pro Tips for This Recipe:
- Keep the sauce thick so it stays inside the roll.
- Use mini rolls with some crust.
- Let the meatballs rest a minute before packing.
Variations on This Dish:
- Spicy Marinara Version: Add red pepper flakes to the sauce.
- Mozzarella Sub: Swap provolone for mozzarella.
Common Mistakes to Avoid with This Dish:
- Don’t overfill the rolls.
- Don’t make the sauce too thin or it runs everywhere.
21. Grilled Veggie Panini with Goat Cheese
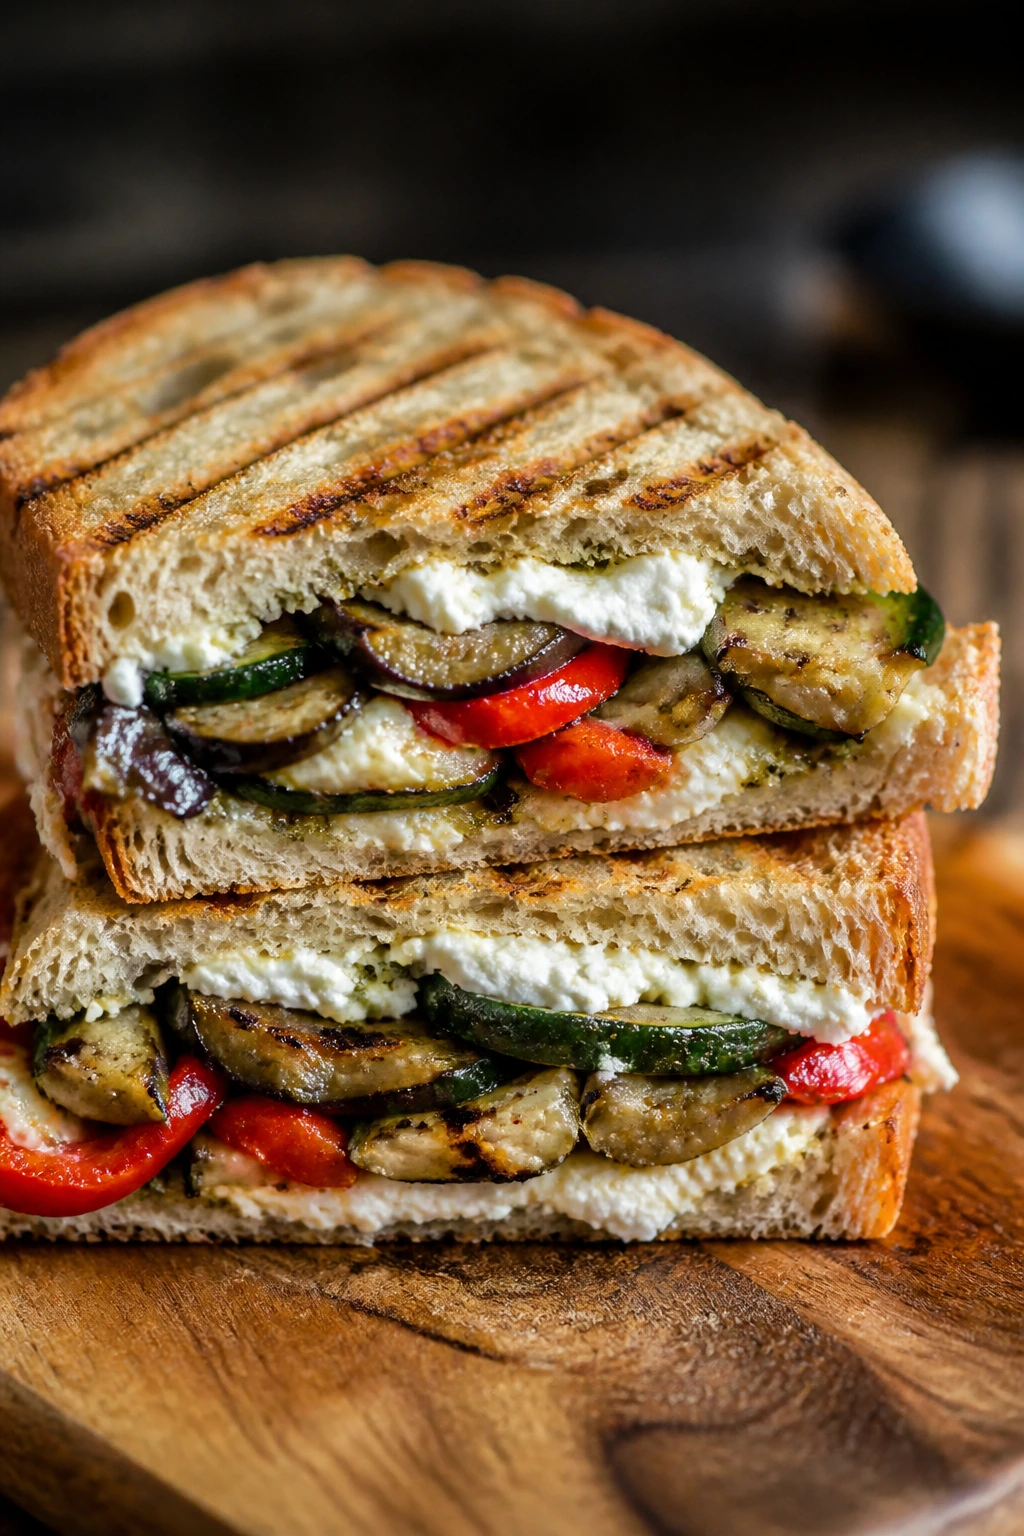
Grilled vegetables taste especially good when they’ve been pressed into bread that can handle the juices. Goat cheese gives the sandwich tang, and the panini press makes the whole thing compact enough for a picnic napkin.
Why It Works: Zucchini, eggplant, and peppers release moisture when cooked, so pressing them between sturdy bread keeps the filling from slipping. Goat cheese adds enough creaminess that you don’t need much else.
Key Ingredients:
- 1 zucchini, sliced lengthwise
- 1 small eggplant, sliced
- 1 red bell pepper, sliced
- 2 tbsp olive oil
- 4 slices ciabatta or rustic bread
- 4 oz goat cheese
- 1 tbsp pesto
Quick Steps:
- Brush vegetables with oil and grill until browned.
- Spread pesto on the bread.
- Add goat cheese and the grilled vegetables.
- Press in a panini press or skillet for 3 to 4 minutes.
- Cut and wrap once the crust firms up.
Equipment for This Recipe:
- Grill pan or skillet
- Panini press or heavy pan
- Knife
How to Serve This Dish: It works well with cherry tomatoes and a handful of kettle chips. If you want to pack it cold, let it cool first so the cheese doesn’t smear.
Pro Tips for This Recipe:
- Grill the vegetables until they lose their raw wetness.
- Use thick bread slices so the panini holds shape.
- Let the sandwich rest a minute before cutting.
Variations on This Dish:
- Mozzarella Version: Use mozzarella instead of goat cheese.
- Balsamic Version: Add a quick drizzle of balsamic glaze.
Common Mistakes to Avoid with This Dish:
- Don’t use watery vegetables straight from the grill.
- Don’t press so hard that the filling squeezes out.
22. White Bean and Artichoke Smash Sandwich
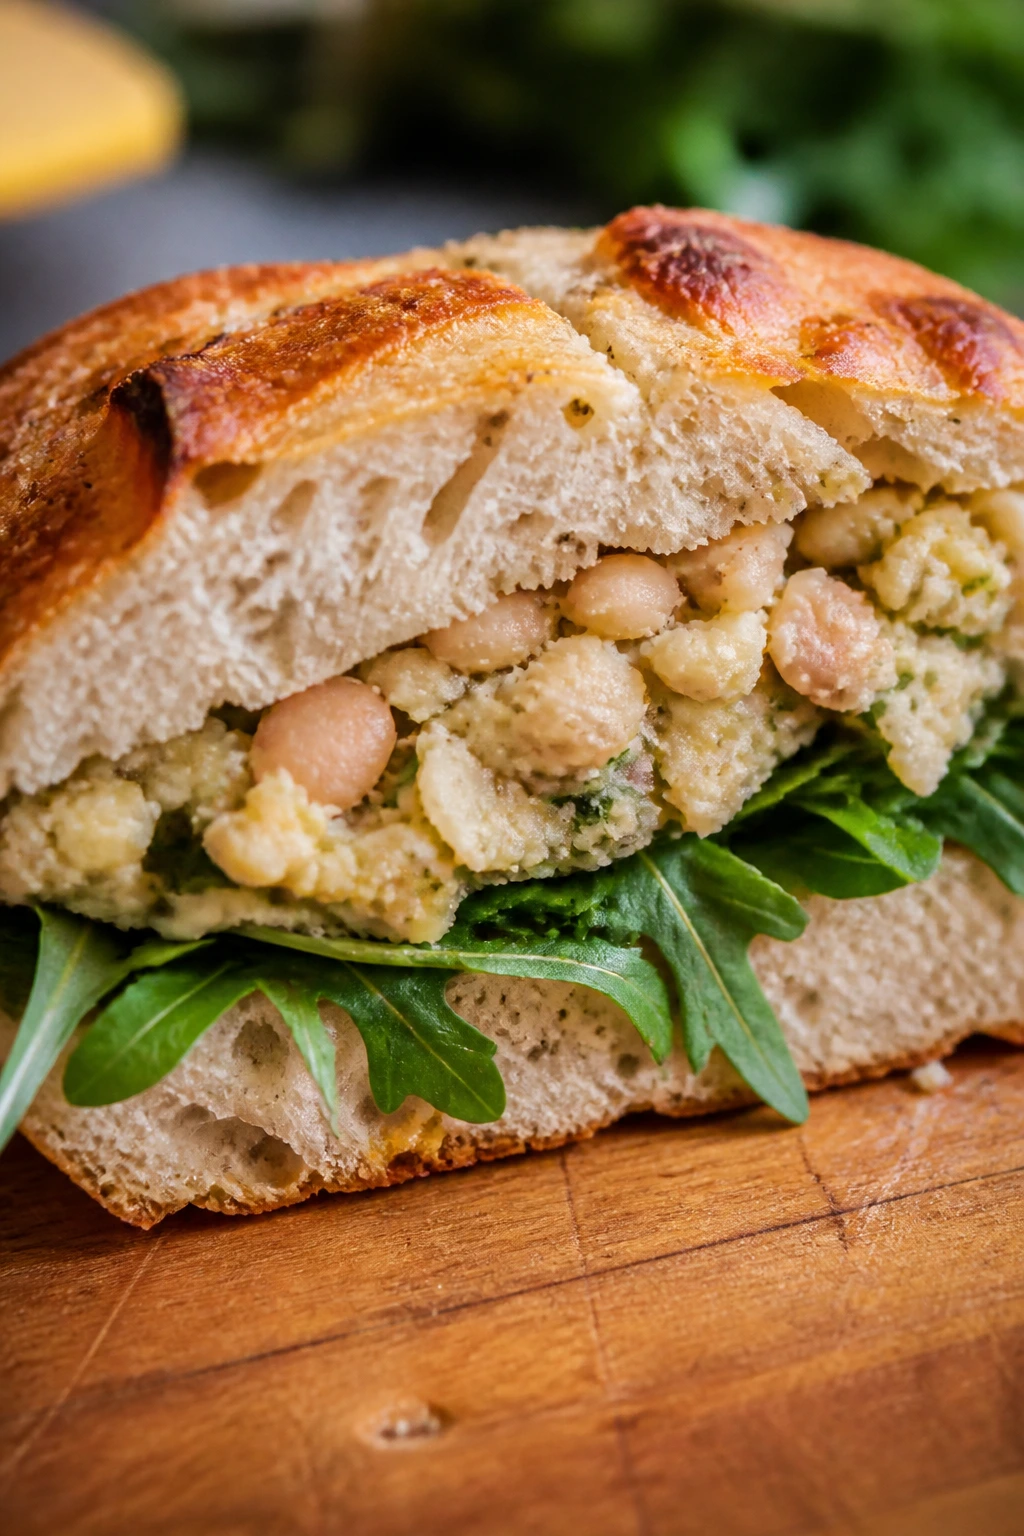
White beans and artichokes make a picnic filling that feels substantial without needing meat. Lemon and parsley keep it bright, and the mash spreads neatly on crusty bread.
Why It Works: The beans give the sandwich body, while artichokes bring a briny note that wakes up the whole thing. A little texture left in the mash keeps it from turning into paste.
Key Ingredients:
- 1 can white beans, drained and rinsed
- 1/2 cup marinated artichoke hearts, chopped
- 1 tbsp lemon juice
- 2 tbsp olive oil
- 1 tbsp chopped parsley
- 4 slices rustic bread
- 1 cup arugula
Quick Steps:
- Mash the beans lightly with a fork.
- Stir in artichokes, lemon juice, olive oil, parsley, salt, and pepper.
- Toast the bread lightly.
- Layer arugula, then the bean mixture.
- Close and cut.
Equipment for This Recipe:
- Fork
- Bowl
- Toaster or skillet
How to Serve This Dish: Serve it with olives or a simple chopped salad. It’s a good one for a picnic when you want a vegetarian filling that doesn’t feel thin.
Pro Tips for This Recipe:
- Leave some beans whole for better texture.
- Chop the artichokes small so they spread evenly.
- Toast the bread enough to keep the mash from soaking in.
Variations on This Dish:
- Garlic Bean Smash: Add 1 small grated garlic clove.
- Sun-Dried Tomato Version: Add chopped sun-dried tomatoes for sweetness.
Common Mistakes to Avoid with This Dish:
- Don’t overmash the beans into a smooth paste.
- Don’t use soft bread; it gives up too fast.
23. Tuna Melt on Sourdough

A tuna melt is one of the few sandwiches that can go from skillet to basket without losing its charm. Sourdough, cheddar, and a little dill pickle keep the filling from tasting flat.
Why It Works: Toasting the bread first gives the sandwich structure, and melted cheddar locks the tuna into place. The pickle adds the acid this sandwich needs to taste fresh instead of heavy.
Key Ingredients:
- 1 can tuna, drained
- 1/4 cup mayonnaise
- 1 tbsp chopped dill pickle
- 4 slices sourdough
- 4 slices cheddar
- 1 tbsp butter
- 1 tsp Dijon mustard
Quick Steps:
- Mix tuna, mayo, pickle, and Dijon.
- Butter the outside of the sourdough.
- Fill with tuna and cheddar.
- Cook in a skillet over medium heat for 3 to 4 minutes per side until golden.
- Rest briefly before cutting.
Equipment for This Recipe:
- Skillet
- Spatula
- Knife
How to Serve This Dish: Serve it hot with tomato wedges or a handful of chips. If you’re making it for a picnic, wrap it in foil so it stays warm longer.
Pro Tips for This Recipe:
- Drain the tuna until it’s nearly dry.
- Use sharp cheddar so the melt has more bite.
- Let it rest before slicing or the filling spills out.
Variations on This Dish:
- Pepper Jack Melt: Swap cheddar for pepper jack.
- Tomato Melt: Add thin tomato slices between the tuna and cheese.
Common Mistakes to Avoid with This Dish:
- Don’t cook over high heat; the bread burns before the cheese melts.
- Don’t pack it without wrapping if you want to keep the crust crisp.
24. Mozzarella, Prosciutto, and Melon Sandwich
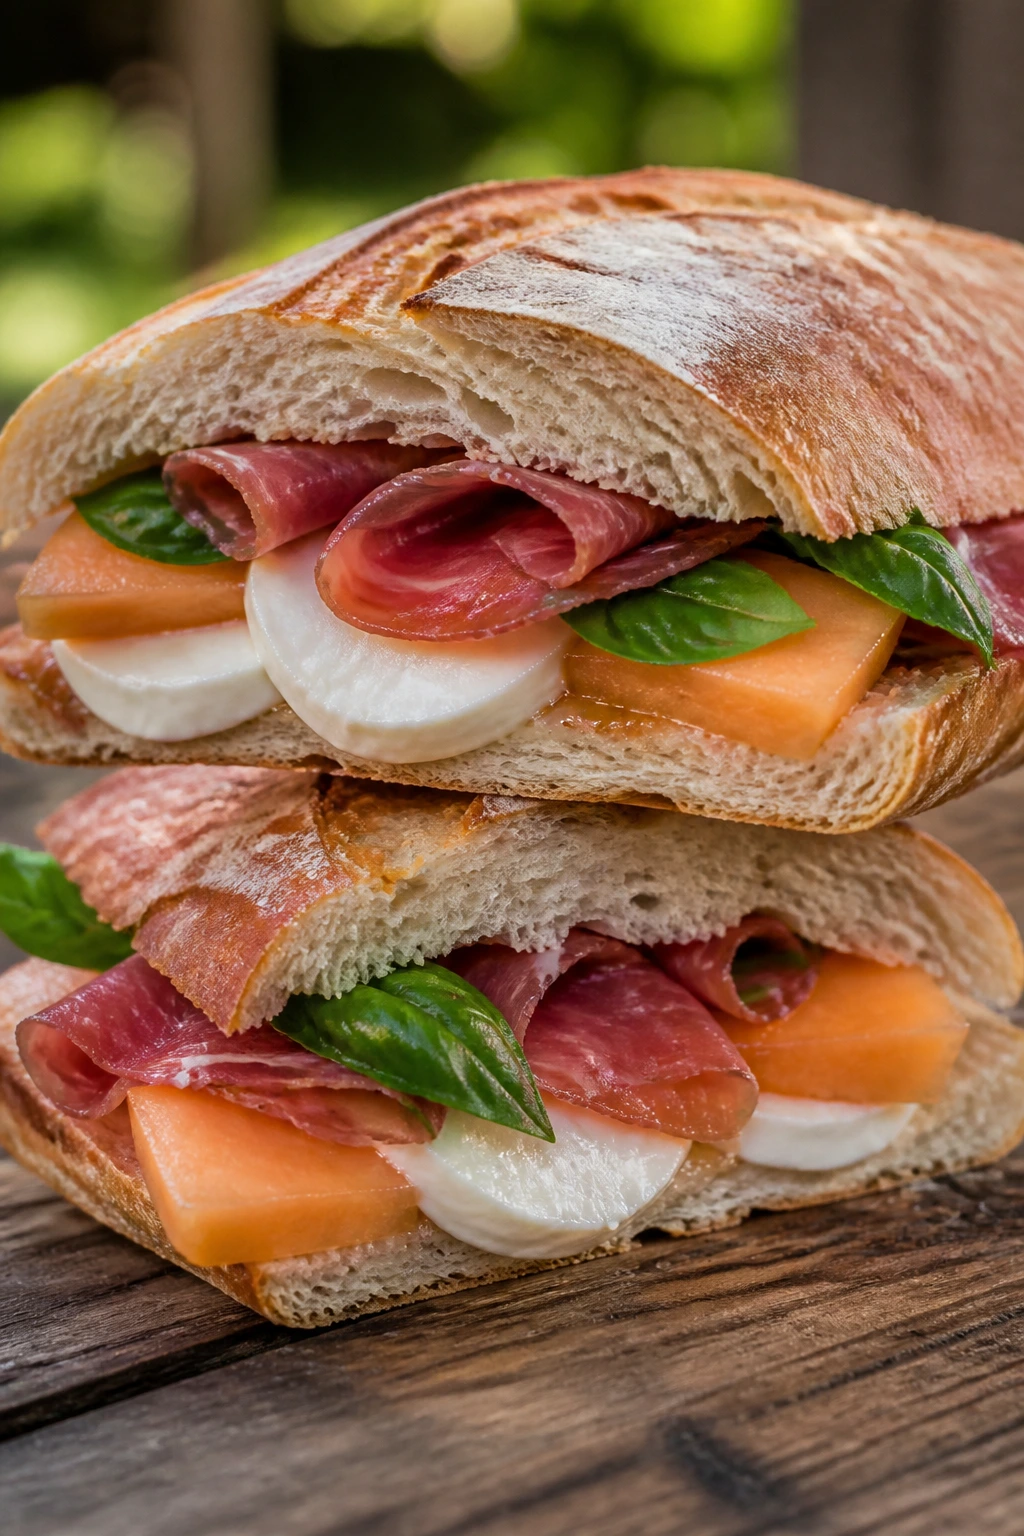
This is the sandwich that reminds people a picnic can be a little bit luxurious. Sweet melon, salty prosciutto, and creamy mozzarella make a sharp, juicy combination that tastes best on bread with some chew.
Why It Works: Melon brings the sweetness, prosciutto brings the salt, and mozzarella smooths the whole thing out. A crusty baguette or roll keeps the fruit from turning everything soggy.
Key Ingredients:
- 1 small baguette, split
- 4 oz prosciutto
- 6 oz fresh mozzarella, sliced and patted dry
- 1 cup cantaloupe or honeydew, thinly sliced
- 1 tbsp olive oil
- 1/4 cup basil leaves
Quick Steps:
- Lightly toast the baguette.
- Layer mozzarella, prosciutto, melon, and basil.
- Drizzle with olive oil.
- Press gently and close the sandwich.
- Wrap and chill briefly before serving.
Equipment for This Recipe:
- Knife
- Cutting board
- Parchment paper
How to Serve This Dish: Serve it with a few salty nuts or olives. It’s one of the better choices when you want something cold that still feels special.
Pro Tips for This Recipe:
- Choose melon that’s ripe but not watery.
- Pat the mozzarella dry before slicing.
- Keep the basil leaves whole for better aroma.
Variations on This Dish:
- Burrata Version: Use burrata for a softer center.
- Peach Swap: Use firm peach slices instead of melon.
Common Mistakes to Avoid with This Dish:
- Don’t overfill with fruit.
- Don’t skip the toast; the bread needs help.
25. Southwestern Chicken Avocado Wrap
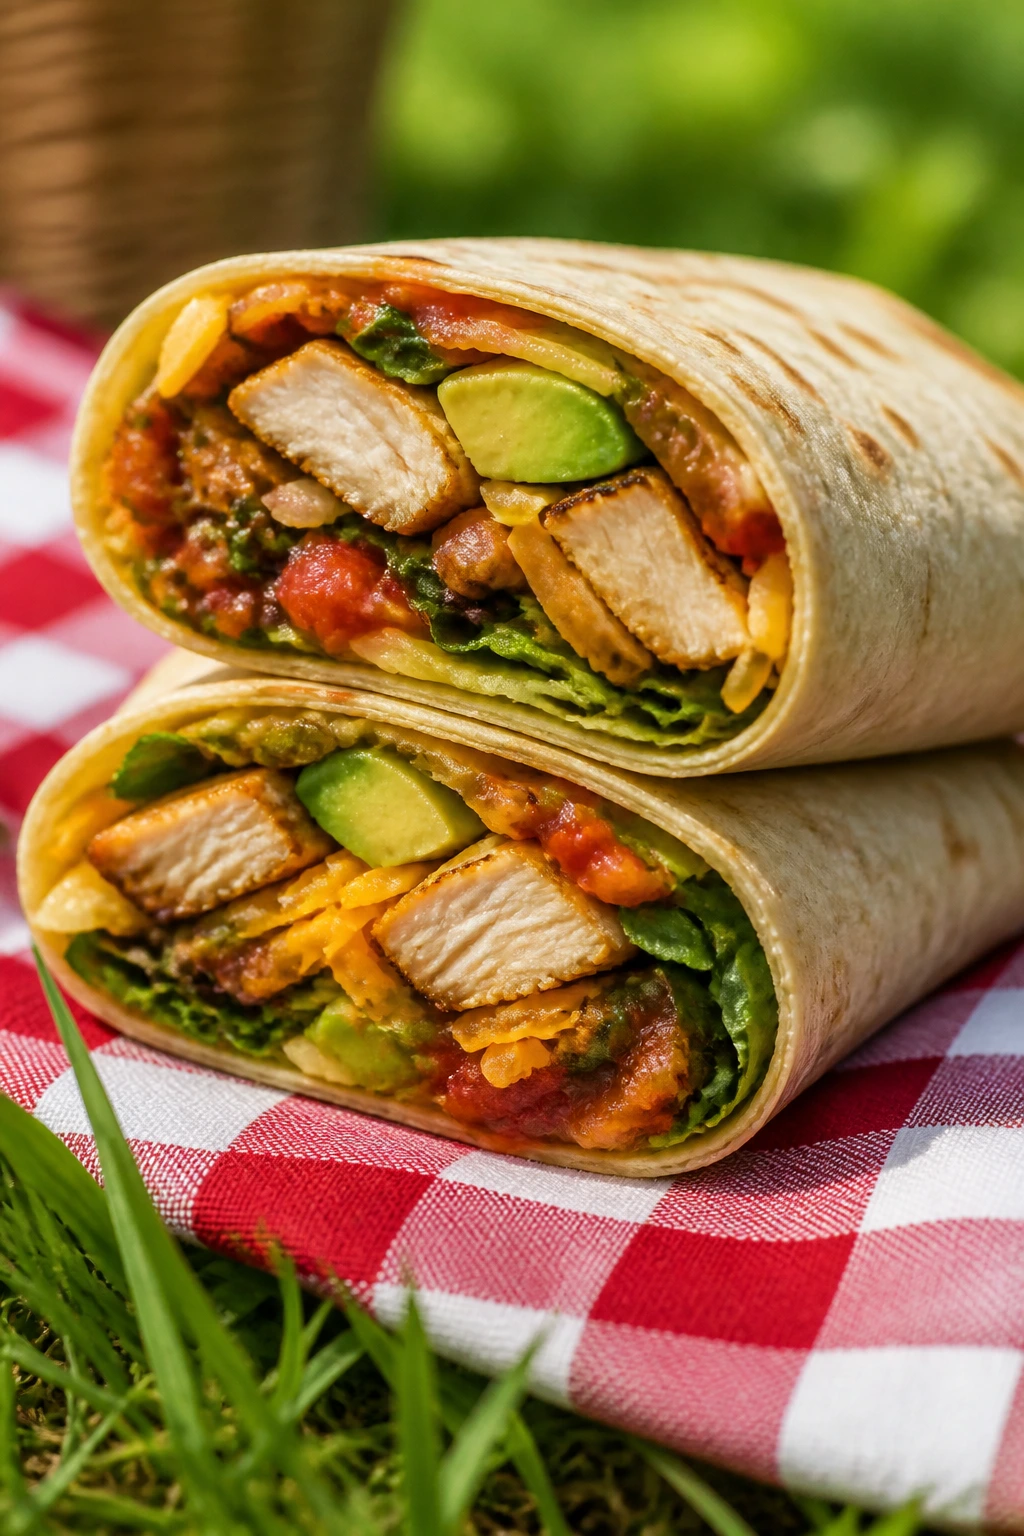
This wrap has enough smoke and creaminess to hold attention at a picnic. Chicken, avocado, salsa, and a little lime keep it bright without needing a big stack of ingredients.
Why It Works: The avocado softens the chicken, while salsa brings a little heat and acid. A tortilla wraps the filling tighter than sliced bread ever could.
Key Ingredients:
- 2 large flour tortillas
- 2 cups cooked chicken, sliced
- 1 avocado, sliced
- 1/2 cup salsa
- 1 cup shredded lettuce
- 1/4 cup shredded cheddar
- 1 tbsp lime juice
Quick Steps:
- Lay the tortillas flat and spread a thin line of salsa.
- Layer chicken, avocado, lettuce, cheddar, and lime juice.
- Roll tightly and tuck in the ends.
- Chill for 10 minutes.
- Slice and wrap.
Equipment for This Recipe:
- Cutting board
- Sharp knife
- Parchment paper
How to Serve This Dish: It goes well with tortilla chips and a few slices of mango or pineapple. If the salsa is very loose, spoon it on sparingly and serve more on the side.
Pro Tips for This Recipe:
- Use a thicker salsa so the wrap doesn’t leak.
- Slice the avocado right before assembly.
- Warm the tortilla for 10 seconds so it rolls without cracking.
Variations on This Dish:
- Bean Version: Add black beans for more heft.
- Spicier Wrap: Add pickled jalapeños or hot sauce.
Common Mistakes to Avoid with This Dish:
- Don’t overstuff the tortilla.
- Don’t use watery salsa straight from a thin jar.
26. Sesame Tofu and Cabbage Slaw Sandwich
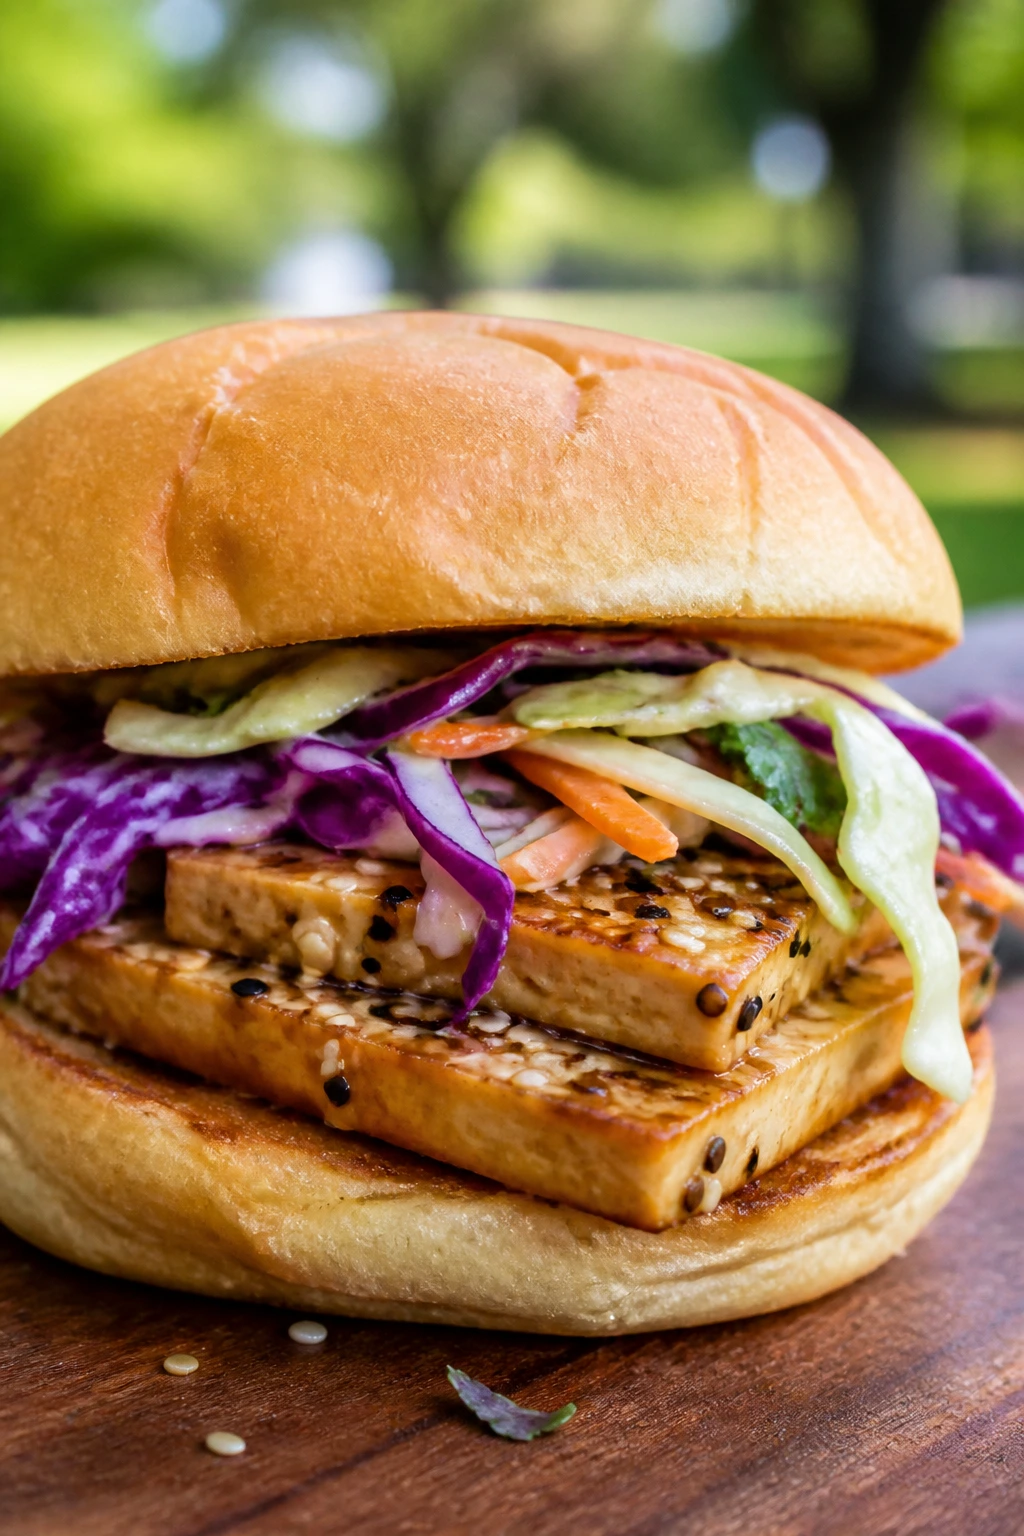
Tofu gets overlooked in picnic food, which is a shame. Pressed tofu, cabbage slaw, and a sesame dressing make a sandwich that stays crunchy and tidy longer than most mayonnaise-heavy options.
Why It Works: Pressing the tofu removes the water that would otherwise fight the bread, and cabbage slaw stays crisp for hours. Sesame gives the filling a nutty depth that fits well with soft buns.
Key Ingredients:
- 1 block firm tofu, pressed and sliced
- 2 tbsp soy sauce
- 1 tbsp sesame oil
- 2 cups shredded cabbage
- 1 carrot, shredded
- 2 tbsp mayo or tahini
- 4 sandwich buns or rolls
Quick Steps:
- Press the tofu for 15 minutes, then slice.
- Marinate with soy sauce and sesame oil for 10 minutes.
- Toss cabbage, carrot, and mayo or tahini.
- Toast the buns lightly.
- Layer slaw and tofu, then wrap.
Equipment for This Recipe:
- Tofu press or towel
- Skillet
- Mixing bowl
How to Serve This Dish: Serve it with edamame or cucumber spears. This is one of the few picnic sandwiches that gets better if the components are packed separately and assembled at the table.
Pro Tips for This Recipe:
- Press the tofu longer if it feels spongy.
- Salt the cabbage lightly and let it sit 5 minutes for extra crunch.
- Toast the buns so they can handle the slaw.
Variations on This Dish:
- Spicy Sesame Tofu: Add chili crisp.
- Peanut Slaw Version: Mix a little peanut butter into the dressing.
Common Mistakes to Avoid with This Dish:
- Don’t skip the tofu press.
- Don’t dress the cabbage so heavily that it turns limp.
27. Falafel Pita with Tahini
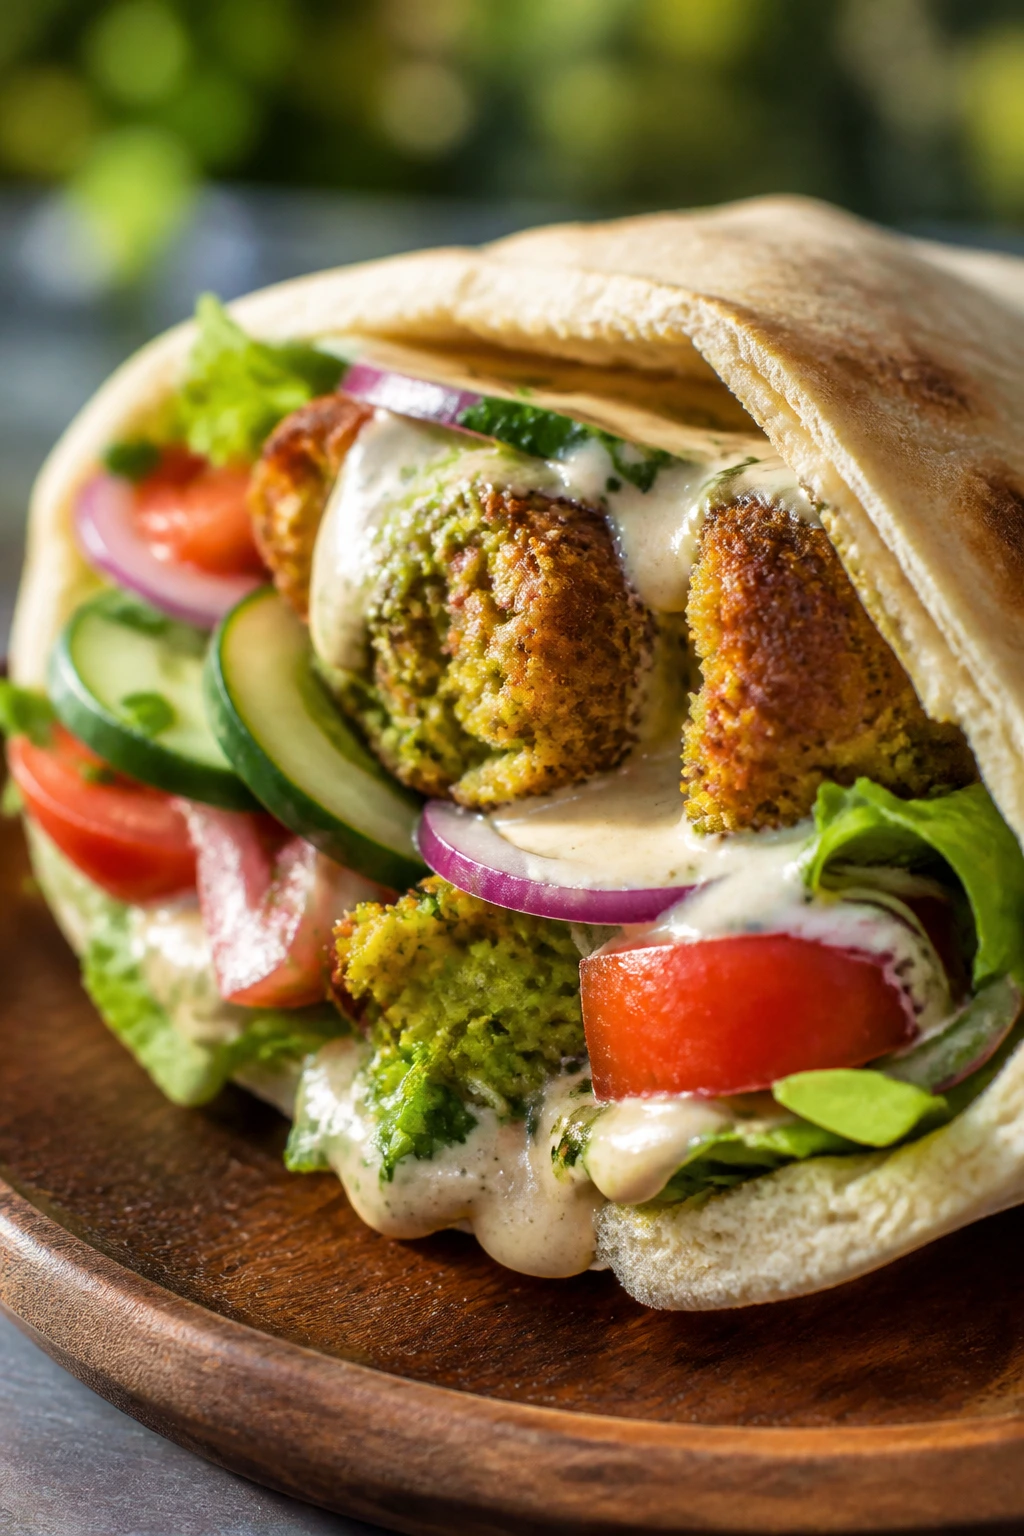
Falafel in pita is one of the few sandwiches that feels built for outdoor eating. It’s sturdy, compact, and the chickpea patties stay interesting even after they cool a bit.
Why It Works: Falafel is dry enough to travel well, and tahini gives the sandwich a creamy note without making it soggy. Cucumber, tomato, and pickled onions keep the filling sharp.
Key Ingredients:
- 8 small falafel
- 2 pita breads
- 1/4 cup tahini
- 1 cucumber, sliced
- 1 tomato, sliced
- 1/4 cup pickled onions
- 1 cup lettuce
Quick Steps:
- Warm the falafel briefly in a skillet or oven.
- Split the pitas and spread in the tahini.
- Fill with lettuce, cucumber, tomato, onions, and falafel.
- Fold the pitas and wrap.
- Chill only lightly if you want them warm.
Equipment for This Recipe:
- Skillet or oven
- Knife
- Parchment paper
How to Serve This Dish: Serve with olives and a spoonful of hummus on the side. They’re best when the pita is still soft and the filling hasn’t been left sitting too long.
Pro Tips for This Recipe:
- Warm the pita for a few seconds so it bends instead of cracking.
- Use thick tahini so it stays put.
- Keep the vegetables dry and sliced thin.
Variations on This Dish:
- Harissa Falafel: Add a swipe of harissa.
- Herb Pita: Add parsley and mint for a fresher finish.
Common Mistakes to Avoid with This Dish:
- Don’t overfill the pita pocket.
- Don’t pack wet tomatoes without blotting them first.
28. Steak and Chimichurri Sandwich
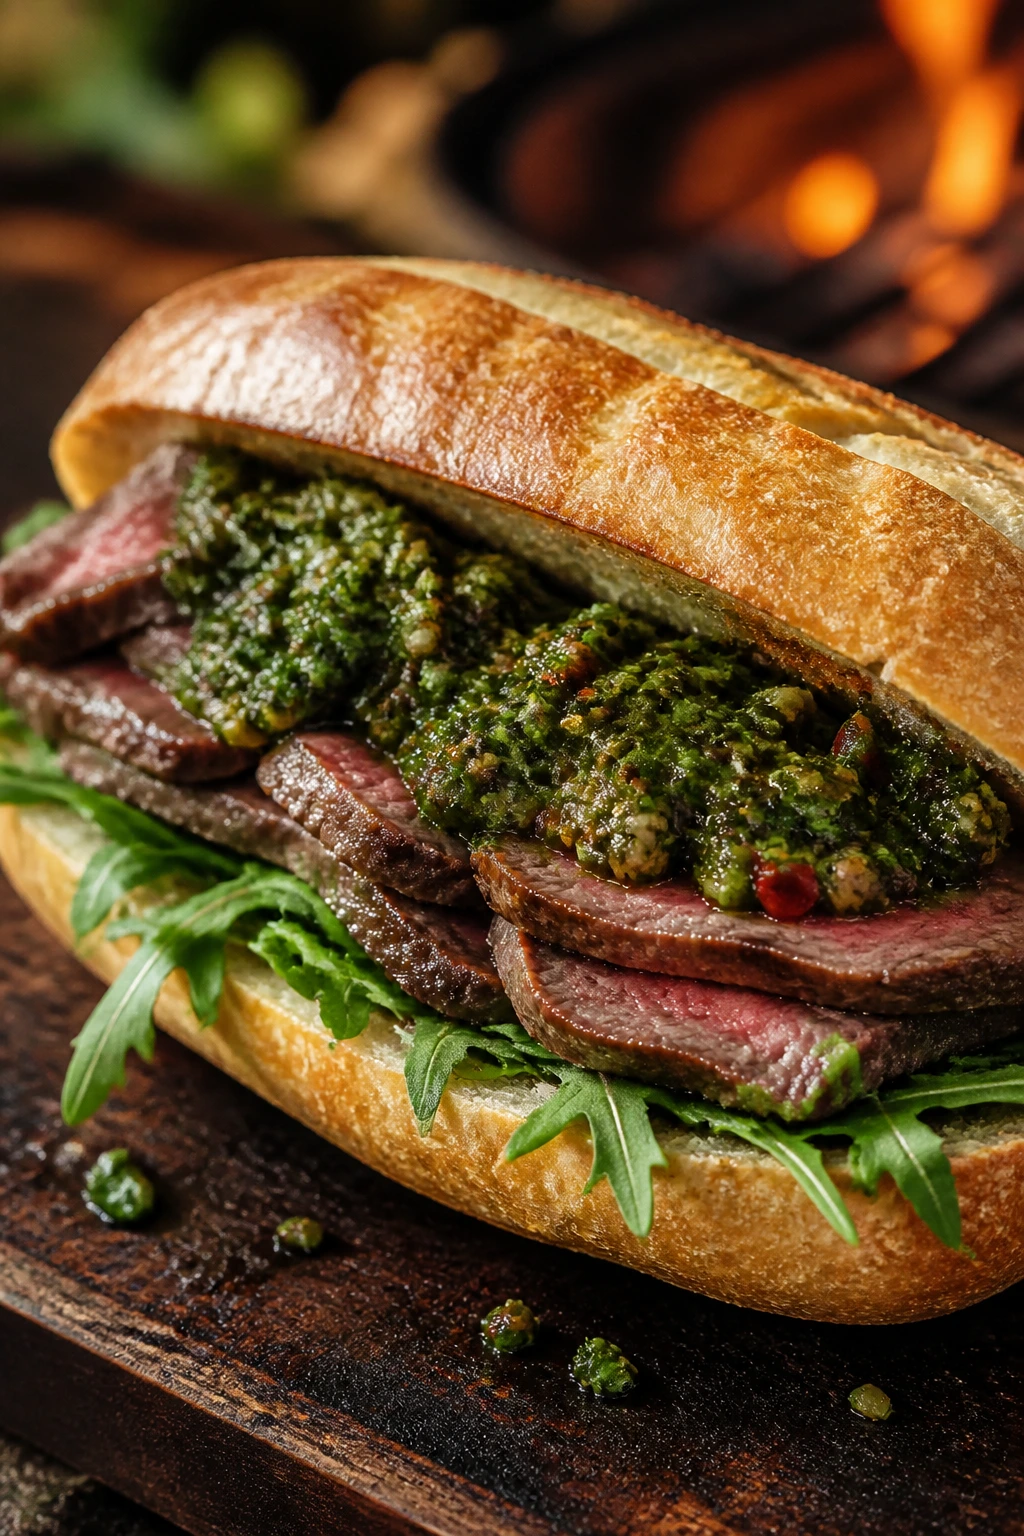
Steak sandwiches can taste heavy, which is exactly why chimichurri matters. The herb sauce keeps the meat bright, and a good roll lets you slice through everything cleanly.
Why It Works: Thinly sliced steak gives you tenderness without bulk, and chimichurri adds acidity, garlic, and herbs in one shot. Arugula adds a peppery edge that stands up to the meat.
Key Ingredients:
- 8 oz cooked steak, thinly sliced
- 2 sandwich rolls or ciabatta halves
- 3 tbsp chimichurri
- 1 cup arugula
- 1/4 red onion, thinly sliced
- 1 tbsp olive oil
Quick Steps:
- Warm the steak gently if needed.
- Toast the rolls lightly.
- Spoon chimichurri on both sides.
- Add steak, arugula, and onion.
- Press, cut, and wrap.
Equipment for This Recipe:
- Knife
- Skillet
- Cutting board
How to Serve This Dish: Serve it with potato wedges or a tomato salad. It’s strong enough to be the center of the picnic plate, so keep the side dishes simple.
Pro Tips for This Recipe:
- Slice the steak against the grain.
- Keep the chimichurri thick and spoonable.
- Don’t overheat the meat if it’s already cooked.
Variations on This Dish:
- Peppery Version: Add extra arugula and cracked pepper.
- Steak-Blue Cheese Swap: Add a little blue cheese for a sharper bite.
Common Mistakes to Avoid with This Dish:
- Don’t slice the steak with the grain.
- Don’t flood the roll with chimichurri.
29. Roast Veggie and Goat Cheese Focaccia

Focaccia is a good home for roasted vegetables because it has enough surface area and enough chew. Goat cheese gives the sandwich some tang, and the vegetables bring the sweet, browned flavor you want from a summer tray bake.
Why It Works: The oil in focaccia keeps the bread supple, while roasted vegetables stay drier than raw ones and don’t collapse into the crumb. Goat cheese adds a creamy stop between the bread and the filling.
Key Ingredients:
- 2 pieces focaccia, split
- 1 cup roasted zucchini, eggplant, or peppers
- 4 oz goat cheese
- 1 tbsp olive oil
- 1 tbsp balsamic glaze
- 1 cup baby spinach
Quick Steps:
- Toast the focaccia lightly.
- Spread goat cheese on the cut sides.
- Add spinach and roasted vegetables.
- Drizzle with olive oil and balsamic glaze.
- Close, cut, and wrap.
Equipment for This Recipe:
- Knife
- Baking sheet
- Parchment paper
How to Serve This Dish: It pairs well with marinated beans or olives. The sandwich is at its best when the vegetables have cooled enough to stop steaming.
Pro Tips for This Recipe:
- Roast the vegetables until their edges brown.
- Let them cool before assembly.
- Use thick focaccia so the filling doesn’t break through.
Variations on This Dish:
- Mozzarella Version: Replace goat cheese with fresh mozzarella.
- Pesto Version: Add a thin layer of pesto under the vegetables.
Common Mistakes to Avoid with This Dish:
- Don’t use hot vegetables straight from the oven.
- Don’t skip the toast on the focaccia surface.
30. Apple, Cheddar, and Turkey Sandwich

Apple and cheddar do the one-two punch that keeps turkey from tasting bland. Crisp fruit, sharp cheese, and grainy mustard make this sandwich taste like more than deli meat on bread.
Why It Works: The apple adds crunch and sweetness, cheddar brings salt and depth, and turkey gives the sandwich enough weight to feel like lunch. A sturdy bread keeps the slices from sliding apart.
Key Ingredients:
- 6 slices turkey
- 4 slices sharp cheddar
- 1 small apple, thinly sliced
- 2 tbsp grainy mustard
- 4 slices whole-grain bread
- 1 cup spinach
Quick Steps:
- Spread mustard on the bread.
- Add spinach, turkey, cheddar, and apple slices.
- Close and press lightly.
- Cut in half.
- Wrap and chill briefly if packing ahead.
Equipment for This Recipe:
- Knife
- Cutting board
- Butter knife
How to Serve This Dish: It works well with a handful of pretzels and a few grapes. If the apple is very juicy, eat it the same day.
Pro Tips for This Recipe:
- Choose a firm apple with a tart bite.
- Slice the apple thin so it doesn’t push the sandwich open.
- Use extra-sharp cheddar if you want more contrast.
Variations on This Dish:
- Cranberry Version: Add a thin spread of cranberry sauce.
- Brie Swap: Replace cheddar with brie for a softer finish.
Common Mistakes to Avoid with This Dish:
- Don’t use a mealy apple.
- Don’t build it too thick or the bread splits.
31. Smoked Turkey, Cranberry, and Pepper Jack
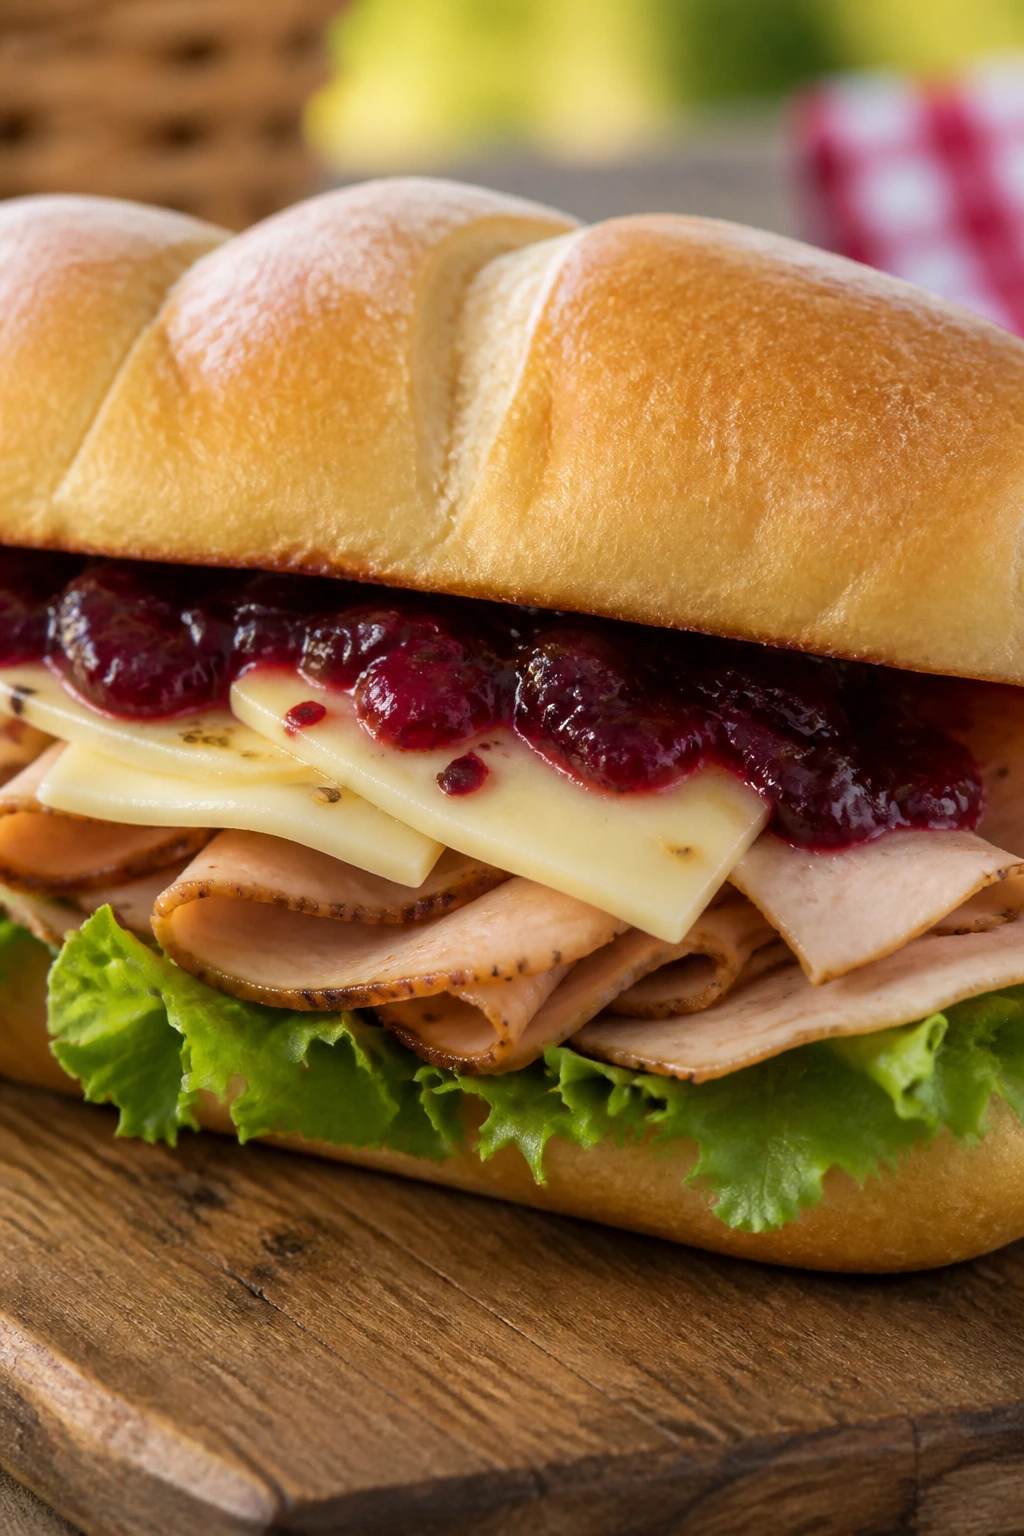
Smoked turkey gets a lot of mileage out of a sweet spread. Cranberry and pepper jack make a sandwich that feels a little festive but still works on a warm afternoon.
Why It Works: The cranberry spread keeps the turkey from tasting dry, and pepper jack adds enough heat to stop the sandwich from feeling one-note. Soft bread makes the sweet-savory combination land cleanly.
Key Ingredients:
- 6 slices smoked turkey
- 4 slices pepper jack
- 2 sandwich rolls
- 2 tbsp cranberry sauce
- 1 cup lettuce
- 1 tbsp mayonnaise
Quick Steps:
- Split and lightly toast the rolls.
- Spread mayo and cranberry sauce on the bread.
- Layer turkey, pepper jack, and lettuce.
- Close and press gently.
- Wrap for transport.
Equipment for This Recipe:
- Knife
- Toaster or skillet
- Cutting board
How to Serve This Dish: Serve it with kettle chips or a cucumber salad. It’s a good sandwich for a picnic where you want something familiar but not boring.
Pro Tips for This Recipe:
- Keep the cranberry layer thin.
- Let the cheese sit against the turkey if you want a little warmth.
- Use lettuce to keep the roll from getting wet.
Variations on This Dish:
- Sharp Cheddar Swap: Replace pepper jack with cheddar.
- Herb Turkey Version: Add a little thyme or parsley.
Common Mistakes to Avoid with This Dish:
- Don’t add too much cranberry sauce.
- Don’t use bread too soft to hold the filling.
32. Tomato, Bacon, and Pimento Cheese Sandwich
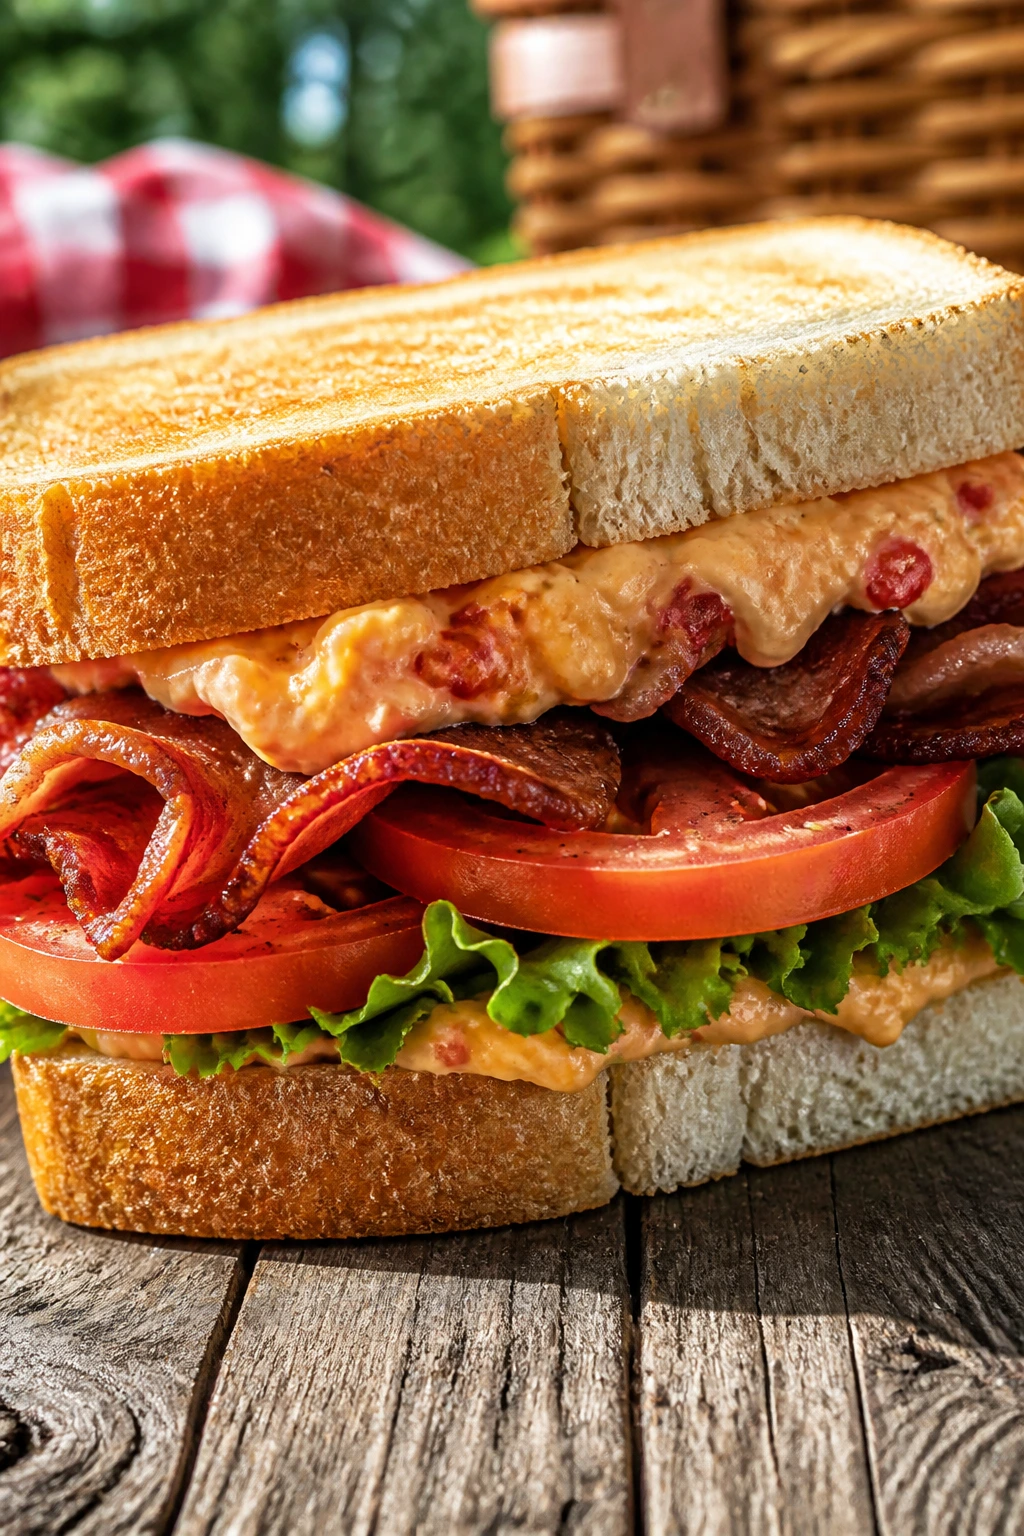
Pimento cheese is already rich, so the tomato and bacon need to bring the freshness and crunch. This is a sandwich that wants a little salt, a little smoke, and a bread that can stand up without sagging.
Why It Works: Pimento cheese sticks to the bread and keeps the tomato from slipping around, while bacon adds crisp edges that cut the richness. White bread or a soft roll gives it that classic picnic feel.
Key Ingredients:
- 4 slices white bread
- 1/2 cup pimento cheese
- 4 slices bacon, cooked crisp
- 2 tomato slices
- 2 lettuce leaves
- Pinch of black pepper
Quick Steps:
- Toast the bread lightly if you want more structure.
- Spread pimento cheese on both slices.
- Add lettuce, tomato, and bacon.
- Season with pepper.
- Close, cut, and eat soon.
Equipment for This Recipe:
- Skillet
- Knife
- Paper towels
How to Serve This Dish: It goes well with watermelon, chips, or a few pickles. Because the tomato is so central, this one tastes best when assembled close to serving.
Pro Tips for This Recipe:
- Salt and blot the tomato slices.
- Keep the bacon crisp before assembly.
- Use a thick pimento cheese spread, not a loose dip.
Variations on This Dish:
- Spicy Pimento Cheese: Add diced jalapeño.
- Bacon-Less Version: Use roasted red peppers instead of bacon.
Common Mistakes to Avoid with This Dish:
- Don’t stack watery tomatoes on soft bread.
- Don’t use pimento cheese that’s too loose.
33. Kimchi Grilled Cheese
Kimchi grilled cheese is for anyone who thinks a picnic sandwich should have some attitude. The kimchi brings heat and tang, while the melted cheese softens the edges just enough.
Why It Works: Kimchi adds acidity that slices through all that cheese, and squeezing it dry keeps the sandwich from turning wet. Sourdough gives the crust enough bite to handle the pan.
Key Ingredients:
- 4 slices sourdough
- 4 slices cheddar
- 1/2 cup kimchi, squeezed dry and chopped
- 2 tbsp butter
- 1 tbsp scallions, sliced
- 1 tsp mayonnaise, optional for browning
Quick Steps:
- Butter the outside of each bread slice.
- Layer cheese, kimchi, scallions, and more cheese inside.
- Cook in a skillet over medium heat for 3 to 4 minutes per side.
- Press lightly with a spatula until golden.
- Rest, then cut.
Equipment for This Recipe:
- Skillet
- Spatula
- Knife
How to Serve This Dish: Serve it with cucumber spears or a simple slaw. It’s better warm, but it still works once it cools down a little.
Pro Tips for This Recipe:
- Squeeze the kimchi until it barely drips.
- Keep the heat medium so the bread browns slowly.
- Let the cheese melt fully before flipping.
Variations on This Dish:
- Goat Cheese Version: Swap some cheddar for goat cheese.
- Mozzarella Version: Use mozzarella for a milder melt.
Common Mistakes to Avoid with This Dish:
- Don’t leave the kimchi wet.
- Don’t crank the heat high or the bread burns.
34. Avocado, Tomato, and Sprout Sandwich
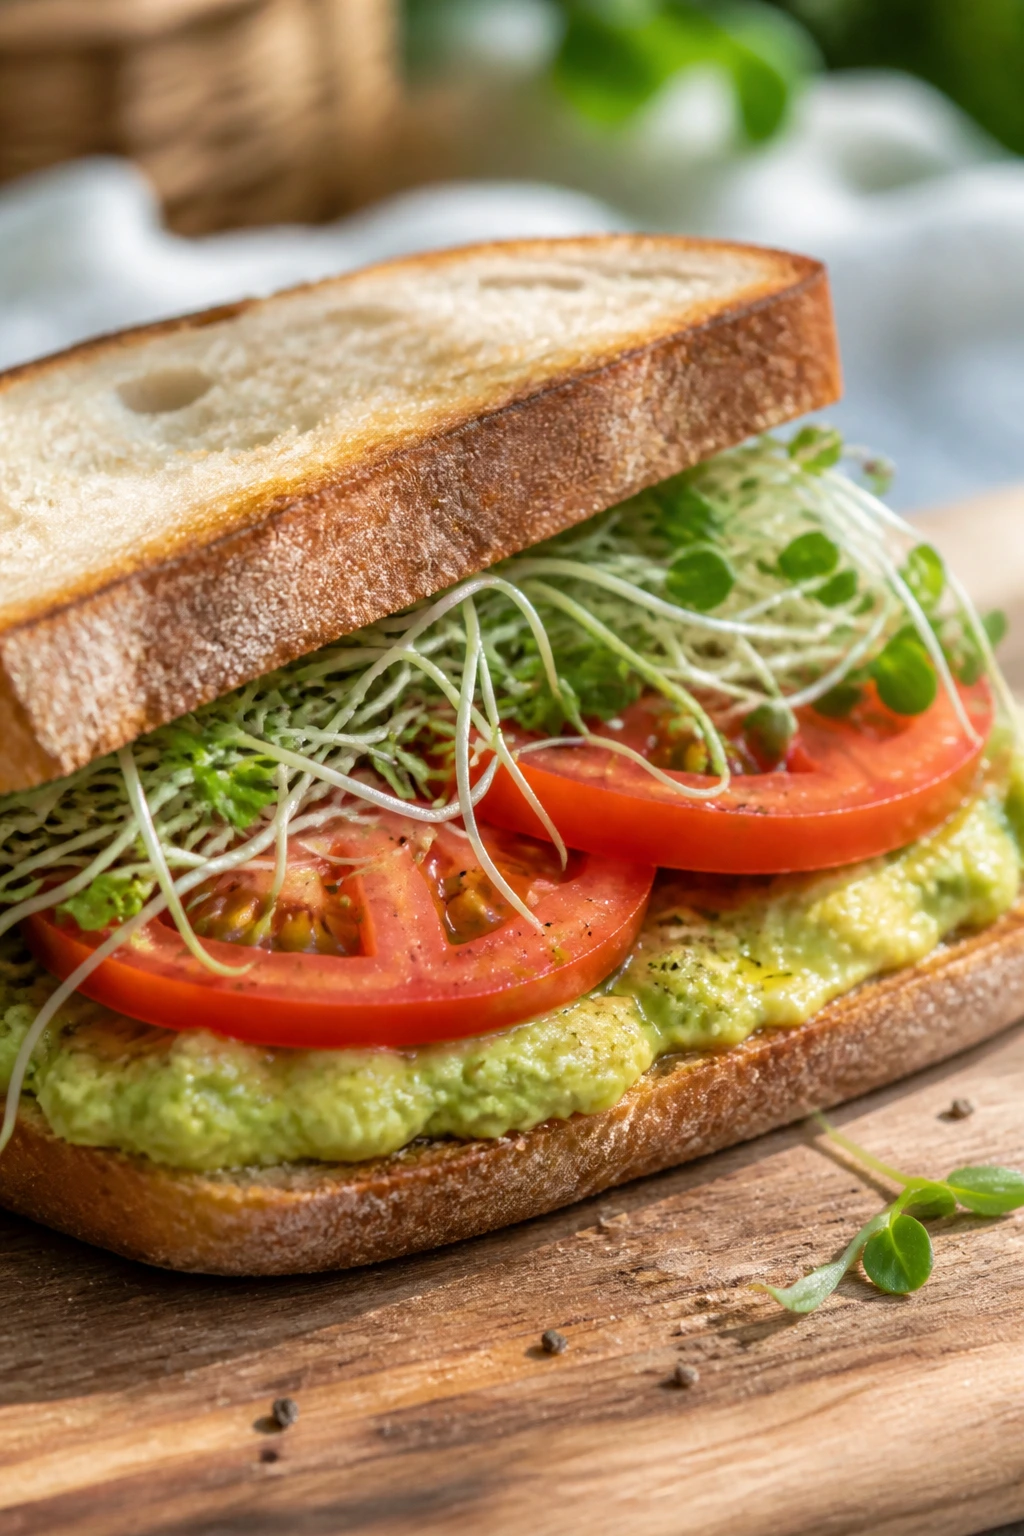
This one is light, green, and clean-tasting, which makes it a good counterpoint to the heavier sandwiches in the basket. Avocado gives body, tomato gives juice, and sprouts bring the crisp little snap that keeps it interesting.
Why It Works: Avocado coats the bread, tomatoes supply brightness, and sprouts add a dry crunch that stays lively for a while. A slice of whole-grain bread or country loaf handles the fillings without turning flimsy.
Key Ingredients:
- 4 slices whole-grain bread
- 1 ripe avocado
- 2 tomato slices
- 1 cup sprouts
- 1 tbsp lemon juice
- 1 tbsp olive oil
Quick Steps:
- Mash the avocado with lemon juice, salt, and pepper.
- Toast the bread lightly.
- Spread avocado on the bread.
- Layer tomato and sprouts.
- Close, cut, and pack carefully.
Equipment for This Recipe:
- Fork
- Knife
- Cutting board
How to Serve This Dish: Serve it with carrot sticks and a handful of cherry tomatoes. It’s best eaten the same day, before the sprouts lose their bite.
Pro Tips for This Recipe:
- Use lemon juice right away so the avocado stays green.
- Toast the bread enough to keep the sandwich from sagging.
- Keep the tomato slice thin.
Variations on This Dish:
- Cucumber Swap: Replace tomato with cucumber for less juice.
- Herb Version: Add basil or dill for extra freshness.
Common Mistakes to Avoid with This Dish:
- Don’t leave the avocado exposed too long before assembling.
- Don’t use bread so soft it can’t hold the spread.
35. Sardine Salad Sandwich
Sardines are not shy, and that’s exactly why this sandwich works. Lemon, capers, and celery keep the fish bright and firm, and rye bread gives it a deep, earthy base.
Why It Works: Sardines bring big flavor in a small amount, which means you don’t need much else to make the sandwich taste complete. A little acid keeps the richness in check.
Key Ingredients:
- 1 tin sardines, drained
- 2 tbsp mayonnaise
- 1 tsp lemon juice
- 1 tbsp chopped celery
- 1 tsp capers, chopped
- 4 slices rye bread
- 1 cup lettuce
Quick Steps:
- Mash the sardines lightly with mayo, lemon, celery, and capers.
- Toast the rye if you want more structure.
- Layer lettuce on the bread.
- Spoon on the sardine mixture.
- Close, cut, and wrap well.
Equipment for This Recipe:
- Bowl
- Fork
- Knife
How to Serve This Dish: Serve it with pickles or sliced radishes. It’s a strong sandwich, so a small portion goes a long way.
Pro Tips for This Recipe:
- Drain the sardines well before mixing.
- Chop the capers fine so they distribute evenly.
- Rye is the right bread here; it stands up to the flavor.
Variations on This Dish:
- Mustard Sardine Salad: Replace half the mayo with Dijon.
- Mediterranean Version: Add chopped parsley and a few olives.
Common Mistakes to Avoid with This Dish:
- Don’t drown the sardines in mayo.
- Don’t use bread too mild for the filling.
36. Fried Chicken Biscuit Sandwich
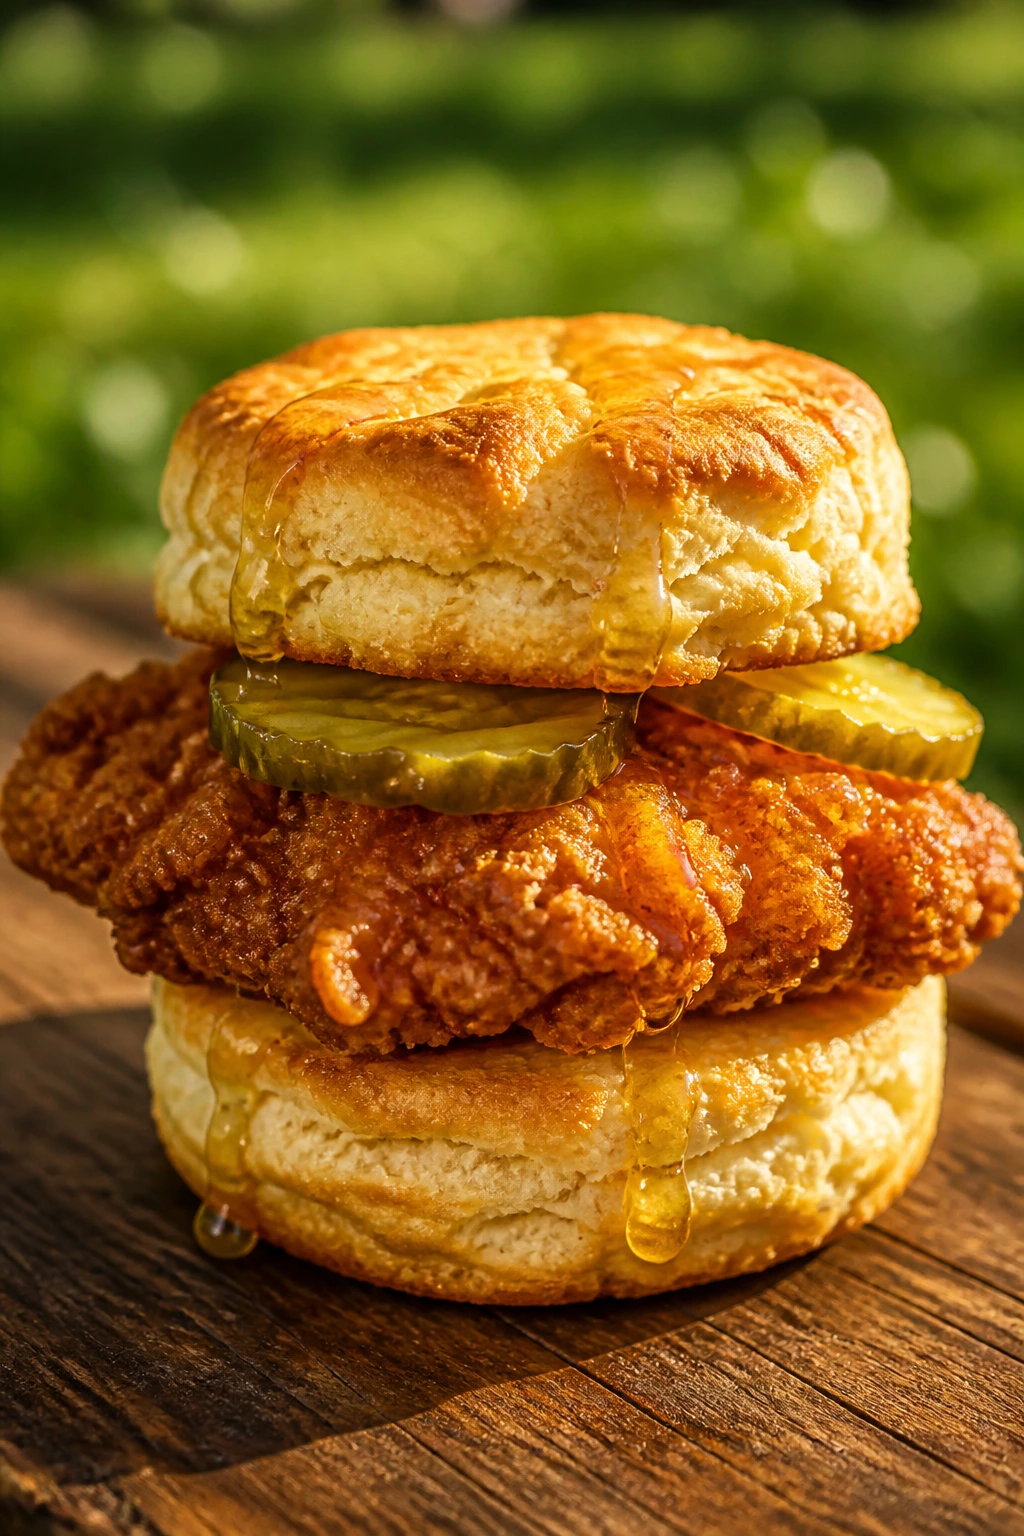
This is the picnic sandwich that wins on texture alone. Crisp fried chicken, a soft biscuit, and a swipe of honey or pickles give you salty, crunchy, buttery all at once.
Why It Works: The biscuit is tender enough to soak up flavor but sturdy enough to hold the chicken. Pickles or honey give the sandwich the contrast it needs so it doesn’t taste heavy.
Key Ingredients:
- 2 fried chicken cutlets
- 2 biscuits, split
- 4 pickle slices
- 1 tbsp honey or hot honey
- 1 tbsp butter, softened
Quick Steps:
- Split the biscuits and warm them briefly.
- Spread butter inside each biscuit.
- Add chicken, pickles, and a drizzle of honey.
- Close while the chicken is still warm.
- Wrap tightly in parchment.
Equipment for This Recipe:
- Baking sheet
- Knife
- Parchment paper
How to Serve This Dish: Serve it with slaw or potato salad. Because it’s richer than most picnic sandwiches, I like pairing it with something cold and tart.
Pro Tips for This Recipe:
- Keep the chicken crisp by assembling close to eating time.
- Pickles give the best contrast here.
- Warm the biscuits just enough to soften the crumb.
Variations on This Dish:
- Hot Honey Version: Use hot honey instead of plain honey.
- Southern Slaw Version: Add a small scoop of slaw inside.
Common Mistakes to Avoid with This Dish:
- Don’t build it too early or the crust softens.
- Don’t use biscuits that crumble when split.
37. Mushroom and Swiss Melt
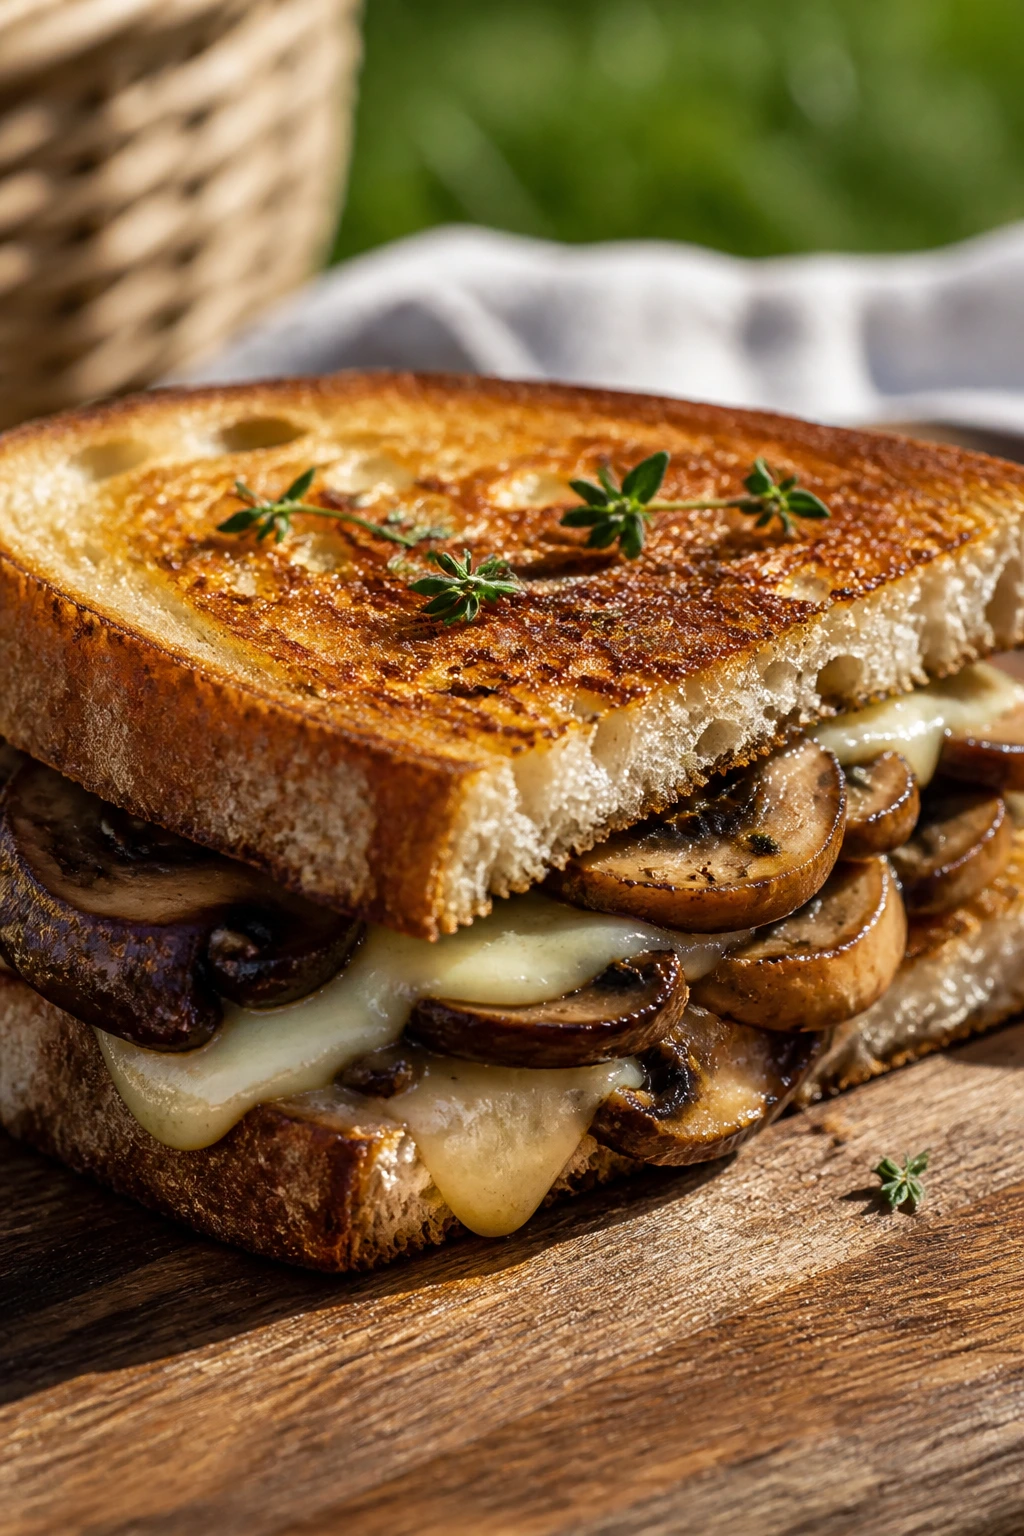
Mushrooms need a little patience, but they reward you with deep, savory flavor. Swiss cheese melts cleanly, and good bread keeps the sandwich from turning slippery.
Why It Works: Cooking the mushrooms until their moisture cooks off keeps the sandwich from getting soggy. Swiss gives you a mellow melt that doesn’t fight the mushrooms.
Key Ingredients:
- 8 oz mushrooms, sliced
- 1 tbsp butter
- 1 tsp thyme
- 4 slices Swiss cheese
- 4 slices sourdough
- 1 tbsp mayonnaise or butter for the bread
Quick Steps:
- Cook the mushrooms in butter over medium heat until browned and dry.
- Season with thyme, salt, and pepper.
- Spread butter or mayo on the bread.
- Fill with mushrooms and Swiss, then grill until golden.
- Rest briefly before cutting.
Equipment for This Recipe:
- Skillet
- Spatula
- Knife
How to Serve This Dish: Serve it with a crisp green salad or a few cornichons. It’s better warm than cold, so pack it in foil if you want to keep the heat.
Pro Tips for This Recipe:
- Let the mushrooms cook long enough to dry out.
- Use bread with a firm crust.
- Swiss melts nicely without running everywhere.
Variations on This Dish:
- Garlic Mushroom Melt: Add minced garlic with the mushrooms.
- Gruyère Swap: Use Gruyère for a nuttier flavor.
Common Mistakes to Avoid with This Dish:
- Don’t rush the mushroom cooking.
- Don’t use a watery filling or the bread softens fast.
38. Sun-Dried Tomato and Ricotta Sandwich

Ricotta and sun-dried tomatoes make a soft, salty-sweet sandwich that feels cooler than a hot melt but richer than a vegetable stack. Basil and olive oil round out the edges.
Why It Works: Ricotta spreads easily and gives the bread a creamy base, while sun-dried tomatoes bring concentrated flavor without the wetness of fresh tomato. A little pepper keeps it from tasting flat.
Key Ingredients:
- 1 small baguette or ciabatta roll
- 1/2 cup ricotta
- 1/4 cup sun-dried tomatoes, chopped
- 1 tbsp olive oil
- 1 tbsp basil, chopped
- Pinch of black pepper
Quick Steps:
- Toast the bread lightly.
- Stir ricotta with basil, pepper, and a little salt.
- Spread ricotta on the bread.
- Add sun-dried tomatoes and olive oil.
- Close and wrap.
Equipment for This Recipe:
- Bowl
- Knife
- Cutting board
How to Serve This Dish: It pairs nicely with grapes and a few salted nuts. I like this one as part of a bigger spread because it’s rich enough to feel special but not heavy.
Pro Tips for This Recipe:
- Drain very oily sun-dried tomatoes if needed.
- Use ricotta that’s thick, not watery.
- A little lemon zest gives it more lift.
Variations on This Dish:
- Whipped Ricotta Version: Whip the ricotta for a lighter texture.
- Pesto Ricotta Sandwich: Add a spoon of pesto under the tomatoes.
Common Mistakes to Avoid with This Dish:
- Don’t use ricotta straight from a watery container.
- Don’t pile on too many sun-dried tomatoes.
39. Pizza Sub Sandwich
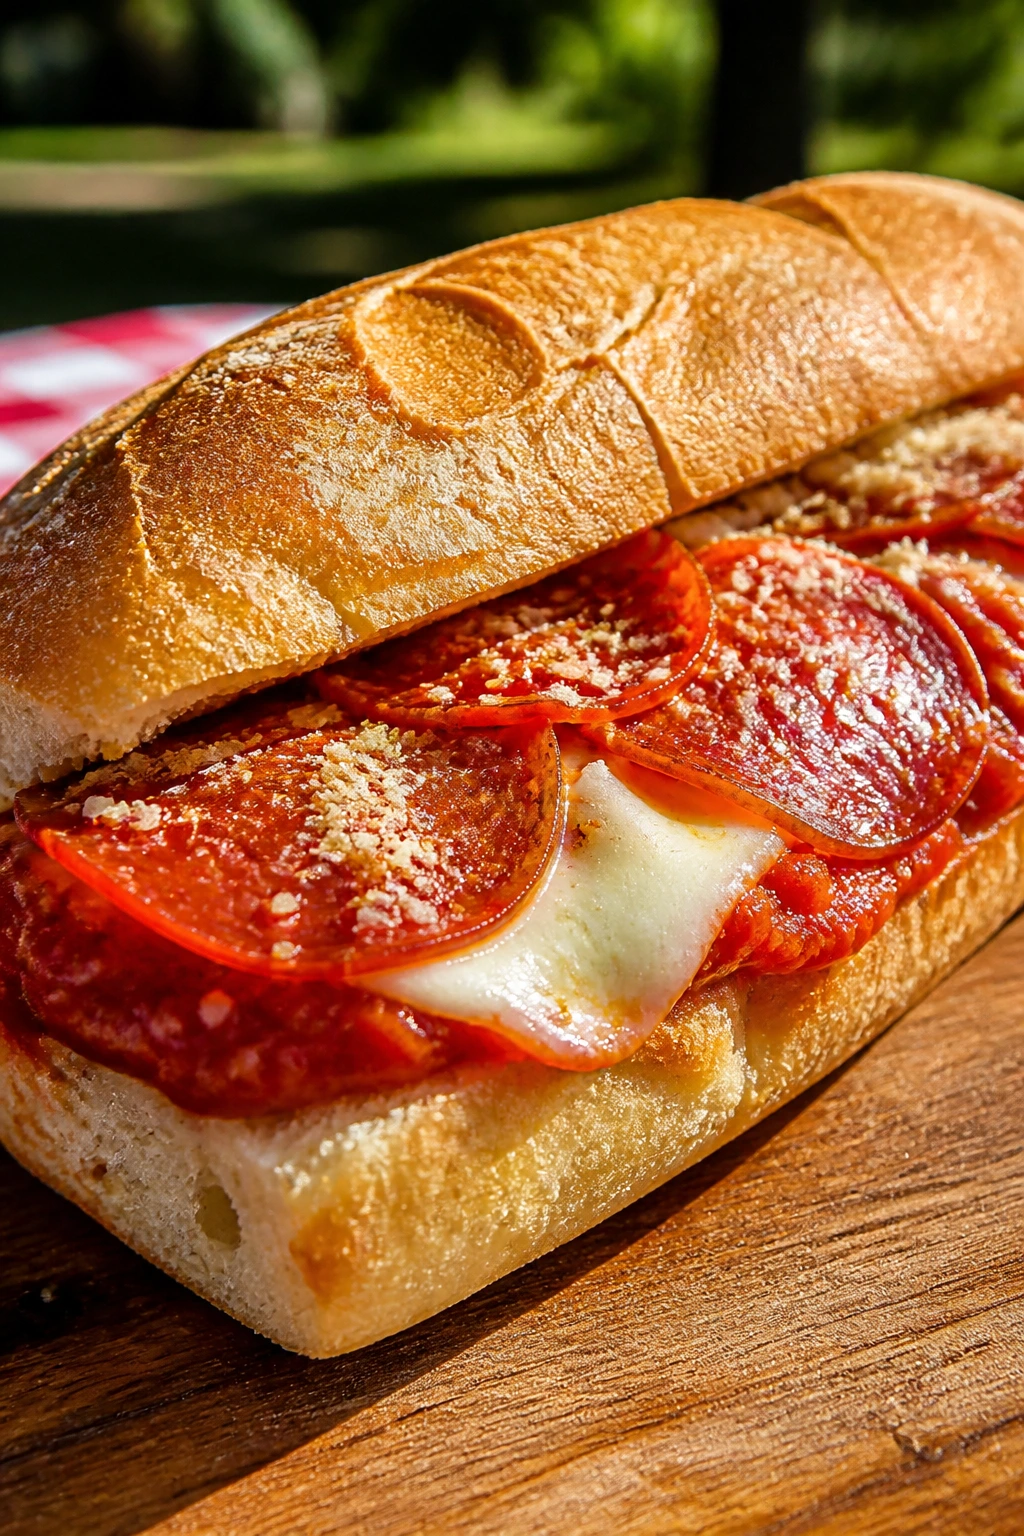
This sandwich gives you the pizza-shop flavor without needing a box. Marinara, pepperoni, and melted mozzarella turn a sub roll into something that feels familiar and a little messy in the best way.
Why It Works: The roll can handle sauce if you keep it measured, and the cheese helps seal the filling. A quick bake gets the sandwich closer to pizza without going full calzone.
Key Ingredients:
- 2 sub rolls
- 1/2 cup marinara sauce
- 6 slices pepperoni
- 4 oz mozzarella, sliced
- 1 tbsp grated parmesan
- 1 tsp dried oregano
Quick Steps:
- Split the rolls and spoon on a thin layer of marinara.
- Add pepperoni and mozzarella.
- Sprinkle parmesan and oregano.
- Bake at 375°F for 6 to 8 minutes until the cheese melts.
- Close, cut, and let rest a minute.
Equipment for This Recipe:
- Baking sheet
- Knife
- Spoon
How to Serve This Dish: Serve it with carrot sticks or a simple Caesar-style salad. It’s a good warm picnic sandwich if you can keep the heat on it for the ride.
Pro Tips for This Recipe:
- Use sauce sparingly to avoid soggy bread.
- Bake just until the cheese loosens.
- Let it rest before wrapping so the steam settles.
Variations on This Dish:
- Veggie Pizza Sub: Add peppers and olives.
- Meatball Pizza Sub: Add sliced meatballs.
Common Mistakes to Avoid with This Dish:
- Don’t pour sauce into the bread.
- Don’t overbake and dry out the rolls.
40. Grilled Peach and Mascarpone Sandwich
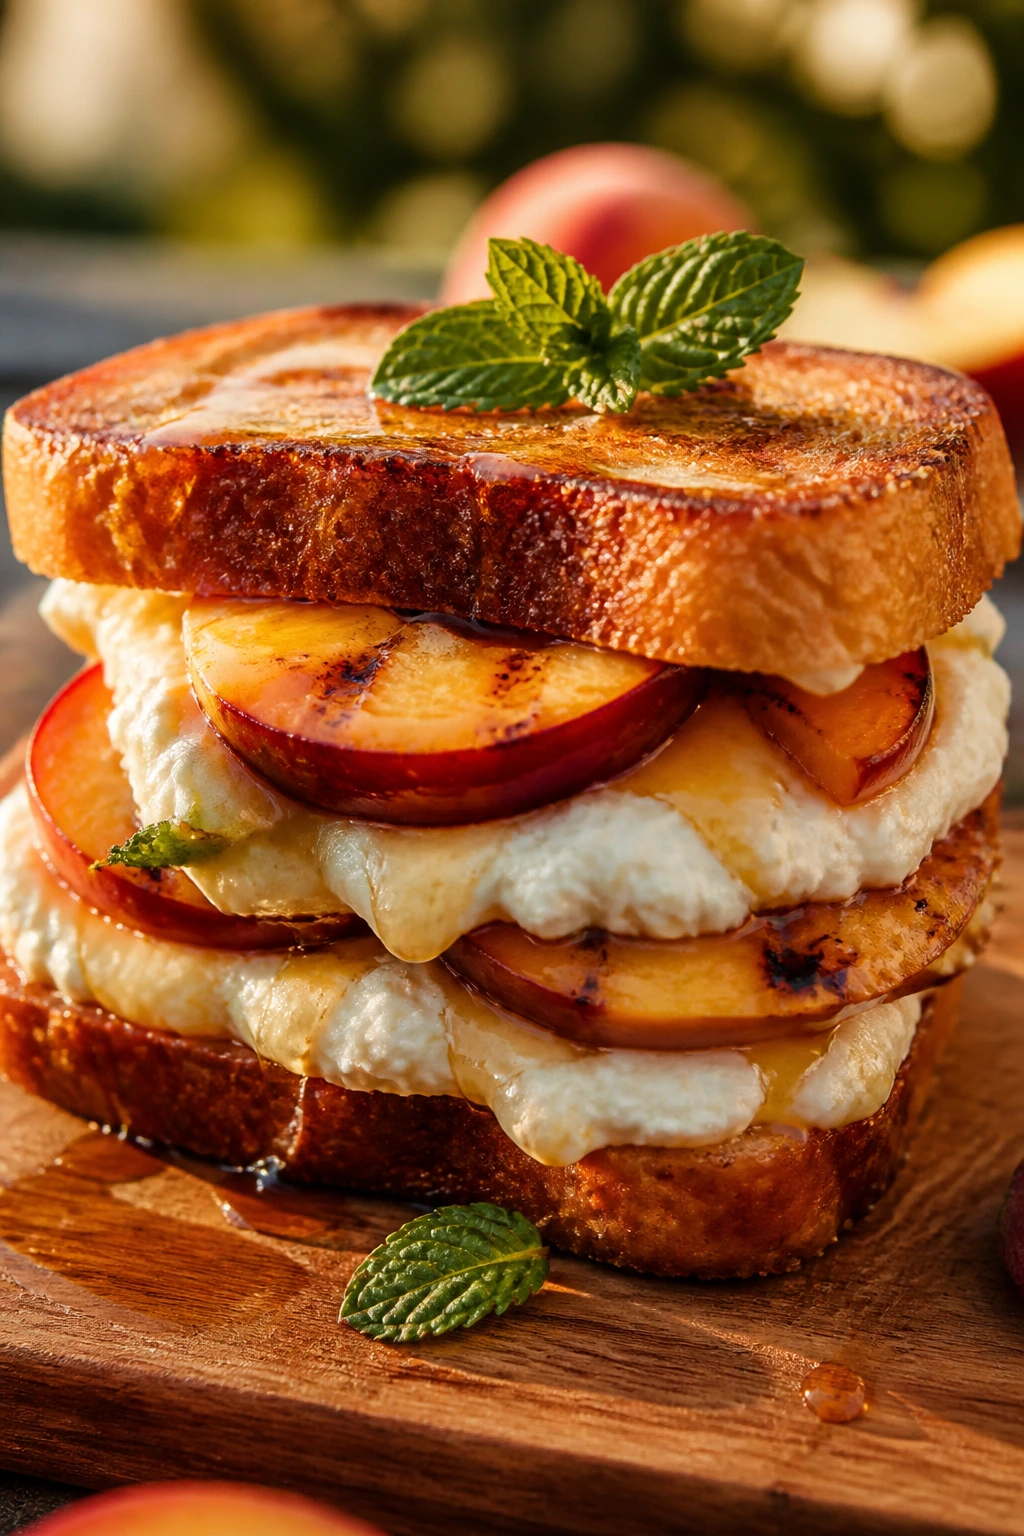
This is the sweet picnic sandwich that tastes like summer fruit and toast. Grilled peaches bring caramelized edges, mascarpone brings cool creaminess, and brioche keeps the whole thing soft and rich.
Why It Works: Grilling the peaches concentrates their flavor and keeps them from making the bread wet. Mascarpone spreads smoothly and gives the sandwich a clean, almost dessert-like finish.
Key Ingredients:
- 4 slices brioche
- 2 peaches, halved and sliced
- 1 tbsp butter or oil
- 1/3 cup mascarpone
- 1 tbsp honey
- 4 mint leaves
Quick Steps:
- Grill the peach slices over medium heat for 2 minutes per side.
- Toast the brioche lightly.
- Spread mascarpone on the bread.
- Add peaches, honey, and mint.
- Close gently and serve.
Equipment for This Recipe:
- Grill pan or skillet
- Knife
- Cutting board
How to Serve This Dish: Serve it with fresh berries or salty almonds. It works as a snack, a lunch add-on, or the sweet bite at the end of a picnic spread.
Pro Tips for This Recipe:
- Choose peaches that are ripe but still firm.
- Let the fruit cool for a minute before assembling.
- A pinch of flaky salt makes the peach taste louder.
Variations on This Dish:
- Brie Peach Sandwich: Swap mascarpone for brie.
- Honey-Thyme Version: Add thyme instead of mint.
Common Mistakes to Avoid with This Dish:
- Don’t use overripe peaches.
- Don’t skip the grill; raw peaches don’t have the same depth.
41. Greek Chicken Pita
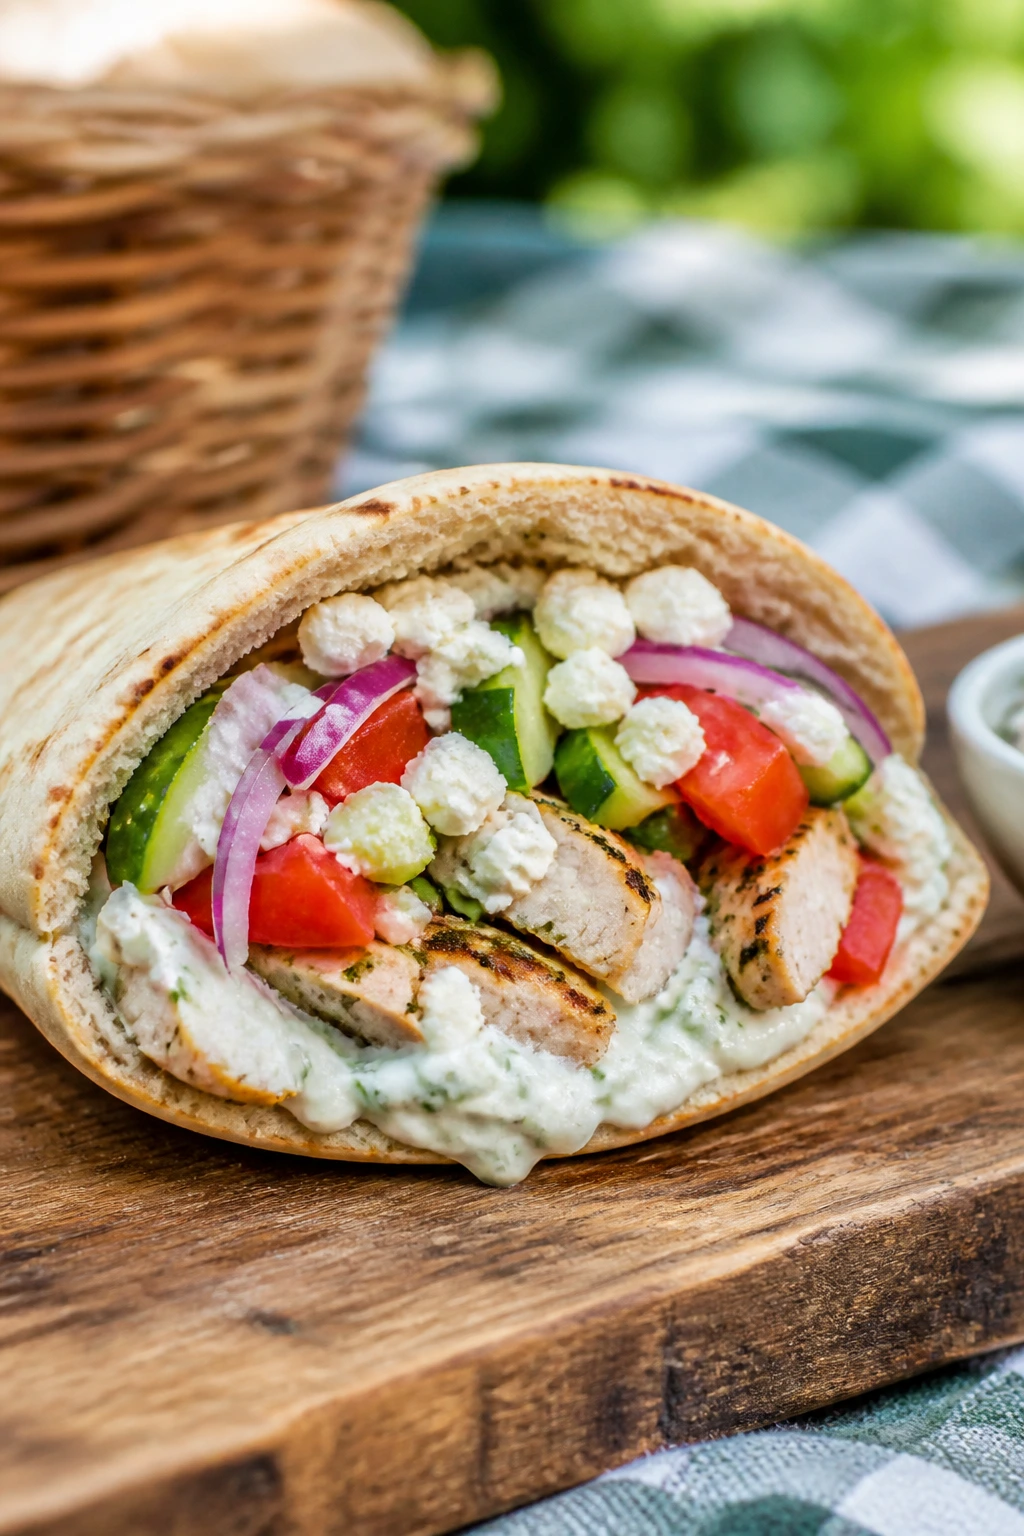
Greek chicken pita is a picnic sandwich with good manners. Tzatziki, cucumber, tomato, feta, and red onion keep the flavor clean and bright.
Why It Works: The pita catches the juices, and tzatziki gives you enough creaminess without drowning the filling. Chicken makes it filling enough for lunch, but the herbs keep it feeling light.
Key Ingredients:
- 2 pita breads
- 2 cups cooked chicken, sliced
- 1/3 cup tzatziki
- 1/2 cucumber, sliced
- 1 tomato, sliced
- 1/4 cup feta
- 2 tbsp red onion, thinly sliced
Quick Steps:
- Warm the pita for 30 seconds.
- Spread tzatziki inside.
- Add chicken, cucumber, tomato, feta, and onion.
- Fold and wrap.
- Chill briefly or serve right away.
Equipment for This Recipe:
- Knife
- Cutting board
- Spoon
How to Serve This Dish: Serve it with olives and a little cucumber salad. It’s a strong choice when you want something cold that still tastes fresh after a few hours.
Pro Tips for This Recipe:
- Salt the tomato slices lightly and blot them.
- Thin onion slices keep the bite sharp but not harsh.
- Keep the tzatziki thick.
Variations on This Dish:
- Lamb Version: Swap chicken for sliced lamb.
- Veggie Version: Use grilled zucchini instead of chicken.
Common Mistakes to Avoid with This Dish:
- Don’t overstuff the pita pocket.
- Don’t pack it wet if you want the bread to stay intact.
42. Bacon, Lettuce, and Avocado on Country Bread
This is a thicker, more relaxed BLT that leans on avocado instead of basil mayo. Country bread gives it a chewy bite, and the bacon keeps the whole thing from tasting too soft.
Why It Works: Avocado and bacon create a rich middle, while lettuce and tomato keep the sandwich from feeling dense. Country bread is hearty enough to handle the stack without turning floppy.
Key Ingredients:
- 4 slices country bread
- 6 slices bacon, cooked crisp
- 1 avocado, sliced
- 2 tomato slices
- 4 lettuce leaves
- 2 tbsp mayonnaise
- Pinch of salt
Quick Steps:
- Toast the bread until golden.
- Spread mayo on each slice.
- Layer lettuce, tomato, bacon, and avocado.
- Season lightly with salt.
- Close, cut, and wrap.
Equipment for This Recipe:
- Skillet
- Knife
- Cutting board
How to Serve This Dish: Serve it with chips and an iced drink. If the avocado is very ripe, assemble it close to eating time so the bread doesn’t absorb too much moisture.
Pro Tips for This Recipe:
- Keep the bacon crisp.
- Use just-ripe avocado that slices cleanly.
- Salt the tomato lightly before assembly.
Variations on This Dish:
- Fried Egg Version: Add a fried egg for a brunch picnic.
- Spicy Mayo Version: Stir hot sauce into the mayo.
Common Mistakes to Avoid with This Dish:
- Don’t use bread too soft for the filling.
- Don’t let the avocado sit exposed for long.
43. Roast Beef, Horseradish, and Arugula Sandwich
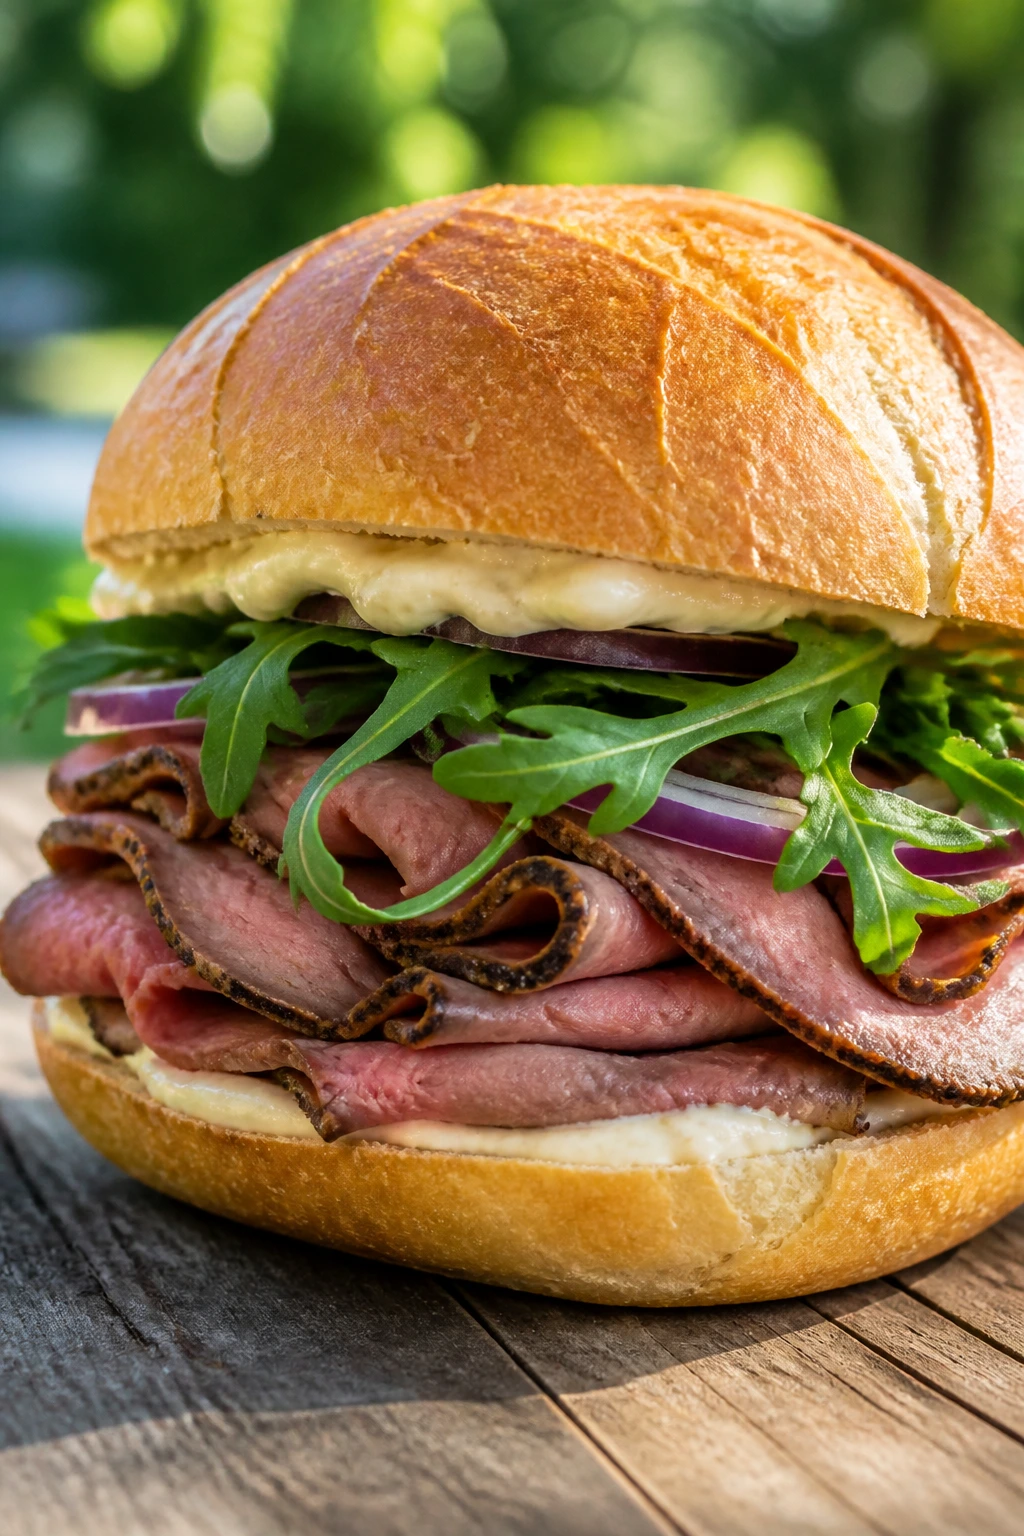
Roast beef needs a sharp partner, and horseradish is the right kind of bite. Arugula adds pepper, and a good roll gives the sandwich enough structure to stay neat.
Why It Works: Roast beef is rich and smooth, while horseradish cuts through that richness fast. Arugula keeps the flavor from feeling heavy, even when the meat is generously stacked.
Key Ingredients:
- 8 oz roast beef, thinly sliced
- 2 sandwich rolls
- 2 tbsp horseradish sauce
- 1 cup arugula
- 2 slices red onion
- 1 tbsp mayonnaise
Quick Steps:
- Split the rolls and toast lightly.
- Spread horseradish sauce and mayo on the bread.
- Layer roast beef, arugula, and onion.
- Press gently and cut.
- Wrap well.
Equipment for This Recipe:
- Knife
- Cutting board
- Toaster or skillet
How to Serve This Dish: Serve it with pickles or potato salad. It’s a good one for people who want a sandwich with a little more bite than deli turkey.
Pro Tips for This Recipe:
- Keep the beef sliced thin.
- Don’t overdo the horseradish or it takes over.
- Arugula is better here than lettuce.
Variations on This Dish:
- Cheddar Roast Beef: Add sharp cheddar slices.
- Mushroom Version: Add sautéed mushrooms for more depth.
Common Mistakes to Avoid with This Dish:
- Don’t use thick beef slices.
- Don’t drown the bread in horseradish sauce.
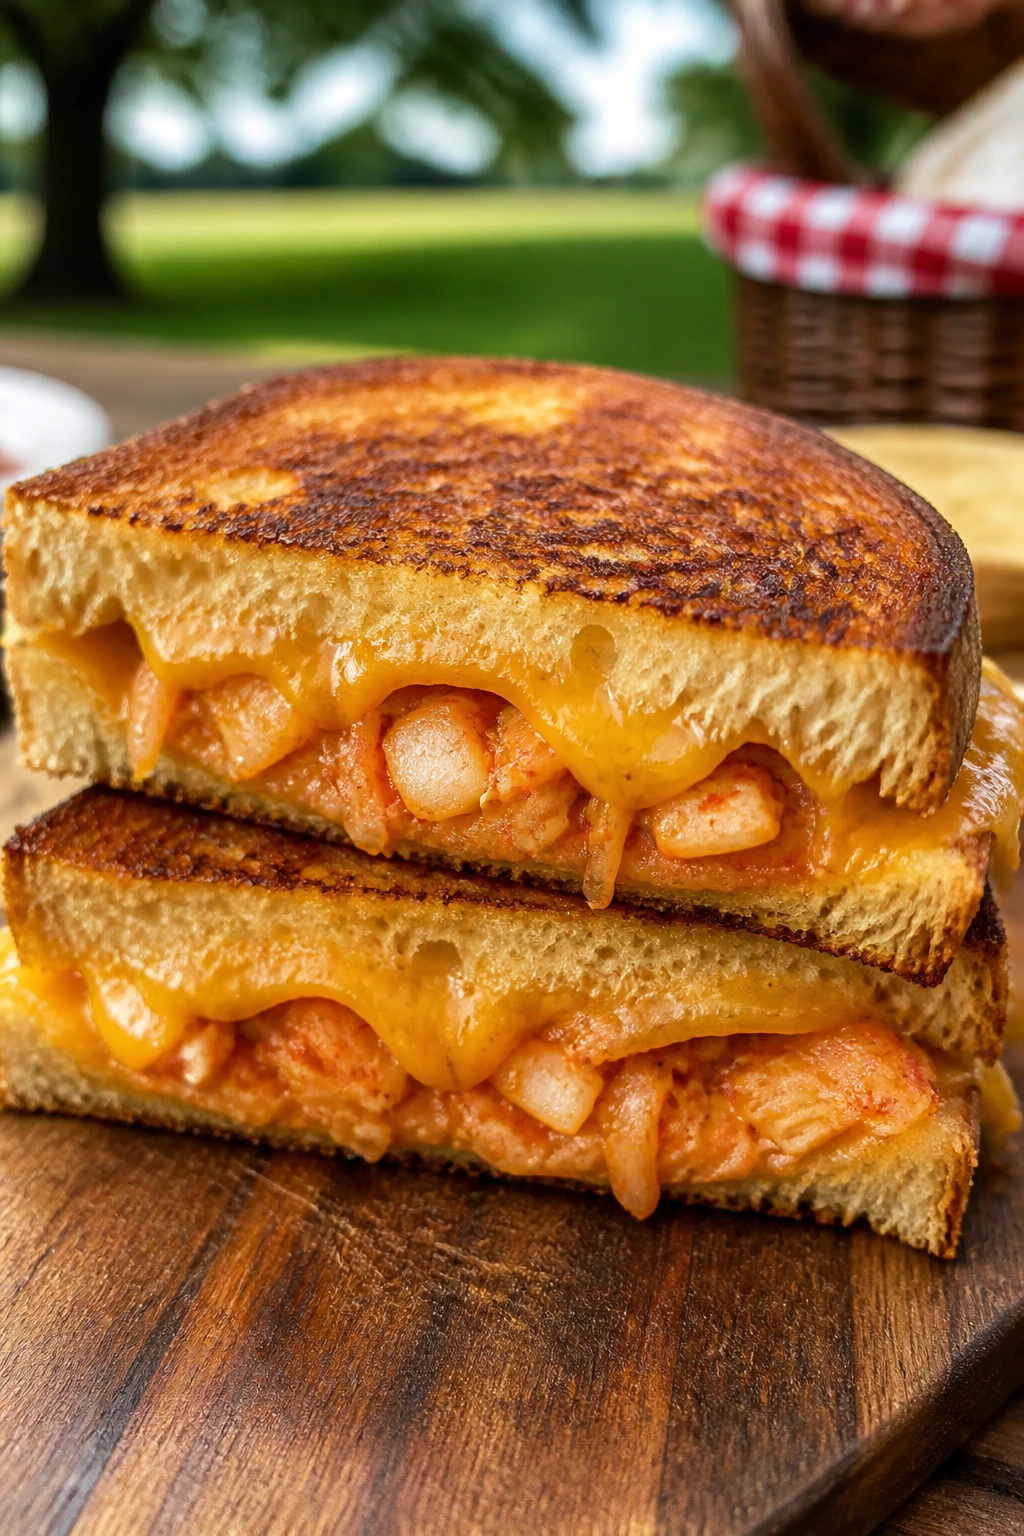
44. Shrimp Salad Brioche Roll
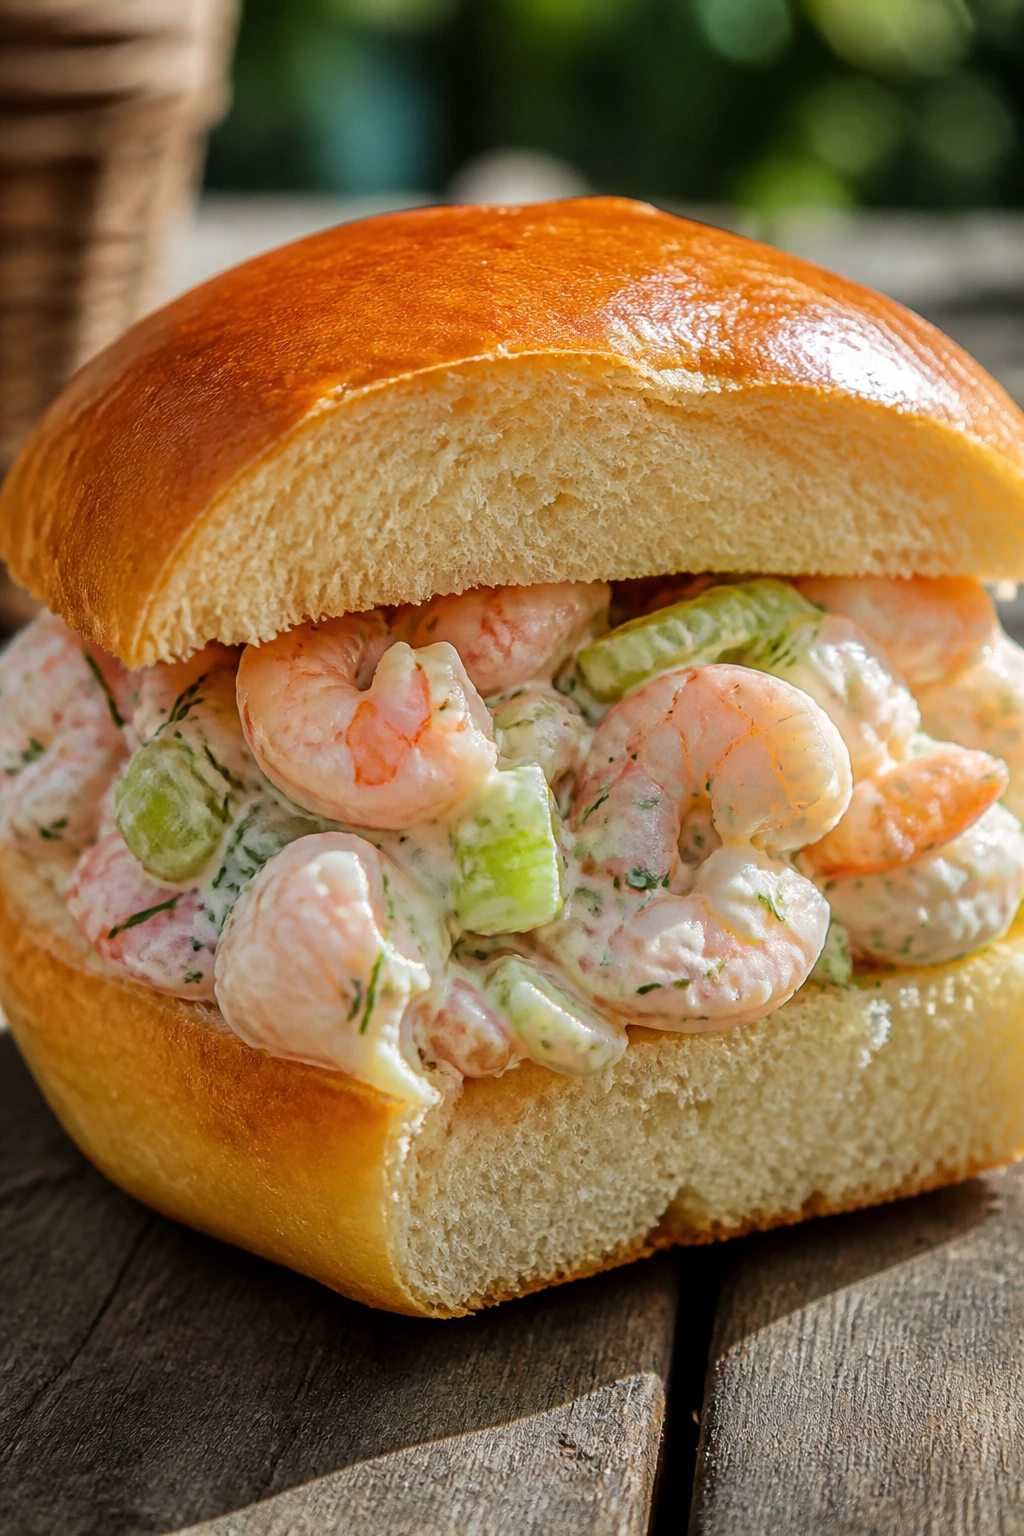
Shrimp salad is cool, soft, and a little fancy without trying too hard. Brioche rolls add enough sweetness to keep the lemon and dill balanced, and the shrimp makes the whole sandwich feel like a real summer lunch.
Why It Works: Chilled shrimp salad is best on bread that has a little richness, and brioche gives it that. Celery and dill add crunch and herbiness without fighting the seafood.
Key Ingredients:
- 1 lb cooked shrimp, chopped
- 1/4 cup mayonnaise
- 1 tbsp lemon juice
- 1 celery stalk, diced
- 1 tbsp chopped dill
- 4 brioche rolls
- 1 cup lettuce
Quick Steps:
- Mix shrimp, mayo, lemon juice, celery, dill, salt, and pepper.
- Chill the salad for 20 minutes.
- Split and lightly toast the brioche rolls.
- Add lettuce and spoon in the shrimp salad.
- Close and wrap cold.
Equipment for This Recipe:
- Mixing bowl
- Knife
- Spoon
How to Serve This Dish: Serve it with cucumber slices or a crisp green salad. Keep it cold until the last minute; shrimp salad is not the one to leave sitting around.
Pro Tips for This Recipe:
- Dry the shrimp well before chopping.
- Chill the salad so the flavors settle.
- Brioche should be lightly toasted, not browned hard.
Variations on This Dish:
- Old Bay Shrimp Salad: Add a pinch of Old Bay seasoning.
- Avocado Shrimp Roll: Add thin avocado slices.
Common Mistakes to Avoid with This Dish:
- Don’t use warm shrimp.
- Don’t leave the filling out in the heat.
45. Eggplant Parmesan Sub
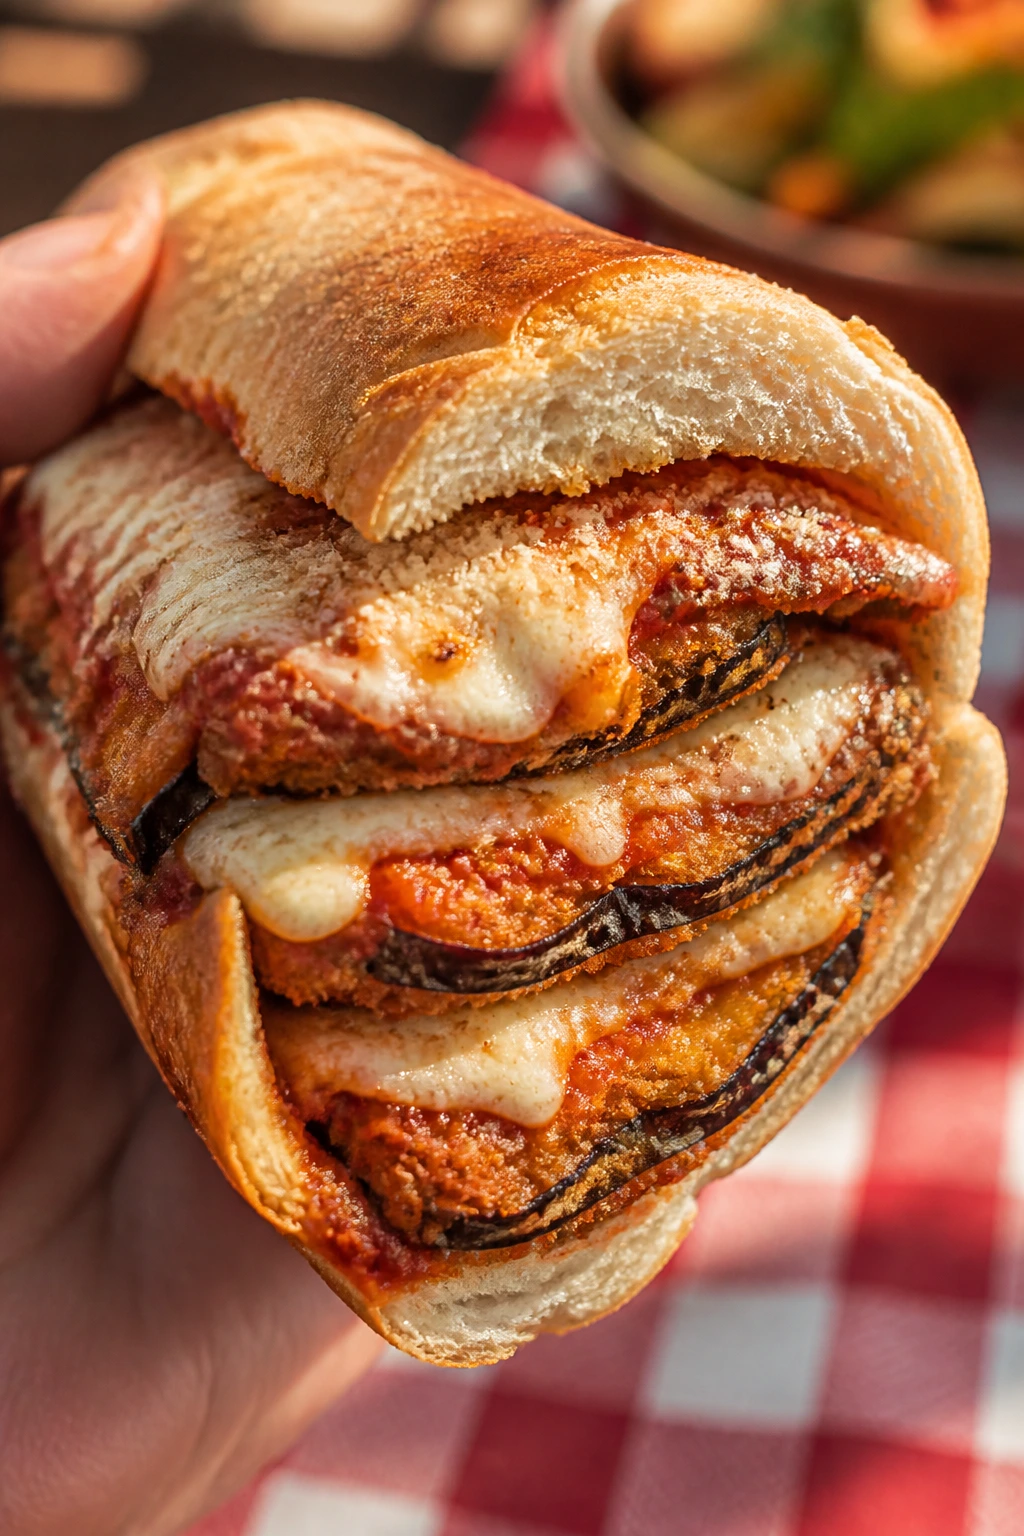
Eggplant Parmesan can absolutely become a picnic sandwich if you keep the breading crisp and the sauce measured. Melty mozzarella and parmesan turn it into a proper handheld meal.
Why It Works: Baked or fried eggplant gives you a meaty texture, while marinara and cheese tie everything together. A sub roll holds the layers better than soft sandwich bread.
Key Ingredients:
- 1 large eggplant, sliced and breaded
- 1 cup marinara sauce
- 4 oz mozzarella
- 2 tbsp parmesan
- 2 sub rolls
- 1 tbsp olive oil
- 1 tbsp basil, chopped
Quick Steps:
- Bake or fry the breaded eggplant until golden.
- Warm the marinara.
- Split the rolls and add eggplant, sauce, and mozzarella.
- Bake at 375°F for 5 minutes until the cheese melts.
- Finish with parmesan and basil.
Equipment for This Recipe:
- Baking sheet
- Skillet, if frying
- Knife
How to Serve This Dish: Serve it with a simple green salad or roasted peppers. It’s best eaten warm, though the breaded eggplant still holds up once it cools a little.
Pro Tips for This Recipe:
- Keep the sauce thin and measured.
- Let the eggplant drain after cooking.
- Use a roll with a crust that can take the steam.
Variations on This Dish:
- Zucchini Parm Sub: Swap eggplant for zucchini.
- Spicy Marinara Version: Add red pepper flakes to the sauce.
Common Mistakes to Avoid with This Dish:
- Don’t flood the roll with sauce.
- Don’t stack wet eggplant straight from the fryer.
46. Breakfast Picnic Sandwich with Egg and Cheese

Breakfast sandwiches belong at picnics more often than people admit. Eggs, cheddar, and a sturdy muffin or roll give you something warm and portable that still feels easy.
Why It Works: Eggs set into a soft patty or folded omelet, which makes them easier to pack than loose scramble. Cheddar melts into the bread and gives the sandwich some staying power.
Key Ingredients:
- 4 eggs
- 2 English muffins, split
- 2 slices cheddar
- 2 slices bacon or sausage patties
- 1 tbsp butter
- 1 tsp hot sauce, optional
Quick Steps:
- Cook the bacon or sausage and set aside.
- Scramble or fold the eggs into neat rounds.
- Toast the English muffins with butter.
- Layer egg, cheese, and meat.
- Wrap in foil if you want to keep it warm.
Equipment for This Recipe:
- Skillet
- Spatula
- Foil
How to Serve This Dish: Serve it with fruit and coffee or iced tea. It works especially well for an early picnic when people want something more substantial than fruit and pastries.
Pro Tips for This Recipe:
- Cook the eggs just until set so they stay tender.
- Wrap the sandwich while it’s still warm to hold heat.
- Use English muffins with enough nooks to catch the melted cheese.
Variations on This Dish:
- Veggie Breakfast Version: Skip the meat and add spinach.
- Spicy Version: Add hot sauce or pepper jack.
Common Mistakes to Avoid with This Dish:
- Don’t overcook the eggs.
- Don’t leave the sandwich unwrapped if you want warmth to last.
47. Caponata Sandwich
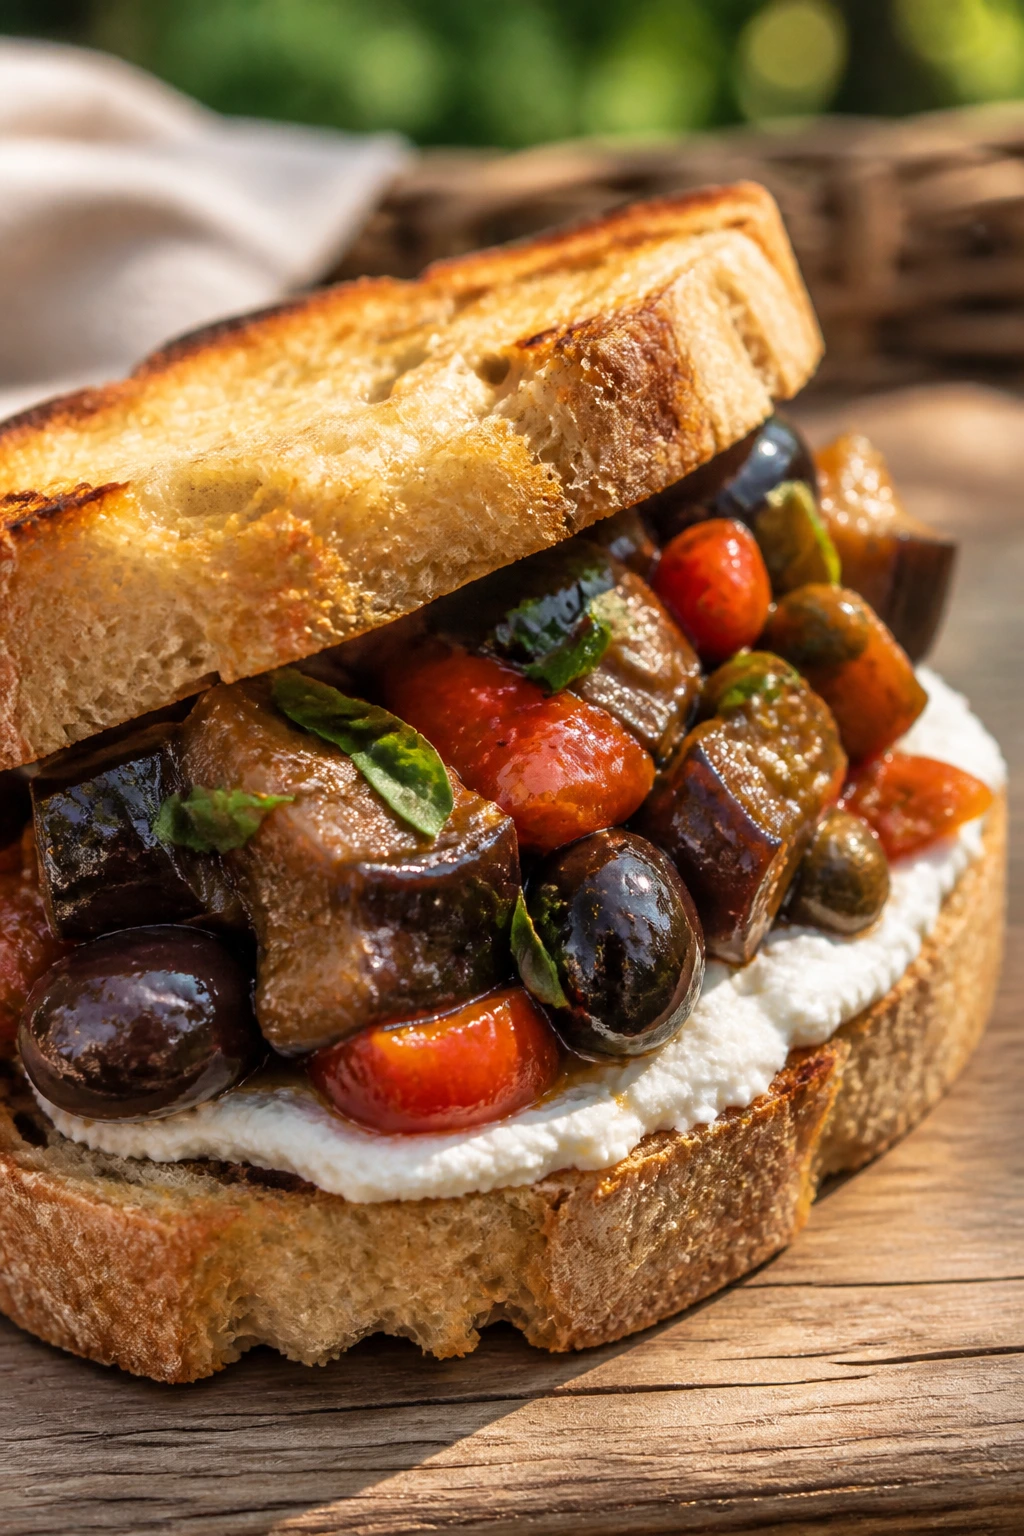
Caponata is the vegetable spread that makes bread taste more interesting. Eggplant, tomato, olives, and a little vinegar give this sandwich sweet-sour depth that plays well with ricotta or goat cheese.
Why It Works: Caponata brings moisture and flavor, but it’s thick enough not to soak the bread if you cool it first. Cheese on the bread adds a creamy stop so the juices stay contained.
Key Ingredients:
- 1 cup caponata, cooled
- 4 slices ciabatta or crusty bread
- 1/2 cup ricotta or goat cheese
- 1 tbsp olive oil
- 1 tbsp basil leaves
- Pinch of salt
Quick Steps:
- Cool the caponata completely.
- Toast the bread lightly.
- Spread cheese on the bread.
- Spoon on caponata and basil.
- Close, cut, and wrap.
Equipment for This Recipe:
- Knife
- Cutting board
- Spoon
How to Serve This Dish: Serve it with olives, cheese, and a few crackers. It’s one of the better vegetarian picnic sandwiches because the flavor is bold enough to stand on its own.
Pro Tips for This Recipe:
- Let the caponata cool all the way down.
- Use thick bread so the spread doesn’t seep through.
- A little extra basil freshens the whole thing.
Variations on This Dish:
- Mozzarella Caponata: Swap the cheese for mozzarella.
- Spicy Caponata: Add red pepper flakes to the spread.
Common Mistakes to Avoid with This Dish:
- Don’t use warm caponata.
- Don’t spread too thinly or the sandwich tastes dry.
48. Tomato and Pimento Cheese Tea Sandwiches
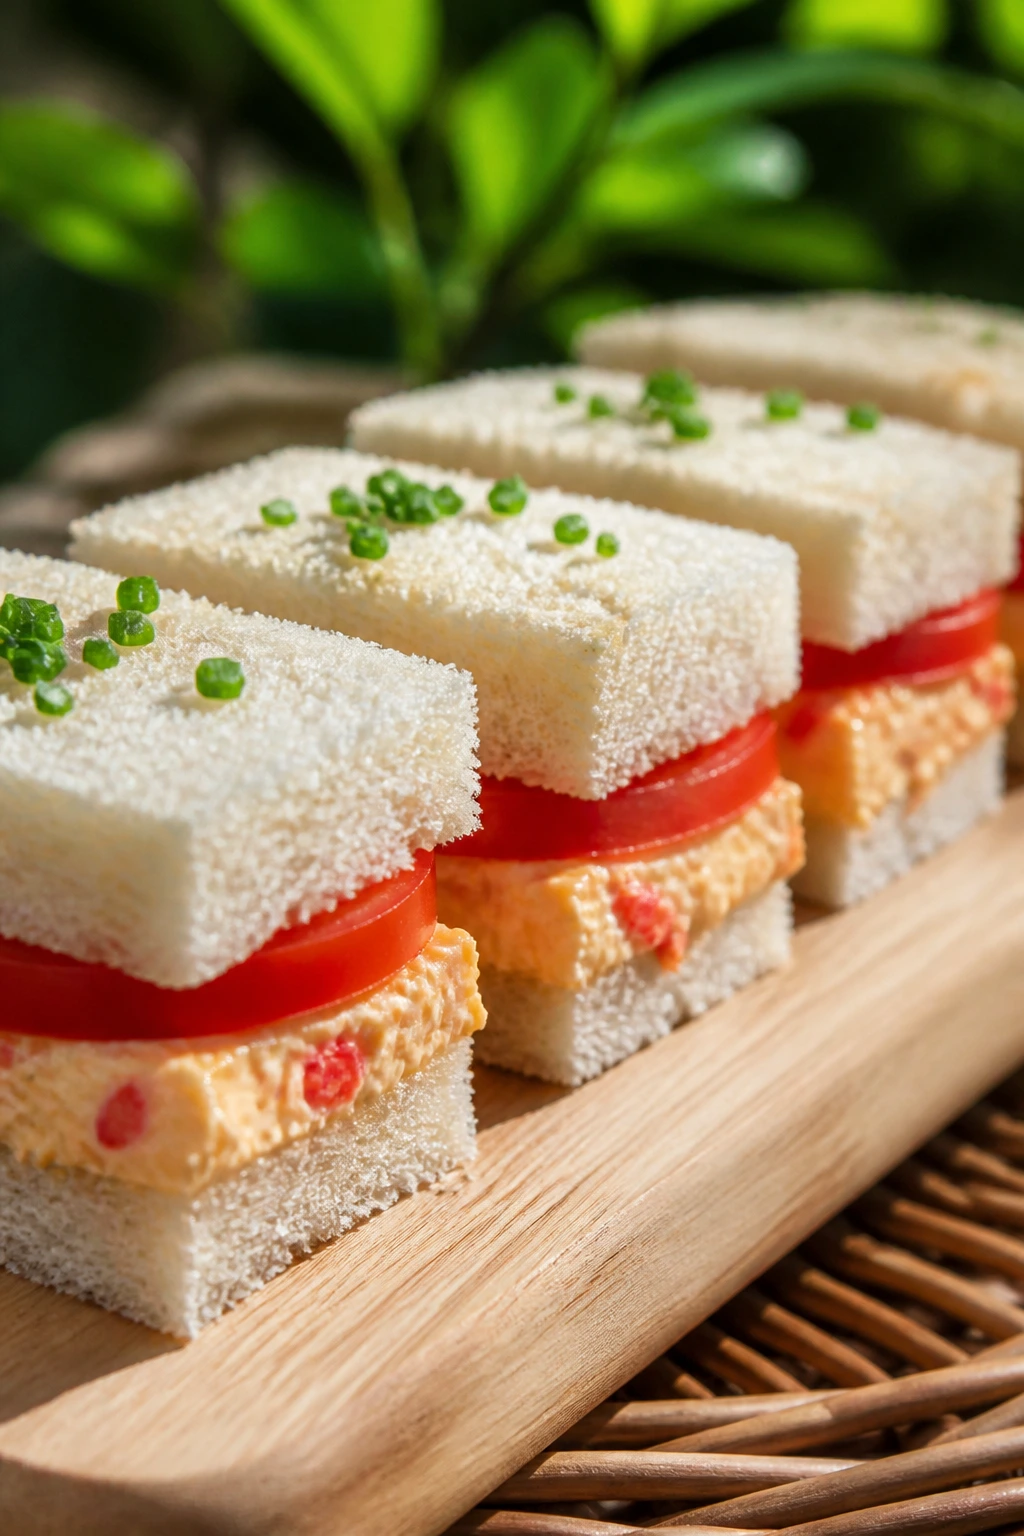
Tomato and pimento cheese is a Southern pairing with enough salt and softness to feel nostalgic. As tea sandwiches, they become neat little squares that pack better than a full tomato sandwich.
Why It Works: Pimento cheese acts like glue and flavor in one, and slicing the tomatoes thin keeps the bread from getting overwhelmed. White bread with the crusts cut off gives the sandwiches a clean edge.
Key Ingredients:
- 8 slices soft white bread, crusts removed
- 1/2 cup pimento cheese
- 1 medium tomato, thinly sliced
- Pinch of salt
- Pinch of black pepper
- 1 tbsp chopped chives
Quick Steps:
- Salt the tomato slices and blot them after 5 minutes.
- Spread pimento cheese on the bread.
- Add tomato slices and chives.
- Top with another slice, press gently, and cut into small squares.
- Chill briefly before packing.
Equipment for This Recipe:
- Sharp knife
- Cutting board
- Small spoon
How to Serve This Dish: Arrange the squares in a tight row with pickles or sliced radishes. They work well when you want a picnic table that feels a little more composed.
Pro Tips for This Recipe:
- Blot the tomatoes well.
- Use chilled pimento cheese so it spreads neatly.
- Trim the crusts after assembling for cleaner edges.
Variations on This Dish:
- Bacon Version: Add crisp bacon inside.
- Herb Version: Add dill or parsley to the pimento cheese.
Common Mistakes to Avoid with This Dish:
- Don’t leave tomato moisture on the bread.
- Don’t skip the chill if you want neat cuts.
49. Crunchy Veggie Peanut Wrap
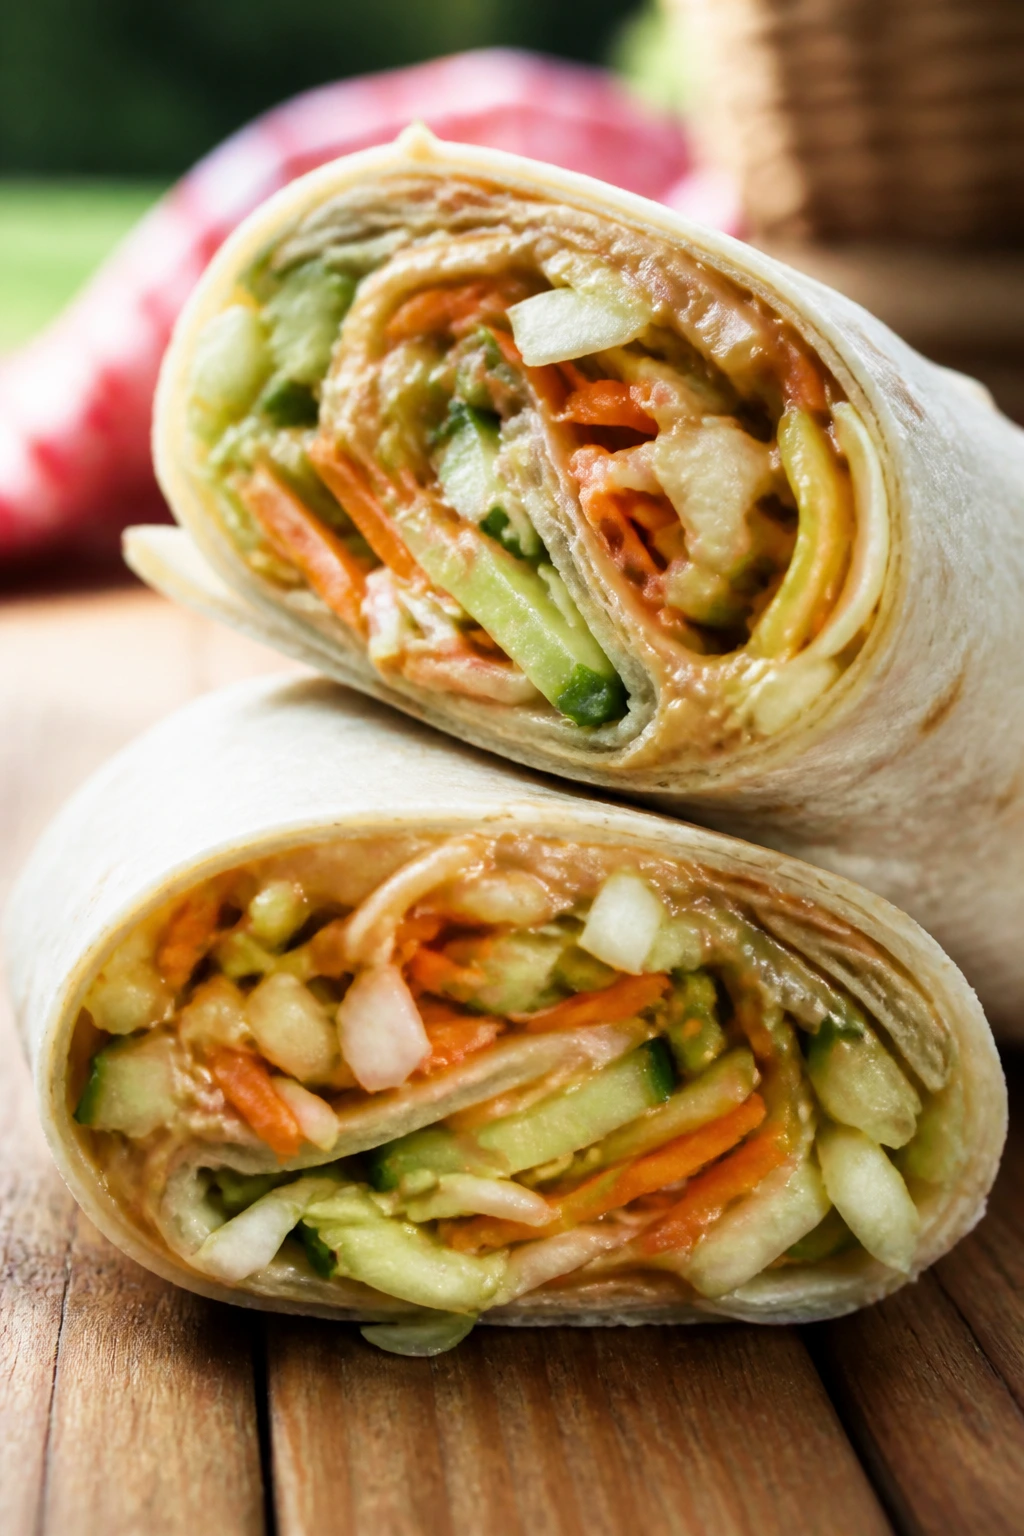
This wrap is all crunch and no fuss. Shredded cabbage, carrot, and cucumber get pulled together by peanut sauce, which makes the whole thing feel bright, salty, and a little playful.
Why It Works: Peanut sauce clings to vegetables better than a thin dressing, and the cabbage stays crisp long enough to survive a picnic bag. A tortilla holds it all together without needing a lot of extra structure.
Key Ingredients:
- 2 large flour tortillas
- 1/3 cup peanut butter
- 1 tbsp soy sauce
- 1 tsp lime juice
- 1 cup shredded cabbage
- 1 carrot, shredded
- 1/2 cucumber, julienned
- 1 tbsp chopped cilantro
Quick Steps:
- Stir peanut butter, soy sauce, lime juice, and a little water into a smooth sauce.
- Spread the sauce on the tortillas.
- Add cabbage, carrot, cucumber, and cilantro.
- Roll tightly and chill for 10 minutes.
- Slice and wrap.
Equipment for This Recipe:
- Small bowl
- Sharp knife
- Cutting board
How to Serve This Dish: Serve it with melon or a few salted peanuts. It’s a good meatless option when the picnic needs something crisp after heavier sandwiches.
Pro Tips for This Recipe:
- Thin the sauce just enough to spread, not run.
- Dry the cucumber well.
- Chill before slicing so the roll stays tight.
Variations on This Dish:
- Spicy Peanut Wrap: Add chili paste or sriracha.
- Tofu Version: Add sliced baked tofu for more protein.
Common Mistakes to Avoid with This Dish:
- Don’t make the sauce too thick to spread.
- Don’t leave the cucumber wet.
50. Blackberry, Brie, and Honey Brioche Sandwich
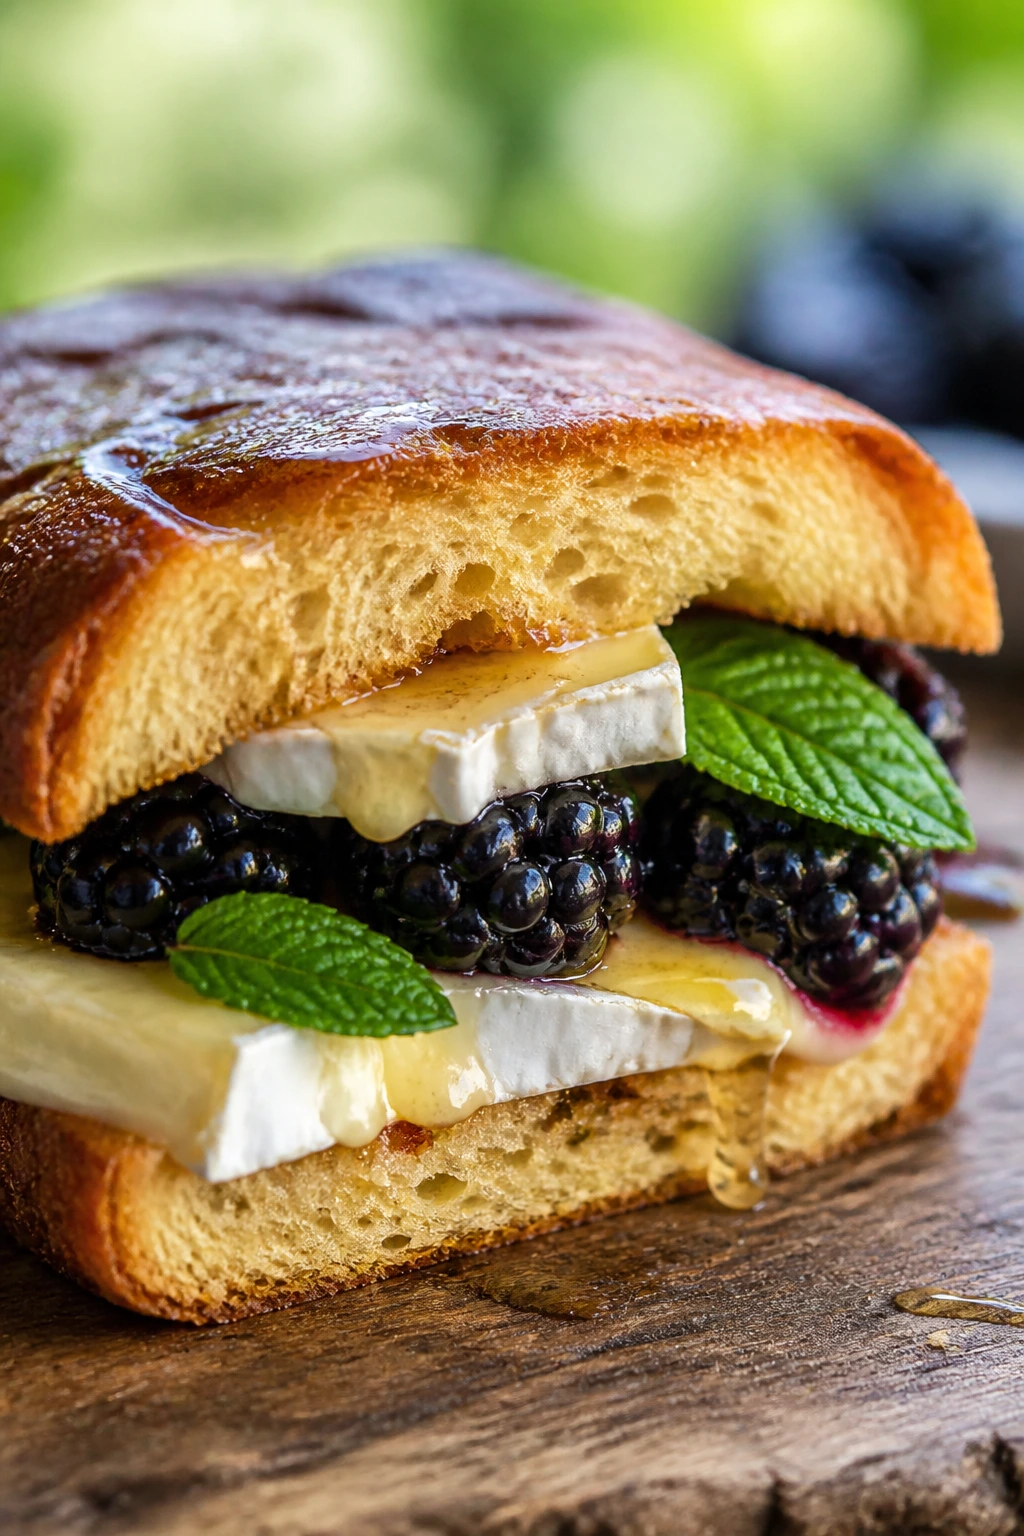
Blackberries and brie sound like a dessert move, and sometimes that’s exactly the point. Brioche gives the sandwich a soft, rich base while honey and berries make the whole thing taste like the end of a very good picnic.
Why It Works: Brie softens at room temperature and spreads into the bread, while blackberries bring sharp juice and a little tartness. A light toast keeps the brioche from going sticky.
Key Ingredients:
- 4 slices brioche
- 4 oz brie, sliced
- 1 cup blackberries
- 1 tbsp honey
- 4 mint leaves
- Pinch of flaky salt
Quick Steps:
- Toast the brioche lightly.
- Layer brie on two slices.
- Add blackberries, honey, mint, and a pinch of salt.
- Close the sandwiches gently.
- Cut and serve right away.
Equipment for This Recipe:
- Knife
- Cutting board
- Toaster or skillet
How to Serve This Dish: Serve it with almonds or plain shortbread cookies if you want a sweet finish to the picnic spread. I like it as a final sandwich, after the savory ones have done their work.
Pro Tips for This Recipe:
- Use blackberries that are ripe but still hold their shape.
- Keep the brie slices thin so they soften without flooding the bread.
- A pinch of salt sharpens the fruit.
Variations on This Dish:
- Strawberry Brie Version: Swap blackberries for sliced strawberries.
- Thyme Honey Version: Add thyme to the honey before drizzling.
Common Mistakes to Avoid with This Dish:
- Don’t use overripe berries that burst everywhere.
- Don’t skip the light toast on the brioche.
Why These Summer Sandwich Ideas Hold Up in a Picnic Basket
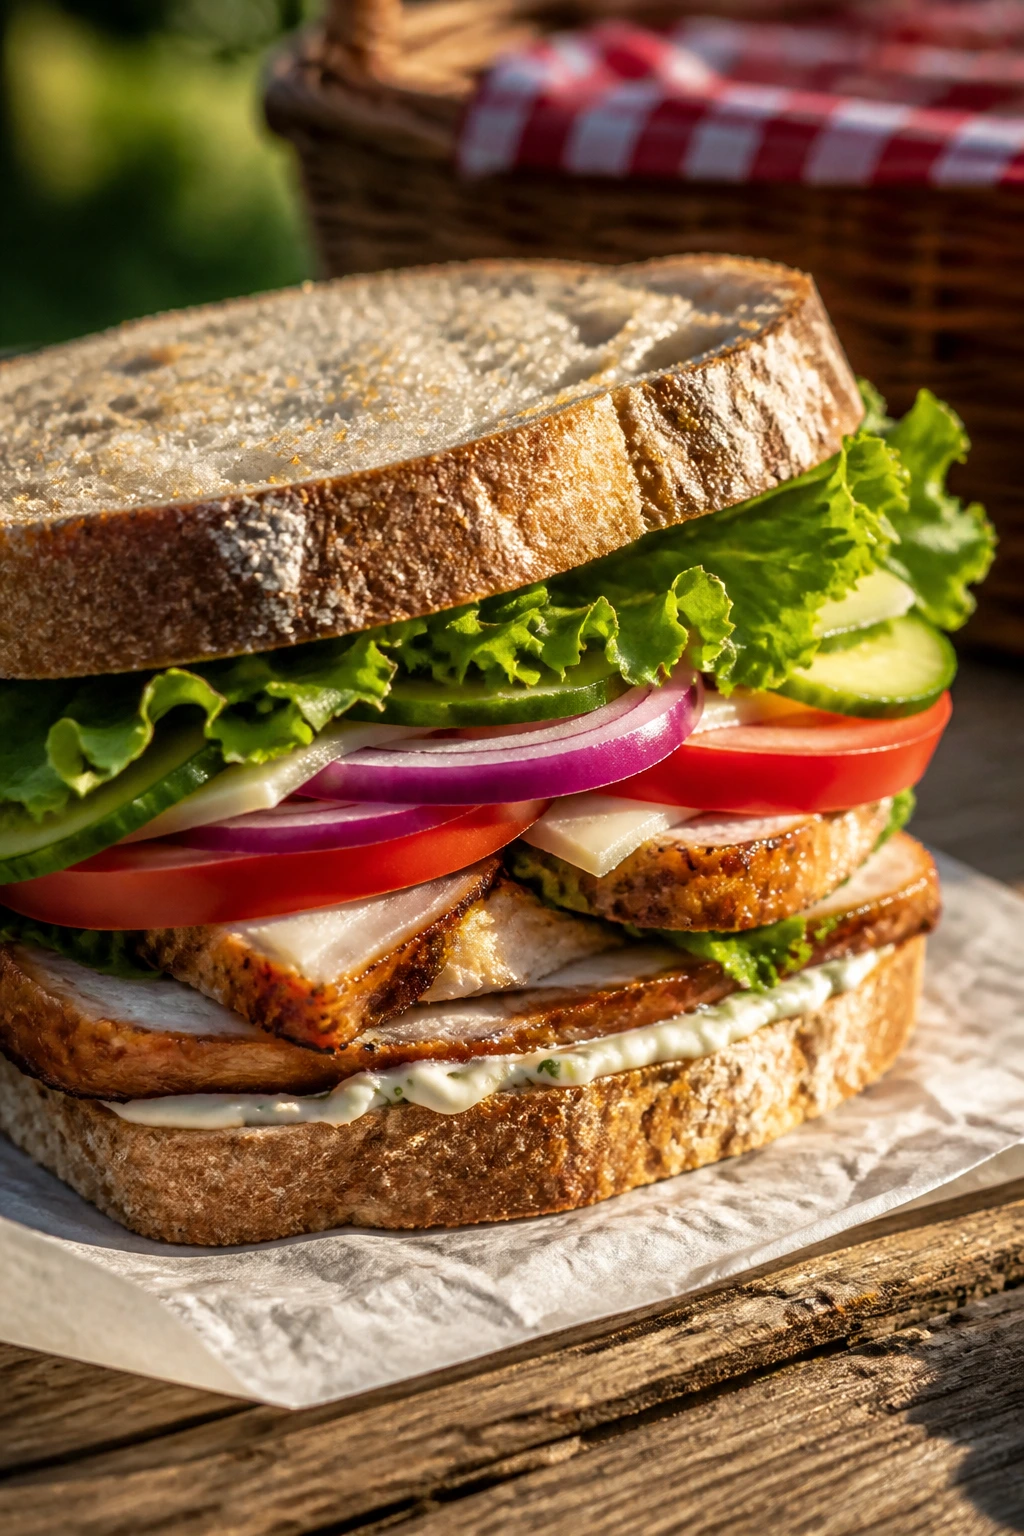
A picnic sandwich has one job: survive the trip and still taste like lunch when the blanket is finally spread out. That means the construction matters more than the garnish. Bread choice, moisture control, and ingredient order all matter here, and they matter in a very practical way — the right sandwich keeps its shape, while the wrong one turns into a damp, collapsed mess before the cooler lid closes.
I like to think in layers. Dry against the bread. Juicy in the middle. Crunch where it can stay crisp. If you put tomatoes, cucumber, and dressed greens directly against soft bread, you’re asking for trouble. If you tuck lettuce, cheese, hummus, mustard, or butter against the slices first, the sandwich buys itself a little time.
Some of these ideas are best cold, and some are better warm enough to melt or toast. That’s not a contradiction. It’s a reminder that picnic food doesn’t have to be frozen into one rule set. A skillet, a toaster, and a clean wrap of parchment can do a lot more than people give them credit for.
Essential Equipment for These Sandwiches
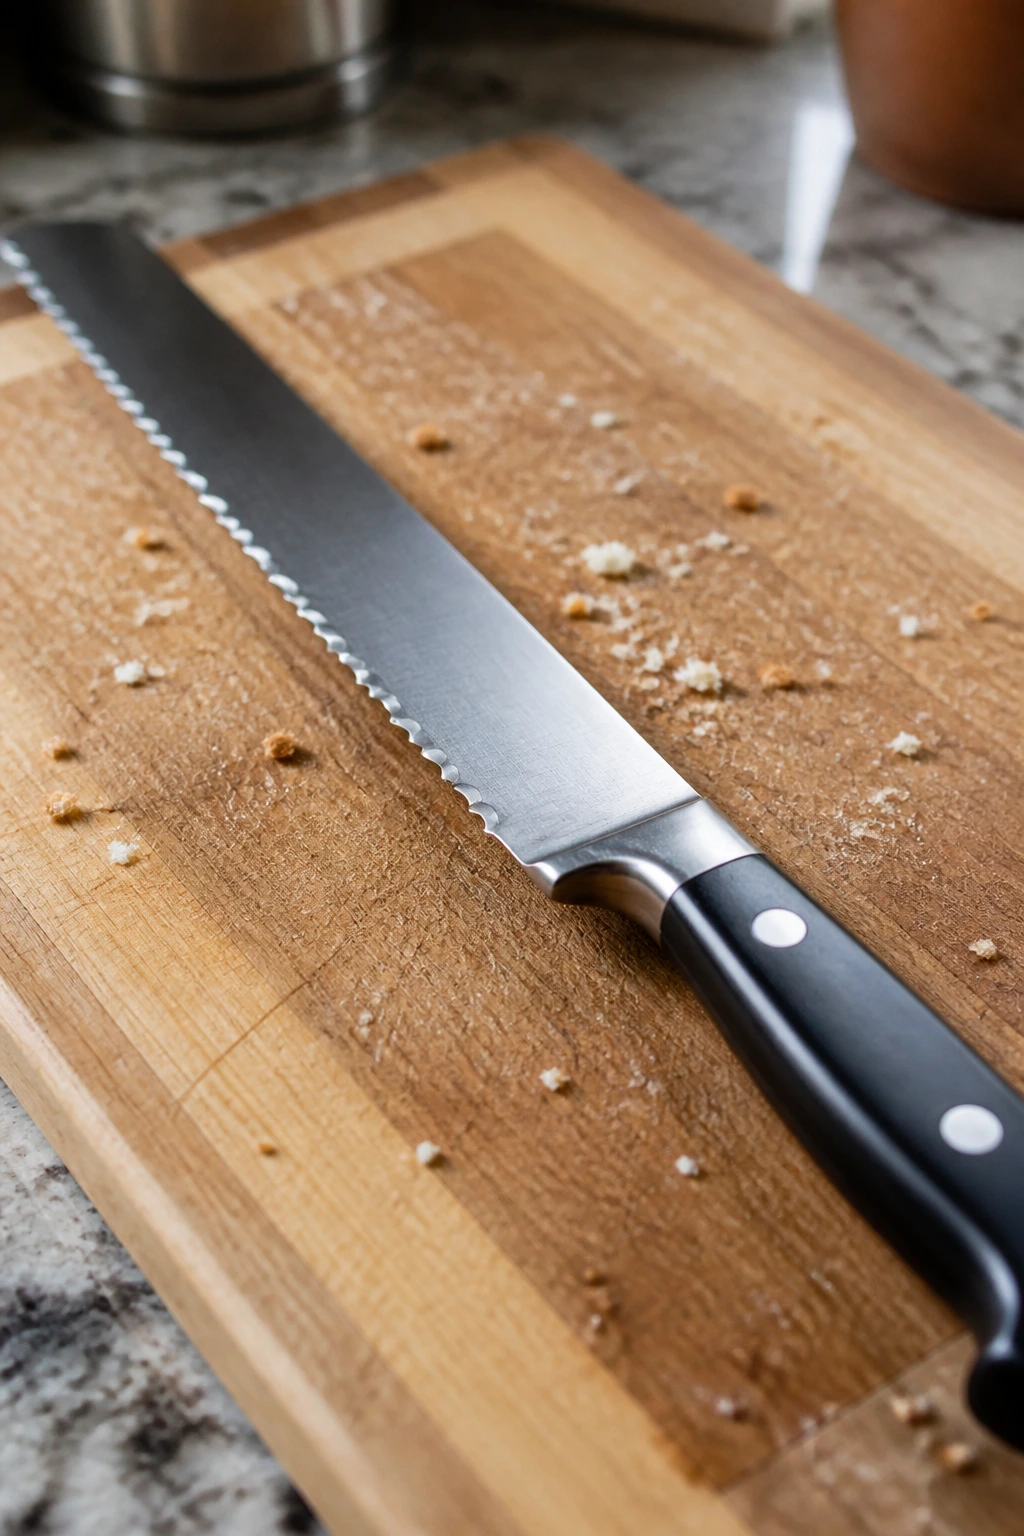
- Serrated bread knife: Cuts crusty loaves, rolls, and brioche cleanly without smashing the crumb.
- Chef’s knife: Handles tomatoes, herbs, onions, peaches, and other fillings that need a sharp edge.
- Stable cutting board: A wooden or plastic board gives you room to build and slice without sliding around.
- Mixing bowls: Use them for chicken salad, tuna salad, chickpea salad, pimento cheese, and dressings.
- Rubber spatula or spoon: Helps spread thick fillings like hummus, ricotta, and mustard without tearing bread.
- Skillet or grill pan: Useful for bacon, grilled cheese, halloumi, mushrooms, and quick bread toasting.
- Baking sheet: Handy for warming sandwiches, toasting bread, or cooling cooked fillings.
- Parchment or wax paper: Wraps sandwiches neatly and keeps them from sticking to each other.
- Cooler with ice packs: Keeps mayo, cheese, seafood, and chicken fillings properly chilled.
- Airtight containers: Best for storing fillings separately until the last minute.
- Tongs or a thin spatula: Makes it easier to move hot sandwiches without crushing them.
- Panini press, optional: Nice to have for pressed sandwiches, but a skillet and another heavy pan work too.
Smart Shopping for Summer Picnic Sandwiches
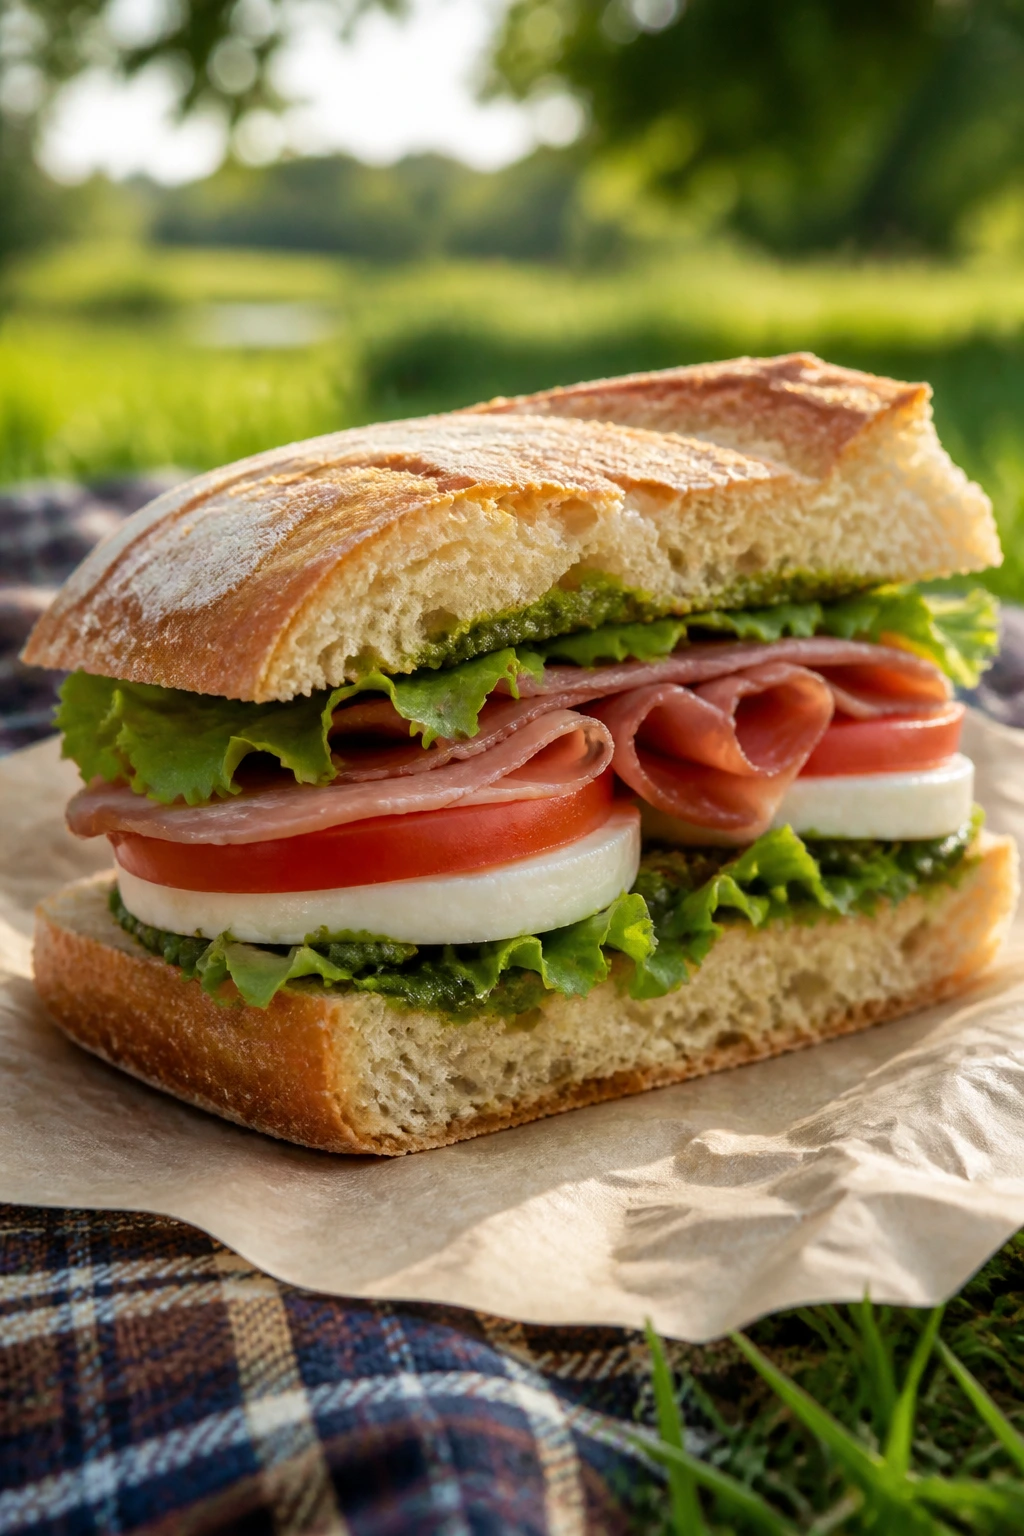
Bread is the first thing I’d buy with purpose. A picnic sandwich needs a loaf that can take pressure, so crusty baguettes, ciabatta, sturdy rolls, and well-made sandwich bread usually beat ultra-soft supermarket loaves. If you want softer bread, brioche and croissants can work, but they’re better with fillings that aren’t dripping juice.
Tomatoes deserve respect. Buy firm-ripe tomatoes that smell like tomato near the stem, not pale hard ones that taste like water. Cucumbers should feel crisp and heavy. Peaches and nectarines need a little give, but not the kind that leaves a thumbprint. Blackberries should be dry and intact, because wet berries turn a sweet sandwich into a leak.
Deli meat is worth asking about at the counter. Thin slices layer better and give the bread less to fight with. Cheese matters too: sharp cheddar, Swiss, provolone, pepper jack, and good mozzarella each behave differently. Soft cheeses like burrata, brie, mascarpone, and ricotta are lovely, but they need crusty bread or a light toast so they don’t spread everywhere.
Herbs should be dry before they go into a sandwich. Wet basil turns dark, and wet dill gets limp in a hurry. Same with lettuce and sprouts. If you wash them, dry them well. The salad spinner is not a luxury here. It’s the difference between crisp layers and a damp middle.
For condiments, buy the ones that do more than add moisture. Mustard, pesto, hummus, tahini, pickled onions, capers, and olive tapenade all bring flavor without making the bread surrender. That’s the kind of shopping that pays off when the basket gets opened a little later than planned.
How to Serve These Sandwiches at a Picnic Table
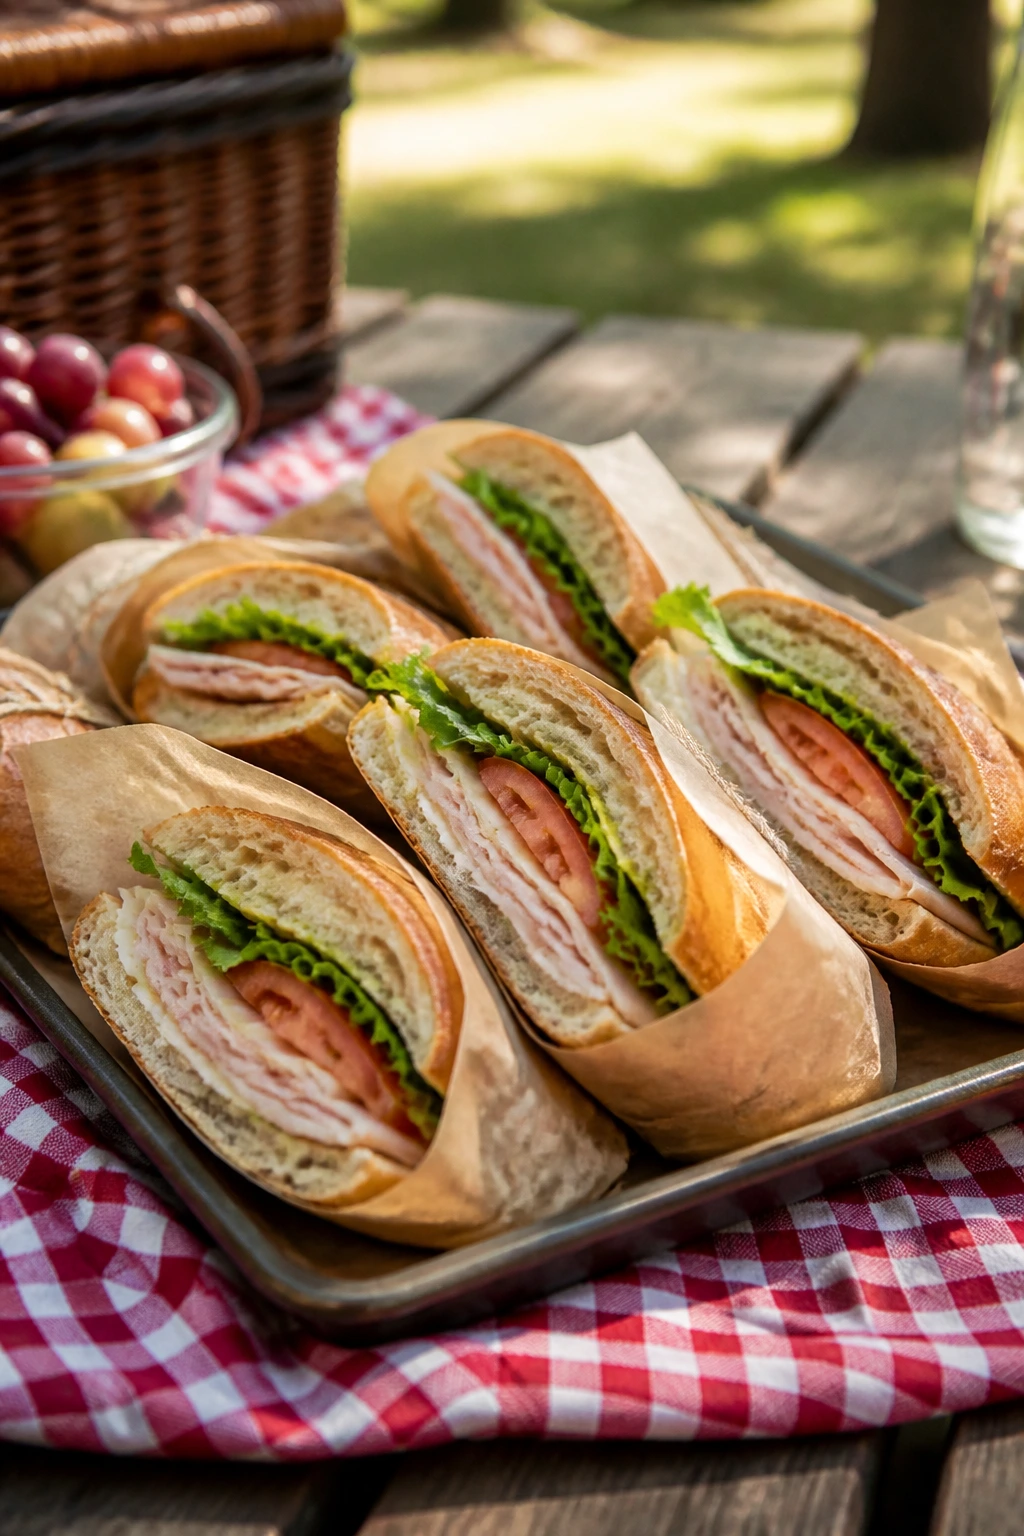
Presentation: Cut long sandwiches on a sharp diagonal so the fillings show, then wrap the cut face in parchment if you’re carrying them across a park or beach. A tray lined with parchment or a checkered cloth makes even the simplest sandwich look deliberate.
Accompaniments: Kettle chips, dill pickles, cherry tomatoes, watermelon wedges, cucumber salad, pasta salad, and marinated olives all play nicely with these sandwiches. If the sandwiches are rich, lean on something cold and sharp beside them.
Portions: One full deli-style sandwich or wrap usually feeds one adult, while sliders and tea sandwiches work best at 3 to 4 pieces per person if the sides are light. For kids, half a sandwich is often plenty, especially if fruit and chips are already in the basket.
Beverage Pairing: Lemonade, unsweetened iced tea, sparkling water with lime, or a cold light beer all fit the mood without crowding the food. For sweeter sandwiches, a plain sparkling water keeps things from tipping too sugary.
Additional Tips and Flavor Boosters
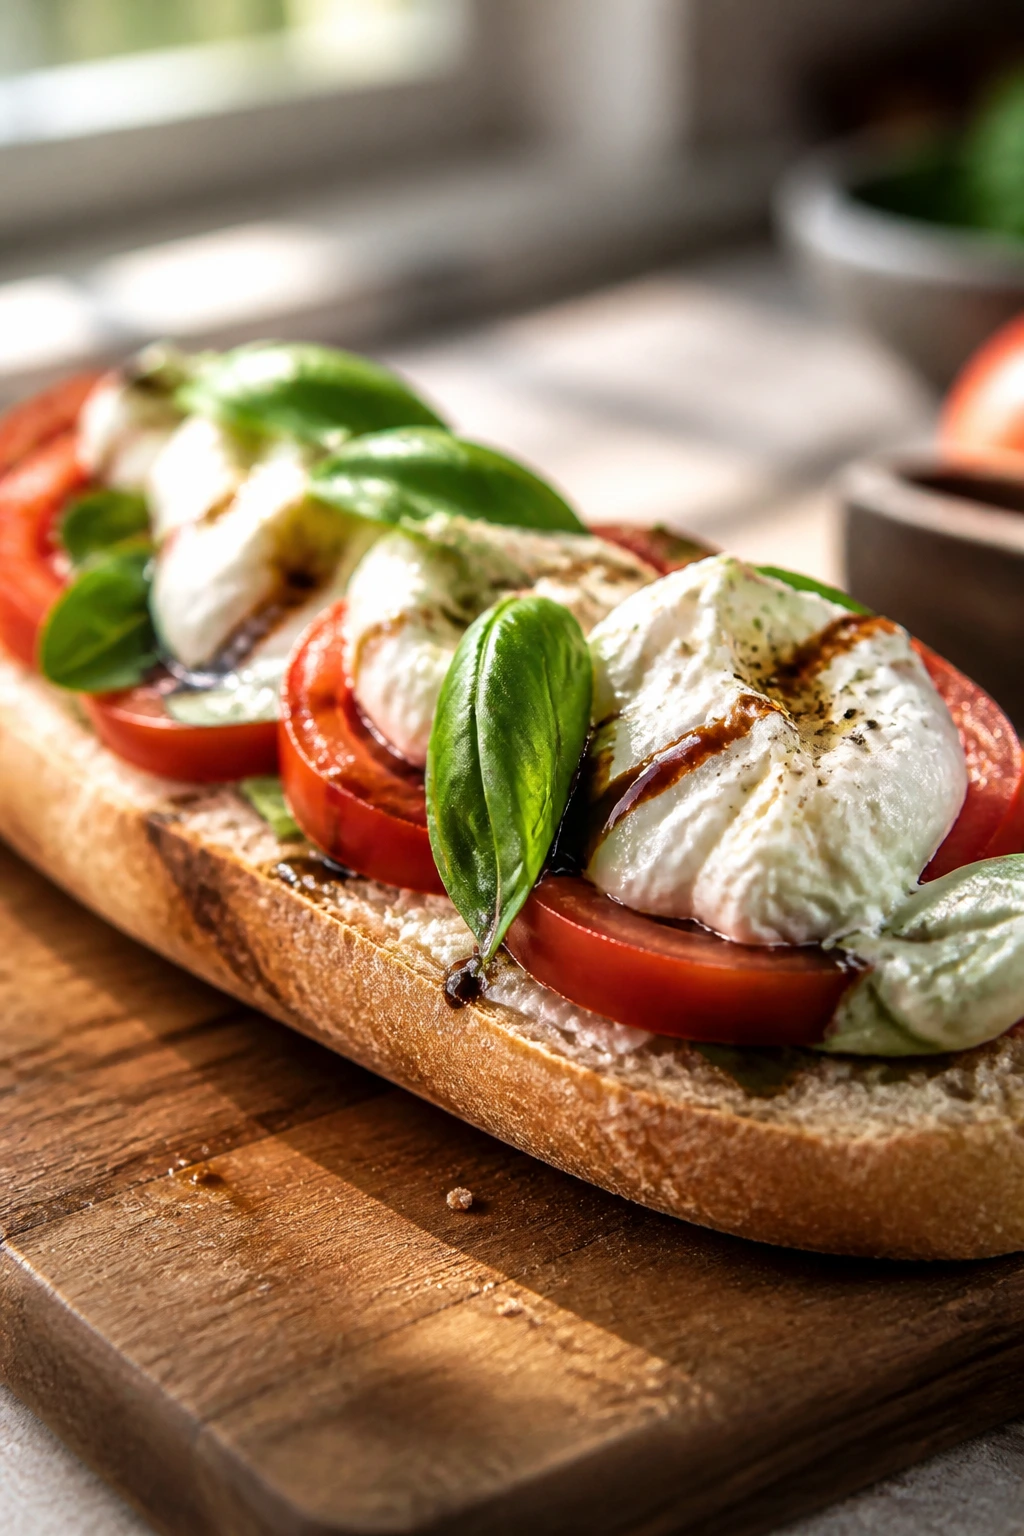
Flavor Enhancement: Brush the cut sides of bread with olive oil or softened butter, then toast them for a thin crisp shell that slows down sogginess. That one move helps more than piling on extra condiments ever will.
Customization: Pickled onions, sliced jalapeños, capers, chopped olives, and quick herb spreads can change the flavor of a sandwich without changing the whole structure. I like that because it lets you use the same loaf in three different ways.
Serving Suggestions: A pinch of flaky salt on tomatoes, peaches, or avocado makes the filling taste brighter. Fresh basil, dill, mint, or chives on top right before serving adds a last-minute lift that still feels easy.
Make-It-Yours: For gluten-free sandwiches, choose a sturdy loaf and toast it well; for dairy-free versions, use hummus, avocado, or mustard instead of soft cheese; for higher protein, add more chicken, turkey, tuna, tofu, or beans instead of loading up on bread and spread.
Make-Ahead, Storage, and Reheating Guidance
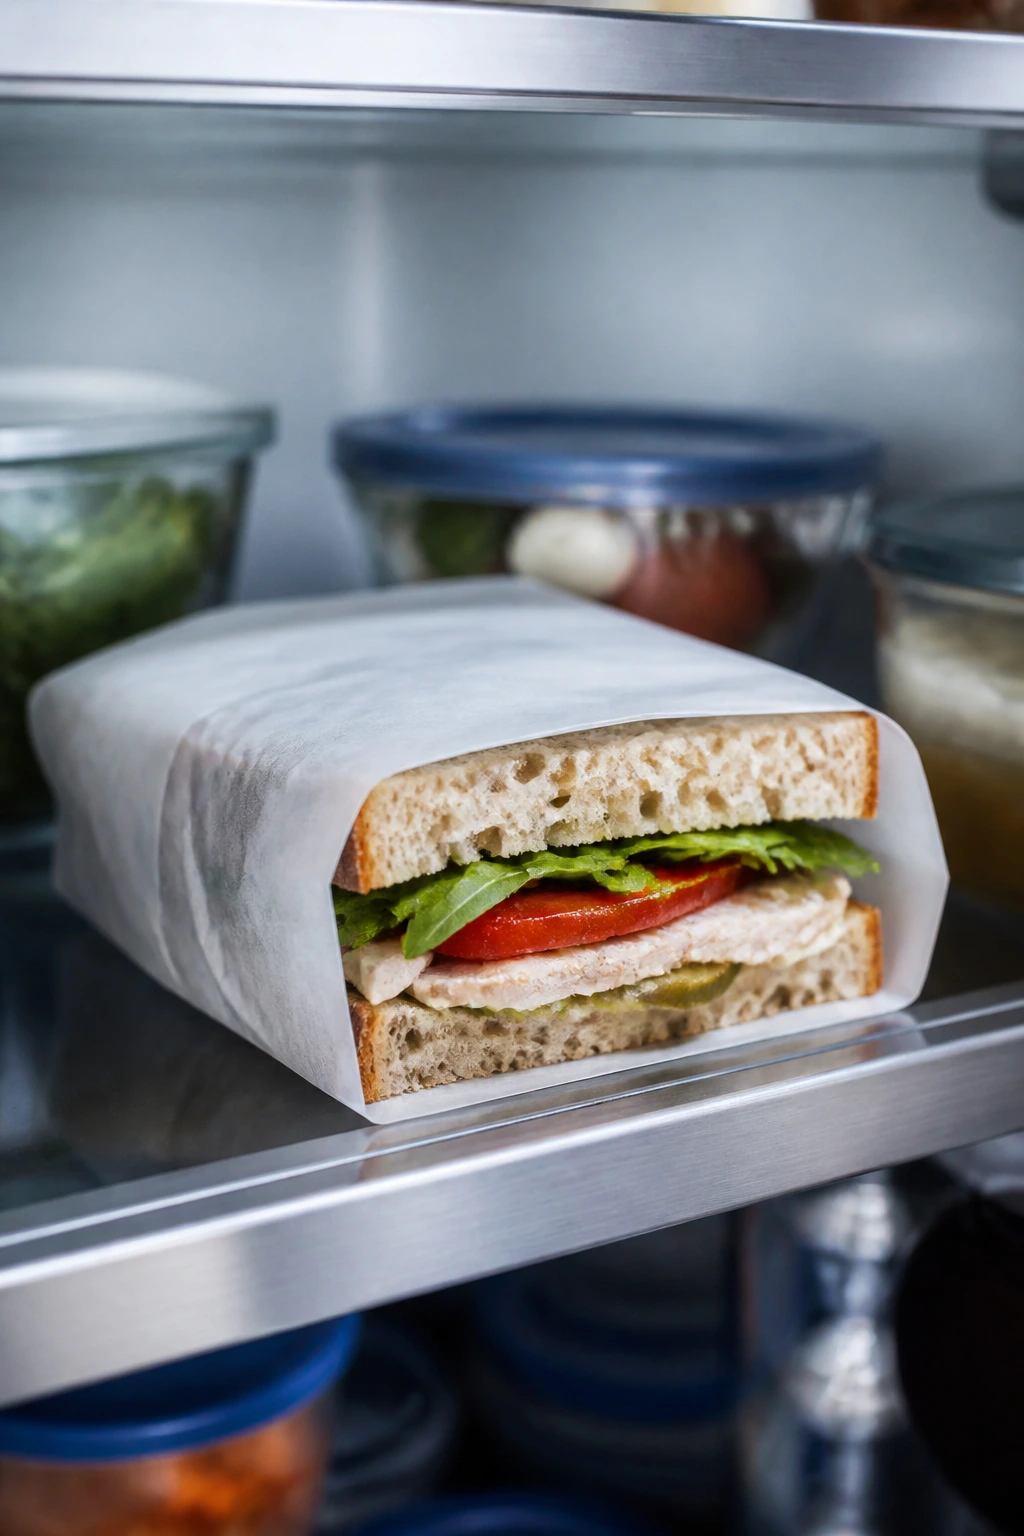
Most assembled cold sandwiches are at their best within 4 to 6 hours if they’re wrapped tightly and kept cold. Sturdy builds like Italian subs, turkey clubs, and wraps can hold for up to 24 hours in the fridge if the wet ingredients are kept moderate. Tomato-heavy, shrimp, egg salad, tuna salad, and mayo-heavy sandwiches taste better the same day, and some of them should be assembled only a short time before serving.
Separate components usually last longer than the finished sandwich. Chicken salad, tuna salad, egg salad, chickpea salad, pimento cheese, and bean spreads keep well for 3 to 4 days in the fridge. Pulled pork, meatballs, cooked chicken, roasted vegetables, and grilled mushrooms also stay good for about 3 to 4 days. Shrimp salad and smoked salmon should be treated more carefully and used within 1 to 2 days. Bread can be kept at room temperature for a day or two if it’s crusty, or frozen sliced for up to 2 months.
Freezing works best for cooked fillings and bread, not for cucumber sandwiches, lettuce-heavy sandwiches, or anything built on a mayo salad that’s already delicate. Pulling a sandwich apart after freezing usually leaves you with a sad, wet crust and limp greens. Better to freeze the parts and assemble later.
For warm sandwiches, reheat in a 325°F to 350°F oven wrapped in foil for 10 to 15 minutes, or in a skillet for 2 to 3 minutes per side if you want the crust crisp again. A toaster oven works well for melts and subs. The microwave is fine for heating meat, but it softens bread fast, so I only use it when texture is not the point.
Variations and Adaptations to Try
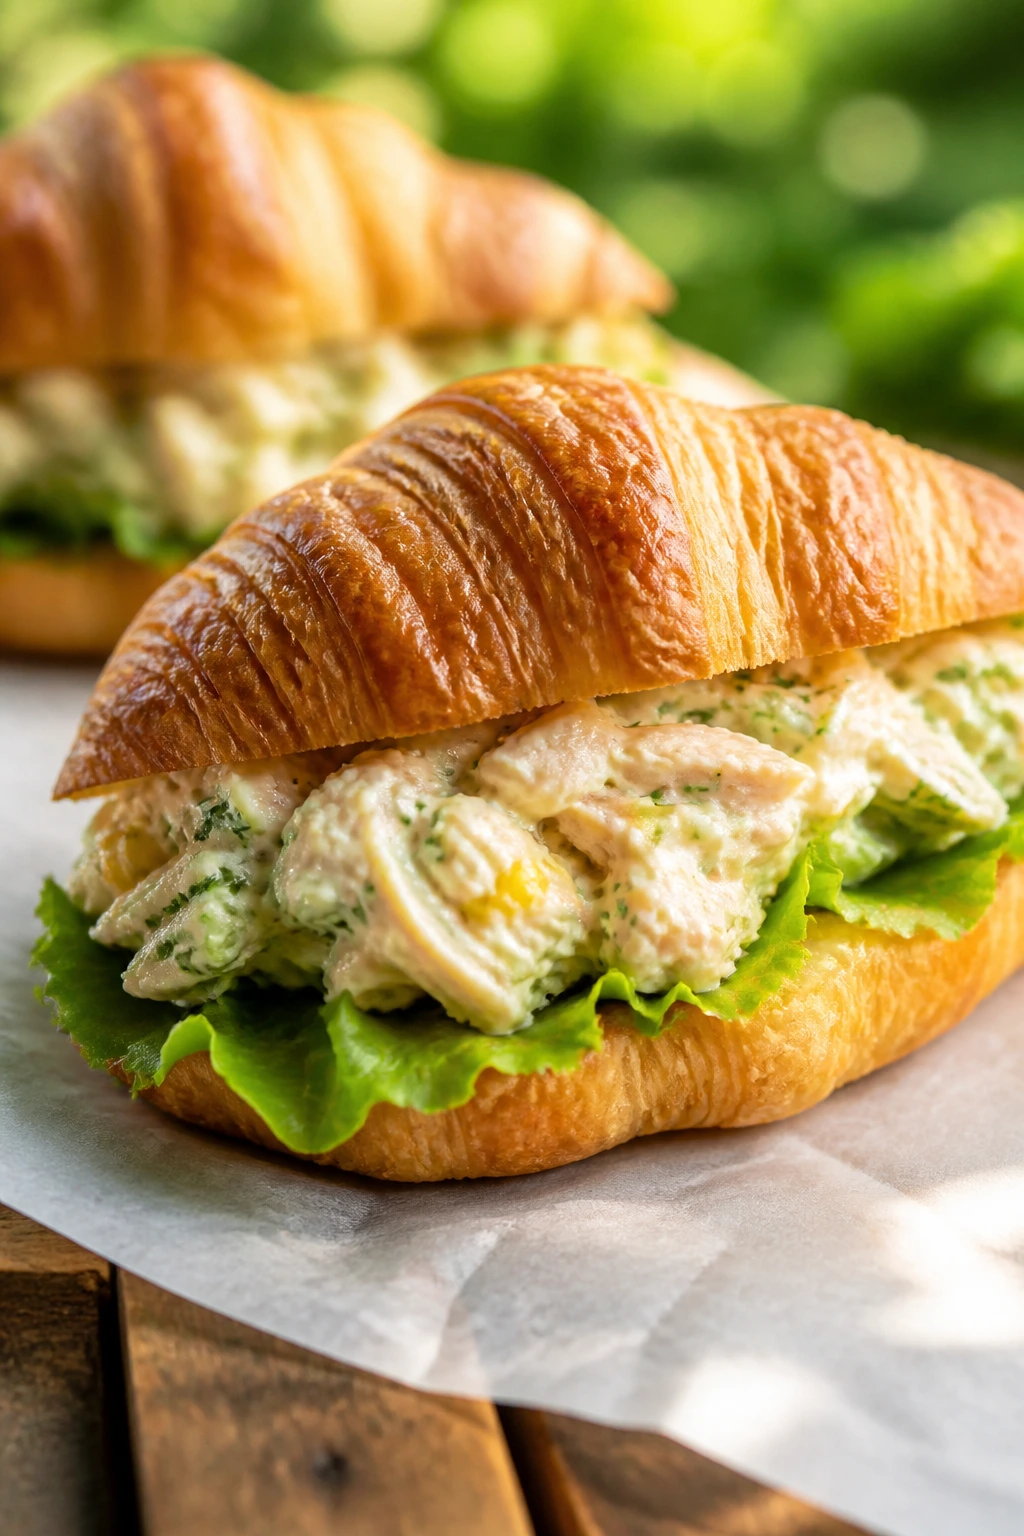
Gluten-Free Basket Build: Use a sturdy gluten-free loaf, lettuce wraps, or large rice-paper rolls for the sandwiches with softer fillings. Toast the bread well so it has a fighting chance against juicy ingredients.
Dairy-Free Picnic Spread: Swap cheese for hummus, avocado, tahini, mustard, or olive oil-based spreads. This works especially well in the wraps, deli sandwiches, and vegetable builds where the flavor already has enough lift.
Higher-Protein Lunch Lineup: Add more turkey, chicken, tuna, shrimp, or tofu, and use thinner bread so the filling can do the heavy lifting. Sliders and pitas are especially useful here because they let you keep the portions neat.
Kid-Sized Mini Cuts: Use slider buns, tea bread, tortilla roll-ups, or crustless sandwiches cut into fingers. Skip the sharp onions and heavy heat, and keep the fillings familiar: turkey, cheese, peanut butter, jam, egg salad, or mild chicken salad.
Spice-Lover Picnic Set: Add hot sauce, pickled jalapeños, chili crisp, pepper jack, horseradish, or harissa mayo. A little heat changes the whole feel of a picnic spread without making the sandwiches harder to pack.
Common Mistakes to Avoid
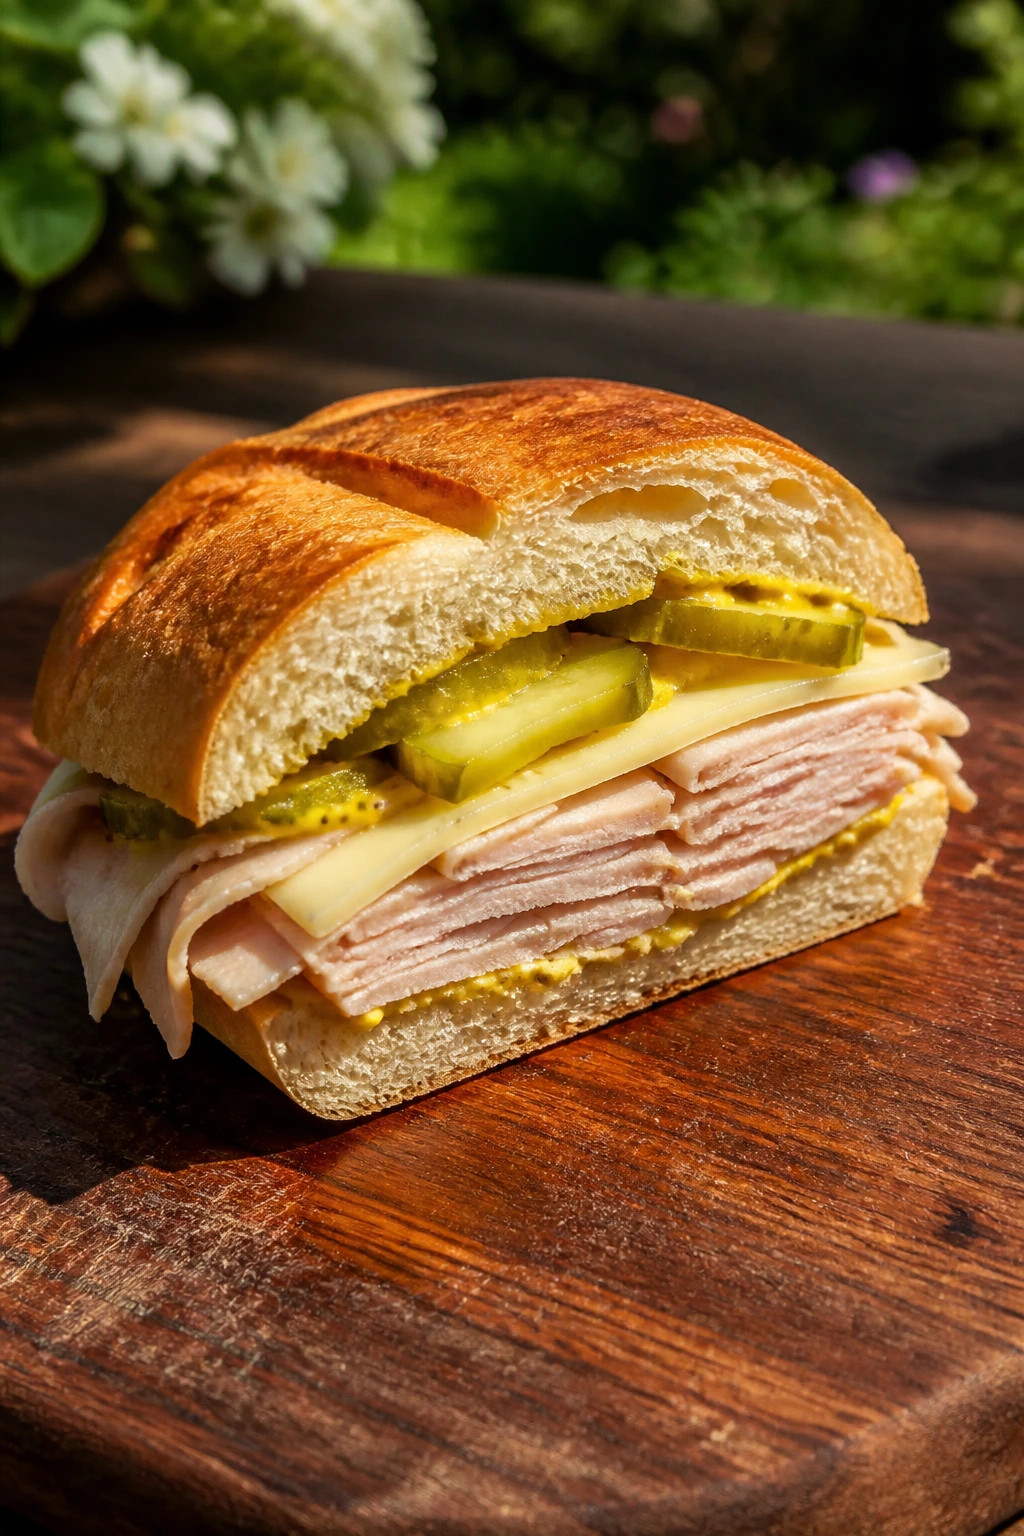
- Putting wet ingredients directly on bare bread: Tomato juice, dressed slaw, and cucumber moisture will soak into the crumb fast. Put cheese, lettuce, hummus, mustard, or butter against the bread first.
- Assembling too far ahead: Even a good sandwich has a limit. Mayo-heavy, tomato-heavy, and seafood sandwiches should be built close to serving time, while sturdier subs and wraps can wait longer.
- Choosing bread that collapses under pressure: Very soft bread looks nice on the shelf and then falls apart the moment it meets a juicy filling. Use a loaf or roll with enough structure to hold shape in a cooler.
- Overfilling every sandwich: A stuffed sandwich sounds generous until it splits at the seam. Leave a little room so the bread can close and the layers can settle.
- Skipping the chill or rest: Cold fillings cut cleaner, and a brief rest after toasting or grilling lets steam escape before wrapping. If you pack sandwiches while they’re piping hot, the trapped steam softens the crust.
- Forgetting to dry produce and herbs: Wet lettuce, basil, cucumber, and tomatoes will make even a good sandwich feel sloppy. Dry them well, then build.
Picnic Sandwich Questions, Answered
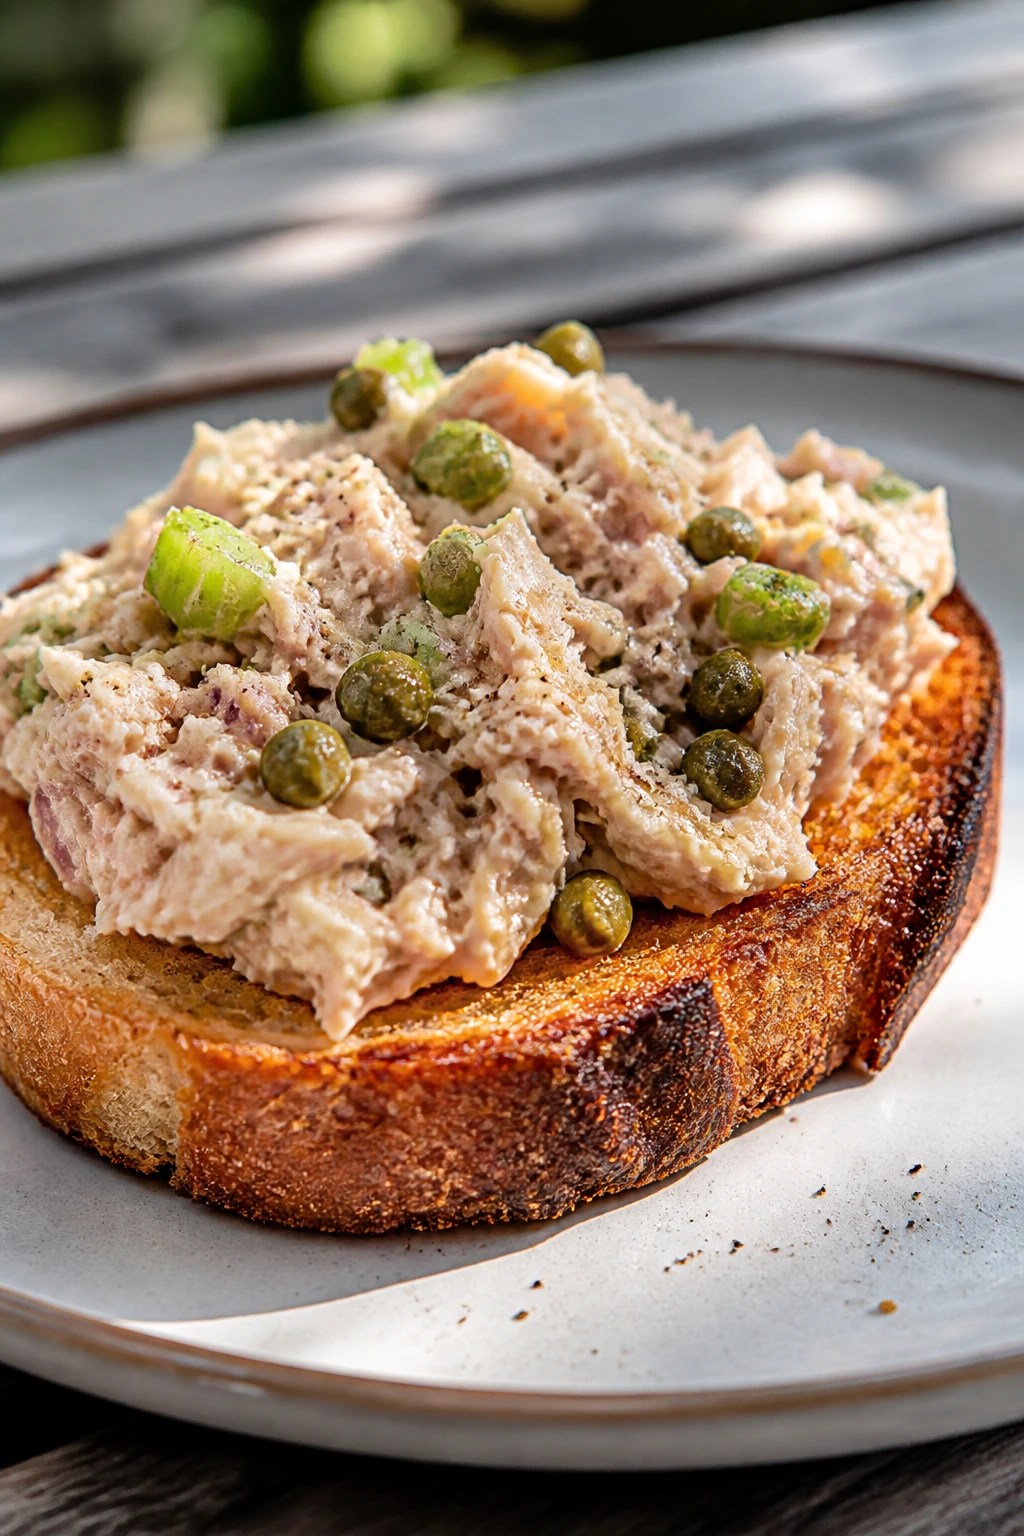
What bread holds up best for a picnic?
Crusty baguettes, ciabatta, sturdy rolls, and good sourdough usually hold up better than soft sandwich bread. If you do use soft bread, toast it lightly first so it resists moisture a little longer.
How do I keep sandwiches from getting soggy?
Put a dry layer against the bread first — cheese, lettuce, mustard, hummus, or butter all help. Also blot tomatoes, cucumbers, and roasted peppers before assembly, and wrap the sandwiches only after the bread has had a chance to settle.
Can I make these the night before?
Some can, but not all. Italian subs, turkey clubs, wraps, and bean-based sandwiches can often be assembled ahead; egg salad, tuna salad, shrimp salad, and tomato-heavy sandwiches are better made closer to serving time.
Which fillings should stay cold the whole time?
Anything with mayonnaise, eggs, chicken, tuna, shrimp, smoked salmon, or dairy-rich spreads should stay chilled until it’s time to eat. Keep a cooler or ice pack close if the picnic stretches on.
Can I use wraps instead of bread for most of these?
Yes, especially for hummus, chicken Caesar, chickpea salad, tofu, and veggie fillings. Wraps are easier to pack and less likely to crumble, though they can get tight if you overfill them.
What if my sandwich gets smashed in the cooler?
Wrap it in parchment first, then keep it in a rigid container instead of loose in the bag. If it’s still a little flattened, a few minutes unwrapped on a plate can help the bread recover.
Can I make these gluten-free?
Absolutely, but choose a gluten-free bread with some structure or move to lettuce wraps, pita-style alternatives, or tortilla wraps if they suit the filling. Toasting helps a lot because it firms up the surface.
How do I keep warm sandwiches warm outdoors?
Wrap them in foil while they’re still hot and tuck them into an insulated bag or lined container. For best texture, keep the warm sandwich separate from cold sides so the steam doesn’t soften everything else.
Packed and Ready

The best picnic sandwiches are the ones that know how to behave. They don’t leak all over the basket, they don’t collapse when you cut them, and they still taste like themselves after a little travel time. Bread choice, moisture control, and a little restraint do more for these sandwiches than any fancy spread ever could.
Pick one from the cold side, one from the grilled side, and maybe one sweet one at the end. Wrap them well, keep them cool, and let the first bite tell you whether the basket was packed right.