
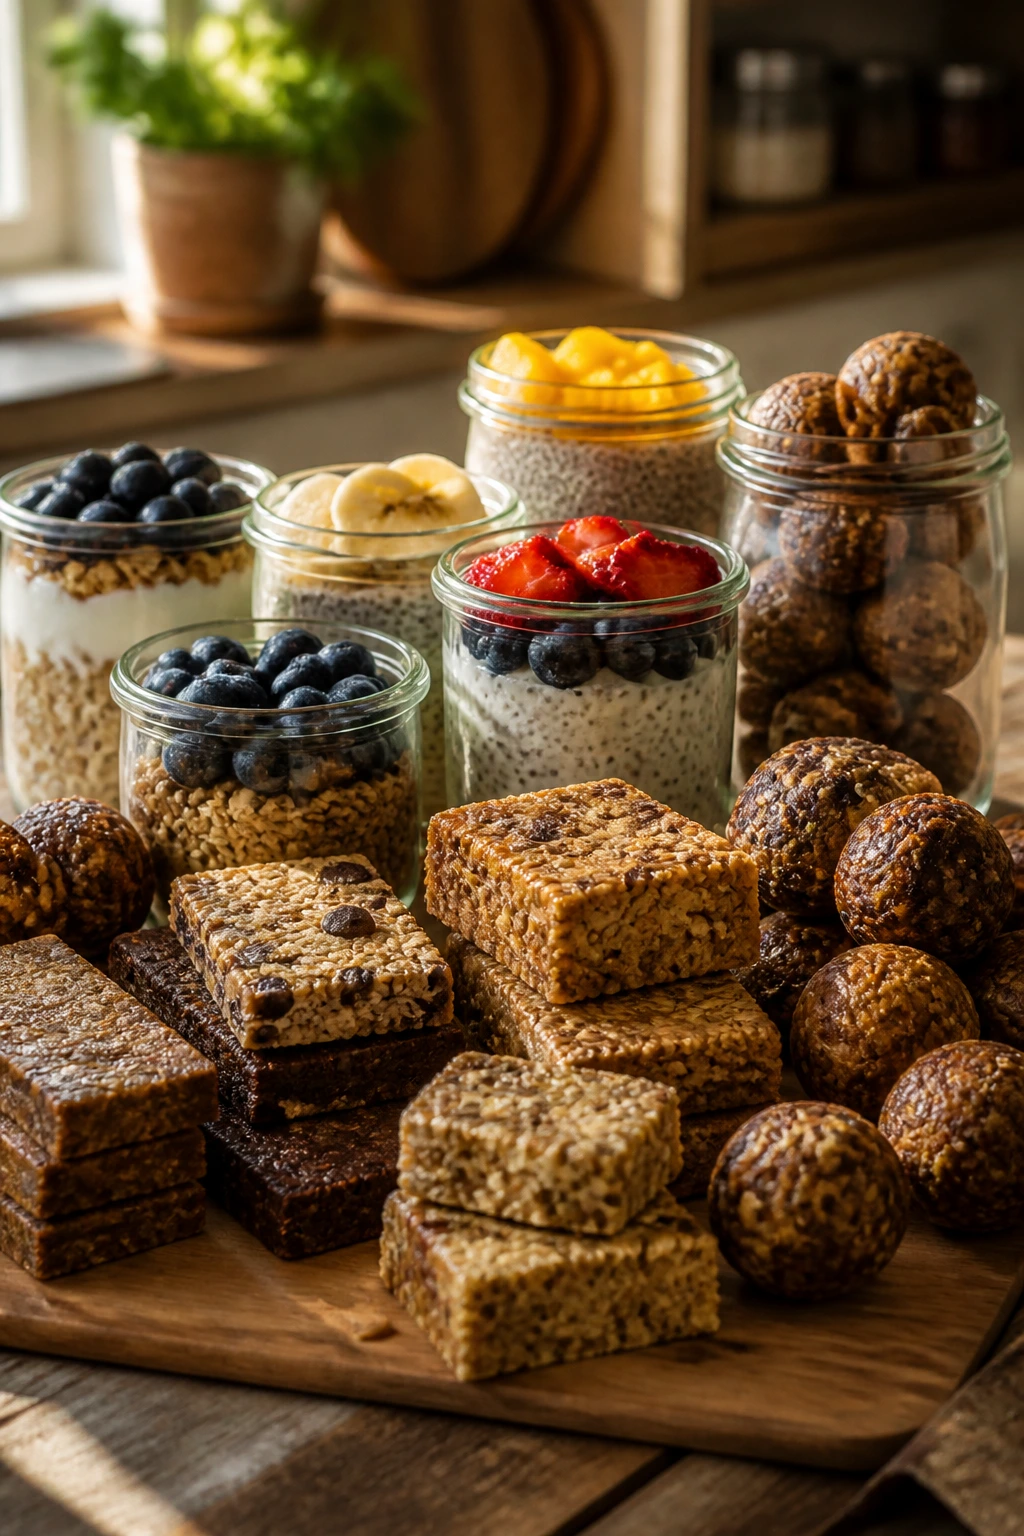
By Sunday afternoon, the good intentions are usually sitting in the fridge, looking a little wilted. You bought the fruit, the oats, the yogurt, the nut butter — then Monday shows up anyway, and somehow there’s still nothing ready to grab with one hand. That’s where healthy treats for meal prep Sundays earn their keep: they have to taste like a treat, hold up for several days, and survive the cold without turning soggy, gritty, or weirdly sad.
The best ones are built around ingredients that behave themselves. Thick yogurt. Rolled oats. Chia seeds. Dates. Frozen fruit that gets a little jammy instead of watery. A few recipes bake once and disappear into bars, muffins, or snack cake squares. Others never meet the oven at all, which is honestly a gift when you’ve already got a full Sunday list and the sink is giving you side-eye.
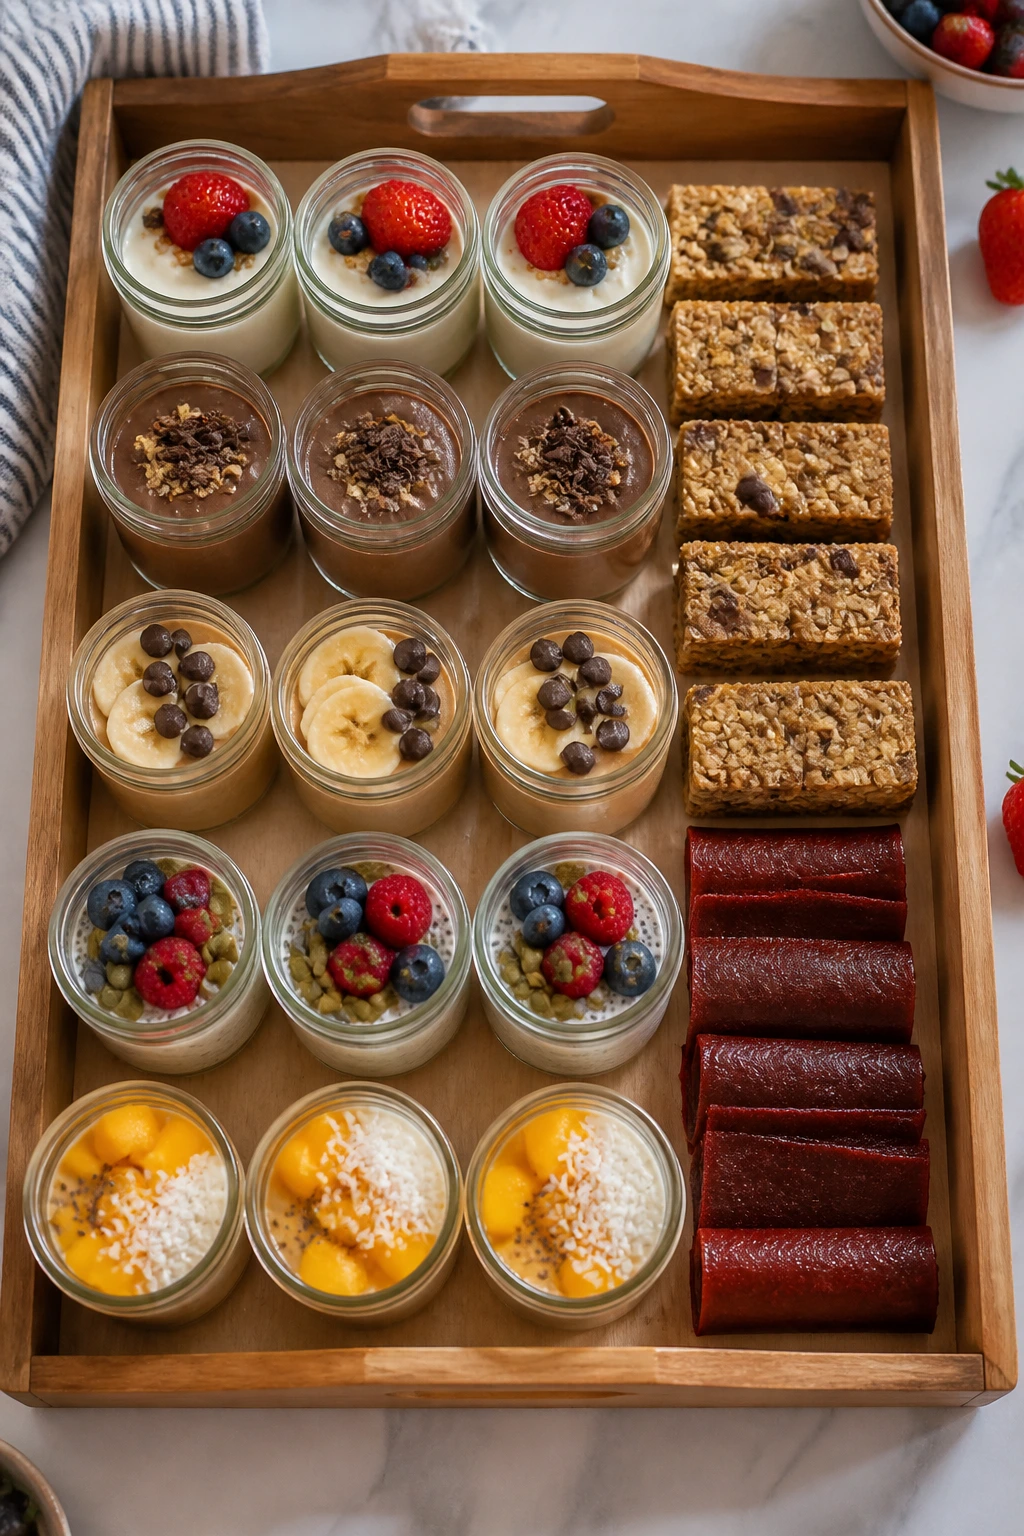
What I like about this kind of prep is how practical it gets without feeling punitive. You’re not making “diet food” in the gray, joyless sense of the phrase. You’re making little fridgeable desserts, breakfast bites, and snack portions that are sweet enough to feel worth eating and sturdy enough to survive a few days of real life. Start with the jars if you want freshness, or the bars if you want something you can eat while standing at the counter.
Why You’ll Love This Collection
-
Grab-and-go portions: Every recipe here can be portioned into jars, bars, bites, or squares, so your snack life becomes a matter of opening the fridge instead of negotiating with yourself.
-
Lower added sugar, not lower flavor: These recipes lean on ripe fruit, cinnamon, cocoa, vanilla, lemon zest, and toasted nuts instead of dumping in enough sweetener to flatten your appetite by noon.
-
A lot of them are freezer-friendly: That matters. It means you can make a double batch of bites, bars, muffins, or bark and stash half for the week that gets busier than you planned.
-
Good textures after a few days: Thick yogurt, baked oats, chia pudding, and oat-based bars hold shape better than delicate pastries, which is exactly why they belong in meal prep rotation.
-
Sweet enough to feel like a treat: None of these tastes like you’re eating air disguised as food. A square of chocolate date bark or a chilled cacao pudding cup still feels like a reward.
-
Flexible for real kitchens: If you have a blender, a bowl, a muffin tin, and some containers, you can make most of this list without shopping for special gear.
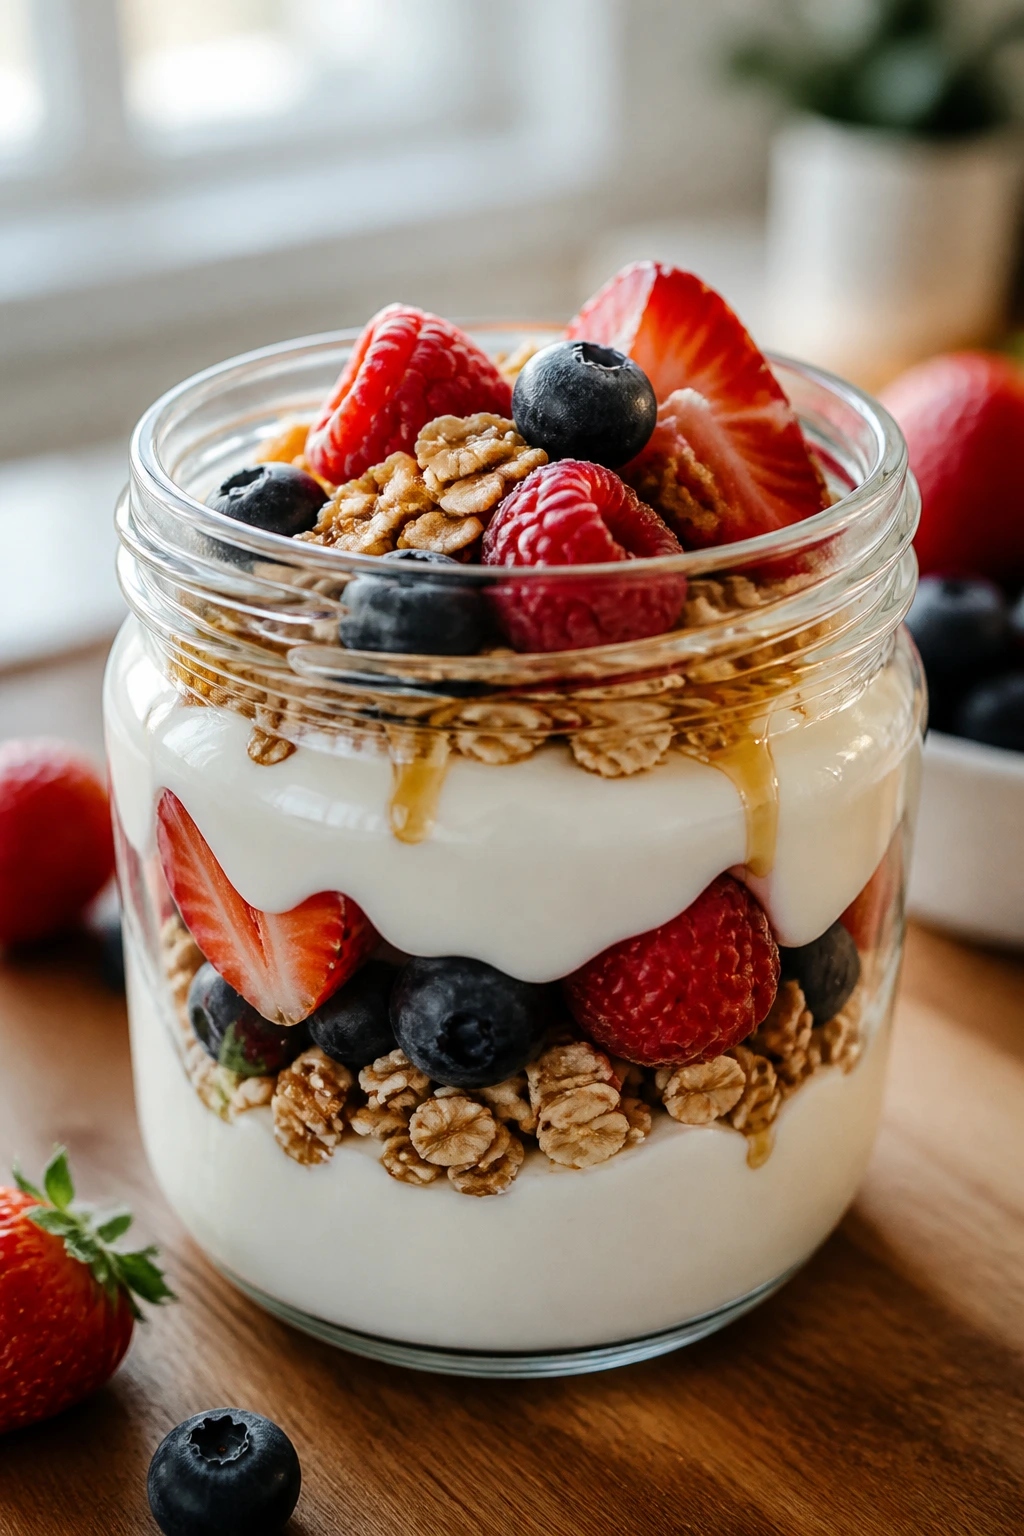
1. Greek Yogurt Berry Parfait Jars
Cold, creamy yogurt layered with berries and a little crunch is the easiest kind of prep to love. These jars look cheerful on a shelf, but the real win is the texture: thick yogurt underneath, juicy berries in the middle, and granola that stays crisp if you keep it separate until the last minute.
Why It Works:
Greek yogurt brings protein and a thick spoonable body, so these jars feel more like a snack than a sugar crash in disguise. Berries add acidity and moisture without needing much help, and a small amount of honey keeps the yogurt from tasting flat. I like this one because it’s honest about what it is: simple, cold, and clean-tasting, with just enough crunch to keep you interested.
Key Ingredients:
- 2 cups plain Greek yogurt — use 2% or full-fat for the thickest texture.
- 1 to 2 tablespoons honey or maple syrup — enough to soften the tang without making it dessert-sweet.
- 1 teaspoon vanilla extract — gives the yogurt a rounder, warmer flavor.
- 1 cup strawberries, chopped — sweet, juicy, and easy to layer.
- 1 cup blueberries — they hold their shape and don’t leak as much as softer fruit.
- 1 cup raspberries or blackberries — use them for color and sharpness.
- 1 1/2 cups low-sugar granola — pick a cluster style if you want better crunch.
- 2 teaspoons chia seeds — optional, but they soak up a little moisture and add body.
Quick Steps:
- In a medium bowl, stir together the Greek yogurt, honey, and vanilla until smooth and glossy.
- Wash and dry the berries well. Slice the strawberries into bite-size pieces so they layer neatly instead of sliding around.
- Spoon a layer of yogurt into 4 small jars, about 1/3 cup each.
- Add a layer of berries, then a sprinkle of granola. Repeat once more, finishing with berries on top if you want the prettiest look.
- Sprinkle chia seeds over the top, screw on the lids, and chill for at least 20 minutes if you want the layers to settle. If you’re making them for later in the week, store the granola separately and add it right before eating.
Equipment for This Recipe:
- 4 small glass jars with lids — 8-ounce jars are a nice size.
- Mixing bowl — wide enough to stir without splashing.
- Spoon or small spatula — for neat layering.
- Cutting board and paring knife — for the berries.
How to Serve This Dish:
Serve one jar chilled with a teaspoon tucked in the lid, or pour it into a bowl and scatter the granola over the top if you want a little more crunch. It works well as a midmorning snack or a light breakfast, especially when the fridge is full of heavier prep.
Pro Tips for This Recipe:
- Pat the berries dry. Even a little extra water softens granola faster than you expect.
- If you want the jars to last the full week, keep granola in a separate container.
- A strip of lemon zest stirred into the yogurt makes the whole thing taste brighter.
- Use plain yogurt, not vanilla-flavored yogurt; the flavored stuff usually brings more sugar than you need.
Variations on This Dish:
- Peach Melba Jars: Swap the berries for sliced peaches and a few raspberries. A pinch of cinnamon works surprisingly well here.
- Chocolate Cherry Jars: Stir 1 teaspoon cocoa powder into the yogurt and layer with halved cherries and cacao nibs.
- Dairy-Free Coconut Jars: Use thick coconut yogurt and add toasted coconut flakes for crunch.
Common Mistakes to Avoid with This Dish:
- Adding granola too early: It turns soft by day two. Keep it dry until serving.
- Using overly juicy fruit: Waterlogged berries make the yogurt loose and the jars messy.
- Over-sweetening the base: Too much honey turns this into dessert syrup. Start small and taste first.
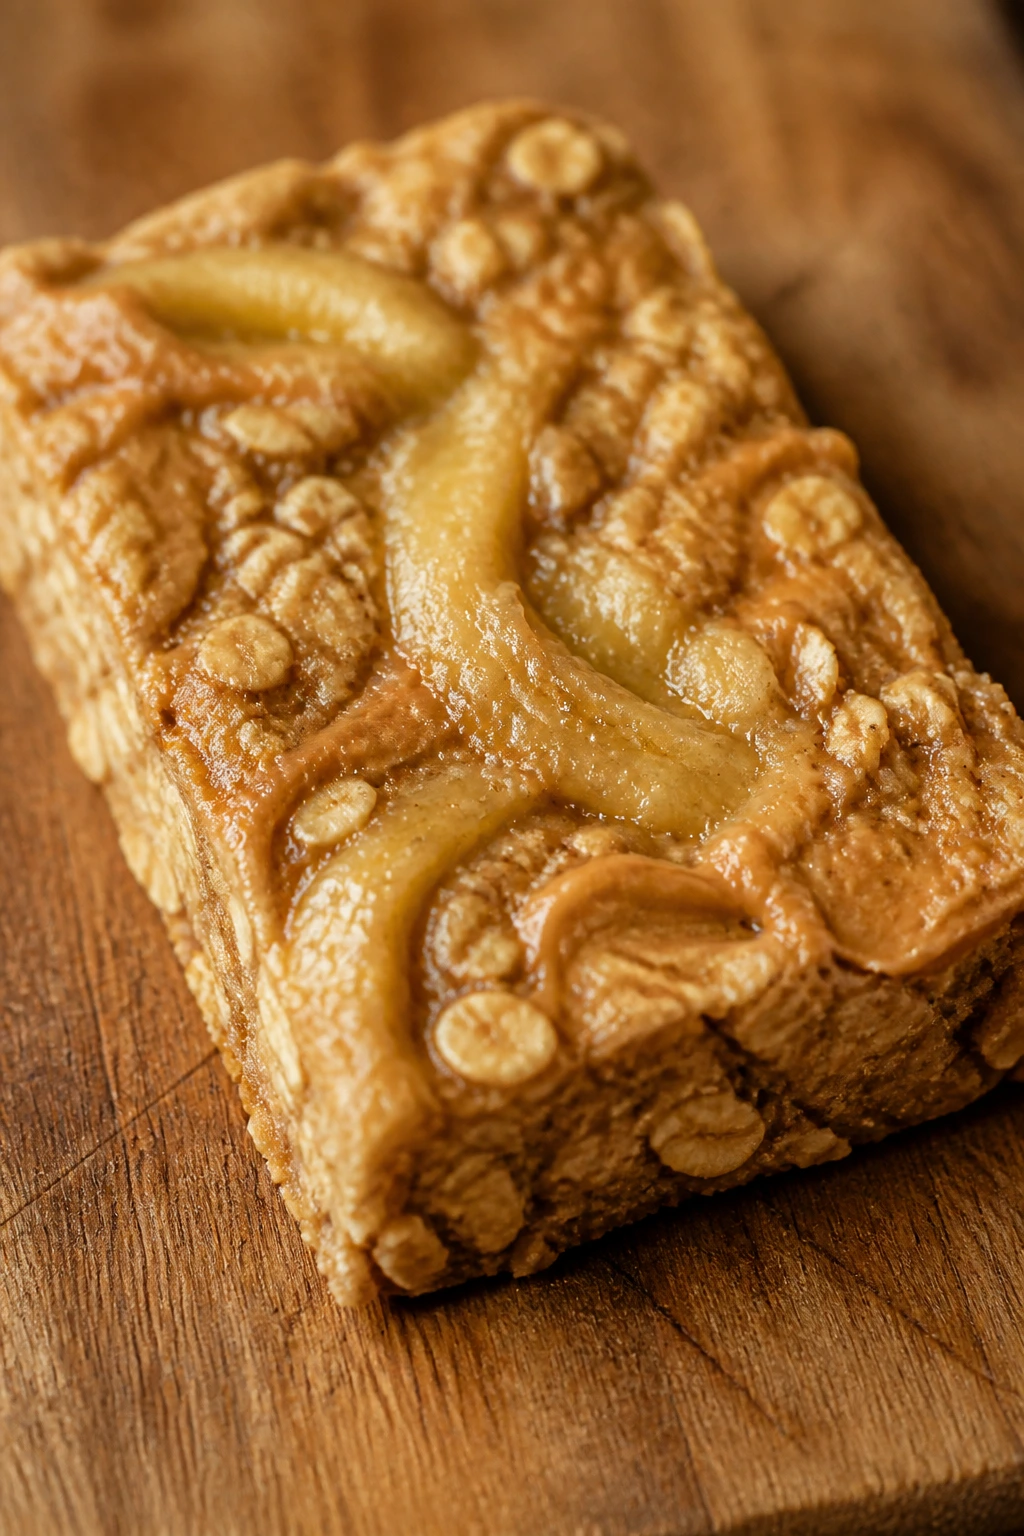
2. Peanut Butter Banana Oat Bars
These bars are the kind of thing you cut once and keep reaching for all week. They’re chewy in the middle, a little firm at the edges, and they smell like banana bread that decided to get organized.
Why It Works:
Banana gives the bars sweetness and moisture, peanut butter brings fat and protein, and oats hold everything together without needing a long ingredient list. The texture lands somewhere between a soft baked oatmeal square and a snack bar, which is exactly why they disappear so fast from a lunchbox or desk drawer. They’re also one of the few “healthy treat” recipes that doesn’t feel like it’s apologizing for itself.
Key Ingredients:
- 3 very ripe bananas, mashed — the browner the skins, the sweeter the bars.
- 1 cup natural peanut butter — stir it well first if the oil has separated.
- 2 large eggs — they help the bars set cleanly.
- 2 cups old-fashioned rolled oats — quick oats make a softer, less structured bar.
- 1 teaspoon cinnamon — gives the banana a warmer, more baked flavor.
- 1 teaspoon baking powder — adds a little lift.
- 1/2 teaspoon fine salt — keeps the peanut butter from tasting flat.
- 1 teaspoon vanilla extract — rounds out the sweetness.
- 1/3 cup chopped walnuts — optional, but they add bite.
- 1/4 cup dark chocolate chips — optional if you want a more treat-like finish.
Quick Steps:
- Preheat the oven to 350°F (175°C). Line an 8×8-inch baking pan with parchment paper, leaving a little overhang.
- In a large bowl, mash the bananas until mostly smooth. Stir in the peanut butter, eggs, and vanilla.
- Add the oats, cinnamon, baking powder, salt, walnuts, and chocolate chips. Stir until everything is evenly coated and the batter looks thick.
- Spread the mixture into the prepared pan and press it into an even layer with a spatula.
- Bake for 25 to 30 minutes, until the top is set and the center no longer looks wet. The edges should be lightly golden.
- Cool completely in the pan, then lift out and cut into 9 or 12 bars. For the cleanest slices, chill them for 20 minutes first.
Equipment for This Recipe:
- 8×8-inch baking pan — the square shape gives the best bar thickness.
- Parchment paper — makes lifting and slicing easier.
- Large mixing bowl — enough room to stir without spilling oats everywhere.
- Silicone spatula — helps press the batter into the corners.
How to Serve This Dish:
Eat one bar cold or at room temperature, with coffee, milk, or a spoonful of plain yogurt if you want extra protein. They’re dense enough to travel well, which makes them good for backpack snacks or a quick breakfast on the run.
Pro Tips for This Recipe:
- Mash the bananas thoroughly. Big lumps leave wet pockets in the center.
- If your peanut butter is stiff, warm it for 10 to 15 seconds so it stirs in cleanly.
- Let the bars cool all the way before cutting. Warm bars crumble at the edges.
- A pinch of flaky salt on top right after baking makes the peanut butter flavor pop.
Variations on This Dish:
- Almond Butter Banana Bars: Swap peanut butter for almond butter and add a tablespoon of flaxseed for a nuttier flavor.
- Chocolate Swirl Bars: Stir 2 tablespoons cocoa powder into half the batter and drag a knife through the pan for a marbled look.
- Nut-Free School Bars: Use sunflower seed butter and skip the walnuts.
Common Mistakes to Avoid with This Dish:
- Using under-ripe bananas: The bars taste bland and need extra sweetener.
- Cutting too soon: They’ll seem soft and messy until fully cooled.
- Overbaking: Dry edges are fine; a dry center means the bars will turn chalky by day two.
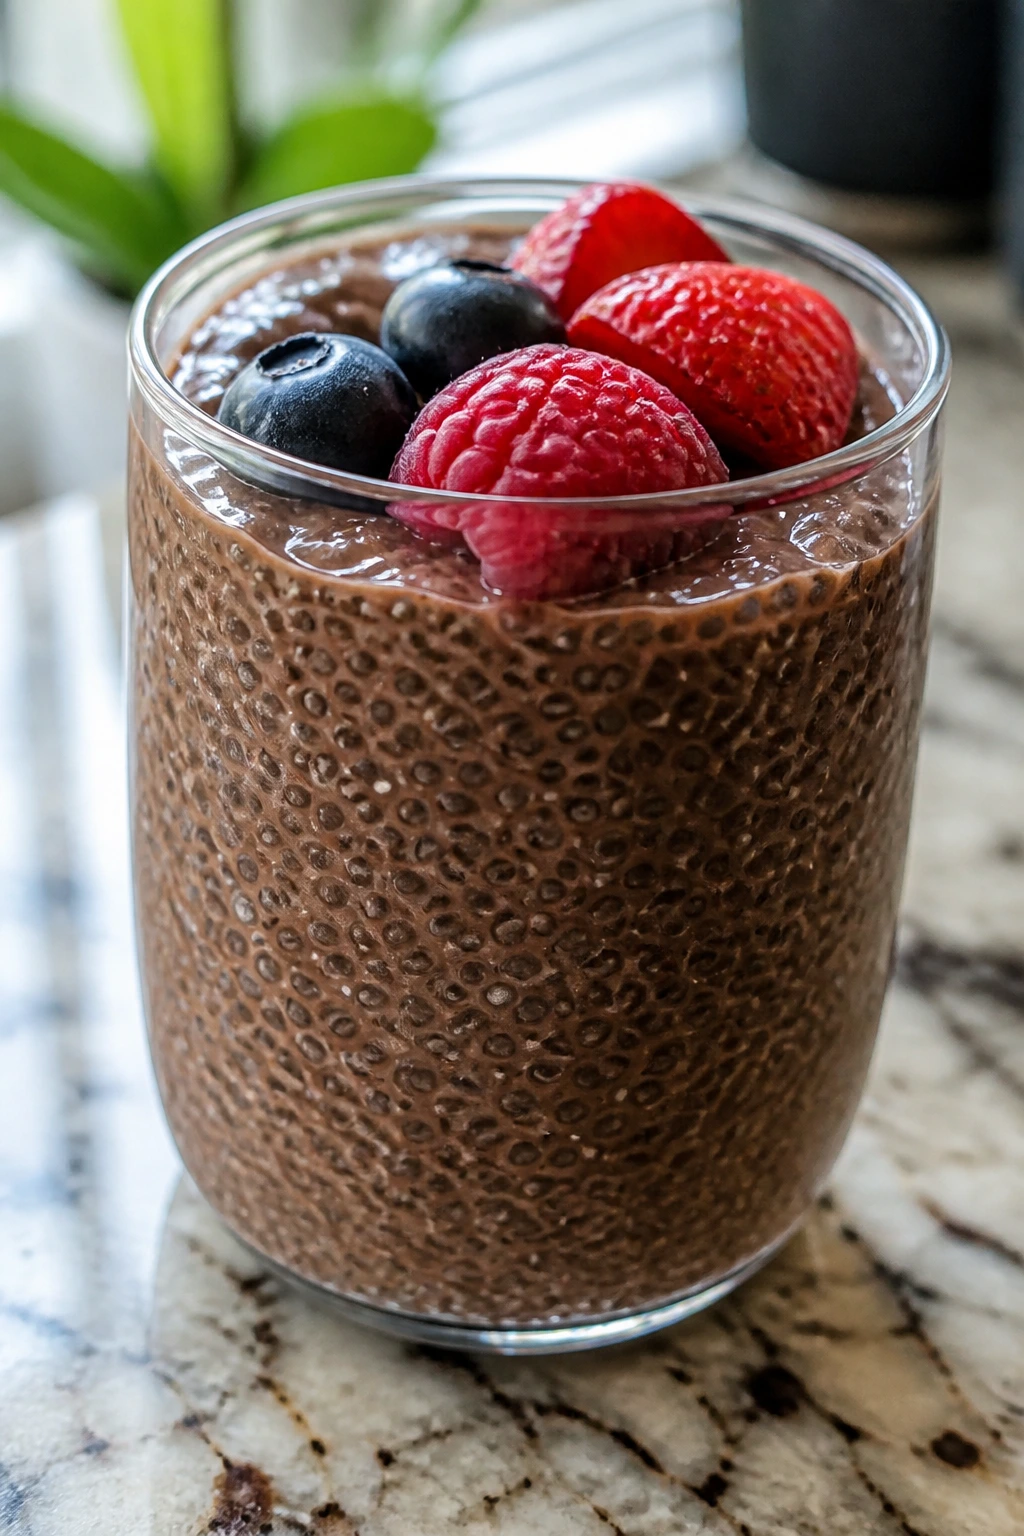
3. Chocolate Chia Pudding Cups
If you like pudding but don’t want the sugar-heavy, spoon-coating kind, chia pudding has its own quiet charm. The cocoa makes it taste deep and brown and a little fancy, and the seeds turn into that gelled, tapioca-like texture after a few hours in the fridge.
Why It Works:
Chia seeds absorb liquid and thicken without cooking, which makes this one of the easiest meal prep treats to batch ahead. Cocoa gives you the chocolate hit, maple syrup smooths out the bitterness, and a pinch of salt keeps the whole thing from tasting muddy. The texture is the point here — cold, thick, and slightly bouncy, like a pudding that knows how to behave.
Key Ingredients:
- 1/2 cup chia seeds — don’t eyeball this; the ratio matters.
- 2 cups unsweetened milk or almond milk — any milk works, but thicker milks make a creamier pudding.
- 1/4 cup unsweetened cocoa powder — sift it if yours is clumpy.
- 3 tablespoons maple syrup — enough sweetness for balance.
- 1 teaspoon vanilla extract — makes the chocolate taste fuller.
- 1 pinch fine salt — sharpens the cocoa flavor.
- 1 cup berries — fresh or thawed frozen berries both work.
- 1/4 cup chopped almonds or hazelnuts — for crunch on top.
- 2 tablespoons peanut butter or Greek yogurt — optional for a richer finish.
Quick Steps:
- In a medium bowl or a large jar, whisk together the milk, cocoa powder, maple syrup, vanilla, and salt until the cocoa is fully dissolved.
- Add the chia seeds and whisk hard for 20 to 30 seconds. Let the mixture sit for 5 minutes, then whisk again so the seeds don’t sink into a clump.
- Cover and refrigerate for at least 4 hours, or overnight. The pudding should look thick and spoonable, not watery.
- Stir once more before dividing into 4 cups or jars.
- Top with berries, nuts, and a small spoonful of peanut butter or yogurt if you want a richer bite.
Equipment for This Recipe:
- Mixing bowl or large jar — both work fine.
- Whisk — essential for breaking up clumps.
- Measuring cups and spoons — chia pudding is ratio-driven.
- 4 small containers — jars or cups with lids are best.
How to Serve This Dish:
Serve it cold, straight from the fridge, with a spoonful of berries on top and maybe a few sliced almonds for crunch. It’s rich enough to feel like dessert, but it still passes as a very respectable breakfast if you don’t drown it in toppings.
Pro Tips for This Recipe:
- Whisk twice. The second whisk after 5 minutes saves you from seed clumps.
- If the pudding seems too thick after chilling, stir in 2 to 3 tablespoons of milk.
- Use a good cocoa powder. Flat cocoa makes flat pudding.
- Add toppings just before eating if you want the nuts to stay crisp.
Variations on This Dish:
- Mocha Chia Cups: Add 1 teaspoon instant espresso powder to the milk mixture.
- Raspberry Cocoa Cups: Mash a few raspberries into the base before chilling.
- Coconut Chocolate Cups: Swap half the milk for light coconut milk and top with toasted coconut.
Common Mistakes to Avoid with This Dish:
- Skipping the second whisk: The seeds clump at the bottom and the texture goes patchy.
- Using too little liquid: You’ll get a dry, rubbery spoonful instead of pudding.
- Adding toppings too early: Nuts and fruit sink or soften if they sit on top for days.
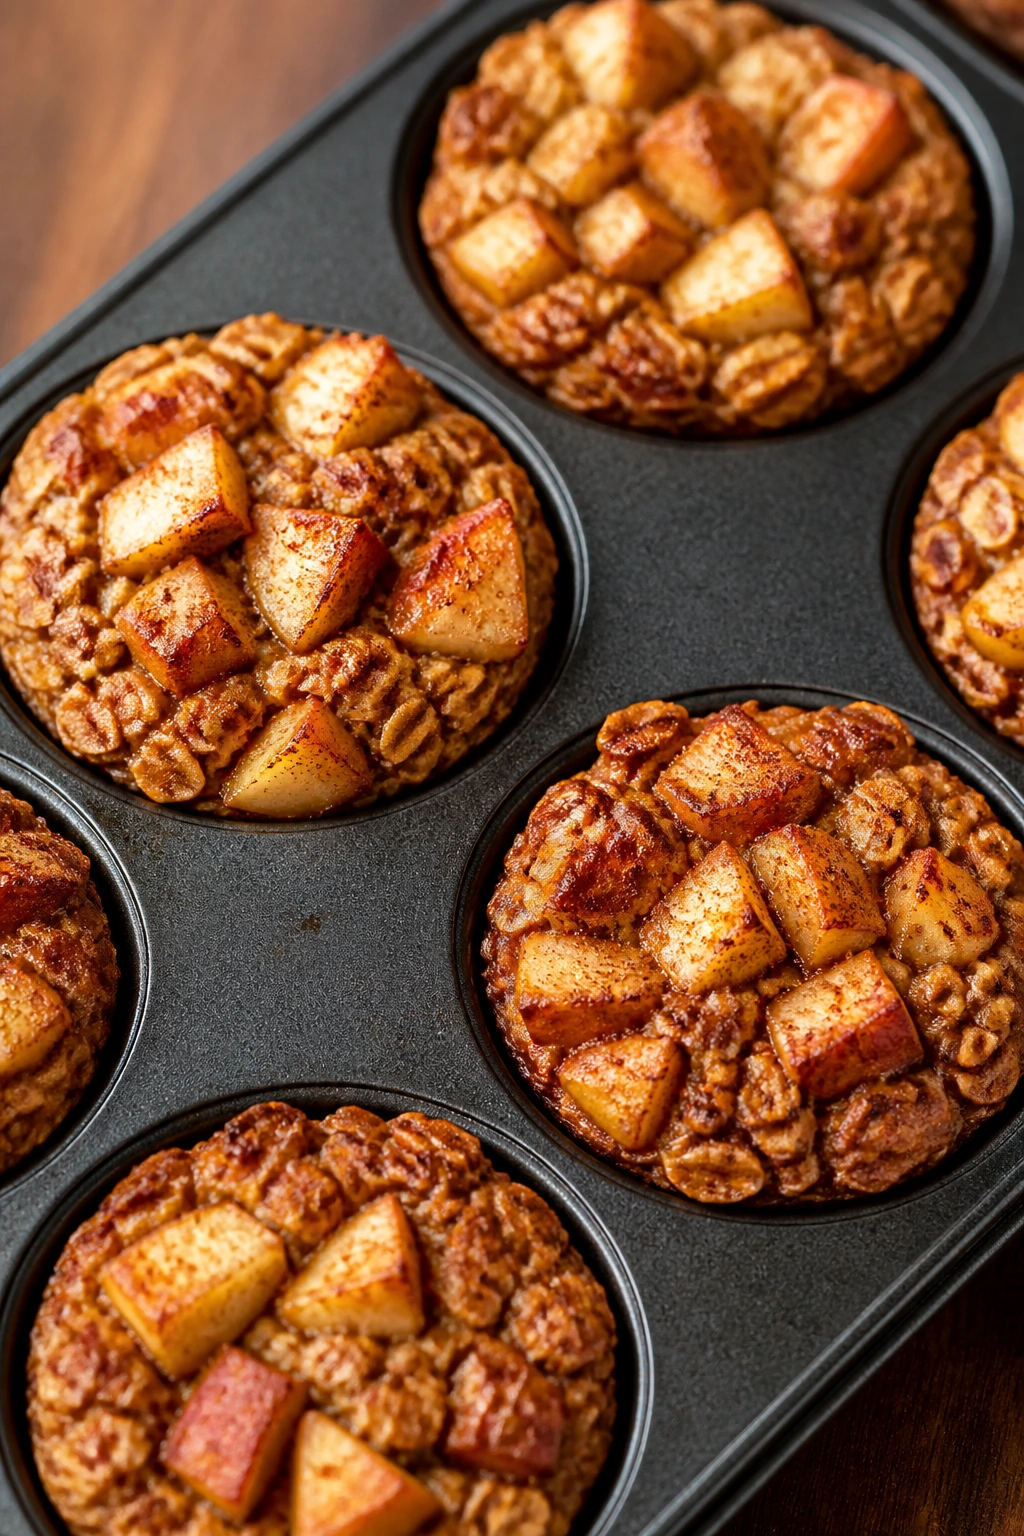
4. Apple Cinnamon Baked Oatmeal Cups
These smell like a breakfast bakery, only they’re built to live in the fridge and be reheated later. The oats set up around tiny bits of apple, so each cup eats like a soft muffin crossed with a baked oatmeal square.
Why It Works:
Baked oatmeal cups hold their shape better than a loose casserole, which makes them ideal for meal prep. Apples bring moisture and a little chew, while cinnamon and nutmeg do the heavy lifting on flavor. The eggs and milk bind everything so the cups slice or pop out cleanly after cooling, and the oats stay pleasantly tender instead of turning gluey.
Key Ingredients:
- 2 cups old-fashioned rolled oats — the main structure of the cups.
- 1 teaspoon baking powder — helps the cups puff slightly.
- 1 teaspoon cinnamon — the dominant spice here.
- 1/2 teaspoon nutmeg — small amount, but it matters.
- 1/2 teaspoon fine salt — keeps the flavor grounded.
- 2 large eggs — for binding and lift.
- 1 3/4 cups milk — dairy or unsweetened non-dairy both work.
- 1/4 cup maple syrup — just enough sweetness.
- 2 tablespoons melted coconut oil or butter — for richness.
- 1 cup peeled apple, finely diced or grated — use a firm apple so it keeps texture.
- 1/3 cup chopped walnuts — optional, but they add nice crunch.
- 1 teaspoon vanilla extract — brings the whole pan together.
Quick Steps:
- Preheat the oven to 350°F (175°C). Grease a 12-cup muffin tin well, or line it with paper liners.
- In a large bowl, whisk the oats, baking powder, cinnamon, nutmeg, and salt.
- In a second bowl, whisk the eggs, milk, maple syrup, melted coconut oil, and vanilla.
- Pour the wet mixture into the dry ingredients and stir in the apple and walnuts. Let the mixture sit for 5 minutes so the oats start to absorb the liquid.
- Divide the mixture evenly among the muffin cups, filling each about 3/4 full.
- Bake for 22 to 26 minutes, until the tops are set and lightly golden.
- Cool in the pan for 10 minutes, then move to a rack to finish cooling.
Equipment for This Recipe:
- 12-cup muffin tin — standard size works best.
- Mixing bowls — one for dry, one for wet.
- Whisk and spatula — for mixing without beating.
- Cooling rack — keeps the bottoms from getting soggy.
How to Serve This Dish:
Eat two cups warm, or split one open and add a spoonful of yogurt if you want extra creaminess. They’re good plain, but a small drizzle of maple syrup and a few sliced apples make them feel a little more finished.
Pro Tips for This Recipe:
- Dice the apples small if you want even texture in every bite.
- Don’t skip the resting time. It helps the oats drink up the liquid.
- If your apples are very juicy, reduce the milk by 2 tablespoons.
- These freeze well, but wrap them tightly once they’re fully cool.
Variations on This Dish:
- Pear Cardamom Cups: Swap the apple for ripe pear and add 1/4 teaspoon cardamom.
- Raisin Walnut Cups: Stir in 1/4 cup raisins for a sweeter, chewier version.
- Dairy-Free Cups: Use almond milk and melted coconut oil.
Common Mistakes to Avoid with This Dish:
- Using oversized apple chunks: They sink and leave wet pockets.
- Overfilling the tin: The cups puff, then spill over.
- Taking them out too early: The center should feel set, not jiggly.
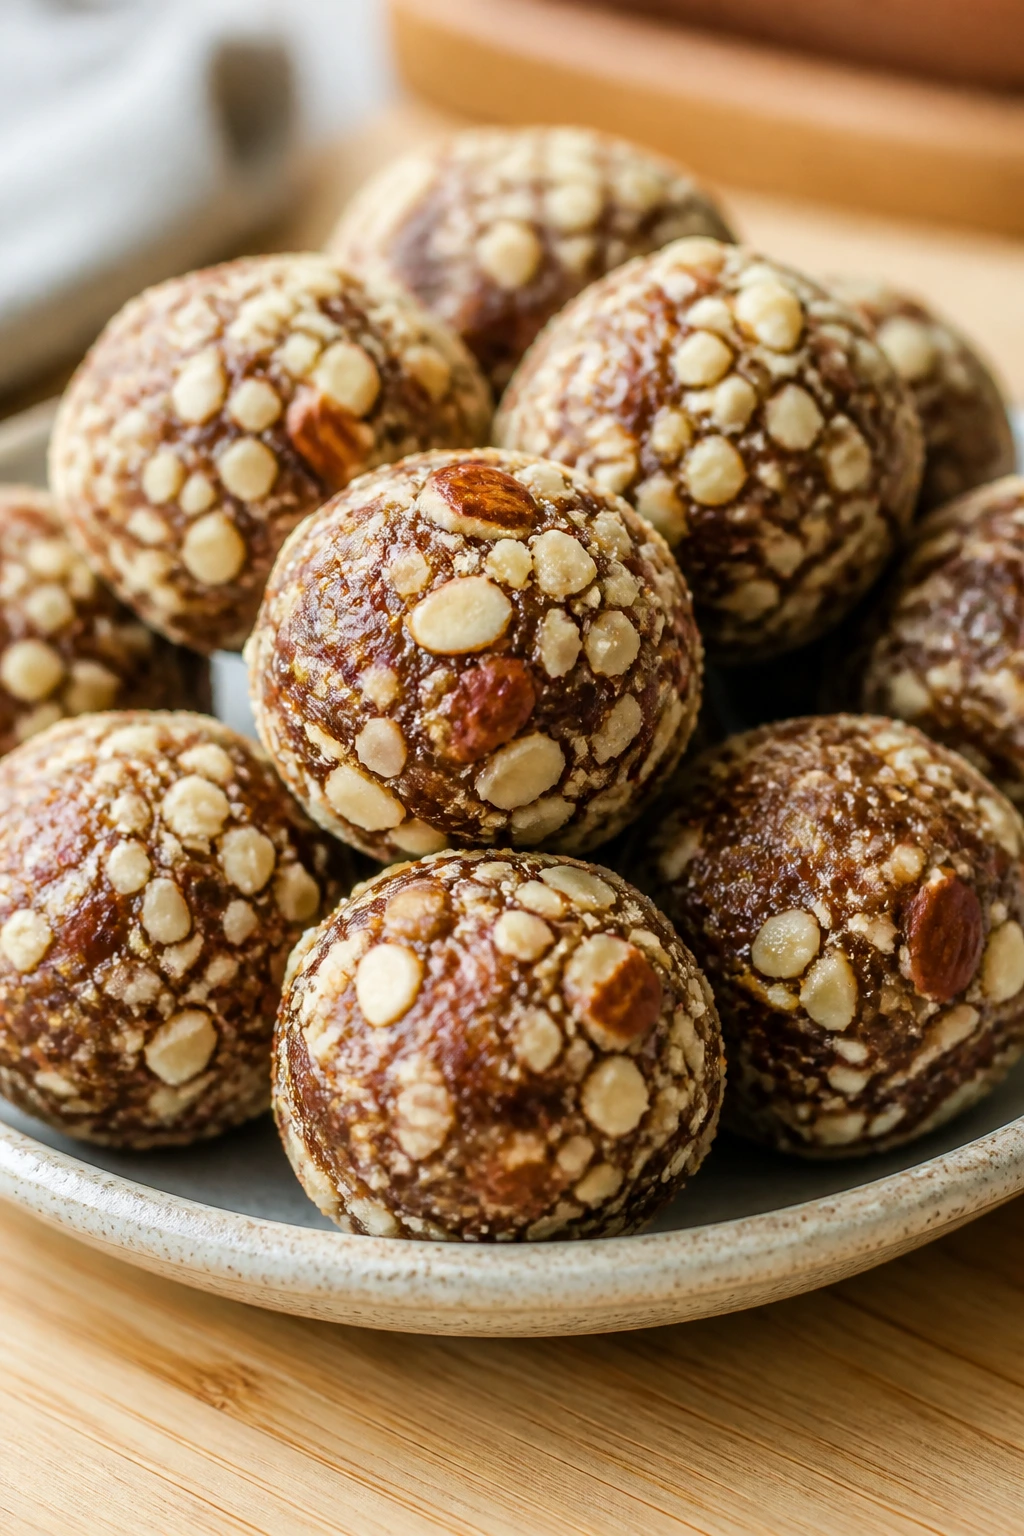
5. Almond Date Energy Bites
These are the snacks that rescue a long afternoon. They’re chewy, nutty, cocoa-dark if you want them that way, and they need no oven at all, which is a nice change when the kitchen already feels busy.
Why It Works:
Dates are the binder here; they’re soft enough to mash into a paste and sticky enough to hold oats and nuts together. Almonds bring crunch and fat, oats give the bites some bulk, and chia seeds or cocoa powder turn them from pure sweetness into something more balanced. They also store beautifully, which is half the point.
Key Ingredients:
- 1 1/2 cups pitted Medjool dates — soft dates blend the easiest.
- 1 cup raw almonds — lightly toasted almonds taste deeper, but raw works fine.
- 1/2 cup old-fashioned rolled oats — adds body and keeps the bites from being too dense.
- 1 tablespoon chia seeds — helps bind and adds a little texture.
- 1 tablespoon unsweetened cocoa powder — optional if you want a chocolate version.
- 1 tablespoon almond butter — gives the mixture a smoother, richer feel.
- 1 teaspoon cinnamon — warms up the date flavor.
- 1 pinch fine salt — keeps the sweetness from taking over.
- 2 tablespoons unsweetened shredded coconut — for rolling, if you like a finished coating.
Quick Steps:
- If your dates are firm, soak them in hot water for 5 minutes, then drain well.
- Add the almonds and oats to a food processor and pulse until the nuts are broken down into small bits.
- Add the dates, chia seeds, cocoa powder, almond butter, cinnamon, and salt. Pulse until the mixture looks sticky and starts clumping together.
- If the mixture feels dry, add 1 teaspoon of water at a time and pulse again.
- Scoop out 1-tablespoon portions and roll them into balls with damp hands.
- Roll in shredded coconut if you want, then chill for 30 minutes to firm up.
Equipment for This Recipe:
- Food processor — the easiest way to get the right texture.
- Measuring spoons — for keeping the ratios tight.
- Small bowl — for rolling and coating.
- Baking sheet or plate — for chilling the bites.
How to Serve This Dish:
Keep a few in a small container in the fridge and eat them cold, or pack them into lunchboxes where they can soften slightly by midday. They’re rich enough to satisfy a sweet craving but small enough that you don’t need a nap afterward.
Pro Tips for This Recipe:
- Softer dates make a smoother bite. If they feel leathery, soak them.
- Don’t overprocess the mixture or you’ll end up with a paste instead of a chewy bite.
- Damp hands keep the mixture from sticking while you roll.
- A tiny pinch of flaky salt on the outside is a nice finish if you like sweet-salty snacks.
Variations on This Dish:
- Lemon Coconut Bites: Skip the cocoa and add lemon zest plus extra shredded coconut.
- Espresso Cocoa Bites: Add 1 teaspoon instant espresso powder for a deeper chocolate flavor.
- Nut-Free Seed Bites: Use sunflower seeds and pumpkin seeds instead of almonds.
Common Mistakes to Avoid with This Dish:
- Using dry dates without soaking: The mixture won’t come together cleanly.
- Adding too much liquid: You’ll get sticky paste that won’t roll.
- Skipping the chill time: Warm bites feel soft and messy instead of firm and tidy.
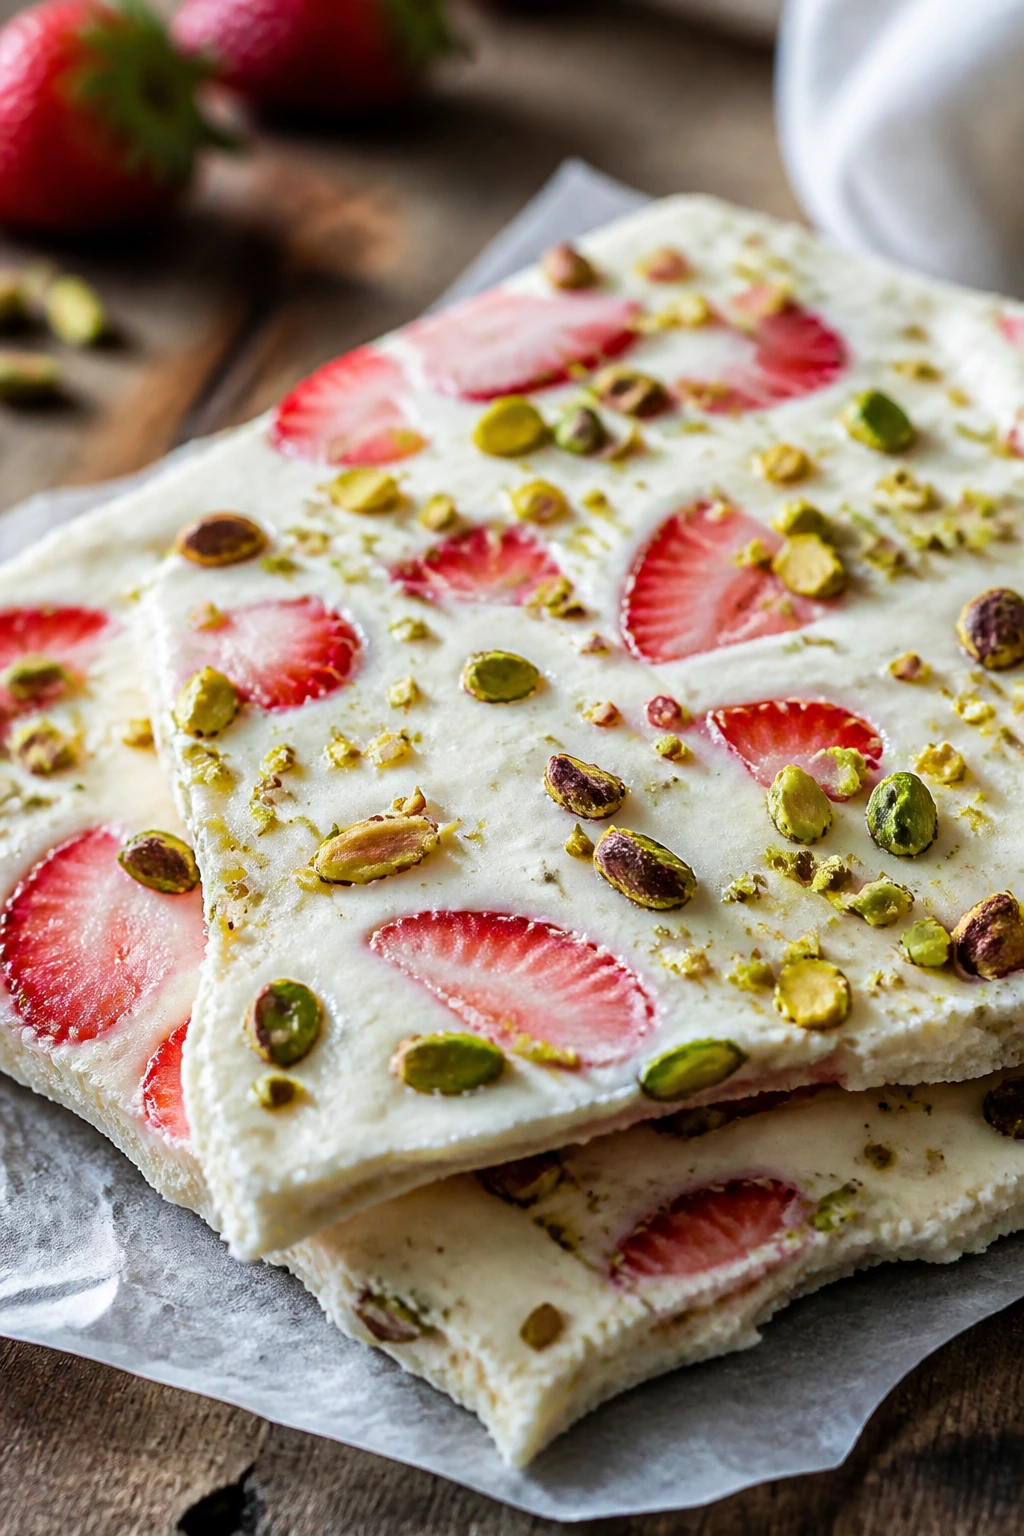
6. Strawberry Pistachio Yogurt Bark
Yogurt bark is one of those recipes that looks almost too simple to bother with, then gets eaten way faster than anything with more effort. The strawberries soften into little ruby pockets, the pistachios add a salty bite, and the whole thing snaps in cold shards.
Why It Works:
Thick yogurt freezes into a creamy base, and a small amount of honey keeps it from tasting icy or sharp. Strawberries bring bright flavor, pistachios give color and crunch, and a little salt makes the sweetness read cleaner. The trick is using a thick yogurt and not piling on too much fruit, because excess moisture is what turns bark into a freezer sheet disaster.
Key Ingredients:
- 2 cups plain Greek yogurt — full-fat gives the best bark.
- 2 tablespoons honey — just enough to soften the tang.
- 1 teaspoon vanilla extract — adds warmth.
- 1 cup strawberries, thinly sliced — thin slices freeze better than chunks.
- 1/3 cup shelled pistachios, chopped — for crunch and a little salt.
- 2 tablespoons pumpkin seeds — optional, but they help the bark feel more substantial.
- 1 pinch flaky salt — optional, but excellent with strawberries.
Quick Steps:
- Line a rimmed baking sheet with parchment paper.
- Stir the yogurt, honey, and vanilla together until smooth.
- Spread the yogurt onto the parchment in a layer about 1/4 inch thick.
- Scatter the strawberries, pistachios, pumpkin seeds, and flaky salt over the surface.
- Freeze for 2 to 3 hours, until solid enough to snap.
- Lift the bark off the parchment and break it into irregular pieces.
Equipment for This Recipe:
- Rimmed baking sheet — gives you a large flat surface.
- Parchment paper — nonnegotiable; bark sticks.
- Mixing bowl and spatula — for the yogurt base.
- Sharp knife — to slice the strawberries thinly.
How to Serve This Dish:
Serve the bark straight from the freezer or after it sits 2 or 3 minutes on the counter, just long enough to take the edge off the cold. It works well as a late-night treat or a snack you pull out when you want something cool and crisp.
Pro Tips for This Recipe:
- Use strawberries that are ripe but not watery.
- Don’t spread the yogurt too thin or the bark becomes fragile and melts fast.
- Break it into pieces only after it’s fully frozen.
- Store it in a flat container with parchment between layers so the pieces don’t fuse together.
Variations on This Dish:
- Blueberry Almond Bark: Use blueberries and sliced almonds instead of strawberries and pistachios.
- Chocolate Berry Bark: Swirl a teaspoon of melted dark chocolate through the yogurt before freezing.
- Tropical Bark: Use diced mango, toasted coconut, and chopped macadamias.
Common Mistakes to Avoid with This Dish:
- Using watery yogurt: It freezes into a crumbly, icy layer.
- Adding thick fruit chunks: They fall off the bark when you break it.
- Leaving bark uncovered in the freezer: It picks up freezer smell fast.
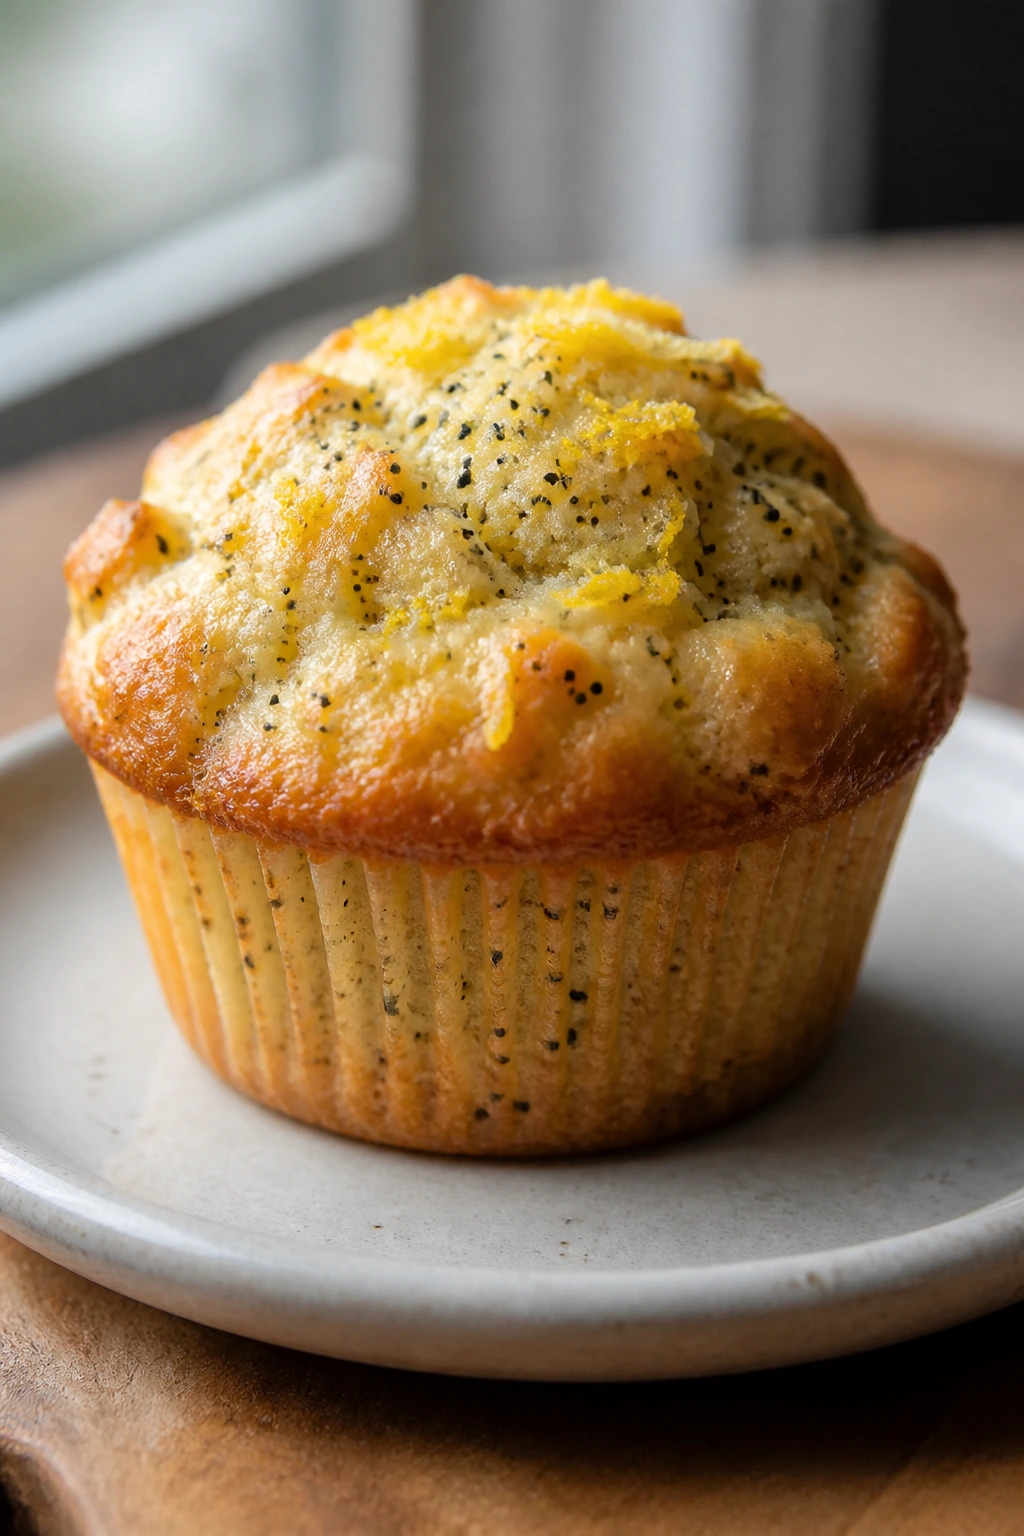
7. Lemon Poppy Seed Greek Yogurt Muffins
These muffins are bright, lightly sweet, and just rich enough to feel like a treat with coffee. The lemon zest does the heavy lifting, and the poppy seeds give the crumb a tiny bit of crunch that keeps each bite from feeling plain.
Why It Works:
Greek yogurt keeps the muffins moist without making them heavy, and lemon juice plus zest gives them that sharp citrus edge that makes you want a second one. The batter is simple, but it’s not flimsy; the oil and eggs help the muffins stay tender for a few days, which is the whole point when you’re baking on Sunday. They freeze well, too, which makes them one of the smartest things in the whole lineup.
Key Ingredients:
- 1 3/4 cups all-purpose flour or white whole wheat flour — white whole wheat adds a little more fiber.
- 1 teaspoon baking powder — for lift.
- 1/2 teaspoon baking soda — reacts with the yogurt and lemon.
- 1/2 teaspoon fine salt — keeps the flavor balanced.
- 2 tablespoons poppy seeds — enough to show in every bite.
- 1/2 cup plain Greek yogurt — thick and tangy.
- 1/3 cup olive oil or melted butter — olive oil gives a softer crumb.
- 1/2 cup maple syrup — the main sweetener.
- 2 large eggs — for structure.
- Zest of 2 lemons — don’t skip this.
- 3 tablespoons lemon juice — brings the citrus into the crumb.
- 1 teaspoon vanilla extract — softens the sharp edges.
Quick Steps:
- Preheat the oven to 350°F (175°C). Line a 12-cup muffin tin with paper liners or grease it well.
- Whisk together the flour, baking powder, baking soda, salt, and poppy seeds in a large bowl.
- In a second bowl, whisk the yogurt, oil, maple syrup, eggs, lemon zest, lemon juice, and vanilla until smooth.
- Pour the wet ingredients into the dry ingredients and stir only until the flour disappears. Do not overmix or the muffins will bake up tough.
- Divide the batter among the muffin cups, filling each about 3/4 full.
- Bake for 18 to 22 minutes, until the tops spring back when touched and a toothpick comes out clean.
- Cool in the pan for 5 minutes, then move the muffins to a rack.
Equipment for This Recipe:
- 12-cup muffin tin — standard size.
- Paper liners or grease for the pan — both work.
- Two mixing bowls — one dry, one wet.
- Citrus zester — makes the lemon flavor stronger and cleaner.
How to Serve This Dish:
Eat one warm or at room temperature with tea, coffee, or a spoonful of ricotta if you want a softer breakfast plate. A little extra lemon zest on top makes them look as bright as they taste.
Pro Tips for This Recipe:
- Zest the lemons before you juice them. It’s easier, and you get more flavor.
- Use room-temperature eggs so the batter mixes smoothly.
- A tablespoon of coarse sugar on top gives a faint crunch if you want it.
- Don’t overfill the cups. These rise better when they have room.
Variations on This Dish:
- Blueberry Lemon Muffins: Fold in 3/4 cup blueberries and skip the poppy seeds.
- Orange Poppy Muffins: Swap the lemon for orange zest and juice.
- Dairy-Free Version: Use a thick plain dairy-free yogurt and add 1 tablespoon extra flour if the batter seems loose.
Common Mistakes to Avoid with This Dish:
- Overmixing the batter: The crumb gets dense and rubbery.
- Using too much lemon juice: The muffins can taste sharp and collapse a little.
- Pulling them before they’re set: The centers should spring back, not sink.
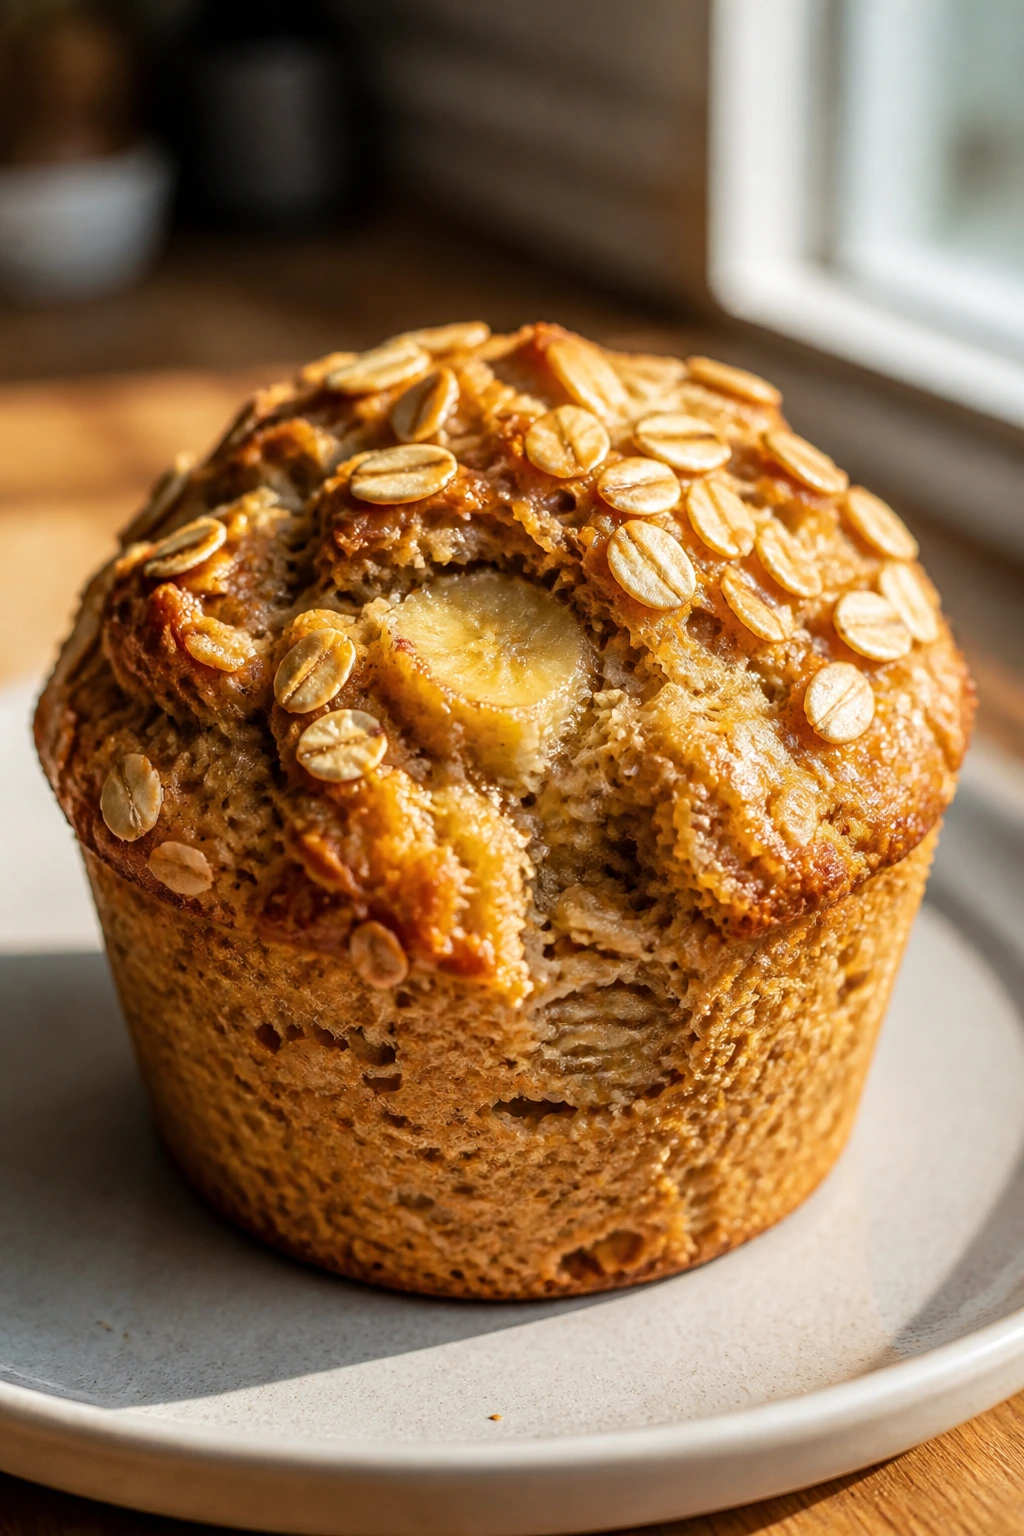
8. Banana Protein Muffins with Oats
These are the muffins you make when you want something sweet that still pulls its own weight. They’re soft, a little hearty, and sturdy enough to survive a backpack, which matters more than it sounds.
Why It Works:
Bananas sweeten the batter naturally, oats bring chew, and protein powder gives the muffins a firmer, more filling crumb. Greek yogurt keeps them moist, which matters because protein powder can dry things out fast if you’re heavy-handed. These are not cupcake impersonators. They taste like breakfast that got a little smarter.
Key Ingredients:
- 3 ripe bananas, mashed — the darker the peel, the better the sweetness.
- 2 large eggs — for structure.
- 1/3 cup plain Greek yogurt — adds moisture and a little tang.
- 1/4 cup maple syrup — optional but helpful if your bananas aren’t very sweet.
- 1 1/2 cups old-fashioned rolled oats — part of the structure and texture.
- 1 cup whole wheat flour — gives the muffins body.
- 1/2 cup vanilla protein powder — whey or plant-based both work, but textures vary.
- 1 teaspoon baking soda — the main leavener.
- 1 teaspoon baking powder — helps the tops rise.
- 1 teaspoon cinnamon — keeps the banana flavor warm.
- 1/2 teaspoon salt — necessary, not optional.
- 1/2 cup blueberries or dark chocolate chips — choose one.
Quick Steps:
- Preheat the oven to 350°F (175°C) and line a 12-cup muffin tin.
- In a large bowl, mash the bananas, then whisk in the eggs, yogurt, maple syrup, and vanilla.
- Stir in the oats, flour, protein powder, baking soda, baking powder, cinnamon, and salt. Mix until just combined.
- Fold in the blueberries or chocolate chips.
- Let the batter sit for 5 minutes so the oats and protein powder absorb some liquid.
- Divide the batter into the muffin cups and bake for 18 to 20 minutes, until the tops are set and a toothpick comes out with only a few moist crumbs.
- Cool in the pan for 5 minutes, then move to a rack.
Equipment for This Recipe:
- 12-cup muffin tin — standard size.
- Mixing bowl and spatula — no mixer needed.
- Measuring cups and spoons — protein powder is not forgiving if you overdo it.
- Cooling rack — helps the muffins set cleanly.
How to Serve This Dish:
Serve one muffin with coffee or a small yogurt cup if you want a fuller breakfast. They’re good slightly warm, but they hold together better once cooled completely.
Pro Tips for This Recipe:
- Use a protein powder you already like the taste of on its own.
- If the batter looks dry, add 1 to 2 tablespoons milk; if it looks loose, add a tablespoon of oats.
- Don’t overbake them. Protein powder goes from moist to chalky fast.
- Blueberries are great here, but chocolate chips make them feel more treat-like.
Variations on This Dish:
- Peanut Butter Banana Muffins: Stir in 1/4 cup peanut butter and skip the blueberries.
- Chocolate Banana Muffins: Use chocolate protein powder and add a few cacao nibs.
- Nut-Free Version: Choose a plant protein without nut ingredients and skip the nut toppings.
Common Mistakes to Avoid with This Dish:
- Using too much protein powder: The muffins turn dry and a little gritty.
- Not resting the batter: The oats need time to hydrate.
- Overbaking the tops: The centers should stay tender, not dusty.
9. Carrot Cake Overnight Oats Jars
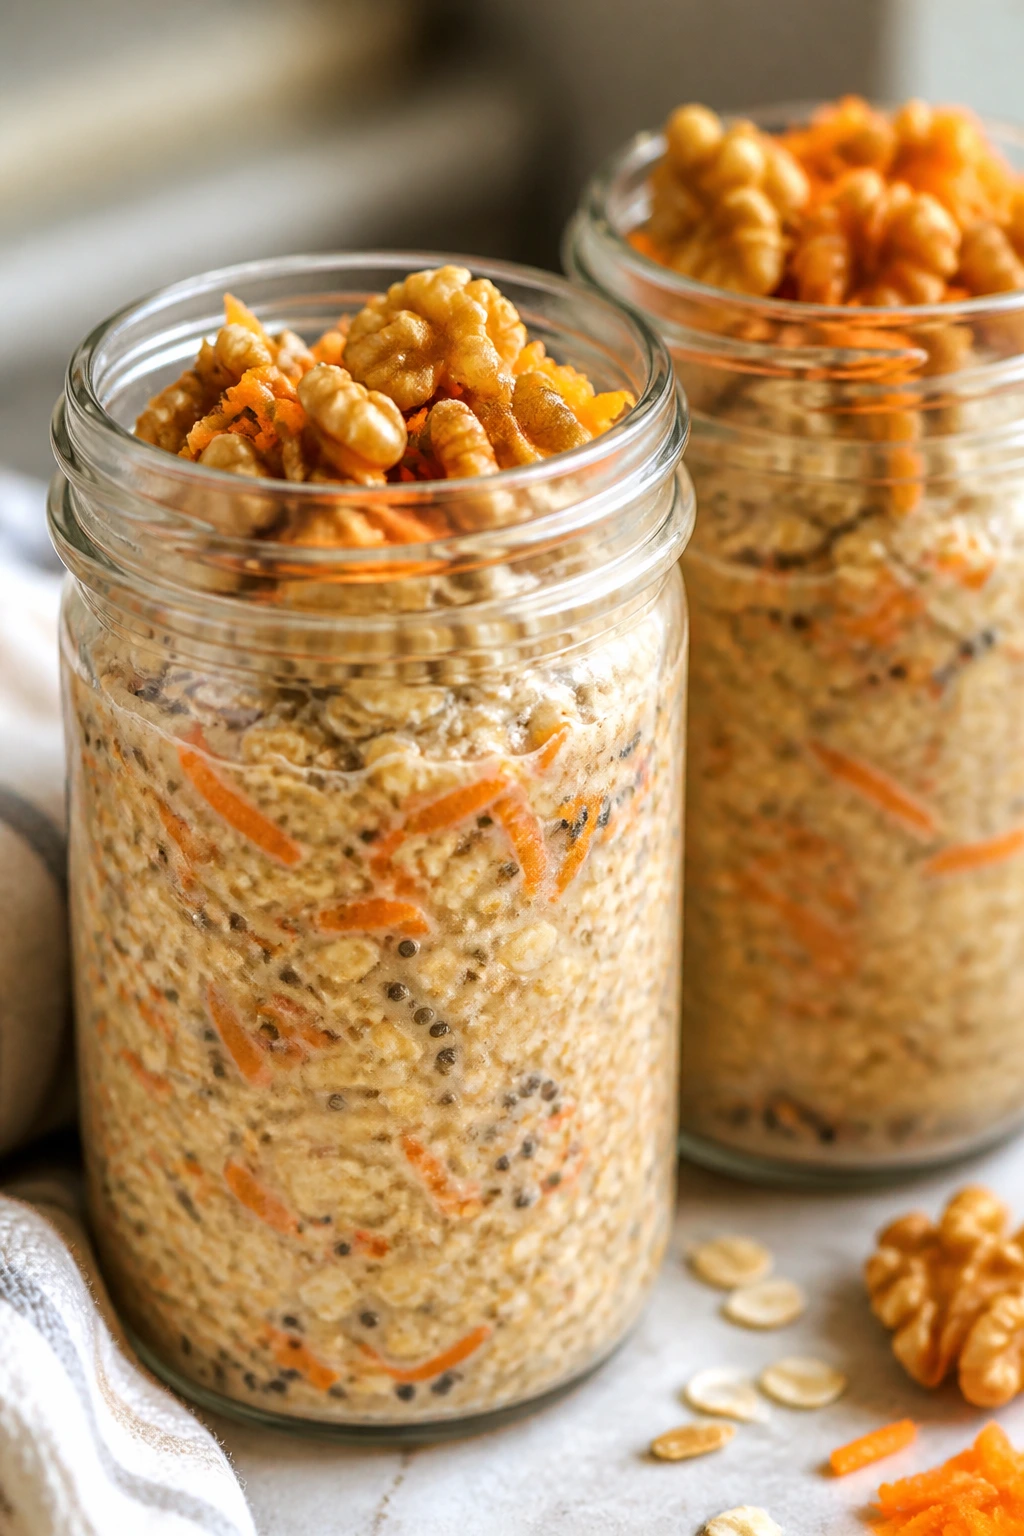
This is carrot cake in a breakfast jacket, and that jacket happens to be practical. The oats soften overnight, the carrot gives a faint sweetness and a little texture, and the spices make the whole jar smell like you did more work than you actually did.
Why It Works:
Overnight oats are a meal-prep dream because the fridge does the work, and this version leans on Greek yogurt and chia seeds to get a thicker, creamier finish. Grated carrot blends into the oats without disappearing completely, so every spoonful has a little bite. It’s sweet enough to feel like a treat, but the oats, carrot, and walnuts keep it grounded.
Key Ingredients:
- 2 cups old-fashioned rolled oats — use these, not quick oats, for the best texture.
- 2 cups milk — dairy or unsweetened non-dairy both work.
- 1 cup plain Greek yogurt — adds creaminess and protein.
- 2 tablespoons chia seeds — thickens the jars overnight.
- 1 1/2 cups finely grated carrot — grate it small so it softens well.
- 1/4 cup raisins — optional, but they fit the theme.
- 2 tablespoons maple syrup — enough to sweeten without making it candy-like.
- 1 teaspoon cinnamon — the main spice.
- 1/2 teaspoon ground ginger — gives the carrot cake note.
- 1 pinch salt — keeps the sweetness from flattening.
- 1/3 cup chopped walnuts — for texture on top or mixed in.
Quick Steps:
- In a large bowl, stir together the oats, milk, yogurt, chia seeds, carrot, raisins, maple syrup, cinnamon, ginger, and salt.
- Let the mixture sit for 5 minutes, then stir again. The chia seeds need that second stir to distribute evenly.
- Divide the mixture into 4 jars or containers.
- Sprinkle walnuts on top, or leave them off until serving if you want them crisp.
- Cover and refrigerate overnight, or at least 6 hours, until the oats are soft and the mixture is spoonable.
- Stir before eating and add a splash of milk if you want it looser.
Equipment for This Recipe:
- Mixing bowl — roomy enough for all the oats.
- Box grater or fine grater — for the carrots.
- 4 jars or containers with lids — make the portions easy.
- Spoon — for stirring and layering.
How to Serve This Dish:
Serve it cold in the jar or spooned into a bowl with a few extra walnuts and a dusting of cinnamon. A little dollop of yogurt on top makes it look like breakfast from a café without the inconvenience of leaving the house.
Pro Tips for This Recipe:
- Grate the carrot finely so it softens overnight.
- If you want a sweeter jar, add 1 tablespoon more maple syrup, not more raisins.
- Stir before serving; overnight oats settle a bit in the fridge.
- Toast the walnuts first if you want a deeper, less raw flavor.
Variations on This Dish:
- Pineapple Carrot Oats: Add 1/4 cup crushed pineapple, well-drained, for a brighter flavor.
- Higher-Protein Jars: Add 2 tablespoons hemp seeds or a scoop of plain protein powder.
- Dairy-Free Jars: Use coconut yogurt and unsweetened almond milk.
Common Mistakes to Avoid with This Dish:
- Grating the carrot too coarsely: It stays tough and distracts from the oats.
- Using too much liquid: The jar turns soupy instead of creamy.
- Forgetting to stir before chilling: The chia seeds can clump at the bottom.
10. Dark Chocolate Coconut Date Bark
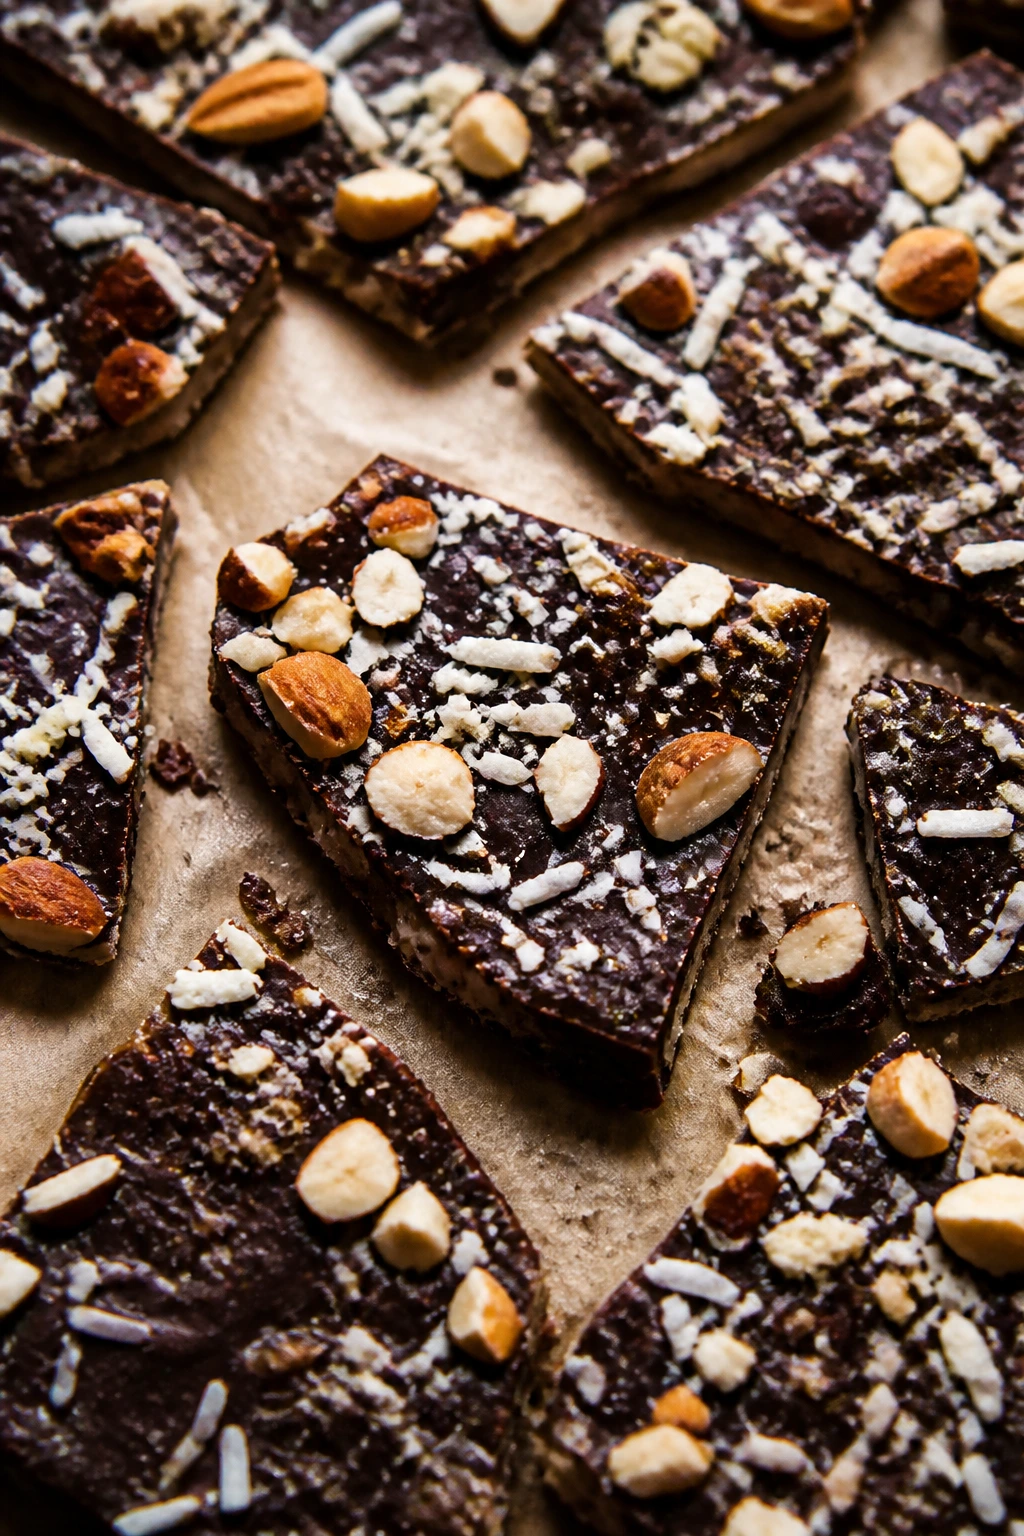
This is the kind of thing you break into rough pieces and then keep “testing” until half the tray is gone. Dark chocolate, sticky dates, coconut, and almonds give you sweet, bitter, chewy, and crunchy in one cold bite.
Why It Works:
Dates and chocolate are a natural fit, but the bark only gets good if the layer is thin enough to snap. Coconut adds chew and a toasted flavor note, almonds keep it from tasting too soft, and flaky salt makes the chocolate taste sharper. It’s freezer candy, basically — only a little less fussy and a lot more reasonable to stash in portioned containers.
Key Ingredients:
- 8 ounces dark chocolate, chopped — aim for 70% if you like a darker bite.
- 1 cup pitted Medjool dates, chopped small — too-large pieces make the bark lumpy.
- 1/2 cup unsweetened shredded coconut — toast it first if you want more flavor.
- 1/3 cup roasted almonds, chopped — for crunch.
- 1 pinch flaky salt — tiny amount, big difference.
- 1 teaspoon coconut oil — optional, helps the chocolate melt smoothly.
Quick Steps:
- Line a baking sheet or tray with parchment paper.
- Melt the chocolate in a heatproof bowl over barely simmering water, or in short microwave bursts, stirring between each one. Stir in the coconut oil if using.
- Spread the melted chocolate into a thin layer on the parchment, about 1/4 inch thick.
- Scatter the chopped dates, coconut, almonds, and flaky salt over the top while the chocolate is still soft.
- Chill in the refrigerator for 30 to 40 minutes, or until firm.
- Break into pieces and store in the fridge or freezer.
Equipment for This Recipe:
- Baking sheet or tray — flat and sturdy.
- Parchment paper — keeps the bark from sticking.
- Heatproof bowl — for melting the chocolate.
- Spoon or offset spatula — for spreading.
How to Serve This Dish:
Serve a few shards on a small plate after dinner or keep them in a freezer container for a cold afternoon snack. It feels indulgent in the first bite, then the dates and nuts remind you that you’re still being practical.
Pro Tips for This Recipe:
- Chop the dates small so every piece has some in it.
- Don’t let any water near the chocolate. Even a drop can make it seize.
- Toast the coconut if you want a deeper, almost caramel flavor.
- Break the bark only after it’s fully chilled; warm bark bends instead of snapping.
Variations on This Dish:
- Cherry Pistachio Bark: Swap the dates for chopped dried cherries and the almonds for pistachios.
- Sea Salt Almond Bark: Keep it simple with just almonds and a heavier pinch of flaky salt.
- Nut-Free Seed Bark: Use pumpkin seeds and sunflower seeds instead of nuts.
Common Mistakes to Avoid with This Dish:
- Spreading the chocolate too thick: The bark becomes hard to bite and slow to melt.
- Using sticky date clumps: They fall off when you break the bark.
- Storing it in a warm cabinet: Chocolate softens fast and loses its snap.
11. Blueberry Almond Breakfast Cookies
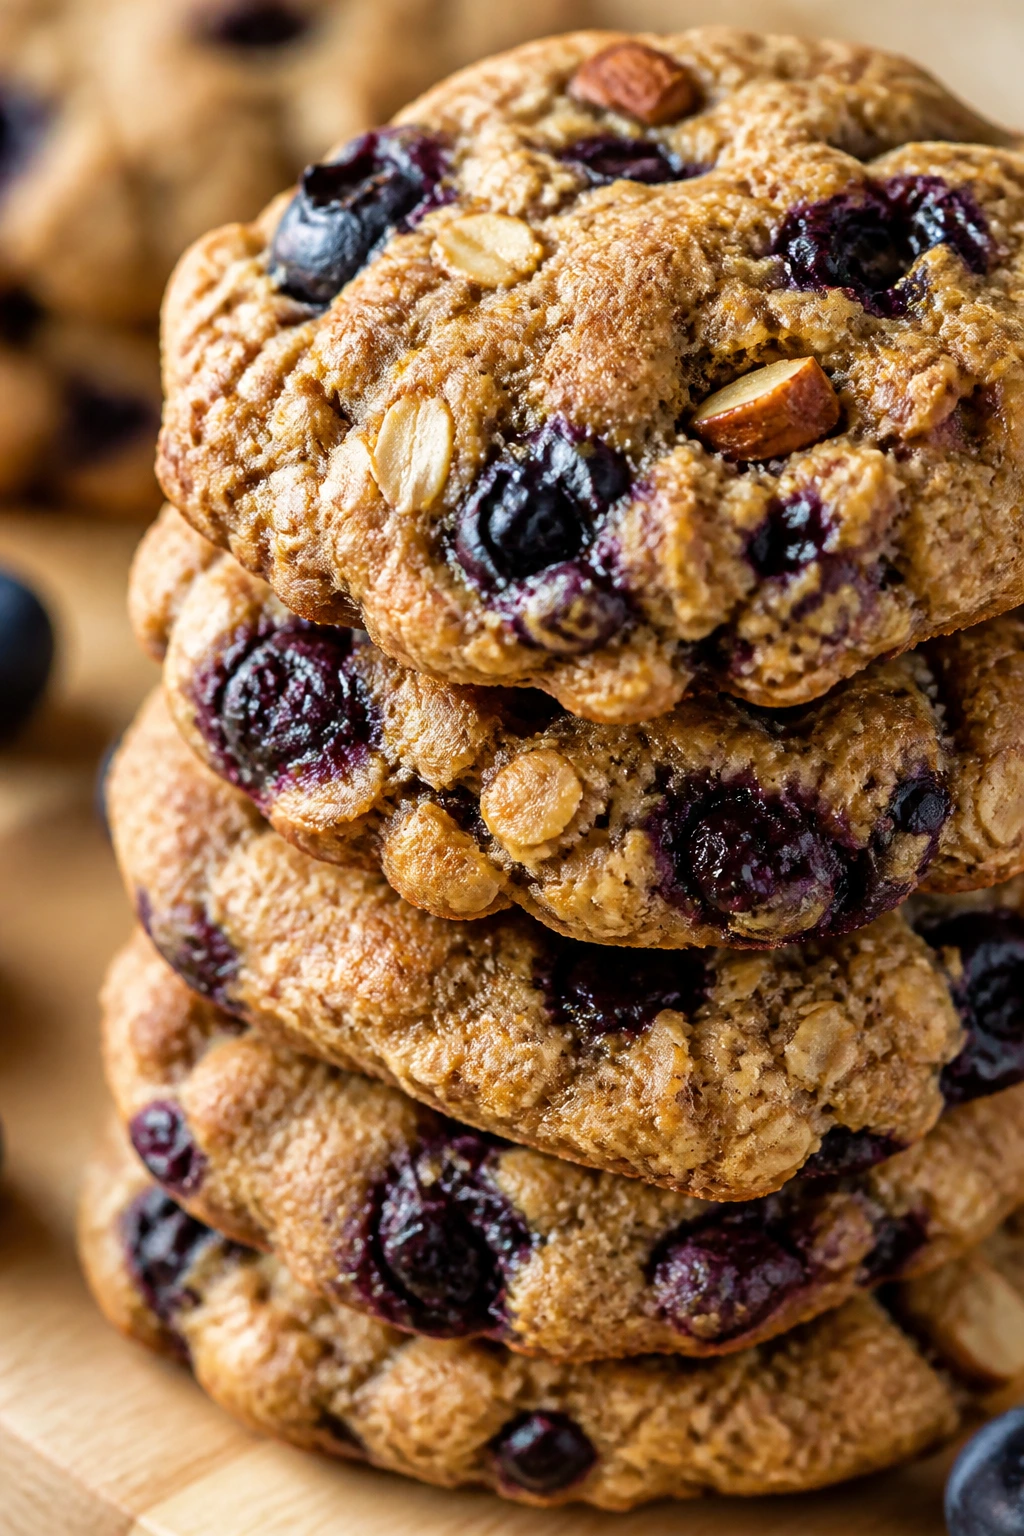
These are soft, chewy, and just sweet enough to feel like cookies without collapsing into dessert. They’re excellent for meal prep because they travel well, freeze well, and make breakfast feel a little less like a chore.
Why It Works:
Bananas and almond butter bind the dough, oats and almond flour give it structure, and blueberries bring bursts of tart juice through the middle. The cookies stay tender because there’s no heavy creaming step, no rolling, and no drama. That simplicity is the reason they’re such a strong Sunday prep move.
Key Ingredients:
- 2 cups old-fashioned rolled oats — the main bulk.
- 1 cup almond flour — adds tenderness and a little richness.
- 1/2 teaspoon baking powder — helps the cookies puff slightly.
- 1 teaspoon cinnamon — keeps the flavor warm.
- 1/2 teaspoon salt — necessary for balance.
- 2 ripe bananas, mashed — the main sweetener and binder.
- 1 large egg — helps the cookies hold shape.
- 1/4 cup almond butter — gives a soft, nutty finish.
- 1 teaspoon vanilla extract — rounds out the flavor.
- 1 cup blueberries — fresh or frozen, but don’t thaw frozen berries.
- 1/3 cup sliced almonds — for crunch on top or mixed in.
Quick Steps:
- Preheat the oven to 350°F (175°C). Line a baking sheet with parchment paper.
- In a large bowl, mix the oats, almond flour, baking powder, cinnamon, and salt.
- In a second bowl, mash the bananas, then stir in the egg, almond butter, and vanilla.
- Fold the wet mixture into the dry ingredients, then gently stir in the blueberries and sliced almonds.
- Scoop the dough into 12 rounded mounds on the baking sheet and flatten each one slightly with damp fingers.
- Bake for 12 to 14 minutes, until the edges are set and the tops no longer look wet.
- Cool on the sheet for 5 minutes, then transfer to a rack.
Equipment for This Recipe:
- Rimmed baking sheet — keeps the cookies contained.
- Parchment paper — prevents sticking.
- Mixing bowls — one dry, one wet.
- Cookie scoop or spoon — helps keep the sizes even.
How to Serve This Dish:
Eat two cookies with coffee, tea, or a hard-boiled egg if you want more staying power. They’re soft enough to feel like a treat and sturdy enough to tuck into a lunch bag without wrecking the rest of your food.
Pro Tips for This Recipe:
- If using frozen blueberries, fold them in straight from frozen to limit purple streaks.
- Damp hands make shaping the dough much easier.
- Don’t expect them to spread much. Flatten them before baking.
- Let them cool fully so they firm up and stop feeling fragile.
Variations on This Dish:
- Raspberry Almond Cookies: Swap blueberries for raspberries and use chopped almonds for extra crunch.
- Chocolate Chip Banana Cookies: Replace the berries with dark chocolate chips for a more dessert-like version.
- Nut-Free Version: Use sunflower seed butter and oat flour instead of almond flour.
Common Mistakes to Avoid with This Dish:
- Using overripe bananas with too much liquid: The cookies spread and bake up gummy.
- Skipping the parchment: These stick more than you’d think.
- Trying to move them too soon: They need a few minutes to set after baking.
12. Zucchini Walnut Snack Cake
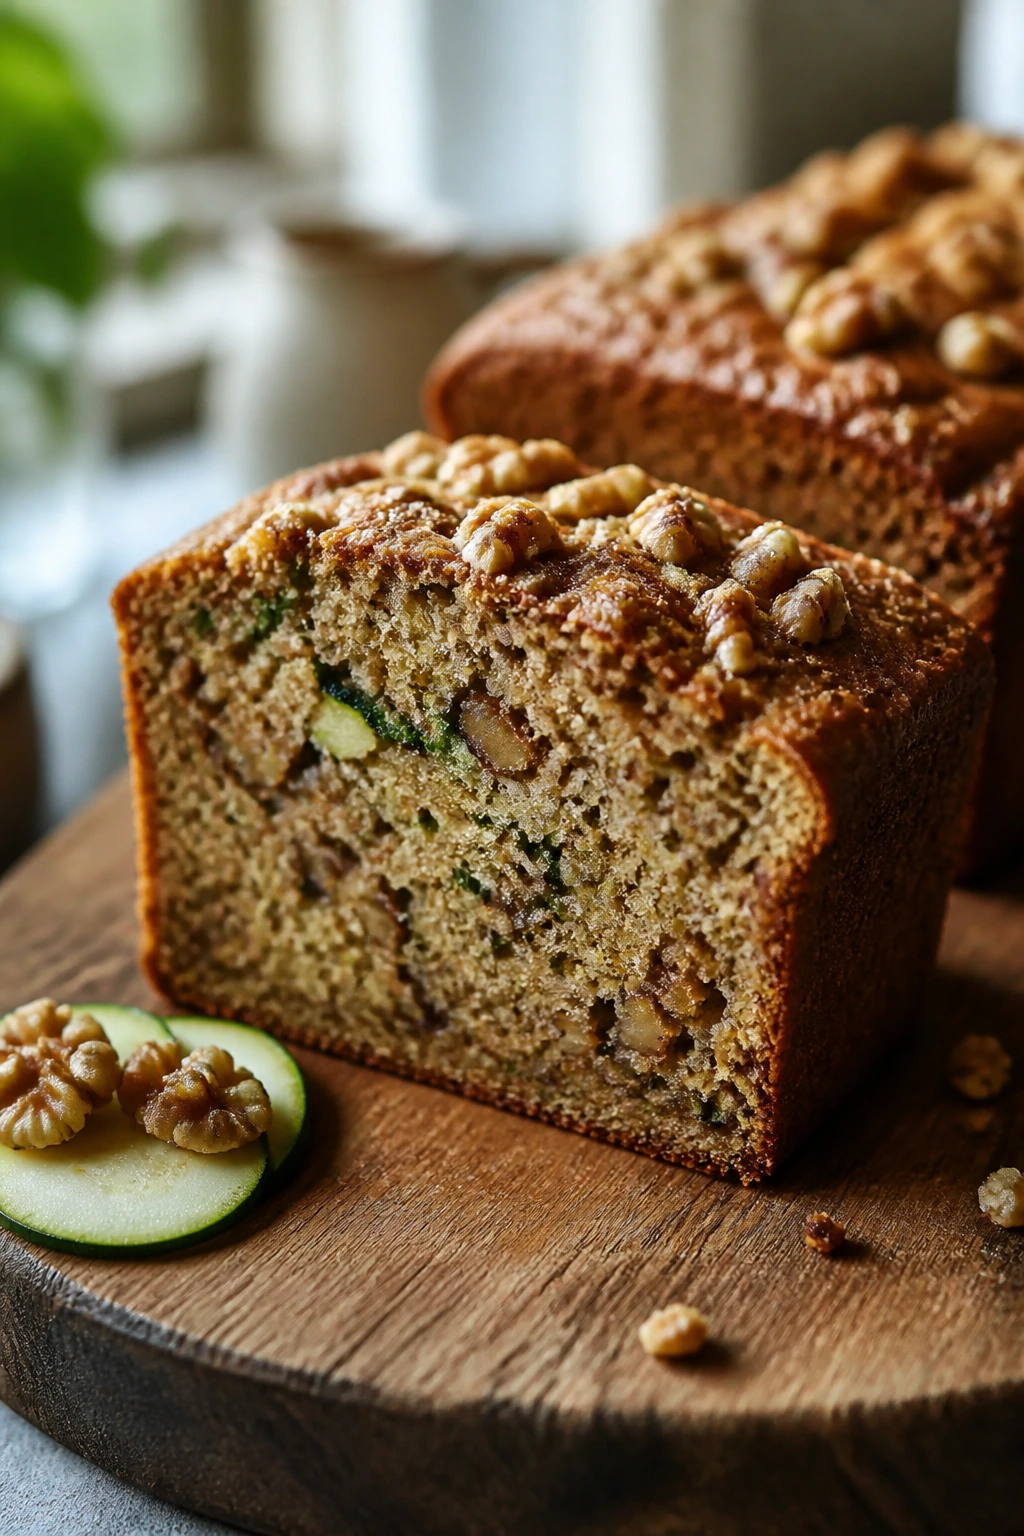
This cake is humble in the best way. It slices neatly, stays moist for days, and tastes like a coffee break that happened to include vegetables.
Why It Works:
Zucchini carries moisture without much flavor of its own, so it softens the crumb and disappears into the background. Walnuts give the cake a little structure, maple syrup keeps the sweetness mellow, and cinnamon makes the whole thing smell warm when it comes out of the oven. It’s one of those recipes that quietly improves the next day, which is exactly what you want from meal prep.
Key Ingredients:
- 2 cups grated zucchini, lightly squeezed — leave some moisture, but not all of it.
- 1 1/2 cups whole wheat flour — gives the cake a little more fiber.
- 1/2 cup almond flour — keeps the crumb tender.
- 1 teaspoon baking soda — the main leavener.
- 1 teaspoon cinnamon — the main spice.
- 1/2 teaspoon salt — balances the sweetness.
- 2 large eggs — for structure.
- 1/3 cup olive oil — keeps the cake moist for days.
- 1/3 cup maple syrup — the primary sweetener.
- 1/4 cup plain Greek yogurt — adds tenderness.
- 1 teaspoon vanilla extract — rounds things out.
- 1/2 cup chopped walnuts — for texture.
- 1/3 cup dark chocolate chips — optional, but they make the cake feel more treat-like.
Quick Steps:
- Preheat the oven to 350°F (175°C). Line an 8×8-inch baking pan with parchment paper.
- In a large bowl, whisk together the flours, baking soda, cinnamon, and salt.
- In a second bowl, whisk the eggs, olive oil, maple syrup, Greek yogurt, and vanilla.
- Stir the wet mixture into the dry ingredients, then fold in the zucchini, walnuts, and chocolate chips.
- Spread the batter into the prepared pan and smooth the top.
- Bake for 30 to 35 minutes, until the center springs back lightly and a toothpick comes out with a few crumbs.
- Cool completely before slicing.
Equipment for This Recipe:
- 8×8-inch baking pan — the best size for tidy squares.
- Parchment paper — helps lift the cake out cleanly.
- Mixing bowls — one dry, one wet.
- Box grater — for the zucchini.
How to Serve This Dish:
Cut the cake into squares and serve at room temperature with coffee or tea. A thin swipe of almond butter on top turns it into a sturdier snack without changing the flavor much.
Pro Tips for This Recipe:
- Squeeze the zucchini lightly, not dry as dust. A little moisture helps the cake stay tender.
- Don’t overmix once the flour goes in.
- The cake slices best after it cools completely.
- If you like a bakery-style finish, dust the top with a little cinnamon before baking.
Variations on This Dish:
- Lemon Zucchini Cake: Add lemon zest and skip the chocolate chips.
- Chocolate Zucchini Cake: Use 1/4 cup cocoa powder in place of some of the flour.
- Nut-Free Version: Leave out the walnuts and add sunflower seeds instead.
Common Mistakes to Avoid with This Dish:
- Not squeezing the zucchini at all: The cake turns wet in the center.
- Using too much flour: The crumb gets dry and heavy.
- Cutting while warm: The squares collapse and look messy.
13. Mango Coconut Chia Pudding Cups
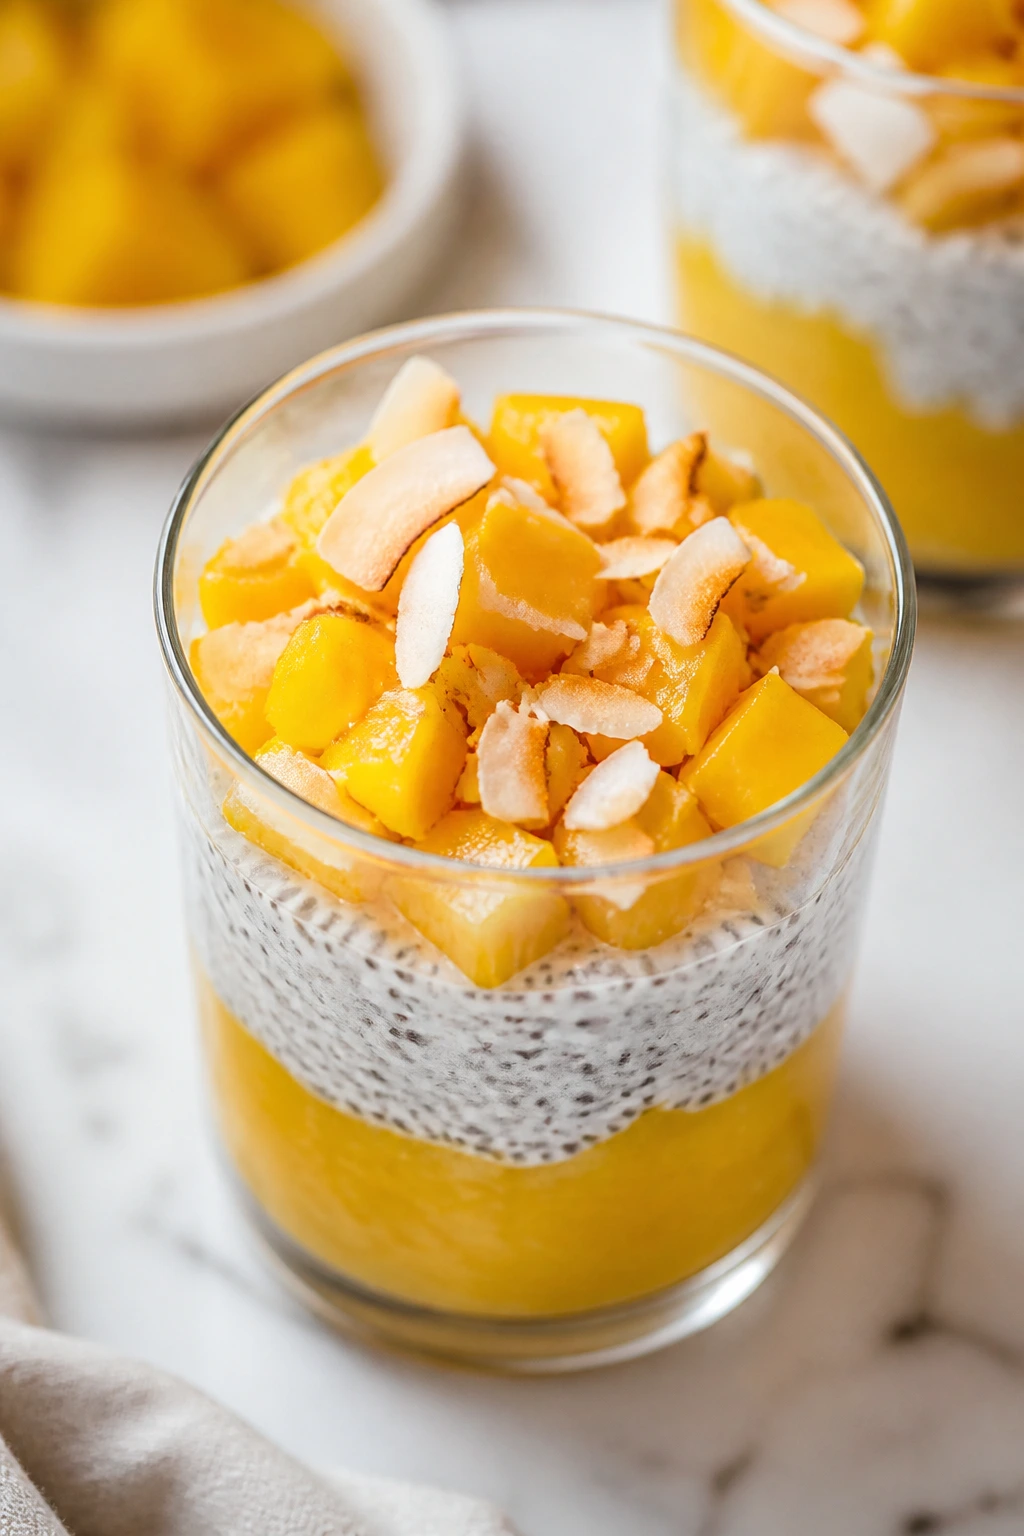
This version leans brighter and sunnier than the chocolate one. Mango makes the pudding taste tropical, coconut gives it a soft richness, and lime zest or juice keeps the sweetness from becoming blunt.
Why It Works:
Chia pudding is at its best when the flavors have contrast, and mango with coconut gives you exactly that: sweet, creamy, and a little tangy if you add lime. Blending part of the mango into the base creates a smoother cup, while keeping some diced fruit for the top gives you texture and a fresher bite. It’s chilled, portable, and tidy in the fridge, which makes it easy to love on a practical level.
Key Ingredients:
- 1/2 cup chia seeds — the thickening agent.
- 1 cup light coconut milk — for creaminess.
- 1 cup unsweetened almond milk — keeps the pudding from getting too heavy.
- 2 tablespoons maple syrup — enough sweetness for balance.
- 1 teaspoon vanilla extract — softens the coconut.
- 1/4 teaspoon ground cardamom — optional, but lovely with mango.
- 1 tablespoon lime juice — brightens the finish.
- 1 1/2 cups mango, divided — half blended, half diced.
- 1/3 cup toasted coconut flakes — for topping.
Quick Steps:
- In a blender, puree 3/4 cup of the mango with the coconut milk, almond milk, maple syrup, vanilla, cardamom, and lime juice.
- Pour the mixture into a bowl or jar and whisk in the chia seeds.
- Let it sit for 5 minutes, whisk again, then cover and refrigerate for at least 4 hours.
- Dice the remaining mango into small cubes.
- Spoon the pudding into 4 cups or jars and top with the diced mango and toasted coconut.
- Chill until serving.
Equipment for This Recipe:
- Blender — makes the base smooth.
- Whisk — keeps the chia seeds from clumping.
- Jars or cups with lids — for easy storage.
- Measuring cups — chia ratios matter.
How to Serve This Dish:
Serve it cold with a spoonful of diced mango and a shower of toasted coconut. It’s light enough for breakfast and polished enough to pass as a dessert when you want something sweet but not heavy.
Pro Tips for This Recipe:
- Use ripe mango. Under-ripe mango tastes flat and fibrous.
- Toast the coconut in a dry skillet for 2 to 3 minutes until lightly golden.
- If the pudding is too thick, whisk in a splash more almond milk.
- Add the diced mango right before eating if you want the cleanest texture.
Variations on This Dish:
- Pineapple Coconut Cups: Swap mango for pineapple and add extra lime juice.
- Berry Coconut Cups: Blend in strawberries or raspberries for a pink version.
- Higher-Protein Cups: Stir in 1/4 cup plain Greek yogurt before chilling.
Common Mistakes to Avoid with This Dish:
- Using canned coconut milk that’s too rich: The pudding can turn heavy.
- Skipping the whisk after 5 minutes: Chia seeds clump fast.
- Adding mango that’s too wet: The topping slides and waters down the pudding.
14. Homemade Fruit Leather
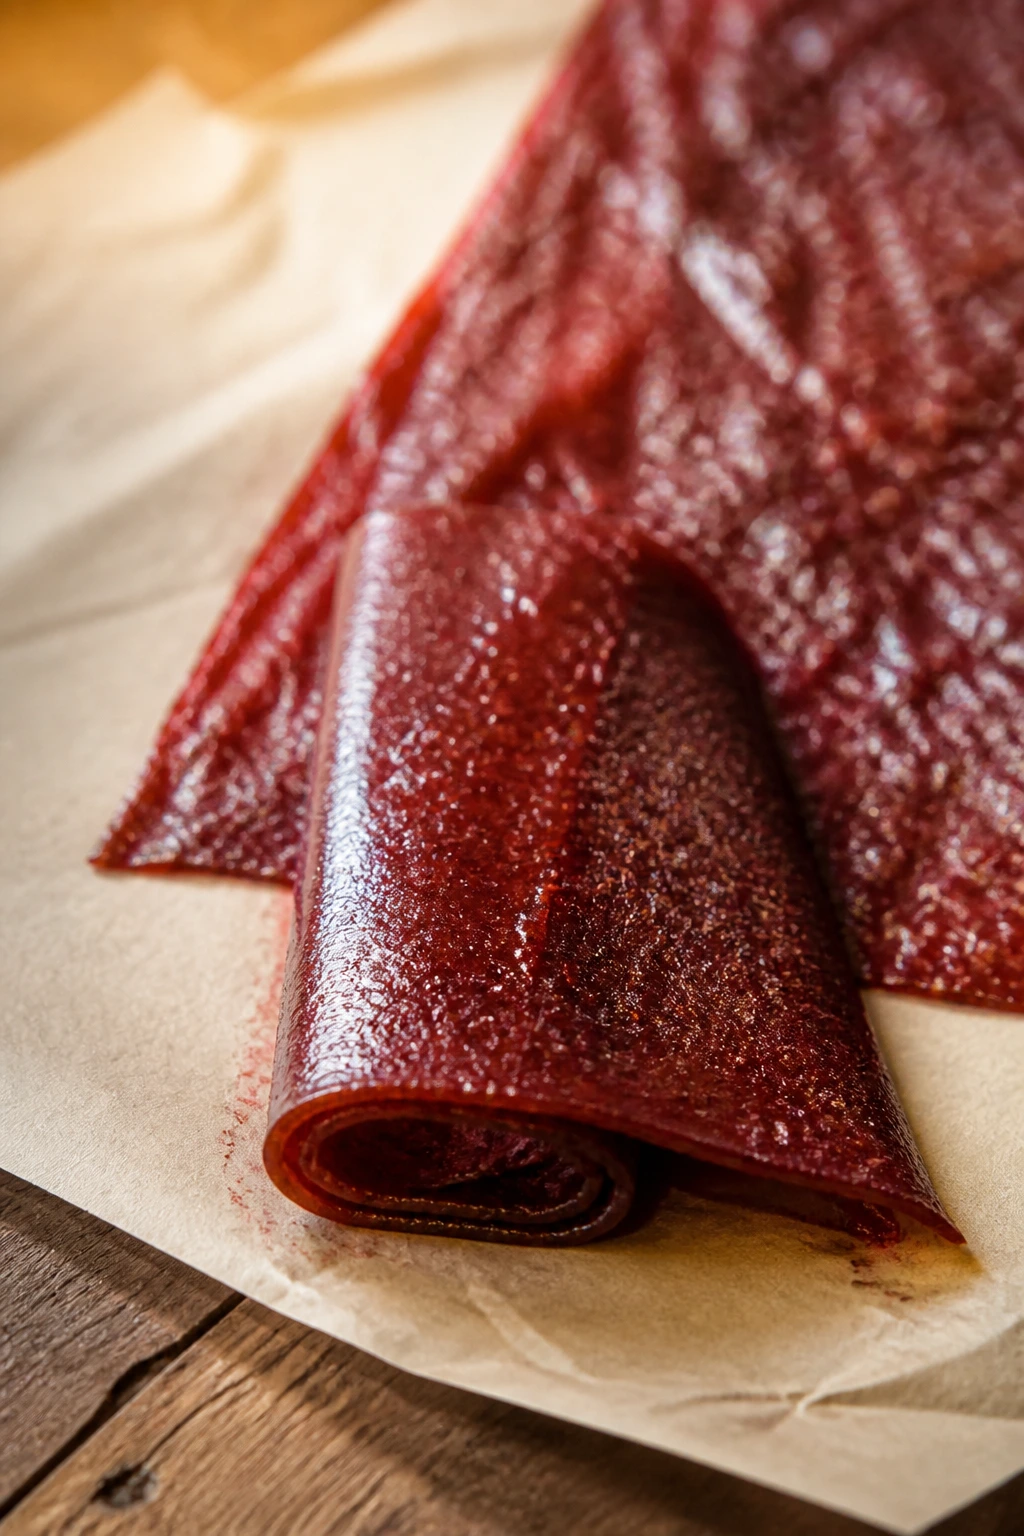
Fruit leather is one of those old-school snacks that still makes sense. It’s portable, chewy, and a good way to turn very ripe fruit into something that lives in a drawer instead of dying on the counter.
Why It Works:
Fruit leather needs almost nothing beyond fruit and low heat, which is part of its charm. Pureeing the fruit smooth lets it dry evenly, and a little lemon juice keeps the flavor bright instead of jammy and dull. It’s especially good for meal prep because it stores at room temperature once fully dried, so it doesn’t fight for fridge space with the jars and muffins.
Key Ingredients:
- 4 cups fruit puree — use apples, berries, peaches, mango, or a mix.
- 1 tablespoon lemon juice — keeps the color brighter and the flavor fresher.
- 1 tablespoon honey — optional, only if the fruit needs a touch more sweetness.
Quick Steps:
- Preheat the oven to 170°F (75°C), or the lowest setting your oven allows. If you have a dehydrator, follow the machine’s low-temperature setting.
- Blend the fruit puree with the lemon juice and honey until completely smooth.
- Line a rimmed baking sheet with a silicone mat or parchment paper.
- Pour the puree onto the sheet and spread it into a rectangle about 1/8 inch thick. Do not leave the edges thicker than the center or they’ll dry unevenly.
- Bake for 4 to 6 hours, until the surface is tacky but not wet and you can peel it from the liner in one piece.
- Cool fully, peel off, and cut into strips. Roll them up in parchment if you want the classic look.
Equipment for This Recipe:
- Blender — for a smooth puree.
- Rimmed baking sheet — keeps the puree contained.
- Silicone mat or parchment — essential for release.
- Offset spatula — helps spread the puree evenly.
How to Serve This Dish:
Roll strips into small spirals and tuck them into snack containers or lunchboxes. They’re a nice option when you want something sweet that doesn’t require refrigeration or a fork.
Pro Tips for This Recipe:
- Spread the puree evenly. Thin edges dry too fast and become brittle.
- Check for dryness in the center, not just the edges.
- Let the leather cool completely before peeling.
- Store strips with parchment between layers so they don’t fuse back together.
Variations on This Dish:
- Berry Apple Leather: Use apples and mixed berries for a tart, familiar flavor.
- Peach Ginger Leather: Add a small piece of fresh ginger for warmth.
- Mango Lime Leather: Bright, tropical, and good with a little extra lime zest.
Common Mistakes to Avoid with This Dish:
- Spreading it too thick: The center stays sticky forever.
- Turning the oven too hot: The fruit can brown before it dries.
- Packing it away too soon: Warm fruit leather sticks to itself.
15. Cottage Cheese Cocoa Pudding Cups
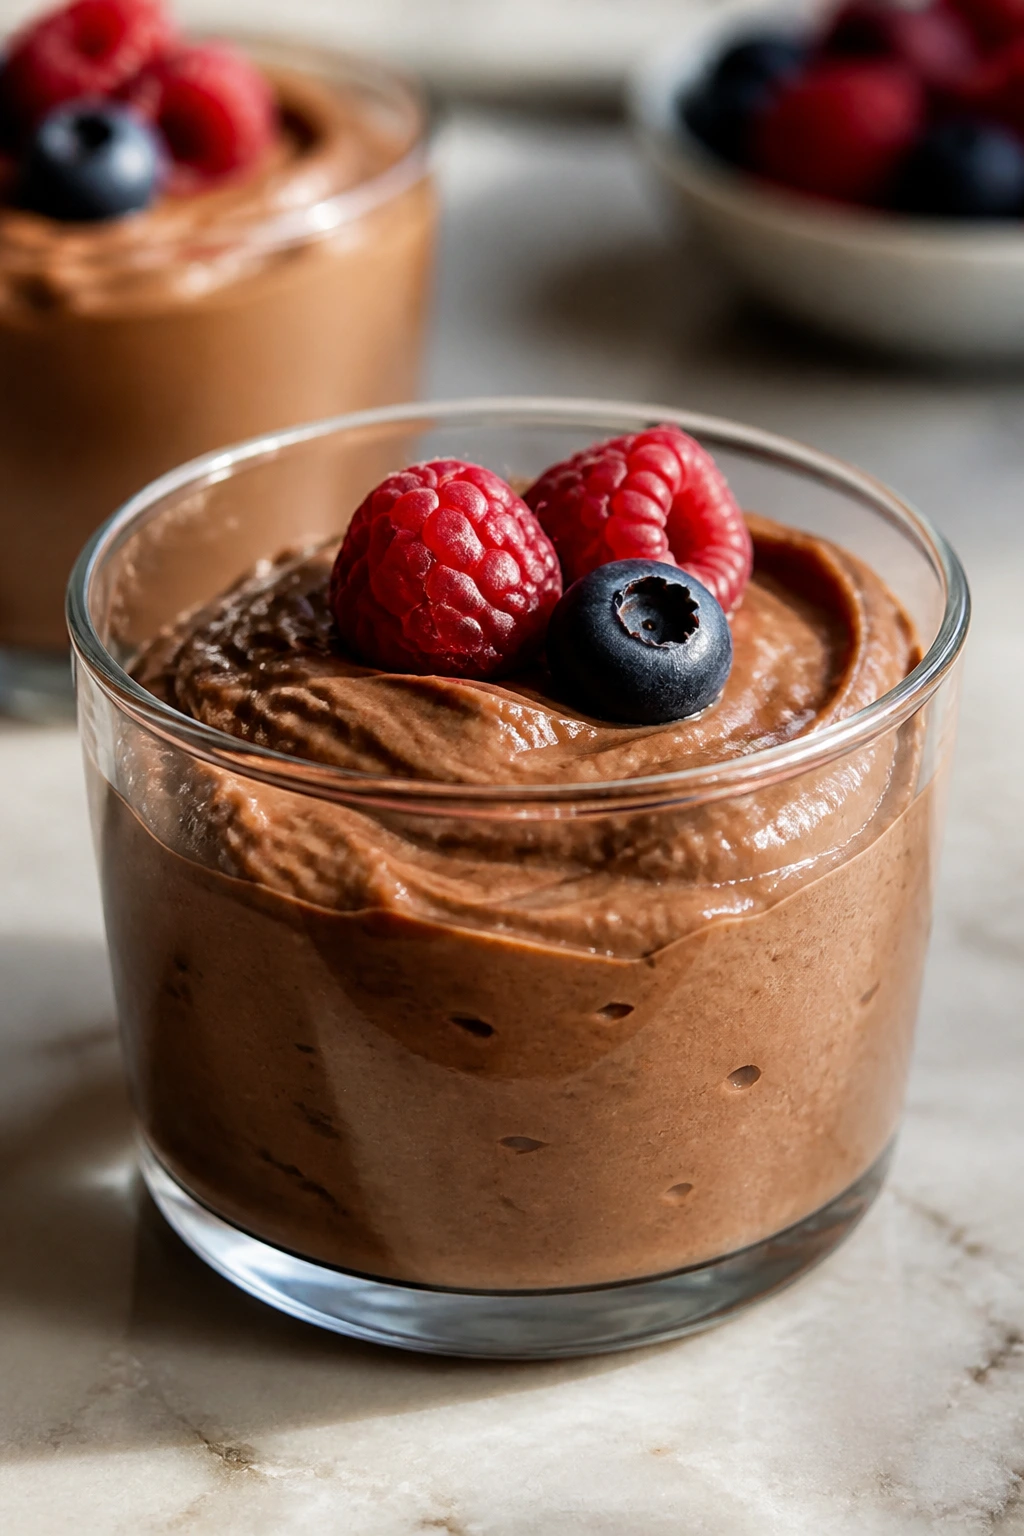
This one surprises people the first time, then gets requested again. Cottage cheese blends into a thick, mousse-like pudding with a deep cocoa flavor, and the result is high in protein without tasting like a gym snack in disguise.
Why It Works:
Blended cottage cheese loses the curdy texture that puts some people off and turns into a smooth, dense base that holds cocoa and sweetener well. The protein is the draw, but the texture is what makes it stick in your meal prep rotation: cool, creamy, and spoonable. A few berries or chopped nuts on top give you contrast, which this pudding needs.
Key Ingredients:
- 2 cups cottage cheese — use small-curd cottage cheese for the smoothest blend.
- 3 tablespoons unsweetened cocoa powder — sift it if it’s lumpy.
- 3 tablespoons maple syrup or honey — sweeten to taste.
- 1 teaspoon vanilla extract — rounds out the cocoa.
- 2 tablespoons milk — helps the blender move if needed.
- 1 pinch fine salt — makes the chocolate taste deeper.
- 1/4 cup peanut butter or chopped hazelnuts — optional topping.
- 1 cup berries or banana slices — for serving.
Quick Steps:
- Add the cottage cheese, cocoa powder, maple syrup, vanilla, milk, and salt to a blender.
- Blend on high until completely smooth, scraping down the sides if needed.
- Taste and add another teaspoon of sweetener if the cocoa seems too sharp.
- Divide into 4 cups or jars.
- Top with peanut butter, hazelnuts, berries, or banana slices.
- Chill for 30 minutes if you want a firmer spoonful.
Equipment for This Recipe:
- Blender — the pudding depends on it.
- Measuring cups and spoons — for a consistent texture.
- Jars or small containers — perfect for portioning.
- Rubber spatula — for scraping every bit of pudding out.
How to Serve This Dish:
Serve it as a cold afternoon snack or a dessert after dinner. A few sliced strawberries on top keep it from feeling too dense, and a pinch of flaky salt works well if you like chocolate with a little edge.
Pro Tips for This Recipe:
- Blend long enough. If you stop early, the texture stays grainy.
- Small-curd cottage cheese usually blends more smoothly than larger curds.
- Keep the sweetener modest; too much and the cocoa gets muddy.
- Nut butter on top is best added right before eating so it stays glossy.
Variations on This Dish:
- Mocha Pudding: Add 1 teaspoon instant espresso powder.
- Peanut Butter Cup Pudding: Swirl peanut butter through the top and add chopped peanuts.
- Cherry Cocoa Cups: Top with tart cherries for a more dessert-like finish.
Common Mistakes to Avoid with This Dish:
- Not blending enough: The curds remain visible and the texture feels off.
- Using watery cottage cheese: The pudding thins out and won’t set as nicely.
- Overloading with toppings: It becomes messy fast and drowns the cocoa flavor.
16. Tahini Sesame Oat Squares
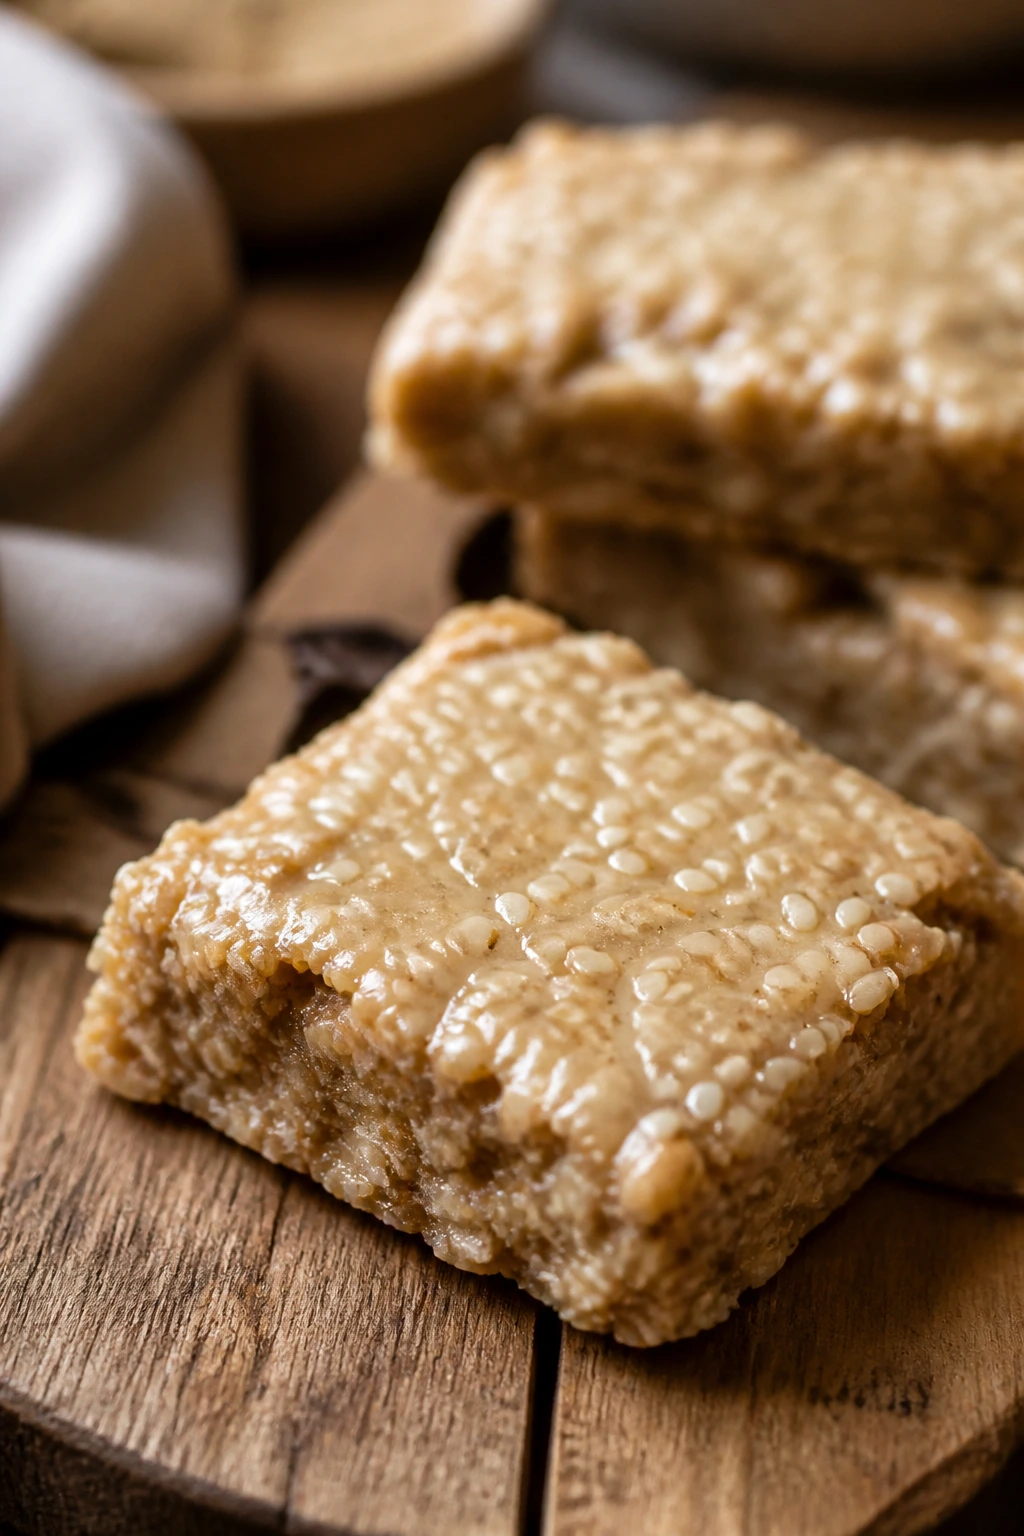
These squares are nutty, a little toasty, and not overly sweet, which makes them especially good for the days when you want something with actual structure. Tahini gives them a grown-up flavor that lands somewhere between granola bar and cookie.
Why It Works:
Tahini brings fat and a slight bitterness that keeps the honey from tipping this into candy territory. Oats and almond flour create a tender, chewy base, while sesame seeds echo the tahini and give you a little crackle on top. The bars set up neatly if you let them cool all the way, which means they pack well and don’t fall apart in your hand.
Key Ingredients:
- 2 cups old-fashioned rolled oats — for chew.
- 1 cup almond flour — helps the squares hold together without getting dense.
- 1/2 cup tahini — stir it well so the oil is fully mixed in.
- 1/3 cup honey — the main sweetener.
- 1/4 cup sesame seeds — extra nutty crunch.
- 1 large egg — binds the mixture.
- 1 teaspoon vanilla extract — softens the tahini flavor.
- 1 teaspoon cinnamon — optional, but it warms the whole pan.
- 1/2 teaspoon salt — keeps the bars from tasting flat.
- 1/4 cup chopped dried apricots or raisins — optional for little sweet bursts.
Quick Steps:
- Preheat the oven to 350°F (175°C). Line an 8×8-inch baking pan with parchment paper.
- In a large bowl, stir together the oats, almond flour, sesame seeds, cinnamon, and salt.
- In a second bowl, whisk the tahini, honey, egg, and vanilla until smooth.
- Pour the wet mixture into the dry ingredients and stir until everything is evenly coated. Fold in the dried fruit if using.
- Spread the mixture into the pan and press it firmly into an even layer.
- Bake for 18 to 22 minutes, until the top is set and the edges are lightly golden.
- Cool completely before cutting into squares. Chill briefly if you want especially clean cuts.
Equipment for This Recipe:
- 8×8-inch baking pan — ideal for thick squares.
- Parchment paper — helps with clean removal.
- Two mixing bowls — keeps the wet and dry ingredients easy to manage.
- Spatula — to press the mixture firmly into the pan.
How to Serve This Dish:
Serve the squares with coffee, tea, or a piece of fruit if you want to round out the snack. They’re sturdy enough to tuck into a lunch bag and nuanced enough that they don’t feel like the same old granola bar.
Pro Tips for This Recipe:
- Stir tahini well before measuring so you get the full flavor and texture.
- Press the mixture firmly into the pan; loose bars crumble.
- Let them cool completely before slicing or they’ll fall apart.
- A few sesame seeds on top before baking make the finish look polished.
Variations on This Dish:
- Chocolate Tahini Squares: Add 2 tablespoons cocoa powder and a handful of dark chocolate chips.
- Date Walnut Squares: Swap the dried apricots for chopped dates and add walnuts.
- Seed-Only Version: Use sunflower seeds and pumpkin seeds for a nut-free bar.
Common Mistakes to Avoid with This Dish:
- Using separated tahini without stirring: The fat and solids won’t mix evenly.
- Cutting while warm: The squares collapse at the edges.
- Underbaking: They should feel set in the center, not soft like batter.
Why Meal Prep Sunday Works So Well for Sweet Snacks
There’s a reason these recipes fit Sunday prep better than, say, a delicate tart or a frosted layer cake. They’re built around texture that lasts. Yogurt jars stay good if you keep the crunch separate. Oat bars and snack cakes slice cleanly after cooling. Chia pudding thickens on its own. Fruit leather dries into something shelf-stable. That’s the whole trick: each recipe gives the week a snack that can survive being ignored for a few days.
The other advantage is portion control without the usual tiny-container nonsense. A jar, a square, a muffin, a bark shard — those are easy units. You don’t have to measure your snack into a bowl every time, and you don’t have to re-think whether you’re “allowed” to have one. You already made the thing. It’s sitting there, labeled, ready, and not asking for a fresh round of cooking during the week.
I also think Sunday prep works because it front-loads the messy parts. Washing berries. Pitting dates. Grating carrots. Line the pan once, rinse the blender once, and cut 12 muffins or 16 squares while the kitchen still has the capacity for such things. On a Wednesday night, that same job feels twice as annoying.
Essential Equipment for These Recipes
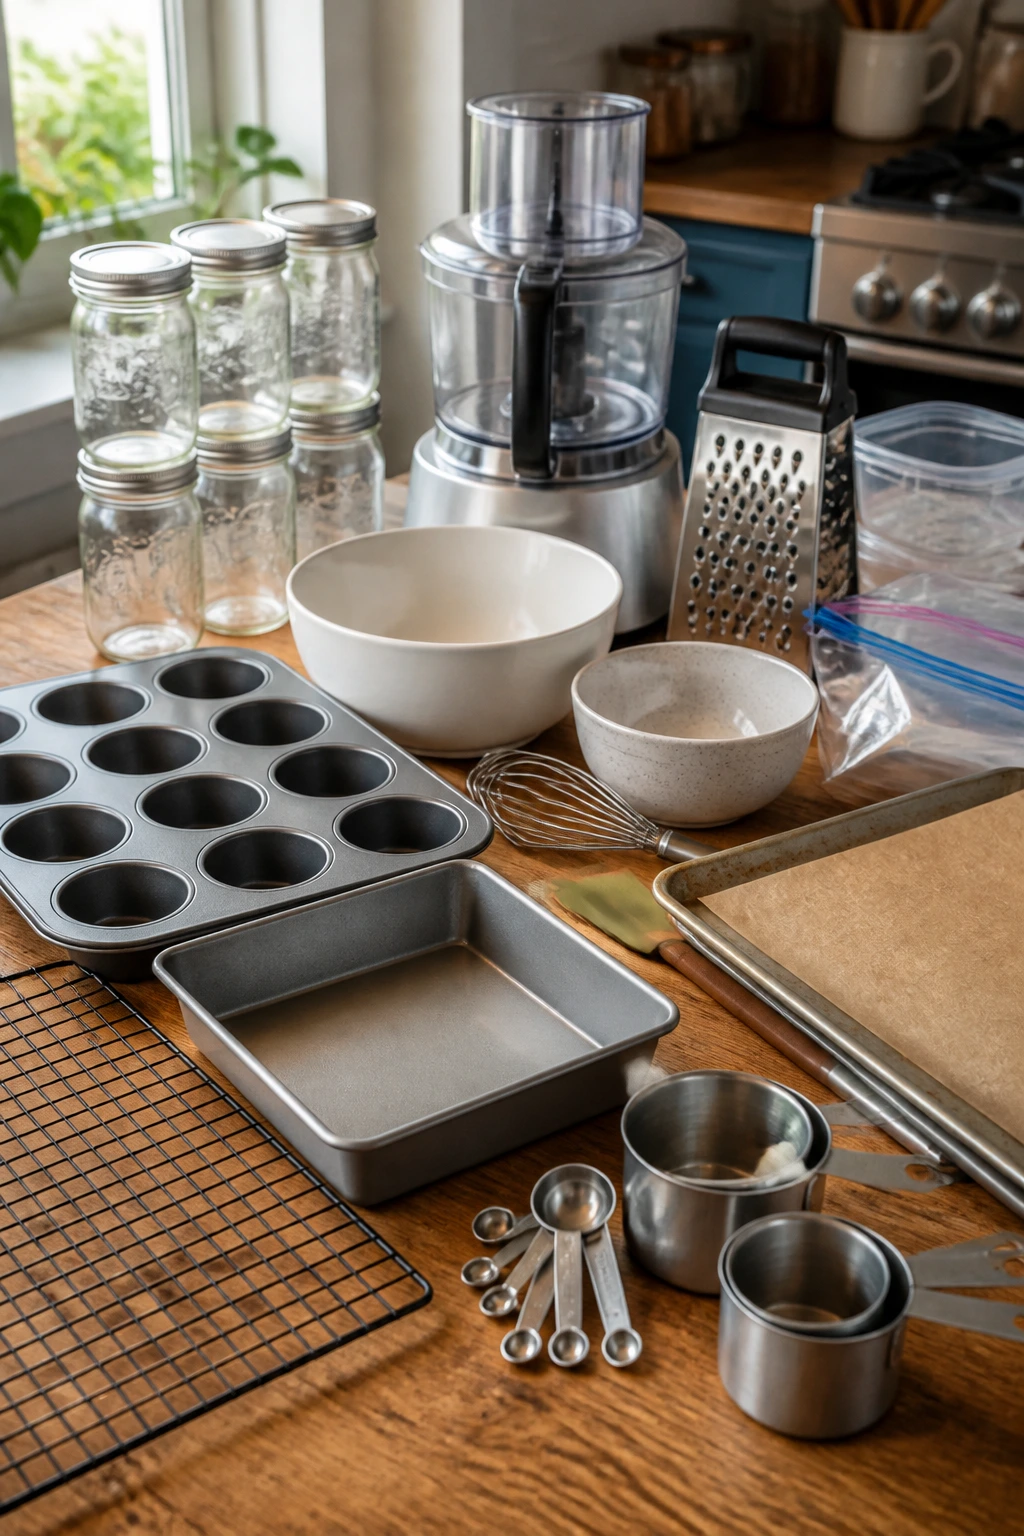
- Mason jars or small lidded containers — ideal for parfaits, chia pudding, and overnight oats.
- 12-cup muffin tin — essential for baked oatmeal cups and muffins.
- 8×8-inch baking pan — the right size for bars, snack cake, and squares.
- Rimmed baking sheet — needed for bark and fruit leather.
- Parchment paper — keeps bars, bark, and leather from sticking.
- Mixing bowls in two sizes — one large bowl saves a lot of spill cleanup.
- Whisk and silicone spatula — the combination that handles wet batters and thick mixtures well.
- Food processor or blender — needed for energy bites, cottage cheese pudding, and fruit leather puree.
- Fine grater or box grater — for carrots, zucchini, and citrus zest.
- Cooling rack — helps muffins and bars set without getting damp bottoms.
- Airtight freezer containers or bags — useful for anything you plan to stash longer than a few days.
- Measuring cups and spoons — these recipes depend on the right ratios, especially chia and oats.
Smart Shopping and Ingredient Tips for Meal Prep Sundays
Choose plain yogurt on purpose. Sweetened cups can be fine for eating immediately, but for meal prep they usually bring too much sugar and too much variability. Plain Greek yogurt gives you control, a thicker texture, and a better base for berries, cocoa, or citrus zest.
Buy the right oats. Old-fashioned rolled oats are the workhorse here. Quick oats can go mushy in bars and cookies, and steel-cut oats are too stubborn for overnight jars unless you want a very different result. If you’re shopping for a gluten-free version, look for certified gluten-free oats rather than assuming all oats are safe.
Look for Medjool dates that feel soft and slightly sticky. Hard dates can still work, but you’ll spend more time soaking them and your food processor will complain. Soft dates blend into energy bites and bark fillings much more cleanly.
Use frozen fruit where it makes sense. Blueberries, strawberries, mango, and berries for chia cups are all fine from frozen. For jars and toppings, thaw them first and drain off excess liquid so you don’t flood the yogurt or pudding. For baked goods, frozen berries can go in straight from the freezer — no thawing, no purple mess if you fold them in gently.
Don’t ignore the nuts and seeds. Fresh almonds, pistachios, pepitas, sesame seeds, and chia seeds make a difference in a collection like this. Old nuts taste stale in a way that no sweetener can hide. If a bag smells dusty or bitter, toss it.
Check the expiration date on baking powder and baking soda. Muffins, snack cake, and oat cups depend on them for lift. Flat leaveners mean flat baked goods, and no amount of frosting or drizzle is fixing that.
How to Serve These Recipes
Presentation:
Keep the serving style matched to the recipe. Jars look best with visible layers and a spoon tucked beside them. Bars and snack cake should be cut with a long sharp knife wiped clean between slices. Bark and fruit leather look best broken or rolled into irregular pieces — neatness isn’t the point there.
Accompaniments:
Coffee goes with the muffins, snack cake, breakfast cookies, and tahini squares. Tea works especially well with lemon muffins, parfait jars, and baked oatmeal cups. For the colder recipes, a bowl of berries on the side or a spoonful of extra yogurt gives the plate a little more life. If you’re eating these as breakfast rather than dessert, pair them with plain yogurt, a boiled egg, or a piece of fruit to make the meal last longer.
Portions:
One parfait jar, one muffin, one or two breakfast cookies, one bar, or a small handful of bark is a normal snack-size portion. For breakfast, most people will want two baked oatmeal cups or one larger jar with extra fruit. The nice thing about the collection is that scaling up or down is easy: make the full batch for a family, or freeze half if you’re prepping only for yourself and don’t want a week of the same thing.
Beverage Pairing:
Unsweetened iced coffee, black tea, chai, or cold milk all fit different parts of this lineup. For the fruitier recipes, a sparkling water with lemon or lime keeps things bright. For chocolate and tahini, a stronger coffee or a milky tea does a better job of matching the richer flavors.
Additional Tips and Flavor Boosters
Flavor Enhancement:
A little citrus zest goes a long way. Lemon zest in yogurt jars, orange zest in baked oats, or lime zest in mango chia pudding can wake up a recipe that otherwise tastes good but slightly flat. A pinch of flaky salt on chocolate bark or date bark also sharpens the sweetness in a way that feels grown-up, not fussy.
Customization:
Swap nuts based on what’s in the pantry, but keep the texture in mind. Almonds and pistachios stay crunchy; walnuts go softer and more buttery. If you want a higher-protein batch, add Greek yogurt to the pudding cups or hemp seeds to the oats. If you want a lower-sugar batch, lean on berries, vanilla, cinnamon, and cocoa before you reach for extra honey.
Serving Suggestions:
Add a small topping ritual before eating: toasted coconut on chia pudding, chopped nuts on parfaits, a drizzle of peanut butter on banana bars, or a spoonful of jam on muffins. Those finishing touches change the mood of the whole snack without creating more work. It’s a nice place to use the last tablespoon of something good that’s been hanging around in the fridge.
Make-It-Yours:
For dairy-free prep, use thick coconut yogurt, almond milk, or oat milk where the recipe allows. For gluten-free prep, use certified gluten-free oats and almond flour, and skip the wheat flour versions or swap in a cup-for-cup gluten-free blend where a bake recipe needs structure. For nut-free homes, sunflower seed butter and pumpkin seeds stand in well enough that you won’t miss the nuts much, especially in the oat bars and bark.
Make-Ahead, Storage, and Reheating Guidance
Fridge Life:
Yogurt jars, chia puddings, overnight oats, cottage cheese pudding, and snack cake squares all hold for about 3 to 4 days refrigerated in airtight containers. The parfait jars are the most fragile because of the granola, so either store the crunch separately or plan to eat those early in the week. Muffins and bars usually keep a little longer — about 4 to 5 days in the fridge if they’re tightly wrapped.
Freezer Life:
Peanut butter banana bars, blueberry breakfast cookies, muffins, snack cake squares, energy bites, and bark all freeze well for up to 2 months. Wrap bars and cake squares individually, then store them in a freezer bag or box so you can pull out one at a time. Chia pudding can be frozen, but the texture gets grainy when thawed, so I don’t bother. Fruit leather keeps best in a cool pantry or fridge rather than the freezer.
Best Reheating Moves:
Muffins, baked oats, and bars warm well in a microwave for 10 to 20 seconds, just enough to take the chill off without drying them out. If you want the edges of a snack cake square to feel freshly baked, warm it in a low oven at 300°F (150°C) for 5 to 8 minutes. Bark, pudding, and parfaits should stay cold; reheating ruins the point and usually the texture, too.
Make-Ahead Strategy:
Bake the muffins, bars, and snack cake first, because they need full cooling time. While they cool, make the jars, chia cups, or energy bites. That sequence saves counter space and keeps you from sealing warm food into containers, which is a fast way to make condensation and soggy tops. Anything with fresh fruit is best kept chilled and eaten within the first half of the week, while the baked items can sit a little longer or go straight into the freezer.
Variations and Adaptations to Try
Dairy-Free Prep Week:
Use coconut yogurt in the jars, almond milk in chia pudding, and dairy-free yogurt in the baked oats where the batter can handle it. Coconut yogurt tends to be thinner than Greek yogurt, so keep the granola separate and don’t overload the jars with extra fruit juice. For chocolate treats, choose a dark chocolate that doesn’t contain milk solids.
Gluten-Free Pantry Reset:
Certified gluten-free oats make almost half this list easy to adapt. The oat bars, chia puddings, energy bites, fruit leather, and bark are already naturally gluten-free if your add-ins are too. For muffins, snack cake, and breakfast cookies, use a gluten-free flour blend or an almond-flour-based recipe rather than forcing a weak substitution.
Higher-Protein Batch:
Add more Greek yogurt to the jars and puddings, use cottage cheese pudding, and choose the banana protein muffins for the baked side of the list. You can also stir hemp seeds into the overnight oats or sprinkle them over bark and parfaits. The key is not to flood the recipes with powder; protein can dry a bake out fast if you chase numbers instead of texture.
Lower-Sugar Sweet Tooth:
Lean on very ripe bananas, berries, cinnamon, vanilla, and cocoa. In the bark and puddings, use just enough honey or maple syrup to smooth the edges, then let the fruit and chocolate do the rest. If you reduce the sweetener in baked recipes, add a little extra vanilla or a pinch more salt so the flavor doesn’t go blunt.
Nut-Free Lunchbox Version:
Swap sunflower seed butter for peanut or almond butter, use pumpkin seeds instead of pistachios and walnuts, and leave out any almonds in the bark or cookies. Nut-free versions often need a touch more salt and cinnamon because seeds taste softer and less naturally sweet than nuts. The result still feels snacky, just a little more school-friendly.
Common Mistakes to Avoid
-
Making every recipe too wet: That’s the fastest way to ruin texture. A loose batter in bars or muffins turns gummy, while too much liquid in chia pudding or overnight oats becomes soup. If a mixture looks thin before chilling or baking, stop and check the ratio before adding more fruit or milk.
-
Using sweetened dairy by accident: Flavored yogurts can add a lot more sugar than you intended, and they often thin out the base. Plain Greek yogurt gives you control over sweetness and holds up better in jars and bark.
-
Packing wet and dry elements together too early: Granola softens, cookies can pick up moisture, and bark stored with damp fruit gets tacky fast. Keep crunchy toppings in separate containers until serving if you want the texture to last.
-
Pulling baked items before they’re done cooling: Bars, muffins, and snack cake all seem softer when warm, but that softness can turn into collapse once you cut them. Cool completely before slicing and wrapping, or you’ll end up with ragged edges and a sticky middle.
-
Using under-ripe fruit when the recipe depends on sweetness: Bananas, mango, and berries all matter more than people think in these recipes. If the fruit tastes dull on its own, the finished treat will need extra sweetener and still may not taste balanced.
-
Forgetting freezer separation: Bark and fruit leather pieces stick together in a block if you just toss them into one bag. Parchment between layers saves a lot of annoyance later.
Frequently Asked Questions
Which of these healthy treats hold up the best through the week?
The strongest fridge performers are chia pudding, overnight oats, snack cake squares, baked oatmeal cups, and energy bites. They keep their texture without much fuss and don’t depend on a crisp topping to stay enjoyable.
Can I freeze yogurt-based treats?
You can freeze some baked yogurt recipes, but direct yogurt jars and chia pudding don’t thaw elegantly. The yogurt gets a little grainy, so I’d only freeze the baked muffins or bars that happen to contain yogurt in the batter.
Do I need a food processor or blender for the whole list?
No. You’ll need one for the energy bites, cottage cheese pudding, and fruit leather puree, but many of the other recipes are straight bowl-and-spoon jobs. If you only own a blender, that’s enough to cover a lot of the list.
What if my oat bars or snack cake crumble when I cut them?
They probably needed more cooling time or were underbaked in the center. Chill them for 20 minutes, then use a sharp knife wiped clean between cuts. If they still crumble, your pan may have been a little too small or the batter a little too dry.
Can I use quick oats instead of rolled oats?
In some recipes, yes, but the texture changes. Quick oats make softer bars and cookies and can turn overnight oats mushy faster. For the best structure, rolled oats are worth buying.
How do I keep fruit from making parfaits soggy?
Dry the fruit well, keep the granola separate if you’re storing the jars longer than a day, and avoid overloading the middle layer. Juicy fruit is fine — floodwater is not.
Which recipes are best if I want a higher-protein snack?
Greek yogurt jars, cottage cheese pudding, banana protein muffins, and overnight oats with yogurt are the most protein-forward choices here. If you want to boost the rest without changing the recipe too much, add hemp seeds or serve them with a side of plain yogurt.
What’s the easiest recipe on the list if I’m short on time?
Energy bites and fruit leather are the least demanding if you already have the ingredients. Yogurt bark is close behind, especially if you don’t mind waiting for the freezer to do the work.
A Fridge Full of Easy Wins
The nicest thing about a Sunday batch of healthy treats is that it changes the tone of the week without asking for a full kitchen overhaul. You end up with jars that actually get eaten, bars that don’t crumble into the bottom of a bag, and a few cold, sweet things you can reach for without turning snack time into a decision tree.
I’d start with two or three recipes from different categories: one jar, one bake, and one freezer treat. That gives you enough variety to avoid boredom, and it keeps the prep from feeling like a production line. Once you’ve done that once or twice, the whole rhythm gets easier — and the fridge starts looking like it belongs to someone who planned ahead on purpose.