
Healthy family dinners for meal prep Sundays live or die by texture. A chicken breast that tastes fine at 6 p.m. can turn stringy by Wednesday, and a bowl of steamed vegetables can go limp in one afternoon. The recipes below dodge that problem on purpose.
I’m not interested in healthy food that feels like a punishment. I want dinners that still look like dinner after a night in the fridge — glossy sauces, roasted edges, grains that don’t collapse into paste, and enough brightness that the second serving doesn’t taste tired. That means choosing the right cuts, the right vegetables, and the right sauces, not just the right calorie count.
The real trick is boring in the best way. Build meals with moisture, acidity, and structure. Roasted potatoes. Beans. Cabbage. Brothy sauces. Chickpeas. Brown rice. A little fat helps, too. So does salt, used like a grown-up. Sunday gets the work done; the week gets the payoff.
Why You’ll Love This Collection
-
Fridge-Friendly Textures: These dinners are built around ingredients that stay good after two or three reheats, not ingredients that turn watery and sad by Tuesday.
-
Family-Size Portions: Most of the recipes make 4 to 6 servings, so you can feed one dinner and still have lunches without cooking a second batch from scratch.
-
Balanced Containers: Protein, vegetables, and a sturdy starch land in the same box, which means fewer side dishes and fewer “what’s for dinner?” arguments.
-
Flavor That Survives Reheating: Lemon, salsa, curry, mustard, pesto, and tomato sauce keep the food tasting alive even after a run through the microwave.
-
Flexible for Picky Eaters: Several of these dinners let you keep toppings separate, which is a small thing until you have one child who hates cilantro and another who wants extra hot sauce.
-
Freezer Help When You Need It: The soups, chili, sauces, and curry freeze cleanly, so one Sunday session can buy you a backup plan for a rough week.
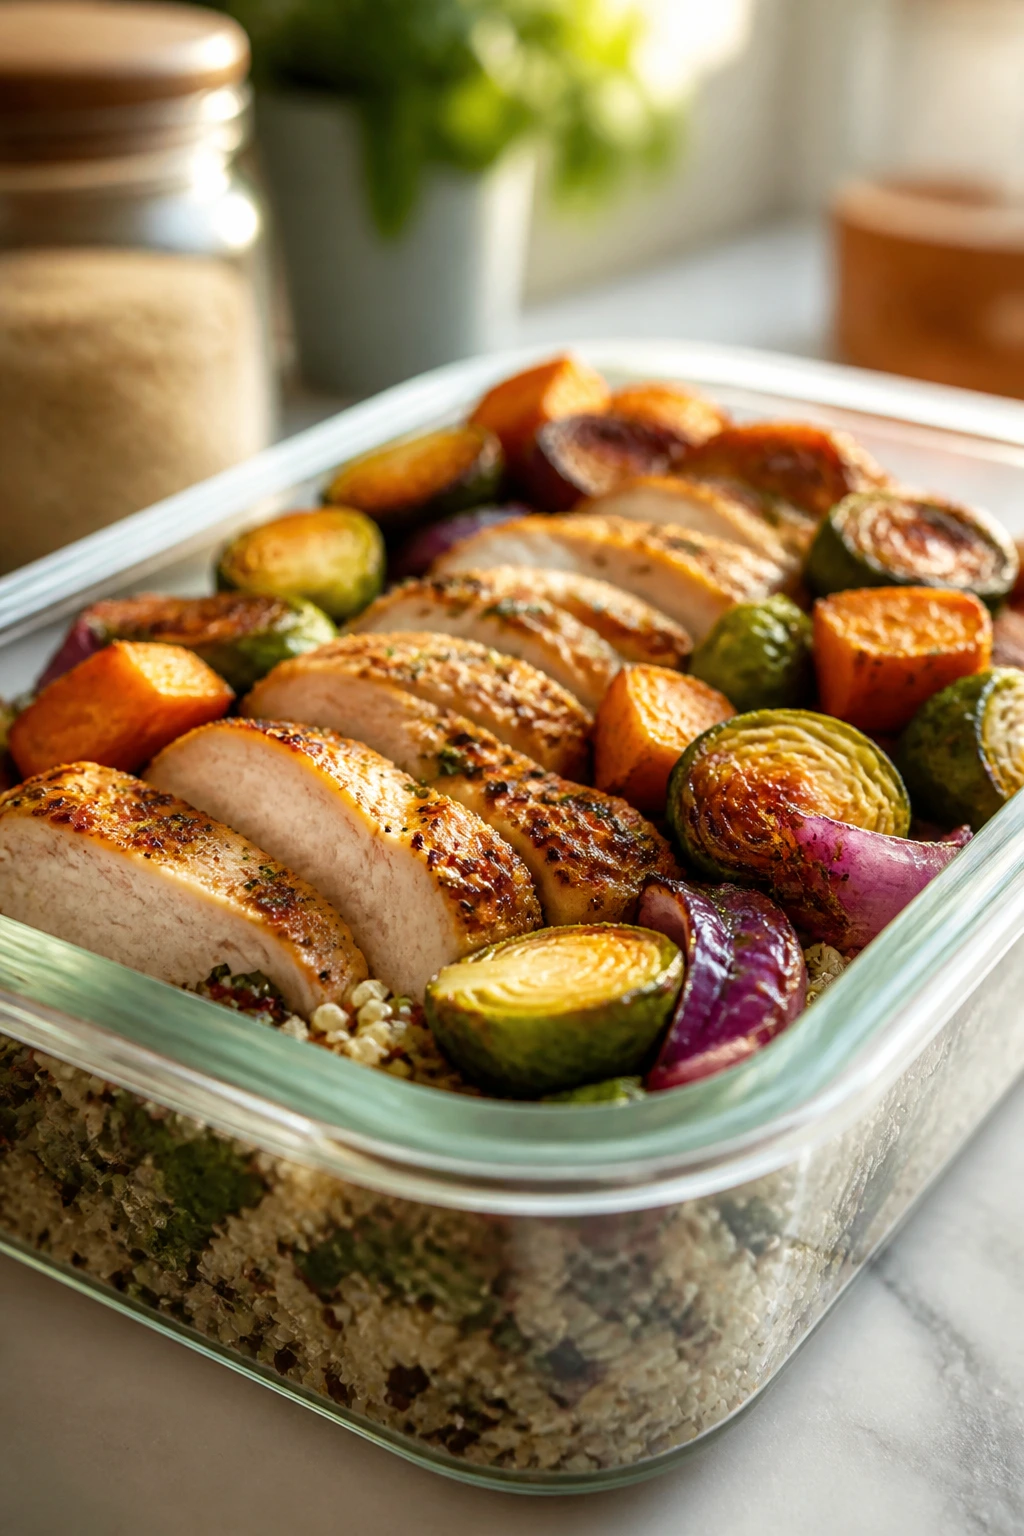
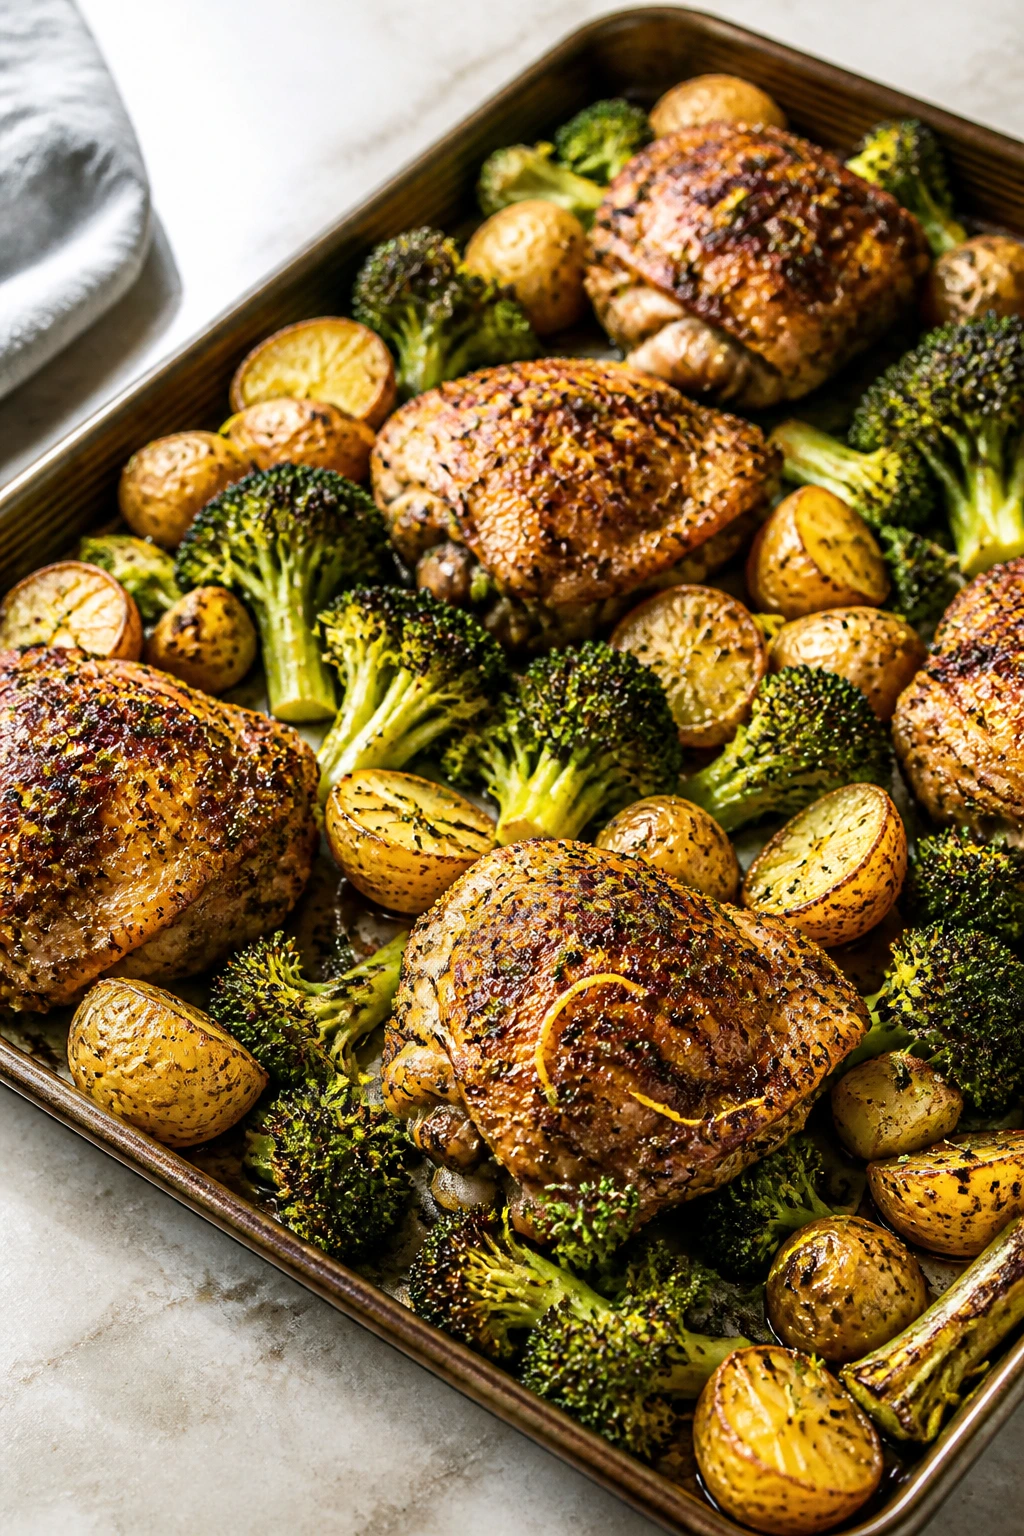
1. Lemon-Herb Sheet Pan Chicken with Broccoli and Potatoes
A hot sheet pan does most of the work here, and that’s exactly why I keep coming back to it. The potatoes get those browned, almost crackly cut sides, the broccoli picks up a little char, and the chicken thighs stay juicy enough to survive a second or third night in the fridge. Lemon shows up twice — zest in the marinade and juice at the end — which keeps the whole tray tasting bright instead of heavy.
Why It Works:
Chicken thighs are forgiving at 425°F, and that matters when the potatoes need time to brown. Broccoli roasted next to the meat gets nutty edges that hold up better than steamed florets. Dijon helps the oil and lemon cling to the chicken, so the seasoning stays where you put it. One pan, steady heat, very little drama.
Key Ingredients:
- 2 lb boneless, skinless chicken thighs — the most forgiving cut here, with enough fat to stay moist after reheating.
- 1½ lb baby potatoes, halved — they roast fast and turn crisp where the cut sides meet the pan.
- 4 cups broccoli florets — choose tight, deep-green heads so the florets don’t collapse.
- 3 tablespoons olive oil — enough to coat the potatoes and chicken without leaving the pan greasy.
- 1 tablespoon Dijon mustard — gives the lemon marinade a little grip and a slight tang.
- 1 lemon, zested and juiced — use both parts; the zest carries the aroma.
- 2 cloves garlic, minced — raw garlic in the marinade keeps the chicken from tasting flat.
- 1 teaspoon dried oregano — a small amount is enough to pull the whole tray toward Mediterranean flavors.
- 1½ teaspoons kosher salt, plus more to taste — divide it so the vegetables and chicken both get seasoned.
- ½ teaspoon black pepper — enough to wake up the potatoes without scorching.
Quick Steps:
- Preheat the oven to 425°F and line a rimmed sheet pan with parchment. Toss the potatoes with 1 tablespoon olive oil, ½ teaspoon salt, and a few grinds of pepper, then spread them cut-side down.
- Roast the potatoes for 15 minutes. You want the cut sides to start turning golden before the chicken goes in.
- Mix the chicken marinade. Stir together the remaining oil, Dijon, lemon zest, lemon juice, garlic, oregano, 1 teaspoon salt, and the remaining pepper until the mixture looks loose and glossy.
- Coat the chicken and broccoli. Toss the chicken with the marinade, then toss the broccoli with any marinade left in the bowl and a pinch of salt.
- Add the chicken and broccoli to the pan. Nestle the chicken among the potatoes and scatter the broccoli around the edges so everything gets some direct heat.
- Roast for 18 to 20 minutes. The chicken should reach 165°F at the thickest part, the broccoli should have browned tips, and the potatoes should give easily when pierced with a fork.
- Finish with lemon and parsley. Rest the tray for 5 minutes, then shower it with chopped parsley and a squeeze of fresh lemon.
Equipment for This Recipe:
- Rimmed half-sheet pan — the broad surface keeps the potatoes from steaming.
- Parchment paper — makes cleanup easier and keeps the chicken from sticking.
- Large mixing bowl — big enough to toss the chicken without splashing marinade everywhere.
- Instant-read thermometer — the fastest way to avoid dry chicken.
- Tongs — useful for moving the chicken without tearing the skinless pieces.
How to Serve This Dish:
Pile the chicken and vegetables into shallow containers, then spoon any pan juices over the top. I like it with a small scoop of brown rice or a chunk of warm whole-grain bread when you want something more filling. It also works next to a quick cucumber salad if you want a cold, crunchy side.
Pro Tips for This Recipe:
- Cut the potatoes evenly. Uneven pieces mean some are mush while others are still hard.
- Don’t crowd the broccoli. Give the florets room or they’ll go soft before they brown.
- Check temperature early. Thighs stay forgiving, but if your oven runs hot, start checking at 17 minutes.
- Add fresh lemon at the end. The baked lemon flavor gets soft; the fresh squeeze wakes everything back up.
Variations on This Dish:
- Smoked Paprika Version: Add 1 teaspoon smoked paprika to the marinade for a deeper, warmer flavor.
- Garlic-Parmesan Finish: Toss the hot tray with 2 tablespoons grated parmesan and a little extra parsley before serving.
- Mediterranean Olive Tray: Add ½ cup pitted olives during the last 5 minutes for a saltier, brinier finish.
Common Mistakes to Avoid with This Dish:
- Crowding the pan: If the potatoes and broccoli sit on top of each other, they steam instead of roast. Use two pans if needed.
- Skipping the first roast on the potatoes: If you add everything at once, the chicken will finish before the potatoes get real color.
- Overdoing the lemon juice in the marinade: Too much acid can make the chicken taste sharp after baking. Keep the fresh squeeze for the end.
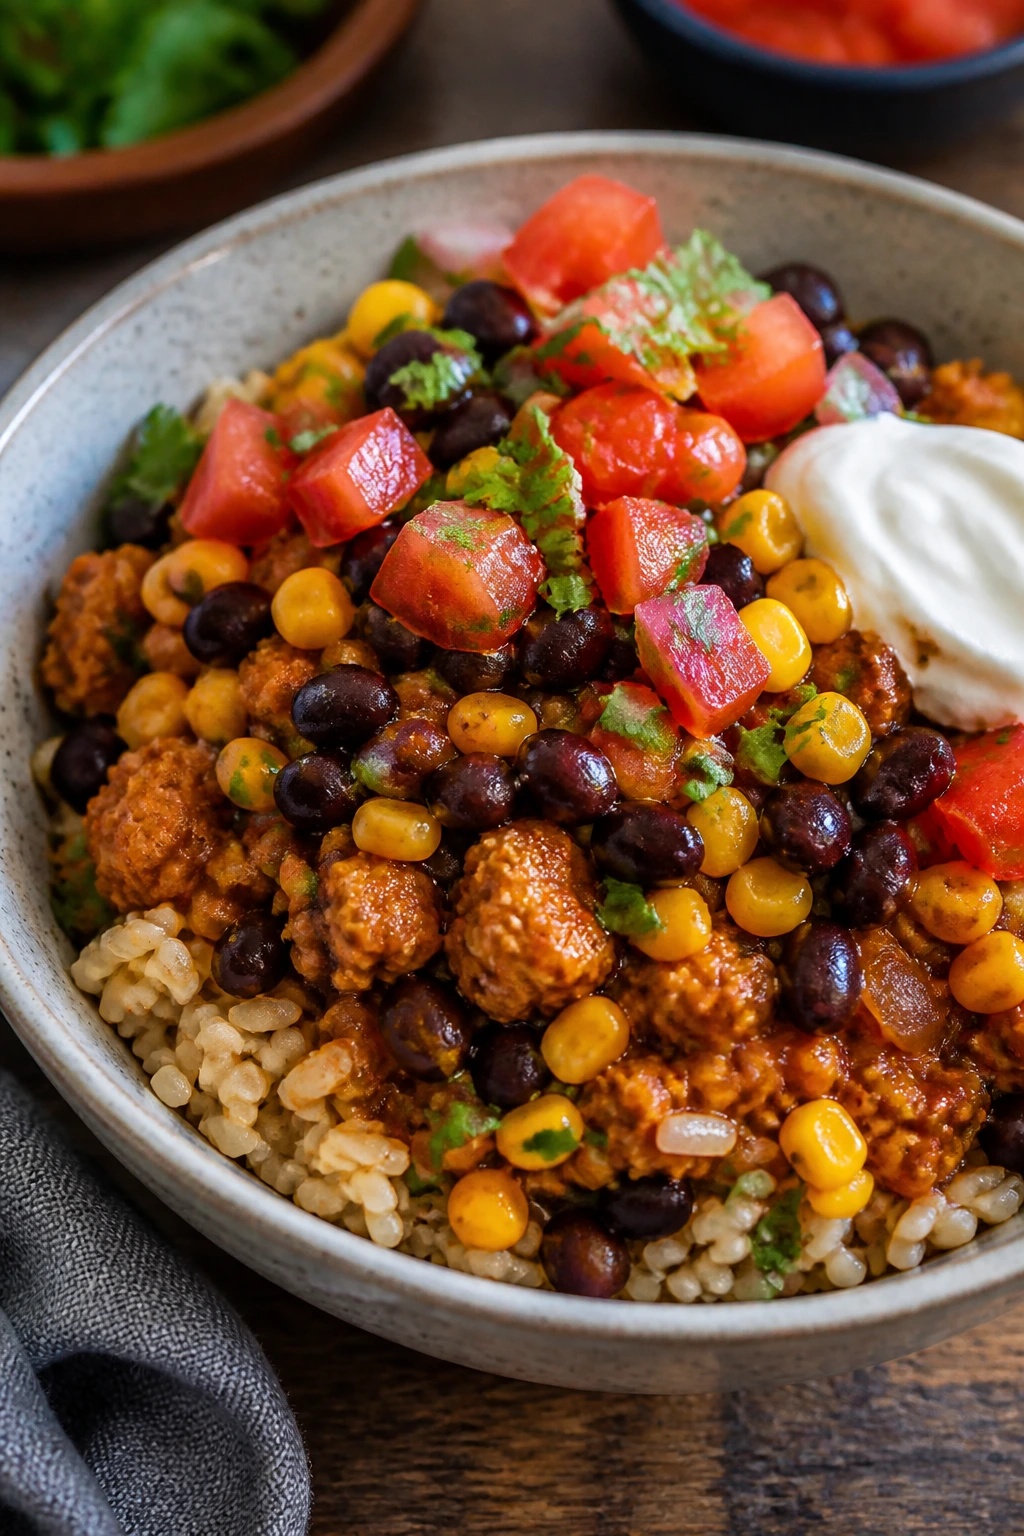
2. Turkey Taco Rice Bowls with Black Beans
These bowls are the weeknight equivalent of taking control of the refrigerator. Spiced turkey, black beans, corn, and brown rice make a container that still tastes like a proper meal after two days, not a pile of leftovers pretending to be one. Keep the toppings separate and you get a dinner that can morph into lunch without repeating itself.
Why It Works:
Lean turkey on its own can be dull, so the salsa and taco seasoning do the heavy lifting here. Black beans add fiber and keep the mixture from drying out, while corn gives each bite a little sweetness. Brown rice gives the bowl enough chew to hold the saucy filling. The whole thing reheats cleanly because the moisture is built into the filling, not left to chance.
Key Ingredients:
- 1½ lb lean ground turkey — choose 93% lean if you want some richness without a greasy pan.
- 1 tablespoon olive oil — enough to soften the onion before the turkey goes in.
- 1 small yellow onion, diced — adds a sweet base that keeps the turkey from tasting thin.
- 2 cloves garlic, minced — stir in near the end so it doesn’t burn.
- 2 tablespoons taco seasoning — use a blend with cumin, chili powder, and paprika.
- ½ cup low-sodium salsa — gives the filling body and moisture.
- 1 can black beans (15 oz), rinsed and drained — adds protein and keeps the bowls hearty.
- 1 cup frozen corn — no need to thaw; it warms right through in the skillet.
- 3 cups cooked brown rice — warm or chilled, depending on how you meal prep.
- 1 avocado, sliced, plus cilantro and lime wedges — keep these for serving, not cooking.
Quick Steps:
- Warm the rice if you’re cooking it from scratch. Simmer 1 cup dry brown rice with 2 cups water, covered, for 40 to 45 minutes, then rest it for 10.
- Cook the onion in oil over medium heat. Give it 4 to 5 minutes until it turns soft and a little glossy.
- Add the turkey and garlic. Break the meat up with a spoon and cook for 6 to 8 minutes until no pink remains.
- Season the filling. Stir in the taco seasoning, salsa, black beans, and corn, then simmer for 3 to 4 minutes until the mixture looks thick and spoonable.
- Taste and adjust. Add a pinch more salt or a squeeze of lime if the flavor feels flat.
- Build the bowls. Divide rice among containers, top with the turkey mixture, and keep avocado, cilantro, and lime separate until serving.
Equipment for This Recipe:
- Large skillet — a 12-inch pan gives the turkey space to brown.
- Medium saucepan with lid — useful if you’re cooking the rice from scratch.
- Wooden spoon or spatula — helps break the turkey into small pieces.
- Storage containers with lids — pick ones that stack neatly in the fridge.
How to Serve This Dish:
Serve the turkey mixture over the rice with avocado, cilantro, and a squeeze of lime right before eating. A spoonful of plain Greek yogurt works well if you want a creamy finish without sour cream. If your family likes crunch, add crushed tortilla chips at the table, not in the prep container.
Pro Tips for This Recipe:
- Let the turkey brown a little before stirring constantly. That browning gives the filling a deeper flavor.
- Use a salsa you’d eat plain. If the salsa tastes dull from the jar, it won’t improve in the pan.
- Keep avocado out of the prep box. It turns brown fast and can make the whole container look tired.
- Add lime after reheating. Acid brightens the bowl much more at the end than before storage.
Variations on This Dish:
- Chicken Taco Bowls: Swap in 1½ lb shredded rotisserie chicken and warm it with the beans, corn, and salsa.
- Cauliflower Rice Version: Replace half the brown rice with cauliflower rice for a lighter bowl that still feels full.
- Spicy Chipotle Batch: Add 1 minced chipotle pepper in adobo for a smokier, hotter filling.
Common Mistakes to Avoid with This Dish:
- Using too much salsa: The filling gets soupy and soaks the rice. Start with ½ cup, then add more only if needed.
- Packing avocado into the container: It browns and softens overnight. Add it fresh.
- Skipping the lime: The bowls taste heavier without an acidic finish.
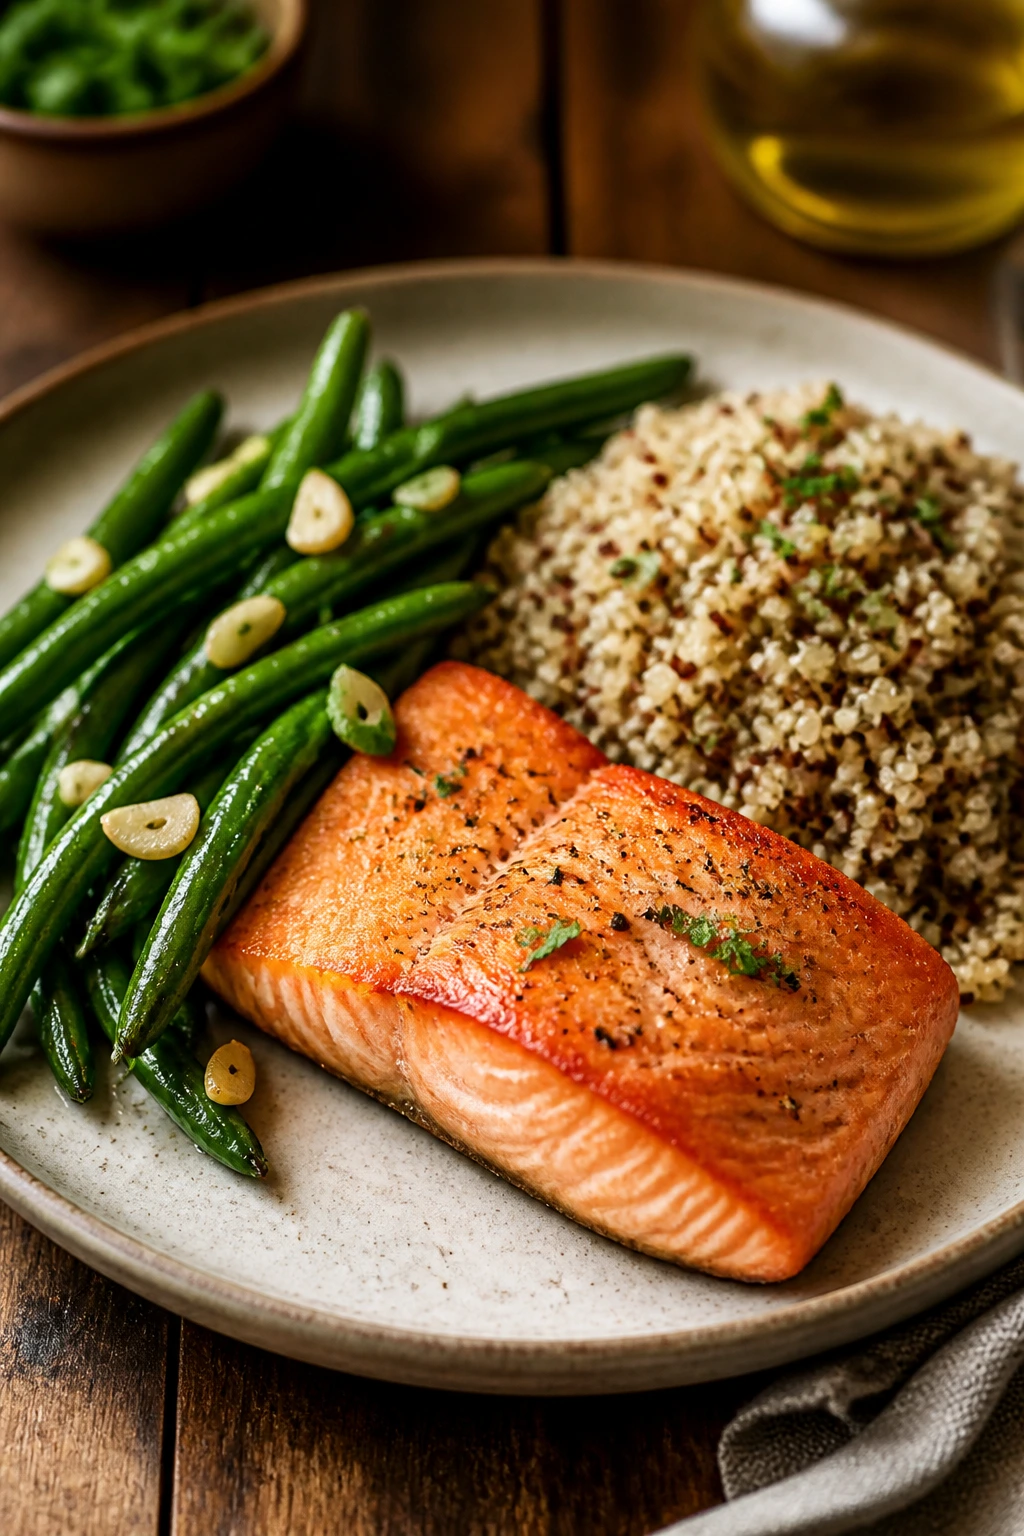
3. Salmon with Garlicky Green Beans and Quinoa
Salmon is the trickiest fish to meal prep because overcooked salmon gets crumbly in a hurry. The way around that is simple: don’t cook it to death, and don’t drown it in sauce. Here, the lemon, dill, and garlic ride on top of the fish while quinoa and green beans handle the bulk of the meal.
Why It Works:
Quinoa gives you a fast-cooking base with a little bite, and green beans stay firm enough to reheat without collapsing. Roasting the beans before the salmon gives the pan some texture and keeps the vegetables from tasting boiled. A thin coat of oil and seasoning on the fish is enough; salmon already brings its own richness. If you cook it just until the flakes separate, the leftovers stay pleasant for two days.
Key Ingredients:
- 4 salmon fillets, about 6 oz each — pick fillets of similar thickness so they finish together.
- 1 cup quinoa, rinsed — rinsing removes the bitter coating on the grains.
- 2 cups water or low-sodium broth — broth adds a little more flavor to the quinoa.
- 1 lb green beans, trimmed — look for beans that snap cleanly instead of bending.
- 2 tablespoons olive oil — used between the beans and the fish.
- 3 cloves garlic, minced — keep some on the beans, some on the fish.
- 1 lemon, zested and cut into wedges — the bright finish matters here.
- 1 teaspoon kosher salt — split between the quinoa, vegetables, and fish.
- ½ teaspoon black pepper — enough to season without making the fish taste peppery.
- 1 teaspoon dried dill or 1 tablespoon fresh dill — a small amount goes a long way with salmon.
- ½ teaspoon paprika — adds color and a faint smoky note.
Quick Steps:
- Cook the quinoa. Combine 1 cup rinsed quinoa with 2 cups water and a pinch of salt, bring to a boil, then cover and simmer for 15 minutes until the liquid is gone. Rest it for 5 minutes, then fluff with a fork.
- Preheat the oven to 400°F. Line a sheet pan with parchment.
- Roast the green beans first. Toss them with 1 tablespoon olive oil, half the garlic, ¼ teaspoon salt, and pepper, then spread them on the pan and roast for 8 minutes.
- Add the salmon. Rub the fillets with the remaining oil, garlic, dill, lemon zest, paprika, and the remaining salt.
- Bake for 10 to 12 minutes. The fish should flake at the thickest part and reach 145°F without drying out.
- Finish and portion. Spoon quinoa into containers, top with green beans and salmon, and add lemon wedges for serving.
Equipment for This Recipe:
- Sheet pan — for roasting the fish and beans together.
- Small saucepan with a lid — for the quinoa.
- Fine-mesh strainer — helpful for rinsing quinoa cleanly.
- Instant-read thermometer — especially useful for salmon, which can go from tender to dry fast.
How to Serve This Dish:
I like this one with a cucumber salad or a handful of cherry tomatoes on the side. It makes a tidy lunch container if you keep the lemon wedges separate and squeeze them only after reheating. A spoonful of plain yogurt mixed with dill also works if you want a cool sauce.
Pro Tips for This Recipe:
- Don’t overcook the salmon “for safety.” Dry fish is the fastest way to make healthy dinner feel like a chore.
- Use fresh lemon at the end. Baked citrus gets muted; the fresh squeeze tastes cleaner.
- Keep quinoa light. Fluff it with a fork and let the steam escape so it doesn’t turn gummy in storage.
- Choose thicker fillets if you can. Thin salmon pieces dry out before the beans are done.
Variations on This Dish:
- Maple-Dijon Salmon: Brush the fillets with 1 tablespoon maple syrup and 1 tablespoon Dijon before baking.
- Herb Butter Finish: Add 1 tablespoon softened butter mixed with dill and lemon zest on top right after the salmon comes out.
- Rice Bowl Swap: Replace quinoa with brown rice if you want a more familiar grain for kids.
Common Mistakes to Avoid with This Dish:
- Cooking the salmon until it looks opaque all the way through before checking temperature: It dries out. Pull it as soon as it flakes and hits 145°F.
- Letting quinoa sit wet in the pot: It turns sticky. Rest it covered, then fluff.
- Adding the lemon too early: The brightness fades after storage. Save the fresh wedge for serving.
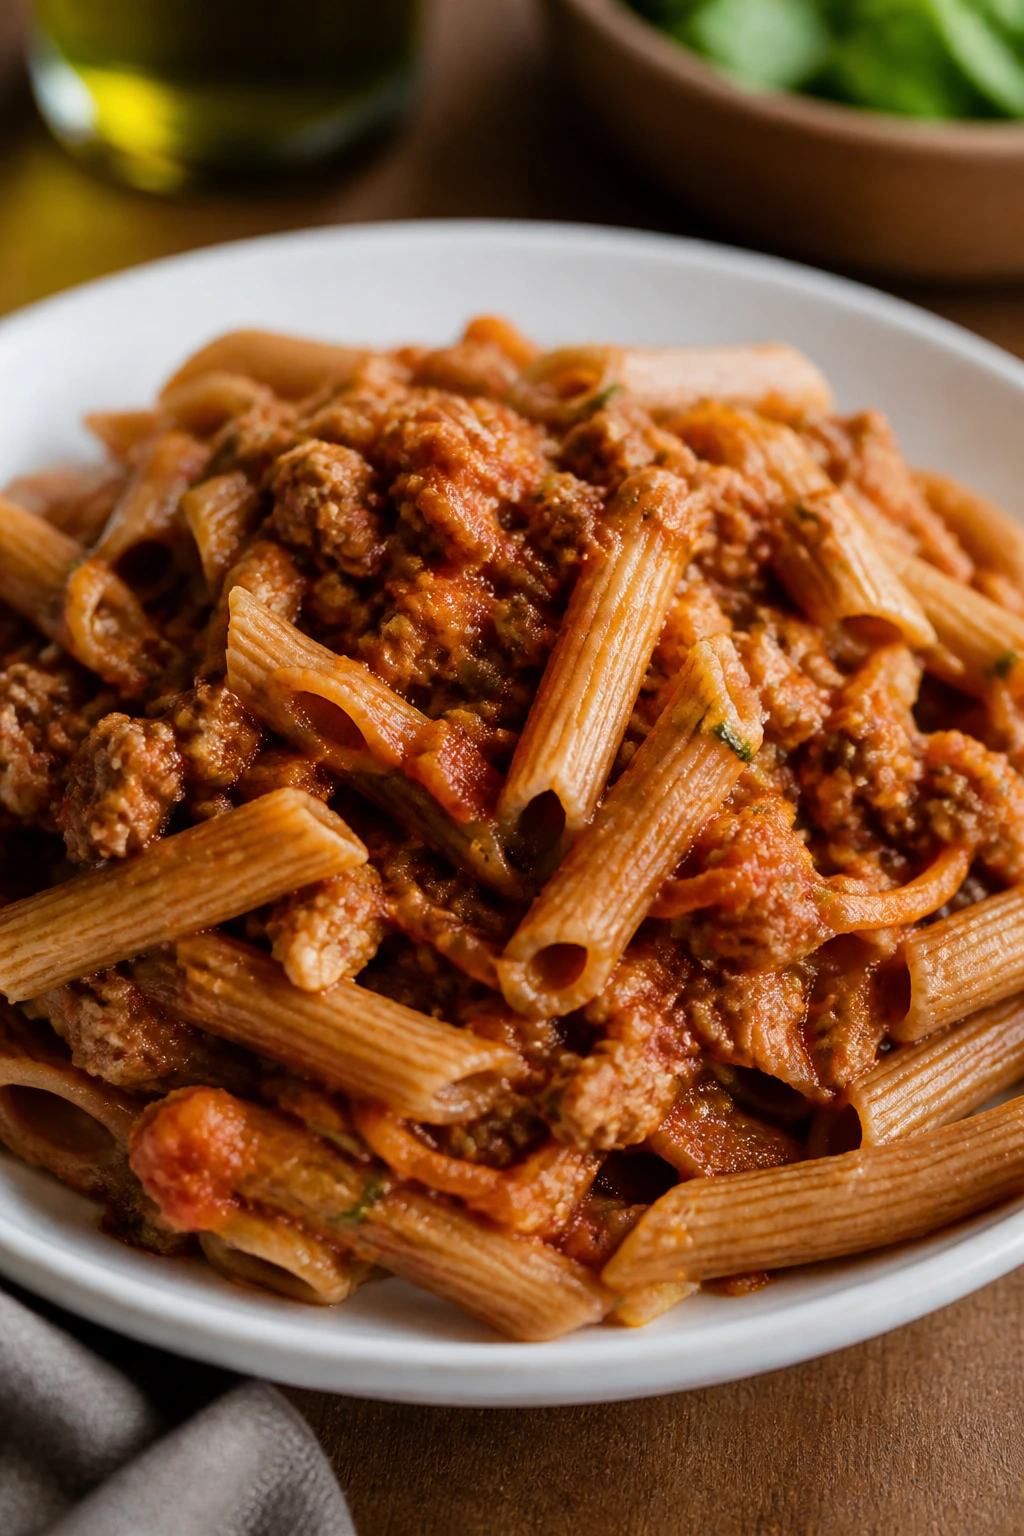
4. Hidden-Veggie Turkey Meat Sauce with Whole-Wheat Pasta
This is the kind of dinner I wish more people made on Sundays. It tastes like a proper meat sauce, but there’s a pile of grated carrot and zucchini in the pan, which quietly sweetens the sauce and gives you more vegetables without asking the kids to sign a waiver. It reheats better than most pasta dishes because the sauce is doing the real work, not the noodles.
Why It Works:
Ground turkey needs help, and the vegetables do that job without turning the sauce into baby food. Tomato paste adds depth, while the marinara keeps everything saucy enough to coat whole-wheat pasta. Grating the carrot and zucchini means they melt into the sauce instead of sitting there like obvious intruders. Keep the pasta and sauce separate for meal prep and the texture stays much better.
Key Ingredients:
- 1½ lb ground turkey — a lean but still flavorful base for the sauce.
- 1 tablespoon olive oil — just enough to soften the onion and vegetables.
- 1 yellow onion, diced — builds the first layer of flavor.
- 2 carrots, grated — they disappear into the sauce and add sweetness.
- 1 zucchini, grated and squeezed dry — removes excess moisture so the sauce doesn’t thin out.
- 3 cloves garlic, minced — adds backbone to the sauce.
- 1 tablespoon tomato paste — deepens the tomato flavor fast.
- 1 jar marinara sauce, 24 oz — choose one with a short ingredient list and no extra sugar if possible.
- ½ cup water or low-sodium broth — loosens the sauce just enough to simmer.
- 12 oz whole-wheat pasta — penne or rotini holds sauce best.
- 1 teaspoon Italian seasoning — parsley, oregano, and basil do the work here.
- ¼ cup grated parmesan, optional — keep it for serving if you want a salty finish.
Quick Steps:
- Cook the pasta in salted water. Boil it until just shy of al dente, about 1 minute less than the package says, then drain.
- Brown the turkey in olive oil over medium-high heat. Cook for 5 to 6 minutes, breaking it up as it loses its pink color.
- Add the onion, carrot, zucchini, and garlic. Cook for another 4 to 5 minutes until the vegetables soften and the zucchini looks less wet.
- Stir in tomato paste and seasoning. Let the paste toast for 30 seconds so it darkens a shade.
- Pour in the marinara and water. Simmer for 10 to 15 minutes until the sauce thickens and coats a spoon.
- Toss with pasta or store separately. If you’re meal prepping, keep the pasta and sauce in separate containers so the noodles don’t drink all the liquid overnight.
Equipment for This Recipe:
- Large skillet or sauté pan — wide enough for the turkey and vegetables.
- Large pot — for the pasta.
- Box grater — the fastest way to hide the vegetables in the sauce.
- Colander — to drain the pasta without breaking it.
How to Serve This Dish:
Serve it with a green salad or steamed broccoli and a little parmesan on top. If you’re packing it for the week, spoon the sauce over the pasta after reheating rather than before; the noodles stay less sticky that way. A slice of toasted whole-grain bread doesn’t hurt either.
Pro Tips for This Recipe:
- Squeeze the zucchini dry. If you skip that step, the sauce goes watery.
- Undercook the pasta by a minute. It finishes in the sauce or the microwave.
- Taste before salting hard. Jarred marinara already carries salt.
- Use a wide pan. Crowding the turkey and vegetables makes them steam instead of brown.
Variations on This Dish:
- Beef-Turkey Blend: Use 1 lb ground turkey and ½ lb lean ground beef for a deeper flavor.
- Protein-Packed Penne: Stir in 1 cup cooked white beans when the sauce simmers.
- Spicy Red Sauce: Add ¼ teaspoon red pepper flakes with the garlic if your family likes a little heat.
Common Mistakes to Avoid with This Dish:
- Adding too much extra water: The sauce slips off the pasta and looks thin. Start with ½ cup and add only if needed.
- Using raw zucchini without squeezing it: The sauce gets loose and watery.
- Cooking the pasta until soft: It turns mushy after reheating. Stop at just under al dente.
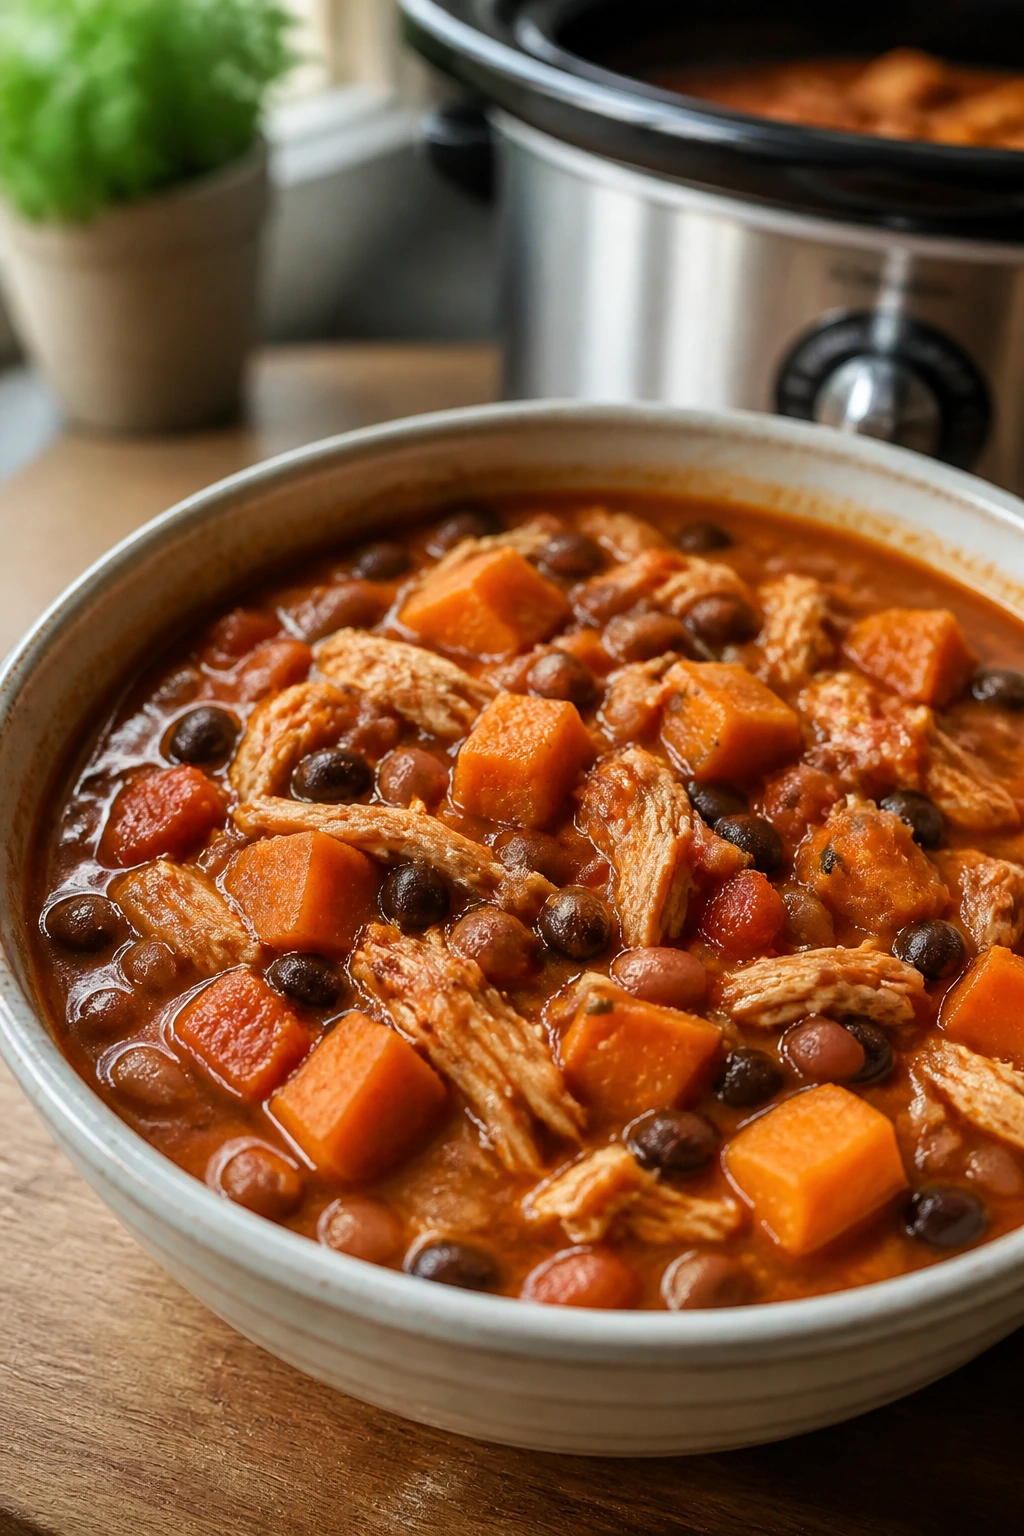
5. Slow Cooker Chicken Chili with Sweet Potato
There’s a reason this kind of chili shows up on my Sunday list over and over. You dump the ingredients in a slow cooker, walk away, and come back to something thick enough to spoon over rice or ladle into a bowl with yogurt and avocado on top. The sweet potato softens just enough to thicken the broth, and the beans make it feel like a complete dinner.
Why It Works:
Slow cooking gives the chicken time to soak up the broth and spices, which is a nice fix for lean poultry that might otherwise dry out. Sweet potato adds body and a faint sweetness that plays well with chili powder and cumin. White beans keep the chili creamy without needing actual cream. It freezes cleanly, and that matters more than people think.
Key Ingredients:
- 2 lb boneless, skinless chicken thighs or breasts — thighs stay juicier, breasts shred a little more neatly.
- 1 large sweet potato, peeled and cut into ¾-inch cubes — small enough to cook through without turning mushy.
- 1 onion, diced — gives the chili a savory base.
- 2 cans white beans, 15 oz each, rinsed and drained — cannellini or great northern both work.
- 1 can diced green chiles, 4 oz — adds mild heat and a little tang.
- 4 cups low-sodium chicken broth — enough liquid to keep the chili spoonable, not soupy.
- 2 teaspoons cumin — the backbone of the spice profile.
- 2 teaspoons chili powder — choose one with a little smokiness.
- 1 teaspoon smoked paprika — adds depth without real heat.
- 2 cloves garlic, minced — a small amount goes far in the slow cooker.
- 1 cup frozen corn — optional, but I like the pop of sweetness.
- 2 tablespoons lime juice — added at the end so the flavor stays sharp.
- ¼ cup chopped cilantro — for serving, not cooking.
Quick Steps:
- Add everything except the lime and cilantro to the slow cooker. Place the chicken, sweet potato, onion, beans, green chiles, broth, spices, garlic, and corn in the insert and stir once.
- Cook on low for 6 to 7 hours or high for 3 to 4 hours. The sweet potato should be tender and the chicken should shred without resistance.
- Shred the chicken. Pull it apart with two forks right in the cooker.
- Stir in the lime juice. Taste the chili and add salt if it needs more edge.
- Serve or cool for storage. The chili thickens as it sits, which is useful, not a problem.
Equipment for This Recipe:
- 6-quart slow cooker — big enough for the full batch without overflow.
- Cutting board and sharp knife — for the sweet potato and onion.
- Two forks — the easiest way to shred the chicken.
- Ladle — useful for filling containers without spilling broth everywhere.
How to Serve This Dish:
I like this over brown rice with a spoonful of Greek yogurt and a little avocado. It also works with a simple cabbage slaw if you want crunch instead of starch. For kids, keep the cilantro on the side and let them add it themselves if they care at all.
Pro Tips for This Recipe:
- Cut the sweet potato small. Big cubes stay hard longer than you want.
- Use thighs if you want richer flavor. Breasts work, but they need more attention if you overcook them.
- Add lime at the end only. The fresh citrus taste disappears if it cooks too long.
- Cool in shallow containers. Chili is thick, which means it takes longer to chill safely if you leave it in one deep pot.
Variations on This Dish:
- Chicken and Pinto Bean Chili: Swap in pinto beans for a softer texture and a slightly creamier finish.
- Extra-Veggie Batch: Stir in diced bell peppers or zucchini during the last hour of cooking.
- Creamy White Chili: Add 4 ounces of cream cheese after shredding the chicken if you want a richer pot.
Common Mistakes to Avoid with This Dish:
- Using sweet potato chunks that are too large: They take forever to soften and can dominate the bowl.
- Adding lime at the start: The citrus vanishes and the chili tastes flatter.
- Skipping the salt check at the end: Broth brands vary a lot; taste before you pack it away.
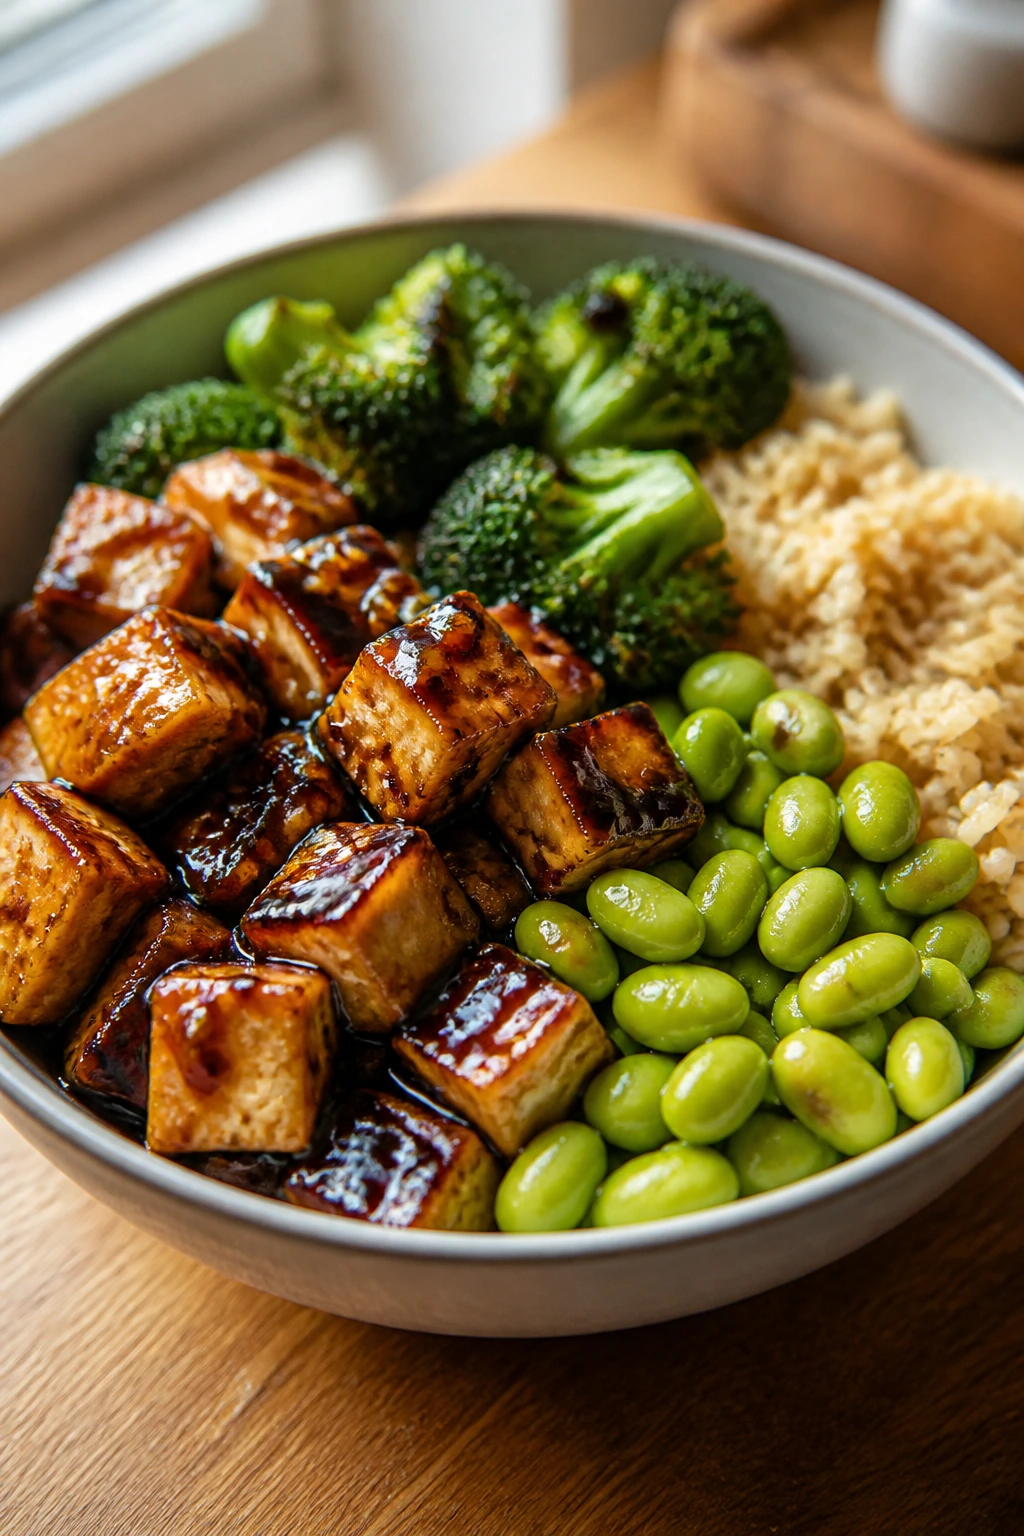
6. Teriyaki Tofu and Edamame Bowls
If you’ve ever tried to meal prep tofu and ended up with soft cubes that taste like the container they were stored in, this one is for you. Pressing the tofu and baking it until the edges go crisp solves most of that problem. Teriyaki, edamame, broccoli, and rice make a bowl that feels complete without a lot of moving parts.
Why It Works:
Extra-firm tofu takes on texture when you press out the moisture and dust it with cornstarch. That crisp shell keeps it from going soggy when you add sauce. Edamame brings protein and a green pop, while broccoli gives the bowl a little bite. Teriyaki works here because it gives the tofu shine and enough sweetness to make the bowl kid-friendly without being sugary.
Key Ingredients:
- 2 blocks extra-firm tofu, 14 oz each, pressed and cubed — the dryer the tofu, the better it browns.
- 2 tablespoons cornstarch — coats the tofu and helps the crust form.
- 2 tablespoons neutral oil — avocado or canola both work.
- 1 cup low-sodium teriyaki sauce — use a sauce that isn’t cloyingly sweet.
- 2 cups shelled edamame, thawed — an easy protein boost.
- 4 cups broccoli florets — sturdy enough to roast and reheat.
- 3 cups cooked brown rice — the bowl base.
- 2 scallions, sliced — for a sharp, fresh finish.
- 2 teaspoons sesame seeds — tiny, but they matter for texture.
- 1 tablespoon rice vinegar — brightens the finished bowl.
Quick Steps:
- Press the tofu for 15 to 20 minutes. Wrap it in a clean towel, set a heavy pan on top, and let the water squeeze out.
- Preheat the oven to 425°F. Line a sheet pan with parchment.
- Toss the tofu with cornstarch, oil, and a pinch of salt. Spread the cubes out in a single layer and bake for 25 to 30 minutes, flipping halfway through, until the edges are golden.
- Roast or steam the broccoli. Toss it with a little oil and roast for 12 to 15 minutes, or steam until bright green and still firm.
- Warm the edamame and sauce the tofu. Toss the hot tofu with teriyaki sauce and the rice vinegar so the cubes shine instead of swimming.
- Build the bowls. Divide the rice, broccoli, tofu, and edamame among containers, then top with scallions and sesame seeds.
Equipment for This Recipe:
- Sheet pan — for baking the tofu.
- Parchment paper — keeps the tofu from sticking.
- Tofu press or clean kitchen towel with a heavy skillet — either works.
- Mixing bowl — for coating the tofu.
- Small saucepan or microwave-safe bowl — for warming the teriyaki if needed.
How to Serve This Dish:
Serve with a few cucumber slices or a quick slaw if you want something cold on the side. A little sriracha at the table helps older eaters; keep it separate if the kids are not fans. The bowl should look neat, not drowned.
Pro Tips for This Recipe:
- Don’t skip the press. Wet tofu steams before it crisps.
- Use parchment, not bare metal. The cubes stick less and brown more evenly.
- Sauce after baking, not before. If the tofu swims in teriyaki too soon, the crust disappears.
- Keep the rice light and fluffy. Dense rice makes the bowl feel heavy even when the other ingredients are fine.
Variations on This Dish:
- Sesame-Ginger Version: Add 1 teaspoon grated ginger to the teriyaki sauce for more lift.
- Chickpea Swap: Replace the tofu with 2 cans of chickpeas, drained and roasted until crisp.
- Spicy Peanut Bowl: Drizzle with a thin peanut-lime sauce instead of teriyaki for a richer flavor.
Common Mistakes to Avoid with This Dish:
- Using soft tofu: It falls apart before it has a chance to brown.
- Saucing the tofu before baking: You lose the crisp edges that make the bowl worth eating.
- Packing the broccoli while it’s still wet: It turns limp in storage. Let it cool first.
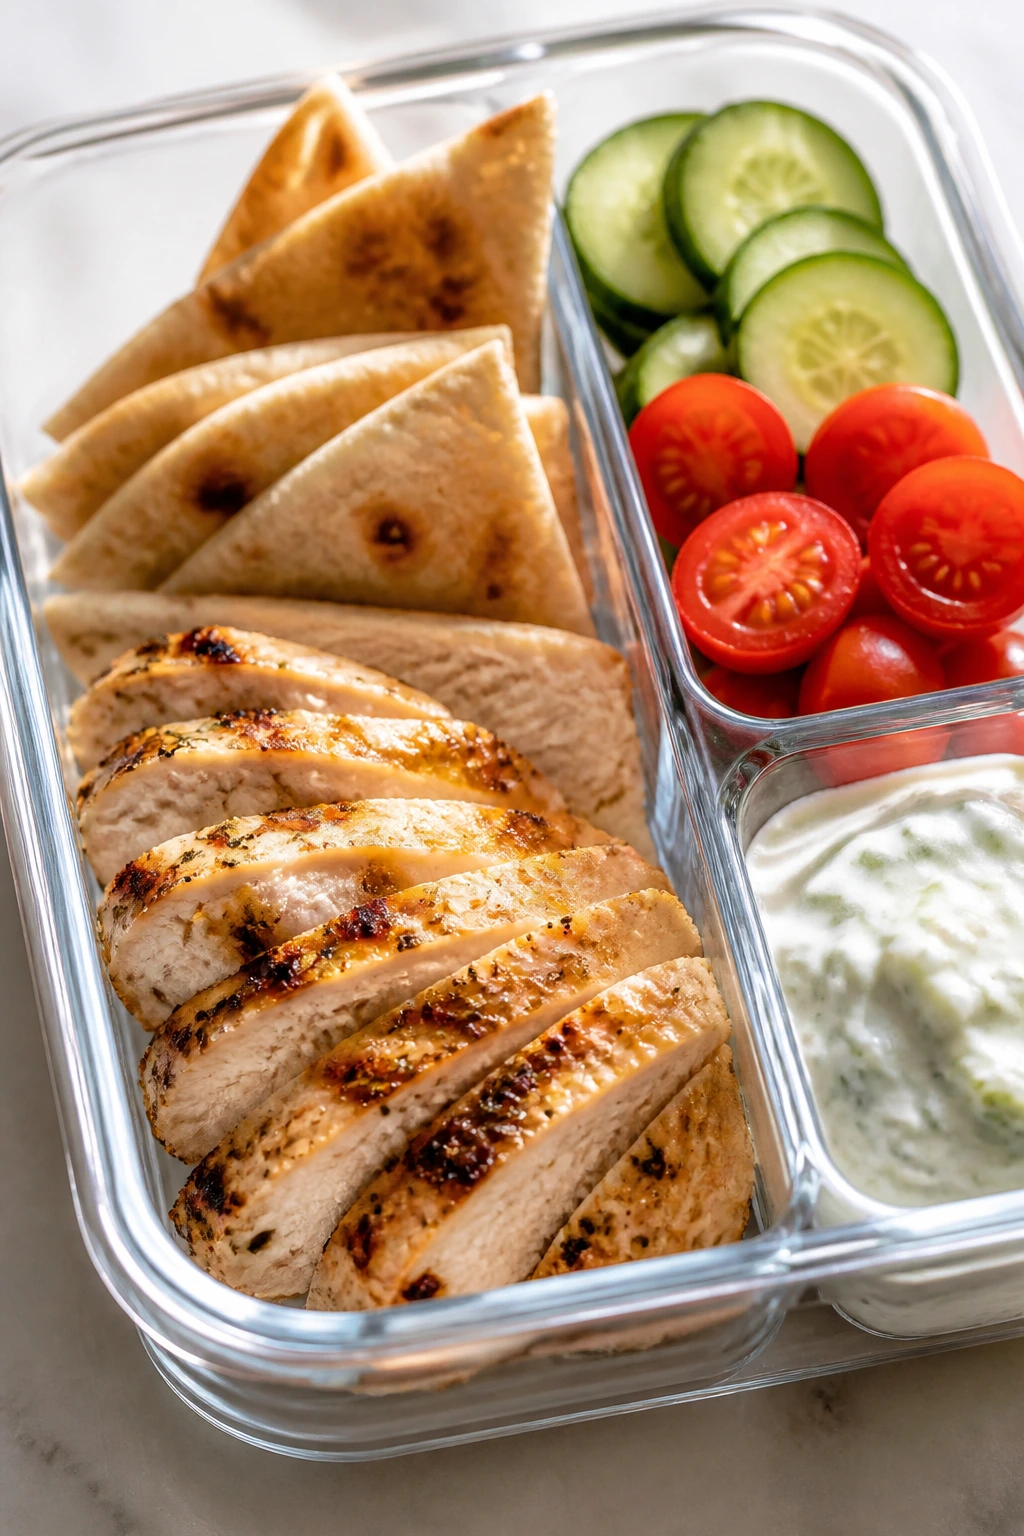
7. Greek Chicken Pita Boxes
This is the lunchbox dinner I wish more people trusted. The chicken gets a yogurt-lemon marinade that keeps it tender, the vegetables stay crisp, and the pita can sit beside everything instead of soaking up all the moisture. It’s the kind of meal that can be eaten cold, warm, or assembled at the table while everyone argues over the feta.
Why It Works:
Greek yogurt in the marinade helps the chicken stay juicy and gives the surface a little tang. Lemon and oregano carry enough flavor that the leftovers don’t need rescue sauce. Cucumbers, tomatoes, and red onion bring freshness, while hummus and tzatziki give you creaminess without building a heavy plate. The “box” format also makes this easy to pack for the week without assembling everything in a way that ruins the bread.
Key Ingredients:
- 2 lb boneless, skinless chicken thighs — more forgiving than breasts and better for reheating.
- ½ cup plain Greek yogurt — the marinade base.
- 2 tablespoons lemon juice — adds brightness and helps tenderize the meat.
- 2 tablespoons olive oil — keeps the marinade loose.
- 2 teaspoons dried oregano — the flavor backbone.
- 3 cloves garlic, minced — sharpens the marinade.
- 1 teaspoon kosher salt — enough to season the chicken through.
- ½ teaspoon black pepper — keeps the flavor balanced.
- 1 English cucumber, diced — cool and crisp.
- 2 cups cherry tomatoes, halved — juicy and sturdy.
- 1 small red onion, thinly sliced — a little bite goes a long way.
- 1 cup hummus — makes the box feel full and helps with moisture.
- 6 whole wheat pitas — keep them separate until serving.
- 1 cup tzatziki or plain yogurt — optional, for spooning over the top.
- ¼ cup crumbled feta — optional, but useful.
Quick Steps:
- Mix the marinade. Stir the yogurt, lemon juice, olive oil, oregano, garlic, salt, and pepper in a bowl.
- Coat the chicken and marinate it. Add the thighs and let them sit for at least 30 minutes or up to overnight.
- Bake the chicken at 425°F for 18 to 22 minutes. It should reach 165°F and look lightly browned at the edges.
- Rest and slice the chicken. Give it 5 minutes before cutting so the juices stay in the meat.
- Prep the vegetables and boxes. Divide cucumber, tomatoes, onion, hummus, and chicken into containers.
- Pack the pita separately. Warm it when serving so it stays soft instead of steamy.
Equipment for This Recipe:
- Mixing bowl — for the marinade.
- Rimmed baking sheet — for the chicken.
- Sharp knife — for the vegetables and sliced chicken.
- Meal-prep containers — ideally ones with separate compartments.
- Instant-read thermometer — keeps the chicken from overcooking.
How to Serve This Dish:
Build the pita at the table so everyone can decide how much hummus, chicken, and feta they want. If you’re packing boxes for the week, keep the pita wrapped separately in foil or a small bag. A simple olive-and-cucumber side works if you want a little extra on the plate.
Pro Tips for This Recipe:
- Marinate the chicken long enough to matter. Thirty minutes helps; overnight is better.
- Don’t pile wet tomatoes onto the pita in advance. The bread softens fast.
- Slice the chicken against the grain. The strips feel less chewy.
- Use thick hummus. Thin hummus slides around and turns the box messy.
Variations on This Dish:
- Chicken Shawarma Version: Swap oregano for 1 teaspoon cumin, 1 teaspoon coriander, and ½ teaspoon cinnamon.
- Falafel Box: Replace the chicken with store-bought or homemade falafel if you want a vegetarian box.
- No-Bread Bowl: Serve everything over chopped romaine or farro instead of pita.
Common Mistakes to Avoid with This Dish:
- Assembling too early: The pita gets soggy and the vegetables lose crunch.
- Overcooking the chicken: Thighs can take it better than breasts, but dry chicken is still dry chicken.
- Skipping the rest after baking: Slicing immediately spills the juices onto the cutting board.
8. Beef and Broccoli with Brown Rice
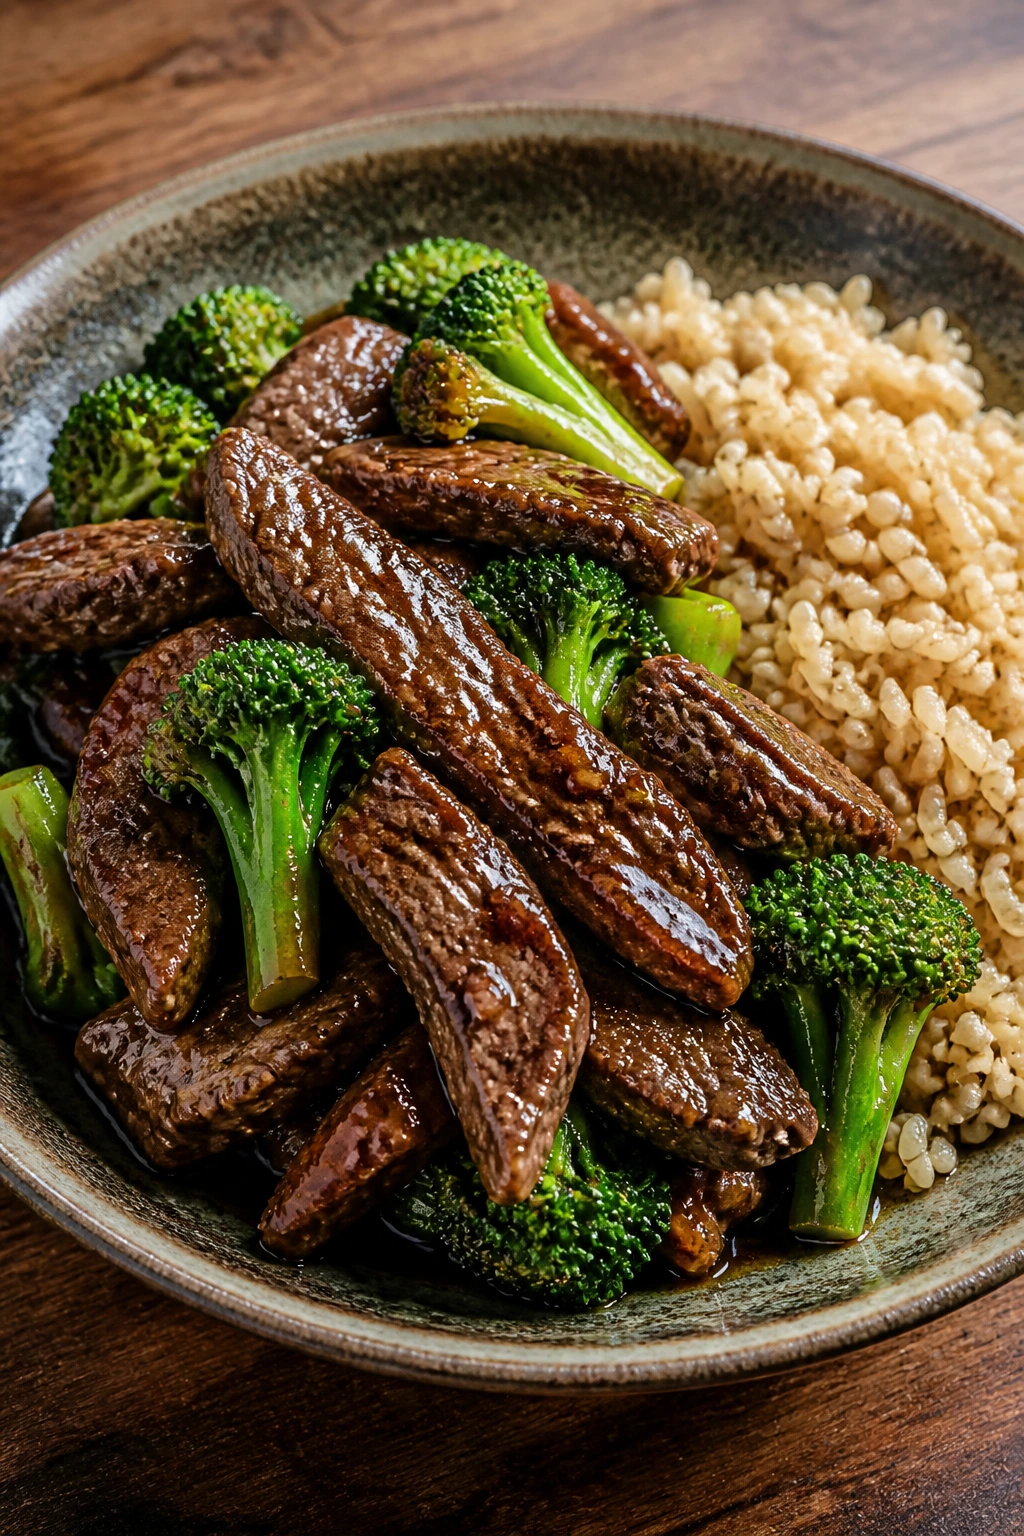
Beef and broccoli can get greasy fast if you treat it like restaurant takeout and not like a real meal-prep dinner. The version I like keeps the sauce light, the broccoli bright, and the steak sliced thin enough that it cooks in minutes instead of turning leathery. It’s still satisfying. It just isn’t trying to knock you over with oil.
Why It Works:
Thinly sliced flank steak gives you a lot of flavor without a lot of cooking time. The quick sauce — soy, honey, vinegar, sesame oil, garlic, and ginger — coats the beef without drowning the broccoli. Steaming or blanching the broccoli for a few minutes first keeps it vivid and less bitter after storage. Brown rice gives the bowl a firm base that doesn’t vanish under the sauce.
Key Ingredients:
- 1½ lb flank steak, thinly sliced against the grain — the cut and the slice matter here.
- 2 tablespoons cornstarch — helps
- 1½ teaspoons kosher salt — enough to season the beef and broccoli without pushing the sauce into soy-bomb territory.
- 3 cups broccoli florets — cut them into bite-size pieces so they stay crisp-tender after reheating.
- 3 cloves garlic, minced — add this to the pan sauce so it perfumes the whole bowl.
- 1 tablespoon fresh ginger, grated — keep the flavor sharp and clean.
- ¼ cup low-sodium soy sauce — the salty backbone of the dish.
- 2 tablespoons water — loosens the sauce before it thickens.
- 1 tablespoon honey — adds enough sweetness to round out the soy without turning the dish sticky.
- 1 tablespoon rice vinegar — gives the sauce a little lift.
- 1 tablespoon cornstarch mixed with 2 tablespoons cold water — thickens the sauce so it clings to the beef instead of pooling at the bottom of the container.
- 3 cups cooked brown rice — the base that makes this into a full family dinner.
Quick Steps:
- Cook the brown rice first. Simmer 1 cup dry brown rice with 2 cups water, covered, for 40 to 45 minutes, then let it rest for 10 minutes and fluff it with a fork.
- Toss the steak with cornstarch and salt. Coat the sliced beef lightly so it browns faster and grabs onto the sauce later.
- Sear the beef in a hot skillet. Use 1 tablespoon oil over medium-high heat and cook the steak in two batches for 1 to 2 minutes per side, just until browned. Do not crowd the pan or the beef will steam.
- Cook the broccoli. Add the broccoli to the same pan with a splash of water, cover for 2 minutes, then uncover and cook until bright green and just tender.
- Build the sauce. Stir in the garlic, ginger, soy sauce, water, honey, and rice vinegar, then add the cornstarch slurry and simmer for 1 minute until glossy.
- Combine and portion. Return the beef to the pan, toss until coated, then spoon over the rice in meal-prep containers.
Equipment for This Recipe:
- Large skillet or wok — a wide pan keeps the beef from steaming.
- Medium saucepan — for the rice.
- Sharp knife — needed for slicing the steak thinly across the grain.
- Measuring spoons and cups — the sauce depends on a balanced ratio.
- Meal-prep containers — shallow ones help the rice cool faster.
How to Serve This Dish:
Serve the beef and broccoli over a mound of rice with a few sesame seeds on top if you like a little crunch. A side of sliced cucumbers or edamame keeps the plate cool and fresh. If you want the dish to feel less lunchbox and more dinner, add a squeeze of lime right before eating.
Pro Tips for This Recipe:
- Partially freeze the steak for 20 minutes before slicing. It’s easier to cut thinly and evenly.
- Use low-sodium soy sauce. Regular soy can flatten the broccoli and make the whole bowl taste too salty after reheating.
- Keep the sauce modest. A thin glaze clings better than a puddle.
- Reheat the rice with a teaspoon of water. It loosens the grains and keeps them from turning hard in the microwave.
Variations on This Dish:
- Sesame-Orange Beef: Add 1 tablespoon orange juice and ½ teaspoon sesame oil for a brighter sauce.
- Chicken Broccoli Bowl: Swap flank steak for boneless chicken thighs sliced thinly.
- Extra-Veggie Stir-Fry: Add sliced bell pepper or snap peas in the last 2 minutes for more color and crunch.
Common Mistakes to Avoid with This Dish:
- Slicing the beef with the grain: The meat turns chewy instead of tender.
- Letting the sauce boil too hard after the cornstarch goes in: It can turn gluey. A gentle simmer is enough.
- Overcooking the broccoli: It should still have some bite after reheating, so stop once it turns bright green.
9. Baked Zucchini Turkey Meatballs with Marinara and Polenta
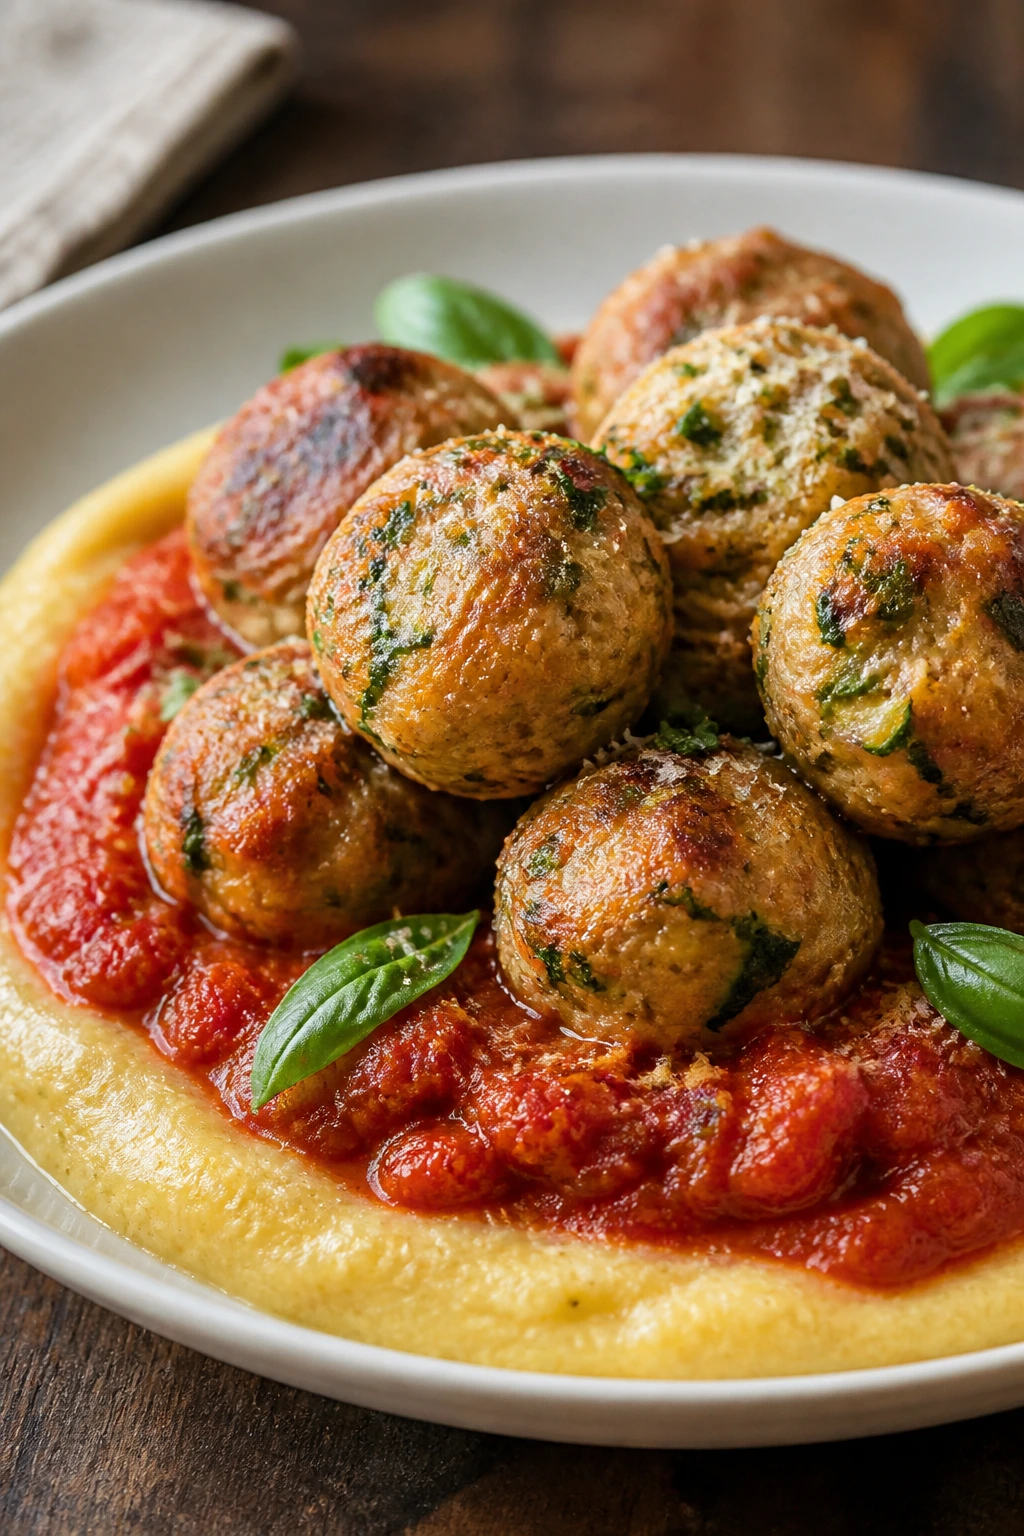
These meatballs are the kind of Sunday prep that makes Tuesday feel less annoying. The grated zucchini disappears into the turkey, which keeps the meatballs soft without making them fragile, and the polenta gives you a creamy base that feels like comfort food with better manners. Marinara does the heavy lifting, but the oven does the browning.
Why It Works:
Turkey meatballs can dry out fast, so the zucchini and egg bring back some moisture. Baking them instead of pan-frying means you can make a full tray without babysitting a skillet. Polenta stores well if you keep it slightly loose, and marinara keeps both the meatballs and the grains from tasting flat after a few days in the fridge. It’s a meal that reheats like it was planned.
Key Ingredients:
- 1½ lb ground turkey — choose a blend with enough fat to stay tender.
- 1 medium zucchini, grated and squeezed dry — keeps the meatballs soft.
- ½ cup breadcrumbs — helps the mixture hold together.
- 1 egg — binds the meatball mix.
- ¼ cup grated parmesan — adds salt and a little sharpness.
- 2 cloves garlic, minced — gives the meatballs more depth.
- 1 teaspoon dried Italian seasoning — oregano, basil, and thyme all work here.
- 1 jar marinara sauce, 24 oz — use one you’d happily eat on its own.
- 1 cup dry polenta — the base for serving.
- 4 cups water or broth — for cooking the polenta.
- 1 tablespoon butter or olive oil — makes the polenta smooth.
- ½ teaspoon salt — enough to season the polenta without overpowering the sauce.
Quick Steps:
- Preheat the oven to 425°F. Line a baking sheet with parchment.
- Mix the meatball mixture. Combine turkey, zucchini, breadcrumbs, egg, parmesan, garlic, Italian seasoning, and a pinch of salt until just mixed.
- Shape the meatballs. Roll into 1½-inch balls and place them on the baking sheet with a little space between each one.
- Bake for 15 to 18 minutes. They should reach 165°F and feel firm but not dry.
- Warm the marinara. Simmer it in a saucepan while the meatballs bake so everything is hot at the same time.
- Cook the polenta. Whisk polenta into simmering water or broth, cook for 20 to 25 minutes, then stir in butter and salt until smooth and creamy.
- Assemble. Spoon polenta into containers, top with meatballs and marinara, and finish with a little parmesan if you want.
Equipment for This Recipe:
- Rimmed baking sheet — keeps the meatballs contained.
- Parchment paper — prevents sticking and simplifies cleanup.
- Large mixing bowl — for the meatball mixture.
- Medium saucepan — for the marinara and polenta.
- Whisk — essential for lump-free polenta.
How to Serve This Dish:
Spoon the meatballs over the polenta with a little extra sauce so the base stays creamy. A green salad or roasted green beans makes a good side if you’re serving it fresh rather than packing it away. The bowl should look saucy, not dry.
Pro Tips for This Recipe:
- Squeeze the zucchini hard. Too much water makes the meatballs loose.
- Do not overmix the turkey. A quick hand mix keeps the texture light.
- Keep the polenta loose for meal prep. It thickens as it cools, so start a little softer than you think you need.
- Cool meatballs on the tray for 5 minutes. They firm up and stop losing juices.
Variations on This Dish:
- Spinach Turkey Meatballs: Fold in 1 cup finely chopped spinach with the zucchini.
- Spicy Arrabbiata Version: Use a spicy marinara or add red pepper flakes to the sauce.
- Dairy-Free Bowl: Skip the parmesan and finish with nutritional yeast if you want a savory edge.
Common Mistakes to Avoid with This Dish:
- Using wet zucchini: The meatballs fall apart or bake up spongy.
- Making the polenta too thick: It turns into a brick after refrigeration.
- Baking until the tops are deeply dark: Turkey dries out fast; stop when the center reaches 165°F.
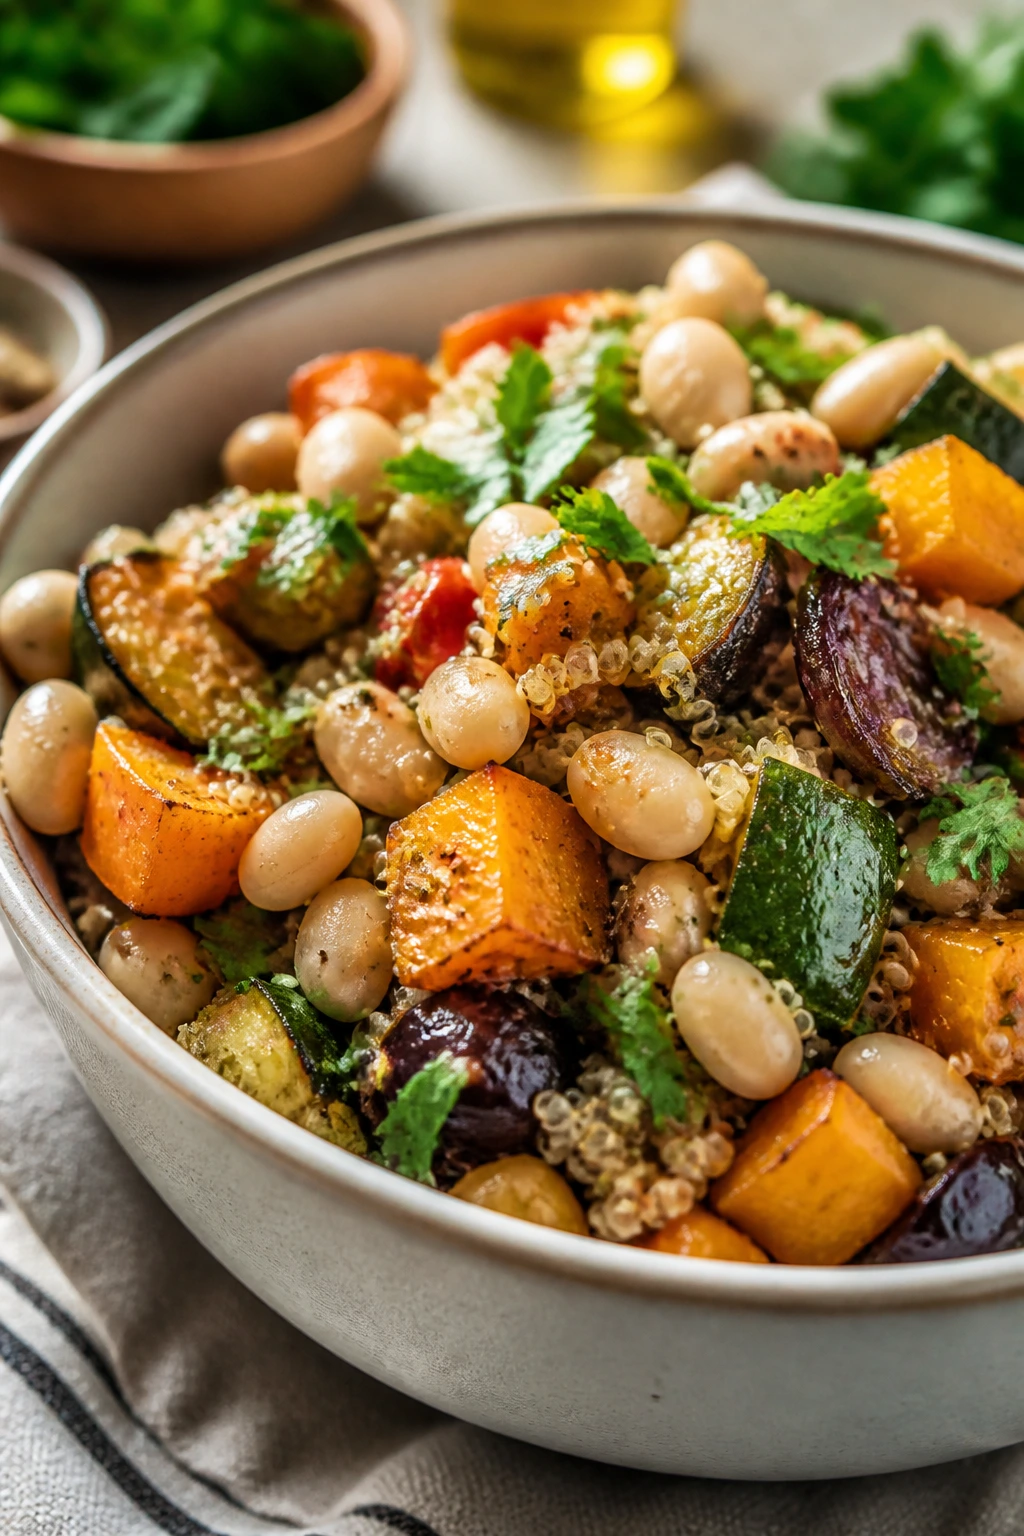
10. Chickpea Coconut Curry with Spinach and Rice
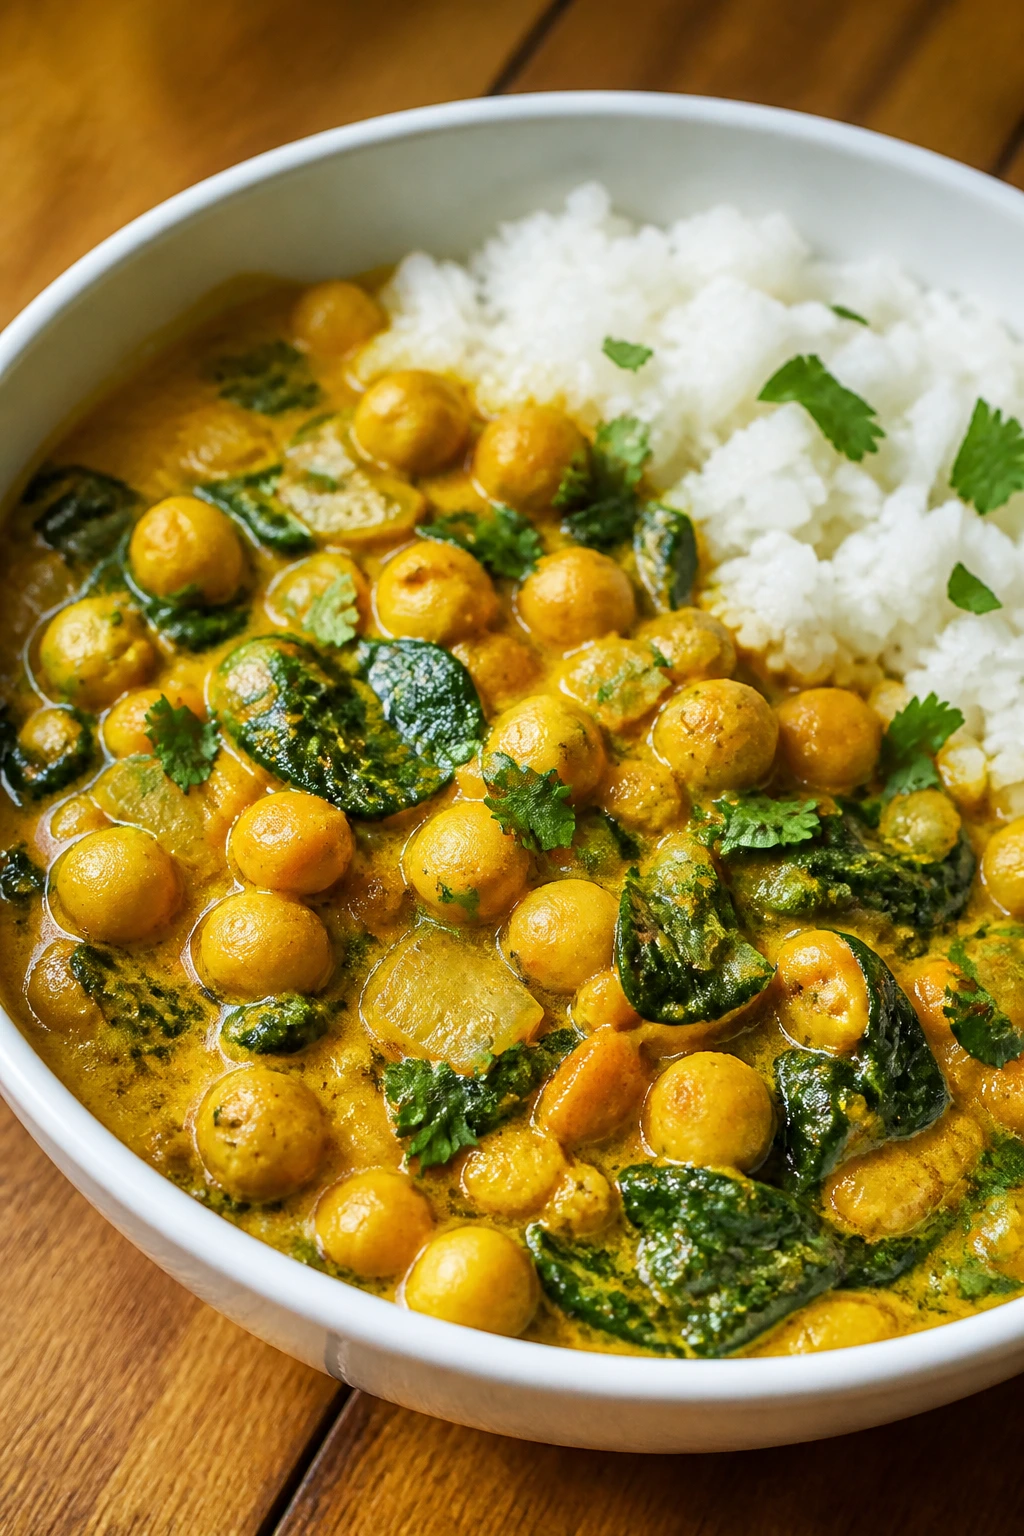
This is the dinner I keep on hand when the week looks chaotic and someone still needs to eat like a human. Chickpeas bring bulk, coconut milk brings silkiness, and spinach melts into the curry at the end so you get greens without a lot of fuss. The sauce tastes even better the next day, which is the whole point of Sunday prep.
Why It Works:
Chickpeas hold their shape and don’t go mushy in the fridge. Coconut milk gives the curry body without dairy, and curry paste or powder layers the flavor without a long ingredient list. Spinach wilts fast and disappears into the sauce, so you’re not left with stringy greens after reheating. Serve it with rice and it becomes a real meal, not a side dish wearing a scarf.
Key Ingredients:
- 2 tablespoons oil — for the onion and spices.
- 1 yellow onion, diced — builds the base of the curry.
- 3 cloves garlic, minced — sharpens the flavor.
- 1 tablespoon fresh ginger, grated — gives the sauce warmth.
- 2 tablespoons curry paste or 2 teaspoons curry powder — use what you have and taste as you go.
- 2 cans chickpeas, 15 oz each, rinsed and drained — the main protein and bulk.
- 1 can coconut milk, 13.5 oz — makes the sauce creamy.
- 1 cup diced tomatoes or crushed tomatoes — adds acidity and body.
- 3 cups baby spinach — wilts down quickly.
- 1 teaspoon salt — adjust after simmering.
- 3 cups cooked basmati or brown rice — the starch that carries the sauce.
- 1 tablespoon lime juice — for the end.
Quick Steps:
- Cook the rice first. Make enough for the whole batch and let it cool slightly before packing.
- Sauté the onion in oil over medium heat. Cook for 5 to 6 minutes until soft and translucent.
- Stir in garlic, ginger, and curry paste. Cook for 30 seconds until fragrant.
- Add chickpeas, coconut milk, and tomatoes. Simmer for 10 to 12 minutes until the sauce thickens slightly.
- Wilt in the spinach. Stir until the leaves collapse and turn dark green.
- Finish with salt and lime juice. Taste before packing; the curry should be savory with a little brightness.
Equipment for This Recipe:
- Large saucepan or Dutch oven — enough room for the sauce and chickpeas.
- Wooden spoon — useful for stirring without smashing the beans.
- Measuring cups and spoons — the curry paste and coconut milk need balance.
- Meal-prep containers — rice on one side, curry on the other if you like.
How to Serve This Dish:
Serve the curry over rice with a spoonful of yogurt or a sprinkle of chopped cilantro if your family likes it. Naan or flatbread works too, though I usually keep the bread for nights when I want a little extra. It’s also fine in a bowl on its own if the sauce is thick enough.
Pro Tips for This Recipe:
- Let the onion soften fully. Raw onion makes the curry taste harsh after storage.
- Taste the curry paste first. Some brands are far saltier and hotter than others.
- Add spinach at the very end. If it cooks too long, it turns dull and muddy.
- Cook the sauce a little thicker than you think. It loosens slightly when reheated.
Variations on This Dish:
- Red Lentil Coconut Curry: Swap in 1 cup red lentils and add 1 extra cup water.
- Sweet Potato Chickpea Curry: Stir in cubed sweet potato and simmer until tender.
- Mild Family Version: Use curry powder instead of paste for gentler spice.
Common Mistakes to Avoid with This Dish:
- Boiling the coconut milk hard: It can split. Keep the simmer gentle.
- Skipping the lime: The curry tastes heavier without a bright finish.
- Using too much liquid: The sauce should coat the chickpeas, not drown them.
11. Chicken Fajita Quinoa Bowls
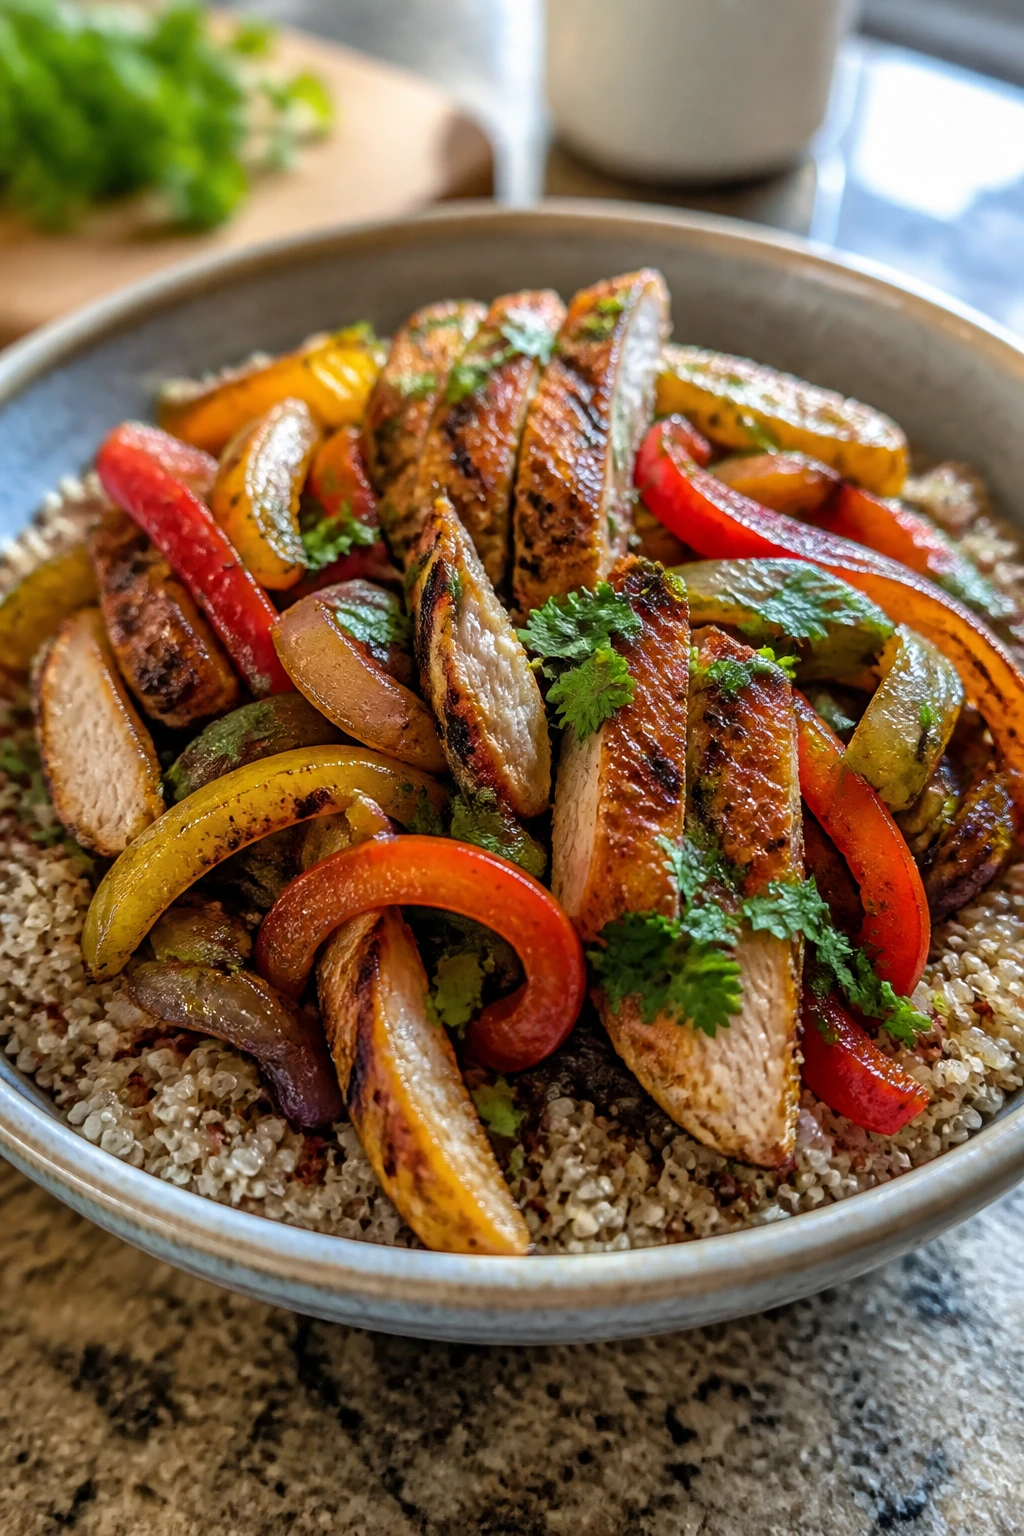
These bowls are built for Sunday prep because every part holds up on its own. The chicken stays juicy, the peppers and onions keep some texture, and quinoa doesn’t turn to glue if you cool it properly. Salsa or a quick lime-yogurt sauce on the side keeps the bowl from tasting dry by day three.
Why It Works:
Chicken thighs take the fajita spices better than breasts, though breasts still work if you watch them closely. Bell peppers and onions roast or sauté quickly and bring enough sweetness to balance the spice. Quinoa gives you a protein-rich base that reheats better than a lot of grains if you fluff it after cooking. This is one of those meals that can be eaten warm, room temp, or straight from the fridge and still feel coherent.
Key Ingredients:
- 2 lb boneless, skinless chicken thighs — cut into strips for quick cooking.
- 2 bell peppers, sliced — use different colors if you want a little brightness.
- 1 large red onion, sliced — adds sweetness and bite.
- 2 tablespoons olive oil — for the chicken and vegetables.
- 2 teaspoons chili powder — the main seasoning.
- 1 teaspoon cumin — gives the fajita flavor its dusty warmth.
- 1 teaspoon garlic powder — helps the chicken taste seasoned all the way through.
- 1 teaspoon salt — divide it between the chicken and vegetables.
- 1 cup quinoa, rinsed — the bowl base.
- 2 cups water or broth — for cooking the quinoa.
- 1 can black beans, rinsed and drained — adds substance and fiber.
- 1 lime, cut into wedges — for serving.
- ½ cup salsa or Greek yogurt — optional topping.
Quick Steps:
- Cook the quinoa. Simmer rinsed quinoa with water or broth for 15 minutes, then rest and fluff.
- Season the chicken. Toss the strips with oil, chili powder, cumin, garlic powder, and salt.
- Cook the chicken in a hot skillet. Give it 4 to 6 minutes, turning once, until cooked through and lightly browned.
- Sauté the peppers and onions. Use the same skillet so they pick up the browned bits, and cook until the onions soften and the peppers still have a little snap.
- Warm the beans. Stir them into the skillet for the last minute or heat them separately if you want cleaner layers.
- Assemble the bowls. Pack quinoa, chicken, vegetables, and beans into containers, then add lime wedges and salsa on the side.
Equipment for This Recipe:
- Large skillet — for the chicken and vegetables.
- Medium saucepan with a lid — for the quinoa.
- Sharp knife and cutting board — for the peppers, onion, and chicken.
- Storage containers — helpful if you want separate sections.
How to Serve This Dish:
Top the bowls with avocado, cilantro, or a little shredded cheese if you want more richness. They’re sturdy enough to eat warm or cold, which makes them useful for lunches as well as dinner. If you’re serving them fresh, add the lime at the table so the flavors pop.
Pro Tips for This Recipe:
- Cut the chicken into even strips. Uneven pieces cook unevenly and dry out.
- Don’t overcook the peppers. They should still bend, not collapse.
- Use broth for the quinoa if you want more flavor. Water works, but broth gives the grains more life.
- Keep the salsa separate. It helps the bowls stay neat until serving time.
Variations on This Dish:
- Steak Fajita Bowls: Swap chicken for flank steak sliced thinly across the grain.
- Veggie-Only Version: Use portobello strips or extra black beans instead of chicken.
- Cauliflower Rice Bowl: Replace half the quinoa if you want a lighter base.
Common Mistakes to Avoid with This Dish:
- Packing hot quinoa into containers: It traps steam and turns gummy. Let it cool a little first.
- Underseasoning the vegetables: The peppers and onions need salt or they taste like filler.
- Letting the chicken overcook: Thighs forgive more than breasts, but dry fajita chicken is still dry chicken.
12. Lentil Shepherd’s Pie with Cauliflower Mash
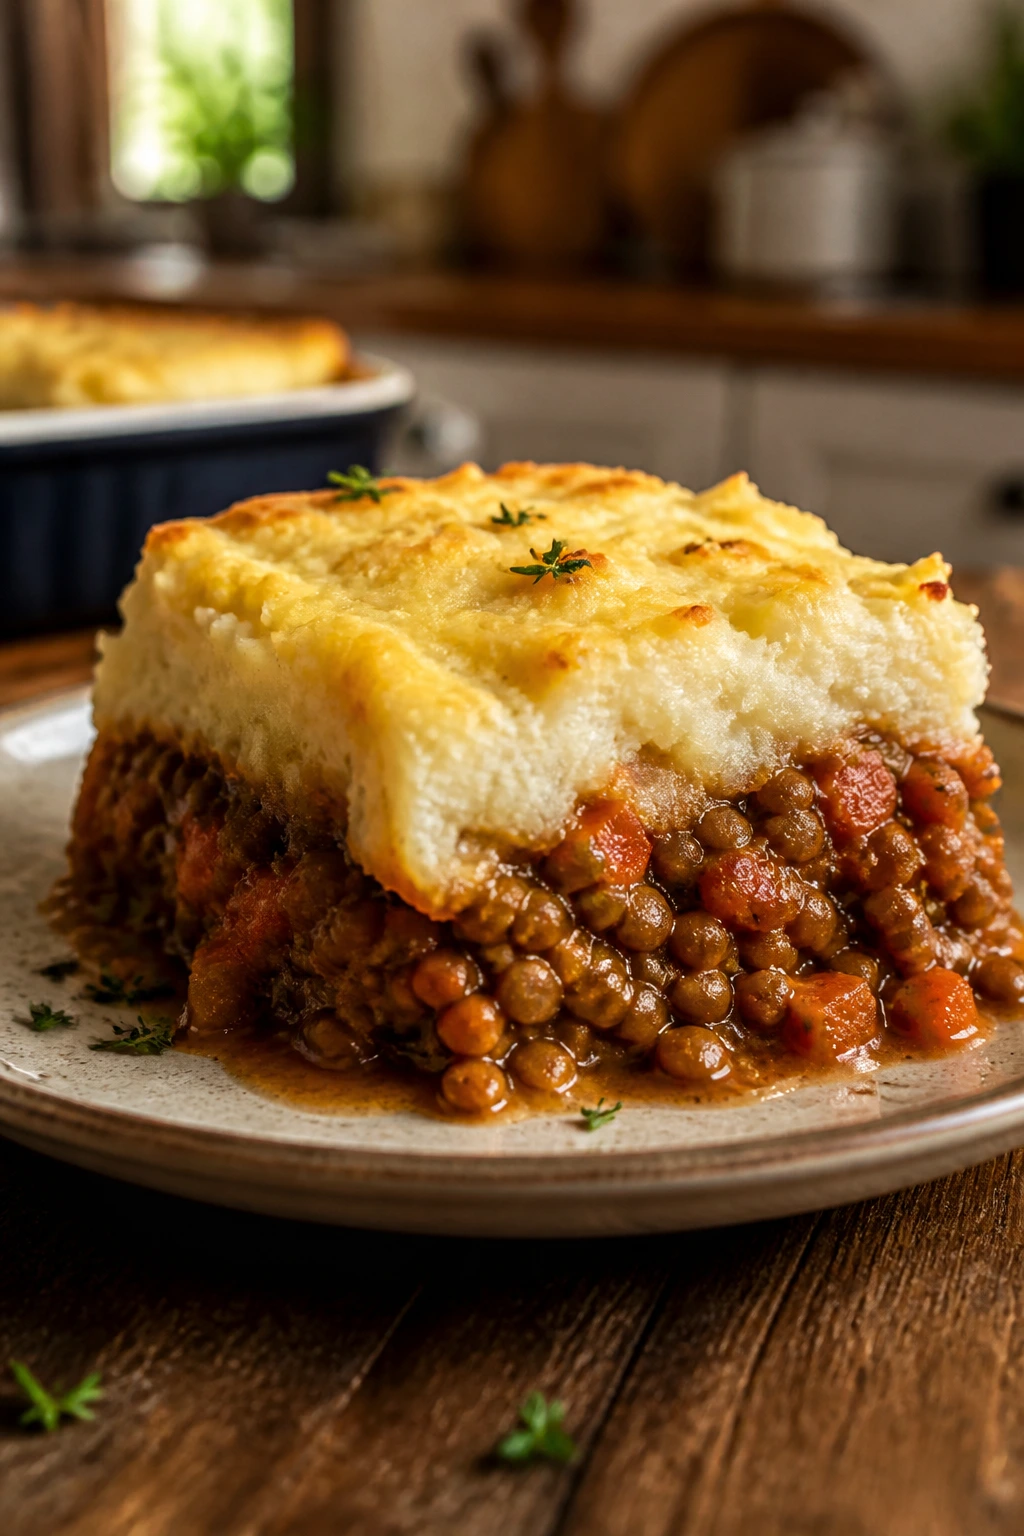
This is the comfort-food dinner that still behaves itself on the plate. Lentils stand in for the usual meat filling, and cauliflower mash covers the top with a soft, buttery feel without burying the whole dish under potatoes. It reheats well because the filling is saucy and the mash is thick enough to sit on top without sliding around.
Why It Works:
Brown or green lentils hold their shape and bring a meaty texture without needing a long simmer. Carrots, celery, onions, and tomato paste make the filling taste deep instead of “vegetarian in a hurry.” Cauliflower mash keeps the top lighter, and if you mix in a little potato or parmesan, it gets even better without losing its clean finish. The dish freezes in portions better than most casseroles.
Key Ingredients:
- 1½ cups brown or green lentils, rinsed — they keep some bite after cooking.
- 1 tablespoon olive oil — for the vegetables.
- 1 onion, diced — the first layer of flavor.
- 2 carrots, diced — add sweetness and color.
- 2 celery stalks, diced — gives the filling a savory base.
- 2 cloves garlic, minced — adds depth.
- 2 tablespoons tomato paste — makes the lentils taste richer.
- 3 cups vegetable broth — enough liquid to cook the lentils and form a saucy filling.
- 1 teaspoon thyme — classic shepherd’s pie flavor.
- 1 cup frozen peas — stirred in at the end.
- 1 large head cauliflower, cut into florets — the mash base.
- 2 tablespoons butter or olive oil — for the mash.
- 2 tablespoons milk or unsweetened non-dairy milk — loosens the mash.
- ½ teaspoon salt and ¼ teaspoon pepper — for seasoning both layers.
Quick Steps:
- Cook the cauliflower. Steam or boil the florets until tender, about 10 to 12 minutes.
- Make the lentil filling. Sauté onion, carrots, and celery in olive oil for 6 to 8 minutes, then add garlic and tomato paste and cook for 30 seconds.
- Simmer the lentils. Add lentils, broth, thyme, salt, and pepper, then cook for 20 to 25 minutes until tender and most of the liquid is absorbed.
- Stir in the peas. Add them near the end so they keep their color.
- Mash the cauliflower. Blend or mash it with butter, milk, salt, and pepper until smooth but not watery.
- Assemble and bake. Spoon the lentil filling into a baking dish, spread the mash on top, and bake at 400°F for 15 to 20 minutes until the top firms up a little.
Equipment for This Recipe:
- Large saucepan or Dutch oven — for the filling.
- Pot with steamer basket or saucepan — for the cauliflower.
- Potato masher or food processor — either works for the mash.
- Baking dish — for the final bake.
How to Serve This Dish:
Serve it with a crisp green salad or a handful of roasted green beans. The filling should be thick enough to scoop without sloshing, and the top should hold a spoon mark. If you want a little extra richness, add chopped chives before serving.
Pro Tips for This Recipe:
- Cook the lentils until tender but not split apart. Mushy lentils turn the filling muddy.
- Drain the cauliflower well. Extra water makes the mash slide.
- Make the filling a bit saucy. It thickens after chilling.
- Let the pie rest before portioning. Ten minutes helps it set.
Variations on This Dish:
- Potato-Cauliflower Top: Use half potato and half cauliflower for a more traditional mash.
- Mushroom Lentil Filling: Add 8 oz chopped mushrooms with the carrots for extra savory flavor.
- Dairy-Free Version: Use olive oil and unsweetened oat milk in the mash.
Common Mistakes to Avoid with This Dish:
- Making the mash too thin: It slips into the filling. Keep it thick.
- Undercooking the lentils: They stay gritty and don’t soften in the oven.
- Skipping the rest time: The pie falls apart if you scoop it straight from the oven.
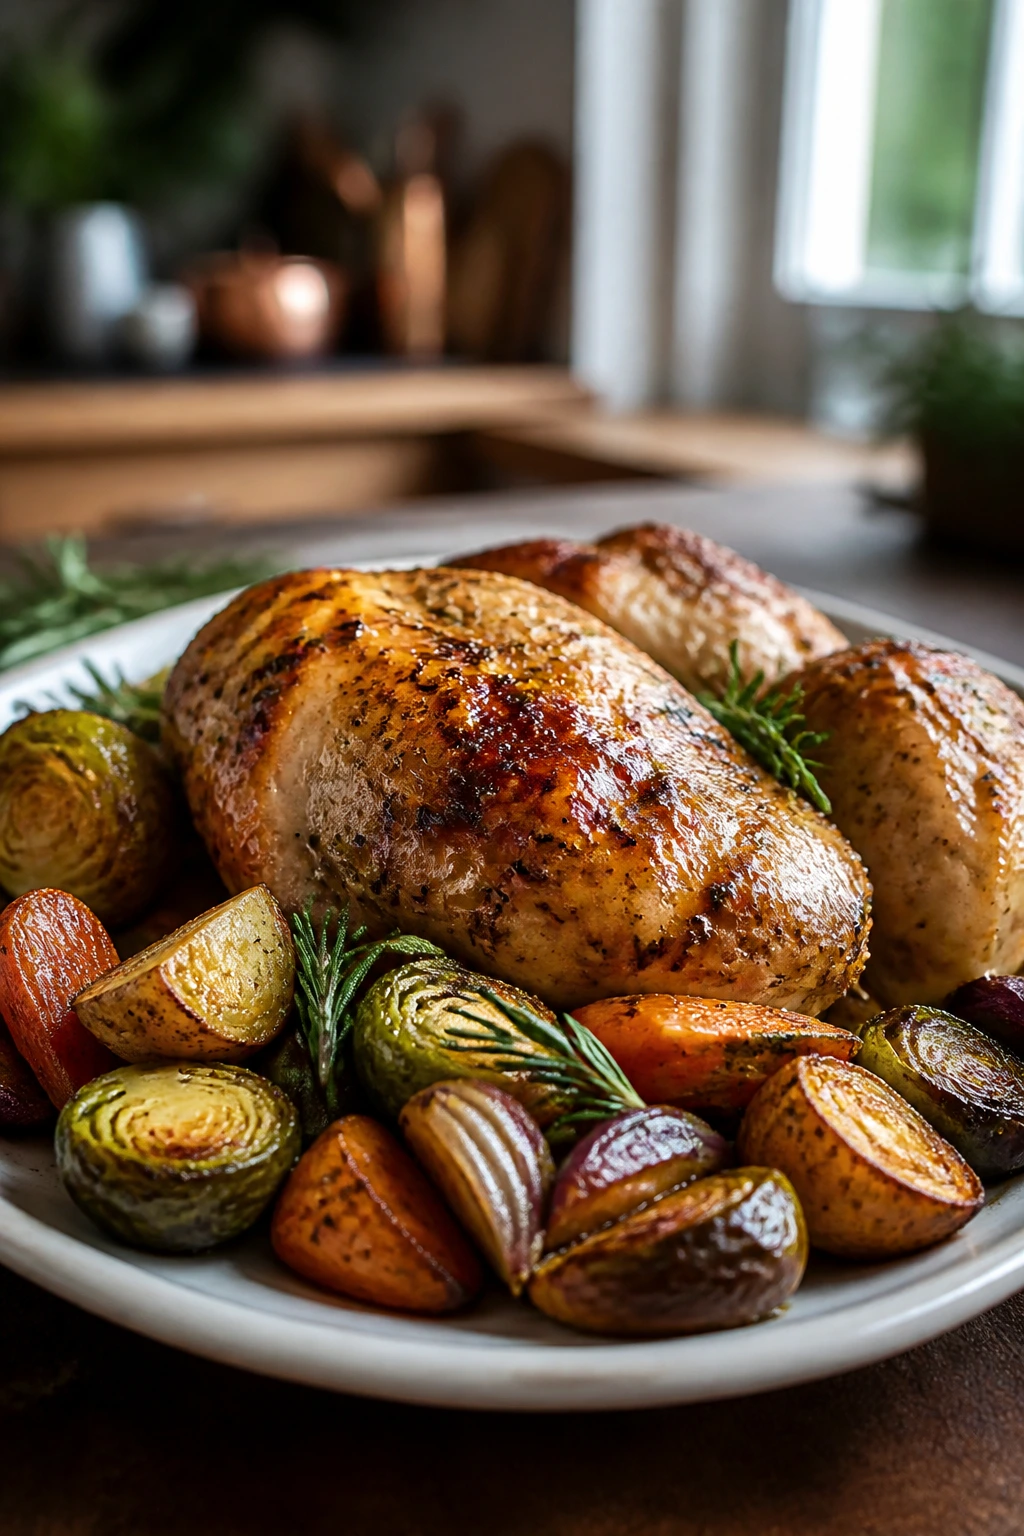
13. Sheet Pan Pork Tenderloin with Apples and Brussels Sprouts
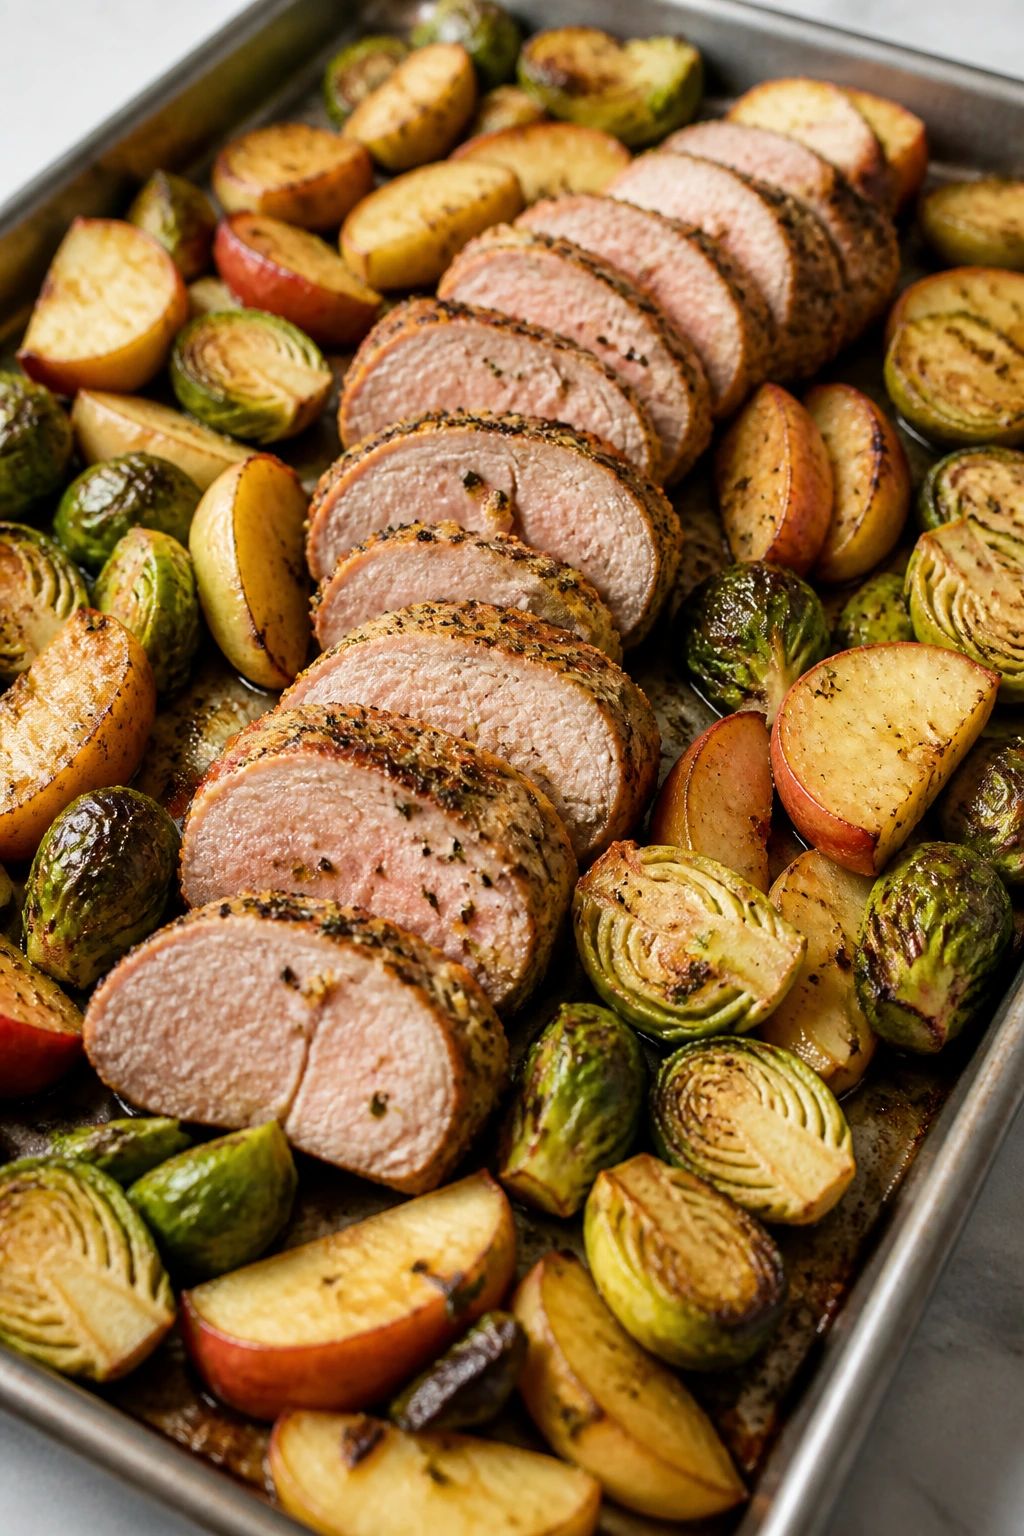
Pork tenderloin is one of those cuts people overcomplicate. Keep the seasoning simple, roast it with apples and Brussels sprouts, and it turns into a tidy dinner that tastes like you worked harder than you did. The apples soften at the edges, the sprouts get browned, and the pork stays tender if you pull it at the right moment.
Why It Works:
Pork tenderloin cooks quickly, so it’s ideal for a sheet pan meal prep batch. Brussels sprouts can handle high heat and hold texture after a few days in the fridge. Apples add a little sweetness and moisture that keeps the pan from tasting too earthy. Mustard and thyme tie everything together with very little effort.
Key Ingredients:
- 2 pork tenderloins, about 1 to 1¼ lb each — similar size helps them cook evenly.
- 1½ lb Brussels sprouts, trimmed and halved — cut larger sprouts in quarters.
- 2 apples, cored and sliced into wedges — firm varieties hold up best.
- 3 tablespoons olive oil — for the pan and the seasoning.
- 2 tablespoons Dijon mustard — coats the pork and adds tang.
- 1 teaspoon dried thyme — a little goes far.
- 1 teaspoon kosher salt — enough to season the meat and vegetables.
- ½ teaspoon black pepper — for the pork.
- 1 tablespoon apple cider vinegar — stirred into the pan juices at the end.
Quick Steps:
- Preheat the oven to 425°F. Line a large sheet pan with parchment.
- Season the pork. Rub it with 1 tablespoon olive oil, Dijon mustard, thyme, salt, and pepper.
- Toss the Brussels sprouts and apples. Use the remaining oil and a pinch of salt, then spread them around the pan.
- Roast for 18 to 22 minutes. Stir the vegetables once halfway through and check the pork with a thermometer.
- Pull the pork at 145°F. Rest it for 5 to 10 minutes before slicing.
- Finish the pan juices. Stir the vinegar into the juices and spoon them over the sliced pork and vegetables.
Equipment for This Recipe:
- Rimmed sheet pan — enough room for the pork and vegetables.
- Parchment paper — simplifies cleanup.
- Sharp knife — for slicing the pork after resting.
- Instant-read thermometer — the fastest way to avoid dry pork.
How to Serve This Dish:
Slice the pork and pack it with a scoop of Brussels sprouts and apples in each container. A spoonful of the pan juices over the top keeps the reheated meal from tasting dry. If you want a starch, roasted sweet potato wedges fit neatly beside it.
Pro Tips for This Recipe:
- Choose tenderloins of similar thickness. One skinny piece can overcook before the other is done.
- Don’t slice the pork too soon. The juices need time to settle.
- Use firm apples. Soft apples melt into the pan.
- Roast the sprouts cut-side down when possible. They brown better that way.
Variations on This Dish:
- Balsamic Pork Version: Swap apple cider vinegar for balsamic at the finish.
- Carrot Add-In: Toss in thick carrot coins if you want more vegetables on the pan.
- Sage Finish: Add a few chopped sage leaves for a deeper fall-style flavor.
Common Mistakes to Avoid with This Dish:
- Cooking pork until it’s totally white and firm: That’s usually too far. Pull it at 145°F.
- Using too many apples: The pan gets soft and watery.
- Packing while hot: The sprouts steam and lose their browned edges.
14. Veggie-Packed Egg Fried Rice with Edamame and Carrots
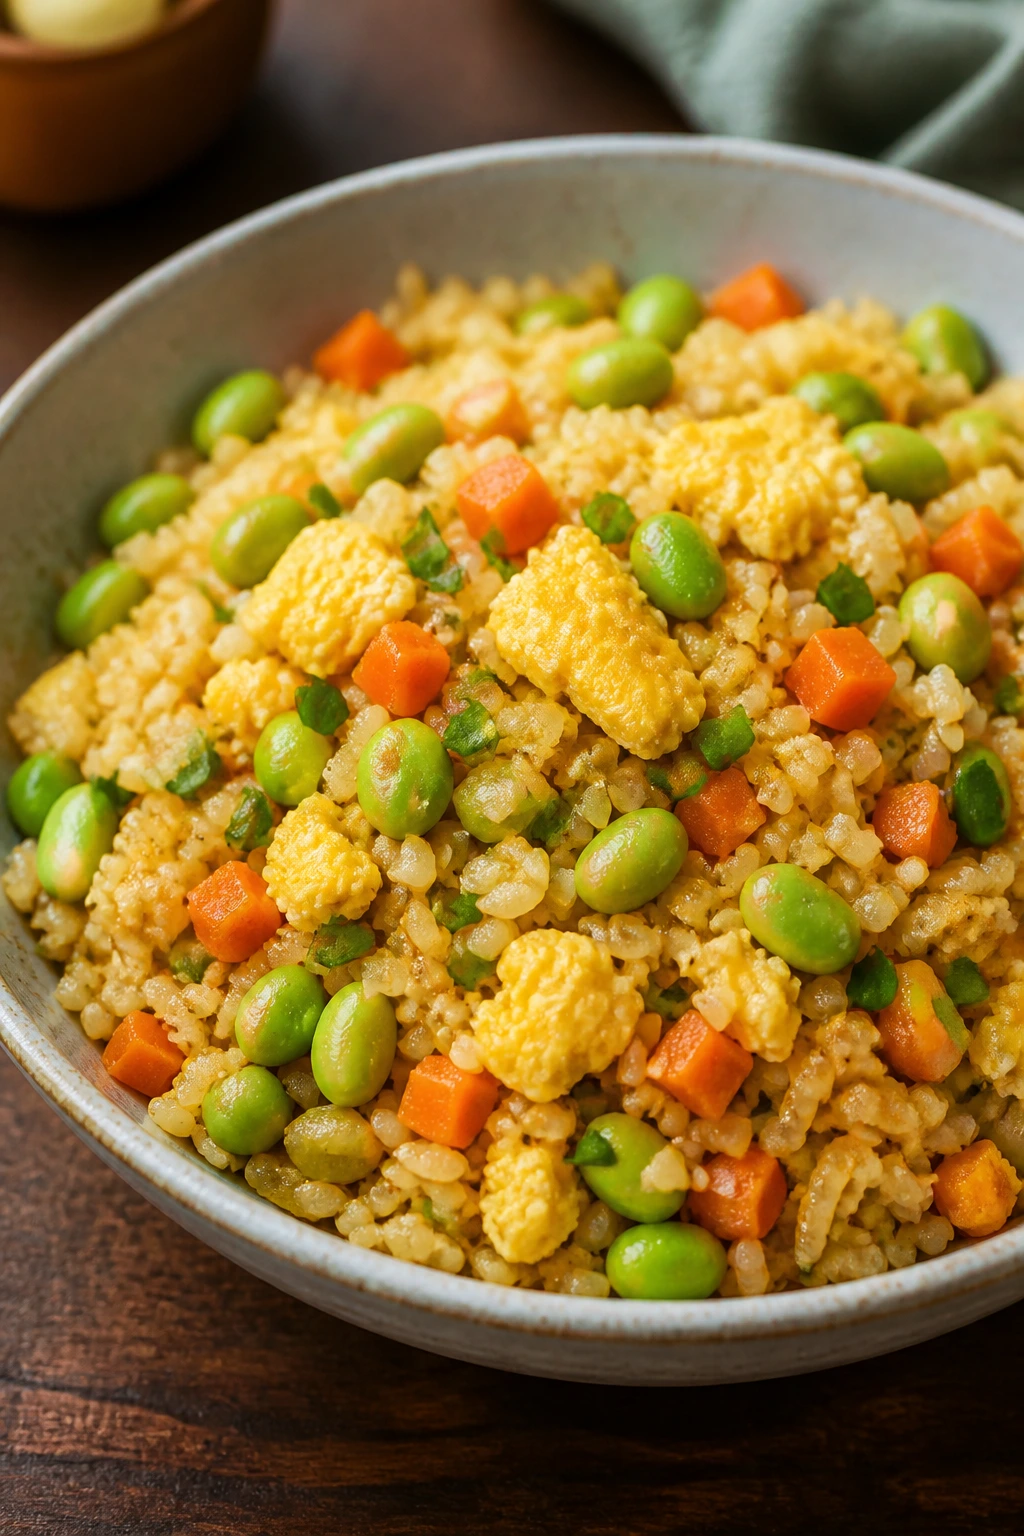
Fried rice is a smart meal-prep move if you treat it as a rice-and-vegetable dish, not a grease delivery system. Day-old rice gives you the best texture, the eggs add protein, and the edamame plus carrots keep the bowl bright instead of heavy. It’s one of the few dinners that can come together fast after a long Sunday cook session.
Why It Works:
Cold rice dries out a little in the fridge, which is exactly what you want for fried rice. It fries instead of turning mushy. Eggs scramble into the grains and coat the rice with a light richness, while edamame gives you plant protein and carrots add sweetness. A small amount of soy sauce and sesame oil is enough; too much and the whole pan tastes wet.
Key Ingredients:
- 4 cups cooked and chilled brown rice — day-old rice works best.
- 3 tablespoons neutral oil — enough for the skillet without making it greasy.
- 4 eggs, beaten — adds protein and binds the rice.
- 1 cup diced carrots — small dice cook fast and evenly.
- 1 cup shelled edamame, thawed — gives the rice more staying power.
- 3 scallions, sliced — half for cooking, half for finishing.
- 2 cloves garlic, minced — optional but useful for depth.
- 2 tablespoons low-sodium soy sauce — season in small amounts.
- 1 teaspoon sesame oil — a finishing note, not a cooking oil.
- ½ teaspoon black pepper — enough to wake up the rice.
Quick Steps:
- Heat 1 tablespoon oil in a large skillet or wok. Scramble the eggs until just set, then remove them to a plate.
- Add the remaining oil, carrots, and garlic. Cook for 2 to 3 minutes until the carrots soften a little.
- Stir in the rice. Break up any clumps and fry for 3 to 4 minutes until the grains are hot and a little toasted.
- Add the edamame, scallions, soy sauce, sesame oil, and pepper. Toss until everything is coated and evenly heated.
- Fold the eggs back in. Stir gently so the eggs stay in soft pieces.
- Cool and pack. Spread the rice on a tray for a few minutes if you want to cool it faster before storing.
Equipment for This Recipe:
- Large skillet or wok — a wide cooking surface is the whole point.
- Spatula — helpful for breaking up the rice.
- Mixing bowl — for beating the eggs.
- Tray or shallow container — useful for cooling the rice fast.
How to Serve This Dish:
Serve it on its own or with a side of sliced cucumber and chili crisp for the adults. A little extra scallion on top keeps the bowl from looking flat. If you want more sauce, drizzle on a teaspoon of soy mixed with a splash of rice vinegar at serving time.
Pro Tips for This Recipe:
- Use cold rice. Warm rice clumps and turns gummy.
- Cook in a big pan. Small pans crowd the grains and make them steam.
- Go easy on the soy sauce. You can always add more, but you cannot pull it back out.
- Add sesame oil at the end. Heat dulls the flavor fast.
Variations on This Dish:
- Chicken Fried Rice: Stir in chopped cooked chicken from another meal-prep batch.
- Pea and Carrot Version: Swap edamame for peas if that’s what your family likes better.
- Cauliflower Rice Blend: Mix half cauliflower rice with the brown rice for a lighter bowl.
Common Mistakes to Avoid with This Dish:
- Using fresh hot rice: It sticks and smears.
- Pouring in too much sauce: The rice gets wet instead of fried.
- Overcooking the eggs: They turn rubbery when reheated.
15. White Bean and Kale Soup with Parmesan Toast
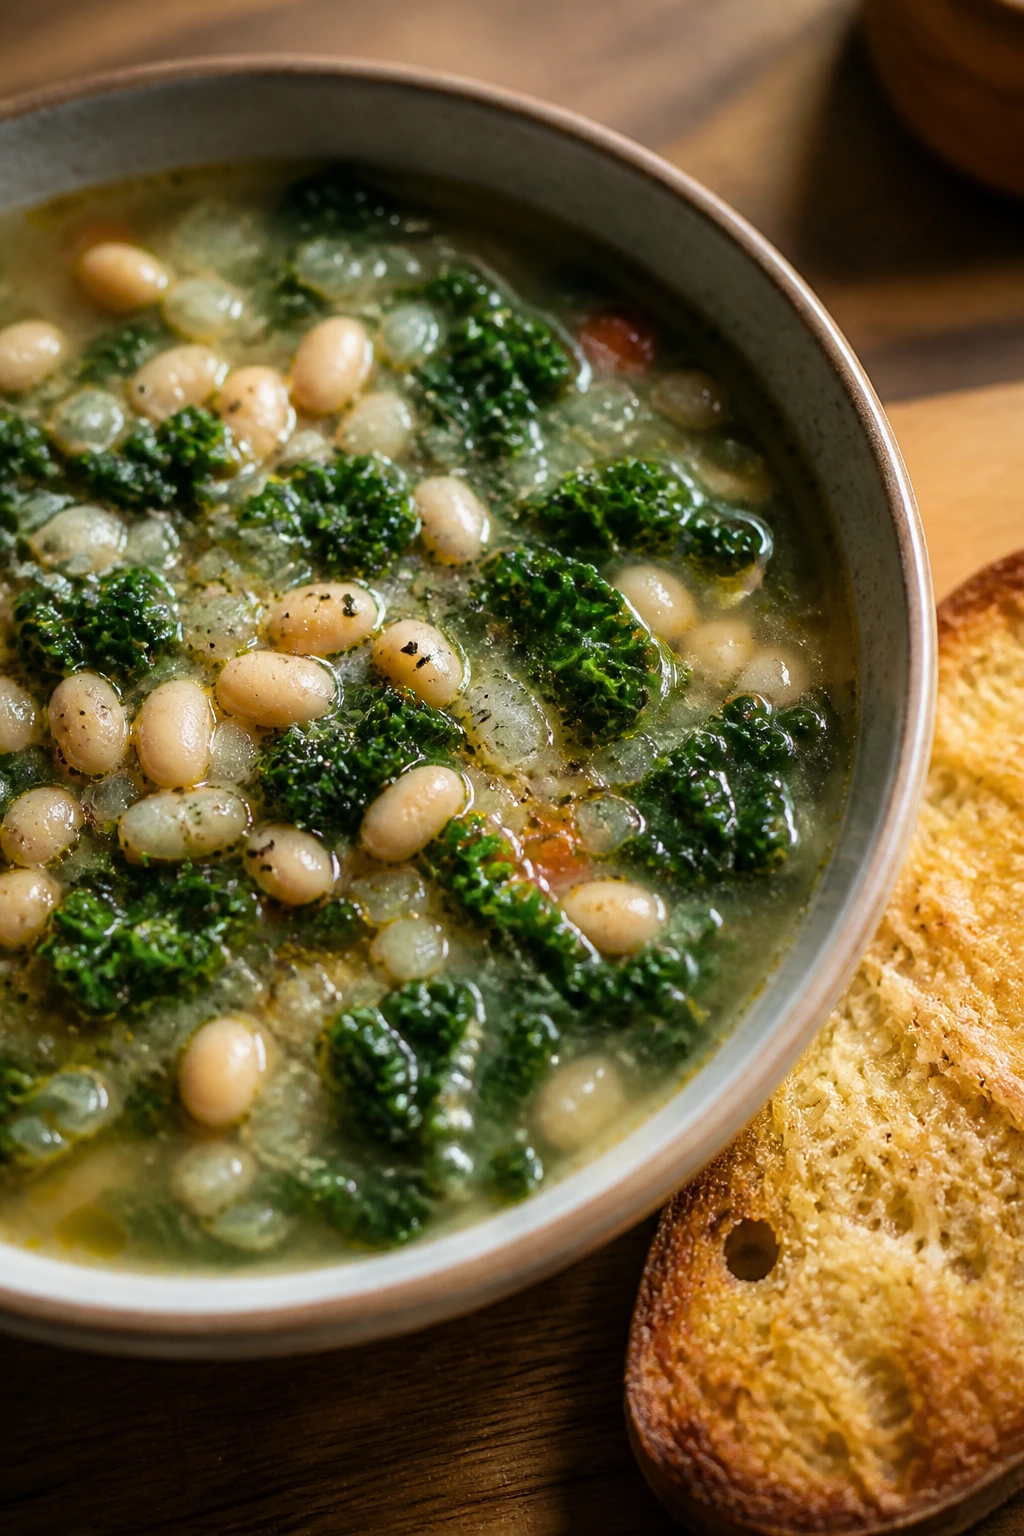
Soup is the quiet hero of meal prep Sundays. It takes a big pot, a few sturdy vegetables, and a can or two of beans, then pays you back with lunches and dinners that taste better after a day in the fridge. White beans make the broth creamy without actual cream, and kale keeps enough structure to survive reheating.
Why It Works:
White beans break down slightly and thicken the broth naturally. Kale is tougher than spinach, which means it won’t vanish in the fridge or get slimy by the next day. Onion, carrot, celery, and garlic make a broth that feels rounded instead of thin. Parmesan toast on the side gives you crunch, salt, and a little richness without needing a full cheese course.
Key Ingredients:
- 2 tablespoons olive oil — for the vegetables.
- 1 onion, diced — the base flavor.
- 2 carrots, diced — bring sweetness and color.
- 2 celery stalks, diced — classic soup backbone.
- 3 cloves garlic, minced — for depth.
- 2 cans white beans, 15 oz each, rinsed and drained — cannellini or navy both work.
- 6 cups low-sodium vegetable or chicken broth — enough for a brothy soup that still feels full.
- 1 teaspoon dried thyme — a steady herbal note.
- 1 bay leaf — optional, but useful.
- 1 bunch kale, stems removed and leaves chopped — sturdy enough to hold up.
- 1 tablespoon lemon juice — brightens the whole pot.
- 4 slices whole-grain bread — for the toast.
- ½ cup grated parmesan — for the bread and finishing.
- 1 tablespoon butter or olive oil — for toasting.
Quick Steps:
- Sauté the onion, carrot, and celery in olive oil. Cook over medium heat for 7 to 8 minutes until the vegetables soften.
- Add the garlic and thyme. Cook for 30 seconds until fragrant.
- Stir in the beans, broth, and bay leaf. Simmer for 15 minutes so the beans break down a little.
- Add the kale. Cook for 5 to 7 minutes until the leaves are tender but still green.
- Finish with lemon juice. Taste and add salt and pepper until the broth tastes balanced.
- Make the parmesan toast. Butter the bread, sprinkle with parmesan, and broil until melted and browned around the edges.
Equipment for This Recipe:
- Large soup pot or Dutch oven — enough room for the broth and greens.
- Cutting board and knife — for the vegetables and kale.
- Sheet pan — for broiling the toast if you want to keep it easy.
- Ladle — useful for packing soup into containers.
How to Serve This Dish:
Ladle the soup into bowls and serve the parmesan toast alongside or on top if you like it soft around the edges. A green salad or sliced pears fits if you want another side, though the soup does most of the work. The broth should be savory, not thin and salty.
Pro Tips for This Recipe:
- Chop the kale small. Long ribbons can be awkward in a meal-prep container.
- Mash a few beans against the pot. It thickens the broth without flour or cream.
- Toast the bread separately. It keeps its crunch until serving.
- Add lemon at the end. Acid keeps the soup tasting fresh after storage.
Variations on This Dish:
- Sausage and Bean Version: Add sliced turkey sausage if you want more protein.
- Tomato-Kale Soup: Stir in 1 cup crushed tomatoes for a redder, heartier broth.
- Dairy-Free Toast: Skip the parmesan and rub the toast with garlic instead.
Common Mistakes to Avoid with This Dish:
- Adding the kale too early: It goes army-green and soft.
- Forgetting to season at the end: Beans and broth need more salt than people expect.
- Packing the toast with the soup: It turns soggy. Keep it separate.
What Makes Sunday Meal Prep Actually Work
The meals in this collection are built around a simple idea: texture has to survive a second life. A recipe can taste fine the moment it leaves the stove and still fail miserably in a lunch container two days later. The dinners above use sturdy vegetables, sauces with body, and proteins that stay pleasant after reheating, which matters more than any flashy shortcut.
I like this kind of cooking because it respects the fridge. Chicken thighs, pork tenderloin, lentils, chickpeas, quinoa, brown rice, cabbage, broccoli, and kale all hold up in a way that delicate greens and overcooked pasta do not. That does not mean you have to live on dry containers and limp vegetables. It means you cook with leftovers in mind from the start.
There’s also a small mental trick here that helps on busy weeks. When dinner is already packed into boxes, the decision is made. You do not have to stand in front of the fridge at 6:40 p.m. negotiating with yourself.
Essential Equipment for These Recipes

- Rimmed sheet pans: Useful for chicken, pork, vegetables, meatballs, and any dinner that needs browning in one layer.
- Large skillet or wok: The stir-fries and fried rice work best in a pan with room to toss, not a cramped sauté pan.
- Dutch oven or large soup pot: Best for chili, curry, soup, and lentil filling.
- Instant-read thermometer: The easiest way to keep chicken, pork, and salmon from drying out.
- Sharp chef’s knife: Thin slicing and even chopping matter more in meal prep than in one-off dinners.
- Cutting board with a damp towel underneath: Stops sliding when you’re chopping a mountain of vegetables.
- Meal-prep containers with lids: Shallow containers cool faster and stack cleaner.
- Fine-mesh strainer: Handy for rinsing quinoa, beans, or lentils.
- Parchment paper: Saves time on cleanup, especially with roasted dinners and meatballs.
- Wooden spoon or spatula: Gentle on sauces and useful for breaking up meat and rice.
Smart Shopping and Ingredient Tips
Buy the vegetables that can take a little neglect. That means broccoli, Brussels sprouts, carrots, cabbage, kale, onions, peppers, zucchini, and sweet potatoes. They keep their shape after roasting or simmering, and they don’t demand perfect timing from you on Sunday afternoon.
For protein, thighs tend to be more forgiving than breasts. Chicken thighs, turkey thighs if you can find them, pork tenderloin, salmon fillets of similar thickness, and ground turkey all work well for meal prep because they stay juicy enough after reheating. If you do use chicken breast, keep the cooking time tight and pull it the second it hits temperature.
Canned goods are not cheating here. Chickpeas, white beans, black beans, diced tomatoes, marinara, coconut milk, salsa, and broth all make meal prep realistic. The trick is to check salt levels and choose brands with ingredients you recognize. If a canned tomato sauce tastes flat by itself, it will not improve in a casserole.
Grains matter more than people think. Brown rice, quinoa, polenta, and whole-wheat pasta all hold up better than softer starches when you’re prepping several days ahead. Cook them a little under if they’ll be reheated, and let them cool before sealing the lid so the steam does not make everything mushy.
How to Serve These Recipes
Presentation:
Pack dinners into shallow containers with the saucy part in one section and anything crisp or fresh in another. Roasted vegetables should sit above the sauce, not drown in it. If you’re serving at the table, finish each plate with something bright — lemon wedges, scallions, parsley, cilantro, or a spoonful of yogurt.
Accompaniments:
Brown rice, quinoa, roasted potatoes, whole-wheat pasta, polenta, and warm pita all show up in this collection because they carry sauce well without falling apart. A simple side salad with cucumber, tomato, or shredded cabbage works when you want something cold next to something hot. Toasted bread is useful with soup, chili, curry, and bean dishes.
Portions:
A typical family dinner here serves 4 to 6, though the soups and chili usually stretch farther. If you’re feeding smaller eaters, pack more vegetables and less starch, then keep the toppings separate so people can build their own plate. If you’re feeding bigger appetites, add another grain side rather than doubling the protein every time.
Beverage Pairing:
Sparkling water with lemon or lime fits almost everything in this lineup. For something with more flavor, unsweetened iced tea, cucumber water, or a light, tart kombucha works well with the richer dishes like meatballs, chili, or curry. I’d keep heavy, sweet drinks away from the plates here; they flatten the food faster than most people realize.
Additional Tips and Flavor Boosters
Flavor Enhancement:
A finishing squeeze of lemon or lime fixes a surprising number of meal-prep dinners. So does a spoonful of yogurt, a little salsa, or a drizzle of olive oil right before serving. Acid and fat at the end can make three-day-old food taste freshly cooked.
Customization:
If your family likes more heat, keep chili flakes, hot sauce, and pickled jalapeños on the table instead of mixing them into the whole batch. That way the main pan stays kid-friendly, and the adults can build their own version. For milder eaters, use roasted garlic, extra carrots, or a little honey in tomato sauces to round out sharp flavors.
Serving Suggestions:
Fresh herbs matter more than people give them credit for. Parsley, cilantro, basil, dill, and scallions can make a meal-prep bowl look and taste less tired. A handful of crunchy toppings — sesame seeds, pumpkin seeds, crushed tortilla chips, or toasted breadcrumbs — gives the leftovers some life.
Make-It-Yours:
For dairy-free meals, use olive oil, coconut milk, or non-dairy yogurt where appropriate. For gluten-free dinners, lean on rice, quinoa, potatoes, corn tortillas, or polenta. If you need a higher-protein plan, add beans to grain bowls and soups instead of just making the meat portion larger.
Make-Ahead, Storage, and Reheating Guidance
Most of these dinners keep 3 to 4 days in the refrigerator if you cool them quickly and store them in shallow, sealed containers. Soups, chili, curry, and meat sauces often taste better the next day because the seasoning settles in. Delicate items — salmon, fried rice, and roasted broccoli — are best within 2 to 3 days, before the texture starts to slide.
For the freezer, think in terms of up to 2 months for chili, curry, soup, lentil pie filling, meat sauce, and some of the cooked chicken dishes. Freeze them in portions that match your family’s usual dinner size. The less you thaw and refreeze, the better the texture stays.
Reheating depends on the food. For sheet-pan meals and roasted vegetables, use the oven at 350°F for 10 to 15 minutes with a loose foil cover if needed. For rice bowls, add a teaspoon of water and microwave in 60-second bursts, stirring once in the middle. Soups and stews reheat gently on the stovetop over medium-low heat until steaming, not boiling. Salmon and pork are best warmed just until hot to the center so they don’t dry out.
If you want to meal prep on Sunday and eat more than one night from the same batch, store fresh toppings separately. Avocado, herbs, toasted bread, crunchy vegetables, and yogurt should usually stay out of the main container until serving. That small habit does more to keep the food pleasant than most fancy tricks.
Variations and Adaptations to Try
Gluten-Free Batch Cooking:
Use rice, quinoa, potatoes, polenta, or corn tortillas as the starch in place of pasta or bread. Most of the dinners in this collection already land close to gluten-free, so the main job is checking sauces and broths for hidden flour. Marinara, curry, chili, and most bean soups make this swap easily.
Lower-Sodium Week:
Choose low-sodium broth, beans, salsa, soy sauce, and marinara, then season at the end with lemon juice, herbs, garlic, and vinegar. That keeps the food from tasting flat without leaning on salt as the only flavor. You’ll notice the difference most in soups and stir-fries.
Vegetarian Rotation:
Chickpeas, lentils, white beans, tofu, eggs, and edamame can replace meat in several of these dinners without making the meals feel second-rate. The trick is to keep enough texture in the dish — roast the vegetables, crisp the tofu, or thicken the sauce so the bowl still feels complete.
Kid-Friendly Mildness:
Keep the spice in a separate bowl. Use less curry paste, fewer chili flakes, more roasted vegetables, and sauces that lean on tomato, mustard, lemon, or a little honey. Kids usually respond better to food that looks familiar on the plate, even if the flavor is a little more interesting than plain chicken and rice.
Extra-Protein Upgrade:
Add beans to rice bowls, lentils to soups, Greek yogurt to sauces, and eggs to fried rice. That’s usually a better move than doubling the meat, which can make a dinner heavier without improving the texture. The food ends up more filling and easier to portion.
Common Mistakes to Avoid
Packing everything into one sauce-heavy container:
The food turns soggy and the textures blend into a mushy mix. Keep fresh toppings, starches, and saucy components separate when you can.
Cooking vegetables too far on Sunday:
If broccoli, Brussels sprouts, or green beans are already soft before they hit the fridge, they’ll be limp by the time you reheat them. Stop cooking them a minute or two earlier than you think.
Using chicken breast like it’s all the same:
Breasts dry out faster than thighs, especially in reheated meals. If you use them, watch the thermometer and pull them as soon as they’re done.
Sealing hot food too quickly:
Steam builds inside the container and makes rice, vegetables, and roasted meat soggy. Let food cool a bit on the counter before lidding it, or spread it on a tray for a few minutes.
Skipping acid at the end:
A lot of meal-prep food tastes fine on day one and dull on day three. Lemon, lime, vinegar, salsa, or yogurt at serving time solves that problem faster than adding more salt.
Making portions too large:
Oversized containers invite waste. Keep the family dinner sized to actual appetites, then add a simple side if someone is still hungry.
Frequently Asked Questions
Can I prep these meals all at once on Sunday?
Yes, but do the jobs in order. Start with grains and anything that takes the longest, then move to sheet-pan dinners, then soups and sauces, then quick items like fried rice. That keeps you from juggling hot pans while the rice overcooks on the stove.
Which dinners freeze best?
Chili, curry, soup, lentil filling, meat sauce, and some shredded chicken dishes freeze the cleanest. Meals with roasted potatoes, salmon, or crispy vegetables are better fresh or refrigerated for a few days rather than frozen.
How do I stop meal-prep chicken from drying out?
Use thighs when you can, and cook breasts only to temperature, not beyond it. A sauce, marinade, or pan juice helps too. Store the chicken with a little moisture instead of packing it dry.
Can I reheat these in the oven instead of the microwave?
Absolutely. Oven reheating at 325°F to 350°F gives better texture for roasted dinners, meatballs, pork, and casseroles. Cover loosely with foil if the top is drying out, and add a spoonful of sauce or broth if the food looks thirsty.
What if my family doesn’t like spicy food?
Keep the spice mild in the main batch and offer hot sauce, chili flakes, or pickled peppers at the table. That way the base meal stays friendly for kids, and adults can add heat without changing the whole pan.
Can I swap white rice for brown rice in most of these?
Yes, though brown rice holds up better in meal prep and adds a little more chew. White rice is fine if that’s what your family eats, but it tends to soften faster after refrigeration.
How far ahead can I chop vegetables?
Most sturdy vegetables — onions, peppers, carrots, Brussels sprouts, broccoli, and cabbage — can be chopped 2 to 3 days ahead if you keep them dry and sealed. Kale and herbs are better closer to cooking time, especially if you want them to stay bright.
What’s the best way to avoid boring leftovers?
Use a finishing ingredient that stays out of the main cook: fresh herbs, lemon juice, lime wedges, yogurt, salsa, mustard, chili crisp, or toasted seeds. That last-minute hit of flavor does more than a second round of salt ever will.
Are these meals still good if reheated at work or in the car?
Yes, especially the bowls, soups, chili, and curry. Pack the toppings separately, keep the lid tight, and reheat the food until it’s steaming all the way through. If the meal needs crunch, add that part after heating.
Sunday Dinner That Keeps Paying Off
Meal prep Sundays work best when the food in the fridge still feels like dinner on Wednesday. That’s the standard I used here. Not “healthy” in the abstract. Not “easy” in the lazy sense. Just food that keeps its shape, keeps its flavor, and doesn’t get insulting after a few days in a plastic container.
If you build around sturdy vegetables, sensible sauces, and proteins that stay juicy, the week gets easier in a way that feels almost unfair. You cook once, and then you get to stop thinking about dinner for a while. That, honestly, is the whole charm.
When Sunday rolls around again, pick two or three from this list, not all fifteen. A good meal-prep session should leave you with food you want to eat, not a fridge full of obligations.