
By the time the kitchen air turns thick enough to chew, the last thing most people want is a skillet sputtering on the stove. That’s where no-cook dinners for hot summer days earn their keep: crisp cucumber, briny olives, cold chicken, ripe tomatoes, good bread, and enough salt and acid to make the whole plate wake up.
A decent no-cook dinner is not a sad bowl of leftovers. Not even close. The best ones are built with intention — a creamy thing, a crunchy thing, something salty, something sharp, and a protein that does its job without making you sweat through your shirt. That’s the whole trick. Don’t try to fake a hot meal with cold ingredients. Build a cold meal that makes sense on its own terms.
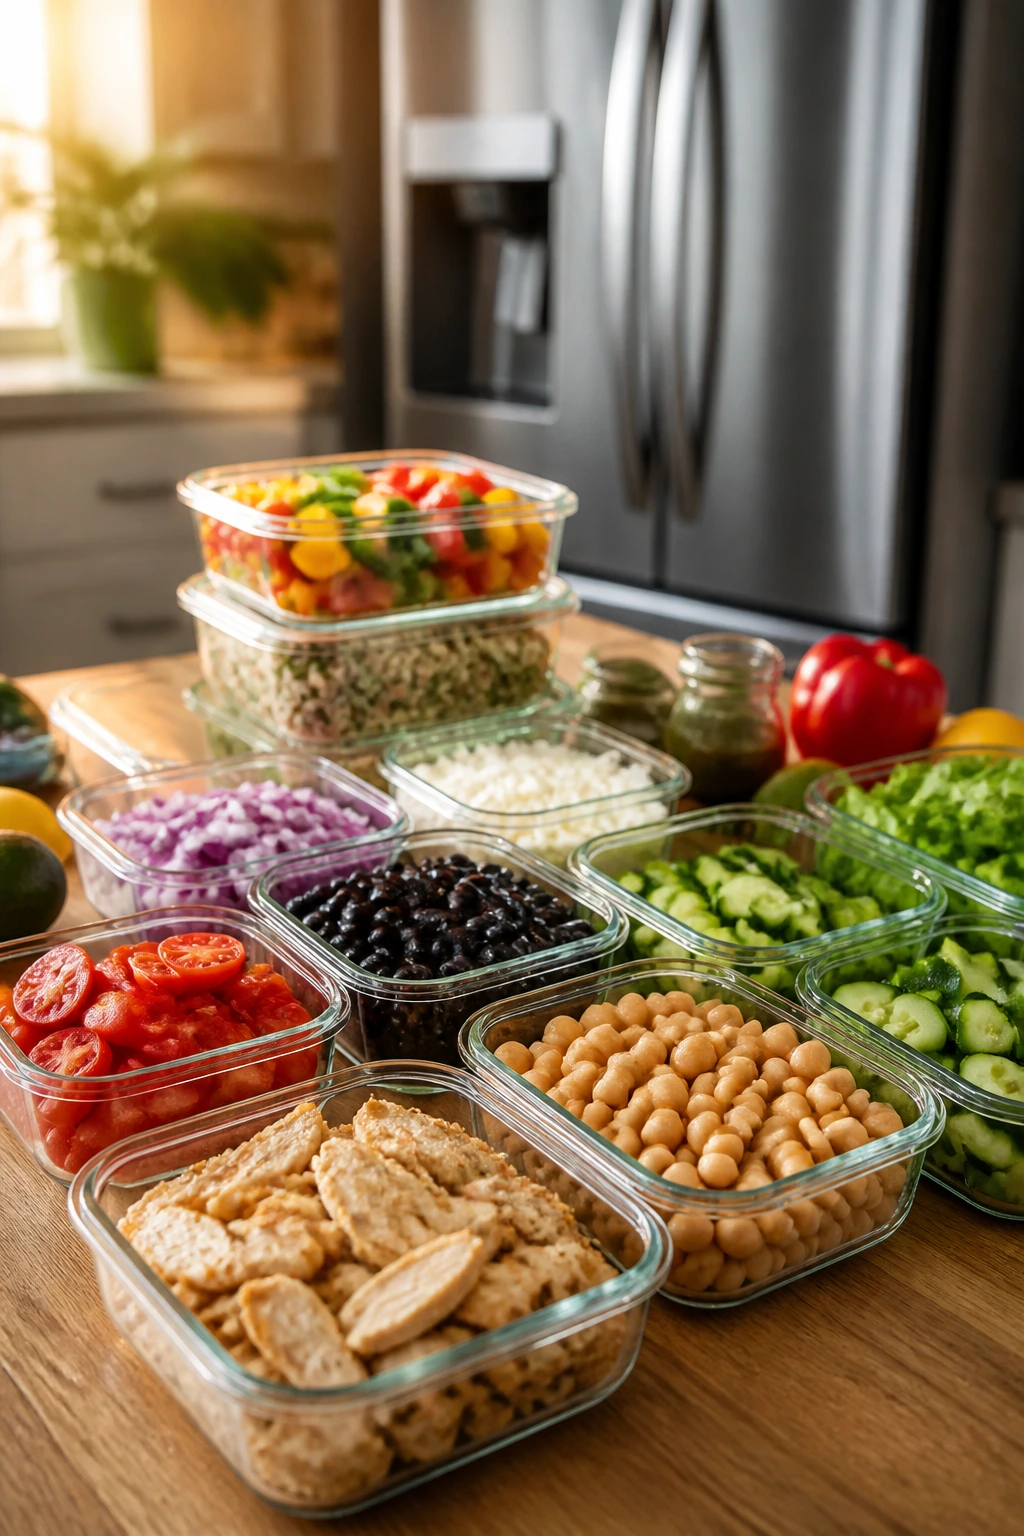
I keep coming back to these kinds of dinners because they solve three problems at once: they keep the stove off, they still feel like dinner, and they don’t rely on one tired ingredient repeated six different ways. Canned beans, rotisserie chicken, smoked salmon, deli turkey, shrimp cocktail, good hummus, and a few ripe vegetables can do a lot more than people give them credit for. Once you start thinking in terms of texture and contrast instead of “what can I heat up,” the whole category opens up fast.
Why These No-Cook Dinners Earn Their Keep
-
Heat-Free: You can get a full dinner on the table without warming the kitchen, which matters more than people admit when the air feels sticky and still.
-
Fast to Build: Most of these come together in 10 to 20 minutes, and the work is mostly chopping, draining, and assembling.
-
Strong Flavors, Little Effort: Acid, salt, herbs, and a good store-bought shortcut do most of the heavy lifting here.
-
Flexible Protein: Chickpeas, tuna, shrimp, chicken, turkey, tofu, beans, and cheese all fit the same basic no-cook logic.
-
Leftover-Friendly: A lot of the components can be made ahead in batches, then mixed and matched for a second or third dinner.
-
Actually Satisfying: The best plates here have crunch, creaminess, and enough protein to stop the 9 p.m. snack hunt.
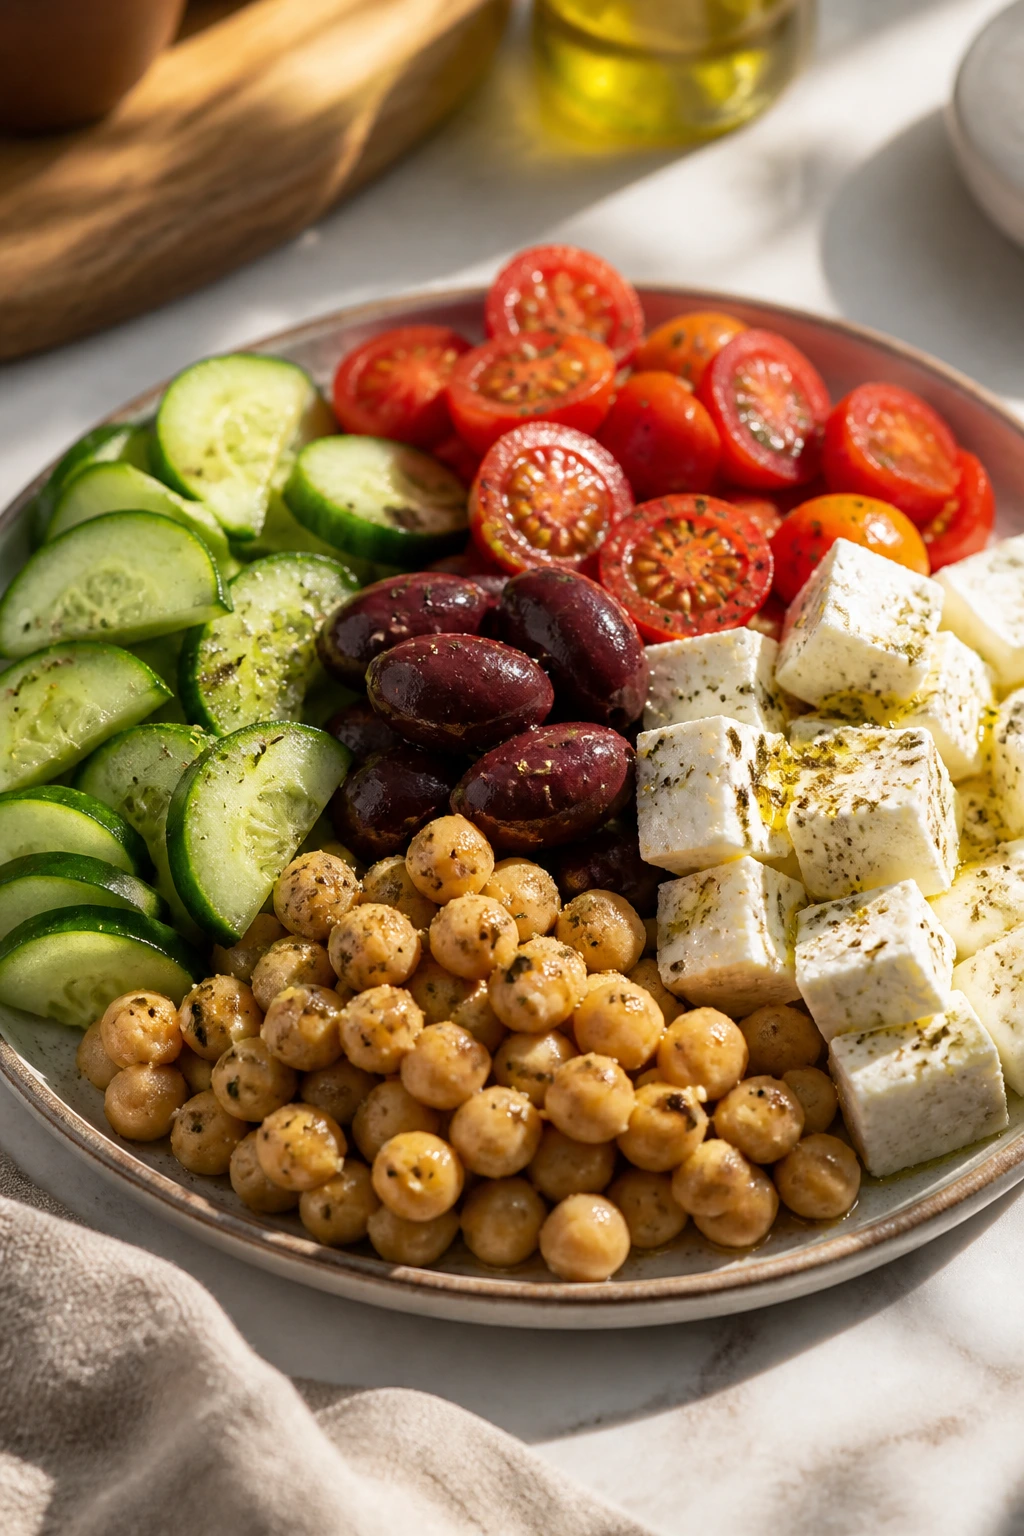
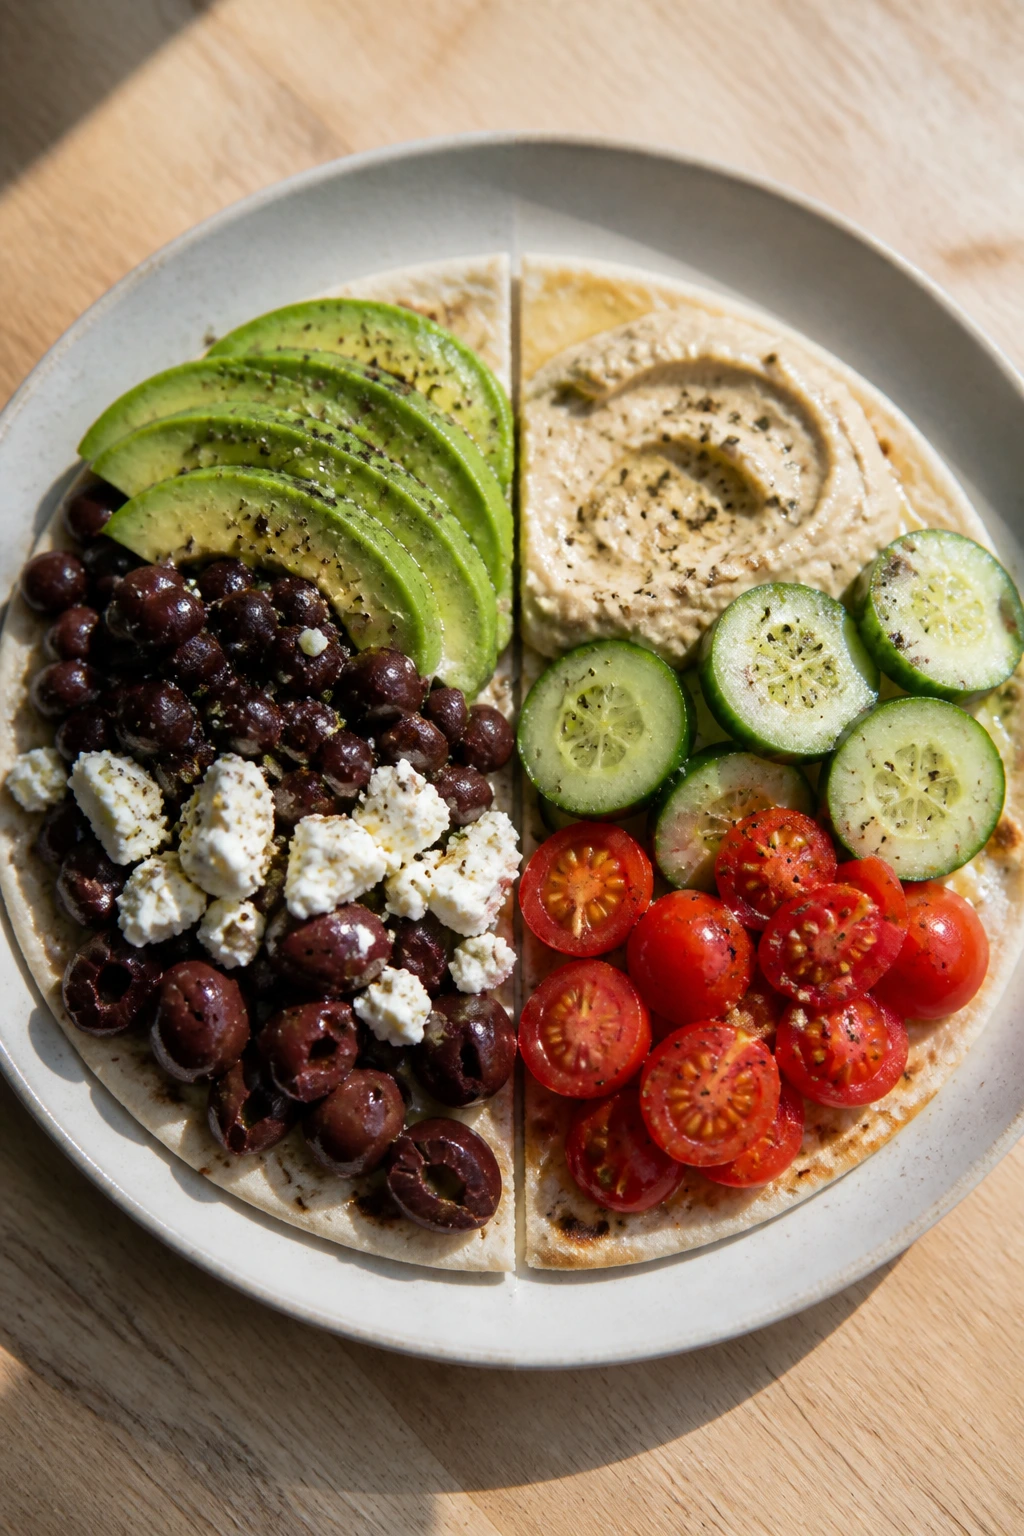
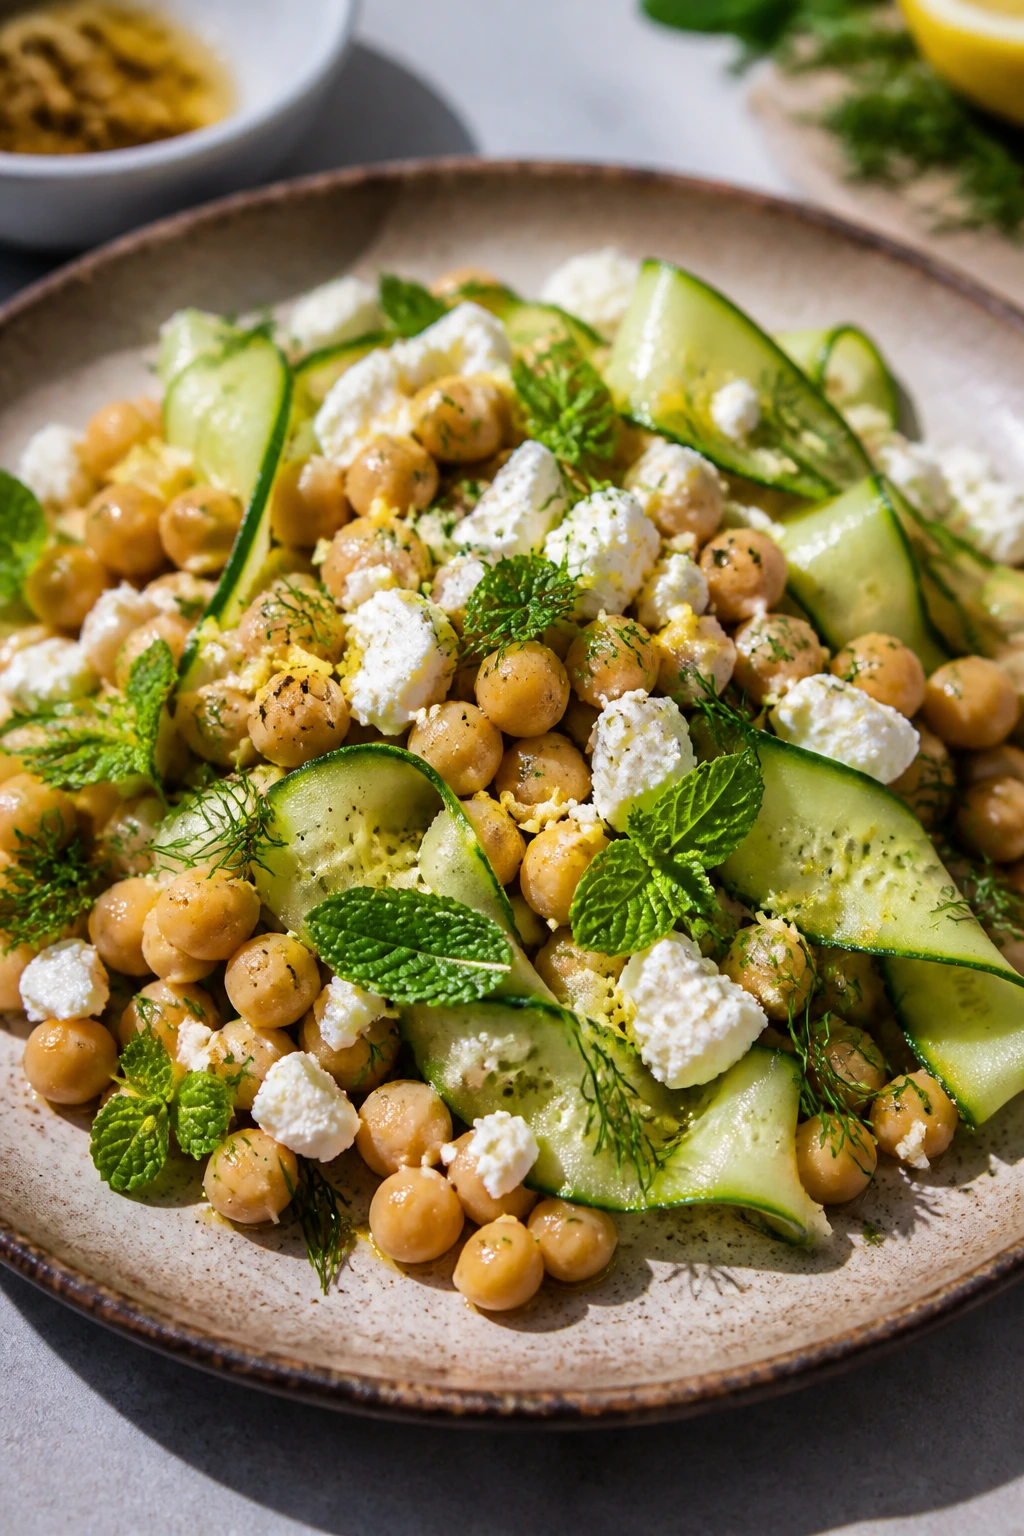
1. Greek Chickpea Pita Pockets
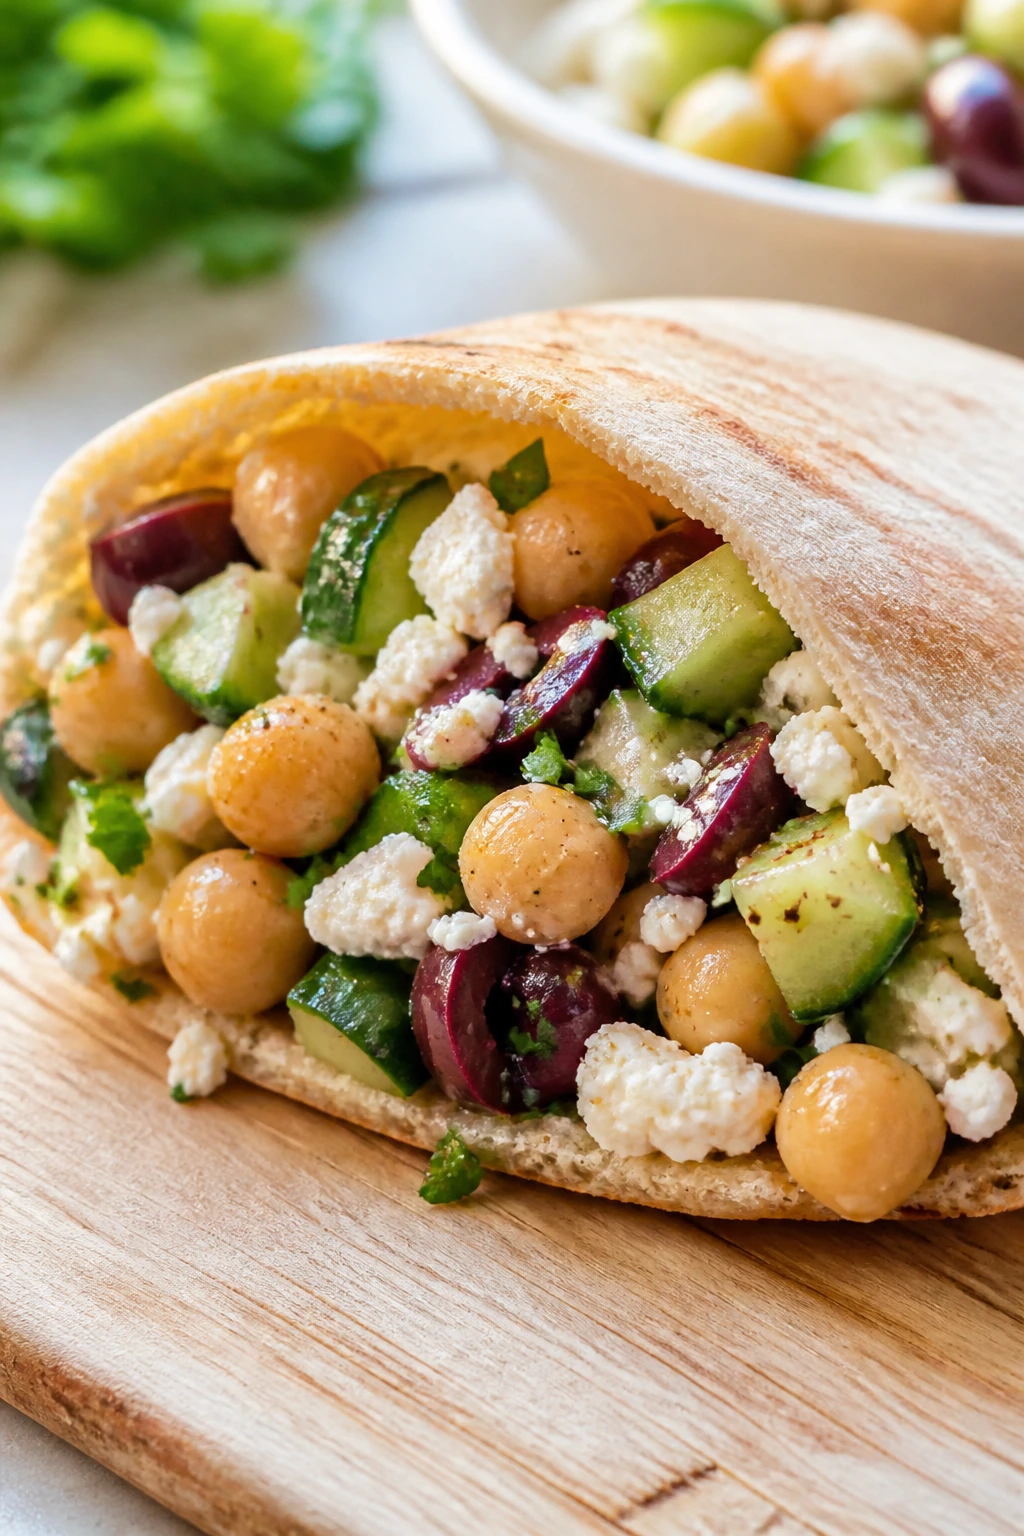
These taste like the kind of dinner you make once and then quietly start craving on repeat. Lemon, dill, cucumber, feta, and chickpeas are a reliable little gang, and when you tuck them into soft pita with a swipe of tzatziki, the whole thing lands somewhere between a salad and a sandwich.
The nice part is that nothing here needs to be fussy. Chickpeas bring heft. The vegetables bring snap. The briny olives keep it from getting flat and polite. If you want a cold dinner that still feels substantial, this is one of the easiest places to start.
Why It Works
Chickpeas are sturdy, which makes them perfect for no-cook dinners. They don’t wilt, they don’t turn soggy if you dress them lightly, and they hold onto lemon and herbs in a way leafy greens never will. The feta and tzatziki add a creamy-salty layer, so you get actual richness without any heat. It also scales well: one extra can of chickpeas makes another full meal with almost no effort.
Key Ingredients
- 2 (15-ounce) cans chickpeas, drained and rinsed
- 1 medium cucumber, diced
- 1 cup cherry tomatoes, halved
- 1/3 cup red onion, finely diced
- 1/2 cup crumbled feta
- 1/4 cup Kalamata olives, chopped
- 2 tablespoons lemon juice
- 2 tablespoons olive oil
- 1 small garlic clove, grated
- 2 tablespoons chopped dill or parsley
- 4 pita breads
- 1/2 cup tzatziki or plain Greek yogurt
Quick Steps
-
Mix the filling: In a large bowl, combine the chickpeas, cucumber, tomatoes, red onion, feta, olives, dill, lemon juice, olive oil, garlic, and a pinch of salt and pepper.
-
Taste and adjust: Let the mixture sit for 5 minutes, then taste again. Add more lemon if it tastes flat, or a little more salt if the chickpeas are still bland.
-
Prep the pita: Split the pita pockets or cut each round in half. If the pita is very stiff, wrap it in a barely damp towel for a minute so it softens.
-
Add the creamy layer: Spoon tzatziki or Greek yogurt inside each pita. This keeps the filling from sliding around and gives the first bite some cool richness.
-
Fill and serve: Pile in the chickpea salad generously. Serve with extra lemon wedges and a few torn herbs on top.
Tips and Variations
-
Make-ahead move: Mix the chickpea filling up to 1 day ahead, but add the cucumber right before serving if you hate soft edges.
-
Dairy-free version: Swap the feta for chopped avocado and use tahini instead of tzatziki.
-
More dinner-like: Add a handful of romaine or shredded cabbage for extra crunch and volume.
2. Rotisserie Chicken Caesar Wraps
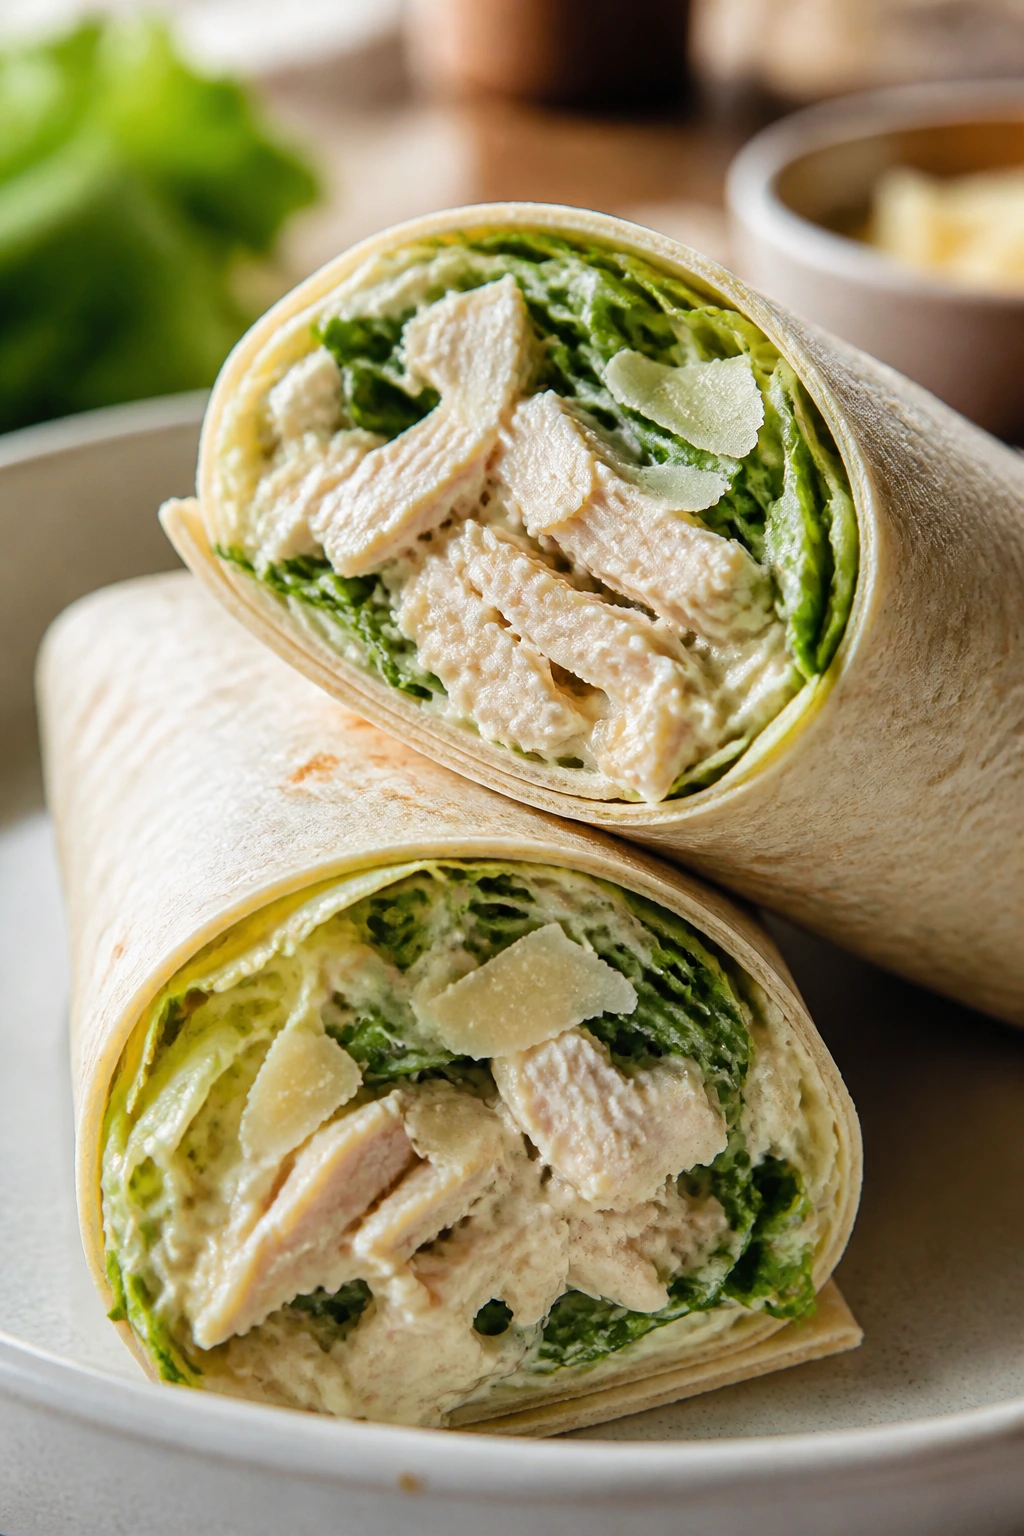
A good Caesar wrap hits that sweet spot between lunch food and proper dinner. The rotisserie chicken brings the salt and seasoning, the romaine brings the crunch, and the Parmesan gives the whole thing a sharp little finish that keeps it from tasting like random poultry in a tortilla.
This is the sort of dinner I make when I want something cool but not puny. It’s fast, yes. It’s also sturdy enough to eat with one hand while you stand near a fan and pretend that counts as air conditioning.
Why It Works
Rotisserie chicken already has flavor and fat, which means you don’t need to doctor it much. Tossing the chicken with Caesar dressing before wrapping helps every bite taste seasoned instead of dry, and the romaine stays crisp if you dry it well after washing. A little lemon or black pepper keeps the wrap from tasting heavy, which is the thing that ruins a lot of store-bought Caesar setups.
Key Ingredients
- 3 cups shredded rotisserie chicken
- 1 large romaine heart, chopped
- 1/2 cup Caesar dressing
- 1/3 cup shaved Parmesan
- 1/2 cup croutons, lightly crushed
- 4 large flour tortillas
- 1 tablespoon lemon juice
- 1/2 teaspoon black pepper
- 2 tablespoons cooked bacon bits, optional
Quick Steps
-
Season the chicken: Put the shredded chicken in a bowl with 1/4 cup of the Caesar dressing, the lemon juice, and black pepper. Stir until the chicken looks lightly coated.
-
Build the crunch: Add the romaine, Parmesan, and crushed croutons. Toss gently so the lettuce stays crisp and doesn’t collapse.
-
Warm the tortillas only if needed: A room-temperature tortilla works fine, but if it’s stiff, let it sit under a clean towel for a minute.
-
Fill the wraps: Divide the chicken mixture across the tortillas. Don’t overload them or they’ll split down the middle when you roll.
-
Roll tightly: Fold in the sides first, then roll from the bottom up. Slice in half if you want cleaner edges.
Tips and Variations
-
Best texture trick: Keep the remaining dressing on the side and add only a little at first. Too much dressing turns the lettuce soggy fast.
-
Add a stronger bite: A spoonful of chopped pepperoncini gives the wrap a sharper edge.
-
Shortcut that helps: Use bagged chopped romaine if the leaves are clean and dry; just shake them well before mixing.
3. Tuna Niçoise Salad Plates

This is what happens when you stop treating tuna salad like a sandwich filling and start giving it a real plate. The result is cooler, brighter, and far more dinner-worthy, especially when you add crisp cucumbers, salty olives, tomatoes, and peeled hard-boiled eggs from the store.
There’s a reason this kind of meal has stuck around. It eats like something you planned, even when you really just opened a few cans, sliced a cucumber, and let the ingredients do their own thing.
Why It Works
Niçoise-style salads work because every part has a job. Tuna adds protein, beans add body, eggs add richness, and the vegetables keep the whole plate feeling fresh instead of dense. Using canned white beans instead of potatoes keeps it fully no-cook, and it also means the salad stays good at room temperature for a little longer without turning mealy.
Key Ingredients
- 2 cans tuna in olive oil, drained lightly
- 4 store-bought hard-boiled eggs, peeled and quartered
- 1 can cannellini beans, drained and rinsed
- 1 cup cherry tomatoes, halved
- 1 medium cucumber, sliced
- 1/2 cup Kalamata olives
- 1/4 cup red onion, thinly sliced
- 4 cups butter lettuce or mixed greens
- 3 tablespoons red wine vinegar
- 4 tablespoons olive oil
- 1 teaspoon Dijon mustard
- 1 tablespoon capers, optional
Quick Steps
-
Make the dressing: Whisk the vinegar, olive oil, Dijon, a pinch of salt, and black pepper in a small bowl until it turns glossy.
-
Dress the beans lightly: Toss the beans with 1 tablespoon of the dressing. This helps them taste seasoned instead of dusty.
-
Build the greens: Divide the lettuce among four plates. Top with cucumber, tomatoes, onion, olives, and capers.
-
Add the protein: Break the tuna into large chunks and arrange it over the salad. Nestle the egg quarters around the plate.
-
Finish and serve: Spoon the remaining dressing over everything. Add more pepper than you think you need.
Tips and Variations
-
Better tuna choice: Tuna packed in olive oil tastes fuller and less dry than water-packed tuna.
-
Egg shortcut: If you don’t want to buy hard-boiled eggs, leave them out and add avocado instead.
-
More filling: A few whole grain crackers on the side make the plate feel more like dinner and less like a lunch board.
4. Caprese White Bean Salad Bowls
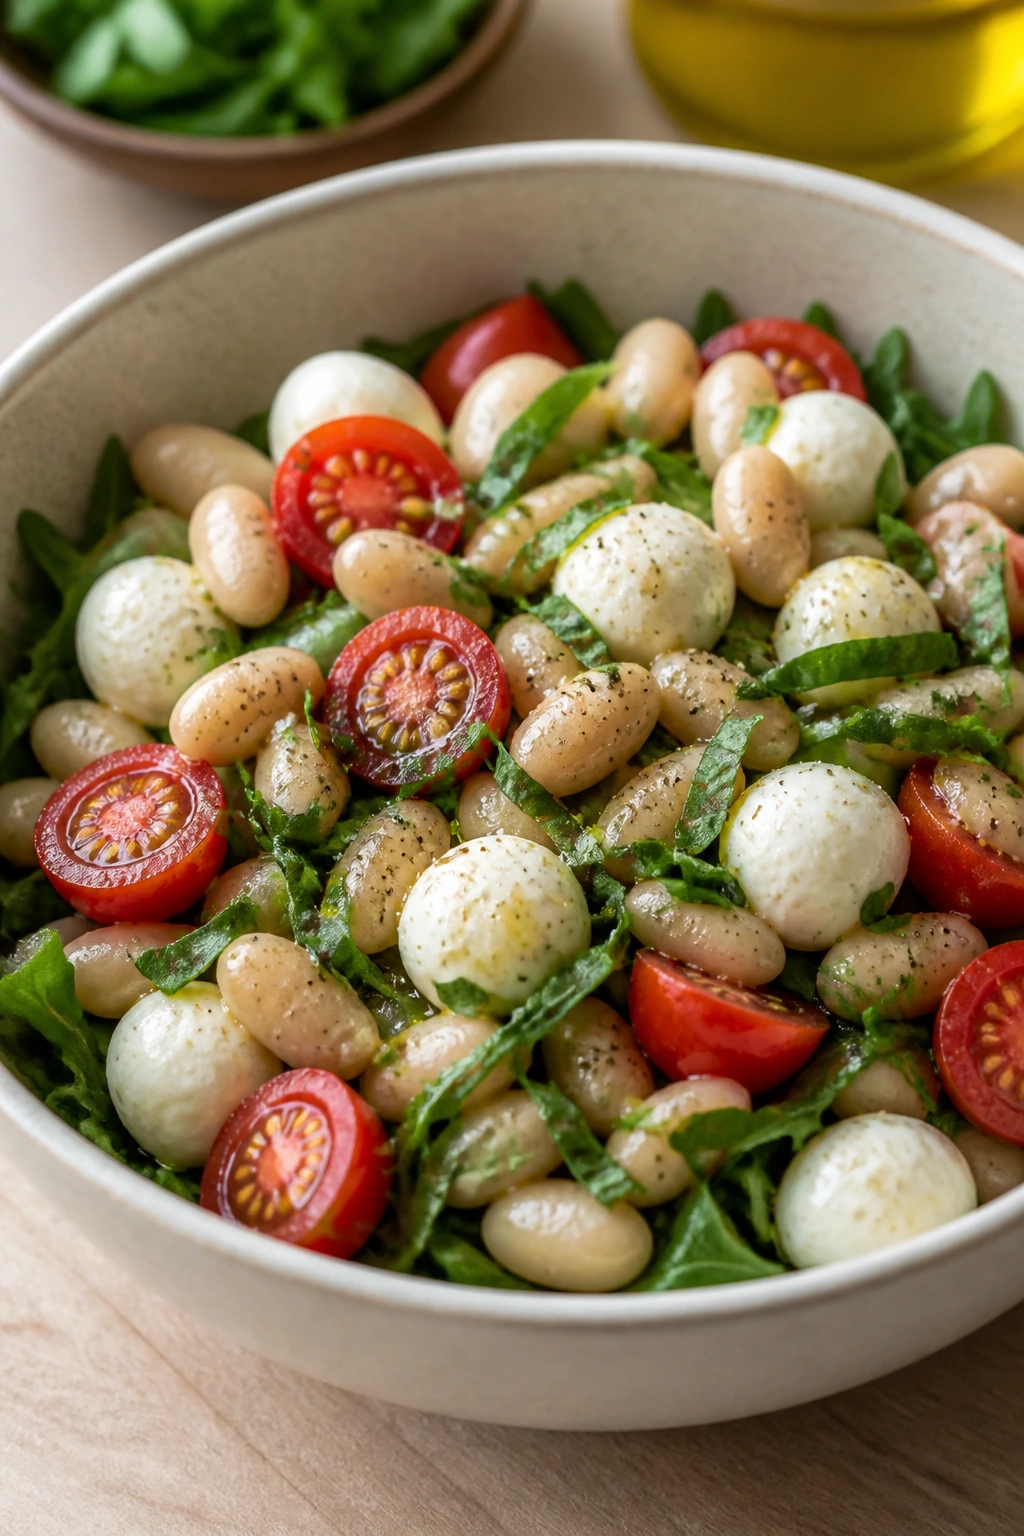
A Caprese salad can be dinner, but only if you stop treating it like garnish. White beans give it the muscle it needs, and once you add mozzarella pearls, sweet tomatoes, basil, and olive oil, the bowl starts behaving like a full meal instead of a side dish in a nice dress.
This is one of those recipes that relies on good produce more than fancy technique. If the tomatoes are bland, it’s bland. If they’re ripe and fragrant, you don’t need much else.
Why It Works
Cannellini beans are creamy without being heavy, which makes them a smart anchor for a no-cook bowl. They pair well with mozzarella because both are mild and rich, and the tomatoes and balsamic glaze bring the acid that keeps everything from tasting flat. A few basil leaves matter more than people think; torn basil smells louder and tastes fresher than chopped basil that’s been sitting around too long.
Key Ingredients
- 2 (15-ounce) cans cannellini beans, drained and rinsed
- 2 cups cherry tomatoes, halved
- 8 ounces mozzarella pearls
- 2 cups baby arugula
- 1/2 cup fresh basil leaves, torn
- 3 tablespoons olive oil
- 2 tablespoons balsamic glaze
- 1 teaspoon lemon juice
- 1/2 teaspoon kosher salt
- 1/4 teaspoon black pepper
- Crackers or crusty bread, for serving
Quick Steps
-
Season the beans: Put the beans in a bowl with olive oil, lemon juice, salt, and pepper. Stir gently so they stay intact.
-
Add the tomatoes and mozzarella: Fold in the tomatoes and mozzarella pearls. Let the mixture sit for 5 minutes so the beans pick up the seasoning.
-
Build the bowls: Divide the arugula among four bowls. Spoon the bean mixture over the greens.
-
Finish with basil and glaze: Tear the basil over the top and drizzle on the balsamic glaze right before serving.
-
Serve with something crunchy: Add crackers or bread on the side so the bowl has more texture and feels complete.
Tips and Variations
-
If the tomatoes are watery: Salt them lightly and let them sit for 10 minutes, then spoon off the extra juice.
-
Extra richness: Burrata can replace the mozzarella pearls if you want a softer, creamier bowl.
-
Pantry backup: If basil is missing, use parsley and a little extra lemon instead. It won’t be the same, but it still works.
5. Smoked Salmon Bagel Boards
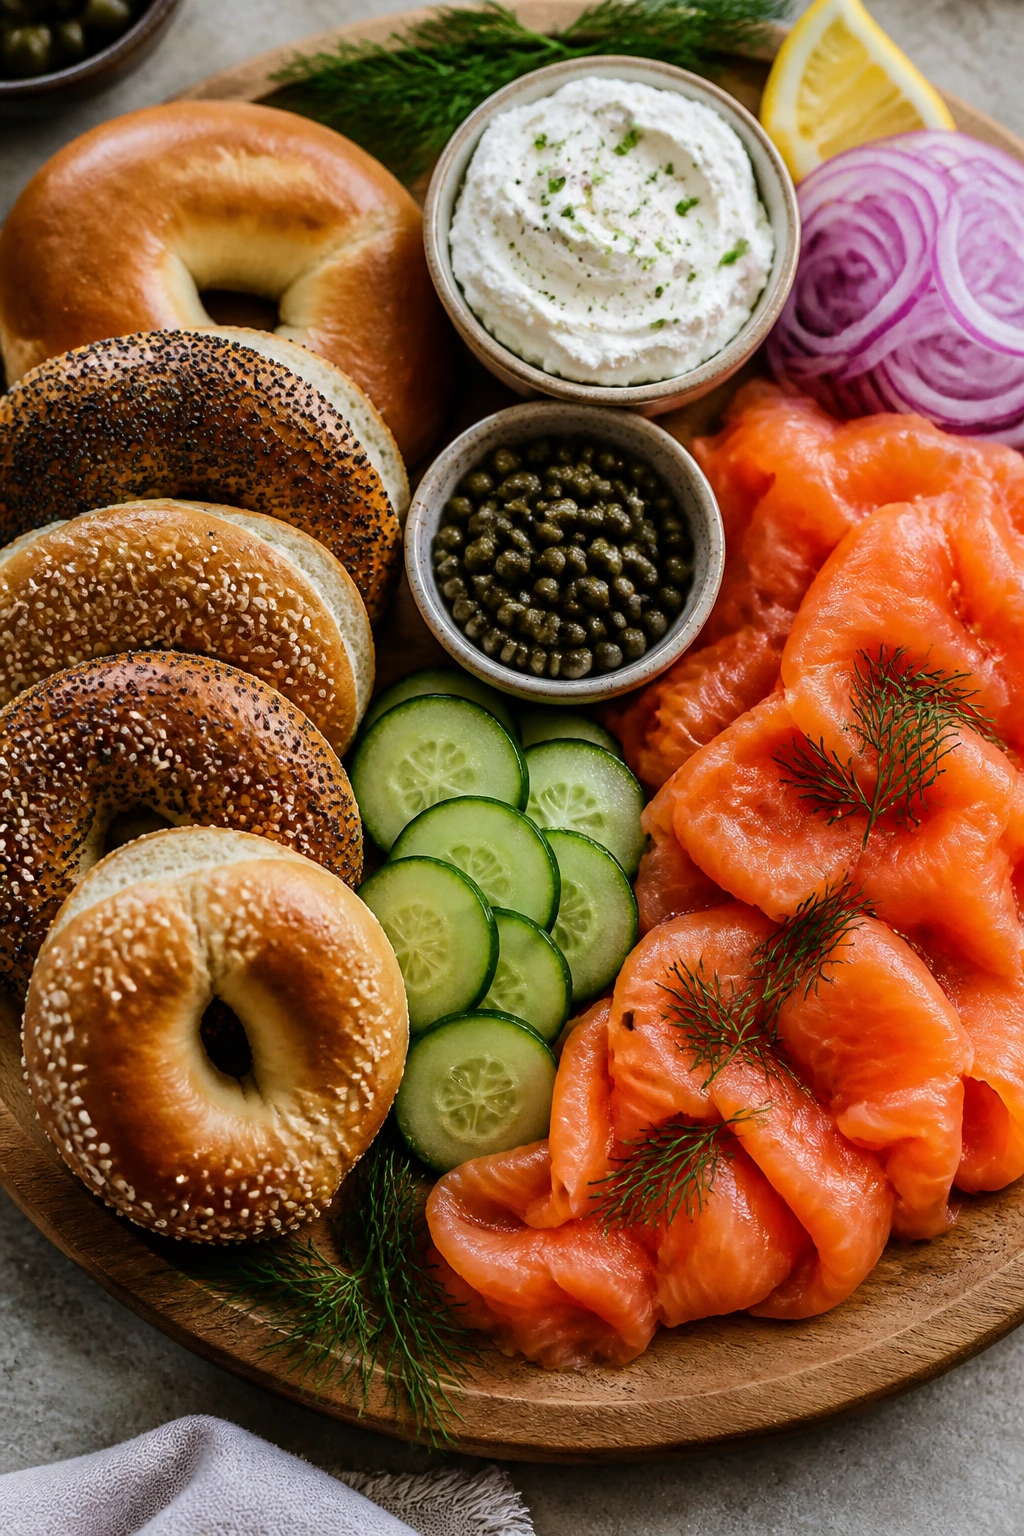
Some dinners are trying too hard. This is not one of them. A smoked salmon board is cold, salty, creamy, and fast, and it feels just fancy enough to make a weeknight less annoying without turning into a production.
The trick is to treat it like a build-your-own situation. Once the salmon, cream cheese, cucumber, capers, and onion are laid out, people can stack their own bagels exactly the way they like them. That’s half the appeal.
Why It Works
Smoked salmon arrives already seasoned, which means it doesn’t need cooking and doesn’t need much help. Cream cheese gives it a soft base, the cucumber keeps things cool, and capers or dill bring enough bite to stop the board from tasting soft and one-note. Bagels hold everything better than sliced bread, which matters when the filling is slick.
Key Ingredients
- 4 plain or everything bagels, split
- 8 ounces smoked salmon
- 8 ounces cream cheese, softened
- 1 cucumber, thinly sliced
- 1 small red onion, thinly sliced
- 2 tablespoons capers, drained
- 2 tablespoons chopped dill
- 1 lemon, cut into wedges
- 1 medium tomato, sliced
- Everything bagel seasoning, optional
Quick Steps
-
Set up the base: Arrange the split bagels on a platter or board.
-
Spread the cream cheese: Use a generous layer on each bagel half so the salmon doesn’t slide off.
-
Layer the toppings: Add smoked salmon, cucumber, red onion, tomato, and capers. Keep the slices loose and uneven instead of packed flat.
-
Add the herbs and lemon: Scatter dill over the board and place lemon wedges nearby.
-
Serve immediately: Give everyone a knife and let them build their own bagel halves.
Tips and Variations
-
Texture trick: Whipped cream cheese spreads cleaner than block cream cheese straight from the fridge.
-
Salt control: Capers and smoked salmon can both be salty, so taste before adding extra salt.
-
Make it sturdier: Add thin slices of avocado if you want the board to eat more like dinner and less like brunch.
6. Turkey Club Lettuce Wraps
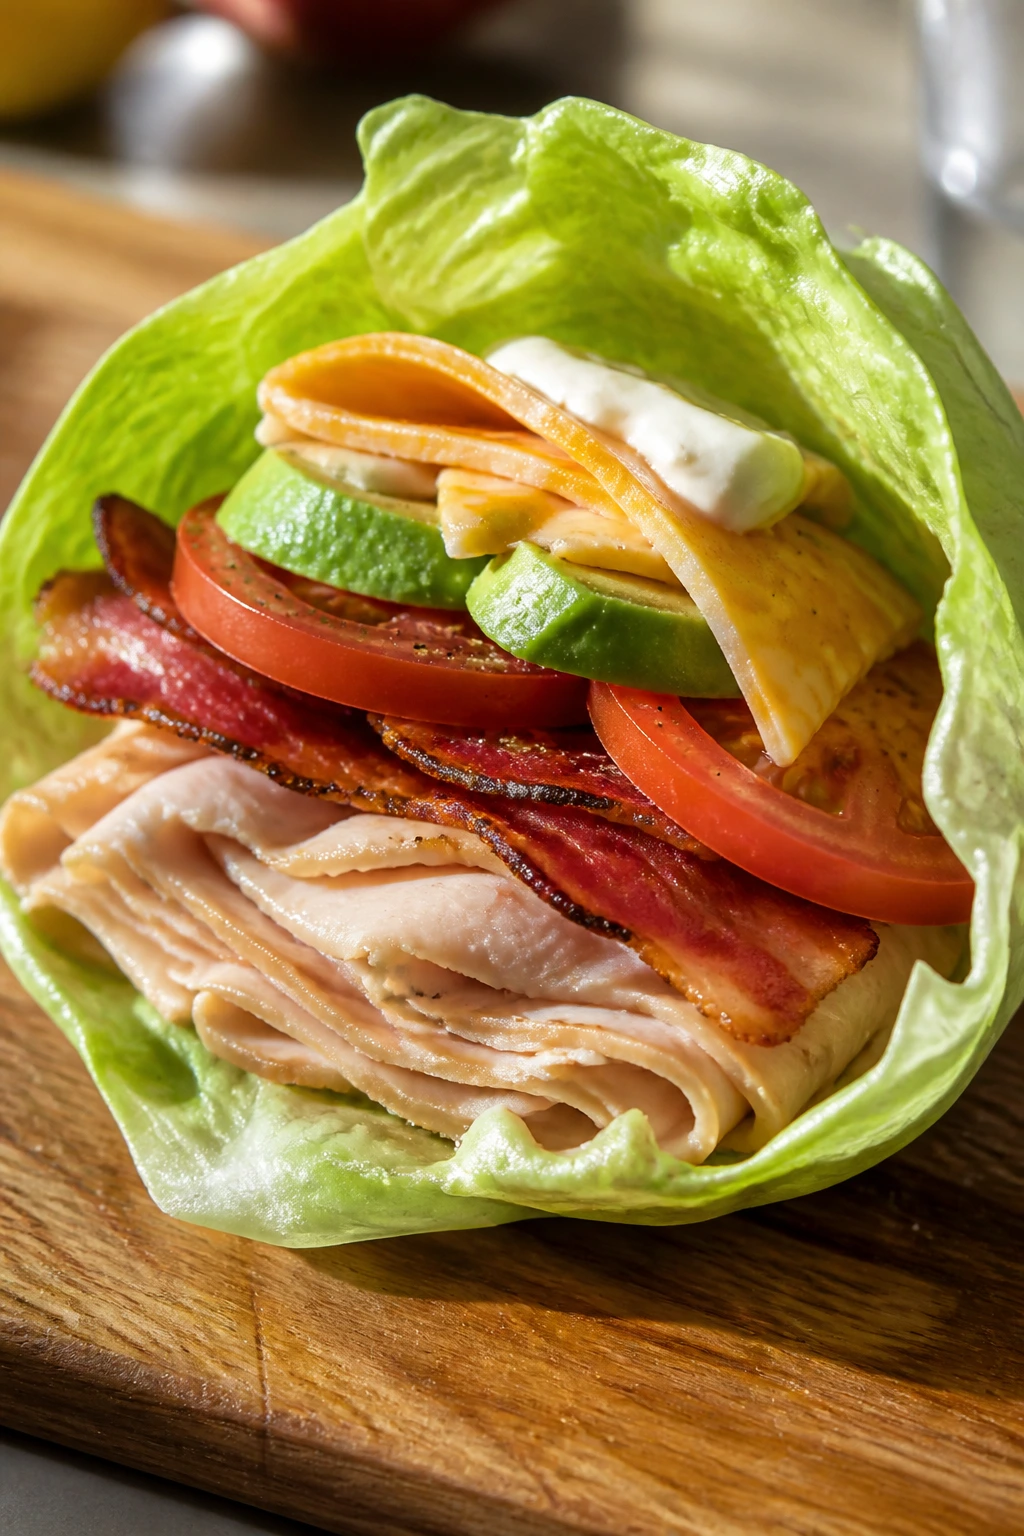
There’s something satisfying about a turkey club that ditches the bread and doesn’t apologize for it. You still get the bacon, the tomato, the cheese, and the savory turkey, but the lettuce keeps it cool enough to eat when the room feels like a greenhouse.
I like this version because it scratches the sandwich itch without demanding a toaster or grill pan. Also, if you stack it right, the first bite is all crunch and salt. That’s the good stuff.
Why It Works
Lettuce wraps work best when the filling is dry enough to hold and flavorful enough to stand on its own. Deli turkey is mild, so the bacon, mustard, and cheese do the important work. Butter lettuce is soft and foldable, while romaine gives more crunch. Either one works, but the leaves need to be dry or the whole thing slips apart.
Key Ingredients
- 12 ounces deli turkey, sliced
- 8 slices cooked bacon
- 1 head butter lettuce or 6 romaine leaves
- 2 medium tomatoes, sliced
- 1 avocado, sliced
- 4 slices cheddar or Swiss cheese
- 2 tablespoons mayo
- 1 tablespoon Dijon mustard
- 1 tablespoon chopped chives, optional
- Black pepper, to taste
Quick Steps
-
Mix the spread: Stir the mayo and Dijon together in a small bowl. Add chives if you have them.
-
Prep the lettuce: Separate the leaves and pat them dry. Dry leaves hold the filling much better.
-
Layer the fillings: Add turkey, bacon, tomato, avocado, and cheese to each leaf. Keep the stack centered so the wrap doesn’t tear.
-
Add the spread and pepper: Spoon on a little of the mayo mixture and finish with black pepper.
-
Fold and eat: Fold the lettuce like a taco or roll it like a loose wrap. Eat right away.
Tips and Variations
-
Best crunch move: Add thin cucumber slices for another layer of freshness.
-
For more bite: A few pickle chips tucked into each wrap make the turkey taste sharper.
-
Lunch-meets-dinner fix: Pair these with potato chips or a cold bean salad if you want a fuller plate.
7. Chilled Gazpacho with Tapenade Crackers
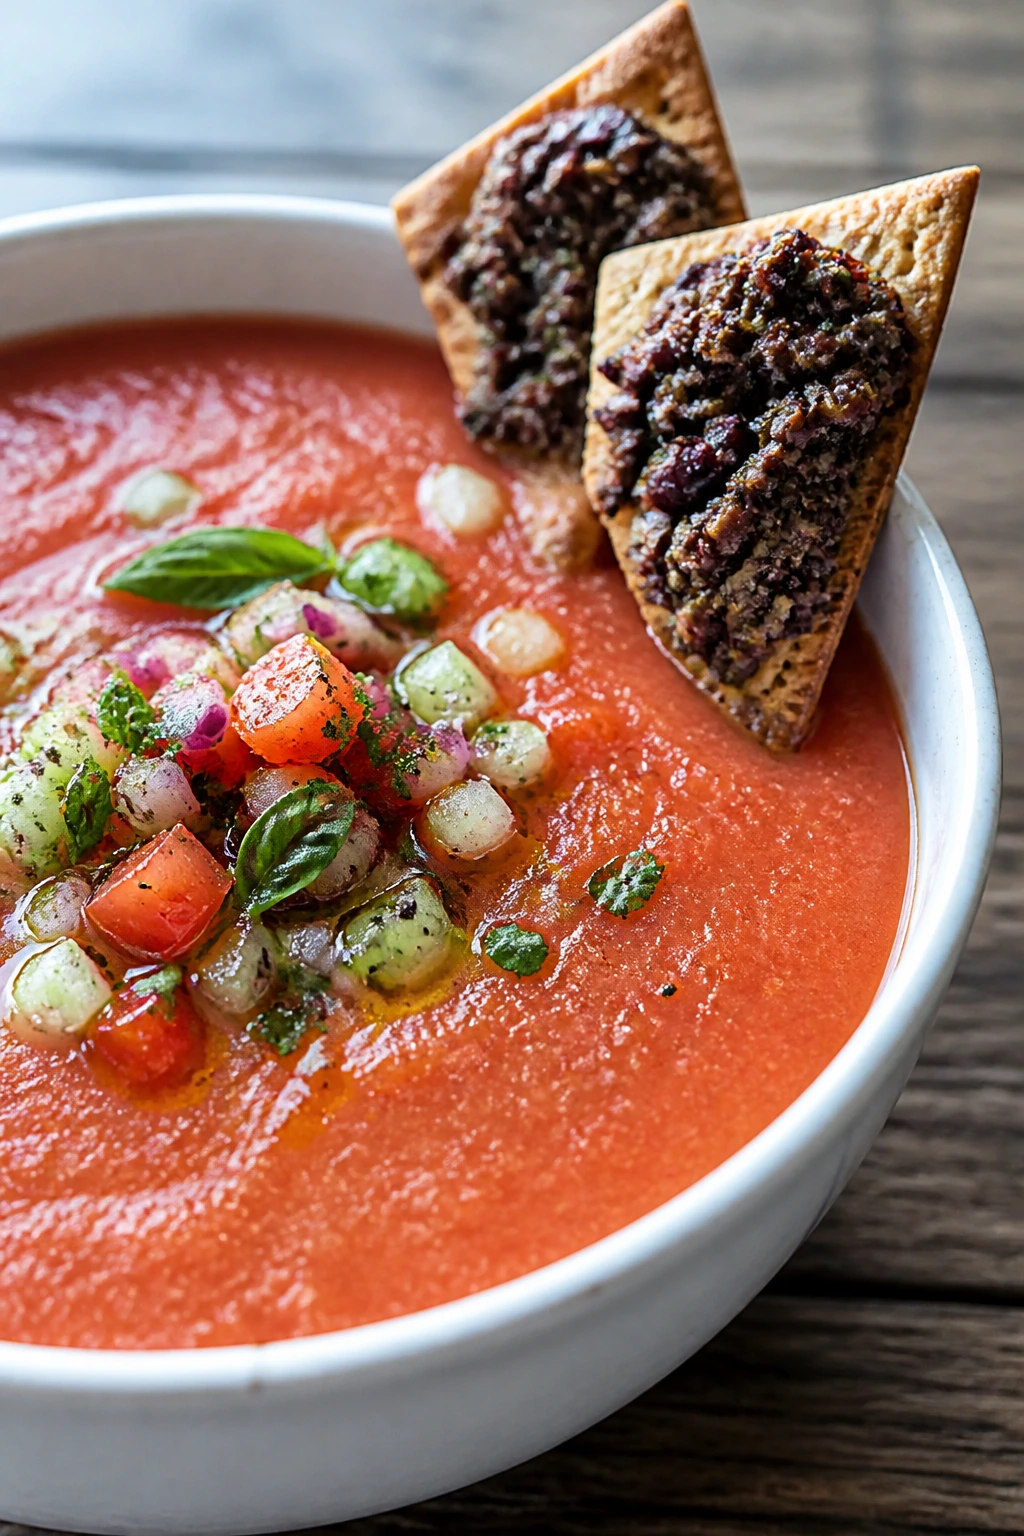
Gazpacho is the cold soup that actually earns its coldness. It tastes like tomatoes in full voice, with cucumber and pepper underneath, and it’s one of the few dinners that gets better after it sits in the fridge for a bit.
The tapenade crackers are the little bonus that turns this from starter to meal. A bowl of gazpacho alone can feel light. Add salty olive spread and something crisp to scoop with, and the whole thing starts behaving more like dinner.
Why It Works
Gazpacho works because it leans into raw vegetables instead of pretending they need heat. The tomatoes give sweetness, the cucumber cools it down, the vinegar sharpens it, and the olive oil smooths the edges. If you blend long enough, the soup turns silky; if you pulse it less, you get a more rustic texture. Both are good. The important part is letting it chill so the flavors stop tasting separate.
Key Ingredients
- 6 ripe tomatoes, chopped
- 1 cucumber, peeled if the skin is tough
- 1 red bell pepper, seeded and chopped
- 1/2 small red onion, chopped
- 1 garlic clove
- 3 tablespoons sherry vinegar or red wine vinegar
- 3 tablespoons olive oil
- 1 teaspoon kosher salt
- 1/4 teaspoon black pepper
- A few dashes hot sauce, optional
- 1/2 cup store-bought olive tapenade
- 1 box crackers or crostini
- Fresh basil, for garnish
Quick Steps
-
Blend the soup base: Combine the tomatoes, cucumber, bell pepper, onion, garlic, vinegar, olive oil, salt, pepper, and hot sauce in a blender.
-
Blend to your preferred texture: Blend until smooth or leave a few small bits if you like a rustic bowl.
-
Chill it down: Refrigerate the soup for at least 30 minutes. Thirty minutes is the bare minimum; an hour tastes better.
-
Prep the crackers: Spread olive tapenade on crackers or crostini.
-
Serve cold: Pour the gazpacho into bowls, top with basil, and serve the crackers on the side.
Tips and Variations
-
If the soup tastes flat: Add another splash of vinegar before serving. Cold soup often needs more acid than you think.
-
Silkier texture: Strain the blended soup through a fine sieve if you want a smoother finish.
-
Heat-lovers’ version: Add chopped jalapeño or a pinch of cayenne to the blender.
8. Shrimp Cocktail Avocado Salad
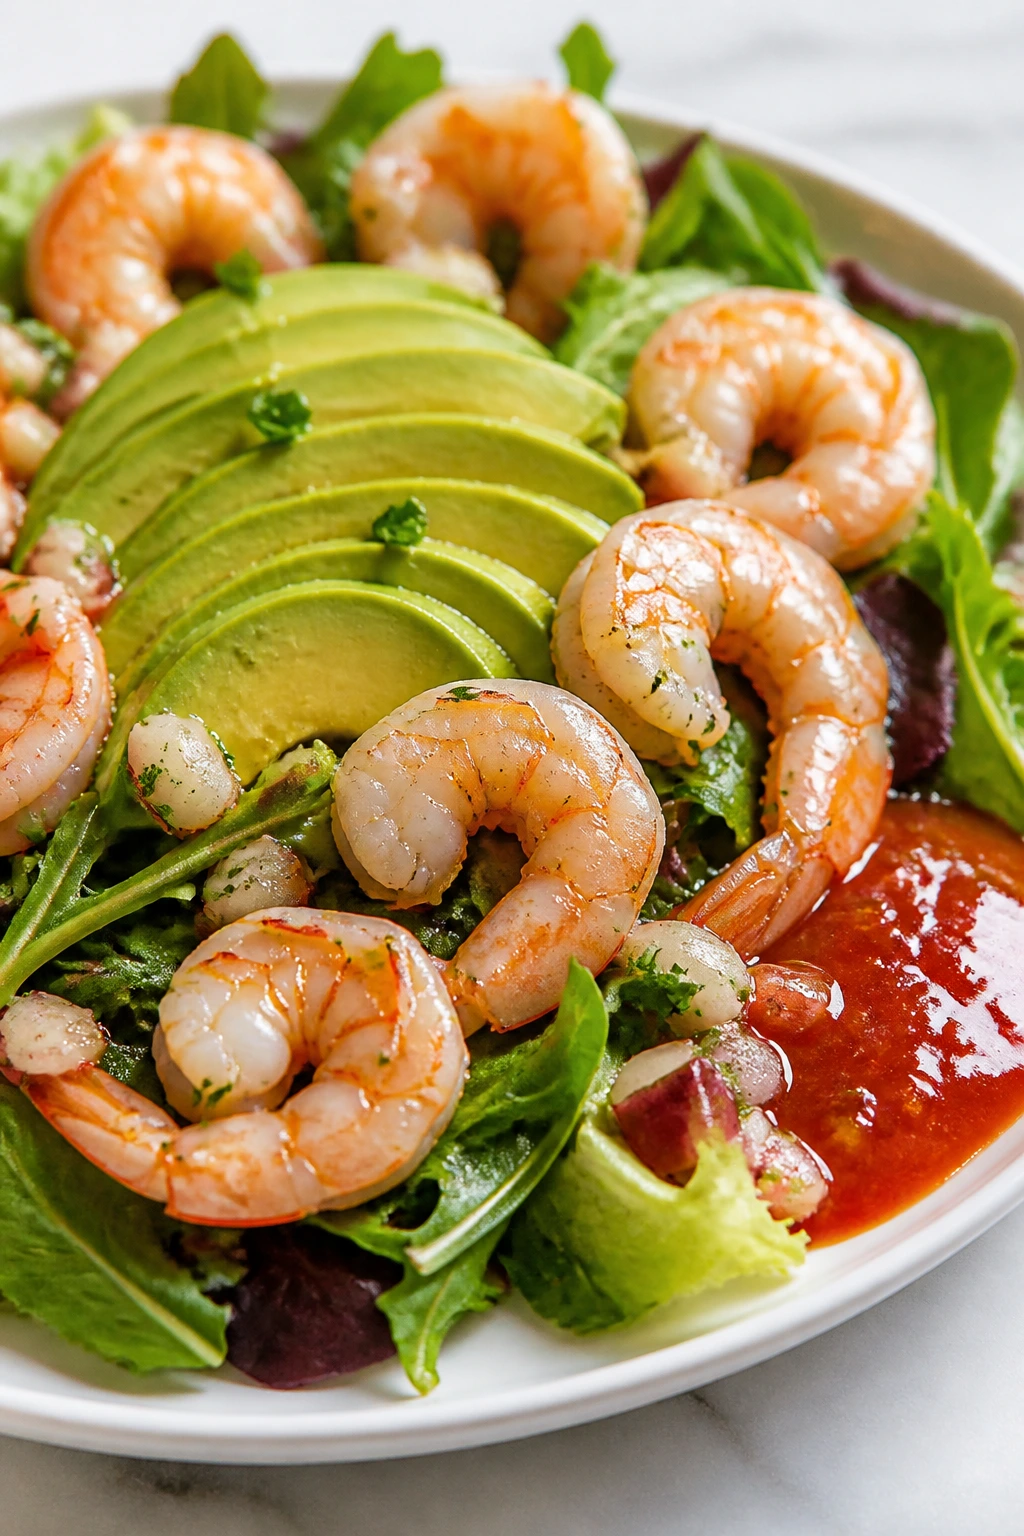
This is shrimp cocktail that got dressed up and stopped pretending it was just a party appetizer. With avocado, cucumber, greens, and a cold spoonful of cocktail sauce, it eats like a real meal instead of a tray snack.
The only thing worth paying attention to here is the shrimp itself. Buy decent cooked shrimp, keep it cold, and do not drown it in sauce. Shrimp has a delicate sweetness that disappears fast under too much dressing.
Why It Works
Cooked shrimp is one of the best no-cook proteins because it’s firm, fast, and already ready to eat. Avocado gives creaminess, greens give volume, and cucumber adds crunch. Cocktail sauce supplies the heat and acid, so you don’t need much else. If you want a more filling plate, tuck the salad into a tortilla or serve it with crackers.
Key Ingredients
- 1 pound cooked shrimp, peeled and deveined
- 2 ripe avocados, sliced
- 3 cups baby greens
- 1 cucumber, sliced
- 1 cup cherry tomatoes, halved
- 2 celery stalks, thinly sliced
- 1/3 cup cocktail sauce
- 1 tablespoon lemon or lime juice
- 1 tablespoon chopped dill or parsley
- Black pepper, to taste
Quick Steps
-
Dry the shrimp: Pat the shrimp with paper towels if they feel wet. Dry shrimp taste cleaner and hold the sauce better.
-
Build the greens: Spread the baby greens across four plates or bowls.
-
Add the vegetables: Scatter cucumber, tomatoes, celery, and avocado over the greens.
-
Top with shrimp: Arrange the shrimp on top in a loose layer.
-
Finish with sauce: Spoon cocktail sauce over the shrimp or serve it on the side with lemon or lime wedges.
Tips and Variations
-
Best buying move: Look for shrimp labeled “cooked” and “peeled” so you’re not doing shell work on a hot night.
-
If avocado browns fast: Toss the slices with lemon juice right before plating.
-
Different flavor path: Swap cocktail sauce for a little yogurt mixed with horseradish and lemon.
9. Hummus Rainbow Veggie Wraps
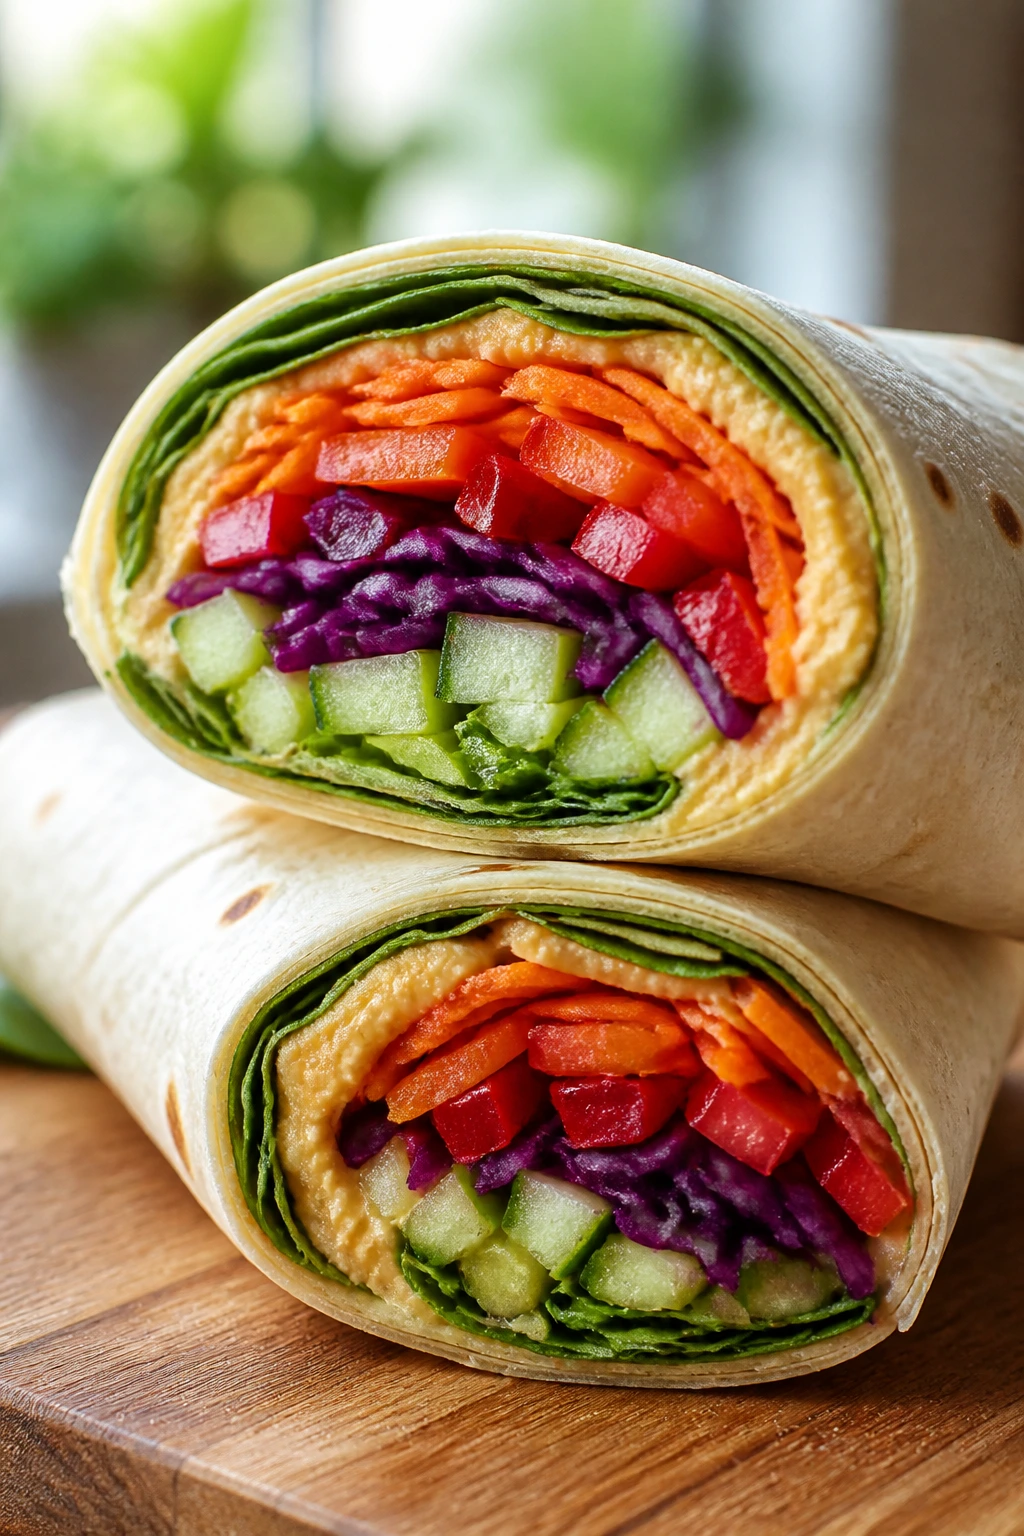
These are the wraps you make when the fridge is full of odds and ends and you need dinner that doesn’t complain. Hummus glues the whole thing together, the vegetables bring color and crunch, and the tortilla does the unglamorous but necessary job of holding it all in place.
I like these more than I should. They’re easy, yes. They’re also one of the few no-cook dinners that can be dressed up with almost no cost if you keep a few vegetables around.
Why It Works
Hummus adds both fat and protein, which keeps a vegetable-heavy wrap from feeling flimsy. Shredded carrots, cabbage, cucumber, and bell pepper each bring a different kind of crunch, so the wrap doesn’t collapse into one soft texture. A little feta or sunflower seed crunch gives it a finished feel, but the basic version is still solid.
Key Ingredients
- 1 cup hummus
- 4 large tortillas or lavash
- 1 cup shredded carrots
- 1 cup shredded red cabbage
- 1 cucumber, cut into matchsticks
- 1 red bell pepper, sliced thin
- 2 cups baby spinach
- 1/2 cup crumbled feta, optional
- 1/4 cup roasted sunflower seeds, optional
- 1 tablespoon lemon juice
Quick Steps
-
Spread the hummus: Smear hummus across each tortilla, leaving a small border at the edge.
-
Layer the vegetables: Add spinach, carrots, cabbage, cucumber, and bell pepper in the center.
-
Add the extras: Sprinkle feta and sunflower seeds over the top if you’re using them.
-
Brighten it up: Drizzle lightly with lemon juice and a pinch of black pepper.
-
Roll tightly: Fold in the sides, then roll from the bottom up. Slice in half if you want cleaner edges.
Tips and Variations
-
Dry vegetables first: Wet cucumbers or spinach make the tortilla slippery, and that gets messy fast.
-
Protein bump: Add a handful of chickpeas or some sliced hard-boiled eggs if you want more staying power.
-
Different spread: Baba ganoush or tahini yogurt can replace the hummus without changing the whole method.
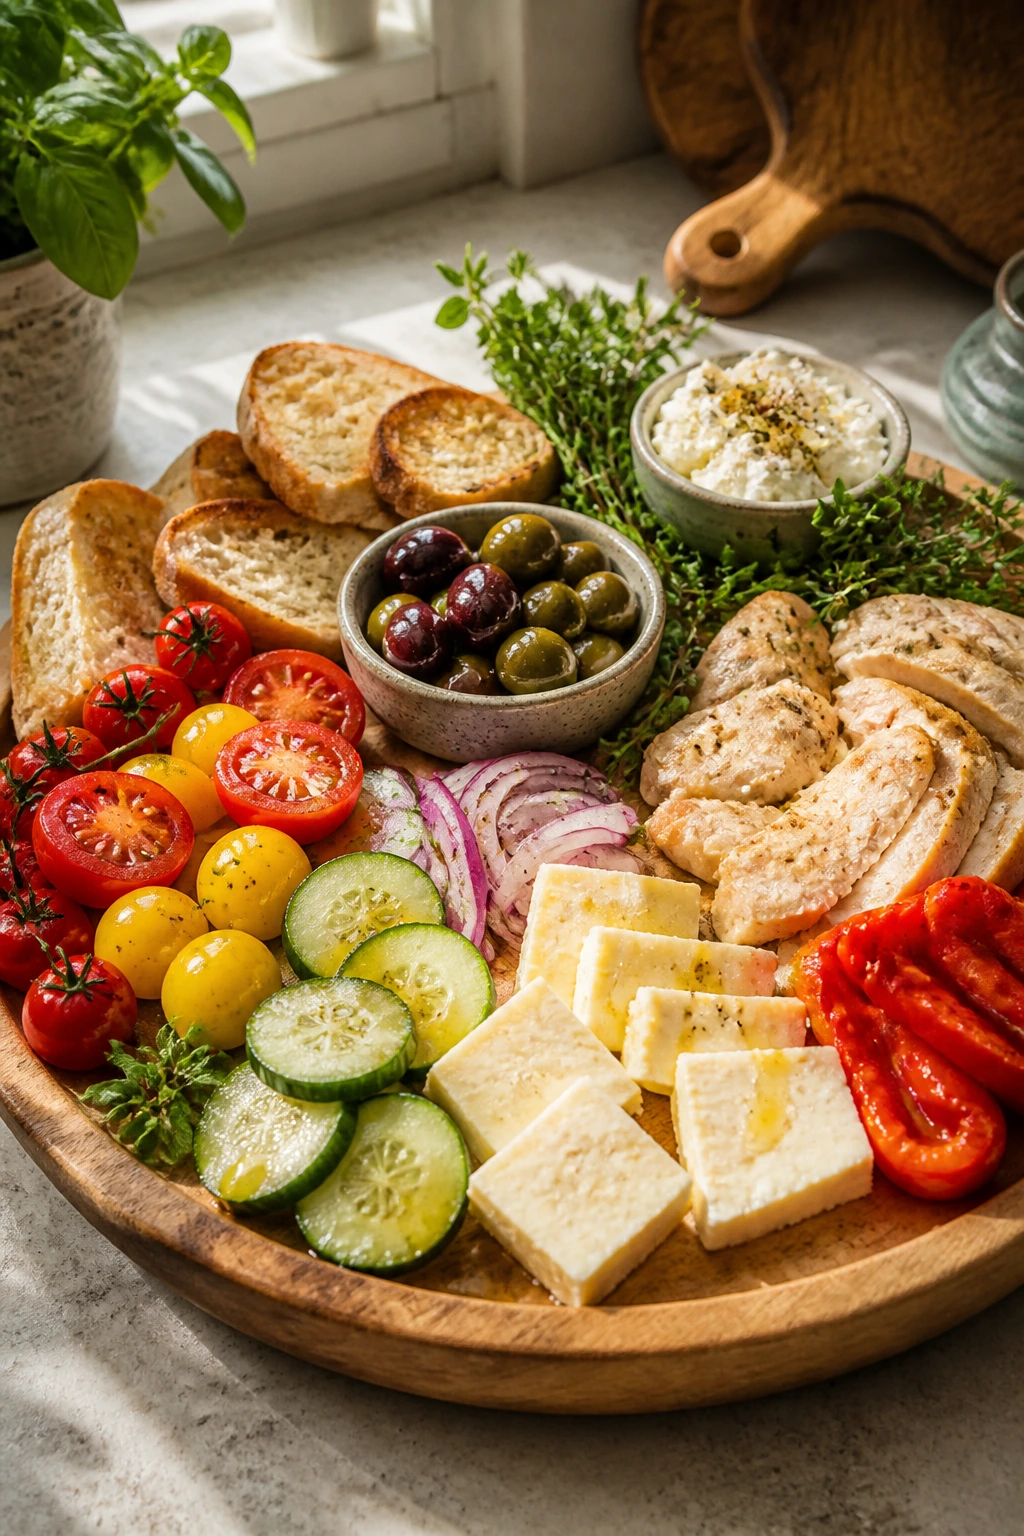
10. Antipasto Dinner Board
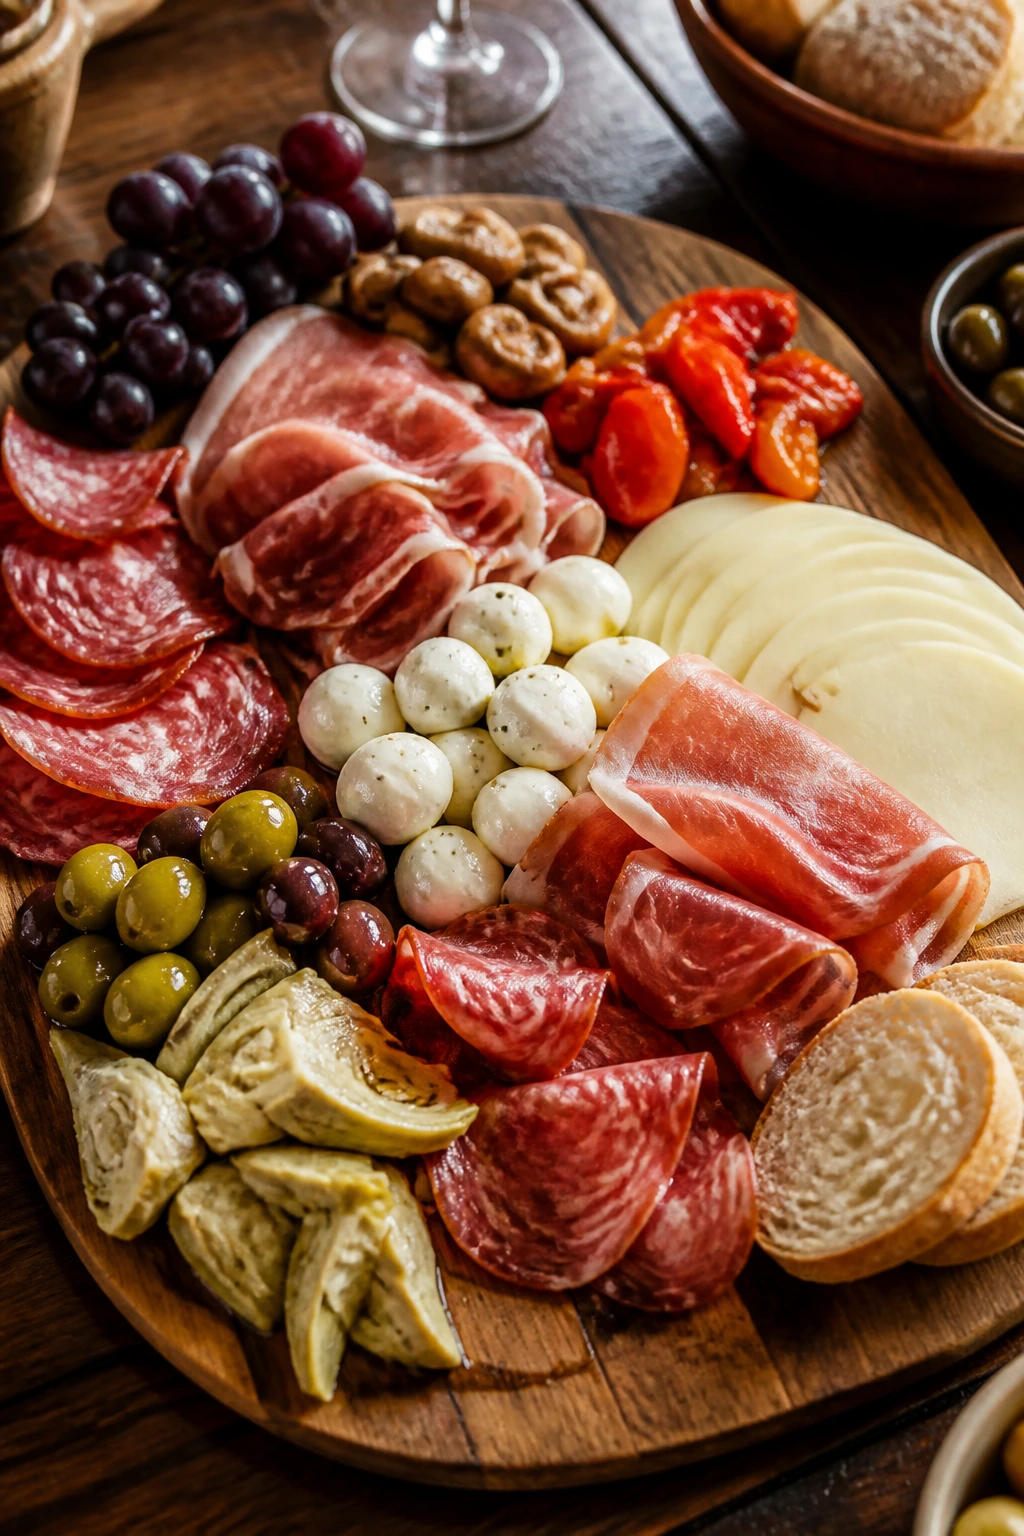
An antipasto board is the dinner version of grazing, and I mean that as a compliment. It lets you pull together salami, cheese, artichokes, olives, peppers, and bread into something that feels generous without requiring a single burner.
The only rule is that every bite should have contrast. If the board is all soft or all salty, it gets dull quickly. Add one acidic thing, one crunchy thing, and one fresh thing, and the whole board wakes up.
Why It Works
Antipasto is built on balance. Cured meats bring richness, pickled vegetables bring acid, cheese softens the salt, and crackers or bread give you structure. Because nothing needs cooking, the job is really about pacing and arrangement. A board that has a few little bowls for wet items stays cleaner and tastes better than one giant heap of food.
Key Ingredients
- 6 ounces salami, folded
- 4 ounces prosciutto or soppressata
- 6 ounces provolone, sliced
- 6 ounces fresh mozzarella balls
- 1 cup marinated artichoke hearts
- 1 cup mixed olives
- 1/2 cup pepperoncini
- 1/2 cup roasted red peppers, sliced
- 1/2 cup marinated mushrooms
- 1 cup grapes or cherries
- Crackers, bread, or breadsticks
- Fresh basil, optional
Quick Steps
-
Choose your board: Use a large platter, cutting board, or tray with enough room for everything to breathe.
-
Place the anchors: Set the cheeses, meats, and small bowls for marinated vegetables first.
-
Add the fresh items: Tuck grapes or cherries into the gaps so the board doesn’t feel heavy.
-
Fill the spaces: Add crackers, bread, and basil sprigs where they fit.
-
Serve cold or cool: Keep the board chilled until the last minute so the cheeses and meats stay firm.
Tips and Variations
-
Better board rule: Put the wet pickled items in little bowls so the crackers don’t go soggy.
-
Make it more filling: Add a can of drained white beans with olive oil and parsley.
-
Wine-night version: A few slices of melon or figs make the board feel more complete without extra work.
11. Peanut-Lime Zoodle Bowls with Tofu
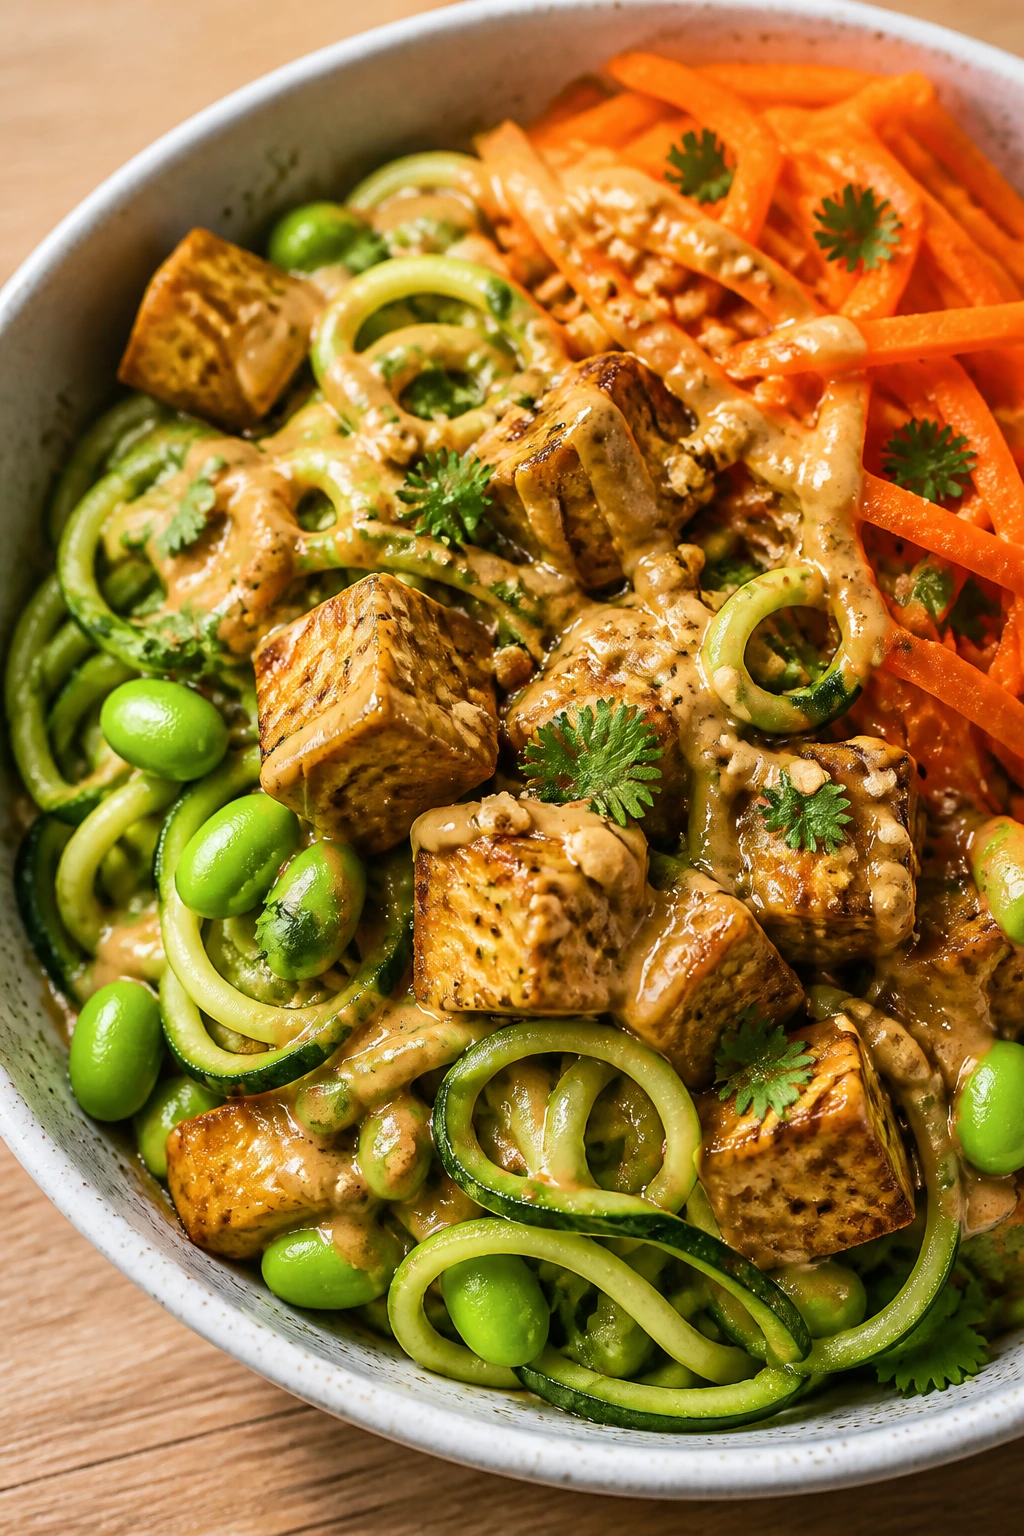
Zucchini noodles are at their best when they stay crisp and cold, which is exactly why they fit here. The peanut-lime sauce gives the bowl real heft, the tofu keeps it filling, and the raw carrots and edamame keep the whole thing from tasting soft and samey.
This is one of my favorite no-cook dinners for people who want something that eats like a composed bowl, not a salad in disguise. It’s bright, a little nutty, and way more satisfying than it looks on paper.
Why It Works
Raw zucchini gives you a clean, cool base, but it can be watery if you don’t treat it right. A quick salt-and-blot step helps, and the peanut sauce clings better if it’s thick enough to coat a spoon. Extra-firm tofu is mild, which lets the sauce do the talking, and it turns the bowl into a real meal with decent protein.
Key Ingredients
- 3 medium zucchini, spiralized
- 14 ounces extra-firm tofu, cubed
- 1 cup shredded carrots
- 1 cup thawed shelled edamame
- 3 tablespoons peanut butter
- 2 tablespoons lime juice
- 1 tablespoon soy sauce
- 1 teaspoon honey
- 1 teaspoon sesame oil
- 2 tablespoons water, plus more if needed
- 1 teaspoon grated fresh ginger
- 2 tablespoons chopped cilantro
- 2 tablespoons chopped peanuts
Quick Steps
-
Dry the zoodles: Toss the spiralized zucchini with a small pinch of salt and let it sit for 5 minutes. Blot it dry with paper towels so the bowl doesn’t get watery.
-
Make the sauce: Whisk the peanut butter, lime juice, soy sauce, honey, sesame oil, water, and ginger until smooth. Add more water a teaspoon at a time if it’s too thick.
-
Build the bowl base: Combine the zoodles, carrots, and edamame in a large bowl.
-
Add the tofu: Scatter the tofu cubes over the vegetables.
-
Finish and serve: Drizzle with peanut sauce, top with cilantro and peanuts, and toss gently right before eating.
Tips and Variations
-
Tofu tip: Use extra-firm tofu that’s been pressed at the store or at home; soft tofu turns mushy fast.
-
Heat boost: A little chili crisp or sriracha changes the bowl from mellow to sharp.
-
Protein swap: Rotisserie chicken or canned chickpeas work if tofu isn’t your thing.
12. Cauliflower Rice Taco Salad
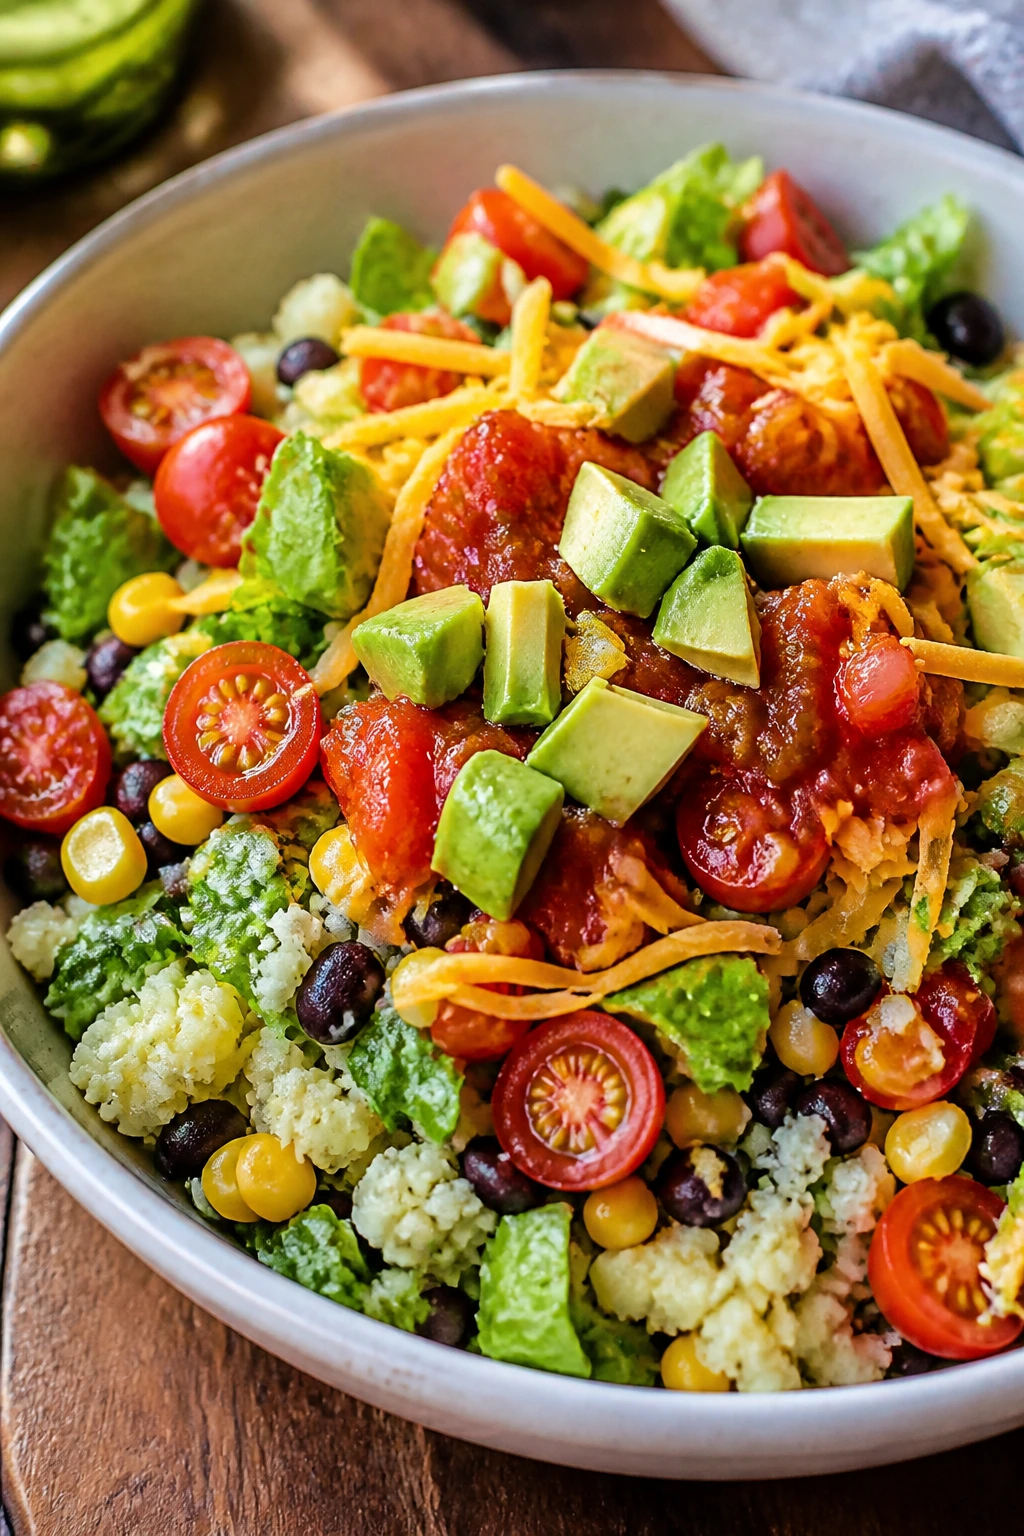
This is taco night stripped down to the parts people actually want: crunch, spice, cheese, avocado, and salsa. Cauliflower rice gives the bowl a base that feels light but still holds toppings the way lettuce sometimes can’t.
It’s also one of the easiest ways to use up odds and ends from the produce drawer. A handful of tomatoes, a half-used jar of salsa, and a can of beans suddenly turn into dinner instead of a fridge cleanup project.
Why It Works
Raw cauliflower rice is mild and crisp, which makes it a good blank slate for bold taco flavors. Black beans add substance, salsa acts like a dressing, and avocado brings the creamy piece that keeps the bowl from feeling dry. Tortilla chips on top matter more than people think; they add a salty crunch that makes the bowl taste finished.
Key Ingredients
- 4 cups cauliflower rice
- 1 can black beans, drained and rinsed
- 1 cup corn kernels, thawed if frozen
- 3 cups chopped romaine
- 1 cup cherry tomatoes, halved
- 1 avocado, diced
- 1/2 cup salsa
- 1/2 cup shredded cheddar or Monterey Jack
- 1/3 cup crushed tortilla chips
- 2 tablespoons lime juice
- 2 tablespoons chopped cilantro
Quick Steps
-
Season the base: Toss the cauliflower rice with lime juice and a small pinch of salt. That wakes it up a little.
-
Add the vegetables: Mix in the romaine, black beans, corn, and tomatoes.
-
Fold in the cheese: Sprinkle in the cheddar and cilantro.
-
Top the bowl: Add the avocado and crushed tortilla chips right before serving.
-
Finish with salsa: Spoon salsa over each bowl, then toss lightly so it coats everything without turning it soggy.
Tips and Variations
-
Less watery bowl: Drain the beans and corn well before adding them.
-
Spice control: Use mild salsa for kids, or add pickled jalapeños if you want more heat.
-
More filling: Add sliced deli turkey or leftover cooked chicken if you have it, though the bowl is solid on its own.
13. Black Bean Mango Lettuce Cups

These are sweet, sharp, and fresh in a way that makes a hot day feel less punishing. Mango brings a soft juicy note, black beans bring heft, and butter lettuce gives you little edible cups that feel a bit playful without becoming childish.
I like this style of dinner when I want something bright but not flimsy. The mango keeps the beans from tasting heavy, and the lime does the important work of making the whole thing taste alive.
Why It Works
Black beans are filling, but they need acid and something sweet to keep them from tasting flat. Mango handles the sweet part, lime handles the acid, and cilantro adds the herbal edge that makes the filling feel fresh instead of canned. Lettuce cups also keep the dish crisp, which is useful when you want dinner without a pile of bread or a pile of heat.
Key Ingredients
- 2 cans black beans, drained and rinsed
- 1 ripe mango, diced
- 1 avocado, diced
- 1 small red onion, finely diced
- 1 jalapeño, seeded and minced
- 1/2 cup chopped cilantro
- 2 tablespoons lime juice
- 1 tablespoon olive oil
- 1/2 teaspoon kosher salt
- 8 to 10 butter lettuce leaves
- 2 tablespoons pepitas
- 1/4 cup crumbled cotija, optional
Quick Steps
-
Mix the filling: Combine the black beans, mango, avocado, onion, jalapeño, cilantro, lime juice, olive oil, and salt in a bowl.
-
Let it sit briefly: Give it 5 minutes so the lime can sharpen the flavor and the beans can pick up some seasoning.
-
Set out the lettuce cups: Arrange the butter lettuce leaves on a platter.
-
Fill the cups: Spoon the bean mixture into the leaves.
-
Finish with crunch: Sprinkle pepitas and cotija over the top, then serve right away.
Tips and Variations
-
Ripe mango matters: It should yield slightly when pressed, but not collapse into mush.
-
Sturdier option: Endive leaves work if you want a smaller, less floppy cup.
-
Extra dinner body: Add thawed corn or diced cucumber if you want more volume.
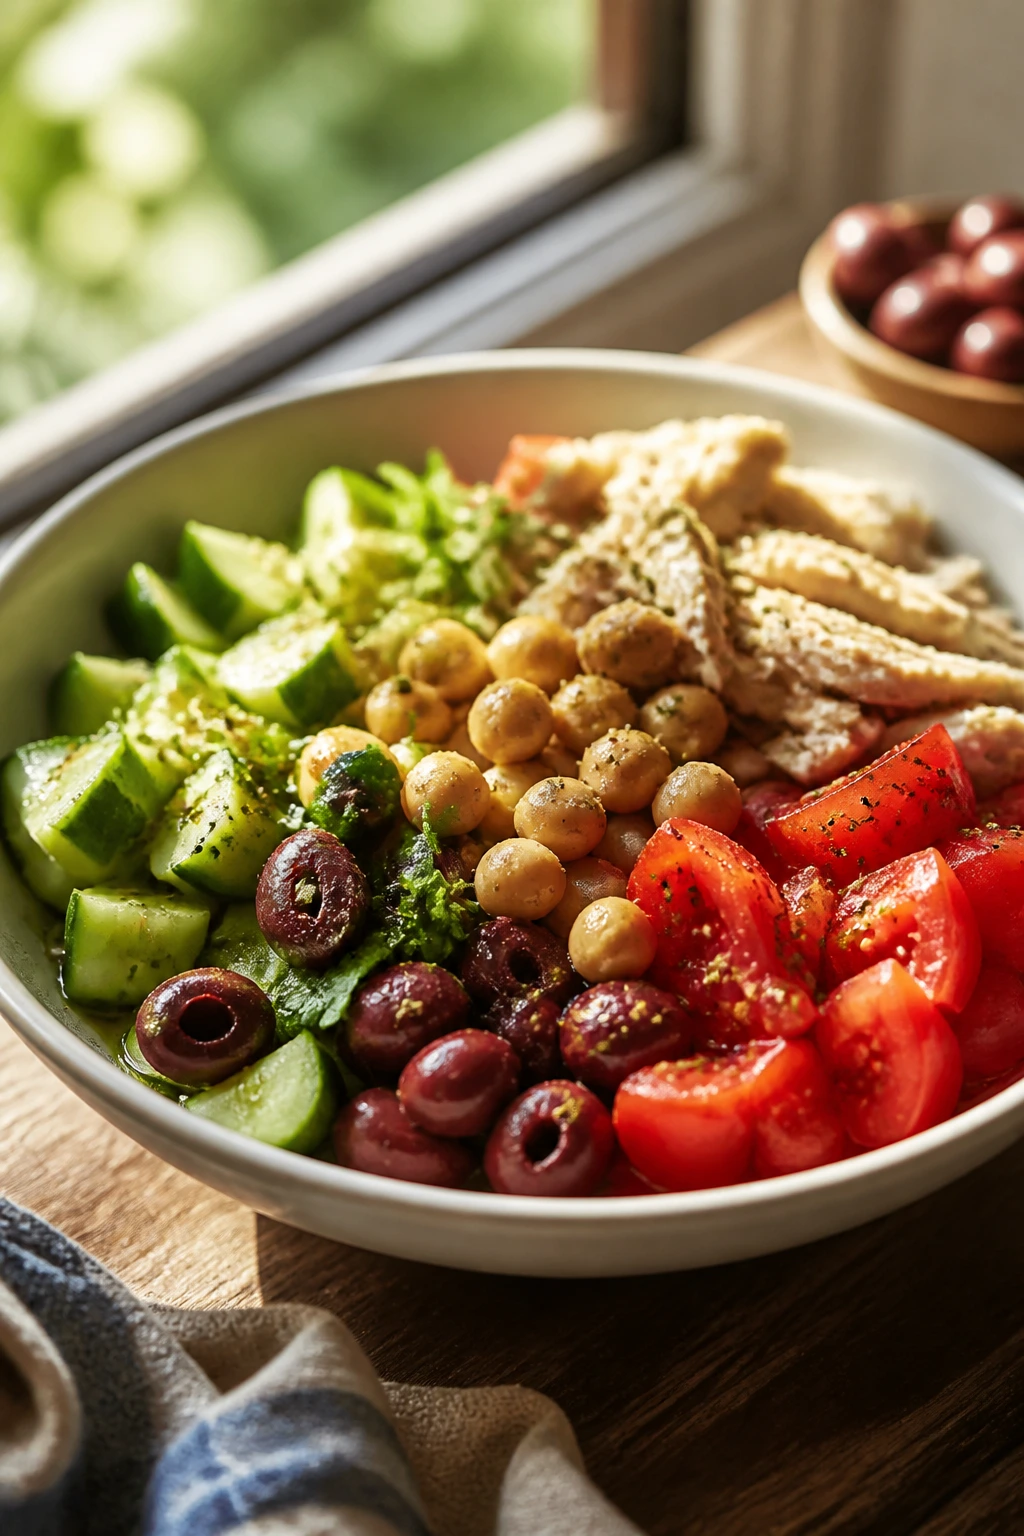
14. Mediterranean Cottage Cheese Bowls

Cottage cheese is one of those ingredients people either ignore or defend fiercely. I’m in the second camp. It’s cool, salty, and filling, and when you treat it like a dinner base instead of a diet relic, it starts making a lot more sense.
With tomatoes, cucumber, olives, chickpeas, and a little za’atar, this bowl gets a proper savory backbone. It’s fast. It’s not fussy. And it has enough protein to keep you from rummaging the kitchen an hour later.
Why It Works
Cottage cheese brings a creamy texture and a solid protein hit without needing cooking. The Mediterranean toppings add salt, crunch, and brightness, which is exactly what cottage cheese needs to stop tasting bland. Za’atar gives the bowl a savory-herbal finish, and a drizzle of olive oil smooths everything out.
Key Ingredients
- 2 cups cottage cheese
- 1 cucumber, diced
- 1 cup cherry tomatoes, halved
- 1/2 cup canned chickpeas, drained and rinsed
- 1/4 cup Kalamata olives, sliced
- 2 tablespoons chopped dill
- 1 teaspoon za’atar
- 1 tablespoon olive oil
- 1 teaspoon lemon juice
- 1/4 teaspoon black pepper
- Pita chips or seeded crackers, for serving
Quick Steps
-
Season the cottage cheese: Put the cottage cheese in bowls and stir in lemon juice, black pepper, and half the za’atar.
-
Add the toppings: Scatter the cucumber, tomatoes, chickpeas, olives, and dill on top.
-
Drizzle with oil: Finish with olive oil and the remaining za’atar.
-
Serve with crunch: Add pita chips or crackers on the side for scooping.
Tips and Variations
-
Texture choice: Small-curd cottage cheese feels looser and creamier; whipped cottage cheese tastes smoother.
-
If you want more bite: Add chopped radish or sliced red onion.
-
Good swap: Labneh or thick Greek yogurt can stand in if cottage cheese is not your thing.
15. Roast Beef Horseradish Sandwiches

Sharp horseradish wakes roast beef up in a way that plain mayo never will. Add arugula, tomato, pickles, and good rye bread, and you’ve got a sandwich that feels deliberate instead of thrown together.
This is one of the rare no-cook dinners that tastes better when the flavors are a little aggressive. That peppery bite is the point. Don’t sand it down too much.
Why It Works
Roast beef is rich and savory, so it benefits from something sharp. Horseradish cuts through the fat, arugula adds a peppery note of its own, and pickles bring acid and crunch. Rye bread gives the sandwich structure and a flavor that can hold up to all that salt. If the bread is too soft, the whole thing loses shape fast, so sturdier bread matters here.
Key Ingredients
- 12 ounces deli roast beef
- 4 slices rye bread or crusty sandwich bread
- 3 tablespoons horseradish sauce
- 2 tablespoons mayo
- 1 cup arugula
- 1 medium tomato, sliced
- 1/4 red onion, thinly sliced
- 4 dill pickle chips
- 4 slices provolone
- Black pepper, to taste
Quick Steps
-
Mix the spread: Stir the horseradish sauce and mayo together.
-
Build the base: Spread the horseradish mixture on each slice of bread.
-
Layer the fillings: Add roast beef, provolone, arugula, tomato, onion, and pickles.
-
Season lightly: Add black pepper and press the sandwich gently.
-
Slice and serve: Cut in half so the layers hold together better.
Tips and Variations
-
Less sharp: Use more mayo and less horseradish if you want the flavor softer.
-
Open-faced version: Serve it on thick toast or rye crispbread if you want a knife-and-fork dinner.
-
Best side: Potato chips or a cucumber salad keeps the plate simple and satisfying.
16. Prosciutto Peach Burrata Salad
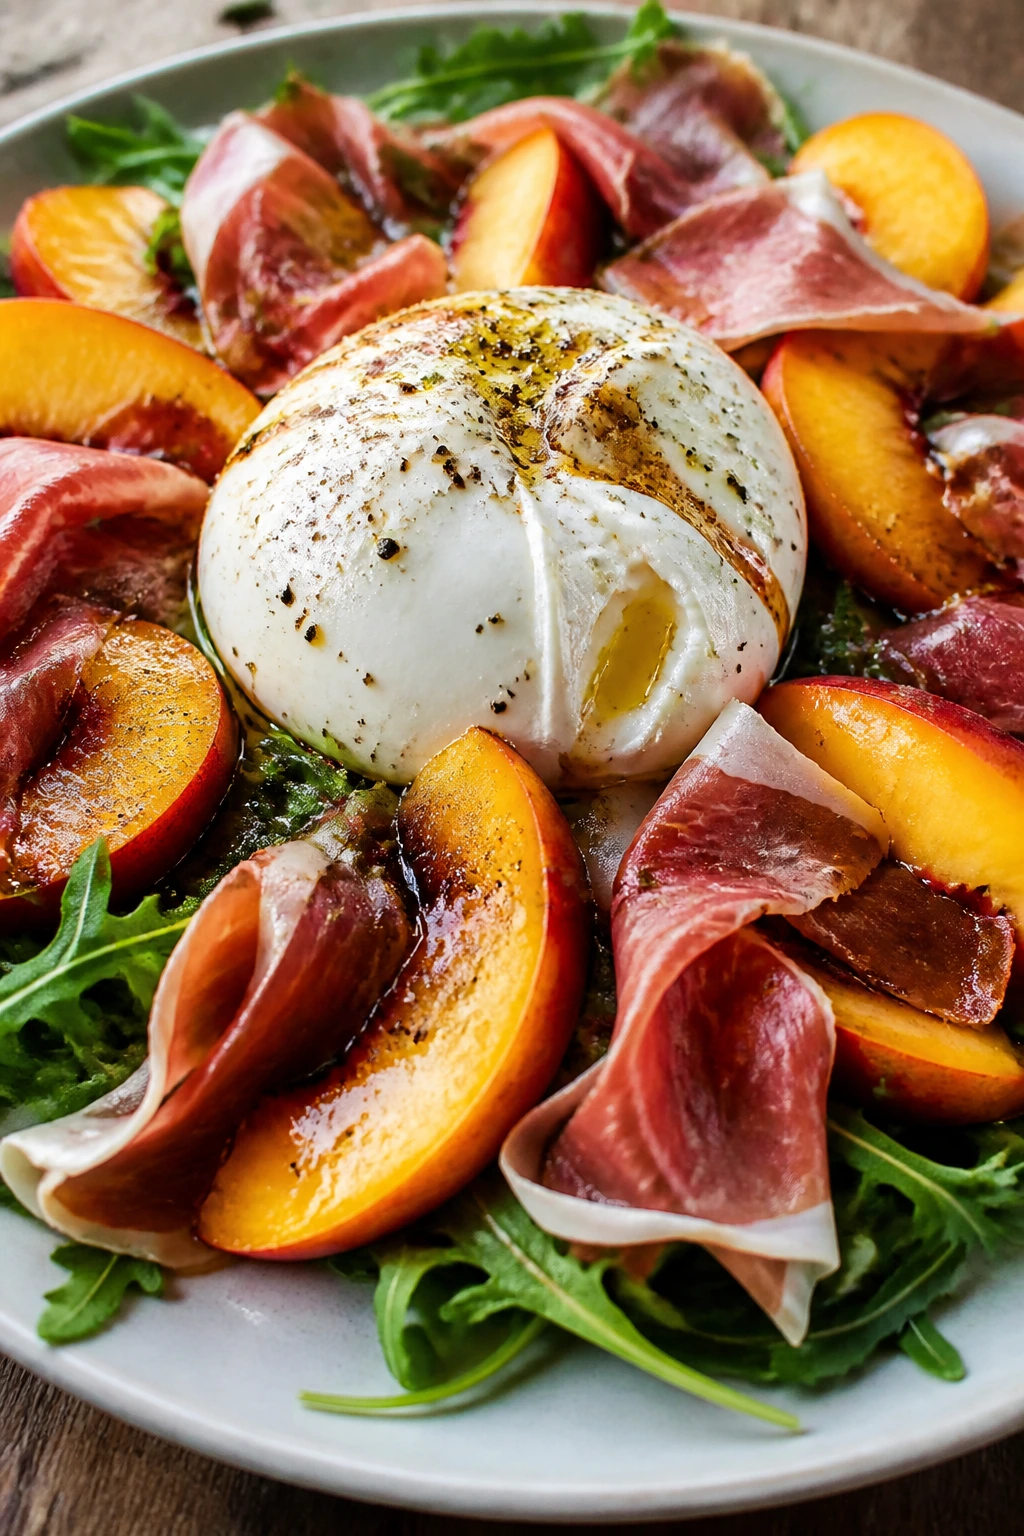
A ripe peach with burrata and prosciutto is one of those combinations that feels almost unfair. Sweet fruit, salty meat, soft cheese, bitter greens — it’s a short list, but each thing matters.
This salad has a little drama without any actual work. That’s the kind of drama I can support. If the peaches are good, you barely need to touch anything.
Why It Works
Prosciutto brings salt and texture, burrata brings creaminess, and peaches bring juice and sweetness. Arugula keeps the salad from turning cloying, and balsamic glaze ties the flavors together with a dark, slightly sweet finish. The one mistake to avoid is serving underripe peaches; they make the whole thing taste flat and stubborn.
Key Ingredients
- 4 ounces prosciutto
- 2 ripe peaches, sliced
- 1 ball burrata, about 8 ounces
- 3 cups arugula
- 1/4 cup basil leaves
- 2 tablespoons olive oil
- 1 tablespoon balsamic glaze
- 2 tablespoons pistachios or sliced almonds
- Flaky salt, to taste
- Black pepper, to taste
Quick Steps
-
Arrange the greens: Spread the arugula on a platter or divide it among four plates.
-
Add the burrata: Place the burrata in the center and tear it open slightly.
-
Layer the peaches and prosciutto: Scatter the peach slices and drape the prosciutto in loose folds.
-
Finish the salad: Drizzle with olive oil and balsamic glaze. Add basil, nuts, flaky salt, and black pepper.
-
Serve right away: Burrata tastes best when it’s cool but not icy.
Tips and Variations
-
Better cheese texture: Let burrata sit out for 15 to 20 minutes before serving so the center loosens.
-
Fruit swap: Nectarines work just as well if they’re firmer.
-
Extra crunch: Toasted pistachios add a nice snap, especially with the soft cheese.
17. Sardine White Bean Lemon Salad
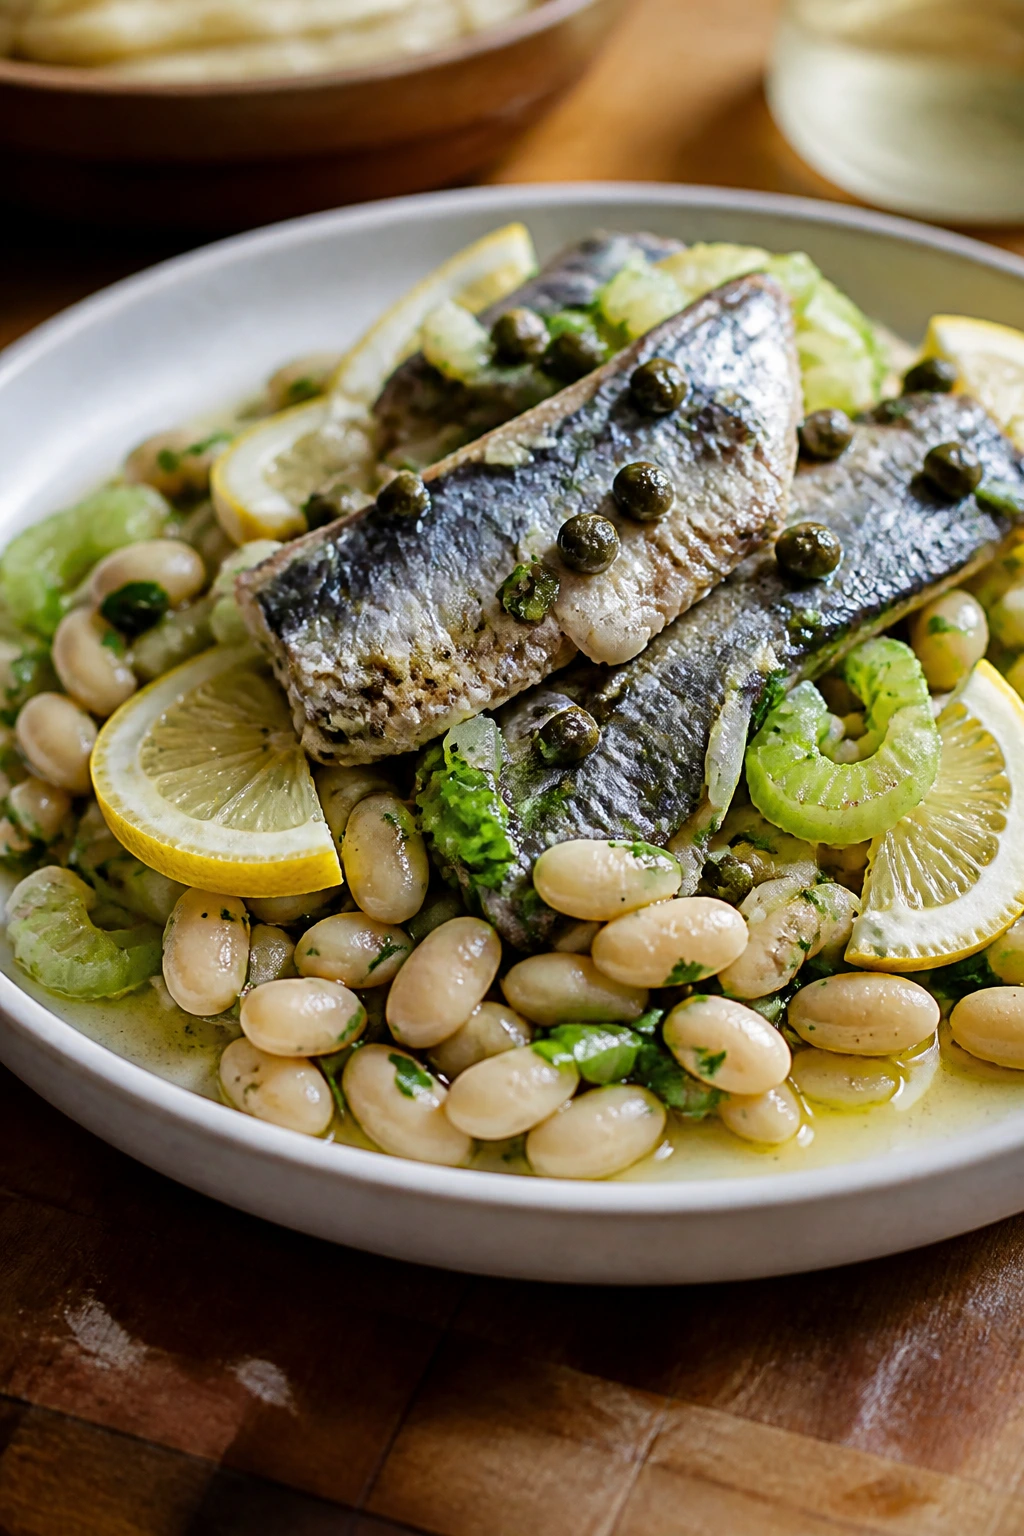
Sardines are not subtle. That’s the point. When you put them with white beans, lemon, capers, and celery, the whole plate turns briny, bright, and much more dinner-friendly than people expect.
This is a pantry dinner with a backbone. It’s cheap, fast, and weirdly satisfying if you like salty food that tastes like it has a plan.
Why It Works
Sardines bring rich omega-style fat and strong flavor, while white beans soften the edges and make the salad feel like a meal. Lemon and capers keep the fish from tasting heavy, and celery gives the bowl a cold crunch. If sardines are new to you, this is a gentle way to meet them without making them the only thing on the plate.
Key Ingredients
- 2 tins sardines in olive oil
- 1 can cannellini beans, drained and rinsed
- 2 celery stalks, thinly sliced
- 1/4 cup red onion, minced
- 2 tablespoons capers
- 2 tablespoons chopped parsley
- 2 tablespoons lemon juice
- 1 tablespoon olive oil
- 1 teaspoon Dijon mustard
- Black pepper, to taste
- Crackers or greens, for serving
Quick Steps
-
Make the base: Combine the beans, celery, red onion, capers, parsley, lemon juice, olive oil, Dijon, salt, and pepper in a bowl.
-
Taste the bean mixture: It should be sharp and a little salty before the sardines go in.
-
Add the sardines: Lay them on top in large pieces instead of crushing them into the salad.
-
Serve on crackers or greens: Spoon the mixture onto crackers or over greens.
-
Finish with pepper: Add another crack of pepper right before eating.
Tips and Variations
-
If sardines seem intense: Skinless, boneless sardines taste gentler and blend in more easily.
-
Creamier texture: Mash a few beans against the side of the bowl before adding the fish.
-
Herb swap: Dill works well if parsley is not in the fridge.
18. Chopped Italian Sub Salad
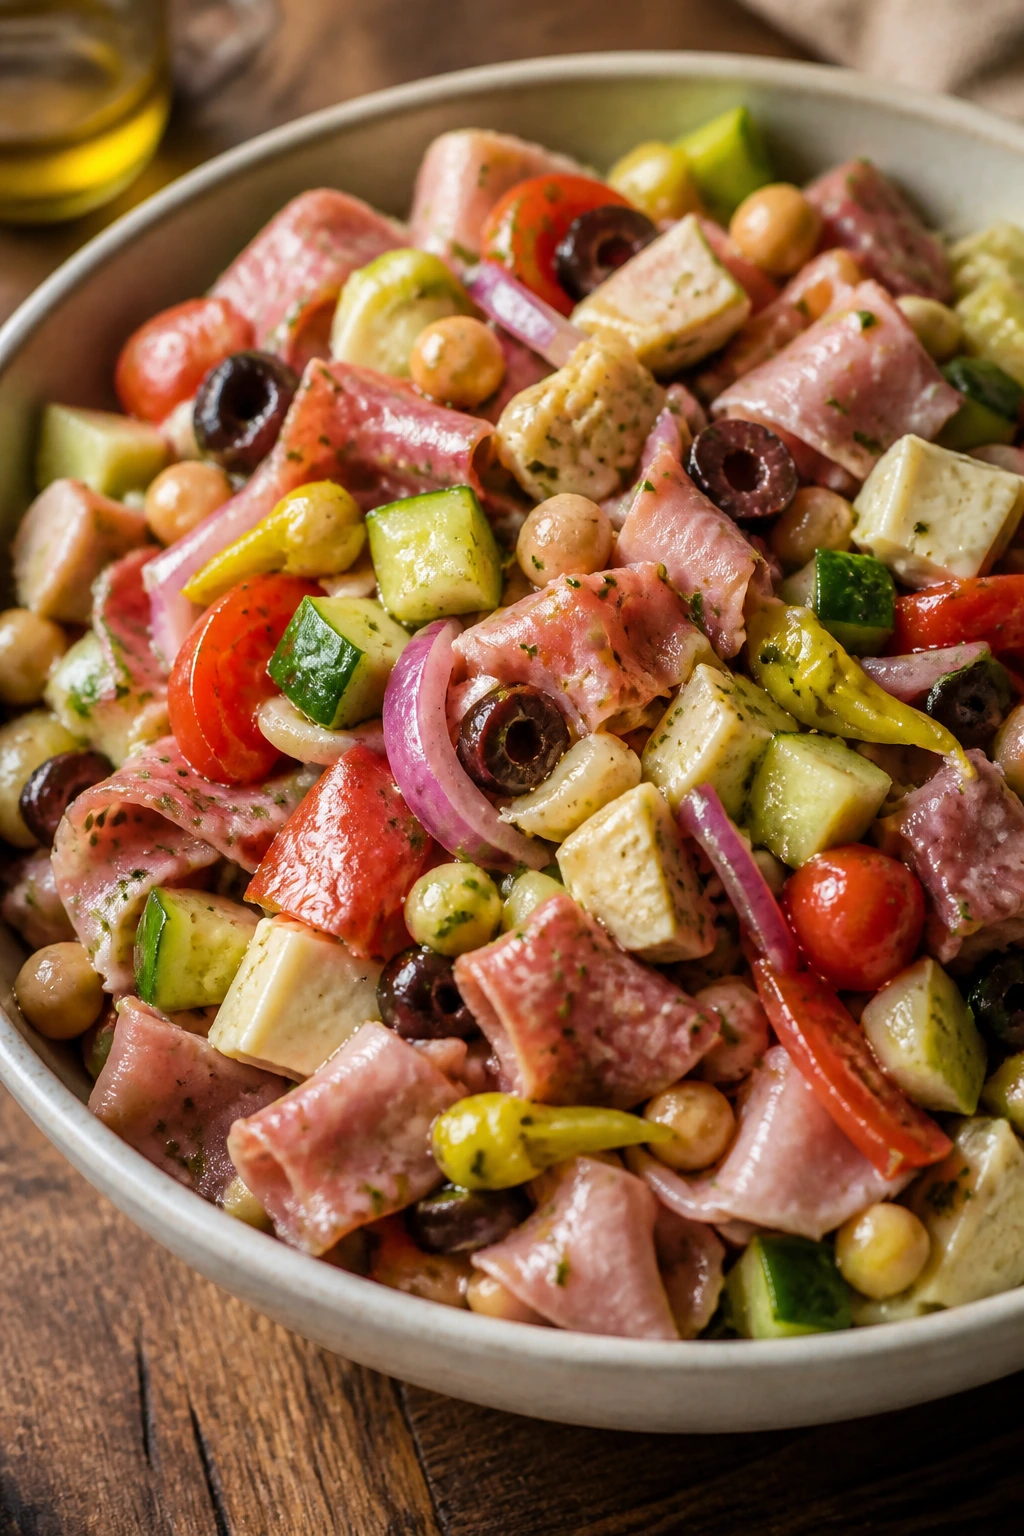
This is what happens when a deli sandwich forgets the bread and becomes sharper for it. Salami, ham, provolone, chickpeas, peppers, and tomatoes get chopped into one bowl, and suddenly you’ve got a no-cook dinner that tastes like a sub with better manners.
It’s loud in the best way. Tangy, salty, crunchy, and satisfying. And if you’ve ever looked at a giant sub and thought, “I want the inside more than the roll,” this one’s for you.
Why It Works
Chopped salads work because every bite has a little of everything. The meats and cheese supply the savory part, chickpeas add enough heft to make it dinner, and pepperoncini plus Italian dressing bring acid and bite. Finely chopping the ingredients matters more here than people realize; it keeps the flavors mixed instead of sorting themselves into separate piles.
Key Ingredients
- 4 cups chopped romaine
- 1 cup chopped iceberg lettuce
- 4 ounces salami, chopped
- 4 ounces ham, chopped
- 4 ounces provolone, diced
- 1 can chickpeas, drained and rinsed
- 1 cup cherry tomatoes, halved
- 1 cucumber, diced
- 1/4 cup red onion, thinly sliced
- 1/4 cup pepperoncini, sliced
- 1/3 cup Italian dressing
- 1/4 cup black olives, sliced
- Croutons, optional
Quick Steps
-
Chop everything small: Keep the lettuce, meats, cheese, and vegetables in bite-size pieces so the salad feels cohesive.
-
Mix the base: Combine the lettuce, chickpeas, tomatoes, cucumber, red onion, pepperoncini, and olives in a large bowl.
-
Add the meats and cheese: Fold in the salami, ham, and provolone.
-
Dress lightly: Pour over the Italian dressing and toss until evenly coated.
-
Finish and serve: Add croutons if you want more crunch and serve immediately.
Tips and Variations
-
Best texture trick: Dry the lettuce well after washing or the dressing will slide off.
-
Spice it up: Add sliced banana peppers or a spoonful of giardiniera.
-
Bread optional: If you want a true sub feel, serve the salad with a split roll on the side.
Why No-Cook Dinners Make Sense When the Air Feels Heavy
The reason no-cook dinners for hot summer days work so well is simple: they let flavor do the labor. Salt, acid, fat, crunch, and herbs can build a meal just as convincingly as heat can, and often faster. A good cold dinner is not an apology for not cooking. It’s a different method with its own strengths.
Texture Beats Temperature
A lot of people try to make no-cook meals by stacking soft things together and hoping the chill does the rest. Bad idea. What actually works is contrast: creamy with crisp, salty with sweet, juicy with chewy. When you combine those textures on one plate, the meal feels complete instead of improvised.
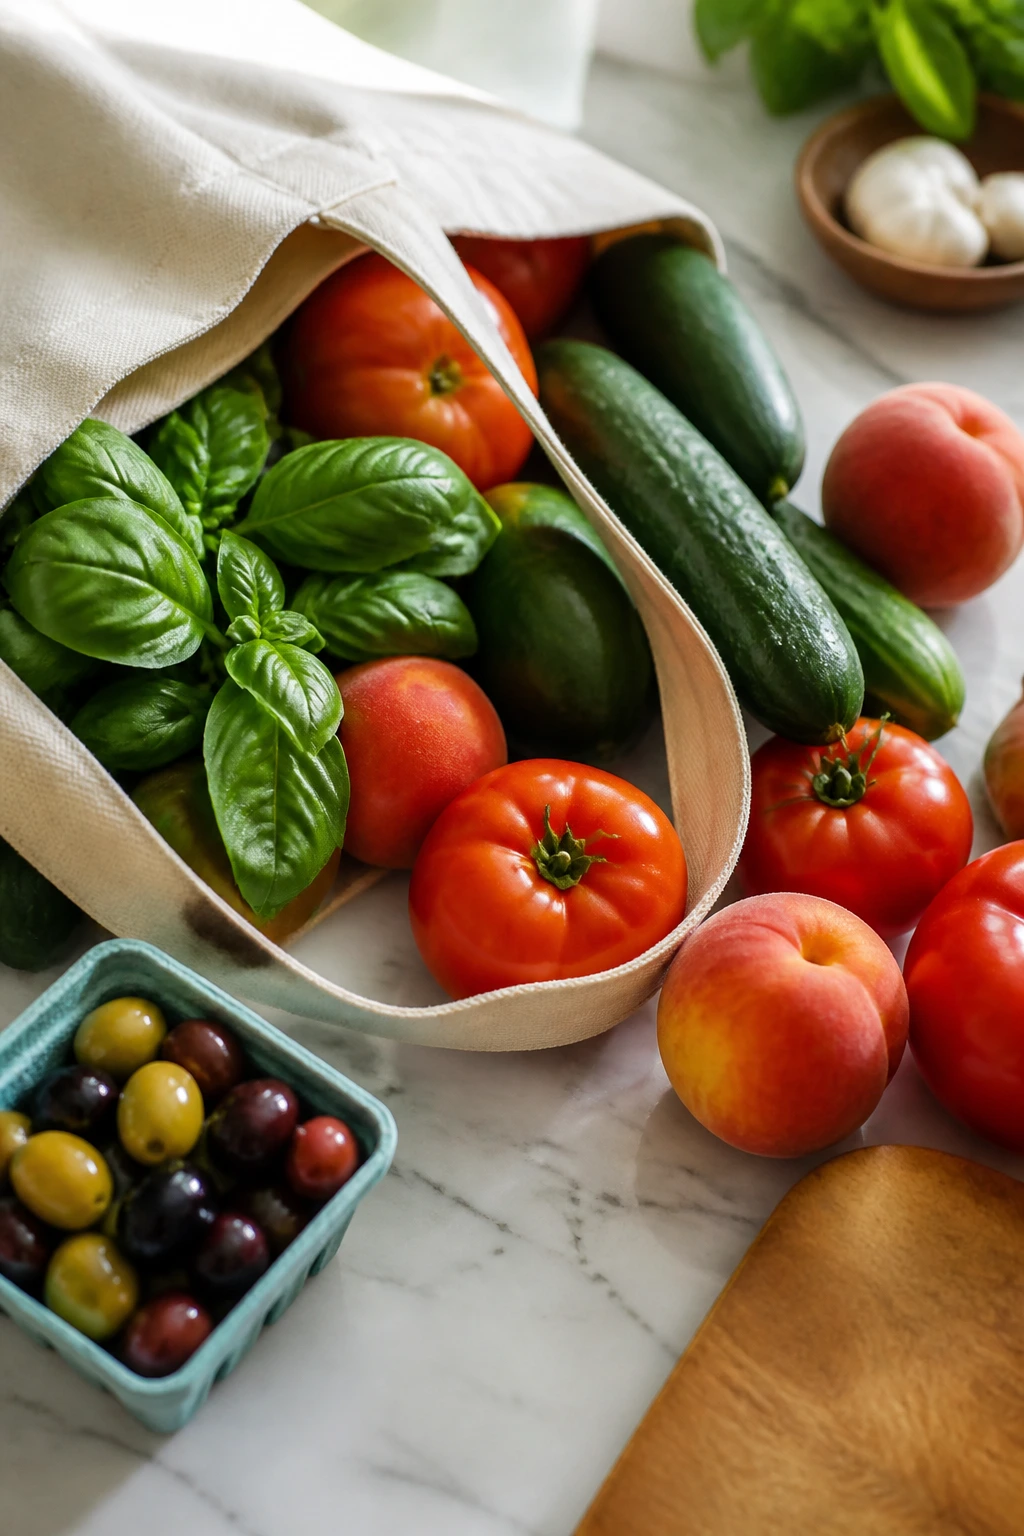
Pantry Plus Produce Is the Real Sweet Spot
The best heat-free dinners are usually built from a mix of pantry staples and fresh produce. Beans, tuna, sardines, tortillas, crackers, and jarred peppers hold the structure. Tomatoes, cucumbers, peaches, basil, and herbs bring the life. That balance is what keeps the food from tasting like emergency rations.
Cold Food Wants More Seasoning
Cold dulls flavor a little. That’s just how it goes. You need a touch more salt, a touch more acid, and a little more herb or spice than you might use in a warm dish. Taste as you go. If something feels flat, it usually needs lemon, vinegar, or another pinch of salt before it needs anything else.
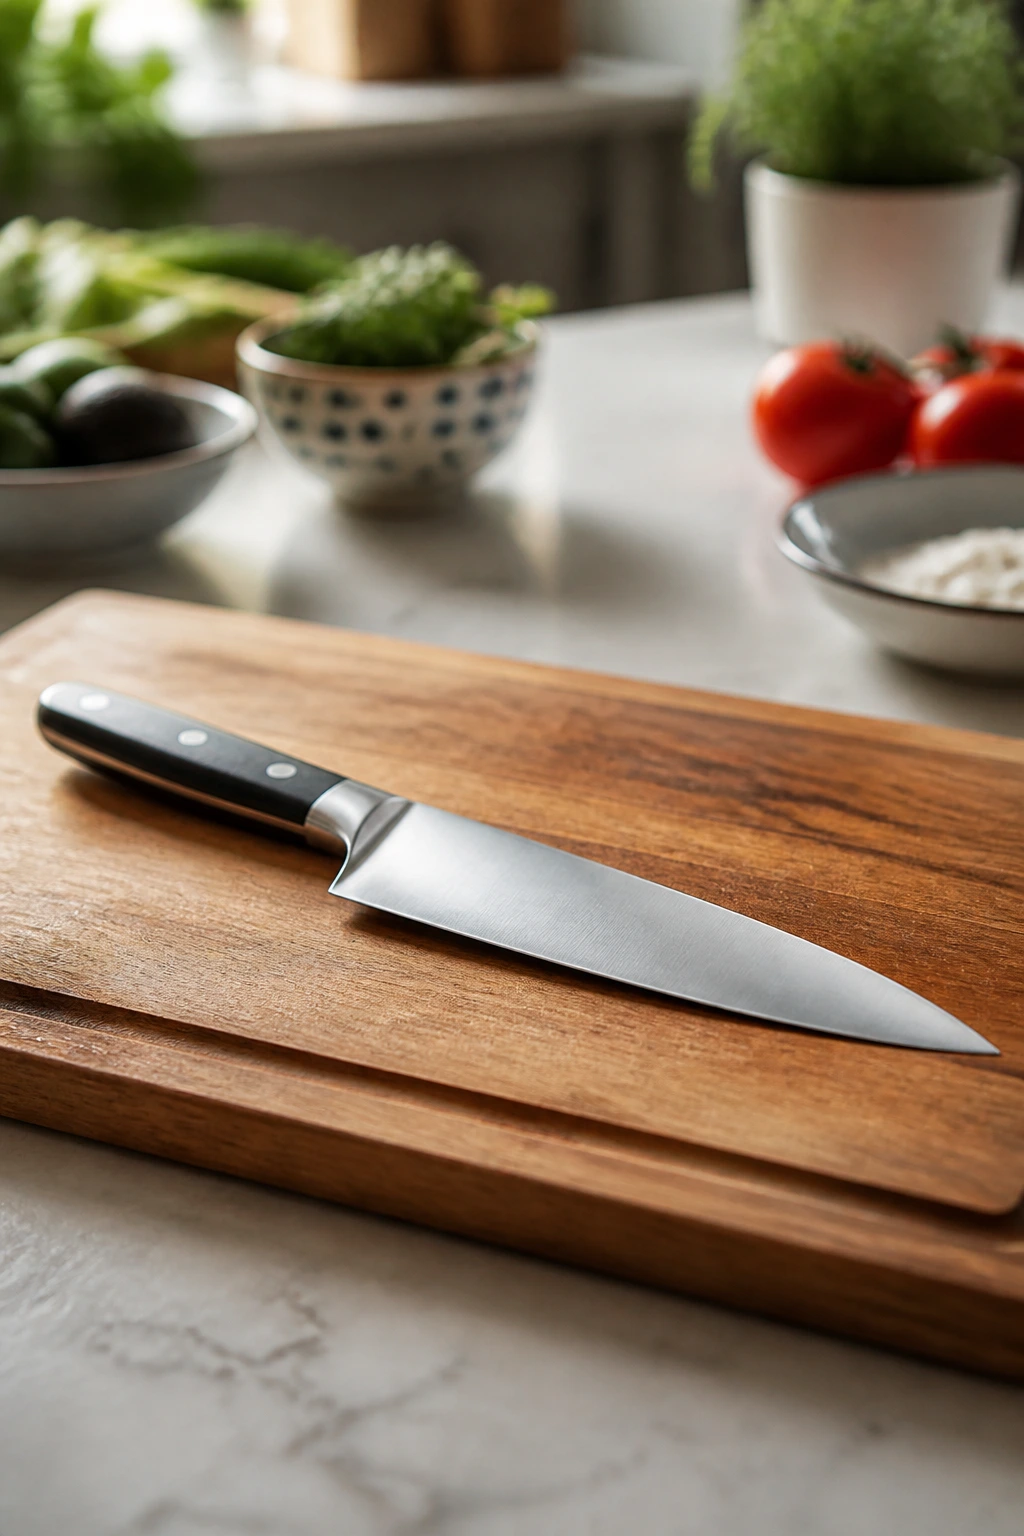
Essential Equipment for These Recipes
-
Large mixing bowls: One or two roomy bowls make it easier to toss salads without crushing delicate ingredients.
-
Sharp chef’s knife: Tomatoes, cucumbers, herbs, onions, and deli meats all cut better with a knife that isn’t fighting you.
-
Cutting board with a juice groove: Useful for tomatoes, peaches, citrus, and anything else that wants to leak across the counter.
-
Colander or strainer: You’ll use this for beans, canned fish, and anything that needs draining before it hits the bowl.
-
Measuring spoons: Dressing recipes are simple, but they still go wrong when the vinegar-to-oil ratio drifts too far.
-
Microplane or small grater: Handy for garlic, lemon zest, and ginger when a recipe needs a sharp finish.
-
Salad spinner or clean towels: Dry greens matter. Wet greens make wraps and salads slide around like they’re on ice.
-
Blender or food processor: Needed for gazpacho and useful for quick sauces or dressings.
-
Serving boards and platters: A big board makes antipasto and bagel spreads easier to assemble and less cluttered.
-
Airtight containers: Essential for storing chopped vegetables, cooked proteins, and dressings separately.
Smart Shopping and Ingredient Tips
The biggest mistake people make with no-cook dinners is assuming every shortcut is equal. It isn’t. Some shortcuts are excellent. Some are the sad, flavorless ones that make the whole meal feel tired. Spend your money where it matters: on ripe tomatoes, decent olive oil, good bread, and proteins that already taste like something.
For canned beans, look for beans packed in plain water or low-sodium liquid if you can find them. Rinse them well unless you want every salad tasting like the can. Canned tuna in olive oil is usually richer and less dry than water-packed tuna, and the same goes for sardines. With deli meat, ask for thin slices if the counter will do it; thick slices are clumsy in wraps and salad bowls.
Produce matters more than usual because there’s no heat to rescue it. Tomatoes should feel heavy and smell tomatoey near the stem. Cucumbers should be firm, not soft at the ends. Peaches and mangoes need a little give, but not collapse. Herbs should look perky, not limp. If basil is black at the edges, skip it. It will taste tired too.
One more thing: buy at least one crunchy element for every dinner. Crackers, croutons, cucumbers, celery, tortilla chips, pepitas, toasted nuts, or cabbage all do the job. Without crunch, a no-cook dinner often ends up tasting like a cold pile of soft things, and nobody needs that.
How to Serve These Recipes
Presentation: Spread board meals on a large tray or cutting board, and keep wet ingredients in small bowls so the rest of the plate stays neat. For salads and bowls, use wide shallow dishes instead of deep bowls; they look better and make the toppings easier to see and eat.
Accompaniments: Crusty bread, pita chips, seed crackers, tortilla chips, and simple fruit all work across this collection. A cold cucumber salad, potato chips, or a handful of olives can round out lighter dinners without adding any real work.
Portions: Most of these recipes serve 4 as a main course, though the board-style dinners can stretch to 6 if people snack. If you’re feeding hungrier eaters, add bread or crackers on the side instead of doubling the whole recipe. That usually gives you a better meal than simply piling more of the same thing into the bowl.
Beverage Pairing: Sparkling water with lemon works across almost everything here. If you want something with more character, iced tea, lemonade, dry white wine, or a light lager sits nicely next to the salty, cold, and acidic flavors these dinners lean on.
Additional Tips and Flavor Boosters
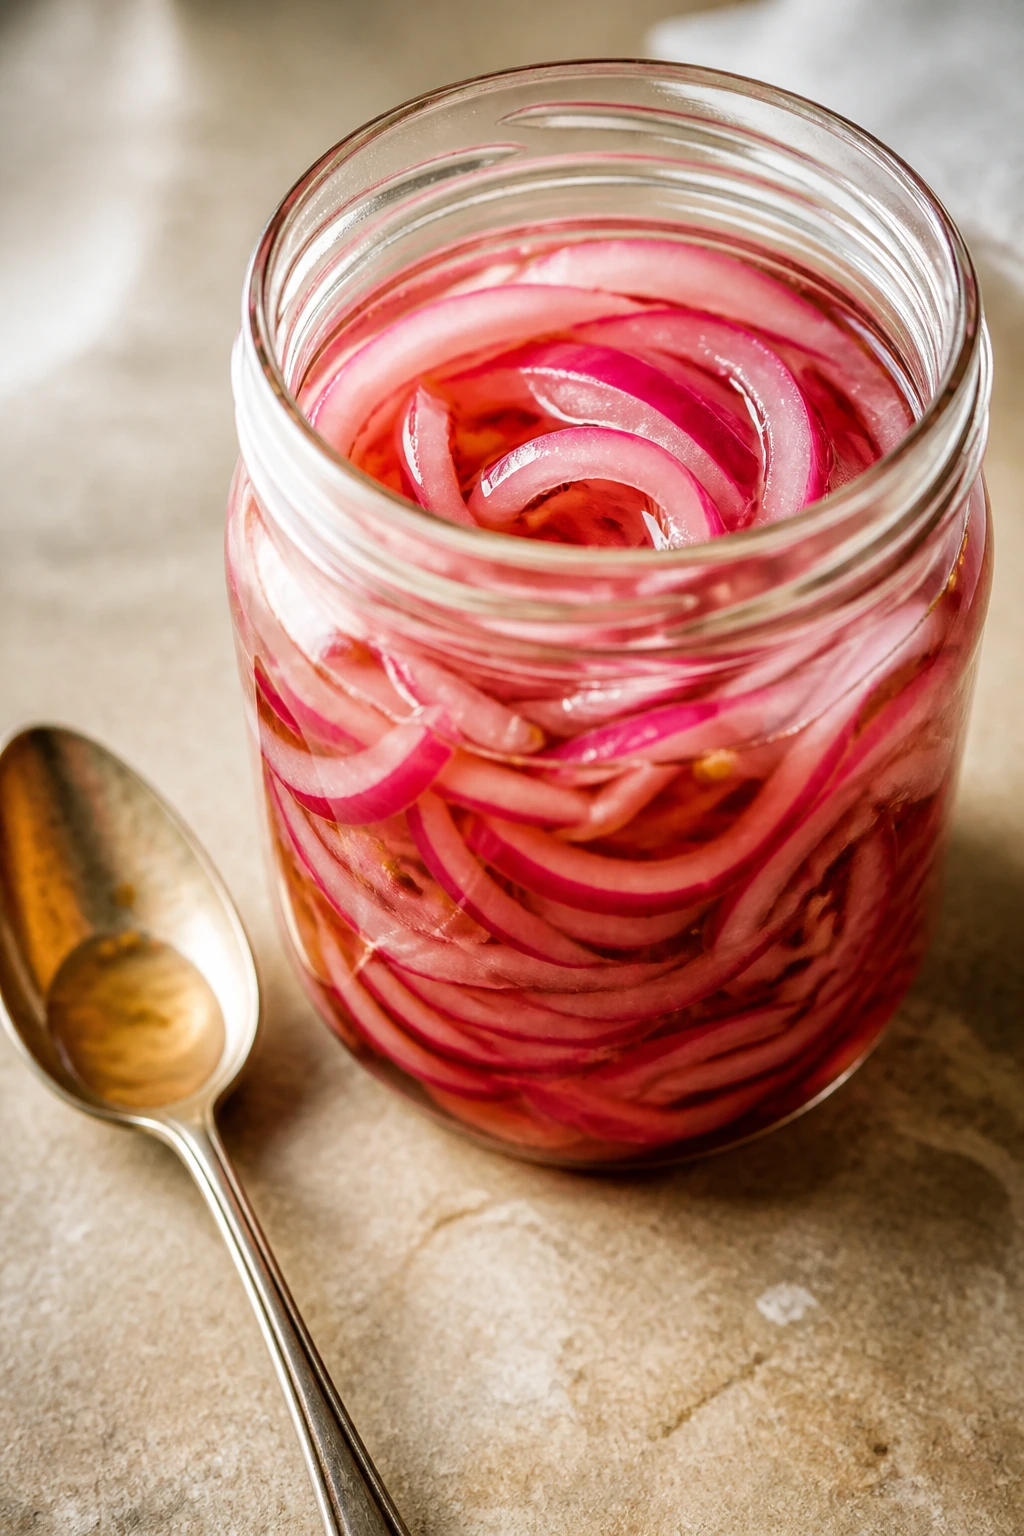
Flavor Enhancement: Keep a jar of pickled onions, pepperoncini, or capers around. A spoonful of something briny can rescue a flat bowl in seconds, especially when the ingredients are cold and need a little push.
Customization: If a recipe feels too light, add one more protein and one more crunch. That can mean chickpeas in a wrap, toasted nuts on a salad, or extra beans in a bowl. The formula stays the same, but the meal lands harder.
Serving Suggestions: Finish with torn herbs, black pepper, a drizzle of olive oil, or a squeeze of lemon right at the table. Small finishes matter more in no-cook cooking because they give the food its freshest smell and taste.
Make-It-Yours: Dairy-free eaters can lean on tahini, avocado, hummus, or olive oil instead of cheese and yogurt. Gluten-free diners can use lettuce cups, corn tortillas, rice crackers, or plain chopped bowls without changing the spirit of the meal.
Make-Ahead, Storage, and Reheating Guidance
Most of these no-cook dinners are best assembled close to serving, but the parts are often easy to prep ahead. Chop vegetables, mix dressings, and portion proteins 1 to 2 days in advance, then keep everything in airtight containers in the refrigerator. Beans, dressed chickpeas, and sturdy chopped slaws usually hold for 3 to 4 days. Delicate greens, sliced tomatoes, and avocado are much less forgiving and are best used the same day.
Seafood salads and anything with shrimp, tuna, or smoked salmon should be kept cold and eaten within 1 day for the best texture. Deli meat wraps and chicken wraps can usually make it through 2 days if the greens are dry and the dressing stays light. Sandwiches are the most fragile of the bunch; if you’re packing one ahead, keep the spread separate until the last minute.
Freezing is useful only for a small slice of this collection. Cooked rotisserie chicken, if you’re portioning leftovers into another meal, freezes well for up to 2 months. Tortillas and some breads can freeze too. But assembled salads, avocado, cucumbers, tomatoes, and dressed greens do not belong in the freezer. They come back limp and watery, which is a terrible trade.
There’s no real reheating step for most of these, and that’s the point. If you want something warm, reheat only the protein or bread on the side and build the rest cold. Reheating the whole dish defeats the purpose and usually wrecks the texture.
Easy Swaps for Different Preferences
Lower-Sodium Pantry Night: Rinse beans well, choose low-sodium canned fish when possible, and lean on lemon, herbs, and black pepper instead of extra salt. A few extra capers or olives can still work, but use them as accents.
Dairy-Free Route: Skip feta, burrata, mozzarella, and yogurt-based spreads. Avocado, tahini, hummus, and olive oil do a lot of the same creamy work without changing the meal’s shape.
Gluten-Free Setup: Use lettuce cups, rice crackers, corn chips, or gluten-free tortillas. Most of these recipes already lean naturally gluten-free if you keep an eye on the bread and crackers.
Kid-Friendly Mild Version: Leave out red onion, jalapeño, capers, pepperoncini, and hot sauce. Add sweet corn, cucumber, melon, or extra cheese instead. Kids usually like the cool crunch more than the bold brine anyway.
Protein-Heavy Upgrade: Add extra chickpeas, hard-boiled eggs, shrimp, rotisserie chicken, or extra tofu to any bowl or wrap. That’s the easiest way to turn a lighter plate into a dinner that holds through the evening.
Common Mistakes to Avoid
Using ingredients that all taste soft: This is the classic no-cook trap. If everything is creamy, juicy, or tender, the meal turns dull fast. Fix it with a crunchy piece every single time — crackers, cabbage, cucumbers, nuts, chips, celery, or toasted seeds.
Overdressing too early: Cold salads and wraps can go soggy in a hurry. Dress lightly first, taste, then add more only if the bowl still feels dry. For wraps and sandwiches, keep extra dressing on the side.
Skipping the seasoning step: Cold food needs more help than warm food. A pinch of salt, a squeeze of lemon, or a splash of vinegar can wake up beans, tuna, chicken, and tofu in a way that plain refrigeration never will.
Choosing weak produce: Flavorless tomatoes, limp herbs, and watery cucumbers drag the whole plate down. If you’re making a dinner where the vegetables are this central, buy the best ones you can find and use them soon.
Letting wet ingredients leak everywhere: Drained beans, blotted shrimp, dry lettuce, and patted cucumbers matter. Moisture is the enemy of wraps, boards, and chopped salads. A few paper towels can save a meal.
Assembling too far ahead: Some components hold up well, but the finished dish often doesn’t. Keep fillings separate until serving when you can, especially for wraps, salad bowls, and anything with avocado or greens.
Frequently Asked Questions
What counts as a no-cook dinner?
A no-cook dinner is any meal you can assemble without turning on the stove or oven. That includes cold salads, wraps, boards, sandwich plates, and soups like gazpacho. Some versions rely on store-bought cooked ingredients such as rotisserie chicken or cooked shrimp, and that still fits the spirit of the thing.
Can I make these dinners ahead of time?
Yes, but make the components ahead rather than the fully assembled meal. Chop vegetables, mix dressings, and portion proteins a day or two in advance, then combine them at dinner time so the textures stay crisp. Anything with avocado, lettuce, or bread is better built at the last minute.
What’s the best protein for heat-free meals?
Rotisserie chicken, canned tuna, cooked shrimp, smoked salmon, beans, chickpeas, and tofu all work well. The right choice depends on whether you want something mild, briny, rich, or budget-friendly. I reach for beans when I want ease, and seafood when I want a dinner that feels a little more special.
How do I stop wraps and sandwiches from getting soggy?
Dry the greens, drain the tomatoes if they’re extra juicy, and keep wet dressings away from the bread until the last minute. A layer of lettuce between the bread and the wetter ingredients also helps. If you’re packing the meal ahead, wrap the fillings separately and assemble at the table.
Can I use canned beans straight from the can?
You can, but rinsing them usually makes the flavor cleaner and less salty. If you want a creamier salad, mash a few beans against the side of the bowl after rinsing. That gives the dressing something to cling to.
How do I keep avocado from browning?
Toss it with lemon or lime juice and add it close to serving time. If you’re making a bowl ahead, leave the avocado whole and slice it right before eating. Brown avocado is still safe, but it looks tired and tastes less fresh.
Are these dinners filling enough for adults?
They can be, as long as you build them with enough protein and texture. Chickpeas, white beans, tuna, shrimp, turkey, and cheese go a long way, especially when paired with bread, crackers, or chips. The meal needs structure, not just salad greens.
What if I don’t eat fish?
Use chicken, turkey, tofu, beans, hummus, cottage cheese, or eggs instead. The flavor profile changes, but the method stays the same. Cold dinners are forgiving that way.
Can I serve these to guests without making it feel casual?
Absolutely. A well-arranged board, bright salad plates, and a few herbs or citrus wedges make the meal look thoughtful fast. The difference is mostly in the plating, not the ingredients.
Cool Plates for Sticky Nights
The best part about no-cook dinners is that they don’t ask you to pretend the stove is still charming when the room feels muggy and slow. They’re practical, yes, but they can also be sharp, pretty, and full of actual flavor. A bowl of chickpeas with feta and lemon, a pile of smoked salmon and cucumbers, or a chopped Italian sub salad can feel more satisfying than a hot meal you had to wrestle into existence.
Keep a few of these in your back pocket for the nights when dinner needs to be quick, cold, and not at all dramatic. Once you start thinking this way, the hot months get easier to feed.
Recipe Collection Quick Reference Table
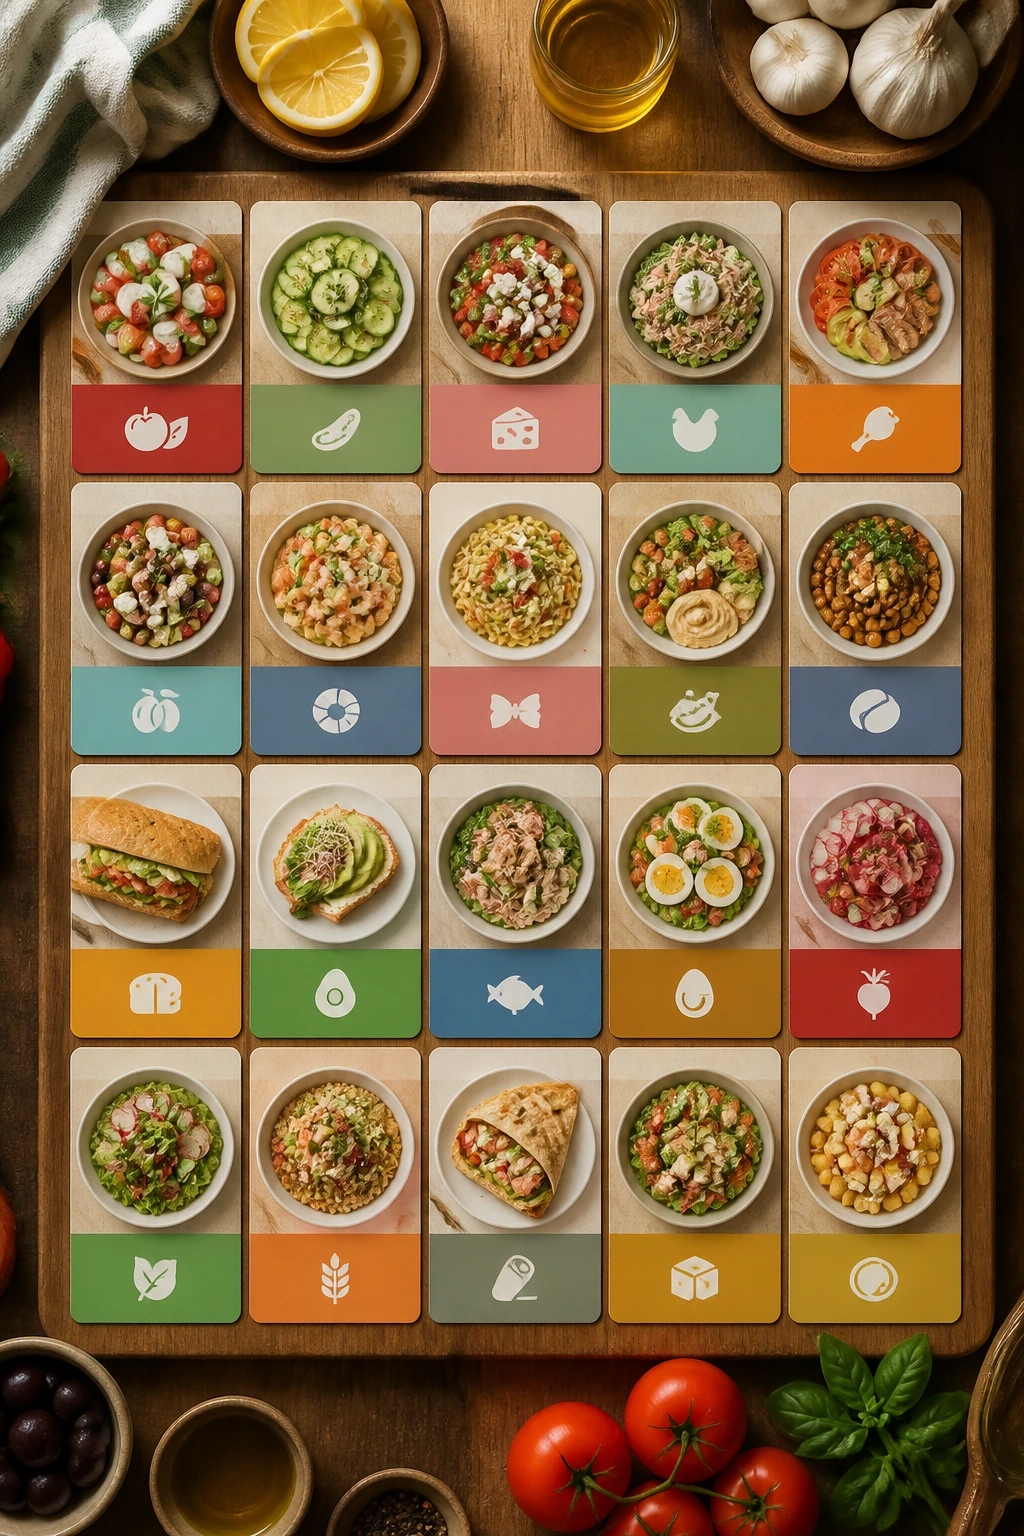
| Recipe | Prep Time | Cook Time | Total Time | Servings | Standout Detail |
|---|---|---|---|---|---|
| Greek Chickpea Pita Pockets | 15 min | 0 min | 15 min | 4 | Bright lemon-feta filling |
| Rotisserie Chicken Caesar Wraps | 15 min | 0 min | 15 min | 4 | Crunchy romaine in every bite |
| Tuna Niçoise Salad Plates | 20 min | 0 min | 20 min | 4 | Most dinner-like salad plate |
| Caprese White Bean Salad Bowls | 15 min | 0 min | 15 min | 4 | Basil and balsamic glaze finish |
| Smoked Salmon Bagel Boards | 10 min | 0 min | 10 min | 2 to 3 | Brunch energy, dinner appetite |
| Turkey Club Lettuce Wraps | 15 min | 0 min | 15 min | 4 | Bacon crunch and cool lettuce |
| Chilled Gazpacho with Tapenade Crackers | 20 min | 0 min | 50 min | 4 | Best served icy-cold |
| Shrimp Cocktail Avocado Salad | 15 min | 0 min | 15 min | 4 | Cocktail sauce meets creamy avocado |
| Hummus Rainbow Veggie Wraps | 15 min | 0 min | 15 min | 4 | Easy make-ahead wrap dinner |
| Antipasto Dinner Board | 20 min | 0 min | 20 min | 4 to 6 | Snackable and very low effort |
| Peanut-Lime Zoodle Bowls with Tofu | 20 min | 0 min | 20 min | 4 | Bright peanut sauce does the heavy lifting |
| Cauliflower Rice Taco Salad | 15 min | 0 min | 15 min | 4 | Taco night without a pan |
| Black Bean Mango Lettuce Cups | 15 min | 0 min | 15 min | 4 | Sweet mango keeps it lively |
| Mediterranean Cottage Cheese Bowls | 10 min | 0 min | 10 min | 2 to 3 | High-protein and salty-slick |
| Roast Beef Horseradish Sandwiches | 10 min | 0 min | 10 min | 4 | Sharp horseradish cuts richness |
| Prosciutto Peach Burrata Salad | 15 min | 0 min | 15 min | 4 | Sweet-salty summer plate |
| Sardine White Bean Lemon Salad | 15 min | 0 min | 15 min | 4 | Briny pantry-sturdy dinner |
| Chopped Italian Sub Salad | 20 min | 0 min | 20 min | 4 | All the deli flavors, chopped |